
Crochet bag “Cornelia”
Crochet a Lovely Bag with a Lid
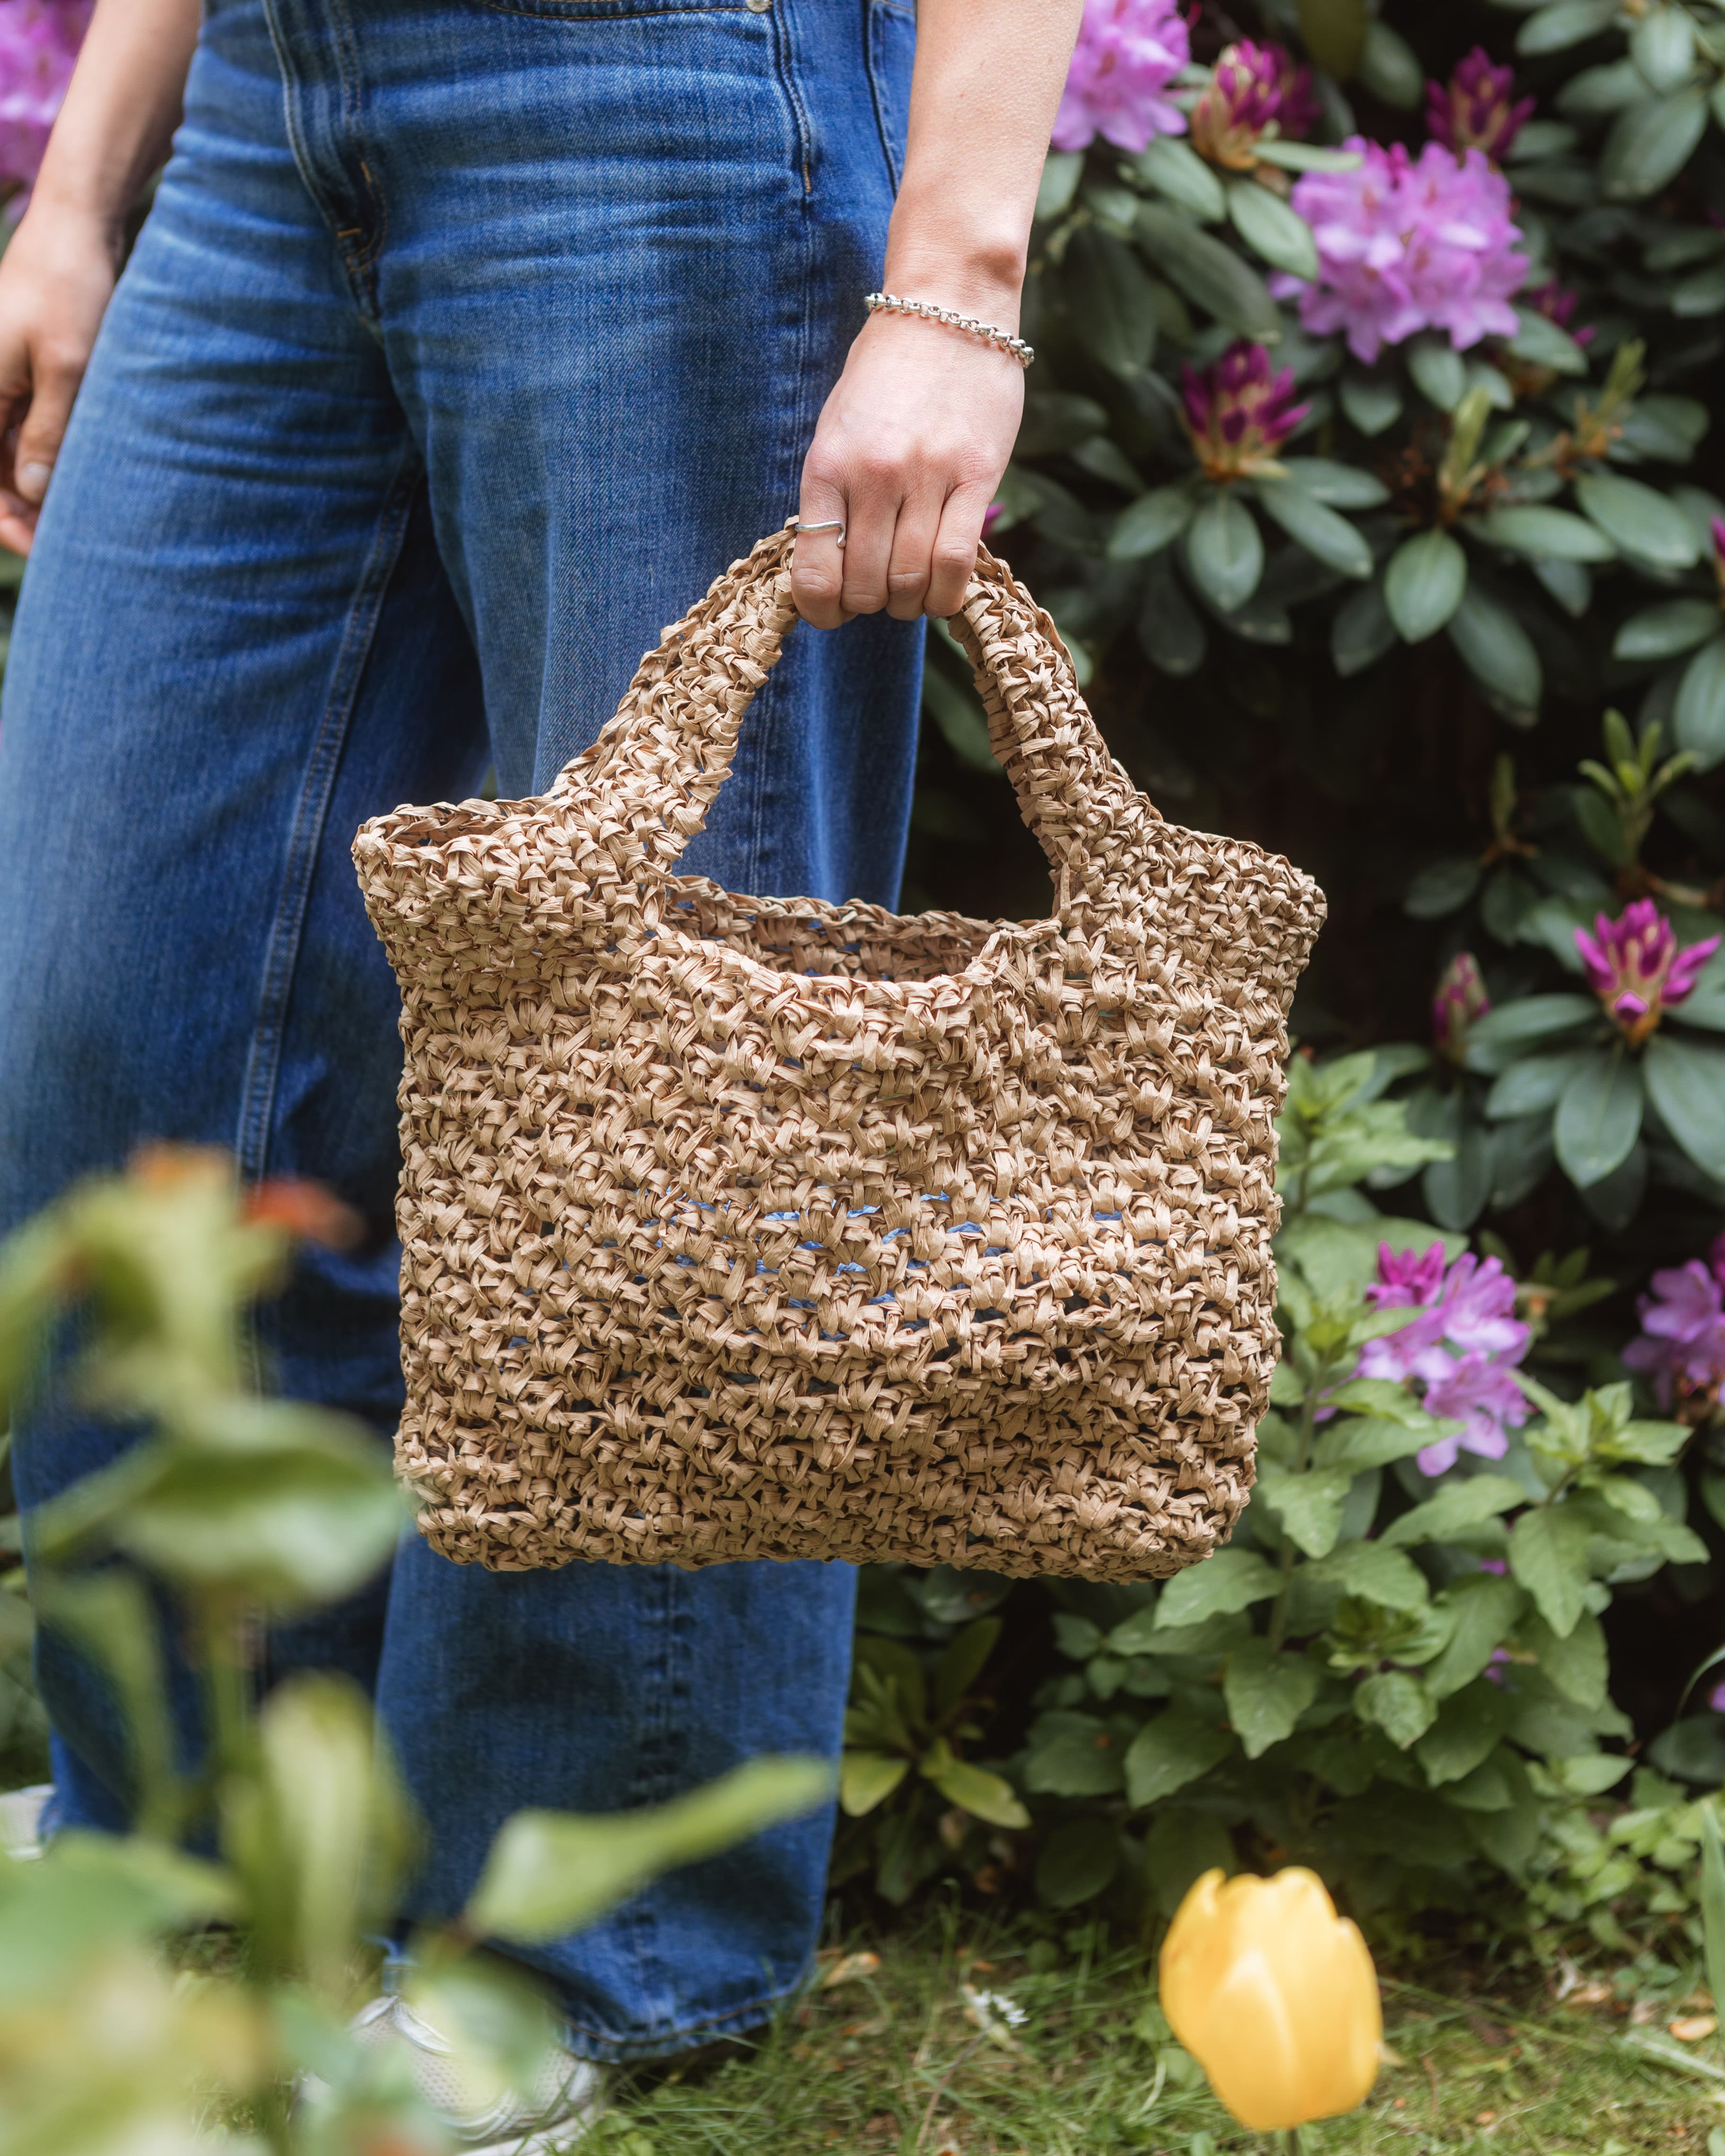
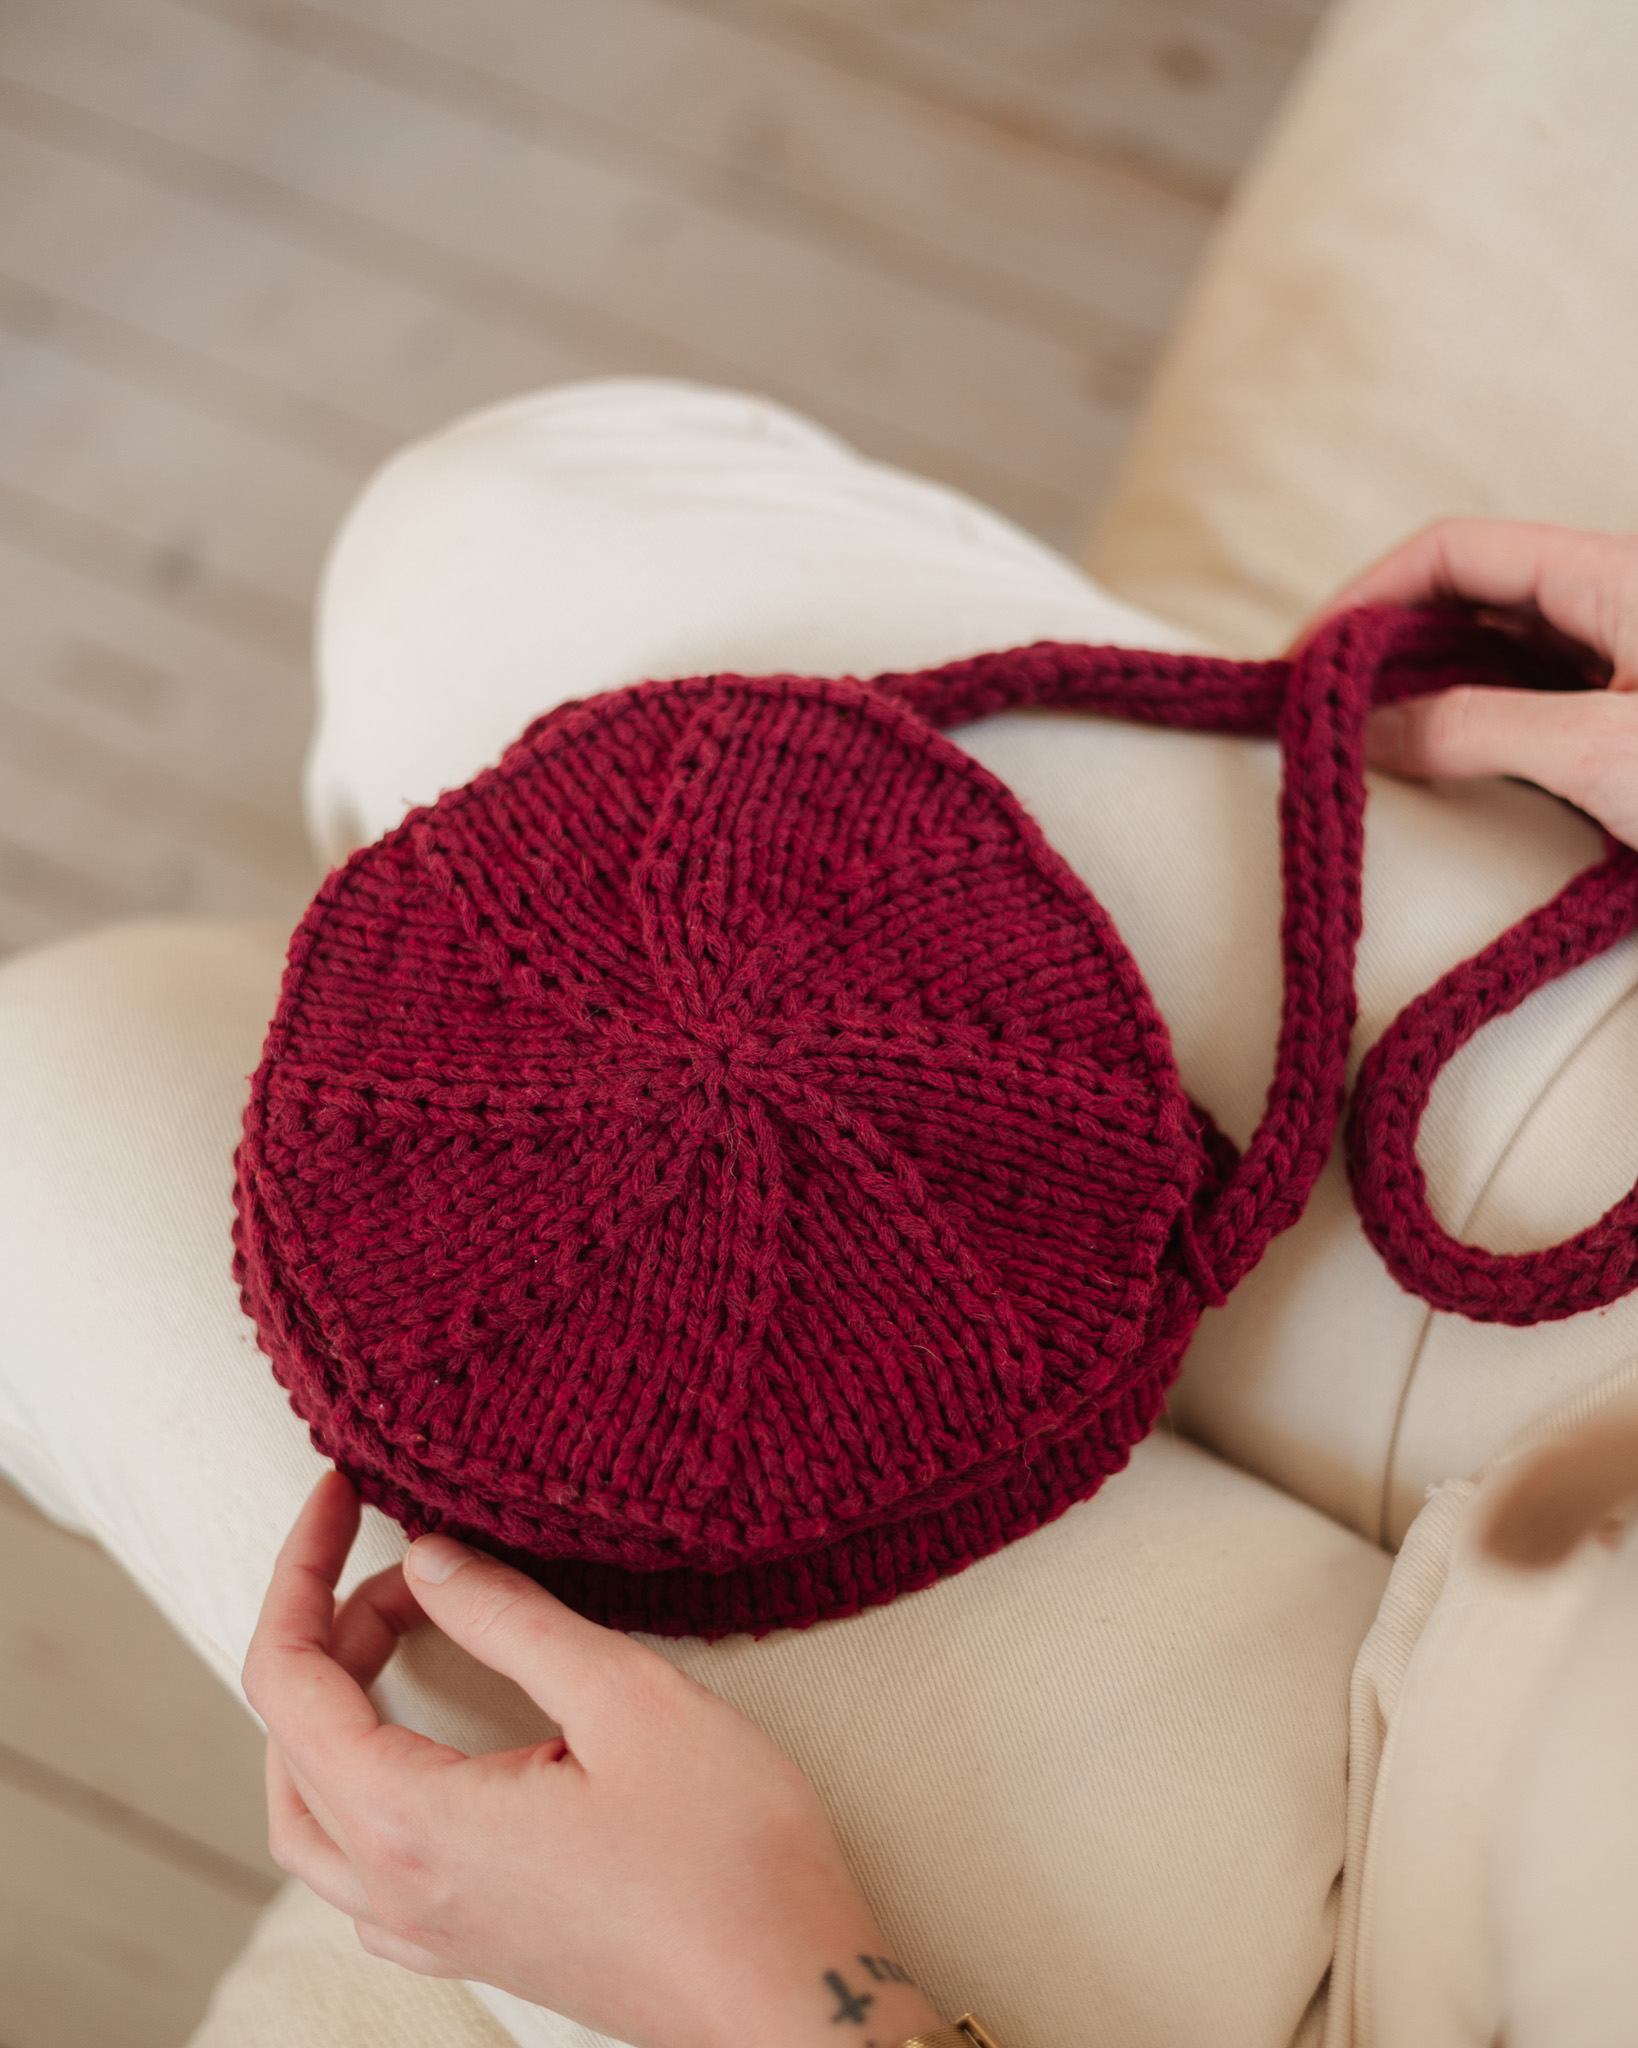
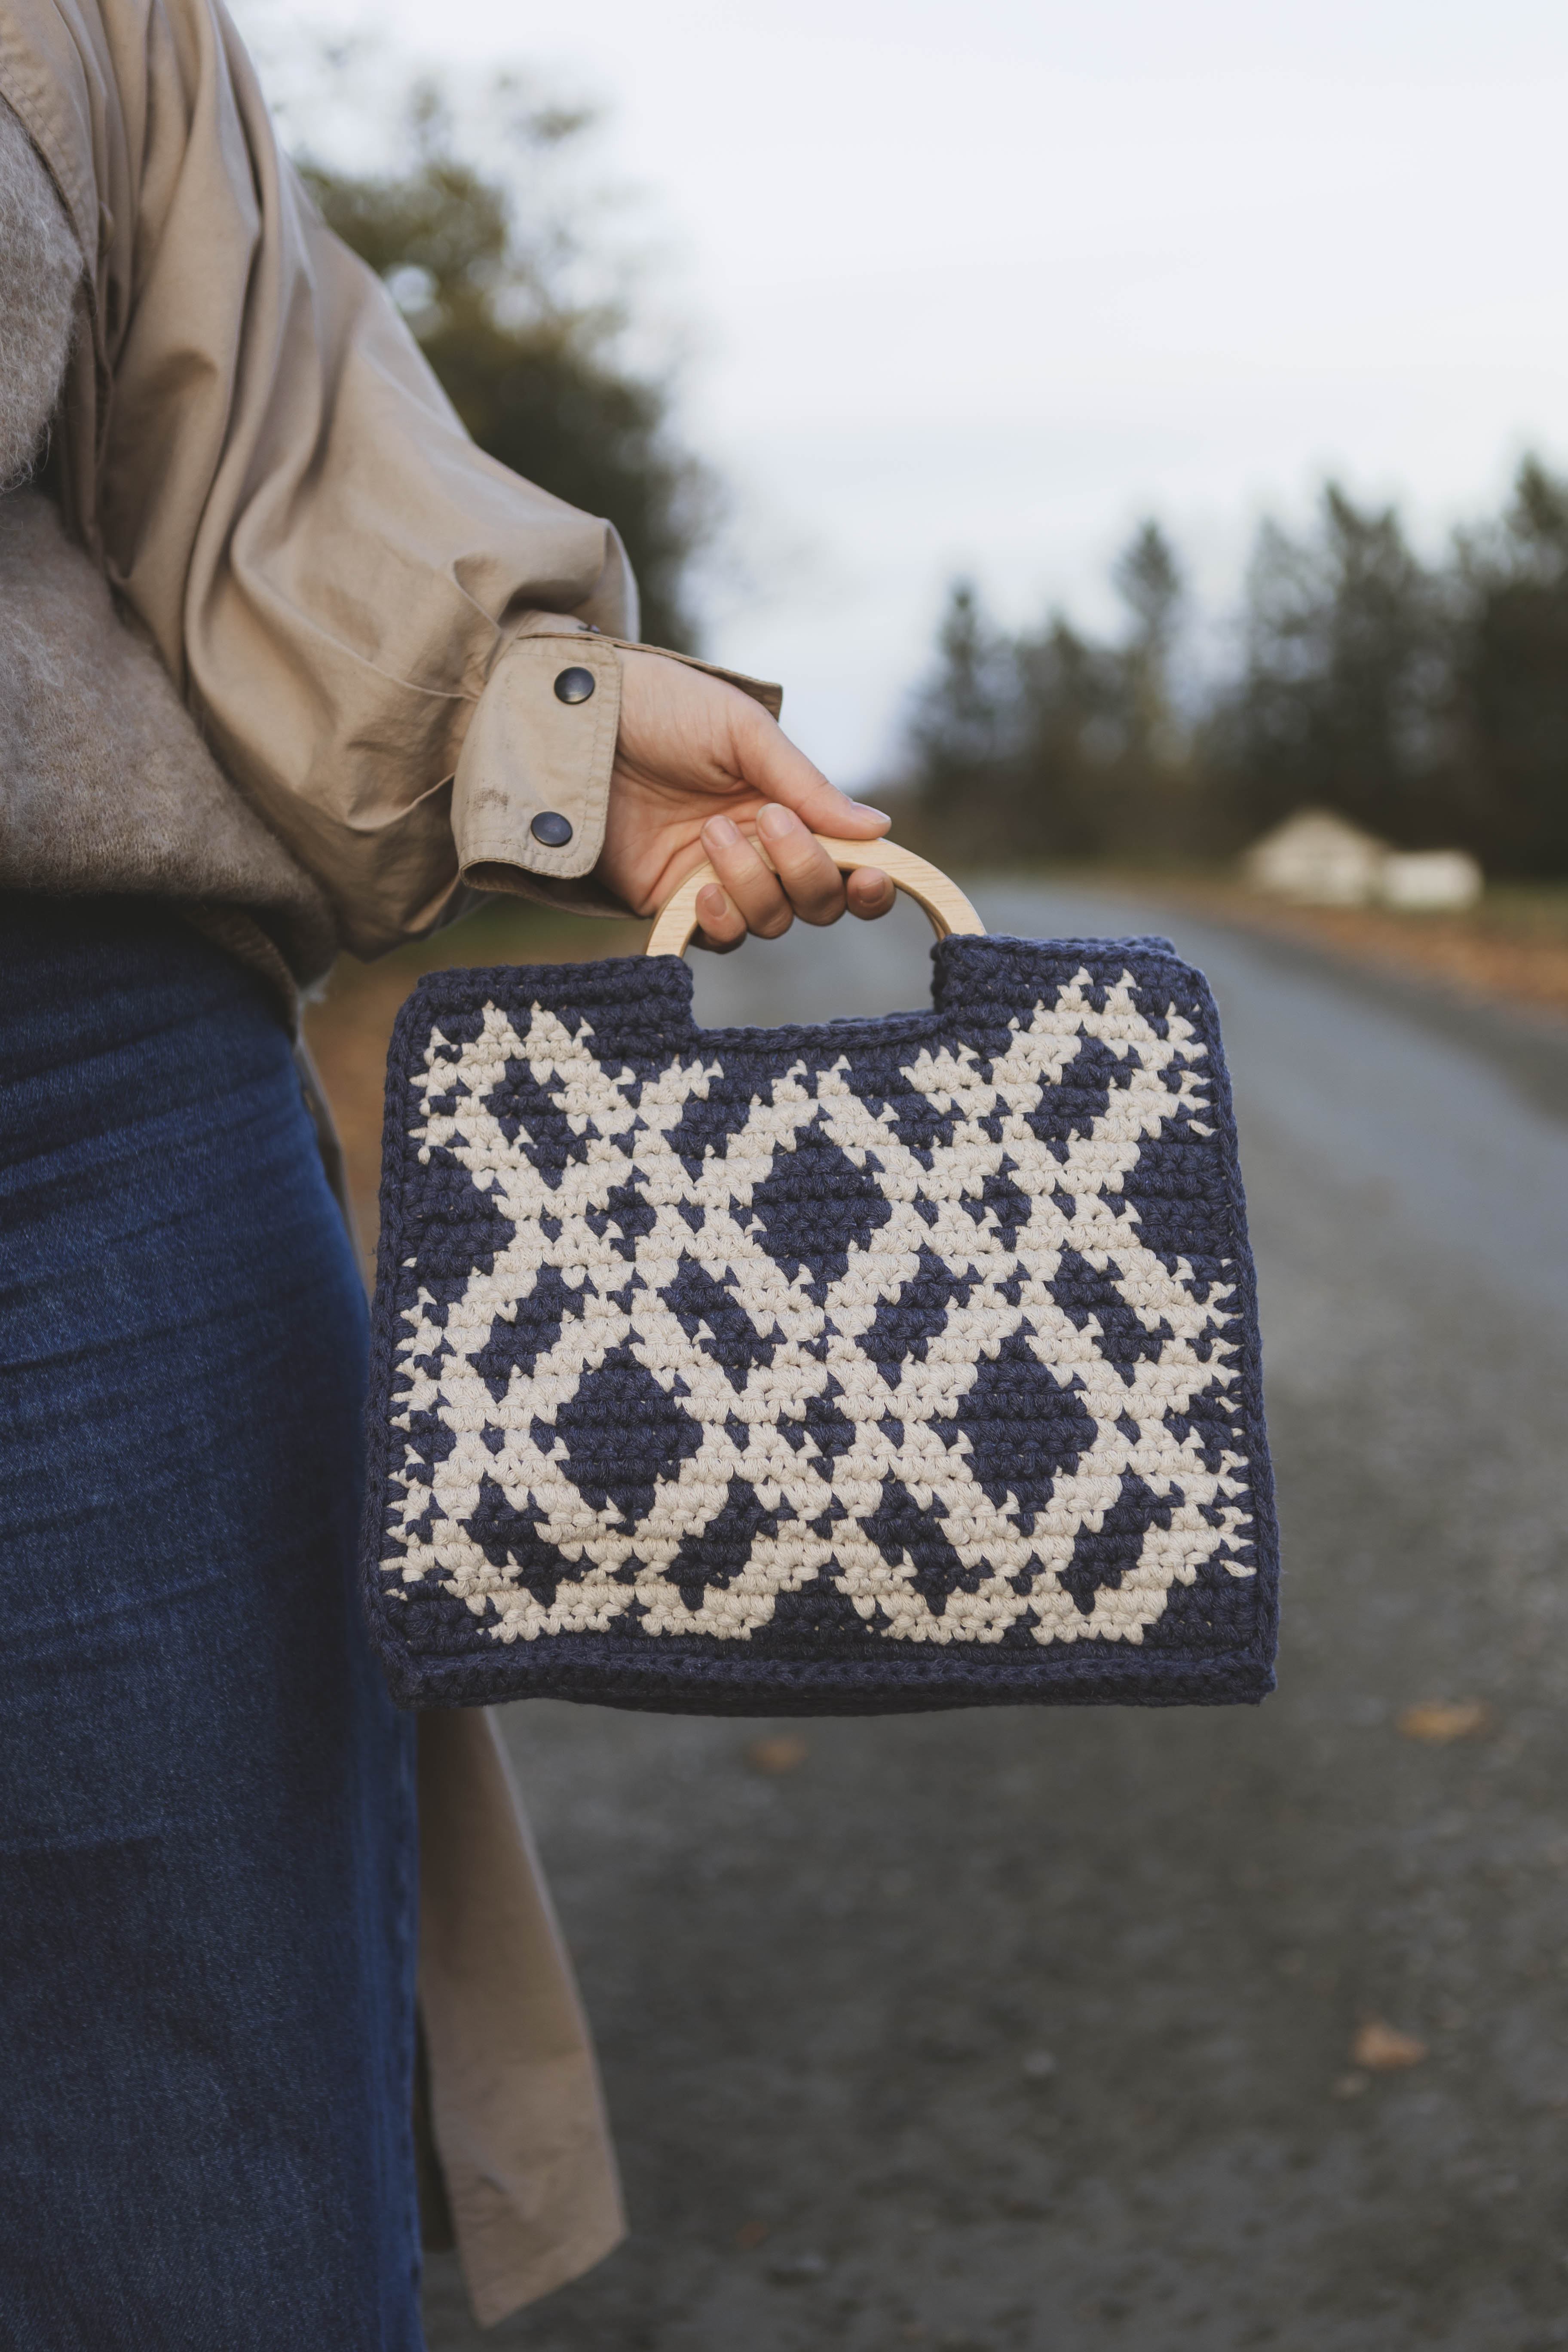
This bag has a nice braided front and a wide shoulder strap. The bag might look advanced, but it's actually quite simple and mainly consists of single crochet stitches. This bag has the perfect size and is a lot of fun to make! It can be properly closed with the braided lid and a snap or magnetic button. You will need EKO mini yarn, a 6 mm crochet hook, 2 snap hooks (75 mm), and 2 D-rings. If you want the bag to close, we recommend using a magnetic or snap button (or equivalent). You will also need a needle, scissors, measuring tape.
Yarn Consumption: Approximately 550-600 g, depending on how long the strap you want and how tight you crochet. The bag in the picture weighs 581 g in total (the finished product including all accessories).
The bag measures approximately 27 x 18 cm and 6 cm at the bottom (the measurements may vary depending on how tightly you crochet).
Please note that in this tutorial, we use videos from our technique library. If you are looking for a full-length video for a crocheted bag, we recommend the bag Linn.


Here's how to do it
The bag is first crocheted by making stripes of various lengths and thicknesses, which are then braided and crocheted together at the edges. Then, you continue crocheting the back piece and the middle piece. Finally, it is crocheted together with the braided front. The sides of the bag are crocheted as separate panels, which are then joined at the sides of the bag. Add a border with crab stitches and a shoulder strap, and then the bag is complete! I hope you want to try making your own bag! Good luck! /Johanna H
%20(4).jpg)
This is what you need:
Here you can directly purchase the material for the product. Please note that the instruction is digital and appears here on the page (no written instruction).

EKO Mini tube yarn | 1000g
Narrow "Ribbon" yarn for crocheting, made of 80% recycled cotton
Buy product
.jpg)
Unleash your creativity
For only 85kr per month you get access to all our 300+ beginner-friendly instructions for crochet, knitting and macrame.
A perfect way to get started with your new hobby!

The first step is to crochet the 9 strips that make up the braided section. There should be 5 strips that are wide and short (the vertical ones) and 4 strips that are narrower and longer (the horizontal ones).
Vertical strips (make 5): Make a loop around your crochet hook and chain 17 chains. If you're unsure how to crochet a chain, see the video below (chain).
Skip the last chain you just made and crochet a single crochet into the remaining 16 chains of the chain. If you're unsure how to crochet single crochets, see the video below.
Make a chain stitch and turn the piece. Skip the chain stitch you just made and crochet 16 single crochets again. Repeat this for another two rows so that you have a total of 4 rows with 16 single crochets. Cut the yarn and fasten off the thread. If you're unsure how to fasten off, see the video below.
Now you have made the first strip, which should be about 4.5 cm wide and 16 cm long. Make 4 more strips.
Horizontal strips (make 4): These are made the same way as the vertical strips, but with a few differences. Start by chaining 26 chains for the first row. Crochet 25 single crochets for a total of 3 rows, which is one row less than the other strips. These should be about 3.5 cm wide and 25 cm long.

Lay out your strips in the braided pattern. It may feel like the strips are a bit too short at this stage, but don’t worry, they will fit together nicely if they measure as indicated above.

Now you will crochet the strips together at the edges with single crochets. Start in the top left corner by making a loop and inserting your hook into a loop at that corner. Crochet single crochets through both layers (the top and bottom strips).

Make 4 single crochets per strip along the first short side, which should result in 16 single crochets. See the red pins marking where you make the stitches on the short side.

In the last stitch of the short side (at the corner), make a total of three single crochets.

Continue in the same way along the bottom long side, but make 5 single crochets per strip (green pins in the picture above), which should give you a total of 25 single crochets along the long side. Continue in the same way on the last two sides. Finish with two single crochets in the corner where you started, to make three single crochets in the top left corner. Make a chain stitch and turn (do not cut the yarn).

Now continue with the back piece of the bag.
NOTE: Always make a chain stitch and turn between rows. It’s important to double-check from time to time that you haven’t missed or accidentally added a stitch, as this will cause a crooked edge.
Row 1: Make single crochets in the front loop of each stitch, meaning the loop closest to you, along the long side. If you're unsure which is the front loop, see the video below.
This should result in 26 single crochets and a width of 26 cm. This is the width and the number of stitches that the following rows of the entire bag will follow. If you feel that you need to adjust the number of stitches to get the correct width, you can do so by either increasing or decreasing at the end and/or beginning of this row.

Rows 2-19: Make one single crochet in each stitch, meaning 26 single crochets per row (a total of 18 rows).
Row 20: Crochet 26 single crochets in the back loop only, which is the loop furthest from you. It is important that the edge created by crocheting in the back loops in this row aligns with the edge from row 1. If you're unsure which is the back loop, see the video below.

Rows 21-25: Make one single crochet in each stitch, meaning 26 single crochets per row (a total of 5 rows).
Row 26: Repeat row 20. It is important that the edge created by crocheting in the front and back loops in rows 1, 20, and 26 ends up on the same side of the piece.
Rows 27-42: Make one single crochet in each stitch, meaning 26 single crochets per row (a total of 16 rows).
Now, crochet the sides of the bag as two panels that will later be crocheted together with the piece you crocheted in Step 3.
Make 8 chain stitches.
Row 1: Skip the first stitch and crochet 7 single crochets in the remaining stitches of the chain.
Row 2: Crochet 7 single crochets. Make a chain stitch and turn.
Row 3: Start in the stitch marked by the needle in the picture. Make a chain stitch and turn.and crochet 6 single crochets. Make a chain stitch and turn.

Row 4: Crochet 6 single crochets. Make a chain stitch and turn.
Row 5: Skip the first stitch and crochet 5 single crochets. Make a chain stitch and turn.
Row 6: Crochet 5 single crochets. Make a chain stitch and turn.
Row 7: Crochet 5 single crochets. Make a chain stitch and turn.
Row 8: Skip the first stitch and crochet 4 single crochets. Make a chain stitch and turn.
Rows 9-16: Crochet 4 single crochets for a total of 8 rows. Make a chain stitch at each turn.
Do not cut the yarn as you will now sew the side panel onto the bag. The side panel should now be approximately as long as rows 27-42 of the bag.

Insert the needle into the front right corner of the last row of the bag (row 42 in step 3), see the picture.

Crochet the pieces together with single crochets through both layers. In the last stitch, make an extra stitch (2 single crochets in one).

Continue in the same way, crocheting the piece together with the bottom and back of the bag. Finish with a slip stitch. Cut the yarn and fasten off.


Then create another side panel in the same way. When you crochet the side panel onto the left side of the bag, do it the same way, but you will need to start at the back of the bag instead of the front corner. This is to ensure the seams are angled the same way.
NOTE: If you're left-handed, you may need to do it in reverse.
Be careful not to start at the very top of the back edge, as the piece won’t reach down to the bottom of the bag. Count 16 rows from the bottom, and/or place the side panel against the back edge to measure where you should begin crocheting them together.
Now, crochet the final step of the bag, which is the border around the braided section using the crab stitch technique. If you're unsure how to crochet crab stitches, see the video below.
Start at the top right corner of the braided part/"lid" of the bag. Make a loop on the hook and pull the loop through the corner, then make a slip stitch. Crochet crab stitches all the way around the edge, one crab stitch in each stitch. When you reach the top left corner, make a slip stitch down into the edge of the bag, cut the yarn, and fasten off.
Attach the D-rings on each side of the bag. Cut a long length of yarn and sew the D-ring onto the edge formed by crocheting the side panel to the bag. Attach the D-ring in two places, where the needle is pointing in the picture.


If you want a button of any kind to close the bag, you can attach it now. In the picture, we’ve used a magnetic button, which is crocheted together with 8/4 cotton yarn in a suitable color and with an appropriate-sized needle depending on your choice of thread/yarn.
The last step is to crochet the shoulder strap. For this, you will need the two snap hooks.
Make a slip knot and insert the loop into the snap hook from the back to the front. Place the loop on the crochet hook, yarn over, and pull through the loop to create a starting point.

Crochet 4 single crochets around the snap hook. Make a chain stitch and turn.

Row 1: Skip the chain stitch, crochet 4 single crochets. Make a new chain stitch and turn.
Row 2: In this row, you will alternate between single crochets and long single crochets, which are done slightly differently. If you're unsure how to crochet long single crochets, see the video below (Spike Stitch).
Skip the chain stitch, then start by making a single crochet in the first stitch. Now, you will make a long single crochet, which is a single crochet but you insert your hook one row below where you would normally insert the hook. See the blue markings showing where to insert the hook for a regular single crochet on the right and a long single crochet on the left.

Make one more single crochet, then a long single crochet. You should have made a total of 4 stitches.
Make a chain stitch and turn. When making a long single crochet, be sure to pull up the long loop properly, to the same height as the second loop on the hook, see the picture.

Repeat row 2 (1 single crochet, 1 long single crochet, 1 single crochet, 1 long single crochet + 1 chain stitch at the turn) until you are satisfied with the length of the shoulder strap.
Place the second snap hook on the back of the strap. Crochet 4 single crochets through the loop and the snap hook.

Finish with a slip stitch at the edge of the strap. Cut the yarn and fasten off the end.

Now you’re finished! Great job ☺
Abbreviations
MR = Magic ring
st/sts = stitch
ch = chain stitch
sl st= slip stitch
sc = single crochet
dsc = long single crochet
hdc = half double crochet
dc = double crochet
blo = back loop only
flo = front loop only
(...) = indicates the number of stitches in the current row
*...* = Everything within *...* is repeated the specified number of times
[...] = Everything within [...] is crocheted in the same stitch
Now, let's crochet a beautiful bag! If you need help along the way, check out our simple version of this pattern.
Step 1
The first step is to crochet the 9 strips that make up the braided section. There should be 5 strips that are wider and shorter (the vertical ones) and 4 strips that are narrower and longer (the horizontal ones).
Vertical strips (make 5):
Ch 17. Turn.
Row 1-4: Skip the first st. Crochet 16 sc (16). Ch 1 stitch and turn. Repeat for a total of 4 rows. Cut the yarn and fasten off. Now you have made the first strip, which should be about 4.5 cm wide and 16 cm long.
Horizontal strips (make 4):
Ch 26. Turn.
Row 1-3: Skip the first st. Crochet 25 sc (25). Ch 1 and turn. Repeat for a total of 3 rows. Cut the yarn and fasten off. The strip should be about 3.5 cm wide and 25 cm long.
Step 2
Lay out your strips in the braided pattern.
Short side:
Pick up the yarn in the top right corner. Crochet sc through both layers (the upper and the lower strip), 4 sc per strip (16). Make 2 sc in the last stitch (3 sc total in the corner).
Long side:
5 sc per strip (25). 2 sc in the last st.
Repeat the short side and long side one more time. Finish with two sc in the corner where you started. Make a ch and turn.
Step 3
Now continue with the back panel of the bag.
NOTE: Always make a ch and turn between rows. It’s important to double-check from time to time to ensure you haven’t missed or accidentally added a stitch, as this will create a crooked edge. It’s crucial that the loops created by working in the fmb and bmb on rows 1, 20, and 26 are on the same side of the piece.
Row 1: 26 sc in the flo (26).
Check that the width is approximately 26 cm. This is the width and the number of stitches that will follow for the next rows of the entire bag. Adjust with increases or decreases at the beginning and/or end of the row if needed.
Row 2-19: 26 sc for a total of 18 rows (26)
Row 20: 26 sc in the blo (26)
Row 21-25: 26 sc for a total of 5 rows (26)
Row 26: 26 sc in the blo (26)
Row 27-42: 26 sc for a total of 16 rows (26)
Step 4
Side Panels (make 2)
Make 8 ch.
Row 1: Skip the first ch, 7 sc. (7) Ch 1, turn.
Row 2: 7 sc. (7) Ch 1, turn.
Row 3: Skip the first ch, 6 sc. (6) Ch 1, turn.
Row 4: 6 sc. (6) Ch 1, turn.
Row 5: Skip the first ch, 5 sc. (5) Ch 1, turn.
Row 6-7: 5 sc for 2 rows. (5) Ch 1, turn.
Row 8: Skip the first ch, 4 sc. (4) Ch 1, turn.
Row 9-16: 4 sc for a total of 8 rows. Ch 1, turn.
Do not cut the yarn as you will now attach the side panel to the bag. The side panel should now be approximately the same length as rows 27-42 of the bag. Insert your needle into the front right corner of the last row of the bag (row 42 from step 3), see the picture.
Crochet the pieces together with sc through both layers. In the last stitch (the corner), make 2 sc in the same stitch.
Continue in the same way to crochet the piece together with the bottom and back of the bag. Cut the yarn and fasten off.
Create another side panel in the same way. When crocheting the side panel onto the left side of the bag, do so in the same way, but start at the back of the bag instead of in the front corner. This will make the seams angle in the same direction.
Note: if you're left-handed, you may need to do it in reverse.
Be careful not to start at the very top of the back side, as the piece will not reach down to the bottom of the bag. Count 16 rows from the bottom or place the side panel against the back edge to measure where to start crocheting the pieces together.
Step 5 - Edge on the front
Start in the top right corner of the braided part/“flap” of the bag. Make a slip knot and insert the hook into the corner to make a slip stitch. Then, crochet crab stitches all the way around, one crab stitch in each stitch. When you reach the top left corner, make a slip stitch into the edge of the bag, cut the yarn, and fasten off.
Step 6 - Attach D-rings to each side of the bag:
Cut a long strand of yarn and sew the D-ring onto the edge formed by crocheting the side panel/bag together in two places.
Mount the press stud/magnetic button if you want to close the bag. In the picture, we have used a magnetic button crocheted together with cotton yarn 8/4 in a suitable color and with a suitable needle size based on the choice of thread/yarn.
Step 7 Shoulder strap
Make a slip knot and insert the loop into the trigger hook from back to front. Place the loop on the crochet hook, yarn over, and pull through the loop so you have a start. Always chain stitch at turnarounds and skip the chain stitch after turning. 4 single crochets around the trigger hook.
Now, you’ll continue crocheting the strap in rows or in the round as needed for your desired length. Make sure to measure it against your body to get the right fit! Let me know if you need help with the rest of the strap or any other parts.
Row 1: 4 sc (4)
Row 2: 1 sc, 1 dsc, 1 sc, 1 dsc (4)
Repeat row 2 until you are satisfied with the length of the shoulder strap.
Place the second trigger hook on the back of the strap. Crochet 4 sc through the loop and trigger hook. Finish with a slip stitch in the edge of the strap. Cut off and fasten the yarn end.
You're done! Great job ☺
The rights to this pattern belong to MYO Make Your Own. The pattern or its pictures may not be copied, shared or resold either in parts or in its entirety, but you may sell items you have crocheted from this pattern. If you have questions about the pattern, contact MYO at hello@makeyourown.se.
The first step is to crochet the 9 strips that make up the braided section. There should be 5 strips that are wide and short (the vertical ones) and 4 strips that are narrower and longer (the horizontal ones).
Vertical strips (make 5): Make a loop around your crochet hook and chain 17 chains. If you're unsure how to crochet a chain, see the video below (chain).
Skip the last chain you just made and crochet a single crochet into the remaining 16 chains of the chain. If you're unsure how to crochet single crochets, see the video below.
Make a chain stitch and turn the piece. Skip the chain stitch you just made and crochet 16 single crochets again. Repeat this for another two rows so that you have a total of 4 rows with 16 single crochets. Cut the yarn and fasten off the thread. If you're unsure how to fasten off, see the video below.
Now you have made the first strip, which should be about 4.5 cm wide and 16 cm long. Make 4 more strips.
Horizontal strips (make 4): These are made the same way as the vertical strips, but with a few differences. Start by chaining 26 chains for the first row. Crochet 25 single crochets for a total of 3 rows, which is one row less than the other strips. These should be about 3.5 cm wide and 25 cm long.
Lay out your strips in the braided pattern. It may feel like the strips are a bit too short at this stage, but don’t worry, they will fit together nicely if they measure as indicated above.
Now you will crochet the strips together at the edges with single crochets. Start in the top left corner by making a loop and inserting your hook into a loop at that corner. Crochet single crochets through both layers (the top and bottom strips).
Make 4 single crochets per strip along the first short side, which should result in 16 single crochets. See the red pins marking where you make the stitches on the short side.
In the last stitch of the short side (at the corner), make a total of three single crochets.
Continue in the same way along the bottom long side, but make 5 single crochets per strip (green pins in the picture above), which should give you a total of 25 single crochets along the long side. Continue in the same way on the last two sides. Finish with two single crochets in the corner where you started, to make three single crochets in the top left corner. Make a chain stitch and turn (do not cut the yarn).
Now continue with the back piece of the bag.
NOTE: Always make a chain stitch and turn between rows. It’s important to double-check from time to time that you haven’t missed or accidentally added a stitch, as this will cause a crooked edge.
Row 1: Make single crochets in the front loop of each stitch, meaning the loop closest to you, along the long side. If you're unsure which is the front loop, see the video below.
This should result in 26 single crochets and a width of 26 cm. This is the width and the number of stitches that the following rows of the entire bag will follow. If you feel that you need to adjust the number of stitches to get the correct width, you can do so by either increasing or decreasing at the end and/or beginning of this row.
Rows 2-19: Make one single crochet in each stitch, meaning 26 single crochets per row (a total of 18 rows).
Row 20: Crochet 26 single crochets in the back loop only, which is the loop furthest from you. It is important that the edge created by crocheting in the back loops in this row aligns with the edge from row 1. If you're unsure which is the back loop, see the video below.
Rows 21-25: Make one single crochet in each stitch, meaning 26 single crochets per row (a total of 5 rows).
Row 26: Repeat row 20. It is important that the edge created by crocheting in the front and back loops in rows 1, 20, and 26 ends up on the same side of the piece.
Rows 27-42: Make one single crochet in each stitch, meaning 26 single crochets per row (a total of 16 rows).
Now, crochet the sides of the bag as two panels that will later be crocheted together with the piece you crocheted in Step 3.
Make 8 chain stitches.
Row 1: Skip the first stitch and crochet 7 single crochets in the remaining stitches of the chain.
Row 2: Crochet 7 single crochets. Make a chain stitch and turn.
Row 3: Start in the stitch marked by the needle in the picture. Make a chain stitch and turn.and crochet 6 single crochets. Make a chain stitch and turn.
Row 4: Crochet 6 single crochets. Make a chain stitch and turn.
Row 5: Skip the first stitch and crochet 5 single crochets. Make a chain stitch and turn.
Row 6: Crochet 5 single crochets. Make a chain stitch and turn.
Row 7: Crochet 5 single crochets. Make a chain stitch and turn.
Row 8: Skip the first stitch and crochet 4 single crochets. Make a chain stitch and turn.
Rows 9-16: Crochet 4 single crochets for a total of 8 rows. Make a chain stitch at each turn.
Do not cut the yarn as you will now sew the side panel onto the bag. The side panel should now be approximately as long as rows 27-42 of the bag.
Insert the needle into the front right corner of the last row of the bag (row 42 in step 3), see the picture.
Crochet the pieces together with single crochets through both layers. In the last stitch, make an extra stitch (2 single crochets in one).
Continue in the same way, crocheting the piece together with the bottom and back of the bag. Finish with a slip stitch. Cut the yarn and fasten off.
Then create another side panel in the same way. When you crochet the side panel onto the left side of the bag, do it the same way, but you will need to start at the back of the bag instead of the front corner. This is to ensure the seams are angled the same way.
NOTE: If you're left-handed, you may need to do it in reverse.
Be careful not to start at the very top of the back edge, as the piece won’t reach down to the bottom of the bag. Count 16 rows from the bottom, and/or place the side panel against the back edge to measure where you should begin crocheting them together.
Now, crochet the final step of the bag, which is the border around the braided section using the crab stitch technique. If you're unsure how to crochet crab stitches, see the video below.
Start at the top right corner of the braided part/"lid" of the bag. Make a loop on the hook and pull the loop through the corner, then make a slip stitch. Crochet crab stitches all the way around the edge, one crab stitch in each stitch. When you reach the top left corner, make a slip stitch down into the edge of the bag, cut the yarn, and fasten off.
Attach the D-rings on each side of the bag. Cut a long length of yarn and sew the D-ring onto the edge formed by crocheting the side panel to the bag. Attach the D-ring in two places, where the needle is pointing in the picture.
If you want a button of any kind to close the bag, you can attach it now. In the picture, we’ve used a magnetic button, which is crocheted together with 8/4 cotton yarn in a suitable color and with an appropriate-sized needle depending on your choice of thread/yarn.
The last step is to crochet the shoulder strap. For this, you will need the two snap hooks.
Make a slip knot and insert the loop into the snap hook from the back to the front. Place the loop on the crochet hook, yarn over, and pull through the loop to create a starting point.
Crochet 4 single crochets around the snap hook. Make a chain stitch and turn.
Row 1: Skip the chain stitch, crochet 4 single crochets. Make a new chain stitch and turn.
Row 2: In this row, you will alternate between single crochets and long single crochets, which are done slightly differently. If you're unsure how to crochet long single crochets, see the video below (Spike Stitch).
Skip the chain stitch, then start by making a single crochet in the first stitch. Now, you will make a long single crochet, which is a single crochet but you insert your hook one row below where you would normally insert the hook. See the blue markings showing where to insert the hook for a regular single crochet on the right and a long single crochet on the left.
Make one more single crochet, then a long single crochet. You should have made a total of 4 stitches.
Make a chain stitch and turn. When making a long single crochet, be sure to pull up the long loop properly, to the same height as the second loop on the hook, see the picture.
Repeat row 2 (1 single crochet, 1 long single crochet, 1 single crochet, 1 long single crochet + 1 chain stitch at the turn) until you are satisfied with the length of the shoulder strap.
Place the second snap hook on the back of the strap. Crochet 4 single crochets through the loop and the snap hook.
Finish with a slip stitch at the edge of the strap. Cut the yarn and fasten off the end.
Now you’re finished! Great job ☺
Abbreviations
MR = Magic ring
st/sts = stitch
ch = chain stitch
sl st= slip stitch
sc = single crochet
dsc = long single crochet
hdc = half double crochet
dc = double crochet
blo = back loop only
flo = front loop only
(...) = indicates the number of stitches in the current row
*...* = Everything within *...* is repeated the specified number of times
[...] = Everything within [...] is crocheted in the same stitch
Now, let's crochet a beautiful bag! If you need help along the way, check out our simple version of this pattern.
Step 1
The first step is to crochet the 9 strips that make up the braided section. There should be 5 strips that are wider and shorter (the vertical ones) and 4 strips that are narrower and longer (the horizontal ones).
Vertical strips (make 5):
Ch 17. Turn.
Row 1-4: Skip the first st. Crochet 16 sc (16). Ch 1 stitch and turn. Repeat for a total of 4 rows. Cut the yarn and fasten off. Now you have made the first strip, which should be about 4.5 cm wide and 16 cm long.
Horizontal strips (make 4):
Ch 26. Turn.
Row 1-3: Skip the first st. Crochet 25 sc (25). Ch 1 and turn. Repeat for a total of 3 rows. Cut the yarn and fasten off. The strip should be about 3.5 cm wide and 25 cm long.
Step 2
Lay out your strips in the braided pattern.
Short side:
Pick up the yarn in the top right corner. Crochet sc through both layers (the upper and the lower strip), 4 sc per strip (16). Make 2 sc in the last stitch (3 sc total in the corner).
Long side:
5 sc per strip (25). 2 sc in the last st.
Repeat the short side and long side one more time. Finish with two sc in the corner where you started. Make a ch and turn.
Step 3
Now continue with the back panel of the bag.
NOTE: Always make a ch and turn between rows. It’s important to double-check from time to time to ensure you haven’t missed or accidentally added a stitch, as this will create a crooked edge. It’s crucial that the loops created by working in the fmb and bmb on rows 1, 20, and 26 are on the same side of the piece.
Row 1: 26 sc in the flo (26).
Check that the width is approximately 26 cm. This is the width and the number of stitches that will follow for the next rows of the entire bag. Adjust with increases or decreases at the beginning and/or end of the row if needed.
Row 2-19: 26 sc for a total of 18 rows (26)
Row 20: 26 sc in the blo (26)
Row 21-25: 26 sc for a total of 5 rows (26)
Row 26: 26 sc in the blo (26)
Row 27-42: 26 sc for a total of 16 rows (26)
Step 4
Side Panels (make 2)
Make 8 ch.
Row 1: Skip the first ch, 7 sc. (7) Ch 1, turn.
Row 2: 7 sc. (7) Ch 1, turn.
Row 3: Skip the first ch, 6 sc. (6) Ch 1, turn.
Row 4: 6 sc. (6) Ch 1, turn.
Row 5: Skip the first ch, 5 sc. (5) Ch 1, turn.
Row 6-7: 5 sc for 2 rows. (5) Ch 1, turn.
Row 8: Skip the first ch, 4 sc. (4) Ch 1, turn.
Row 9-16: 4 sc for a total of 8 rows. Ch 1, turn.
Do not cut the yarn as you will now attach the side panel to the bag. The side panel should now be approximately the same length as rows 27-42 of the bag. Insert your needle into the front right corner of the last row of the bag (row 42 from step 3), see the picture.
Crochet the pieces together with sc through both layers. In the last stitch (the corner), make 2 sc in the same stitch.
Continue in the same way to crochet the piece together with the bottom and back of the bag. Cut the yarn and fasten off.
Create another side panel in the same way. When crocheting the side panel onto the left side of the bag, do so in the same way, but start at the back of the bag instead of in the front corner. This will make the seams angle in the same direction.
Note: if you're left-handed, you may need to do it in reverse.
Be careful not to start at the very top of the back side, as the piece will not reach down to the bottom of the bag. Count 16 rows from the bottom or place the side panel against the back edge to measure where to start crocheting the pieces together.
Step 5 - Edge on the front
Start in the top right corner of the braided part/“flap” of the bag. Make a slip knot and insert the hook into the corner to make a slip stitch. Then, crochet crab stitches all the way around, one crab stitch in each stitch. When you reach the top left corner, make a slip stitch into the edge of the bag, cut the yarn, and fasten off.
Step 6 - Attach D-rings to each side of the bag:
Cut a long strand of yarn and sew the D-ring onto the edge formed by crocheting the side panel/bag together in two places.
Mount the press stud/magnetic button if you want to close the bag. In the picture, we have used a magnetic button crocheted together with cotton yarn 8/4 in a suitable color and with a suitable needle size based on the choice of thread/yarn.
Step 7 Shoulder strap
Make a slip knot and insert the loop into the trigger hook from back to front. Place the loop on the crochet hook, yarn over, and pull through the loop so you have a start. Always chain stitch at turnarounds and skip the chain stitch after turning. 4 single crochets around the trigger hook.
Now, you’ll continue crocheting the strap in rows or in the round as needed for your desired length. Make sure to measure it against your body to get the right fit! Let me know if you need help with the rest of the strap or any other parts.
Row 1: 4 sc (4)
Row 2: 1 sc, 1 dsc, 1 sc, 1 dsc (4)
Repeat row 2 until you are satisfied with the length of the shoulder strap.
Place the second trigger hook on the back of the strap. Crochet 4 sc through the loop and trigger hook. Finish with a slip stitch in the edge of the strap. Cut off and fasten the yarn end.
You're done! Great job ☺
The rights to this pattern belong to MYO Make Your Own. The pattern or its pictures may not be copied, shared or resold either in parts or in its entirety, but you may sell items you have crocheted from this pattern. If you have questions about the pattern, contact MYO at hello@makeyourown.se.

Share your creations with us
Thank you!
Your comment was sent!