
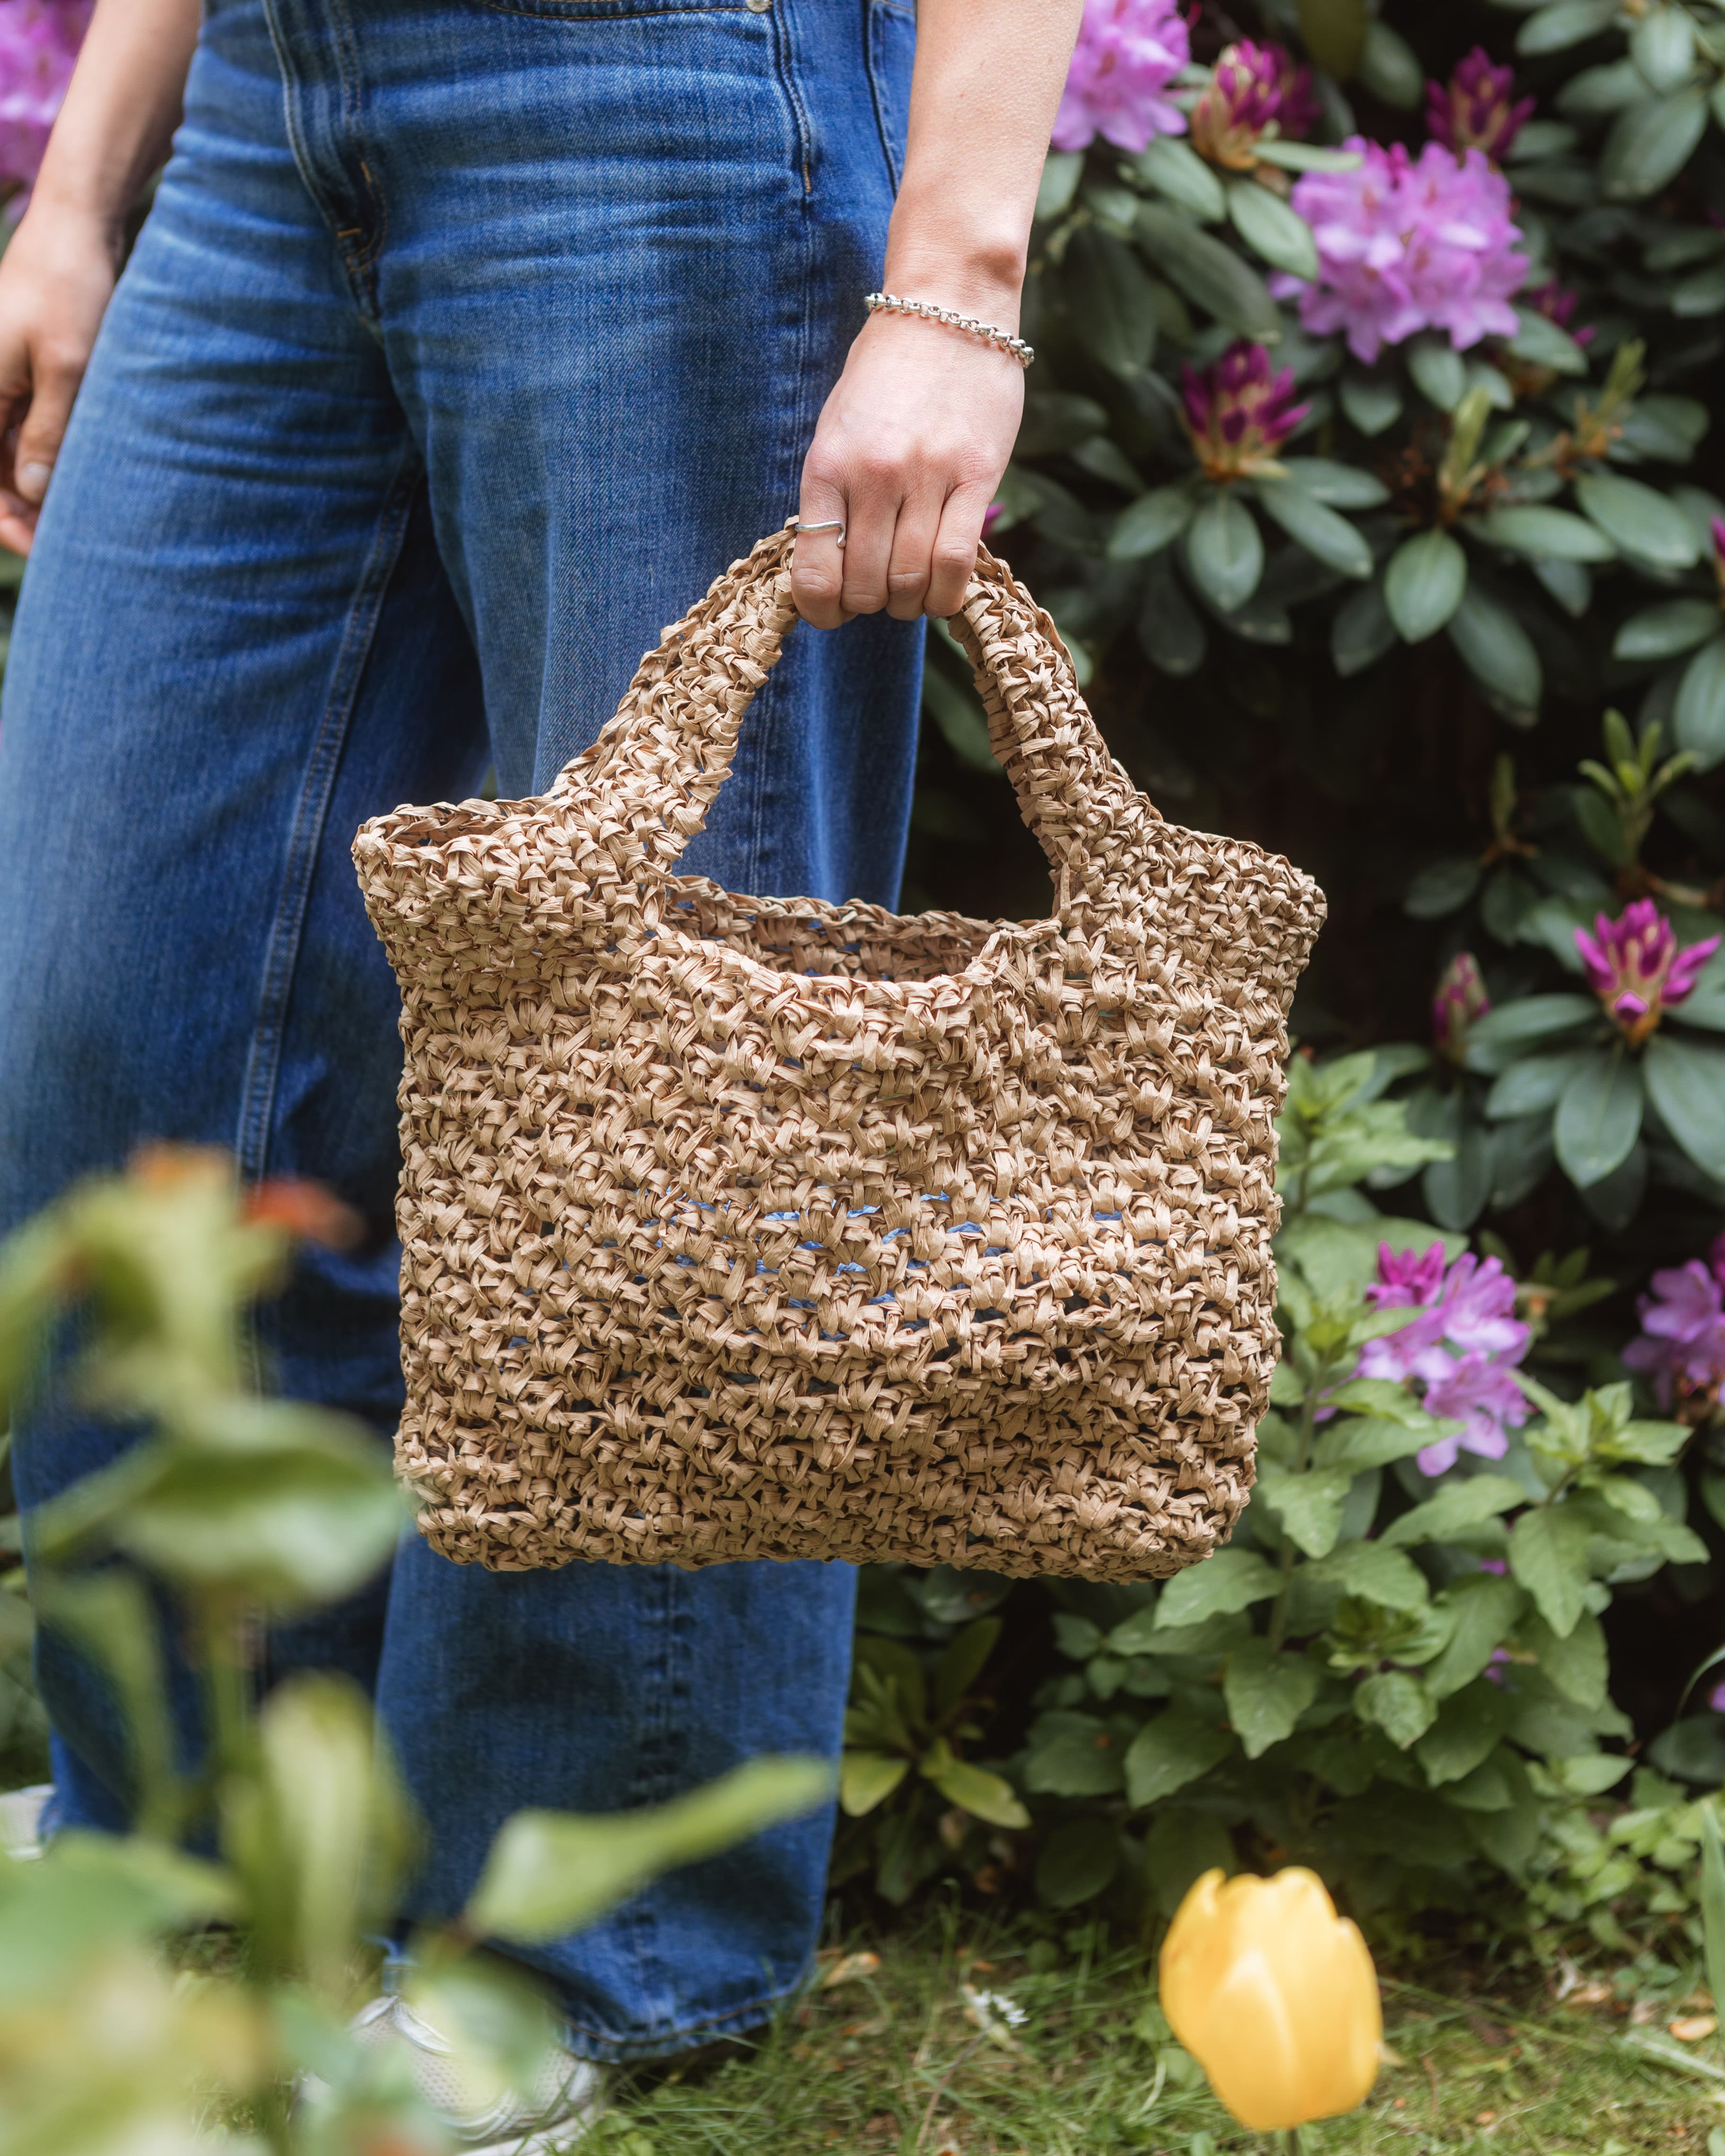
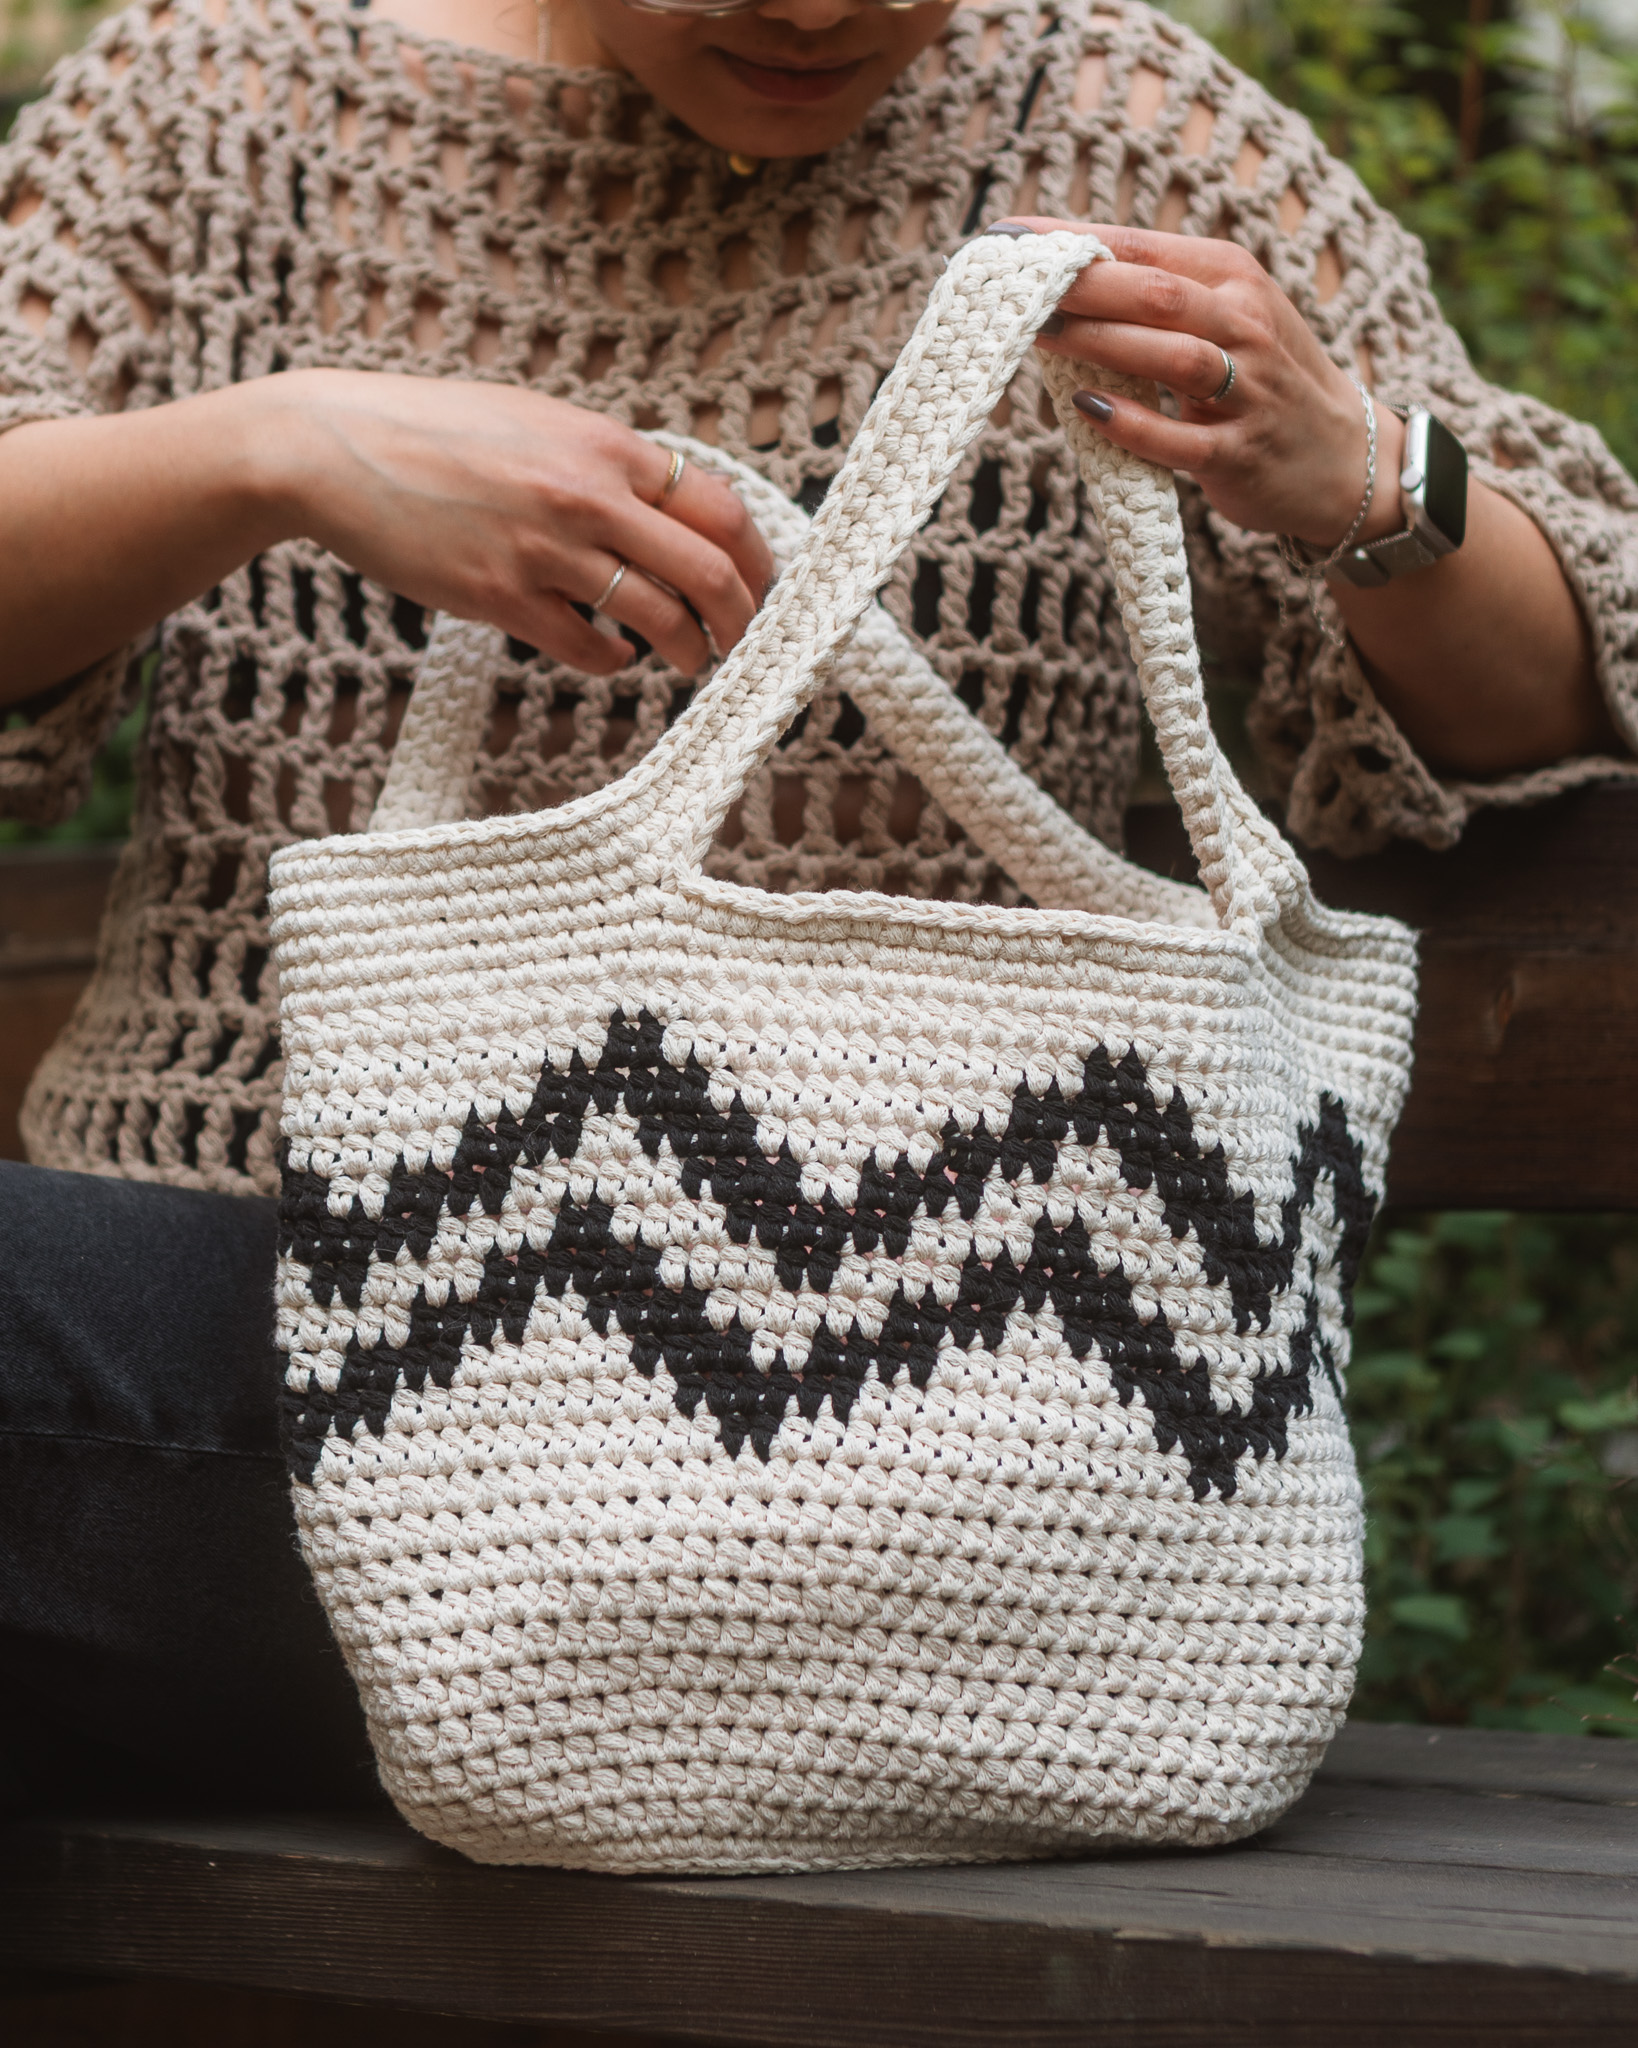
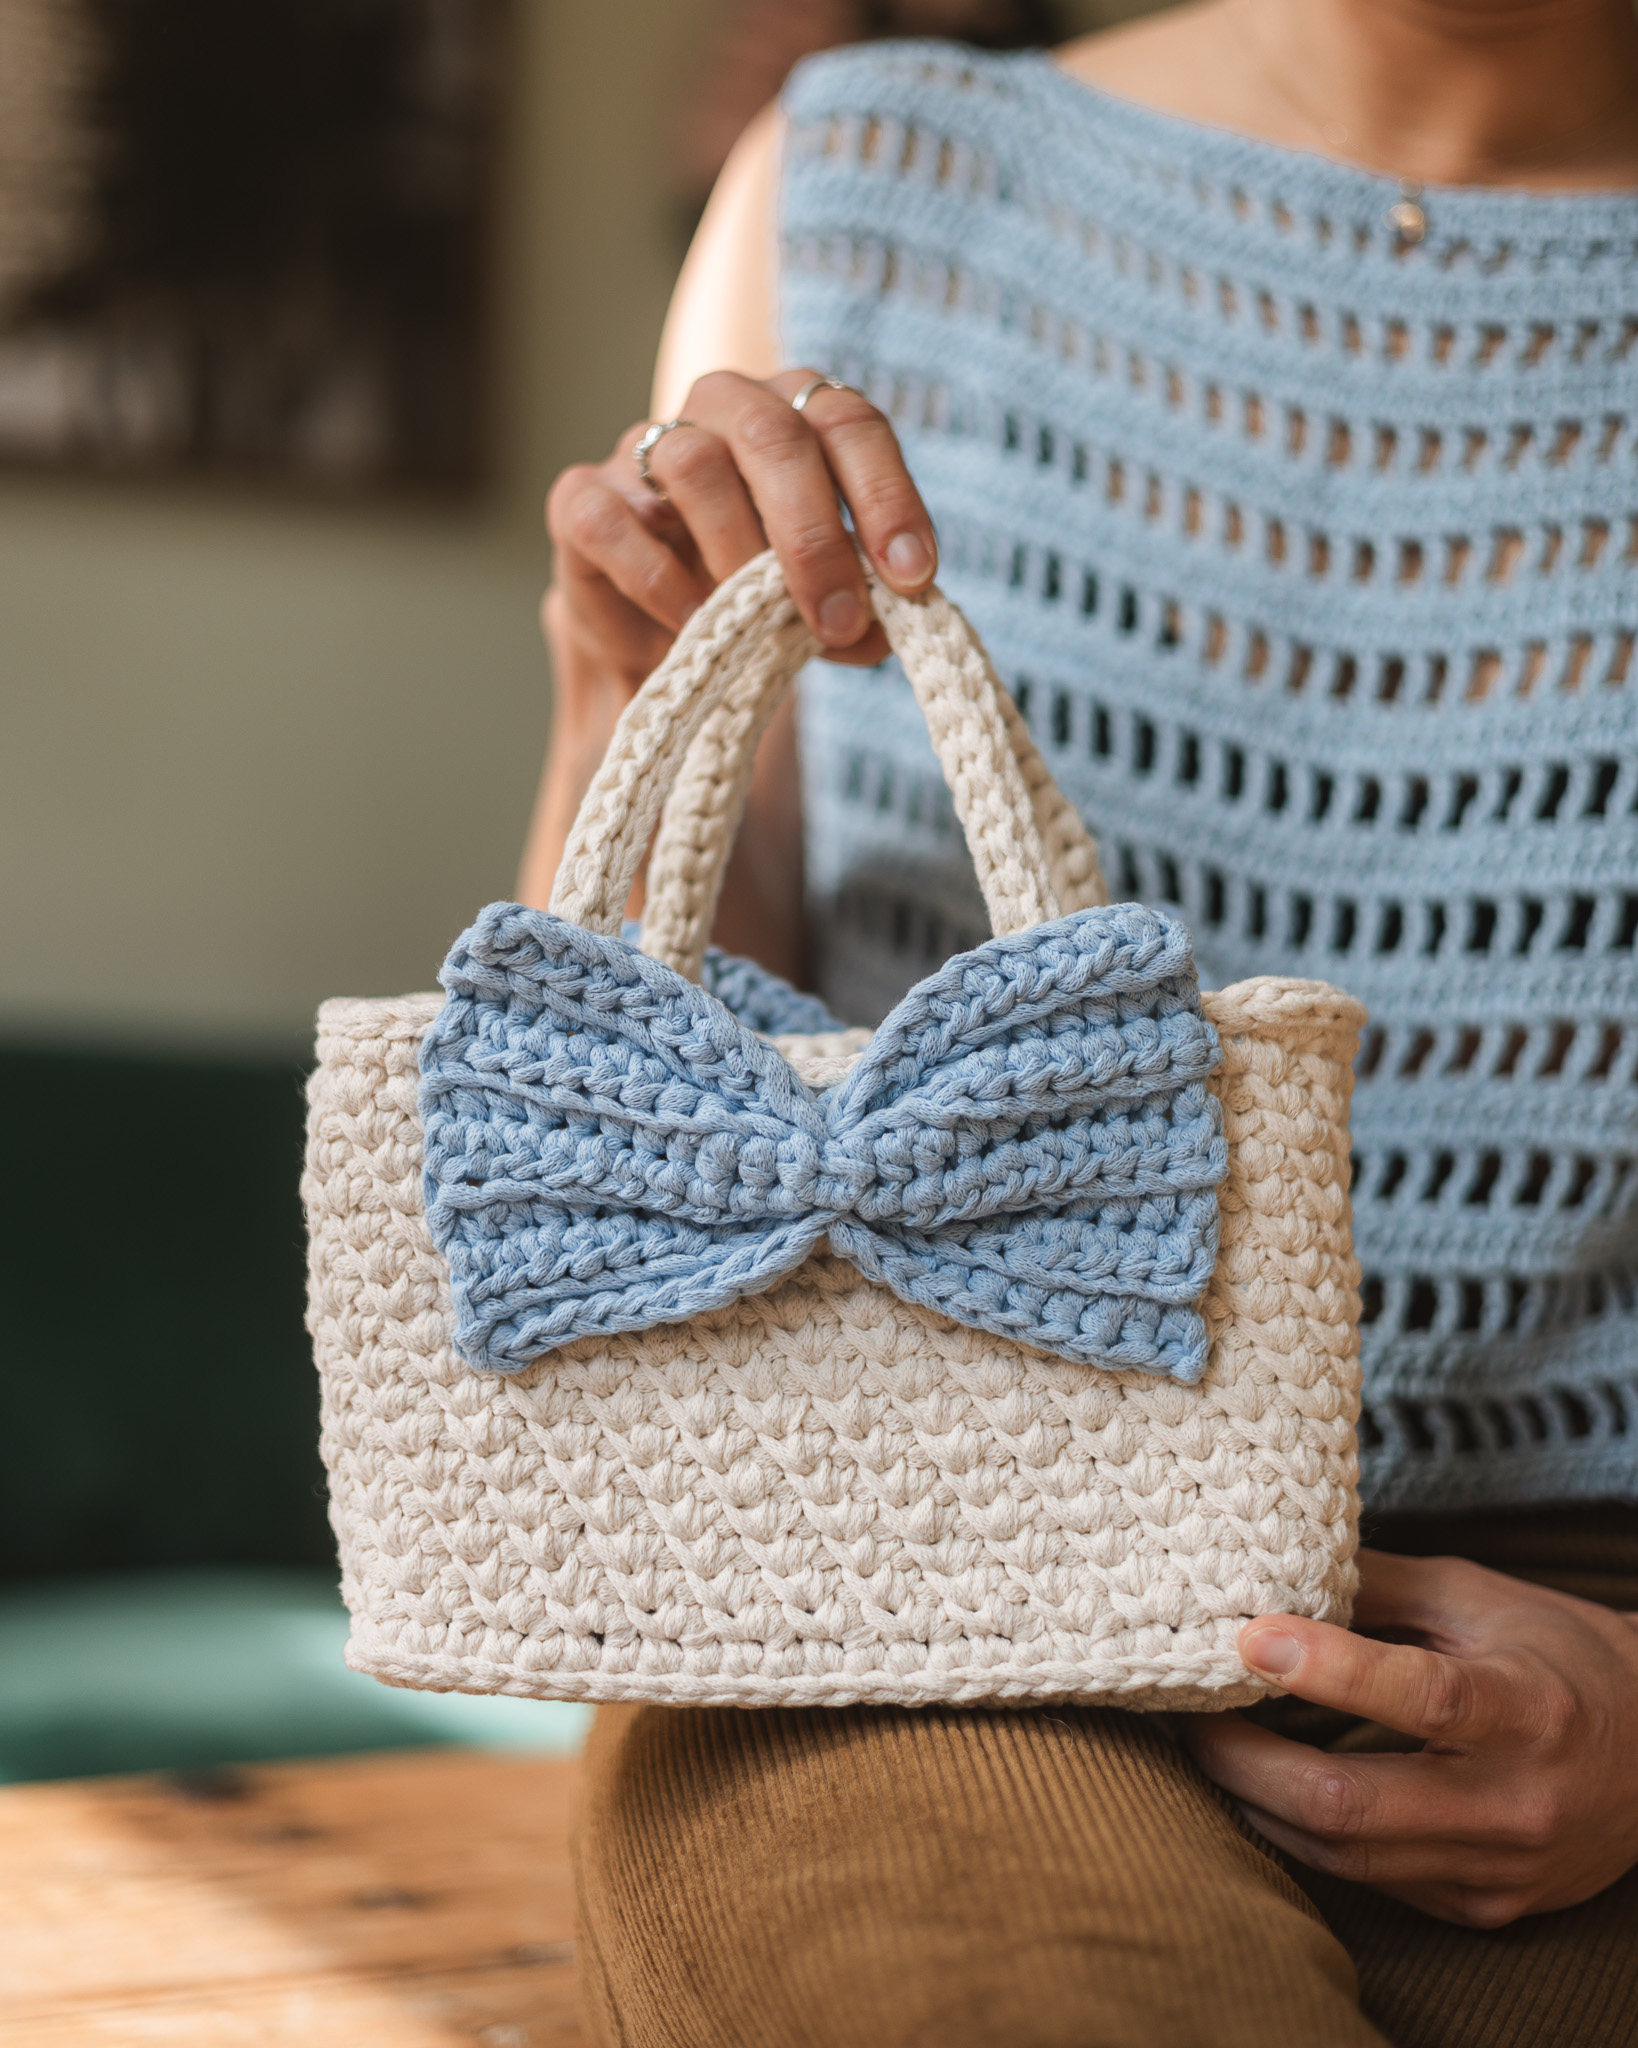
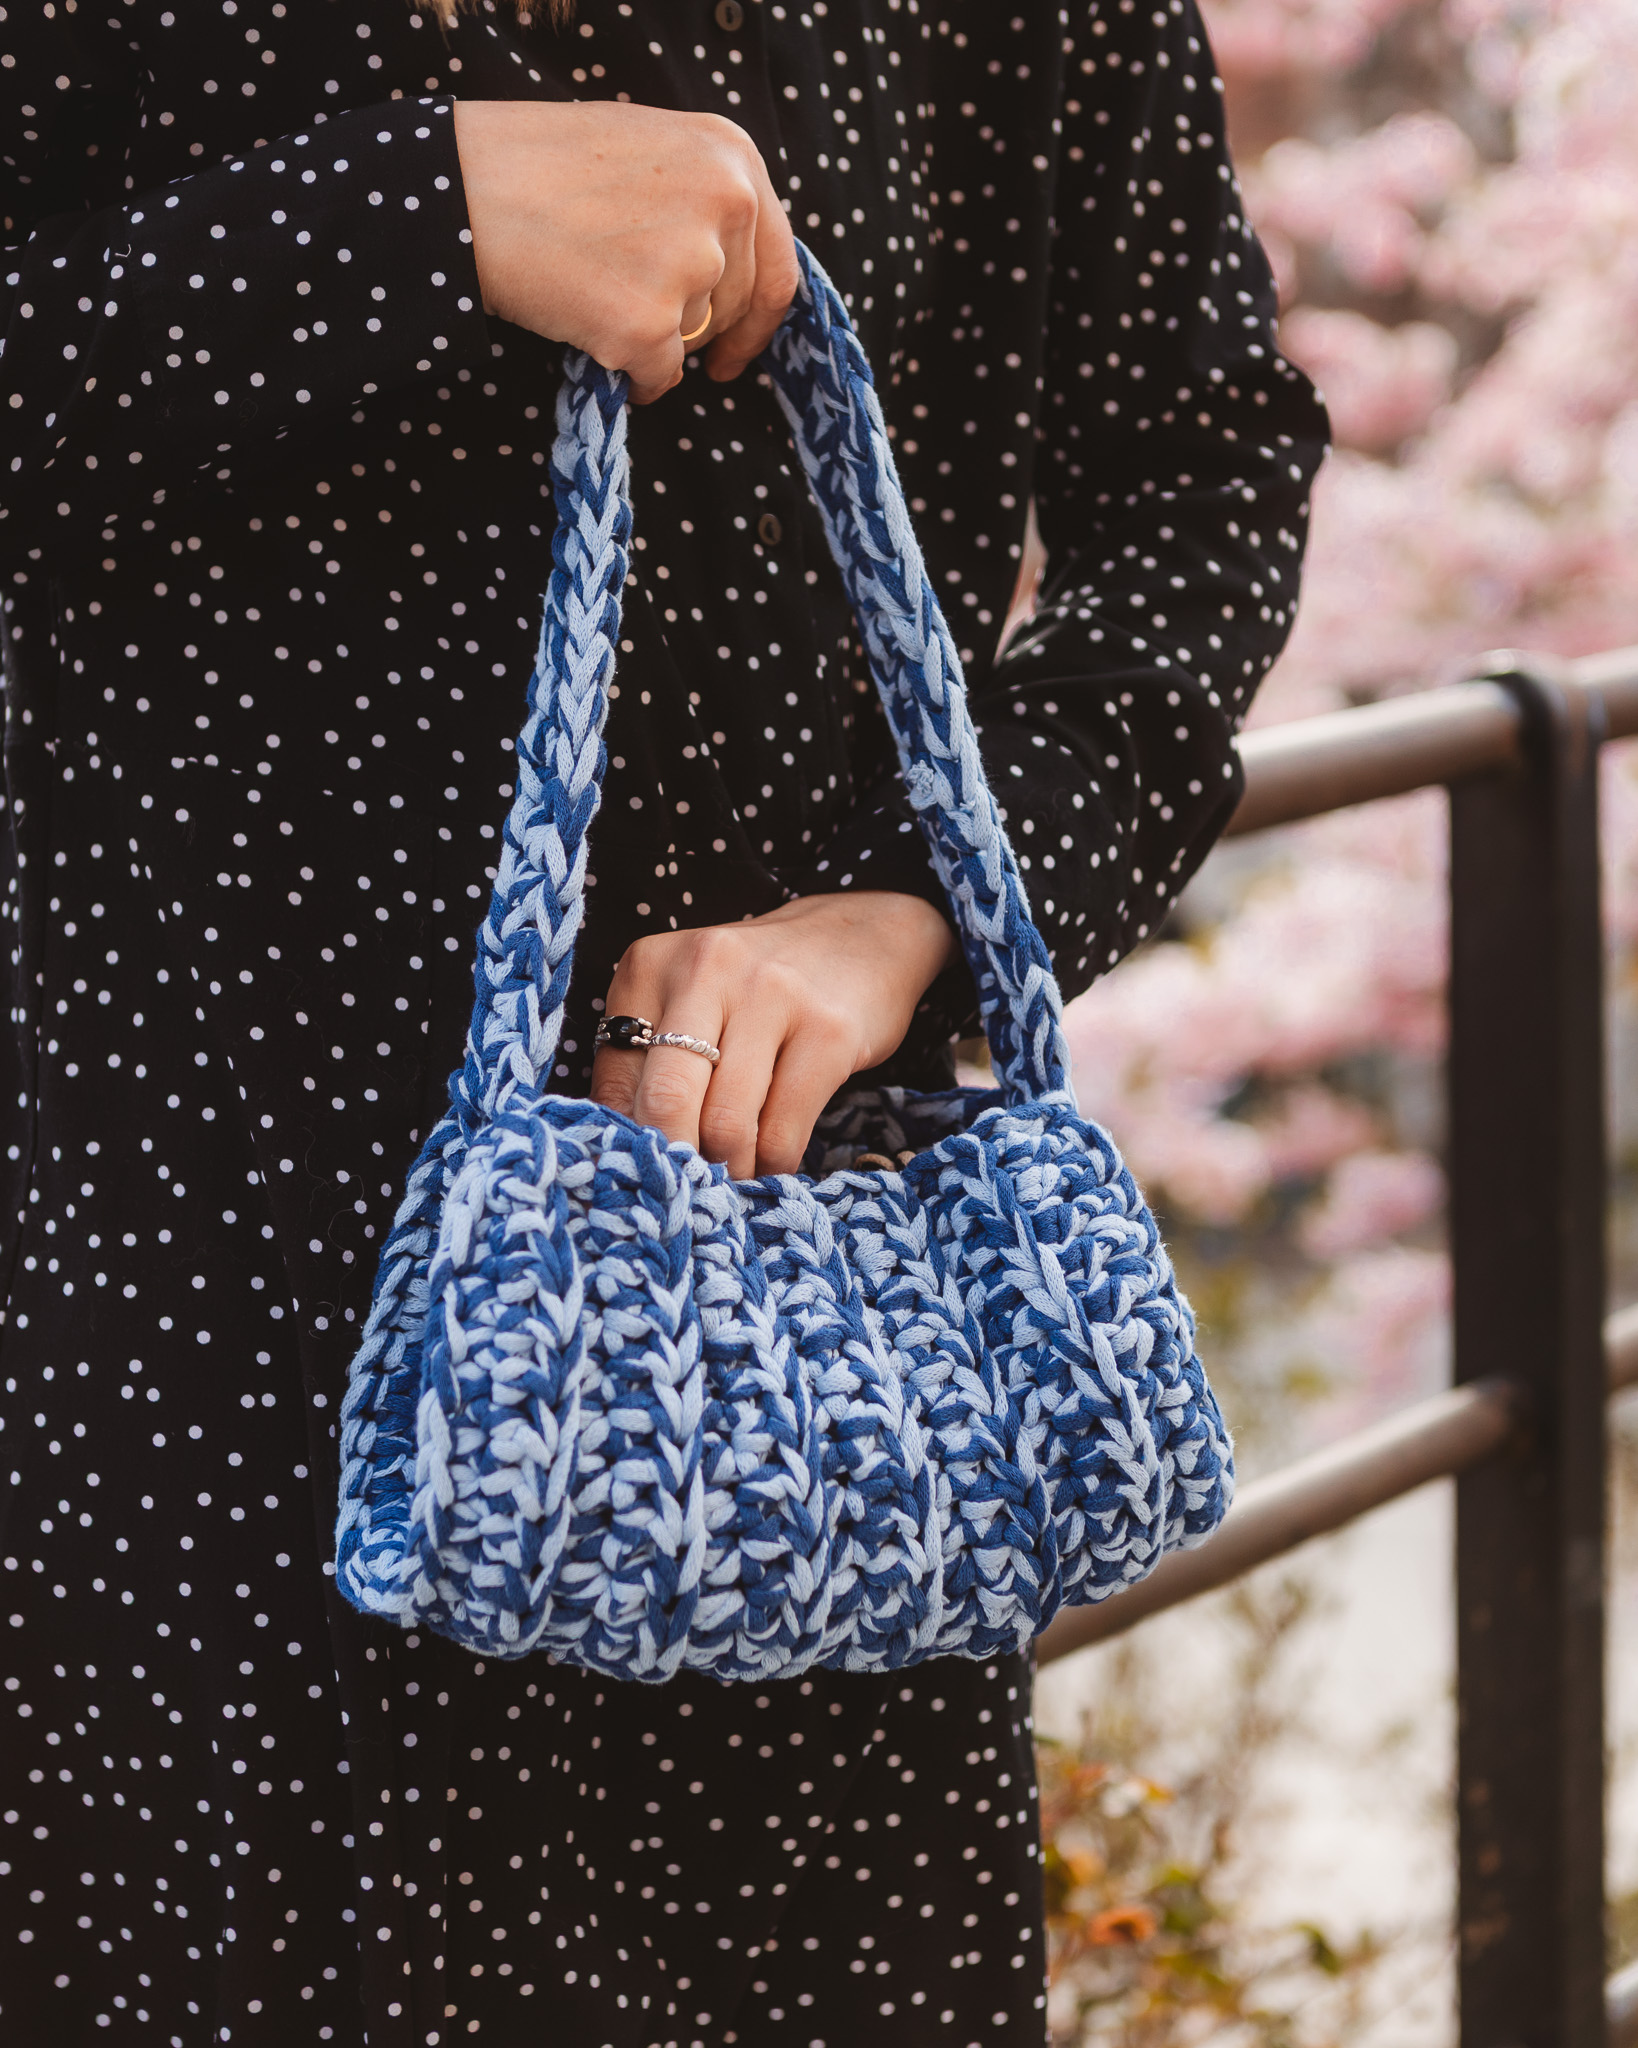
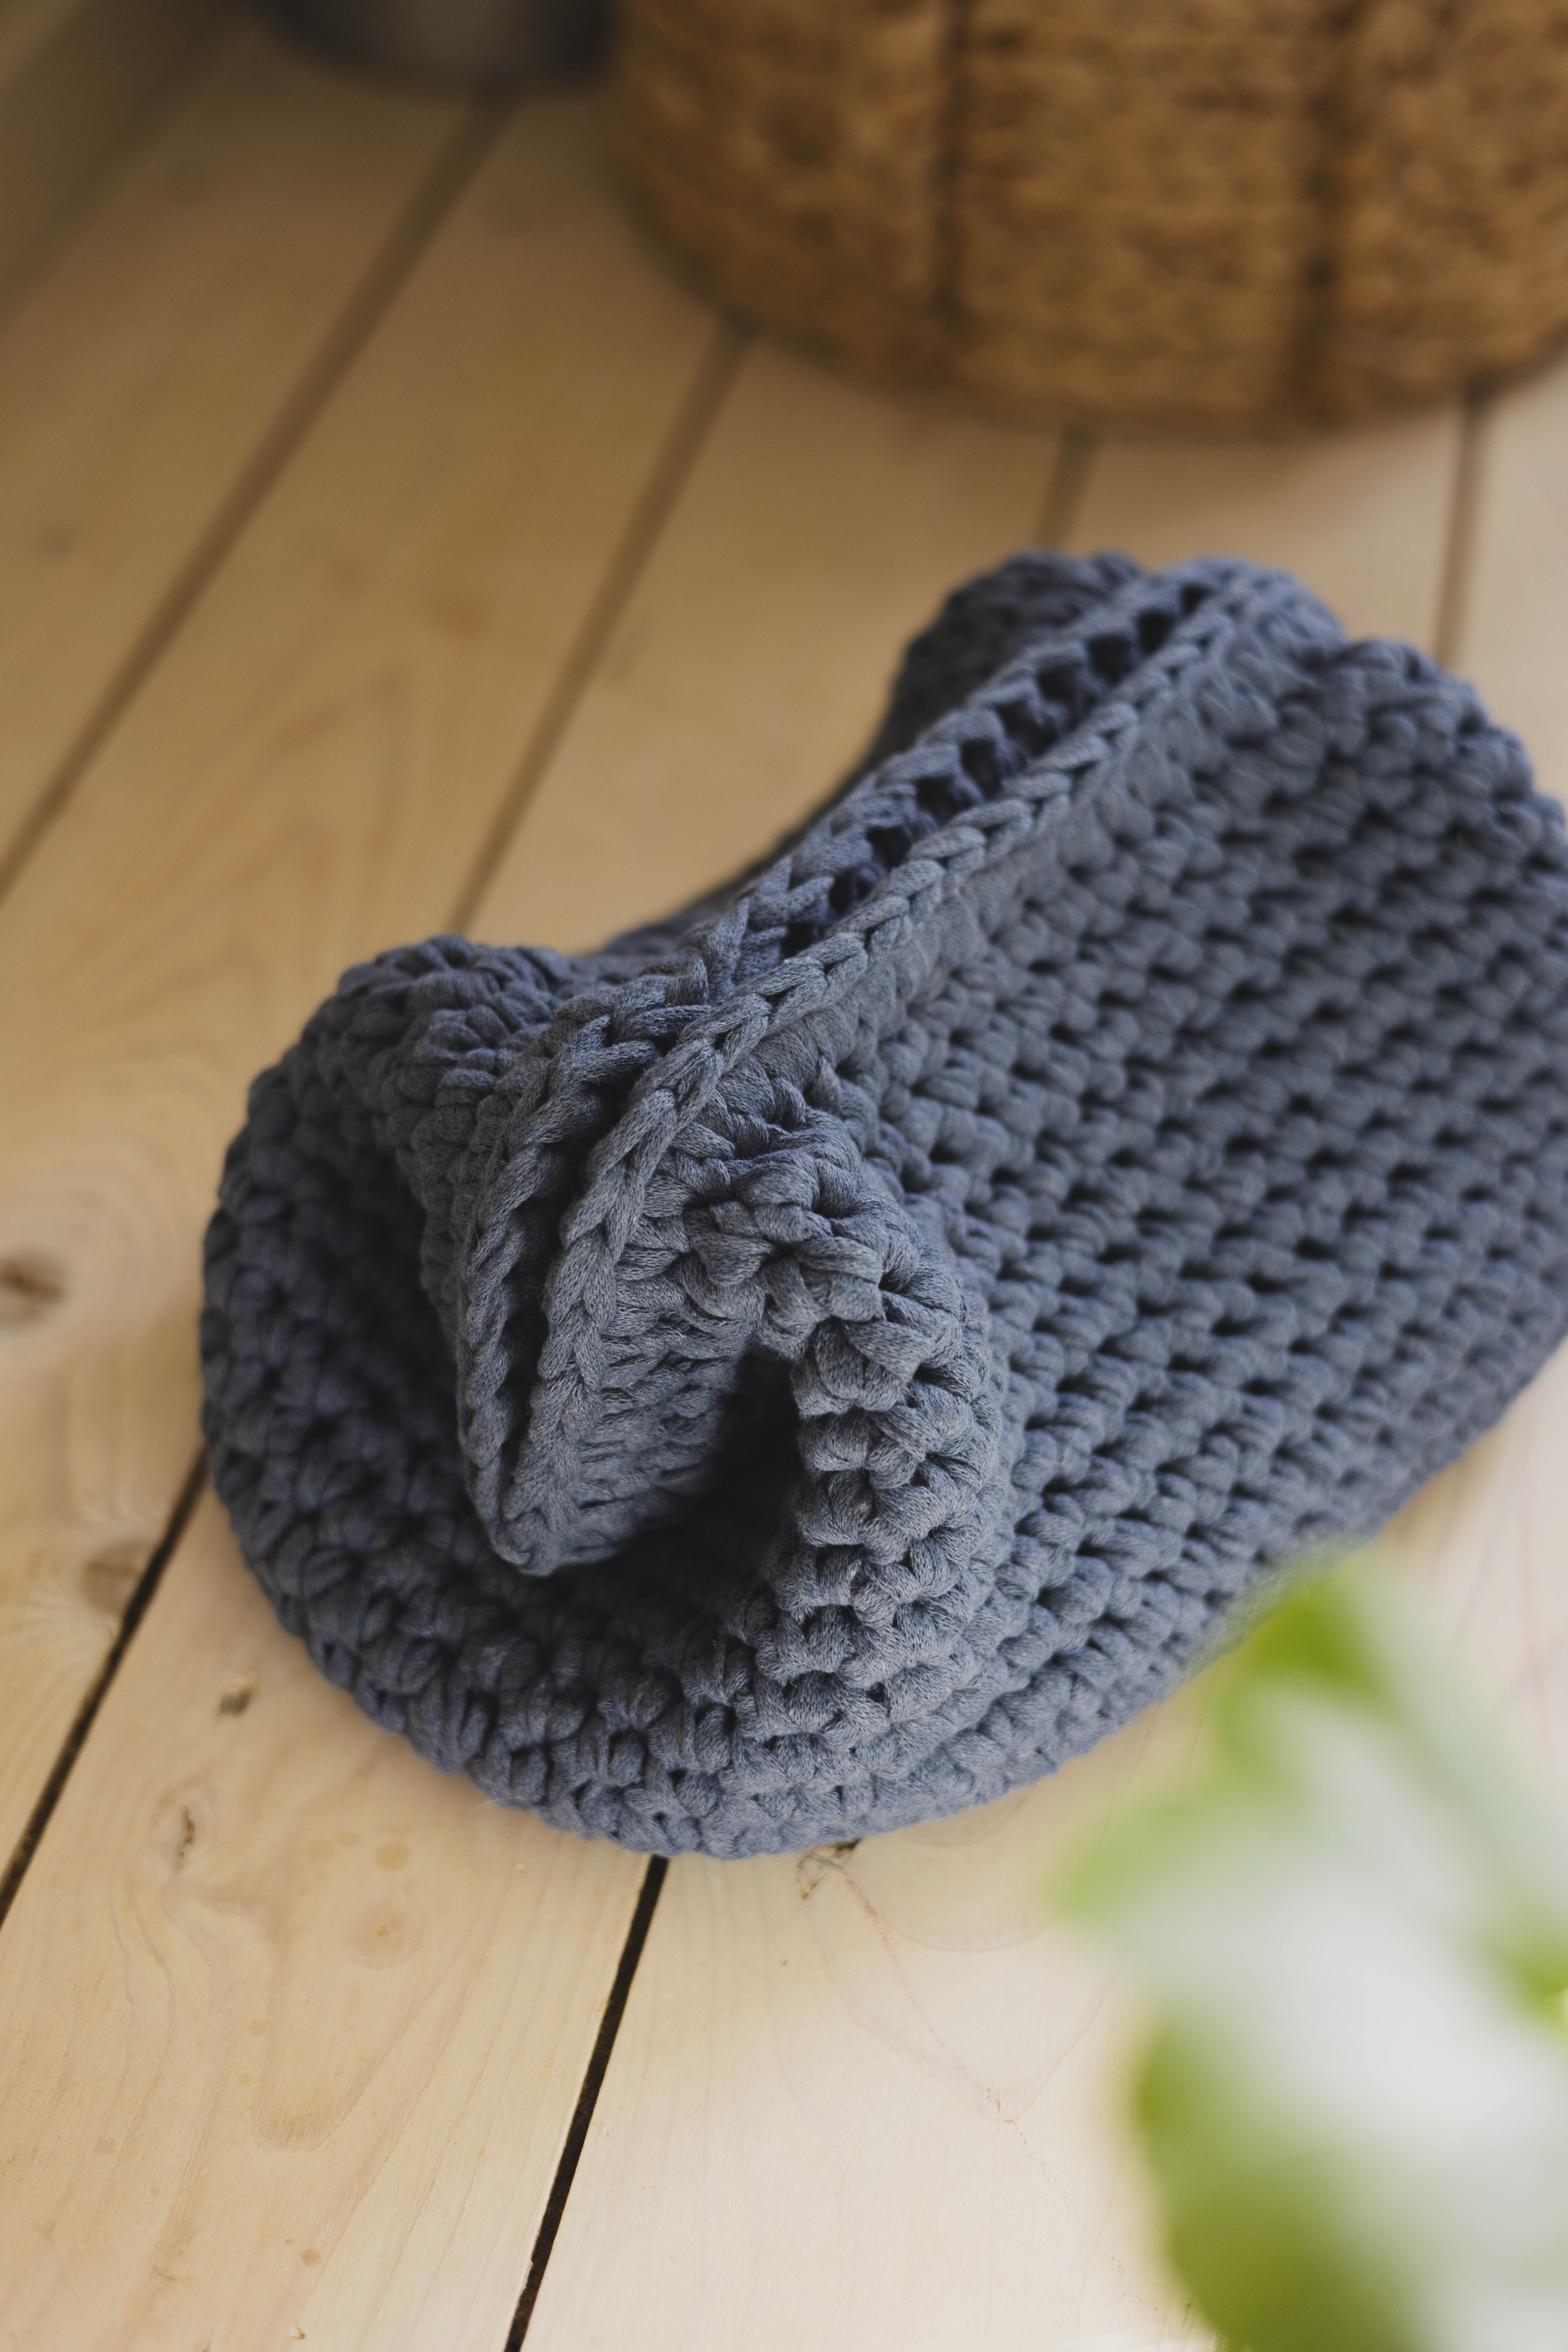
Crochet bag “Verona”
Crochet a Simple but Practical Bag!
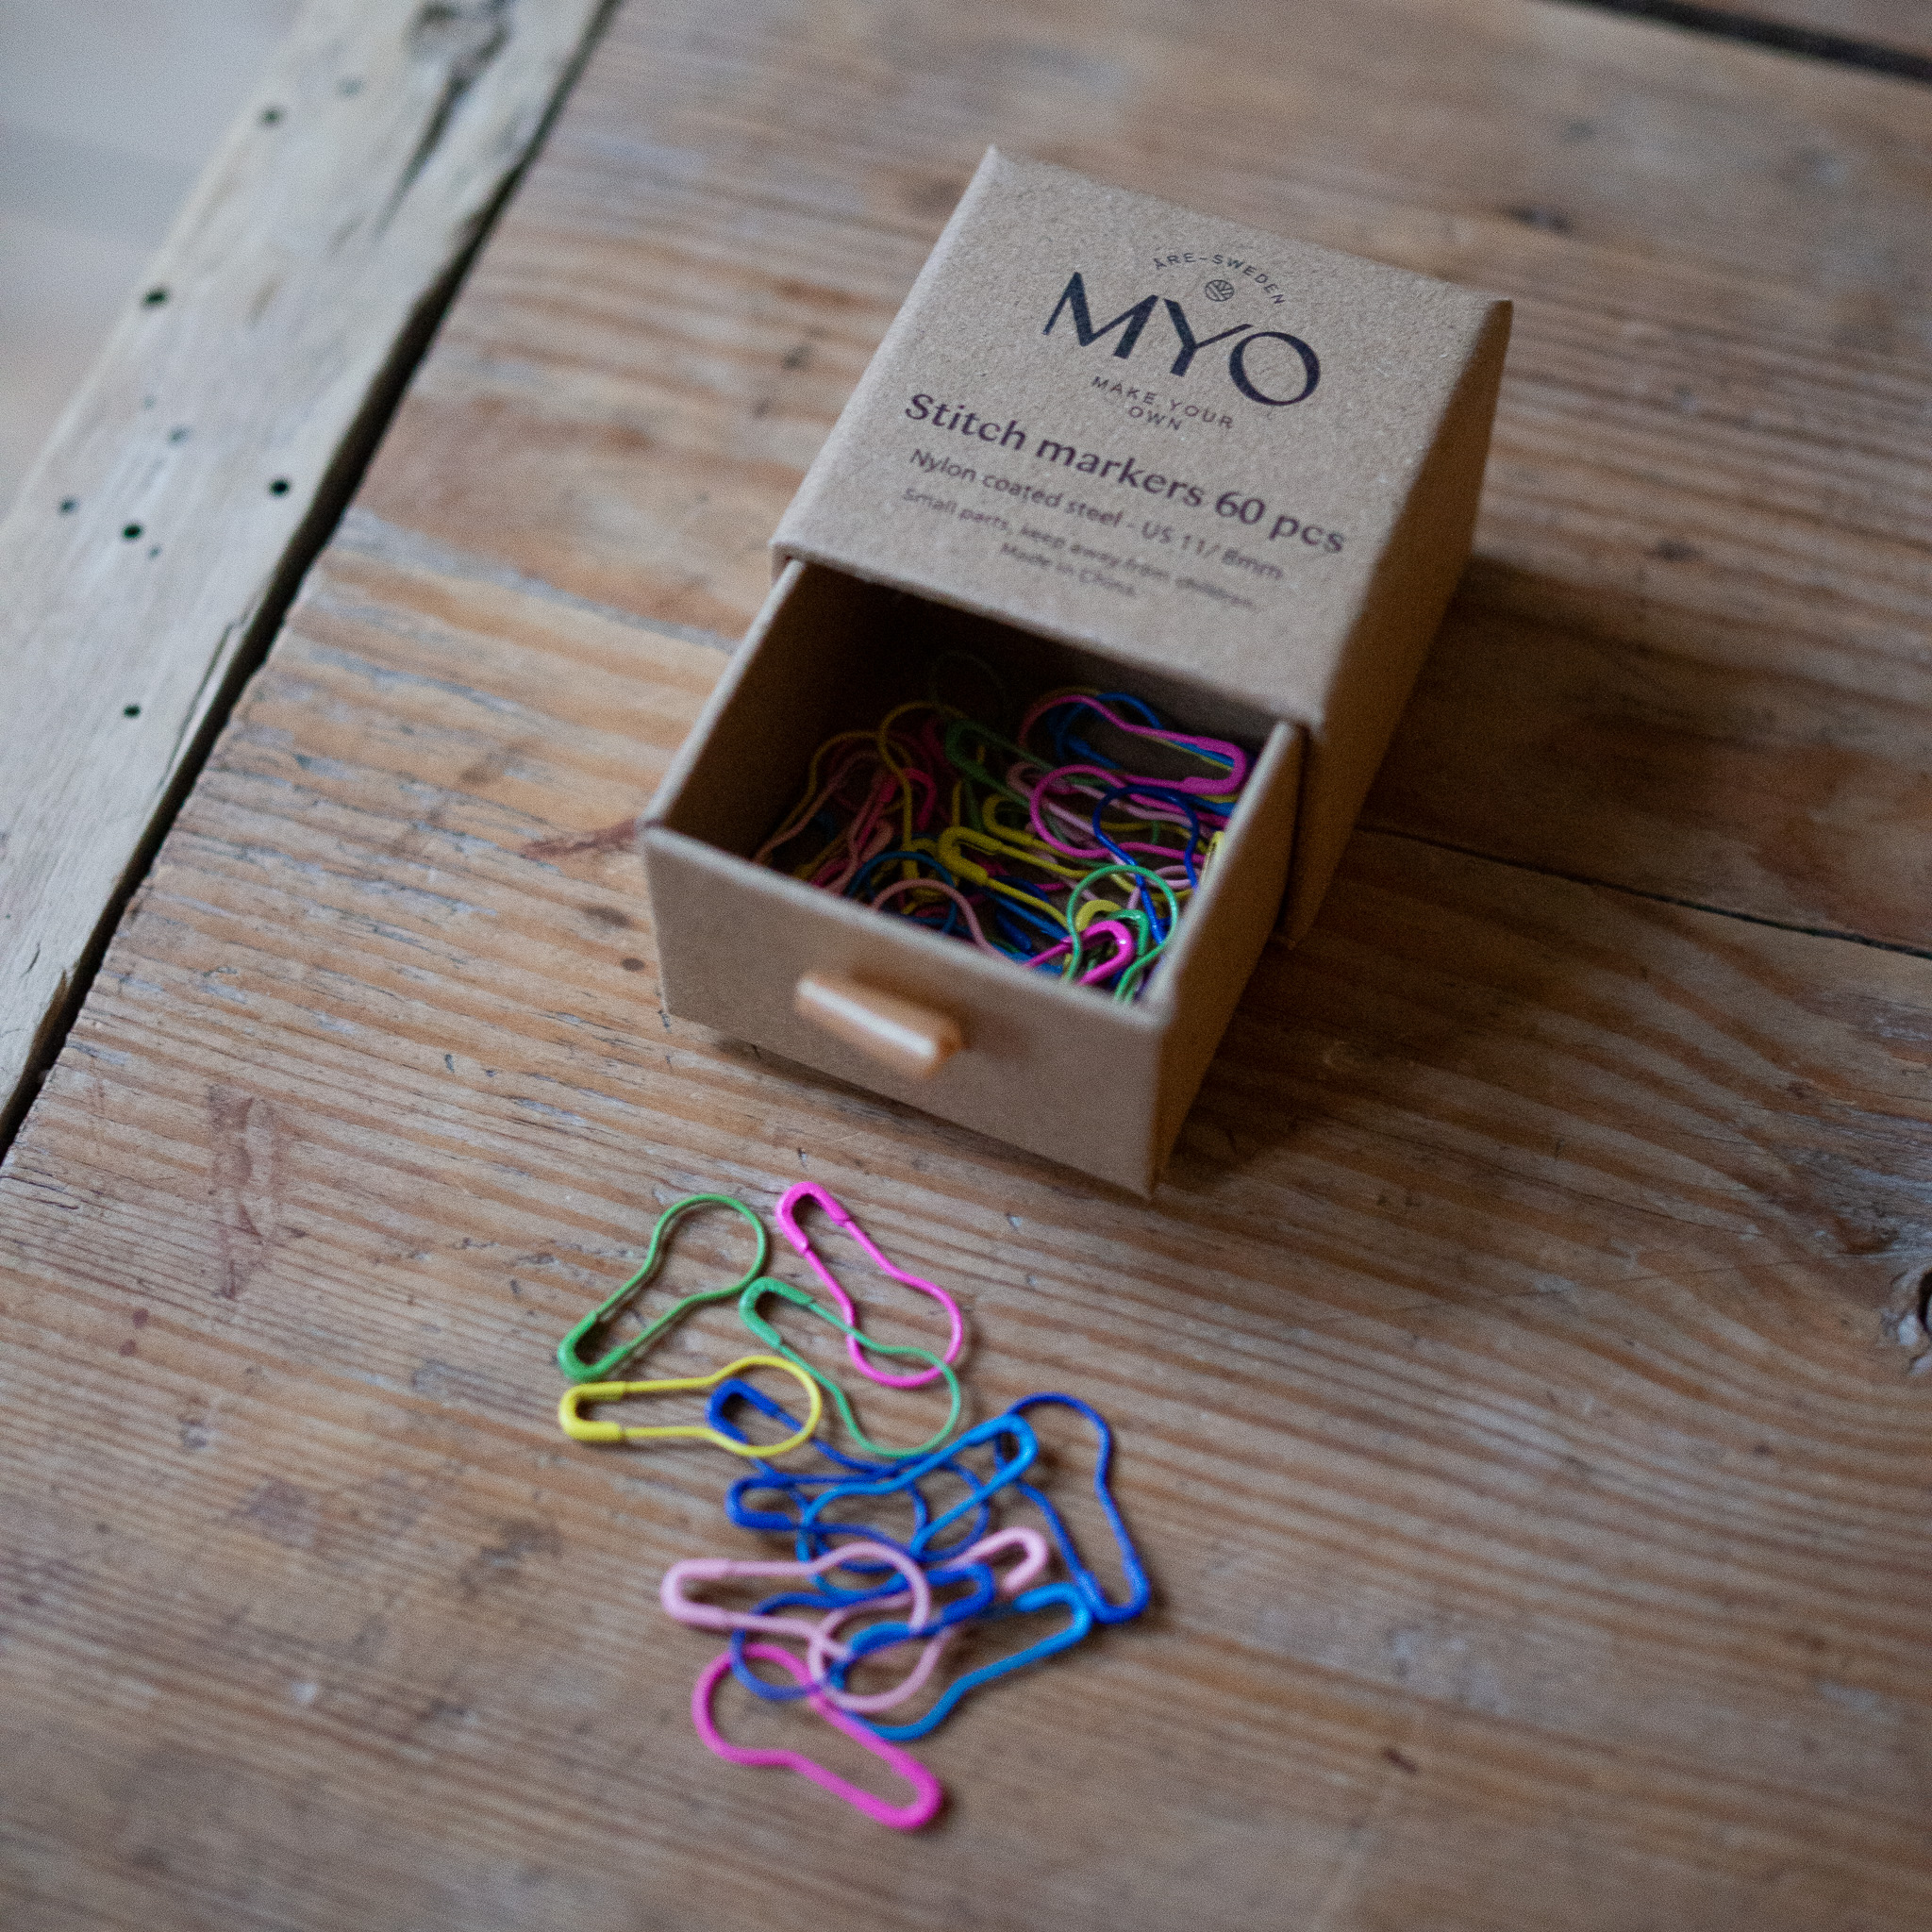
The perfect bag for those who want something simple yet functional. This is an easy pattern suitable for everyone, and when you’re done, you’ll have a perfect bag with a flap. You can crochet the bag using either EKO Ribbon or EKO Mini. EKO Ribbon gives a chunkier, thicker look while EKO Mini creates a more delicate feel. You will also need a 6 mm crochet hook for EKO Mini or an 8 mm crochet hook for EKO Ribbon, stitch markers, and a magnetic clasp.
Yarn Consumption: Approx. 250 g of EKO Mini (short strap) or approx. 450 g of EKO Ribbon (medium-length strap). Yarn consumption may vary depending on your tension and the length/width of the strap.
Please note that in this pattern, we use technique videos from our technique library along with explanatory images.


Here's how to do it
The bag is crocheted in rounds around a chain. At the end, we fold the bag and crochet it together. A simple and relatively quick project! Start with your favorite color. /Lizette

This is what you need:
Here you can directly purchase the material for the product. Please note that the instruction is digital and appears here on the page (no written instruction).


Magnetic button
A magnetic button that can be used for bags, accessories and clothing. The button has two sides that are fastened with ordinary sewing thread and needle.
Buy product.jpg)
Unleash your creativity
For only 85kr per month you get access to all our 300+ beginner-friendly instructions for crochet, knitting and macrame.
A perfect way to get started with your new hobby!

Throughout the pattern, we will indicate the number of stitches you should use depending on whether you choose to crochet with EKO Mini or EKO Ribbon.
We will write it like this: 28/32 chains, which means 28 for EKO Ribbon and 32 for EKO Mini.
Row 1: Chain 28/32. Turn. If you're unsure how to make a chain, see the video below.
Row 2: Single crochet in the next 26/30 stitches. You now have 1 stitch left on the chain.

In that last stitch, crochet three single crochets into the same stitch. These three stitches will stay with us throughout the increases and help create the rounded shape of the flap. Mark the first and the last of these three stitches.
If you're unsure how to crochet single crochets, see the video below.

Now we're going to crochet along the other side of the chain:
- Crochet 25/29 single crochets.
- In the last stitch, crochet 1 extra single crochet.
- Chain 1 and turn your work.
You should now have a total of 55 stitches for EKO Ribbon or 63 stitches for EKO Mini on the row.

From now on, always start crocheting in the second stitch — that means you skip the turning chain you made when turning your work.

Row 3: Crochet 26/30 single crochets until you reach your first stitch marker. In the three stitches between the markers (including the stitches with the markers), crochet 2 single crochets in each stitch (increase in each = 6 sc total).
Place stitch markers in the first and last of these 6 stitches — these will help mark the increases forming the curved flap.
You should now have 58/66 stitches in total on the row.


Row 4:
Crochet 26/30 single crochets until you reach your first stitch marker.
Now it’s time to begin the increases between the markers. You now have 6 stitches between your two stitch markers (including the stitches with the markers). In these 6 stitches, you will repeat the following sequence 3 times: 1 single crochet, 1 increase (2 single crochets in same stitch)
Don’t forget: Place a stitch marker in the first stitch of this sequence and another marker in the last stitch of the sequence.
This helps you keep track of your increase section as it expands row by row.


Row 4: Crochet 26/30 single crochets until you reach the end of the row. Chain 1 and turn. You should have 61/66 stitches on the row.
Row 5: Crochet 26/30 single crochets until you reach your first stitch marker. Repeat the following sequence 3 times: 2 single crochets, then 1 increase (2 single crochets in the same stitch). Don’t forget the stitch markers in the first and last stitch of the sequence!
Crochet 26/30 single crochets until you reach the end of the row. Chain 1 and turn. You should have 64/69 stitches on the row.
Row 6: Crochet 26/30 single crochets until you reach your first stitch marker. Repeat the following sequence 3 times: 3 single crochets, then 1 increase (2 single crochets in the same stitch). Don’t forget the stitch markers in the first and last stitch of the sequence!
Crochet 26/30 single crochets until the end of the row. Chain 1 and turn. You should have 67/72 stitches on the row.
Row 7: Crochet 26/30 single crochets until you reach your first stitch marker. Repeat the following sequence 3 times: 4 single crochets, then 1 increase. Don’t forget the stitch markers in the first and last stitch of the sequence!
Crochet 26/30 single crochets until the end of the row. Chain 1 and turn. You should have 70/75 stitches on the row.
Row 8: Crochet 26/30 single crochets until you reach your first stitch marker. Repeat the following sequence 3 times: 5 single crochets, then 1 increase. Don’t forget the stitch markers in the first and last stitch of the sequence!
Crochet 26/30 single crochets until the end of the row. Chain 1 and turn. You should have 73/78 stitches on the row.
Row 9: Crochet 26/30 single crochets until you reach your first stitch marker. Repeat the following sequence 3 times: 6 single crochets, then 1 increase. Don’t forget the stitch markers in the first and last stitch of the sequence!
Crochet 26/30 single crochets until the end of the row. Chain 1 and turn. You should have 76/81 stitches on the row.
Row 10: Crochet 26/30 single crochets until you reach your first stitch marker. Repeat the following sequence 3 times: 7 single crochets, then 1 increase. Don’t forget the stitch markers in the first and last stitch of the sequence!
Crochet 26/30 single crochets until the end of the row. Chain 1 and turn. You should have 79/84 stitches on the row.

Row 11: Crochet 26/30 single crochets until you reach your first stitch marker. Repeat the following sequence 3 times: 8 single crochets, then 1 increase (2 single crochets in the same stitch). Don’t forget the stitch markers in the first and last stitch of the sequence!
Crochet 26/30 single crochets until the end of the row. Chain 1 and turn. You should have 82/87 stitches on the row.
Row 12: Crochet 26/30 single crochets until you reach your first stitch marker. Repeat the following sequence 3 times: 9 single crochets, then 1 increase.
Don’t forget the stitch markers in the first and last stitch of the sequence!
Crochet 26/30 single crochets until the end of the row. Chain 1 and turn. You should have 85/90 stitches on the row.
Row 13: Crochet 26/30 single crochets until you reach your first stitch marker. Repeat the following sequence 3 times: 10 single crochets, then 1 increase. Don’t forget the stitch markers in the first and last stitch of the sequence!
Crochet 26/30 single crochets until the end of the row. Chain 1 and turn. You should have 88/93 stitches on the row.
Row 14: Crochet 26/30 single crochets until you reach your first stitch marker. Repeat the following sequence 3 times: 11 single crochets, then 1 increase. Don’t forget the stitch markers in the first and last stitch of the sequence!
Crochet 26/30 single crochets until the end of the row. Chain 1 and turn. You should have 91/96 stitches on the row.
Assembly
Crochet a row of single crochets along the short side of the bag if you want it to have a straighter shape. Start by crocheting an extra single crochet in the corner stitch, then make one single crochet in each stitch until you reach the other side. For reference, this will be about 15–16 single crochets if you are working with EKO Ribbon.


Cut the yarn and fasten off. If you’re unsure how to fasten off, see the video below.
Fold up the short side as high as you like. Test that the flap length works well when you fold it down. For the bag crocheted with EKO Mini, I folded the short side edge exactly to the markers. With EKO Ribbon, I left one single crochet stitch between the marker and where I folded up the short side.

When you’re happy with the fold, place a stitch marker at the top and bottom to hold it in place while you crochet the sides together.

Start crocheting at the bottom of the left side of the bag when looking at it from the front.

First, make a slip knot and then start crocheting. If you're unsure how to make a slip knot, see the video below.
There are two ways to join the edges:
- Crochet one single crochet in each stitch.
- Crochet slip stitches in the innermost loops, the ones closest to each other.
If you're unsure how to crochet slip stitches, see the video below.
For EKO Mini, I felt it doesn't really matter which method you use, but for EKO Ribbon, method 2 works best. It’s completely up to you—method 1 is a bit easier.
Method 1 – one single crochet in each stitch.


Method 2 – Slip stitches in the innermost loops.


When you’ve crocheted up one side and reach the flap, it’s time to start crocheting an edge around the flap. Crochet 1 slip stitch and then 1 chain stitch in each stitch until you reach the side again. Then crochet the sides together just like you did on the first side.


Shoulder Strap
Now it’s time to crochet the shoulder strap/handle. Start with a slip knot and attach it to the side of your bag. Chain as many stitches until the strap is a bit shorter than your desired length. For reference, I made 68 chains with EKO Mini for a short handle (not crossbody) and 65 chains with EKO Ribbon for a crossbody strap. The strap will stretch! So do not make it as long as you want in the end.

When you’re done, fasten off with 1 single crochet stitch on the side of the bag. Make sure to leave space for one more single crochet stitch next to it. IMPORTANT: Be careful that your chain doesn’t twist. Test the bag to make sure the strap is not too long or short.

Crochet a single crochet next to it on the edge of the bag, then work single crochets back along your chain. If you want a nice finish, you can crochet into the "bumps" on the back side of your chain, but this isn’t necessary if it feels difficult.

Attach the strap on the other side with 1 single crochet. If you’re happy with the width, you can stop here. If you want a wider strap, turn your work and crochet another row of single crochets. Alternatively, you can crochet one round of slip stitches to make it a bit thicker without adding much width.

Slip stitch to secure the strap so it looks neat, and double-check that it’s not twisted. Test the bag to see that the strap is not too long or short, if it is unravel and start over. Fasten off your yarn, and if the strap doesn’t look quite right, you can use the yarn tail to weave it up and down through a stitch to fix it. Finally, fasten off the yarn completely.

Crochet Terms
Now we’re going to crochet a nice and practical bag! If you need help along the way, see our simpler version of this pattern. This version is based on crochet terms.
Abbreviations
St/sts = stitch/stitches
ch = chain
sl st = slip stitch
sc = single crochet
inc = increase (2 single crochets in the same stitch)
(...) = indicates the number of stitches in the current row/round
'...* = repeat everything between the *...*the number of times stated
In the pattern, we’ll describe how many stitches to use depending on if you choose to crochet with EKO Mini or EKO Ribbon. We will write it like this: 28/32 ch, which means 28 ch for EKO Ribbon and 32 ch for EKO Mini.
Row 1: Ch 28/32. Turn.
Row 2: Sc 26/30. You now have 1 stitch left on the chain. In that stitch, work 3 sc in the same stitch. These 3 sts will be with us throughout the increases and form the rounded shape that creates the half circle on the flap. Mark the first and the last of these 3 stitches.
Now we’ll crochet on the other side of the chain: sc 26/30. Ch 1, turn. (55/63 sts)
Row 3: Sc 26/30 until you reach your first stitch marker. In the 3 stitches between the markers (including the marked stitches), work 2 sc in each stitch. Mark the first and last stitch as you crochet between the markers. Then sc 26/30, ch 1, turn. (58/66 sts)
Row 4: Sc 26/30 until you reach your first stitch marker.1 sc, inc repeat 3 times.Don’t forget the stitch markers in the first and last stitch of the sequence! You’ll keep doing this on the upcoming rows as well. Then sc 26/30, ch 1, turn. (61/66 sts)
Row 5: Sc 26/30 until you reach your first stitch marker. *2 sc, inc* x3. Sc 26/30, ch 1, turn. (64/69 sts)
Row 6: Sc 26/30 until you reach your first stitch marker. *3 sc, inc* x3. Sc 26/30, ch 1, turn. (67/72 sts)
Row 7: Sc 26/30 until you reach your first stitch marker. *4 sc, inc* x3. Sc 26/30, ch 1, turn. (70/75 sts)
Row 8: Sc 26/30 until you reach your first stitch marker. *5 sc, inc* x3. Sc 26/30, ch 1, turn. (73/78 sts)
Row 9: Sc 26/30 until you reach your first stitch marker. *6 sc, inc* x3. Sc 26/30, ch 1, turn. (76/81 sts)
Row 10: Sc 26/30 until you reach your first stitch marker. *7 sc, inc* x3. Sc 26/30, ch 1, turn. (79/84 sts)
If you’re working with EKO Ribbon, stop here and move on to assembly. If you’re using EKO Mini, continue below.
Row 11: Sc 26/30 until you reach your first marker. *8 sc, inc* x3. Sc 26/30. Ch 1, turn. (82/87 sts)
Row 12: Sc 26/30 until you reach your first marker. *9 sc, inc* x3. Sc 26/30. Ch 1, turn. (85/90 sts)
Row 13: Sc 26/30 until you reach your first marker. *10 sc, inc* x3. Sc 26/30. Ch 1, turn. (88/93 sts)
Row 14: Sc 26/30 until you reach your first marker. *11 sc, inc* x3. Sc 26/30. Ch 1, turn. (91/96 sts)
Now the base of the bag in EKO Mini is done. Proceed to assembly.
Assembly:
Work a row of sc along the short side of the bag if you want a straighter shape. Start by making 1 extra sc in the corner, then 1 sc in each stitch until you reach the other side. Cut the yarn and fasten off.
Fold up the short side as high as you want. Test that the flap is a good length when folded down. For the bag made with EKO Mini, I folded the short side edge-to-edge with the markers. With EKO Ribbon, I folded it just after one single crochet next to the marker.
When you’re happy with the fold, place stitch markers at the top and bottom to hold it in place while you crochet.
Start crocheting with the back of the bag facing you, at the bottom left side when looking at it from the front. Make a slip knot first, then begin crocheting.
There are two ways to join the edges:
- Crochet 1 sc in each st.
- Crochet sl st in the innermost stitch loops, the ones closest together.
For EKO Mini, I found either method works fine, but for EKO Ribbon, method 2 (sl st in inner loops) worked best. It’s a preference — method 1 is a bit easier. For the Ribbon bag, I used method 2.
When you’re crocheting the sides together and reach the flap, crochet a border on the flap.
Crochet 1 sl st, then 1 ch in each stitch around until you reach the side again. Then crochet the sides together just like you did on the first side.
Shoulder Strap
Now you’ll crochet the shoulder strap/handle. Start with a slip knot and attach it to the side of your bag. Ch as many stitches soit is a bit shorter than your desired length. For reference, I crocheted 68 ch for the mini, which gives a short handle (not crossbody), and 65 ch with EKO Ribbon, which makes it crossbody length. The strap will stretch!
When you’re done, sl st to the side of the bag with 1 sc, making sure there’s room for one more sc next to it. IMPORTANT: Be careful not to twist your chain.
Crochet 1 sc next to the edge of the bag, then work sc back along your chain. For a nice finish, you can crochet into the “bumps” on the back side of your chain, but it’s not necessary if that’s tricky.
Slip stitch (sl st) to the other side with 1 sc. If you’re happy with the width, you’re done! Test the strap again to check the length and remember that it will stretch! If you want a wider strap, turn your work and crochet another row of sc. Alternatively, you can do a round of sl st to make it a bit thicker without adding much width.
Slip stitch (sl st) to fasten off so the strap looks neat. Check again that the strap isn’t twisted. Fasten off your yarn, and if the strap looks uneven, you can use the yarn tail to pull up or down through a stitch to adjust it.
Fasten off completely.
You’re done!
The rights to this pattern belong to MYO Make Your Own. The pattern or its pictures may not be copied, shared or resold either in parts or in its entirety, but you may sell items you have crocheted from this pattern. If you have questions about the pattern, contact MYO at hello@makeyourown.se.
Throughout the pattern, we will indicate the number of stitches you should use depending on whether you choose to crochet with EKO Mini or EKO Ribbon.
We will write it like this: 28/32 chains, which means 28 for EKO Ribbon and 32 for EKO Mini.
Row 1: Chain 28/32. Turn. If you're unsure how to make a chain, see the video below.
Row 2: Single crochet in the next 26/30 stitches. You now have 1 stitch left on the chain.
In that last stitch, crochet three single crochets into the same stitch. These three stitches will stay with us throughout the increases and help create the rounded shape of the flap. Mark the first and the last of these three stitches.
If you're unsure how to crochet single crochets, see the video below.
Now we're going to crochet along the other side of the chain:
- Crochet 25/29 single crochets.
- In the last stitch, crochet 1 extra single crochet.
- Chain 1 and turn your work.
You should now have a total of 55 stitches for EKO Ribbon or 63 stitches for EKO Mini on the row.
From now on, always start crocheting in the second stitch — that means you skip the turning chain you made when turning your work.
Row 3: Crochet 26/30 single crochets until you reach your first stitch marker. In the three stitches between the markers (including the stitches with the markers), crochet 2 single crochets in each stitch (increase in each = 6 sc total).
Place stitch markers in the first and last of these 6 stitches — these will help mark the increases forming the curved flap.
You should now have 58/66 stitches in total on the row.
Row 4:
Crochet 26/30 single crochets until you reach your first stitch marker.
Now it’s time to begin the increases between the markers. You now have 6 stitches between your two stitch markers (including the stitches with the markers). In these 6 stitches, you will repeat the following sequence 3 times: 1 single crochet, 1 increase (2 single crochets in same stitch)
Don’t forget: Place a stitch marker in the first stitch of this sequence and another marker in the last stitch of the sequence.
This helps you keep track of your increase section as it expands row by row.
Row 4: Crochet 26/30 single crochets until you reach the end of the row. Chain 1 and turn. You should have 61/66 stitches on the row.
Row 5: Crochet 26/30 single crochets until you reach your first stitch marker. Repeat the following sequence 3 times: 2 single crochets, then 1 increase (2 single crochets in the same stitch). Don’t forget the stitch markers in the first and last stitch of the sequence!
Crochet 26/30 single crochets until you reach the end of the row. Chain 1 and turn. You should have 64/69 stitches on the row.
Row 6: Crochet 26/30 single crochets until you reach your first stitch marker. Repeat the following sequence 3 times: 3 single crochets, then 1 increase (2 single crochets in the same stitch). Don’t forget the stitch markers in the first and last stitch of the sequence!
Crochet 26/30 single crochets until the end of the row. Chain 1 and turn. You should have 67/72 stitches on the row.
Row 7: Crochet 26/30 single crochets until you reach your first stitch marker. Repeat the following sequence 3 times: 4 single crochets, then 1 increase. Don’t forget the stitch markers in the first and last stitch of the sequence!
Crochet 26/30 single crochets until the end of the row. Chain 1 and turn. You should have 70/75 stitches on the row.
Row 8: Crochet 26/30 single crochets until you reach your first stitch marker. Repeat the following sequence 3 times: 5 single crochets, then 1 increase. Don’t forget the stitch markers in the first and last stitch of the sequence!
Crochet 26/30 single crochets until the end of the row. Chain 1 and turn. You should have 73/78 stitches on the row.
Row 9: Crochet 26/30 single crochets until you reach your first stitch marker. Repeat the following sequence 3 times: 6 single crochets, then 1 increase. Don’t forget the stitch markers in the first and last stitch of the sequence!
Crochet 26/30 single crochets until the end of the row. Chain 1 and turn. You should have 76/81 stitches on the row.
Row 10: Crochet 26/30 single crochets until you reach your first stitch marker. Repeat the following sequence 3 times: 7 single crochets, then 1 increase. Don’t forget the stitch markers in the first and last stitch of the sequence!
Crochet 26/30 single crochets until the end of the row. Chain 1 and turn. You should have 79/84 stitches on the row.
Row 11: Crochet 26/30 single crochets until you reach your first stitch marker. Repeat the following sequence 3 times: 8 single crochets, then 1 increase (2 single crochets in the same stitch). Don’t forget the stitch markers in the first and last stitch of the sequence!
Crochet 26/30 single crochets until the end of the row. Chain 1 and turn. You should have 82/87 stitches on the row.
Row 12: Crochet 26/30 single crochets until you reach your first stitch marker. Repeat the following sequence 3 times: 9 single crochets, then 1 increase.
Don’t forget the stitch markers in the first and last stitch of the sequence!
Crochet 26/30 single crochets until the end of the row. Chain 1 and turn. You should have 85/90 stitches on the row.
Row 13: Crochet 26/30 single crochets until you reach your first stitch marker. Repeat the following sequence 3 times: 10 single crochets, then 1 increase. Don’t forget the stitch markers in the first and last stitch of the sequence!
Crochet 26/30 single crochets until the end of the row. Chain 1 and turn. You should have 88/93 stitches on the row.
Row 14: Crochet 26/30 single crochets until you reach your first stitch marker. Repeat the following sequence 3 times: 11 single crochets, then 1 increase. Don’t forget the stitch markers in the first and last stitch of the sequence!
Crochet 26/30 single crochets until the end of the row. Chain 1 and turn. You should have 91/96 stitches on the row.
Assembly
Crochet a row of single crochets along the short side of the bag if you want it to have a straighter shape. Start by crocheting an extra single crochet in the corner stitch, then make one single crochet in each stitch until you reach the other side. For reference, this will be about 15–16 single crochets if you are working with EKO Ribbon.
Cut the yarn and fasten off. If you’re unsure how to fasten off, see the video below.
Fold up the short side as high as you like. Test that the flap length works well when you fold it down. For the bag crocheted with EKO Mini, I folded the short side edge exactly to the markers. With EKO Ribbon, I left one single crochet stitch between the marker and where I folded up the short side.
When you’re happy with the fold, place a stitch marker at the top and bottom to hold it in place while you crochet the sides together.
Start crocheting at the bottom of the left side of the bag when looking at it from the front.
First, make a slip knot and then start crocheting. If you're unsure how to make a slip knot, see the video below.
There are two ways to join the edges:
- Crochet one single crochet in each stitch.
- Crochet slip stitches in the innermost loops, the ones closest to each other.
If you're unsure how to crochet slip stitches, see the video below.
For EKO Mini, I felt it doesn't really matter which method you use, but for EKO Ribbon, method 2 works best. It’s completely up to you—method 1 is a bit easier.
Method 1 – one single crochet in each stitch.
Method 2 – Slip stitches in the innermost loops.
When you’ve crocheted up one side and reach the flap, it’s time to start crocheting an edge around the flap. Crochet 1 slip stitch and then 1 chain stitch in each stitch until you reach the side again. Then crochet the sides together just like you did on the first side.
Shoulder Strap
Now it’s time to crochet the shoulder strap/handle. Start with a slip knot and attach it to the side of your bag. Chain as many stitches until the strap is a bit shorter than your desired length. For reference, I made 68 chains with EKO Mini for a short handle (not crossbody) and 65 chains with EKO Ribbon for a crossbody strap. The strap will stretch! So do not make it as long as you want in the end.
When you’re done, fasten off with 1 single crochet stitch on the side of the bag. Make sure to leave space for one more single crochet stitch next to it. IMPORTANT: Be careful that your chain doesn’t twist. Test the bag to make sure the strap is not too long or short.
Crochet a single crochet next to it on the edge of the bag, then work single crochets back along your chain. If you want a nice finish, you can crochet into the "bumps" on the back side of your chain, but this isn’t necessary if it feels difficult.
Attach the strap on the other side with 1 single crochet. If you’re happy with the width, you can stop here. If you want a wider strap, turn your work and crochet another row of single crochets. Alternatively, you can crochet one round of slip stitches to make it a bit thicker without adding much width.
Slip stitch to secure the strap so it looks neat, and double-check that it’s not twisted. Test the bag to see that the strap is not too long or short, if it is unravel and start over. Fasten off your yarn, and if the strap doesn’t look quite right, you can use the yarn tail to weave it up and down through a stitch to fix it. Finally, fasten off the yarn completely.
Crochet Terms
Now we’re going to crochet a nice and practical bag! If you need help along the way, see our simpler version of this pattern. This version is based on crochet terms.
Abbreviations
St/sts = stitch/stitches
ch = chain
sl st = slip stitch
sc = single crochet
inc = increase (2 single crochets in the same stitch)
(...) = indicates the number of stitches in the current row/round
'...* = repeat everything between the *...*the number of times stated
In the pattern, we’ll describe how many stitches to use depending on if you choose to crochet with EKO Mini or EKO Ribbon. We will write it like this: 28/32 ch, which means 28 ch for EKO Ribbon and 32 ch for EKO Mini.
Row 1: Ch 28/32. Turn.
Row 2: Sc 26/30. You now have 1 stitch left on the chain. In that stitch, work 3 sc in the same stitch. These 3 sts will be with us throughout the increases and form the rounded shape that creates the half circle on the flap. Mark the first and the last of these 3 stitches.
Now we’ll crochet on the other side of the chain: sc 26/30. Ch 1, turn. (55/63 sts)
Row 3: Sc 26/30 until you reach your first stitch marker. In the 3 stitches between the markers (including the marked stitches), work 2 sc in each stitch. Mark the first and last stitch as you crochet between the markers. Then sc 26/30, ch 1, turn. (58/66 sts)
Row 4: Sc 26/30 until you reach your first stitch marker.1 sc, inc repeat 3 times.Don’t forget the stitch markers in the first and last stitch of the sequence! You’ll keep doing this on the upcoming rows as well. Then sc 26/30, ch 1, turn. (61/66 sts)
Row 5: Sc 26/30 until you reach your first stitch marker. *2 sc, inc* x3. Sc 26/30, ch 1, turn. (64/69 sts)
Row 6: Sc 26/30 until you reach your first stitch marker. *3 sc, inc* x3. Sc 26/30, ch 1, turn. (67/72 sts)
Row 7: Sc 26/30 until you reach your first stitch marker. *4 sc, inc* x3. Sc 26/30, ch 1, turn. (70/75 sts)
Row 8: Sc 26/30 until you reach your first stitch marker. *5 sc, inc* x3. Sc 26/30, ch 1, turn. (73/78 sts)
Row 9: Sc 26/30 until you reach your first stitch marker. *6 sc, inc* x3. Sc 26/30, ch 1, turn. (76/81 sts)
Row 10: Sc 26/30 until you reach your first stitch marker. *7 sc, inc* x3. Sc 26/30, ch 1, turn. (79/84 sts)
If you’re working with EKO Ribbon, stop here and move on to assembly. If you’re using EKO Mini, continue below.
Row 11: Sc 26/30 until you reach your first marker. *8 sc, inc* x3. Sc 26/30. Ch 1, turn. (82/87 sts)
Row 12: Sc 26/30 until you reach your first marker. *9 sc, inc* x3. Sc 26/30. Ch 1, turn. (85/90 sts)
Row 13: Sc 26/30 until you reach your first marker. *10 sc, inc* x3. Sc 26/30. Ch 1, turn. (88/93 sts)
Row 14: Sc 26/30 until you reach your first marker. *11 sc, inc* x3. Sc 26/30. Ch 1, turn. (91/96 sts)
Now the base of the bag in EKO Mini is done. Proceed to assembly.
Assembly:
Work a row of sc along the short side of the bag if you want a straighter shape. Start by making 1 extra sc in the corner, then 1 sc in each stitch until you reach the other side. Cut the yarn and fasten off.
Fold up the short side as high as you want. Test that the flap is a good length when folded down. For the bag made with EKO Mini, I folded the short side edge-to-edge with the markers. With EKO Ribbon, I folded it just after one single crochet next to the marker.
When you’re happy with the fold, place stitch markers at the top and bottom to hold it in place while you crochet.
Start crocheting with the back of the bag facing you, at the bottom left side when looking at it from the front. Make a slip knot first, then begin crocheting.
There are two ways to join the edges:
- Crochet 1 sc in each st.
- Crochet sl st in the innermost stitch loops, the ones closest together.
For EKO Mini, I found either method works fine, but for EKO Ribbon, method 2 (sl st in inner loops) worked best. It’s a preference — method 1 is a bit easier. For the Ribbon bag, I used method 2.
When you’re crocheting the sides together and reach the flap, crochet a border on the flap.
Crochet 1 sl st, then 1 ch in each stitch around until you reach the side again. Then crochet the sides together just like you did on the first side.
Shoulder Strap
Now you’ll crochet the shoulder strap/handle. Start with a slip knot and attach it to the side of your bag. Ch as many stitches soit is a bit shorter than your desired length. For reference, I crocheted 68 ch for the mini, which gives a short handle (not crossbody), and 65 ch with EKO Ribbon, which makes it crossbody length. The strap will stretch!
When you’re done, sl st to the side of the bag with 1 sc, making sure there’s room for one more sc next to it. IMPORTANT: Be careful not to twist your chain.
Crochet 1 sc next to the edge of the bag, then work sc back along your chain. For a nice finish, you can crochet into the “bumps” on the back side of your chain, but it’s not necessary if that’s tricky.
Slip stitch (sl st) to the other side with 1 sc. If you’re happy with the width, you’re done! Test the strap again to check the length and remember that it will stretch! If you want a wider strap, turn your work and crochet another row of sc. Alternatively, you can do a round of sl st to make it a bit thicker without adding much width.
Slip stitch (sl st) to fasten off so the strap looks neat. Check again that the strap isn’t twisted. Fasten off your yarn, and if the strap looks uneven, you can use the yarn tail to pull up or down through a stitch to adjust it.
Fasten off completely.
You’re done!
The rights to this pattern belong to MYO Make Your Own. The pattern or its pictures may not be copied, shared or resold either in parts or in its entirety, but you may sell items you have crocheted from this pattern. If you have questions about the pattern, contact MYO at hello@makeyourown.se.

Share your creations with us
Thank you!
Your comment was sent!