
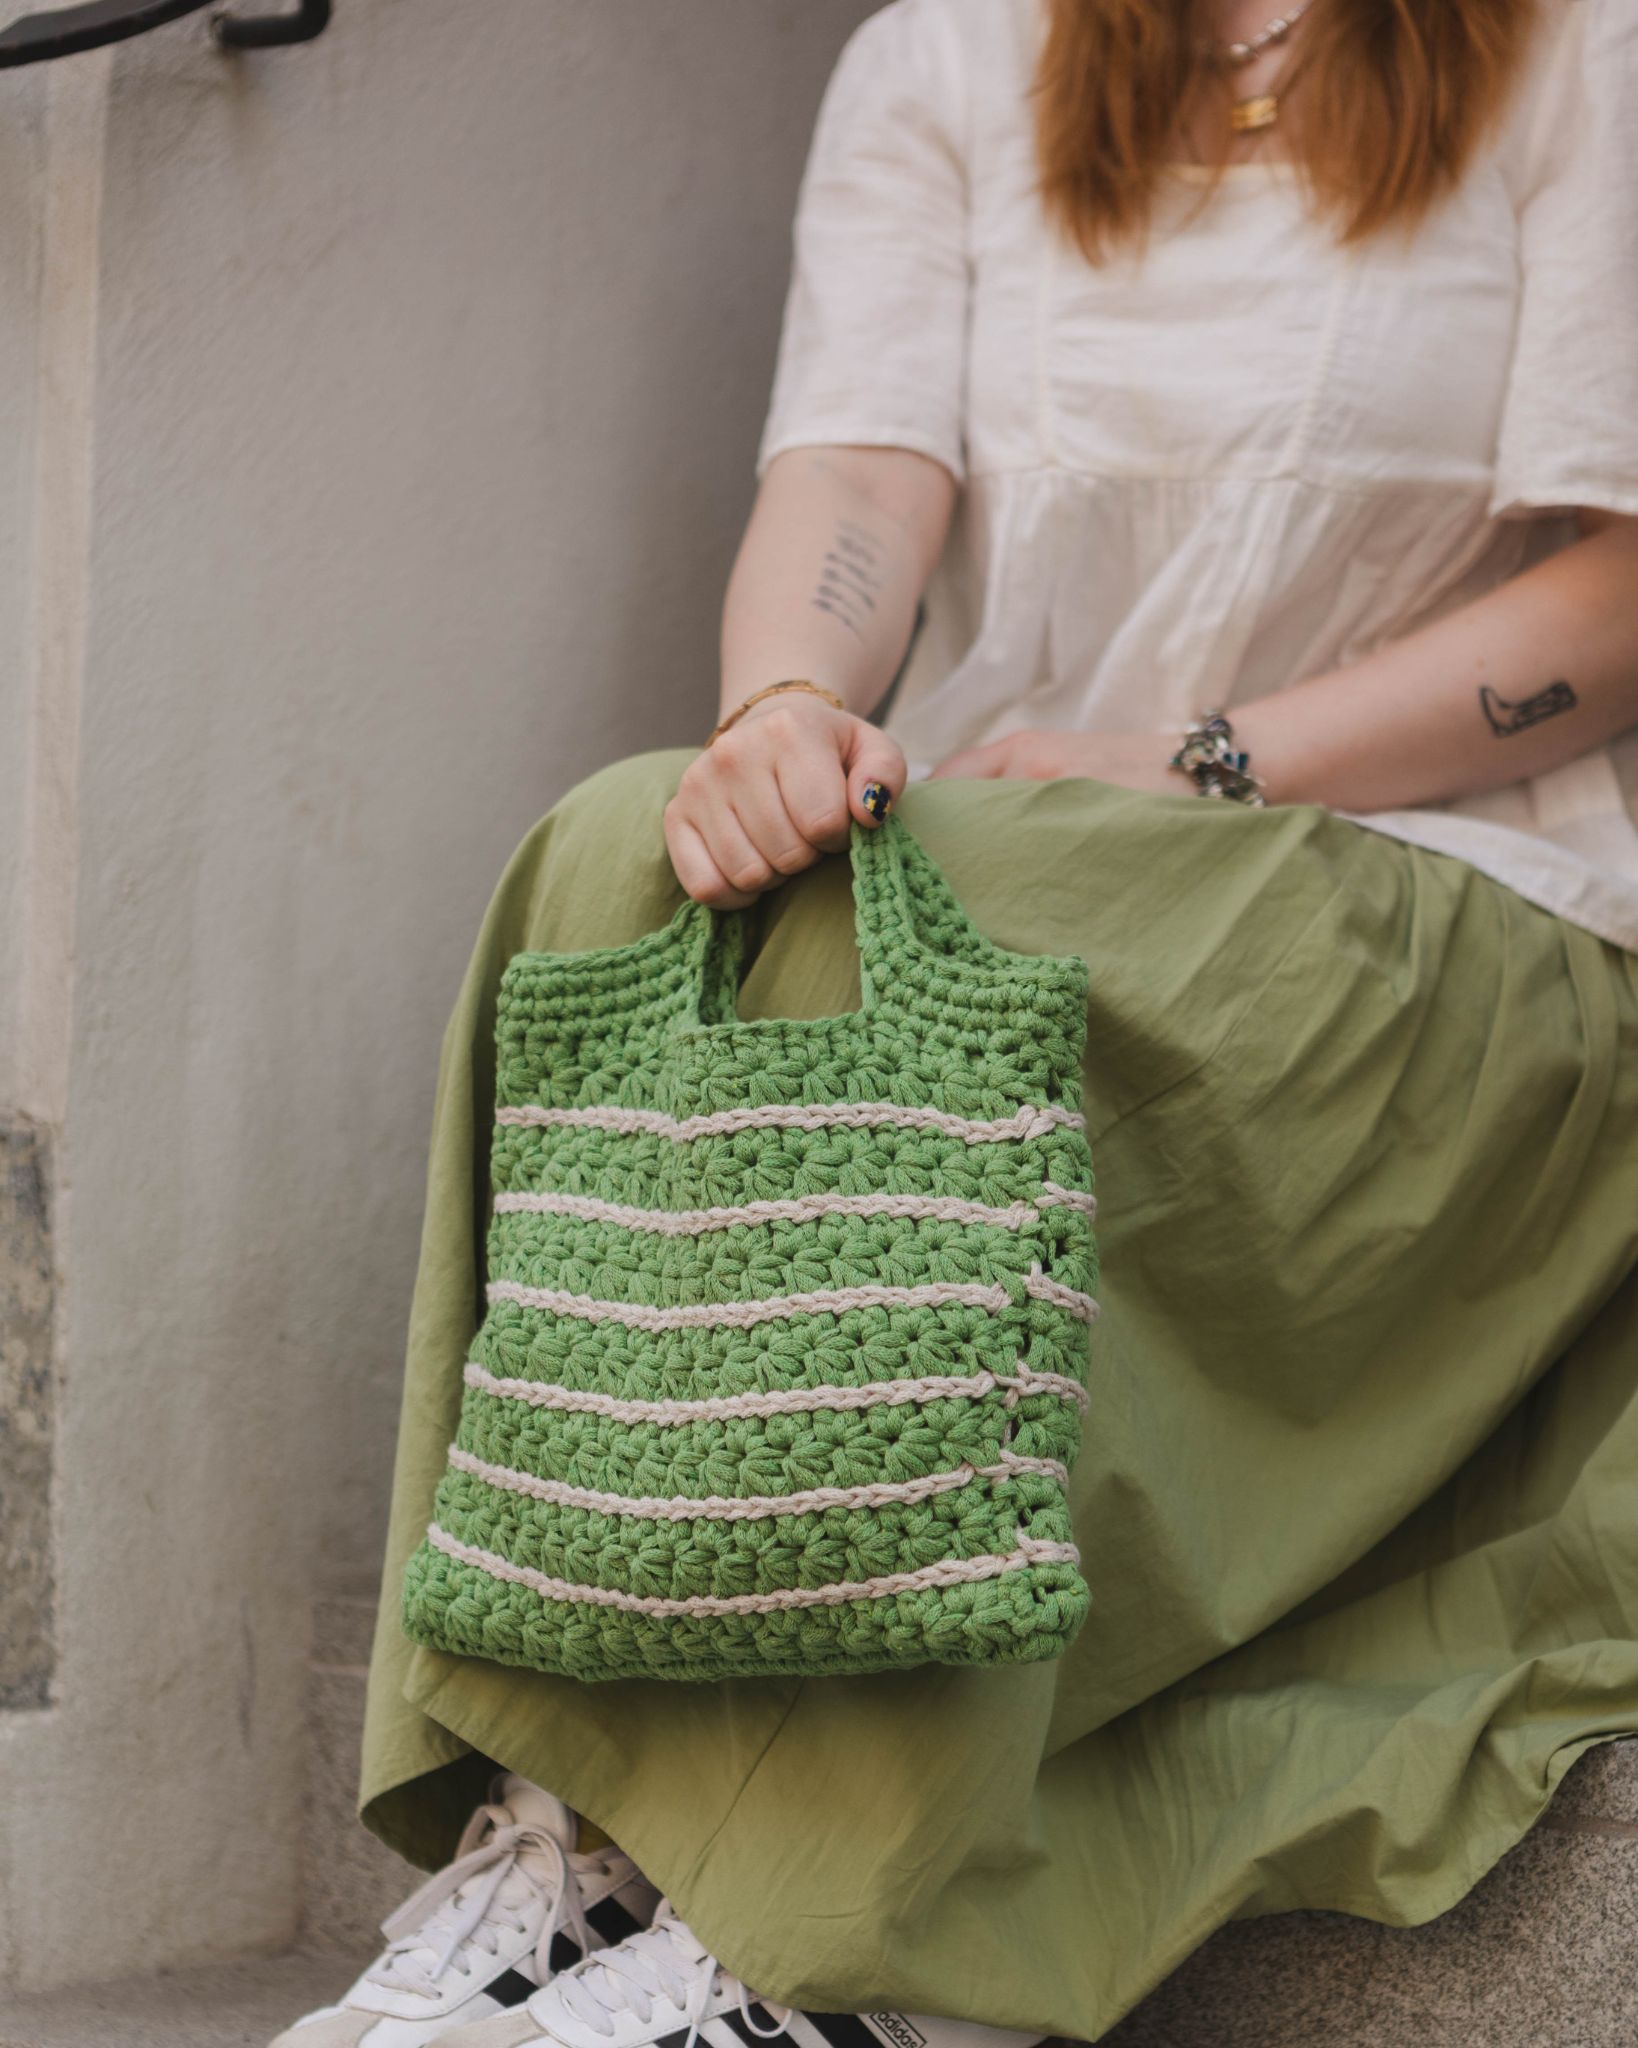
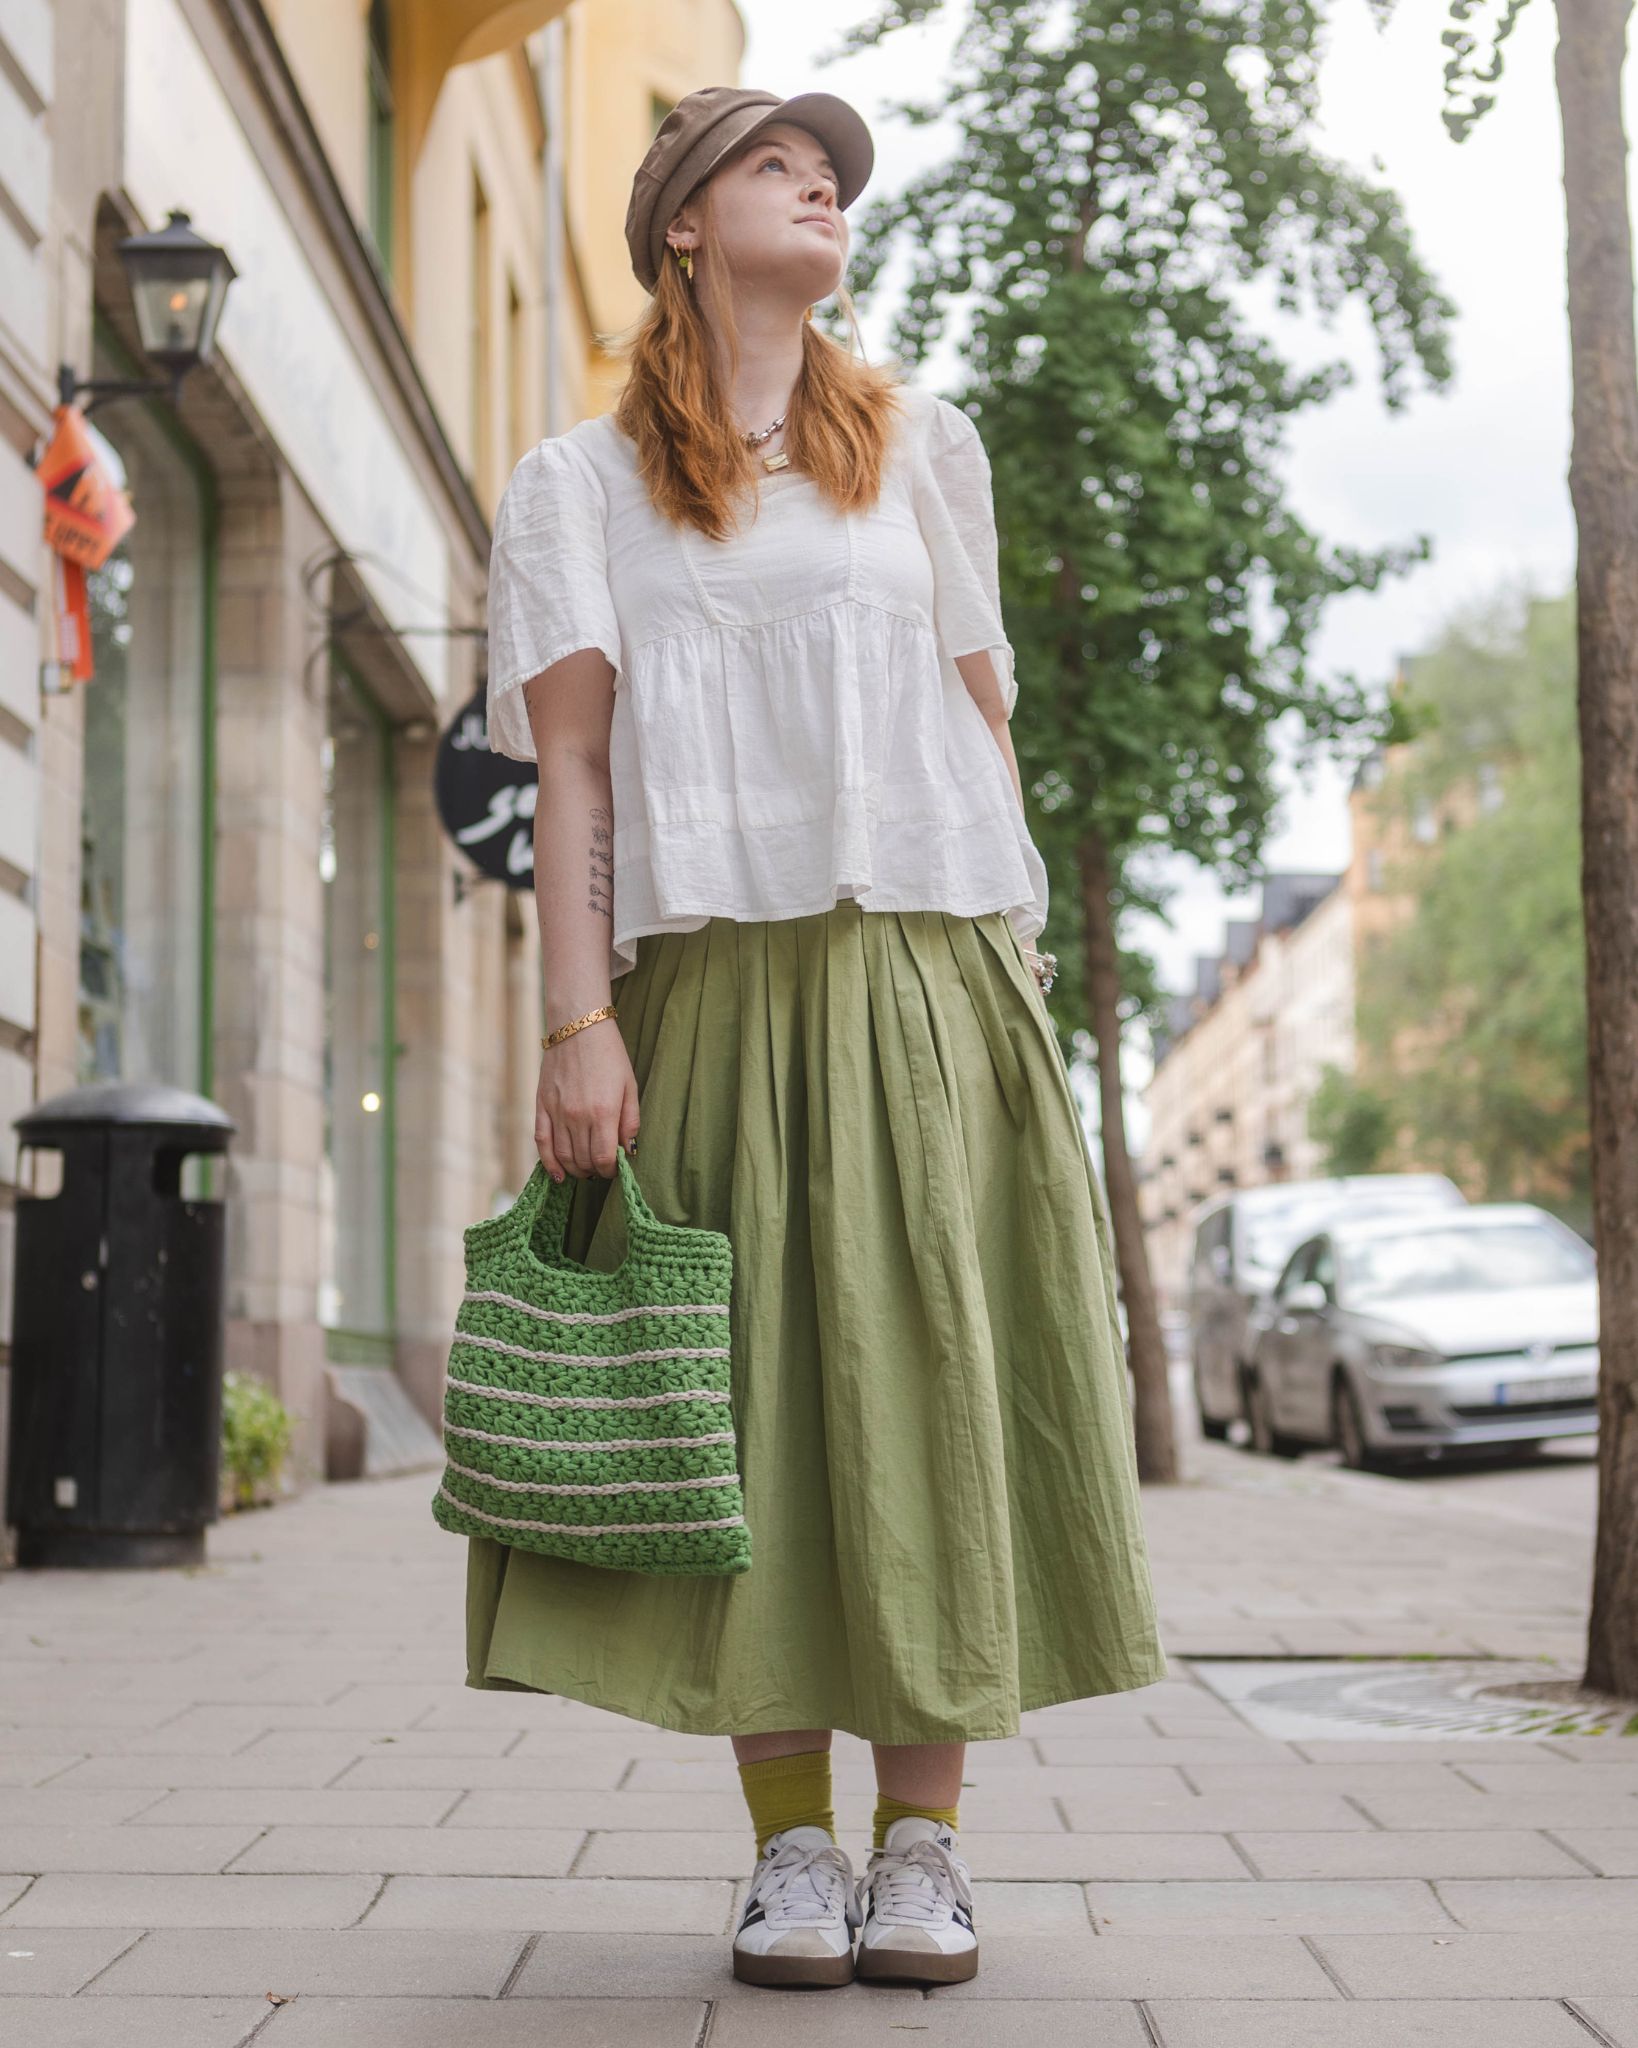
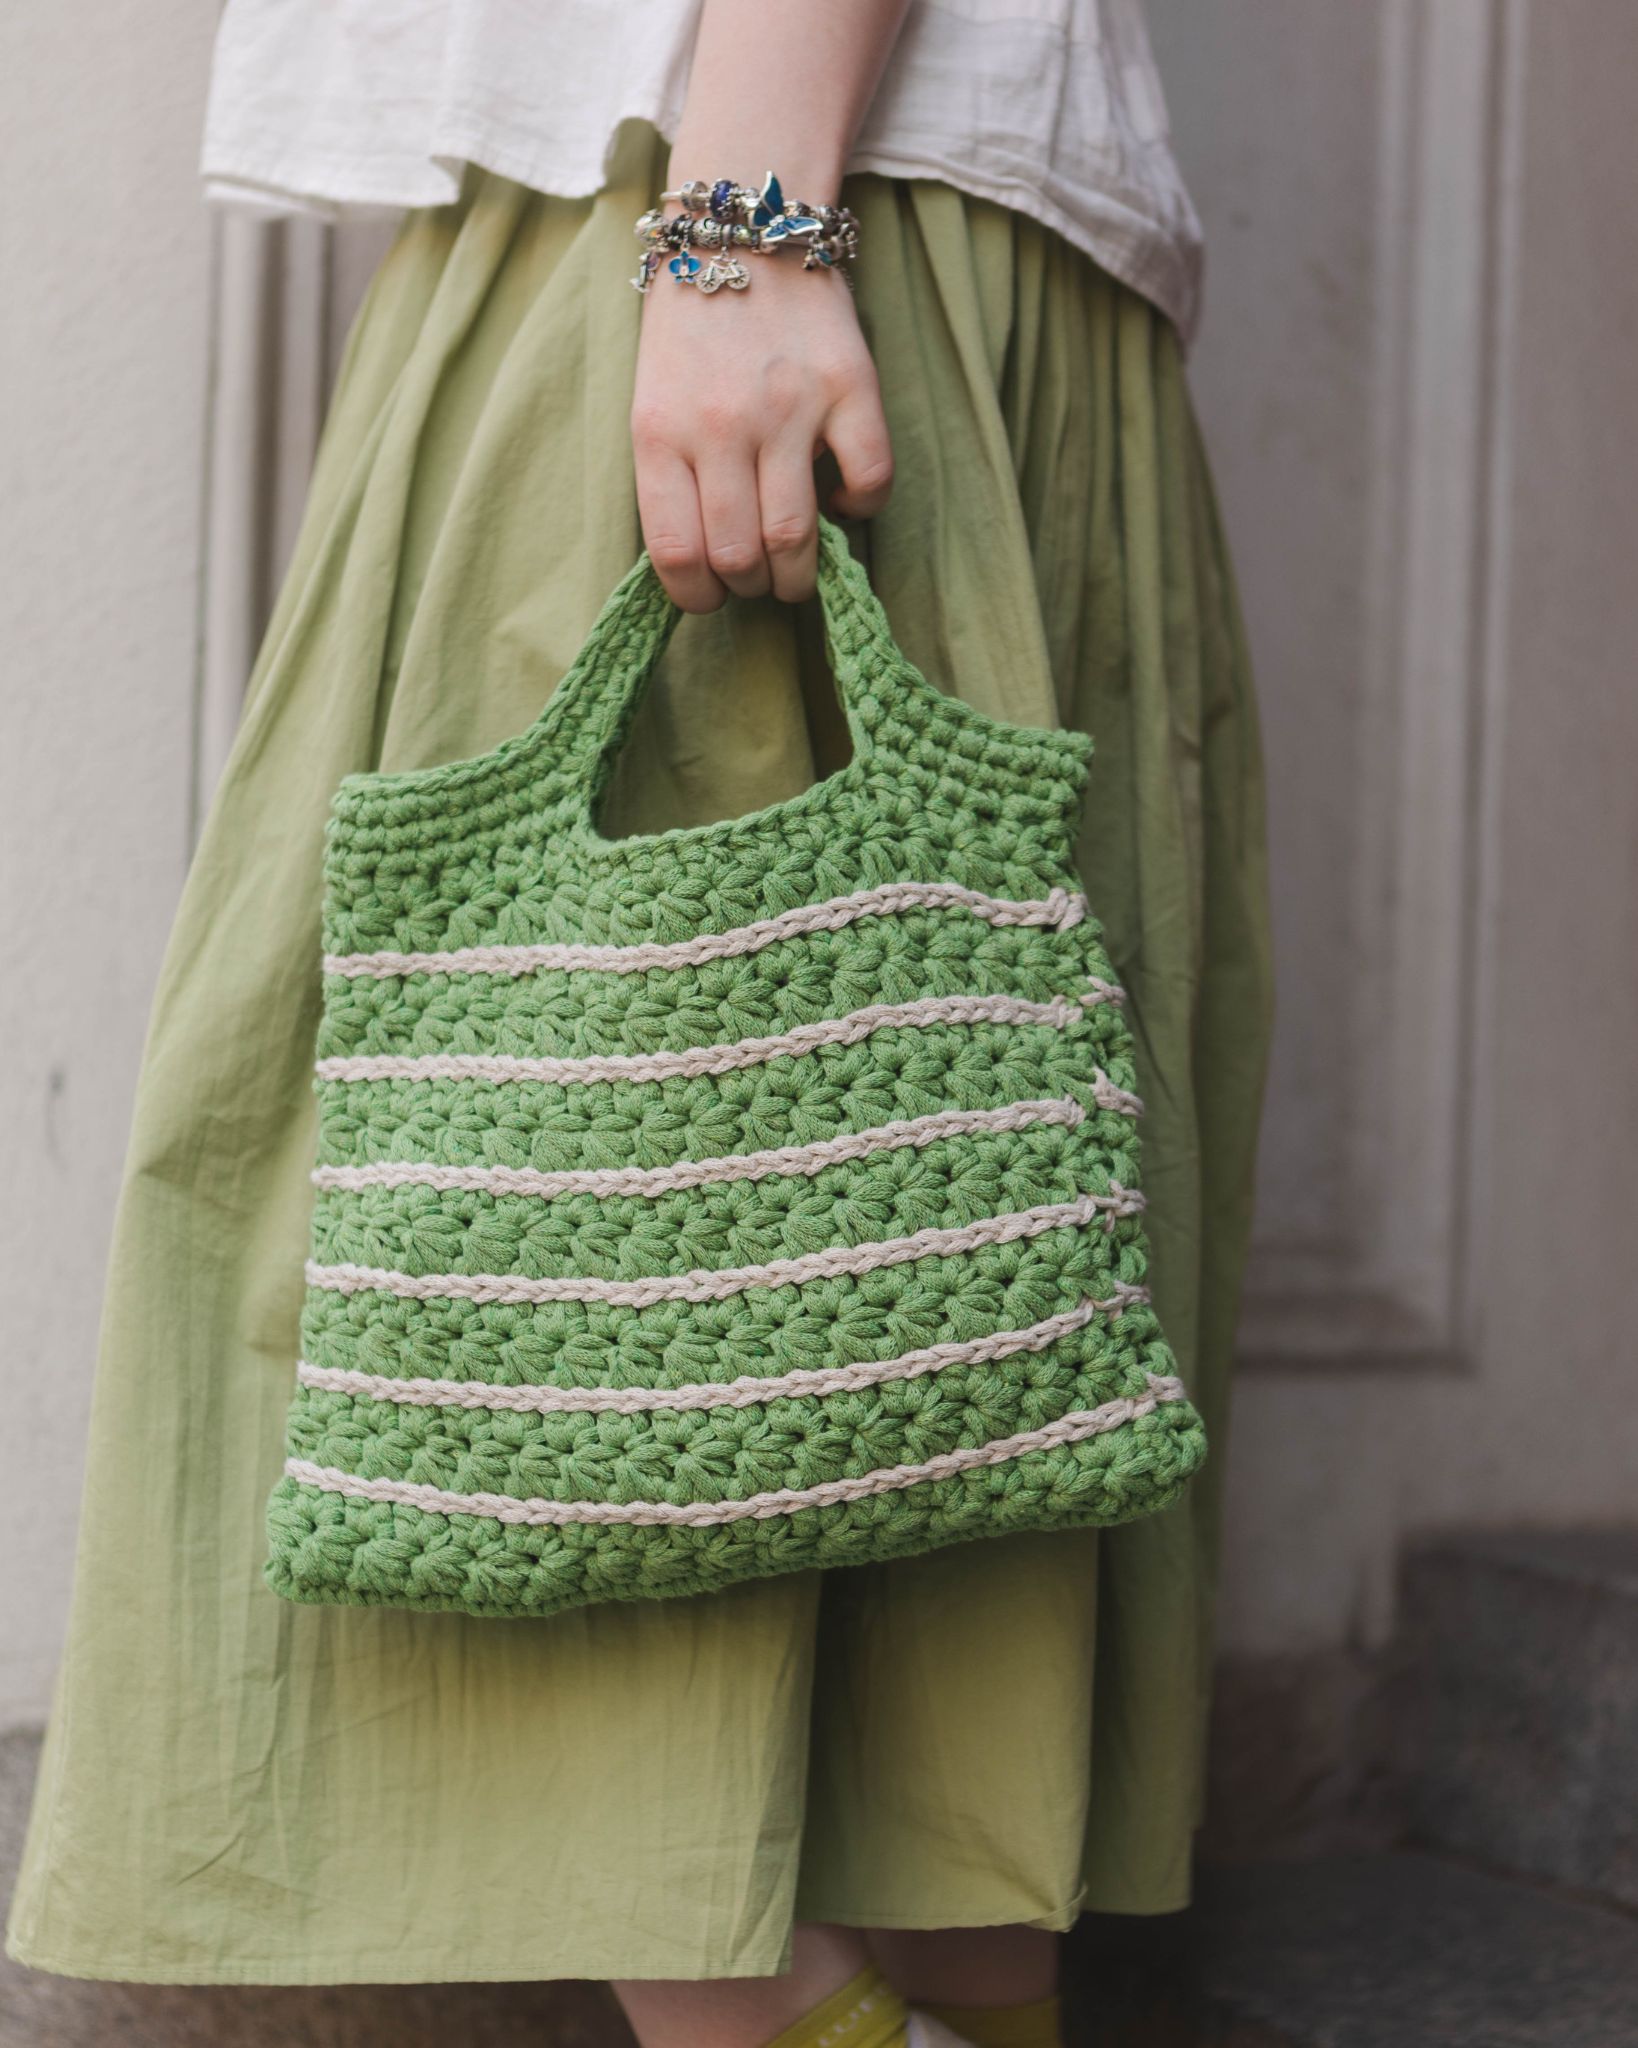
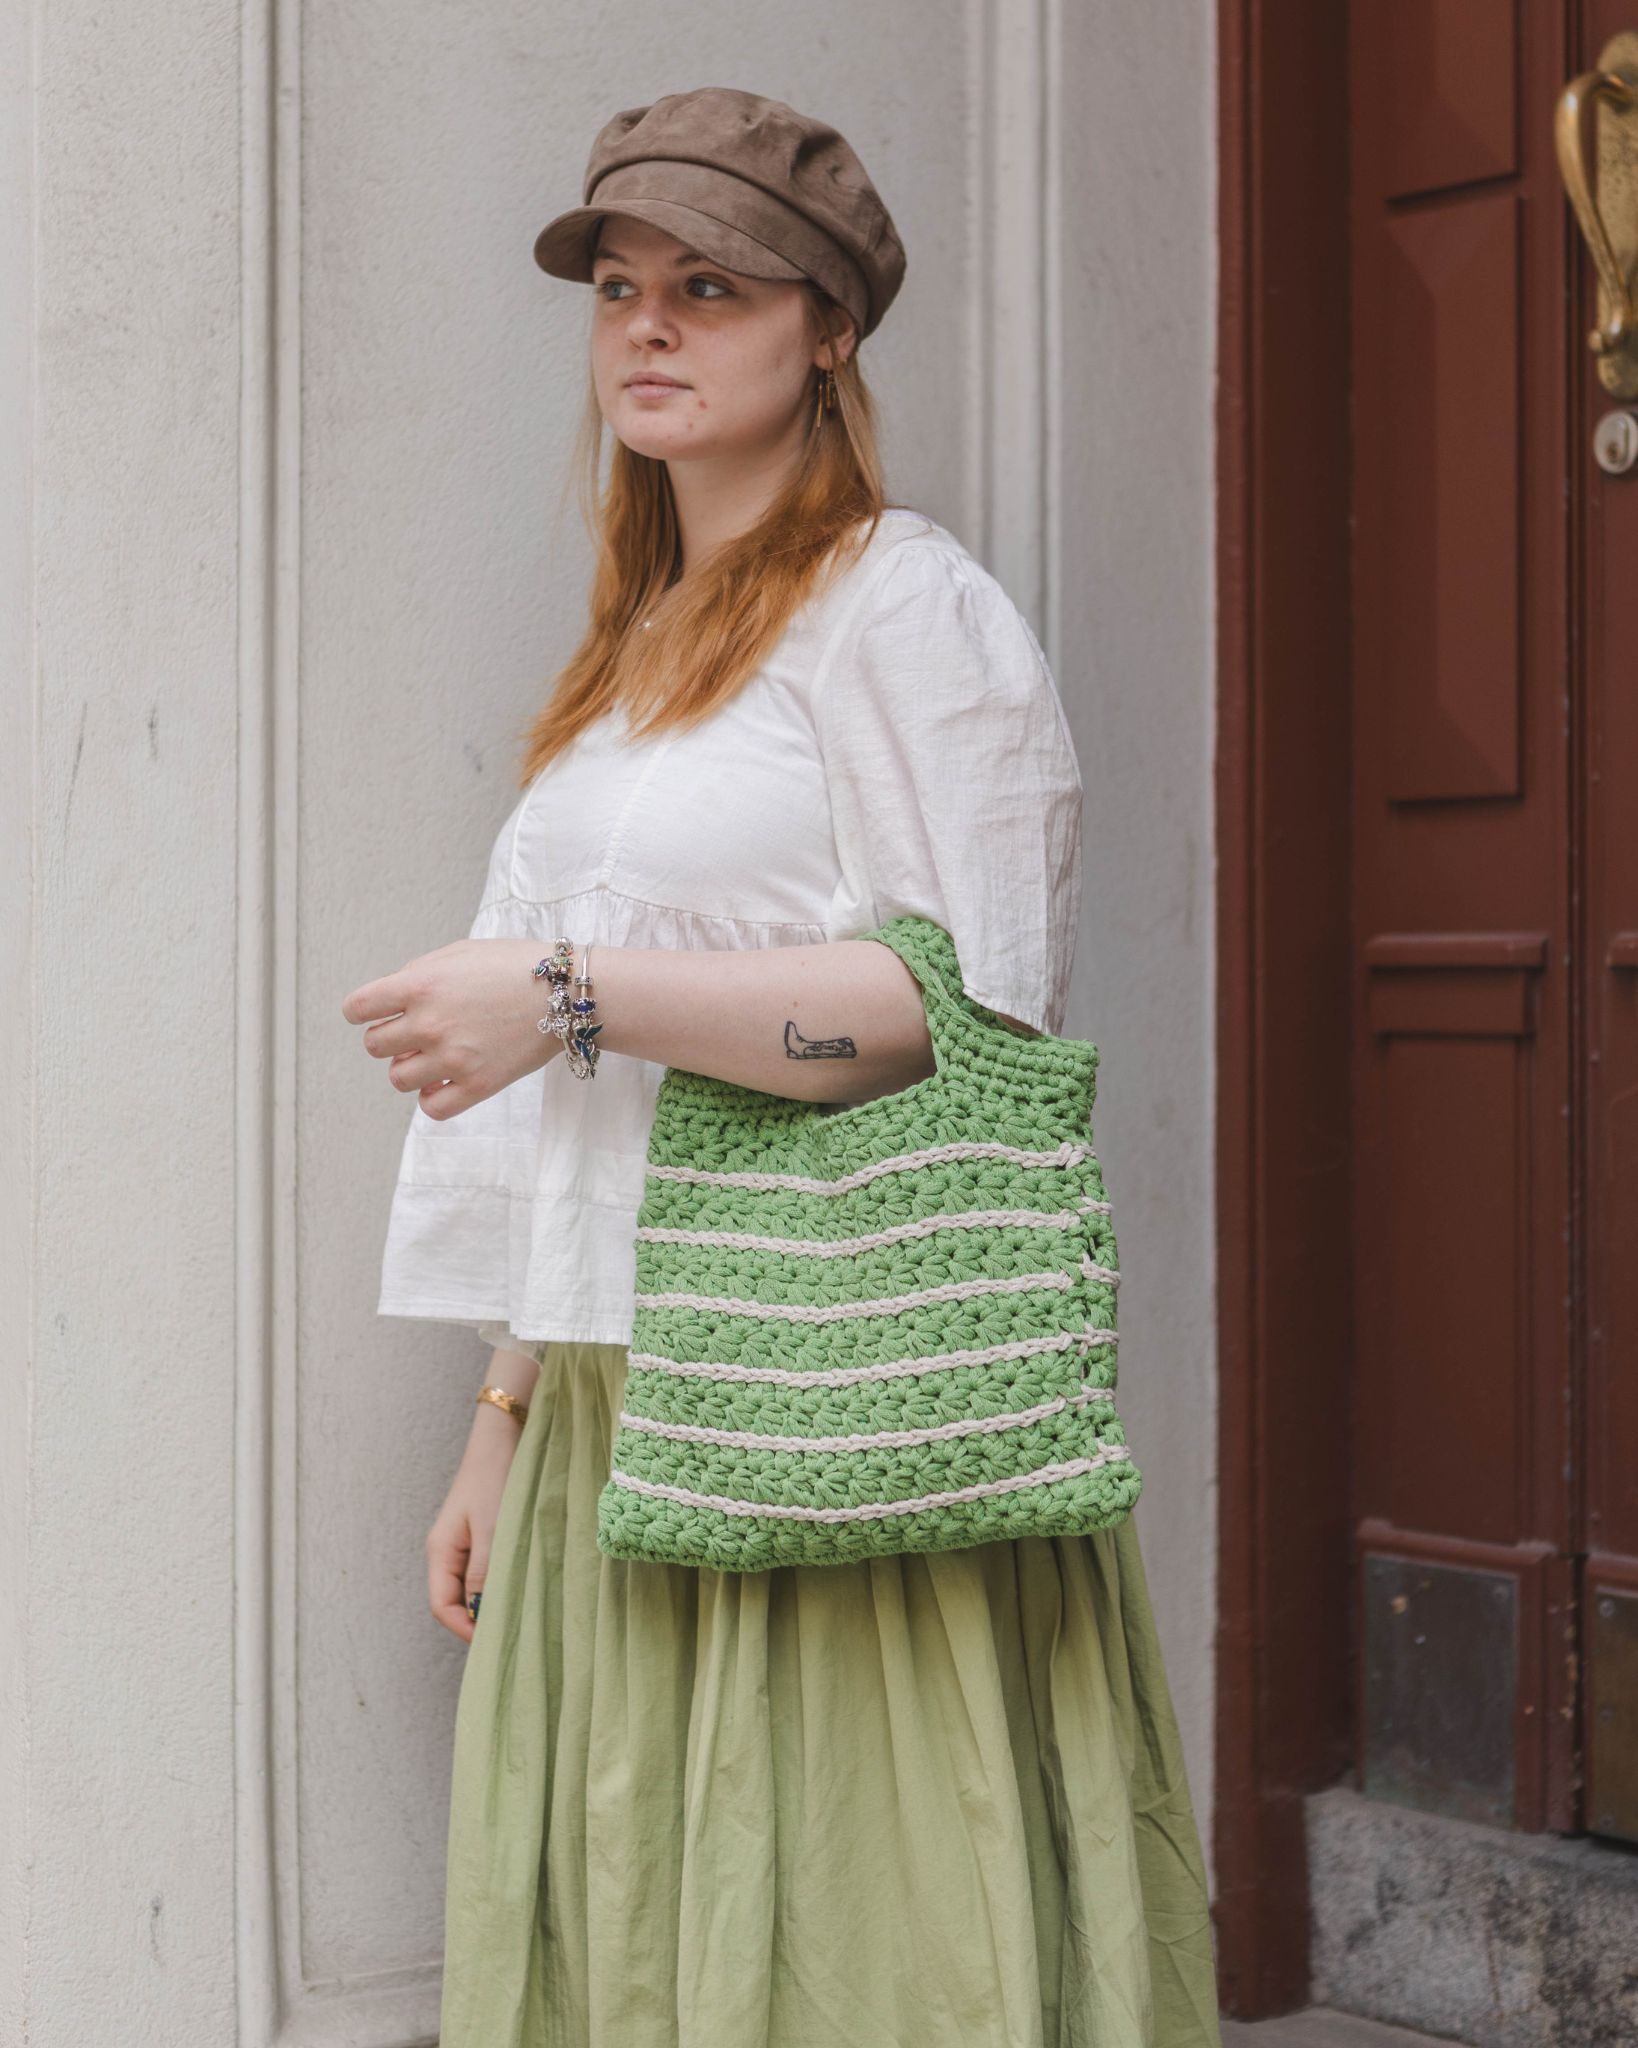
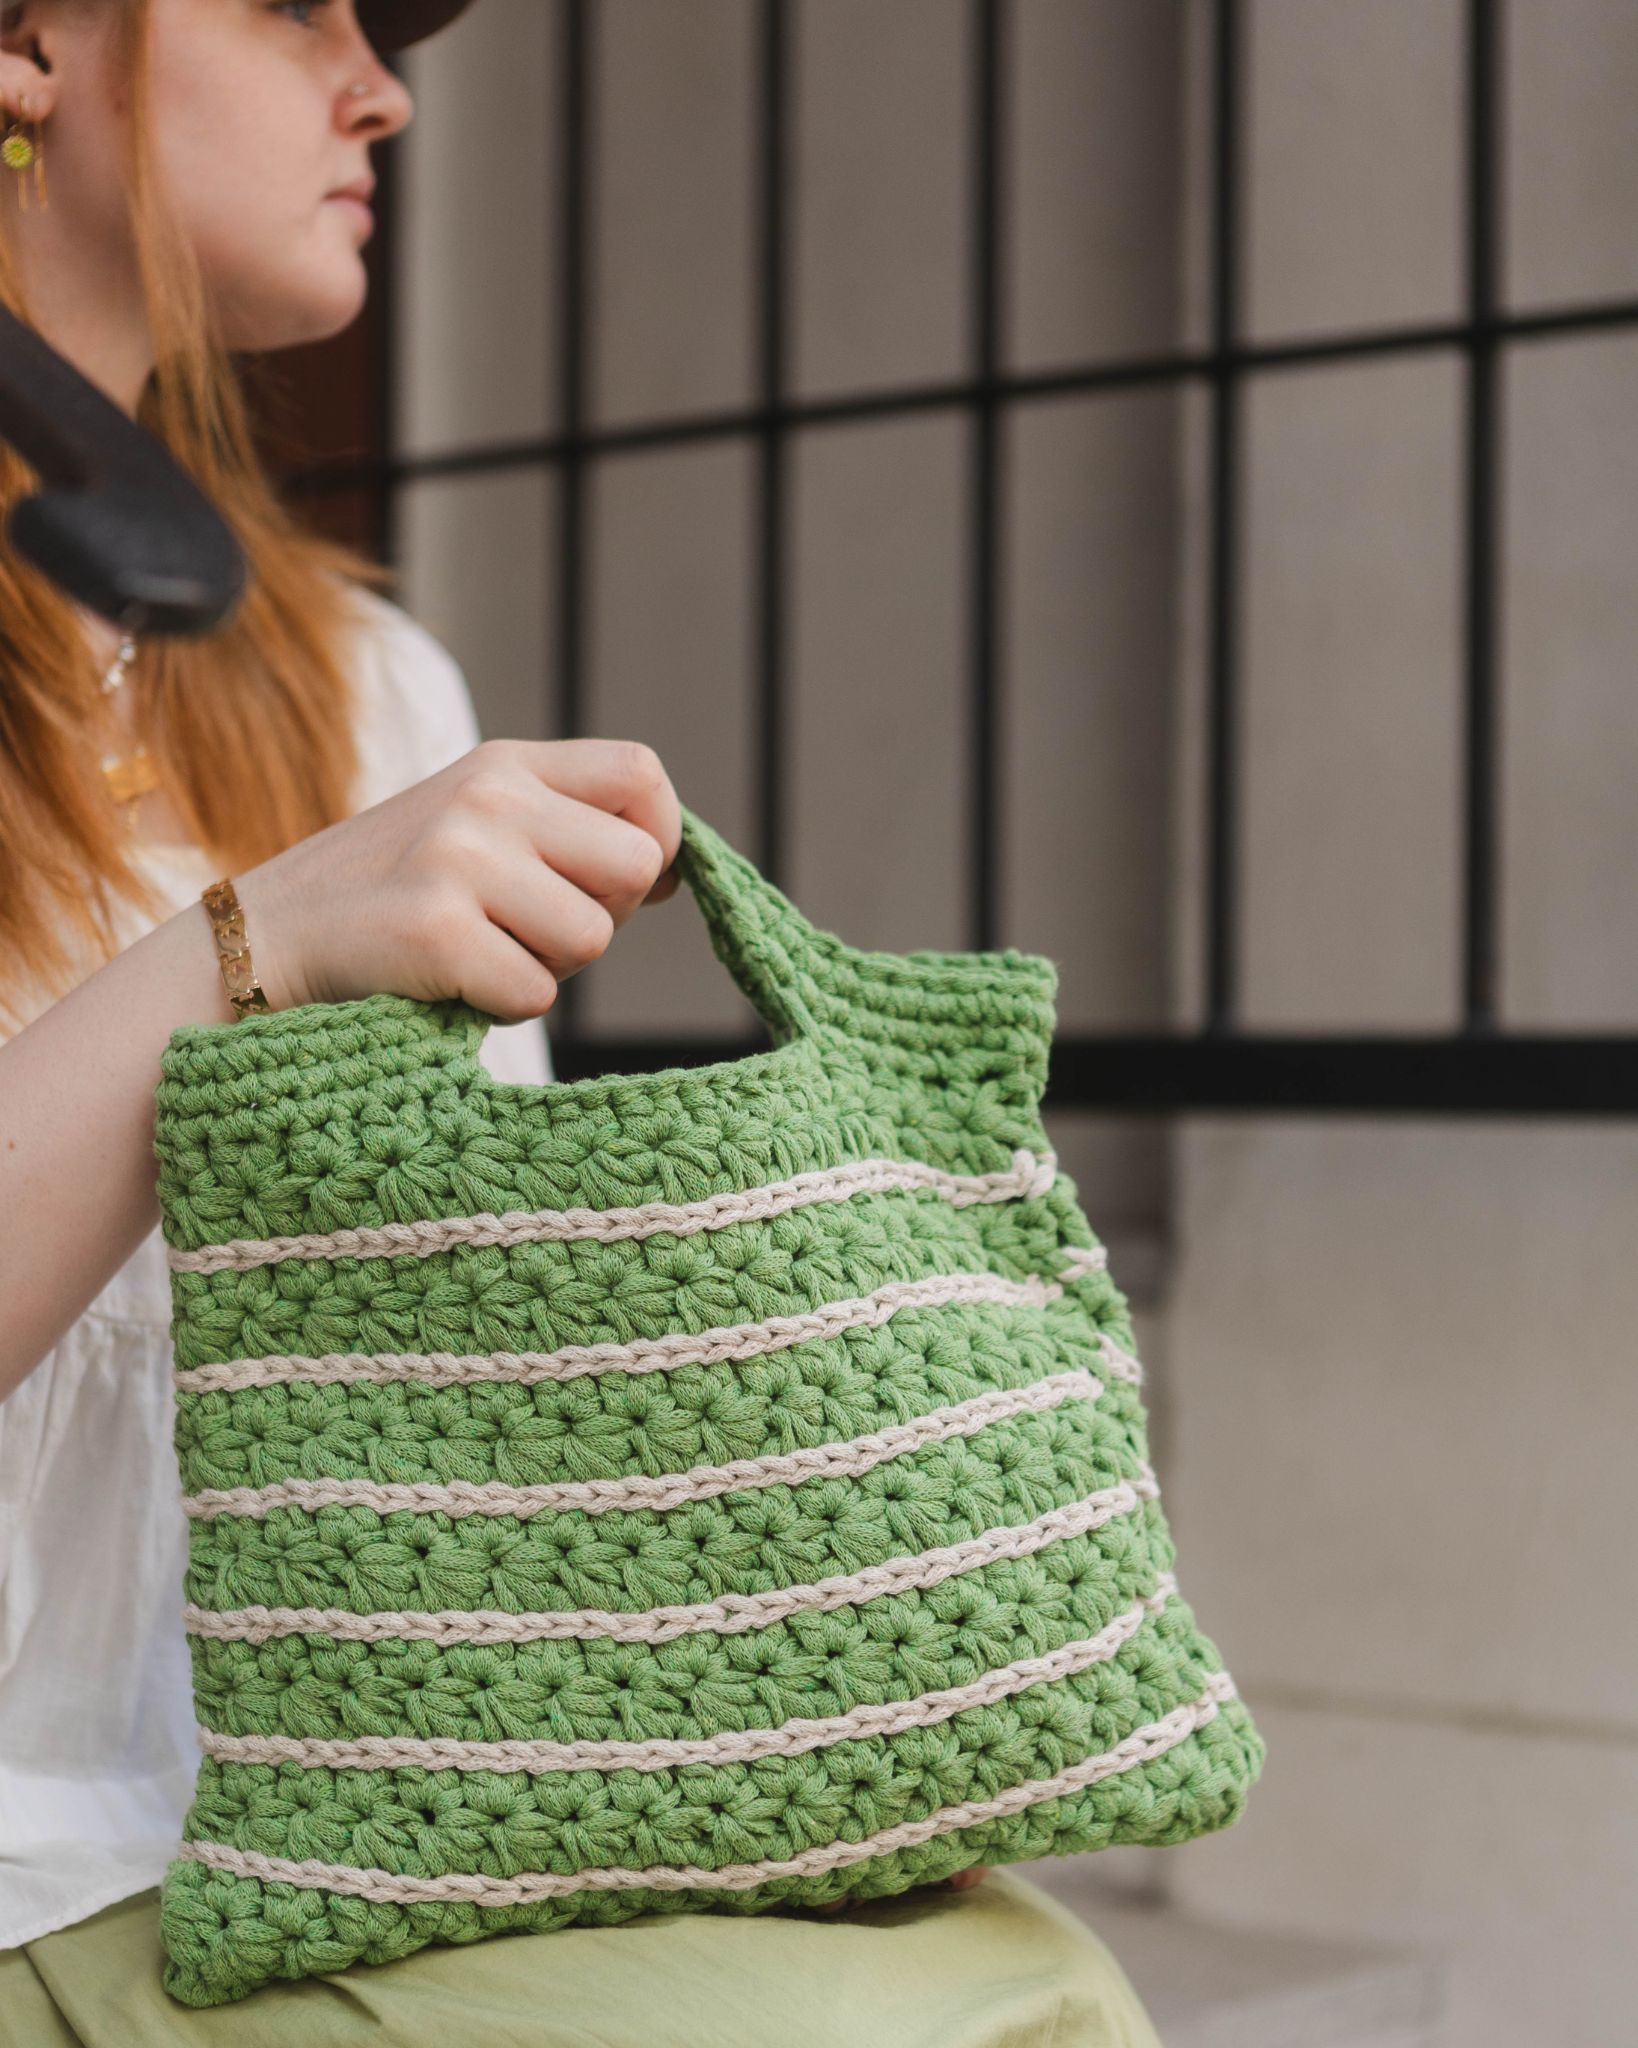
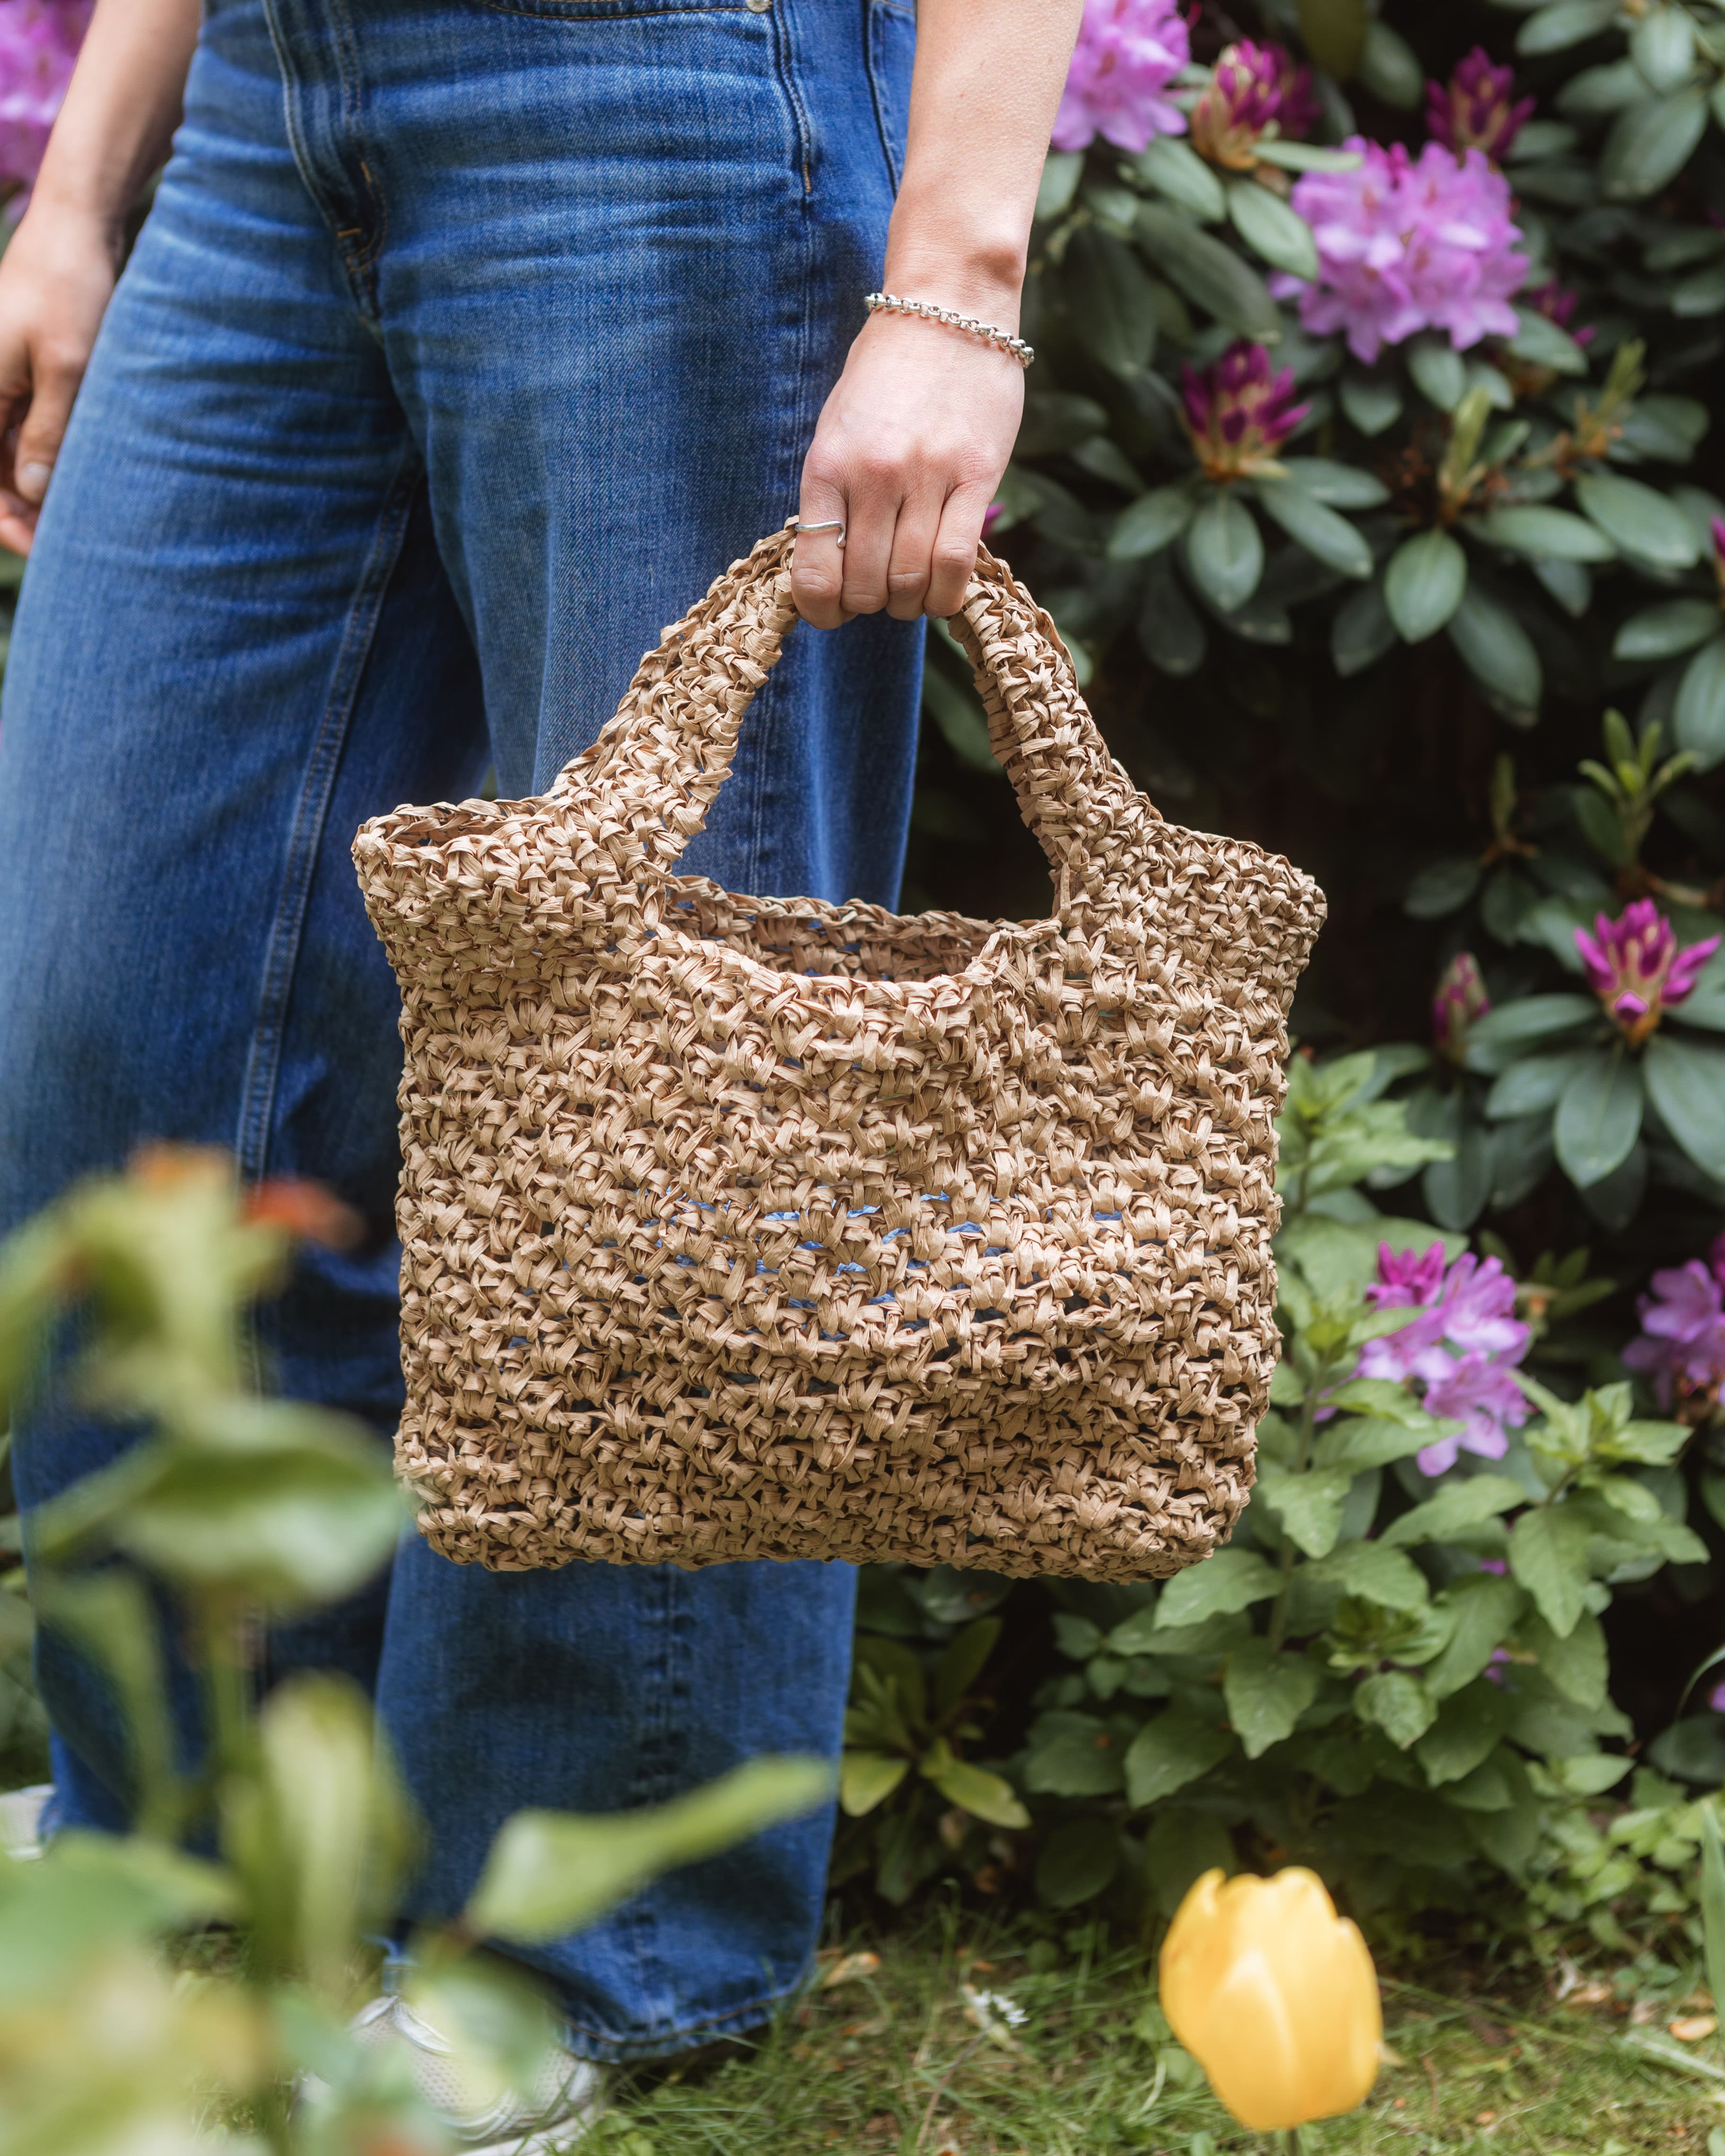
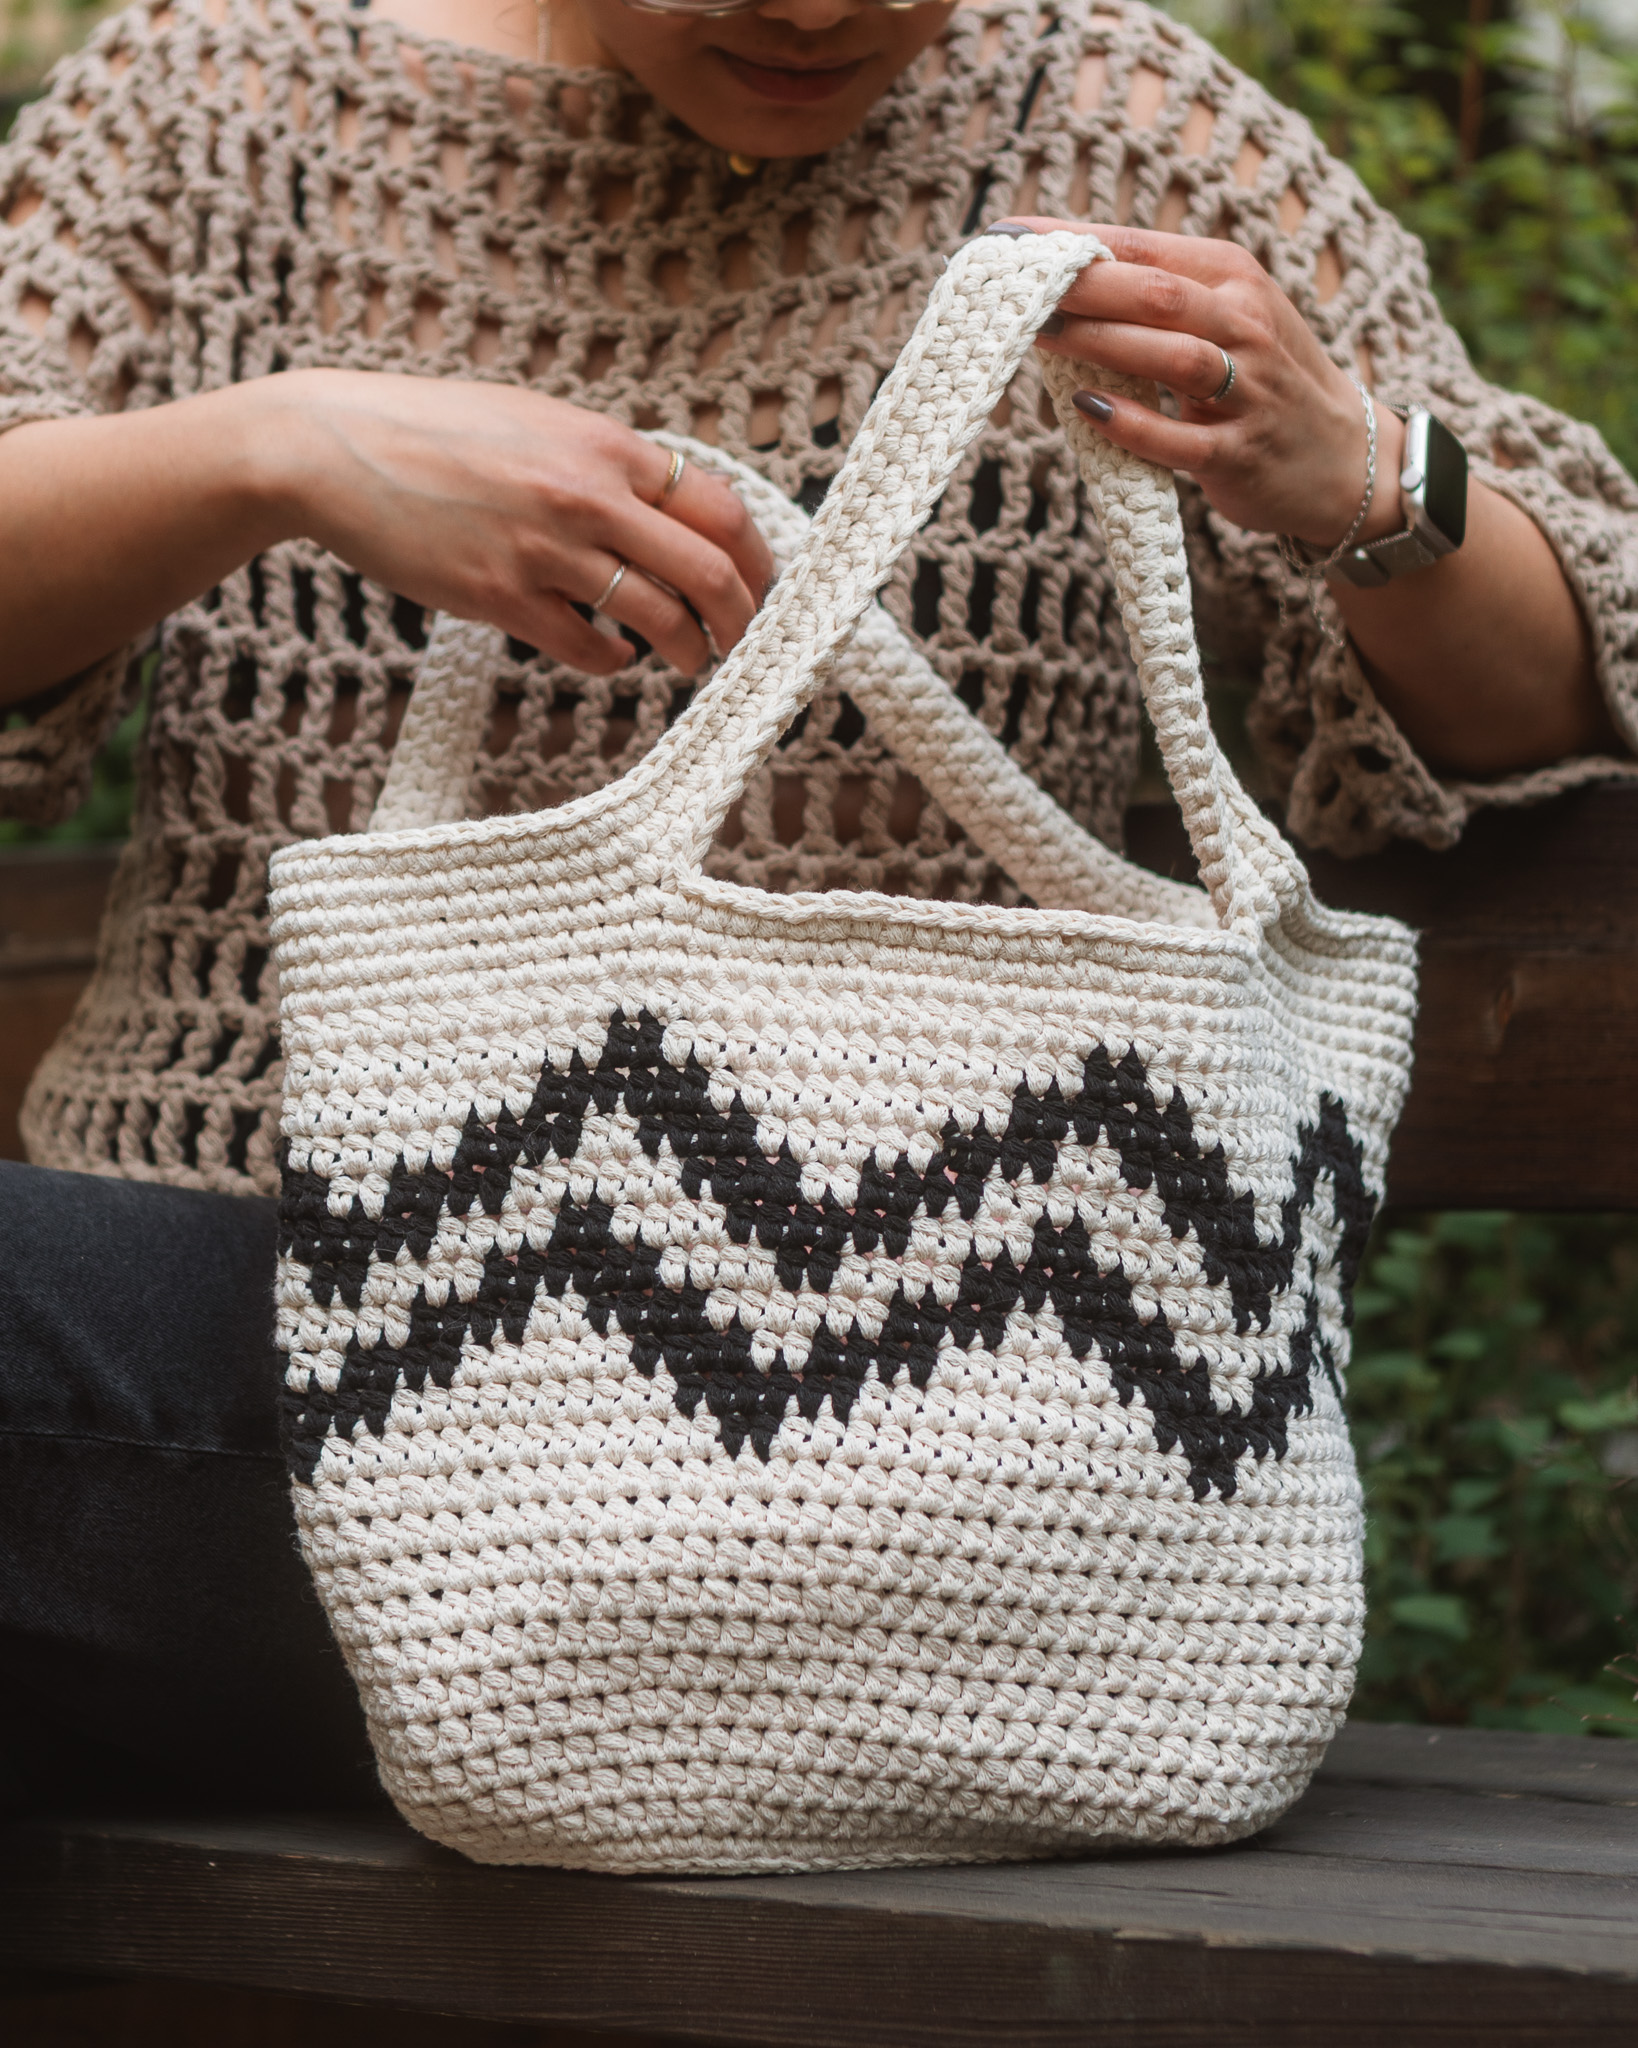
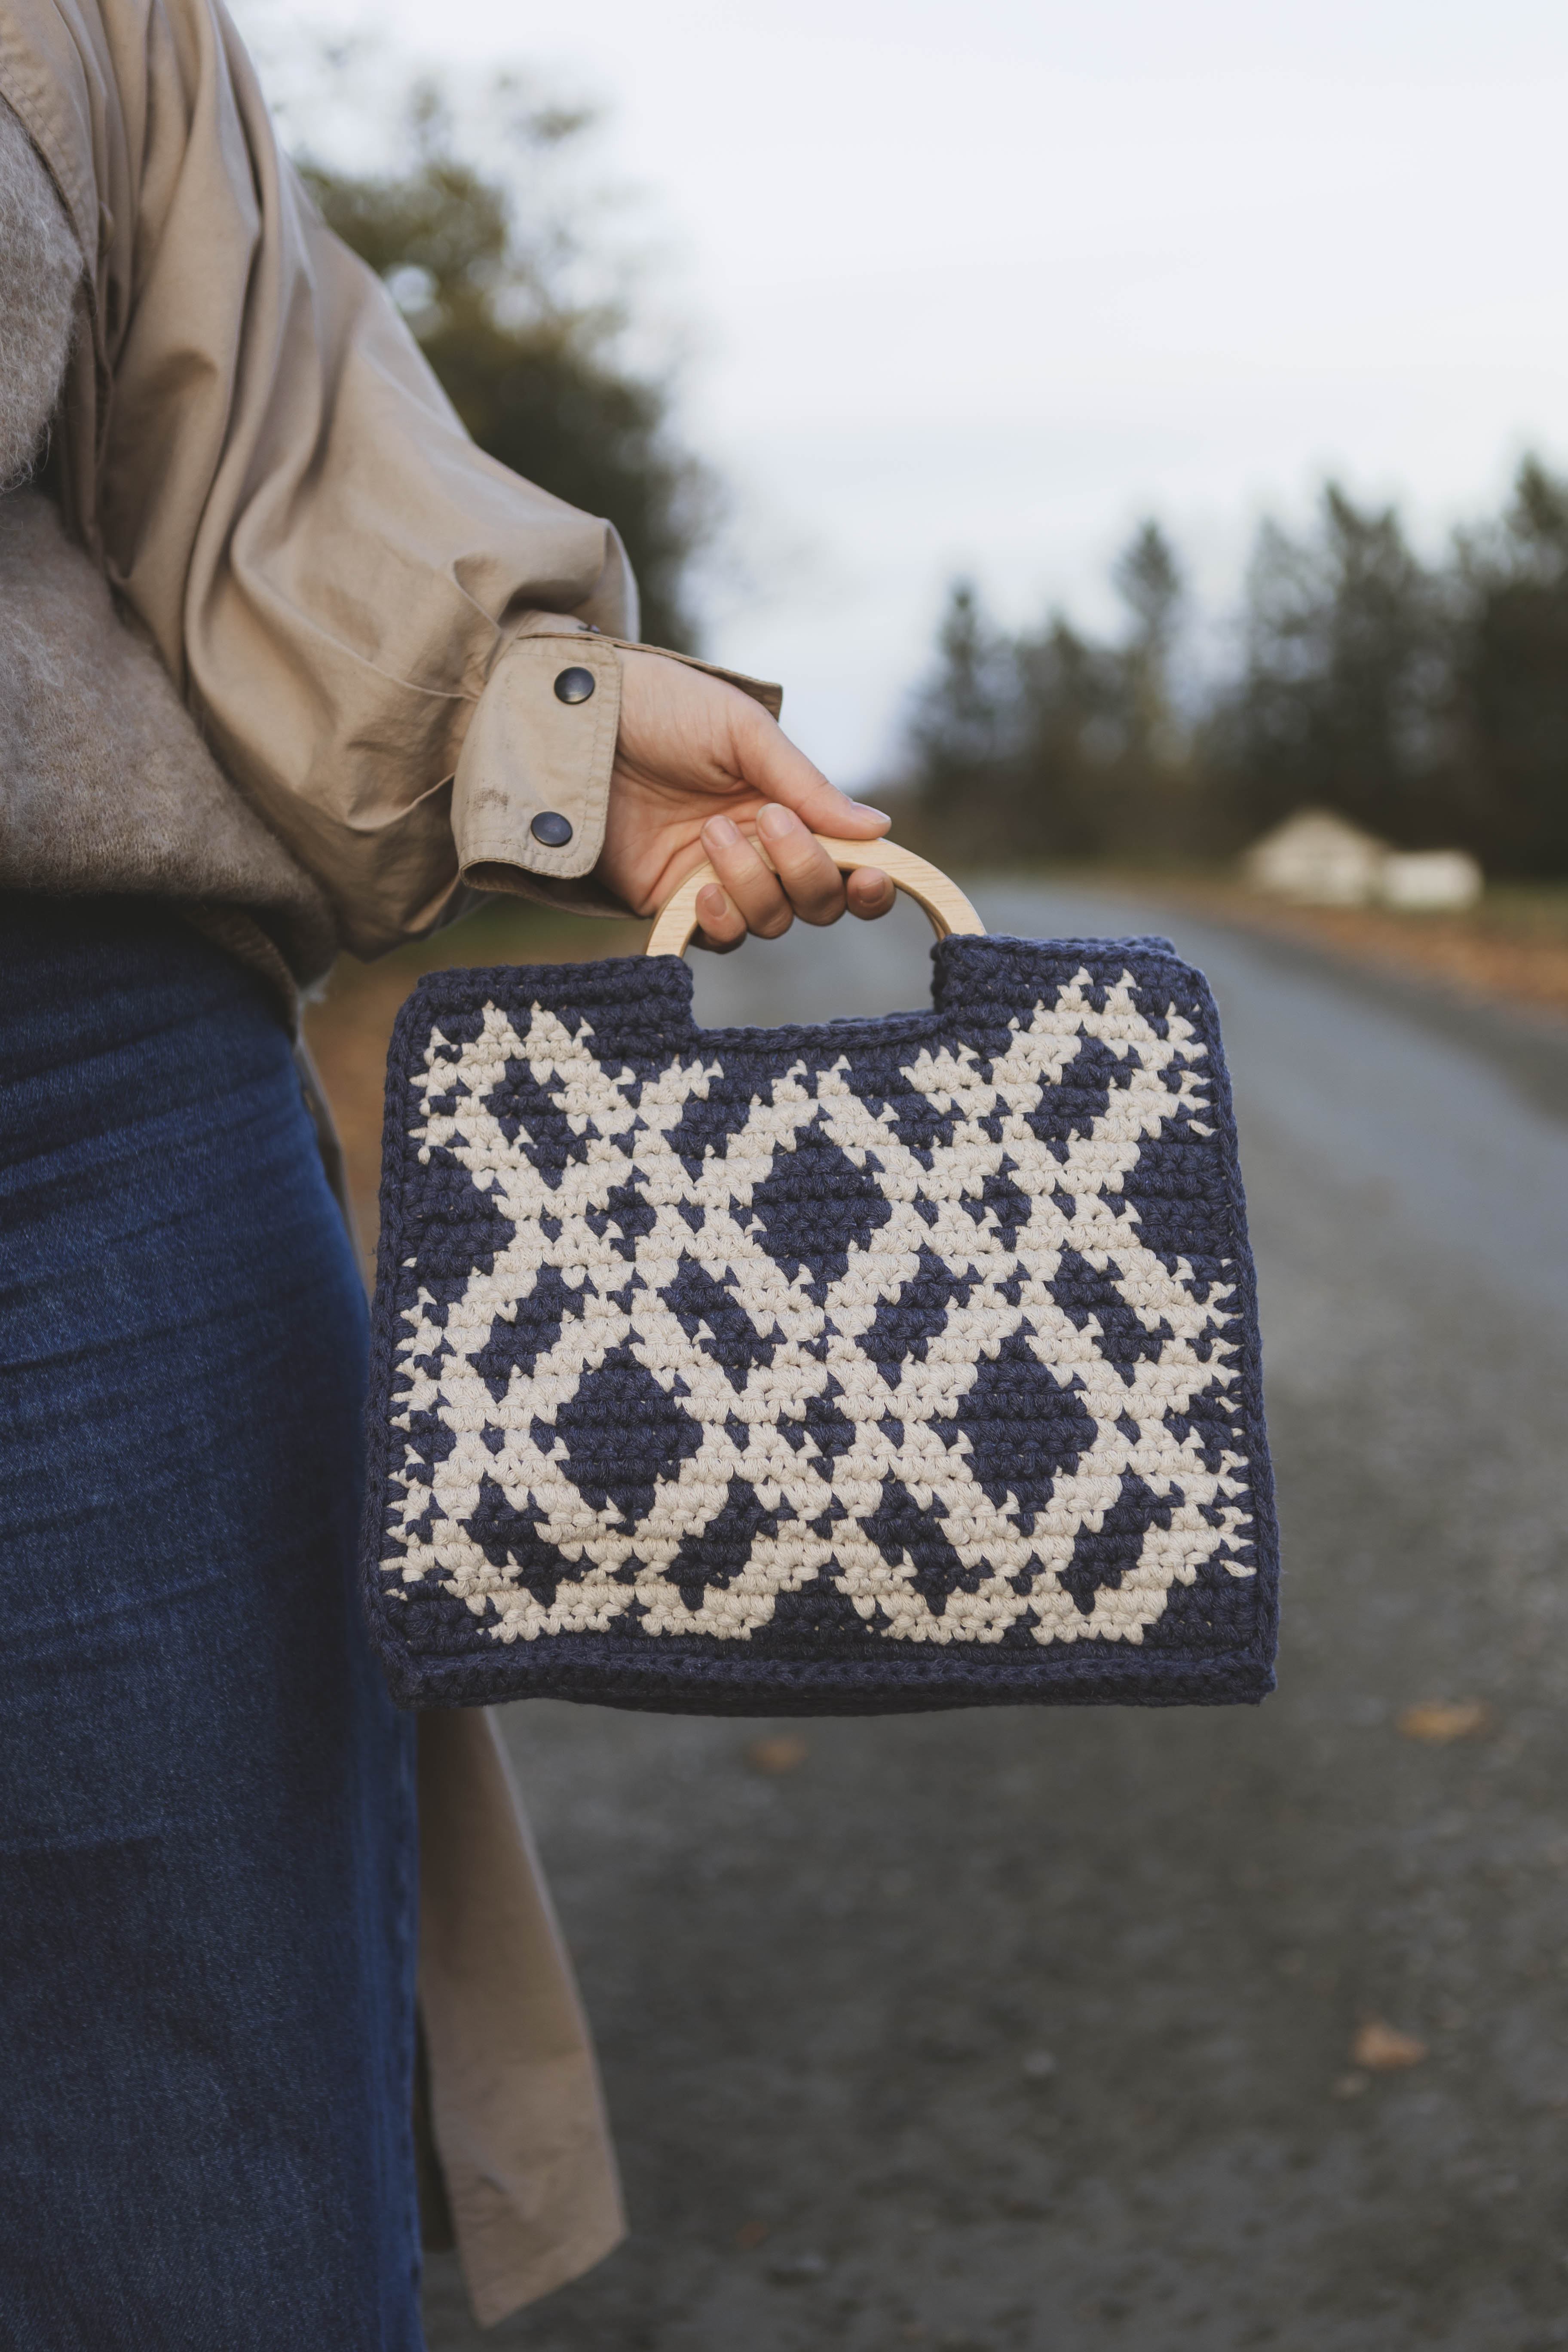
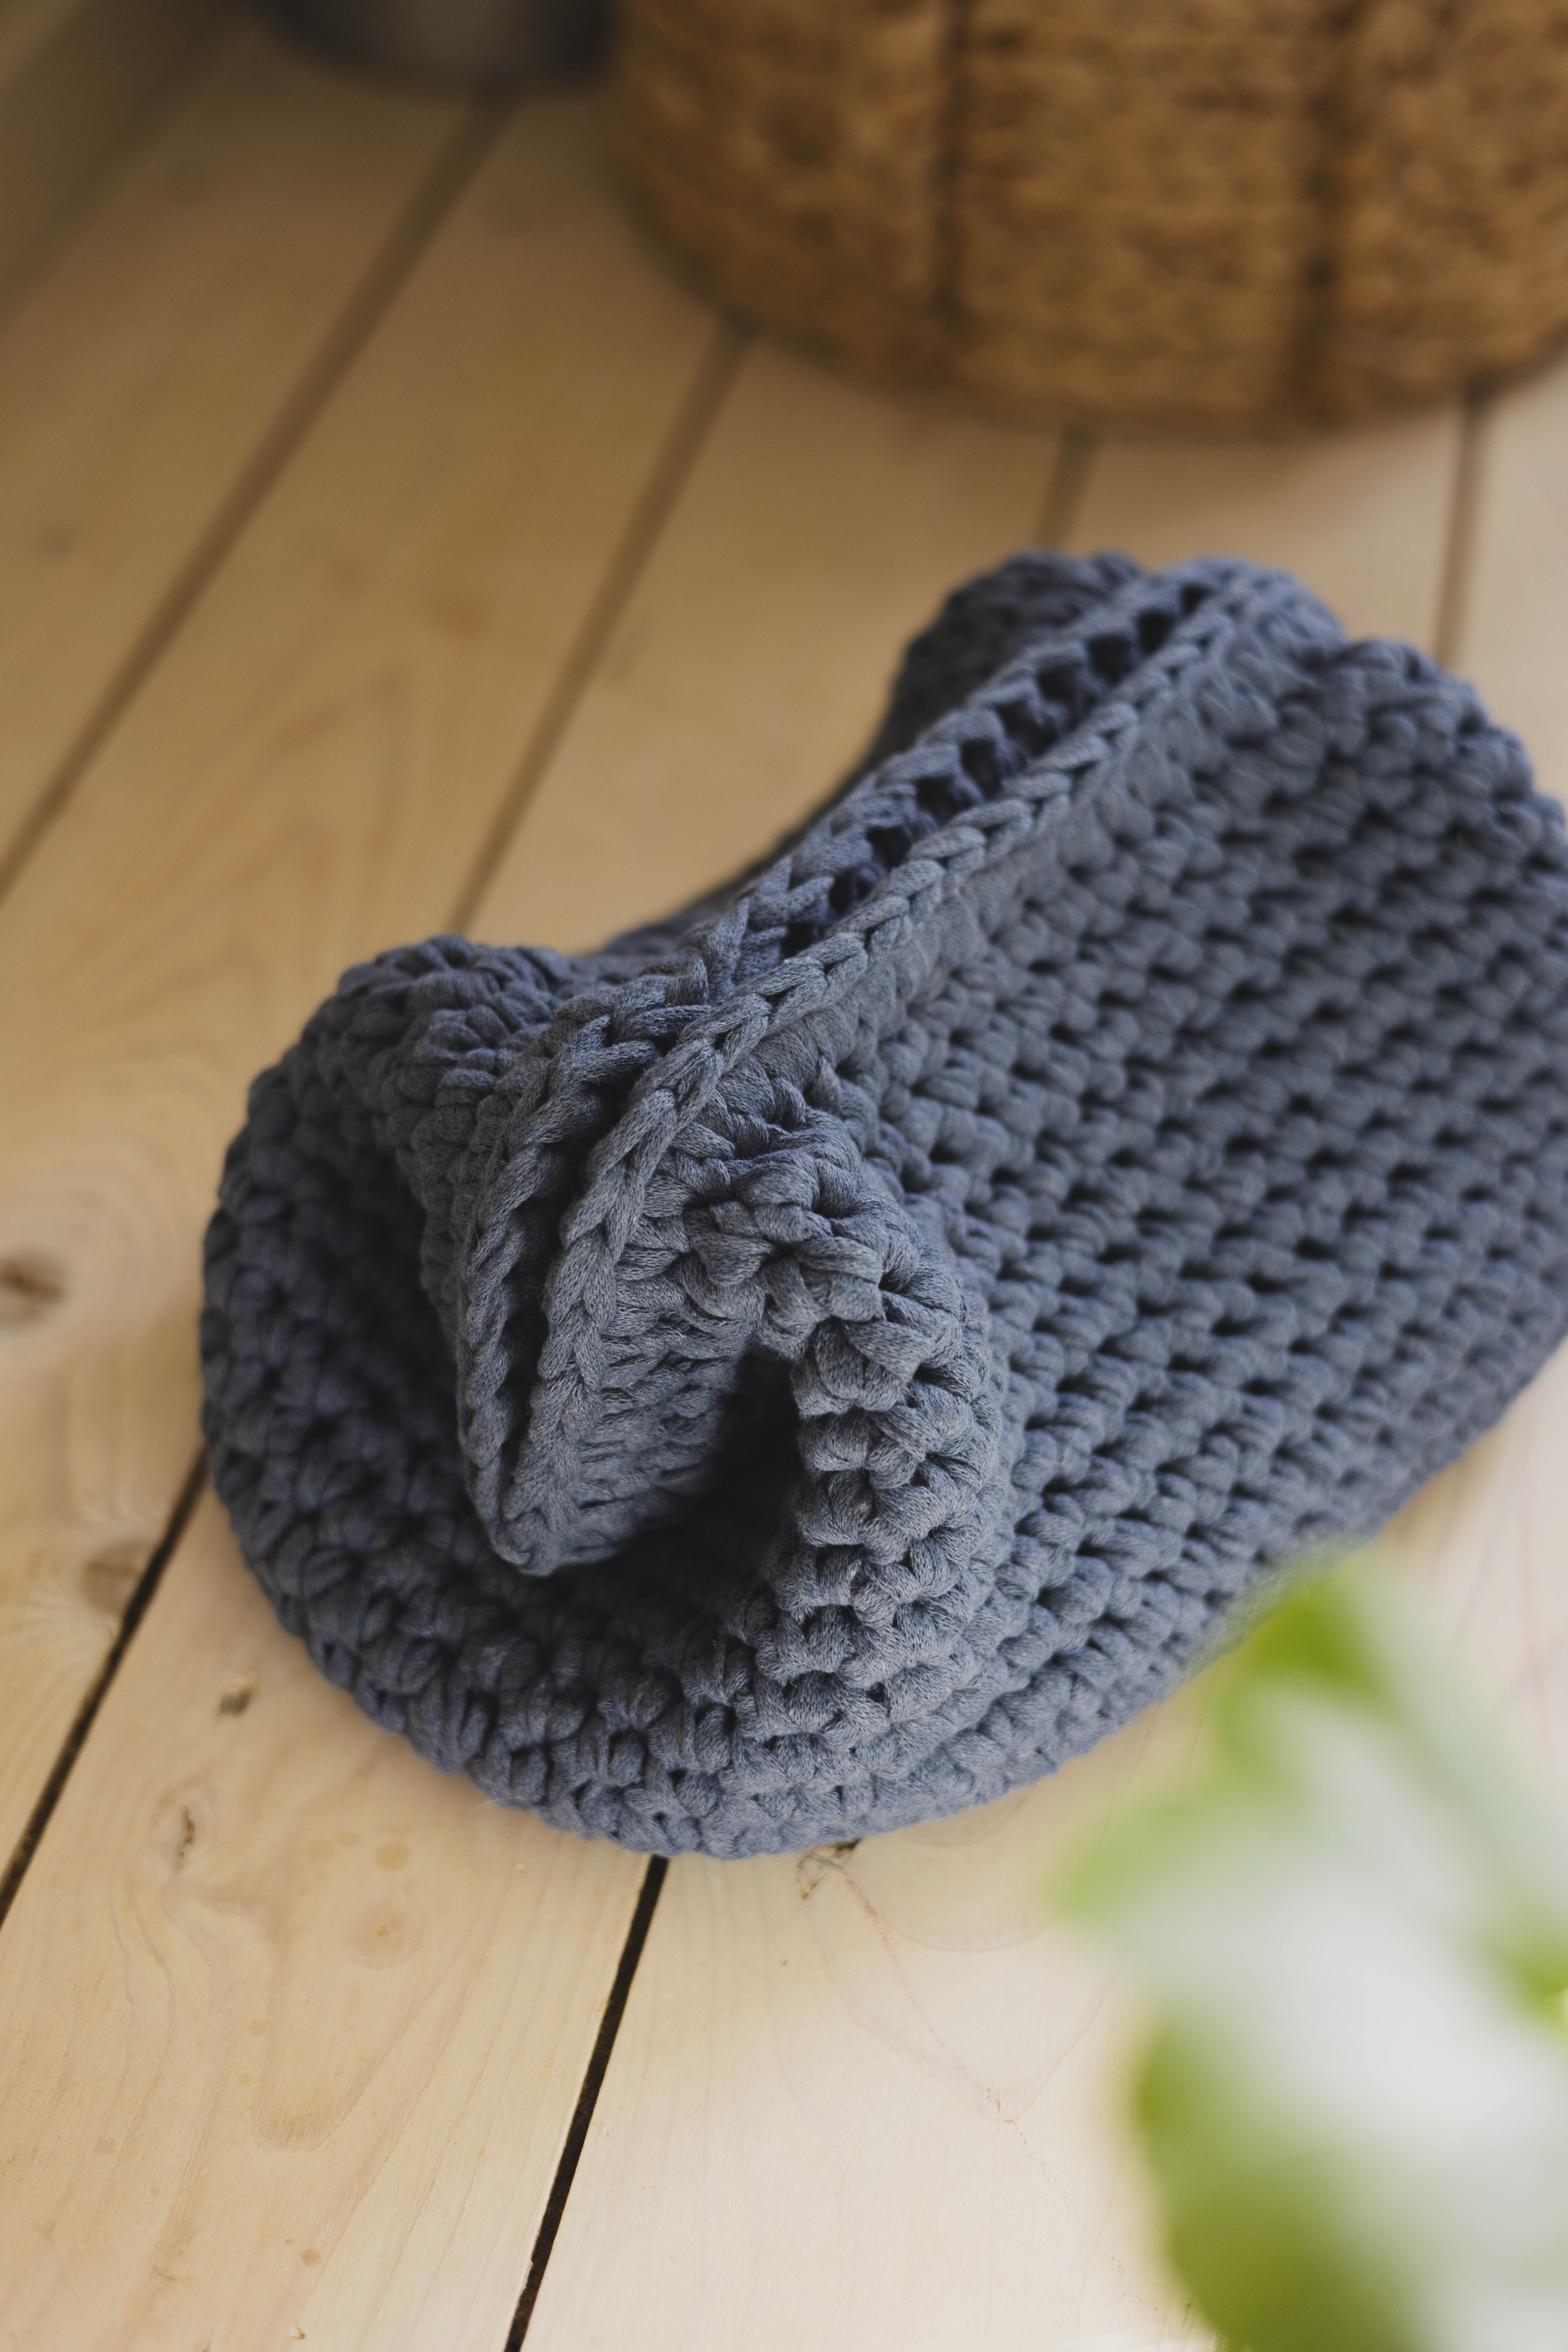
Crochet bag “Fiona”
Crochet a Bag with a Star Pattern
Want to learn a beautiful new technique while crocheting a bag? Then this bag is perfect for you! We recommend that you have crocheted before you start with this pattern. You can choose to crochet it in one color or two colors (or as many as you like, of course). The bag is best suited for lighter items since the technique isn’t very stiff. Maybe perfect for notebooks, a lightweight sweater, etc. You can also use it for your laptop, but then it needs to fit snugly around it to work best. You will need EKO Mini yarn in 2 colors. We used "Bright Green" and "Greige". You will also need a 6 mm crochet hook.
Yarn Consumption: Approximately 360 g total, with about 40–50 g of Greige. Yarn amount may vary depending on how tightly you crochet.
Please note that in this pattern, we use videos from our technique school along with pictures.

Here's how to do it
This bag gets such a beautiful look! The technique is a bit challenging but I'll try to guide you right as best I can:) /Lizette

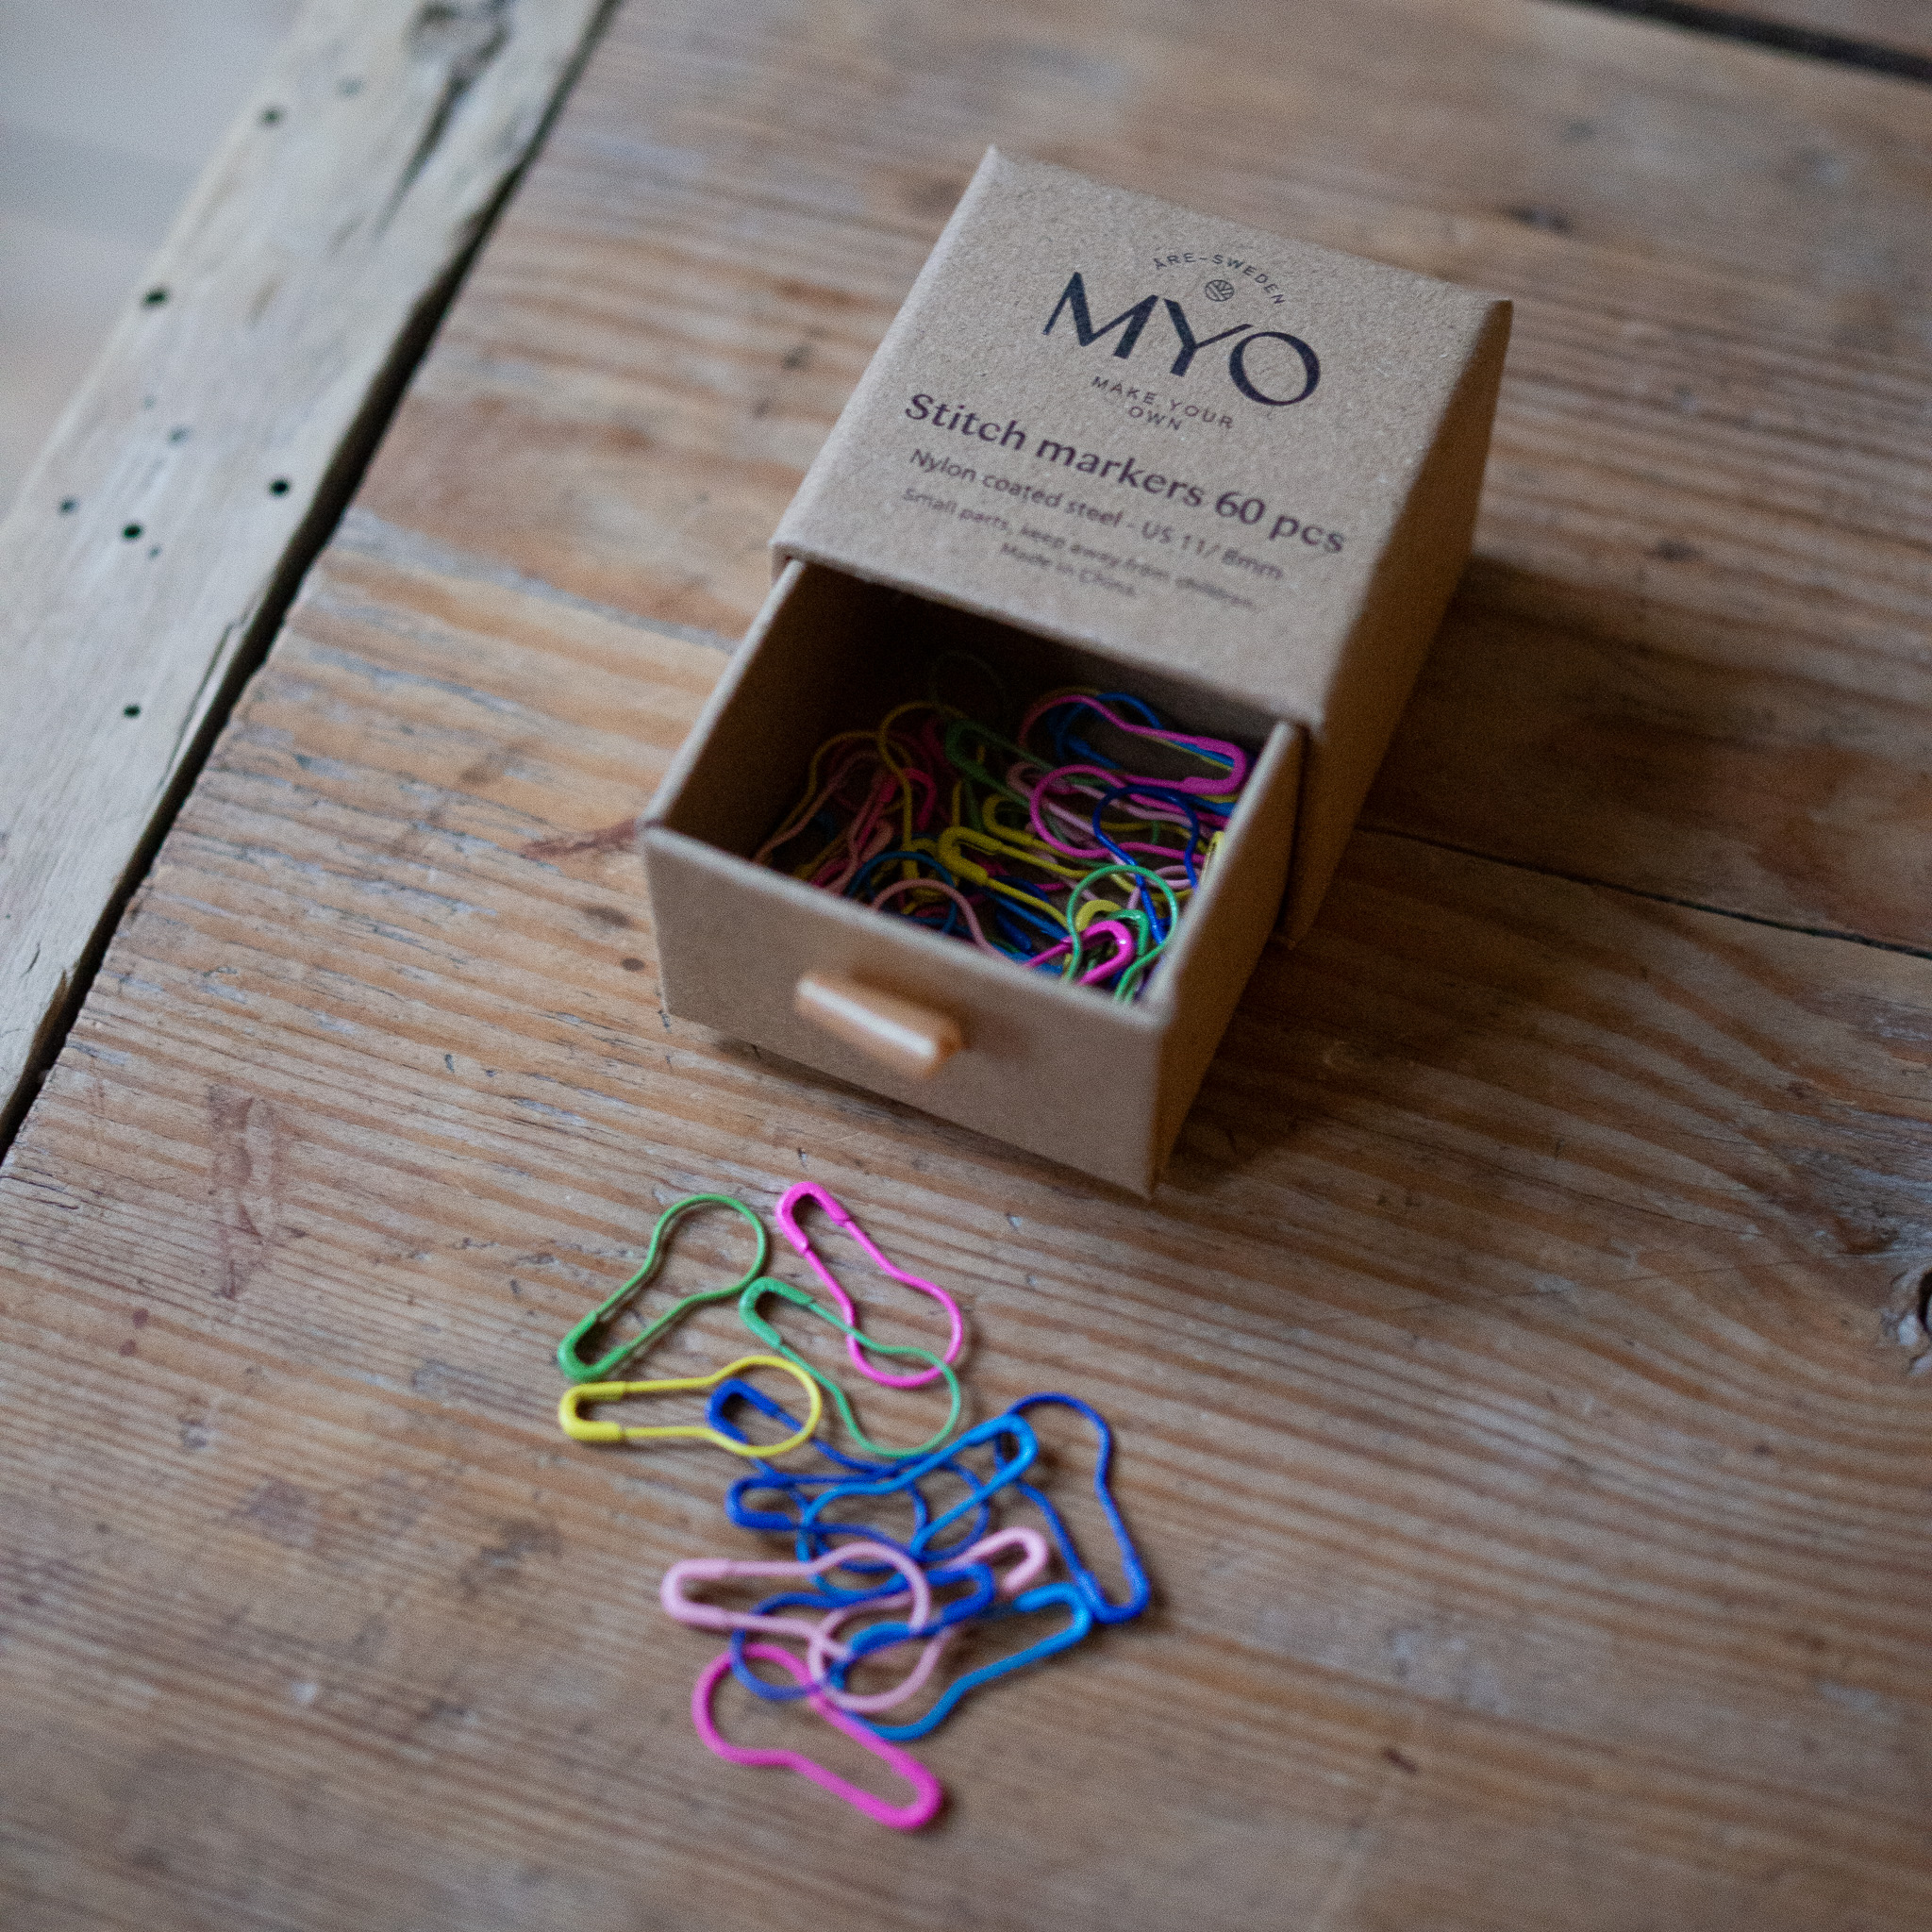
This is what you need:
Here you can directly purchase the material for the product. Please note that the instruction is digital and appears here on the page (no written instruction).


EKO Mini tube yarn | 1000g
Narrow "Ribbon" yarn for crocheting, made of 80% recycled cotton
Buy product.jpg)
Unleash your creativity
For only 85kr per month you get access to all our 300+ beginner-friendly instructions for crochet, knitting and macrame.
A perfect way to get started with your new hobby!

The bag is crocheted in joined rounds, the rounds are joined with a slip stitch. The whole bag is crocheted in one piece.
Bottom of the bag:
Start crocheting with the green yarn (main color).
Row 1: Chain 32 stitches. If you’re unsure how to crochet a chain, see the video below.
Round 2: Start in the second stitch, skipping the first stitch. Crochet 30 single crochets. In your last stitch, crochet 3 single crochets in the same stitch.
Then crochet 29 single crochets and 4 single crochets in your last stitch. Finish the round with a slip stitch.
If you’re unsure how to crochet single crochet or how to work around a chain, see the videos below.
Sides:
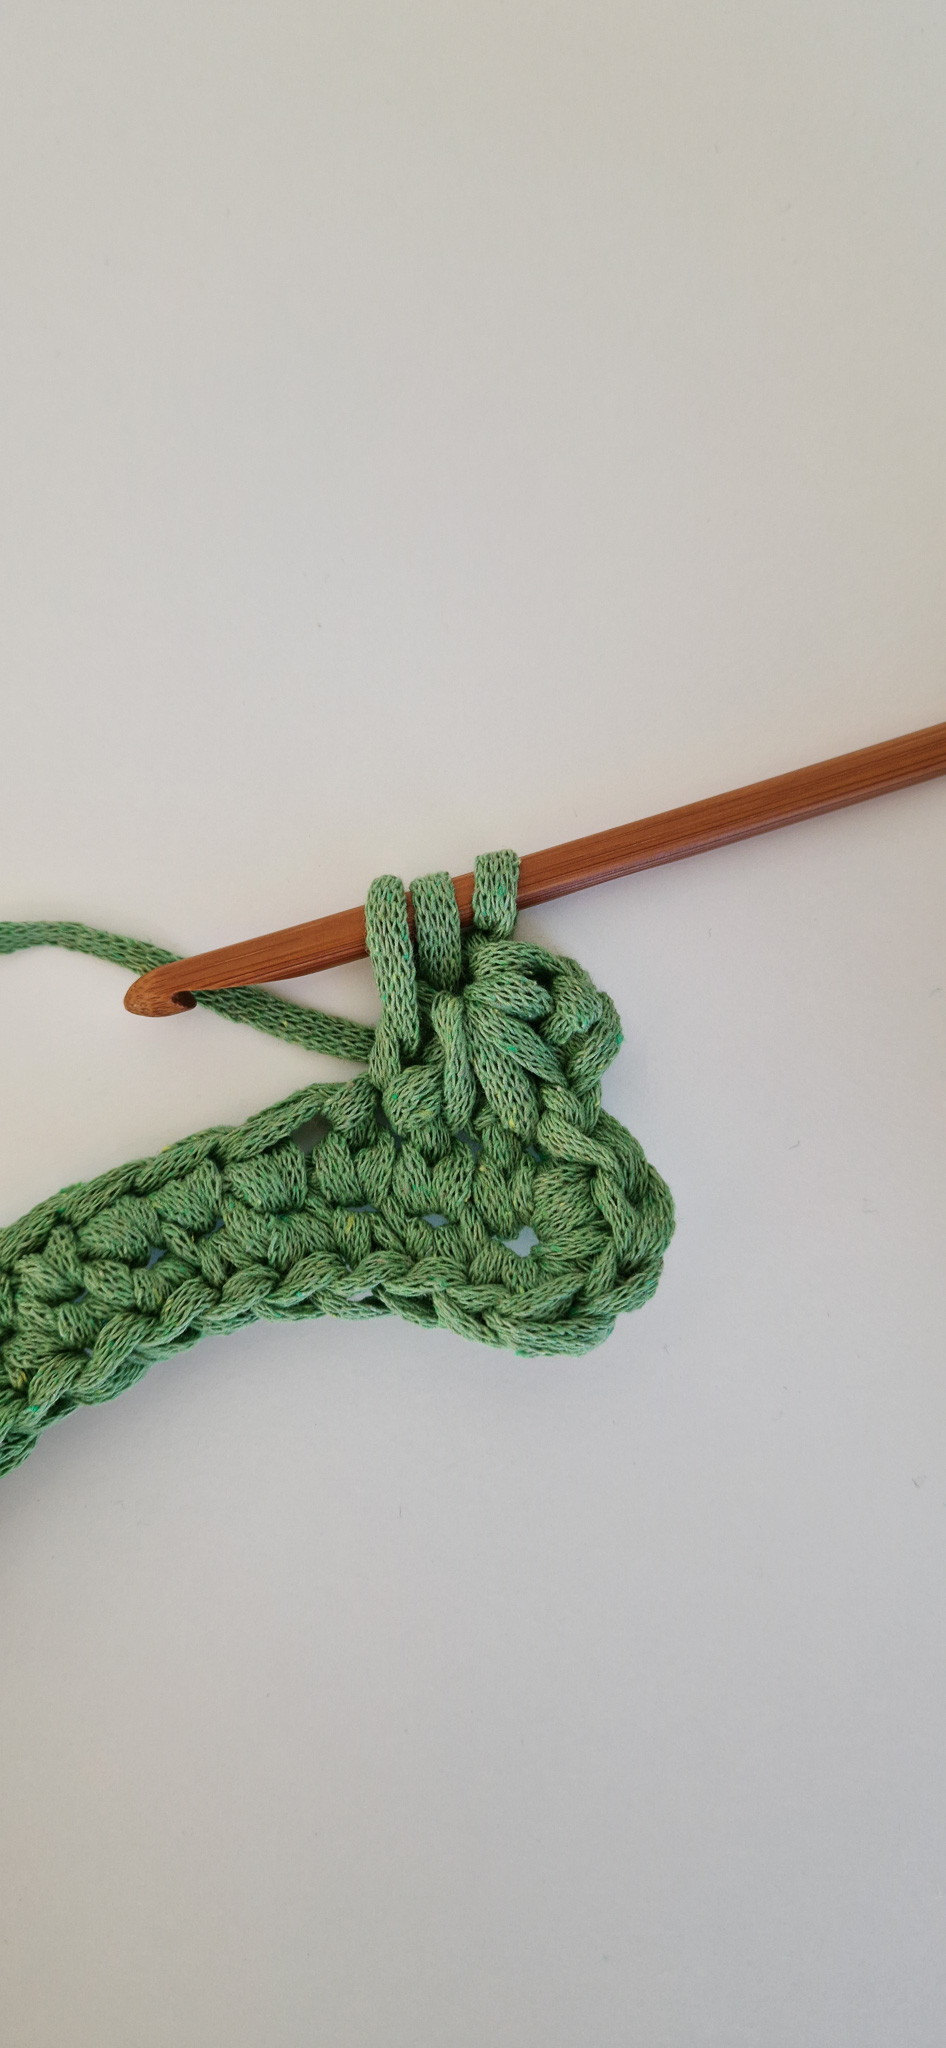
Now the star stitch pattern begins, so have a little patience :) See the video below if you want to watch how to crochet the star stitches (Star Stitches).
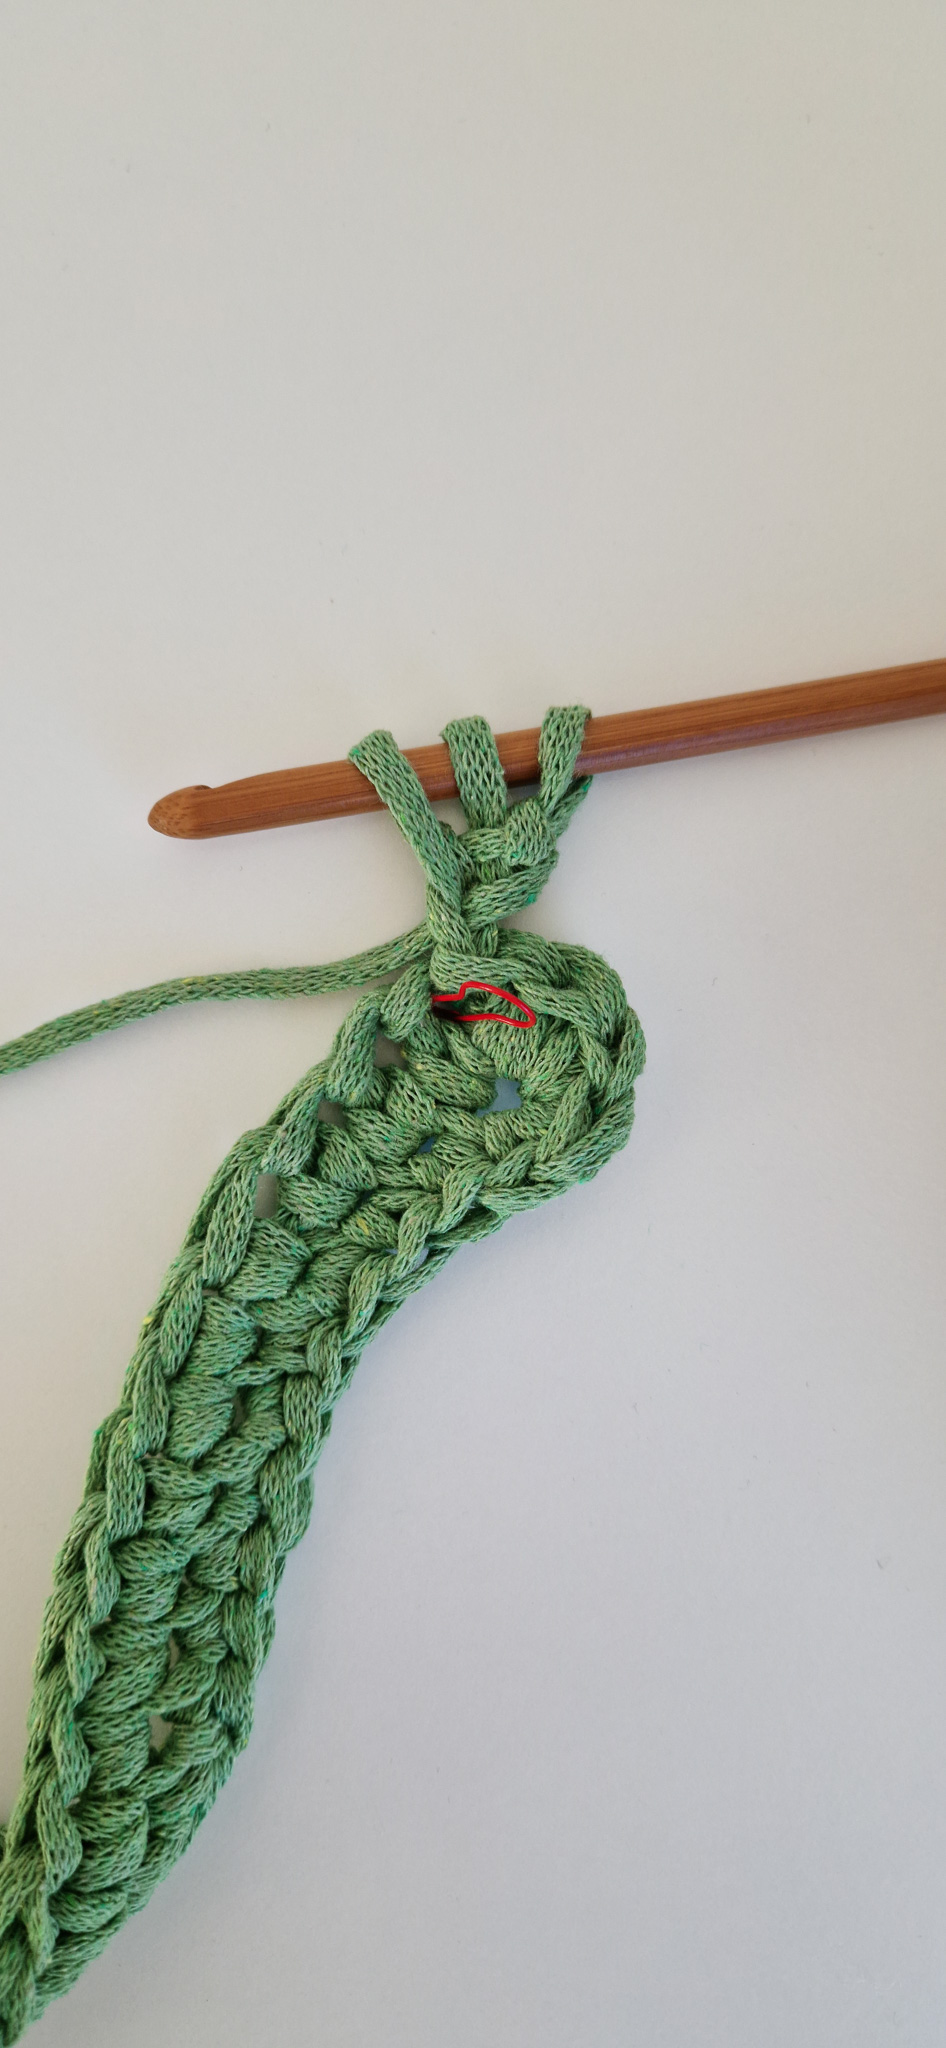
Round 3: Chain 2.
Yarn over and pull up a loop in the back loop of the first chain you made.
Yarn over and pull up a loop in the front loop of the same chain.
Yarn over and pull up a loop in the first stitch of your work, then in the next two stitches.
You should now have six loops on your hook.
Yarn over and pull through all six loops.
Chain 1 (this "hole" that is created is called the "eye").
Yarn over and pull up a loop in the “eye” (the chain space).
Yarn over and pull up a loop in the stitch between the “eye” and the worked stitch.
Yarn over and pull up a loop in the first worked stitch.
Yarn over and pull up loops in the next two stitches.You now have six loops on the hook.
Yarn over and pull through all six loops. Chain 1. Continue around the row.
When you’re done, finish the round with 1 slip stitch into the top of the first star stitch.
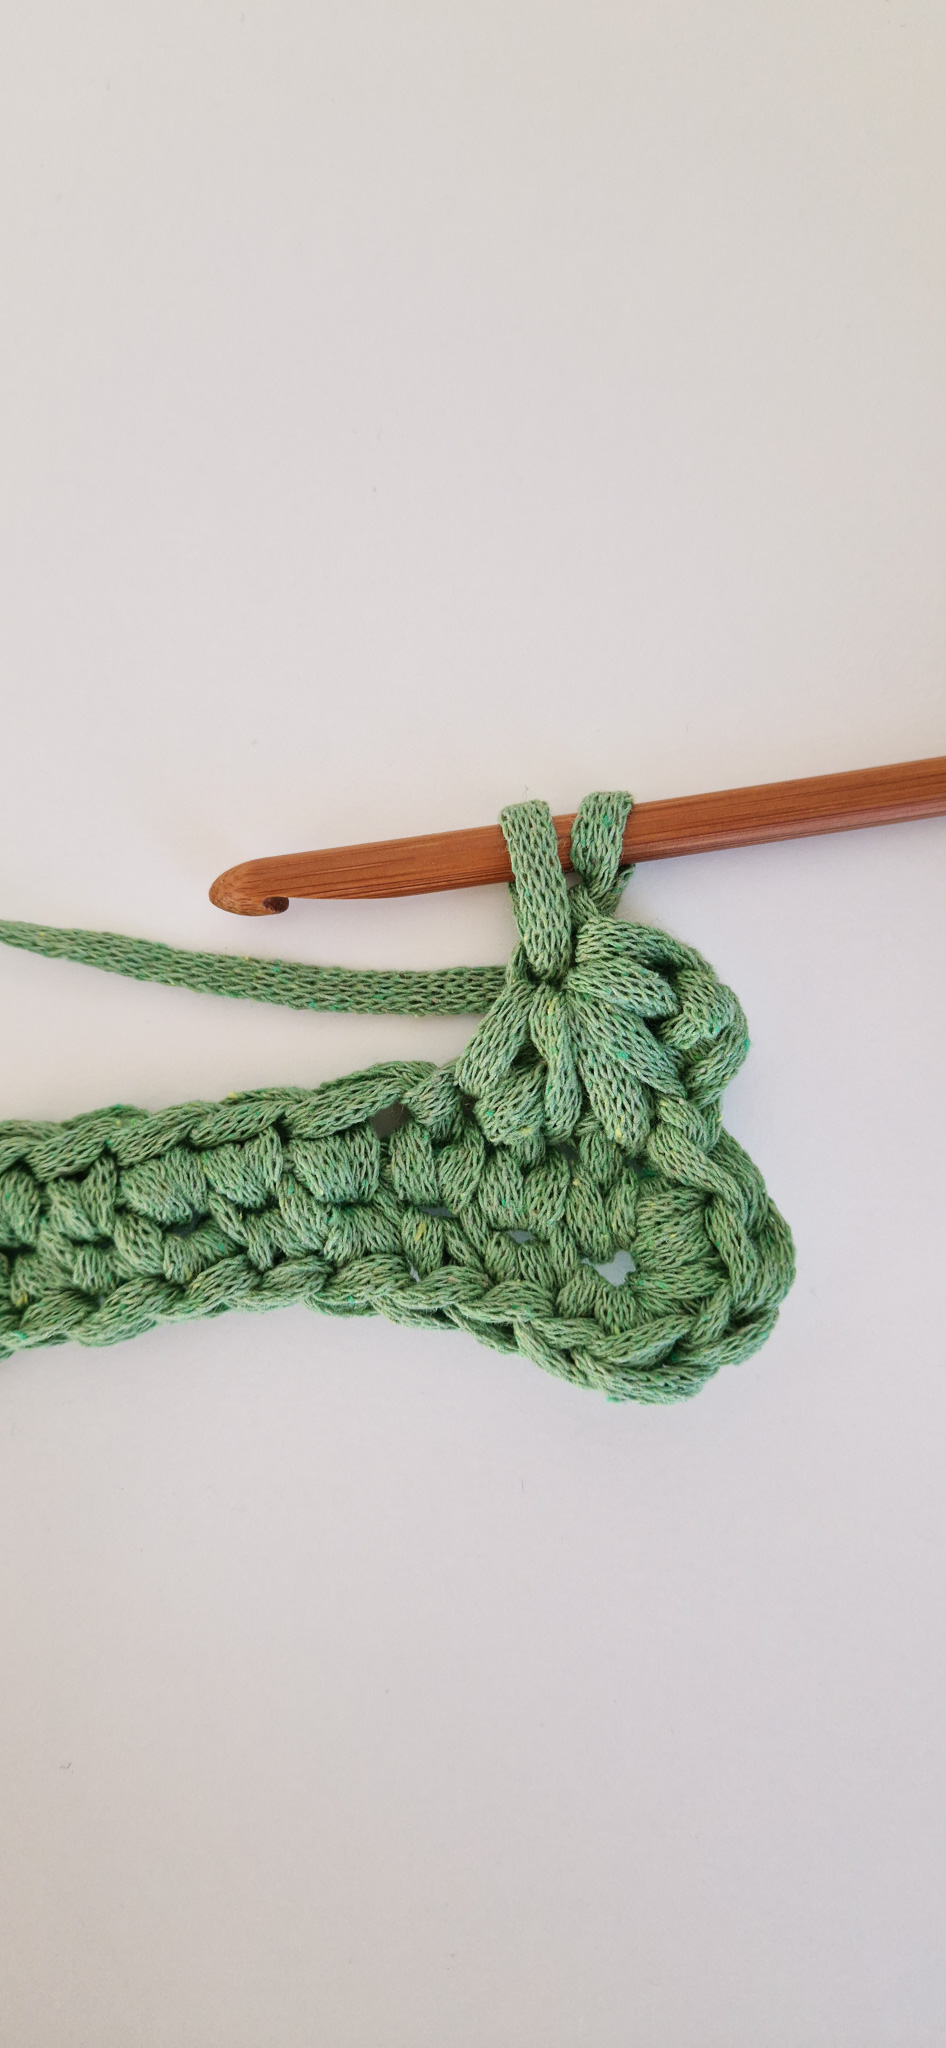
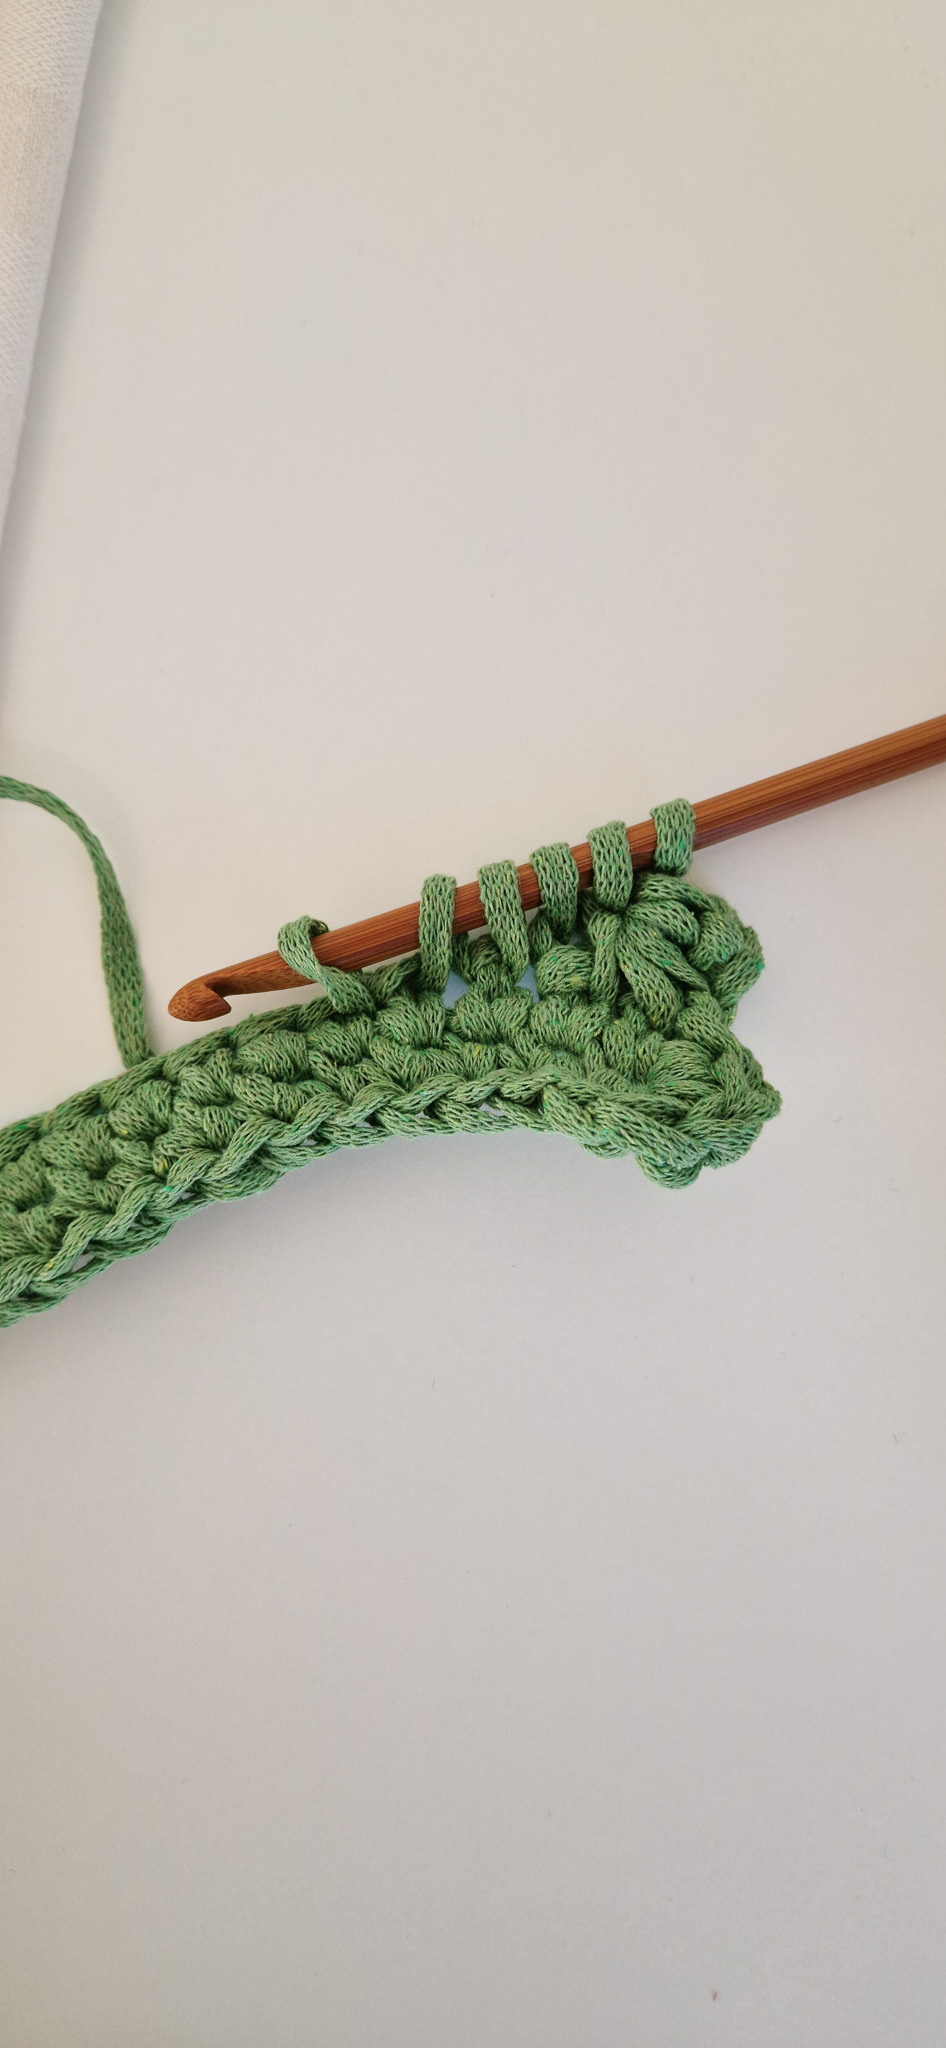

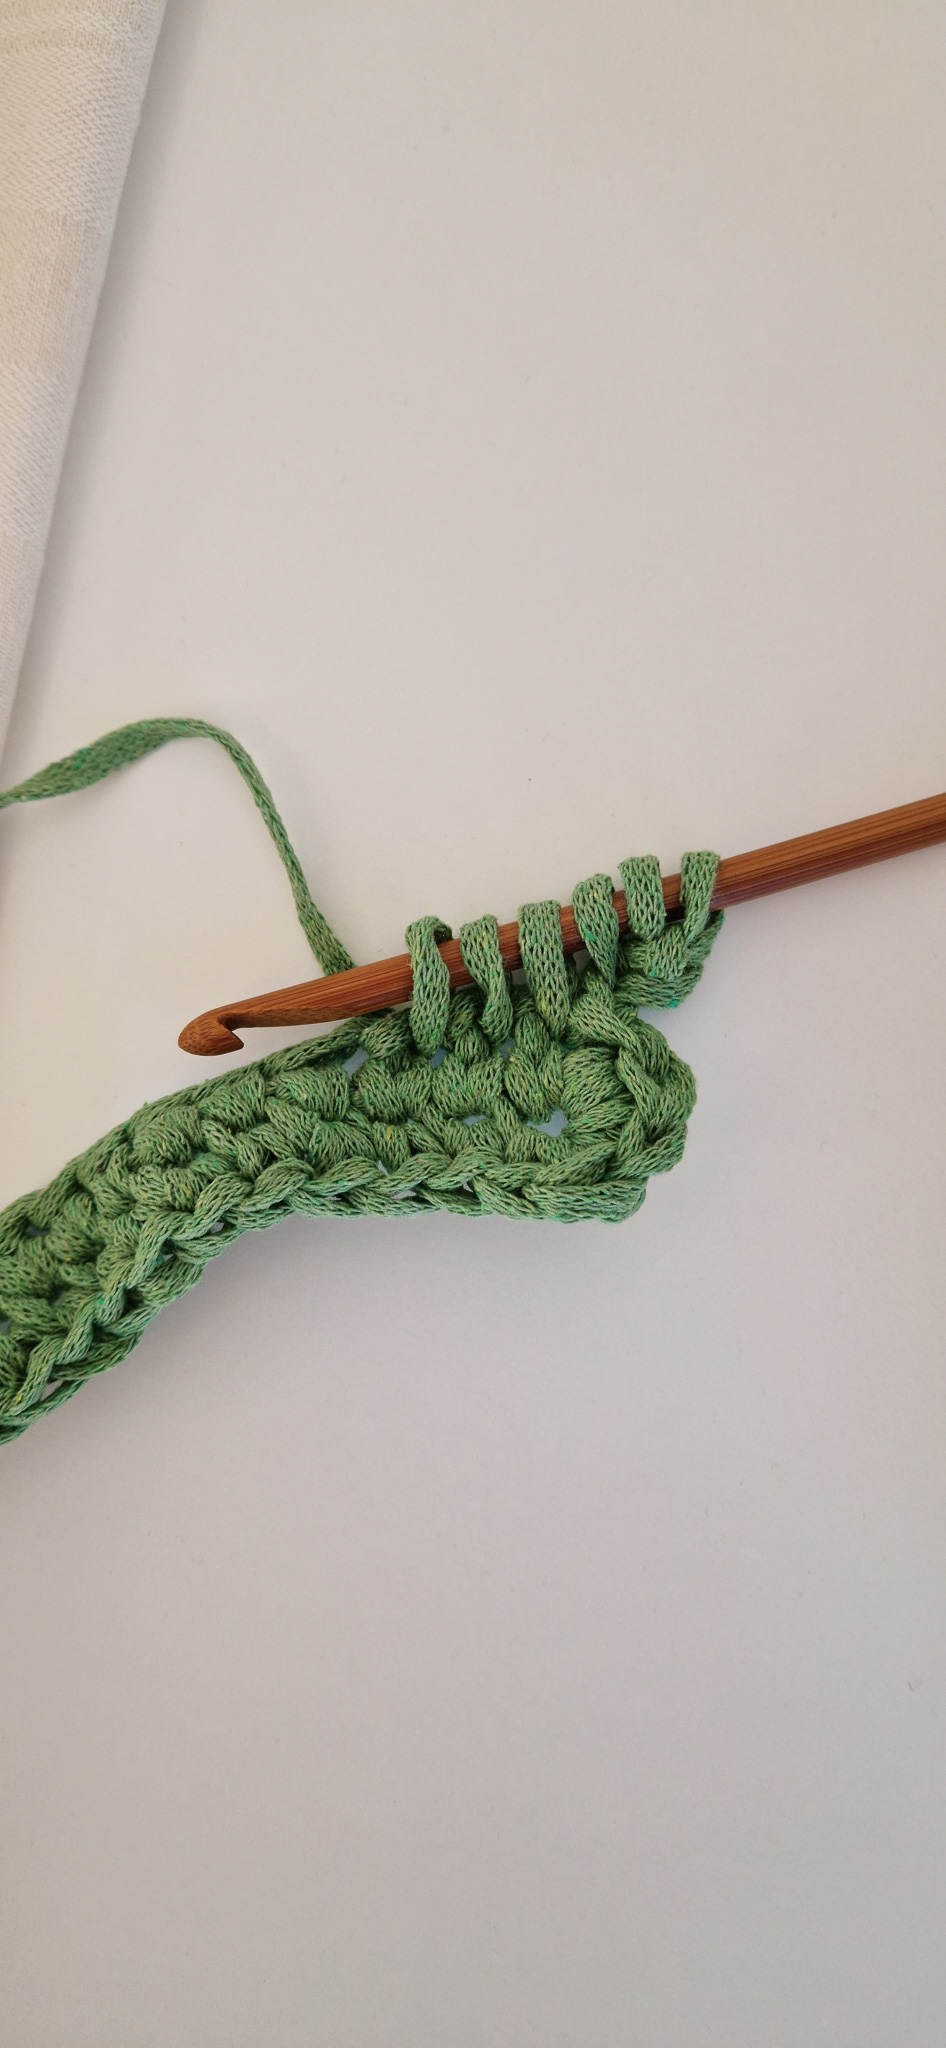
Round 4: Work two half double crochets (hdc) in each eye (the little holes). If you're unsure how to make a half double crochet, check out the video below.
Finish the round with a slip stitch in the first stitch, but when you do, change color (if you want). That means you pull the yarn through the stitch with the new color. Do not cut the yarn.
Round 5: Chain 1, then single crochet in each stitch, starting in the first stitch where you made a slip stitch. Finish with a slip stitch in the first chain, pulling through with the first color. Do not cut any yarn; leave both colors on the inside as you continue crocheting.

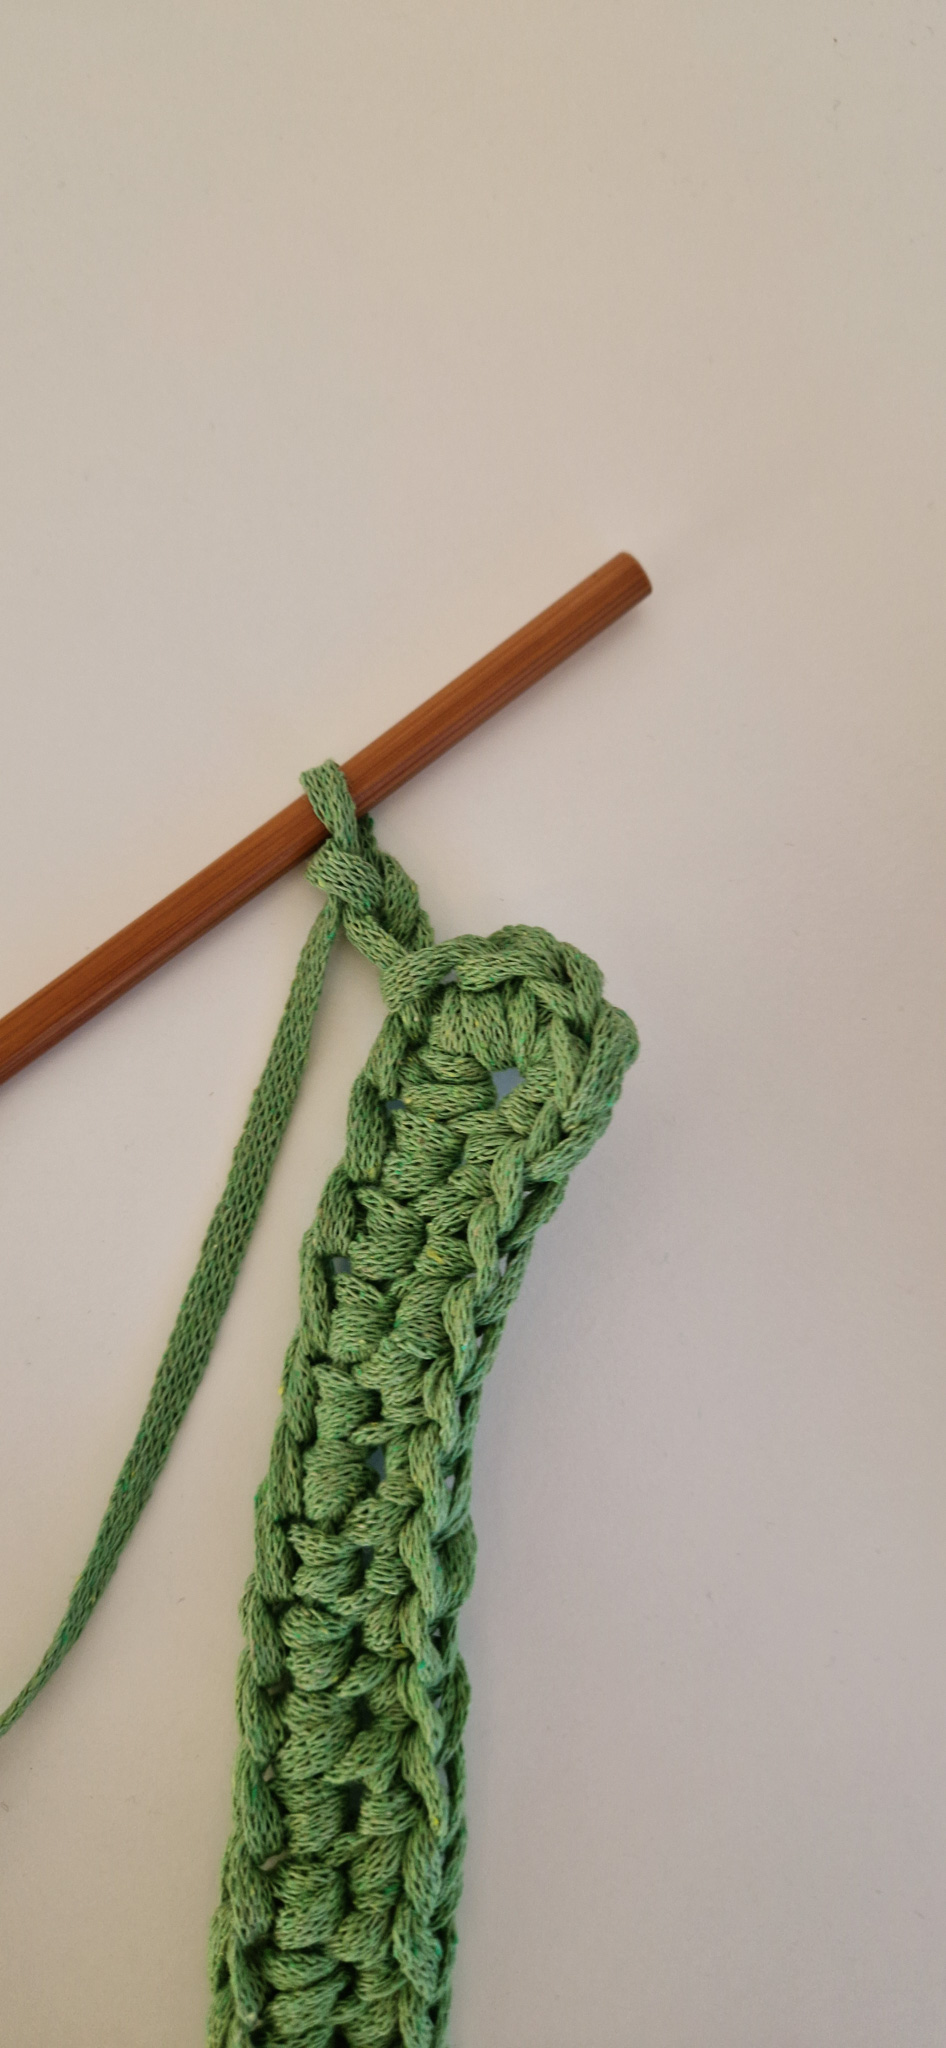
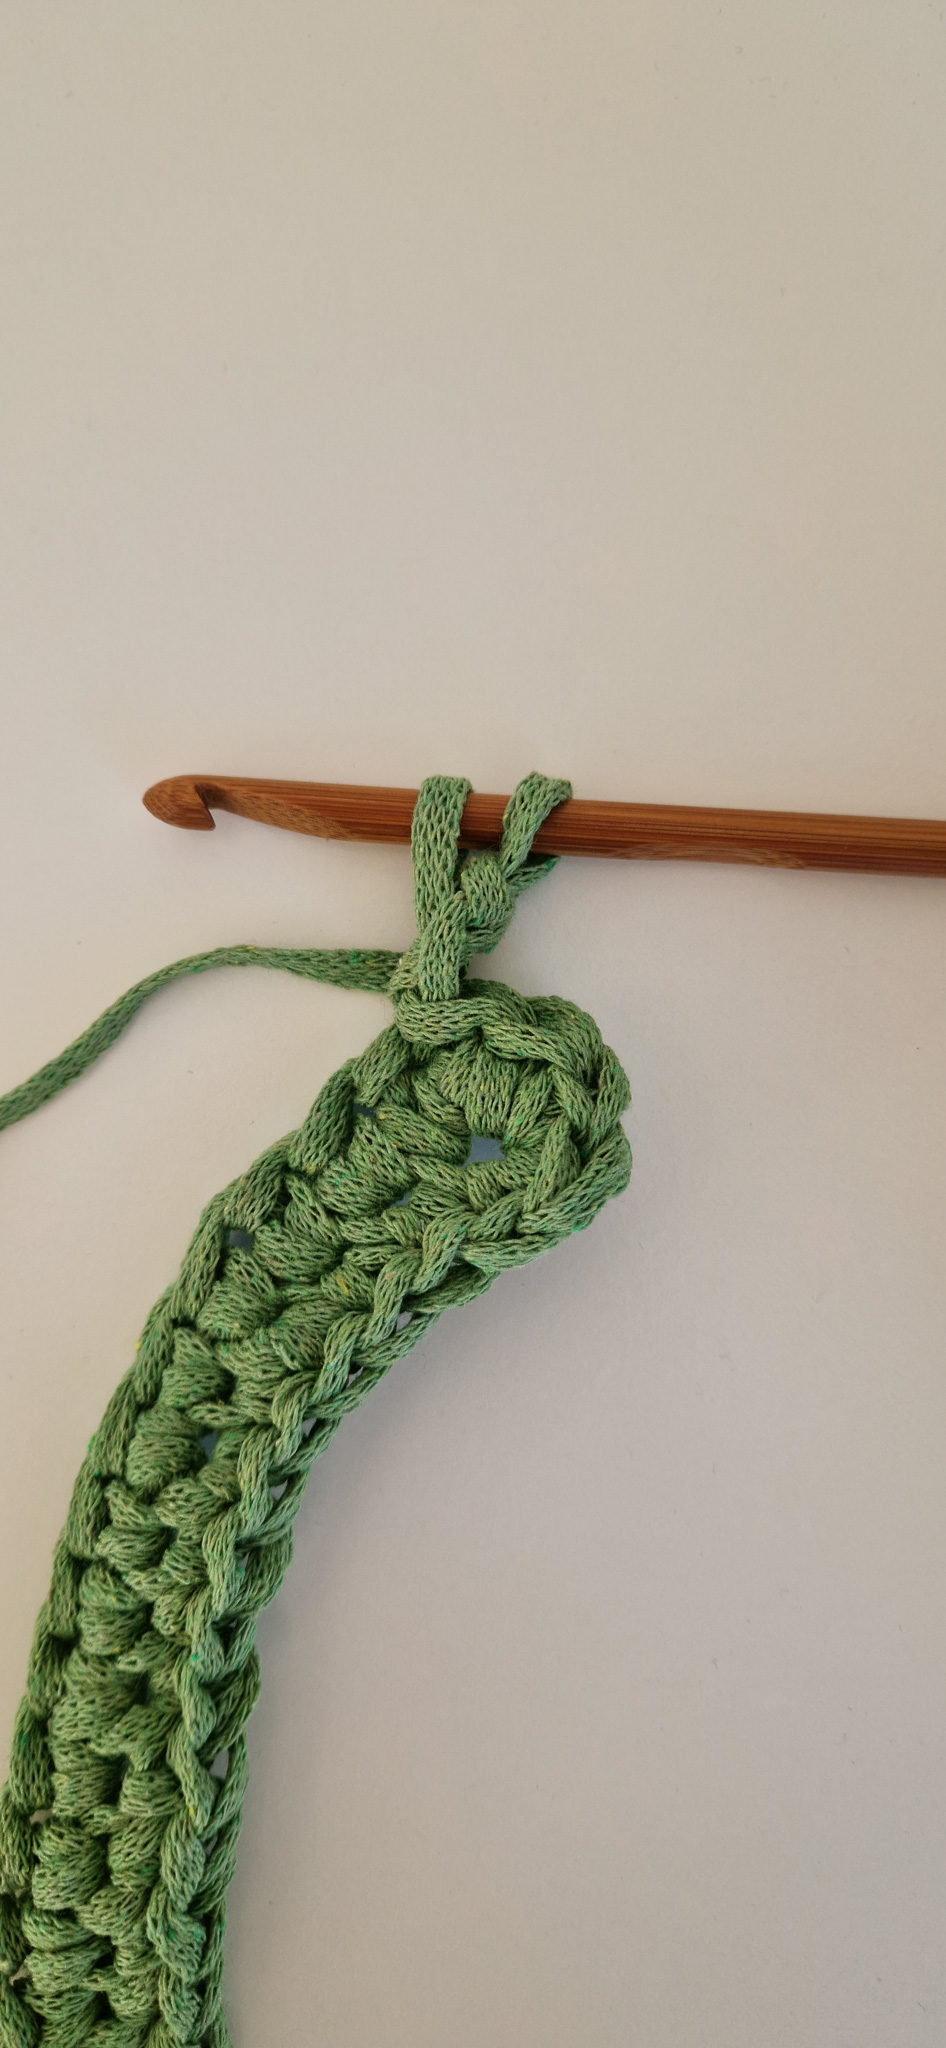
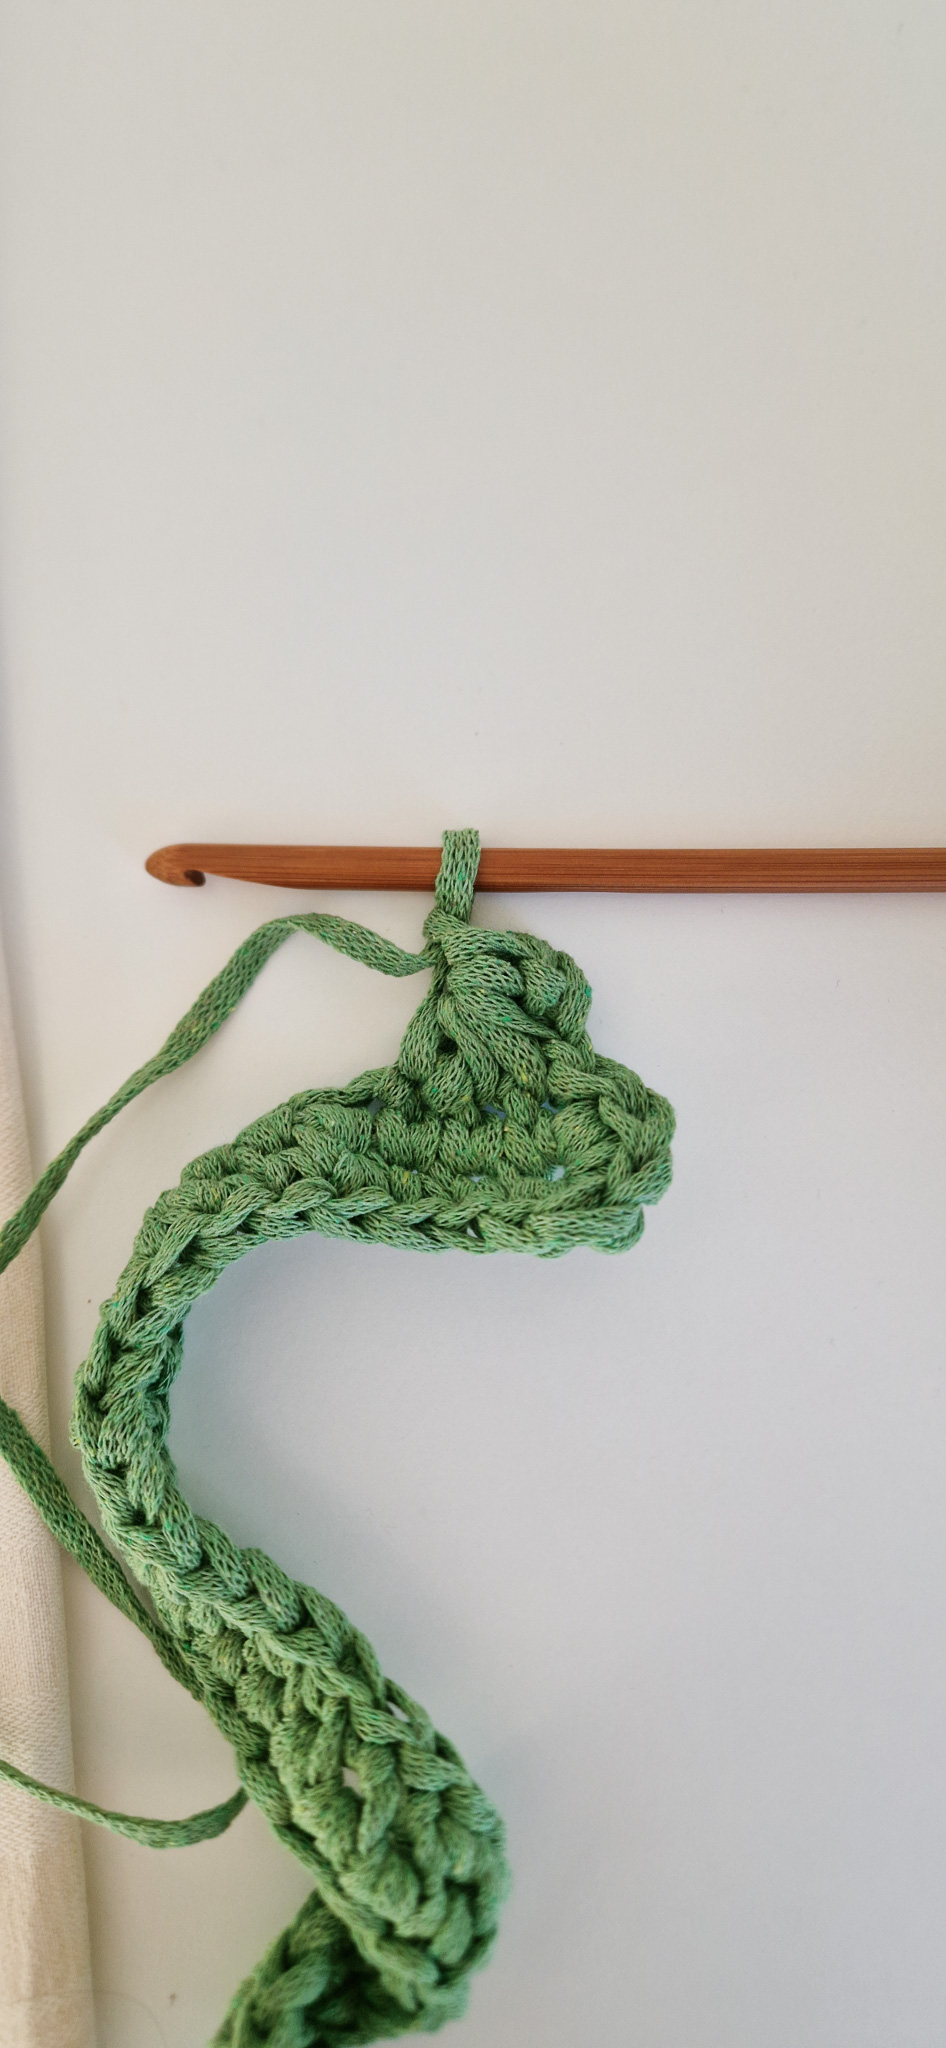
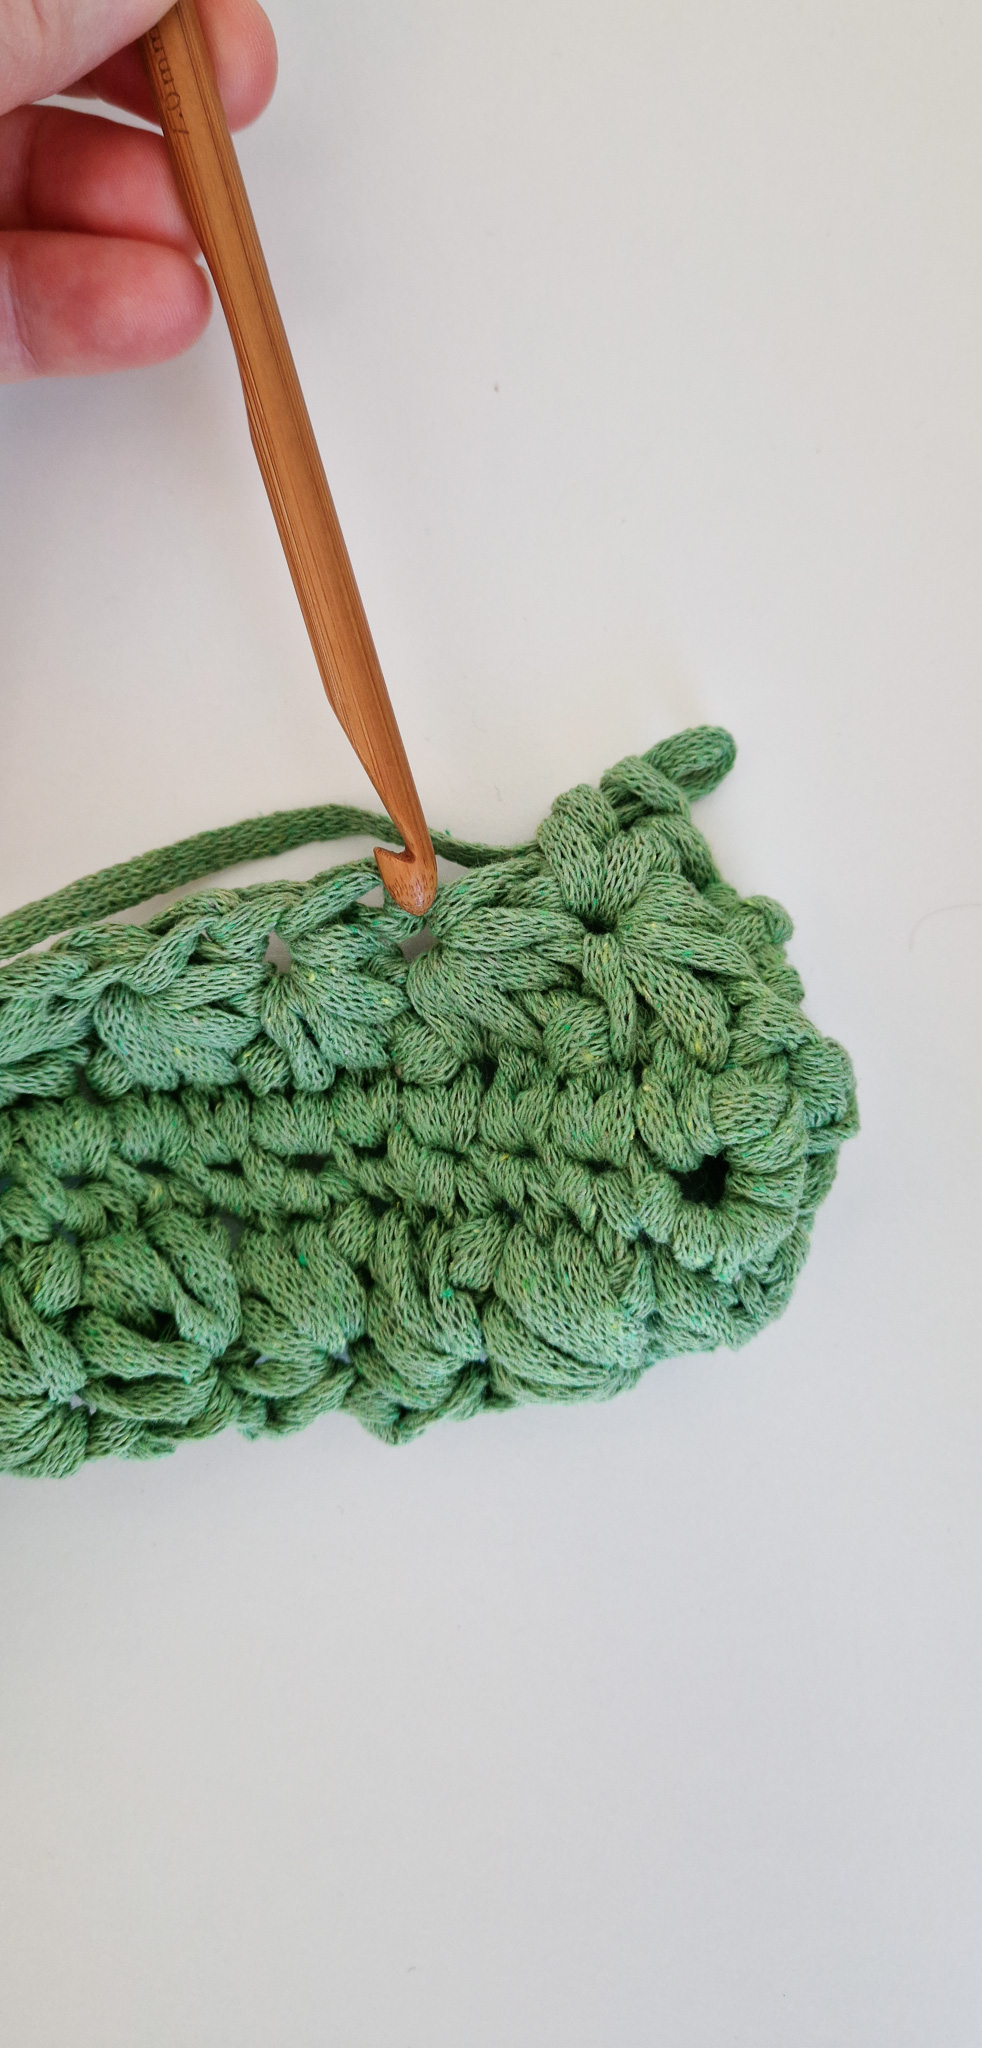
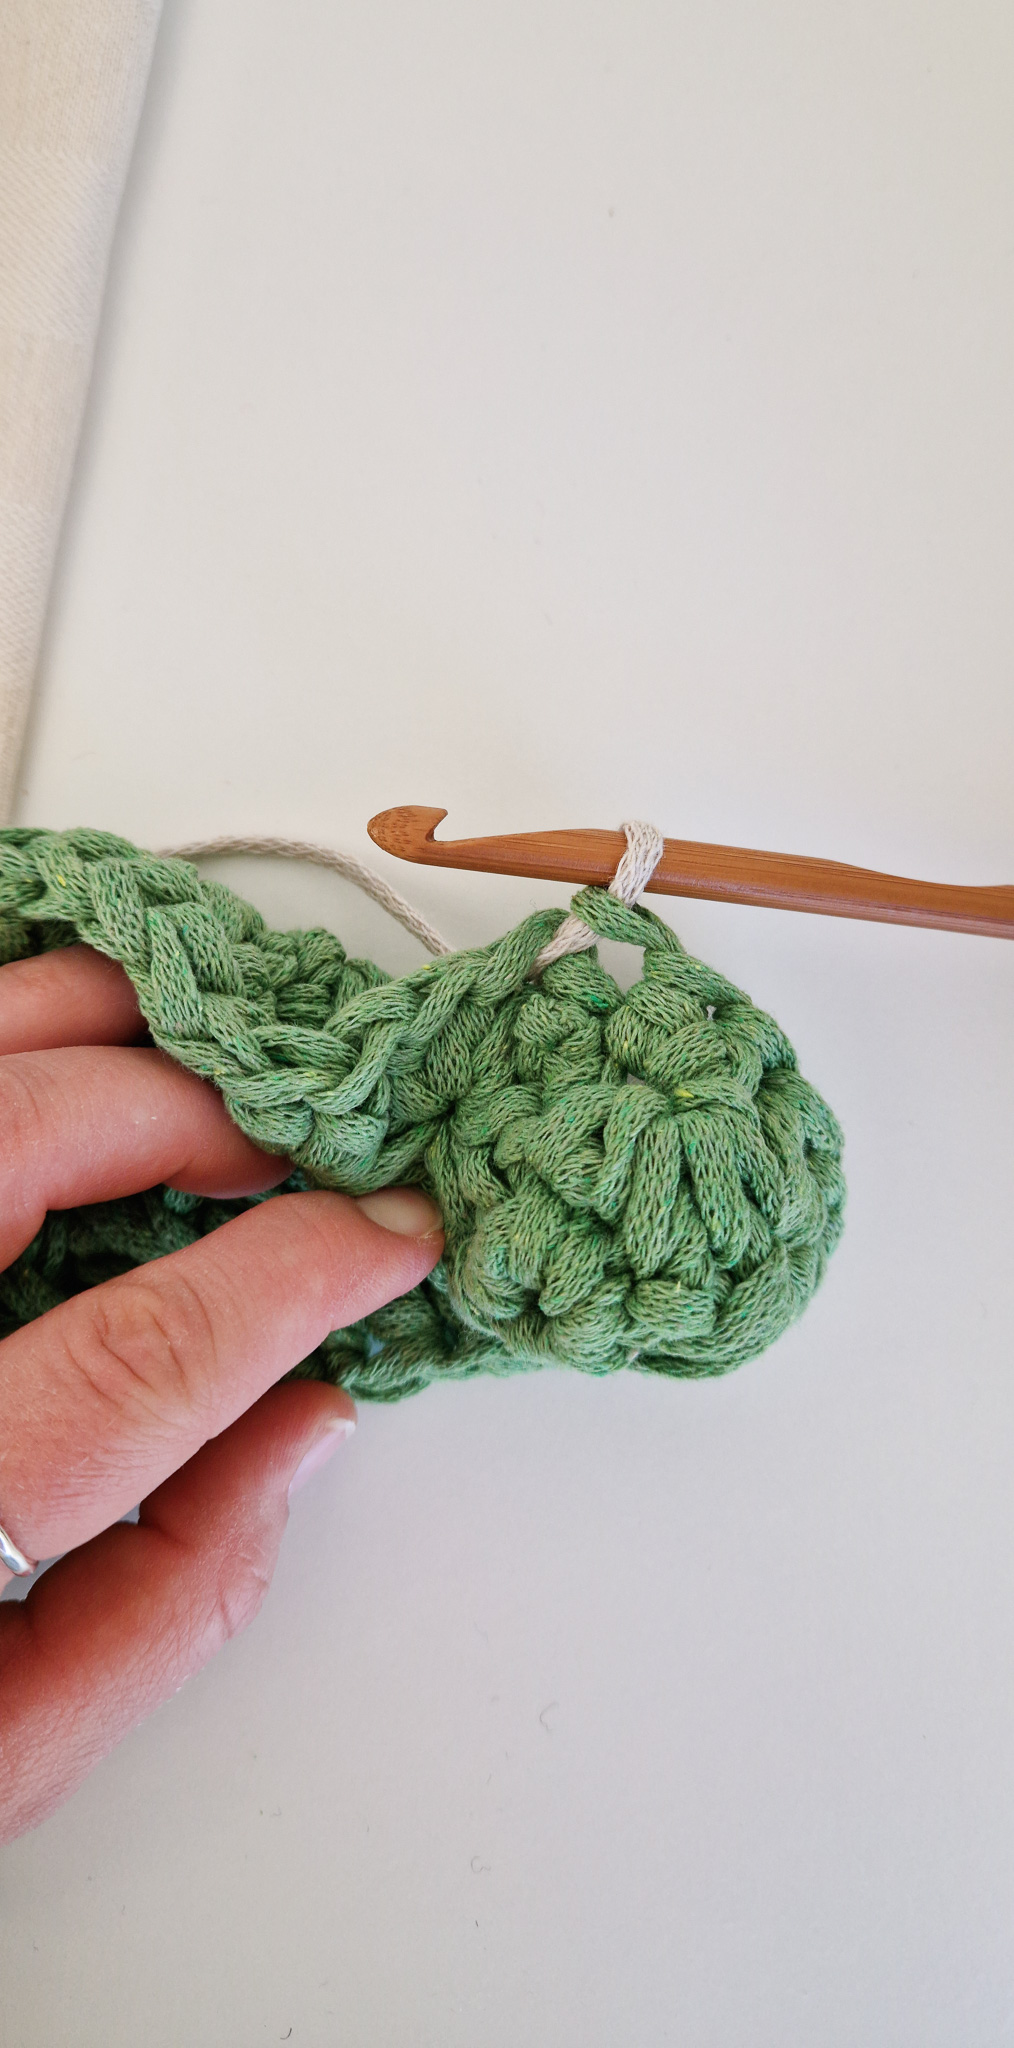
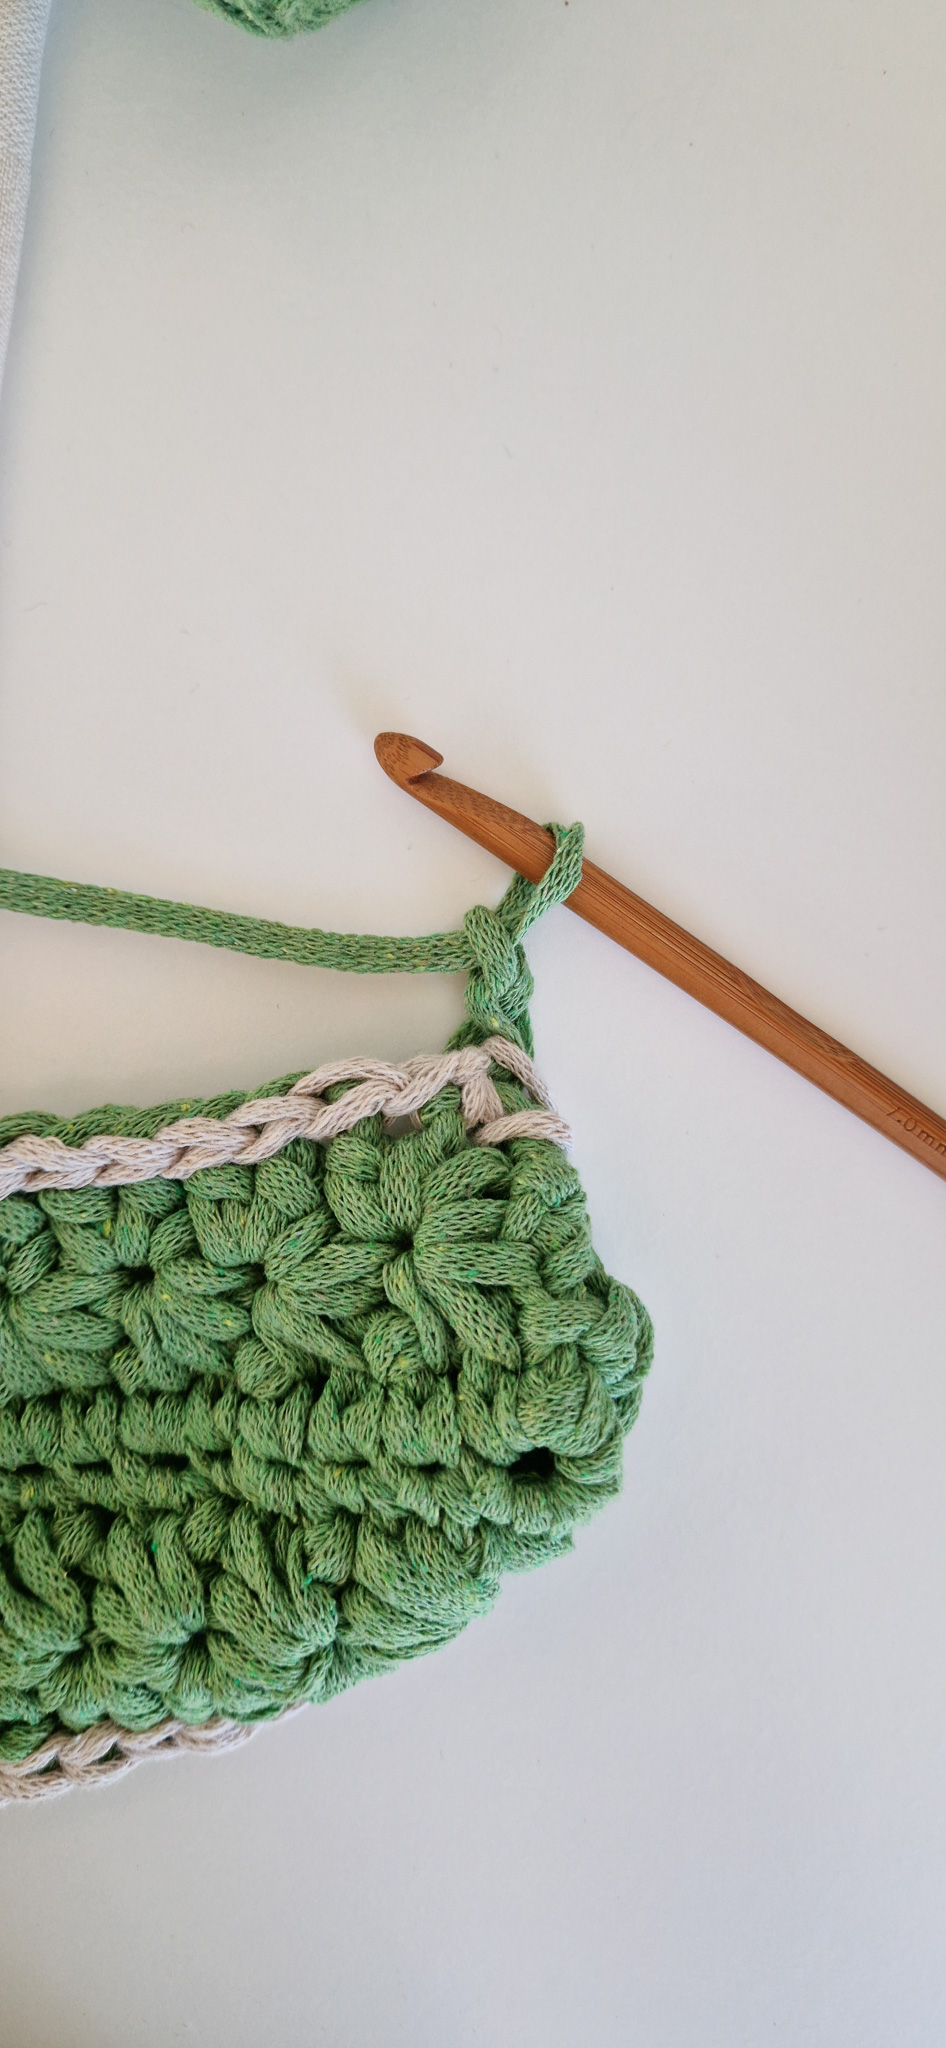
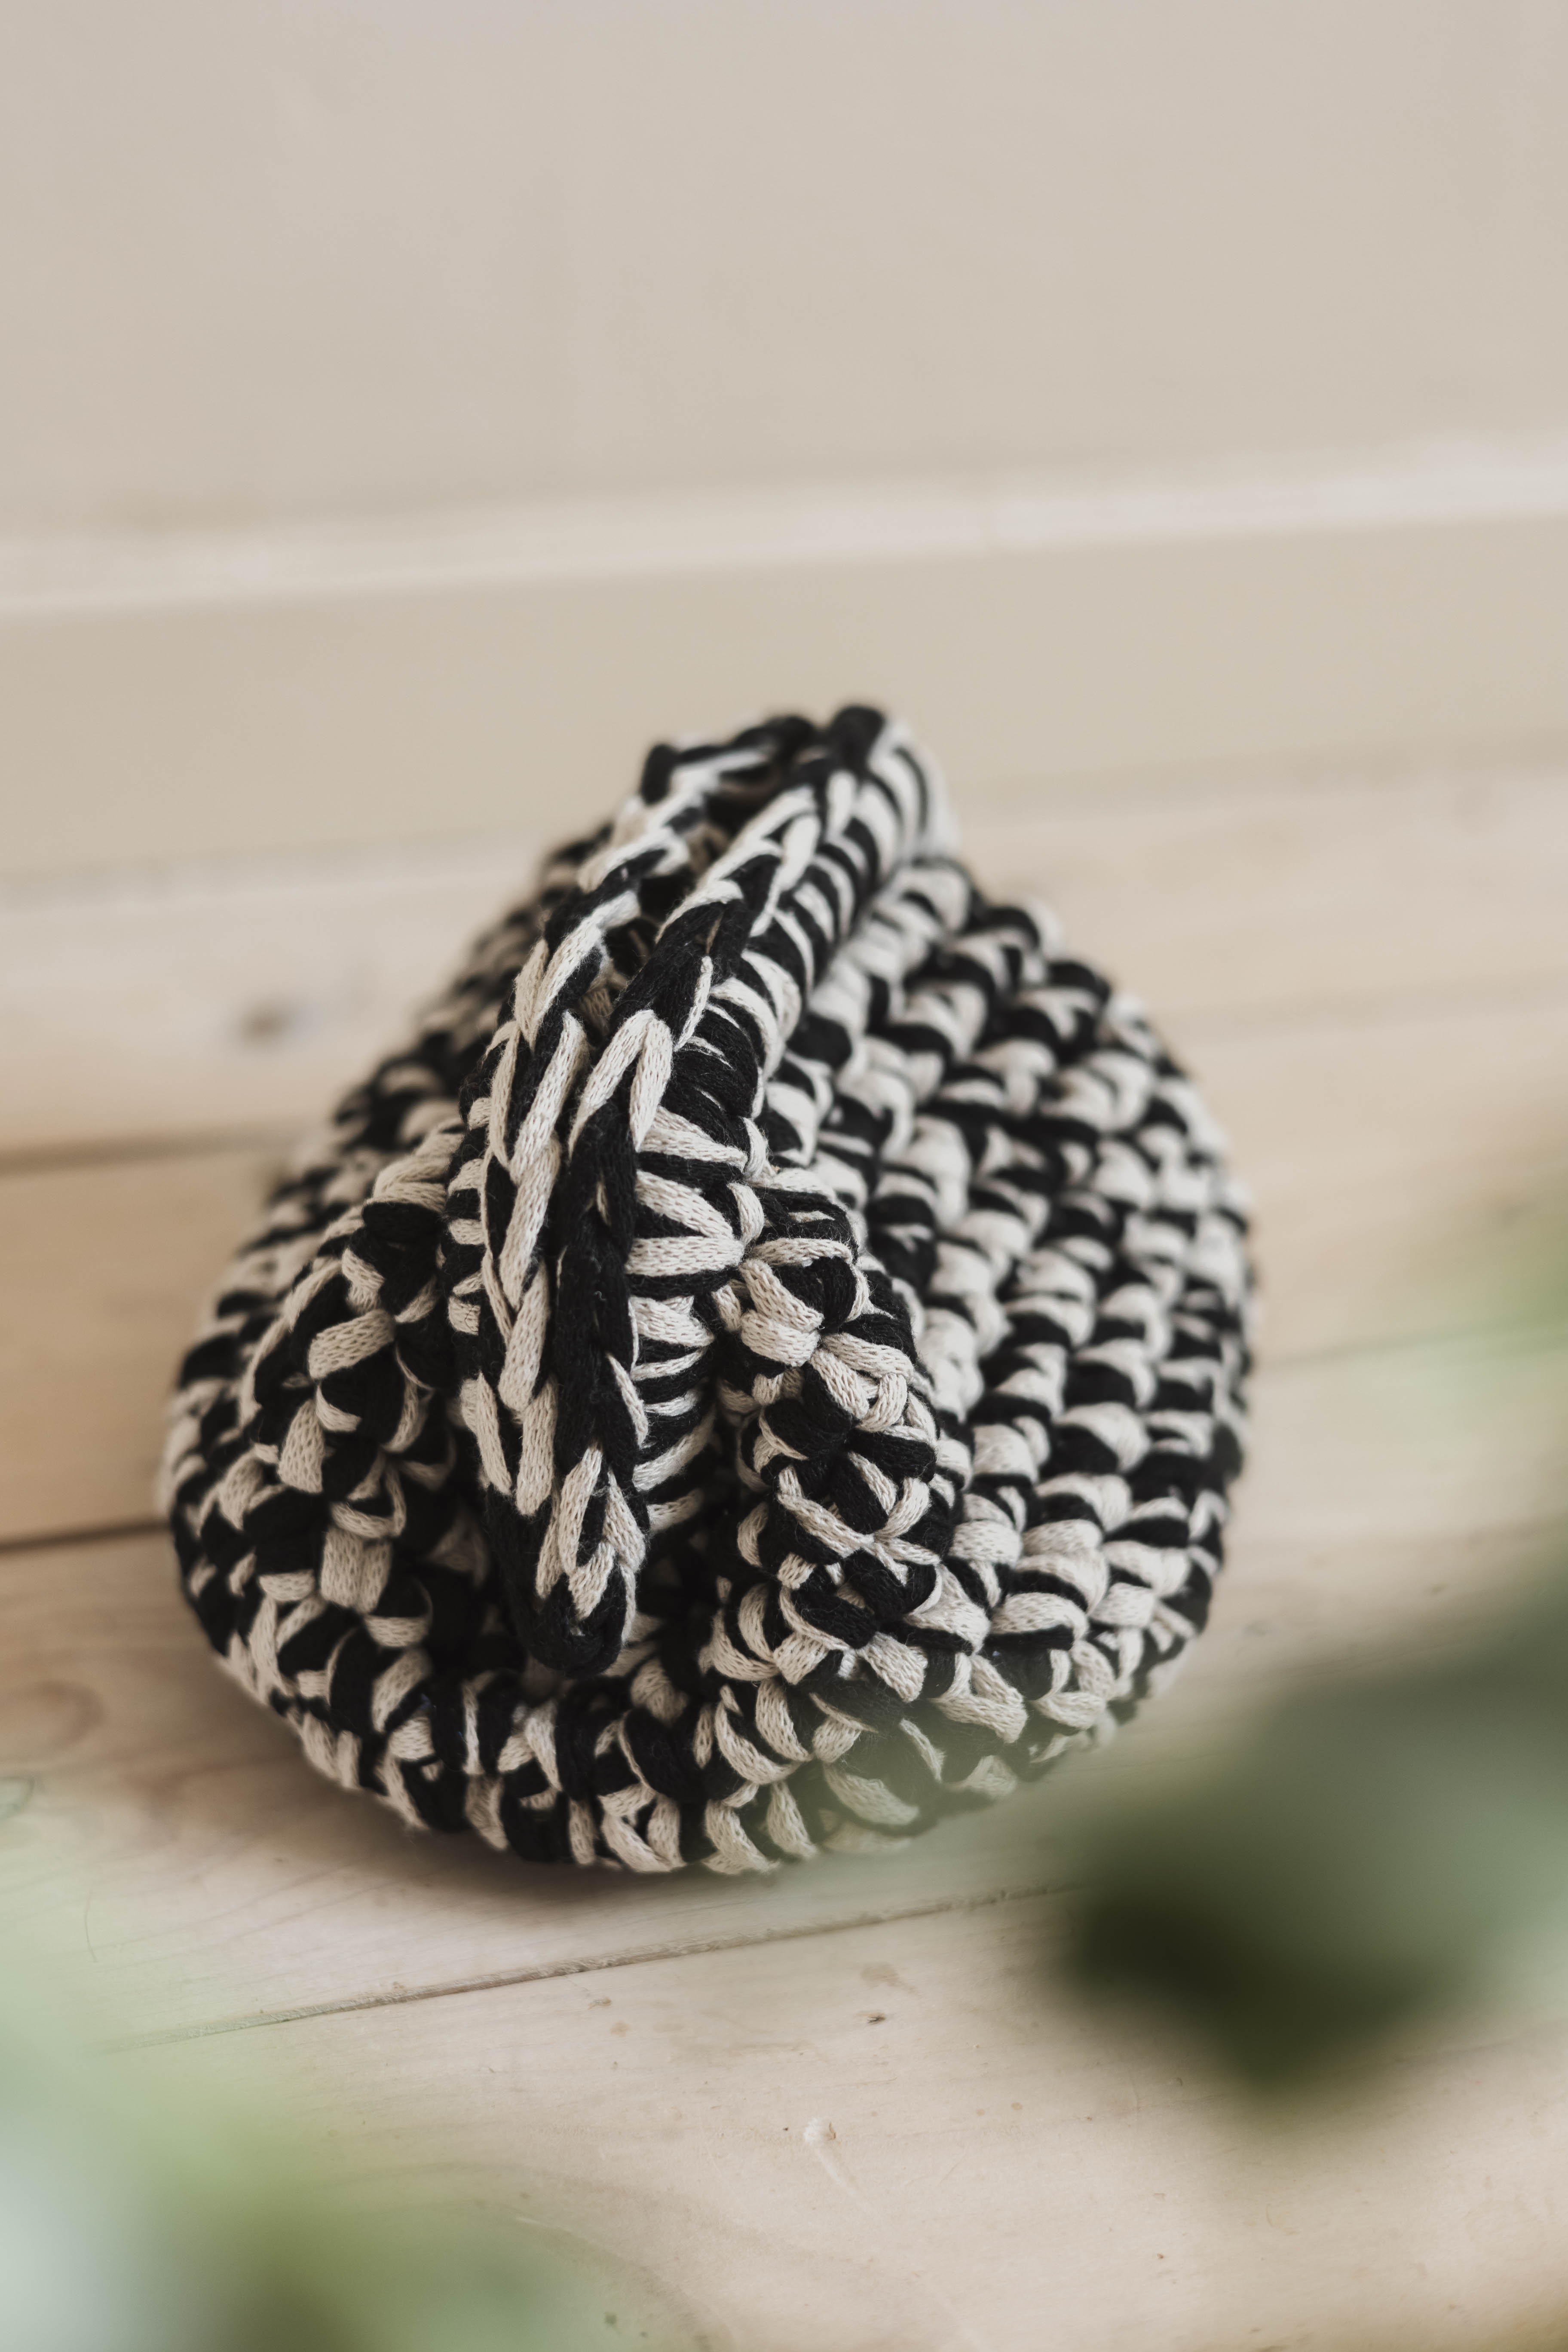
Now start over and crochet rounds 3–5 as many times as needed to reach the right size for your bag. For reference, we repeated these rounds 6 more times. Keep in mind that there will be a few extra rounds when you crochet the handle. In round 3, always crochet into the green stitches (the gray stitches should end up nicely on the outside of the bag), see image.
The stars should line up directly above each other so that the bag doesn’t get smaller or bigger as you crochet.
When you’re happy with the size, crochet rounds 3 and 4 one more time before we start the handle.
Keep in mind, if you plan to carry your laptop in the bag, we recommend crocheting the bag tightly around the laptop — this goes for the height as well. Otherwise, the bag won’t hold its shape due to the weight of the laptop.
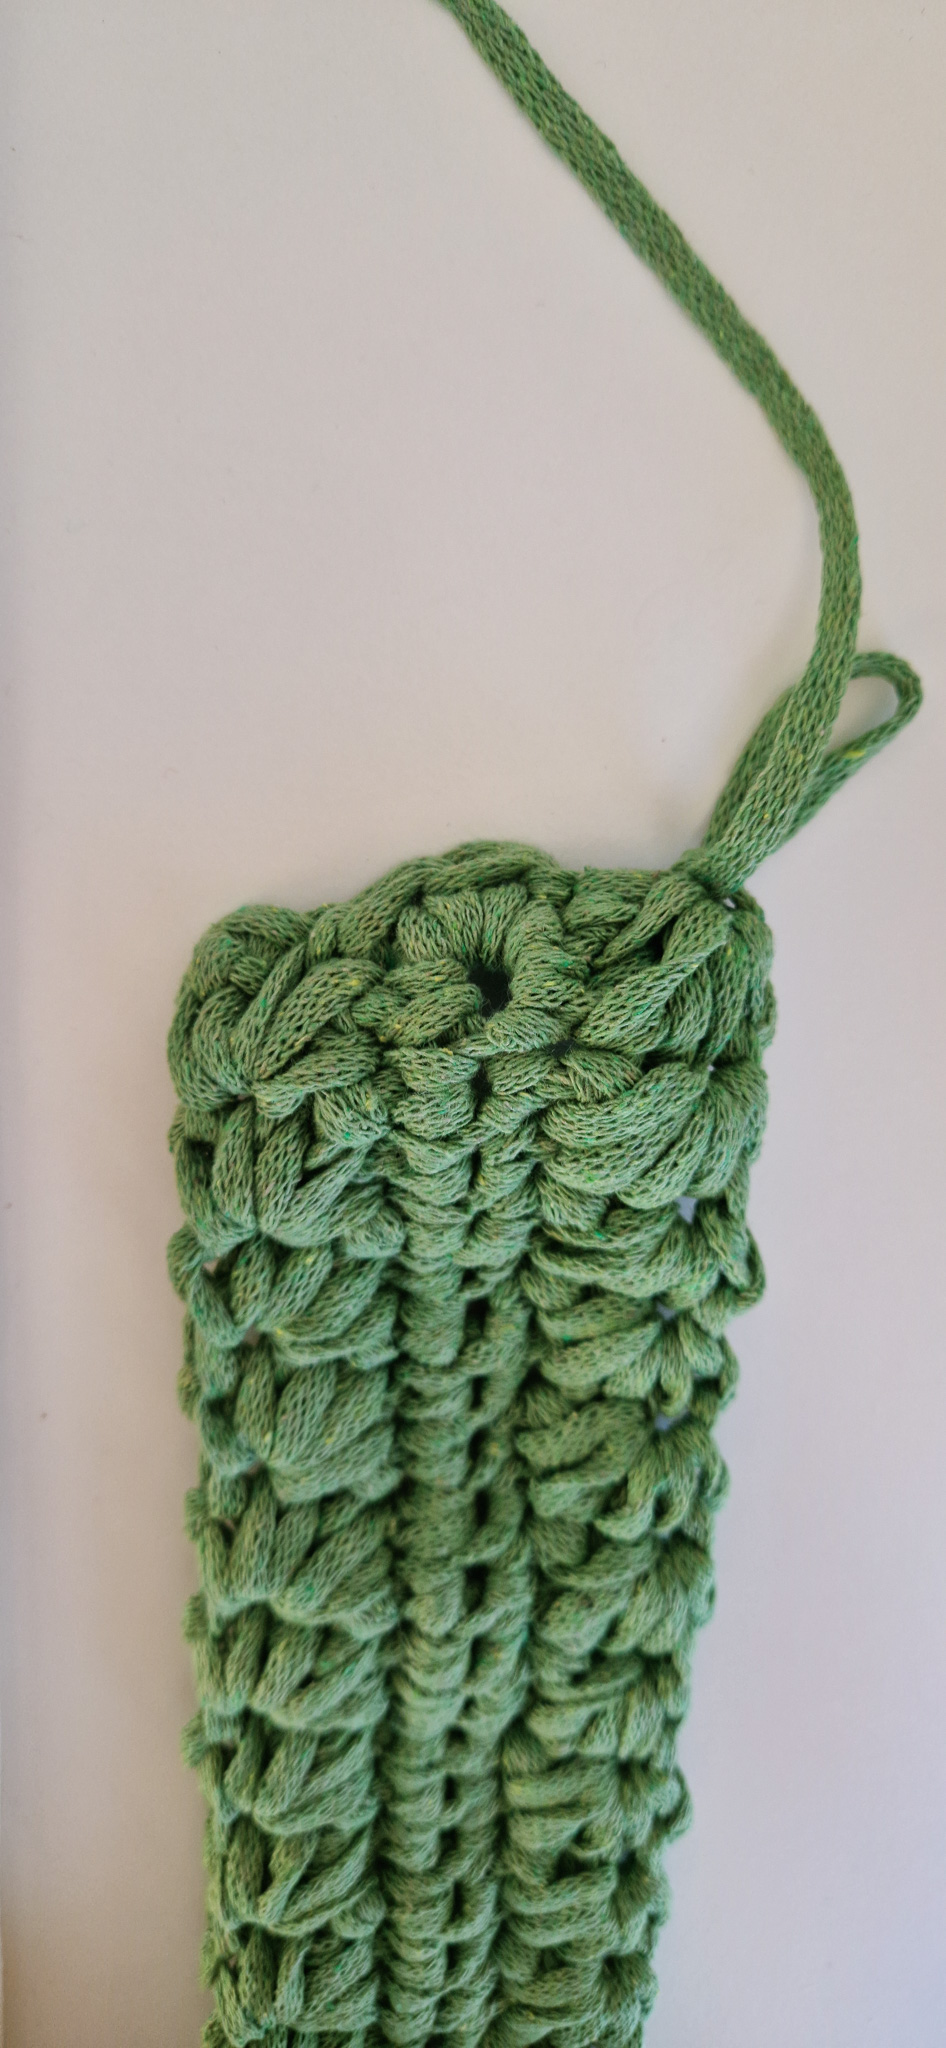
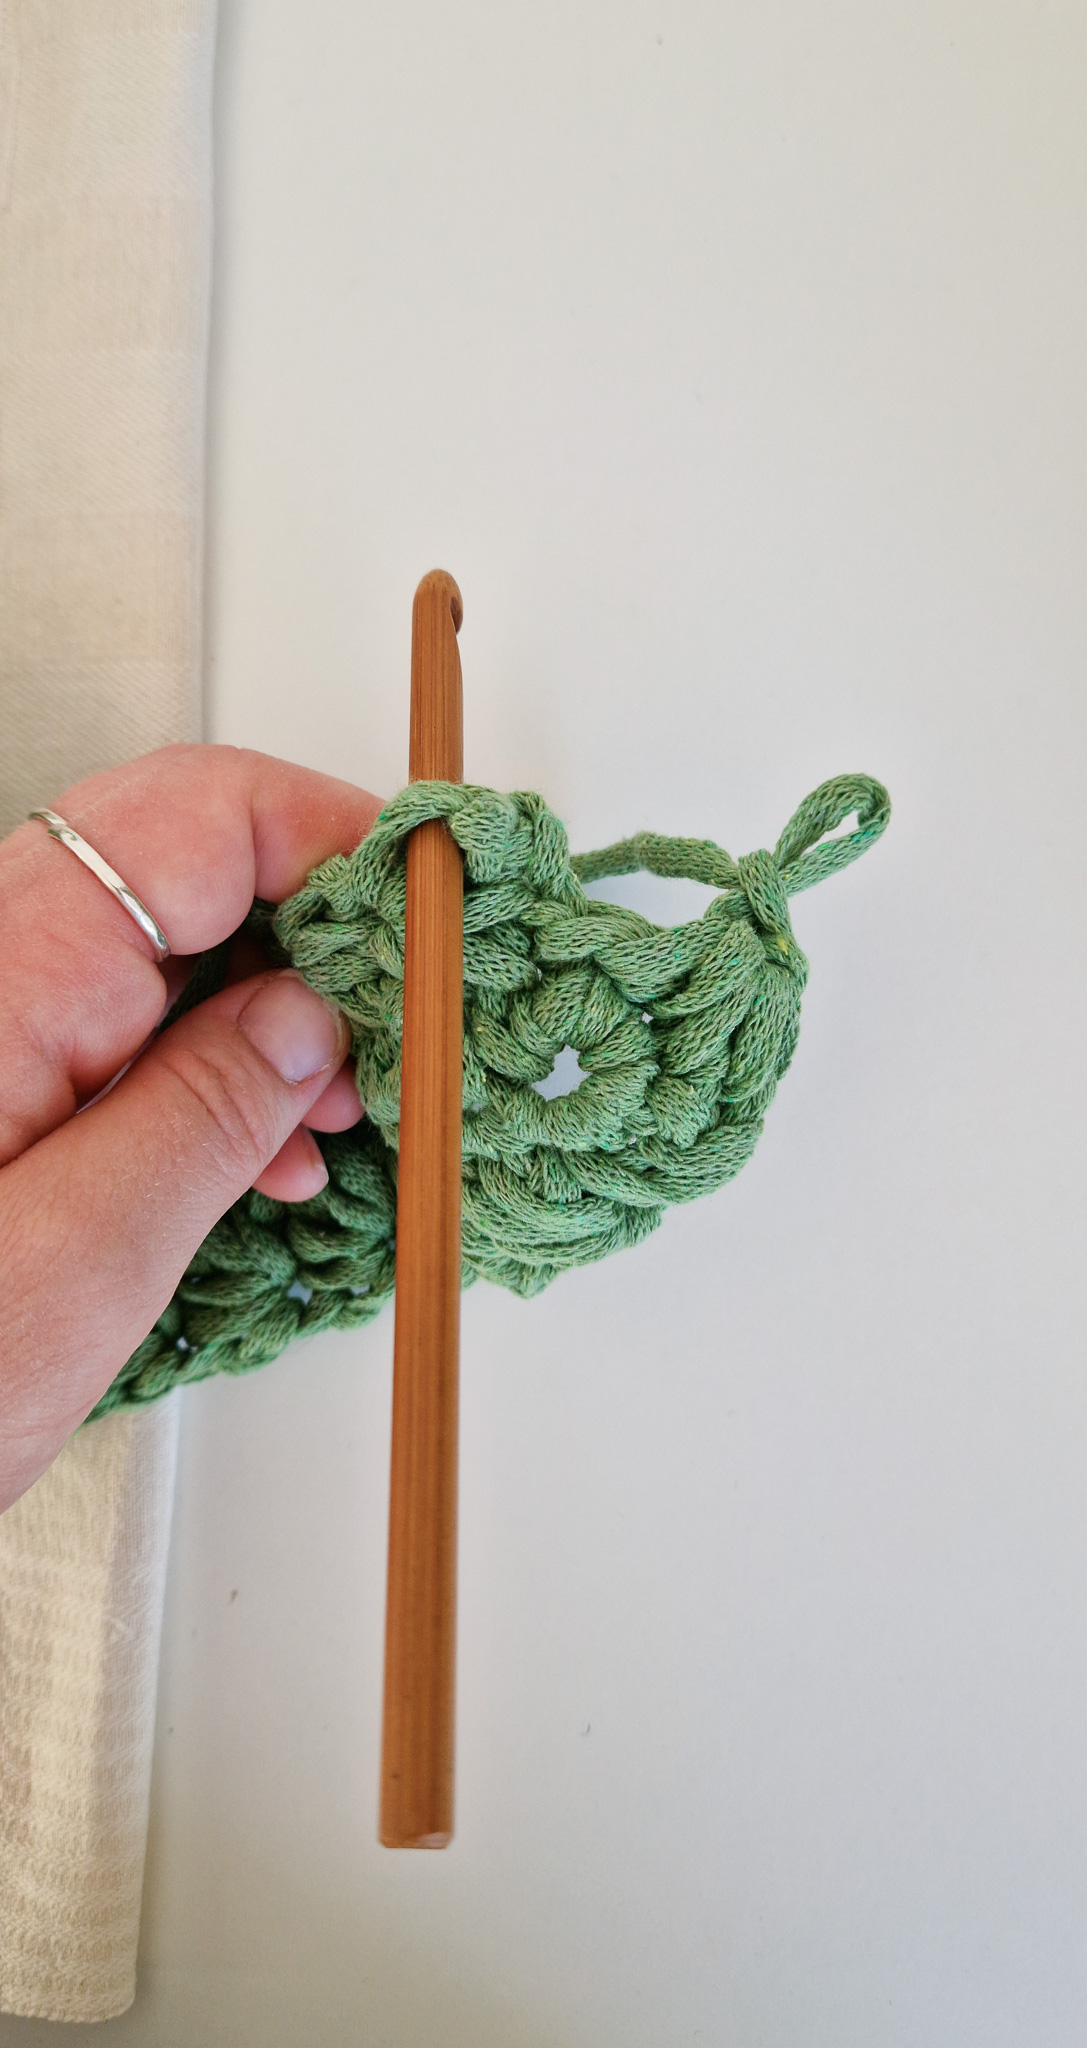
Handle
Use 4 stitch markers to mark where you want your handles and how big they should be. We will crochet the last stitch before the handle into the stitch where you placed the marker. For reference, we had 12 stitches between the markers.

Crochet single crochet stitches until you reach the stitch just before the first marker. Then, crochet as many chain stitches as you want to get the desired length for the handle. For reference, we crocheted as many chains as the number of stitches you’re skipping.
Insert your hook into the stitch after your second marker and crochet single crochets until you reach your third marker. There, crochet the same number of chain stitches as you did for your first handle.
Continue crocheting single crochets until you are back at the start. You don’t need to finish with a slip stitch anymore; you can crochet in a spiral.
Keep crocheting several rounds of single crochet—one stitch in each stitch—until the handles are as thick as you want.
You’re done! 😊
Abbreviations
This section of the pattern contains only crochet terms. If you need help along the way, please see our simplified version of this pattern.
ch = chain
sl st = slip stitch
sc = single crochet
hdc = half double crochet
blo = back loop only
flo = front loop only
(...) = number of stitches in the round
*...* = repeat the instructions between *...* as many times as stated
[...] = all stitches inside [...] are worked in the same stitch
Start crocheting with green yarn (main color).
The bag is crocheted in joined rounds, the rounds are joined with a slip stitch. The whole bag is crocheted in one piece.
Bottom of the bag:
Row 1: Ch 32.
Round 2: Start in 2nd ch; sc 30. In last ch, work 3 sc in same stitch. On other side of chain, sc 29, then 4 sc in last stitch. Finish with 1 sl st.
Sides:
Now the star pattern begins, so be patient :)
If you need help, there’s a video for how to crochet the star stitches in the simpler section.
Round 3: Ch 2. Yarn over and pull up loop in blo of first ch you made. Yarn over and pull up loop in flo of first ch you made. Yarn over and pull up loop in first stitch of work and the next 2 stitches. You now have 6 loops on hook. Yarn over and pull through all loops. Ch 1 (this hole that forms is called the “eye”).
Yarn over in the “eye”.
Yarn over in the stitch between the eye and the stitch on the work.
Yarn over in the first stitch on the work, the one you already crocheted into.
Yarn over in the next 2 stitches.
Yarn over and pull through all loops on the hook.
Chain 1.
Continue around the row.
Finish the round with 1 sl st into the top of the first star.


Round 4: Work 2 hdc in each "eye" all the way around. Finish the round with 1 sl st in the first st.

Round 5: Ch 1, sc in each st starting in the first st where you made a sl st. Finish the round with 1 sl st in the first ch, pulling through with the first color. Do not cut any yarn; let them lie inside while you continue crocheting.
Repeat rounds 3–5 as many times as needed until your bag reaches the desired size. For reference, we repeated 6 more times. Keep in mind that you’ll crochet a few extra rounds when making the handle.
In round 3, always work into the green stitches (the gray stitches should sit nicely on the outside of the bag), see picture.

The stars should line up directly above each other so that the bag neither decreases nor increases in size as you work.

When you’re happy with the size, crochet rounds 3 and 4 one more time before starting the handle. Keep in mind, if you plan to put your laptop in the bag, we recommend crocheting the bag snugly around the laptop—including the height—otherwise, the bag won’t hold its shape well.
Handle:
Use 4 stitch markers to mark where you want your handles and how big they should be. We will crochet the last stitch before the handle in the stitch where the marker is placed. For reference, we had 12 stitches between the markers.
Crochet sc until you reach the stitch just before the first marker. Chain as many stitches as you want to get the right length for your handle. For reference, we chained the same number as the stitches you’re skipping.
Insert your hook into the stitch after your second marker and crochet sc until you reach your third marker. There, chain the same number of chains as you did for your first handle. Continue crocheting sc until you’re back at the start. You don’t need to slip stitch anymore—you can crochet in a spiral.
Continue crocheting several rounds of sc, one sc in each stitch, until the handles are as thick as you want.
You’re done! :)
The rights to this pattern belong to MYO Make Your Own. The pattern or its pictures may not be copied, shared or resold either in parts or in its entirety, but you may sell items you have crocheted from this pattern. If you have questions about the pattern, contact MYO at hello@makeyourown.se.
The bag is crocheted in joined rounds, the rounds are joined with a slip stitch. The whole bag is crocheted in one piece.
Bottom of the bag:
Start crocheting with the green yarn (main color).
Row 1: Chain 32 stitches. If you’re unsure how to crochet a chain, see the video below.
Round 2: Start in the second stitch, skipping the first stitch. Crochet 30 single crochets. In your last stitch, crochet 3 single crochets in the same stitch.
Then crochet 29 single crochets and 4 single crochets in your last stitch. Finish the round with a slip stitch.
If you’re unsure how to crochet single crochet or how to work around a chain, see the videos below.
Sides:
Now the star stitch pattern begins, so have a little patience :) See the video below if you want to watch how to crochet the star stitches (Star Stitches).
Round 3: Chain 2.
Yarn over and pull up a loop in the back loop of the first chain you made.
Yarn over and pull up a loop in the front loop of the same chain.
Yarn over and pull up a loop in the first stitch of your work, then in the next two stitches.
You should now have six loops on your hook.
Yarn over and pull through all six loops.
Chain 1 (this "hole" that is created is called the "eye").
Yarn over and pull up a loop in the “eye” (the chain space).
Yarn over and pull up a loop in the stitch between the “eye” and the worked stitch.
Yarn over and pull up a loop in the first worked stitch.
Yarn over and pull up loops in the next two stitches.You now have six loops on the hook.
Yarn over and pull through all six loops. Chain 1. Continue around the row.
When you’re done, finish the round with 1 slip stitch into the top of the first star stitch.
Round 4: Work two half double crochets (hdc) in each eye (the little holes). If you're unsure how to make a half double crochet, check out the video below.
Finish the round with a slip stitch in the first stitch, but when you do, change color (if you want). That means you pull the yarn through the stitch with the new color. Do not cut the yarn.
Round 5: Chain 1, then single crochet in each stitch, starting in the first stitch where you made a slip stitch. Finish with a slip stitch in the first chain, pulling through with the first color. Do not cut any yarn; leave both colors on the inside as you continue crocheting.
Now start over and crochet rounds 3–5 as many times as needed to reach the right size for your bag. For reference, we repeated these rounds 6 more times. Keep in mind that there will be a few extra rounds when you crochet the handle. In round 3, always crochet into the green stitches (the gray stitches should end up nicely on the outside of the bag), see image.
The stars should line up directly above each other so that the bag doesn’t get smaller or bigger as you crochet.
When you’re happy with the size, crochet rounds 3 and 4 one more time before we start the handle.
Keep in mind, if you plan to carry your laptop in the bag, we recommend crocheting the bag tightly around the laptop — this goes for the height as well. Otherwise, the bag won’t hold its shape due to the weight of the laptop.
Handle
Use 4 stitch markers to mark where you want your handles and how big they should be. We will crochet the last stitch before the handle into the stitch where you placed the marker. For reference, we had 12 stitches between the markers.
Crochet single crochet stitches until you reach the stitch just before the first marker. Then, crochet as many chain stitches as you want to get the desired length for the handle. For reference, we crocheted as many chains as the number of stitches you’re skipping.
Insert your hook into the stitch after your second marker and crochet single crochets until you reach your third marker. There, crochet the same number of chain stitches as you did for your first handle.
Continue crocheting single crochets until you are back at the start. You don’t need to finish with a slip stitch anymore; you can crochet in a spiral.
Keep crocheting several rounds of single crochet—one stitch in each stitch—until the handles are as thick as you want.
You’re done! 😊
Abbreviations
This section of the pattern contains only crochet terms. If you need help along the way, please see our simplified version of this pattern.
ch = chain
sl st = slip stitch
sc = single crochet
hdc = half double crochet
blo = back loop only
flo = front loop only
(...) = number of stitches in the round
*...* = repeat the instructions between *...* as many times as stated
[...] = all stitches inside [...] are worked in the same stitch
Start crocheting with green yarn (main color).
The bag is crocheted in joined rounds, the rounds are joined with a slip stitch. The whole bag is crocheted in one piece.
Bottom of the bag:
Row 1: Ch 32.
Round 2: Start in 2nd ch; sc 30. In last ch, work 3 sc in same stitch. On other side of chain, sc 29, then 4 sc in last stitch. Finish with 1 sl st.
Sides:
Now the star pattern begins, so be patient :)
If you need help, there’s a video for how to crochet the star stitches in the simpler section.
Round 3: Ch 2. Yarn over and pull up loop in blo of first ch you made. Yarn over and pull up loop in flo of first ch you made. Yarn over and pull up loop in first stitch of work and the next 2 stitches. You now have 6 loops on hook. Yarn over and pull through all loops. Ch 1 (this hole that forms is called the “eye”).
Yarn over in the “eye”.
Yarn over in the stitch between the eye and the stitch on the work.
Yarn over in the first stitch on the work, the one you already crocheted into.
Yarn over in the next 2 stitches.
Yarn over and pull through all loops on the hook.
Chain 1.
Continue around the row.
Finish the round with 1 sl st into the top of the first star.
Round 4: Work 2 hdc in each "eye" all the way around. Finish the round with 1 sl st in the first st.
Round 5: Ch 1, sc in each st starting in the first st where you made a sl st. Finish the round with 1 sl st in the first ch, pulling through with the first color. Do not cut any yarn; let them lie inside while you continue crocheting.
Repeat rounds 3–5 as many times as needed until your bag reaches the desired size. For reference, we repeated 6 more times. Keep in mind that you’ll crochet a few extra rounds when making the handle.
In round 3, always work into the green stitches (the gray stitches should sit nicely on the outside of the bag), see picture.
The stars should line up directly above each other so that the bag neither decreases nor increases in size as you work.
When you’re happy with the size, crochet rounds 3 and 4 one more time before starting the handle. Keep in mind, if you plan to put your laptop in the bag, we recommend crocheting the bag snugly around the laptop—including the height—otherwise, the bag won’t hold its shape well.
Handle:
Use 4 stitch markers to mark where you want your handles and how big they should be. We will crochet the last stitch before the handle in the stitch where the marker is placed. For reference, we had 12 stitches between the markers.
Crochet sc until you reach the stitch just before the first marker. Chain as many stitches as you want to get the right length for your handle. For reference, we chained the same number as the stitches you’re skipping.
Insert your hook into the stitch after your second marker and crochet sc until you reach your third marker. There, chain the same number of chains as you did for your first handle. Continue crocheting sc until you’re back at the start. You don’t need to slip stitch anymore—you can crochet in a spiral.
Continue crocheting several rounds of sc, one sc in each stitch, until the handles are as thick as you want.
You’re done! :)
The rights to this pattern belong to MYO Make Your Own. The pattern or its pictures may not be copied, shared or resold either in parts or in its entirety, but you may sell items you have crocheted from this pattern. If you have questions about the pattern, contact MYO at hello@makeyourown.se.

Share your creations with us
Thank you!
Your comment was sent!