Du kommer att förlora åtkomst till våra instruktioner och medlemsrabatter. Vi hoppas att du vill stanna kvar, men förstår om det inte känns rätt just nu - du är alltid välkommen tillbaka! :)

Buy your material here

You can buy the materials and needles we use at makeyourown.semakeyourown.se

Go to shop
Copyright © 2022 Make Your Own
Please verify your email address by clicking on the link sent to youremail@gmail.com or resubmit.
patterns

Crochet cardigan “Maj”

Crochet a classic cardigan in granny squares.

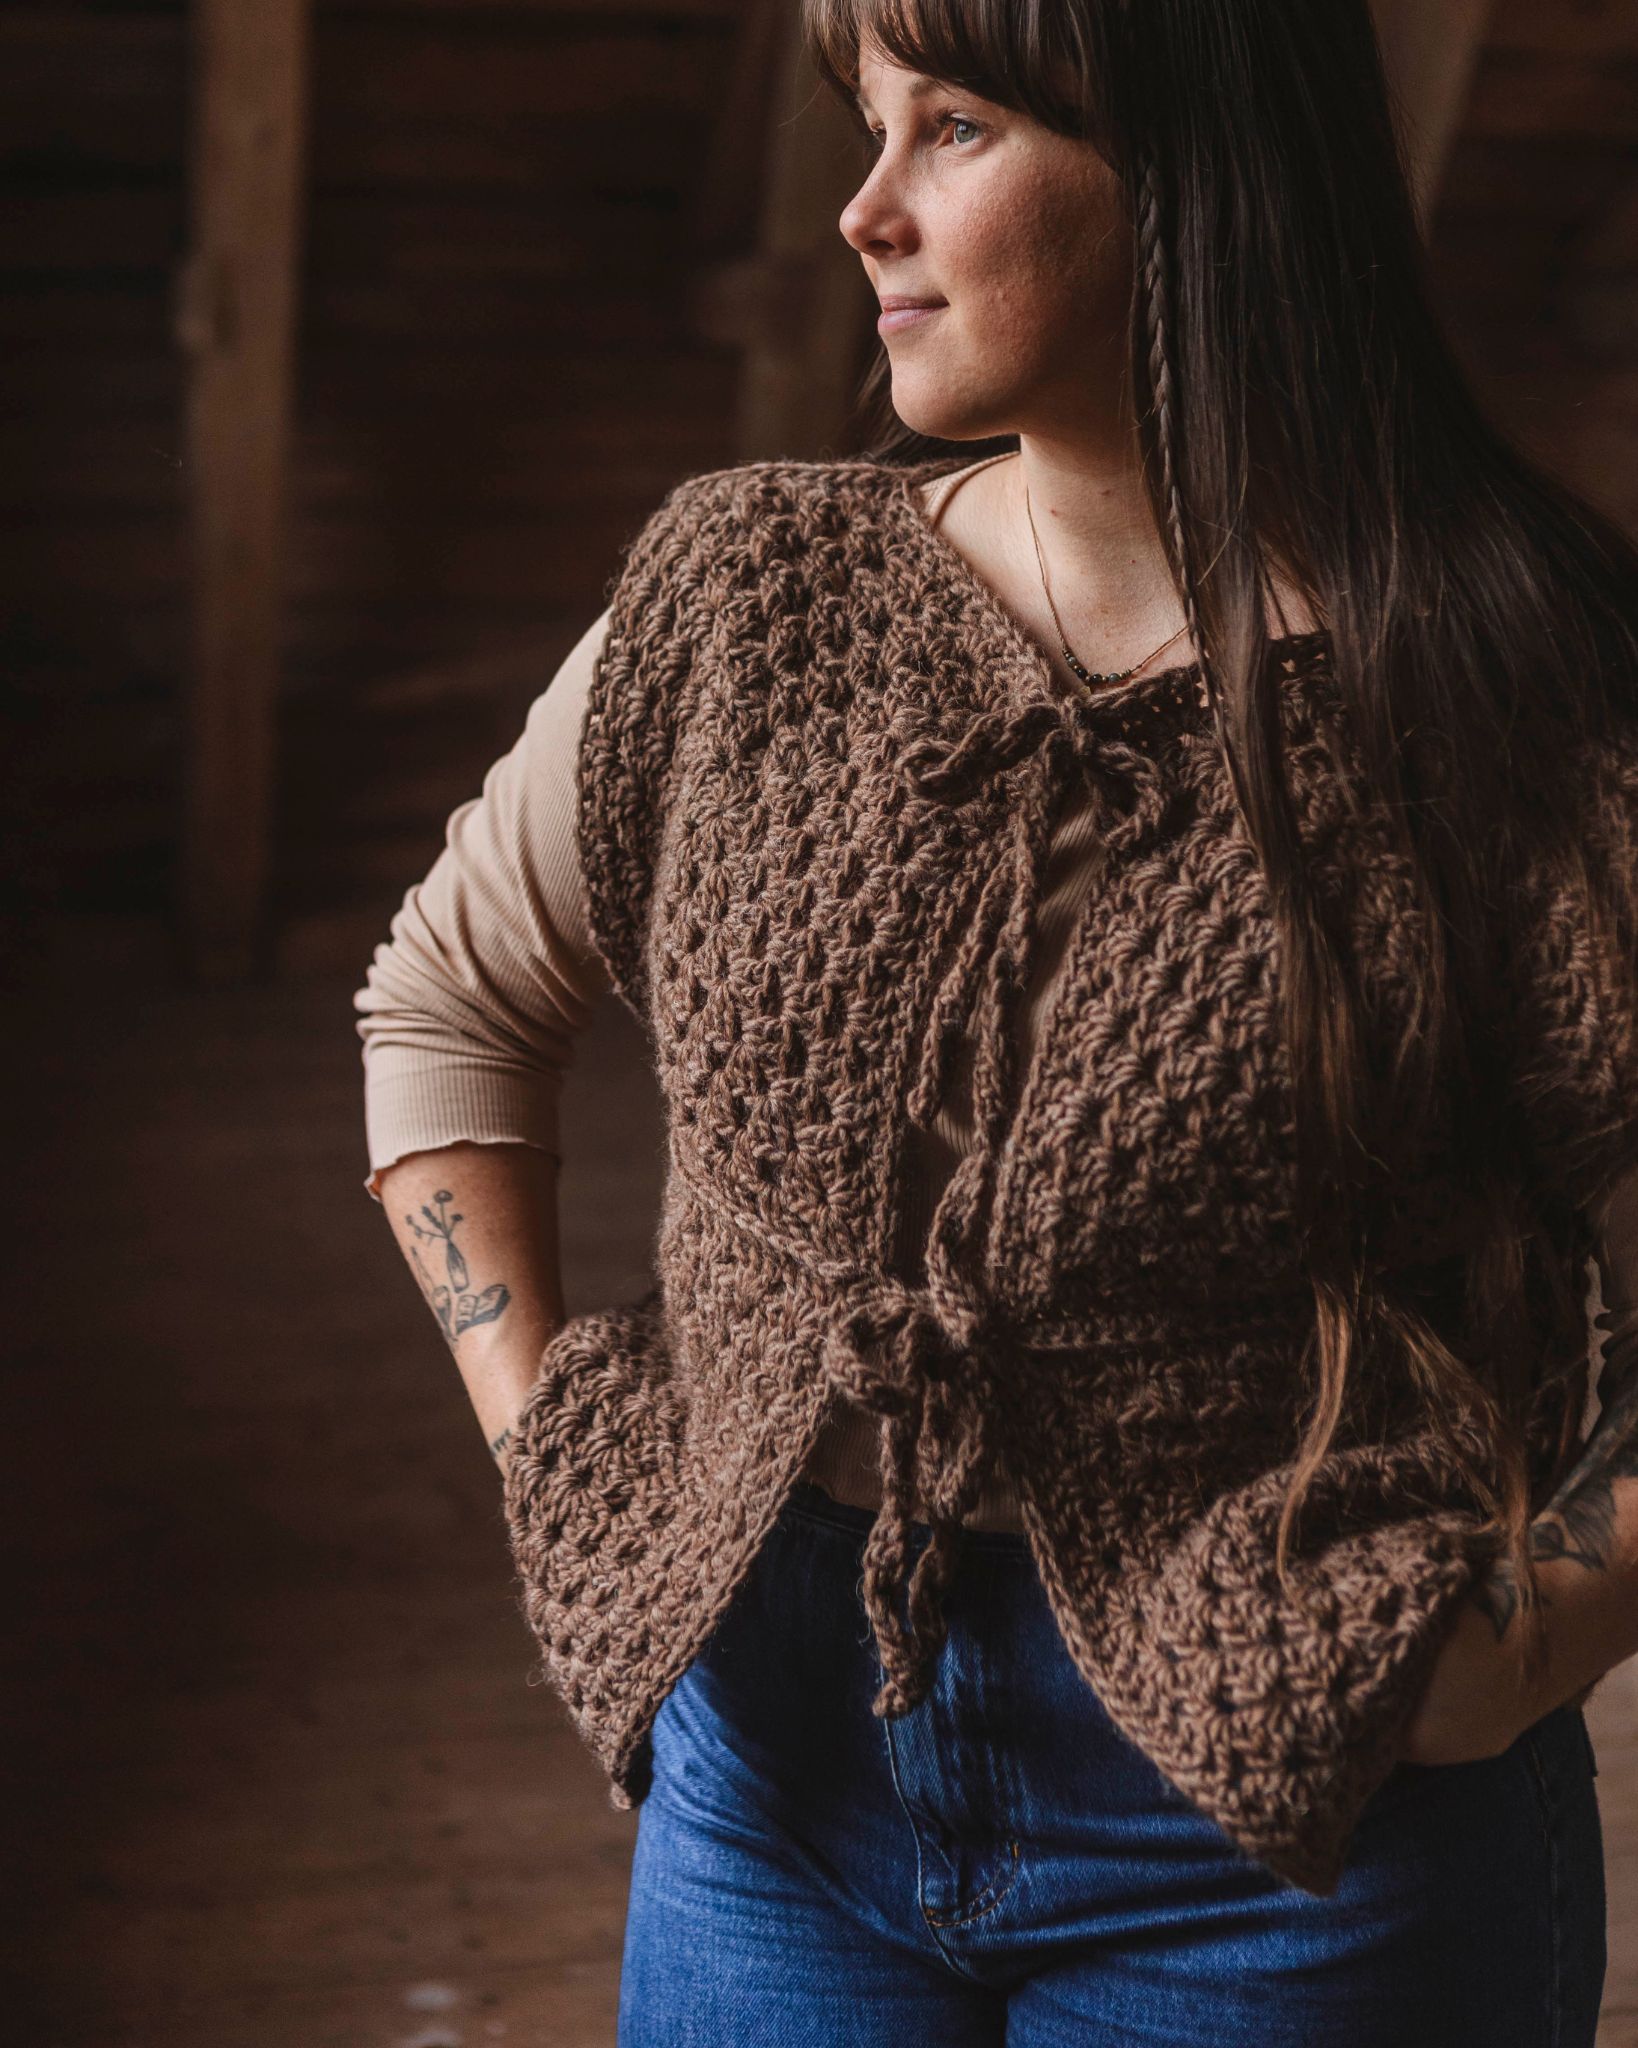
This timeless cardigan is made from granny squares that are then assembled. This allows you to choose the colors you want for your cardigan and make it completely unique. It is warm and cozy, perfect for autumn weather, winter lounging, spring mornings, or summer evenings. You’ll need MYO Basic Wool and a crochet hook size 5-7 mm (most commonly 6 mm). This is a so-called "made-to-measure" pattern, meaning you measure yourself to determine the size of the granny squares, and for this, you’ll need a measuring tape.

Yarn Consumption: Approximately 900 g in total for size S. Add about 100 g for each size up. Note: If you crochet the cardigan longer, you will need more skeins. For size S, you’ll need around 5 skeins of the main color and 4 skeins for the middle colors. The total yarn usage depends on how tightly you crochet, the length of the cardigan, how many colors you choose, and how many rounds you crochet around the cardigan.

Note that we in this instruction uses videos from out technique library. If you are looking for a full instruction video for a crocheted vest, we suggest the cardigan Linnea.

Crochet cardigan “Maj”

This is what you need:

MYO Basic wool | 100g

Basic wool - Wool yarn

Köp produkt

Crochet hook 6mm

Bamboo Crochet Hook

Köp produkt

Here's how to do it

The sweater is crocheted using granny squares. We make five different parts for the cardigan: one back piece, two front pieces, and two pieces for the sleeves. Then, the back piece and front pieces are assembled. If you find the sweater too short or too long, you can add or remove 9 squares. After that, the sleeve pieces are assembled, and finally, the sweater is crocheted together. Once the assembly is complete, we crochet rounds around the edges of the sweater for a nice finish. The most challenging part of the cardigan is finding the right size, but once you figure that out, it’s all about crocheting away! Hope you enjoy it :) /Lizette

Lizette By

Sign up to see the full instruction

This instruction is exclusive content for those who have an active membership with MYO. By being a member, you get access to all our 100+ instructions, technology tips, etc., but also membership offers and priority to new product launches. At the same time, you help us develop the instructions page further and release new instructions every week.

Becoming a member is easy and works like a subscription (price: 80 kr/mo), if you want to test our instructions first, we have a number of free instructions available for everyone.

Welcome to our wonderful team of creators! /The Girls from MYO

Steg 1

Weight (reference for a granny square with a 6 mm hook, measuring approximately 11 x 11 cm with 3 rounds):

A single square weighs just under 10 g. If you crochet 3 rounds, the two middle rounds weigh about the same as the outer round—approximately 5 g each. Using this reference, 81 squares would weigh around 800 g. To join the squares and crochet around the cardigan, you’ll need at least 100 g more.

Measurements:
This is a "made-to-measure" pattern, meaning you measure yourself to determine the size of your granny squares.

  1. Measure from shoulder point to shoulder point. For reference, measure across your chest in front of you between the shoulder points using a measuring tape.
  2. Divide the measurement by 3. This is approximately the size of each granny square. You’ll need three squares to span shoulder point to shoulder point. The width of the back piece is 5 squares, so the remaining two squares will drape over the shoulders. For reference, I measured about 35–36 cm between my shoulder points, and my squares measured 11 cm after blocking (size S). Note that blocking can make the squares slightly larger.
  3. Crochet a test granny square to determine how many rounds you need to achieve your measurement. If you plan to block your squares, for best results, block a test square and measure it.

Note: Blocking will make your squares larger than when freshly crocheted. Additionally, the cardigan will stretch slightly with wear!

Size Guidelines:
The sizes provided are only indications because crochet tension varies. Always crochet a test square and measure against your shoulder width. You can make your granny squares larger by adding rounds of single crochet. For smaller or tighter squares, try a 5 mm hook. For a looser, more airy sweater, try a 7 mm hook. Just remember to measure as you go!

  • XS: 3 rounds with a 5 mm hook, approximately 10 cm per square after blocking.
  • S: 3 rounds with a 6 mm hook, approximately 11 cm per square after blocking. Reference: The length of 5 joined squares is approximately 54 cm (as shown in the photo).
  • M: 3 rounds with a 7 mm hook, or use a 6 mm hook with a final round of single crochet. Approximately 12 cm per square after blocking.
  • L: 4 rounds with a 6 mm hook, approximately 13 cm per square after blocking. If too large, crochet 3 rounds plus 1–2 rounds of single crochet.
  • XL: 4 rounds with a 6 mm hook, with extra single crochet rounds as needed.

If you plan to block your squares before assembling, test by crocheting one square and blocking it to get a more accurate size. Instructions for blocking squares can be found in Step 8.

Number of Squares:

  • For the cardigan length shown in the photo, you’ll need 81 squares.
  • For a shorter version, you’ll need 72 squares.
  • For a longer version, you’ll need 90 squares.
81 squarea.
If you want a shorter cardigan you need 72 squares.
If you want a longer cardigan, add 9 squares (90 squares in total).
Steg 2

GRANNY SQUARES

We’ll start crocheting the granny squares. Throughout the pattern, I’ll be referring to 81 squares as a base.

  • Back Piece: 25 squares
  • Front Pieces: 12 squares x 2
  • Sleeves: 16 squares x 2

You can choose whether to crochet the squares for the front and back pieces first and assemble these parts, or crochet all the squares at once.The advantage of assembling the back and front pieces first, before crocheting additional squares, is that you can check the length of the cardigan before continuing.

If you’re unsure how to make a granny square, you can check the video below.

Round 1: Crochet a magic ring. In the ring, start with 3 chain stitches, then crochet 2 double crochets. This forms the first double crochet group. Next, crochet 2 chain stitches. Repeat this sequence (3 double crochets + 2 chain stitches) a total of 4 times. Finish with a slip stitch in the third chain from the start.

Round 2: Change color. Begin in a chain space. In each chain space, crochet 3 double crochets, 2 chain stitches, and 3 more double crochets to form the corners. Finish with a slip stitch in the third chain from the start.

Round 3: Change color. Start in a corner (a space where you crocheted 2 chain stitches). Crochet 3 double crochets, 2 chain stitches, and 3 double crochets. In the next space between the corners, crochet 3 double crochets. Work the next corner in the same way as the first and continue around. Corners are crocheted with 3 double crochets, 2 chain stitches, and 3 double crochets in the same space. Between the corners, crochet 3 double crochets with no chain stitches in between. Finish with a slip stitch in the third chain from the start.

Round 4: Crochet the same way as Round 3. All corners are worked with 3 double crochets, 2 chain stitches, and 3 double crochets in the same space, and between the corners, crochet 3 double crochets. Finish the same way as before.

Fasten off all ends and cut the yarn.

If you need to add rounds with single crochet, work 1 single crochet in each stitch, and in the corners, crochet 4 single crochets.

Tips:
If you want your squares to be extra square and have sharp corners, you can block the finished squares. This step is optional but provides a neater final shape. For a simple blocking method, refer to the instructions at the end of Step 8.

Steg 3

Assembly of Pieces

Now we will assemble the parts by attaching them piece by piece. Start by joining horizontally, then vertically, so that all the squares are securely connected.

Place the wrong sides together, with the right side facing out, and use slip stitches to join the closest loops of each square. If you’re unsure how to do this, refer to the video below.

You can choose to assemble the front pieces and back piece first and join them before moving on. This allows you to double-check that the size isn’t too small and that the sweater isn’t too short.

If you find the front and back pieces too small, you can add a few rounds of single crochet around the entire piece to make it larger.

To do this, crochet single crochets, one in each stitch, and in each corner stitch, crochet three single crochets.

The parts of the cardigan
Steg 4

Assembly of the Sweater

Now we will assemble the sections of the sweater. Start with the back piece and the front pieces. I crochet so that the seam is on the inside, which means you will crochet with the right sides facing each other. Use the same technique as you used to join the squares.

  1. Start by attaching the front pieces to the back piece, aligning the edges.
  2. There will be a gap where there is no front piece; in this area, crochet single crochets before continuing to the next front and back piece.
This is how front pieves and the back piece are assembled.
Steg 5

2. Attach the Sleeve Pieces to the Cardigan
Lay the sleeve pieces according to the image below. Double-check once more to ensure the pieces are placed correctly, as it's easy to make a mistake.

Crochet them together along the dotted lines.

Note: Be sure to check the image to make sure that one square remains unattached, as it should hang loosely for now.

Attach the sleeves.
Steg 6

3. Fold the SweaterFold the sweater along the dashed lines as shown below, still with the inside facing out. Make sure the back side is facing up.

Fold the cardigan like this.
This is how it looks when folded.
Have the backside facing up.

4. Crochet the Sleeves and Side Together
Crochet the sleeves and sides together according to the image. You will fold and join the row of granny squares that are not yet attached to the cardigan with the other edge. The dotted lines indicate a folded square.

This will leave a small gap in one side of the underarm. When you start crocheting down the side after joining the sleeve, make sure you don’t crochet through both parts of the half-square.

Fold up the square and secure it.
When the sleeve is folded, continue crocheting down the side.When crocheting the first part of the folded square, be careful not to crochet through both layers!

5. Crochet the Small Holes Under the Armpits. Crochet together the small holes left under the armpits from the previous step. Simply crochet through the remaining gaps to close them up, ensuring a smooth seam and a snug fit under the arms.

Now the entire cardigan should be crocheted together! Try on the cardigan. If the sleeves are too short, you can extend them in the next step.

Steg 7

Crochet Around the Cardigan

If you'd like to crochet ribbing, check out our slipover "Rut" and the instructions for crocheting ribbing.

We will begin by crocheting around the sleeves. Start with a round of single crochet around the sleeves. If there are any "gaps" where you've joined the squares, you can choose to crochet double crochets (dc) in those gaps to smooth things out.

If the sleeves are too short, crochet a few rounds of double crochet until you’re happy with the length. Finish off with a round of single crochet.

If you're unsure how to crochet single crochets, refer to the video below.

In these "gaps," you can crochet double crochets instead of single crochets to smooth things out and create a more even edge.

When you’ve crocheted around the sleeves, continue by crocheting around the edge of the cardigan.
I’ve chosen to crochet two rounds: one round of double crochet and one finishing round of single crochet. You can certainly choose to crochet more rounds of double crochet, but finishing with a round of single crochet gives it a neat edge.

It’s important to note that at the back, where there is a corner, skip one stitch in the corner. When you reach the corners at the front of the cardigan, crochet three stitches into the corner stitch to maintain the shape.

I hope you love your new cardigan! :)

Crochet three double crochets in the corner.
When you reach the back of the cardigan, skip one stitch in the corner to ensure the shape remains smooth and neat.
Steg 8

BLOCKING

There are many ways to block your pieces. Here's a simple method to do it. You’ll need pins and a surface to attach the pins to. We sell blocking mats at MYO, but a yoga mat or a firmer cushion will work as well.

  1. Soak the squares in water. You can choose to wash them with wool detergent if you have it. Let them soak for a while so that the inner fibers get wet. The fabric may seem soaked just minutes after placing it in water, but the inner fibers take a little longer to soak through.
  2. Press out as much water as possible. You can roll the squares in a towel and press as much as you can. Avoid twisting the squares, as it can distort their shape.
  3. Stretch and shape the squares to the desired size.
  4. Pin them into place. If you’re blocking squares, be sure to pin the corners to get sharp edges and straight sides. If you’re blocking the whole cardigan or parts of it, make sure to pin the corners and along the edges to avoid curved shapes along the edges.
  5. Let them dry completely before removing the pins.
  6. Done!
Steg 9
Steg 10
Steg 1

Weight (reference for a granny square with a 6 mm hook, measuring approximately 11 x 11 cm with 3 rounds):

A single square weighs just under 10 g. If you crochet 3 rounds, the two middle rounds weigh about the same as the outer round—approximately 5 g each. Using this reference, 81 squares would weigh around 800 g. To join the squares and crochet around the cardigan, you’ll need at least 100 g more.

Measurements:
This is a "made-to-measure" pattern, meaning you measure yourself to determine the size of your granny squares.

  1. Measure from shoulder point to shoulder point. For reference, measure across your chest in front of you between the shoulder points using a measuring tape.
  2. Divide the measurement by 3. This is approximately the size of each granny square. You’ll need three squares to span shoulder point to shoulder point. The width of the back piece is 5 squares, so the remaining two squares will drape over the shoulders. For reference, I measured about 35–36 cm between my shoulder points, and my squares measured 11 cm after blocking (size S). Note that blocking can make the squares slightly larger.
  3. Crochet a test granny square to determine how many rounds you need to achieve your measurement. If you plan to block your squares, for best results, block a test square and measure it.

Note: Blocking will make your squares larger than when freshly crocheted. Additionally, the cardigan will stretch slightly with wear!

Size Guidelines:
The sizes provided are only indications because crochet tension varies. Always crochet a test square and measure against your shoulder width. You can make your granny squares larger by adding rounds of single crochet. For smaller or tighter squares, try a 5 mm hook. For a looser, more airy sweater, try a 7 mm hook. Just remember to measure as you go!

  • XS: 3 rounds with a 5 mm hook, approximately 10 cm per square after blocking.
  • S: 3 rounds with a 6 mm hook, approximately 11 cm per square after blocking. Reference: The length of 5 joined squares is approximately 54 cm (as shown in the photo).
  • M: 3 rounds with a 7 mm hook, or use a 6 mm hook with a final round of single crochet. Approximately 12 cm per square after blocking.
  • L: 4 rounds with a 6 mm hook, approximately 13 cm per square after blocking. If too large, crochet 3 rounds plus 1–2 rounds of single crochet.
  • XL: 4 rounds with a 6 mm hook, with extra single crochet rounds as needed.

If you plan to block your squares before assembling, test by crocheting one square and blocking it to get a more accurate size. Instructions for blocking squares can be found in Step 8.

Number of Squares:

  • For the cardigan length shown in the photo, you’ll need 81 squares.
  • For a shorter version, you’ll need 72 squares.
  • For a longer version, you’ll need 90 squares.
81 squarea.
If you want a shorter cardigan you need 72 squares.
If you want a longer cardigan, add 9 squares (90 squares in total).
Steg 2

GRANNY SQUARES

We’ll start crocheting the granny squares. Throughout the pattern, I’ll be referring to 81 squares as a base.

  • Back Piece: 25 squares
  • Front Pieces: 12 squares x 2
  • Sleeves: 16 squares x 2

You can choose whether to crochet the squares for the front and back pieces first and assemble these parts, or crochet all the squares at once.The advantage of assembling the back and front pieces first, before crocheting additional squares, is that you can check the length of the cardigan before continuing.

If you’re unsure how to make a granny square, you can check the video below.

Round 1: Crochet a magic ring. In the ring, start with 3 chain stitches, then crochet 2 double crochets. This forms the first double crochet group. Next, crochet 2 chain stitches. Repeat this sequence (3 double crochets + 2 chain stitches) a total of 4 times. Finish with a slip stitch in the third chain from the start.

Round 2: Change color. Begin in a chain space. In each chain space, crochet 3 double crochets, 2 chain stitches, and 3 more double crochets to form the corners. Finish with a slip stitch in the third chain from the start.

Round 3: Change color. Start in a corner (a space where you crocheted 2 chain stitches). Crochet 3 double crochets, 2 chain stitches, and 3 double crochets. In the next space between the corners, crochet 3 double crochets. Work the next corner in the same way as the first and continue around. Corners are crocheted with 3 double crochets, 2 chain stitches, and 3 double crochets in the same space. Between the corners, crochet 3 double crochets with no chain stitches in between. Finish with a slip stitch in the third chain from the start.

Round 4: Crochet the same way as Round 3. All corners are worked with 3 double crochets, 2 chain stitches, and 3 double crochets in the same space, and between the corners, crochet 3 double crochets. Finish the same way as before.

Fasten off all ends and cut the yarn.

If you need to add rounds with single crochet, work 1 single crochet in each stitch, and in the corners, crochet 4 single crochets.

Tips:
If you want your squares to be extra square and have sharp corners, you can block the finished squares. This step is optional but provides a neater final shape. For a simple blocking method, refer to the instructions at the end of Step 8.

Steg 3

Assembly of Pieces

Now we will assemble the parts by attaching them piece by piece. Start by joining horizontally, then vertically, so that all the squares are securely connected.

Place the wrong sides together, with the right side facing out, and use slip stitches to join the closest loops of each square. If you’re unsure how to do this, refer to the video below.

You can choose to assemble the front pieces and back piece first and join them before moving on. This allows you to double-check that the size isn’t too small and that the sweater isn’t too short.

If you find the front and back pieces too small, you can add a few rounds of single crochet around the entire piece to make it larger.

To do this, crochet single crochets, one in each stitch, and in each corner stitch, crochet three single crochets.

The parts of the cardigan
Steg 4

Assembly of the Sweater

Now we will assemble the sections of the sweater. Start with the back piece and the front pieces. I crochet so that the seam is on the inside, which means you will crochet with the right sides facing each other. Use the same technique as you used to join the squares.

  1. Start by attaching the front pieces to the back piece, aligning the edges.
  2. There will be a gap where there is no front piece; in this area, crochet single crochets before continuing to the next front and back piece.
This is how front pieves and the back piece are assembled.
Steg 5

2. Attach the Sleeve Pieces to the Cardigan
Lay the sleeve pieces according to the image below. Double-check once more to ensure the pieces are placed correctly, as it's easy to make a mistake.

Crochet them together along the dotted lines.

Note: Be sure to check the image to make sure that one square remains unattached, as it should hang loosely for now.

Attach the sleeves.
Steg 6

3. Fold the SweaterFold the sweater along the dashed lines as shown below, still with the inside facing out. Make sure the back side is facing up.

Fold the cardigan like this.
This is how it looks when folded.
Have the backside facing up.

4. Crochet the Sleeves and Side Together
Crochet the sleeves and sides together according to the image. You will fold and join the row of granny squares that are not yet attached to the cardigan with the other edge. The dotted lines indicate a folded square.

This will leave a small gap in one side of the underarm. When you start crocheting down the side after joining the sleeve, make sure you don’t crochet through both parts of the half-square.

Fold up the square and secure it.
When the sleeve is folded, continue crocheting down the side.When crocheting the first part of the folded square, be careful not to crochet through both layers!

5. Crochet the Small Holes Under the Armpits. Crochet together the small holes left under the armpits from the previous step. Simply crochet through the remaining gaps to close them up, ensuring a smooth seam and a snug fit under the arms.

Now the entire cardigan should be crocheted together! Try on the cardigan. If the sleeves are too short, you can extend them in the next step.

Steg 7

Crochet Around the Cardigan

If you'd like to crochet ribbing, check out our slipover "Rut" and the instructions for crocheting ribbing.

We will begin by crocheting around the sleeves. Start with a round of single crochet around the sleeves. If there are any "gaps" where you've joined the squares, you can choose to crochet double crochets (dc) in those gaps to smooth things out.

If the sleeves are too short, crochet a few rounds of double crochet until you’re happy with the length. Finish off with a round of single crochet.

If you're unsure how to crochet single crochets, refer to the video below.

In these "gaps," you can crochet double crochets instead of single crochets to smooth things out and create a more even edge.

When you’ve crocheted around the sleeves, continue by crocheting around the edge of the cardigan.
I’ve chosen to crochet two rounds: one round of double crochet and one finishing round of single crochet. You can certainly choose to crochet more rounds of double crochet, but finishing with a round of single crochet gives it a neat edge.

It’s important to note that at the back, where there is a corner, skip one stitch in the corner. When you reach the corners at the front of the cardigan, crochet three stitches into the corner stitch to maintain the shape.

I hope you love your new cardigan! :)

Crochet three double crochets in the corner.
When you reach the back of the cardigan, skip one stitch in the corner to ensure the shape remains smooth and neat.
Steg 8

BLOCKING

There are many ways to block your pieces. Here's a simple method to do it. You’ll need pins and a surface to attach the pins to. We sell blocking mats at MYO, but a yoga mat or a firmer cushion will work as well.

  1. Soak the squares in water. You can choose to wash them with wool detergent if you have it. Let them soak for a while so that the inner fibers get wet. The fabric may seem soaked just minutes after placing it in water, but the inner fibers take a little longer to soak through.
  2. Press out as much water as possible. You can roll the squares in a towel and press as much as you can. Avoid twisting the squares, as it can distort their shape.
  3. Stretch and shape the squares to the desired size.
  4. Pin them into place. If you’re blocking squares, be sure to pin the corners to get sharp edges and straight sides. If you’re blocking the whole cardigan or parts of it, make sure to pin the corners and along the edges to avoid curved shapes along the edges.
  5. Let them dry completely before removing the pins.
  6. Done!
Steg 9
Steg 10

The rights to this pattern belong to MYO Make Your Own. The pattern or its pictures may not be copied, shared or resold either in parts or in its entirety, but you may sell items you have crocheted from this pattern. If you have questions about the pattern, contact MYO at hello@makeyourown.se.

Crochet cardigan “Maj”

Crochet a classic cardigan in granny squares.

This timeless cardigan is made from granny squares that are then assembled. This allows you to choose the colors you want for your cardigan and make it completely unique. It is warm and cozy, perfect for autumn weather, winter lounging, spring mornings, or summer evenings. You’ll need MYO Basic Wool and a crochet hook size 5-7 mm (most commonly 6 mm). This is a so-called "made-to-measure" pattern, meaning you measure yourself to determine the size of the granny squares, and for this, you’ll need a measuring tape.

Yarn Consumption: Approximately 900 g in total for size S. Add about 100 g for each size up. Note: If you crochet the cardigan longer, you will need more skeins. For size S, you’ll need around 5 skeins of the main color and 4 skeins for the middle colors. The total yarn usage depends on how tightly you crochet, the length of the cardigan, how many colors you choose, and how many rounds you crochet around the cardigan.

Note that we in this instruction uses videos from out technique library. If you are looking for a full instruction video for a crocheted vest, we suggest the cardigan Linnea.

Crochet cardigan “Maj”
Steg 1

Weight (reference for a granny square with a 6 mm hook, measuring approximately 11 x 11 cm with 3 rounds):

A single square weighs just under 10 g. If you crochet 3 rounds, the two middle rounds weigh about the same as the outer round—approximately 5 g each. Using this reference, 81 squares would weigh around 800 g. To join the squares and crochet around the cardigan, you’ll need at least 100 g more.

Measurements:
This is a "made-to-measure" pattern, meaning you measure yourself to determine the size of your granny squares.

  1. Measure from shoulder point to shoulder point. For reference, measure across your chest in front of you between the shoulder points using a measuring tape.
  2. Divide the measurement by 3. This is approximately the size of each granny square. You’ll need three squares to span shoulder point to shoulder point. The width of the back piece is 5 squares, so the remaining two squares will drape over the shoulders. For reference, I measured about 35–36 cm between my shoulder points, and my squares measured 11 cm after blocking (size S). Note that blocking can make the squares slightly larger.
  3. Crochet a test granny square to determine how many rounds you need to achieve your measurement. If you plan to block your squares, for best results, block a test square and measure it.

Note: Blocking will make your squares larger than when freshly crocheted. Additionally, the cardigan will stretch slightly with wear!

Size Guidelines:
The sizes provided are only indications because crochet tension varies. Always crochet a test square and measure against your shoulder width. You can make your granny squares larger by adding rounds of single crochet. For smaller or tighter squares, try a 5 mm hook. For a looser, more airy sweater, try a 7 mm hook. Just remember to measure as you go!

  • XS: 3 rounds with a 5 mm hook, approximately 10 cm per square after blocking.
  • S: 3 rounds with a 6 mm hook, approximately 11 cm per square after blocking. Reference: The length of 5 joined squares is approximately 54 cm (as shown in the photo).
  • M: 3 rounds with a 7 mm hook, or use a 6 mm hook with a final round of single crochet. Approximately 12 cm per square after blocking.
  • L: 4 rounds with a 6 mm hook, approximately 13 cm per square after blocking. If too large, crochet 3 rounds plus 1–2 rounds of single crochet.
  • XL: 4 rounds with a 6 mm hook, with extra single crochet rounds as needed.

If you plan to block your squares before assembling, test by crocheting one square and blocking it to get a more accurate size. Instructions for blocking squares can be found in Step 8.

Number of Squares:

  • For the cardigan length shown in the photo, you’ll need 81 squares.
  • For a shorter version, you’ll need 72 squares.
  • For a longer version, you’ll need 90 squares.
81 squarea.
If you want a shorter cardigan you need 72 squares.
If you want a longer cardigan, add 9 squares (90 squares in total).
Steg 2

GRANNY SQUARES

We’ll start crocheting the granny squares. Throughout the pattern, I’ll be referring to 81 squares as a base.

  • Back Piece: 25 squares
  • Front Pieces: 12 squares x 2
  • Sleeves: 16 squares x 2

You can choose whether to crochet the squares for the front and back pieces first and assemble these parts, or crochet all the squares at once.The advantage of assembling the back and front pieces first, before crocheting additional squares, is that you can check the length of the cardigan before continuing.

If you’re unsure how to make a granny square, you can check the video below.

Round 1: Crochet a magic ring. In the ring, start with 3 chain stitches, then crochet 2 double crochets. This forms the first double crochet group. Next, crochet 2 chain stitches. Repeat this sequence (3 double crochets + 2 chain stitches) a total of 4 times. Finish with a slip stitch in the third chain from the start.

Round 2: Change color. Begin in a chain space. In each chain space, crochet 3 double crochets, 2 chain stitches, and 3 more double crochets to form the corners. Finish with a slip stitch in the third chain from the start.

Round 3: Change color. Start in a corner (a space where you crocheted 2 chain stitches). Crochet 3 double crochets, 2 chain stitches, and 3 double crochets. In the next space between the corners, crochet 3 double crochets. Work the next corner in the same way as the first and continue around. Corners are crocheted with 3 double crochets, 2 chain stitches, and 3 double crochets in the same space. Between the corners, crochet 3 double crochets with no chain stitches in between. Finish with a slip stitch in the third chain from the start.

Round 4: Crochet the same way as Round 3. All corners are worked with 3 double crochets, 2 chain stitches, and 3 double crochets in the same space, and between the corners, crochet 3 double crochets. Finish the same way as before.

Fasten off all ends and cut the yarn.

If you need to add rounds with single crochet, work 1 single crochet in each stitch, and in the corners, crochet 4 single crochets.

Tips:
If you want your squares to be extra square and have sharp corners, you can block the finished squares. This step is optional but provides a neater final shape. For a simple blocking method, refer to the instructions at the end of Step 8.

Steg 3

Assembly of Pieces

Now we will assemble the parts by attaching them piece by piece. Start by joining horizontally, then vertically, so that all the squares are securely connected.

Place the wrong sides together, with the right side facing out, and use slip stitches to join the closest loops of each square. If you’re unsure how to do this, refer to the video below.

You can choose to assemble the front pieces and back piece first and join them before moving on. This allows you to double-check that the size isn’t too small and that the sweater isn’t too short.

If you find the front and back pieces too small, you can add a few rounds of single crochet around the entire piece to make it larger.

To do this, crochet single crochets, one in each stitch, and in each corner stitch, crochet three single crochets.

The parts of the cardigan
Steg 4

Assembly of the Sweater

Now we will assemble the sections of the sweater. Start with the back piece and the front pieces. I crochet so that the seam is on the inside, which means you will crochet with the right sides facing each other. Use the same technique as you used to join the squares.

  1. Start by attaching the front pieces to the back piece, aligning the edges.
  2. There will be a gap where there is no front piece; in this area, crochet single crochets before continuing to the next front and back piece.
This is how front pieves and the back piece are assembled.
Steg 5

2. Attach the Sleeve Pieces to the Cardigan
Lay the sleeve pieces according to the image below. Double-check once more to ensure the pieces are placed correctly, as it's easy to make a mistake.

Crochet them together along the dotted lines.

Note: Be sure to check the image to make sure that one square remains unattached, as it should hang loosely for now.

Attach the sleeves.
Steg 6

3. Fold the SweaterFold the sweater along the dashed lines as shown below, still with the inside facing out. Make sure the back side is facing up.

Fold the cardigan like this.
This is how it looks when folded.
Have the backside facing up.

4. Crochet the Sleeves and Side Together
Crochet the sleeves and sides together according to the image. You will fold and join the row of granny squares that are not yet attached to the cardigan with the other edge. The dotted lines indicate a folded square.

This will leave a small gap in one side of the underarm. When you start crocheting down the side after joining the sleeve, make sure you don’t crochet through both parts of the half-square.

Fold up the square and secure it.
When the sleeve is folded, continue crocheting down the side.When crocheting the first part of the folded square, be careful not to crochet through both layers!

5. Crochet the Small Holes Under the Armpits. Crochet together the small holes left under the armpits from the previous step. Simply crochet through the remaining gaps to close them up, ensuring a smooth seam and a snug fit under the arms.

Now the entire cardigan should be crocheted together! Try on the cardigan. If the sleeves are too short, you can extend them in the next step.

Steg 7

Crochet Around the Cardigan

If you'd like to crochet ribbing, check out our slipover "Rut" and the instructions for crocheting ribbing.

We will begin by crocheting around the sleeves. Start with a round of single crochet around the sleeves. If there are any "gaps" where you've joined the squares, you can choose to crochet double crochets (dc) in those gaps to smooth things out.

If the sleeves are too short, crochet a few rounds of double crochet until you’re happy with the length. Finish off with a round of single crochet.

If you're unsure how to crochet single crochets, refer to the video below.

In these "gaps," you can crochet double crochets instead of single crochets to smooth things out and create a more even edge.

When you’ve crocheted around the sleeves, continue by crocheting around the edge of the cardigan.
I’ve chosen to crochet two rounds: one round of double crochet and one finishing round of single crochet. You can certainly choose to crochet more rounds of double crochet, but finishing with a round of single crochet gives it a neat edge.

It’s important to note that at the back, where there is a corner, skip one stitch in the corner. When you reach the corners at the front of the cardigan, crochet three stitches into the corner stitch to maintain the shape.

I hope you love your new cardigan! :)

Crochet three double crochets in the corner.
When you reach the back of the cardigan, skip one stitch in the corner to ensure the shape remains smooth and neat.
Steg 8

BLOCKING

There are many ways to block your pieces. Here's a simple method to do it. You’ll need pins and a surface to attach the pins to. We sell blocking mats at MYO, but a yoga mat or a firmer cushion will work as well.

  1. Soak the squares in water. You can choose to wash them with wool detergent if you have it. Let them soak for a while so that the inner fibers get wet. The fabric may seem soaked just minutes after placing it in water, but the inner fibers take a little longer to soak through.
  2. Press out as much water as possible. You can roll the squares in a towel and press as much as you can. Avoid twisting the squares, as it can distort their shape.
  3. Stretch and shape the squares to the desired size.
  4. Pin them into place. If you’re blocking squares, be sure to pin the corners to get sharp edges and straight sides. If you’re blocking the whole cardigan or parts of it, make sure to pin the corners and along the edges to avoid curved shapes along the edges.
  5. Let them dry completely before removing the pins.
  6. Done!
Steg 9
Steg 10

The rights to this pattern belong to MYO Make Your Own. The pattern or its pictures may not be copied, shared or resold either in parts or in its entirety, but you may sell items you have crocheted from this pattern. If you have questions about the pattern, contact MYO at hello@makeyourown.se.

Crochet cardigan “Maj”

Crochet a classic cardigan in granny squares.

This timeless cardigan is made from granny squares that are then assembled. This allows you to choose the colors you want for your cardigan and make it completely unique. It is warm and cozy, perfect for autumn weather, winter lounging, spring mornings, or summer evenings. You’ll need MYO Basic Wool and a crochet hook size 5-7 mm (most commonly 6 mm). This is a so-called "made-to-measure" pattern, meaning you measure yourself to determine the size of the granny squares, and for this, you’ll need a measuring tape.

Yarn Consumption: Approximately 900 g in total for size S. Add about 100 g for each size up. Note: If you crochet the cardigan longer, you will need more skeins. For size S, you’ll need around 5 skeins of the main color and 4 skeins for the middle colors. The total yarn usage depends on how tightly you crochet, the length of the cardigan, how many colors you choose, and how many rounds you crochet around the cardigan.

Note that we in this instruction uses videos from out technique library. If you are looking for a full instruction video for a crocheted vest, we suggest the cardigan Linnea.

Crochet cardigan “Maj”
Steg 1

Weight (reference for a granny square with a 6 mm hook, measuring approximately 11 x 11 cm with 3 rounds):

A single square weighs just under 10 g. If you crochet 3 rounds, the two middle rounds weigh about the same as the outer round—approximately 5 g each. Using this reference, 81 squares would weigh around 800 g. To join the squares and crochet around the cardigan, you’ll need at least 100 g more.

Measurements:
This is a "made-to-measure" pattern, meaning you measure yourself to determine the size of your granny squares.

  1. Measure from shoulder point to shoulder point. For reference, measure across your chest in front of you between the shoulder points using a measuring tape.
  2. Divide the measurement by 3. This is approximately the size of each granny square. You’ll need three squares to span shoulder point to shoulder point. The width of the back piece is 5 squares, so the remaining two squares will drape over the shoulders. For reference, I measured about 35–36 cm between my shoulder points, and my squares measured 11 cm after blocking (size S). Note that blocking can make the squares slightly larger.
  3. Crochet a test granny square to determine how many rounds you need to achieve your measurement. If you plan to block your squares, for best results, block a test square and measure it.

Note: Blocking will make your squares larger than when freshly crocheted. Additionally, the cardigan will stretch slightly with wear!

Size Guidelines:
The sizes provided are only indications because crochet tension varies. Always crochet a test square and measure against your shoulder width. You can make your granny squares larger by adding rounds of single crochet. For smaller or tighter squares, try a 5 mm hook. For a looser, more airy sweater, try a 7 mm hook. Just remember to measure as you go!

  • XS: 3 rounds with a 5 mm hook, approximately 10 cm per square after blocking.
  • S: 3 rounds with a 6 mm hook, approximately 11 cm per square after blocking. Reference: The length of 5 joined squares is approximately 54 cm (as shown in the photo).
  • M: 3 rounds with a 7 mm hook, or use a 6 mm hook with a final round of single crochet. Approximately 12 cm per square after blocking.
  • L: 4 rounds with a 6 mm hook, approximately 13 cm per square after blocking. If too large, crochet 3 rounds plus 1–2 rounds of single crochet.
  • XL: 4 rounds with a 6 mm hook, with extra single crochet rounds as needed.

If you plan to block your squares before assembling, test by crocheting one square and blocking it to get a more accurate size. Instructions for blocking squares can be found in Step 8.

Number of Squares:

  • For the cardigan length shown in the photo, you’ll need 81 squares.
  • For a shorter version, you’ll need 72 squares.
  • For a longer version, you’ll need 90 squares.
81 squarea.
If you want a shorter cardigan you need 72 squares.
If you want a longer cardigan, add 9 squares (90 squares in total).
Steg 2

GRANNY SQUARES

We’ll start crocheting the granny squares. Throughout the pattern, I’ll be referring to 81 squares as a base.

  • Back Piece: 25 squares
  • Front Pieces: 12 squares x 2
  • Sleeves: 16 squares x 2

You can choose whether to crochet the squares for the front and back pieces first and assemble these parts, or crochet all the squares at once.The advantage of assembling the back and front pieces first, before crocheting additional squares, is that you can check the length of the cardigan before continuing.

If you’re unsure how to make a granny square, you can check the video below.

Round 1: Crochet a magic ring. In the ring, start with 3 chain stitches, then crochet 2 double crochets. This forms the first double crochet group. Next, crochet 2 chain stitches. Repeat this sequence (3 double crochets + 2 chain stitches) a total of 4 times. Finish with a slip stitch in the third chain from the start.

Round 2: Change color. Begin in a chain space. In each chain space, crochet 3 double crochets, 2 chain stitches, and 3 more double crochets to form the corners. Finish with a slip stitch in the third chain from the start.

Round 3: Change color. Start in a corner (a space where you crocheted 2 chain stitches). Crochet 3 double crochets, 2 chain stitches, and 3 double crochets. In the next space between the corners, crochet 3 double crochets. Work the next corner in the same way as the first and continue around. Corners are crocheted with 3 double crochets, 2 chain stitches, and 3 double crochets in the same space. Between the corners, crochet 3 double crochets with no chain stitches in between. Finish with a slip stitch in the third chain from the start.

Round 4: Crochet the same way as Round 3. All corners are worked with 3 double crochets, 2 chain stitches, and 3 double crochets in the same space, and between the corners, crochet 3 double crochets. Finish the same way as before.

Fasten off all ends and cut the yarn.

If you need to add rounds with single crochet, work 1 single crochet in each stitch, and in the corners, crochet 4 single crochets.

Tips:
If you want your squares to be extra square and have sharp corners, you can block the finished squares. This step is optional but provides a neater final shape. For a simple blocking method, refer to the instructions at the end of Step 8.

Steg 3

Assembly of Pieces

Now we will assemble the parts by attaching them piece by piece. Start by joining horizontally, then vertically, so that all the squares are securely connected.

Place the wrong sides together, with the right side facing out, and use slip stitches to join the closest loops of each square. If you’re unsure how to do this, refer to the video below.

You can choose to assemble the front pieces and back piece first and join them before moving on. This allows you to double-check that the size isn’t too small and that the sweater isn’t too short.

If you find the front and back pieces too small, you can add a few rounds of single crochet around the entire piece to make it larger.

To do this, crochet single crochets, one in each stitch, and in each corner stitch, crochet three single crochets.

The parts of the cardigan
Steg 4

Assembly of the Sweater

Now we will assemble the sections of the sweater. Start with the back piece and the front pieces. I crochet so that the seam is on the inside, which means you will crochet with the right sides facing each other. Use the same technique as you used to join the squares.

  1. Start by attaching the front pieces to the back piece, aligning the edges.
  2. There will be a gap where there is no front piece; in this area, crochet single crochets before continuing to the next front and back piece.
This is how front pieves and the back piece are assembled.
Steg 5

2. Attach the Sleeve Pieces to the Cardigan
Lay the sleeve pieces according to the image below. Double-check once more to ensure the pieces are placed correctly, as it's easy to make a mistake.

Crochet them together along the dotted lines.

Note: Be sure to check the image to make sure that one square remains unattached, as it should hang loosely for now.

Attach the sleeves.
Steg 6

3. Fold the SweaterFold the sweater along the dashed lines as shown below, still with the inside facing out. Make sure the back side is facing up.

Fold the cardigan like this.
This is how it looks when folded.
Have the backside facing up.

4. Crochet the Sleeves and Side Together
Crochet the sleeves and sides together according to the image. You will fold and join the row of granny squares that are not yet attached to the cardigan with the other edge. The dotted lines indicate a folded square.

This will leave a small gap in one side of the underarm. When you start crocheting down the side after joining the sleeve, make sure you don’t crochet through both parts of the half-square.

Fold up the square and secure it.
When the sleeve is folded, continue crocheting down the side.When crocheting the first part of the folded square, be careful not to crochet through both layers!

5. Crochet the Small Holes Under the Armpits. Crochet together the small holes left under the armpits from the previous step. Simply crochet through the remaining gaps to close them up, ensuring a smooth seam and a snug fit under the arms.

Now the entire cardigan should be crocheted together! Try on the cardigan. If the sleeves are too short, you can extend them in the next step.

Steg 7

Crochet Around the Cardigan

If you'd like to crochet ribbing, check out our slipover "Rut" and the instructions for crocheting ribbing.

We will begin by crocheting around the sleeves. Start with a round of single crochet around the sleeves. If there are any "gaps" where you've joined the squares, you can choose to crochet double crochets (dc) in those gaps to smooth things out.

If the sleeves are too short, crochet a few rounds of double crochet until you’re happy with the length. Finish off with a round of single crochet.

If you're unsure how to crochet single crochets, refer to the video below.

In these "gaps," you can crochet double crochets instead of single crochets to smooth things out and create a more even edge.

When you’ve crocheted around the sleeves, continue by crocheting around the edge of the cardigan.
I’ve chosen to crochet two rounds: one round of double crochet and one finishing round of single crochet. You can certainly choose to crochet more rounds of double crochet, but finishing with a round of single crochet gives it a neat edge.

It’s important to note that at the back, where there is a corner, skip one stitch in the corner. When you reach the corners at the front of the cardigan, crochet three stitches into the corner stitch to maintain the shape.

I hope you love your new cardigan! :)

Crochet three double crochets in the corner.
When you reach the back of the cardigan, skip one stitch in the corner to ensure the shape remains smooth and neat.
Steg 8

BLOCKING

There are many ways to block your pieces. Here's a simple method to do it. You’ll need pins and a surface to attach the pins to. We sell blocking mats at MYO, but a yoga mat or a firmer cushion will work as well.

  1. Soak the squares in water. You can choose to wash them with wool detergent if you have it. Let them soak for a while so that the inner fibers get wet. The fabric may seem soaked just minutes after placing it in water, but the inner fibers take a little longer to soak through.
  2. Press out as much water as possible. You can roll the squares in a towel and press as much as you can. Avoid twisting the squares, as it can distort their shape.
  3. Stretch and shape the squares to the desired size.
  4. Pin them into place. If you’re blocking squares, be sure to pin the corners to get sharp edges and straight sides. If you’re blocking the whole cardigan or parts of it, make sure to pin the corners and along the edges to avoid curved shapes along the edges.
  5. Let them dry completely before removing the pins.
  6. Done!
Steg 9
Steg 10

The rights to this pattern belong to MYO Make Your Own. The pattern or its pictures may not be copied, shared or resold either in parts or in its entirety, but you may sell items you have crocheted from this pattern. If you have questions about the pattern, contact MYO at hello@makeyourown.se.