
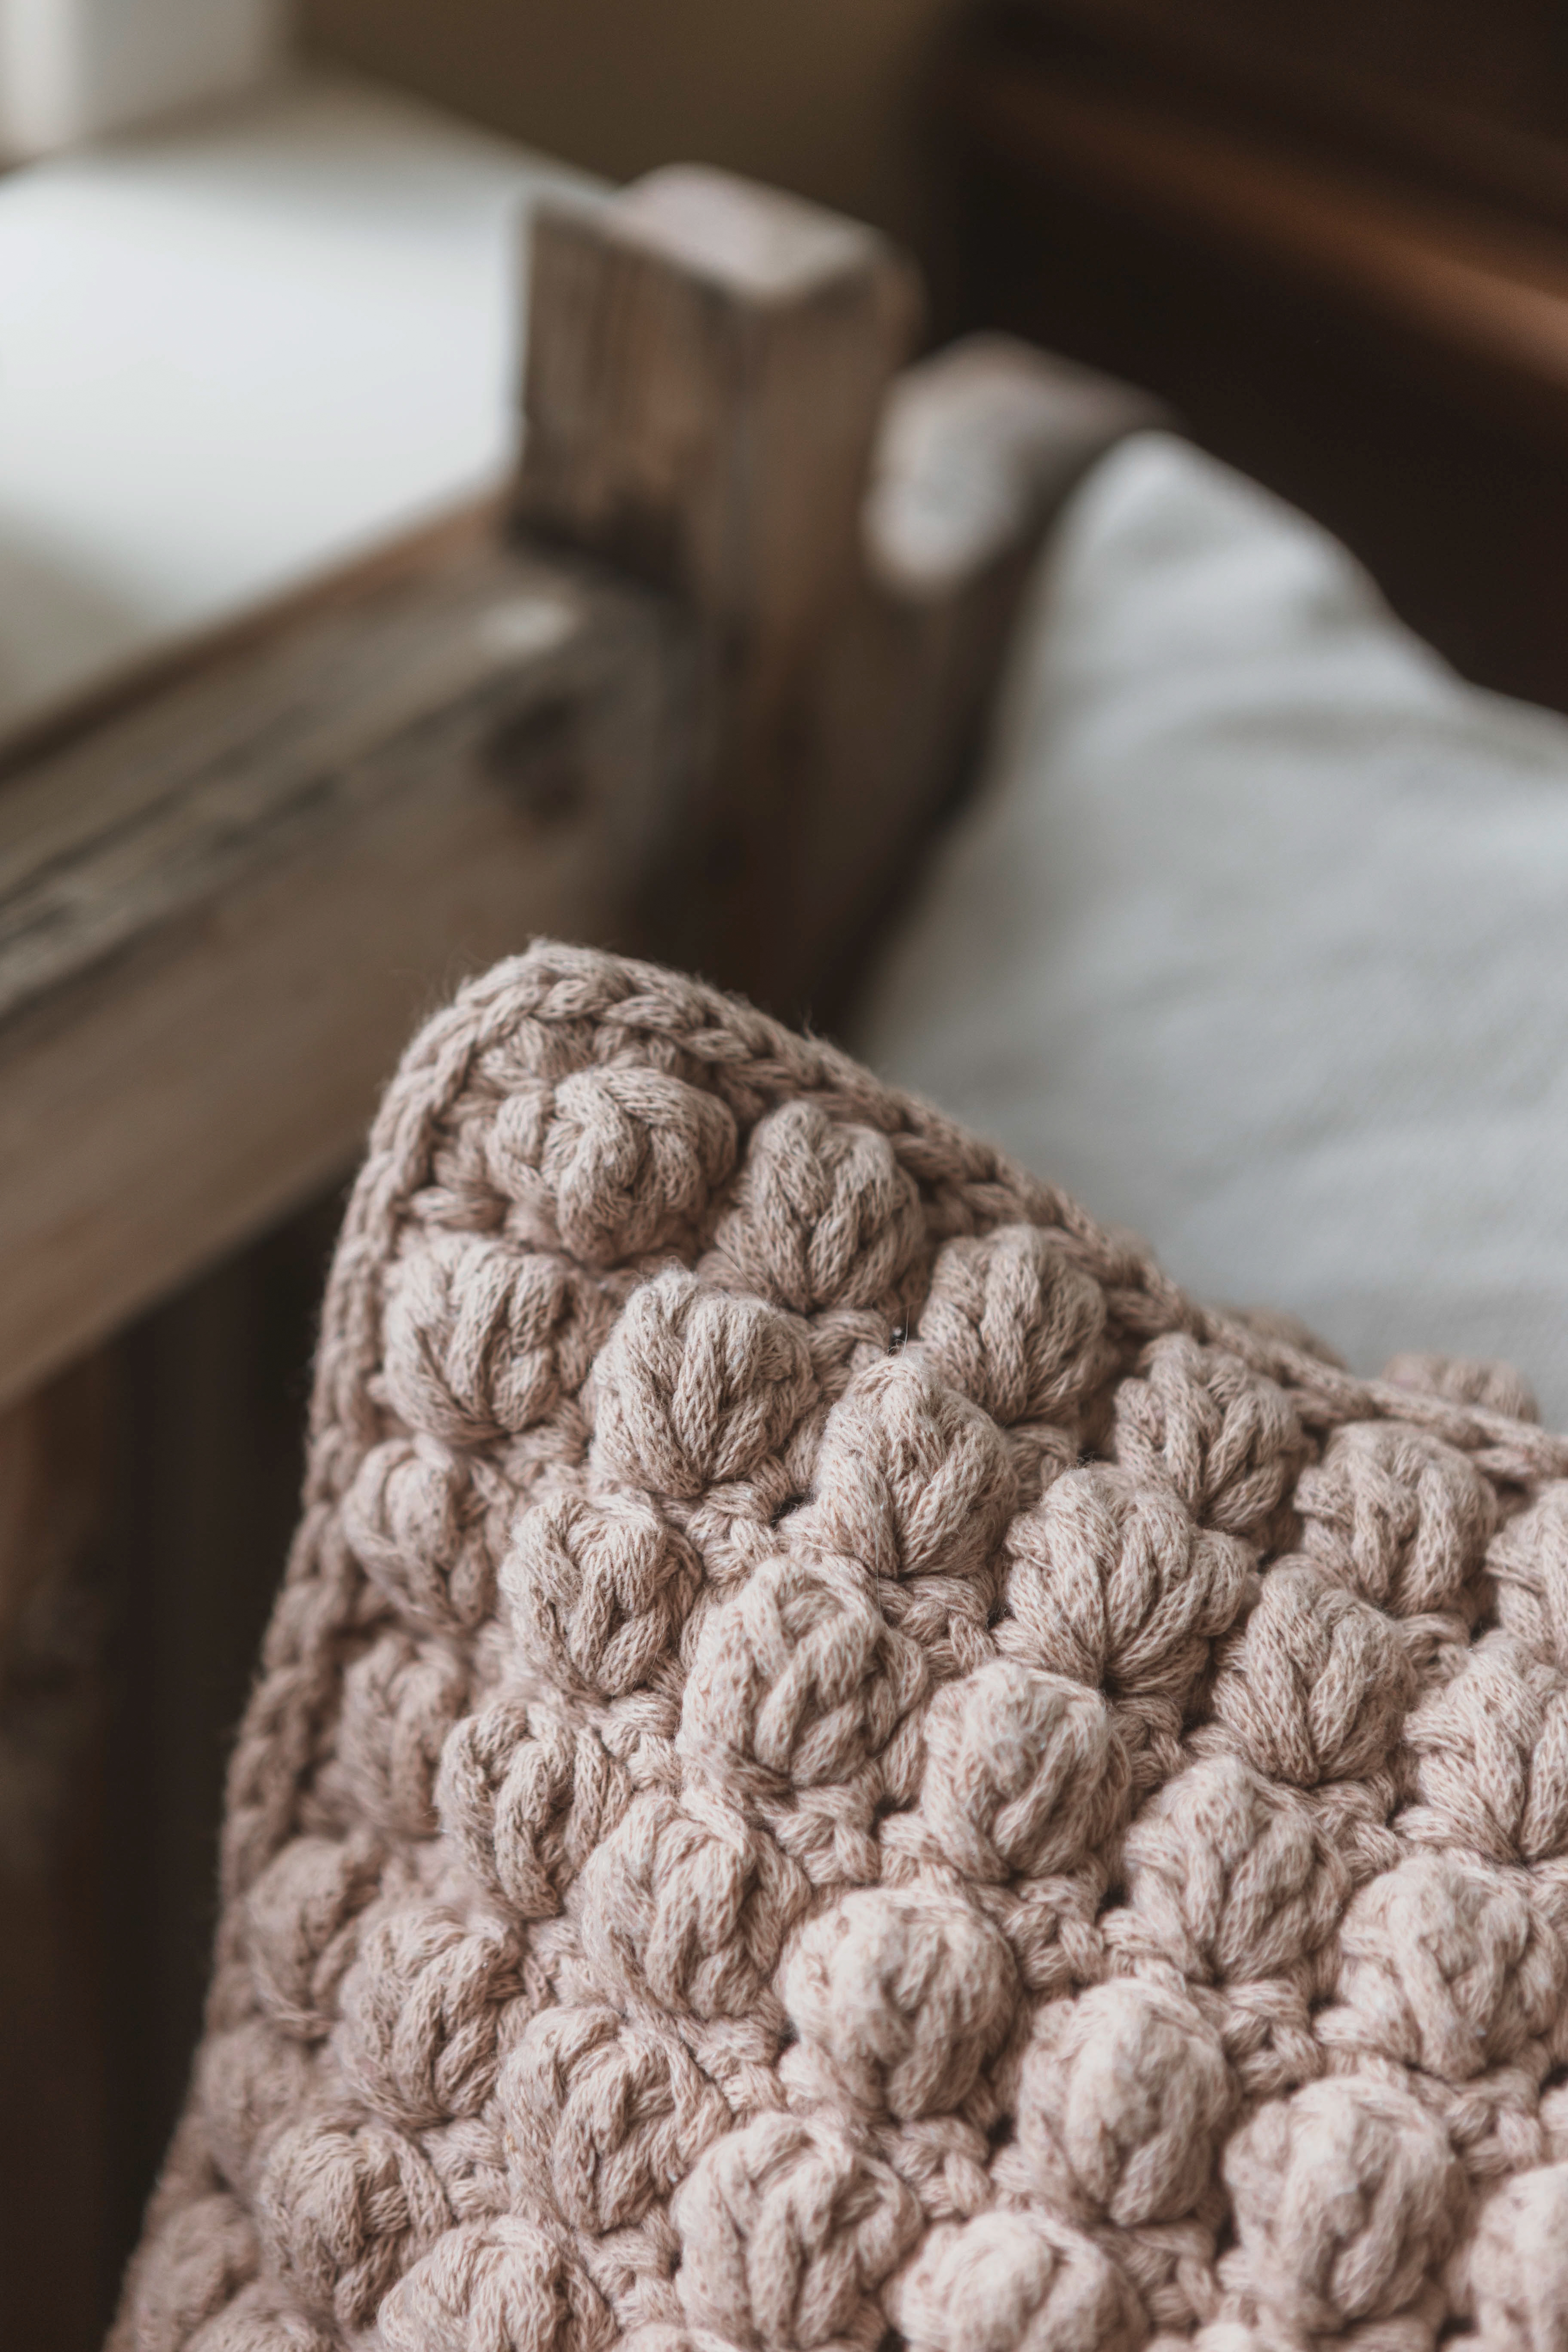
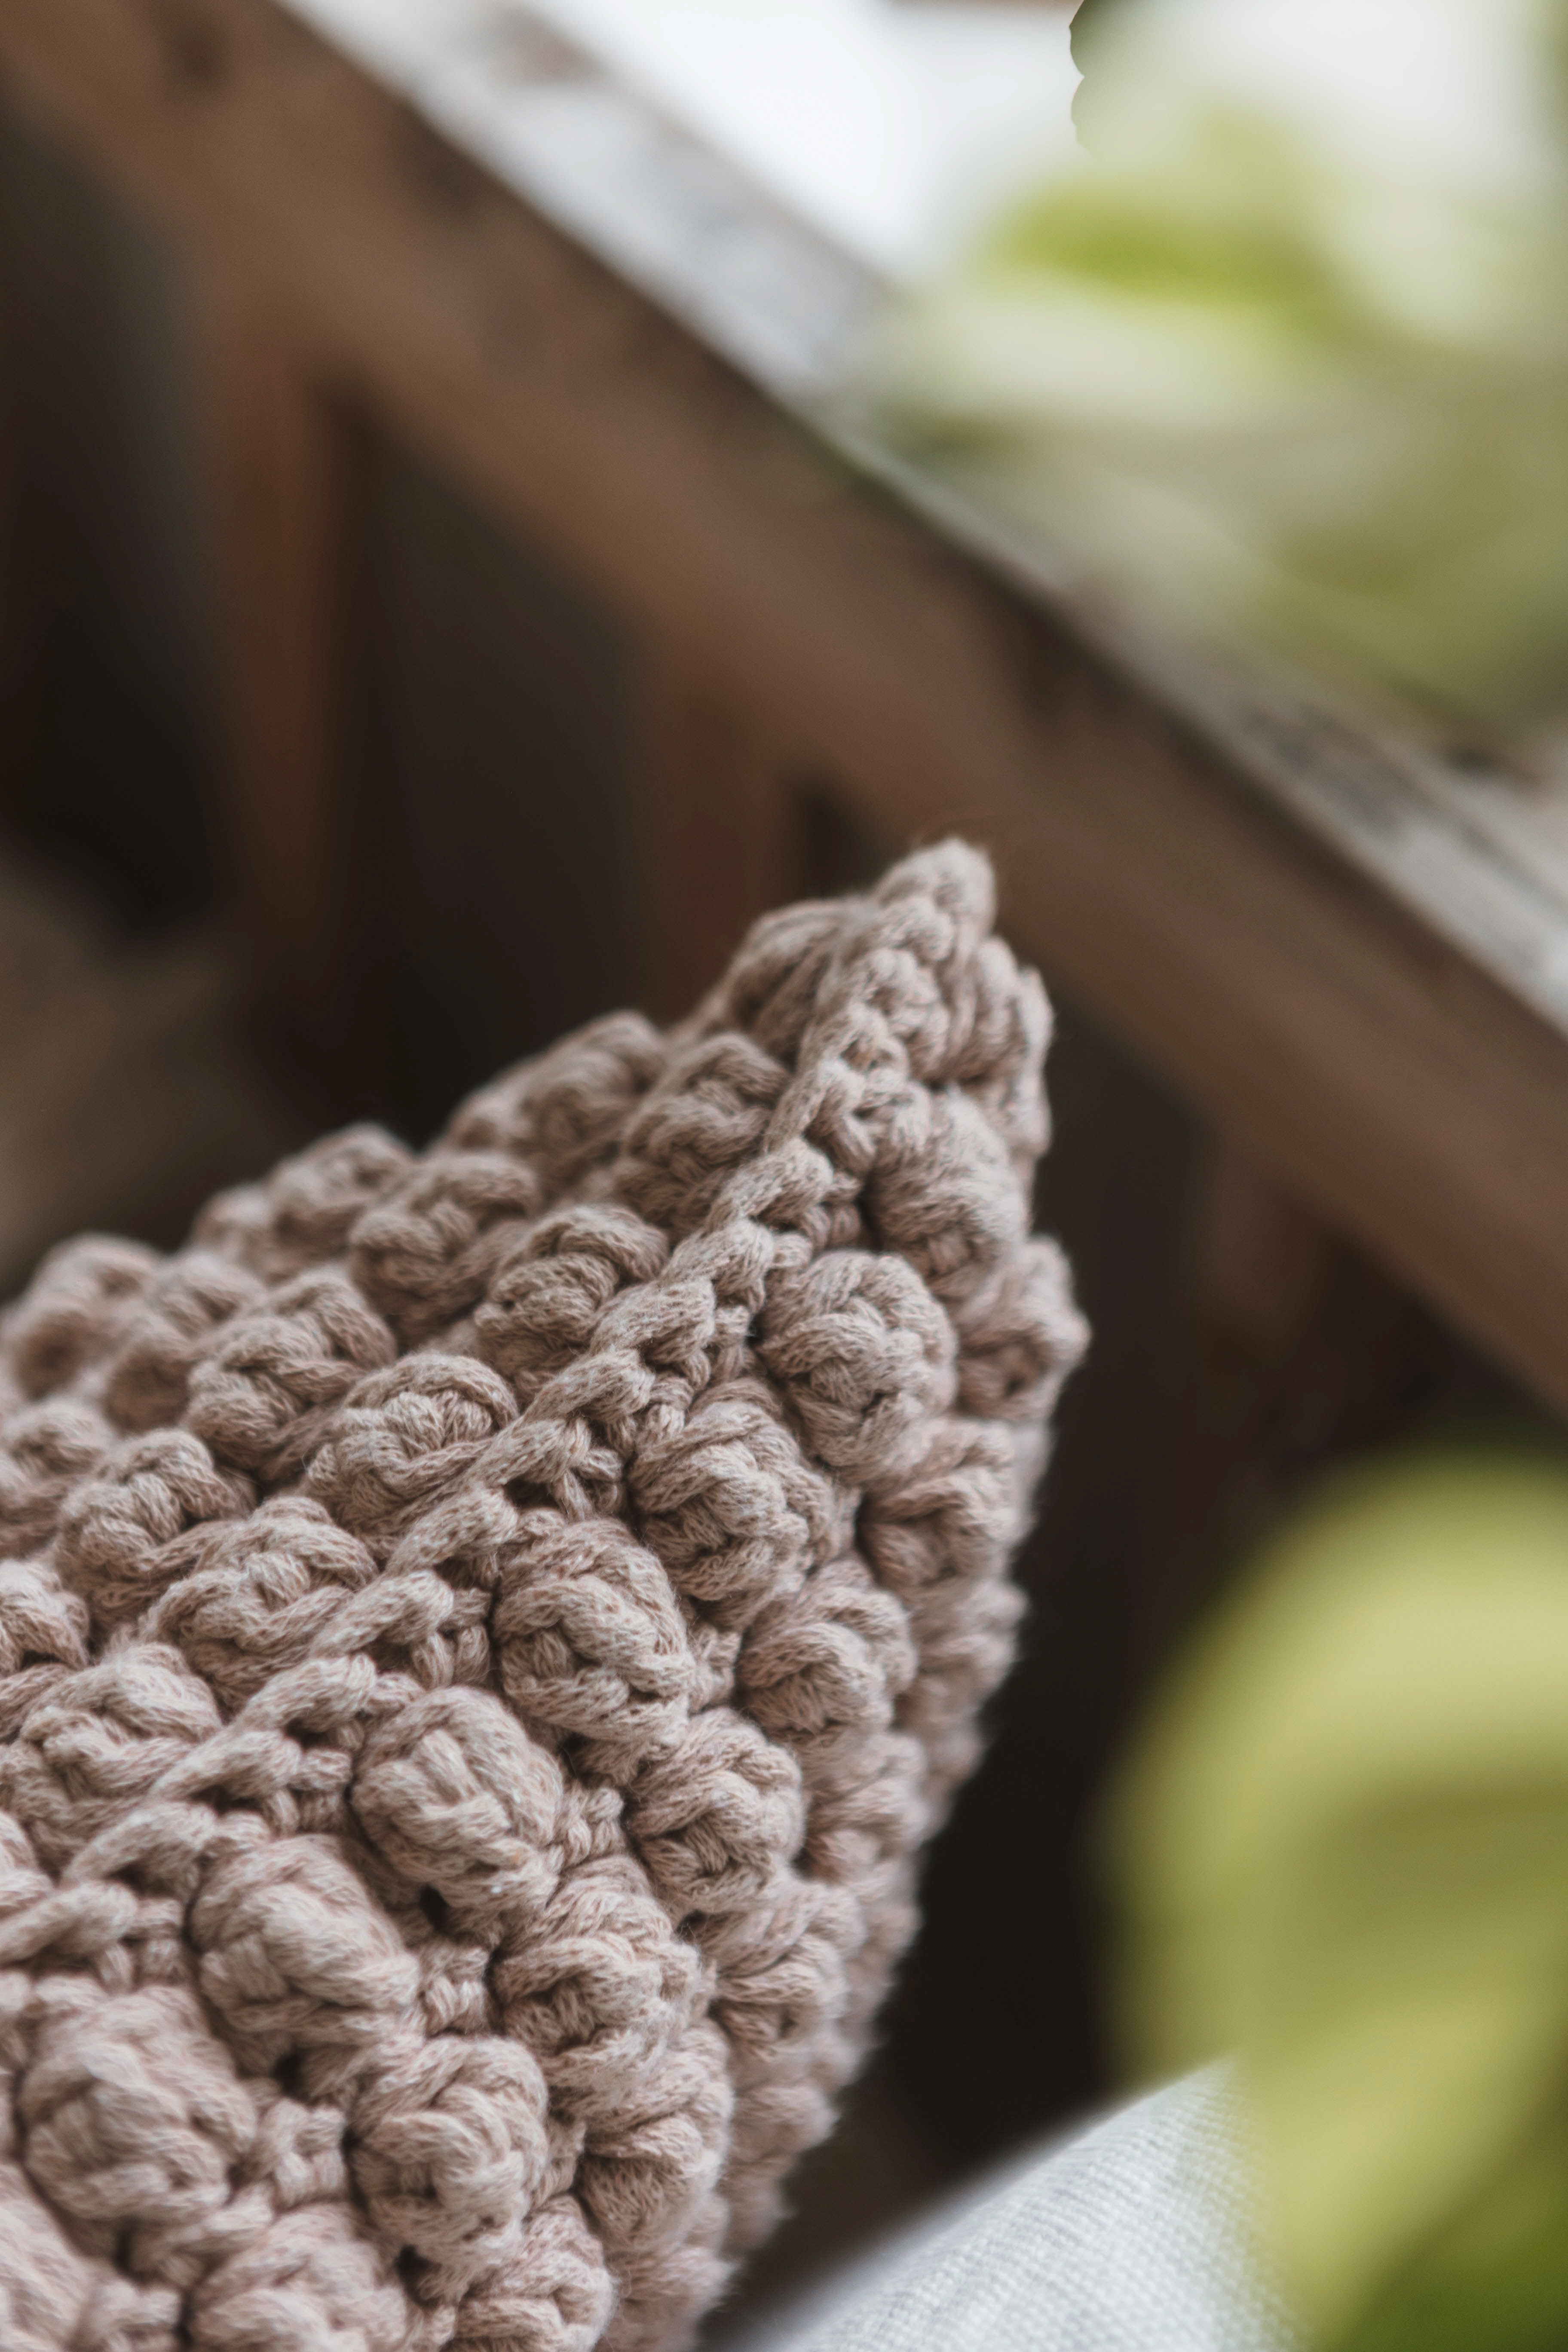
Cushion cover in bubbles “Elsa”
Spruce up the sofa with a cushion cover with the trendy texture "bubbles"
Crochet a trendy cushion cover in bubbles! This cushion cover is super cute and surprisingly easy to make. You can crochet the cushion cover larger or smaller than shown in the picture. The video shows how to attach a zipper to the cover, but you can skip that step and crochet your pillow instead. You need EKO Nano Tube yarn, crochet hook 6 mm, an inner pillow and possibly a zipper with a runner.
Yarn consumption : About 1200g depending on how tight you crochet.

Here's how to do it
The cushion cover will measure approximately 45 × 45 cm (18 × 18 inches), but you can easily adjust the size by making more or fewer chain stitches in the foundation chain (it must, however, be an odd number) and by crocheting more or fewer rows. Keep in mind that everyone crochets with a different tension, so these measurements are only a guideline. If you crochet tightly, your cushion cover will turn out smaller. Remember that the foundation chain must always contain an odd number of chain stitches. /Lizette

This is what you need:
Here you can directly purchase the material for the product. Please note that the instruction is digital and appears here on the page (no written instruction).


.jpg)
Unleash your creativity
For only 85kr per month you get access to all our 300+ beginner-friendly instructions for crochet, knitting and macrame.
A perfect way to get started with your new hobby!

Get started
We are going to crochet a cushion cover with a front and a back that have the same structure, i.e. bubbles on both sides, so you crochet two equal parts, front and back. Start by making a simple loop around the crochet hook. One way you can do this is to wrap the yarn around your index and middle finger and then pull the yarn up so that the loop locks when you tighten. Leave about 15 cm tail.
The chain
Adjust the size of the loop around your crochet hook. Now we will start crocheting the chain, use the crochet hook and pick up the yarn with the end that comes from the yarn roll (you temporarily have two loops on the crochet hook) and pull through so that a loop is formed (the first loop). Do this until you have a total of 39 stitches on your chain. If you want to make the pillowcase bigger/smaller, you must always have an uneven number of stitches on the chain. Keep in mind that if you make a larger pillowcase, you will need more than two yarn roles.
Row 2
Now start following the chain back and crochet row 2. Skip the first loop (which is holding your crochet hook) and start going down the loop that comes after. Catch the yarn and pull through (you now temporarily have 2 loops on the hook). Pick up the yarn with the needle again and pull through both loops. Repeat this 37 more times so you have 38 stitches on row 2 (always one stitch less than the number you had on the chain). When you have done this 38 times, make a simple loose loop. Now you turn the work over and continue.
ATTENTION! If you forget to add a loose loop before turning the work, the side will be uneven
Row 3
Now let´s start crocheting bubbles!
We start the row in the second stitch from your crochet hook, so you skip the first stitch.
A bubble is crocheted like this: make a wrap around the crochet hook, go down into the stitch, pick up yarn and pull through. Pick up the yarn again and pull through two loops (you have two loops on the hook). Now we will do the same thing again; make a wrap around the crochet hook, go down in the same stitch, pick up yarn and pull through. Pick up yarn and pull through two loops (you now have three loops on the hook). Continue two more times in the same way so that you have five loops on the hook.
When you have five loops on the crochet hook, make a wrap around the crochet hook and pull through all five loops. When you do this, put your finger on the back of the bubble so that you push it a little towards it while pulling through all five loops. In the stitch after the bubble, make a single stitch. Go down the stitch by bringing the crochet hook just behind the bubble and down into the stitch (so that the bubble lays correctly). Pick up yarn and pull through. Pick up yarn again and pull through. Now you crochet every other bubble and every other single stitch.
When you are on the other side you should have 19 bubbles if you have crocheted 39 loops on your chain. Finish with a loop and turn and crochet the next row.
Row 4
In this row, we also start in the second stitch and skip the first stitch. Now crochet single stitches, go down into the stitch, pick up the yarn (you have two loops on the hook), pick up the yarn again, and pull through. Work 38 double crochets until you are on the other side. Finish with a loop.
Now crochet every other row 3 and every other row 4. Continue until part 1 is square.
Fasten
When the part is square, cut off and attach to the inside. Attach by tying a knot in the back around a loop and hide the yarn end in nearby stitches.
Part 2
Crochet part 2 in the same way as the first side, so you have two equal sides.
Join the pieces
Place the pieces wrong side against wrong side (with the bobbles facing outward and oriented the same way), first row against first row.
Start on the left side of the top edge. Insert your hook into the corner, going through both pieces, and work 1 slip stitch (sl st).
Then work single crochet (sc) along the entire side. In the corner, work 3 sc in the same stitch.
Continue in the same way along the next two sides.
If you would like to skip the zipper and instead crochet the cover closed now, insert the inner cushion and then crochet the last side together as well.
When you have crocheted three or four sides together, cut the yarn and fasten off.
Zipper
These instructions apply to zipper tape sold by the yard.
First, measure one side of the cushion cover. Take that measurement, add approx. 2–2.5 in (5–6 cm), and cut the zipper to that length.
Attach the zipper slider onto the zipper tape (see the video tutorial if you are unsure).
Sew the zipper onto both sides using a needle and thread, making sure the same amount of zipper extends beyond the cushion cover on each side.
At the beginning and end of the zipper, create stops for the slider by sewing back and forth several times across the zipper teeth.
Fasten off all threads.
Tuck the ends of the zipper into the cushion cover.
Abbreviations
st = stitch
sc = single crochet
ch = chain
sl st = slip stitch
bo = bobble stitch
(...) = Indicates the number of stitches in the row
*...* = Everything within *...* is repeated the number of times specified
Pattern
We will crochet a cushion cover with a front and back side that have the same texture, meaning bobbles on both sides. You will crochet two identical pieces, one for the front and one for the back. This cushion cover will measure 45 cm x 45 cm, but you can adjust the size by making more or fewer chains in the first chain row (must be an odd number) and crocheting more or fewer rows.
Front and back pieces
Crochet 2 identical pieces. When chaining, you can add or remove chains to make the cushion cover larger or smaller. Just remember that the total number of chains should be odd.
Row 1: Ch 39, turn. (39)
From now on, end each row with 1 ch, then turn your work. Each new row starts in the 2nd stitch from the hook (skip the chain you just made).
Row 2: 38 sc, turn. (38)
Row 3: *1 bo, 1 sc* × 19. (38)
Row 4: 38 sc, turn. (38)
Repeat rows 3–4 until the piece is square. Fasten off.
Make another piece in the same way.
Join the pieces
Place the pieces wrong side against wrong side (with the bobbles facing outward and oriented the same way), first row against first row.
Start on the left side of the top edge. Insert your hook into the corner, going through both pieces, and work 1 slip stitch (sl st).
Then work single crochet (sc) along the entire side. In the corner, work 3 sc in the same stitch.
Continue in the same way along the next two sides.
If you would like to skip the zipper and instead crochet the cover closed now, insert the inner cushion and then crochet the last side together as well.
When you have crocheted three or four sides together, cut the yarn and fasten off.
Zipper
These instructions apply to zipper tape sold by the yard.
First, measure one side of the cushion cover. Take that measurement, add approx. 2–2.5 in (5–6 cm), and cut the zipper to that length.
Attach the zipper slider onto the zipper tape (see the video tutorial if you are unsure).
Sew the zipper onto both sides using a needle and thread, making sure the same amount of zipper extends beyond the cushion cover on each side.
At the beginning and end of the zipper, create stops for the slider by sewing back and forth several times across the zipper teeth.
Fasten off all threads.
Tuck the ends of the zipper into the cushion cover.
You are now finished! 😊
The rights to this pattern belong to MYO Make Your Own. The pattern or its pictures may not be copied, shared or resold either in parts or in its entirety, but you may sell items you have crocheted from this pattern. If you have questions about the pattern, contact MYO at hello@makeyourown.se.


.jpg)


Share your creations with us
Thank you!
Your comment was sent!