
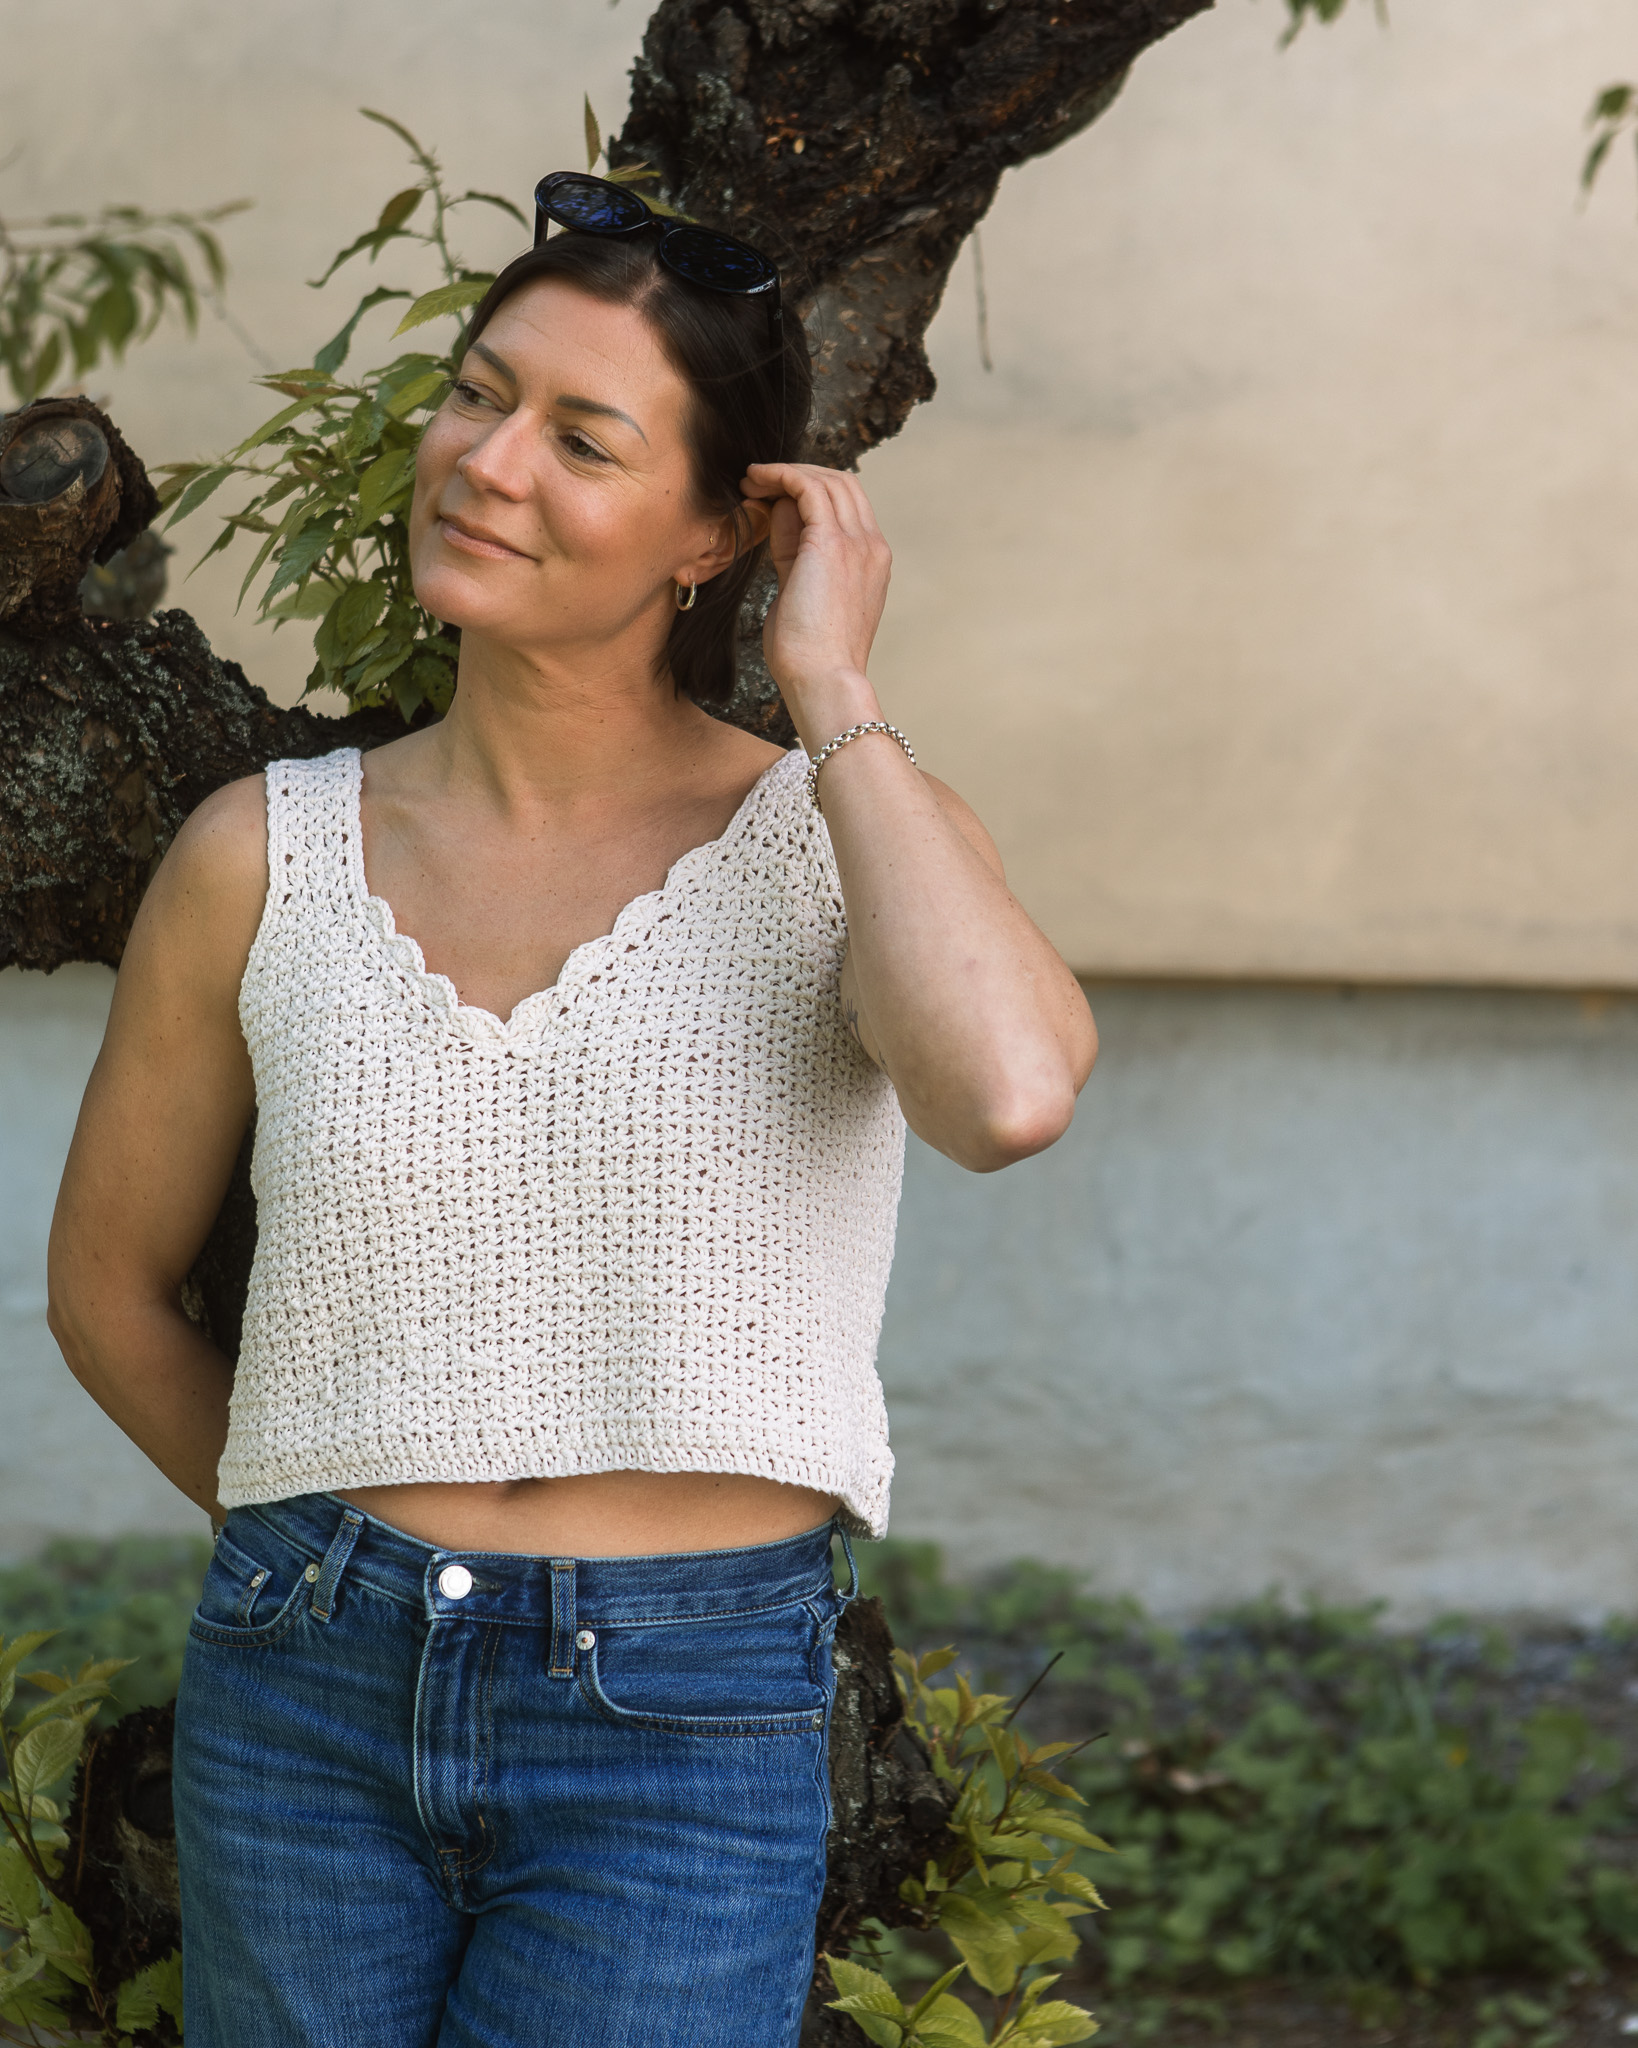
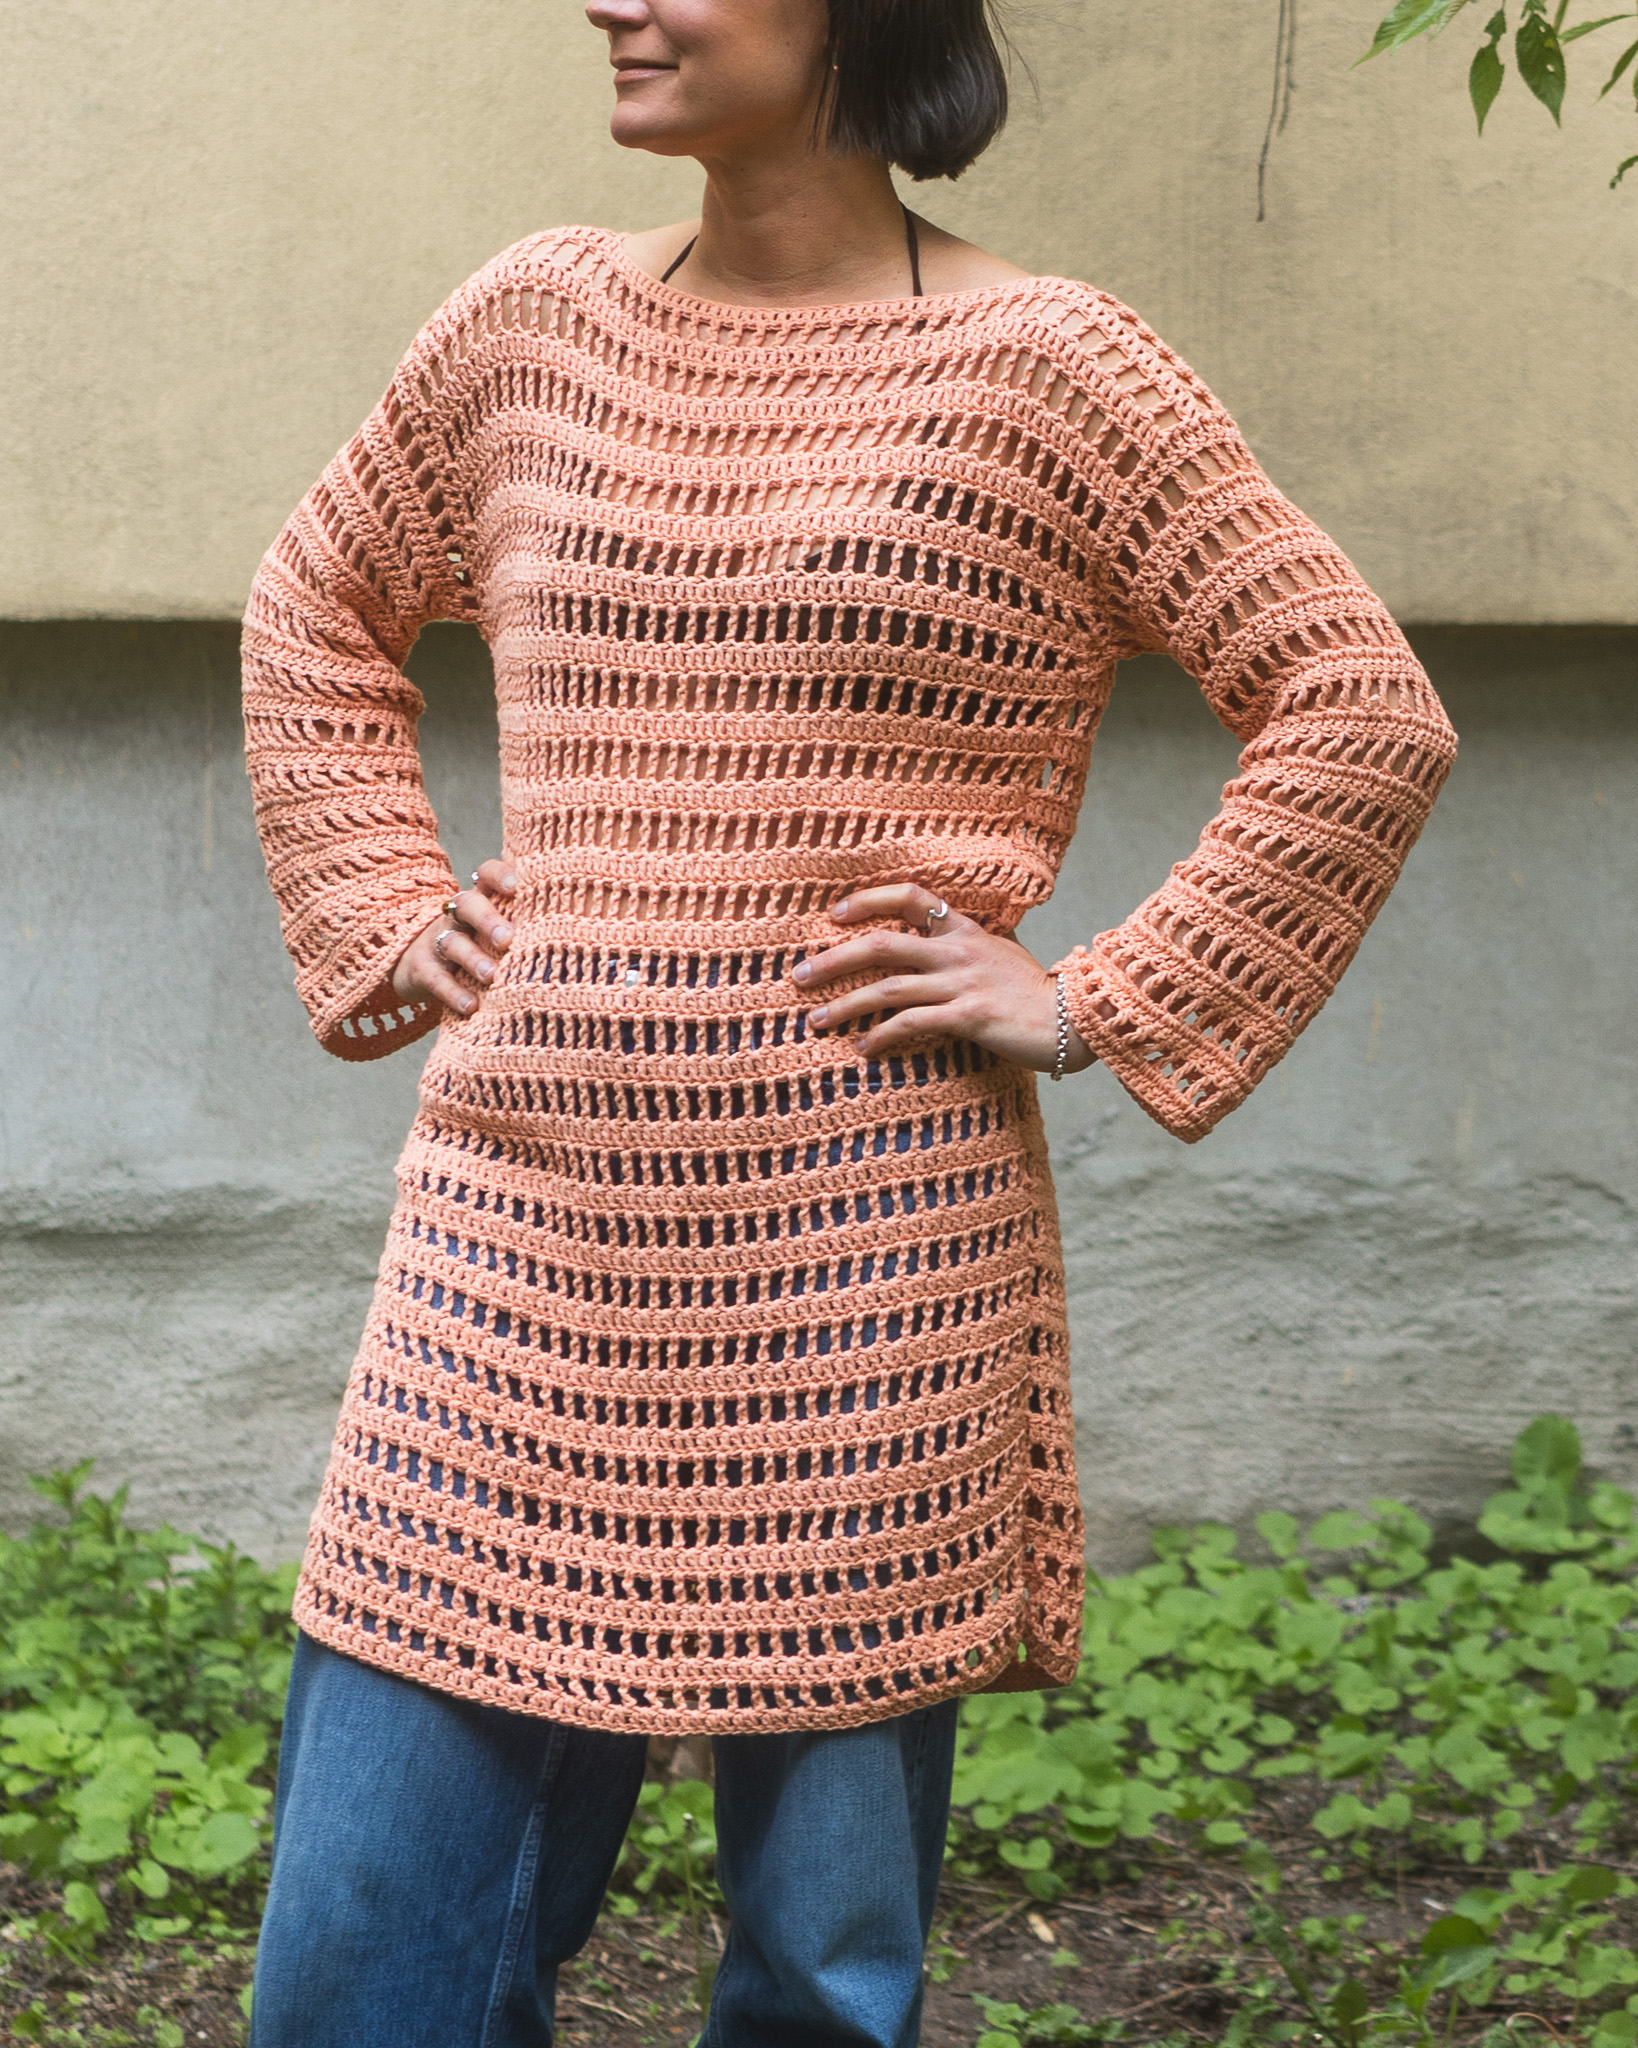
Crochet pullover "Hulda"
A wonderful and cozy pullover in MYO Basic wool!
This Turtleneck Pullover, with this beautiful pattern, is beginner friendly and very easy to make. The crochet pattern is worked in one piece so it is perfect for beginners. The instruction includes size S - XXL but you can easily customize the pullover along the way. You need MYO Basic Wool and crochet hook 5 mm and 6 mm. In addition to yarn and crochet hooks, you will need tape measure, sewing needles and markers. As a marker, you can use a piece of yarn or a hairpin.
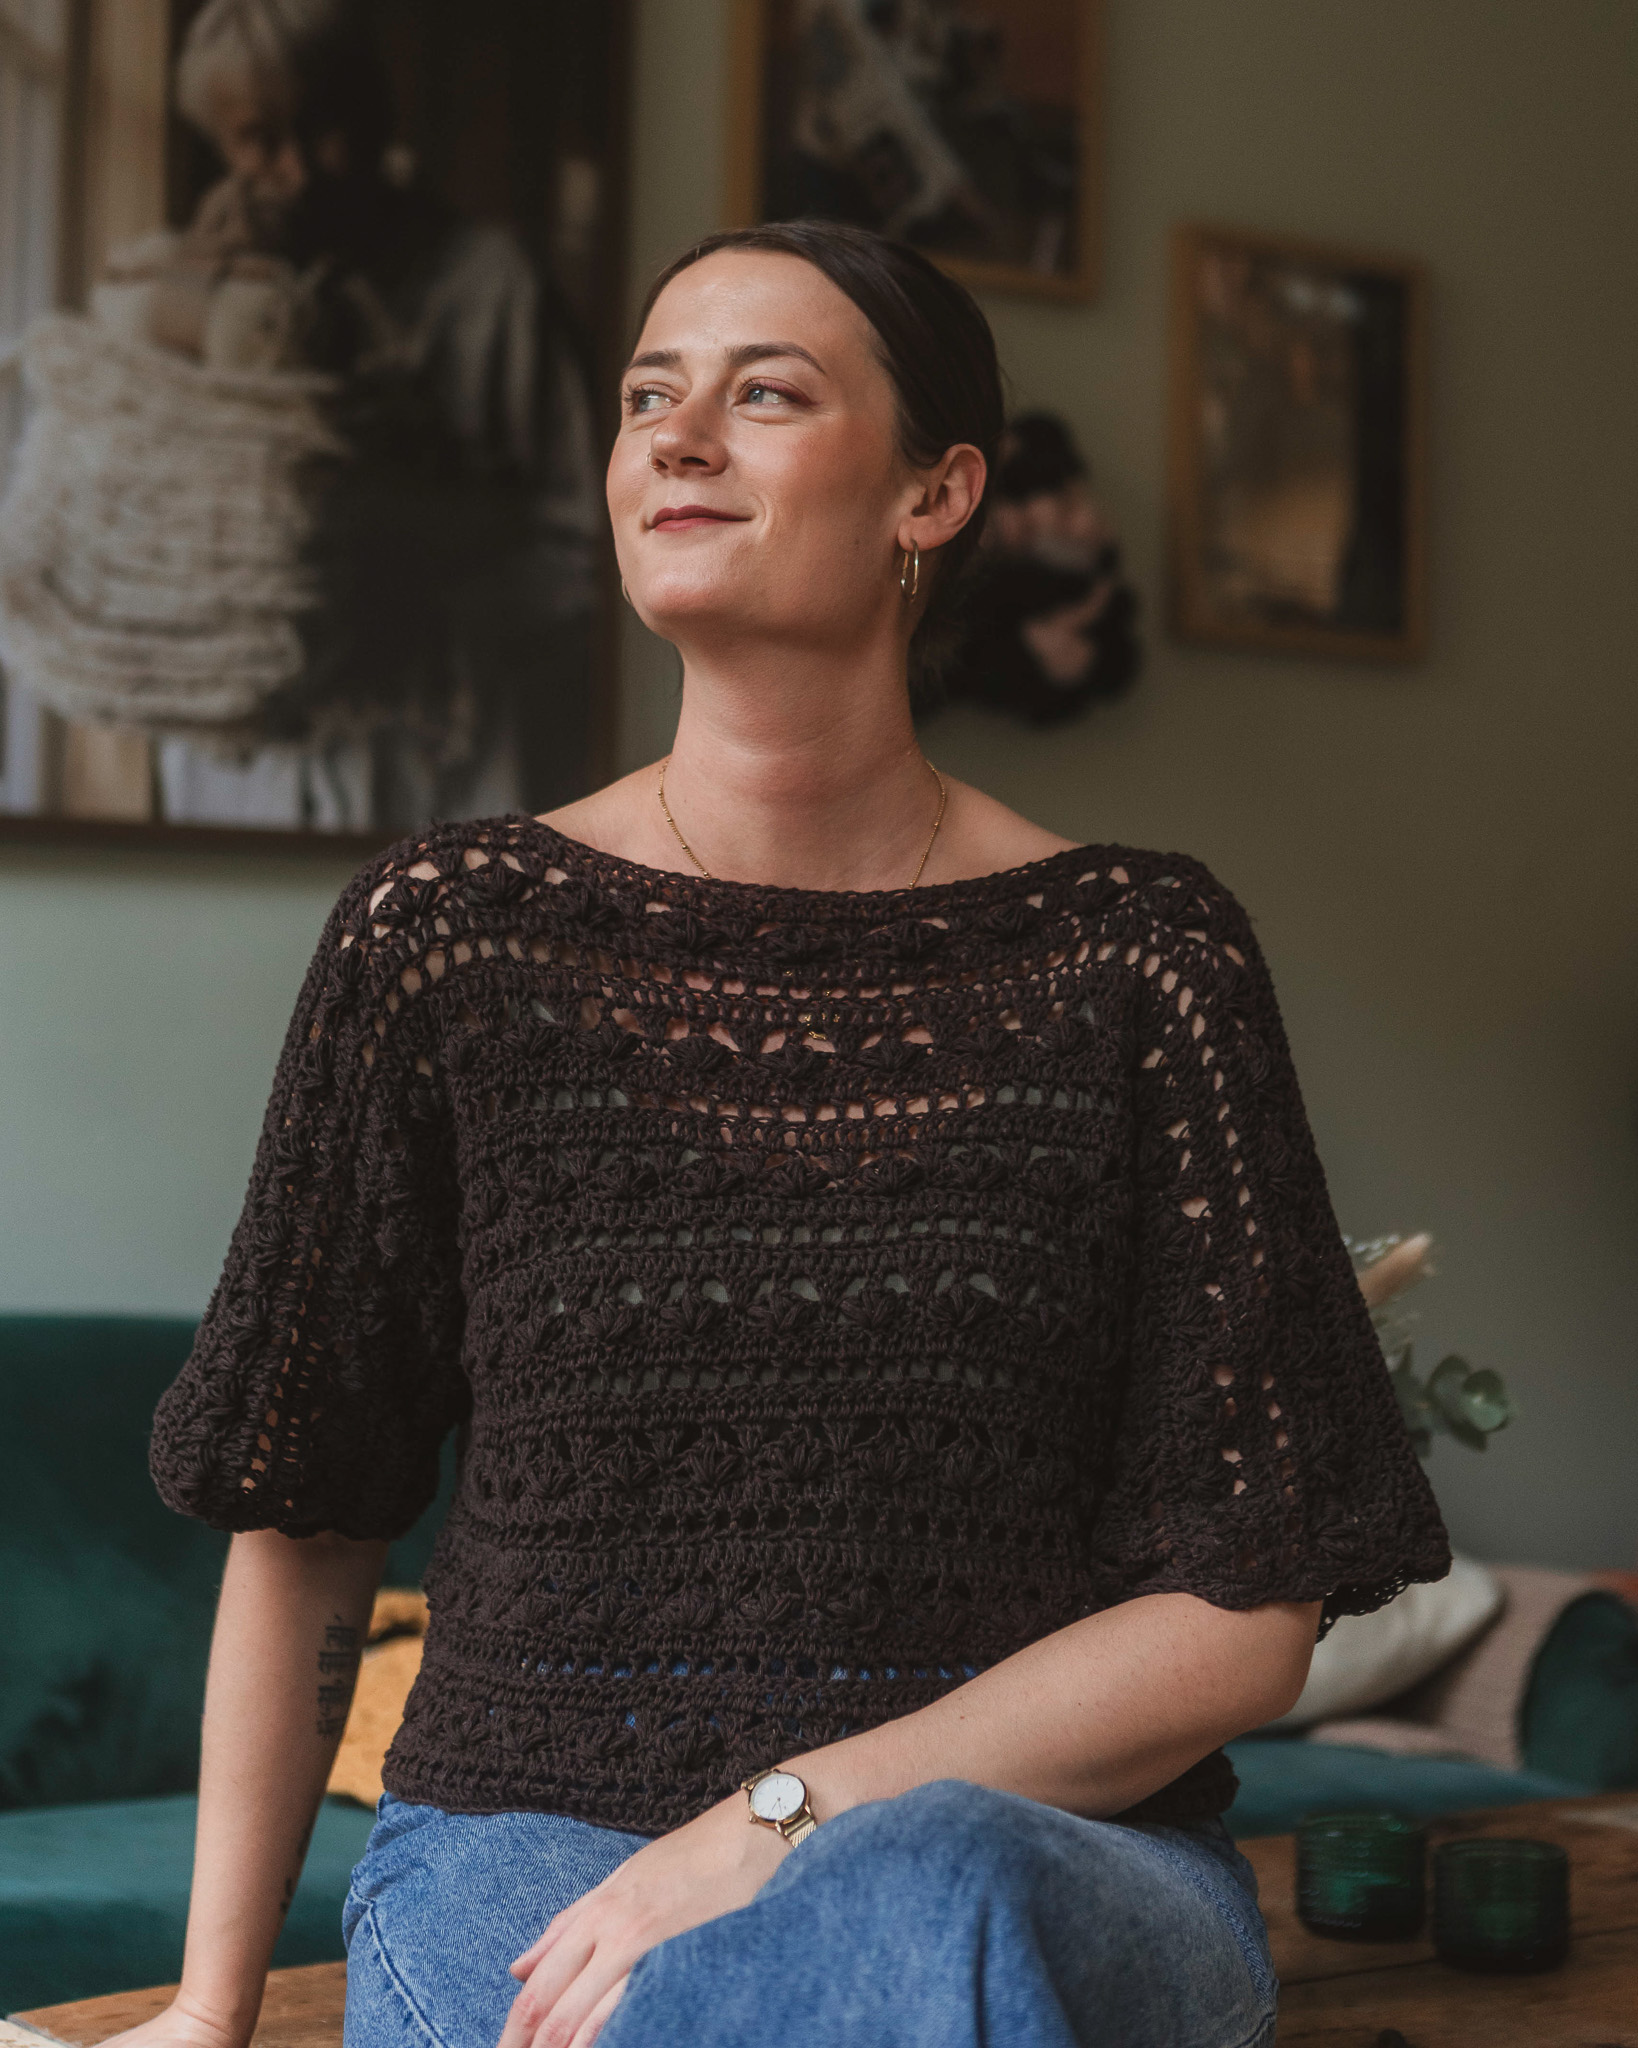
Yarn Consumption: about 900 g for size S & M, about 1000 g for the remaining sizes. It all depends on how tight you crochet. The pullover in the picture shows size M (the creator usually wears XS-S).
Note that we in this instruction uses videos from out technique library. If you are looking for a full instruction video for a crocheted vest, we suggest the cardigan Linnea.
%20(2).jpg)


Here's how to do it
This sweater is easy to crochet despite the beautiful pattern! We start working the pullover from the bottom up and then continue with the other side from the top down to make the pullover complete. At the end, we add the sleeve cuffs and neck collar and finish by sewing the sides. I have provided a breakdown of each section of the pattern so you can alter it to your body type. If you have a pullower that fits you well, measure the size and use its measurements to create your pullover. Hope you like this shirt and the beautiful pattern! /Johanna R

This is what you need:
Here you can directly purchase the material for the product. Please note that the instruction is digital and appears here on the page (no written instruction).


.jpg)
Unleash your creativity
For only 85kr per month you get access to all our 300+ beginner-friendly instructions for crochet, knitting and macrame.
A perfect way to get started with your new hobby!

Info
The technique used in this pattern is called Herringbone double crochet and we have added a short video if you are unsure how to crochet this technique. The cuffs are made with single crochets and crocheted with a 5 mm crochet hook while the pullover is crocheted with a 6 mm crochet hook. We begin to crochet the sweater from the bottom up, and then continue with the other side of the sweater from top to bottom.
At the end, we add cuffs at the sleeves and neck collar and finish by sewing the sides together. You can easily change the crochet pattern to make it longer or wider to match your own measurements or if you want the sweater to be tighter or loose.
Keep in mind that chain 1-2 used at the beginning of each row, do not count as stitches!
Sizing chart (cm)
X (M, L, XL,XXL)
Finished Bust: 48,5/53,5/58,5/63,5/68,5
Finished Length: 51 / -
Finished Arm: 42/44/44/44/44
How to crochet the Herringbone Double Crochet:
- Yarn over, insert hook into a stitch
- Yarn over, pull a loop through the stitch and continue to pull through the first loop on the hook (2 loops on hook)
- Yarn over, pull through 1 loop (2 loops on hook)
- Yarn over, pull through 2 loops to complete the stitch
.jpeg)
Back ribbing, crochet hook 5 mm
Row 1: Crochet a chain of 11 stitches. Turn. If you are unsure how to crochet Herringbone Double Crochet, see below video.
Row 2 (right side): Crochet single crochet in back loop only until you are at the end. Chain one and turn. You have a total of 10 stitches. If you are unsure how to crochet Single Crochett or in Back Loop Only, see below videos.
Row 3-60 (66, 72, 78, 84): Repeat row 2. Keep in mind that you always have 10 stitches in your row.
After you have crocheted your last row, turn.
Crochet one single crochet in each row all around the ribbing on the long side (creates a foundation so we can start crocheting the body), for a total of 60 (66, 72, 78, 84) stitches.


Back piece, crochet hook 6 mm
Row 1 (on the side): Chain 2 (not counted as stitches). Crochet Herringbone double crochet until you are at the end of the row. Turn. In total, you have 60 (66, 72, 78, 84) Herringbone double crochets. If you are unsure how to crochet the Herringbone Double crochet, see below video.


Row 2-21: Repeat row 1. If you want your pullover to be longer, crochet more rows but remember how many because you will crochet the same number of rows on the front piece. We suggest ending on an odd number row to keep the pattern consistent.
Do not cut the yarn.

Sleeves
Info
Sleeve length is 41 (43, 43, 43, 43) cm. With the cuff (cuff folded) the total Sleeve length is 46,5 cm for size S and 48,5 cm for size M-XXL. To lengthen or shorten sleeves, increase or reduce the sleeve chain (1 loose stitch equal to 1 cm).

Left sleeve
Pause the yarn you used for the back piece. Take a new yarn roll and start on the other side (i.e. not the same side where you paused the yarn from your back piece). Make a slip stitch in the top on the left side of the back piece, in the Herringbone double crochet. Chain 47 (49,49,49,49) loose and cut off (this will be the left sleeve).
Right sleeve
Now, use the yarn where you paused the back part. Chain 49 (51,51,51,51). You make two extra chain stitches on this side of the pullover, because the extra chain 2 stitches count as 2 turning stitches, which you do on each turn before turning and crocheting back.
We begin to crochet rows, so that the sleeves are formed. We crochet everything in one piece so from one sleeve, over the body and to the end of the other sleeve.
Row 1 (right side): Crochet a Herringbone double crochet in the 3rd stitch from your crochet hook. Then crochet a Herringbone double crochet in each stitch until the end of the row. In total, you have 154 (164, 170, 176, 182) stitches.
Row 2: Chain 2. Crochet a Herringbone double crochet into the first stitch and continue until you finish the row. Turn. In total, you have 154 (164, 170, 176, 182) stitches.
Row 3-14 (14, 16, 18, 20). Repeat row 2. Do not cut the yarn.
.jpeg)

Mark Neck Opening
Place the markers by counting, from the left and right side, 65 (69, 72, 75, 78) stitches. Place your marker in the next stitch. Including marked stitches, the neck opening should be a total of 24 stitches for S size and 26 stitches for all other sizes.

1) Chain 2 and then crochet a Herringbone double crochet in the first stitch. Crochet Herringbone double crochets in each stitch until you reach your marker. Do not work into the marked stitch.

Chain 24 (26, 26, 26, 26) and then a Herringbone double crochet into the stitch after your second marker. This will be the neckline on the pullover. Crochet a Herringbone double crochet in each stitch until you get to the end, turn. In total, you have 160 (164, 164, 164, 164) stitches.

2) Chain 2, Herringbone double crochet in the first stitch and then in each stitch until you are at the end of the row. Turn. In total, you have 160 (164, 164, 164) stitches.
.jpeg)
Sleeves
Row 1: Chain 2, Herringbone double crochet in the first stitch and then in each stitch until you are at the end of the row. Turn. In total, you have 160 (164, 164, 164, 164) stitches.
Row 2-14 (14, 16, 18, 20): Repeat row 1, cut and fasten off.
Front piece
Count 47 (49, 49, 49, 49) stitches both from the left and from the right. Put a marker in the stitch after. This will be the front of the pullover.
.jpeg)
Row 1 (right side): Attach the yarn to the stitch that is to the right of the right marker. Chain two. Then crochet Herringbone double crochet in each stitch until you are at the end of the row. Turn.
Row 2: Chain 2, Herringbone double crochet in each stitch until you are at the end of the row. Turn. In total, you have 60 (66, 72, 78, 84) stitches.
Row 3-21: Repeat row 2.
Row 22: Chain one. Crochet single crochet in each stitch until you are at the end of the row. Turn. In total, you have 60 (66, 72, 78, 84) stitches.
Ribbing on the front side
This rib is crocheted with single crochets “as-we-go”. So, we do not crochet the rib separately, but directly on the row of single crochet that we crocheted in row 22.
Row 1: Chain 11. Crochet single crochet starting in the second stitch. So you skip the first chain. Crochet single crochet until the end. Skip the first stitch on the edge of the front piece (on row 22). Then crochet a slip stitch into the next two stitches. Turn. In total, you have 10 stitches.
.jpeg)
.jpeg)
Row 2: Skip the slip stitches you just made and crochet single crochet back up, but crochet in back loop only. Turn. In total, you have 10 stitches.
Row 3: Chain 1 and crochet single crochet in back loop only in each stitch until you are at row 22 of the front piece again. Slip stitches in the next two stitches on that row. Turn. In total, you have 10 stitches.
Row 4-60 (66, 72, 78, 84): Repeat row 2-3. Finish after you crochet row 2 (meaning you finish on top of the ribbing). Cut and fasten off.
.jpeg)
Sleeve cuff
Repeat below steps on both sleeves. Use crochet hook 5 mm.
Sleeve edge: Attach the yarn to the edge of the sleeve. Chain 1. Crochet 40 (40, 44, 44, 46) single crochet along the end of the sleeve. Turn.
Sleeve ribbing
You crochet the ribs the same way you did the ribs on the front piece.
Row 1: Chain 19. Crochet single crochet in all stitches starting in the second stitch. Then skip the first stitch on the end of the sleeve. Crochet two slip stitches in the next stitches. Turn. In total, you have 18 stitches.
Row 2: Skip the slip stitches you just crocheted. Crochet single crochet in the back loop only up on the rib again. Turn. A total of 18 stitches.
Row 3: Chain 1, single crochet in the back loop only until you are at the end. Slip stitches in the next 2 stitches. Turn. In total, you have 18 stitches.
Row 4-40 (40, 44, 44, 46): Repeat row 2-3 and end with row 2. Cut and fasten off. Leave a long yarn tail that you will use later to sew the pullover together.
Turtleneck ribbing, crochet hook 5 mm
Note! On Round 1, you should increase three times on both sides of the opening (you thus increase the number of stitches with 3 stitches). An increase is two single crochet in the same stitch. As guide, look in the pictures below. You can also, or instead of the increases, choose to crochet with a 6 mm crochet hook to make the ribbing a little larger.
Round 1: Start by attaching the yarn to the corner on the right side. Chain 1. Crochet single crochet aroung the opening until you are on the other side of the opening. This creates a foundation to use when starting with the ribbing. Slip stitch in the first hole where we chain 1. When you finish the row, you will have a total of 54 (54, 56, 56, 56) stitches.
The ribbing is crocheted in rows, back and forth, and at the end the collar is crocheted together.
Row 1: Chain 27. Start in the 2nd stitch and crochet single crochet until you are back at the edge. Skip the first stitch on the edge of the collar. Then make two slip stitches in the next two stitches. Turn. In total, you have 26 stitches.
.jpeg)
Row 2: Skip the slip stitches you just crocheted. Crochet single crochet in back loop only until you are back. Turn. In total, you have 26 stitches.
Row 3: Chain 1, crochet single crochet in back loop only all the way down. Two slip stitches in the next two stitches. Turn. In total, you have 26 stitches.
Row 4-54 (54, 60, 60, 62): Repeat row 2-3. Finish with row 2. Then we crochet together both sides of the ribbing to form the collar, so that the ribbing is forming a circle. Crochet slip stitches through both sides of the ribbing so that the ribbing closes. Cut and fasten off.
Assembly
Repeat the same for both sides. Fold the pullover with the nice side out. Using sewing needle and yarn, sew the pullover along the sides.
Now you're done! We hope you like your pullover!


Pattern Description (Crochet Terms)
This part of the pattern uses crochet terminology. If you need help along the way, technique videos and additional photos are available in the beginner-friendly section.
Abbreviations
ch = chain
sc = single crochet
hb-dc = herringbone double crochet
sk = skip
st = stitch
blo = back loop only
(...) = number of stitches in the row
Information
The technique used in this pattern is called Herringbone Double Crochet (hb-dc). We have created a technique video that you can watch if you are unsure how to crochet this stitch. You can find the video in Step 1 of the beginner-friendly section.
The ribbing is made using single crochet stitches and worked with a 5 mm crochet hook, while the rest of the sweater is worked with a 6 mm crochet hook.
We begin crocheting the sweater from the bottom up, and then continue with the other side of the sweater from the top down. At the end, we add ribbing at the sleeves and the neckline, and finish by seaming the sides.
You can easily modify the pattern to make it longer or wider to match your own measurements, or if you want the sweater to fit tighter or looser.
Note that the 1–2 chains used at the beginning when turning the work do not count as stitches.
Size Chart (cm)
S (M, L, XL, XXL)
Bust width:
48.5 / 53.5 / 58.5 / 63.5 / 68.5
Length:
51 / –
Sleeve length:
42 / 44 / 44 / 44 / 44
How to crochet a Herringbone Double Crochet
- Yarn over so that you have two loops on the hook. Insert the hook into the stitch.
- Yarn over and pull through the stitch and through the first loop on the hook.
- Yarn over again and pull through one loop on the hook.
- Yarn over one last time and pull through both loops on the hook.
Let’s begin!
Bottom Ribbing of the Sweater – Hook 5 mm
Row 1: Ch 11.
Row 2 (right side): Start in the 2nd st from the hook. Work sc in blo across the row. (10)
Rows 3–60 (66, 72, 78, 84):
Repeat Row 2. Make sure you always have 10 stitches in each row.
After finishing the last row, turn the work and crochet 1 sc in each row along the long side of the ribbing.
Total: 60 (66, 72, 78, 84) sts.
Back Panel – Hook 6 mm
Row 1 (wrong side): Ch 2 (does not count as st). Begin in the st after the ch. Work 1 hb-dc in each stitch across the row. Turn. Total: 60 (66, 72, 78, 84) hb-dc.
Rows 2–21: Repeat Row 1.
If you want to make your sweater longer, you can crochet additional rows, but remember how many rows you add because you will need to crochet the same number for the front panel.
It is recommended to finish with an odd-numbered row, as it makes the stitch pattern look best.
Do not cut the yarn.
Sleeves
The sleeves are now worked directly onto the sweater.
Information
The sleeve length is 41 (43, 43, 43, 43) cm. If you include the ribbing that will be added to the sleeve later, the total sleeve length will be approximately 46.5 cm for size S and 48.5 cm for sizes M–XXL.
If you want to make the sleeves longer, simply chain more stitches. One loosely crocheted chain equals approximately 1 cm.
Left Sleeve
Pause the work and the yarn you used for the back panel.
Take a new skein of yarn and start on the other side of the piece (not the same side where you paused the yarn from the back panel).
Work 1 sl st in the top of the left side of the back panel, in a hb-dc stitch.
Chain 47 (49, 49, 49, 49) loosely, then cut the yarn. (This will form the left sleeve.)
Right Sleeve
Now use the yarn where you paused the back panel.
Chain 49 (51, 51, 51, 51).
You make 2 extra chains on this side of the sweater, because these 2 chains count as turning chains, which you will make at the beginning of each row before turning and crocheting back.
Now we begin working rows so that the sleeves are formed. You will crochet across both sleeves and the back panel.
Row 1 (right side): Work 1 hb-dc in the 3rd ch from the hook. Then work 1 hb-dc in each st across until the end of the row. Total: 154 (164, 170, 176, 182) sts.
Row 2: Ch 2. Work 1 hb-dc in the first st, then continue working 1 hb-dc in each st across. Turn. Total: 154 (164, 170, 176, 182) sts.
Rows 3–14 (14, 16, 18, 20): Repeat Row 2.
Cut the yarn.
Marking the Neck Opening
Now we will place stitch markers to indicate where the neck opening of the sweater will be.
Count 65 (69, 72, 75, 78) stitches from both the right and the left side. Place a stitch marker in the next stitch after each count.
You should place one marker when counting from the left side and one marker when counting from the right side.
The neck opening will have a total of 24 stitches for size S (including the stitches with markers) and 26 stitches for the other sizes.
Row 15: Ch 2, then work hb-dc in each st (starting in the 3rd ch) until you reach your marker. Do not work a stitch in the stitch with the marker. Ch 24 (26, 26, 26, 26), then work 1 hb-dc in the stitch after your second marker. This will form the neck opening of the sweater.
Continue working 1 hb-dc in each stitch across until the end of the row. Turn. Total: 154 (160, 164, 164, 164) sts.
Sleeves – Front Side
Ch 2, then work hb-dc in each st across until the end of the row. Turn. Total: 154 (160, 164, 164, 164) sts.
Row 1: Ch 2. Work hb-dc in the first st, then hb-dc in each st across until the end of the row. Turn. Total: 154 (160, 164, 164, 164) sts.
Rows 2–14 (14, 16, 18, 20): Repeat Row 1, then cut the yarn and fasten off. Total rows: 13 / 13 / 15 / 17 / 19.
Front Panel
Count 47 (49, 49, 49, 49) sts from both the left side and the right side. Place a stitch marker in the stitch after each count. This marks the front panel of the sweater.
Front Panel
Row 1 (RS): Attach the yarn in the stitch to the right of the right marker. Ch 2. Work hb-dc in each st across until the end of the row. Turn.
Row 2: Ch 2, work hb-dc in each st across until the end of the row. Turn. Total: 60 (66, 72, 78, 84) sts
Rows 3–21: Repeat Row 2, or work the same number of rows as you made on the back panel.
Row 22: Ch 1. Work sc in each st across until the end of the row. Turn. Total: 60 (66, 72, 78, 84) sts
Ribbing on the Front Panel Hook: 5 mm
This ribbing is worked as-you-go, meaning it is crocheted directly onto the row of sc from Row 22 rather than separately.
Chain 11.
Row 1: Work sc starting in the 2nd ch from the hook (skip the first chain). Work sc across. Skip the first st on the edge of the front panel (Row 22). Then work sl st in the next 2 sts. Turn. Total: 10 sts
Row 2: Skip the sl st you just made and work sc back up the ribbing, working in blo. Turn. Total: 10 sts
Row 3: Ch 1. Work sc in the blo in each st until you reach Row 22 of the front panel again. Work sl st in the next 2 sts on that row. Turn. Total: 10 sts
Rows 4–60 (66, 72, 78, 84): Repeat Rows 2–3.
Finish after completing Row 2 (so you end at the top of the ribbing). Cut the yarn and fasten off.
Sleeve Ribbing Hook: 5 mm
Repeat the following steps for both sleeves.
Sleeve – Step 1
Attach yarn to the edge of the sleeve. Ch 1.
Work 40 (40, 44, 44, 46) sc evenly along the edge of the sleeve, starting in the stitch where you attached the yarn. Turn.
The ribbing is worked the same way as the front ribbing.
Chain 19.
Row 1: Work sc starting in the 2nd ch from the hook. Skip the first st on the sleeve edge. Then work 2 sl st in the next 2 sts. Turn. Total: 18 sts
Row 2: Skip the slip stitches you just made. Work sc in blo back up the ribbing. Turn. Total: 18 sts (ribbing)
Row 3: Ch 1, then work sc in blo until the start again. Work sl st in the next 2 sts on the sleeve edge. Turn. Total: 18 sts (ribbing).
Rows 4–40 (40, 44, 44, 46): Repeat Rows 2–3, ending with Row 2.
Cut the yarn and fasten off. Leave a long yarn tail that will later be used to sew the sweater together.
Turtleneck Ribbing (Neckline) Hook: 5 mm
Note: On Round 1, increase 3 times on each side of the opening (a total increase of 6 sts).
Alternatively, instead of increasing (or in addition), you may use a 6 mm hook to make the ribbing slightly larger.
Round 1: Attach the yarn in the corner on the right side. Ch 1. Work sc evenly around the neckline opening. You are working one round of single crochet around the opening before starting the ribbing. Join with sl st in the first ch-1 space. Total: 54 (54, 56, 56, 56) sts. Now the ribbing begins.
The ribbing is worked in rows, just like the sleeve ribbing. You will work back and forth, and at the end the collar will be sewn together.
Row 1: Ch 27, then turn to work back toward the sweater. Start in the 2nd ch from the hook and work sc across until you reach the neckline. Skip the first stitch on the collar edge, then work 2 sl st in the next 2 sts. Turn. Total: 26 sts
Row 2: Skip the sl sts you just made. Work sc in BLO until you reach the top of the ribbing again. Turn. Total: 26 sts
Row 3: Ch 1, then work sc in BLO all the way down toward the neckline. Work 2 sl sts in the next 2 sts on the neckline edge. Turn. Total: 26 sts
Rows 4–54 (54, 60, 60, 62): Repeat Rows 2–3.
Finish with Row 2.
Next, join both sides of the ribbing so the collar becomes circular. Work sl sts through both sides of the ribbing to close the collar.
Cut the yarn and fasten off.
Assembly
Repeat the same steps for both sides.
Fold the sweater so the right side faces outward. Using a yarn needle and yarn, sew the sweater along the sides. Sew by inserting the needle up and down through the spaces between stitches. There are several ways to sew the sides together, so choose the method that works best for you.
Your sweater is now finished! We hope you love it :)
The rights to this pattern belong to MYO Make Your Own. The pattern or its pictures may not be copied, shared or resold either in parts or in its entirety, but you may sell items you have crocheted from this pattern. If you have questions about the pattern, contact MYO at hello@makeyourown.se.
Info
The technique used in this pattern is called Herringbone double crochet and we have added a short video if you are unsure how to crochet this technique. The cuffs are made with single crochets and crocheted with a 5 mm crochet hook while the pullover is crocheted with a 6 mm crochet hook. We begin to crochet the sweater from the bottom up, and then continue with the other side of the sweater from top to bottom.
At the end, we add cuffs at the sleeves and neck collar and finish by sewing the sides together. You can easily change the crochet pattern to make it longer or wider to match your own measurements or if you want the sweater to be tighter or loose.
Keep in mind that chain 1-2 used at the beginning of each row, do not count as stitches!
Sizing chart (cm)
X (M, L, XL,XXL)
Finished Bust: 48,5/53,5/58,5/63,5/68,5
Finished Length: 51 / -
Finished Arm: 42/44/44/44/44
How to crochet the Herringbone Double Crochet:
- Yarn over, insert hook into a stitch
- Yarn over, pull a loop through the stitch and continue to pull through the first loop on the hook (2 loops on hook)
- Yarn over, pull through 1 loop (2 loops on hook)
- Yarn over, pull through 2 loops to complete the stitch
Back ribbing, crochet hook 5 mm
Row 1: Crochet a chain of 11 stitches. Turn. If you are unsure how to crochet Herringbone Double Crochet, see below video.
Row 2 (right side): Crochet single crochet in back loop only until you are at the end. Chain one and turn. You have a total of 10 stitches. If you are unsure how to crochet Single Crochett or in Back Loop Only, see below videos.
Row 3-60 (66, 72, 78, 84): Repeat row 2. Keep in mind that you always have 10 stitches in your row.
After you have crocheted your last row, turn.
Crochet one single crochet in each row all around the ribbing on the long side (creates a foundation so we can start crocheting the body), for a total of 60 (66, 72, 78, 84) stitches.
Back piece, crochet hook 6 mm
Row 1 (on the side): Chain 2 (not counted as stitches). Crochet Herringbone double crochet until you are at the end of the row. Turn. In total, you have 60 (66, 72, 78, 84) Herringbone double crochets. If you are unsure how to crochet the Herringbone Double crochet, see below video.
Row 2-21: Repeat row 1. If you want your pullover to be longer, crochet more rows but remember how many because you will crochet the same number of rows on the front piece. We suggest ending on an odd number row to keep the pattern consistent.
Do not cut the yarn.
Sleeves
Info
Sleeve length is 41 (43, 43, 43, 43) cm. With the cuff (cuff folded) the total Sleeve length is 46,5 cm for size S and 48,5 cm for size M-XXL. To lengthen or shorten sleeves, increase or reduce the sleeve chain (1 loose stitch equal to 1 cm).
Left sleeve
Pause the yarn you used for the back piece. Take a new yarn roll and start on the other side (i.e. not the same side where you paused the yarn from your back piece). Make a slip stitch in the top on the left side of the back piece, in the Herringbone double crochet. Chain 47 (49,49,49,49) loose and cut off (this will be the left sleeve).
Right sleeve
Now, use the yarn where you paused the back part. Chain 49 (51,51,51,51). You make two extra chain stitches on this side of the pullover, because the extra chain 2 stitches count as 2 turning stitches, which you do on each turn before turning and crocheting back.
We begin to crochet rows, so that the sleeves are formed. We crochet everything in one piece so from one sleeve, over the body and to the end of the other sleeve.
Row 1 (right side): Crochet a Herringbone double crochet in the 3rd stitch from your crochet hook. Then crochet a Herringbone double crochet in each stitch until the end of the row. In total, you have 154 (164, 170, 176, 182) stitches.
Row 2: Chain 2. Crochet a Herringbone double crochet into the first stitch and continue until you finish the row. Turn. In total, you have 154 (164, 170, 176, 182) stitches.
Row 3-14 (14, 16, 18, 20). Repeat row 2. Do not cut the yarn.
Mark Neck Opening
Place the markers by counting, from the left and right side, 65 (69, 72, 75, 78) stitches. Place your marker in the next stitch. Including marked stitches, the neck opening should be a total of 24 stitches for S size and 26 stitches for all other sizes.
1) Chain 2 and then crochet a Herringbone double crochet in the first stitch. Crochet Herringbone double crochets in each stitch until you reach your marker. Do not work into the marked stitch.
Chain 24 (26, 26, 26, 26) and then a Herringbone double crochet into the stitch after your second marker. This will be the neckline on the pullover. Crochet a Herringbone double crochet in each stitch until you get to the end, turn. In total, you have 160 (164, 164, 164, 164) stitches.
2) Chain 2, Herringbone double crochet in the first stitch and then in each stitch until you are at the end of the row. Turn. In total, you have 160 (164, 164, 164) stitches.
Sleeves
Row 1: Chain 2, Herringbone double crochet in the first stitch and then in each stitch until you are at the end of the row. Turn. In total, you have 160 (164, 164, 164, 164) stitches.
Row 2-14 (14, 16, 18, 20): Repeat row 1, cut and fasten off.
Front piece
Count 47 (49, 49, 49, 49) stitches both from the left and from the right. Put a marker in the stitch after. This will be the front of the pullover.
Row 1 (right side): Attach the yarn to the stitch that is to the right of the right marker. Chain two. Then crochet Herringbone double crochet in each stitch until you are at the end of the row. Turn.
Row 2: Chain 2, Herringbone double crochet in each stitch until you are at the end of the row. Turn. In total, you have 60 (66, 72, 78, 84) stitches.
Row 3-21: Repeat row 2.
Row 22: Chain one. Crochet single crochet in each stitch until you are at the end of the row. Turn. In total, you have 60 (66, 72, 78, 84) stitches.
Ribbing on the front side
This rib is crocheted with single crochets “as-we-go”. So, we do not crochet the rib separately, but directly on the row of single crochet that we crocheted in row 22.
Row 1: Chain 11. Crochet single crochet starting in the second stitch. So you skip the first chain. Crochet single crochet until the end. Skip the first stitch on the edge of the front piece (on row 22). Then crochet a slip stitch into the next two stitches. Turn. In total, you have 10 stitches.
Row 2: Skip the slip stitches you just made and crochet single crochet back up, but crochet in back loop only. Turn. In total, you have 10 stitches.
Row 3: Chain 1 and crochet single crochet in back loop only in each stitch until you are at row 22 of the front piece again. Slip stitches in the next two stitches on that row. Turn. In total, you have 10 stitches.
Row 4-60 (66, 72, 78, 84): Repeat row 2-3. Finish after you crochet row 2 (meaning you finish on top of the ribbing). Cut and fasten off.
Sleeve cuff
Repeat below steps on both sleeves. Use crochet hook 5 mm.
Sleeve edge: Attach the yarn to the edge of the sleeve. Chain 1. Crochet 40 (40, 44, 44, 46) single crochet along the end of the sleeve. Turn.
Sleeve ribbing
You crochet the ribs the same way you did the ribs on the front piece.
Row 1: Chain 19. Crochet single crochet in all stitches starting in the second stitch. Then skip the first stitch on the end of the sleeve. Crochet two slip stitches in the next stitches. Turn. In total, you have 18 stitches.
Row 2: Skip the slip stitches you just crocheted. Crochet single crochet in the back loop only up on the rib again. Turn. A total of 18 stitches.
Row 3: Chain 1, single crochet in the back loop only until you are at the end. Slip stitches in the next 2 stitches. Turn. In total, you have 18 stitches.
Row 4-40 (40, 44, 44, 46): Repeat row 2-3 and end with row 2. Cut and fasten off. Leave a long yarn tail that you will use later to sew the pullover together.
Turtleneck ribbing, crochet hook 5 mm
Note! On Round 1, you should increase three times on both sides of the opening (you thus increase the number of stitches with 3 stitches). An increase is two single crochet in the same stitch. As guide, look in the pictures below. You can also, or instead of the increases, choose to crochet with a 6 mm crochet hook to make the ribbing a little larger.
Round 1: Start by attaching the yarn to the corner on the right side. Chain 1. Crochet single crochet aroung the opening until you are on the other side of the opening. This creates a foundation to use when starting with the ribbing. Slip stitch in the first hole where we chain 1. When you finish the row, you will have a total of 54 (54, 56, 56, 56) stitches.
The ribbing is crocheted in rows, back and forth, and at the end the collar is crocheted together.
Row 1: Chain 27. Start in the 2nd stitch and crochet single crochet until you are back at the edge. Skip the first stitch on the edge of the collar. Then make two slip stitches in the next two stitches. Turn. In total, you have 26 stitches.
Row 2: Skip the slip stitches you just crocheted. Crochet single crochet in back loop only until you are back. Turn. In total, you have 26 stitches.
Row 3: Chain 1, crochet single crochet in back loop only all the way down. Two slip stitches in the next two stitches. Turn. In total, you have 26 stitches.
Row 4-54 (54, 60, 60, 62): Repeat row 2-3. Finish with row 2. Then we crochet together both sides of the ribbing to form the collar, so that the ribbing is forming a circle. Crochet slip stitches through both sides of the ribbing so that the ribbing closes. Cut and fasten off.
Assembly
Repeat the same for both sides. Fold the pullover with the nice side out. Using sewing needle and yarn, sew the pullover along the sides.
Now you're done! We hope you like your pullover!
Pattern Description (Crochet Terms)
This part of the pattern uses crochet terminology. If you need help along the way, technique videos and additional photos are available in the beginner-friendly section.
Abbreviations
ch = chain
sc = single crochet
hb-dc = herringbone double crochet
sk = skip
st = stitch
blo = back loop only
(...) = number of stitches in the row
Information
The technique used in this pattern is called Herringbone Double Crochet (hb-dc). We have created a technique video that you can watch if you are unsure how to crochet this stitch. You can find the video in Step 1 of the beginner-friendly section.
The ribbing is made using single crochet stitches and worked with a 5 mm crochet hook, while the rest of the sweater is worked with a 6 mm crochet hook.
We begin crocheting the sweater from the bottom up, and then continue with the other side of the sweater from the top down. At the end, we add ribbing at the sleeves and the neckline, and finish by seaming the sides.
You can easily modify the pattern to make it longer or wider to match your own measurements, or if you want the sweater to fit tighter or looser.
Note that the 1–2 chains used at the beginning when turning the work do not count as stitches.
Size Chart (cm)
S (M, L, XL, XXL)
Bust width:
48.5 / 53.5 / 58.5 / 63.5 / 68.5
Length:
51 / –
Sleeve length:
42 / 44 / 44 / 44 / 44
How to crochet a Herringbone Double Crochet
- Yarn over so that you have two loops on the hook. Insert the hook into the stitch.
- Yarn over and pull through the stitch and through the first loop on the hook.
- Yarn over again and pull through one loop on the hook.
- Yarn over one last time and pull through both loops on the hook.
Let’s begin!
Bottom Ribbing of the Sweater – Hook 5 mm
Row 1: Ch 11.
Row 2 (right side): Start in the 2nd st from the hook. Work sc in blo across the row. (10)
Rows 3–60 (66, 72, 78, 84):
Repeat Row 2. Make sure you always have 10 stitches in each row.
After finishing the last row, turn the work and crochet 1 sc in each row along the long side of the ribbing.
Total: 60 (66, 72, 78, 84) sts.
Back Panel – Hook 6 mm
Row 1 (wrong side): Ch 2 (does not count as st). Begin in the st after the ch. Work 1 hb-dc in each stitch across the row. Turn. Total: 60 (66, 72, 78, 84) hb-dc.
Rows 2–21: Repeat Row 1.
If you want to make your sweater longer, you can crochet additional rows, but remember how many rows you add because you will need to crochet the same number for the front panel.
It is recommended to finish with an odd-numbered row, as it makes the stitch pattern look best.
Do not cut the yarn.
Sleeves
The sleeves are now worked directly onto the sweater.
Information
The sleeve length is 41 (43, 43, 43, 43) cm. If you include the ribbing that will be added to the sleeve later, the total sleeve length will be approximately 46.5 cm for size S and 48.5 cm for sizes M–XXL.
If you want to make the sleeves longer, simply chain more stitches. One loosely crocheted chain equals approximately 1 cm.
Left Sleeve
Pause the work and the yarn you used for the back panel.
Take a new skein of yarn and start on the other side of the piece (not the same side where you paused the yarn from the back panel).
Work 1 sl st in the top of the left side of the back panel, in a hb-dc stitch.
Chain 47 (49, 49, 49, 49) loosely, then cut the yarn. (This will form the left sleeve.)
Right Sleeve
Now use the yarn where you paused the back panel.
Chain 49 (51, 51, 51, 51).
You make 2 extra chains on this side of the sweater, because these 2 chains count as turning chains, which you will make at the beginning of each row before turning and crocheting back.
Now we begin working rows so that the sleeves are formed. You will crochet across both sleeves and the back panel.
Row 1 (right side): Work 1 hb-dc in the 3rd ch from the hook. Then work 1 hb-dc in each st across until the end of the row. Total: 154 (164, 170, 176, 182) sts.
Row 2: Ch 2. Work 1 hb-dc in the first st, then continue working 1 hb-dc in each st across. Turn. Total: 154 (164, 170, 176, 182) sts.
Rows 3–14 (14, 16, 18, 20): Repeat Row 2.
Cut the yarn.
Marking the Neck Opening
Now we will place stitch markers to indicate where the neck opening of the sweater will be.
Count 65 (69, 72, 75, 78) stitches from both the right and the left side. Place a stitch marker in the next stitch after each count.
You should place one marker when counting from the left side and one marker when counting from the right side.
The neck opening will have a total of 24 stitches for size S (including the stitches with markers) and 26 stitches for the other sizes.
Row 15: Ch 2, then work hb-dc in each st (starting in the 3rd ch) until you reach your marker. Do not work a stitch in the stitch with the marker. Ch 24 (26, 26, 26, 26), then work 1 hb-dc in the stitch after your second marker. This will form the neck opening of the sweater.
Continue working 1 hb-dc in each stitch across until the end of the row. Turn. Total: 154 (160, 164, 164, 164) sts.
Sleeves – Front Side
Ch 2, then work hb-dc in each st across until the end of the row. Turn. Total: 154 (160, 164, 164, 164) sts.
Row 1: Ch 2. Work hb-dc in the first st, then hb-dc in each st across until the end of the row. Turn. Total: 154 (160, 164, 164, 164) sts.
Rows 2–14 (14, 16, 18, 20): Repeat Row 1, then cut the yarn and fasten off. Total rows: 13 / 13 / 15 / 17 / 19.
Front Panel
Count 47 (49, 49, 49, 49) sts from both the left side and the right side. Place a stitch marker in the stitch after each count. This marks the front panel of the sweater.
Front Panel
Row 1 (RS): Attach the yarn in the stitch to the right of the right marker. Ch 2. Work hb-dc in each st across until the end of the row. Turn.
Row 2: Ch 2, work hb-dc in each st across until the end of the row. Turn. Total: 60 (66, 72, 78, 84) sts
Rows 3–21: Repeat Row 2, or work the same number of rows as you made on the back panel.
Row 22: Ch 1. Work sc in each st across until the end of the row. Turn. Total: 60 (66, 72, 78, 84) sts
Ribbing on the Front Panel Hook: 5 mm
This ribbing is worked as-you-go, meaning it is crocheted directly onto the row of sc from Row 22 rather than separately.
Chain 11.
Row 1: Work sc starting in the 2nd ch from the hook (skip the first chain). Work sc across. Skip the first st on the edge of the front panel (Row 22). Then work sl st in the next 2 sts. Turn. Total: 10 sts
Row 2: Skip the sl st you just made and work sc back up the ribbing, working in blo. Turn. Total: 10 sts
Row 3: Ch 1. Work sc in the blo in each st until you reach Row 22 of the front panel again. Work sl st in the next 2 sts on that row. Turn. Total: 10 sts
Rows 4–60 (66, 72, 78, 84): Repeat Rows 2–3.
Finish after completing Row 2 (so you end at the top of the ribbing). Cut the yarn and fasten off.
Sleeve Ribbing Hook: 5 mm
Repeat the following steps for both sleeves.
Sleeve – Step 1
Attach yarn to the edge of the sleeve. Ch 1.
Work 40 (40, 44, 44, 46) sc evenly along the edge of the sleeve, starting in the stitch where you attached the yarn. Turn.
The ribbing is worked the same way as the front ribbing.
Chain 19.
Row 1: Work sc starting in the 2nd ch from the hook. Skip the first st on the sleeve edge. Then work 2 sl st in the next 2 sts. Turn. Total: 18 sts
Row 2: Skip the slip stitches you just made. Work sc in blo back up the ribbing. Turn. Total: 18 sts (ribbing)
Row 3: Ch 1, then work sc in blo until the start again. Work sl st in the next 2 sts on the sleeve edge. Turn. Total: 18 sts (ribbing).
Rows 4–40 (40, 44, 44, 46): Repeat Rows 2–3, ending with Row 2.
Cut the yarn and fasten off. Leave a long yarn tail that will later be used to sew the sweater together.
Turtleneck Ribbing (Neckline) Hook: 5 mm
Note: On Round 1, increase 3 times on each side of the opening (a total increase of 6 sts).
Alternatively, instead of increasing (or in addition), you may use a 6 mm hook to make the ribbing slightly larger.
Round 1: Attach the yarn in the corner on the right side. Ch 1. Work sc evenly around the neckline opening. You are working one round of single crochet around the opening before starting the ribbing. Join with sl st in the first ch-1 space. Total: 54 (54, 56, 56, 56) sts. Now the ribbing begins.
The ribbing is worked in rows, just like the sleeve ribbing. You will work back and forth, and at the end the collar will be sewn together.
Row 1: Ch 27, then turn to work back toward the sweater. Start in the 2nd ch from the hook and work sc across until you reach the neckline. Skip the first stitch on the collar edge, then work 2 sl st in the next 2 sts. Turn. Total: 26 sts
Row 2: Skip the sl sts you just made. Work sc in BLO until you reach the top of the ribbing again. Turn. Total: 26 sts
Row 3: Ch 1, then work sc in BLO all the way down toward the neckline. Work 2 sl sts in the next 2 sts on the neckline edge. Turn. Total: 26 sts
Rows 4–54 (54, 60, 60, 62): Repeat Rows 2–3.
Finish with Row 2.
Next, join both sides of the ribbing so the collar becomes circular. Work sl sts through both sides of the ribbing to close the collar.
Cut the yarn and fasten off.
Assembly
Repeat the same steps for both sides.
Fold the sweater so the right side faces outward. Using a yarn needle and yarn, sew the sweater along the sides. Sew by inserting the needle up and down through the spaces between stitches. There are several ways to sew the sides together, so choose the method that works best for you.
Your sweater is now finished! We hope you love it :)
The rights to this pattern belong to MYO Make Your Own. The pattern or its pictures may not be copied, shared or resold either in parts or in its entirety, but you may sell items you have crocheted from this pattern. If you have questions about the pattern, contact MYO at hello@makeyourown.se.
%20(5).jpg)
Share your creations with us
Thank you!
Your comment was sent!