
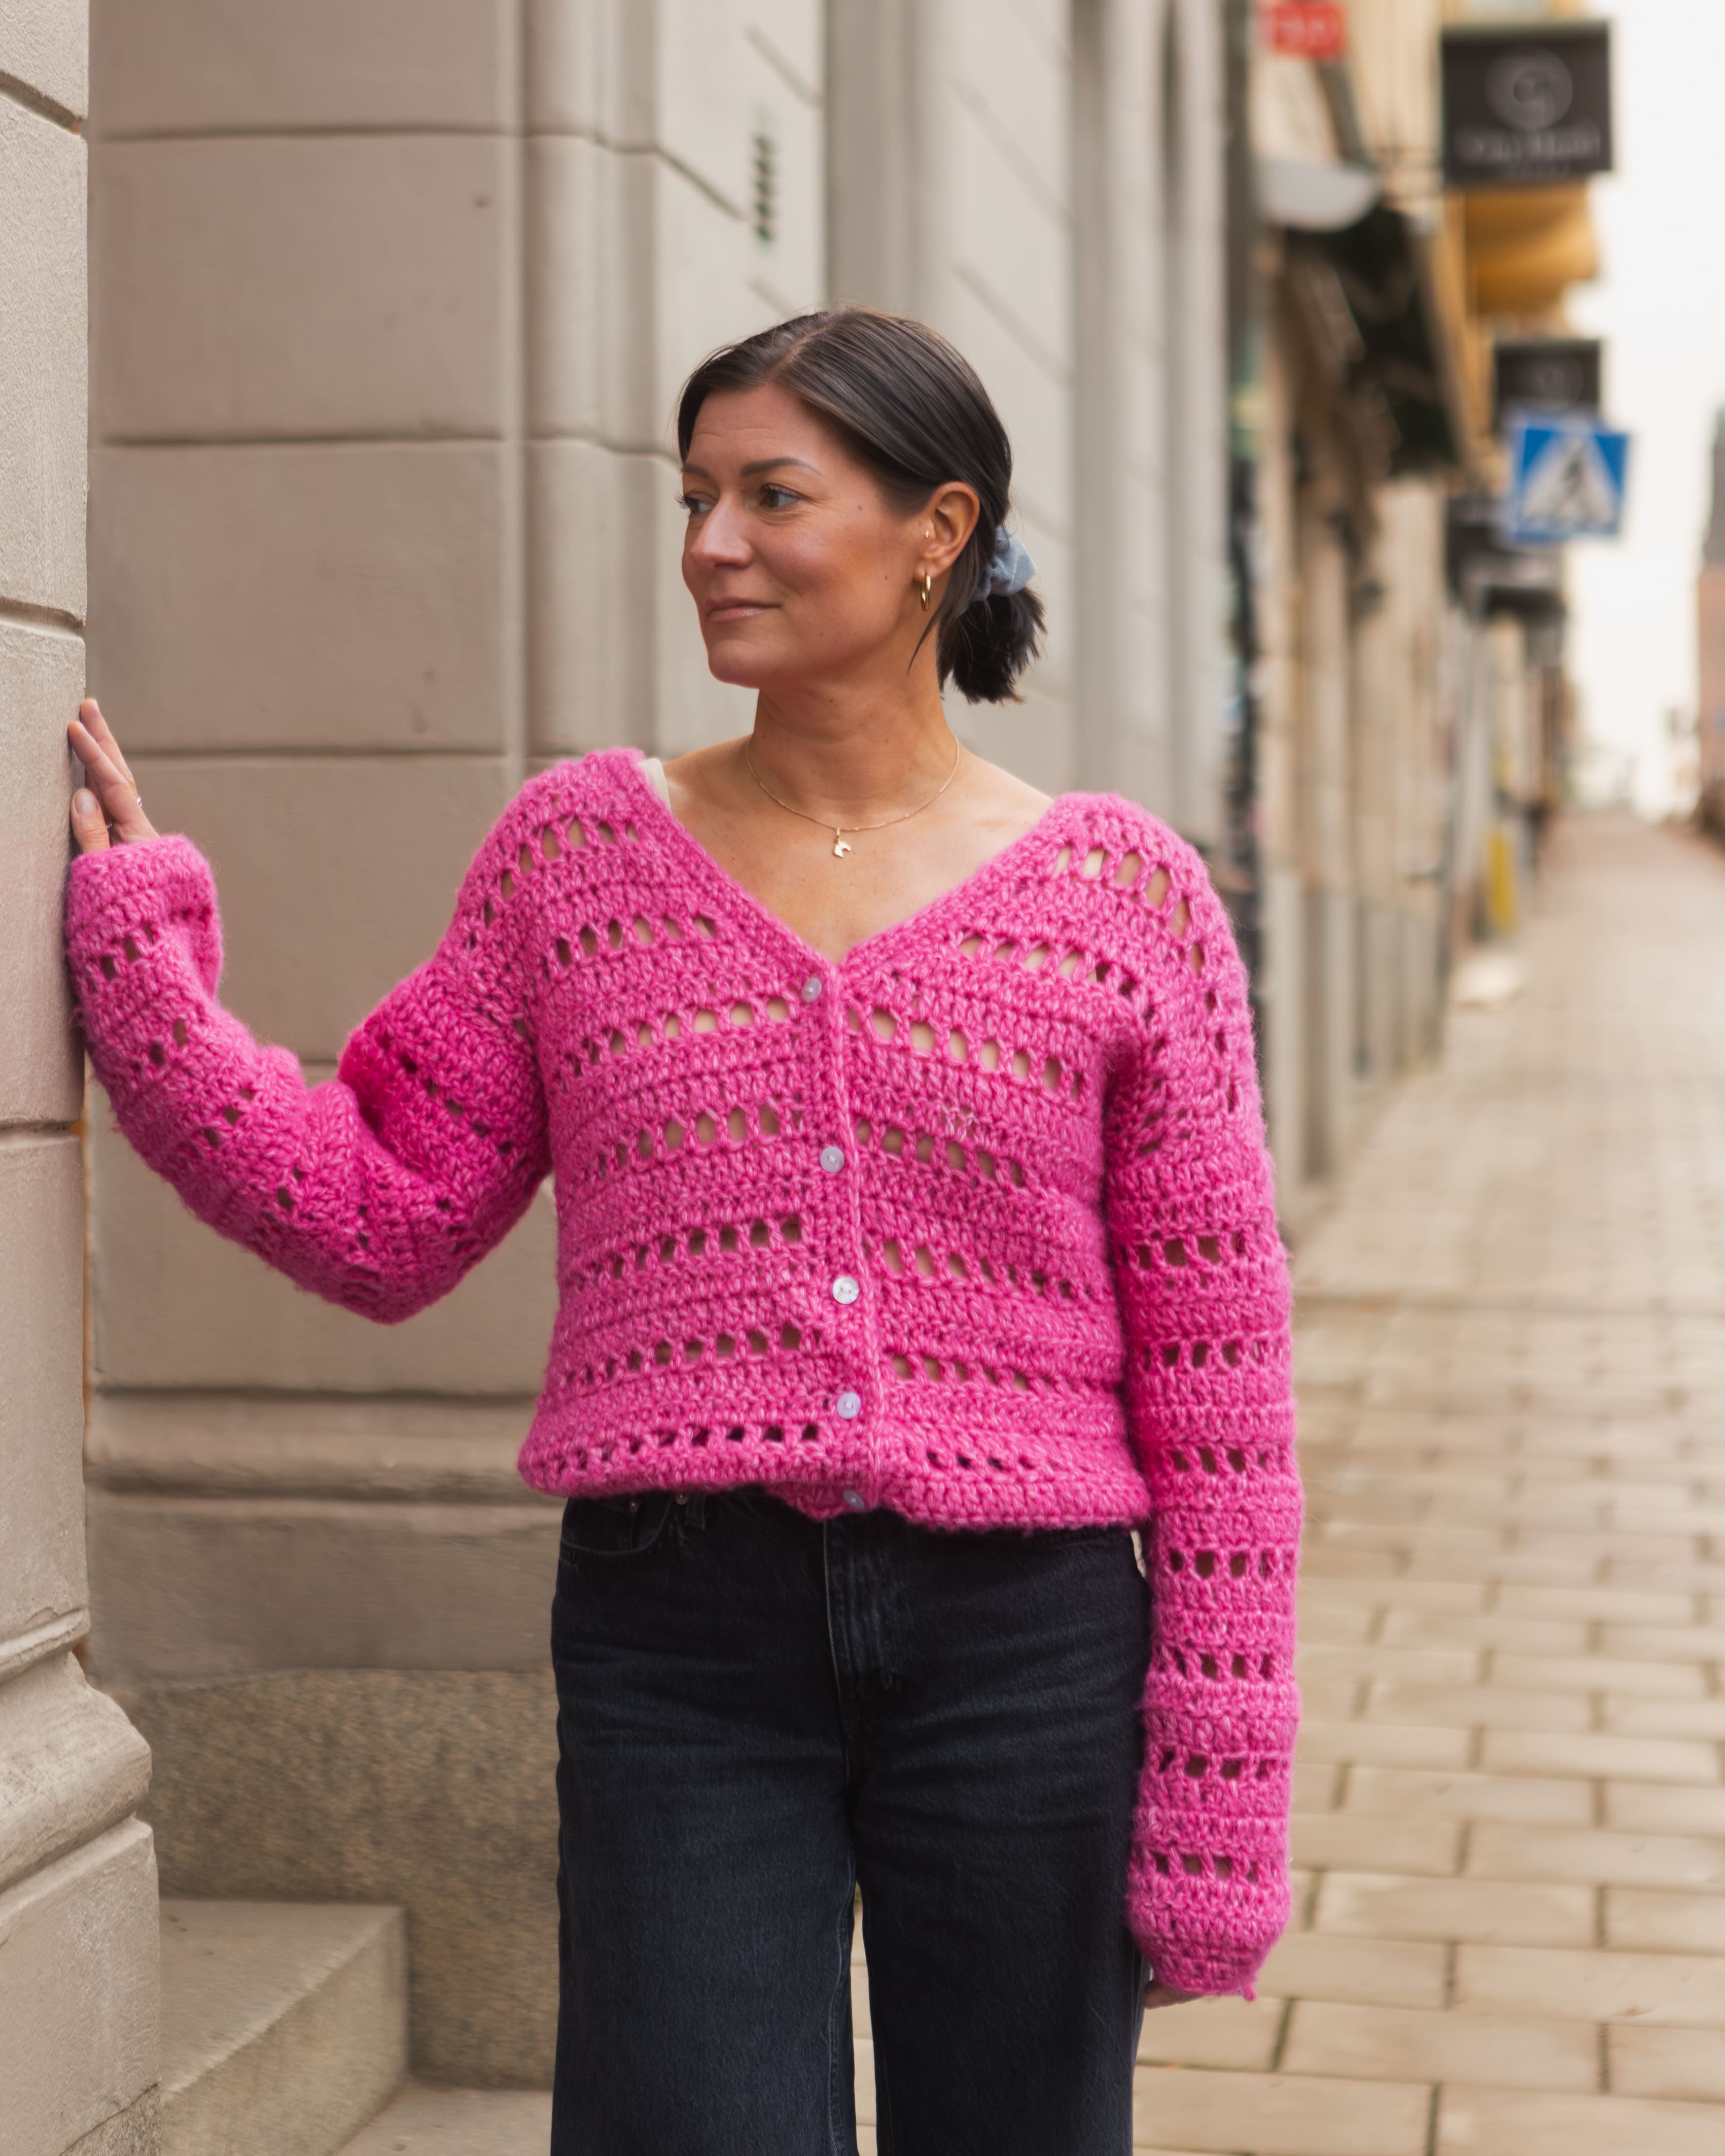
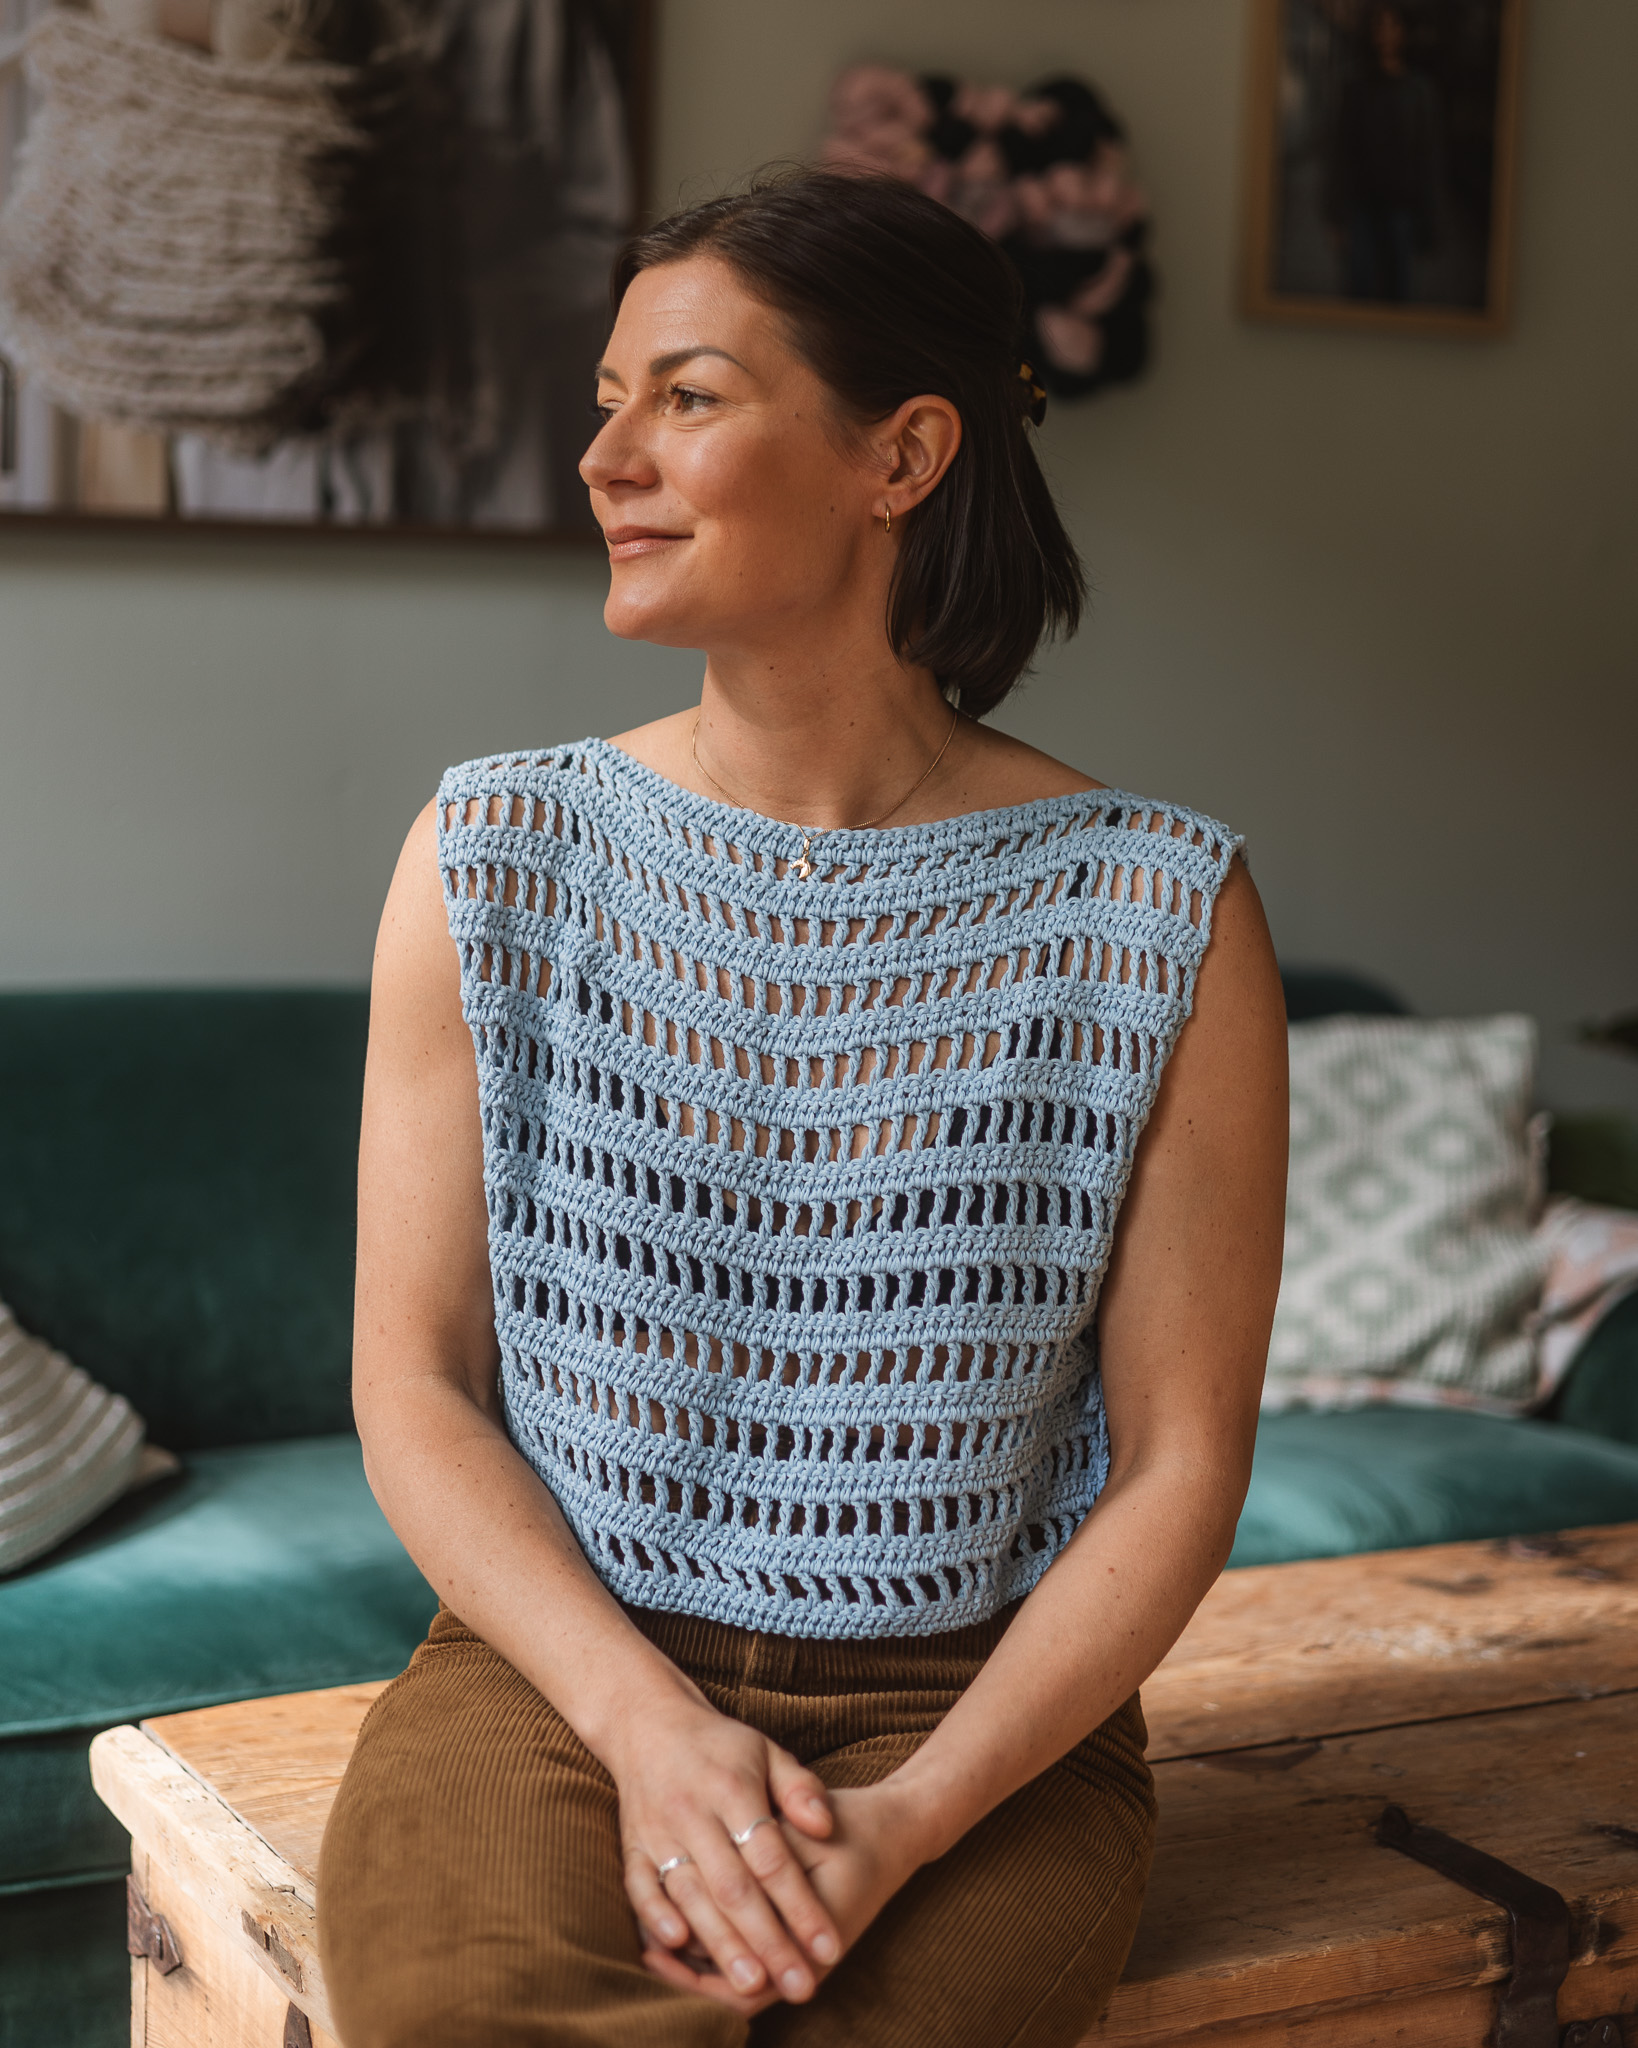
Crochet cardigan “Regina”
Crochet a Cozy Cardigan
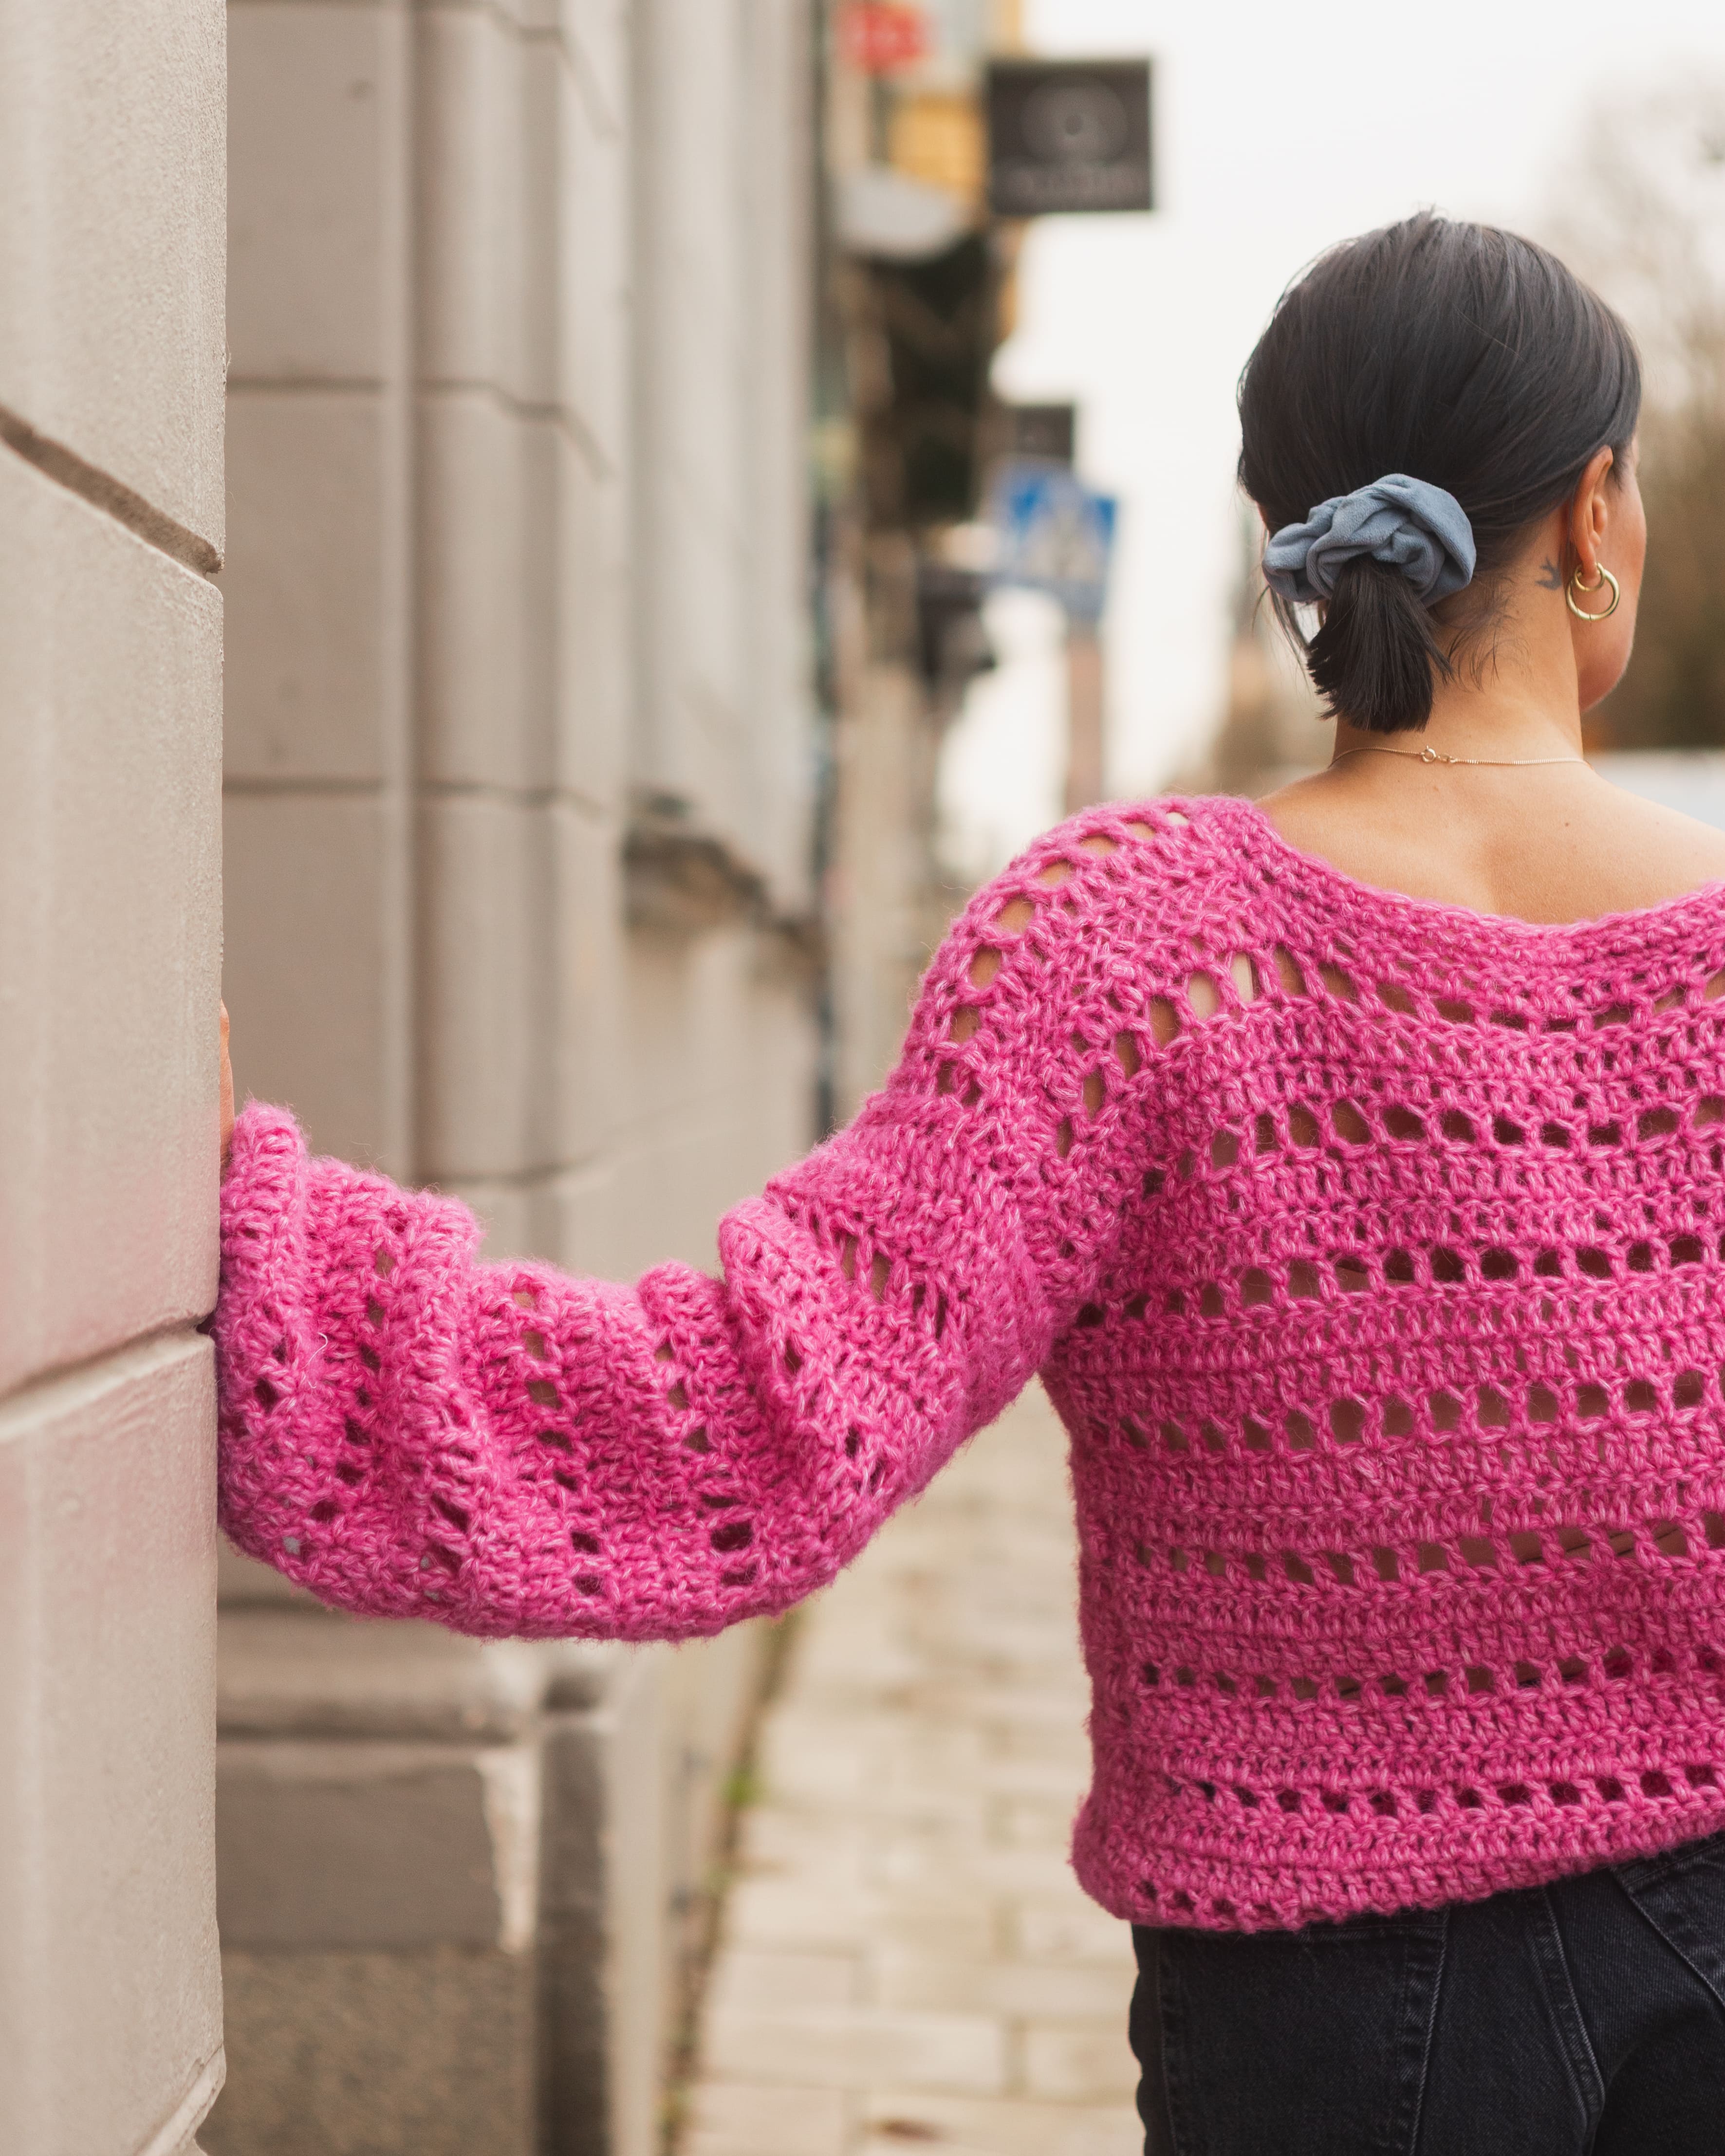
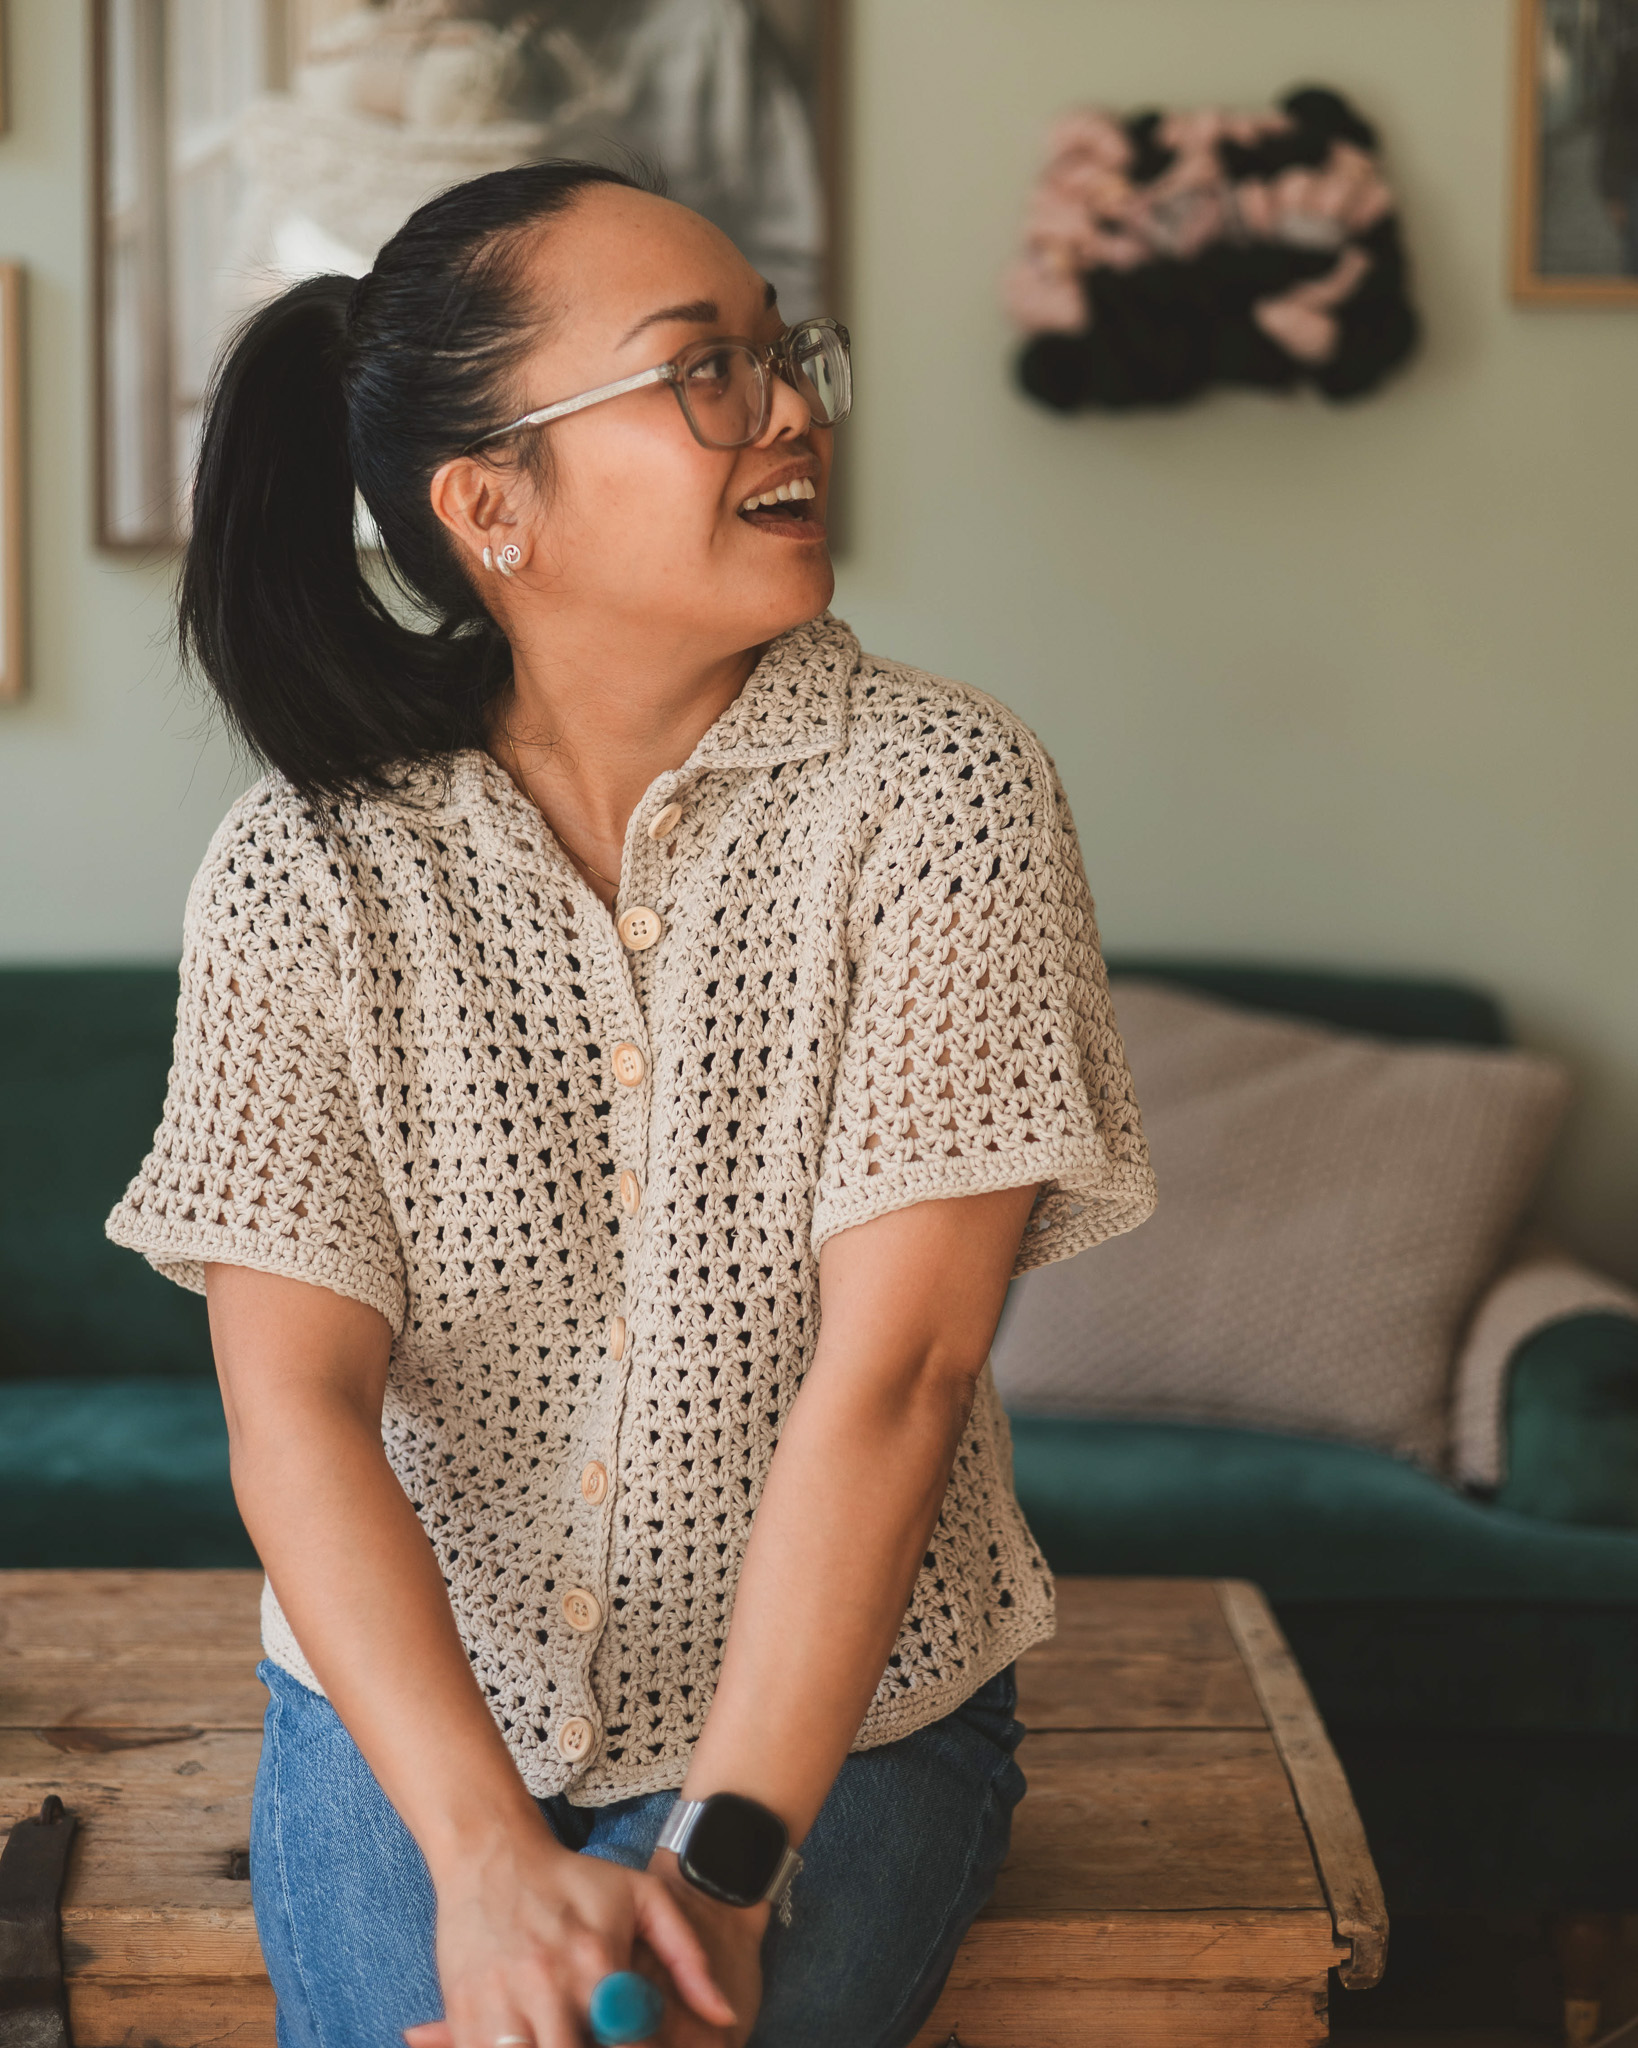
This cardigan is a loose-fitting style that works perfectly for everyday wear or for a more dressed-up look. It’s beginner-friendly but we recommend that you have crocheted a little before. The cardigan will definitely brighten up any outfit. This version is crocheted using Dreamy Blend yarn and a 6 mm (US size J-10) crochet hook. You will also need a yarn needle and scissors. The cardigan is available in two sizes: S/M and L/XL.
Yarn Consumption: Approximately 350 g Dreamy Blend for S/M and 500 g for L/XL. Yarn consumption may vary depending on how tightly you crochet.
Note: This pattern uses videos from our technique library along with pictures for guidance.

%20(16).jpg)
Here's how to do it
This cardigan is crocheted in three pieces, which are then joined together before the sleeves are crocheted onto the body. It’s beginner-friendly and absolutely beautiful! We hope you’ll crochet it with us. /Alma

This is what you need:
Here you can directly purchase the material for the product. Please note that the instruction is digital and appears here on the page (no written instruction).

MYO Dreamy blend | 50g
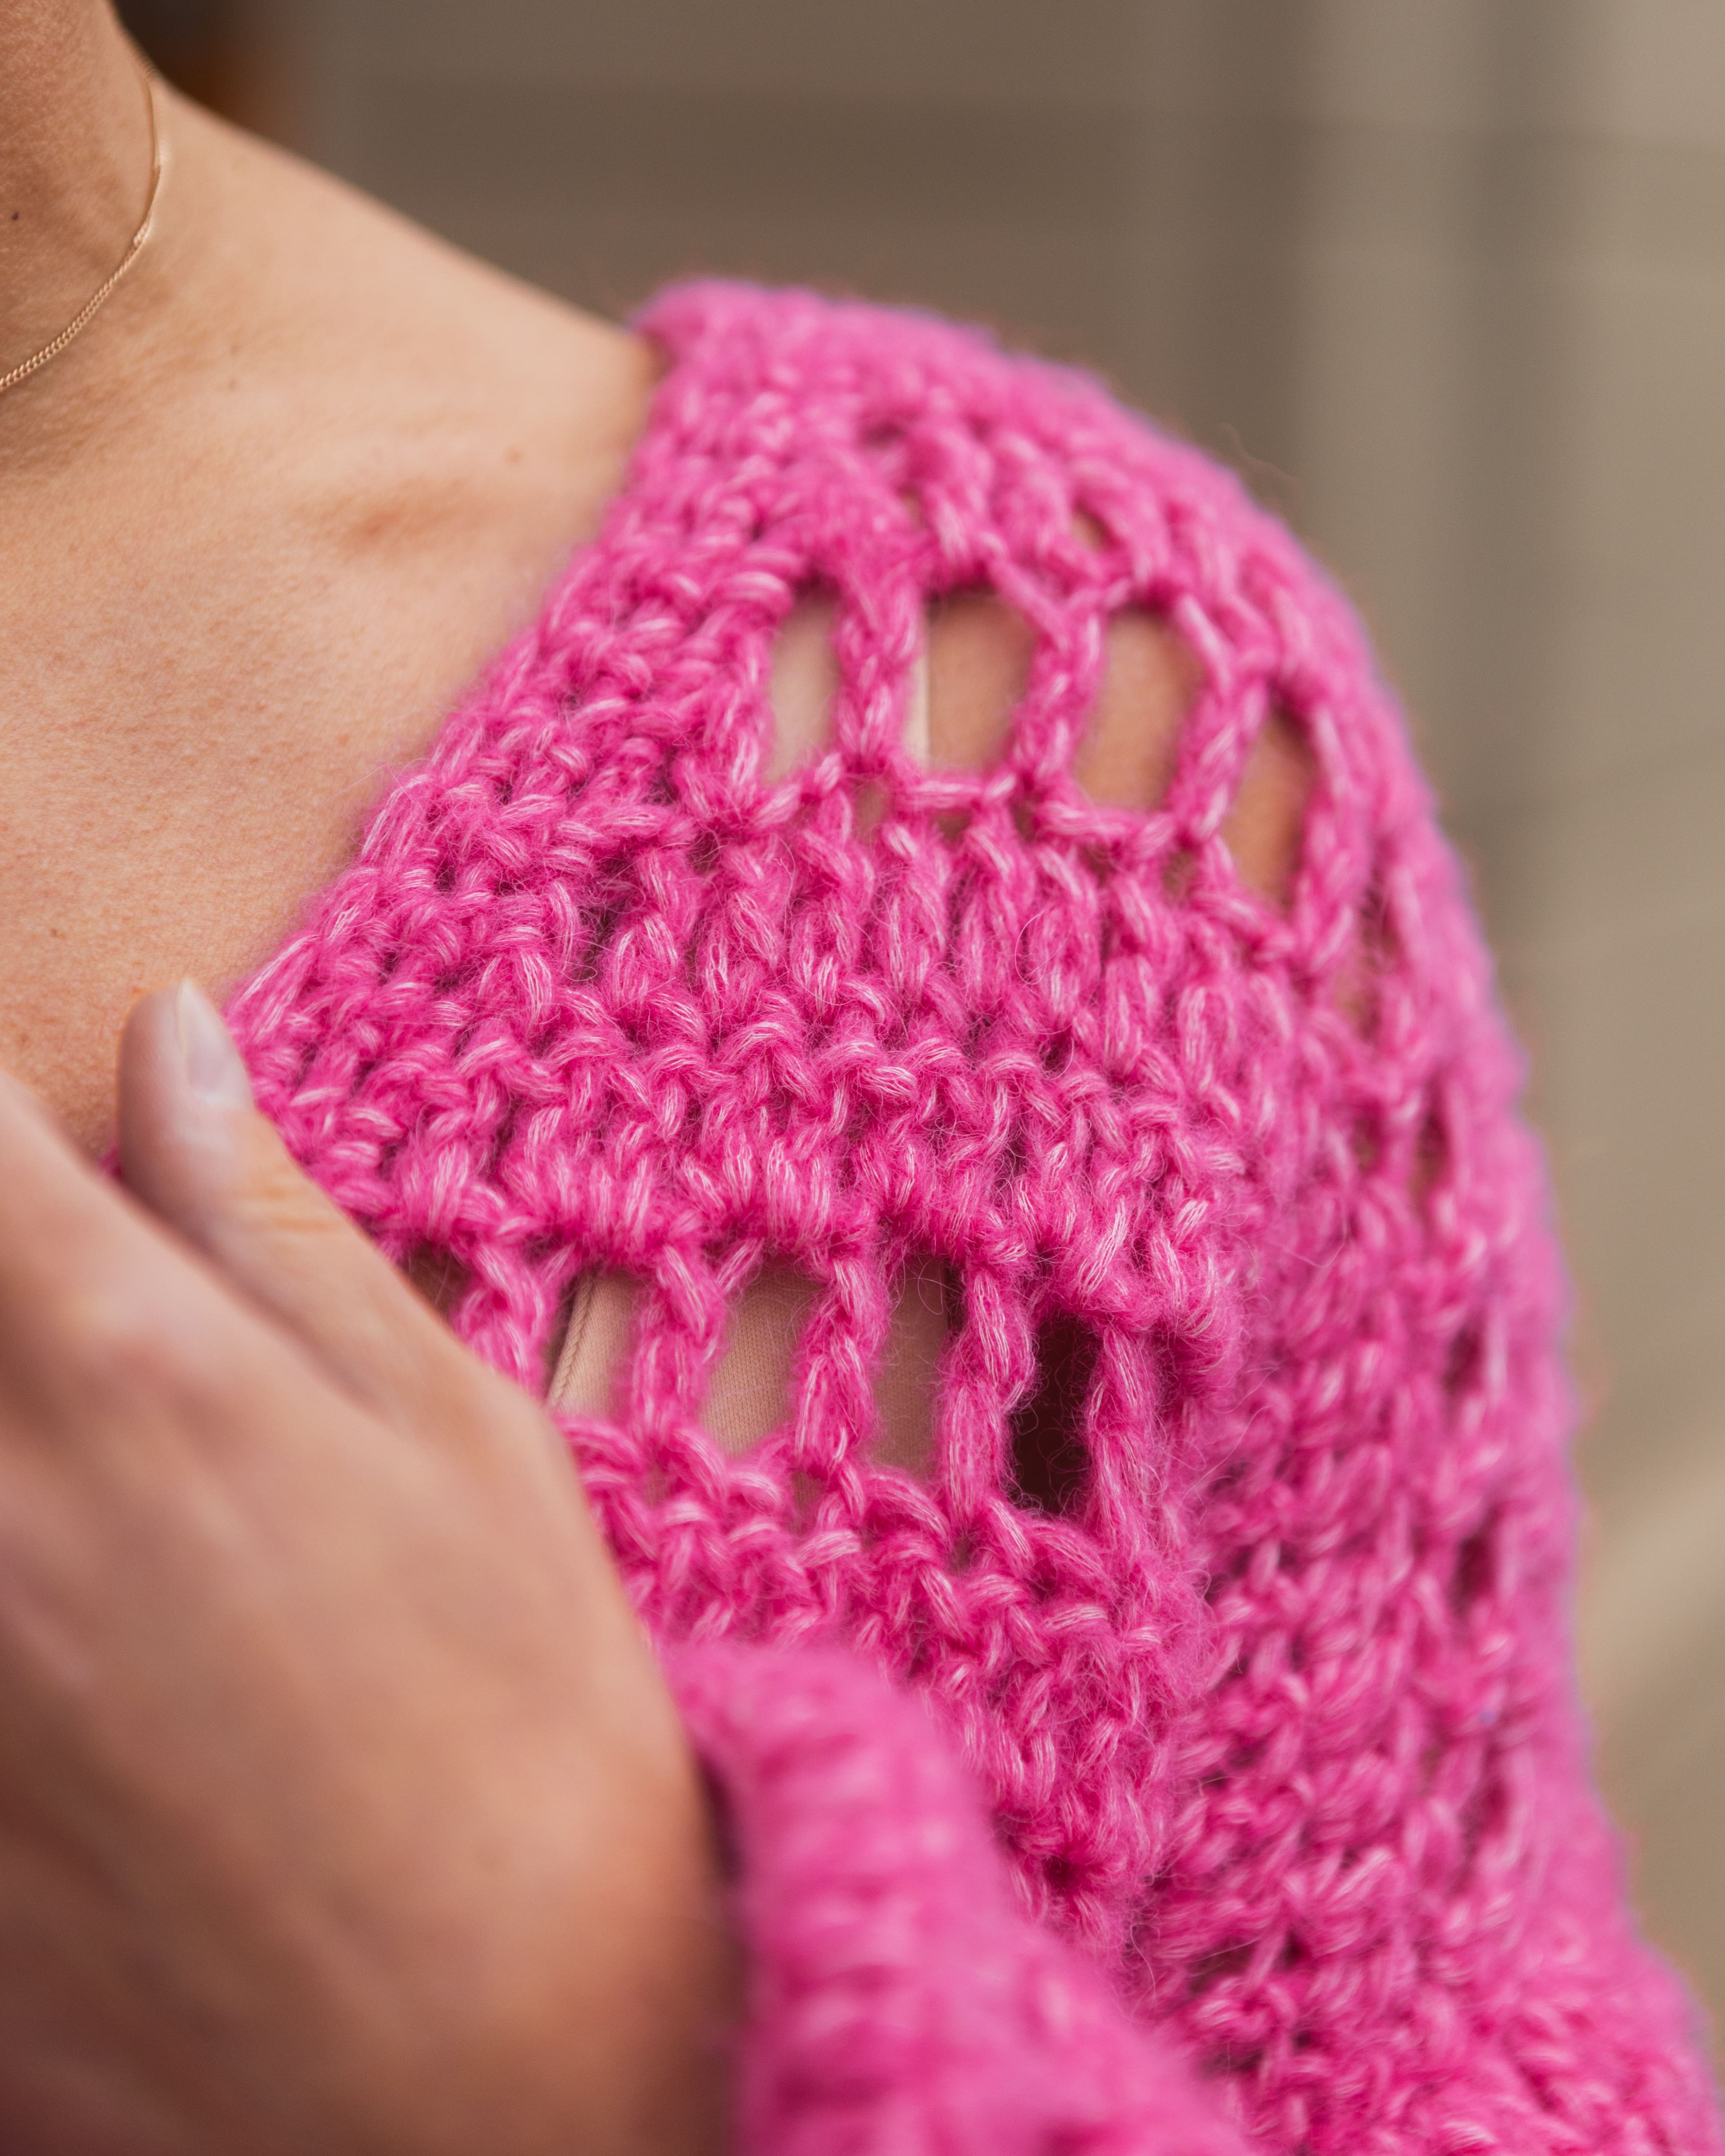
A soft blend yarn that consists of 40% cotton, 35% superfine alpaca, and 25% wool.
Buy product
.jpg)
Unleash your creativity
For only 85kr per month you get access to all our 300+ beginner-friendly instructions for crochet, knitting and macrame.
A perfect way to get started with your new hobby!

Info
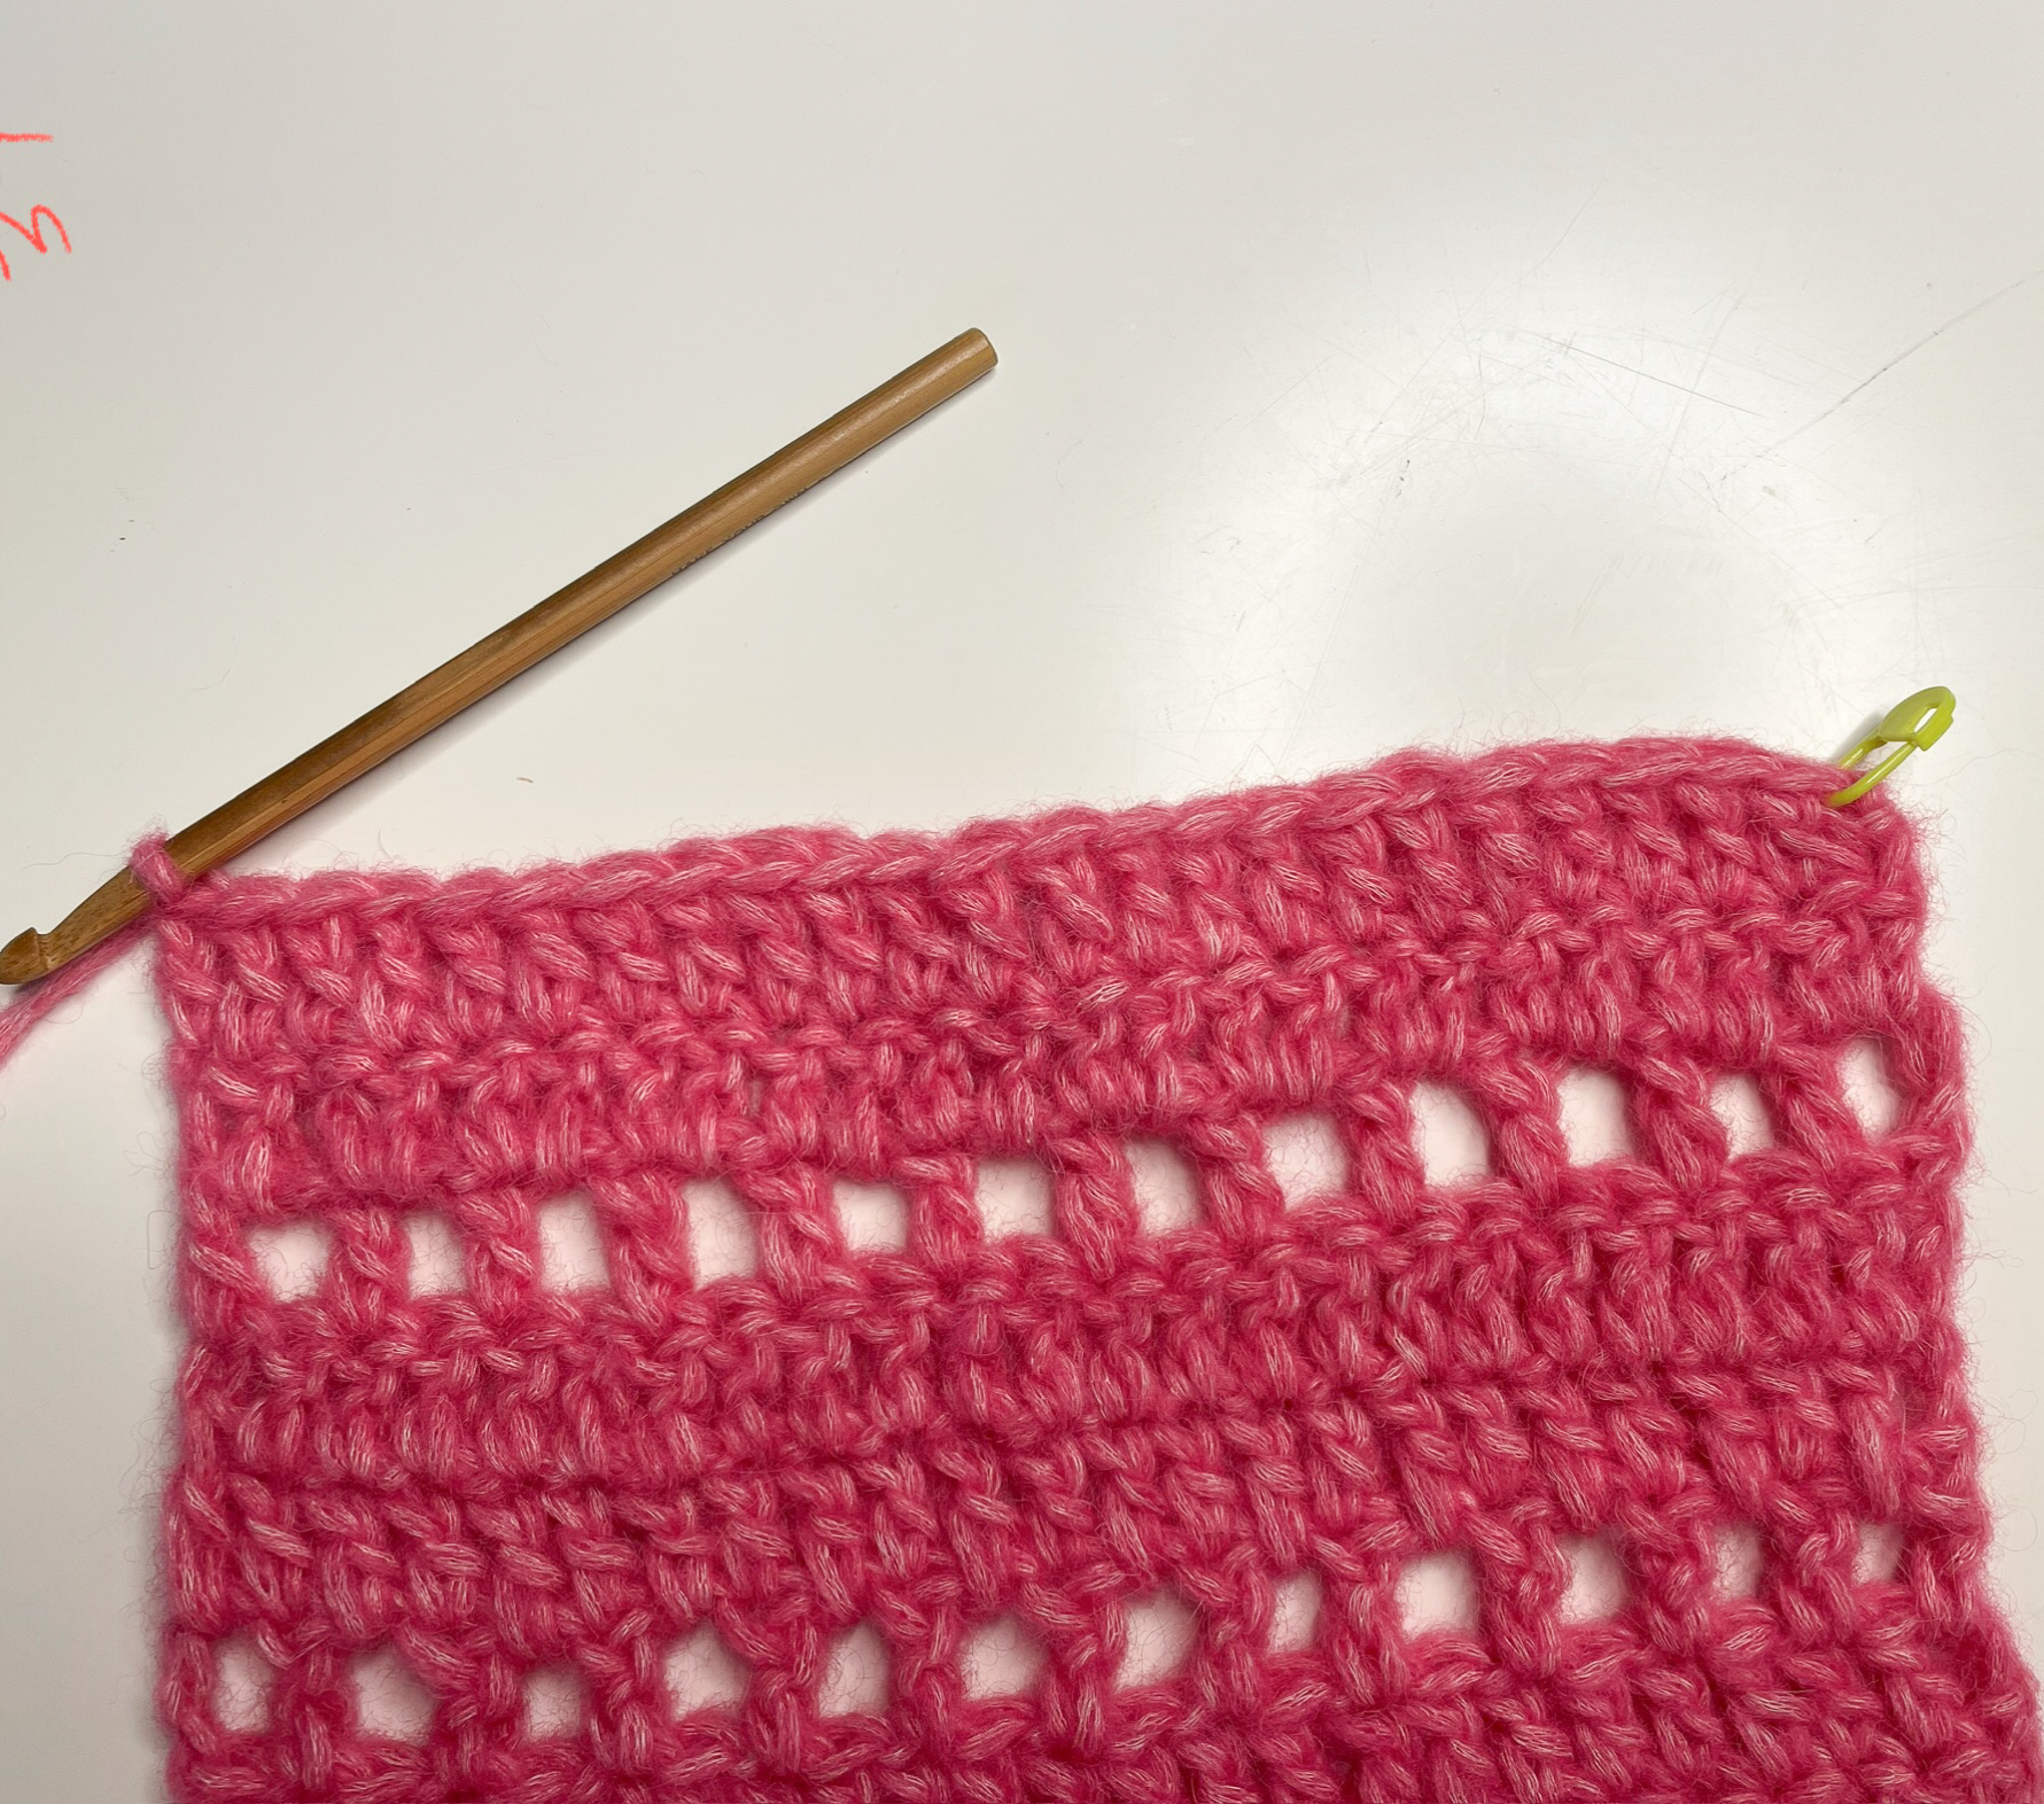
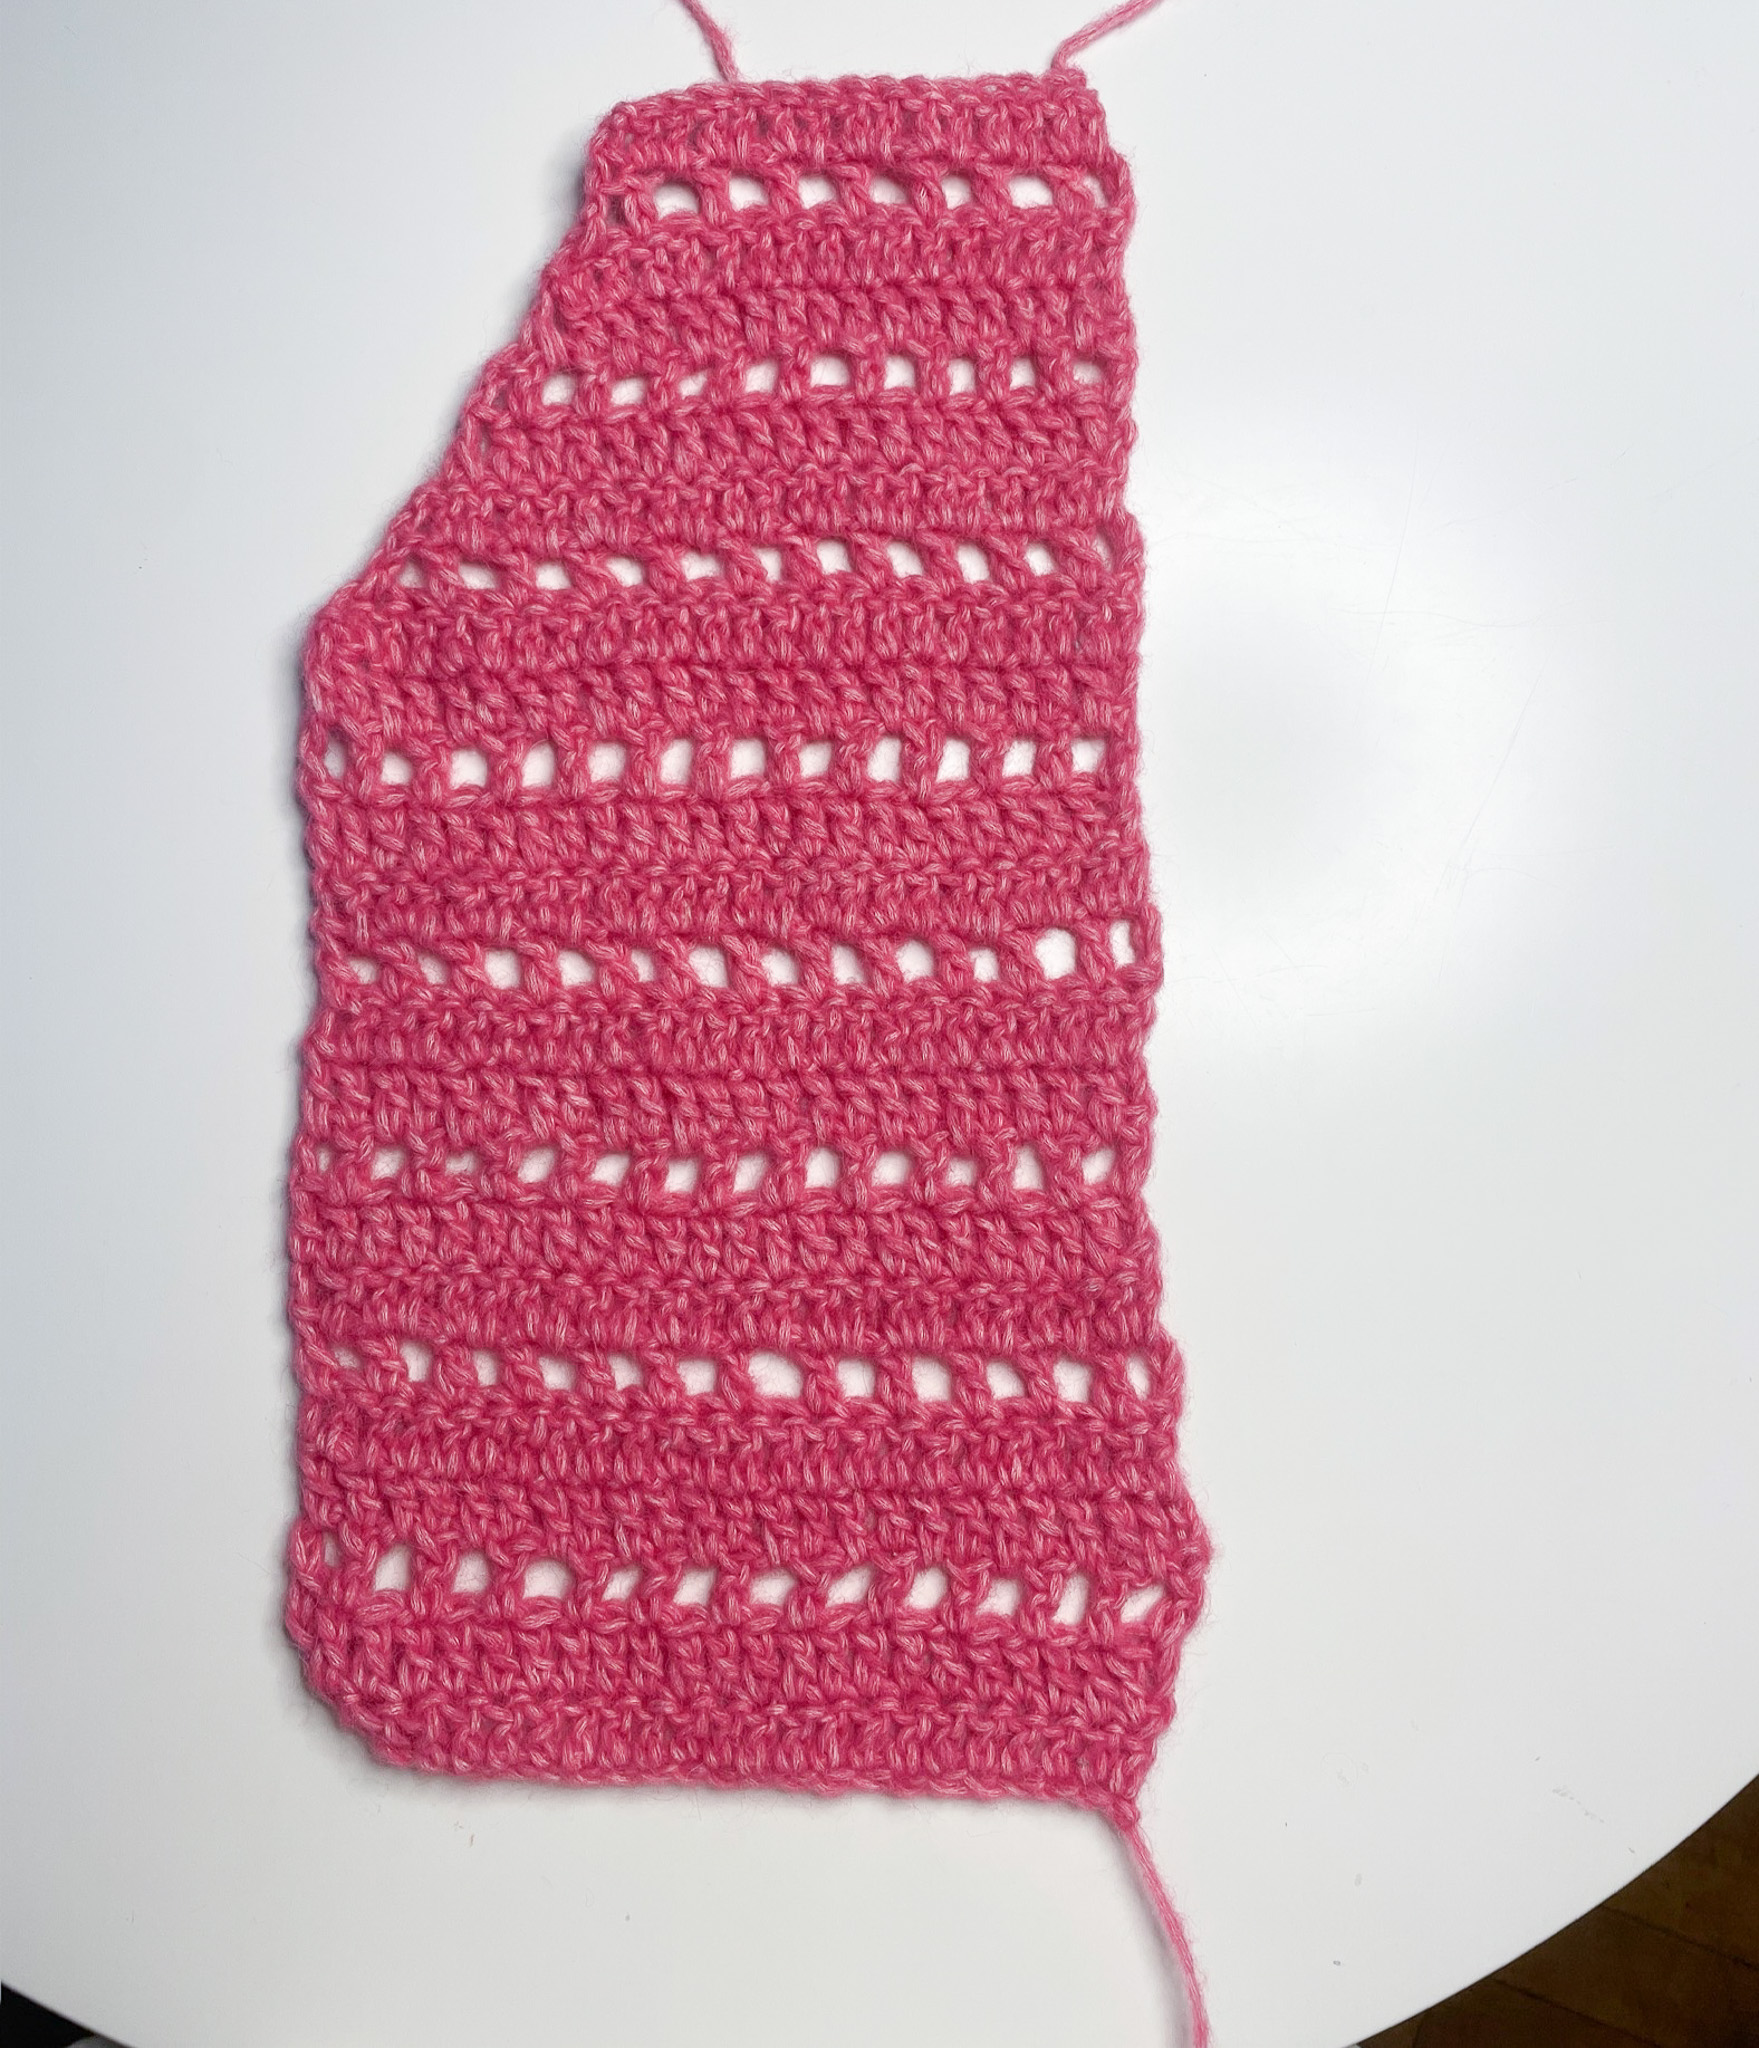
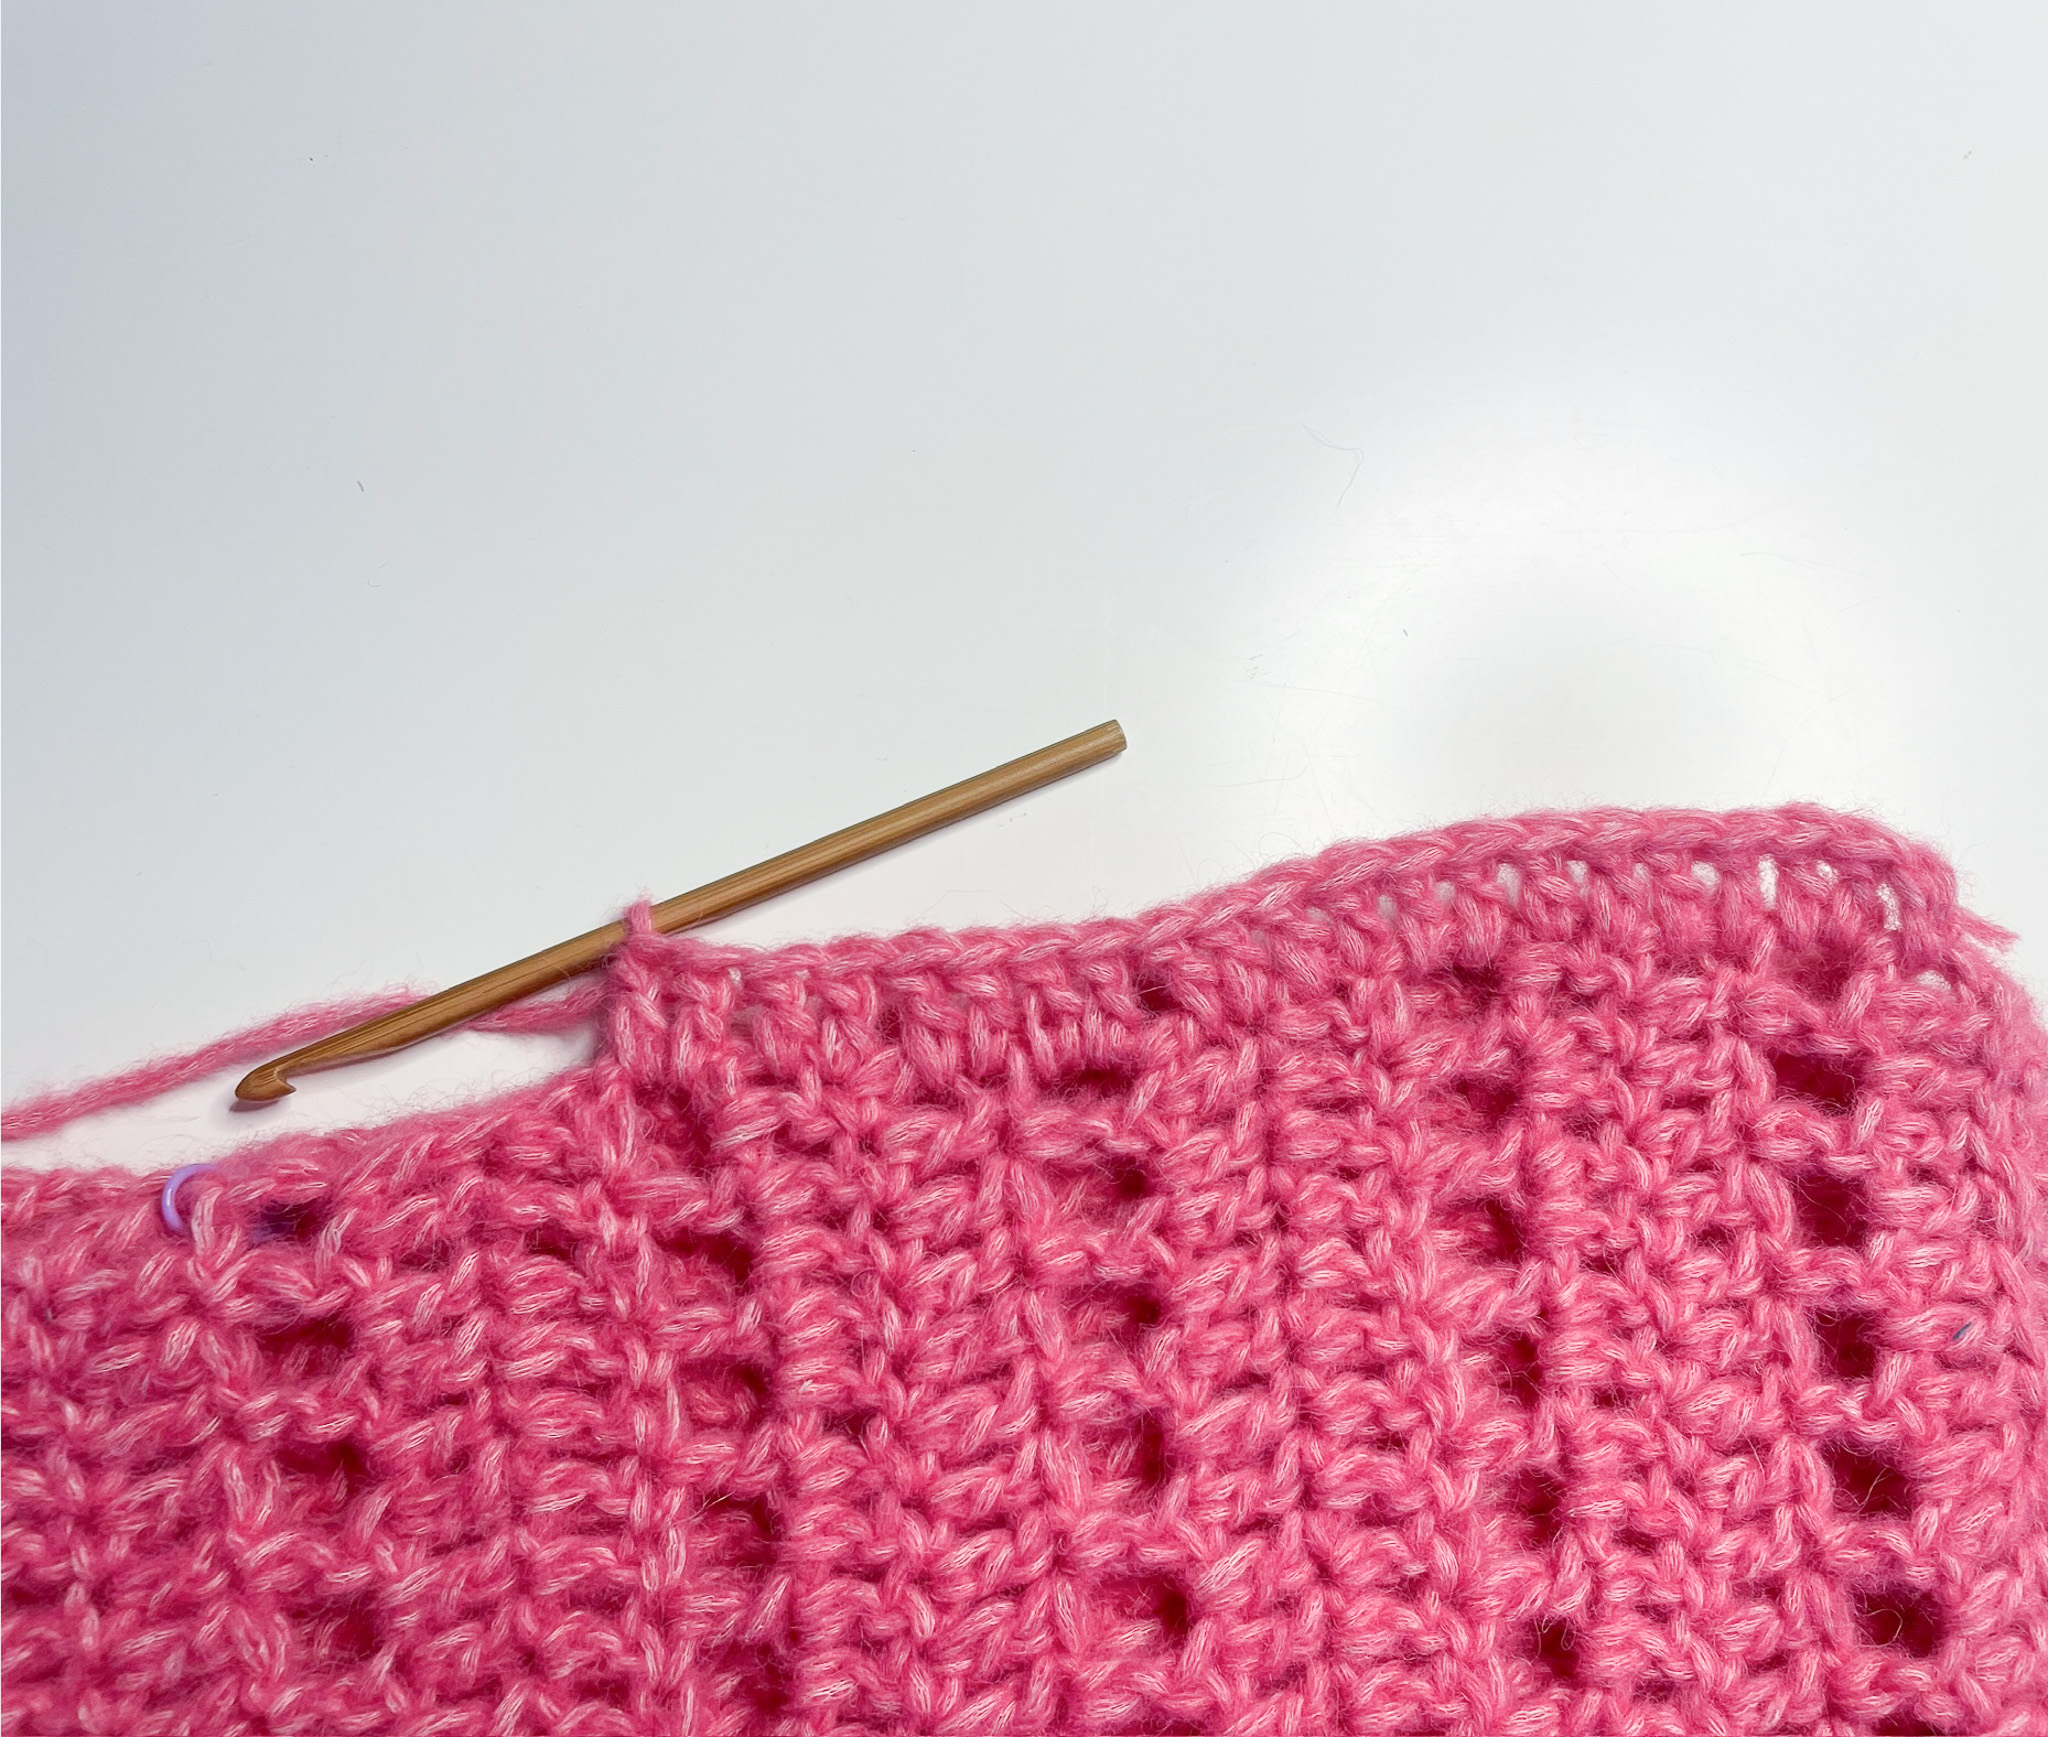
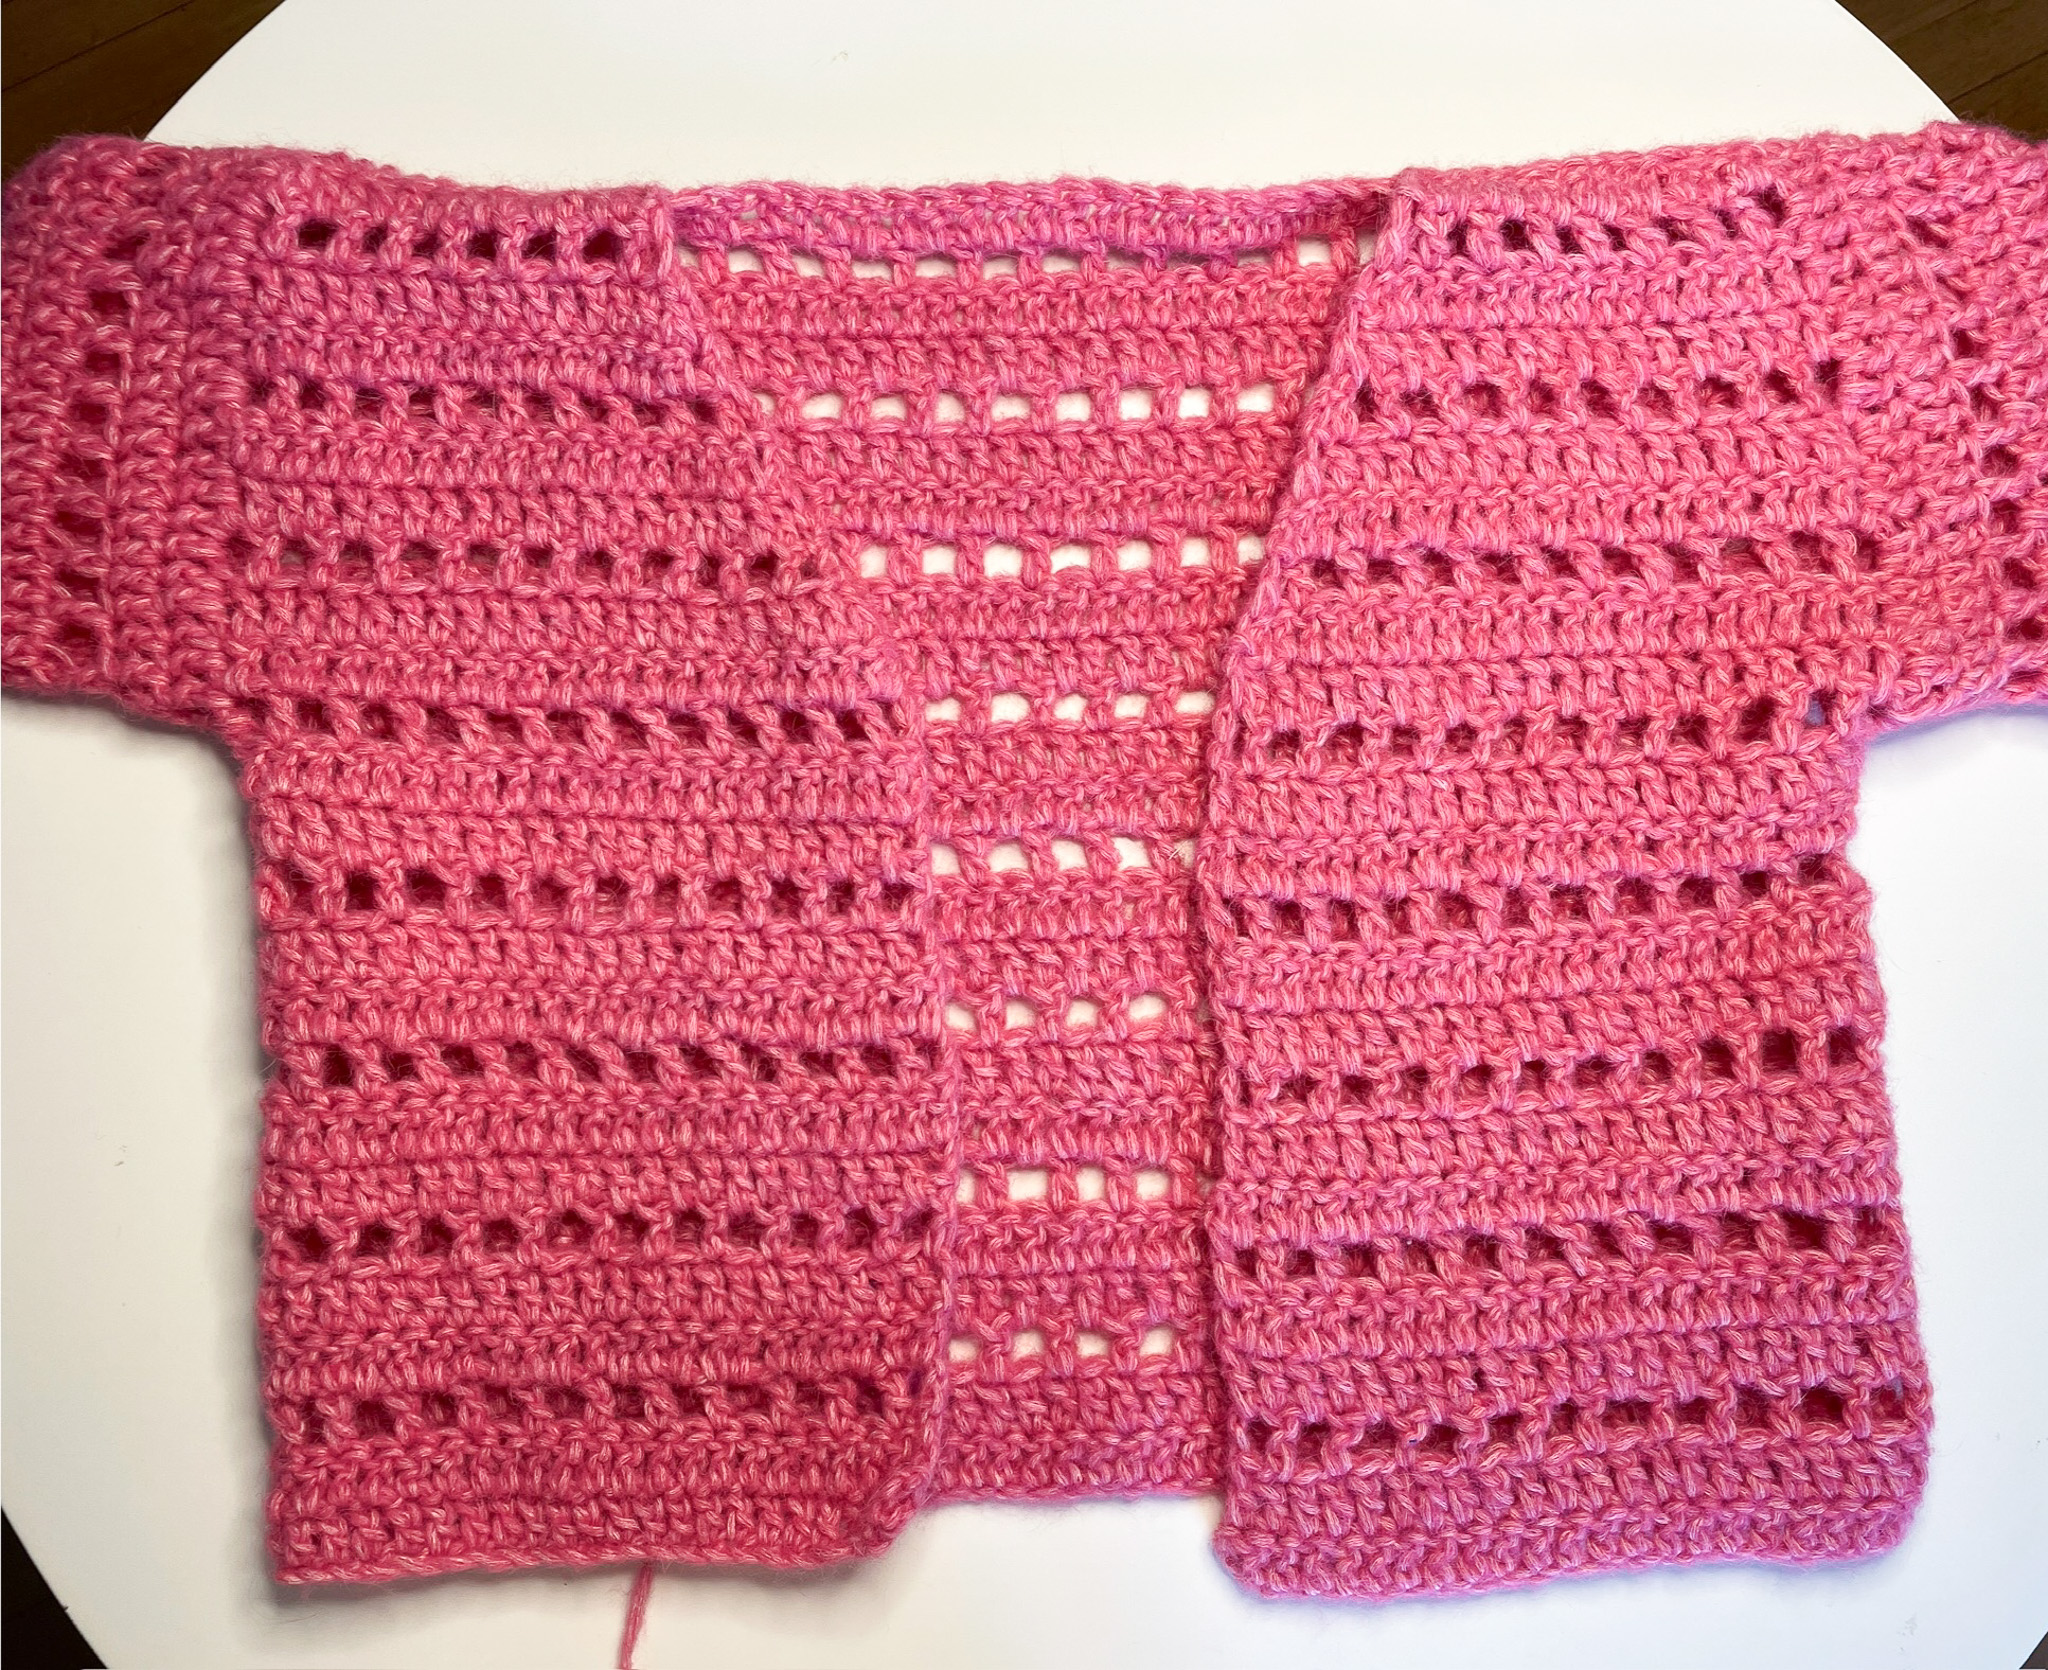
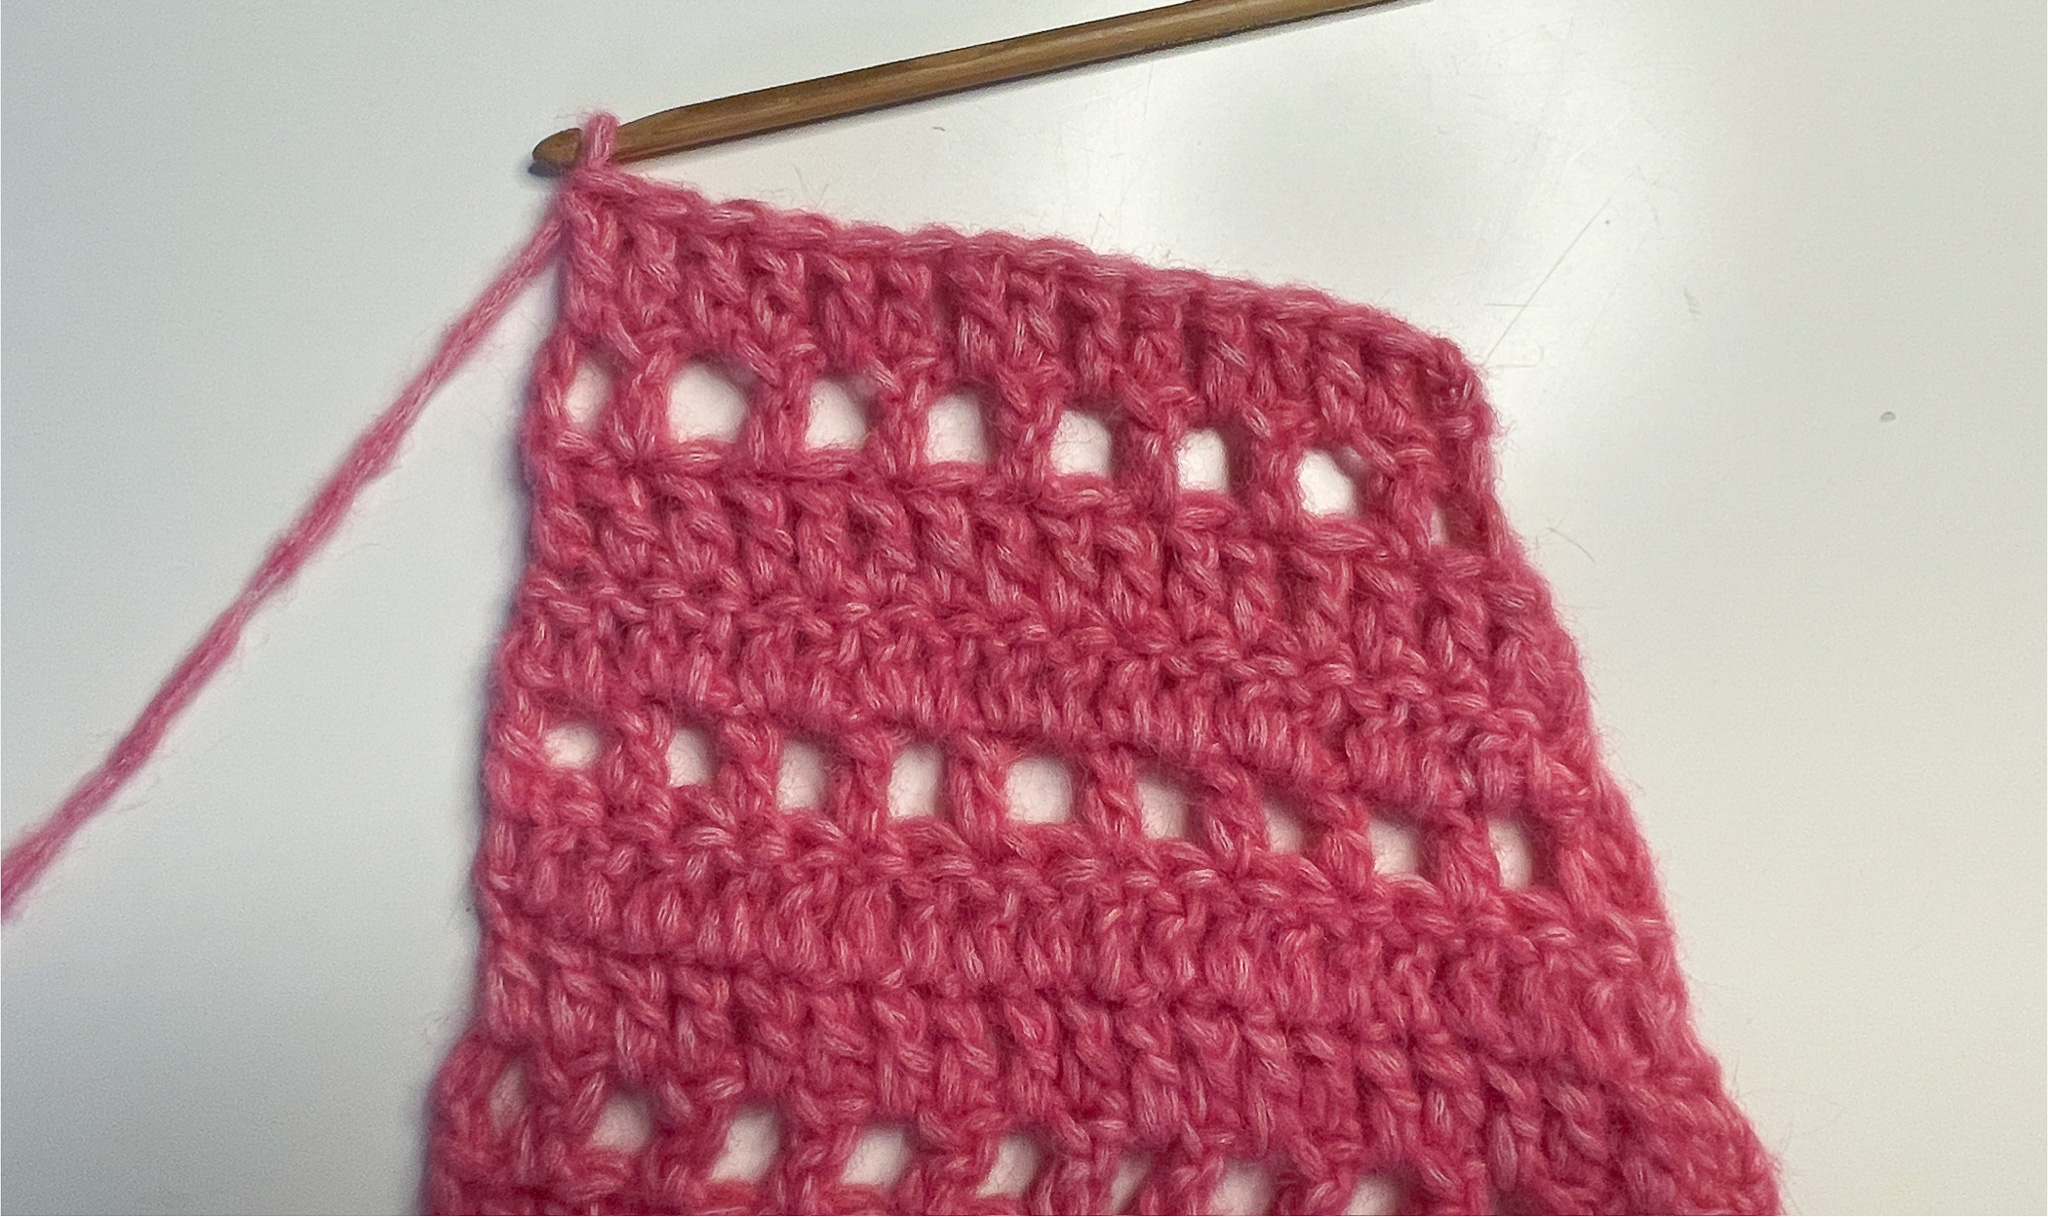
You will make this cardigan in three pieces: one back panel and two front panels. These are sewn together first, and then the sleeves are crocheted directly onto the body. The pattern is written for sizes S/M and L/XL (the L/XL instructions are in parentheses). If only one number is given, it applies to both sizes.
BACK PANEL
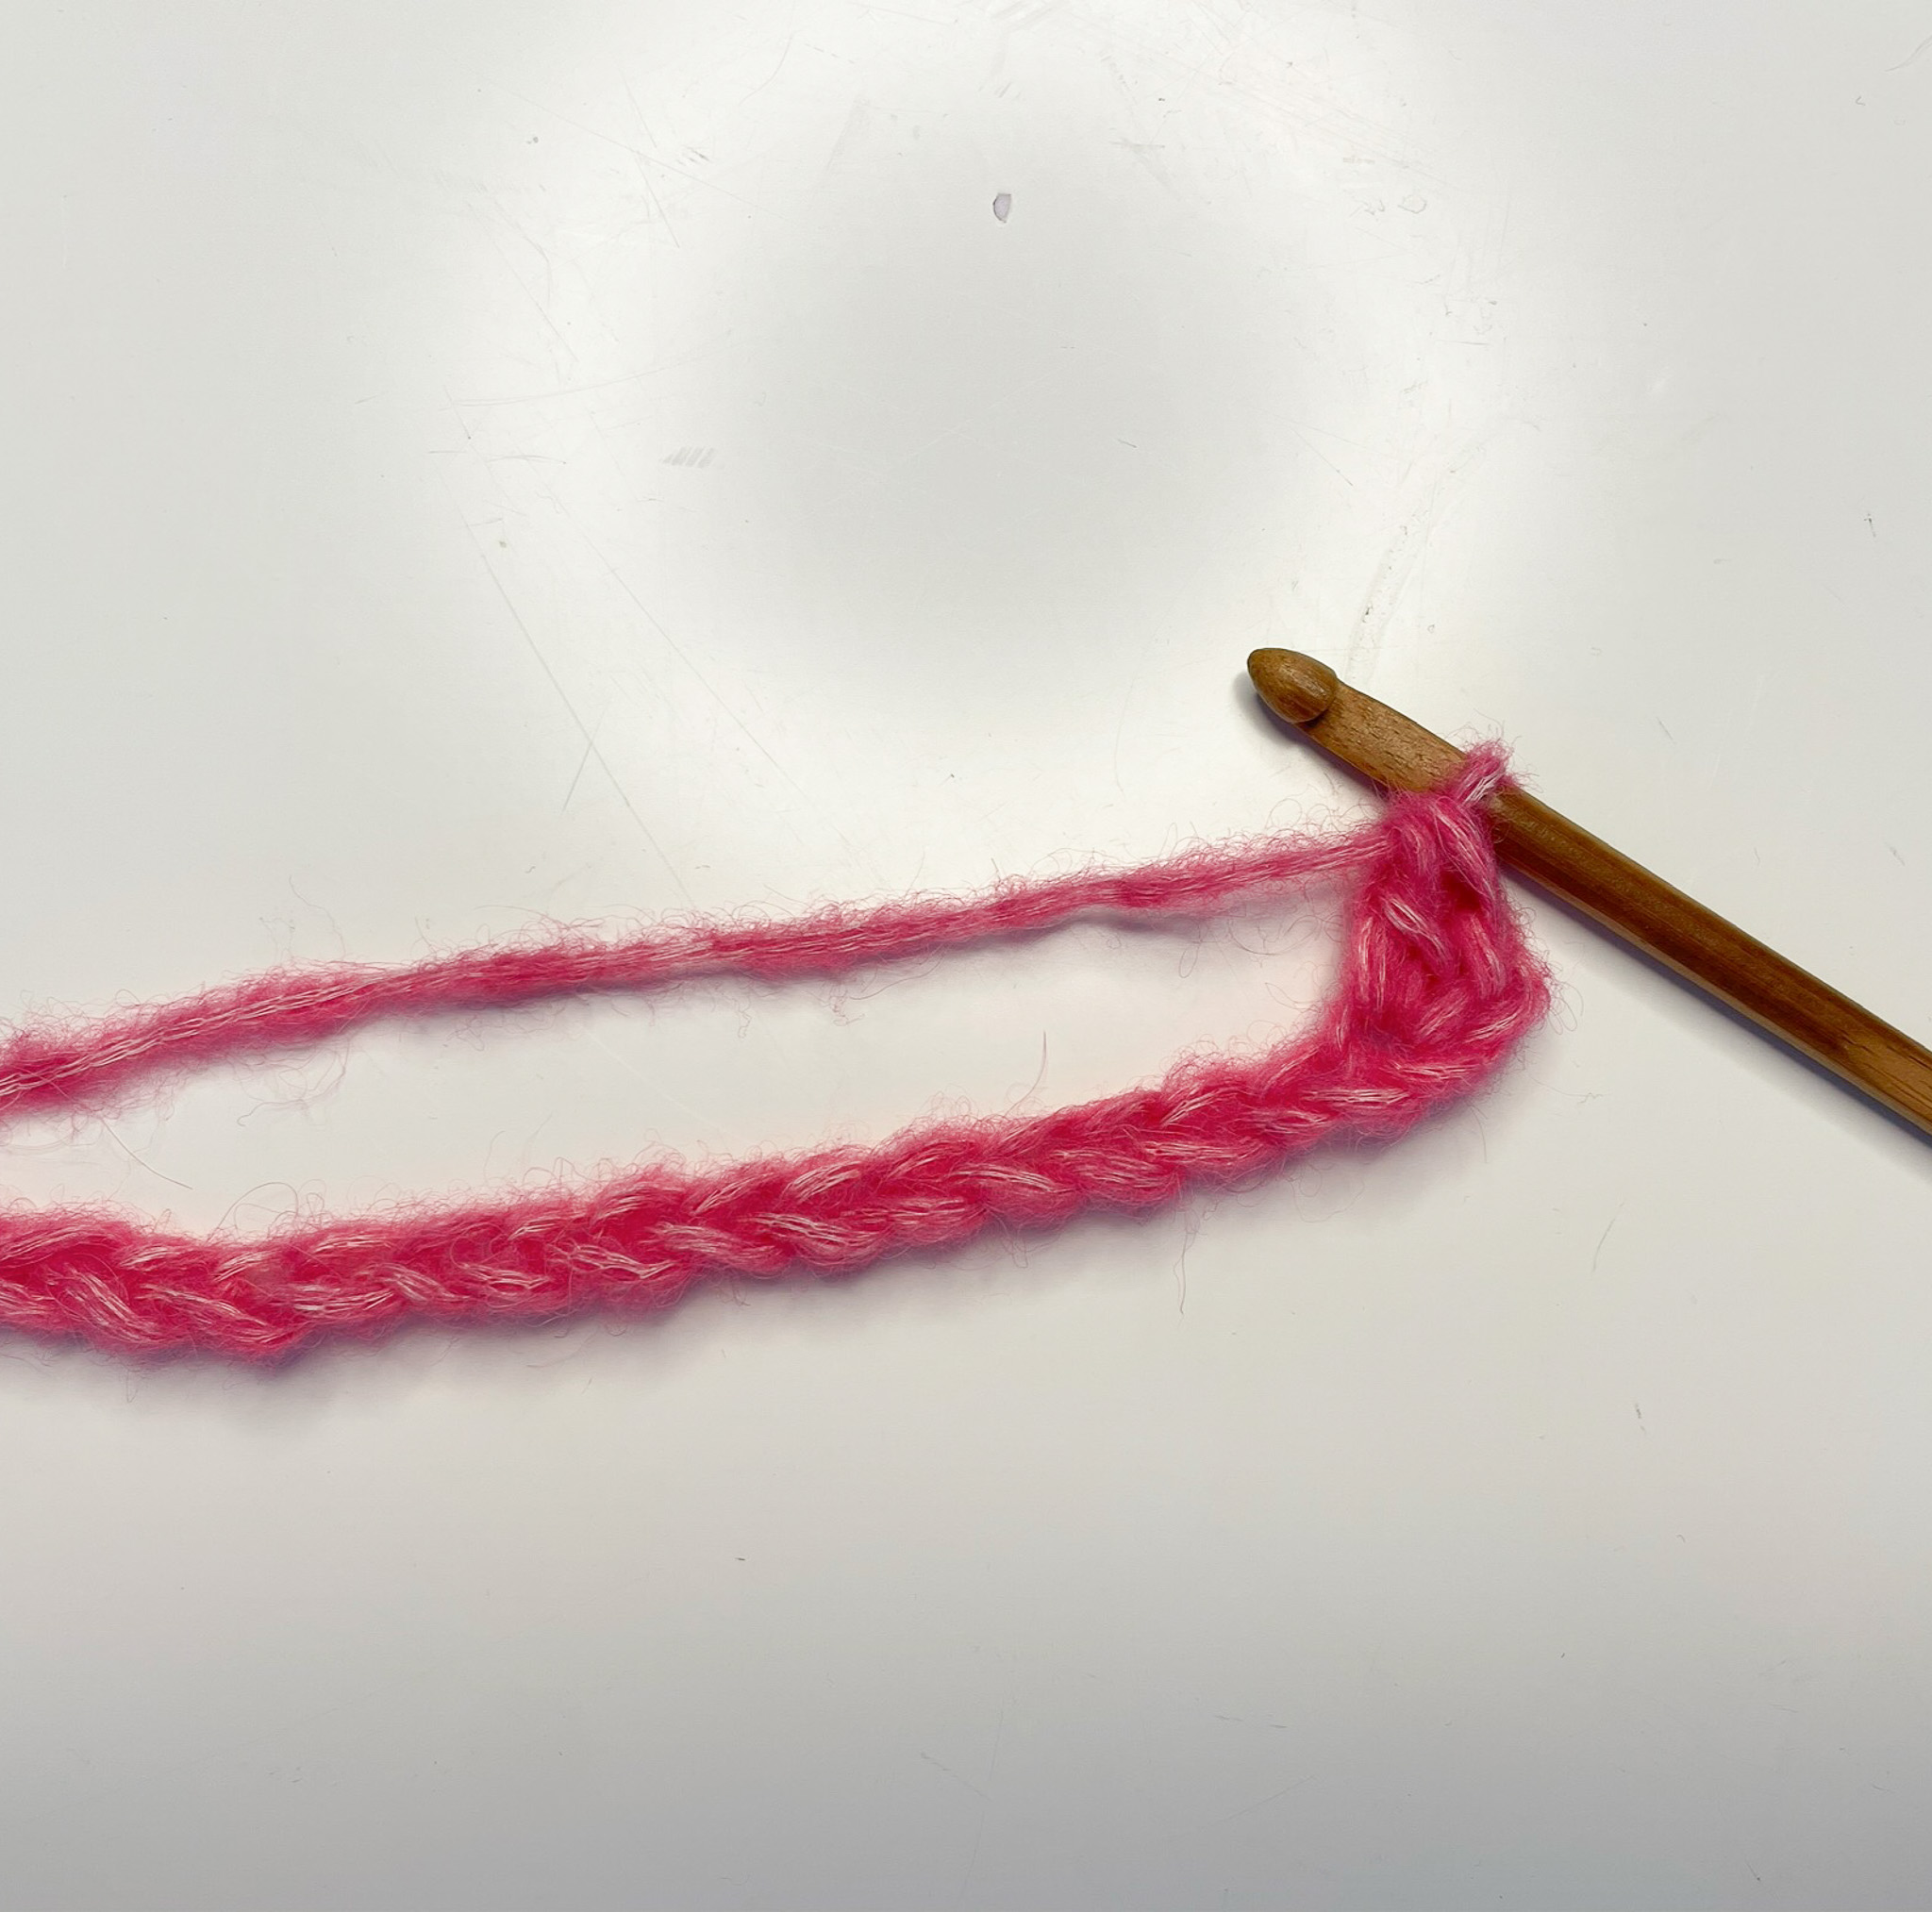
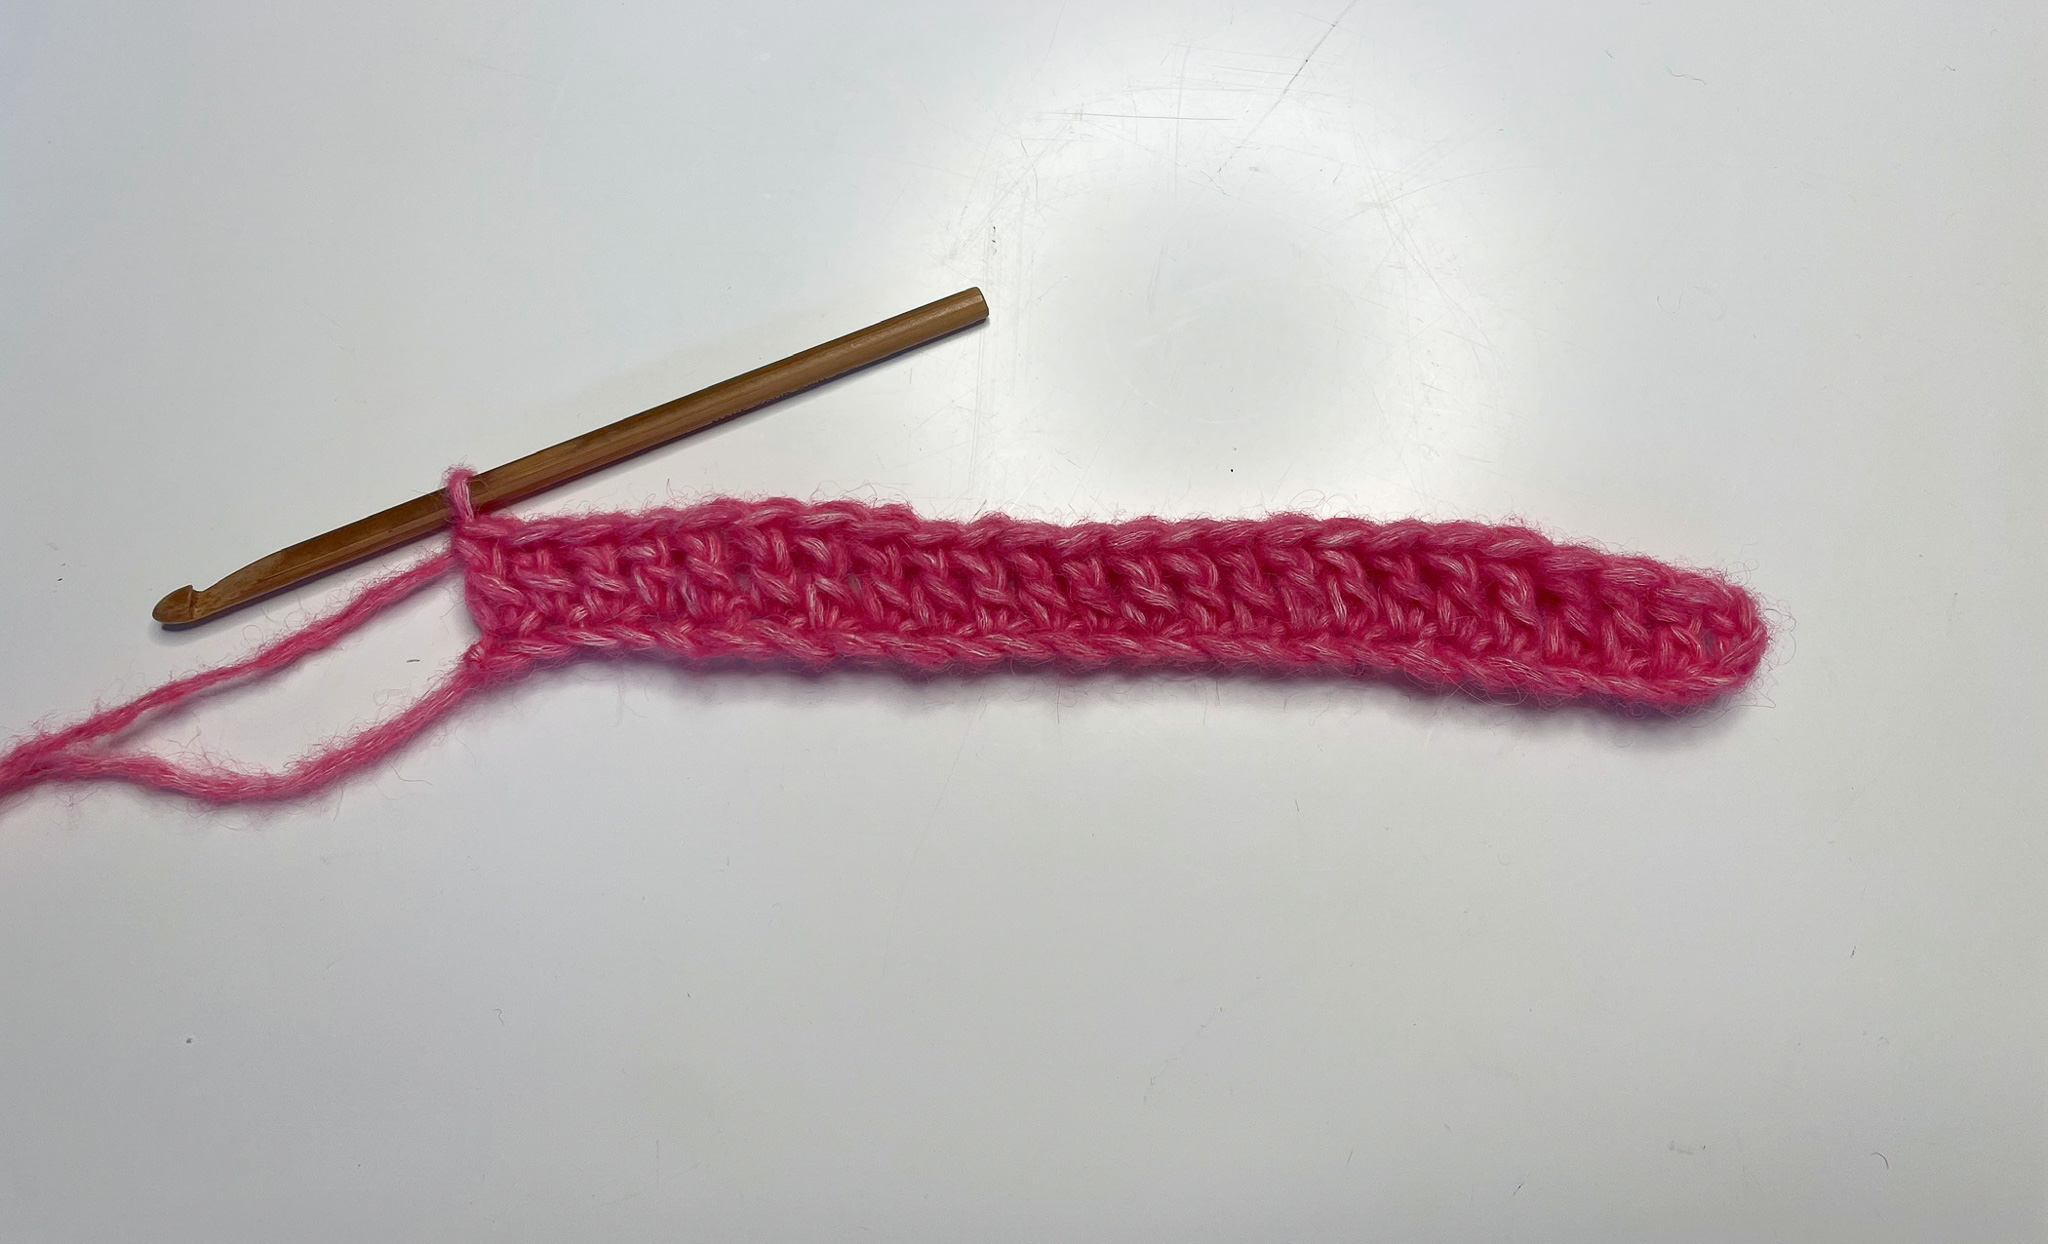
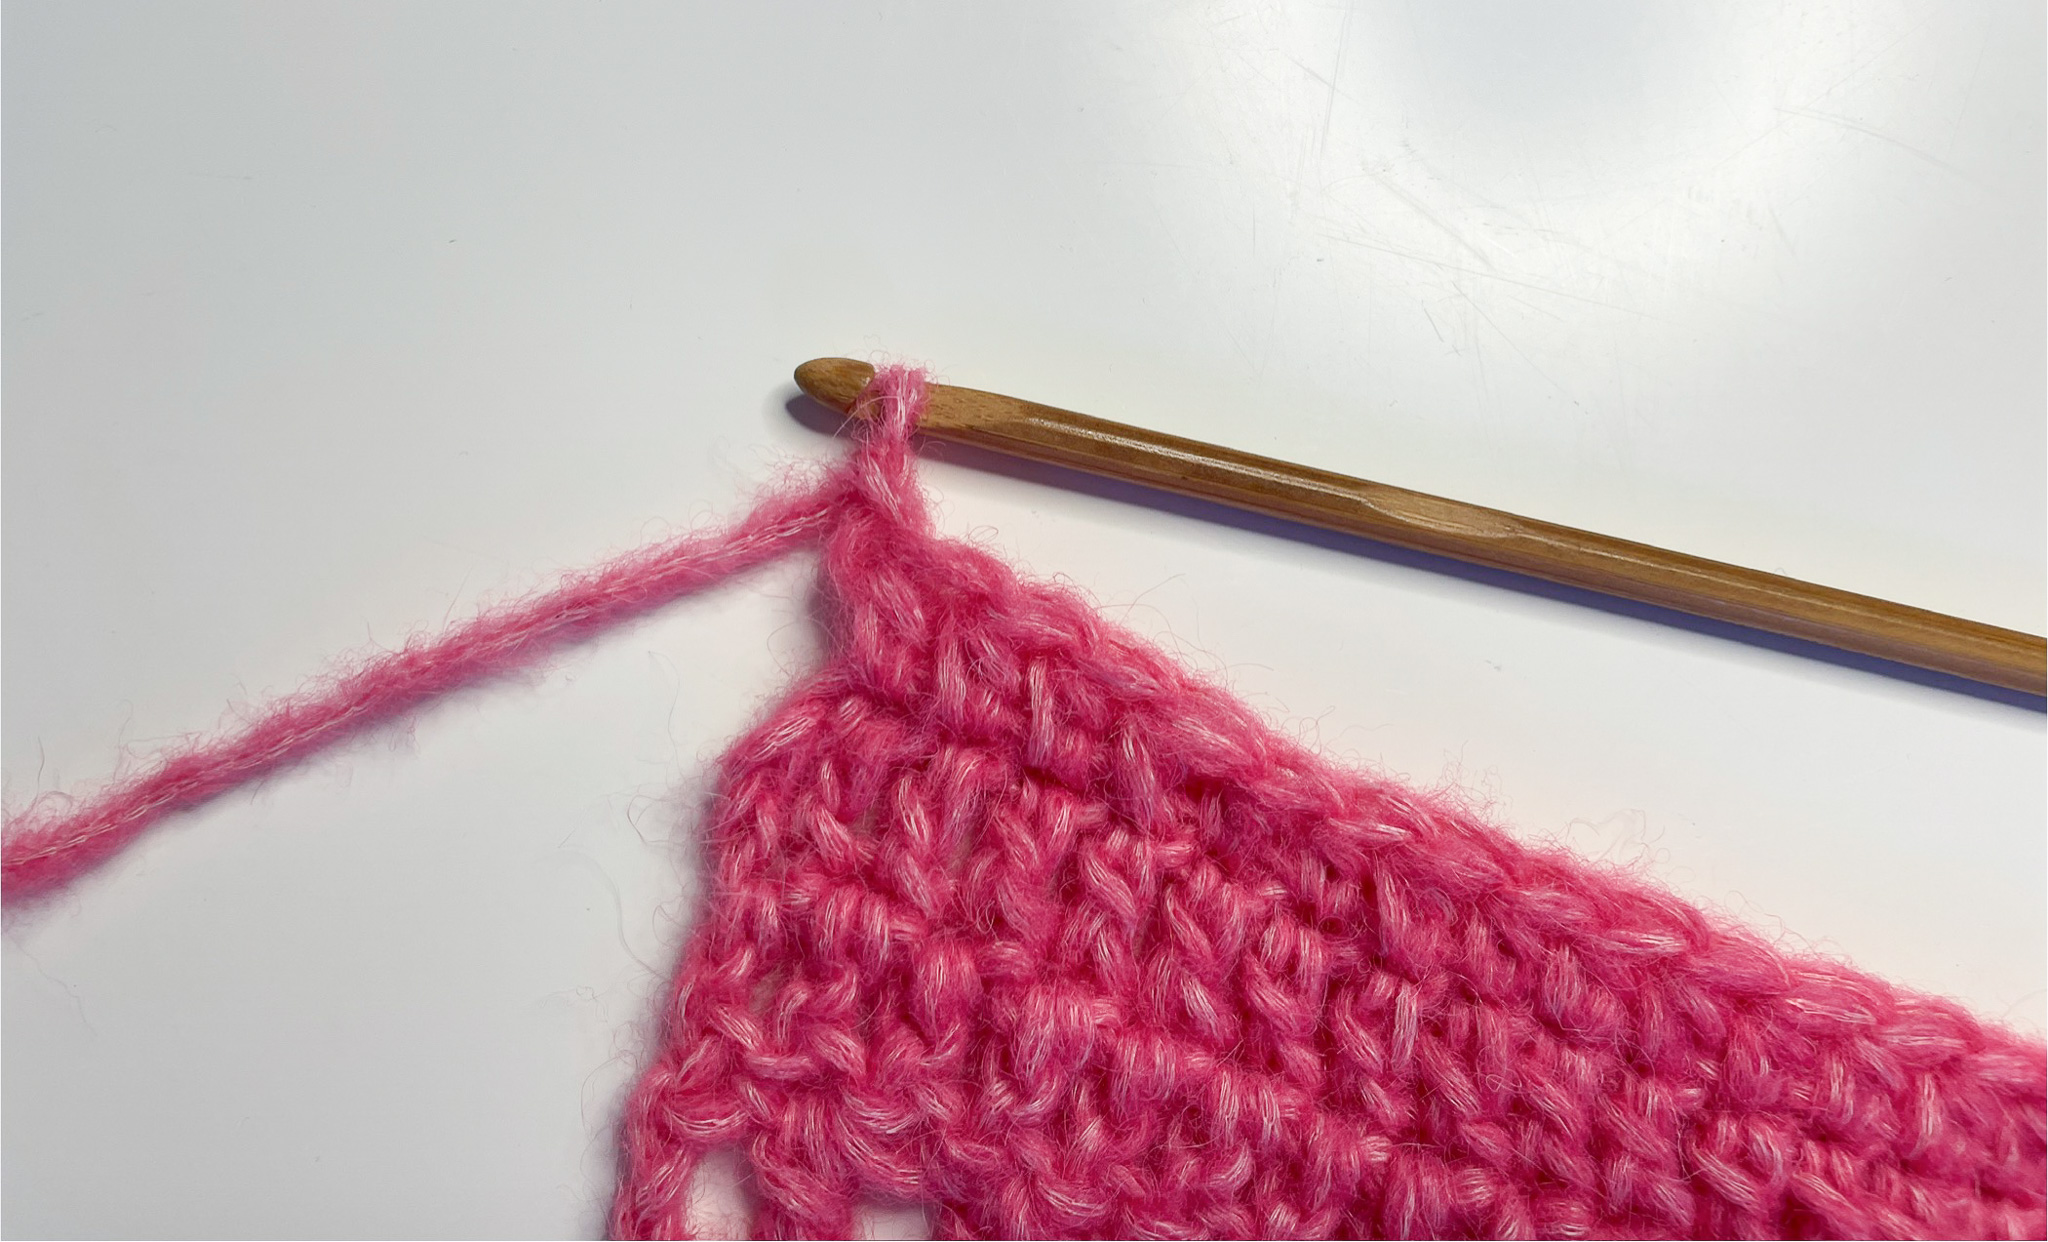
Row 1: Chain 50 + 2, turn.
If you are unsure how to make chain stitches, see the video below.
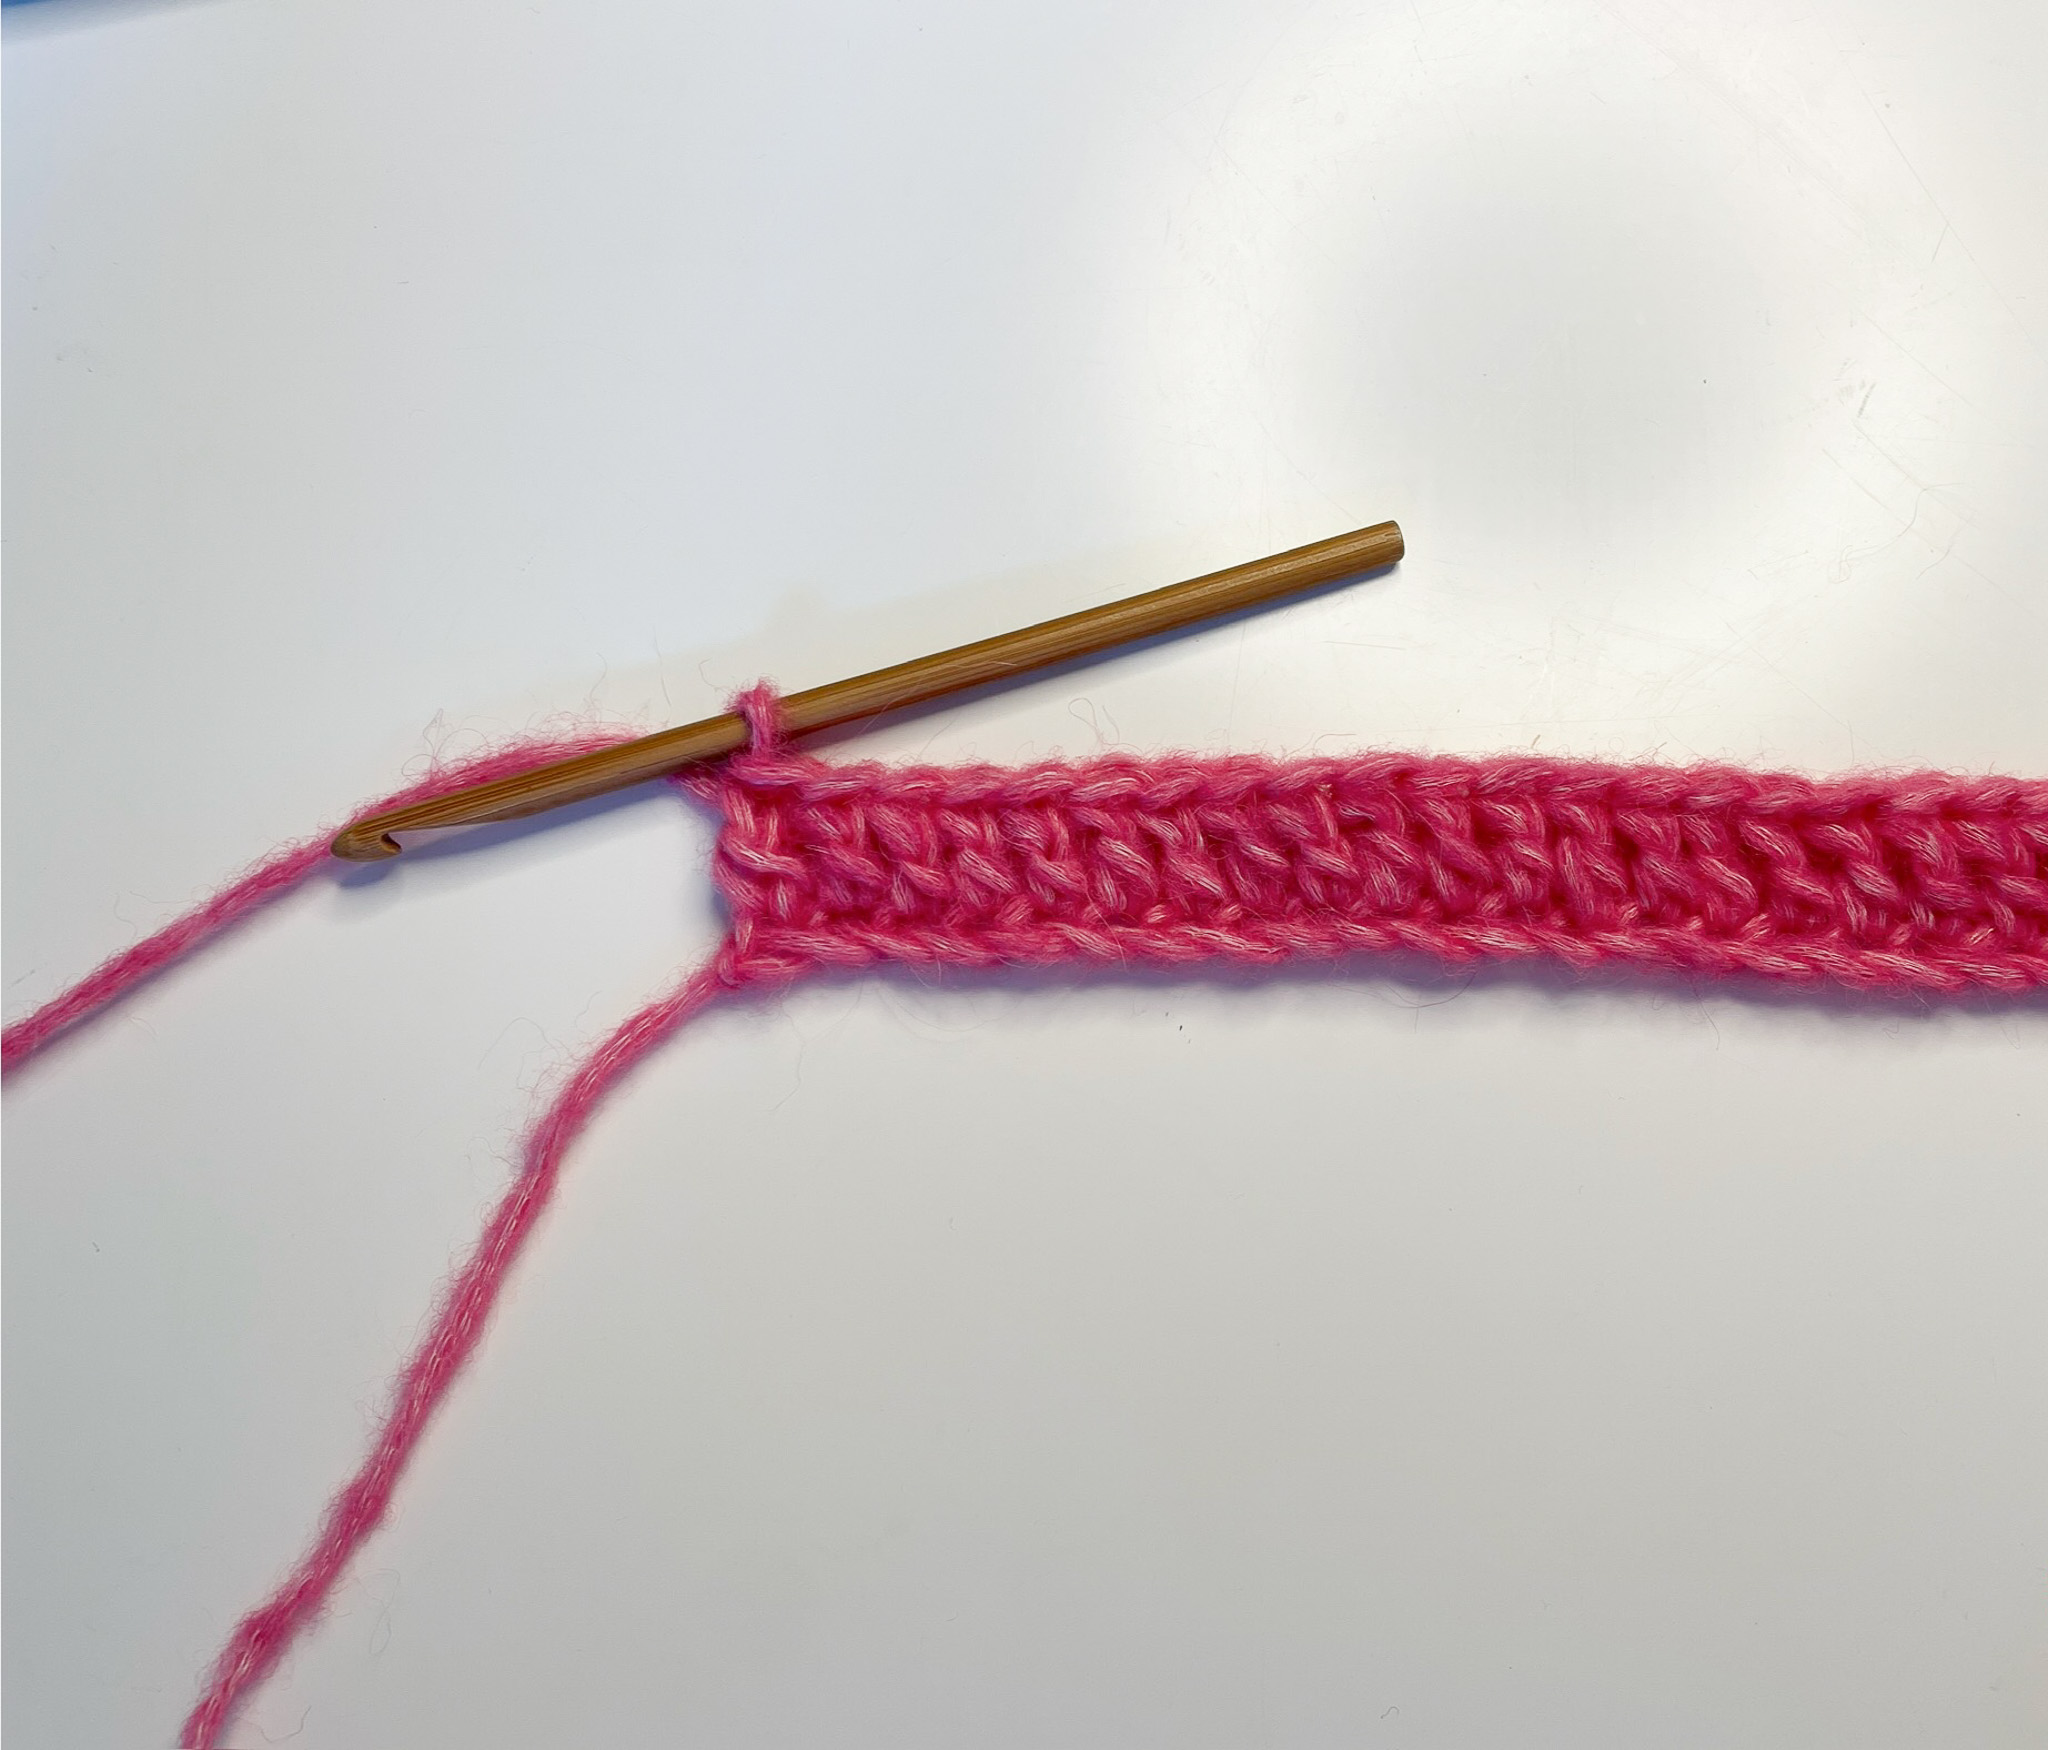
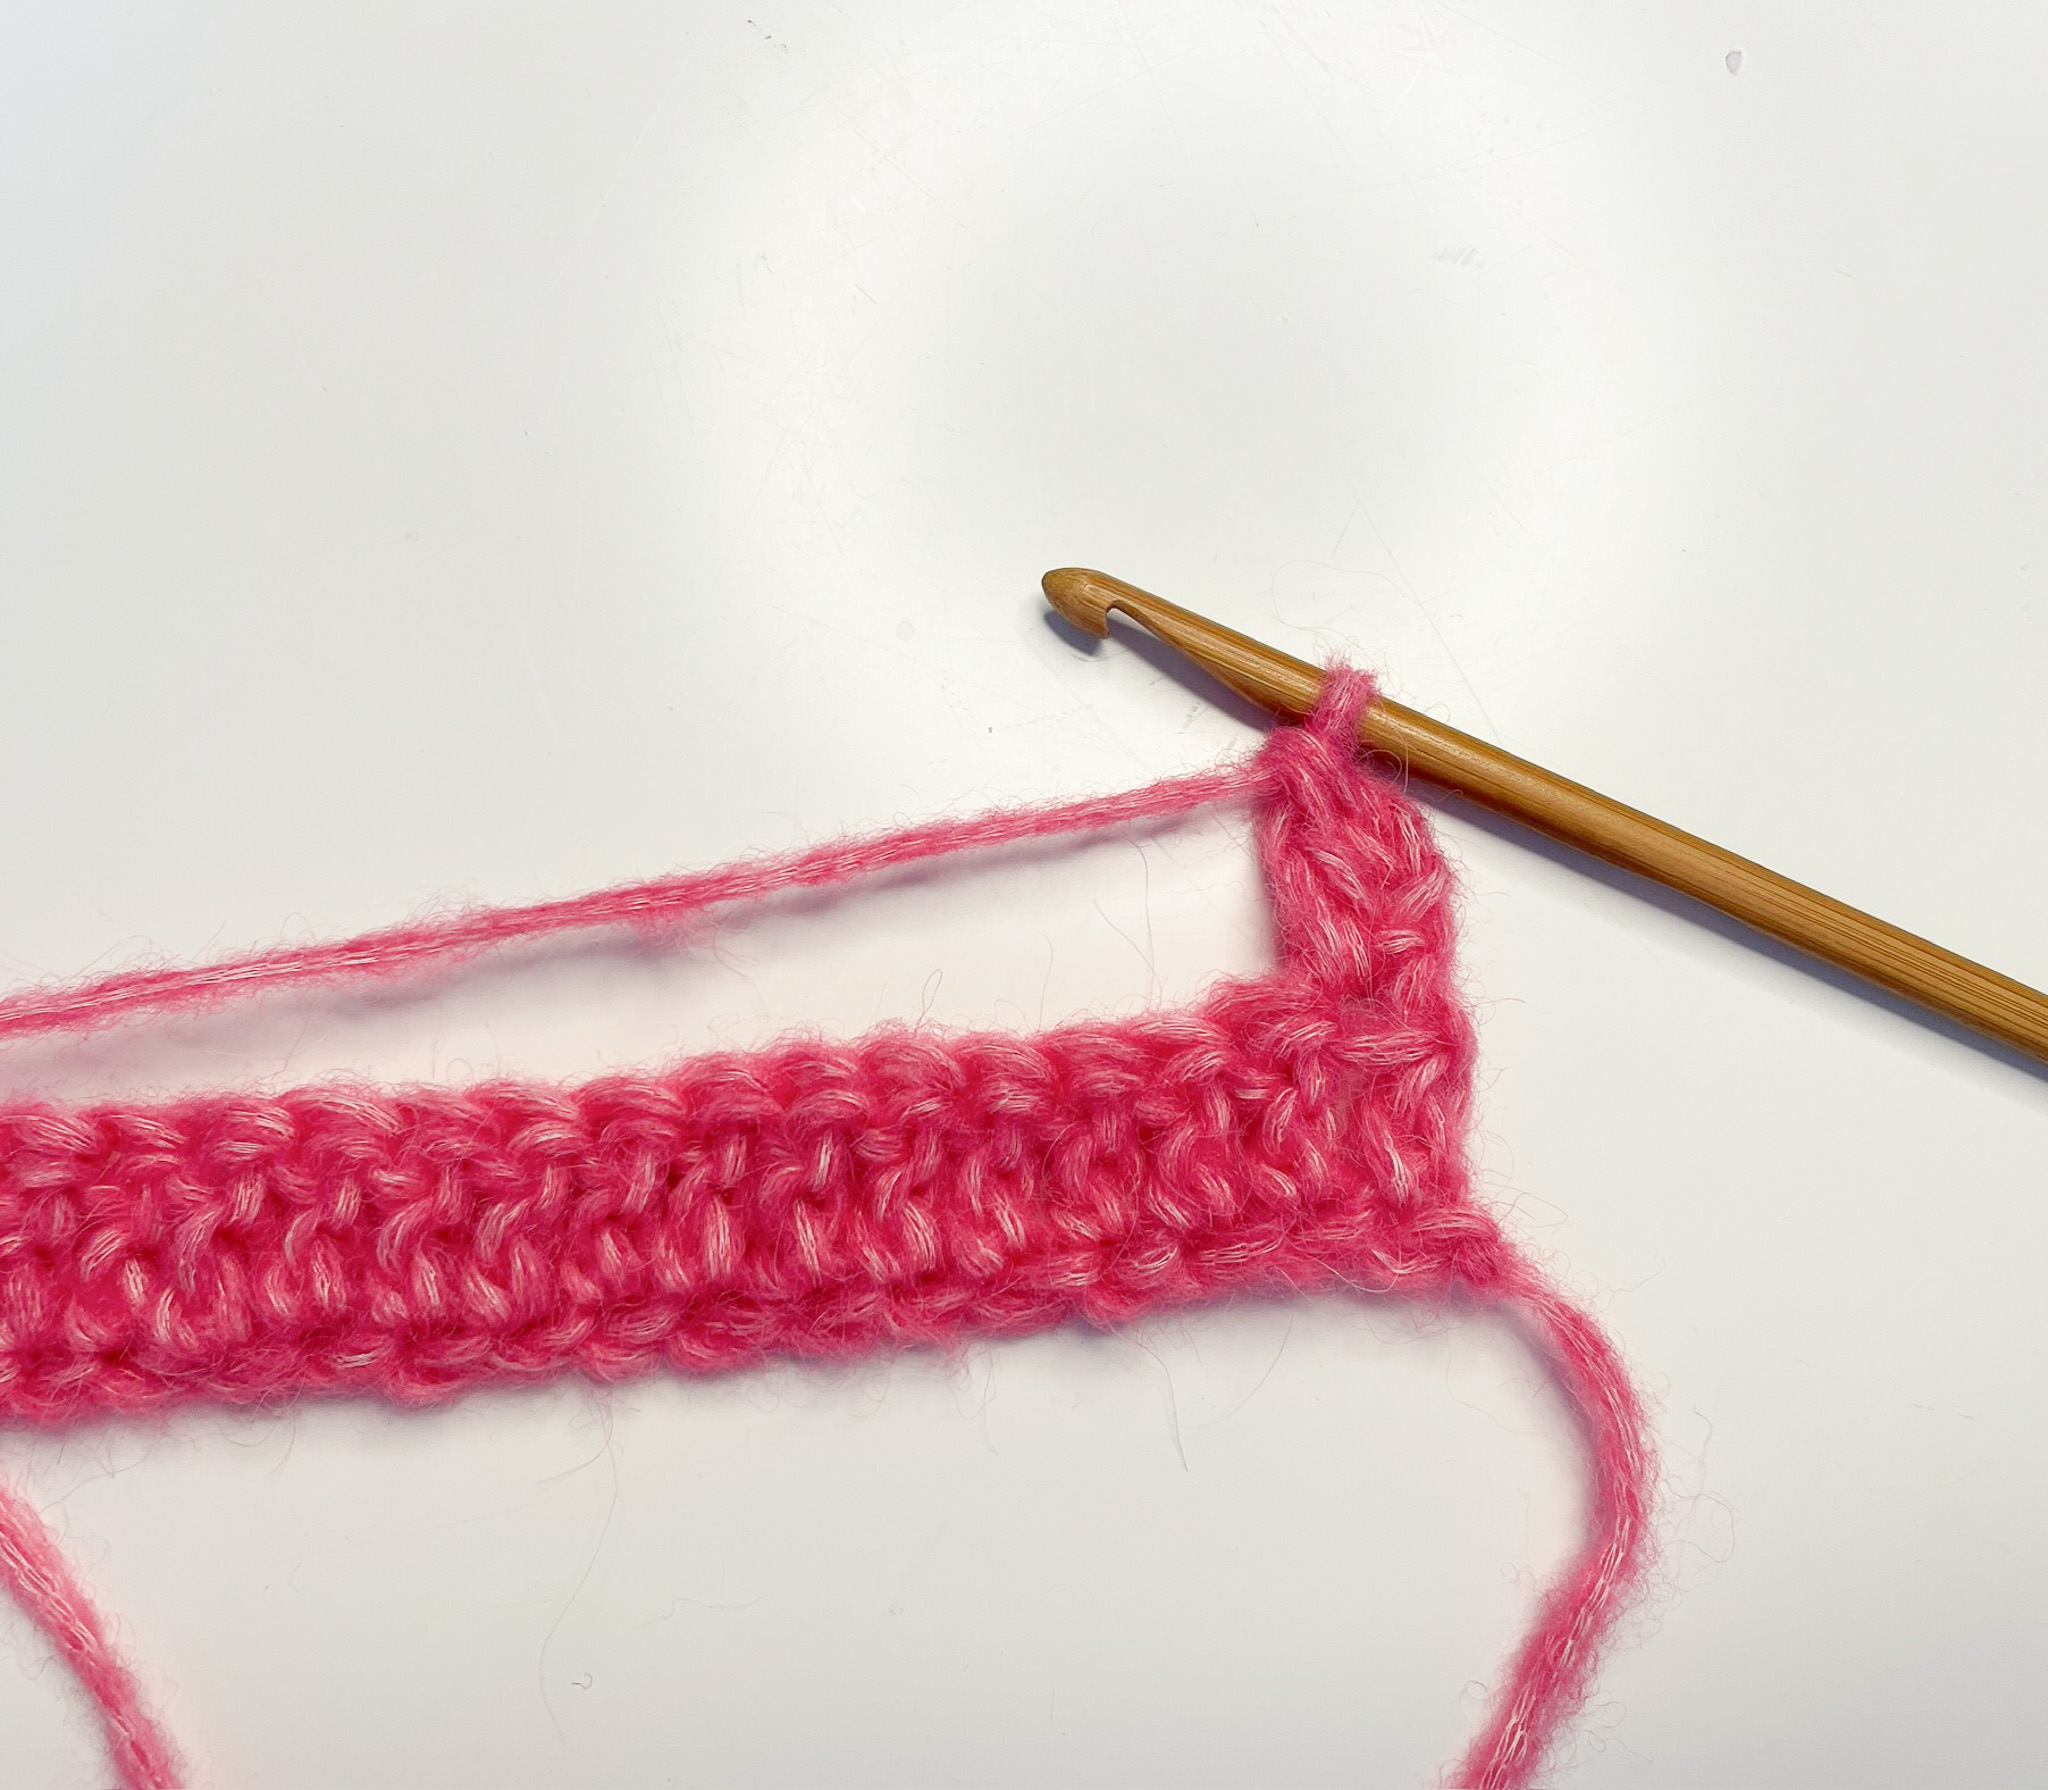
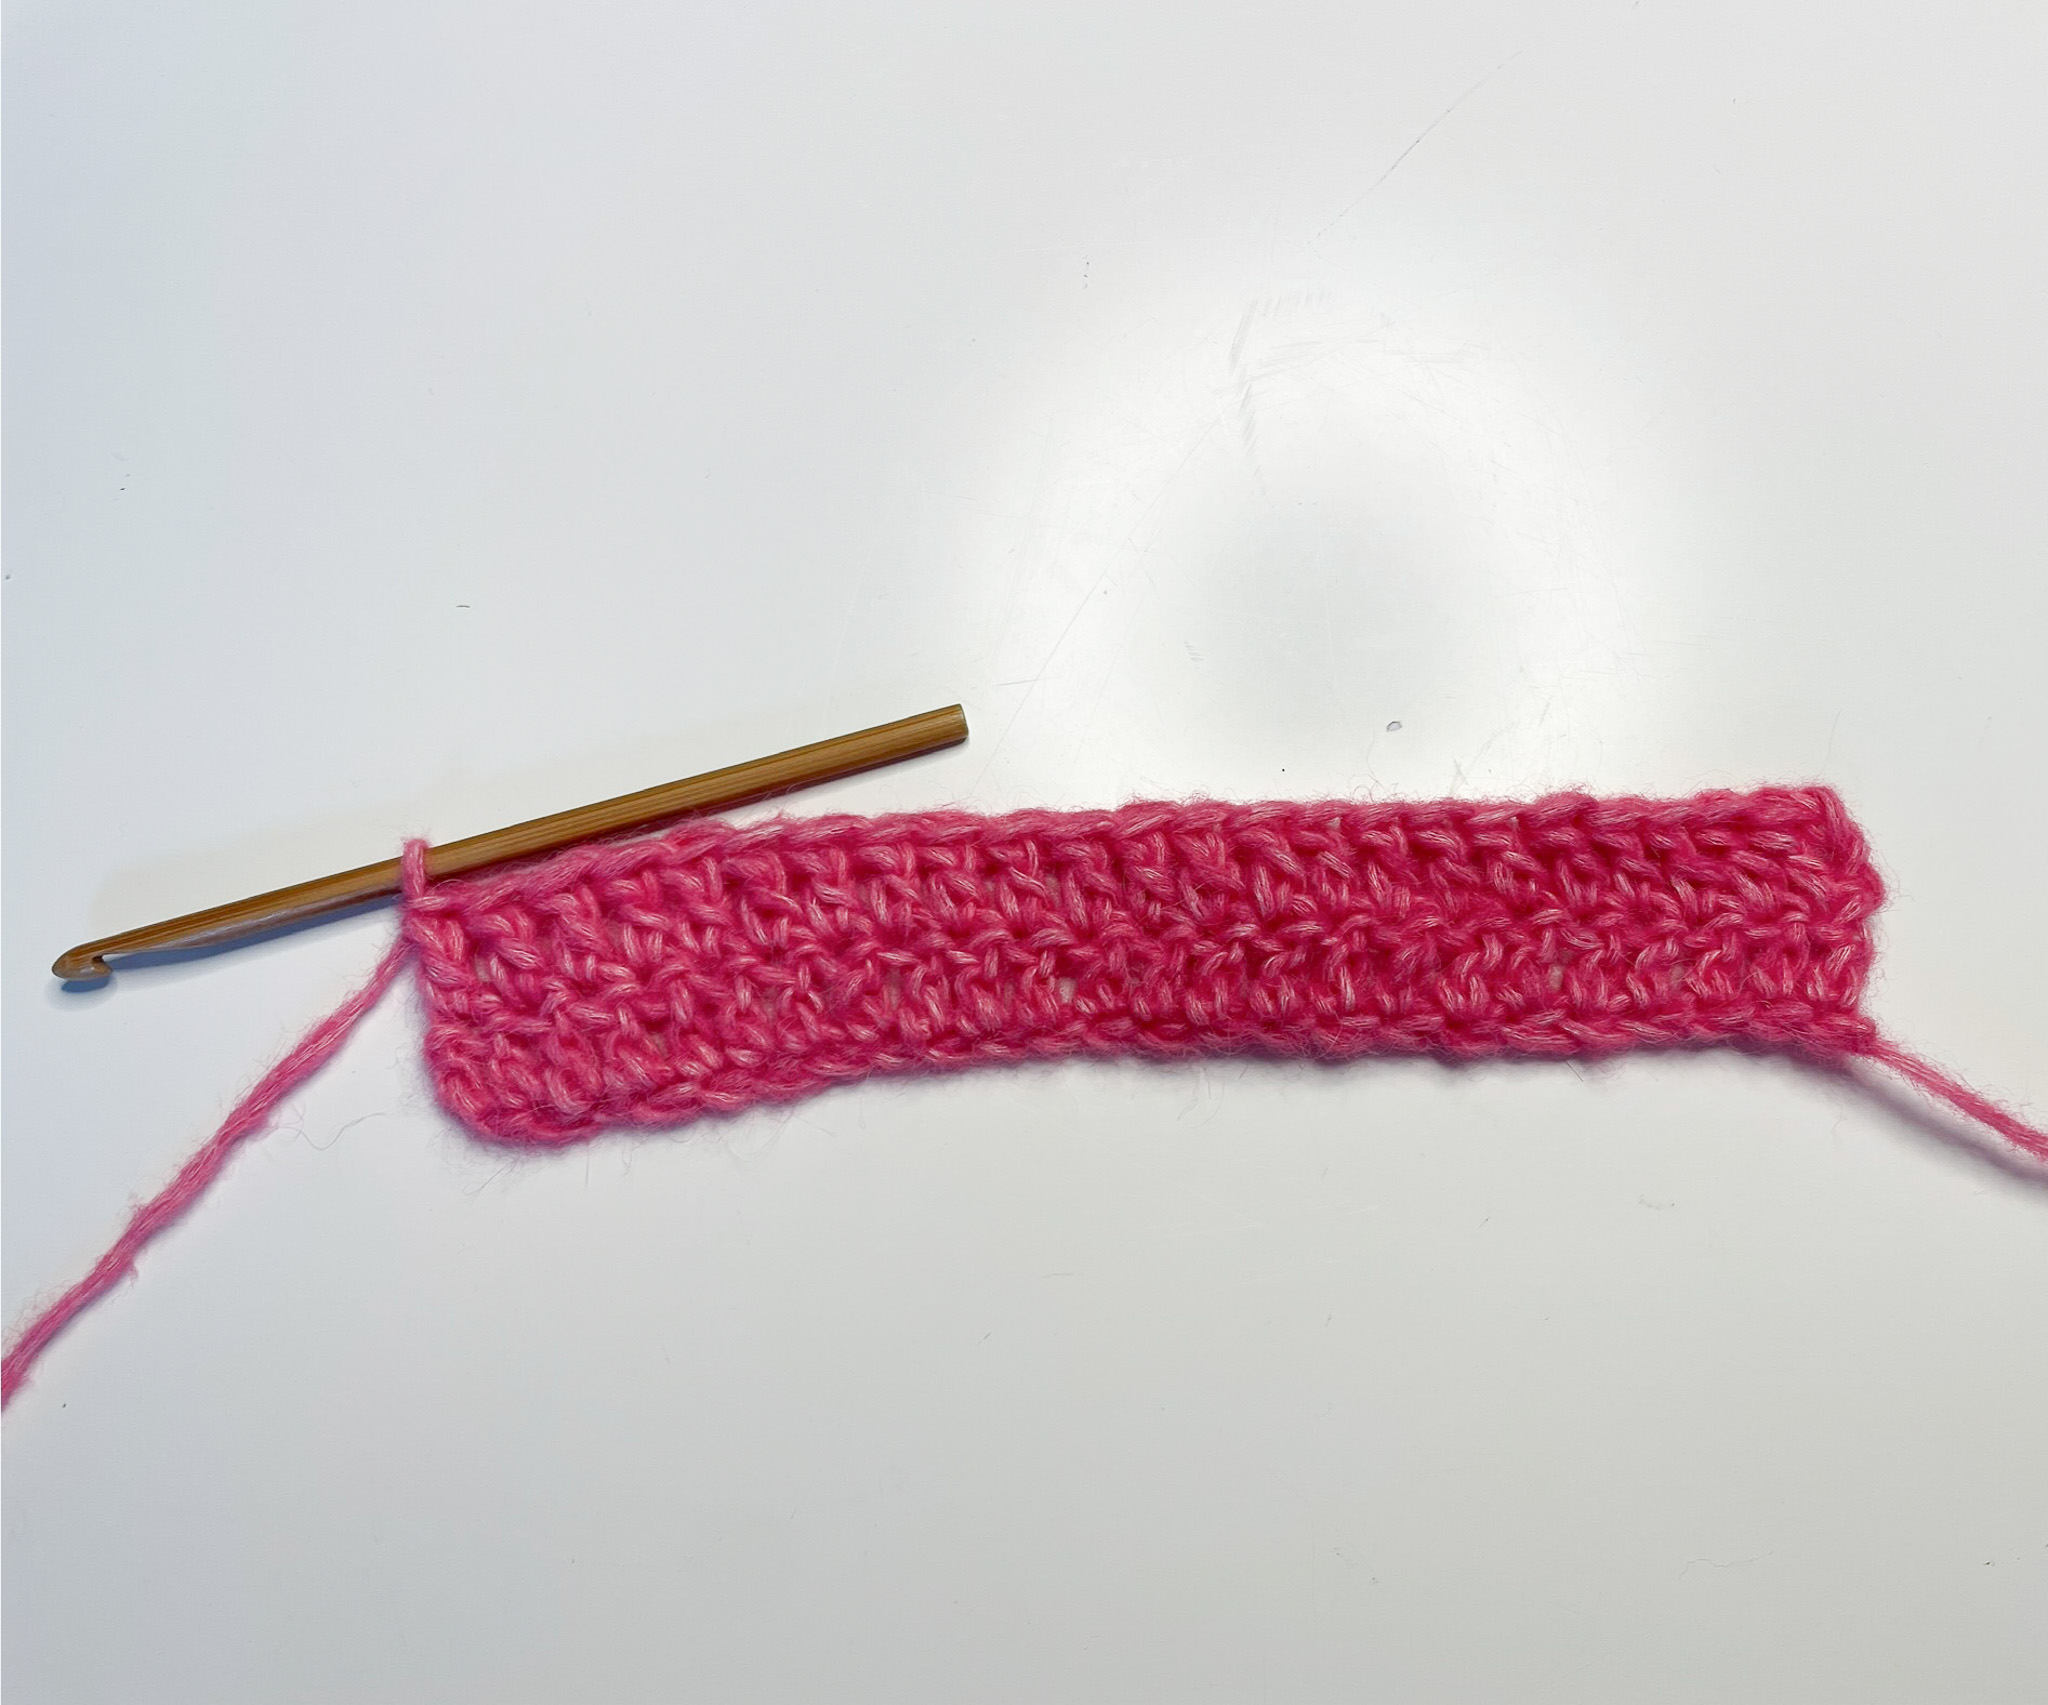
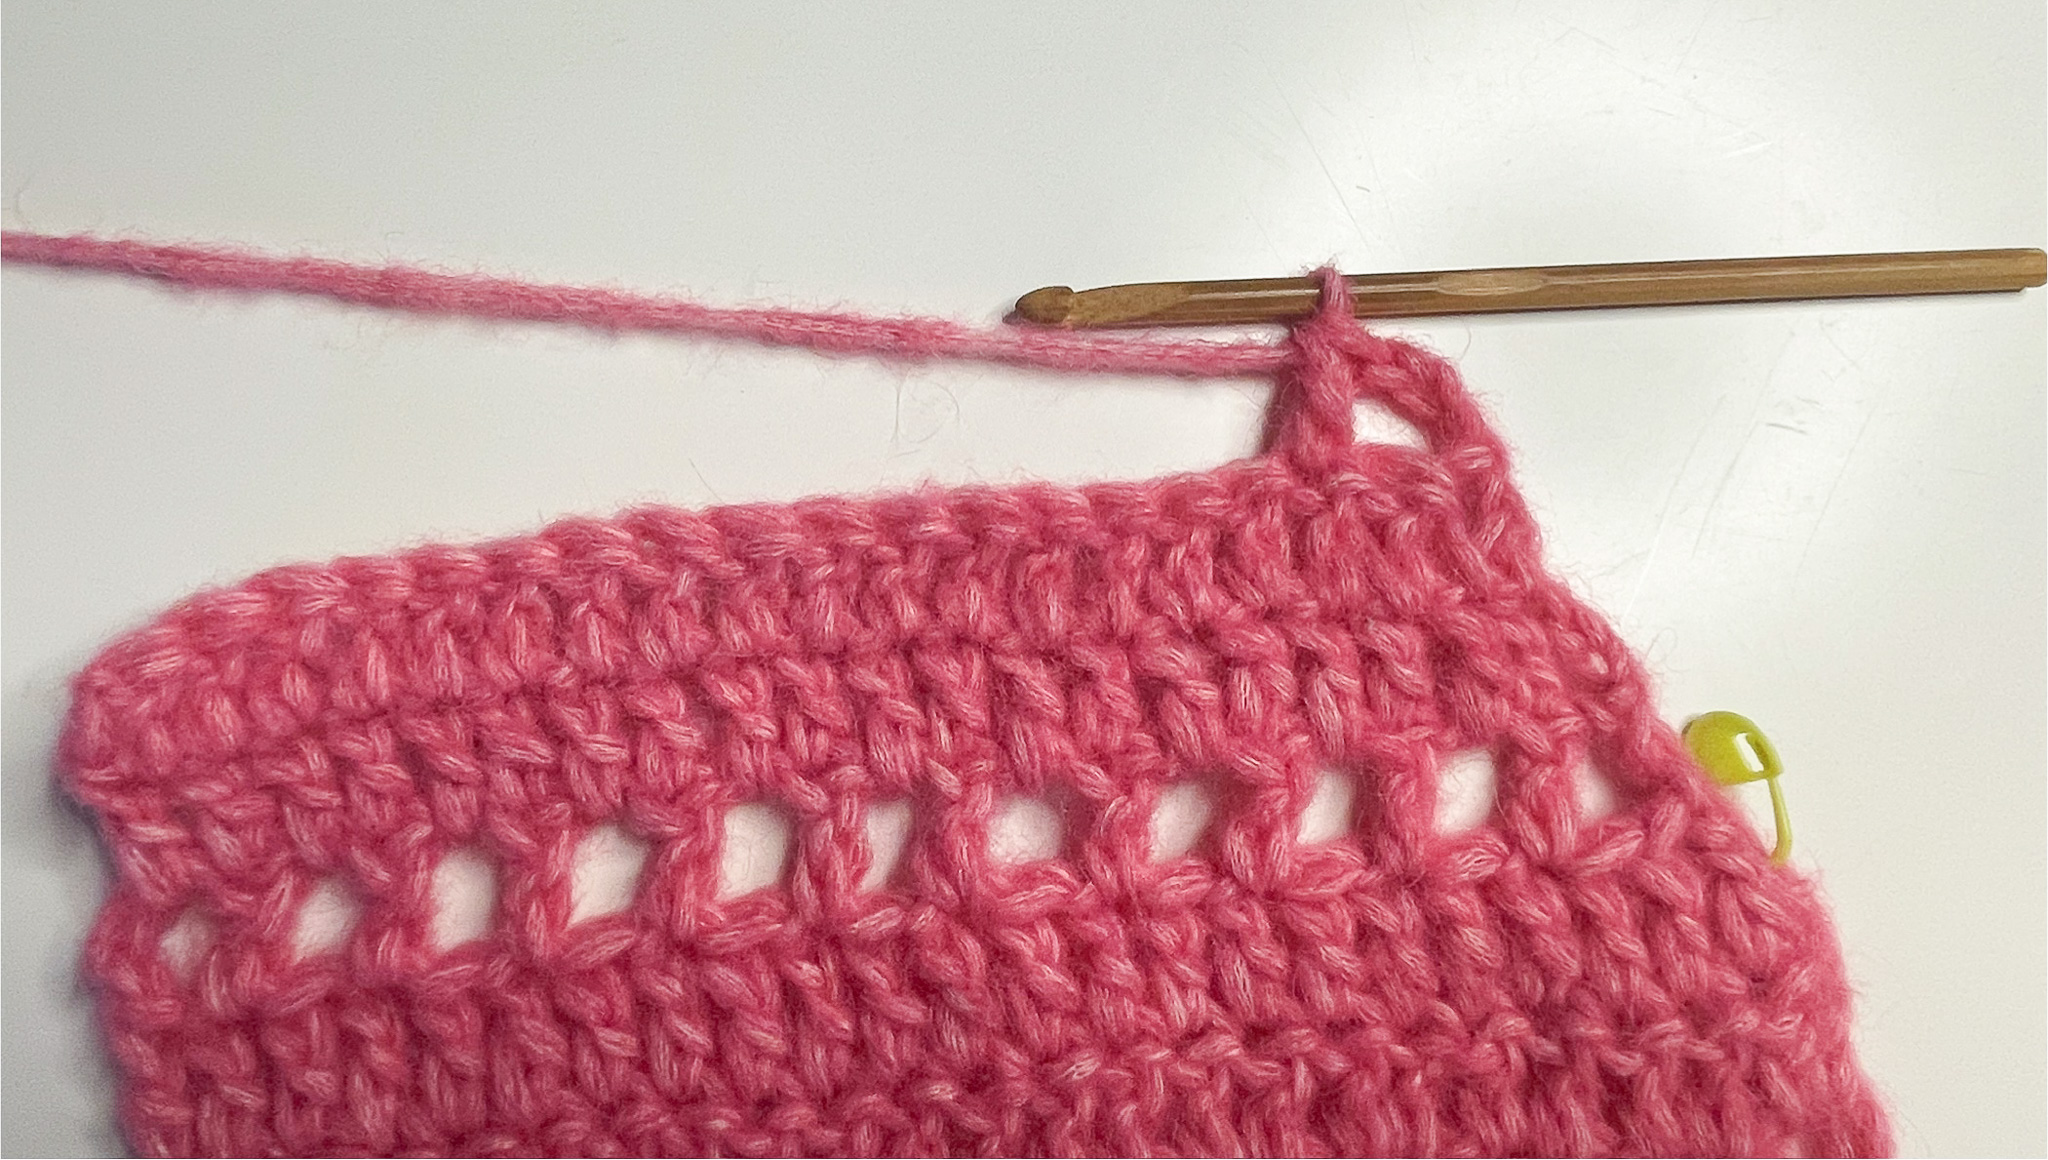
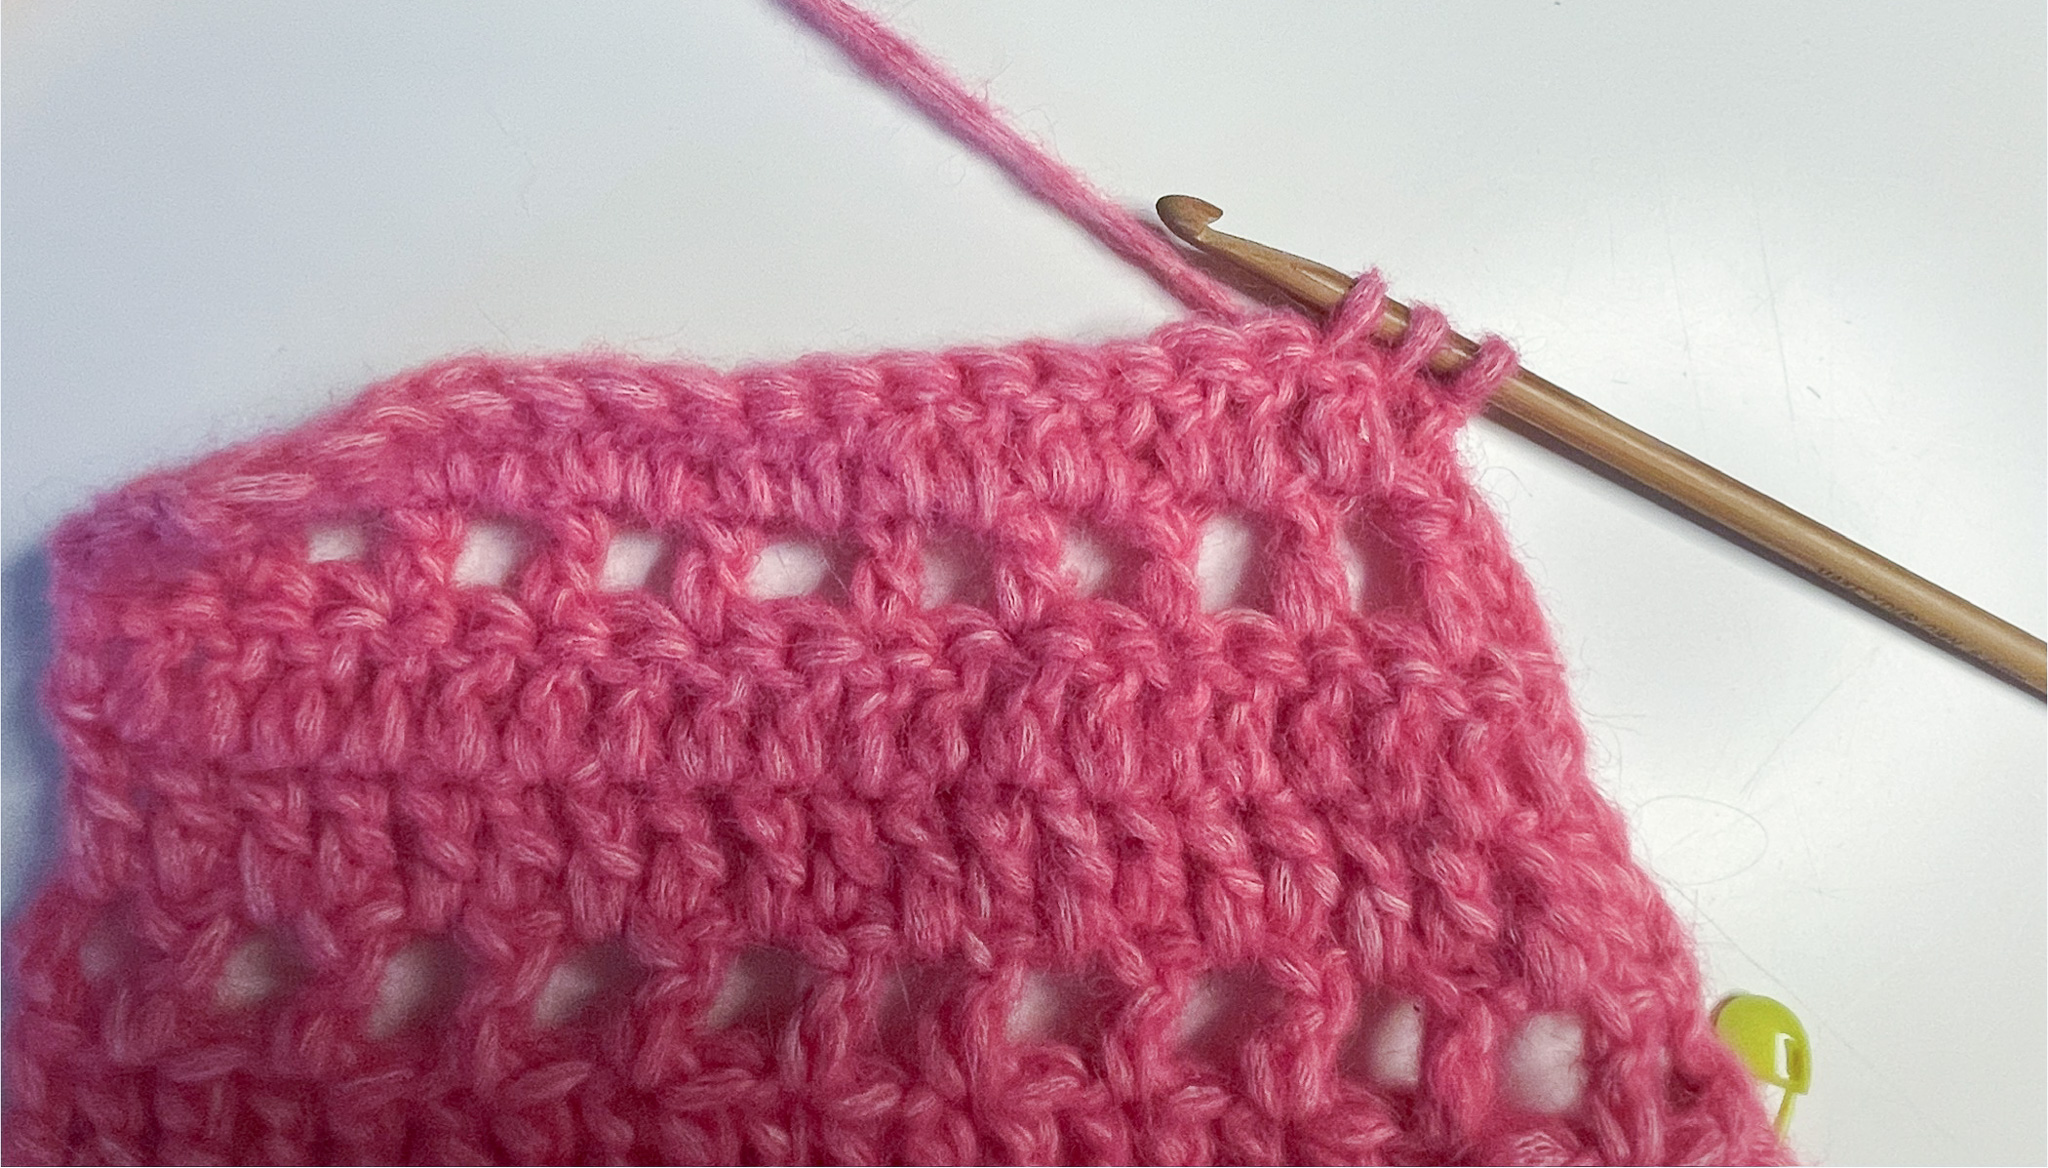
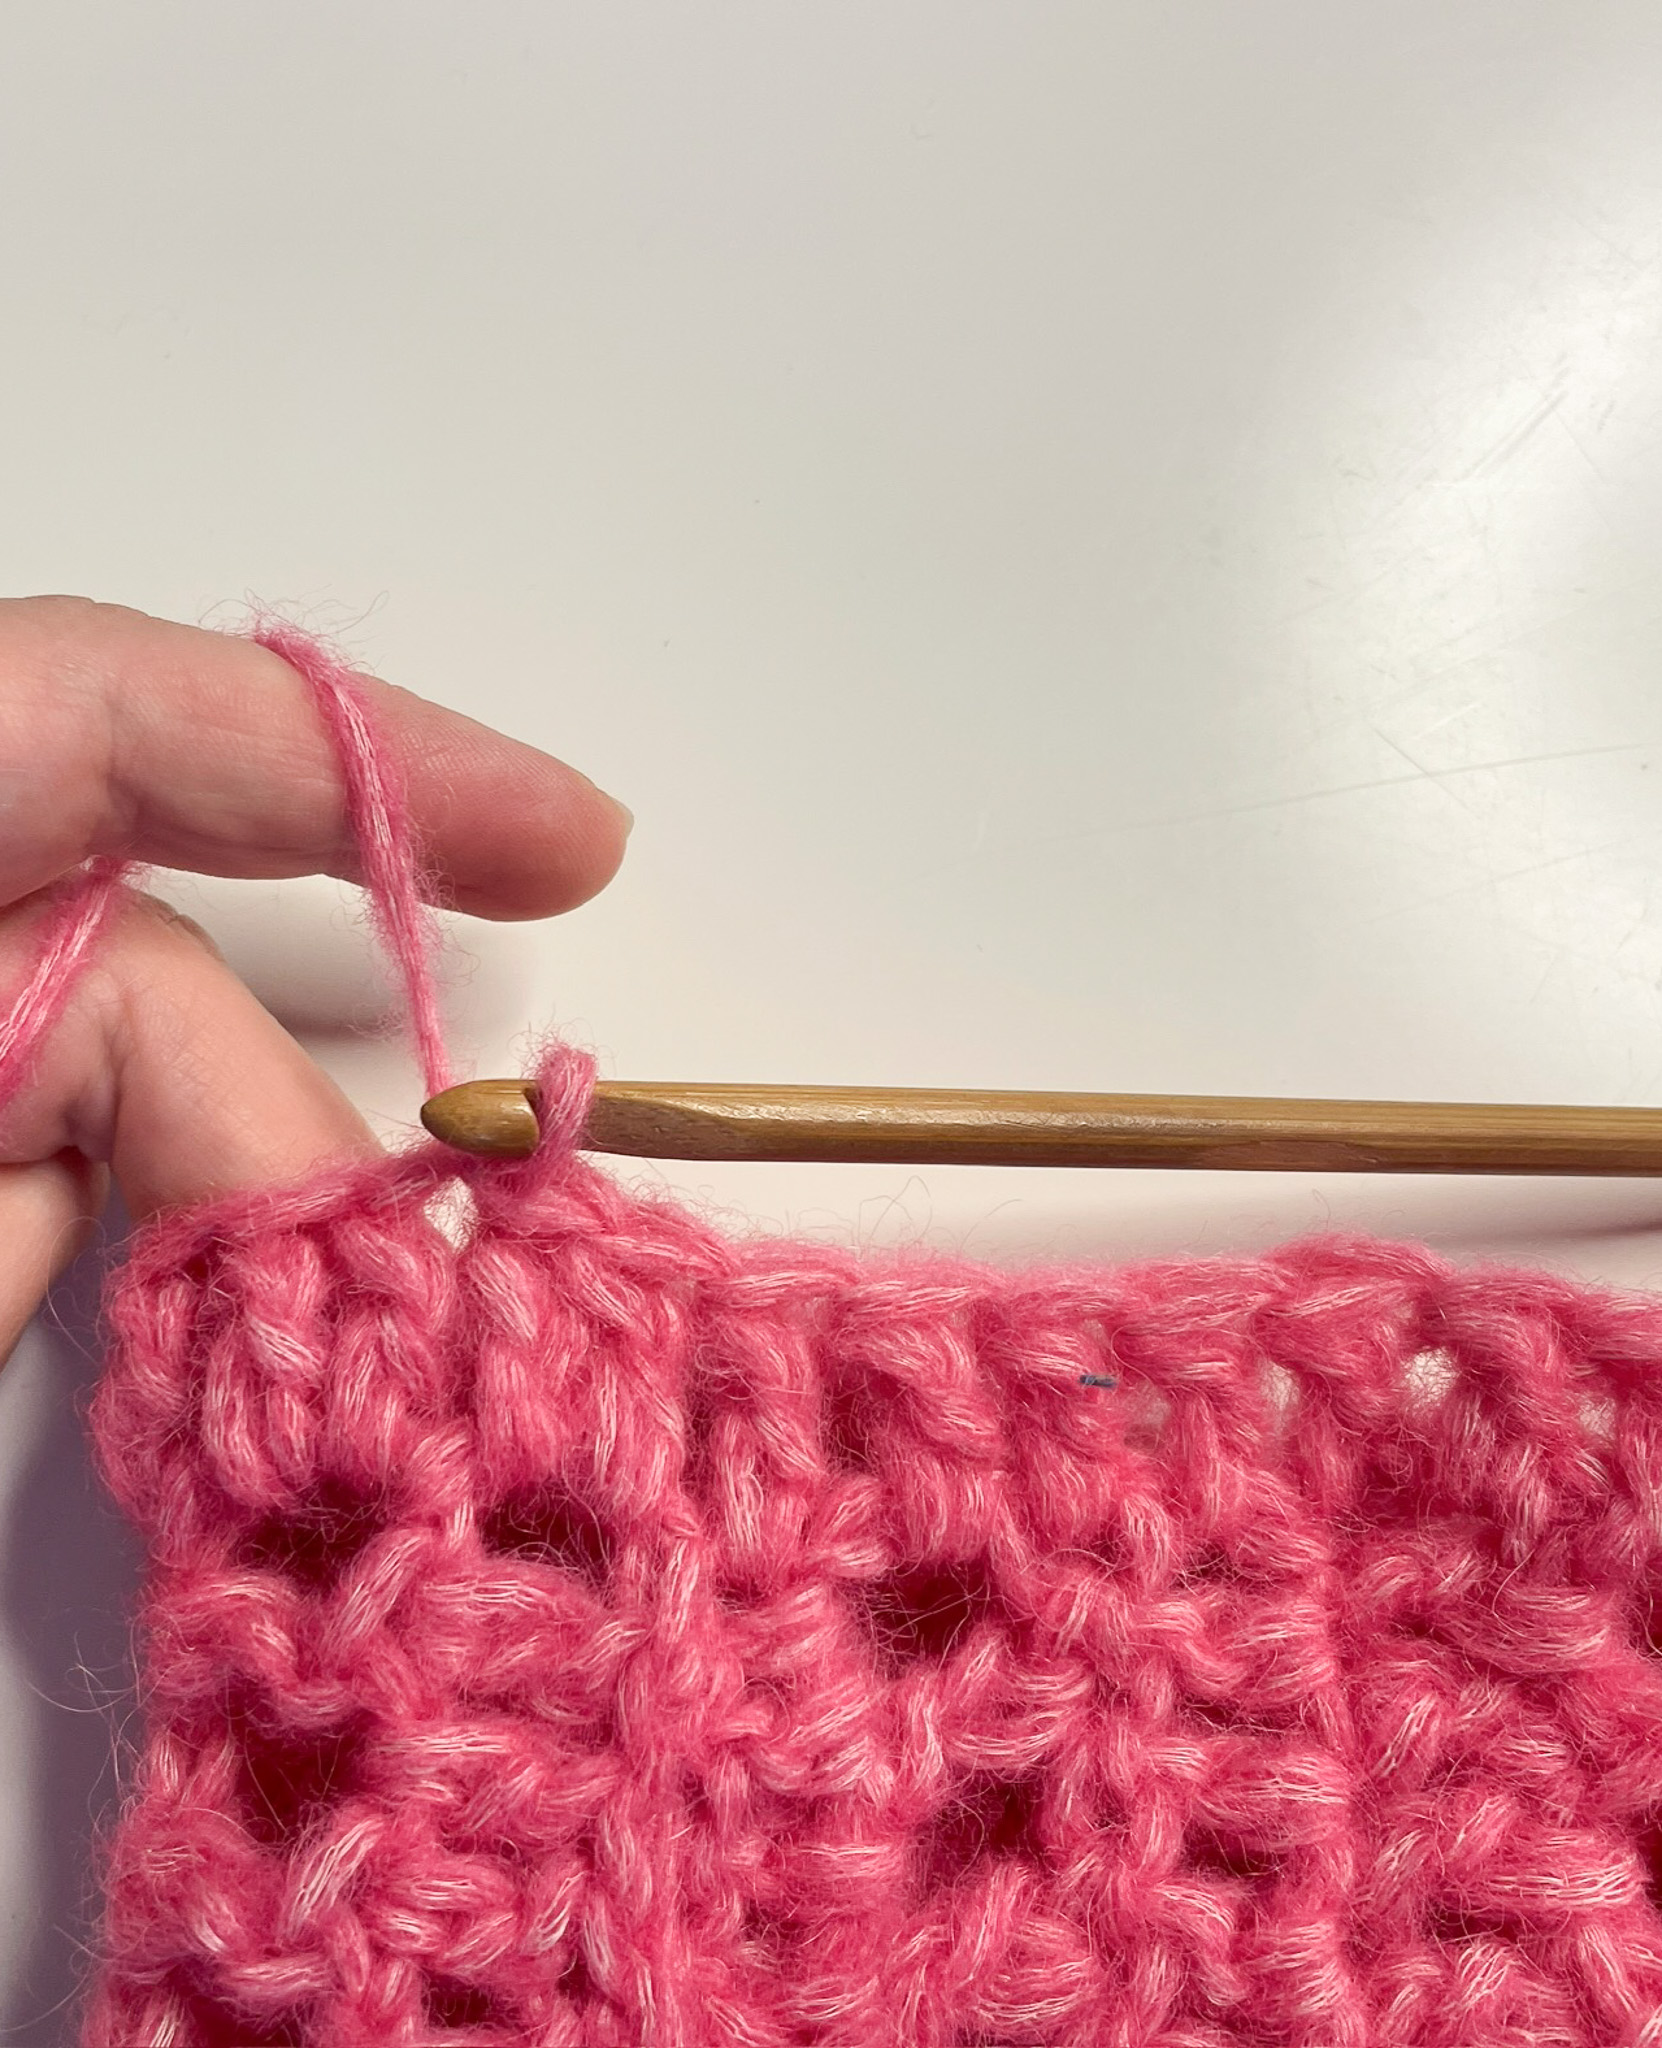
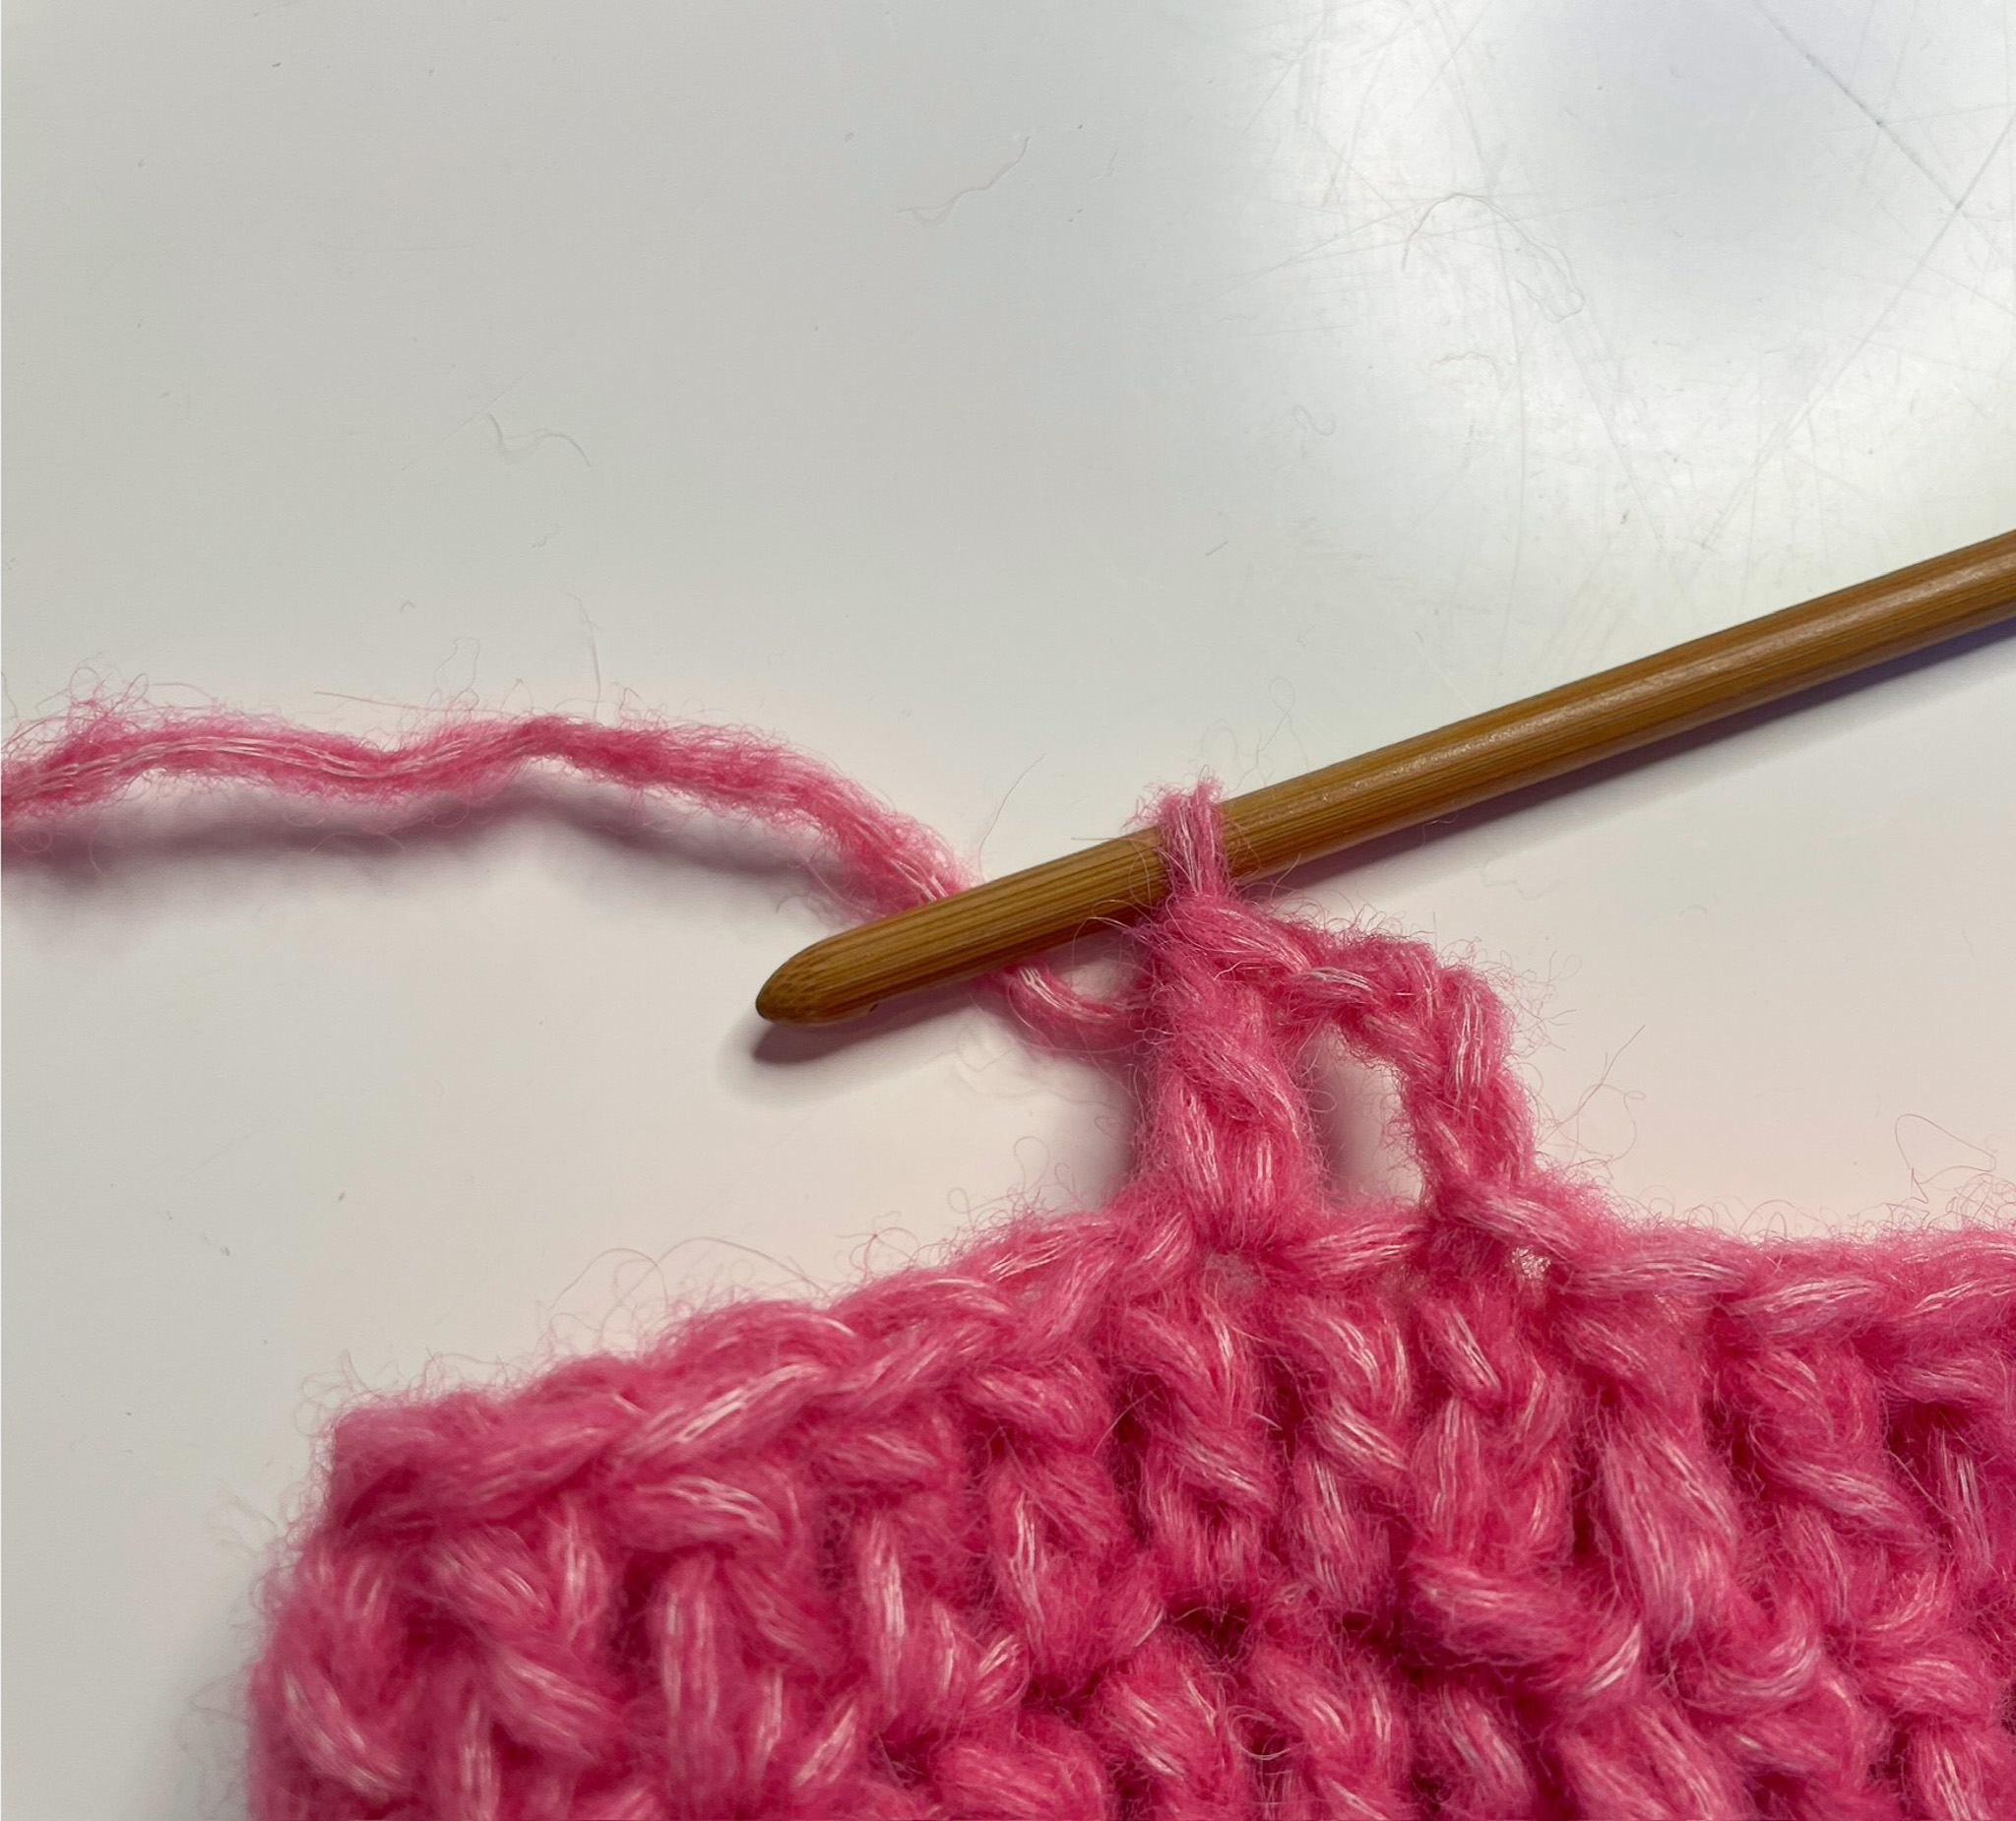
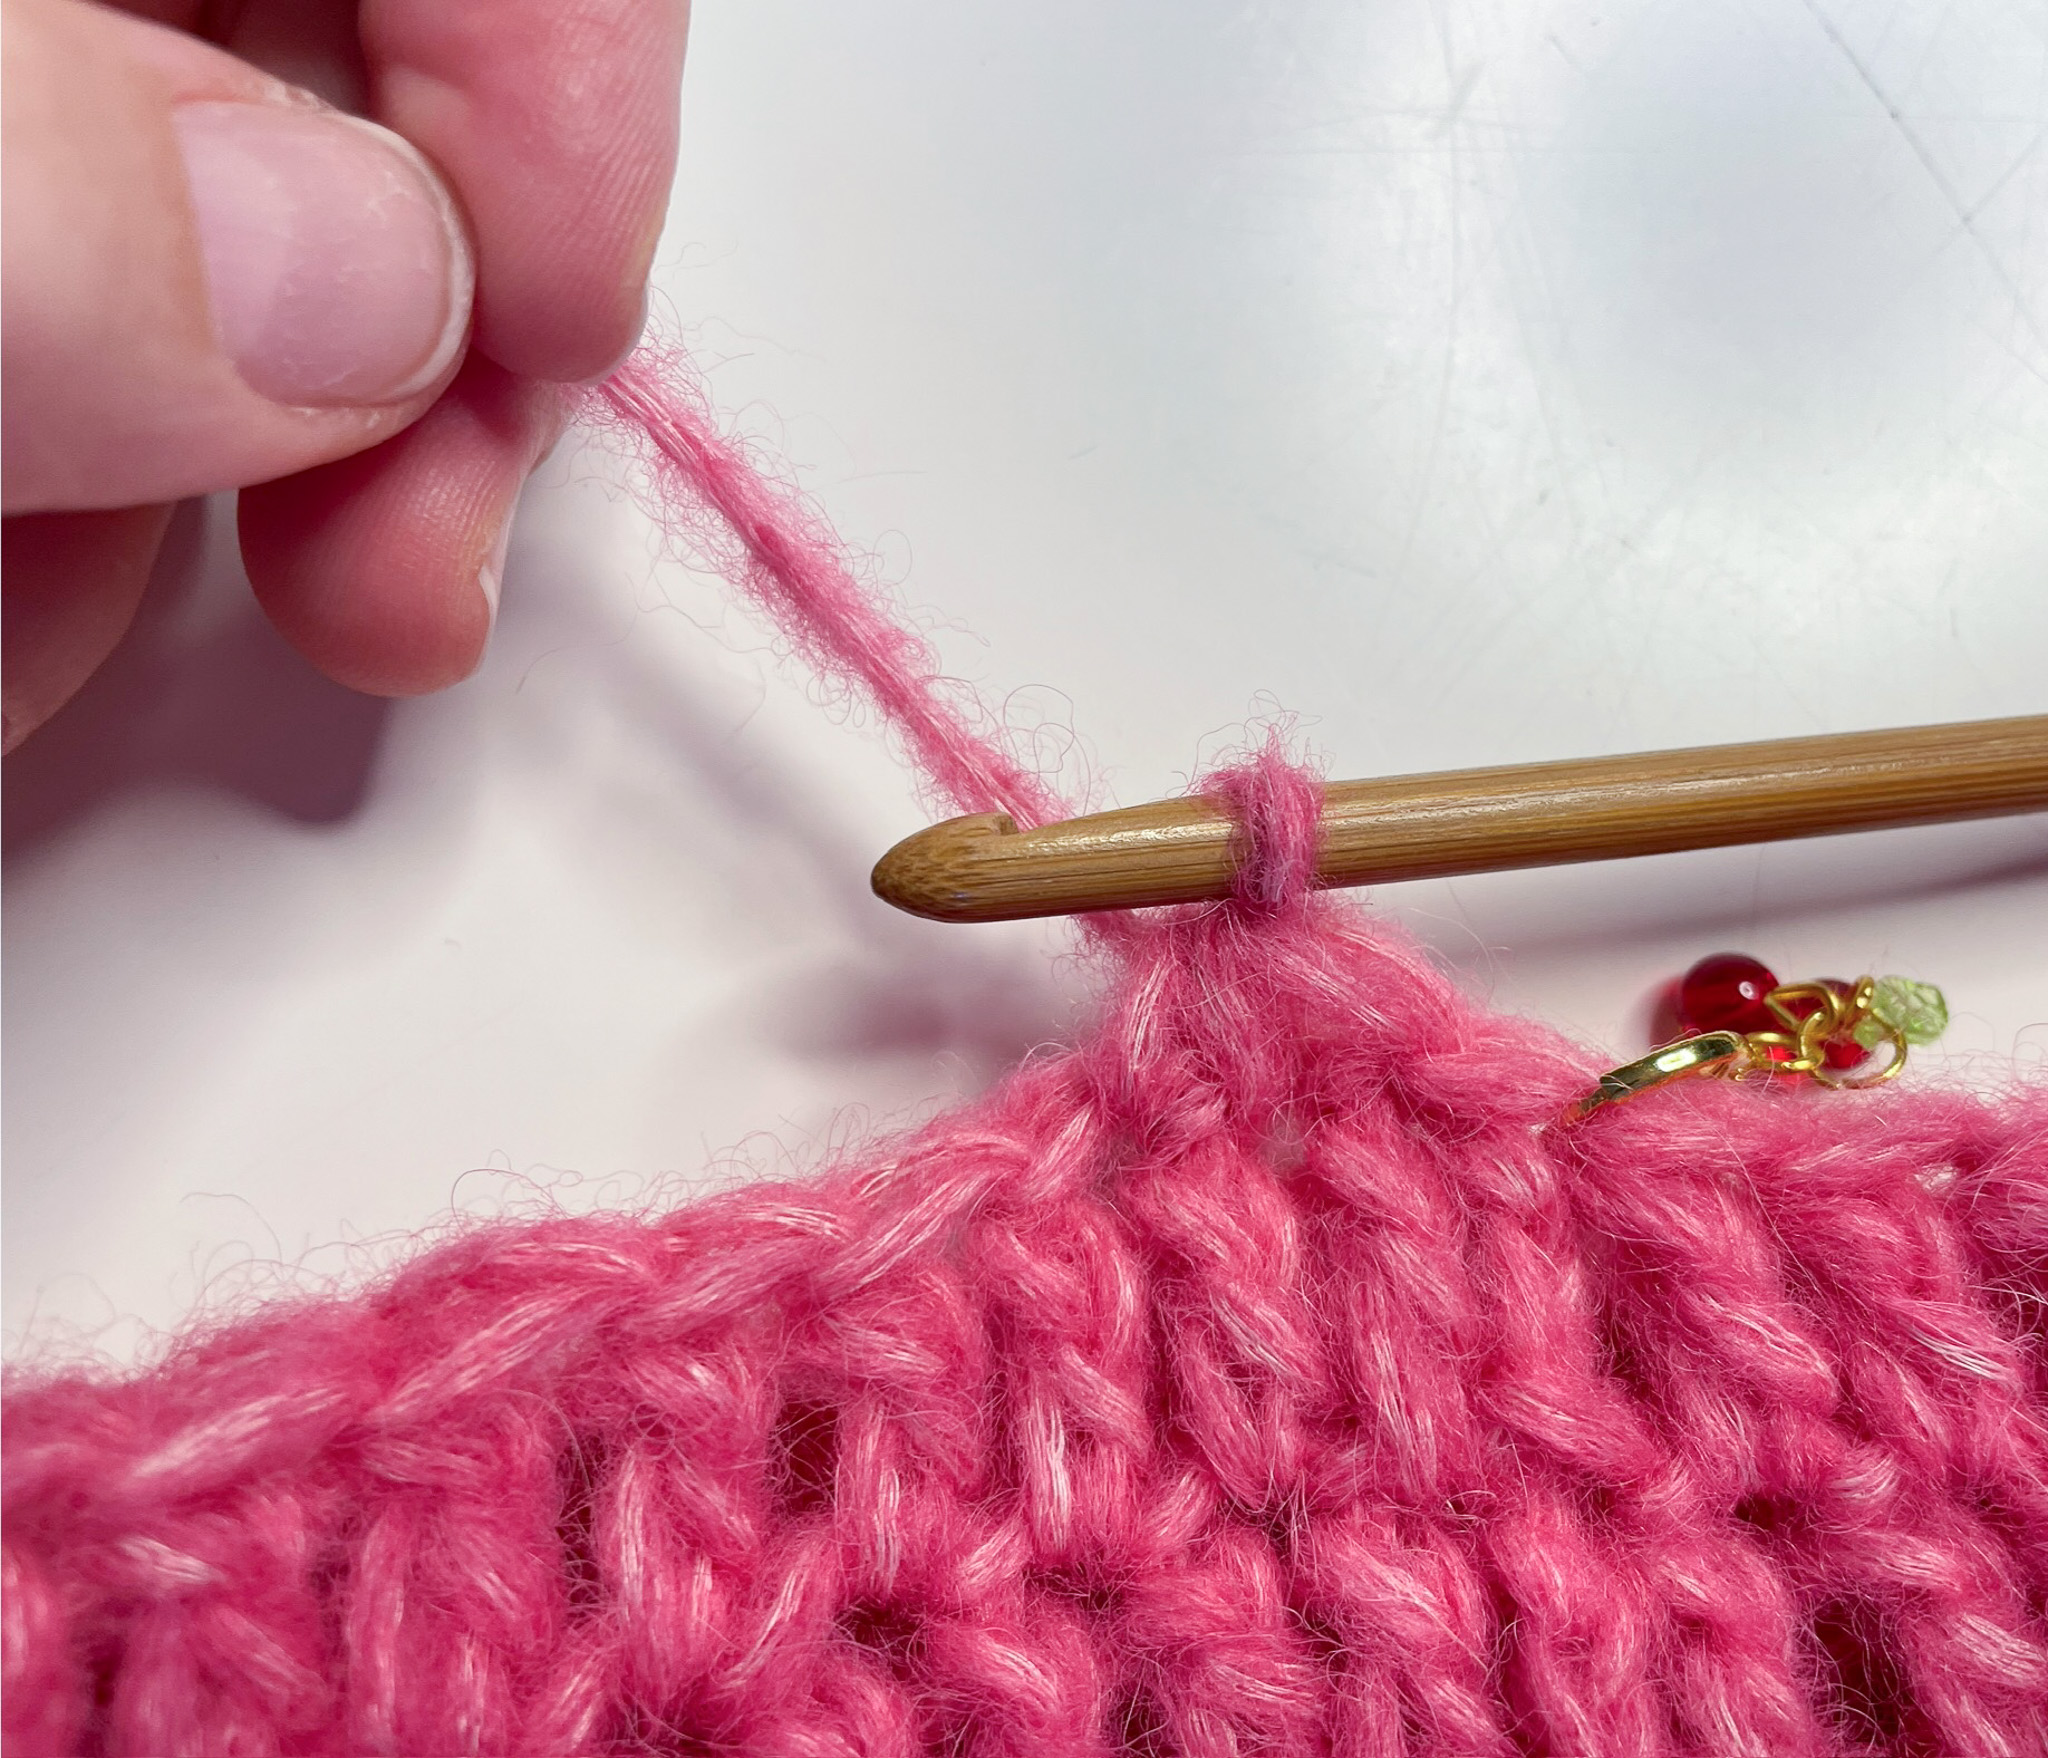
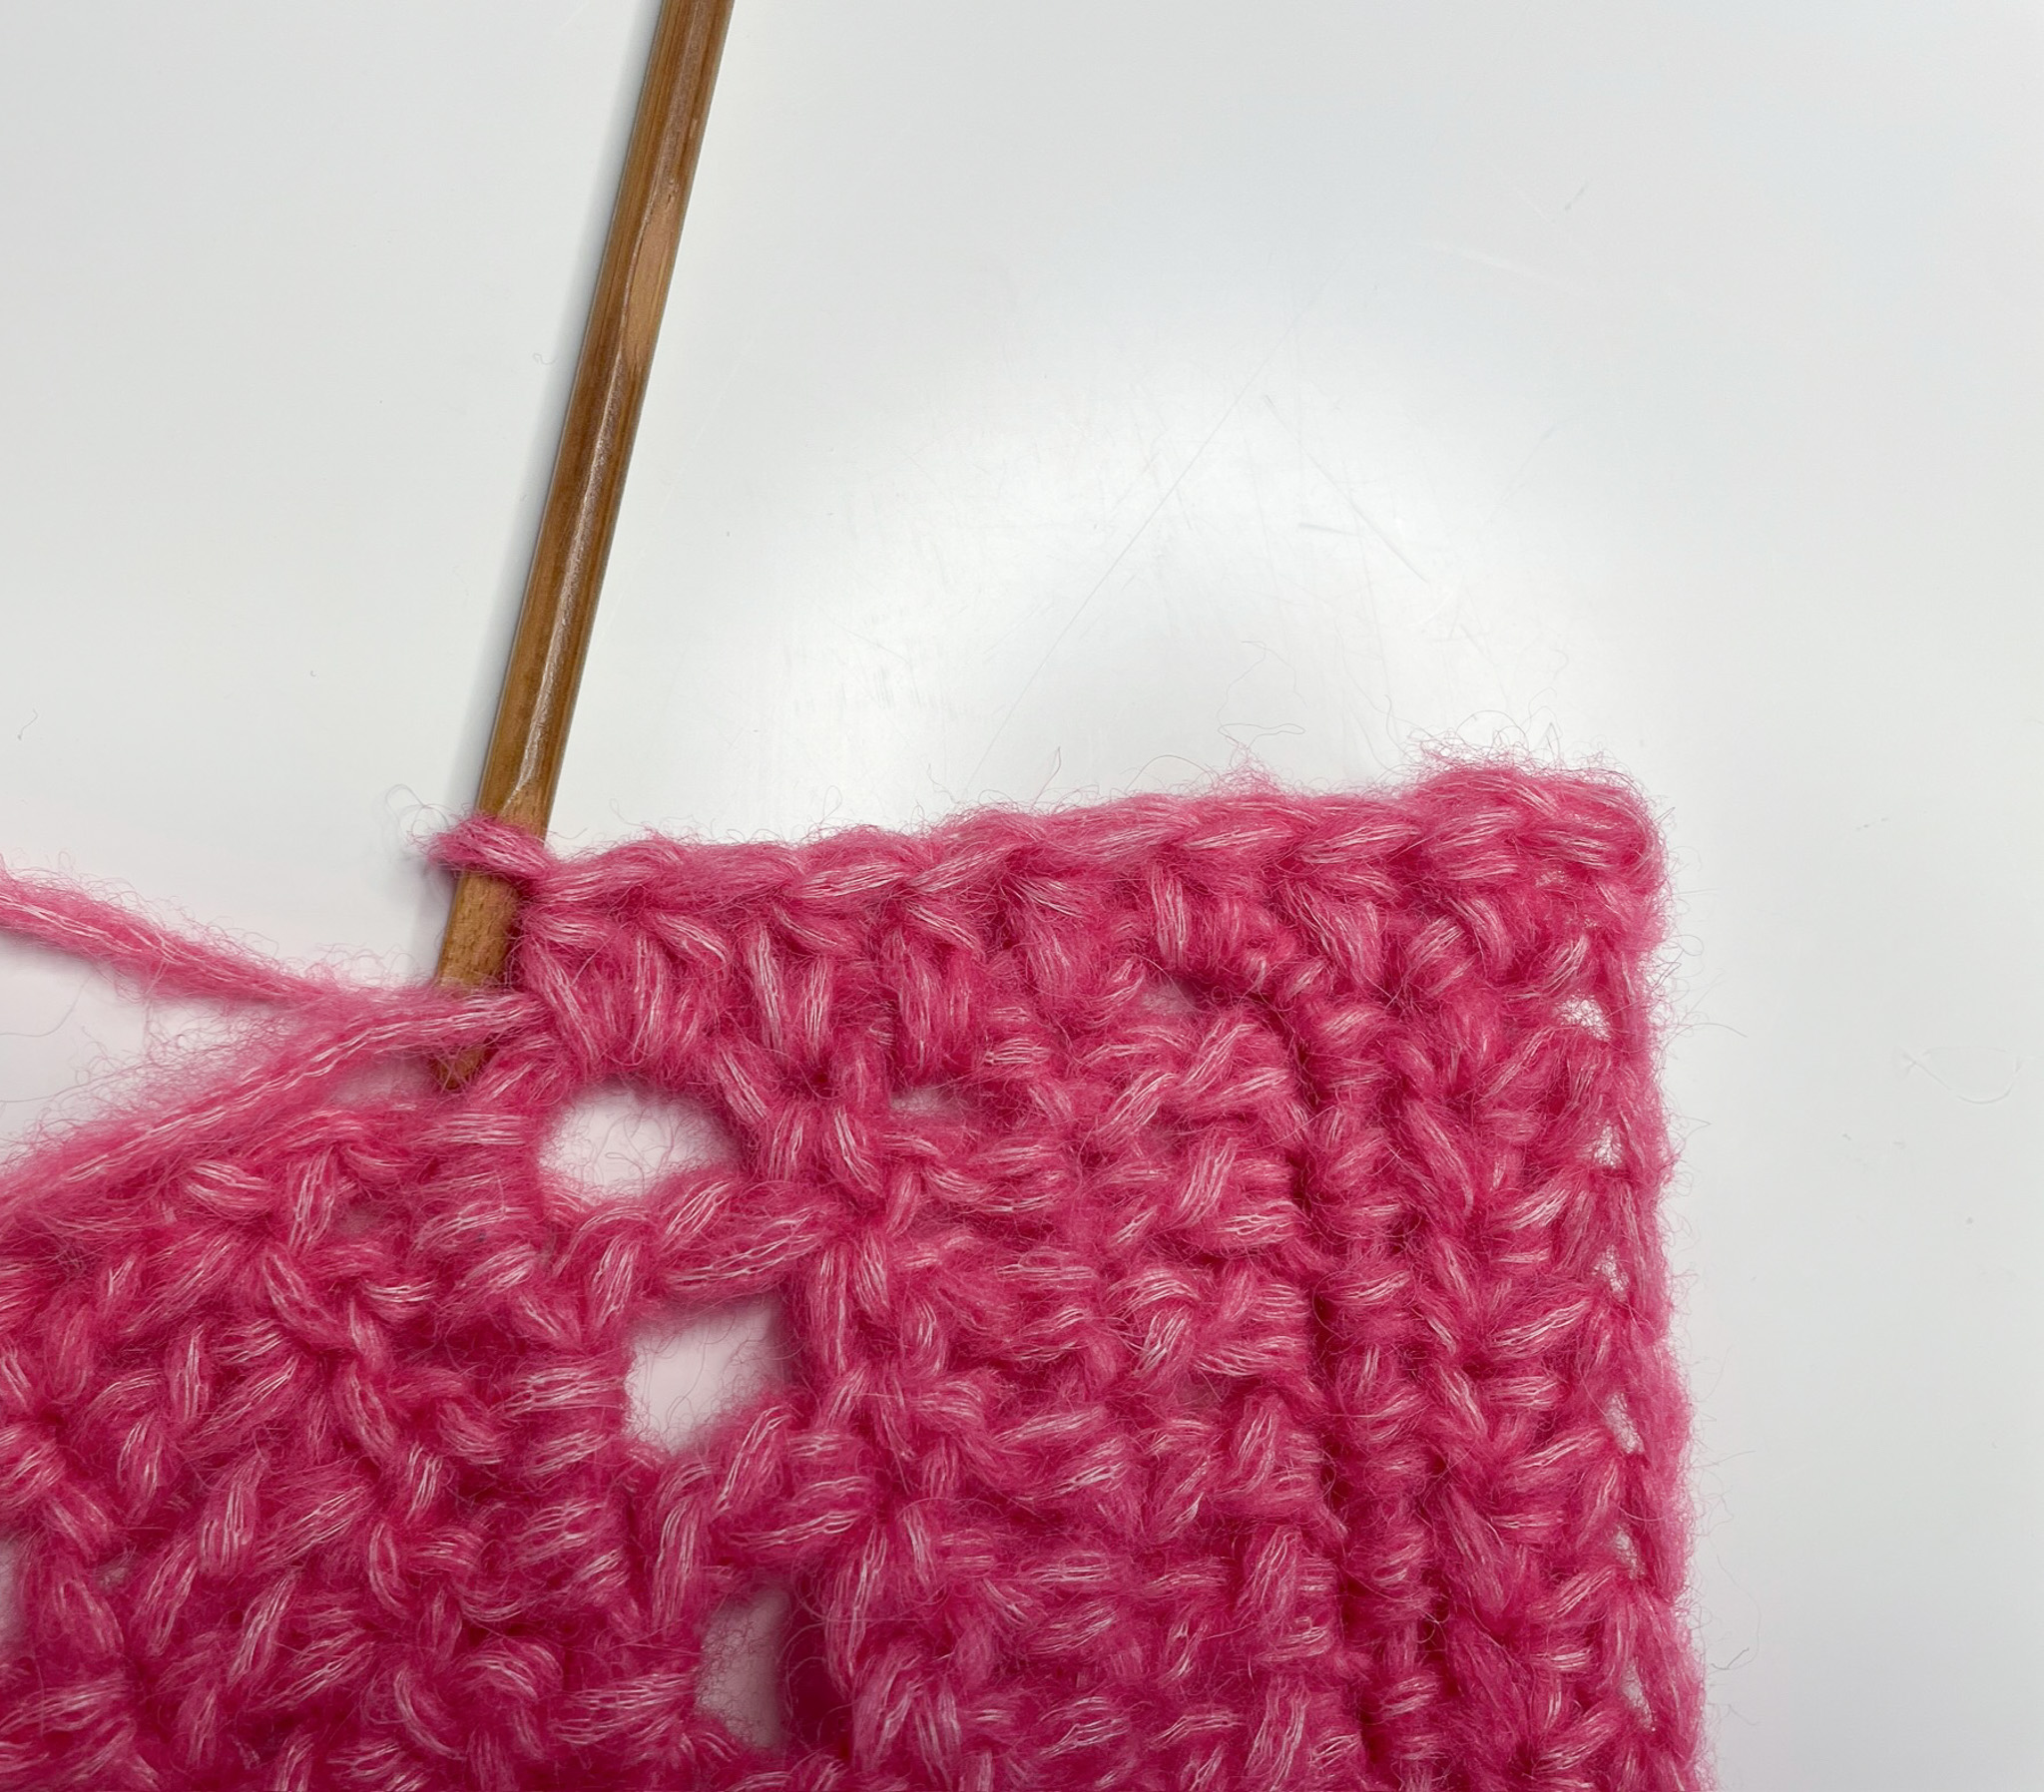
Row 2: Begin in the 3rd chain from the hook and work 49 double crochets. Chain 2, turn. You should now have 50 double crochets (one of the double crochets includes the 2 chains you made at the end of Row 1).
If you’re unsure how to work a double crochet, see the video below.
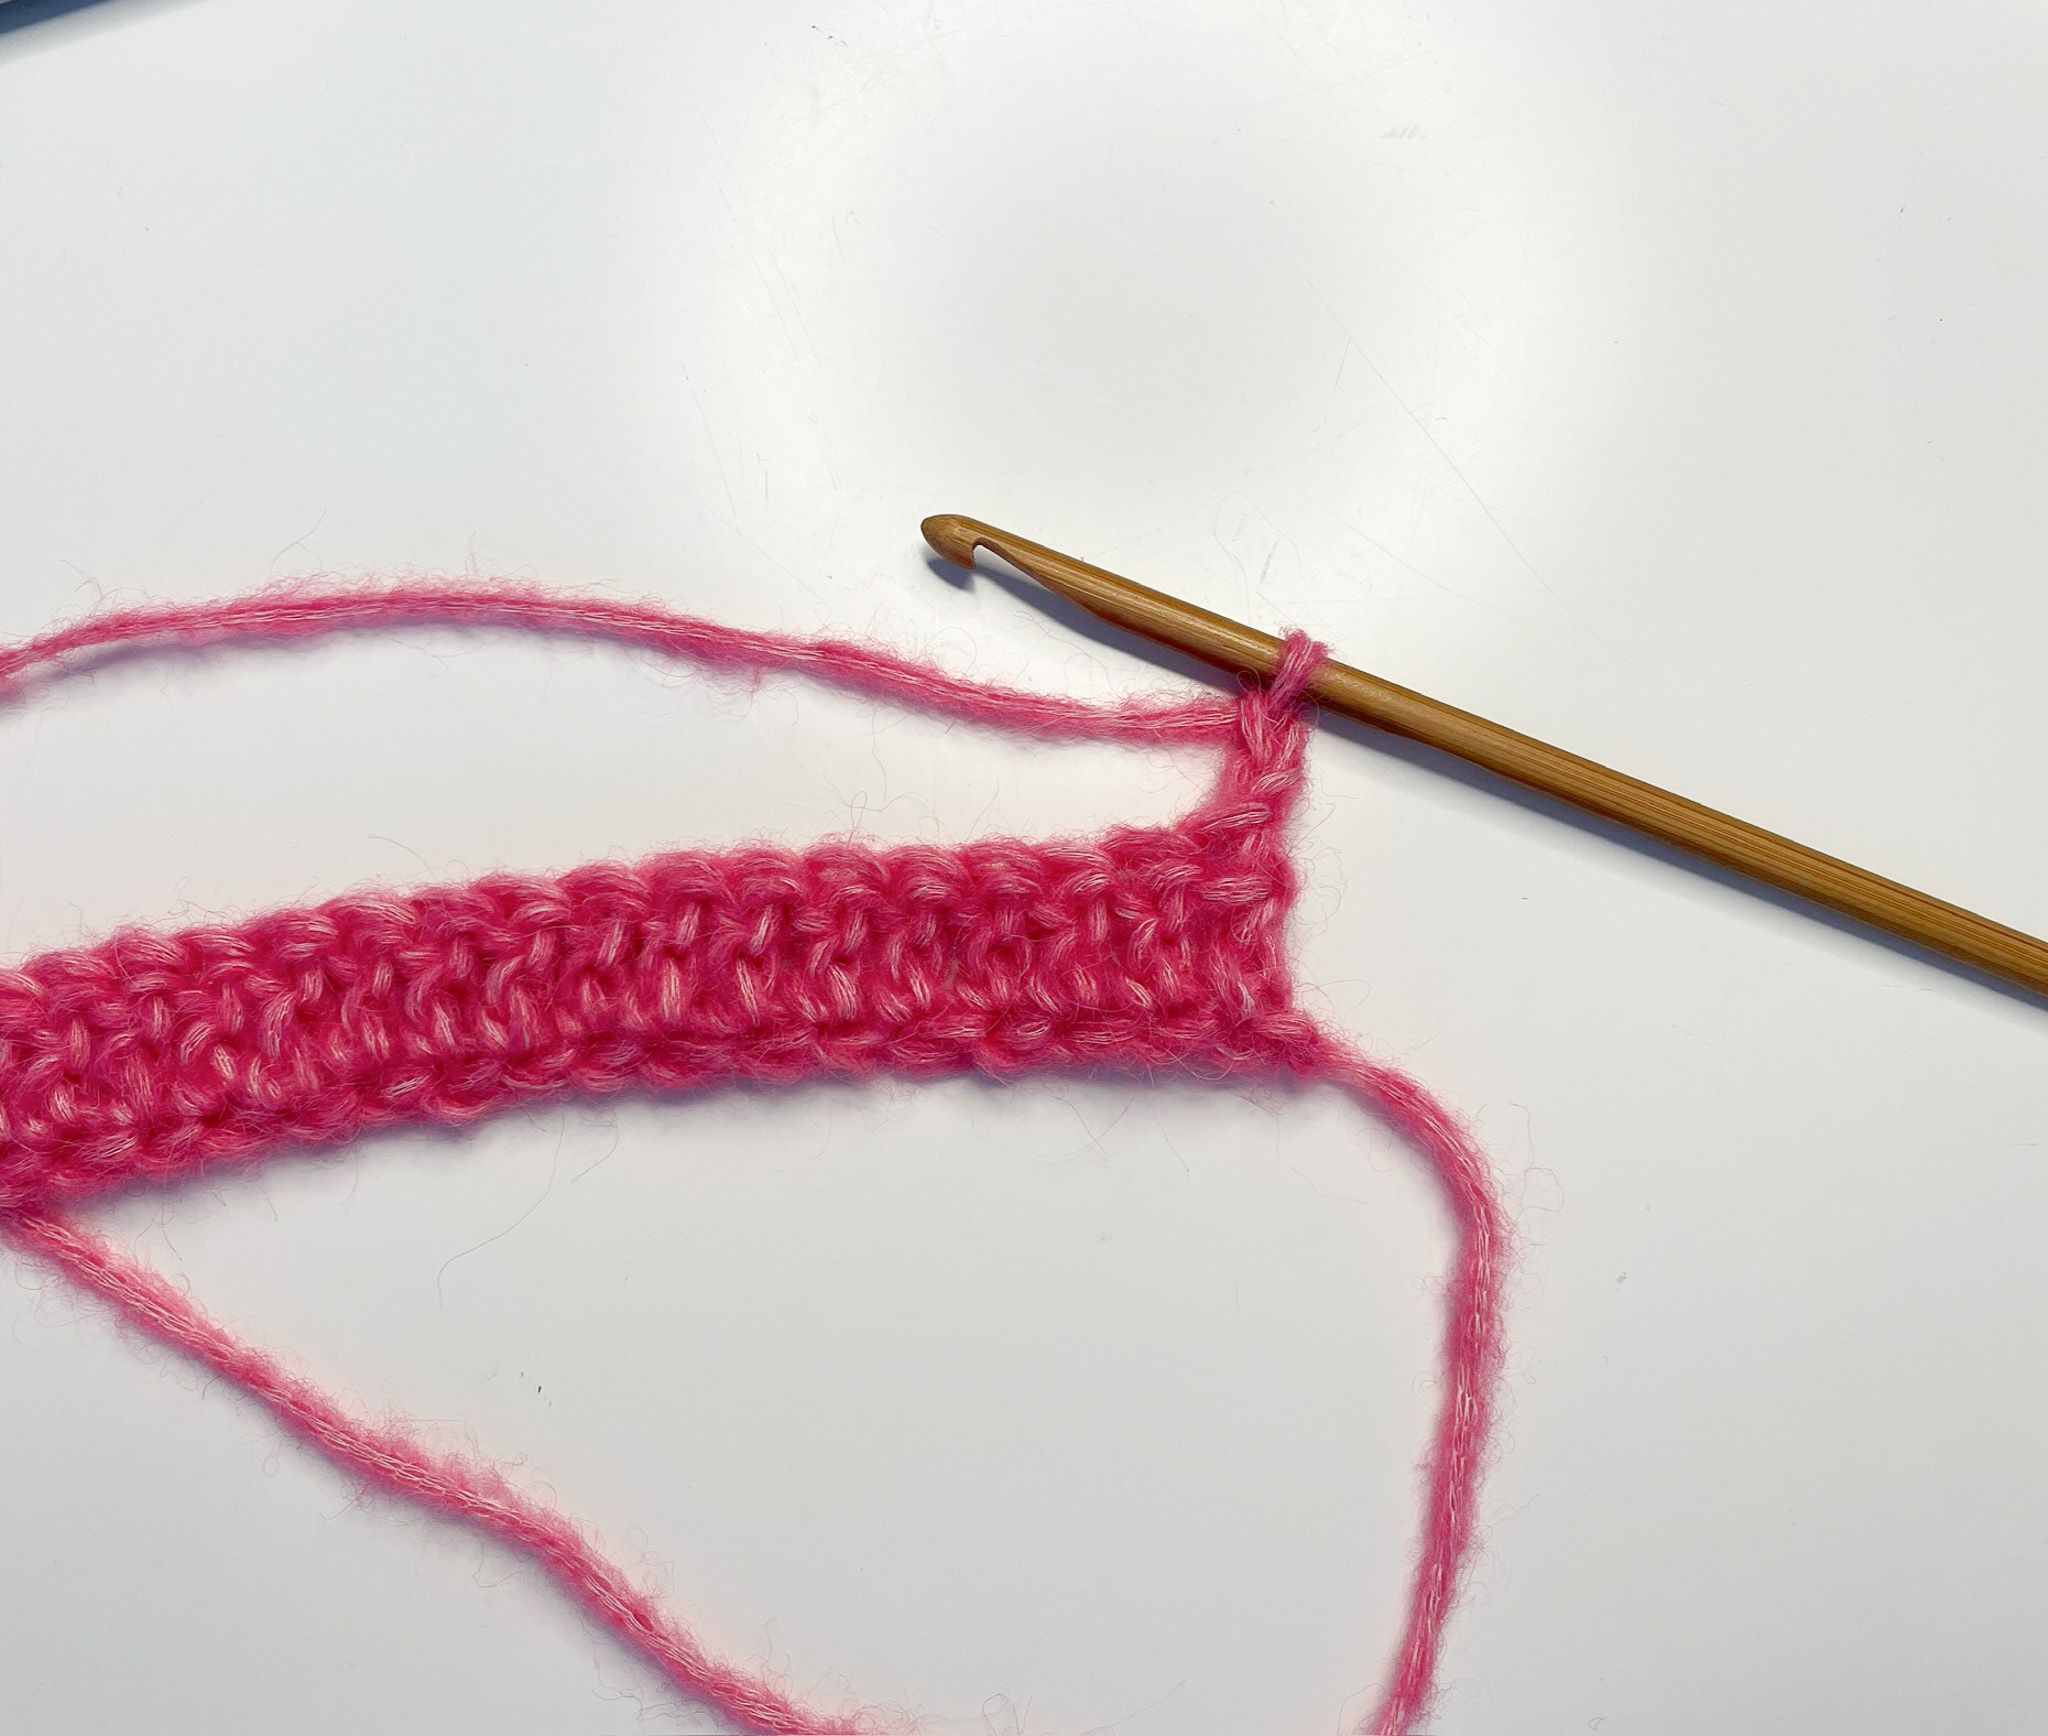
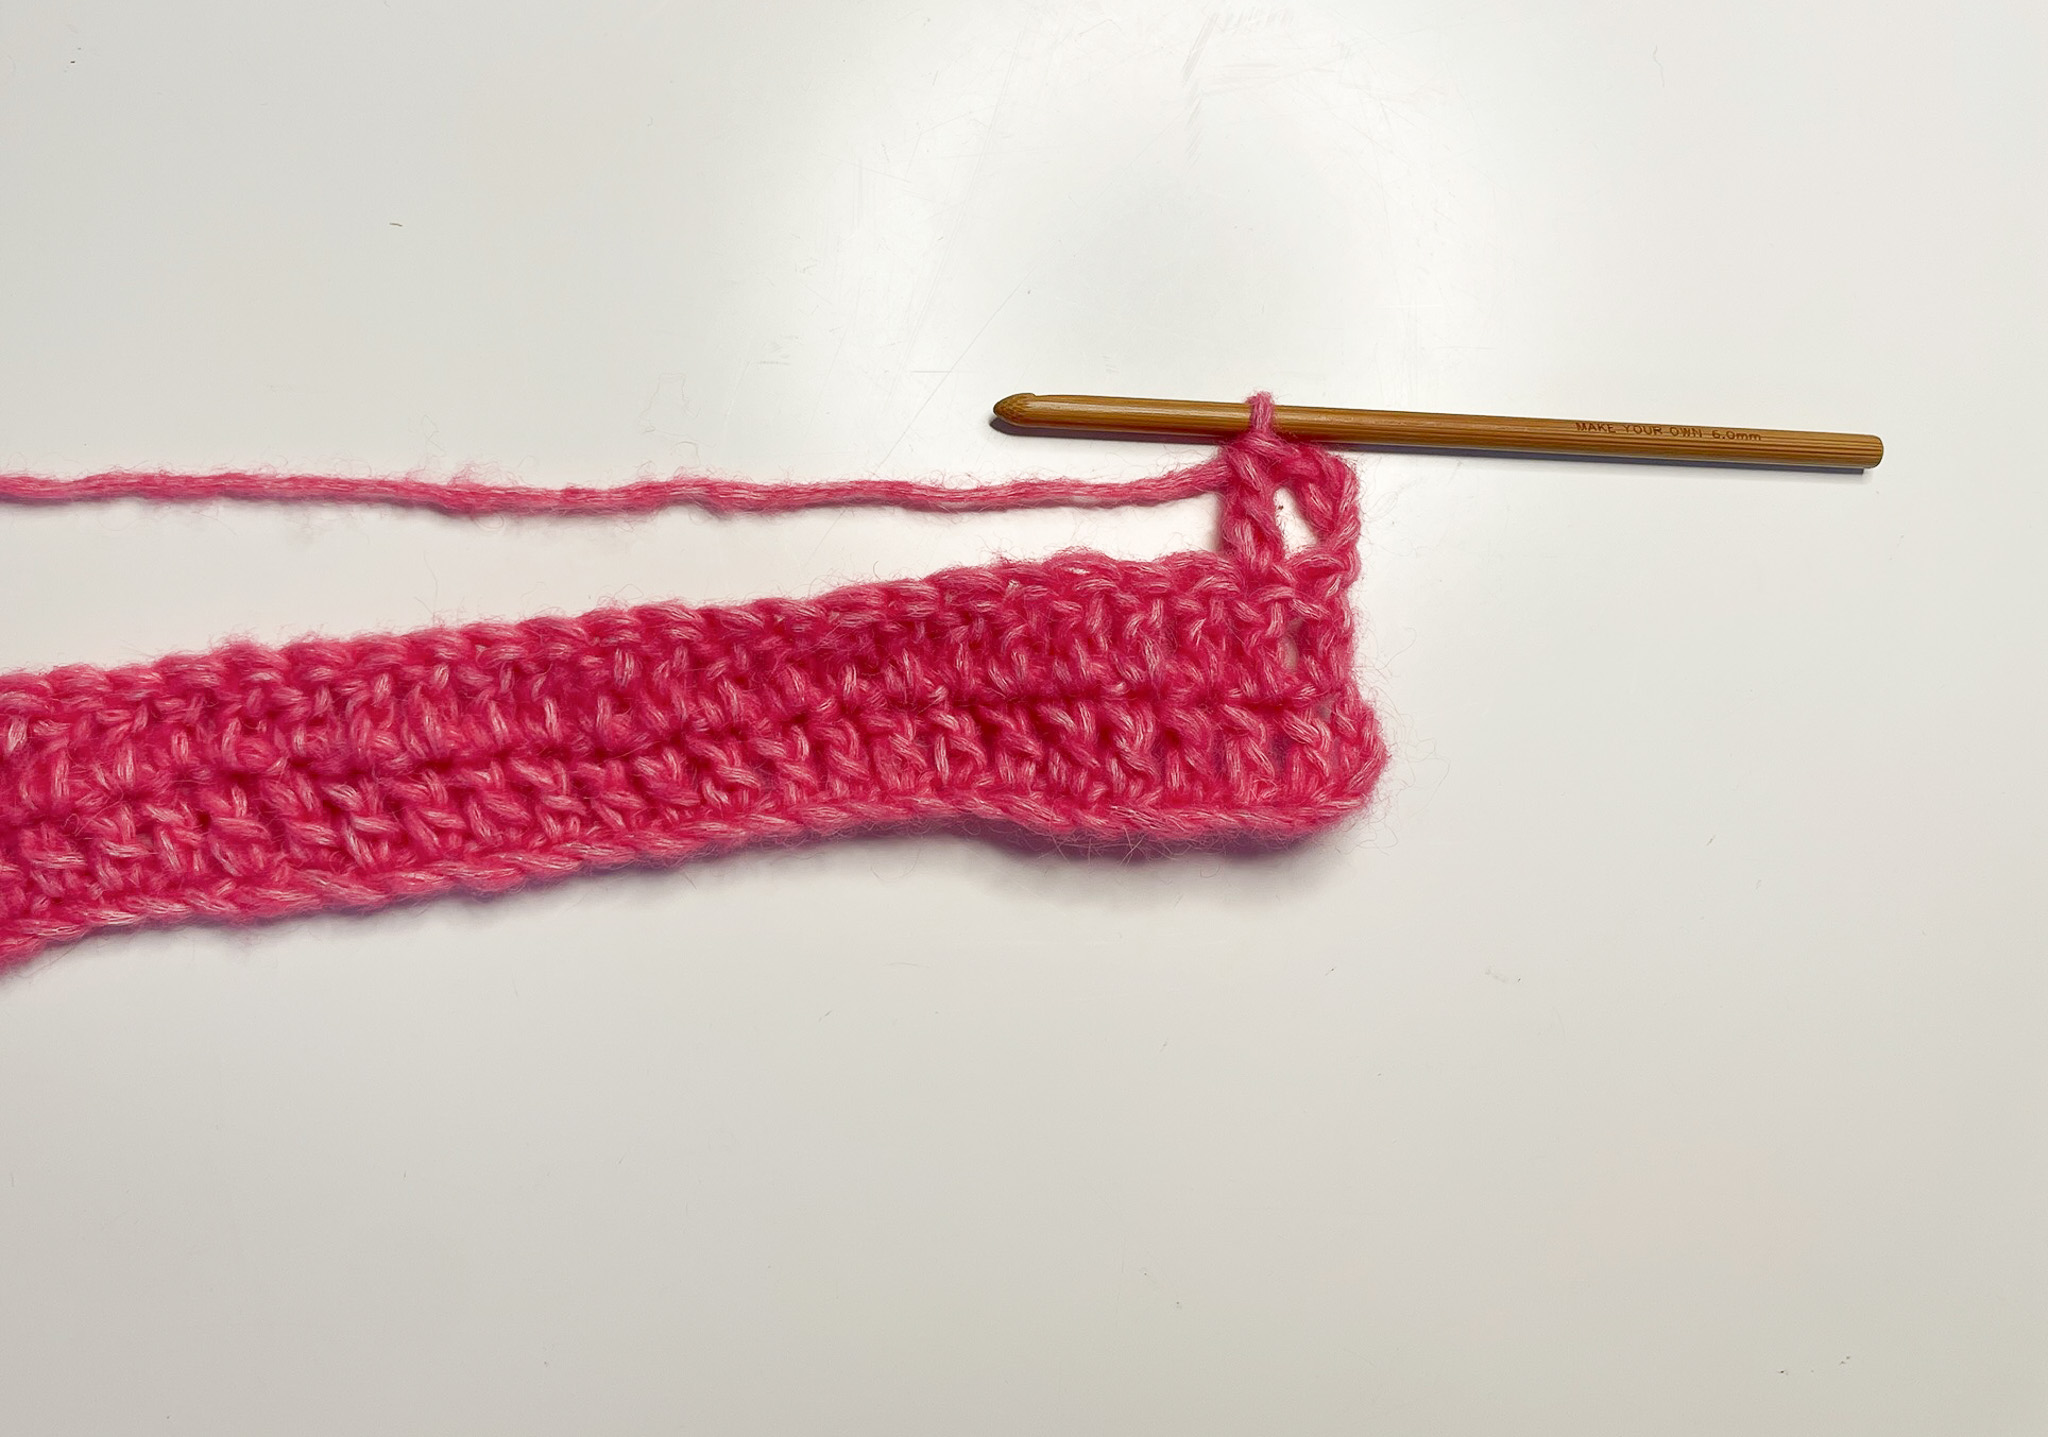
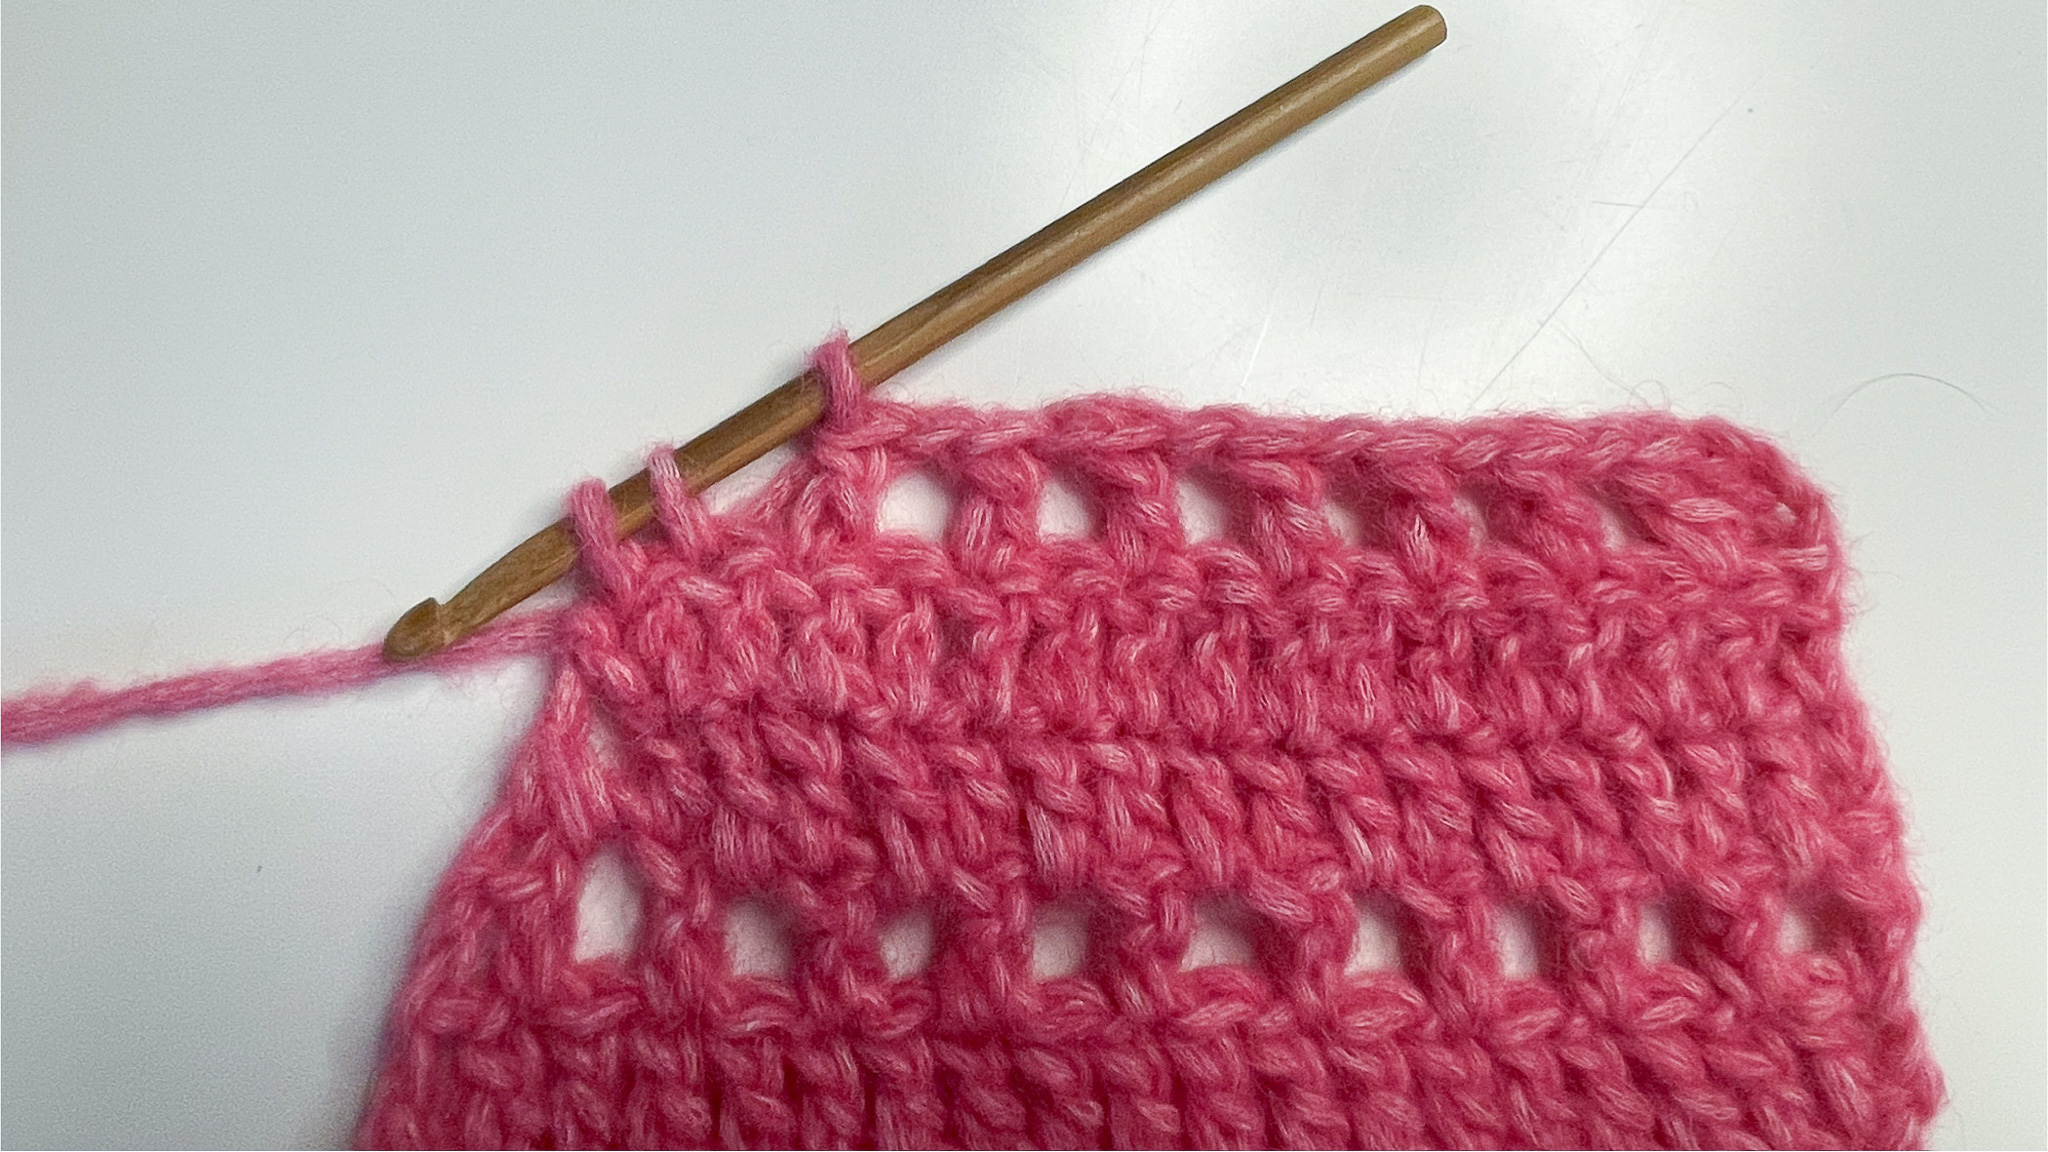
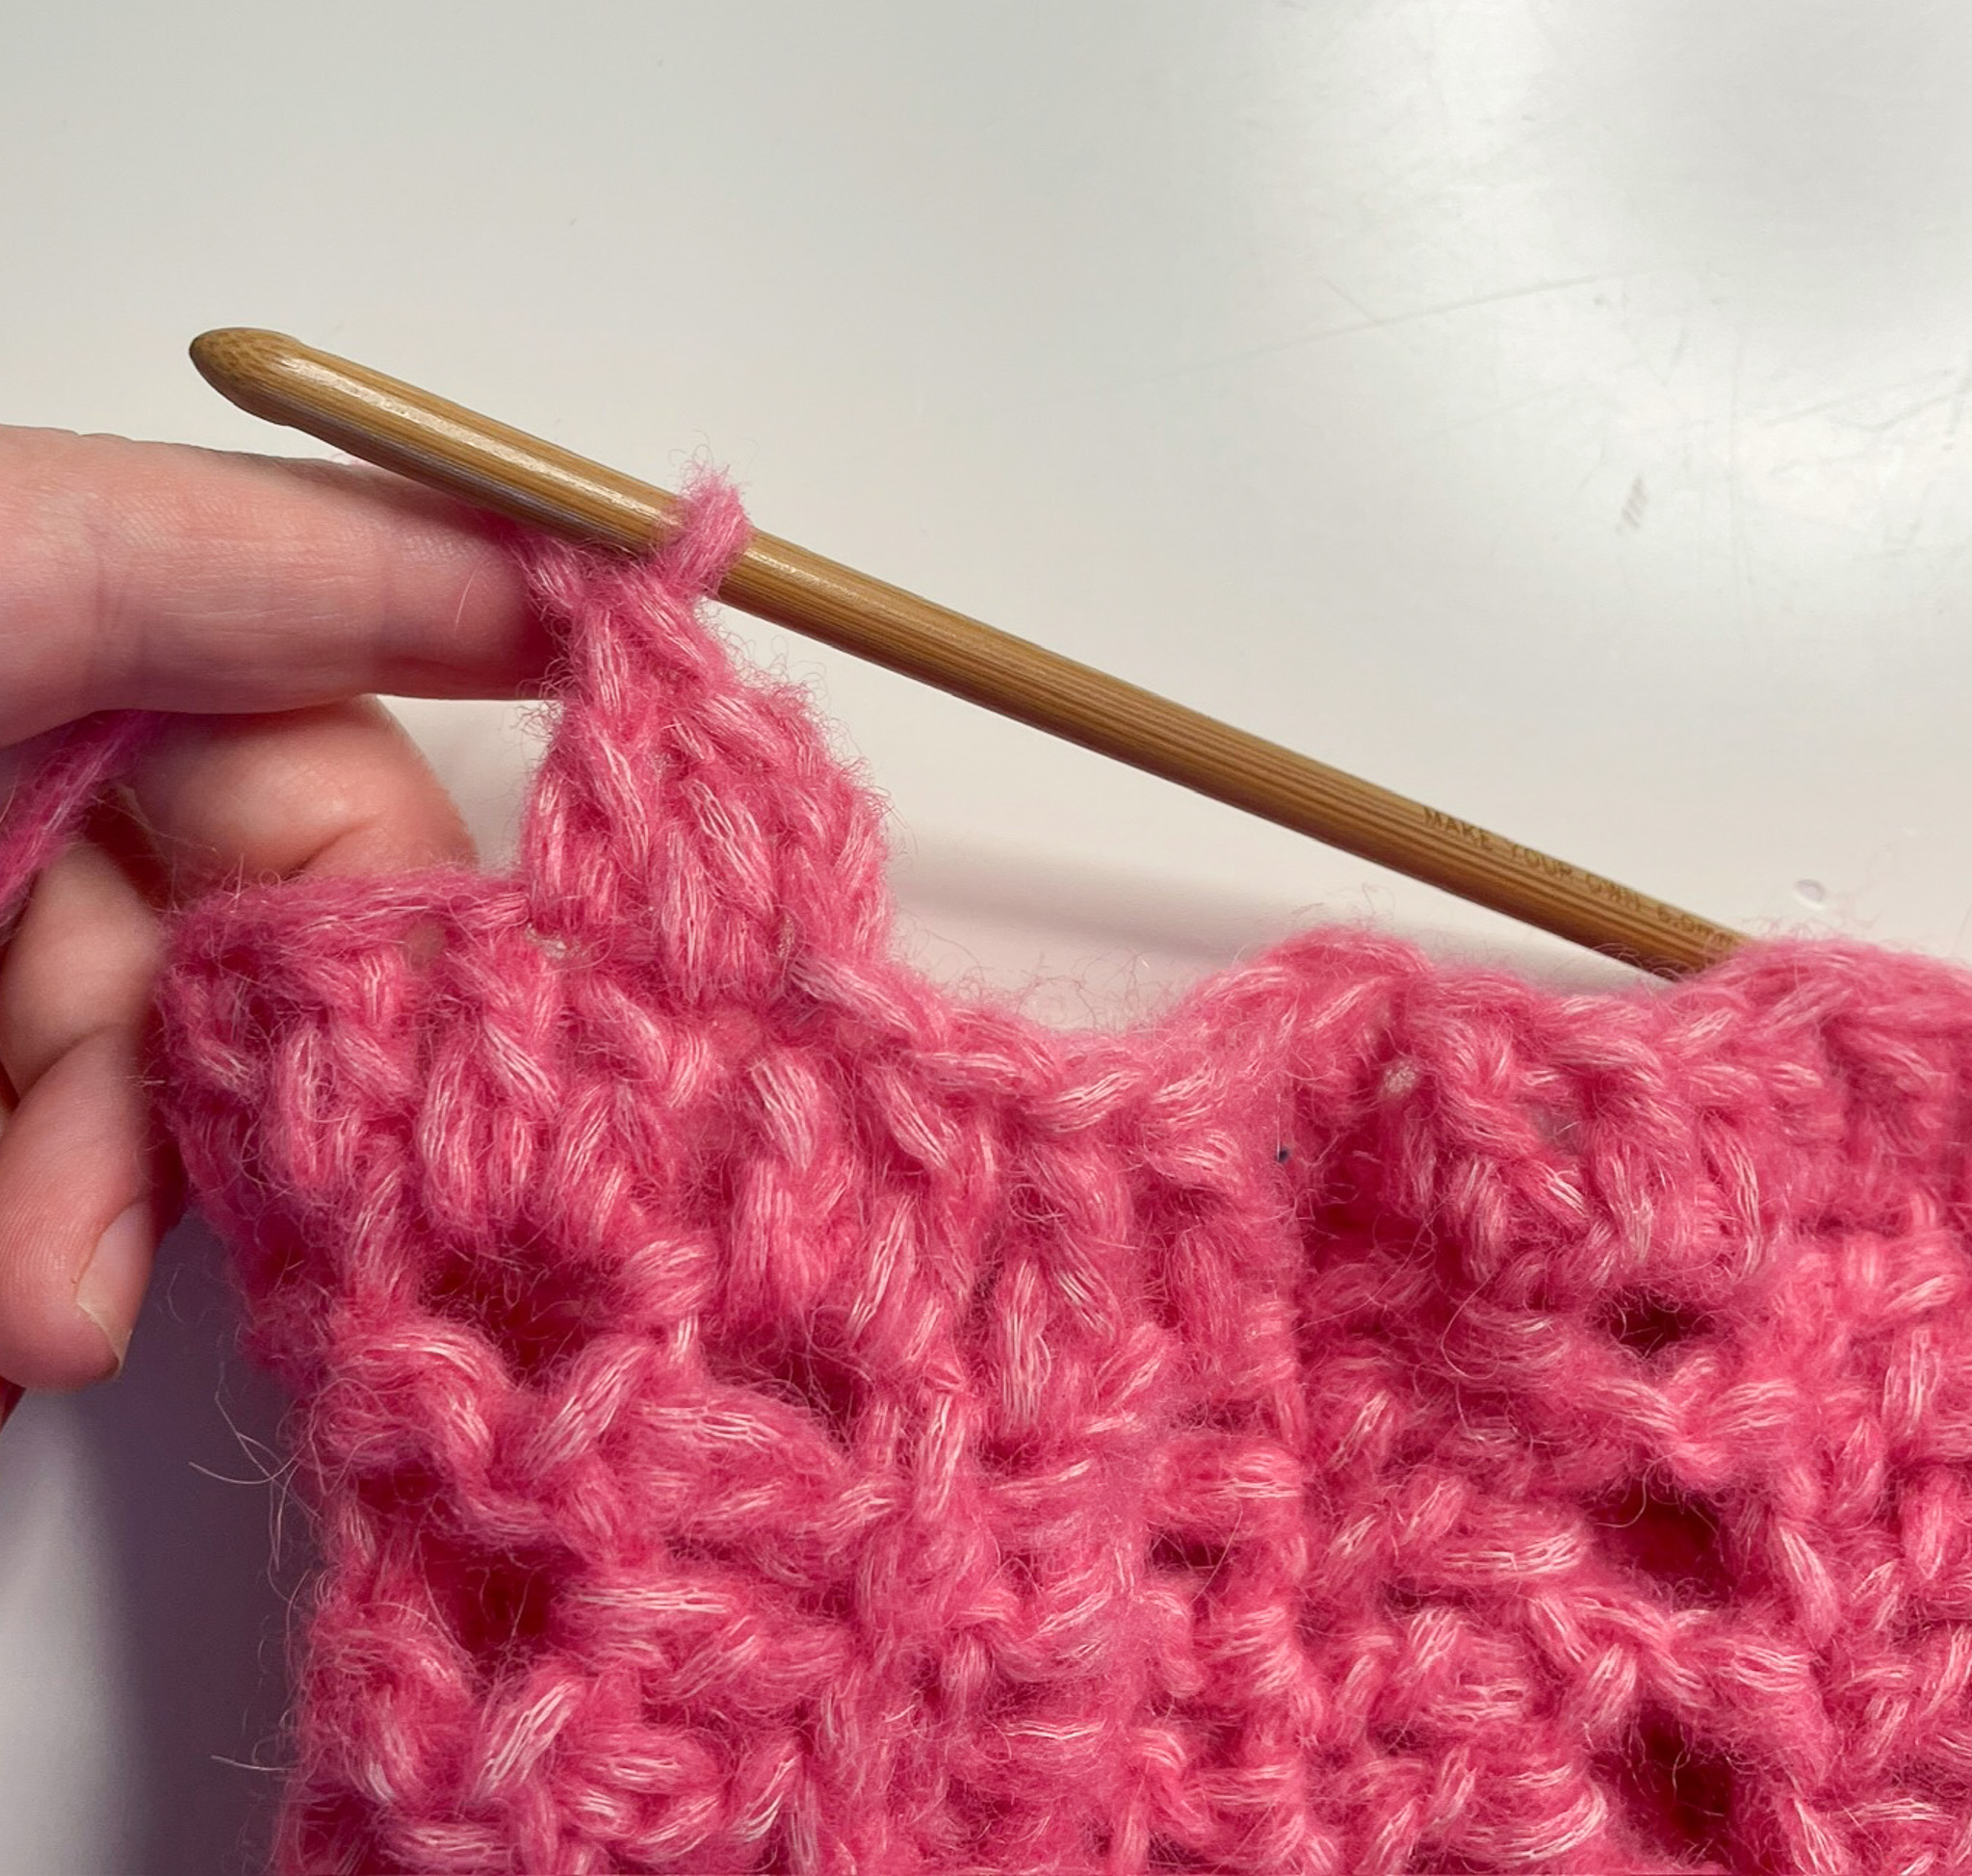
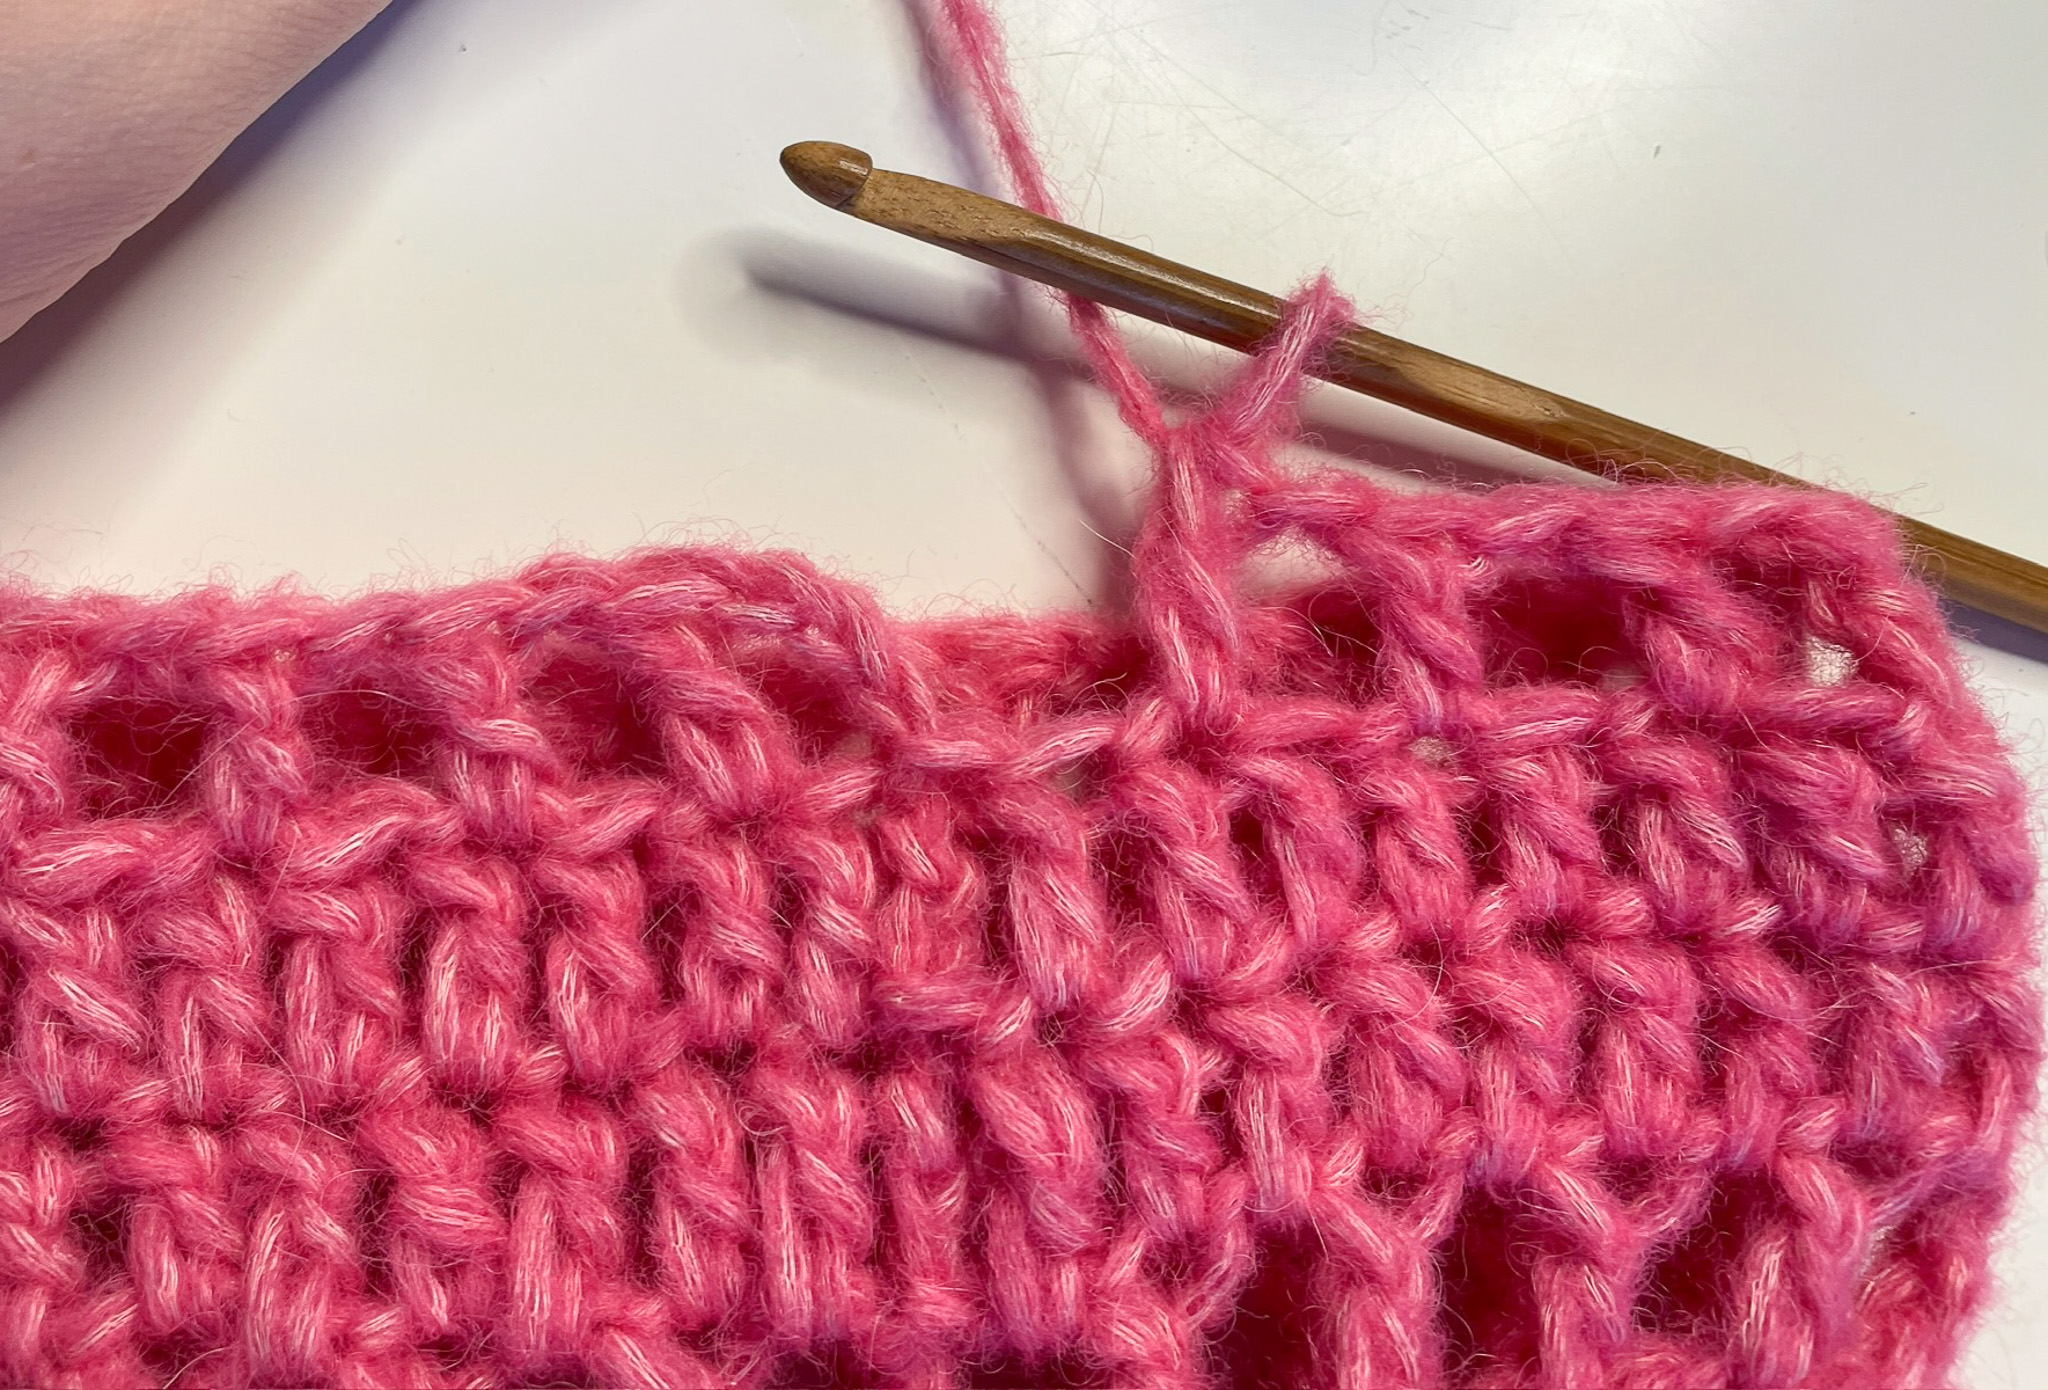
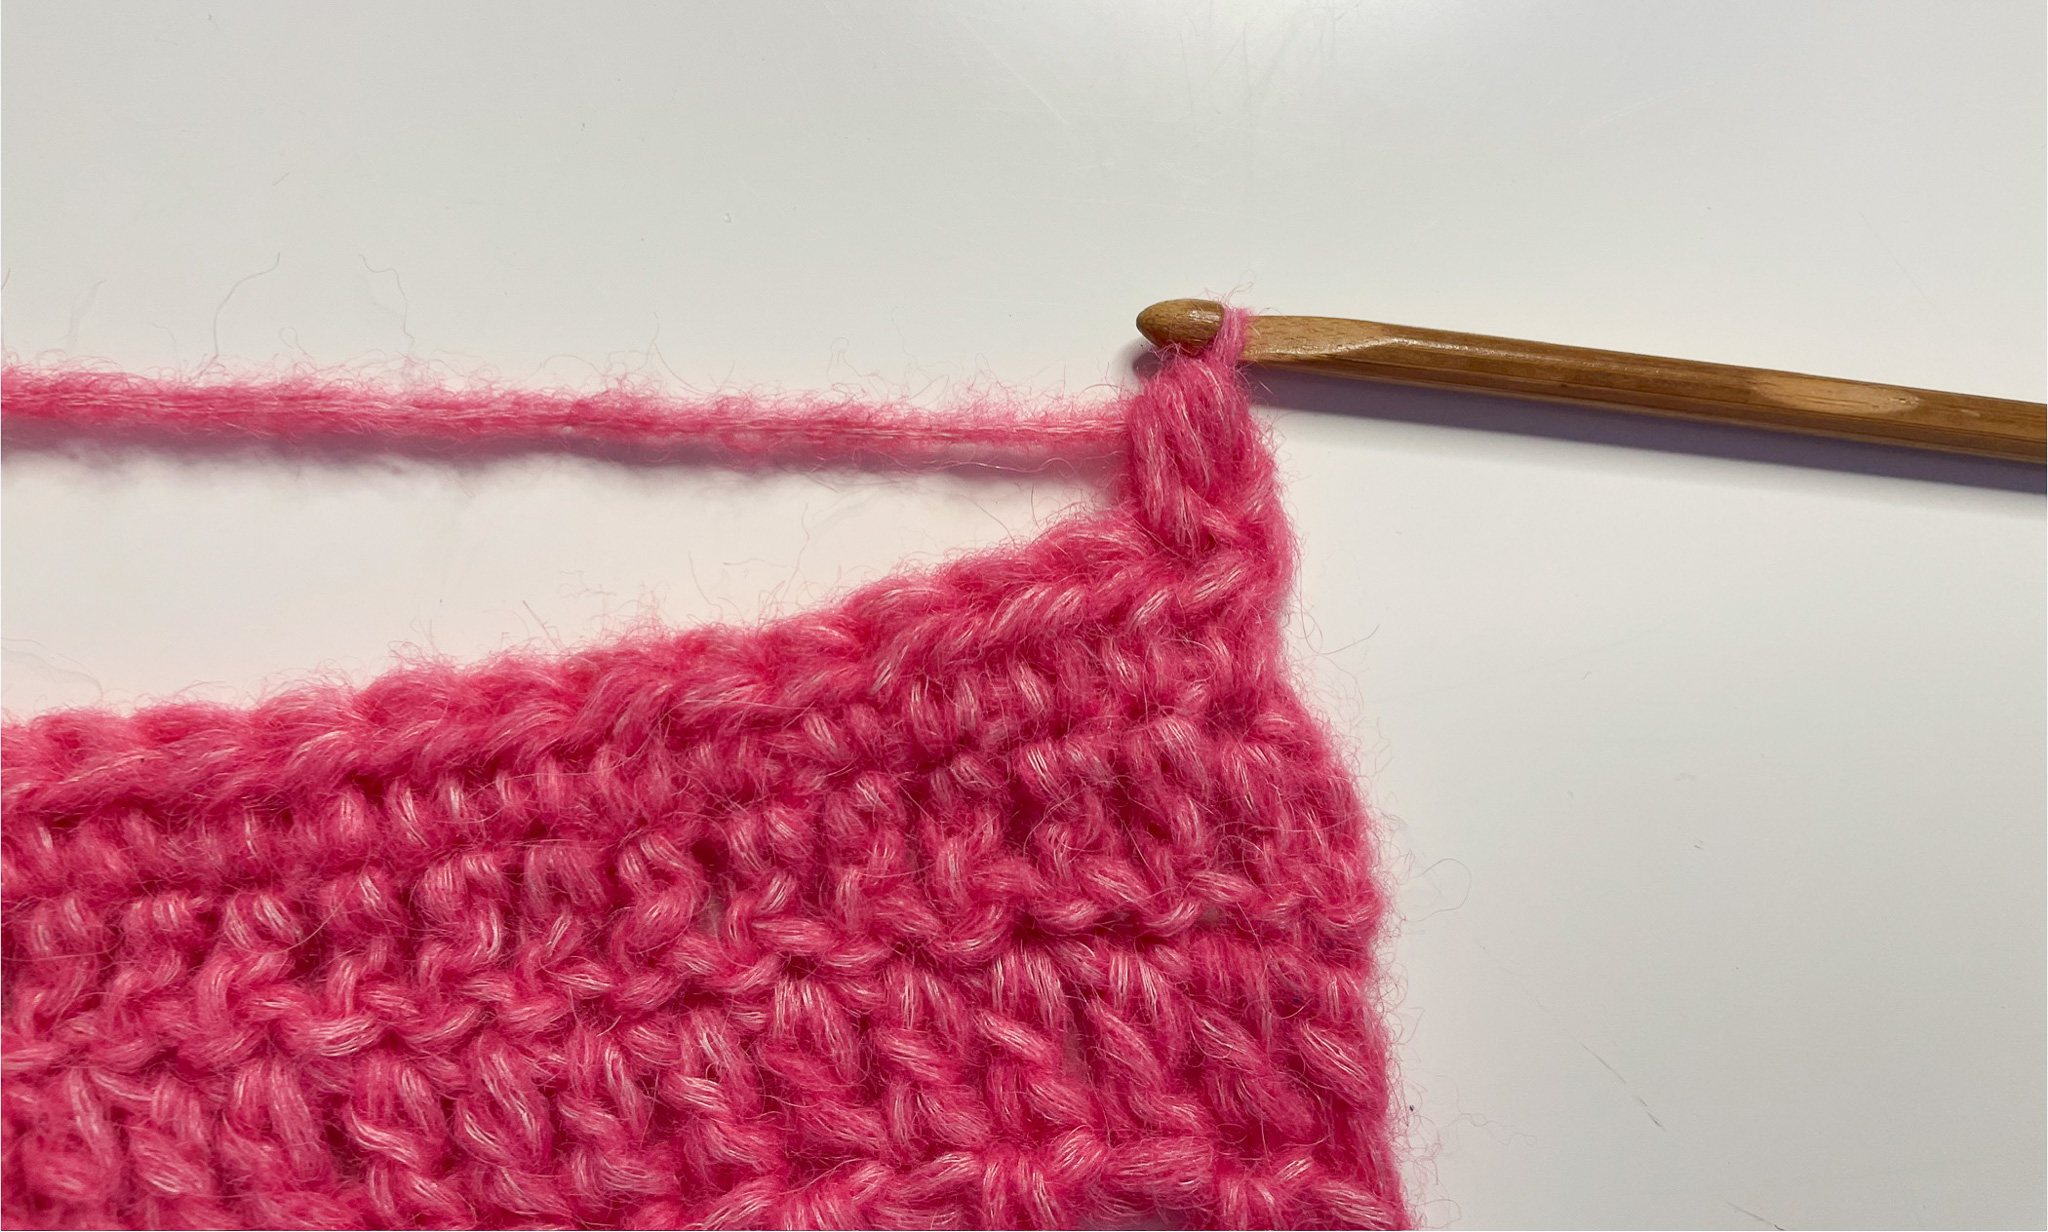
Row 3: Chain 2. Begin in the 3rd chain from the hook and work 49 double crochets, turn.
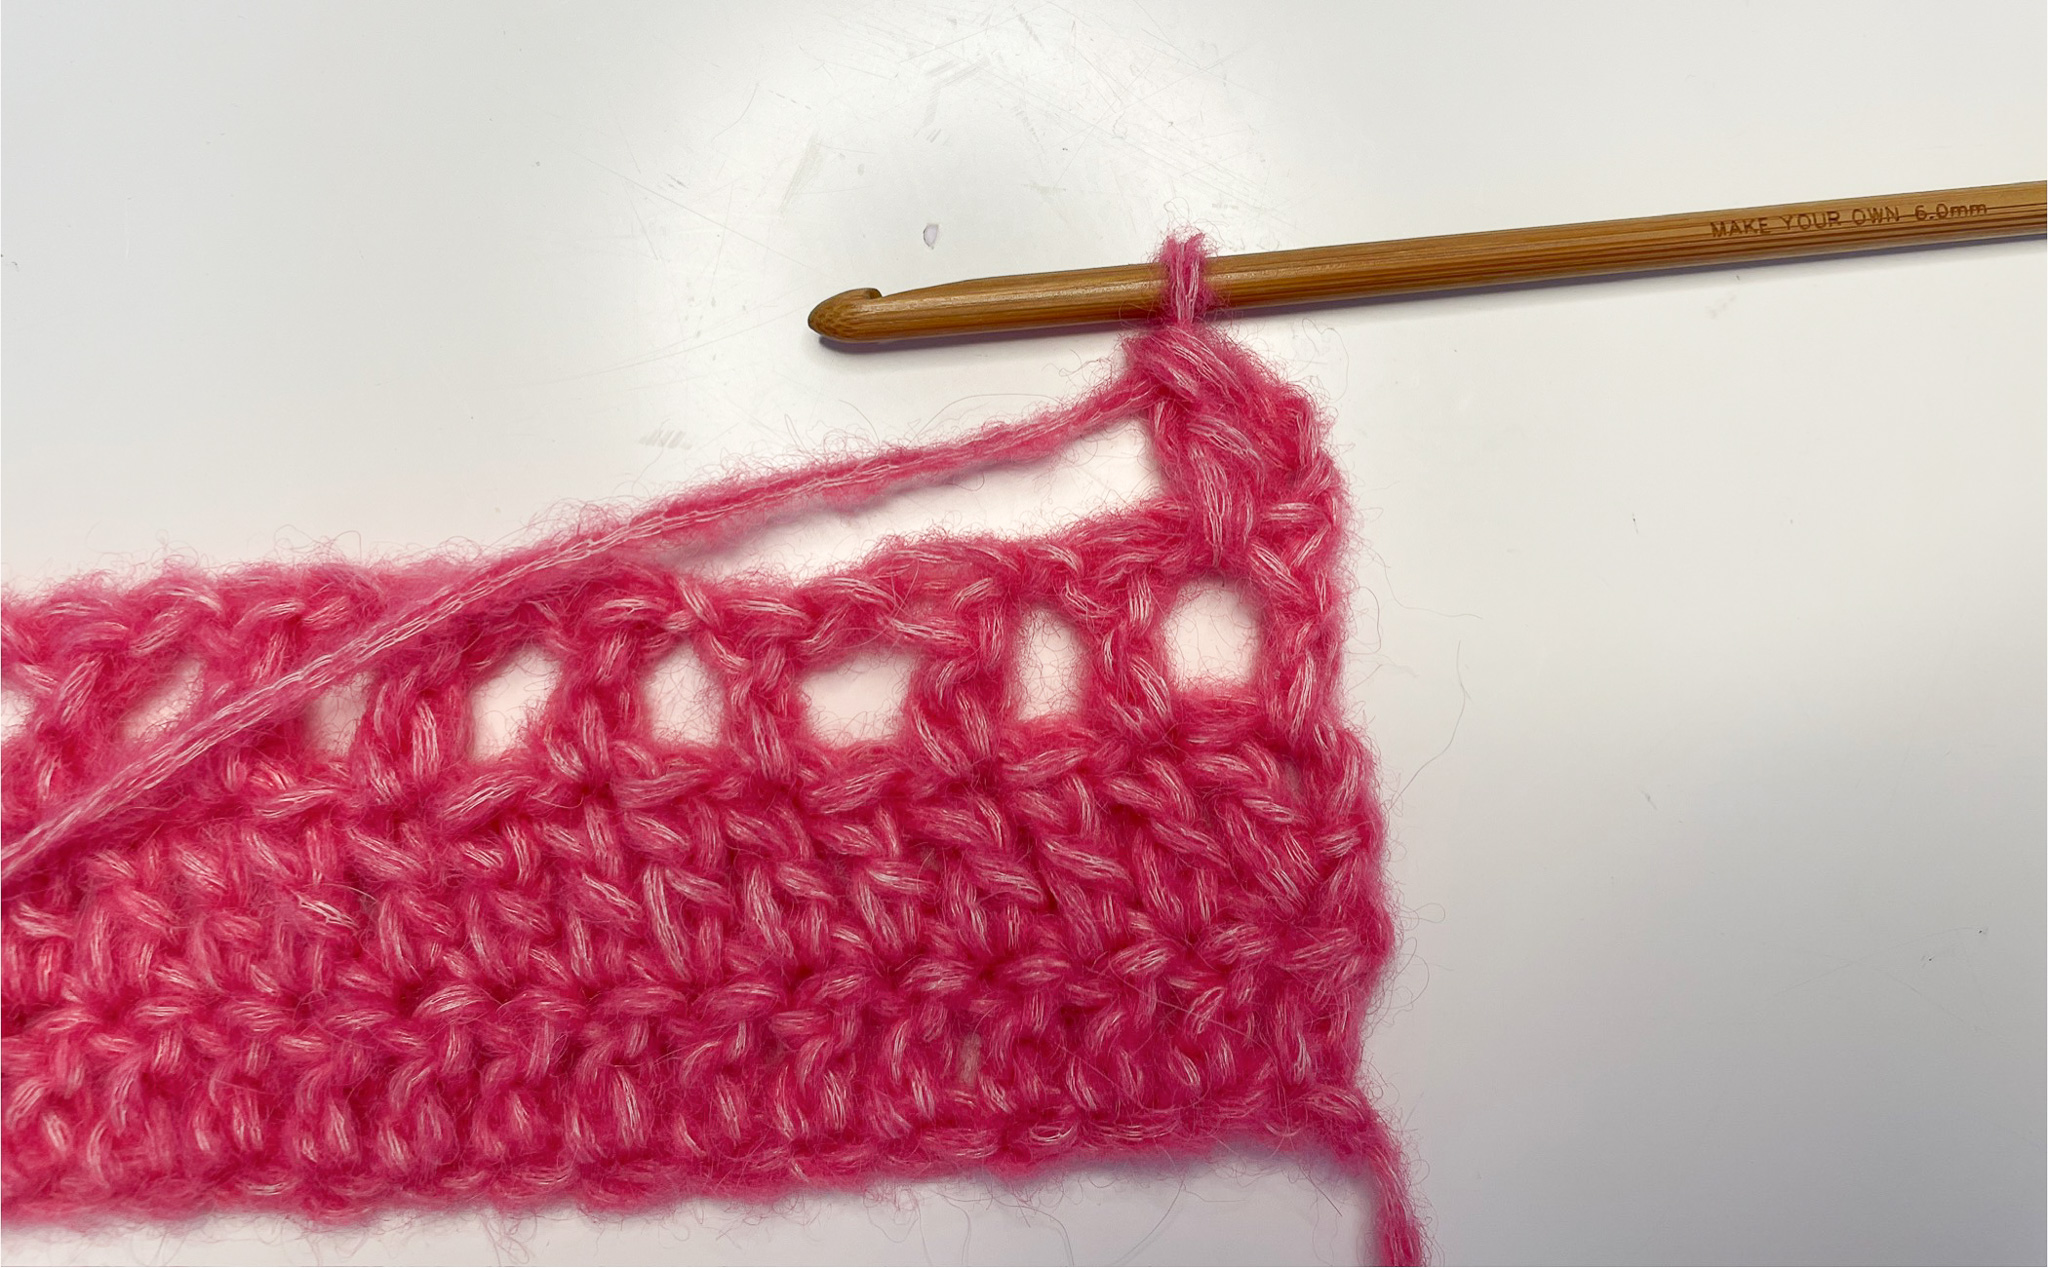
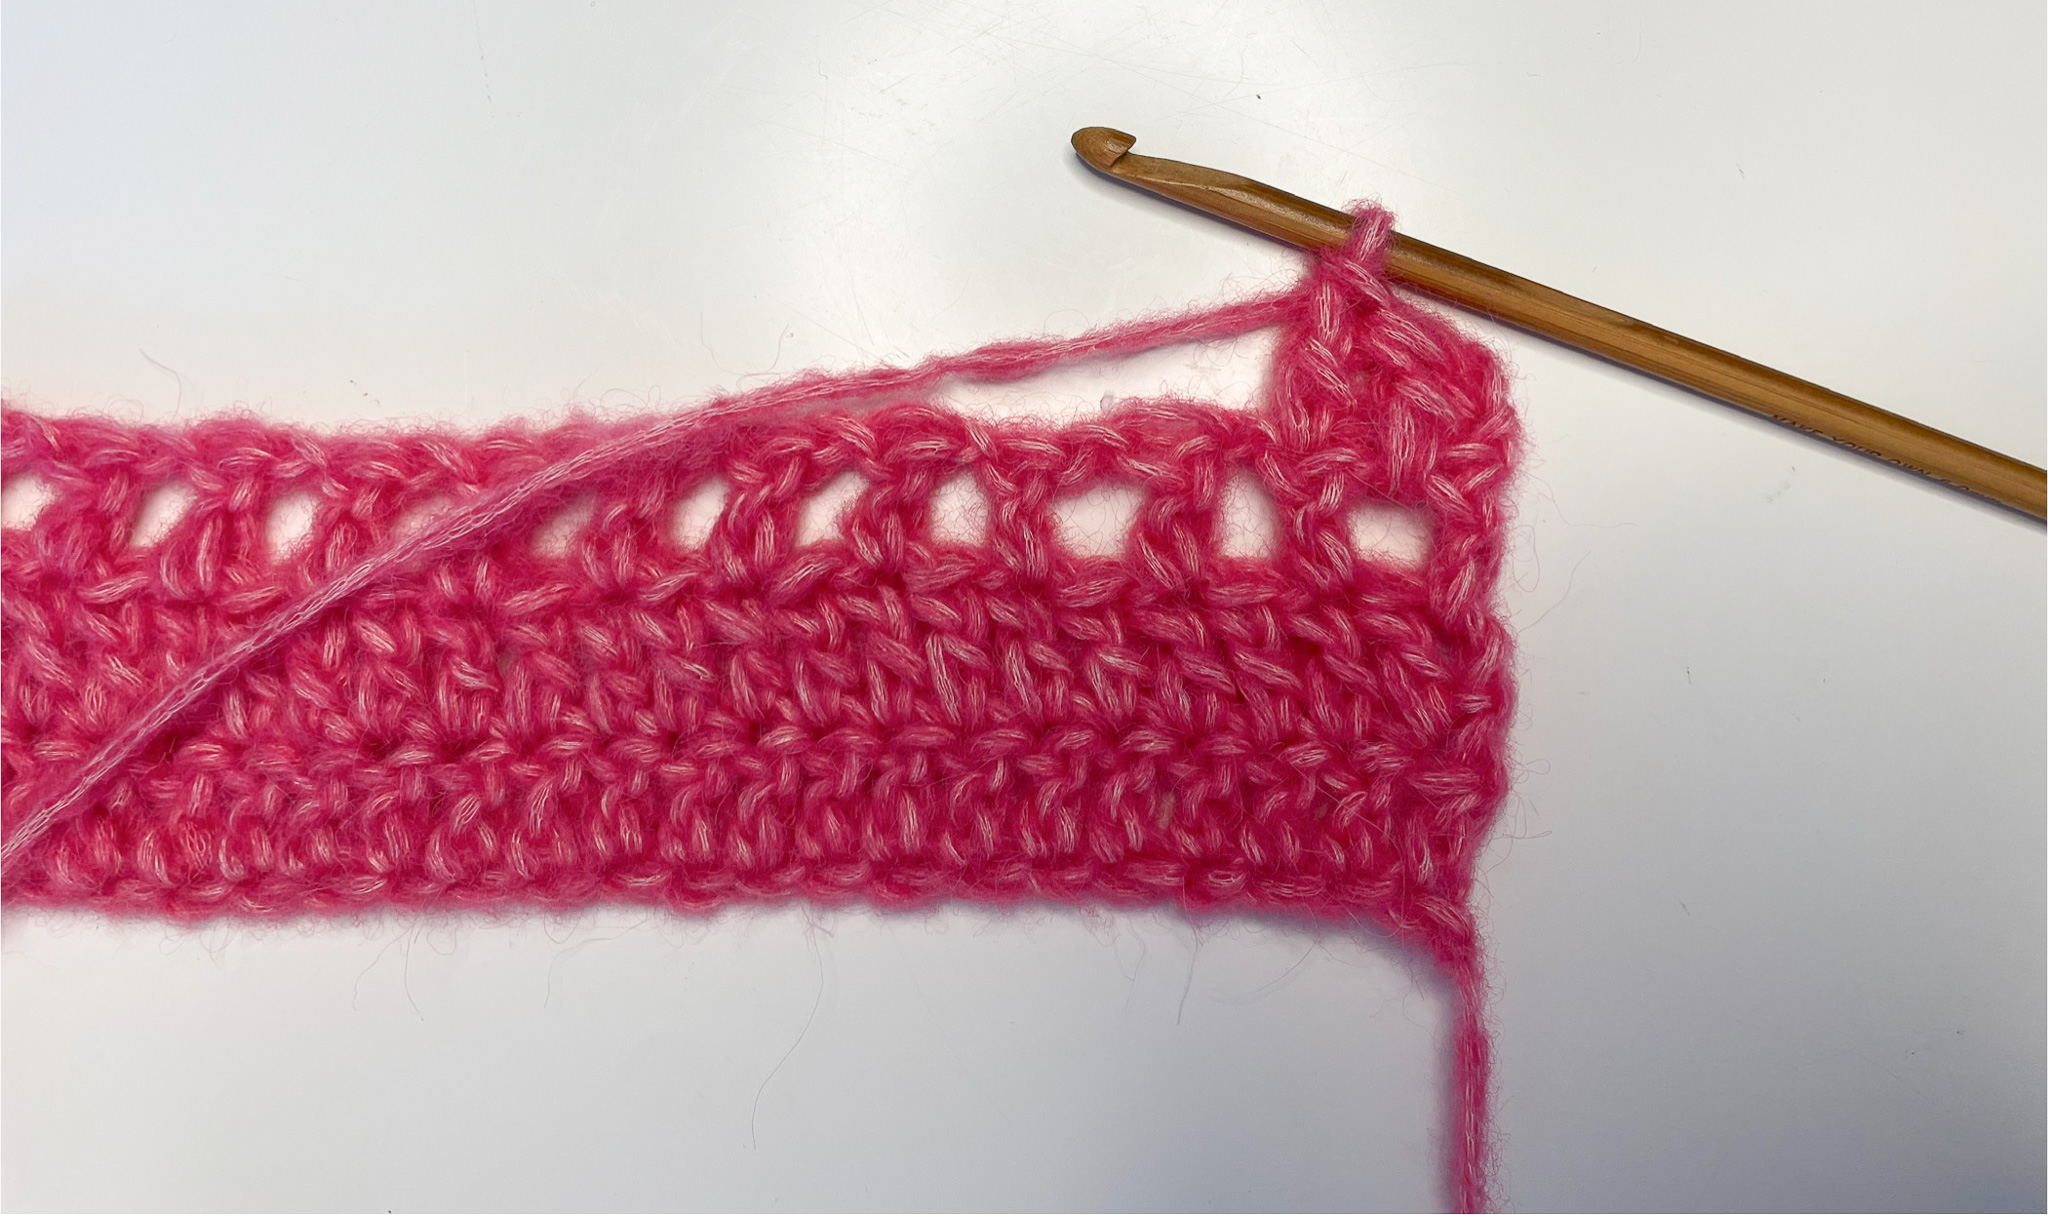
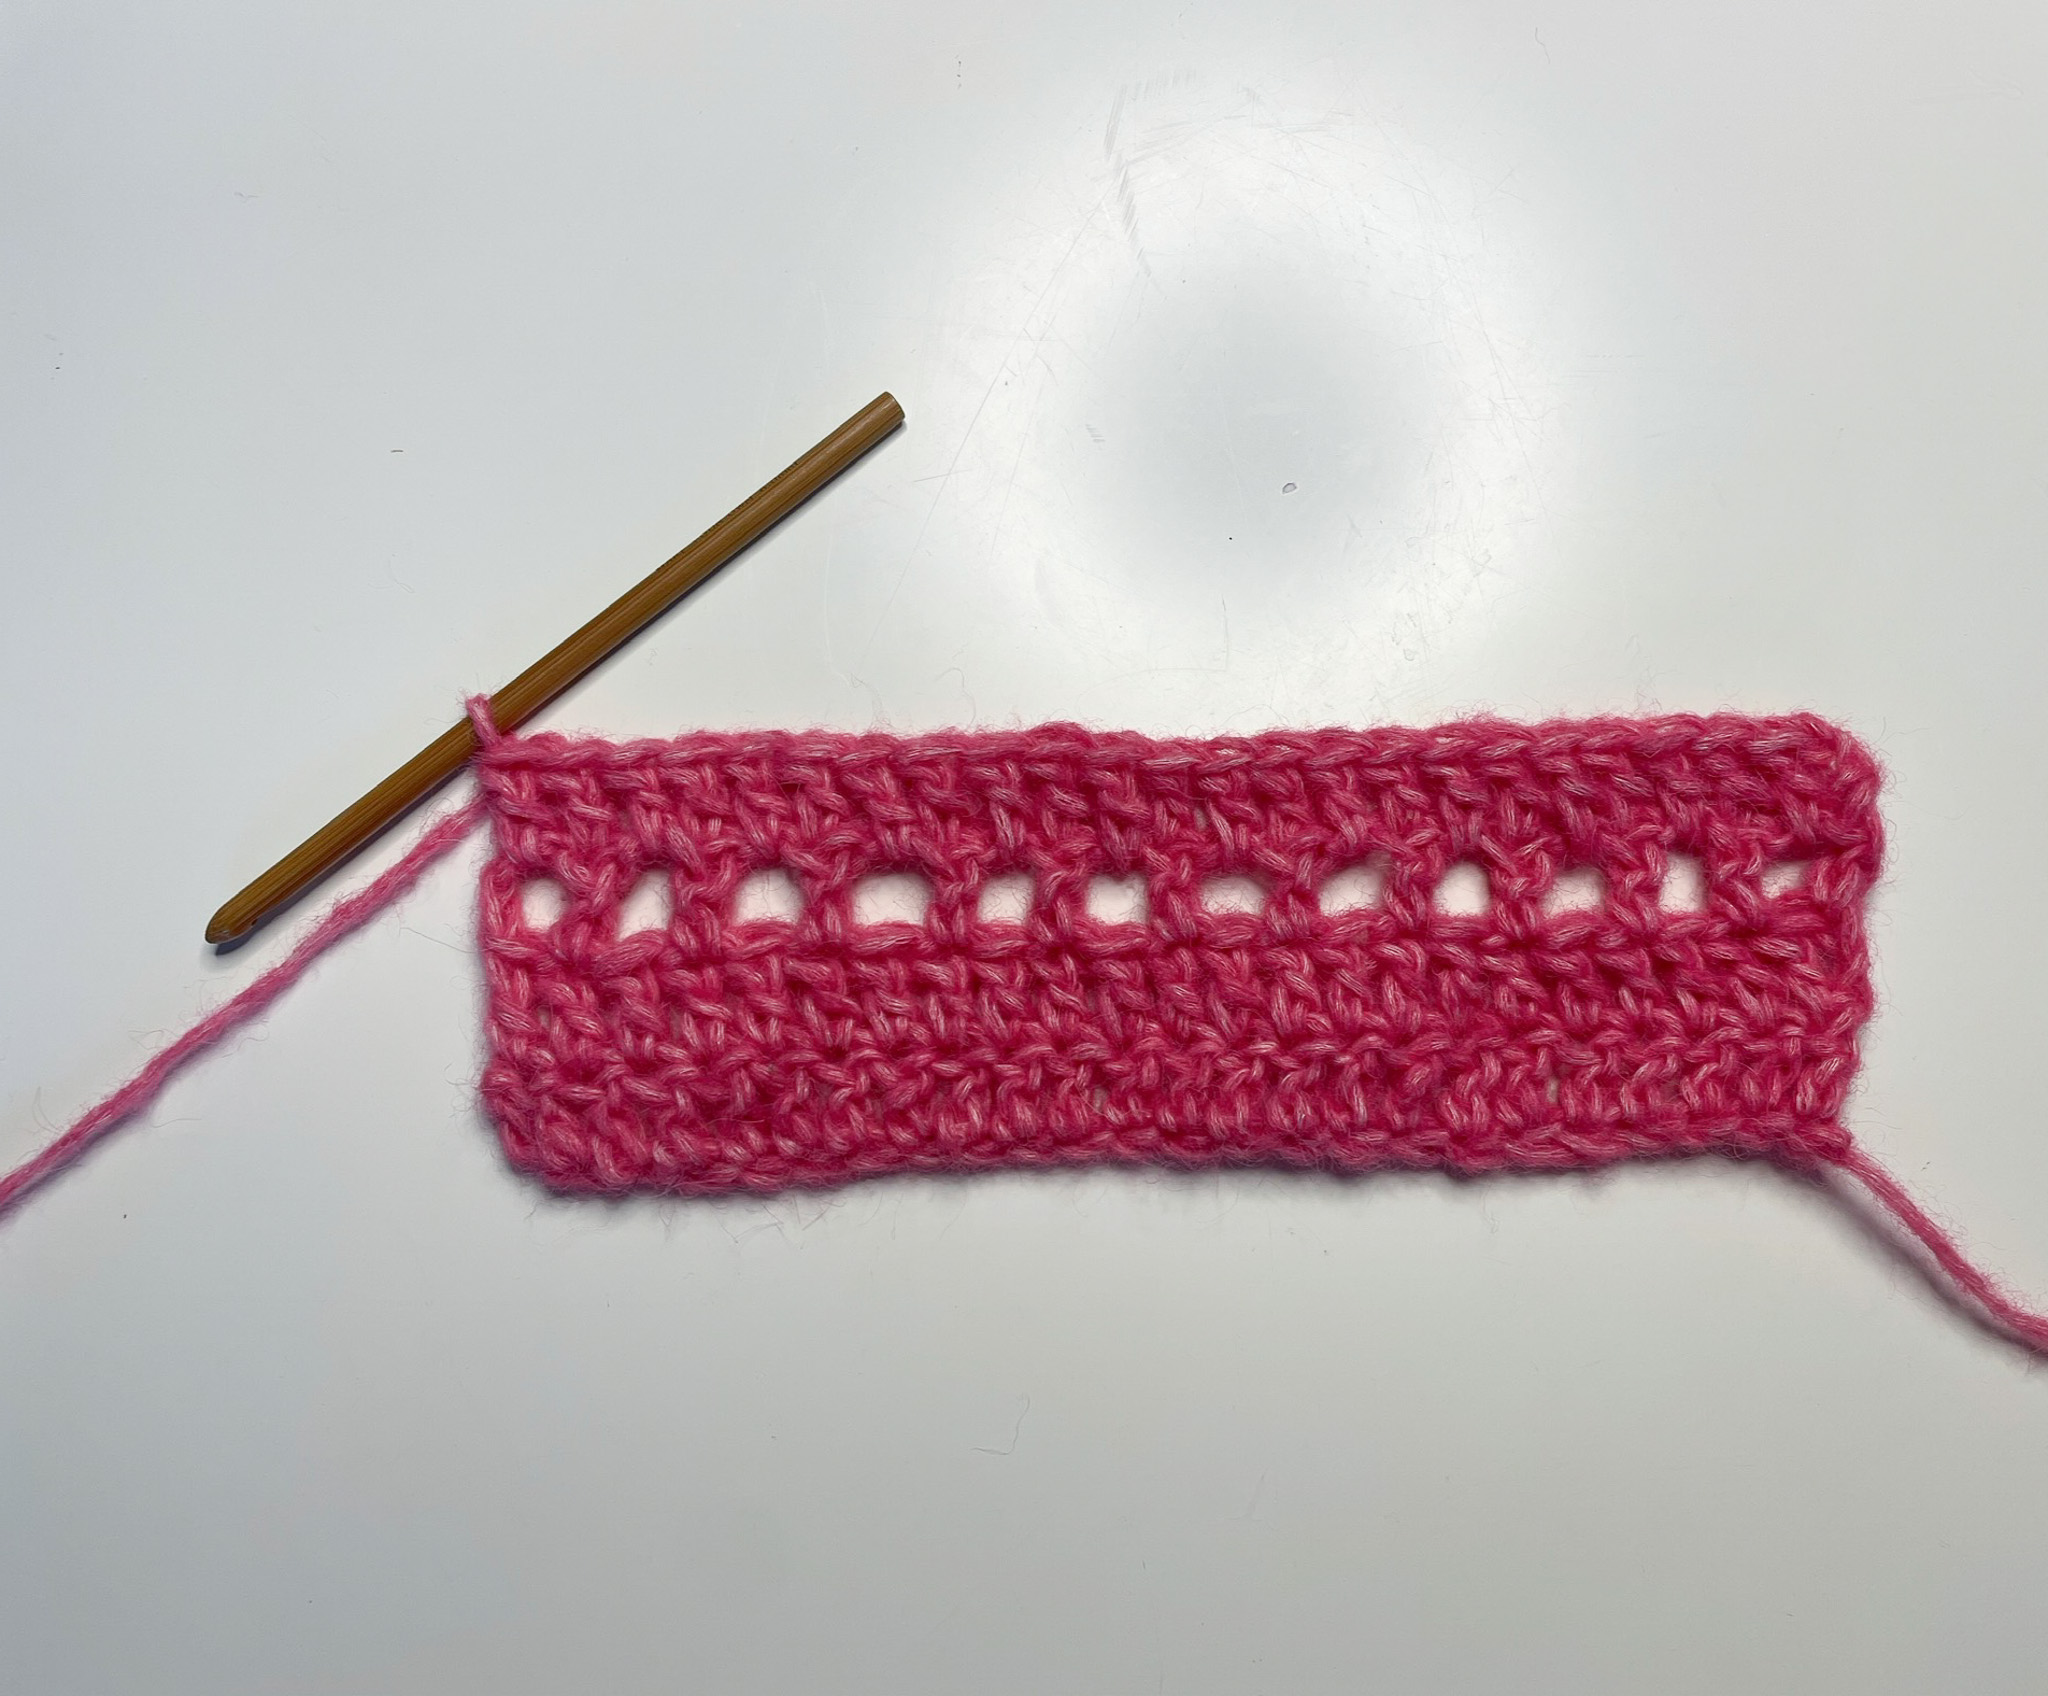
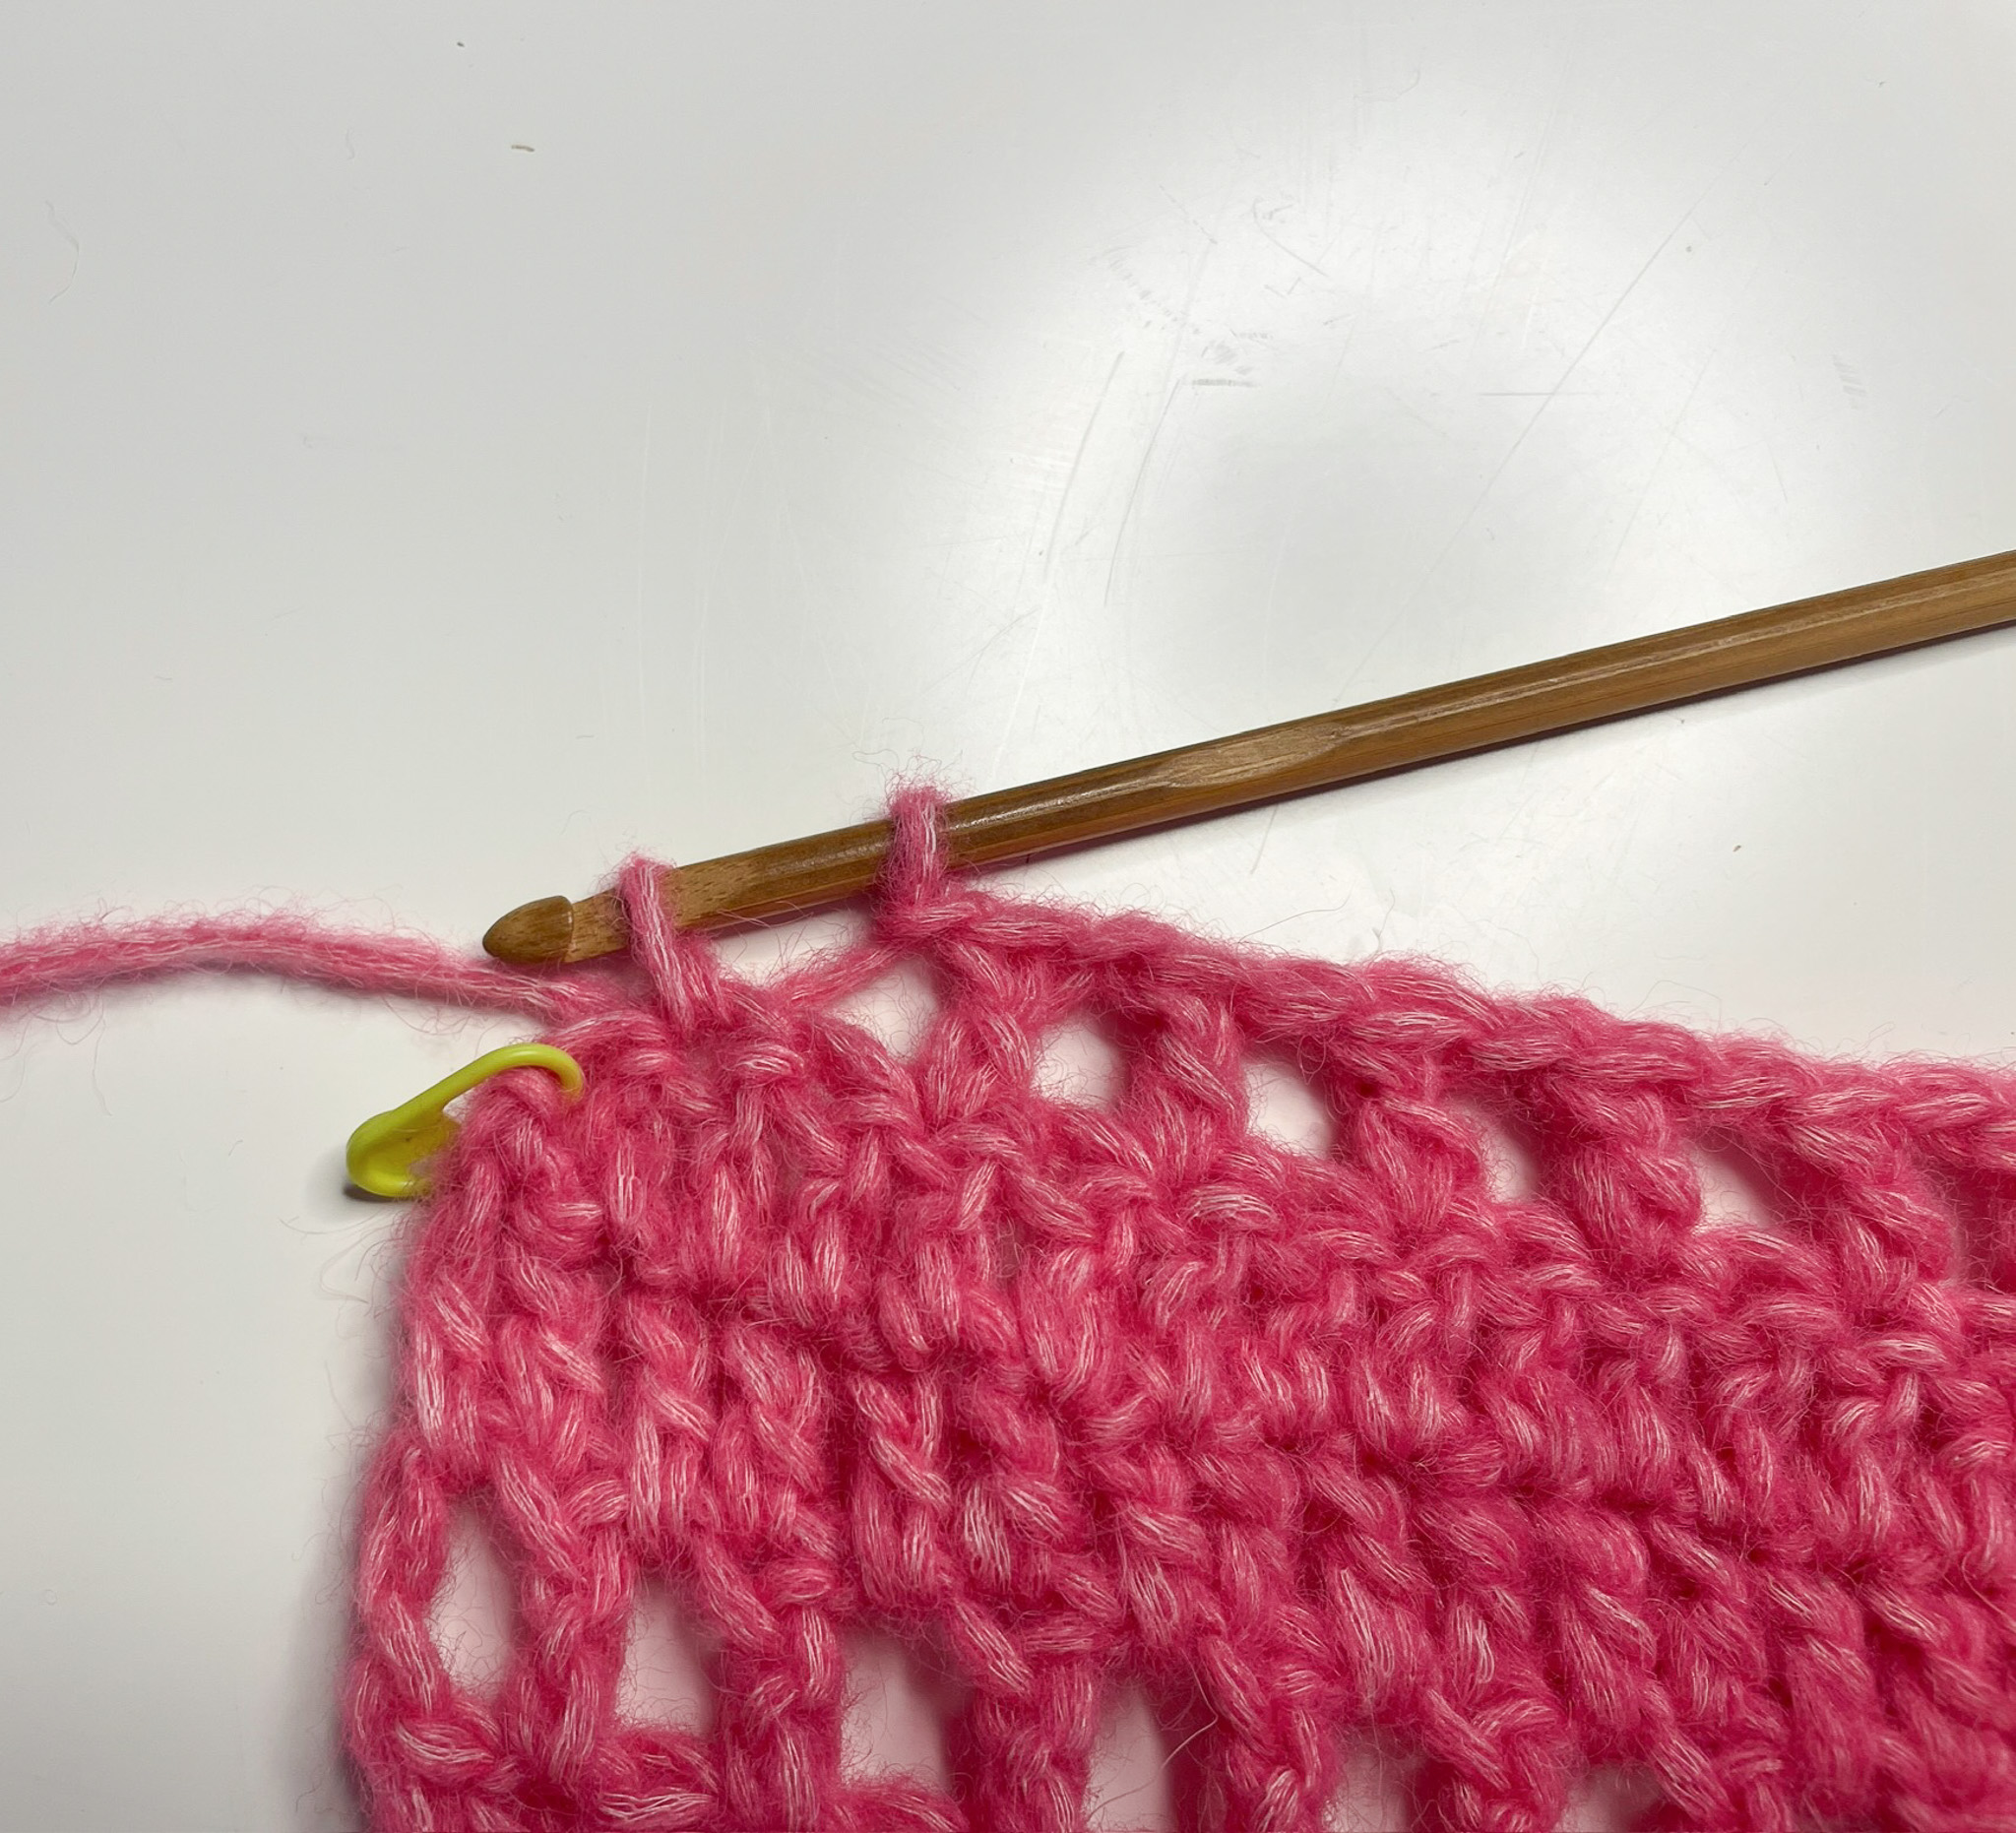
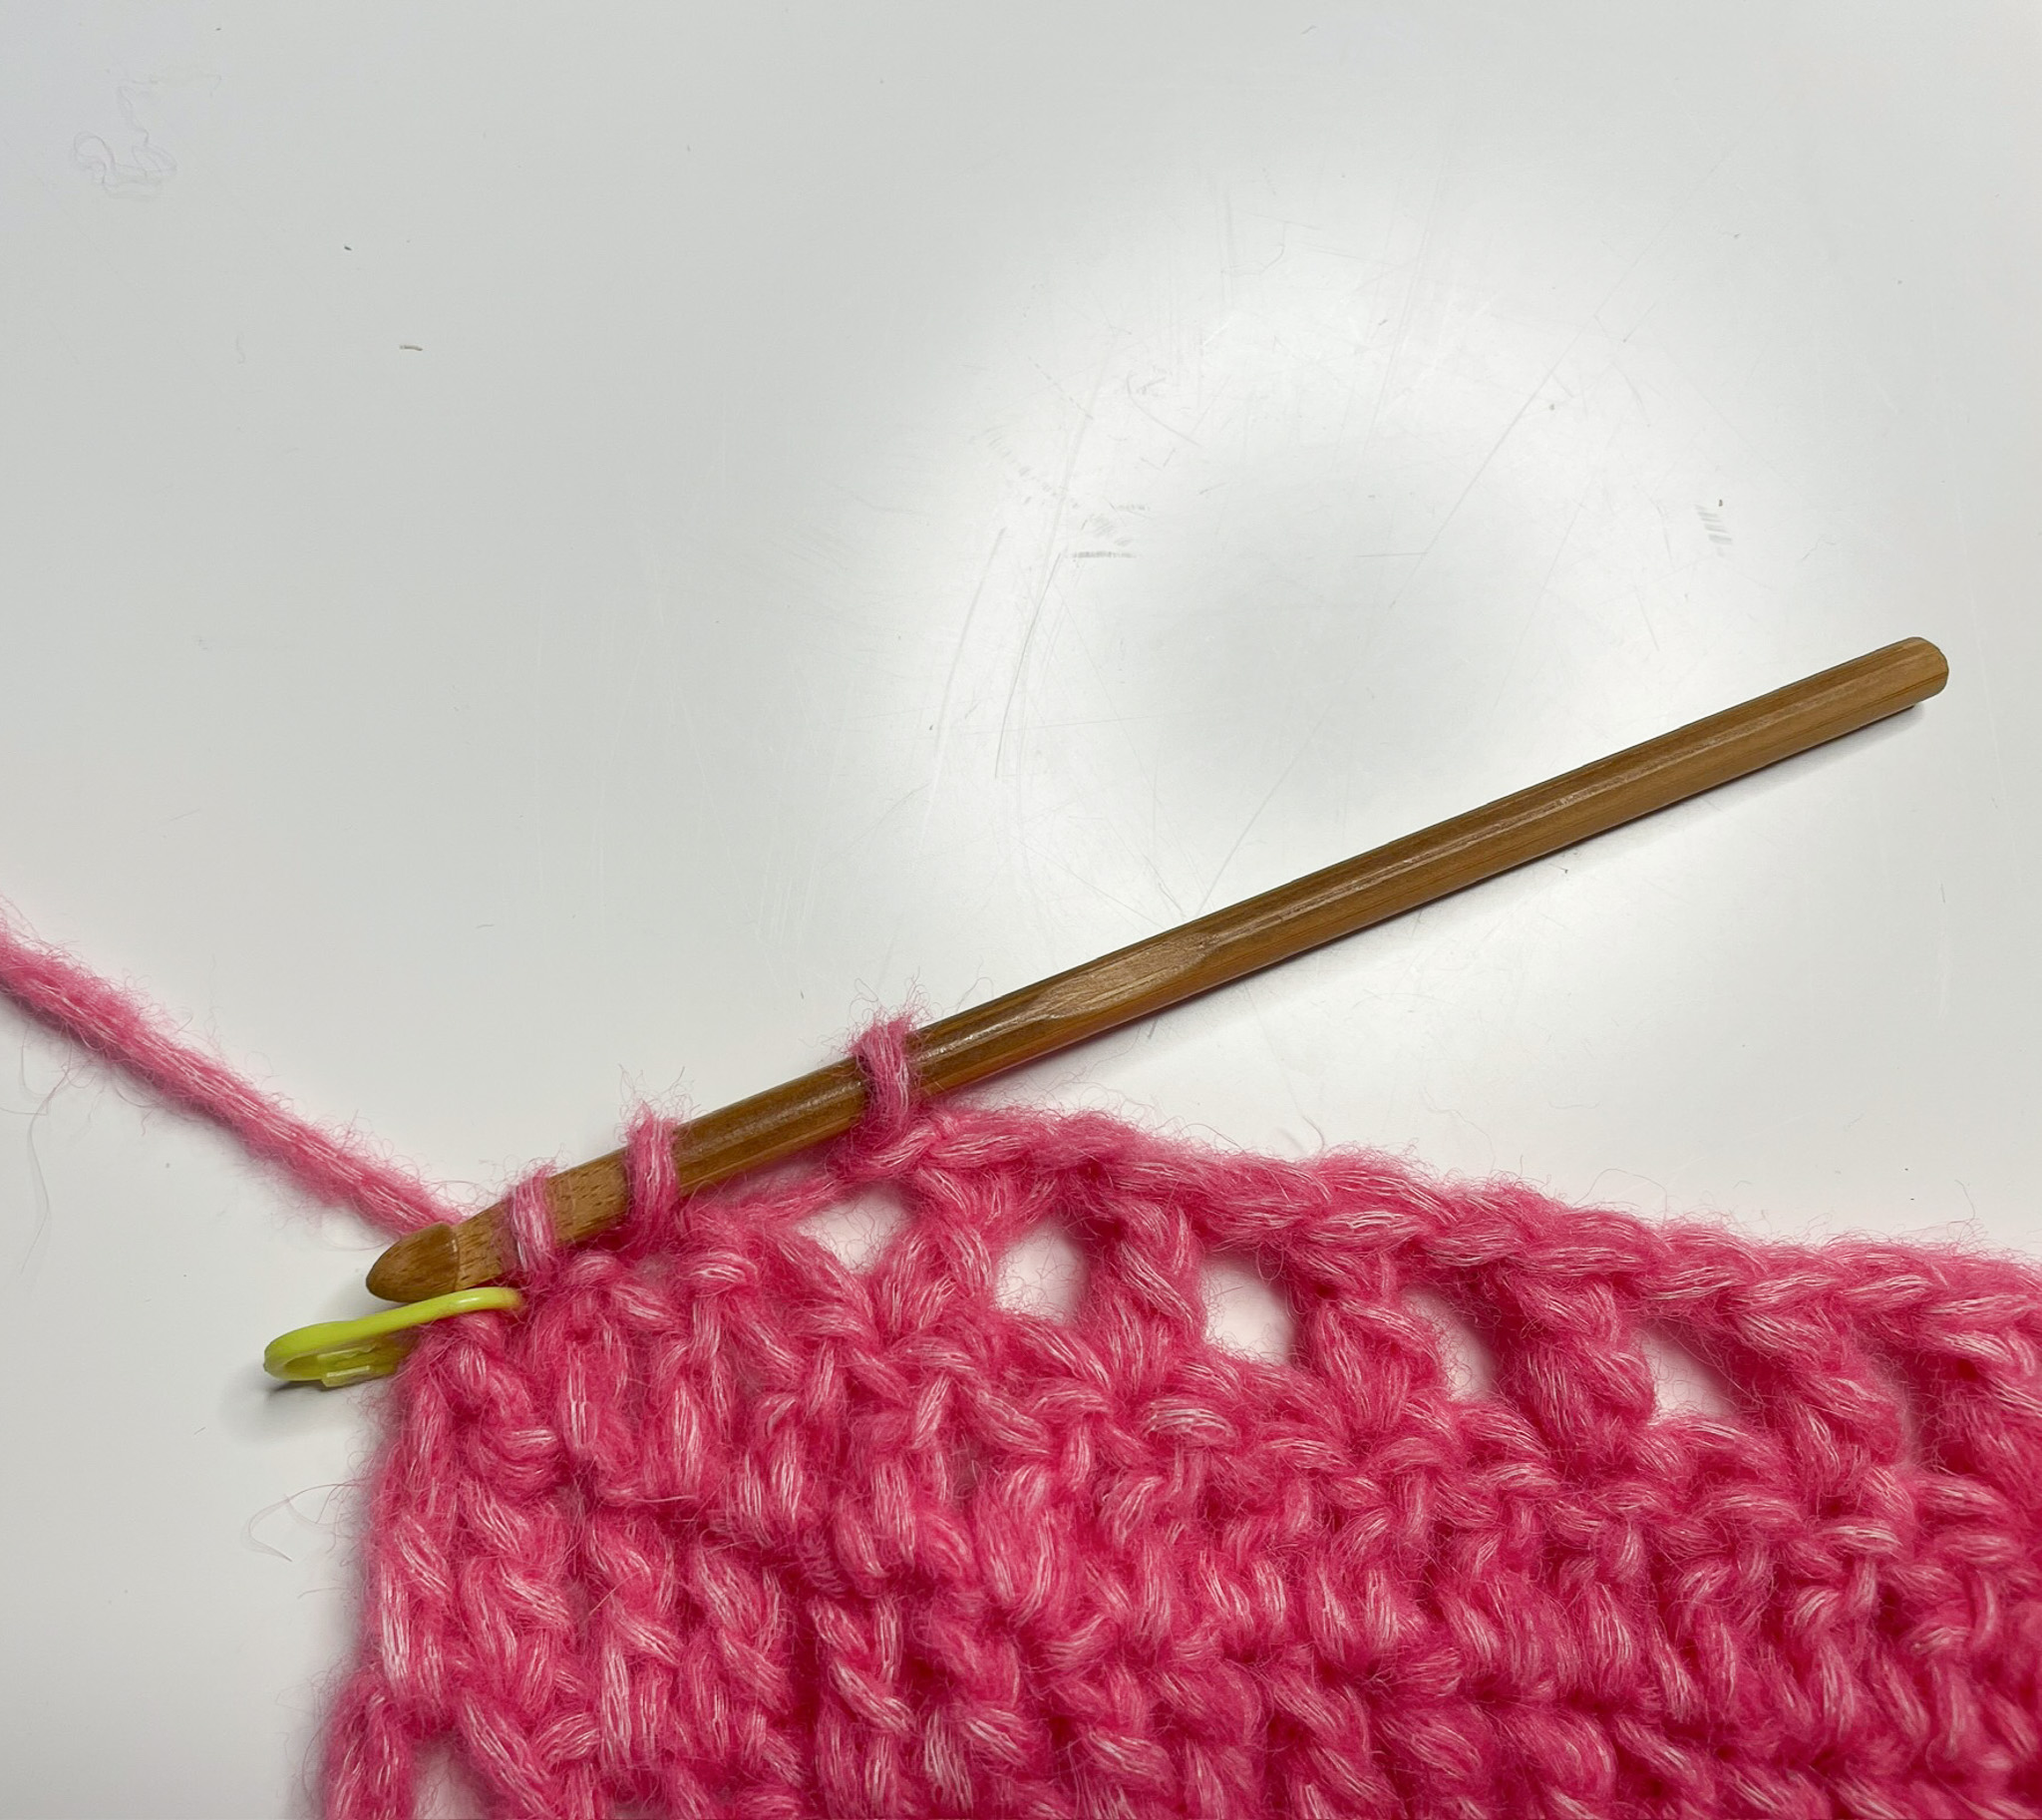
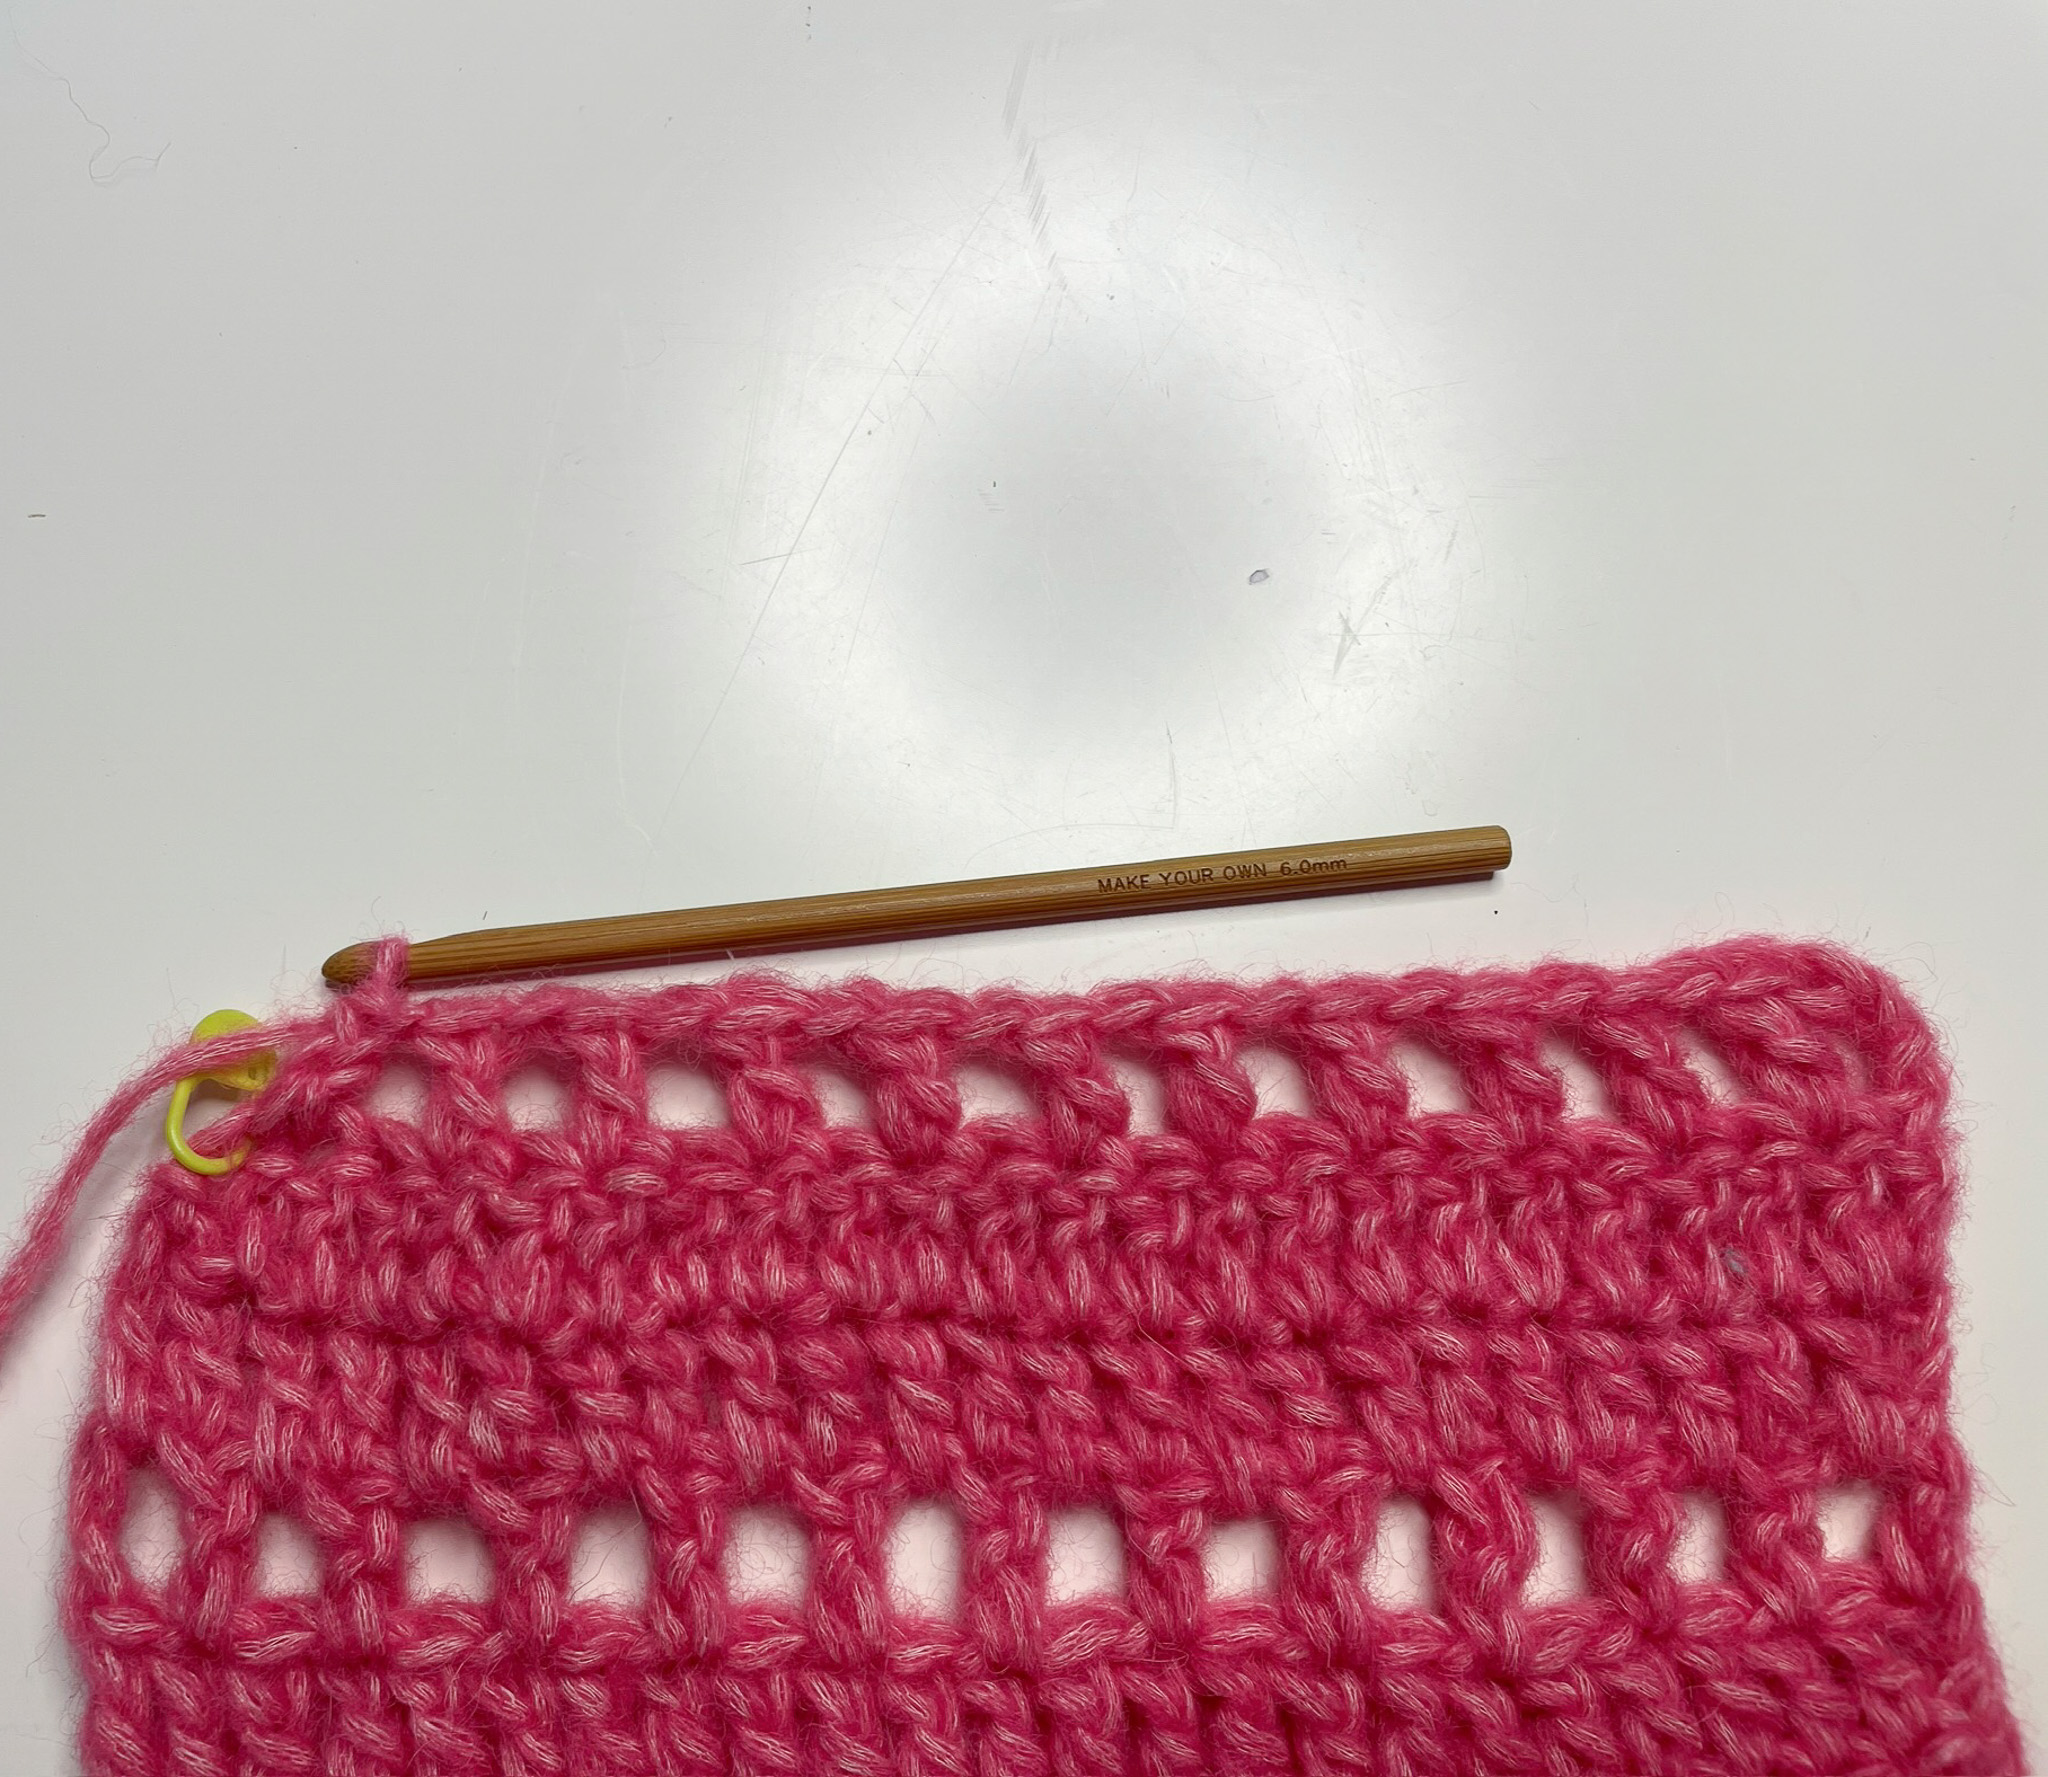
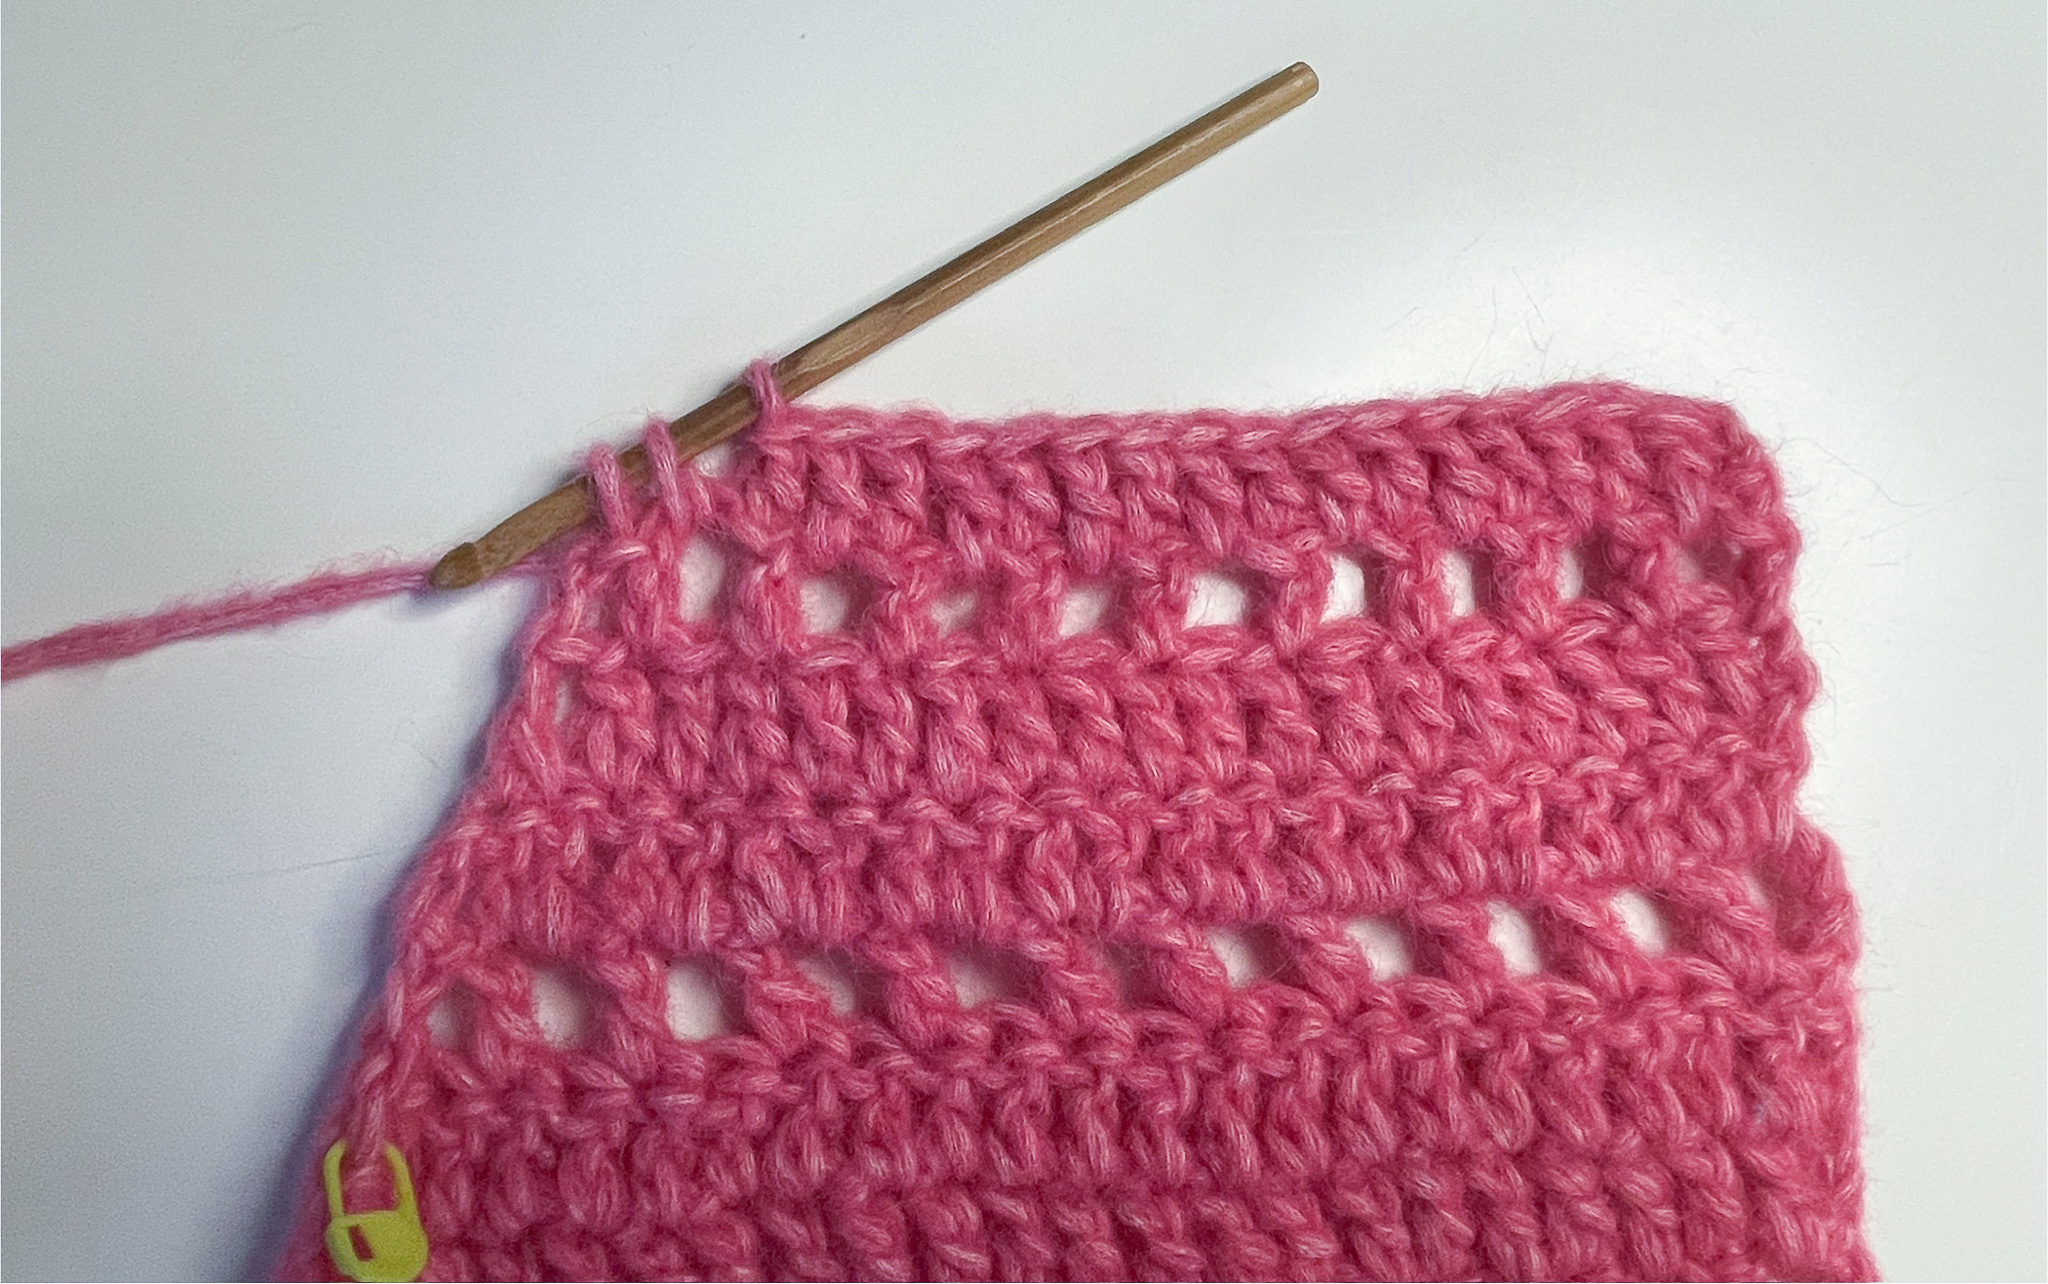
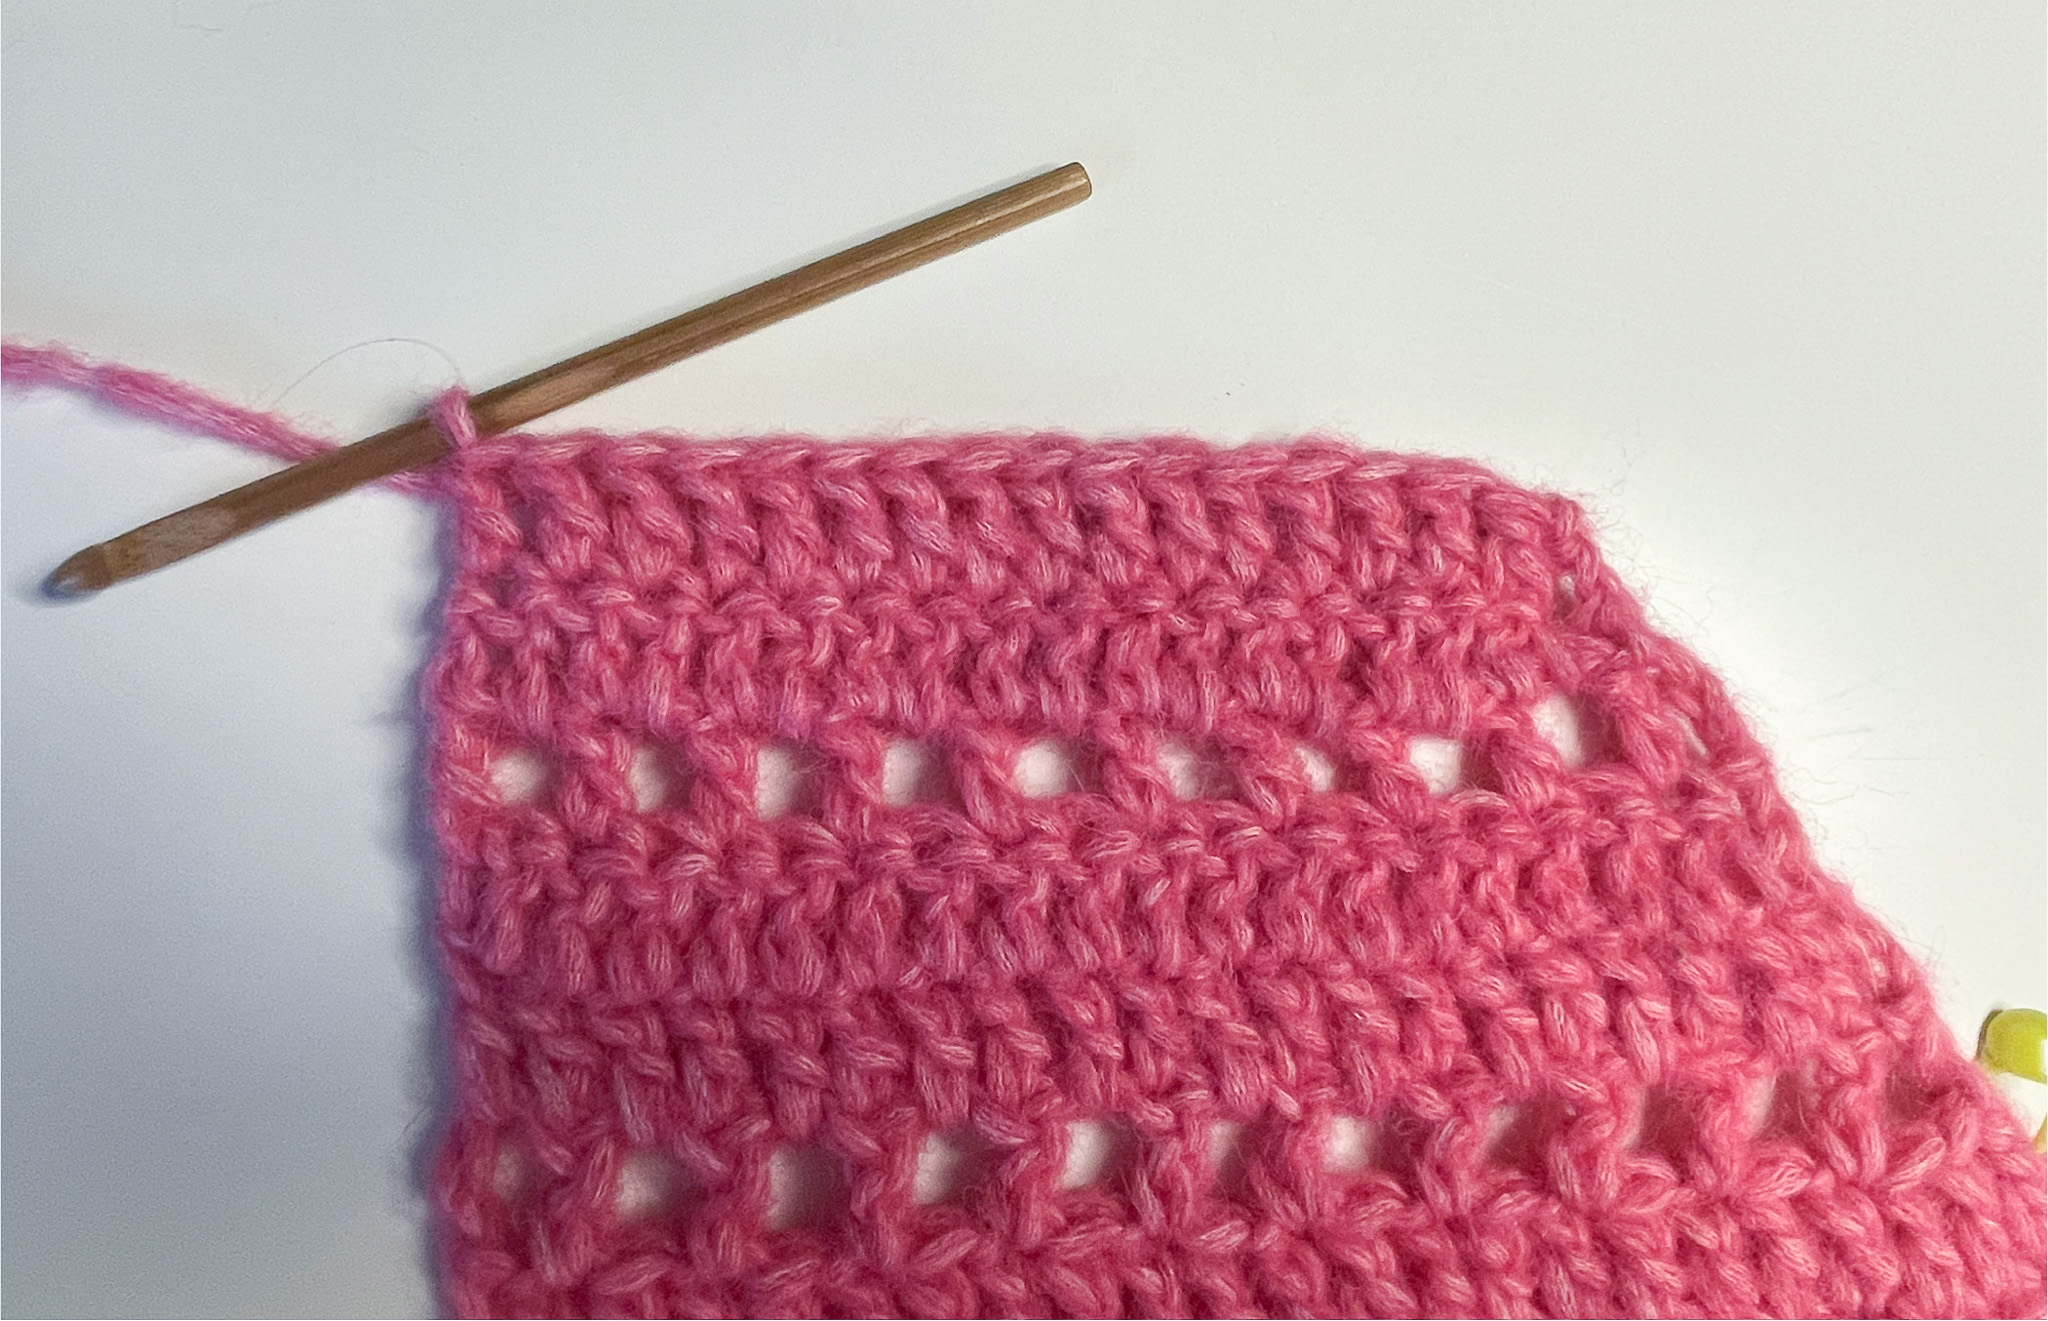
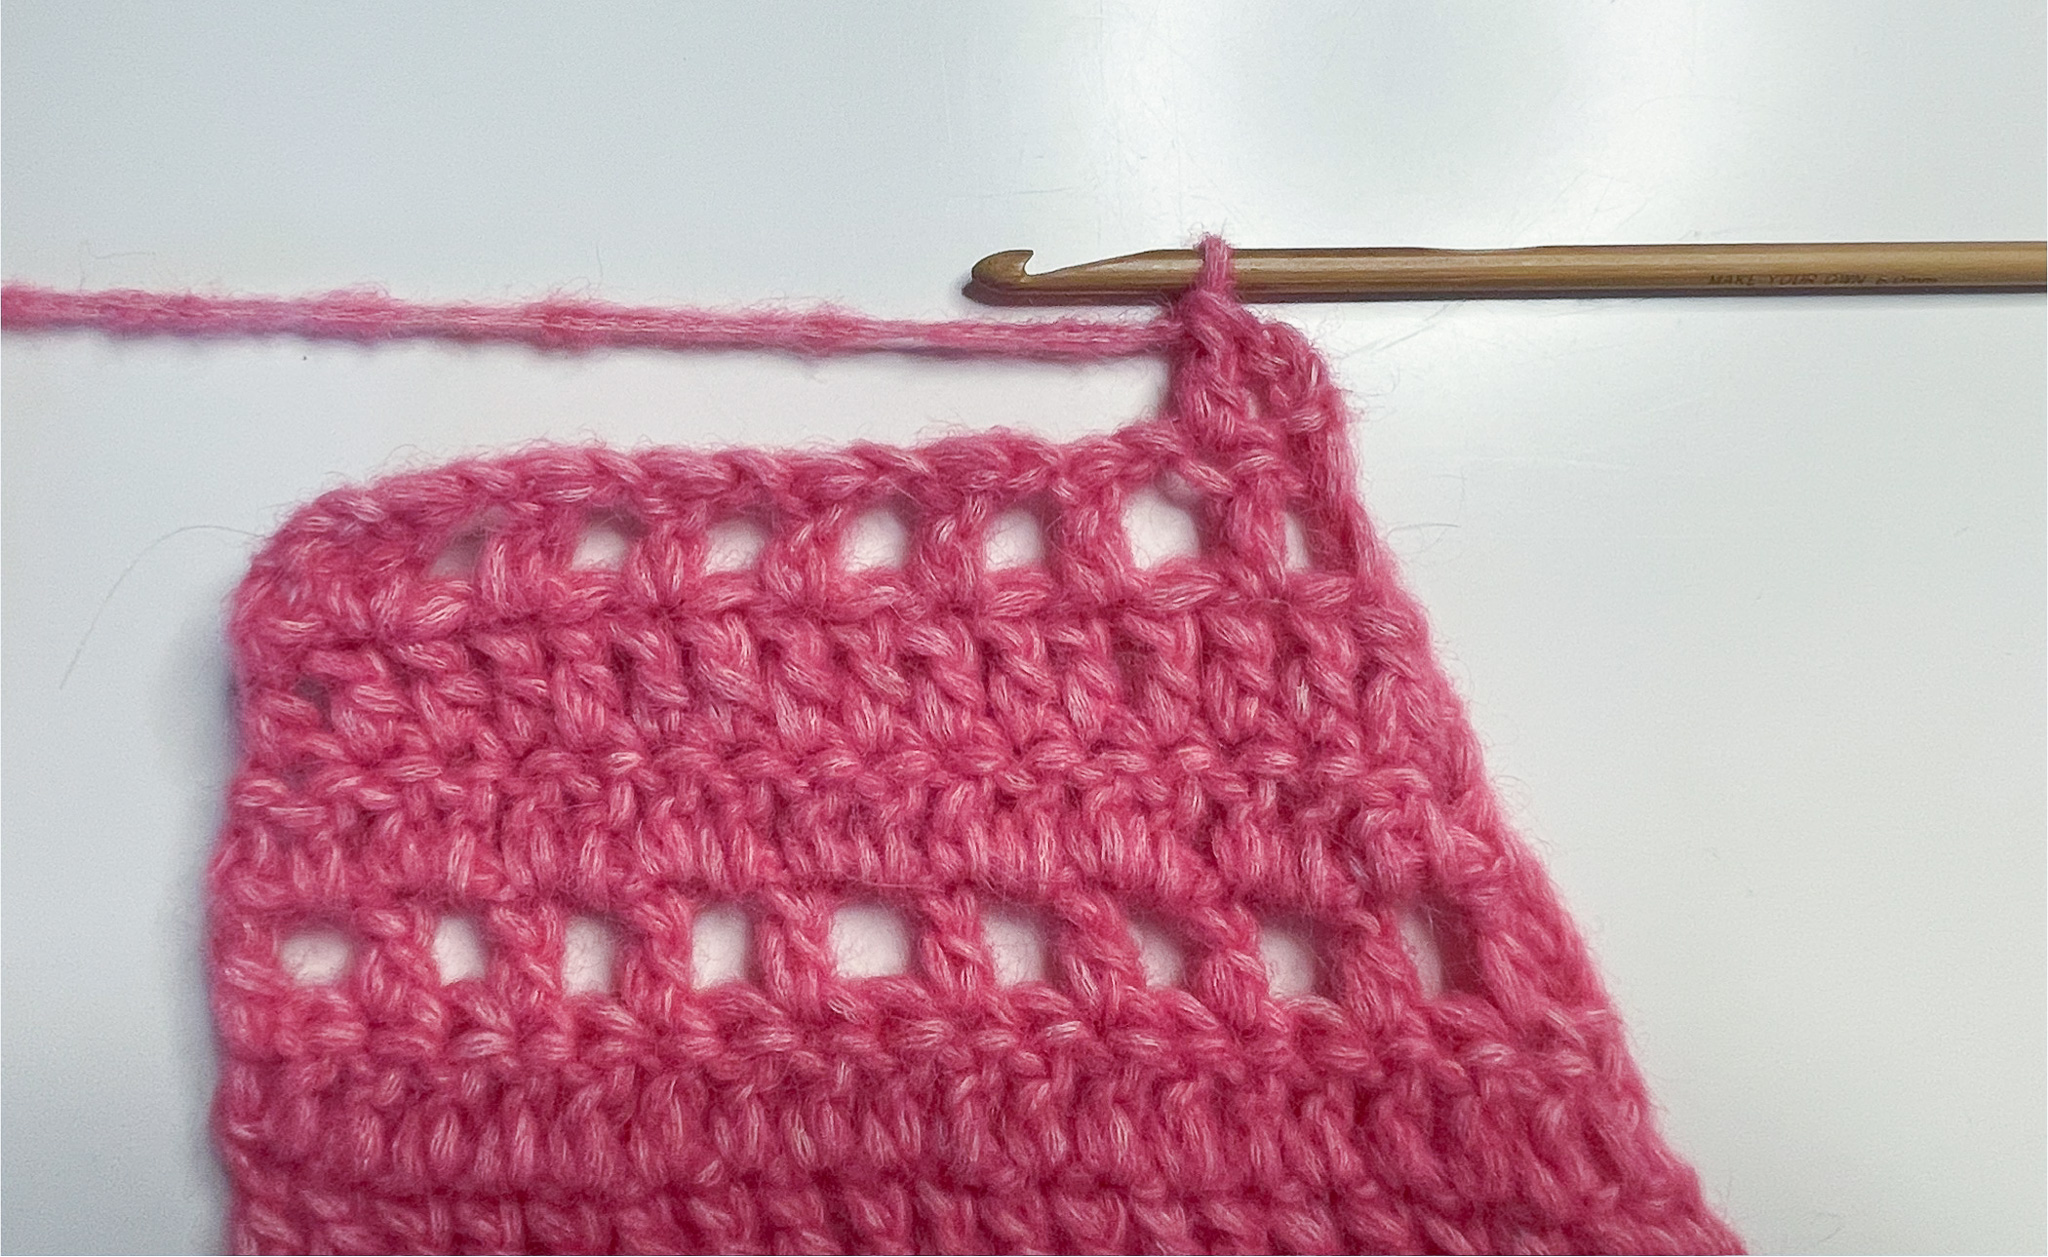
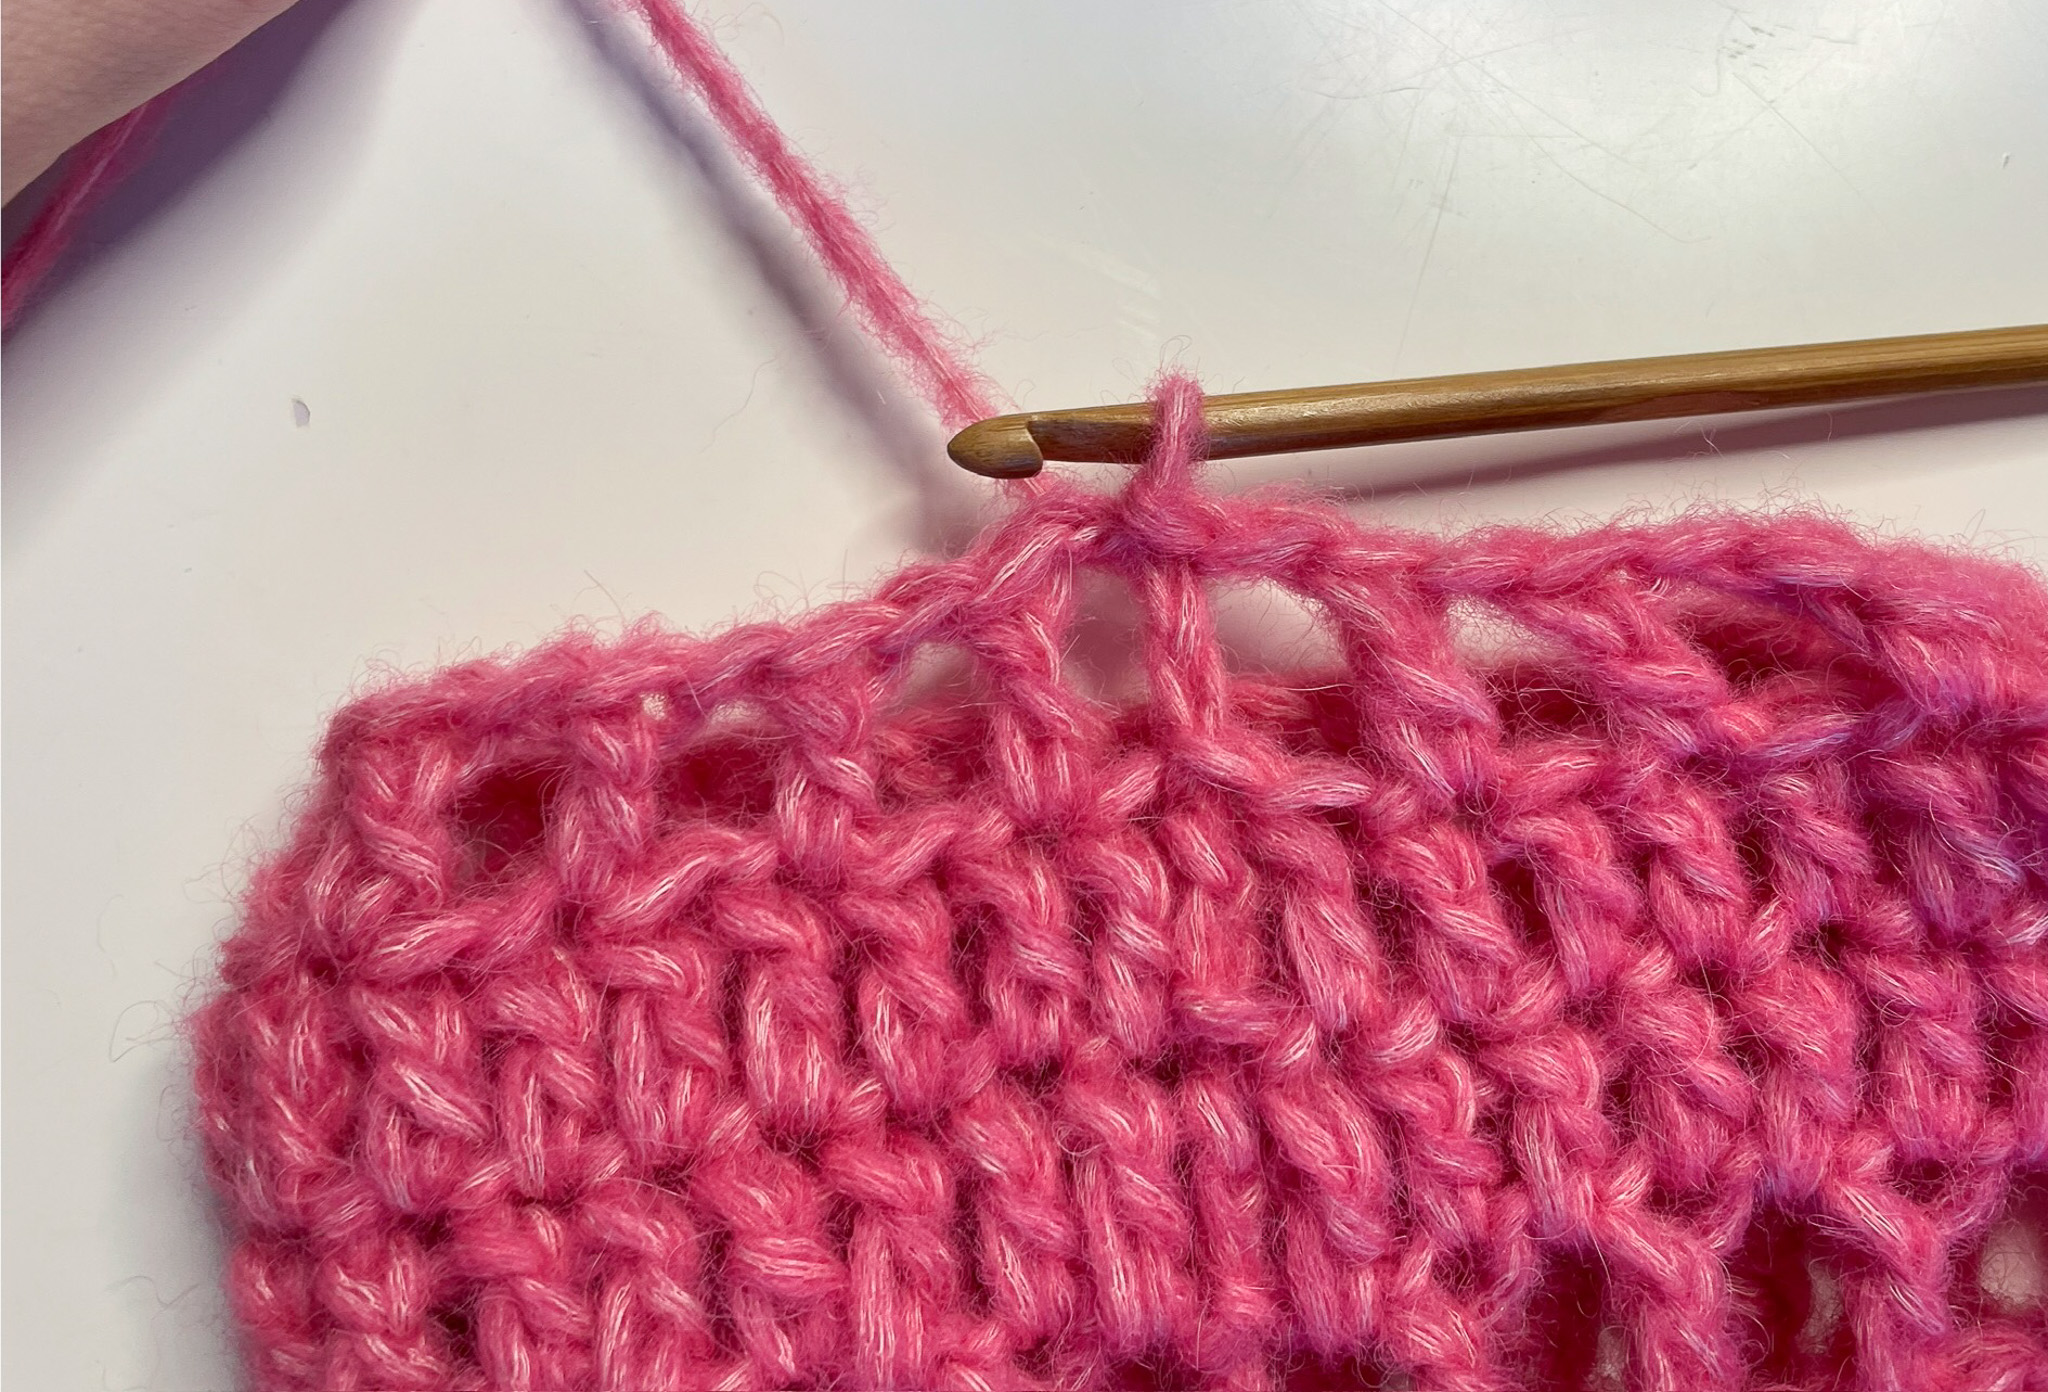
Row 4: Chain 3. Begin in the 5th stitch from the hook and work *1 double crochet, chain 1, skip 1 stitch, work 1 double crochet in the next stitch*. Repeat from * to * across the row. Turn. You should now have 25 gaps and 26 double crochets.
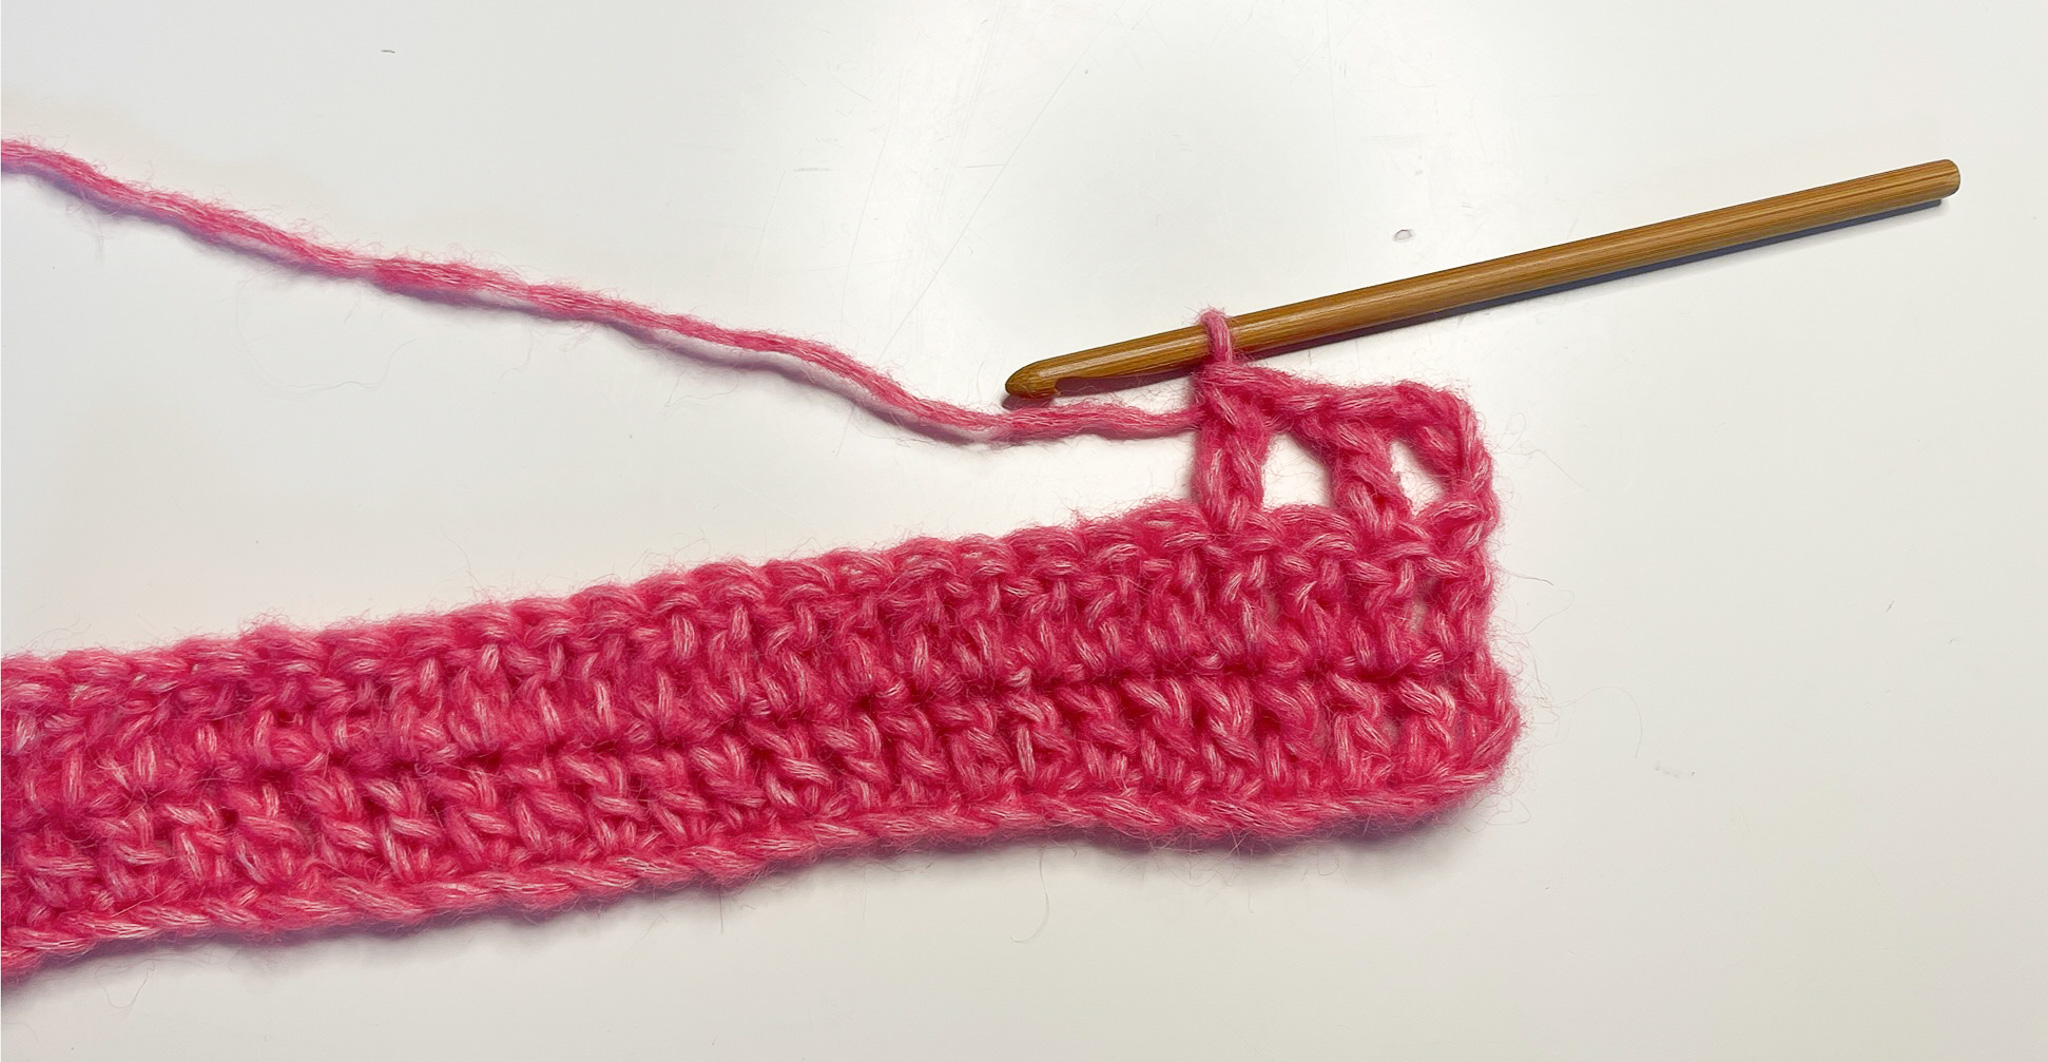
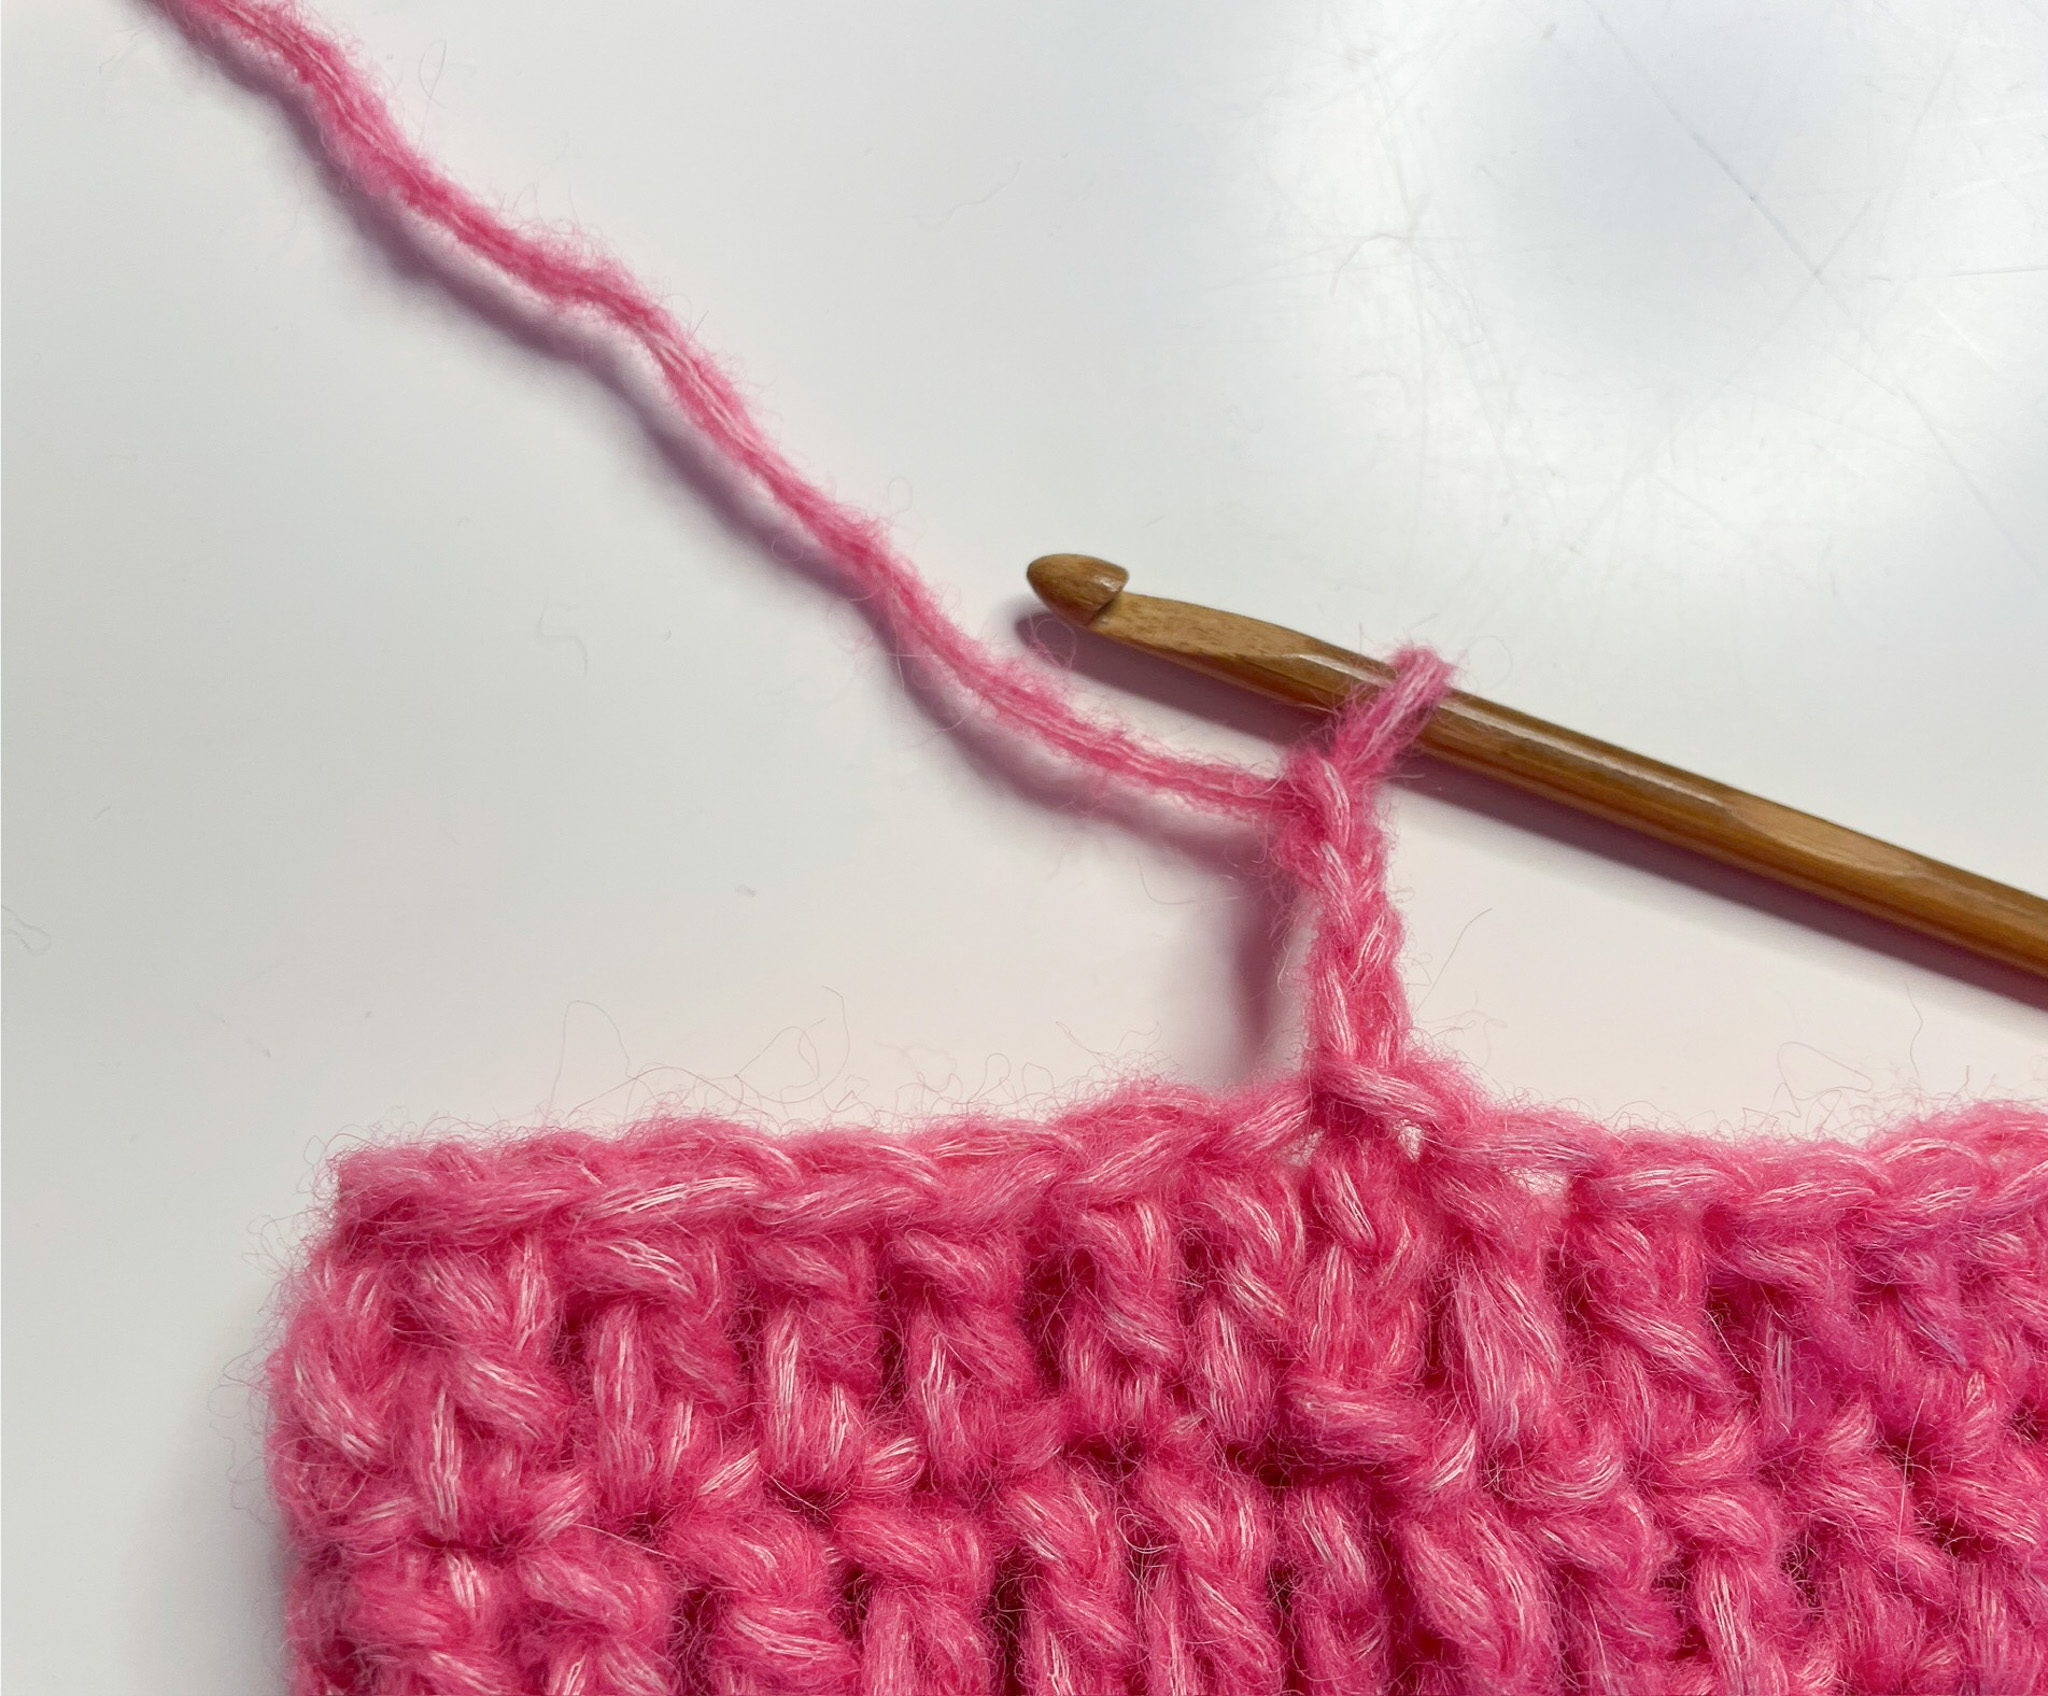
Row 5: Chain 2. Work *1 double crochet in the chain space from the previous row, then 1 double crochet in the next stitch*. Repeat from * to * across the row. Turn. The last stitch of the row will be a double crochet worked in a chain space.

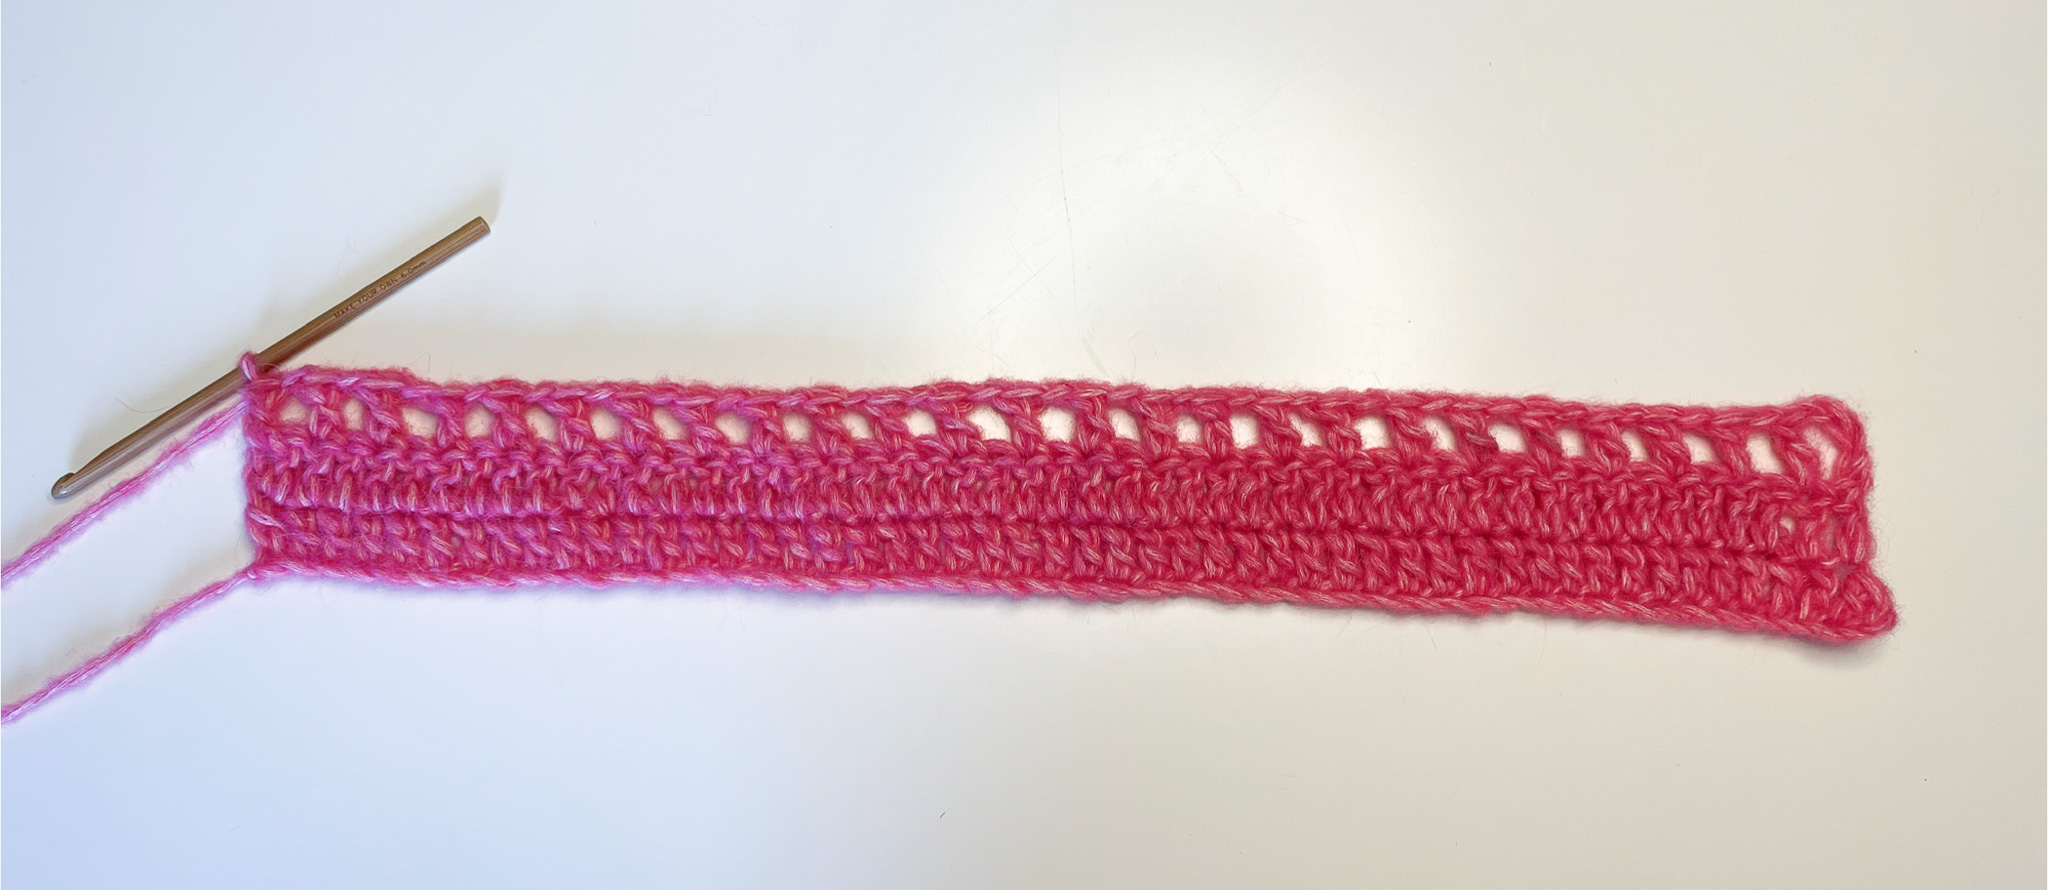
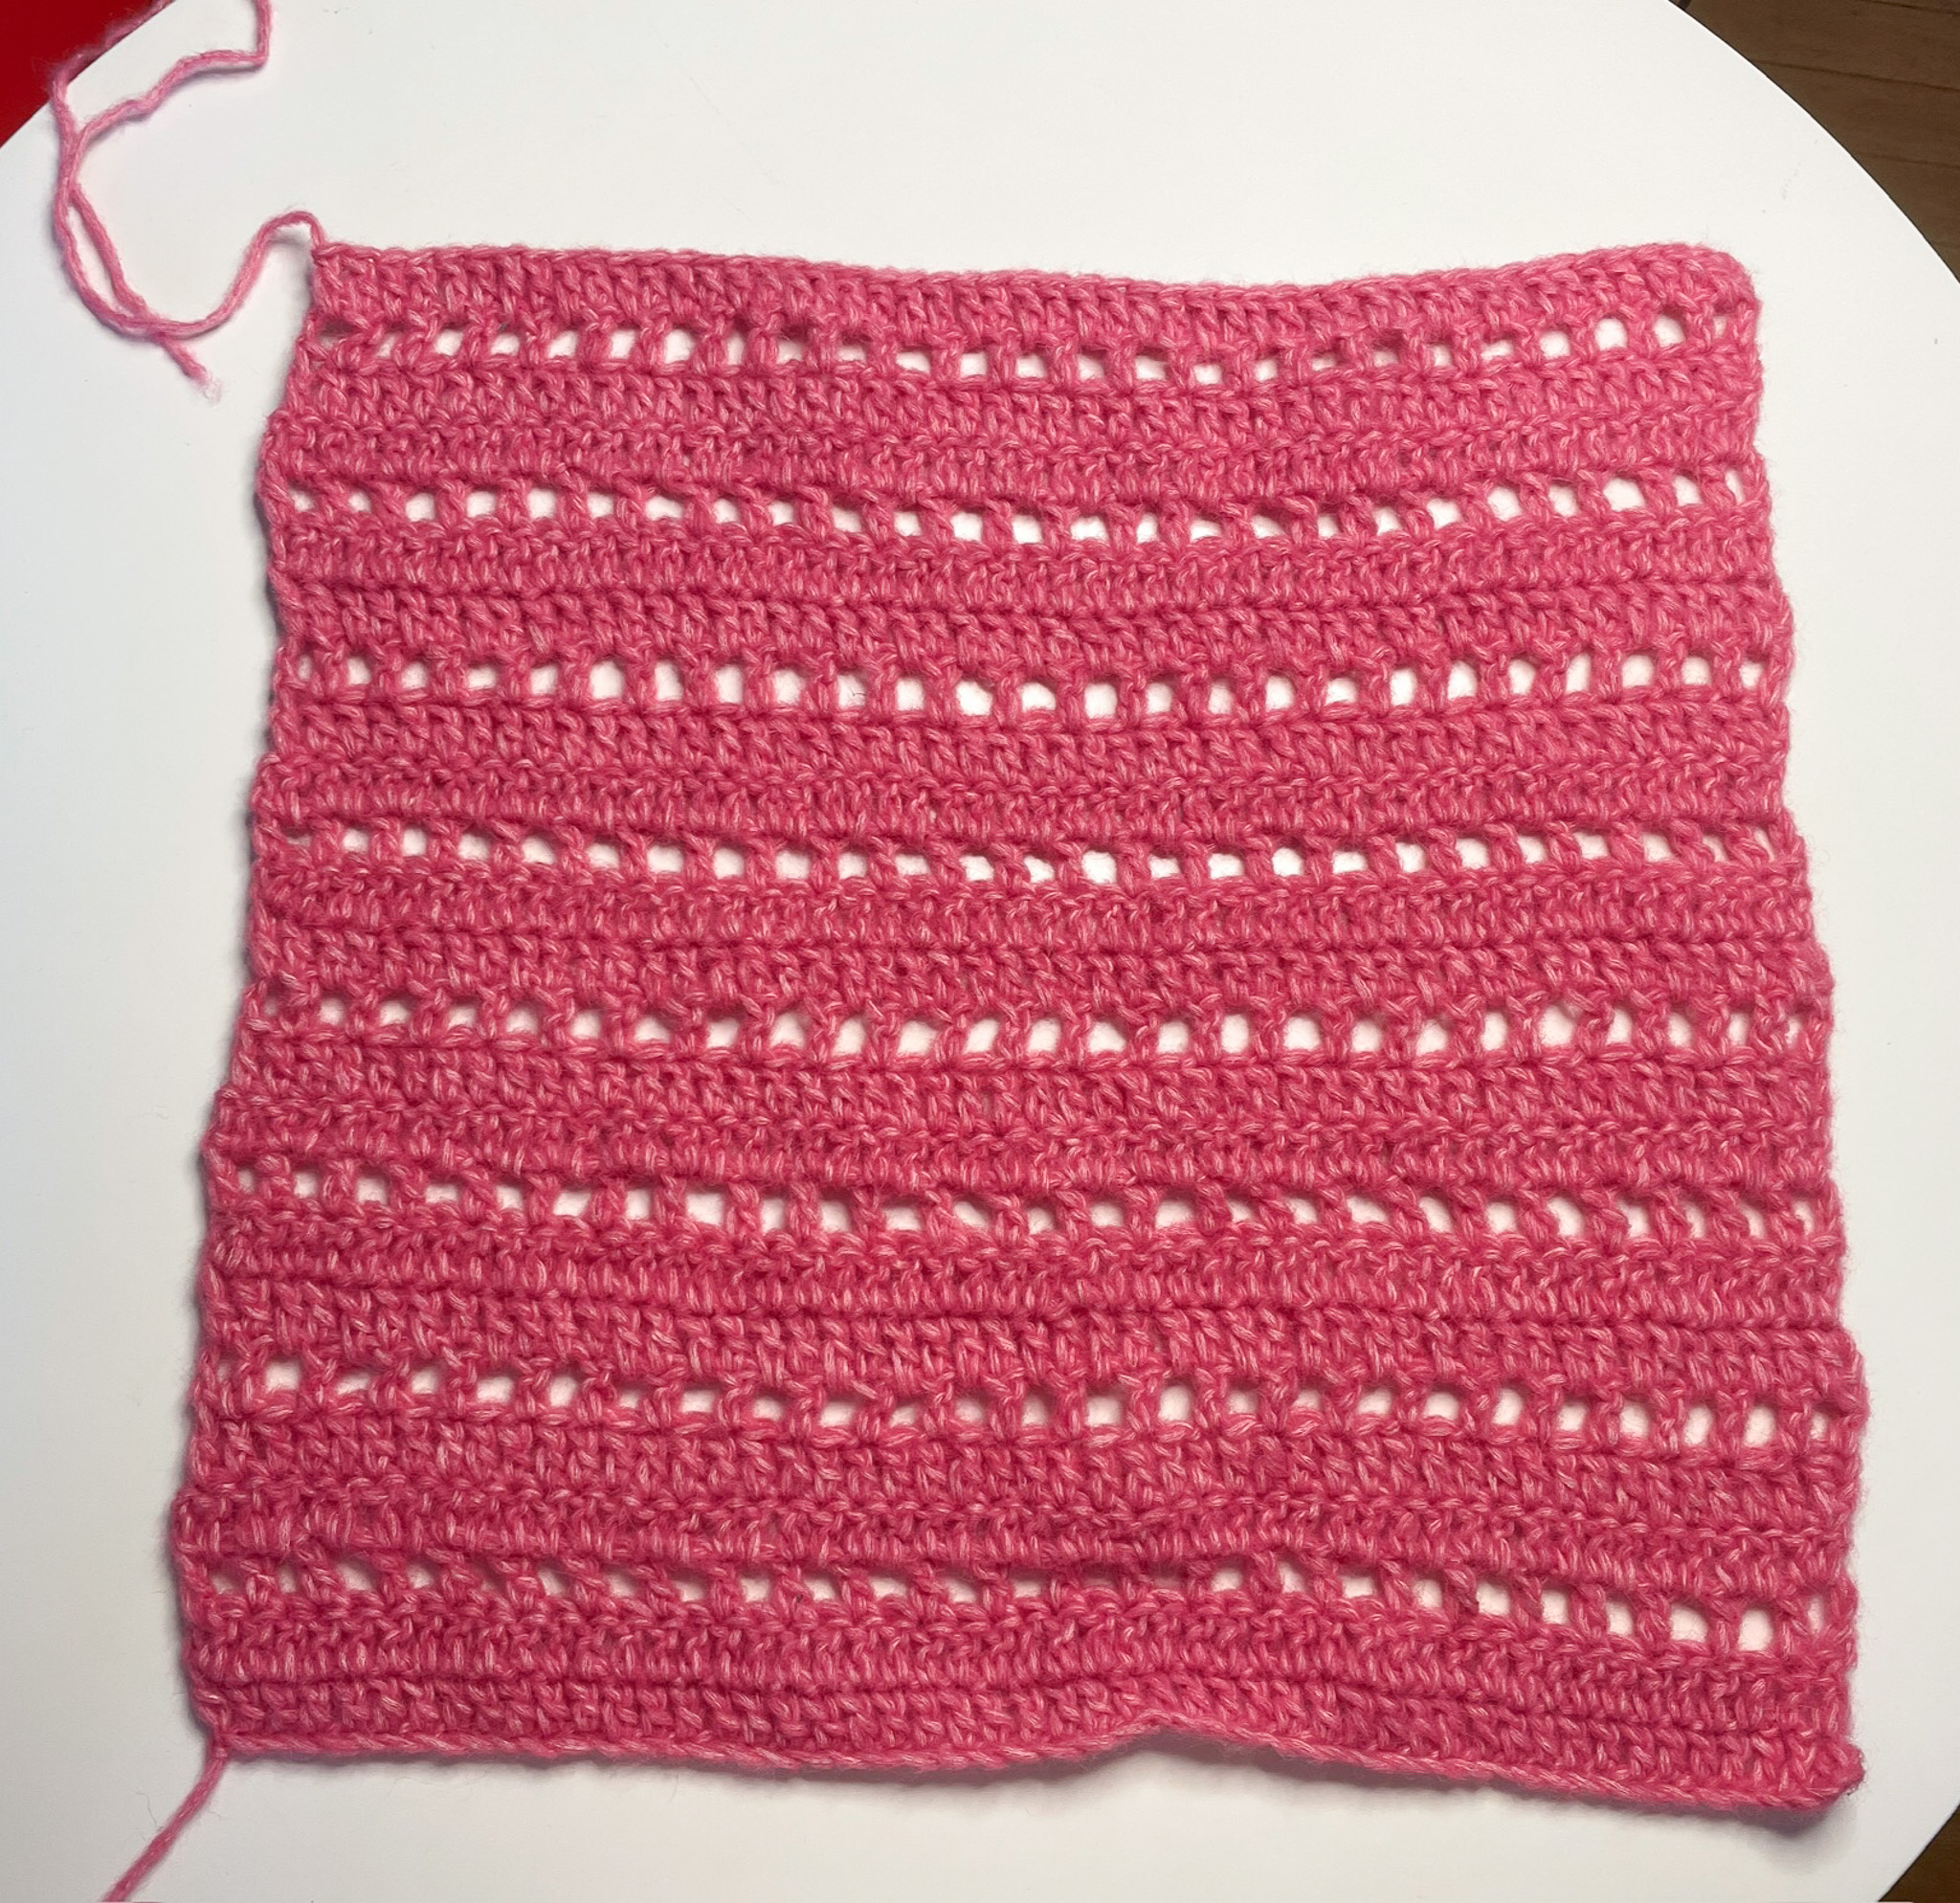
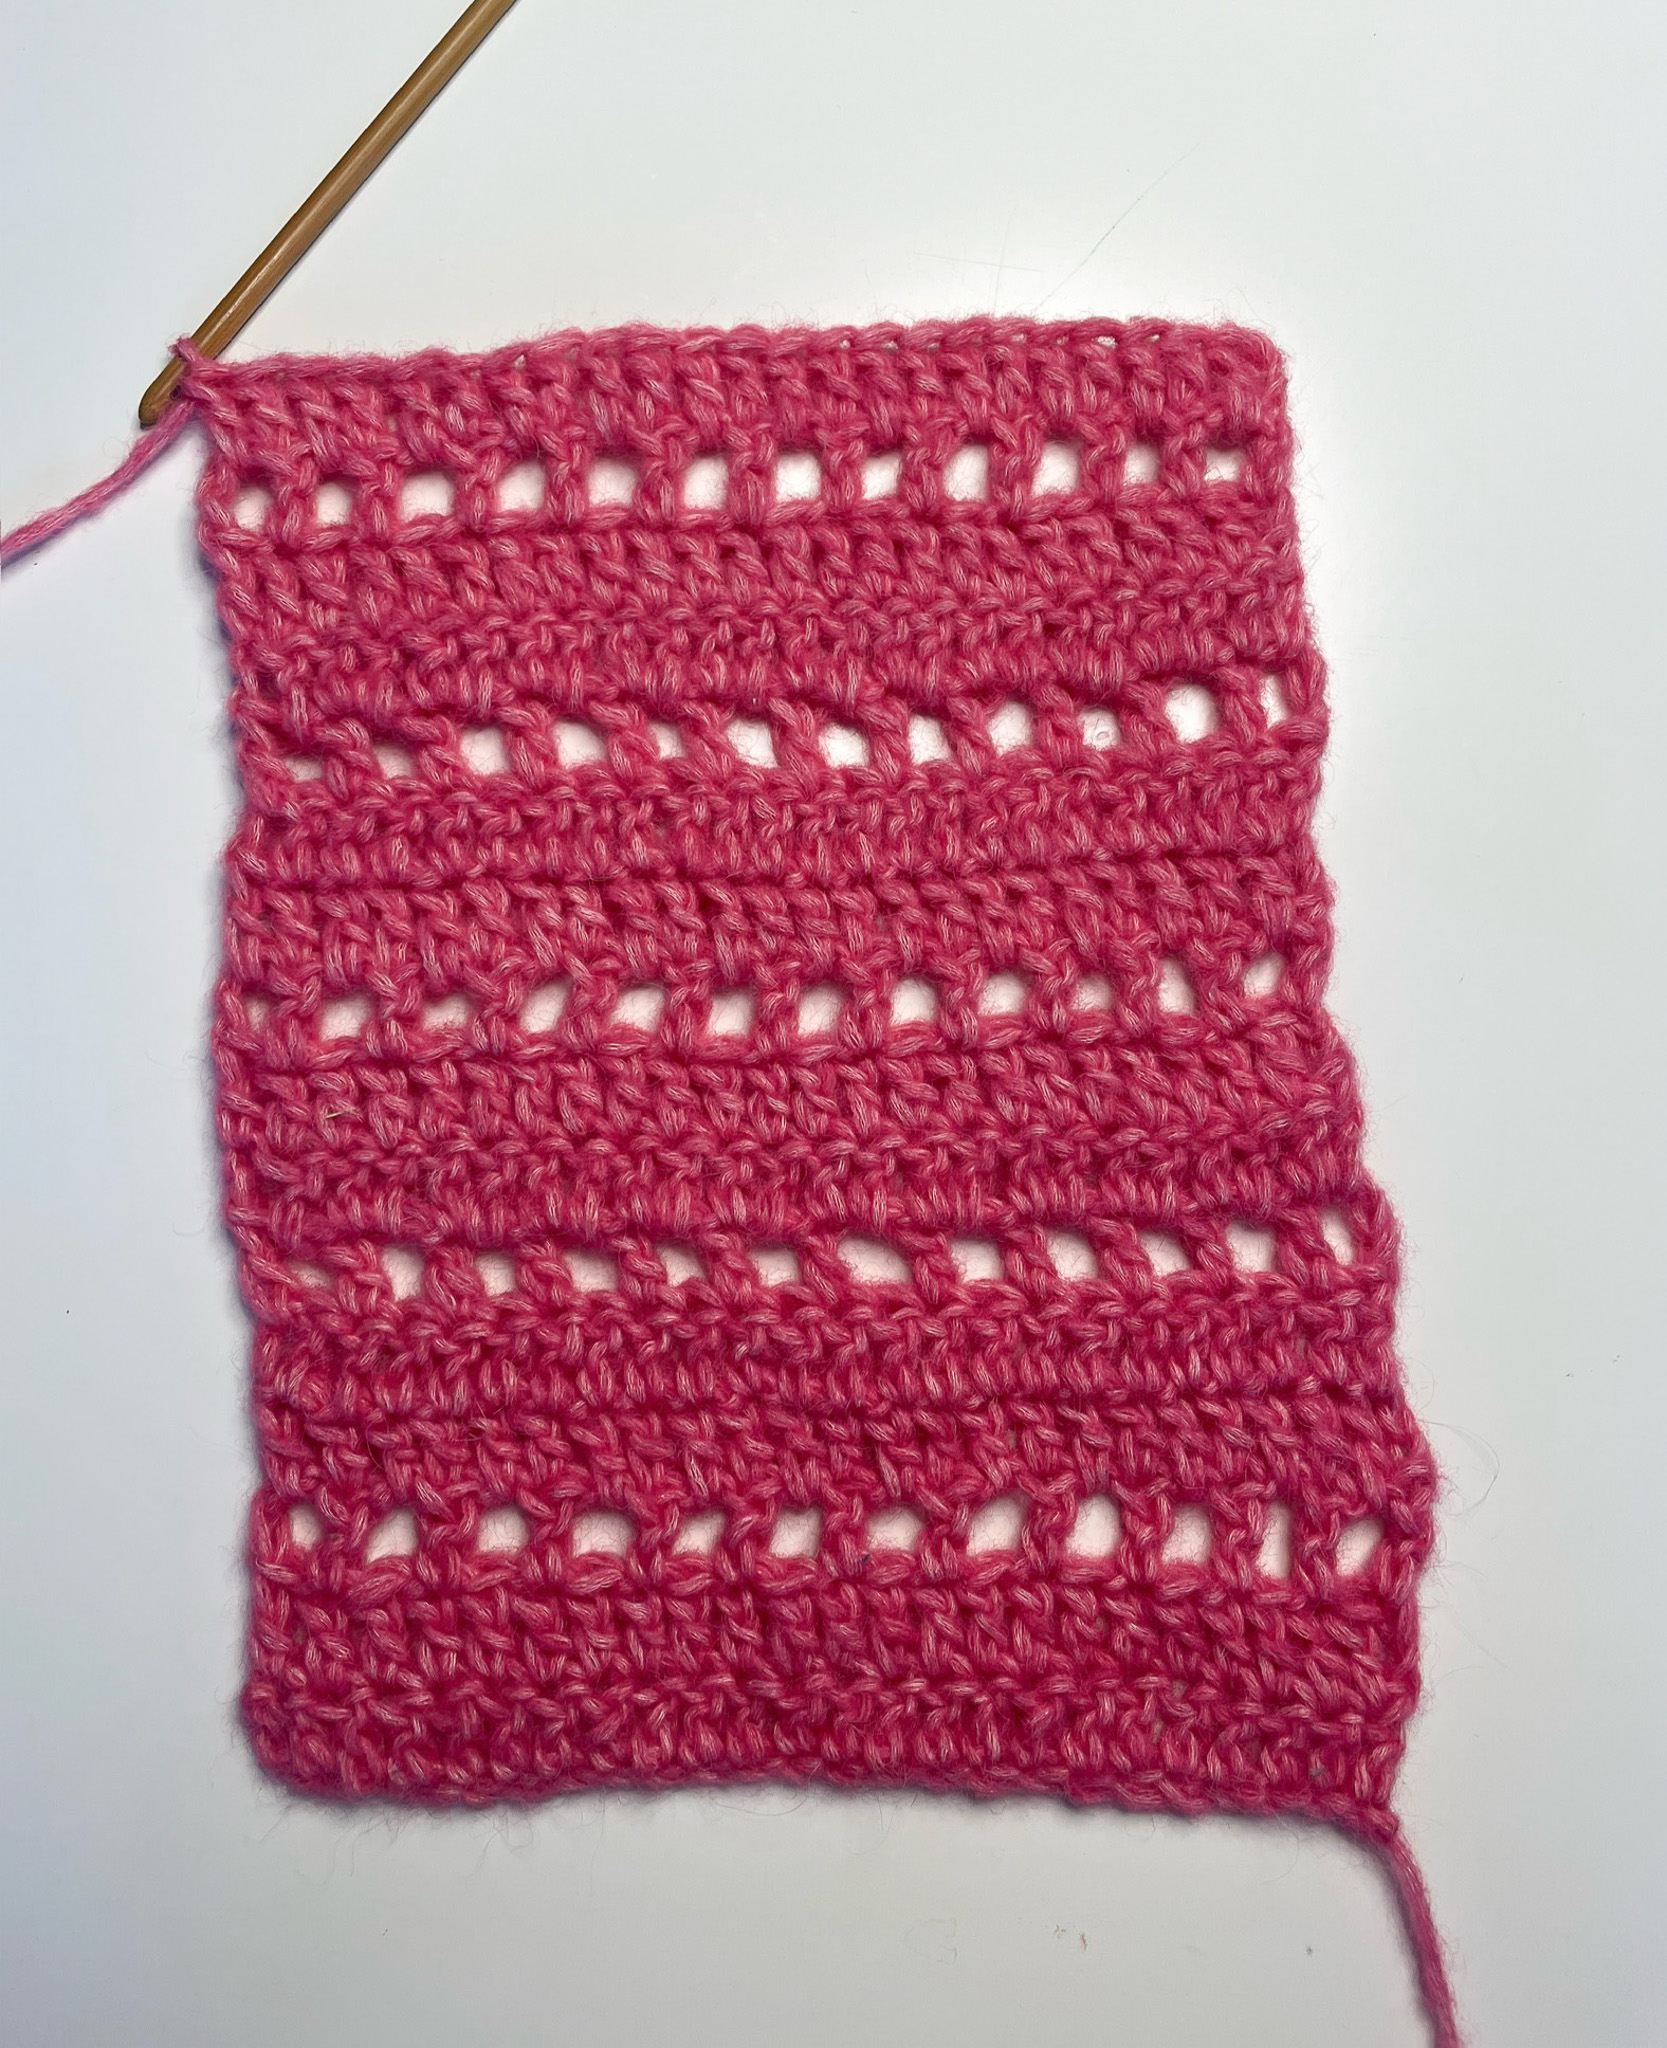
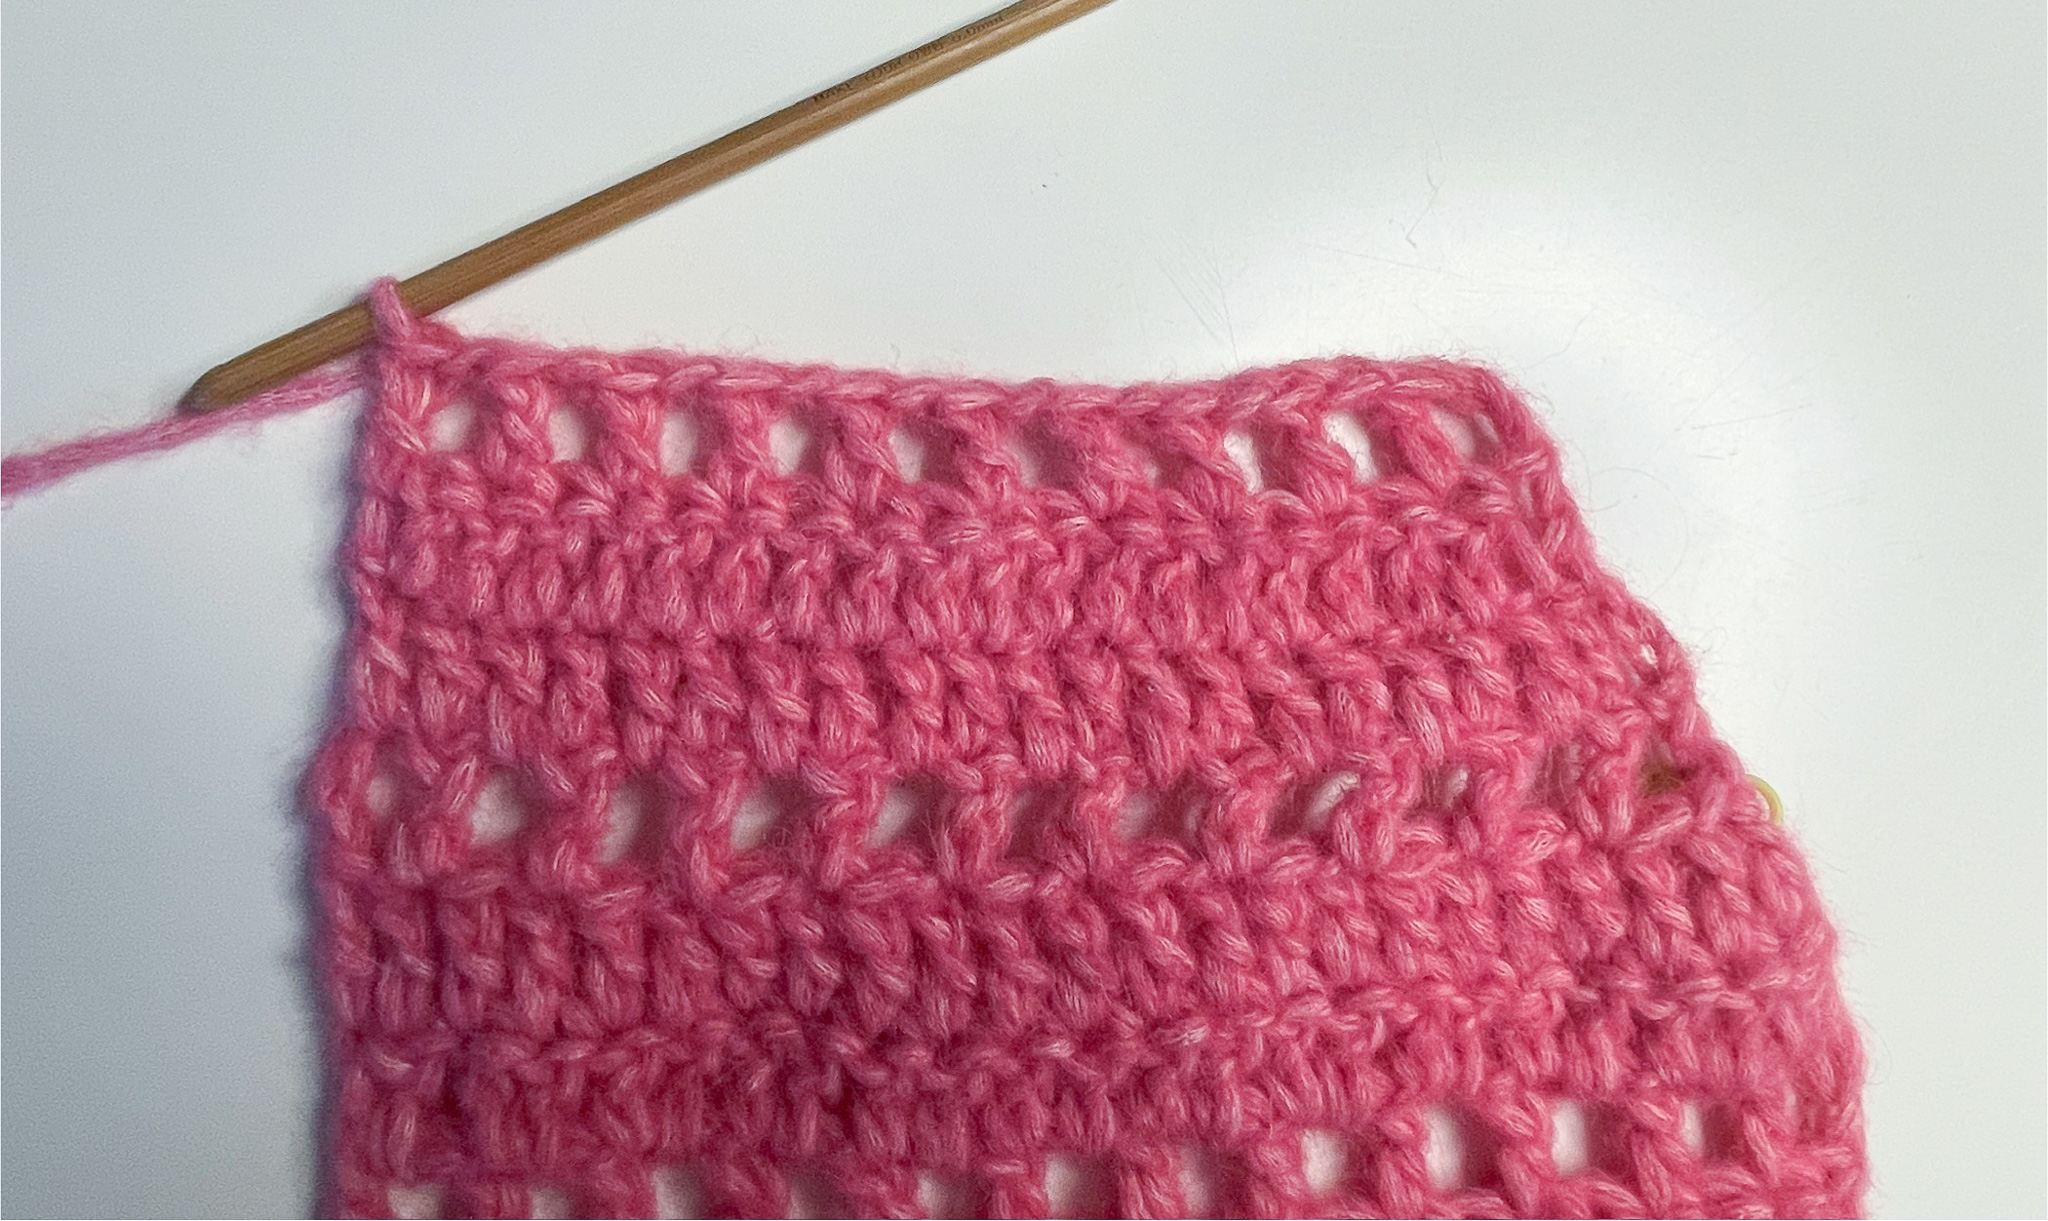
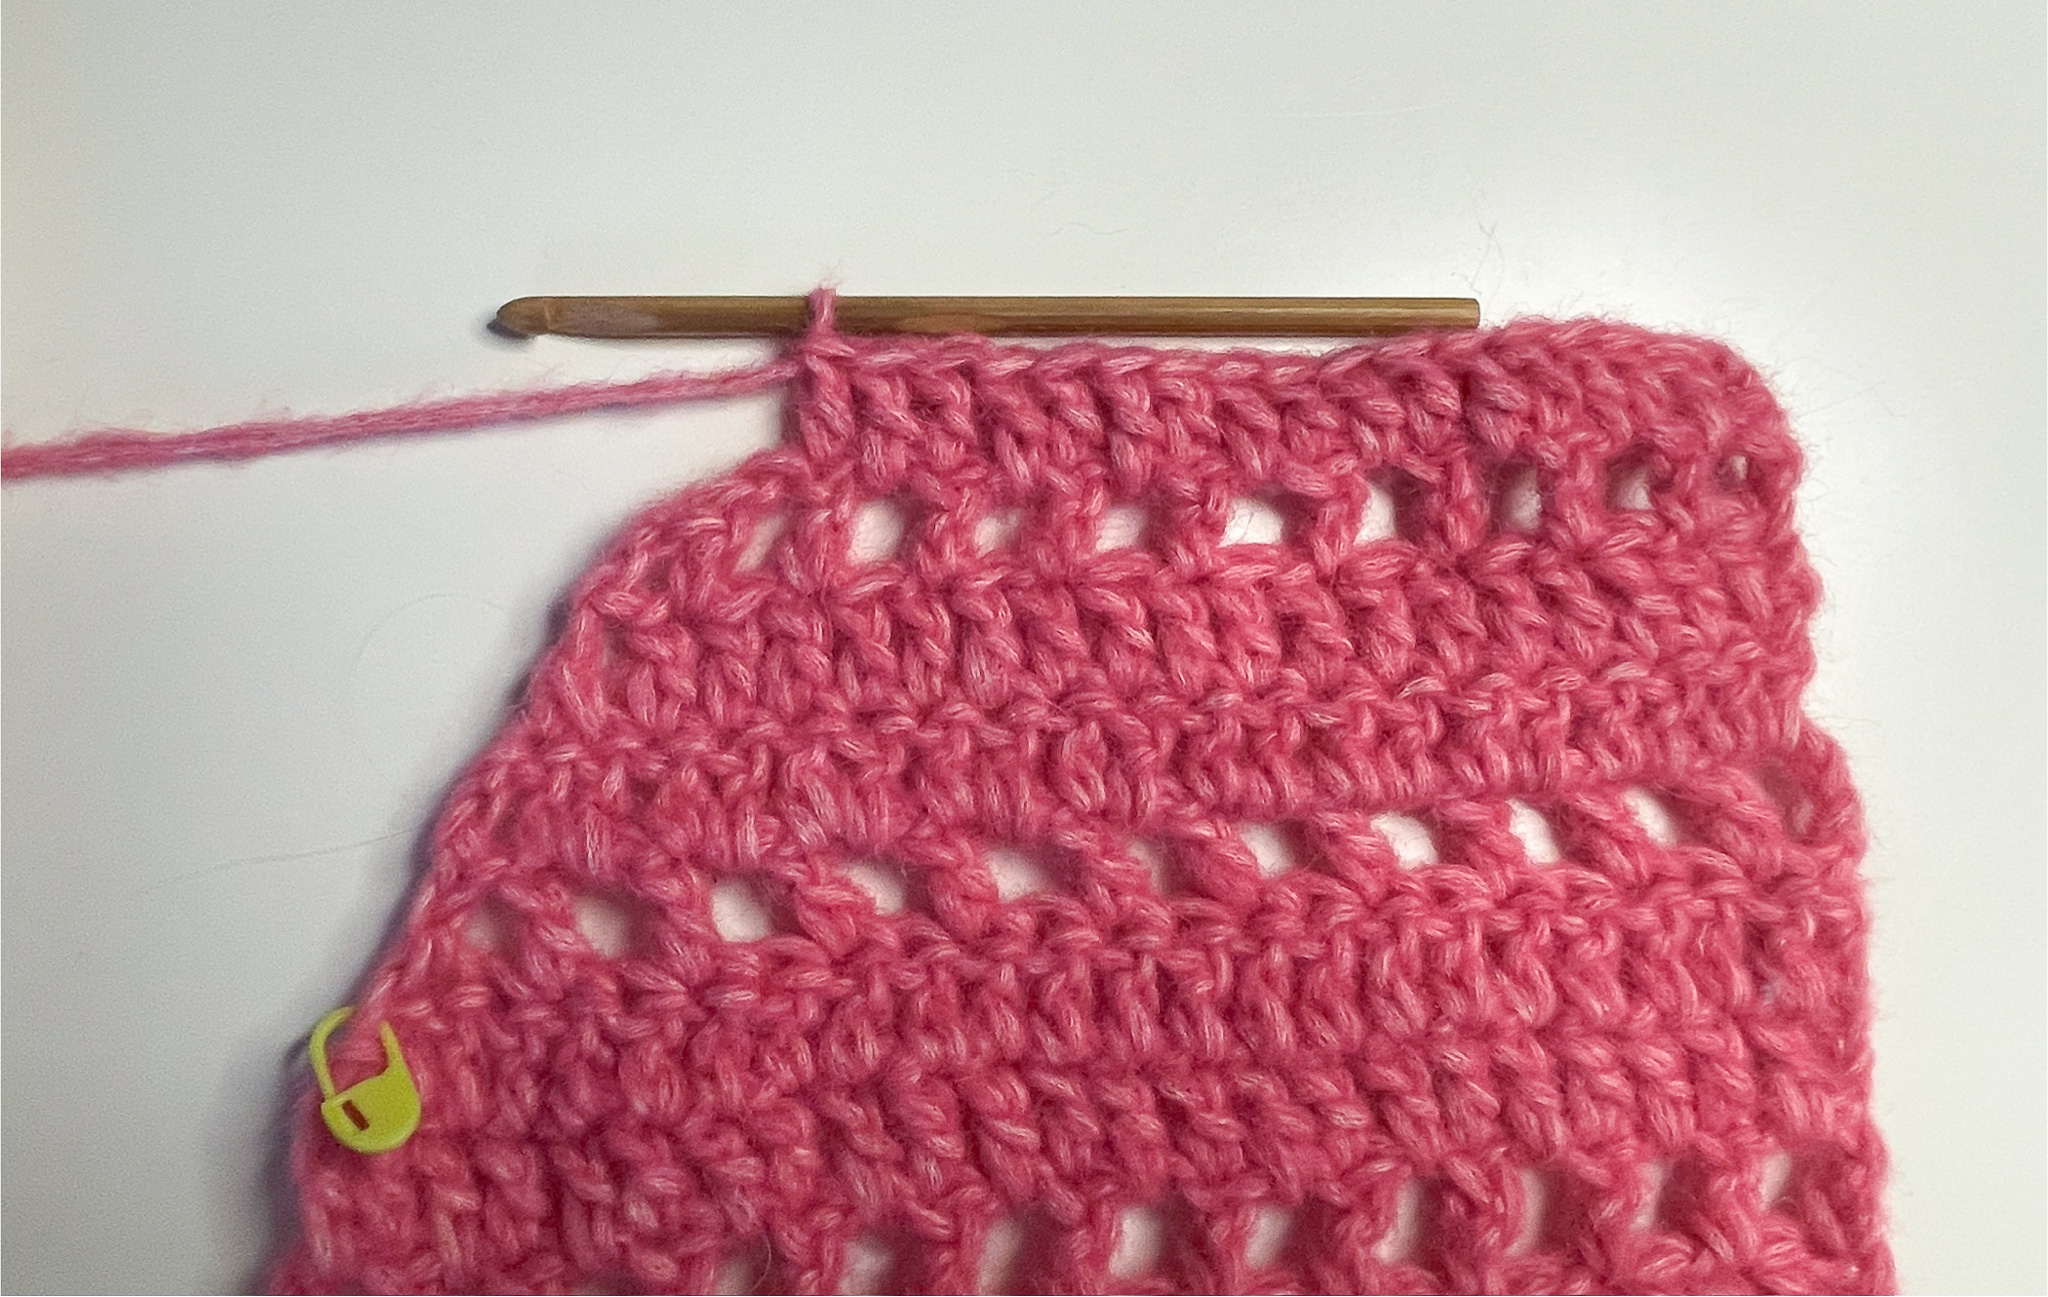
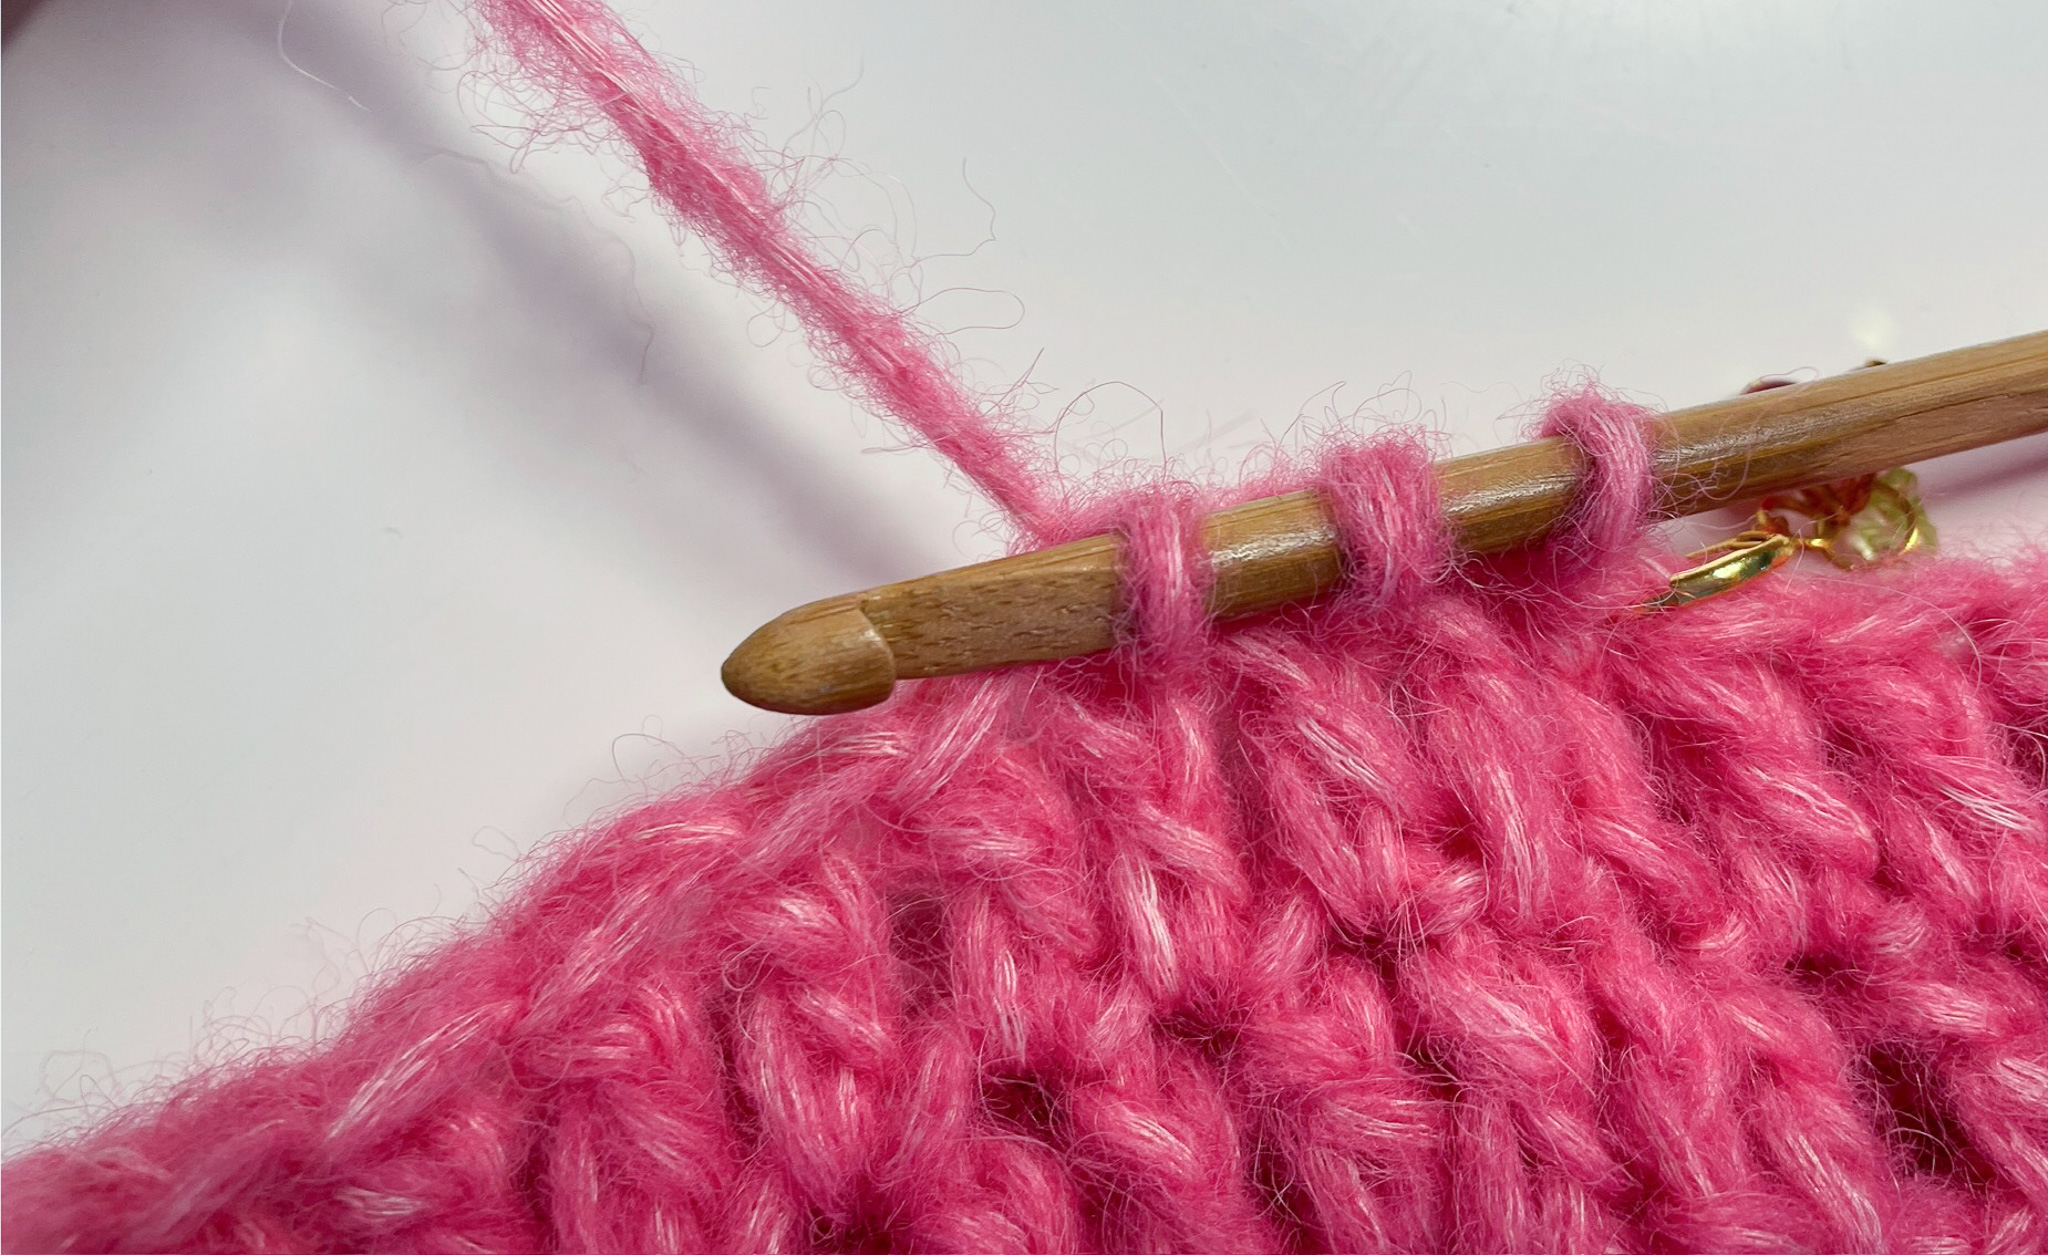
Rows 6–25: Repeat Rows 3–5.
FRONT PANELS – MAKE 2
Row 1: Chain 24 + 2 for size S/M, 30 + 2 for L/XL, turn.
Row 2: Start in the 4th chain from the hook and work 24 (30) double crochets. Chain 2, turn.
Row 3: Start in the 3rd chain from the hook and work 24 (30) double crochets, turn.
Row 4: Chain 3. Start in the 5th stitch from the hook and work 1 double crochet, *chain 1, skip 1 stitch, 1 double crochet in the next stitch; repeat from * across. End the row with 1 double crochet in the last stitch. Turn. You should now have 12 (15) holes and 13 (16) double crochets.

Row 5: Chain 2. *Work 1 double crochet in the chain space from the previous row, 1 double crochet in the next stitch, 1 double crochet in the next chain space; repeat from * across. Turn. You should now have 24 (30) double crochets on the row.
Row 6-17: Repeat row 2-5.
Now we begin decreasing on one side of the panel to shape the V-neck.
Row 18: Chain 1. Decrease on one side by yarn over and pulling through the first stitch and then the second stitch of the row, then complete the stitch as a regular double crochet. Place a stitch marker in this stitch to mark the first double crochet of the row. Continue working double crochets to the end of the row. You should now have 23 (29) double crochets on the row. Turn.
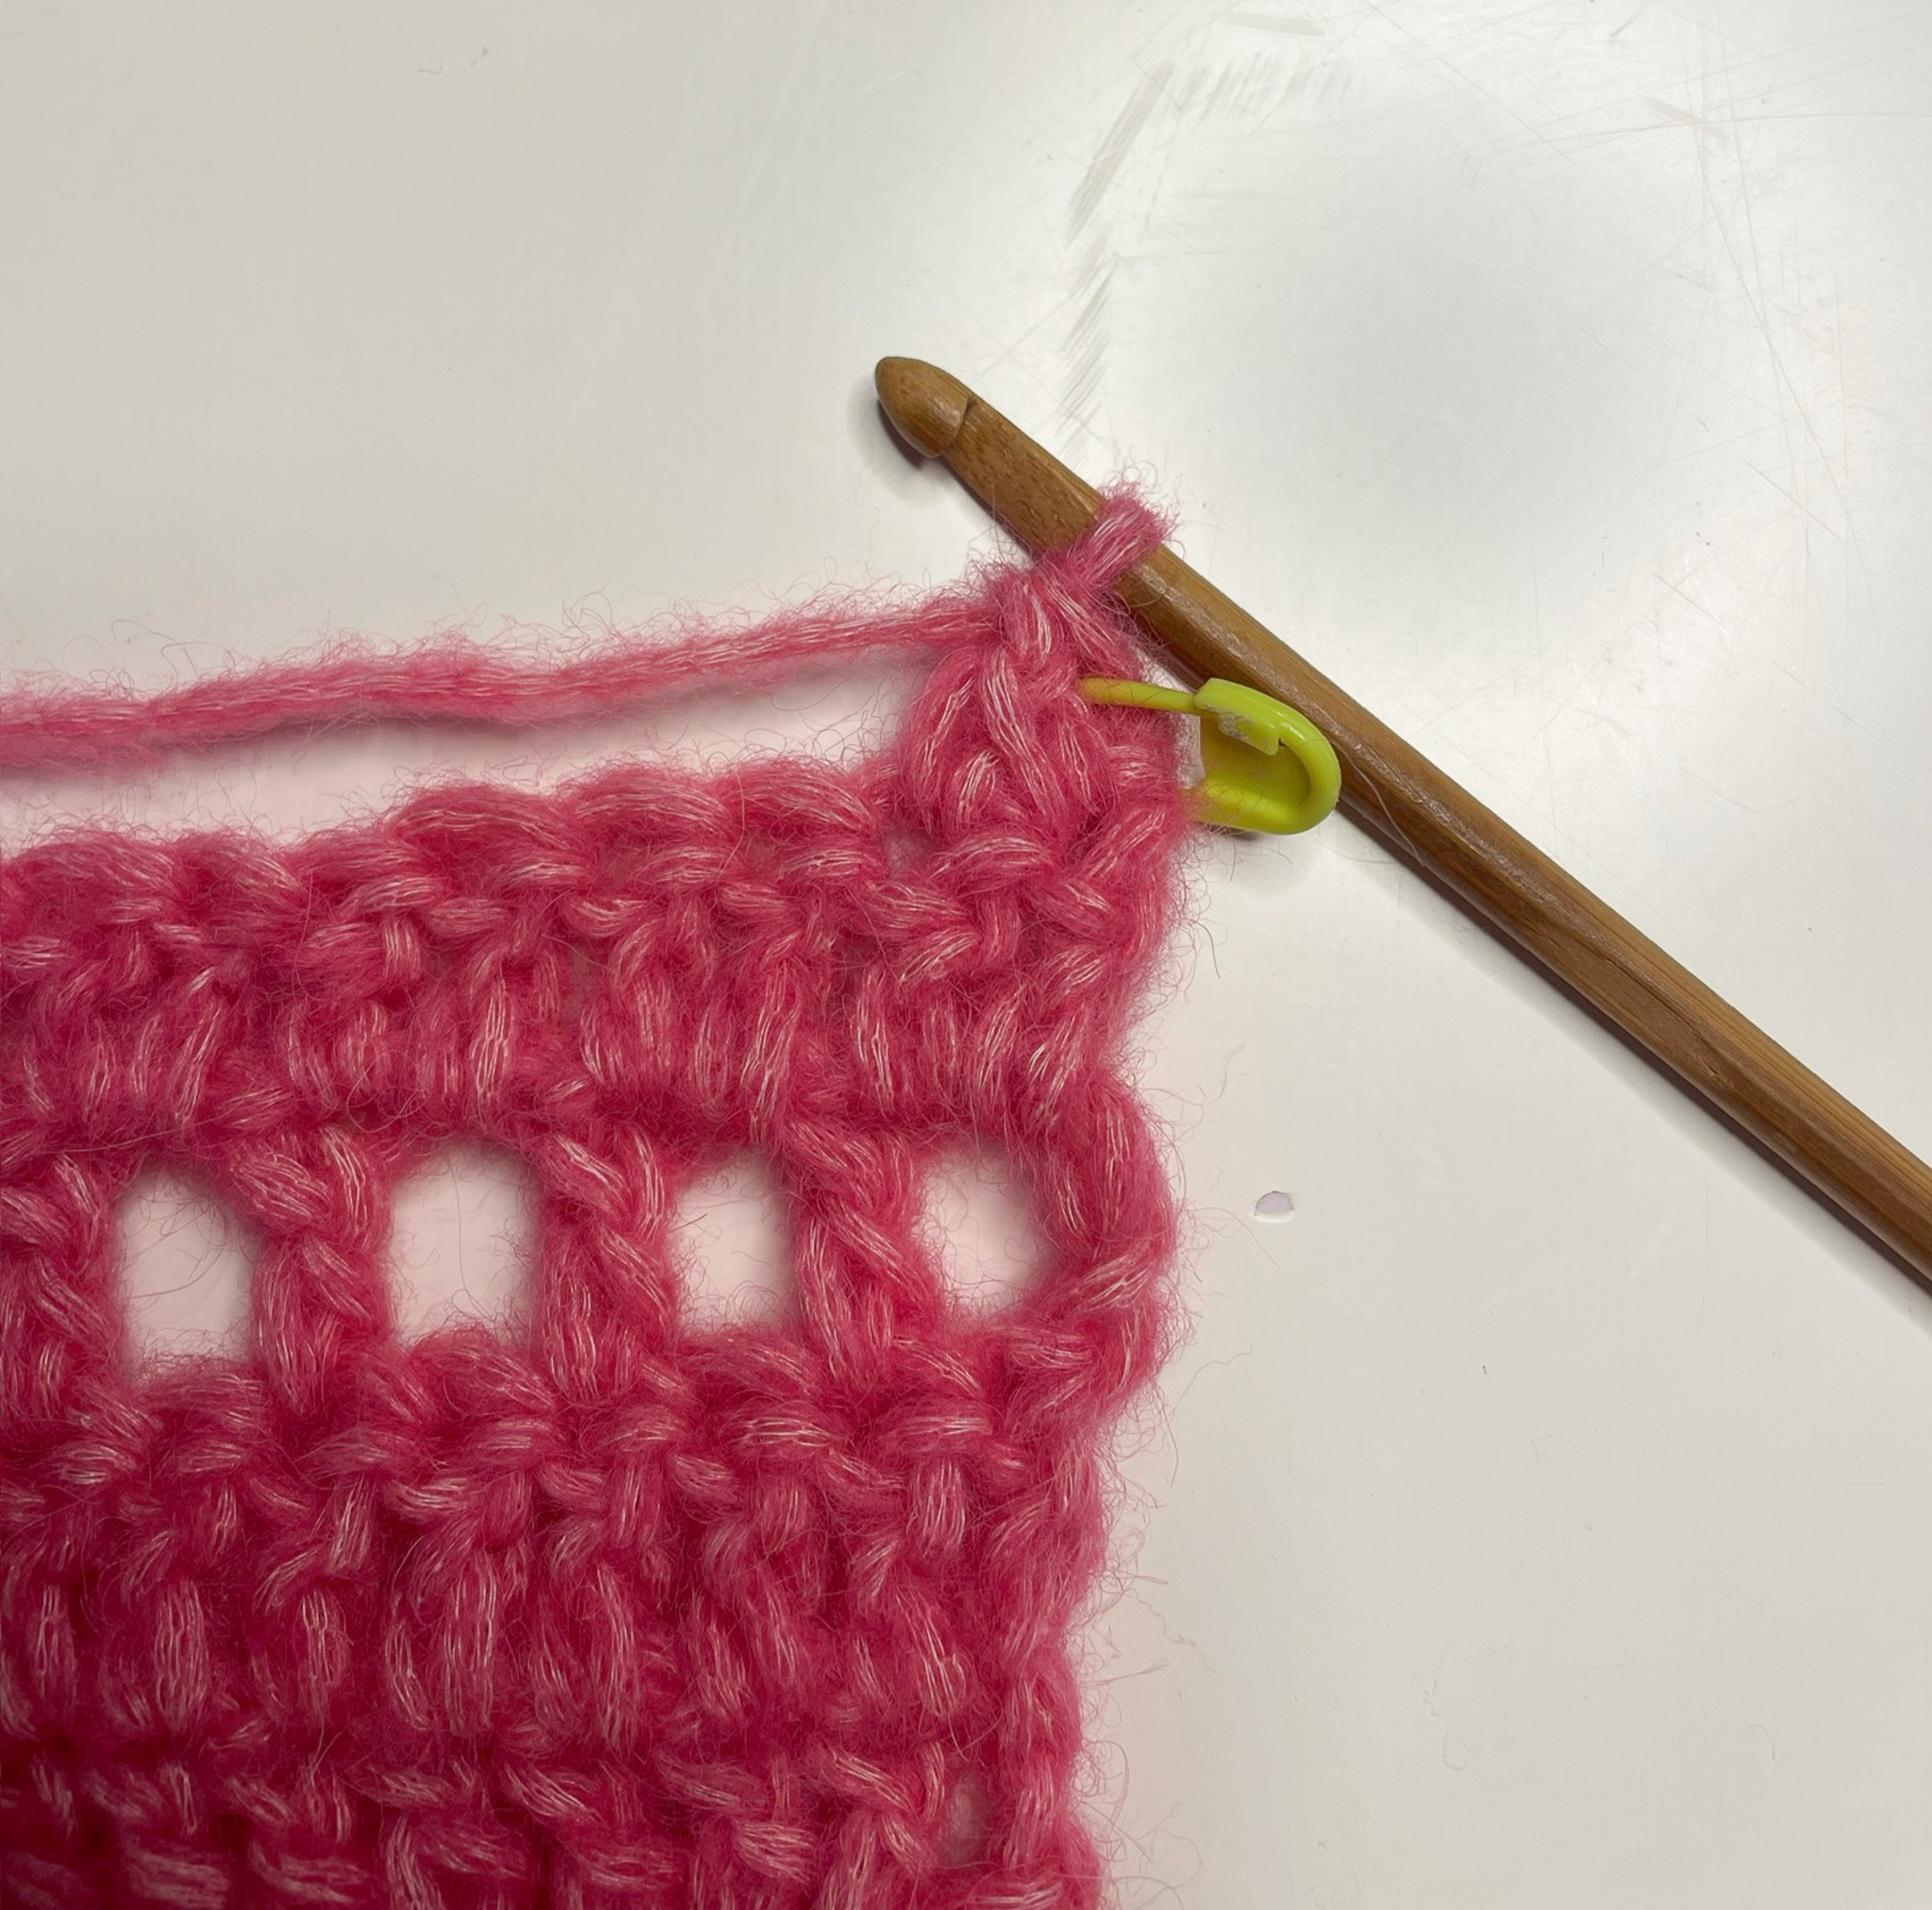
Row 19: Chain 3. Start in the 5th stitch from the hook and *dc 1, ch 1, skip 1 stitch. Repeat from * until 3 stitches remain on the row. Chain 1. For the last two stitches, yarn over into the second-to-last stitch and then into the last stitch (the one with the marker) and work them together as a double crochet. Turn. You should now have 11 (14) spaces and 12 (15) double crochets.
Row 20: Chain 2 and start in the 3rd stitch from the hook. Work 1 double crochet in the first stitch of the row. *Work 1 double crochet in the chain space from the previous row, 1 double crochet in the next stitch. Repeat from * to the end of the row, turn. You should now have 21 (27) double crochets on the row.
Row 21: Chain 2. Start in the 3rd chain from the hook and work double crochets until 2 stitches remain on the row. Yarn over and pull through the next-to-last stitch and then the last stitch, working them together as 1 double crochet. Turn. You should now have 20 (26) double crochets on the row.
Row 22:
Chain 3 and start in the 5th stitch from the hook (skip the first stitch) and work 1 double crochet into the 5th stitch. *Chain 1, skip the next stitch, work 1 double crochet in the next stitch. Repeat from * to the end of the row. Turn. You should now have 10 (13) spaces and 11 (14) double crochets.
Row 23:
Chain 2. Work 1 double crochet in the chain space of the previous row, then 1 double crochet in the next stitch. Repeat this pattern until 2 stitches remain at the end of the row (one chain space and one stitch). Yarn over in the chain space and then in the last stitch, and work them together as 1 double crochet. You should now have 18 (24) double crochets in the row.
Row 24: Chain 1 and start in the 2nd st from hook. Yarn over and work the first two stitches together as 1 double crochet. Continue working double crochets across the row. Turn. You should now have 17 (23) double crochets in the row.
Row 25: Chain 3. Start in the 5th stitch from the hook and *work 1 double crochet, chain 1, skip 1 stitch. Repeat from * until 2 stitches remain on the row. Yarn over and work the last two stitches together as 1 double crochet. Turn. You should now have 8 (11) chain spaces and 9 (12) double crochets.
Row 26: Chain 3. Start in the 5th stitch from the hook and *work 1 double crochet, chain 1, skip 1 stitch. Repeat from * until 2 stitches remain on the row. Yarn over and work the last two stitches together as 1 double crochet, turn. You should now have 8 (11) chain spaces and 9 (12) double crochets.
Cut and fasten off the yarn. If you’re unsure how to fasten off, see the video below.
Repeat the same steps to create an identical piece so that you have two front panels.
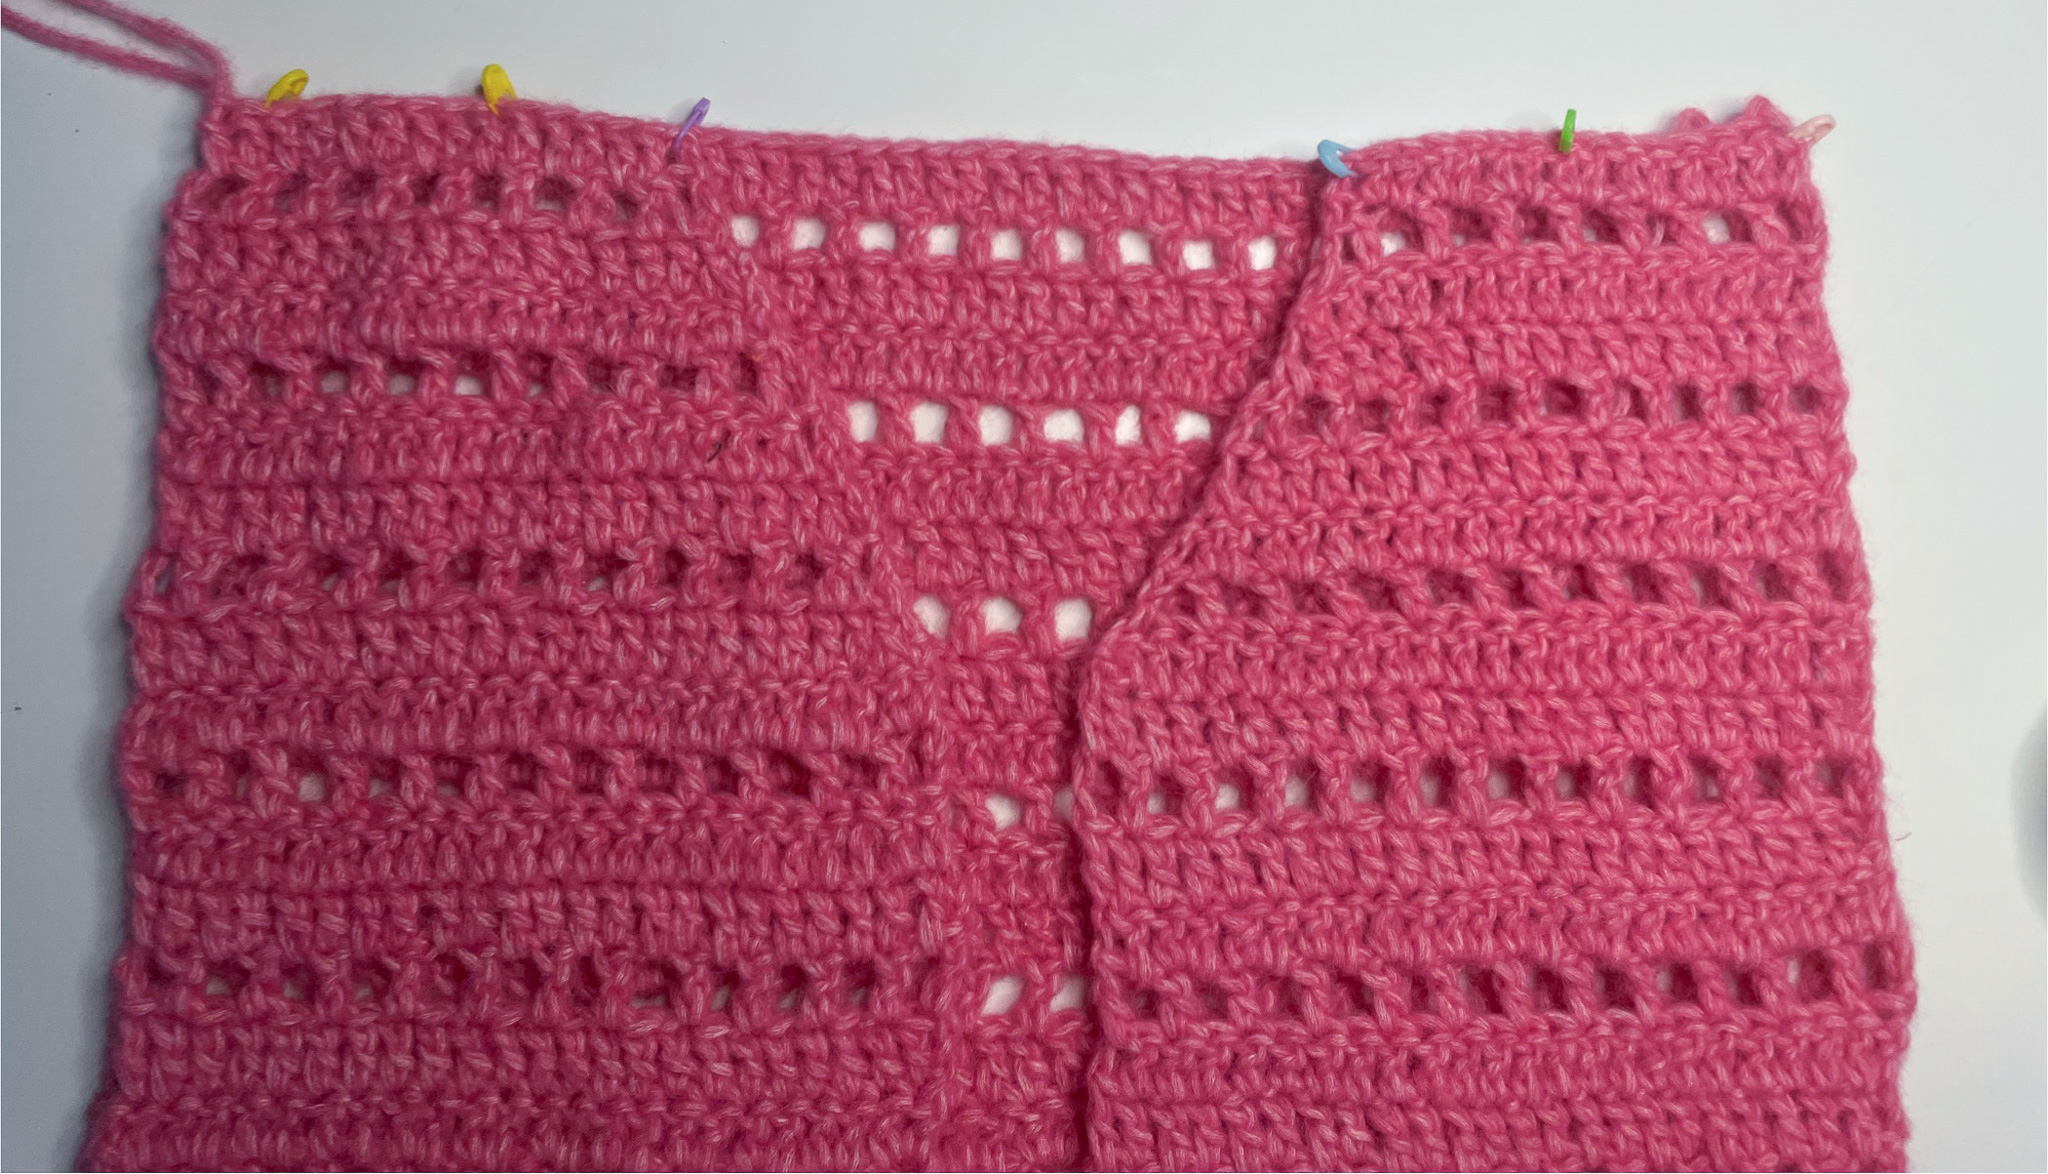
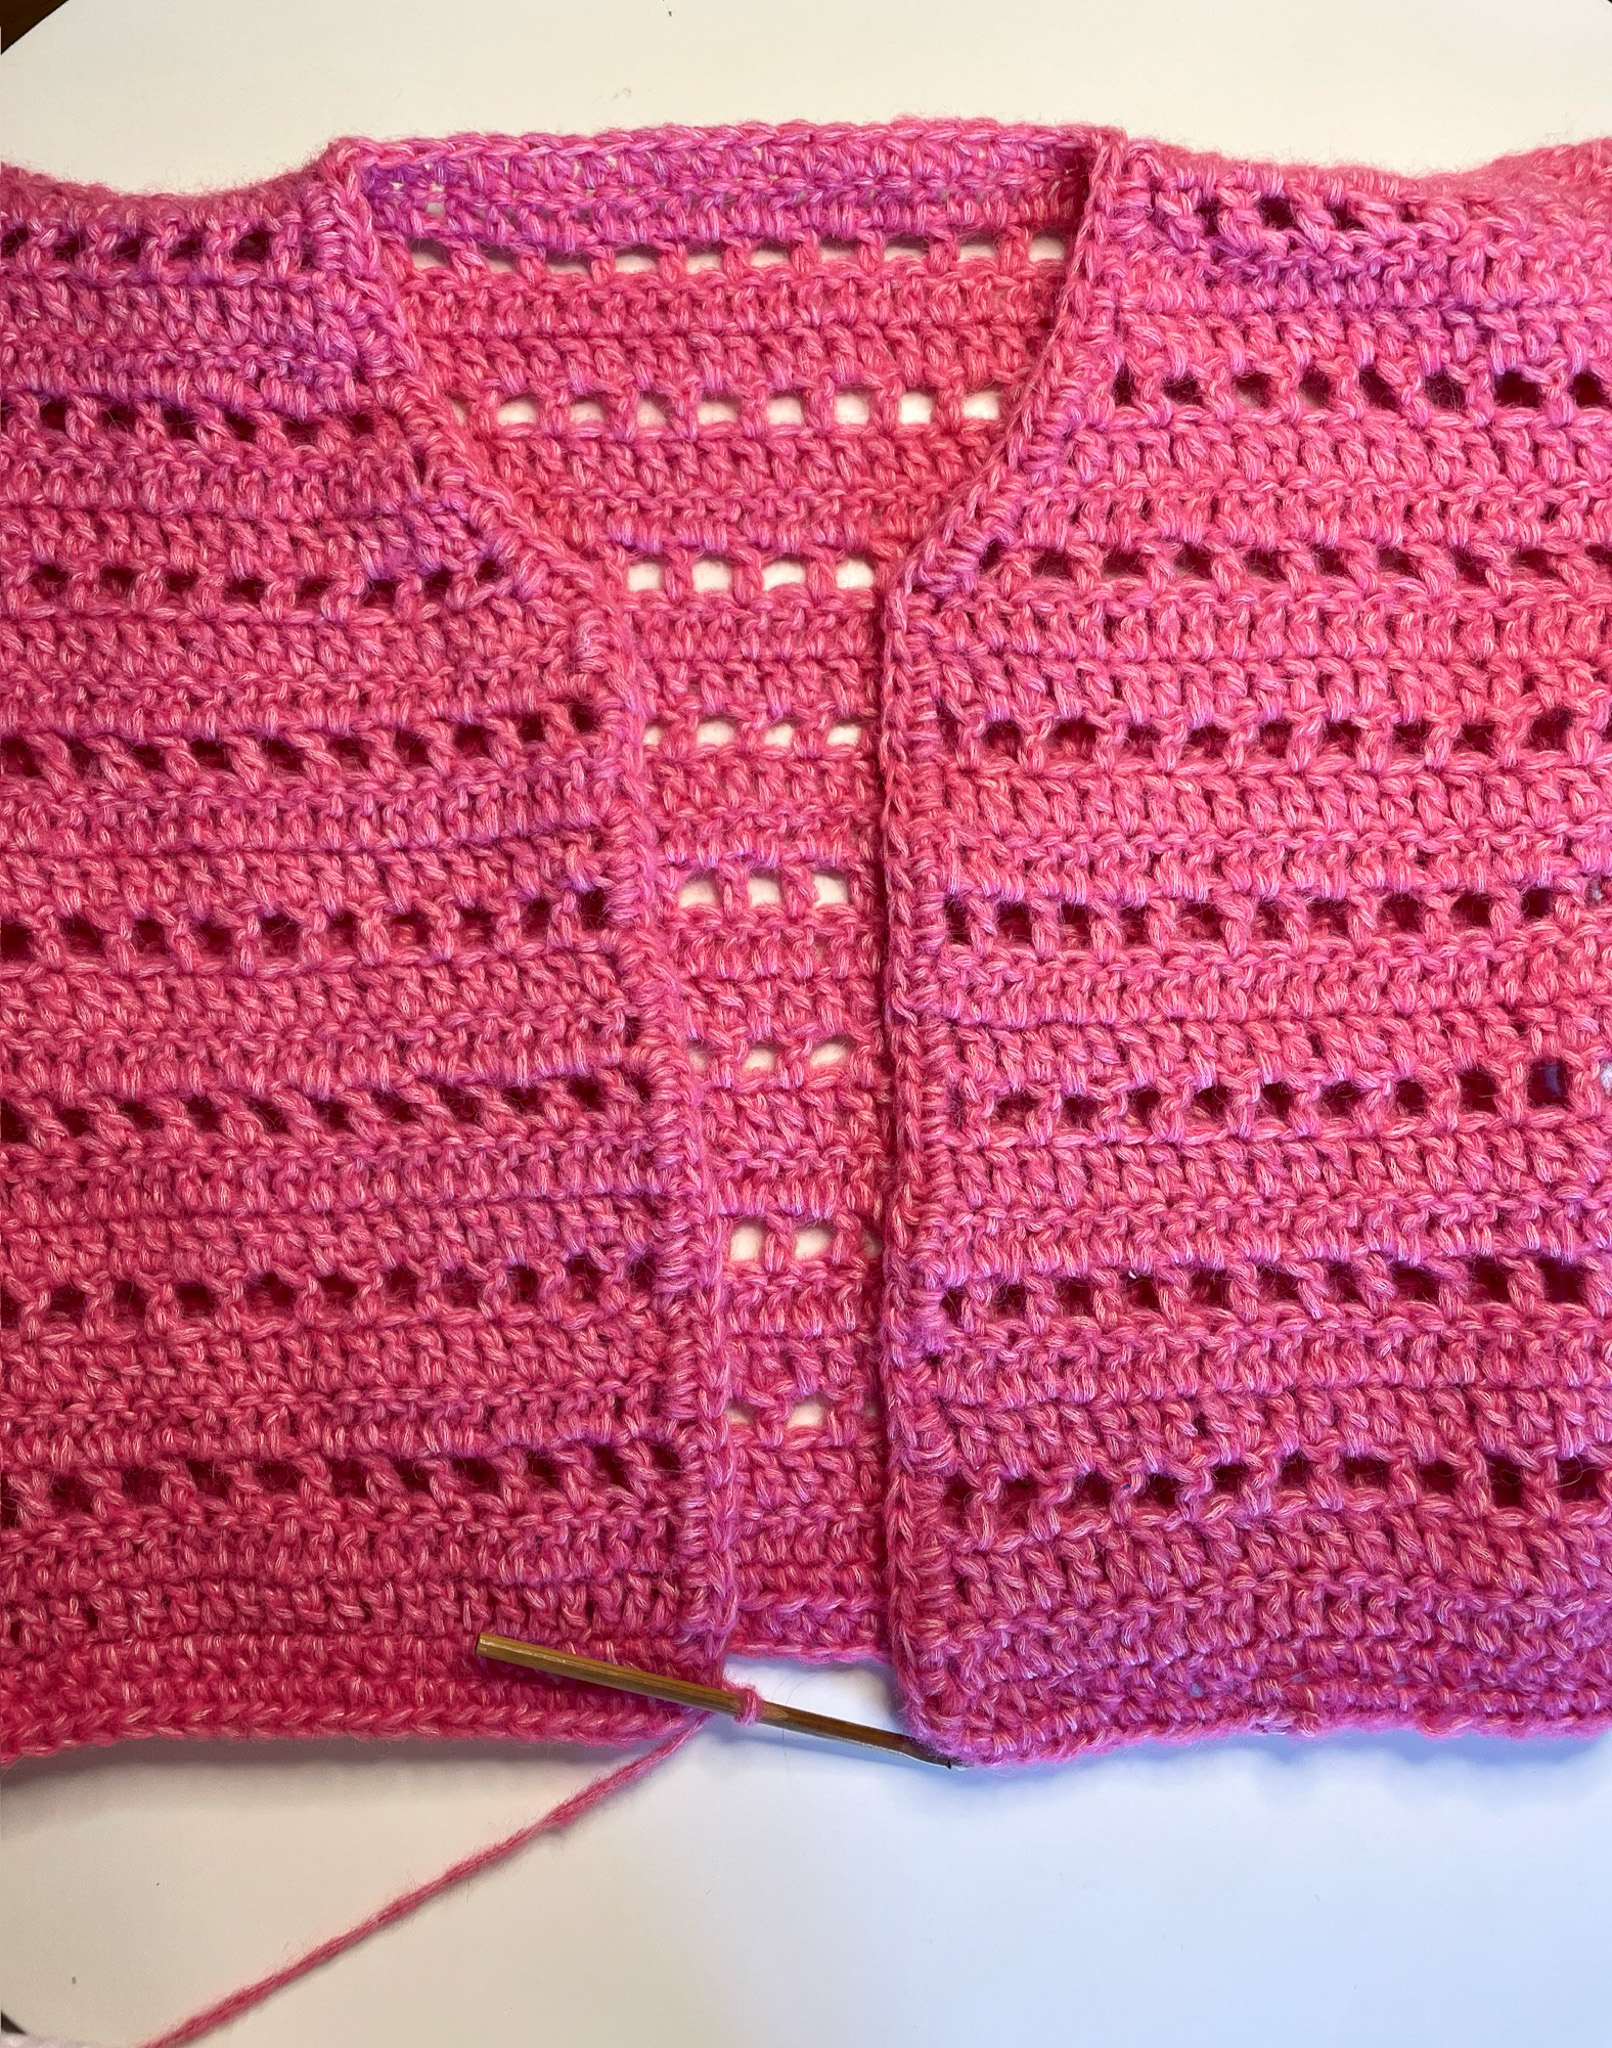
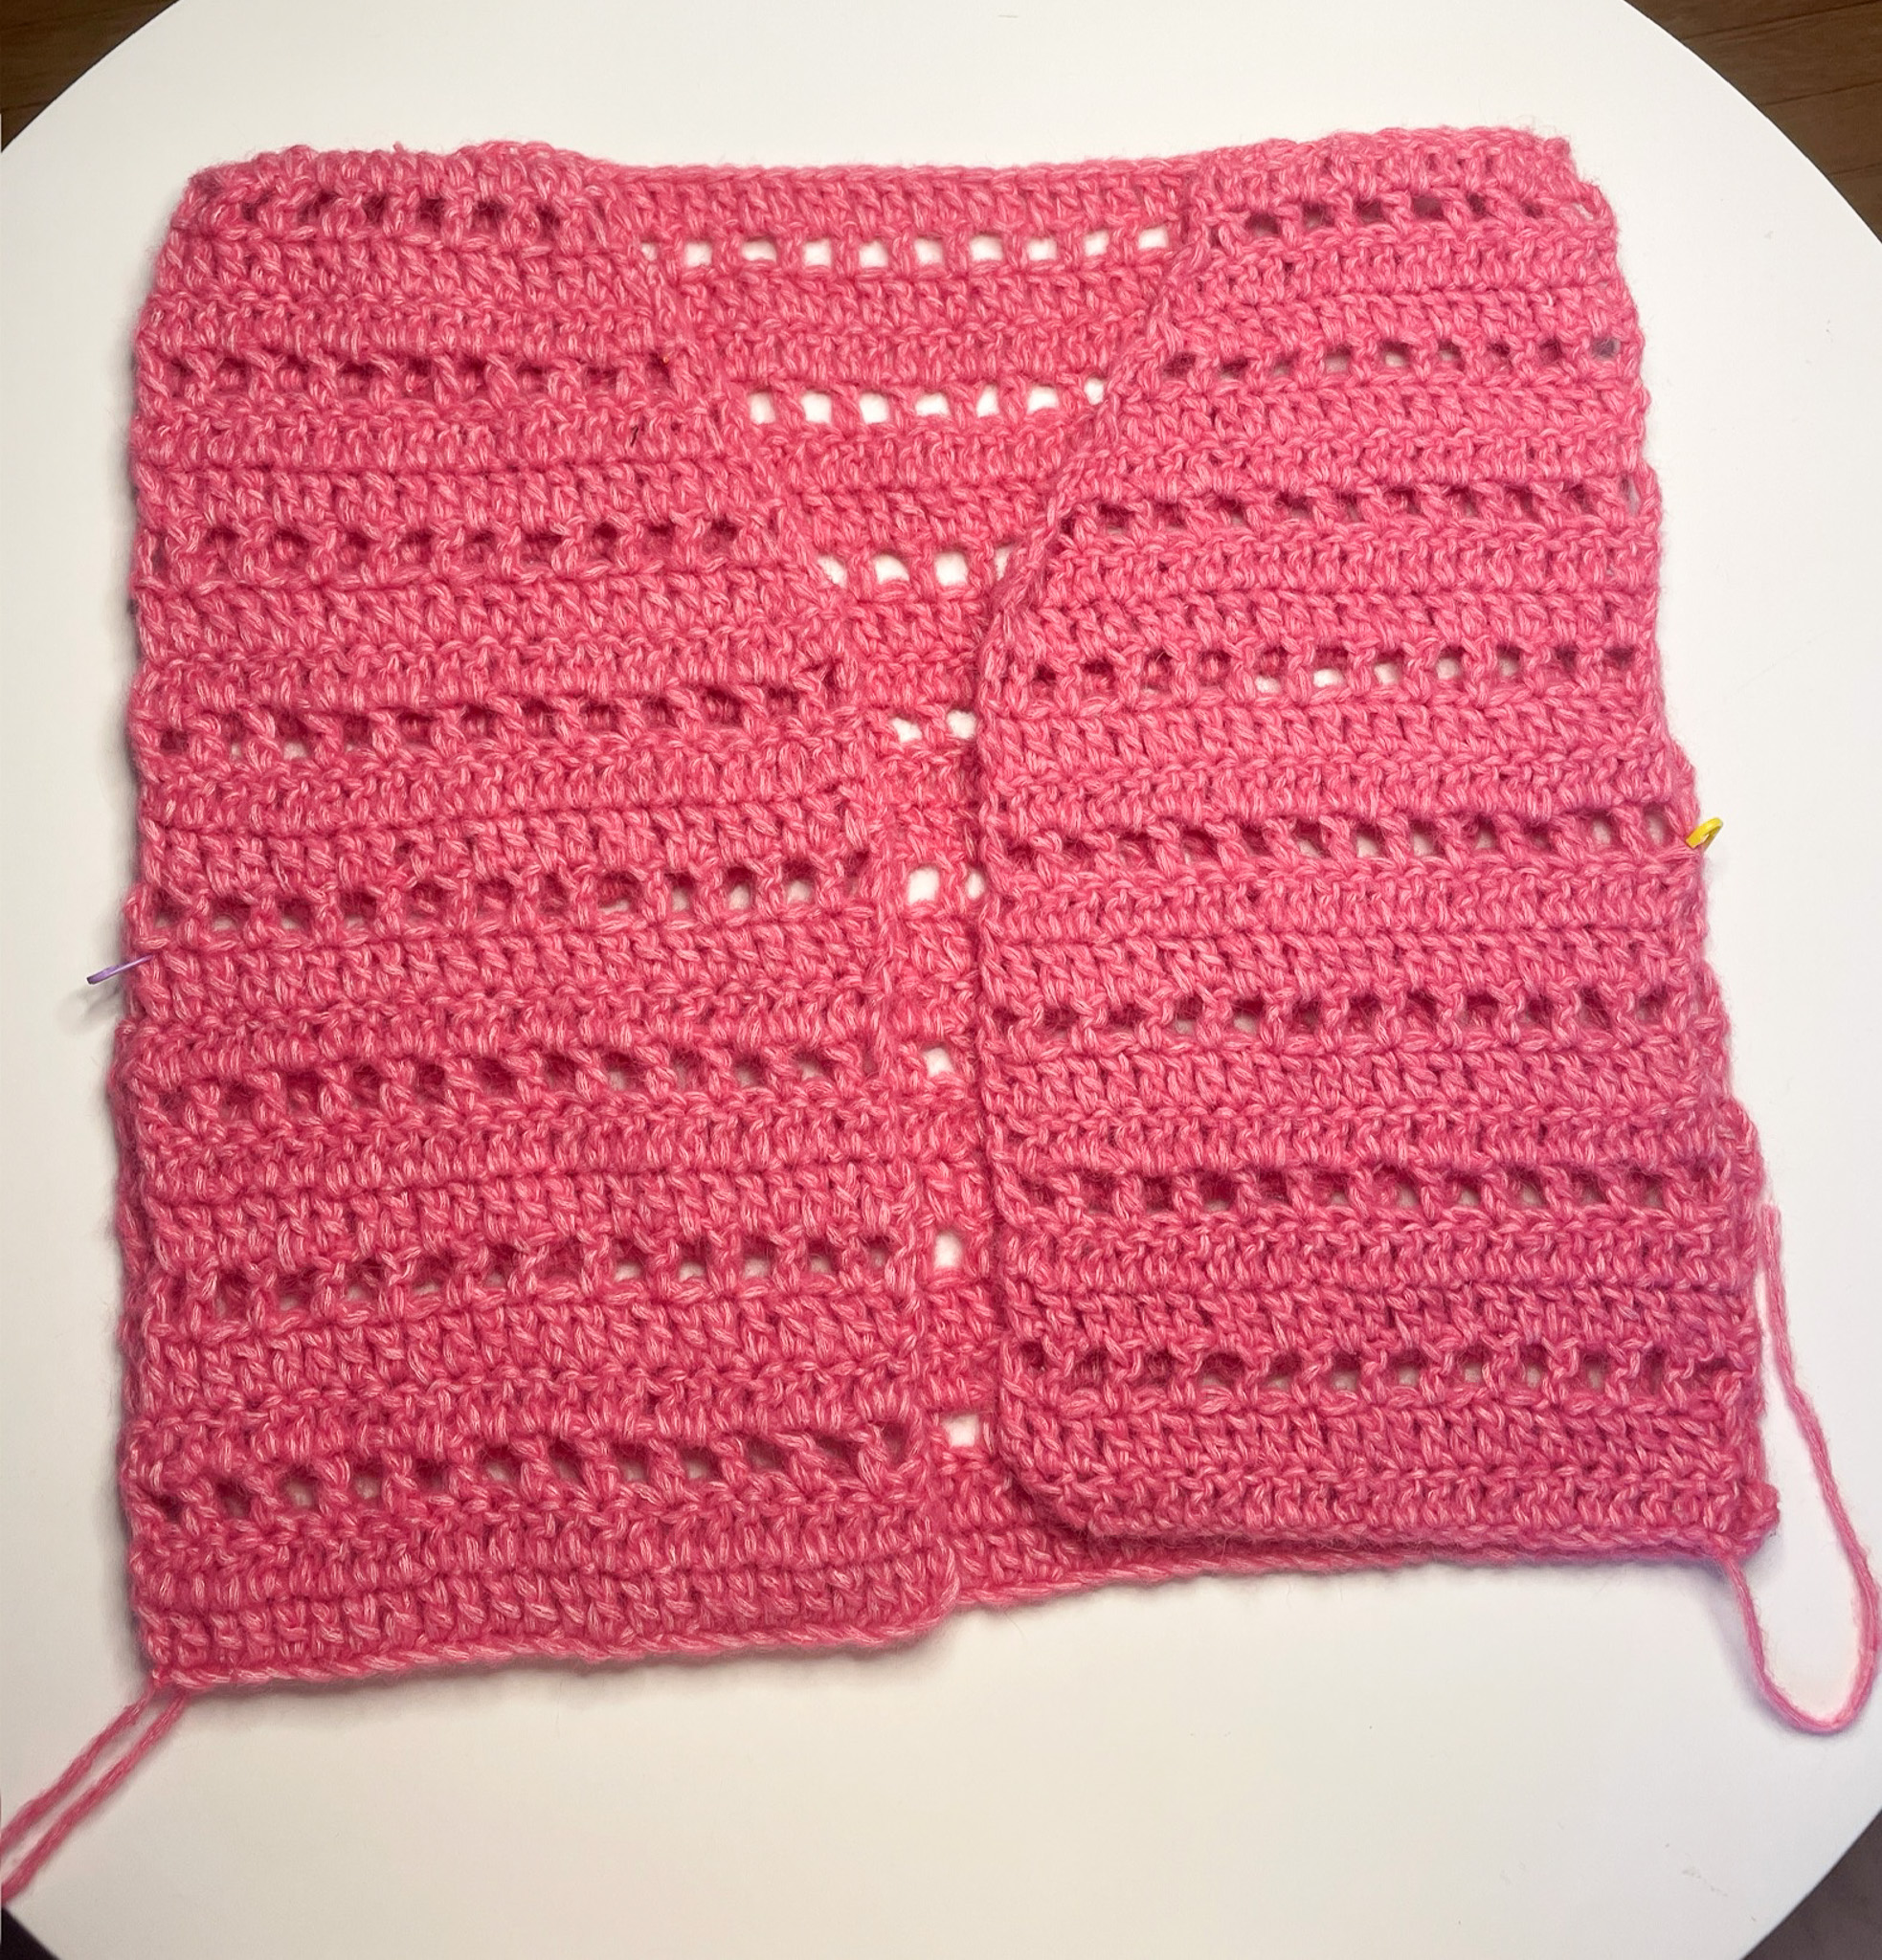
Assembly of Front and Back Panels
Now it’s time to assemble the front and back panels before crocheting the sleeves directly onto the cardigan. Follow these steps:
- Align the pieces: Place the front panels so they align with the shoulders of the back panel. The pieces look almost identical on both sides, so position the sides you want facing outward when the cardigan is finished toward each other.
- Join the shoulders: Use the yarn tail from the back panel to sew the shoulders together. Secure all yarn ends.
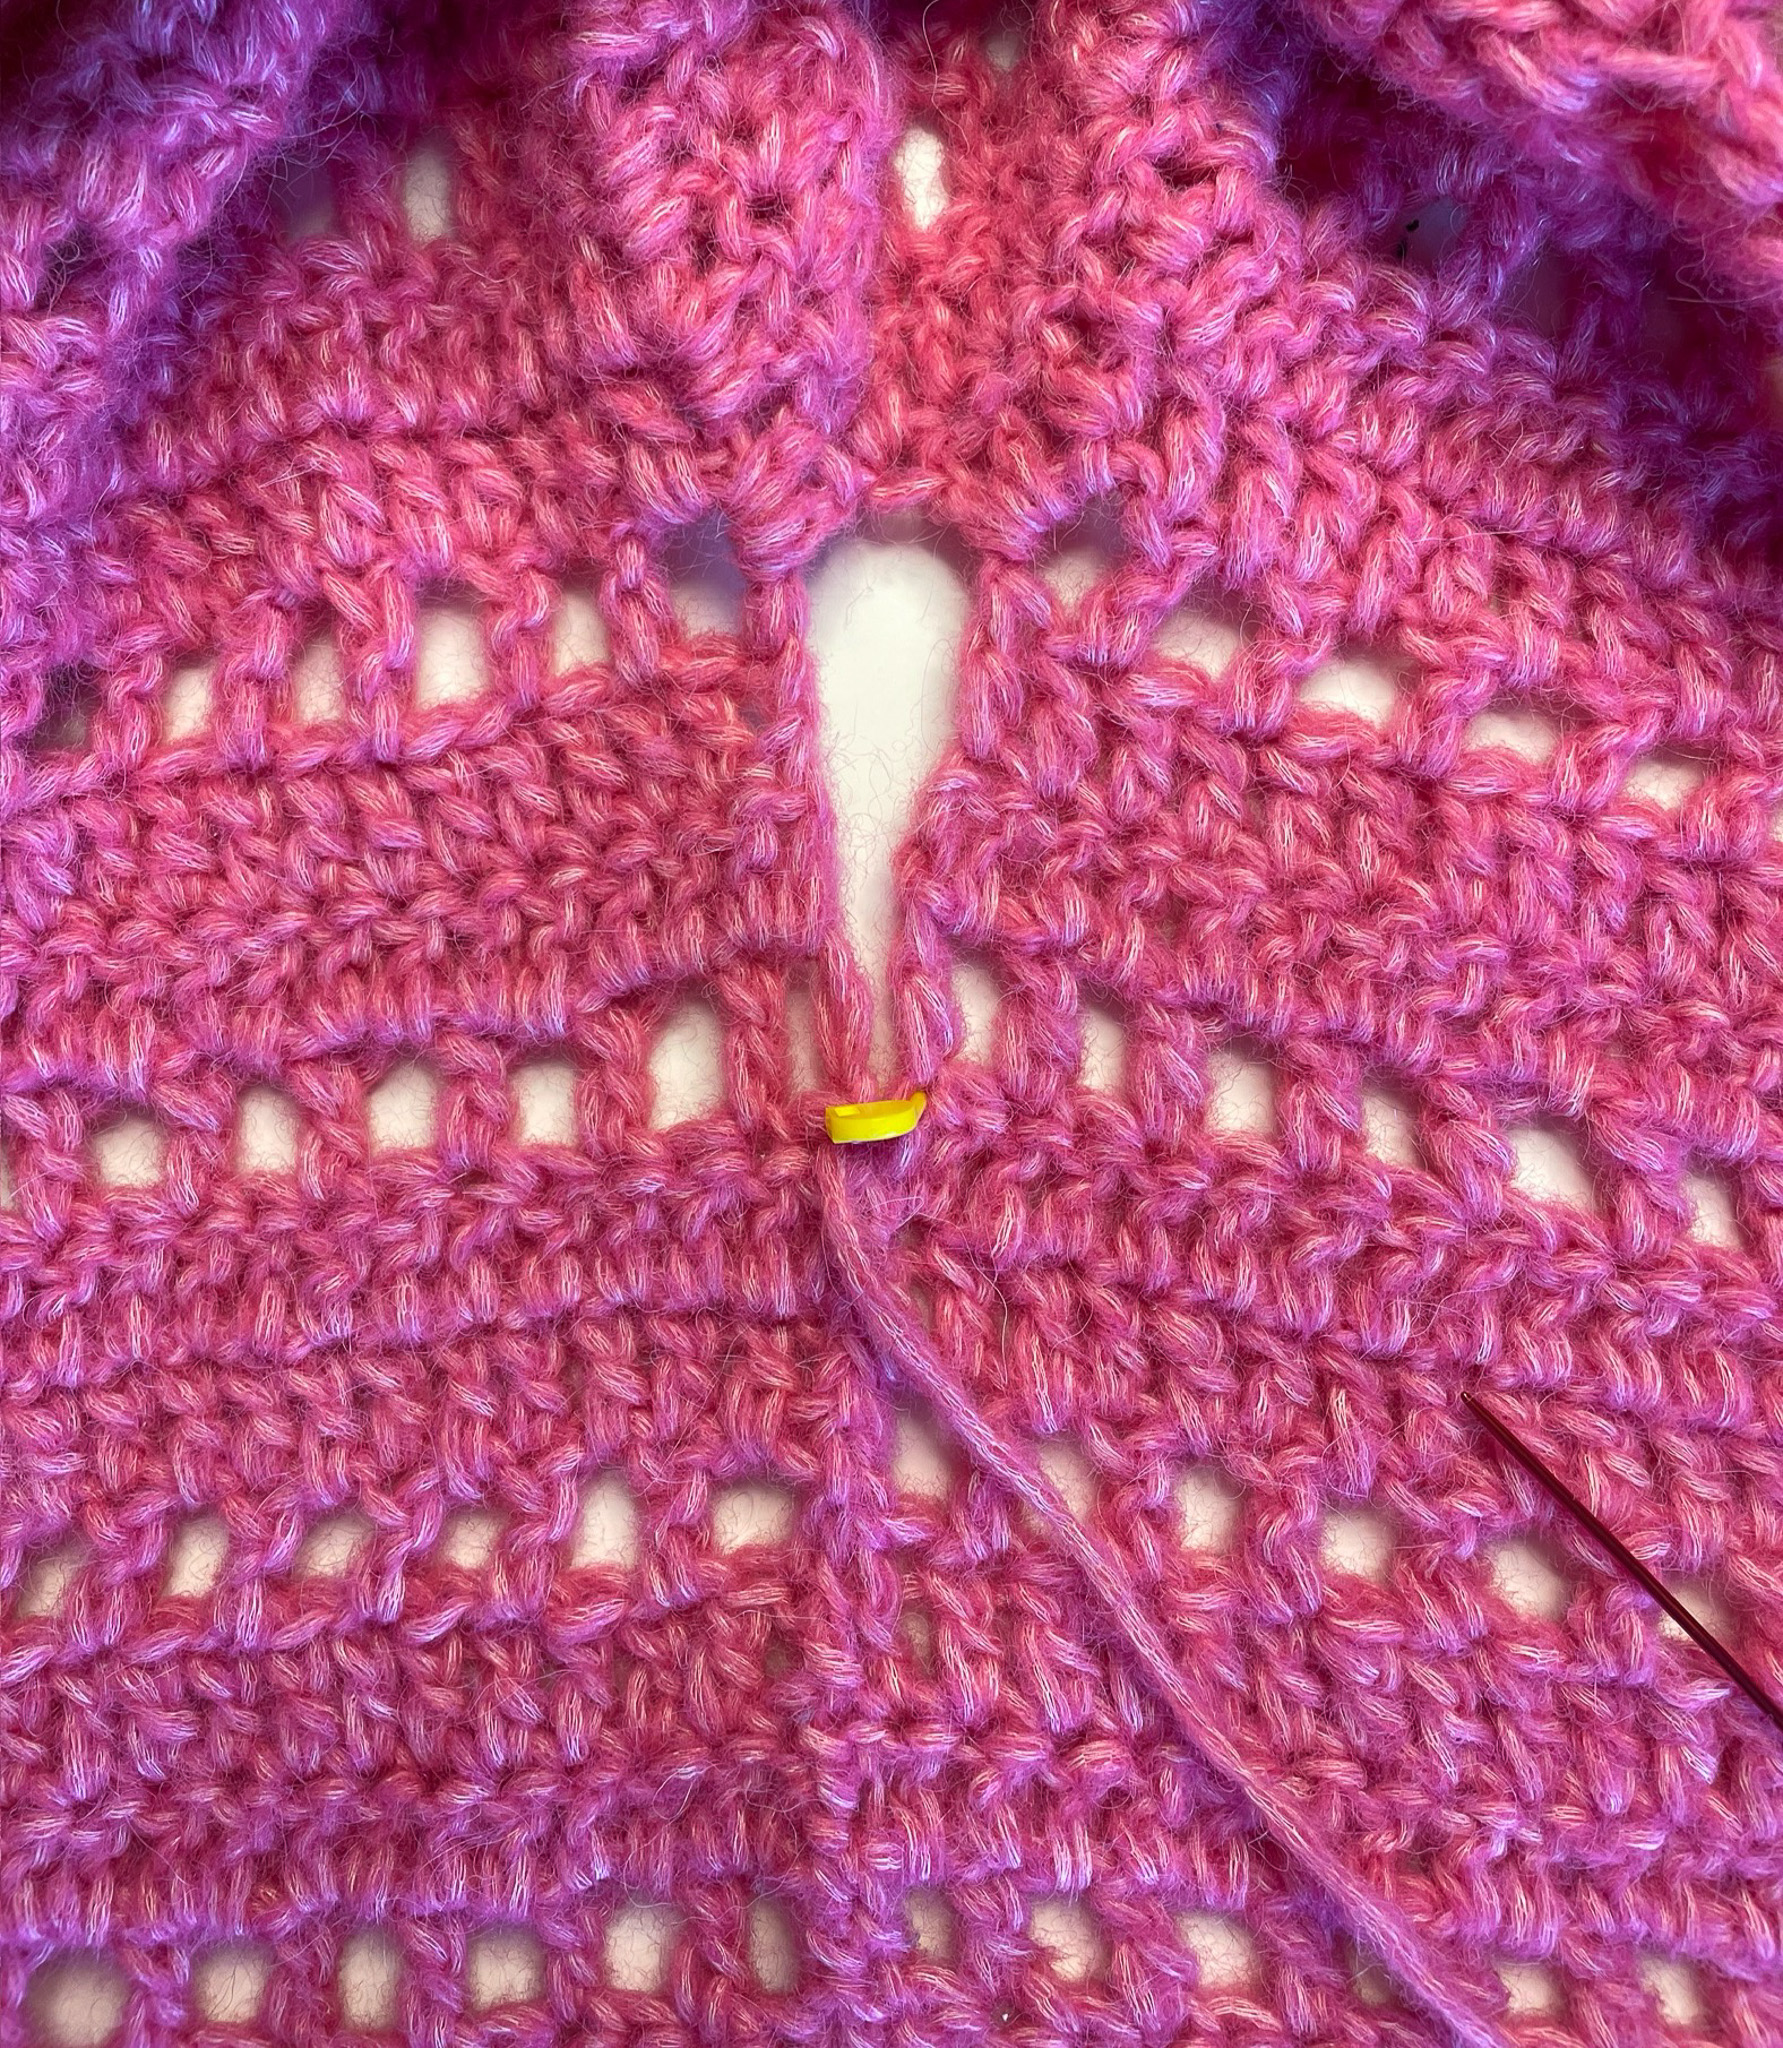
- Attach at the “hole row”: Use stitch markers to connect the fourth row with the “hole row” (about half of the cardigan) and sew until you reach the marker.
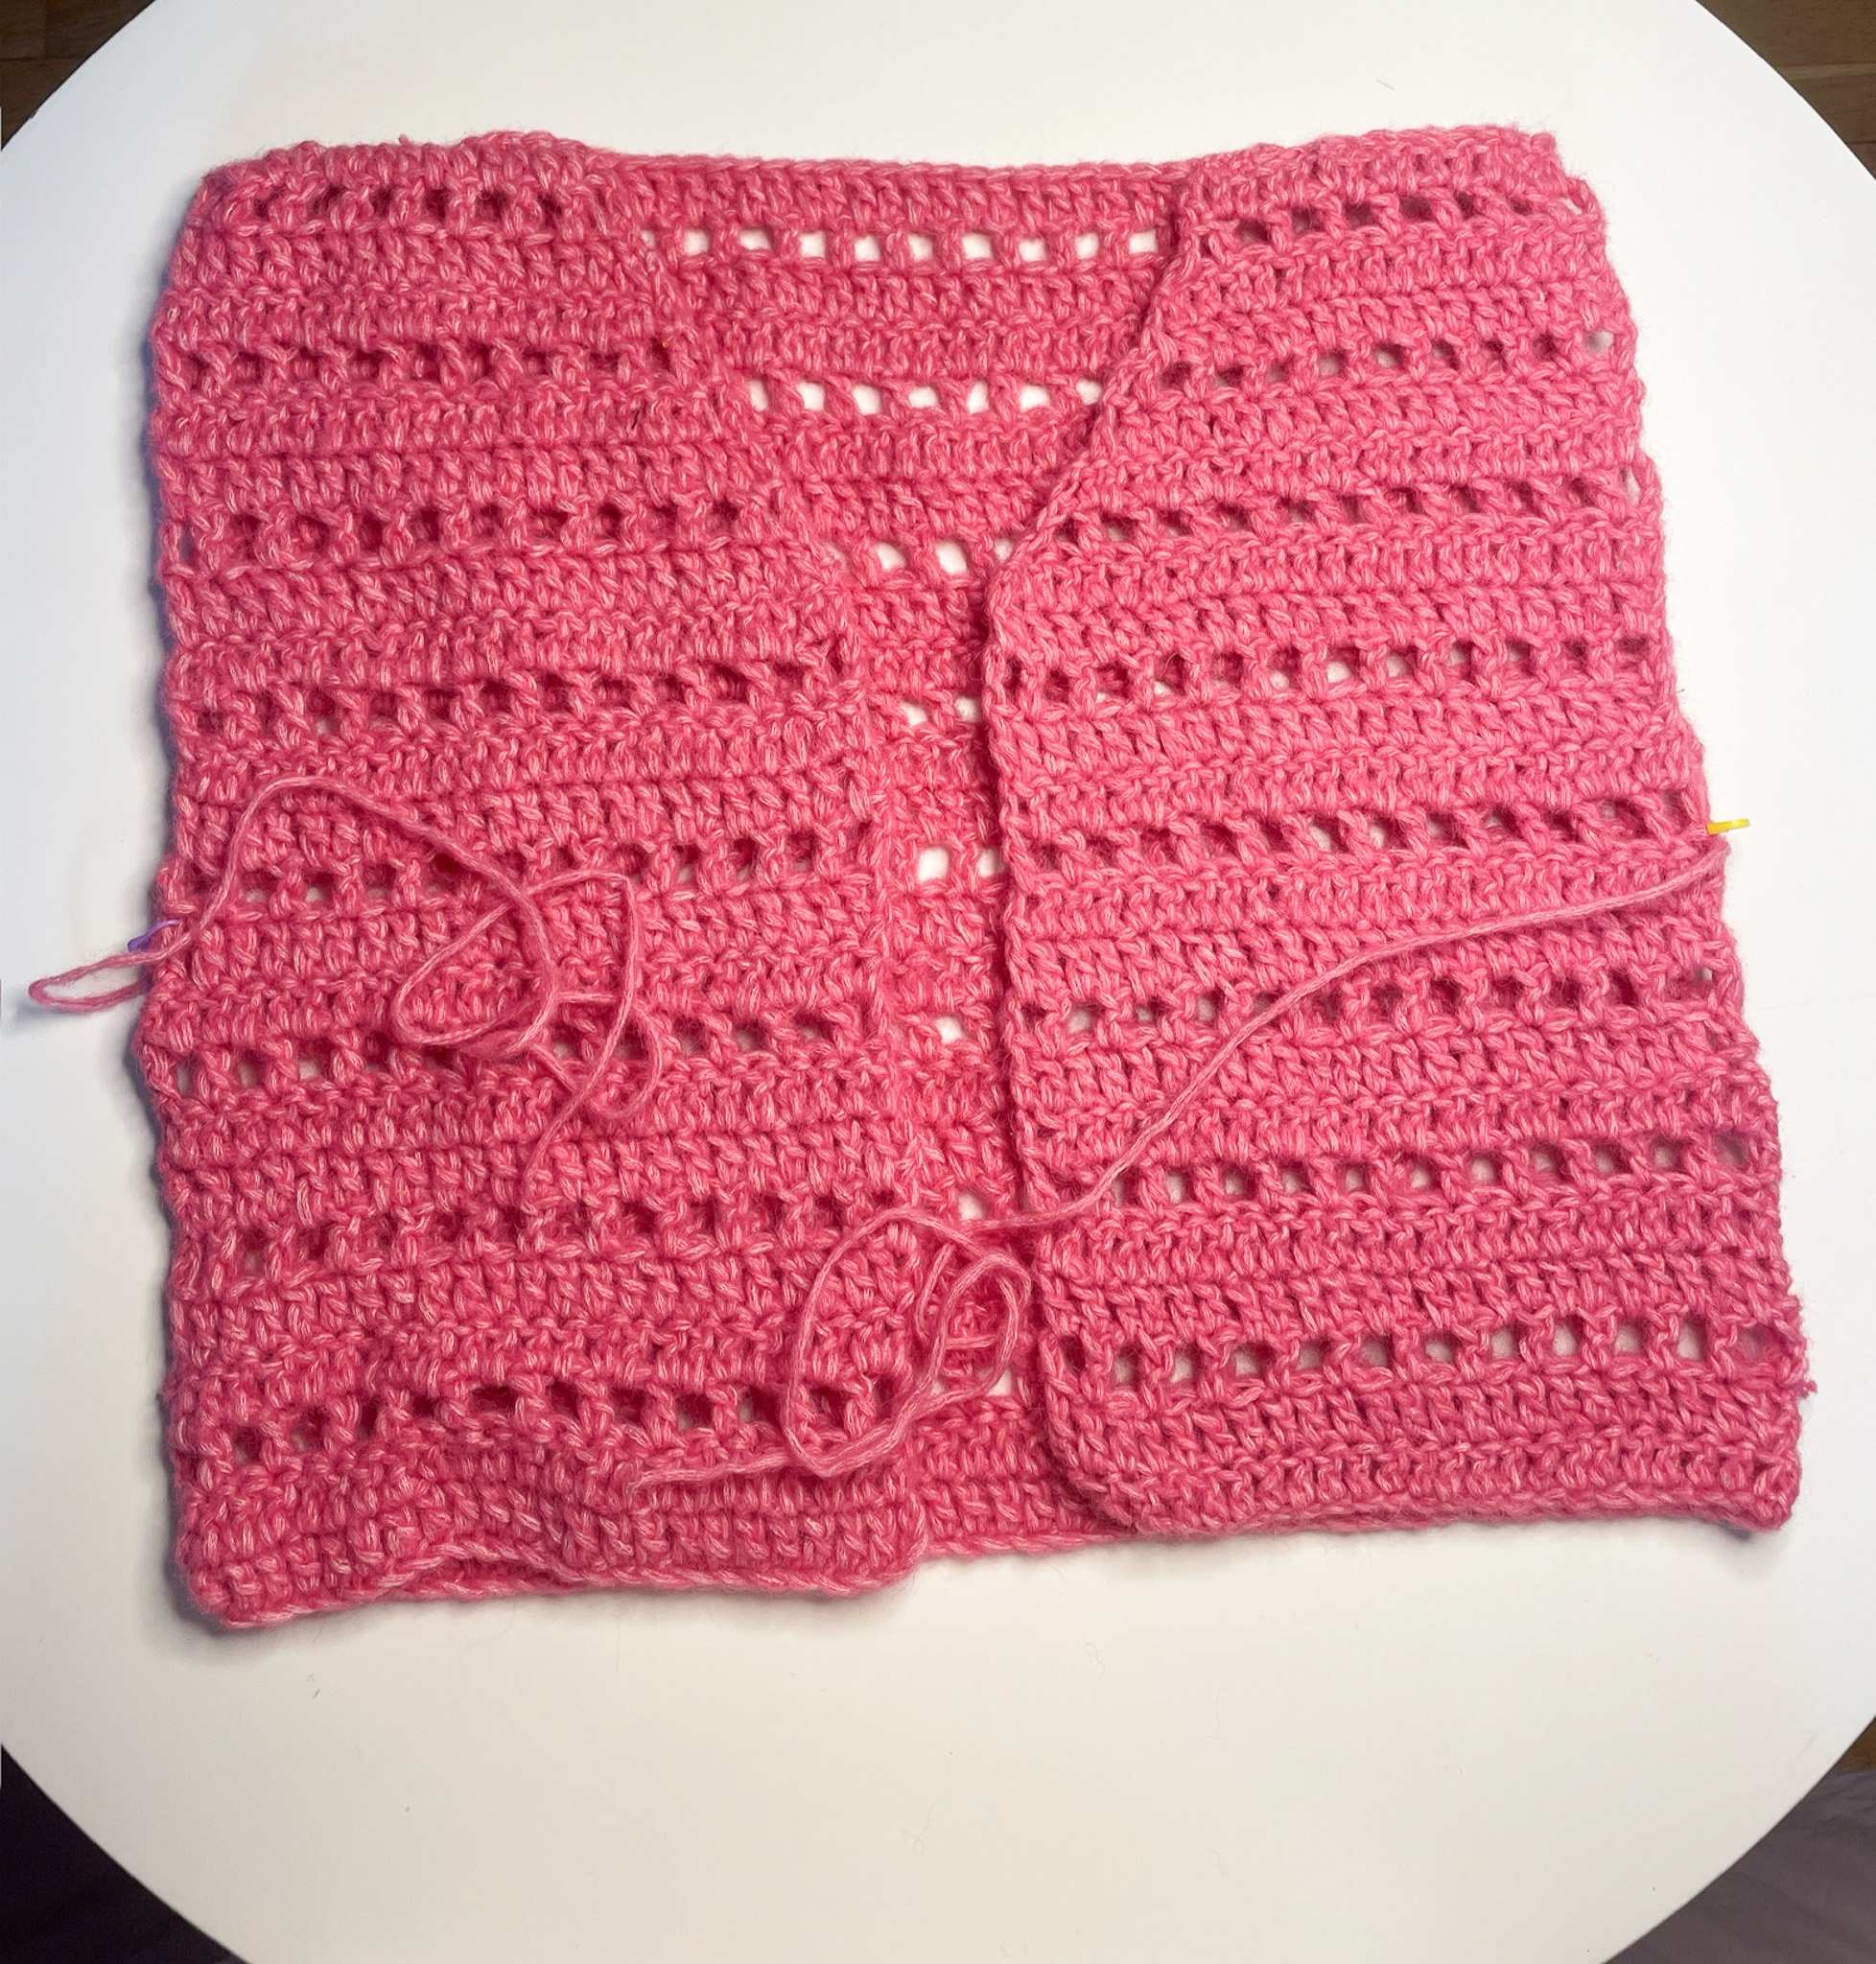
If you think the cardigan turned out too short, you can crochet a few extra rows along the bottom. Start in one of the openings and work as follows:
Hole row: Chain 3. Starting in the 5th chain from the hook, work 1 double crochet, *chain 1, skip 1 stitch, and work 1 double crochet in the next stitch. Repeat from * to the end of the row. End the row with 1 double crochet in the last stitch. Turn.
Row with double crochet: Starting in the 4th stitch from the hook, work 24 (30) double crochets. Chain 2, turn.
Row with double crochet: Starting in the 4th stitch from the hook, work 24 (30) double crochets, turn.
Repeat från "hole" row if you want it longer.
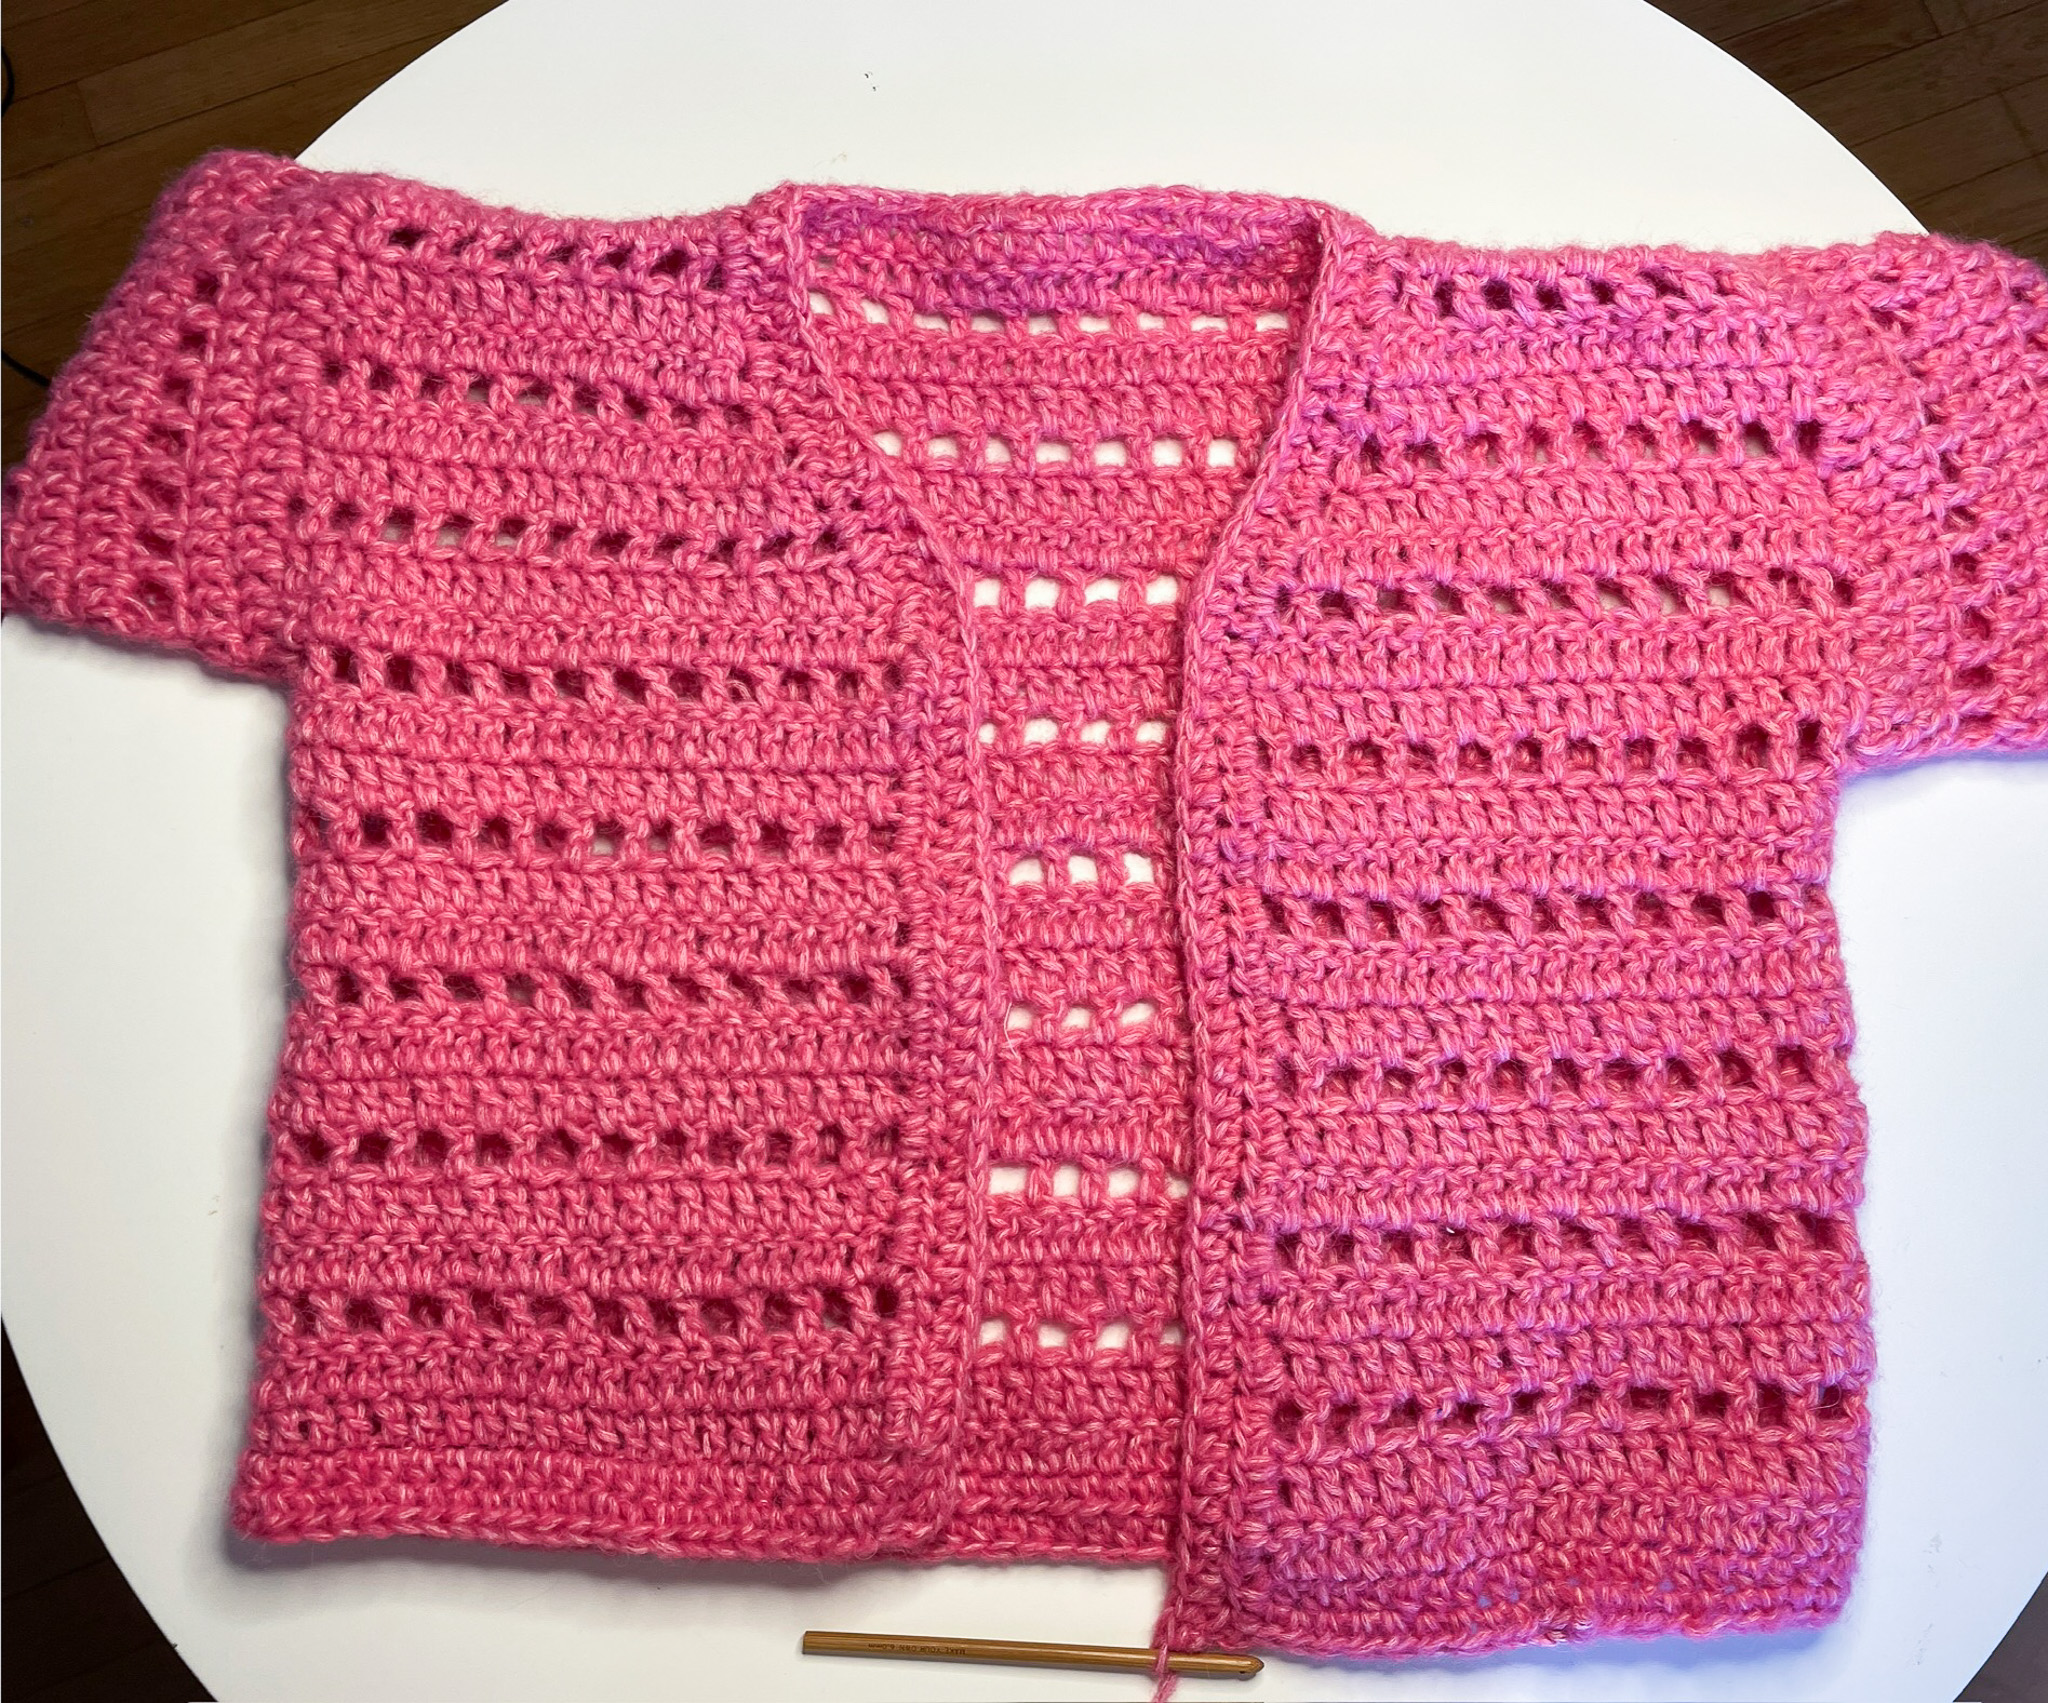
Sleeves
It’s time to crochet the sleeves onto the cardigan. Here you can decide how wide or puffy you want the sleeves to be—the more stitches you pick up, the puffier the sleeves will become. For this model, the following method was used:
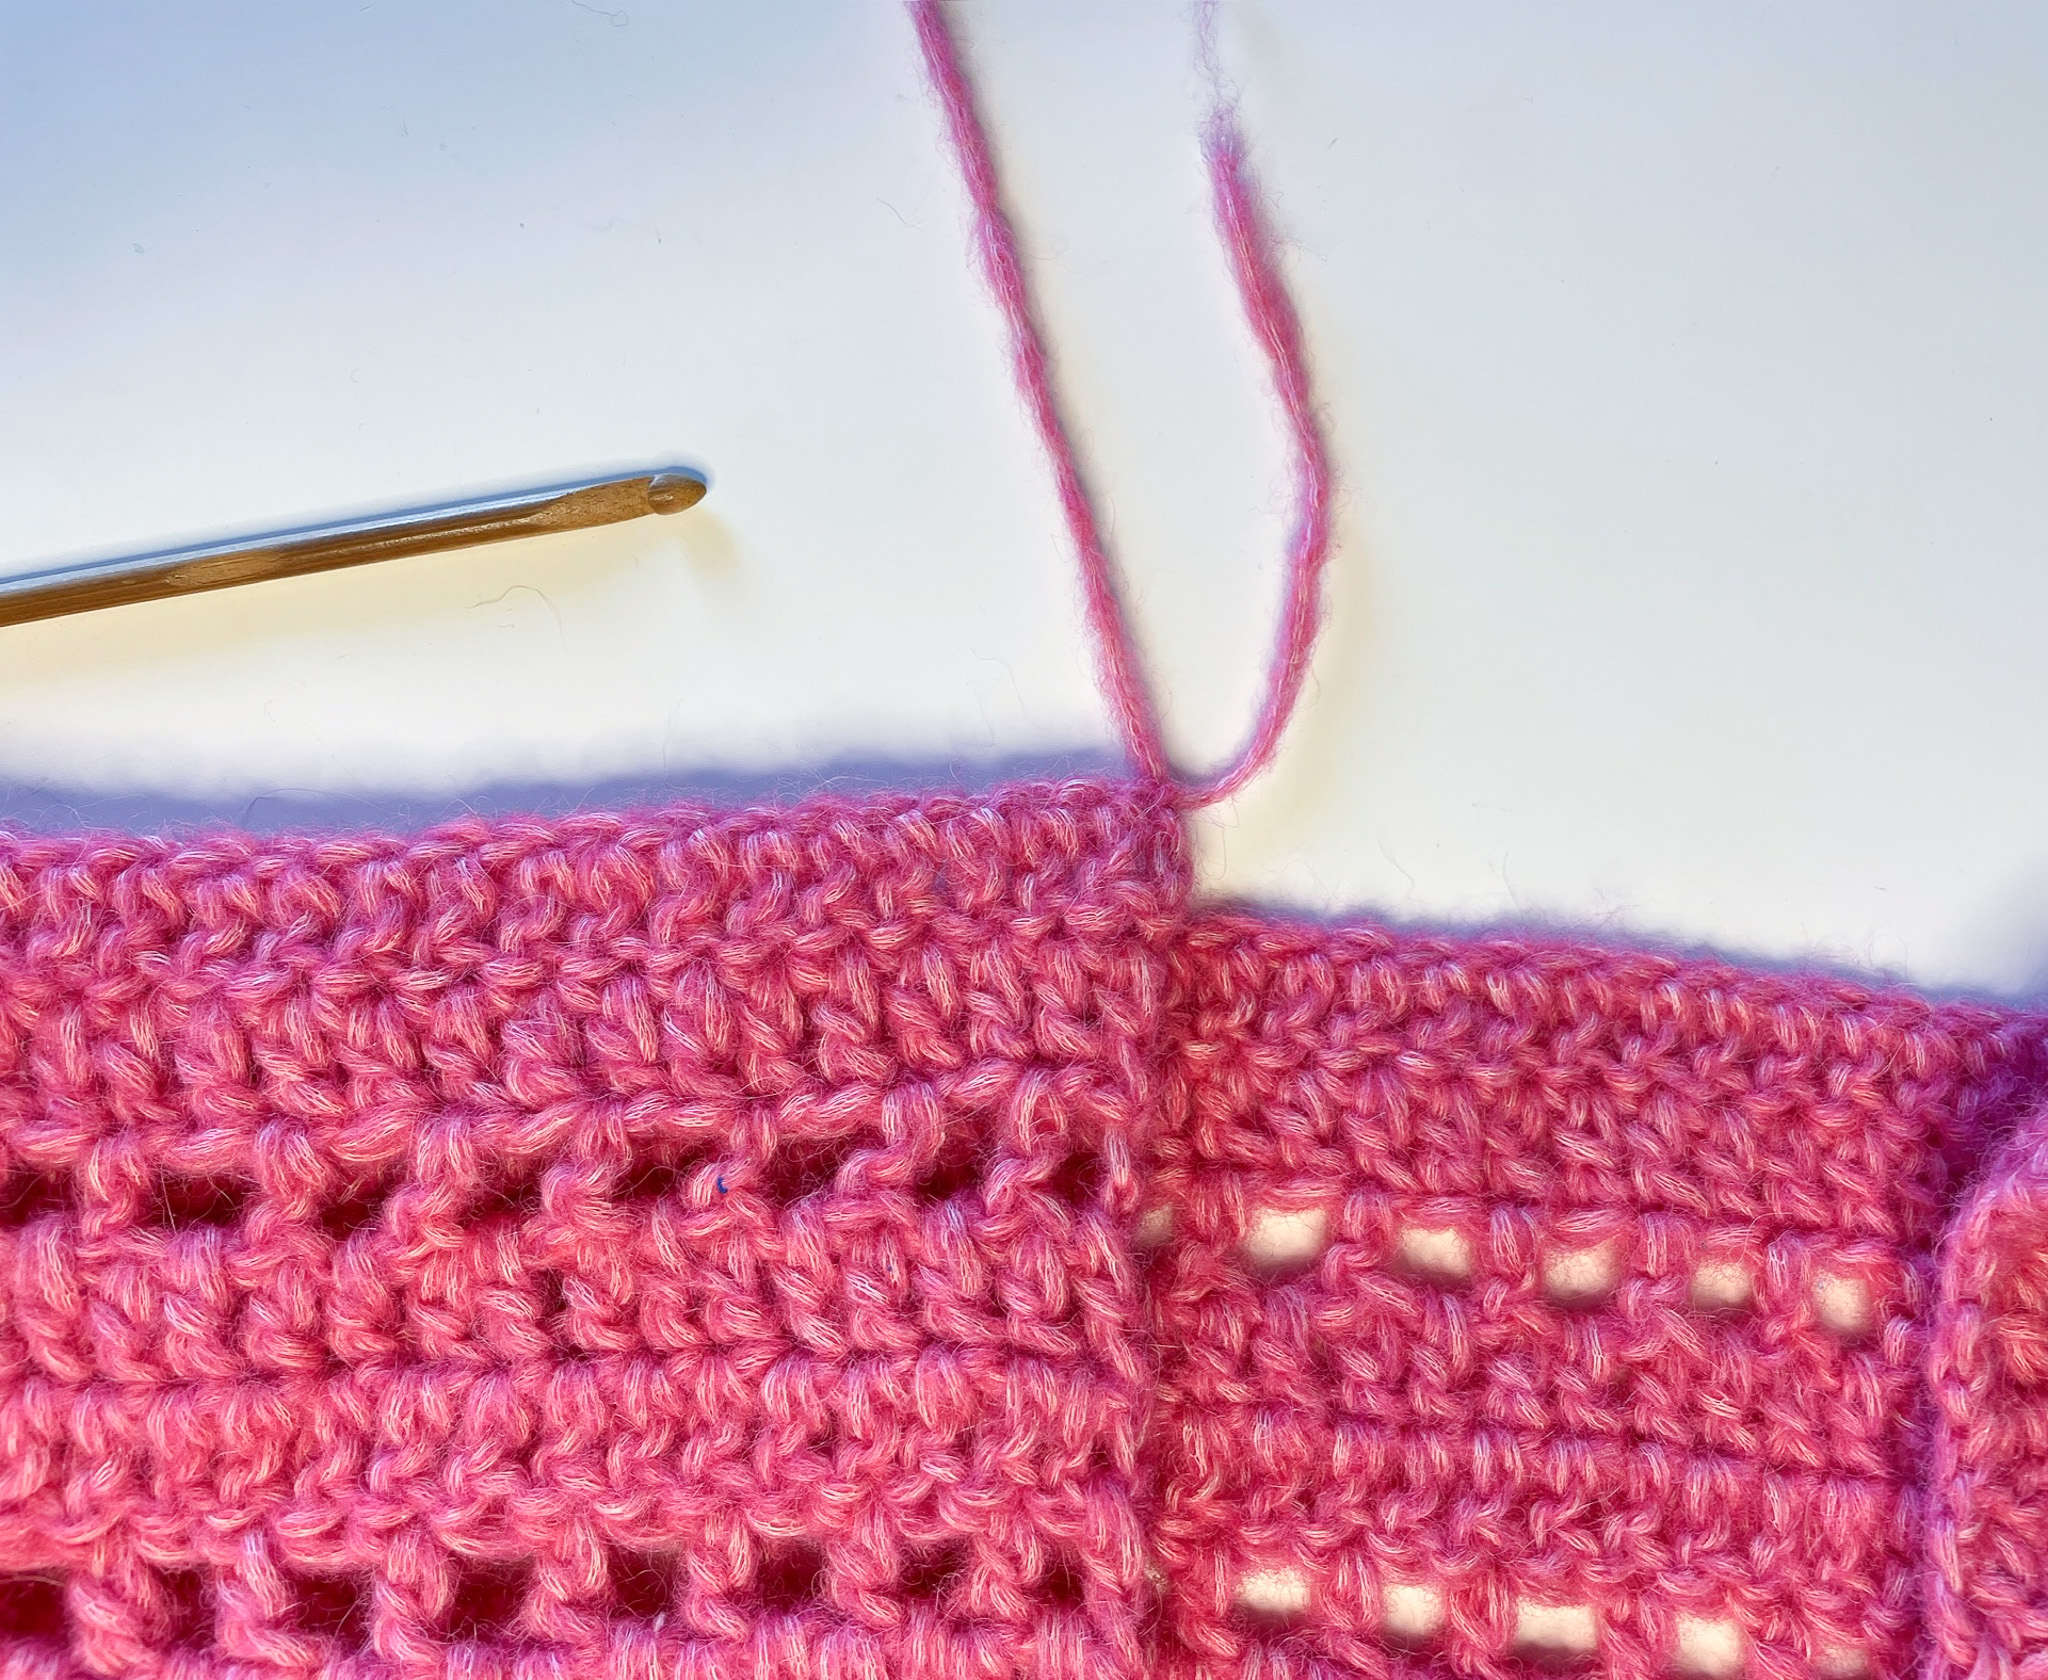
- Turn the cardigan so that the right side is facing up (the side that will be on the outside).
- Round 1: Attach the yarn in the middle of the shoulder seam where the front and back pieces were joined. Chain 2, then work 1 double crochet into the first stitch of the row of double crochets (the last row of double crochets on the front piece).
Crochet 2 double crochets into the “hole row,” then work 2 double crochets into each row of double crochets from the front piece. Repeat this sequence until you have 20 (25) stitches.
Note: You can now adjust the sleeve width—more stitches will make a larger sleeve. We have intentionally left the side partially open to allow for customizing the sleeve size.
Once you’re happy with the sleeve width, turn the cardigan and crochet the same number of stitches on the other side—in this case, 20 (25) stitches. When you reach the first stitch again, join with a slip stitch in the first stitch.
Round 2: Chain 2. Begin in the 3rd stitch from the hook and work double crochets all the way around. Join the round with a slip stitch in the top of the starting chain.
Round 3: Chain 3. Begin in the 5th stitch from the hook and work *1 double crochet, 1 chain, skip 1 stitch. Repeat from * to the end of the round, and join with a slip stitch into the first chain space.
Rounds 4–20: Repeat rounds 1–3.
Round 21: We finish the sleeve by decreasing to 10 (12) stitches. Do this by yarn over the first stitch and then the second stitch on the row, pulling through all three loops on the hook. Place a stitch marker so you know where the round begins. Repeat this 9 (11) more times.
If you are unsure how to work a decrease, see the video below.
Round 22: Work 10 (12) half double crochets (hdc) around the sleeve.
If you’re unsure how to make a half double crochet, see the video below.
Cut and fasten off the yarn.
Repeat the same process for the other sleeve.
Also, sew the side of the cardigan where you left an opening to start the sleeve.
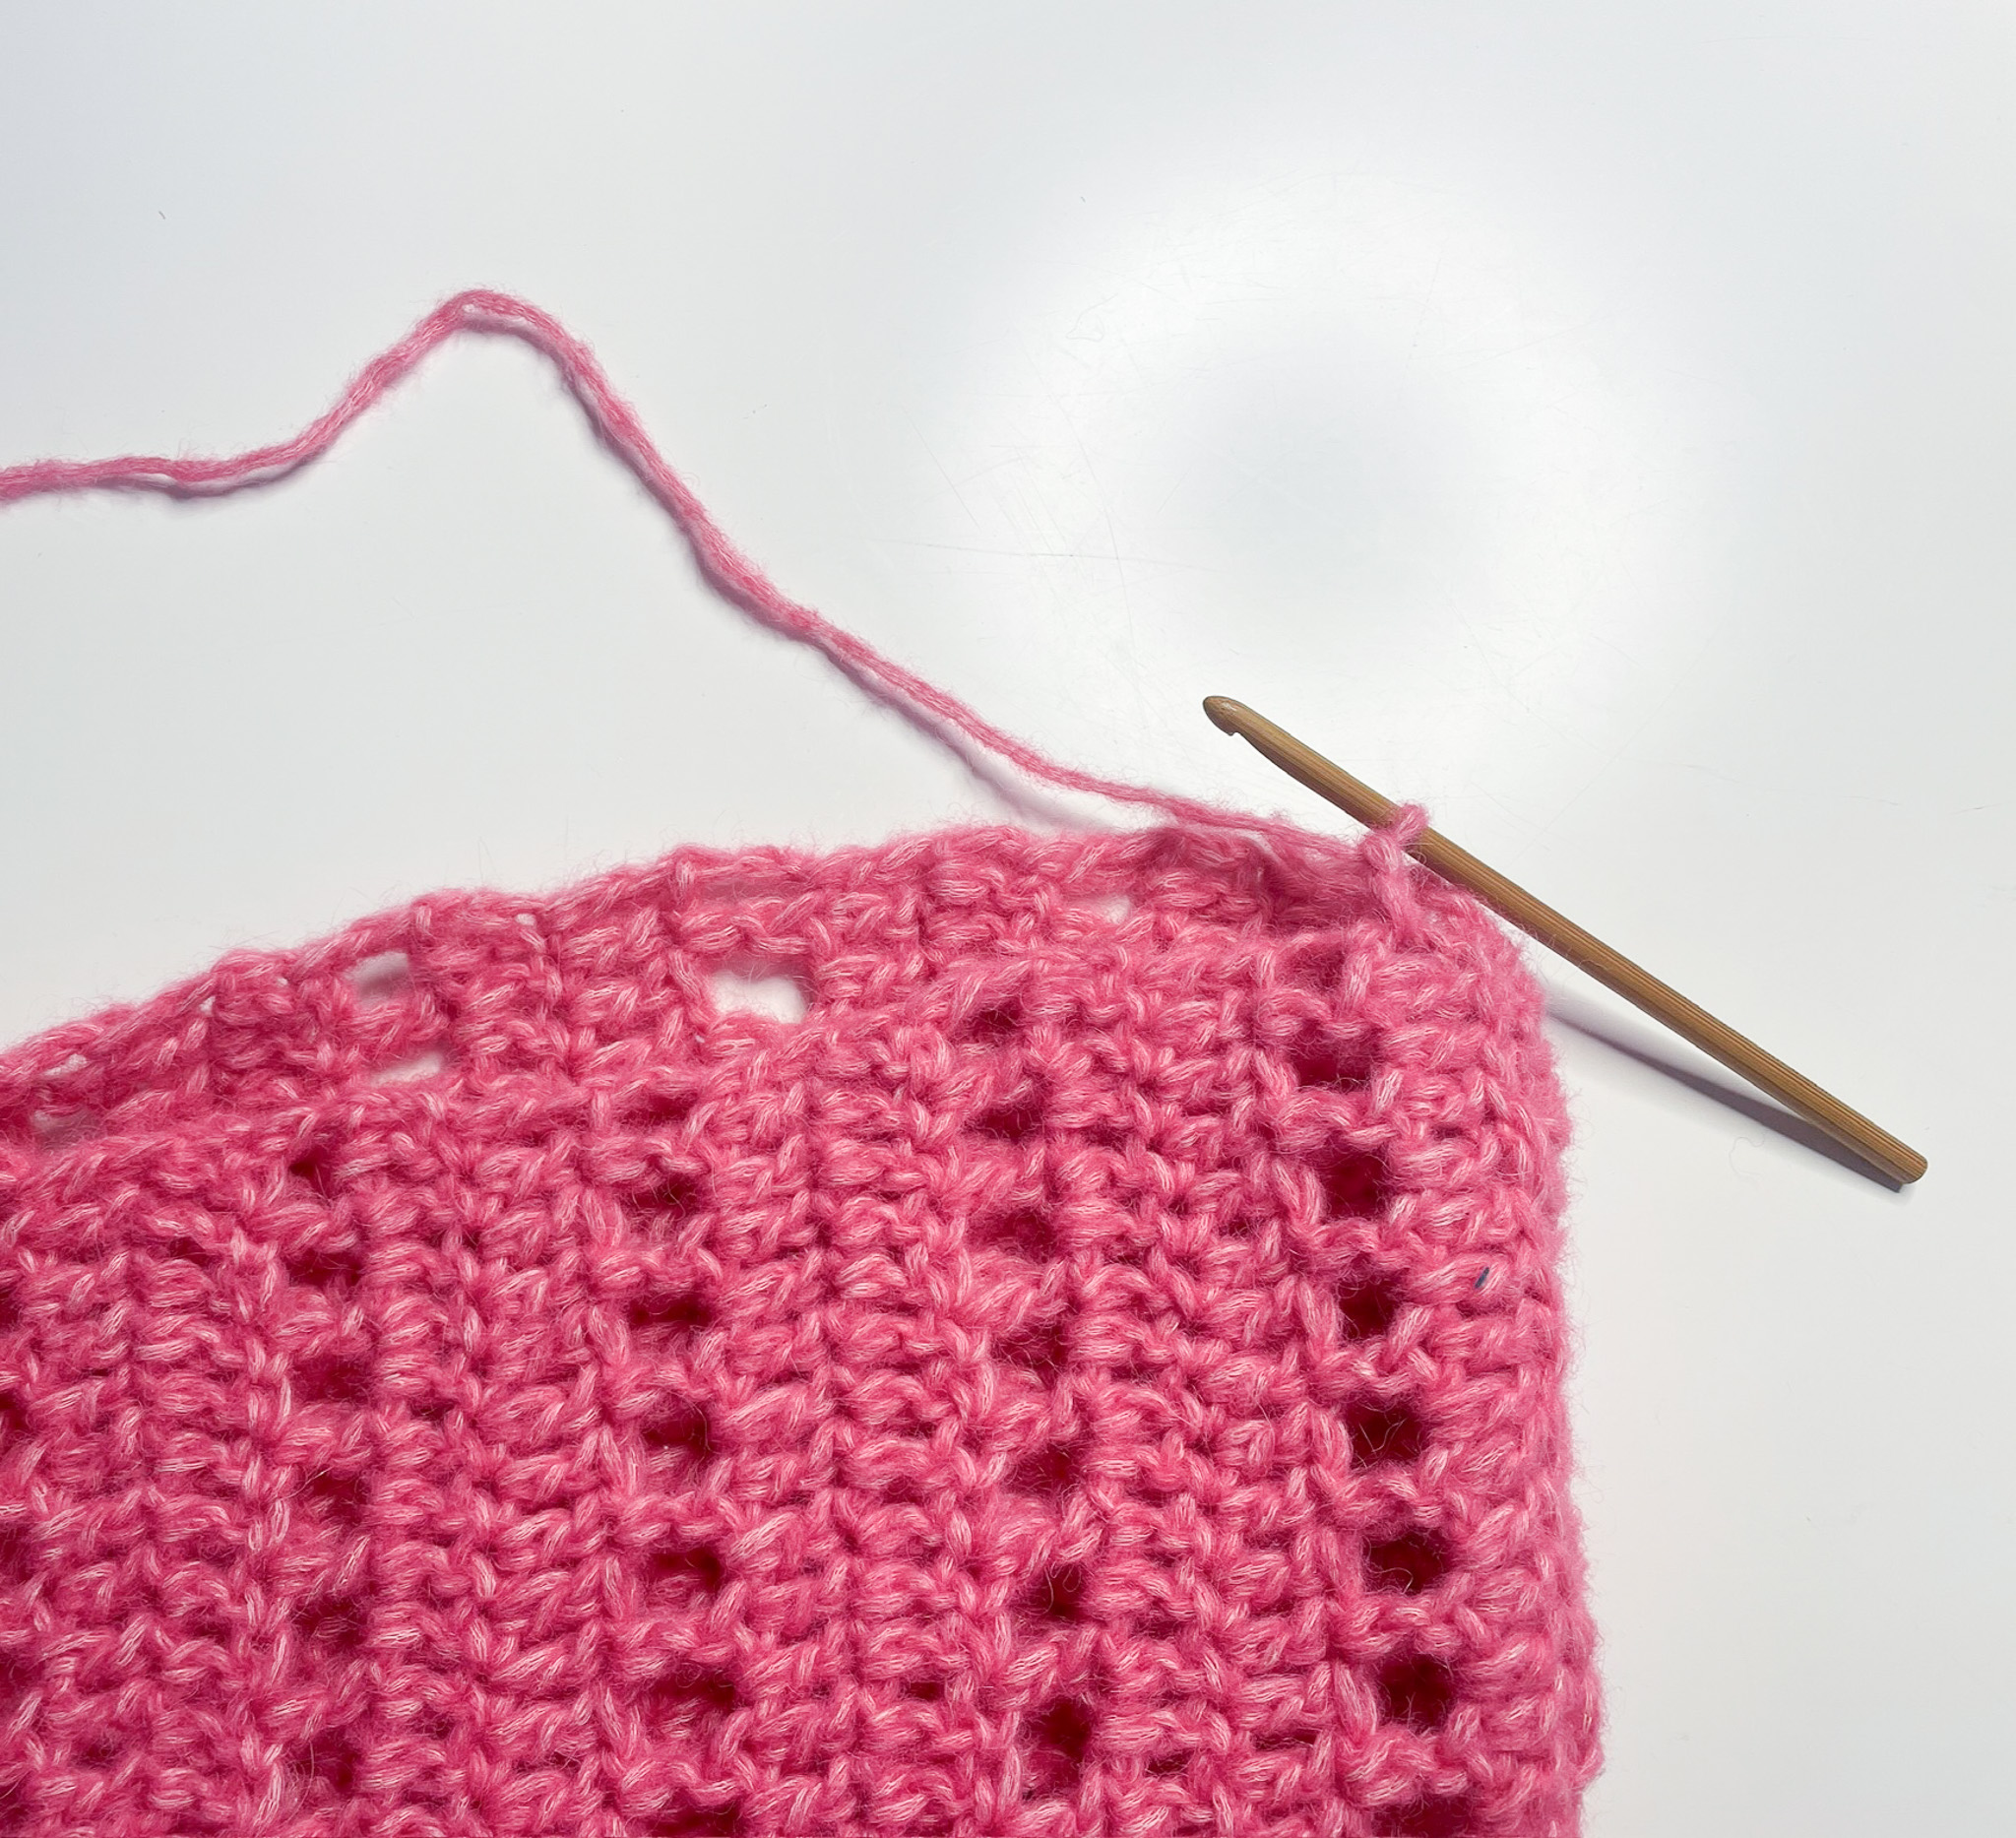
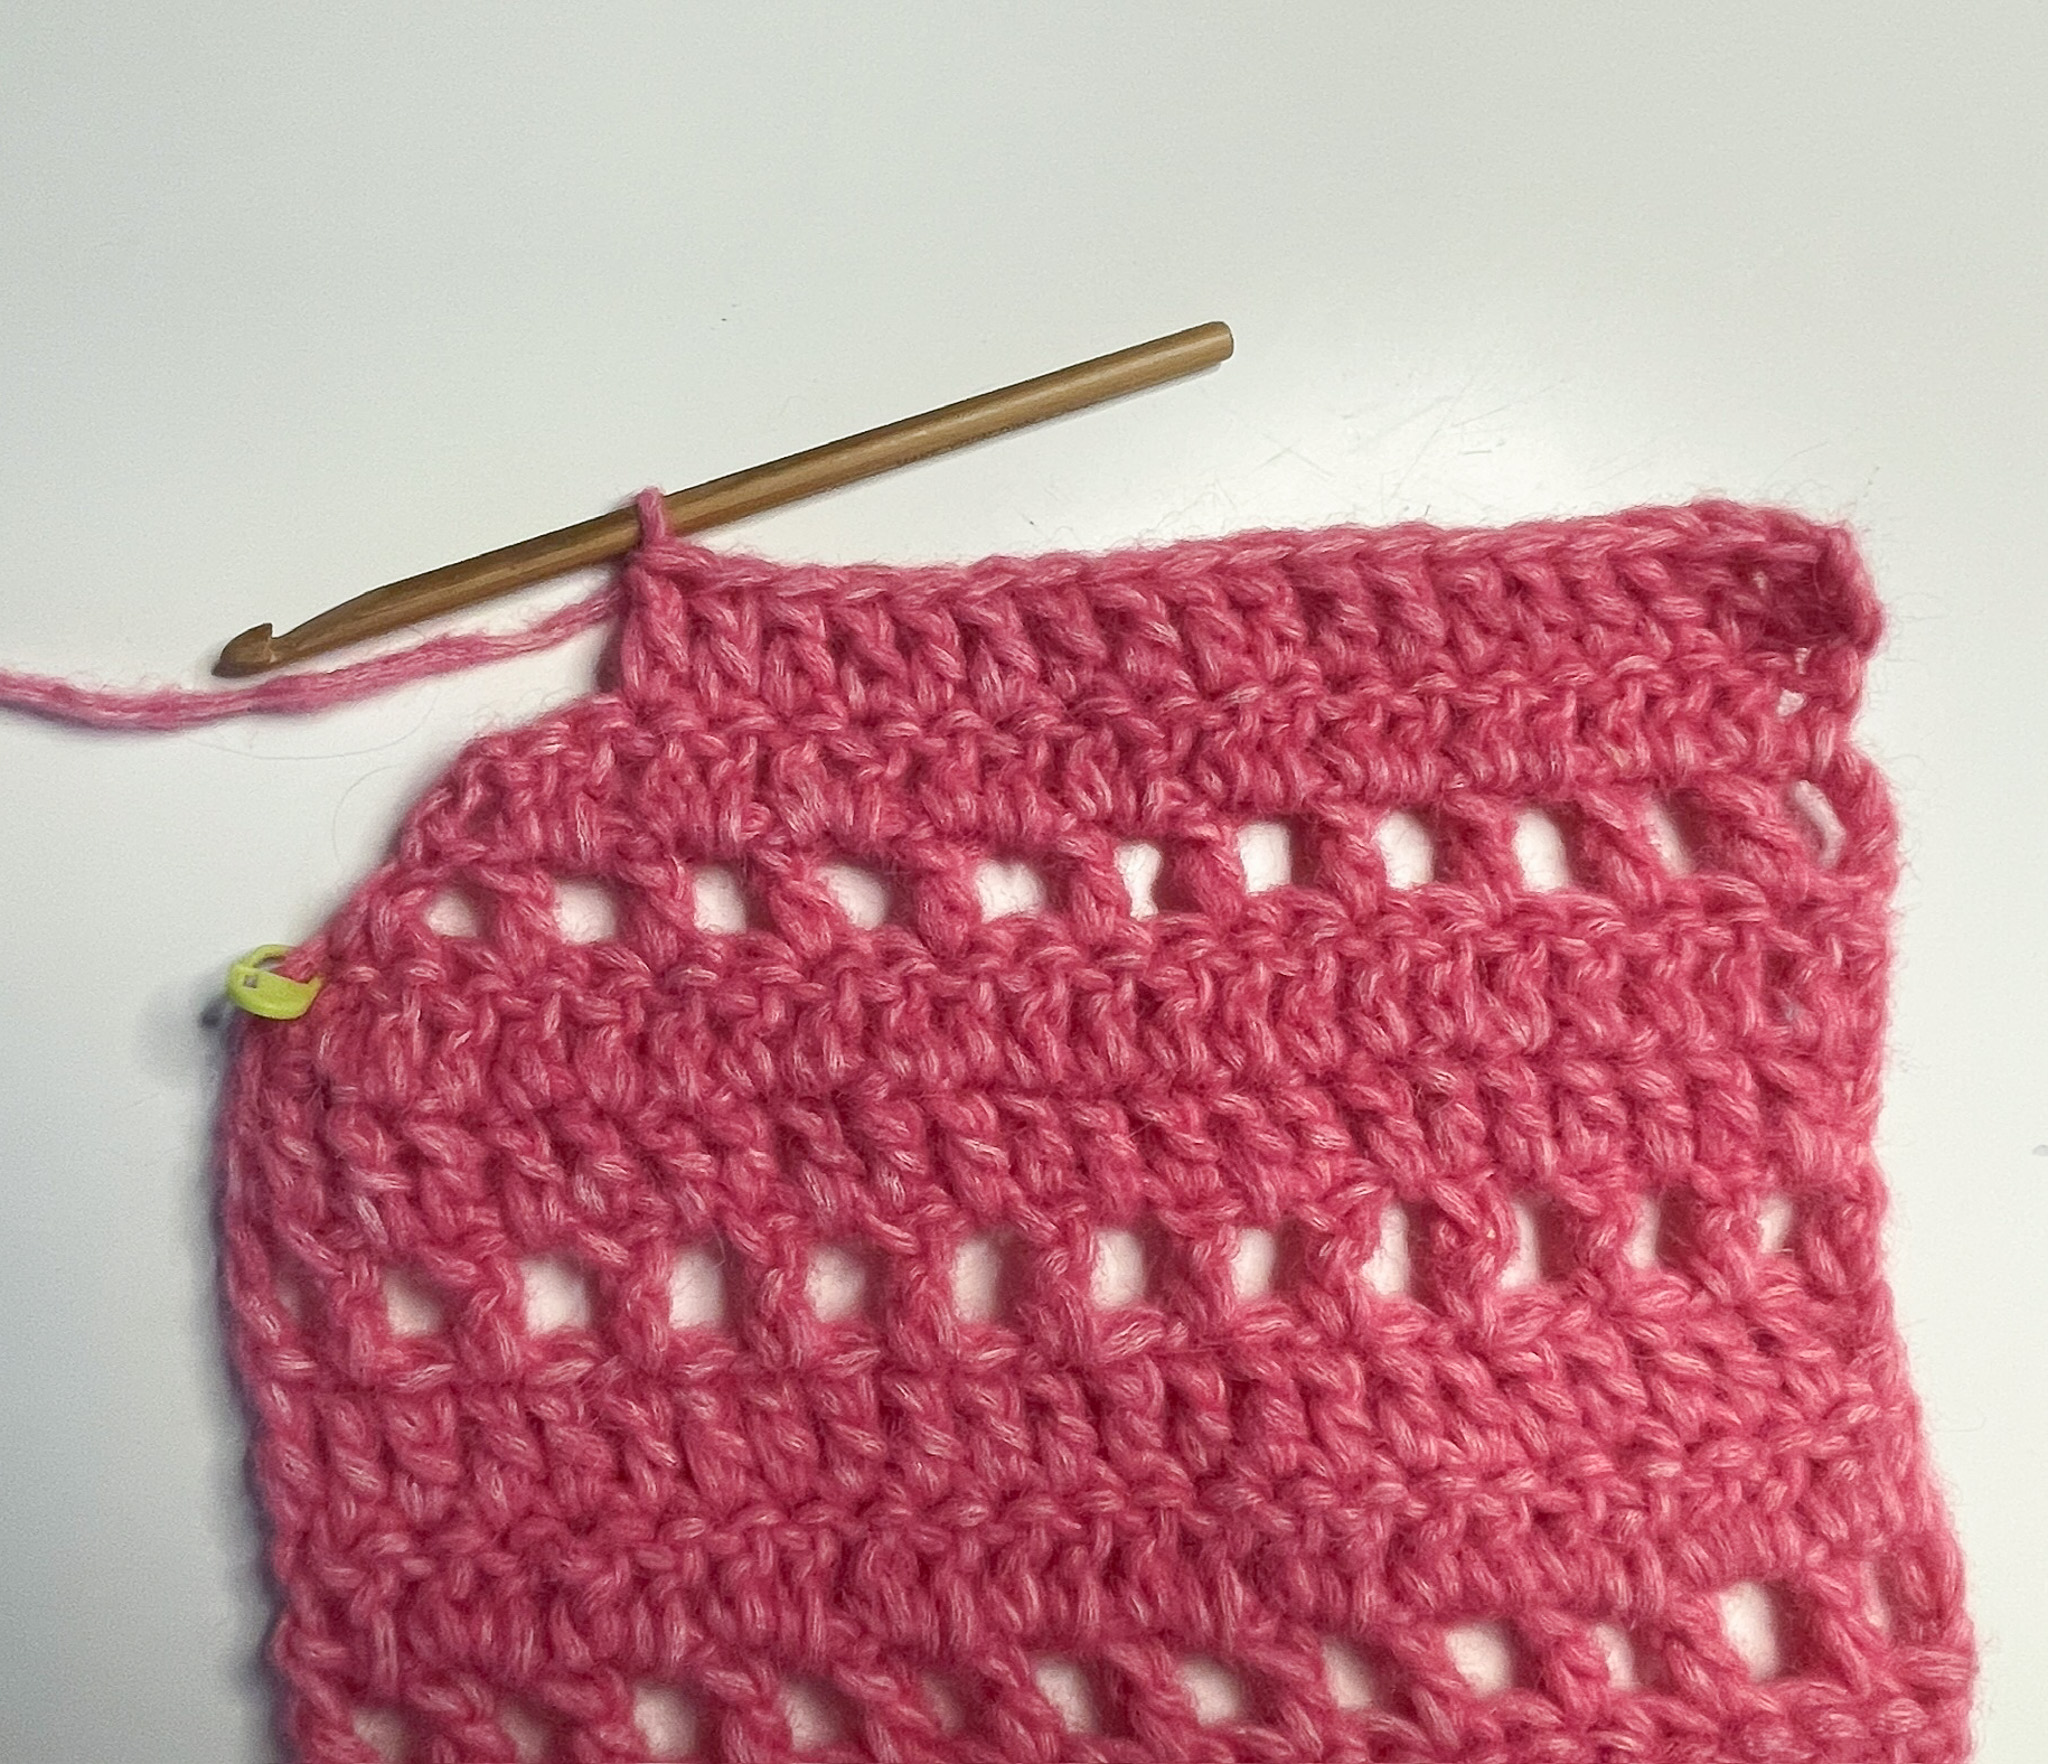
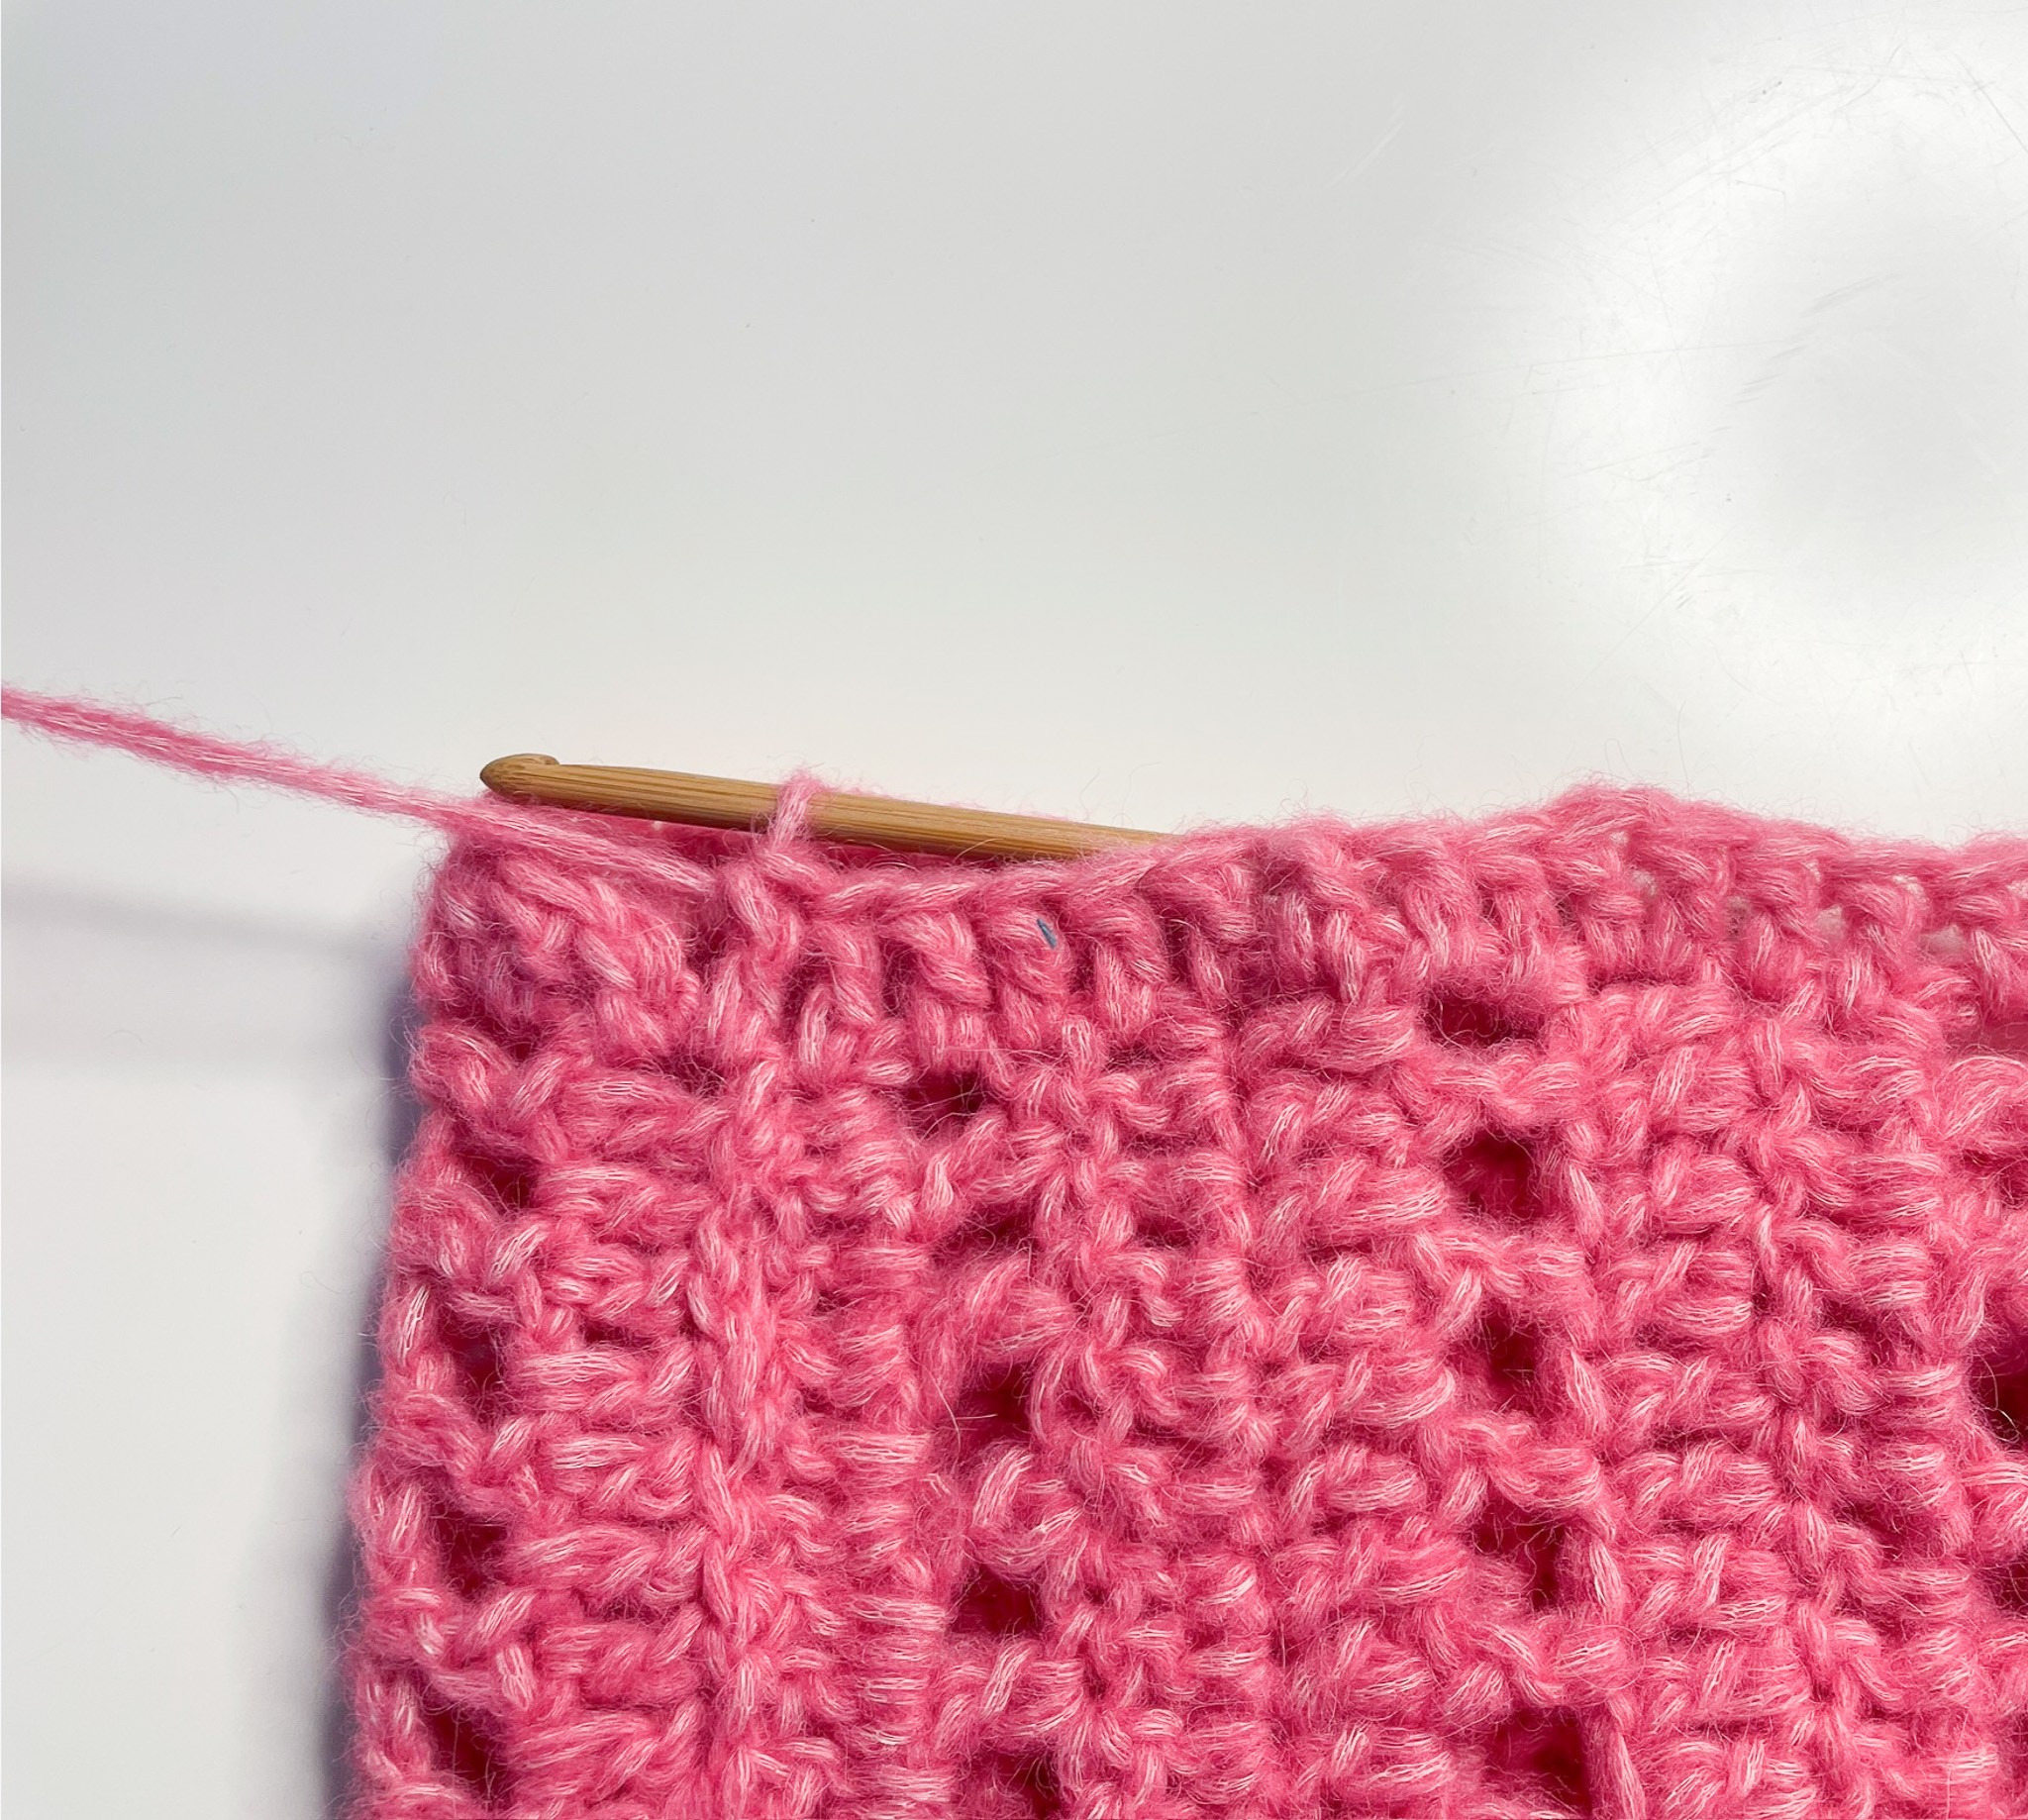
Decorative Edge Around the Bottom of the Cardigan + Front Panels and Neckline
Attach the yarn at the bottom of the left front panel (as seen when wearing the cardigan). Chain 1, then work half double crochets along the bottom edge of the cardigan, all the way around. Chain 1, turn.
Work half double crochets all the way back to where you started.
Front Panels and Neckline:
Without cutting the yarn, chain 2, then work 2 half double crochets into the same stitch you just worked in.
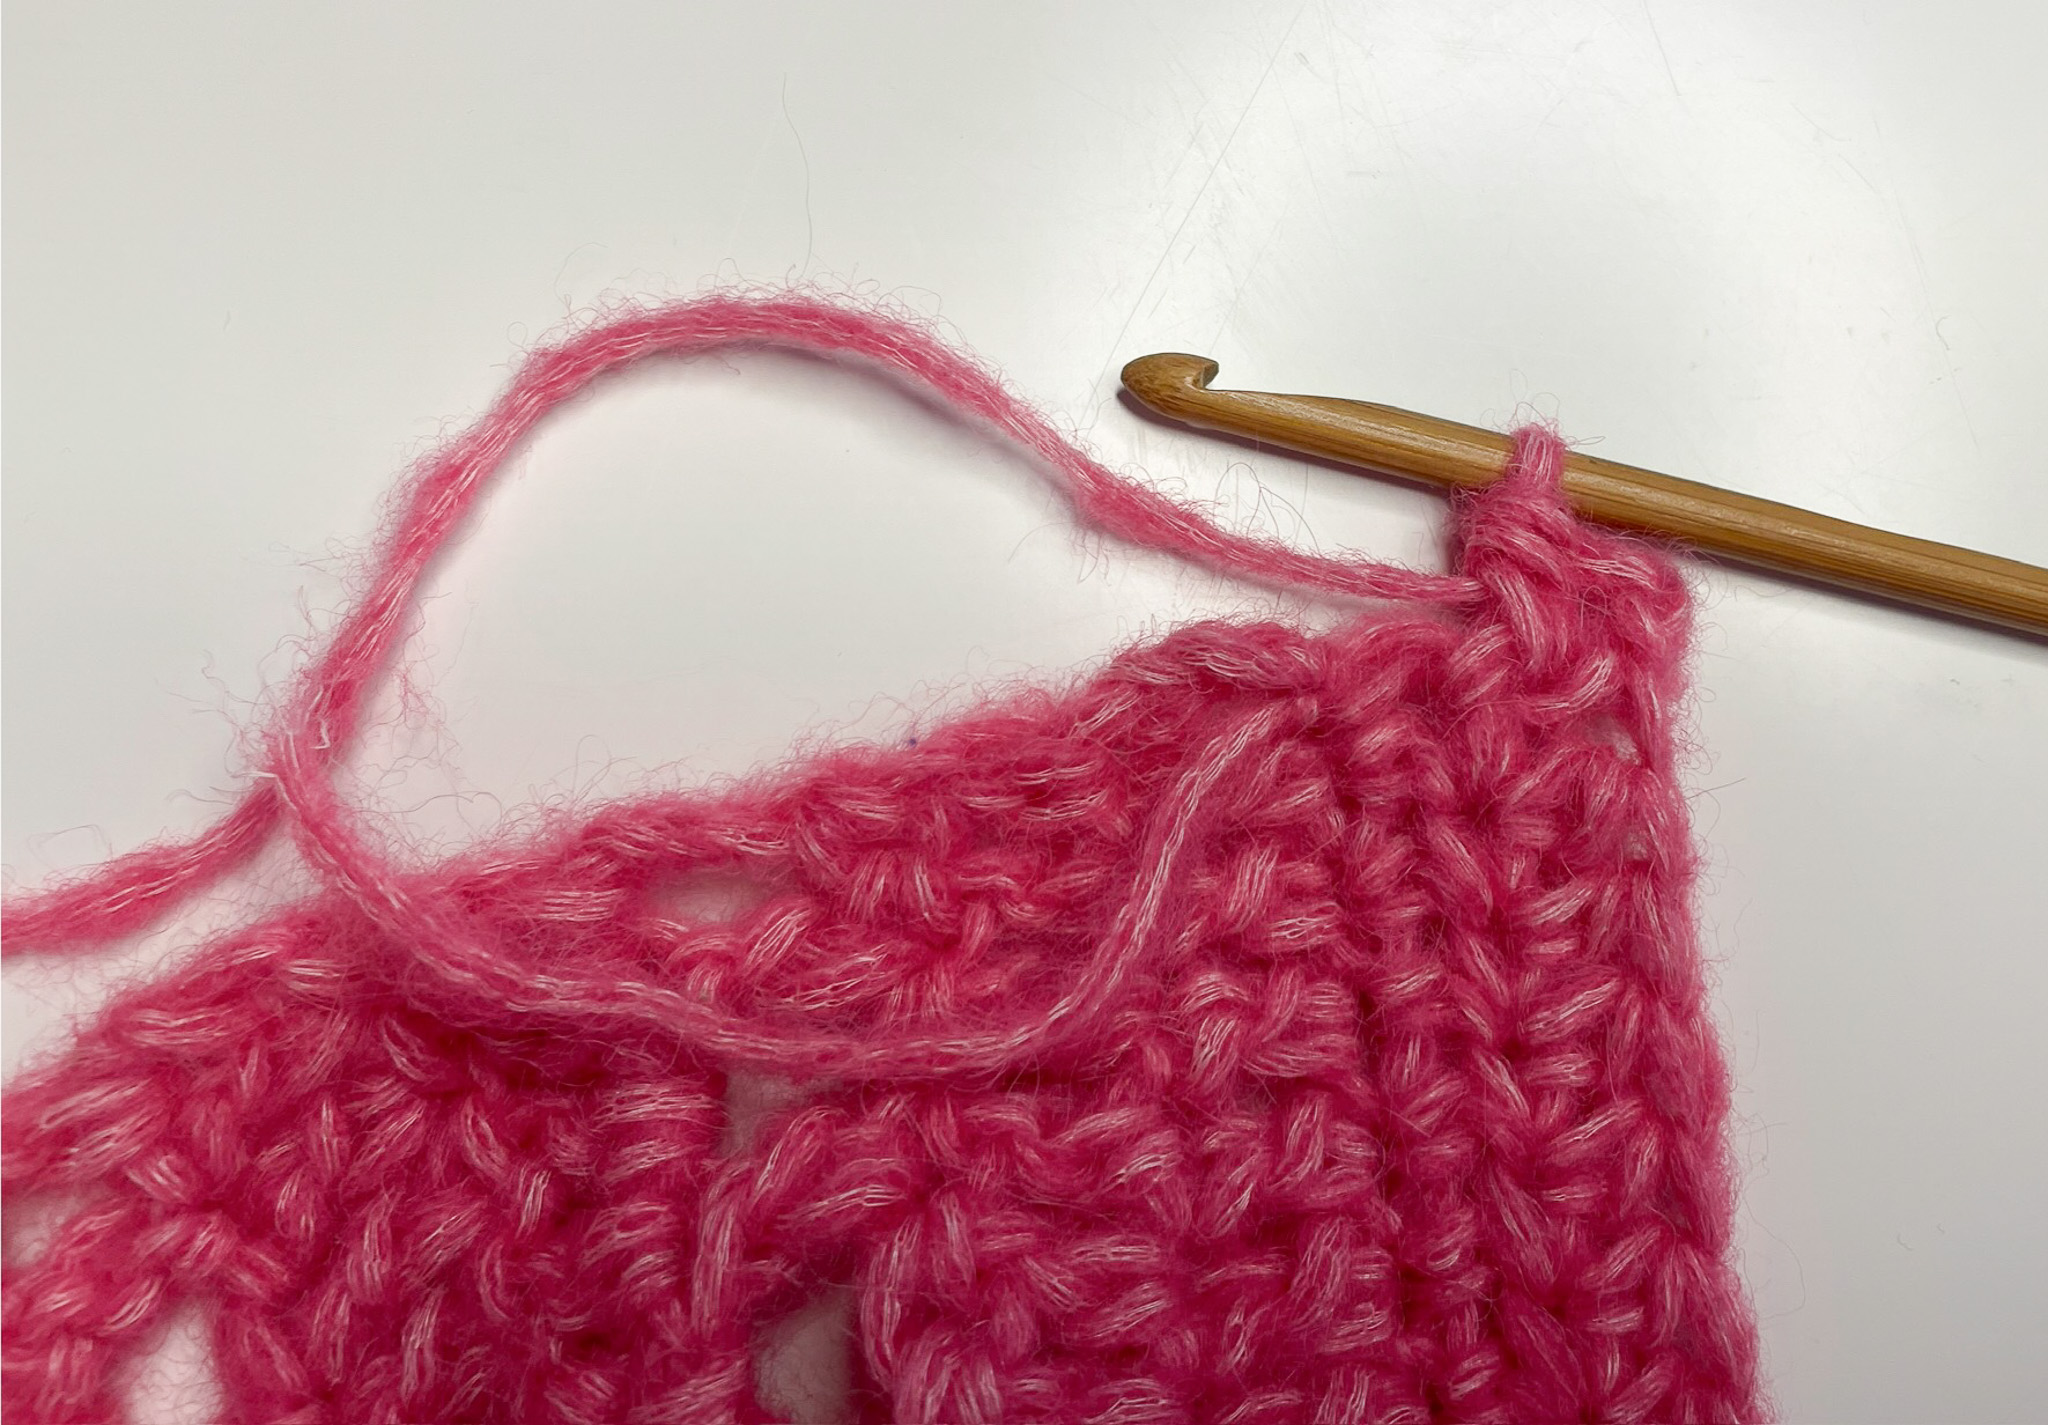
Continue working 2 half double crochets in each “post” and “space” all the way around the V-neck and neckline, down to the other side of the front panel.
When you reach the end, chain 1 and turn. Then work half double crochets all the way back.
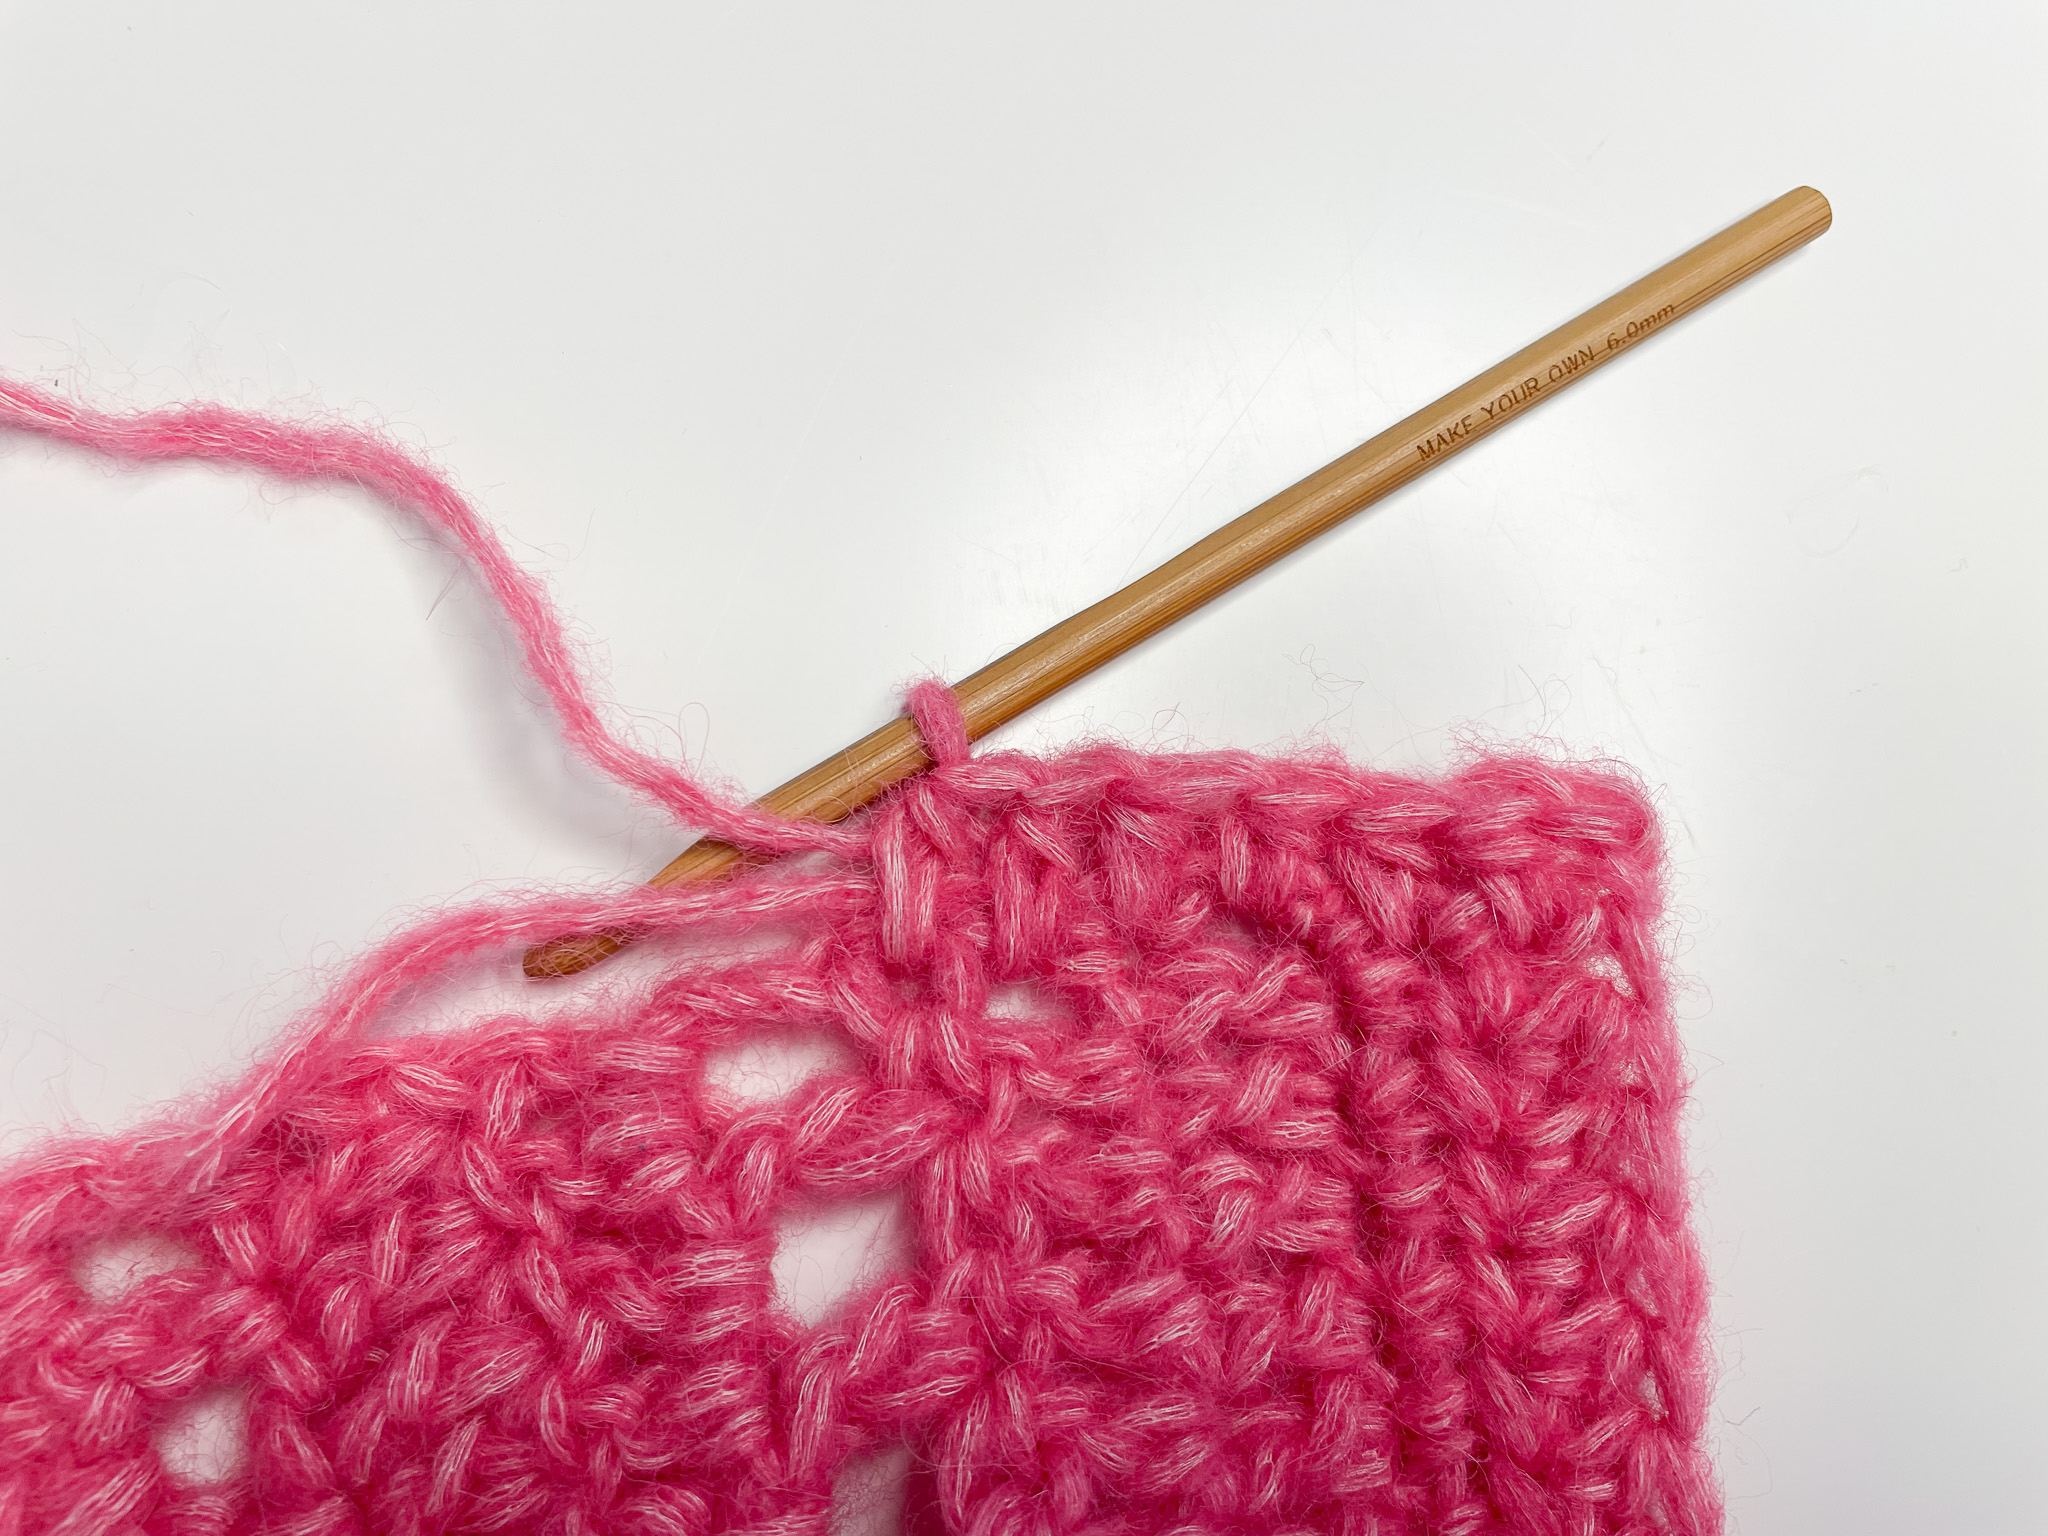
Cut the yarn and fasten off.
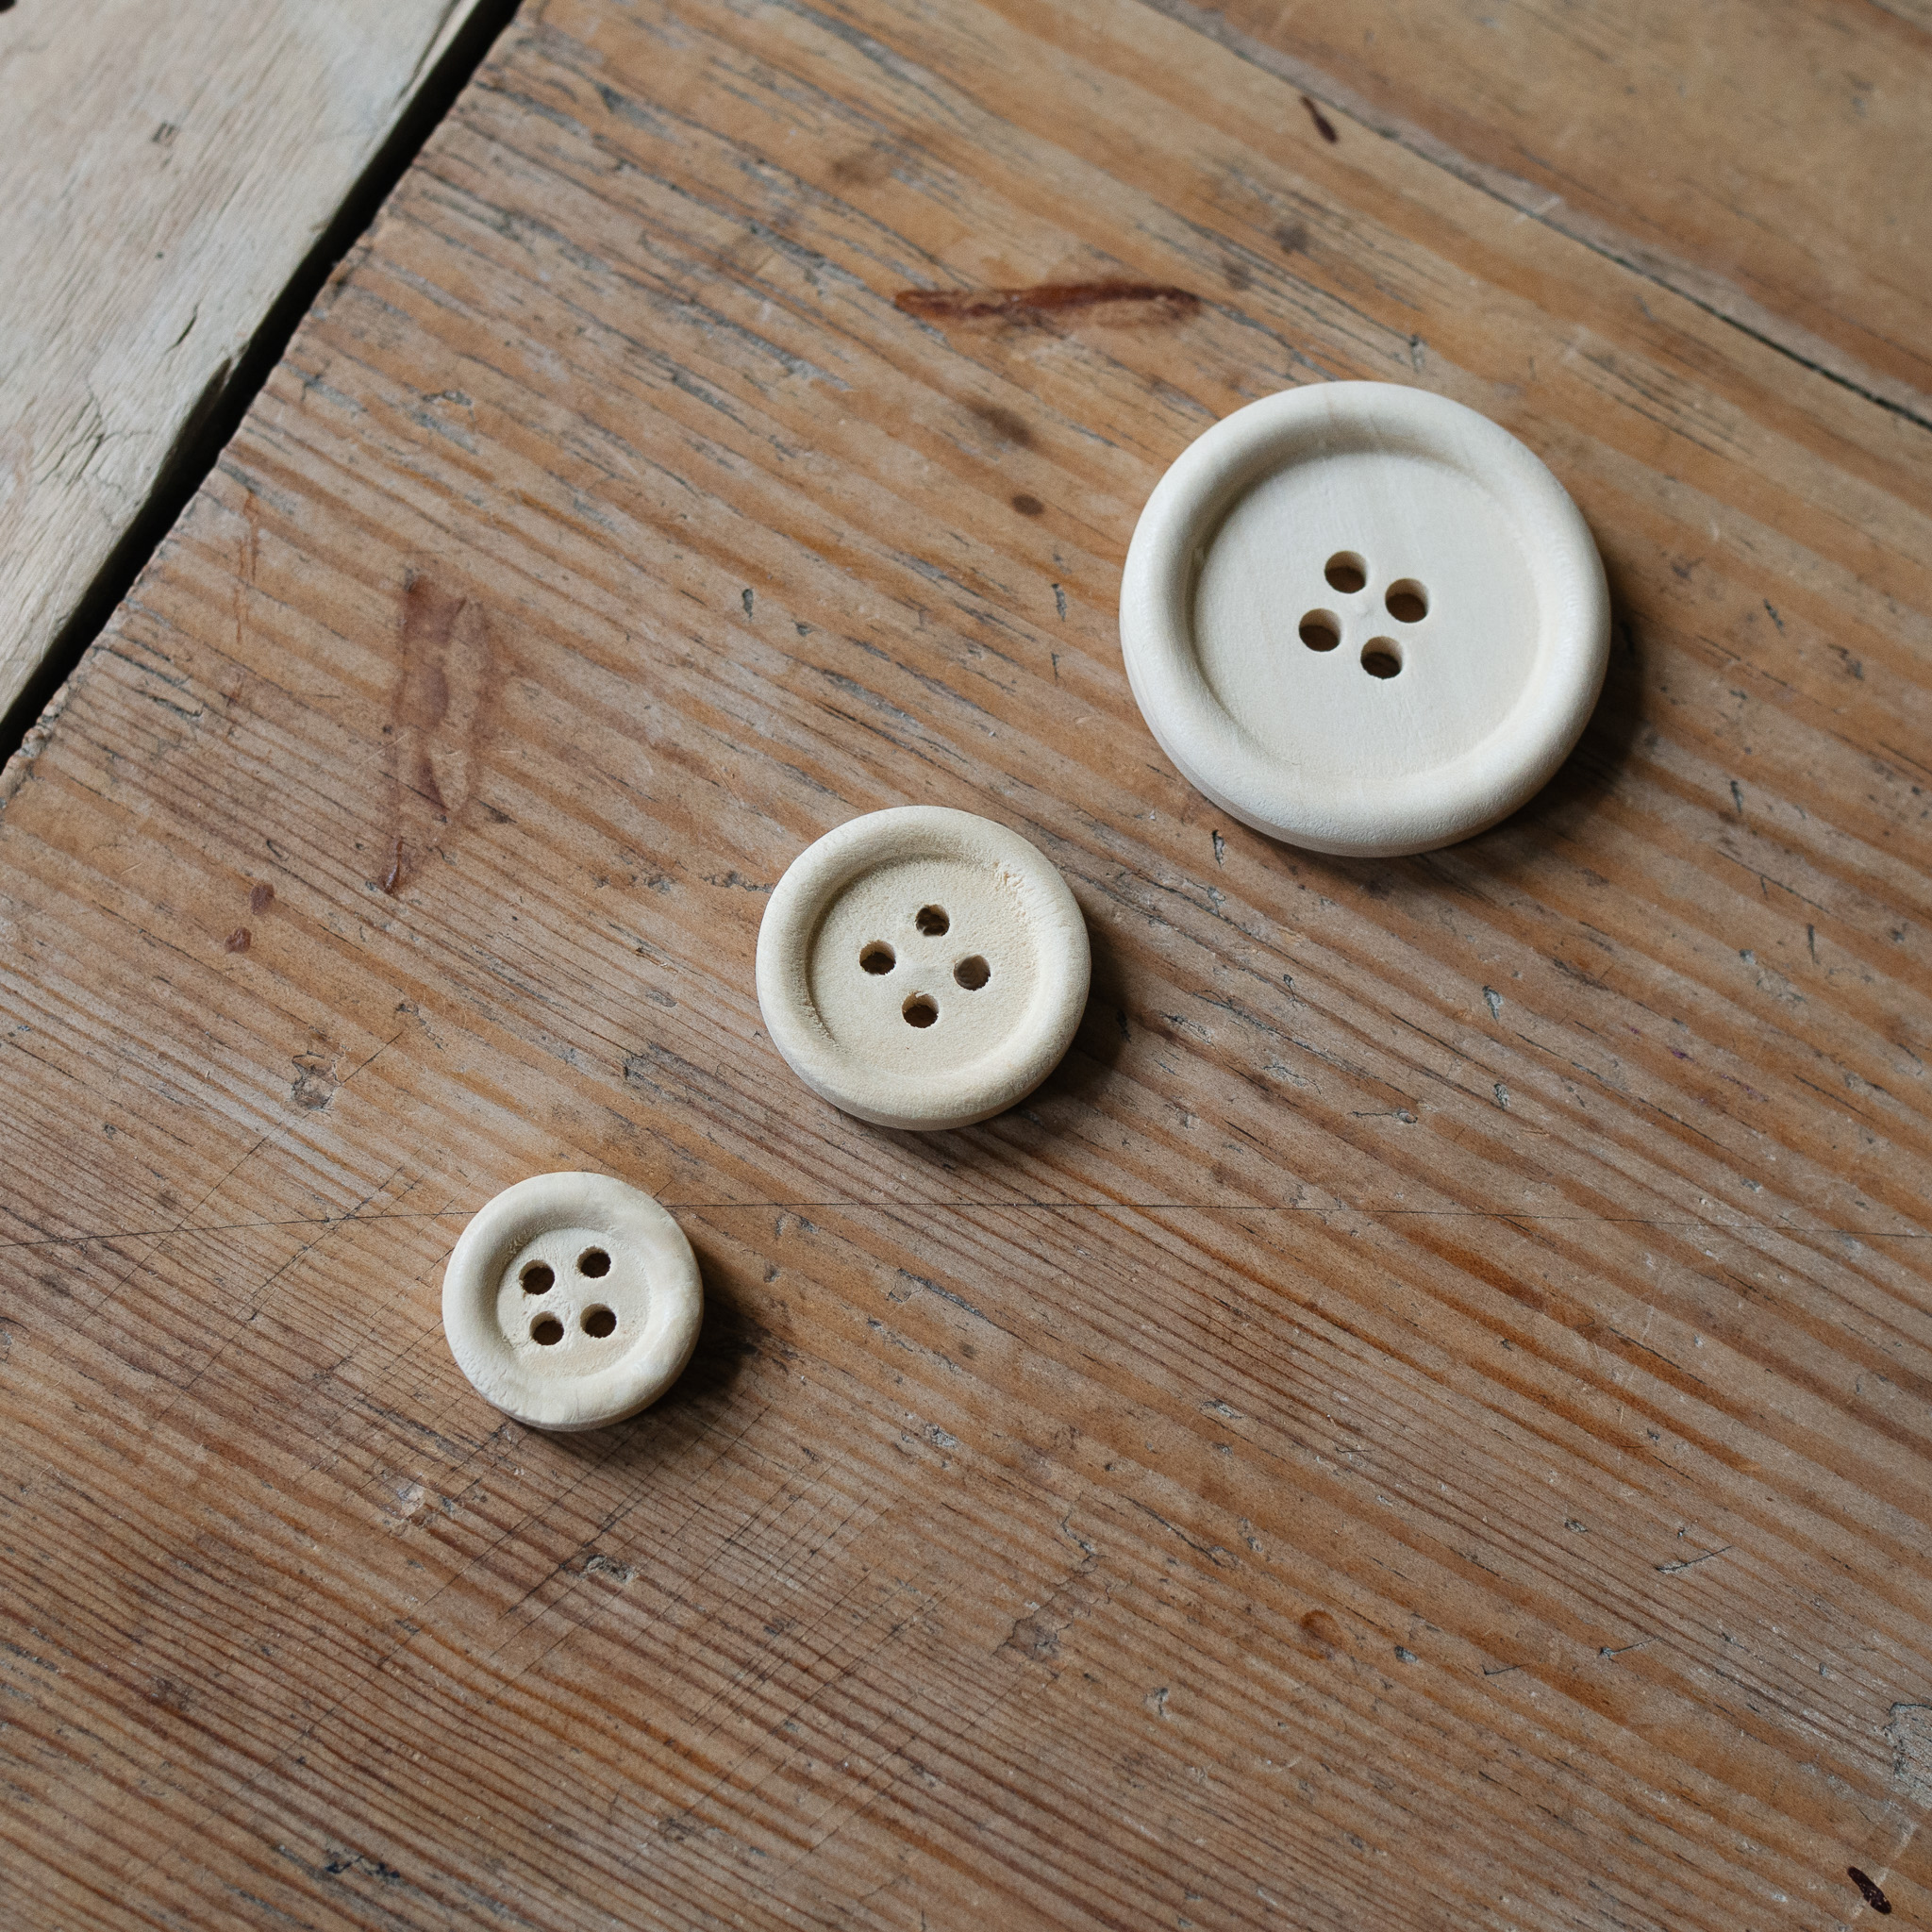
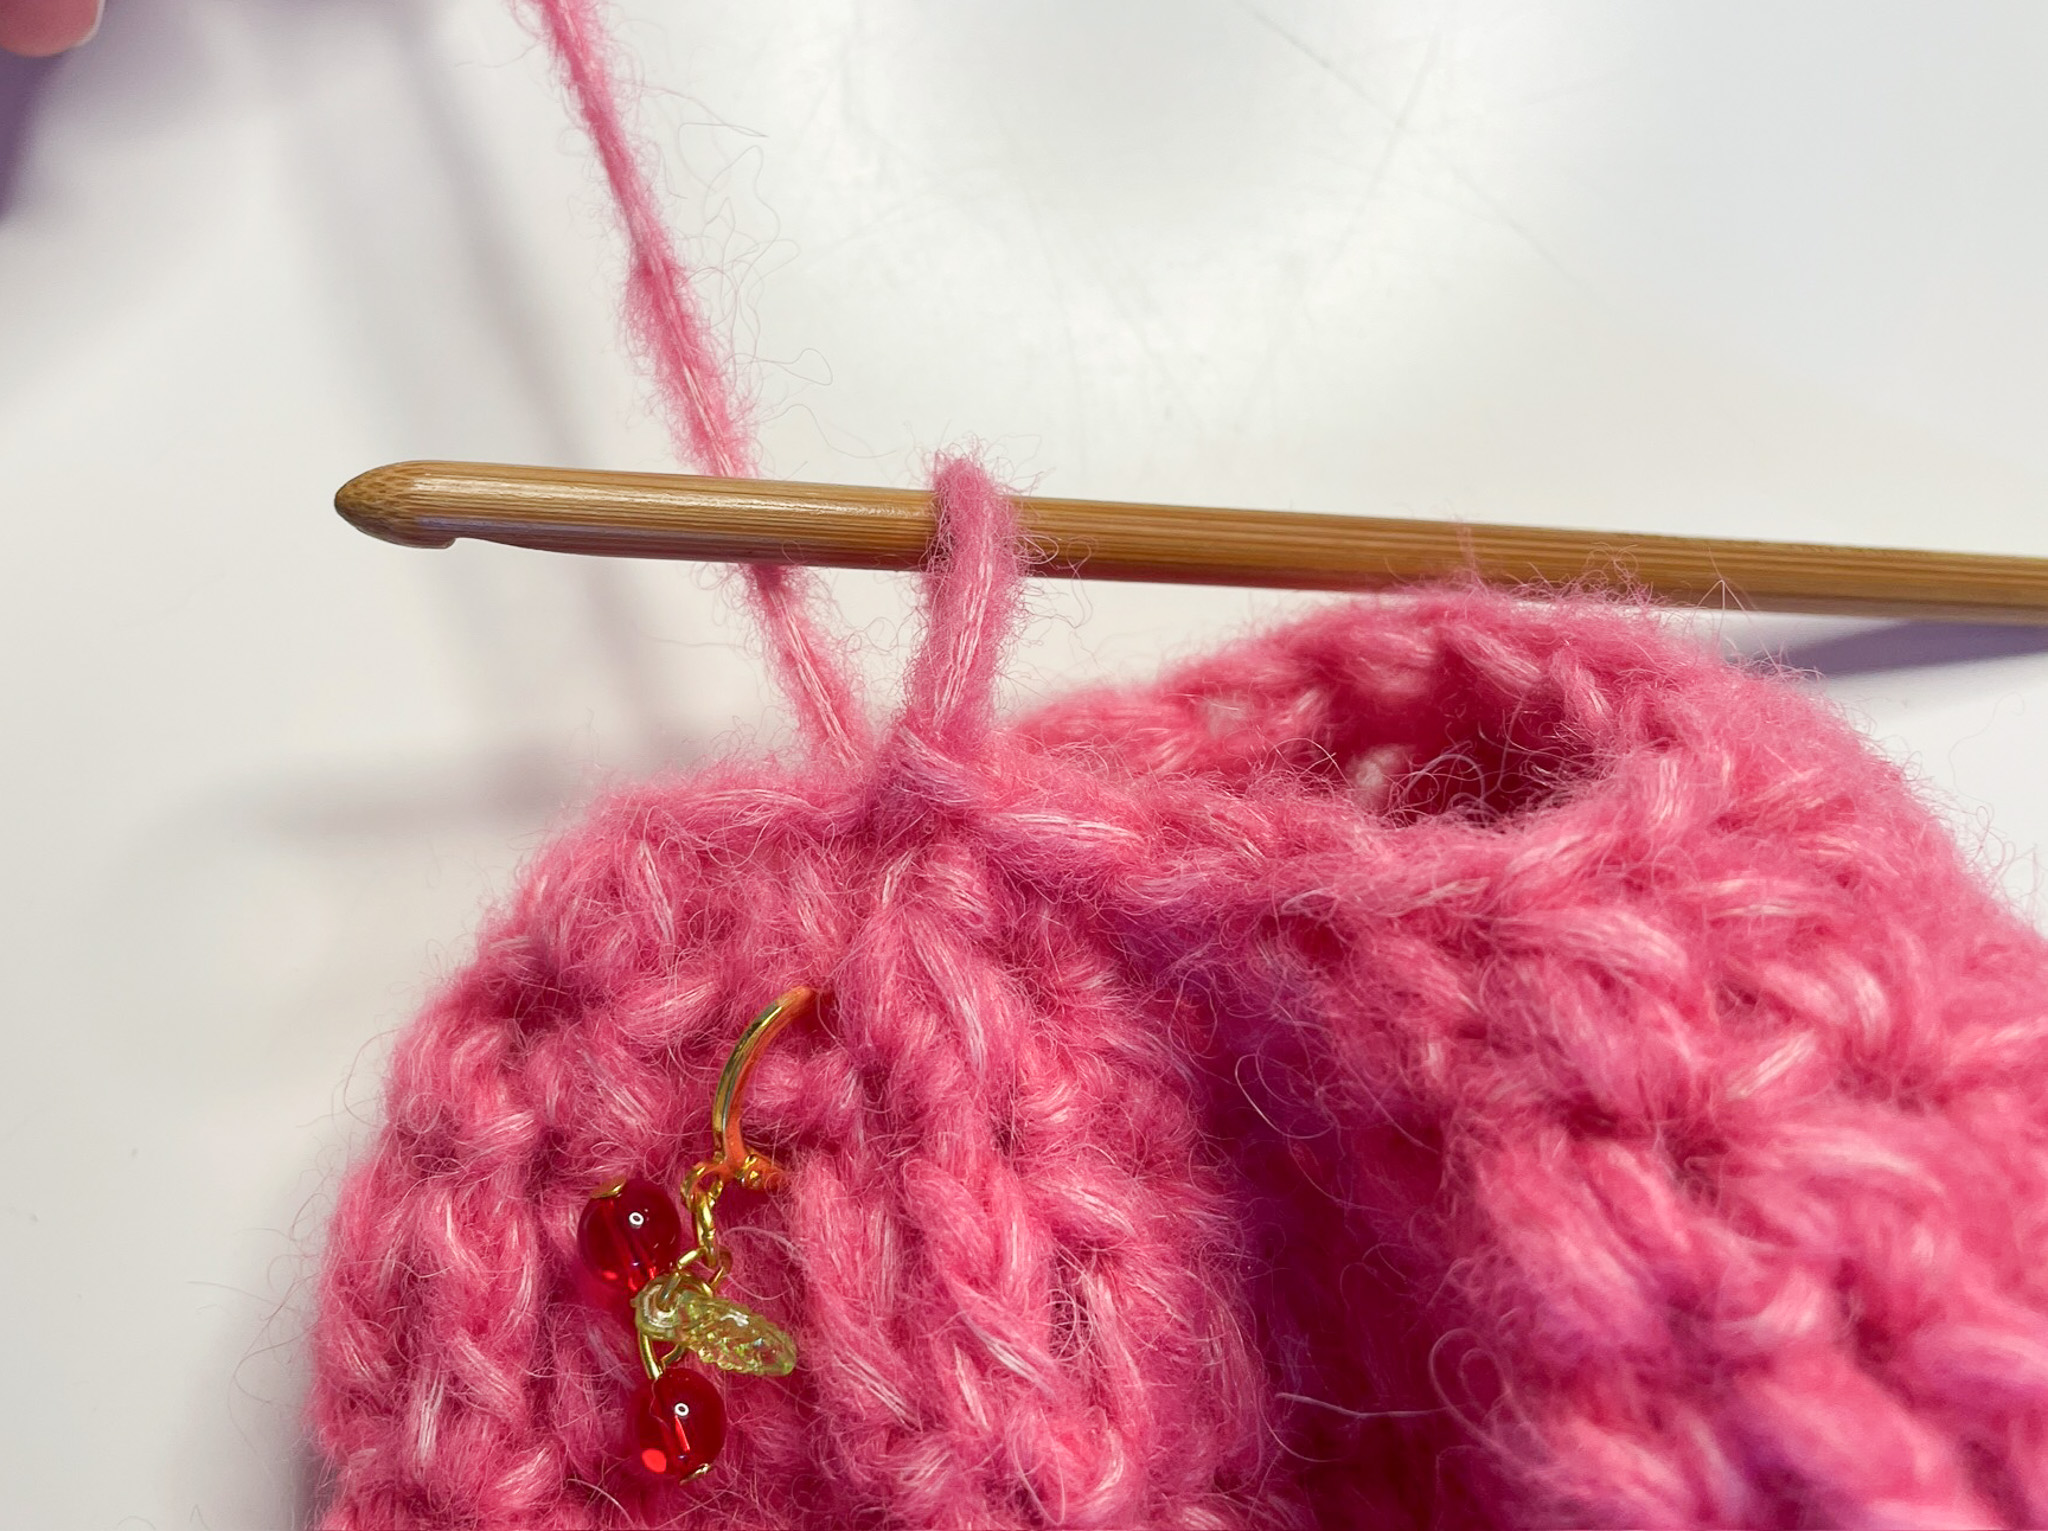
Sew on your buttons using a needle and thread appropriate for the size of the buttonholes. I used regular sewing thread and a sewing needle. Start with the top and bottom buttons, then work your way toward the middle. This way, you ensure the buttons and buttonholes are evenly spaced and look straight.
Now your cardigan is finished! Great job ☺
Crochet Terms
This part of the pattern consists only of crochet terms. If you need help along the way, see the simpler version with more pictures.
Abbreviations (US terms):
m – stitch (st)
fm – single crochet (sc)
lm – chain (ch)
sm – slip stitch (sl st)
st – double crochet (dc)
hst – half double crochet (hdc)
hö – skip (sk)
lu – chain space from previous row (ch-sp)
[…] – work all stitches inside the same stitch
*...* - Repeat across
BACK PANEL
Size S/M (L/XL)
Row 1: Ch 52. Turn.
Rows 2–3: Starting in the 3rd ch from the hook, dc 49, ch 2, turn (50).
Row 4: Ch 3 and start in 4th st: *sk 1 st, dc 1, ch 1*. Ch 2. Turn.
Rows 5–6: Start with 1 dc in the ch-sp, *dc in each st*, ch 2, turn. (50)
Row 7: Ch 3, start in the 4th st: *sk 1 st, dc in next st, ch 1*. Ch 2, turn.
Rows 8–9: *Dc in ch-sp, dc in next st*. Ch 2, turn. (50)
Row 10: Ch 3, start in the 4th st: *sk 1 st, dc in next st, ch 1*. Ch 2, turn.
Rows 11–12: *Dc in ch-sp, dc in next st*. ch 2, turn. (50)
Row 13: Ch 3, start in the 4th st: *sk 1 st, dc in next st, ch 1*. Ch 2, turn.
Rows 14–15: *Dc in ch-sp, dc in next st*. Ch 2, turn. (50)
Row 16: Ch 3, start in the 4th st: *sk 1 st, dc in next st, ch 1*. Ch 2, turn.
Rows 17–18: *Dc in ch-sp, dc in next st*. Ch 2, turn. (50)
Row 19: Ch 3, start in the 4th st: *sk 1 st, dc in next st, ch 1*. Ch 2, turn.
Rows 20–21: *Dc in ch-sp, dc in next st*. Ch 2, turn. (50 dc)
Row 22: Ch 3, start in the 4th st: *sk 1 st, dc in next st, ch 1*. Ch 2, turn.
Row 23: *Dc in ch-sp, dc in next st*. Ch 2, turn. (50 dc)
Back panel is finished.
Front Panel – (S/M (L/XL)
Row 1: Ch 26 (32). Turn.
Rows 2–3: Starting in the 2nd ch from the hook, work 24 (30) dc. Ch 2, turn. (24 (30))
Row 4: Ch 3, start in the 4th st: *sk 1 st, dc in next st, ch 1*. Ch 2, turn.
Rows 5–6: *Dc in ch-sp, dc in next st*. Ch 2, turn. (30)
Rows 6–17: Repeat Rows 3–5.
You now begin shaping the V-neck with decreases.
Row 18 (begin V-neck decrease):
Ch 1. Yarn over, insert hook into first st, yarn over and pull up a loop. Yarn over, insert hook into next st, pull up a loop. Yarn over, pull through all loops on hook to make 1 dc decrease. Dc 22 (28) across to end of row — total 23 (29) dc. Ch 2, turn.
Row 19:
Ch 3, start in the 4th st from the hook. *Dc in next st, ch 1, sk 1*. Repeat from * until 3 sts remain. Ch 1, dc2tog over the last 2 sts.
You should now have 11 (14) ch-spaces and 12 (15) dc.
Row 20: Ch 2, start in the 3rd st: Dc in first st. *Dc in ch-space, dc in next st*. Turn. You should now have 21 (27) dc on the row.
Row 21: Ch 2. Begin in the 3rd st from the hook and dc across until 2 sts remain. Yo and draw up a loop in the next-to-last st and in the last st together, dc these together as 1 dc (decrease). Turn. You should now have 20 (26) dc on the row.
Row 22: Ch 2, start in the 4th st, dc in the 4th st. *Ch 1, skip the next st, dc in the next st*. Repeat from * to * across the row. Turn. You should now have 10 (13) spaces and 11 (14) dc.
Row 23: Ch 2, *dc in ch-1 space, dc in next st*. Repeat from * to * until 2 sts remain on the row (this will be a space and a stitch). Yo and pull up a loop from the space, then yo and pull through the last st together, working them as 1 dc. You should now have 18 (24) dc on the row.
Row 24: Ch 1. Pull up a loop from the first and second stitch and work them together as 1 dc. Dc across the row. Turn. You should now have 17 (23) dc on the row.
Row 25: Ch 3. Starting in the 4th st from the hook, *dc 1, ch 1, skip 1 st*. Repeat from * to * until 2 sts remain. Yo and pull up a loop from the next-to-last st and the last st, work together as 1 dc. Turn. You should now have 8 (11) spaces and 9 (12) dc.
Row 26: Ch 3. Starting in the 4th st from the hook, dc in each st across the row. Turn.
Assembly of Front and Back Pieces
Now we’ll start assembling the front and back pieces so that you can crochet the sleeves directly onto the cardigan. Follow the steps below:
- Align the front pieces with the back piece at the shoulders. The pieces look almost identical on both sides, so place the sides you want facing outward when the cardigan is finished against each other.
- Use the yarn tail from the back piece to sew the shoulders together.
- Weave in all yarn ends.
- Tip: Secure the pieces with stitch markers before sewing to make assembly easier.
Then, using the stitch markers, join the fourth row along the sides of the cardigan (about halfway down the piece) and sew up from the bottom until you reach the marker. Cut the yarn, leaving a longer tail, but do not fasten off yet.
Sleeves
Now we’ll crochet the sleeves onto the cardigan. Here you can decide how wide you want the sleeves to be. The more dc you pick up, the “wide” the sleeves will become. For this sample, the following was worked:
Turn the cardigan so the right side is facing out.
Round 1: Attach the yarn at the center of the shoulder where the pieces were sewn together. Ch 2, dc in the first row of dc (the last row of dc from the front panel), dc 2 in the ch spaces. Repeat in the same way until you have about 20 (25) stitches.
Note: You can now make the sleeve as wide as you like — the more stitches you work, the larger the sleeve will be.
We have intentionally left the side partially open to allow you to adjust the sleeve size. Once you’re happy with the sleeve width, turn the cardigan and work the same number of dc on the other side — in this case, 20 (25) stitches.
Finish with a sl st in the first stitch. The sleeve is now complete with a total of 40 (50) stitches.
Round 2: Chain 2. Begin in the 3rd stitch from the hook and work 39 (49) dc. End with 1 sl st.
Round 3: Chain 3. Begin in the 5th stitch from the hook and work *1 dc, chain 1, skip 1 st*. Finish with 1 sl st in the space of the first chain.
Rounds 4–20: Repeat Rounds 1–3.
Round 21: Finish the sleeve by decreasing to 10 (12) sts. Do this by making 9 (11) more decreases.
Round 22: Work 10 (12) hdc around the sleeve.
Fasten off and weave in the ends. Repeat the same steps for the other sleeve.
Also, sew the side of the cardigan where you left the opening to start the sleeves.
Decorative Edging Around the Bottom, Front Panels, and Neckline:
Attach the yarn at the bottom of the left front panel (if you are wearing the cardigan). Chain 1, then work hdc evenly along the bottom edge of the cardigan, all the way around. Chain 1 and turn.
Continue the Decorative Edging for the Front Panels and Neckline:
Without cutting the yarn, chain 2, then work 2 hdc into the same stitch you just worked in. Continue to work 2 hdc in each “dc row” and in each “space” (hole) along the edge. Work all the way around the V-neck and down the other side of the front panel.
When you reach the end, chain 1, turn, and work hdc all the way back along the row.
Fasten off and weave in the ends.
Attaching Buttons:
Sew on your buttons using a needle and thread suitable for the size of the buttonholes. I chose regular sewing thread and a hand sewing needle.
Start with the top and bottom buttons, then work your way toward the middle. This ensures that the buttons and buttonholes line up evenly and don’t look crooked.
You’re done!
The rights to this pattern belong to MYO Make Your Own. The pattern or its pictures may not be copied, shared or resold either in parts or in its entirety, but you may sell items you have crocheted from this pattern. If you have questions about the pattern, contact MYO at hello@makeyourown.se.
Info
You will make this cardigan in three pieces: one back panel and two front panels. These are sewn together first, and then the sleeves are crocheted directly onto the body. The pattern is written for sizes S/M and L/XL (the L/XL instructions are in parentheses). If only one number is given, it applies to both sizes.
BACK PANEL
Row 1: Chain 50 + 2, turn.
If you are unsure how to make chain stitches, see the video below.
Row 2: Begin in the 3rd chain from the hook and work 49 double crochets. Chain 2, turn. You should now have 50 double crochets (one of the double crochets includes the 2 chains you made at the end of Row 1).
If you’re unsure how to work a double crochet, see the video below.
Row 3: Chain 2. Begin in the 3rd chain from the hook and work 49 double crochets, turn.
Row 4: Chain 3. Begin in the 5th stitch from the hook and work *1 double crochet, chain 1, skip 1 stitch, work 1 double crochet in the next stitch*. Repeat from * to * across the row. Turn. You should now have 25 gaps and 26 double crochets.
Row 5: Chain 2. Work *1 double crochet in the chain space from the previous row, then 1 double crochet in the next stitch*. Repeat from * to * across the row. Turn. The last stitch of the row will be a double crochet worked in a chain space.
Rows 6–25: Repeat Rows 3–5.
FRONT PANELS – MAKE 2
Row 1: Chain 24 + 2 for size S/M, 30 + 2 for L/XL, turn.
Row 2: Start in the 4th chain from the hook and work 24 (30) double crochets. Chain 2, turn.
Row 3: Start in the 3rd chain from the hook and work 24 (30) double crochets, turn.
Row 4: Chain 3. Start in the 5th stitch from the hook and work 1 double crochet, *chain 1, skip 1 stitch, 1 double crochet in the next stitch; repeat from * across. End the row with 1 double crochet in the last stitch. Turn. You should now have 12 (15) holes and 13 (16) double crochets.
Row 5: Chain 2. *Work 1 double crochet in the chain space from the previous row, 1 double crochet in the next stitch, 1 double crochet in the next chain space; repeat from * across. Turn. You should now have 24 (30) double crochets on the row.
Row 6-17: Repeat row 2-5.
Now we begin decreasing on one side of the panel to shape the V-neck.
Row 18: Chain 1. Decrease on one side by yarn over and pulling through the first stitch and then the second stitch of the row, then complete the stitch as a regular double crochet. Place a stitch marker in this stitch to mark the first double crochet of the row. Continue working double crochets to the end of the row. You should now have 23 (29) double crochets on the row. Turn.
Row 19: Chain 3. Start in the 5th stitch from the hook and *dc 1, ch 1, skip 1 stitch. Repeat from * until 3 stitches remain on the row. Chain 1. For the last two stitches, yarn over into the second-to-last stitch and then into the last stitch (the one with the marker) and work them together as a double crochet. Turn. You should now have 11 (14) spaces and 12 (15) double crochets.
Row 20: Chain 2 and start in the 3rd stitch from the hook. Work 1 double crochet in the first stitch of the row. *Work 1 double crochet in the chain space from the previous row, 1 double crochet in the next stitch. Repeat from * to the end of the row, turn. You should now have 21 (27) double crochets on the row.
Row 21: Chain 2. Start in the 3rd chain from the hook and work double crochets until 2 stitches remain on the row. Yarn over and pull through the next-to-last stitch and then the last stitch, working them together as 1 double crochet. Turn. You should now have 20 (26) double crochets on the row.
Row 22:
Chain 3 and start in the 5th stitch from the hook (skip the first stitch) and work 1 double crochet into the 5th stitch. *Chain 1, skip the next stitch, work 1 double crochet in the next stitch. Repeat from * to the end of the row. Turn. You should now have 10 (13) spaces and 11 (14) double crochets.
Row 23:
Chain 2. Work 1 double crochet in the chain space of the previous row, then 1 double crochet in the next stitch. Repeat this pattern until 2 stitches remain at the end of the row (one chain space and one stitch). Yarn over in the chain space and then in the last stitch, and work them together as 1 double crochet. You should now have 18 (24) double crochets in the row.
Row 24: Chain 1 and start in the 2nd st from hook. Yarn over and work the first two stitches together as 1 double crochet. Continue working double crochets across the row. Turn. You should now have 17 (23) double crochets in the row.
Row 25: Chain 3. Start in the 5th stitch from the hook and *work 1 double crochet, chain 1, skip 1 stitch. Repeat from * until 2 stitches remain on the row. Yarn over and work the last two stitches together as 1 double crochet. Turn. You should now have 8 (11) chain spaces and 9 (12) double crochets.
Row 26: Chain 3. Start in the 5th stitch from the hook and *work 1 double crochet, chain 1, skip 1 stitch. Repeat from * until 2 stitches remain on the row. Yarn over and work the last two stitches together as 1 double crochet, turn. You should now have 8 (11) chain spaces and 9 (12) double crochets.
Cut and fasten off the yarn. If you’re unsure how to fasten off, see the video below.
Repeat the same steps to create an identical piece so that you have two front panels.
Assembly of Front and Back Panels
Now it’s time to assemble the front and back panels before crocheting the sleeves directly onto the cardigan. Follow these steps:
- Align the pieces: Place the front panels so they align with the shoulders of the back panel. The pieces look almost identical on both sides, so position the sides you want facing outward when the cardigan is finished toward each other.
- Join the shoulders: Use the yarn tail from the back panel to sew the shoulders together. Secure all yarn ends.
- Attach at the “hole row”: Use stitch markers to connect the fourth row with the “hole row” (about half of the cardigan) and sew until you reach the marker.
If you think the cardigan turned out too short, you can crochet a few extra rows along the bottom. Start in one of the openings and work as follows:
Hole row: Chain 3. Starting in the 5th chain from the hook, work 1 double crochet, *chain 1, skip 1 stitch, and work 1 double crochet in the next stitch. Repeat from * to the end of the row. End the row with 1 double crochet in the last stitch. Turn.
Row with double crochet: Starting in the 4th stitch from the hook, work 24 (30) double crochets. Chain 2, turn.
Row with double crochet: Starting in the 4th stitch from the hook, work 24 (30) double crochets, turn.
Repeat från "hole" row if you want it longer.
Sleeves
It’s time to crochet the sleeves onto the cardigan. Here you can decide how wide or puffy you want the sleeves to be—the more stitches you pick up, the puffier the sleeves will become. For this model, the following method was used:
- Turn the cardigan so that the right side is facing up (the side that will be on the outside).
- Round 1: Attach the yarn in the middle of the shoulder seam where the front and back pieces were joined. Chain 2, then work 1 double crochet into the first stitch of the row of double crochets (the last row of double crochets on the front piece).
Crochet 2 double crochets into the “hole row,” then work 2 double crochets into each row of double crochets from the front piece. Repeat this sequence until you have 20 (25) stitches.
Note: You can now adjust the sleeve width—more stitches will make a larger sleeve. We have intentionally left the side partially open to allow for customizing the sleeve size.
Once you’re happy with the sleeve width, turn the cardigan and crochet the same number of stitches on the other side—in this case, 20 (25) stitches. When you reach the first stitch again, join with a slip stitch in the first stitch.
Round 2: Chain 2. Begin in the 3rd stitch from the hook and work double crochets all the way around. Join the round with a slip stitch in the top of the starting chain.
Round 3: Chain 3. Begin in the 5th stitch from the hook and work *1 double crochet, 1 chain, skip 1 stitch. Repeat from * to the end of the round, and join with a slip stitch into the first chain space.
Rounds 4–20: Repeat rounds 1–3.
Round 21: We finish the sleeve by decreasing to 10 (12) stitches. Do this by yarn over the first stitch and then the second stitch on the row, pulling through all three loops on the hook. Place a stitch marker so you know where the round begins. Repeat this 9 (11) more times.
If you are unsure how to work a decrease, see the video below.
Round 22: Work 10 (12) half double crochets (hdc) around the sleeve.
If you’re unsure how to make a half double crochet, see the video below.
Cut and fasten off the yarn.
Repeat the same process for the other sleeve.
Also, sew the side of the cardigan where you left an opening to start the sleeve.
Decorative Edge Around the Bottom of the Cardigan + Front Panels and Neckline
Attach the yarn at the bottom of the left front panel (as seen when wearing the cardigan). Chain 1, then work half double crochets along the bottom edge of the cardigan, all the way around. Chain 1, turn.
Work half double crochets all the way back to where you started.
Front Panels and Neckline:
Without cutting the yarn, chain 2, then work 2 half double crochets into the same stitch you just worked in.
Continue working 2 half double crochets in each “post” and “space” all the way around the V-neck and neckline, down to the other side of the front panel.
When you reach the end, chain 1 and turn. Then work half double crochets all the way back.
Cut the yarn and fasten off.
Sew on your buttons using a needle and thread appropriate for the size of the buttonholes. I used regular sewing thread and a sewing needle. Start with the top and bottom buttons, then work your way toward the middle. This way, you ensure the buttons and buttonholes are evenly spaced and look straight.
Now your cardigan is finished! Great job ☺
Crochet Terms
This part of the pattern consists only of crochet terms. If you need help along the way, see the simpler version with more pictures.
Abbreviations (US terms):
m – stitch (st)
fm – single crochet (sc)
lm – chain (ch)
sm – slip stitch (sl st)
st – double crochet (dc)
hst – half double crochet (hdc)
hö – skip (sk)
lu – chain space from previous row (ch-sp)
[…] – work all stitches inside the same stitch
*...* - Repeat across
BACK PANEL
Size S/M (L/XL)
Row 1: Ch 52. Turn.
Rows 2–3: Starting in the 3rd ch from the hook, dc 49, ch 2, turn (50).
Row 4: Ch 3 and start in 4th st: *sk 1 st, dc 1, ch 1*. Ch 2. Turn.
Rows 5–6: Start with 1 dc in the ch-sp, *dc in each st*, ch 2, turn. (50)
Row 7: Ch 3, start in the 4th st: *sk 1 st, dc in next st, ch 1*. Ch 2, turn.
Rows 8–9: *Dc in ch-sp, dc in next st*. Ch 2, turn. (50)
Row 10: Ch 3, start in the 4th st: *sk 1 st, dc in next st, ch 1*. Ch 2, turn.
Rows 11–12: *Dc in ch-sp, dc in next st*. ch 2, turn. (50)
Row 13: Ch 3, start in the 4th st: *sk 1 st, dc in next st, ch 1*. Ch 2, turn.
Rows 14–15: *Dc in ch-sp, dc in next st*. Ch 2, turn. (50)
Row 16: Ch 3, start in the 4th st: *sk 1 st, dc in next st, ch 1*. Ch 2, turn.
Rows 17–18: *Dc in ch-sp, dc in next st*. Ch 2, turn. (50)
Row 19: Ch 3, start in the 4th st: *sk 1 st, dc in next st, ch 1*. Ch 2, turn.
Rows 20–21: *Dc in ch-sp, dc in next st*. Ch 2, turn. (50 dc)
Row 22: Ch 3, start in the 4th st: *sk 1 st, dc in next st, ch 1*. Ch 2, turn.
Row 23: *Dc in ch-sp, dc in next st*. Ch 2, turn. (50 dc)
Back panel is finished.
Front Panel – (S/M (L/XL)
Row 1: Ch 26 (32). Turn.
Rows 2–3: Starting in the 2nd ch from the hook, work 24 (30) dc. Ch 2, turn. (24 (30))
Row 4: Ch 3, start in the 4th st: *sk 1 st, dc in next st, ch 1*. Ch 2, turn.
Rows 5–6: *Dc in ch-sp, dc in next st*. Ch 2, turn. (30)
Rows 6–17: Repeat Rows 3–5.
You now begin shaping the V-neck with decreases.
Row 18 (begin V-neck decrease):
Ch 1. Yarn over, insert hook into first st, yarn over and pull up a loop. Yarn over, insert hook into next st, pull up a loop. Yarn over, pull through all loops on hook to make 1 dc decrease. Dc 22 (28) across to end of row — total 23 (29) dc. Ch 2, turn.
Row 19:
Ch 3, start in the 4th st from the hook. *Dc in next st, ch 1, sk 1*. Repeat from * until 3 sts remain. Ch 1, dc2tog over the last 2 sts.
You should now have 11 (14) ch-spaces and 12 (15) dc.
Row 20: Ch 2, start in the 3rd st: Dc in first st. *Dc in ch-space, dc in next st*. Turn. You should now have 21 (27) dc on the row.
Row 21: Ch 2. Begin in the 3rd st from the hook and dc across until 2 sts remain. Yo and draw up a loop in the next-to-last st and in the last st together, dc these together as 1 dc (decrease). Turn. You should now have 20 (26) dc on the row.
Row 22: Ch 2, start in the 4th st, dc in the 4th st. *Ch 1, skip the next st, dc in the next st*. Repeat from * to * across the row. Turn. You should now have 10 (13) spaces and 11 (14) dc.
Row 23: Ch 2, *dc in ch-1 space, dc in next st*. Repeat from * to * until 2 sts remain on the row (this will be a space and a stitch). Yo and pull up a loop from the space, then yo and pull through the last st together, working them as 1 dc. You should now have 18 (24) dc on the row.
Row 24: Ch 1. Pull up a loop from the first and second stitch and work them together as 1 dc. Dc across the row. Turn. You should now have 17 (23) dc on the row.
Row 25: Ch 3. Starting in the 4th st from the hook, *dc 1, ch 1, skip 1 st*. Repeat from * to * until 2 sts remain. Yo and pull up a loop from the next-to-last st and the last st, work together as 1 dc. Turn. You should now have 8 (11) spaces and 9 (12) dc.
Row 26: Ch 3. Starting in the 4th st from the hook, dc in each st across the row. Turn.
Assembly of Front and Back Pieces
Now we’ll start assembling the front and back pieces so that you can crochet the sleeves directly onto the cardigan. Follow the steps below:
- Align the front pieces with the back piece at the shoulders. The pieces look almost identical on both sides, so place the sides you want facing outward when the cardigan is finished against each other.
- Use the yarn tail from the back piece to sew the shoulders together.
- Weave in all yarn ends.
- Tip: Secure the pieces with stitch markers before sewing to make assembly easier.
Then, using the stitch markers, join the fourth row along the sides of the cardigan (about halfway down the piece) and sew up from the bottom until you reach the marker. Cut the yarn, leaving a longer tail, but do not fasten off yet.
Sleeves
Now we’ll crochet the sleeves onto the cardigan. Here you can decide how wide you want the sleeves to be. The more dc you pick up, the “wide” the sleeves will become. For this sample, the following was worked:
Turn the cardigan so the right side is facing out.
Round 1: Attach the yarn at the center of the shoulder where the pieces were sewn together. Ch 2, dc in the first row of dc (the last row of dc from the front panel), dc 2 in the ch spaces. Repeat in the same way until you have about 20 (25) stitches.
Note: You can now make the sleeve as wide as you like — the more stitches you work, the larger the sleeve will be.
We have intentionally left the side partially open to allow you to adjust the sleeve size. Once you’re happy with the sleeve width, turn the cardigan and work the same number of dc on the other side — in this case, 20 (25) stitches.
Finish with a sl st in the first stitch. The sleeve is now complete with a total of 40 (50) stitches.
Round 2: Chain 2. Begin in the 3rd stitch from the hook and work 39 (49) dc. End with 1 sl st.
Round 3: Chain 3. Begin in the 5th stitch from the hook and work *1 dc, chain 1, skip 1 st*. Finish with 1 sl st in the space of the first chain.
Rounds 4–20: Repeat Rounds 1–3.
Round 21: Finish the sleeve by decreasing to 10 (12) sts. Do this by making 9 (11) more decreases.
Round 22: Work 10 (12) hdc around the sleeve.
Fasten off and weave in the ends. Repeat the same steps for the other sleeve.
Also, sew the side of the cardigan where you left the opening to start the sleeves.
Decorative Edging Around the Bottom, Front Panels, and Neckline:
Attach the yarn at the bottom of the left front panel (if you are wearing the cardigan). Chain 1, then work hdc evenly along the bottom edge of the cardigan, all the way around. Chain 1 and turn.
Continue the Decorative Edging for the Front Panels and Neckline:
Without cutting the yarn, chain 2, then work 2 hdc into the same stitch you just worked in. Continue to work 2 hdc in each “dc row” and in each “space” (hole) along the edge. Work all the way around the V-neck and down the other side of the front panel.
When you reach the end, chain 1, turn, and work hdc all the way back along the row.
Fasten off and weave in the ends.
Attaching Buttons:
Sew on your buttons using a needle and thread suitable for the size of the buttonholes. I chose regular sewing thread and a hand sewing needle.
Start with the top and bottom buttons, then work your way toward the middle. This ensures that the buttons and buttonholes line up evenly and don’t look crooked.
You’re done!
The rights to this pattern belong to MYO Make Your Own. The pattern or its pictures may not be copied, shared or resold either in parts or in its entirety, but you may sell items you have crocheted from this pattern. If you have questions about the pattern, contact MYO at hello@makeyourown.se.
%20(5).jpg)
Share your creations with us
Thank you!
Your comment was sent!