
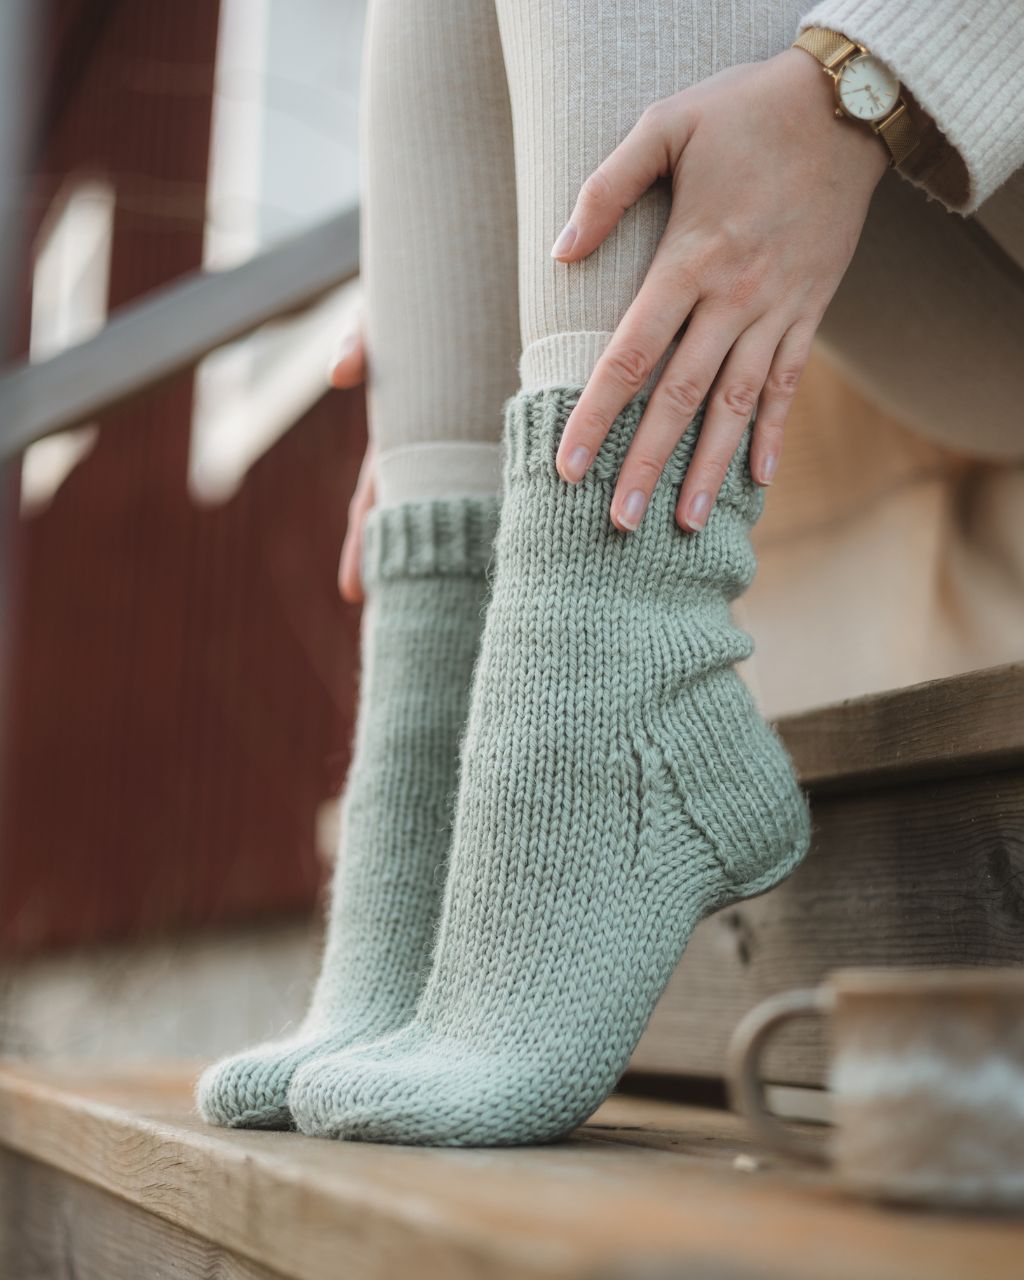
Knitted socks "Anita"
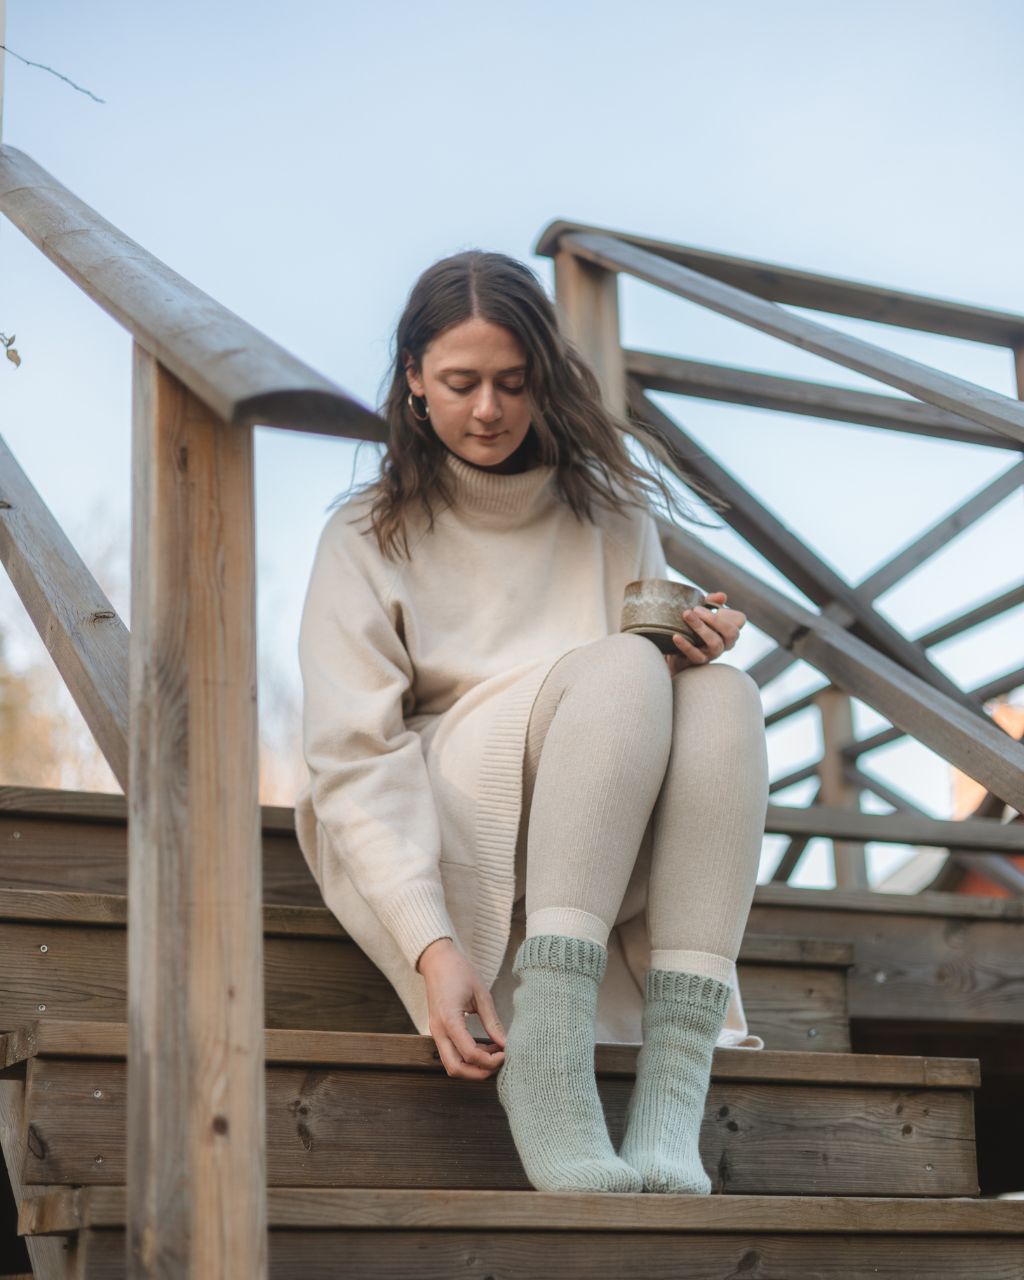
Knit a pair of beginner-friendly socks (without double-pointed needles)!
Have you wanted to try knitting socks but feel that keeping track of five double-pointed needles seems complicated? Then the “Anita” socks are for you. The socks are knitted in the round using the magic loop technique on circular needles, and you can easily adapt the instructions to your own measurements.
To knit the socks you’ll need a color of MYO Basic Wool of your choice, a pair of 80 cm circular needles in size 5, a couple of stitch markers, and a darning needle. In the full-length video you’ll be guided through every step of the process, along with the calculations you need to determine the correct stitch counts for your size.
Yarn requirements: For a pair of socks approximately the same size as the example (EU 39, foot circumference about 30 cm, foot length about 26 cm), you’ll need about 120 g of yarn (about 60 g per sock). Expect a variation of approximately ±12 g for each size up or down. This is an approximate amount and may vary depending on the measurements of the foot, the length of the cuff, and your gauge.
.jpg)
Here's how to do it
These socks are especially beginner-friendly because they are knitted on circular needles instead of double-pointed needles. That way you don’t have to keep track of five different needles and can instead knit using the magic loop technique. With the full-length instructional video, I guide you through every step so you can knit your very own socks in no time <3 / Johanna

This is what you need:
Here you can directly purchase the material for the product. Please note that the instruction is digital and appears here on the page (no written instruction).


.jpg)
Unleash your creativity
For only 85kr per month you get access to all our 300+ beginner-friendly instructions for crochet, knitting and macrame.
A perfect way to get started with your new hobby!

Gauge: 17 sts × 23 rows per 10 cm in stockinette stitch worked in the round on 5 mm needles.
If your work is too tight, go up one needle size.
If it’s too loose, go down one needle size.
Calculating stitch count
Measure the circumference of the widest part of the foot (around the heel and top of the foot). Take the measurement in centimeters and multiply by 1.33.
Round the result to the nearest number divisible by 4, so the stitches can be evenly divided when working with the magic loop.
Cast on this number of stitches plus one extra stitch. The extra stitch helps create a neat start when you begin knitting in the round.
Cast-on
Cast on the stitches using the long-tail cast-on.
This is a common and stable cast-on method that works well for socks.
You have cast on one extra stitch—this is only used to create a neat join when you begin knitting in the round.
Preparation
Measure a sufficiently long length of yarn. How long depends on the number of stitches you will cast on, but it’s better to have it too long than too short.
Make a loop, hold both needles together, and place the loop on the needles. Pull both yarn ends so that the loop sits snugly.
This counts as the first stitch. We cast on over two needles so that the stitches are easier to work and looser for the first round.
Holding the yarn
Place the loose yarn around your left thumb, with the yarn tail on the outside of your thumb.
Bring the yarn from the ball over your left index finger, from the inside of your hand and out.
Hold both yarn ends in your palm with your ring finger and little finger. Now the yarn forms a “V” between thumb and index finger.
Casting on stitches
Insert the right needle under the loop around the thumb from below.
Use the needle to catch the yarn from your index finger.
Pull the yarn back through the loop around the thumb so that a new stitch is formed.
Release the loop from the thumb and gently tighten the stitch on the needle.
Place the yarn around the thumb again and repeat until the desired number of stitches is cast on.
Tips
The stitches should be snug but not tight on the needle.
If the cast-on feels too tight, start over and pull a little looser.
Preparing for Magic Loop
Magic loop allows you to knit in the round even when your work is smaller than the circumference of the needle.
Divide the stitches
After all stitches are cast on:
Slide the stitches to the middle of the circular needle.
Divide them into two equal parts. The needle with the yarn from the ball will have one fewer stitch; the extra stitch sits on the other needle.
Pull out the cable between the needles so that you have two free needle tips.
Half of the stitches are on each needle.
Hold the needles
Hold the needle with the yarn from the ball in your right hand. This is always where you start knitting. The stitches on the other needle are waiting.
The extra stitch (for a neat start)
Move the extra stitch from one needle to the other.
Lift the first stitch over the extra stitch and release it from the needle.
Gently pull the yarn tail.
Now your work is joined in a round without a gap, and you have the correct stitch count.
Important tips
Pull slightly tighter on the first stitch of each needle to avoid gaps.
If it feels tricky, pause, reread, and continue calmly.
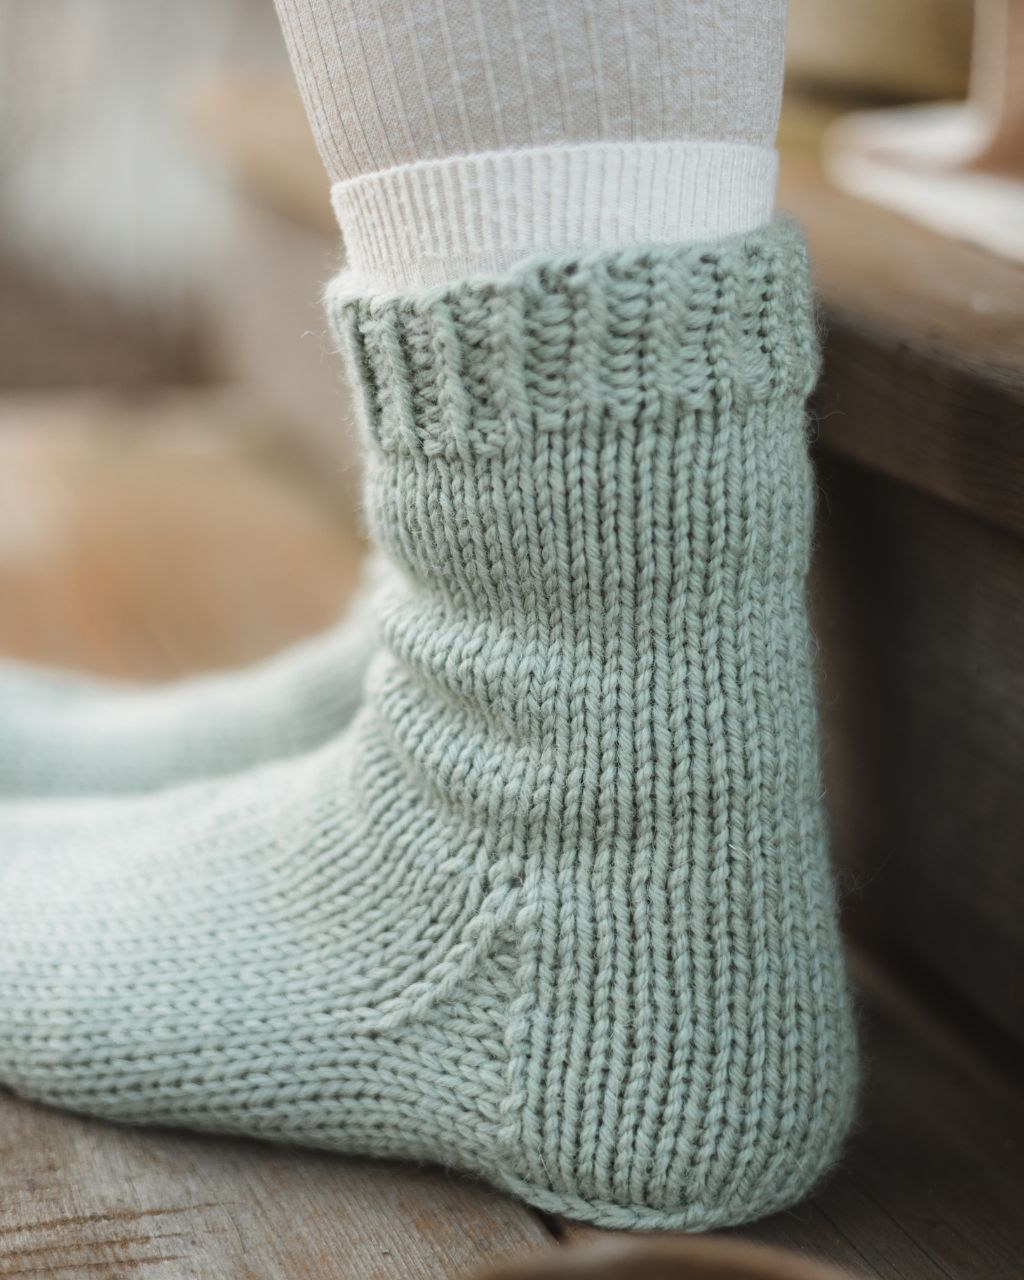
Ribbing
Now we start knitting the ribbing. In the rib, work 1 knit stitch through the back loop, 1 purl stitch, repeating around the round.
Knitting the knit stitches through the back loop twists them slightly, giving a tighter and neater rib – perfect for the beginning of a sock.
How to knit a stitch through the back loop
Insert the right needle from front to back through the back leg of the stitch.
Wrap the yarn around the needle.
Pull the yarn through the stitch.
Slip the old stitch off the left needle.
How to purl a stitch
Bring the yarn to the front of the work.
Insert the right needle from back to front through the stitch.
Wrap the yarn around the needle.
Pull the yarn through the stitch.
Slip the old stitch off the left needle.
Knitting the rib
Work around the round:
1 knit stitch through the back loop
1 purl stitch
Repeat around the entire round.
When the needle is empty, pull out the cable and continue knitting the next needle.
How many ribbing rounds?
To calculate the number of ribbing rounds, use your foot circumference:
Foot circumference × 0.27
Example:
Foot circumference = 30 cm
30 × 0.27 = 8.1
Round up or down to the nearest whole number = 8 rounds of ribbing
Leg
When the ribbing is finished, we start knitting the leg.
The leg is worked in stockinette stitch in the round, which means you knit all stitches through the front loop, instead of the back loop as you did for the ribbing.
Knit all stitches around until the leg reaches the desired length.
How to knit a stitch through the front loop
Insert the right needle from front to back through the front leg of the stitch.
Wrap the yarn around the needle.
Pull the yarn through the stitch.
Slip the old stitch off the left needle.
How many rounds for the leg?
To calculate the number of rounds:
Foot circumference × 0.87
Example:
Foot circumference = 30 cm
30 × 0.87 = 26.1
Round up or down to the nearest whole number = 26 rounds
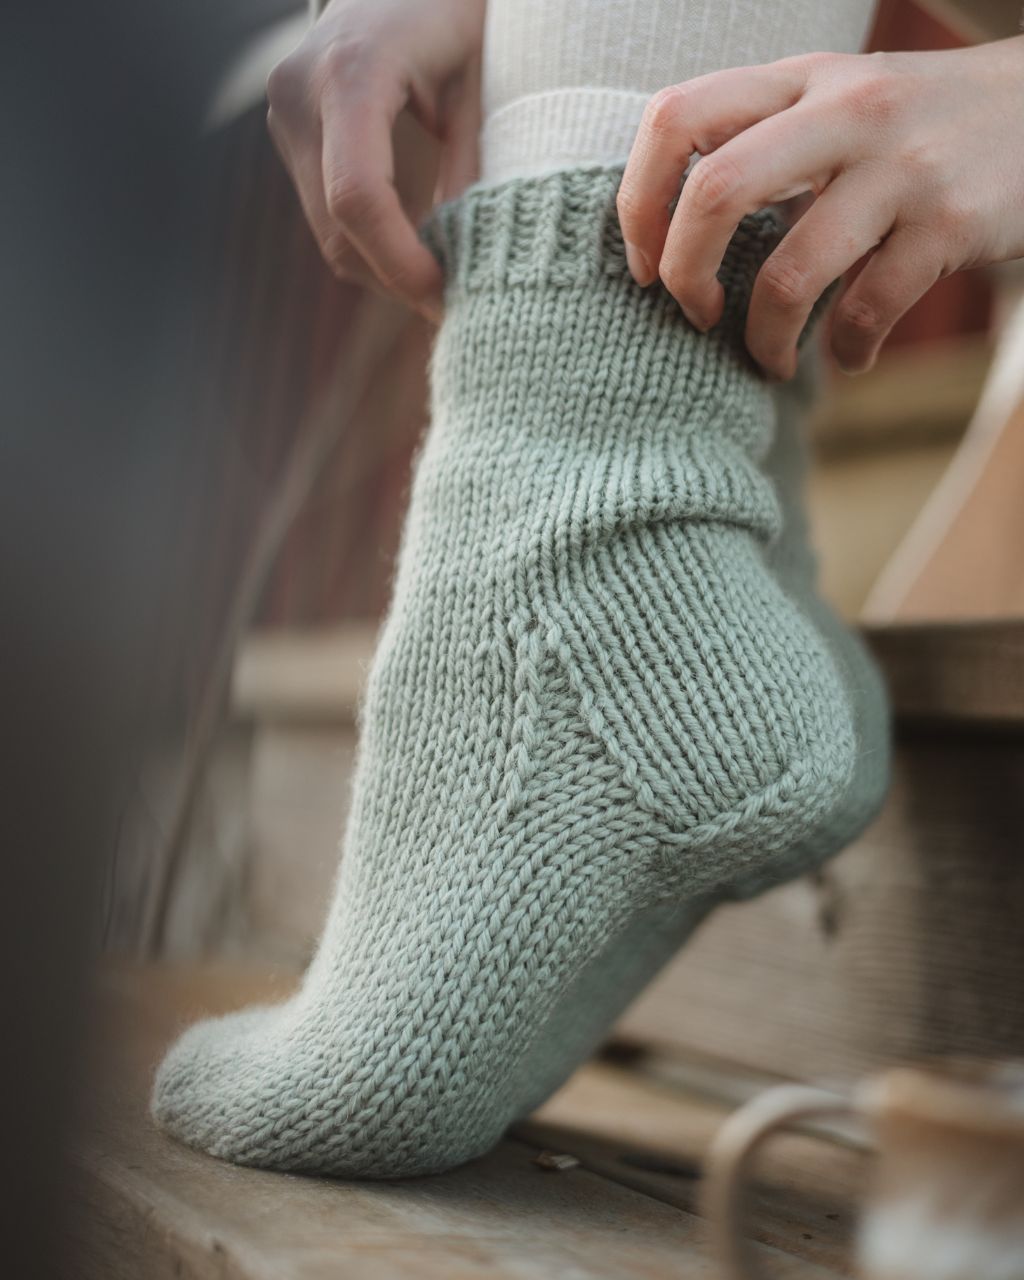
Heel flap
The heel flap is worked back and forth on the first needle (half of all stitches) instead of in the round.
The stitches on the other needle are held while we work the heel.
The heel flap is worked in stockinette stitch back and forth:
Knit stitches on the right side
Purl stitches on the wrong side
To create a neat edge, always slip the first stitch of each row without knitting it.
This edge makes it easier later to pick up stitches along the heel (this is called the gusset).
How to work
Right-side row
Slip the first stitch without knitting it.
Knit the remaining stitches.
Wrong-side row
Slip the first stitch without knitting it.
Purl the remaining stitches.
Turn the work at the end of each row.
How many rows for the heel flap?
Number of cast-on stitches × 0.5
Example:
40 cast-on stitches × 0.5 = 20 rows
Work 20 rows back and forth. The last row should be a wrong-side row.
Heel turn (decreases)
Now we shape the heel by making decreases in the center of the heel flap.
Place a marker in the middle of all stitches on the needle.
Take half of all stitches and divide by 6 to calculate the number of stitches before each decrease.
Example:
40 cast-on stitches
Half = 20
20 ÷ 6 = 3.3 → round to nearest whole number = 3 stitches
Row 1 (right side)
Slip the first stitch without knitting it.
Knit to the marker.
Slip the marker.
Knit the number of stitches calculated above (e.g., 3).
Then make an ssk decrease.
How to do an ssk decrease
Slip the first stitch knitwise.
Slip the next stitch purlwise.
Insert the left needle through both stitches from front to back.
Knit them together through the back loops.
This creates a left-leaning decrease.
Turn the work.
Row 2 (wrong side)
Slip the first stitch purlwise.
Pull the yarn slightly to tighten the edge.
Purl to the marker.
Move the marker to the right needle.
Purl 3 stitches, then make a p2tog decrease.
How to purl two together
Insert the needle through two stitches at once.
Wrap yarn around the needle.
Draw yarn through both stitches.
Slip both stitches off the left needle.
Turn the work.
Continue
Slip the first stitch.
Knit/purl to the marker.
Make the decrease.
Turn the work.
Knit/purl back to the marker.
Make the decrease.
Repeat in this way until you have the number of stitches calculated + 1 stitch on each side of the marker.
The heel is now shaped.
Picking up stitches along the heel flap
Now we begin knitting in the round again while picking up stitches along the heel flap. These stitches form the gusset, which gives extra room for the instep of the foot.
We start on the right side.
First, knit all remaining stitches on the heel needle.
Now we pick up stitches along the edge of the heel flap.
The heel flap has a chain-like edge because we slipped the first stitch of each row. The stitches along this edge are called edge stitches, and these are the stitches where we pick up new stitches.
How to pick up a stitch
The first stitch is picked up by inserting the right needle first through the left leg of the stitch below, then through the right leg of the first edge stitch.
To pick up additional stitches, insert the right needle under each edge stitch,
Wrap the yarn around the needle and pull it through.
You have now created a new stitch on the needle.
Continue picking up one stitch in each edge stitch along the side of the heel flap.
When all side stitches are picked up, pick up one extra stitch in the stitch below the transition to the next needle. This helps prevent a gap at the join.
Knitting across the top of the foot
Knit across the stitches on the top of the foot.
When you reach the center of the top, place a stitch marker.
Continue knitting the remaining stitches across the top of the foot.
Picking up stitches along the other side of the heel flap
Pick up the first stitch through the left leg of the stitch below the last stitch on the previous needle.
Pick up one stitch in each edge stitch along the heel flap.
The last stitch is picked up through the right leg of the stitch below and the left leg of the last edge stitch.
Once all stitches are picked up, knit across until you return to the beginning of the round.
Now all stitches are picked up, and we begin shaping the gusset.
Gusset
We now decrease stitches on the sides of the foot until we return to the original cast-on stitch count.
Move the stitch markers so they sit midway along the sides of the foot, at the join between the picked-up stitches and the stitches from the top of the foot.
Knit until 3 stitches remain before the marker.
k2tog through the front loop.
Knit the last stitch before the marker.
Slip the marker.
Knit all stitches on the top of the foot.
Slip the marker.
Knit 1 stitch, then make an ssk decrease.
Knit to 3 stitches before the next marker and decrease in the same way.
Continue decreasing in this manner until you have the original number of cast-on stitches remaining on the needles.
Foot
Now the foot is worked in stockinette stitch until the first toe decrease.
Move the needles so that the joins between needles are on the sides of the foot instead of under and over the foot. This ensures that the toe decreases will occur on the sides.
To calculate the number of rounds to knit before starting the toe, measure the foot from the back of the heel to the tip of the big toe, then multiply the foot length by 0.96.
Example:
Foot length = 26 cm
26 × 0.96 = 24.96
Round up or down to the nearest whole number = 25 rounds
Knit this number of rounds in stockinette stitch.
Toe decreases – Part 1
Now we start shaping the toe.
To create a smoother shape, we begin by working decreases every other round.
Take the number of stitches on one needle and divide by 10.
Example:
20 stitches on one needle
20 ÷ 10 = 2 decrease rounds
Work as follows
Round 1 – decrease round
Round 2 – knit all stitches
Round 3 – decrease round
Round 4 – knit all stitches
How to decrease
Knit 1 stitch.
Make an ssk decrease.
Knit until 3 stitches remain on the needle.
Knit 2 stitches together through the front loop.
Knit the last stitch.
Change needles and repeat on the other needle.
One decrease round decreases a total of 4 stitches.
Toe decreases – Part 2
Now we continue with decreases on every round.
Take your original cast-on stitch count and divide by 6.
Example:
40 stitches ÷ 6 = 6.67 → round to the nearest even number = 6 stitches per needle
Continue decreasing every round until you have this number of stitches remaining on each needle.
Bind-off – Kitchener Stitch
Cut the yarn, leaving a tail of about 20 cm.
Thread the yarn onto a tapestry needle.
We will now graft the stitches together using Kitchener stitch, which creates an invisible seam for the toe.
Setup
1. Insert the needle purlwise through the first stitch on the front needle. Leave the stitch on the needle.
2. Insert the needle knitwise through the first stitch on the back needle. Leave the stitch on the needle.
Repeat the following four steps
1. Front needle – insert the needle knitwise and slip the stitch off.
2. Next stitch on the front needle – insert the needle purlwise, leave the stitch on.
3. Back needle – insert the needle purlwise and slip the stitch off.
4. Next stitch on the back needle – insert the needle knitwise, leave the stitch on.
Repeat these steps until 2 stitches remain.
Finishing
1. Insert the needle knitwise through the first stitch on the front needle, slip it off.
2. Insert the needle purlwise through the first stitch on the back needle, slip it off.
Gently tighten the yarn.
Weaving in ends
Thread the yarn tail onto a tapestry needle.
Insert the needle into the wrong side of the work.
Weave in the yarn by following the path of the stitches through three stitches in the fabric.
Trim any excess yarn.
Also weave in the cast-on tail on the inside of the ribbing by twisting the needle around one leg of the stitches along a row.
Blocking
Blocking evens out the stitches and gives the sock a nice shape.
1. Soak the socks in lukewarm water and gently squeeze out the excess water.
2. Lay them flat on a blocking mat or on a towel.
3. Shape the socks with your hands so they lie neatly, and let them dry completely.
Knitting terms
ssk = slip, slip, knit
k2tog = knit two together
sl1 = slip one stitch
pm = place marker
m = slip marker
k = knit
p = purl
Calculating stitch count
Measure the foot circumference at the widest part (around the heel and top of the foot).
Multiply the measurement in centimeters by 1.33.
Round to the nearest number divisible by 4.
Cast on this number of stitches.
Cast-on
Cast on your stitches using your preferred method on a circular needle and prepare for magic loop. Distribute the stitches evenly between the needles.
Ribbing
Knit 1 through the back loop, purl 1 around.
Number of rib rounds
Foot circumference × 0.27
Example:
30 cm × 0.27 = 8.1 → 8 rounds
Leg
Knit in stockinette stitch around.
Number of leg rounds
Foot circumference × 0.87
Example:
30 cm × 0.87 = 26.1 → 26 rounds
Heel flap
Worked back and forth over half of the stitches.
Round 1 (RS): sl1, knit to end
Round 2 (WS): sl1, purl to end
Number of heel flap rounds
Cast-on stitches × 0.5
Example: 40 × 0.5 = 20 rounds
End on a WS row.
Heel turn
Place a marker at the center of the stitches.
Calculation: (total stitches × 0.5) ÷ 6
Example: 40 × 0.5 ÷ 6 = 3.3 → 3 stitches
Round 1 (RS): sl1, knit to marker, sm, k X stitches, ssk, turn
Round 2 (WS): sl1, p to marker, sm, p X stitches, p2tog, turn
Repeat these two rounds until X + 1 stitches remain on each side of the marker.
Picking up stitches
From RS:
Knit the heel stitches.
Pick up stitches along the heel flap edge (skip the first and last edge stitch). Pick up one extra stitch at the transition.
Knit the top-of-foot stitches and place a marker in the center.
Pick up stitches along the other side of the heel flap in the same way.
Knit to the beginning of the round.
Gusset
Place stitch markers midway along the sides of the foot, at the transition between the picked-up stitches and the top-of-foot stitches.
Decreases:
Knit until 3 stitches remain before the marker
k2tog, k1, sm
Knit all stitches on the top of the foot, sm, k1, ssk
Knit to 3 stitches before the next marker and repeat the same decrease: k2tog, k1, sm
Continue decreasing in this way each round until you reach the original cast-on stitch count.
Foot
Knit in stockinette stitch around.
Adjust the needle positions so that the joins are on the sides of the foot.
Number of rounds:
Foot length (heel to toe) × 0.96
Example: 26 × 0.96 = 24.96 → 25 rounds
Toe decreases – Part 1
Decrease every other round.
Calculation: (stitches per needle) ÷ 10
Example: 20 ÷ 10 = 2 decrease rounds
Decrease: k1, ssk, knit to 3 stitches remaining, k2tog, k1.
Repeat on the other needle.
Rounds between decrease rounds: knit all stitches.
Toe decreases – Part 2
Decrease every round until:
Original cast-on stitches ÷ 6
Example: 40 ÷ 6 = 6.67 → 6 stitches per needle
Bind-off – Kitchener stitch
Cut the yarn with a long tail and thread onto a tapestry needle.
Setup:
1. Insert needle purlwise through the first stitch on the front needle, leave on needle.
2. Insert needle knitwise through the first stitch on the back needle, leave on needle.
Repeat:
1. Front needle: knitwise, slip off
2. Front needle: purlwise, leave on
3. Back needle: purlwise, slip off
4. Back needle: knitwise, leave on
Repeat until 2 stitches remain.
Finish by grafting the last stitches and tightening the yarn.
Weaving in ends
Weave the yarn tails on the wrong side by following the path of about three stitches.
Also weave in the cast-on tail on the inside of the ribbing.
The rights to this pattern belong to MYO Make Your Own. The pattern or its pictures may not be copied, shared or resold either in parts or in its entirety, but you may sell items you have crocheted from this pattern. If you have questions about the pattern, contact MYO at hello@makeyourown.se.
Gauge: 17 sts × 23 rows per 10 cm in stockinette stitch worked in the round on 5 mm needles.
If your work is too tight, go up one needle size.
If it’s too loose, go down one needle size.
Calculating stitch count
Measure the circumference of the widest part of the foot (around the heel and top of the foot). Take the measurement in centimeters and multiply by 1.33.
Round the result to the nearest number divisible by 4, so the stitches can be evenly divided when working with the magic loop.
Cast on this number of stitches plus one extra stitch. The extra stitch helps create a neat start when you begin knitting in the round.
Cast-on
Cast on the stitches using the long-tail cast-on.
This is a common and stable cast-on method that works well for socks.
You have cast on one extra stitch—this is only used to create a neat join when you begin knitting in the round.
Preparation
Measure a sufficiently long length of yarn. How long depends on the number of stitches you will cast on, but it’s better to have it too long than too short.
Make a loop, hold both needles together, and place the loop on the needles. Pull both yarn ends so that the loop sits snugly.
This counts as the first stitch. We cast on over two needles so that the stitches are easier to work and looser for the first round.
Holding the yarn
Place the loose yarn around your left thumb, with the yarn tail on the outside of your thumb.
Bring the yarn from the ball over your left index finger, from the inside of your hand and out.
Hold both yarn ends in your palm with your ring finger and little finger. Now the yarn forms a “V” between thumb and index finger.
Casting on stitches
Insert the right needle under the loop around the thumb from below.
Use the needle to catch the yarn from your index finger.
Pull the yarn back through the loop around the thumb so that a new stitch is formed.
Release the loop from the thumb and gently tighten the stitch on the needle.
Place the yarn around the thumb again and repeat until the desired number of stitches is cast on.
Tips
The stitches should be snug but not tight on the needle.
If the cast-on feels too tight, start over and pull a little looser.
Preparing for Magic Loop
Magic loop allows you to knit in the round even when your work is smaller than the circumference of the needle.
Divide the stitches
After all stitches are cast on:
Slide the stitches to the middle of the circular needle.
Divide them into two equal parts. The needle with the yarn from the ball will have one fewer stitch; the extra stitch sits on the other needle.
Pull out the cable between the needles so that you have two free needle tips.
Half of the stitches are on each needle.
Hold the needles
Hold the needle with the yarn from the ball in your right hand. This is always where you start knitting. The stitches on the other needle are waiting.
The extra stitch (for a neat start)
Move the extra stitch from one needle to the other.
Lift the first stitch over the extra stitch and release it from the needle.
Gently pull the yarn tail.
Now your work is joined in a round without a gap, and you have the correct stitch count.
Important tips
Pull slightly tighter on the first stitch of each needle to avoid gaps.
If it feels tricky, pause, reread, and continue calmly.
Ribbing
Now we start knitting the ribbing. In the rib, work 1 knit stitch through the back loop, 1 purl stitch, repeating around the round.
Knitting the knit stitches through the back loop twists them slightly, giving a tighter and neater rib – perfect for the beginning of a sock.
How to knit a stitch through the back loop
Insert the right needle from front to back through the back leg of the stitch.
Wrap the yarn around the needle.
Pull the yarn through the stitch.
Slip the old stitch off the left needle.
How to purl a stitch
Bring the yarn to the front of the work.
Insert the right needle from back to front through the stitch.
Wrap the yarn around the needle.
Pull the yarn through the stitch.
Slip the old stitch off the left needle.
Knitting the rib
Work around the round:
1 knit stitch through the back loop
1 purl stitch
Repeat around the entire round.
When the needle is empty, pull out the cable and continue knitting the next needle.
How many ribbing rounds?
To calculate the number of ribbing rounds, use your foot circumference:
Foot circumference × 0.27
Example:
Foot circumference = 30 cm
30 × 0.27 = 8.1
Round up or down to the nearest whole number = 8 rounds of ribbing
Leg
When the ribbing is finished, we start knitting the leg.
The leg is worked in stockinette stitch in the round, which means you knit all stitches through the front loop, instead of the back loop as you did for the ribbing.
Knit all stitches around until the leg reaches the desired length.
How to knit a stitch through the front loop
Insert the right needle from front to back through the front leg of the stitch.
Wrap the yarn around the needle.
Pull the yarn through the stitch.
Slip the old stitch off the left needle.
How many rounds for the leg?
To calculate the number of rounds:
Foot circumference × 0.87
Example:
Foot circumference = 30 cm
30 × 0.87 = 26.1
Round up or down to the nearest whole number = 26 rounds
Heel flap
The heel flap is worked back and forth on the first needle (half of all stitches) instead of in the round.
The stitches on the other needle are held while we work the heel.
The heel flap is worked in stockinette stitch back and forth:
Knit stitches on the right side
Purl stitches on the wrong side
To create a neat edge, always slip the first stitch of each row without knitting it.
This edge makes it easier later to pick up stitches along the heel (this is called the gusset).
How to work
Right-side row
Slip the first stitch without knitting it.
Knit the remaining stitches.
Wrong-side row
Slip the first stitch without knitting it.
Purl the remaining stitches.
Turn the work at the end of each row.
How many rows for the heel flap?
Number of cast-on stitches × 0.5
Example:
40 cast-on stitches × 0.5 = 20 rows
Work 20 rows back and forth. The last row should be a wrong-side row.
Heel turn (decreases)
Now we shape the heel by making decreases in the center of the heel flap.
Place a marker in the middle of all stitches on the needle.
Take half of all stitches and divide by 6 to calculate the number of stitches before each decrease.
Example:
40 cast-on stitches
Half = 20
20 ÷ 6 = 3.3 → round to nearest whole number = 3 stitches
Row 1 (right side)
Slip the first stitch without knitting it.
Knit to the marker.
Slip the marker.
Knit the number of stitches calculated above (e.g., 3).
Then make an ssk decrease.
How to do an ssk decrease
Slip the first stitch knitwise.
Slip the next stitch purlwise.
Insert the left needle through both stitches from front to back.
Knit them together through the back loops.
This creates a left-leaning decrease.
Turn the work.
Row 2 (wrong side)
Slip the first stitch purlwise.
Pull the yarn slightly to tighten the edge.
Purl to the marker.
Move the marker to the right needle.
Purl 3 stitches, then make a p2tog decrease.
How to purl two together
Insert the needle through two stitches at once.
Wrap yarn around the needle.
Draw yarn through both stitches.
Slip both stitches off the left needle.
Turn the work.
Continue
Slip the first stitch.
Knit/purl to the marker.
Make the decrease.
Turn the work.
Knit/purl back to the marker.
Make the decrease.
Repeat in this way until you have the number of stitches calculated + 1 stitch on each side of the marker.
The heel is now shaped.
Picking up stitches along the heel flap
Now we begin knitting in the round again while picking up stitches along the heel flap. These stitches form the gusset, which gives extra room for the instep of the foot.
We start on the right side.
First, knit all remaining stitches on the heel needle.
Now we pick up stitches along the edge of the heel flap.
The heel flap has a chain-like edge because we slipped the first stitch of each row. The stitches along this edge are called edge stitches, and these are the stitches where we pick up new stitches.
How to pick up a stitch
The first stitch is picked up by inserting the right needle first through the left leg of the stitch below, then through the right leg of the first edge stitch.
To pick up additional stitches, insert the right needle under each edge stitch,
Wrap the yarn around the needle and pull it through.
You have now created a new stitch on the needle.
Continue picking up one stitch in each edge stitch along the side of the heel flap.
When all side stitches are picked up, pick up one extra stitch in the stitch below the transition to the next needle. This helps prevent a gap at the join.
Knitting across the top of the foot
Knit across the stitches on the top of the foot.
When you reach the center of the top, place a stitch marker.
Continue knitting the remaining stitches across the top of the foot.
Picking up stitches along the other side of the heel flap
Pick up the first stitch through the left leg of the stitch below the last stitch on the previous needle.
Pick up one stitch in each edge stitch along the heel flap.
The last stitch is picked up through the right leg of the stitch below and the left leg of the last edge stitch.
Once all stitches are picked up, knit across until you return to the beginning of the round.
Now all stitches are picked up, and we begin shaping the gusset.
Gusset
We now decrease stitches on the sides of the foot until we return to the original cast-on stitch count.
Move the stitch markers so they sit midway along the sides of the foot, at the join between the picked-up stitches and the stitches from the top of the foot.
Knit until 3 stitches remain before the marker.
k2tog through the front loop.
Knit the last stitch before the marker.
Slip the marker.
Knit all stitches on the top of the foot.
Slip the marker.
Knit 1 stitch, then make an ssk decrease.
Knit to 3 stitches before the next marker and decrease in the same way.
Continue decreasing in this manner until you have the original number of cast-on stitches remaining on the needles.
Foot
Now the foot is worked in stockinette stitch until the first toe decrease.
Move the needles so that the joins between needles are on the sides of the foot instead of under and over the foot. This ensures that the toe decreases will occur on the sides.
To calculate the number of rounds to knit before starting the toe, measure the foot from the back of the heel to the tip of the big toe, then multiply the foot length by 0.96.
Example:
Foot length = 26 cm
26 × 0.96 = 24.96
Round up or down to the nearest whole number = 25 rounds
Knit this number of rounds in stockinette stitch.
Toe decreases – Part 1
Now we start shaping the toe.
To create a smoother shape, we begin by working decreases every other round.
Take the number of stitches on one needle and divide by 10.
Example:
20 stitches on one needle
20 ÷ 10 = 2 decrease rounds
Work as follows
Round 1 – decrease round
Round 2 – knit all stitches
Round 3 – decrease round
Round 4 – knit all stitches
How to decrease
Knit 1 stitch.
Make an ssk decrease.
Knit until 3 stitches remain on the needle.
Knit 2 stitches together through the front loop.
Knit the last stitch.
Change needles and repeat on the other needle.
One decrease round decreases a total of 4 stitches.
Toe decreases – Part 2
Now we continue with decreases on every round.
Take your original cast-on stitch count and divide by 6.
Example:
40 stitches ÷ 6 = 6.67 → round to the nearest even number = 6 stitches per needle
Continue decreasing every round until you have this number of stitches remaining on each needle.
Bind-off – Kitchener Stitch
Cut the yarn, leaving a tail of about 20 cm.
Thread the yarn onto a tapestry needle.
We will now graft the stitches together using Kitchener stitch, which creates an invisible seam for the toe.
Setup
1. Insert the needle purlwise through the first stitch on the front needle. Leave the stitch on the needle.
2. Insert the needle knitwise through the first stitch on the back needle. Leave the stitch on the needle.
Repeat the following four steps
1. Front needle – insert the needle knitwise and slip the stitch off.
2. Next stitch on the front needle – insert the needle purlwise, leave the stitch on.
3. Back needle – insert the needle purlwise and slip the stitch off.
4. Next stitch on the back needle – insert the needle knitwise, leave the stitch on.
Repeat these steps until 2 stitches remain.
Finishing
1. Insert the needle knitwise through the first stitch on the front needle, slip it off.
2. Insert the needle purlwise through the first stitch on the back needle, slip it off.
Gently tighten the yarn.
Weaving in ends
Thread the yarn tail onto a tapestry needle.
Insert the needle into the wrong side of the work.
Weave in the yarn by following the path of the stitches through three stitches in the fabric.
Trim any excess yarn.
Also weave in the cast-on tail on the inside of the ribbing by twisting the needle around one leg of the stitches along a row.
Blocking
Blocking evens out the stitches and gives the sock a nice shape.
1. Soak the socks in lukewarm water and gently squeeze out the excess water.
2. Lay them flat on a blocking mat or on a towel.
3. Shape the socks with your hands so they lie neatly, and let them dry completely.
Knitting terms
ssk = slip, slip, knit
k2tog = knit two together
sl1 = slip one stitch
pm = place marker
m = slip marker
k = knit
p = purl
Calculating stitch count
Measure the foot circumference at the widest part (around the heel and top of the foot).
Multiply the measurement in centimeters by 1.33.
Round to the nearest number divisible by 4.
Cast on this number of stitches.
Cast-on
Cast on your stitches using your preferred method on a circular needle and prepare for magic loop. Distribute the stitches evenly between the needles.
Ribbing
Knit 1 through the back loop, purl 1 around.
Number of rib rounds
Foot circumference × 0.27
Example:
30 cm × 0.27 = 8.1 → 8 rounds
Leg
Knit in stockinette stitch around.
Number of leg rounds
Foot circumference × 0.87
Example:
30 cm × 0.87 = 26.1 → 26 rounds
Heel flap
Worked back and forth over half of the stitches.
Round 1 (RS): sl1, knit to end
Round 2 (WS): sl1, purl to end
Number of heel flap rounds
Cast-on stitches × 0.5
Example: 40 × 0.5 = 20 rounds
End on a WS row.
Heel turn
Place a marker at the center of the stitches.
Calculation: (total stitches × 0.5) ÷ 6
Example: 40 × 0.5 ÷ 6 = 3.3 → 3 stitches
Round 1 (RS): sl1, knit to marker, sm, k X stitches, ssk, turn
Round 2 (WS): sl1, p to marker, sm, p X stitches, p2tog, turn
Repeat these two rounds until X + 1 stitches remain on each side of the marker.
Picking up stitches
From RS:
Knit the heel stitches.
Pick up stitches along the heel flap edge (skip the first and last edge stitch). Pick up one extra stitch at the transition.
Knit the top-of-foot stitches and place a marker in the center.
Pick up stitches along the other side of the heel flap in the same way.
Knit to the beginning of the round.
Gusset
Place stitch markers midway along the sides of the foot, at the transition between the picked-up stitches and the top-of-foot stitches.
Decreases:
Knit until 3 stitches remain before the marker
k2tog, k1, sm
Knit all stitches on the top of the foot, sm, k1, ssk
Knit to 3 stitches before the next marker and repeat the same decrease: k2tog, k1, sm
Continue decreasing in this way each round until you reach the original cast-on stitch count.
Foot
Knit in stockinette stitch around.
Adjust the needle positions so that the joins are on the sides of the foot.
Number of rounds:
Foot length (heel to toe) × 0.96
Example: 26 × 0.96 = 24.96 → 25 rounds
Toe decreases – Part 1
Decrease every other round.
Calculation: (stitches per needle) ÷ 10
Example: 20 ÷ 10 = 2 decrease rounds
Decrease: k1, ssk, knit to 3 stitches remaining, k2tog, k1.
Repeat on the other needle.
Rounds between decrease rounds: knit all stitches.
Toe decreases – Part 2
Decrease every round until:
Original cast-on stitches ÷ 6
Example: 40 ÷ 6 = 6.67 → 6 stitches per needle
Bind-off – Kitchener stitch
Cut the yarn with a long tail and thread onto a tapestry needle.
Setup:
1. Insert needle purlwise through the first stitch on the front needle, leave on needle.
2. Insert needle knitwise through the first stitch on the back needle, leave on needle.
Repeat:
1. Front needle: knitwise, slip off
2. Front needle: purlwise, leave on
3. Back needle: purlwise, slip off
4. Back needle: knitwise, leave on
Repeat until 2 stitches remain.
Finish by grafting the last stitches and tightening the yarn.
Weaving in ends
Weave the yarn tails on the wrong side by following the path of about three stitches.
Also weave in the cast-on tail on the inside of the ribbing.
The rights to this pattern belong to MYO Make Your Own. The pattern or its pictures may not be copied, shared or resold either in parts or in its entirety, but you may sell items you have crocheted from this pattern. If you have questions about the pattern, contact MYO at hello@makeyourown.se.

%20(5).jpg)

Share your creations with us
Thank you!
Your comment was sent!