
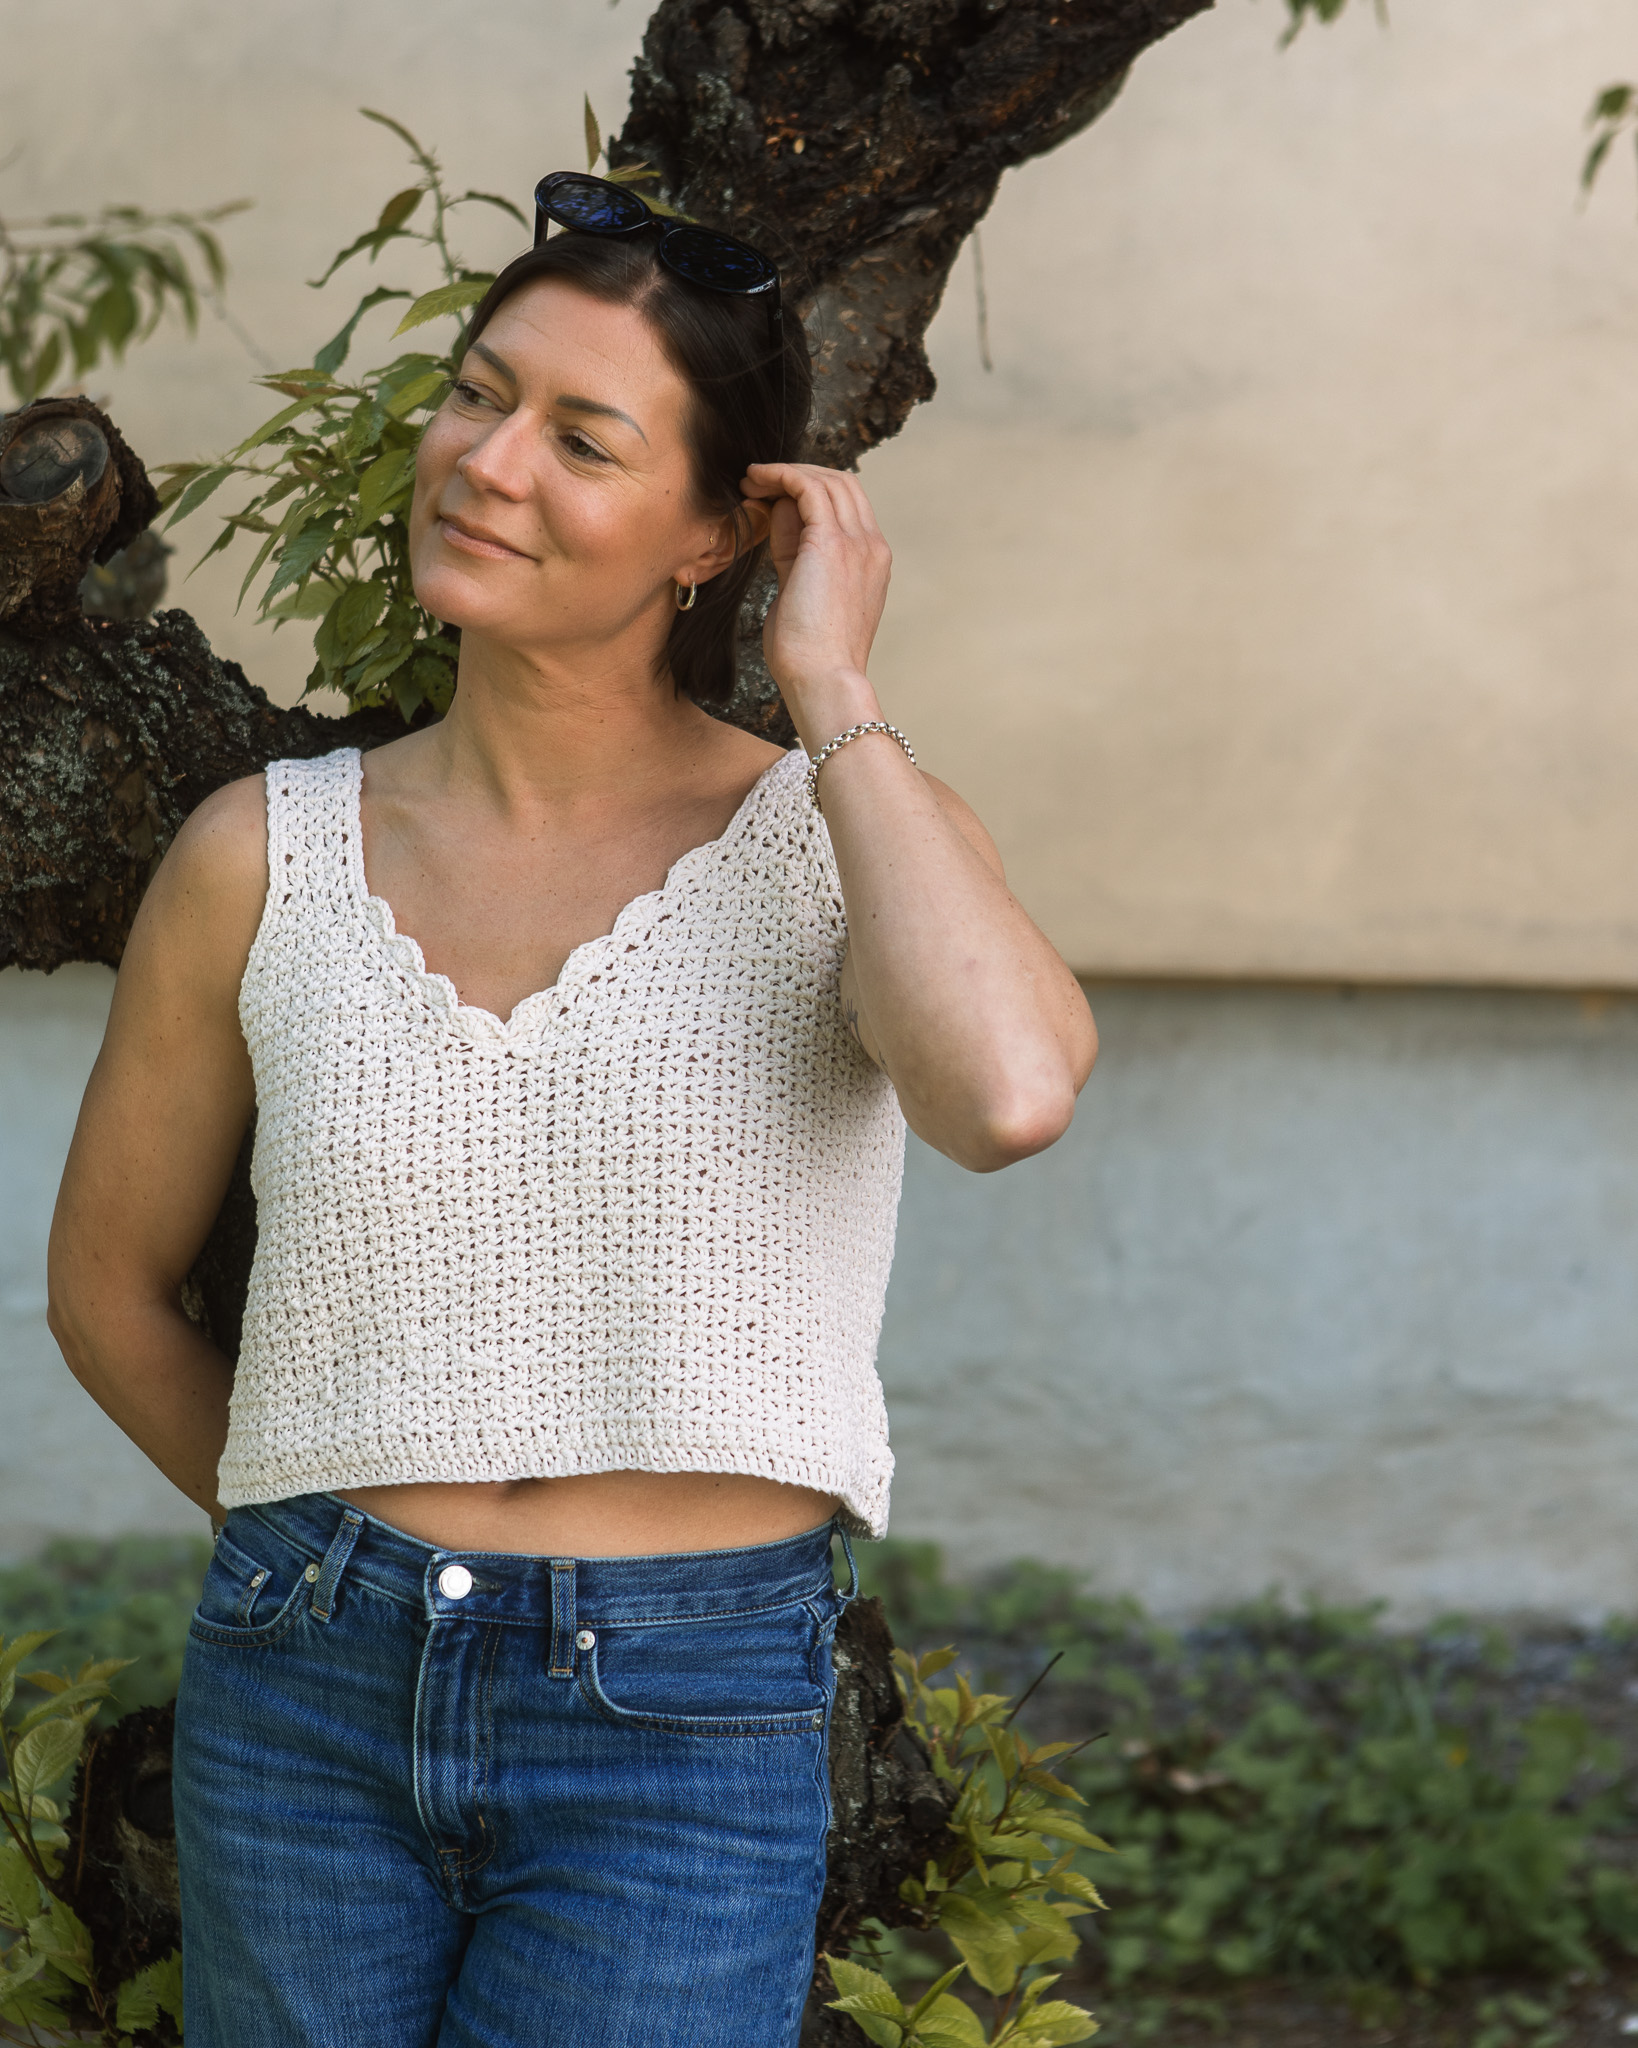
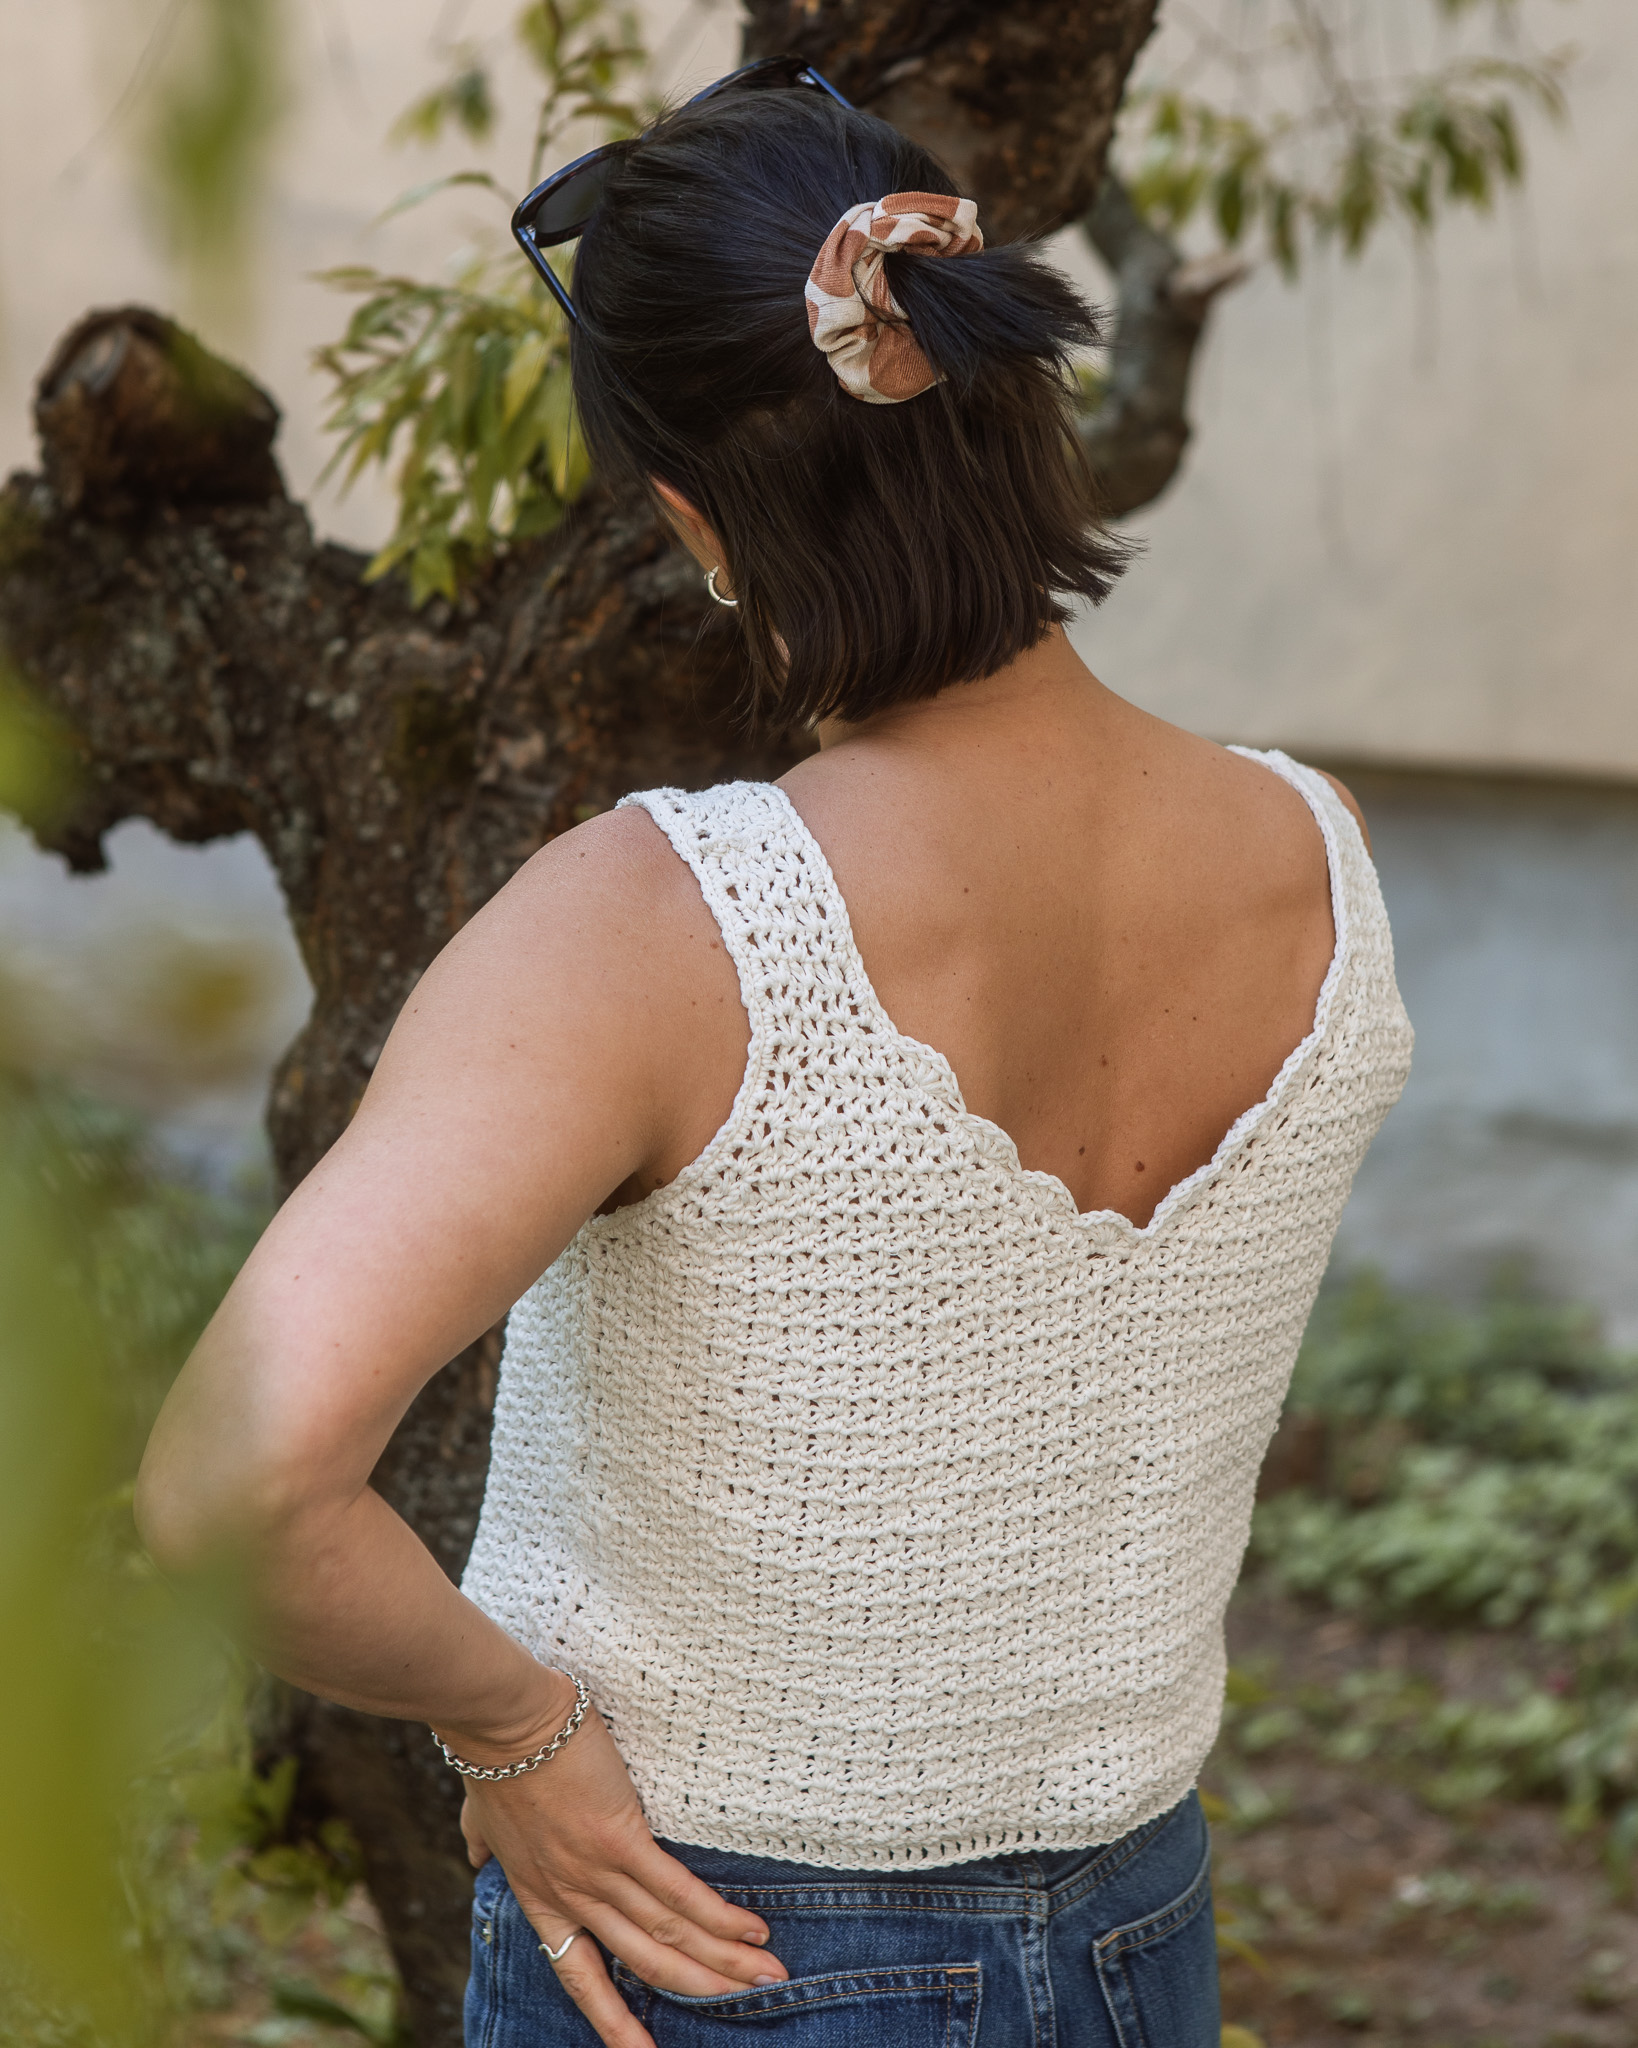
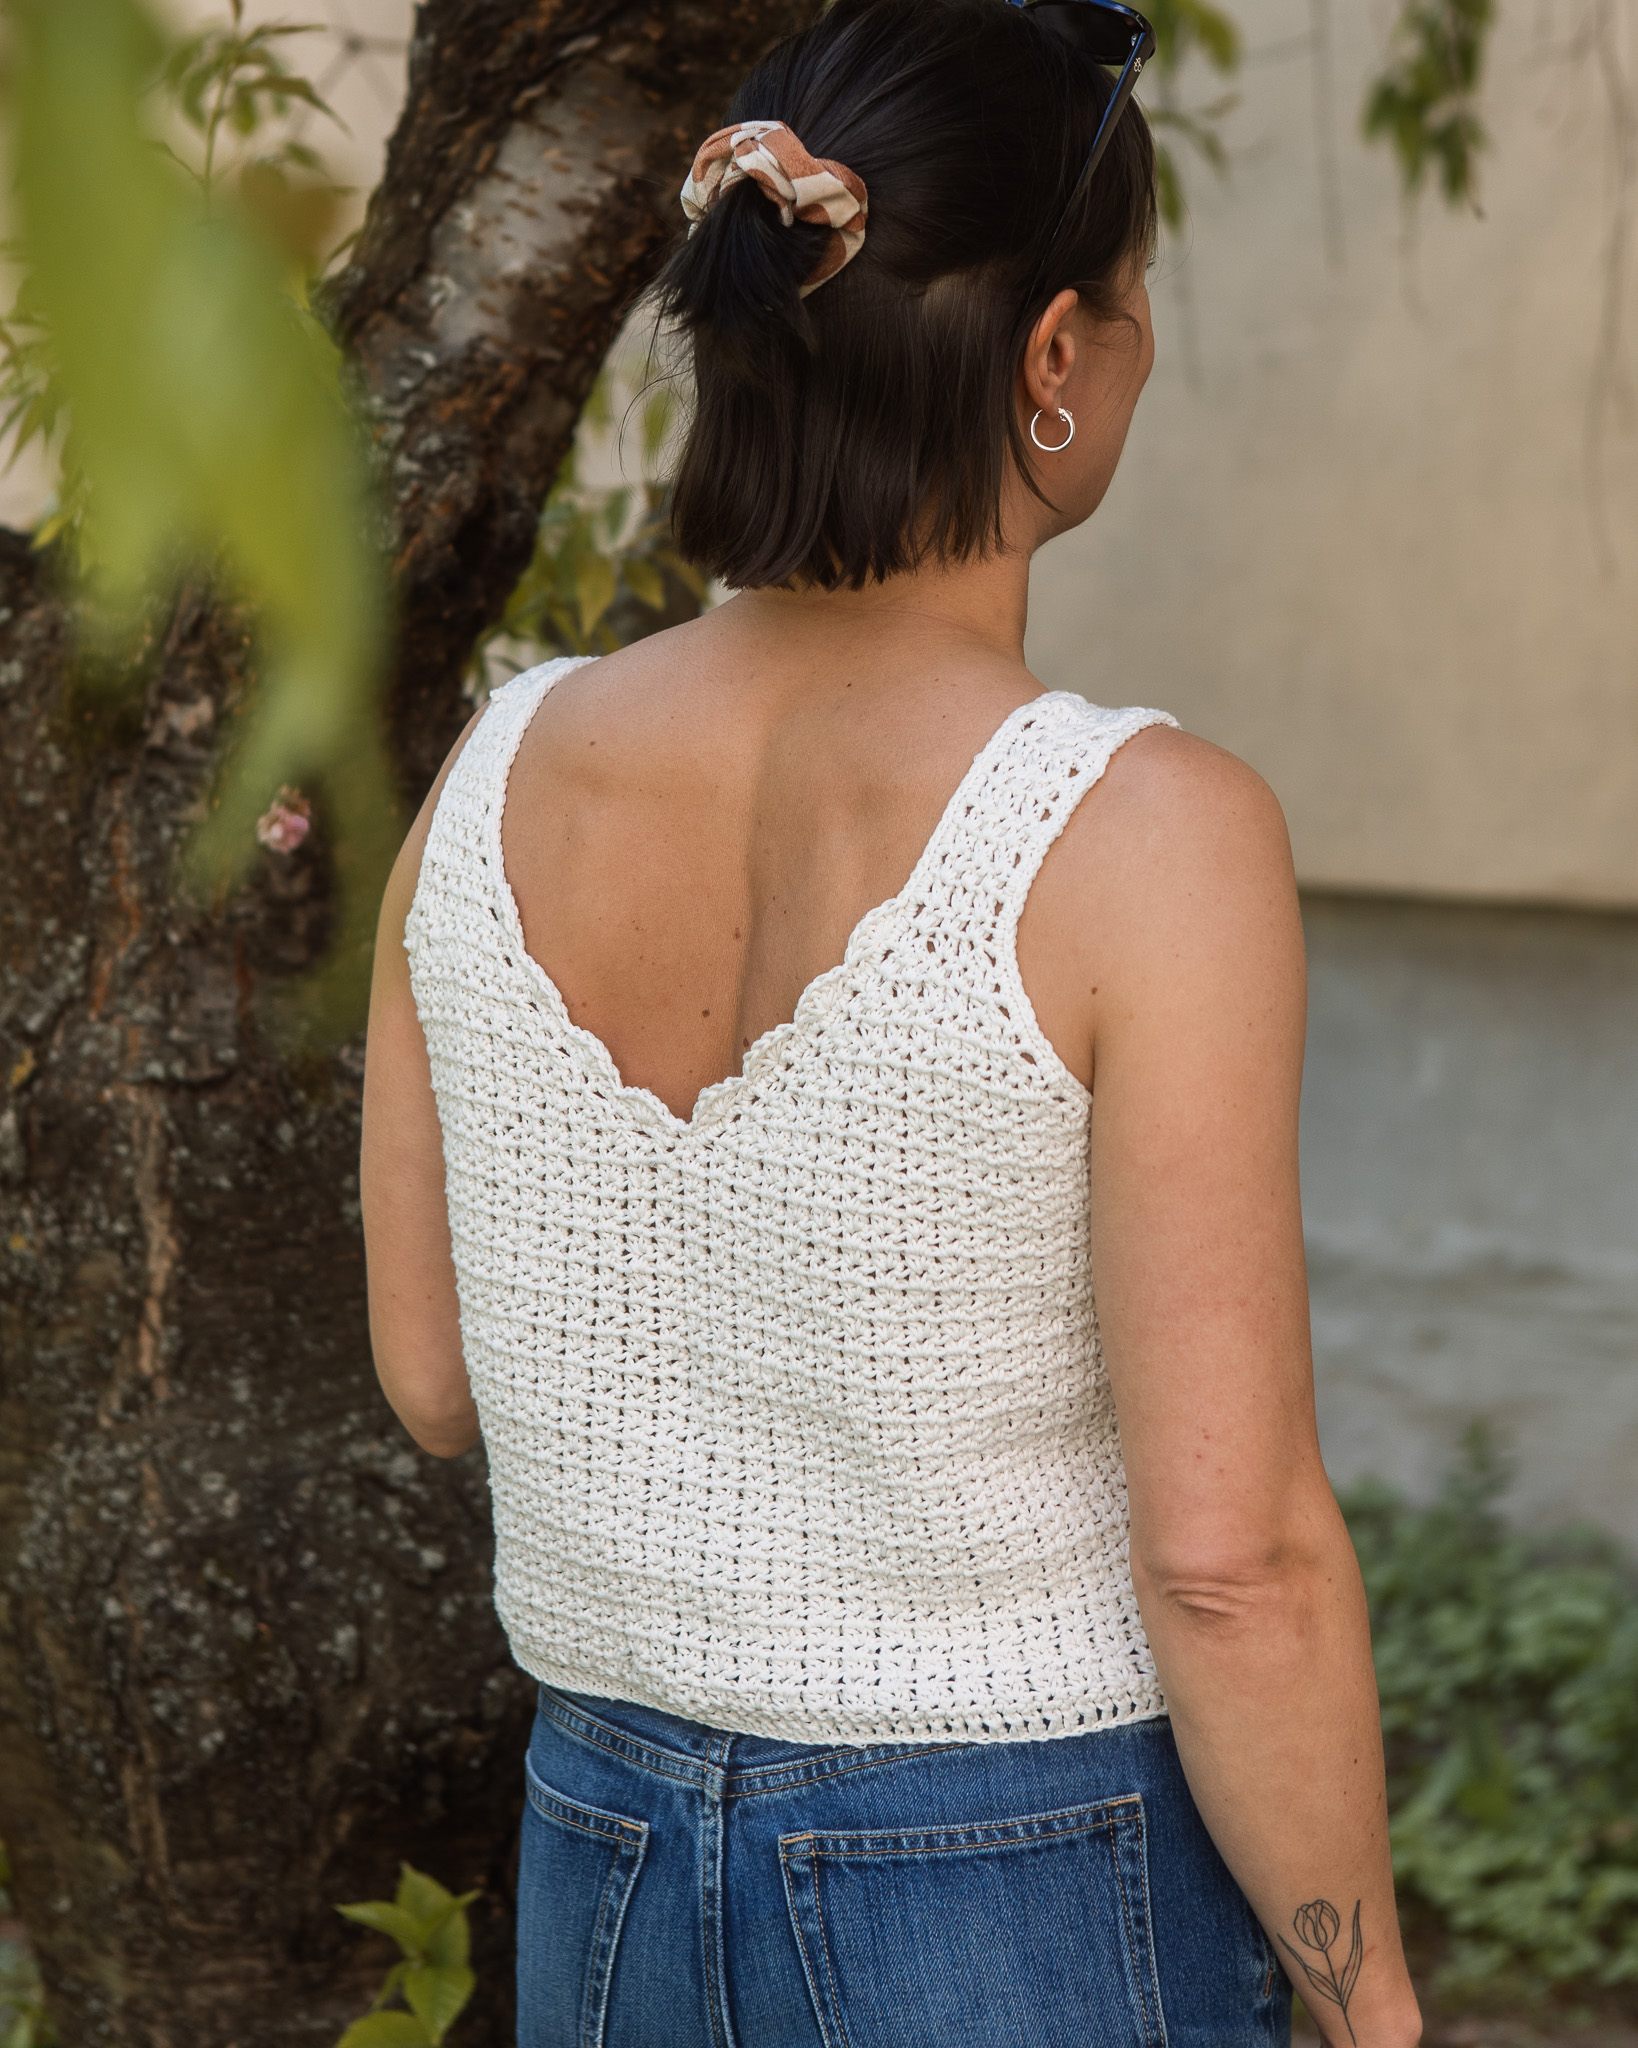
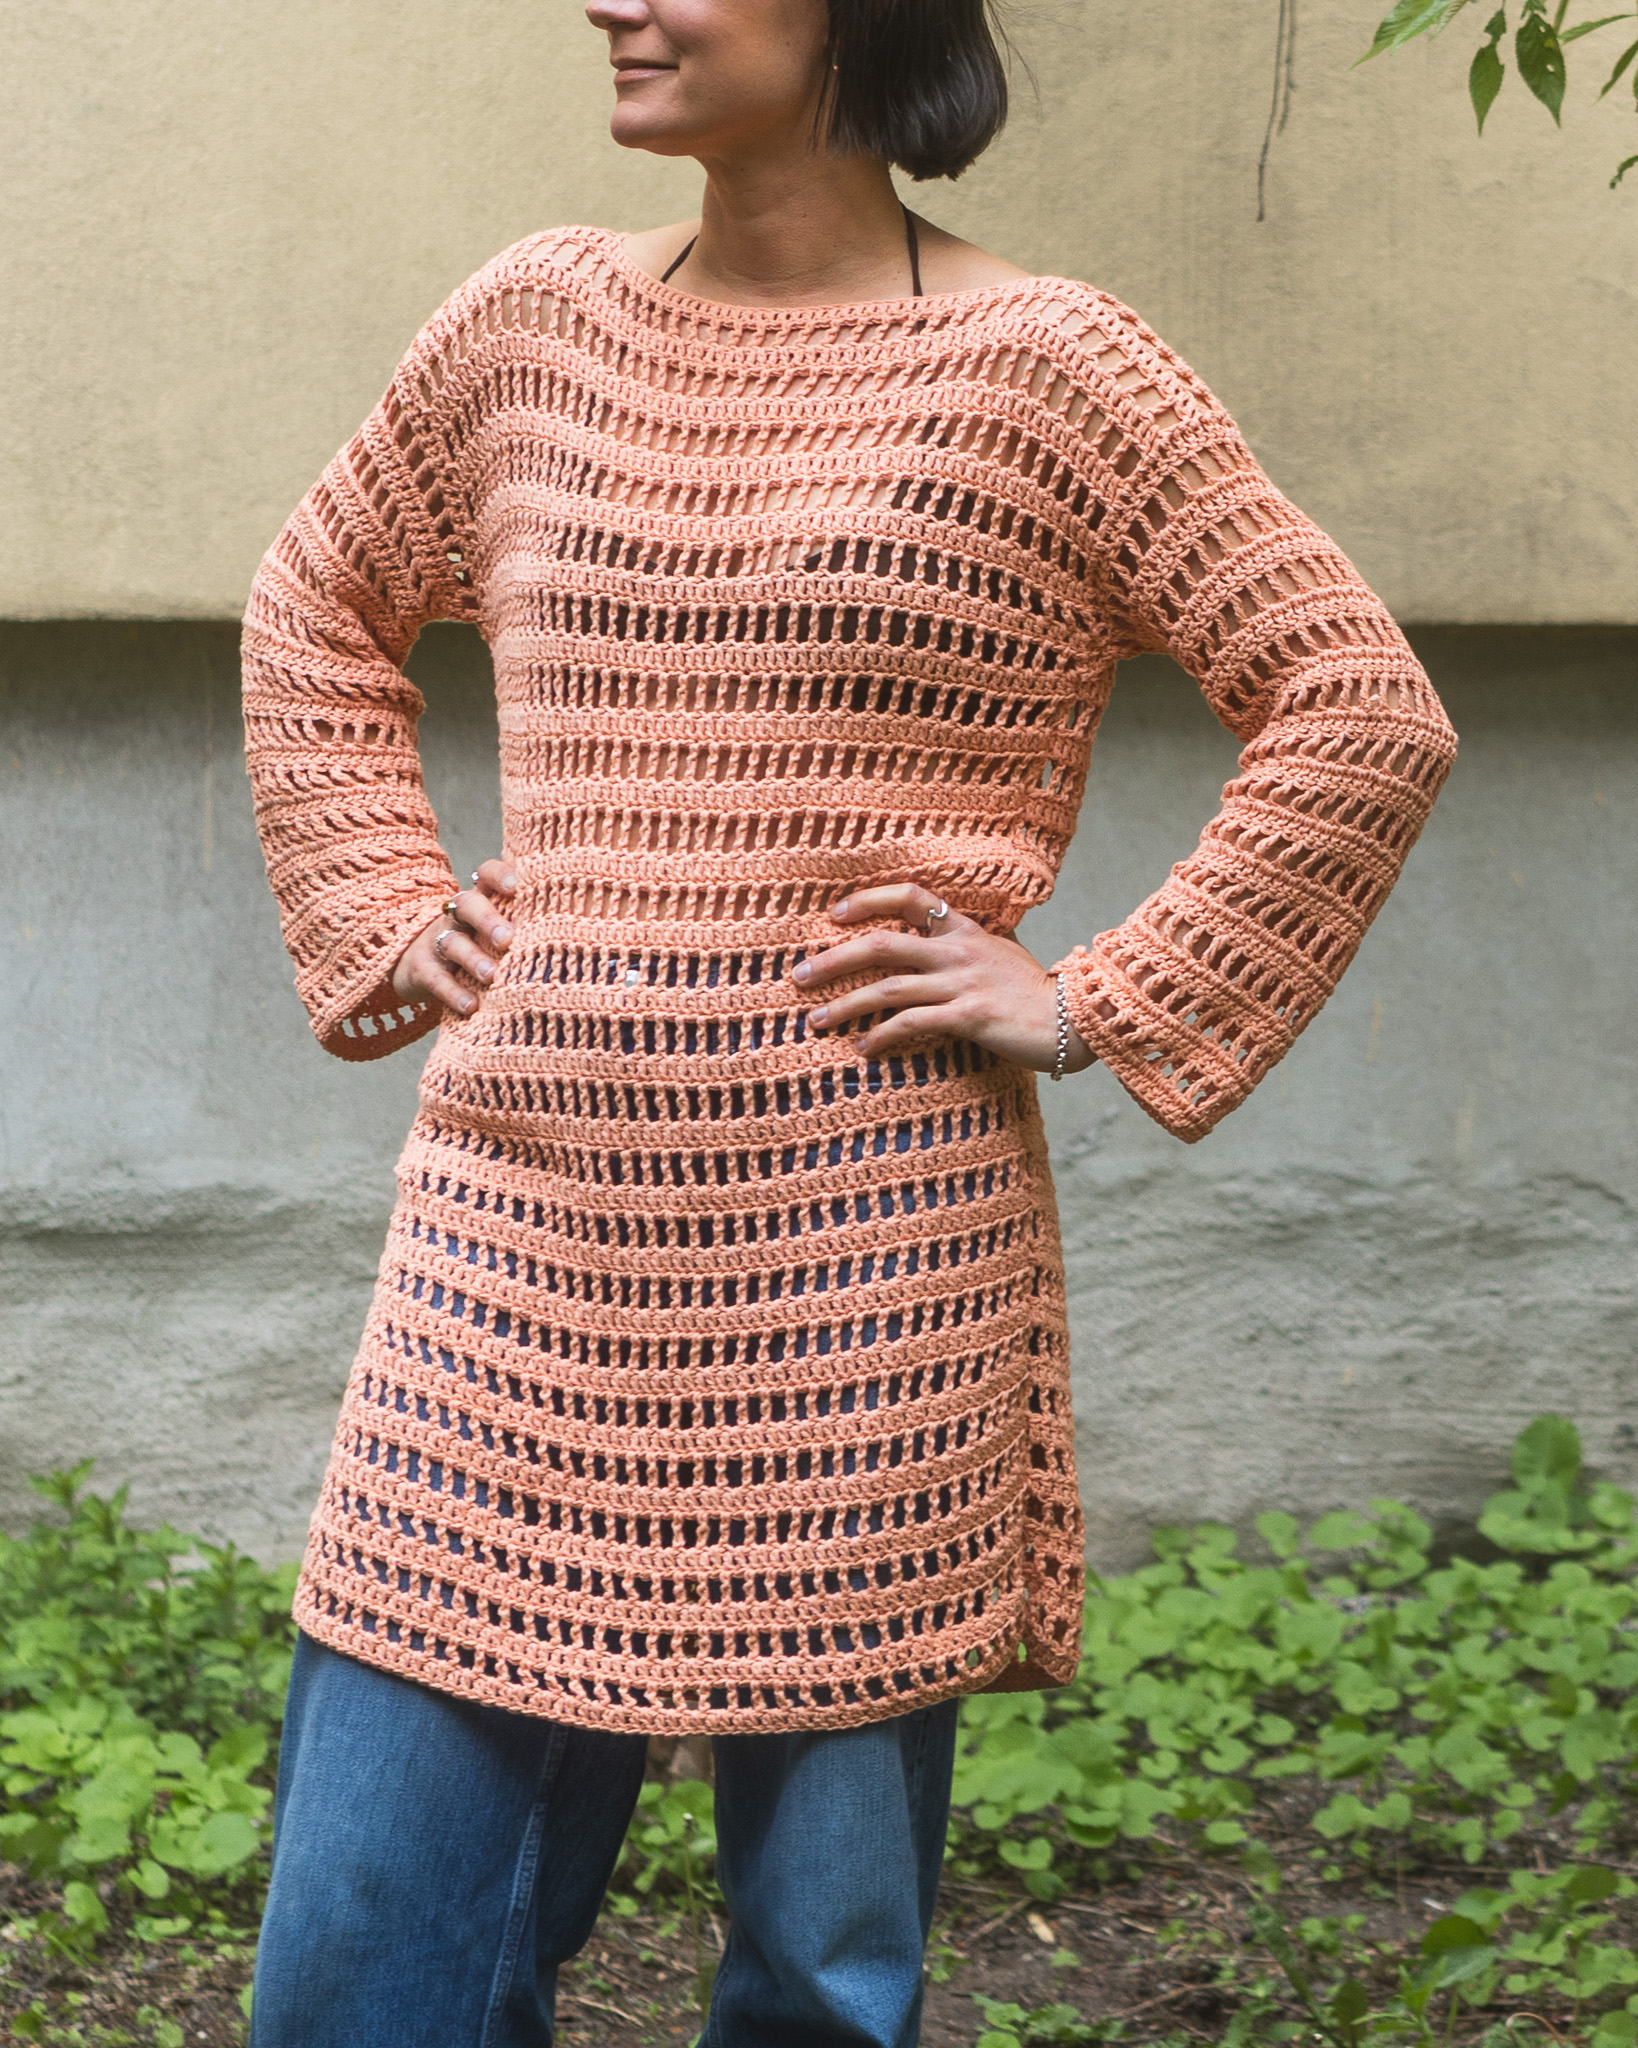
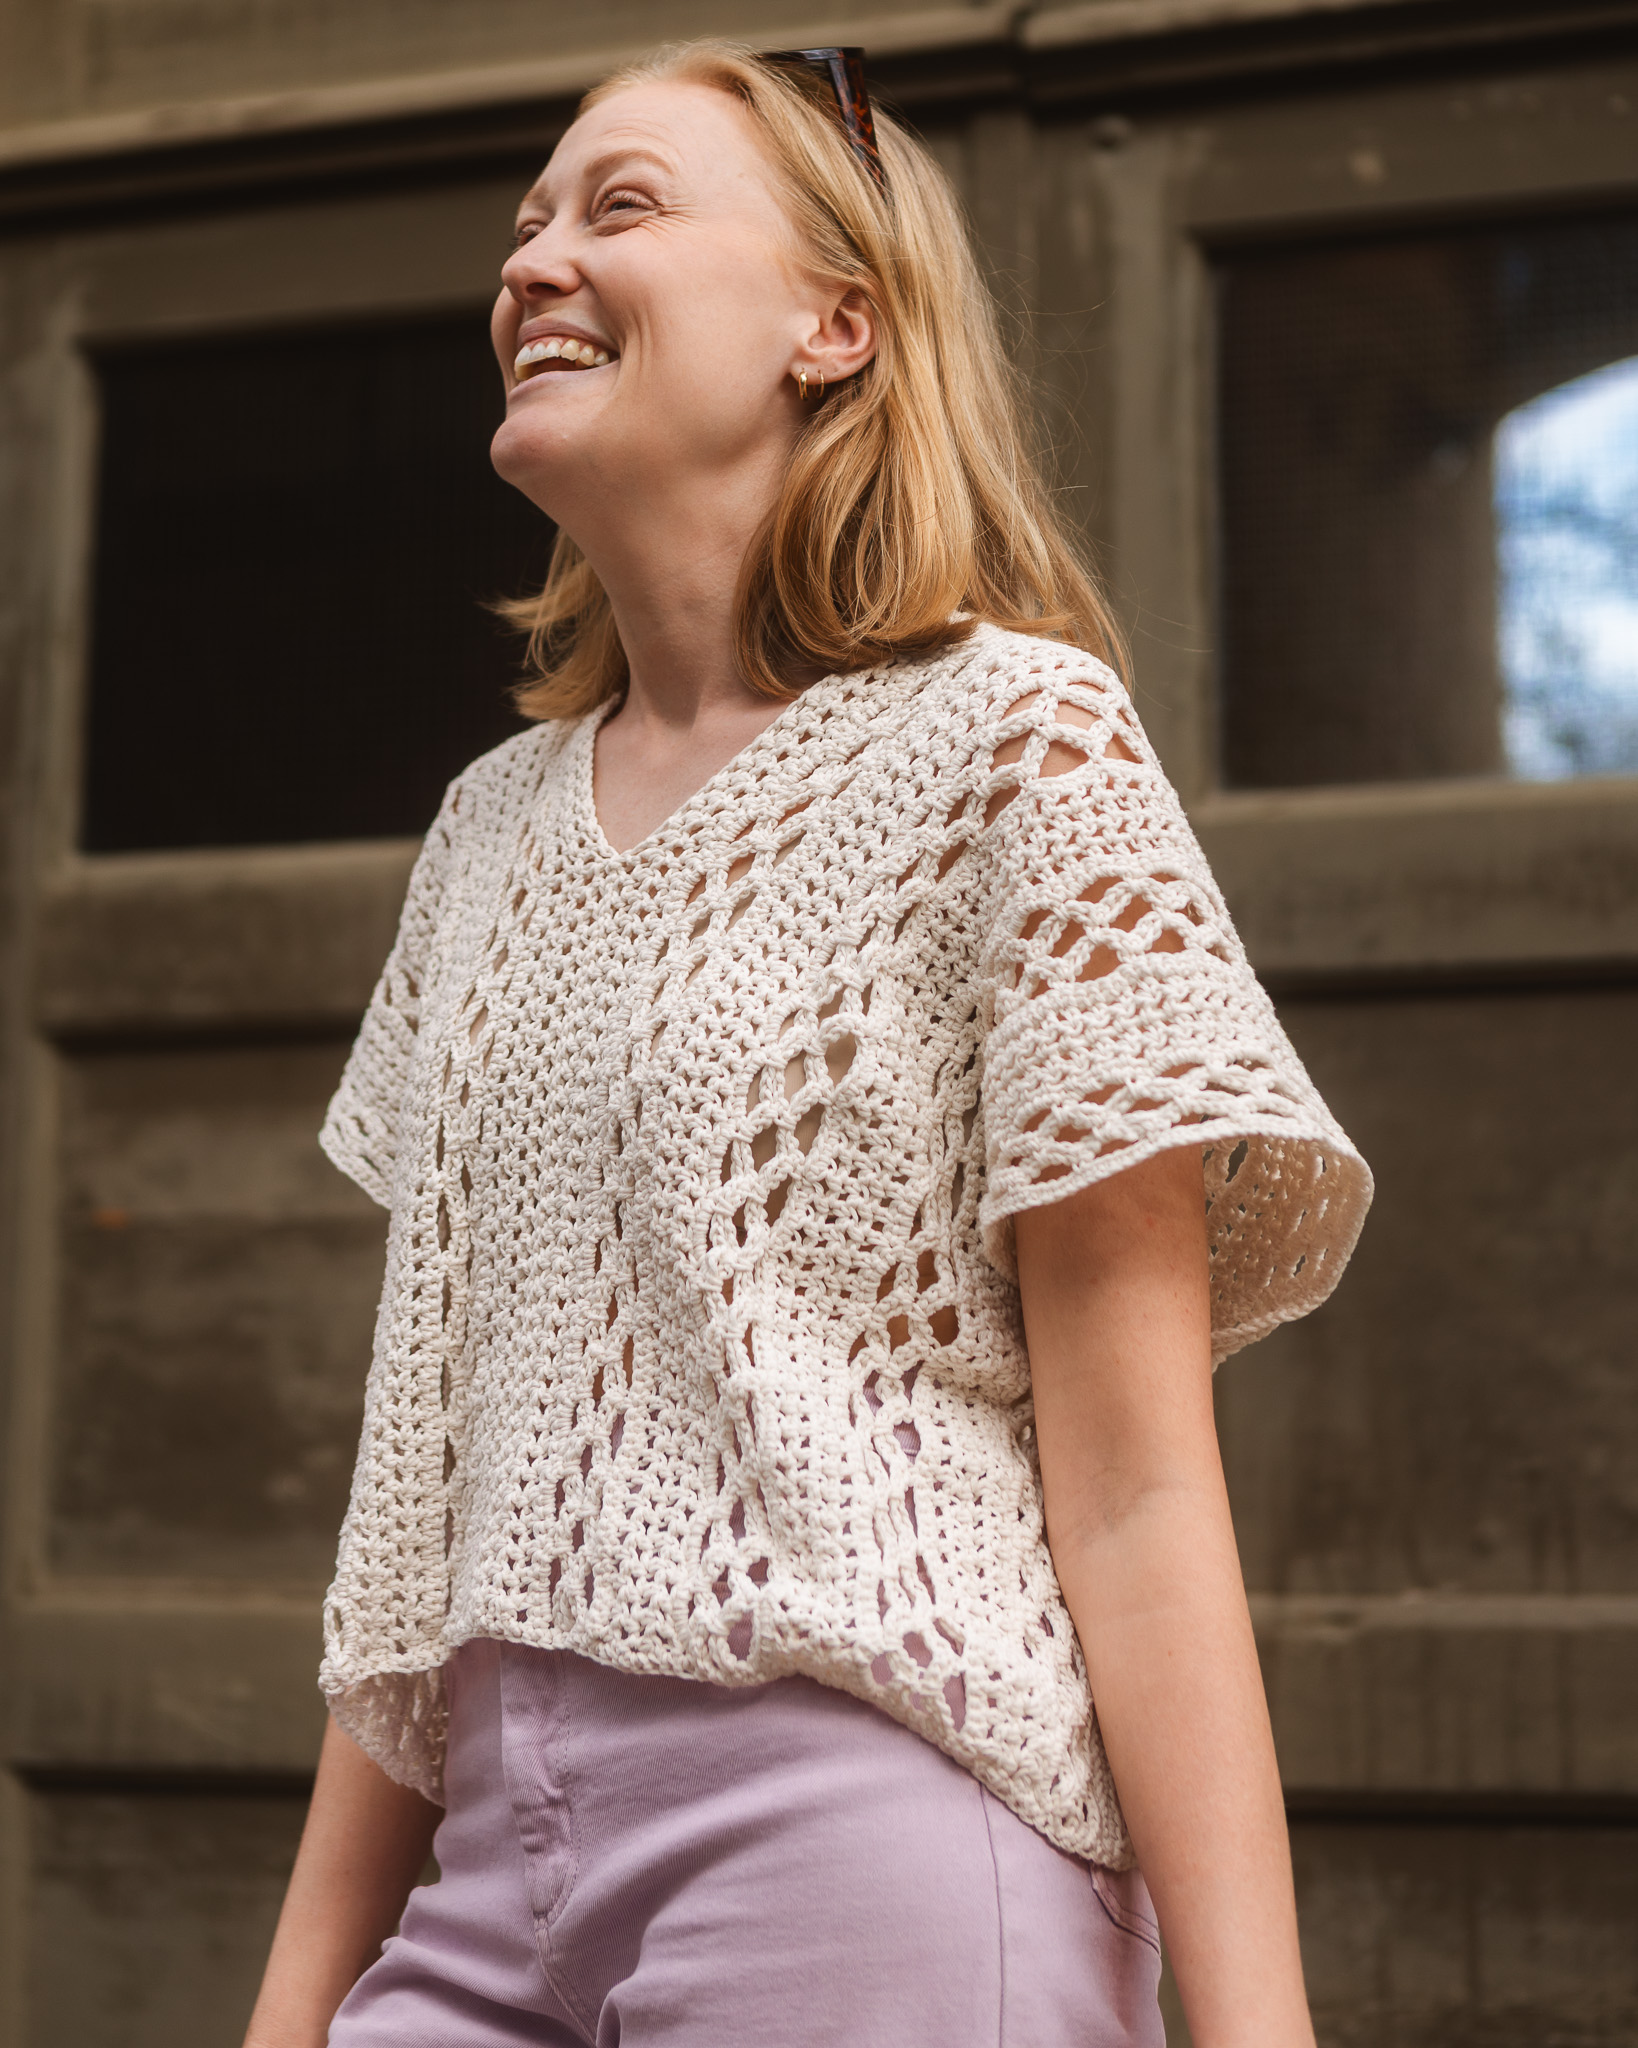
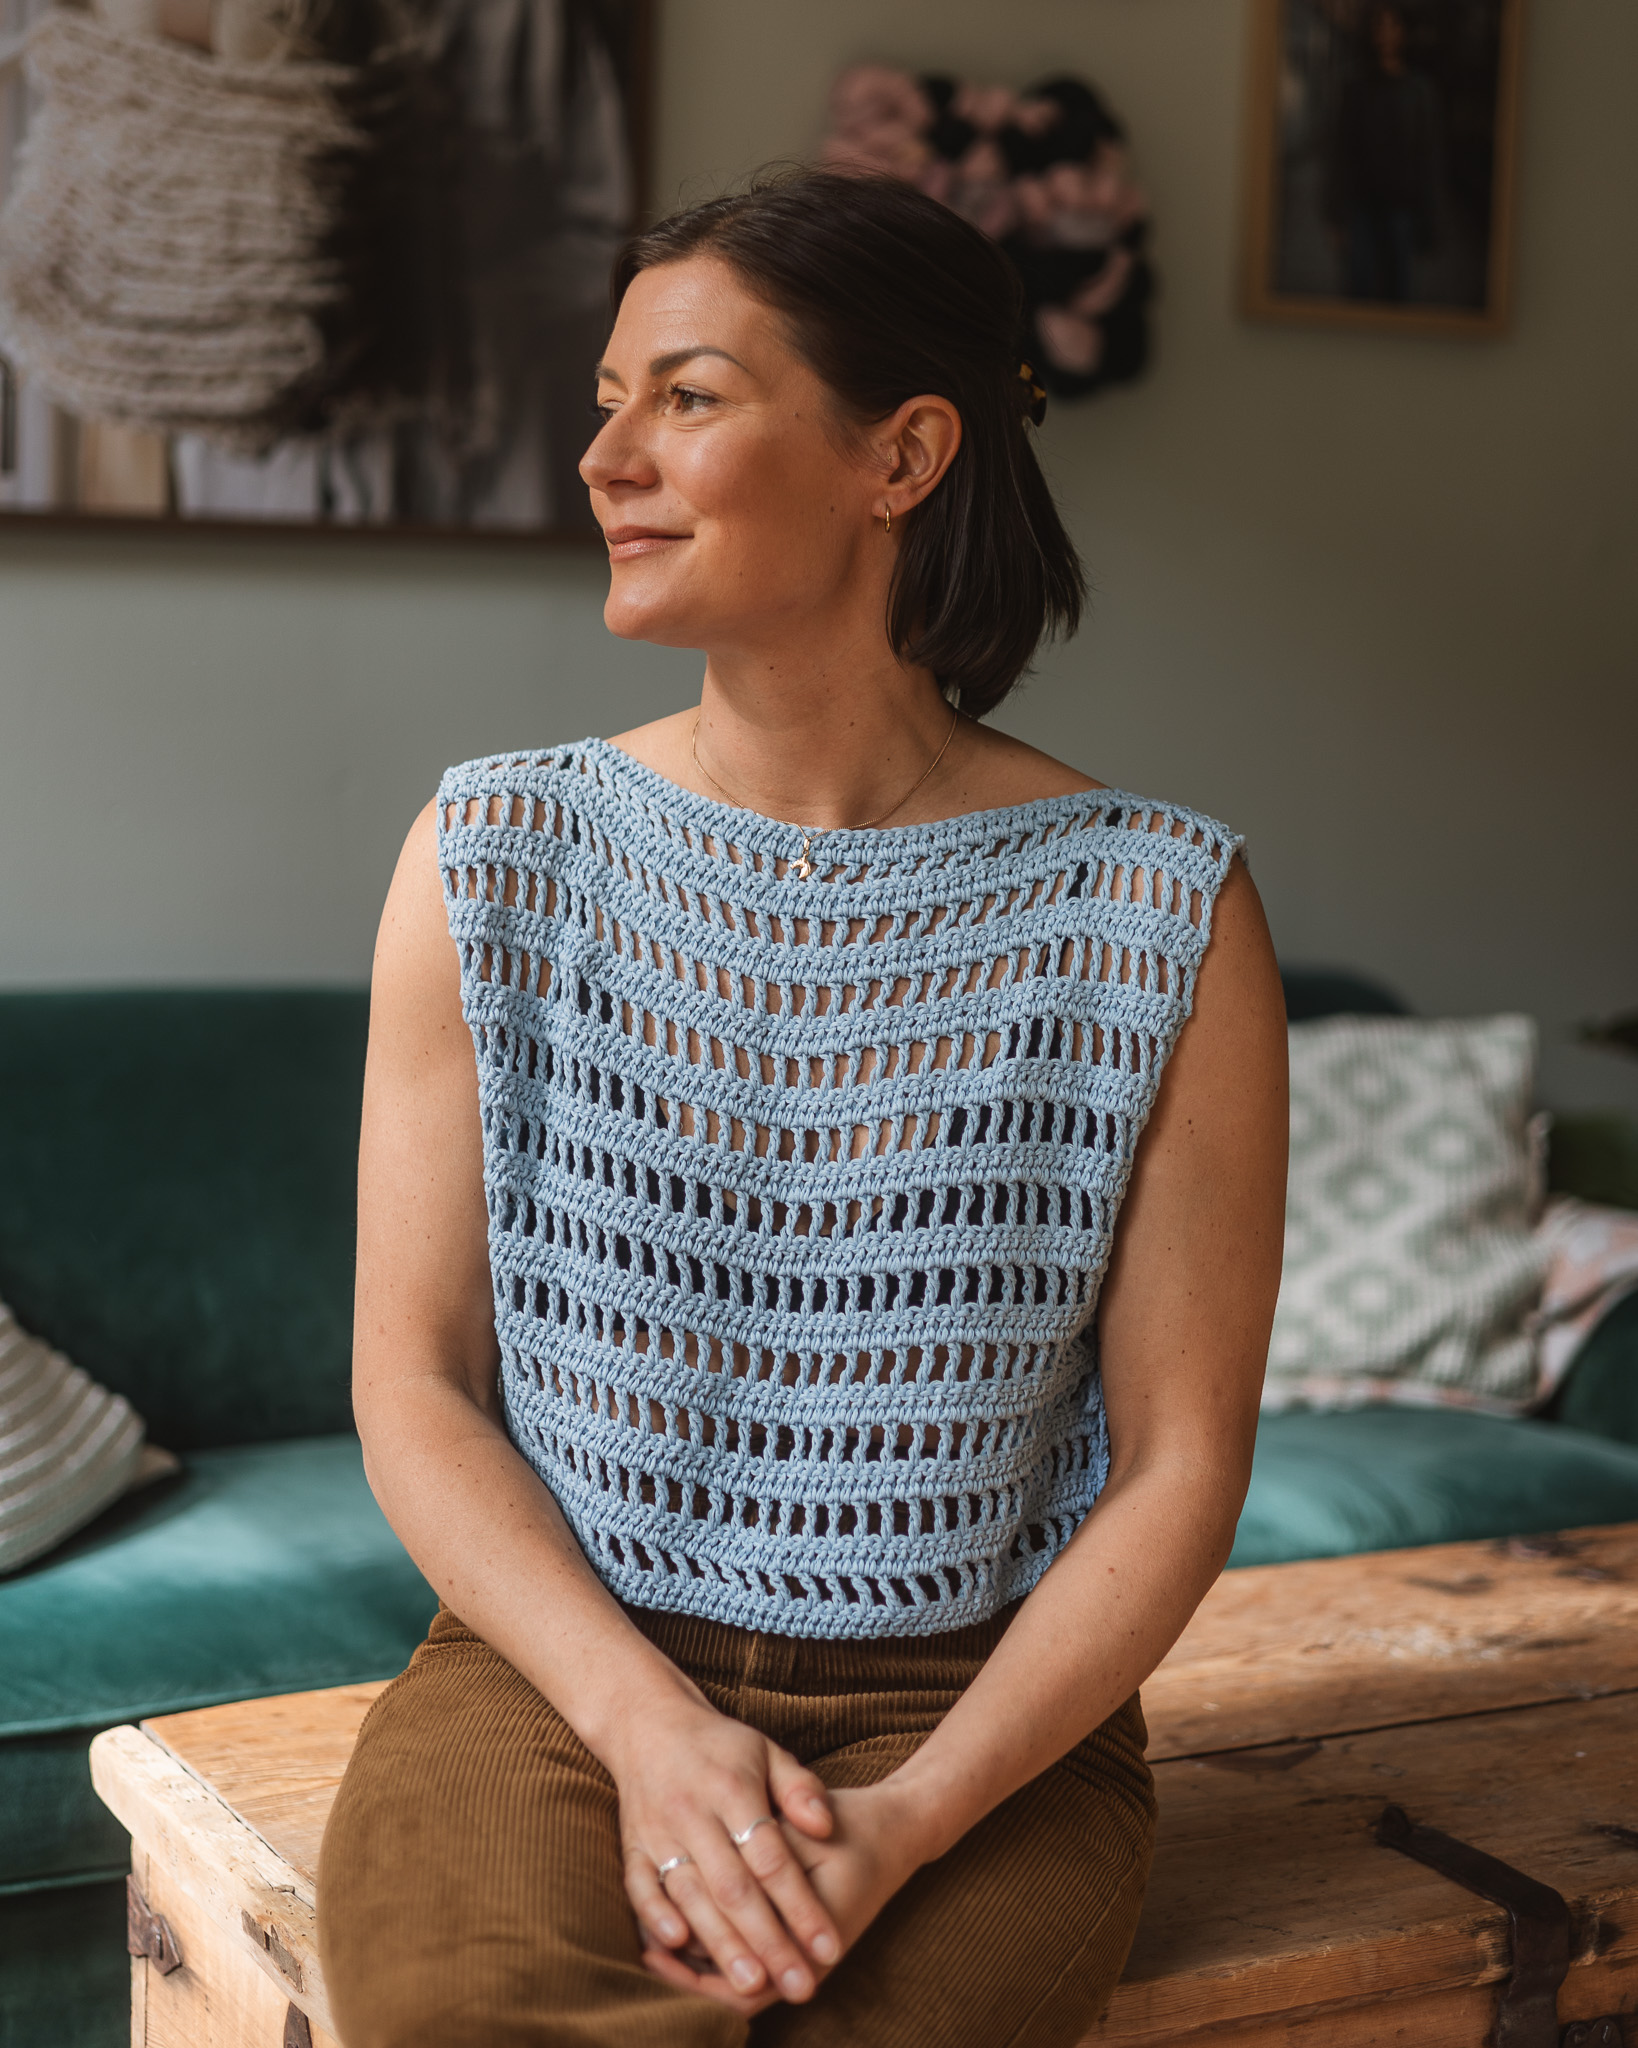
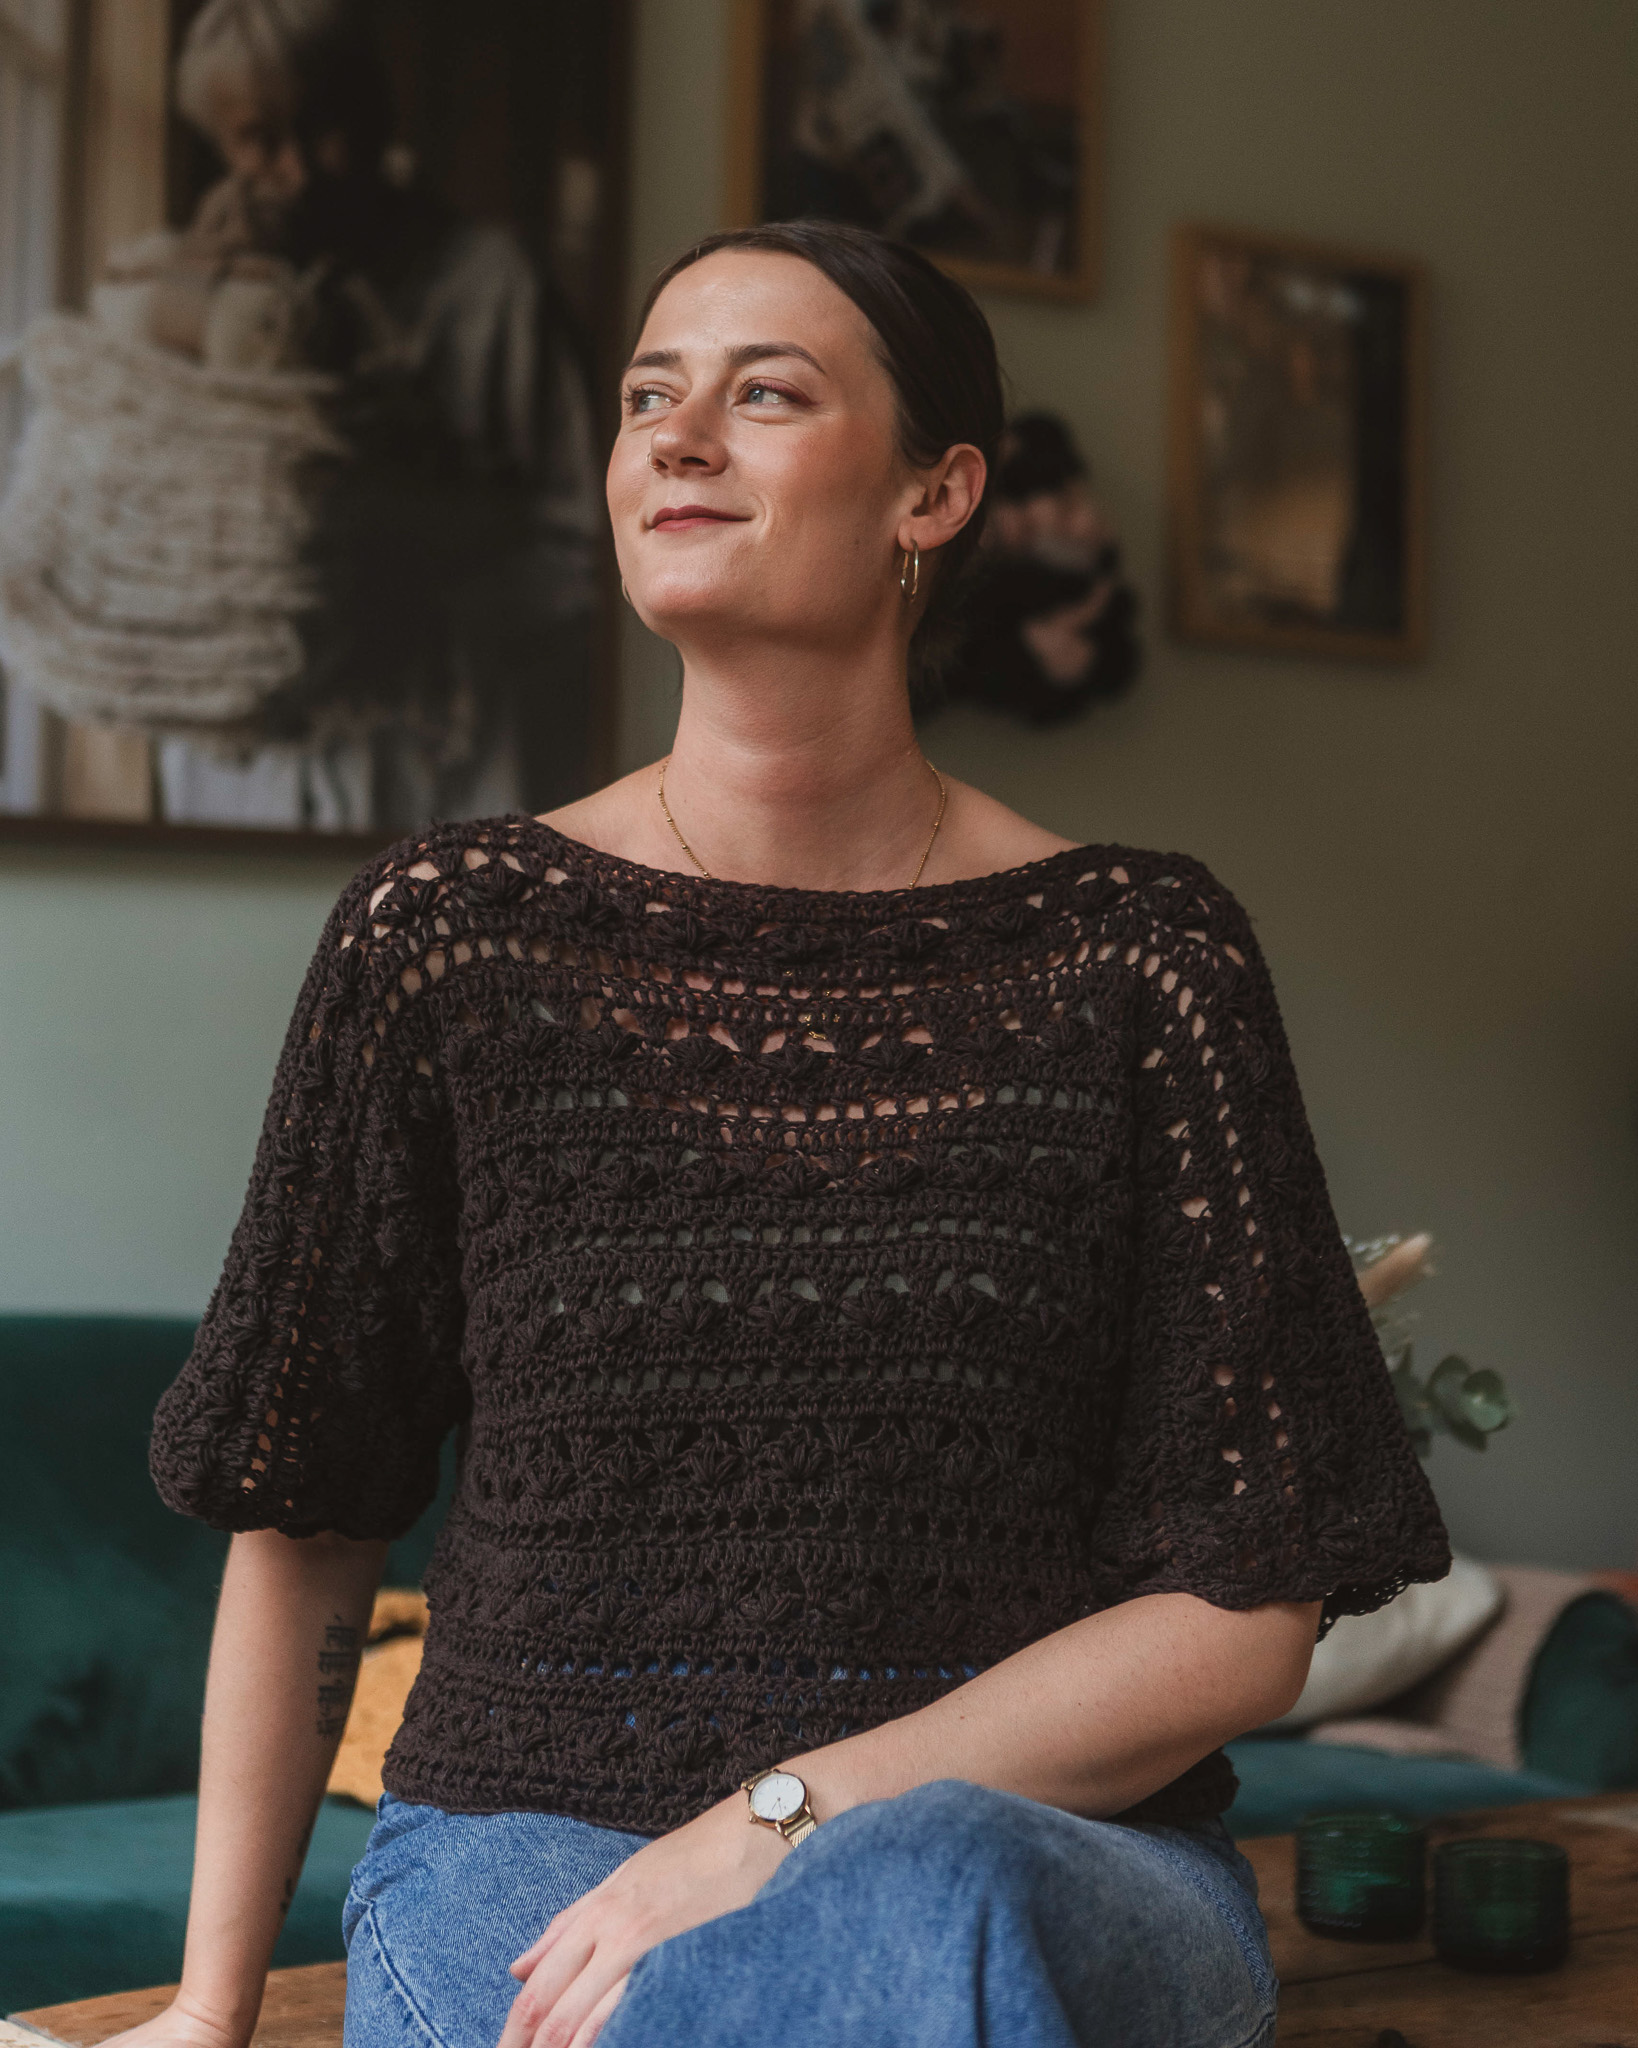
Crocheted tank top "Melli"
Crochet a beautiful tank top!
This beautiful tank top might become your most-loved garment! Perfect to wear with both jeans and skirts. The size is easy to customize to your own measurements, but the pattern also includes instructions for size M (S, L, XL). You will need our MYO Cotton Cloud yarn (we use the color "Cloud") and a 3.5 mm crochet hook. You will also need a tapestry needle, stitch markers, scissors, and a measuring tape.
Yarn Consumption: 400 g for size S/M or 500 g for size M/L
Please note: In this tutorial, we use videos from our crochet technique library and photos.
Here's how to do it
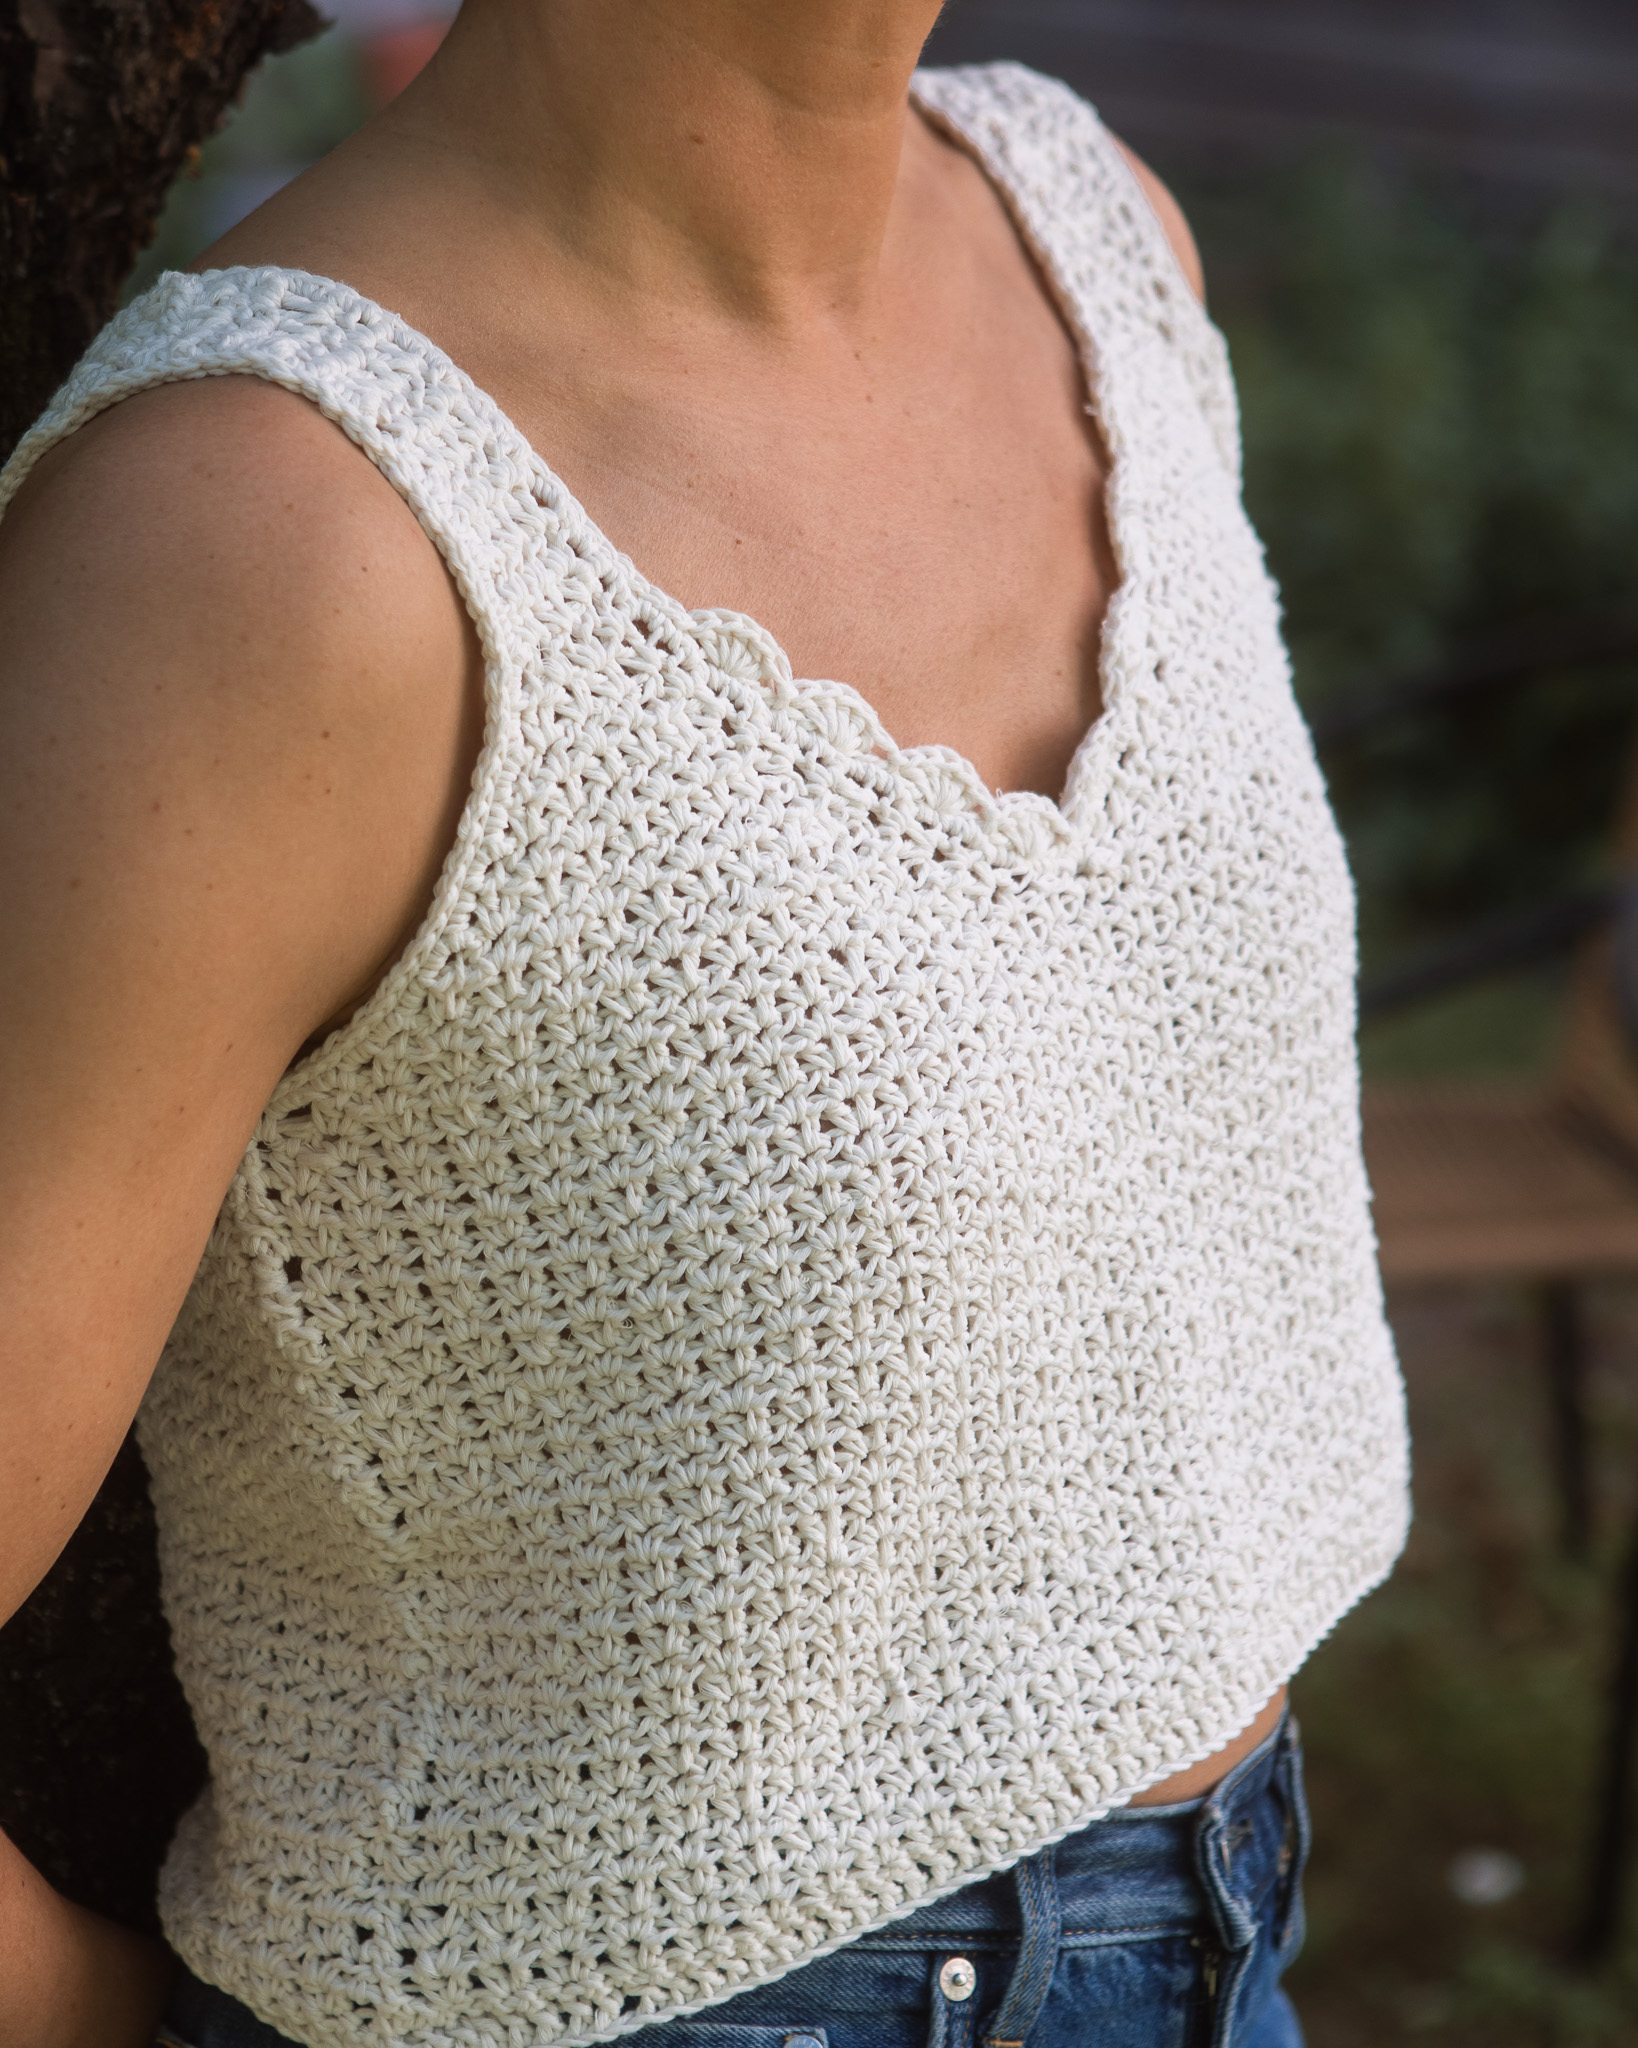
The top is made using a single row that is repeated throughout the project. The pattern uses the following techniques: chain stitch, slip stitch, single crochet, half double crochet, and double crochet. A special technique included in the pattern is the half double crochet V-stitch. The pattern is written for size M, with smaller and larger sizes shown in parentheses (S, L, XL). If only one number is given, it applies to all sizes. Good luck and happy crocheting! :) /Johanna K

This is what you need:
Here you can directly purchase the material for the product. Please note that the instruction is digital and appears here on the page (no written instruction).

Cotton Cloud | 100 g
A slightly thinner cotton yarn that works perfectly for clothes, accessories and amigurumi.
Buy product
.jpg)
Unleash your creativity
For only 85kr per month you get access to all our 300+ beginner-friendly instructions for crochet, knitting and macrame.
A perfect way to get started with your new hobby!

PATTERN INFORMATION – Measurements & Gauge
Measurements: The measurements are based on the gauge below and on the original measurements for size M.
Gauge:
- 7.5 V-stitches = 10 cm (4 in)
- 14 rows = 10 cm (4 in)
If your gauge matches the measurements above, your finished garment will correspond to the sizes listed below, and you can follow the size instructions given in the pattern.

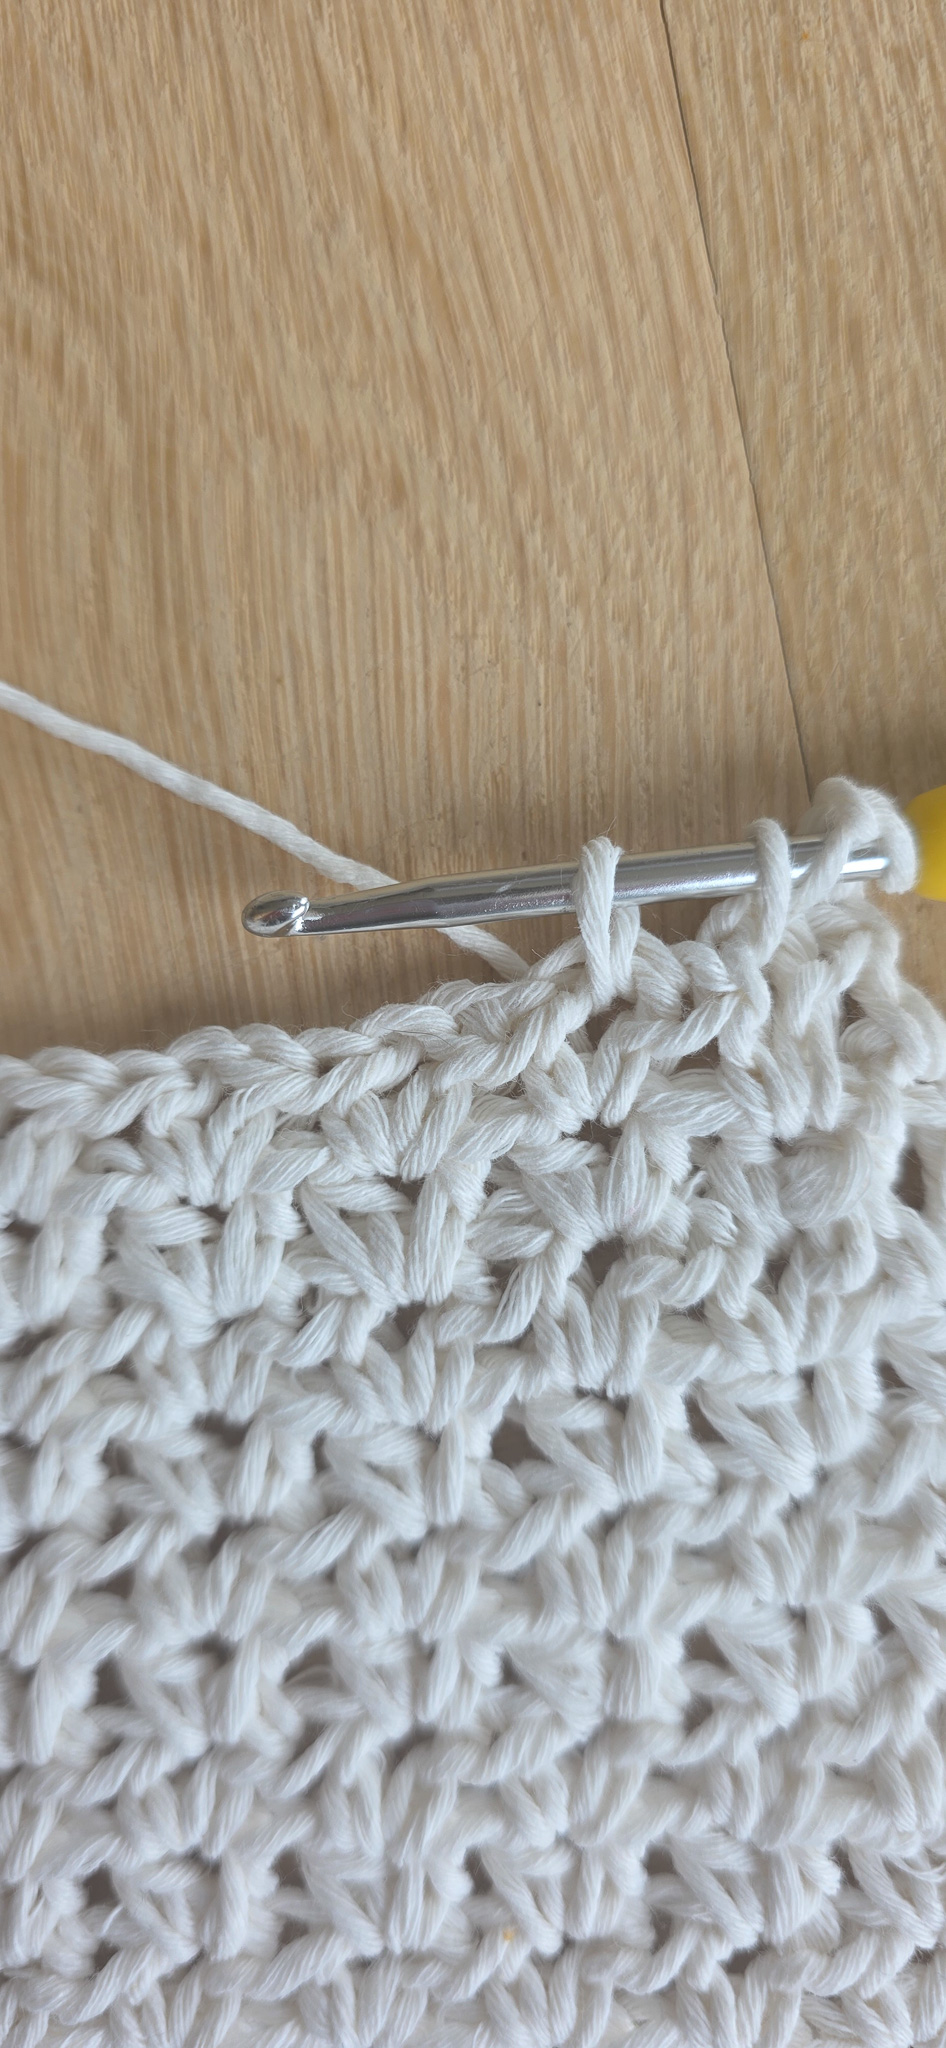
How to Crochet a V-Stitch
The V-stitch in this pattern is made using half double crochet stitches:
(1 half double crochet, 1 chain, 1 half double crochet) in the same stitch or chain space.
- Yarn over.
- Insert your hook into the stitch or chain space where the V-stitch will be made.
- Yarn over and pull up a loop (3 loops on hook).
- Yarn over and pull through all 3 loops on the hook (first half double crochet completed).
- Chain 1.
- Yarn over again and insert your hook into the same stitch or chain space used in Step 2.
- Yarn over and pull up a loop (3 loops on hook).
- Yarn over and pull through all 3 loops on the hook (second half double crochet completed).
You have now formed a V-stitch consisting of two half double crochets separated by one chain stitch.
Working the Next Row
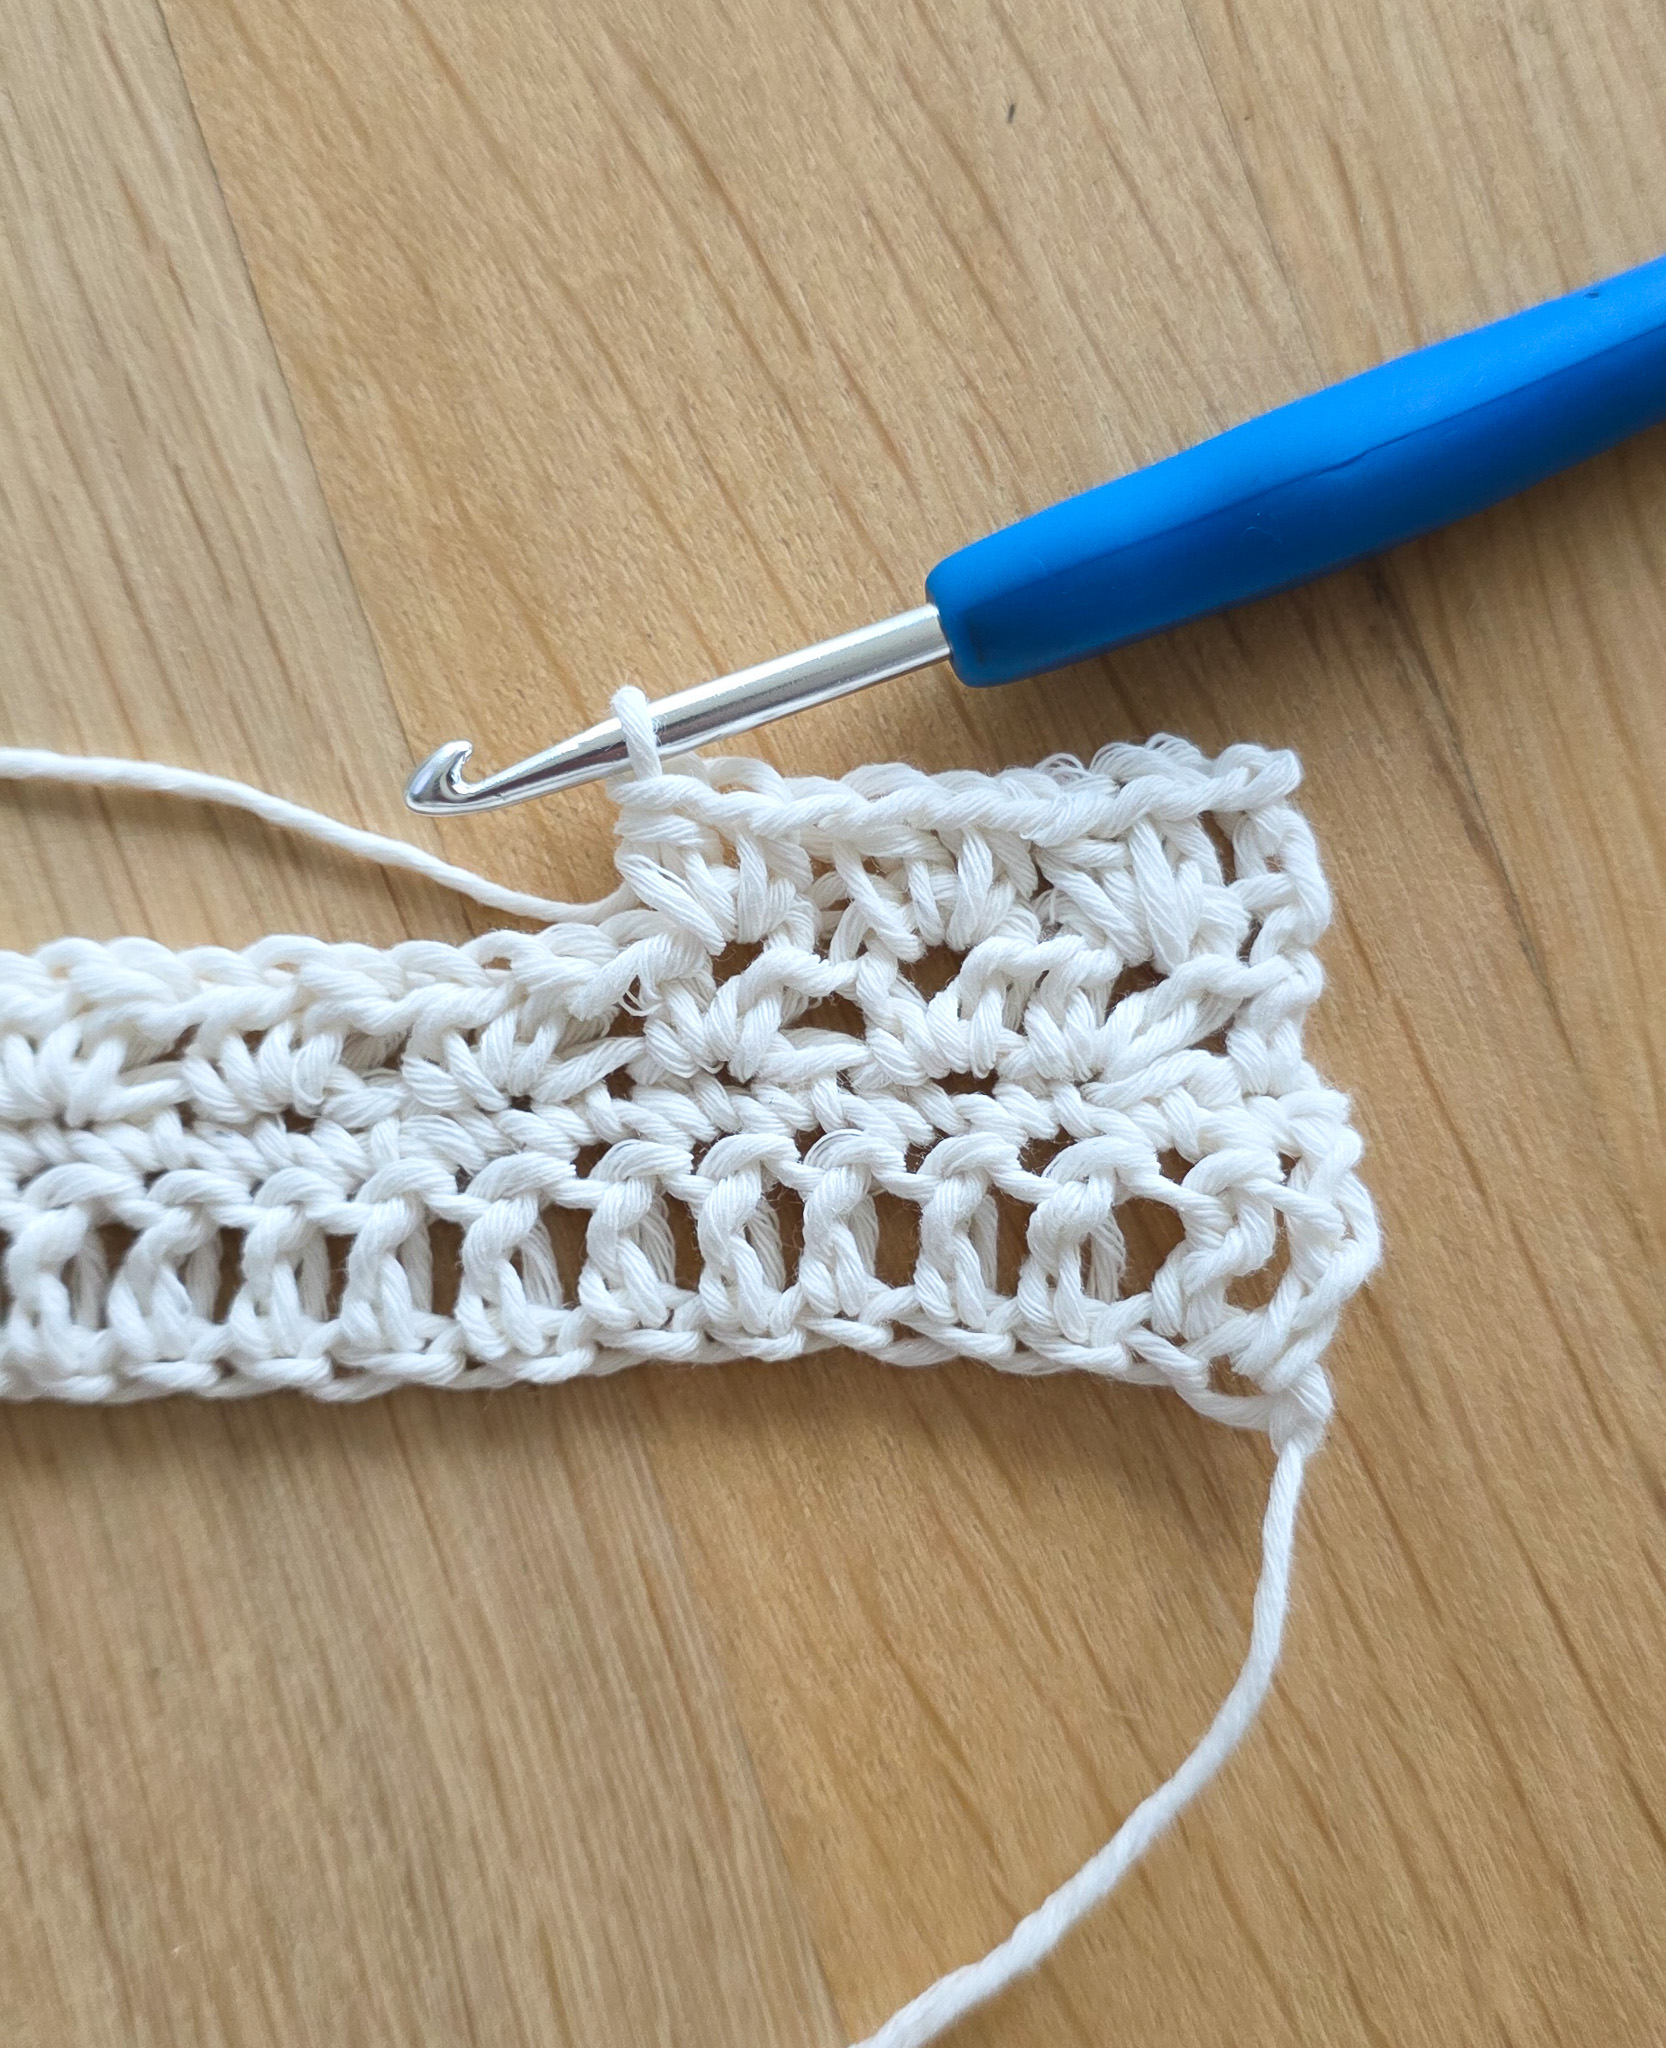
In the next row, crochet a new V-stitch (half double crochet, chain 1, half double crochet) into the chain-1 space of the V-stitch from the previous row. This causes the V-stitches to stack directly on top of one another, creating the pattern.
Front and Back Panel
M (S, L, XL)
You will work the piece from the bottom up.
Foundation Chain:
Chain 69 (60, 77, 85) + 3 chains, or chain any number that is divisible by 3, depending on the width you would like your top to be.
If you are unsure how to crochet a foundation chain, see the video below (Chain).
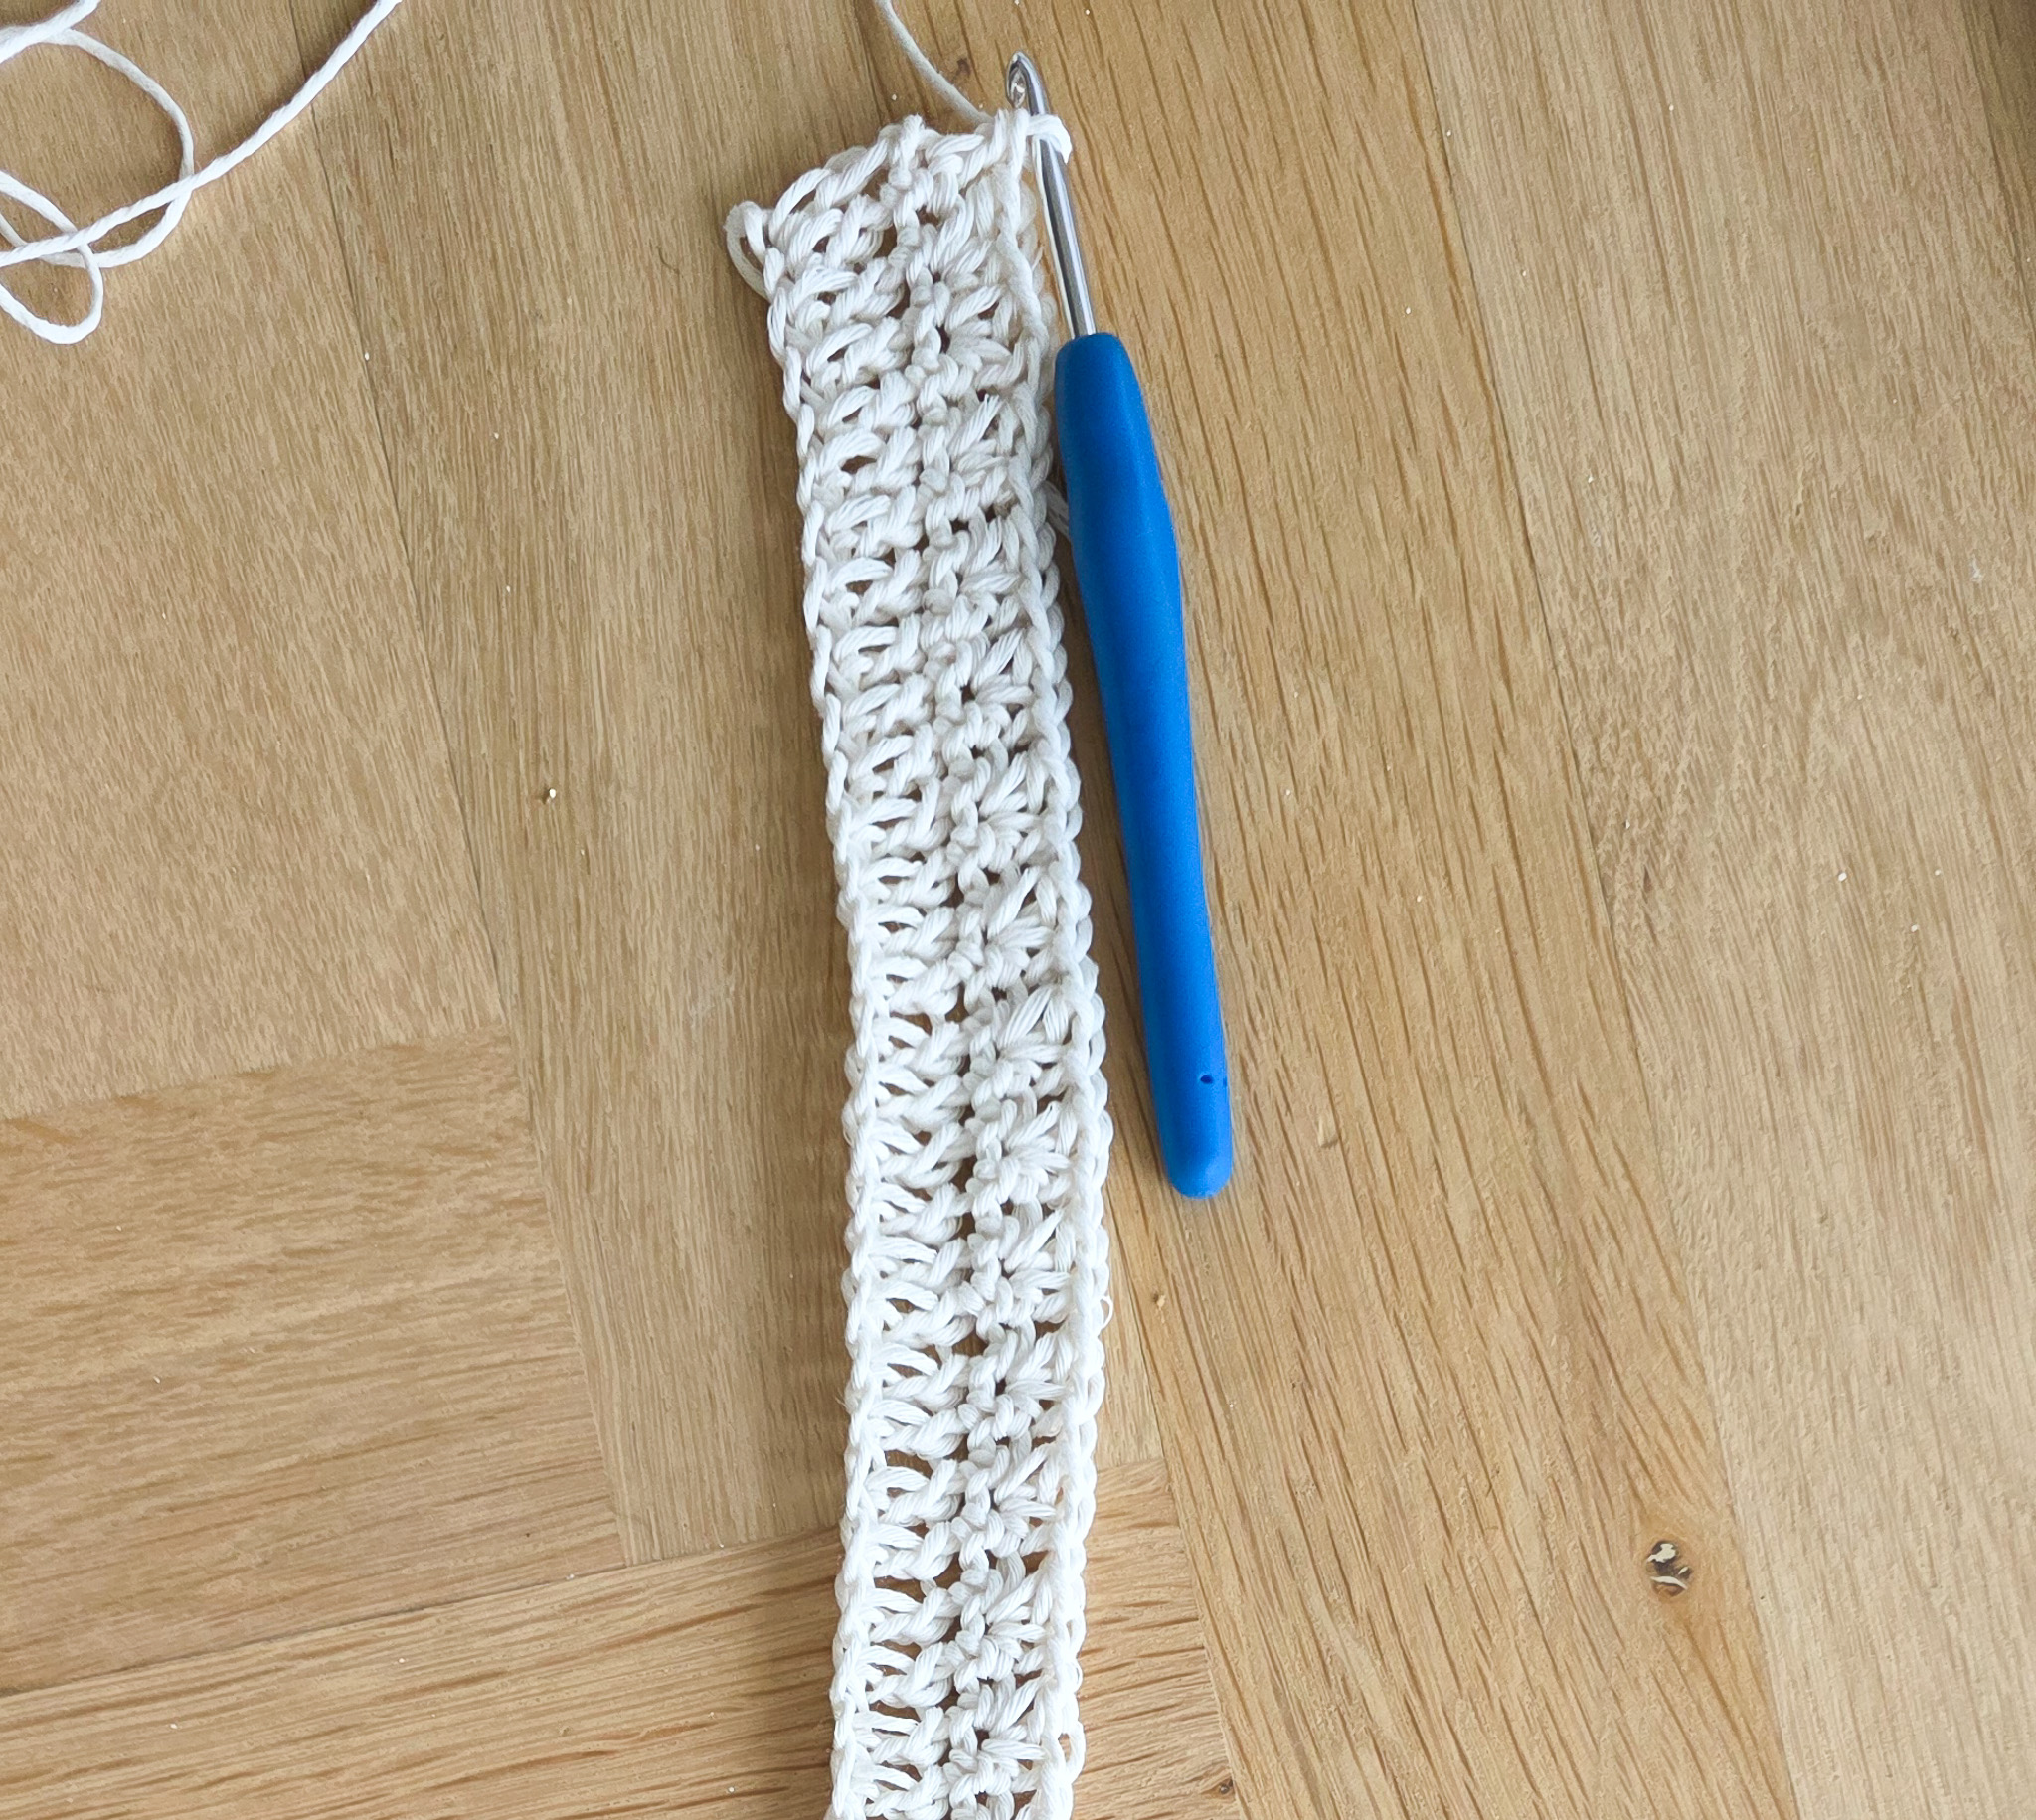
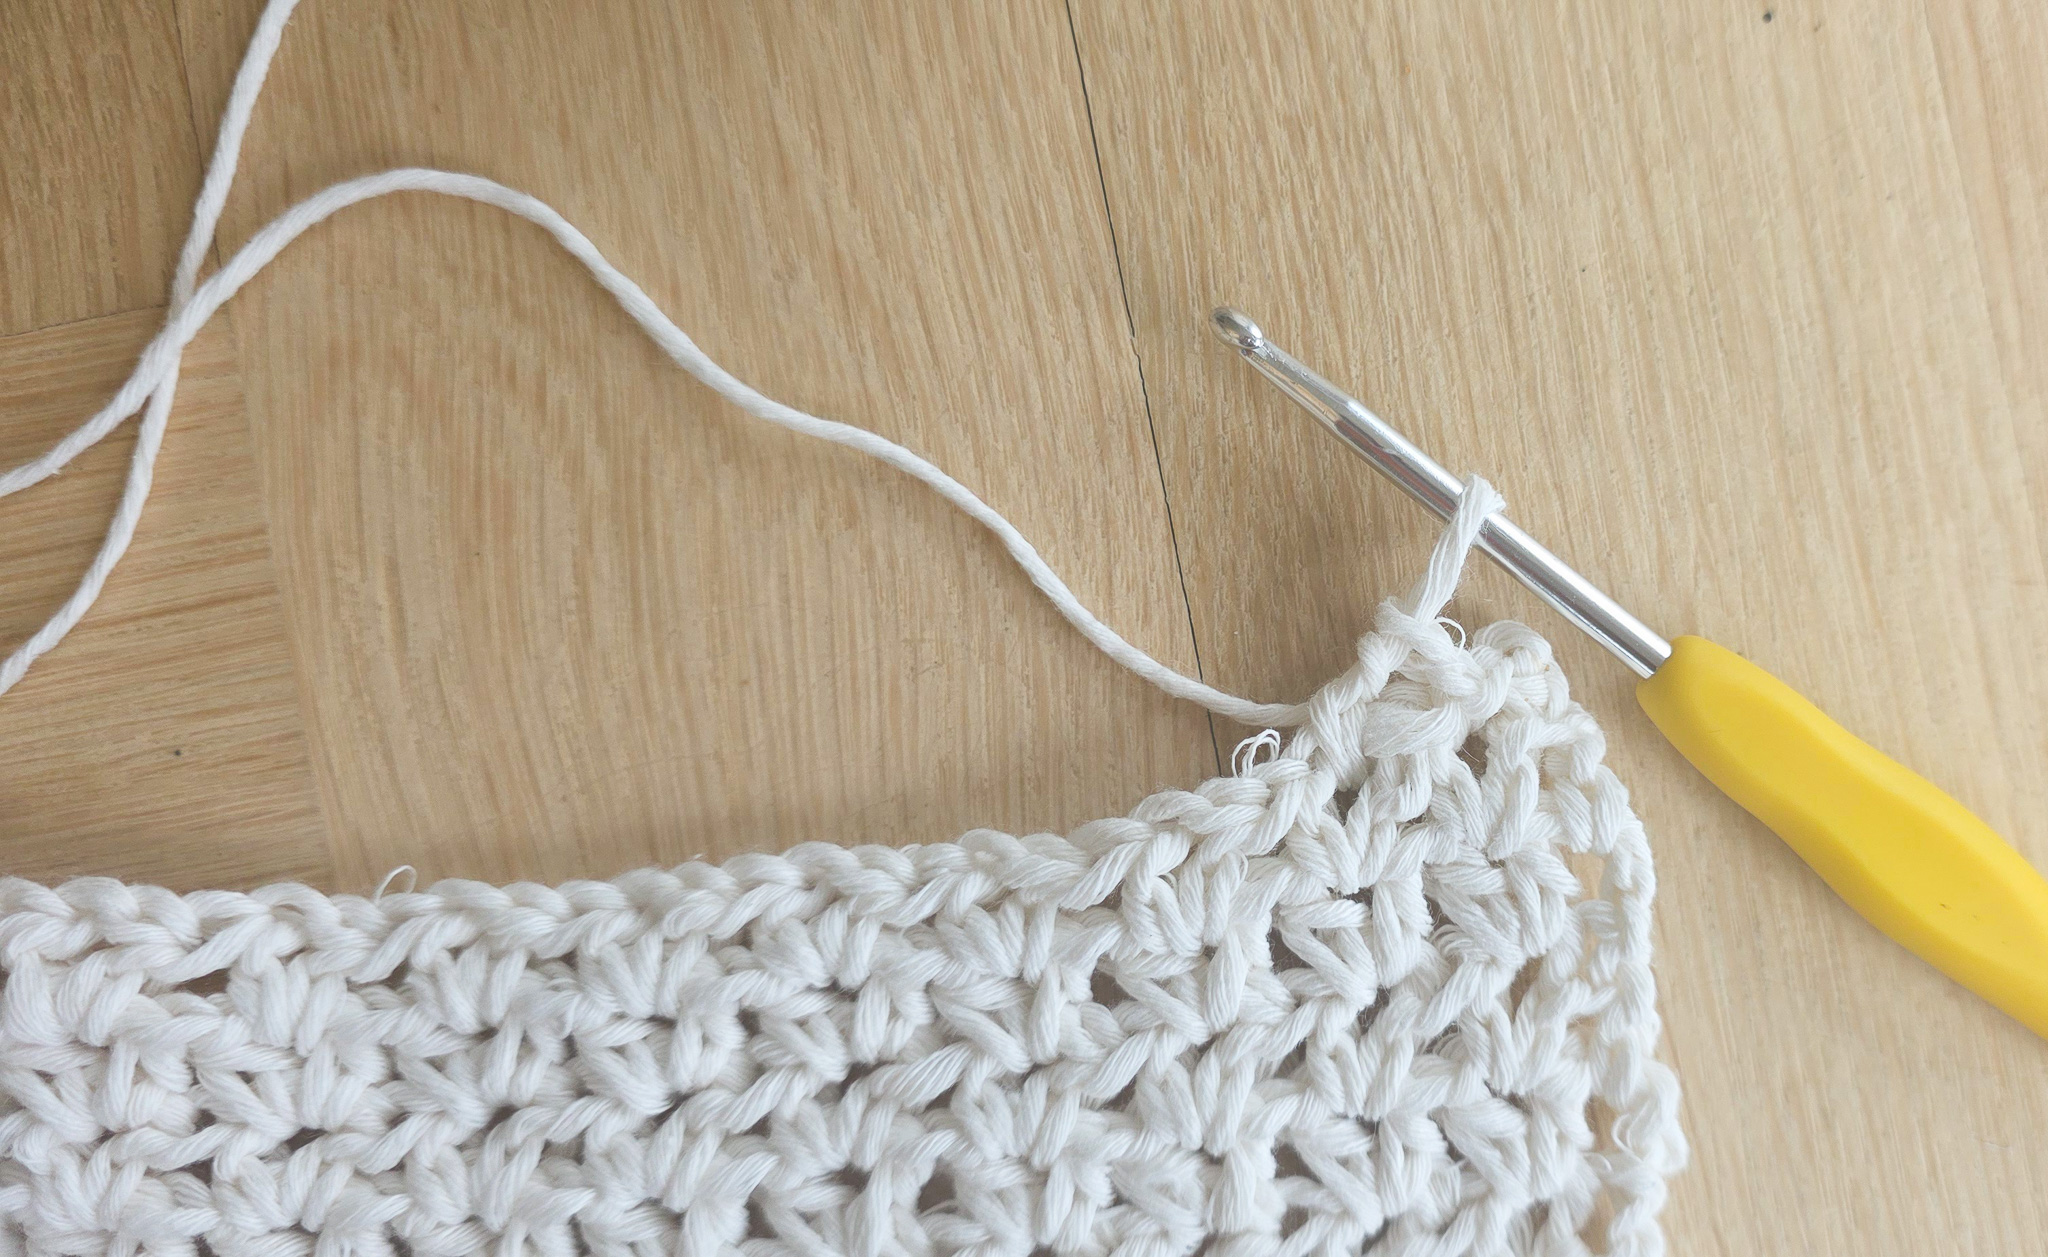
Row 1: Work 1 double crochet (dc) into the 3rd chain from the hook. Work 1 double crochet in each chain across to the end of the row. Ch 1, turn. You should now have a total of 69 (60, 77, 85) double crochets.
If you are unsure how to crochet a double crochet (dc), see the video below (Double Crochet).
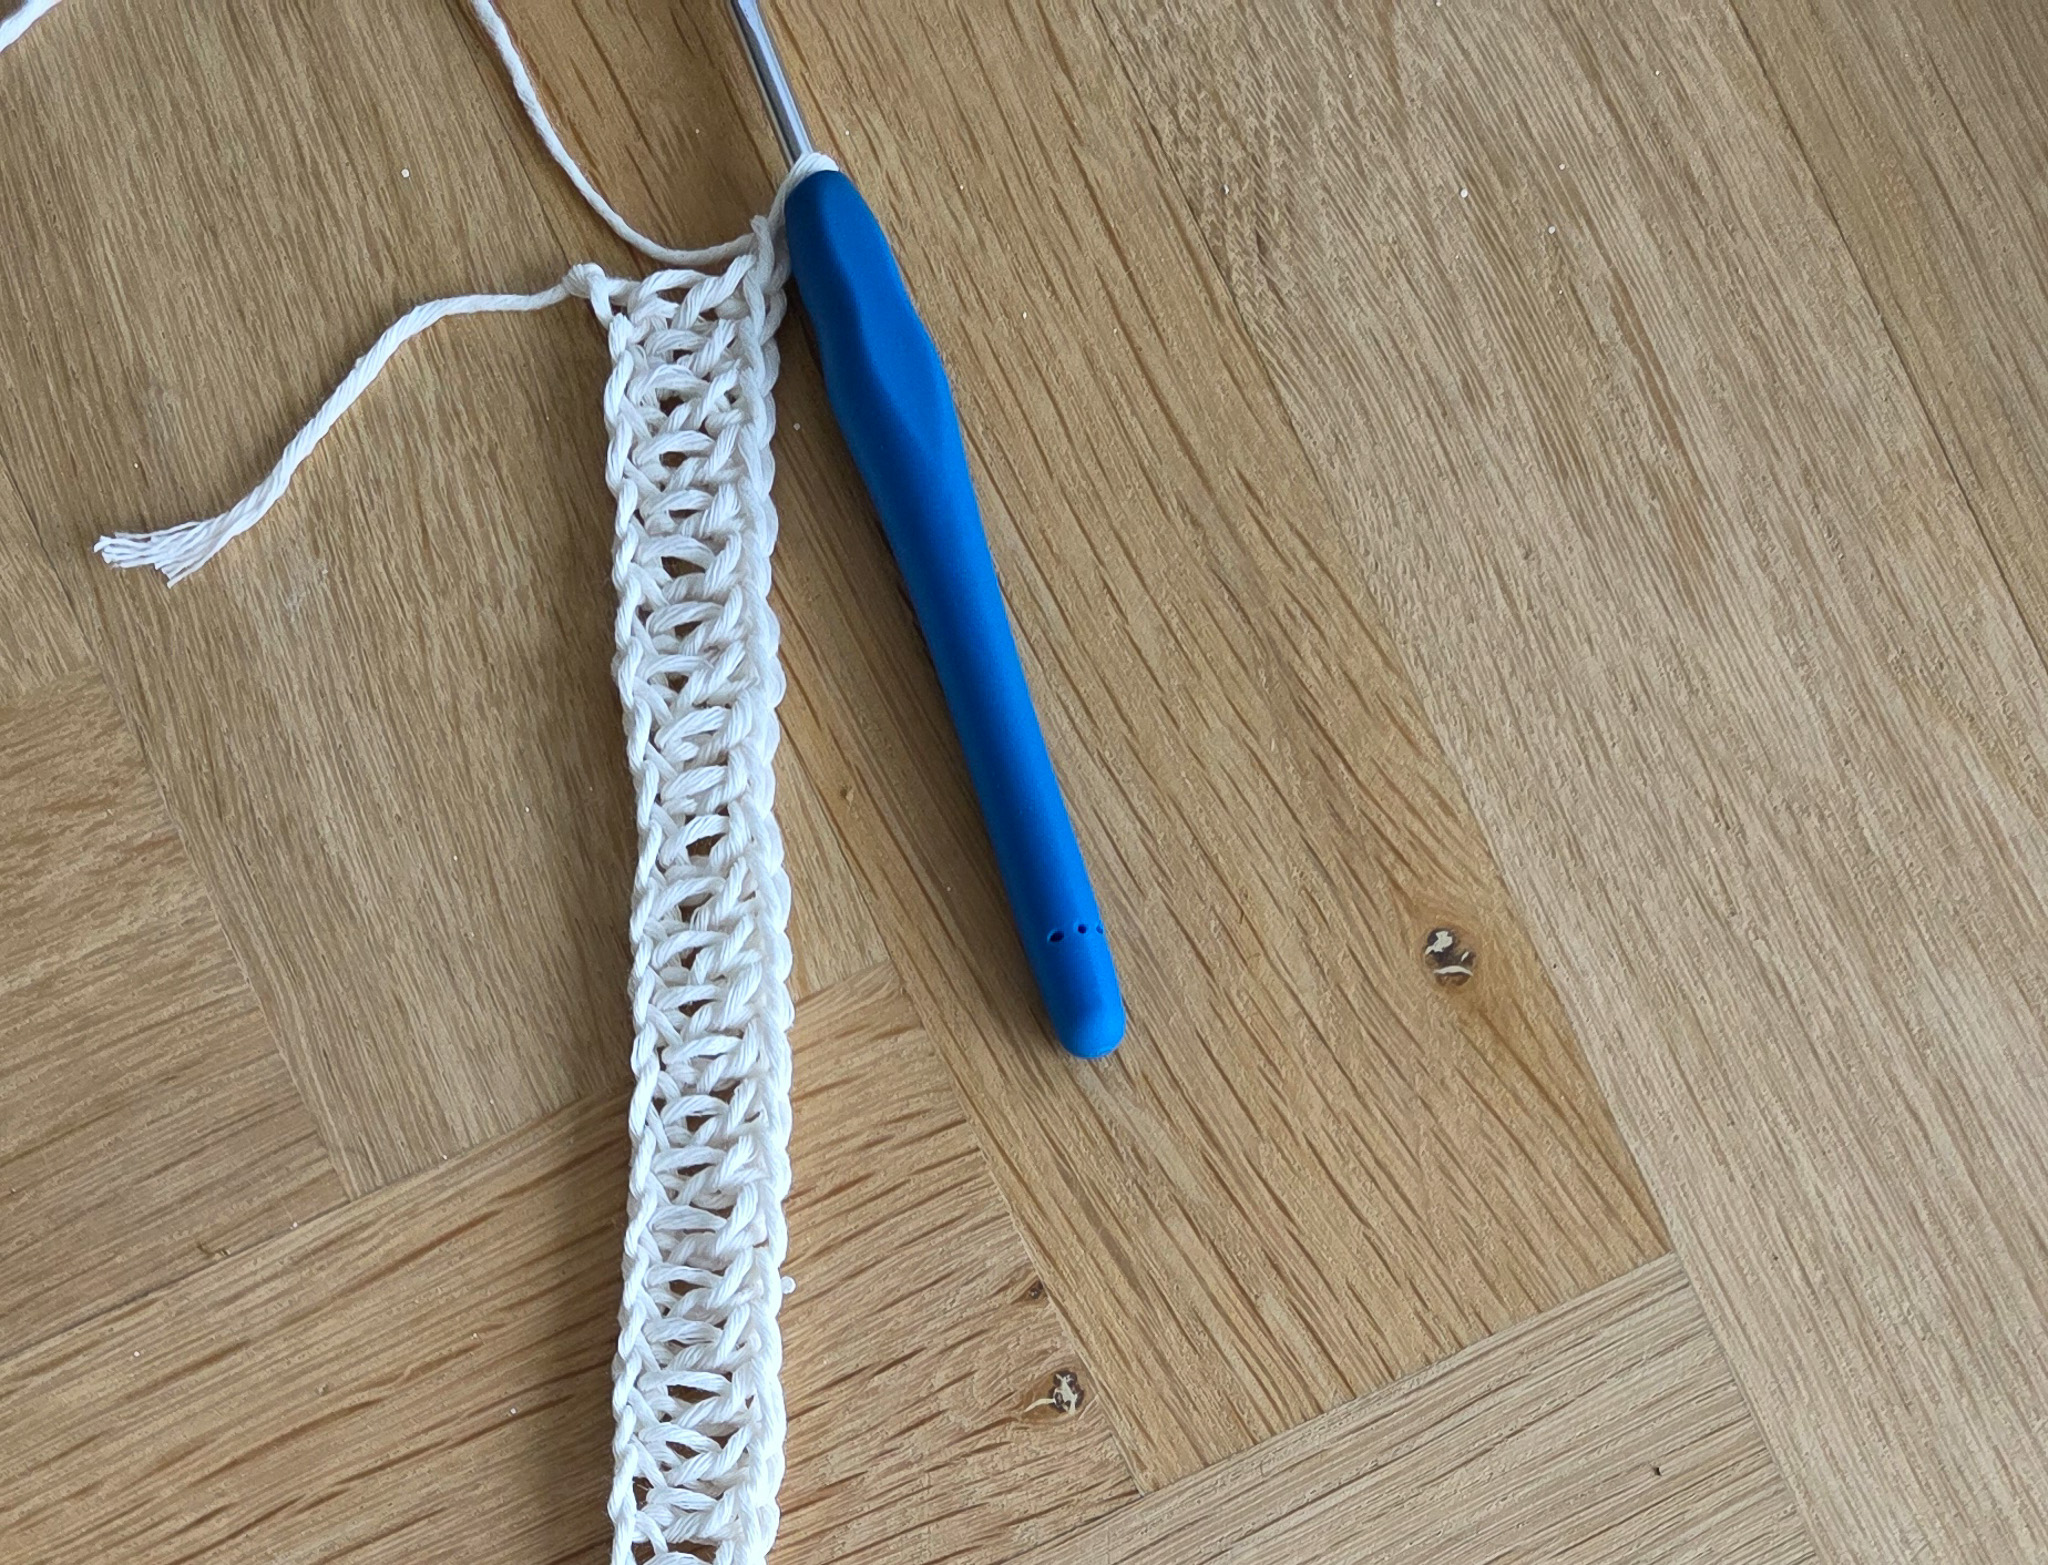
Row 2: Work 1 single crochet in each stitch across to the end of the row. Ch 3, turn. You should now have a total of 69 (60, 77, 85) single crochets.
If you are unsure how to crochet a single crochet, see the video below (Single Crochet).

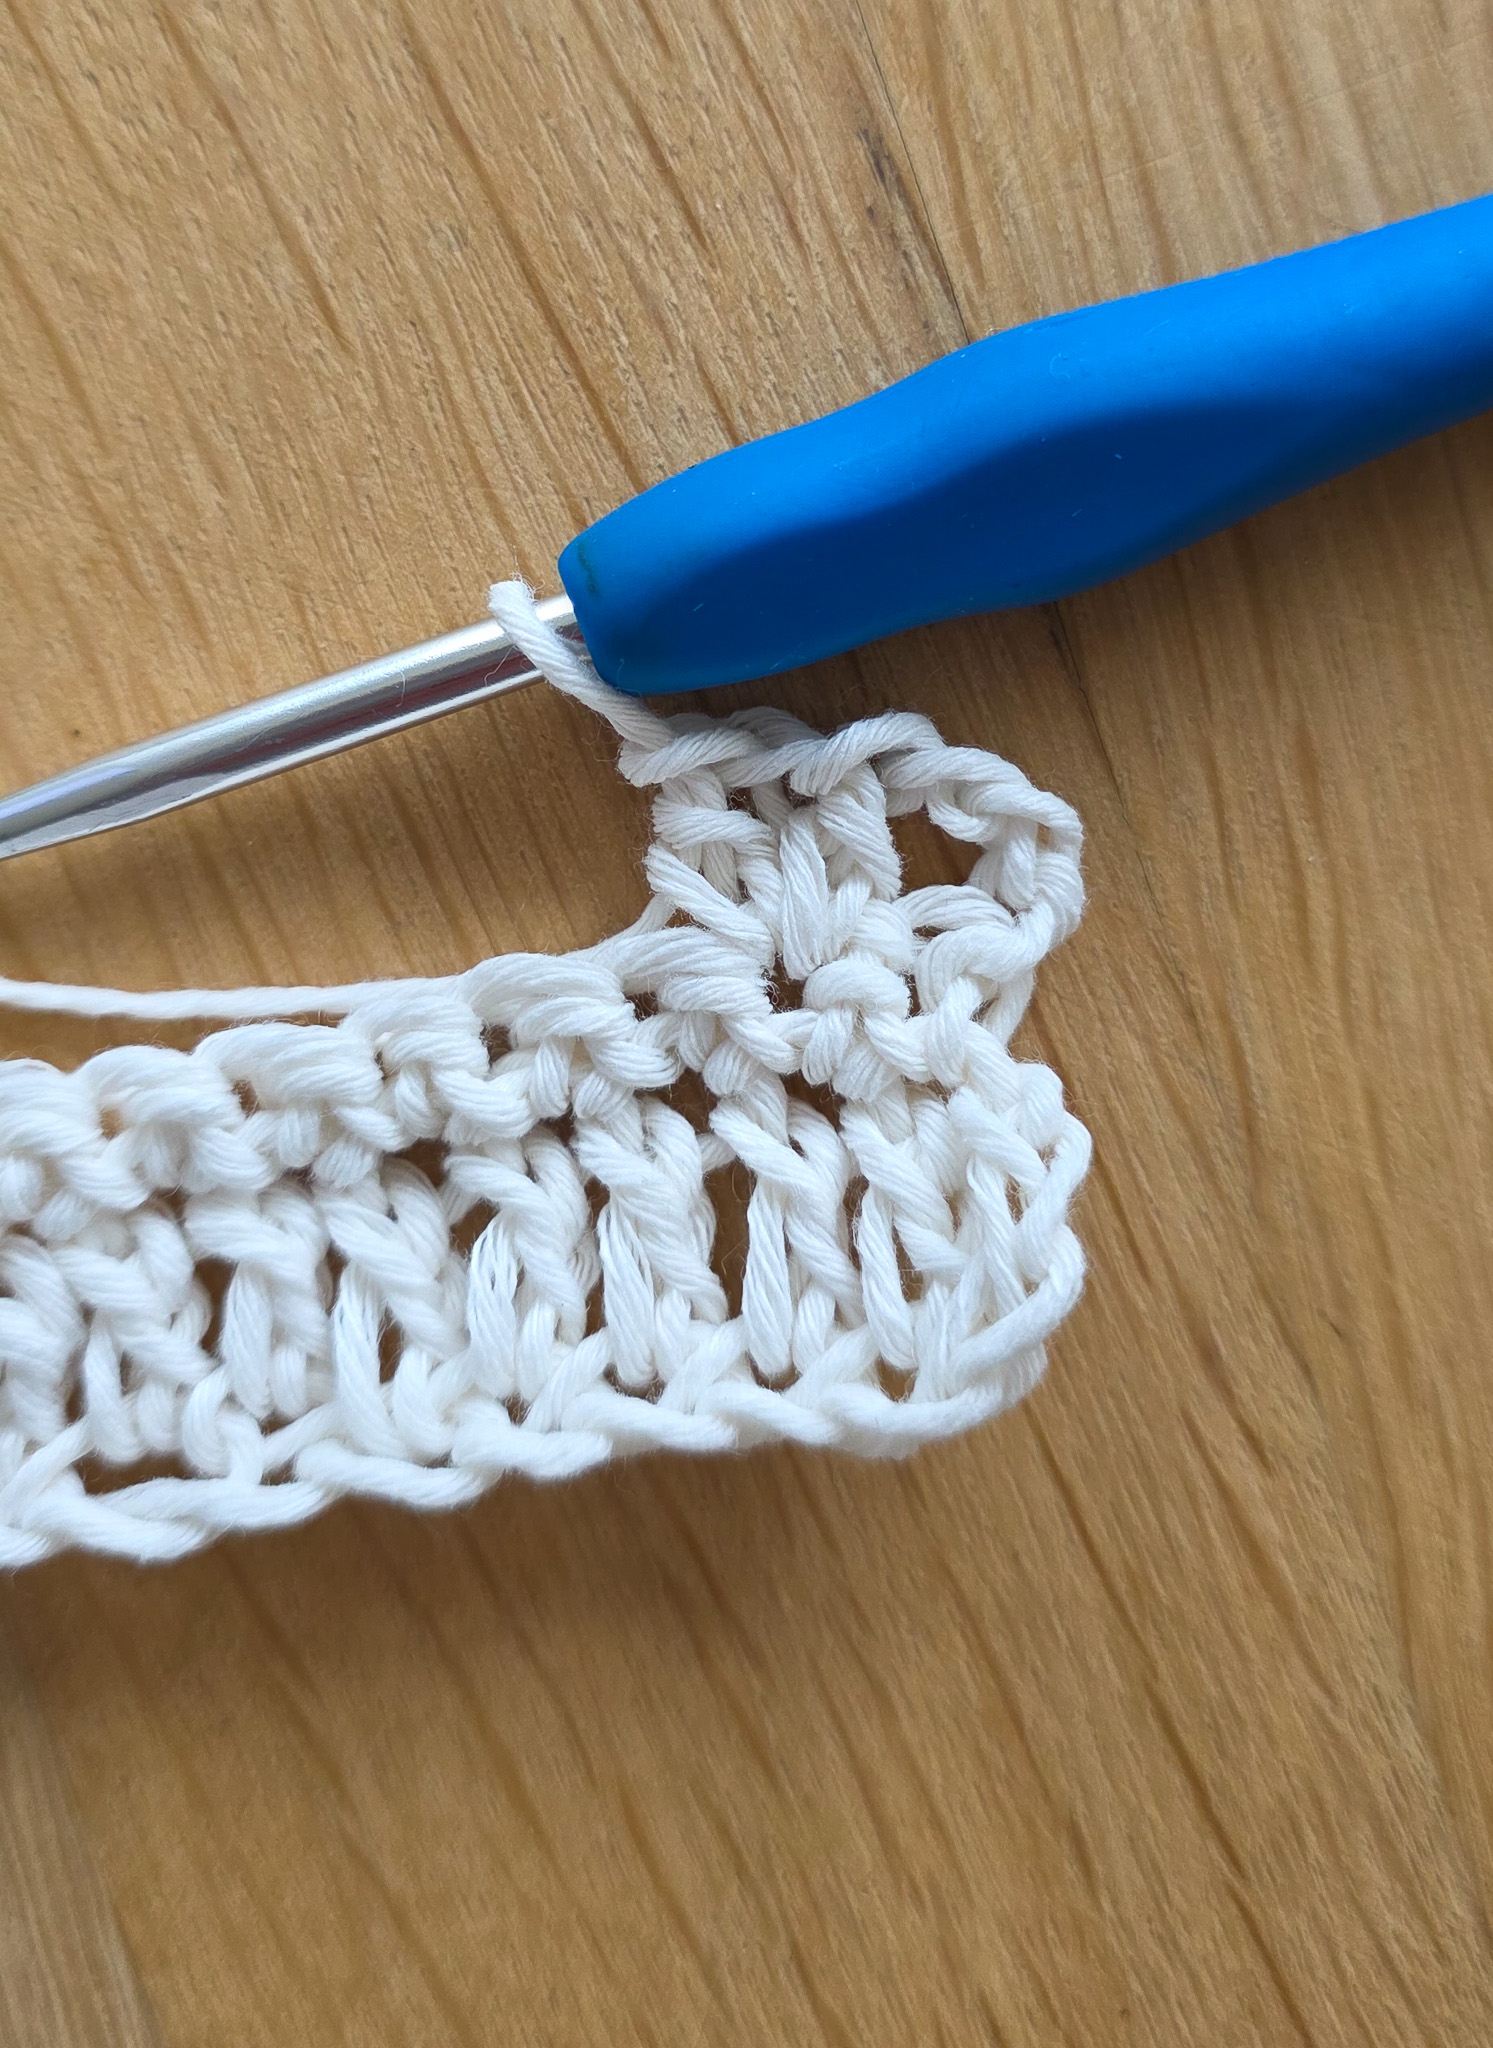
Row 3: Work 1 V-stitch in the 2nd stitch. Skip 1 stitch. Work 1 V-stitch in the next stitch. Continue repeating this pattern across the row:
Skip 1 stitch, work 1 V-stitch in the next stitch. When 2 stitches remain, skip 1 stitch and work 1 double crochet (dc) in the last stitch. Ch 3, turn. You should now have 34 (30, 38, 44) V-stitches.
If you are unsure how to crochet a V-stitch, refer to the instructions under Step 1.
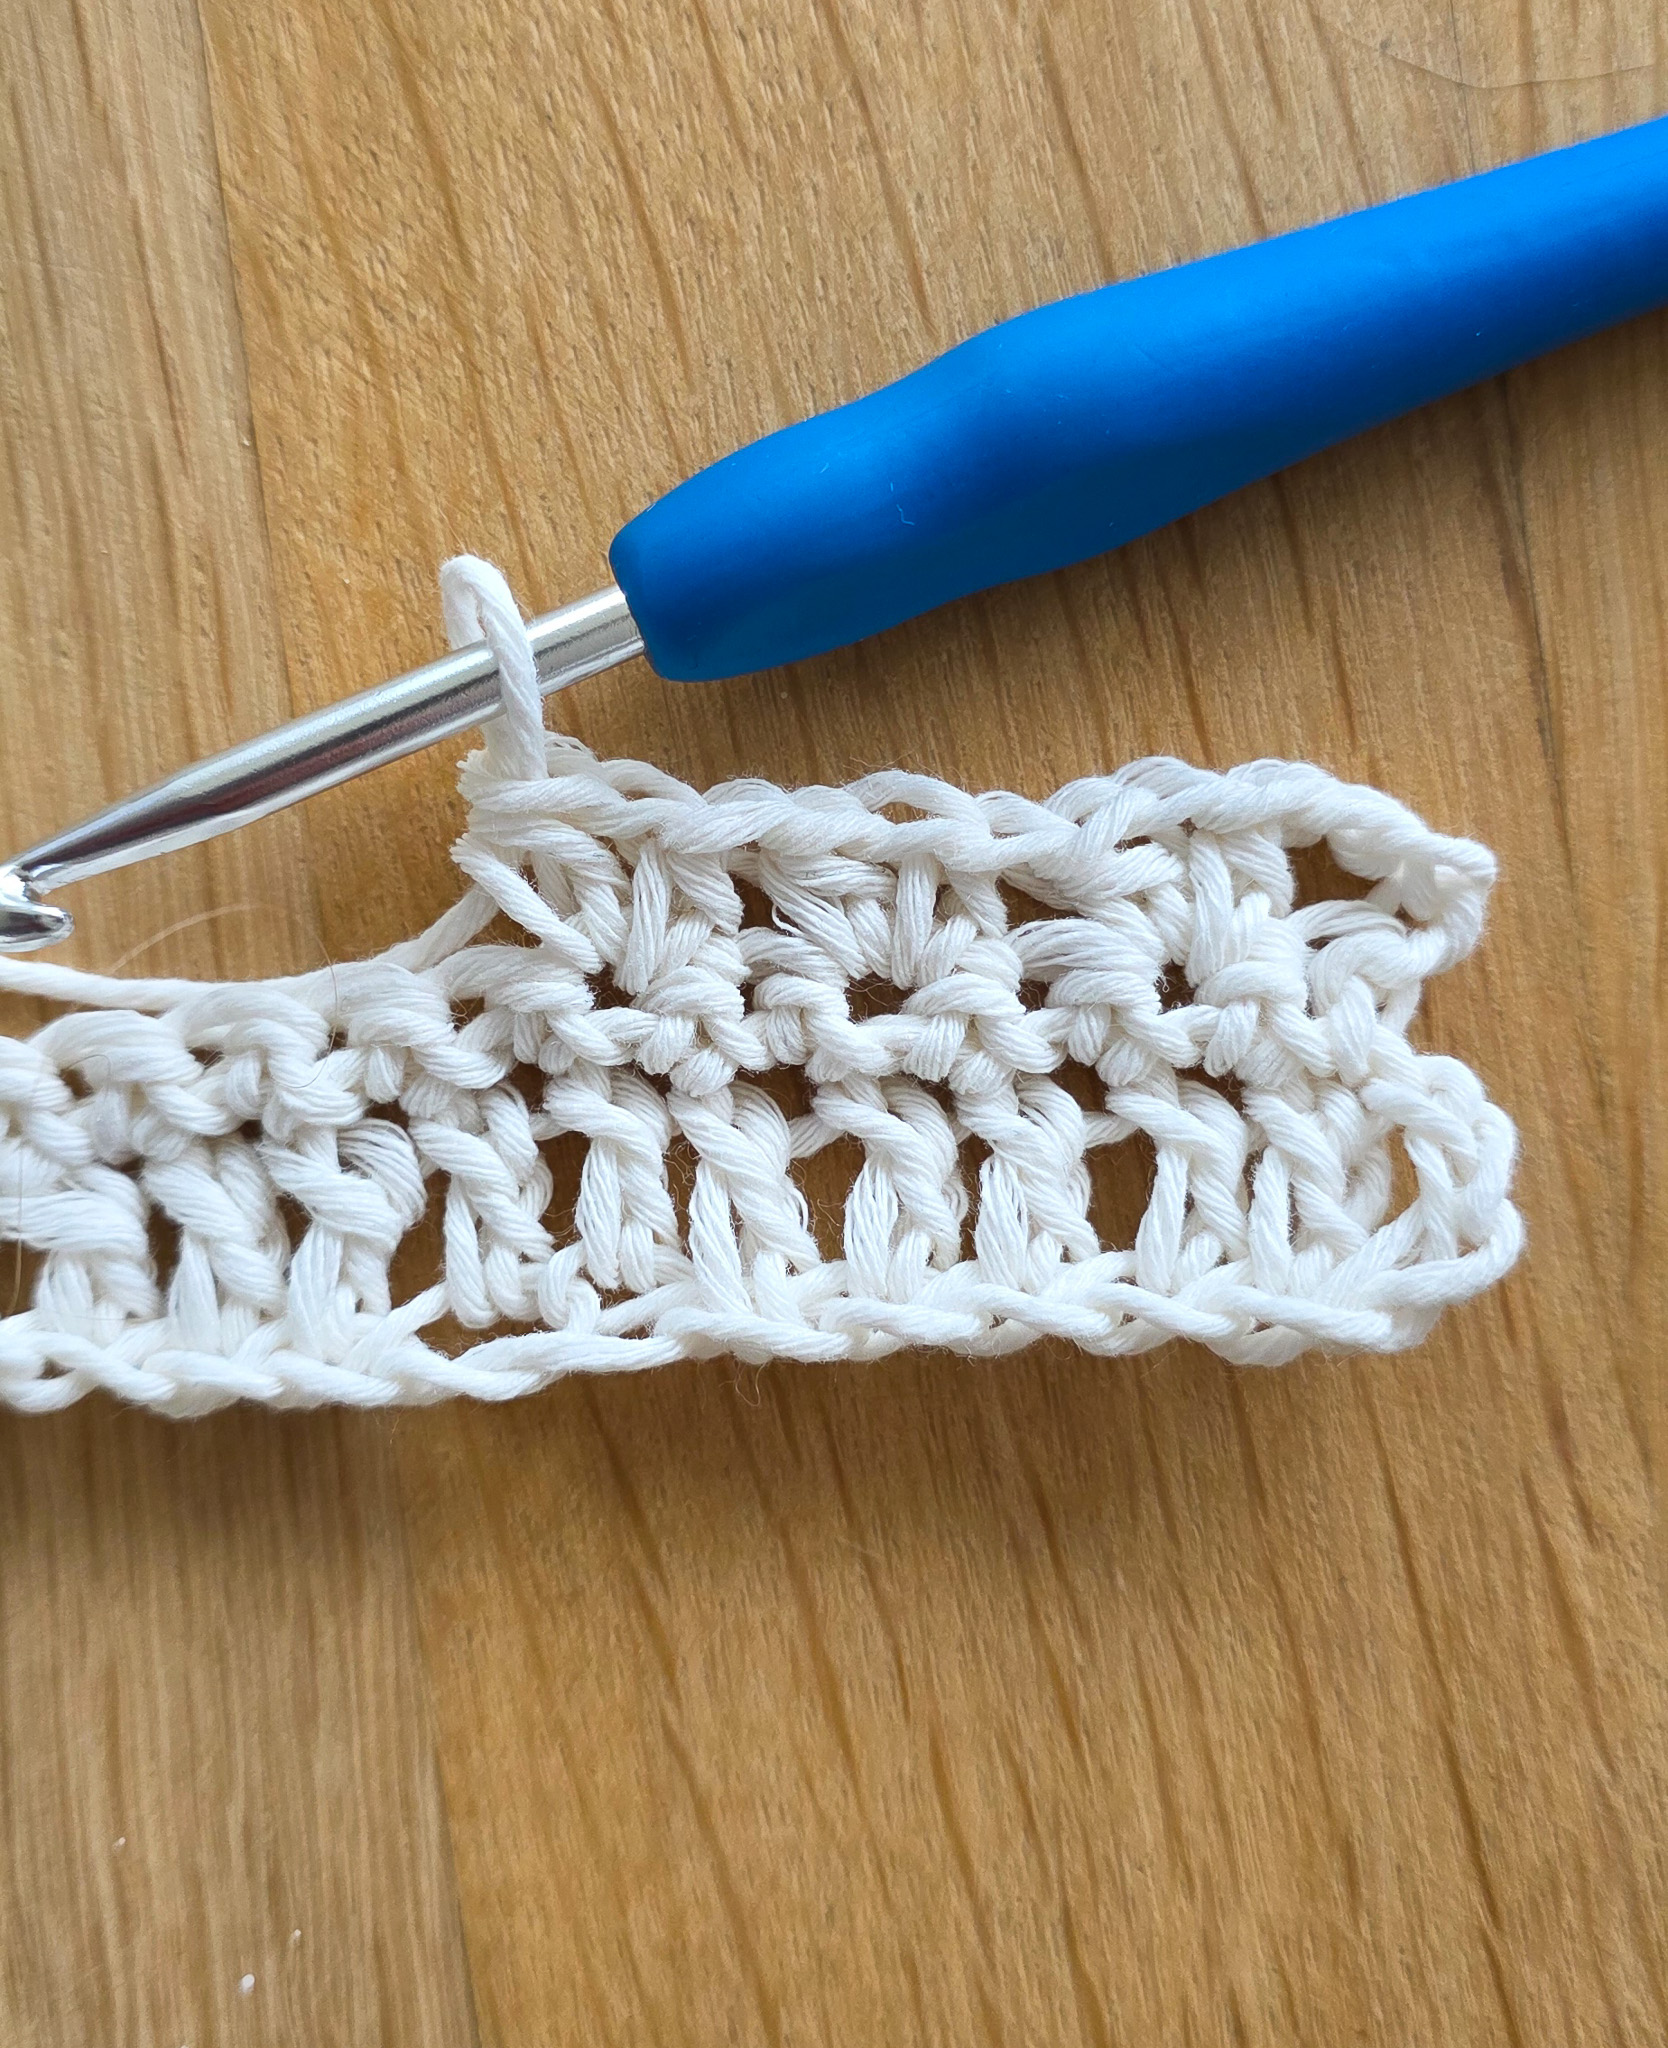
Row 4: Work 1 V-stitch around the chain-1 space of each V-stitch from the previous row. Continue working 1 V-stitch in each chain-1 space across the row. After the last chain space, work 1 double crochet (dc) in the 3rd chain from the previous row’s turning chain.
You should now have a total of 34 (30, 38, 44) V-stitches.
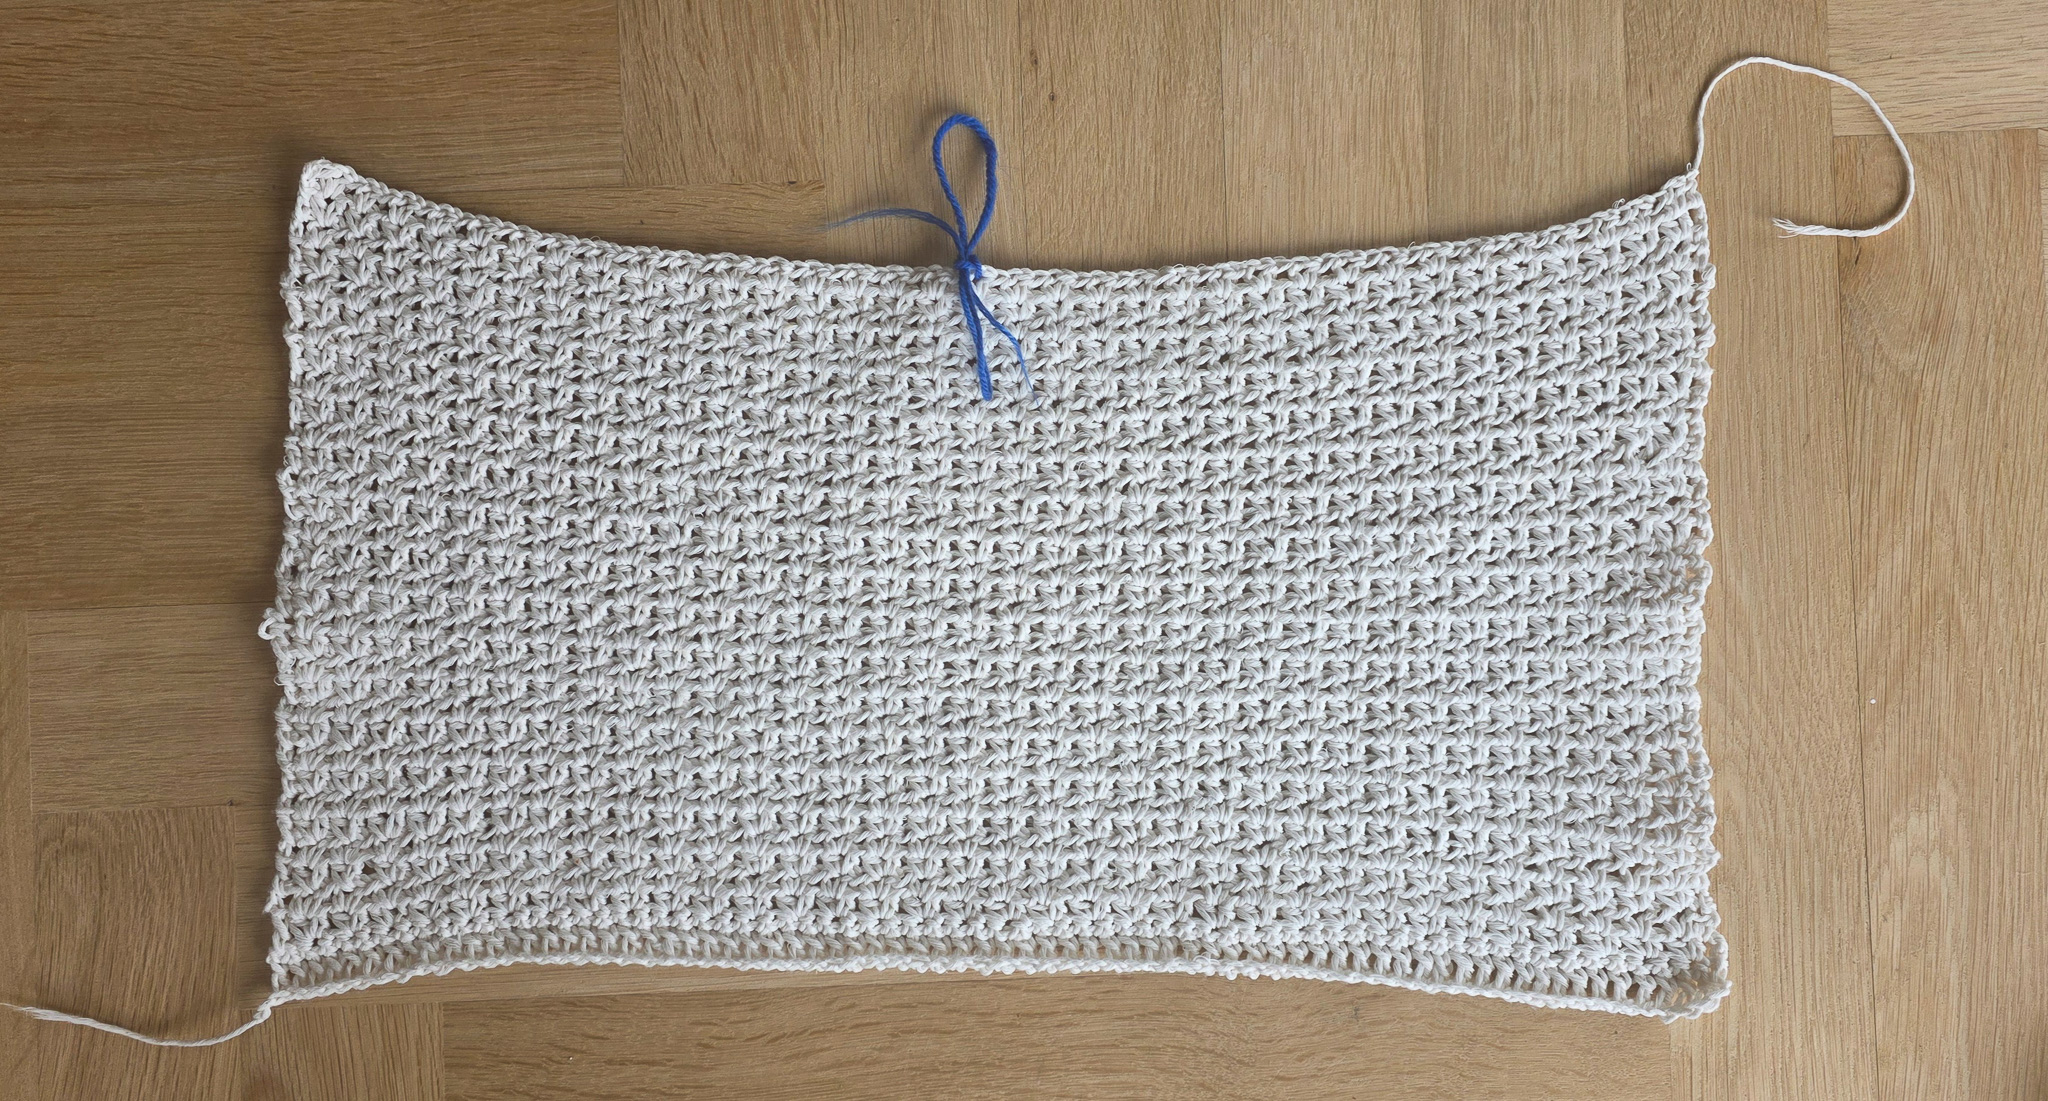
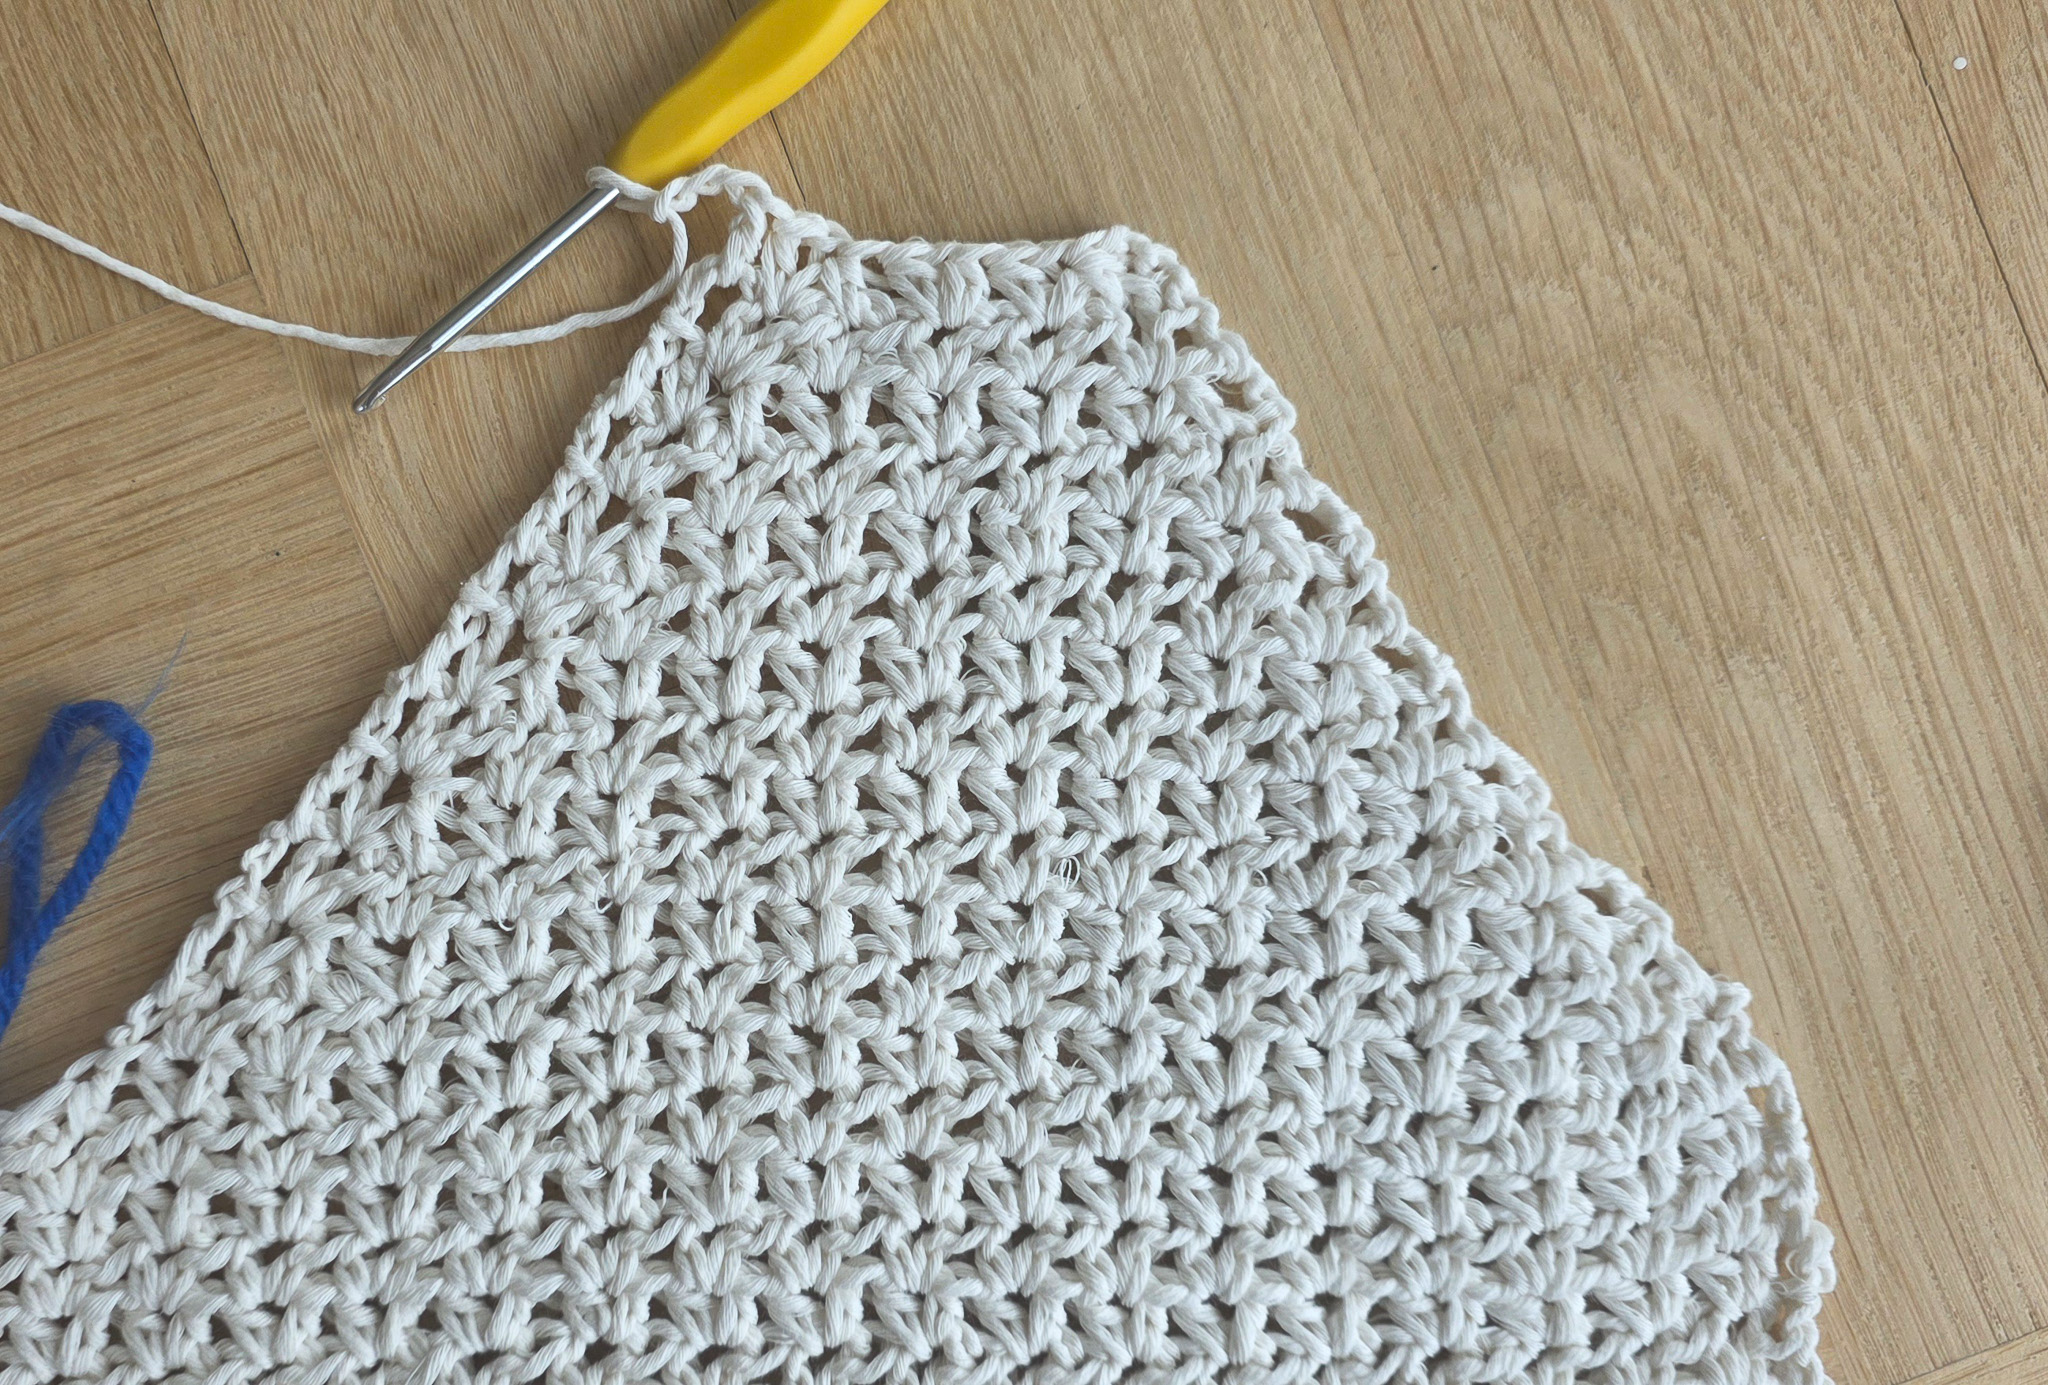
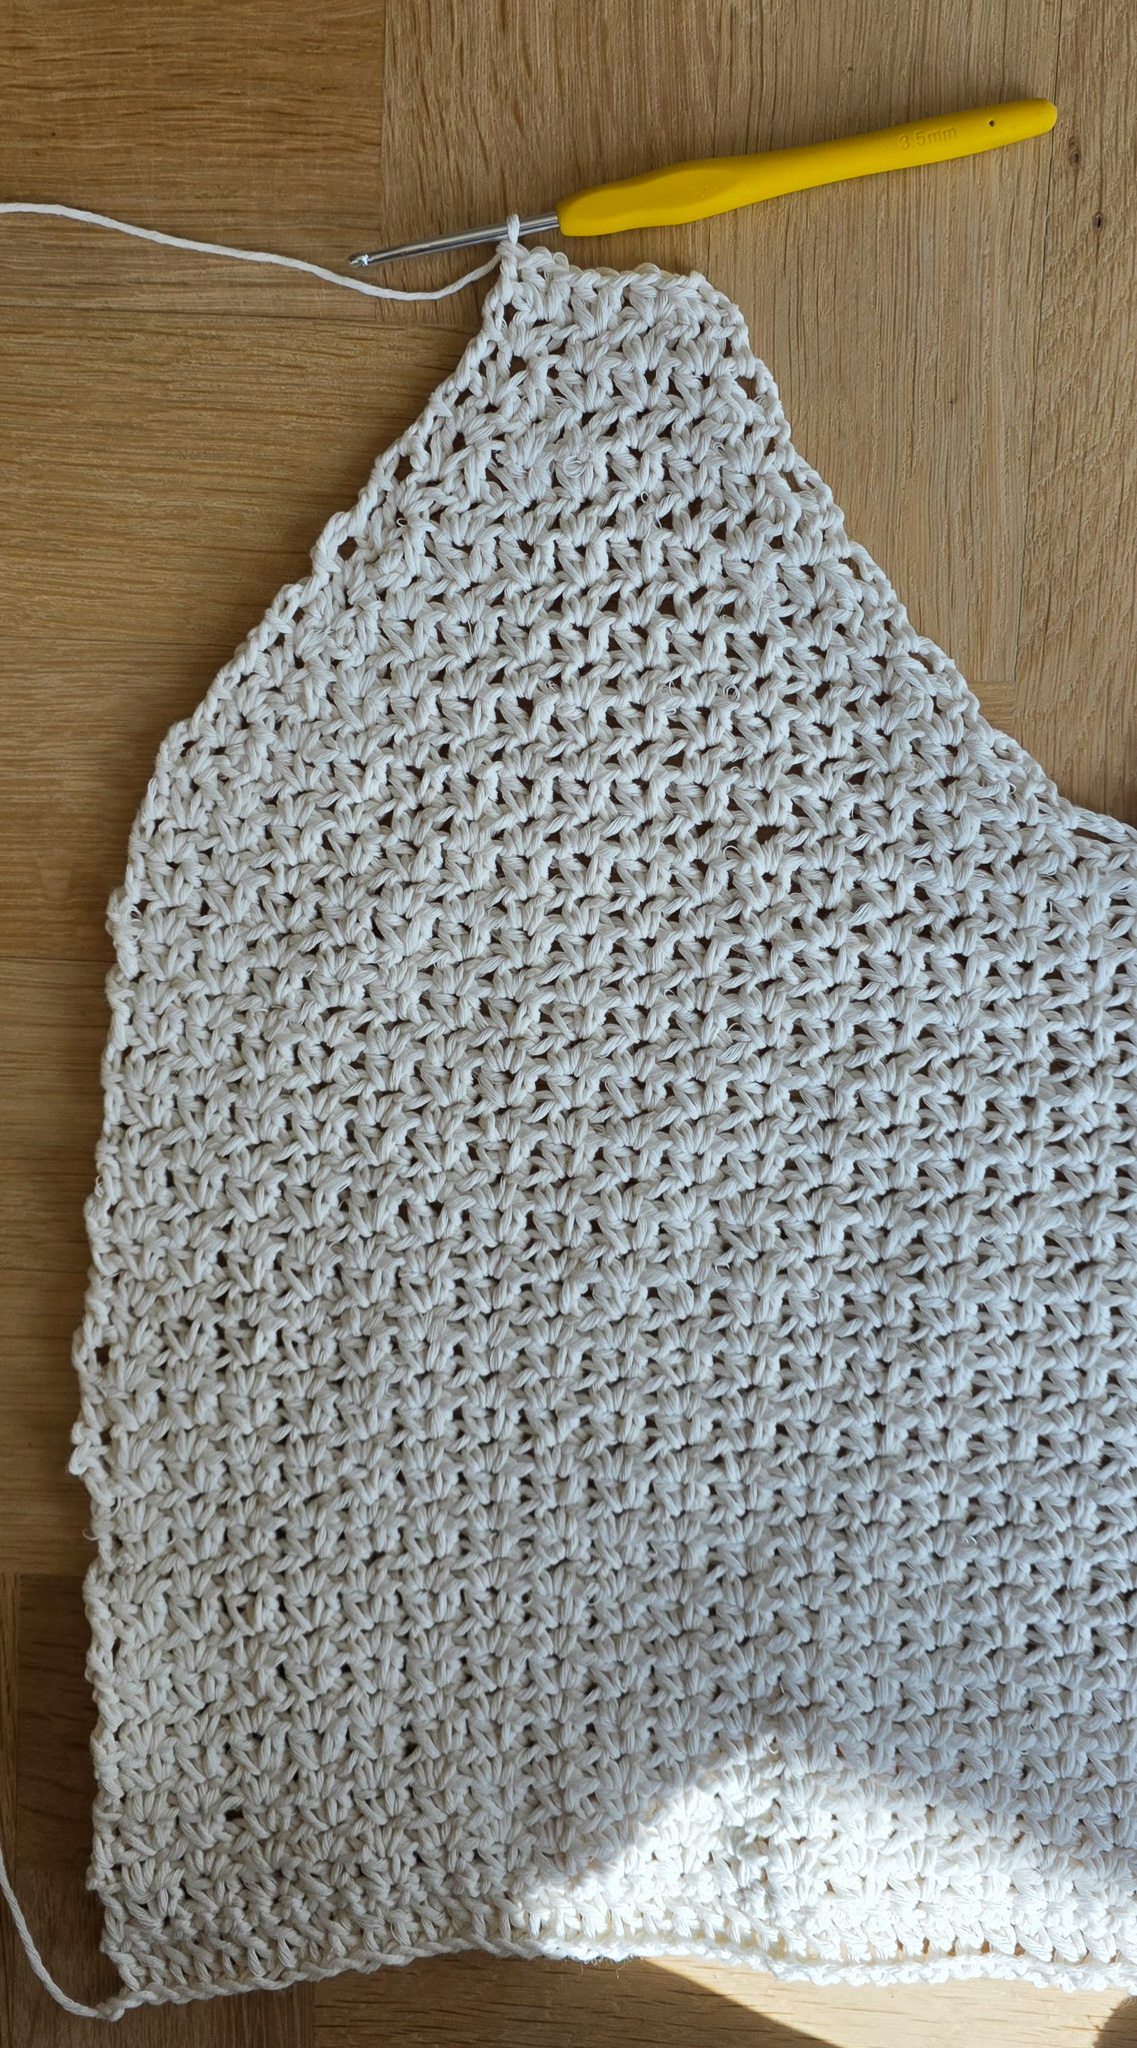
Rows 5–32: From here on, repeat Row 4 until the piece reaches the desired length where the bust shaping will begin.
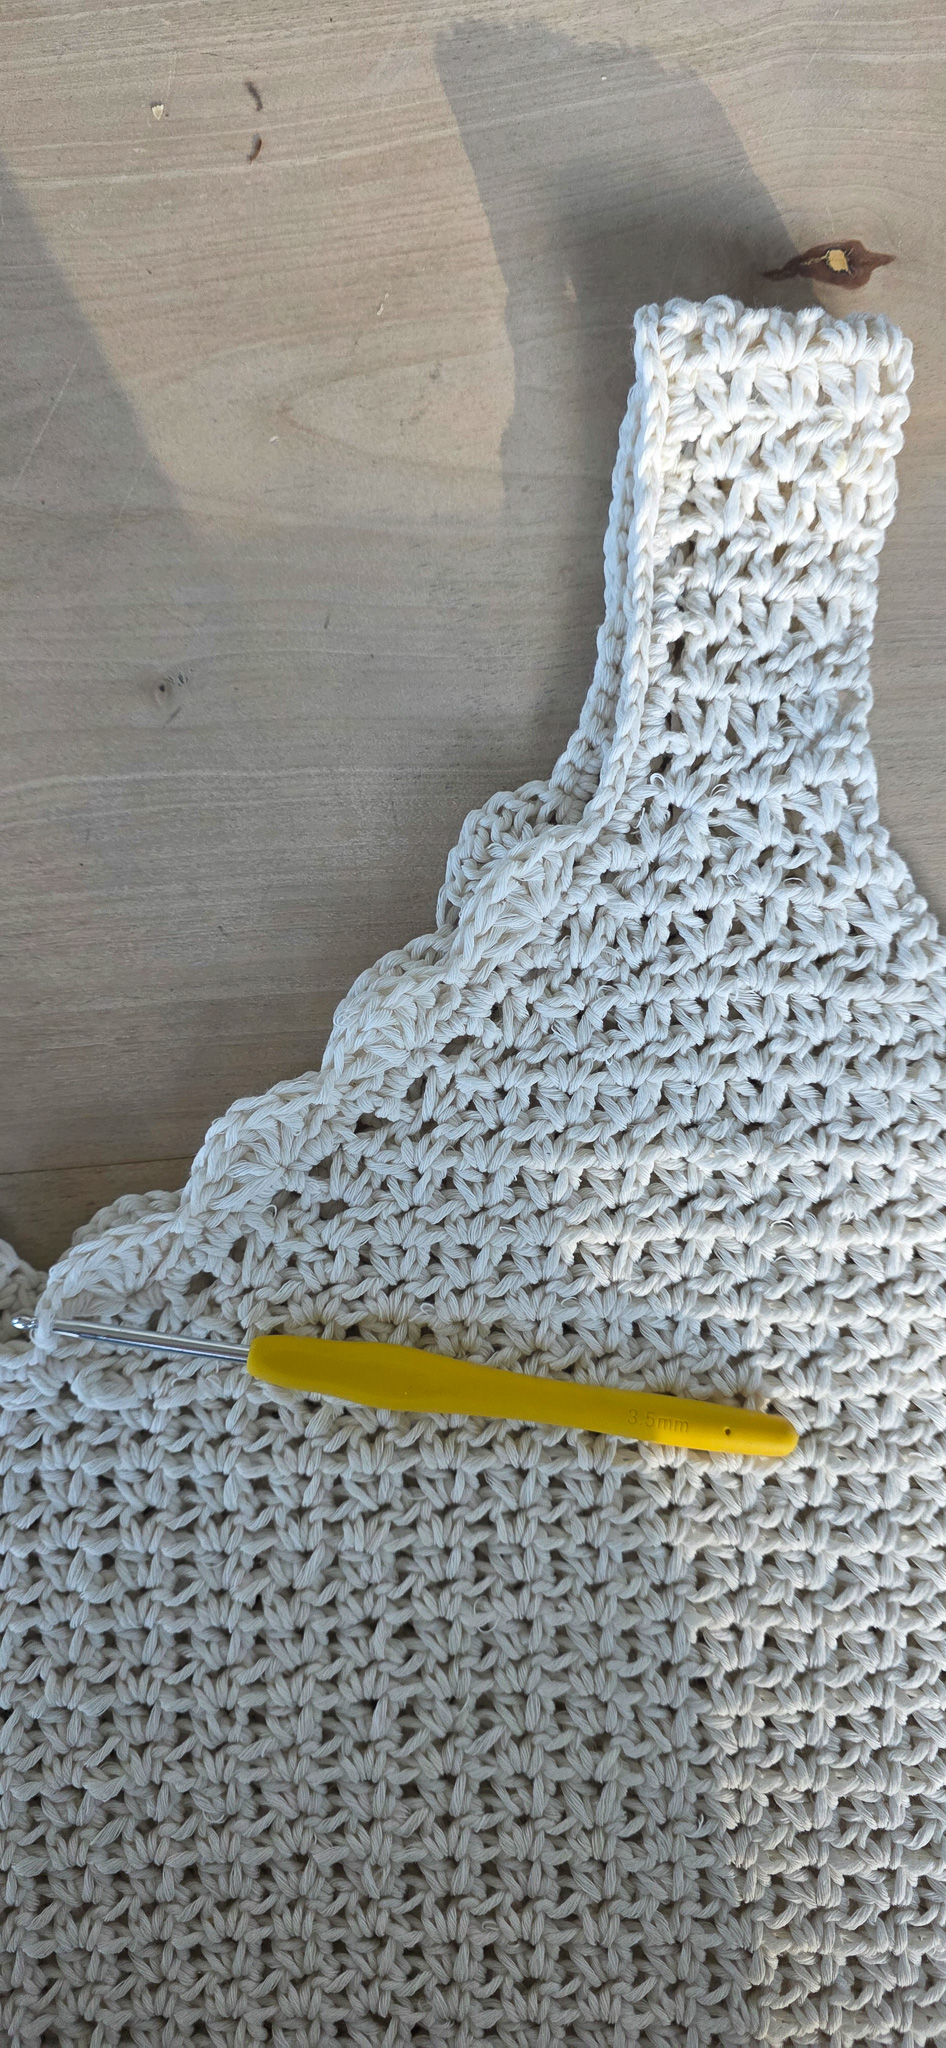
RIGHT BUST CUP (Right Side – front view)
Place a stitch marker in the center of Row 32 to divide the work into two bust cups. The marker should be placed between two V-stitches for all sizes.
For size M, place the marker between V-stitches 17 and 18.
For size S, place it between V-stitches 15 and 16.
For size L, place it between V-stitches 19 and 20.
For size XL, place it between V-stitches 21 and 22.
Bust Shaping — Size M
Once the work has been divided into two equal parts and the marker has been placed in the center, each bust cup is worked separately. The bust cups are shaped the same way for all sizes. Decreases are made at the beginning and end of every second row by crocheting the first two and the last two V-stitches together. Between each decrease row, work one row without decreases. The number of rows varies depending on size, and you continue until the specified number of V-stitches remains before starting the shoulder strap.
Repeat these two rows until the required number of V-stitches is reached for each size. Then continue to the shoulder strap.

The number of rows may vary slightly depending on your crochet tension and the desired fit.
Row 33 — first decrease round
Crochet forward to the marker.
Decrease at the beginning of the row by inserting the hook through the first two V-stitches and crocheting them together into one V-stitch. Then continue working in pattern across the row. At the end of the row, just before the marker, make another decrease by crocheting the last two V-stitches together. Make a double crochet in the same space as the last V-stitch. Chain 3 and turn. Total: 15 V-stitches.
Row 34: Work the row without decreases. Chain 3 and turn.
Continuation
Repeat these two rows: one row with decreases at the beginning and end, and one row without decreases. The decreases are therefore made every other row.
For size M, continue until only 3 V-stitches remain in the row. Finish with row 45. After that, begin the shoulder strap.
Below you will find a specification for sizes S & M, and in step 6 you will find sizes L & XL.
Size S
Start with 15 V-stitches. Decrease every other row until 3 V-stitches remain.
1st decrease row: 13 V-stitches
2nd decrease row: 11 V-stitches
3rd decrease row: 9 V-stitches
4th decrease row: 7 V-stitches
5th decrease row: 5 V-stitches
6th decrease row: 3 V-stitches
Total: 11 rows
Size M
Start with 17 V-stitches. Decrease every other row until 3 V-stitches remain.
1st decrease row: 15 V-stitches
2nd decrease row: 13 V-stitches
3rd decrease row: 11 V-stitches
4th decrease row: 9 V-stitches
5th decrease row: 7 V-stitches
6th decrease row: 5 V-stitches
7th decrease row: 3 V-stitches
Total: 13 rows
Size L
Start with 19 V-stitches. Decrease every other row until 5 V-stitches remain.
1st decrease row: 17 V-stitches
2nd decrease row: 15 V-stitches
3rd decrease row: 13 V-stitches
4th decrease row: 11 V-stitches
5th decrease row: 9 V-stitches
6th decrease row: 7 V-stitches
7th decrease row: 5 V-stitches
Total: 13 rows
Size XL
Start with 21 V-stitches. Decrease every other row until 5 V-stitches remain.
1st decrease row: 19 V-stitches
2nd decrease row: 17 V-stitches
3rd decrease row: 15 V-stitches
4th decrease row: 13 V-stitches
5th decrease row: 11 V-stitches
6th decrease row: 9 V-stitches
7th decrease row: 7 V-stitches
8th decrease row: 5 V-stitches
Total: 15 rows
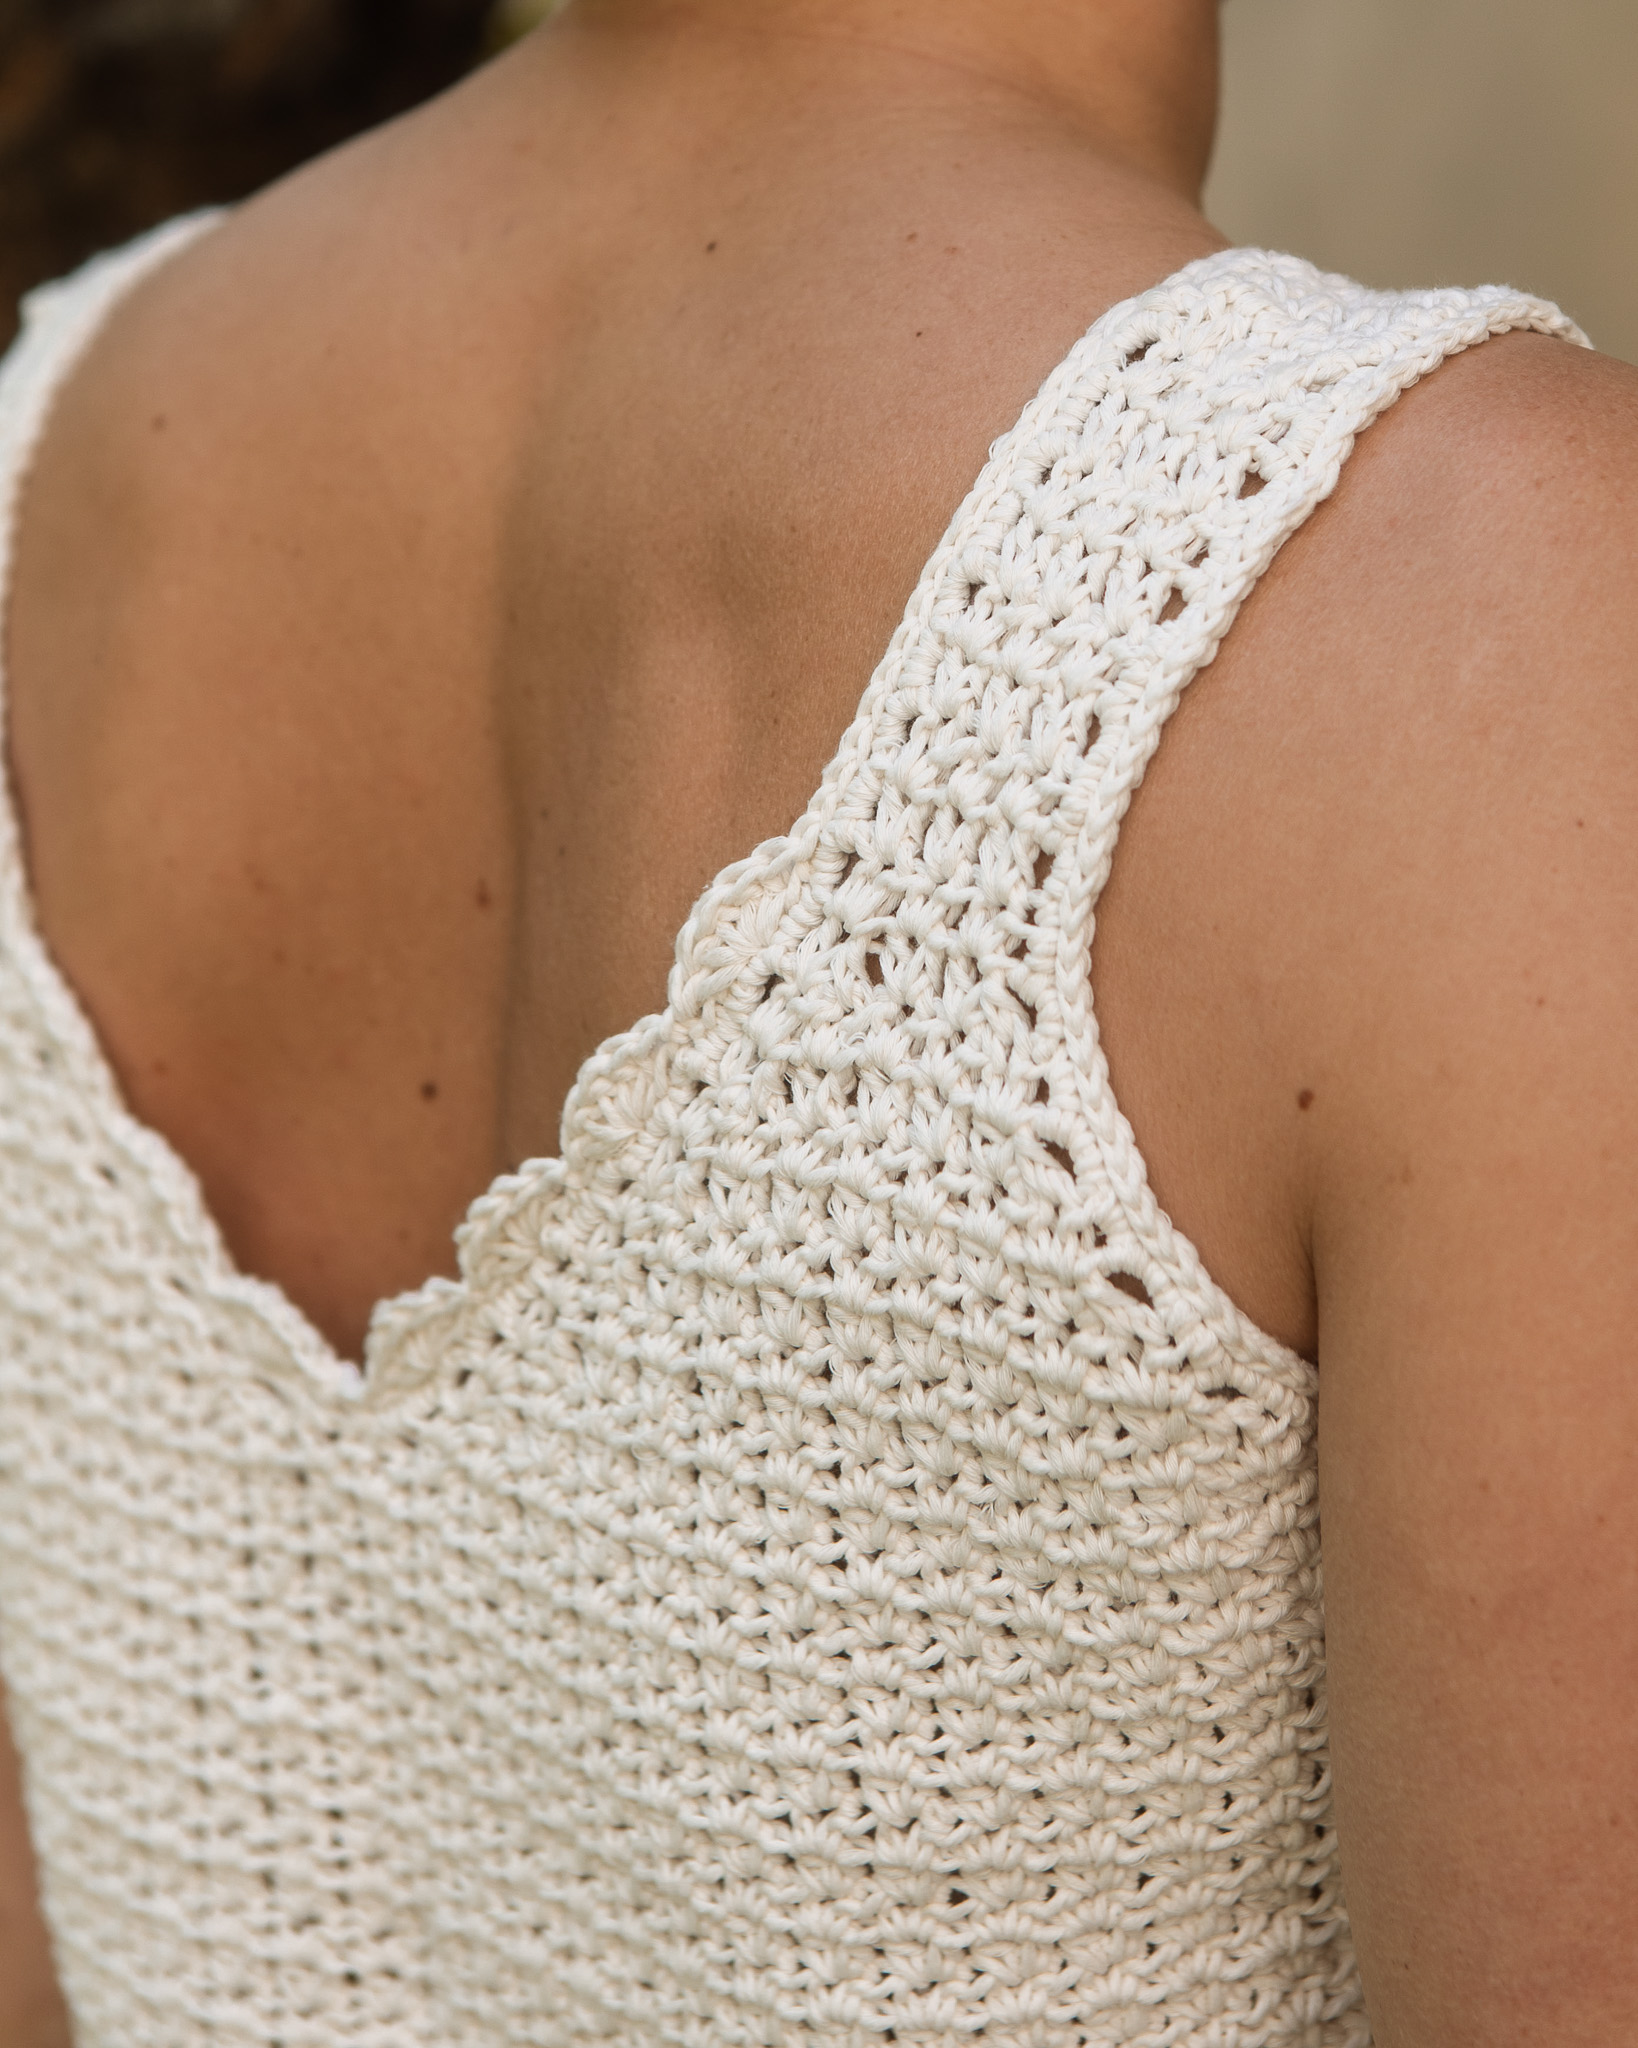
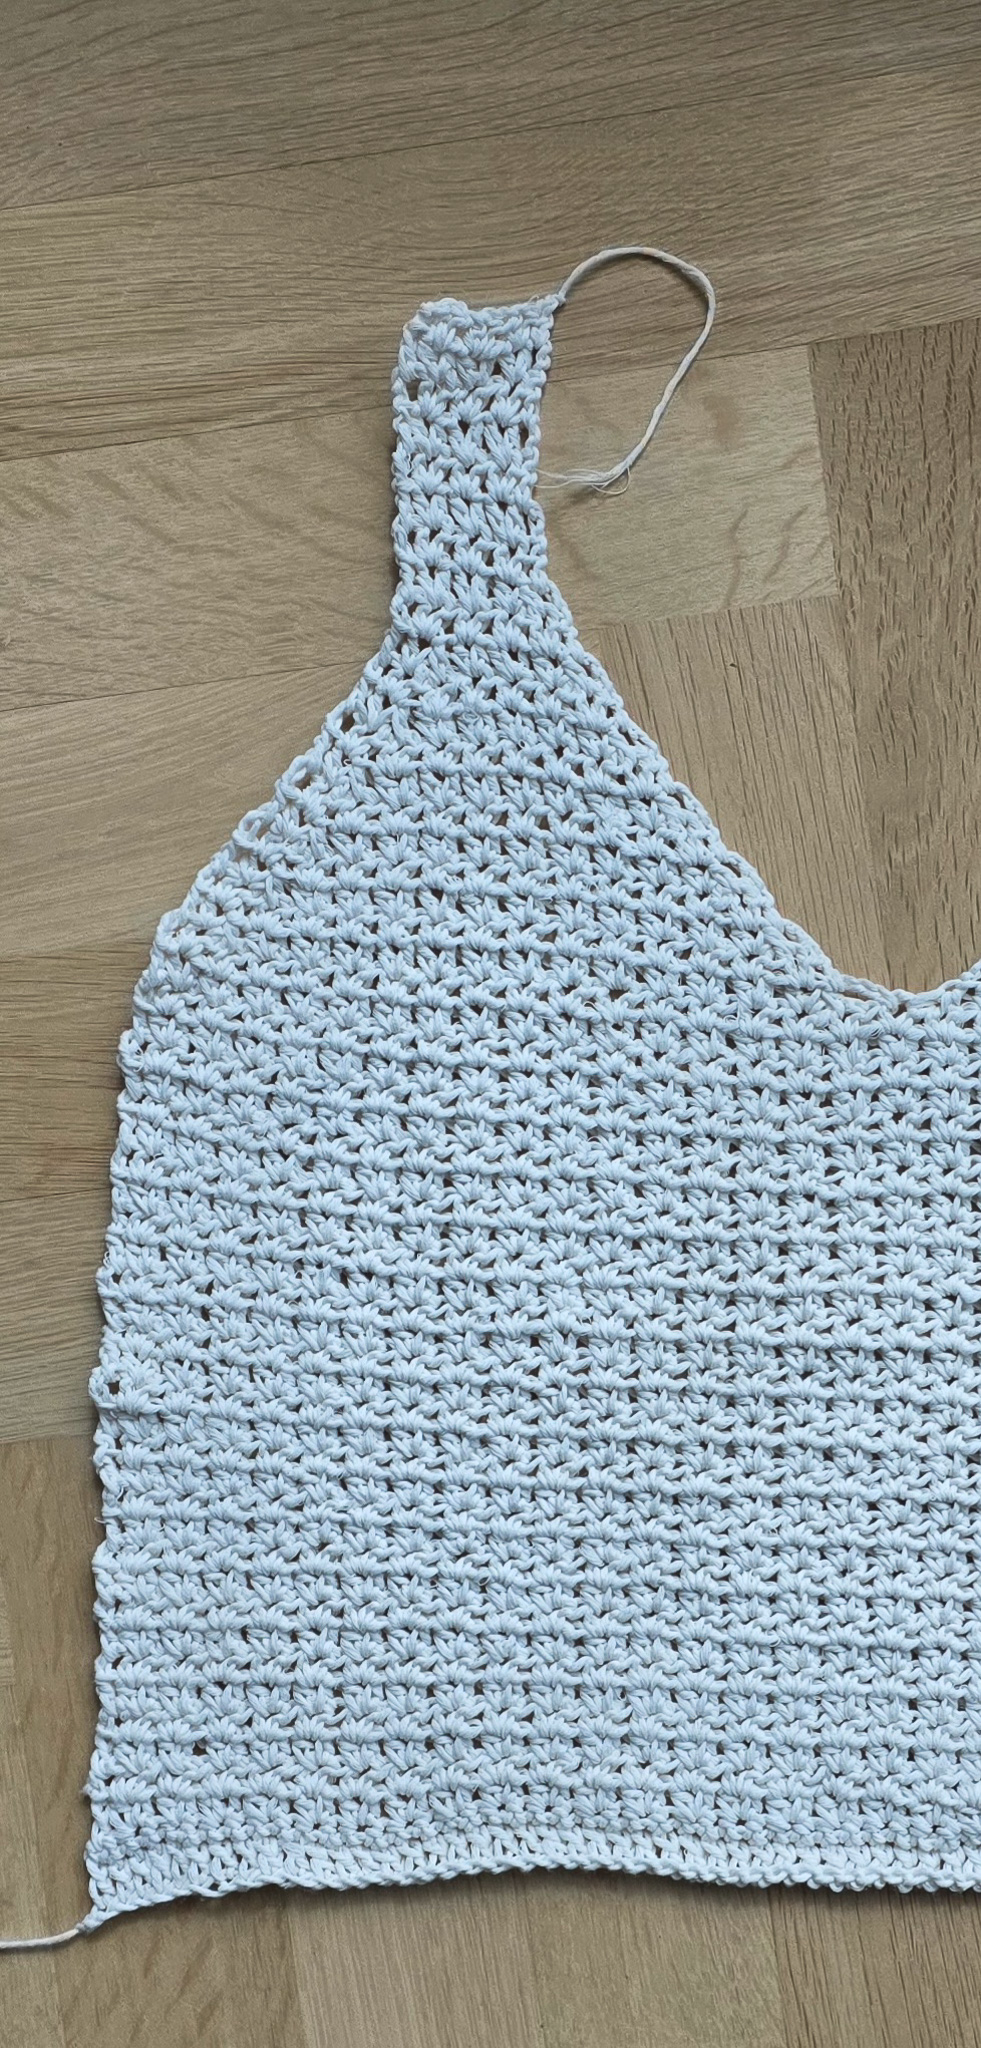
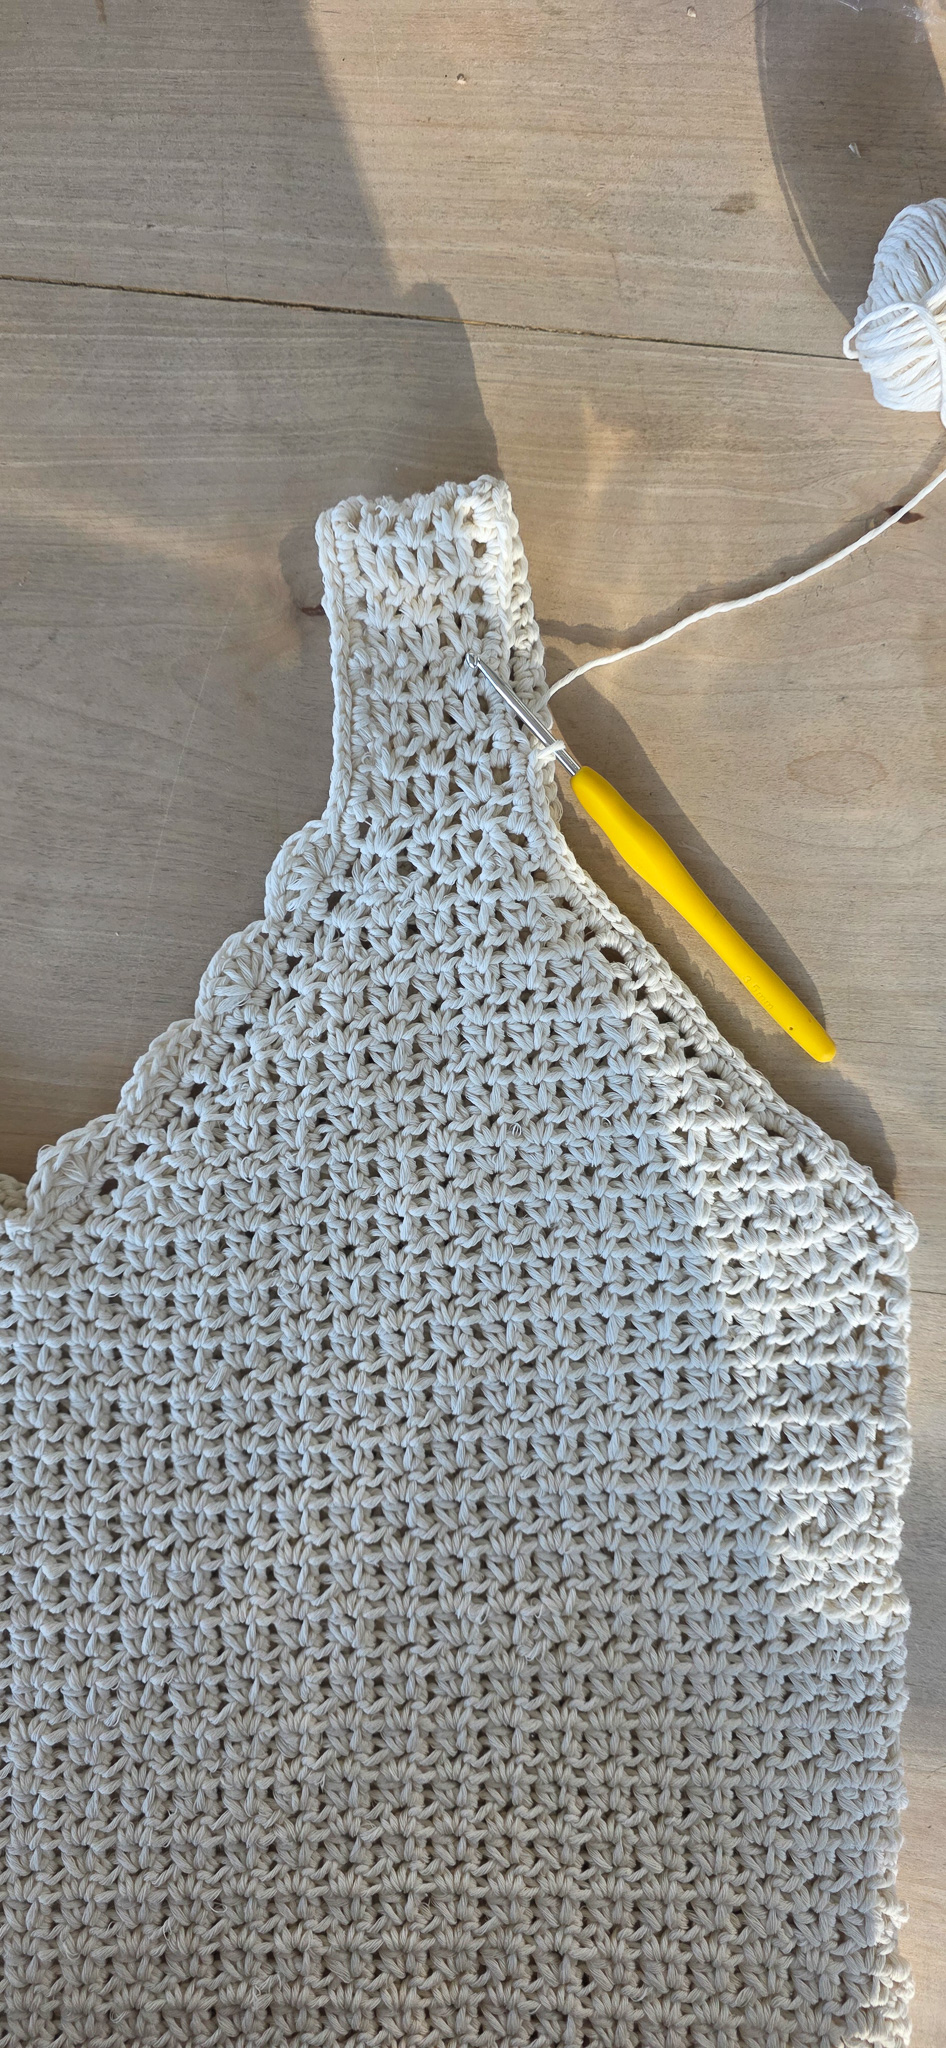
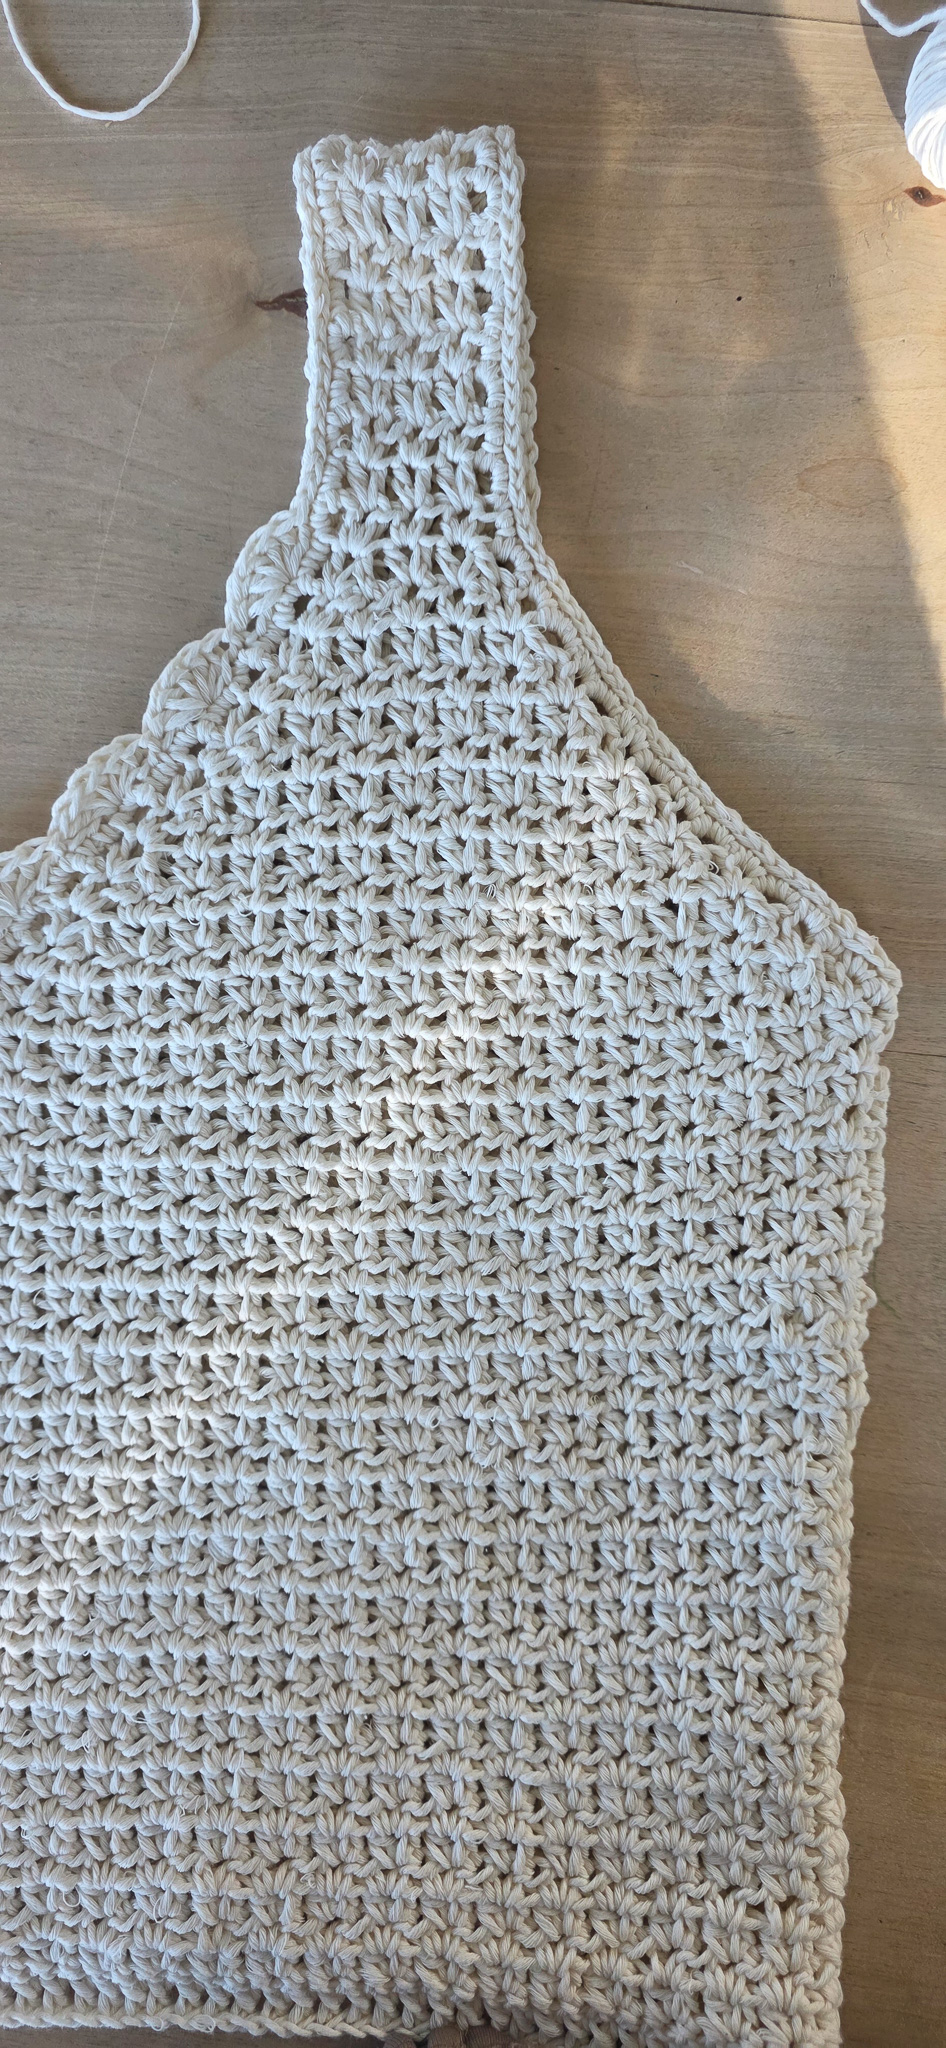
SHOULDER STRAP
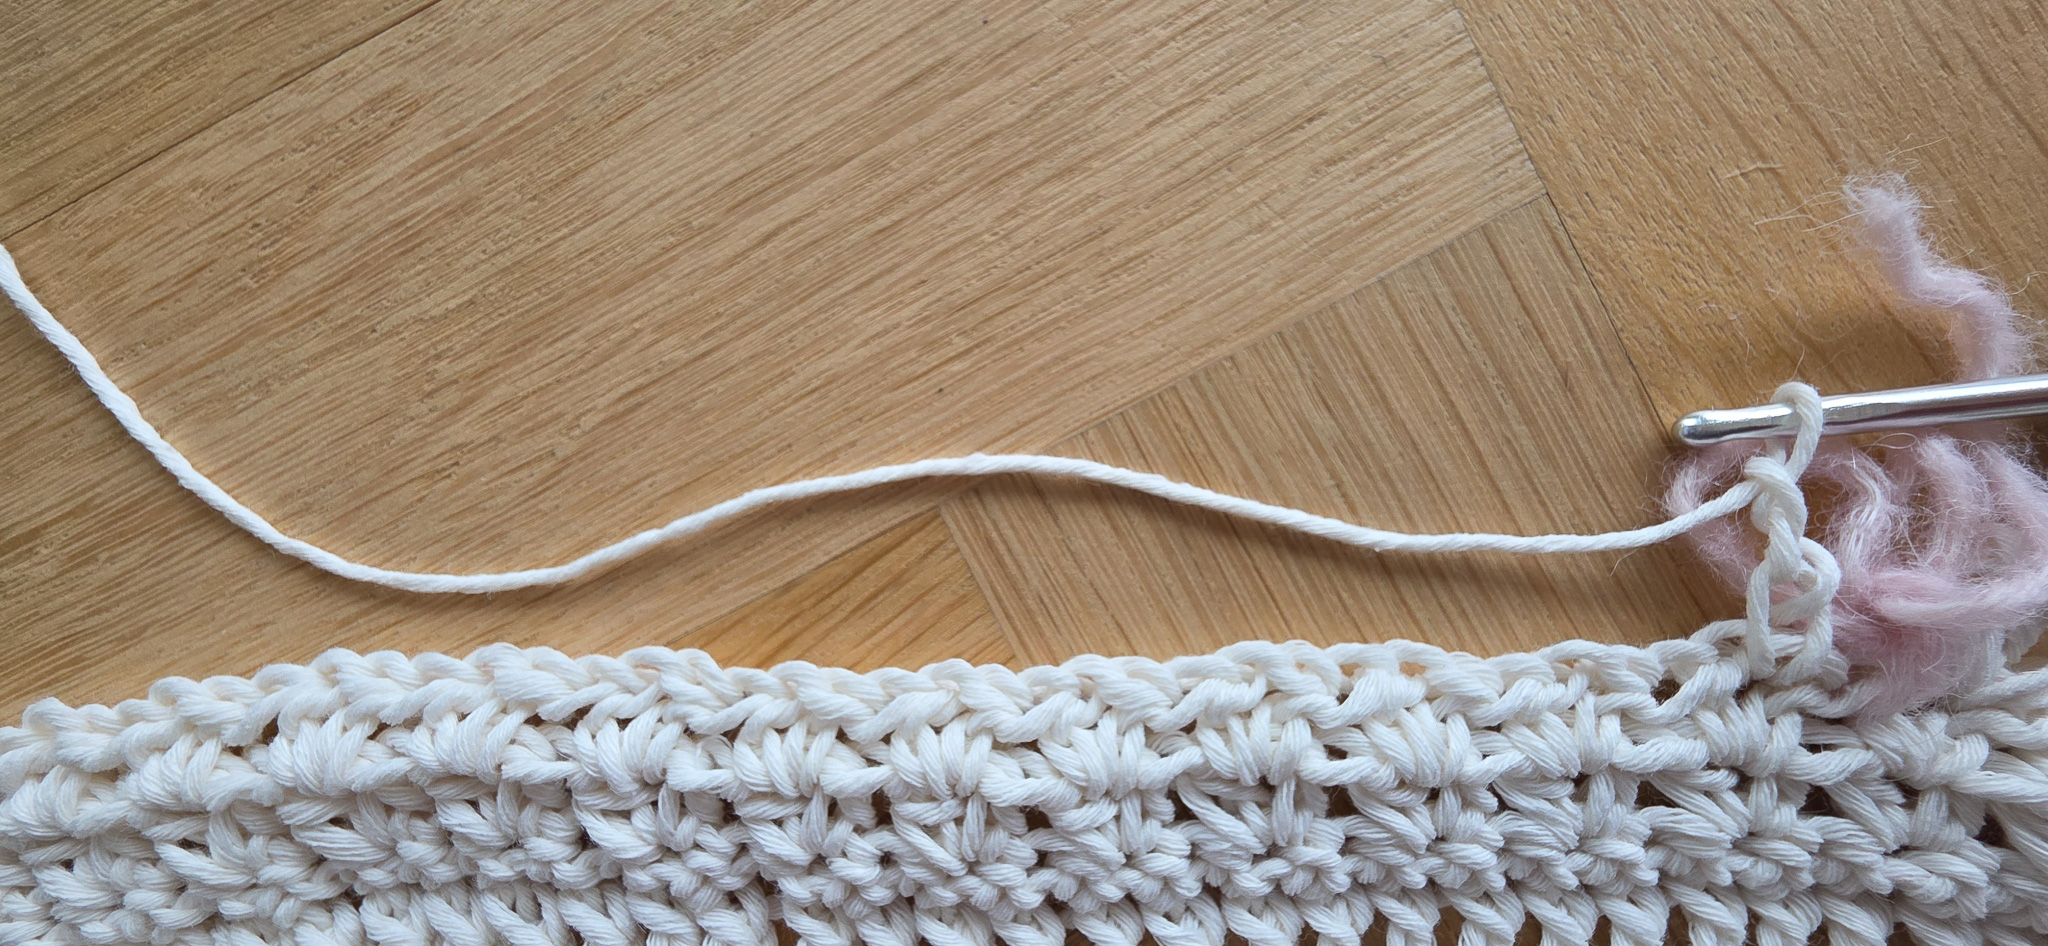
When the specified number of V-stitches remains, continue with the shoulder strap. Work across the remaining V-stitches without any decreases until the shoulder strap has reached the desired length.

Work back and forth in pattern across the V-stitches and finish when the shoulder strap has reached the desired length. Feel free to adjust the length if needed for the best fit. Fasten off the yarn. Leave a slightly longer tail that you can use to sew the shoulder straps from each panel together.

LEFT BUST CUP
The left bust cup is worked in the same way as the right one, but the work continues from the center of the top.
Attach a new yarn in the V-stitch closest to the marker. Chain 3 and continue directly with the first decrease row by crocheting the first and second V-stitch together. Then continue in pattern across the row and make another decrease at the end of the row by crocheting the last two stitches together. Chain 3 and turn the work.
Continue shaping the cup in the same way as the right one:
every other row with decreases at the beginning and end, and every other row without decreases.
Work until the specified number of V-stitches remains for your size, then continue with the shoulder strap. Work the left shoulder strap in the same way as the right one.
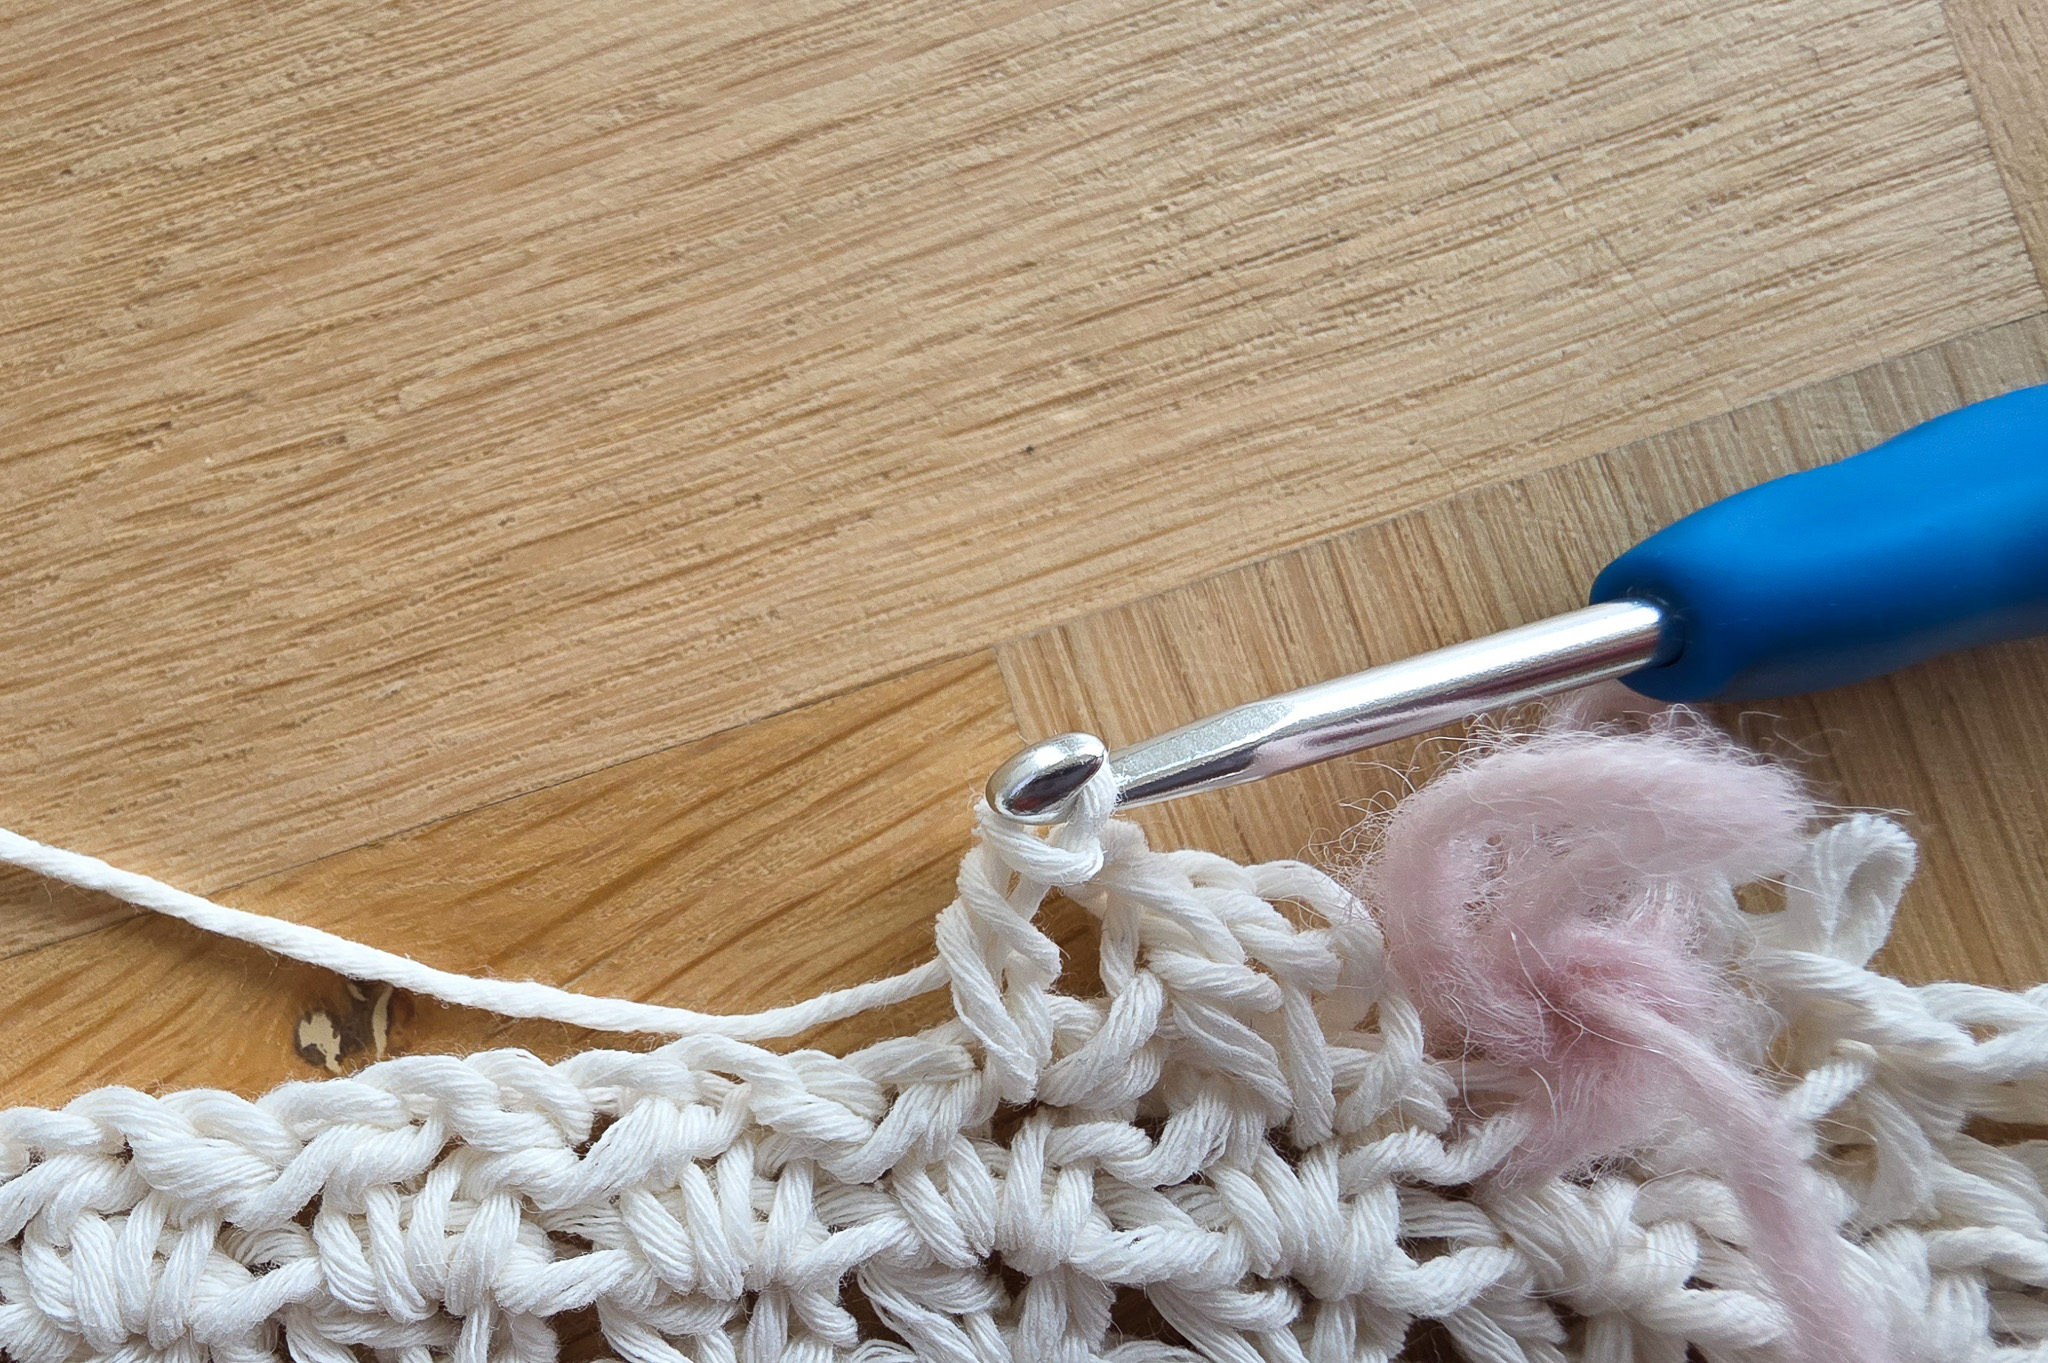
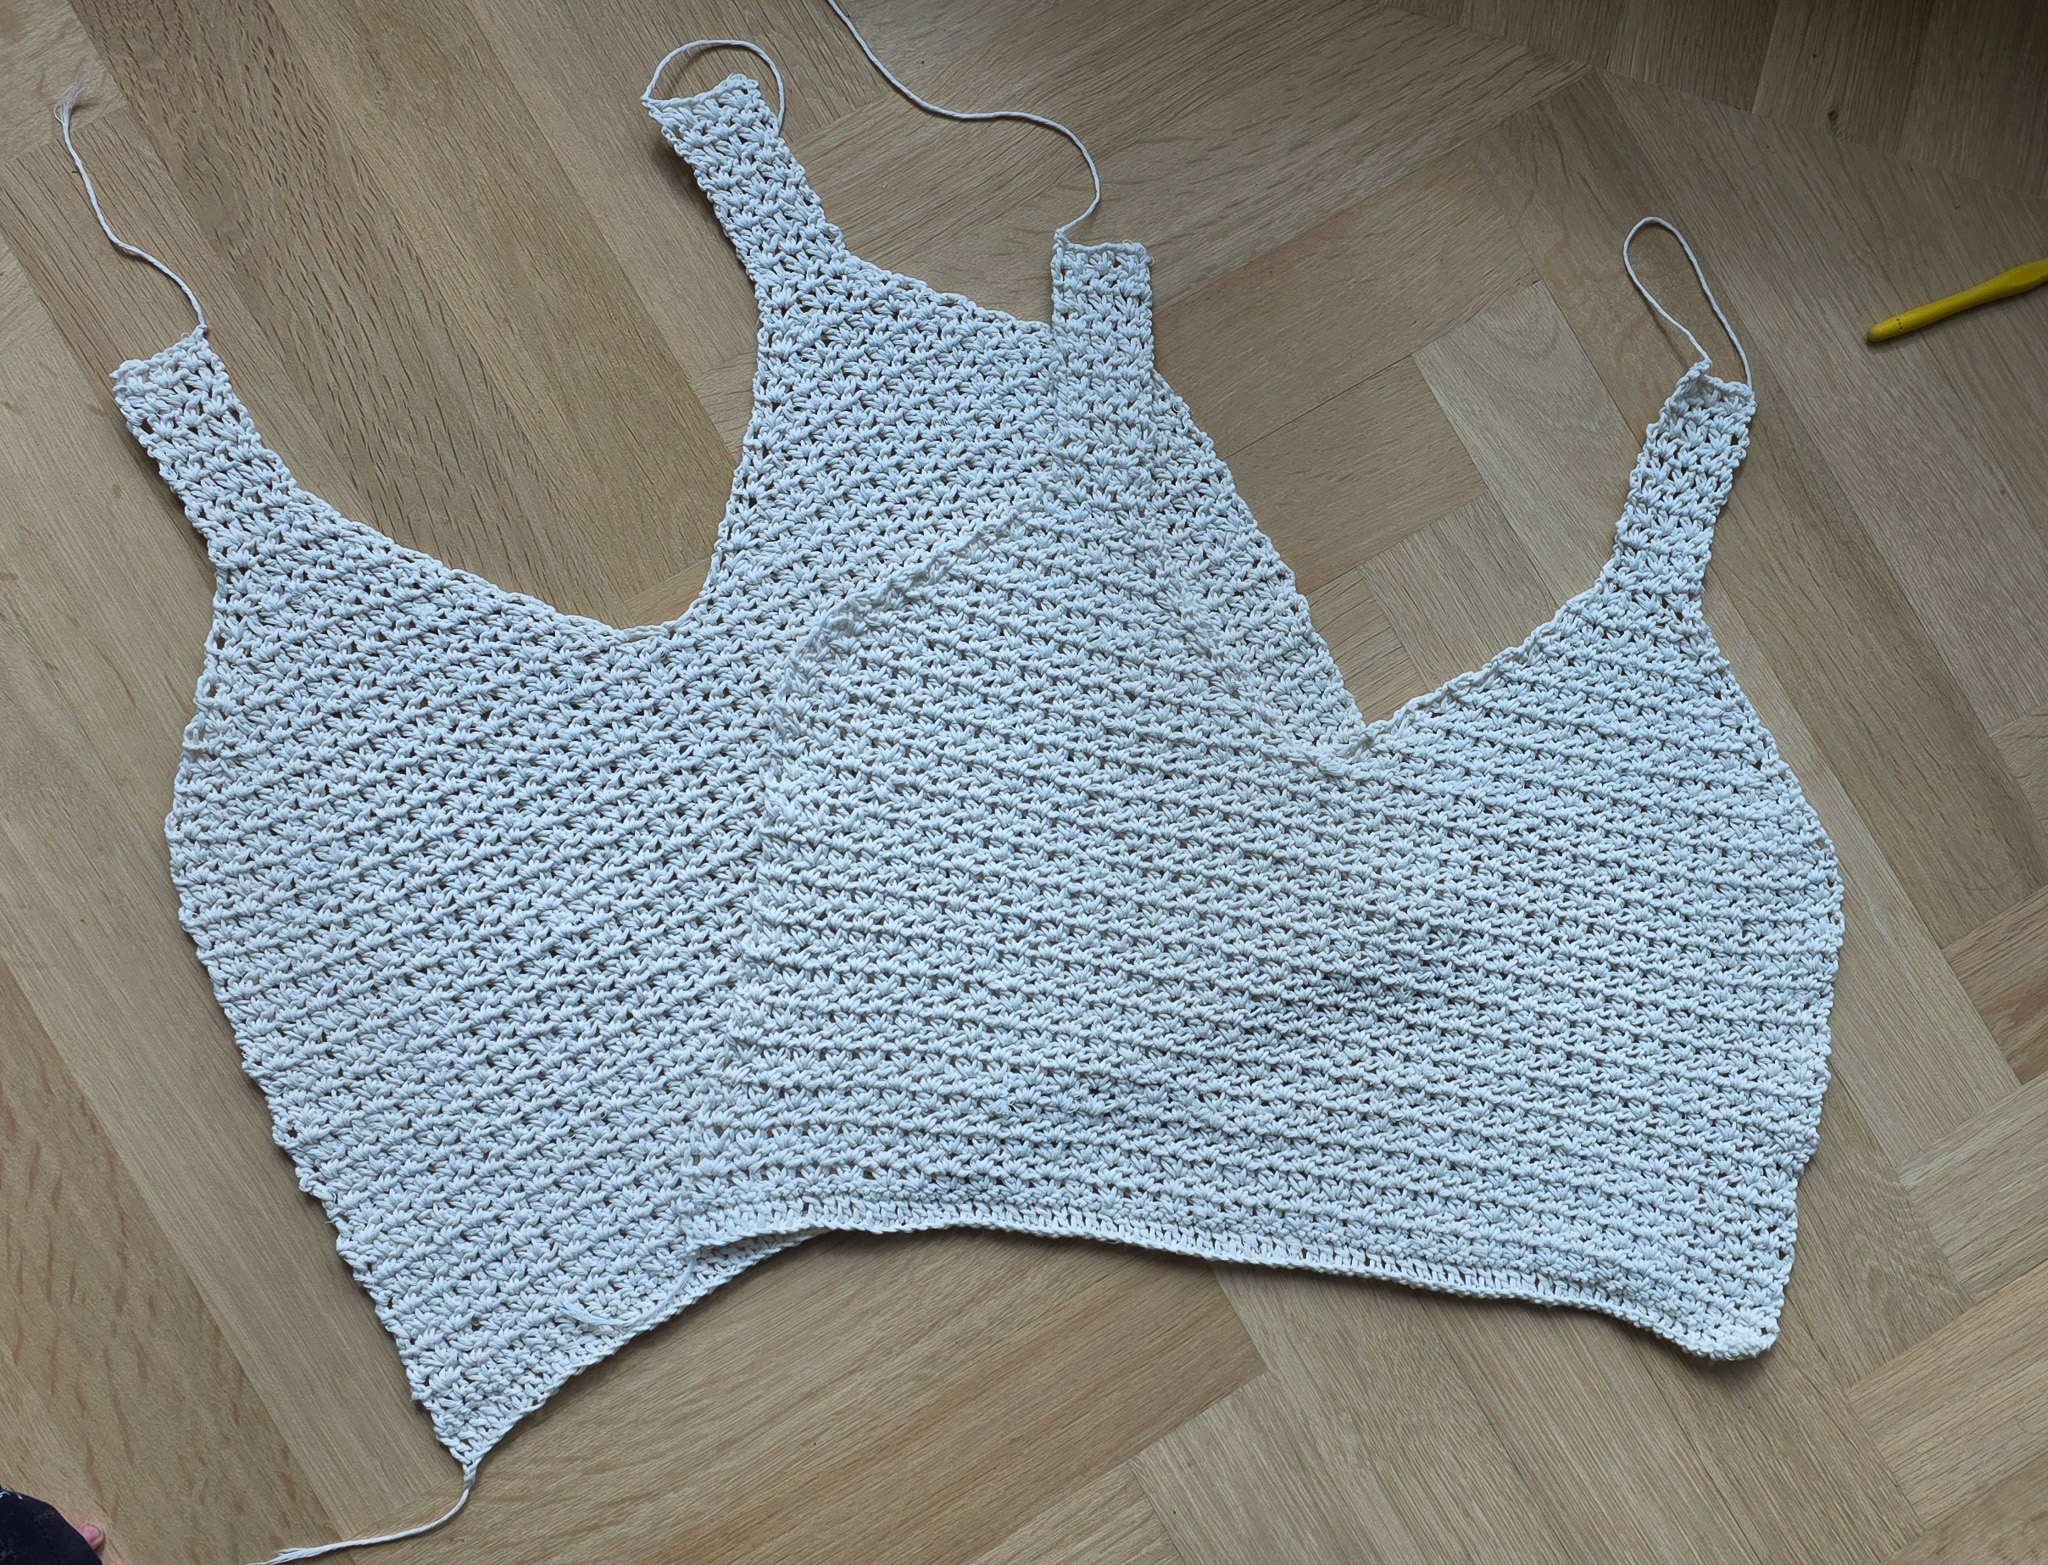
Make an identical panel. Note: When finishing the shoulder strap on the second panel, you do not need to leave a long yarn tail. Fasten off, cut the yarn, and weave in the ends.
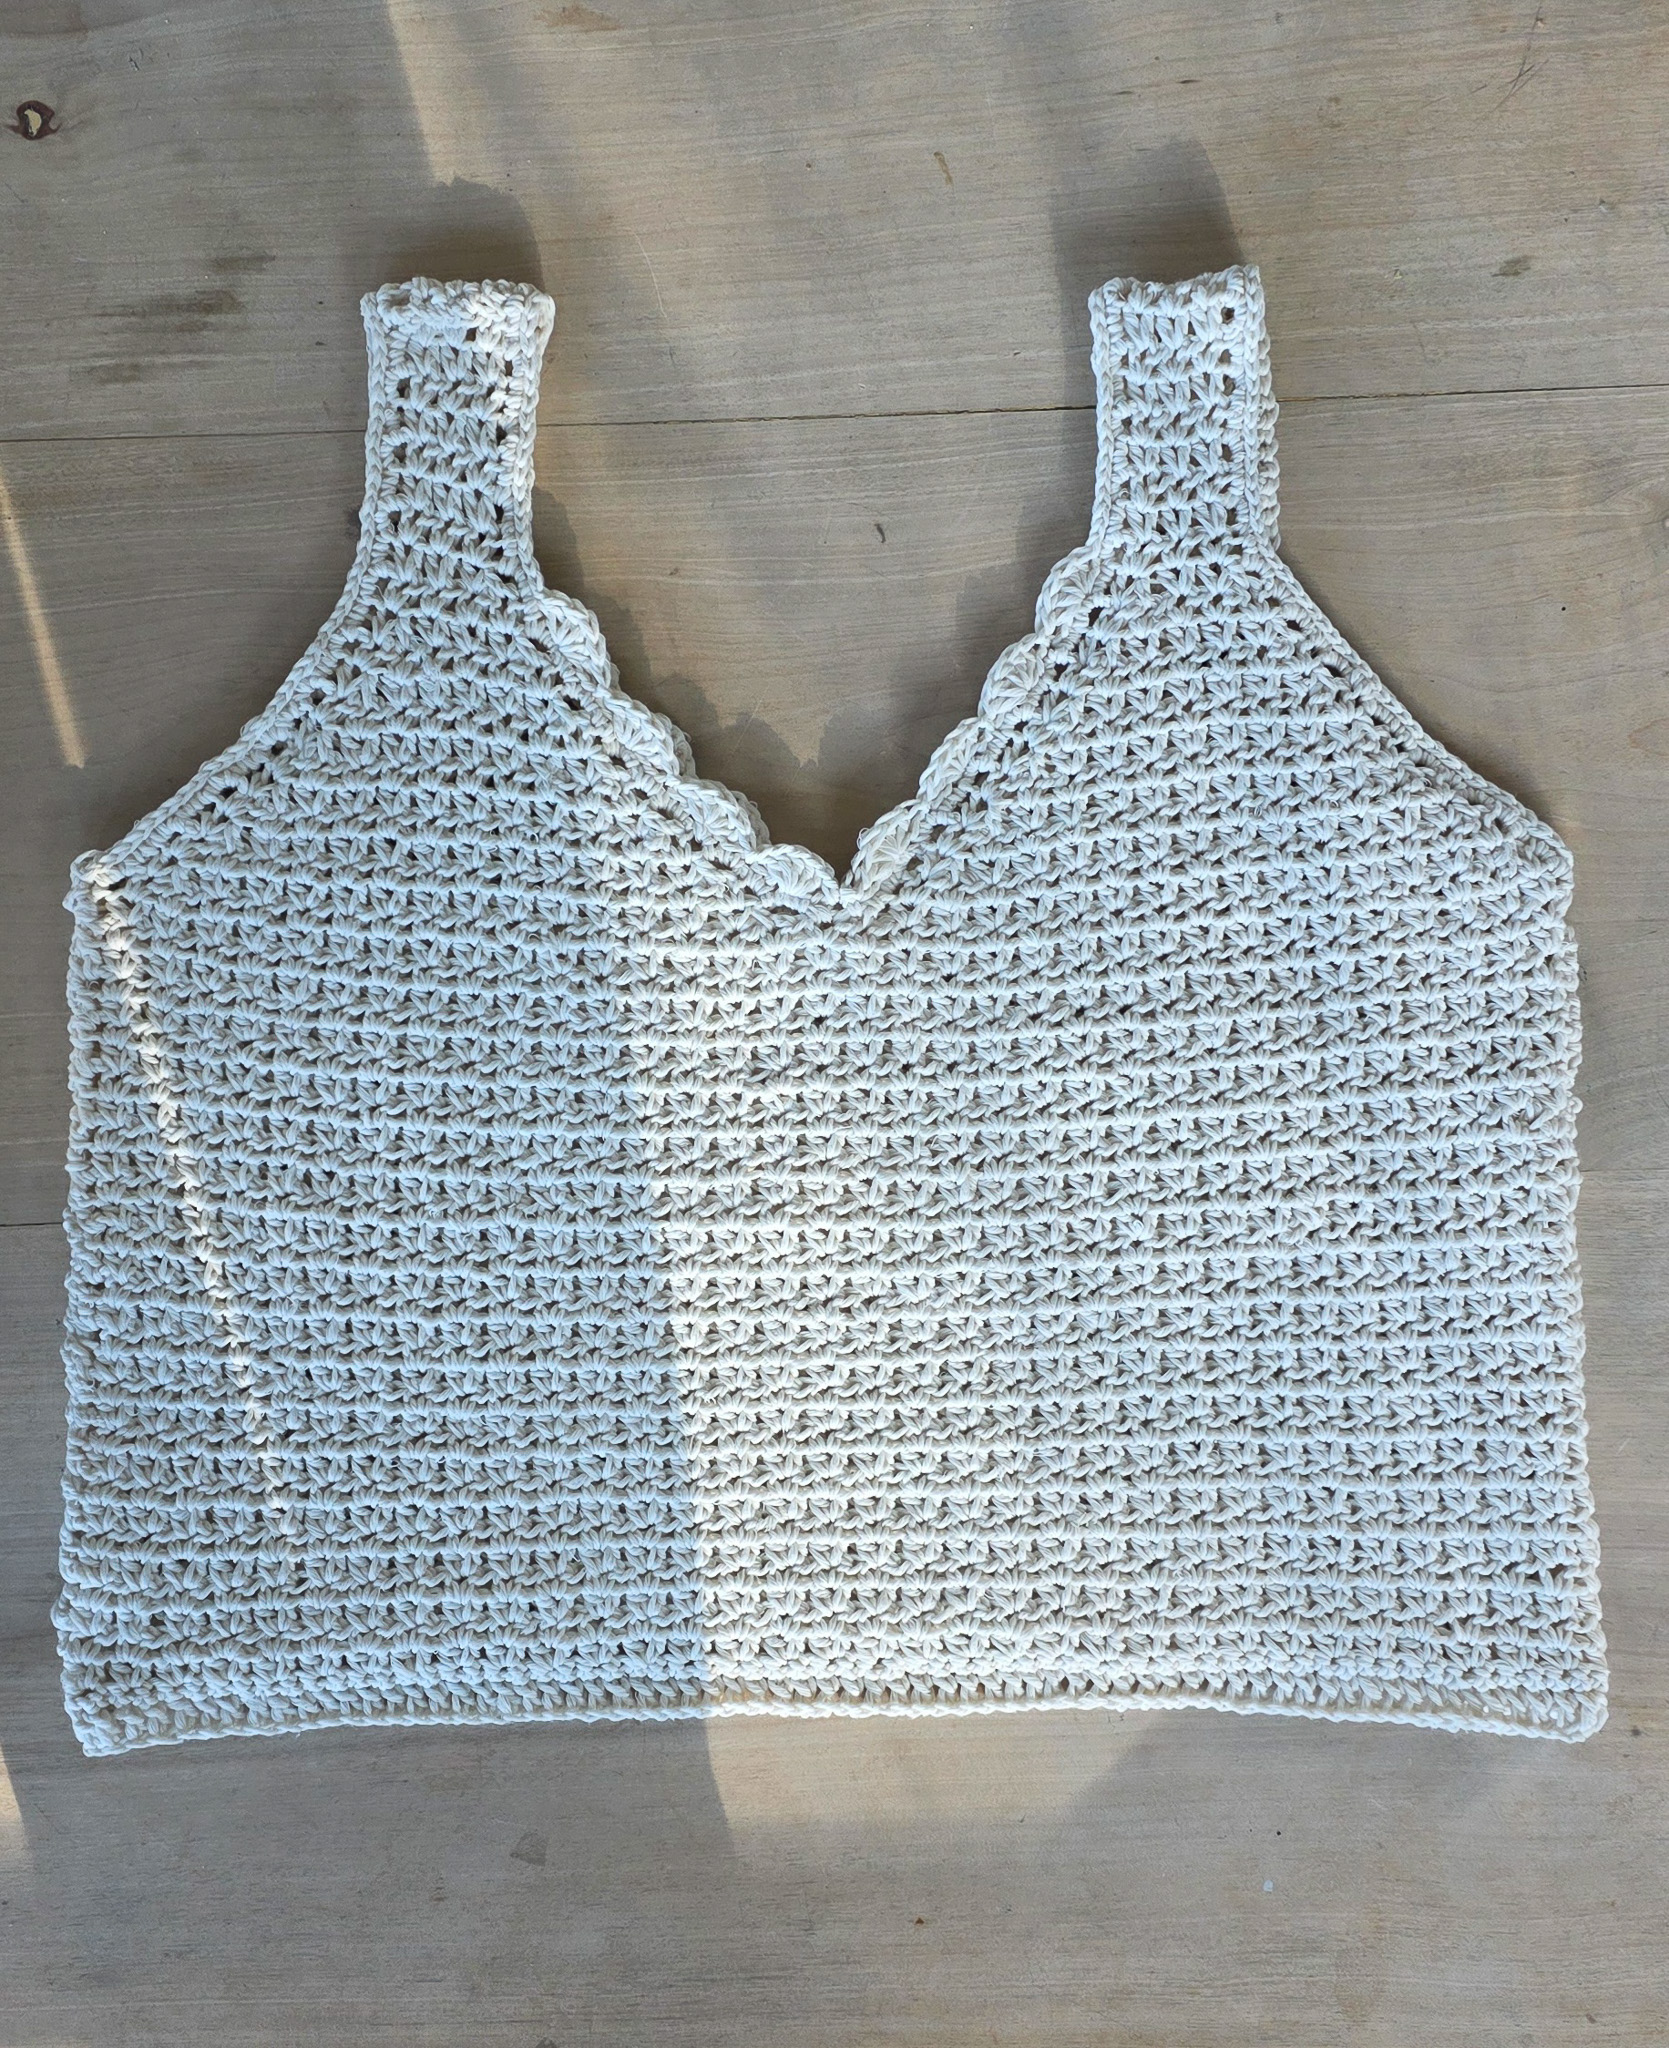
ASSEMBLY
Place the front and back panels of the top together with the right side facing outward.
Sew the sides together by inserting the needle around the 3 chain stitches at the start of each row, working from the bottom edge up toward the bust cups. Continue sewing until you reach the start of the cup. Fasten off the yarn, cut the thread, and weave in the ends.
Repeat the same process on the other side of the top.
Then sew the ends of the shoulder straps together. Insert the needle through both loops on each shoulder strap and sew them together with even stitches along the entire edge.
Fasten off the yarn, cut the thread, and weave in all remaining ends.
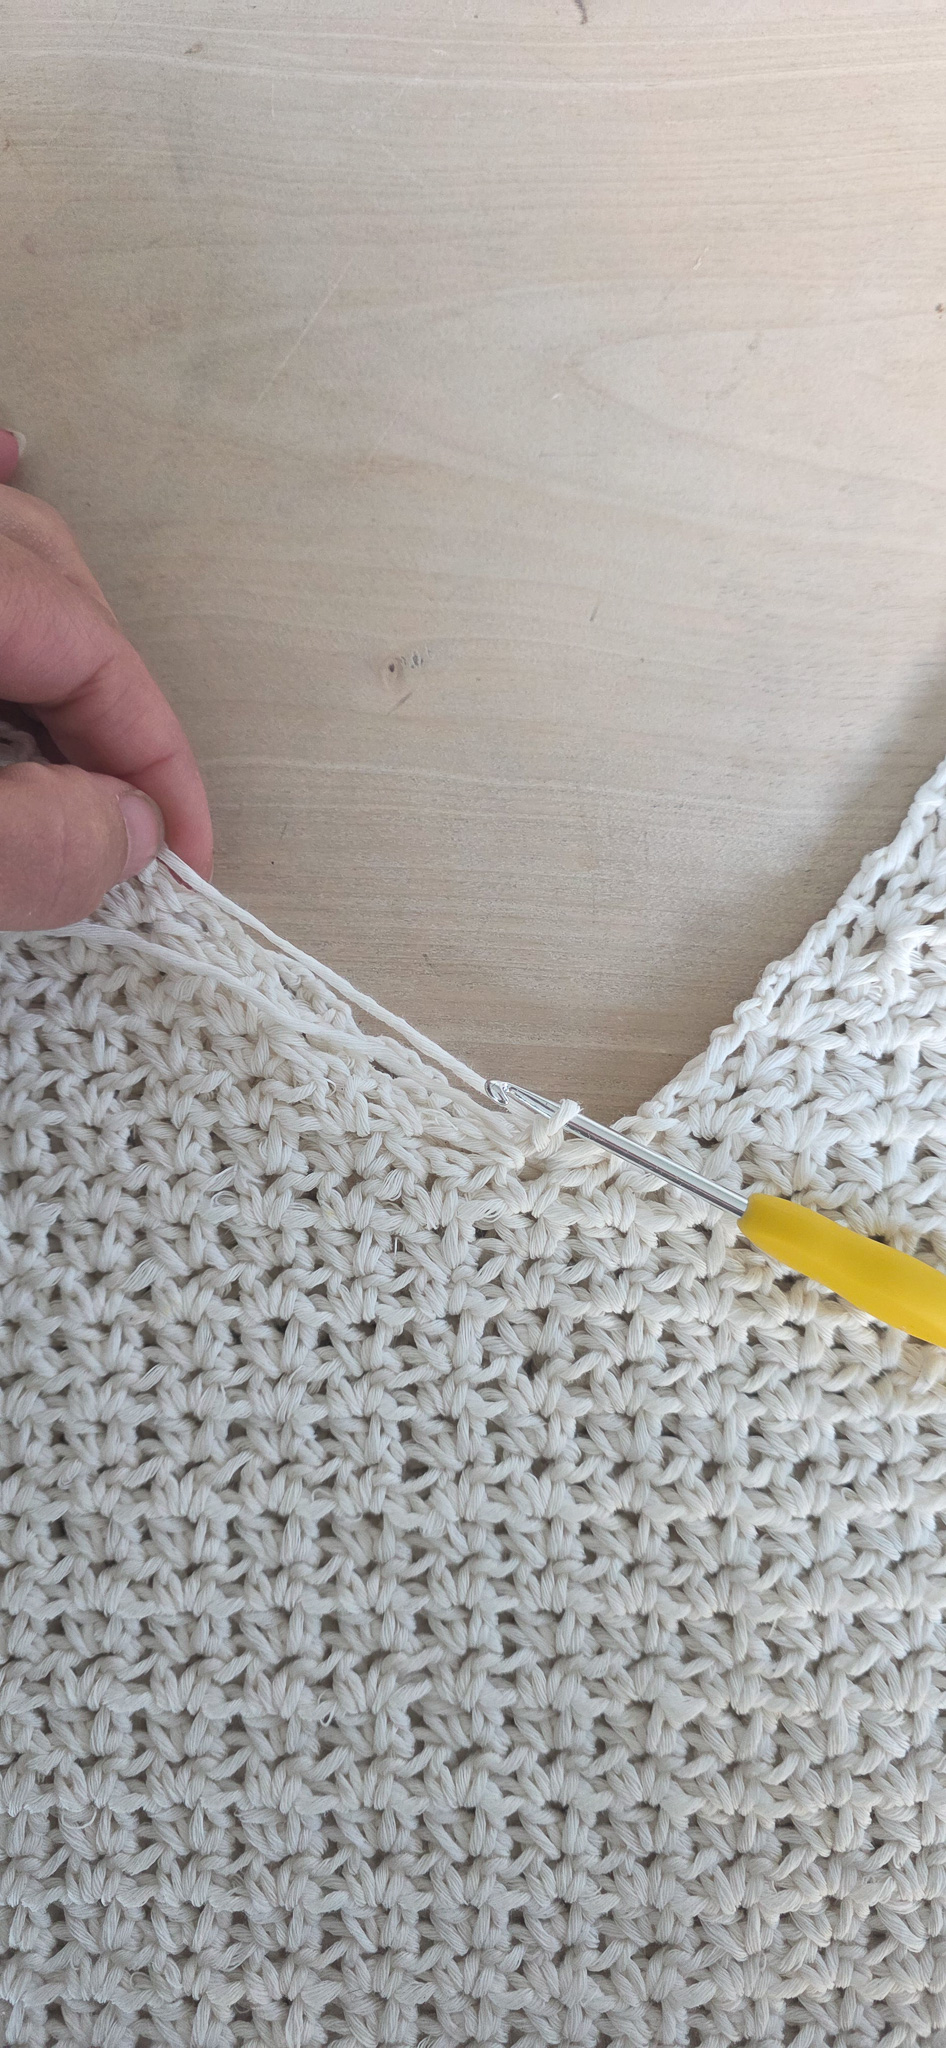
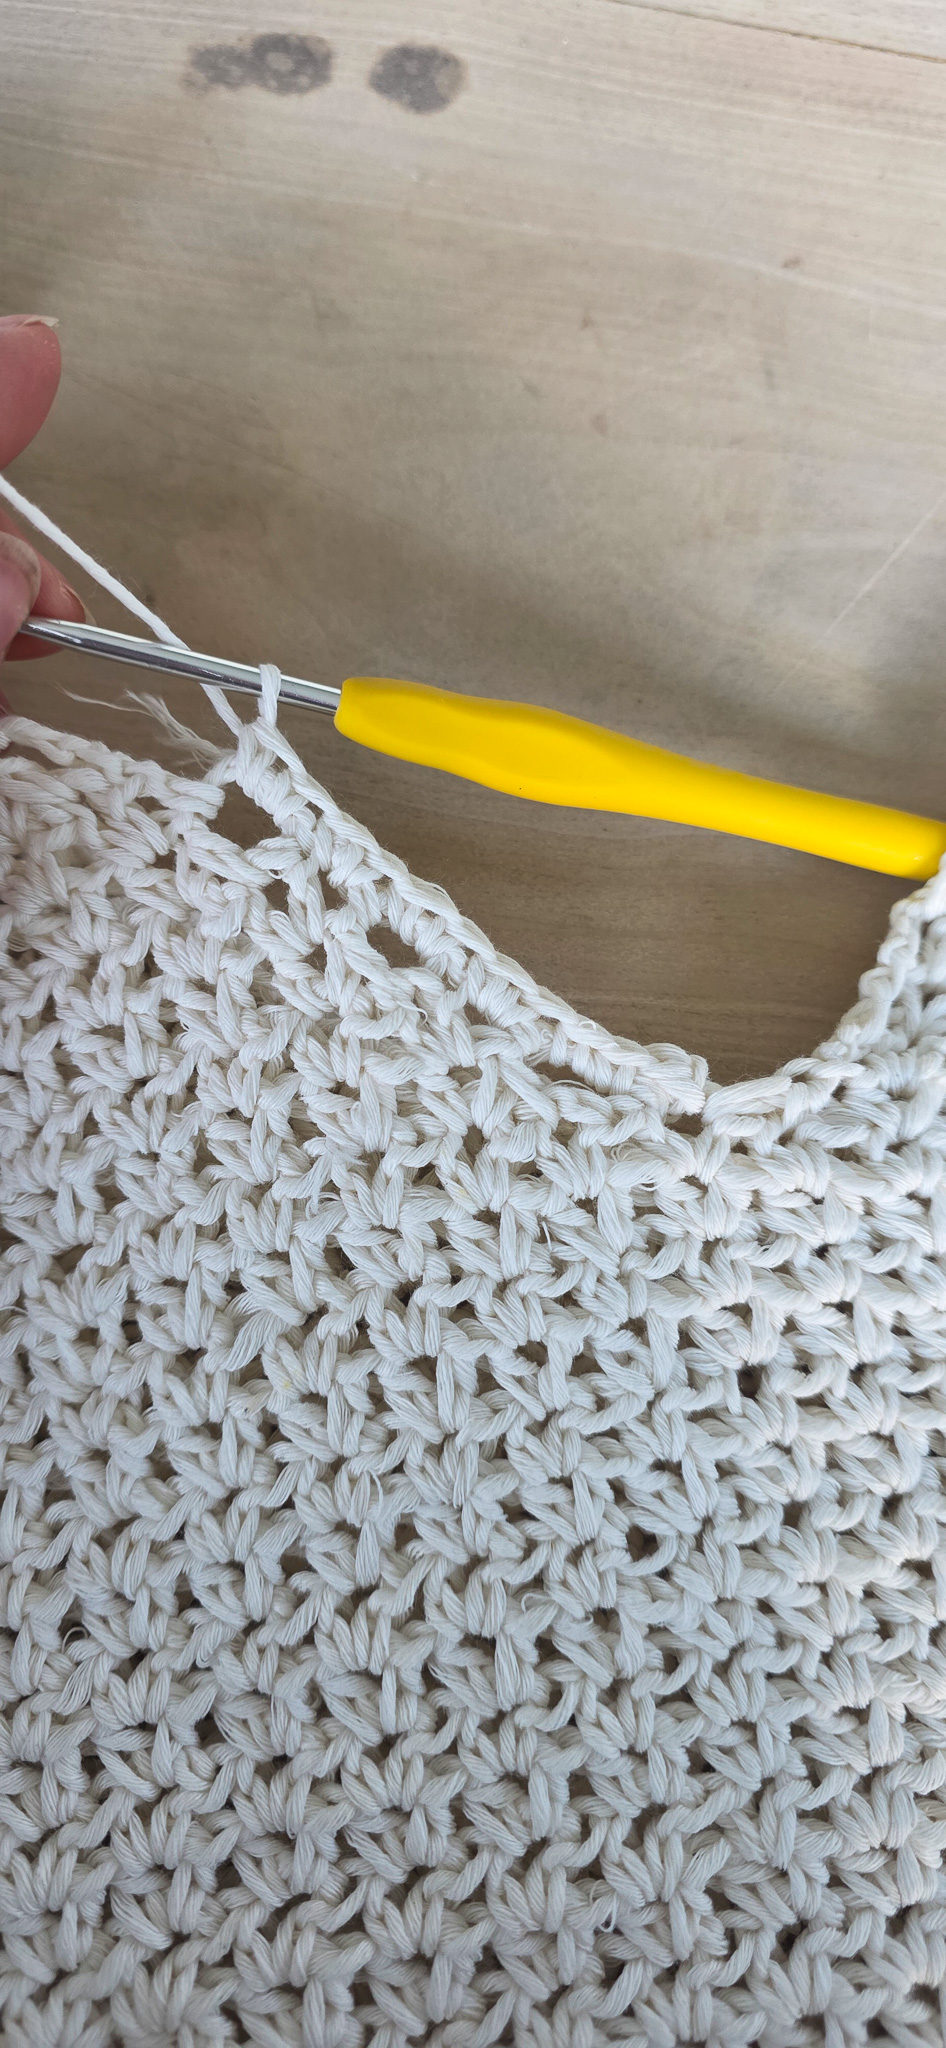
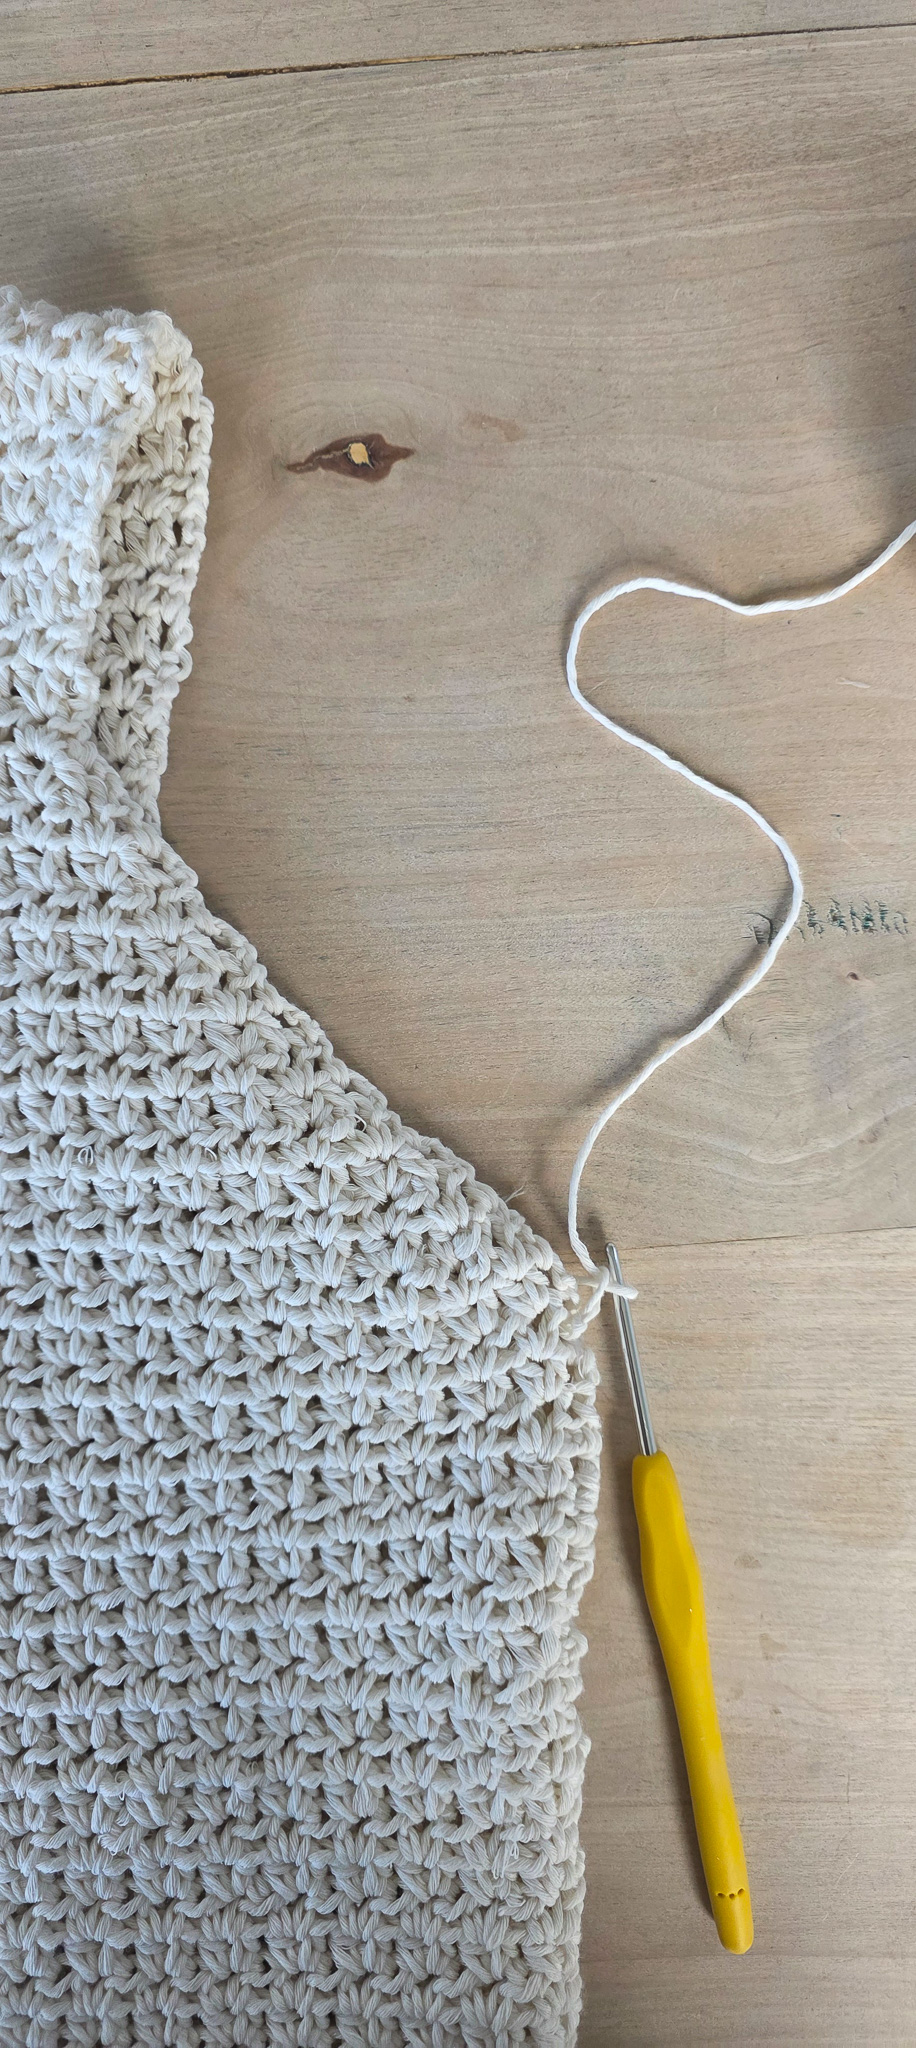
NECKLINE
Attach a new yarn in the center between the bust cups. Chain 1 and then work 1 single crochet in the same space.
Continue working single crochet stitches around the entire neckline opening. Place 2 single crochet stitches around each set of 3 chain stitches worked at the beginning of each row along the edge.
When you reach the shoulder strap seam, skip the seam itself and continue working single crochet stitches along the back neckline in the same way.
Continue all the way around the opening and finish the round by making 1 slip stitch into the first single crochet from the start of the round.
Total: approximately 176 (152, 184, 208) single crochet stitches.

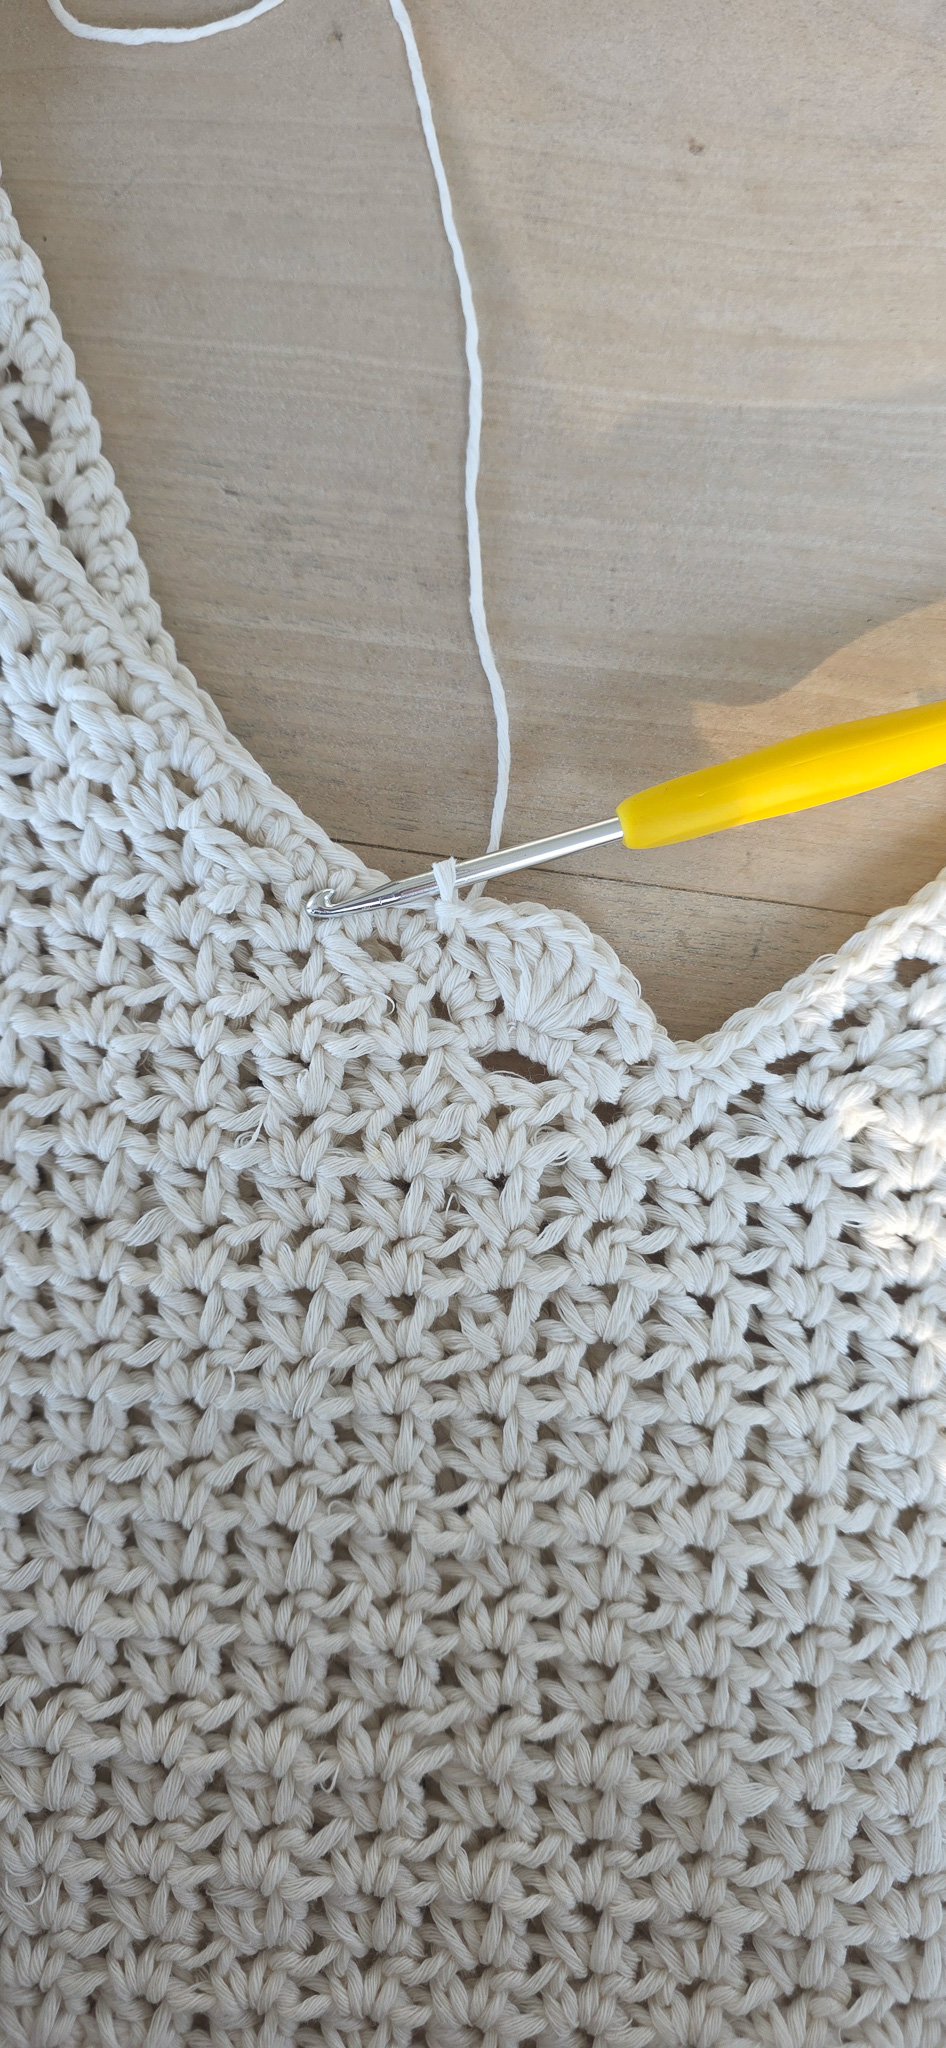
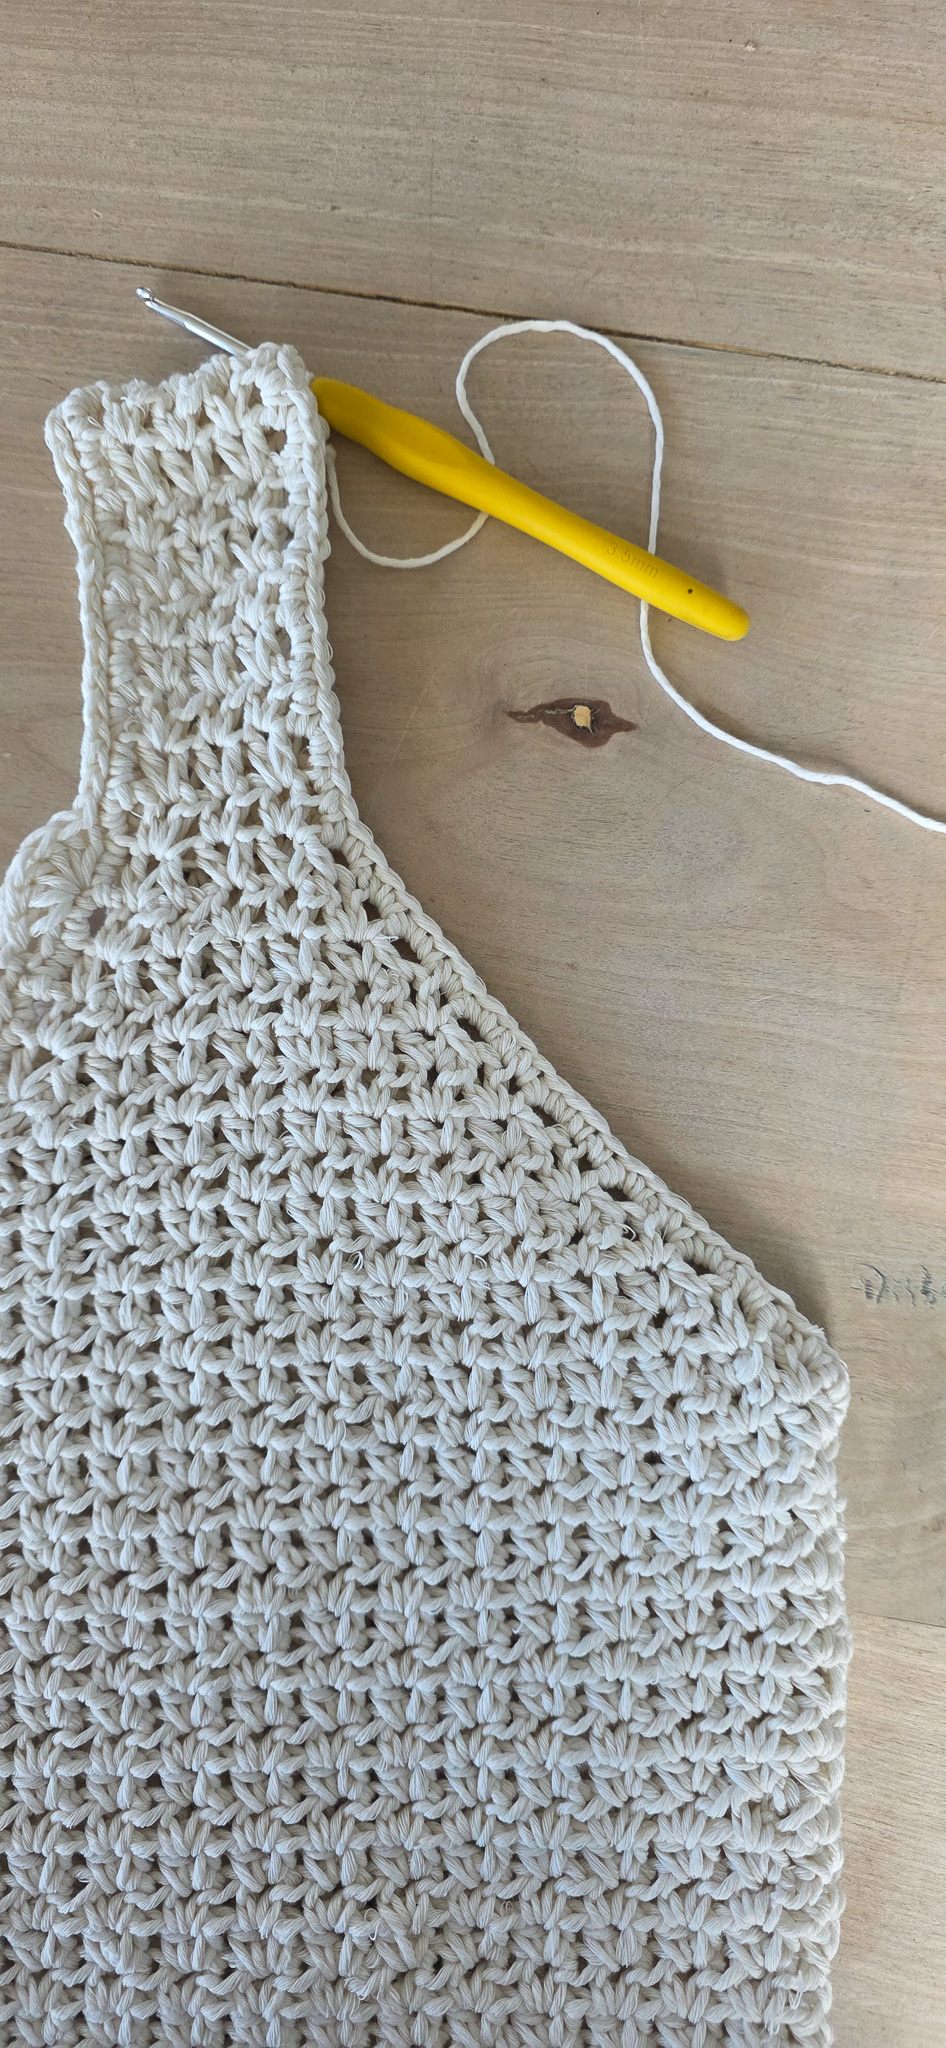
SHELL EDGING AND SHOULDER STRAP
Attach a new yarn in the center between the bust cups.
Work as follows:
1 single crochet in the same space, skip 2 stitches, work 5 double crochets in the next stitch, skip 2 stitches. Repeat the instructions above until you reach the shoulder strap.
Along the shoulder strap, instead work 1 slip stitch in each stitch along the entire edge of the strap.
Then continue in the same way around the rest of the neckline opening.

Adjust if needed by skipping 1 or 3 stitches near the shoulder strap to keep the edge even and symmetrical.
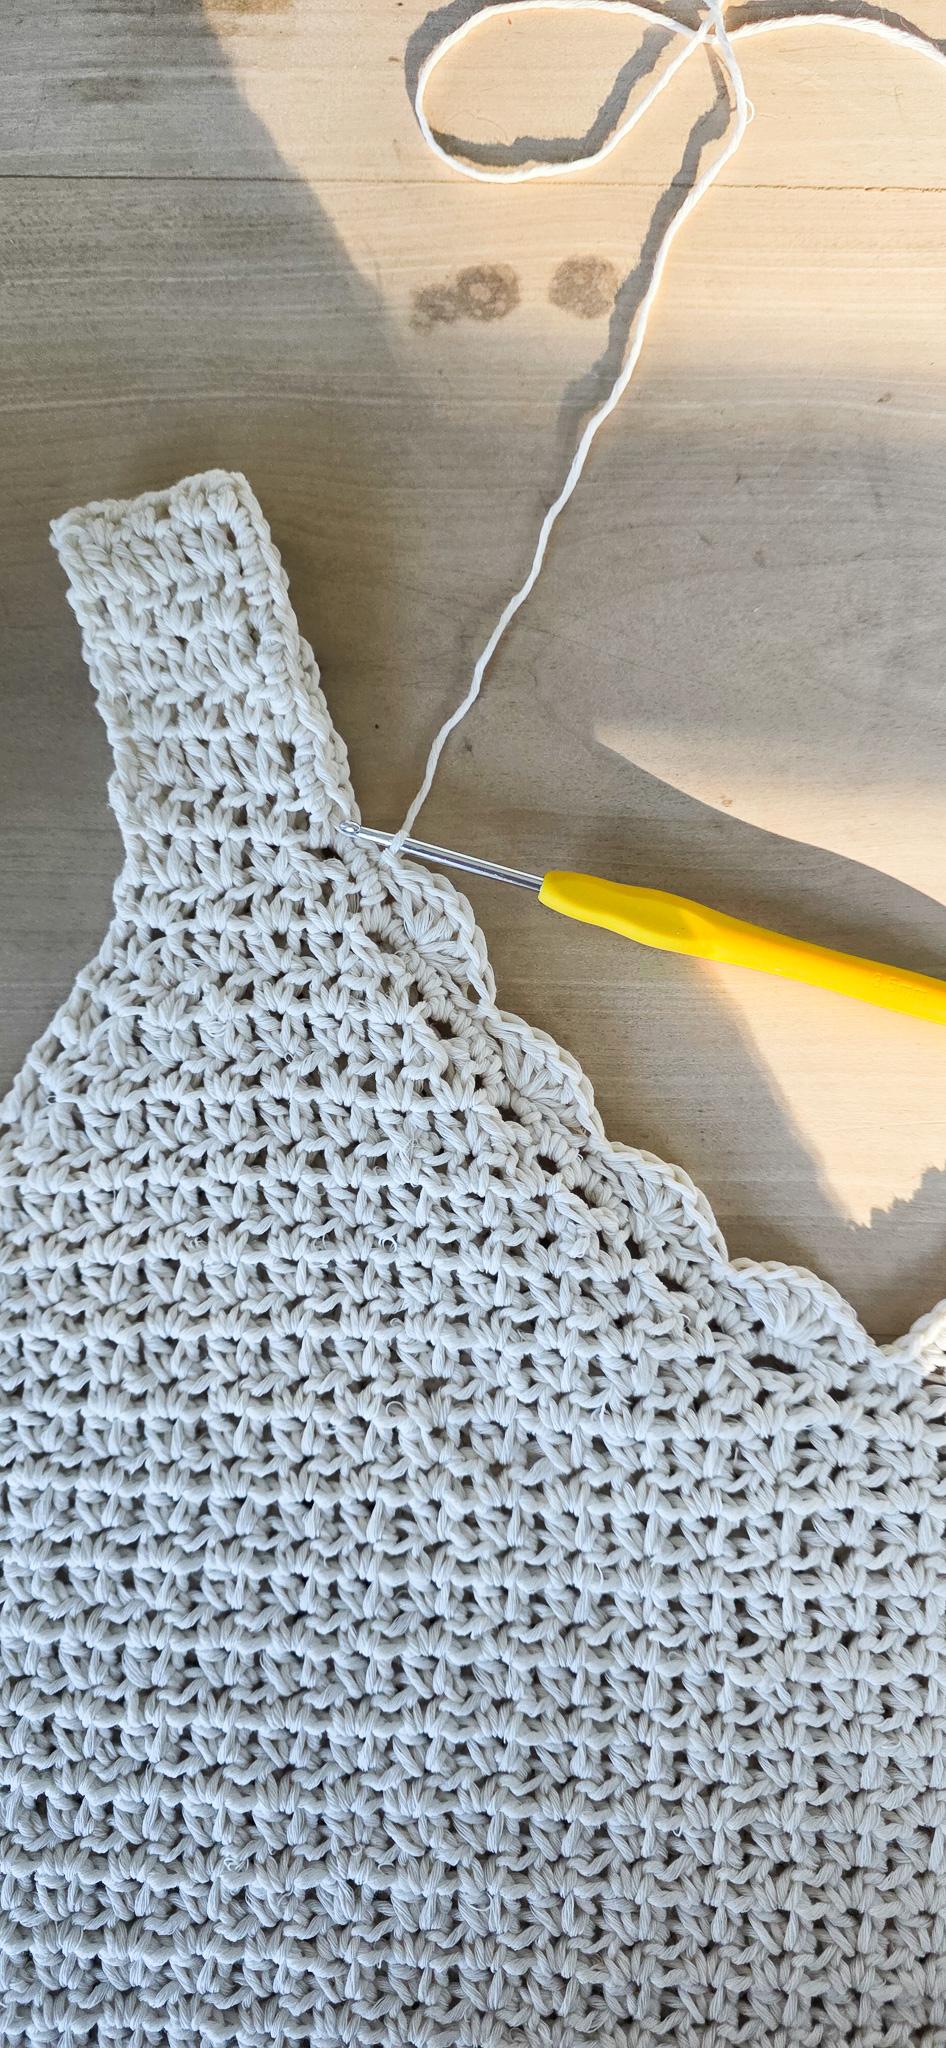
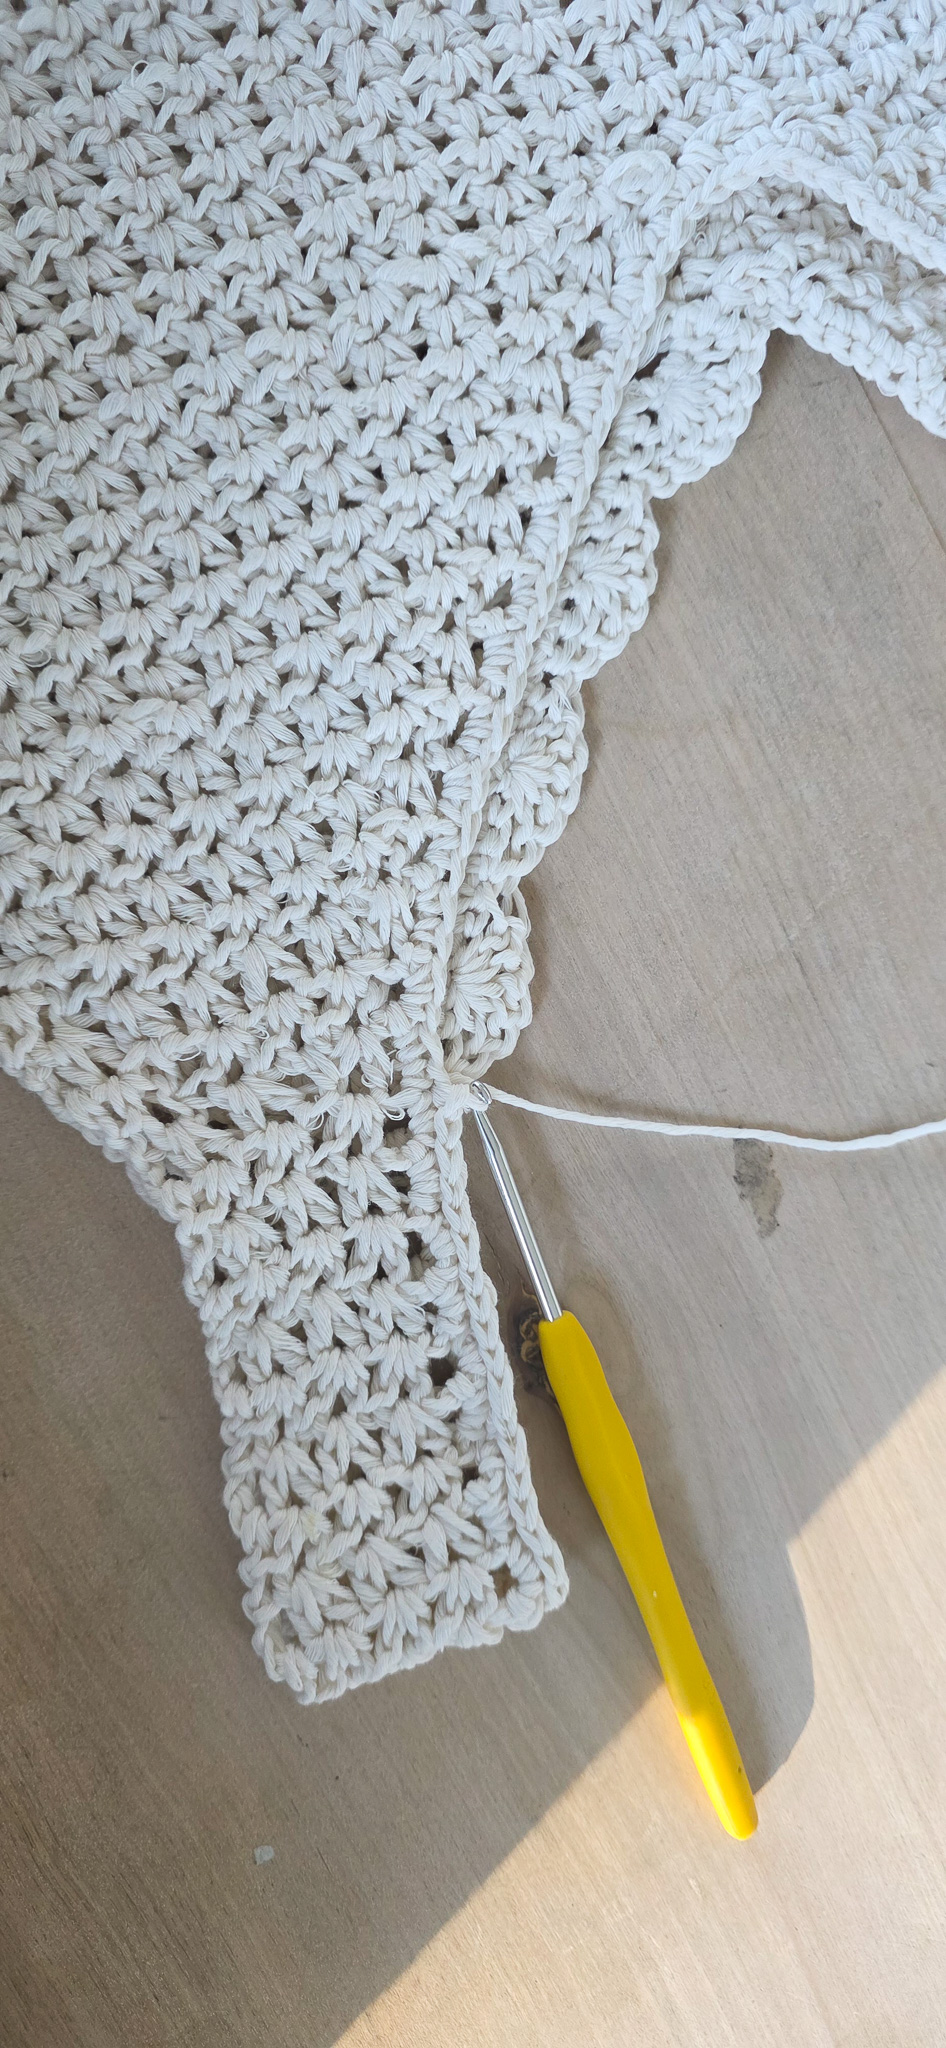
EDGING AROUND THE ARMHOLES
Attach a new yarn at the underarm, at the lower edge of the outer side of the shoulder strap. Chain 1.
Round 1:
Work 1 round of single crochet around the entire armhole following the same principle as for the neckline: place 2 single crochet stitches around each set of 3 chain stitches along the edge. Continue all the way around the opening and finish the round with 1 slip stitch in the first single crochet.
Total: approximately 44 (38, 46, 52) single crochet stitches. The number may vary by a stitch depending on how tightly you crochet and the exact placement of the seams; therefore it is marked as “approx.”
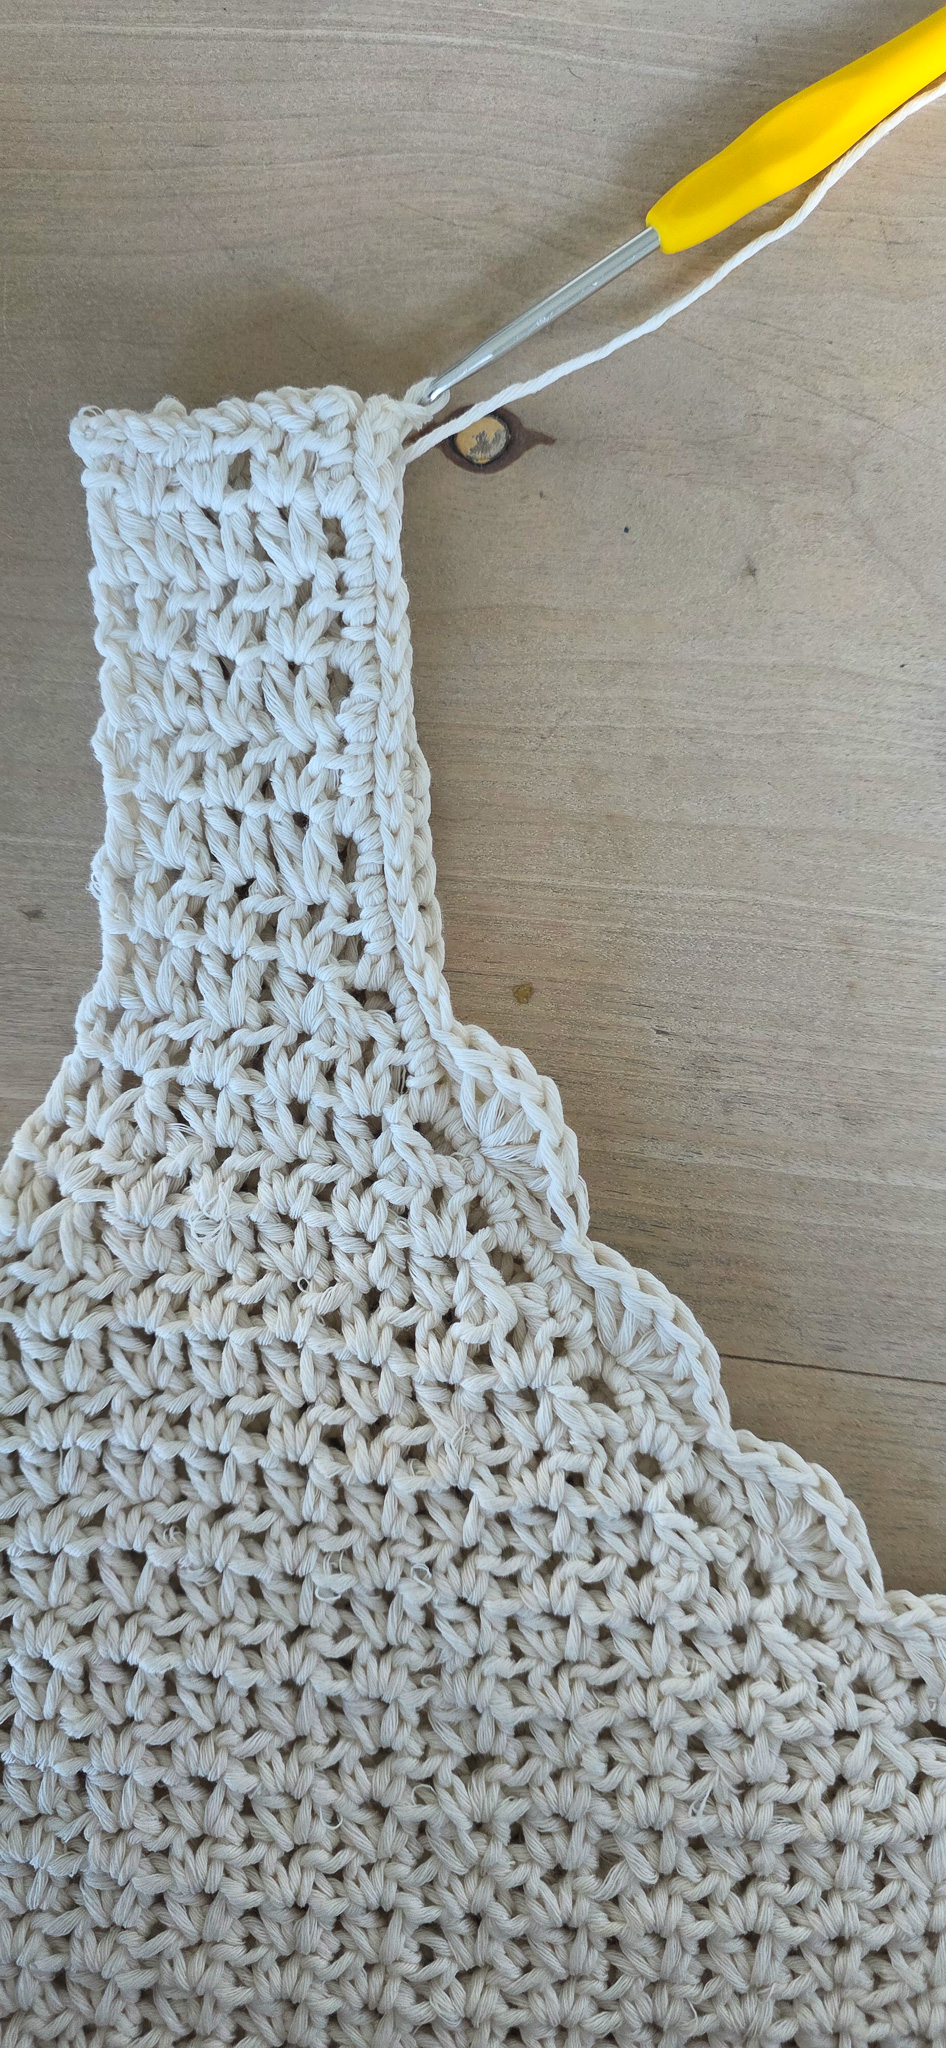
Round 2:
Chain 1 and continue with 1 slip stitch in each stitch all the way around. Finish with 1 slip stitch in the first slip stitch from the round.
Fasten off the yarn, cut the thread, and weave in the ends. Repeat the same process around the other armhole of the top. Total: approximately 44 (38, 46, 52) slip stitches.
The top is now finished.
Pattern terms (US crochet terminology)
This section uses crochet terminology. If you want more pictures or a guide, see the simpler section.
Abbreviations
- ch = chain
- sc = single crochet
- st = stitch
- dc = double crochet
- hdc = half double crochet
- sl st = slip stitch
- rnd/row = round/row
- lp = loop
- V-st = V-stitch
- yo = yarn over
- tog = together
Pattern info – Measurements & gauge
Measurements: The measurements are based on the gauge below and the original size M measurements.
Approximately 7.5 V-stitches = 10 cm (4 in)
Approximately 14 rows = 10 cm (4 in)
Explanation
The width is measured flat from side to side. The total length is measured from the bottom edge of the top up to the top edge of the shoulder straps.
The length to the bust cup is measured from the bottom edge up to where the cup shaping begins.
The measurements may vary slightly depending on crochet tension and how much the piece stretches after use/blocking.
HOW TO CROCHET A V-STITCH
A V-st is made with hdc (1 hdc + Ch 1 + 1 hdc in the same st.
Yarn over.
Insert the hook into the stitch/chain space where the V-stitch should be placed.
Yarn over and pull up a loop (3 loops on the hook).
Yarn over and pull through all 3 loops (first half double crochet complete).
Chain 1.
Yarn over again and insert the hook into the same stitch/chain space as before.
Yarn over and pull up a loop (3 loops on the hook).
Yarn over and pull through all 3 loops (second half double crochet complete).
You have now formed a “V” made of two half double crochets with a chain stitch in between.
How to work the next row:
In the next row, work a new V-st (half double crochet, chain, half double crochet) around the chain space of the previous row’s V-stitch, so the V’s stack on top of each other.
FRONT AND BACK PIECES
Make two pieces.
M (S, L, XL)
Make a chain of 69 (61, 77, 85) + 3 ch.
Row 1: 1 dc in the 3rd chain from the hook. 1 dc in each chain. 1 ch, turn. Total: 69 (61, 77, 85) dc.
Row 2: 1 sc in each st. 3 ch, turn. Total: 69 (61, 77, 85) sc.
Row 3: 1 V-st in 2nd stitch. *Sk 1 st, 1 V-st in next st*. Repeat across the row. When 2 sts remain: sk 1 st, 1 dc in the last st. 3 ch, turn. Total: 34 (30, 38, 42) V-sts.
Row 4: 1 V-st in the chain space of the previous row’s V-st. Repeat across the entire row. Work 1 dc in the 3rd chain from the previous row. Chain 3, turn. Total: 34 (30, 38, 42) V-st.
Row 5–32: Repeat Row 4.
RIGHT BUST CUP
Place a stitch marker in the center of Row 32 between two V-stitches.
M: between V-stitches 17 and 18
S: between V-stitches 15 and 16
L: between V-stitches 19 and 20
XL: between V-stitches 21 and 22
SHAPING
Decrease at the beginning and end of every other row by crocheting 2 V-sts tog into 1 V-st. Between decrease rows, work 1 row without decreases.
Row 33: Work forward to the marker. Crochet 2 V-sts tog at the beginning of the row. Work in pattern across the row. Crochet 2 V-sts tog at the end of the row. Work 1 dc in the same space as the last V-st. Ch 3, turn.
Row 34: Work without decreases. Ch 3, turn.
Repeat Rows 33–34 until the following number of V-sts remain:
SHOULDER STRAP
Continue working across the remaining V-sts without any decreases.
Fasten off the yarn and leave a longer tail for assembly.
LEFT BUST CUP
Attach a new yarn in the V-st closest to the marker. Ch 3. Crochet the first 2 V-sts tog. Work in pattern across the row. Crochet the last 2 V-sts tog. Ch 3, turn.
Continue as for the right bust cup until the specified number of V-sts remain.
Work the left shoulder strap in the same way as the right.
SECOND PANEL
Make one additional identical panel.
For the second panel, there is no need to leave a long yarn tail at the shoulder strap. Fasten off, cut the yarn, and weave in all ends.
ASSEMBLY
Place the front and back pieces together with the right side facing outward.
Sew the sides together by stitching around the 3 chain sts at the beginning of each row, working up toward the bust cups. Repeat on both sides.
Sew the shoulder strap ends together by working through both loops along the entire edge. Fasten off, cut the yarn, and weave in all ends.
NECKLINE
Attach a new yarn between the bust cups. Ch 1, 1 sc in the same space. Work 2 sc sts around each set of 3 chain sts along the neckline opening. Sk the shoulder strap seam. Continue all the way around the neckline opening. Finish with 1 sl stin the first sc.
Approximately 176 (152, 184, 208) sc.
SHELL EDGING AND SHOULDER STRAP
Attach a new yarn between the bust cups.
*1 sc in the same st, skip 2 sts, 5 dc in the next st, skip 2 sts*. Repeat until you reach the shoulder strap.
Along the shoulder strap: work 1 sl stin each stitch/row. Then continue around the remaining neckline opening.
Adjust if needed by skipping 1 or 3 sts near the shoulder strap.
ARMHOLES
Attach a new yarn at the underarm, at the lower edge of the outer side of the shoulder strap.
Round 1: Chain 1. Work 2 sc stitches around each set of ch 3 stitches around the entire armhole. Finish with 1 sl stin the first sc.
Approximately 44 (38, 46, 52) sc.
Round 2: Chain 1. Work 1 sl stin each stitch around. Finish with 1 sl stin the first sl st.
Approximately 44 (38, 46, 52) sl sts. Fasten off, cut the yarn, and weave in all ends. Repeat for the other armhole. The top is now complete.
The rights to this pattern belong to MYO Make Your Own. The pattern or its pictures may not be copied, shared or resold either in parts or in its entirety, but you may sell items you have crocheted from this pattern. If you have questions about the pattern, contact MYO at hello@makeyourown.se.
PATTERN INFORMATION – Measurements & Gauge
Measurements: The measurements are based on the gauge below and on the original measurements for size M.
Gauge:
- 7.5 V-stitches = 10 cm (4 in)
- 14 rows = 10 cm (4 in)
If your gauge matches the measurements above, your finished garment will correspond to the sizes listed below, and you can follow the size instructions given in the pattern.
How to Crochet a V-Stitch
The V-stitch in this pattern is made using half double crochet stitches:
(1 half double crochet, 1 chain, 1 half double crochet) in the same stitch or chain space.
- Yarn over.
- Insert your hook into the stitch or chain space where the V-stitch will be made.
- Yarn over and pull up a loop (3 loops on hook).
- Yarn over and pull through all 3 loops on the hook (first half double crochet completed).
- Chain 1.
- Yarn over again and insert your hook into the same stitch or chain space used in Step 2.
- Yarn over and pull up a loop (3 loops on hook).
- Yarn over and pull through all 3 loops on the hook (second half double crochet completed).
You have now formed a V-stitch consisting of two half double crochets separated by one chain stitch.
Working the Next Row
In the next row, crochet a new V-stitch (half double crochet, chain 1, half double crochet) into the chain-1 space of the V-stitch from the previous row. This causes the V-stitches to stack directly on top of one another, creating the pattern.
Front and Back Panel
M (S, L, XL)
You will work the piece from the bottom up.
Foundation Chain:
Chain 69 (60, 77, 85) + 3 chains, or chain any number that is divisible by 3, depending on the width you would like your top to be.
If you are unsure how to crochet a foundation chain, see the video below (Chain).
Row 1: Work 1 double crochet (dc) into the 3rd chain from the hook. Work 1 double crochet in each chain across to the end of the row. Ch 1, turn. You should now have a total of 69 (60, 77, 85) double crochets.
If you are unsure how to crochet a double crochet (dc), see the video below (Double Crochet).
Row 2: Work 1 single crochet in each stitch across to the end of the row. Ch 3, turn. You should now have a total of 69 (60, 77, 85) single crochets.
If you are unsure how to crochet a single crochet, see the video below (Single Crochet).
Row 3: Work 1 V-stitch in the 2nd stitch. Skip 1 stitch. Work 1 V-stitch in the next stitch. Continue repeating this pattern across the row:
Skip 1 stitch, work 1 V-stitch in the next stitch. When 2 stitches remain, skip 1 stitch and work 1 double crochet (dc) in the last stitch. Ch 3, turn. You should now have 34 (30, 38, 44) V-stitches.
If you are unsure how to crochet a V-stitch, refer to the instructions under Step 1.
Row 4: Work 1 V-stitch around the chain-1 space of each V-stitch from the previous row. Continue working 1 V-stitch in each chain-1 space across the row. After the last chain space, work 1 double crochet (dc) in the 3rd chain from the previous row’s turning chain.
You should now have a total of 34 (30, 38, 44) V-stitches.
Rows 5–32: From here on, repeat Row 4 until the piece reaches the desired length where the bust shaping will begin.
RIGHT BUST CUP (Right Side – front view)
Place a stitch marker in the center of Row 32 to divide the work into two bust cups. The marker should be placed between two V-stitches for all sizes.
For size M, place the marker between V-stitches 17 and 18.
For size S, place it between V-stitches 15 and 16.
For size L, place it between V-stitches 19 and 20.
For size XL, place it between V-stitches 21 and 22.
Bust Shaping — Size M
Once the work has been divided into two equal parts and the marker has been placed in the center, each bust cup is worked separately. The bust cups are shaped the same way for all sizes. Decreases are made at the beginning and end of every second row by crocheting the first two and the last two V-stitches together. Between each decrease row, work one row without decreases. The number of rows varies depending on size, and you continue until the specified number of V-stitches remains before starting the shoulder strap.
Repeat these two rows until the required number of V-stitches is reached for each size. Then continue to the shoulder strap.
The number of rows may vary slightly depending on your crochet tension and the desired fit.
Row 33 — first decrease round
Crochet forward to the marker.
Decrease at the beginning of the row by inserting the hook through the first two V-stitches and crocheting them together into one V-stitch. Then continue working in pattern across the row. At the end of the row, just before the marker, make another decrease by crocheting the last two V-stitches together. Make a double crochet in the same space as the last V-stitch. Chain 3 and turn. Total: 15 V-stitches.
Row 34: Work the row without decreases. Chain 3 and turn.
Continuation
Repeat these two rows: one row with decreases at the beginning and end, and one row without decreases. The decreases are therefore made every other row.
For size M, continue until only 3 V-stitches remain in the row. Finish with row 45. After that, begin the shoulder strap.
Below you will find a specification for sizes S & M, and in step 6 you will find sizes L & XL.
Size S
Start with 15 V-stitches. Decrease every other row until 3 V-stitches remain.
1st decrease row: 13 V-stitches
2nd decrease row: 11 V-stitches
3rd decrease row: 9 V-stitches
4th decrease row: 7 V-stitches
5th decrease row: 5 V-stitches
6th decrease row: 3 V-stitches
Total: 11 rows
Size M
Start with 17 V-stitches. Decrease every other row until 3 V-stitches remain.
1st decrease row: 15 V-stitches
2nd decrease row: 13 V-stitches
3rd decrease row: 11 V-stitches
4th decrease row: 9 V-stitches
5th decrease row: 7 V-stitches
6th decrease row: 5 V-stitches
7th decrease row: 3 V-stitches
Total: 13 rows
Size L
Start with 19 V-stitches. Decrease every other row until 5 V-stitches remain.
1st decrease row: 17 V-stitches
2nd decrease row: 15 V-stitches
3rd decrease row: 13 V-stitches
4th decrease row: 11 V-stitches
5th decrease row: 9 V-stitches
6th decrease row: 7 V-stitches
7th decrease row: 5 V-stitches
Total: 13 rows
Size XL
Start with 21 V-stitches. Decrease every other row until 5 V-stitches remain.
1st decrease row: 19 V-stitches
2nd decrease row: 17 V-stitches
3rd decrease row: 15 V-stitches
4th decrease row: 13 V-stitches
5th decrease row: 11 V-stitches
6th decrease row: 9 V-stitches
7th decrease row: 7 V-stitches
8th decrease row: 5 V-stitches
Total: 15 rows
SHOULDER STRAP
When the specified number of V-stitches remains, continue with the shoulder strap. Work across the remaining V-stitches without any decreases until the shoulder strap has reached the desired length.
Work back and forth in pattern across the V-stitches and finish when the shoulder strap has reached the desired length. Feel free to adjust the length if needed for the best fit. Fasten off the yarn. Leave a slightly longer tail that you can use to sew the shoulder straps from each panel together.
LEFT BUST CUP
The left bust cup is worked in the same way as the right one, but the work continues from the center of the top.
Attach a new yarn in the V-stitch closest to the marker. Chain 3 and continue directly with the first decrease row by crocheting the first and second V-stitch together. Then continue in pattern across the row and make another decrease at the end of the row by crocheting the last two stitches together. Chain 3 and turn the work.
Continue shaping the cup in the same way as the right one:
every other row with decreases at the beginning and end, and every other row without decreases.
Work until the specified number of V-stitches remains for your size, then continue with the shoulder strap. Work the left shoulder strap in the same way as the right one.
Make an identical panel. Note: When finishing the shoulder strap on the second panel, you do not need to leave a long yarn tail. Fasten off, cut the yarn, and weave in the ends.
ASSEMBLY
Place the front and back panels of the top together with the right side facing outward.
Sew the sides together by inserting the needle around the 3 chain stitches at the start of each row, working from the bottom edge up toward the bust cups. Continue sewing until you reach the start of the cup. Fasten off the yarn, cut the thread, and weave in the ends.
Repeat the same process on the other side of the top.
Then sew the ends of the shoulder straps together. Insert the needle through both loops on each shoulder strap and sew them together with even stitches along the entire edge.
Fasten off the yarn, cut the thread, and weave in all remaining ends.
NECKLINE
Attach a new yarn in the center between the bust cups. Chain 1 and then work 1 single crochet in the same space.
Continue working single crochet stitches around the entire neckline opening. Place 2 single crochet stitches around each set of 3 chain stitches worked at the beginning of each row along the edge.
When you reach the shoulder strap seam, skip the seam itself and continue working single crochet stitches along the back neckline in the same way.
Continue all the way around the opening and finish the round by making 1 slip stitch into the first single crochet from the start of the round.
Total: approximately 176 (152, 184, 208) single crochet stitches.
SHELL EDGING AND SHOULDER STRAP
Attach a new yarn in the center between the bust cups.
Work as follows:
1 single crochet in the same space, skip 2 stitches, work 5 double crochets in the next stitch, skip 2 stitches. Repeat the instructions above until you reach the shoulder strap.
Along the shoulder strap, instead work 1 slip stitch in each stitch along the entire edge of the strap.
Then continue in the same way around the rest of the neckline opening.
Adjust if needed by skipping 1 or 3 stitches near the shoulder strap to keep the edge even and symmetrical.
EDGING AROUND THE ARMHOLES
Attach a new yarn at the underarm, at the lower edge of the outer side of the shoulder strap. Chain 1.
Round 1:
Work 1 round of single crochet around the entire armhole following the same principle as for the neckline: place 2 single crochet stitches around each set of 3 chain stitches along the edge. Continue all the way around the opening and finish the round with 1 slip stitch in the first single crochet.
Total: approximately 44 (38, 46, 52) single crochet stitches. The number may vary by a stitch depending on how tightly you crochet and the exact placement of the seams; therefore it is marked as “approx.”
Round 2:
Chain 1 and continue with 1 slip stitch in each stitch all the way around. Finish with 1 slip stitch in the first slip stitch from the round.
Fasten off the yarn, cut the thread, and weave in the ends. Repeat the same process around the other armhole of the top. Total: approximately 44 (38, 46, 52) slip stitches.
The top is now finished.
Pattern terms (US crochet terminology)
This section uses crochet terminology. If you want more pictures or a guide, see the simpler section.
Abbreviations
- ch = chain
- sc = single crochet
- st = stitch
- dc = double crochet
- hdc = half double crochet
- sl st = slip stitch
- rnd/row = round/row
- lp = loop
- V-st = V-stitch
- yo = yarn over
- tog = together
Pattern info – Measurements & gauge
Measurements: The measurements are based on the gauge below and the original size M measurements.
Approximately 7.5 V-stitches = 10 cm (4 in)
Approximately 14 rows = 10 cm (4 in)
Explanation
The width is measured flat from side to side. The total length is measured from the bottom edge of the top up to the top edge of the shoulder straps.
The length to the bust cup is measured from the bottom edge up to where the cup shaping begins.
The measurements may vary slightly depending on crochet tension and how much the piece stretches after use/blocking.
HOW TO CROCHET A V-STITCH
A V-st is made with hdc (1 hdc + Ch 1 + 1 hdc in the same st.
Yarn over.
Insert the hook into the stitch/chain space where the V-stitch should be placed.
Yarn over and pull up a loop (3 loops on the hook).
Yarn over and pull through all 3 loops (first half double crochet complete).
Chain 1.
Yarn over again and insert the hook into the same stitch/chain space as before.
Yarn over and pull up a loop (3 loops on the hook).
Yarn over and pull through all 3 loops (second half double crochet complete).
You have now formed a “V” made of two half double crochets with a chain stitch in between.
How to work the next row:
In the next row, work a new V-st (half double crochet, chain, half double crochet) around the chain space of the previous row’s V-stitch, so the V’s stack on top of each other.
FRONT AND BACK PIECES
Make two pieces.
M (S, L, XL)
Make a chain of 69 (61, 77, 85) + 3 ch.
Row 1: 1 dc in the 3rd chain from the hook. 1 dc in each chain. 1 ch, turn. Total: 69 (61, 77, 85) dc.
Row 2: 1 sc in each st. 3 ch, turn. Total: 69 (61, 77, 85) sc.
Row 3: 1 V-st in 2nd stitch. *Sk 1 st, 1 V-st in next st*. Repeat across the row. When 2 sts remain: sk 1 st, 1 dc in the last st. 3 ch, turn. Total: 34 (30, 38, 42) V-sts.
Row 4: 1 V-st in the chain space of the previous row’s V-st. Repeat across the entire row. Work 1 dc in the 3rd chain from the previous row. Chain 3, turn. Total: 34 (30, 38, 42) V-st.
Row 5–32: Repeat Row 4.
RIGHT BUST CUP
Place a stitch marker in the center of Row 32 between two V-stitches.
M: between V-stitches 17 and 18
S: between V-stitches 15 and 16
L: between V-stitches 19 and 20
XL: between V-stitches 21 and 22
SHAPING
Decrease at the beginning and end of every other row by crocheting 2 V-sts tog into 1 V-st. Between decrease rows, work 1 row without decreases.
Row 33: Work forward to the marker. Crochet 2 V-sts tog at the beginning of the row. Work in pattern across the row. Crochet 2 V-sts tog at the end of the row. Work 1 dc in the same space as the last V-st. Ch 3, turn.
Row 34: Work without decreases. Ch 3, turn.
Repeat Rows 33–34 until the following number of V-sts remain:
SHOULDER STRAP
Continue working across the remaining V-sts without any decreases.
Fasten off the yarn and leave a longer tail for assembly.
LEFT BUST CUP
Attach a new yarn in the V-st closest to the marker. Ch 3. Crochet the first 2 V-sts tog. Work in pattern across the row. Crochet the last 2 V-sts tog. Ch 3, turn.
Continue as for the right bust cup until the specified number of V-sts remain.
Work the left shoulder strap in the same way as the right.
SECOND PANEL
Make one additional identical panel.
For the second panel, there is no need to leave a long yarn tail at the shoulder strap. Fasten off, cut the yarn, and weave in all ends.
ASSEMBLY
Place the front and back pieces together with the right side facing outward.
Sew the sides together by stitching around the 3 chain sts at the beginning of each row, working up toward the bust cups. Repeat on both sides.
Sew the shoulder strap ends together by working through both loops along the entire edge. Fasten off, cut the yarn, and weave in all ends.
NECKLINE
Attach a new yarn between the bust cups. Ch 1, 1 sc in the same space. Work 2 sc sts around each set of 3 chain sts along the neckline opening. Sk the shoulder strap seam. Continue all the way around the neckline opening. Finish with 1 sl stin the first sc.
Approximately 176 (152, 184, 208) sc.
SHELL EDGING AND SHOULDER STRAP
Attach a new yarn between the bust cups.
*1 sc in the same st, skip 2 sts, 5 dc in the next st, skip 2 sts*. Repeat until you reach the shoulder strap.
Along the shoulder strap: work 1 sl stin each stitch/row. Then continue around the remaining neckline opening.
Adjust if needed by skipping 1 or 3 sts near the shoulder strap.
ARMHOLES
Attach a new yarn at the underarm, at the lower edge of the outer side of the shoulder strap.
Round 1: Chain 1. Work 2 sc stitches around each set of ch 3 stitches around the entire armhole. Finish with 1 sl stin the first sc.
Approximately 44 (38, 46, 52) sc.
Round 2: Chain 1. Work 1 sl stin each stitch around. Finish with 1 sl stin the first sl st.
Approximately 44 (38, 46, 52) sl sts. Fasten off, cut the yarn, and weave in all ends. Repeat for the other armhole. The top is now complete.
The rights to this pattern belong to MYO Make Your Own. The pattern or its pictures may not be copied, shared or resold either in parts or in its entirety, but you may sell items you have crocheted from this pattern. If you have questions about the pattern, contact MYO at hello@makeyourown.se.
%20(5).jpg)
Share your creations with us
Thank you!
Your comment was sent!