
Crochet slipover “Helen”
Crochet a warm and trendy slipover
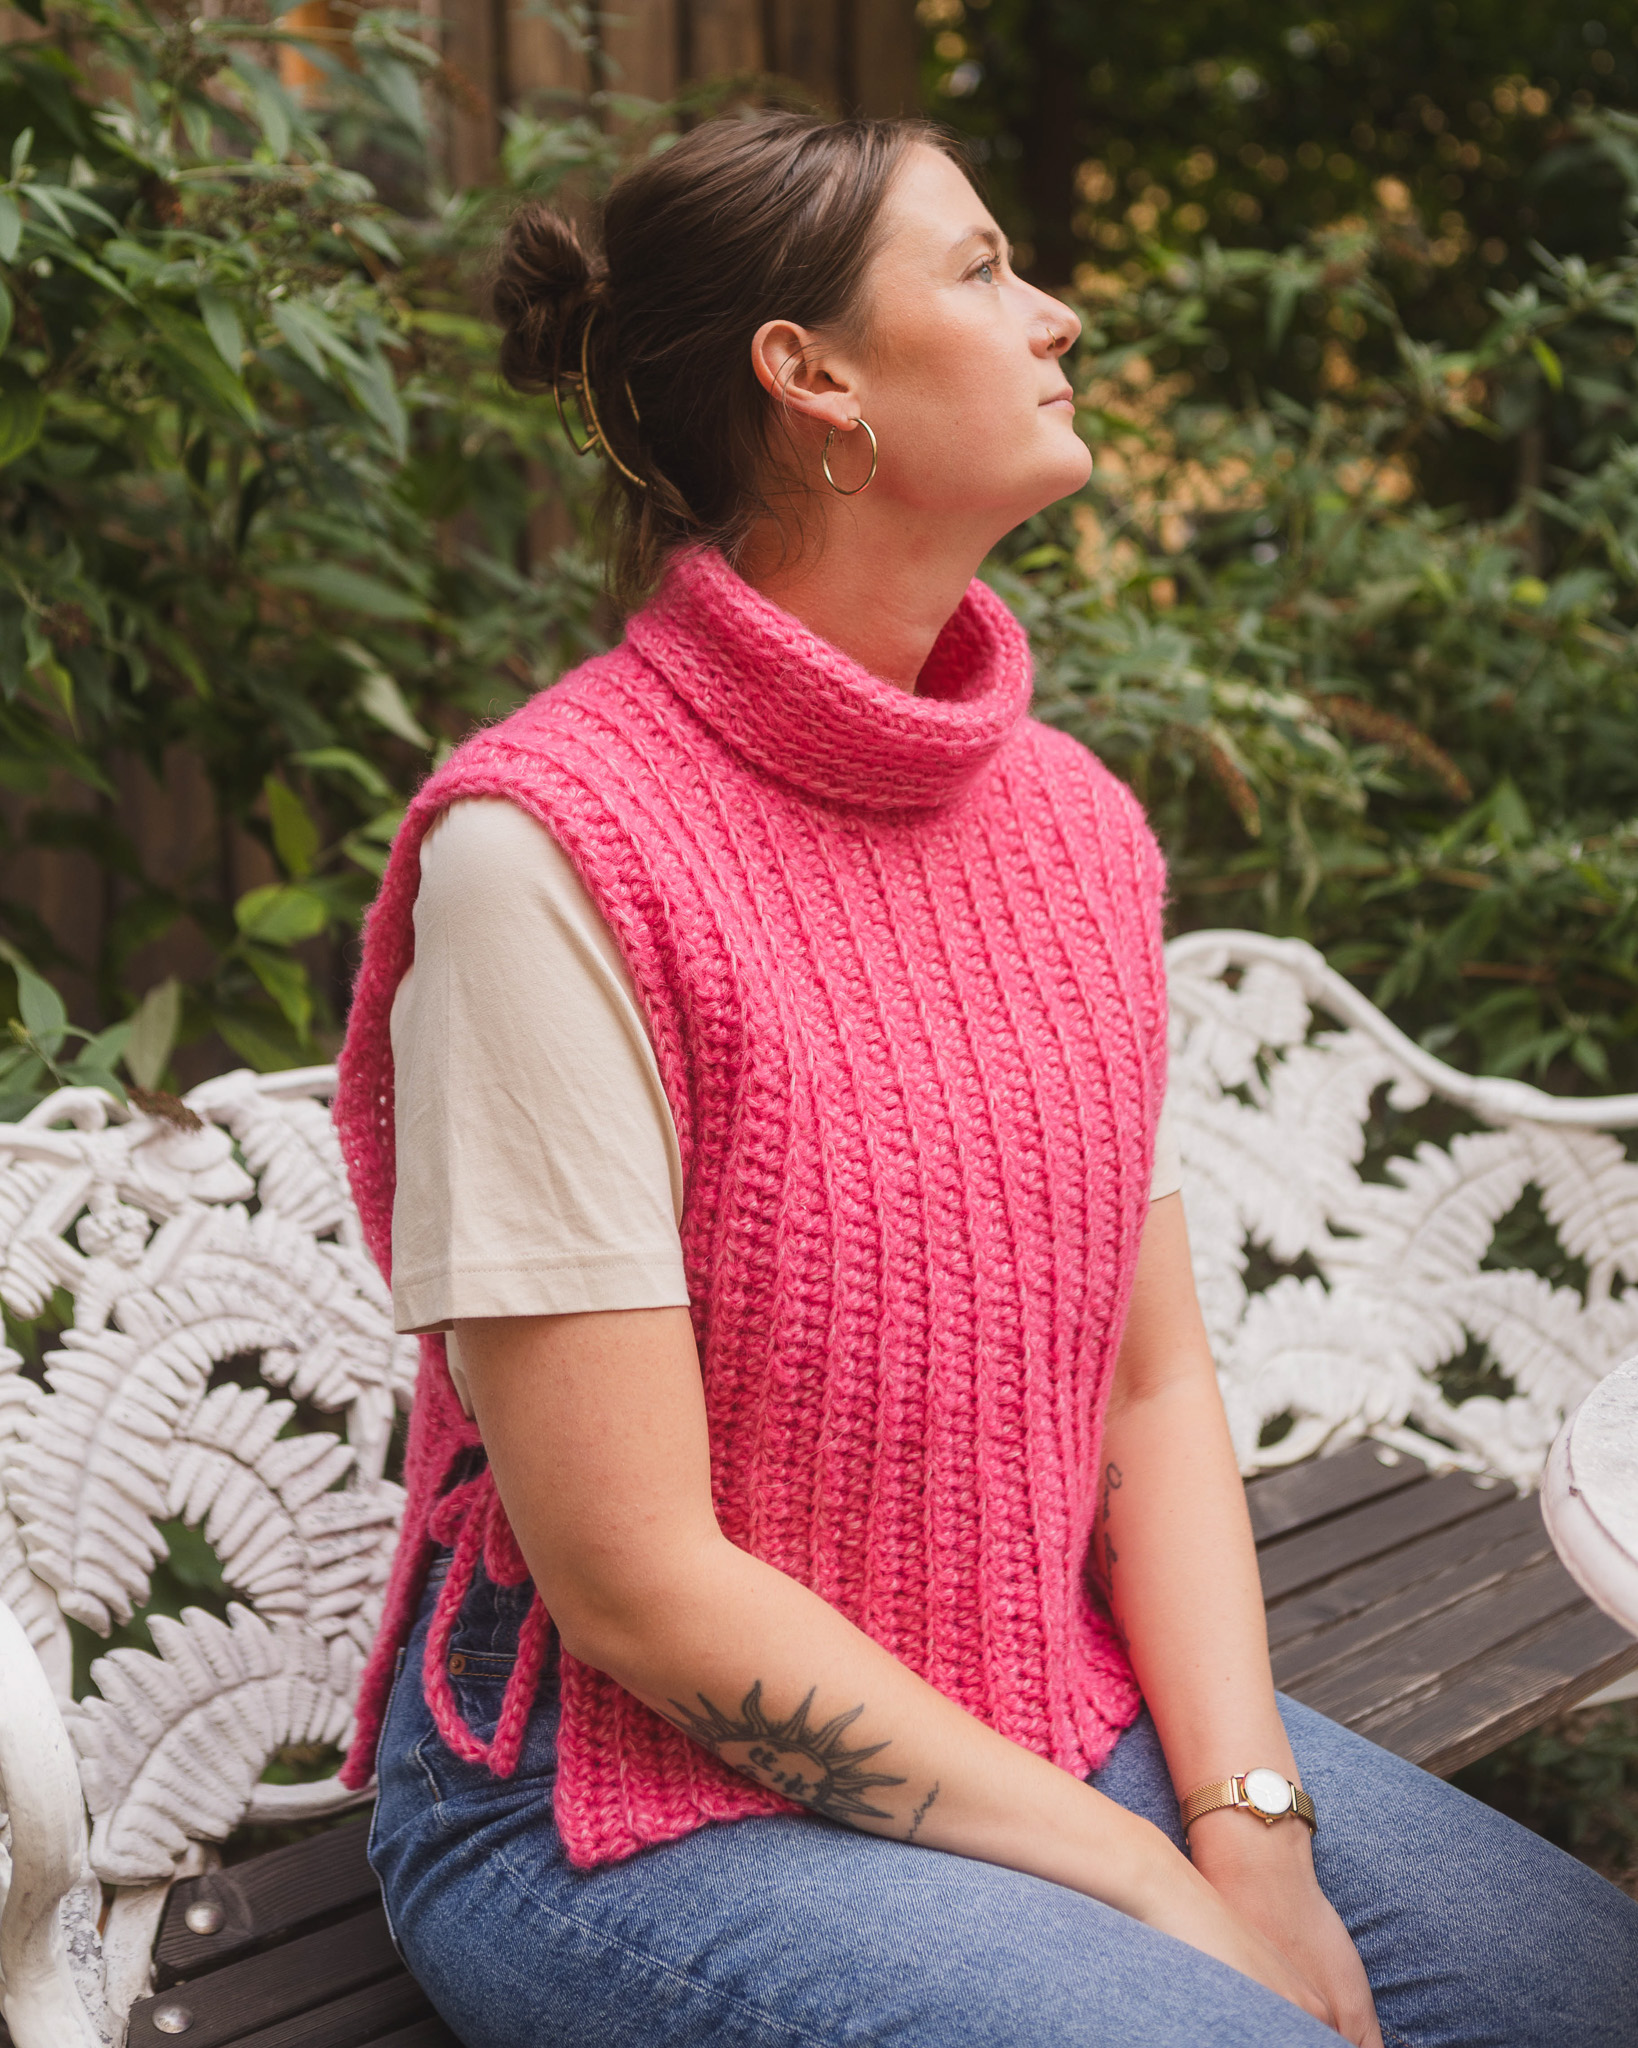
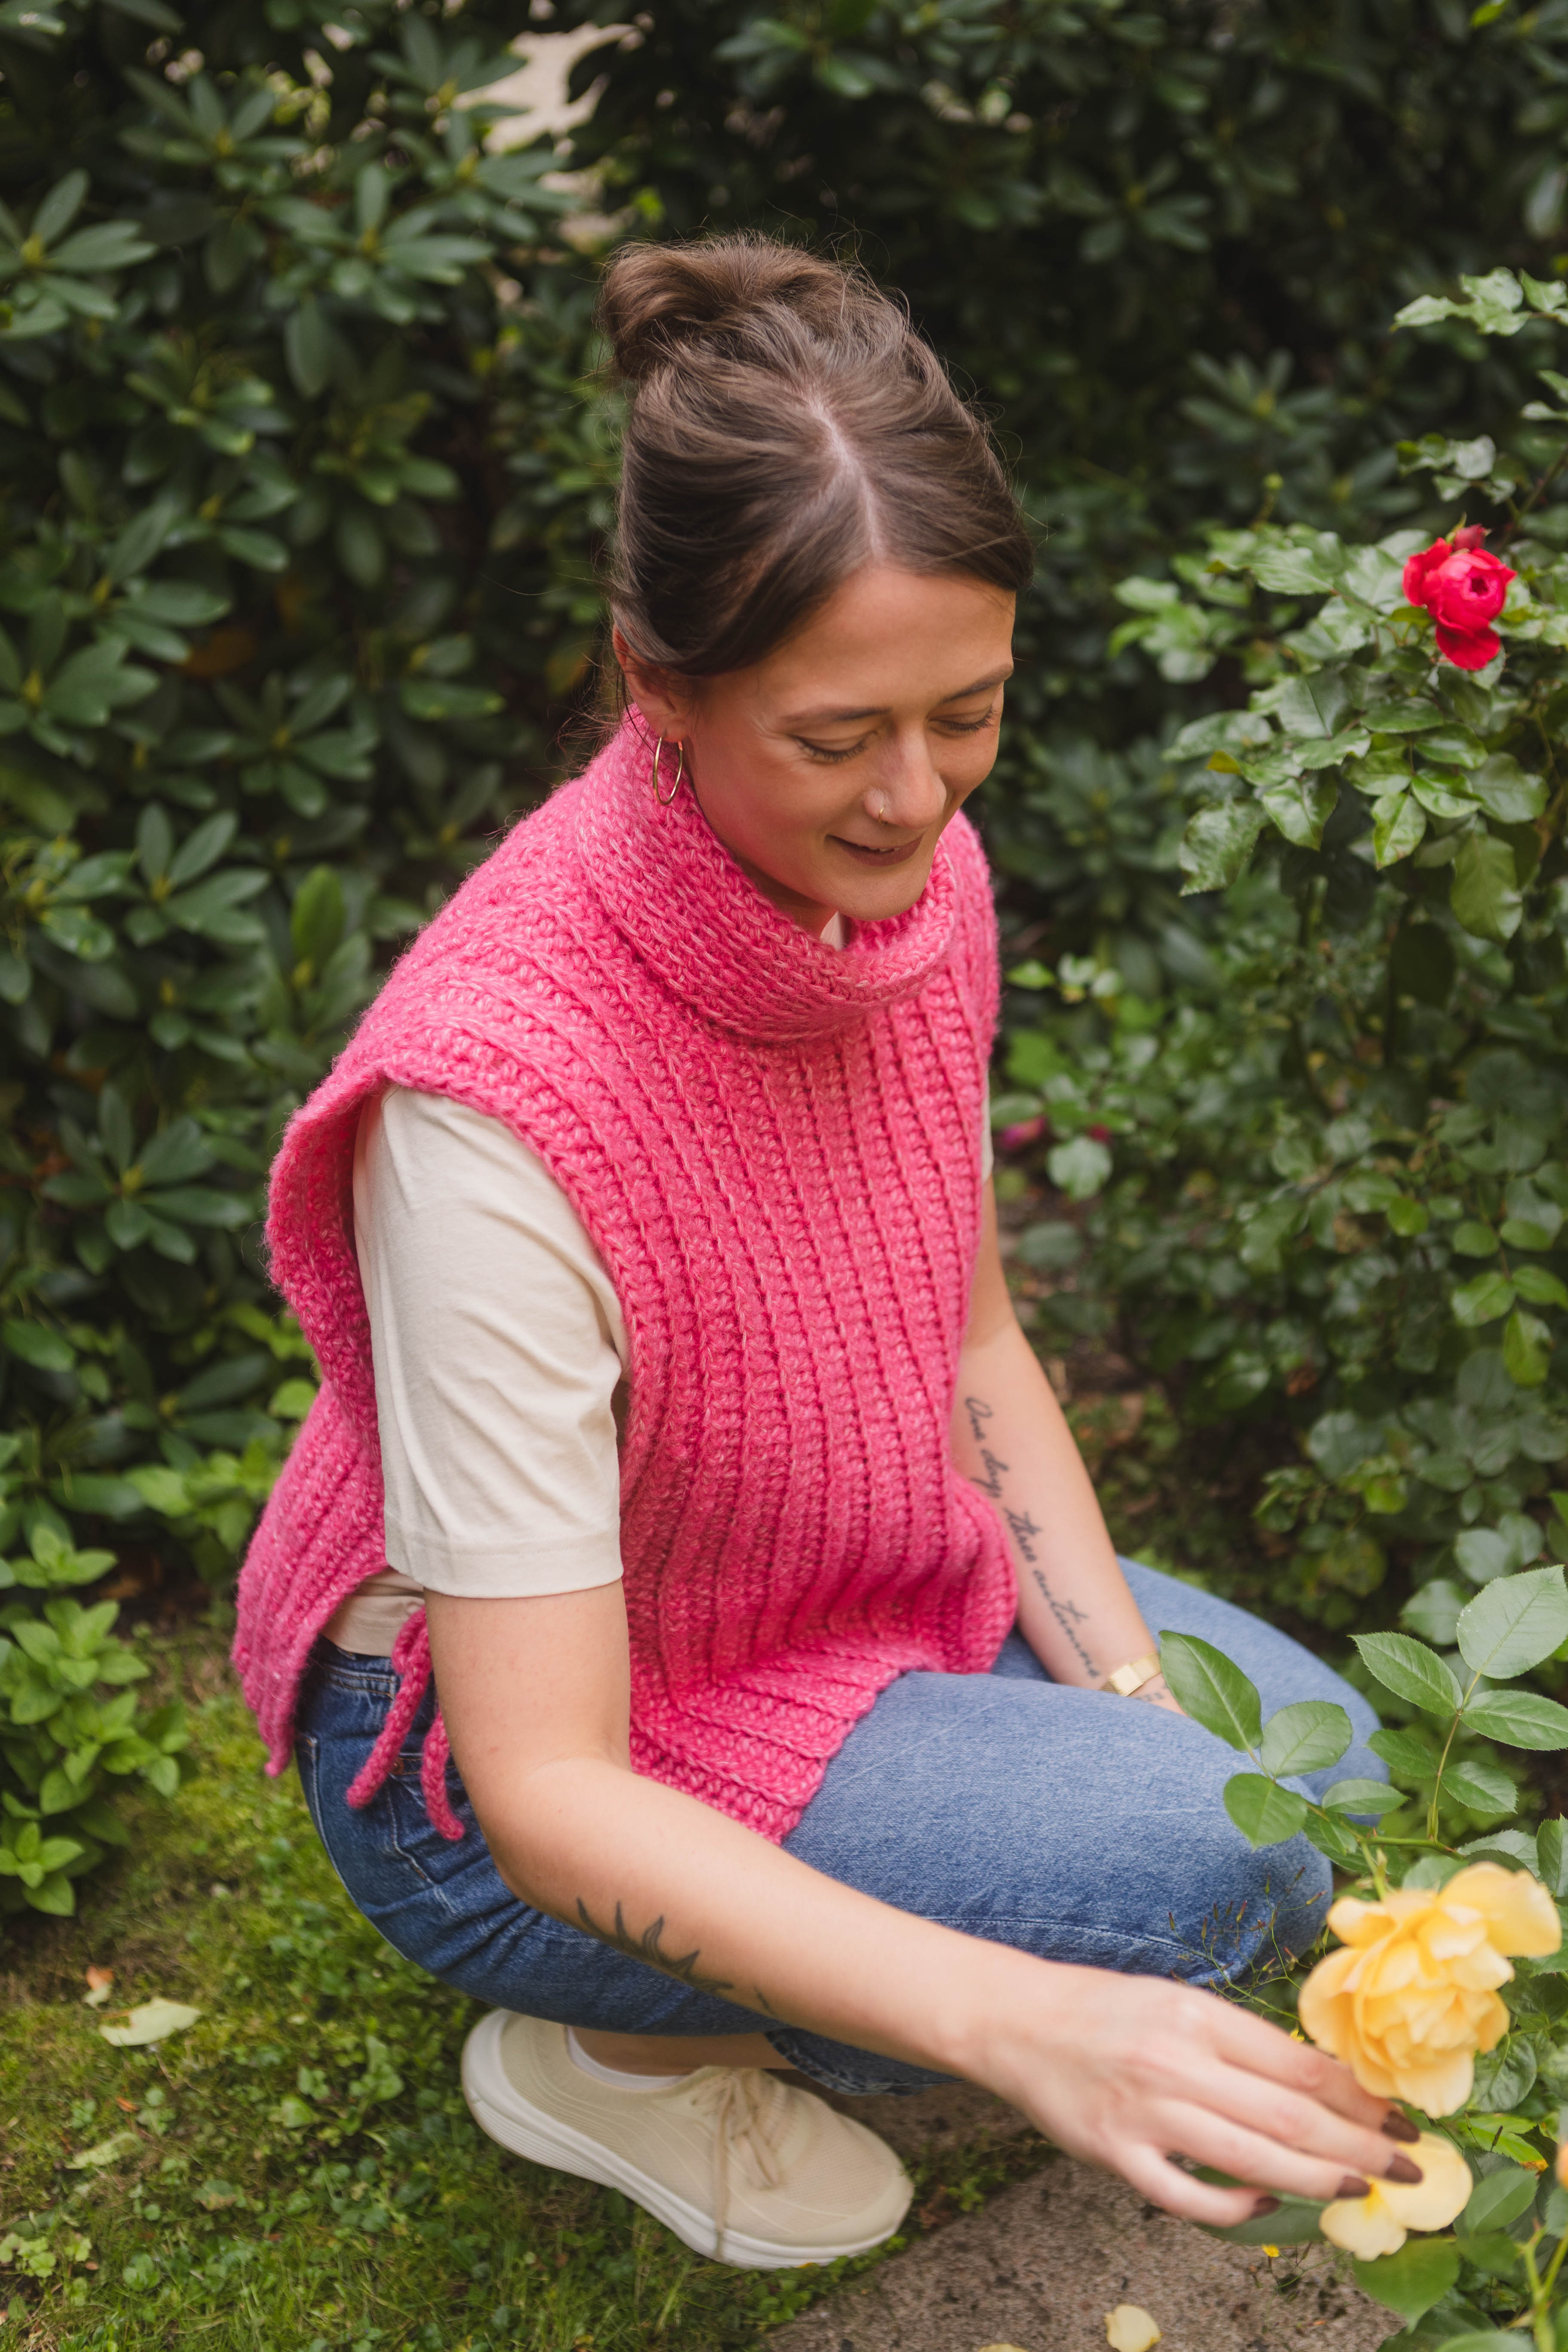
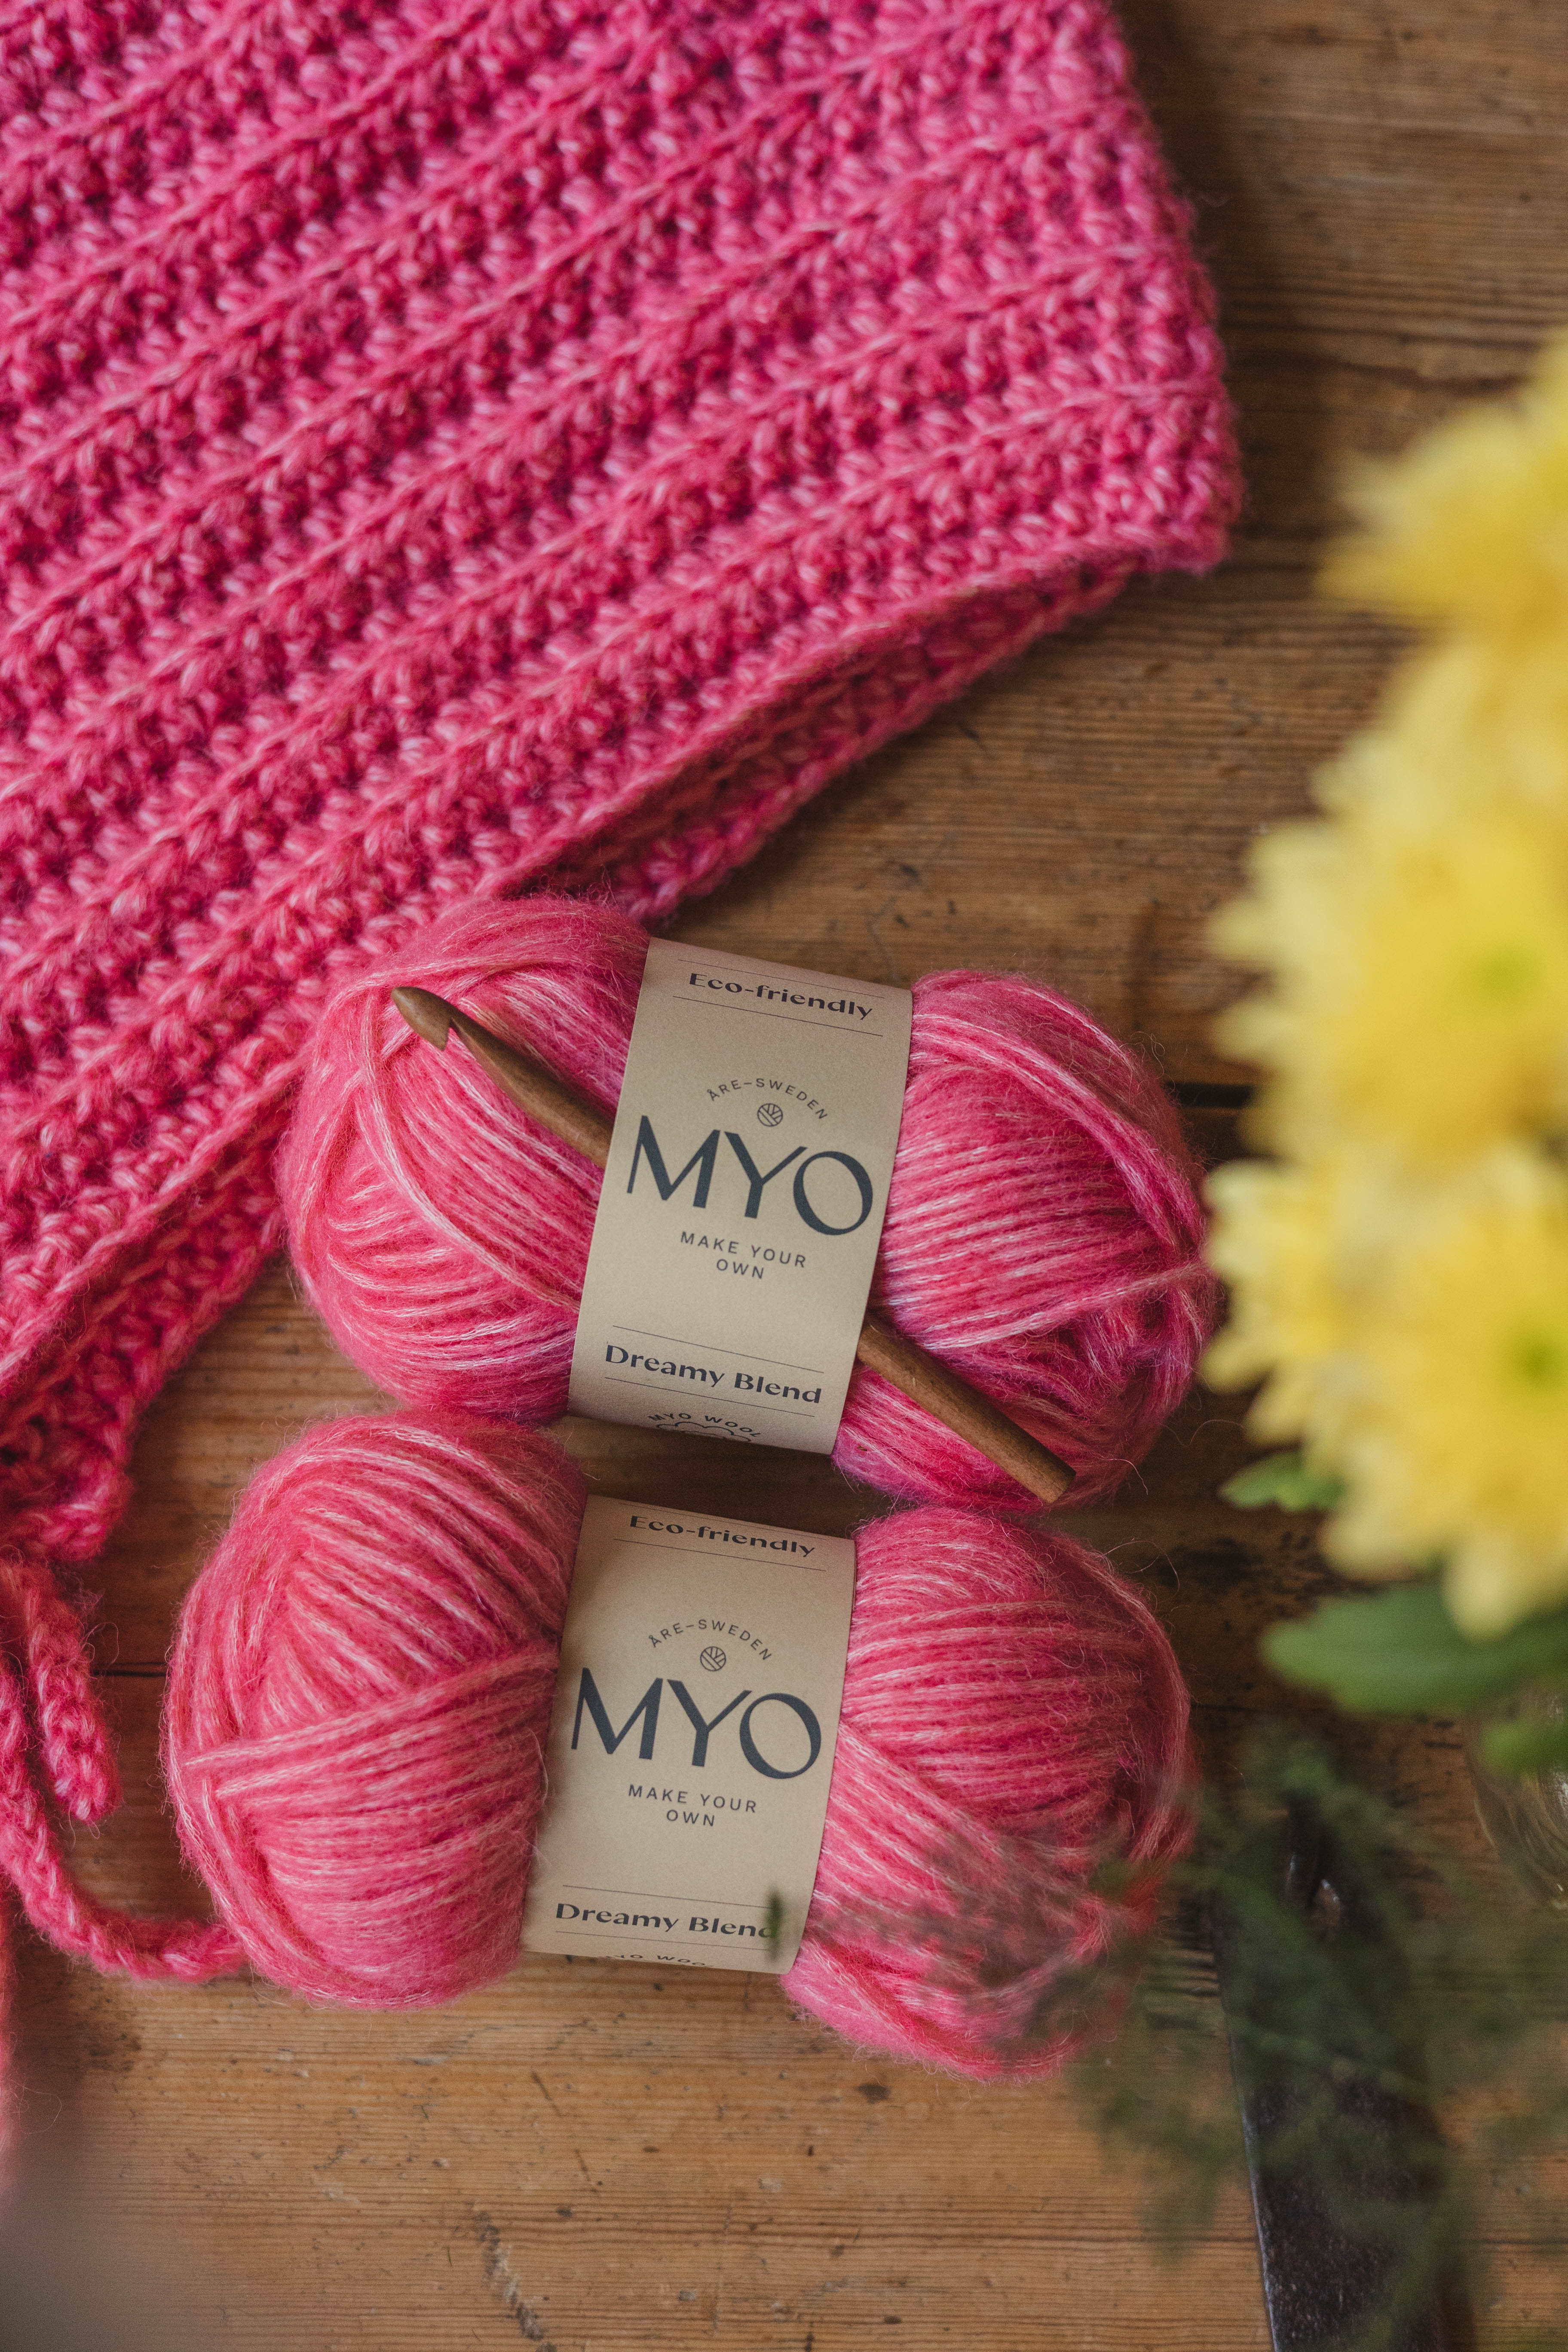
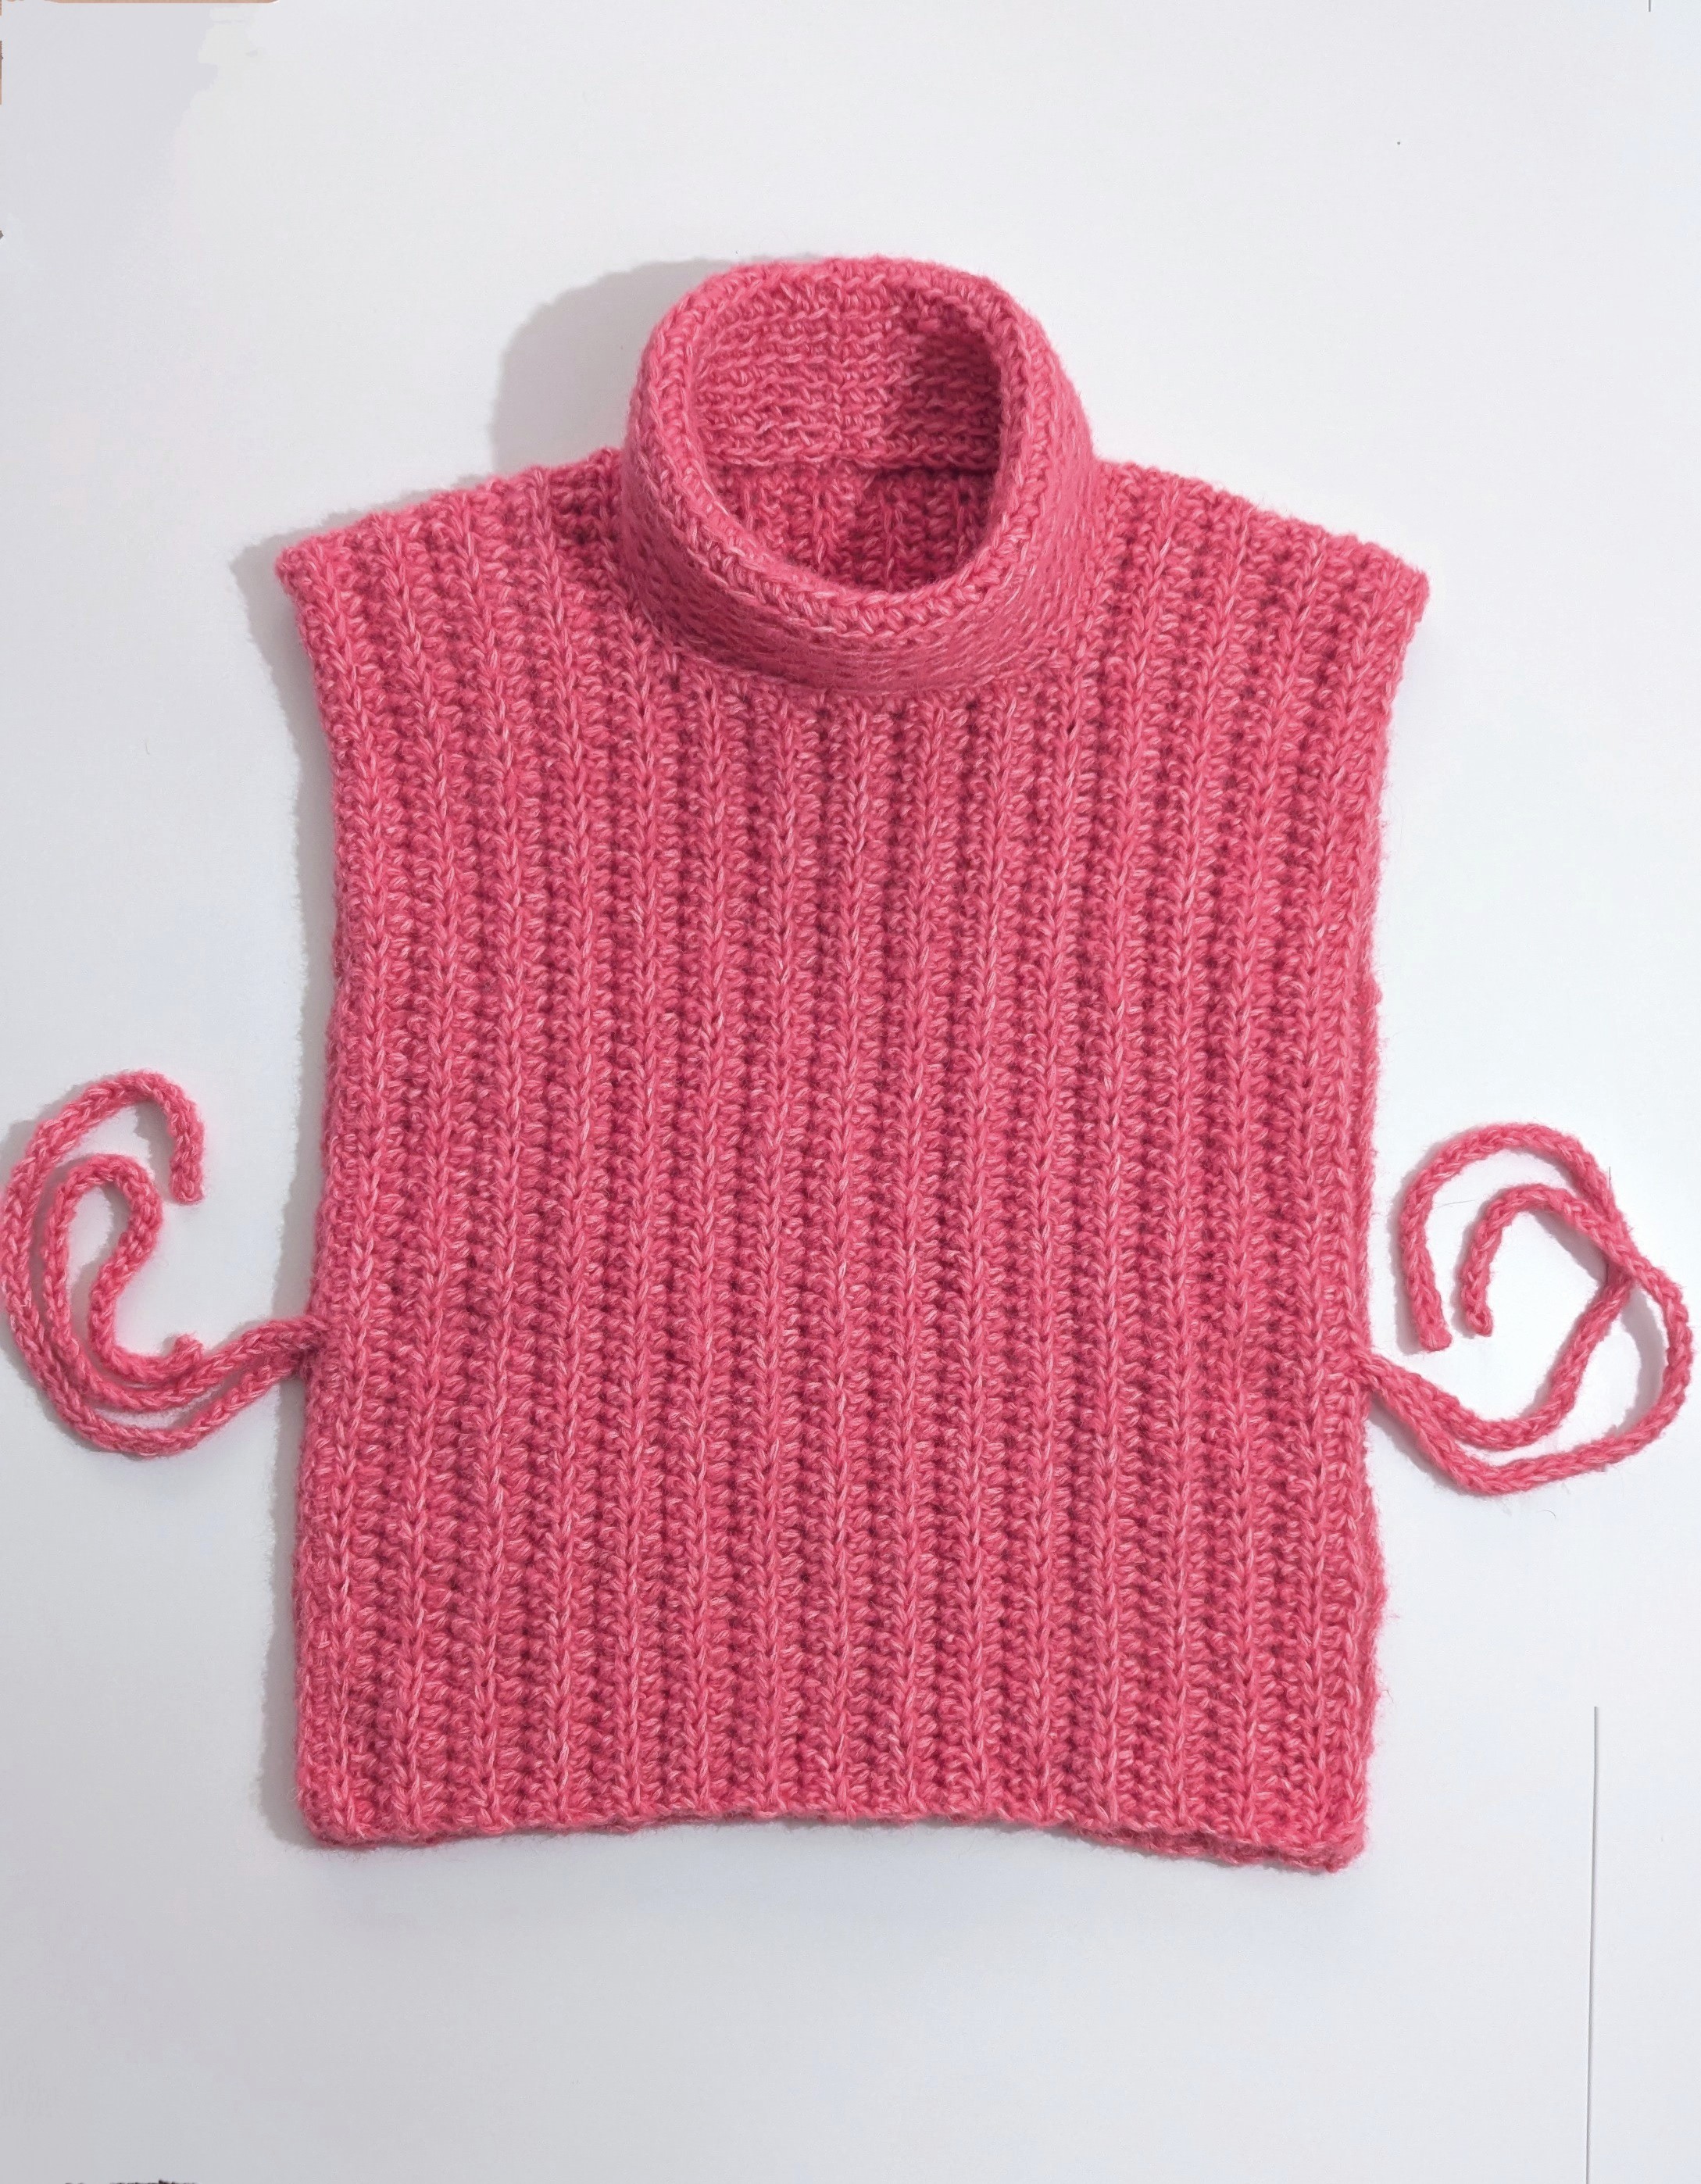
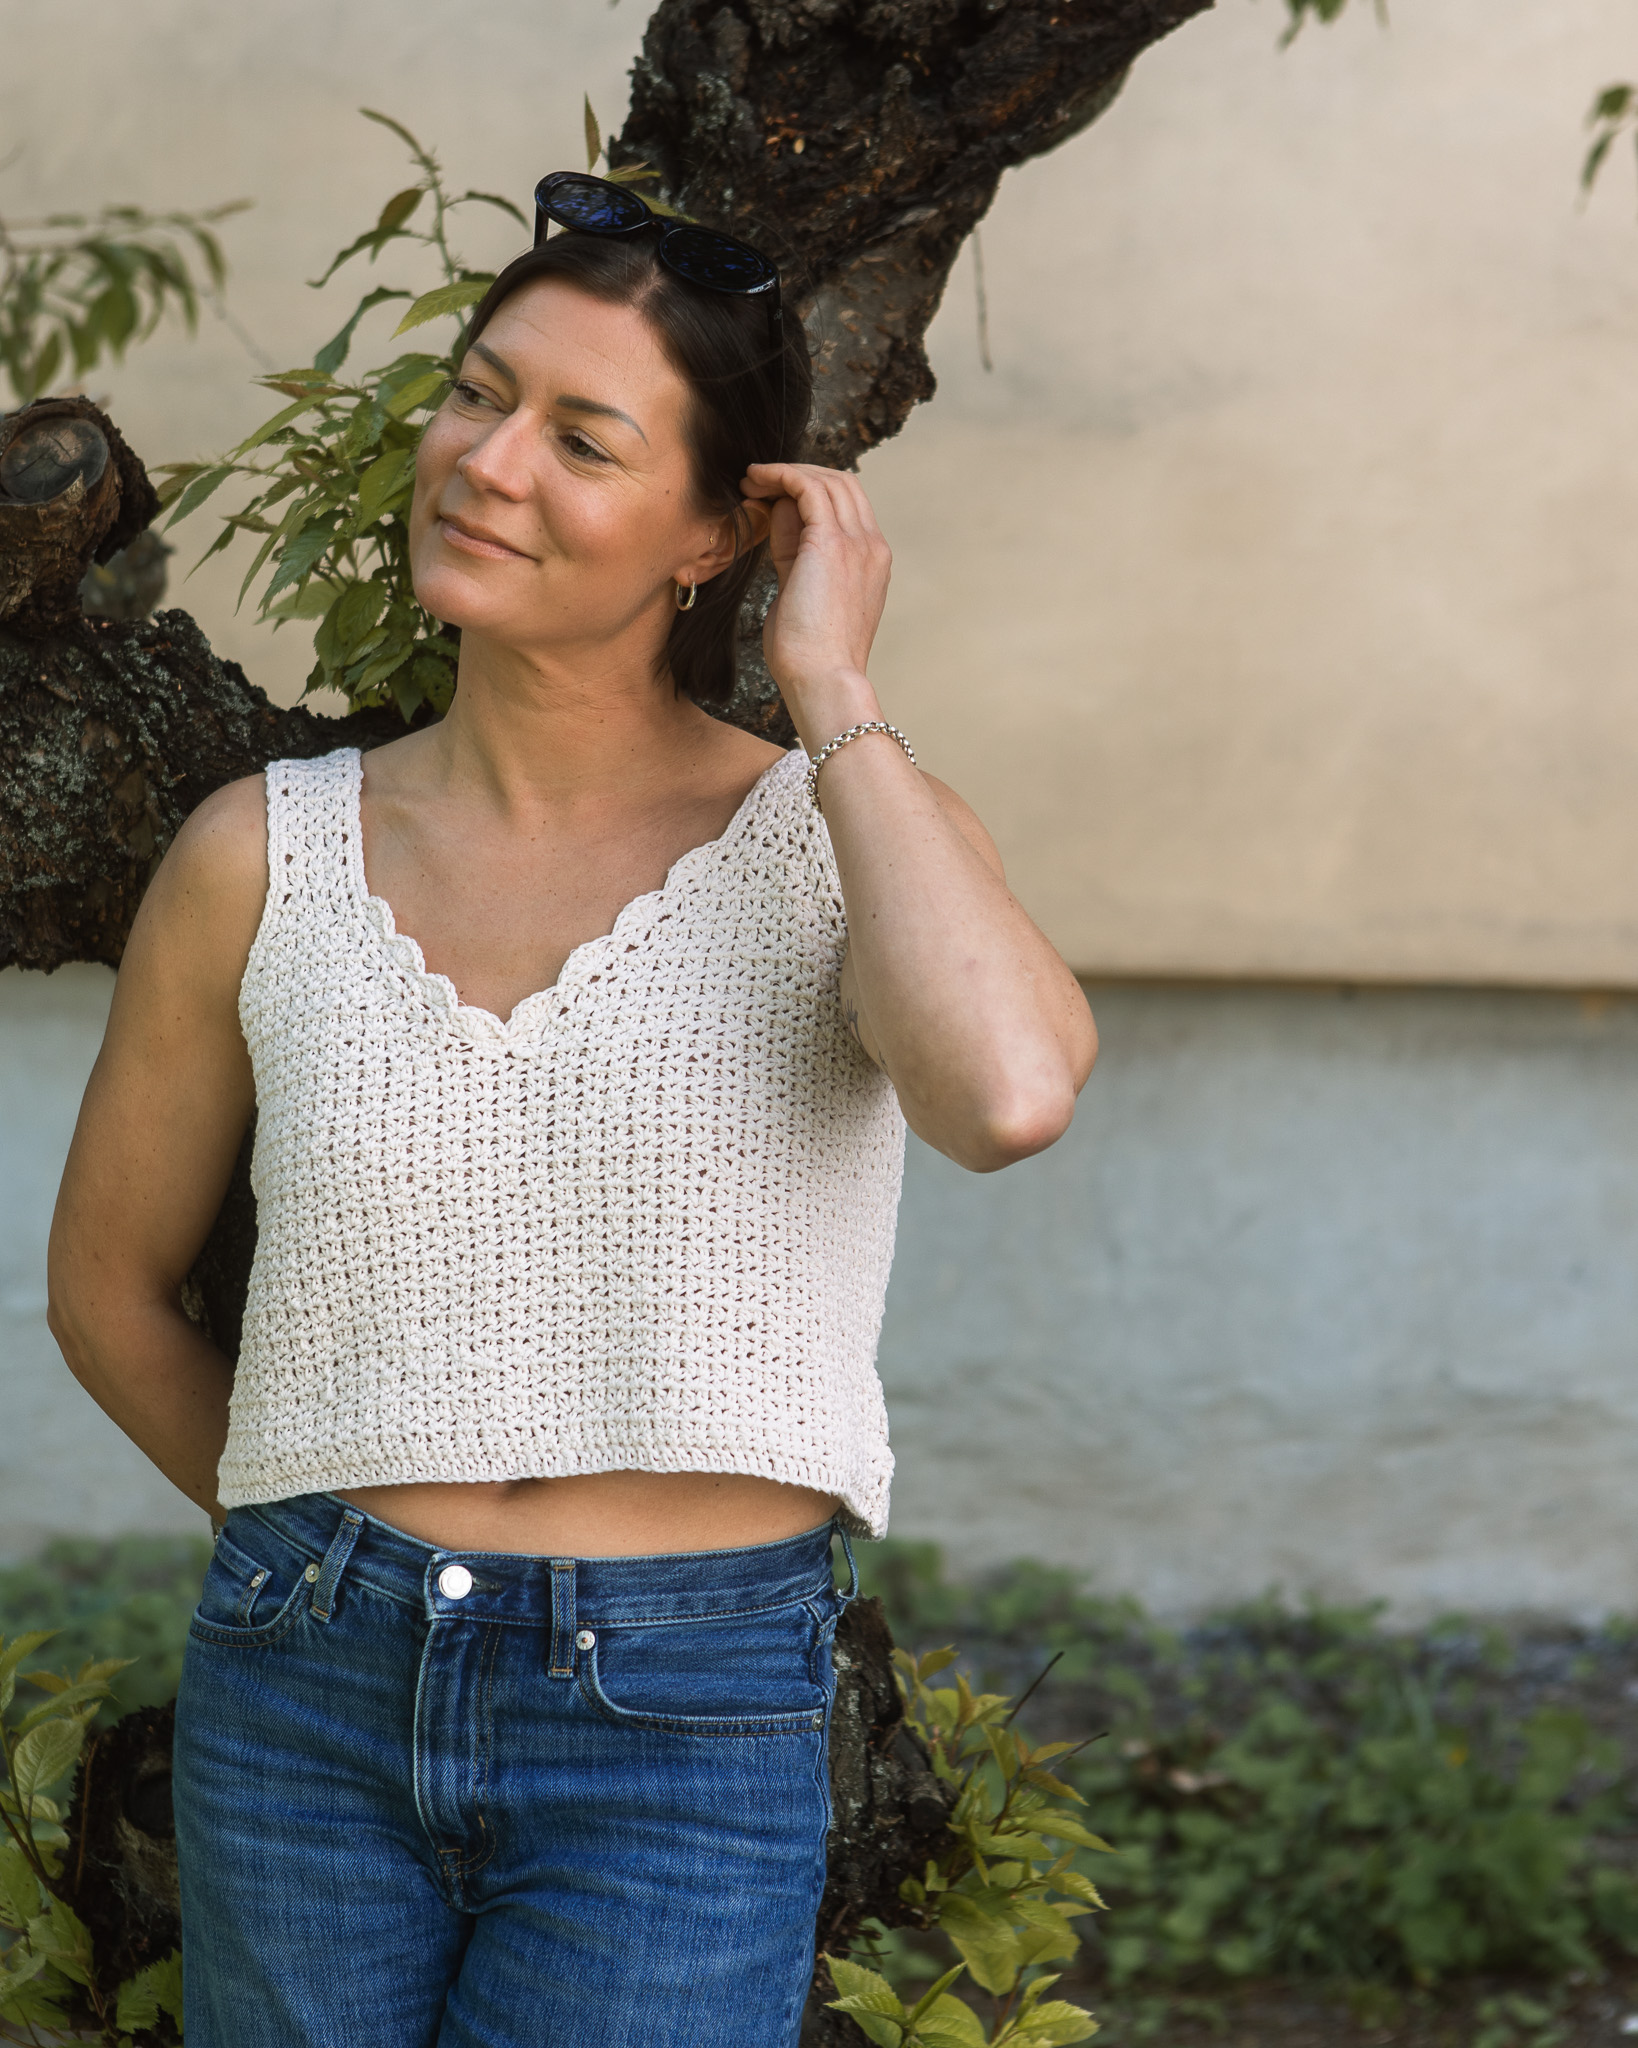
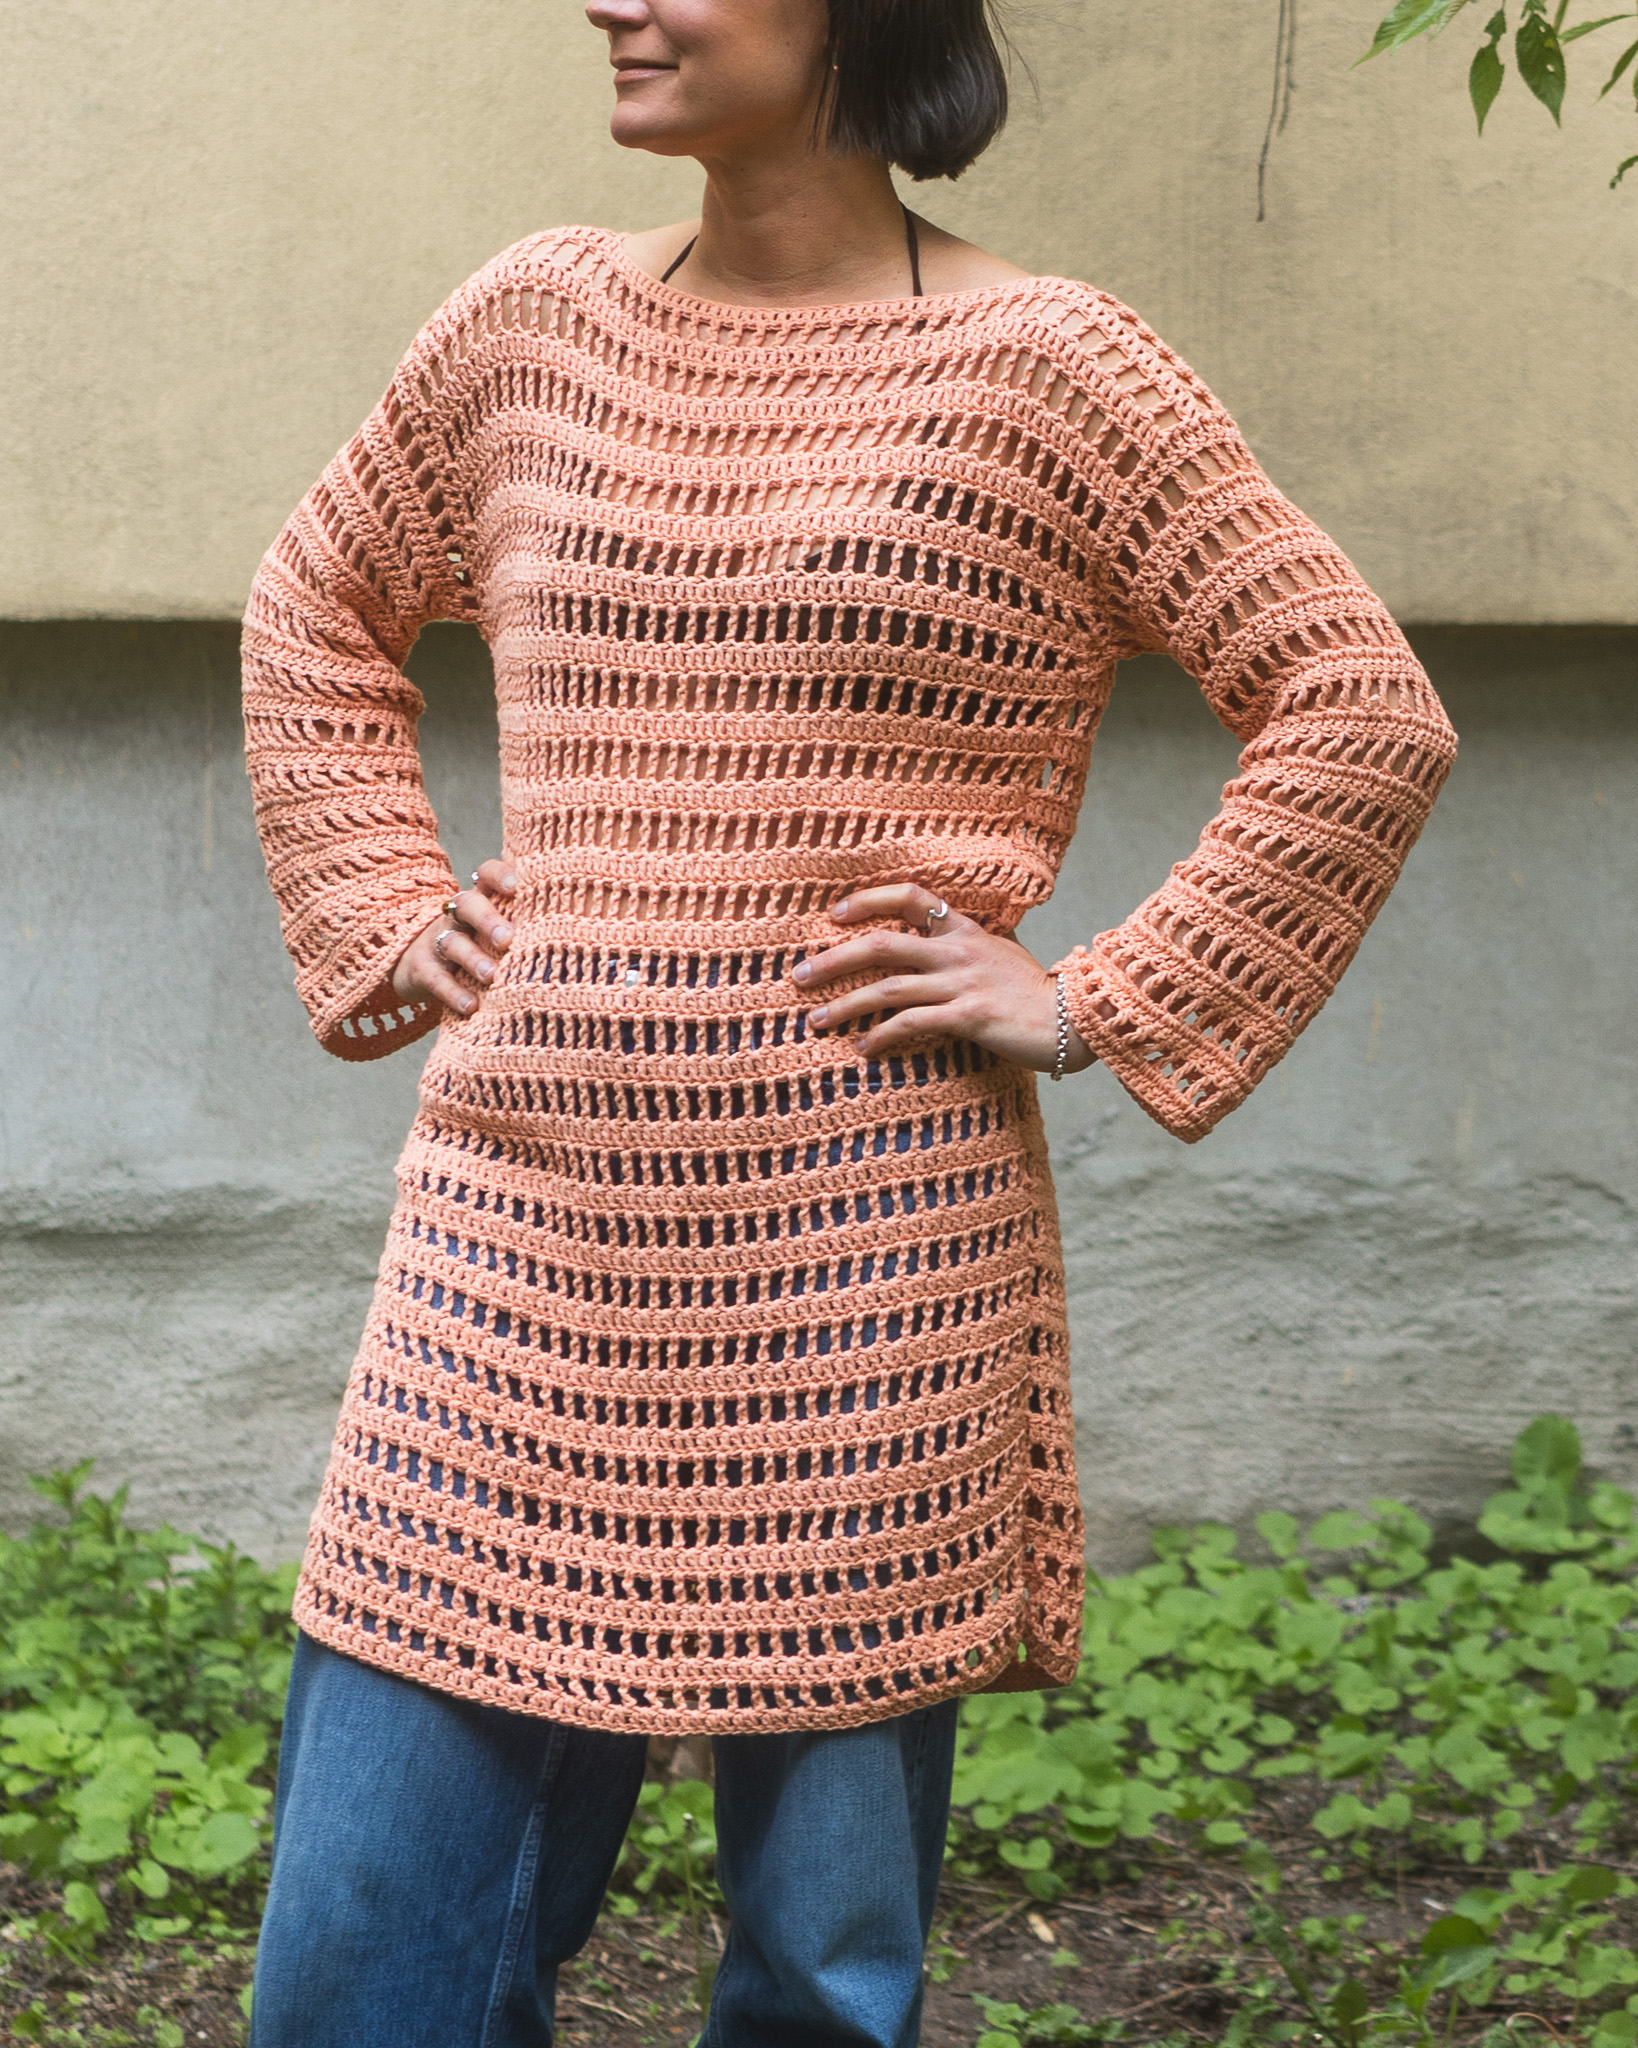
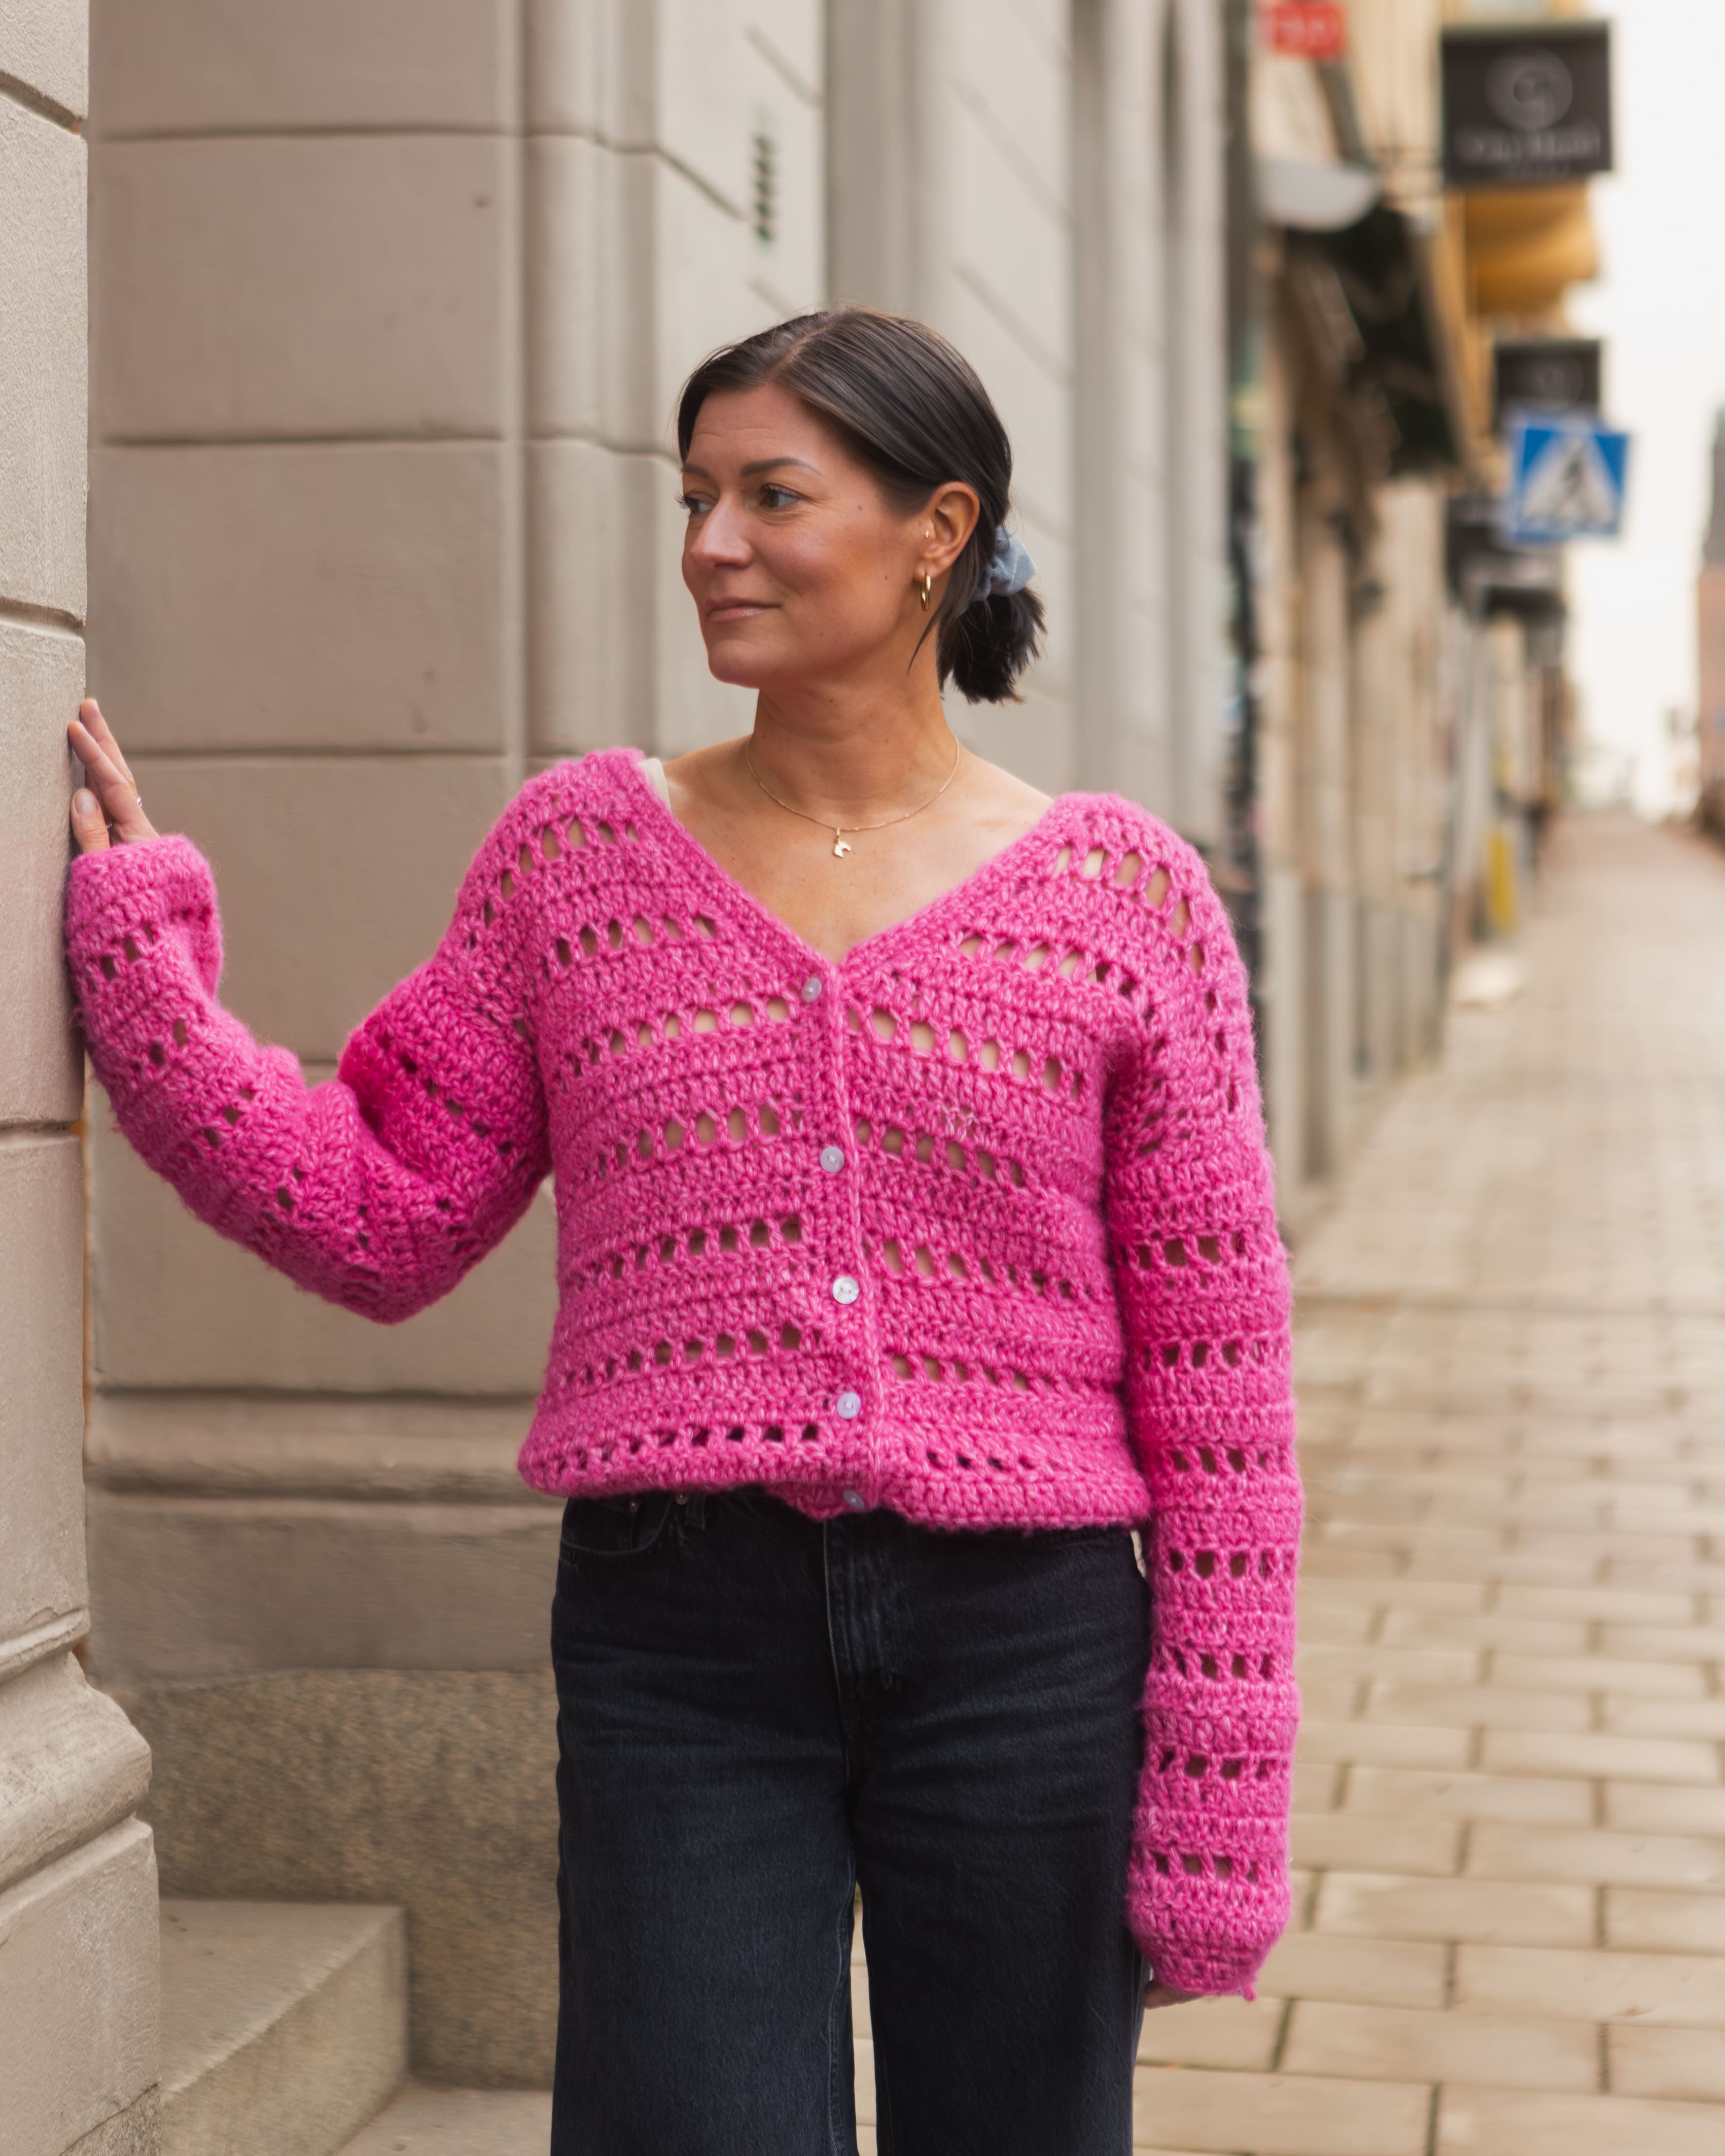
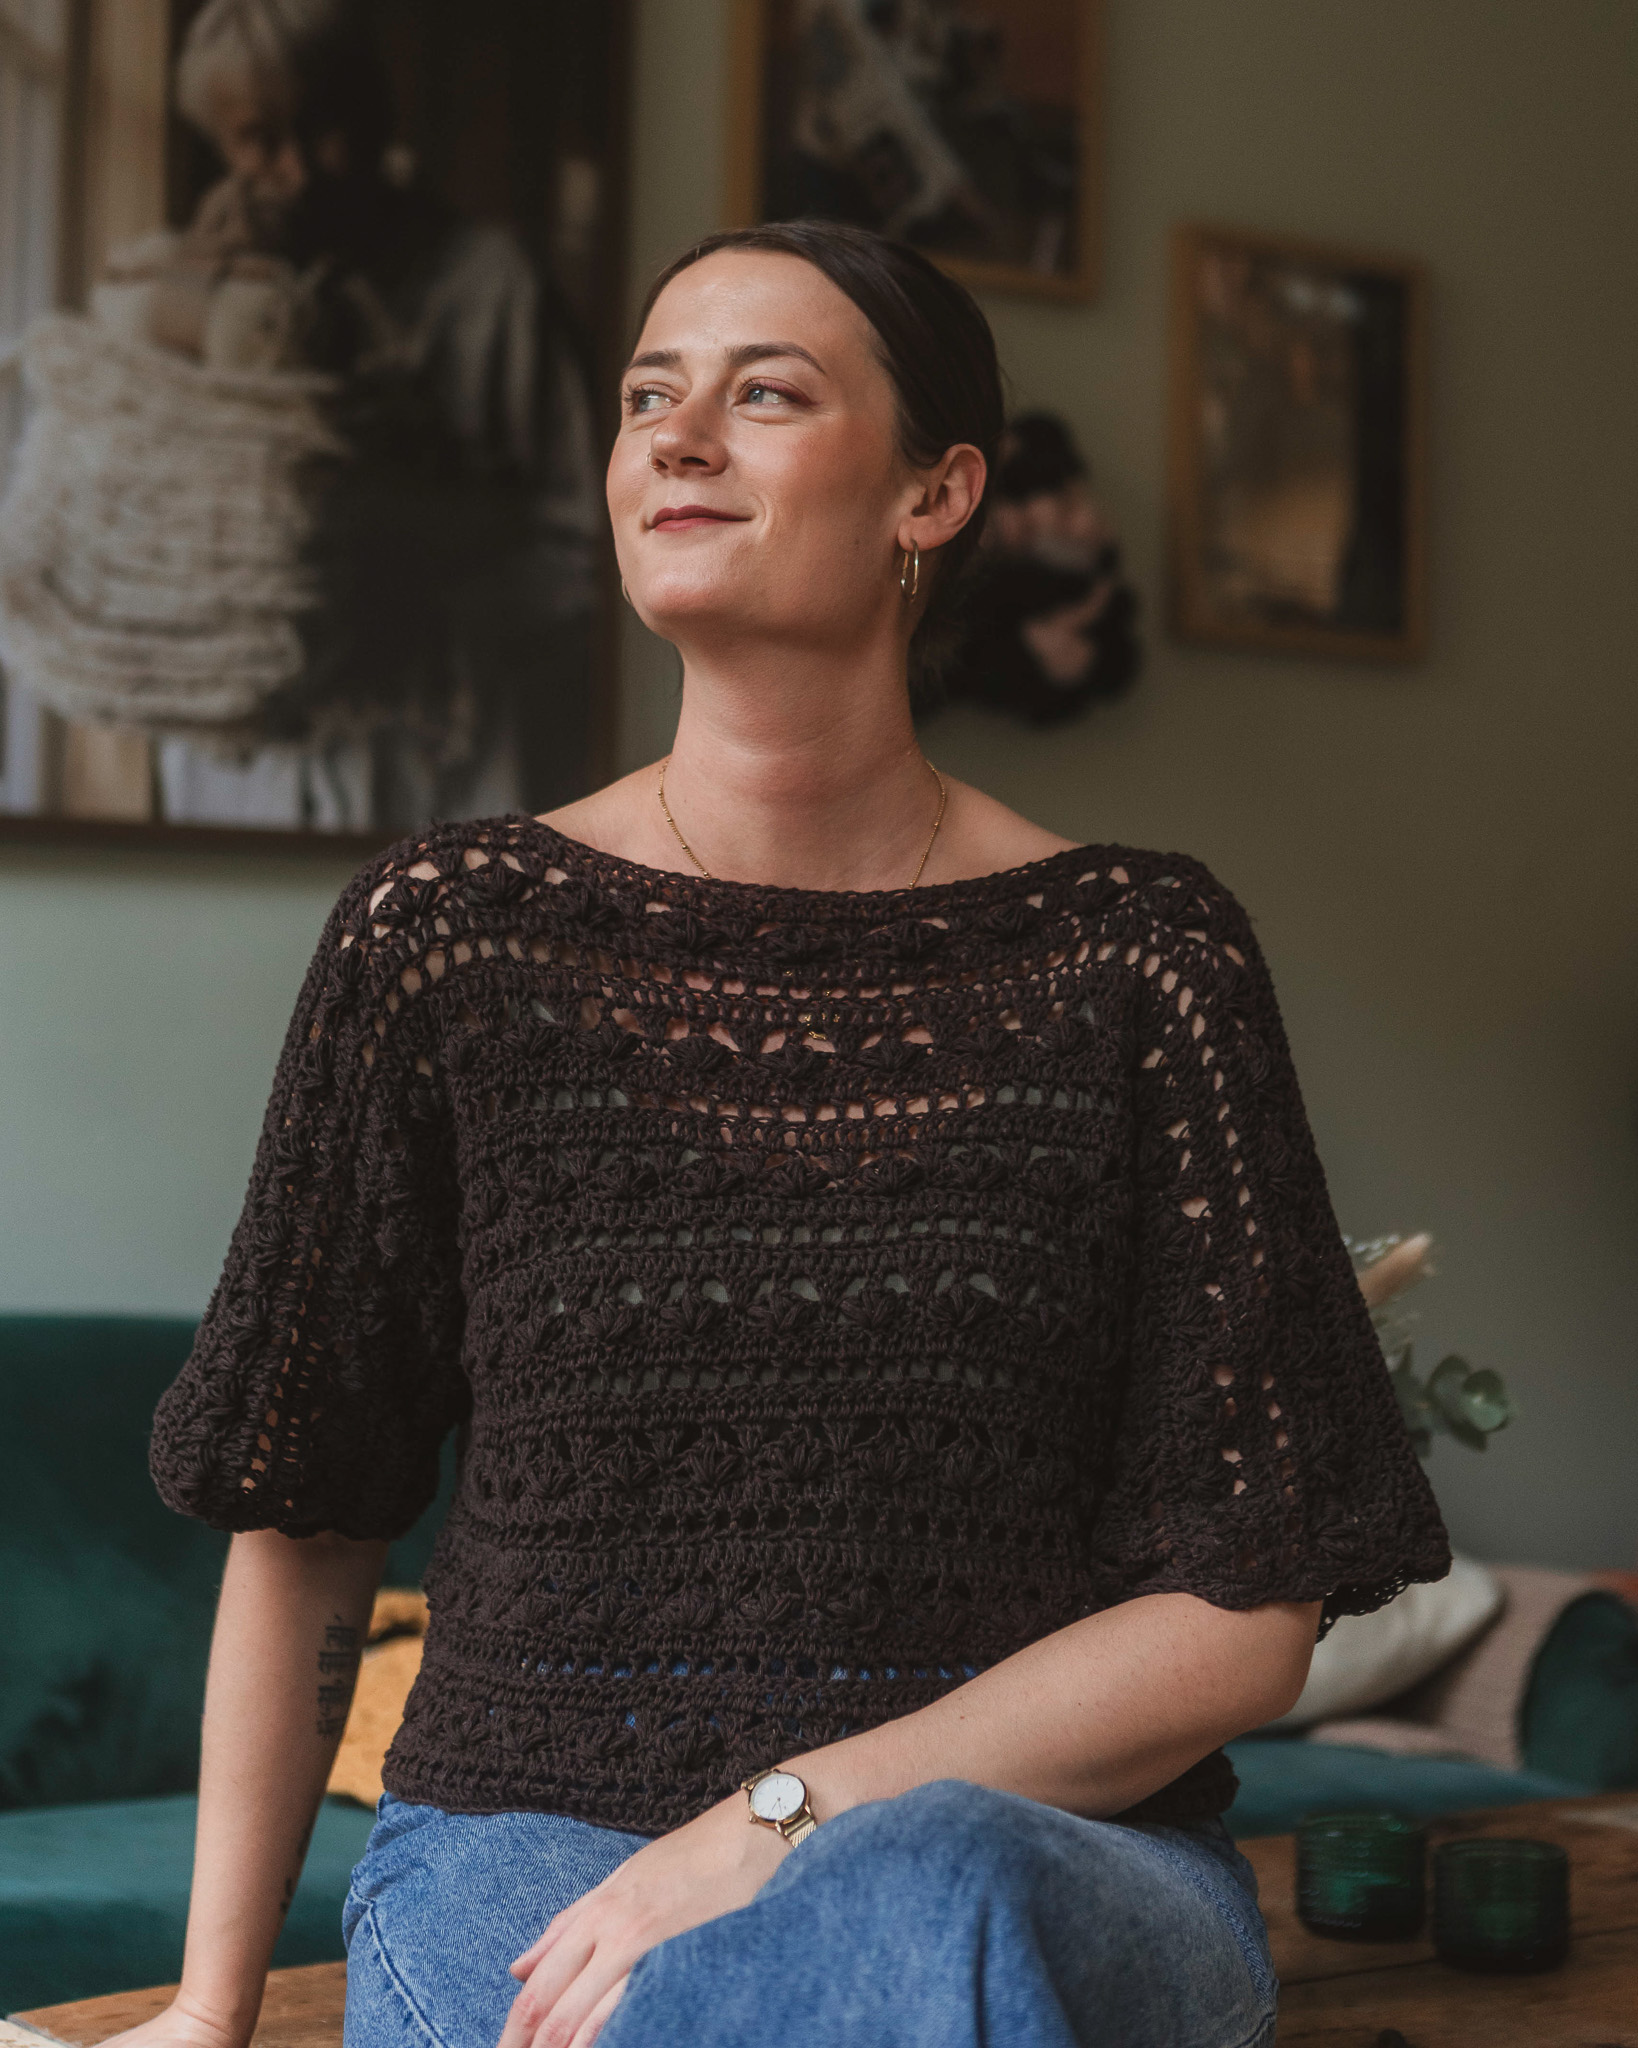
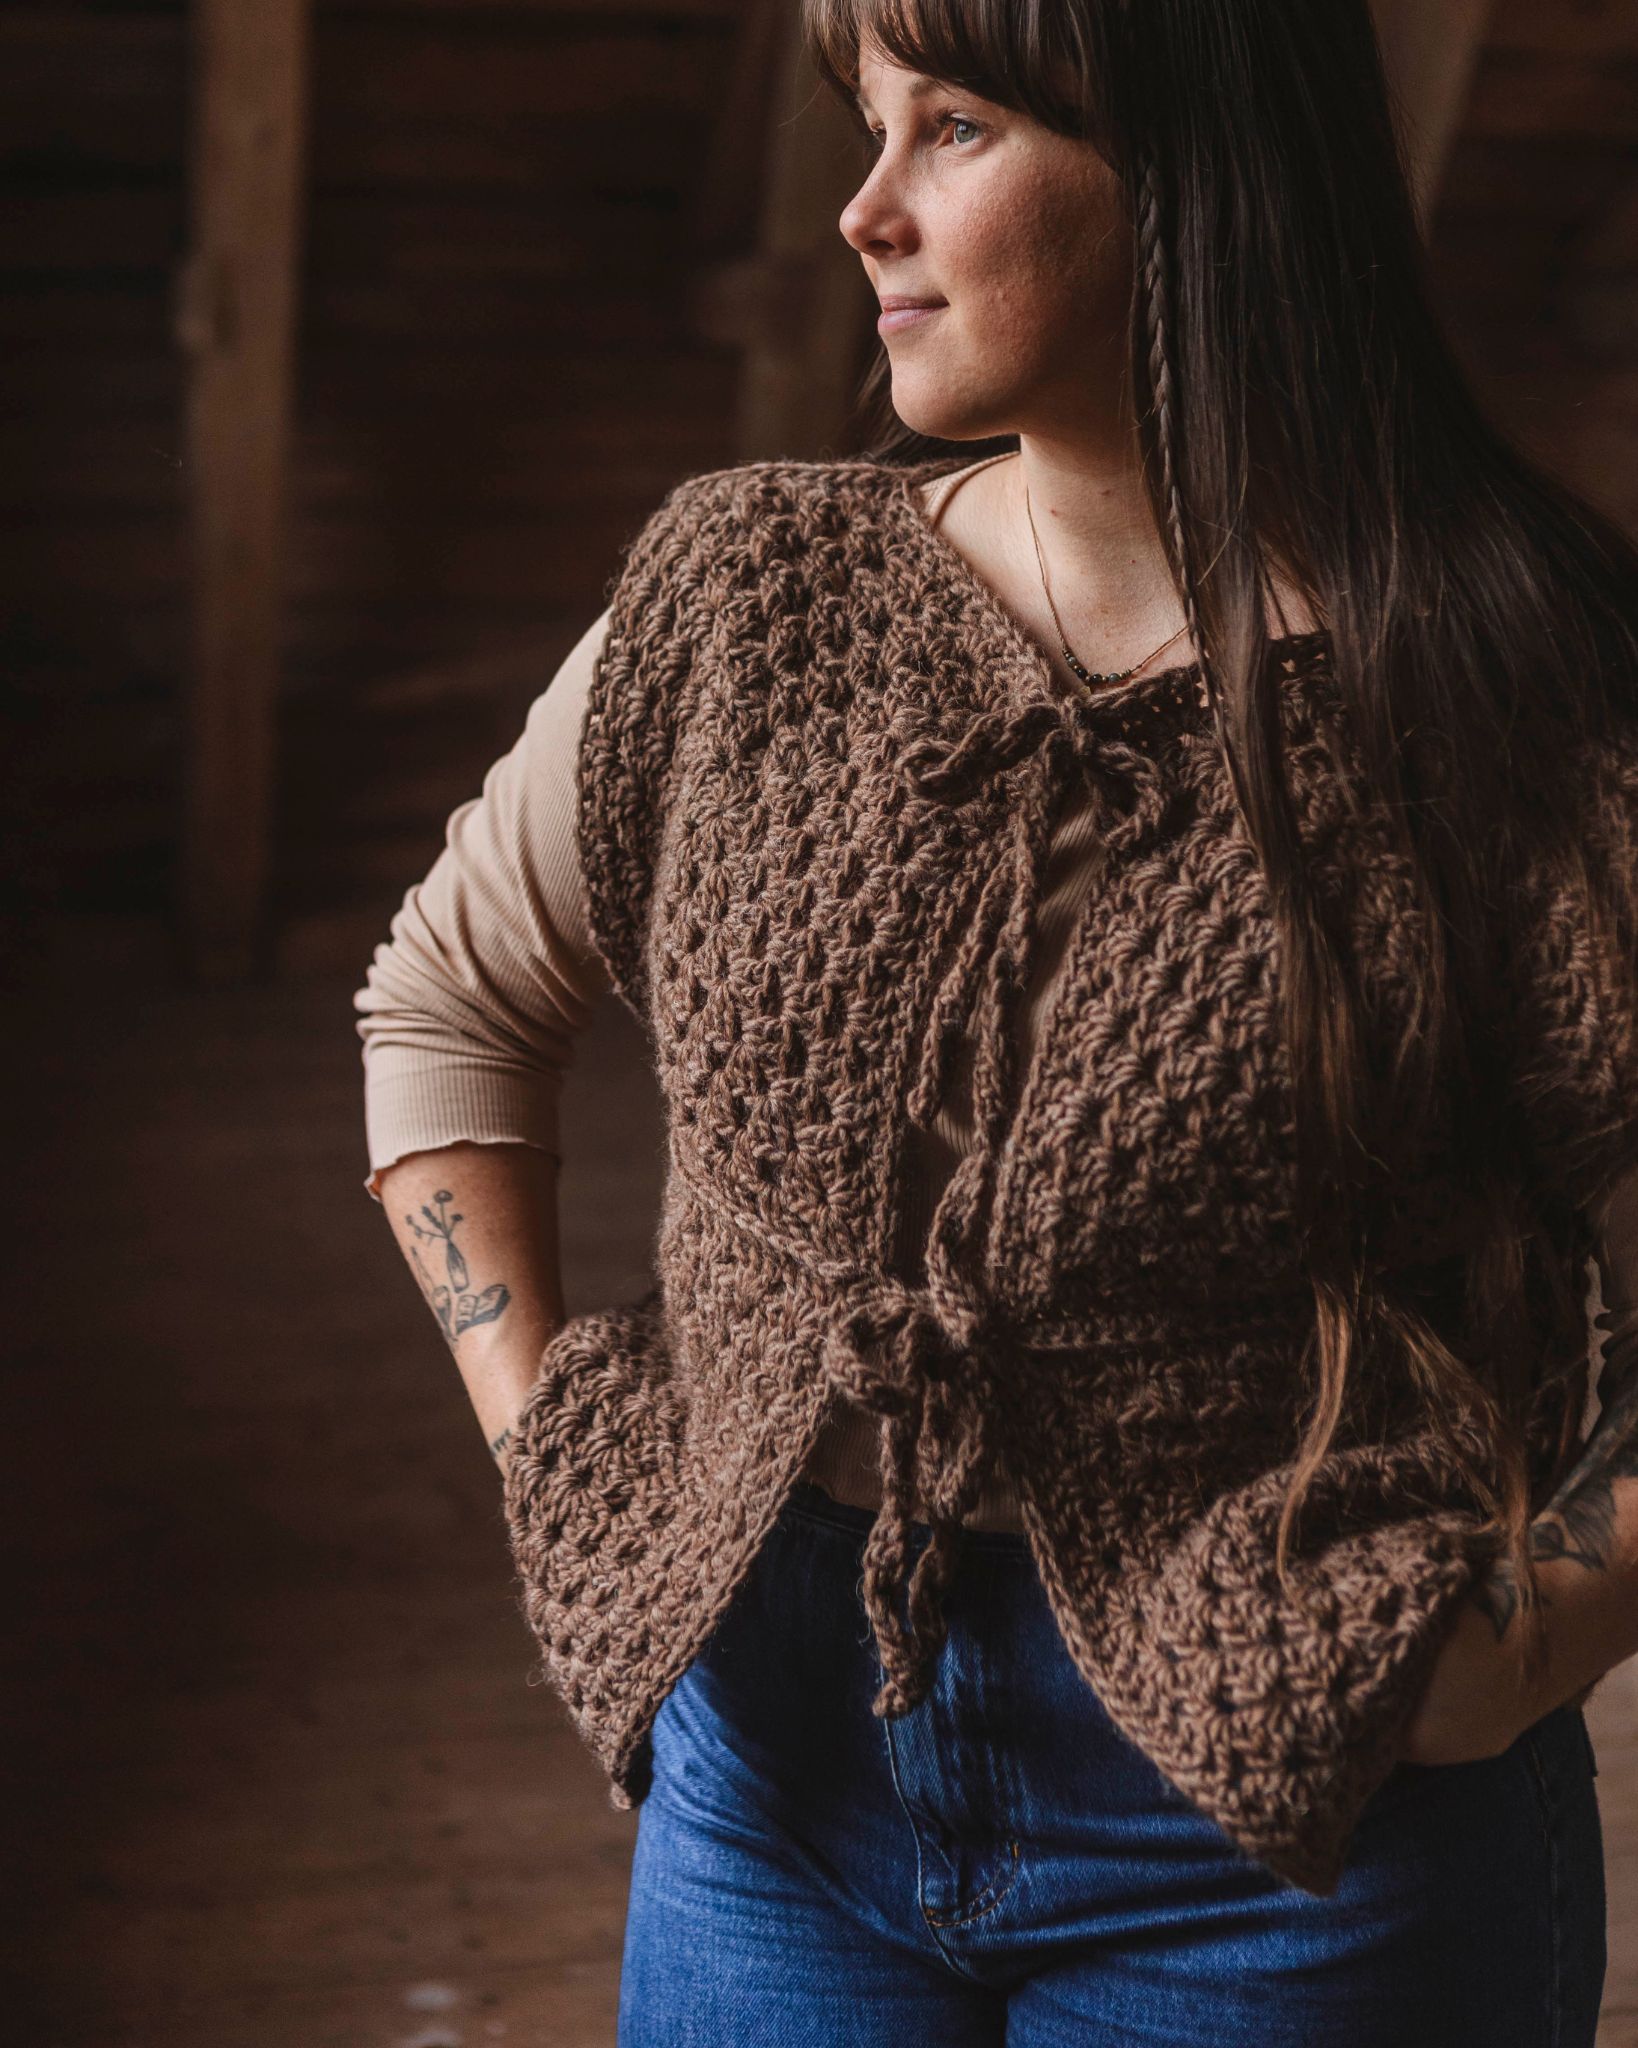
Want a vest that combines style and function in a chic way? Then this is the obvious choice. This trendy vest, available in many sizes, is easy to crochet with an 8 mm hook using the super soft MYO Dreamy Blend, which gives a fluffy and luxurious look. With its smartly shaped shoulders and neckline, Helen fits perfectly and can easily be adapted to your style. Do you want to make a statement with large bows on the sides, or do you prefer subtle ties? High turtleneck or crew neck – the choice is yours! Create your signature look and let Helen become your new wardrobe favorite. In addition to yarn and a crochet hook, you will need stitch markers, a blunt tapestry needle for assembly and weaving in ends, and scissors.
Yarn Consunption: 200 g for XS, 250 g for S/M, 350 g for L/XL, and 450 g for 2XL/3XL. The amount of yarn depends on how tightly you crochet, how big/long the bows are, and how tall you make the collar.

Here's how to do it
This one is easy to crochet and suits everyone. The first step is to double-check your gauge. This may mean you’ll need to switch to a larger or smaller crochet hook.

This is what you need:
Here you can directly purchase the material for the product. Please note that the instruction is digital and appears here on the page (no written instruction).

MYO Dreamy blend | 50g
A soft blend yarn that consists of 40% cotton, 35% superfine alpaca, and 25% wool.
Buy product
.jpg)
Unleash your creativity
For only 85kr per month you get access to all our 300+ beginner-friendly instructions for crochet, knitting and macrame.
A perfect way to get started with your new hobby!

Before you start crocheting, it’s important to read the following.
Info
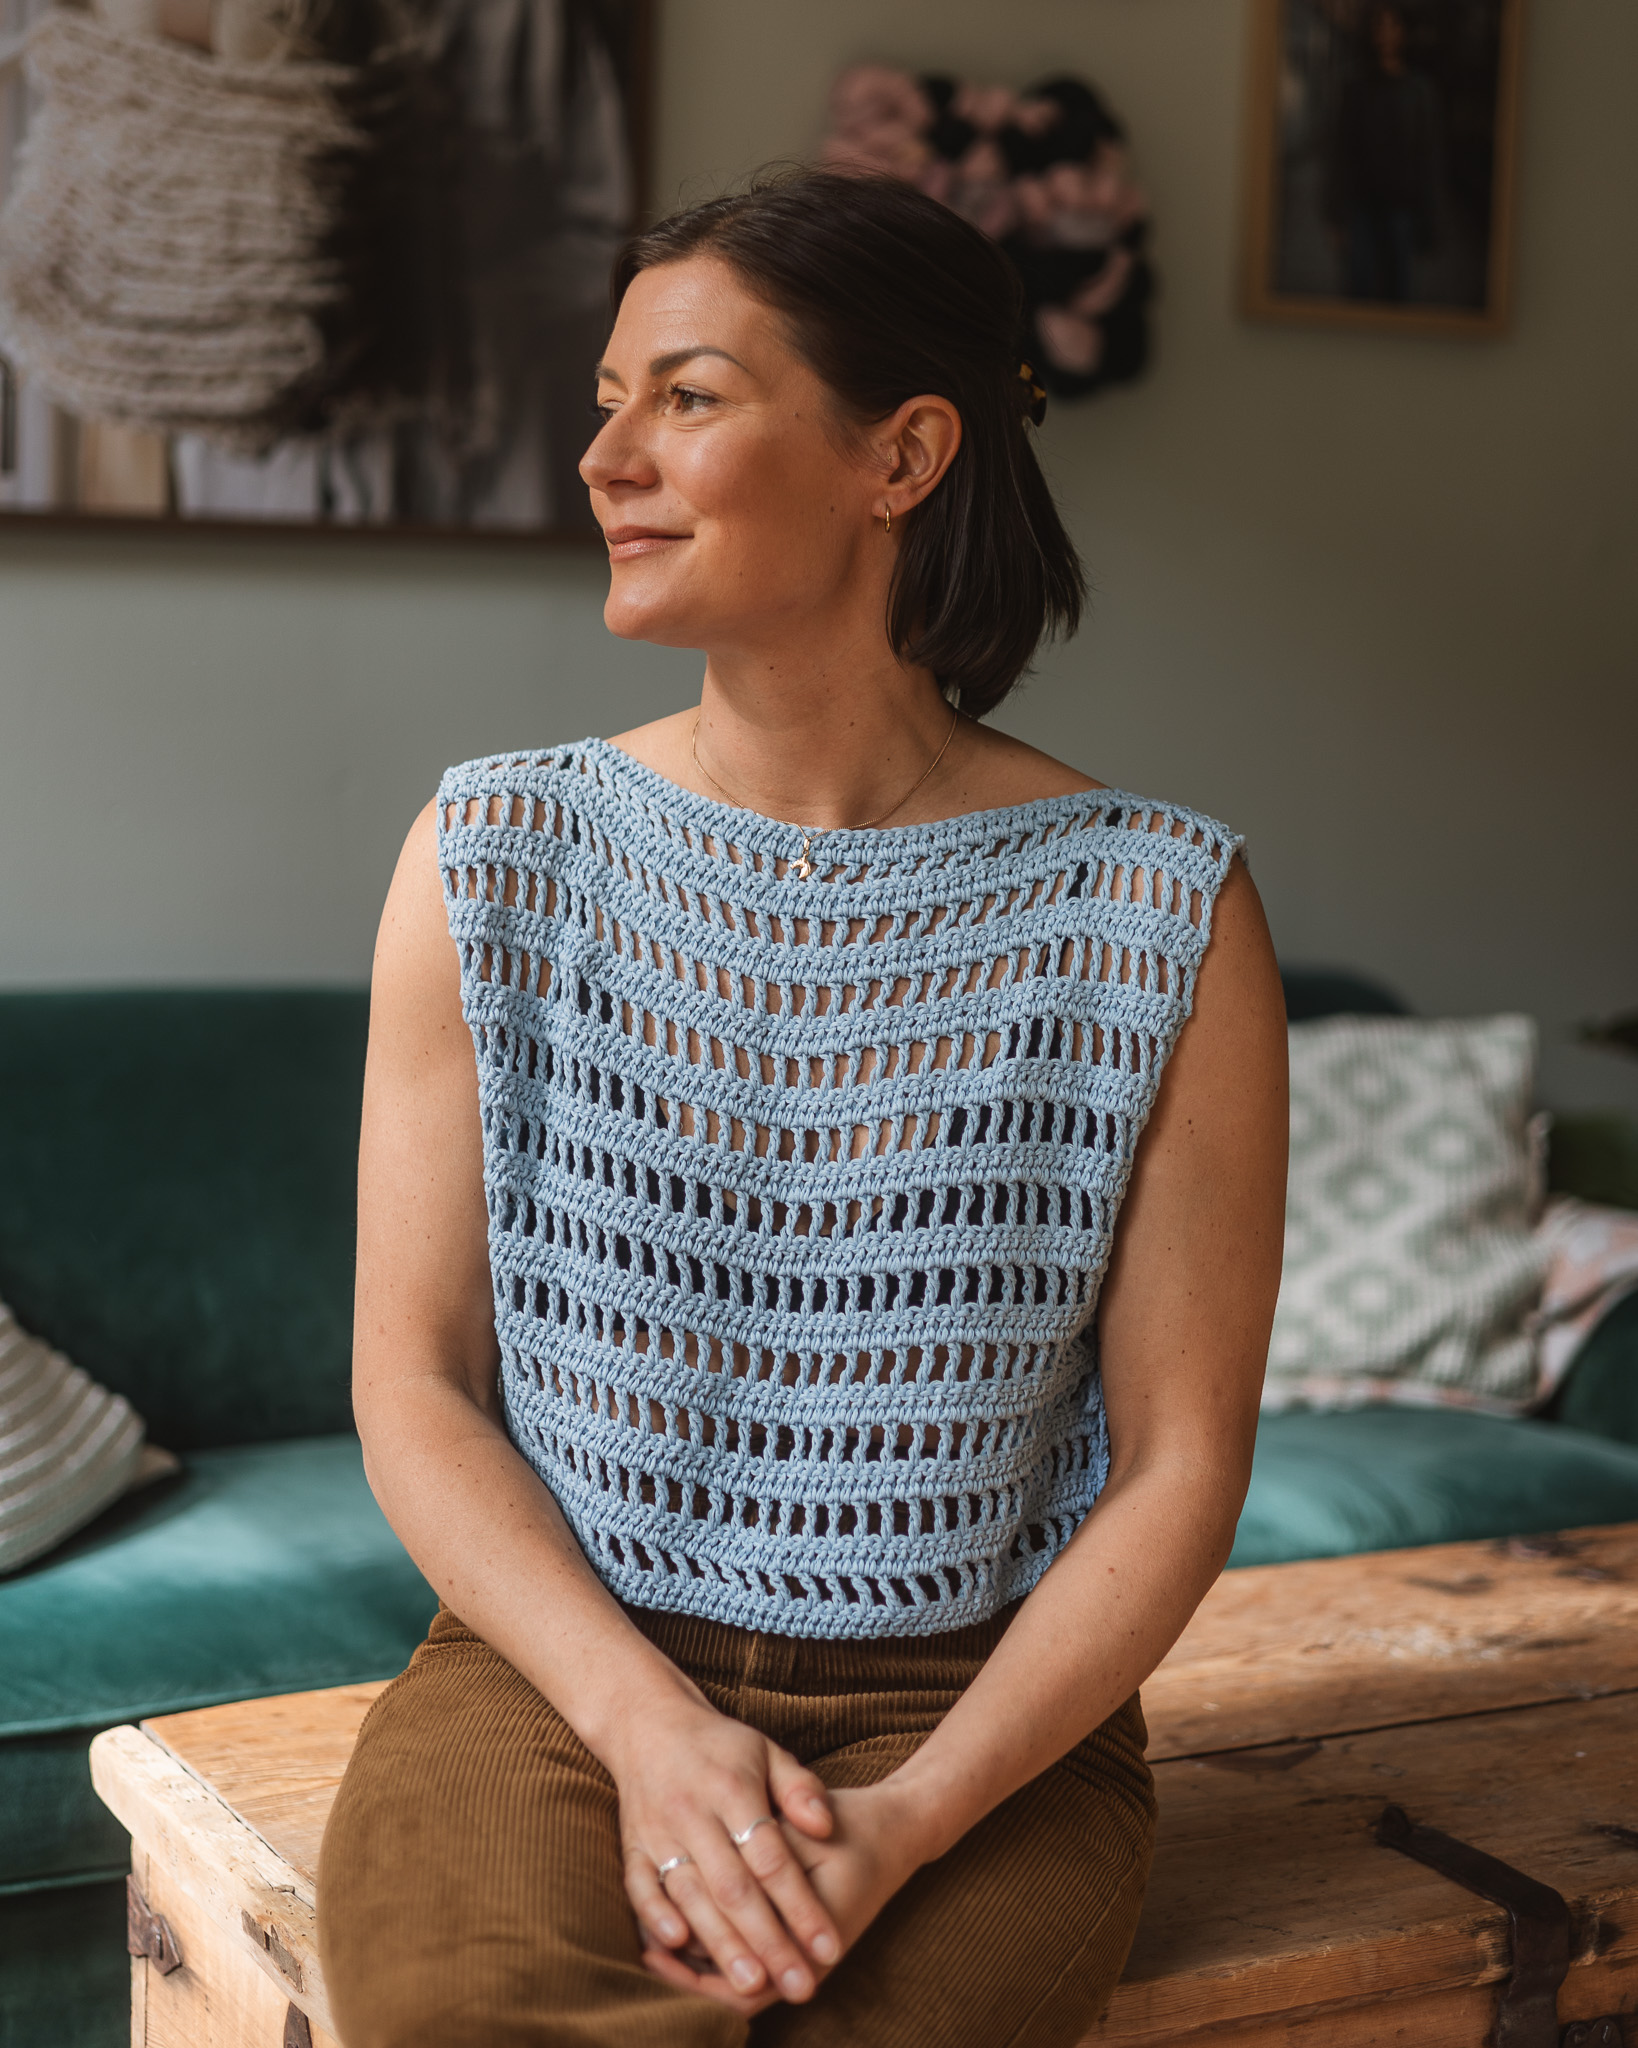
Sizes: XS (S-M, L-XL, 2-3X) fits a bust circumference of approx. 70–80 (85–100, 105–120, 130–145) cm. (The vest shown in the photos is size S-M.)
Vest width: approx. 37 (43, 49, 54) cm
Vest length: approx. 50 (55, 59, 59) cm
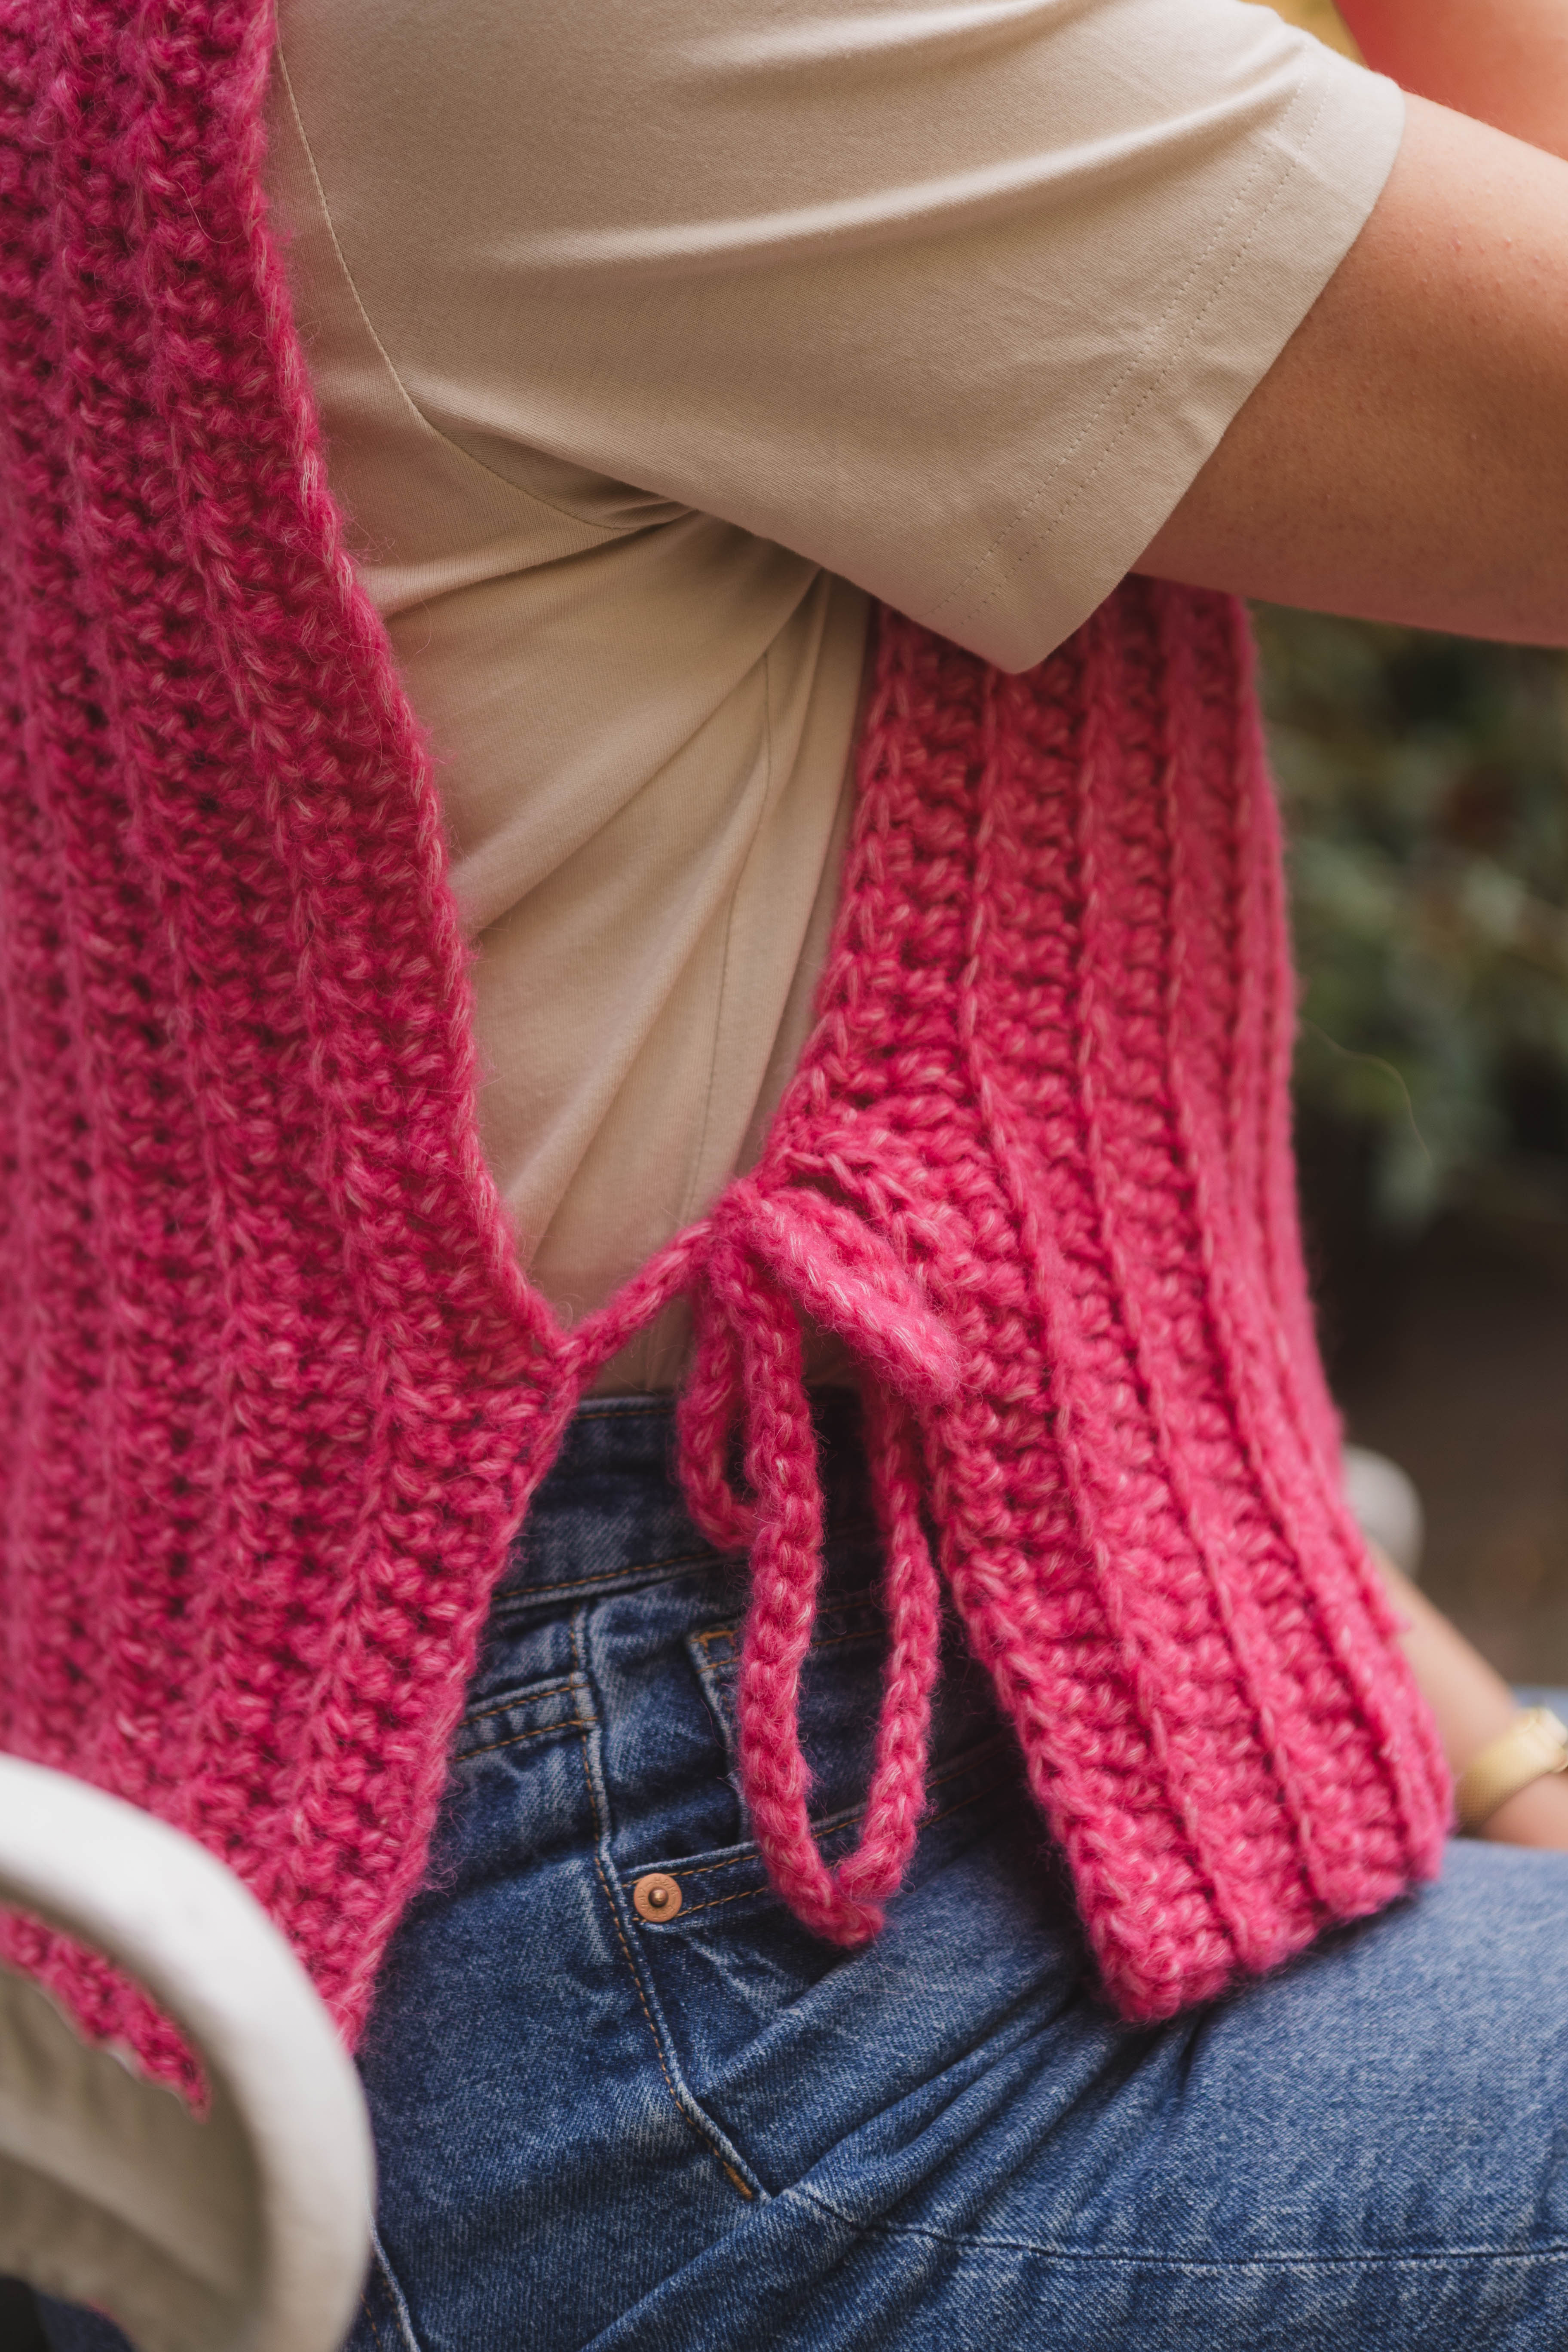
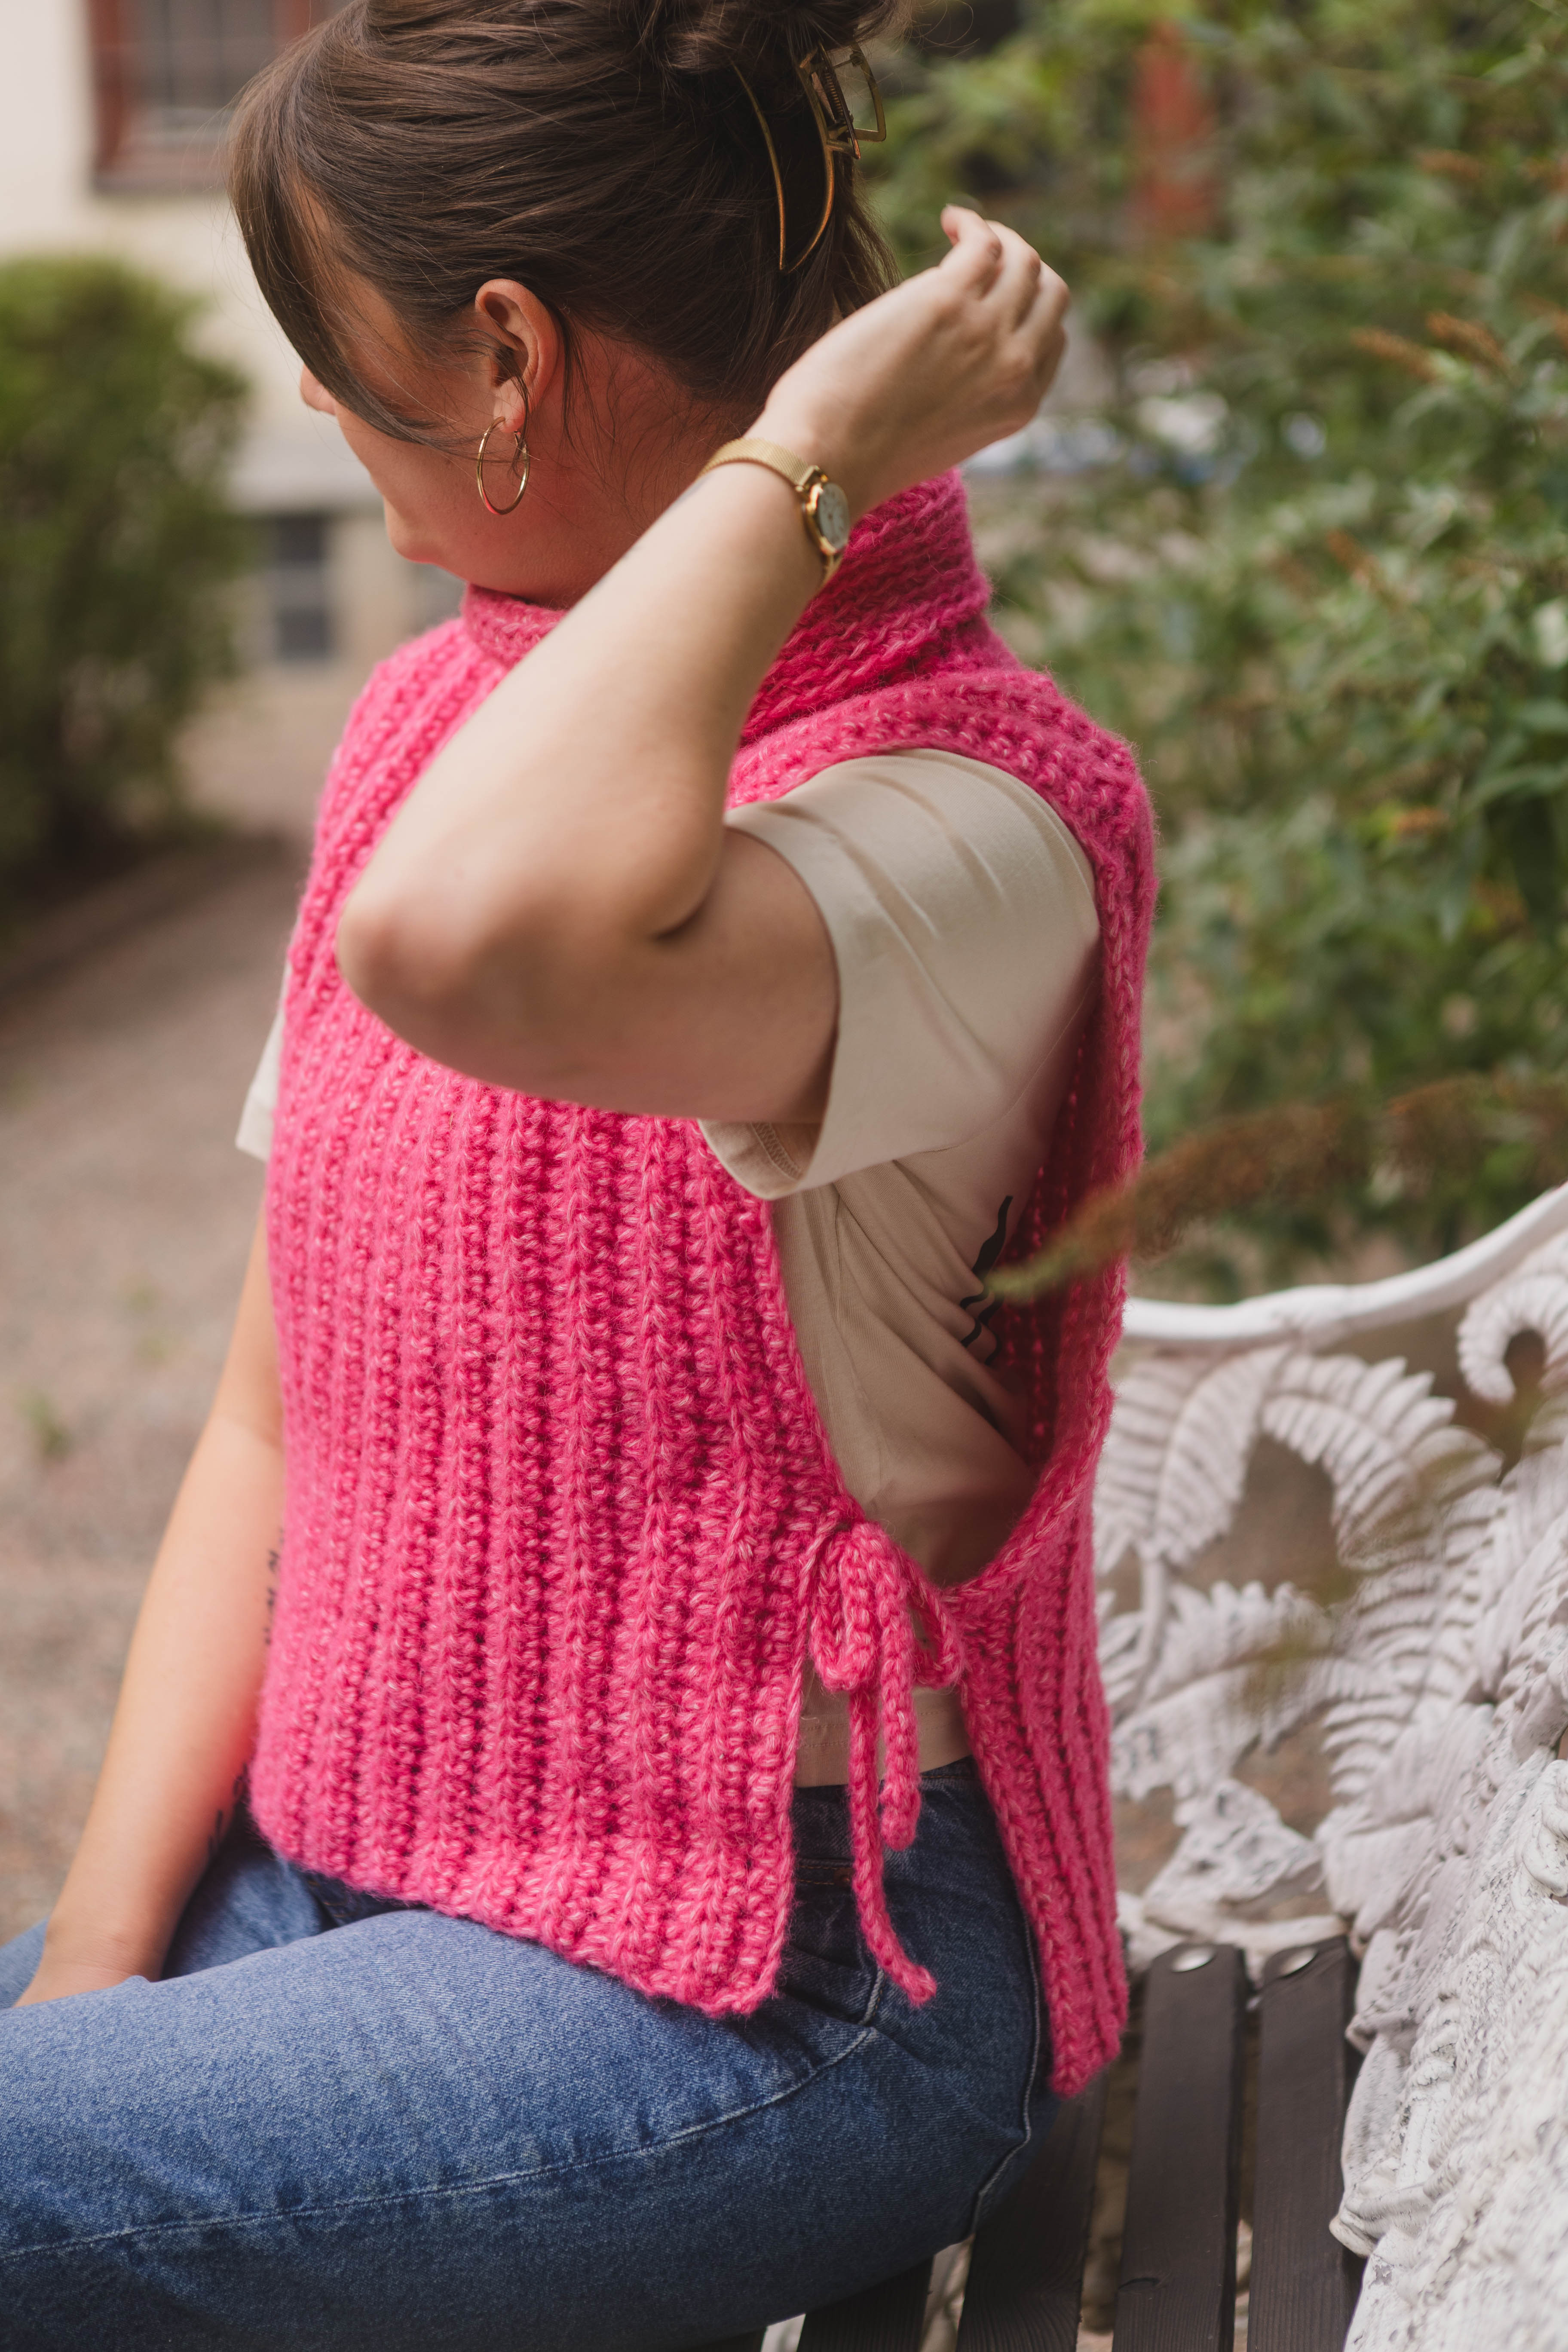
The Helen vest is crocheted in half double crochet stitches in the back loop only, in rows that run up and down the garment. The front and back pieces are crocheted separately and sewn together at the shoulders. Choose between narrow or wide ties, or more discreet straps that connect the front and back pieces at the sides. The collar is worked last, in single crochet stitches around the neckline.
Start by choosing the size you want to make. Then read through the entire pattern and highlight the numbers that correspond to your size. Next, crochet a swatch to check your gauge.
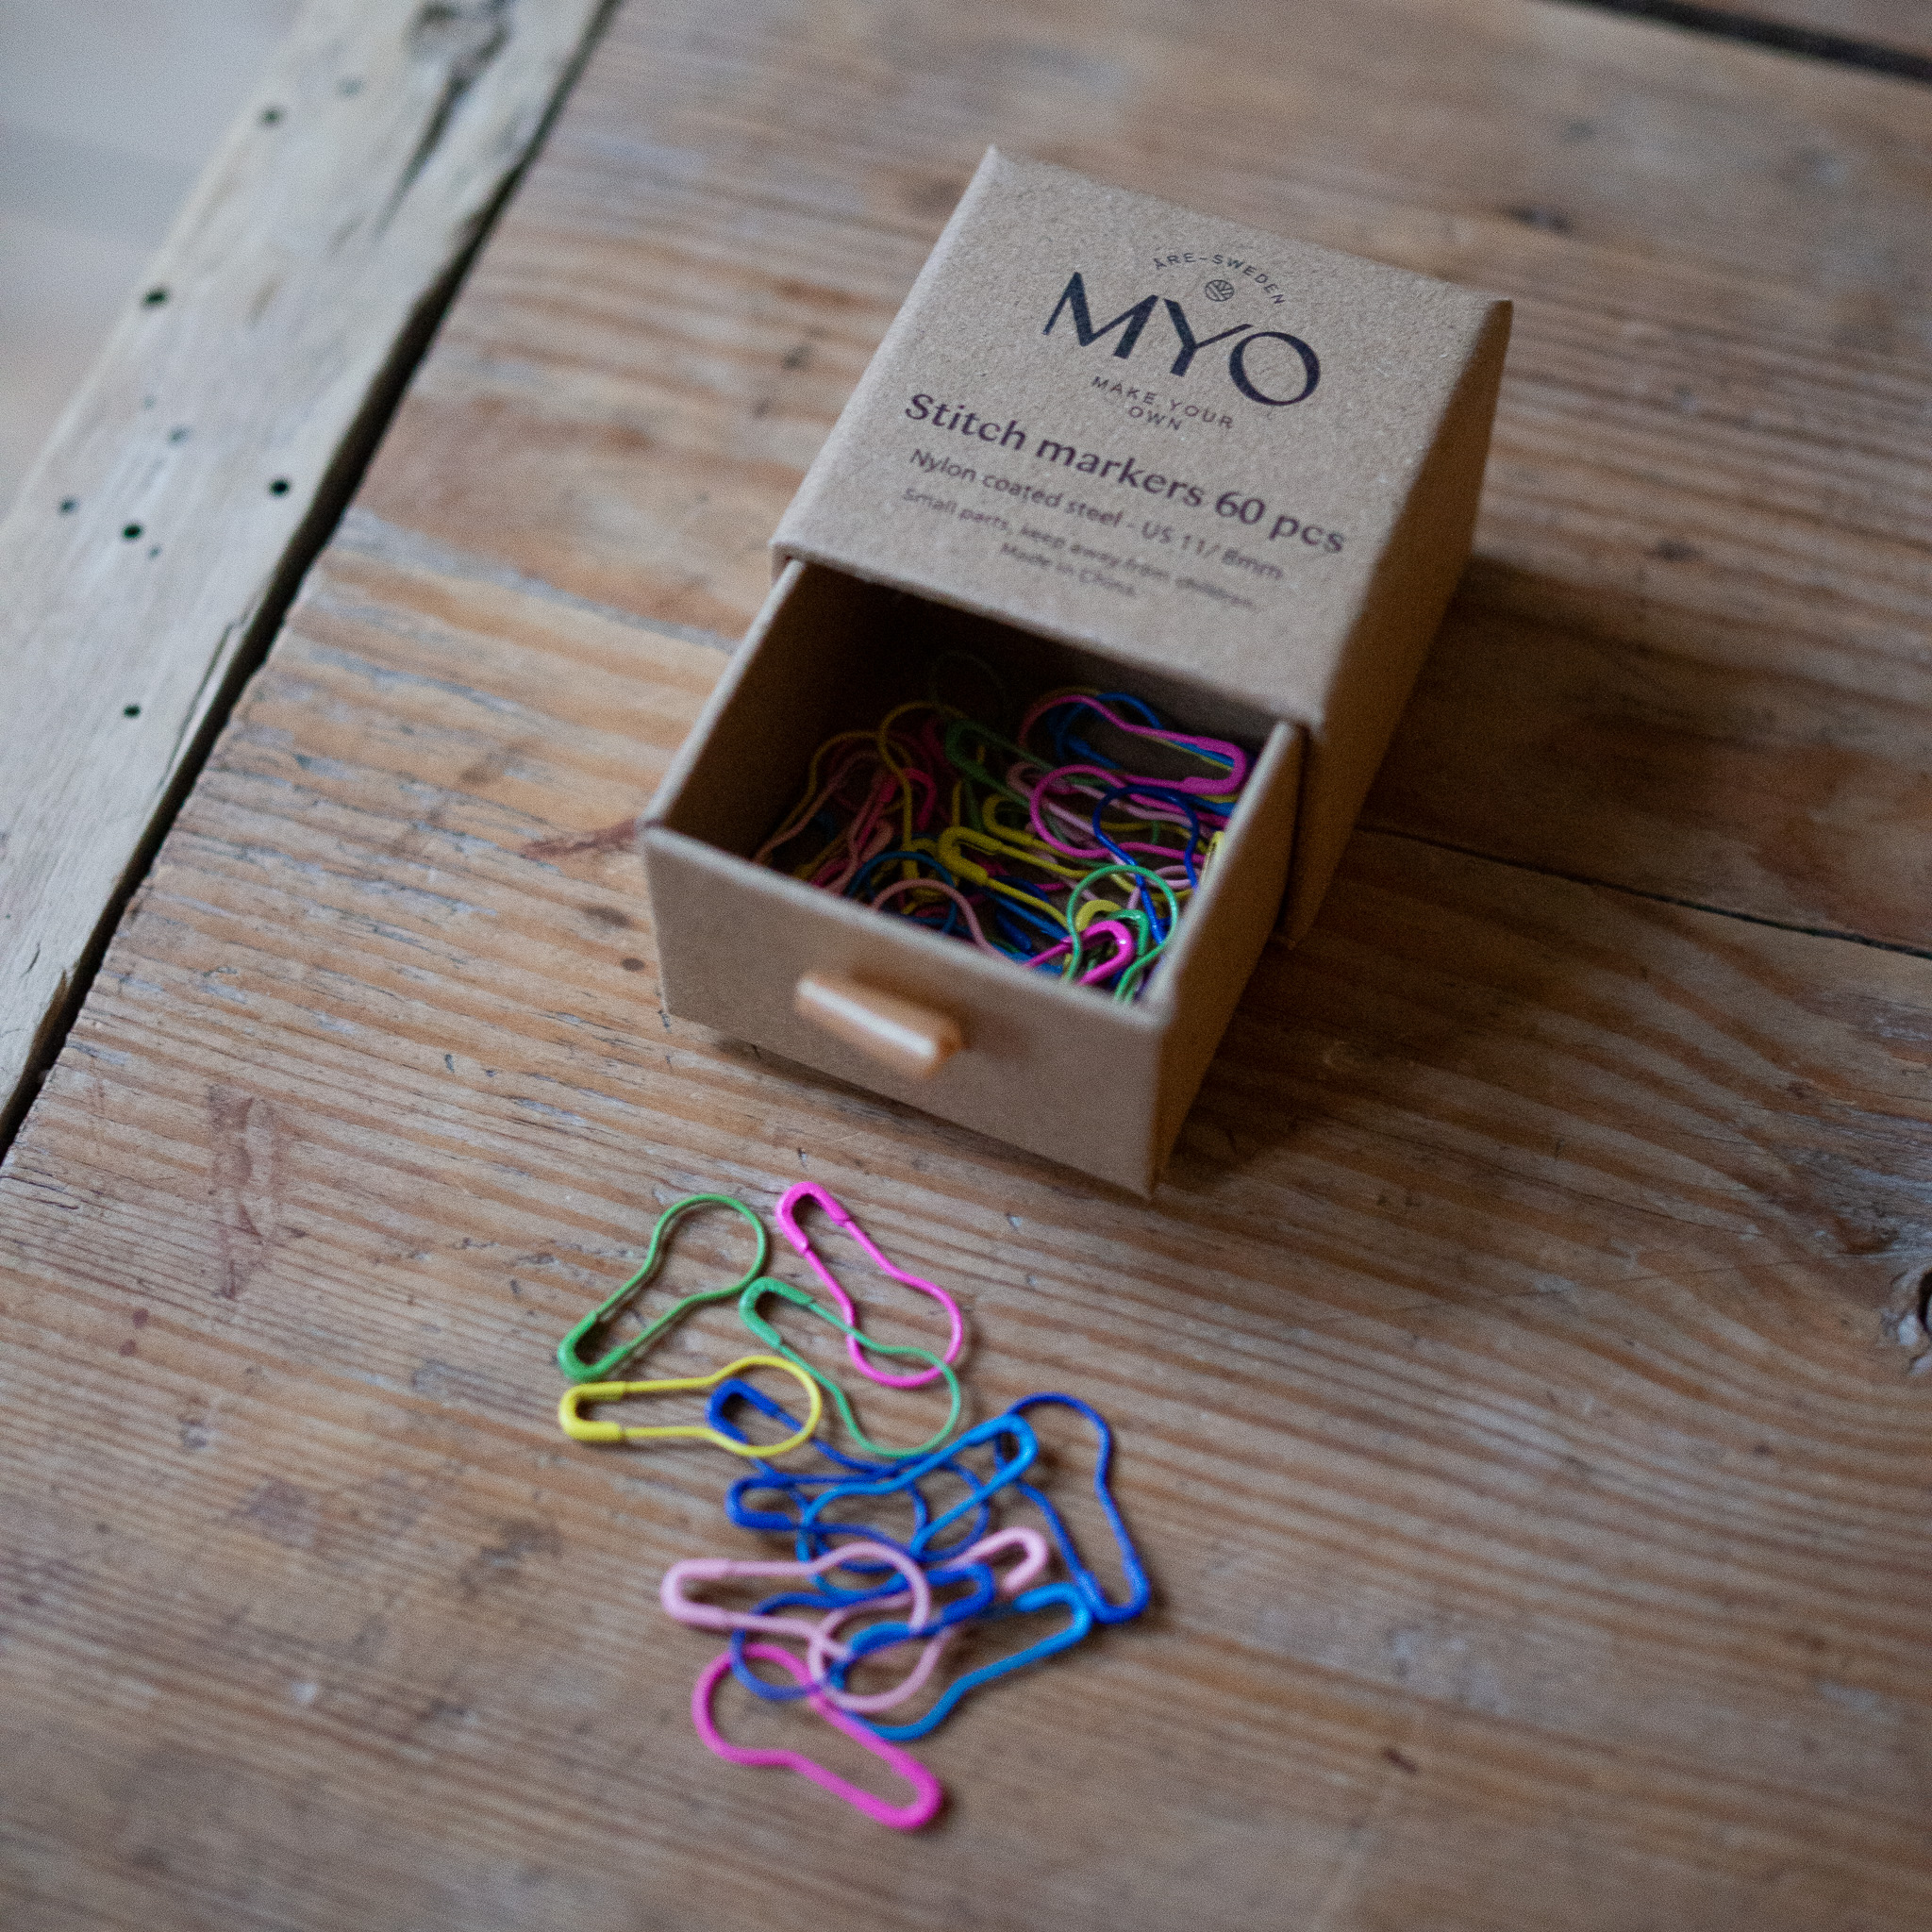
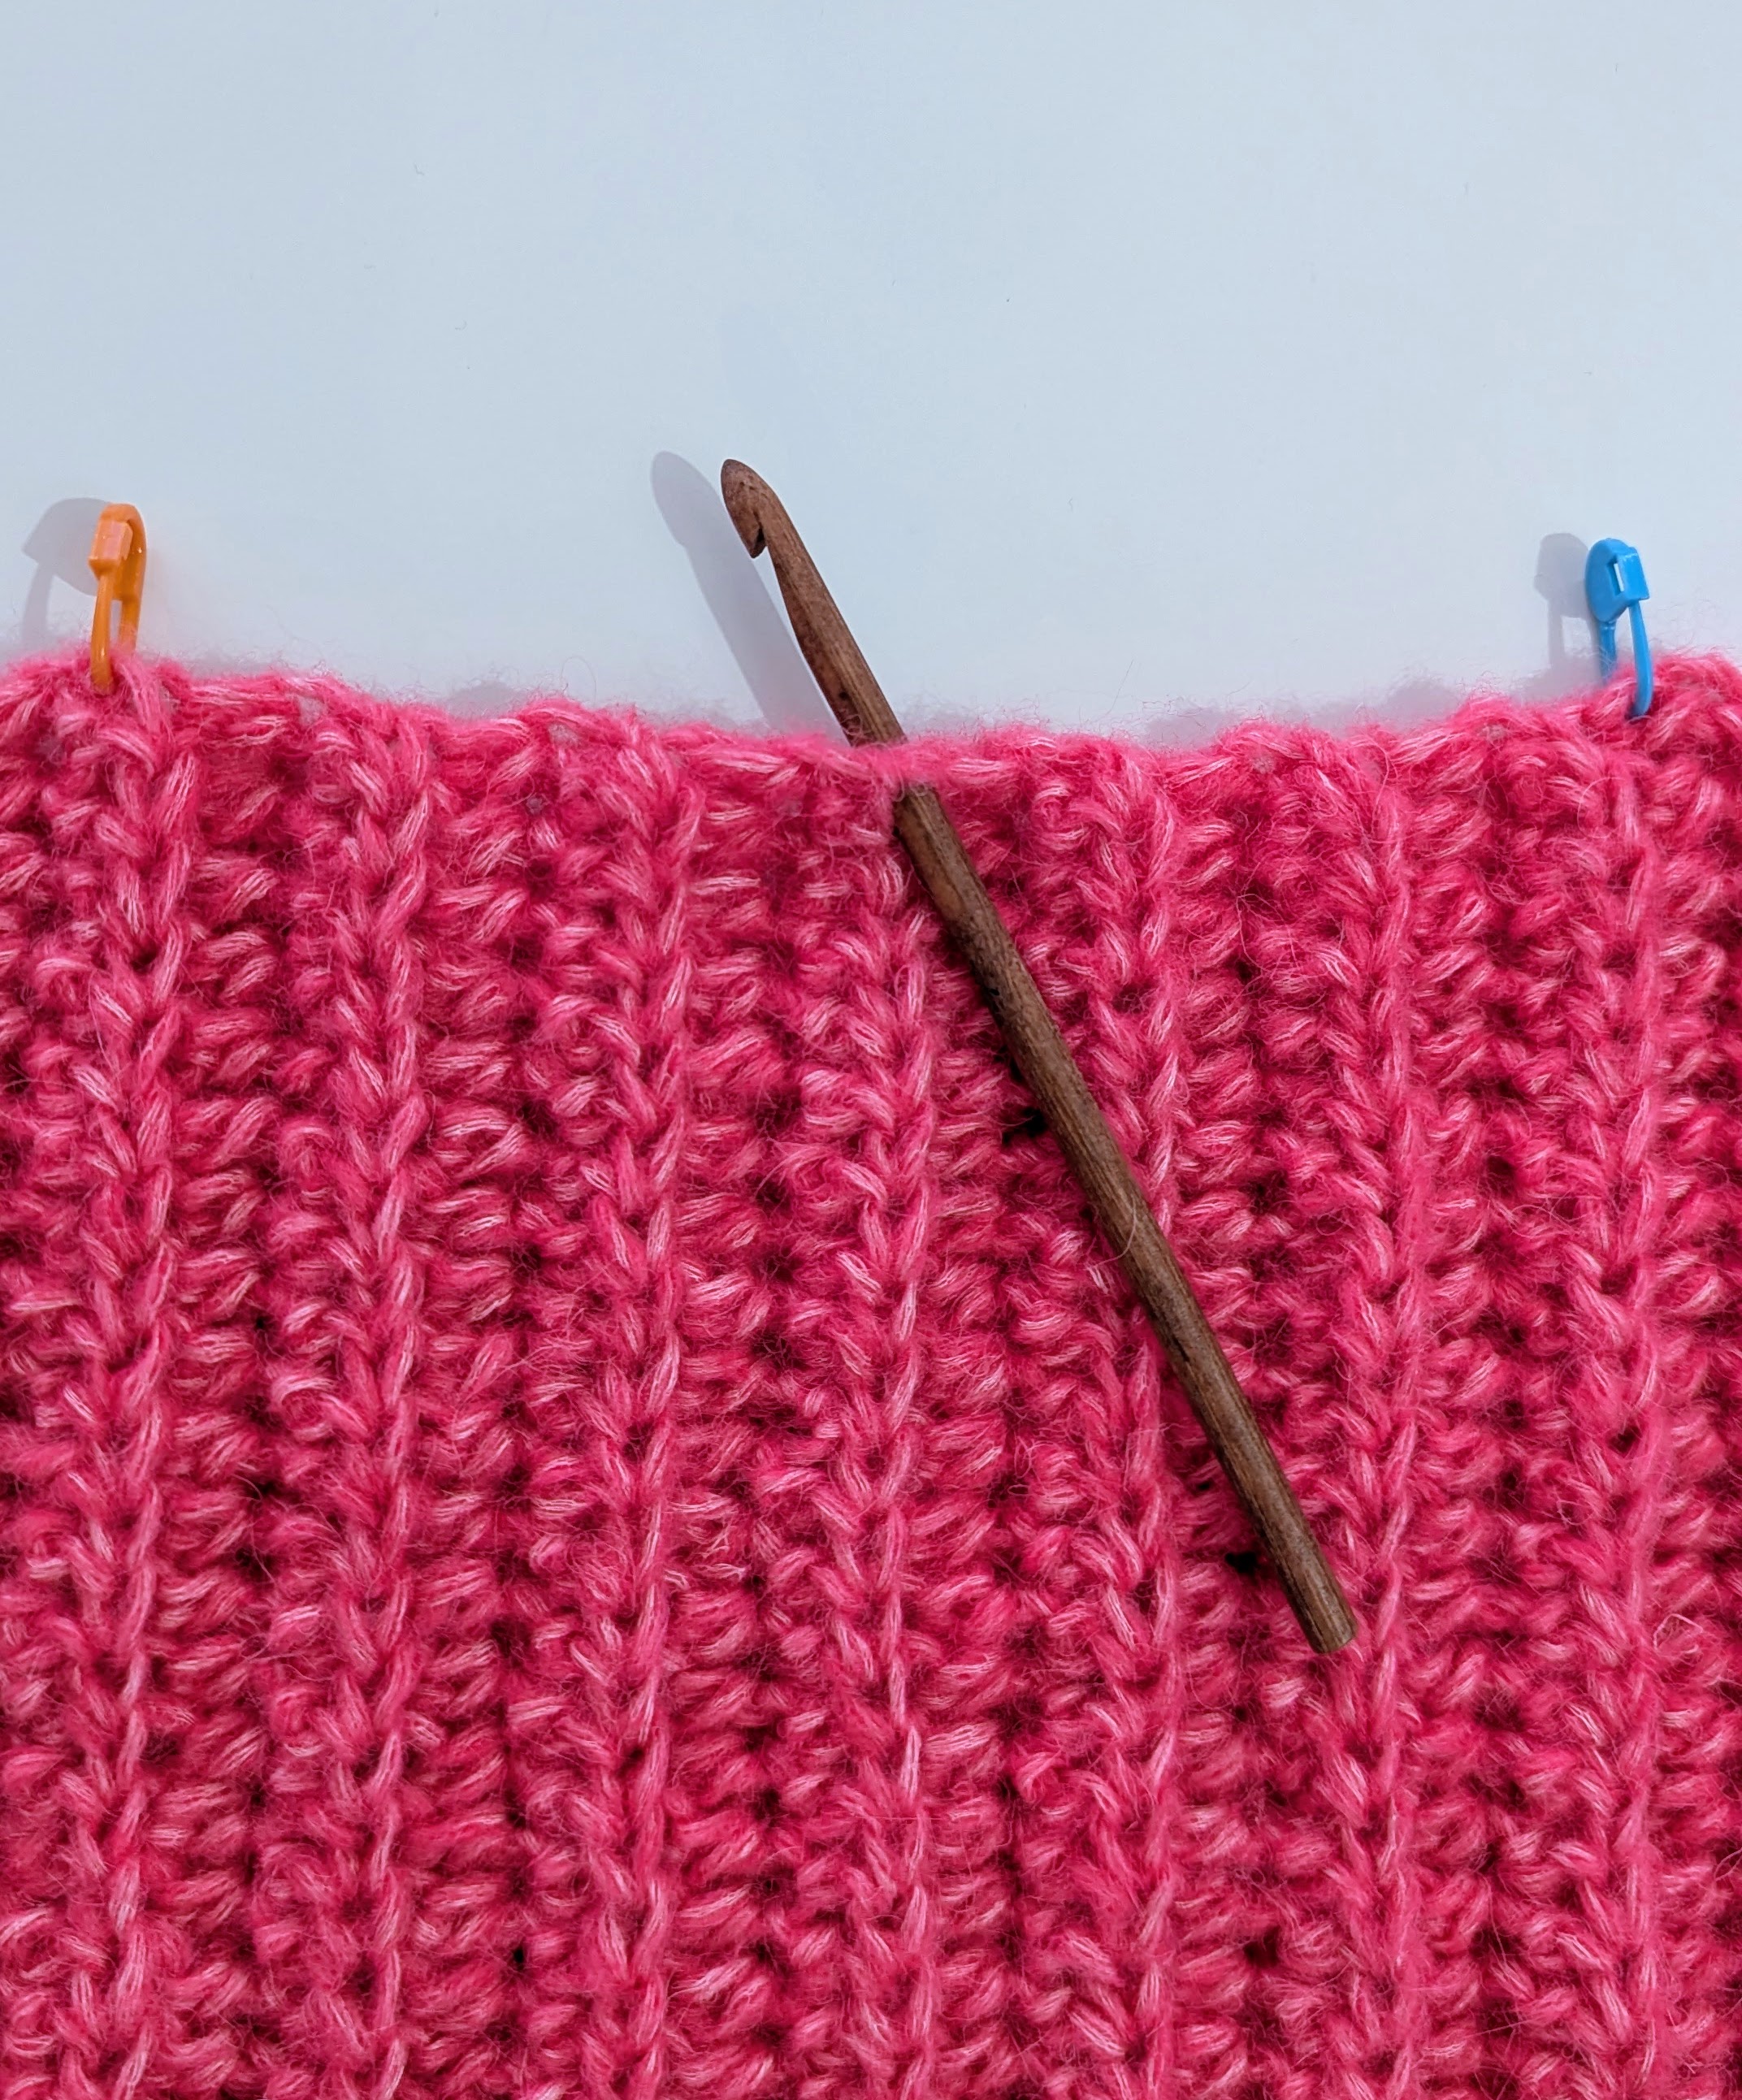
At the end of the instructions for each row, you will see a stitch count given like this: “= xx (xx, xx, xx) half double crochet stitches.” Check your stitch count every now and then to make sure you have the correct number for each row. A good tip is to place stitch markers in the first and last half double crochet of each row so you don’t accidentally miss a stitch or make an increase.
Each row begins with a chain stitch (sometimes called a turning chain) which does not count as a stitch and should not be worked into. It’s common to confuse the turning chain with the first half double crochet (or vice versa), which can cause you to end up with too many or too few stitches. To avoid this, place a marker in the first and last stitch immediately after working them—you’ll quickly learn where to insert your hook.
The length of the vest can be adjusted. For example, if you start the front and back pieces with 11 fewer chains than stated, your vest will be approx. 10 cm shorter. Just remember to also subtract the same number of stitches (in this example, 11) from the stitch count for all rows.
You can choose to crochet wide or narrow ties at the sides, or small straps that are permanently attached to both the front and back pieces if you prefer not to tie the sides.
Gauge: In a 10 x 10 cm square, you should have 11 half double crochet stitches in the back loop across the width and 7 rows back and forth in height.
To ensure your vest fits correctly, it’s important that you match the gauge; if you have more or fewer than 11 stitches x 7 rows per 10 x 10 cm, your vest will turn out smaller or larger than intended. Always check your gauge first by making a swatch with slightly more than 11 stitches x 7 rows. Then measure: if you have too many stitches or rows in 10 cm, switch to a larger hook; if you have too few stitches or rows in 10 cm, switch to a smaller hook.
Now the pattern begins.
Front piece
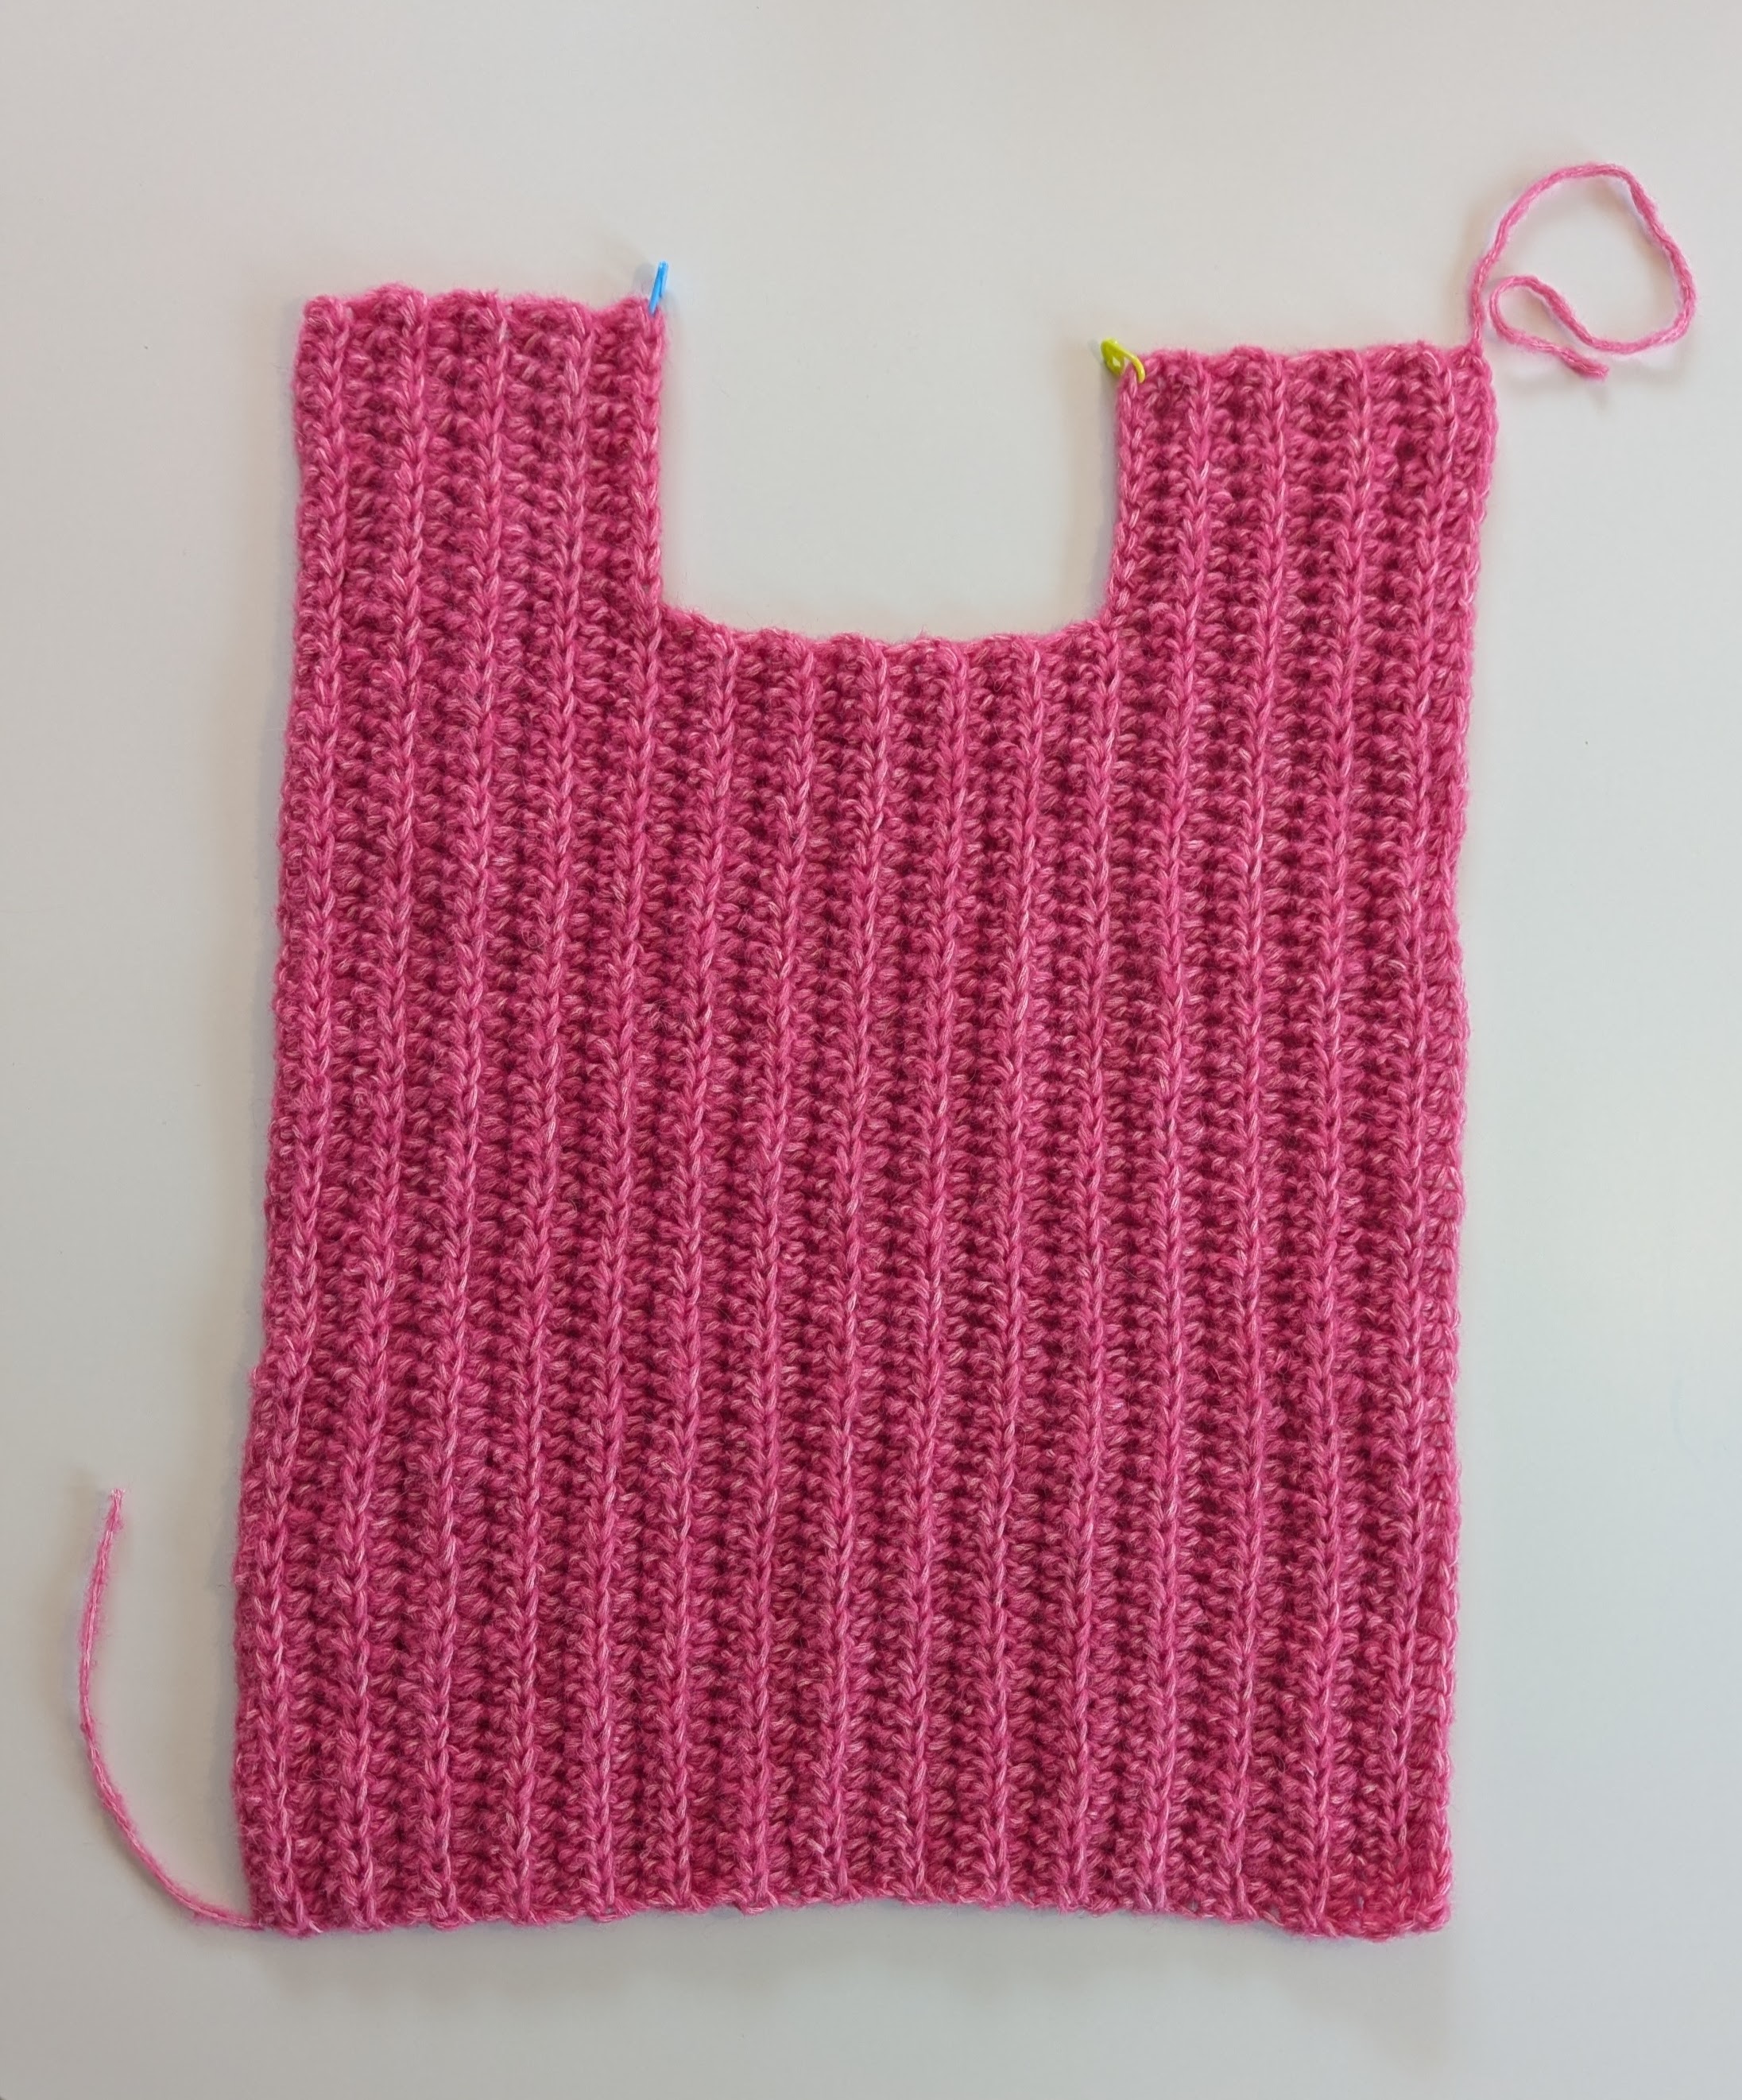
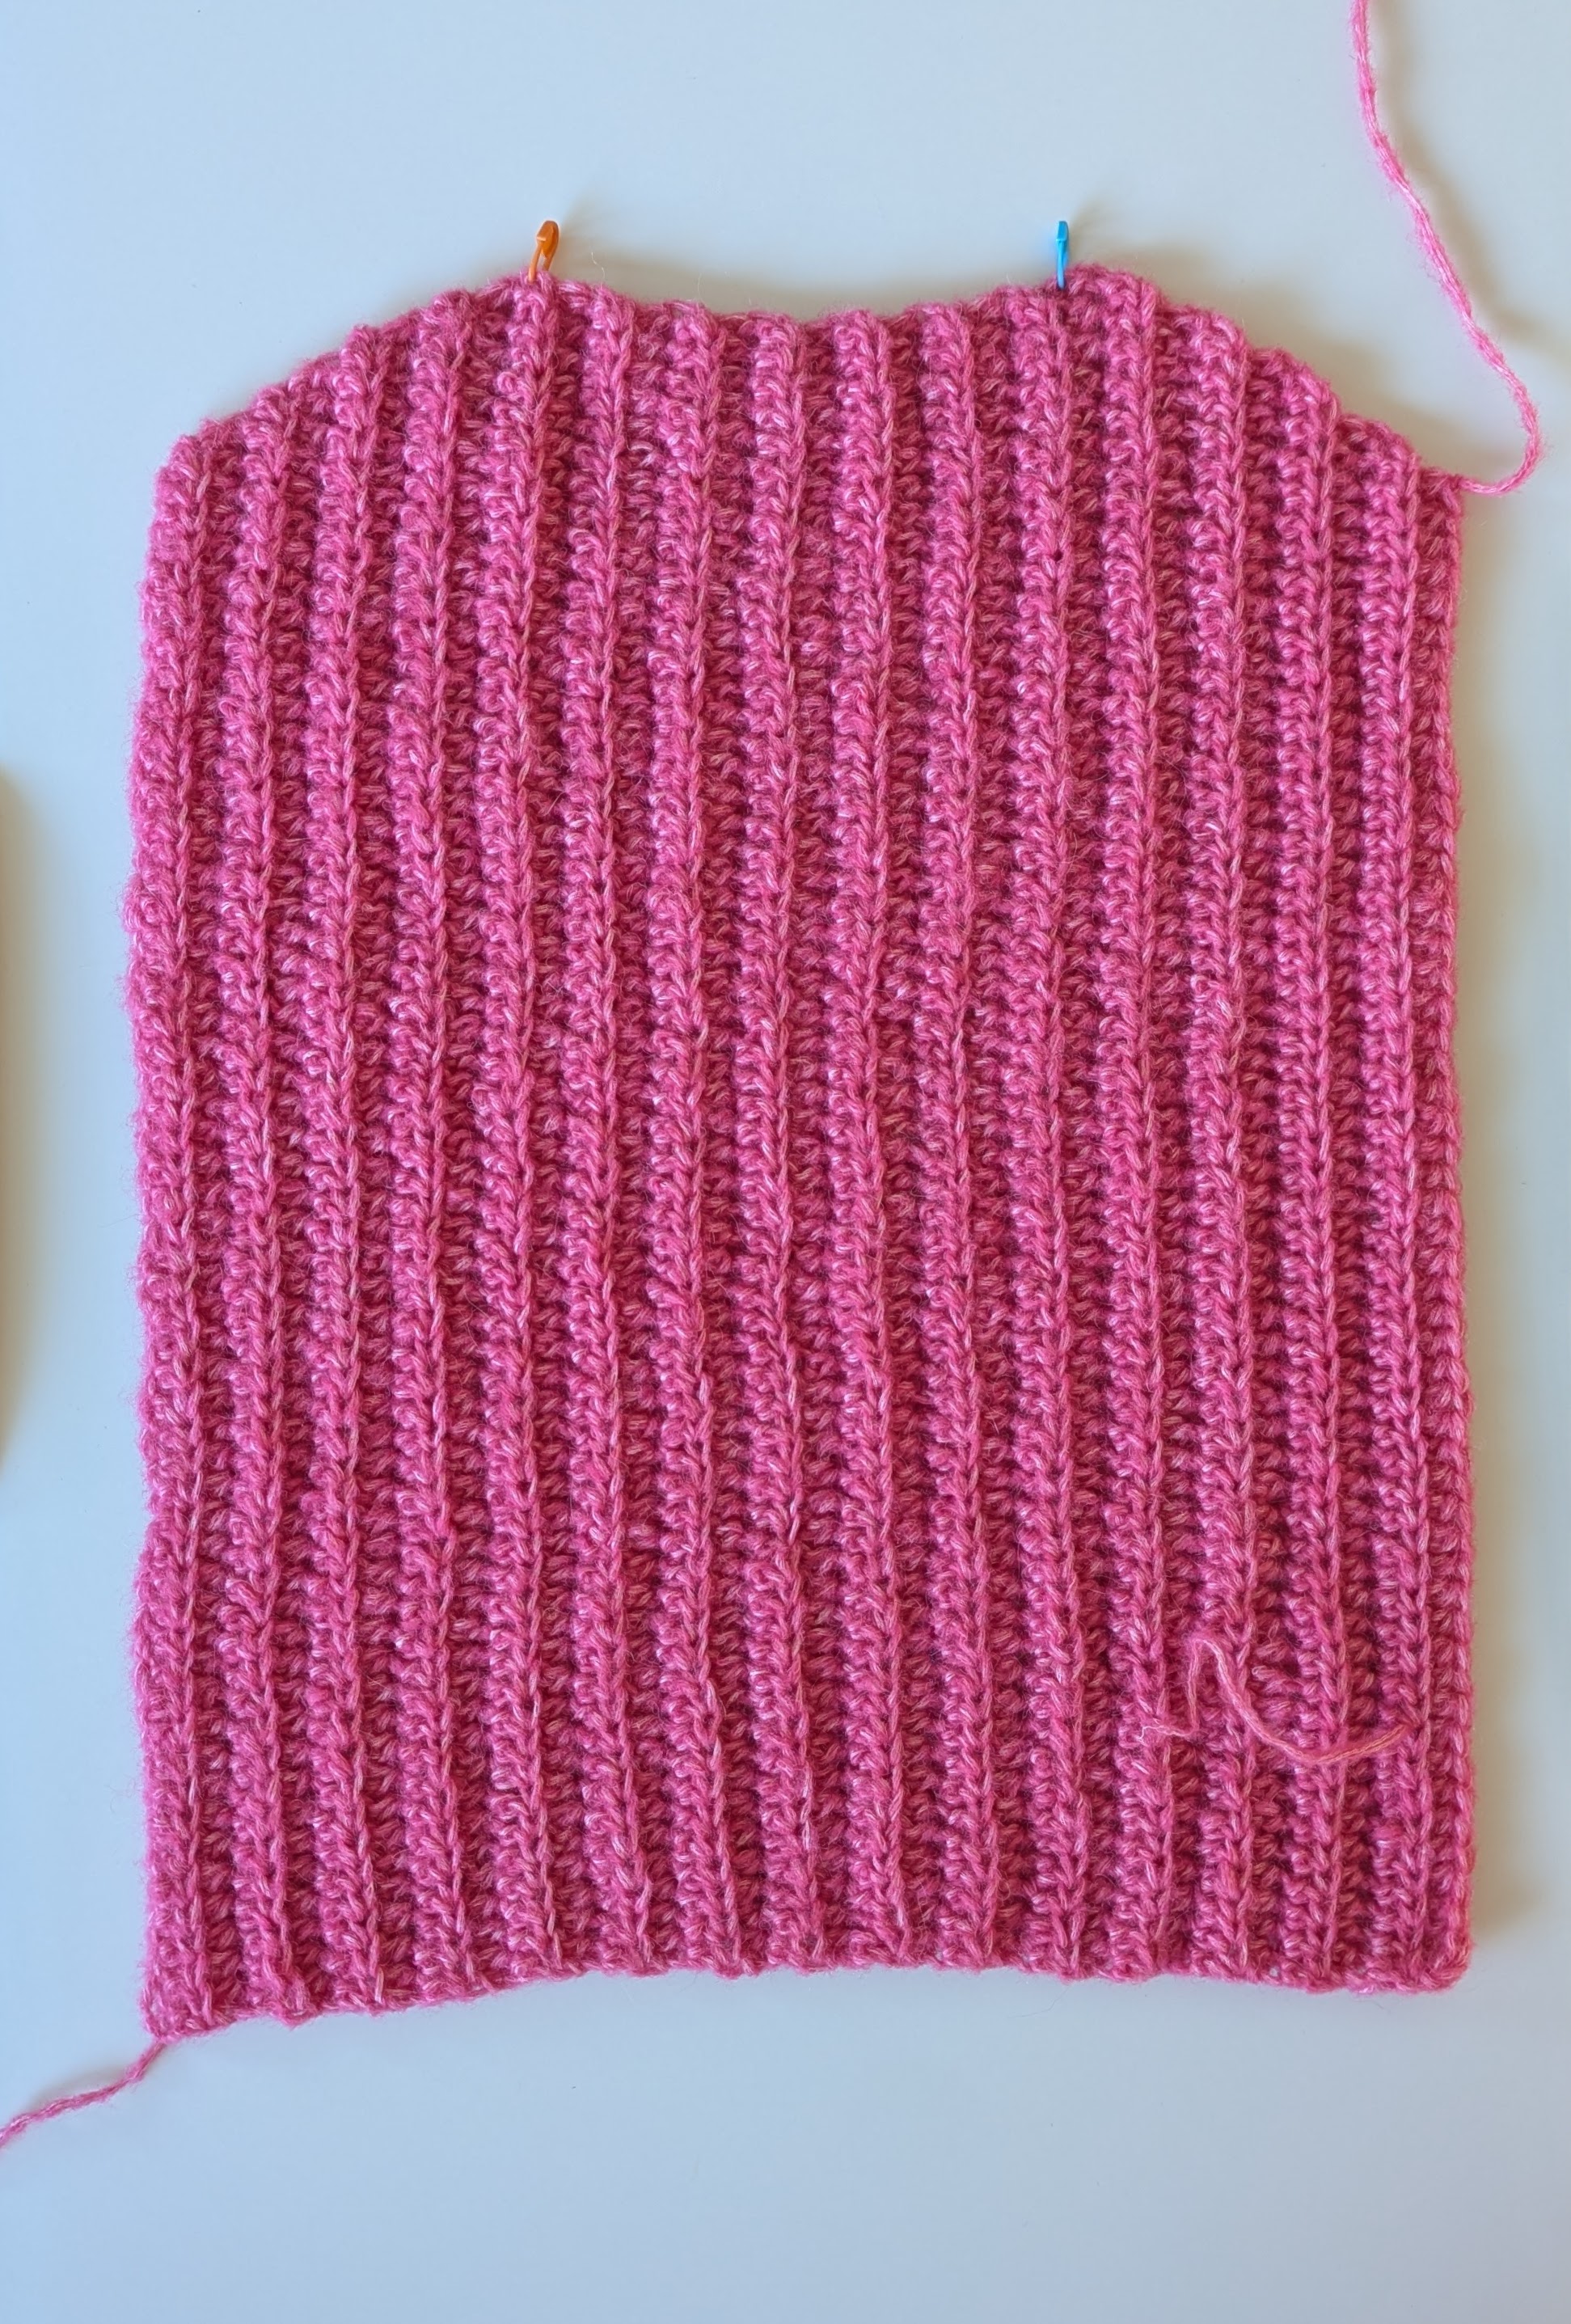
Starting chain: Make a slip knot on the hook and crochet 56 (61, 66, 66) chain stitches. You now have a long foundation chain that will run along one long side of the front piece.
Row 1 (running from the shoulder down): Work a half double crochet (hdc) into the second chain from the hook, and into each remaining chain across. Turn your work. You should now have a total of 55 (60, 65, 65) hdc in the row.
Row 2 (running from the bottom up toward the shoulder): Chain 1 (also called a turning chain), then work 1 hdc in the back loop only of each hdc across the row. Turn your work. Total: 55 (60, 65, 65) hdc.
Repeat Row 2 another 5 (7, 9, 11) times. Even-numbered rows run upward toward the shoulder, odd-numbered rows run downward from the shoulder toward the bottom edge.
You have now worked a total of 7 (9, 11, 13) rows, each with 55 (60, 65, 65) hdc. This forms the right side of the front piece (left if you are left-handed).
Place a stitch marker in the first hdc of Row 7 (9, 11, 13). Leave it there until it’s time to sew the shoulders together.
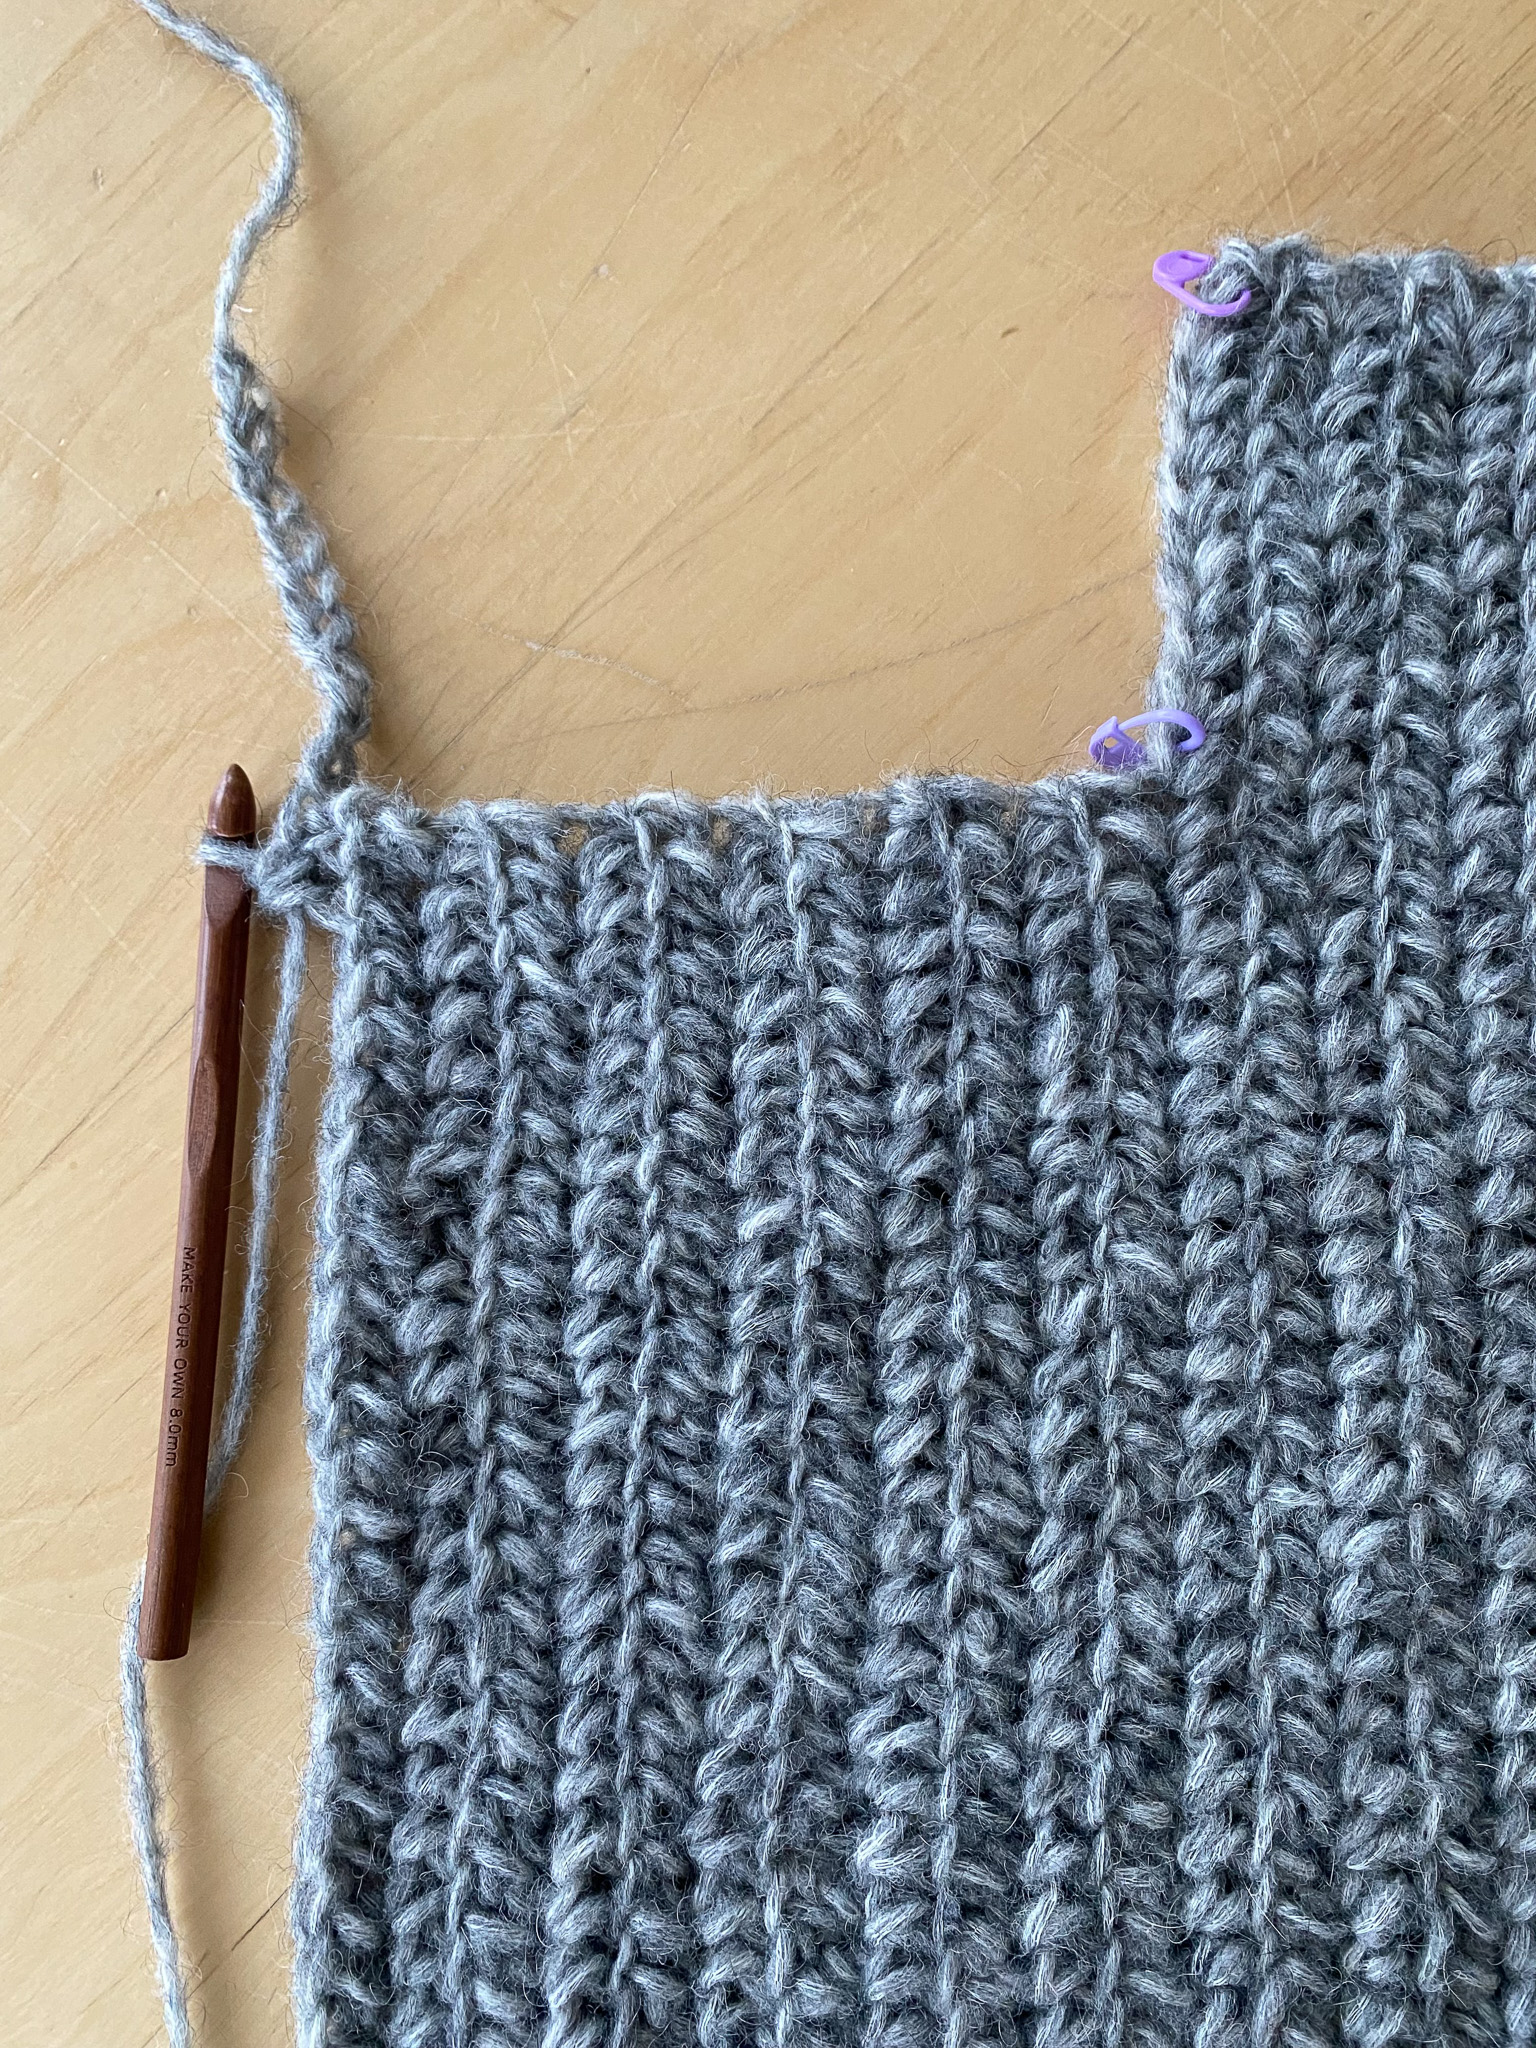
Row 8 (10, 12, 14) (upward): Chain 1 (turning chain), then work 1 half double crochet in the back loop only of the next 45 (50, 55, 55) hdc. Turn your work when there are 10 half double crochets left unworked in the row. Total: 45 (50, 55, 55) half double crochets.
Row 9 (11, 13, 15) (downward): Chain 1 (turning chain), then work 1 half double crochets in the back loop only of each half double crochets across the row. Turn your work. Total: 45 (50, 55, 55) half double crochets.
Repeat Row 9 (11, 13, 15) another 9 times to shape the front neckline opening of the vest.
You should now have worked 11 rows in total with 45 (50, 55, 55) half double crochets in each row. Fasten off and weave in all ends.
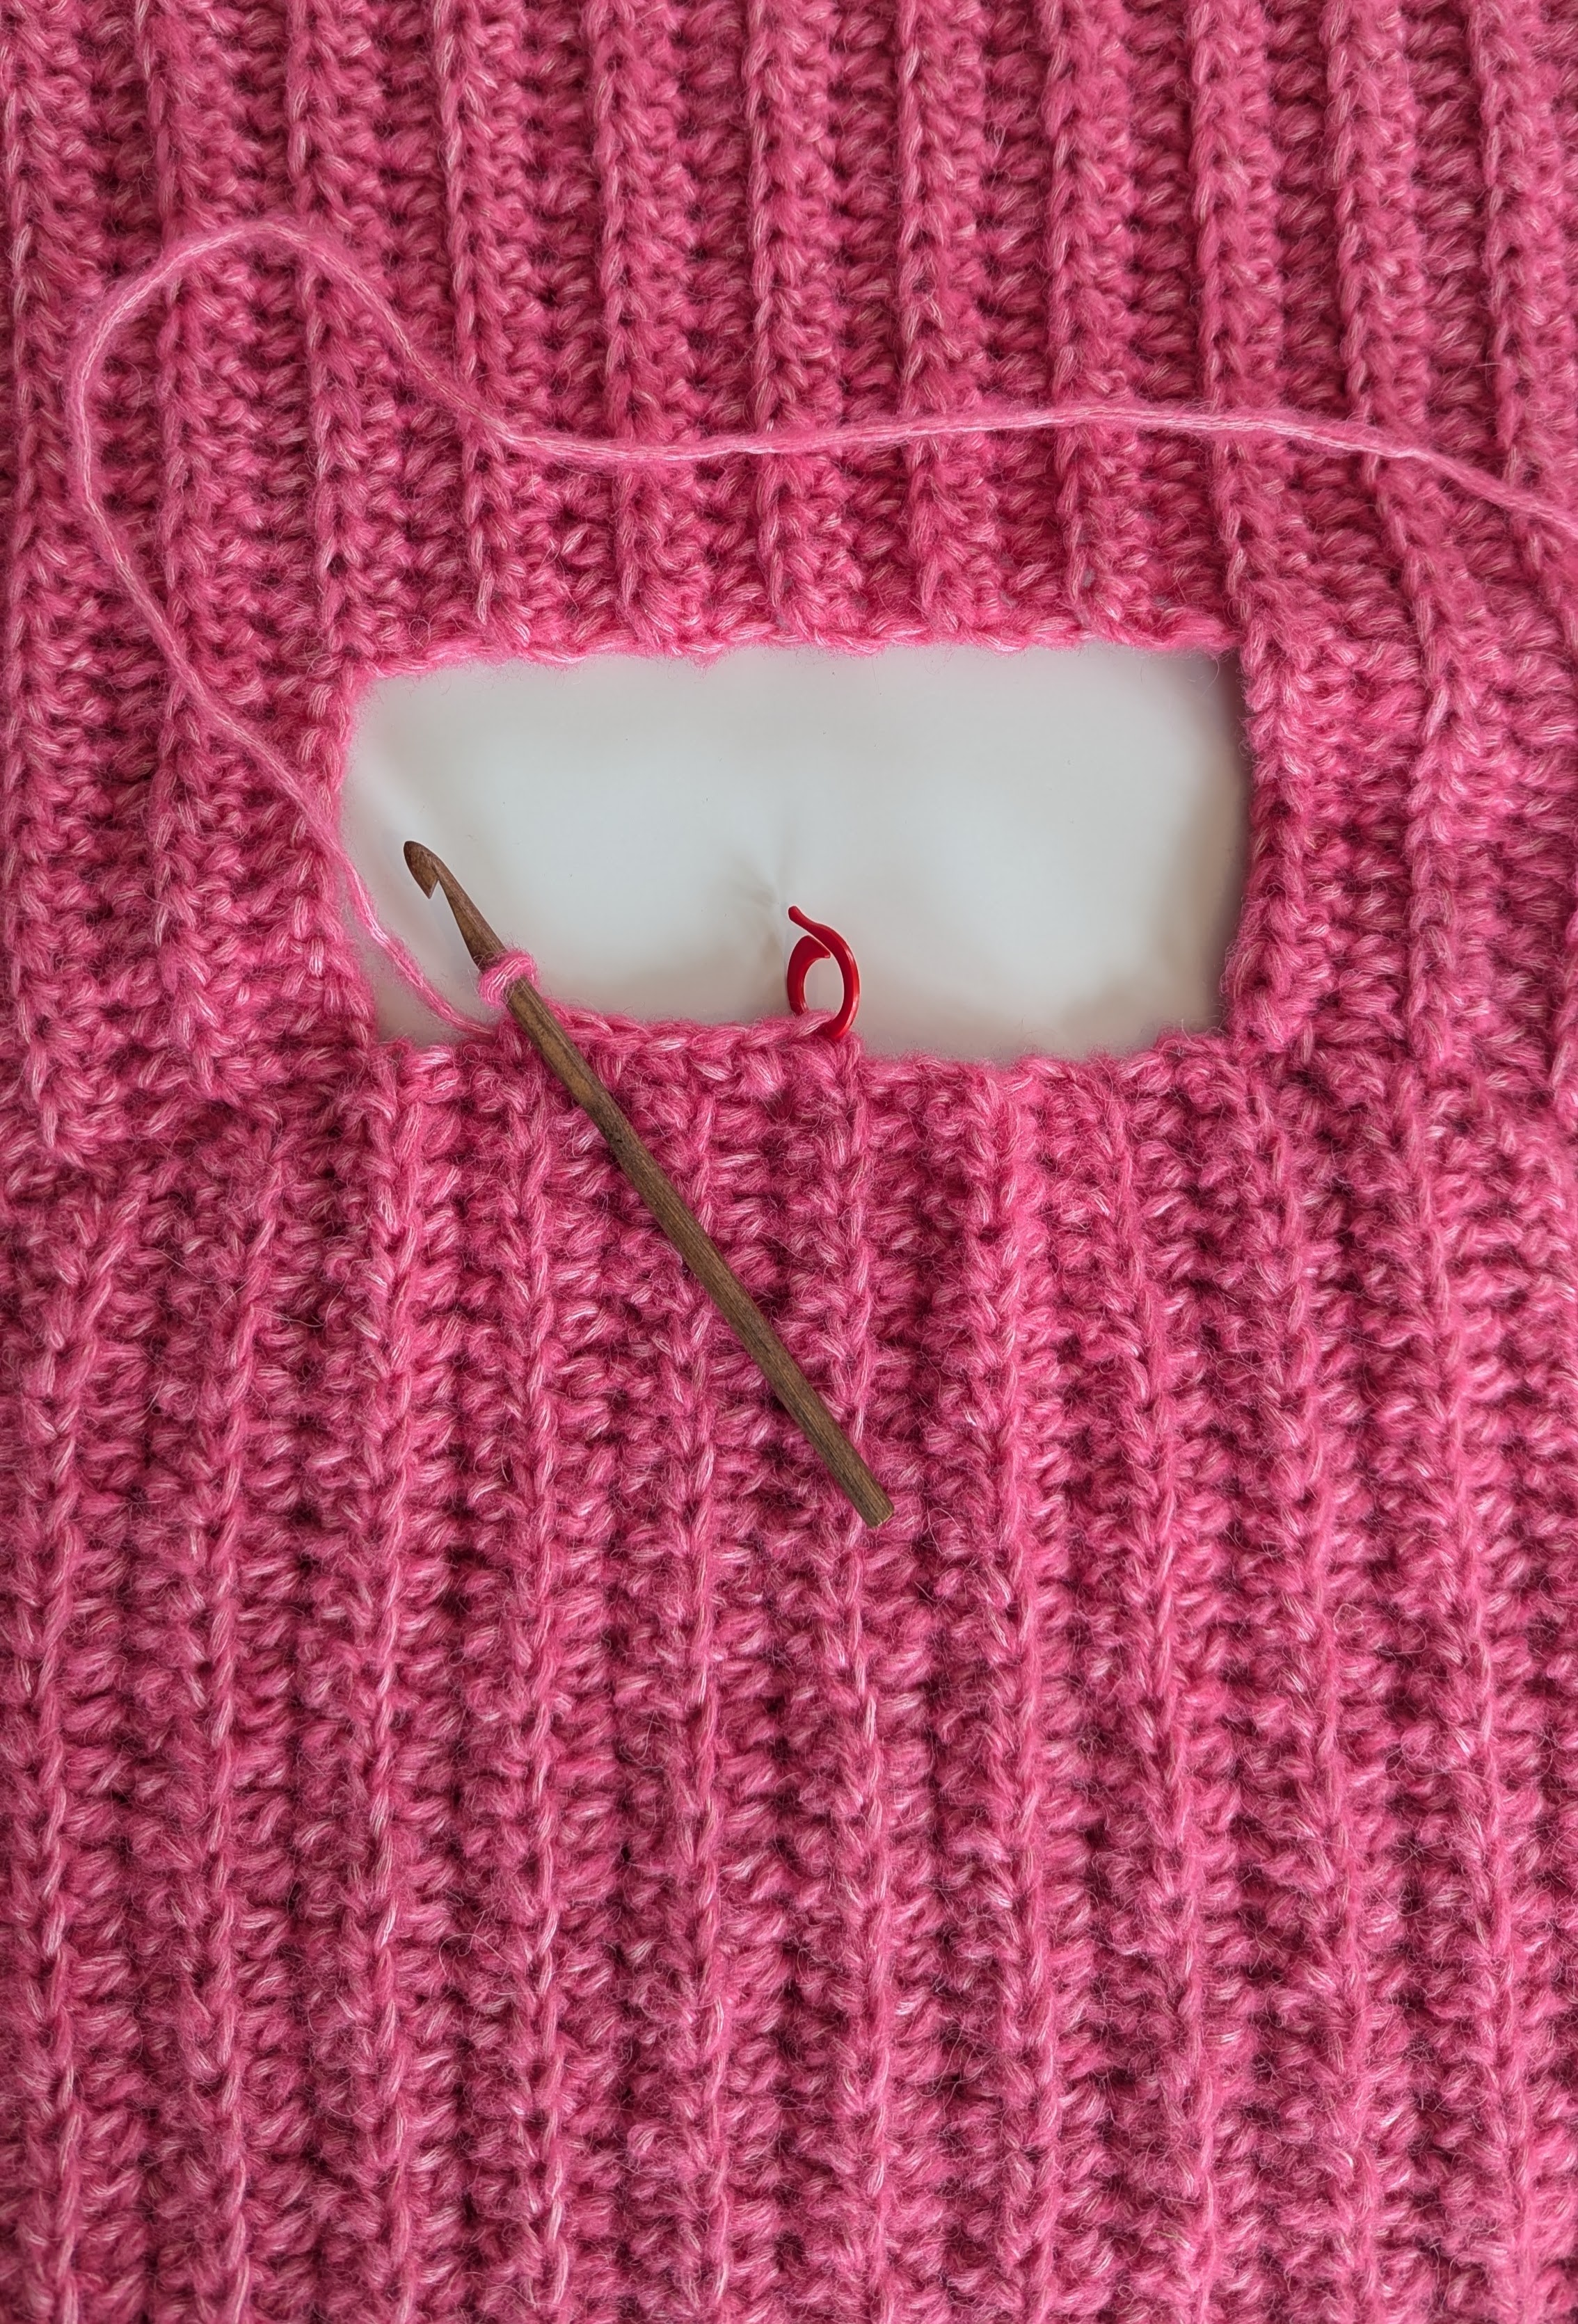
Row 19 (21, 23, 25) (downward): With new yarn, make a slip knot and crochet 10 chain stitches. Yarn over, insert your hook under the back loop of the last hdc from the previous row (at the neckline edge), and work 1 hdc there. Continue working hdc in the back loop only across every half double crochets of the previous row, all the way down the front piece. Total: 45 (50, 55, 55) half double crochets plus the 10 chains at the top of the shoulder.
Row 20 (22, 24, 26) (upward): Chain 1 (turning chain), then work 1 half double crochet in the back loop only of each hdc across the row, and also into the 10 chains at the top. Turn your work. Total: 55 (60, 65, 65) half double crochet.
Place a stitch marker in the last half double crochet at the end of Row 20 (22, 24, 26) and leave it there until it’s time to sew the shoulders together.
Row 21 (23, 25, 27) (downward): Chain 1 (turning chain), then work 1 half double crochet in the back loop only of each half double crochet across the row. Turn your work. Total: 55 (60, 65, 65) half double crochet.
Repeat Row 21 (23, 25, 27) another 5 (7, 9, 11) times.
You should now have 7 (9, 11, 13) rows with 55 (60, 65, 65) half double crochet in each row for the left shoulder (right shoulder if you are left-handed).
In total, you will have crocheted 26 (30, 34, 38) rows for the front piece: 7 (9, 11, 13) rows for each shoulder, and 12 rows for the center neckline opening.
Fasten off and weave in all ends. The stitch markers at the top of Rows 7 (9, 11, 13) and 20 (22, 24, 26) indicate where you will later join the front piece to the back piece along the top edge of the shoulders.
Back piece
The back piece is crocheted in almost the same way as the front piece, except there is no neckline. Instead, the top edge is shaped so that the shoulders slope from the inside of the neck outward.
Foundation chain: Make a slip knot on your hook and crochet 51 (54, 57, 55) chain stitches. You now have a long chain that will run along one long side of the back piece.
Row 1 (runs from the top of the shoulder down): Crochet a half double crochet (hdc) into the second chain from the hook and in all remaining chains, turn your work. You now have 50 (53, 56, 54) hdc stitches in the row.
Row 2 (runs from the bottom up toward the shoulder): Chain 1 (turning chain), then work one hdc in the back loop only of each stitch along the row. In the last stitch of the row, work one hdc through both loops, turn your work. You now have 51 (54, 57, 55) hdc in the row.
Row 3 (downward): Start by chaining 2, then work the first hdc into the first of those two chain stitches (the second chain from the hook). Continue as usual, crocheting hdc in the back loop only of each stitch across the row. Turn your work. You now have 52 (55, 58, 56) hdc in the row.
Repeat Rows 2–3 another 1 (2, 3, 4) times, then repeat Row 2 one more time. Even-numbered rows run upward toward the shoulder, and odd-numbered rows run downward from the shoulder toward the hem.
You have now shaped the left shoulder (right shoulder if you are left-handed) and crocheted 6 (8, 10, 12) rows, with the last row having 55 (60, 65, 65) hdc stitches.
Row 7 (9, 11, 13) (downward): Chain 1 (turning chain), then work one half double crochet in the back loop only of each stitch across the row. Turn your work. You now have 55 (60, 65, 65) half double crochet in the row.
Place a stitch marker in the first half double crochet of Row 7 (9, 11, 13) to mark the end of the left shoulder (right shoulder if you are left-handed) and the beginning of the neckline at the back. Leave it there until it’s time to sew the shoulders together.
Repeat Row 7 (9, 11, 13) another 14 times. You should now have crocheted 21 (23, 25, 27) rows for the back piece, with the last row having 55 (60, 65, 65) half double crochet.
Place a stitch marker in the last half double crochet of Row 20 (22, 24, 26) to mark the end of the neckline and the beginning of the right shoulder (left shoulder if you are left-handed). Leave it there until it’s time to sew the shoulders together.
Row 22 (24, 26, 28) (upward): Chain 1 (turning chain), then work one half double crochet in the back loop only of each stitch until you have one stitch left in the row. Skip this last stitch. Turn your work. You now have 54 (59, 64, 64) half double crochet in the row.
Row 23 (25, 27, 29) (downward): Chain 1 (turning chain), skip the first stitch of the row, then work one half double crochet in the back loop only of each remaining stitch across the row. Turn your work. You now have 53 (58, 63, 63) half double crochet in the row.
Repeat Rows 22–23 (24–25, 26–27, 28–29) another 1 (2, 3, 4) times, then repeat Row 23 (25, 27, 29) once more.
You have now shaped the right shoulder (left shoulder if you are left-handed) and crocheted a total of 26 (30, 34, 38) rows for the back piece, with the last row having 50 (53, 56, 54) half double crochet stitches. Fasten off and weave in all ends.
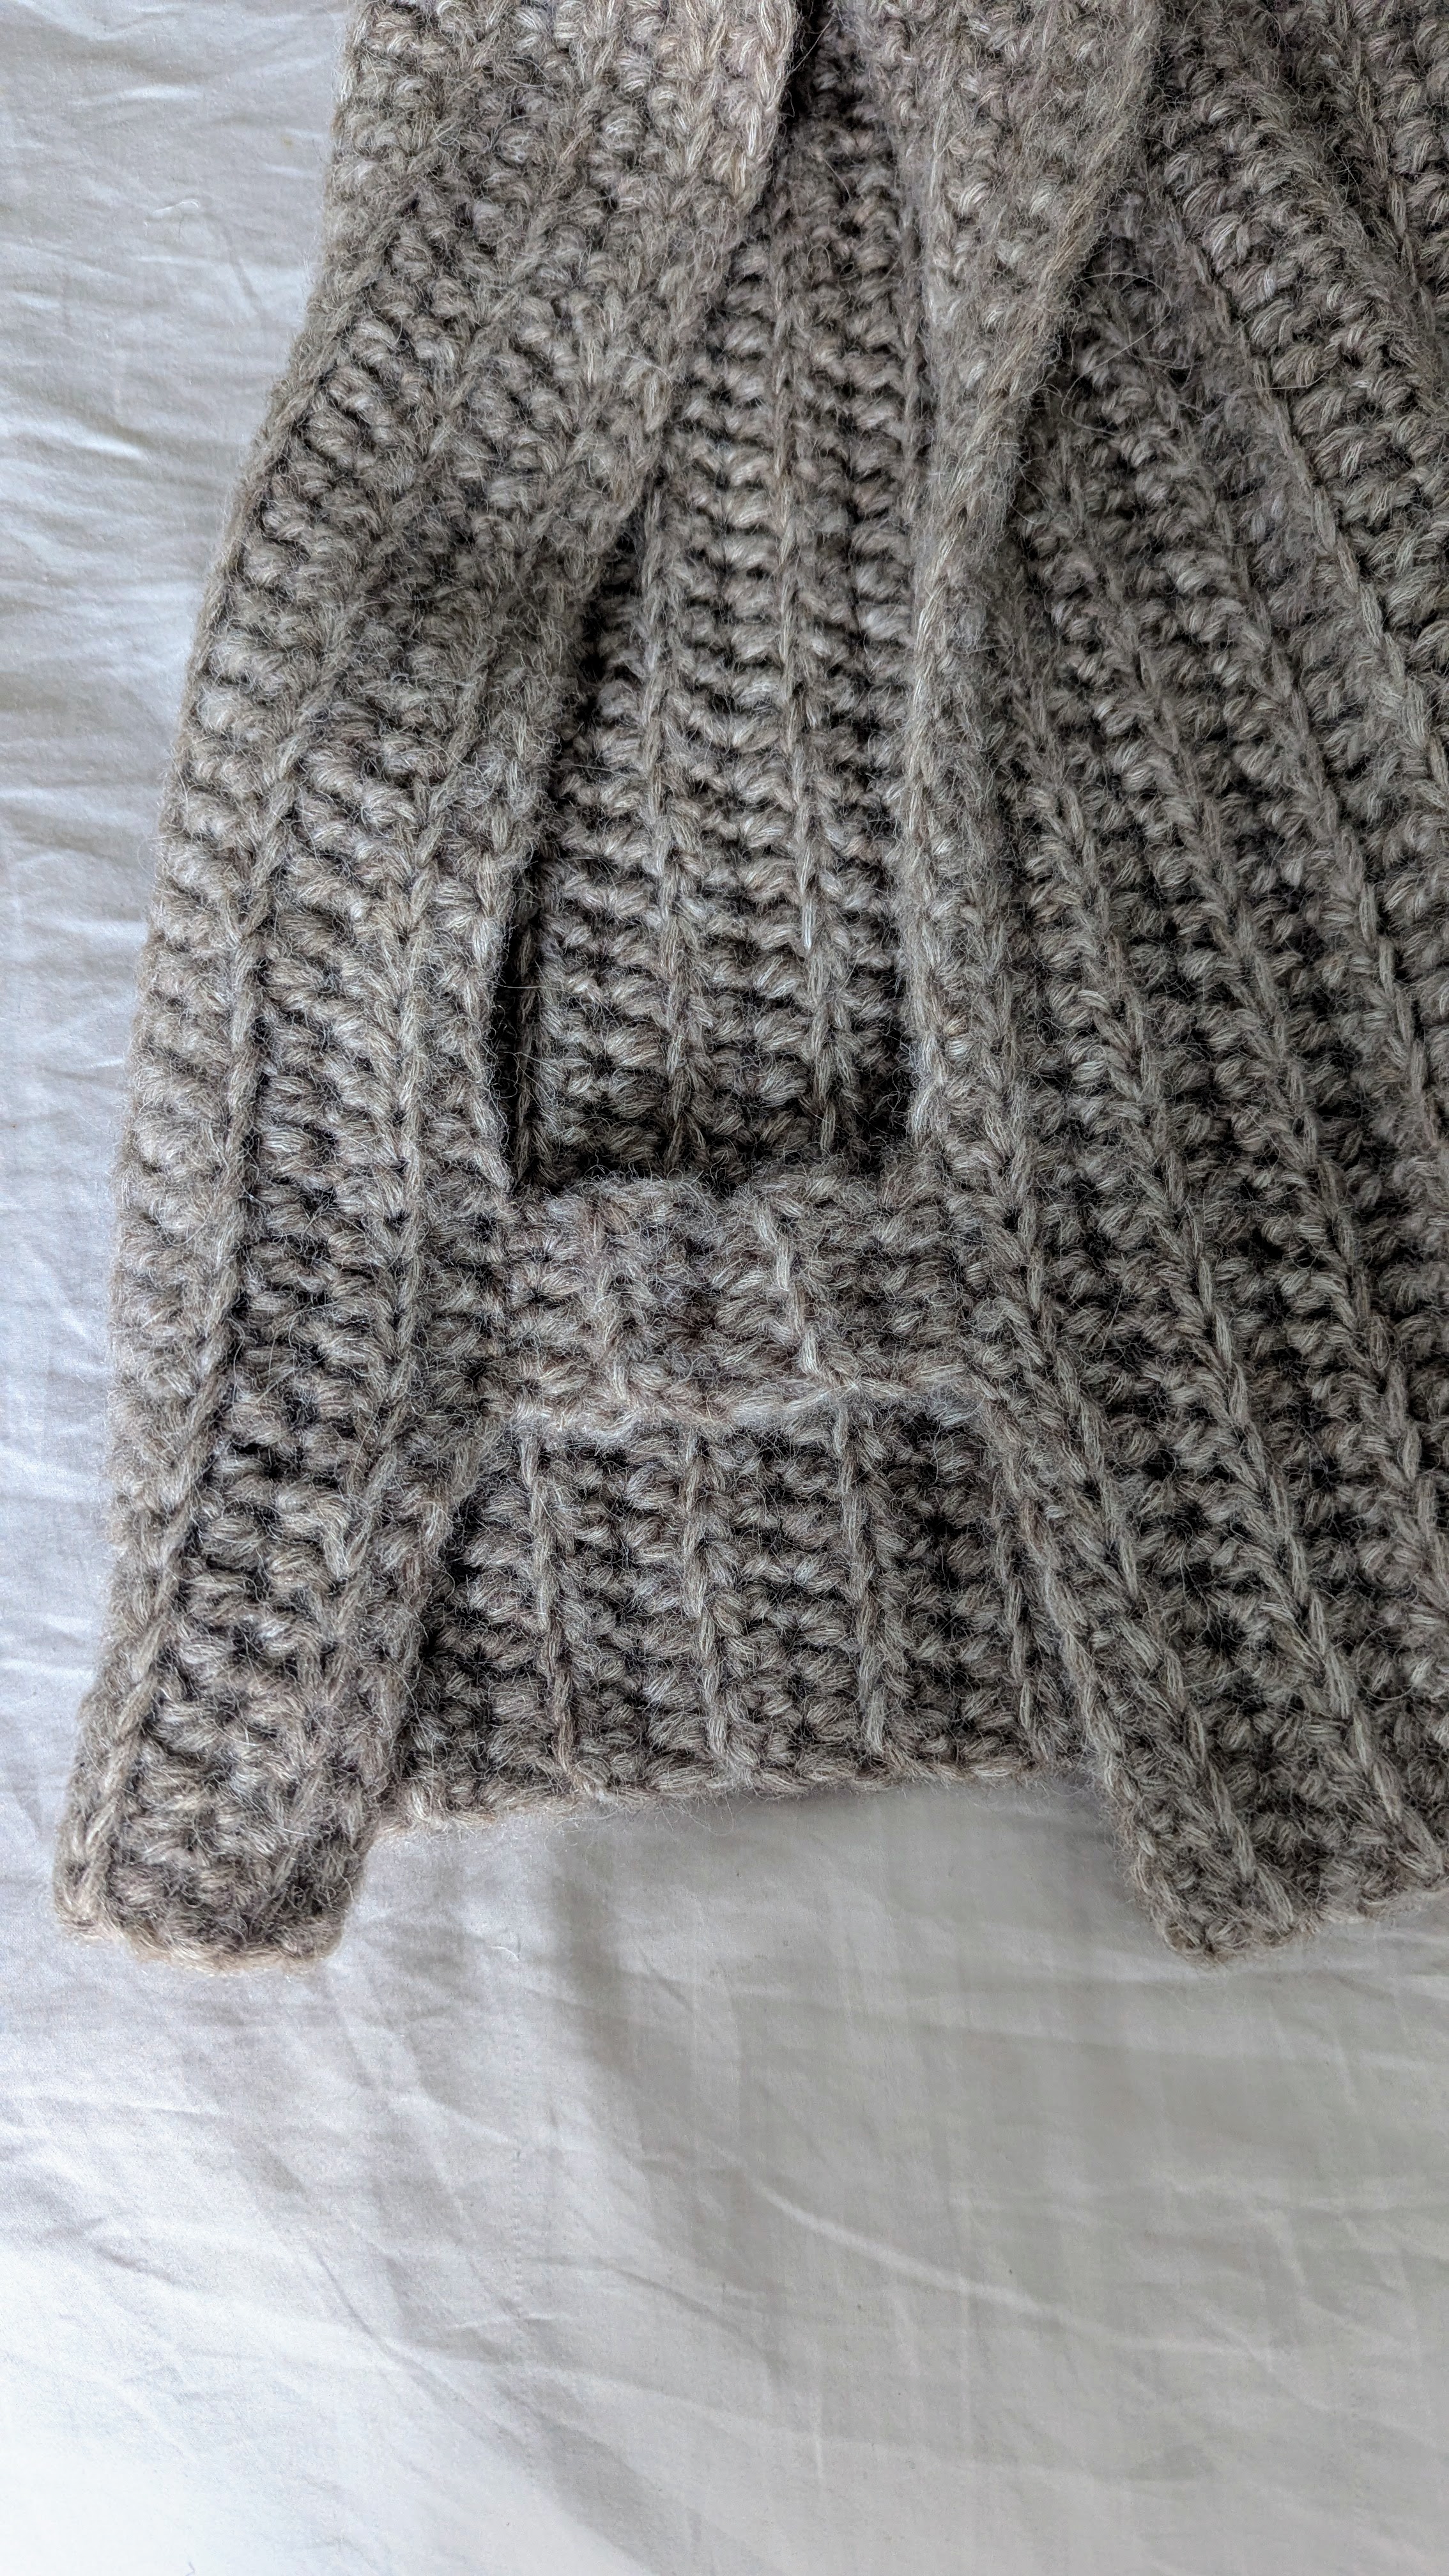
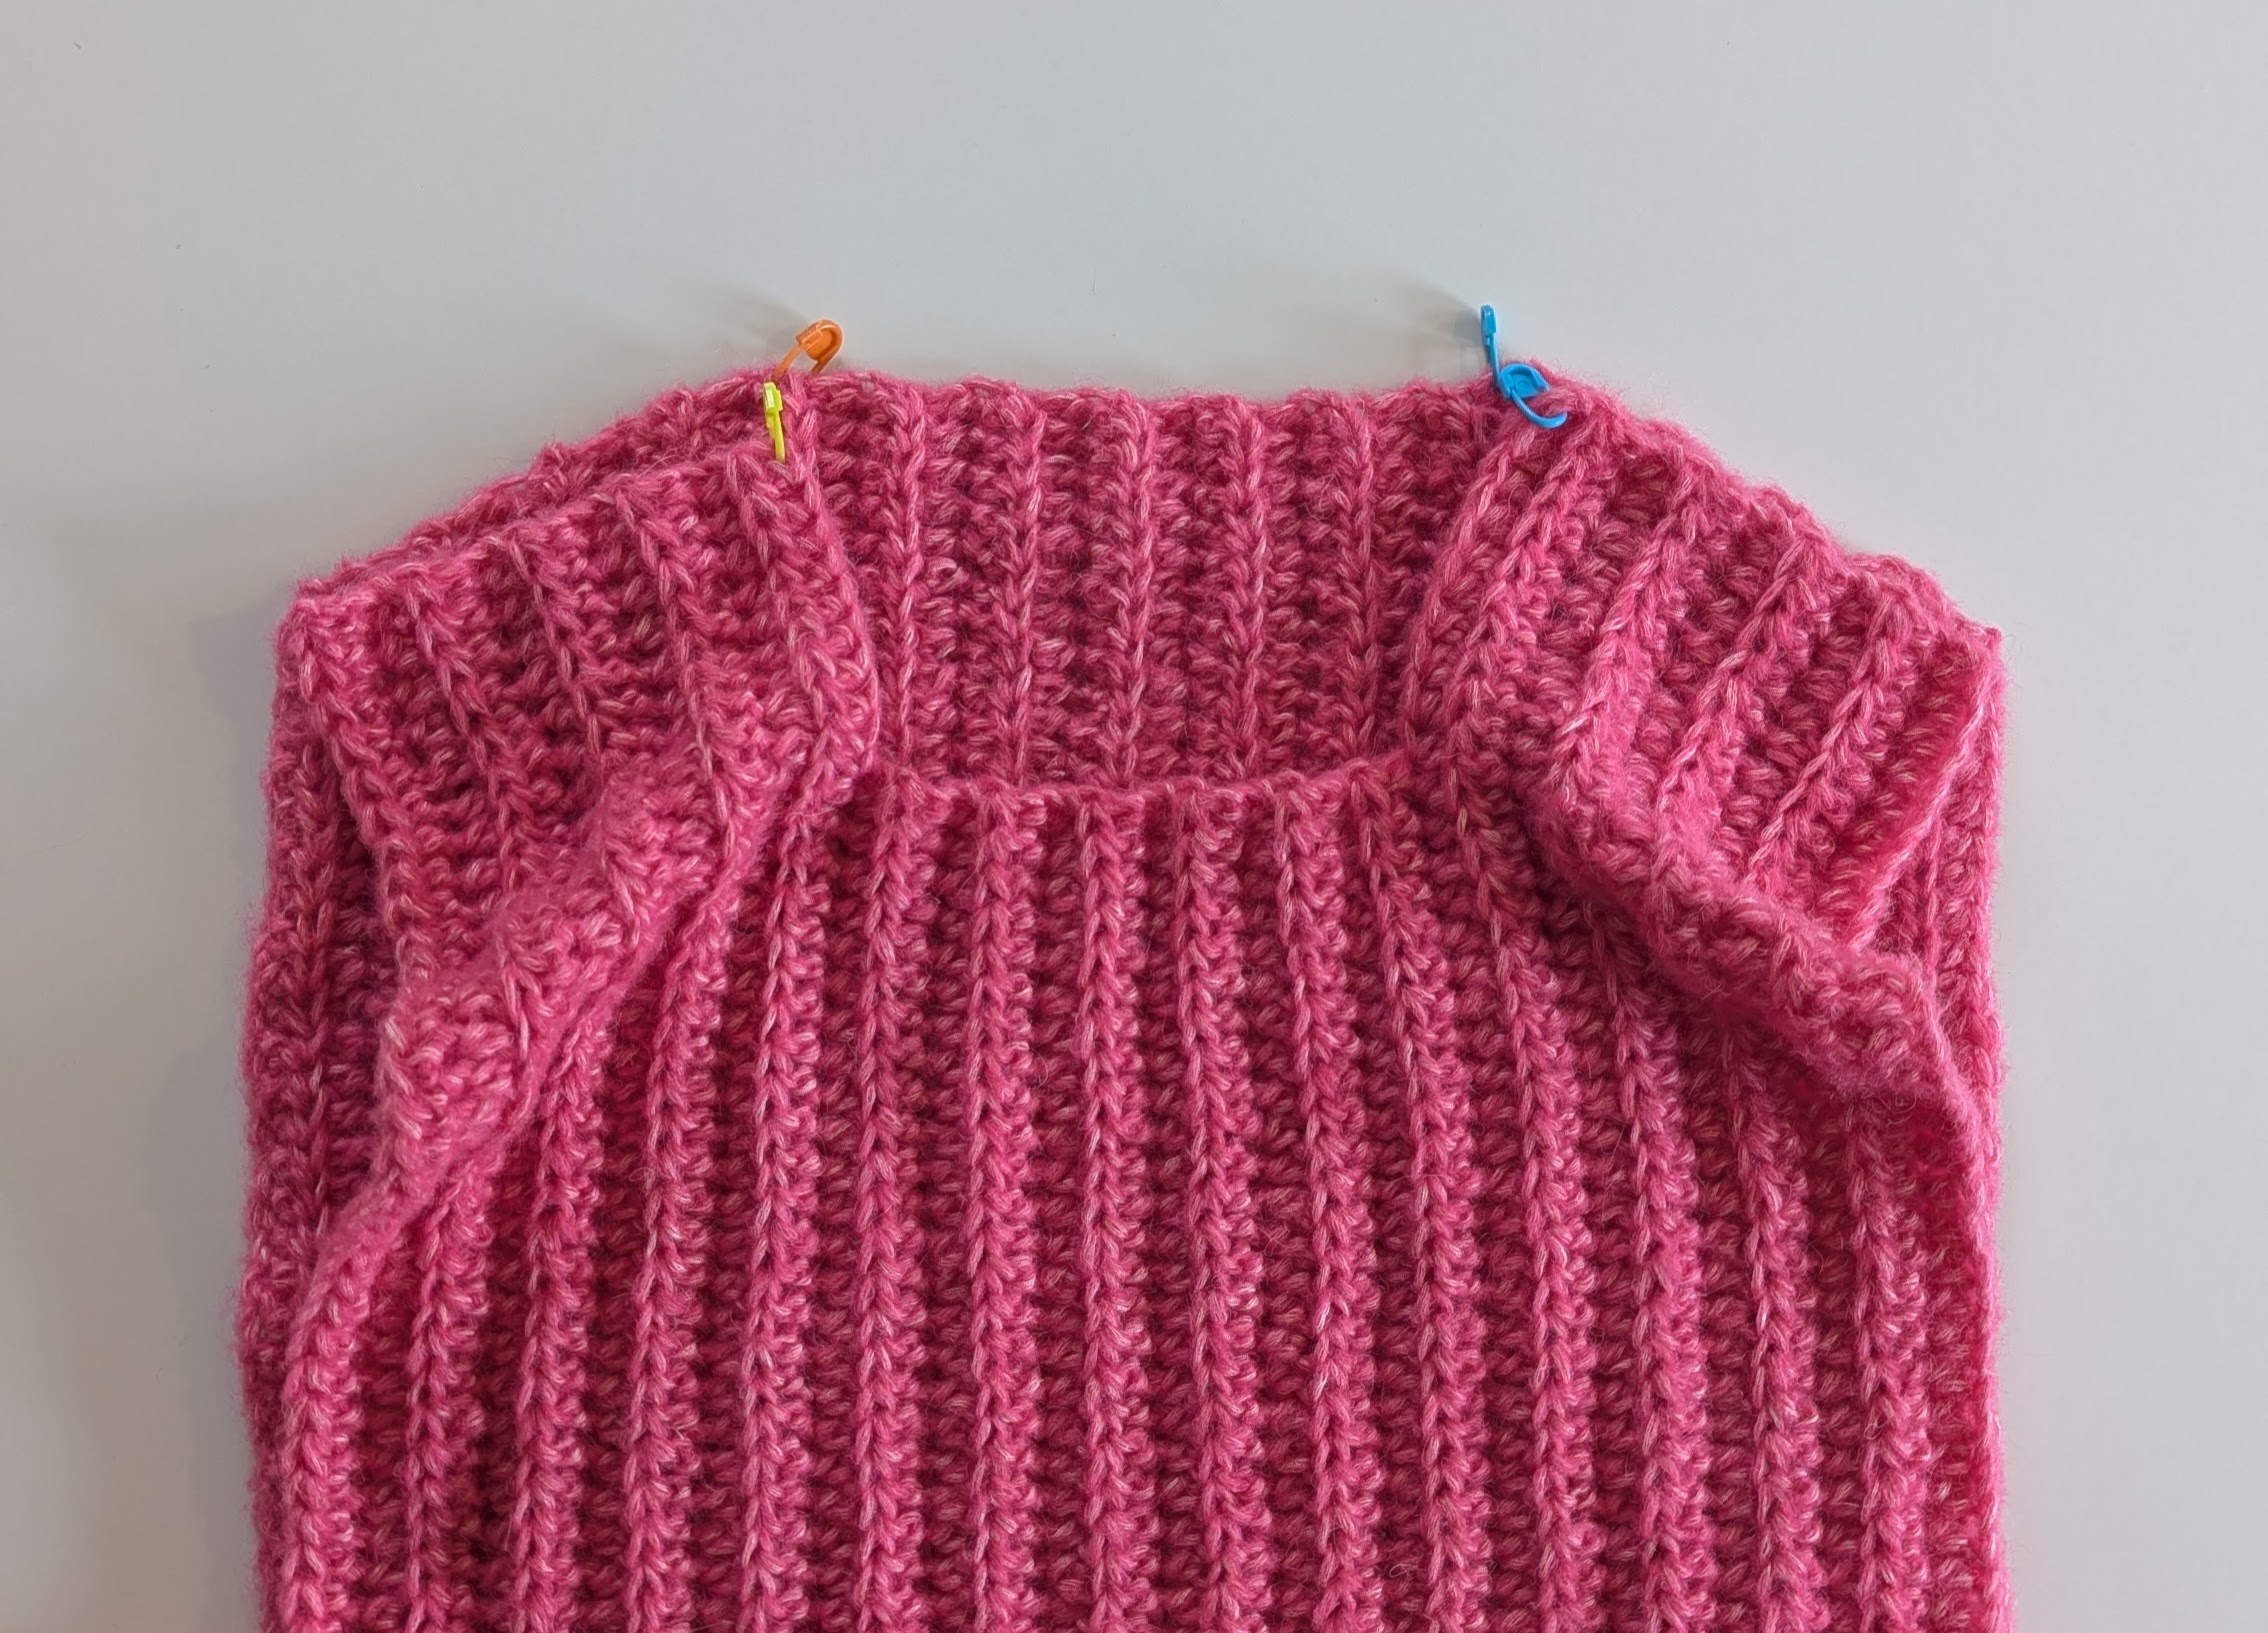
Sew the shoulders together
Place the front and back pieces with right sides facing each other so that the markers on each side of the neckline align. You can decide yourself which side is the right side – choose the one you think looks nicest. Sew the shoulders together, starting from each outer edge and working towards the markers at the neckline. A simple whip stitch works well – about two stitches per row. Make sure the rows match up between the back and front pieces as you sew, so it looks neat. Cut the yarn and weave in the ends.

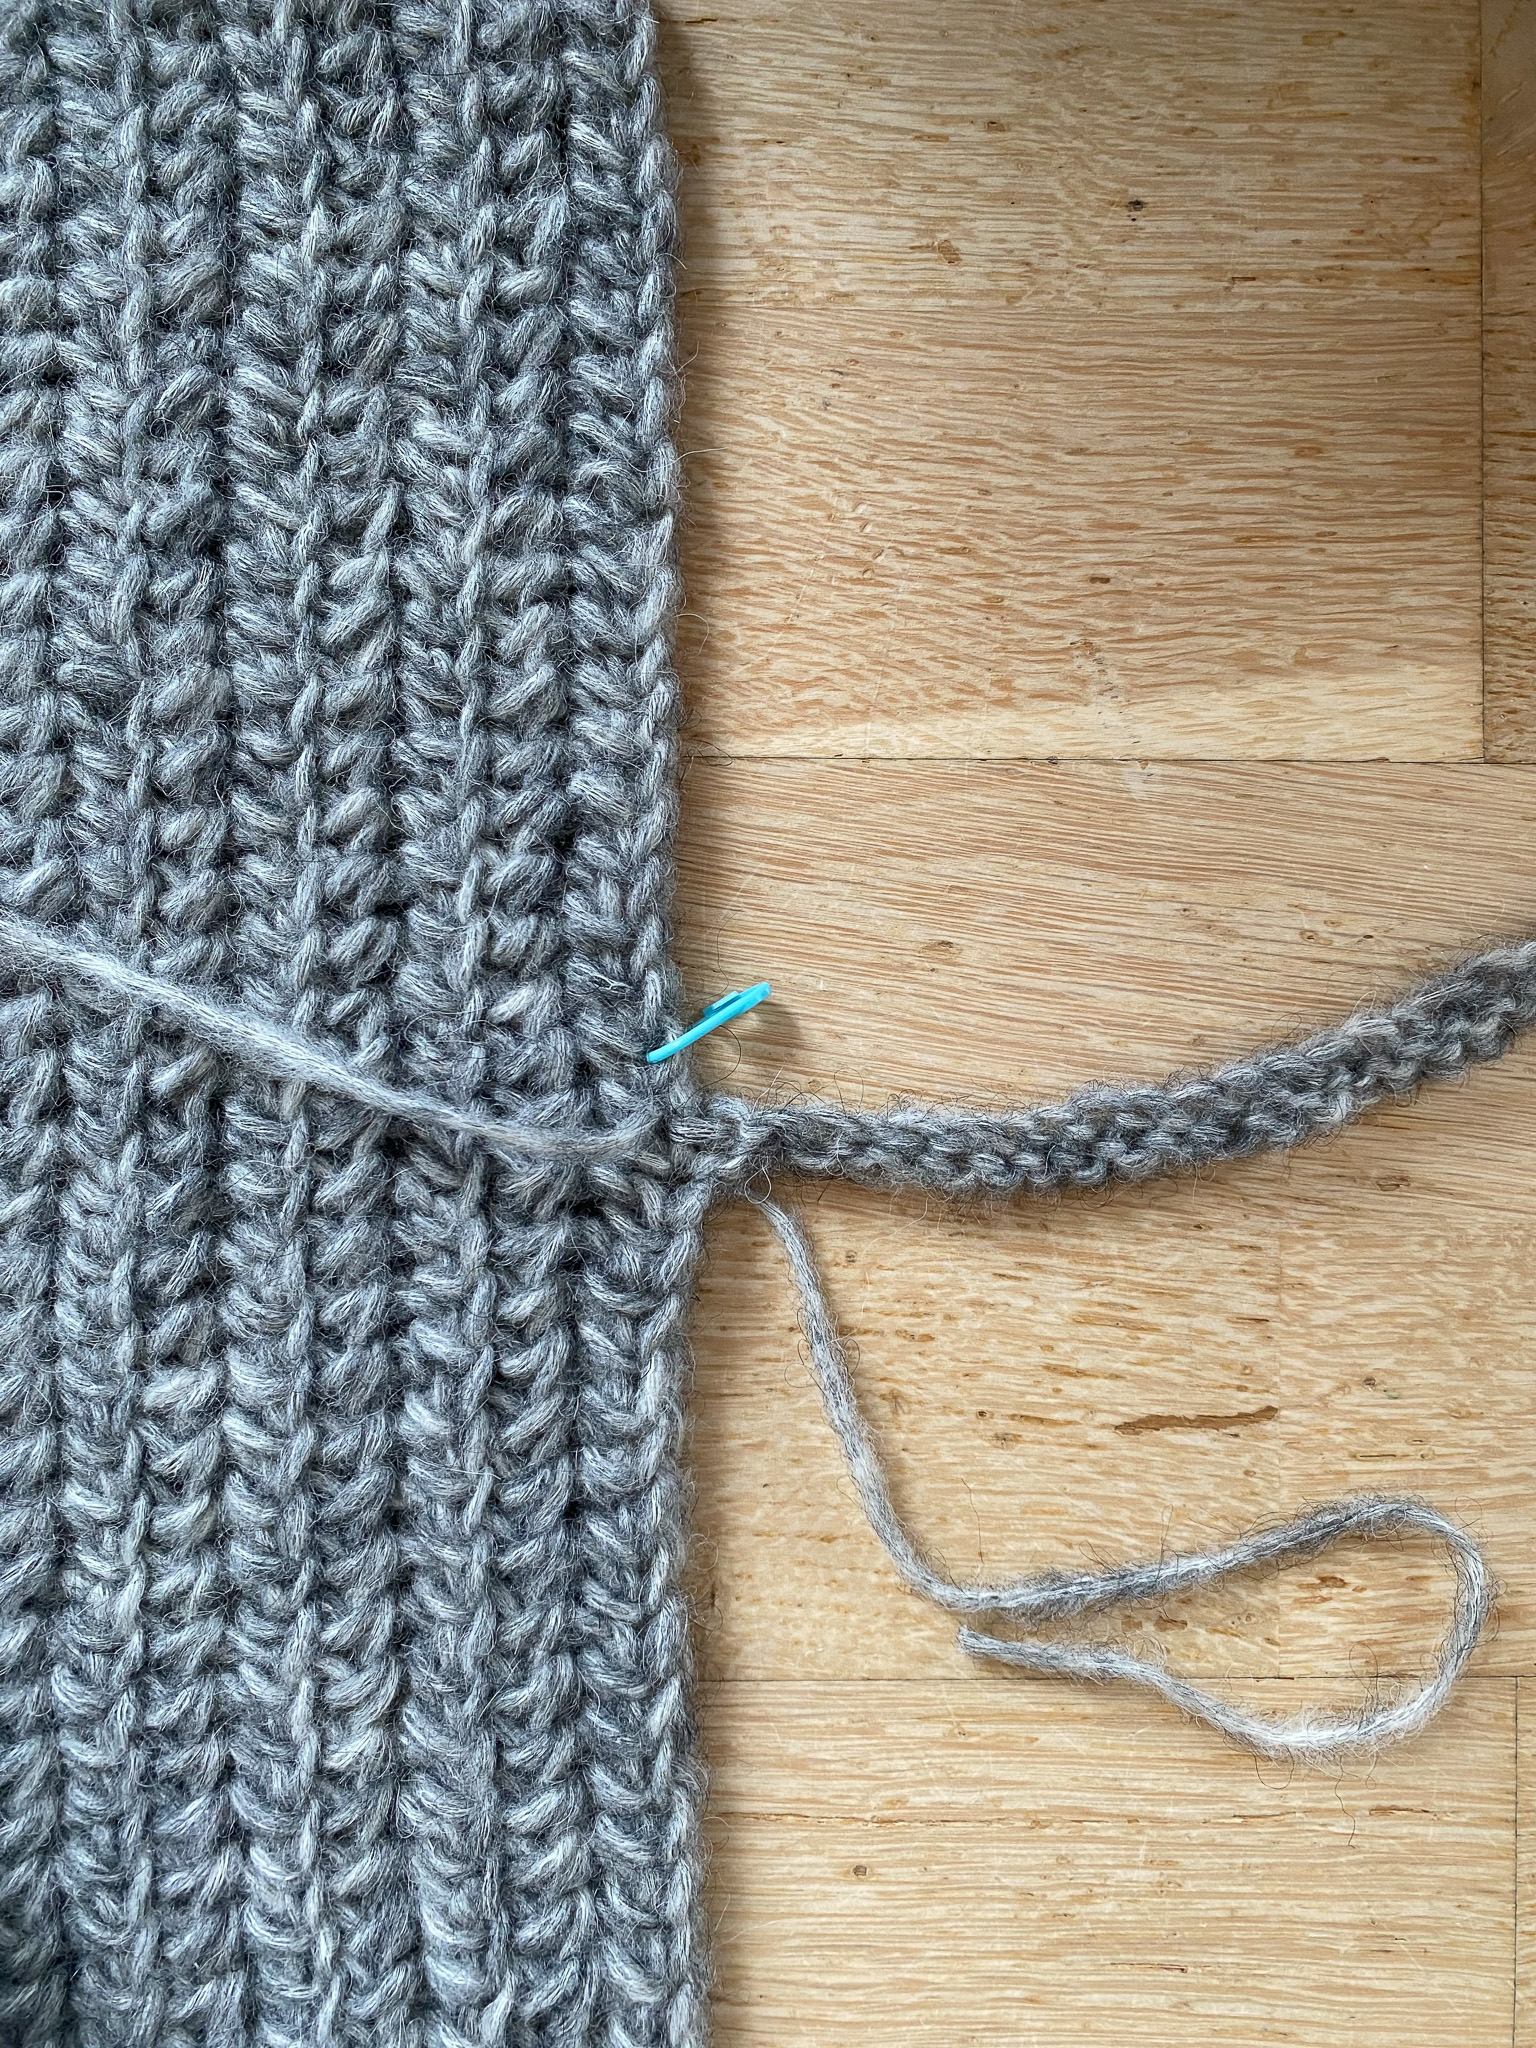
Thin tie straps
From the bottom edge on the right side of the back piece, count 20 half double crochets upward and insert the hook into the 21st half double crochet from the bottom (under both loops). Pull up a loop of yarn and chain until you have a chain about 40 cm long, or your desired length, then turn the chain. Slip stitch into the second chain from the hook and into each chain across the length of the chain. Attach the tie strap to the side of the back piece by making a slip stitch into the next half double crochet (the 22nd from the bottom). Cut the yarn and weave in the ends.
Repeat for the remaining three tie straps: on the left side of the back piece and on both sides of the front piece.
Wide tie straps
If you prefer wider tie straps that create larger, decorative bows at the sides:
From the bottom edge on the right side of the back piece, count 20 half double crochets upward and insert the hook into the 21st half double crochet from the bottom (under both loops). Yarn over and pull up a loop.
Row 1: Chain 1 (turning chain), then work 1 half double crochet into both loops of the next 5 half double crochets along the side edge of the back piece (i.e., into the 21st–25th half double crochets from the bottom). Turn your work. You now have 5 half double crochets in the row.
If you want an even wider strap, work into the 20th–26th half double crochets instead.
Row 2: Chain 1 (turning chain), then work 1 half double crochet into the back loop only of each stitch across the strap, turn your work. You now have 5 half double crochets in the row.
Repeat Row 2 until your strap measures about 40 cm, or your desired length. Fasten off and weave in ends.
Repeat for the remaining three tie straps: on the left side of the back piece and on both sides of the front piece.
Alternative to tie straps: side links
Crochet a short strip between the back and front piece if you prefer the vest to be joined at the sides without having to tie it.
From the bottom edge on the right side of the back piece, count 20 half double crochets upward and insert the hook into the 21st half double crochet from the bottom (under both loops). Yarn over and pull up a loop.
Row 1: Chain 1 (turning chain), then work 1 half double crochet into both loops of the next 5 half double crochets along the side edge of the back piece (i.e., into the 21st–25th half double crochets from the bottom). Turn your work. You now have 5 half double crochets in the row.
Row 2: Chain 1 (turning chain), then work 1 half double crochet into the back loop only of each stitch across the strip. Turn your work. You now have 5 half double crochets in the row.
Repeat Row 2 three more times so you have a total of 5 rows with 5 half double crochets in each row. Cut the yarn and sew the strip in place using the yarn tail, attaching it to the corresponding half double crochets (the 21st–25th from the bottom) on the side of the front piece.
Repeat for the second side link, but this time start from the bottom edge on the left side of the front piece and attach it to the back piece.
Collar
The collar is crocheted around the neckline, using single crochet stitches in the back loop only, to your desired height. Work just a few rounds for a standard crew neck, or keep adding rounds and fold it double for a cozy mock neck or loose turtleneck.
With the right side of the back piece facing you, insert your hook into the center back of the neckline, at the top of the middle row of the back piece. Yarn over and pull up a loop.
Round 1: Chain 1 (turning chain), work 1 single crochet into the top of the middle row of the back piece, continue with about 3 single crochets for every 2 rows along the back neckline, work 1 single crochet into each stitch down the side of the neckline on the front piece, then about 3 single crochets for every 2 rows across the front neckline, work 1 single crochet into each stitch up the other side of the neckline, then about 3 single crochets for every 2 rows along the back neckline. Close the round with a slip stitch into the first single crochet made. Do not turn. You will have about 54 single crochet stitches around the neckline.
Note! The exact stitch count around the collar is not critical. What matters is that it looks good and that the front and back pieces lie flat without being pulled tight or stretched by the collar stitches. If the collar feels too tight, crochet a few more single crochets in round 1 around the neckline; if it looks too loose, crochet fewer single crochets.
Round 2: Chain 1 (turning chain), then crochet 1 single crochet in the back loop only of each single crochet around the entire neckline, while decreasing 4 times by crocheting 2 single crochets together, once in each corner. Close the round with a slip stitch in the first single crochet of the round. Do not turn. You will have about 50 single crochets on this round.
Round 3: Chain 1 (turning chain), then work 1 single crochet in the back loop only of each single crochet around the entire neckline. Close the round with a slip stitch in the first single crochet of the round. Do not turn. You will have about 50 single crochets in total.
Repeat round 3 until the collar is as tall as you want it. Fasten off and weave in all ends.
You’re done!

Crochet Terms
This is the advanced part of the instructions. Need help along the way? See the simpler section.
Abbreviations
st(s) = stitch(es)
ch = chain
sl st = slip stitch
sc = single crochet
dec = decrease (2 sc together)
hdc = half double crochet
bp = back post
fp = front post
PM = place marker
M = marker
Before you start crocheting, it’s important to read the following:
Info
Sizes: XS (S-M, L-XL, 2-3X) fit bust circumference approx. 70–80 (85–100, 105–120, 130–145) cm. (The vest in the photos is size S-M.)
Vest width: approx. 37 (43, 49, 54) cm
Vest length: approx. 50 (55, 59, 59) cm
The Helen vest is worked in half double crochets in the back loop only, in rounds that go up and down the garment. The front and back pieces are worked separately and sewn together at the shoulders. Choose between thin or wide tie bands, or subtle loops that connect the front and back pieces at the sides. Finally, crochet the collar in single crochet around the neckline.
Start by choosing which size you will crochet. Then read through the entire instruction and mark the numbers that apply to your size. Next, crochet a gauge swatch to check your tension.
At the end of the instructions for each row, there is a stitch count given, like this: “= xx (xx, xx, xx) hdc.” Count your stitches occasionally to make sure you have the correct number. A tip is to place markers in the first and last hdc of each row, so you don’t accidentally miss a stitch or increase by mistake.
Each row starts with a chain stitch (sometimes called a turning chain) that does NOT count as a stitch and is not worked into. It is common to mistake the turning chain for the first hdc (or vice versa). This can cause you to have too many or too few hdc in the row. To avoid this, place a marker in the last/first hdc of the row immediately after crocheting it, so you quickly learn where to insert your hook.
The length of the vest can be adjusted. Start the front and back pieces with, for example, 11 fewer chains in the foundation chain than stated, which will make your vest about 10 cm shorter. If you do this, don’t forget to subtract the same number of stitches (in this example, 11) from the stitch count for all rows.
You can choose to crochet wide or narrow tie bands at the sides, or small loops/straps attached to both front and back pieces if you want to avoid tying.
Gauge:
In a 10 x 10 cm square, there should be 11 half double crochets in the back loop across the width and 7 rows worked back and forth in height.
To get the right size for your vest, it’s important that your gauge matches; if you get more or fewer than 11 stitches x 7 rows per 10 x 10 cm, your vest will be smaller or larger than intended. So first check your gauge by crocheting a swatch with a little more than 11 sts x 7 rows, then measure: if you have too many stitches or rows in 10 cm, switch to a bigger hook; if too few, switch to a smaller hook.
Front Piece
Foundation chain: Ch 56 (61, 66, 66), turn.
Row 1: hdc in second ch from hook and in each ch across, turn = 55 (60, 65, 65) hdc
Row 2: ch, hdc in back loop of each hdc across, turn = 55 (60, 65, 65) hdc
Repeat Row 2 another 5 (7, 9, 11) times for the right shoulder (left shoulder if you are left-handed).
You have now crocheted a total of 7 (9, 11, 13) rows with 55 (60, 65, 65) hdc.
Place a marker in the first hdc on Row 7 (9, 11, 13), leave it until assembly.
Row 8 (10, 12, 14): ch, hdc in back loop of the next 45 (50, 55, 55) hdc, turn when 10 hdc remain on the row = 45 (50, 55, 55) hdc
Row 9 (11, 13, 15): ch, hdc in back loop of each hdc across, turn = 45 (50, 55, 55) hdc
Repeat Row 9 (11, 13, 15) another 9 times for the neckline.
You have now crocheted 11 rows with 45 (50, 55, 55) hdc. Fasten off.
Row 19 (21, 23, 25): with new yarn, chain 10, then continue crocheting hdc in back loop of each hdc from the previous row, working top-down on the front piece.
Row 20 (22, 24, 26): ch, hdc in back loop of each hdc and in the 10 chains, turn = 55 (60, 65, 65) hdc
Place a marker in the last hdc at the end of Row 20 (22, 24, 26), leave until assembly.
Row 21 (23, 25, 27): ch, hdc in back loop of each hdc across, turn = 55 (60, 65, 65) hdc
Repeat Row 21 (23, 25, 27) another 5 (7, 9, 11) times.
You have now crocheted 7 (9, 11, 13) rows with 55 (60, 65, 65) hdc for the left shoulder (right shoulder if you are left-handed).
You have now crocheted a total of 26 (30, 34, 38) rows on the front piece: 7 (9, 11, 13) rows for each shoulder and 12 rows for the neckline in the center. Fasten off.
The markers at the top of Row 7 (9, 11, 13) and Row 20 (22, 24, 26) indicate where you will later start sewing the front piece to the back piece along the shoulders.

Back Piece
Foundation chain: Ch 51 (54, 57, 55), turn.
Row 1: hdc in second ch from hook and in each ch across, turn = 50 (53, 56, 54) hdc
Row 2: ch, hdc in back loop of each hdc across, make an extra hdc in both loops of the last hdc on the row, turn = 51 (54, 57, 55) hdc
Row 3: ch 2, hdc in second ch from hook, hdc in back loop of each hdc across, turn = 52 (55, 58, 56) hdc
Repeat Rows 2–3 another 1 (2, 3, 4) times, then repeat Row 2 once more.
You have now shaped the left shoulder (right shoulder if you are left-handed) and crocheted 6 (8, 10, 12) rows, with the last row having 55 (60, 65, 65) hdc.
Row 7 (9, 11, 13): ch, hdc in back loop of each hdc across, turn = 55 (60, 65, 65) hdc
Place a marker in the first hdc on Row 7 (9, 11, 13) to mark the end of the left shoulder (right shoulder if you’re left-handed) and the beginning of the neckline at the neck. Leave the marker until assembly.
Repeat Row 7 (9, 11, 13) another 14 times.
You have now crocheted 21 (23, 25, 27) rows on the back piece.
Place a marker in the last hdc on Row 20 (22, 24, 26) to mark the end of the neckline and the beginning of the right shoulder (left shoulder if you’re left-handed). Leave it until assembly.
Row 22 (24, 26, 28): ch, hdc in back loop of each hdc until 1 hdc remains, skip the last hdc, turn = 54 (59, 64, 64) hdc
Row 23 (25, 27, 29): ch, skip the first hdc, hdc in back loop of remaining hdc across, turn = 53 (58, 63, 63) hdc
Repeat Rows 22–23 (24–25, 26–27, 28–29) another 1 (2, 3, 4) times, then repeat Row 23 (25, 27, 29) once more.
You have now shaped the right shoulder (left shoulder if you’re left-handed) and crocheted a total of 26 (30, 34, 38) rows on the back piece, with the last row having 50 (53, 56, 54) hdc. Fasten off.
Sew the Shoulders Together
Place the front and back pieces right sides together so the markers on each side of the neckline line up. You decide which side is the right side—choose whichever side looks best to you.
Sew the shoulders starting from each outer edge toward the markers. A simple whipstitch works well, with a few stitches per row. Make sure the rows match up on the front and back pieces as you sew, so it looks neat.
Fasten off and weave in ends.
Thin Tie Straps
From the bottom edge on the right side of the back piece, count up 20 hdc, insert the hook into the 21st hdc from the bottom (under both loops), yarn over and pull up a loop.
Ch about 40 cm (or desired length), turn. Sc in the 2nd ch from the hook and in each remaining ch, fasten the tie strap with a sl st into the next hdc on the back piece (the 22nd hdc from the bottom), cut and fasten off.
Repeat for the other 3 tie straps—on the left side of the back piece and both sides of the front piece.
Wide Tie Straps
If you prefer wider tie straps that create bigger, decorative bows on the sides:
From the bottom edge on the right side of the back piece, count up 20 hdc, insert the hook into the 21st hdc from the bottom (under both loops), yarn over and pull up a loop. You can make these wider if you like.
Row 1: ch, hdc in both loops of the next 5 hdc along the edge of the back piece (i.e., 21st–25th hdc from the bottom), turn = 5 hdc
Row 2: ch, hdc in back loops only (BLO) of each hdc across the strip, turn = 5 hdc
Repeat Row 2 until your strap measures about 40 cm or desired length. Cut and fasten off.
Repeat for the other 3 straps—on the left side of the back piece and both sides of the front piece.
Alternative to Tie Straps: Side Links
Crochet a short strip between back and front pieces if you prefer the vest to stay closed without tying on the sides:
From the bottom edge on the right side of the back piece, count up 20 hdc, insert the hook into the 21st hdc from the bottom (under both loops), yarn over and pull up a loop.
Row 1: ch, hdc in both loops on the next 5 hdc along the edge of the back piece (21st–25th hdc from the bottom), turn = 5 hdc
Row 2: ch, hdc in BLO on each hdc across the strip, turn = 5 hdc
Repeat Row 2 three more times, cut yarn, and sew the yarn end attaching the strip to the corresponding 21st–25th hdc on the side of the front piece.
Repeat for the other link, starting from the bottom edge on the left side of the front piece and attach to the back piece.
Collar
The collar is worked around the neckline in single crochet (sc) in the back loop only (BLO) to the desired height. Work just a few rounds for a standard crew neck, or continue working round after round and fold it double for a cozy funnel neck or loose turtleneck.
With the right side of the back piece facing you, insert your hook into the center of the neck, at the top of the middle row of the back piece, yarn over, and pull up a loop.
Round 1: ch, sc in the top of the back piece’s middle row, then continue working approx. 3 sc for every 2 rows along the neck, 1 sc in each st down the side of the neckline on the front piece, approx. 3 sc for every 2 rows across the front center, 1 sc in each st up the side of the neckline on the front piece, approx. 3 sc for every 2 rows along the neck, join with sl st in first sc, do not turn = about 54 sc around the neckline.
Note: The exact stitch count around the collar is not crucial—the important thing is that it looks good and that the fabric of the front and back pieces lies flat, without being pulled in or stretched out by the collar stitches.
If the collar feels too tight, work a few extra sc in Round 1 around the neckline; if it looks too loose, work fewer sc.
Round 2: ch, sc in BLO of each sc around, while decreasing 4 times by working 2 sc together at each corner. Join with sl st to first sc = about 50 sc.
Round 3: ch, sc in BLO of each sc around, join with sl st to first sc = about 50 sc.
Repeat Round 3 until the collar is the desired height. Fasten off and weave in ends.

You are done!
The rights to this pattern belong to MYO Make Your Own. The pattern or its pictures may not be copied, shared or resold either in parts or in its entirety, but you may sell items you have crocheted from this pattern. If you have questions about the pattern, contact MYO at hello@makeyourown.se.
Before you start crocheting, it’s important to read the following.
Info
Sizes: XS (S-M, L-XL, 2-3X) fits a bust circumference of approx. 70–80 (85–100, 105–120, 130–145) cm. (The vest shown in the photos is size S-M.)
Vest width: approx. 37 (43, 49, 54) cm
Vest length: approx. 50 (55, 59, 59) cm
The Helen vest is crocheted in half double crochet stitches in the back loop only, in rows that run up and down the garment. The front and back pieces are crocheted separately and sewn together at the shoulders. Choose between narrow or wide ties, or more discreet straps that connect the front and back pieces at the sides. The collar is worked last, in single crochet stitches around the neckline.
Start by choosing the size you want to make. Then read through the entire pattern and highlight the numbers that correspond to your size. Next, crochet a swatch to check your gauge.
At the end of the instructions for each row, you will see a stitch count given like this: “= xx (xx, xx, xx) half double crochet stitches.” Check your stitch count every now and then to make sure you have the correct number for each row. A good tip is to place stitch markers in the first and last half double crochet of each row so you don’t accidentally miss a stitch or make an increase.
Each row begins with a chain stitch (sometimes called a turning chain) which does not count as a stitch and should not be worked into. It’s common to confuse the turning chain with the first half double crochet (or vice versa), which can cause you to end up with too many or too few stitches. To avoid this, place a marker in the first and last stitch immediately after working them—you’ll quickly learn where to insert your hook.
The length of the vest can be adjusted. For example, if you start the front and back pieces with 11 fewer chains than stated, your vest will be approx. 10 cm shorter. Just remember to also subtract the same number of stitches (in this example, 11) from the stitch count for all rows.
You can choose to crochet wide or narrow ties at the sides, or small straps that are permanently attached to both the front and back pieces if you prefer not to tie the sides.
Gauge: In a 10 x 10 cm square, you should have 11 half double crochet stitches in the back loop across the width and 7 rows back and forth in height.
To ensure your vest fits correctly, it’s important that you match the gauge; if you have more or fewer than 11 stitches x 7 rows per 10 x 10 cm, your vest will turn out smaller or larger than intended. Always check your gauge first by making a swatch with slightly more than 11 stitches x 7 rows. Then measure: if you have too many stitches or rows in 10 cm, switch to a larger hook; if you have too few stitches or rows in 10 cm, switch to a smaller hook.
Now the pattern begins.
Front piece
Starting chain: Make a slip knot on the hook and crochet 56 (61, 66, 66) chain stitches. You now have a long foundation chain that will run along one long side of the front piece.
Row 1 (running from the shoulder down): Work a half double crochet (hdc) into the second chain from the hook, and into each remaining chain across. Turn your work. You should now have a total of 55 (60, 65, 65) hdc in the row.
Row 2 (running from the bottom up toward the shoulder): Chain 1 (also called a turning chain), then work 1 hdc in the back loop only of each hdc across the row. Turn your work. Total: 55 (60, 65, 65) hdc.
Repeat Row 2 another 5 (7, 9, 11) times. Even-numbered rows run upward toward the shoulder, odd-numbered rows run downward from the shoulder toward the bottom edge.
You have now worked a total of 7 (9, 11, 13) rows, each with 55 (60, 65, 65) hdc. This forms the right side of the front piece (left if you are left-handed).
Place a stitch marker in the first hdc of Row 7 (9, 11, 13). Leave it there until it’s time to sew the shoulders together.
Row 8 (10, 12, 14) (upward): Chain 1 (turning chain), then work 1 half double crochet in the back loop only of the next 45 (50, 55, 55) hdc. Turn your work when there are 10 half double crochets left unworked in the row. Total: 45 (50, 55, 55) half double crochets.
Row 9 (11, 13, 15) (downward): Chain 1 (turning chain), then work 1 half double crochets in the back loop only of each half double crochets across the row. Turn your work. Total: 45 (50, 55, 55) half double crochets.
Repeat Row 9 (11, 13, 15) another 9 times to shape the front neckline opening of the vest.
You should now have worked 11 rows in total with 45 (50, 55, 55) half double crochets in each row. Fasten off and weave in all ends.
Row 19 (21, 23, 25) (downward): With new yarn, make a slip knot and crochet 10 chain stitches. Yarn over, insert your hook under the back loop of the last hdc from the previous row (at the neckline edge), and work 1 hdc there. Continue working hdc in the back loop only across every half double crochets of the previous row, all the way down the front piece. Total: 45 (50, 55, 55) half double crochets plus the 10 chains at the top of the shoulder.
Row 20 (22, 24, 26) (upward): Chain 1 (turning chain), then work 1 half double crochet in the back loop only of each hdc across the row, and also into the 10 chains at the top. Turn your work. Total: 55 (60, 65, 65) half double crochet.
Place a stitch marker in the last half double crochet at the end of Row 20 (22, 24, 26) and leave it there until it’s time to sew the shoulders together.
Row 21 (23, 25, 27) (downward): Chain 1 (turning chain), then work 1 half double crochet in the back loop only of each half double crochet across the row. Turn your work. Total: 55 (60, 65, 65) half double crochet.
Repeat Row 21 (23, 25, 27) another 5 (7, 9, 11) times.
You should now have 7 (9, 11, 13) rows with 55 (60, 65, 65) half double crochet in each row for the left shoulder (right shoulder if you are left-handed).
In total, you will have crocheted 26 (30, 34, 38) rows for the front piece: 7 (9, 11, 13) rows for each shoulder, and 12 rows for the center neckline opening.
Fasten off and weave in all ends. The stitch markers at the top of Rows 7 (9, 11, 13) and 20 (22, 24, 26) indicate where you will later join the front piece to the back piece along the top edge of the shoulders.
Back piece
The back piece is crocheted in almost the same way as the front piece, except there is no neckline. Instead, the top edge is shaped so that the shoulders slope from the inside of the neck outward.
Foundation chain: Make a slip knot on your hook and crochet 51 (54, 57, 55) chain stitches. You now have a long chain that will run along one long side of the back piece.
Row 1 (runs from the top of the shoulder down): Crochet a half double crochet (hdc) into the second chain from the hook and in all remaining chains, turn your work. You now have 50 (53, 56, 54) hdc stitches in the row.
Row 2 (runs from the bottom up toward the shoulder): Chain 1 (turning chain), then work one hdc in the back loop only of each stitch along the row. In the last stitch of the row, work one hdc through both loops, turn your work. You now have 51 (54, 57, 55) hdc in the row.
Row 3 (downward): Start by chaining 2, then work the first hdc into the first of those two chain stitches (the second chain from the hook). Continue as usual, crocheting hdc in the back loop only of each stitch across the row. Turn your work. You now have 52 (55, 58, 56) hdc in the row.
Repeat Rows 2–3 another 1 (2, 3, 4) times, then repeat Row 2 one more time. Even-numbered rows run upward toward the shoulder, and odd-numbered rows run downward from the shoulder toward the hem.
You have now shaped the left shoulder (right shoulder if you are left-handed) and crocheted 6 (8, 10, 12) rows, with the last row having 55 (60, 65, 65) hdc stitches.
Row 7 (9, 11, 13) (downward): Chain 1 (turning chain), then work one half double crochet in the back loop only of each stitch across the row. Turn your work. You now have 55 (60, 65, 65) half double crochet in the row.
Place a stitch marker in the first half double crochet of Row 7 (9, 11, 13) to mark the end of the left shoulder (right shoulder if you are left-handed) and the beginning of the neckline at the back. Leave it there until it’s time to sew the shoulders together.
Repeat Row 7 (9, 11, 13) another 14 times. You should now have crocheted 21 (23, 25, 27) rows for the back piece, with the last row having 55 (60, 65, 65) half double crochet.
Place a stitch marker in the last half double crochet of Row 20 (22, 24, 26) to mark the end of the neckline and the beginning of the right shoulder (left shoulder if you are left-handed). Leave it there until it’s time to sew the shoulders together.
Row 22 (24, 26, 28) (upward): Chain 1 (turning chain), then work one half double crochet in the back loop only of each stitch until you have one stitch left in the row. Skip this last stitch. Turn your work. You now have 54 (59, 64, 64) half double crochet in the row.
Row 23 (25, 27, 29) (downward): Chain 1 (turning chain), skip the first stitch of the row, then work one half double crochet in the back loop only of each remaining stitch across the row. Turn your work. You now have 53 (58, 63, 63) half double crochet in the row.
Repeat Rows 22–23 (24–25, 26–27, 28–29) another 1 (2, 3, 4) times, then repeat Row 23 (25, 27, 29) once more.
You have now shaped the right shoulder (left shoulder if you are left-handed) and crocheted a total of 26 (30, 34, 38) rows for the back piece, with the last row having 50 (53, 56, 54) half double crochet stitches. Fasten off and weave in all ends.
Sew the shoulders together
Place the front and back pieces with right sides facing each other so that the markers on each side of the neckline align. You can decide yourself which side is the right side – choose the one you think looks nicest. Sew the shoulders together, starting from each outer edge and working towards the markers at the neckline. A simple whip stitch works well – about two stitches per row. Make sure the rows match up between the back and front pieces as you sew, so it looks neat. Cut the yarn and weave in the ends.
Thin tie straps
From the bottom edge on the right side of the back piece, count 20 half double crochets upward and insert the hook into the 21st half double crochet from the bottom (under both loops). Pull up a loop of yarn and chain until you have a chain about 40 cm long, or your desired length, then turn the chain. Slip stitch into the second chain from the hook and into each chain across the length of the chain. Attach the tie strap to the side of the back piece by making a slip stitch into the next half double crochet (the 22nd from the bottom). Cut the yarn and weave in the ends.
Repeat for the remaining three tie straps: on the left side of the back piece and on both sides of the front piece.
Wide tie straps
If you prefer wider tie straps that create larger, decorative bows at the sides:
From the bottom edge on the right side of the back piece, count 20 half double crochets upward and insert the hook into the 21st half double crochet from the bottom (under both loops). Yarn over and pull up a loop.
Row 1: Chain 1 (turning chain), then work 1 half double crochet into both loops of the next 5 half double crochets along the side edge of the back piece (i.e., into the 21st–25th half double crochets from the bottom). Turn your work. You now have 5 half double crochets in the row.
If you want an even wider strap, work into the 20th–26th half double crochets instead.
Row 2: Chain 1 (turning chain), then work 1 half double crochet into the back loop only of each stitch across the strap, turn your work. You now have 5 half double crochets in the row.
Repeat Row 2 until your strap measures about 40 cm, or your desired length. Fasten off and weave in ends.
Repeat for the remaining three tie straps: on the left side of the back piece and on both sides of the front piece.
Alternative to tie straps: side links
Crochet a short strip between the back and front piece if you prefer the vest to be joined at the sides without having to tie it.
From the bottom edge on the right side of the back piece, count 20 half double crochets upward and insert the hook into the 21st half double crochet from the bottom (under both loops). Yarn over and pull up a loop.
Row 1: Chain 1 (turning chain), then work 1 half double crochet into both loops of the next 5 half double crochets along the side edge of the back piece (i.e., into the 21st–25th half double crochets from the bottom). Turn your work. You now have 5 half double crochets in the row.
Row 2: Chain 1 (turning chain), then work 1 half double crochet into the back loop only of each stitch across the strip. Turn your work. You now have 5 half double crochets in the row.
Repeat Row 2 three more times so you have a total of 5 rows with 5 half double crochets in each row. Cut the yarn and sew the strip in place using the yarn tail, attaching it to the corresponding half double crochets (the 21st–25th from the bottom) on the side of the front piece.
Repeat for the second side link, but this time start from the bottom edge on the left side of the front piece and attach it to the back piece.
Collar
The collar is crocheted around the neckline, using single crochet stitches in the back loop only, to your desired height. Work just a few rounds for a standard crew neck, or keep adding rounds and fold it double for a cozy mock neck or loose turtleneck.
With the right side of the back piece facing you, insert your hook into the center back of the neckline, at the top of the middle row of the back piece. Yarn over and pull up a loop.
Round 1: Chain 1 (turning chain), work 1 single crochet into the top of the middle row of the back piece, continue with about 3 single crochets for every 2 rows along the back neckline, work 1 single crochet into each stitch down the side of the neckline on the front piece, then about 3 single crochets for every 2 rows across the front neckline, work 1 single crochet into each stitch up the other side of the neckline, then about 3 single crochets for every 2 rows along the back neckline. Close the round with a slip stitch into the first single crochet made. Do not turn. You will have about 54 single crochet stitches around the neckline.
Note! The exact stitch count around the collar is not critical. What matters is that it looks good and that the front and back pieces lie flat without being pulled tight or stretched by the collar stitches. If the collar feels too tight, crochet a few more single crochets in round 1 around the neckline; if it looks too loose, crochet fewer single crochets.
Round 2: Chain 1 (turning chain), then crochet 1 single crochet in the back loop only of each single crochet around the entire neckline, while decreasing 4 times by crocheting 2 single crochets together, once in each corner. Close the round with a slip stitch in the first single crochet of the round. Do not turn. You will have about 50 single crochets on this round.
Round 3: Chain 1 (turning chain), then work 1 single crochet in the back loop only of each single crochet around the entire neckline. Close the round with a slip stitch in the first single crochet of the round. Do not turn. You will have about 50 single crochets in total.
Repeat round 3 until the collar is as tall as you want it. Fasten off and weave in all ends.
You’re done!
Crochet Terms
This is the advanced part of the instructions. Need help along the way? See the simpler section.
Abbreviations
st(s) = stitch(es)
ch = chain
sl st = slip stitch
sc = single crochet
dec = decrease (2 sc together)
hdc = half double crochet
bp = back post
fp = front post
PM = place marker
M = marker
Before you start crocheting, it’s important to read the following:
Info
Sizes: XS (S-M, L-XL, 2-3X) fit bust circumference approx. 70–80 (85–100, 105–120, 130–145) cm. (The vest in the photos is size S-M.)
Vest width: approx. 37 (43, 49, 54) cm
Vest length: approx. 50 (55, 59, 59) cm
The Helen vest is worked in half double crochets in the back loop only, in rounds that go up and down the garment. The front and back pieces are worked separately and sewn together at the shoulders. Choose between thin or wide tie bands, or subtle loops that connect the front and back pieces at the sides. Finally, crochet the collar in single crochet around the neckline.
Start by choosing which size you will crochet. Then read through the entire instruction and mark the numbers that apply to your size. Next, crochet a gauge swatch to check your tension.
At the end of the instructions for each row, there is a stitch count given, like this: “= xx (xx, xx, xx) hdc.” Count your stitches occasionally to make sure you have the correct number. A tip is to place markers in the first and last hdc of each row, so you don’t accidentally miss a stitch or increase by mistake.
Each row starts with a chain stitch (sometimes called a turning chain) that does NOT count as a stitch and is not worked into. It is common to mistake the turning chain for the first hdc (or vice versa). This can cause you to have too many or too few hdc in the row. To avoid this, place a marker in the last/first hdc of the row immediately after crocheting it, so you quickly learn where to insert your hook.
The length of the vest can be adjusted. Start the front and back pieces with, for example, 11 fewer chains in the foundation chain than stated, which will make your vest about 10 cm shorter. If you do this, don’t forget to subtract the same number of stitches (in this example, 11) from the stitch count for all rows.
You can choose to crochet wide or narrow tie bands at the sides, or small loops/straps attached to both front and back pieces if you want to avoid tying.
Gauge:
In a 10 x 10 cm square, there should be 11 half double crochets in the back loop across the width and 7 rows worked back and forth in height.
To get the right size for your vest, it’s important that your gauge matches; if you get more or fewer than 11 stitches x 7 rows per 10 x 10 cm, your vest will be smaller or larger than intended. So first check your gauge by crocheting a swatch with a little more than 11 sts x 7 rows, then measure: if you have too many stitches or rows in 10 cm, switch to a bigger hook; if too few, switch to a smaller hook.
Front Piece
Foundation chain: Ch 56 (61, 66, 66), turn.
Row 1: hdc in second ch from hook and in each ch across, turn = 55 (60, 65, 65) hdc
Row 2: ch, hdc in back loop of each hdc across, turn = 55 (60, 65, 65) hdc
Repeat Row 2 another 5 (7, 9, 11) times for the right shoulder (left shoulder if you are left-handed).
You have now crocheted a total of 7 (9, 11, 13) rows with 55 (60, 65, 65) hdc.
Place a marker in the first hdc on Row 7 (9, 11, 13), leave it until assembly.
Row 8 (10, 12, 14): ch, hdc in back loop of the next 45 (50, 55, 55) hdc, turn when 10 hdc remain on the row = 45 (50, 55, 55) hdc
Row 9 (11, 13, 15): ch, hdc in back loop of each hdc across, turn = 45 (50, 55, 55) hdc
Repeat Row 9 (11, 13, 15) another 9 times for the neckline.
You have now crocheted 11 rows with 45 (50, 55, 55) hdc. Fasten off.
Row 19 (21, 23, 25): with new yarn, chain 10, then continue crocheting hdc in back loop of each hdc from the previous row, working top-down on the front piece.
Row 20 (22, 24, 26): ch, hdc in back loop of each hdc and in the 10 chains, turn = 55 (60, 65, 65) hdc
Place a marker in the last hdc at the end of Row 20 (22, 24, 26), leave until assembly.
Row 21 (23, 25, 27): ch, hdc in back loop of each hdc across, turn = 55 (60, 65, 65) hdc
Repeat Row 21 (23, 25, 27) another 5 (7, 9, 11) times.
You have now crocheted 7 (9, 11, 13) rows with 55 (60, 65, 65) hdc for the left shoulder (right shoulder if you are left-handed).
You have now crocheted a total of 26 (30, 34, 38) rows on the front piece: 7 (9, 11, 13) rows for each shoulder and 12 rows for the neckline in the center. Fasten off.
The markers at the top of Row 7 (9, 11, 13) and Row 20 (22, 24, 26) indicate where you will later start sewing the front piece to the back piece along the shoulders.
Back Piece
Foundation chain: Ch 51 (54, 57, 55), turn.
Row 1: hdc in second ch from hook and in each ch across, turn = 50 (53, 56, 54) hdc
Row 2: ch, hdc in back loop of each hdc across, make an extra hdc in both loops of the last hdc on the row, turn = 51 (54, 57, 55) hdc
Row 3: ch 2, hdc in second ch from hook, hdc in back loop of each hdc across, turn = 52 (55, 58, 56) hdc
Repeat Rows 2–3 another 1 (2, 3, 4) times, then repeat Row 2 once more.
You have now shaped the left shoulder (right shoulder if you are left-handed) and crocheted 6 (8, 10, 12) rows, with the last row having 55 (60, 65, 65) hdc.
Row 7 (9, 11, 13): ch, hdc in back loop of each hdc across, turn = 55 (60, 65, 65) hdc
Place a marker in the first hdc on Row 7 (9, 11, 13) to mark the end of the left shoulder (right shoulder if you’re left-handed) and the beginning of the neckline at the neck. Leave the marker until assembly.
Repeat Row 7 (9, 11, 13) another 14 times.
You have now crocheted 21 (23, 25, 27) rows on the back piece.
Place a marker in the last hdc on Row 20 (22, 24, 26) to mark the end of the neckline and the beginning of the right shoulder (left shoulder if you’re left-handed). Leave it until assembly.
Row 22 (24, 26, 28): ch, hdc in back loop of each hdc until 1 hdc remains, skip the last hdc, turn = 54 (59, 64, 64) hdc
Row 23 (25, 27, 29): ch, skip the first hdc, hdc in back loop of remaining hdc across, turn = 53 (58, 63, 63) hdc
Repeat Rows 22–23 (24–25, 26–27, 28–29) another 1 (2, 3, 4) times, then repeat Row 23 (25, 27, 29) once more.
You have now shaped the right shoulder (left shoulder if you’re left-handed) and crocheted a total of 26 (30, 34, 38) rows on the back piece, with the last row having 50 (53, 56, 54) hdc. Fasten off.
Sew the Shoulders Together
Place the front and back pieces right sides together so the markers on each side of the neckline line up. You decide which side is the right side—choose whichever side looks best to you.
Sew the shoulders starting from each outer edge toward the markers. A simple whipstitch works well, with a few stitches per row. Make sure the rows match up on the front and back pieces as you sew, so it looks neat.
Fasten off and weave in ends.
Thin Tie Straps
From the bottom edge on the right side of the back piece, count up 20 hdc, insert the hook into the 21st hdc from the bottom (under both loops), yarn over and pull up a loop.
Ch about 40 cm (or desired length), turn. Sc in the 2nd ch from the hook and in each remaining ch, fasten the tie strap with a sl st into the next hdc on the back piece (the 22nd hdc from the bottom), cut and fasten off.
Repeat for the other 3 tie straps—on the left side of the back piece and both sides of the front piece.
Wide Tie Straps
If you prefer wider tie straps that create bigger, decorative bows on the sides:
From the bottom edge on the right side of the back piece, count up 20 hdc, insert the hook into the 21st hdc from the bottom (under both loops), yarn over and pull up a loop. You can make these wider if you like.
Row 1: ch, hdc in both loops of the next 5 hdc along the edge of the back piece (i.e., 21st–25th hdc from the bottom), turn = 5 hdc
Row 2: ch, hdc in back loops only (BLO) of each hdc across the strip, turn = 5 hdc
Repeat Row 2 until your strap measures about 40 cm or desired length. Cut and fasten off.
Repeat for the other 3 straps—on the left side of the back piece and both sides of the front piece.
Alternative to Tie Straps: Side Links
Crochet a short strip between back and front pieces if you prefer the vest to stay closed without tying on the sides:
From the bottom edge on the right side of the back piece, count up 20 hdc, insert the hook into the 21st hdc from the bottom (under both loops), yarn over and pull up a loop.
Row 1: ch, hdc in both loops on the next 5 hdc along the edge of the back piece (21st–25th hdc from the bottom), turn = 5 hdc
Row 2: ch, hdc in BLO on each hdc across the strip, turn = 5 hdc
Repeat Row 2 three more times, cut yarn, and sew the yarn end attaching the strip to the corresponding 21st–25th hdc on the side of the front piece.
Repeat for the other link, starting from the bottom edge on the left side of the front piece and attach to the back piece.
Collar
The collar is worked around the neckline in single crochet (sc) in the back loop only (BLO) to the desired height. Work just a few rounds for a standard crew neck, or continue working round after round and fold it double for a cozy funnel neck or loose turtleneck.
With the right side of the back piece facing you, insert your hook into the center of the neck, at the top of the middle row of the back piece, yarn over, and pull up a loop.
Round 1: ch, sc in the top of the back piece’s middle row, then continue working approx. 3 sc for every 2 rows along the neck, 1 sc in each st down the side of the neckline on the front piece, approx. 3 sc for every 2 rows across the front center, 1 sc in each st up the side of the neckline on the front piece, approx. 3 sc for every 2 rows along the neck, join with sl st in first sc, do not turn = about 54 sc around the neckline.
Note: The exact stitch count around the collar is not crucial—the important thing is that it looks good and that the fabric of the front and back pieces lies flat, without being pulled in or stretched out by the collar stitches.
If the collar feels too tight, work a few extra sc in Round 1 around the neckline; if it looks too loose, work fewer sc.
Round 2: ch, sc in BLO of each sc around, while decreasing 4 times by working 2 sc together at each corner. Join with sl st to first sc = about 50 sc.
Round 3: ch, sc in BLO of each sc around, join with sl st to first sc = about 50 sc.
Repeat Round 3 until the collar is the desired height. Fasten off and weave in ends.
You are done!
The rights to this pattern belong to MYO Make Your Own. The pattern or its pictures may not be copied, shared or resold either in parts or in its entirety, but you may sell items you have crocheted from this pattern. If you have questions about the pattern, contact MYO at hello@makeyourown.se.
%20(5).jpg)
Share your creations with us
Thank you!
Your comment was sent!