
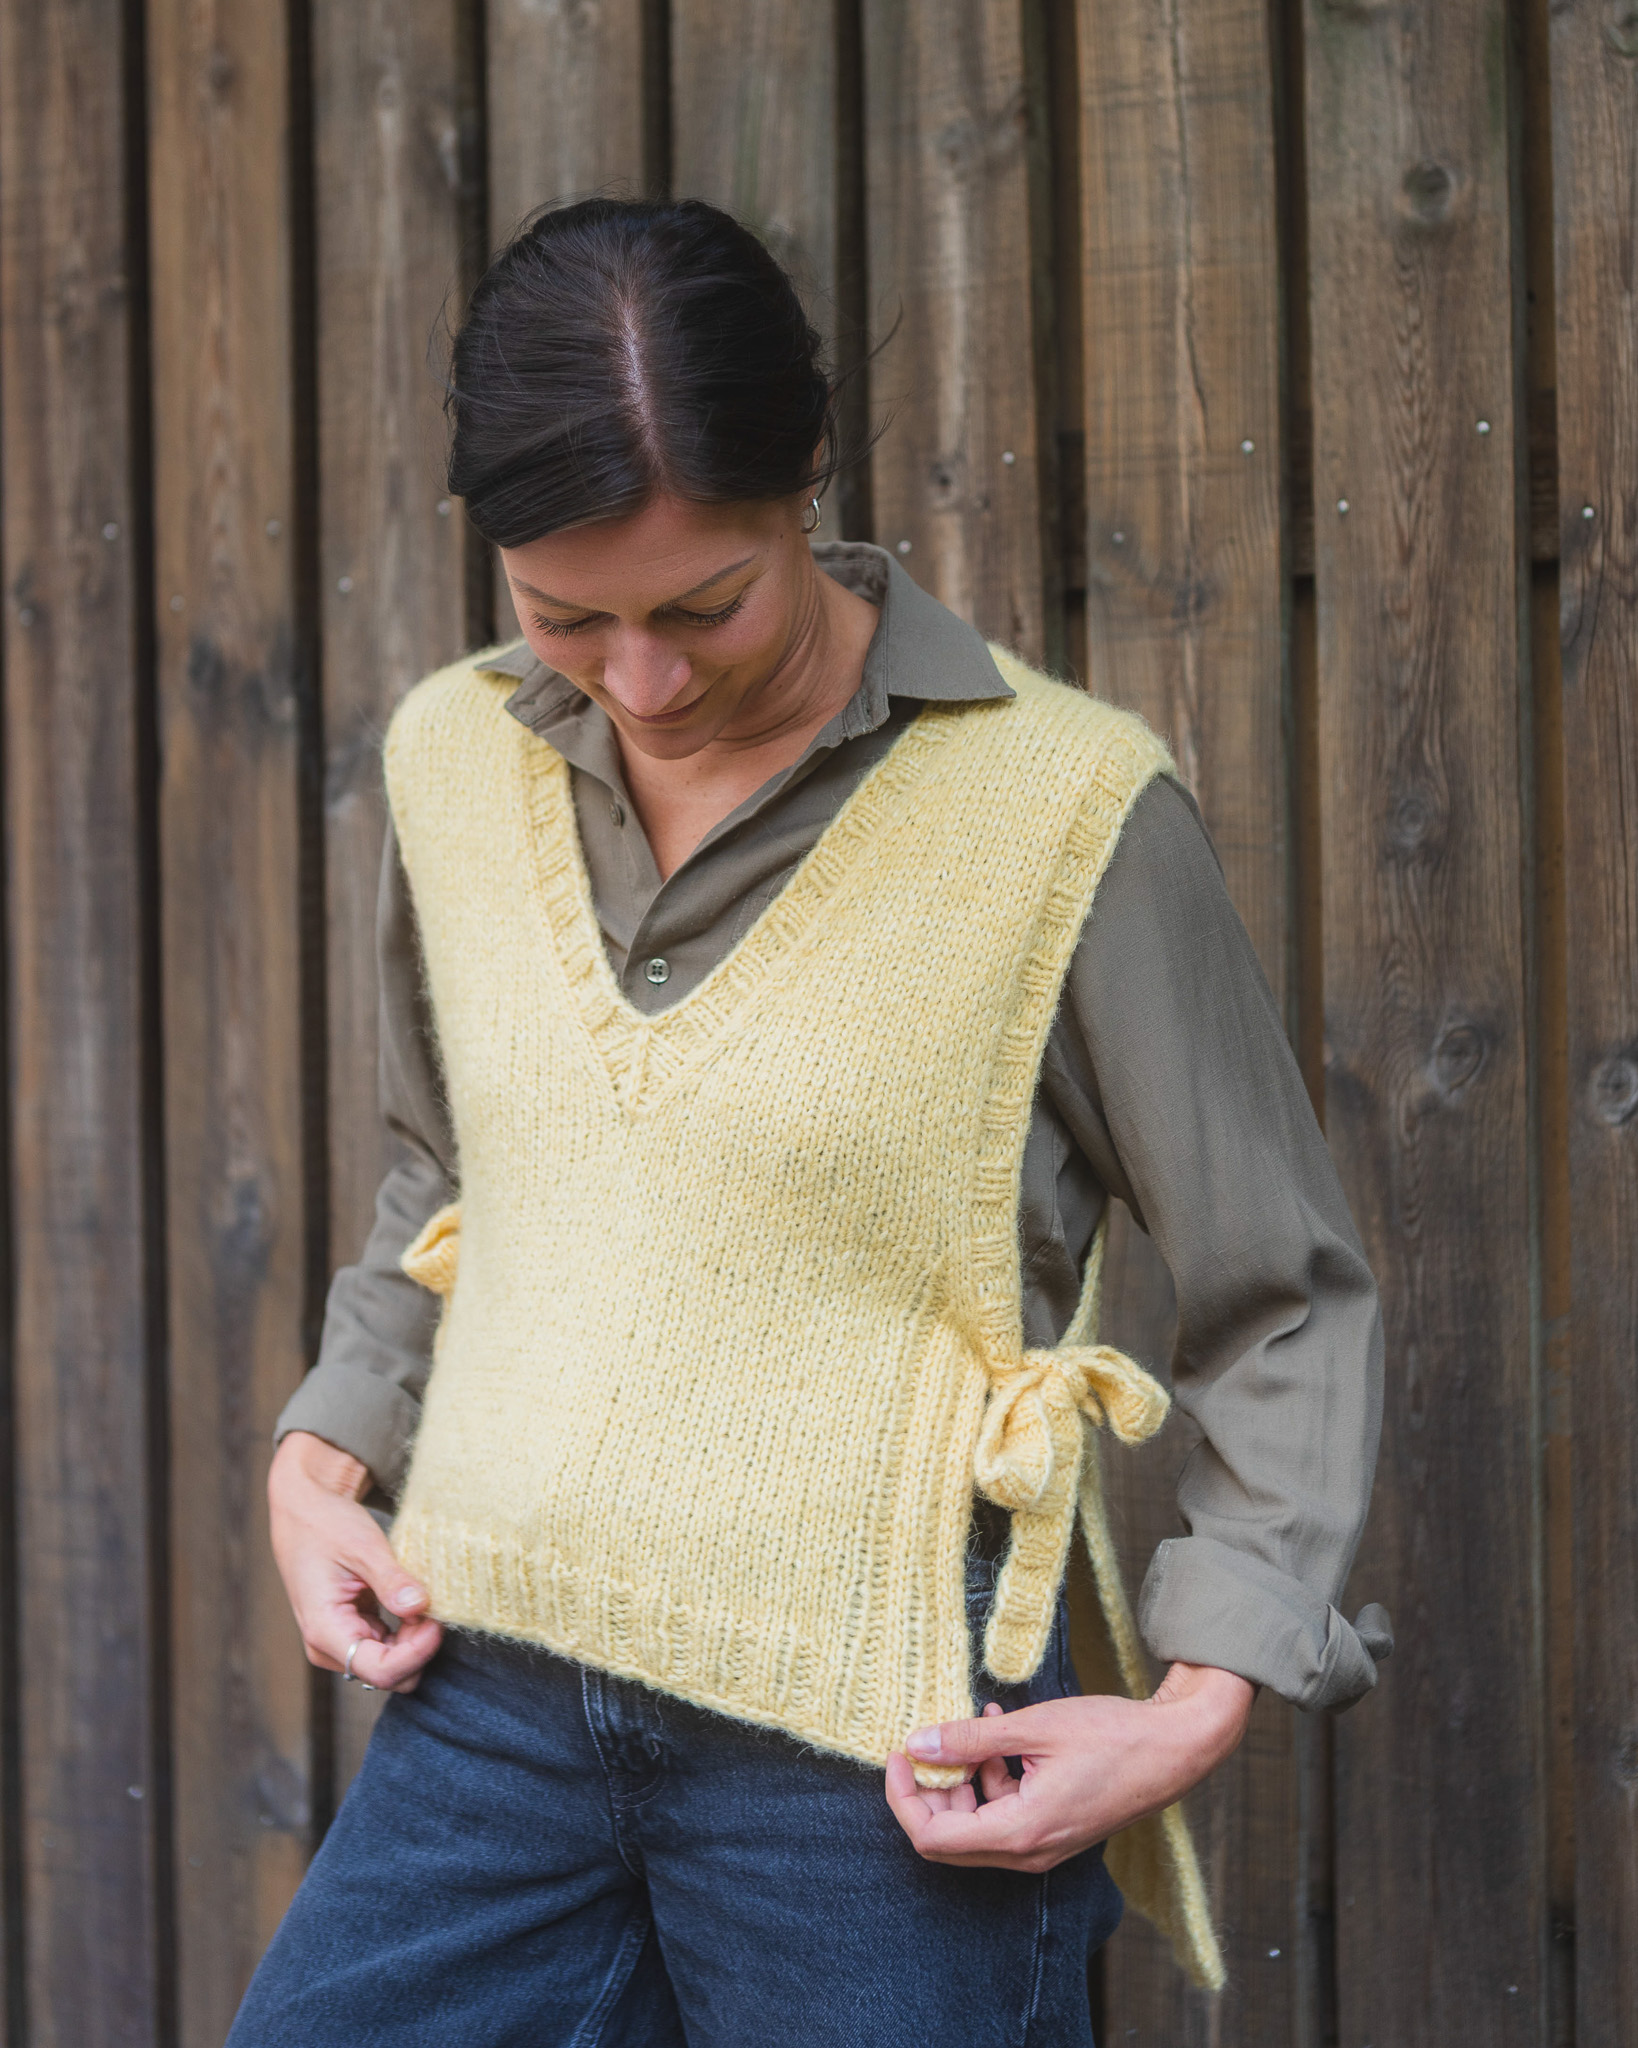
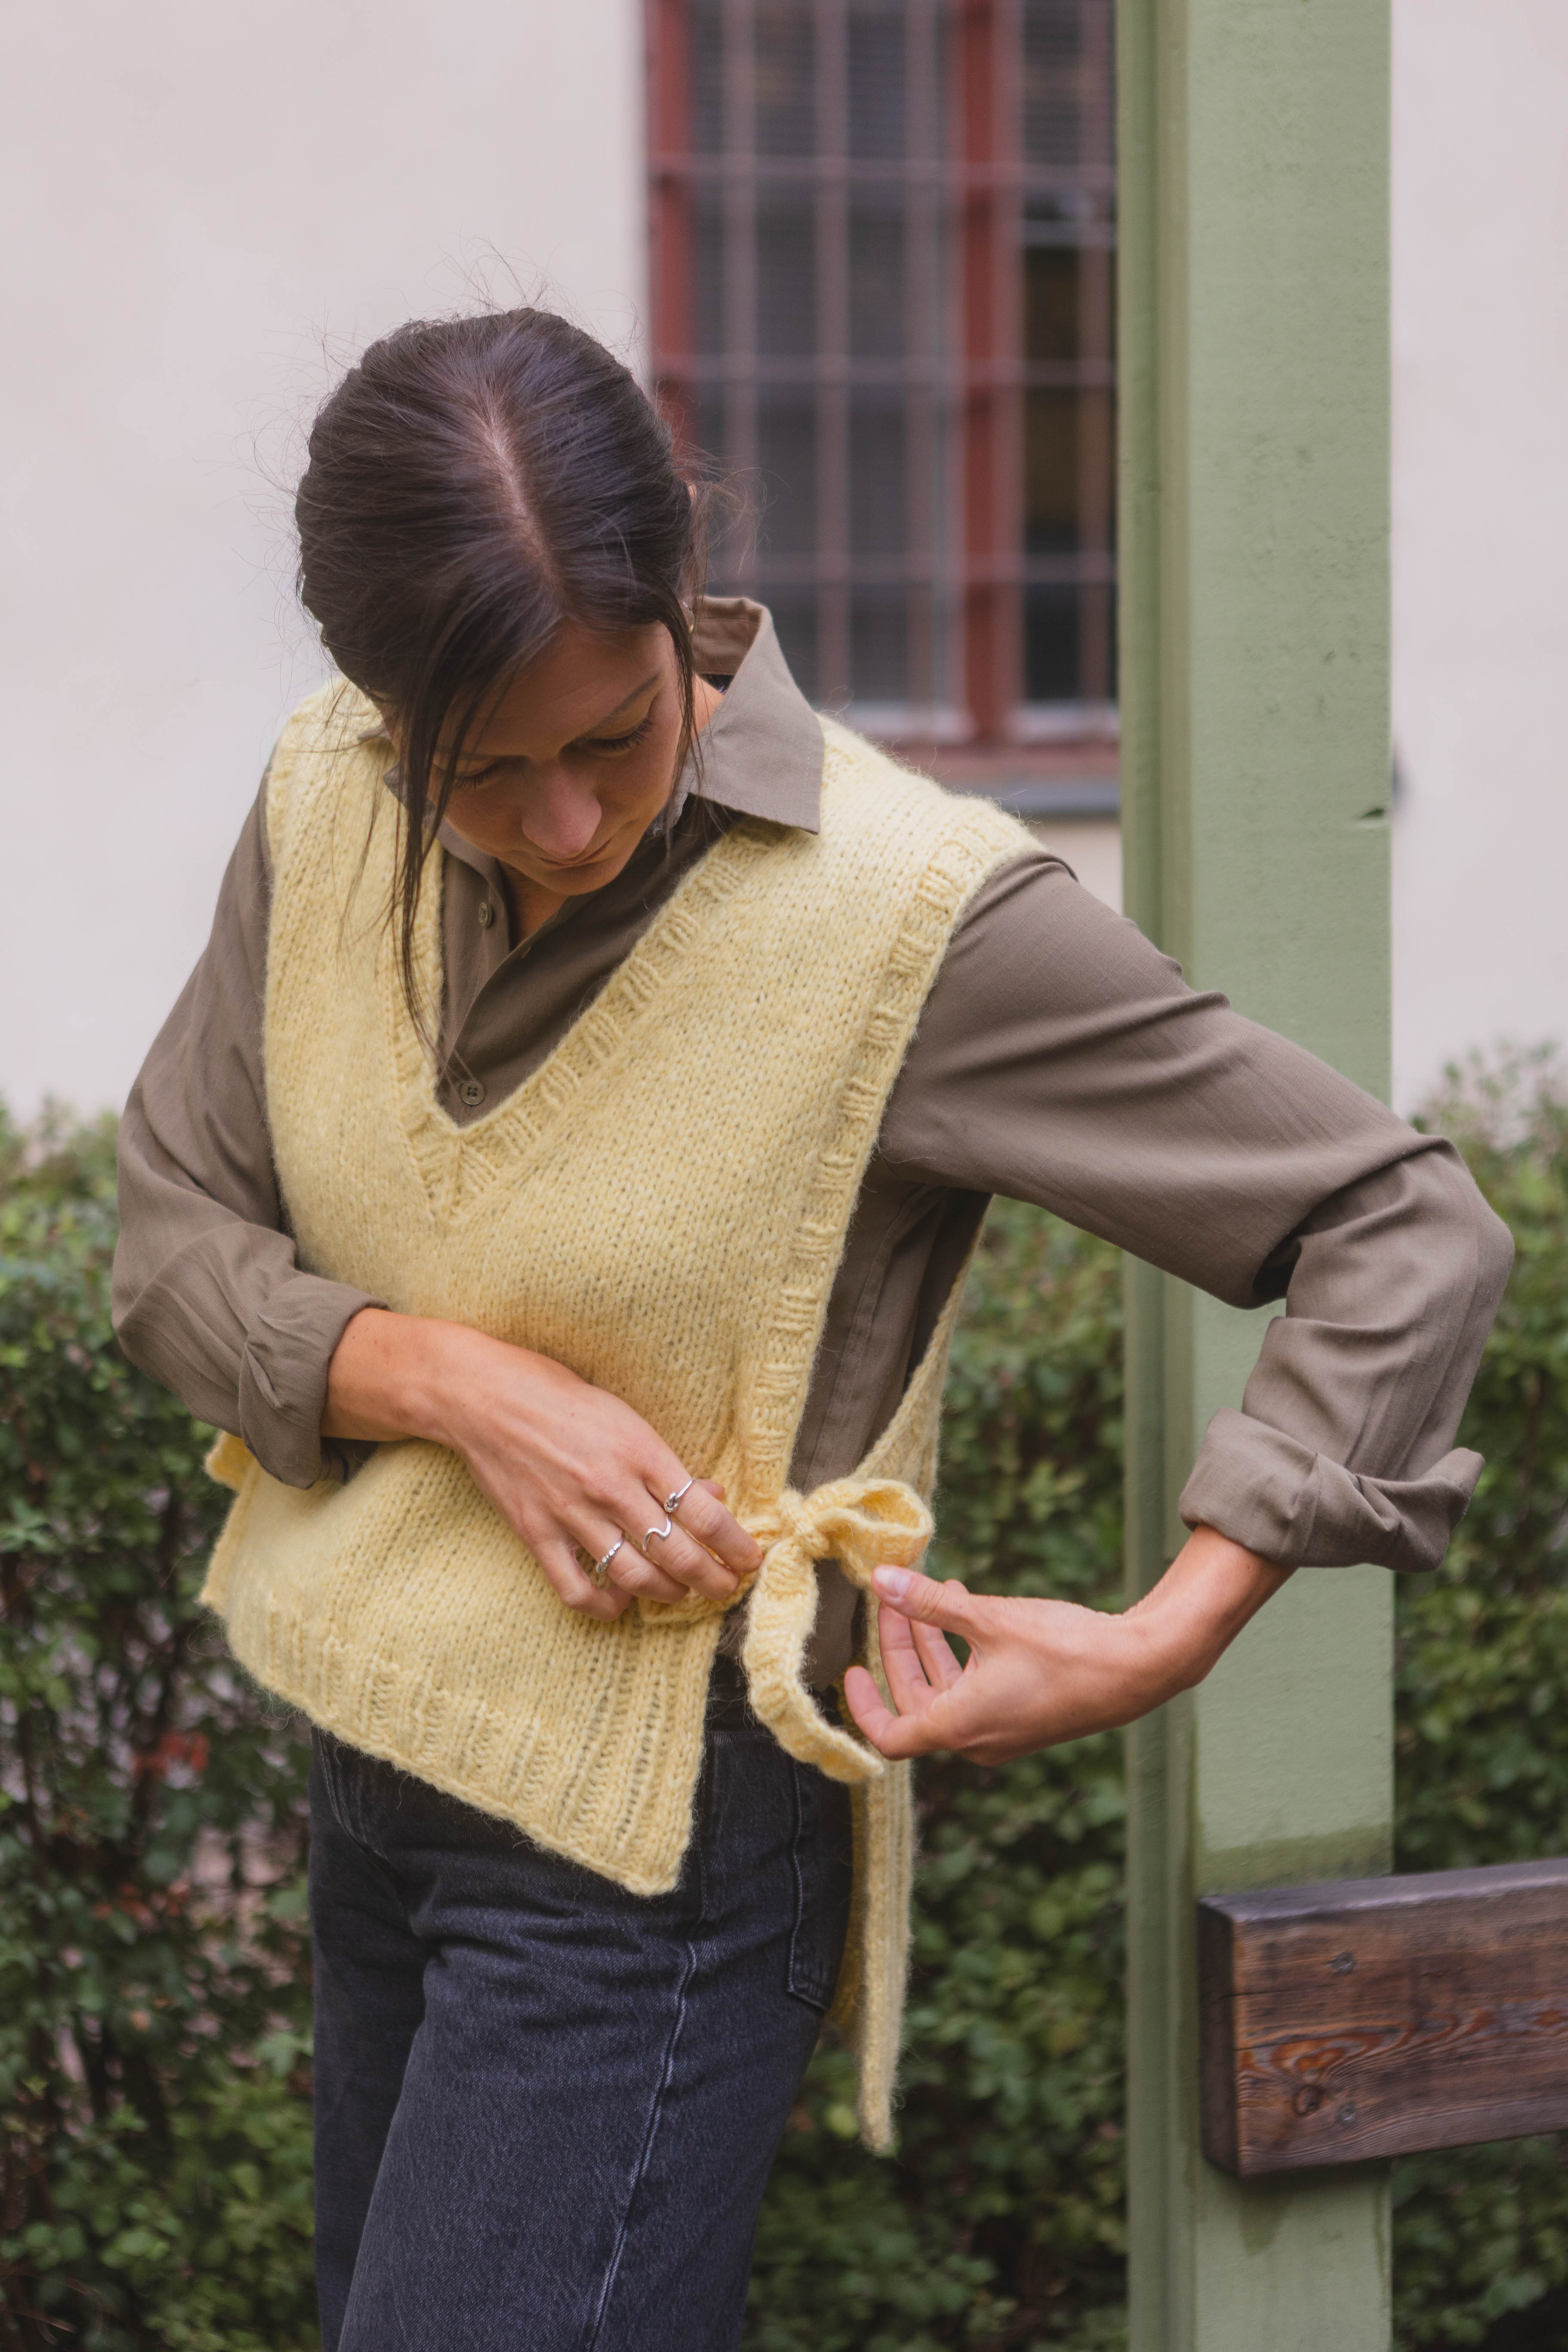
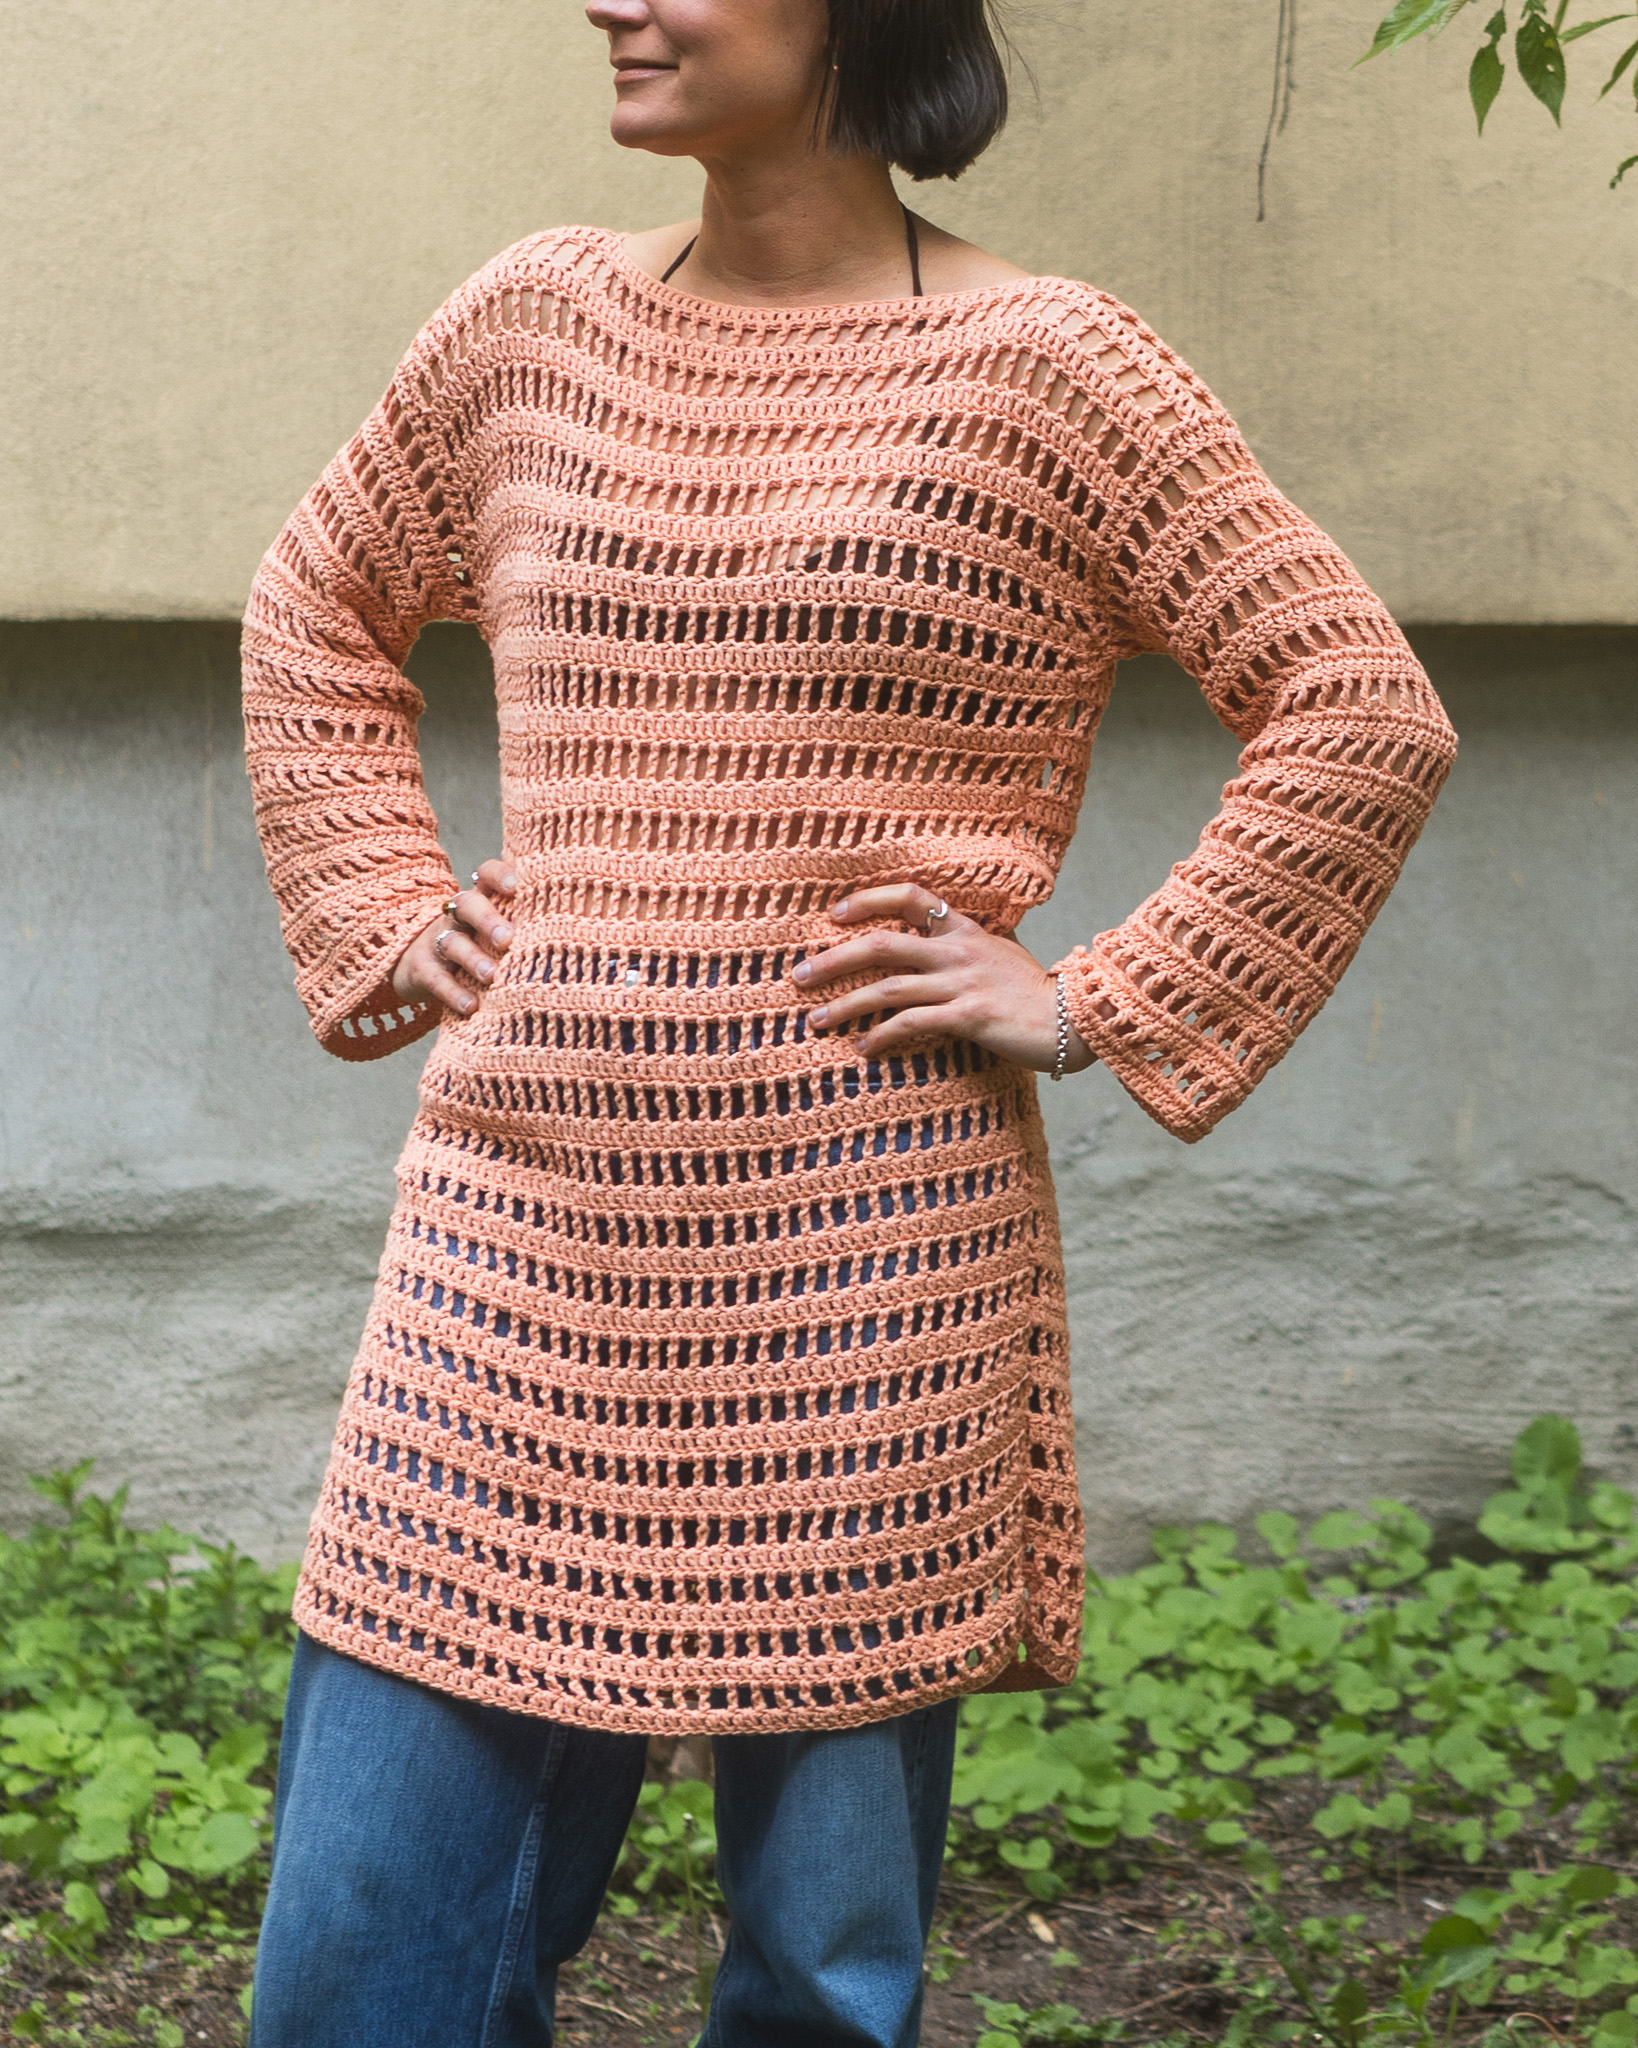
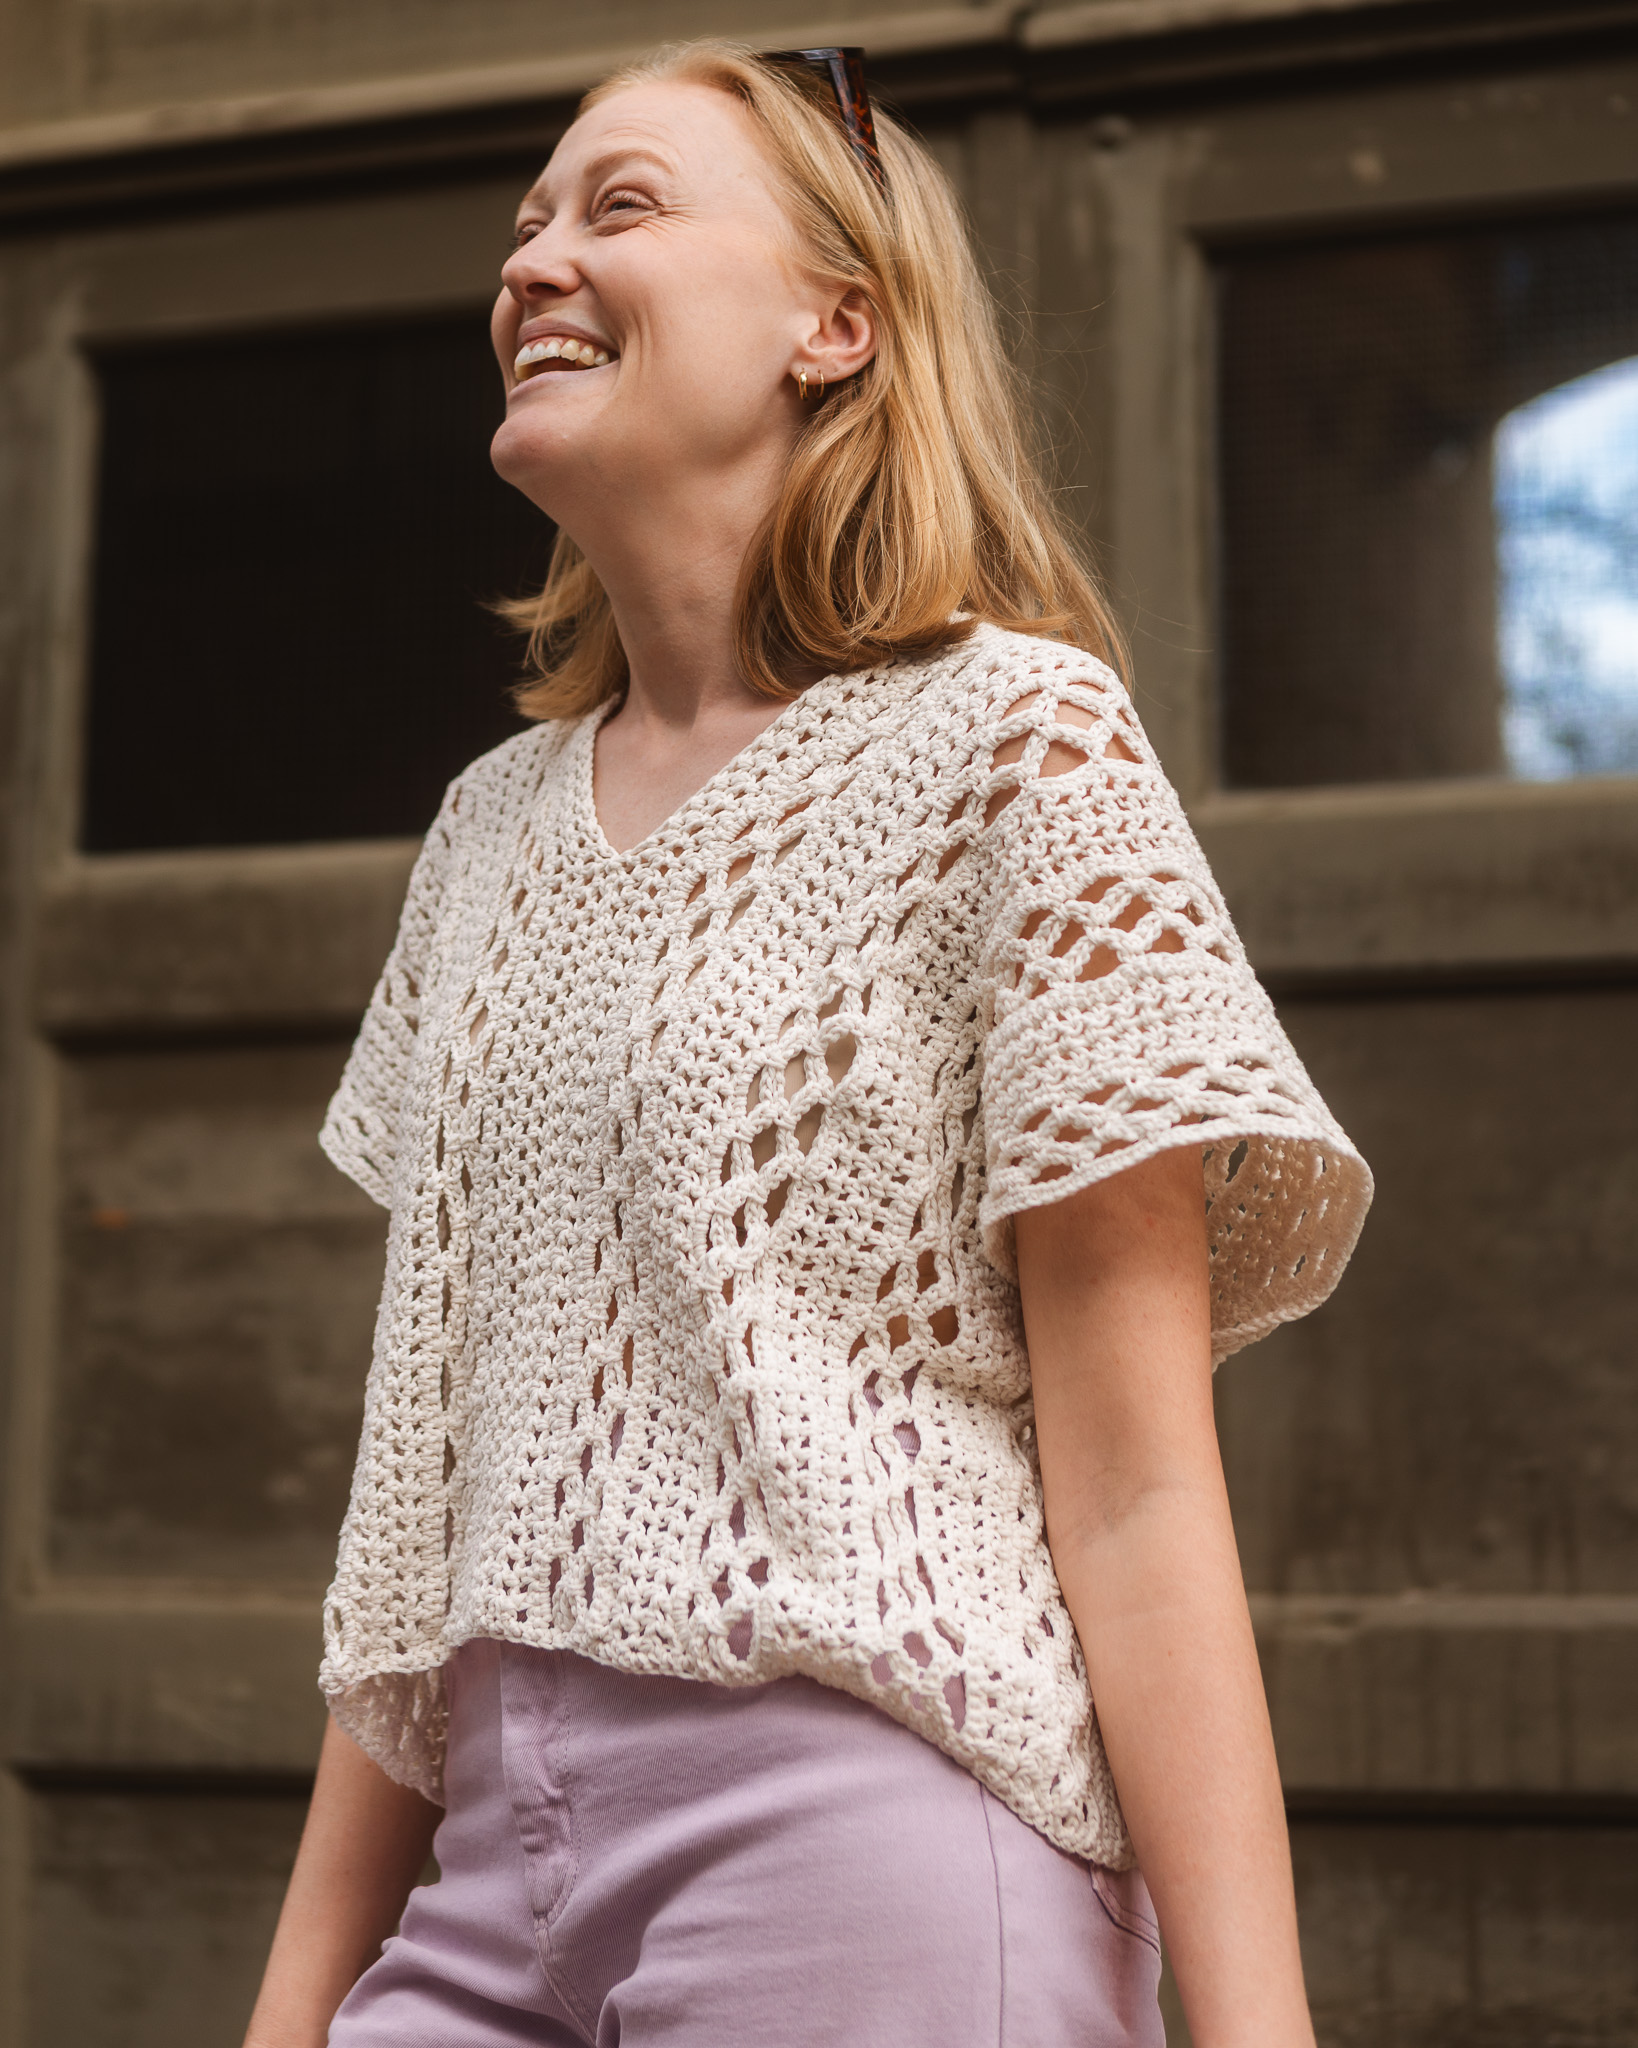
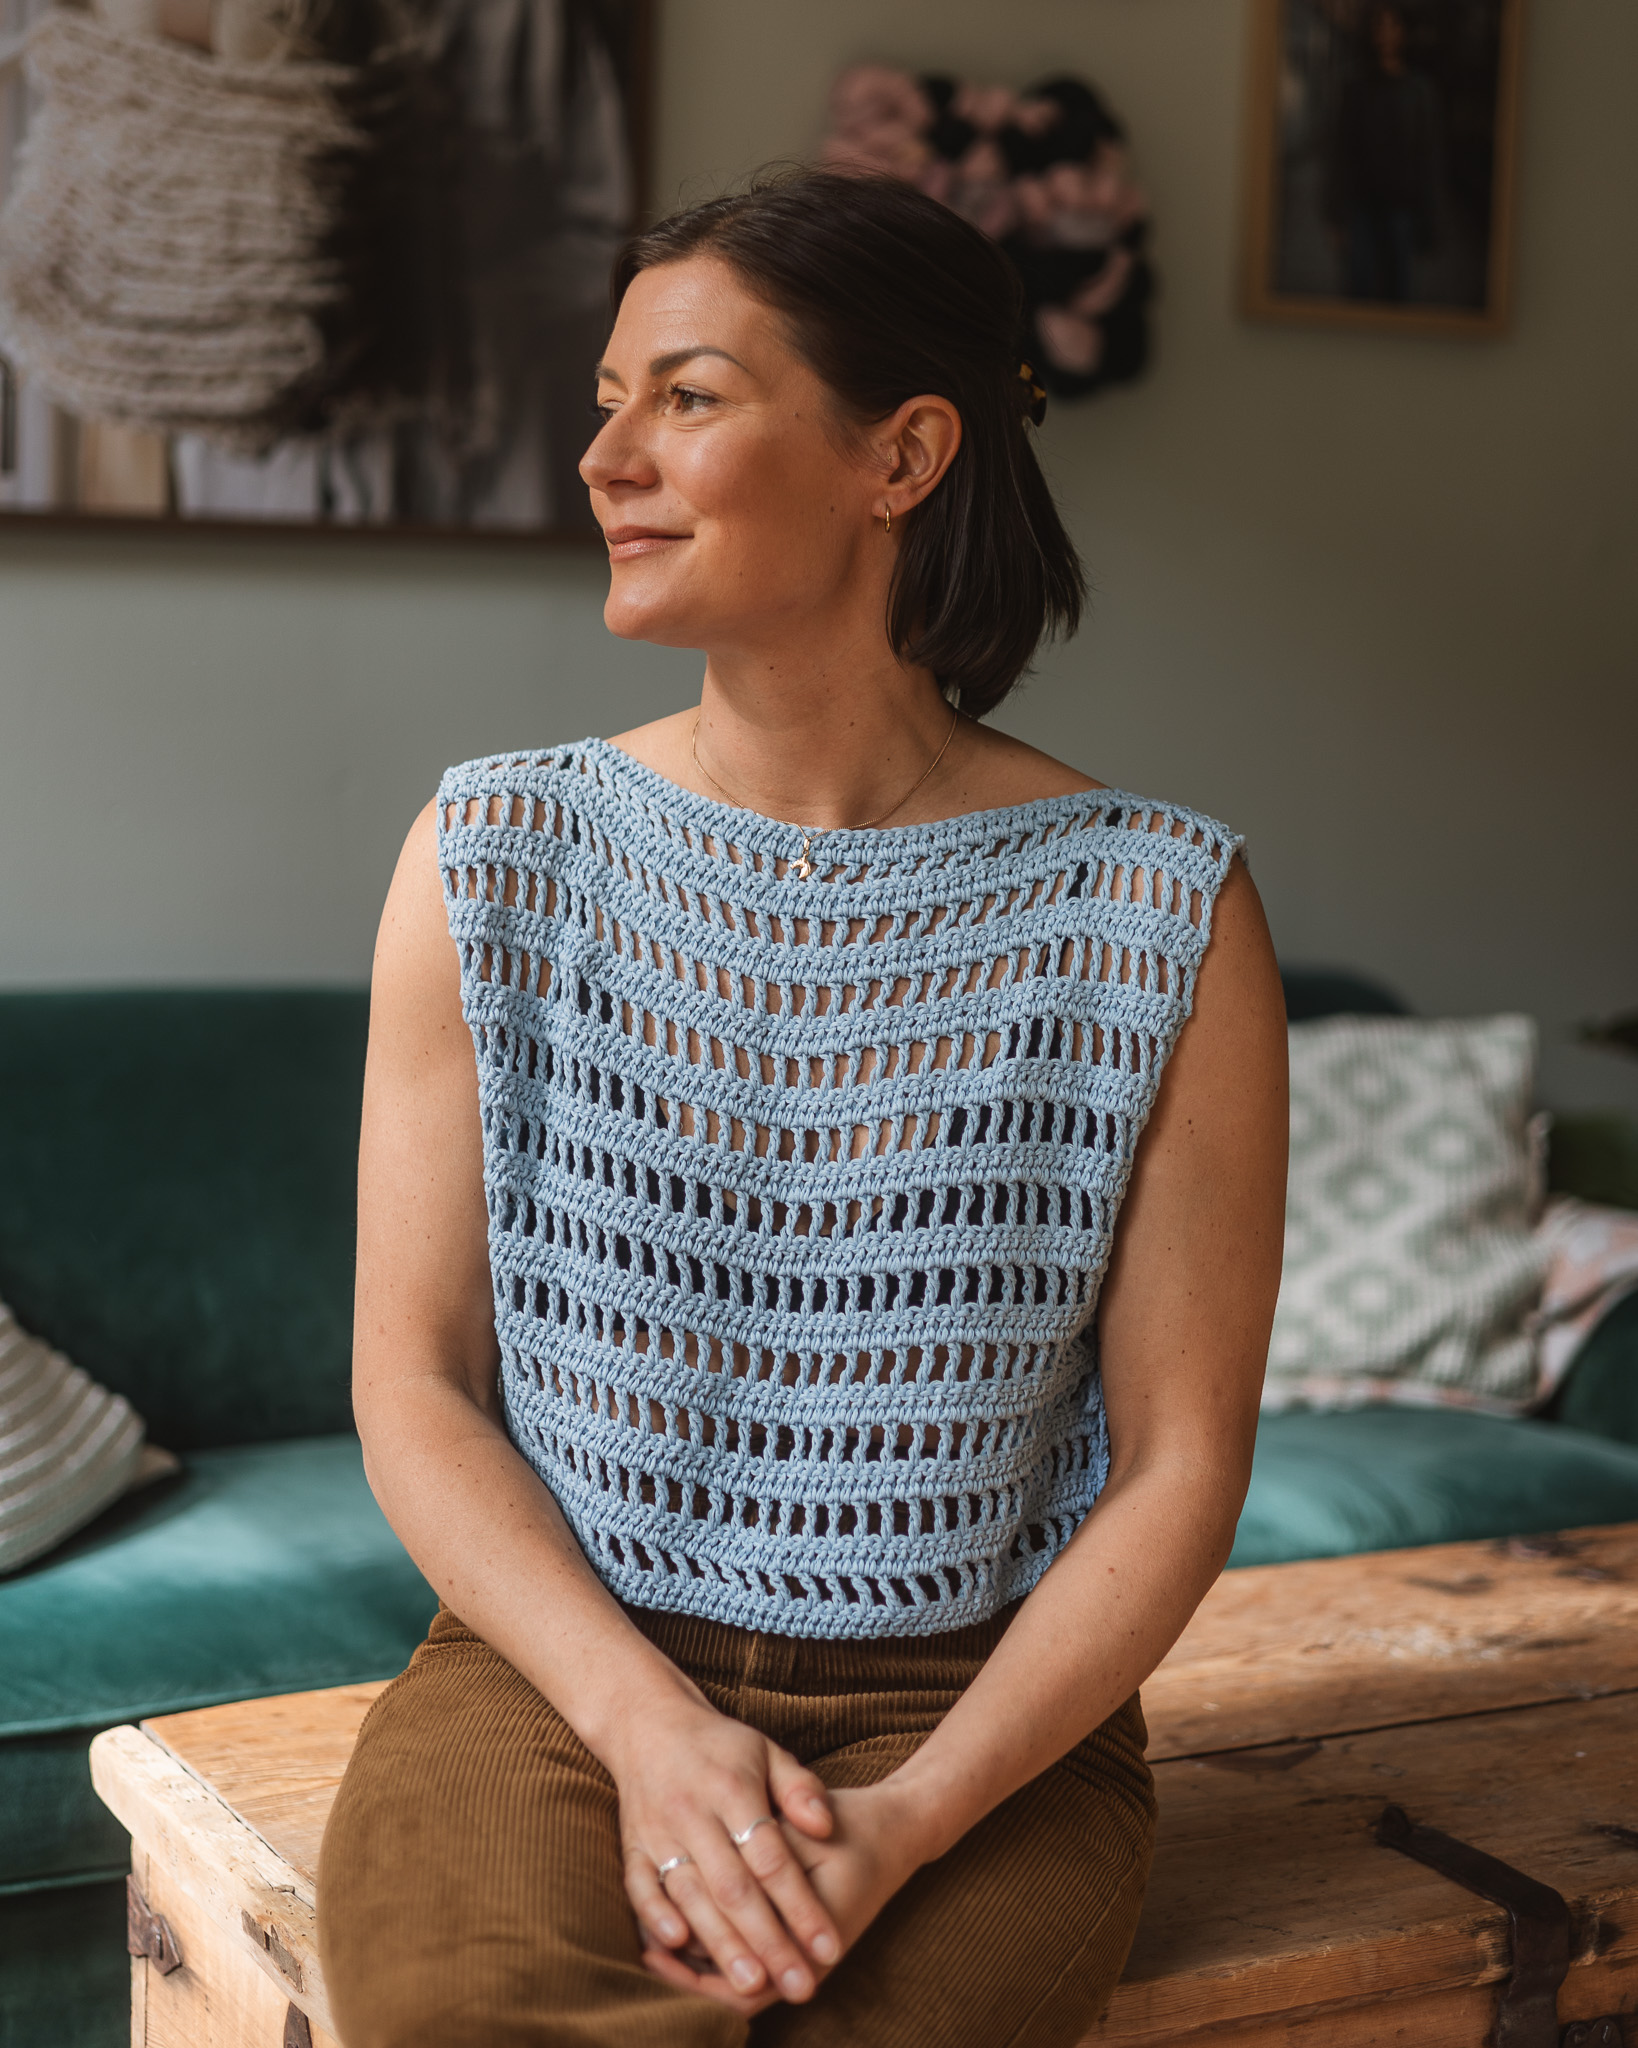
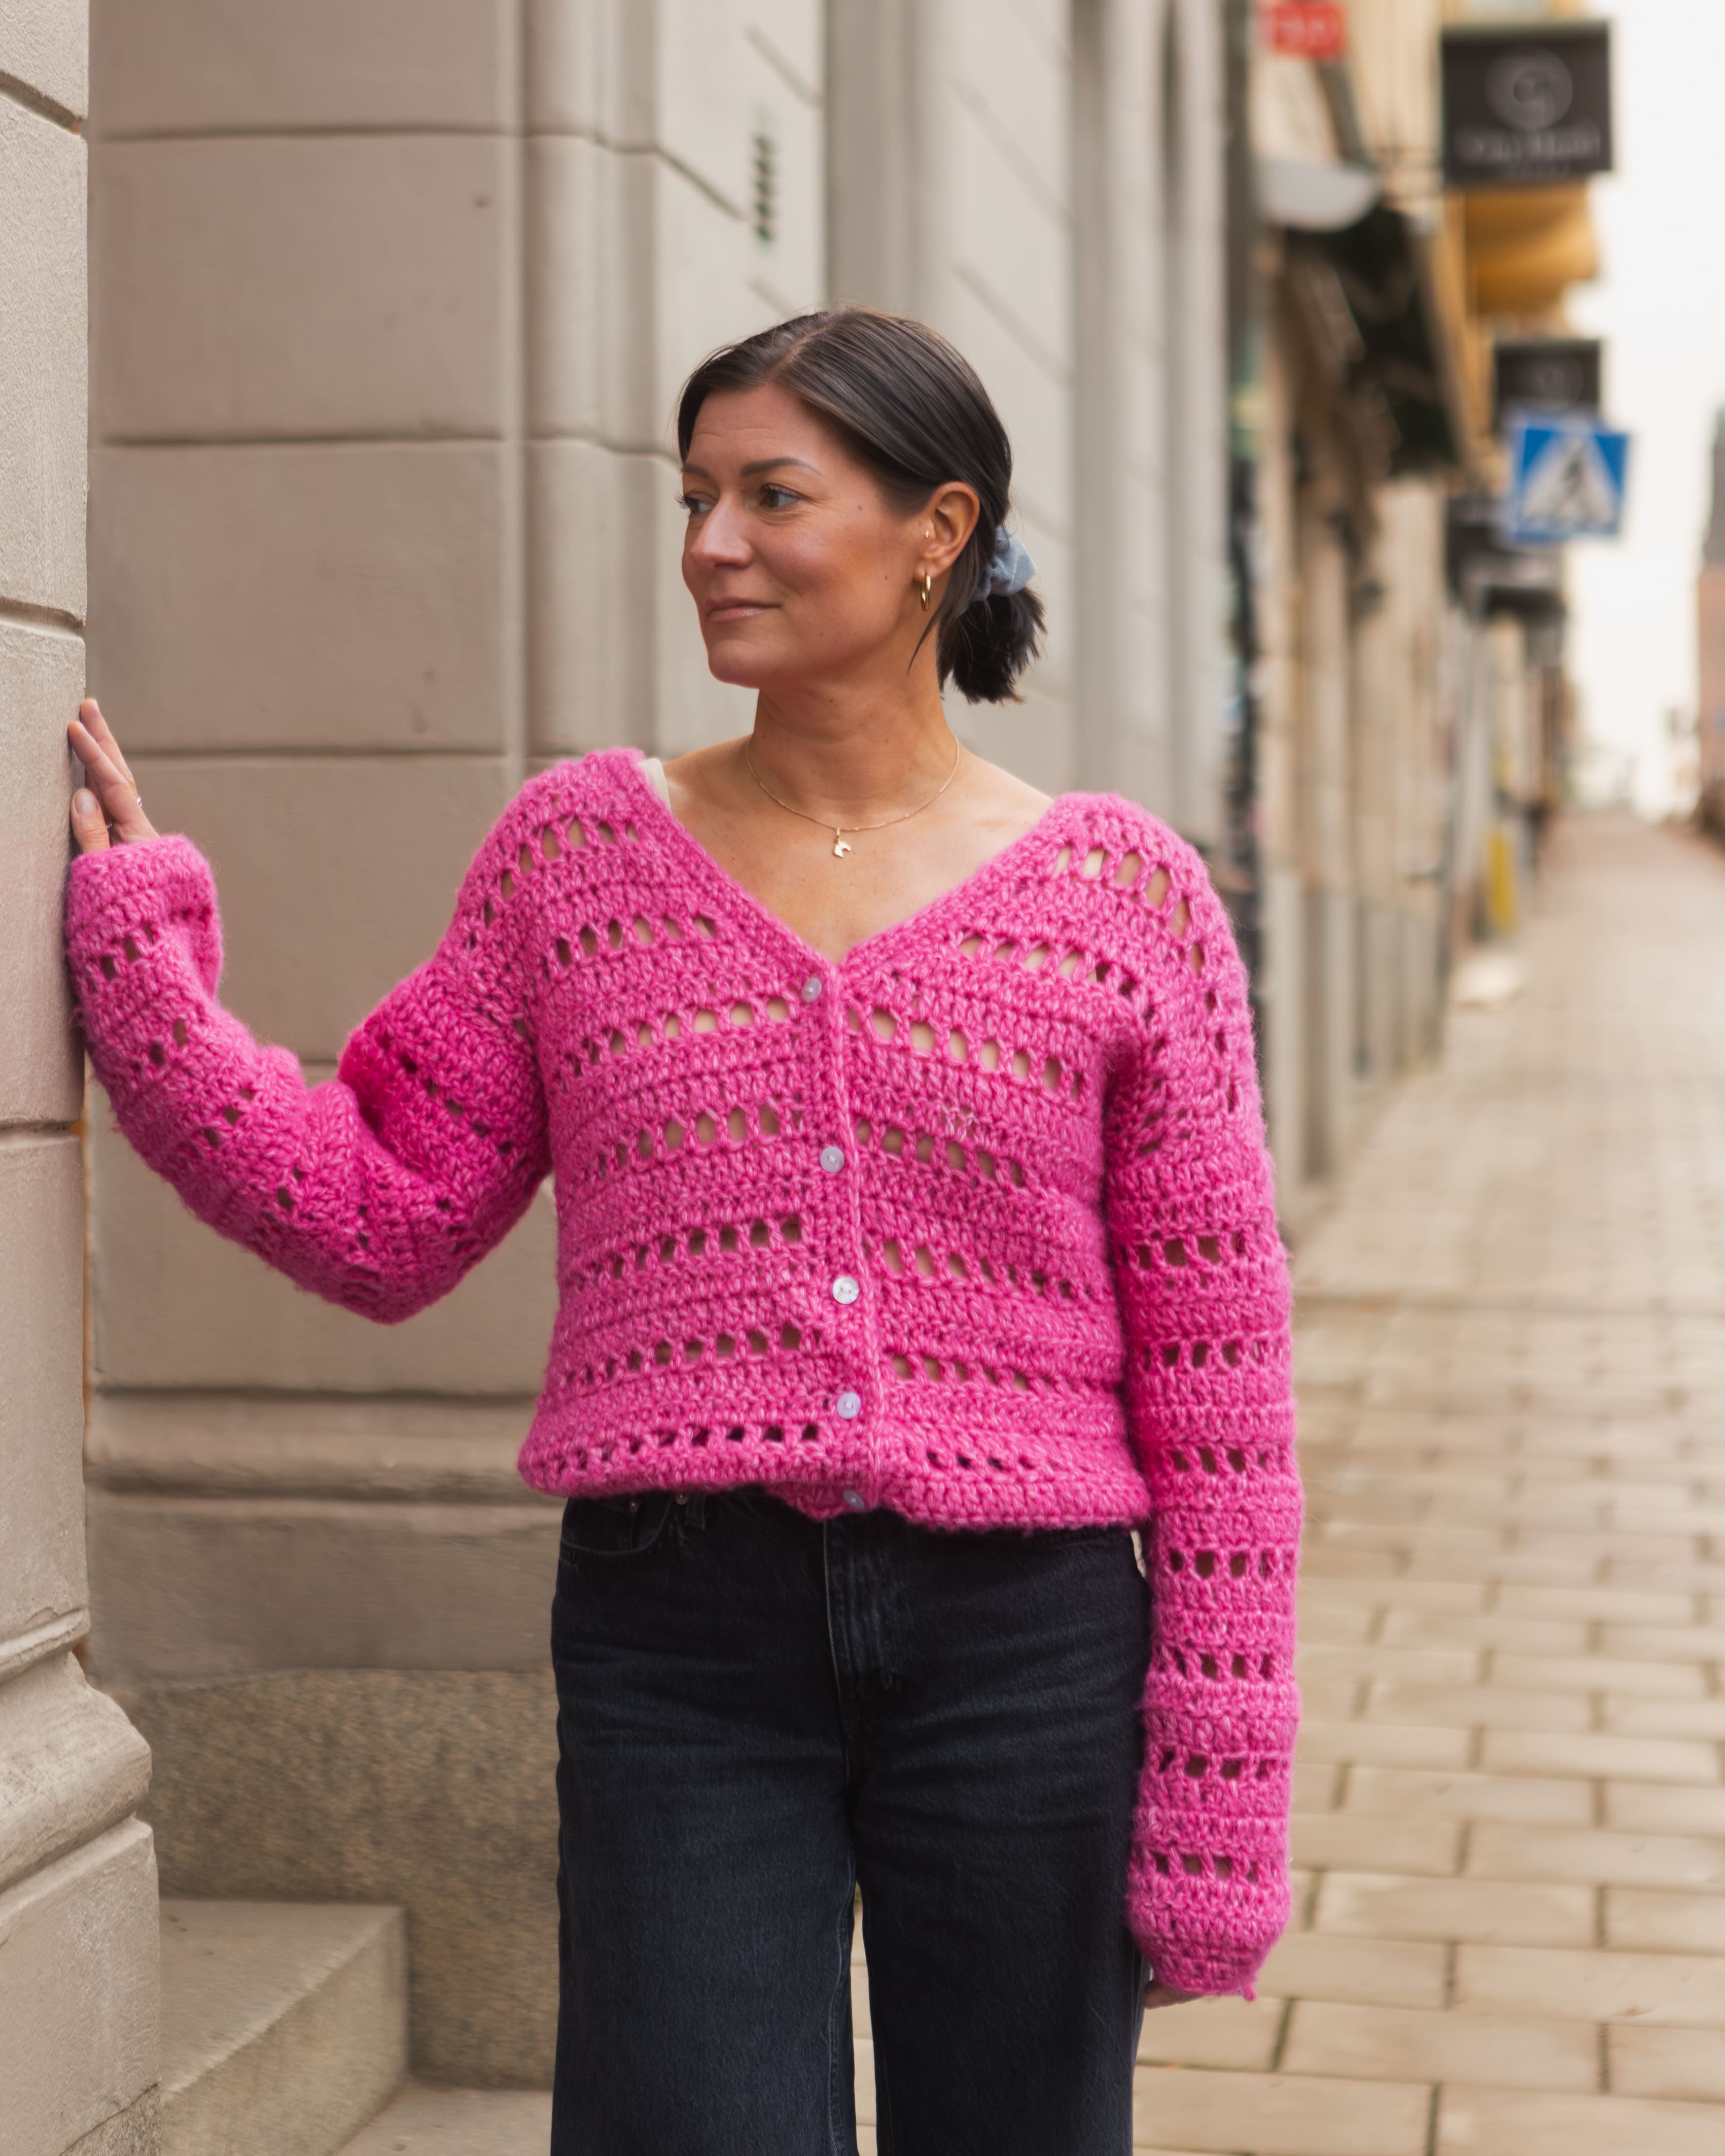
Knitted Slipover “Helga”
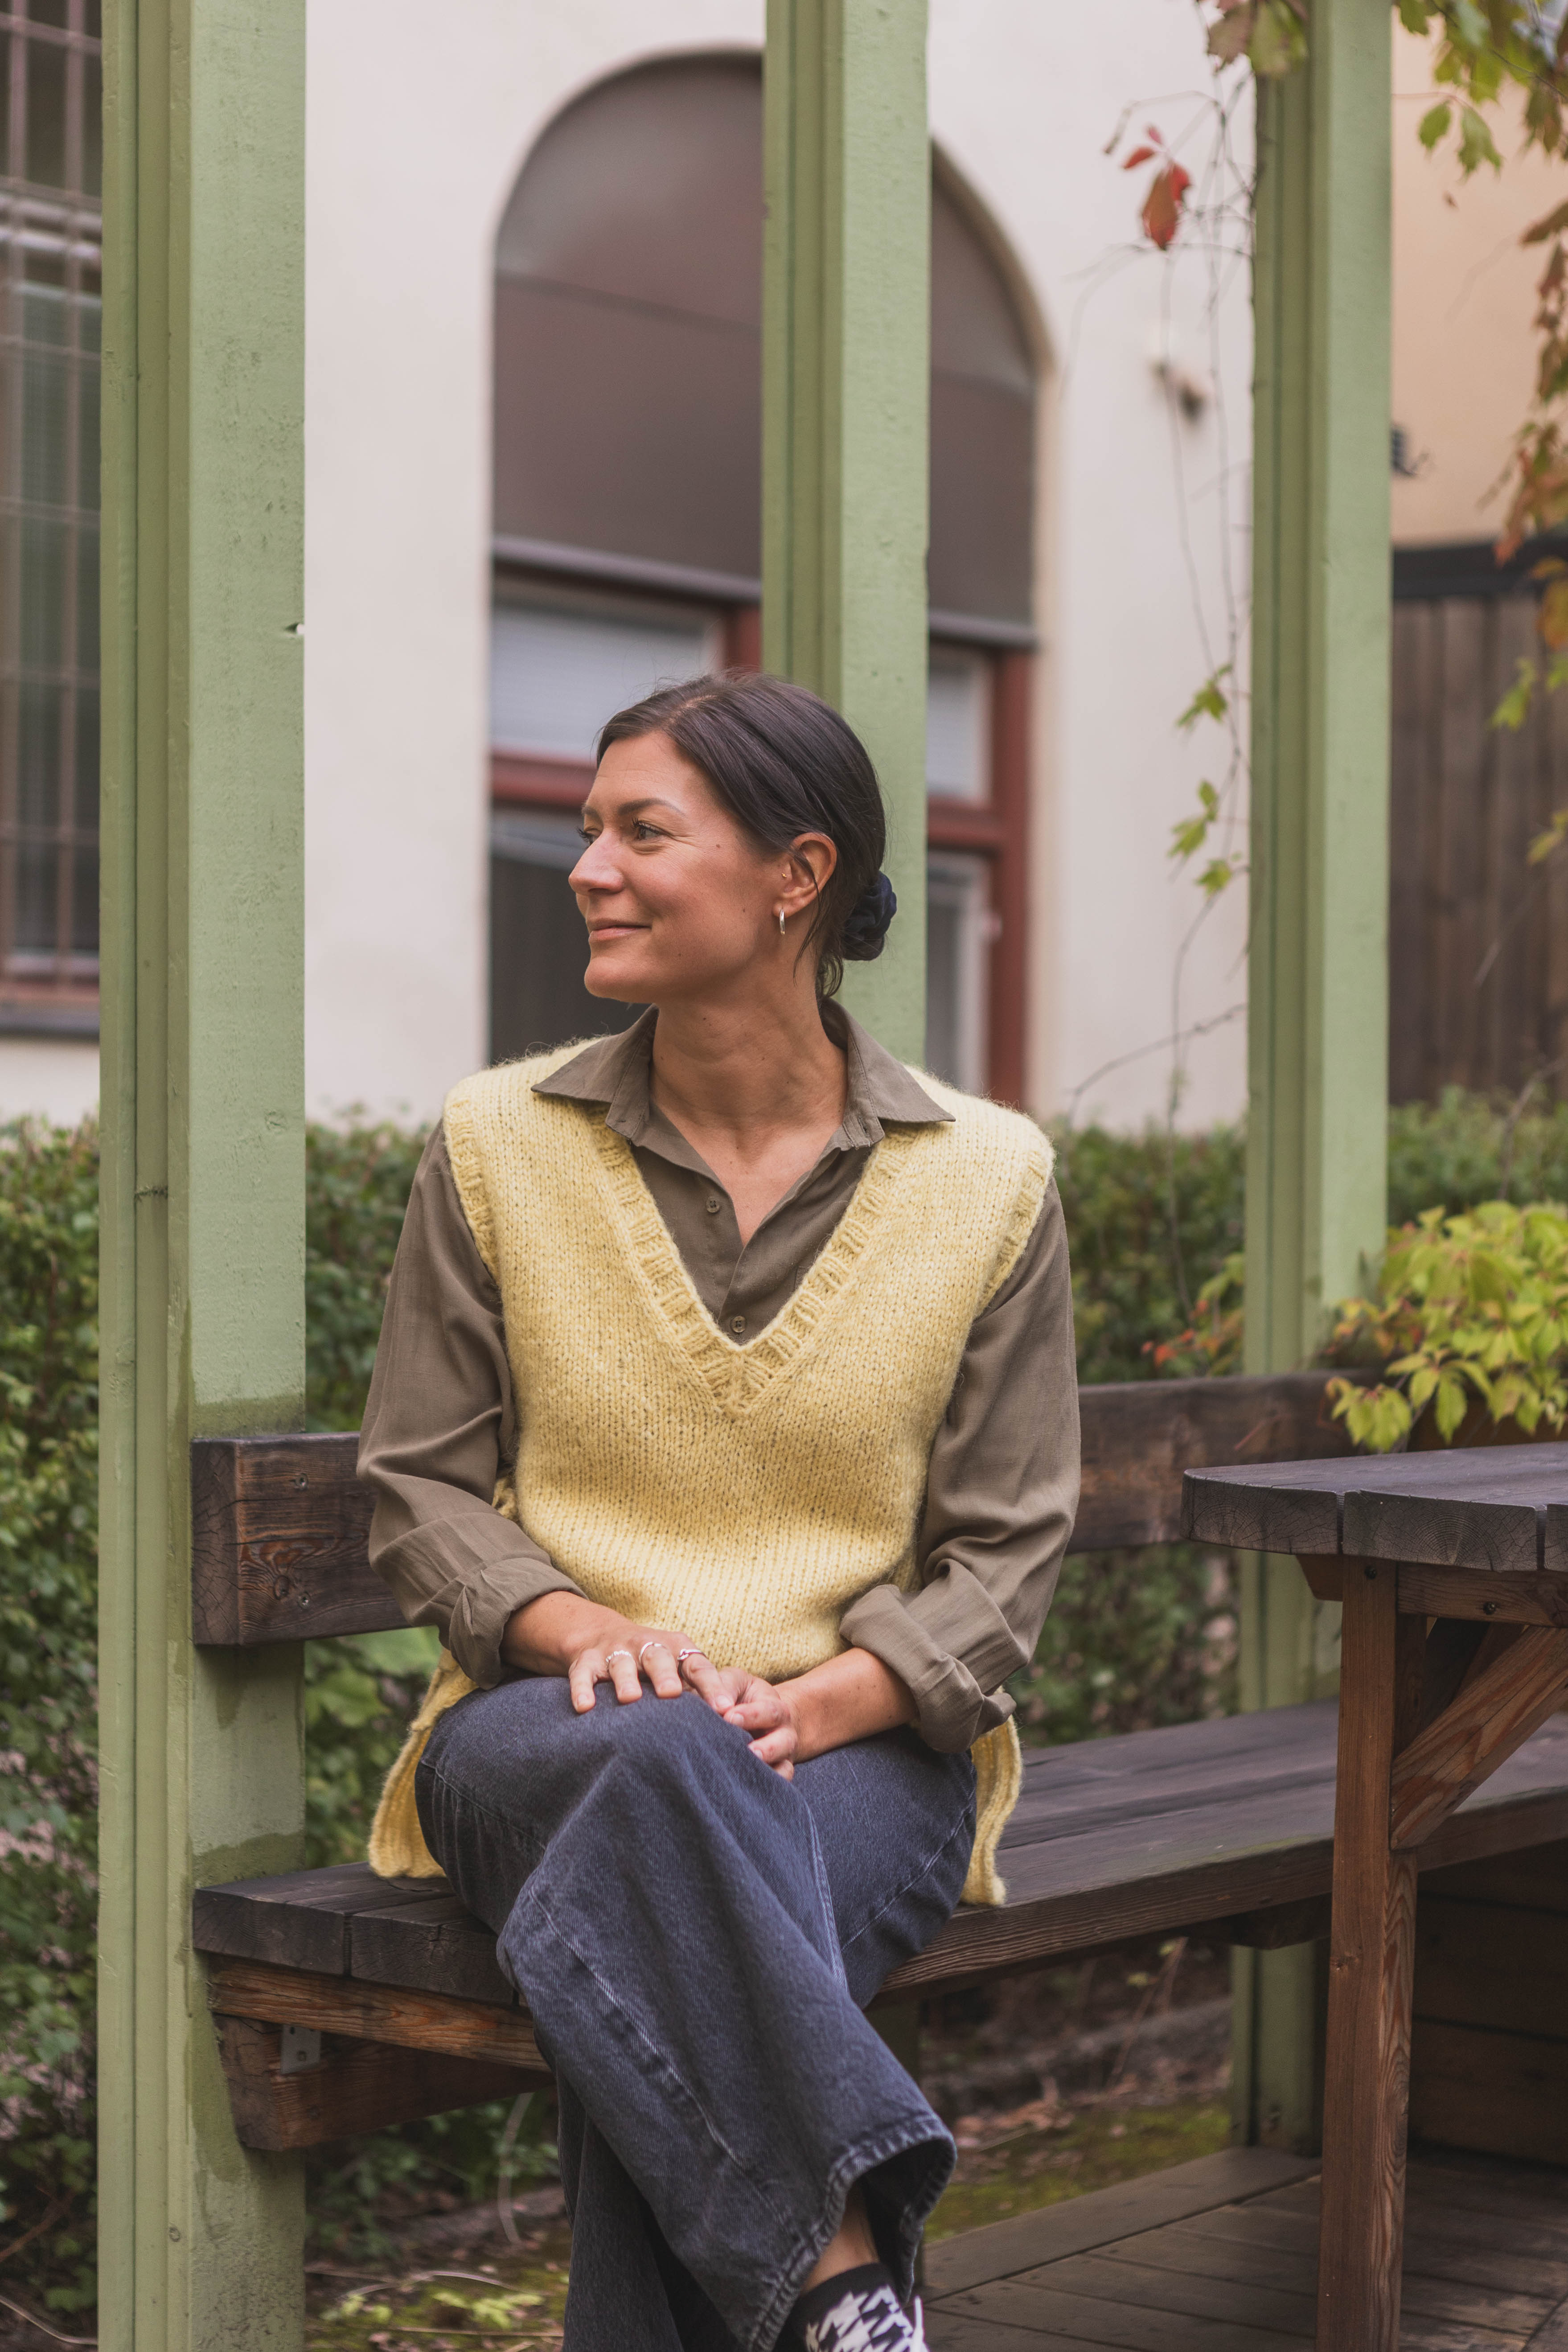
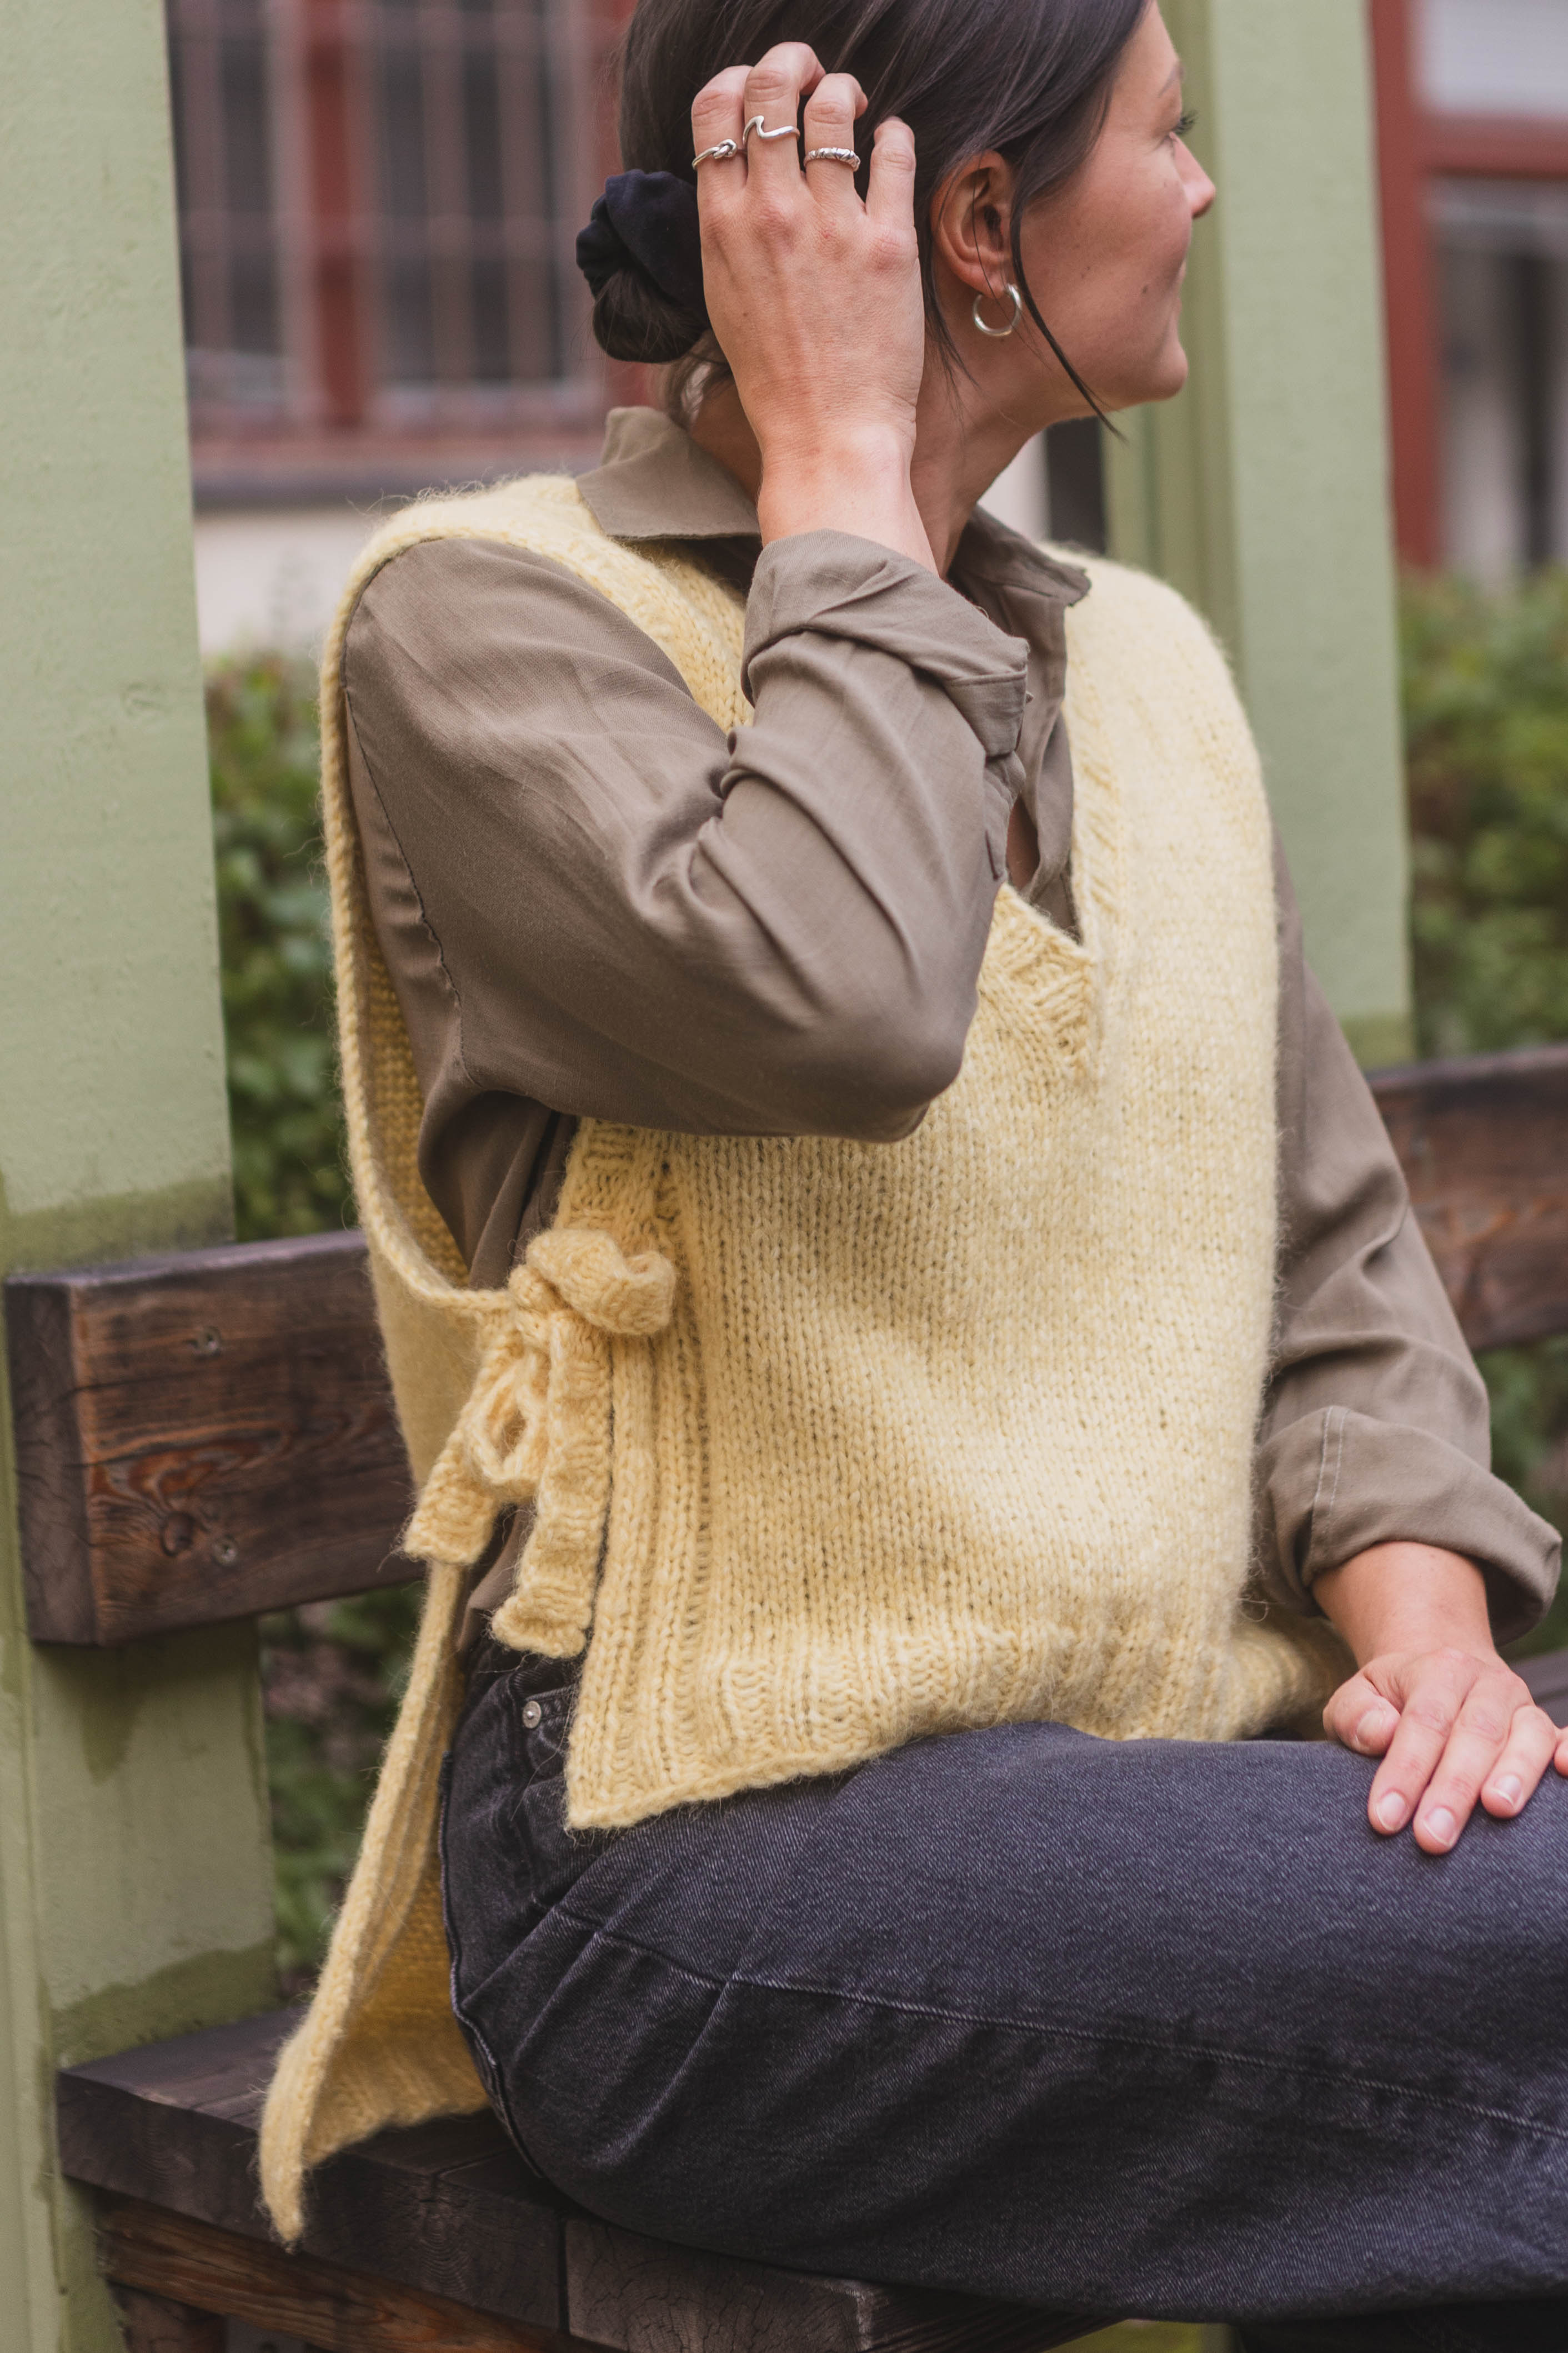
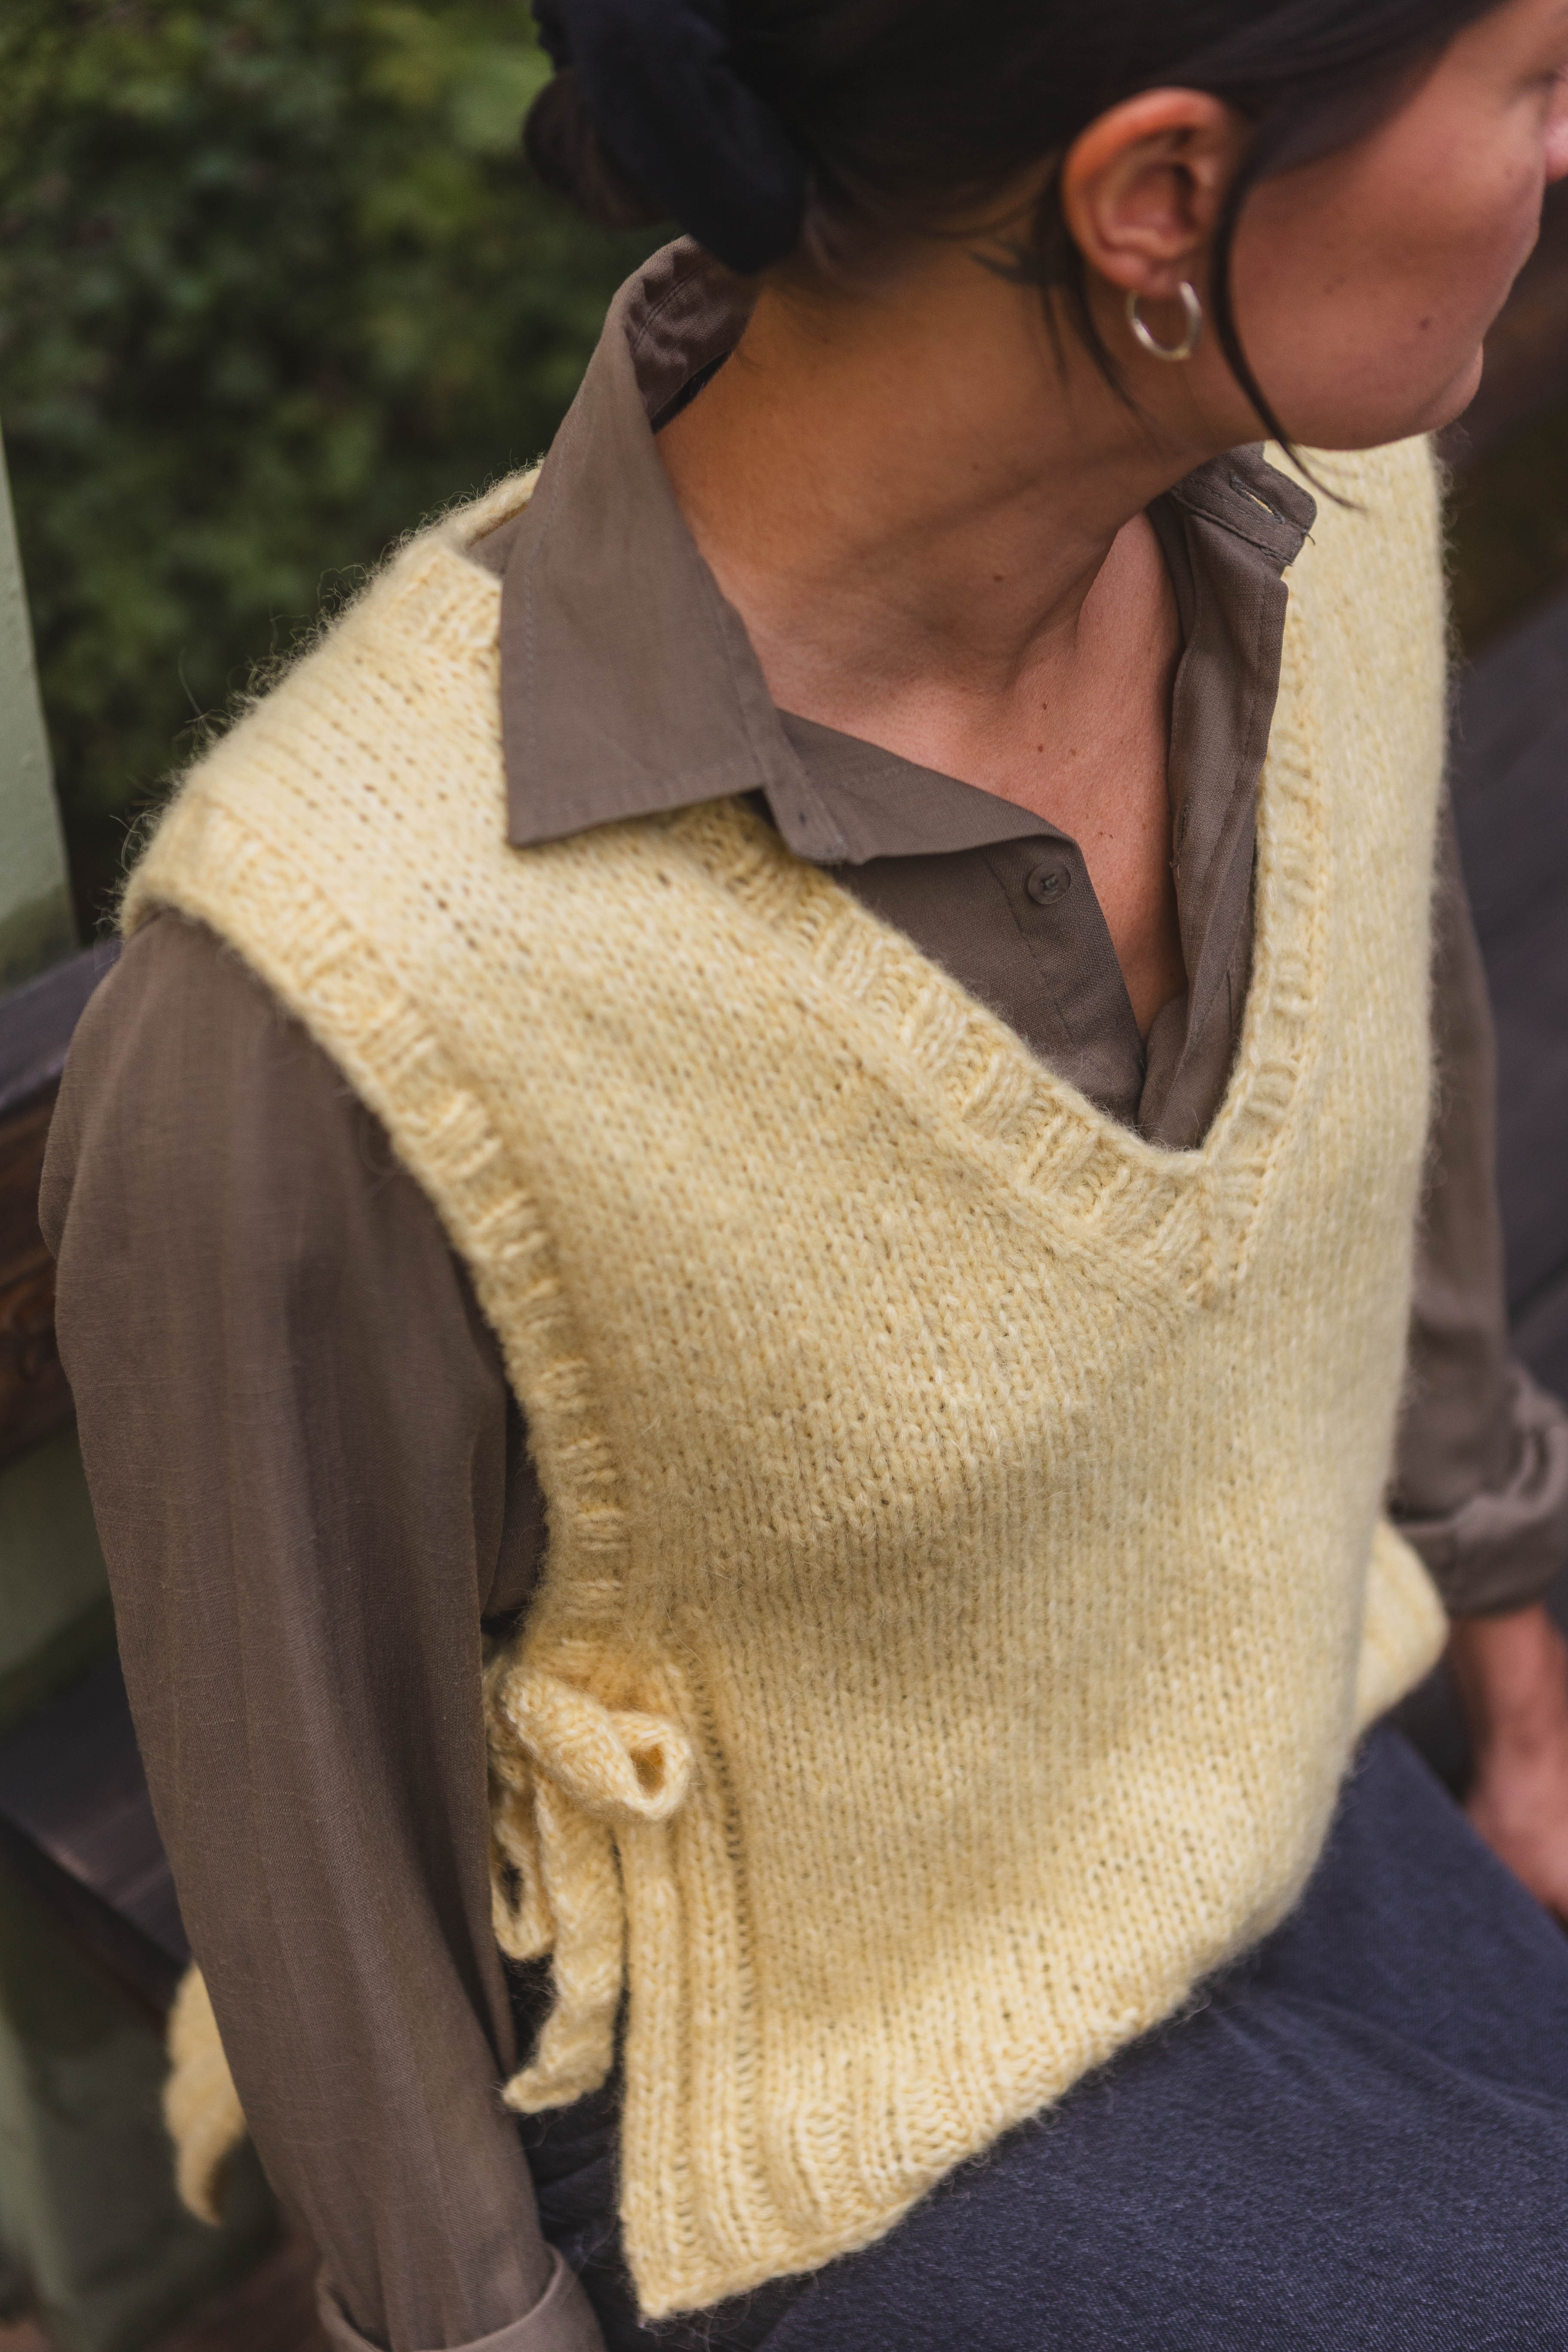
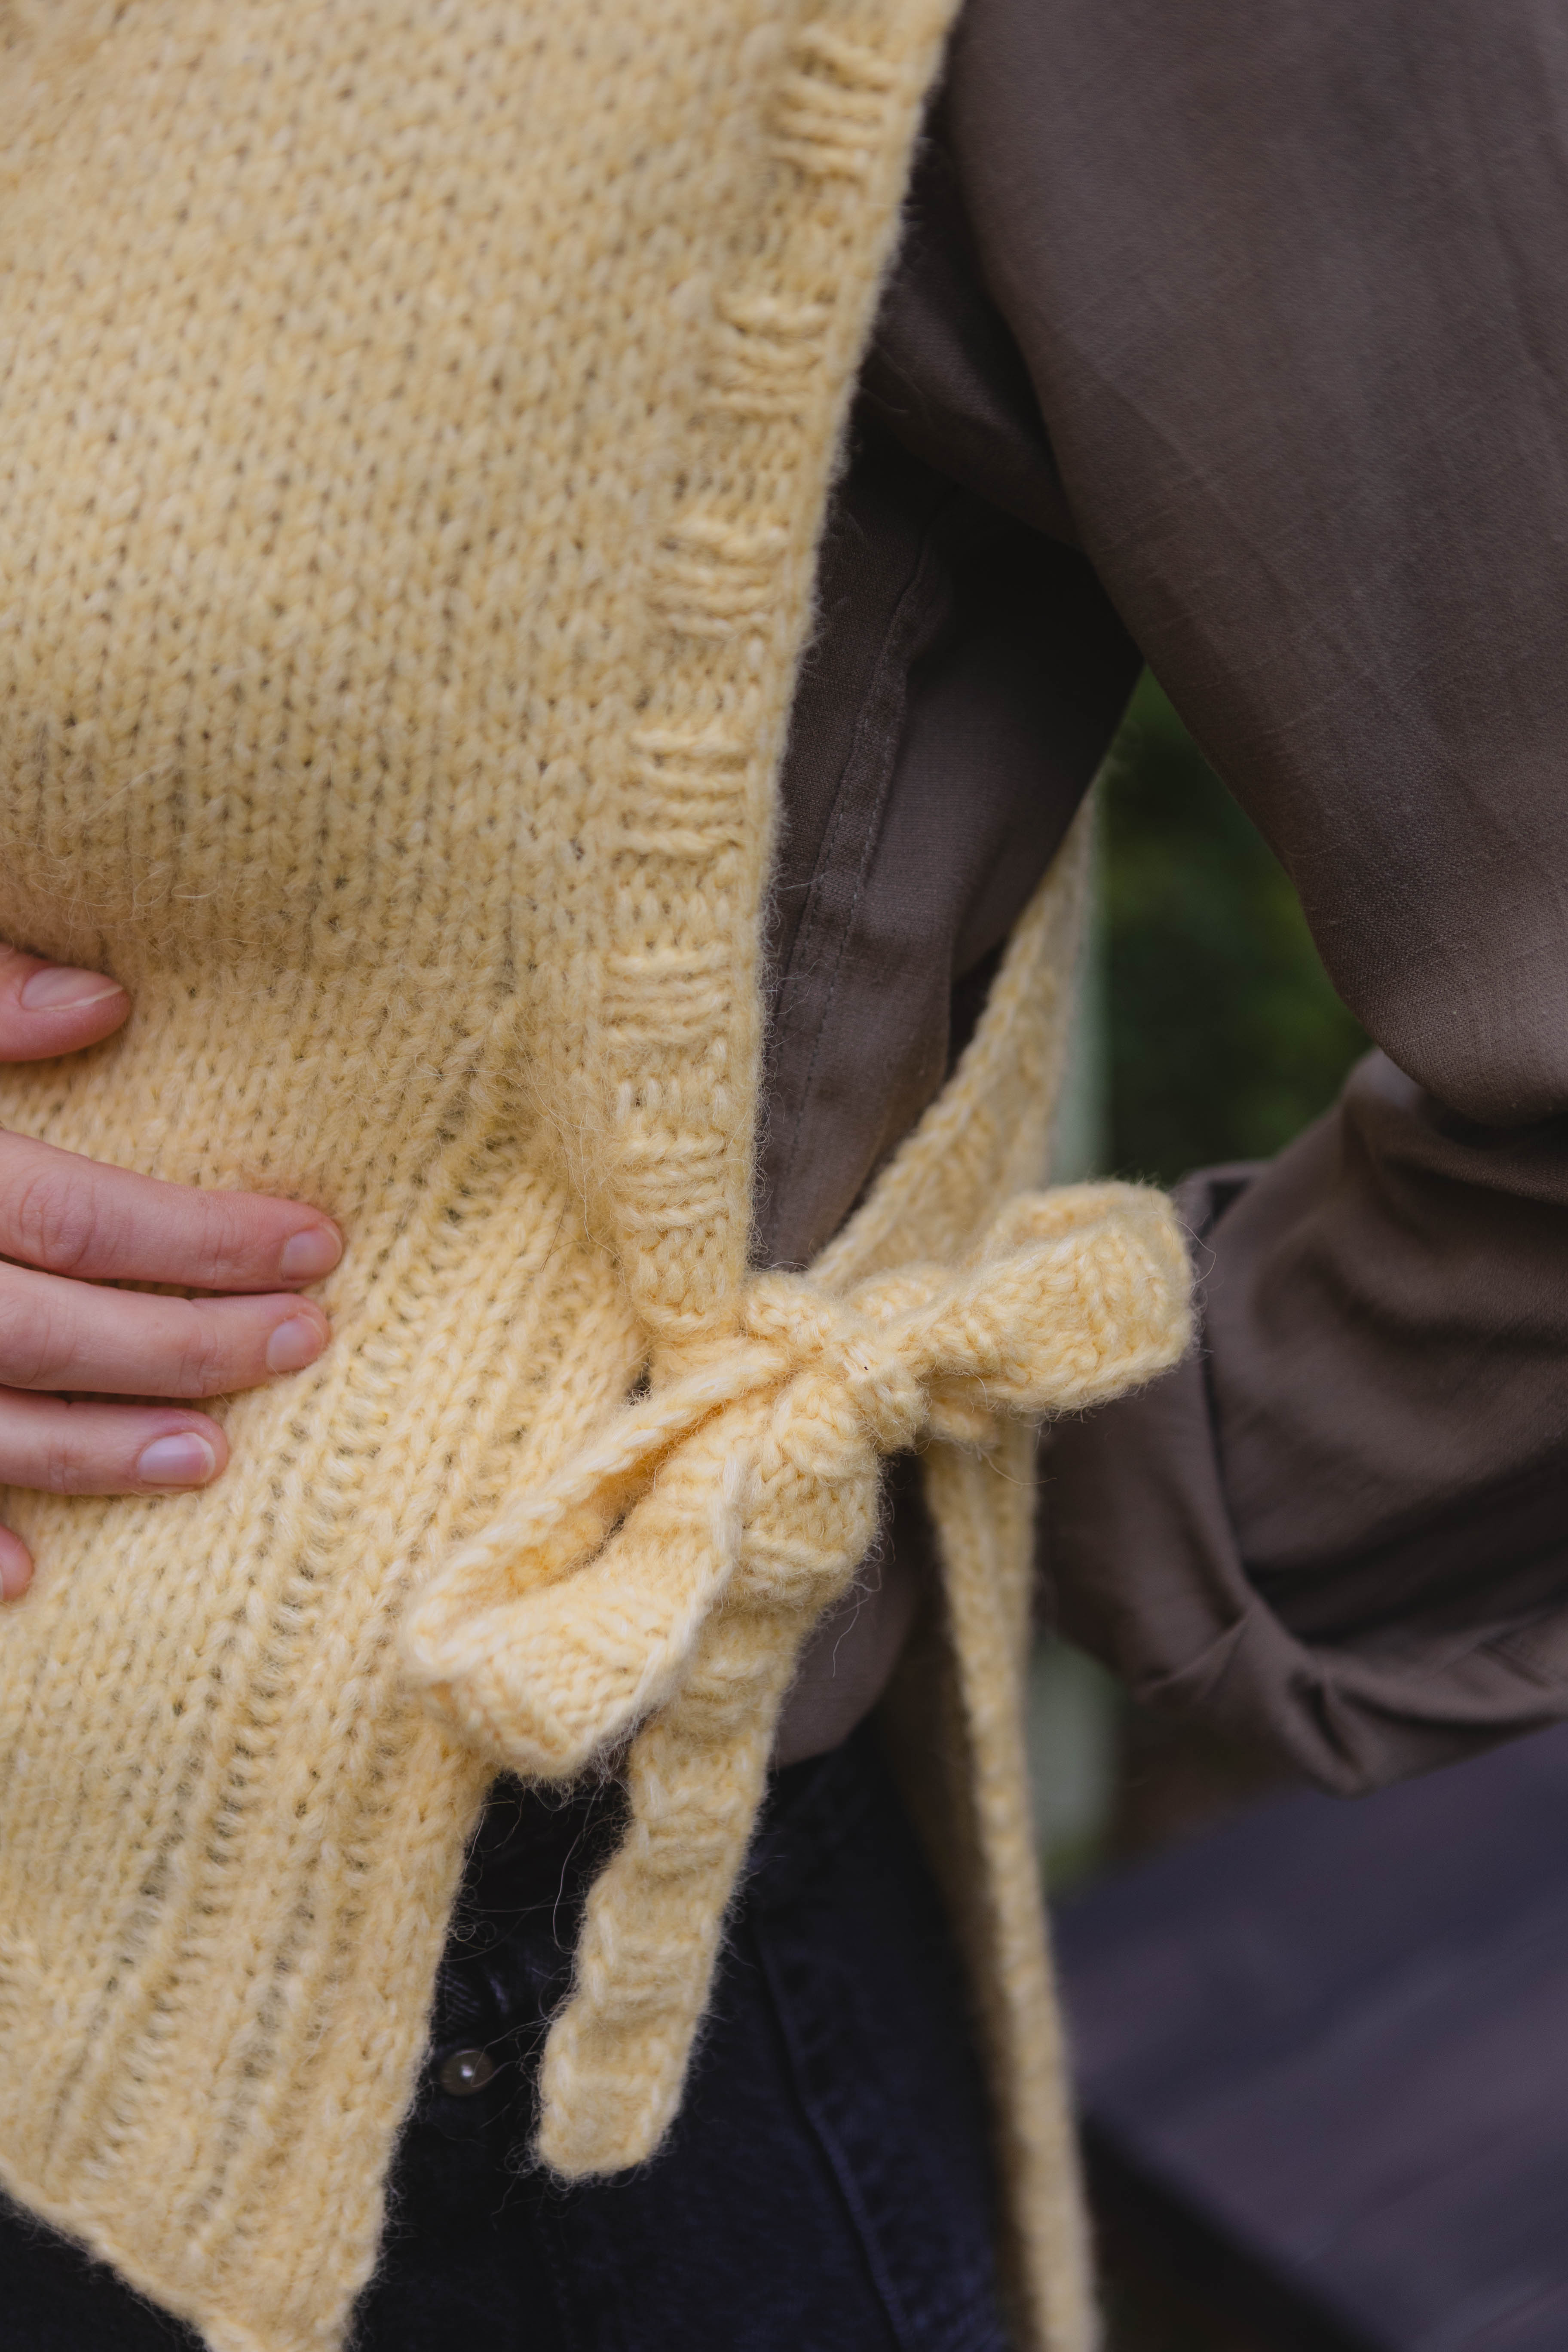
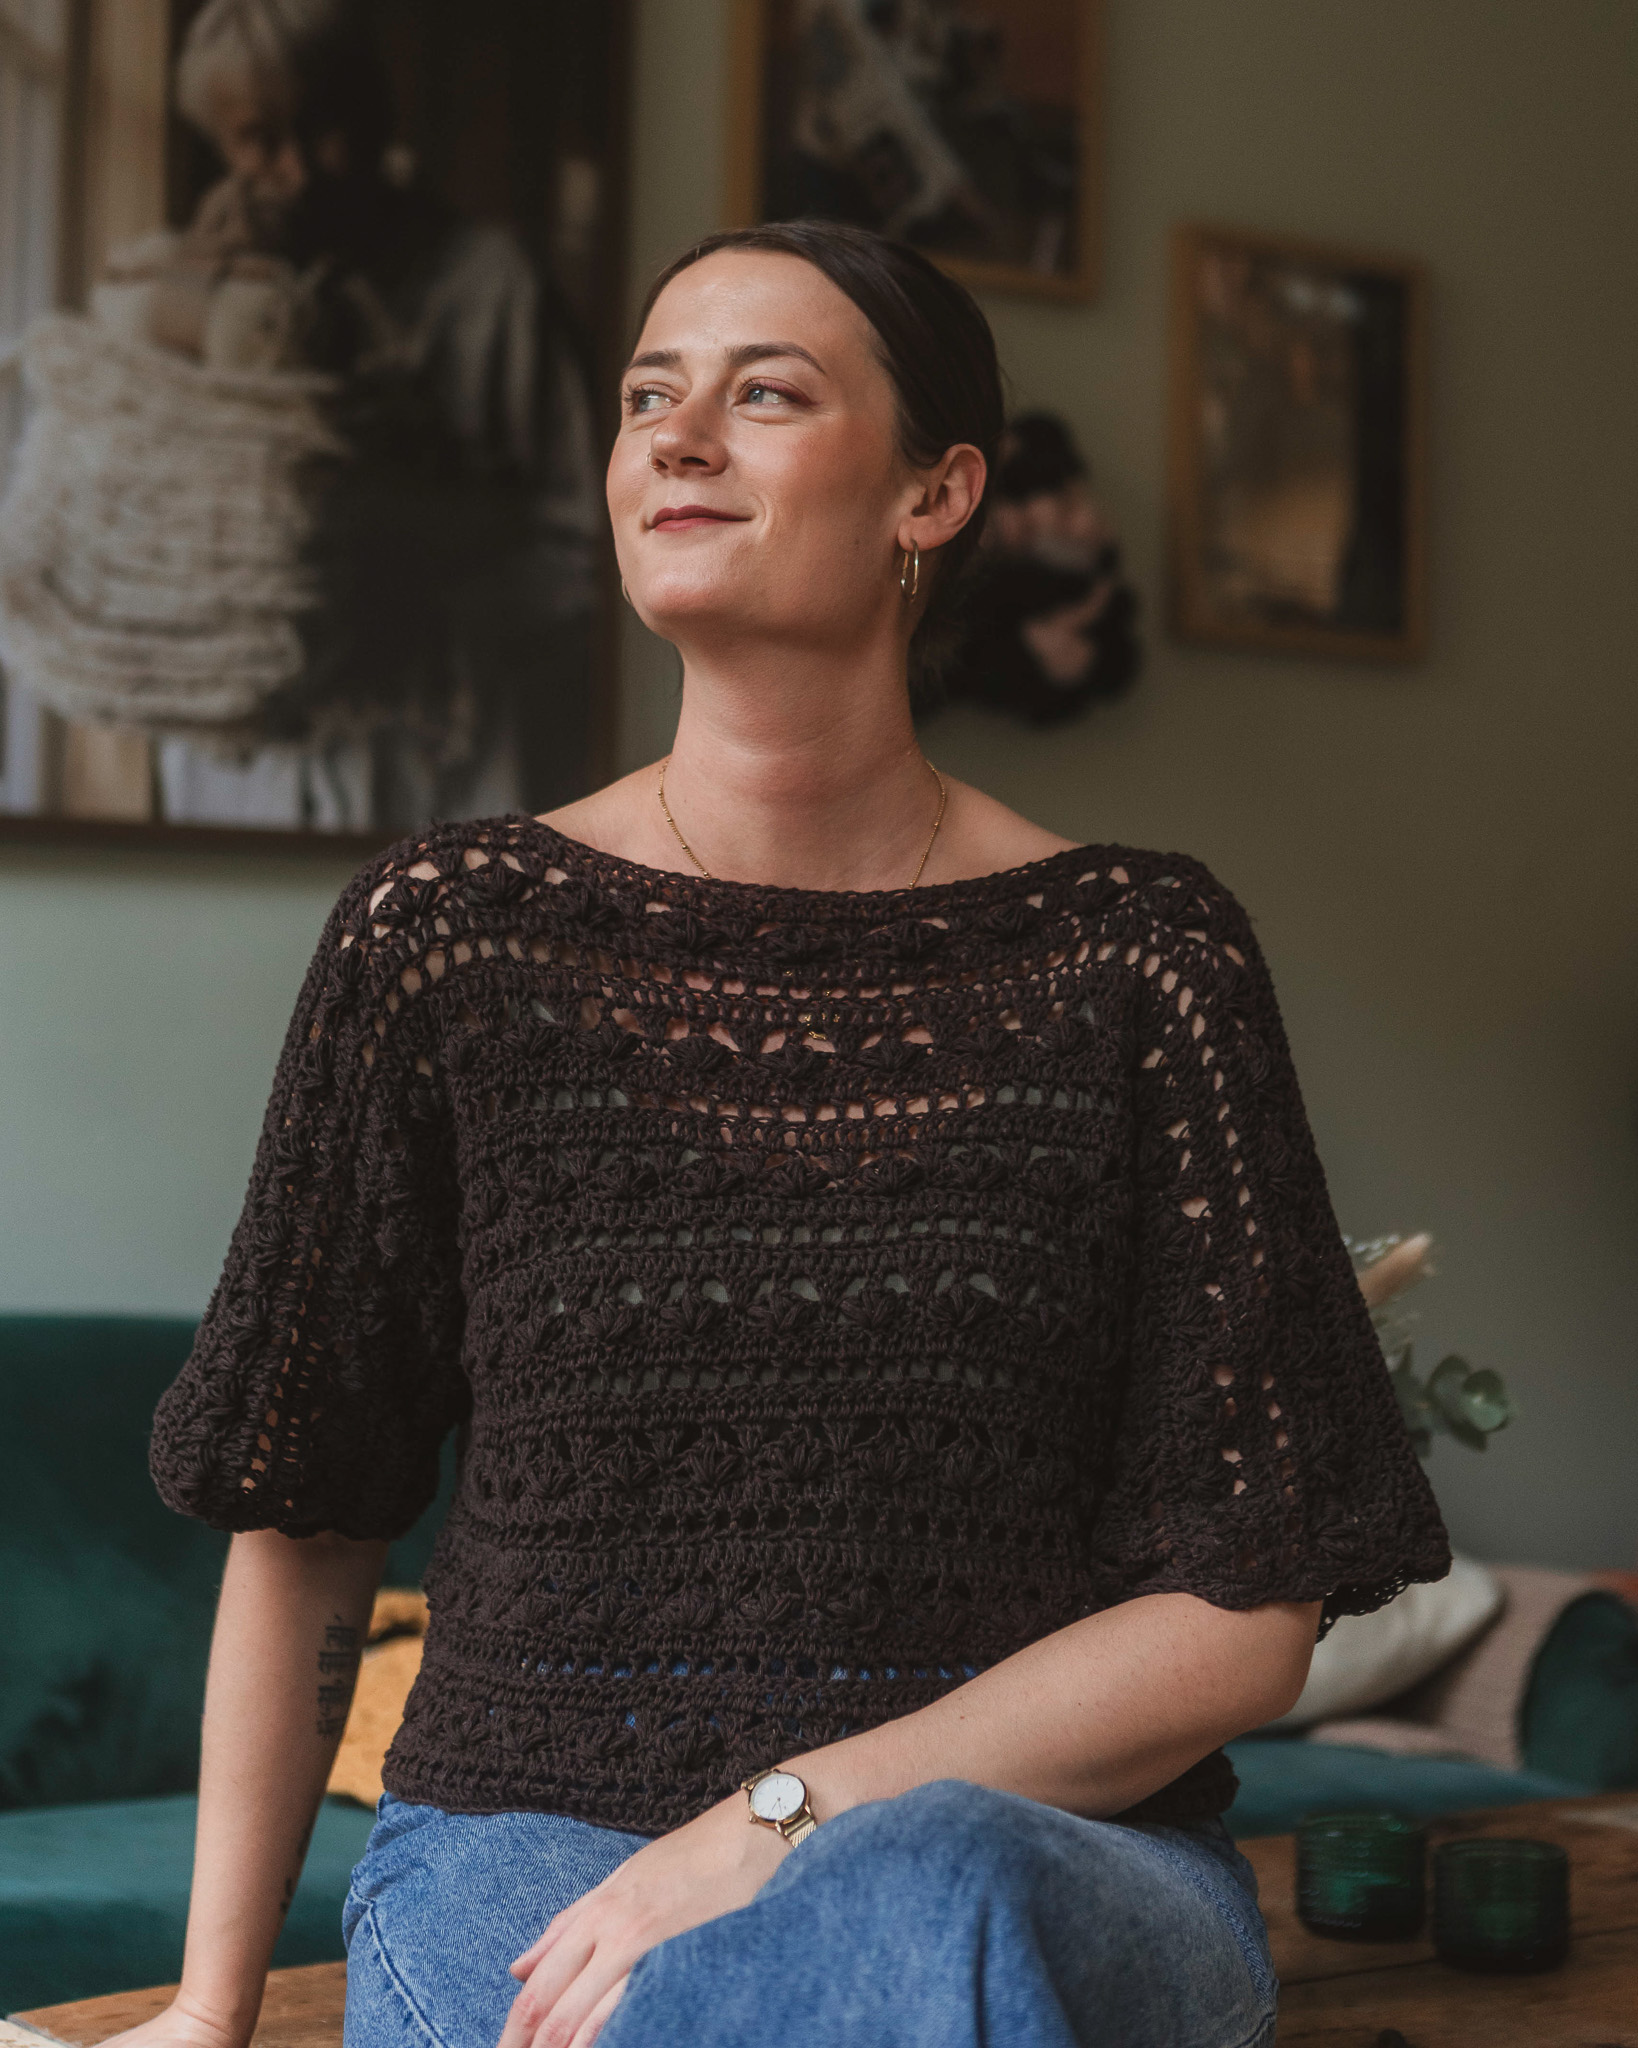
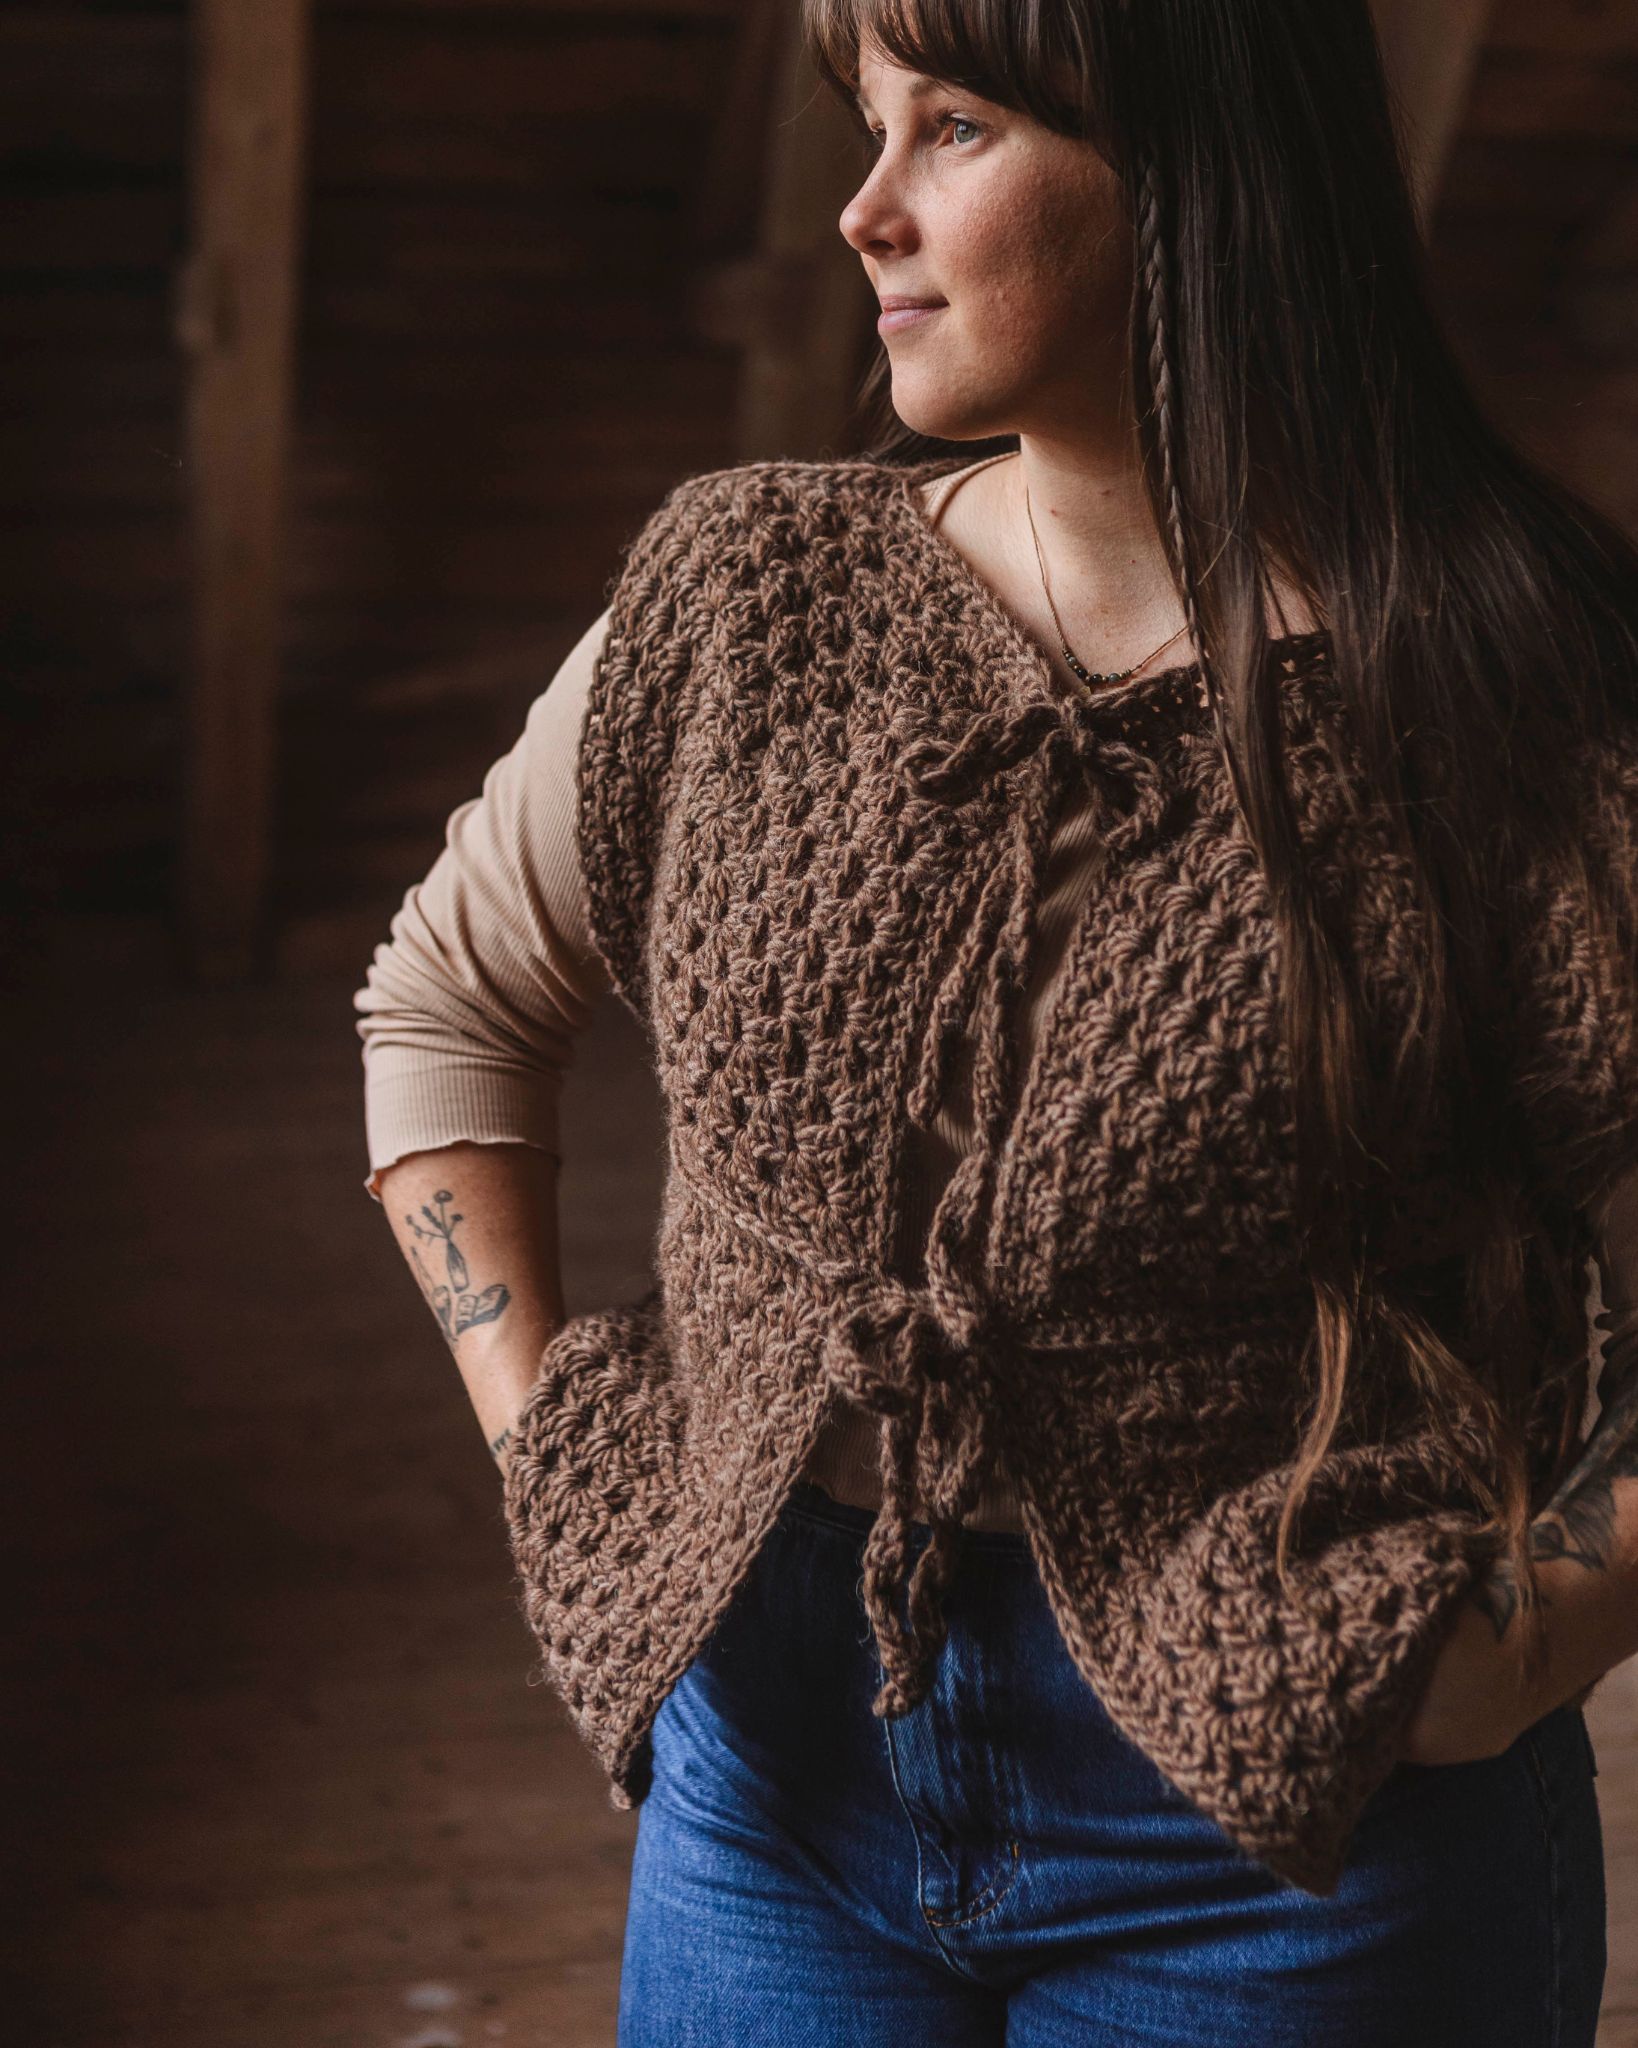
This slipover combines timeless style with a contemporary twist: adjustable tie bands on the sides.
Wear it over your shirt for an elegant layered look, or pair it with a simple t-shirt for casual comfort. Whether you’re dressing up or keeping it relaxed, this slipover is the perfect mid-season garment! You’ll need MYO Dreamy Blend yarn along with circular needles size 5.5 mm (or whichever size gives you the correct gauge), plus circular needles size 4.5 mm for the neckline and tie bands. If you only use one needle, you can use MYO's 5mm needles for the whole project. This pattern uses advanced techniques, so it’s best if you have some knitting experience.
The pattern size is Medium, but you can tie the bands tighter or looser if you want a more fitted or relaxed fit but the length will be the same as this pattern is one size only. Note that this pattern is only available in size M.
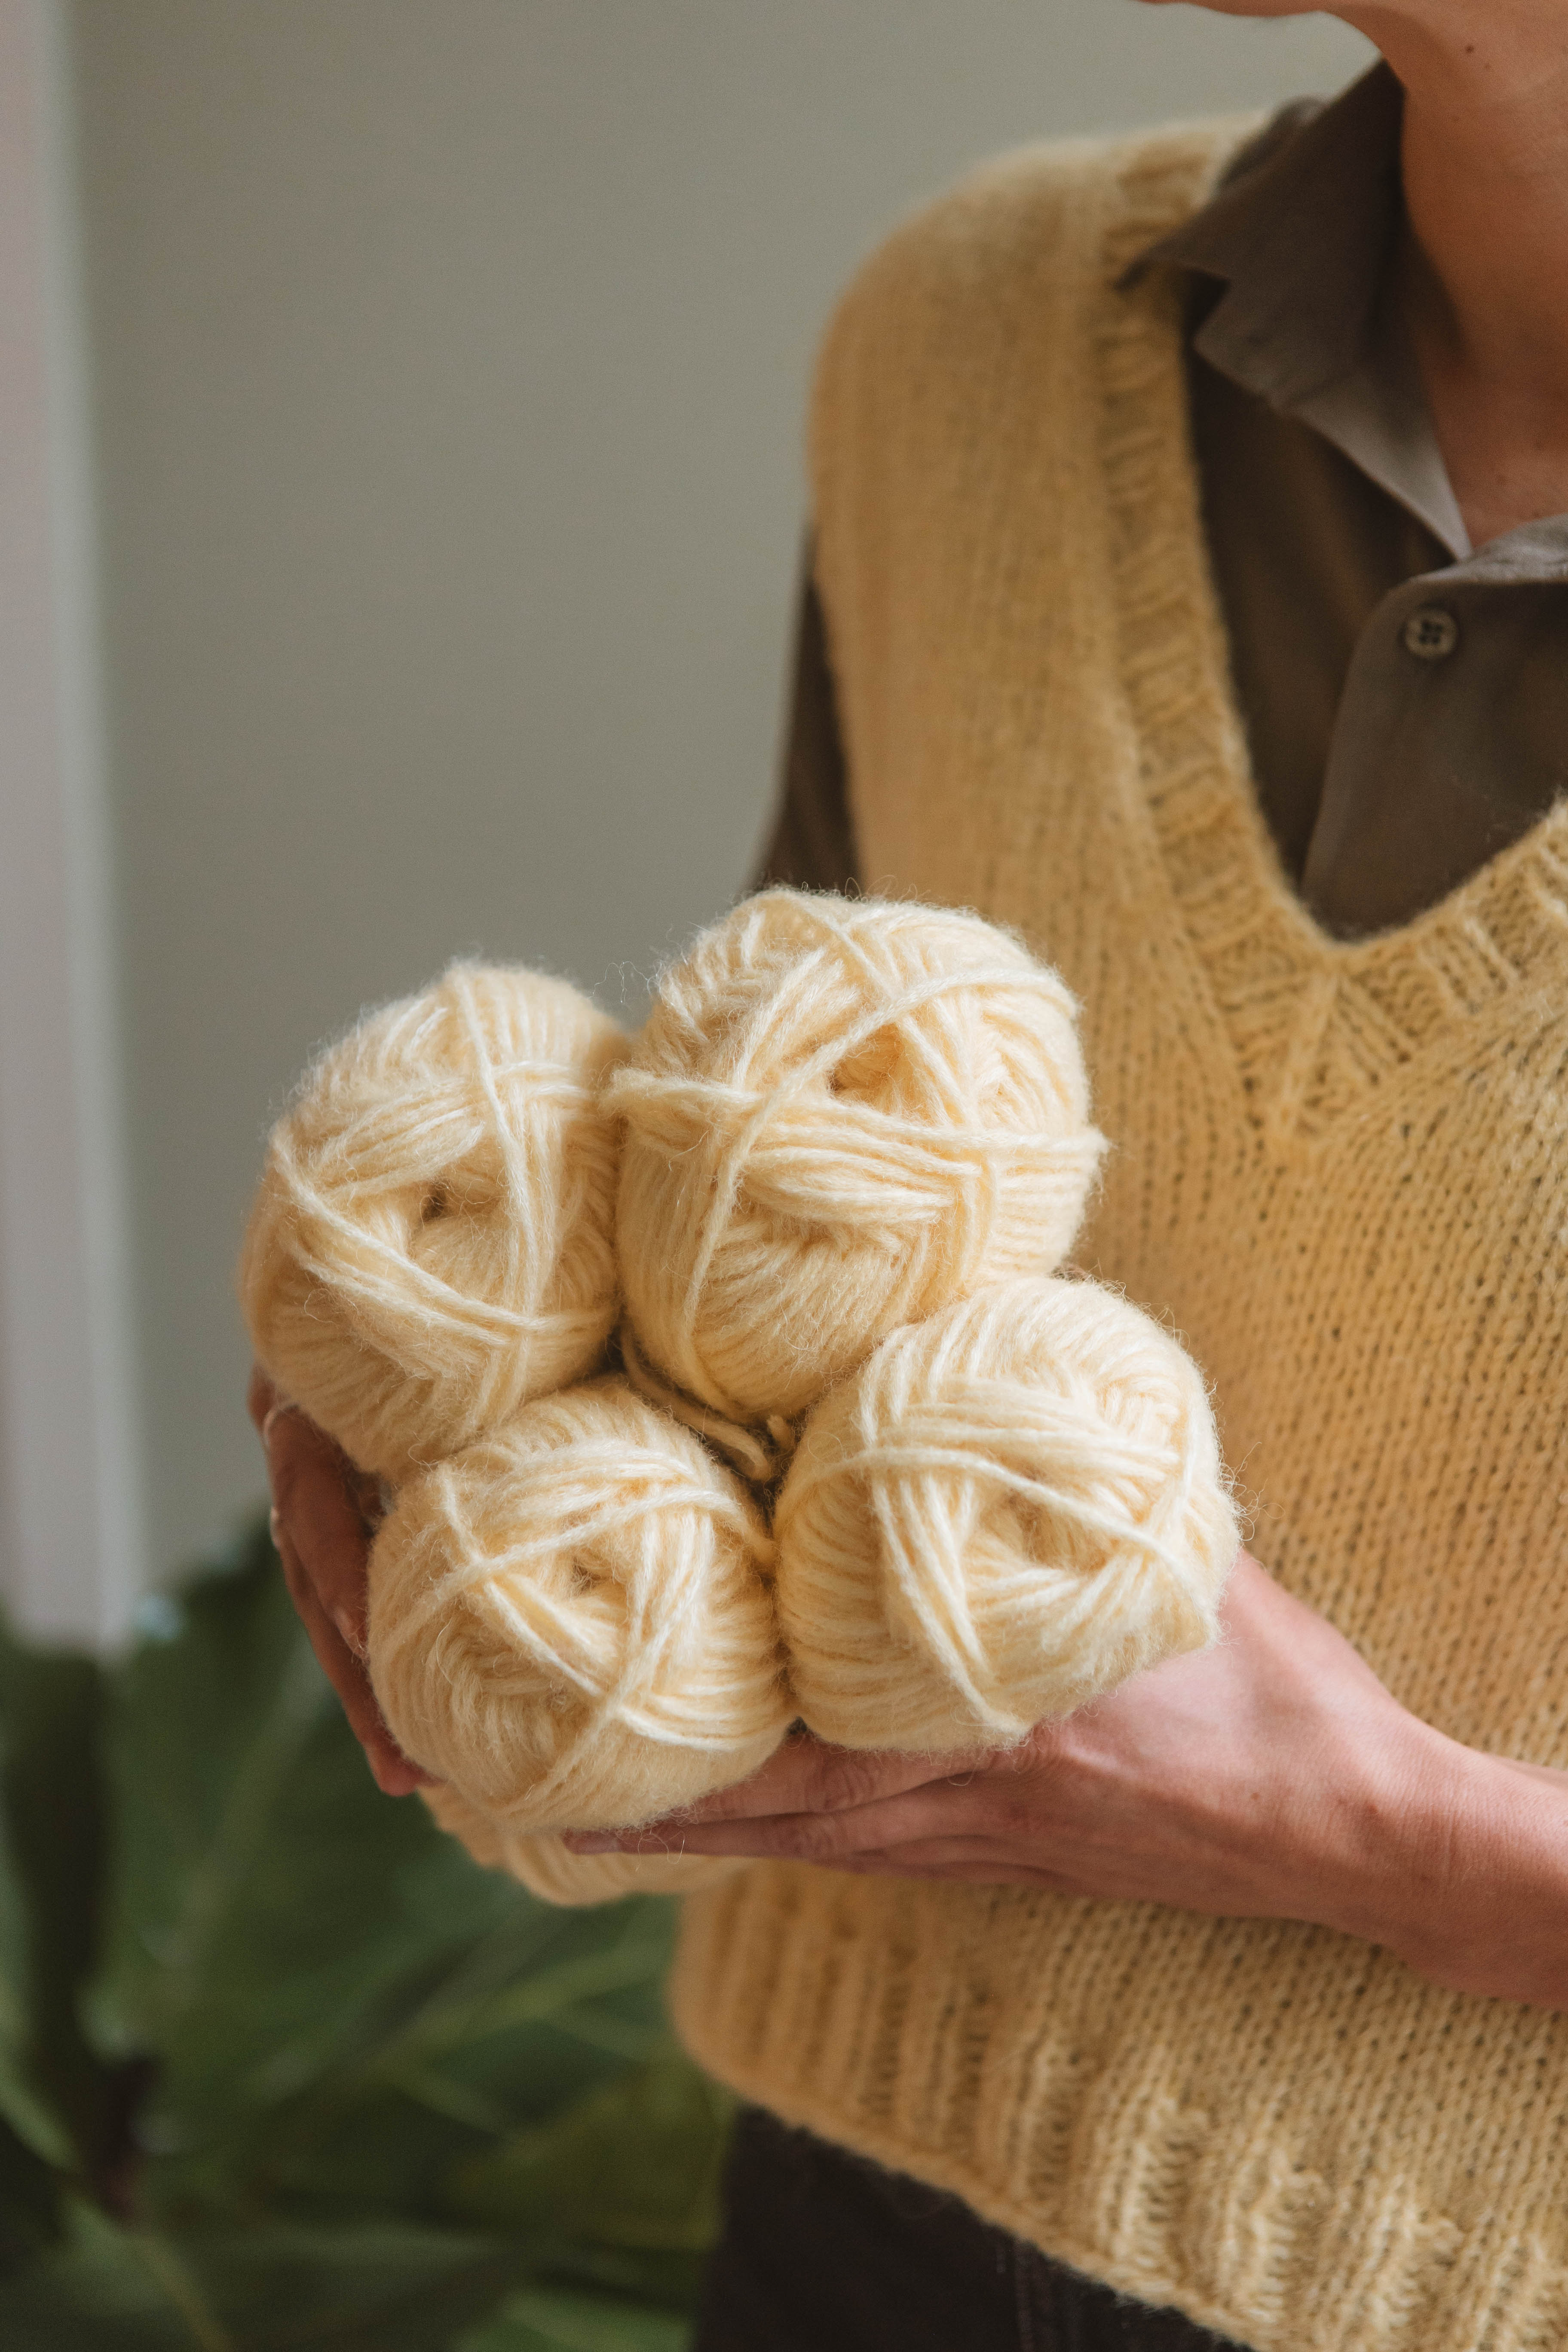
Yarn Consumption: approx. 275 g
Note: This instruction includes videos from our technique school along with photos to guide you.
Here's how to do it
The pattern is organized so that techniques specific to this project are under Step 1. That way, you have everything gathered in one place and can easily go back and take a look. /Anna Vikström
.jpg)
This is what you need:
Here you can directly purchase the material for the product. Please note that the instruction is digital and appears here on the page (no written instruction).

MYO Dreamy blend | 50g
A soft blend yarn that consists of 40% cotton, 35% superfine alpaca, and 25% wool.
Buy product
.jpg)
Unleash your creativity
For only 85kr per month you get access to all our 300+ beginner-friendly instructions for crochet, knitting and macrame.
A perfect way to get started with your new hobby!

Information:
Size:
This pattern is only available in size M. If you want it smaller or larger, you can adjust the opening on the side where you tie the straps.
- Width at center back = 19.3 inches (49 cm)
- Length of back piece = 24.8 inches (63 cm)
- Length of front piece = 21.7 inches (55 cm)
Gauge:
14 sts x 19 rows = 4 x 4 inches (10 x 10 cm) after washing and blocking
Needles:
- Circular needles US 9 (5.5 mm) or size needed to obtain gauge
- Circular needles US 7 (4.5 mm) for neckband and tie straps
General:
The vest is knit back and forth, starting with the back piece from bottom up. Short rows are used to shape the shoulder slope, but you can skip this step if you find it difficult. When the back piece is finished, the work is divided and the front pieces are knit separately until the neckline is completed. Then the front is worked as one piece and finished with a ribbed edge.
Stitches are picked up around the neckline and a ribbed band is knit. Stitches are also picked up along the armholes and the ribbing is knit while simultaneously knitting the tie straps.
Technique Descriptions:
Left-leaning decrease (ssk):
Slip one stitch knitwise, slip the next stitch knitwise, insert the left needle into the fronts of these two slipped stitches, and knit them together.
Right-leaning decrease (k2tog): Insert the right needle through the second stitch and then the first stitch on the left needle, and knit both stitches together.
Right-leaning increase: Lift the strand (bar) between two stitches from the front using the left needle. Knit into the back loop of this lifted strand.
Left-leaning increase: Lift the strand (bar) between two stitches from the back using the left needle. Knit into the front loop of this lifted strand.
Selvage stitch: If the pattern says to knit a selvage stitch, you purl the first stitch of the row, and knit the last stitch of the row through the back loop.
German short rows:
When knitting short rows using the German short row technique, knit until the pattern tells you to turn. Turn your work, slip the first stitch onto the right needle as if to purl, with the working yarn in front. Move the yarn to the back of the work and tighten it. Now the stitch looks like a double stitch, but on the next row, knit or purl the whole stitch on the left needle normally. If you’re unsure, you can watch the video below (German Short Rows).
Pattern
Cast on 72 sts using the Long Tail Cast On method on US size 9 (5.5 mm) needles. If you’re unsure how to do the Long Tail Cast On, see the video below.
The next round is knitted in ribbing from the wrong side, do as follows:
Row 1 (wrong side): Purl 3 stitches, *knit 2 stitches, purl 2 stitches* repeat from * to * until there is 1 stitch left in the row, knit 1 stitch through the back loop.If you're unsure how to purl or knit stitches, see the video below:
Row 2 (right side): Purl 1 stitch, *knit 2 stitches, purl 2 stitches*, repeat from * to * until 3 stitches remain, knit 2 stitches, knit 1 stitch through the back loop.
Repeat rows 1 and 2 a total of 4 times, then knit row 1 one more time.
You have now knitted a total of 9 rows.
Now you will work stockinette stitch in the middle section and ribbing on the edges.
The next row is a right side row. Knit as follows:
Row 1 (right side): Purl 1 stitch, knit 2 stitches, purl 2 stitches, knit 2 stitches, purl 2 stitches, knit in stockinette (knit all stitches) until 9 stitches remain, then purl 2 stitches, knit 2 stitches, purl 2 stitches, knit 2 stitches, knit 1 stitch through the back loop.
Row 2 (wrong side): Purl 3 stitches, knit 2 stitches, purl 2 stitches, knit 2 stitches, purl across until 9 stitches remain, then knit 2 stitches, purl 2 stitches, knit 2 stitches, purl 2 stitches, knit 1 stitch through the back loop.
Repeat Rows 1 and 2 until the piece measures 30 cm.
Let me know if you'd like help visualizing this or converting it to U.S. knitting terminology!
Decreases at the sides
Purl the edge stitch, knit 1 stitch, make a left-leaning decrease.
Knit according to the pattern (as the stitches appear) until 4 stitches remain in the row, then knit 2 stitches together (right-leaning decrease), knit 1 stitch, knit 1 stitch through the back loop. = 2 stitches decreased
Work the return row knitting the stitches as they appear.
Continue decreasing on every other row until there are 48 stitches remaining on the needle.
Now work in stockinette stitch (with 1 edge stitch on each side) until the piece measures 59 cm.
Short rows
Now work short rows at the back using the German short rows technique. If you're unsure how to knit this technique, see the video below.
Short Rows with German Short Rows Technique
Knit 1 edge stitch, knit until 2 stitches remain in the row, turn.
Purl until 2 stitches remain in the row, turn.
Knit until 4 stitches remain, turn.
Purl until 4 stitches remain, turn.
Knit until 6 stitches remain, turn.
Purl until 6 stitches remain, turn.
Knit until 8 stitches remain, turn.
Purl until 8 stitches remain, turn.
Knit until 10 stitches remain, turn.
Purl until 10 stitches remain, turn.
Knit until 12 stitches remain, turn.
Purl until 12 stitches remain, turn.
Knit until 1 stitch remains, then knit 1 edge stitch.
Purl until 1 stitch remains, then purl 1 edge stitch.
Knit 1 edge stitch, knit 11 stitches, bind off 24 stitches, knit 11 stitches, knit 1 edge stitch.
Do not cut the yarn.
Left Front Piece
Next row is worked from the wrong side.
Knit 7 rows in stockinette stitch, with edge stitches as before: The first stitch purl, the last stitch knit through the back loop.
Next row is a right side row.
Row 1: Knit 1 edge stitch, knit 2 stitches, make a right-leaning increase, knit until 1 stitch remains, knit 1 edge stitch.
Row 2: Purl until 1 stitch remains, knit 1 edge stitch.
Row 3: Knit 1 edge stitch, knit until 1 stitch remains, knit 1 edge stitch.
Row 4: Purl until 1 stitch remains, knit 1 edge stitch.
Repeat Rows 1–4 a total of 14 times.
Finish with a row from the wrong side.
You should now have 26 stitches on the needle.
Cut the yarn and set the stitches aside while you knit the right front piece.
Right Front Piece
Start from the wrong side, near the neck.
Knit 7 rows in stockinette stitch, with edge stitches as before:
The first stitch purl, the last stitch knit through the back loop.
Next row is a right side row.
Row 1: Knit 1 edge stitch, knit until 3 stitches remain, make a left-leaning increase, knit 2 stitches, knit 1 edge stitch.
Row 2: Purl until 1 stitch remains, knit 1 edge stitch.
Row 3: Knit 1 edge stitch, knit until 1 stitch remains, knit 1 edge stitch.
Row 4: Purl until 1 stitch remains, knit 1 edge stitch.
Repeat Rows 1–4 a total of 14 times.
Finish with a row from the wrong side.
You should now have 26 stitches on the needle.
Do not cut the yarn, as you will continue knitting from here.
Front Piece (Joining the Left and Right Sides)
Joining the Front Pieces:
Now the front pieces are knitted together into one piece.
Knit 1 selvedge stitch, knit across the right front piece, knit across the left front piece until 1 stitch remains, then knit 1 selvedge stitch. Make sure the front pieces are not twisted before continuing.
Knit one row of purl stitches on the wrong side.
Shaping the Armhole:
Begin the increases to shape the armhole. The new stitches are worked so that they follow the same type of rib pattern as on the back piece. The first row of increases is worked from the right side.
Now you'll increase stitches to shape the armhole.
These new stitches should be worked so they align with the ribbing pattern used on the back piece.
The first row is worked from the right side.
Row 1 (RS): Knit 1 edge stitch, knit 2 stitches, make a right-leaning increase, knit until 3 stitches remain, make a left-leaning increase, knit 2 stitches, knit 1 edge stitch.
Row 2 (WS): Knit 1 edge stitch, purl 2 stitches, knit 1 stitch, purl across until 4 stitches remain, knit 1 stitch, purl 2 stitches, knit 1 edge stitch.
Row 3 (RS): Knit 1 edge stitch, knit 2 stitches, make a right-leaning increase, purl 1 stitch, knit across until 4 stitches remain, purl 1 stitch, make a left-leaning increase, knit 2 stitches, knit 1 edge stitch.
Row 4 (WS): Knit 1 edge stitch, purl 2 stitches, knit 2 stitches, purl across until 5 stitches remain, knit 2 stitches, purl 2 stitches, knit 1 edge stitch.
Row 5 (RS): Knit 1 edge stitch, knit 2 stitches, make a right-leaning increase, knit according to the stitch pattern until 3 stitches remain, make a left-leaning increase, knit 2 stitches, knit 1 edge stitch.
Row 6 (WS): Knit 1 edge stitch, work stitches as they appear until 1 stitch remains, knit 1 edge stitch.
Row 7 (RS): Knit 1 edge stitch, knit 2 stitches, make a right-leaning increase, work stitches as they appear until 3 stitches remain, make a left-leaning increase, knit 2 stitches, knit 1 edge stitch.
Row 8 (WS): Knit 1 edge stitch, work stitches as they appear until 1 stitch remains, knit 1 edge stitch.
Row 9 (RS): Knit 1 edge stitch, knit 2 stitches, make a right-leaning increase, work stitches as they appear until 3 stitches remain, make a left-leaning increase, knit 2 stitches, knit 1 edge stitch.
Row 10 (WS): Knit 1 edge stitch, purl 2 stitches, knit 1 stitch, work stitches as they appear until 4 stitches remain, knit 1 stitch, purl 2 stitches, knit 1 edge stitch.
Row 11 (RS): Knit 1 edge stitch, knit 2 stitches, make a right-leaning increase, work stitches as they appear until 3 stitches remain, make a left-leaning increase, knit 2 stitches, knit 1 edge stitch.
Row 12 (WS): Knit 1 edge stitch, purl 2 stitches, knit 1 stitch, work stitches as they appear until 4 stitches remain, knit 1 stitch, purl 2 stitches, knit 1 edge stitch.
You have now increased 1 stitch at each side on every right-side row, and you should have a total of 64 stitches on the needle.
Continue as follows:
Work the stitches as they appear, keeping edge stitches and ribbing at the outer edges, and stockinette stitch in the center, until the piece measures 21 cm, measured from the point where the front pieces were joined at center front — or until your desired length.
Note: An additional approximately 4 cm of ribbing will be added later.
End with a right-side row.
Begin ribbing on the next row.
Bottom Ribbing – from the Wrong Side:
From the wrong side, work as follows:
- Knit 1 edge stitch, purl 2 stitches,
- Knit 2 stitches, purl 2 stitches
- Repeat from * to * until 1 stitch remains, knit 1 edge stitch.
Then:
- Continue in ribbing (as the stitches appear) with edge stitches for 8 more rows.
- The last row should be a wrong-side row.
Bind off using knit stitches from the right side.
Ties and Armhole Ribbing:
Now you’ll knit the tie bands while working ribbing around the armholes.
- Cast on 49 stitches using the long-tail cast-on method.
- Pick up 94 stitches along the edge of the armhole.
- At the other side of the armhole, add a new strand of yarn and cast on another 49 stitches using the long-tail cast-on.
- Turn the work.
Now work as follows:
- Knit 1 edge stitch, purl 2 stitches,
- Knit 2 stitches, purl 2 stitches
- Repeat from * to * until 1 stitch remains, knit 1 edge stitch.
Continue working 5 more rows in ribbing, as the stitches appear, with edge stitches.
Bind off using knit stitches.
Repeat the tie/armhole ribbing on the other side.
Neckline
Using 4.5 mm needles, pick up stitches as follows:
- 47 stitches along the left neckline,
- 1 stitch at the bottom of the V-neck (this is the center stitch),
- 48 stitches along the right neckline,
- 25 stitches across the back neckline.
You should now have 121 stitches in total.
Row 1 (Set-up row with decreases):
- Purl 1 stitch,
- Knit 2 stitches, purl 2 stitches — repeat until 2 stitches remain before the center stitch,
- Knit 2 stitches, then slip 2 stitches together as if to knit, knit 1 stitch, pass the slipped stitches over (= this is the new center stitch),
- Knit 2 stitches,
- Purl 2 stitches, knit 2 stitches — repeat until 1 stitch remains,
- Purl 1 stitch.
Shaping the V-neck:
- Next row (Row 2) is worked as follows:
Instead of stopping two stitches before the center stitch and then decreasing, stop only one stitch before the center stitch. The center stitch should be stitch number 2 of the two stitches you slip. - Slip the two stitches, knit one stitch, then pass the slipped stitches over the knit stitch. Continue knitting the remaining stitches as shown for the row.
- The following rows are worked in the same way as Row 2. Continue until you have worked a total of 5 rows.
Row 6 (Final row):
- Bind off loosely in pattern,
- At the same time, work the center decrease once more as before.
Finishing:
You're now done knitting!
- Gently wash your garment using a mild wool detergent,
- Lay flat to dry.
Pattern: Advanced
This pattern contains abbreviations. If you want more help, see the simpler version.
Abbreviations:
st = stitch (st)
k = knit stitch (k)
p = purl stitch (p)
s2k1p = left-leaning decrease: slip one stitch knitwise, slip the next stitch knitwise, insert the left needle into these two slipped stitches and knit them together through the back loops (equivalent to s2k1p or sk2p)
M1R = increase right: lift the strand between two stitches from front to back with the left needle and knit it through the back loop (M1R)
M1L = increase left: lift the strand between two stitches from back to front with the left needle and knit it through the front loop (M1L)
Information:
Size:
- Width at center back = 49 cm
- Back length = 63 cm
- Front length = 55 cm
- Gauge: 14 stitches x 19 rows = 10 x 10 cm after washing and blocking
- Needles: Circular needle size 5.5 mm (US 9) or size needed to get gauge; circular needle size 4.5 mm (US 7) for neckline and tie bands
General:
The slipover is knit back and forth, starting with the back piece from the bottom up. Short rows are used to shape the shoulder slope, but you can skip this step if it feels difficult or complicated. Once the back is finished, the work is divided, and the front pieces are knit separately until the neckline shaping is done. Then the front pieces are joined and finished with a ribbed hem. Stitches are picked up around the neckline to knit a ribbed neckband. Stitches are also picked up along the armholes, where ribbing is knit simultaneously with the tie bands.
Techniques:
- Left-leaning decrease: slip one stitch knitwise, slip the next stitch knitwise, insert the left needle into both slipped stitches and knit them together through the back loops (s2k1p or sk2p).
Right-leaning decrease: Knit 2 stitches together by inserting the right needle through the second stitch and then the first stitch on the left needle, and knit them together.
Right-leaning increase (M1R): Lift the strand (bar) between two stitches from front to back with the left needle, then knit this lifted strand through the back loop.
Left-leaning increase (M1L): Lift the strand (bar) between two stitches from back to front with the left needle, then knit this lifted strand through the front loop.
Selvage stitch (edge stitch):
When instructed to knit a selvage stitch, purl the first stitch of the row, and knit the last stitch of the row through the back loop.
German Short Rows:
When working short rows using the German short row technique, knit up to the point where the instructions say to turn. Turn your work. Slip the first stitch on the right needle as if to purl, with the working yarn held in front. Move the yarn to the back of the work and pull it tight. This creates what looks like a double stitch. On the next row, knit or purl this stitch through the back loop, working it as a single stitch.
Pattern
Cast on 72 sts using the cable cast-on method on US 9 (5.5 mm) needles.
Next row is worked in ribbing from the wrong side as follows:
Row 1 (WS): P3, *K2, P2*; repeat from * to * until 1 st remains, K1 through the back loop.
Row 2 (RS): P1, *K2, P2*; repeat from * to * until 3 sts remain, K2, K1 through the back loop.
Work Rows 1 and 2 a total of 4 times, then work Row 1 once more. You will have worked a total of 9 rows.
Now work stockinette stitch over the center section and ribbing on the edges.
The next row is worked from the right side as follows:
Row 1 (RS): P1, K2, P2, K2, P2, knit stockinette until 9 sts remain, P2, K2, P2, K2, K1 through the back loop.
Row 2 (WS): P3, K2, P2, K2, purl until 9 sts remain, K2, P2, K2, P2, K1 through the back loop.
Repeat Rows 1 and 2 until the work measures 30 cm.
Side Decreases
Purl the selvage stitch, K1, ssk (slip, slip, knit — decrease leaning left), knit as the stitches appear until 4 sts remain on the row, k2tog (knit two together — decrease leaning right), K1, K1 through the back loop = 2 sts decreased.
Knit back as the stitches appear.
Continue decreasing every other row until 48 sts remain on the needle.
Now work stockinette stitch with a selvage stitch at each edge until the piece measures 59 cm.
Short Rows
Work short rows on the back using the German short row technique:
- Purl 1 selvage stitch, knit until 2 sts remain, turn.
- Purl until 2 sts remain, turn.
- Knit until 4 sts remain, turn.
- Purl until 4 sts remain, turn.
- Knit until 6 sts remain, turn.
- Purl until 6 sts remain, turn.
- Knit until 8 sts remain, turn.
- Purl until 8 sts remain, turn.
- Knit until 10 sts remain, turn.
- Purl until 10 sts remain, turn.
- Knit until 12 sts remain, turn.
- Purl until 12 sts remain, turn.
- Knit until 1 st remains, then knit 1 selvage stitch.
- Purl until 1 st remains, then knit 1 selvage stitch.
Bind off
Knit 1 selvage stitch, knit 11 sts, bind off 24 sts, knit 11 sts, knit 1 selvage stitch.
Do not cut the yarn.
Left Front Piece
Next row is worked from the wrong side.
Work 7 rows of stockinette stitch with selvage stitches as before (first stitch purl, last stitch twisted knit).
Next row is worked from the right side:
Row 1: Knit 1 selvage stitch, K2, increase right (see note*), knit until 1 st remains, selvage stitch.
Row 2: Purl until the last stitch, knit 1 selvage stitch.
Row 3: Knit 1 selvage stitch, knit until 1 st remains, selvage stitch.
Row 4: Purl until the last stitch, knit 1 selvage stitch.
Repeat Rows 1–4 a total of 14 times.
End with a wrong side row.
You should now have 26 stitches on the needle.
Cut the yarn and let the stitches rest while you work the right front piece.
Right Front Piece
Start from the wrong side, nearest the neck.
Work 7 rows of stockinette stitch with selvage stitches as before (first stitch purl, last stitch twisted knit).
Next row is worked from the right side:
Row 1: Knit 1 selvage stitch, knit until 3 sts remain, increase left (see note**), K2, 1 selvage stitch.
Row 2: Purl until the last stitch, knit 1 selvage stitch.
Row 3: Knit 1 selvage stitch, knit until 1 st remains, knit 1 selvage stitch.
Row 4: Purl until the last stitch, knit 1 selvage stitch.
Repeat Rows 1–4 a total of 14 times.
End with a wrong side row.
You should now have 26 stitches on the needle.
Do not cut the yarn, as you will continue knitting from here.
*Increase right: Lift the strand between the stitches from front to back with the left needle and knit through the back loop.
**Increase left: Lift the strand between the stitches from back to front with the left needle and knit it.
Front Piece
Now the front pieces are joined and worked as one piece.
Knit 1 selvage stitch, knit across the right front piece, knit across the left front piece until 1 stitch remains, knit 1 selvage stitch.
Check that the front pieces are not twisted before continuing.
Now increase stitches to shape the armhole. The new stitches are worked to blend into the same rib pattern as on the back piece.
The first row is worked from the right side.
Row 1: Knit 1 selvage stitch, K2, increase right, knit until 3 stitches remain, increase left, K2, knit 1 selvage stitch.
Row 2: Knit 1 selvage stitch, P2, K1, purl until 4 stitches remain, K1, P2, knit 1 selvage stitch.
Row 3: Knit 1 selvage stitch, K2, increase right, P1, knit until 4 stitches remain, P1, increase left, K2, knit 1 selvage stitch.
Row 4: Knit 1 selvage stitch, P2, K2, purl until 5 stitches remain, K2, P2, knit 1 selvage stitch.
Row 5: Knit 1 selvage stitch, K2, increase right, knit as stitches appear until 3 stitches remain, increase left, K2, knit 1 selvage stitch.
Row 6: Knit 1 selvage stitch, knit as stitches appear until 1 stitch remains, knit 1 selvage stitch.
Row 7: Knit 1 selvage stitch, K2, increase right, knit as stitches appear until 3 stitches remain, increase left, K2, knit 1 selvage stitch.
Row 8: Knit 1 selvage stitch, knit as stitches appear until 1 stitch remains, knit 1 selvage stitch.
Row 9: Knit 1 selvage stitch, K2, increase right, knit as stitches appear until 3 stitches remain, increase left, K2, knit 1 selvage stitch.
Row 10: Knit 1 selvage stitch, P2, K1, knit as stitches appear until 4 stitches remain, K1, P2, knit 1 selvage stitch.
Row 11: Knit 1 selvage stitch, K2, increase right, knit as stitches appear until 3 stitches remain, increase left, K2, knit 1 selvage stitch.
Row 12: Knit 1 selvage stitch, P2, K1, knit as stitches appear until 4 stitches remain, K1, P2, knit 1 selvage stitch.
You have now increased 1 stitch on each side on every right-side row and have a total of 64 stitches on the needle.
Knit as the stitches appear with selvage stitches and ribbing at the edges, and stockinette stitch in the center front until the piece measures 21 cm from the point where the front pieces were joined at center front, or to your desired length. This length includes about 4 cm of ribbing.
End with a right-side row. On the next row, begin the ribbing.
From the wrong side, knit 1 selvage stitch, p2, k2 repeat until 1 stitch remains, knit 1 selvage stitch.
Work ribbing as established with selvage stitches for 8 more rows. The last row is a wrong-side row.
Bind off with knit stitches on the right side.
Knit the tie bands and ribbing around the armholes at the same time.
Cast on 49 sts with a cable cast-on. Pick up 94 sts evenly along the side of the armhole. Using a separate ball of yarn at the other side of the armhole, cast on 49 sts with cable cast-on. Turn.
Knit 1 selvage stitch, *p2, k2, p2* repeat to last stitch, knit 1 selvage stitch.
Work 5 more rows in ribbing as established, with selvage stitches.
Bind off in knit on the right side.
Repeat the tie band/armhole ribbing on the other side.
Neckband:
With 4.5 mm needles, pick up 47 sts along the left neck edge, pick up 1 stitch at the bottom of the V-neck (center front stitch), pick up 47 sts along the right neck edge, then pick up 25 sts along the back neck.
On the first row, decrease 2 sts as follows:
Knit 1 purl (selvage) stitch, k2, p2 repeat until 2 sts remain before the center front stitch, knit 2 sts, slip 2 sts knitwise together, knit 1, pass the slipped sts over (this creates the new center stitch). Knit 1, p2, k2 repeat until 1 stitch remains, knit 1 purl (selvage) stitch.
Now decrease 2 sts on every row at the center front in the same way until 5 rows have been worked.
On the 6th row, bind off while making the center front decrease as before.
You’re done!
Wash your garment gently with wool detergent and lay flat to dry.
The rights to this pattern belong to MYO Make Your Own. The pattern or its pictures may not be copied, shared or resold either in parts or in its entirety, but you may sell items you have crocheted from this pattern. If you have questions about the pattern, contact MYO at hello@makeyourown.se.
Information:
Size:
This pattern is only available in size M. If you want it smaller or larger, you can adjust the opening on the side where you tie the straps.
- Width at center back = 19.3 inches (49 cm)
- Length of back piece = 24.8 inches (63 cm)
- Length of front piece = 21.7 inches (55 cm)
Gauge:
14 sts x 19 rows = 4 x 4 inches (10 x 10 cm) after washing and blocking
Needles:
- Circular needles US 9 (5.5 mm) or size needed to obtain gauge
- Circular needles US 7 (4.5 mm) for neckband and tie straps
General:
The vest is knit back and forth, starting with the back piece from bottom up. Short rows are used to shape the shoulder slope, but you can skip this step if you find it difficult. When the back piece is finished, the work is divided and the front pieces are knit separately until the neckline is completed. Then the front is worked as one piece and finished with a ribbed edge.
Stitches are picked up around the neckline and a ribbed band is knit. Stitches are also picked up along the armholes and the ribbing is knit while simultaneously knitting the tie straps.
Technique Descriptions:
Left-leaning decrease (ssk):
Slip one stitch knitwise, slip the next stitch knitwise, insert the left needle into the fronts of these two slipped stitches, and knit them together.
Right-leaning decrease (k2tog): Insert the right needle through the second stitch and then the first stitch on the left needle, and knit both stitches together.
Right-leaning increase: Lift the strand (bar) between two stitches from the front using the left needle. Knit into the back loop of this lifted strand.
Left-leaning increase: Lift the strand (bar) between two stitches from the back using the left needle. Knit into the front loop of this lifted strand.
Selvage stitch: If the pattern says to knit a selvage stitch, you purl the first stitch of the row, and knit the last stitch of the row through the back loop.
German short rows:
When knitting short rows using the German short row technique, knit until the pattern tells you to turn. Turn your work, slip the first stitch onto the right needle as if to purl, with the working yarn in front. Move the yarn to the back of the work and tighten it. Now the stitch looks like a double stitch, but on the next row, knit or purl the whole stitch on the left needle normally. If you’re unsure, you can watch the video below (German Short Rows).
Pattern
Cast on 72 sts using the Long Tail Cast On method on US size 9 (5.5 mm) needles. If you’re unsure how to do the Long Tail Cast On, see the video below.
The next round is knitted in ribbing from the wrong side, do as follows:
Row 1 (wrong side): Purl 3 stitches, *knit 2 stitches, purl 2 stitches* repeat from * to * until there is 1 stitch left in the row, knit 1 stitch through the back loop.If you're unsure how to purl or knit stitches, see the video below:
Row 2 (right side): Purl 1 stitch, *knit 2 stitches, purl 2 stitches*, repeat from * to * until 3 stitches remain, knit 2 stitches, knit 1 stitch through the back loop.
Repeat rows 1 and 2 a total of 4 times, then knit row 1 one more time.
You have now knitted a total of 9 rows.
Now you will work stockinette stitch in the middle section and ribbing on the edges.
The next row is a right side row. Knit as follows:
Row 1 (right side): Purl 1 stitch, knit 2 stitches, purl 2 stitches, knit 2 stitches, purl 2 stitches, knit in stockinette (knit all stitches) until 9 stitches remain, then purl 2 stitches, knit 2 stitches, purl 2 stitches, knit 2 stitches, knit 1 stitch through the back loop.
Row 2 (wrong side): Purl 3 stitches, knit 2 stitches, purl 2 stitches, knit 2 stitches, purl across until 9 stitches remain, then knit 2 stitches, purl 2 stitches, knit 2 stitches, purl 2 stitches, knit 1 stitch through the back loop.
Repeat Rows 1 and 2 until the piece measures 30 cm.
Let me know if you'd like help visualizing this or converting it to U.S. knitting terminology!
Decreases at the sides
Purl the edge stitch, knit 1 stitch, make a left-leaning decrease.
Knit according to the pattern (as the stitches appear) until 4 stitches remain in the row, then knit 2 stitches together (right-leaning decrease), knit 1 stitch, knit 1 stitch through the back loop. = 2 stitches decreased
Work the return row knitting the stitches as they appear.
Continue decreasing on every other row until there are 48 stitches remaining on the needle.
Now work in stockinette stitch (with 1 edge stitch on each side) until the piece measures 59 cm.
Short rows
Now work short rows at the back using the German short rows technique. If you're unsure how to knit this technique, see the video below.
Short Rows with German Short Rows Technique
Knit 1 edge stitch, knit until 2 stitches remain in the row, turn.
Purl until 2 stitches remain in the row, turn.
Knit until 4 stitches remain, turn.
Purl until 4 stitches remain, turn.
Knit until 6 stitches remain, turn.
Purl until 6 stitches remain, turn.
Knit until 8 stitches remain, turn.
Purl until 8 stitches remain, turn.
Knit until 10 stitches remain, turn.
Purl until 10 stitches remain, turn.
Knit until 12 stitches remain, turn.
Purl until 12 stitches remain, turn.
Knit until 1 stitch remains, then knit 1 edge stitch.
Purl until 1 stitch remains, then purl 1 edge stitch.
Knit 1 edge stitch, knit 11 stitches, bind off 24 stitches, knit 11 stitches, knit 1 edge stitch.
Do not cut the yarn.
Left Front Piece
Next row is worked from the wrong side.
Knit 7 rows in stockinette stitch, with edge stitches as before: The first stitch purl, the last stitch knit through the back loop.
Next row is a right side row.
Row 1: Knit 1 edge stitch, knit 2 stitches, make a right-leaning increase, knit until 1 stitch remains, knit 1 edge stitch.
Row 2: Purl until 1 stitch remains, knit 1 edge stitch.
Row 3: Knit 1 edge stitch, knit until 1 stitch remains, knit 1 edge stitch.
Row 4: Purl until 1 stitch remains, knit 1 edge stitch.
Repeat Rows 1–4 a total of 14 times.
Finish with a row from the wrong side.
You should now have 26 stitches on the needle.
Cut the yarn and set the stitches aside while you knit the right front piece.
Right Front Piece
Start from the wrong side, near the neck.
Knit 7 rows in stockinette stitch, with edge stitches as before:
The first stitch purl, the last stitch knit through the back loop.
Next row is a right side row.
Row 1: Knit 1 edge stitch, knit until 3 stitches remain, make a left-leaning increase, knit 2 stitches, knit 1 edge stitch.
Row 2: Purl until 1 stitch remains, knit 1 edge stitch.
Row 3: Knit 1 edge stitch, knit until 1 stitch remains, knit 1 edge stitch.
Row 4: Purl until 1 stitch remains, knit 1 edge stitch.
Repeat Rows 1–4 a total of 14 times.
Finish with a row from the wrong side.
You should now have 26 stitches on the needle.
Do not cut the yarn, as you will continue knitting from here.
Front Piece (Joining the Left and Right Sides)
Joining the Front Pieces:
Now the front pieces are knitted together into one piece.
Knit 1 selvedge stitch, knit across the right front piece, knit across the left front piece until 1 stitch remains, then knit 1 selvedge stitch. Make sure the front pieces are not twisted before continuing.
Knit one row of purl stitches on the wrong side.
Shaping the Armhole:
Begin the increases to shape the armhole. The new stitches are worked so that they follow the same type of rib pattern as on the back piece. The first row of increases is worked from the right side.
Now you'll increase stitches to shape the armhole.
These new stitches should be worked so they align with the ribbing pattern used on the back piece.
The first row is worked from the right side.
Row 1 (RS): Knit 1 edge stitch, knit 2 stitches, make a right-leaning increase, knit until 3 stitches remain, make a left-leaning increase, knit 2 stitches, knit 1 edge stitch.
Row 2 (WS): Knit 1 edge stitch, purl 2 stitches, knit 1 stitch, purl across until 4 stitches remain, knit 1 stitch, purl 2 stitches, knit 1 edge stitch.
Row 3 (RS): Knit 1 edge stitch, knit 2 stitches, make a right-leaning increase, purl 1 stitch, knit across until 4 stitches remain, purl 1 stitch, make a left-leaning increase, knit 2 stitches, knit 1 edge stitch.
Row 4 (WS): Knit 1 edge stitch, purl 2 stitches, knit 2 stitches, purl across until 5 stitches remain, knit 2 stitches, purl 2 stitches, knit 1 edge stitch.
Row 5 (RS): Knit 1 edge stitch, knit 2 stitches, make a right-leaning increase, knit according to the stitch pattern until 3 stitches remain, make a left-leaning increase, knit 2 stitches, knit 1 edge stitch.
Row 6 (WS): Knit 1 edge stitch, work stitches as they appear until 1 stitch remains, knit 1 edge stitch.
Row 7 (RS): Knit 1 edge stitch, knit 2 stitches, make a right-leaning increase, work stitches as they appear until 3 stitches remain, make a left-leaning increase, knit 2 stitches, knit 1 edge stitch.
Row 8 (WS): Knit 1 edge stitch, work stitches as they appear until 1 stitch remains, knit 1 edge stitch.
Row 9 (RS): Knit 1 edge stitch, knit 2 stitches, make a right-leaning increase, work stitches as they appear until 3 stitches remain, make a left-leaning increase, knit 2 stitches, knit 1 edge stitch.
Row 10 (WS): Knit 1 edge stitch, purl 2 stitches, knit 1 stitch, work stitches as they appear until 4 stitches remain, knit 1 stitch, purl 2 stitches, knit 1 edge stitch.
Row 11 (RS): Knit 1 edge stitch, knit 2 stitches, make a right-leaning increase, work stitches as they appear until 3 stitches remain, make a left-leaning increase, knit 2 stitches, knit 1 edge stitch.
Row 12 (WS): Knit 1 edge stitch, purl 2 stitches, knit 1 stitch, work stitches as they appear until 4 stitches remain, knit 1 stitch, purl 2 stitches, knit 1 edge stitch.
You have now increased 1 stitch at each side on every right-side row, and you should have a total of 64 stitches on the needle.
Continue as follows:
Work the stitches as they appear, keeping edge stitches and ribbing at the outer edges, and stockinette stitch in the center, until the piece measures 21 cm, measured from the point where the front pieces were joined at center front — or until your desired length.
Note: An additional approximately 4 cm of ribbing will be added later.
End with a right-side row.
Begin ribbing on the next row.
Bottom Ribbing – from the Wrong Side:
From the wrong side, work as follows:
- Knit 1 edge stitch, purl 2 stitches,
- Knit 2 stitches, purl 2 stitches
- Repeat from * to * until 1 stitch remains, knit 1 edge stitch.
Then:
- Continue in ribbing (as the stitches appear) with edge stitches for 8 more rows.
- The last row should be a wrong-side row.
Bind off using knit stitches from the right side.
Ties and Armhole Ribbing:
Now you’ll knit the tie bands while working ribbing around the armholes.
- Cast on 49 stitches using the long-tail cast-on method.
- Pick up 94 stitches along the edge of the armhole.
- At the other side of the armhole, add a new strand of yarn and cast on another 49 stitches using the long-tail cast-on.
- Turn the work.
Now work as follows:
- Knit 1 edge stitch, purl 2 stitches,
- Knit 2 stitches, purl 2 stitches
- Repeat from * to * until 1 stitch remains, knit 1 edge stitch.
Continue working 5 more rows in ribbing, as the stitches appear, with edge stitches.
Bind off using knit stitches.
Repeat the tie/armhole ribbing on the other side.
Neckline
Using 4.5 mm needles, pick up stitches as follows:
- 47 stitches along the left neckline,
- 1 stitch at the bottom of the V-neck (this is the center stitch),
- 48 stitches along the right neckline,
- 25 stitches across the back neckline.
You should now have 121 stitches in total.
Row 1 (Set-up row with decreases):
- Purl 1 stitch,
- Knit 2 stitches, purl 2 stitches — repeat until 2 stitches remain before the center stitch,
- Knit 2 stitches, then slip 2 stitches together as if to knit, knit 1 stitch, pass the slipped stitches over (= this is the new center stitch),
- Knit 2 stitches,
- Purl 2 stitches, knit 2 stitches — repeat until 1 stitch remains,
- Purl 1 stitch.
Shaping the V-neck:
- Next row (Row 2) is worked as follows:
Instead of stopping two stitches before the center stitch and then decreasing, stop only one stitch before the center stitch. The center stitch should be stitch number 2 of the two stitches you slip. - Slip the two stitches, knit one stitch, then pass the slipped stitches over the knit stitch. Continue knitting the remaining stitches as shown for the row.
- The following rows are worked in the same way as Row 2. Continue until you have worked a total of 5 rows.
Row 6 (Final row):
- Bind off loosely in pattern,
- At the same time, work the center decrease once more as before.
Finishing:
You're now done knitting!
- Gently wash your garment using a mild wool detergent,
- Lay flat to dry.
Pattern: Advanced
This pattern contains abbreviations. If you want more help, see the simpler version.
Abbreviations:
st = stitch (st)
k = knit stitch (k)
p = purl stitch (p)
s2k1p = left-leaning decrease: slip one stitch knitwise, slip the next stitch knitwise, insert the left needle into these two slipped stitches and knit them together through the back loops (equivalent to s2k1p or sk2p)
M1R = increase right: lift the strand between two stitches from front to back with the left needle and knit it through the back loop (M1R)
M1L = increase left: lift the strand between two stitches from back to front with the left needle and knit it through the front loop (M1L)
Information:
Size:
- Width at center back = 49 cm
- Back length = 63 cm
- Front length = 55 cm
- Gauge: 14 stitches x 19 rows = 10 x 10 cm after washing and blocking
- Needles: Circular needle size 5.5 mm (US 9) or size needed to get gauge; circular needle size 4.5 mm (US 7) for neckline and tie bands
General:
The slipover is knit back and forth, starting with the back piece from the bottom up. Short rows are used to shape the shoulder slope, but you can skip this step if it feels difficult or complicated. Once the back is finished, the work is divided, and the front pieces are knit separately until the neckline shaping is done. Then the front pieces are joined and finished with a ribbed hem. Stitches are picked up around the neckline to knit a ribbed neckband. Stitches are also picked up along the armholes, where ribbing is knit simultaneously with the tie bands.
Techniques:
- Left-leaning decrease: slip one stitch knitwise, slip the next stitch knitwise, insert the left needle into both slipped stitches and knit them together through the back loops (s2k1p or sk2p).
Right-leaning decrease: Knit 2 stitches together by inserting the right needle through the second stitch and then the first stitch on the left needle, and knit them together.
Right-leaning increase (M1R): Lift the strand (bar) between two stitches from front to back with the left needle, then knit this lifted strand through the back loop.
Left-leaning increase (M1L): Lift the strand (bar) between two stitches from back to front with the left needle, then knit this lifted strand through the front loop.
Selvage stitch (edge stitch):
When instructed to knit a selvage stitch, purl the first stitch of the row, and knit the last stitch of the row through the back loop.
German Short Rows:
When working short rows using the German short row technique, knit up to the point where the instructions say to turn. Turn your work. Slip the first stitch on the right needle as if to purl, with the working yarn held in front. Move the yarn to the back of the work and pull it tight. This creates what looks like a double stitch. On the next row, knit or purl this stitch through the back loop, working it as a single stitch.
Pattern
Cast on 72 sts using the cable cast-on method on US 9 (5.5 mm) needles.
Next row is worked in ribbing from the wrong side as follows:
Row 1 (WS): P3, *K2, P2*; repeat from * to * until 1 st remains, K1 through the back loop.
Row 2 (RS): P1, *K2, P2*; repeat from * to * until 3 sts remain, K2, K1 through the back loop.
Work Rows 1 and 2 a total of 4 times, then work Row 1 once more. You will have worked a total of 9 rows.
Now work stockinette stitch over the center section and ribbing on the edges.
The next row is worked from the right side as follows:
Row 1 (RS): P1, K2, P2, K2, P2, knit stockinette until 9 sts remain, P2, K2, P2, K2, K1 through the back loop.
Row 2 (WS): P3, K2, P2, K2, purl until 9 sts remain, K2, P2, K2, P2, K1 through the back loop.
Repeat Rows 1 and 2 until the work measures 30 cm.
Side Decreases
Purl the selvage stitch, K1, ssk (slip, slip, knit — decrease leaning left), knit as the stitches appear until 4 sts remain on the row, k2tog (knit two together — decrease leaning right), K1, K1 through the back loop = 2 sts decreased.
Knit back as the stitches appear.
Continue decreasing every other row until 48 sts remain on the needle.
Now work stockinette stitch with a selvage stitch at each edge until the piece measures 59 cm.
Short Rows
Work short rows on the back using the German short row technique:
- Purl 1 selvage stitch, knit until 2 sts remain, turn.
- Purl until 2 sts remain, turn.
- Knit until 4 sts remain, turn.
- Purl until 4 sts remain, turn.
- Knit until 6 sts remain, turn.
- Purl until 6 sts remain, turn.
- Knit until 8 sts remain, turn.
- Purl until 8 sts remain, turn.
- Knit until 10 sts remain, turn.
- Purl until 10 sts remain, turn.
- Knit until 12 sts remain, turn.
- Purl until 12 sts remain, turn.
- Knit until 1 st remains, then knit 1 selvage stitch.
- Purl until 1 st remains, then knit 1 selvage stitch.
Bind off
Knit 1 selvage stitch, knit 11 sts, bind off 24 sts, knit 11 sts, knit 1 selvage stitch.
Do not cut the yarn.
Left Front Piece
Next row is worked from the wrong side.
Work 7 rows of stockinette stitch with selvage stitches as before (first stitch purl, last stitch twisted knit).
Next row is worked from the right side:
Row 1: Knit 1 selvage stitch, K2, increase right (see note*), knit until 1 st remains, selvage stitch.
Row 2: Purl until the last stitch, knit 1 selvage stitch.
Row 3: Knit 1 selvage stitch, knit until 1 st remains, selvage stitch.
Row 4: Purl until the last stitch, knit 1 selvage stitch.
Repeat Rows 1–4 a total of 14 times.
End with a wrong side row.
You should now have 26 stitches on the needle.
Cut the yarn and let the stitches rest while you work the right front piece.
Right Front Piece
Start from the wrong side, nearest the neck.
Work 7 rows of stockinette stitch with selvage stitches as before (first stitch purl, last stitch twisted knit).
Next row is worked from the right side:
Row 1: Knit 1 selvage stitch, knit until 3 sts remain, increase left (see note**), K2, 1 selvage stitch.
Row 2: Purl until the last stitch, knit 1 selvage stitch.
Row 3: Knit 1 selvage stitch, knit until 1 st remains, knit 1 selvage stitch.
Row 4: Purl until the last stitch, knit 1 selvage stitch.
Repeat Rows 1–4 a total of 14 times.
End with a wrong side row.
You should now have 26 stitches on the needle.
Do not cut the yarn, as you will continue knitting from here.
*Increase right: Lift the strand between the stitches from front to back with the left needle and knit through the back loop.
**Increase left: Lift the strand between the stitches from back to front with the left needle and knit it.
Front Piece
Now the front pieces are joined and worked as one piece.
Knit 1 selvage stitch, knit across the right front piece, knit across the left front piece until 1 stitch remains, knit 1 selvage stitch.
Check that the front pieces are not twisted before continuing.
Now increase stitches to shape the armhole. The new stitches are worked to blend into the same rib pattern as on the back piece.
The first row is worked from the right side.
Row 1: Knit 1 selvage stitch, K2, increase right, knit until 3 stitches remain, increase left, K2, knit 1 selvage stitch.
Row 2: Knit 1 selvage stitch, P2, K1, purl until 4 stitches remain, K1, P2, knit 1 selvage stitch.
Row 3: Knit 1 selvage stitch, K2, increase right, P1, knit until 4 stitches remain, P1, increase left, K2, knit 1 selvage stitch.
Row 4: Knit 1 selvage stitch, P2, K2, purl until 5 stitches remain, K2, P2, knit 1 selvage stitch.
Row 5: Knit 1 selvage stitch, K2, increase right, knit as stitches appear until 3 stitches remain, increase left, K2, knit 1 selvage stitch.
Row 6: Knit 1 selvage stitch, knit as stitches appear until 1 stitch remains, knit 1 selvage stitch.
Row 7: Knit 1 selvage stitch, K2, increase right, knit as stitches appear until 3 stitches remain, increase left, K2, knit 1 selvage stitch.
Row 8: Knit 1 selvage stitch, knit as stitches appear until 1 stitch remains, knit 1 selvage stitch.
Row 9: Knit 1 selvage stitch, K2, increase right, knit as stitches appear until 3 stitches remain, increase left, K2, knit 1 selvage stitch.
Row 10: Knit 1 selvage stitch, P2, K1, knit as stitches appear until 4 stitches remain, K1, P2, knit 1 selvage stitch.
Row 11: Knit 1 selvage stitch, K2, increase right, knit as stitches appear until 3 stitches remain, increase left, K2, knit 1 selvage stitch.
Row 12: Knit 1 selvage stitch, P2, K1, knit as stitches appear until 4 stitches remain, K1, P2, knit 1 selvage stitch.
You have now increased 1 stitch on each side on every right-side row and have a total of 64 stitches on the needle.
Knit as the stitches appear with selvage stitches and ribbing at the edges, and stockinette stitch in the center front until the piece measures 21 cm from the point where the front pieces were joined at center front, or to your desired length. This length includes about 4 cm of ribbing.
End with a right-side row. On the next row, begin the ribbing.
From the wrong side, knit 1 selvage stitch, p2, k2 repeat until 1 stitch remains, knit 1 selvage stitch.
Work ribbing as established with selvage stitches for 8 more rows. The last row is a wrong-side row.
Bind off with knit stitches on the right side.
Knit the tie bands and ribbing around the armholes at the same time.
Cast on 49 sts with a cable cast-on. Pick up 94 sts evenly along the side of the armhole. Using a separate ball of yarn at the other side of the armhole, cast on 49 sts with cable cast-on. Turn.
Knit 1 selvage stitch, *p2, k2, p2* repeat to last stitch, knit 1 selvage stitch.
Work 5 more rows in ribbing as established, with selvage stitches.
Bind off in knit on the right side.
Repeat the tie band/armhole ribbing on the other side.
Neckband:
With 4.5 mm needles, pick up 47 sts along the left neck edge, pick up 1 stitch at the bottom of the V-neck (center front stitch), pick up 47 sts along the right neck edge, then pick up 25 sts along the back neck.
On the first row, decrease 2 sts as follows:
Knit 1 purl (selvage) stitch, k2, p2 repeat until 2 sts remain before the center front stitch, knit 2 sts, slip 2 sts knitwise together, knit 1, pass the slipped sts over (this creates the new center stitch). Knit 1, p2, k2 repeat until 1 stitch remains, knit 1 purl (selvage) stitch.
Now decrease 2 sts on every row at the center front in the same way until 5 rows have been worked.
On the 6th row, bind off while making the center front decrease as before.
You’re done!
Wash your garment gently with wool detergent and lay flat to dry.
The rights to this pattern belong to MYO Make Your Own. The pattern or its pictures may not be copied, shared or resold either in parts or in its entirety, but you may sell items you have crocheted from this pattern. If you have questions about the pattern, contact MYO at hello@makeyourown.se.
%20(5).jpg)
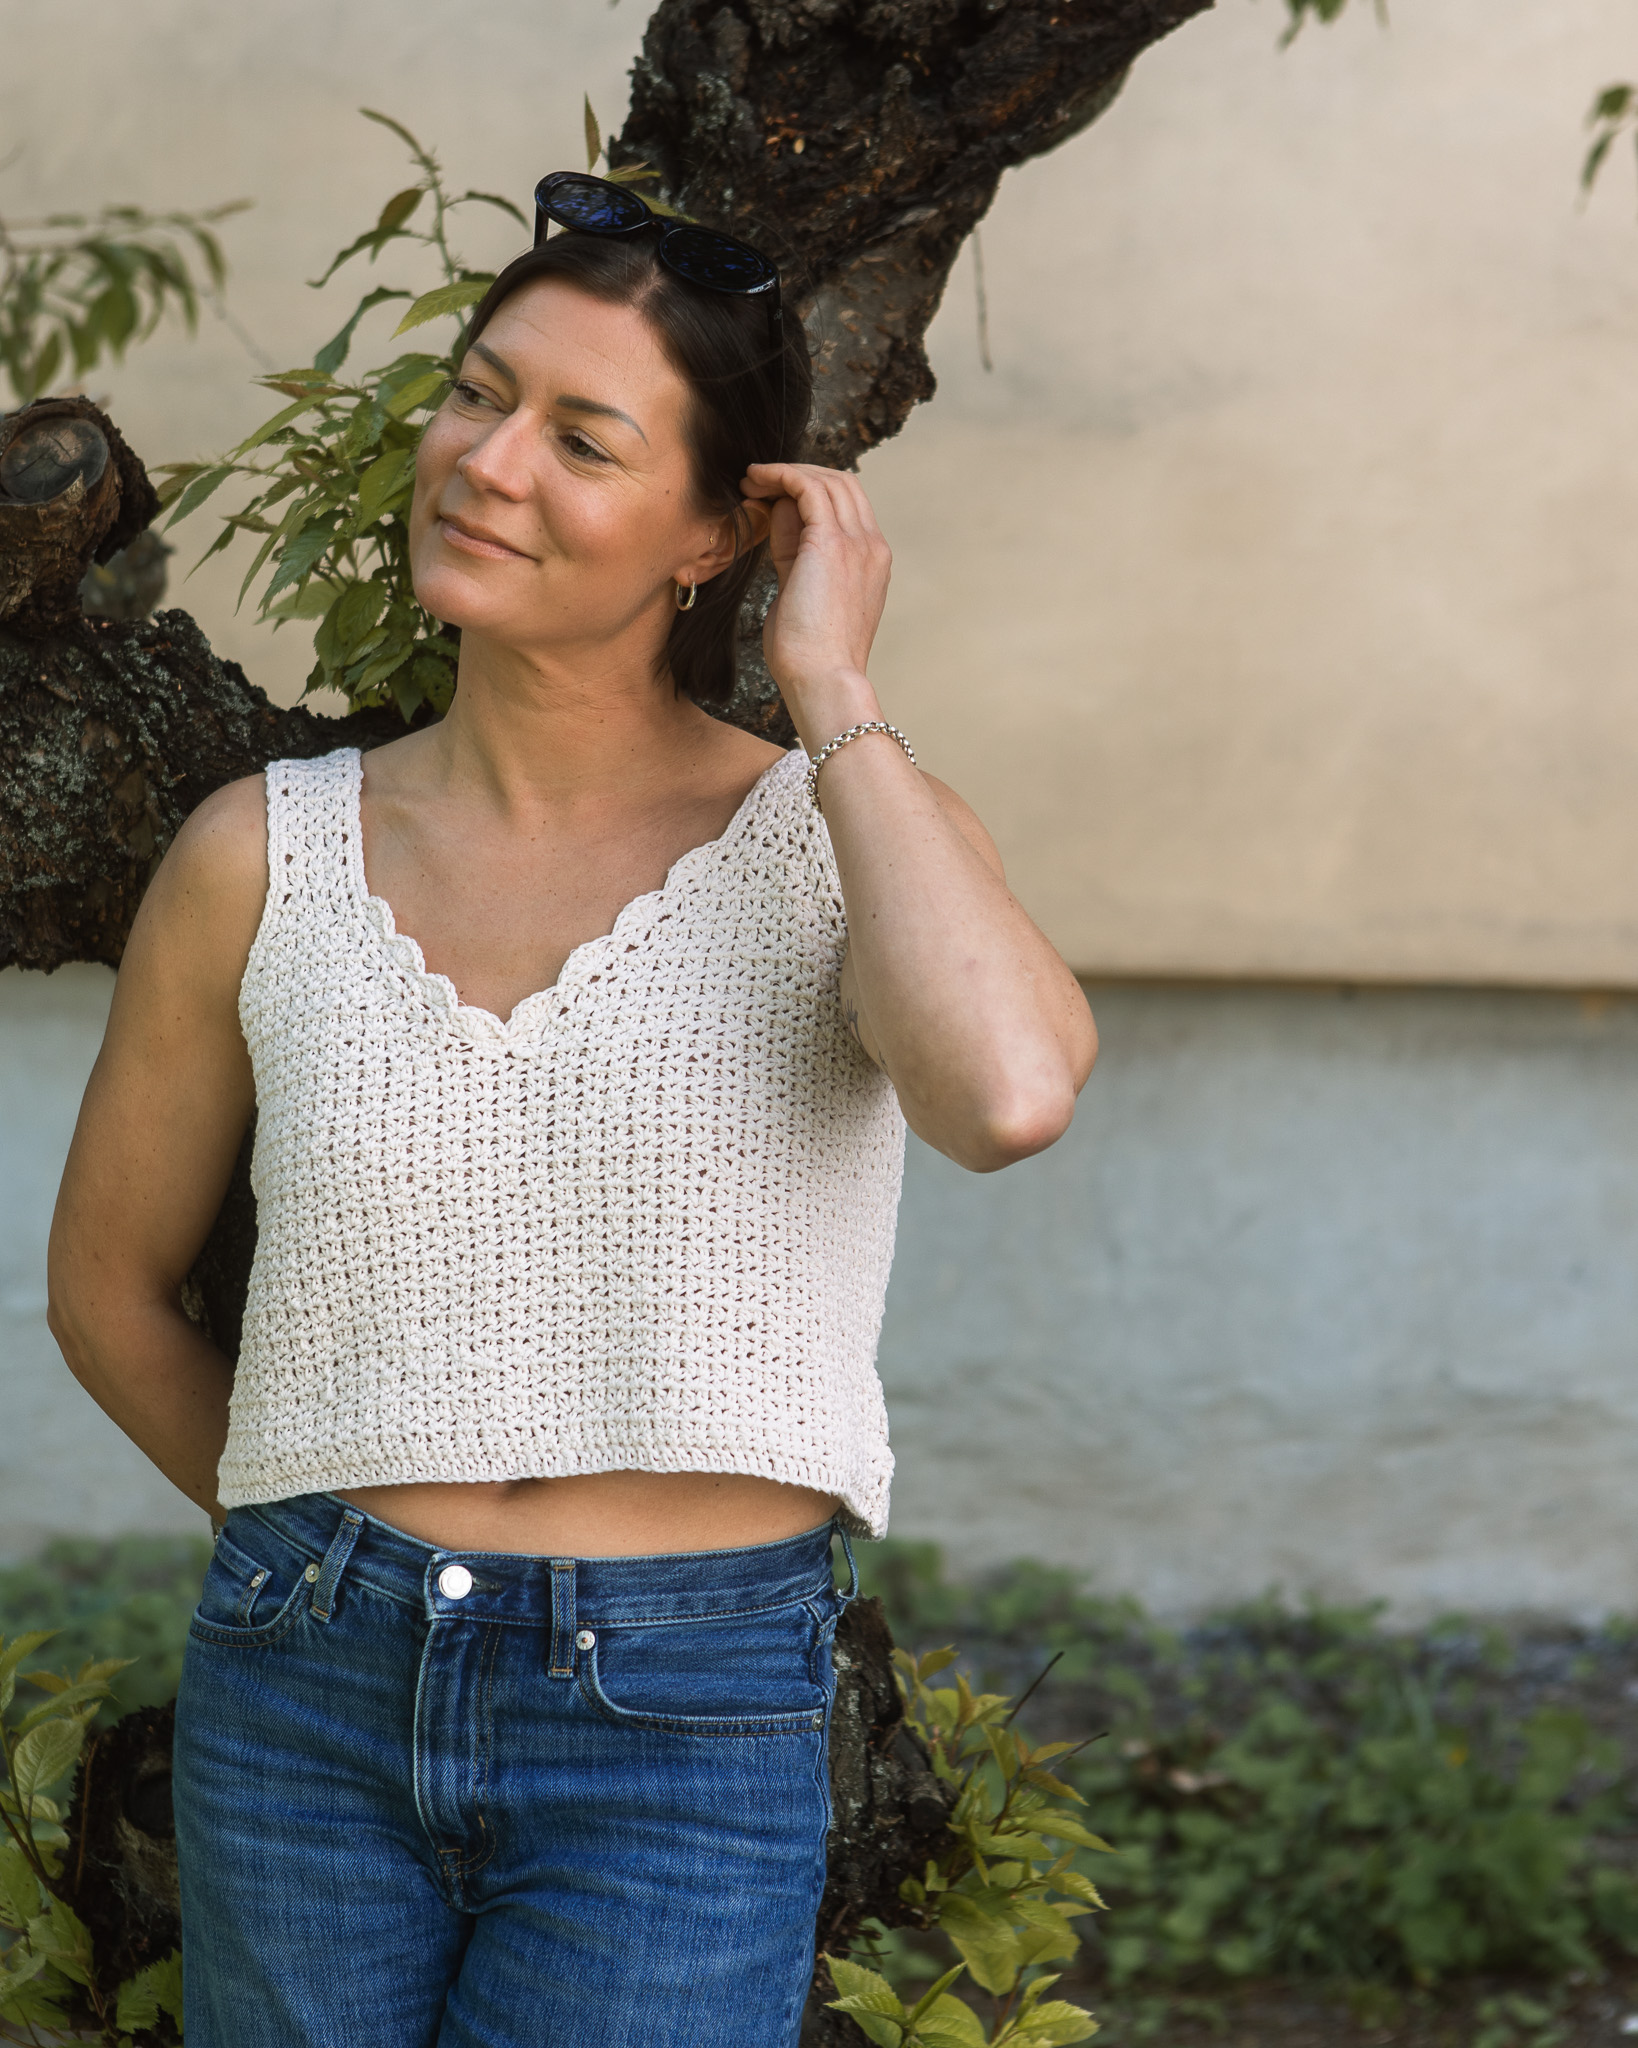
Share your creations with us
Thank you!
Your comment was sent!