
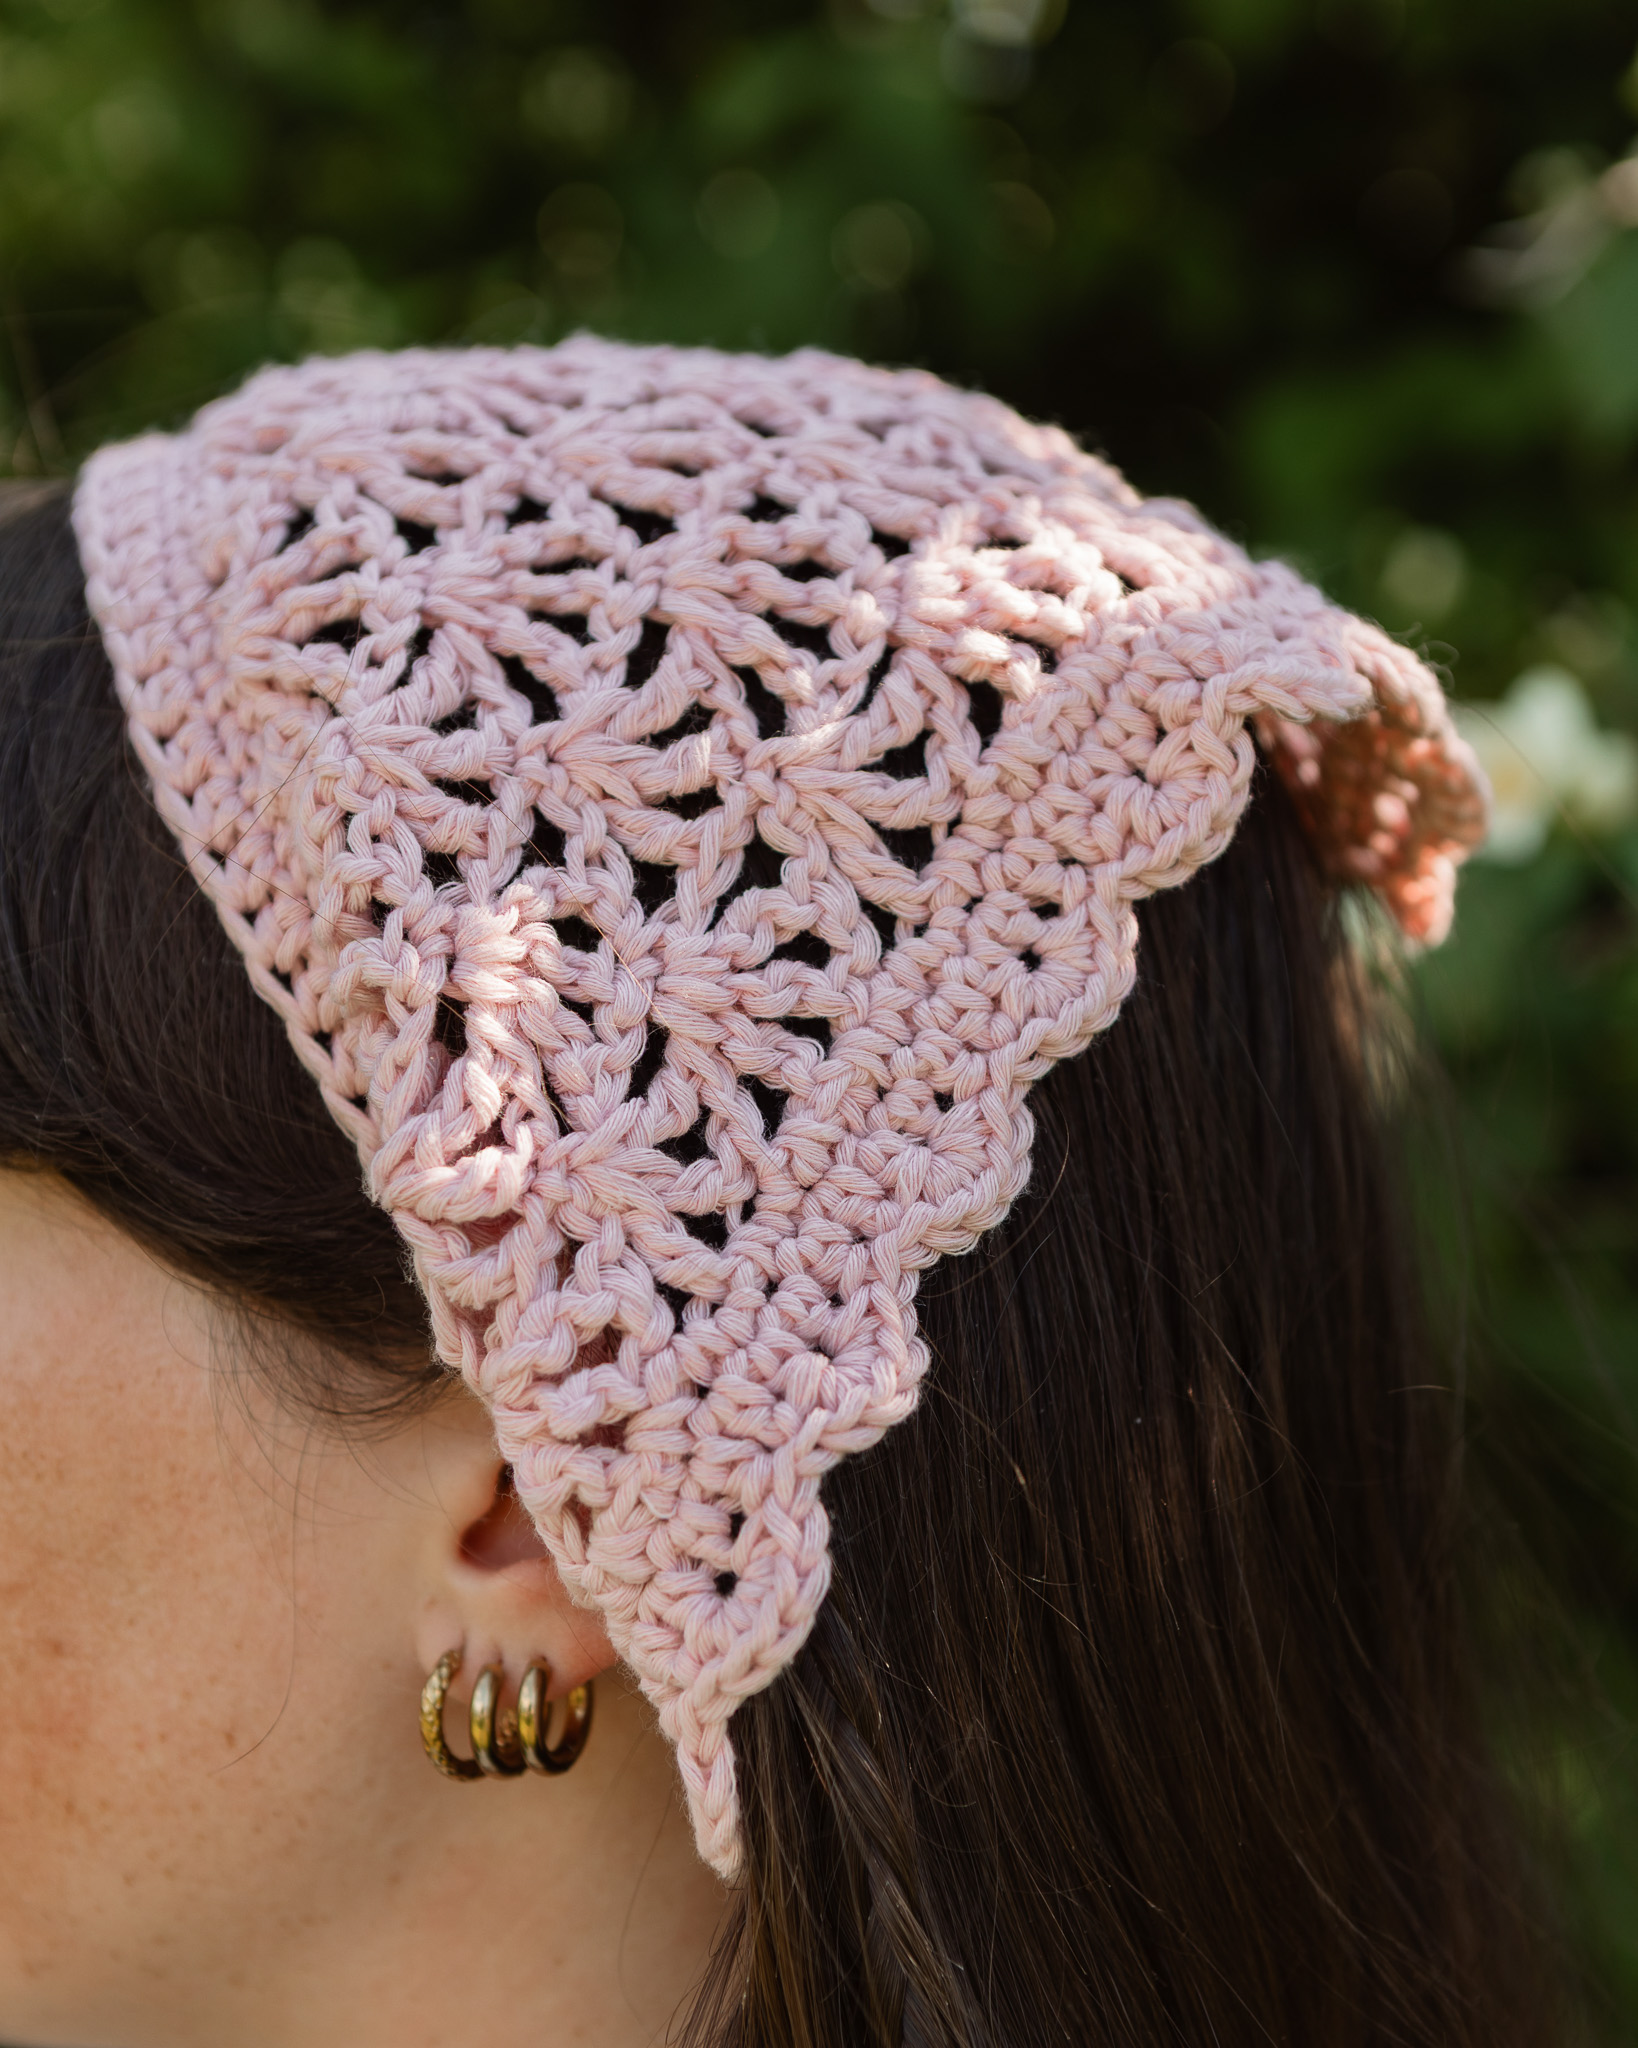
Crocheted bandana "Jana"
Crochet a beautiful and trendy bandana!
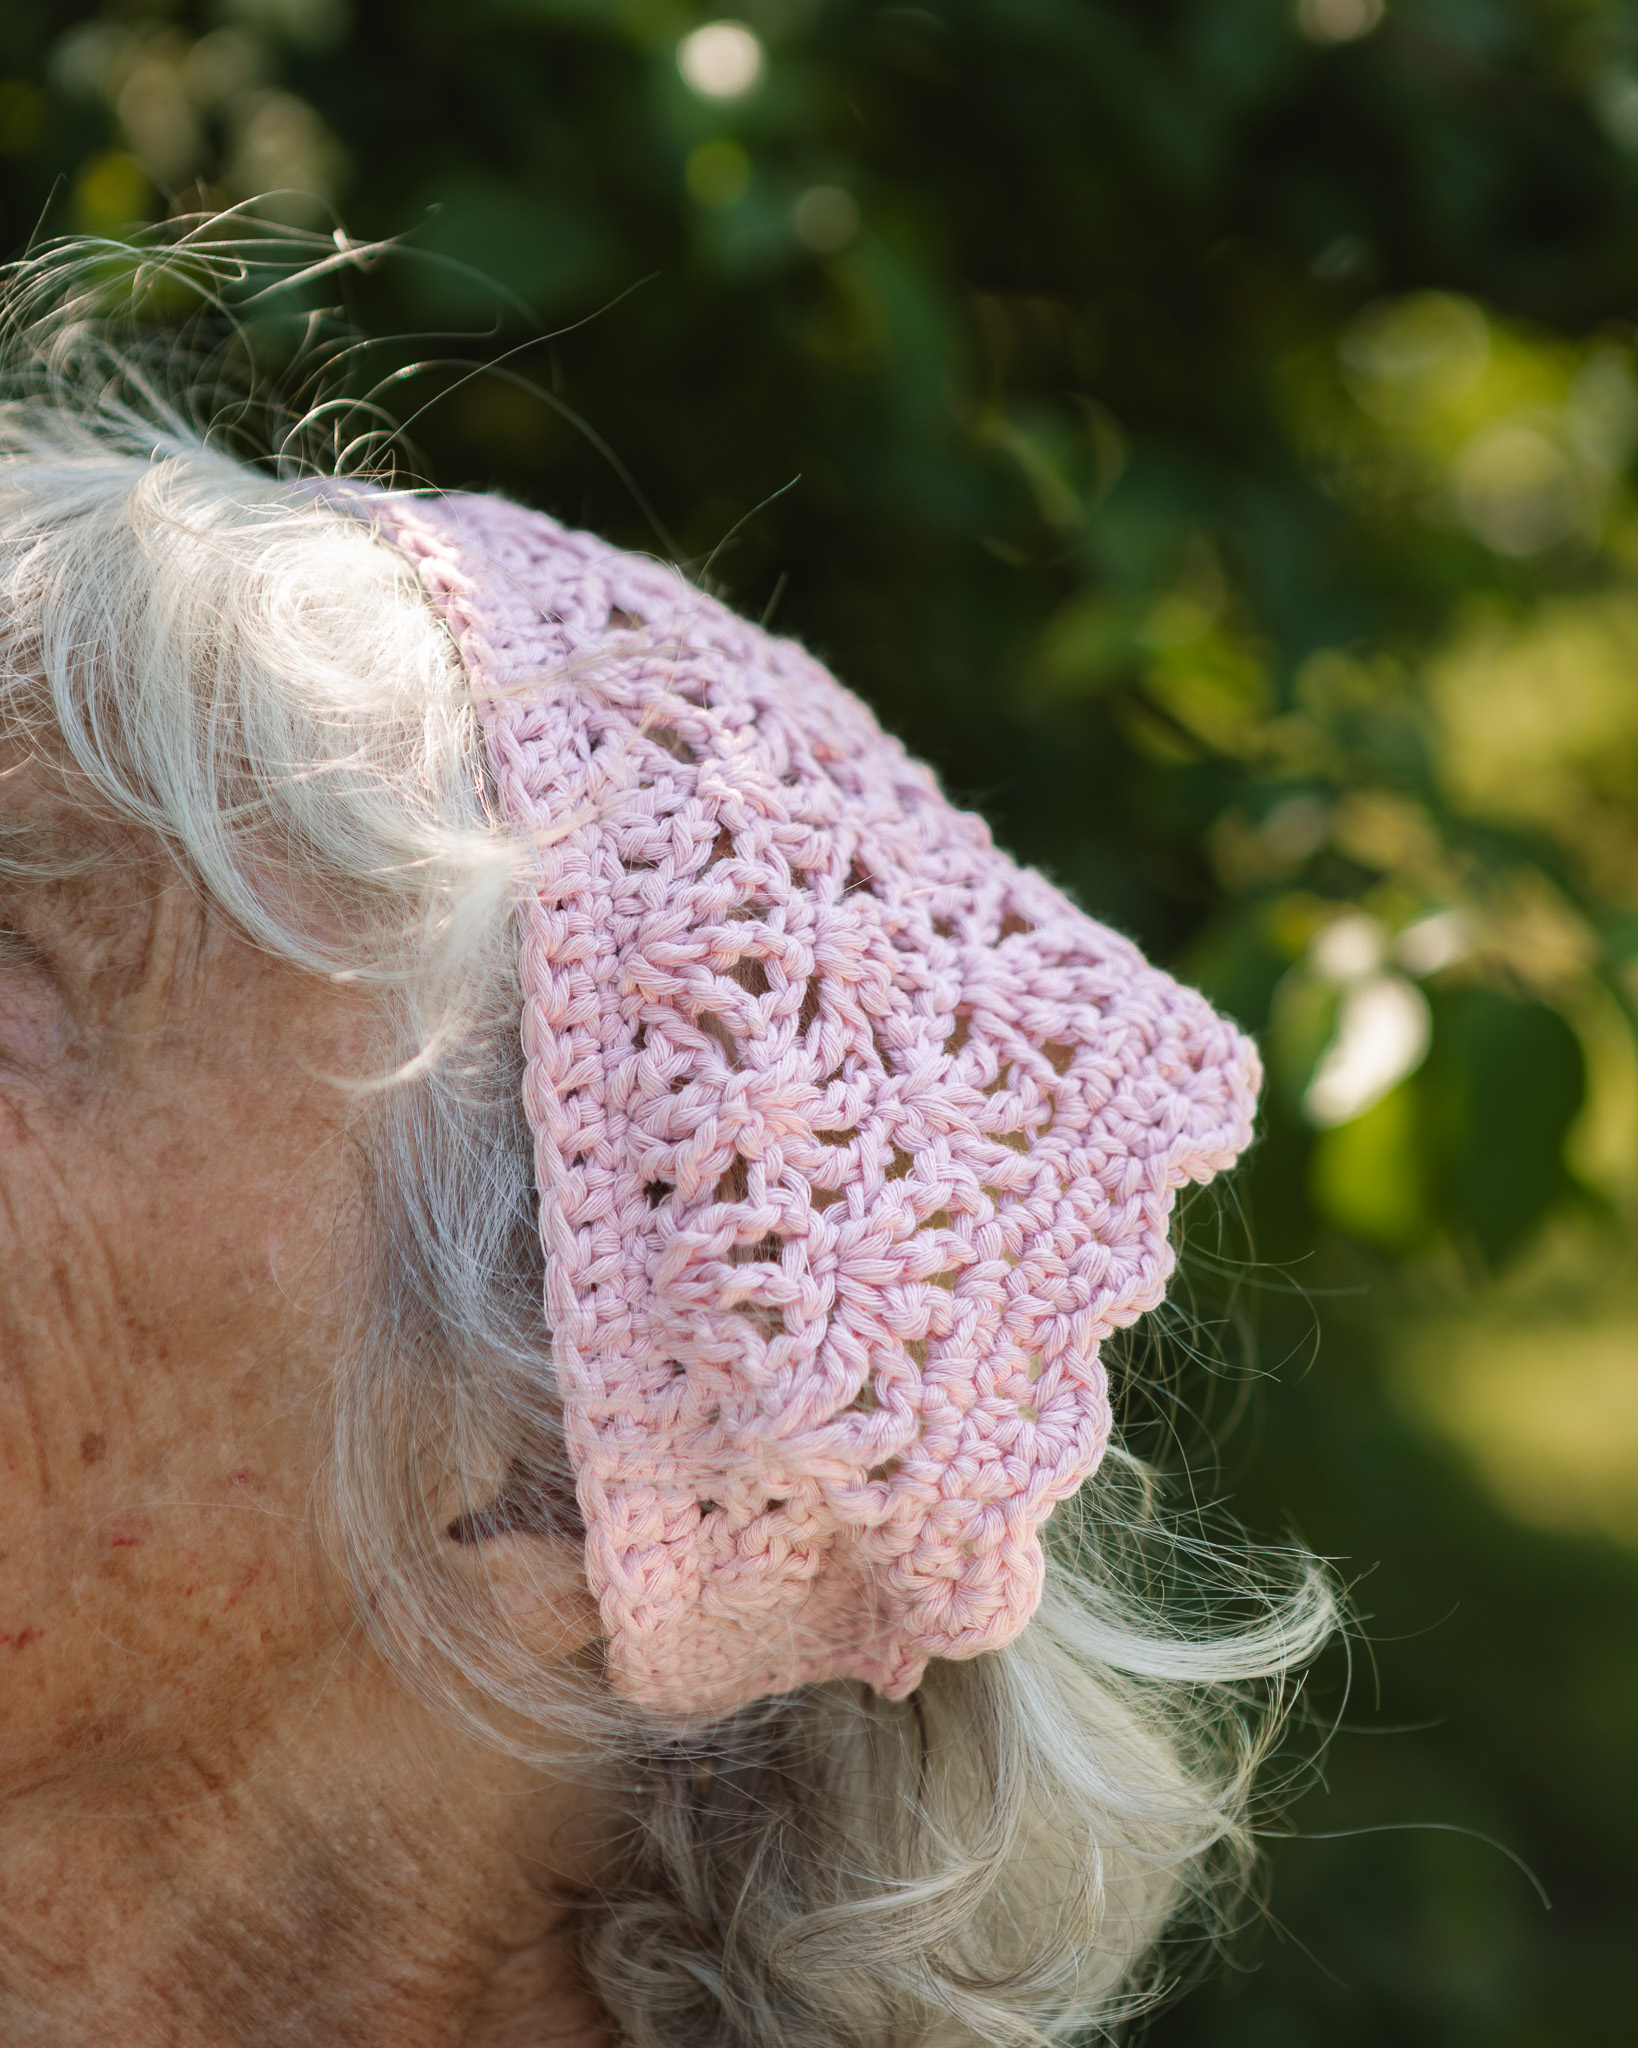
This lovely bandana is made with MYO’s soft and cozy Cotton Cloud yarn and is both quick and fun to crochet. It is the perfect accessory to add a beautiful pop of color to your outfit. If you make the ties longer, you can also wear it around your hips. You will need MYO Cotton Cloud (we used the color “Light Pink”) and a 4 mm crochet hook. You will also need a stitch marker and a pair of scissors.
Yarn Consumption: approximately 40 g.
Please note that in this pattern, we use videos from our technique school together with images.

Here's how to do it
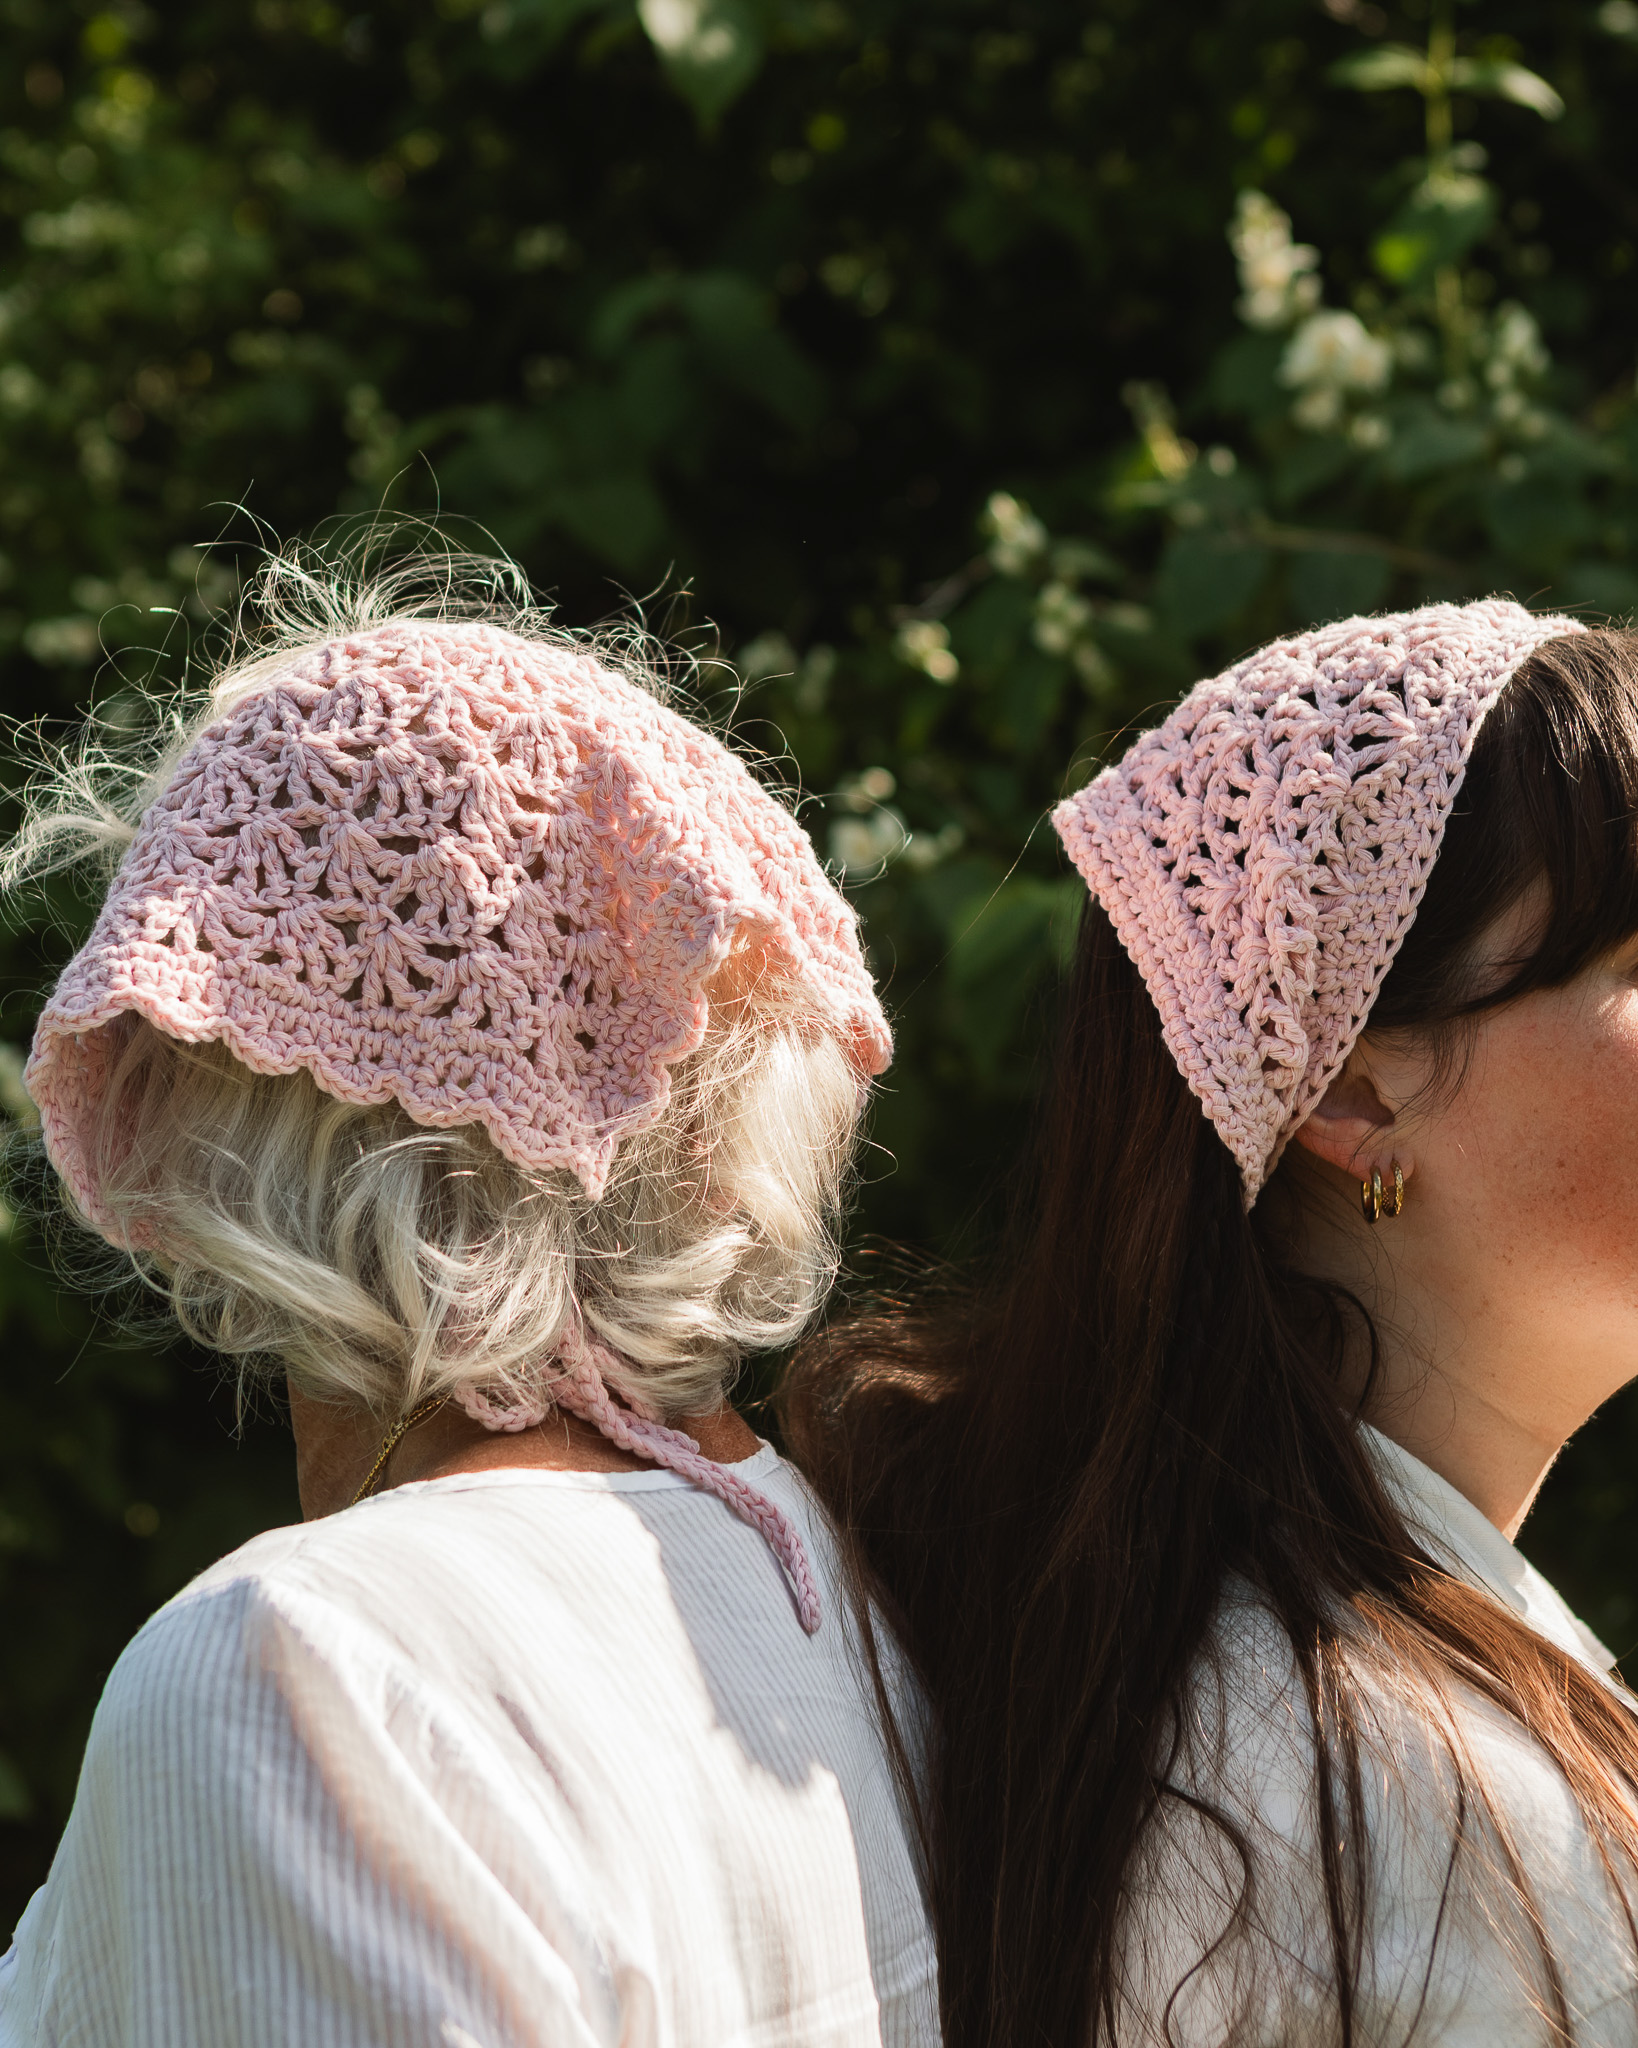
The pattern includes two types of edging: a straight edge and a wavy edge, so you can choose the one that suits your style best. We hope you'll enjoy making this beautiful bandana! Good luck! /Johanna
%20(4).jpg)
This is what you need:
Here you can directly purchase the material for the product. Please note that the instruction is digital and appears here on the page (no written instruction).

Cotton Cloud | 100 g
A slightly thinner cotton yarn that works perfectly for clothes, accessories and amigurumi.
Buy product
.jpg)
Unleash your creativity
For only 85kr per month you get access to all our 300+ beginner-friendly instructions for crochet, knitting and macrame.
A perfect way to get started with your new hobby!

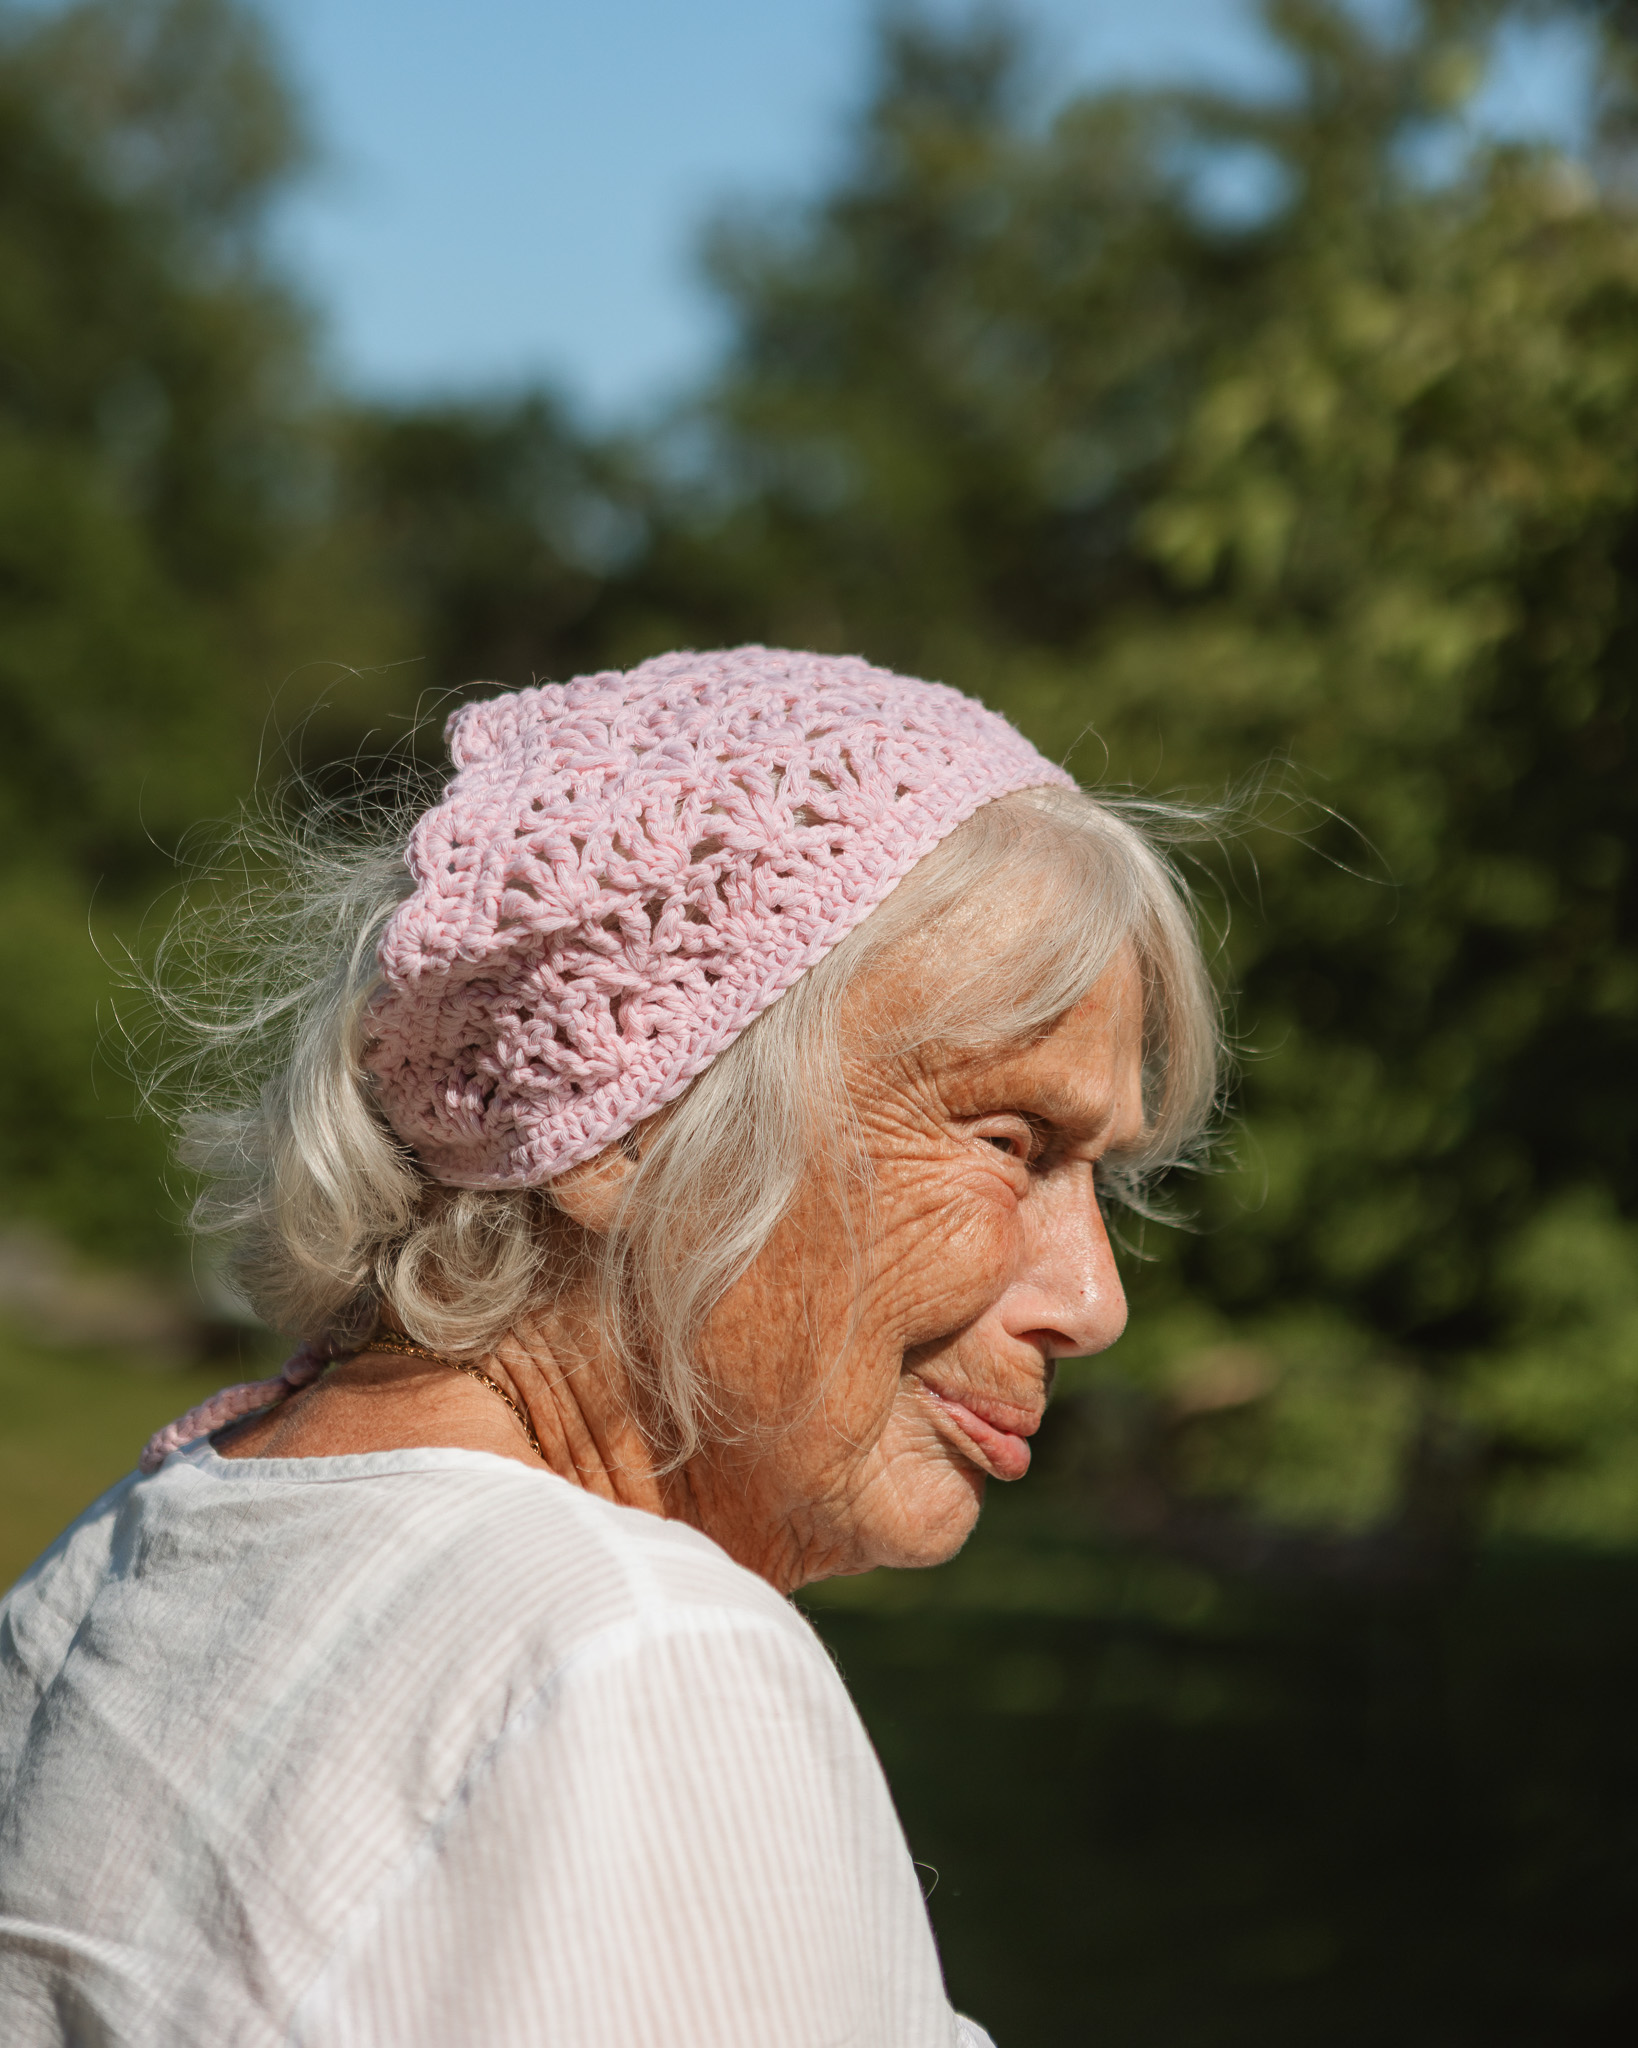
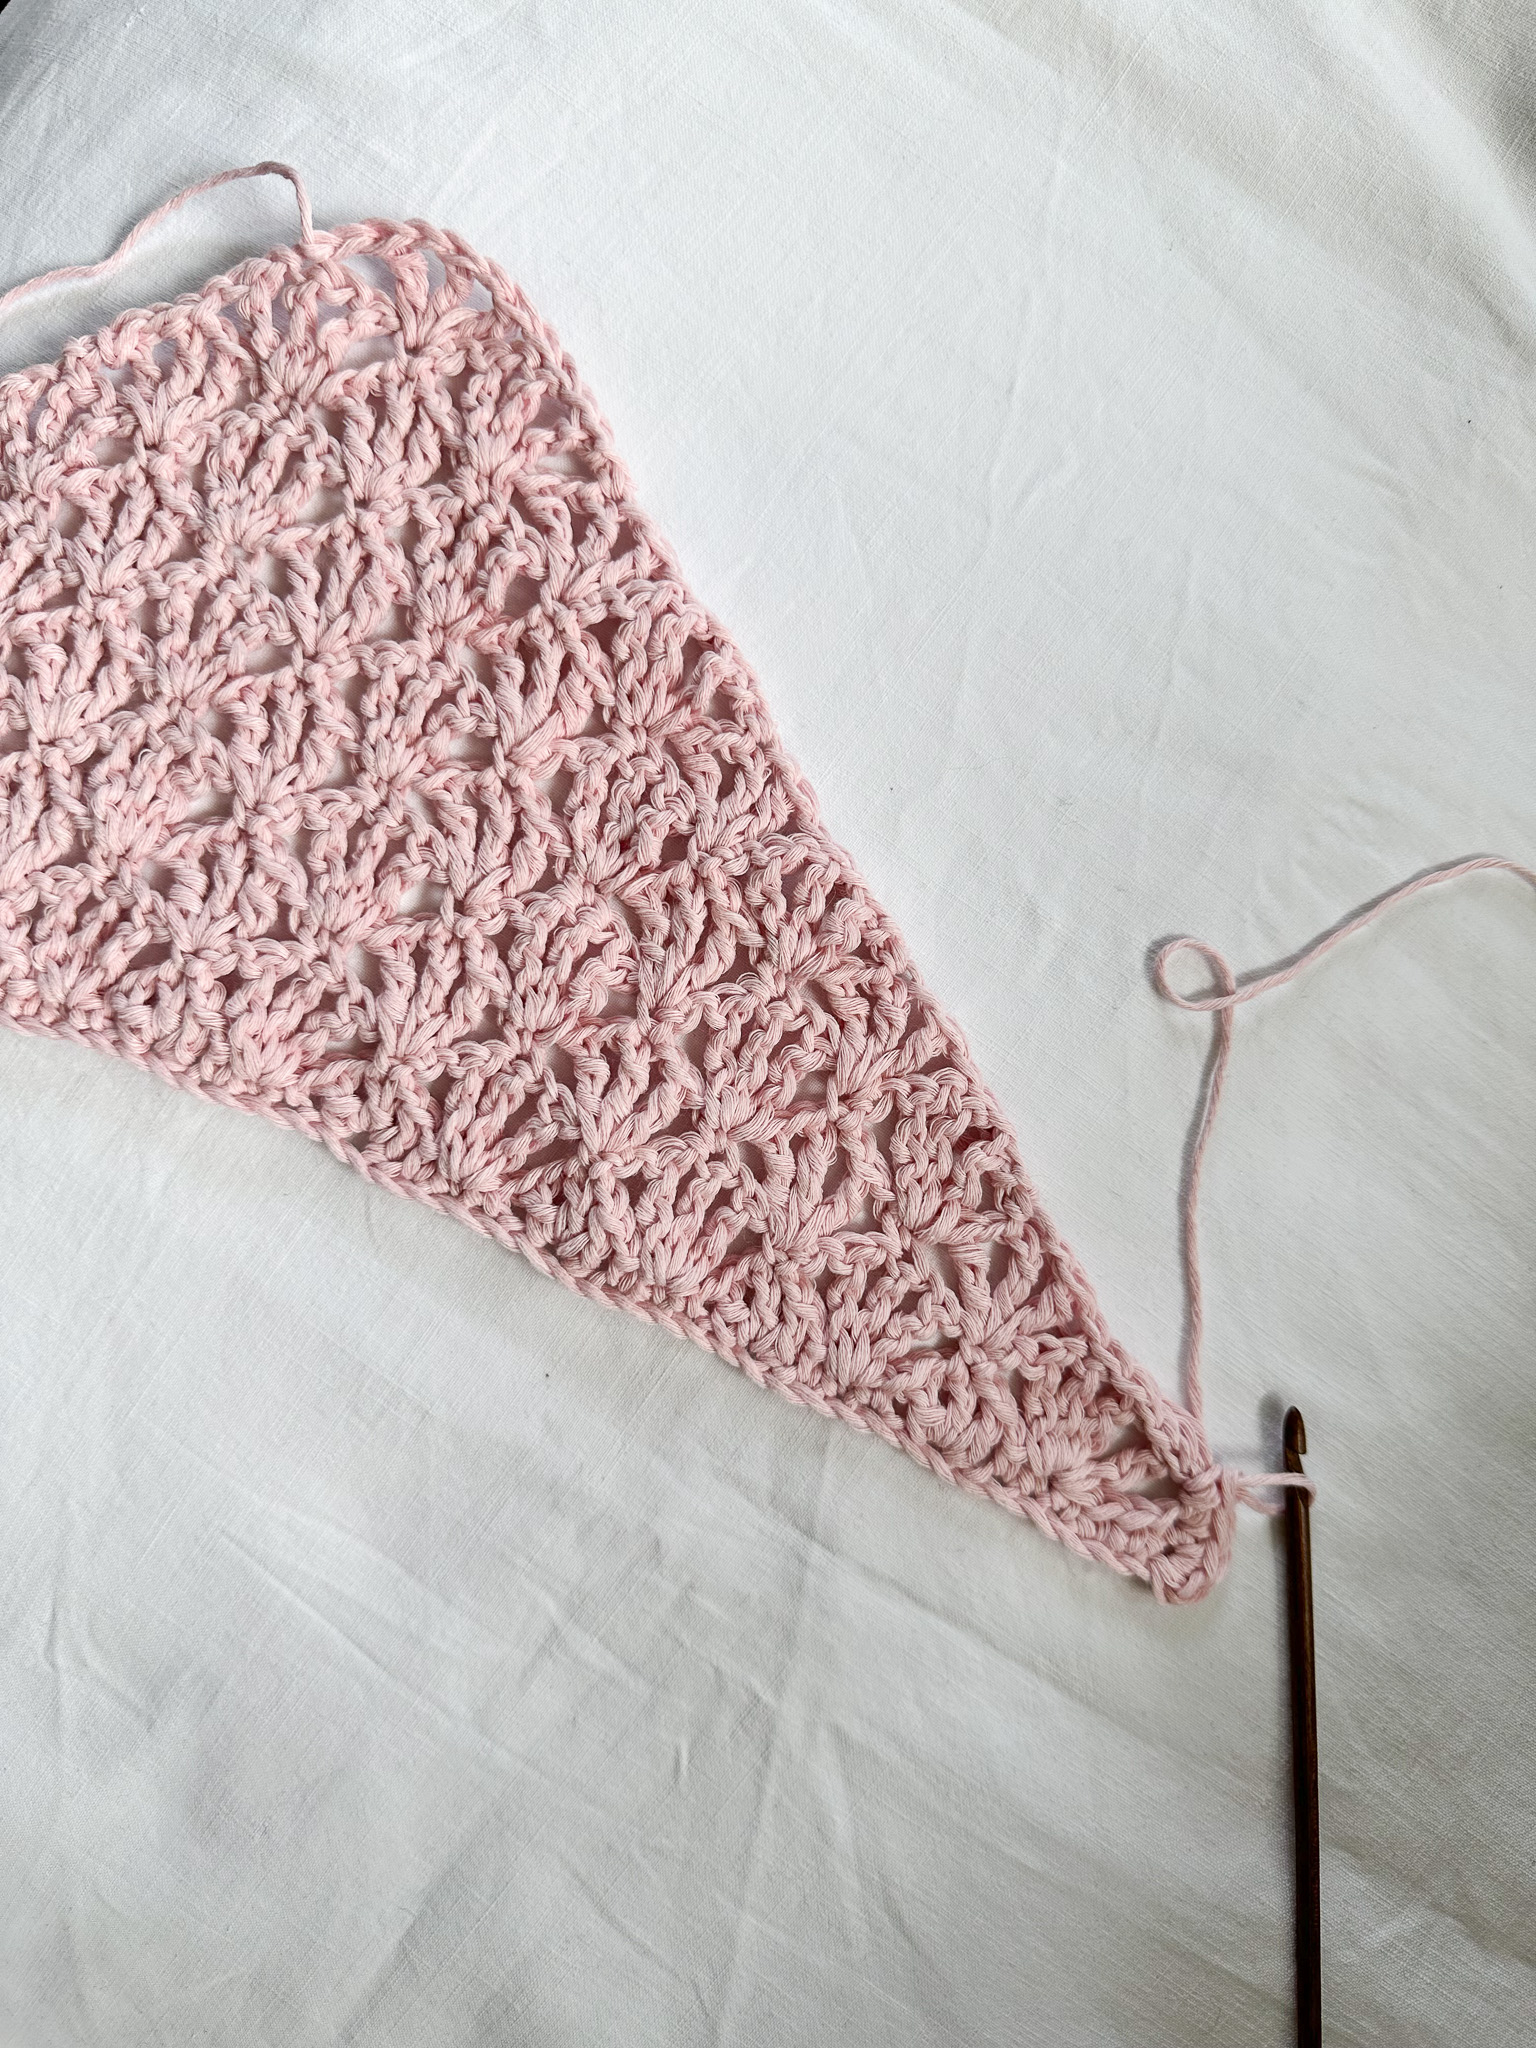
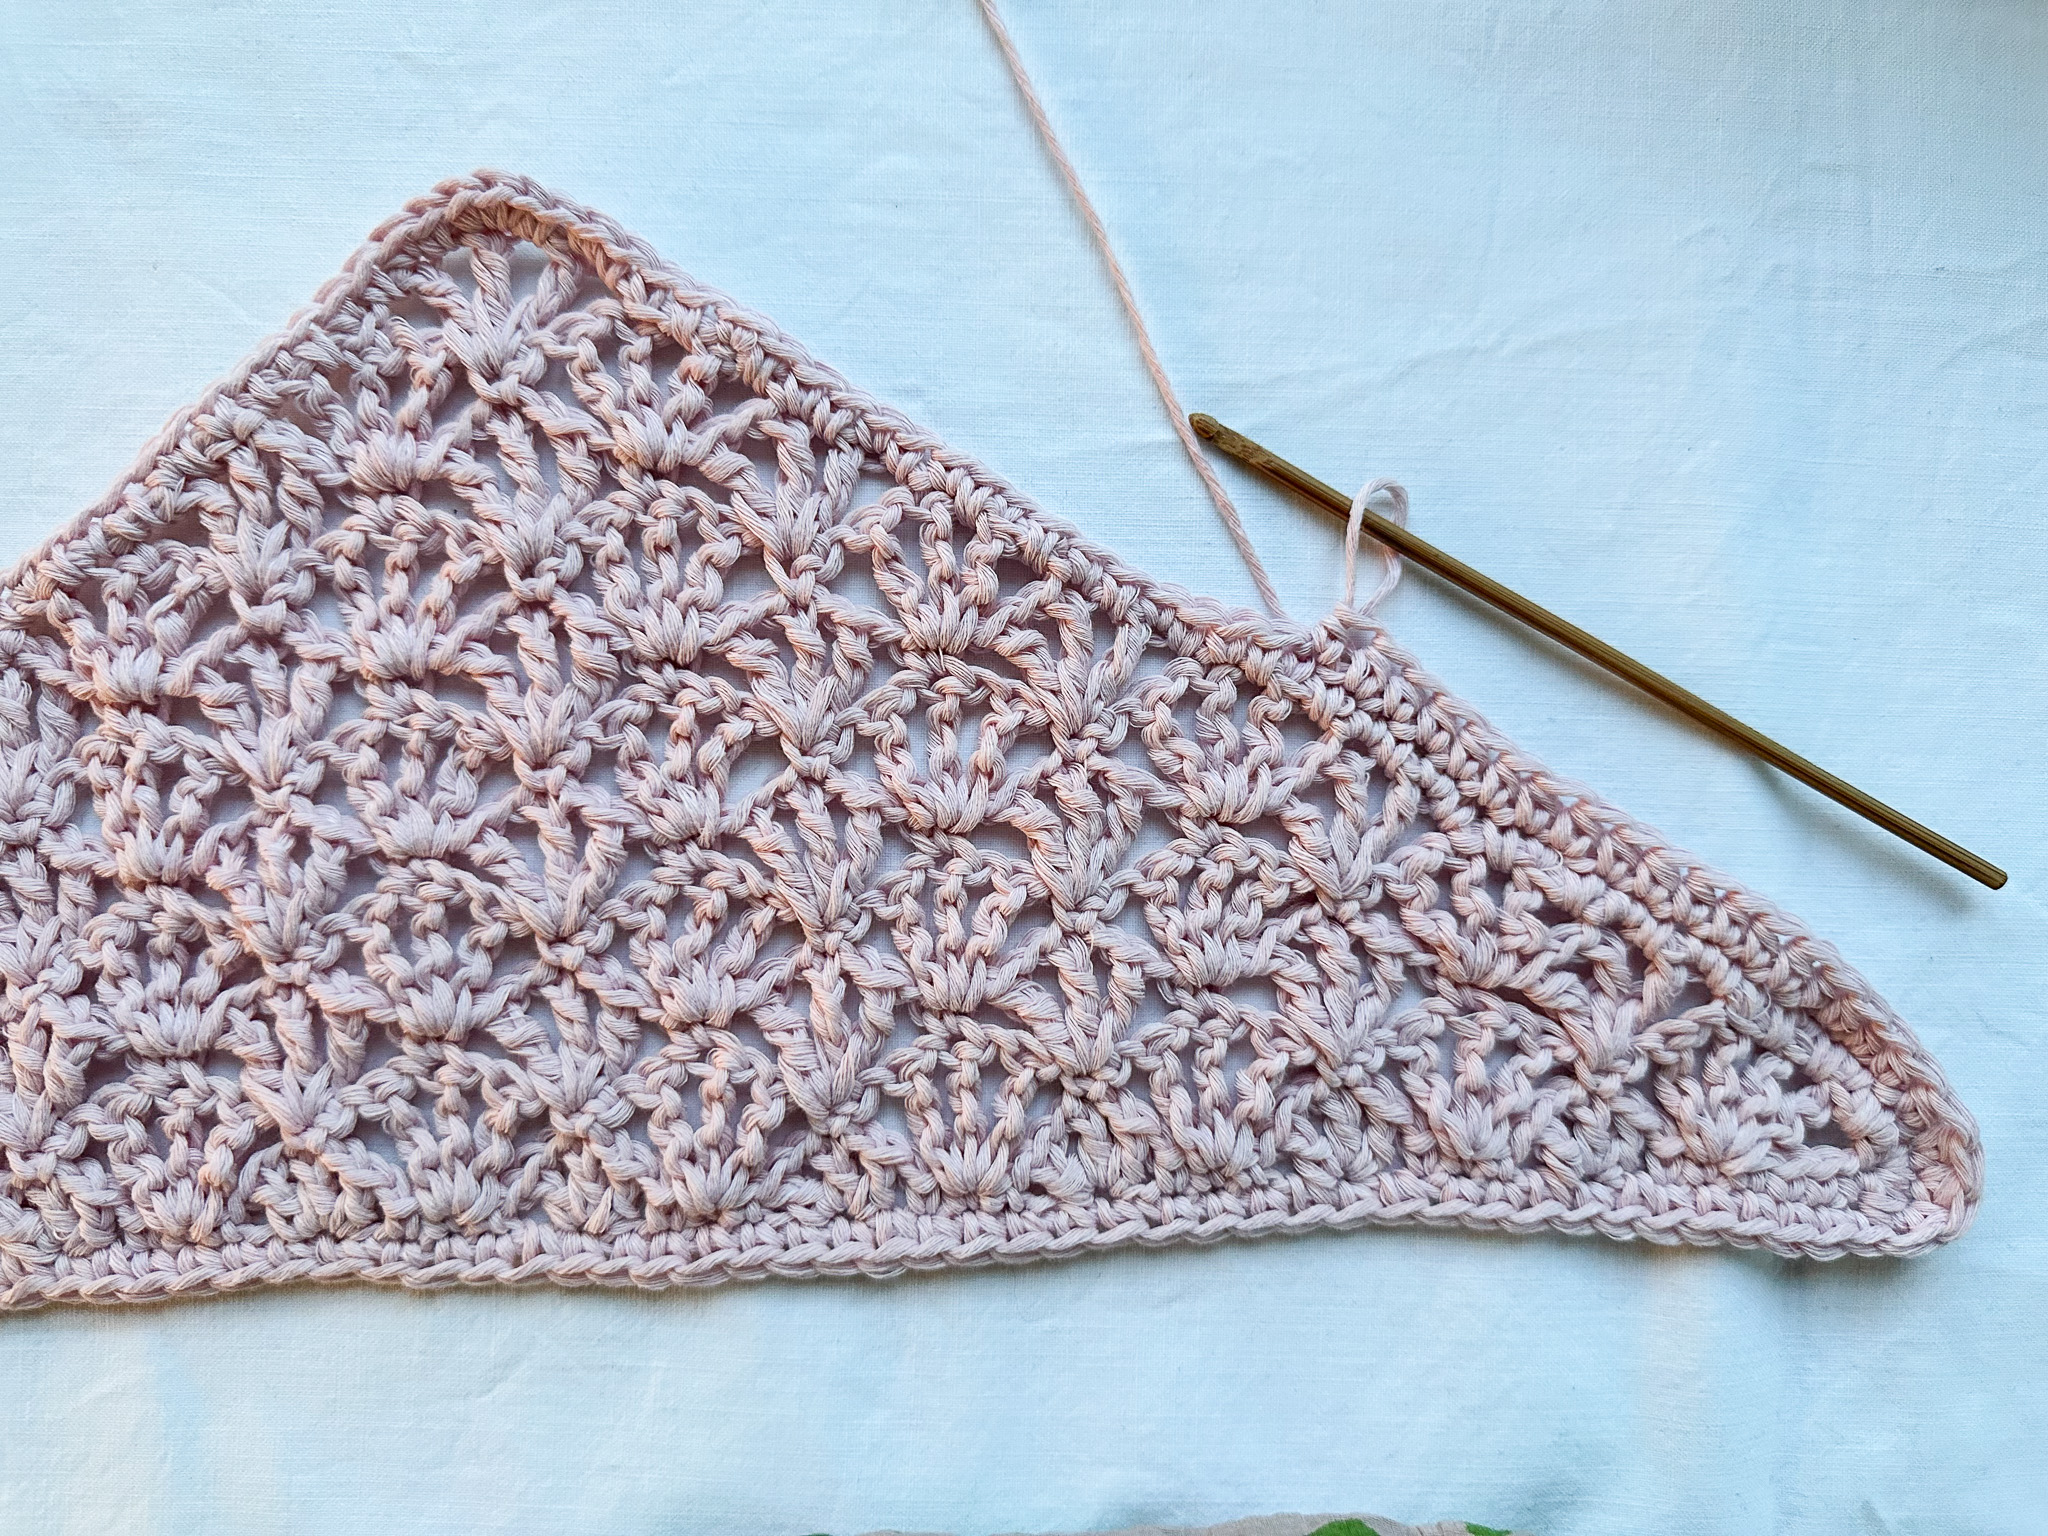
This bandana is crocheted loosely to give it a beautiful drape. Be sure to crochet loosely and avoid pulling the stitches too tightly, as this can make the bandana stiff and cause it to lose its flow.
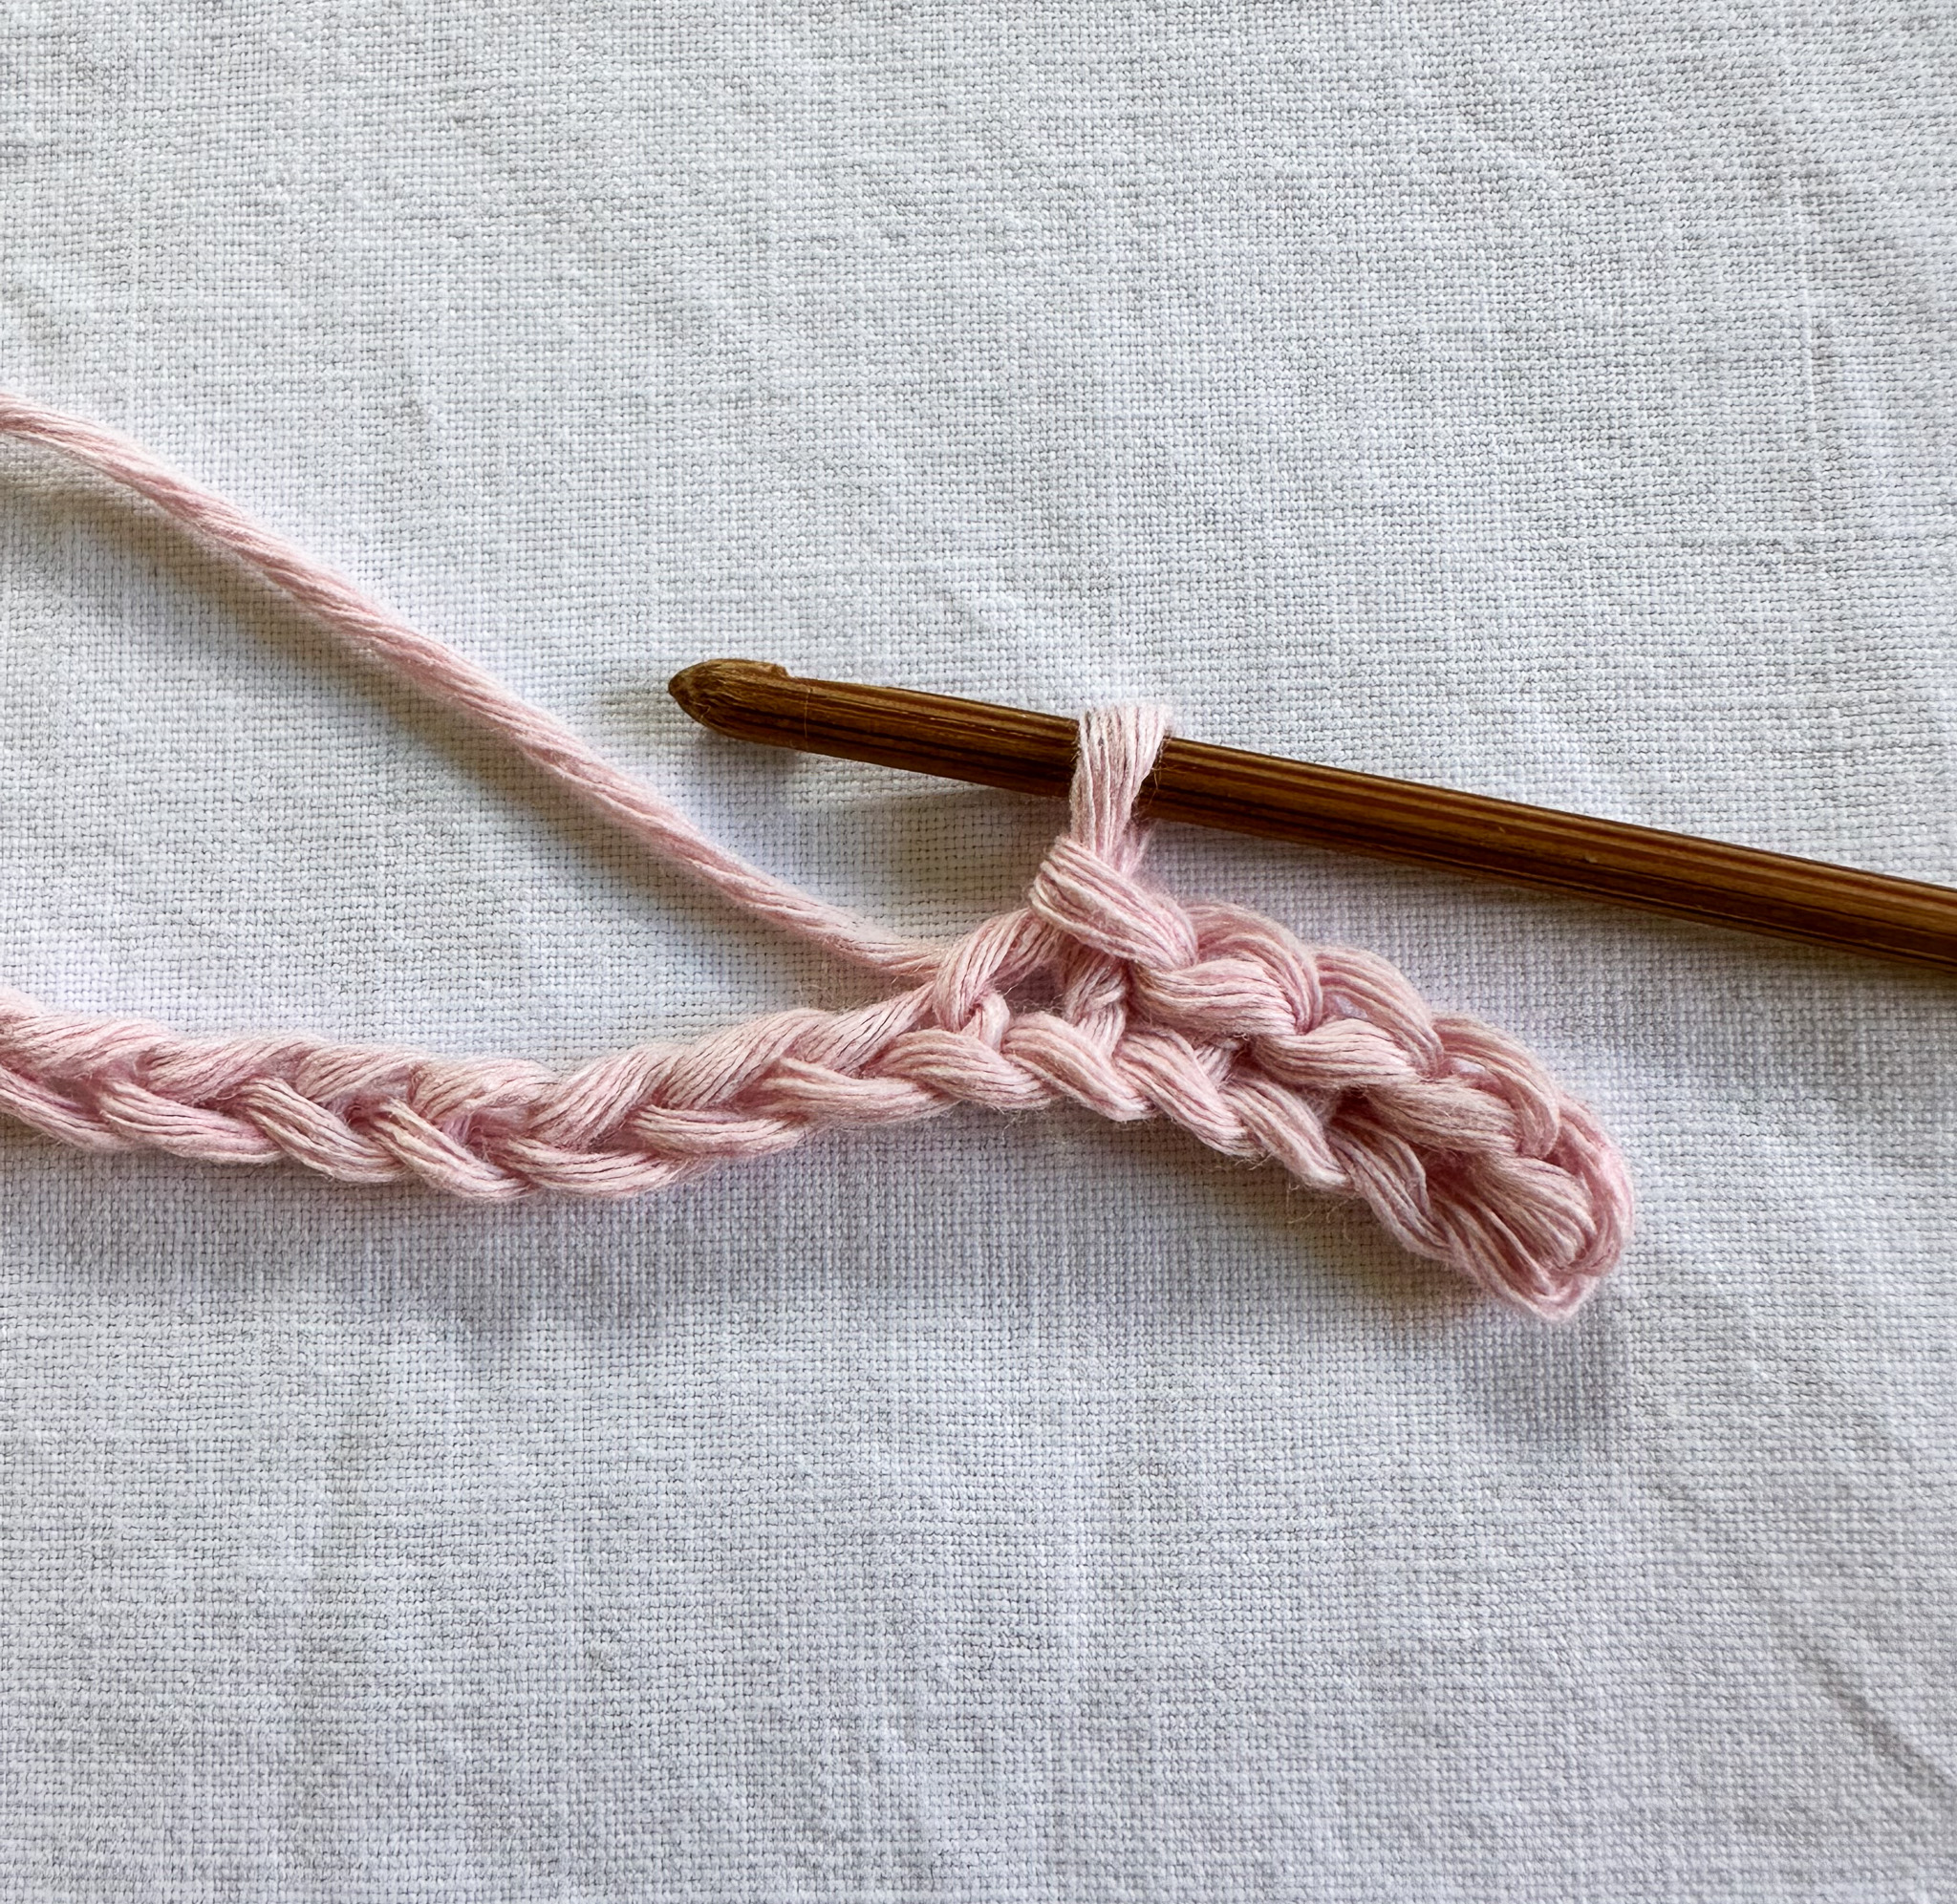
Chain 64 stitches.
If you are unsure how to crochet a chain, watch the video below.
Row 1
Skip the last chain stitch you made. Work 5 single crochet stitches along the chain.
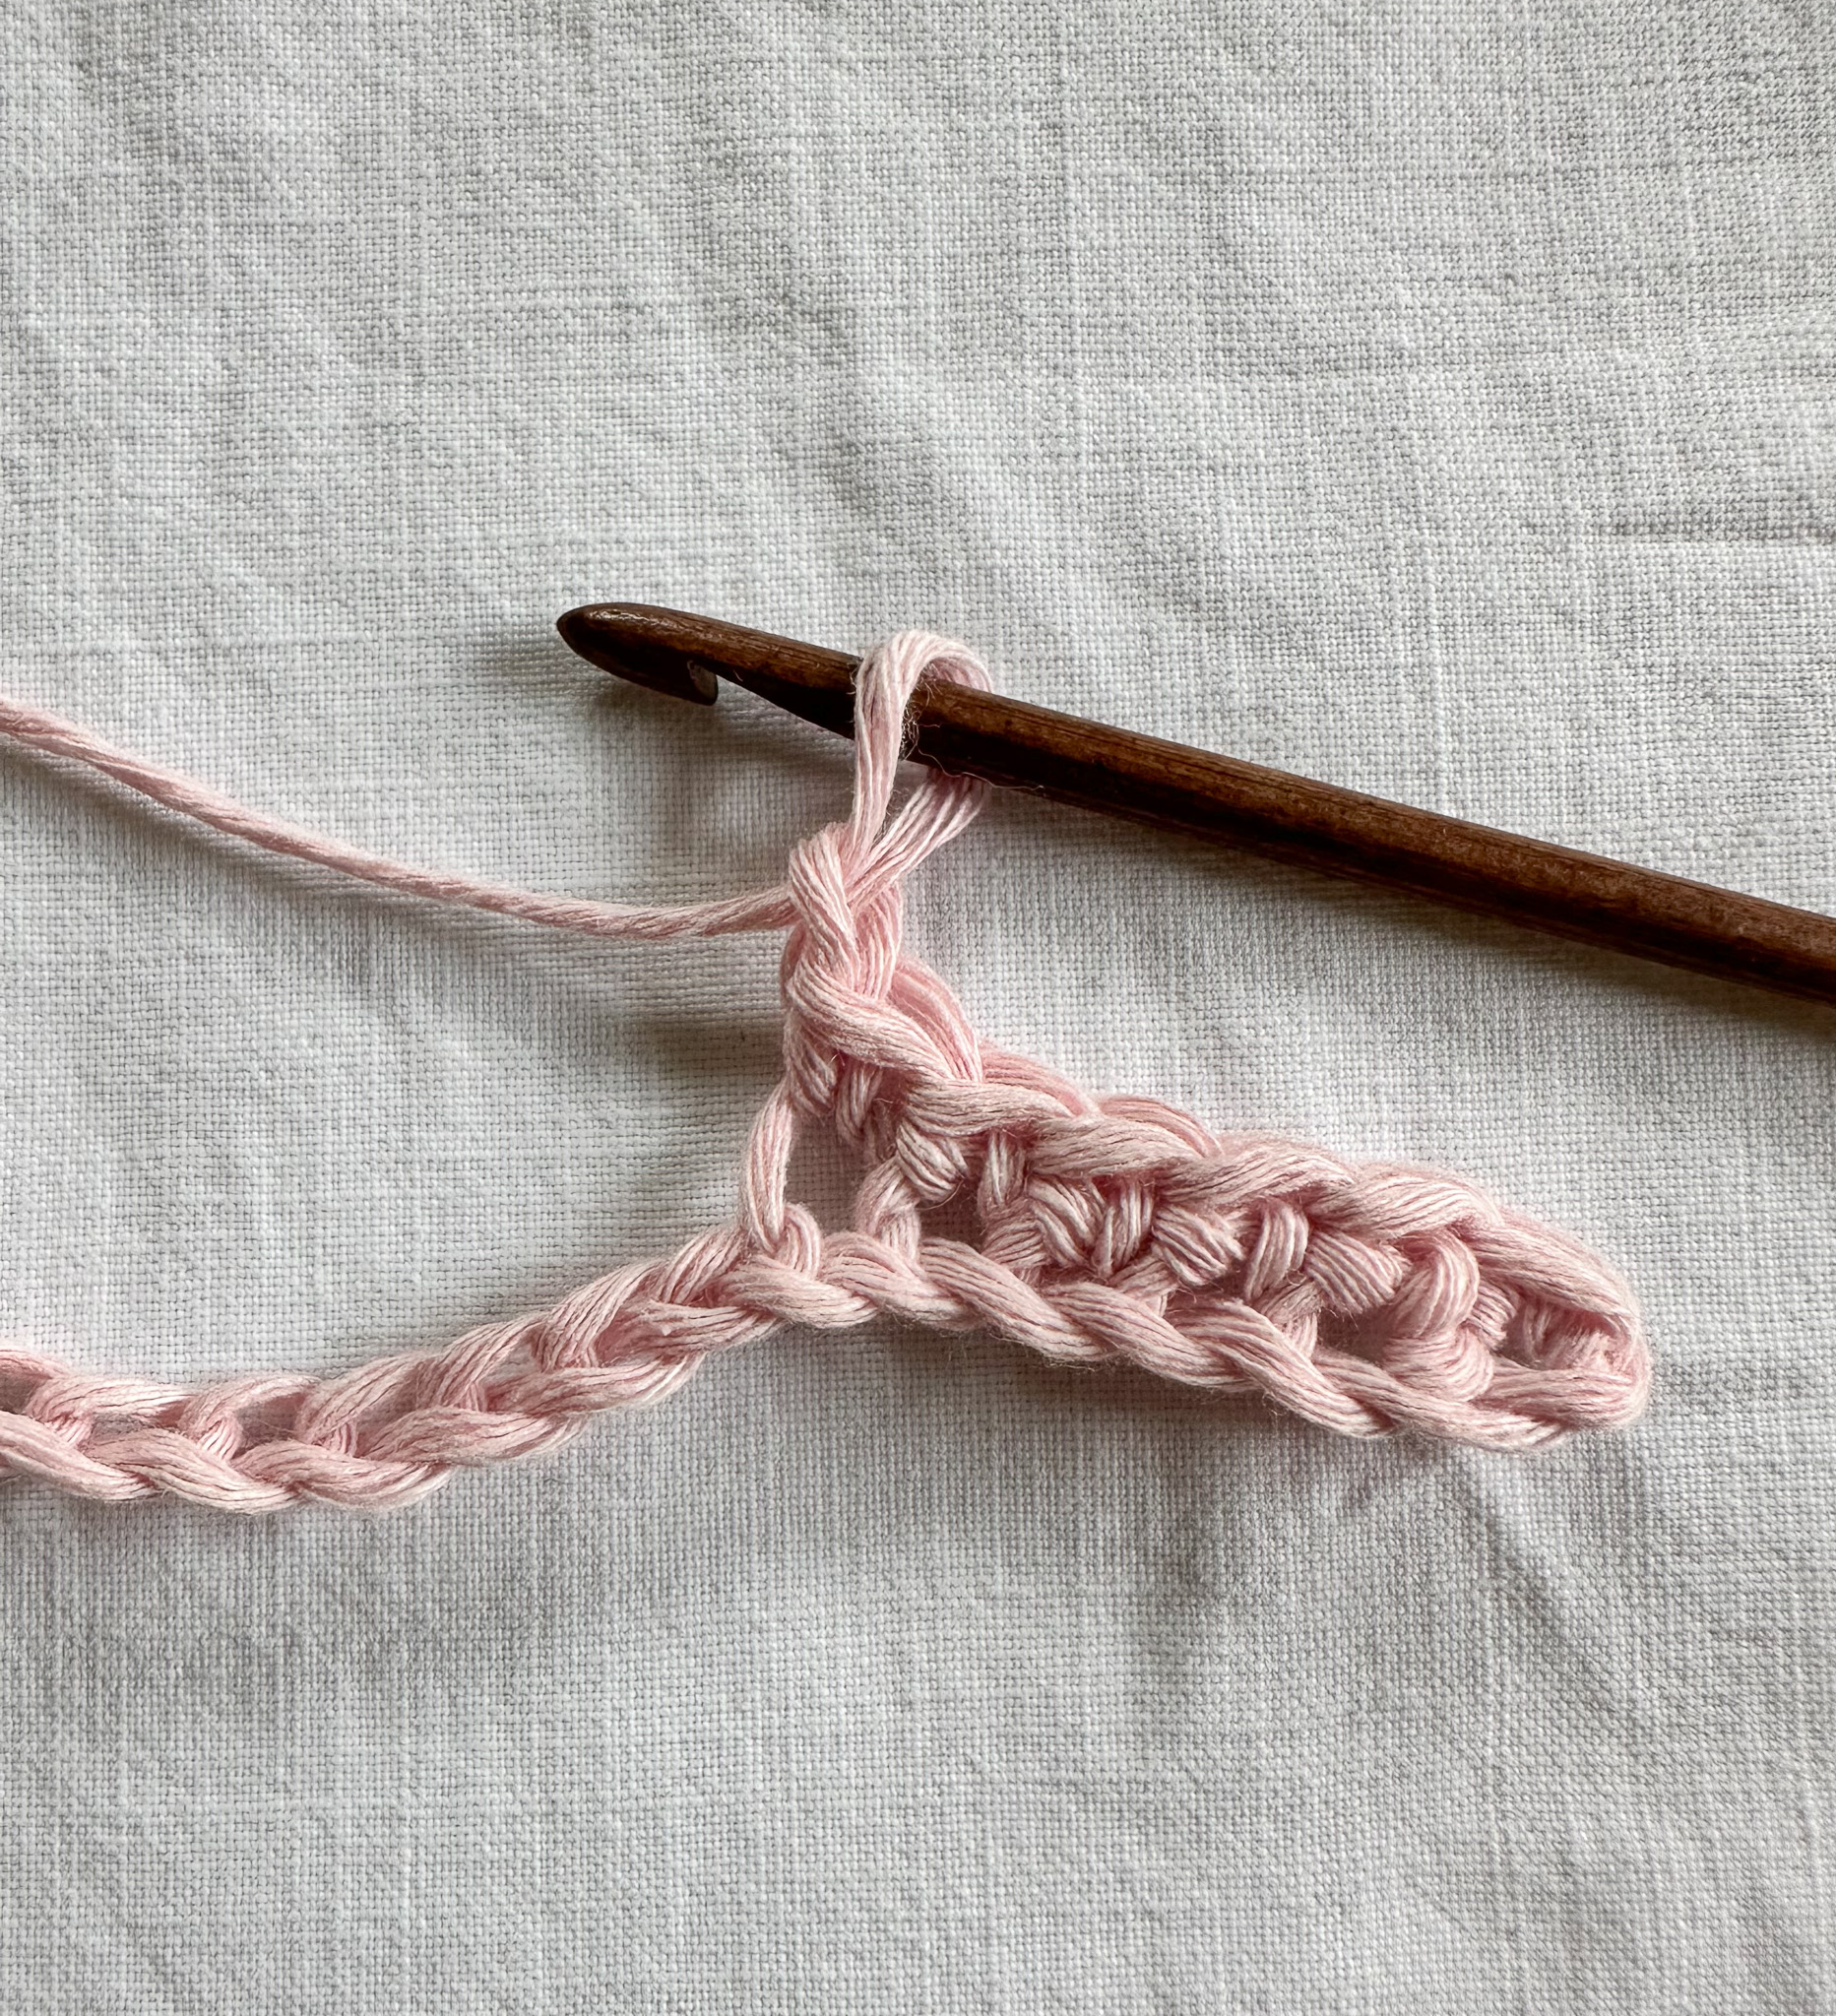
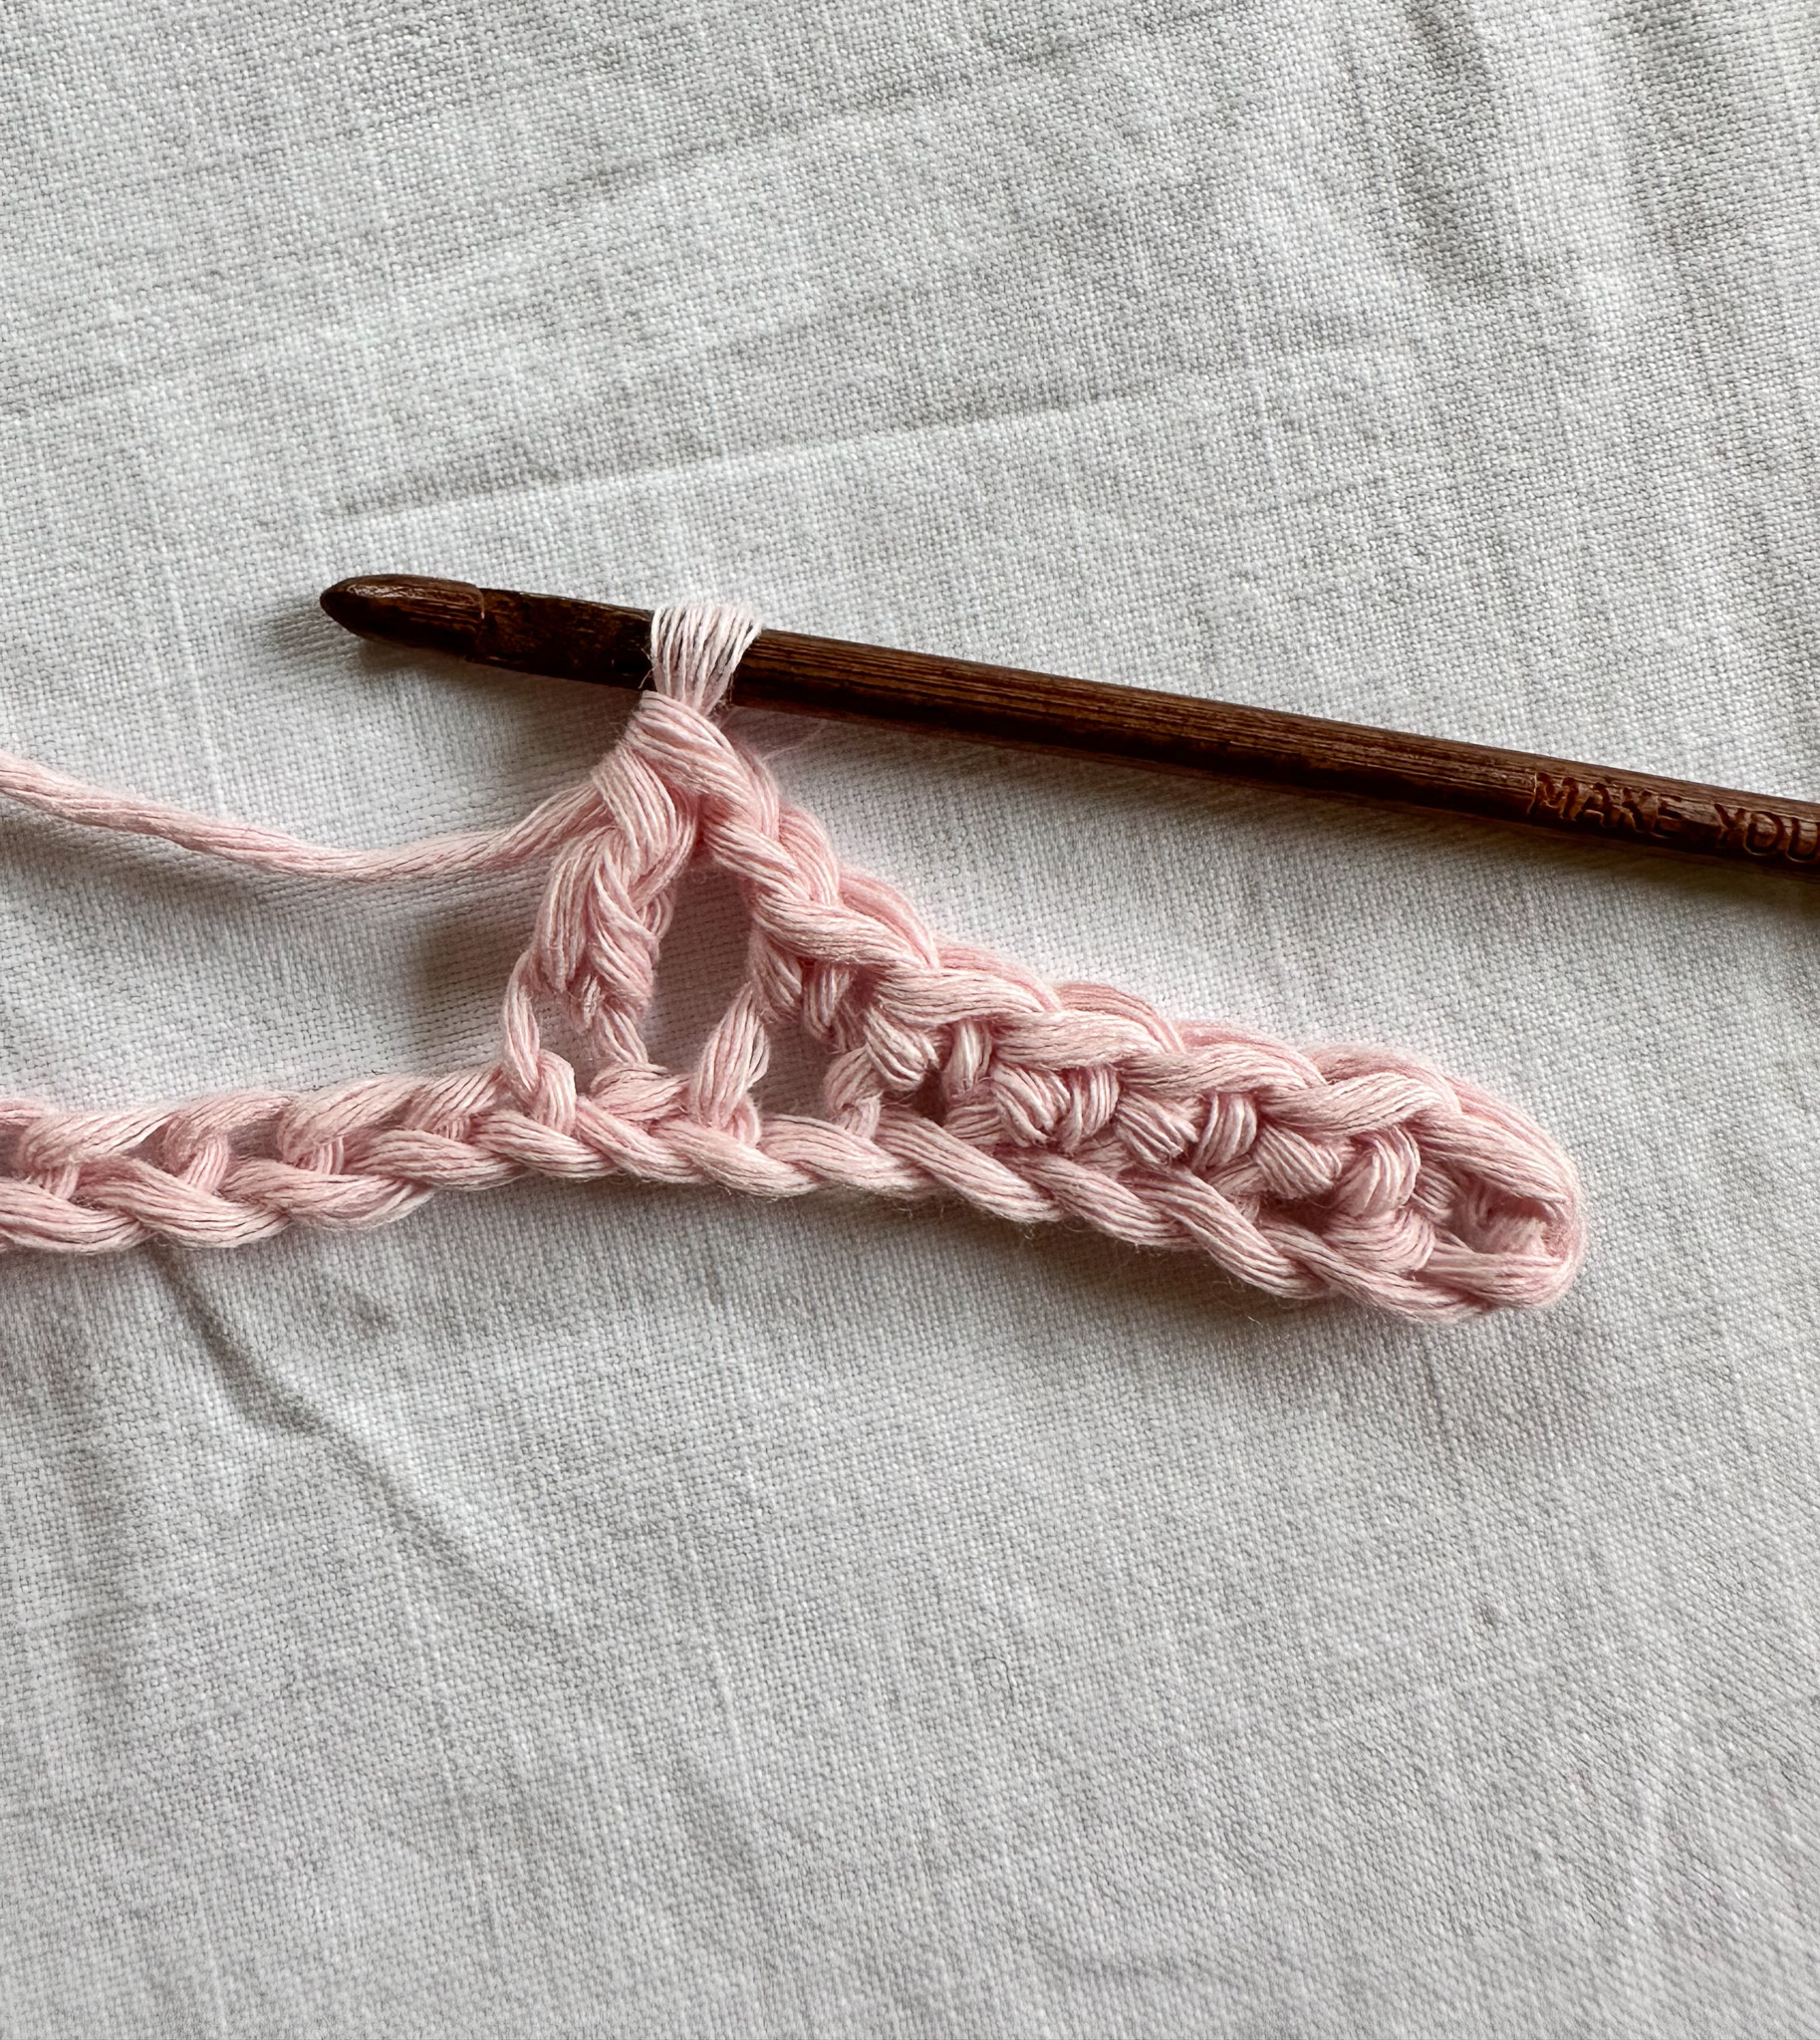
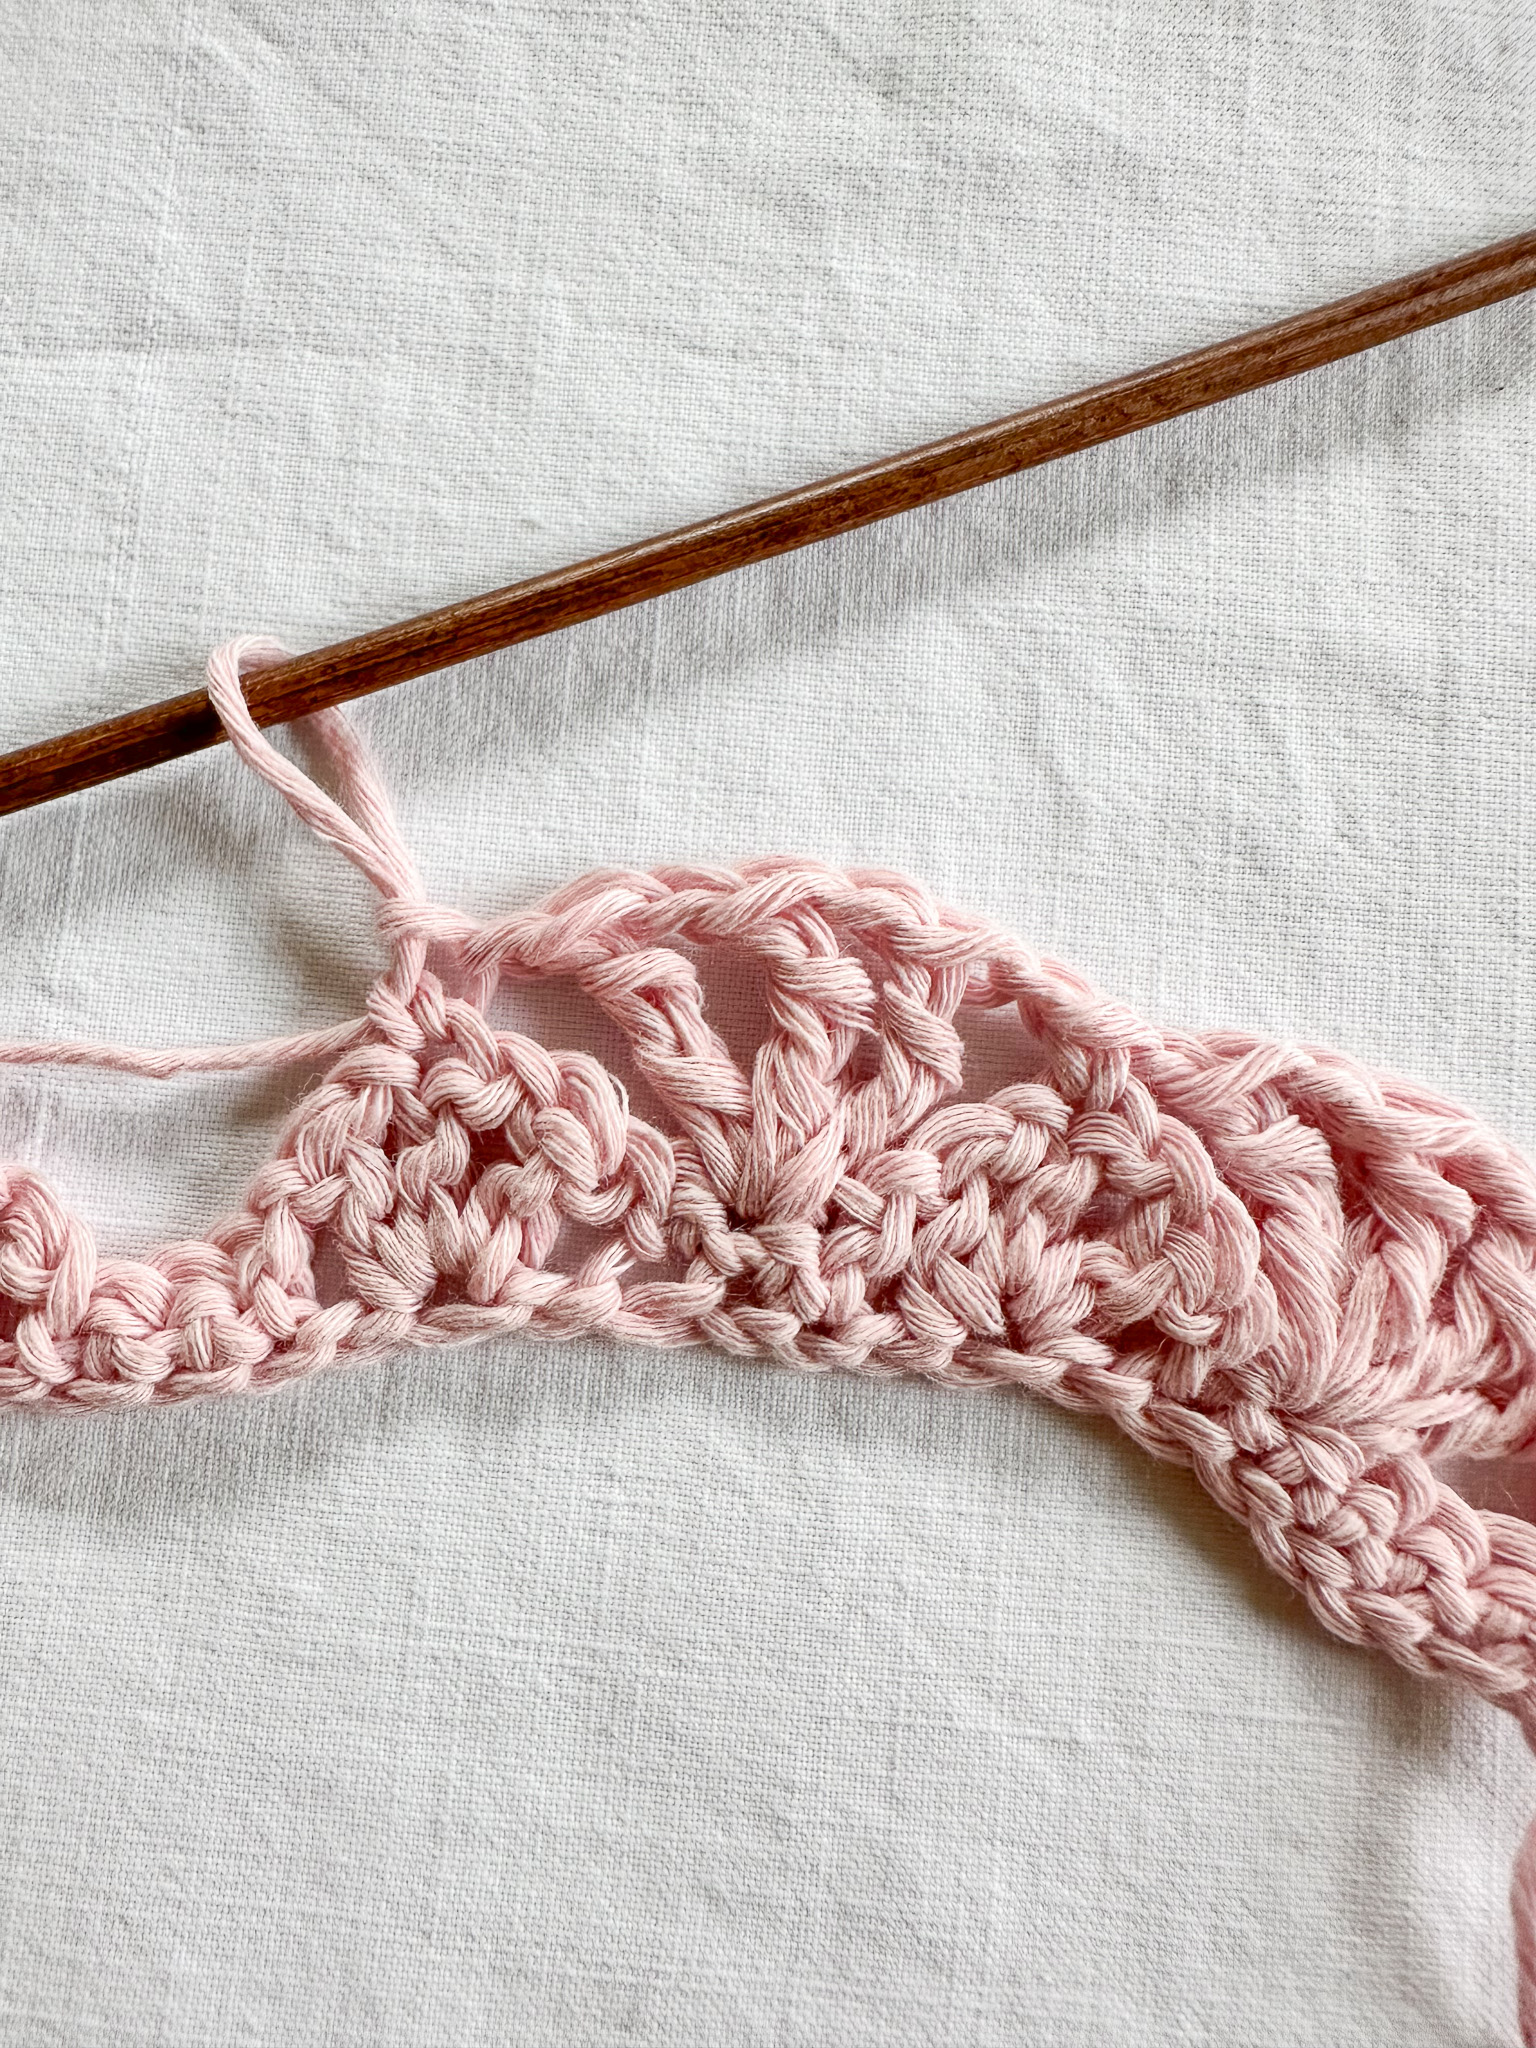
*Make 1 single crochet followed by 1 chain stitch. Skip 1 stitch. In the next stitch, work: 1 double crochet, 1 chain stitch, 1 double crochet, 1 chain stitch, 1 double crochet. Skip 1 stitch, make 1 chain stitch, then work 2 single crochet stitches.*
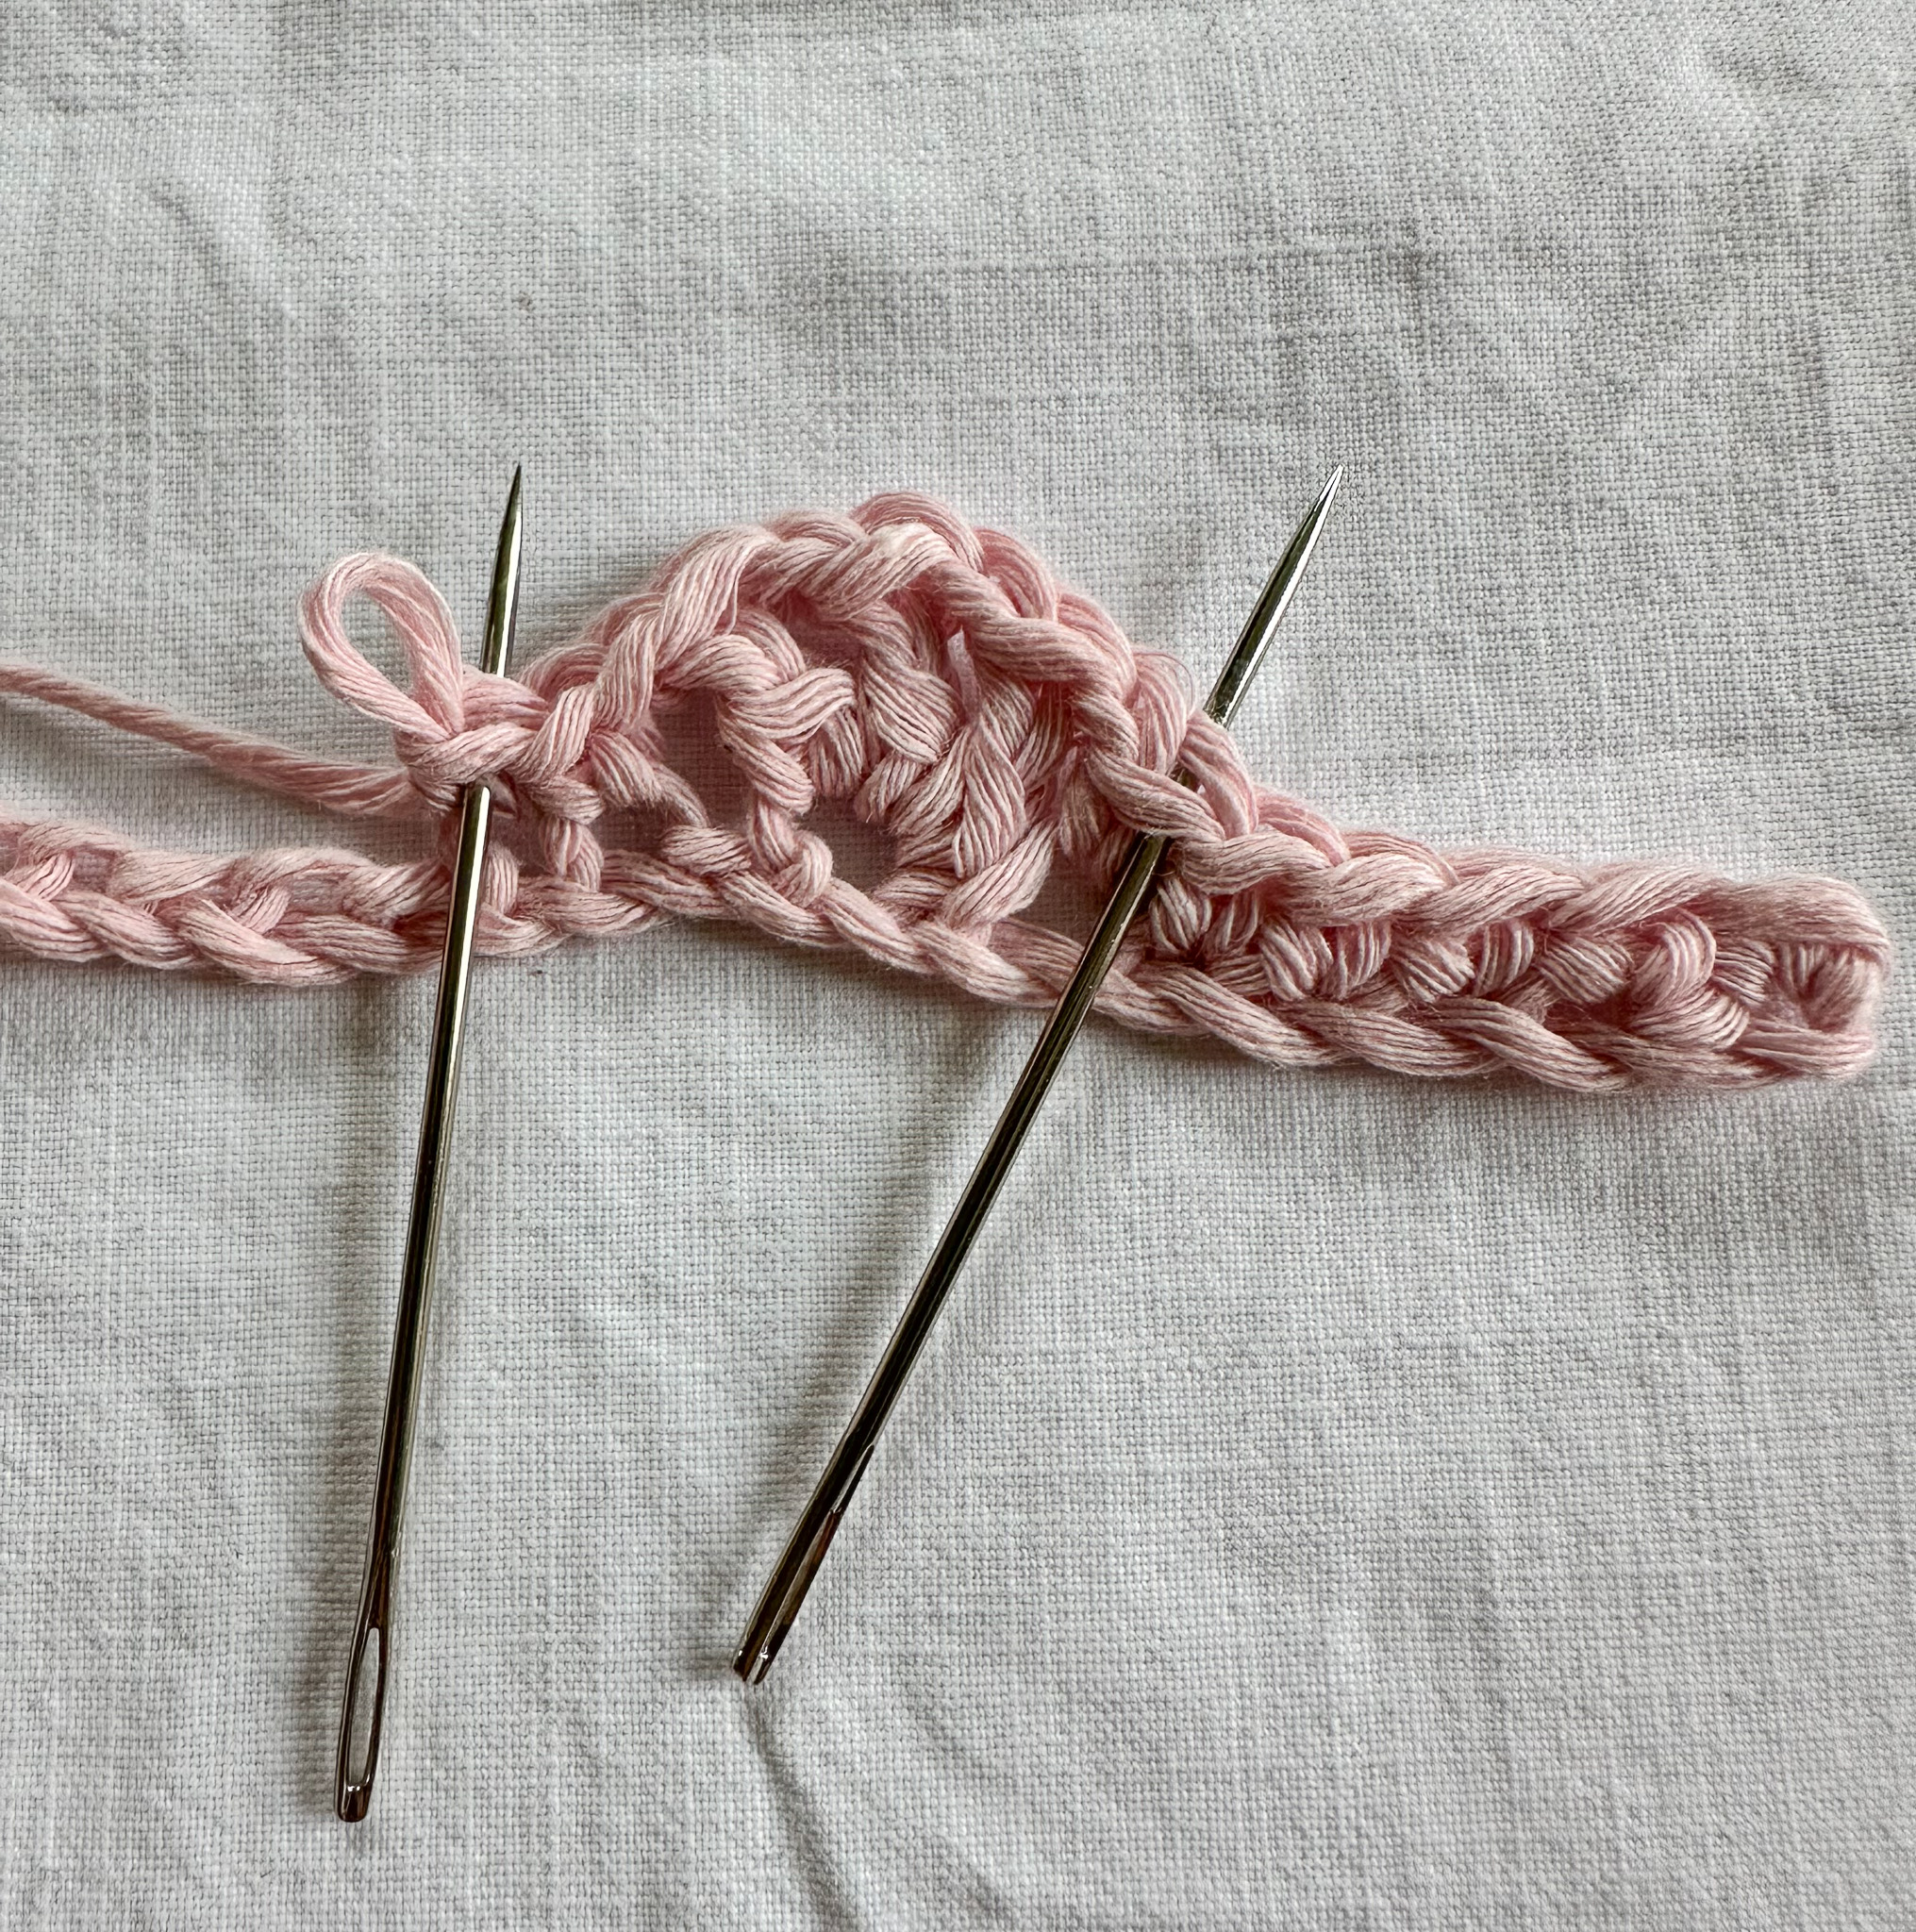
Repeat everything between *...* a total of 9 times. The needles indicate the section that should be repeated 9 times.
After these 9 repeats (9 arches), work 4 single crochet stitches.
Finish with 1 chain stitch and turn. You should have a total of 9 arches across the row.
If you are unsure how to work a single crochet or a double crochet, see the videos below.


Row 2
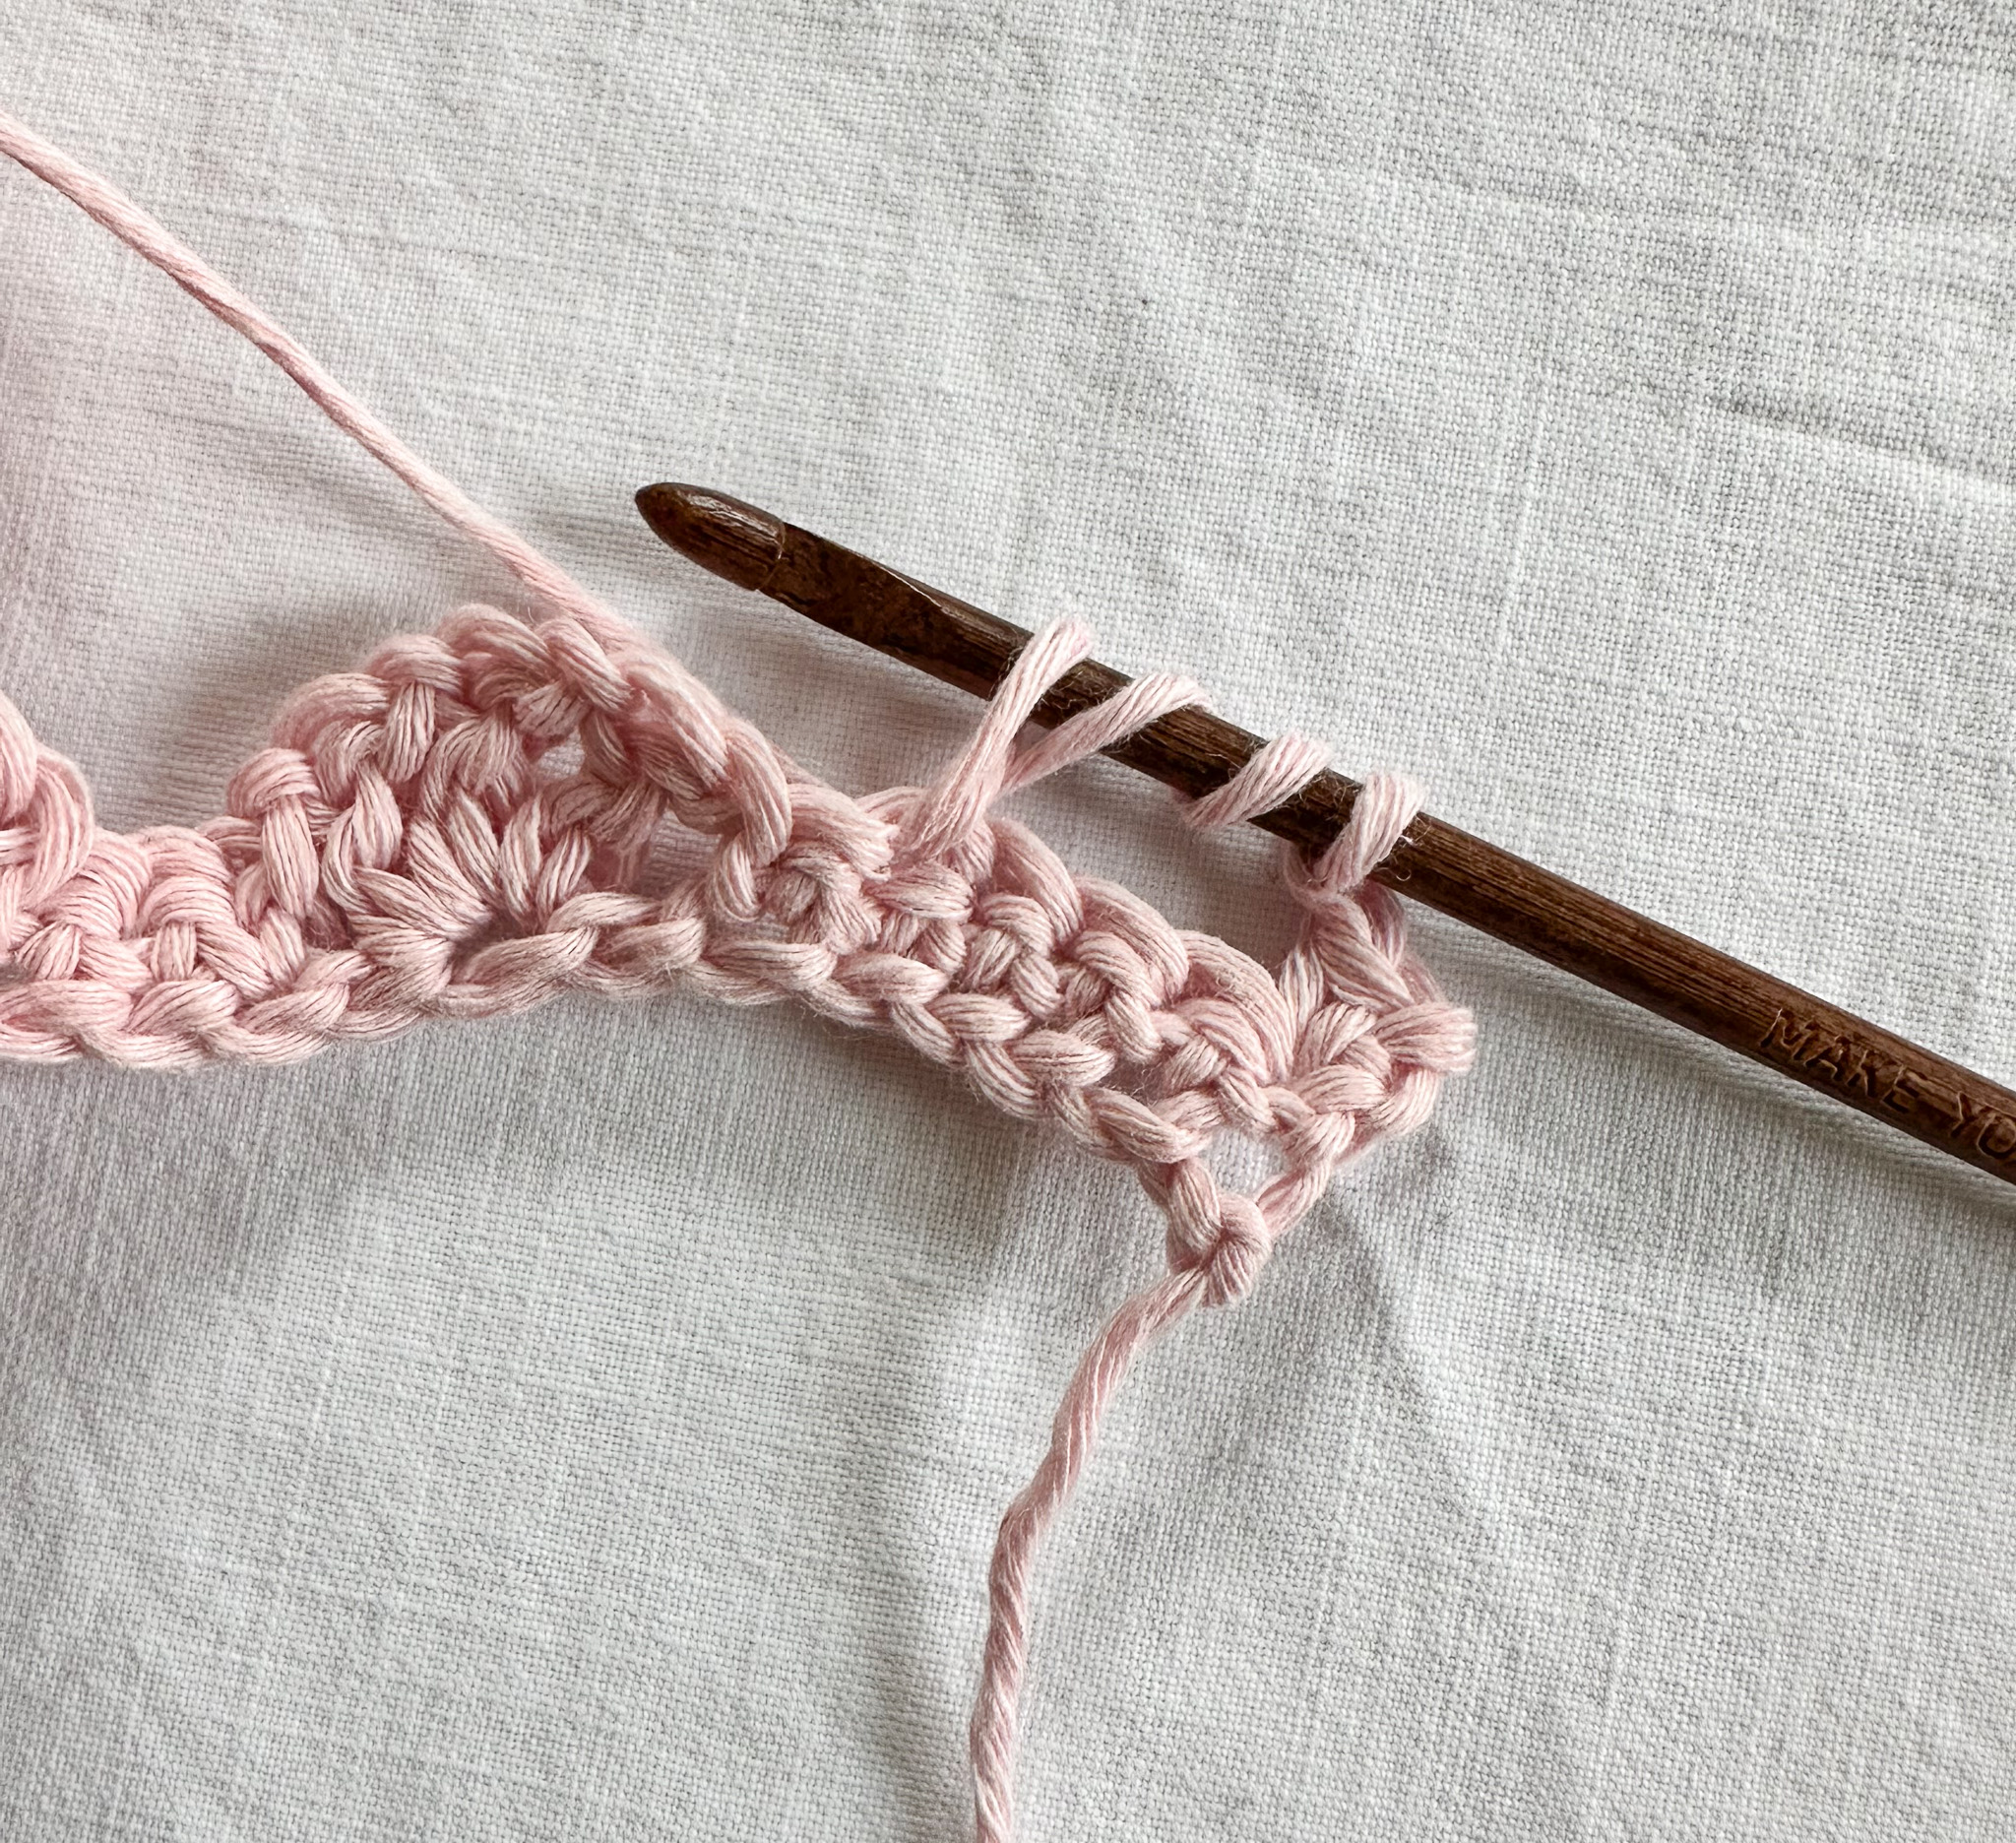
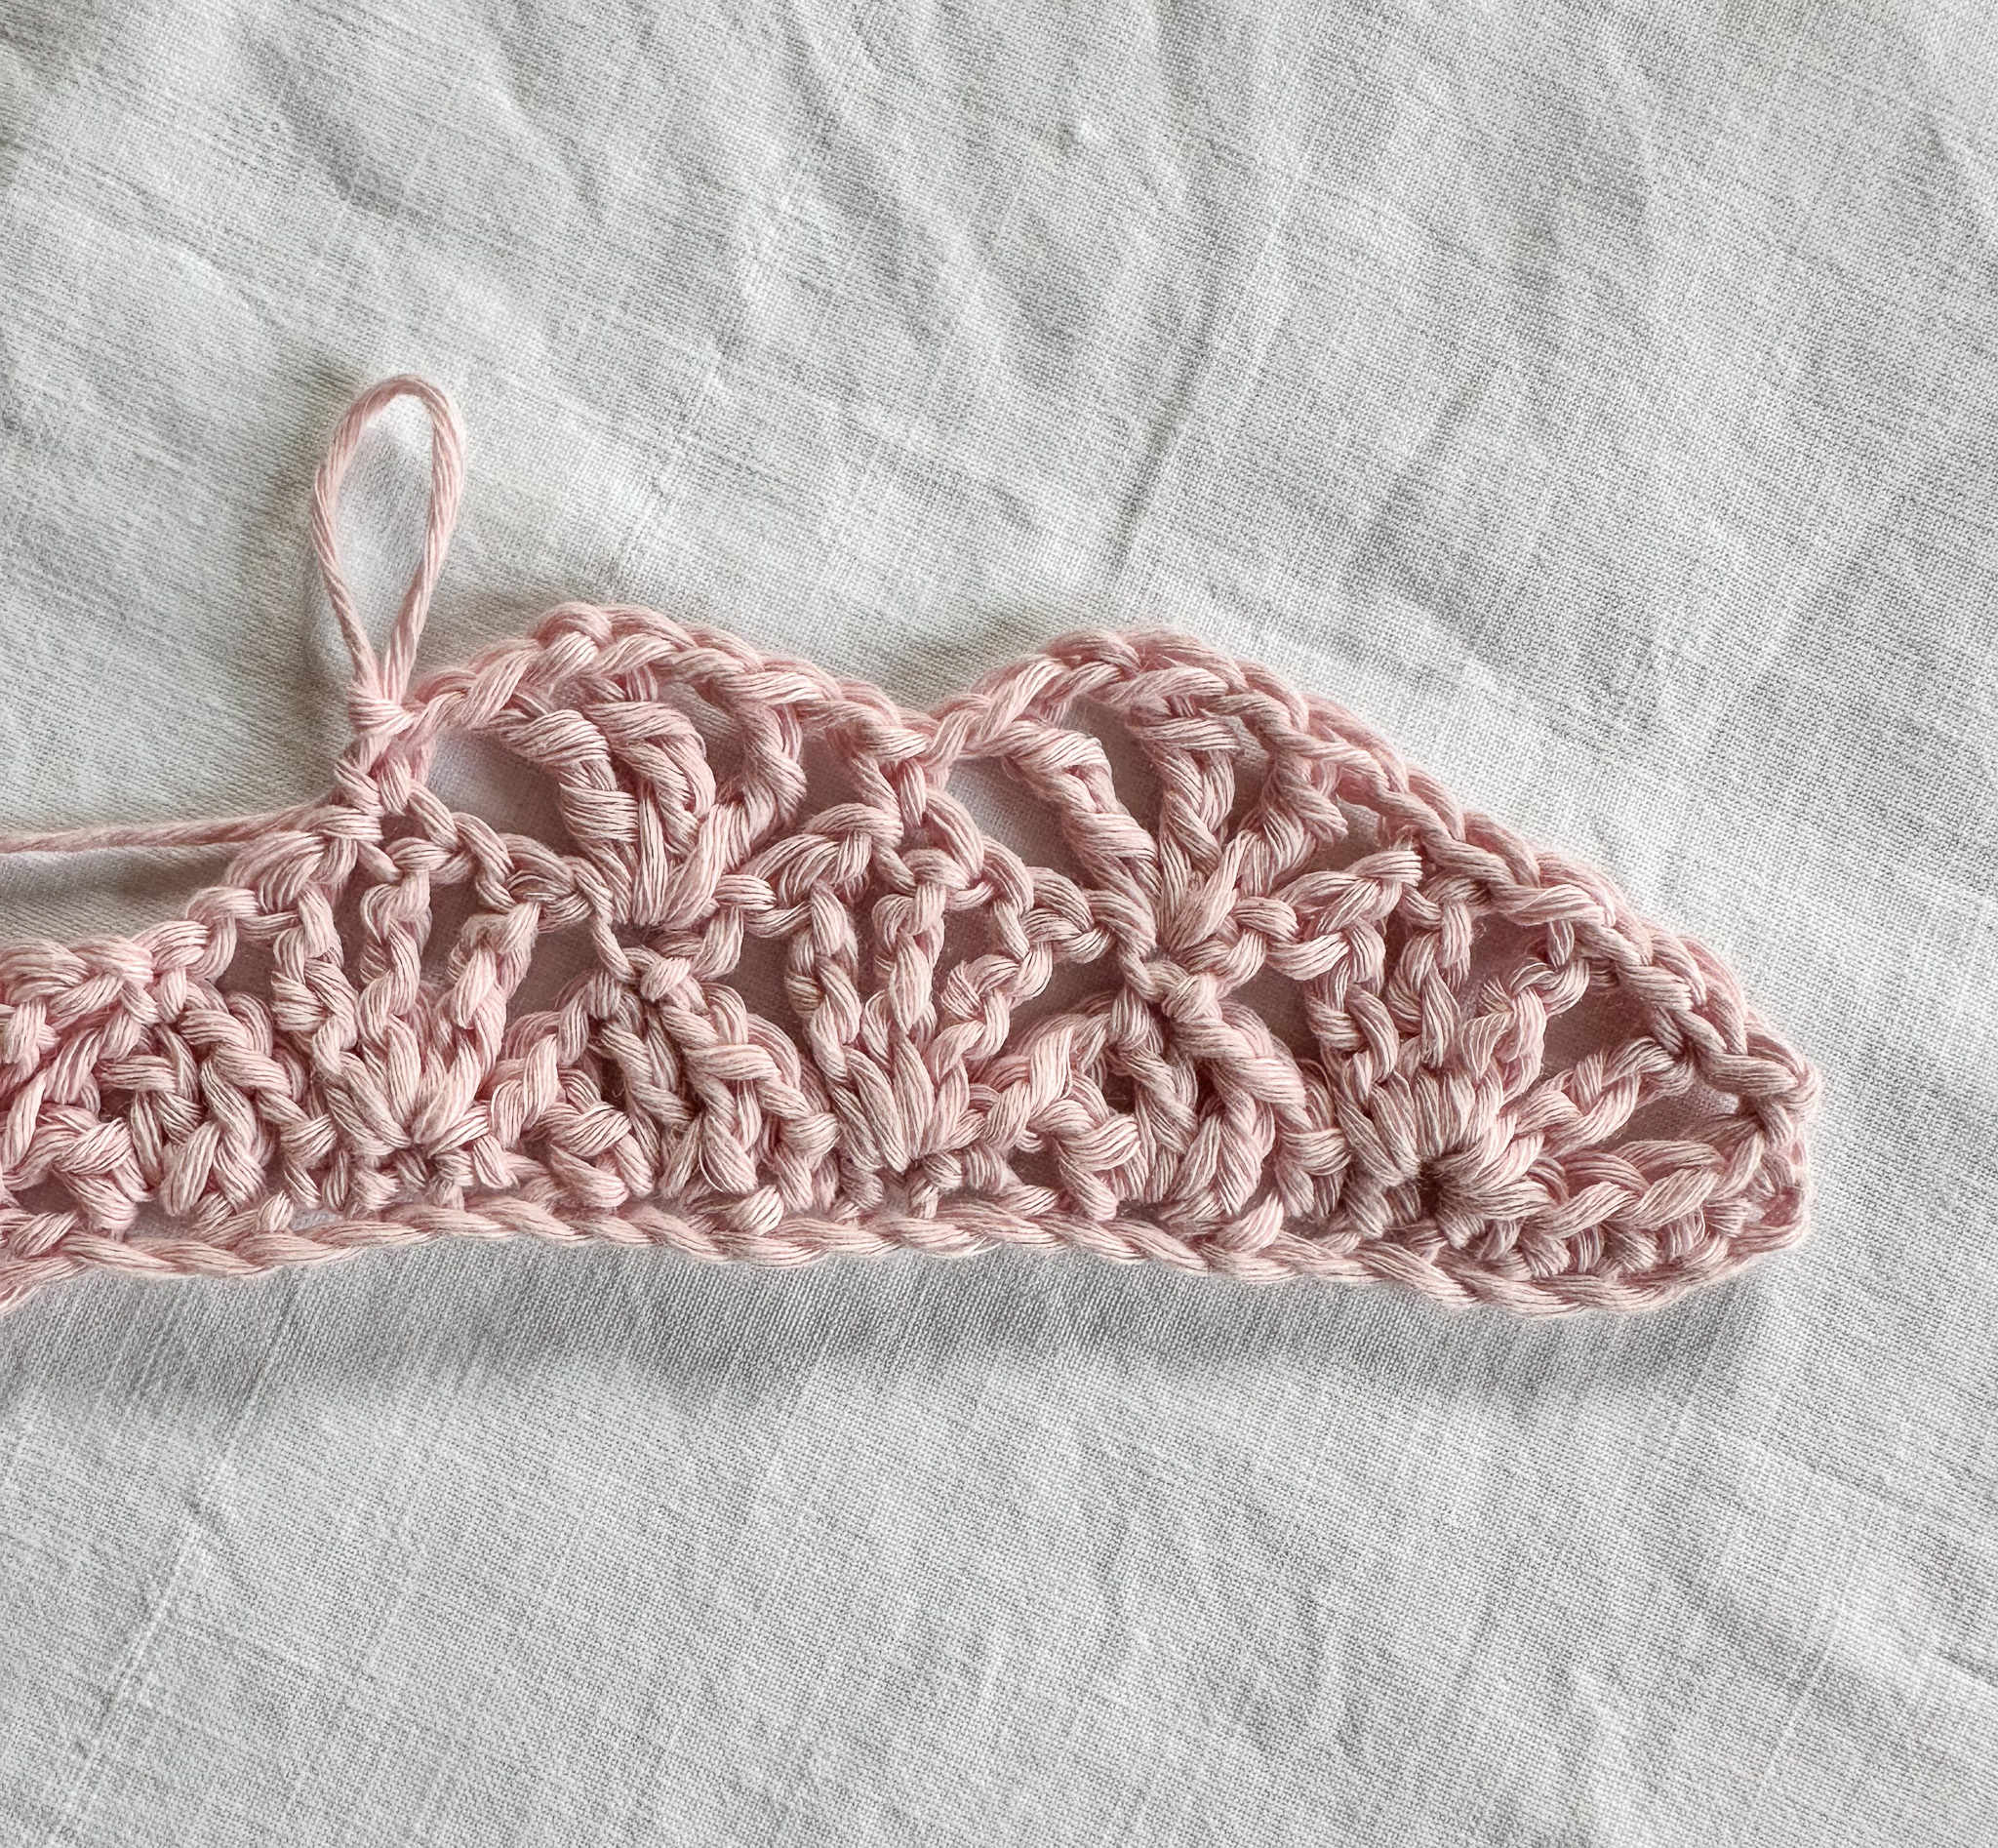
Work 1 single crochet followed by 1 chain stitch. Skip 3 stitches. In the next stitch (the 4th stitch), work the following: repeat *1 treble crochet, 1 chain stitch* a total of 4 times, all into the same stitch.
You have now reached the first arch from Row 1. Work 1 single crochet into the center double crochet of that arch, i.e. at the midpoint of the arch.
You have now completed the first arch of the row.
If you are unsure how to work a treble crochet, see the video below.
Middle of the Row / Middle Arches
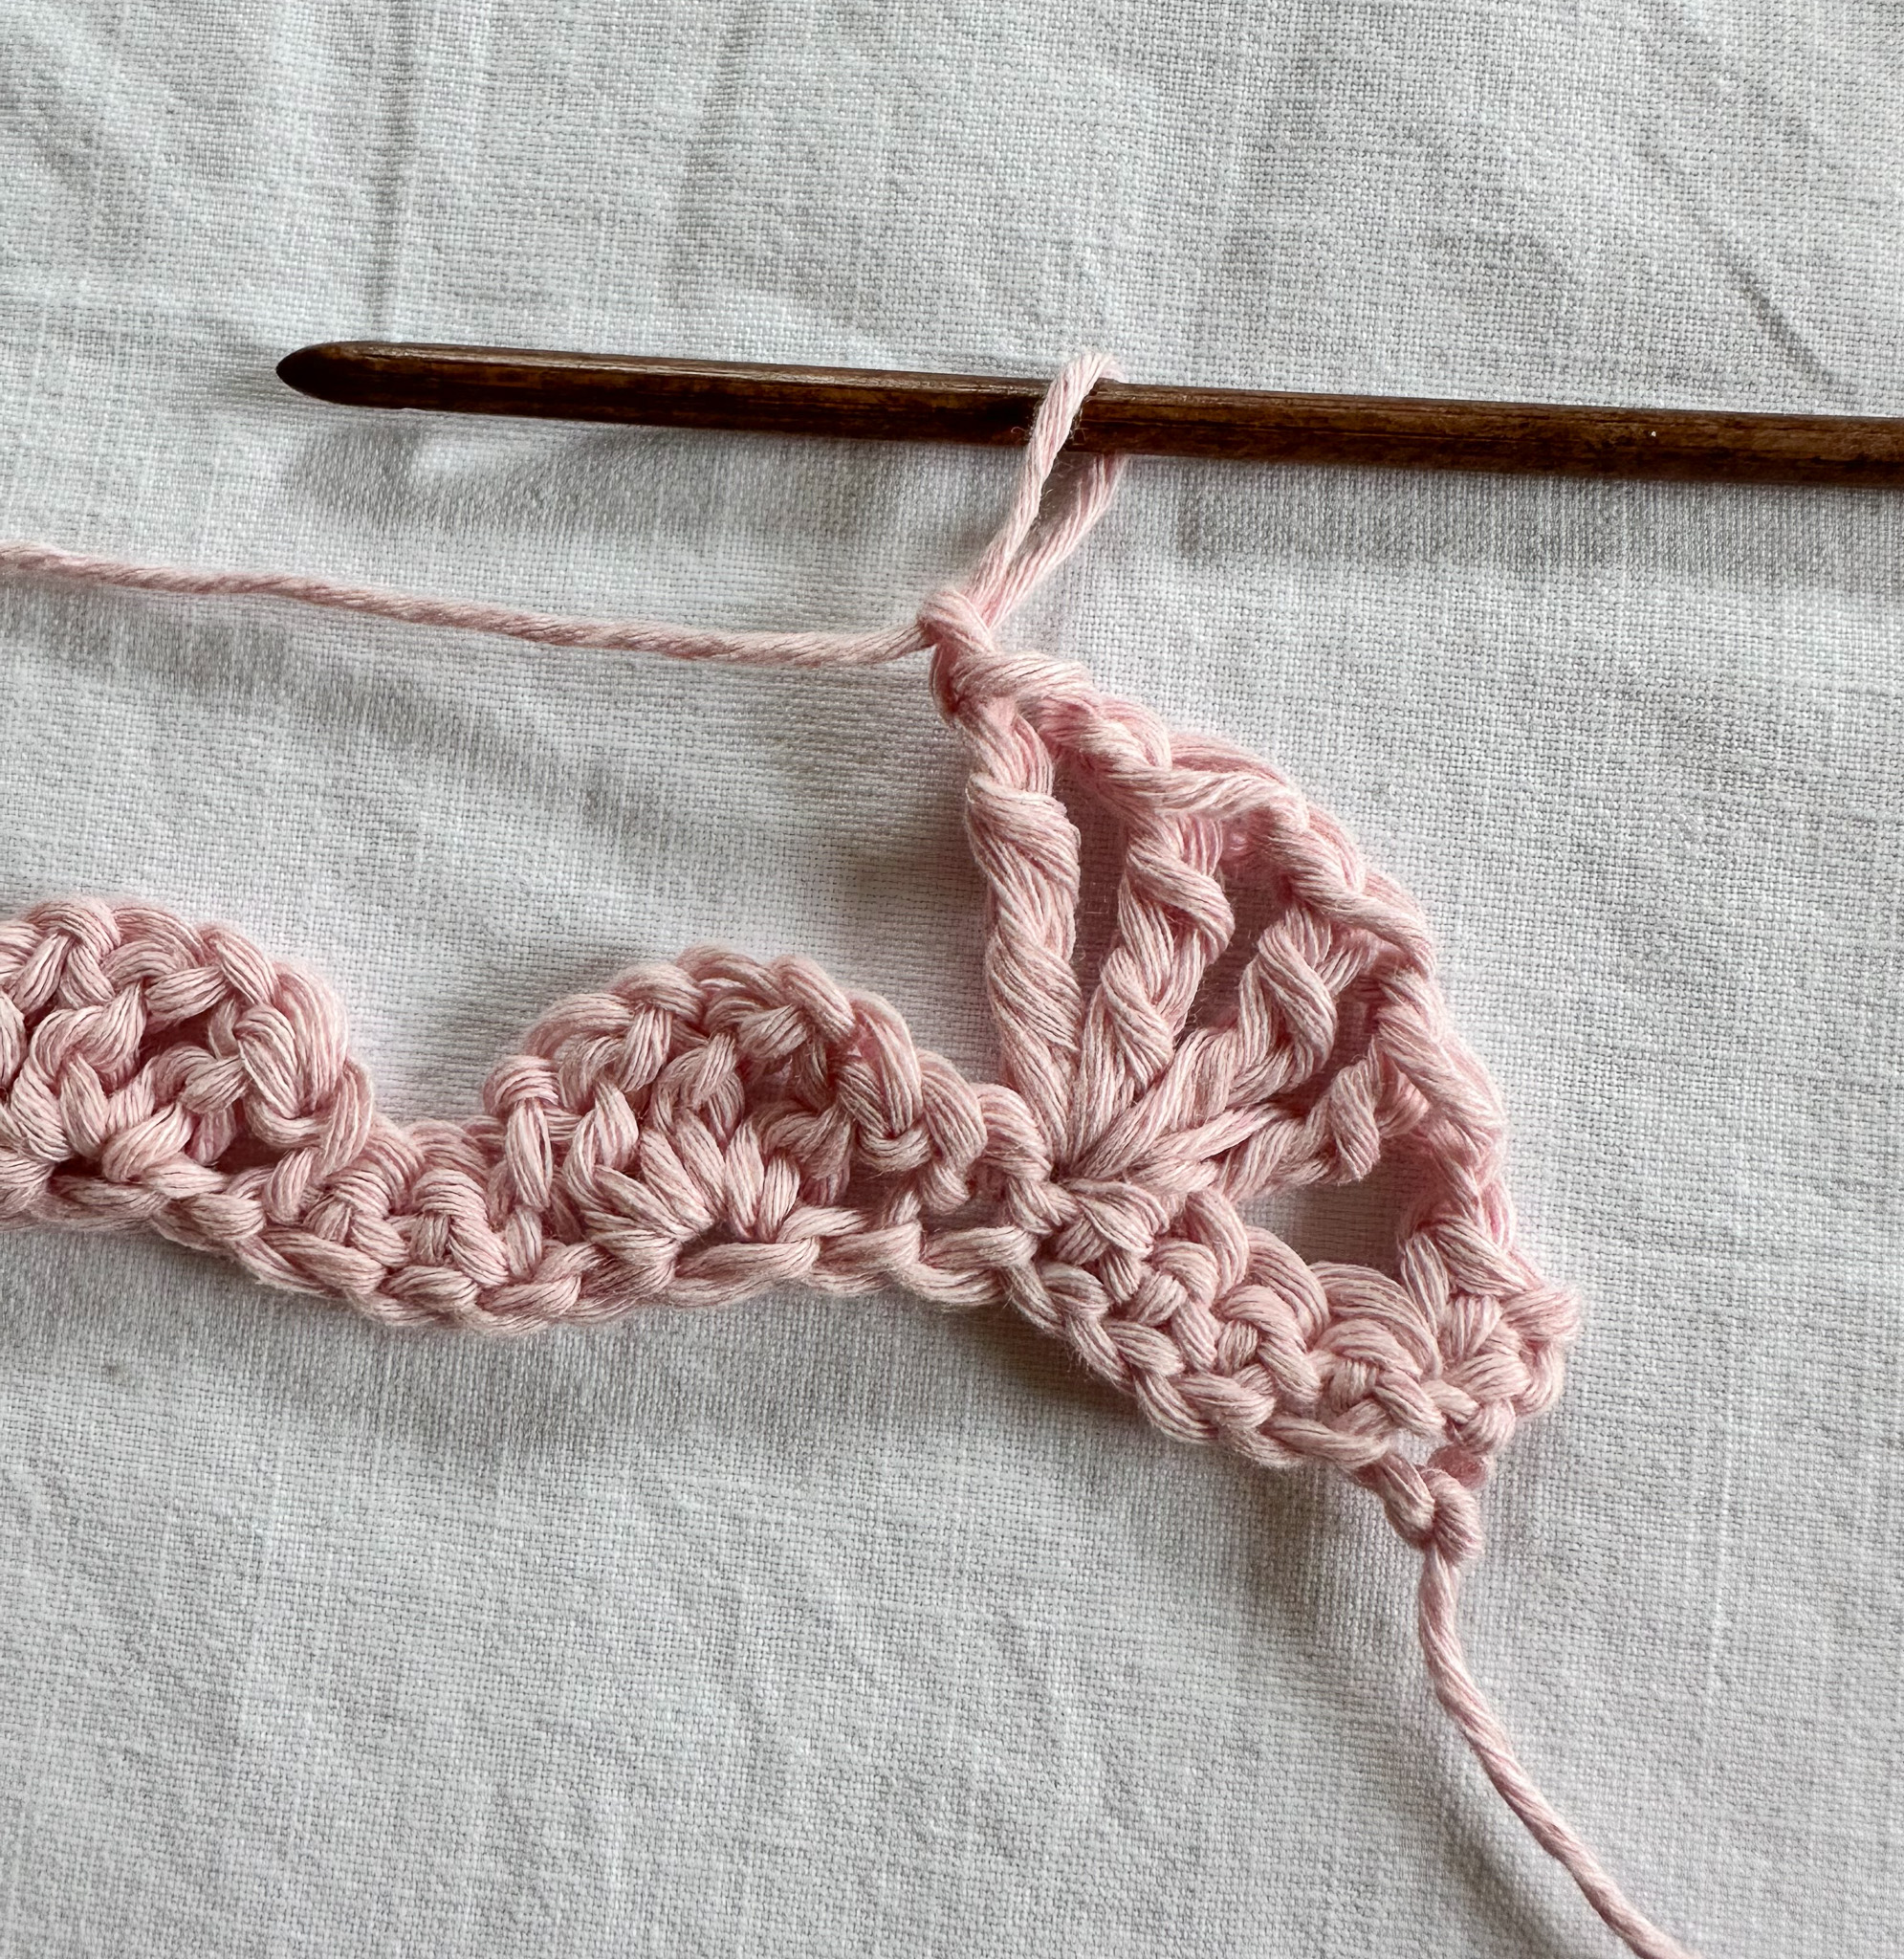
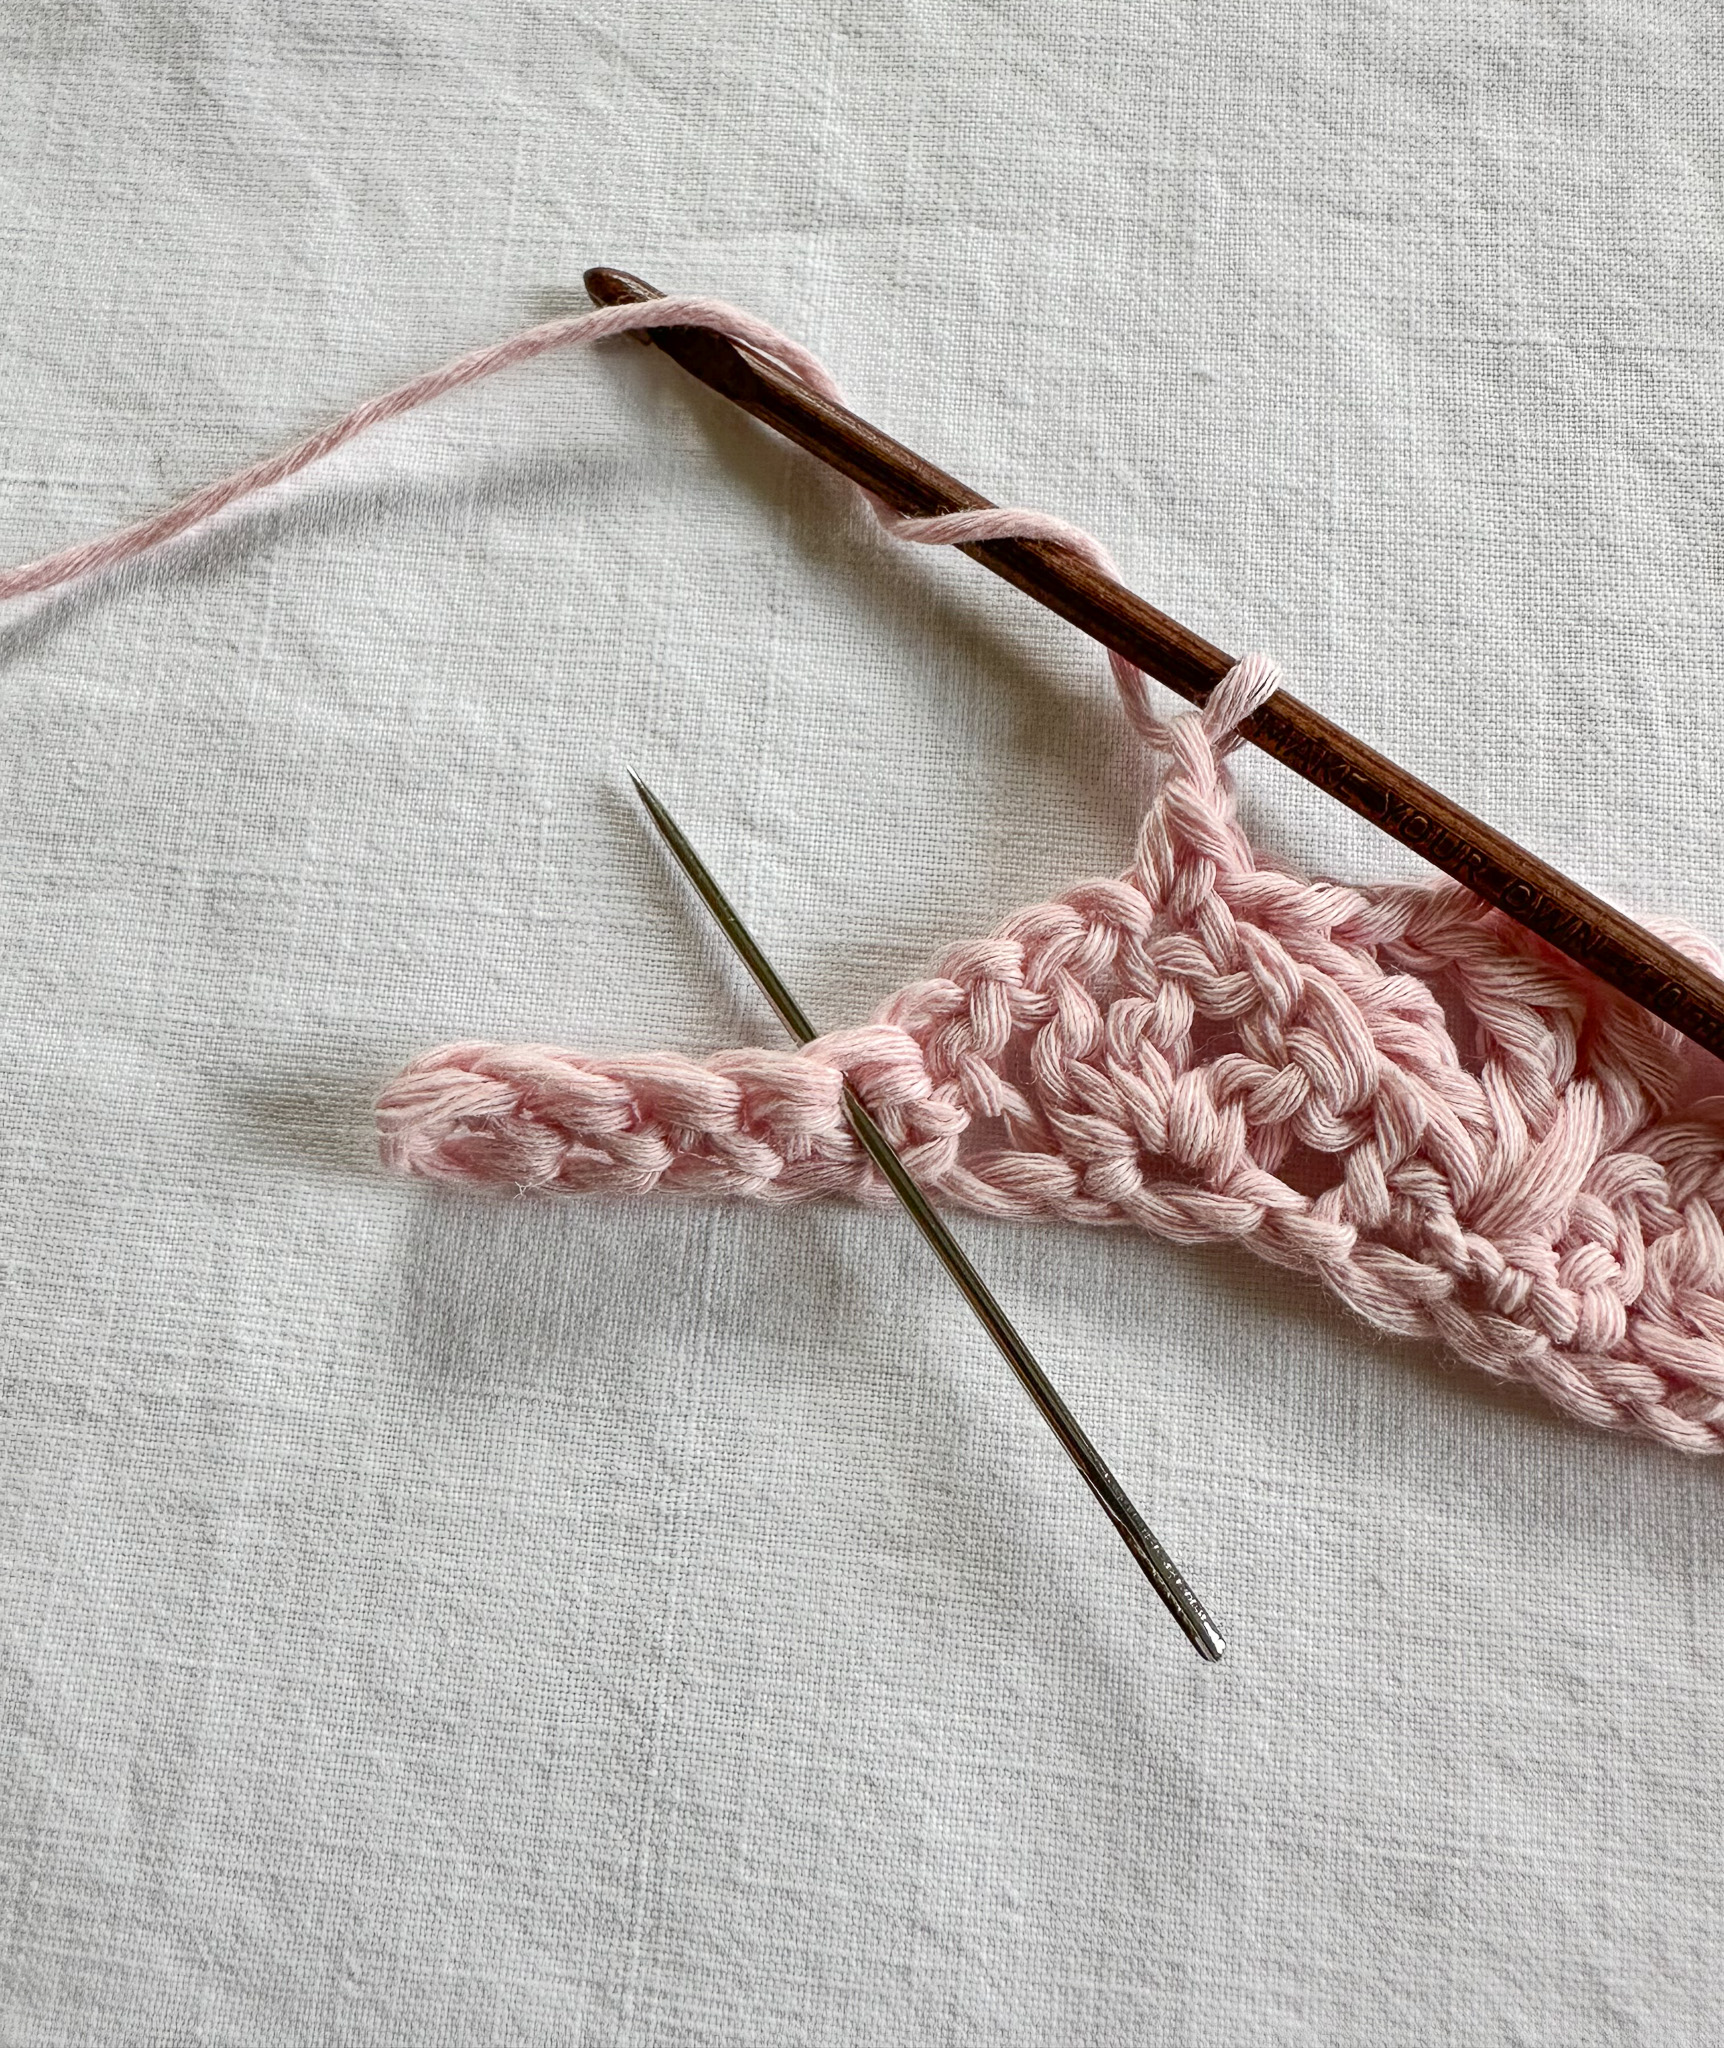
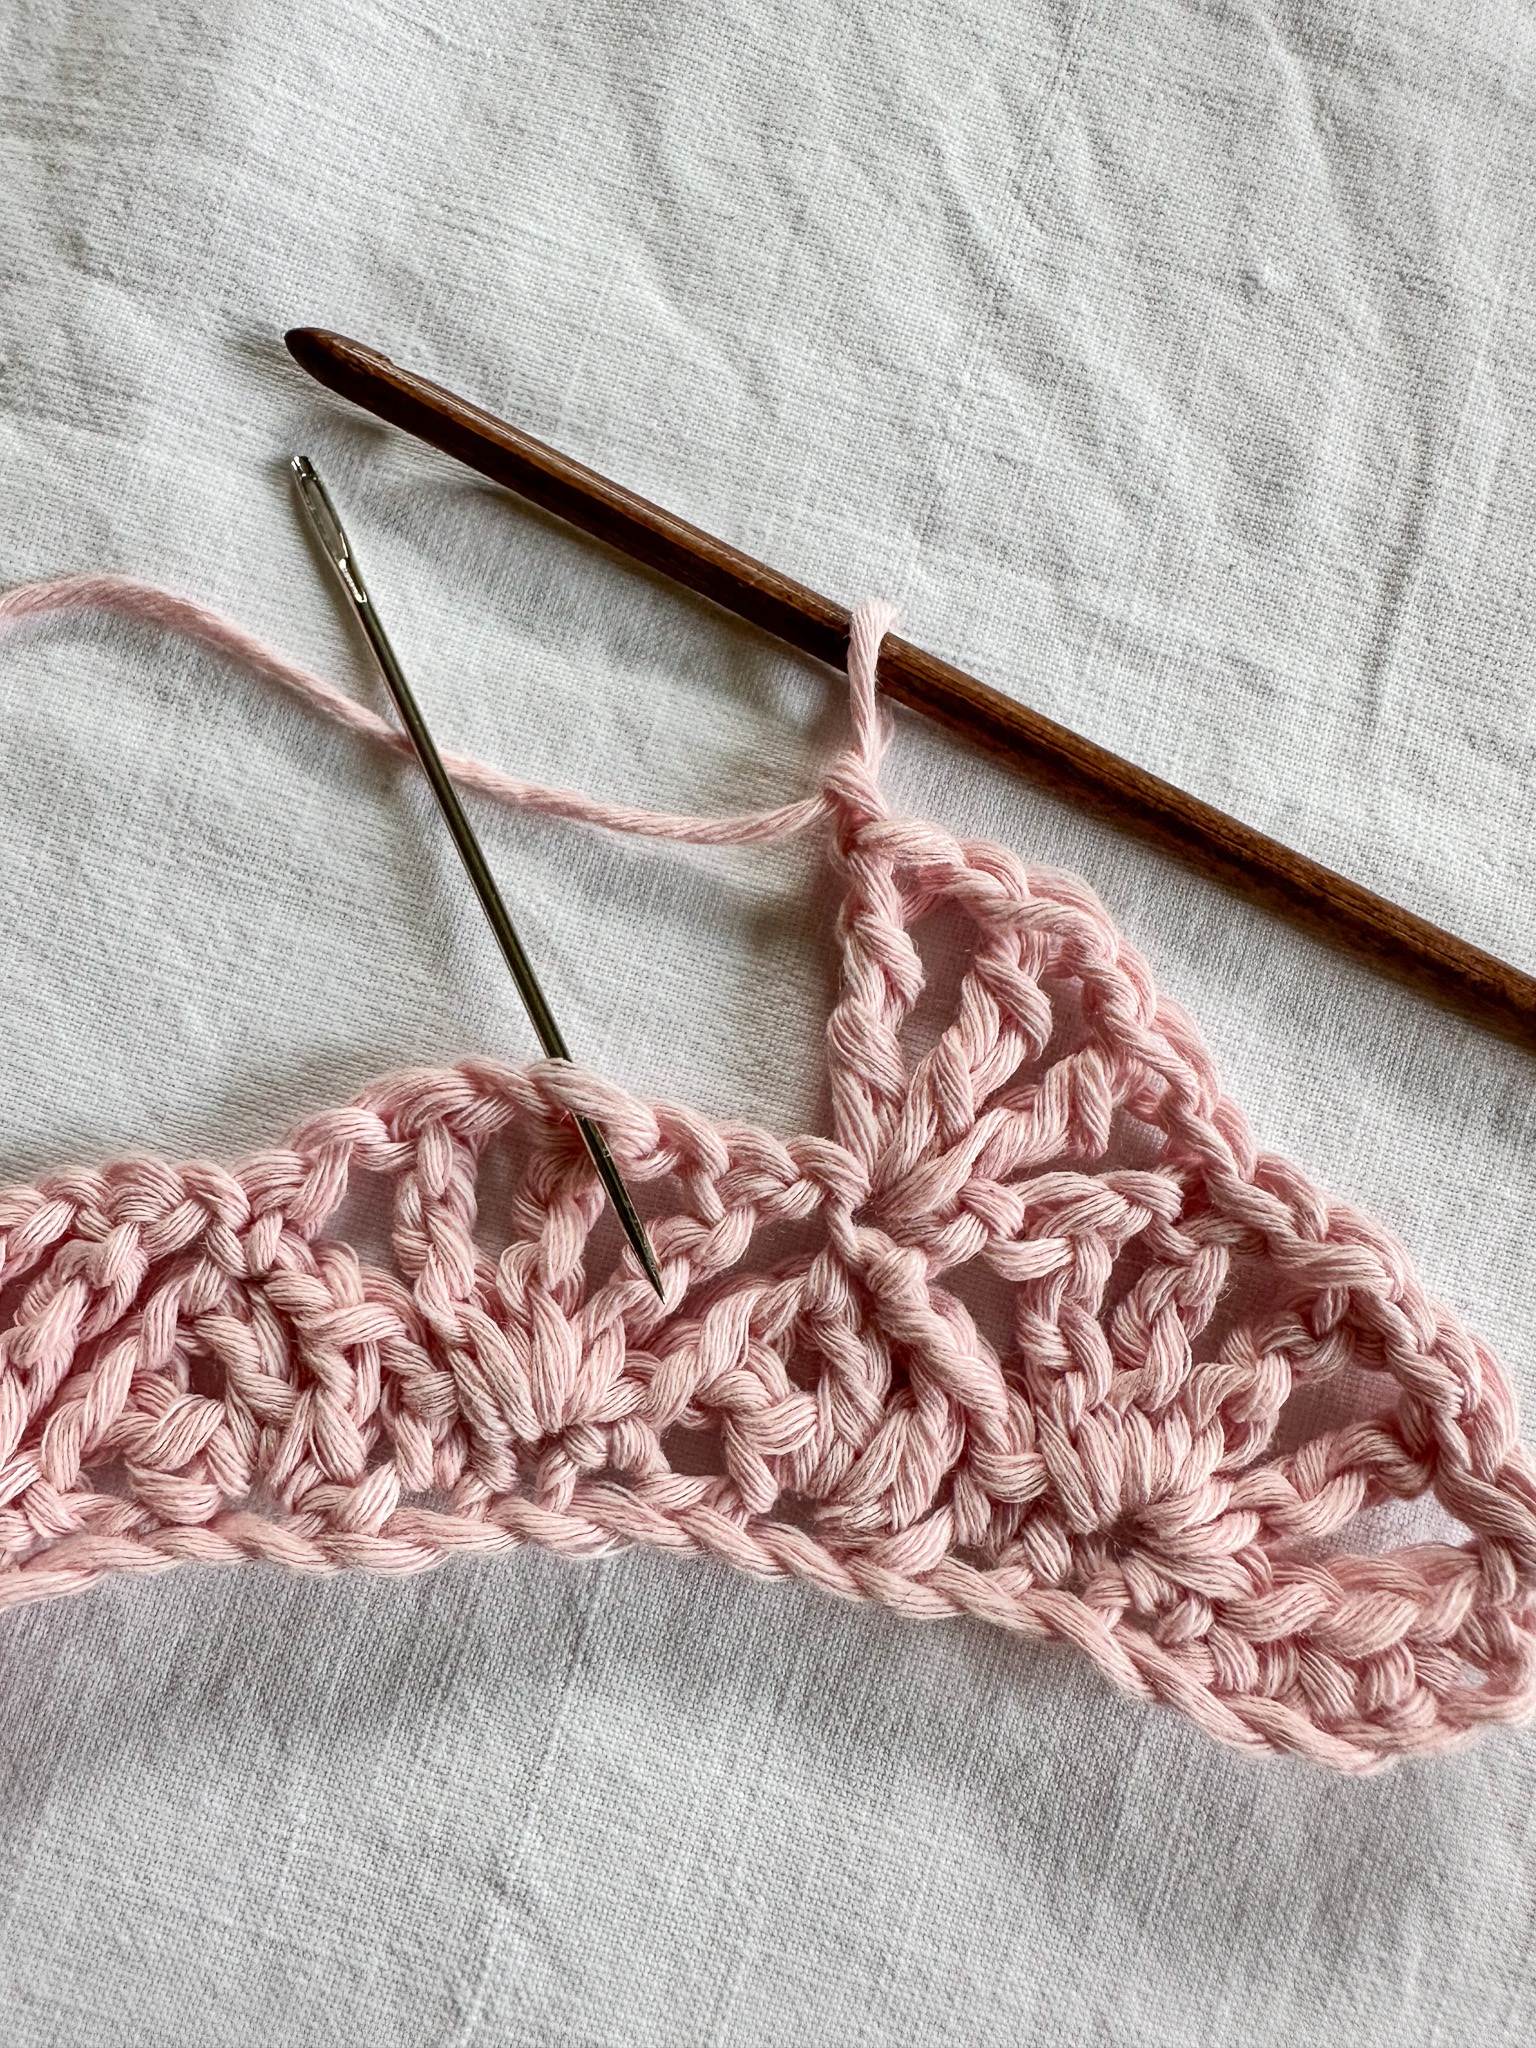
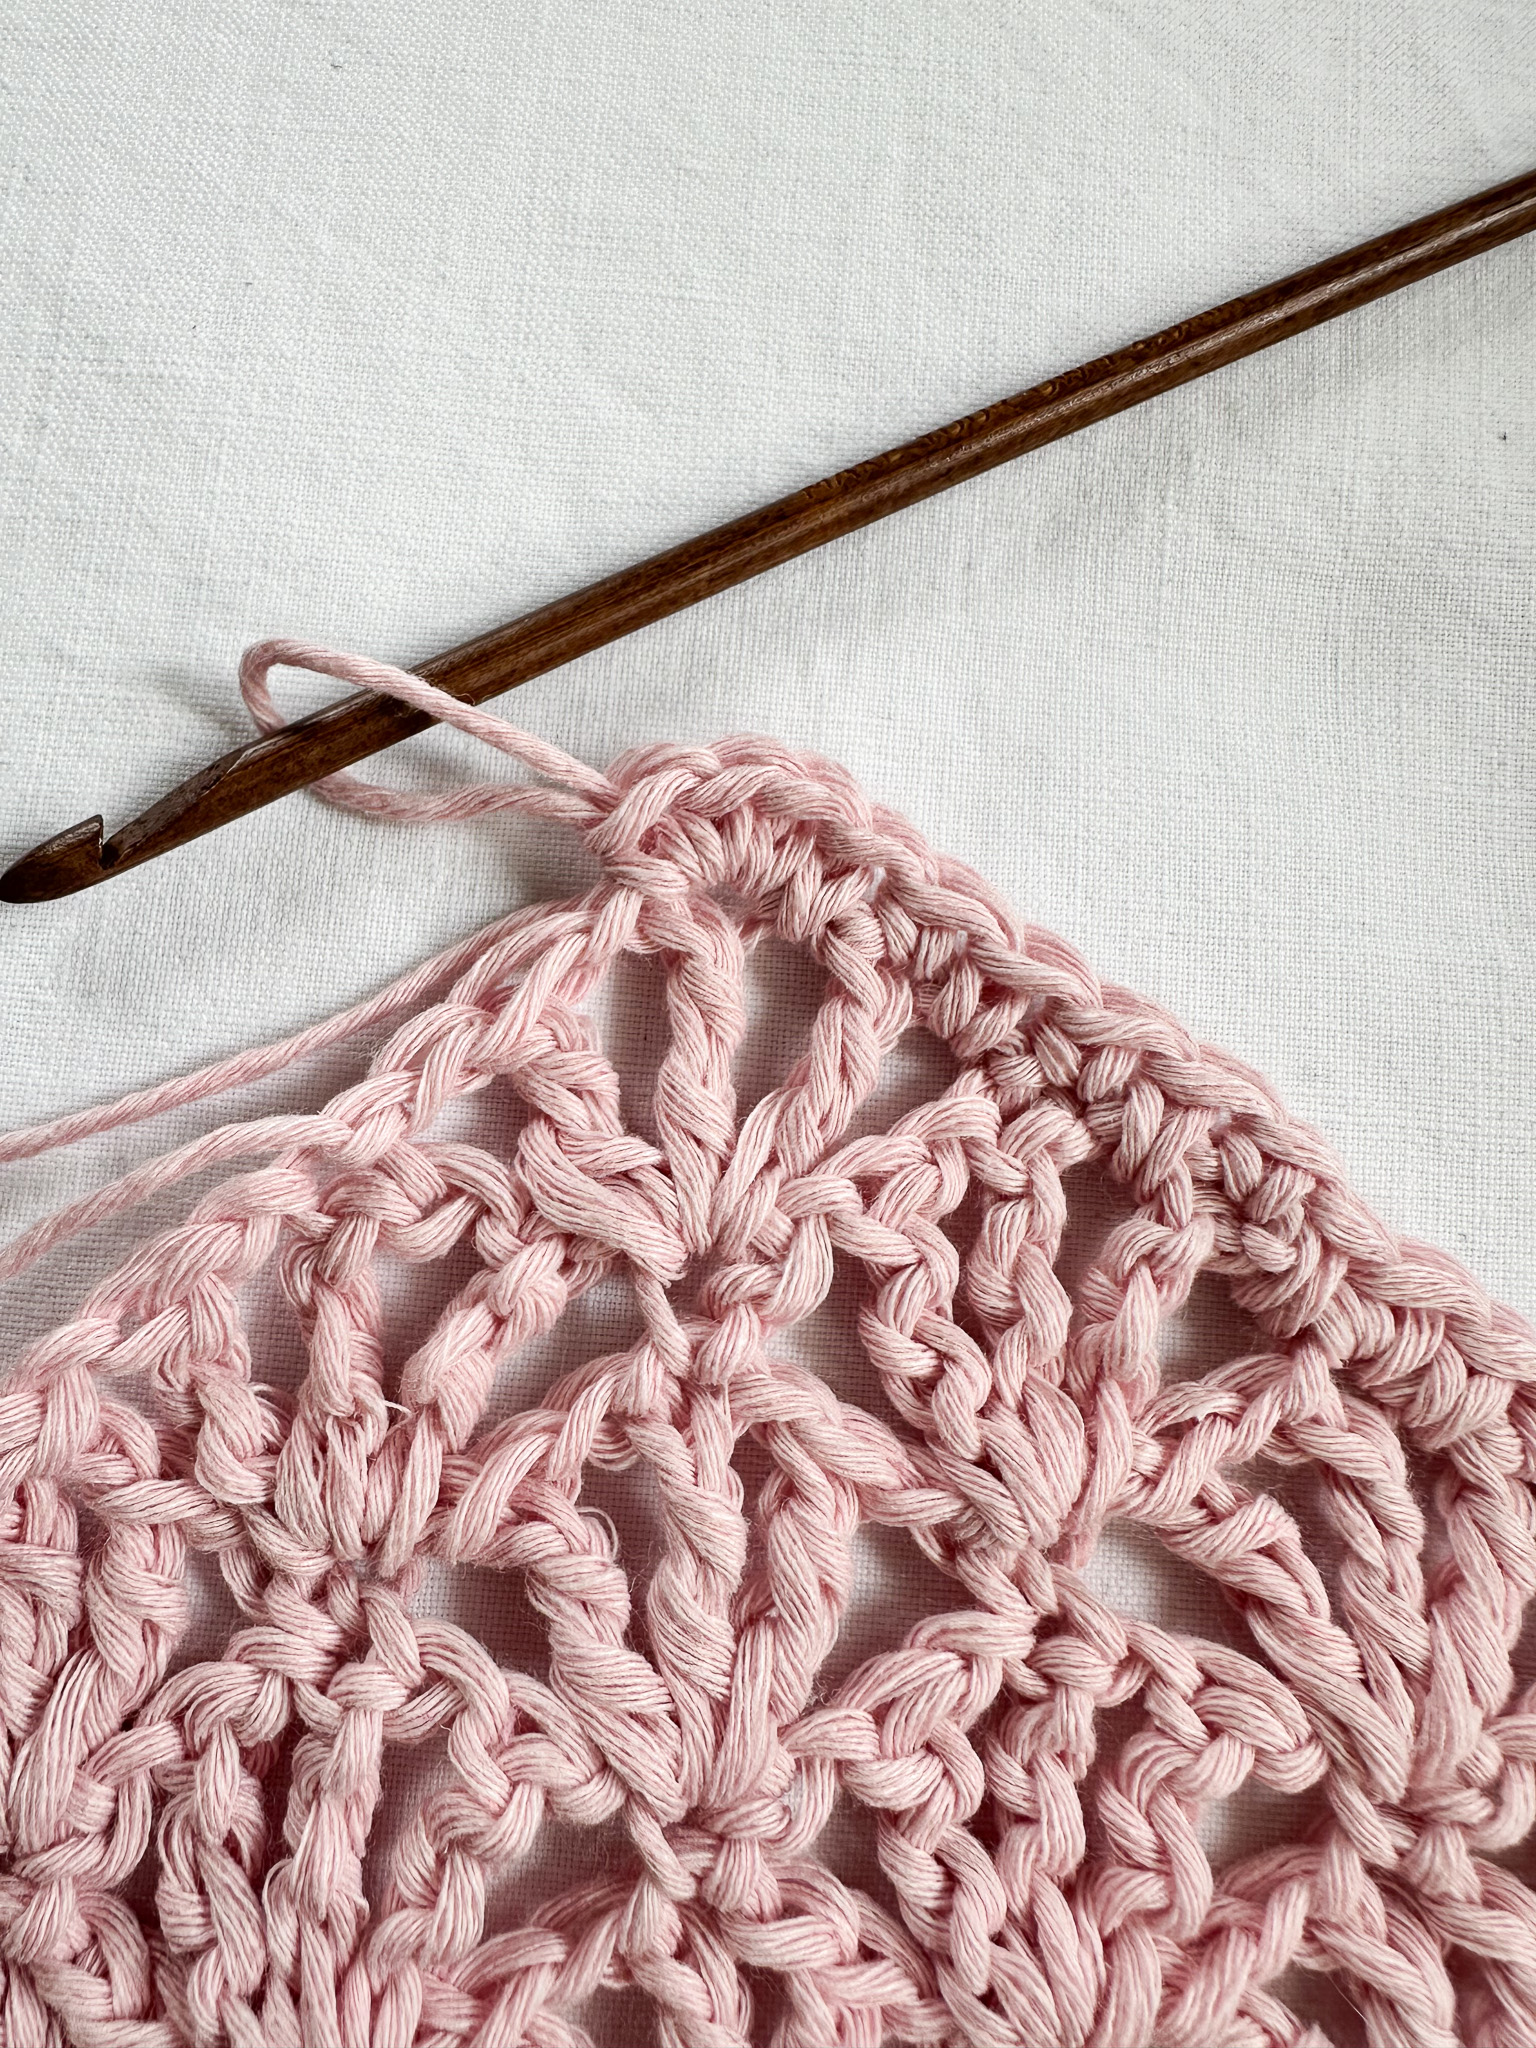
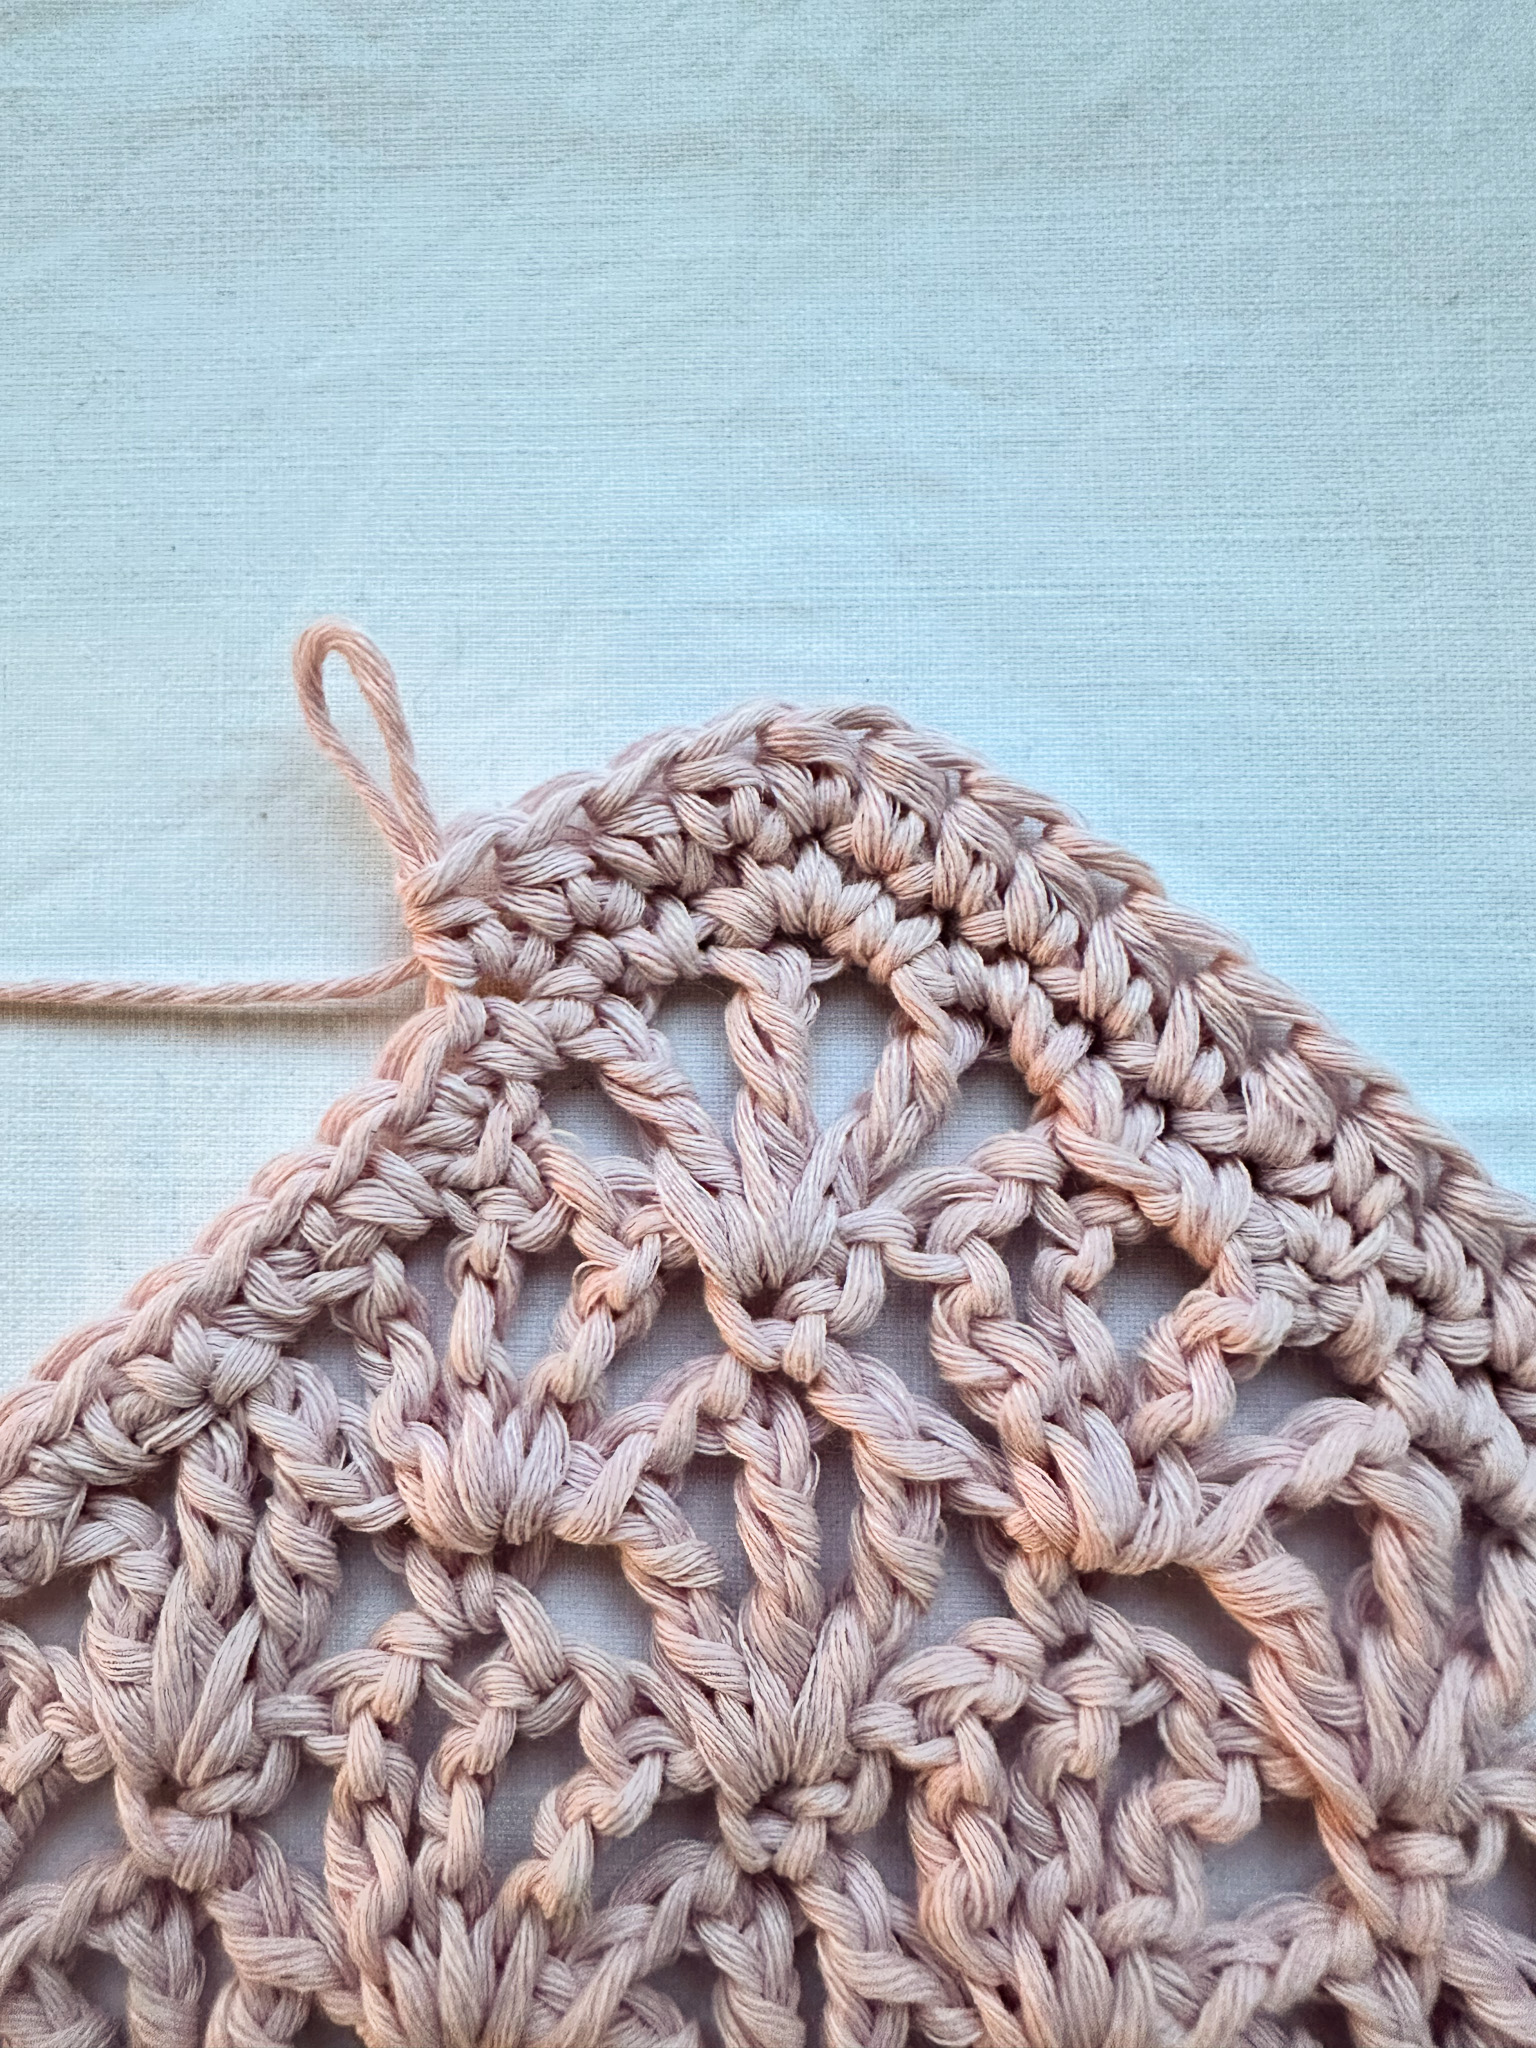
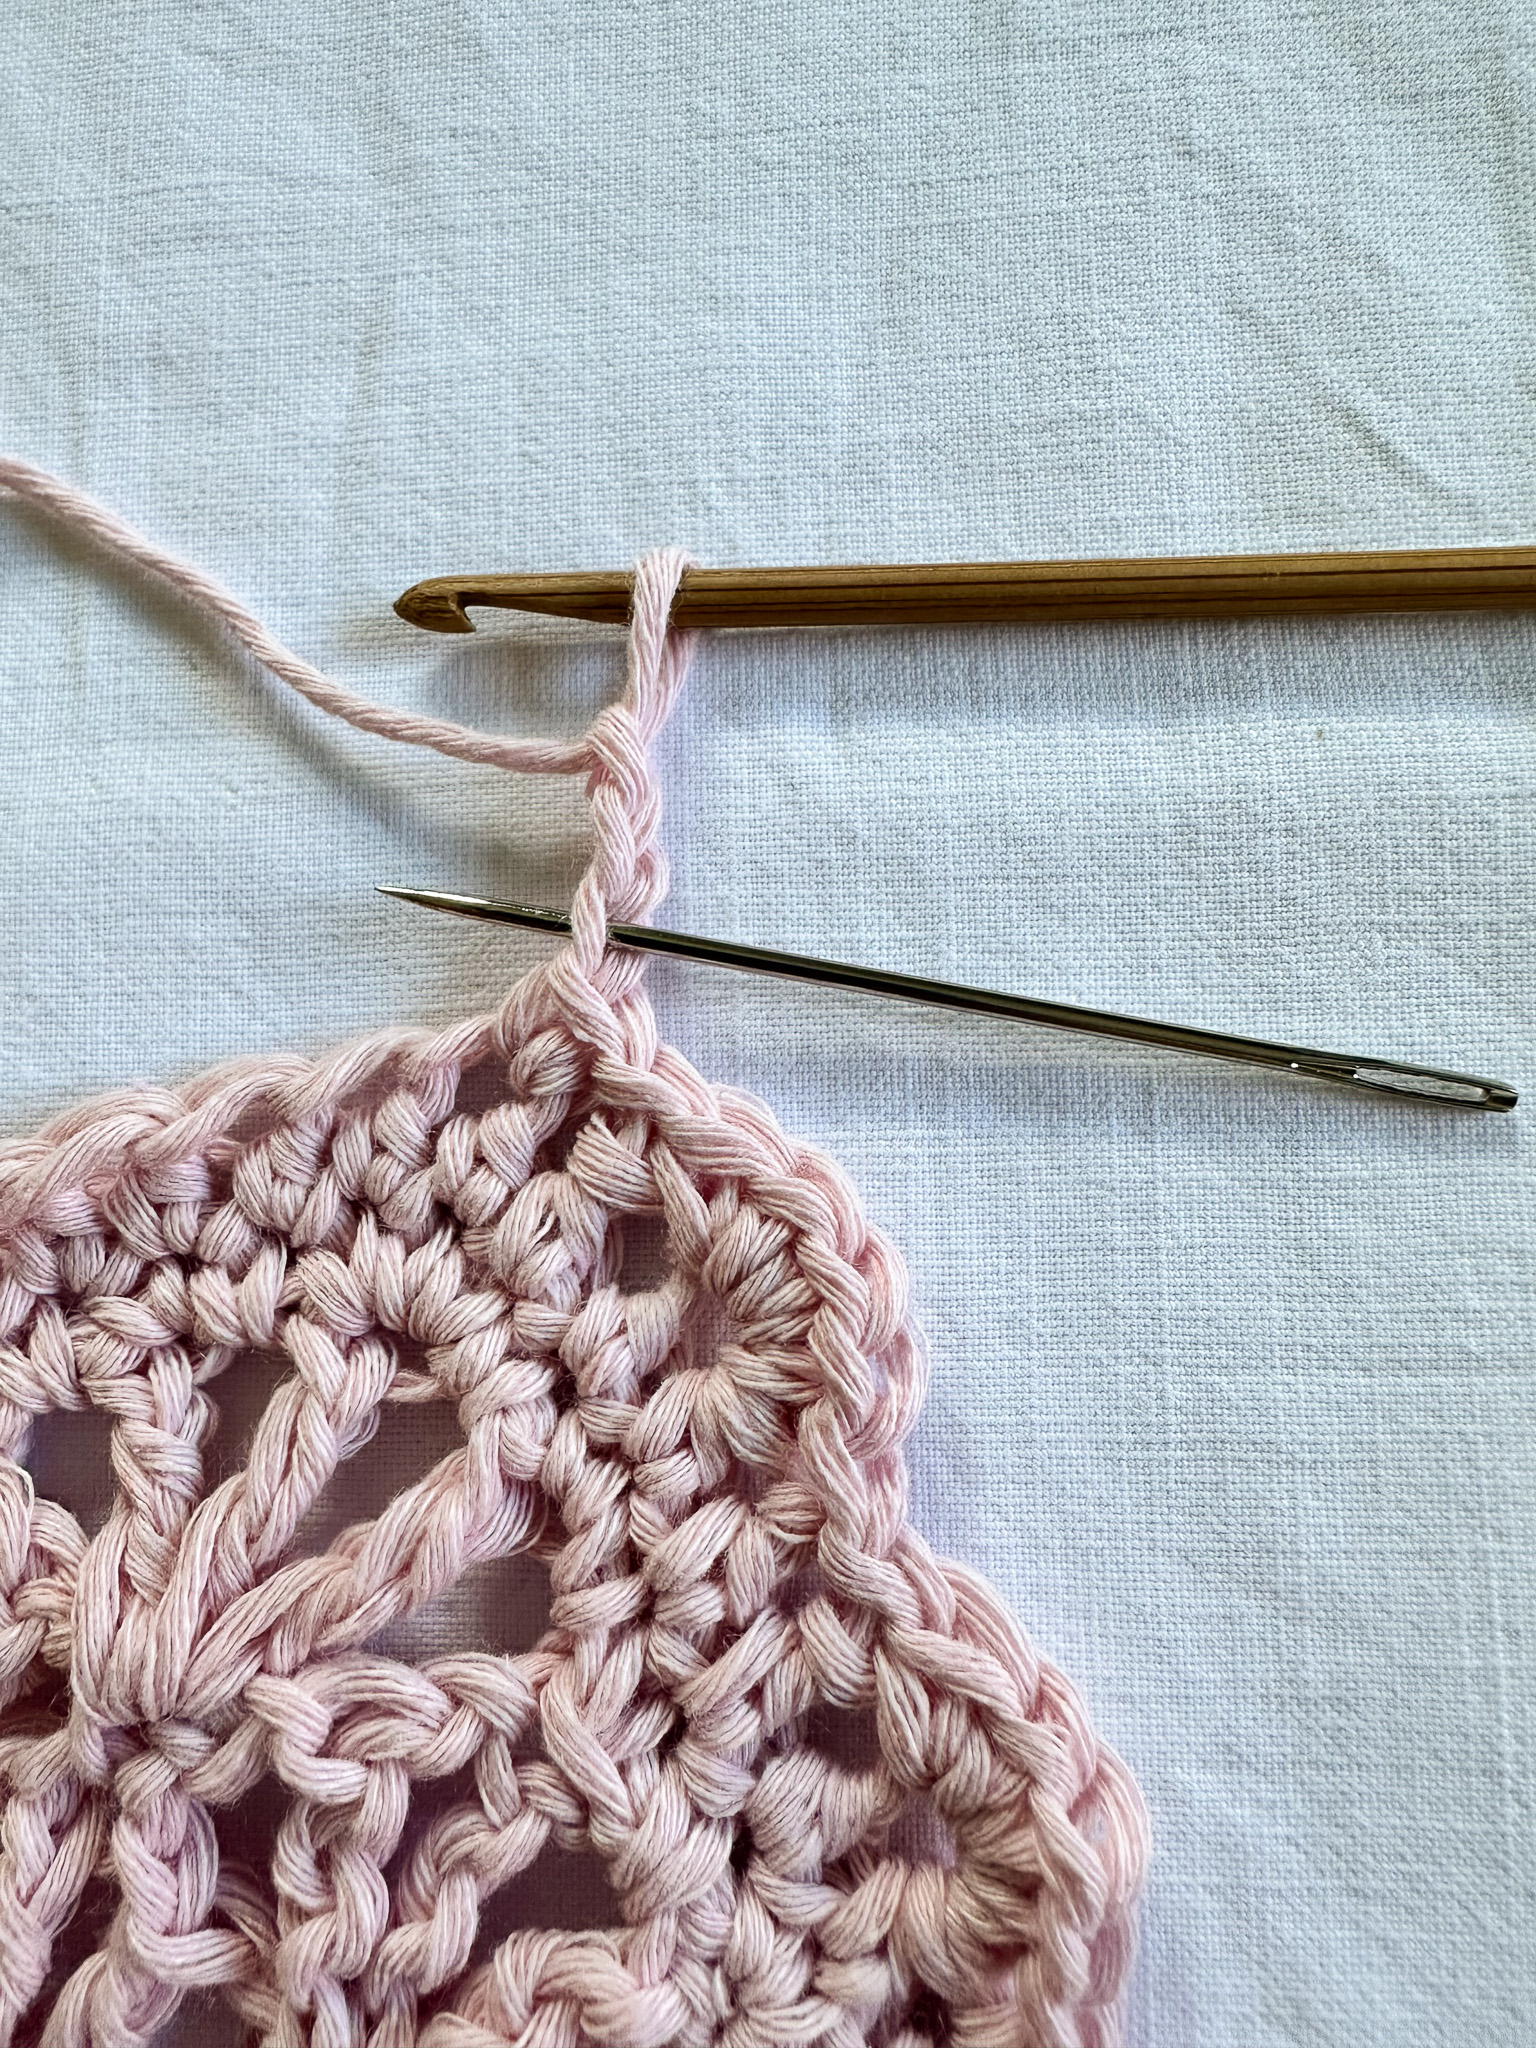
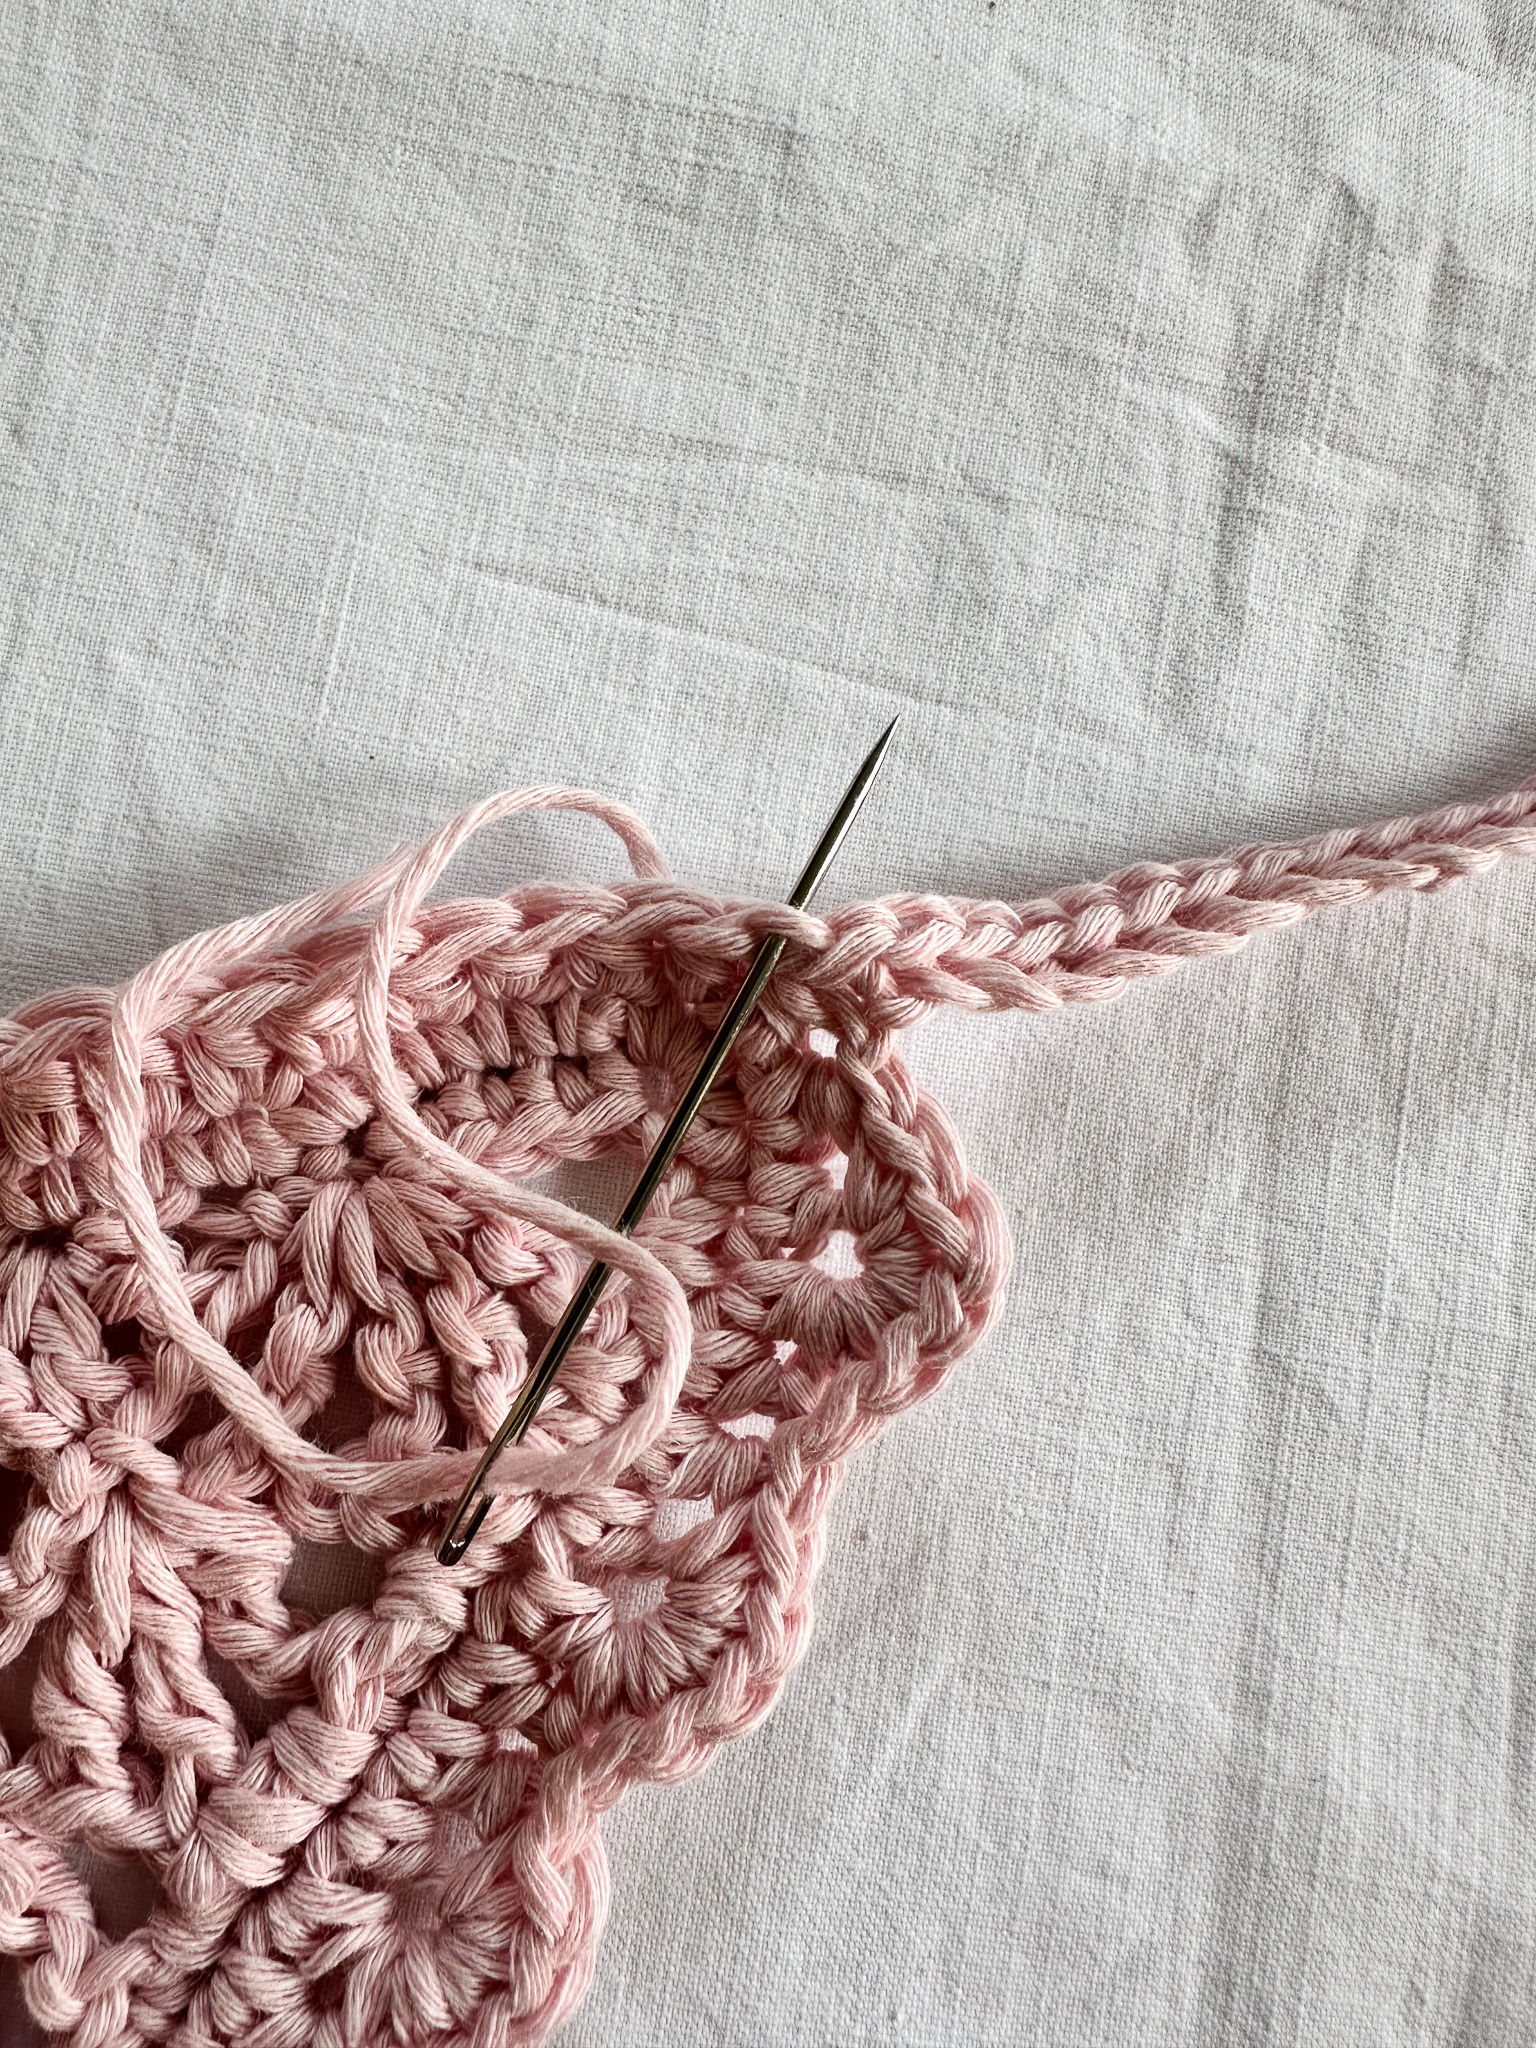
You will now work arches between each of the existing arches, for a total of 8 times. The needle indicates the stitch where the arch should begin.
Start with 1 chain stitch. In the stitch indicated by the needle in the picture (the stitch located between two arches), work the following: repeat 1 treble crochet, 1 chain stitch a total of 3 times. Work 1 single crochet into the arch below at its highest point.
You have now completed one arch between two arches. Continue in the same way a total of 8 times.
The last arch at the edge is worked slightly differently.
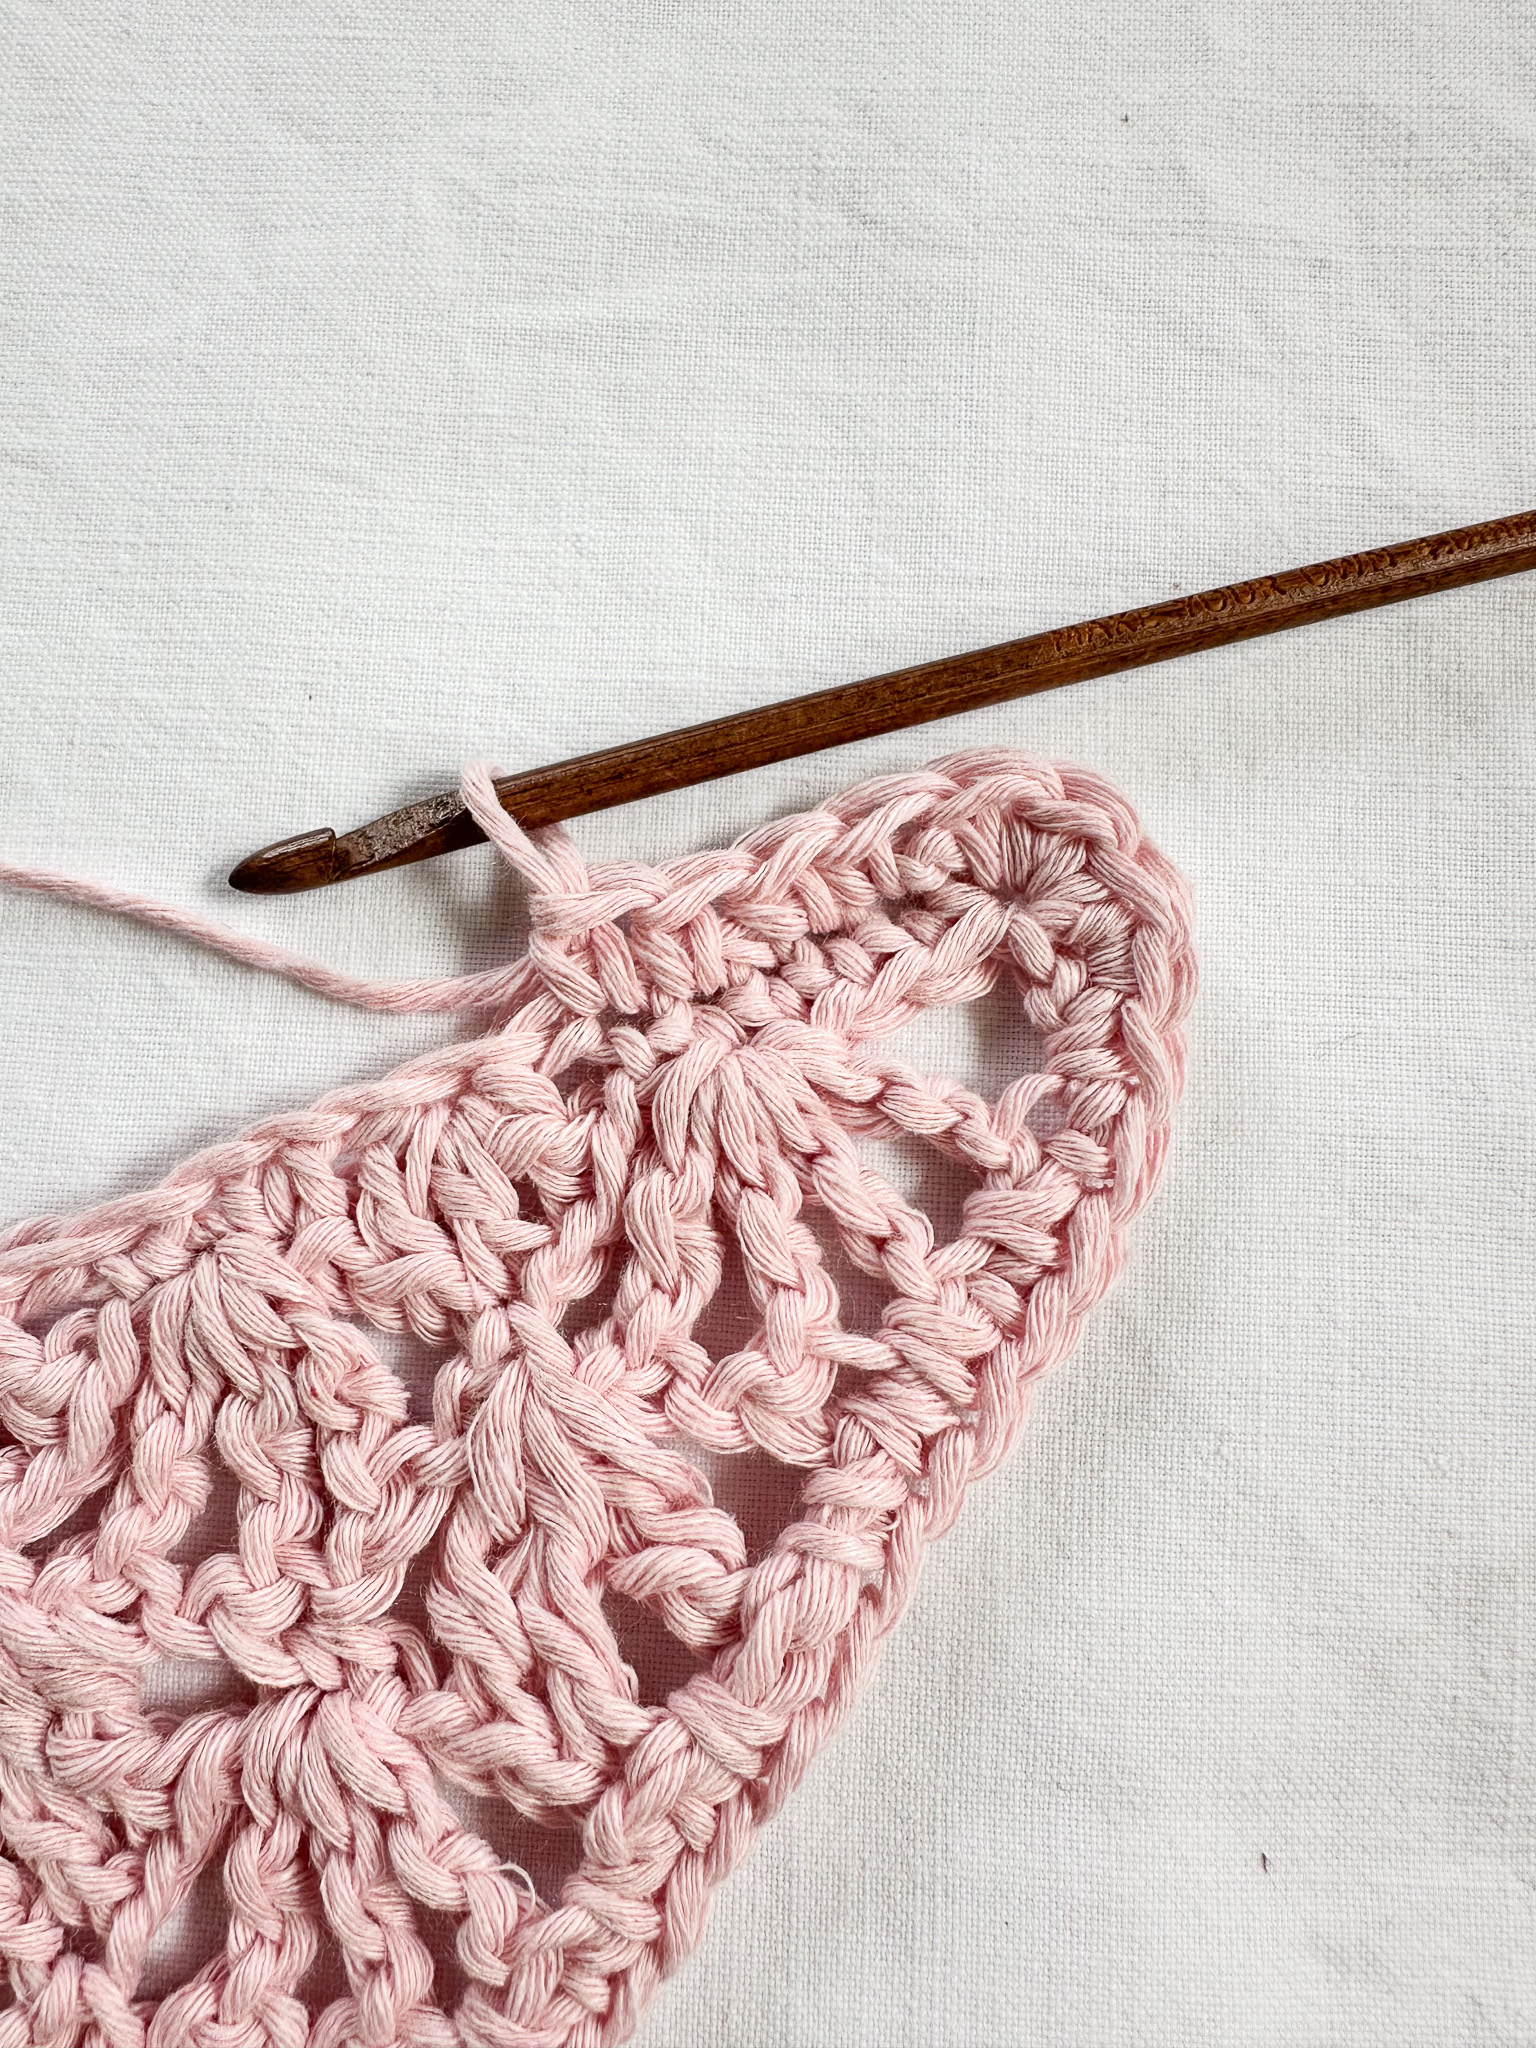
End of the Row / Edge Arch
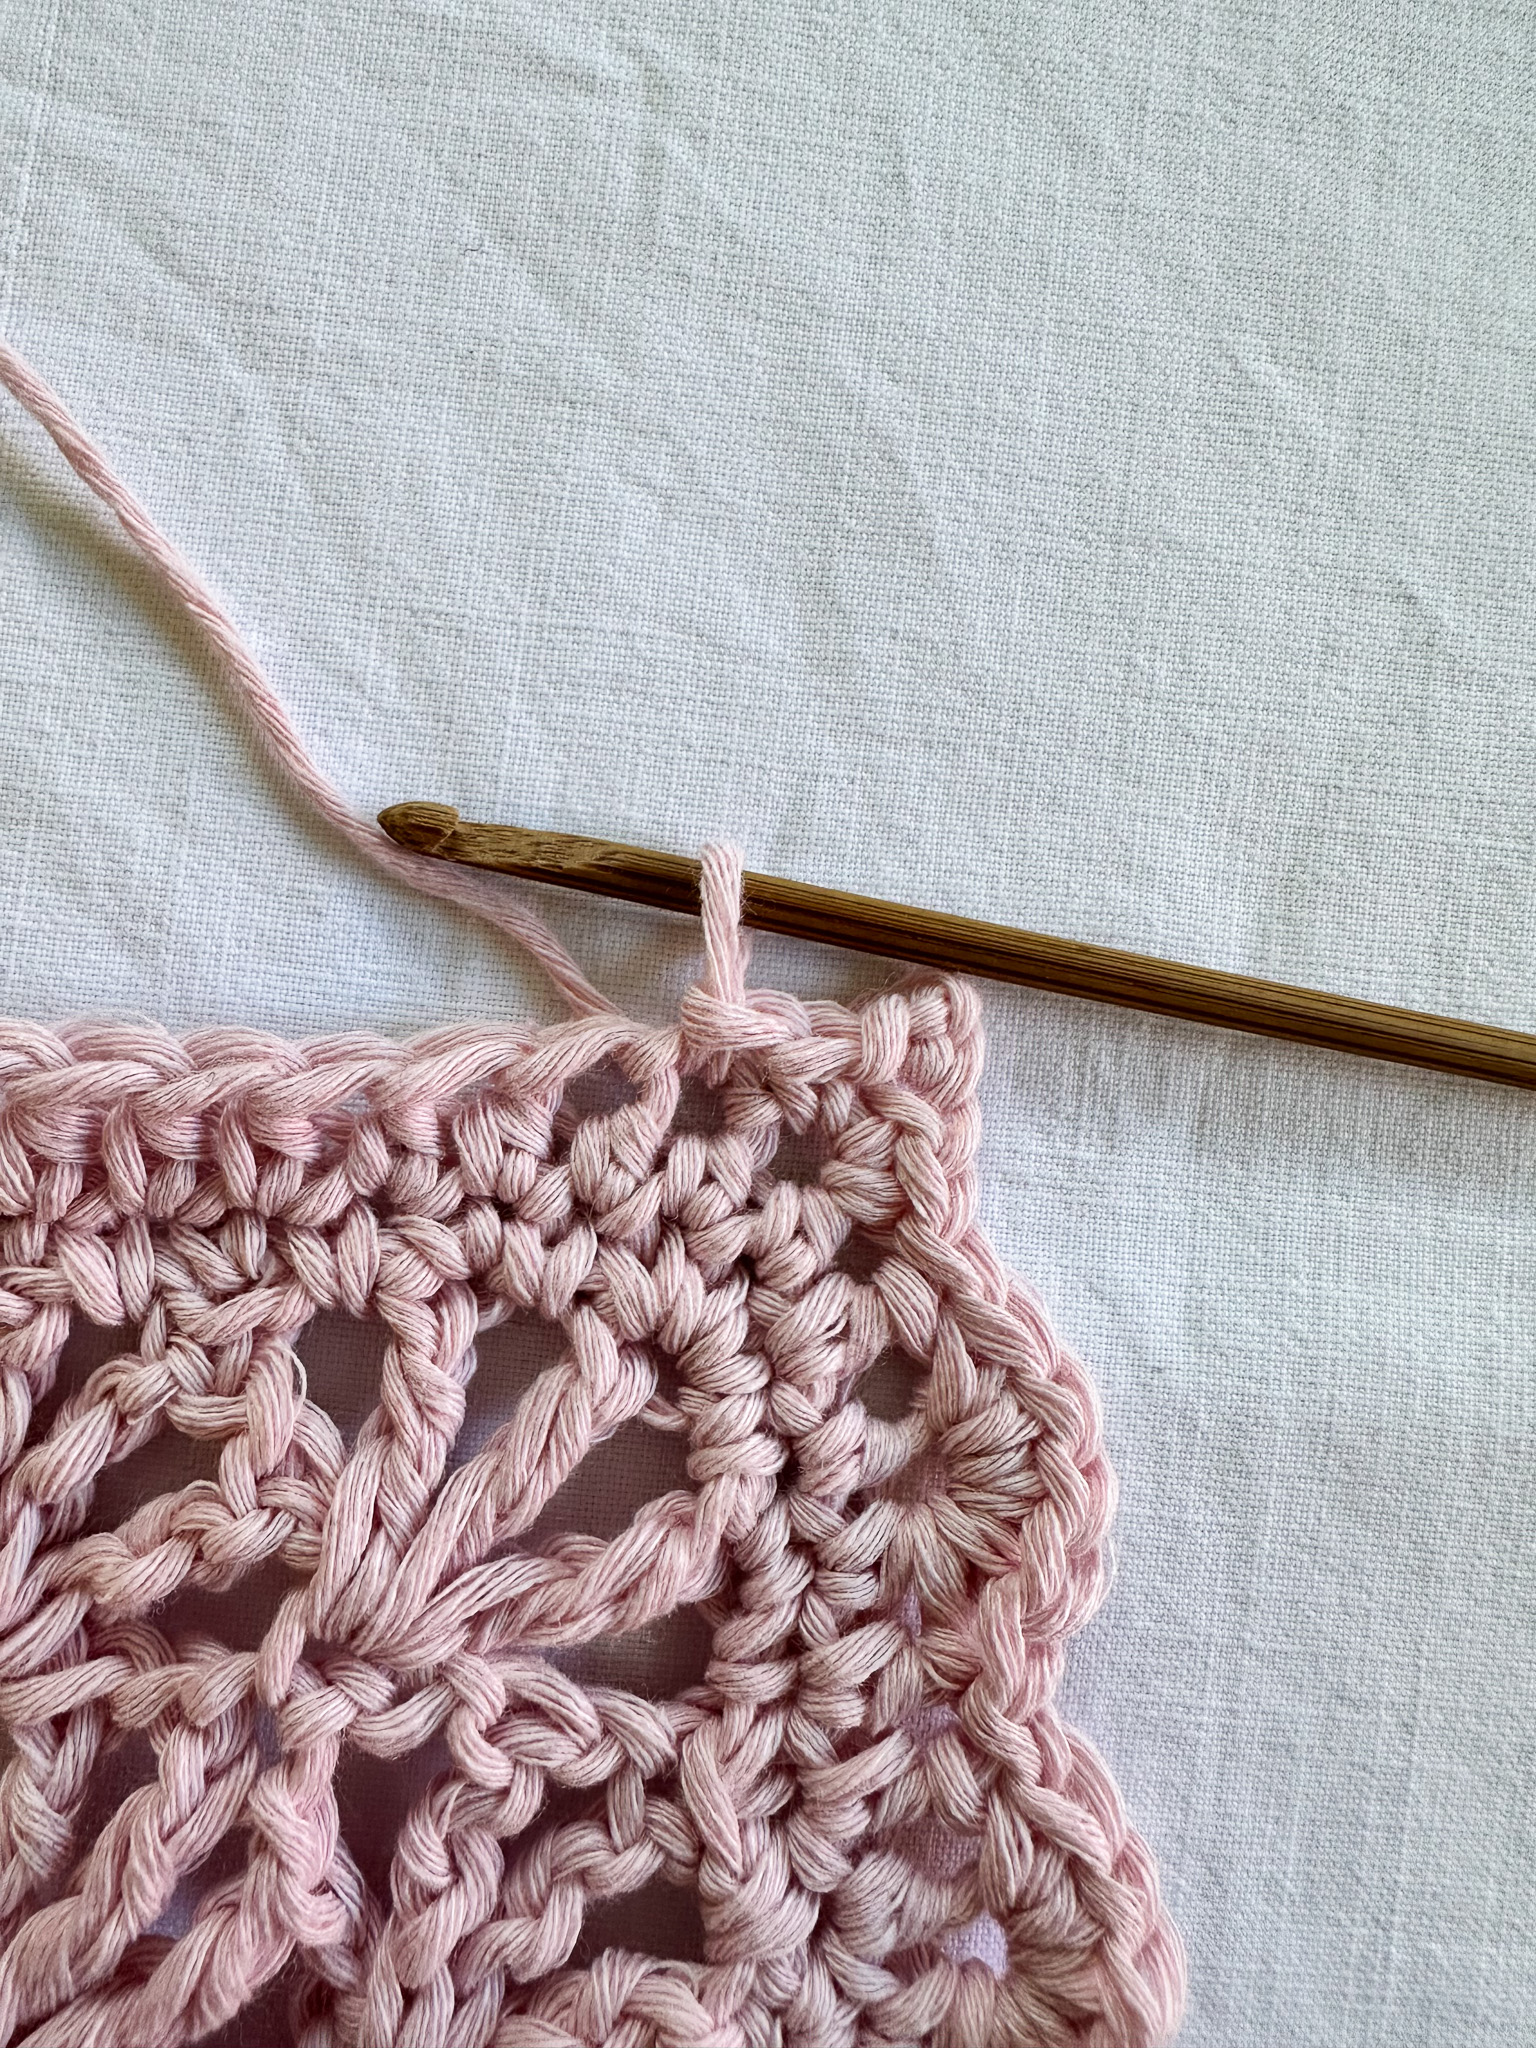
Begin with 1 chain stitch.
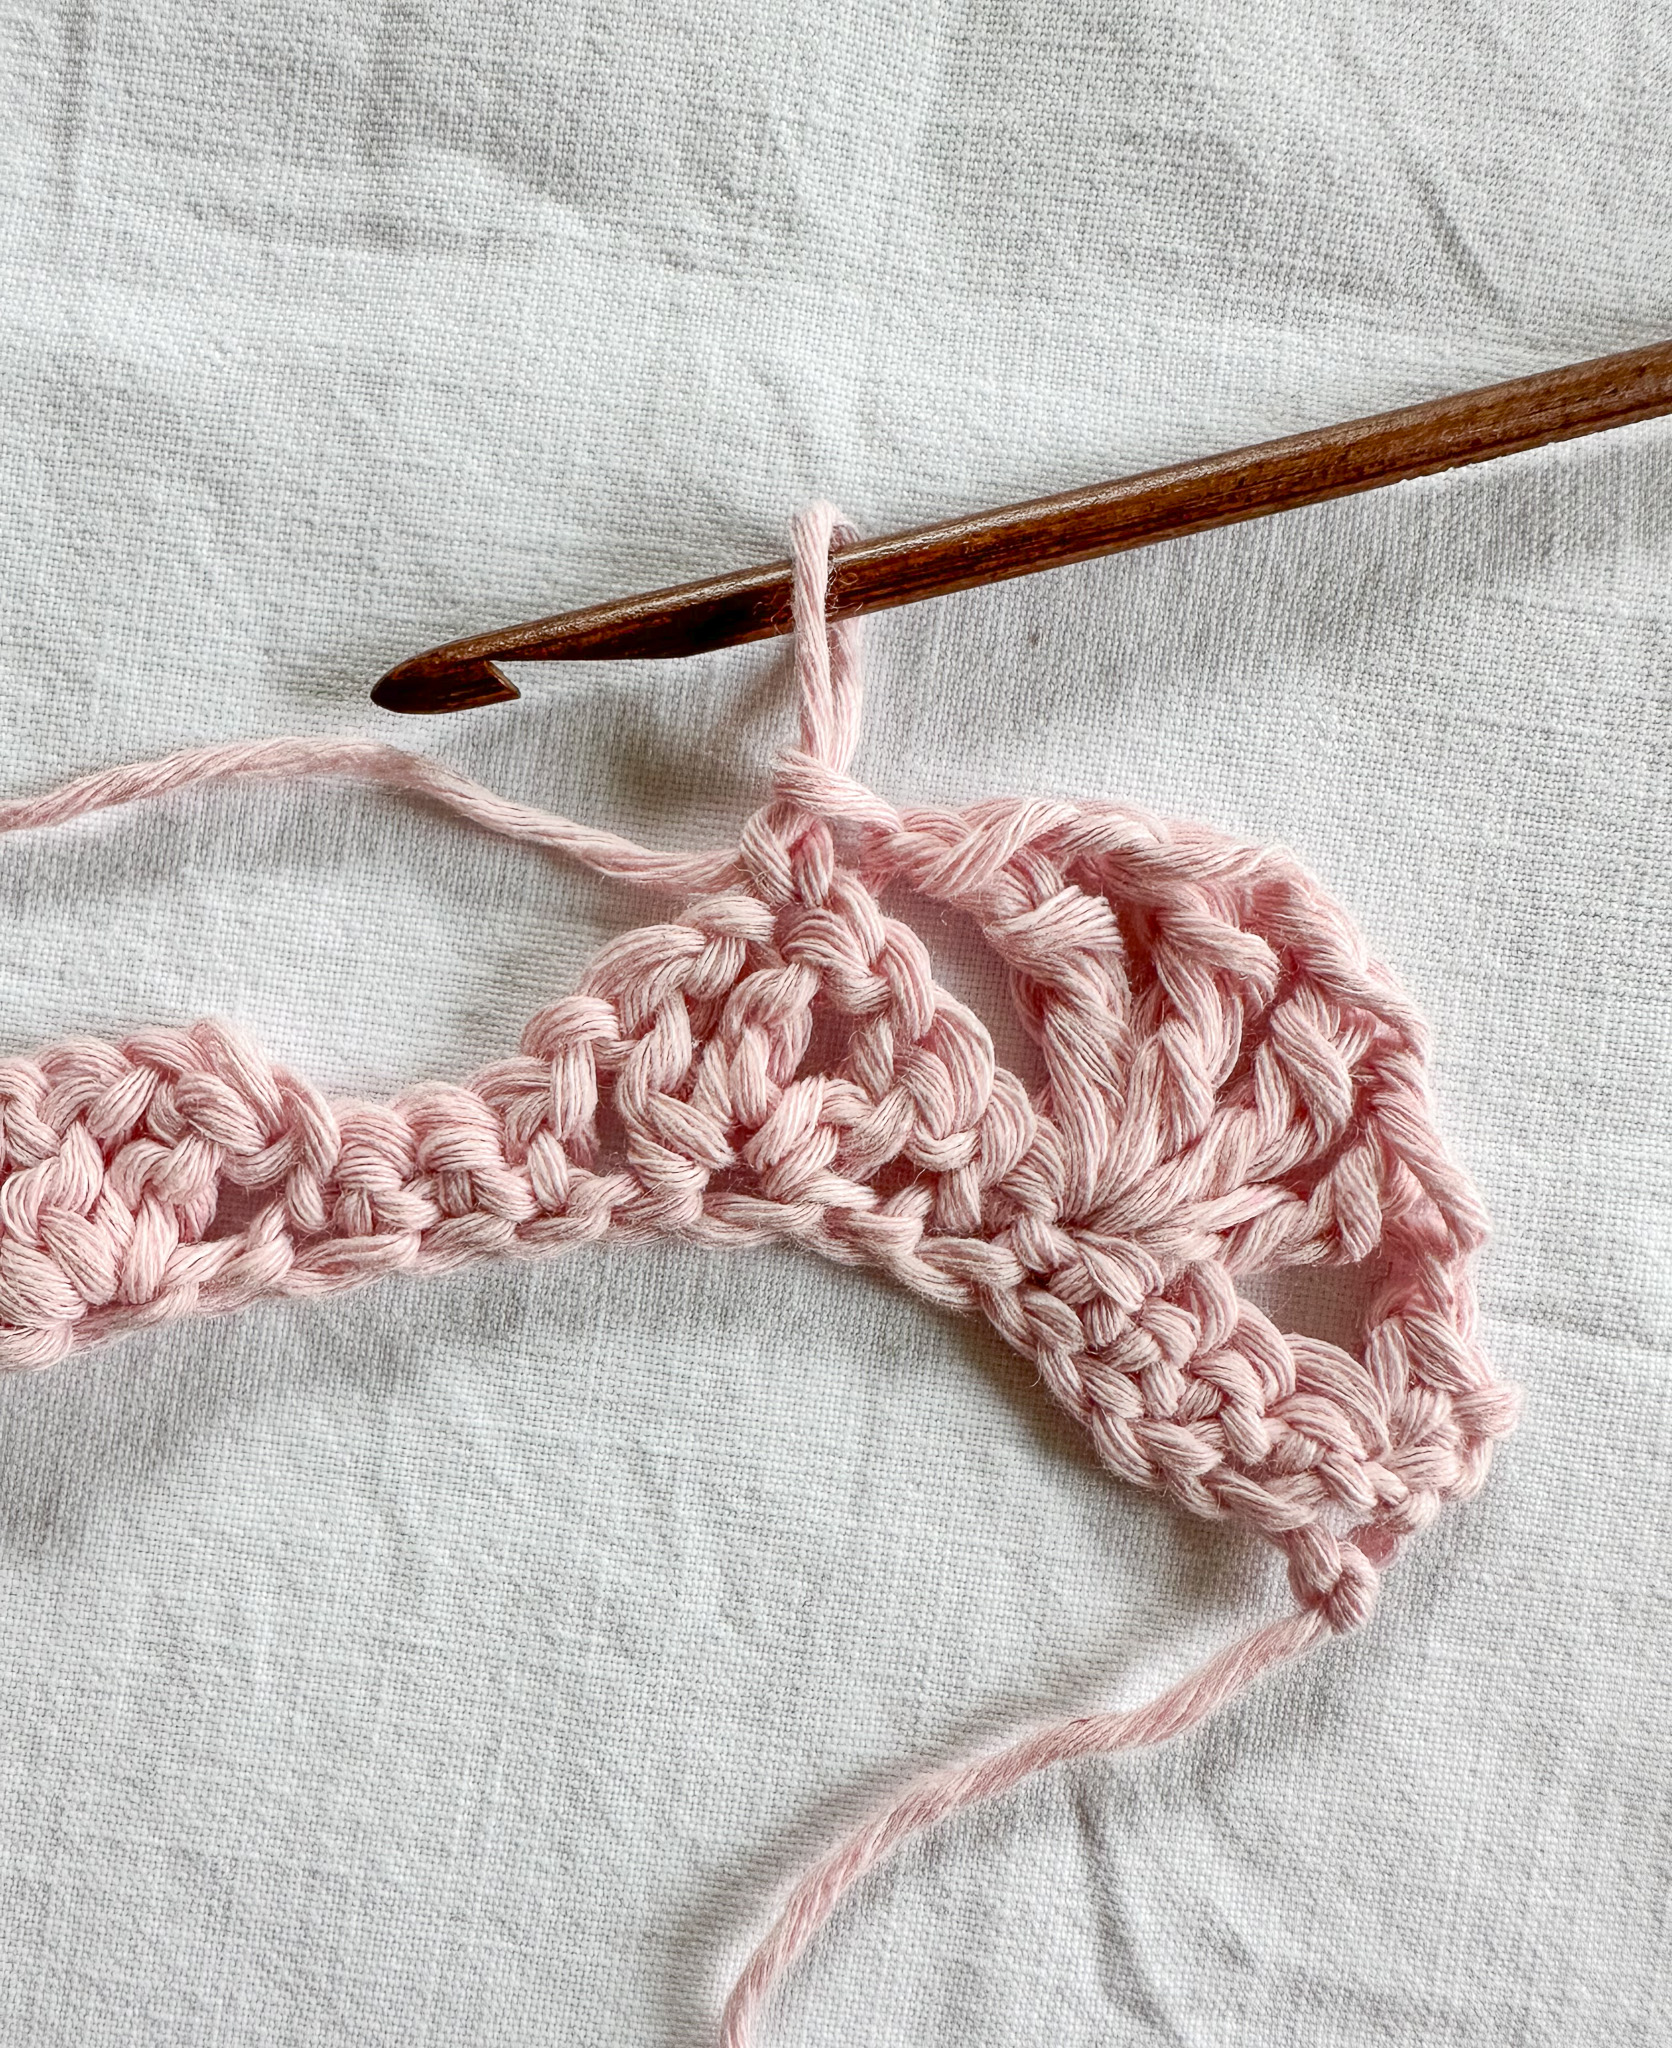
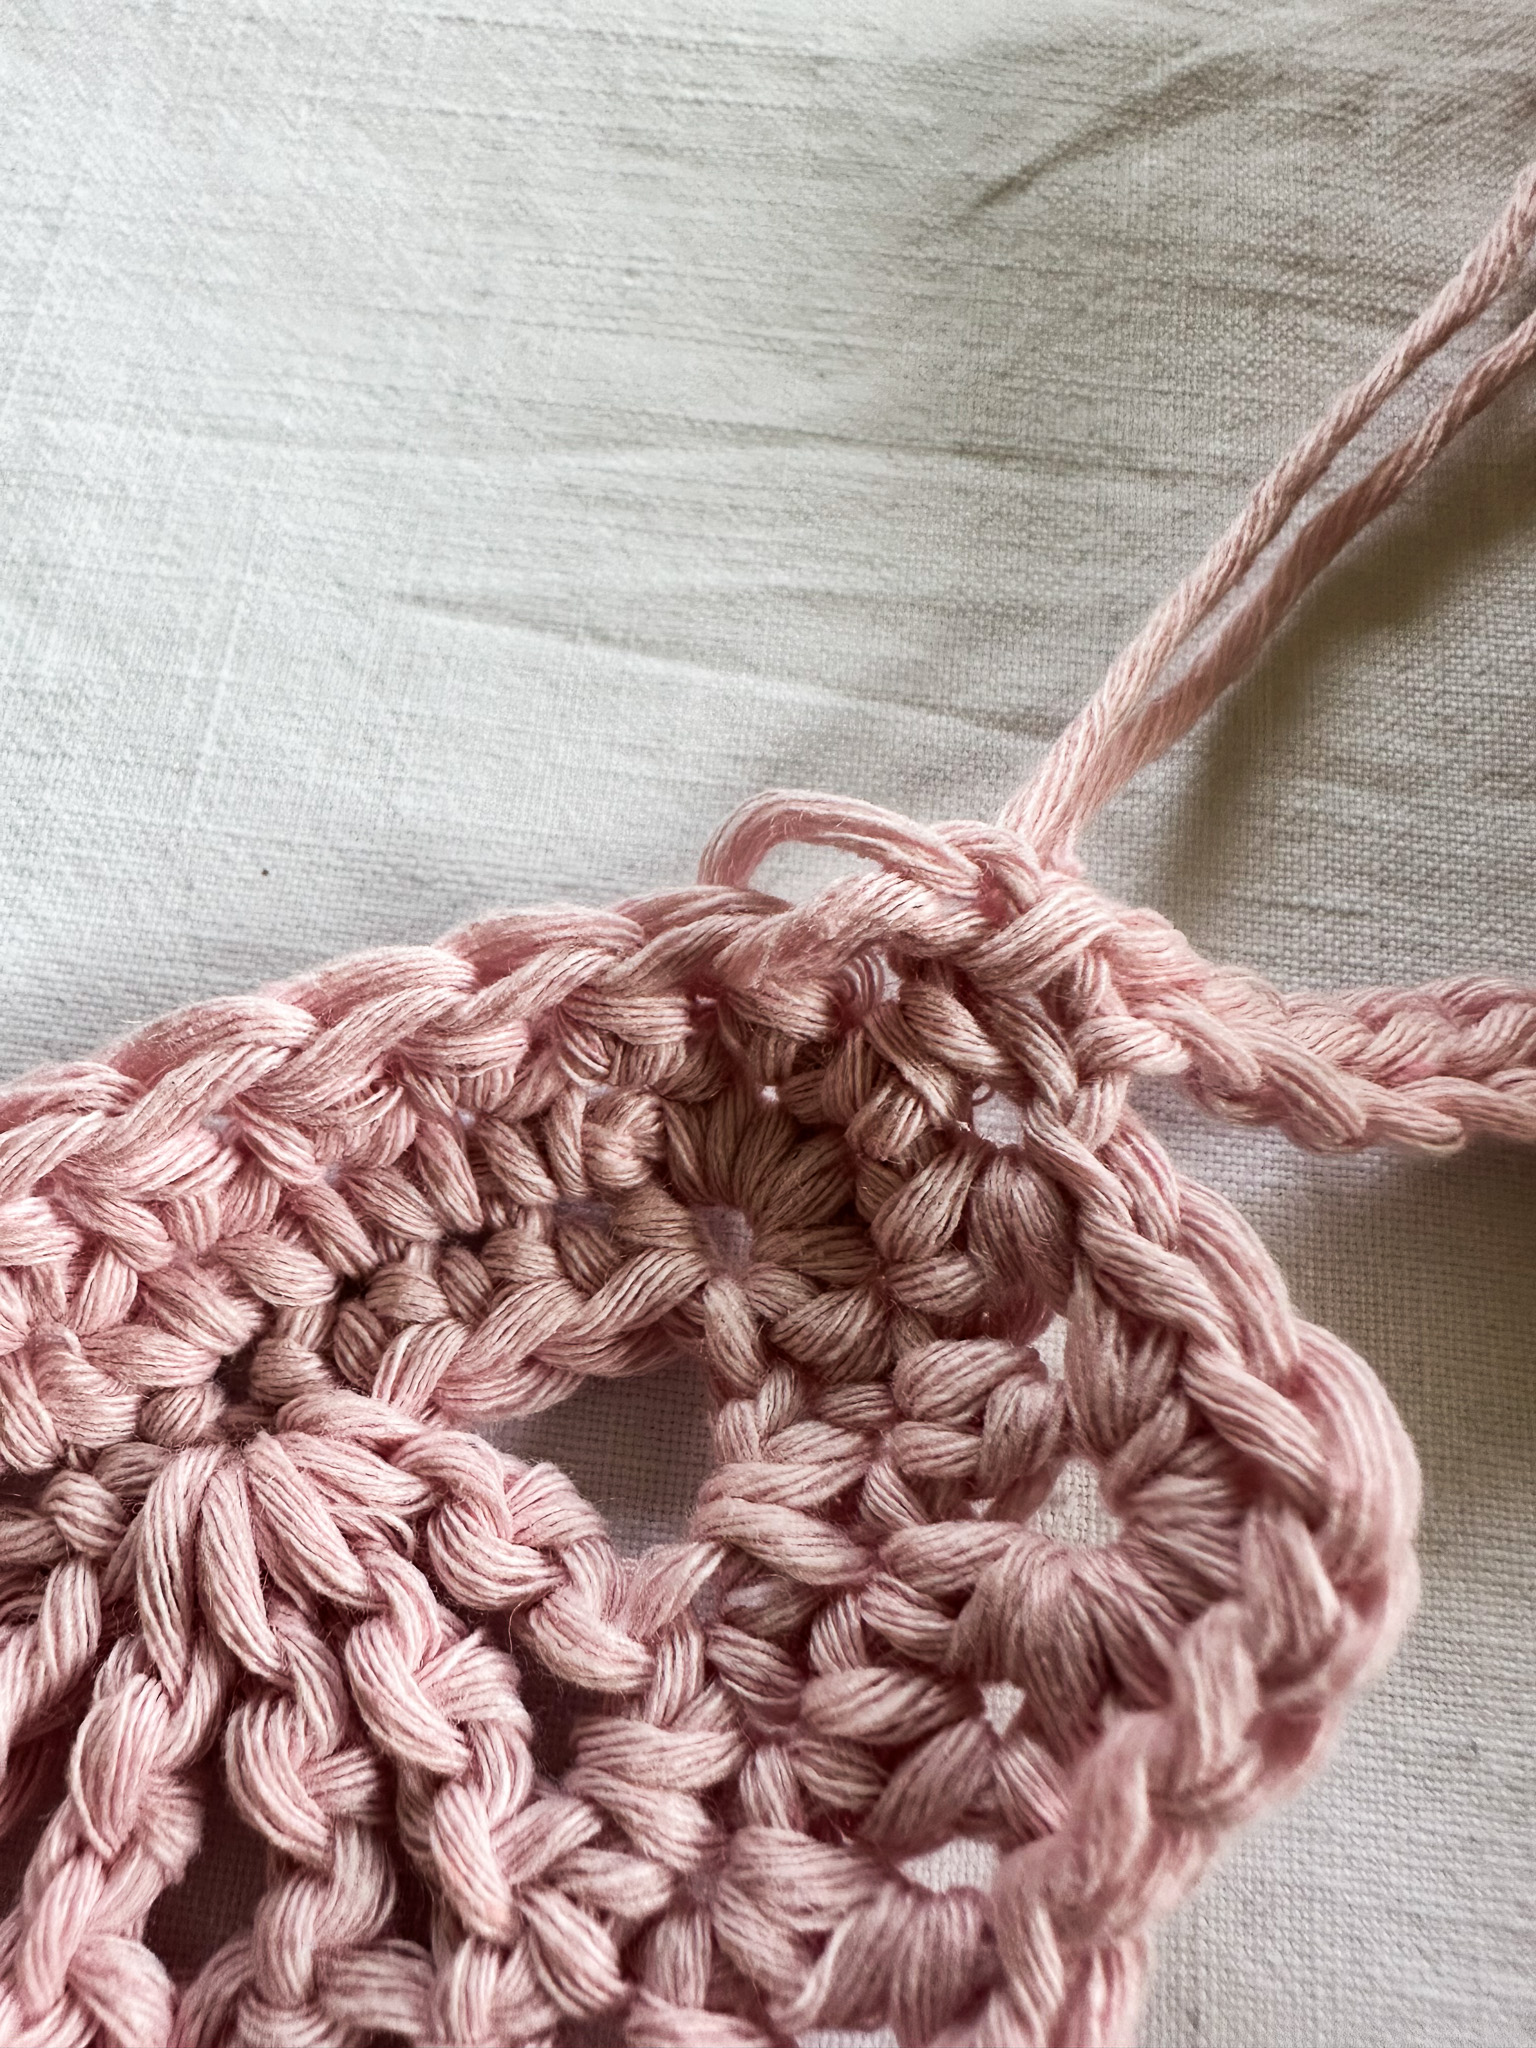
You will now make the final arch in the 5th stitch from the end. See where the needle is pointing. In that stitch, repeat 1 treble crochet, 1 chain stitch a total of 4 times. Finish with 1 single crochet in the very last stitch of the row.
You should now have a total of 10 arches across the row. The first and last arches of the row each have 4 strands, while all 8 middle arches should have 3 strands.
Turn your work without making a chain stitch.

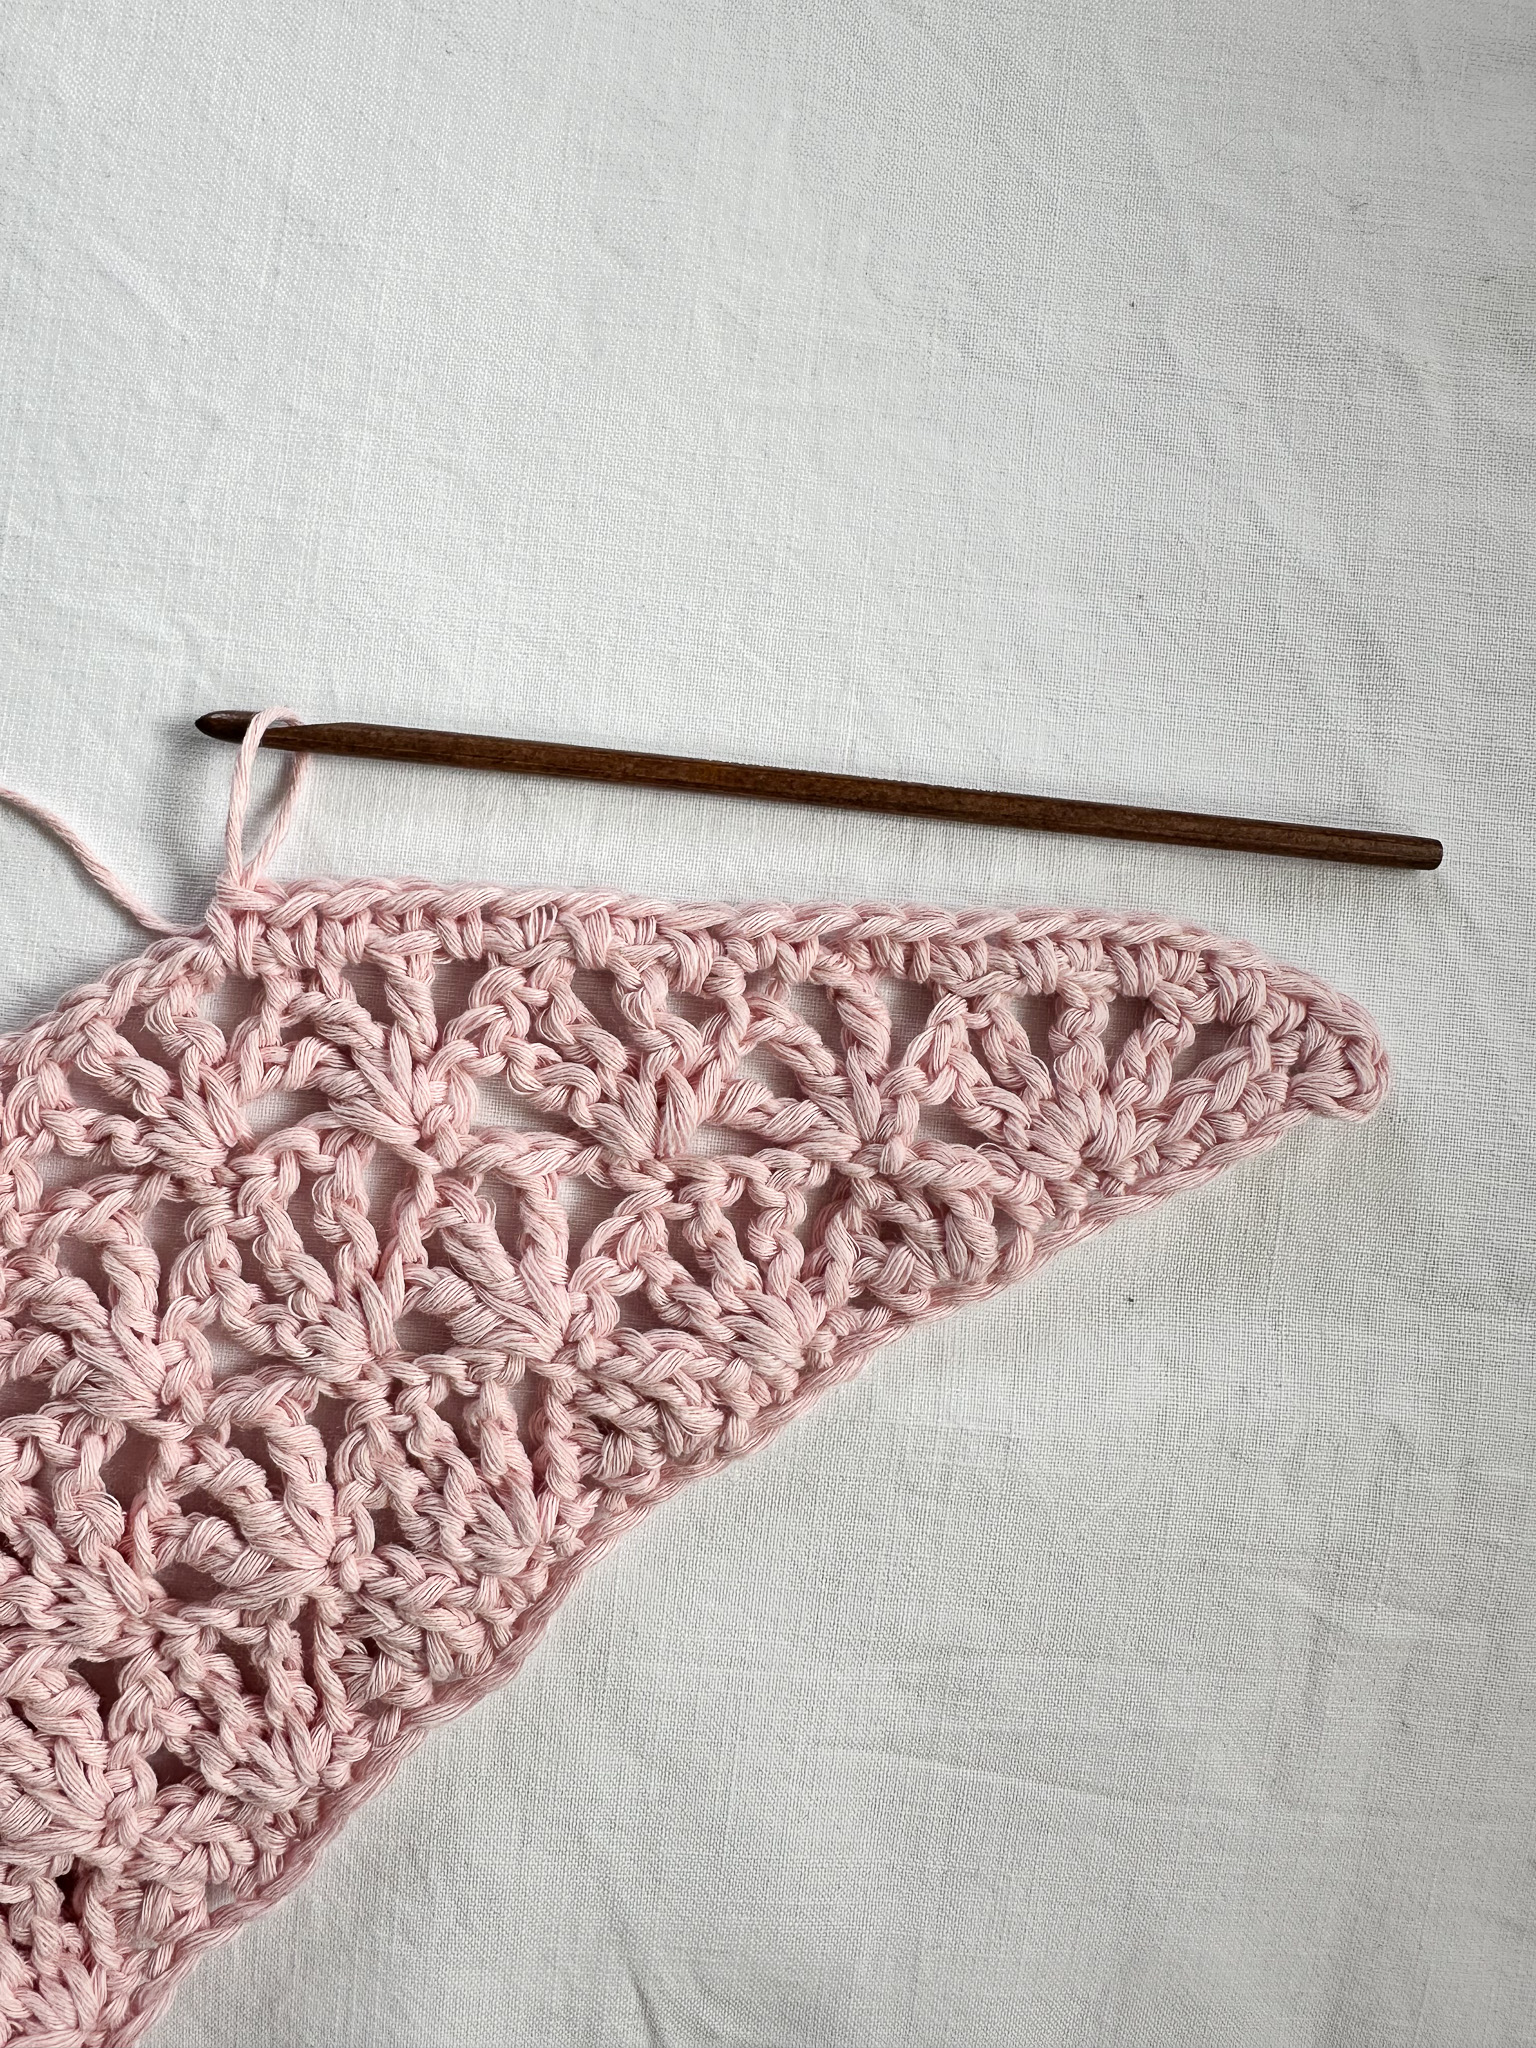
Row 3
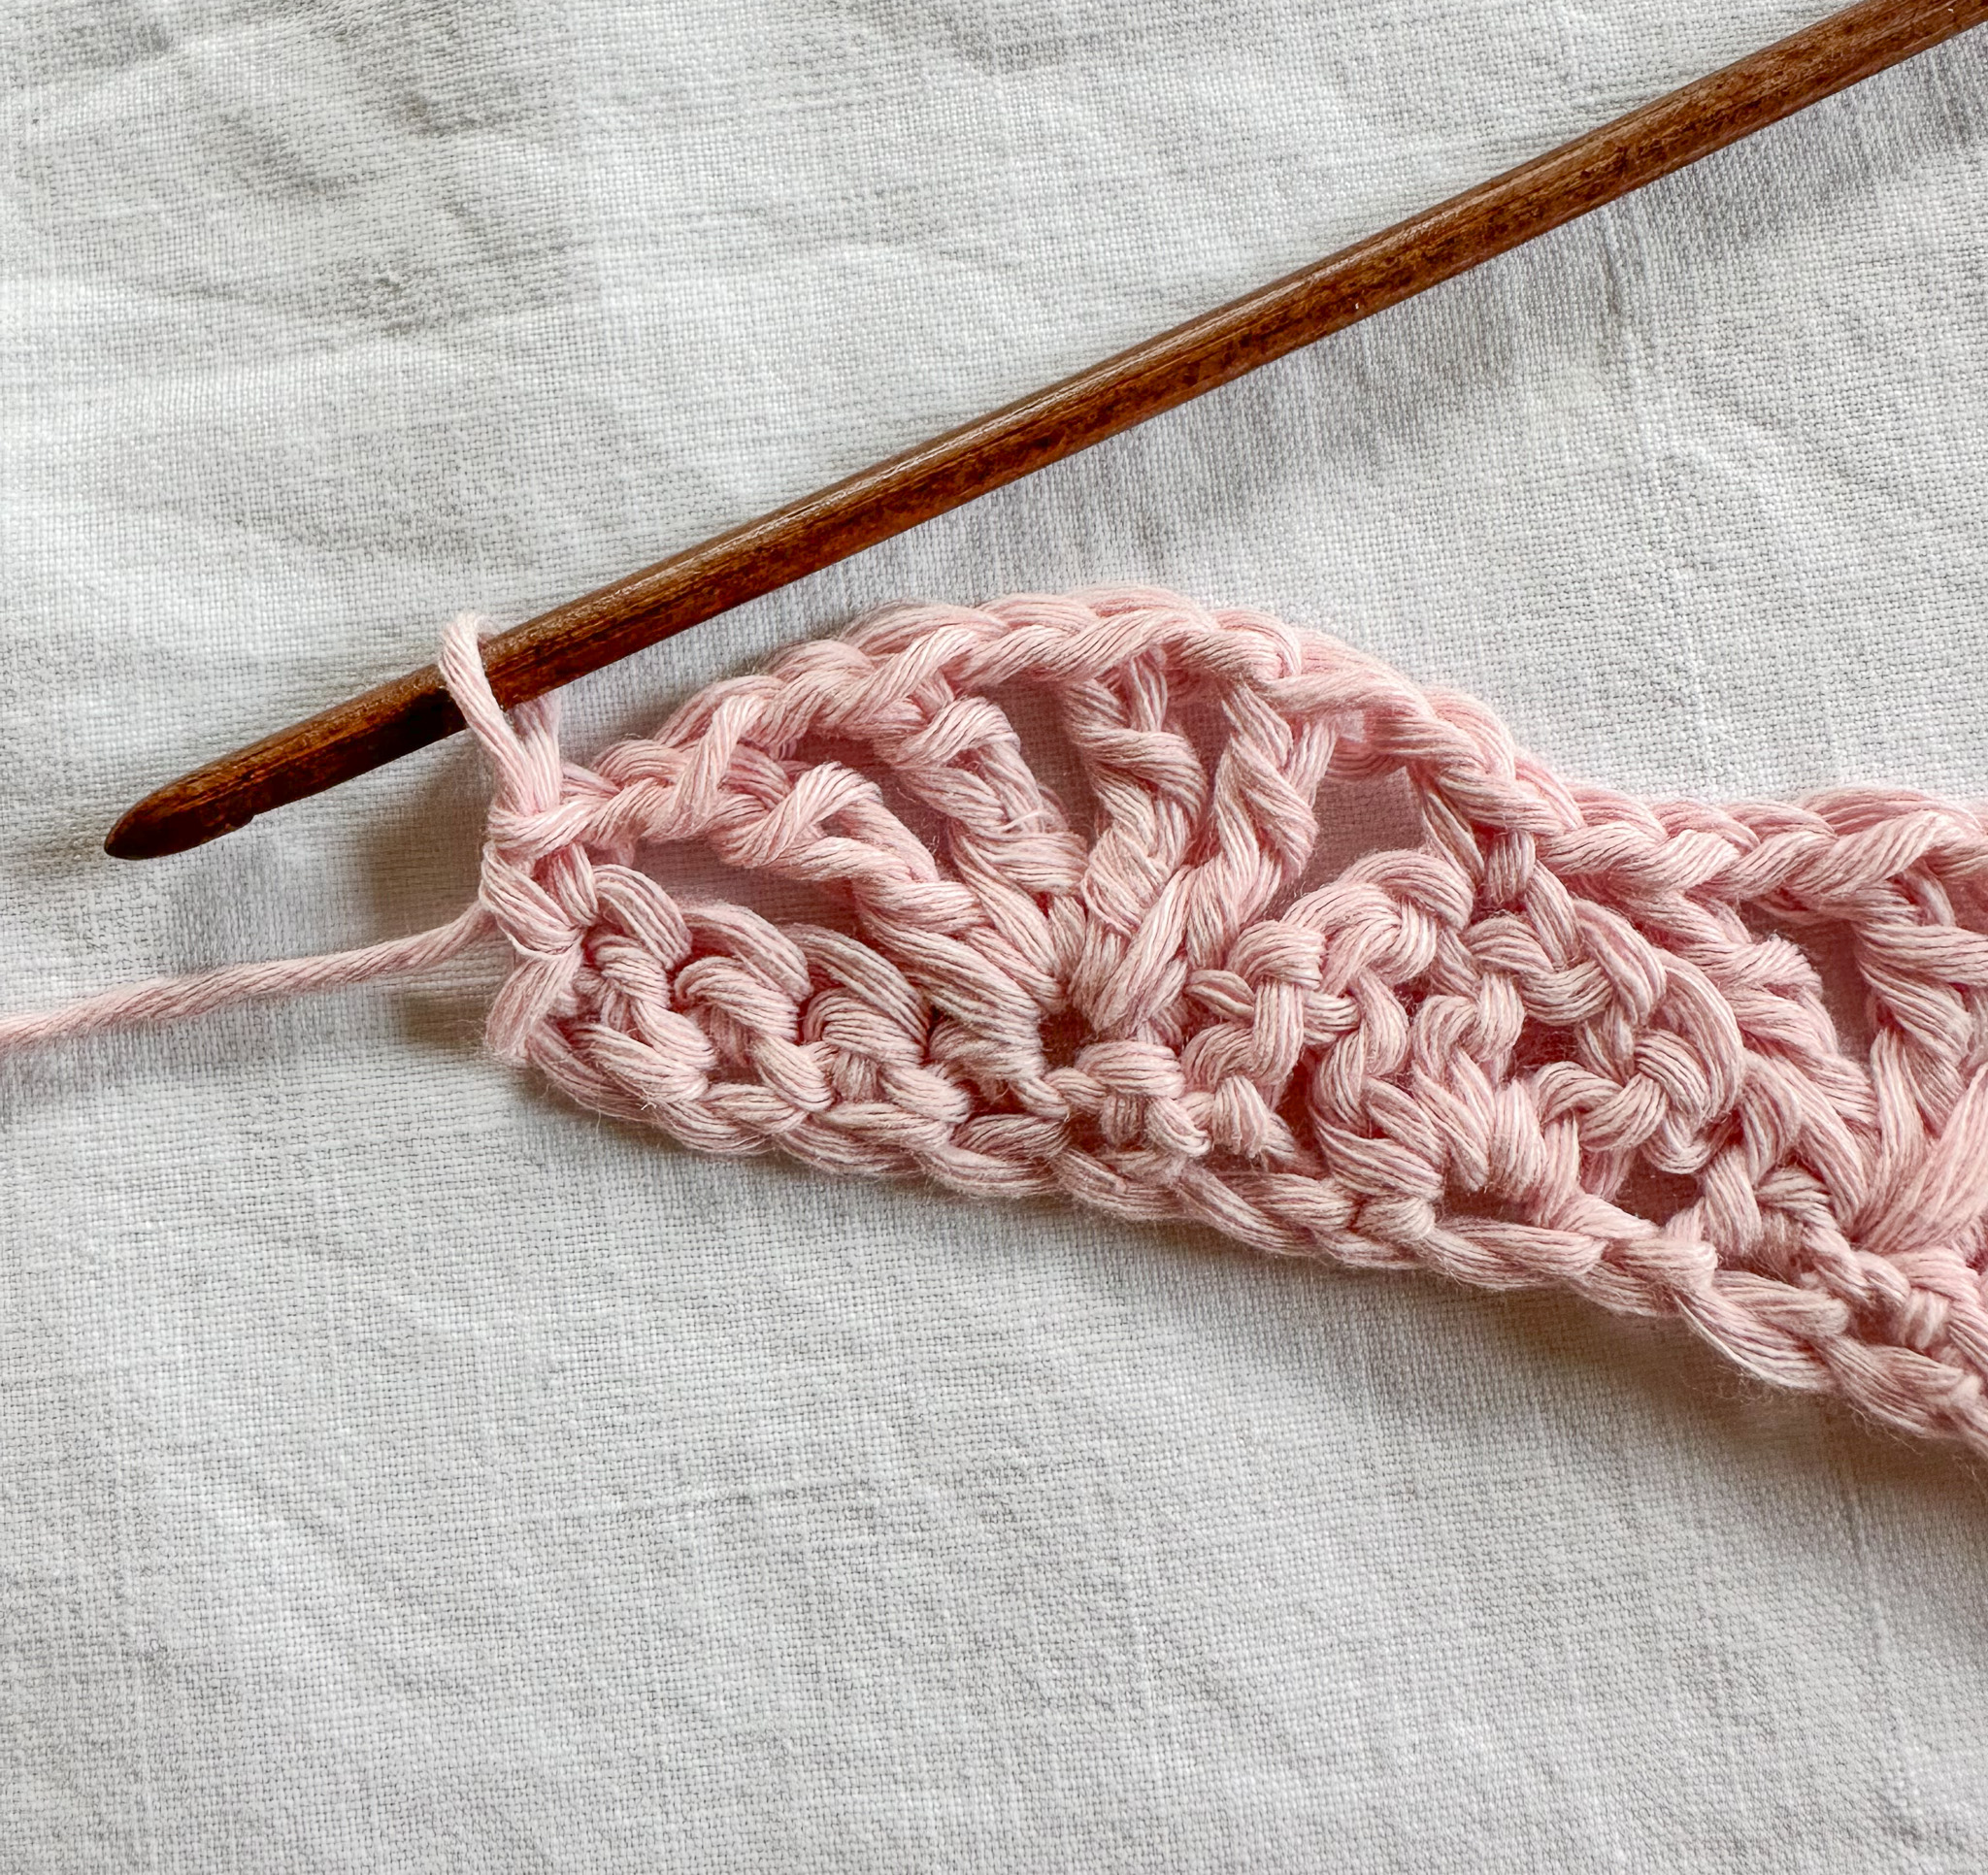
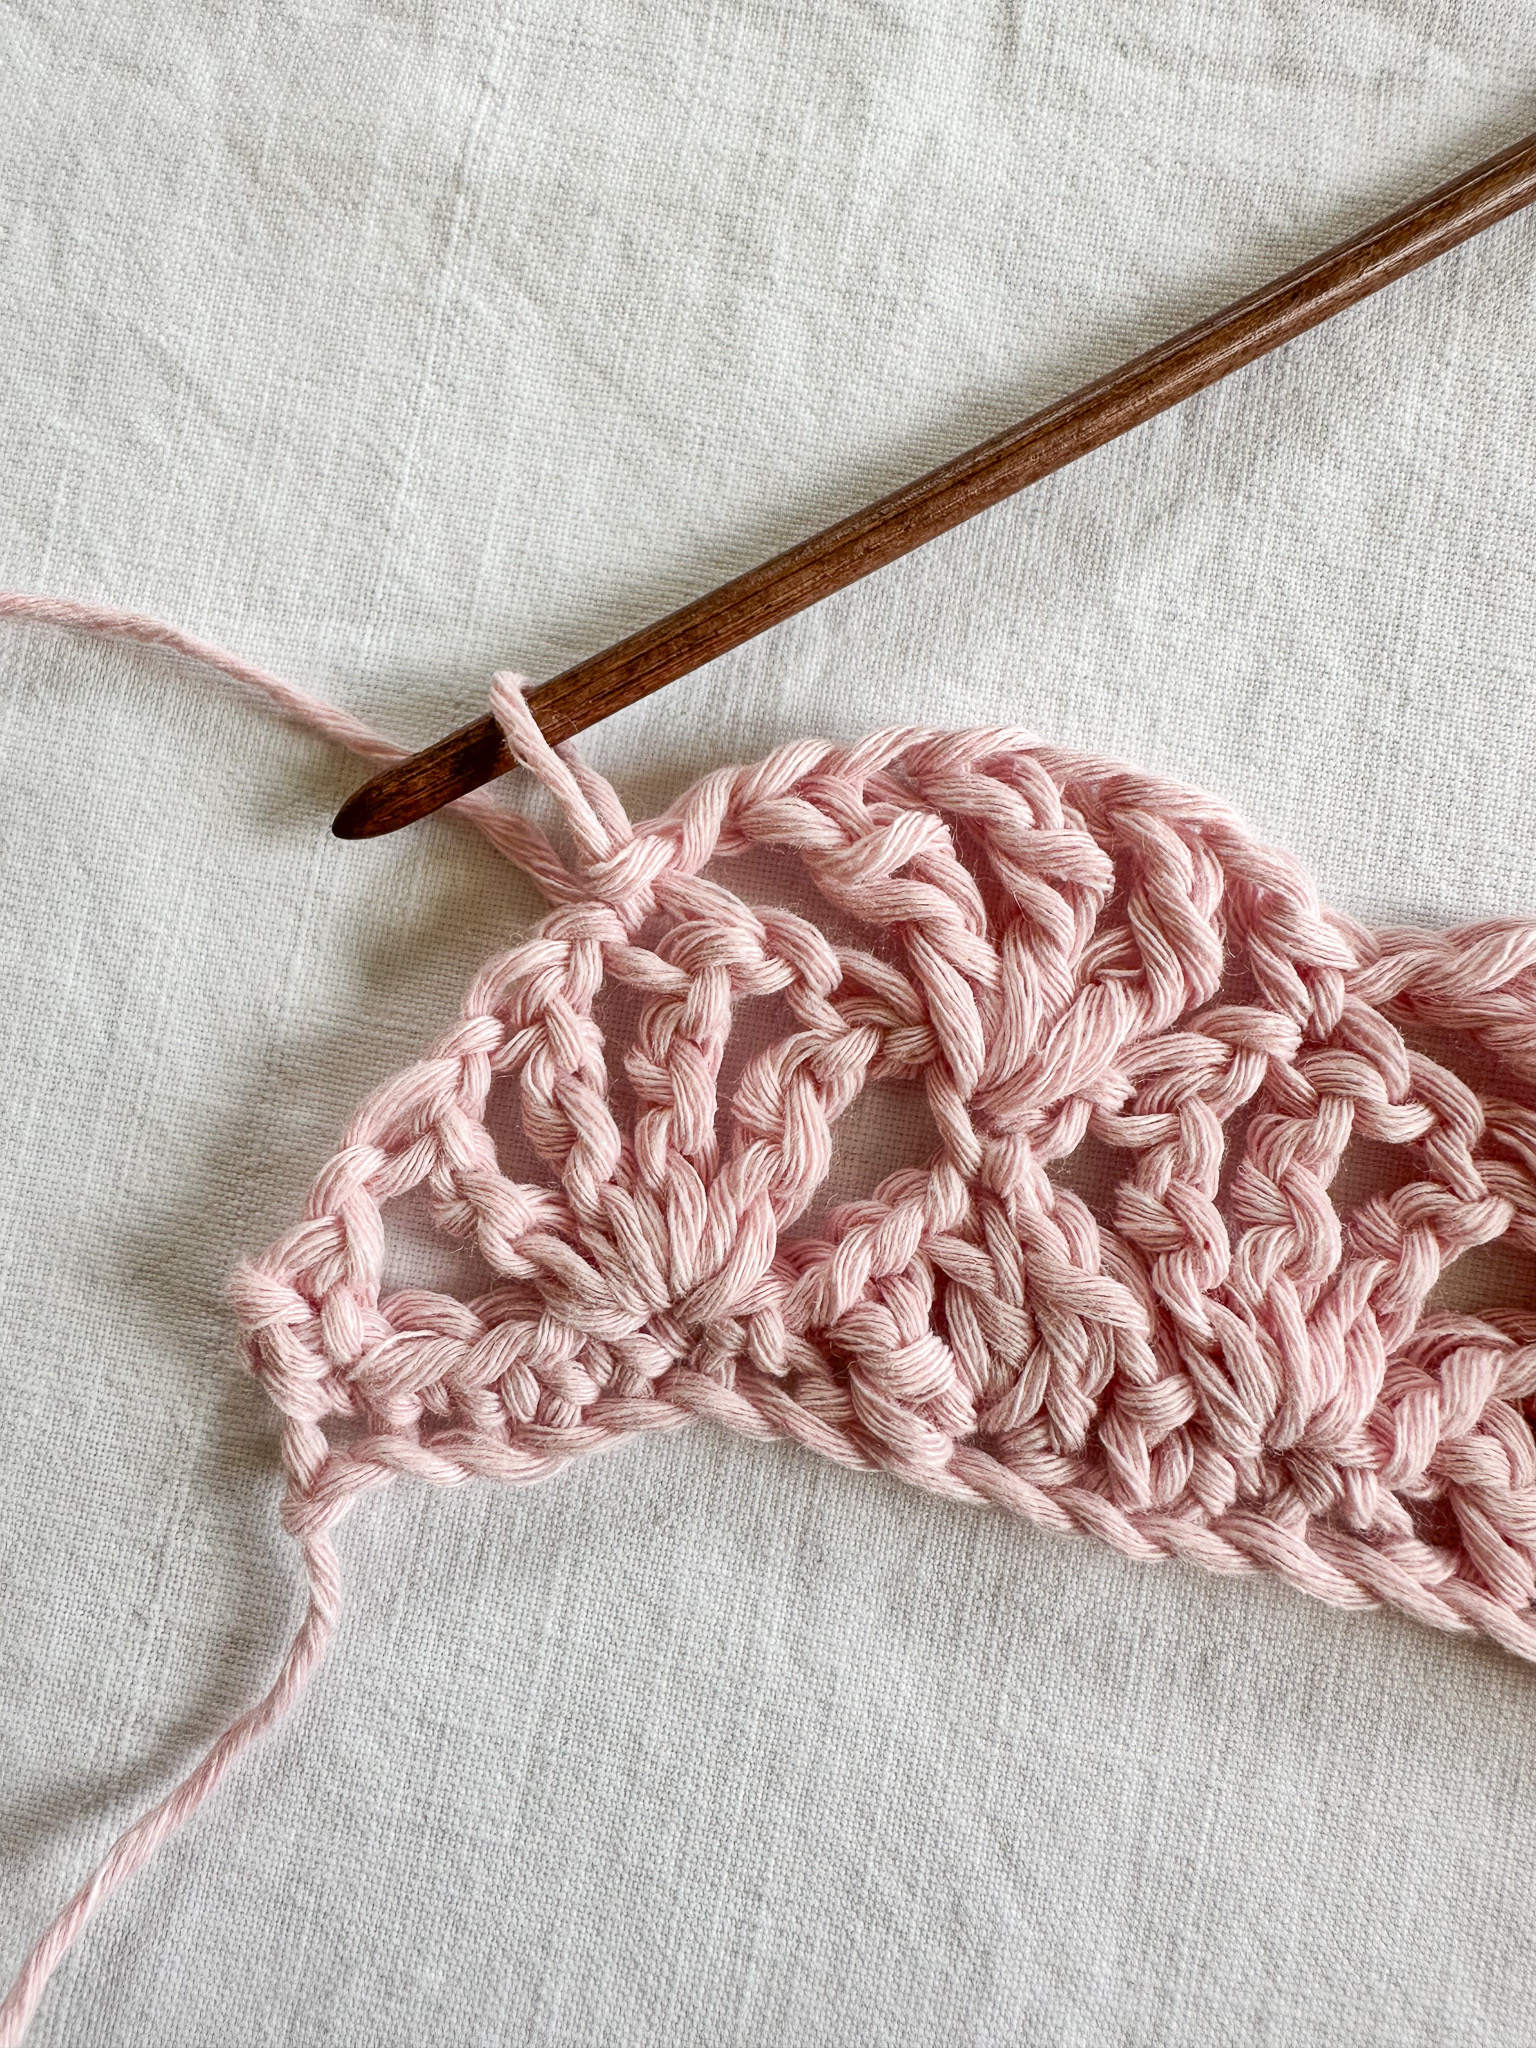
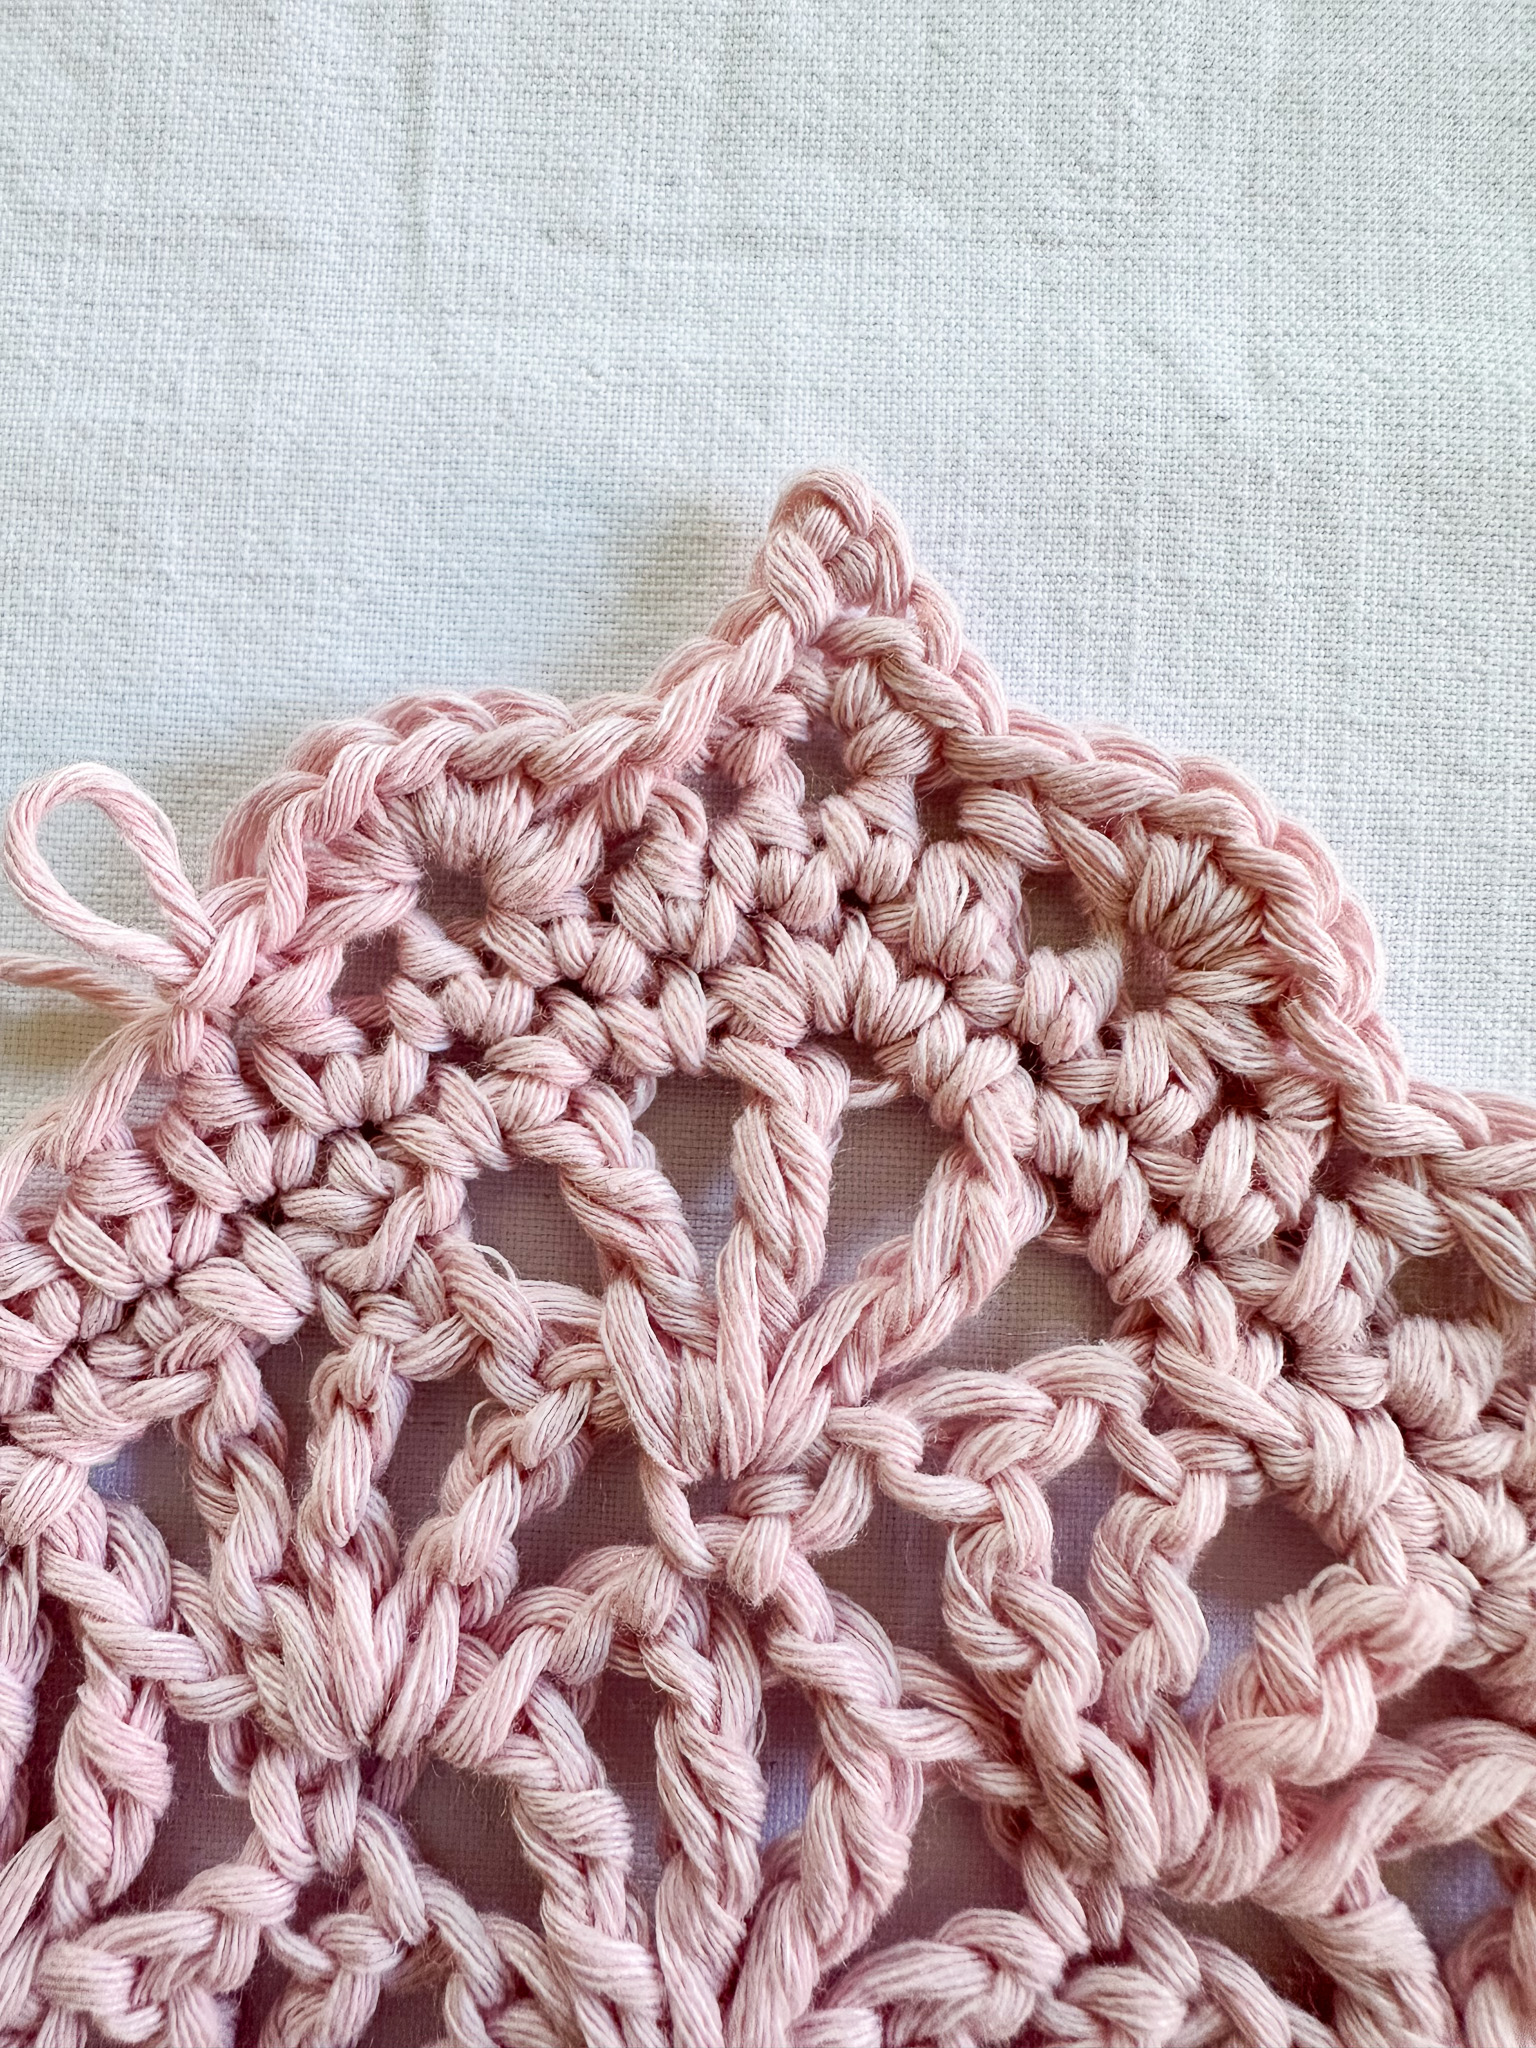
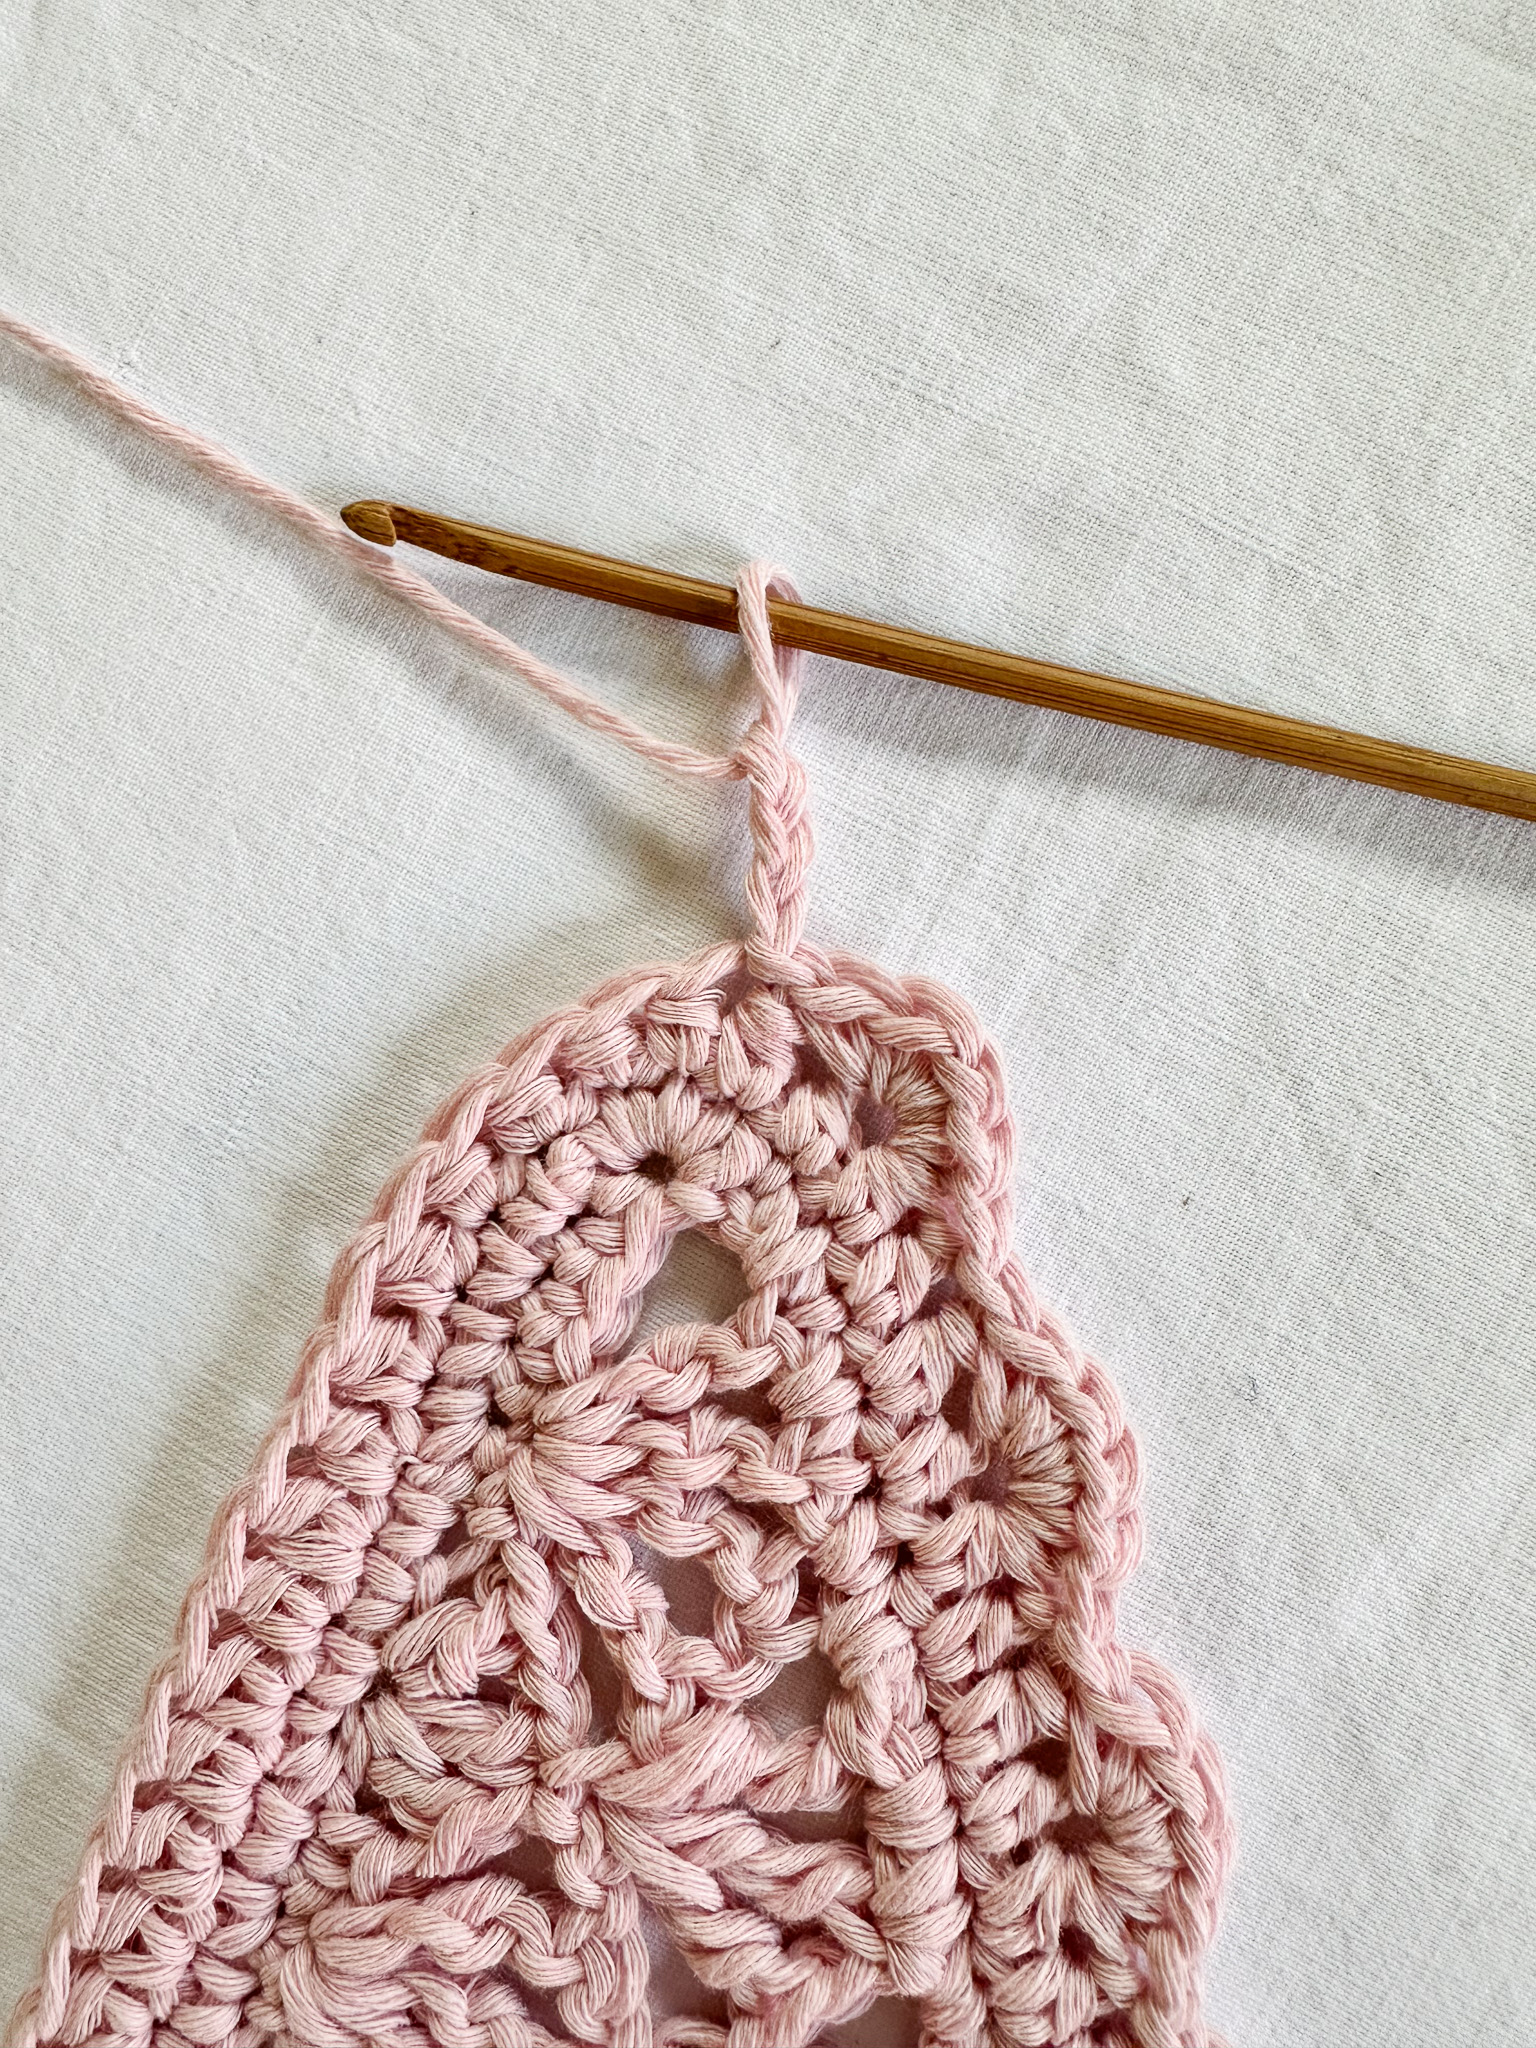
Begin by working slip stitches along the edge of the arch below until you reach the 3rd treble crochet (the 3rd strand) of the edge arch. This is approximately 6 slip stitches.
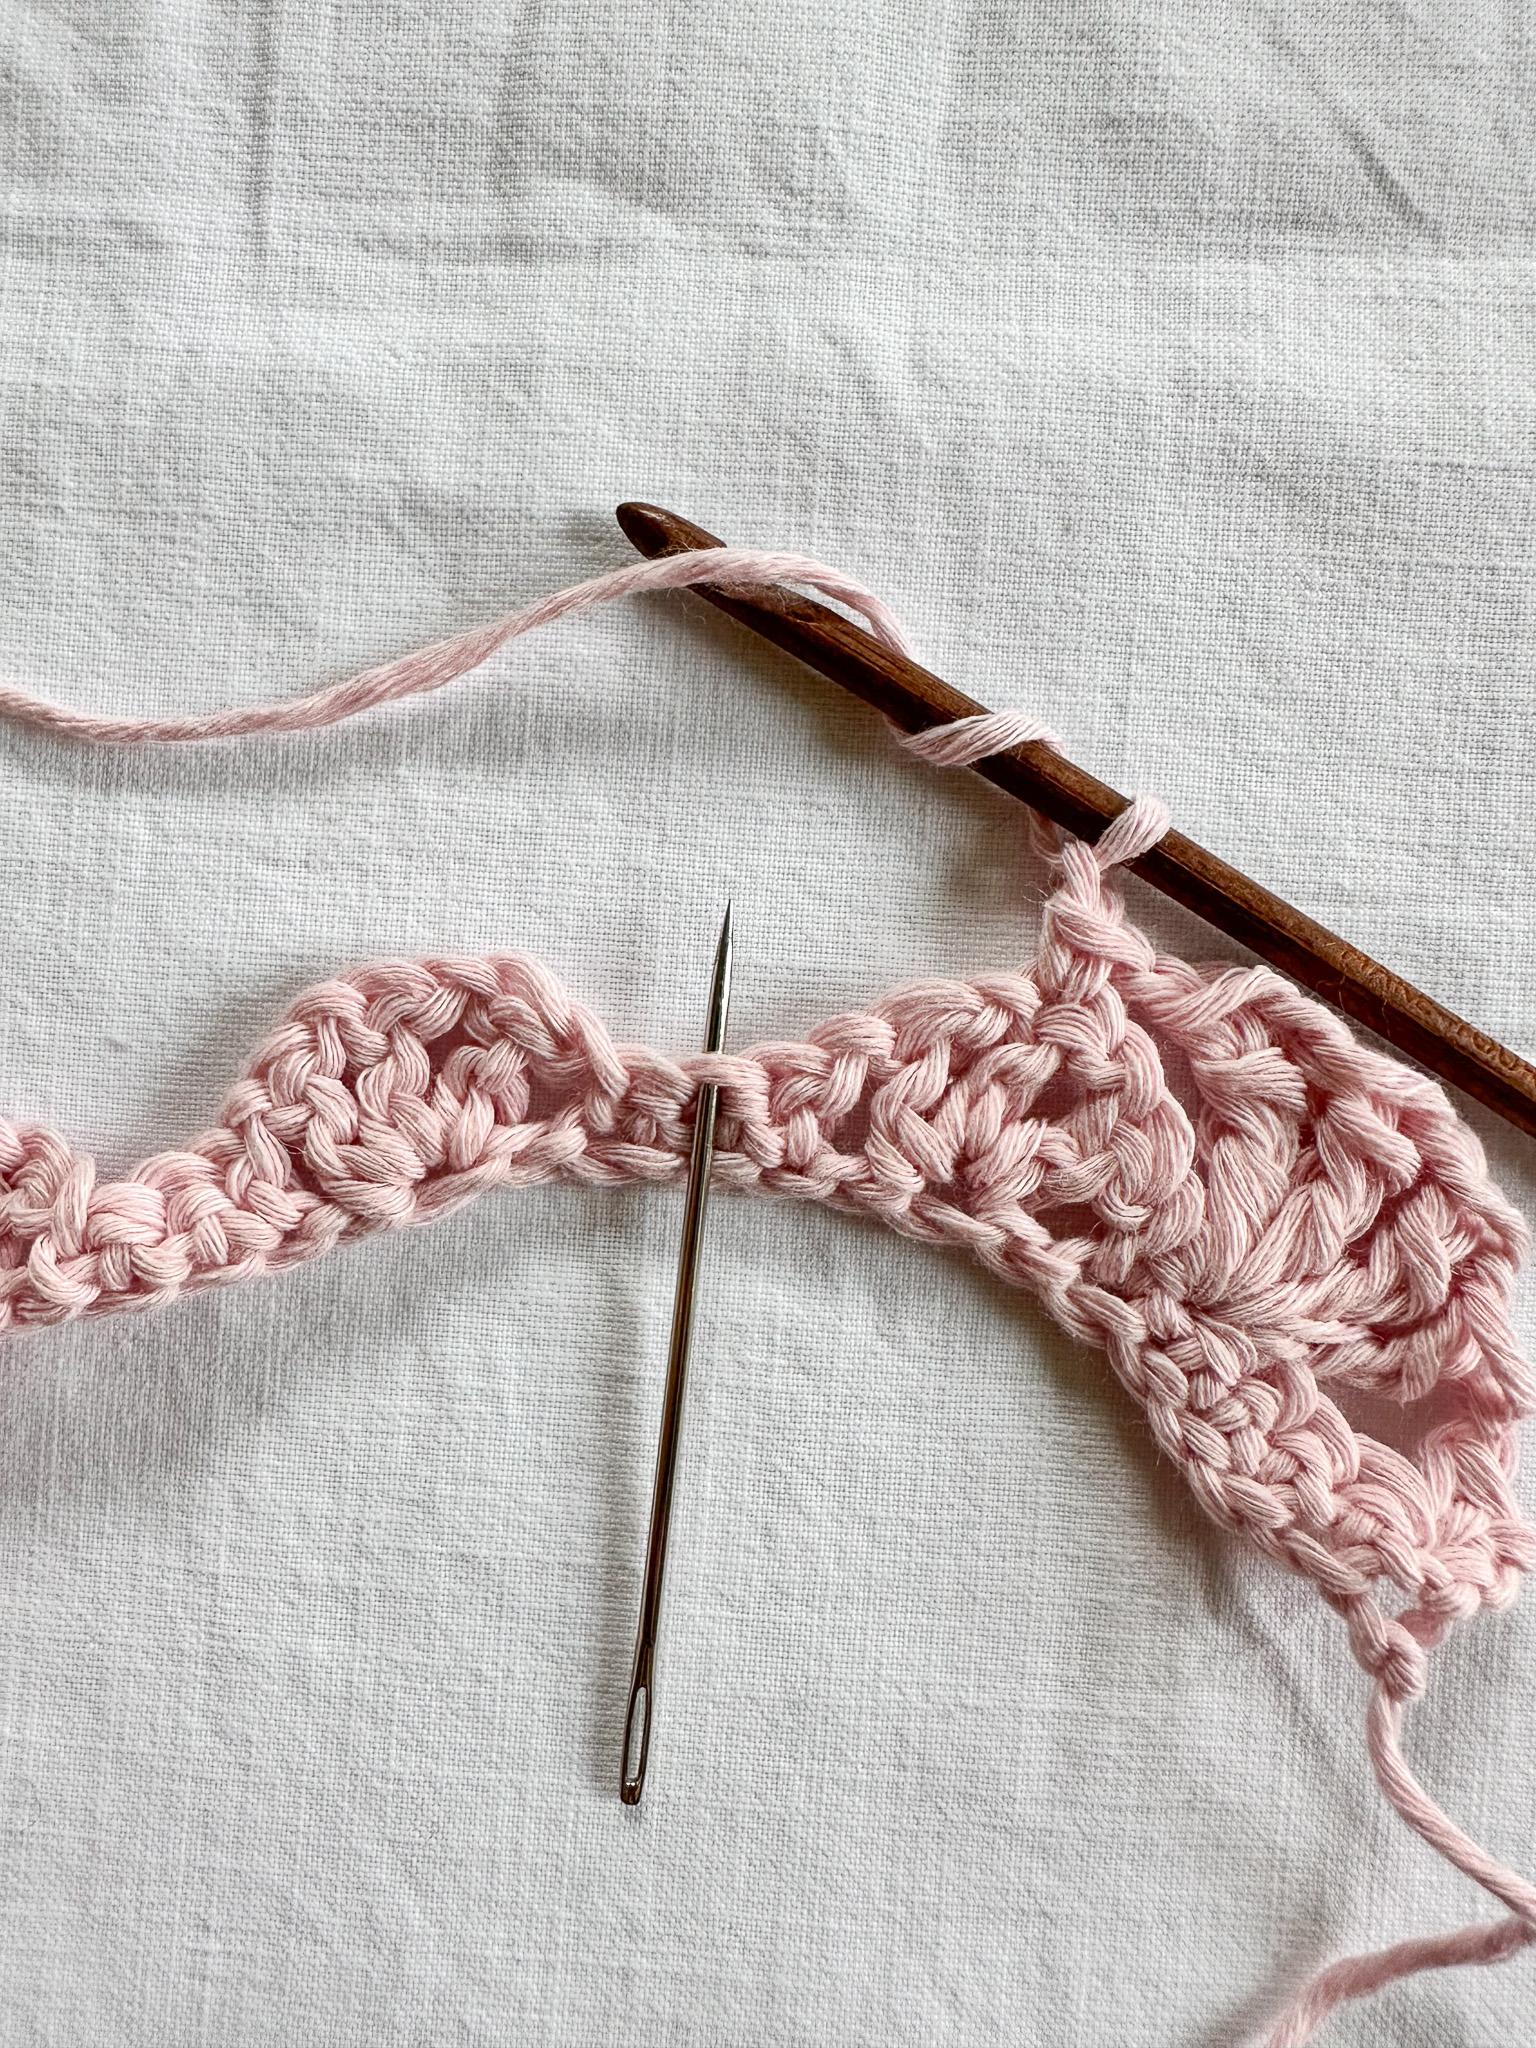
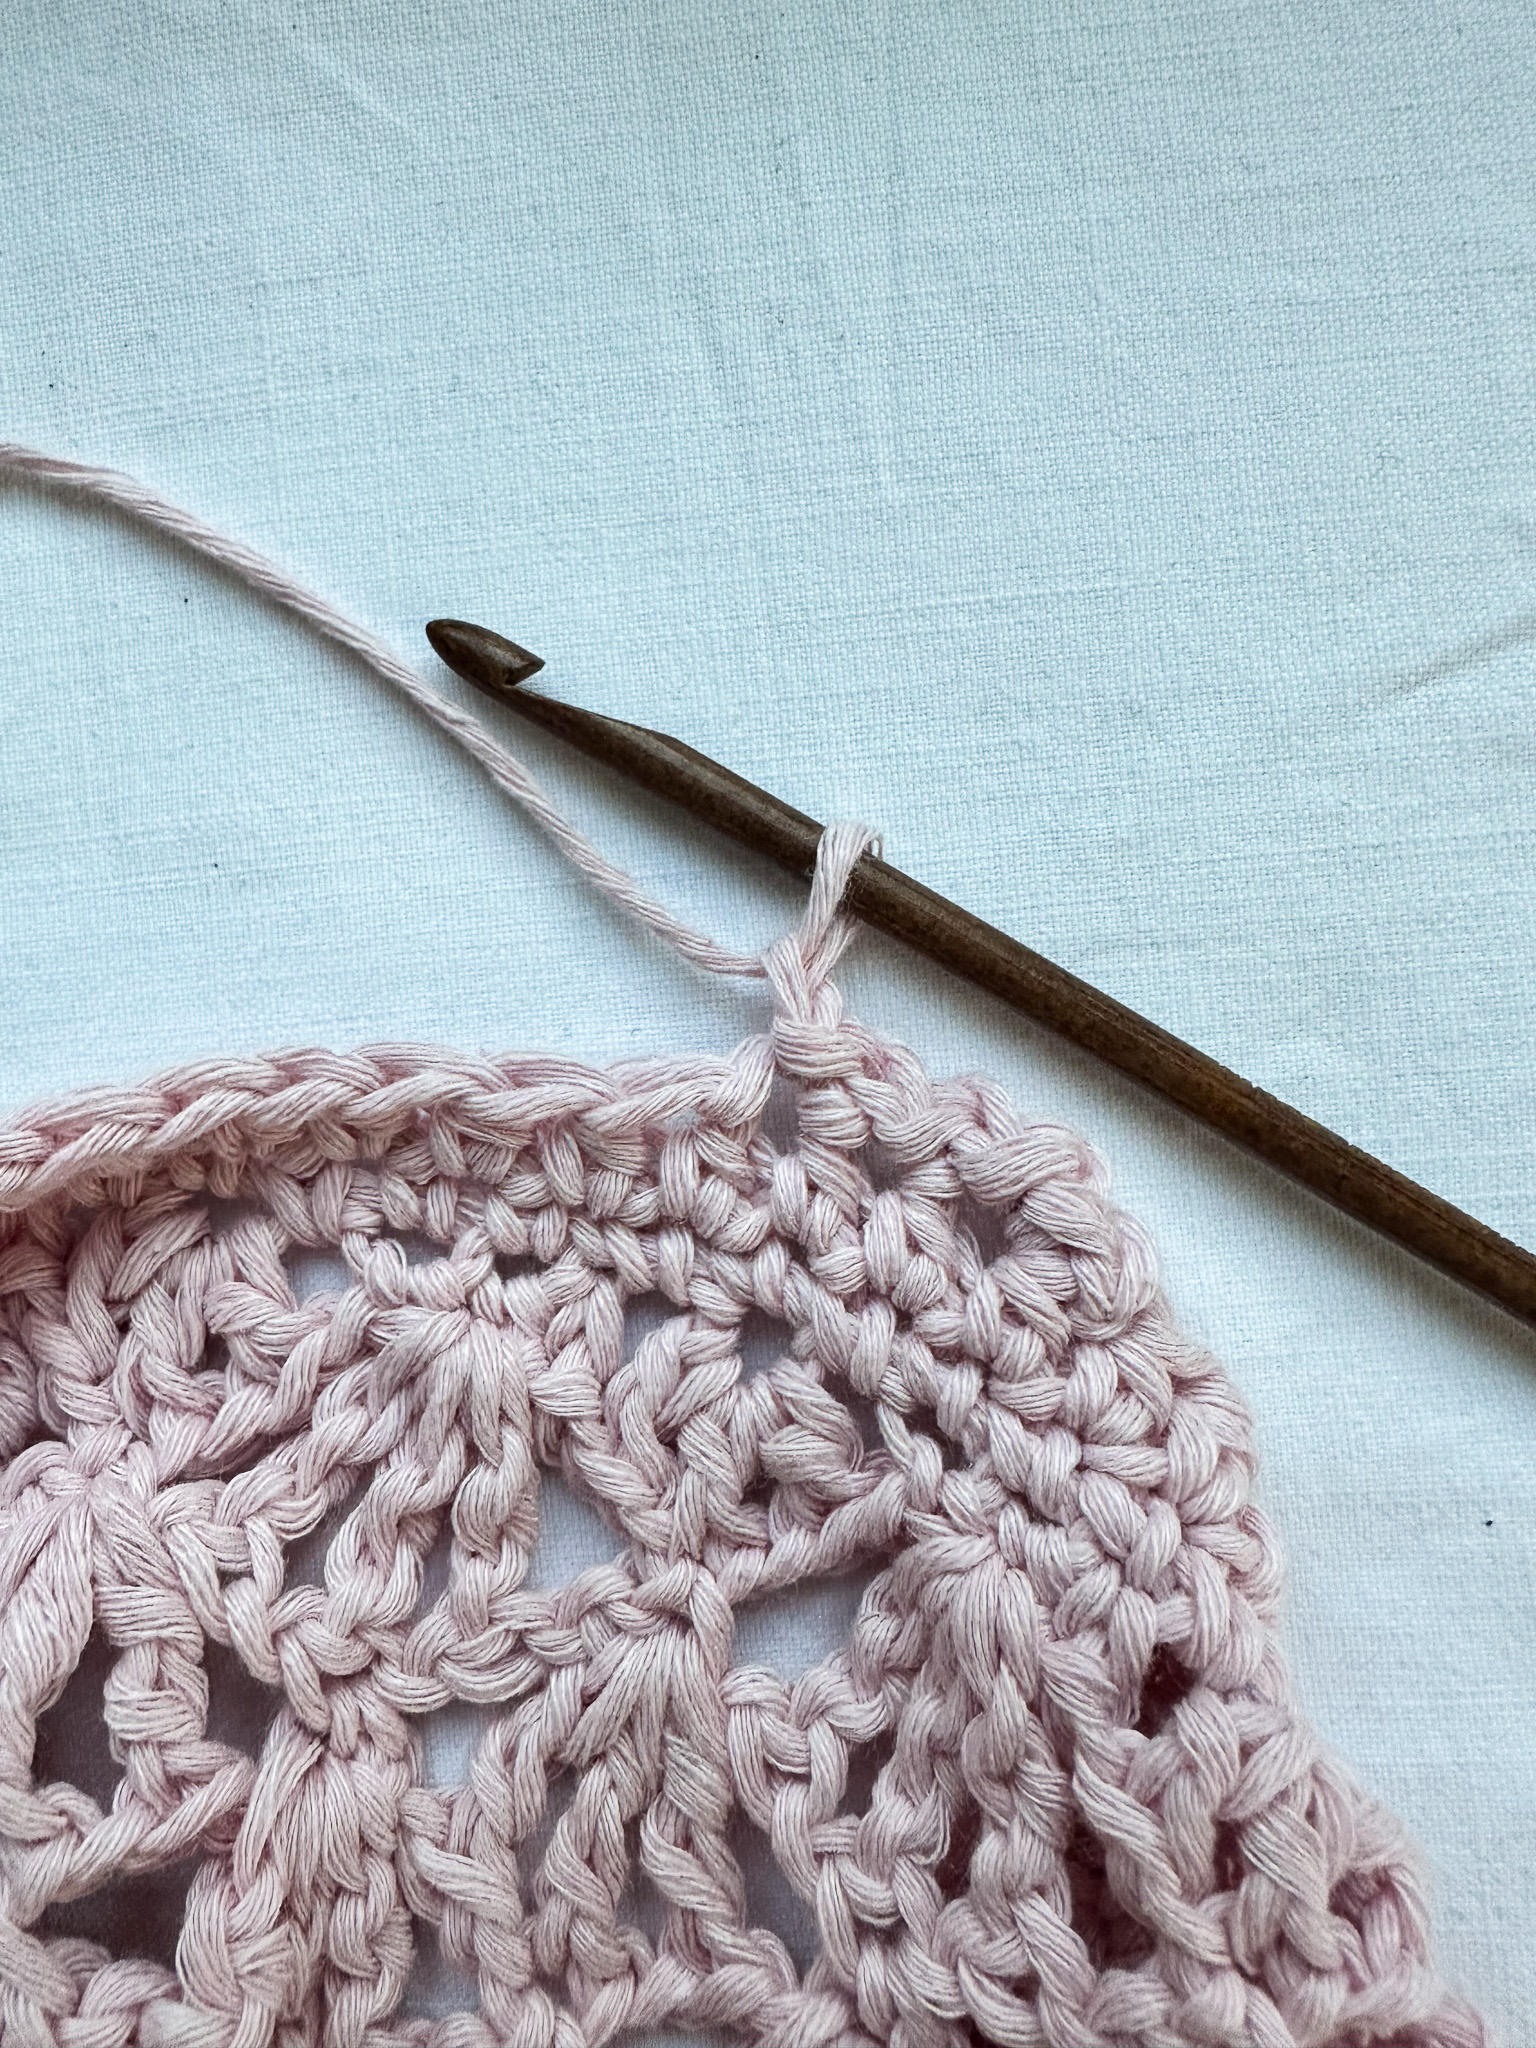
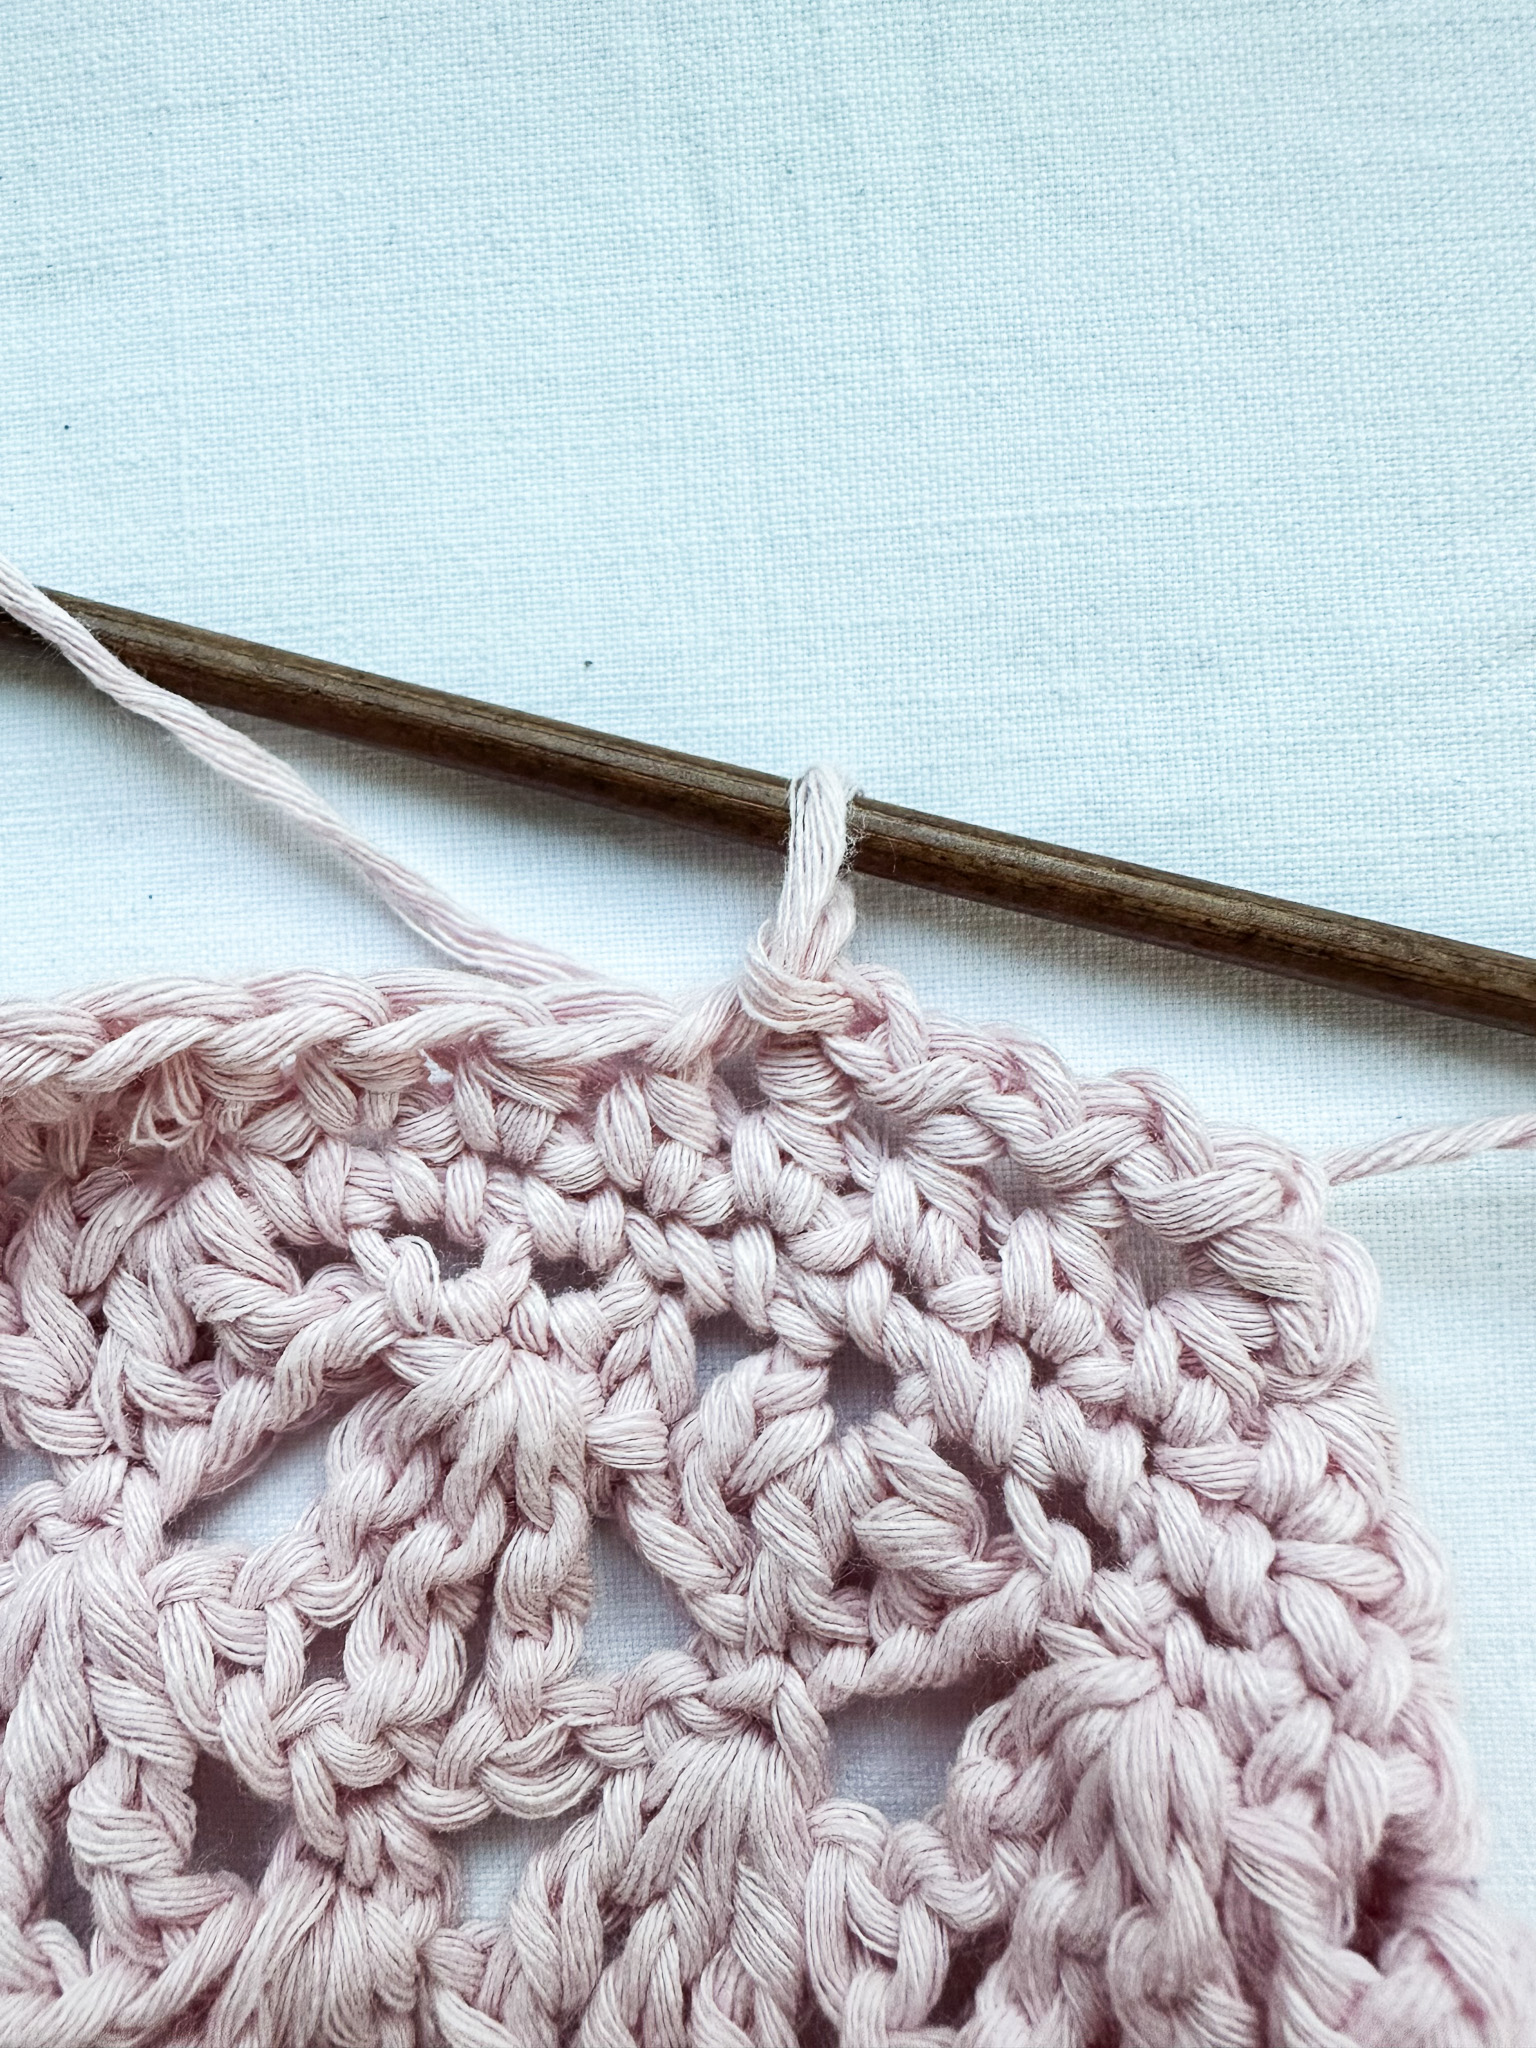
Make 1 chain stitch, then work an arch with 3 treble crochet strands between the next two arches, in the same way you worked the middle arches in the previous row. The needle indicates the stitch where you should work the single crochet between the two arches.
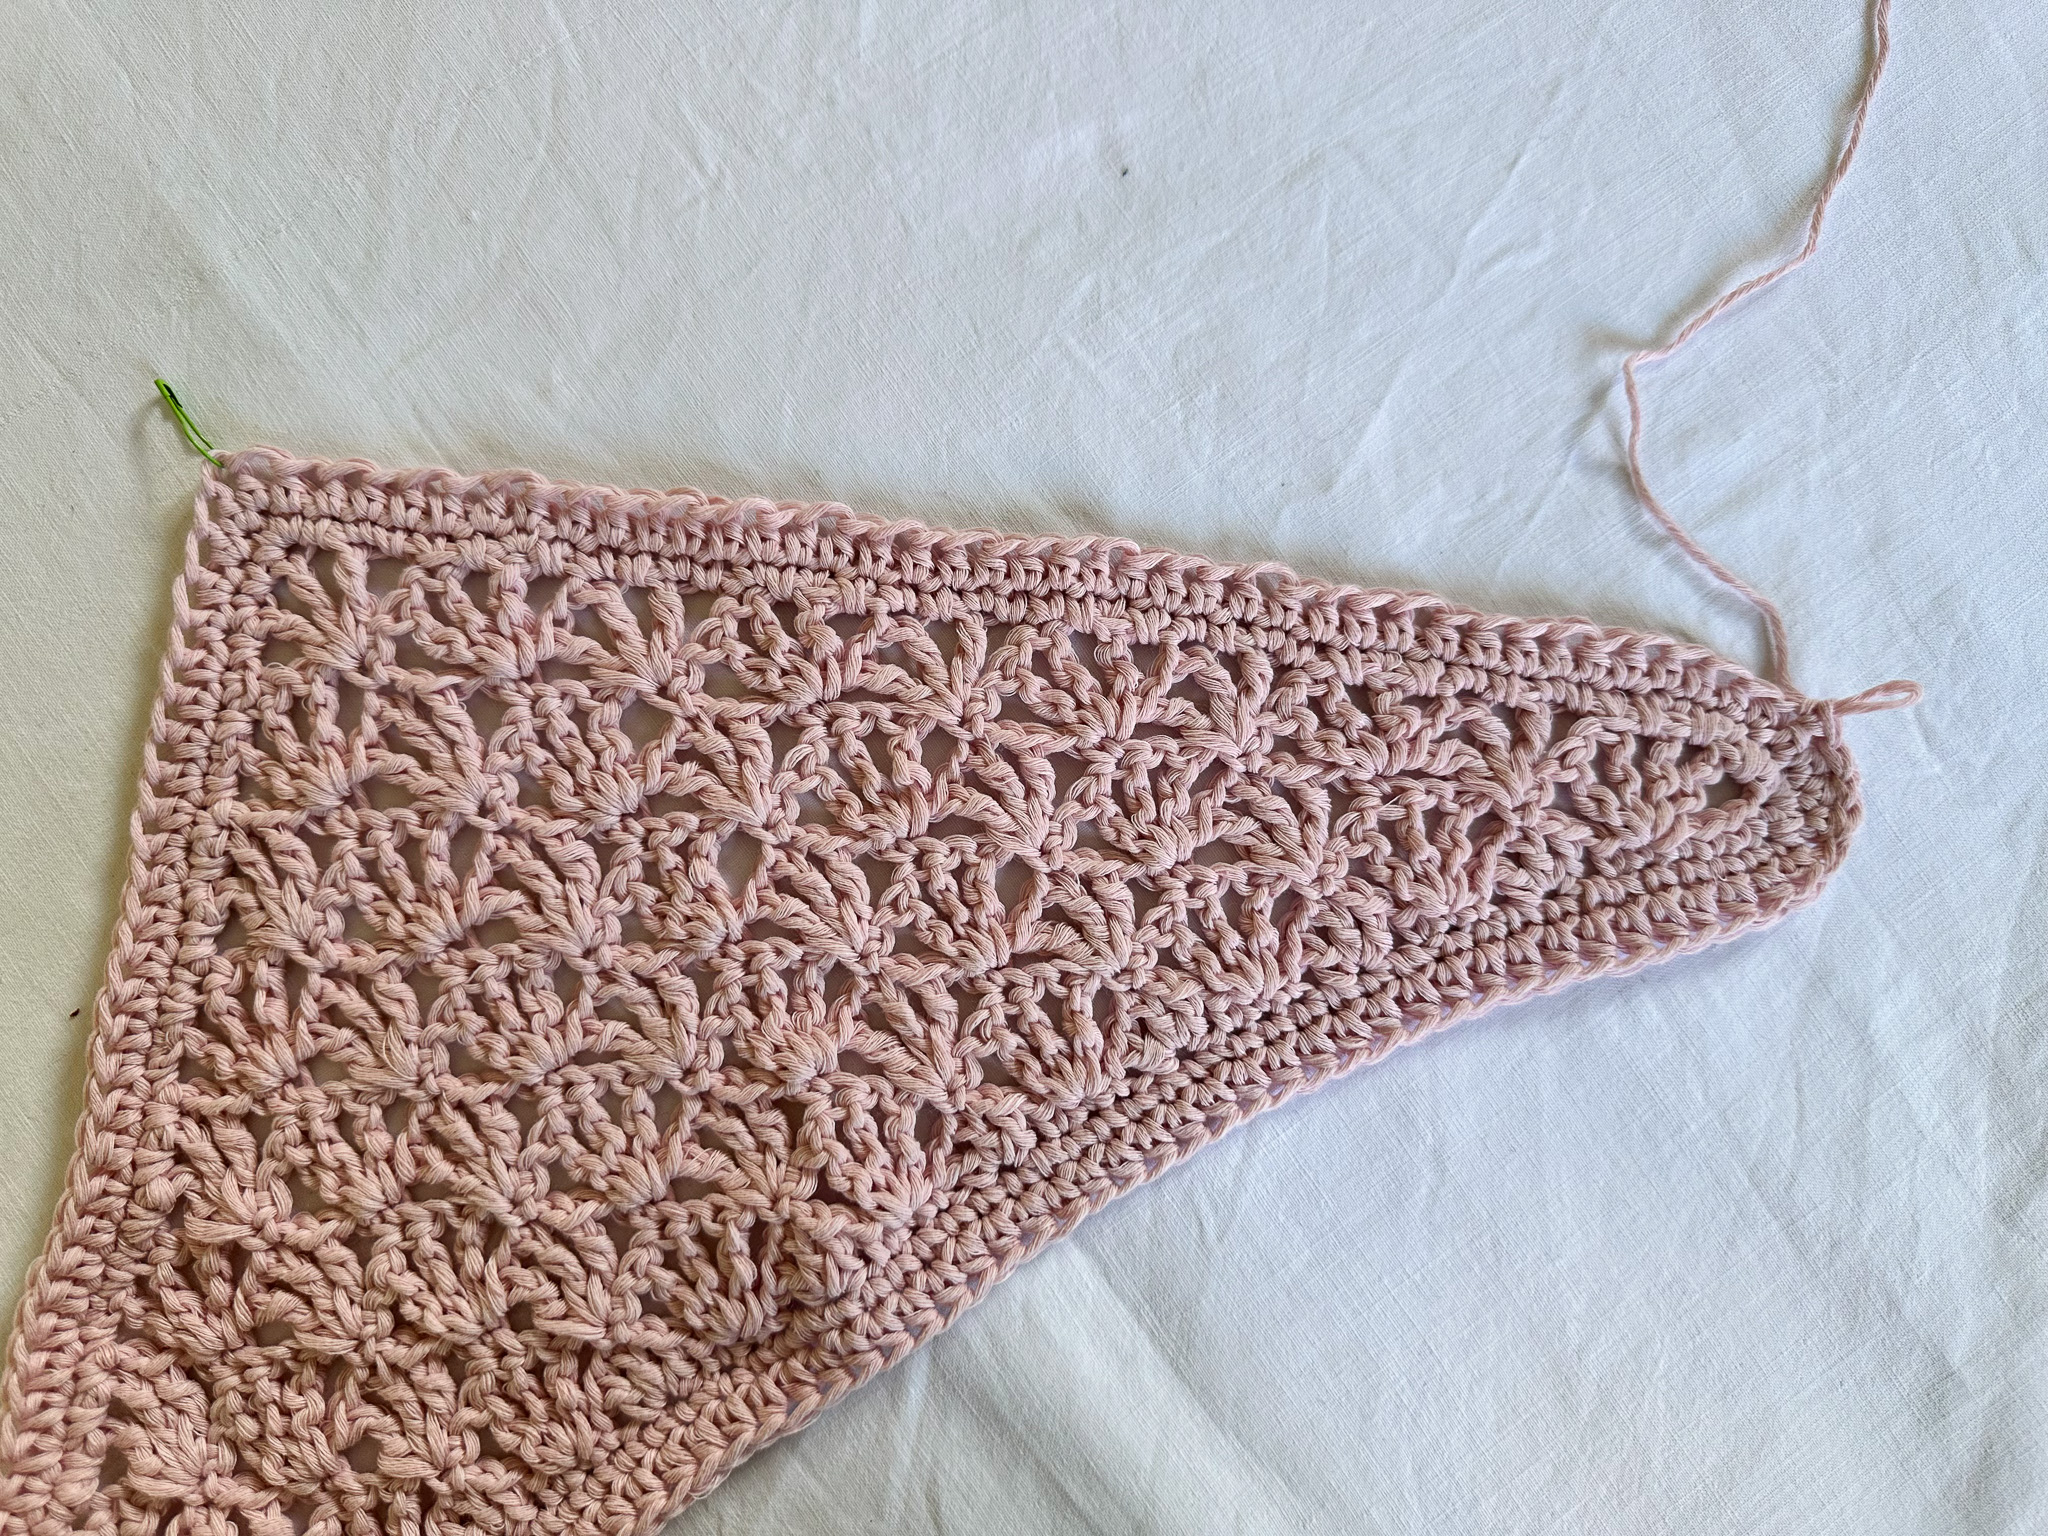
Continue in the same manner across the entire row. You should have a total of 9 arches on Row 3.
Turn your work without making a chain stitch.
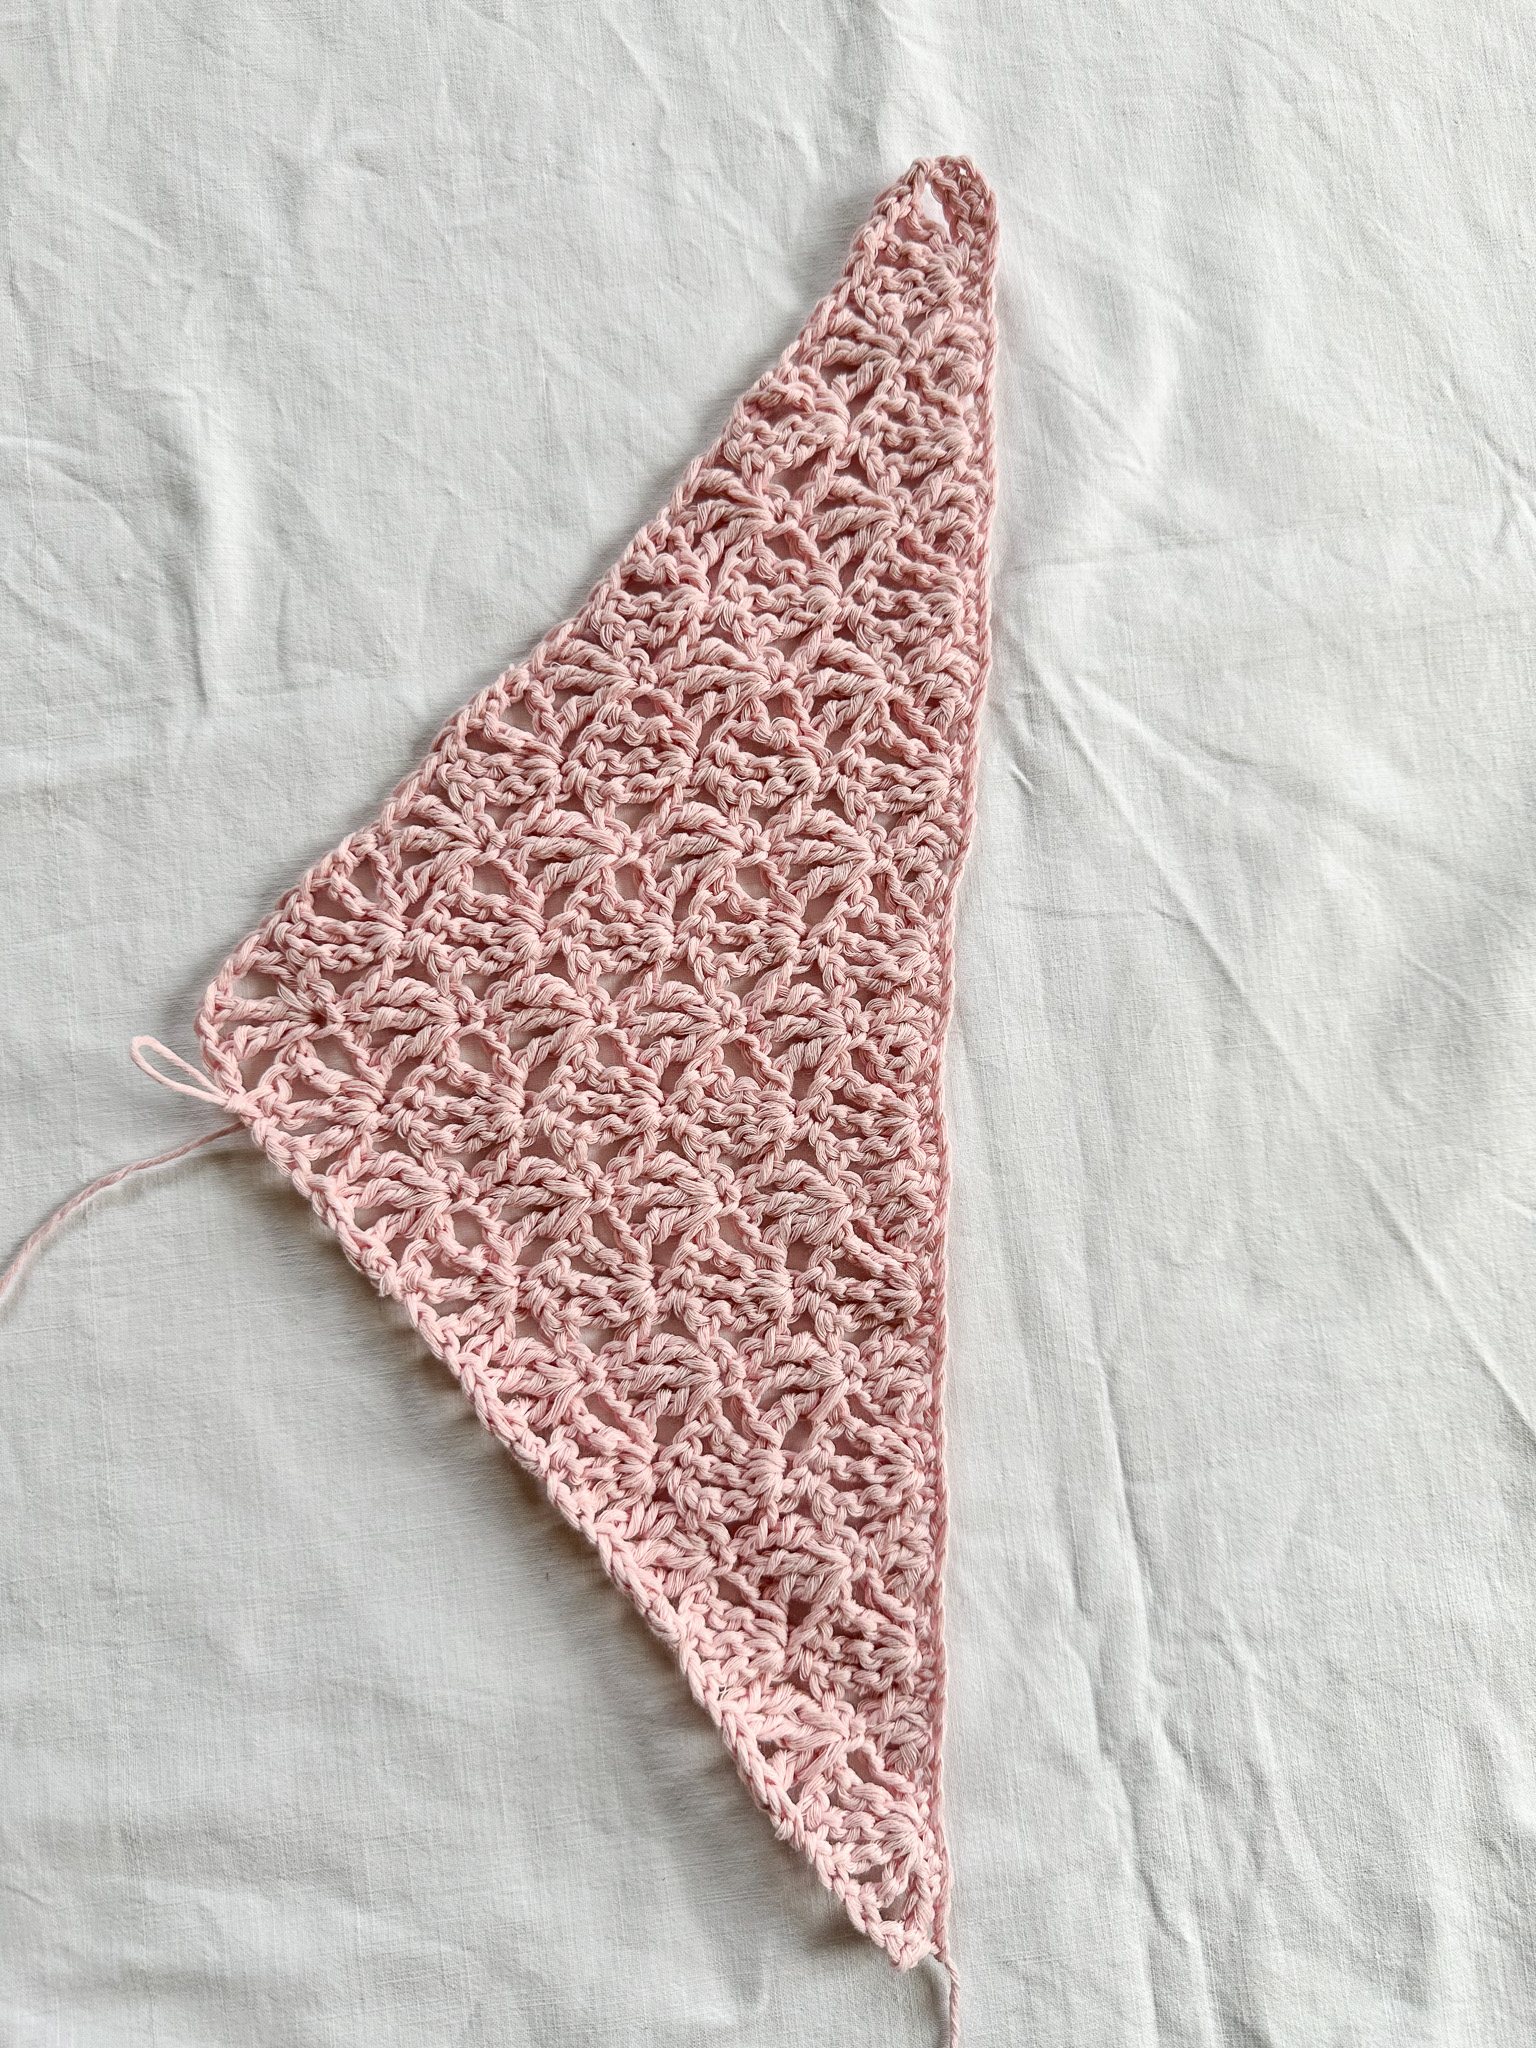
Repeat Row 3 for a total of 9 rows. After each row, you will have one fewer arch, until you end up with only 1 arch in the final row.
Cut the yarn and weave in the ends.
Border
Round 1: Make a slip knot and work 3 single crochet stitches in the bottom right corner (when the triangle is placed in front of you with the point facing upward).
Work single crochet stitches along the long side. Work 1 single crochet in each chain stitch and 1 single crochet in each double crochet.
The exact number is not very important, but it is important not to make too many single crochet stitches per side, as this will cause the triangle to develop a wavy edge.
At the tip of the triangle and in the other corner, work 3 single crochet stitches.
Round 2: Now work another full round around the triangle, but using half double crochet stitches. In the corners/points, work only 1 half double crochet per single crochet (not 3 stitches in the corners).
Round 3: Now you can choose which type of edge you want, a straight edge or a wavy edge.
Note: Round 3 is only worked along 2 of the 3 sides (not between the corners).
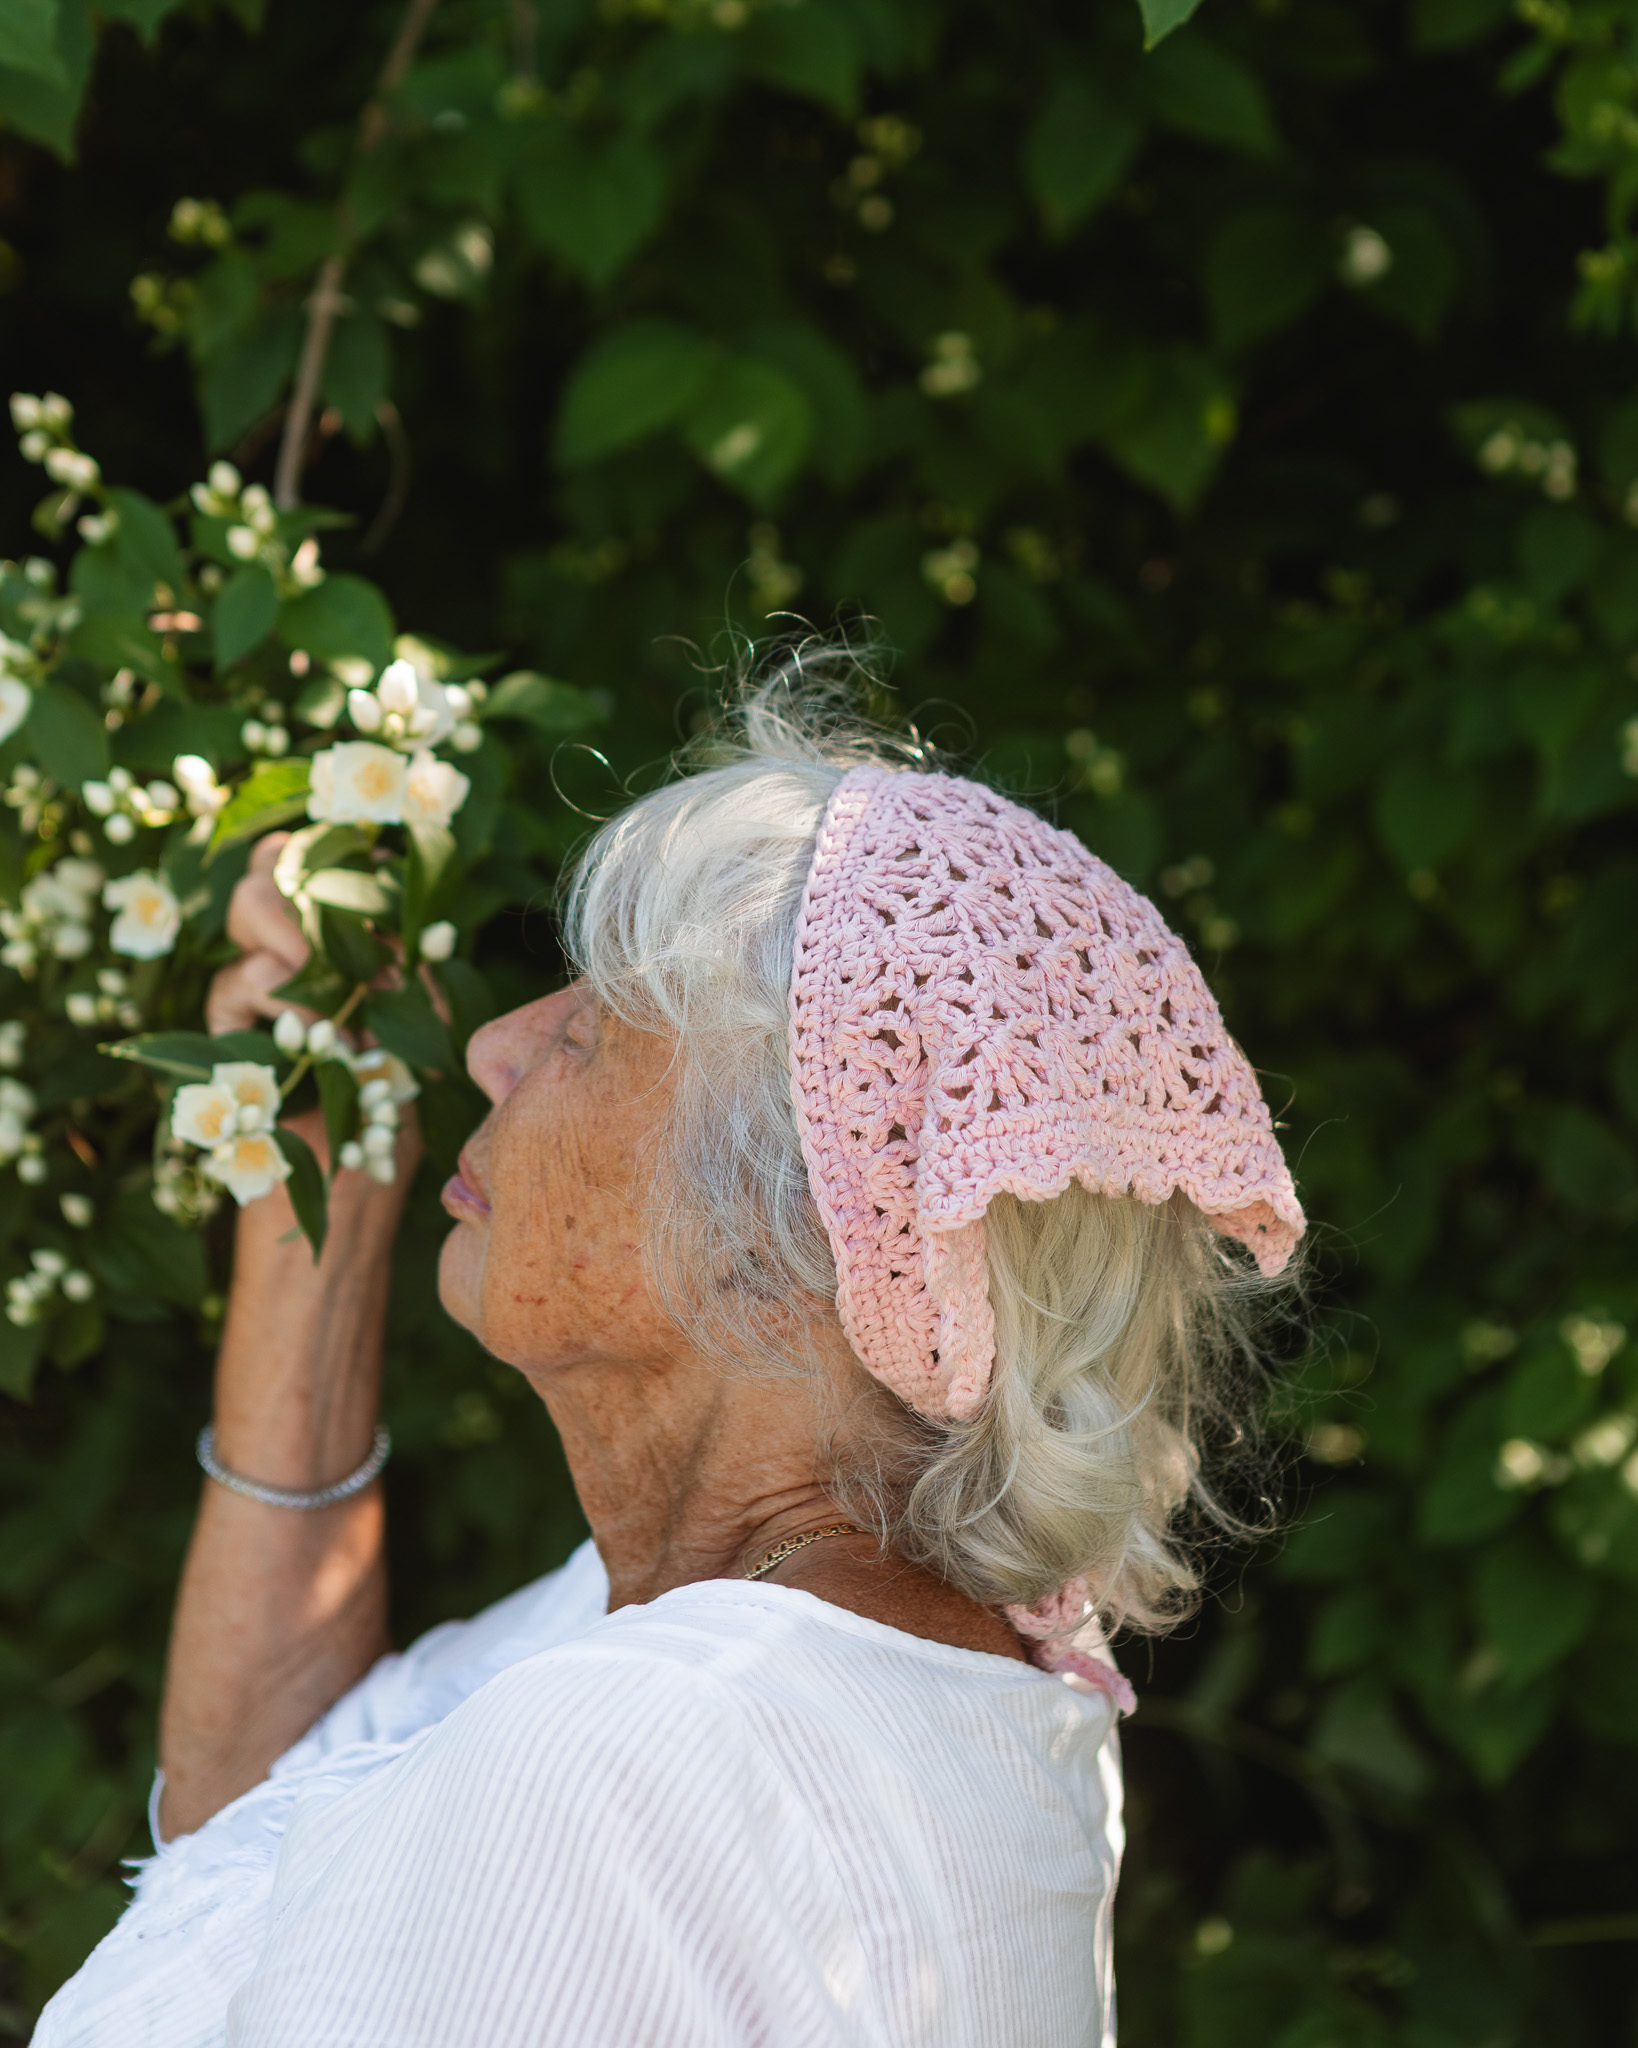
Wavy edge
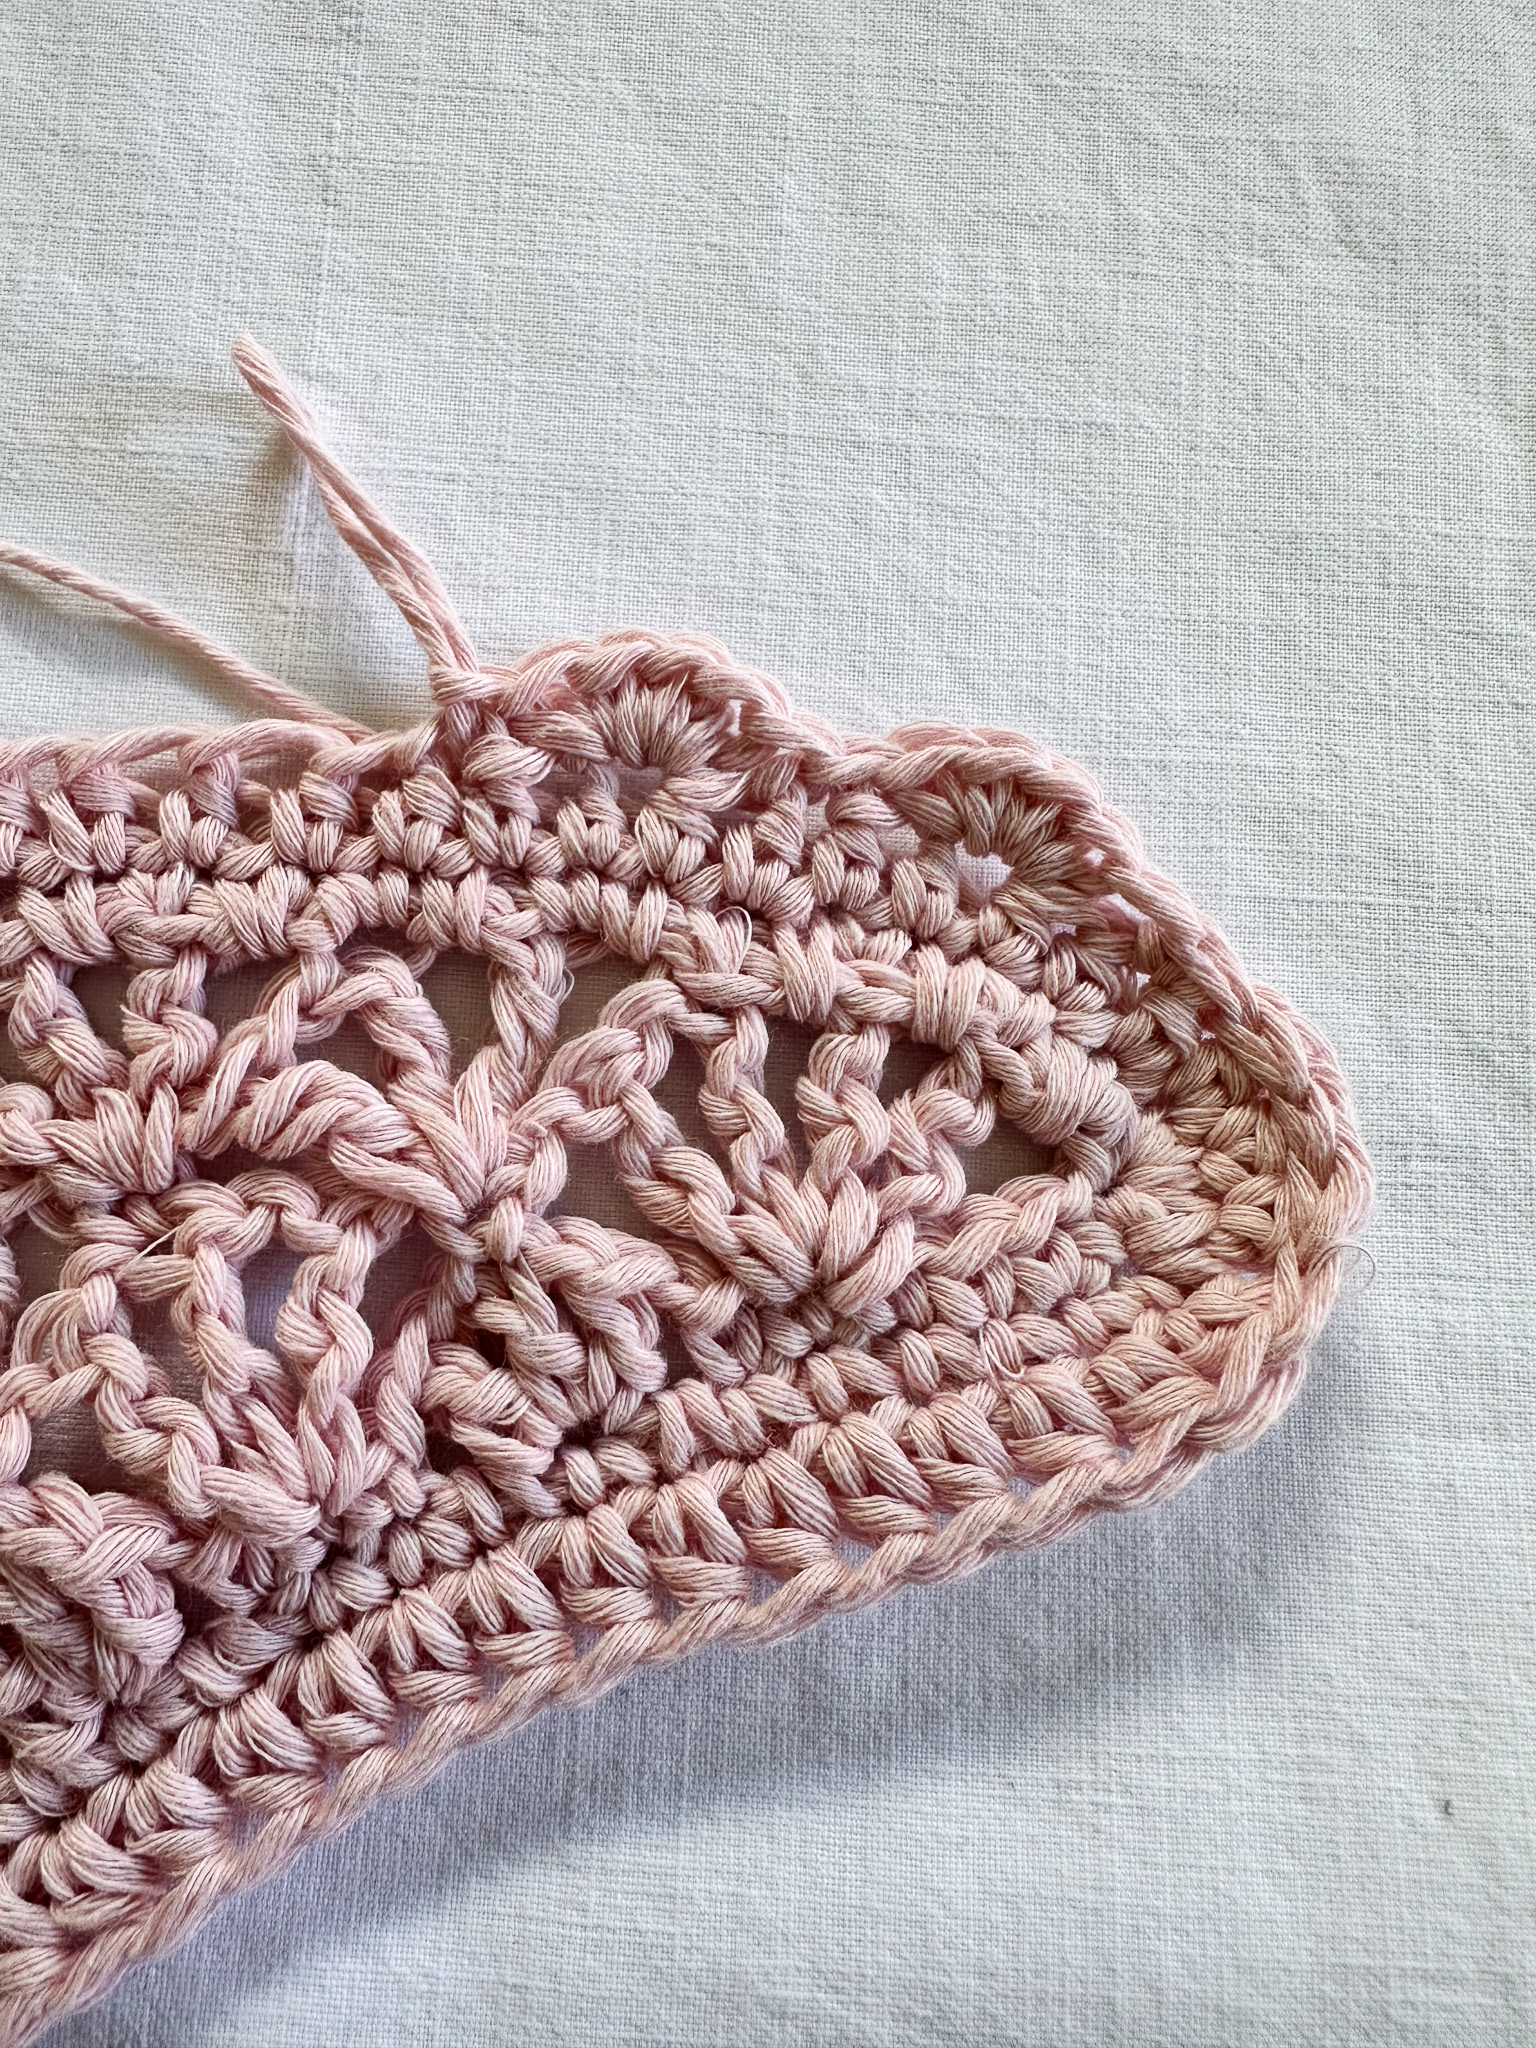
To create the wavy edge, shell stitches are worked. Each shell consists of 4 stitches, so the number of stitches per side must be divisible by 4.
The bandana in the picture has 10 shells, which means there must be 40 stitches between the corner and the tip. You can add or remove shells depending on your bandana’s size, but make sure the stitch count is divisible by 4.
Start by placing a stitch marker or a small piece of yarn at the tip. From the tip (excluding the tip itself), count 40 stitches toward where your hook is now at the corner and mark stitch number 40.
You will likely have a few stitches left between the 40th stitch and your hook, where you finished Round 3. Work slip stitches up to the marked stitch.
You are now ready to work the 10 shells.
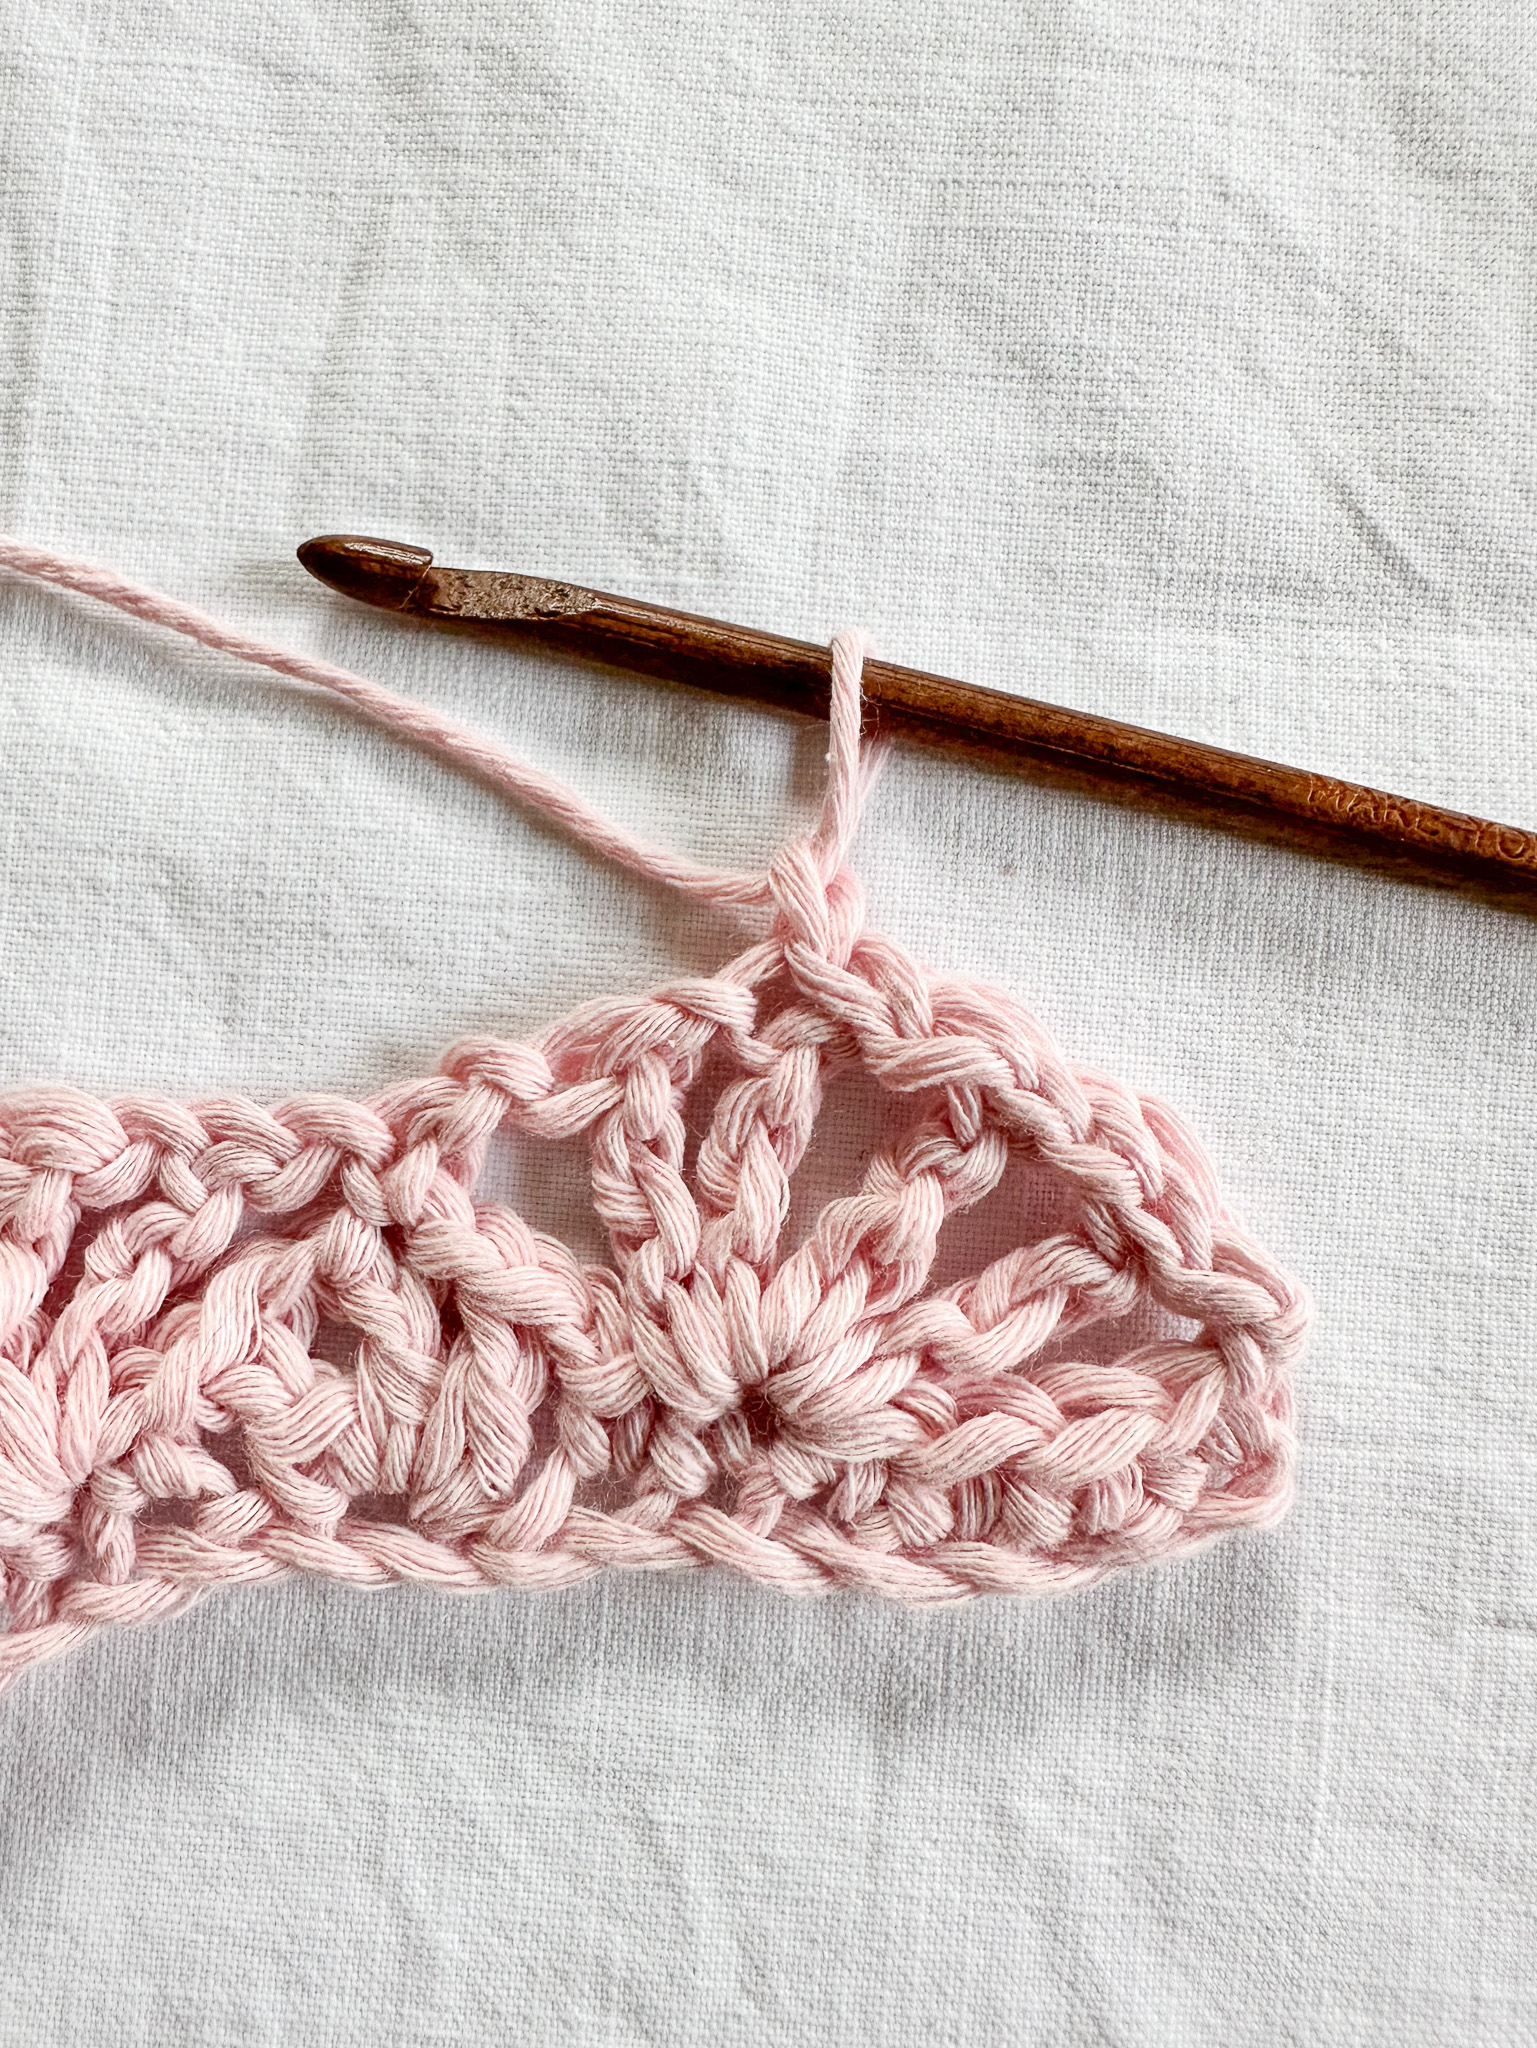
Shells:
Skip 1 stitch. Work 5 single crochet stitches in the same stitch. Skip the next stitch and then work 1 slip stitch. You have now completed one shell.
Repeat this a total of 10 times (10 shells).
At the tip:
In the stitch at the tip, work: 1 single crochet, 3 chain stitches, 1 slip stitch into the first of the 3 chain stitches, and then finish with 1 single crochet in the same stitch where you started.
Make 1 slip stitch in the next stitch before you continue with 10 more shells on the other side.
Then proceed to the next step for the ties.
Straight edge
In each stitch, first make 1 chain stitch, then 1 slip stitch in the next stitch. Repeat slip stitches with chain stitches between them all the way around. For the tip, follow the instructions under the wavy edge above.
Then proceed to the next step.
Ties
You are now at one of the corners where you want to attach a tie.
Make a long chain of chain stitches. Adjust the number of stitches depending on how long you want the tie to be. If you want to be able to tie it around your head, about 60 chain stitches is enough (approximately 33 cm). If you want to tie it around your waist, you will need a longer tie (about 85 chain stitches, approximately 46 cm).
Skip the last chain stitch, and work slip stitches back along the chain toward the triangle. Cut the yarn and fasten off.
If you want an invisible finish, see the tips under Step 7.
Now you will make another tie. Make a slip knot and start a second tie in the other corner. Work in the same way with chain stitches and slip stitches.
Invisible finish:
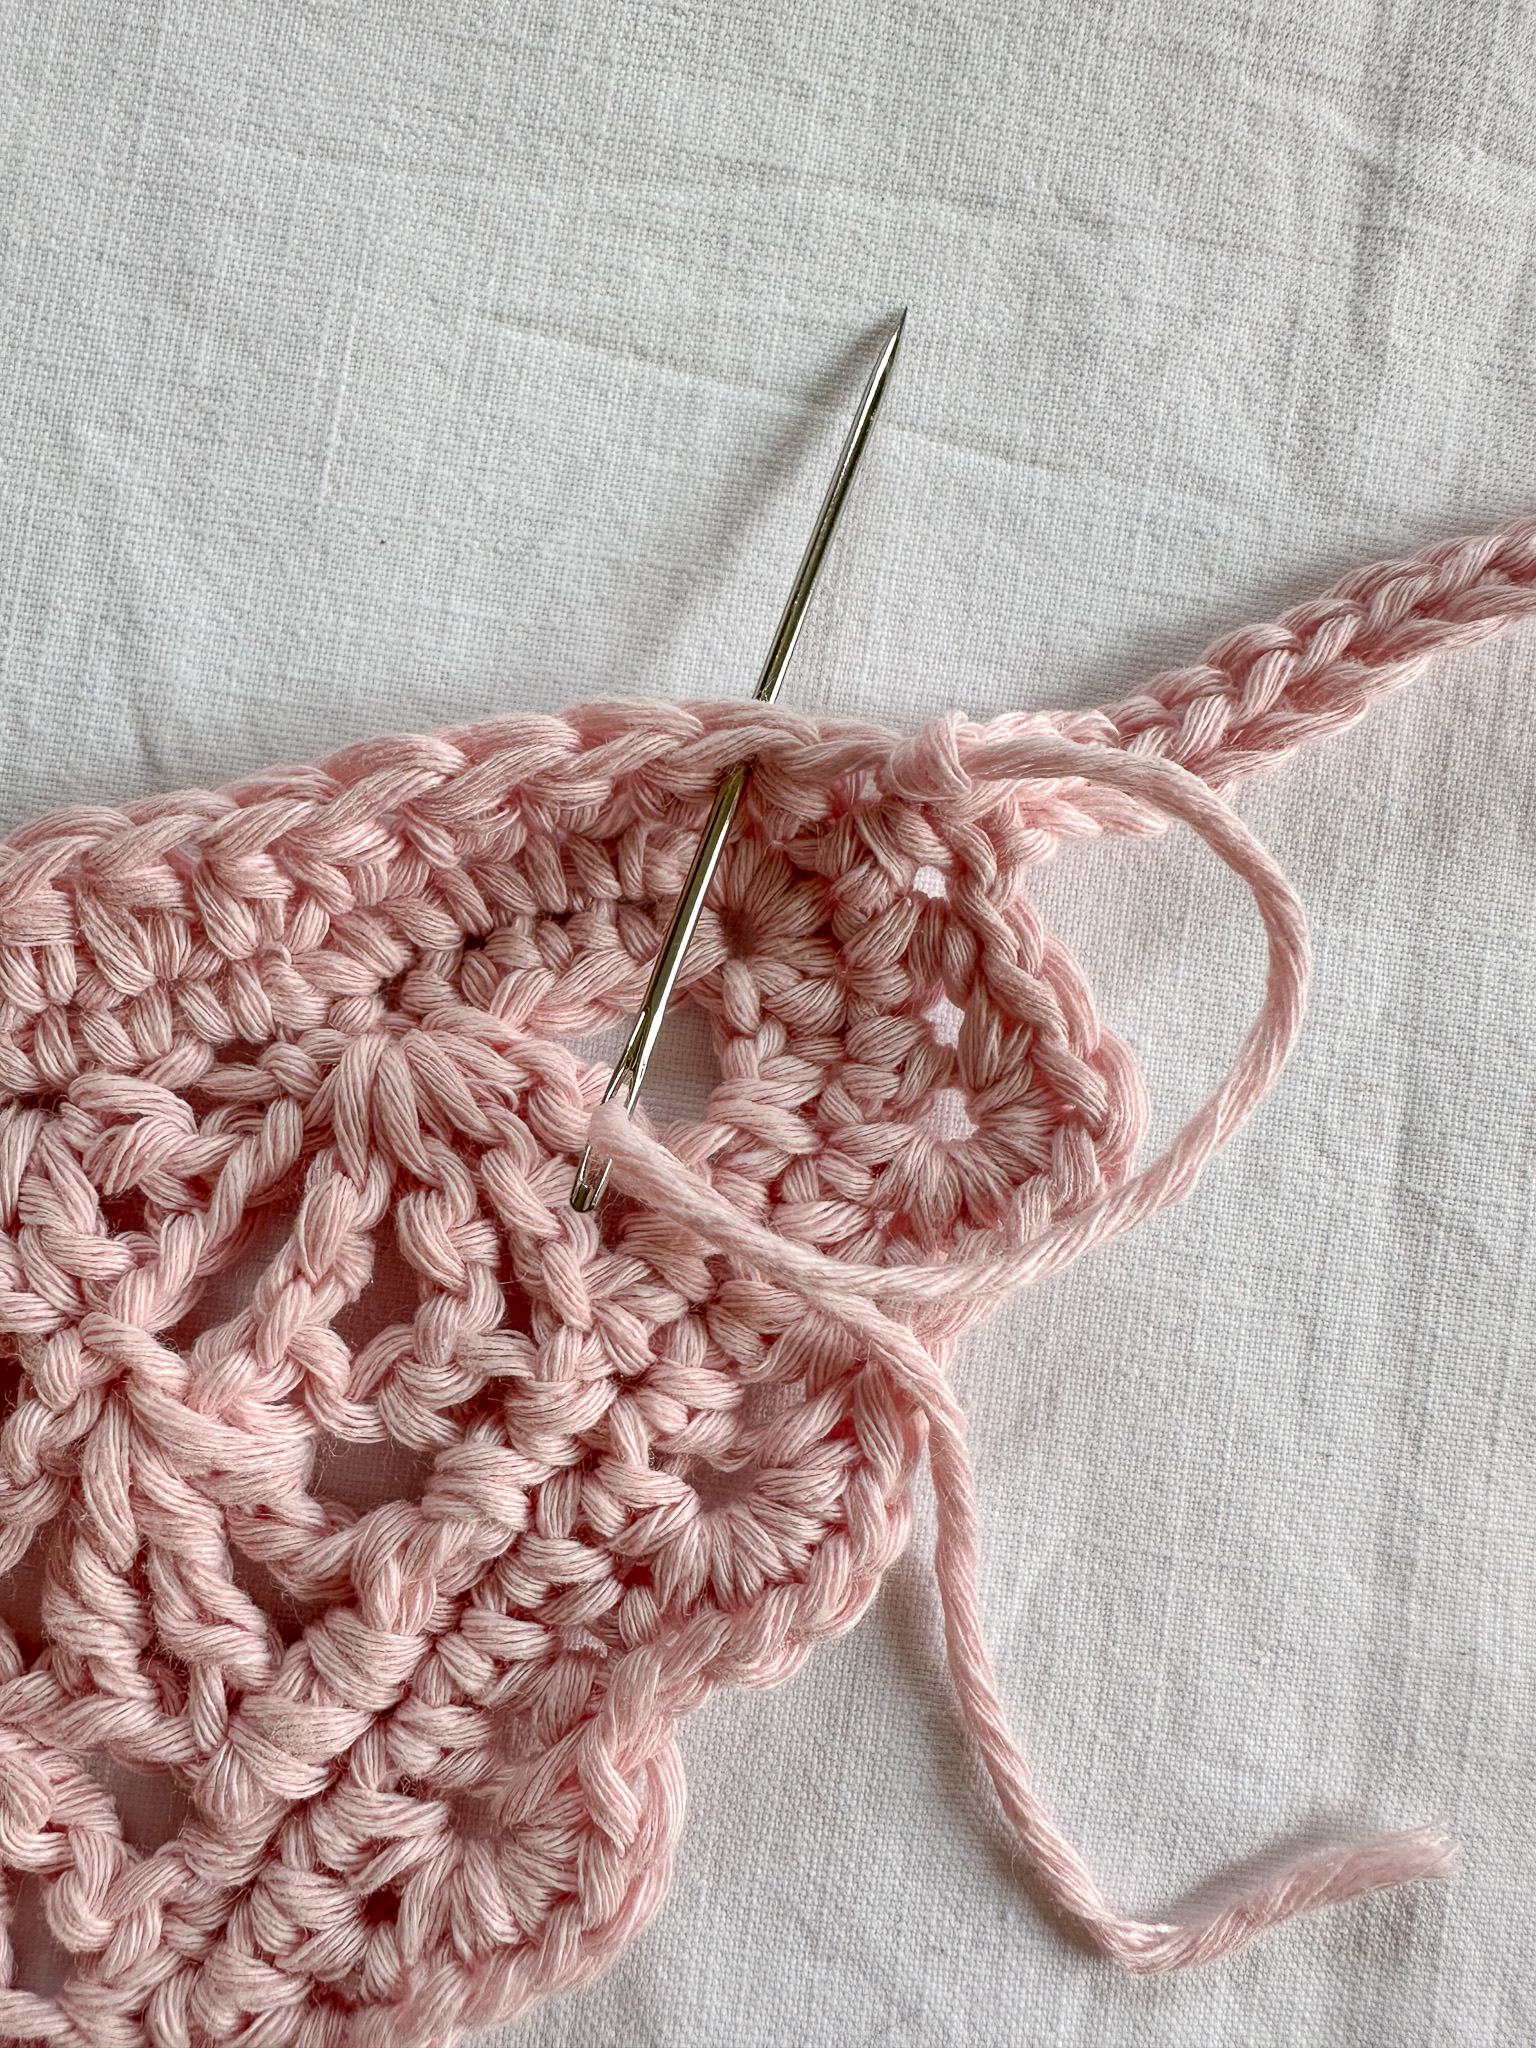
Cut the yarn, leaving about 20 cm of tail. Thread the yarn onto a needle. Insert the yarn under the next stitch (from front to back). Then bring the needle down into the first stitch (from top to bottom). Secure the yarn on the back with a couple of knots.
If you prefer to watch a video, see the bottom of the instructions.
Your bandana is now finished! :)
Crochet Pattern (US Terms)
This section uses crochet abbreviations. If you need more guidance, refer to the simpler version with images.
Abbreviations:
st = stitch
sc = single crochet
hdc = half double crochet
dc = double crochet
tr = treble crochet
sl st = slip stitch
ch = chain
sk = skip
*…* = repeat instructions within *
[ … ] = work all stitches in the same stitch
( … ) = total stitch count for the row
This bandana is worked loosely to ensure a nice drape—do not pull tightly or struggle to get stitches onto the hook.
Foundation: Ch 64
Row 1:
Sk last ch, 5 sc, *1 sc, 1 ch, sk 1. Work in the same stitch: [1 dc, 1 ch, 1 dc, 1 ch, 1 dc], 1 ch, sk 1, 2 sc* x9, 4 sc, ch 1, turn. (9 arches)
Row 2: (To make it easier to read, this row is divided into 3 parts, but it is all worked in the same row)
Beginning of row: sc 1, ch 1, sk 3. Work in the same stitch 4 times: [dc 1, ch 1], sk 4, sc 1.
Middle repeats: *ch 1, sk 4. Work in the same stitch 3 times: [dc 1, ch 1], sk 4, sc 1* x8
End of row: ch 1, sk 4. Work in the same stitch 4 times: [dc 1, ch 1]. sk 3, sc 1. Turn without chaining.
You should now have a total of 10 arches in the row.
Row 3: sl st 6. ch 1, sk 3, *Work in the same stitch 3 times: [dc 1, ch 1], sk 3, sc 1* x9
You should now have a total of 9 arches in the row.
Repeat Row 3 for a total of 9 rows. After each row, you will have one fewer arch, until you end up with only 1 arch in the final row.
Cut the yarn and weave in the ends.
Border
Round 1: Make a slip knot and work 3 sc in the bottom right corner (when the triangle is placed in front of you with the point facing upward). Work sc along the long side. Work 1 sc in each chain stitch and 1 sc in each double crochet stitch. The exact stitch count is not important, but it is important not to work too many single crochets per side, as this will cause the triangle to get a wavy edge.
Work 3 sc in the tip of the triangle and in the other corner.
Round 2: Now work another full round around the triangle, using hdc. In the corners/tips, work only 1 hdc per sc (not 3 stitches in the corners).
Round 3: Now you can choose which type of edge you want, a straight edge or a wavy edge.
Note: Round 3 is only worked along 2 of the 3 sides (not between the corners).
Wavy edge
To create the wavy edge, shell stitches are worked. Each shell consists of 4 stitches, so the number of stitches per side must be divisible by 4.
The bandana in the picture has 10 shells, which means the stitch count between the corner and the tip needs to be 40 stitches. You can add or remove shells depending on your size, but make sure the stitch count is divisible by 4.
Start by placing a stitch marker or a small piece of yarn at the tip. From the tip (excluding the tip itself), count 40 stitches toward where your hook is in the corner and mark stitch number 40.
You will likely have a few stitches left between the 40th stitch and your hook where you finished Round 3. Work slip stitches up to the marked stitch.
You are now ready to work the 10 shells.
Shells: *sk 1, [5 sc] sk 1, sl st* x10
At the tip:
In the stitch at the tip, work:
[1 sc, ch 3, sk 2 ch, 1 sl st in the chain, 1 sc].
Work 1 sl st in the next stitch before making 10 more shells on the other side. Then continue to the ties.
Straight edge
In each stitch, first work 1 ch, then 1 sl st in the next stitch. Repeat slip stitches with chain stitches between them all the way around. For the tip, follow the instructions under the wavy edge above.
Ties
Make a long chain of ch stitches. Adjust the number of stitches depending on how long you want the tie to be. If you want to be able to tie it around your head, 60 ch is enough (≈33 cm). If you want to tie it around your waist, make a longer tie (about 85 ch ≈46 cm).
Skip the last ch, and work sl st back along the chain toward the triangle. Cut the yarn and fasten off.
If you want an invisible finish, see the tips below.
Make a slip knot and start another tie in the other corner. Work in the same way with chain stitches and slip stitches.
Invisible finish:
Cut the yarn, leaving about 20 cm of tail. Thread the yarn onto a needle. Insert the yarn under the next stitch (from front to back). Then bring the needle down into the first stitch (from top to bottom). Secure the yarn on the back with a couple of knots.
The bandana is now finished! :)
The rights to this pattern belong to MYO Make Your Own. The pattern or its pictures may not be copied, shared or resold either in parts or in its entirety, but you may sell items you have crocheted from this pattern. If you have questions about the pattern, contact MYO at hello@makeyourown.se.
This bandana is crocheted loosely to give it a beautiful drape. Be sure to crochet loosely and avoid pulling the stitches too tightly, as this can make the bandana stiff and cause it to lose its flow.
Chain 64 stitches.
If you are unsure how to crochet a chain, watch the video below.
Row 1
Skip the last chain stitch you made. Work 5 single crochet stitches along the chain.
*Make 1 single crochet followed by 1 chain stitch. Skip 1 stitch. In the next stitch, work: 1 double crochet, 1 chain stitch, 1 double crochet, 1 chain stitch, 1 double crochet. Skip 1 stitch, make 1 chain stitch, then work 2 single crochet stitches.*
Repeat everything between *...* a total of 9 times. The needles indicate the section that should be repeated 9 times.
After these 9 repeats (9 arches), work 4 single crochet stitches.
Finish with 1 chain stitch and turn. You should have a total of 9 arches across the row.
If you are unsure how to work a single crochet or a double crochet, see the videos below.
Row 2
Work 1 single crochet followed by 1 chain stitch. Skip 3 stitches. In the next stitch (the 4th stitch), work the following: repeat *1 treble crochet, 1 chain stitch* a total of 4 times, all into the same stitch.
You have now reached the first arch from Row 1. Work 1 single crochet into the center double crochet of that arch, i.e. at the midpoint of the arch.
You have now completed the first arch of the row.
If you are unsure how to work a treble crochet, see the video below.
Middle of the Row / Middle Arches
You will now work arches between each of the existing arches, for a total of 8 times. The needle indicates the stitch where the arch should begin.
Start with 1 chain stitch. In the stitch indicated by the needle in the picture (the stitch located between two arches), work the following: repeat 1 treble crochet, 1 chain stitch a total of 3 times. Work 1 single crochet into the arch below at its highest point.
You have now completed one arch between two arches. Continue in the same way a total of 8 times.
The last arch at the edge is worked slightly differently.
End of the Row / Edge Arch
Begin with 1 chain stitch.
You will now make the final arch in the 5th stitch from the end. See where the needle is pointing. In that stitch, repeat 1 treble crochet, 1 chain stitch a total of 4 times. Finish with 1 single crochet in the very last stitch of the row.
You should now have a total of 10 arches across the row. The first and last arches of the row each have 4 strands, while all 8 middle arches should have 3 strands.
Turn your work without making a chain stitch.
Row 3
Begin by working slip stitches along the edge of the arch below until you reach the 3rd treble crochet (the 3rd strand) of the edge arch. This is approximately 6 slip stitches.
Make 1 chain stitch, then work an arch with 3 treble crochet strands between the next two arches, in the same way you worked the middle arches in the previous row. The needle indicates the stitch where you should work the single crochet between the two arches.
Continue in the same manner across the entire row. You should have a total of 9 arches on Row 3.
Turn your work without making a chain stitch.
Repeat Row 3 for a total of 9 rows. After each row, you will have one fewer arch, until you end up with only 1 arch in the final row.
Cut the yarn and weave in the ends.
Border
Round 1: Make a slip knot and work 3 single crochet stitches in the bottom right corner (when the triangle is placed in front of you with the point facing upward).
Work single crochet stitches along the long side. Work 1 single crochet in each chain stitch and 1 single crochet in each double crochet.
The exact number is not very important, but it is important not to make too many single crochet stitches per side, as this will cause the triangle to develop a wavy edge.
At the tip of the triangle and in the other corner, work 3 single crochet stitches.
Round 2: Now work another full round around the triangle, but using half double crochet stitches. In the corners/points, work only 1 half double crochet per single crochet (not 3 stitches in the corners).
Round 3: Now you can choose which type of edge you want, a straight edge or a wavy edge.
Note: Round 3 is only worked along 2 of the 3 sides (not between the corners).
Wavy edge
To create the wavy edge, shell stitches are worked. Each shell consists of 4 stitches, so the number of stitches per side must be divisible by 4.
The bandana in the picture has 10 shells, which means there must be 40 stitches between the corner and the tip. You can add or remove shells depending on your bandana’s size, but make sure the stitch count is divisible by 4.
Start by placing a stitch marker or a small piece of yarn at the tip. From the tip (excluding the tip itself), count 40 stitches toward where your hook is now at the corner and mark stitch number 40.
You will likely have a few stitches left between the 40th stitch and your hook, where you finished Round 3. Work slip stitches up to the marked stitch.
You are now ready to work the 10 shells.
Shells:
Skip 1 stitch. Work 5 single crochet stitches in the same stitch. Skip the next stitch and then work 1 slip stitch. You have now completed one shell.
Repeat this a total of 10 times (10 shells).
At the tip:
In the stitch at the tip, work: 1 single crochet, 3 chain stitches, 1 slip stitch into the first of the 3 chain stitches, and then finish with 1 single crochet in the same stitch where you started.
Make 1 slip stitch in the next stitch before you continue with 10 more shells on the other side.
Then proceed to the next step for the ties.
Straight edge
In each stitch, first make 1 chain stitch, then 1 slip stitch in the next stitch. Repeat slip stitches with chain stitches between them all the way around. For the tip, follow the instructions under the wavy edge above.
Then proceed to the next step.
Ties
You are now at one of the corners where you want to attach a tie.
Make a long chain of chain stitches. Adjust the number of stitches depending on how long you want the tie to be. If you want to be able to tie it around your head, about 60 chain stitches is enough (approximately 33 cm). If you want to tie it around your waist, you will need a longer tie (about 85 chain stitches, approximately 46 cm).
Skip the last chain stitch, and work slip stitches back along the chain toward the triangle. Cut the yarn and fasten off.
If you want an invisible finish, see the tips under Step 7.
Now you will make another tie. Make a slip knot and start a second tie in the other corner. Work in the same way with chain stitches and slip stitches.
Invisible finish:
Cut the yarn, leaving about 20 cm of tail. Thread the yarn onto a needle. Insert the yarn under the next stitch (from front to back). Then bring the needle down into the first stitch (from top to bottom). Secure the yarn on the back with a couple of knots.
If you prefer to watch a video, see the bottom of the instructions.
Your bandana is now finished! :)
Crochet Pattern (US Terms)
This section uses crochet abbreviations. If you need more guidance, refer to the simpler version with images.
Abbreviations:
st = stitch
sc = single crochet
hdc = half double crochet
dc = double crochet
tr = treble crochet
sl st = slip stitch
ch = chain
sk = skip
*…* = repeat instructions within *
[ … ] = work all stitches in the same stitch
( … ) = total stitch count for the row
This bandana is worked loosely to ensure a nice drape—do not pull tightly or struggle to get stitches onto the hook.
Foundation: Ch 64
Row 1:
Sk last ch, 5 sc, *1 sc, 1 ch, sk 1. Work in the same stitch: [1 dc, 1 ch, 1 dc, 1 ch, 1 dc], 1 ch, sk 1, 2 sc* x9, 4 sc, ch 1, turn. (9 arches)
Row 2: (To make it easier to read, this row is divided into 3 parts, but it is all worked in the same row)
Beginning of row: sc 1, ch 1, sk 3. Work in the same stitch 4 times: [dc 1, ch 1], sk 4, sc 1.
Middle repeats: *ch 1, sk 4. Work in the same stitch 3 times: [dc 1, ch 1], sk 4, sc 1* x8
End of row: ch 1, sk 4. Work in the same stitch 4 times: [dc 1, ch 1]. sk 3, sc 1. Turn without chaining.
You should now have a total of 10 arches in the row.
Row 3: sl st 6. ch 1, sk 3, *Work in the same stitch 3 times: [dc 1, ch 1], sk 3, sc 1* x9
You should now have a total of 9 arches in the row.
Repeat Row 3 for a total of 9 rows. After each row, you will have one fewer arch, until you end up with only 1 arch in the final row.
Cut the yarn and weave in the ends.
Border
Round 1: Make a slip knot and work 3 sc in the bottom right corner (when the triangle is placed in front of you with the point facing upward). Work sc along the long side. Work 1 sc in each chain stitch and 1 sc in each double crochet stitch. The exact stitch count is not important, but it is important not to work too many single crochets per side, as this will cause the triangle to get a wavy edge.
Work 3 sc in the tip of the triangle and in the other corner.
Round 2: Now work another full round around the triangle, using hdc. In the corners/tips, work only 1 hdc per sc (not 3 stitches in the corners).
Round 3: Now you can choose which type of edge you want, a straight edge or a wavy edge.
Note: Round 3 is only worked along 2 of the 3 sides (not between the corners).
Wavy edge
To create the wavy edge, shell stitches are worked. Each shell consists of 4 stitches, so the number of stitches per side must be divisible by 4.
The bandana in the picture has 10 shells, which means the stitch count between the corner and the tip needs to be 40 stitches. You can add or remove shells depending on your size, but make sure the stitch count is divisible by 4.
Start by placing a stitch marker or a small piece of yarn at the tip. From the tip (excluding the tip itself), count 40 stitches toward where your hook is in the corner and mark stitch number 40.
You will likely have a few stitches left between the 40th stitch and your hook where you finished Round 3. Work slip stitches up to the marked stitch.
You are now ready to work the 10 shells.
Shells: *sk 1, [5 sc] sk 1, sl st* x10
At the tip:
In the stitch at the tip, work:
[1 sc, ch 3, sk 2 ch, 1 sl st in the chain, 1 sc].
Work 1 sl st in the next stitch before making 10 more shells on the other side. Then continue to the ties.
Straight edge
In each stitch, first work 1 ch, then 1 sl st in the next stitch. Repeat slip stitches with chain stitches between them all the way around. For the tip, follow the instructions under the wavy edge above.
Ties
Make a long chain of ch stitches. Adjust the number of stitches depending on how long you want the tie to be. If you want to be able to tie it around your head, 60 ch is enough (≈33 cm). If you want to tie it around your waist, make a longer tie (about 85 ch ≈46 cm).
Skip the last ch, and work sl st back along the chain toward the triangle. Cut the yarn and fasten off.
If you want an invisible finish, see the tips below.
Make a slip knot and start another tie in the other corner. Work in the same way with chain stitches and slip stitches.
Invisible finish:
Cut the yarn, leaving about 20 cm of tail. Thread the yarn onto a needle. Insert the yarn under the next stitch (from front to back). Then bring the needle down into the first stitch (from top to bottom). Secure the yarn on the back with a couple of knots.
The bandana is now finished! :)
The rights to this pattern belong to MYO Make Your Own. The pattern or its pictures may not be copied, shared or resold either in parts or in its entirety, but you may sell items you have crocheted from this pattern. If you have questions about the pattern, contact MYO at hello@makeyourown.se.


Share your creations with us
Thank you!
Your comment was sent!