
Storage rear seat “Torun”
Crochet a practical backseat organizer – perfect for yarn!
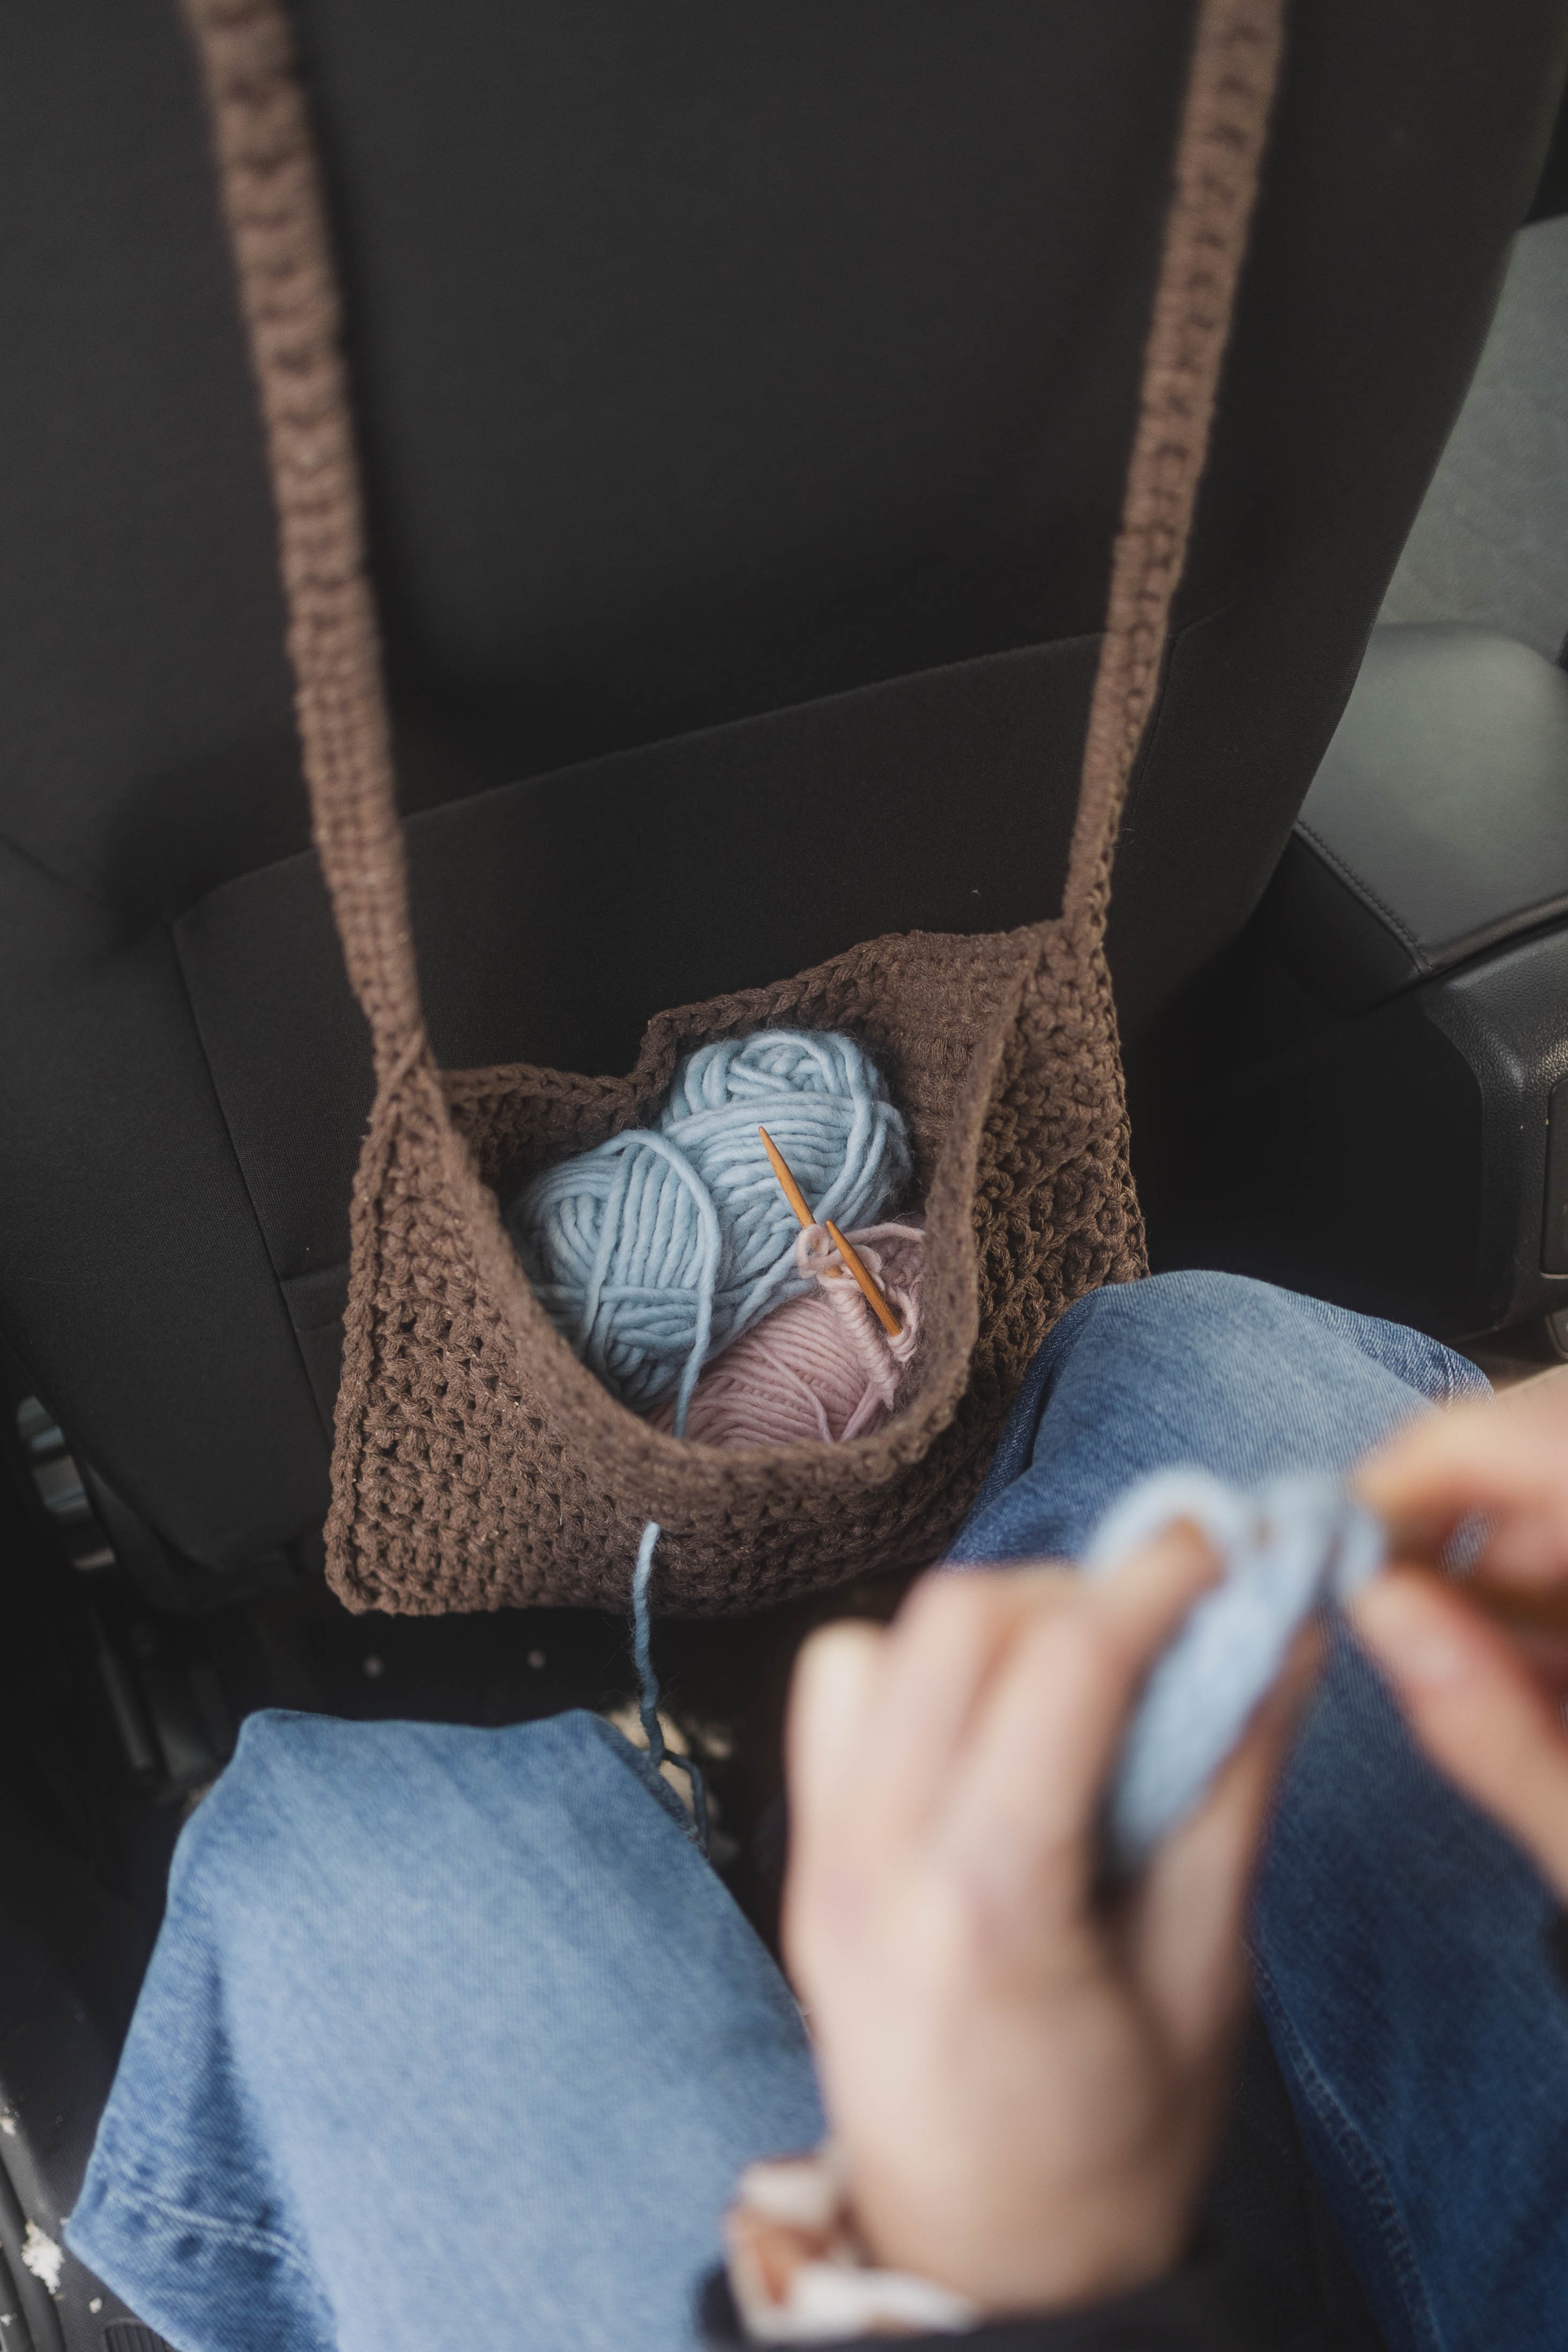
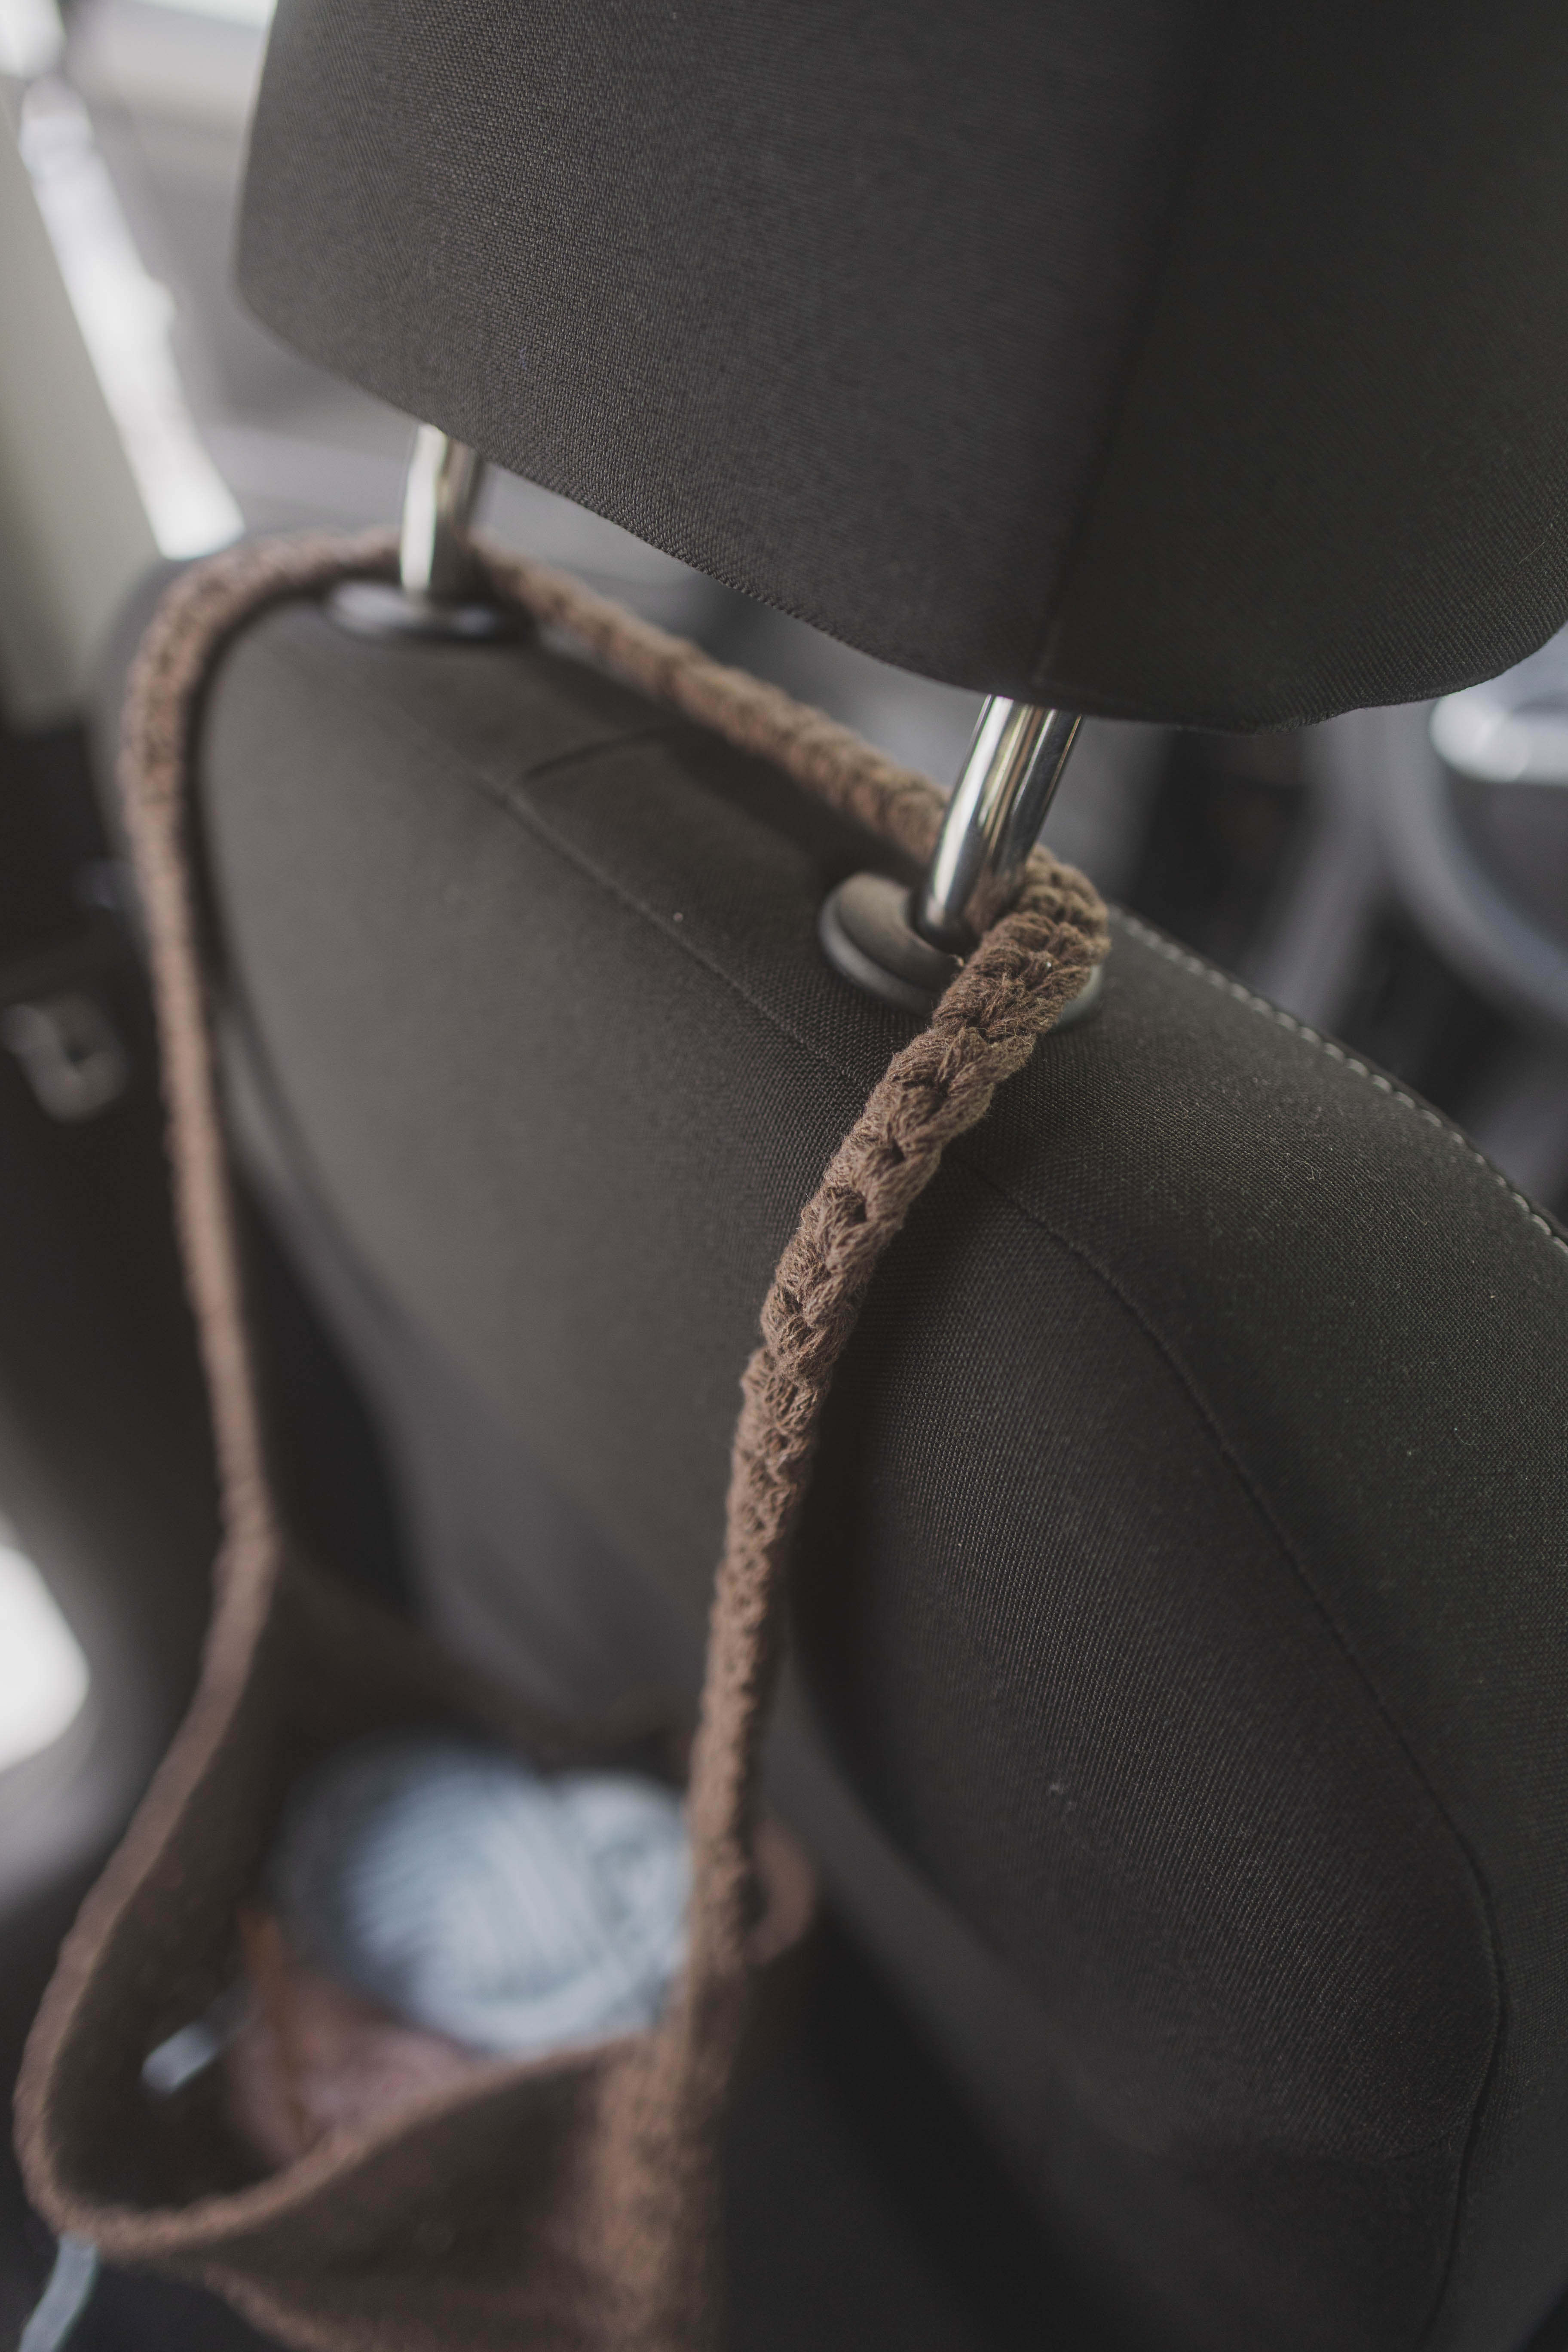
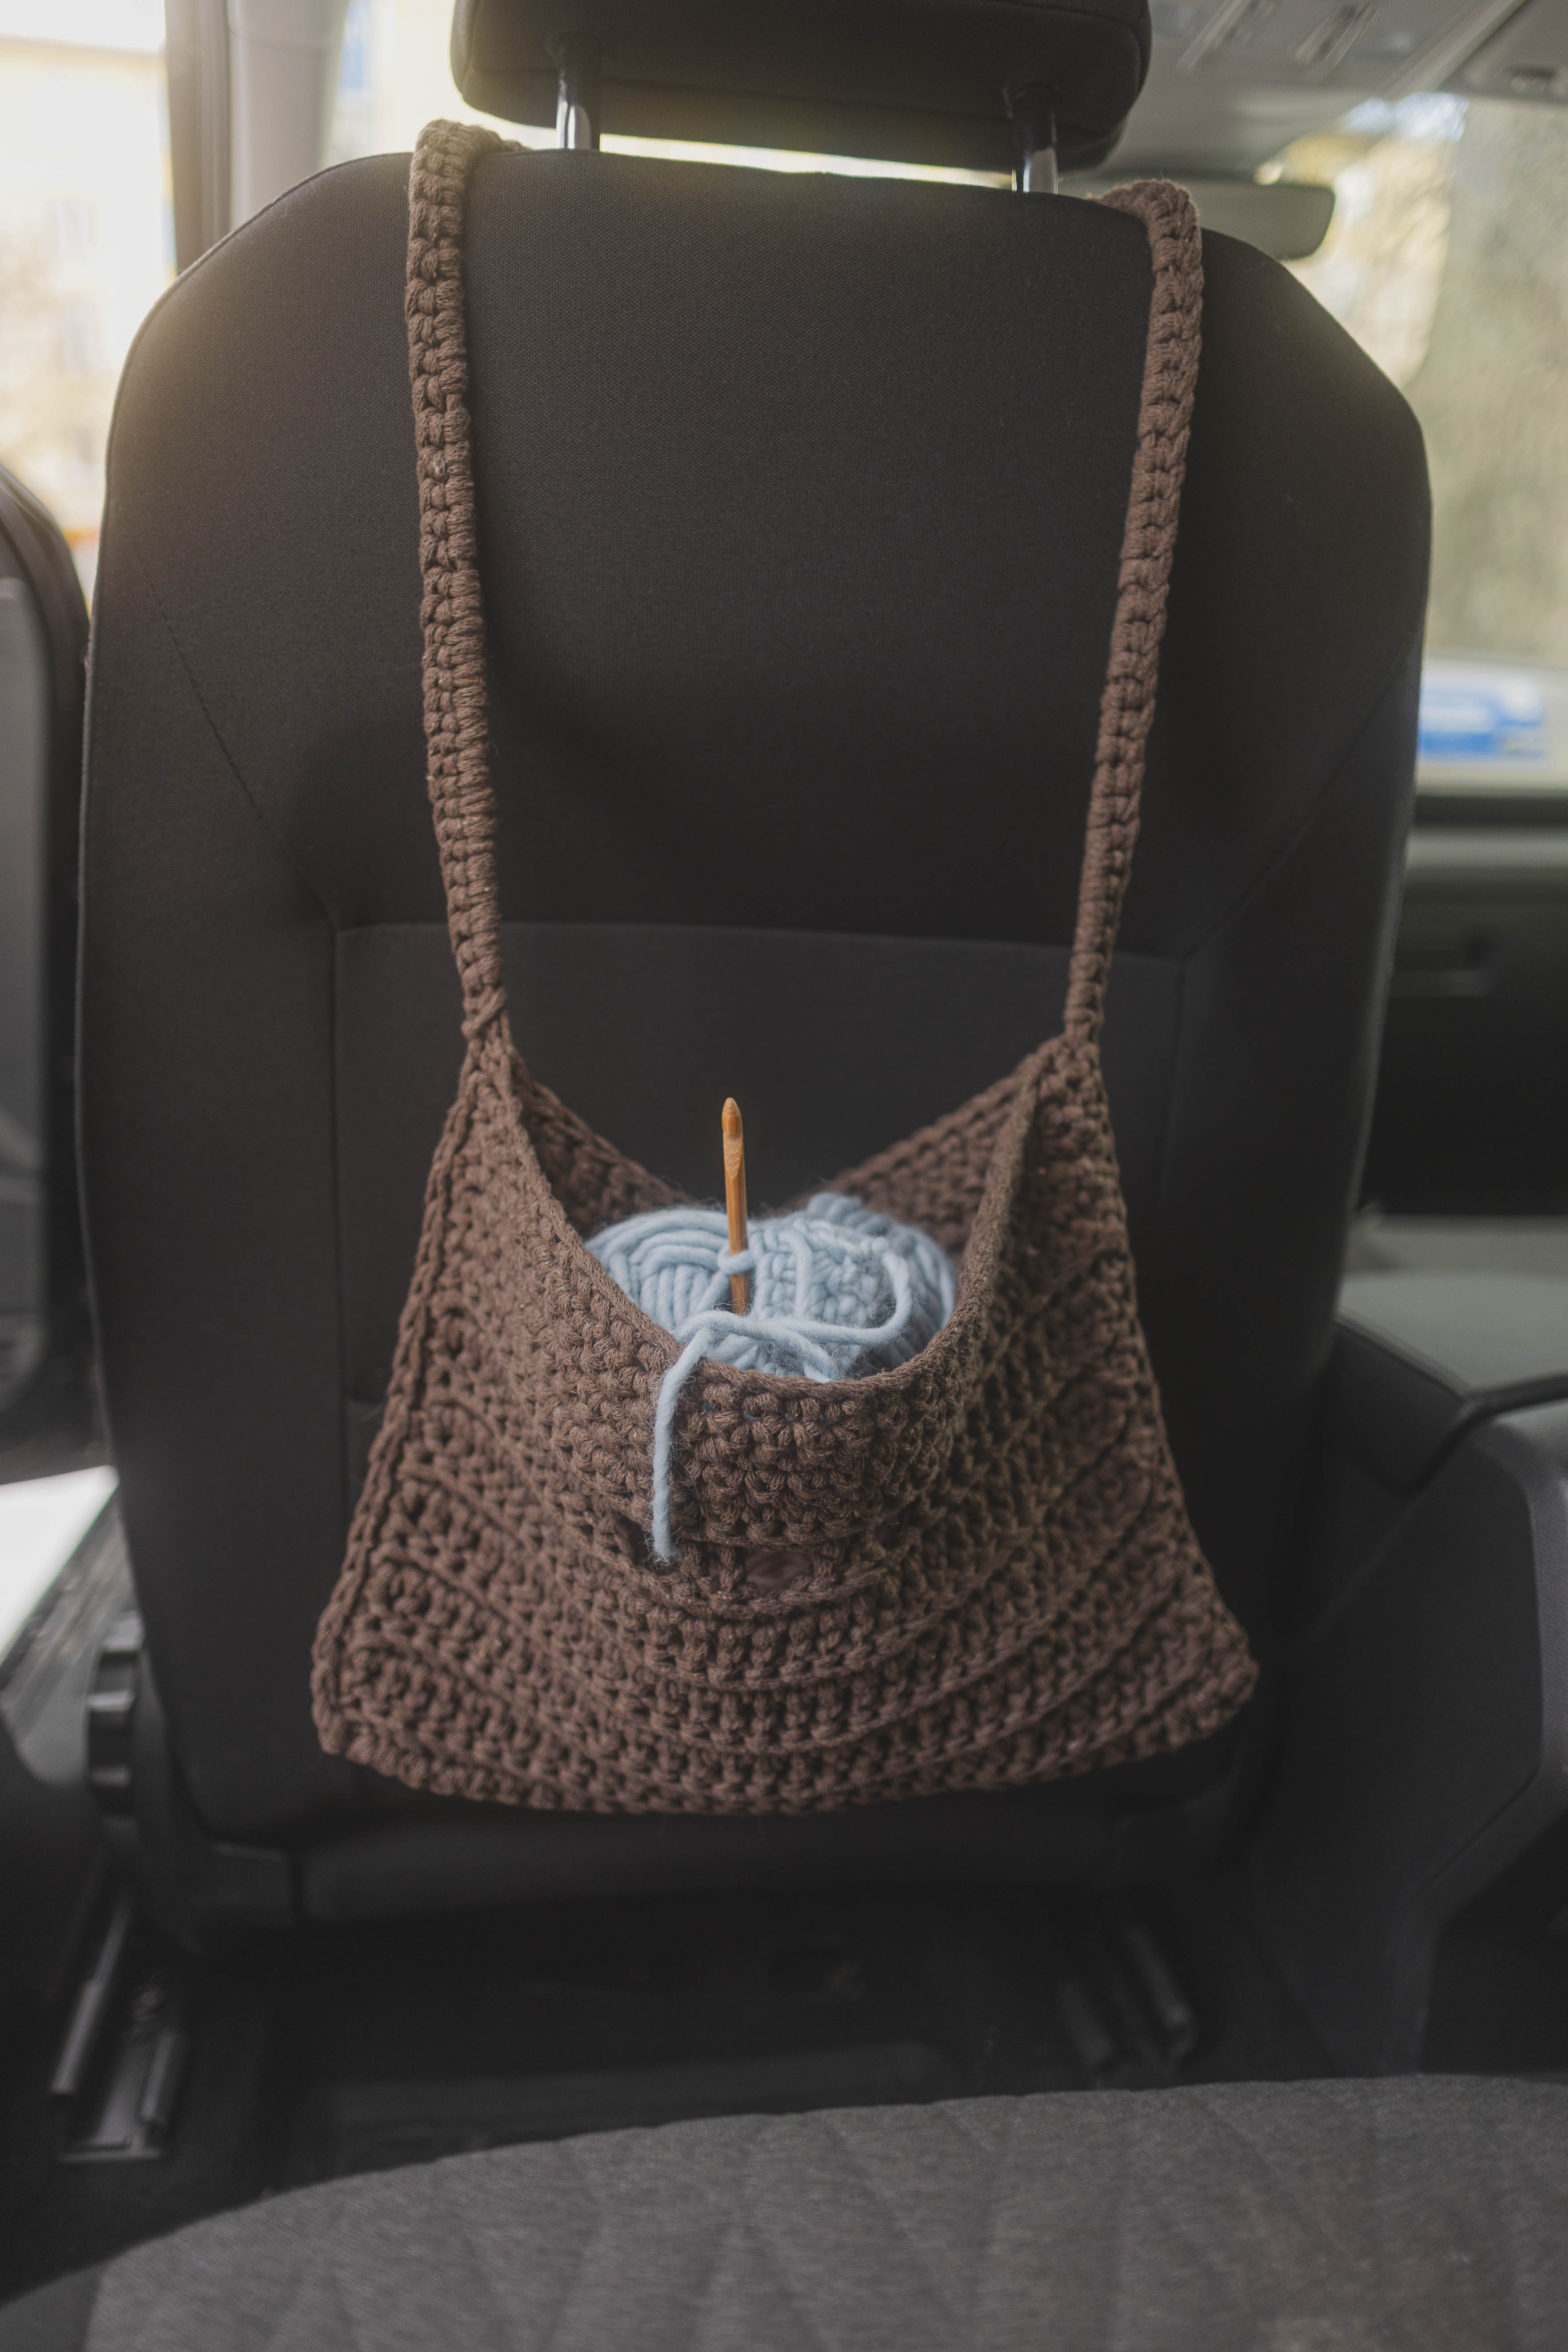
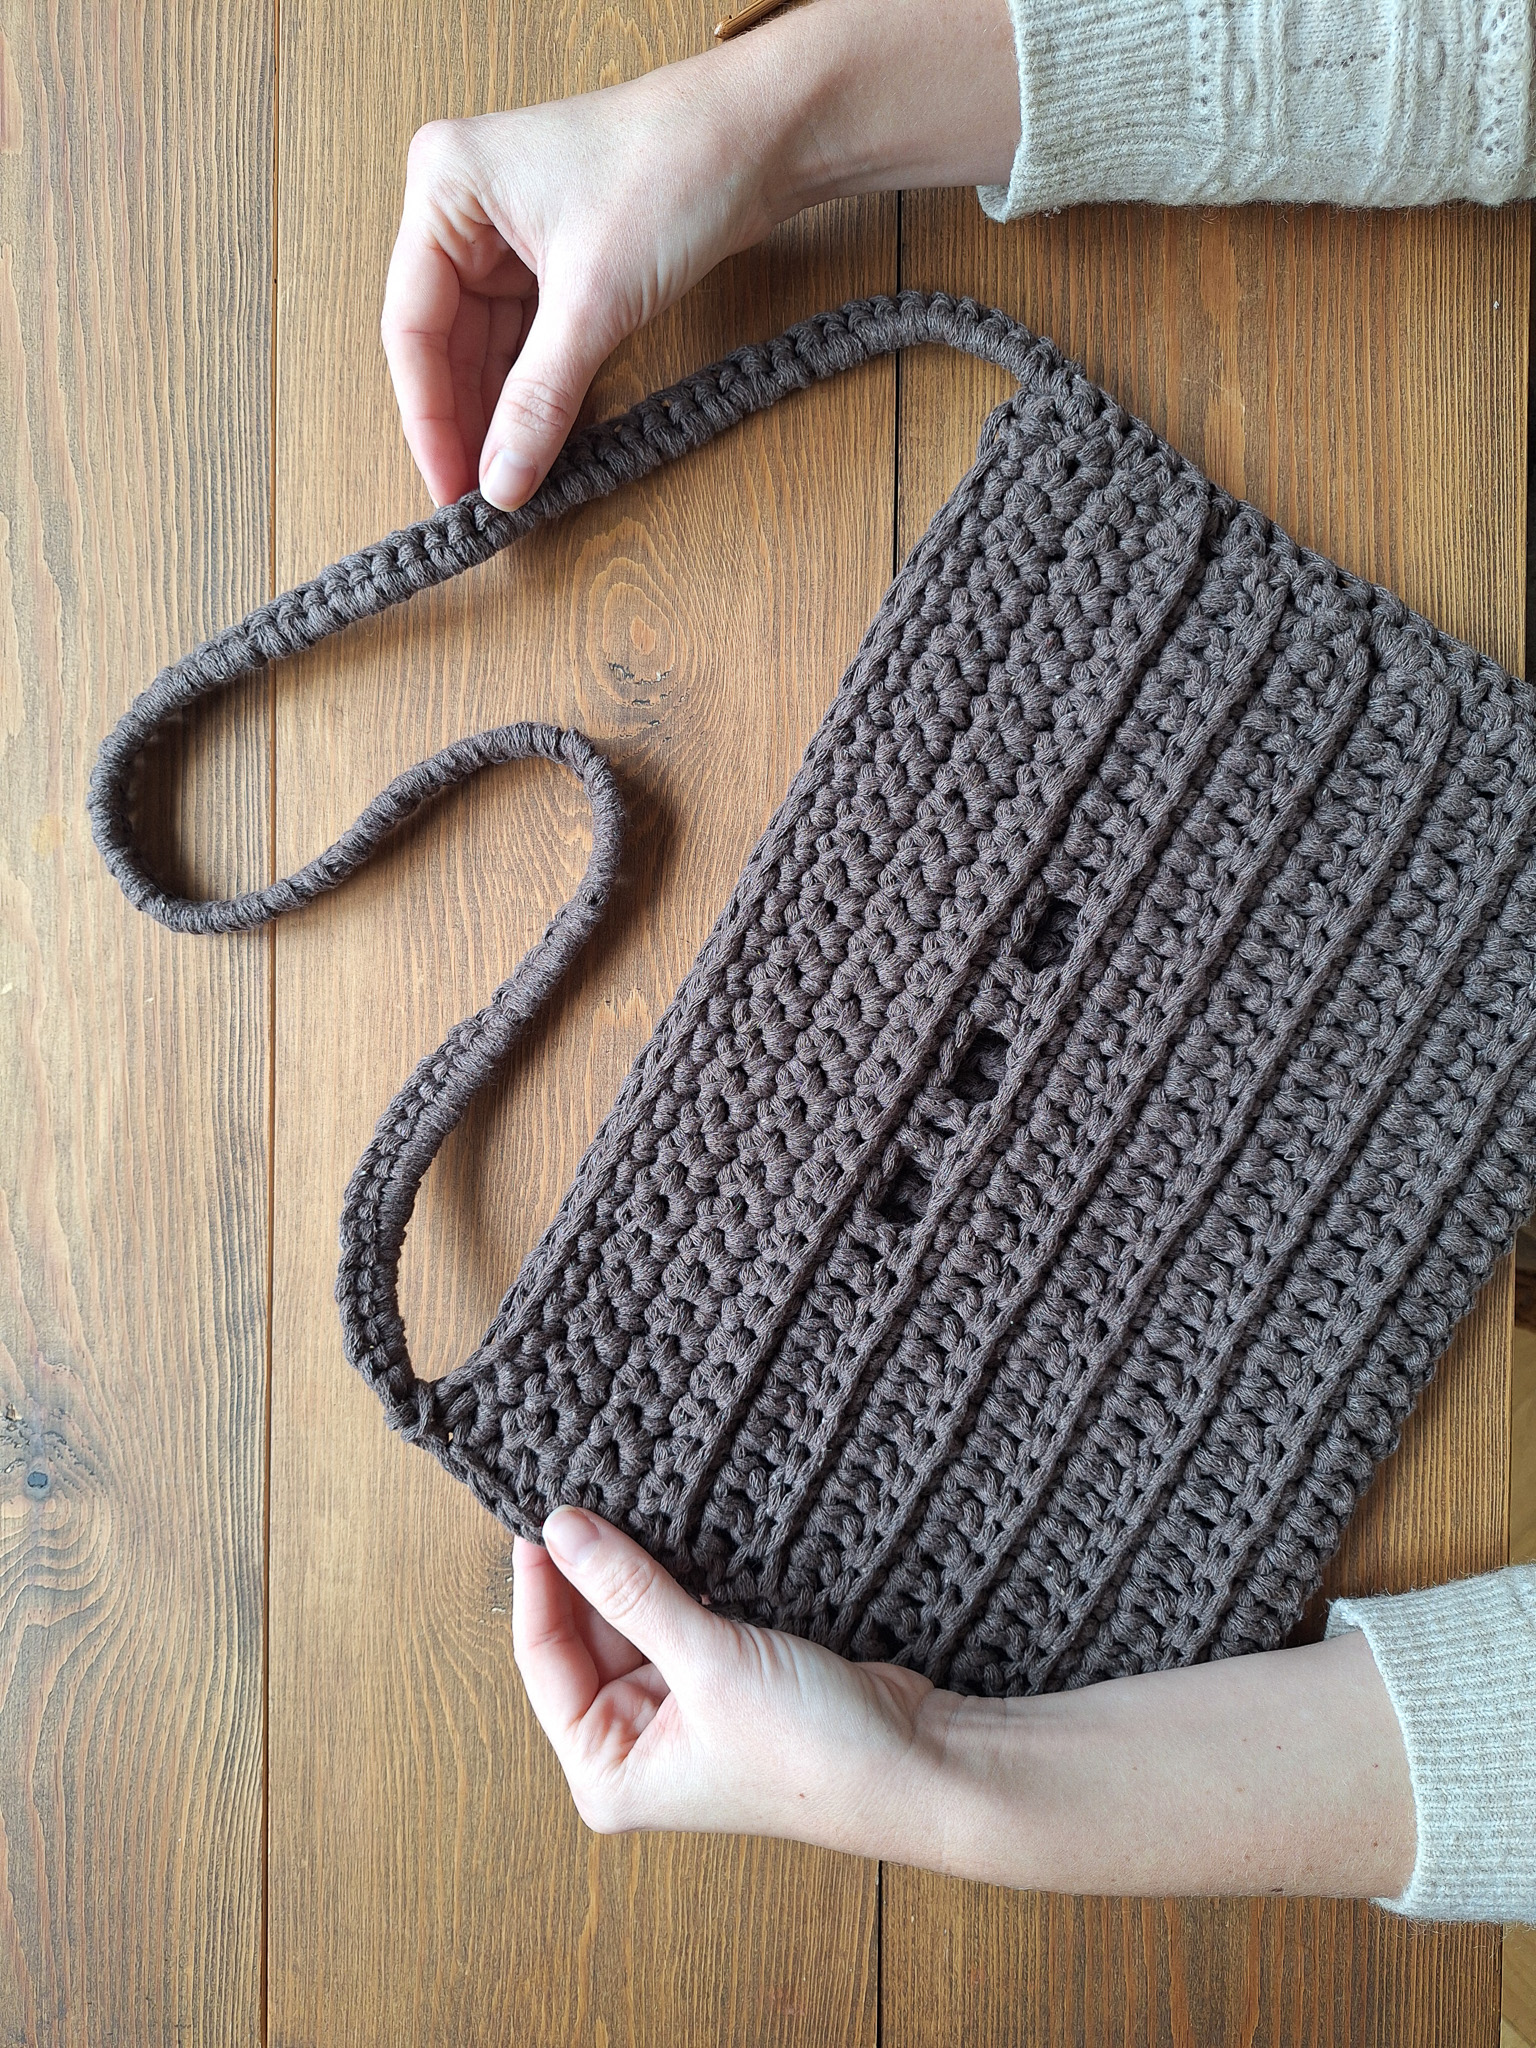
Torun is a practical crochet pattern for a smart storage bag designed for the car. The bag is easily hung over the seat, making it simple to bring your crochet or knitting project along on your journey. The hole pattern on the front allows you to pull the yarn directly from the skeins, which stay neatly in place inside the bag while you crochet or knit. The holes also make it easy to separate different skeins of yarn. In addition, there is space to store both crochet hooks and knitting needles in an easy and accessible way. You will need EKO Nano yarn, a 7 mm crochet hook, and scissors. For reference, we used the color “Cacao. The finished hanging organizer measures approximately 24 × 34 cm.
Yarn Consumption: approx. 240 g.
Please note that in this pattern, we use videos from our technique library together with images.

Here's how to do it
The bag is easy to crochet and we hope to see pictures of your bags with you on trips in your car or van. /Rebecca

This is what you need:
Here you can directly purchase the material for the product. Please note that the instruction is digital and appears here on the page (no written instruction).


.jpg)
Unleash your creativity
For only 85kr per month you get access to all our 300+ beginner-friendly instructions for crochet, knitting and macrame.
A perfect way to get started with your new hobby!

Front piece
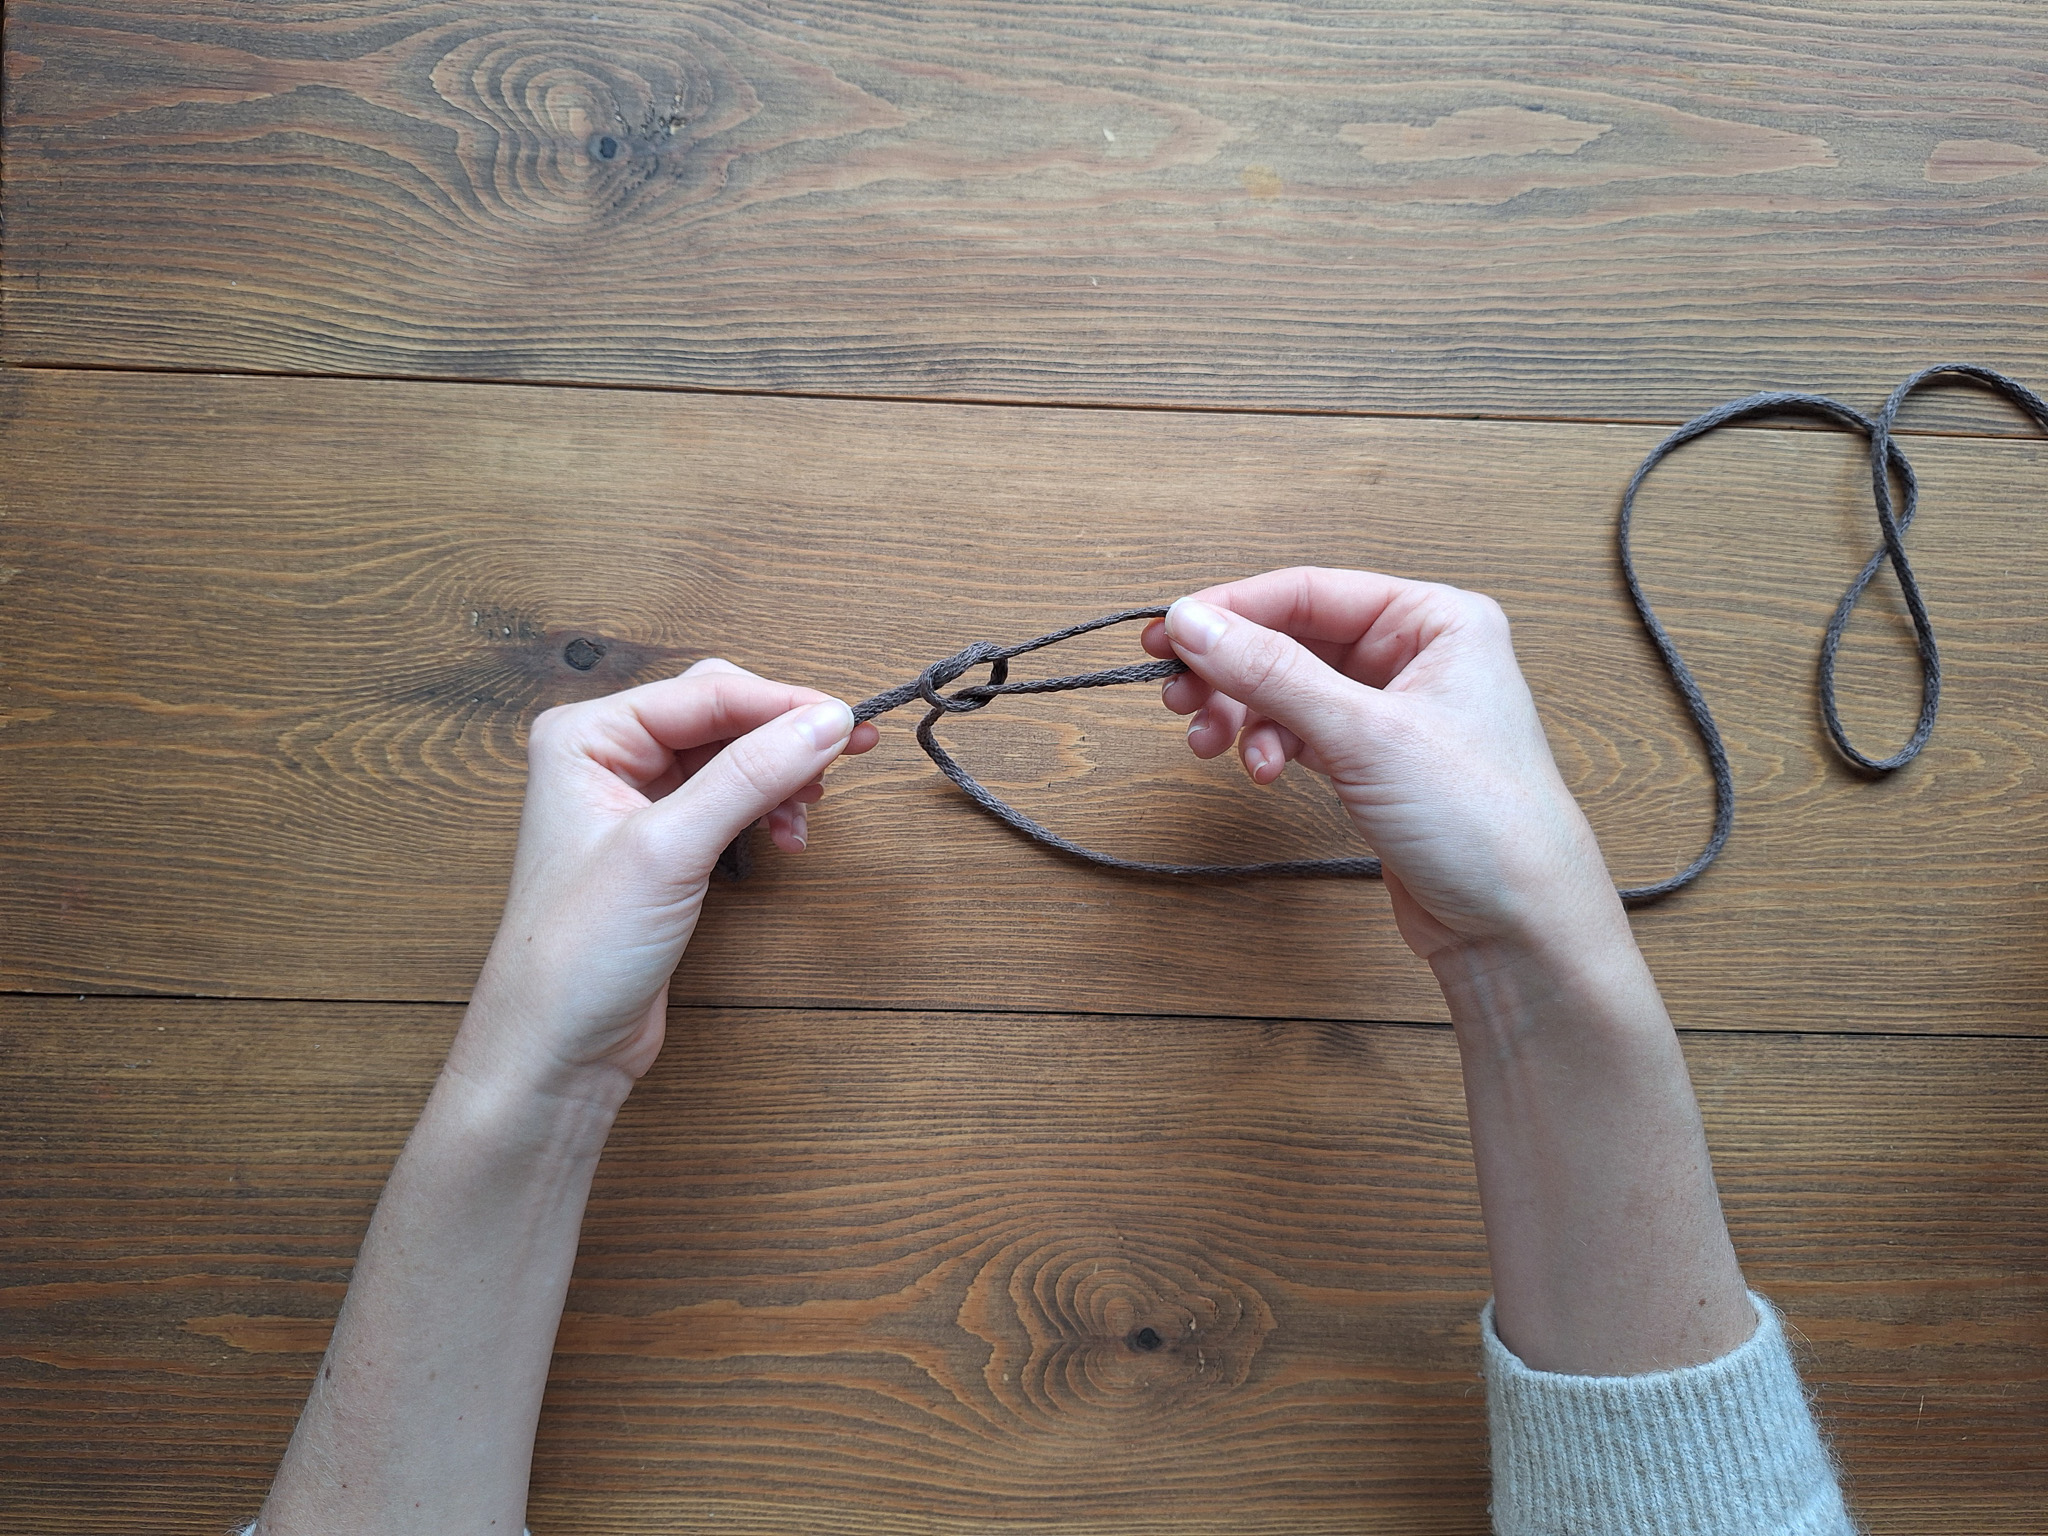
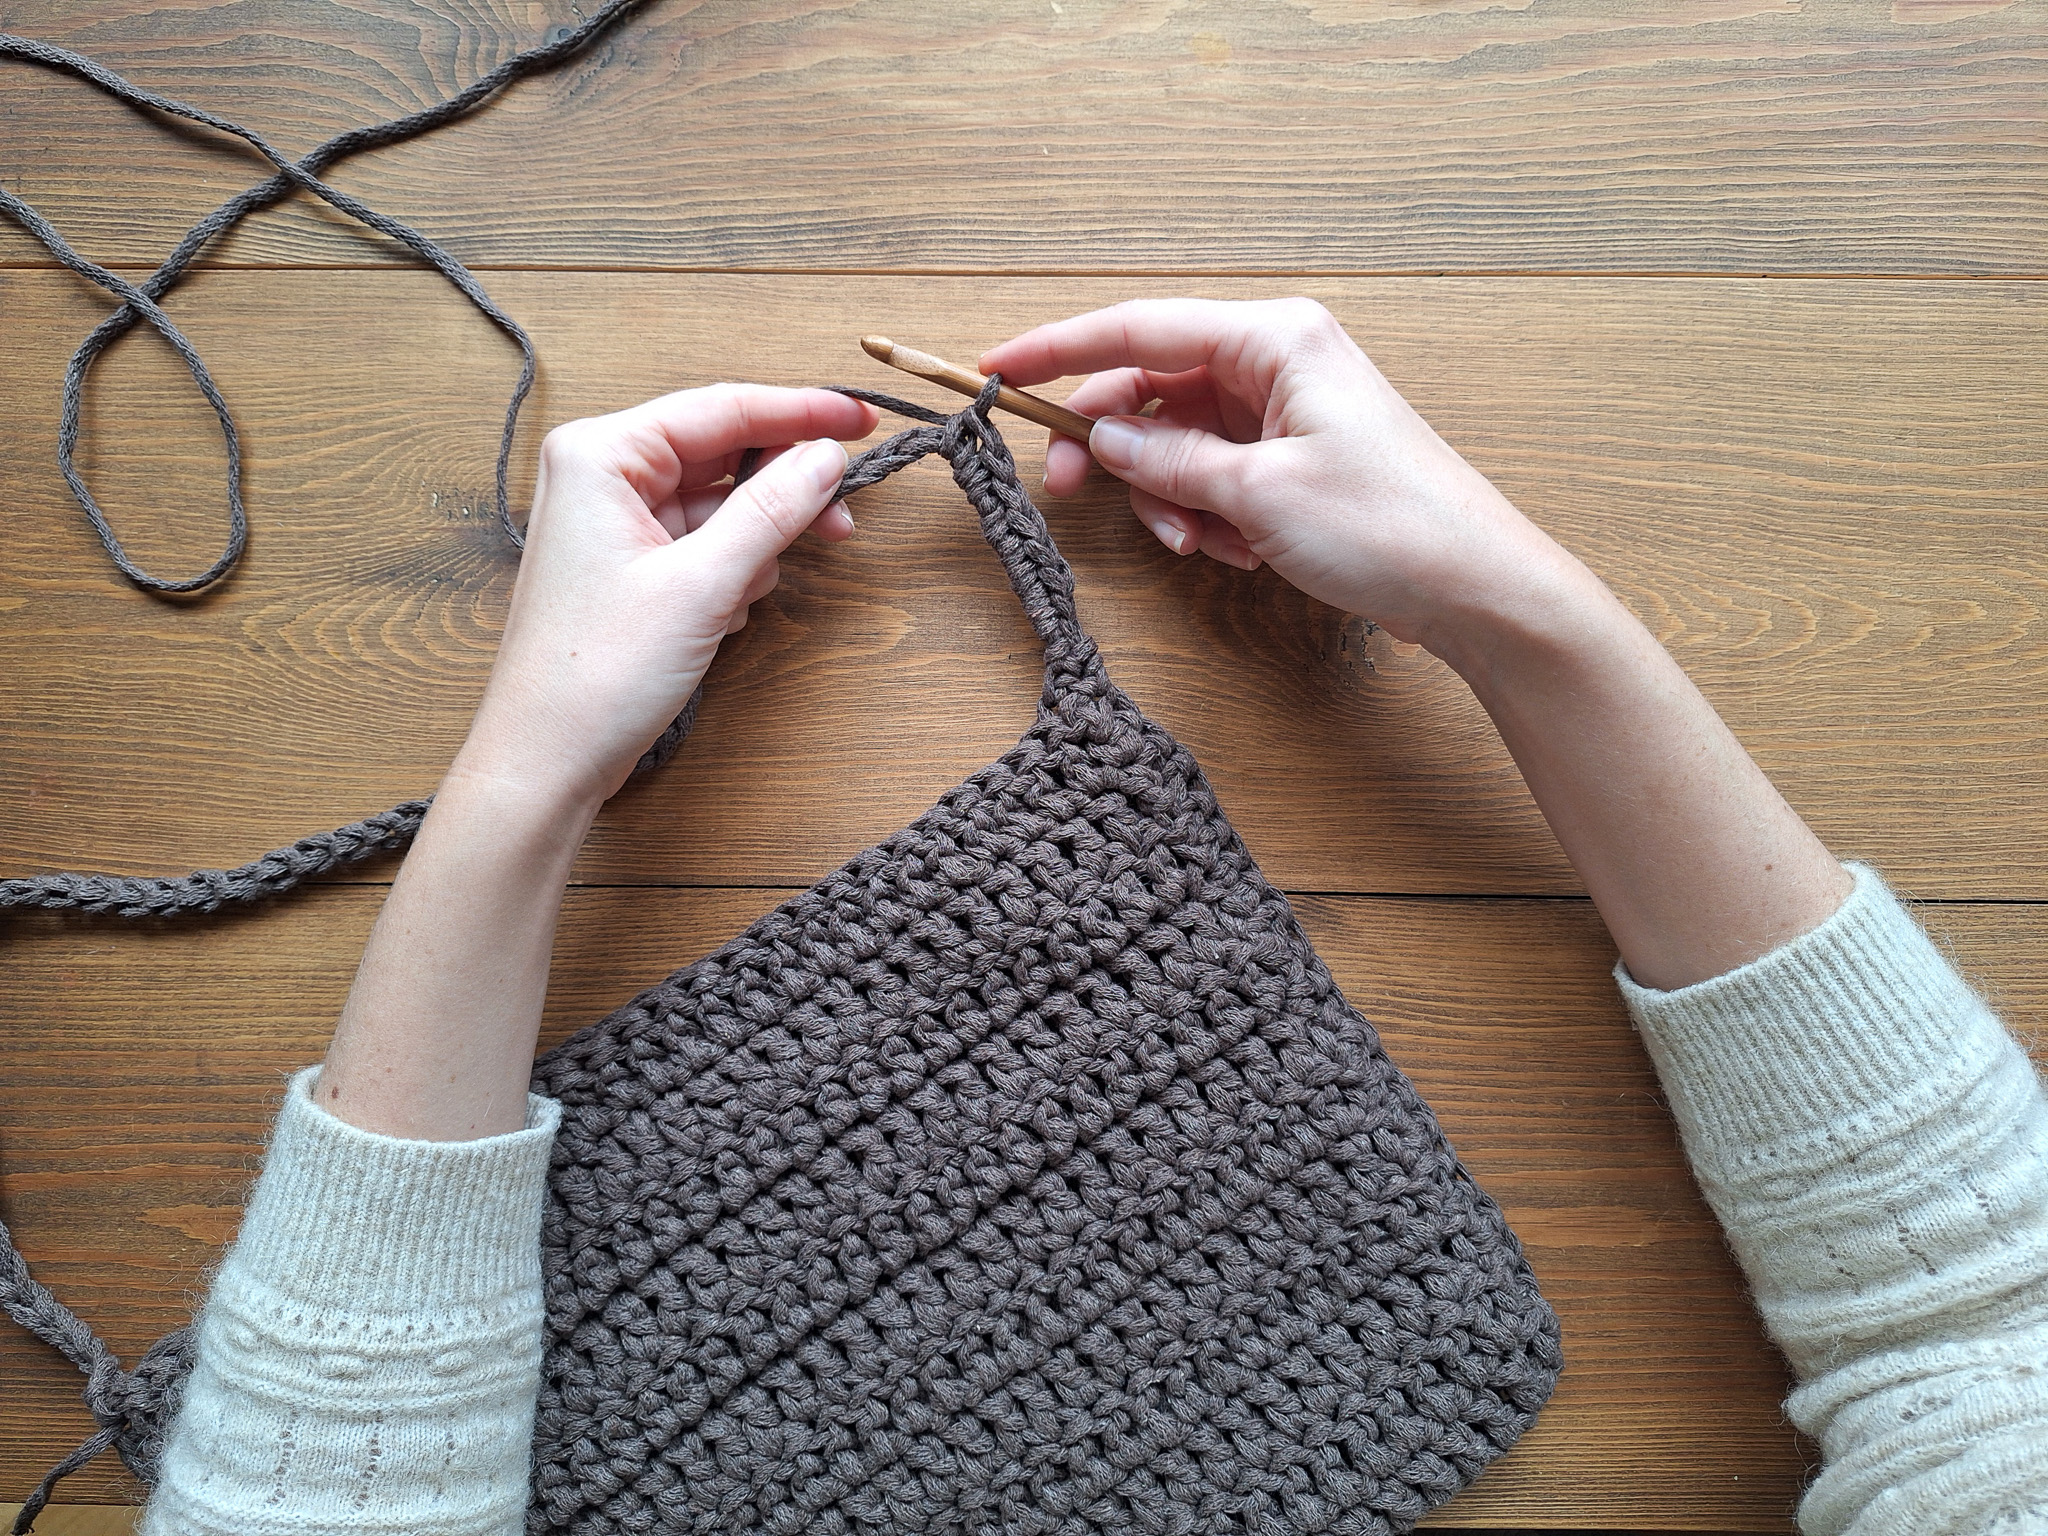
Start: Crochet a chain of 31 stitches. If you are not sure how to crochet a chain, see below video.
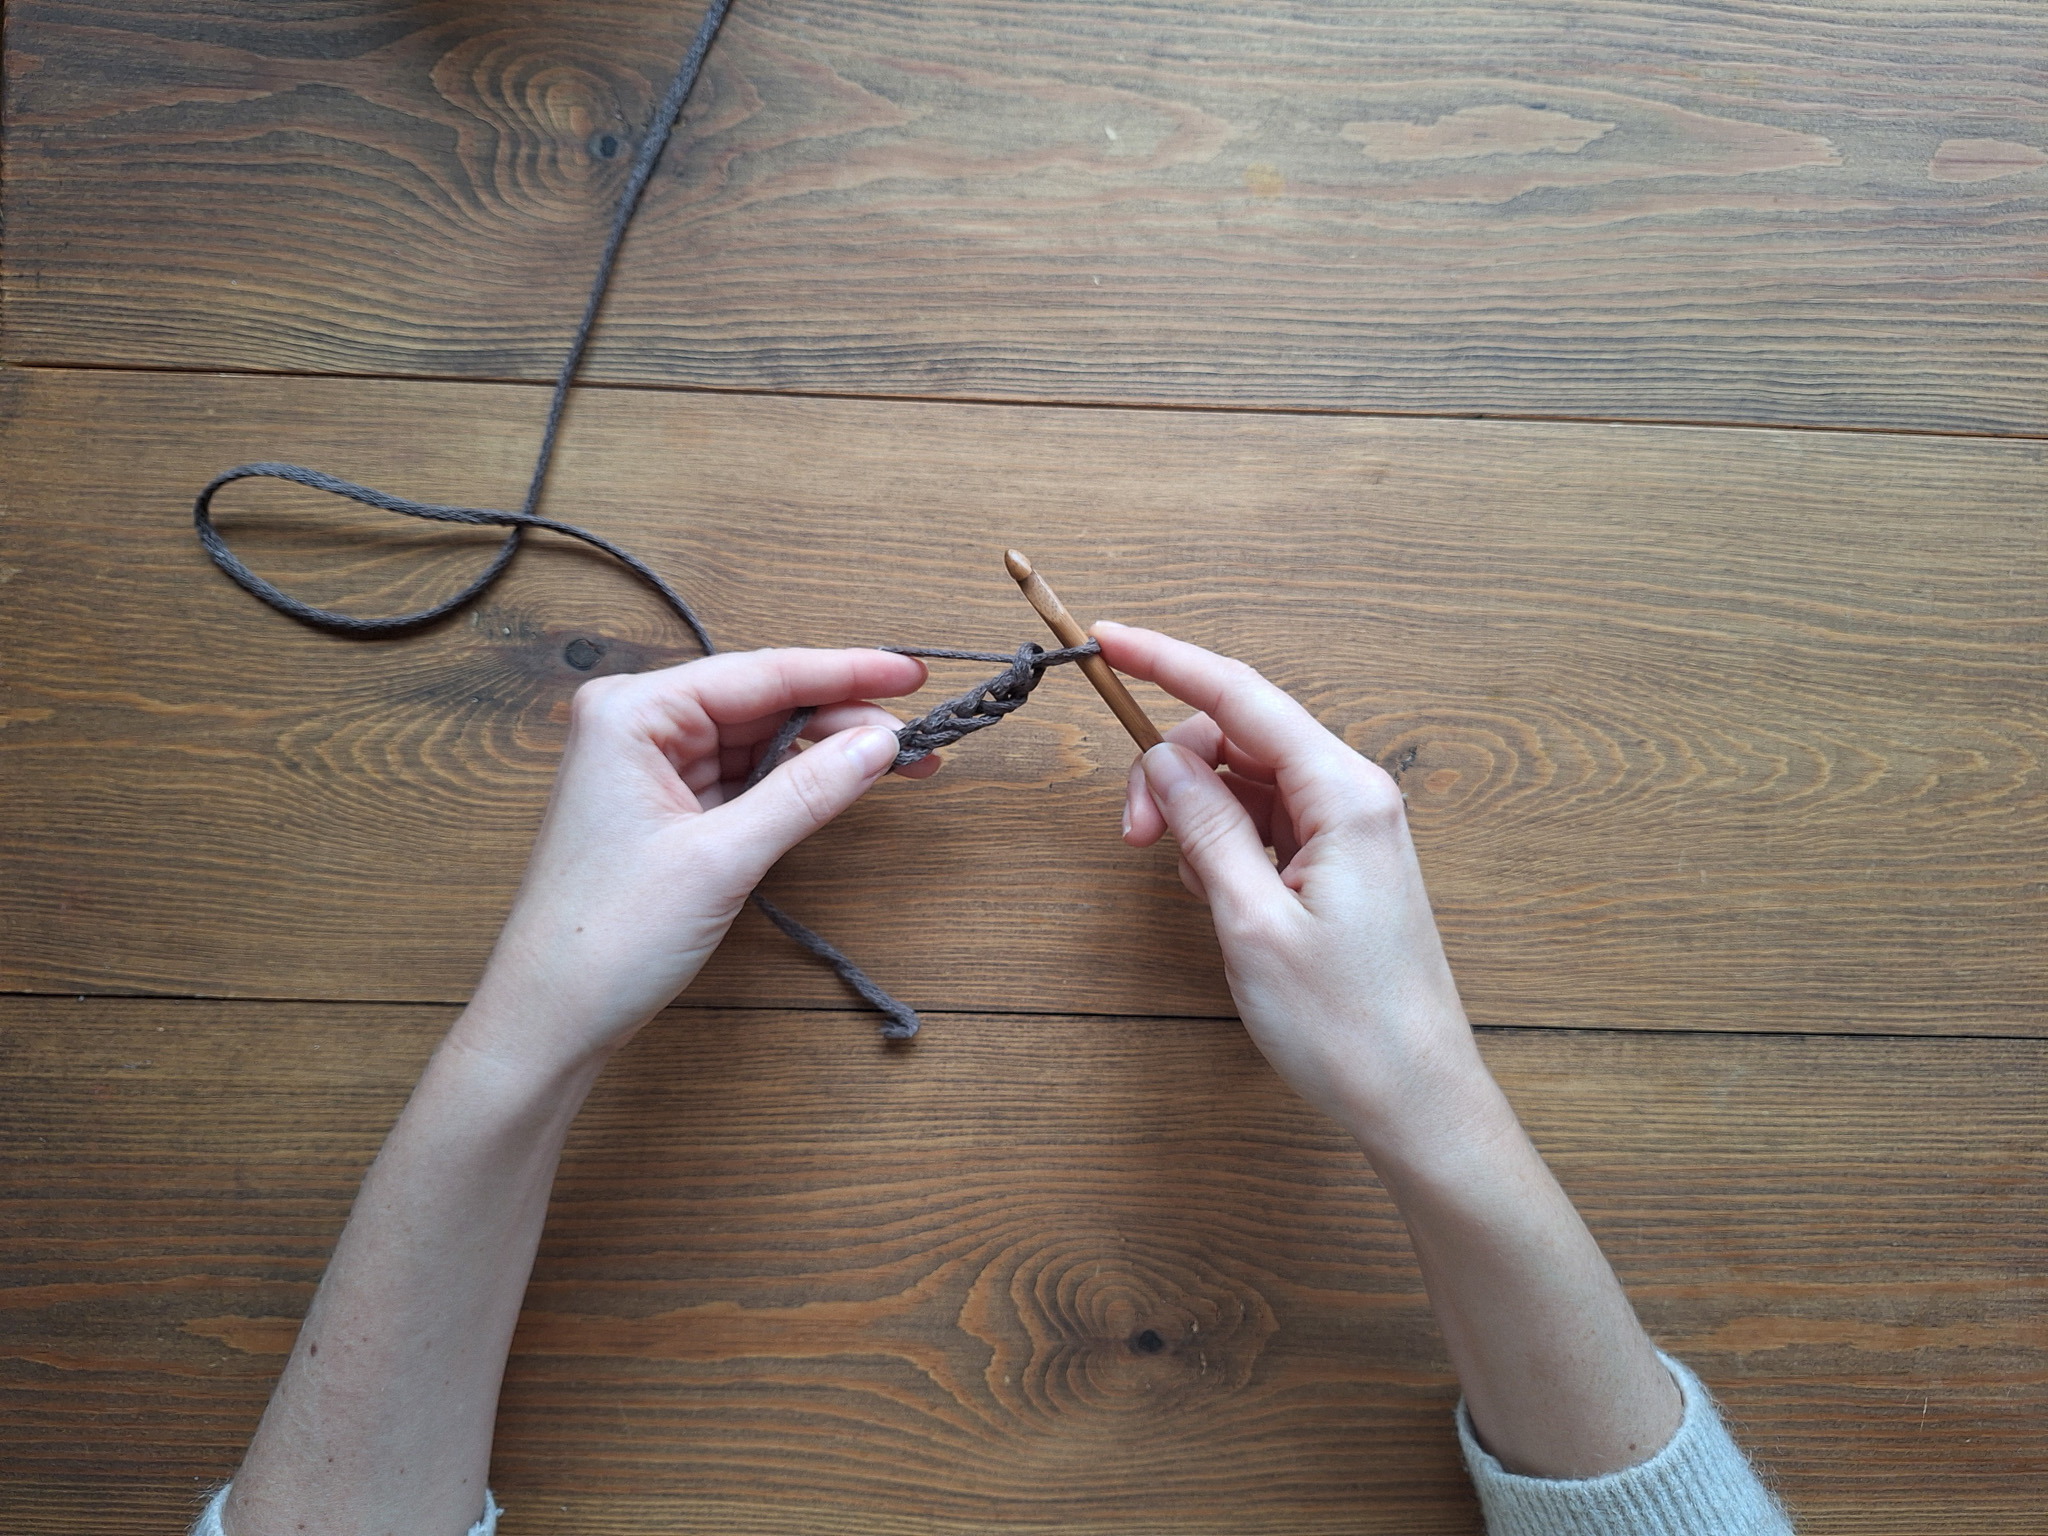
Row 1: Start in the 2nd stitch from your crochet hook and crochet single crochet the entire row (there should be one fewer than that number of chains. Finish the round by chain 1 and turn your work. If you are unsure how to crochet Single Crochet, see below video.
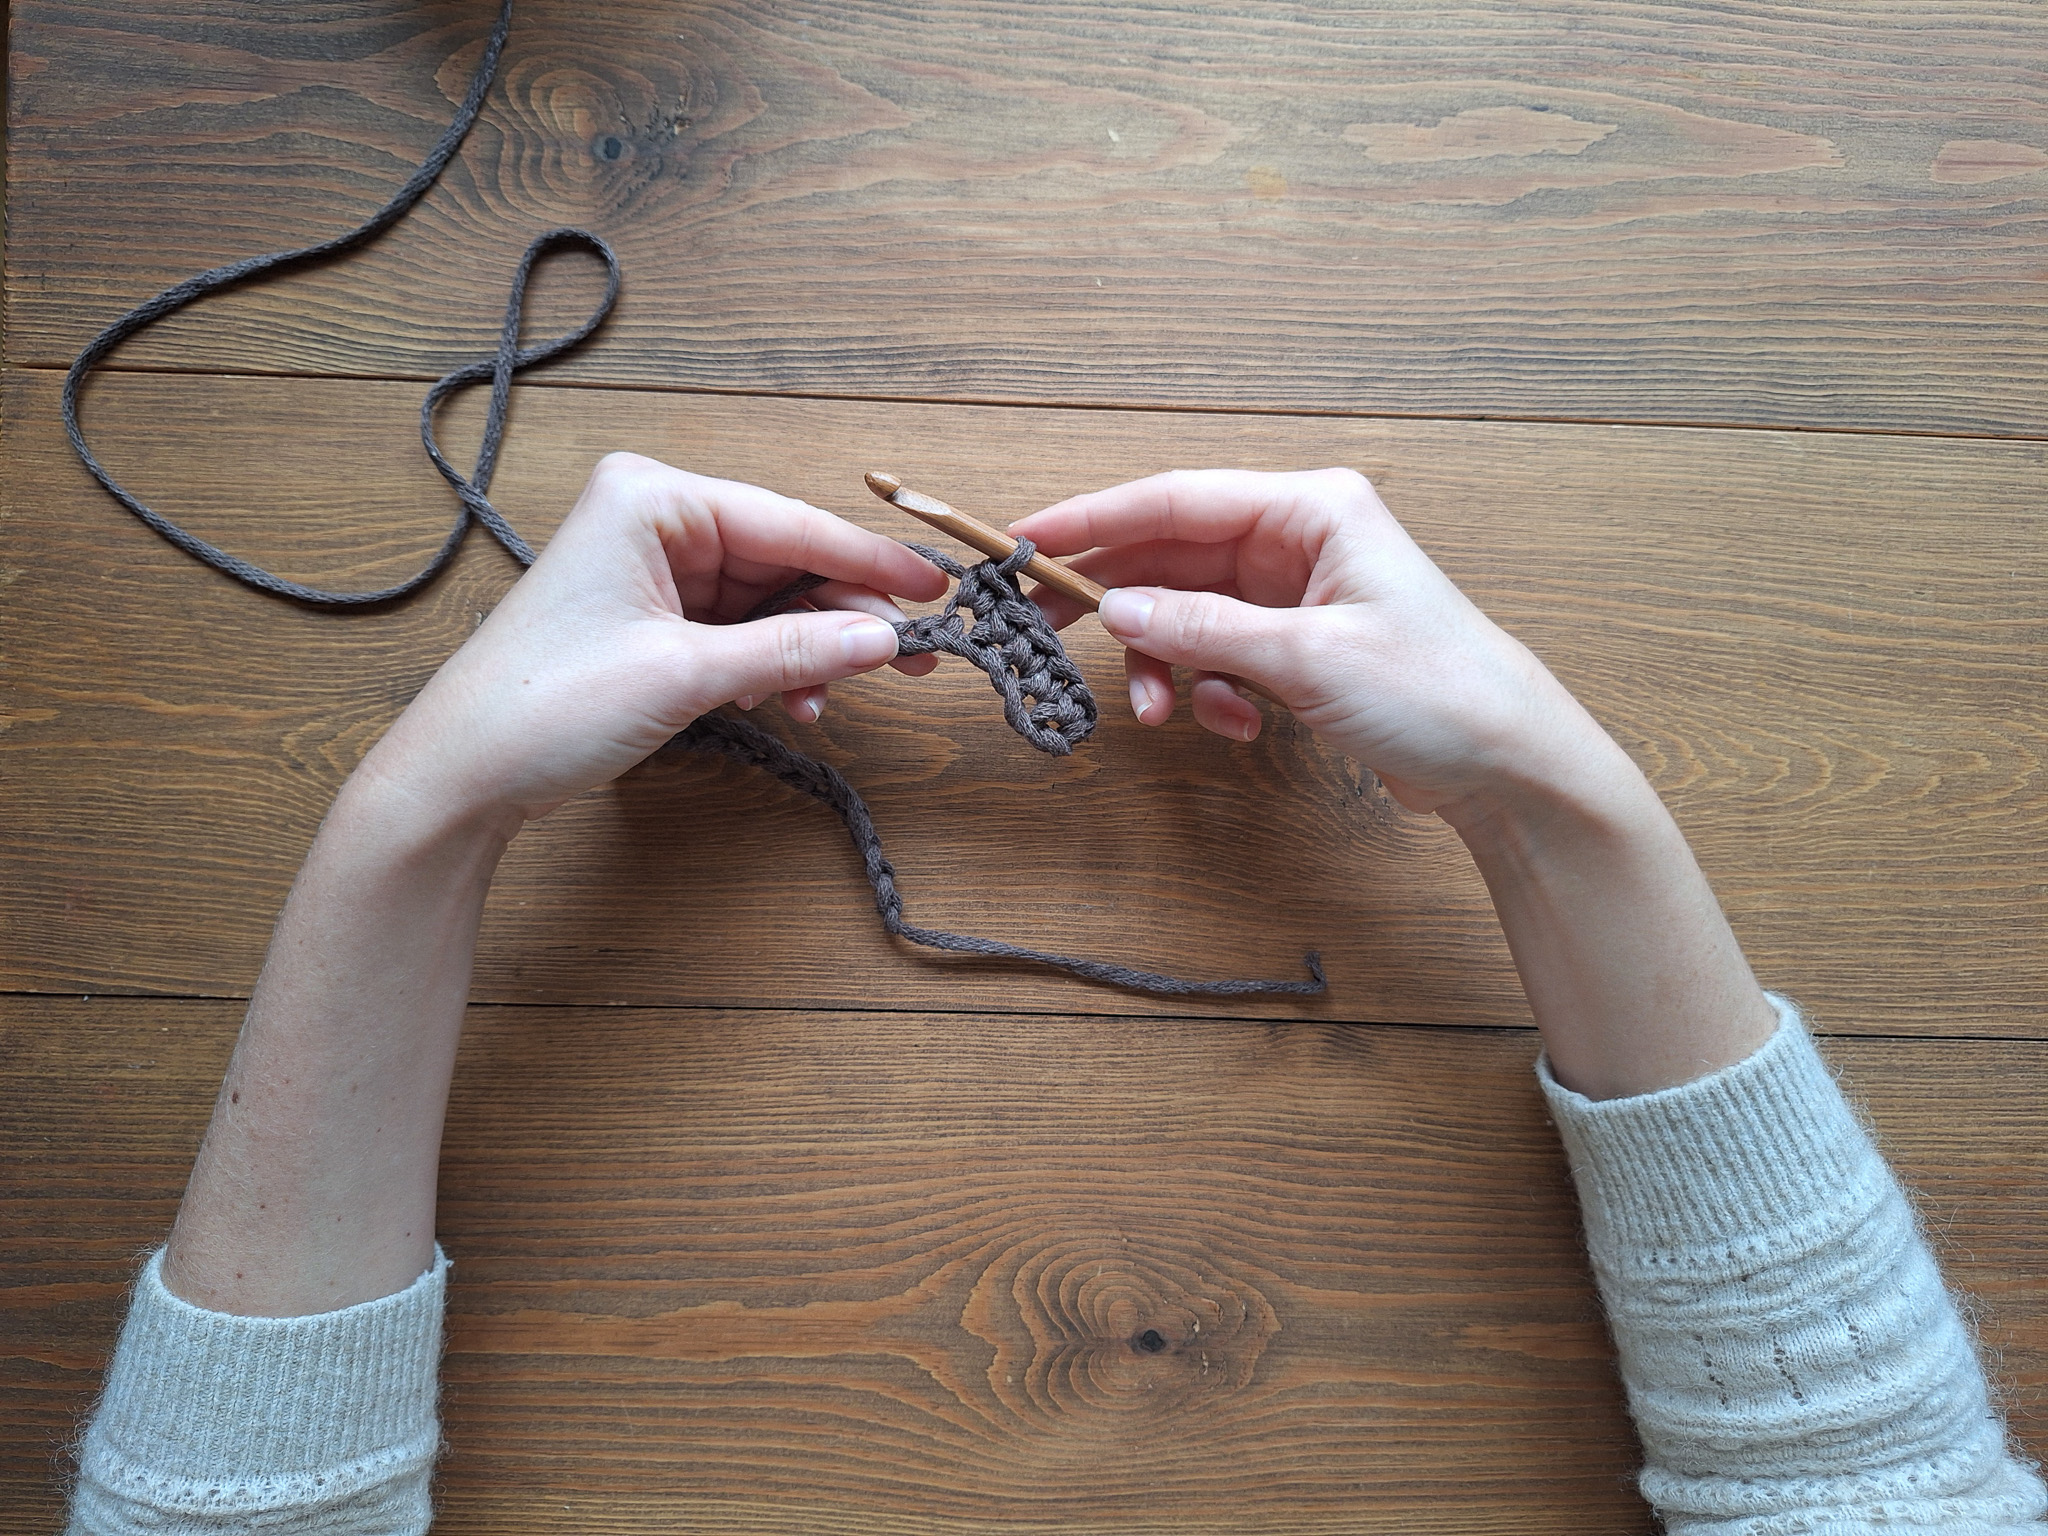
Row 2-6: Repeat row 1 total of 5 times more, so you have a total of 6 rows.
Row 7: Crochet 1 row of single crochets in back loop only, thus the “back” part of the loop which is the back loop. If you are unsure which is the back loop only, see below video (Back Loop Only).
Crocheting the Hole Detail
Row 8
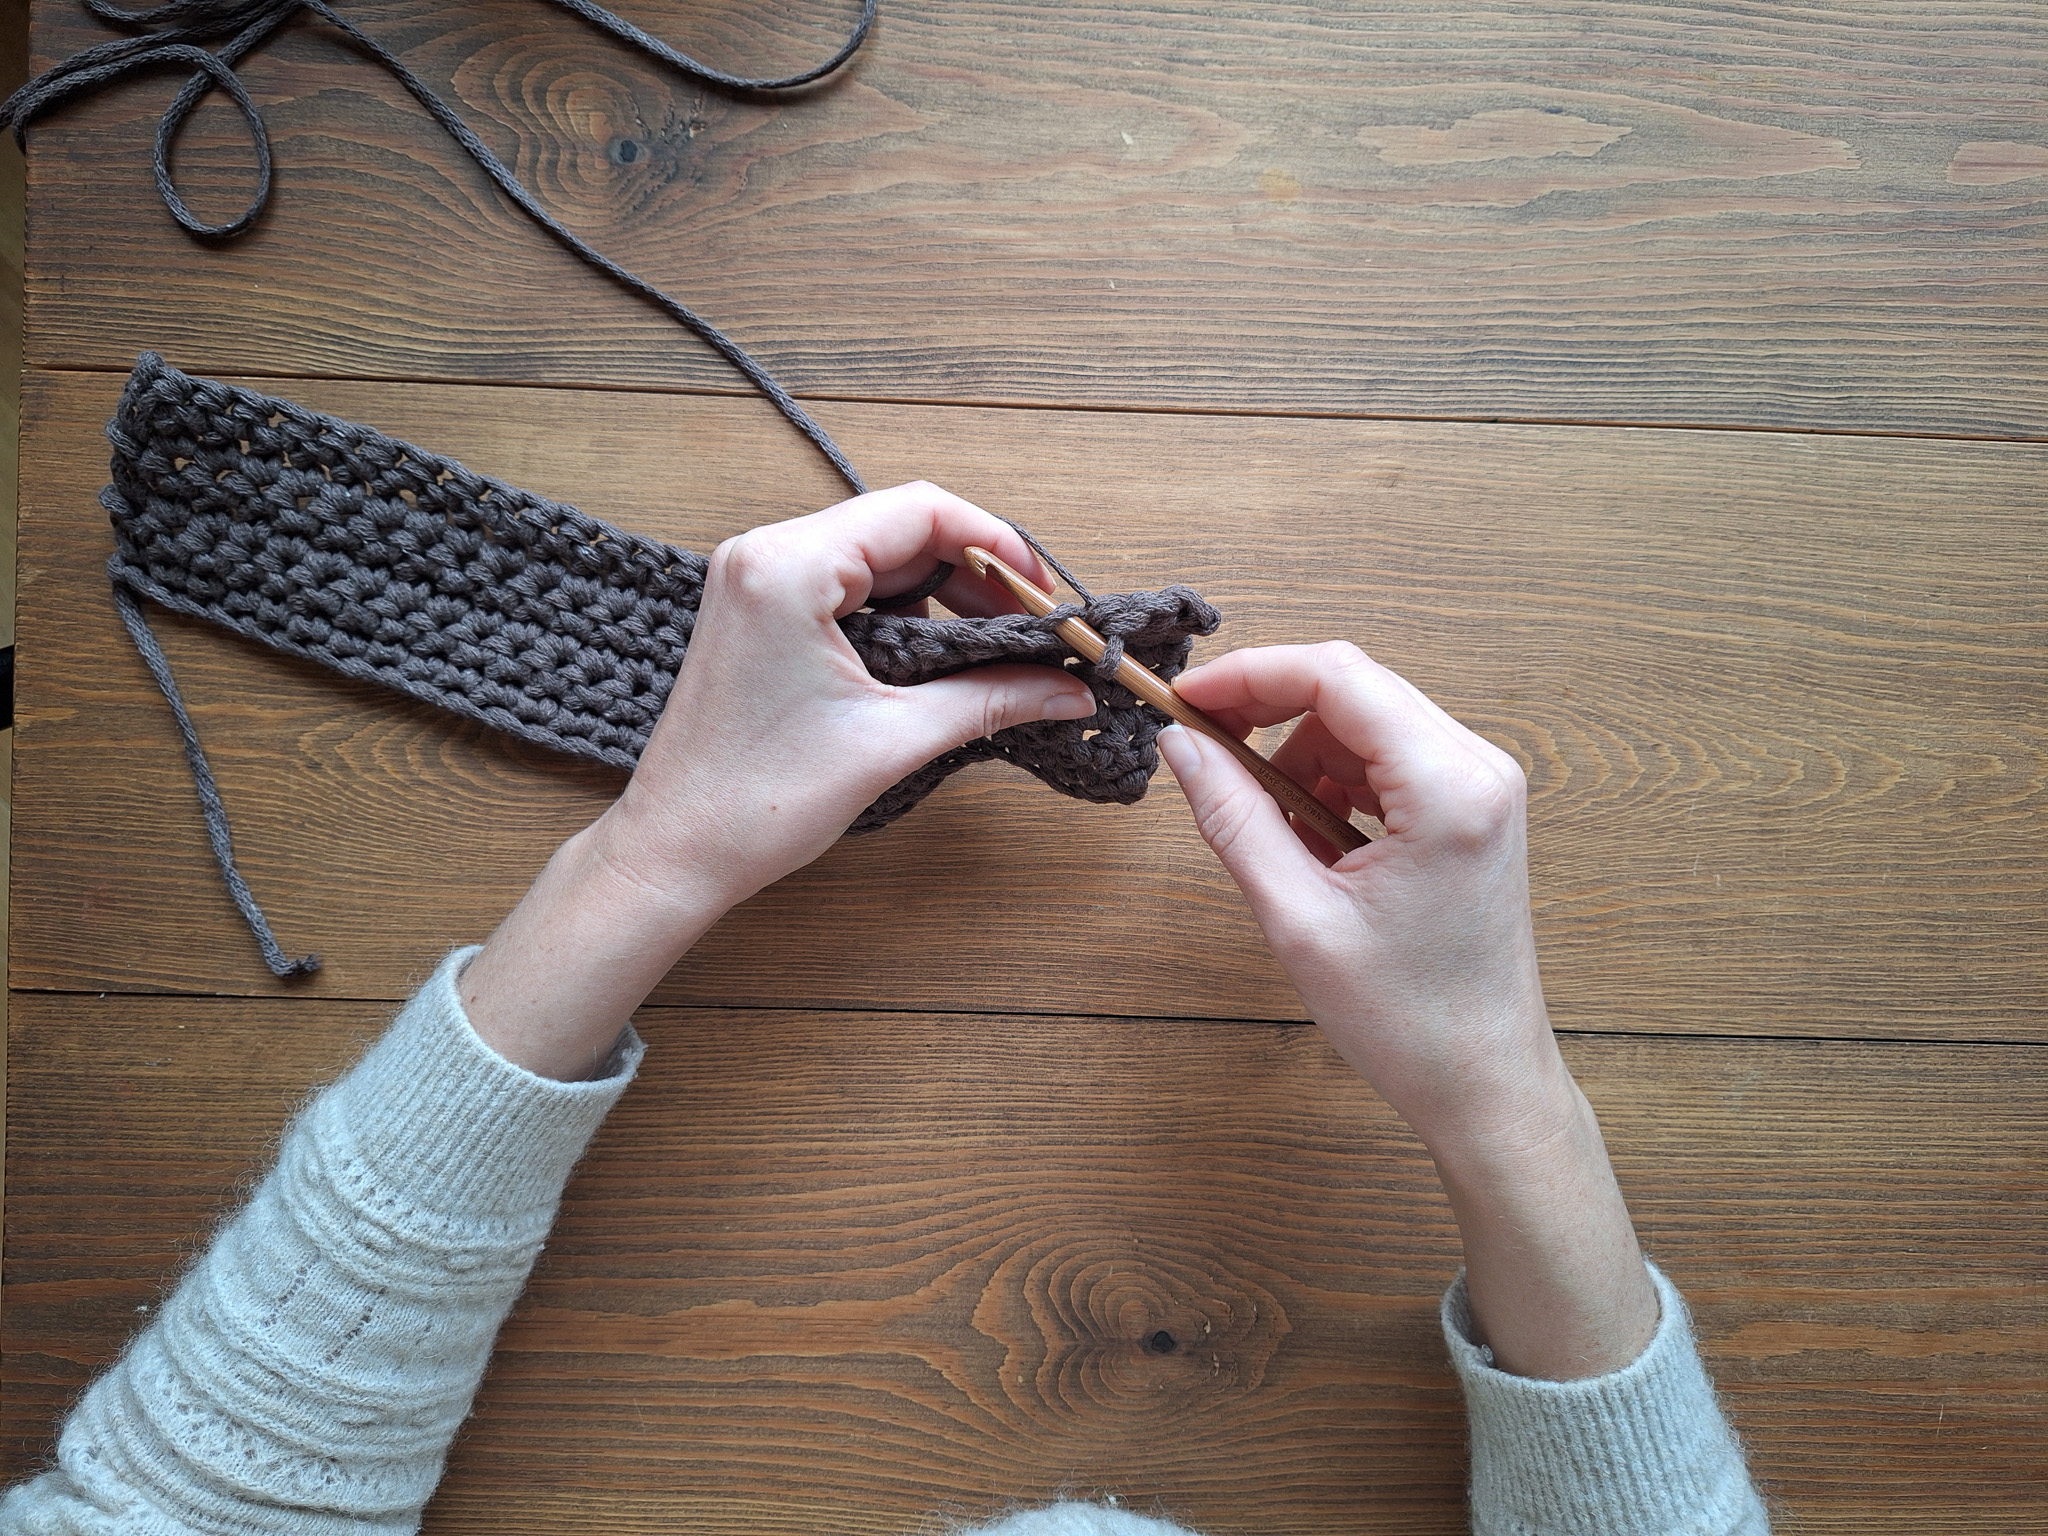
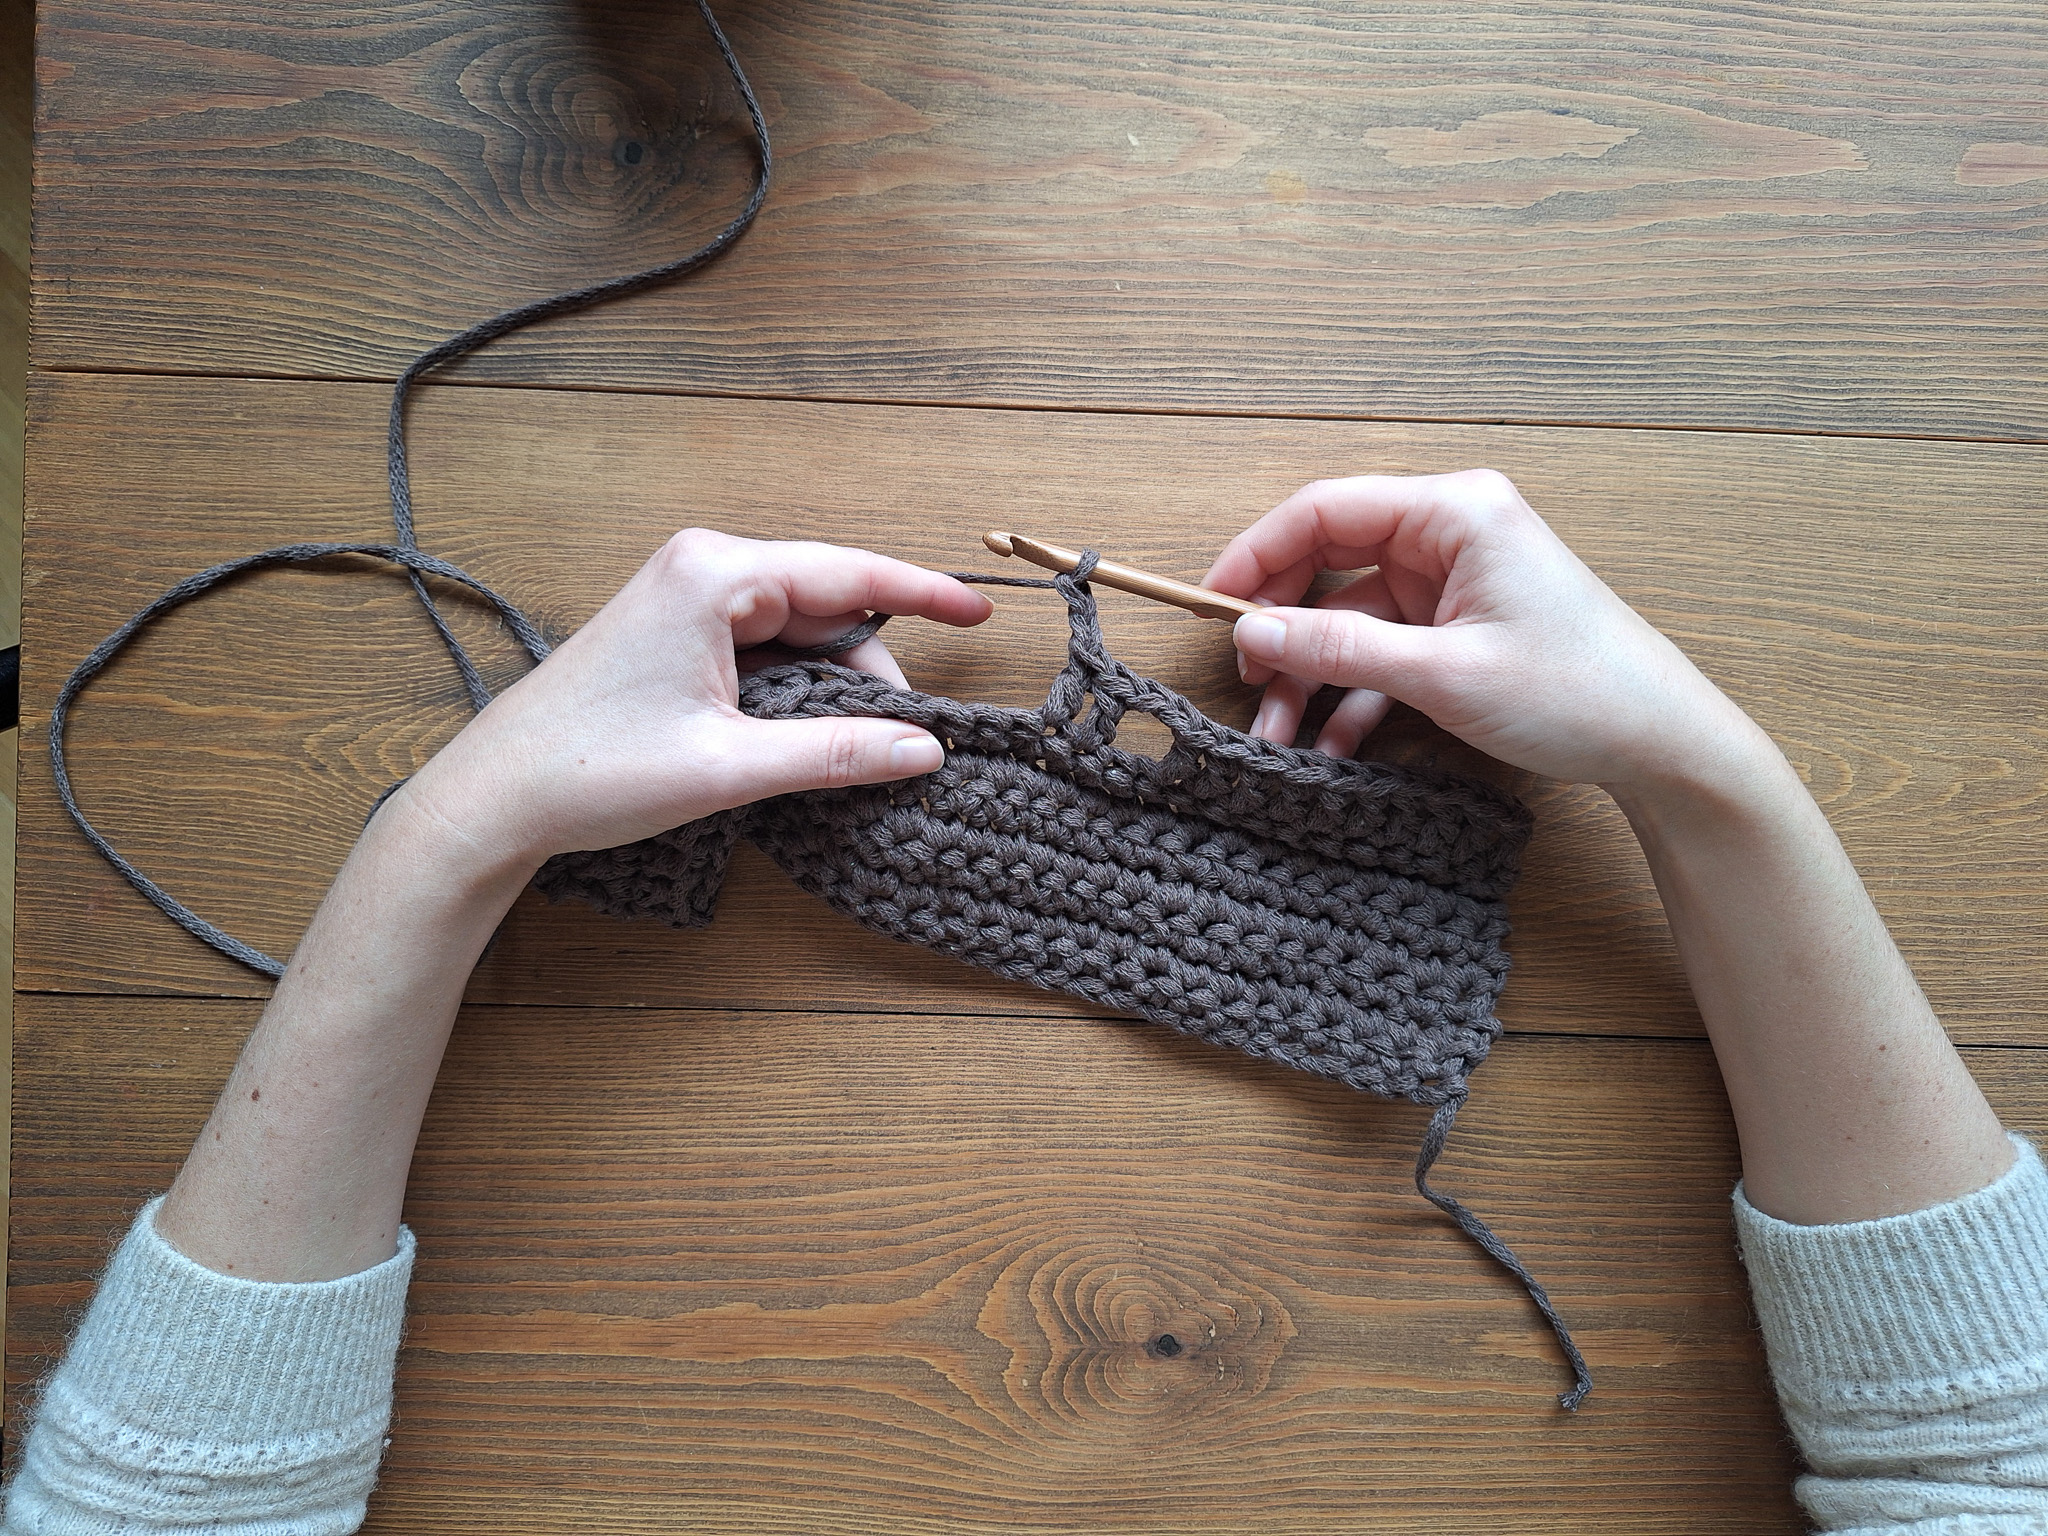
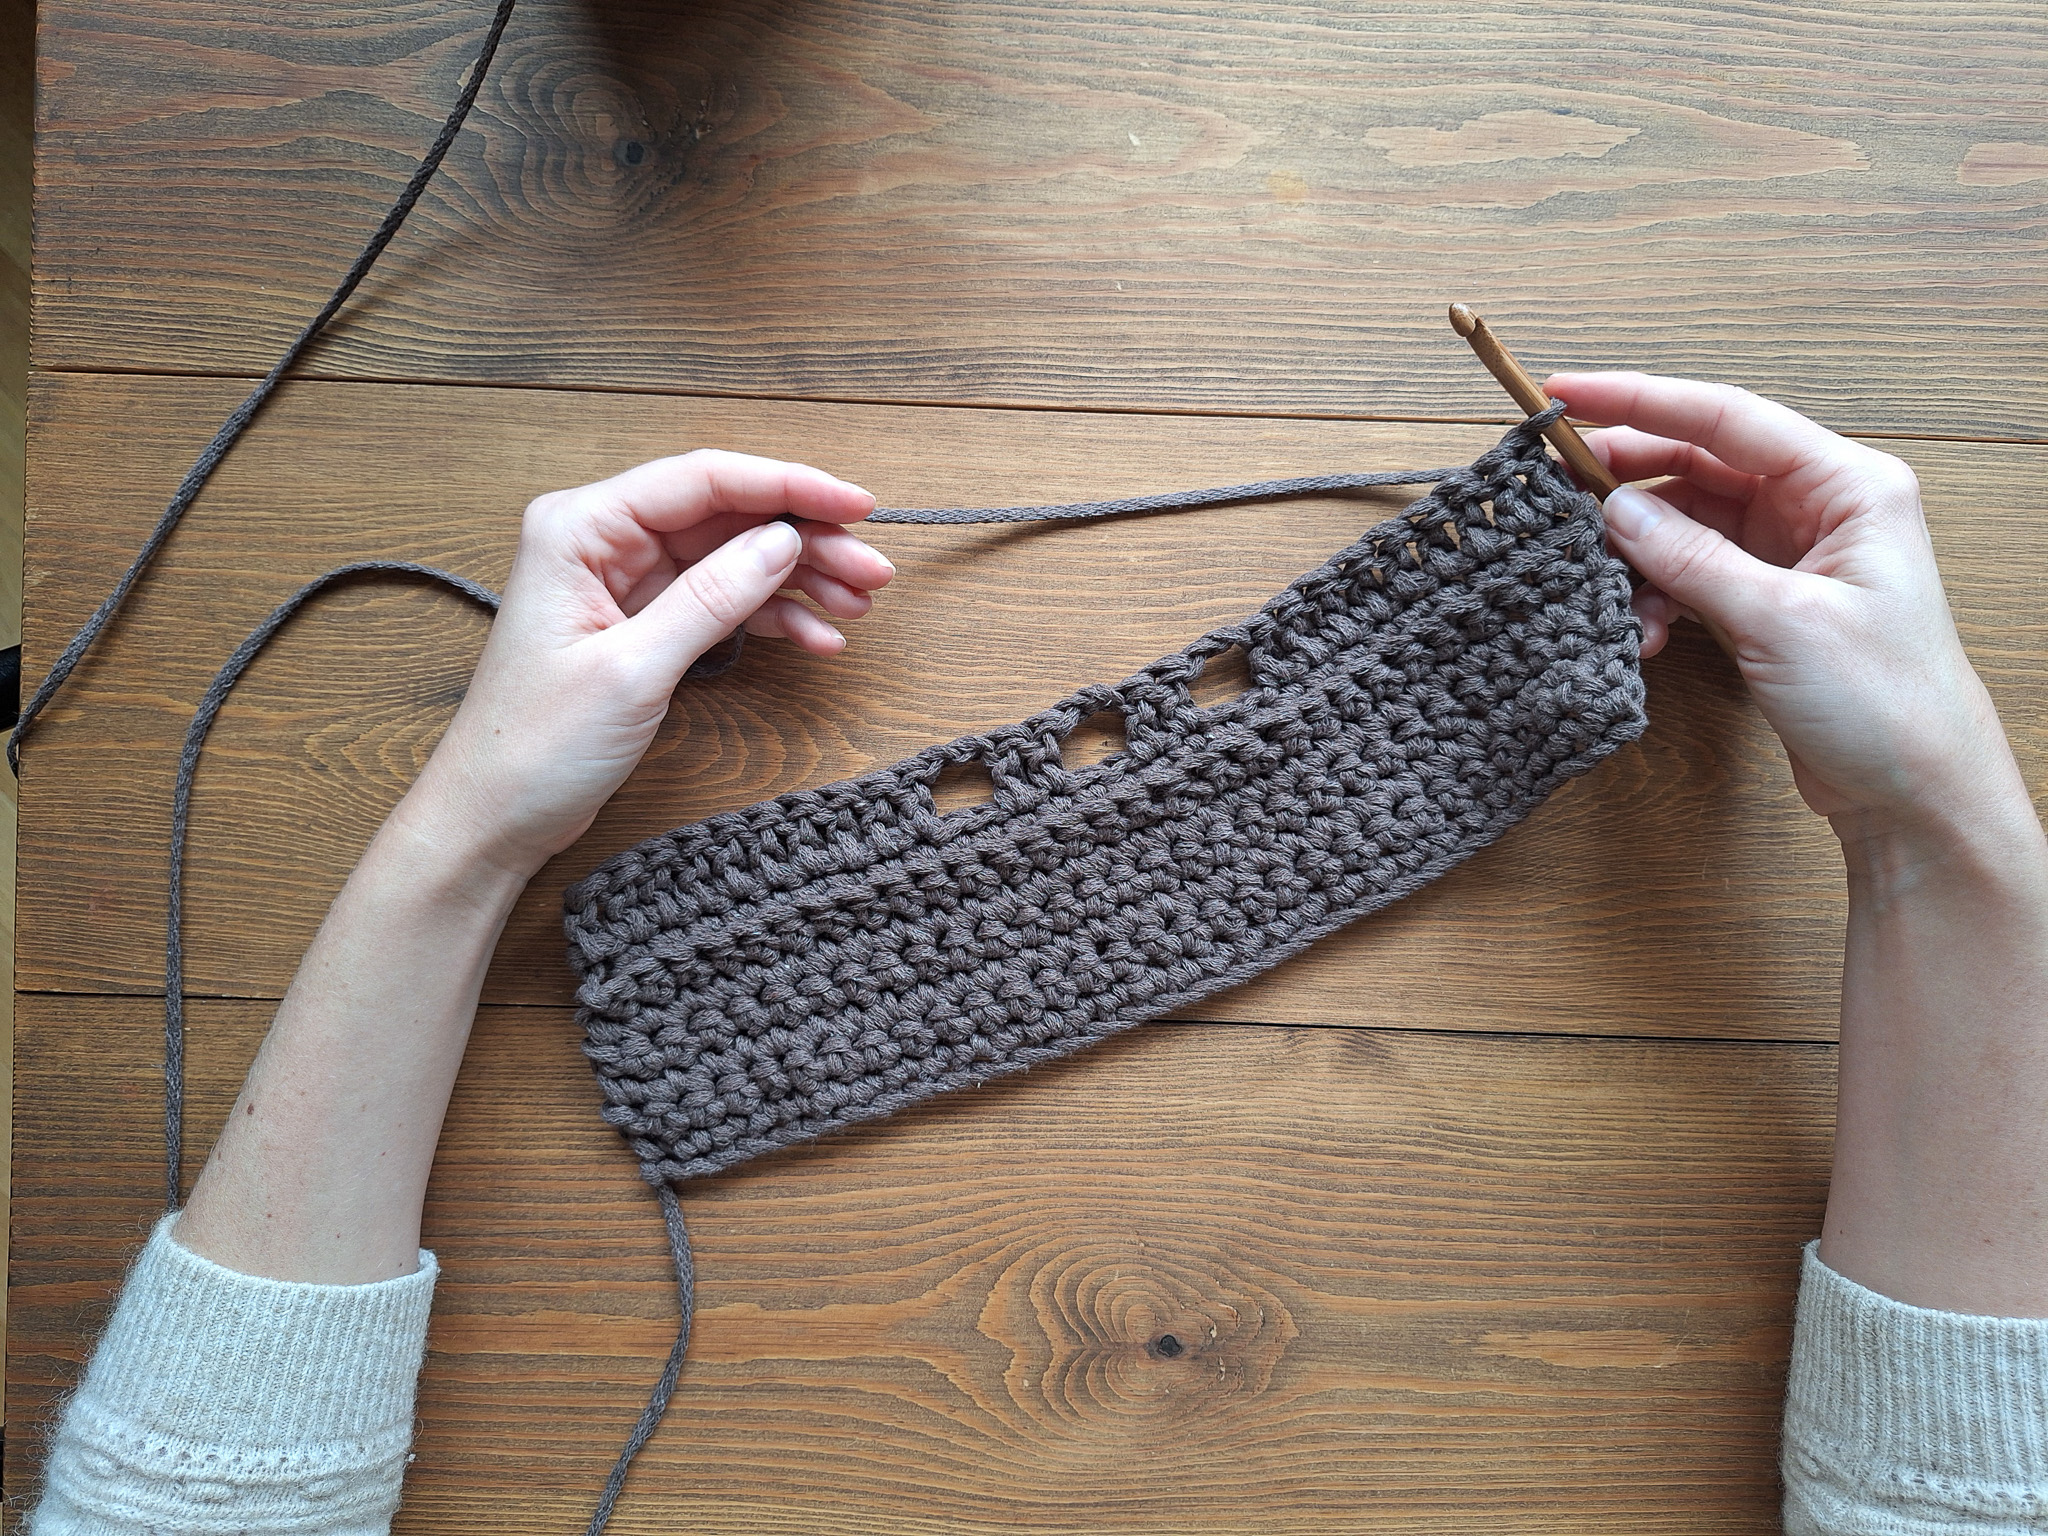
Crochet 10 double crochets, then chain 2, skip 2 stitches, and crochet 2 double crochets into the next two stitches. Chain 2, skip 2 stitches, crochet 2 double crochets. Chain 2, skip 2 stitches.
Finally, crochet the last 10 double crochets, end with chain 1, and turn your work. There should be 3 open spaces in this row.
If you’re unsure how to crochet a double crochet, see the video below.
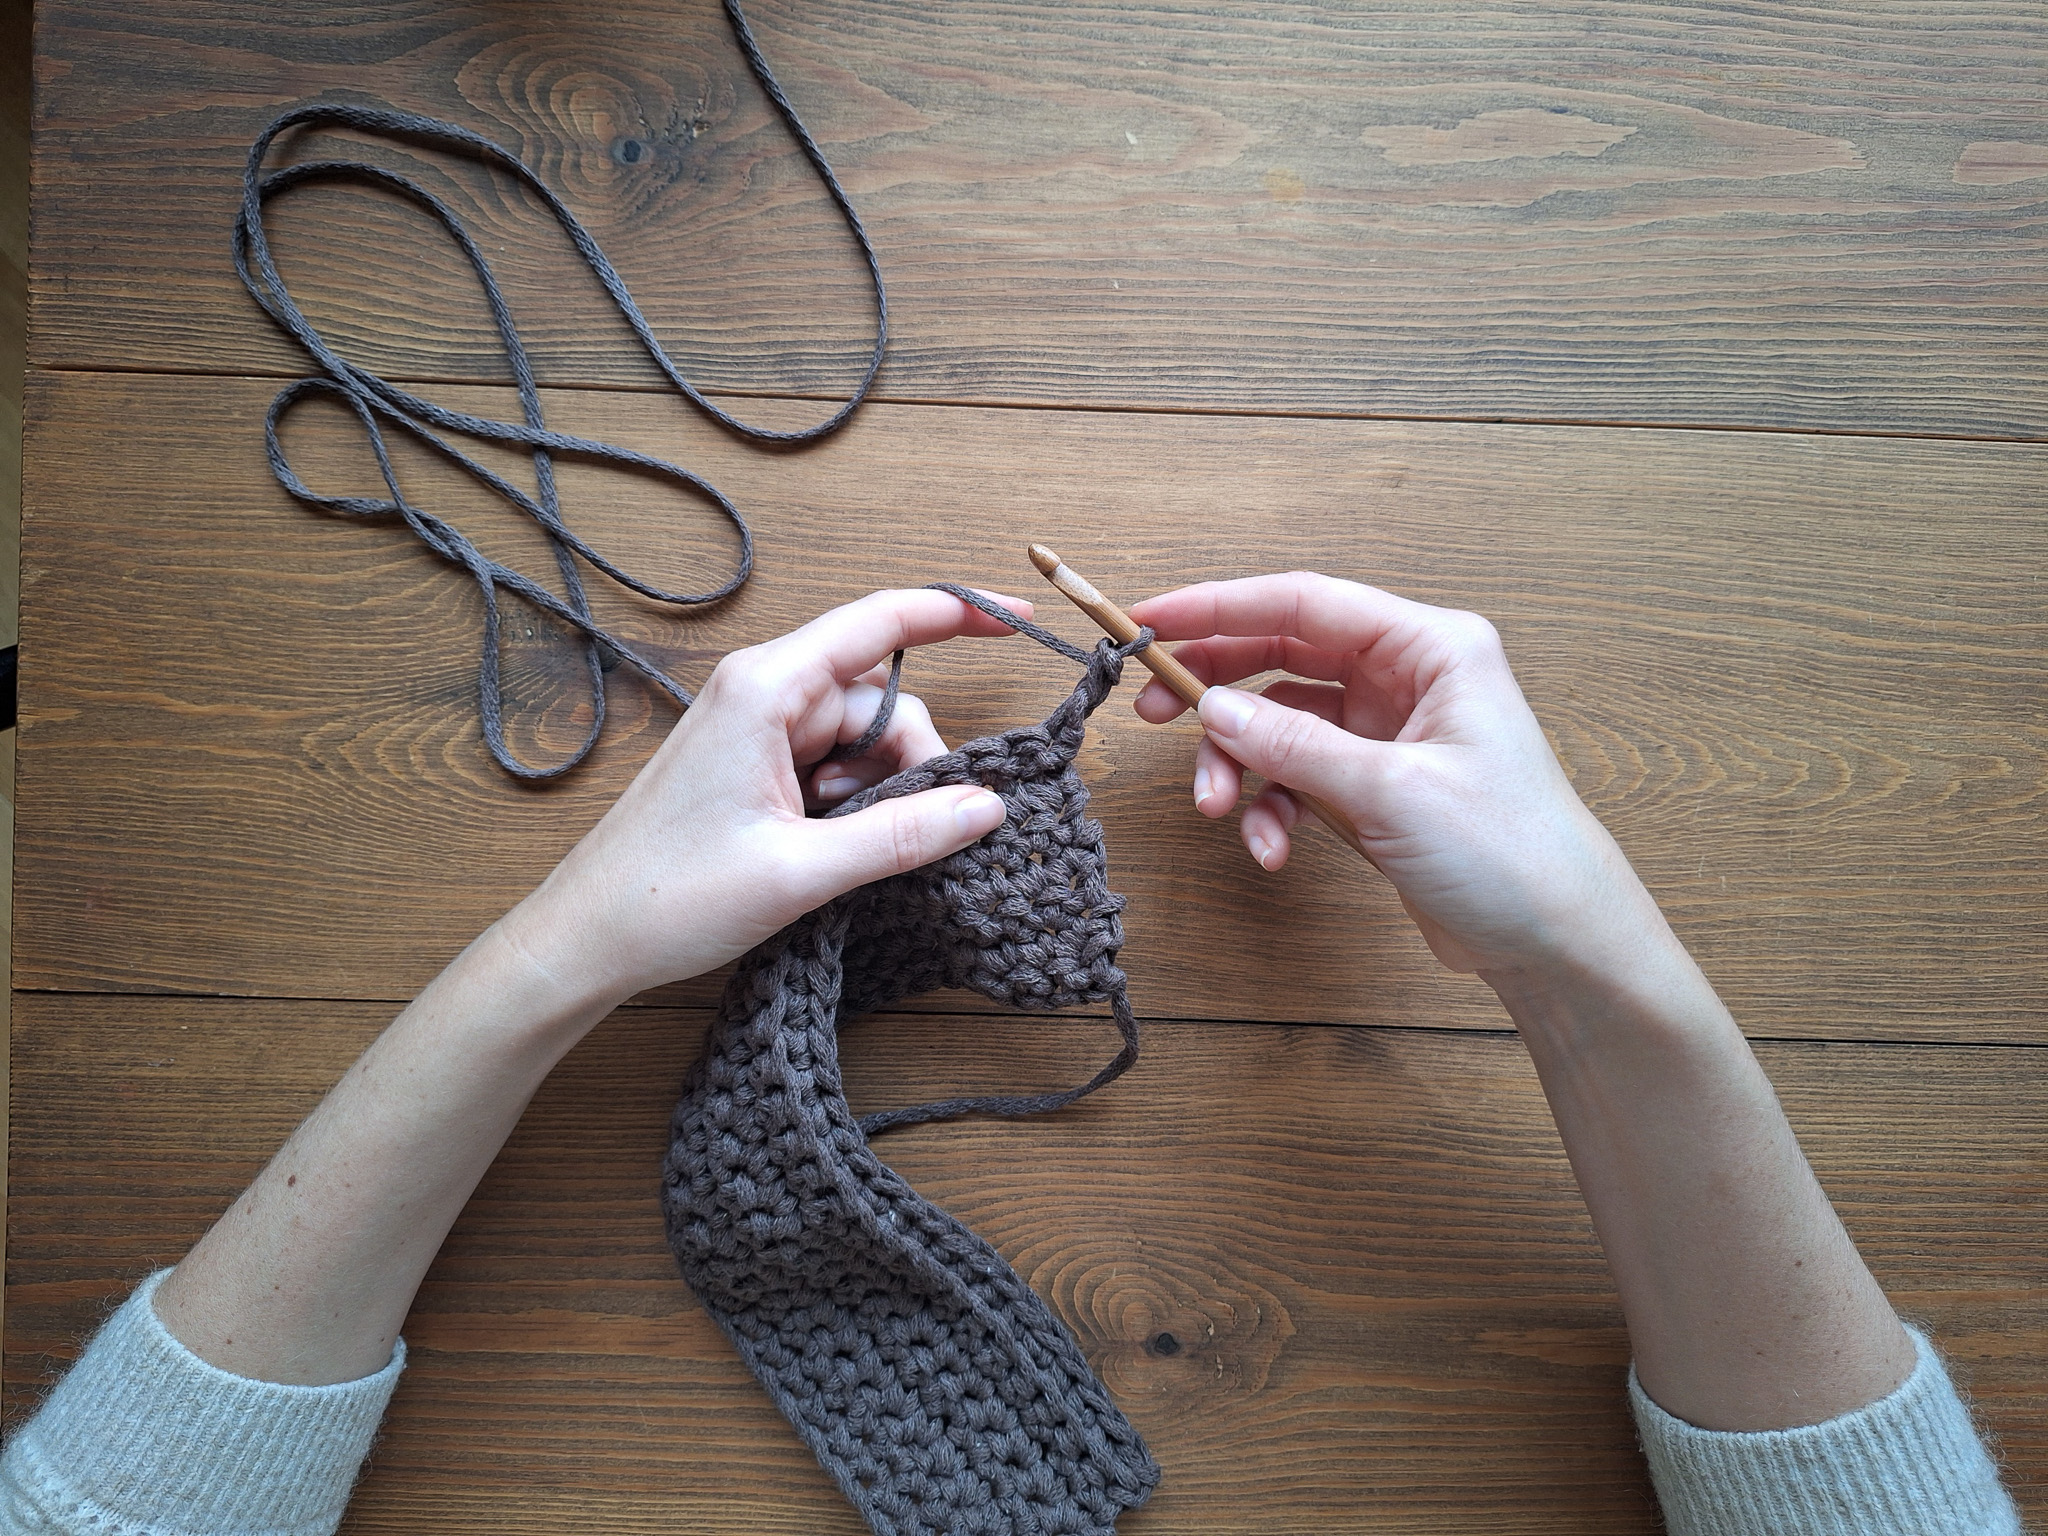
From here on, work every other row in single crochet through the back loop only, and every other row in double crochet.
Row 9: Crochet 30 single crochet in back loop only, chain 1, turn.
Row 10: Crochet 30 double crochet, chain 1, turn.
Repeat Rows 9 and 10 a total of 10 times, so that you have crocheted 5 rows of each.

Rows 19–25: Crochet 30 double crochet. Chain 1 and turn.
Row 26: Crochet double crochet in the front loop only so that the detail / raised line appears on the wrong side compared to the other rows.
If you’re unsure how to crochet in the front loop only, see the video below.
Row 27: Crochet 30 double crochet, chain 1, turn.
Row 28: Crochet 30 double crochet in the front loop only, chain 1 (ch 1), turn.
Rows 29–30: Crochet 30 double crochet, chain 1, turn.
Finish by cutting the yarn and pulling the yarn end through the loop to secure it. Weave in the yarn end between the stitches.
If you’re unsure how to fasten off, see the video below.
Sides and Handles
Sides
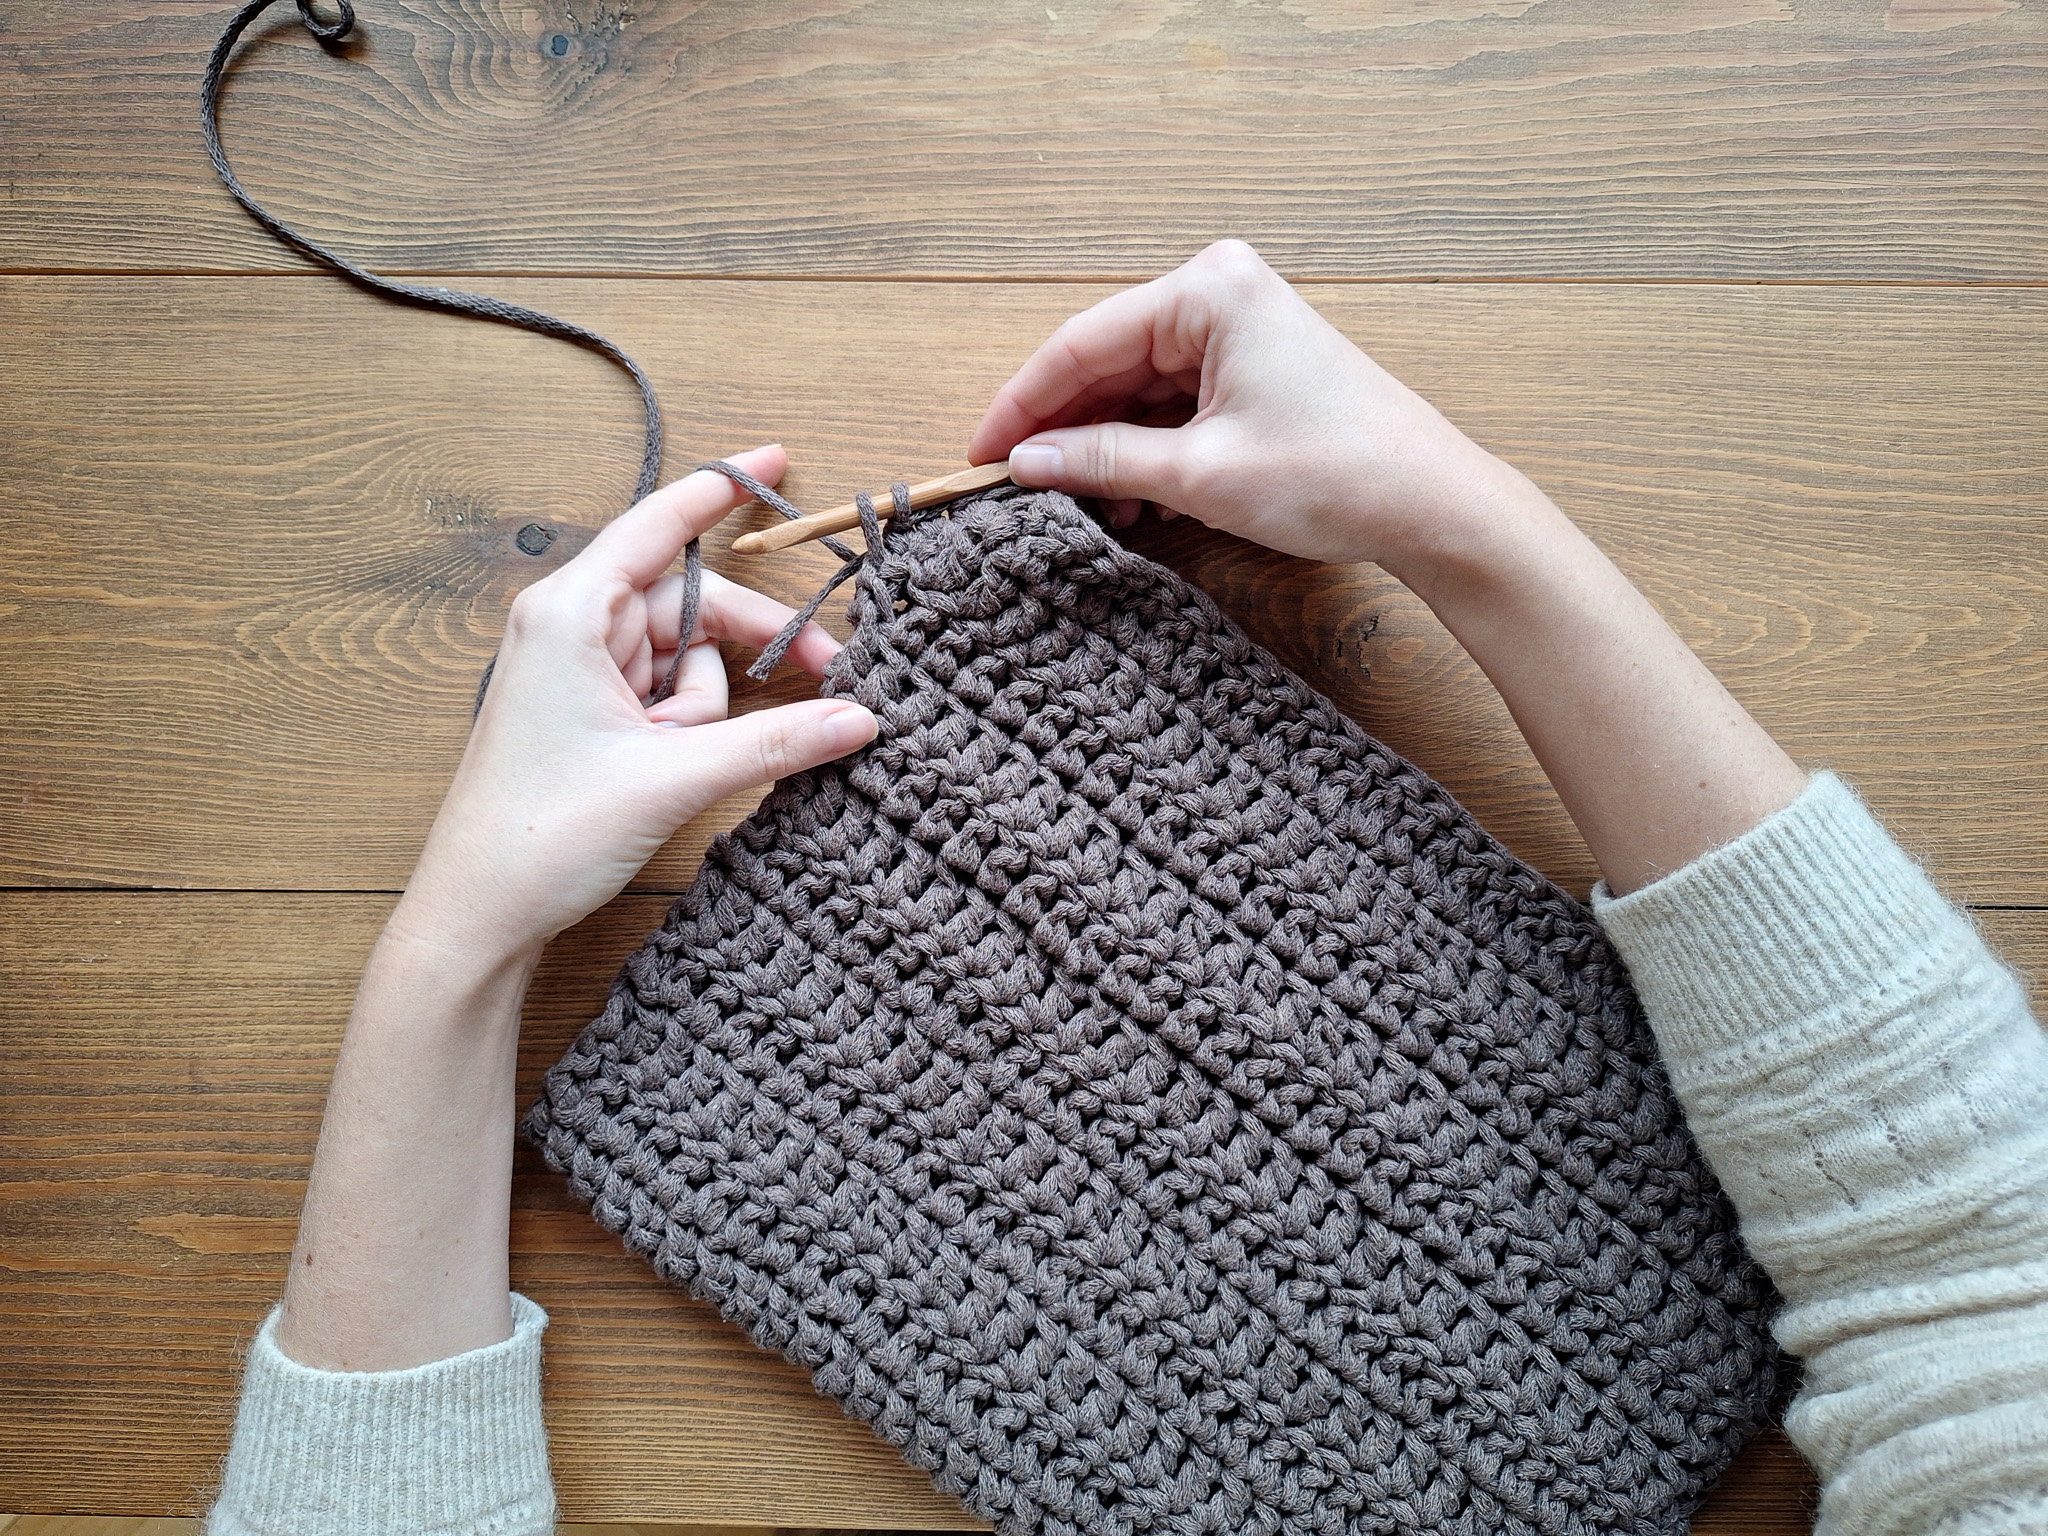
Now we will crochet single crochet along the short sides of the bag.
Fold your bag in half. Keep in mind that the two raised lines made from front loop only stitches should be on the inside of the bag, while the other lines on the front panel should face outward.
Start with one short side, from the top corner and work all the way down.
If using new yarn: attach your yarn at the top corner of the bag. Crochet single crochets along the short side all the way down.
Finish with a knot and weave in the yarn end on the inside.
Repeat on the other short side.
Handles
Attach your yarn to one top corner of your bag.
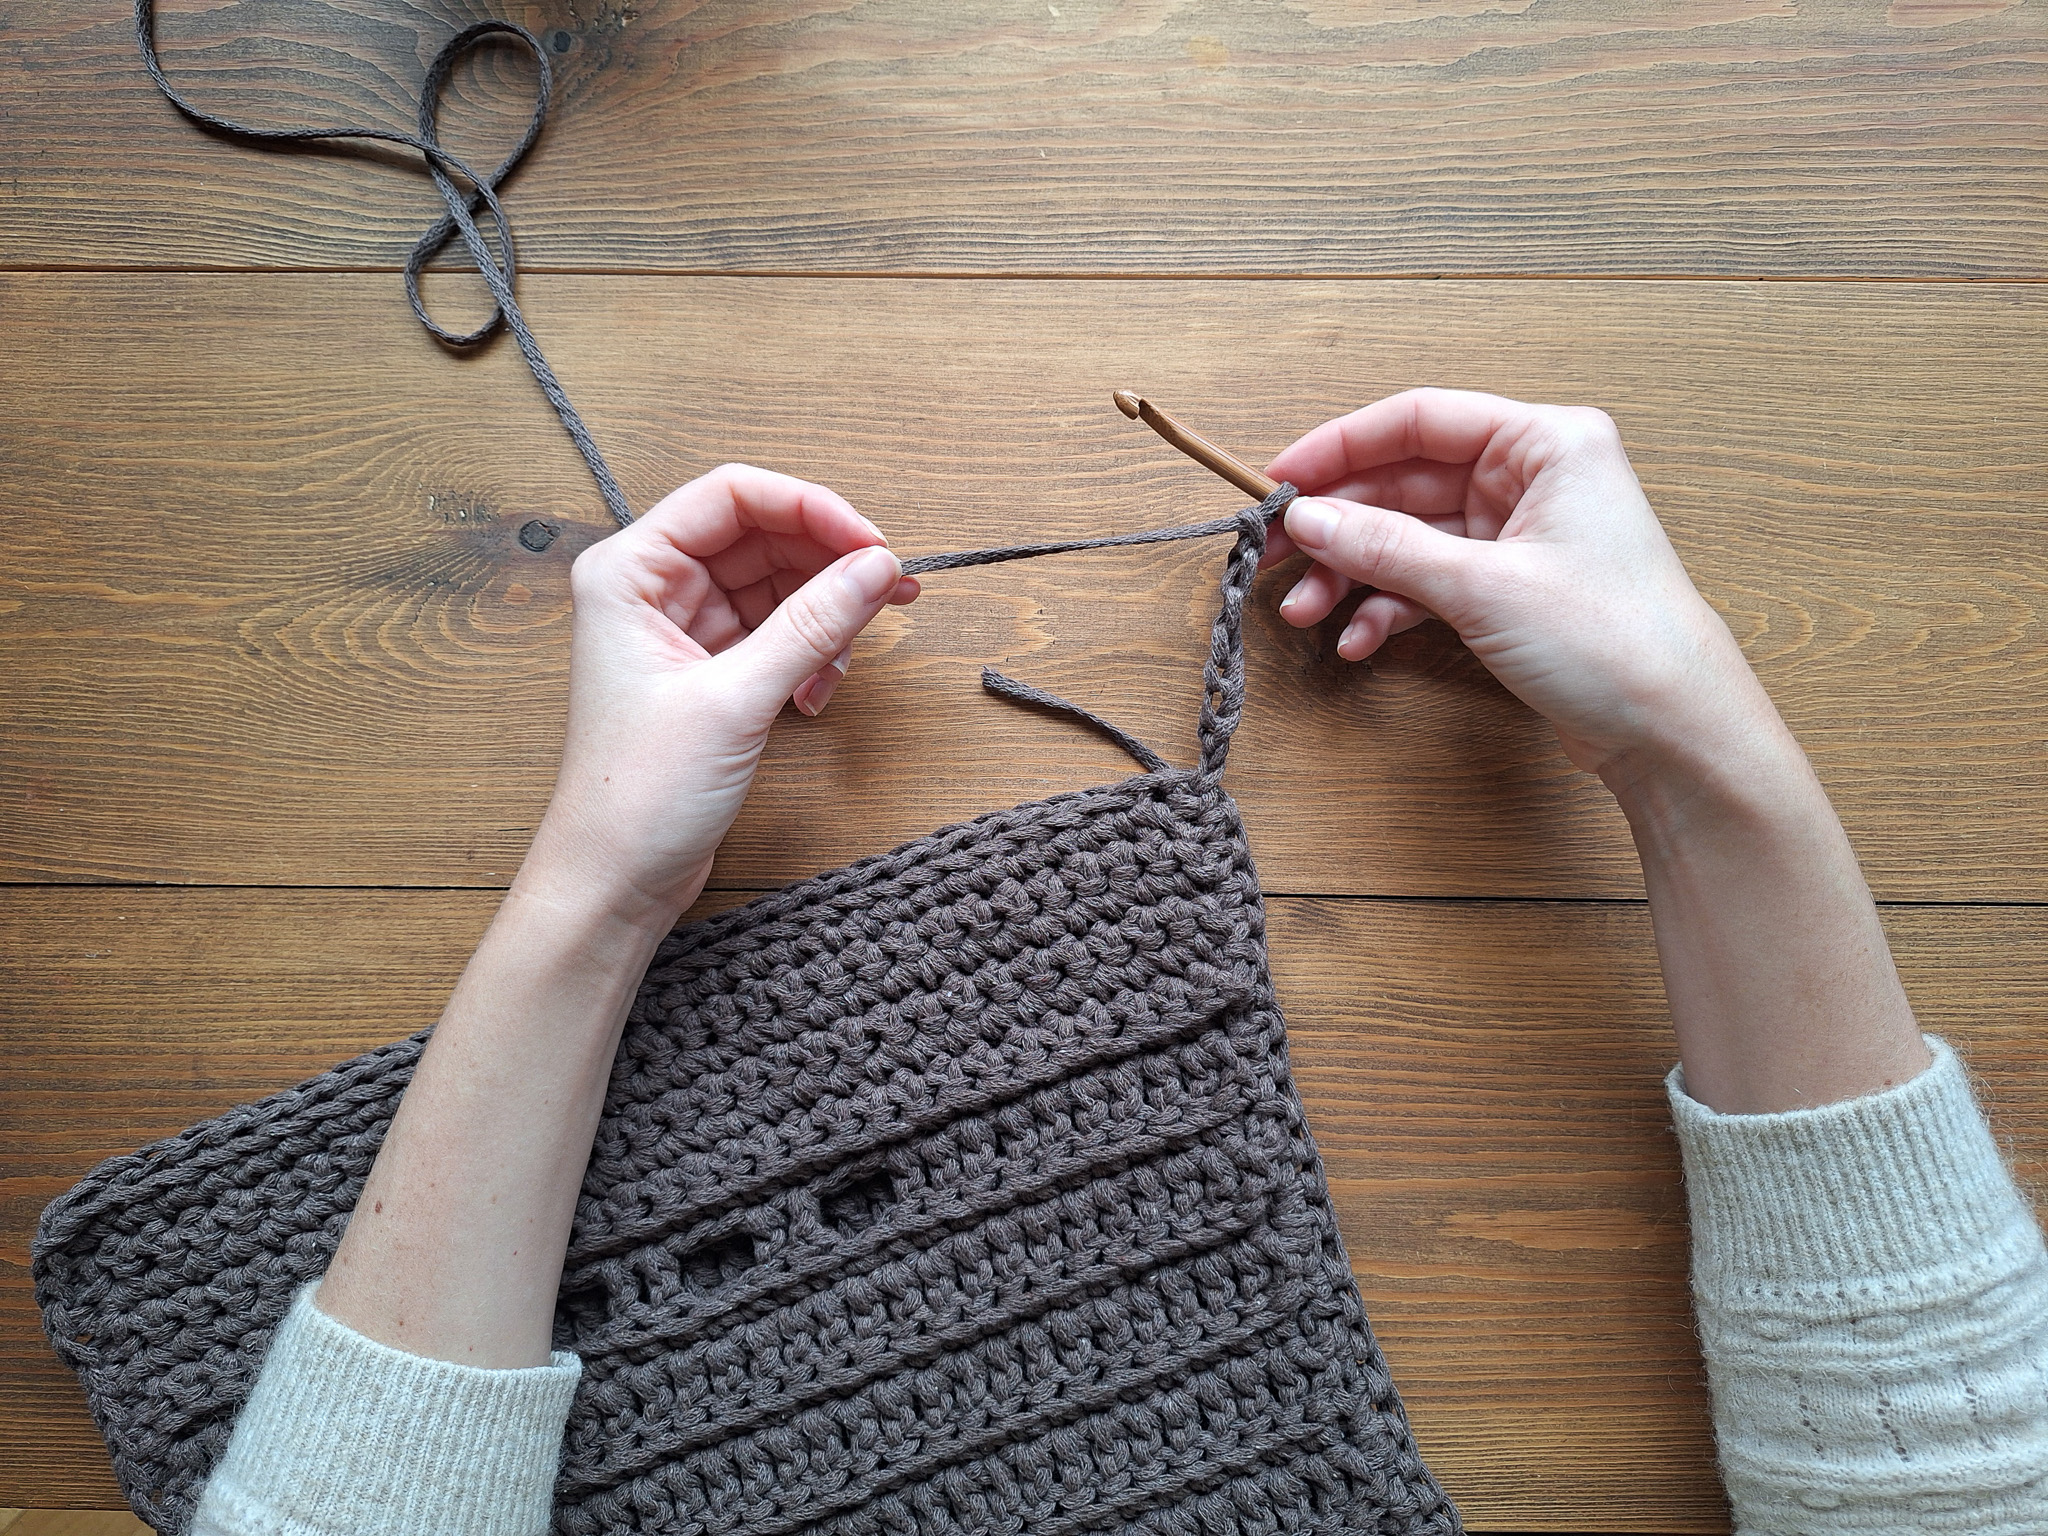
From here crochet a chain, as long as you want your handle. Attach the chain to the opposite corner using a single crochet.
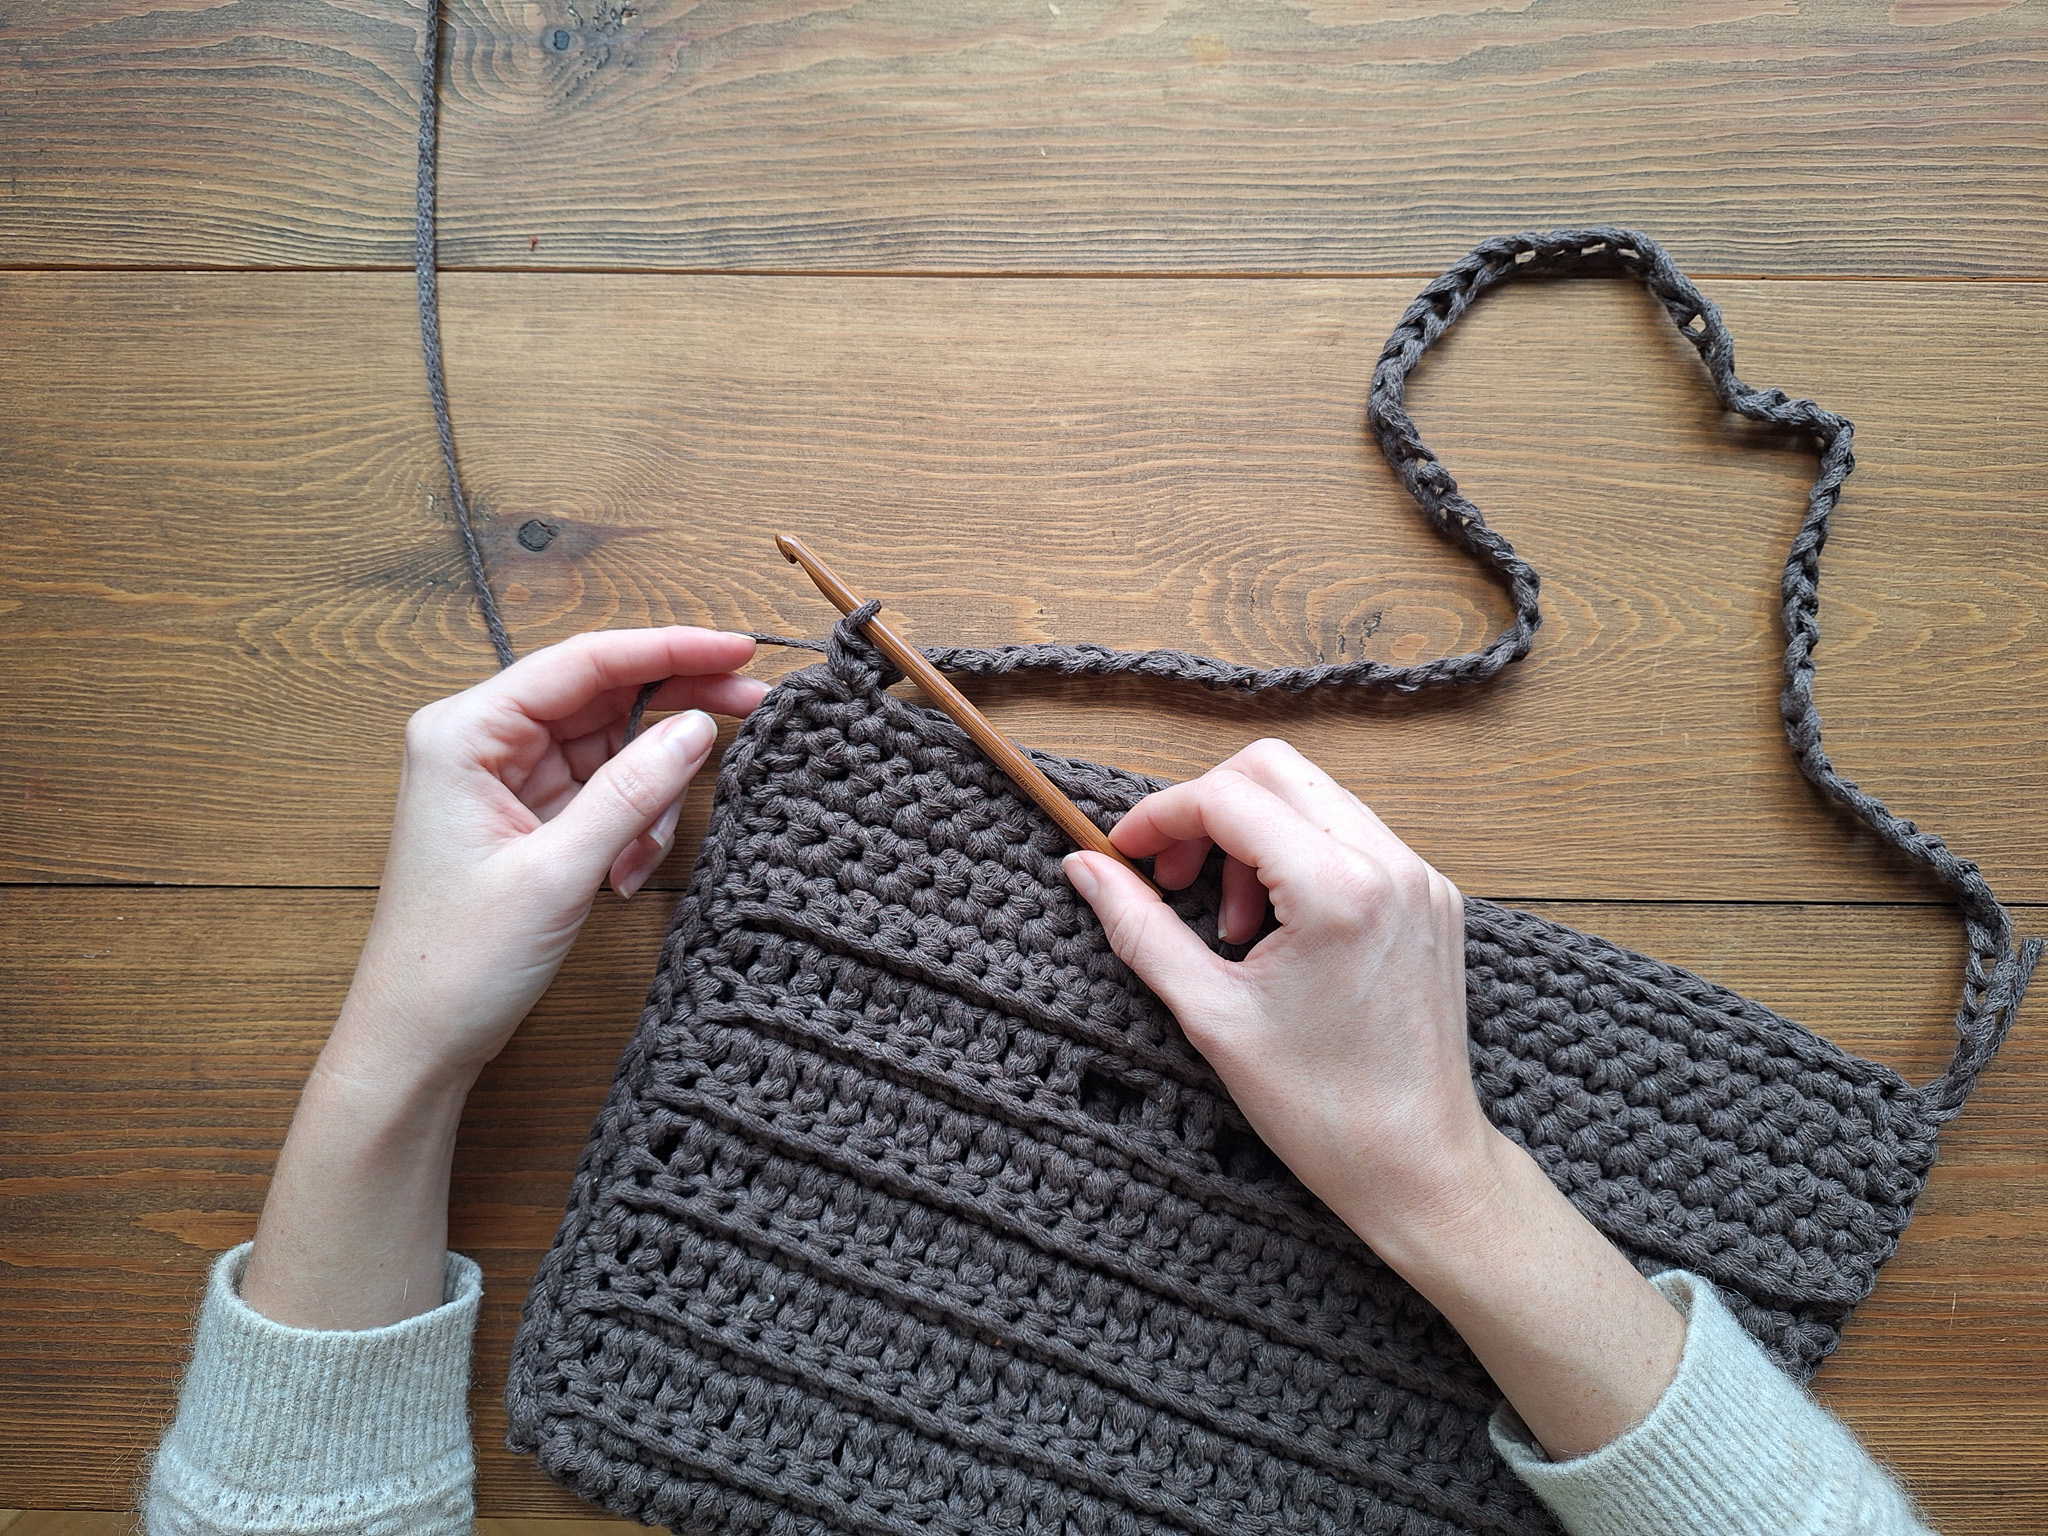
Then crochet single crochet all the way back along with your chain, but you crochet around the chain and not in the stitches. This way you will get a more stable handle.
Finish with a knot and hide the end of the yarn on the inside of the bag.
Done, good job!
Pattern Terms
This section uses crochet terms. If you need more guidance along the way, see the simpler version of this pattern.
- ch – chain
- sc – single crochet
- sl st – slip stitch
- dc – double crochet
- BLO – back loop
- FLO – front loop
- yo – yarn over / skip
- st / sts – stitch / stitches
Front Panel
Start: chain 31 (ch 31).
Row 1: Begin in the 2nd chain from the hook, crochet 30 sc, ch 1, turn. (30 sts)
Rows 2–6: Repeat Row 1 five more times so that you have a total of 6 rows.
Row 7: Crochet 30 sc in the BLO. (30 sts)
Crocheting the Openwork Detail
Row 8: Crochet 10 dc, ch 2, skip 2 sts, crochet 2 dc into the next 2 st. Ch 2, skip 2 sts, crochet 2 dc. Ch 2, skip 2 sts, crochet 10 dc. End with ch 1 and turn your work. There should be 3 open spaces on this row.
From here on, work every other row in sc through the BLO, and every other row in dc.
Row 9: Crochet 30 sc in BLO, ch 1, turn.
Row 10: Crochet 30 dc, ch 1, turn.
Repeat Rows 9 and 10 a total of 10 times, so that you have 5 rows of each.
Rows 19–25: Crochet 30 dc. Ch 1 and turn.
Row 26: Crochet 30 dc in the FLO so that the raised detail appears on the wrong side compared to the other rows. If you’re unsure how to crochet in the front loop only, see the video below.
Row 27: Crochet 30 dc, ch 1, turn.
Row 28: Crochet 30 dc in the FLO, ch 1, turn.
Rows 29–30: Crochet 30 dc, ch 1, turn.
Finish by cutting the yarn and pulling the yarn end through the loop to secure it. Weave in the yarn end between the stitches. If you’re unsure how to fasten off, see the video below.
Sides and Handles
Sides
Now crochet sc along the short sides of the bag.
Fold the bag in half. Keep in mind that the two raised lines made from FLO stitches should be on the inside of the bag, while the other lines on the front panel face outward.
Start with one short side, from the top corner, and work all the way down.
If using new yarn: attach your yarn at the top corner of the bag. Crochet sc along the short side all the way down.
Finish with a knot and weave in the yarn end on the inside.
Repeat on the other short side.
Handles
Attach your yarn at one top corner of your bag. From here, ch as long as you want your handle to be.
Attach the chain to the opposite corner with a sc.
Then, crochet sc along the chain, but work around the chain rather than into the stitches. This creates a stronger, more stable handle.
Finish by tying a knot and weaving in the yarn end on the inside of the bag.
All done – great job! 🎉
The rights to this pattern belong to MYO Make Your Own. The pattern or its pictures may not be copied, shared or resold either in parts or in its entirety, but you may sell items you have crocheted from this pattern. If you have questions about the pattern, contact MYO at hello@makeyourown.se.
Front piece
Start: Crochet a chain of 31 stitches. If you are not sure how to crochet a chain, see below video.
Row 1: Start in the 2nd stitch from your crochet hook and crochet single crochet the entire row (there should be one fewer than that number of chains. Finish the round by chain 1 and turn your work. If you are unsure how to crochet Single Crochet, see below video.
Row 2-6: Repeat row 1 total of 5 times more, so you have a total of 6 rows.
Row 7: Crochet 1 row of single crochets in back loop only, thus the “back” part of the loop which is the back loop. If you are unsure which is the back loop only, see below video (Back Loop Only).
Crocheting the Hole Detail
Row 8
Crochet 10 double crochets, then chain 2, skip 2 stitches, and crochet 2 double crochets into the next two stitches. Chain 2, skip 2 stitches, crochet 2 double crochets. Chain 2, skip 2 stitches.
Finally, crochet the last 10 double crochets, end with chain 1, and turn your work. There should be 3 open spaces in this row.
If you’re unsure how to crochet a double crochet, see the video below.
From here on, work every other row in single crochet through the back loop only, and every other row in double crochet.
Row 9: Crochet 30 single crochet in back loop only, chain 1, turn.
Row 10: Crochet 30 double crochet, chain 1, turn.
Repeat Rows 9 and 10 a total of 10 times, so that you have crocheted 5 rows of each.
Rows 19–25: Crochet 30 double crochet. Chain 1 and turn.
Row 26: Crochet double crochet in the front loop only so that the detail / raised line appears on the wrong side compared to the other rows.
If you’re unsure how to crochet in the front loop only, see the video below.
Row 27: Crochet 30 double crochet, chain 1, turn.
Row 28: Crochet 30 double crochet in the front loop only, chain 1 (ch 1), turn.
Rows 29–30: Crochet 30 double crochet, chain 1, turn.
Finish by cutting the yarn and pulling the yarn end through the loop to secure it. Weave in the yarn end between the stitches.
If you’re unsure how to fasten off, see the video below.
Sides and Handles
Sides
Now we will crochet single crochet along the short sides of the bag.
Fold your bag in half. Keep in mind that the two raised lines made from front loop only stitches should be on the inside of the bag, while the other lines on the front panel should face outward.
Start with one short side, from the top corner and work all the way down.
If using new yarn: attach your yarn at the top corner of the bag. Crochet single crochets along the short side all the way down.
Finish with a knot and weave in the yarn end on the inside.
Repeat on the other short side.
Handles
Attach your yarn to one top corner of your bag.
From here crochet a chain, as long as you want your handle. Attach the chain to the opposite corner using a single crochet.
Then crochet single crochet all the way back along with your chain, but you crochet around the chain and not in the stitches. This way you will get a more stable handle.
Finish with a knot and hide the end of the yarn on the inside of the bag.
Done, good job!
Pattern Terms
This section uses crochet terms. If you need more guidance along the way, see the simpler version of this pattern.
- ch – chain
- sc – single crochet
- sl st – slip stitch
- dc – double crochet
- BLO – back loop
- FLO – front loop
- yo – yarn over / skip
- st / sts – stitch / stitches
Front Panel
Start: chain 31 (ch 31).
Row 1: Begin in the 2nd chain from the hook, crochet 30 sc, ch 1, turn. (30 sts)
Rows 2–6: Repeat Row 1 five more times so that you have a total of 6 rows.
Row 7: Crochet 30 sc in the BLO. (30 sts)
Crocheting the Openwork Detail
Row 8: Crochet 10 dc, ch 2, skip 2 sts, crochet 2 dc into the next 2 st. Ch 2, skip 2 sts, crochet 2 dc. Ch 2, skip 2 sts, crochet 10 dc. End with ch 1 and turn your work. There should be 3 open spaces on this row.
From here on, work every other row in sc through the BLO, and every other row in dc.
Row 9: Crochet 30 sc in BLO, ch 1, turn.
Row 10: Crochet 30 dc, ch 1, turn.
Repeat Rows 9 and 10 a total of 10 times, so that you have 5 rows of each.
Rows 19–25: Crochet 30 dc. Ch 1 and turn.
Row 26: Crochet 30 dc in the FLO so that the raised detail appears on the wrong side compared to the other rows. If you’re unsure how to crochet in the front loop only, see the video below.
Row 27: Crochet 30 dc, ch 1, turn.
Row 28: Crochet 30 dc in the FLO, ch 1, turn.
Rows 29–30: Crochet 30 dc, ch 1, turn.
Finish by cutting the yarn and pulling the yarn end through the loop to secure it. Weave in the yarn end between the stitches. If you’re unsure how to fasten off, see the video below.
Sides and Handles
Sides
Now crochet sc along the short sides of the bag.
Fold the bag in half. Keep in mind that the two raised lines made from FLO stitches should be on the inside of the bag, while the other lines on the front panel face outward.
Start with one short side, from the top corner, and work all the way down.
If using new yarn: attach your yarn at the top corner of the bag. Crochet sc along the short side all the way down.
Finish with a knot and weave in the yarn end on the inside.
Repeat on the other short side.
Handles
Attach your yarn at one top corner of your bag. From here, ch as long as you want your handle to be.
Attach the chain to the opposite corner with a sc.
Then, crochet sc along the chain, but work around the chain rather than into the stitches. This creates a stronger, more stable handle.
Finish by tying a knot and weaving in the yarn end on the inside of the bag.
All done – great job! 🎉
The rights to this pattern belong to MYO Make Your Own. The pattern or its pictures may not be copied, shared or resold either in parts or in its entirety, but you may sell items you have crocheted from this pattern. If you have questions about the pattern, contact MYO at hello@makeyourown.se.


Share your creations with us
Thank you!
Your comment was sent!