
Macramé bag "Mika"
Knot a Beautiful Bag
Knot a small yet stylish bag with beautiful wooden handles that add a natural touch. This detailed, full-length video instruction guides you step by step through the process of creating a fringed bag using two of the most essential macramé knots. As the final step, you'll create the fringe, choosing the length that suits your style. Finished size: Approximately 25 cm (10") high × 20 cm (8") wide (excluding the fringe and handles). Materials: Braided Rope 5 mm (we used the colour Cacao), wooden handles, scissors and a marker.
Yarn Consumption: Approximately 250 g

.jpg)
.jpg)
.jpg)
Here's how to do it
The bag is fully adjustable in size. You can increase the depth of the bag by adding more rows of knots in the final steps of the pattern. You also decide the length of the fringe to create the look you want. Please note that if you plan to add more rows, you will need to increase the length of all the cords before cutting them at the beginning of the project. /Rebecca

This is what you need:
Here you can directly purchase the material for the product. Please note that the instruction is digital and appears here on the page (no written instruction).

EKO Braided rope 5mm | 1000g
Ideal for macramé work such as amples, bags, cord guards etc., but also for crocheting.
Buy product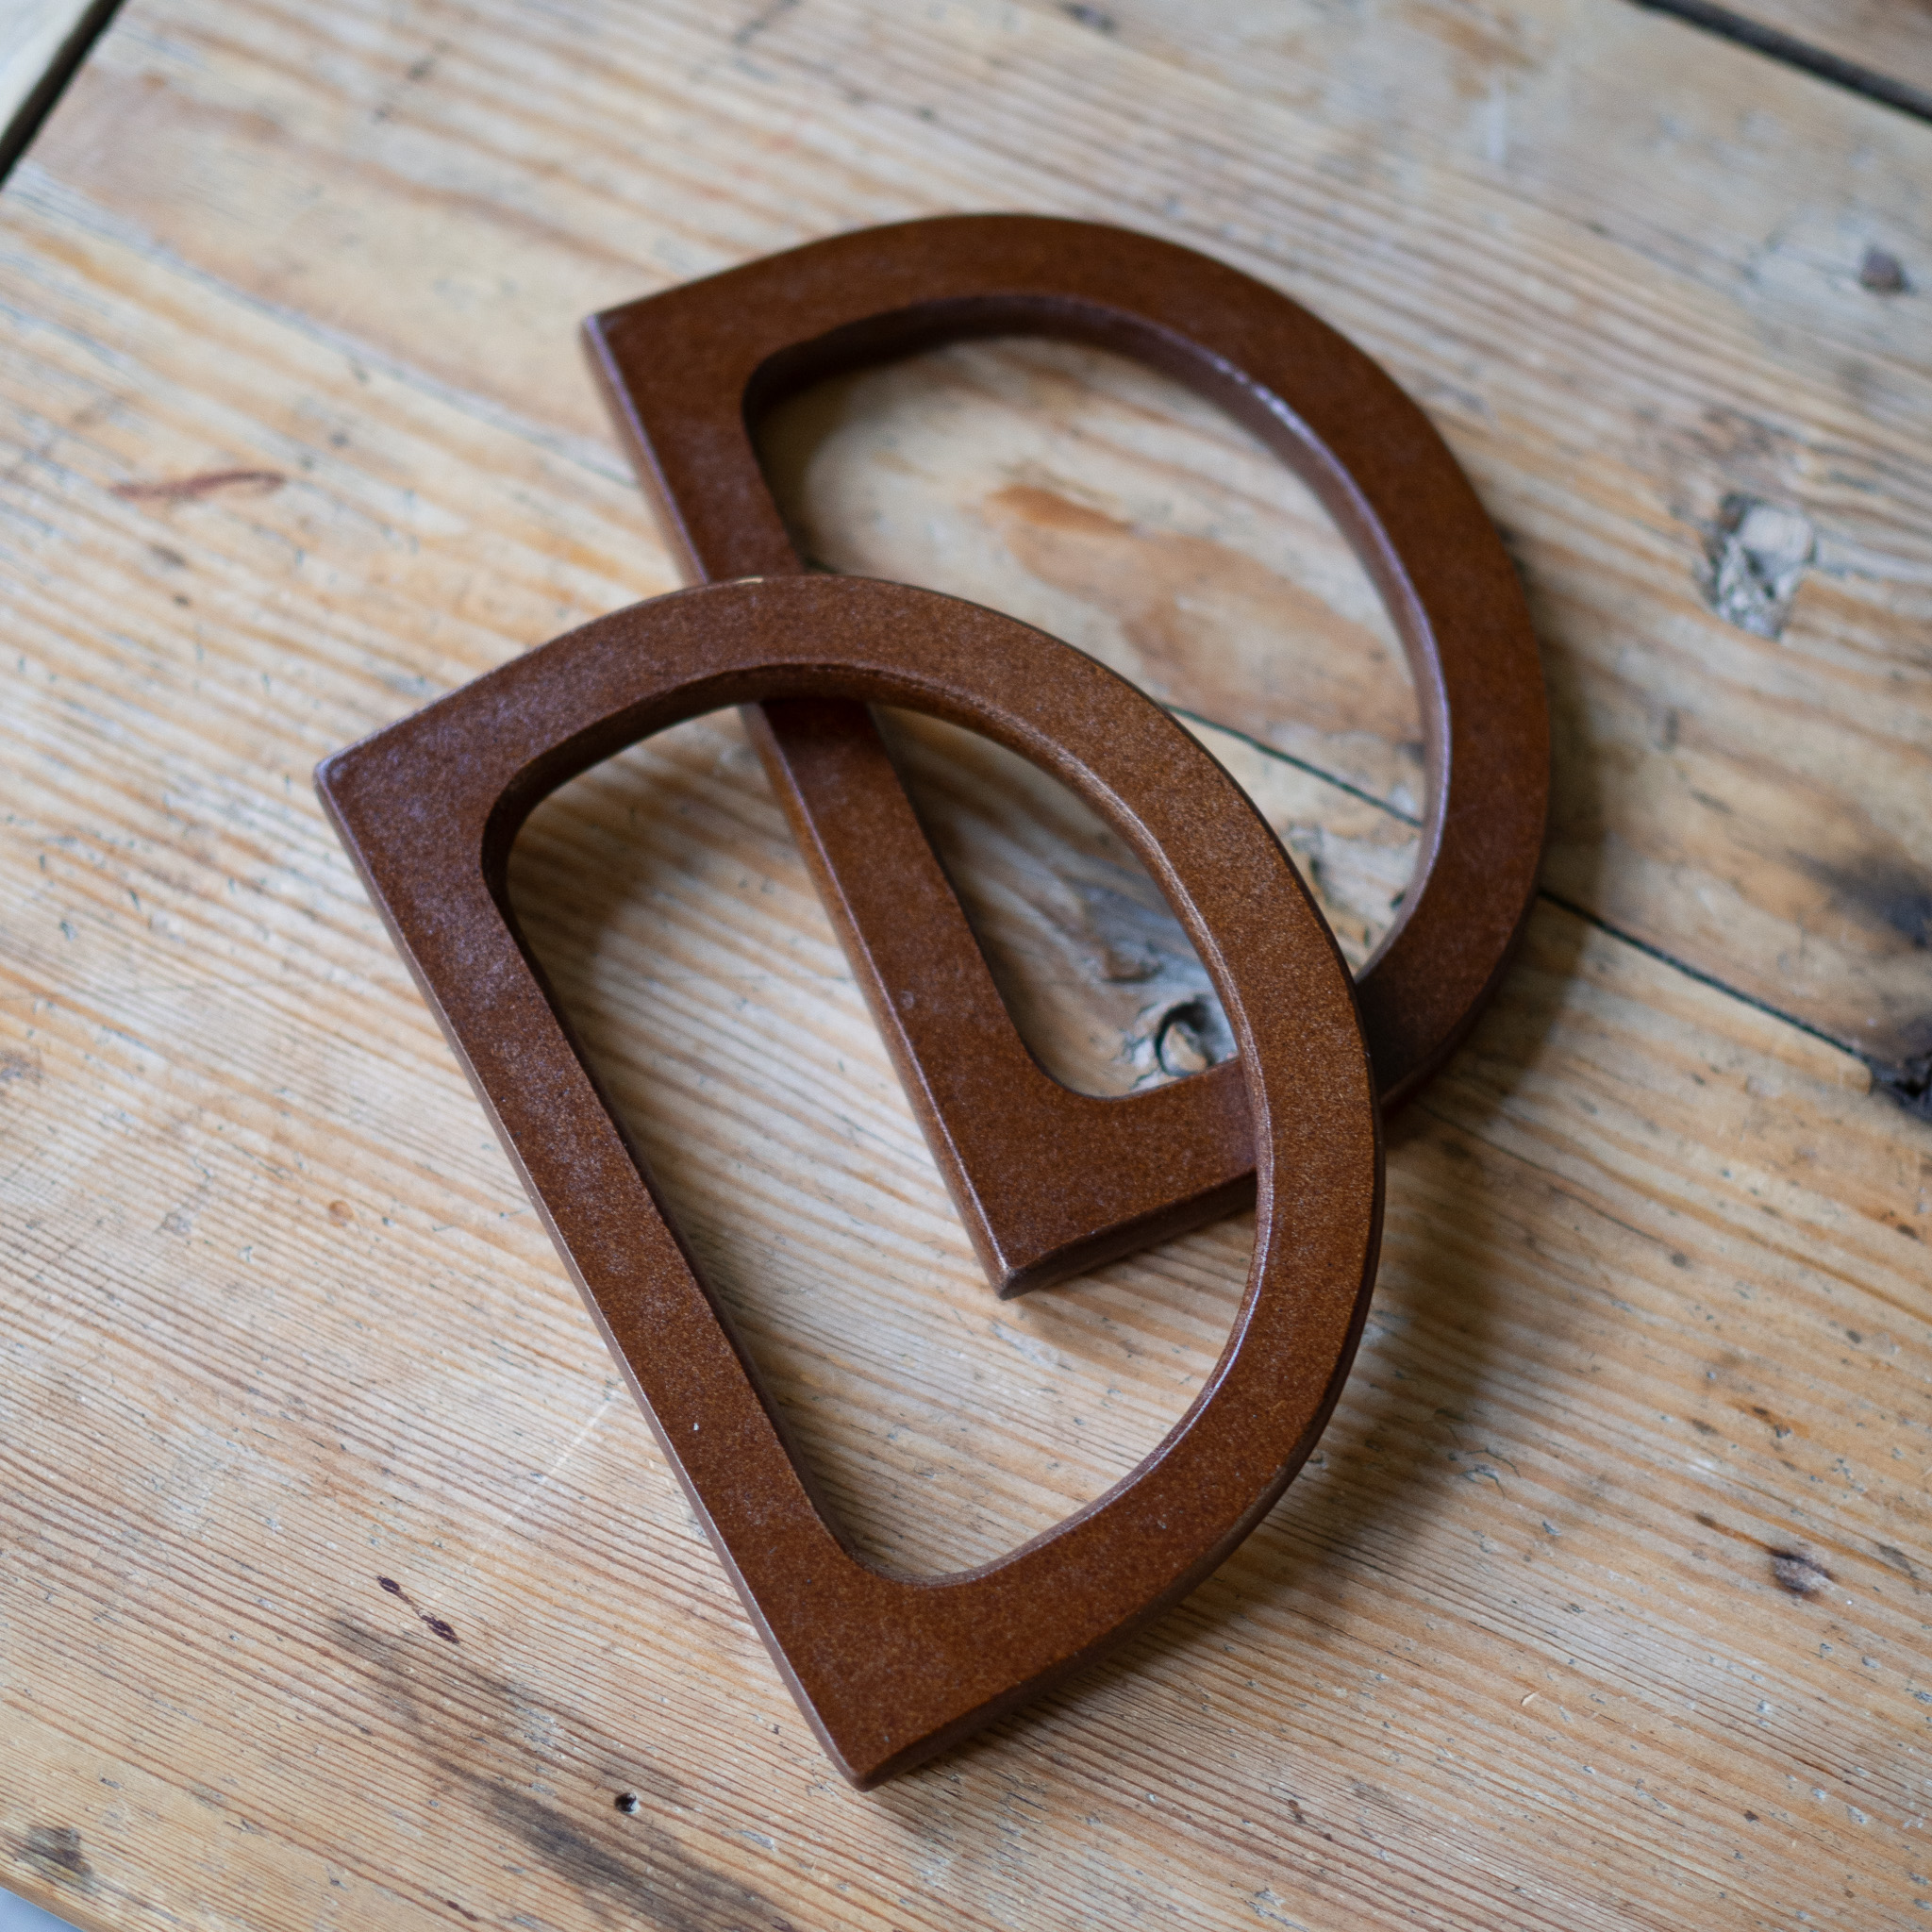
.jpg)
Your next favorite project is waiting
Get access to this pattern and over 300 other beginner-friendly projects for crochet, knitting, and macramé.
Then 85 SEK/month. Cancel anytime.

Number of cords: 28 cords × 2 m
Start by cutting all your cords before you begin.
Row 1: Attach 8 cords to one handle using a Lark’s Head Knot (LHK).
To make the knot: Fold the cord in half, place the folded part (the U-shape) behind the handle, and pull the two loose ends through the loop. This creates a knot similar to a tie knot, visible from the front of the handle.
Repeat the same process for the second handle.
Row 2: Start with one of the handles. Now you will tie Right-Facing Square Knots using the middle cords.
Set the two outermost cords on each side aside and use the remaining cords in the middle to create the knots.
How to tie a Right-Facing Square Knot: Use 4 cords. Choose 4 cords that belong to 2 of the Lark’s Head Knots from the previous row.
Take the left cord and place it over the two middle cords, forming the shape of a “4”, and place it underneath the right cord. Then take the right cord, pass it underneath the two middle cords, and pull it through the large loop of the “4”. Pull the entire cord through the loop and tighten both ends.
Now repeat the same step in reverse (mirror image), creating a “P” shape. Start from the right side, with the right cord placed over the middle cords and the left cord underneath. You have now completed one Right-Facing Square Knot.
You will make a total of 3 Right-Facing Square Knot on your first row. Tighten them firmly around the handle to ensure stability.
Next, take a new cord and fold it in half. Attach it with a Lark’s Head Knot around the two outermost cords on one side, then repeat the same step on the opposite side. This adds extra knots to increase the width of the bag.
The added knots can be moved slightly downward so that they sit approximately 1 cm lower than the other knots.
Repeat the same process for the second handle.
Now repeat the steps from the previous row, keeping approximately 1 cm of space between each row. In other words, tie your knots with about the width of your little finger between the rows to create an airy and lightweight look.
Rows 3 and 4:
Start with one handle again. Set the two outermost cords aside.
Tie Right-Facing Square Knots using the remaining middle cords.
Add one cord on each outer edge around the two outermost cords that you set aside, using a Lark’s Head Knot.
Repeat the same process for the second handle.
Repeat the same process for Row 4.
Now the two halves will be joined together to create a closed circle for the bag.
Row 5:
Start by tying 1 Right-Facing Square Knot on each short side. Use 2 cords from each half to join the two sides together. If helpful, place a stitch marker to indicate where the row begins.
Rows 6–8:
Continue by tying a total of Right-Facing Square Knot all the way around the bag, following the same method as in the previous row. Keep a small gap between each row to maintain the airy look.
Now we will begin creating the bottom section of the bag. There is no major difference in the knotting technique, except that these rows are tied tightly together. This means that each knot should be pushed all the way up against the row above.
Rows 9–11:
Tie 3 rows of Right-Facing Square Knot all the way around, following the same method as before. This time, do not leave any space between the rows. Tighten each knot firmly so that it sits directly against the row above.
Close the bottom and cut the fringe
Now it is time to close the bottom of the bag. This is done in the same way as before using Right-Facing Square Knots, but this time the knots are tied across the entire bottom to join the left and right sides together.
Start at one of the short sides. For the first knot, use all 4 cords from the centred knot, plus 2 cords from the knot on the left and 2 cords from the knot on the right. Tie a Right-Facing Square Knot using these cords.
Continue with the next two knots, using one knot from each side of the centre (right and left). Think of it as closing the opening of the bag.
Continue this process all the way to the opposite short side.
Finish by adjusting the cords so that they hang straight down. Trim the cords to create an even fringe in your desired length.
Your bag is finished!
This section contains macramé terminology. If you need more guidance along the way, please see the simpler version, which includes a full-length video tutorial.
Abbreviations
LHK = Lark’s Head Knot
RFSK = Right-Facing Square Knot
Number of cords
28 cords × 2 m
Start by cutting all your cords before you begin.
Row 1: Attach 8 cords around one handle using LHK.
Repeat for handle 2.
Row 2: Start with one of the handles. Tie RFSK using the middle cords.
Set the 2 outermost cords on each side aside and use the remaining middle cords to tie your knots.
Then take a new cord, fold it in half, and attach it with LHK around the two outermost cords on one side. Repeat the same step on the opposite side. This is to add extra knots and increase the width of the bag.
The added knots can be moved slightly downward so they sit approximately 1 cm lower.
Repeat for handle 2.
Now repeat the steps from the previous row and keep approximately 1 cm of space between the rows. Leave about the width of your little finger between each row to create an airy look.
Rows 3 and 4: Start with one handle. Set the two outermost cords aside.
Tie RFSK with the remaining middle cords.
Add one cord on each outer edge around the 2 outermost cords you set aside using LHK.
Repeat for handle 2 and repeat the same process for Row 4.
Now the two halves will be joined together to create a closed circle for the bag.
Row 5: Tie 1 RFSK on each short side, using 2 cords from each half to join the two halves together.
If helpful, place a marker to indicate where the row begins.
Rows 6–8: Continue tying a total of 3 rows of RFSK all the way around, following the same method as the previous row. Keep a small space between the rows.
Now begin the bottom section of the bag. The only difference is that these rows are tied tightly, meaning each knot should be pushed all the way up against the row above.
Rows 9–11: Tie 3 rows of RFSK all the way around, following the same method as before. This time, do not leave any space between the rows. Tie all knots tightly against the row above.
Closing the bottom and creating the fringe
Now close the bottom using RFSK, just as before, but this time tie the knots across the entire bottom to join the right and left sides together.
Start at one short side. For the first knot, use all 4 cords from the centred knot, plus 2 cords from the knot on the left and 2 cords from the knot on the right. Tie an RFSK with these cords.
Continue with the next two knots, using one knot from each side of the centre (right/left). Think of it as closing the opening.
Continue all the way to the opposite short side.
Finish by adjusting the cords so they hang straight down. Trim the cords to create an even fringe in your desired length.
Done!
The rights to this pattern belong to MYO Make Your Own. The pattern or its pictures may not be copied, shared or resold either in parts or in its entirety, but you may sell items you have crocheted from this pattern. If you have questions about the pattern, contact MYO at hello@makeyourown.se.
Number of cords: 28 cords × 2 m
Start by cutting all your cords before you begin.
Row 1: Attach 8 cords to one handle using a Lark’s Head Knot (LHK).
To make the knot: Fold the cord in half, place the folded part (the U-shape) behind the handle, and pull the two loose ends through the loop. This creates a knot similar to a tie knot, visible from the front of the handle.
Repeat the same process for the second handle.
Row 2: Start with one of the handles. Now you will tie Right-Facing Square Knots using the middle cords.
Set the two outermost cords on each side aside and use the remaining cords in the middle to create the knots.
How to tie a Right-Facing Square Knot: Use 4 cords. Choose 4 cords that belong to 2 of the Lark’s Head Knots from the previous row.
Take the left cord and place it over the two middle cords, forming the shape of a “4”, and place it underneath the right cord. Then take the right cord, pass it underneath the two middle cords, and pull it through the large loop of the “4”. Pull the entire cord through the loop and tighten both ends.
Now repeat the same step in reverse (mirror image), creating a “P” shape. Start from the right side, with the right cord placed over the middle cords and the left cord underneath. You have now completed one Right-Facing Square Knot.
You will make a total of 3 Right-Facing Square Knot on your first row. Tighten them firmly around the handle to ensure stability.
Next, take a new cord and fold it in half. Attach it with a Lark’s Head Knot around the two outermost cords on one side, then repeat the same step on the opposite side. This adds extra knots to increase the width of the bag.
The added knots can be moved slightly downward so that they sit approximately 1 cm lower than the other knots.
Repeat the same process for the second handle.
Now repeat the steps from the previous row, keeping approximately 1 cm of space between each row. In other words, tie your knots with about the width of your little finger between the rows to create an airy and lightweight look.
Rows 3 and 4:
Start with one handle again. Set the two outermost cords aside.
Tie Right-Facing Square Knots using the remaining middle cords.
Add one cord on each outer edge around the two outermost cords that you set aside, using a Lark’s Head Knot.
Repeat the same process for the second handle.
Repeat the same process for Row 4.
Now the two halves will be joined together to create a closed circle for the bag.
Row 5:
Start by tying 1 Right-Facing Square Knot on each short side. Use 2 cords from each half to join the two sides together. If helpful, place a stitch marker to indicate where the row begins.
Rows 6–8:
Continue by tying a total of Right-Facing Square Knot all the way around the bag, following the same method as in the previous row. Keep a small gap between each row to maintain the airy look.
Now we will begin creating the bottom section of the bag. There is no major difference in the knotting technique, except that these rows are tied tightly together. This means that each knot should be pushed all the way up against the row above.
Rows 9–11:
Tie 3 rows of Right-Facing Square Knot all the way around, following the same method as before. This time, do not leave any space between the rows. Tighten each knot firmly so that it sits directly against the row above.
Close the bottom and cut the fringe
Now it is time to close the bottom of the bag. This is done in the same way as before using Right-Facing Square Knots, but this time the knots are tied across the entire bottom to join the left and right sides together.
Start at one of the short sides. For the first knot, use all 4 cords from the centred knot, plus 2 cords from the knot on the left and 2 cords from the knot on the right. Tie a Right-Facing Square Knot using these cords.
Continue with the next two knots, using one knot from each side of the centre (right and left). Think of it as closing the opening of the bag.
Continue this process all the way to the opposite short side.
Finish by adjusting the cords so that they hang straight down. Trim the cords to create an even fringe in your desired length.
Your bag is finished!
This section contains macramé terminology. If you need more guidance along the way, please see the simpler version, which includes a full-length video tutorial.
Abbreviations
LHK = Lark’s Head Knot
RFSK = Right-Facing Square Knot
Number of cords
28 cords × 2 m
Start by cutting all your cords before you begin.
Row 1: Attach 8 cords around one handle using LHK.
Repeat for handle 2.
Row 2: Start with one of the handles. Tie RFSK using the middle cords.
Set the 2 outermost cords on each side aside and use the remaining middle cords to tie your knots.
Then take a new cord, fold it in half, and attach it with LHK around the two outermost cords on one side. Repeat the same step on the opposite side. This is to add extra knots and increase the width of the bag.
The added knots can be moved slightly downward so they sit approximately 1 cm lower.
Repeat for handle 2.
Now repeat the steps from the previous row and keep approximately 1 cm of space between the rows. Leave about the width of your little finger between each row to create an airy look.
Rows 3 and 4: Start with one handle. Set the two outermost cords aside.
Tie RFSK with the remaining middle cords.
Add one cord on each outer edge around the 2 outermost cords you set aside using LHK.
Repeat for handle 2 and repeat the same process for Row 4.
Now the two halves will be joined together to create a closed circle for the bag.
Row 5: Tie 1 RFSK on each short side, using 2 cords from each half to join the two halves together.
If helpful, place a marker to indicate where the row begins.
Rows 6–8: Continue tying a total of 3 rows of RFSK all the way around, following the same method as the previous row. Keep a small space between the rows.
Now begin the bottom section of the bag. The only difference is that these rows are tied tightly, meaning each knot should be pushed all the way up against the row above.
Rows 9–11: Tie 3 rows of RFSK all the way around, following the same method as before. This time, do not leave any space between the rows. Tie all knots tightly against the row above.
Closing the bottom and creating the fringe
Now close the bottom using RFSK, just as before, but this time tie the knots across the entire bottom to join the right and left sides together.
Start at one short side. For the first knot, use all 4 cords from the centred knot, plus 2 cords from the knot on the left and 2 cords from the knot on the right. Tie an RFSK with these cords.
Continue with the next two knots, using one knot from each side of the centre (right/left). Think of it as closing the opening.
Continue all the way to the opposite short side.
Finish by adjusting the cords so they hang straight down. Trim the cords to create an even fringe in your desired length.
Done!
The rights to this pattern belong to MYO Make Your Own. The pattern or its pictures may not be copied, shared or resold either in parts or in its entirety, but you may sell items you have crocheted from this pattern. If you have questions about the pattern, contact MYO at hello@makeyourown.se.

Share your creations with us
Thank you!
Your comment was sent!