You will lose access to our instructions and member discounts. We hope you want to stay, but understand if it doesn't feel right at the moment — you're always welcome back! :)

We would love to hear your thoughts - why do you want to cancel your membership?
Thank you! Your submission has been received!
Oops! Something went wrong while submitting the form.
Buy your material here

You can buy the materials and needles we use at makeyourown.semakeyourown.se

Go to shop
Copyright © 2022 Make Your Own
Please verify your email address by clicking on the link sent to youremail@gmail.com or resubmit.
patterns

Zara headband

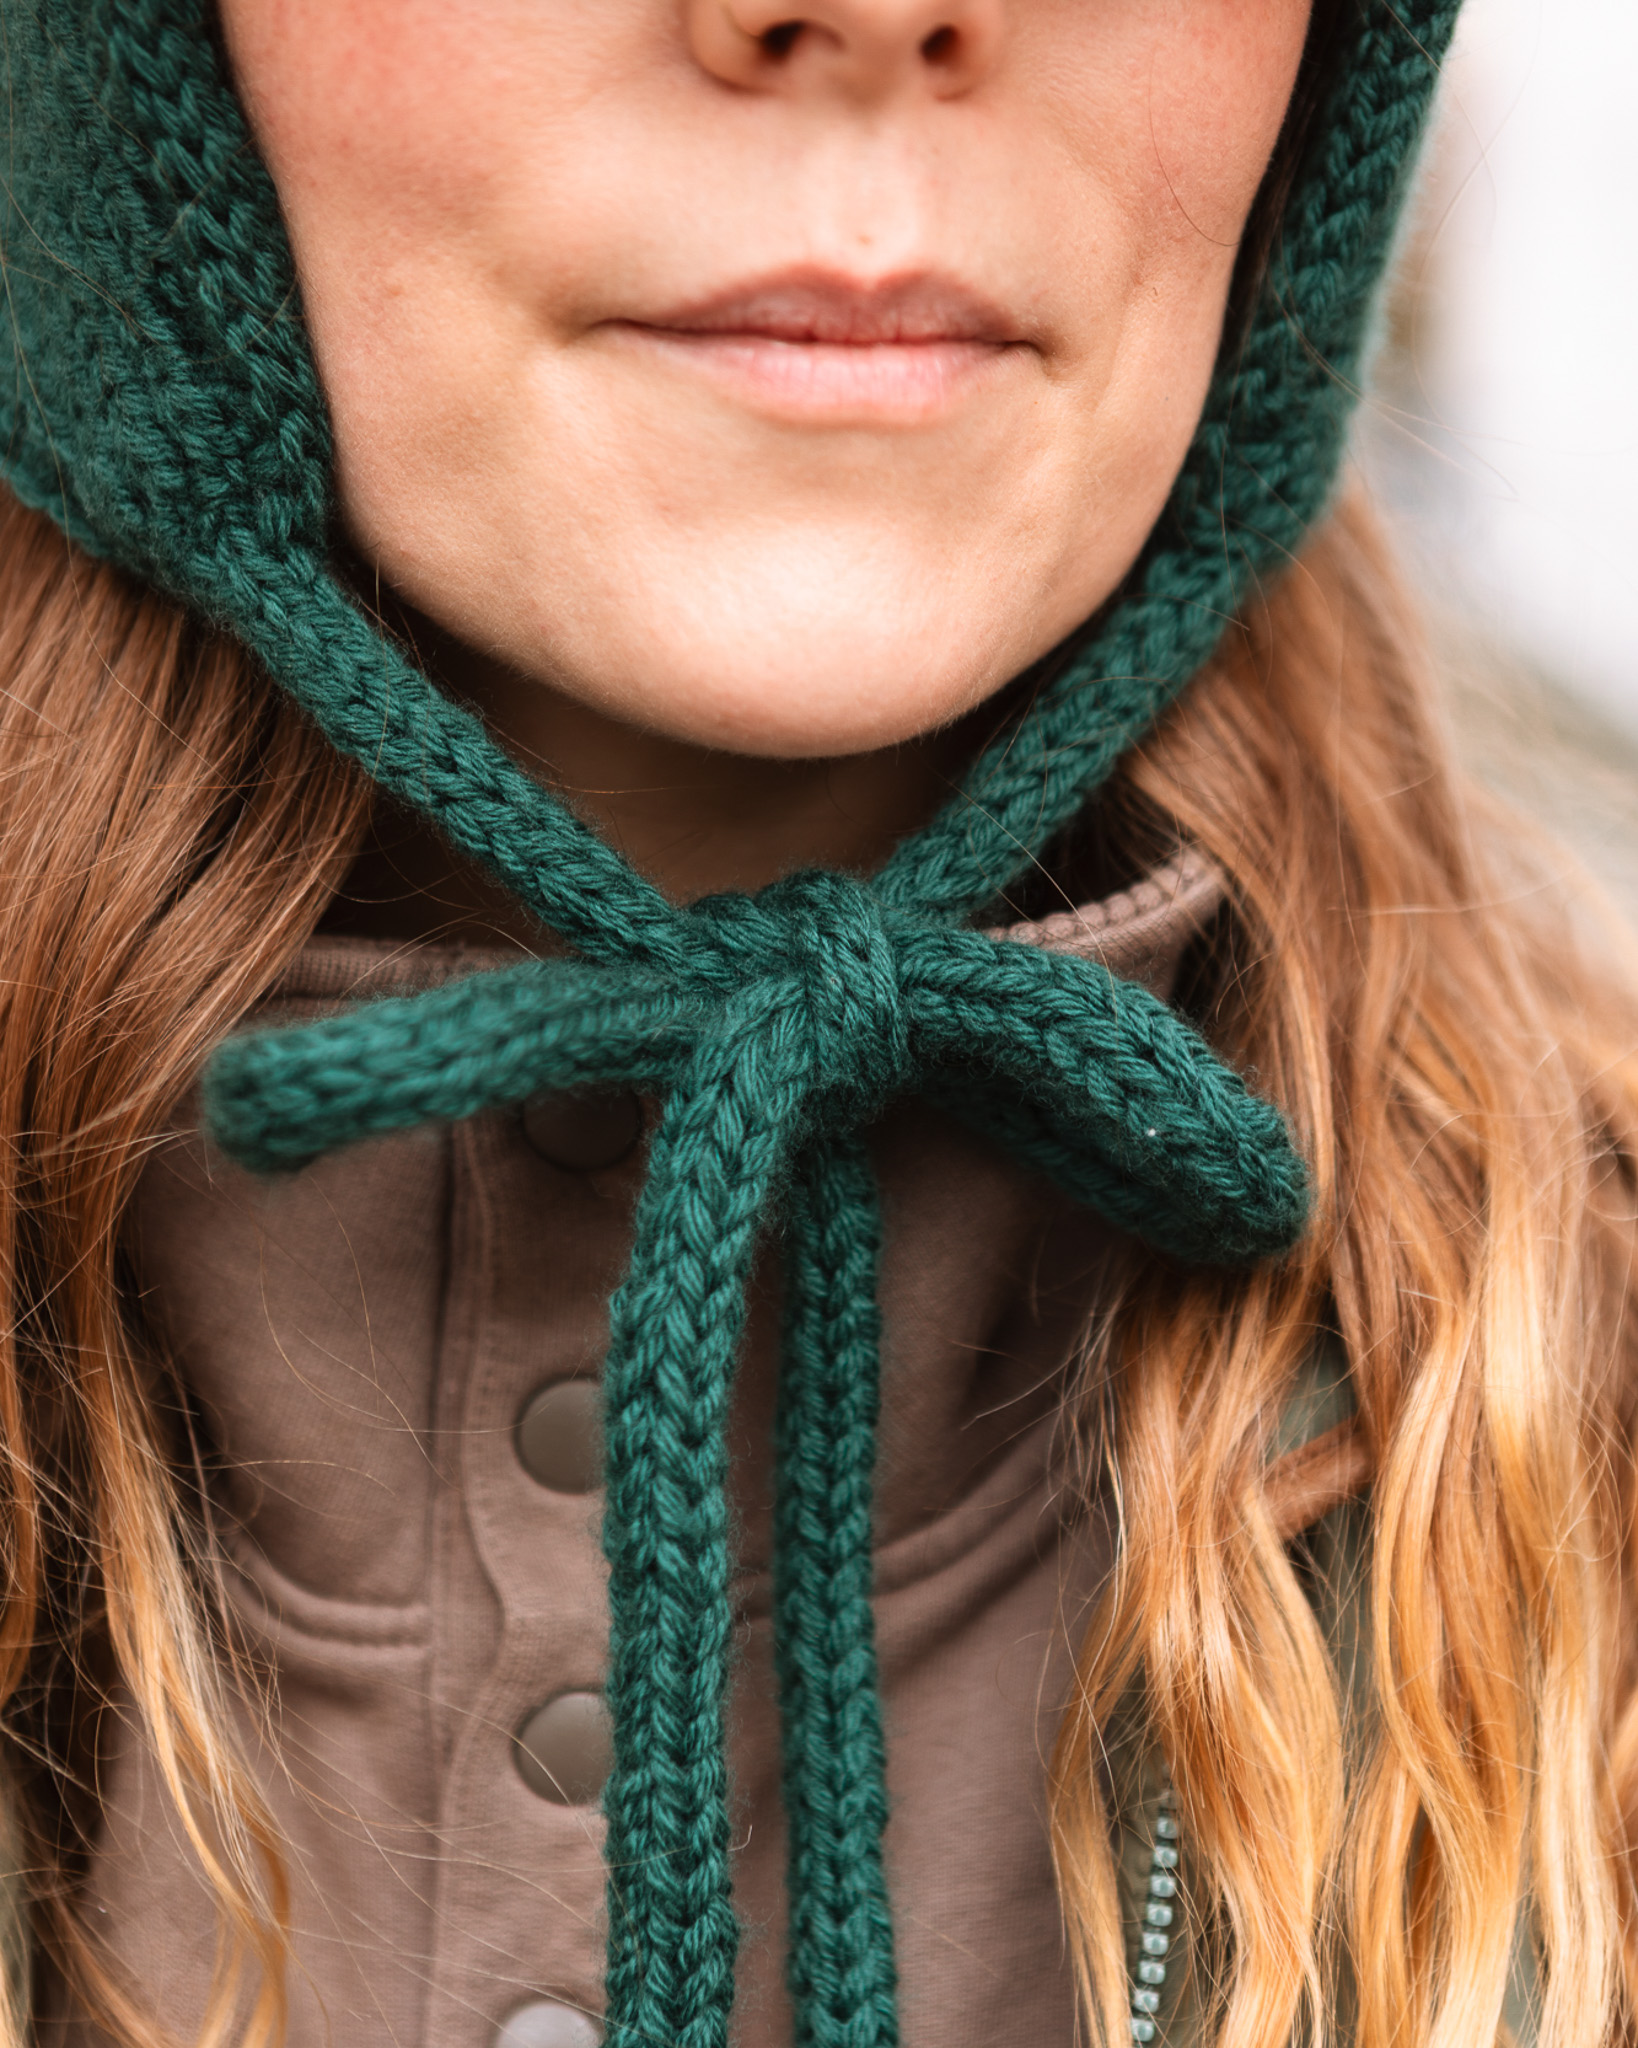
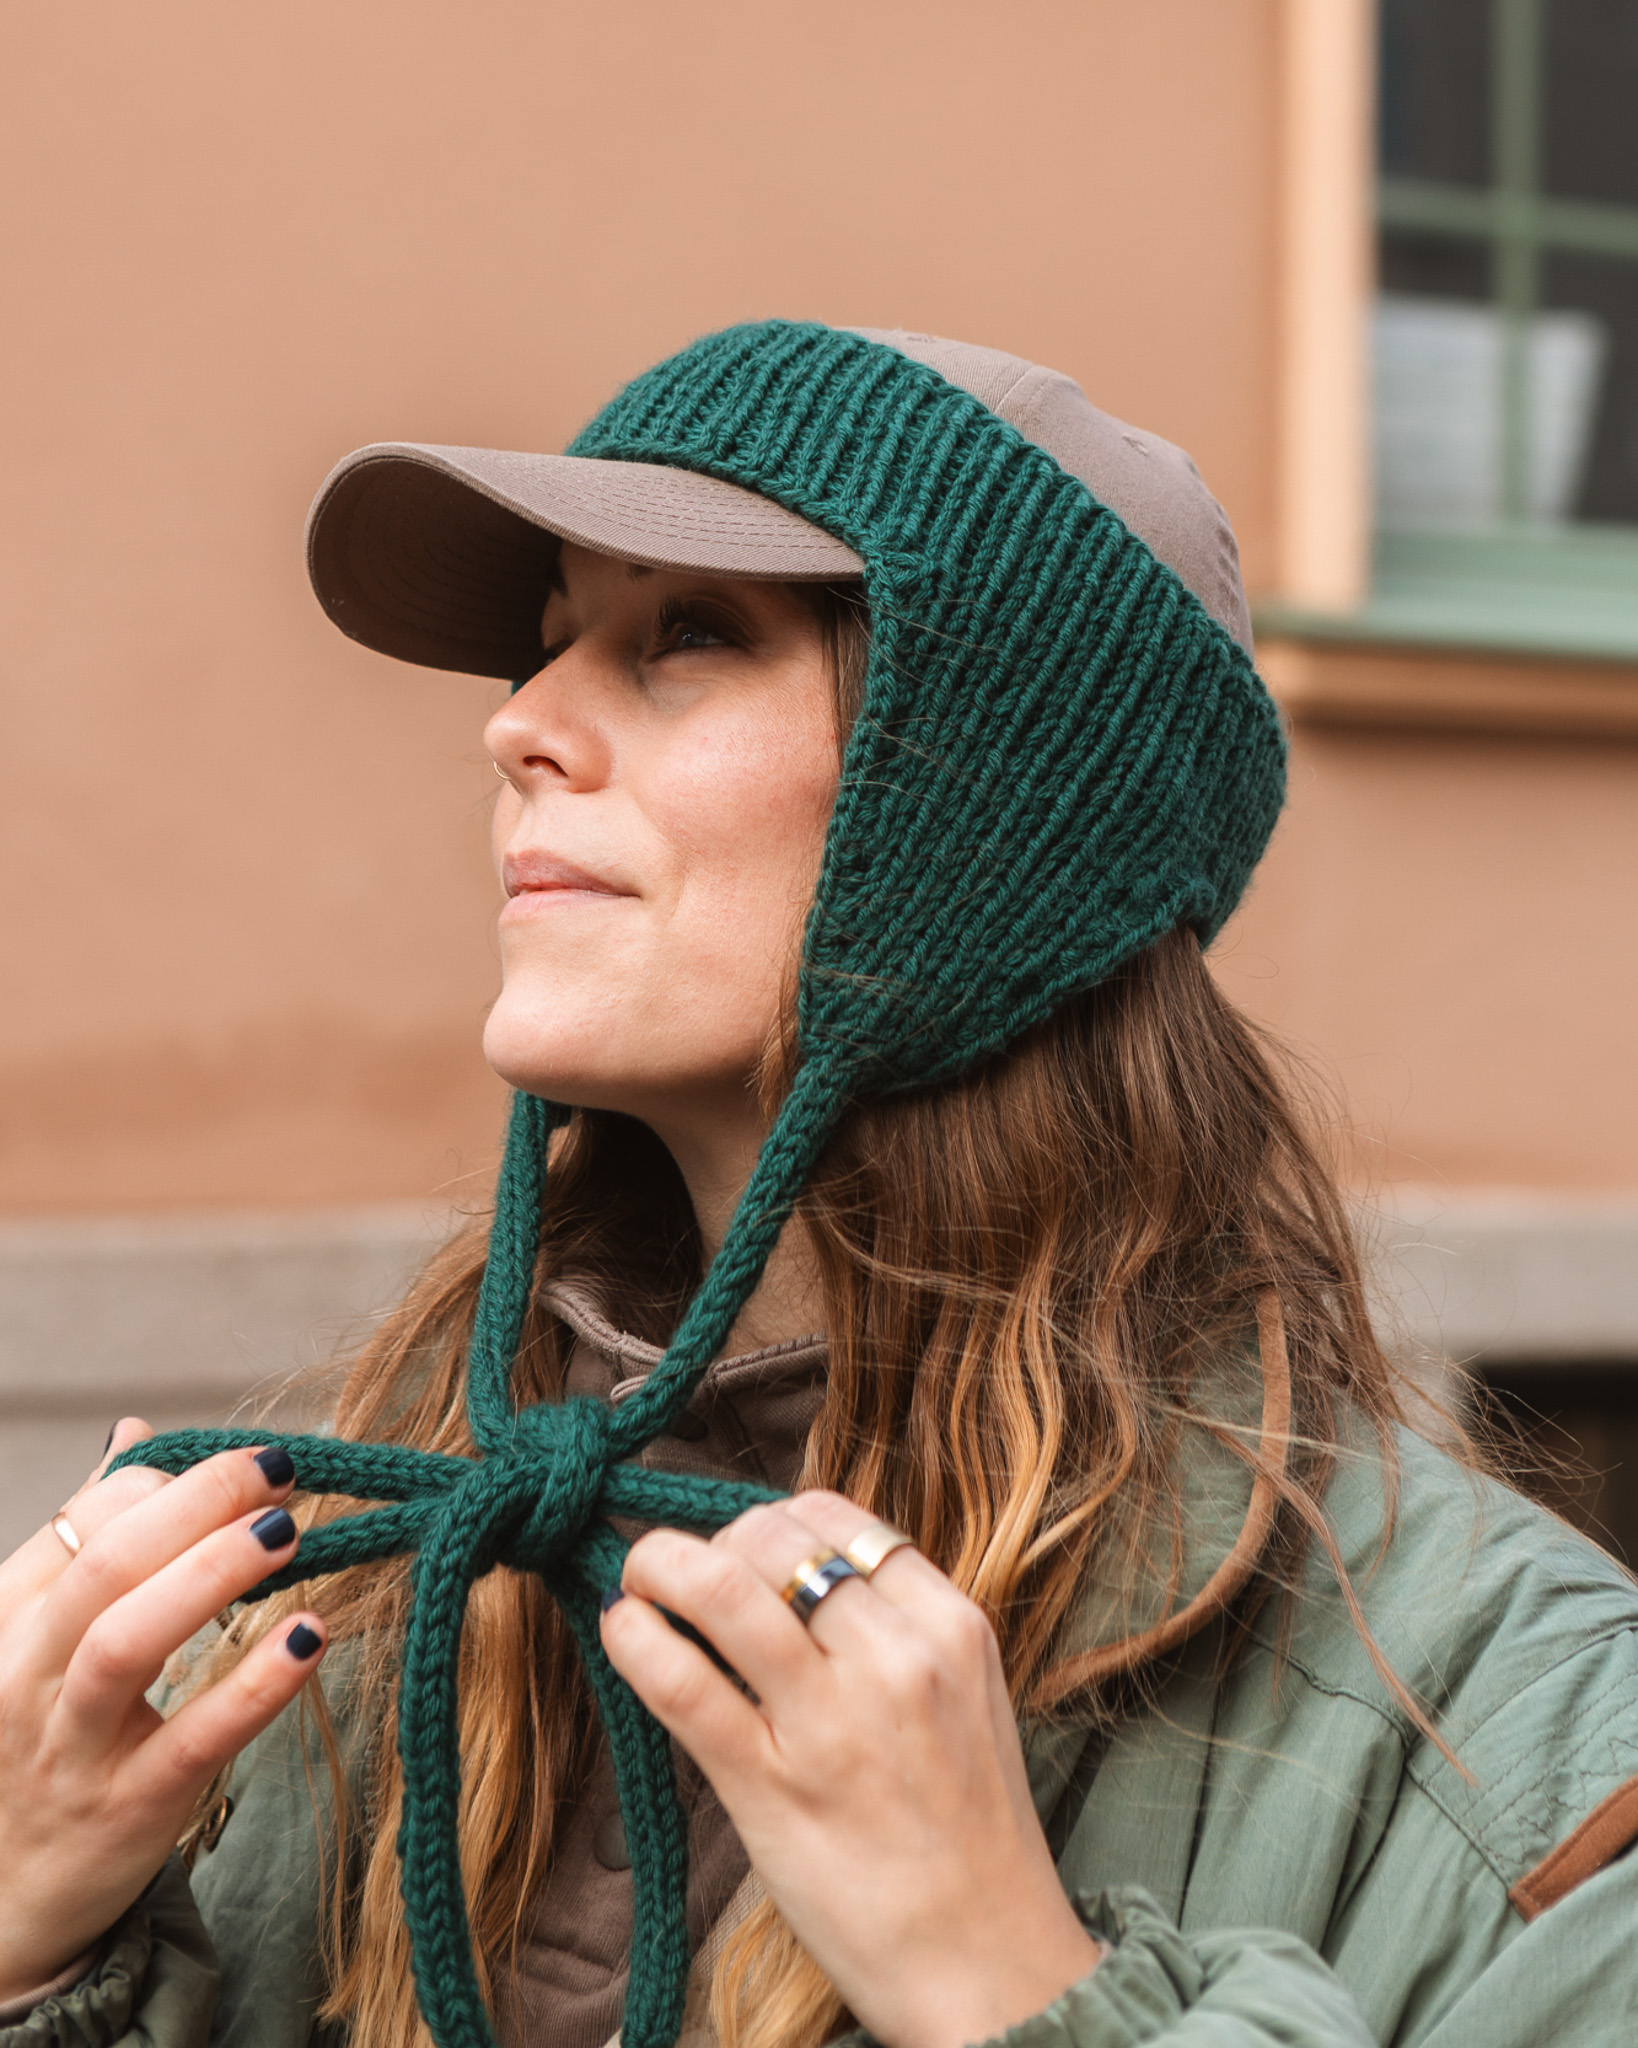
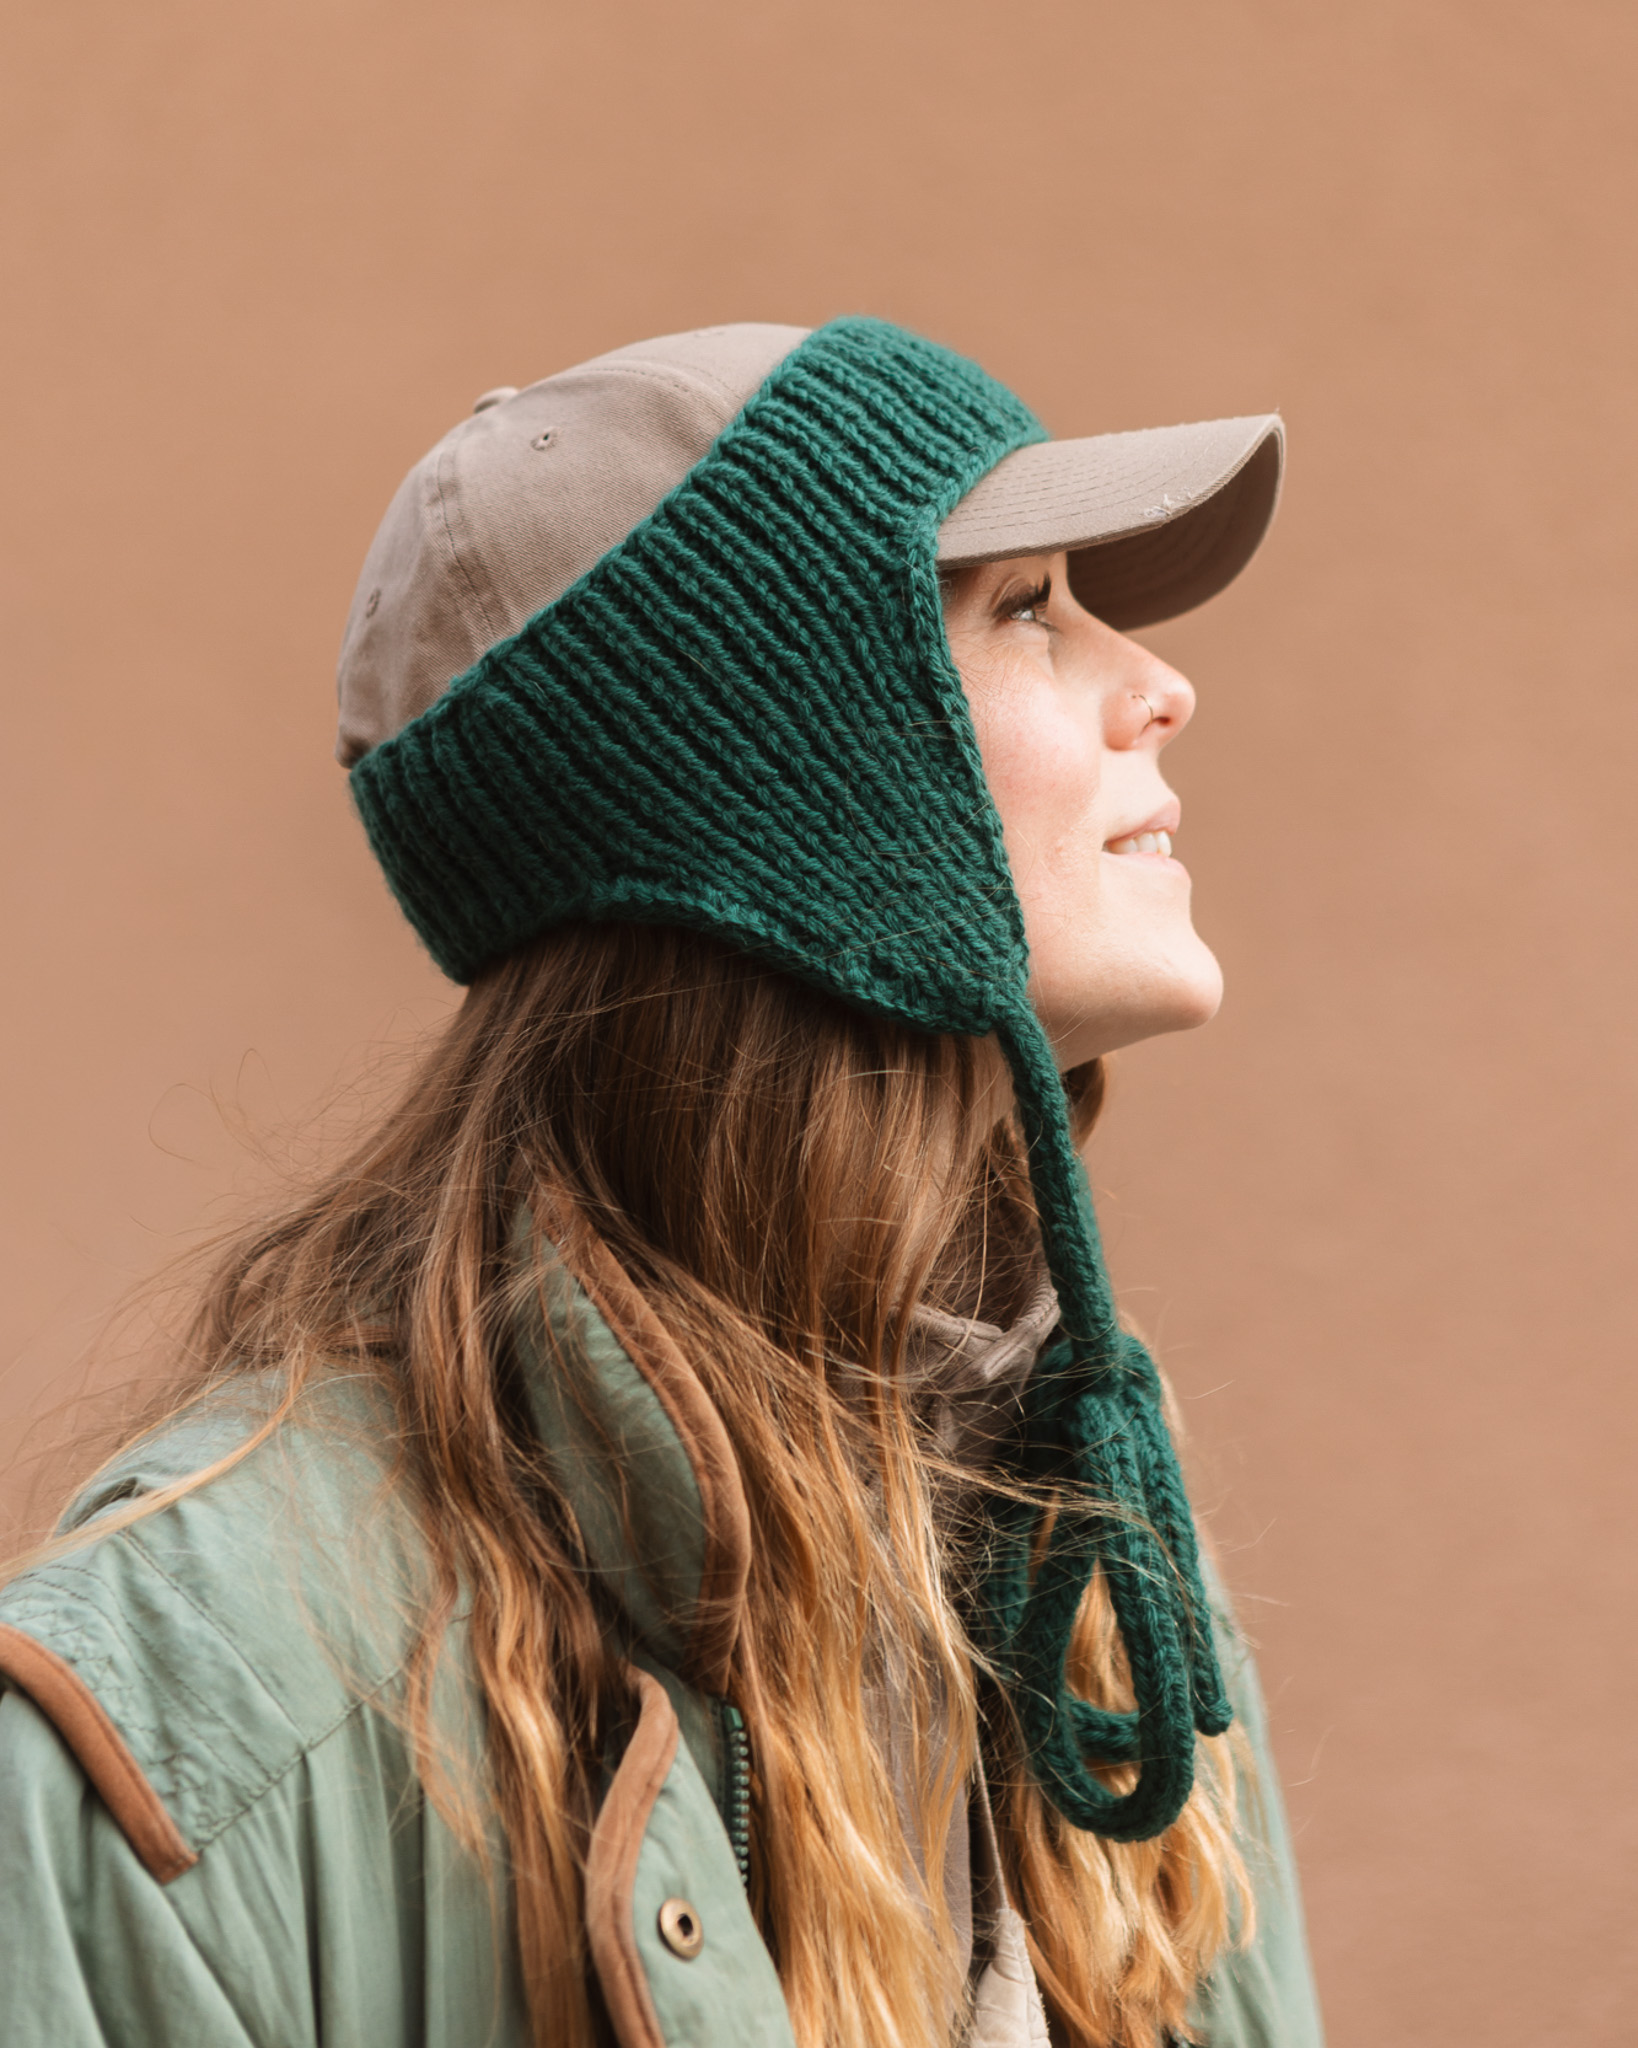
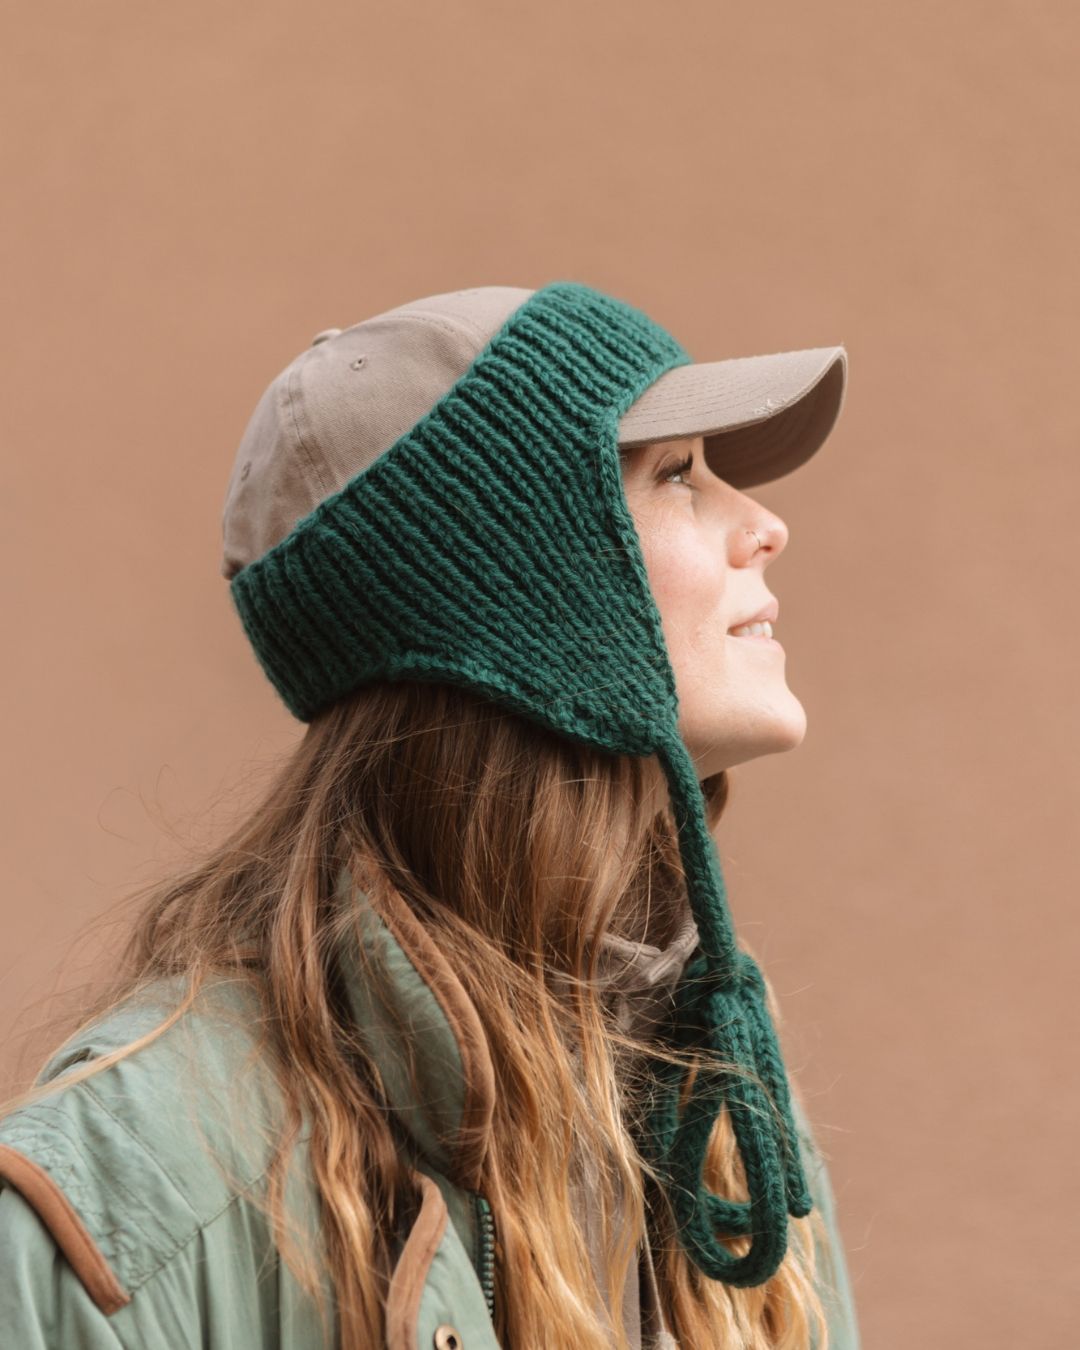
Zara is a knitted headband with earflaps and long ties. You first knit the headband in the round in rib stitch, then the earflaps back and forth, and finally the ties and edging. The instructions include explanatory technique videos to help those who haven't knitted from a standard pattern before.

Size: One size

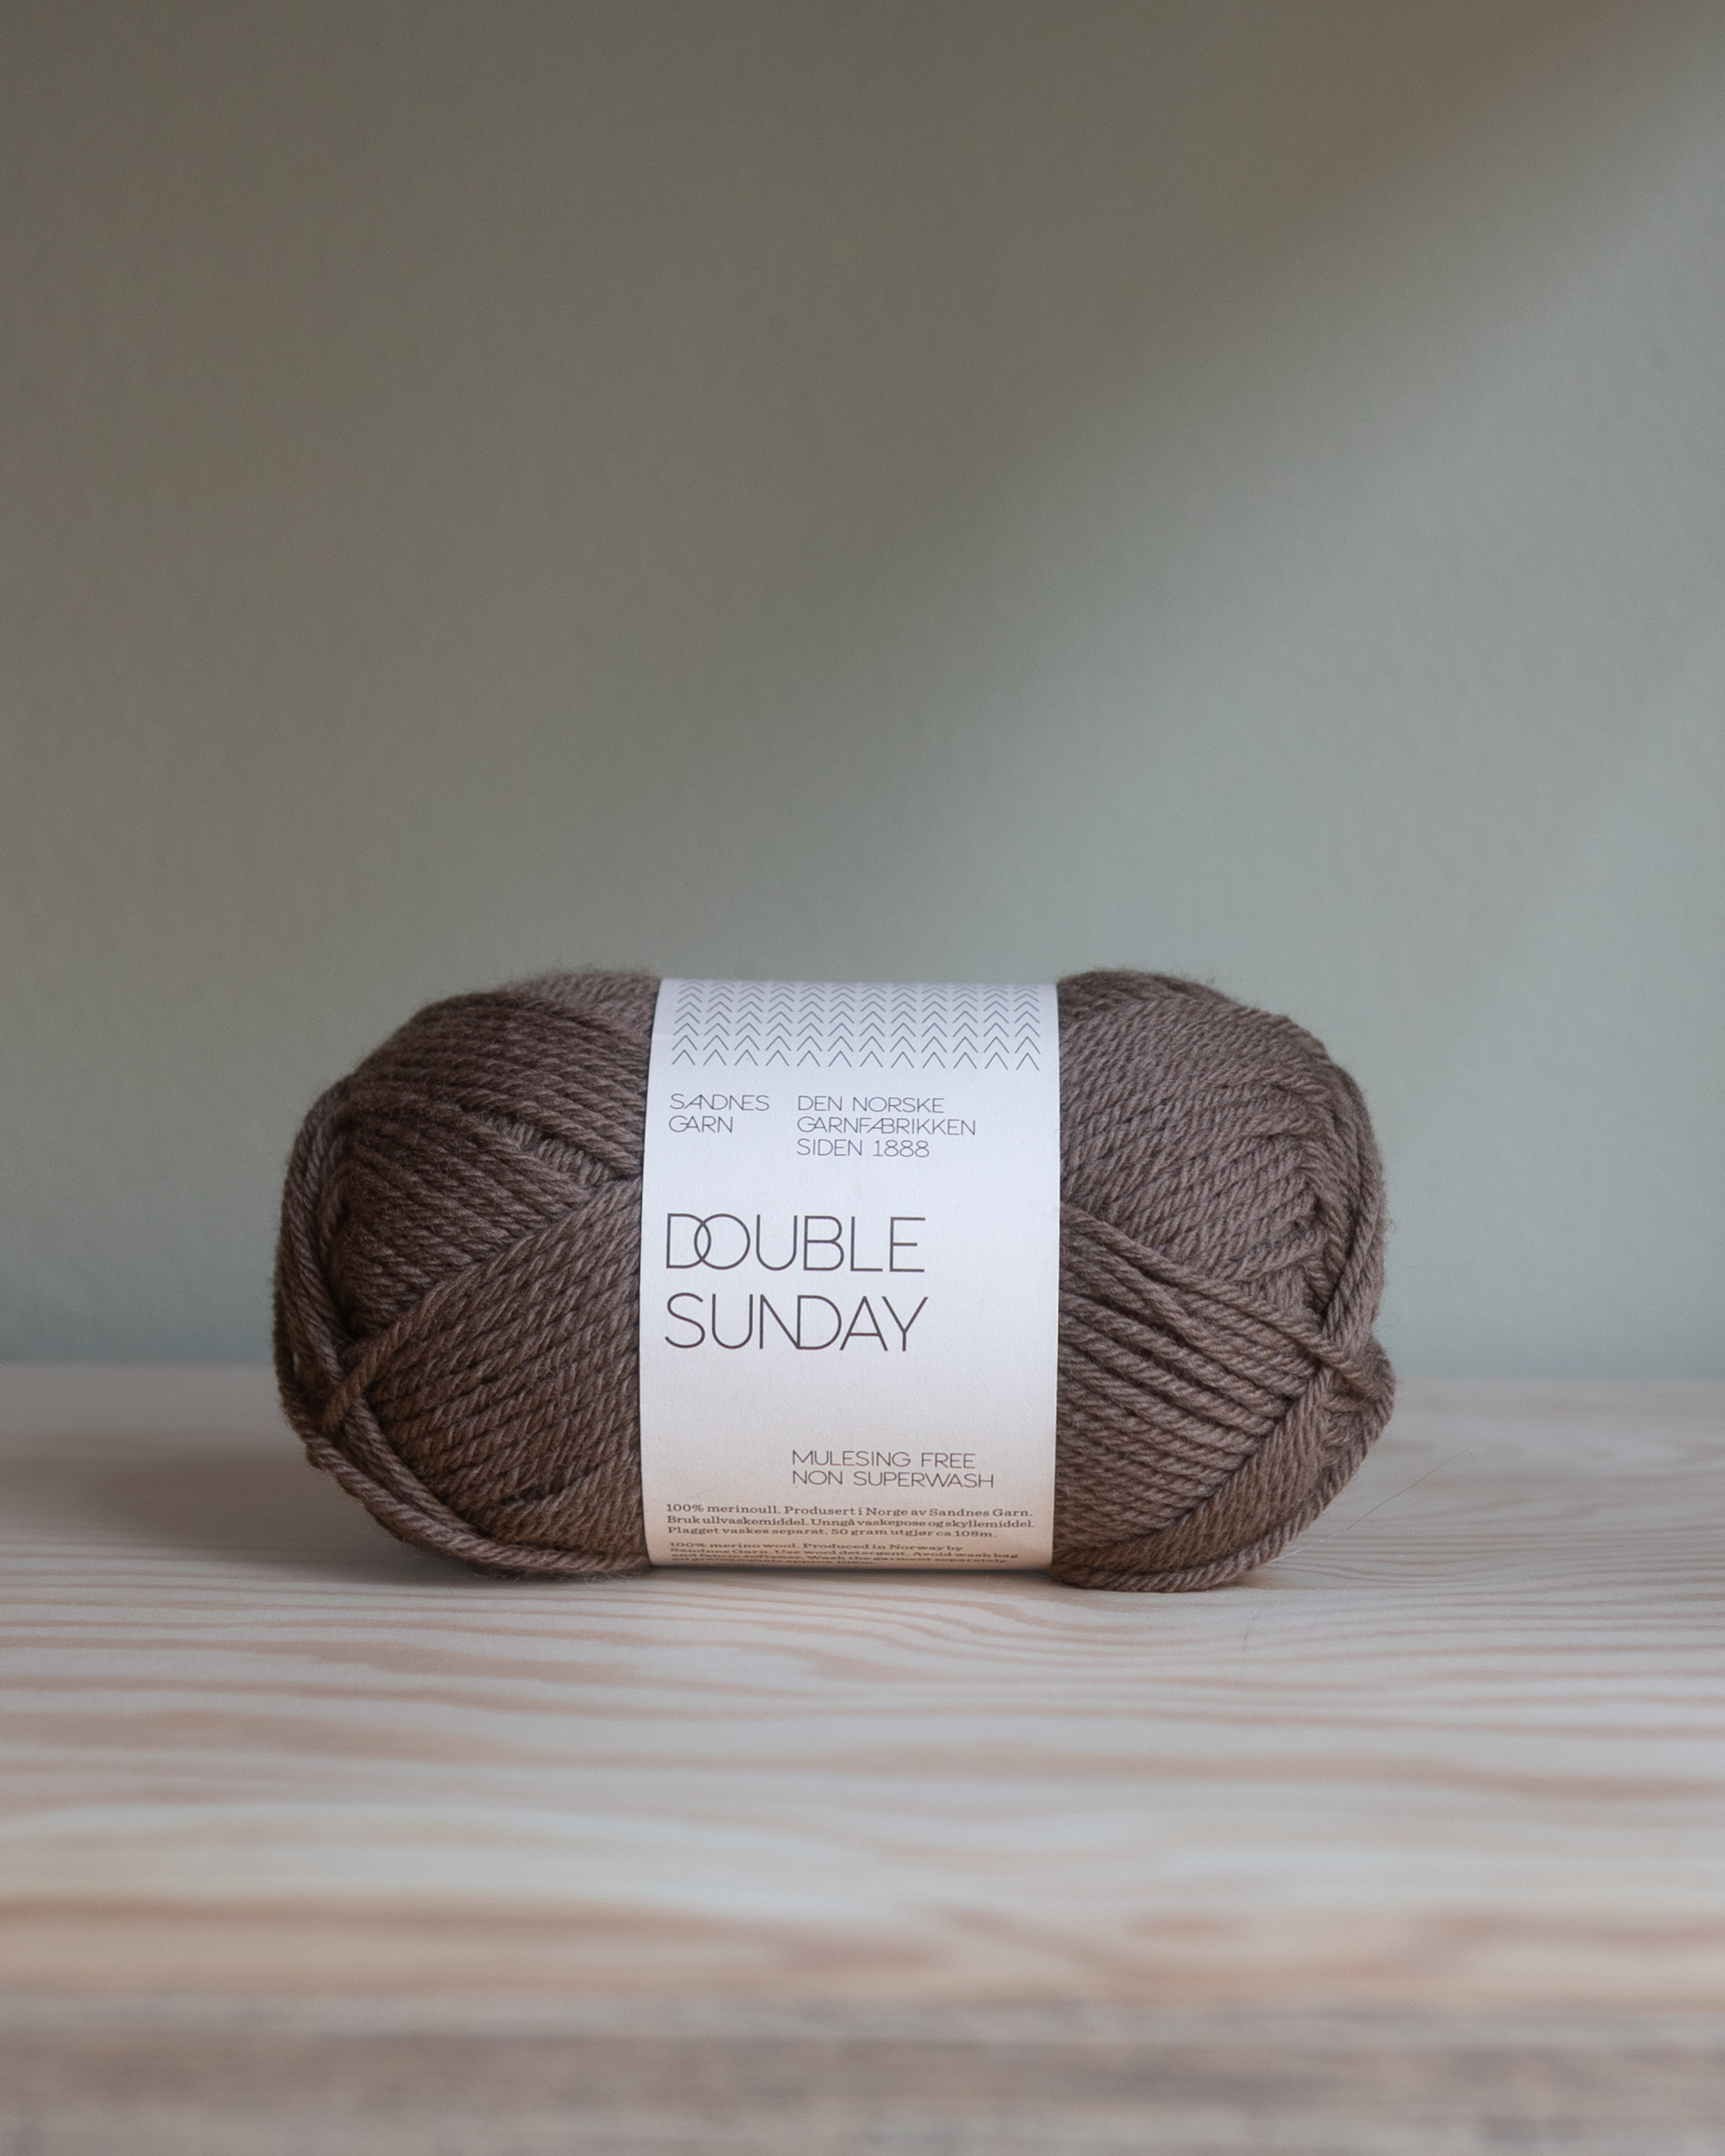
Yarn: Sandnes Double Sunday, held double

Yarn usage: Approximately 80 g

Needles: 5 mm circular needles, 40 cm

Accessories: Stitch markers, needle, and scissors

Designer: Alma Lodin
Print
Print
Spara
Sparad

Here's how to do it

Good to know before you start: Hold two strands of yarn together and knit with them as a single strand. Rib 1x1 means you alternate between one knit stitch and one purl stitch. The right side is the outside of the work, and the wrong side is the inside. Knit two together (k2tog): Knit two stitches together as one knit stitch. Left-leaning decrease (SSK): Slip one stitch as if to knit, slip the next one the same way, then knit the two together through the back loops. Both techniques decrease the number of stitches by one. Bind off in rib: Continue knitting knit stitches as they appear and purl stitches as they appear while binding off.

Alma Lodin

This is what you need:

Here you can directly purchase the material for the product. Please note that the instruction is digital and appears here on the page (no written instruction).

Sandnes Double Sunday

A soft wool yarn, 100% merino wool

Buy product

MYO Circular Needle 5mm/40cm

Circular knitting needles in wood, 40cm long

Buy product

Your next favorite project is waiting

Get access to this pattern and over 300 other beginner-friendly projects for crochet, knitting, and macramé.

Then 85 SEK/month. Cancel anytime.

Steg 1

Knit the headband:

Cast on 94 stitches using the long-tail cast-on method on 5 mm circular needles.

How to cast on: 

‍

Join the work in the round without twisting the stitches. Place a marker for the beginning of the round. Knit in rib (1 knit, 1 purl) for a total of 14 rounds.

How to do knit and purl stitchets:

Steg 2

Divide the stitches:

Place markers to divide the stitches in the following order from the beginning of the round: earflap 1: 20 stitches; front section: 27 stitches; earflap 2: 20 stitches; back section: 27 stitches.

Knit in rib over the first 20 stitches. Bind off the next 27 stitches in rib.

Knit in rib over the next 20 stitches and bind off the last 27 stitches in rib.

Place the stitches for earflap 2 on a stitch holder or spare needle while you work on earflap 1.

‍

Steg 3

Knit the first earflap:

Work back and forth in ribbing over the 20 stitches of the earflap:

Row 1 (wrong side): Work in ribbing over all 20 stitches.

Row 2 (right side): Work in ribbing over all 20 stitches.

Row 3 (wrong side): Work in ribbing over all 20 stitches.

Row 4 (right side): Knit the first 2 stitches together. Continue in ribbing until 2 stitches

remain. Work a slip-slip-knit (SSK) over the last 2 stitches. 18 stitches remain.

Repeat rows 1–4 two more times. You will then have 14 stitches left.

Continue decreasing:

Row 1 (wrong side): Work in ribbing over all 14 stitches.

Row 2 (right side): Knit the first 2 stitches together, continue in ribbing until 2 stitches

remain and work a slip-slip-knit (SSK). 12 stitches remain.

Repeat these two rows two more times. 8 stitches remain. Purl the stitches together two

by two, so that 4 stitches remain. Knit these 4 stitches.

‍

Steg 4

Knit the tie (i-cord):

Knit the 4 stitches. Do not turn the work. Instead, slide the stitches to the other end of

the circular needle. Bring the yarn behind the work and knit the 4 stitches again.

Repeat, pulling the yarn gently at the beginning of each row so the cord becomes round.

Continue until the cord is approximately 55 cm long, or your desired length. Bind off and weave in the yarn end.

How to knit I-cord:

Steg 5

Knit the second earflap:

Place the 20 resting stitches back onto the needle. Knit the second earflap in the same way as the first (step 3). Then knit a tie of the same length according to step 4.

‍

Steg 6

Knit i-cord edge:

Cast on 3 stitches using 5 mm circular needles. Pick up 1 stitch through the edge of the earflap so that you have 4 stitches. Slide the stitches to the other end of the circular needle without turning the work.

Knit 2 stitches, then knit the last 2 stitches together through the back loops. You now have 3 stitches remaining.

Pick up 1 new stitch along the edge and repeat until the edge is finished. Bind off. Do the same on the other earflap.

‍

Steg 7

Finishing:

Weave in all loose yarn ends. Your Zara headband is finished!

‍

Steg 8
Steg 9
Steg 10

The rights to this pattern belong to MYO Make Your Own. The pattern or its pictures may not be copied, shared or resold either in parts or in its entirety, but you may sell items you have crocheted from this pattern. If you have questions about the pattern, contact MYO at hello@makeyourown.se.

Step 1

Knit the headband:

Cast on 94 stitches using the long-tail cast-on method on 5 mm circular needles.

How to cast on: 

‍

Join the work in the round without twisting the stitches. Place a marker for the beginning of the round. Knit in rib (1 knit, 1 purl) for a total of 14 rounds.

How to do knit and purl stitchets:

Step 2

Divide the stitches:

Place markers to divide the stitches in the following order from the beginning of the round: earflap 1: 20 stitches; front section: 27 stitches; earflap 2: 20 stitches; back section: 27 stitches.

Knit in rib over the first 20 stitches. Bind off the next 27 stitches in rib.

Knit in rib over the next 20 stitches and bind off the last 27 stitches in rib.

Place the stitches for earflap 2 on a stitch holder or spare needle while you work on earflap 1.

‍

Step 3

Knit the first earflap:

Work back and forth in ribbing over the 20 stitches of the earflap:

Row 1 (wrong side): Work in ribbing over all 20 stitches.

Row 2 (right side): Work in ribbing over all 20 stitches.

Row 3 (wrong side): Work in ribbing over all 20 stitches.

Row 4 (right side): Knit the first 2 stitches together. Continue in ribbing until 2 stitches

remain. Work a slip-slip-knit (SSK) over the last 2 stitches. 18 stitches remain.

Repeat rows 1–4 two more times. You will then have 14 stitches left.

Continue decreasing:

Row 1 (wrong side): Work in ribbing over all 14 stitches.

Row 2 (right side): Knit the first 2 stitches together, continue in ribbing until 2 stitches

remain and work a slip-slip-knit (SSK). 12 stitches remain.

Repeat these two rows two more times. 8 stitches remain. Purl the stitches together two

by two, so that 4 stitches remain. Knit these 4 stitches.

‍

Step 4

Knit the tie (i-cord):

Knit the 4 stitches. Do not turn the work. Instead, slide the stitches to the other end of

the circular needle. Bring the yarn behind the work and knit the 4 stitches again.

Repeat, pulling the yarn gently at the beginning of each row so the cord becomes round.

Continue until the cord is approximately 55 cm long, or your desired length. Bind off and weave in the yarn end.

How to knit I-cord:

Step 5

Knit the second earflap:

Place the 20 resting stitches back onto the needle. Knit the second earflap in the same way as the first (step 3). Then knit a tie of the same length according to step 4.

‍

Step 6

Knit i-cord edge:

Cast on 3 stitches using 5 mm circular needles. Pick up 1 stitch through the edge of the earflap so that you have 4 stitches. Slide the stitches to the other end of the circular needle without turning the work.

Knit 2 stitches, then knit the last 2 stitches together through the back loops. You now have 3 stitches remaining.

Pick up 1 new stitch along the edge and repeat until the edge is finished. Bind off. Do the same on the other earflap.

‍

Step 7

Finishing:

Weave in all loose yarn ends. Your Zara headband is finished!

‍

Step 8
Step 9
Step 10

The rights to this pattern belong to MYO Make Your Own. The pattern or its pictures may not be copied, shared or resold either in parts or in its entirety, but you may sell items you have crocheted from this pattern. If you have questions about the pattern, contact MYO at hello@makeyourown.se.

Zara headband

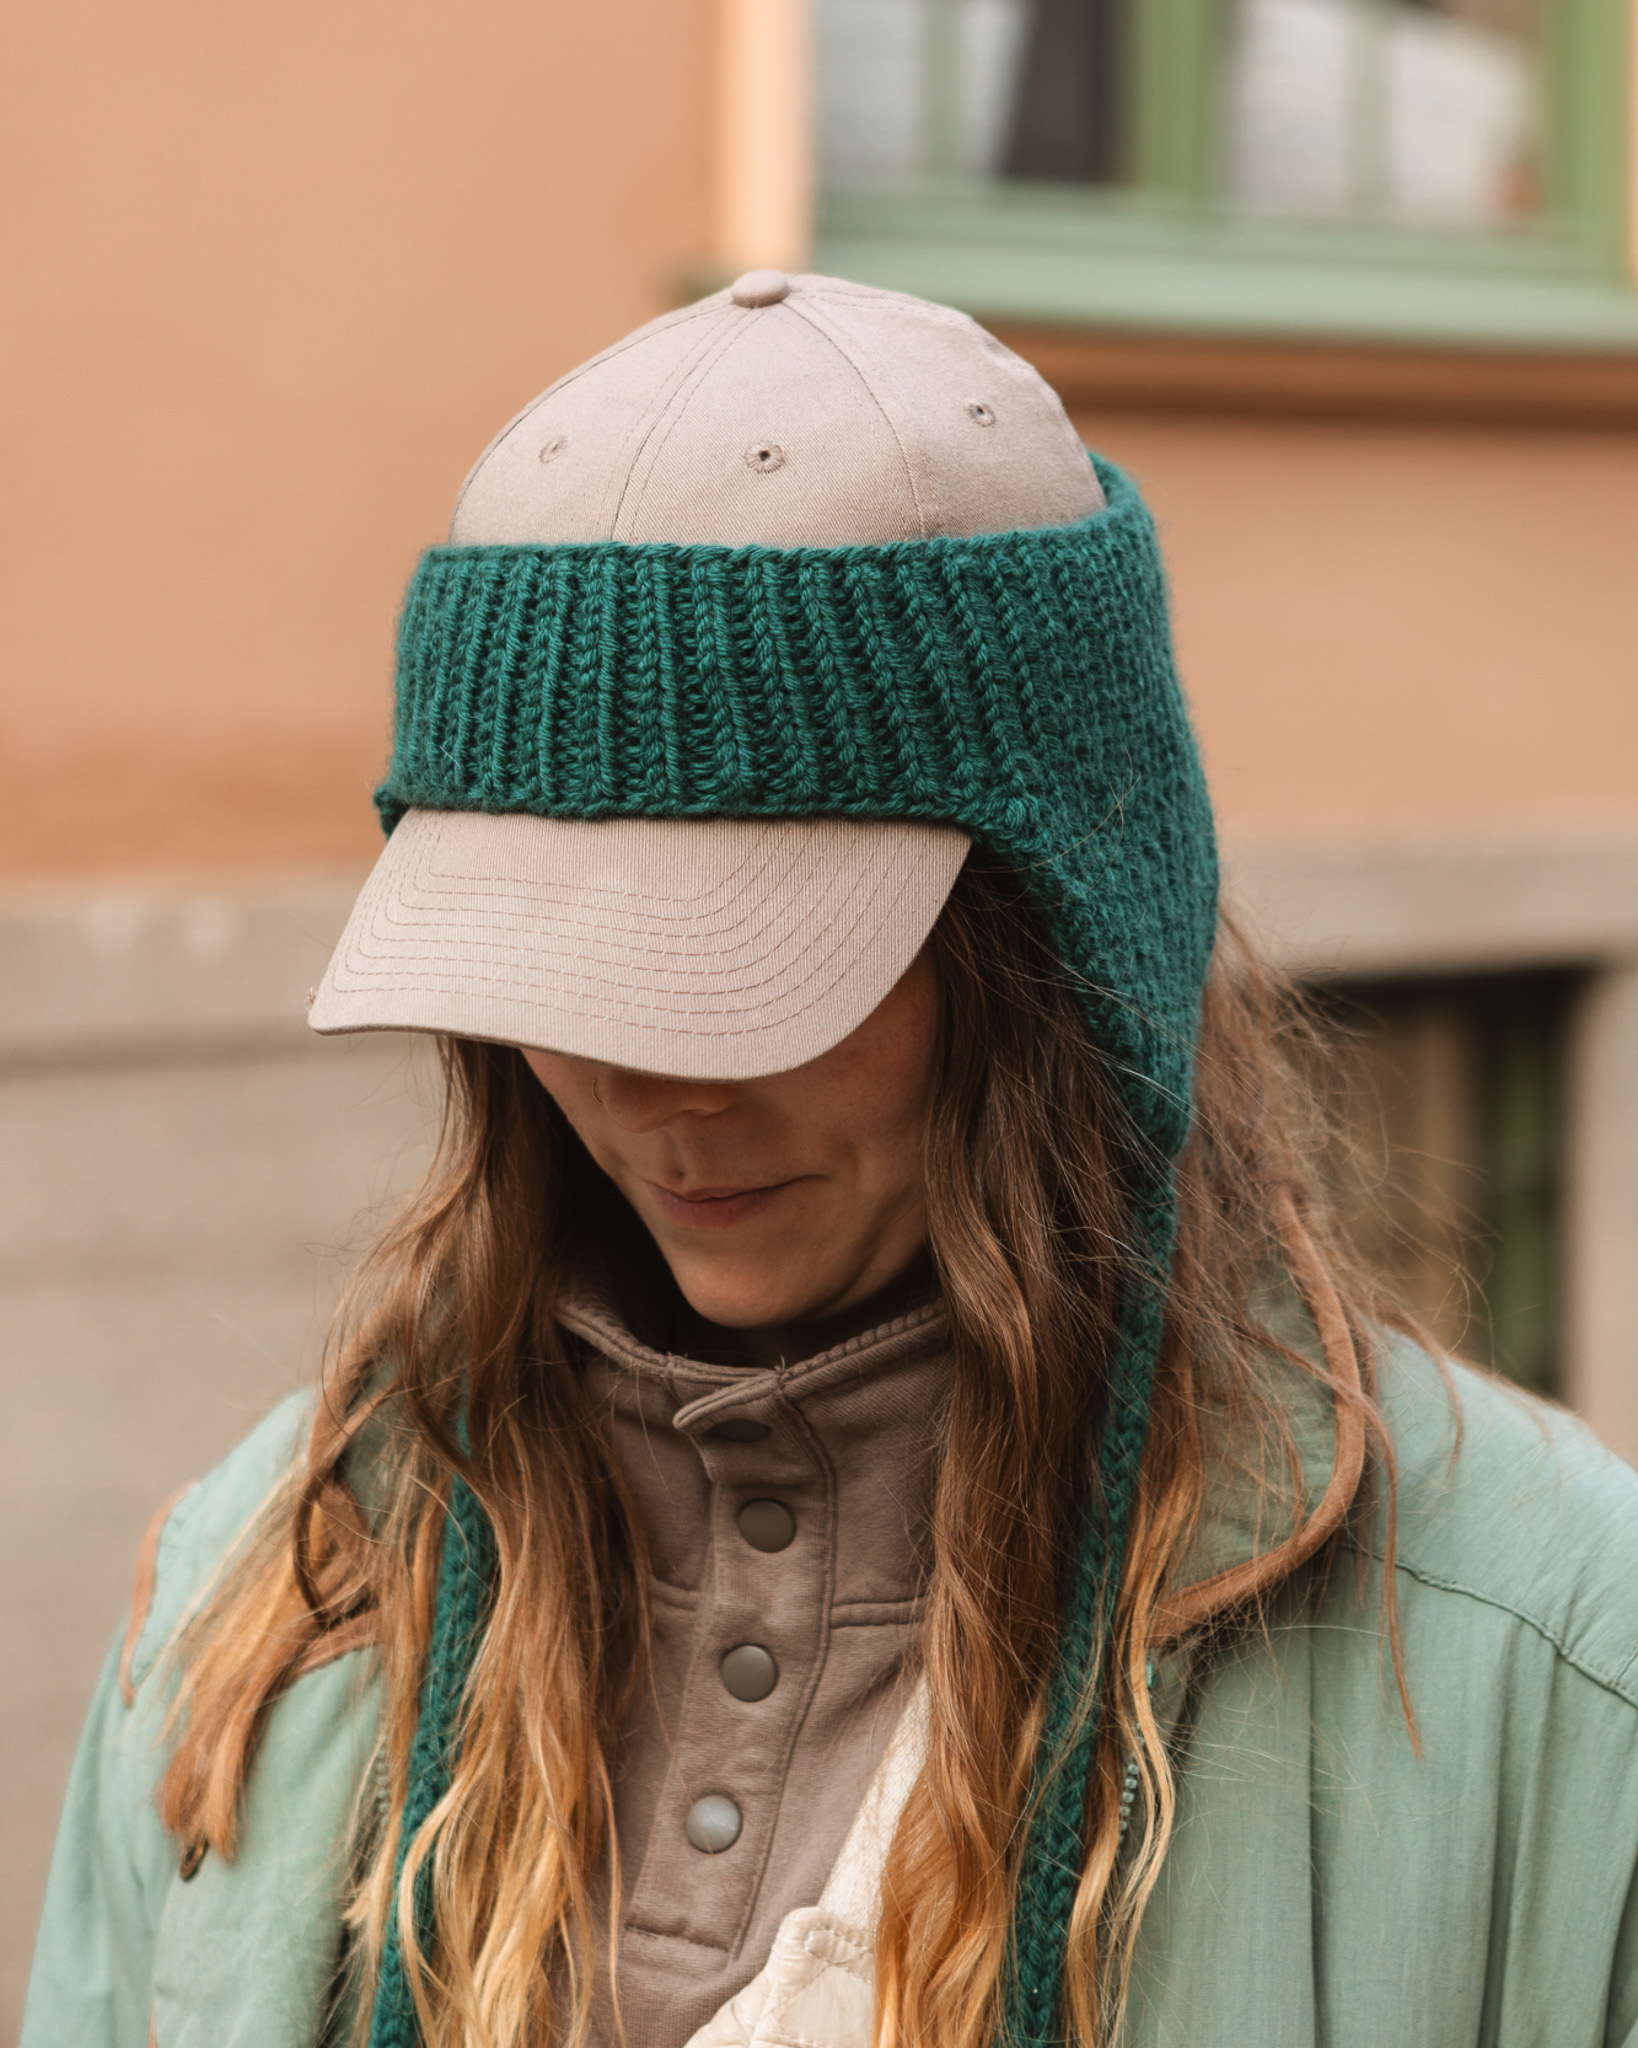
Zara is a knitted headband with earflaps and long ties. You first knit the headband in the round in rib stitch, then the earflaps back and forth, and finally the ties and edging. The instructions include explanatory technique videos to help those who haven't knitted from a standard pattern before.

Size: One size

Yarn: Sandnes Double Sunday, held double

Yarn usage: Approximately 80 g

Needles: 5 mm circular needles, 40 cm

Accessories: Stitch markers, needle, and scissors

Designer: Alma Lodin
Zara headband
Steg 1

Knit the headband:

Cast on 94 stitches using the long-tail cast-on method on 5 mm circular needles.

How to cast on: 

‍

Join the work in the round without twisting the stitches. Place a marker for the beginning of the round. Knit in rib (1 knit, 1 purl) for a total of 14 rounds.

How to do knit and purl stitchets:

Steg 2

Divide the stitches:

Place markers to divide the stitches in the following order from the beginning of the round: earflap 1: 20 stitches; front section: 27 stitches; earflap 2: 20 stitches; back section: 27 stitches.

Knit in rib over the first 20 stitches. Bind off the next 27 stitches in rib.

Knit in rib over the next 20 stitches and bind off the last 27 stitches in rib.

Place the stitches for earflap 2 on a stitch holder or spare needle while you work on earflap 1.

‍

Steg 3

Knit the first earflap:

Work back and forth in ribbing over the 20 stitches of the earflap:

Row 1 (wrong side): Work in ribbing over all 20 stitches.

Row 2 (right side): Work in ribbing over all 20 stitches.

Row 3 (wrong side): Work in ribbing over all 20 stitches.

Row 4 (right side): Knit the first 2 stitches together. Continue in ribbing until 2 stitches

remain. Work a slip-slip-knit (SSK) over the last 2 stitches. 18 stitches remain.

Repeat rows 1–4 two more times. You will then have 14 stitches left.

Continue decreasing:

Row 1 (wrong side): Work in ribbing over all 14 stitches.

Row 2 (right side): Knit the first 2 stitches together, continue in ribbing until 2 stitches

remain and work a slip-slip-knit (SSK). 12 stitches remain.

Repeat these two rows two more times. 8 stitches remain. Purl the stitches together two

by two, so that 4 stitches remain. Knit these 4 stitches.

‍

Steg 4

Knit the tie (i-cord):

Knit the 4 stitches. Do not turn the work. Instead, slide the stitches to the other end of

the circular needle. Bring the yarn behind the work and knit the 4 stitches again.

Repeat, pulling the yarn gently at the beginning of each row so the cord becomes round.

Continue until the cord is approximately 55 cm long, or your desired length. Bind off and weave in the yarn end.

How to knit I-cord:

Steg 5

Knit the second earflap:

Place the 20 resting stitches back onto the needle. Knit the second earflap in the same way as the first (step 3). Then knit a tie of the same length according to step 4.

‍

Steg 6

Knit i-cord edge:

Cast on 3 stitches using 5 mm circular needles. Pick up 1 stitch through the edge of the earflap so that you have 4 stitches. Slide the stitches to the other end of the circular needle without turning the work.

Knit 2 stitches, then knit the last 2 stitches together through the back loops. You now have 3 stitches remaining.

Pick up 1 new stitch along the edge and repeat until the edge is finished. Bind off. Do the same on the other earflap.

‍

Steg 7

Finishing:

Weave in all loose yarn ends. Your Zara headband is finished!

‍

Steg 8
Steg 9
Steg 10

The rights to this pattern belong to MYO Make Your Own. The pattern or its pictures may not be copied, shared or resold either in parts or in its entirety, but you may sell items you have crocheted from this pattern. If you have questions about the pattern, contact MYO at hello@makeyourown.se.

Zara headband

Zara is a knitted headband with earflaps and long ties. You first knit the headband in the round in rib stitch, then the earflaps back and forth, and finally the ties and edging. The instructions include explanatory technique videos to help those who haven't knitted from a standard pattern before.

Size: One size

Yarn: Sandnes Double Sunday, held double

Yarn usage: Approximately 80 g

Needles: 5 mm circular needles, 40 cm

Accessories: Stitch markers, needle, and scissors

Designer: Alma Lodin
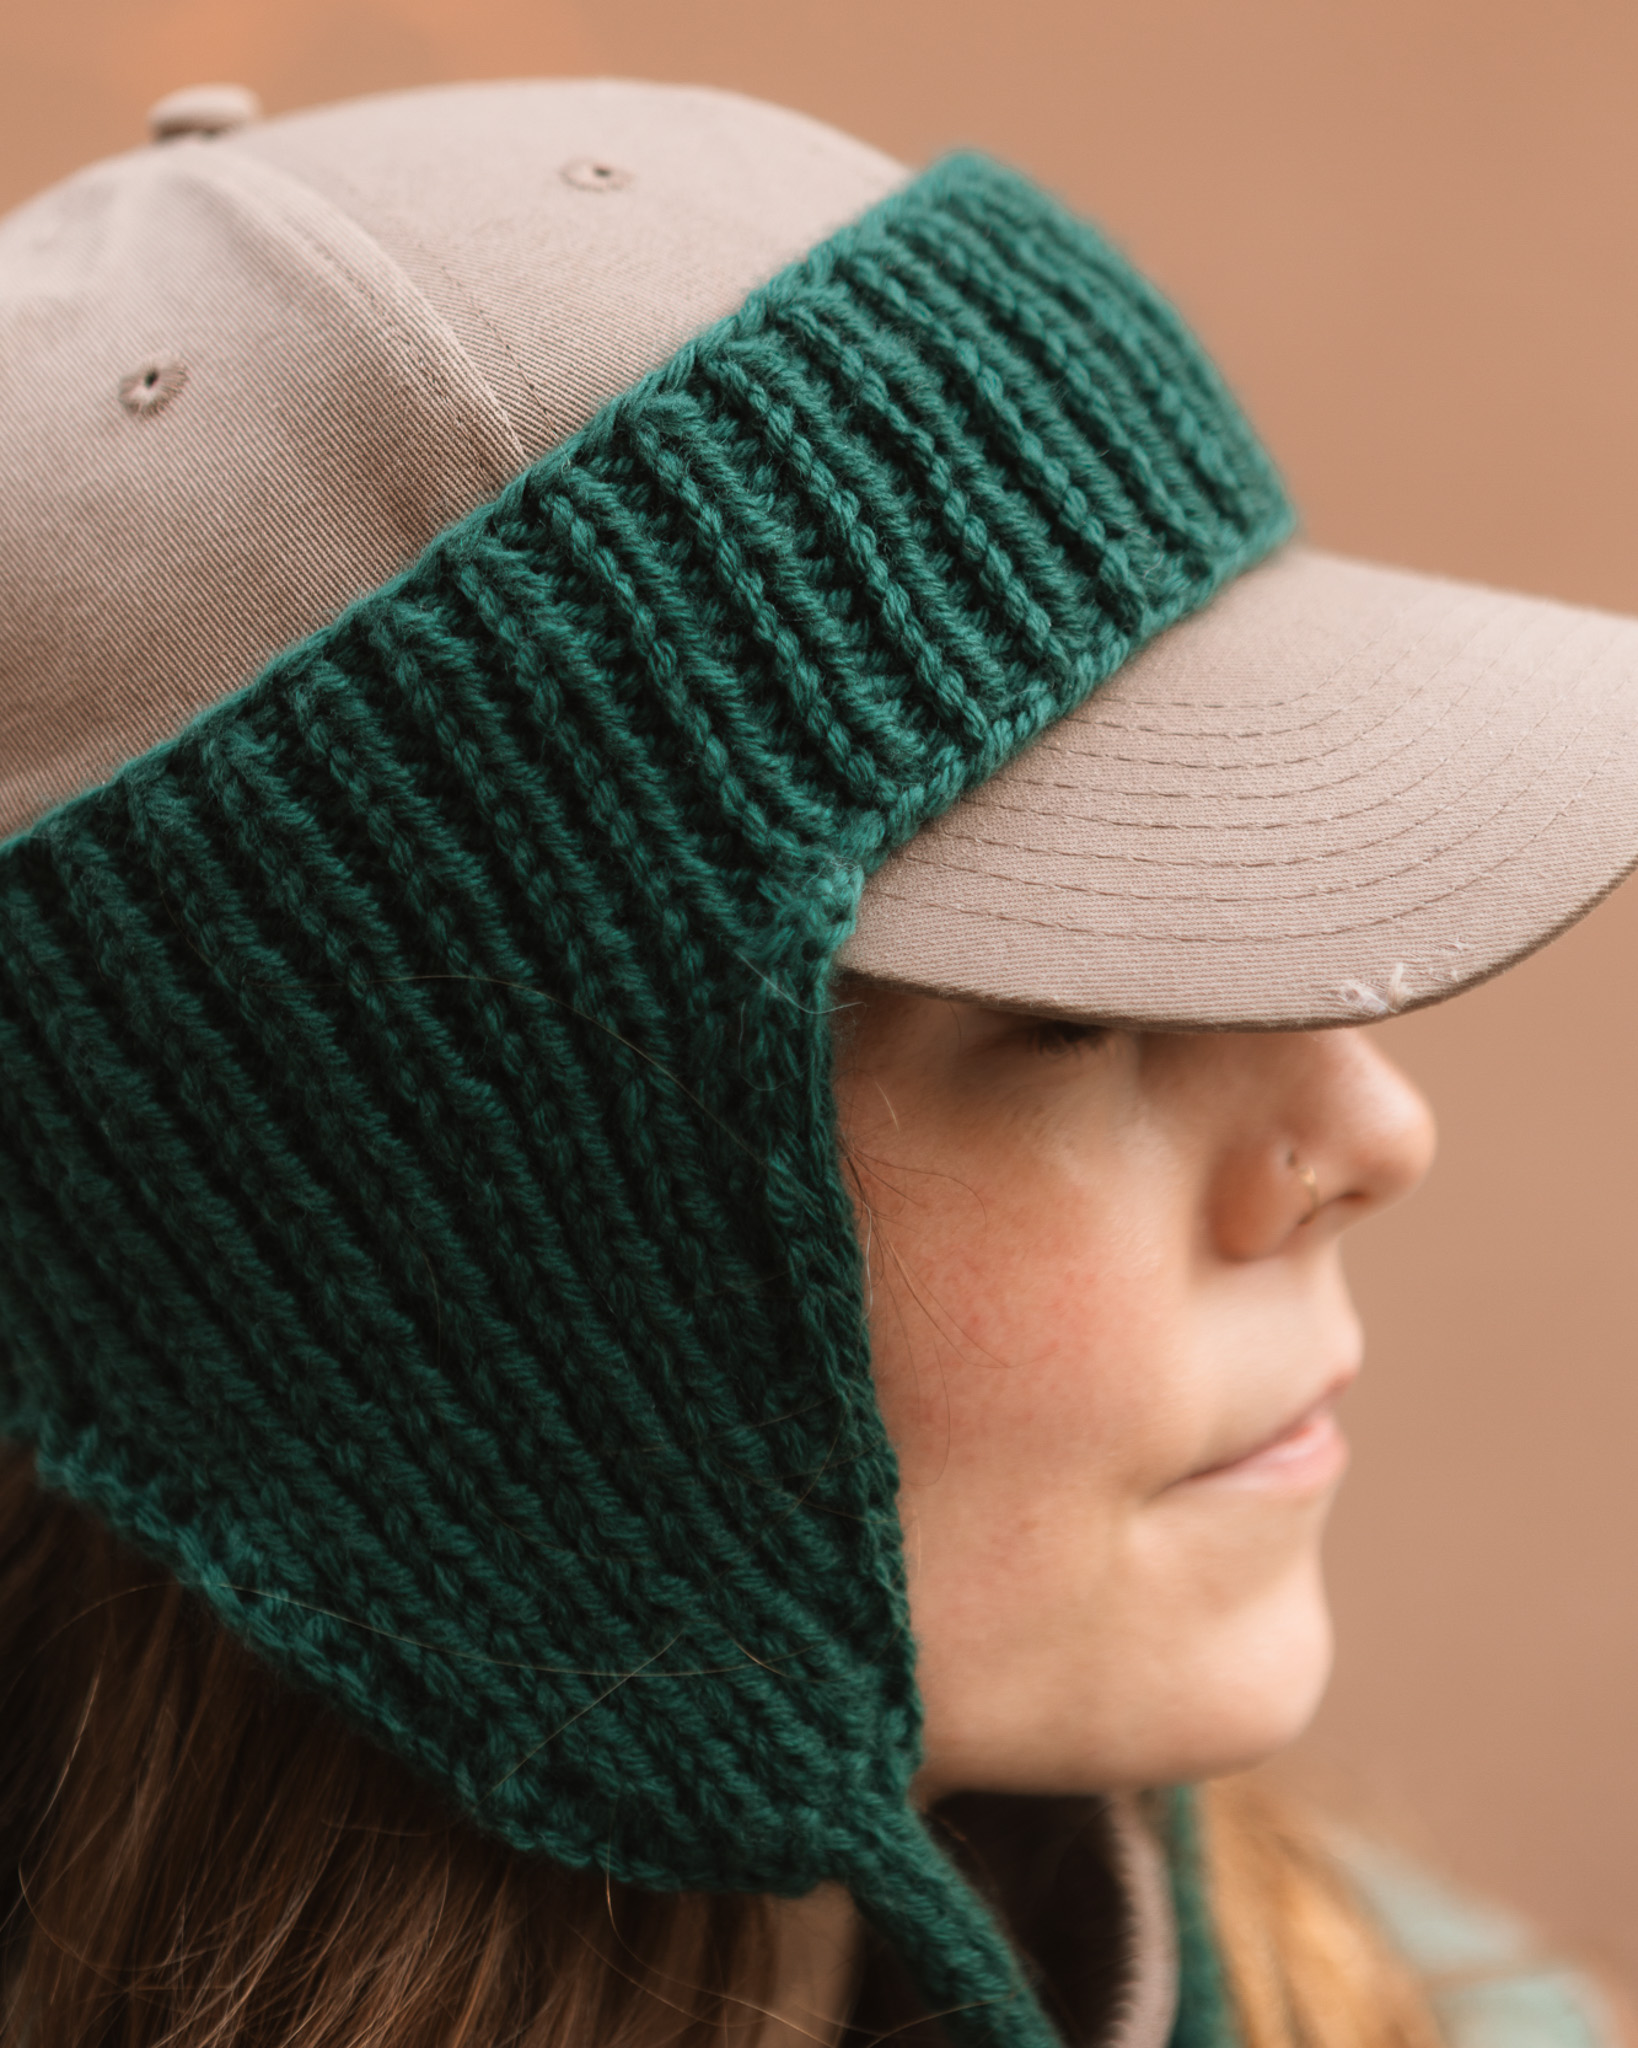
Zara headband
Steg 1

Knit the headband:

Cast on 94 stitches using the long-tail cast-on method on 5 mm circular needles.

How to cast on: 

‍

Join the work in the round without twisting the stitches. Place a marker for the beginning of the round. Knit in rib (1 knit, 1 purl) for a total of 14 rounds.

How to do knit and purl stitchets:

Steg 2

Divide the stitches:

Place markers to divide the stitches in the following order from the beginning of the round: earflap 1: 20 stitches; front section: 27 stitches; earflap 2: 20 stitches; back section: 27 stitches.

Knit in rib over the first 20 stitches. Bind off the next 27 stitches in rib.

Knit in rib over the next 20 stitches and bind off the last 27 stitches in rib.

Place the stitches for earflap 2 on a stitch holder or spare needle while you work on earflap 1.

‍

Steg 3

Knit the first earflap:

Work back and forth in ribbing over the 20 stitches of the earflap:

Row 1 (wrong side): Work in ribbing over all 20 stitches.

Row 2 (right side): Work in ribbing over all 20 stitches.

Row 3 (wrong side): Work in ribbing over all 20 stitches.

Row 4 (right side): Knit the first 2 stitches together. Continue in ribbing until 2 stitches

remain. Work a slip-slip-knit (SSK) over the last 2 stitches. 18 stitches remain.

Repeat rows 1–4 two more times. You will then have 14 stitches left.

Continue decreasing:

Row 1 (wrong side): Work in ribbing over all 14 stitches.

Row 2 (right side): Knit the first 2 stitches together, continue in ribbing until 2 stitches

remain and work a slip-slip-knit (SSK). 12 stitches remain.

Repeat these two rows two more times. 8 stitches remain. Purl the stitches together two

by two, so that 4 stitches remain. Knit these 4 stitches.

‍

Steg 4

Knit the tie (i-cord):

Knit the 4 stitches. Do not turn the work. Instead, slide the stitches to the other end of

the circular needle. Bring the yarn behind the work and knit the 4 stitches again.

Repeat, pulling the yarn gently at the beginning of each row so the cord becomes round.

Continue until the cord is approximately 55 cm long, or your desired length. Bind off and weave in the yarn end.

How to knit I-cord:

Steg 5

Knit the second earflap:

Place the 20 resting stitches back onto the needle. Knit the second earflap in the same way as the first (step 3). Then knit a tie of the same length according to step 4.

‍

Steg 6

Knit i-cord edge:

Cast on 3 stitches using 5 mm circular needles. Pick up 1 stitch through the edge of the earflap so that you have 4 stitches. Slide the stitches to the other end of the circular needle without turning the work.

Knit 2 stitches, then knit the last 2 stitches together through the back loops. You now have 3 stitches remaining.

Pick up 1 new stitch along the edge and repeat until the edge is finished. Bind off. Do the same on the other earflap.

‍

Steg 7

Finishing:

Weave in all loose yarn ends. Your Zara headband is finished!

‍

Steg 8
Steg 9
Steg 10

The rights to this pattern belong to MYO Make Your Own. The pattern or its pictures may not be copied, shared or resold either in parts or in its entirety, but you may sell items you have crocheted from this pattern. If you have questions about the pattern, contact MYO at hello@makeyourown.se.