Crochet collar “Rakel”
Crochet a Beautiful Collar
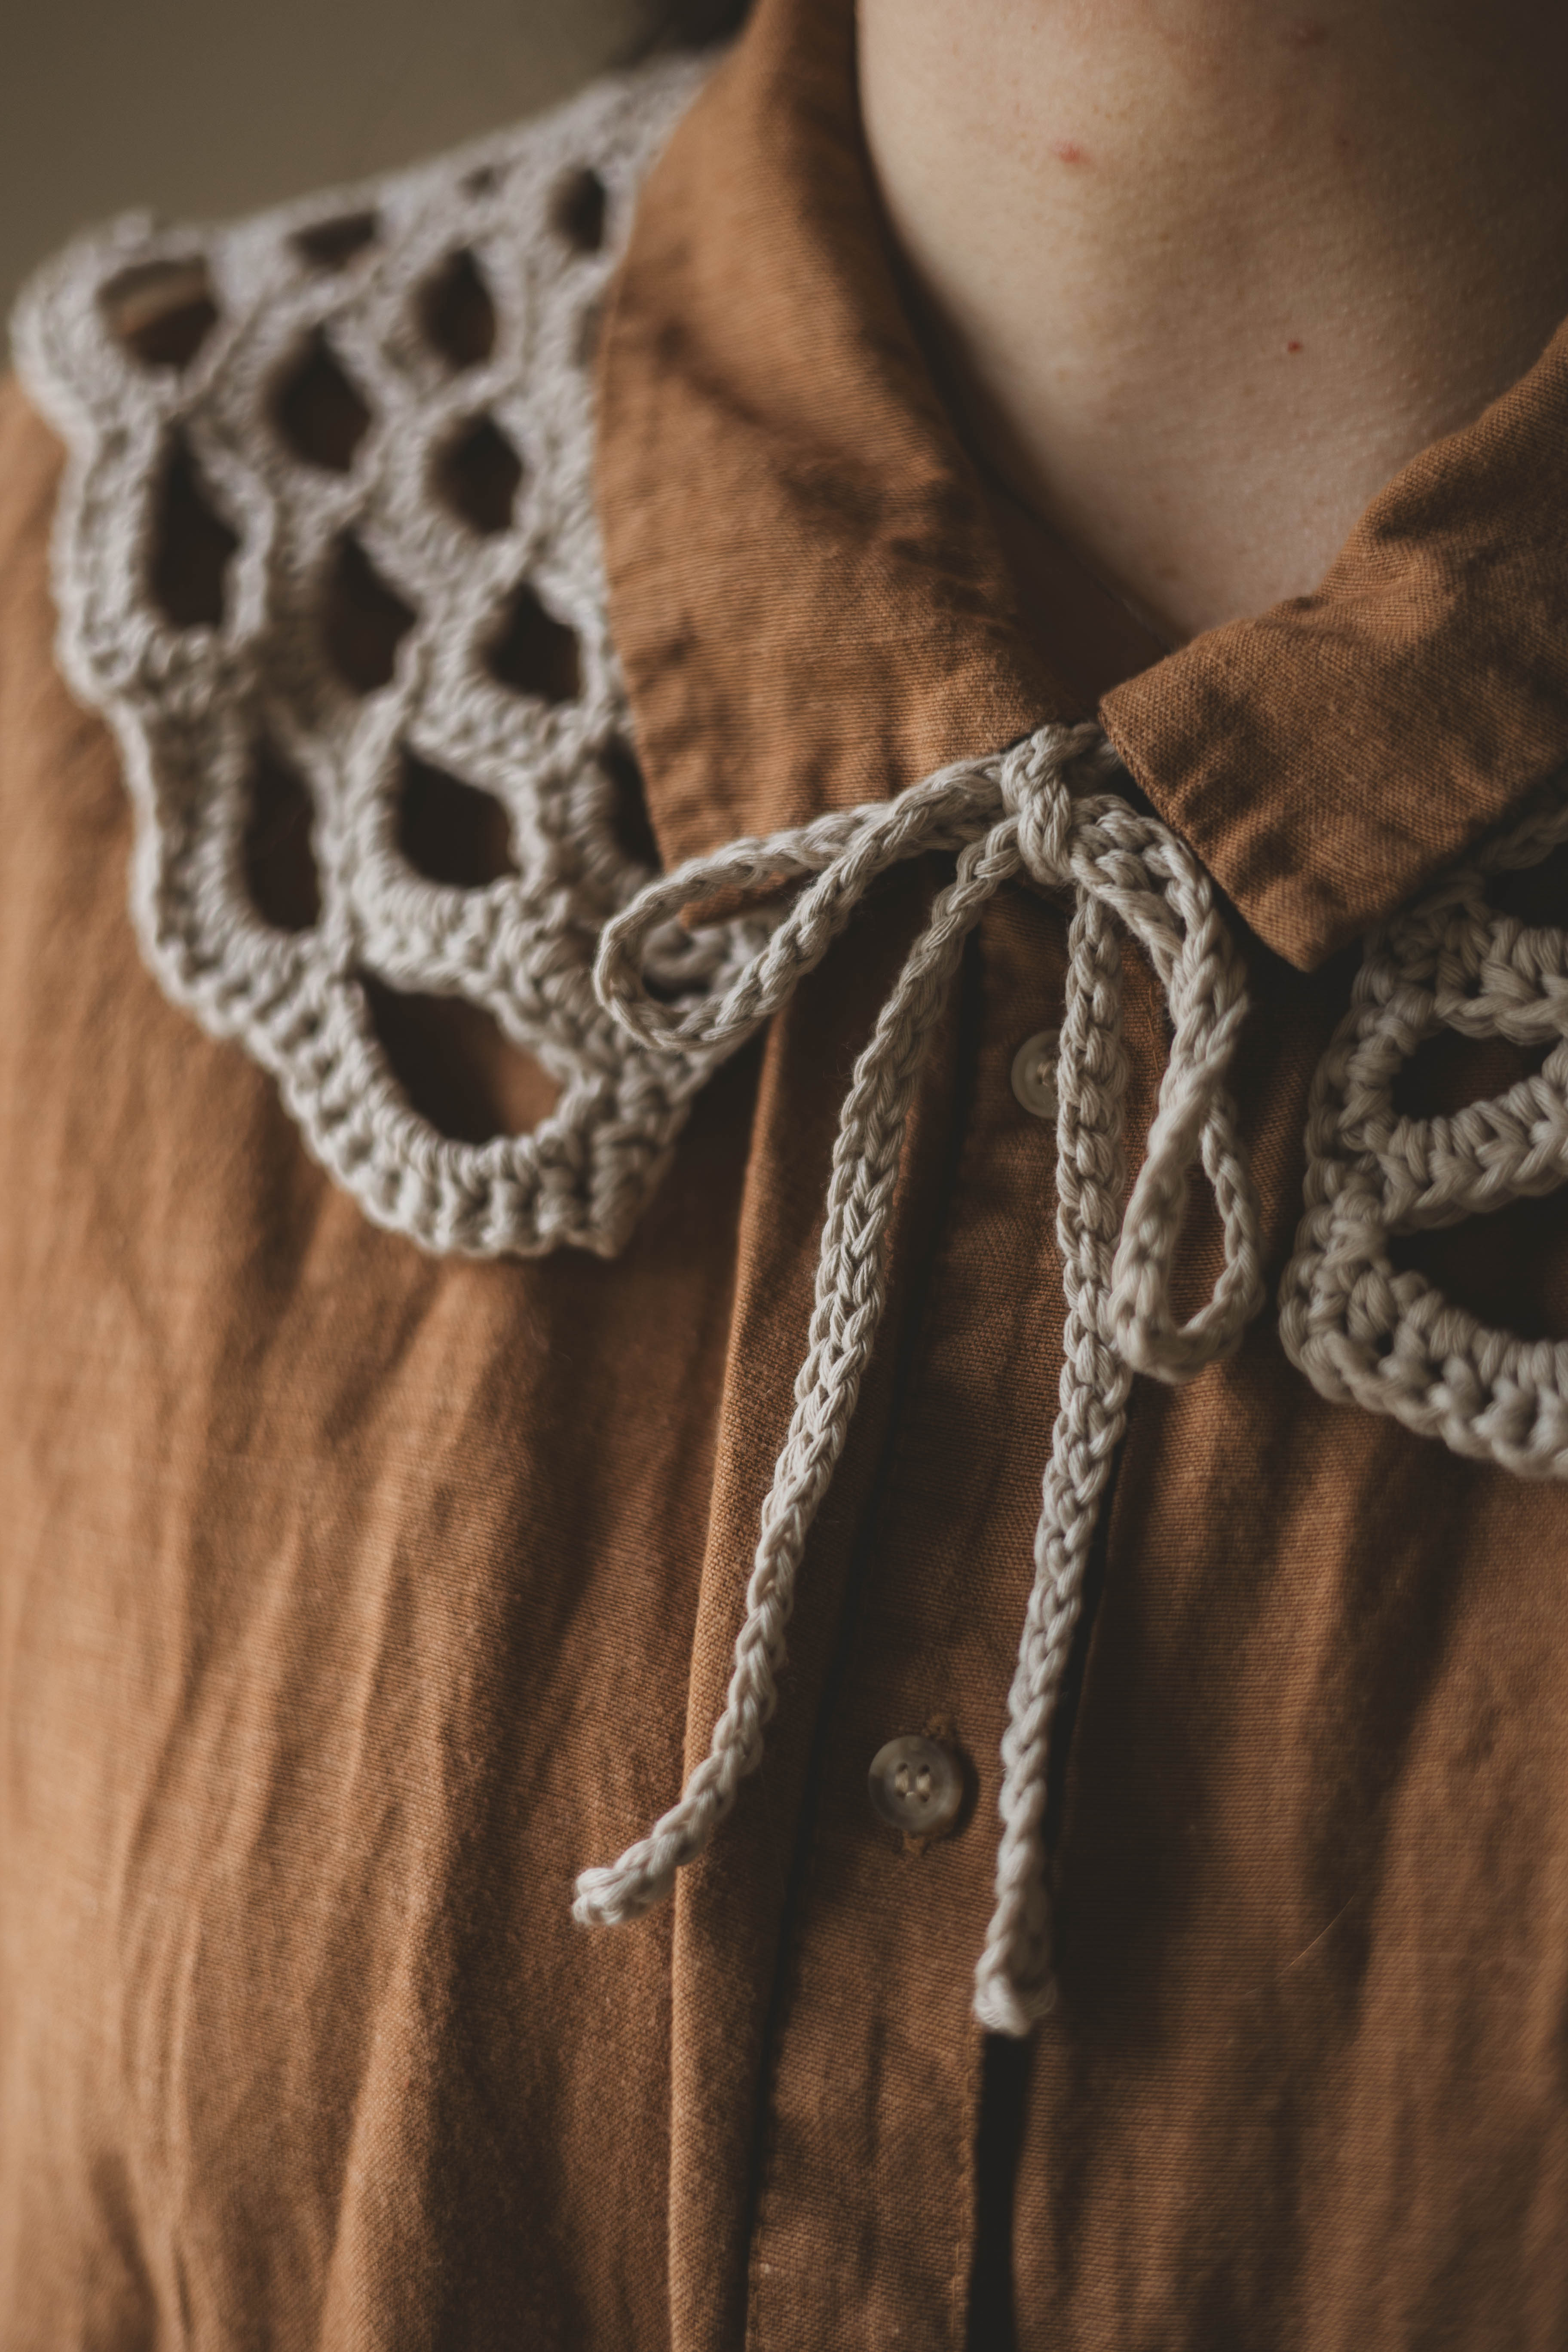
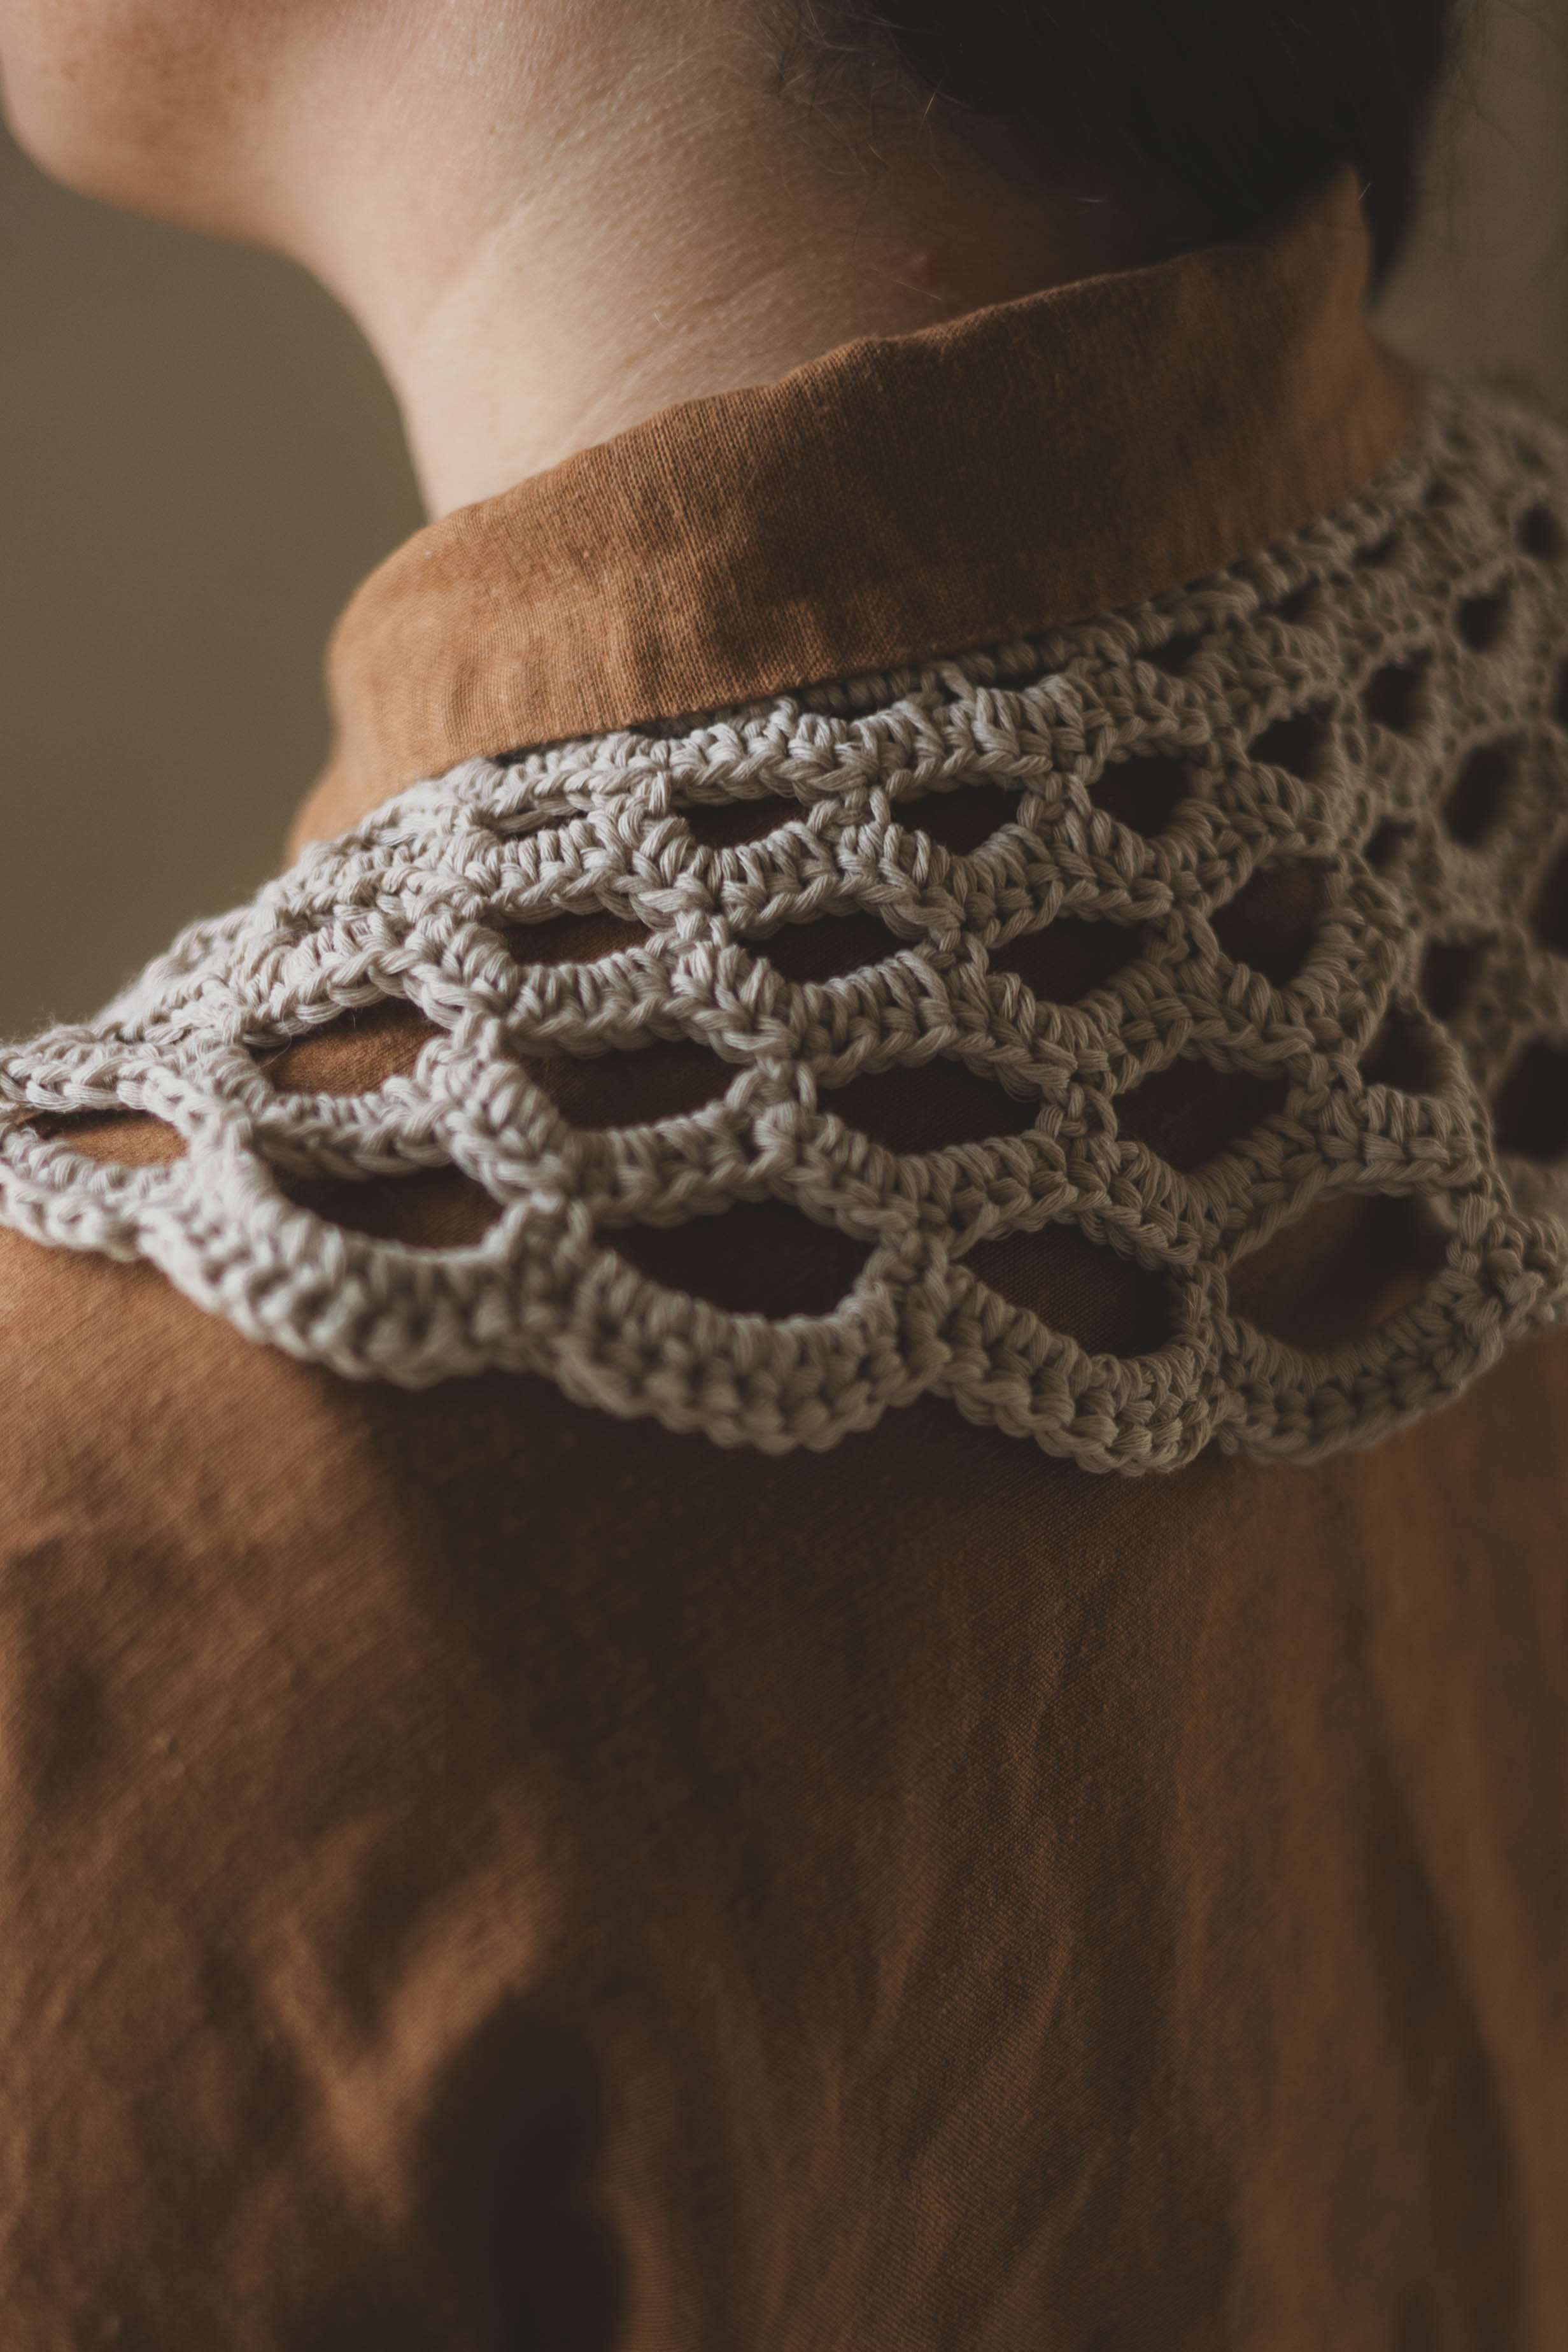
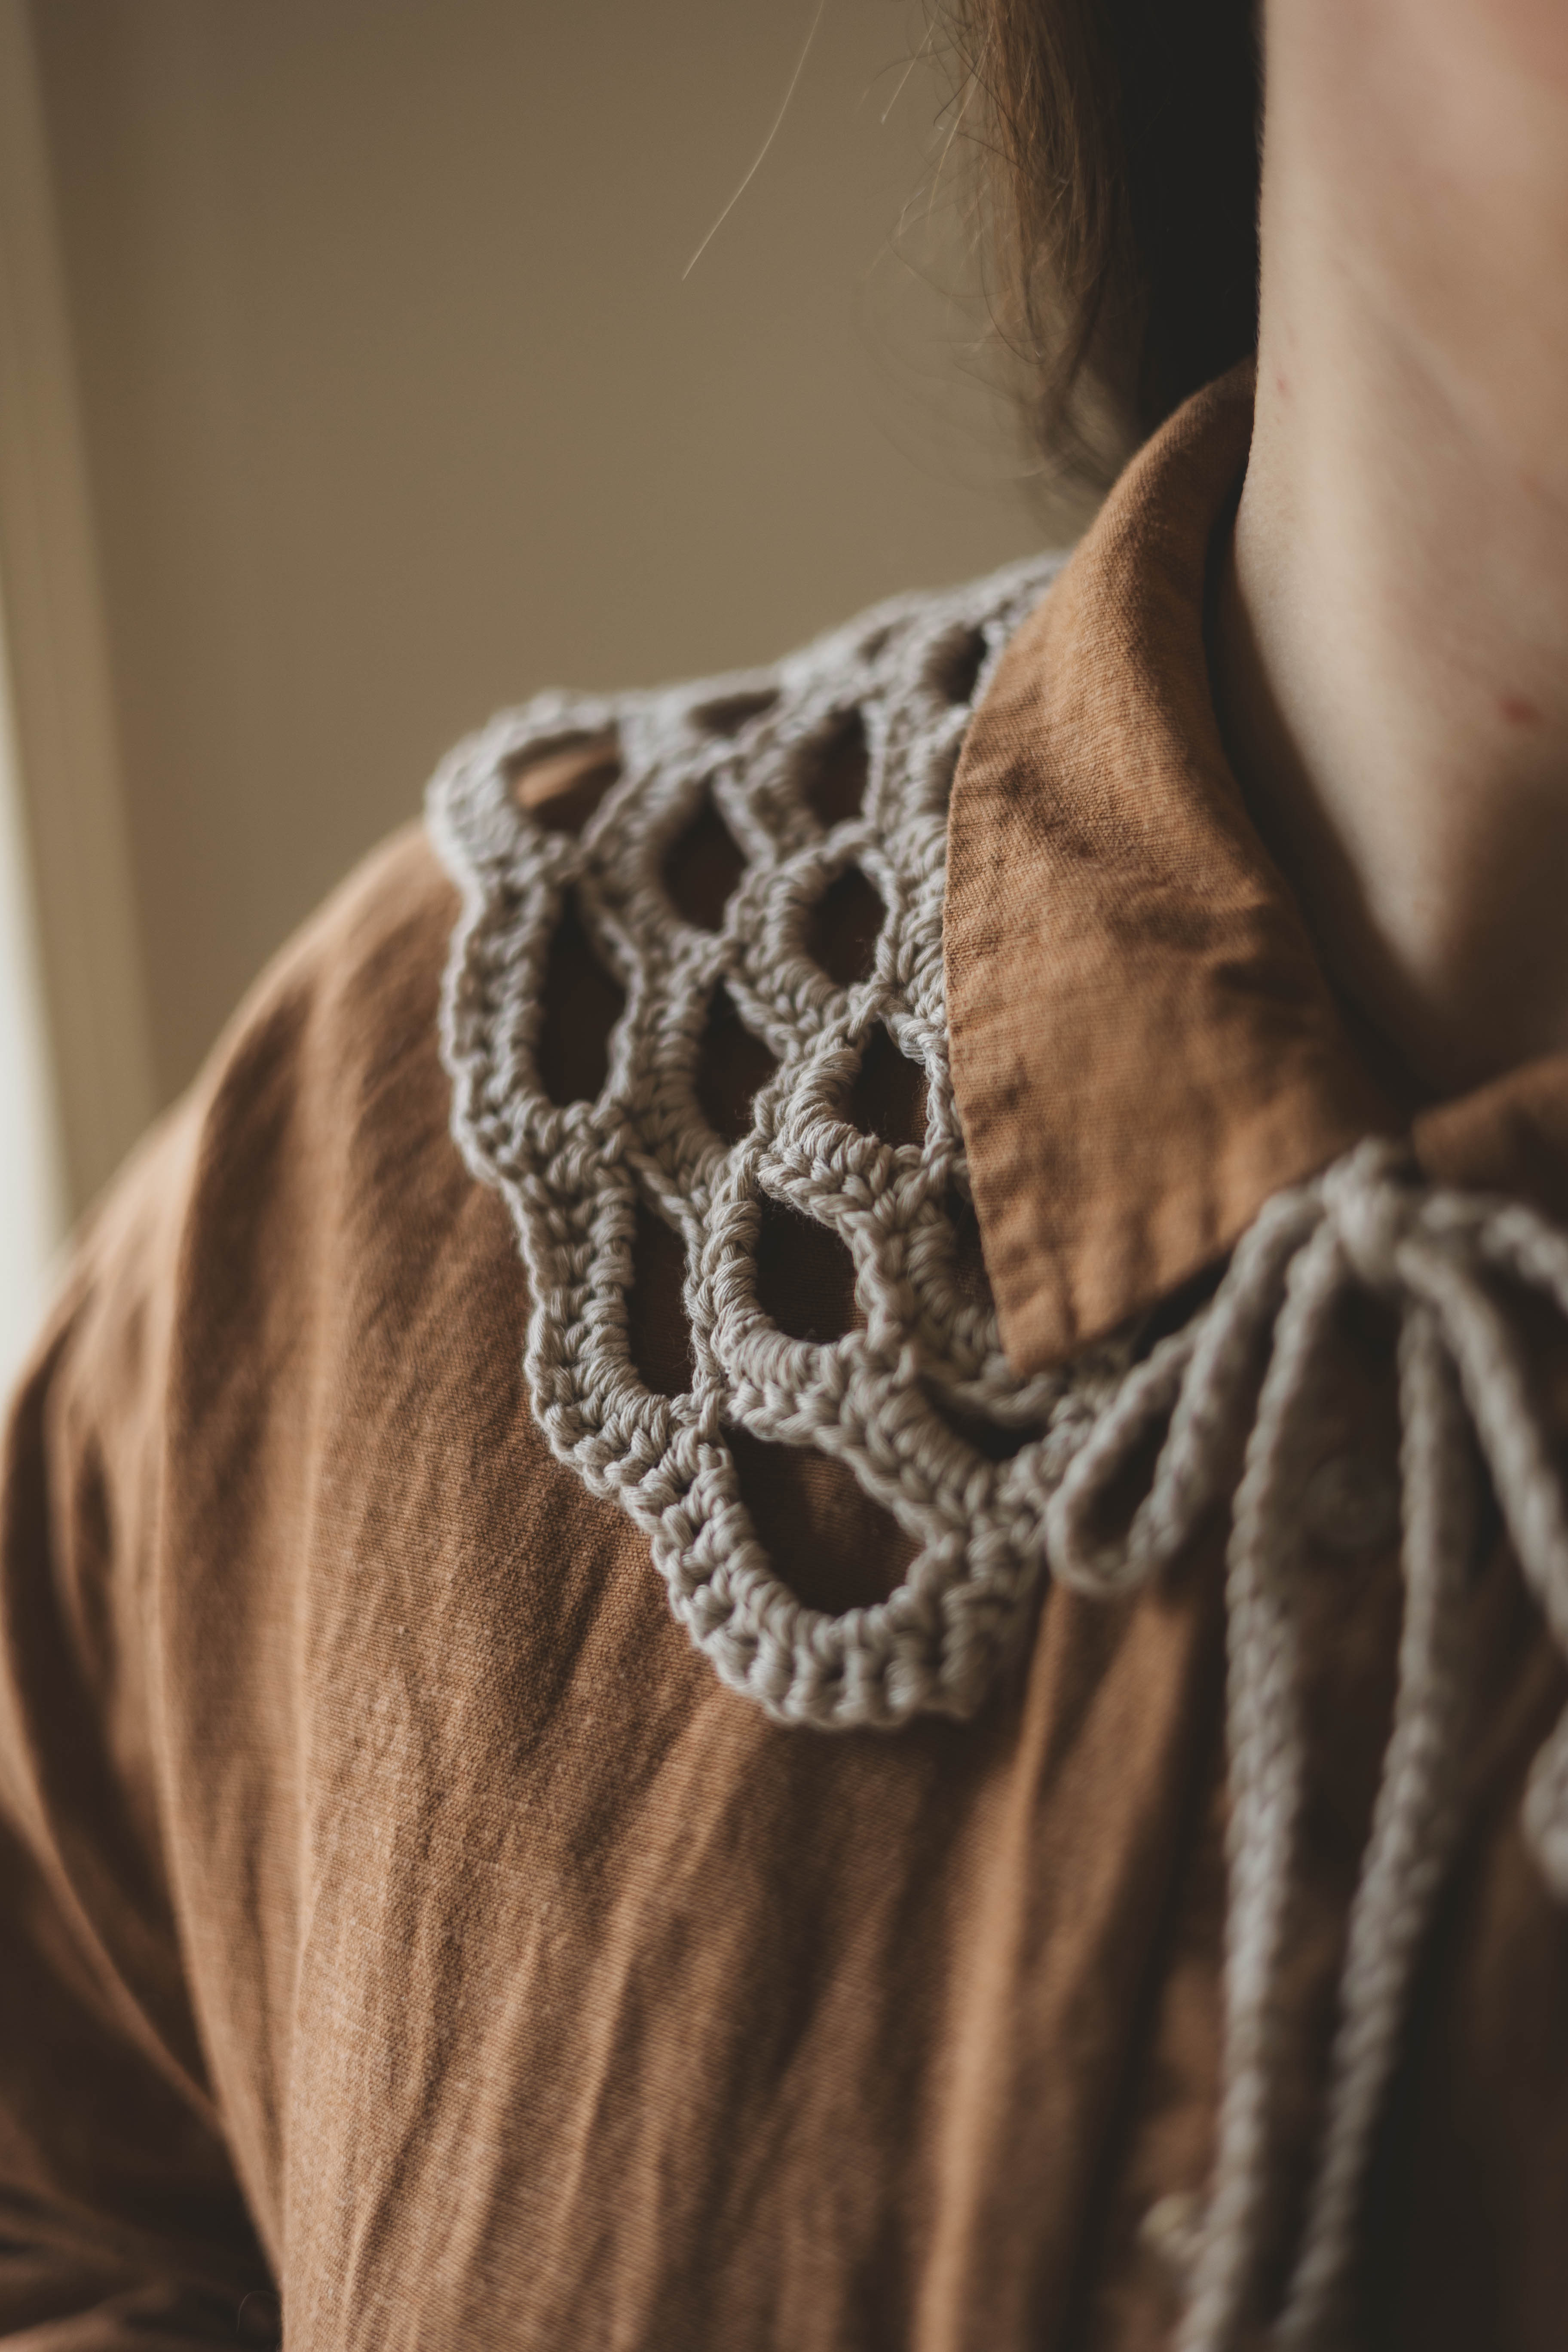
This is a quick and fun pattern for a decorative collar with a lovely texture — perfect for adding a stylish touch to your outfit! The pattern includes two sizes: one for adults and one for children. The entire collar is crocheted in one piece, except for the ties, which are added at the very end. You’ll need Cotton Cloud yarn, a 4 mm crochet hook, scissors, and a tapestry needle to weave in the ends. In this pattern, we’ve used the color “Beige.”
Yarn Consumption: approximately 35 g for the child size and 50 g for the adult size. The amount of yarn may vary depending on your tension.
Please note that this pattern includes both videos from our technique library and step-by-step photos for guidance.

This is what you need:
Here you can directly purchase the material for the product. Please note that the instruction is digital and appears here on the page (no written instruction).

Cotton Cloud | 100 g
A slightly thinner cotton yarn that works perfectly for clothes, accessories and amigurumi.
Buy product
Here's how to do it
Hope you want to try making a collar! Good luck! /Johanna

Info:
This pattern is written in two sizes — one for children and one for adults. In the instructions, the sizes are given with the child size first, followed by the adult size (child/adult).
The neckline measures 30/42 cm (distance between the ties). The ties measure 28/34 cm.
Note: At the end of each row, make the required chain stitches before turning your work. These chains do not count as stitches in the pattern — skip them before continuing on the next row.
Step 1: Chain 44/62 stitches.
If you’re unsure how to crochet a chain, see the instructional video below.
Row 1: Skip the first stitch. Make 1 single crochet (sc) in the second stitch. If you’re unsure how to make a single crochet, see the instructional video below.
Next, chain 4, skip 2 stitches, and make 1 sc in the next stitch — you’ve now created a chain space. Chain 4 again, skip 2 stitches, and make 1 sc — another arch is formed.
Repeat this pattern until you have a total of 14/20 arches (child/adult).
Chain 2 and turn your work.

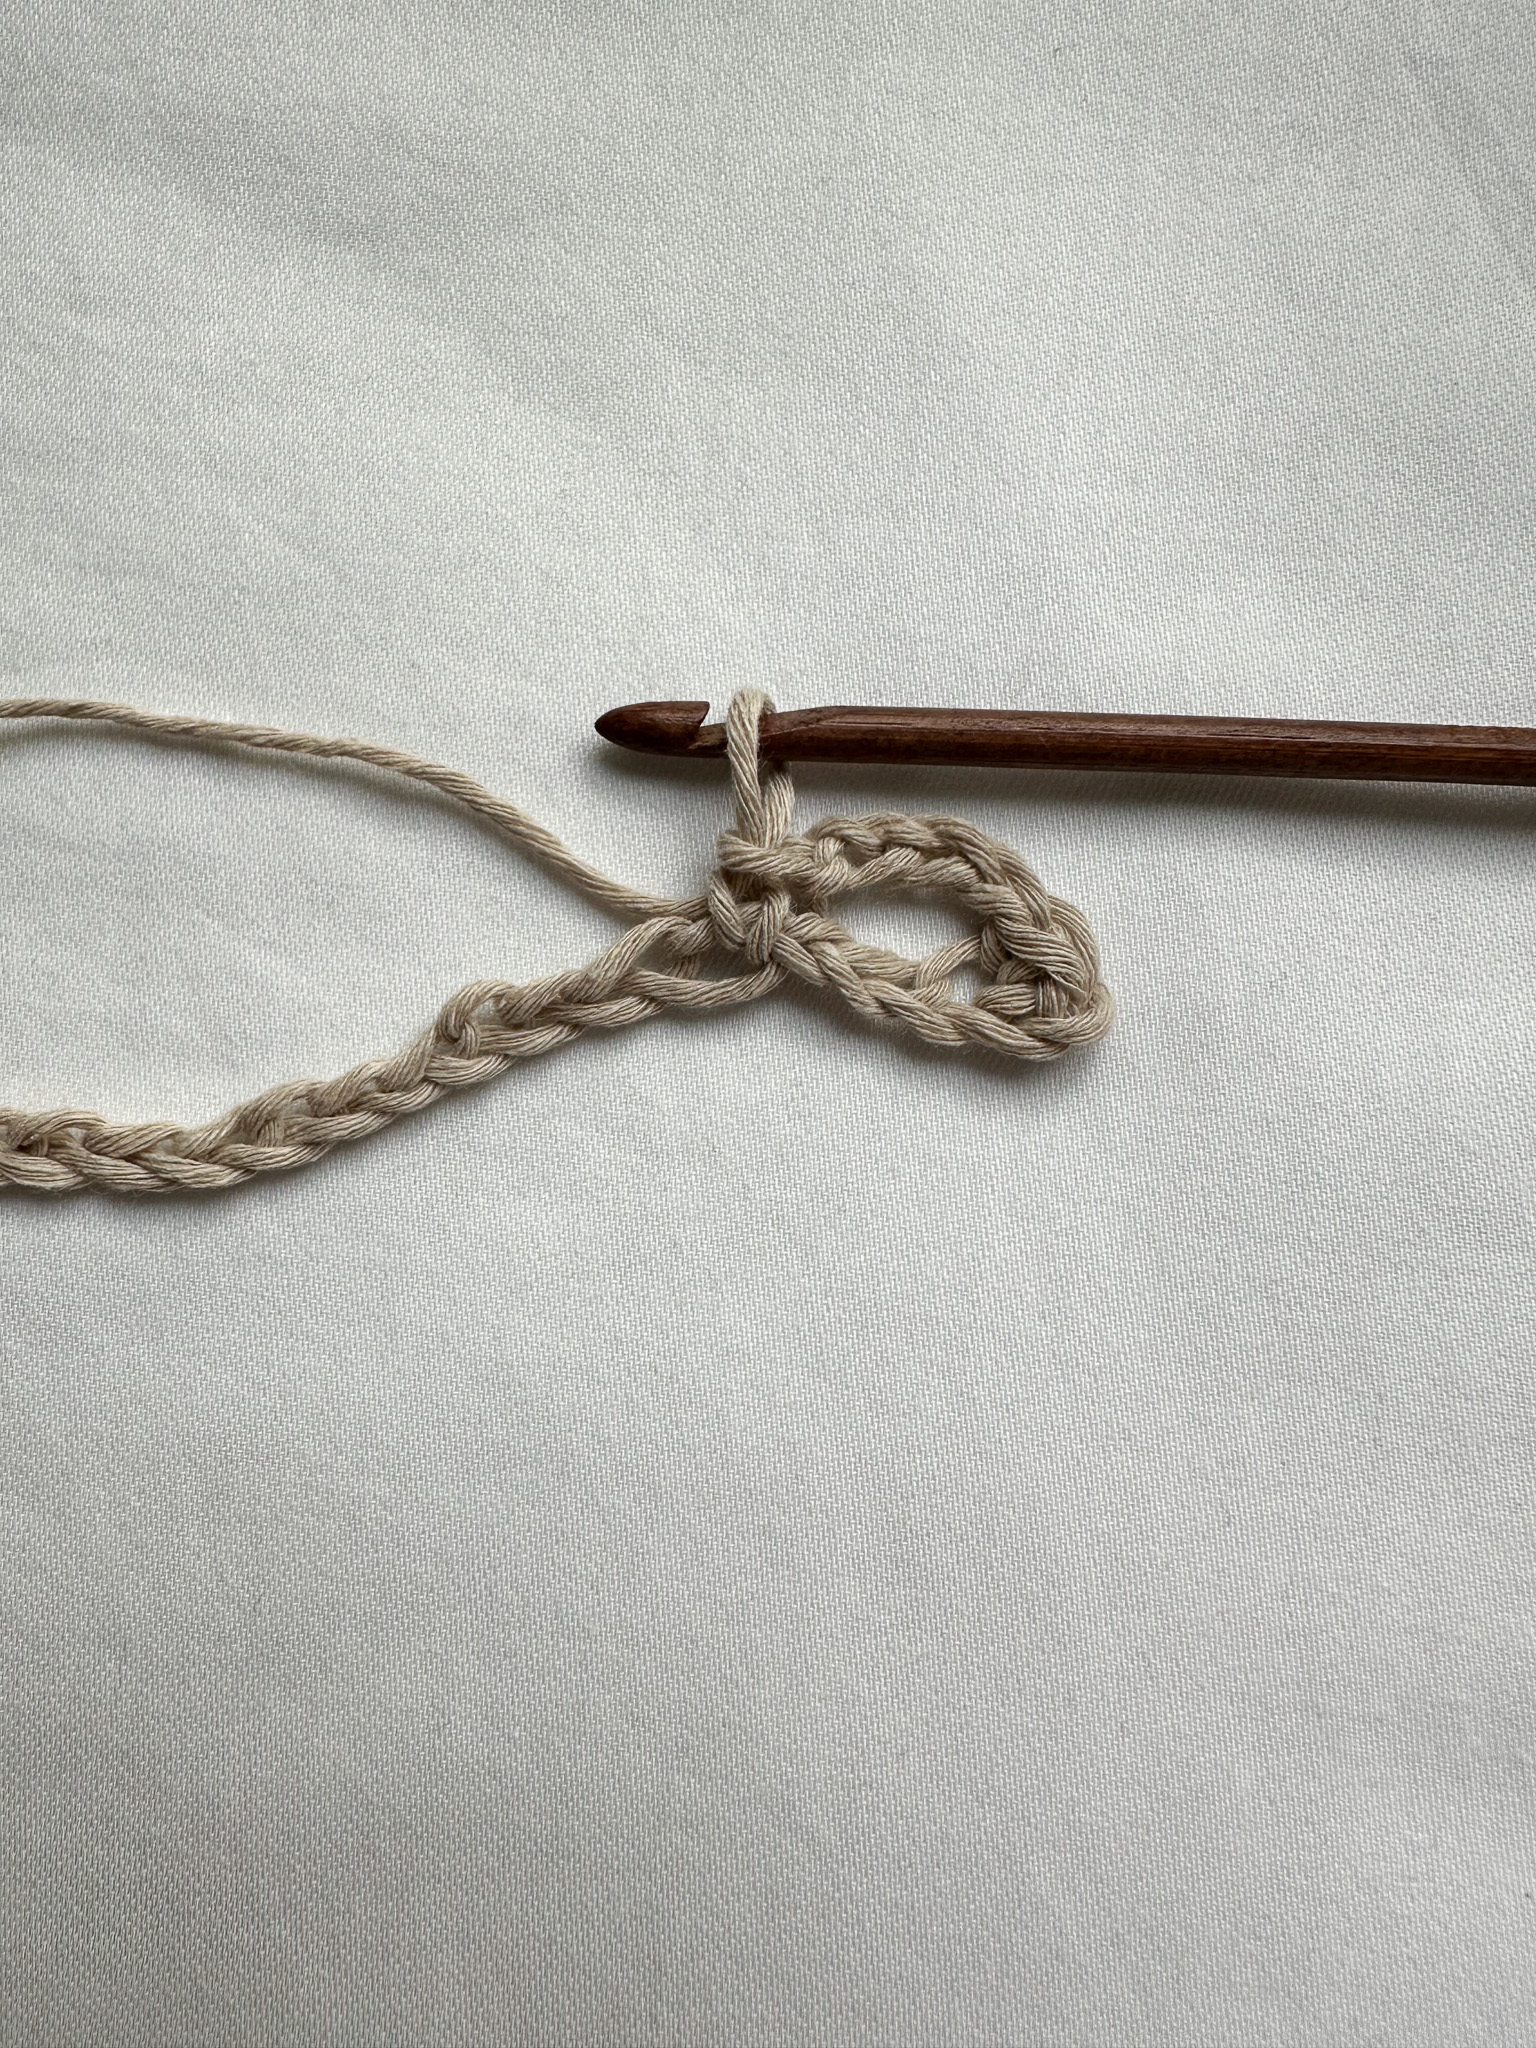
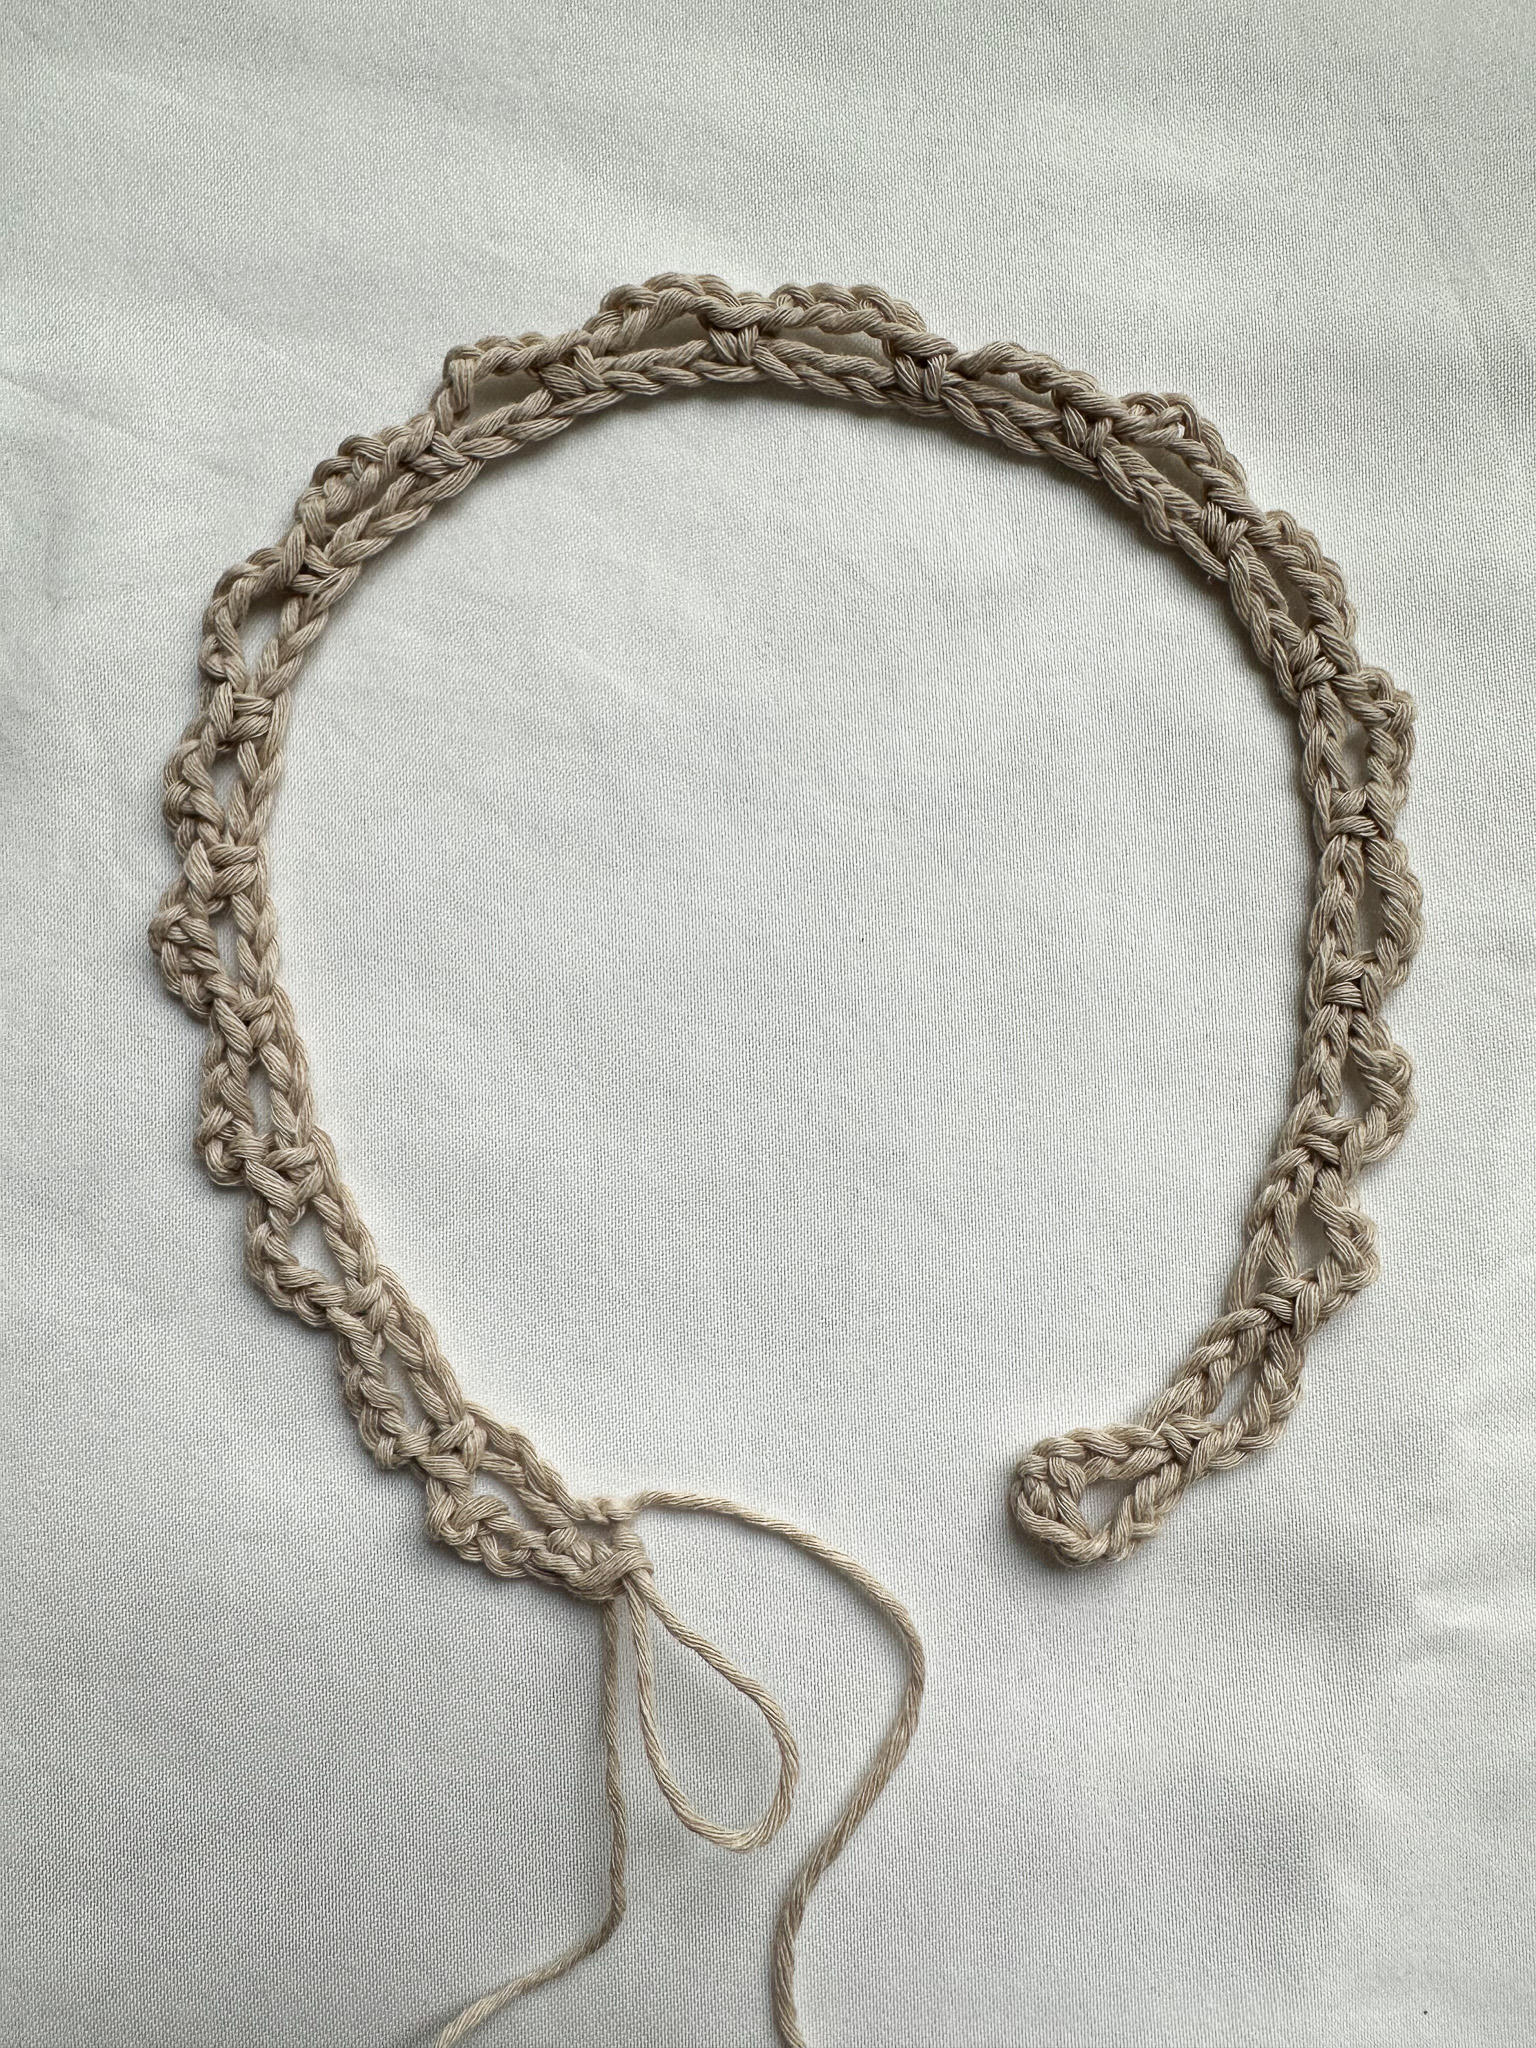
Row 2: Make 1 half double crochet in the first stitch.
(Note: The 2 chains you made when turning do not count as stitches — always skip them, even if it’s not mentioned in the pattern.)
If you’re unsure how to make a half double crochet, see the instructional video below.
Now make 4 half double crochet around the first chain space. Then make 1 half double crochet in the single crochet between the first and second arches. Continue by making 4 half double crochet around each chain space and 1 half double crochet between each arch.
Turn your work without making a chain.

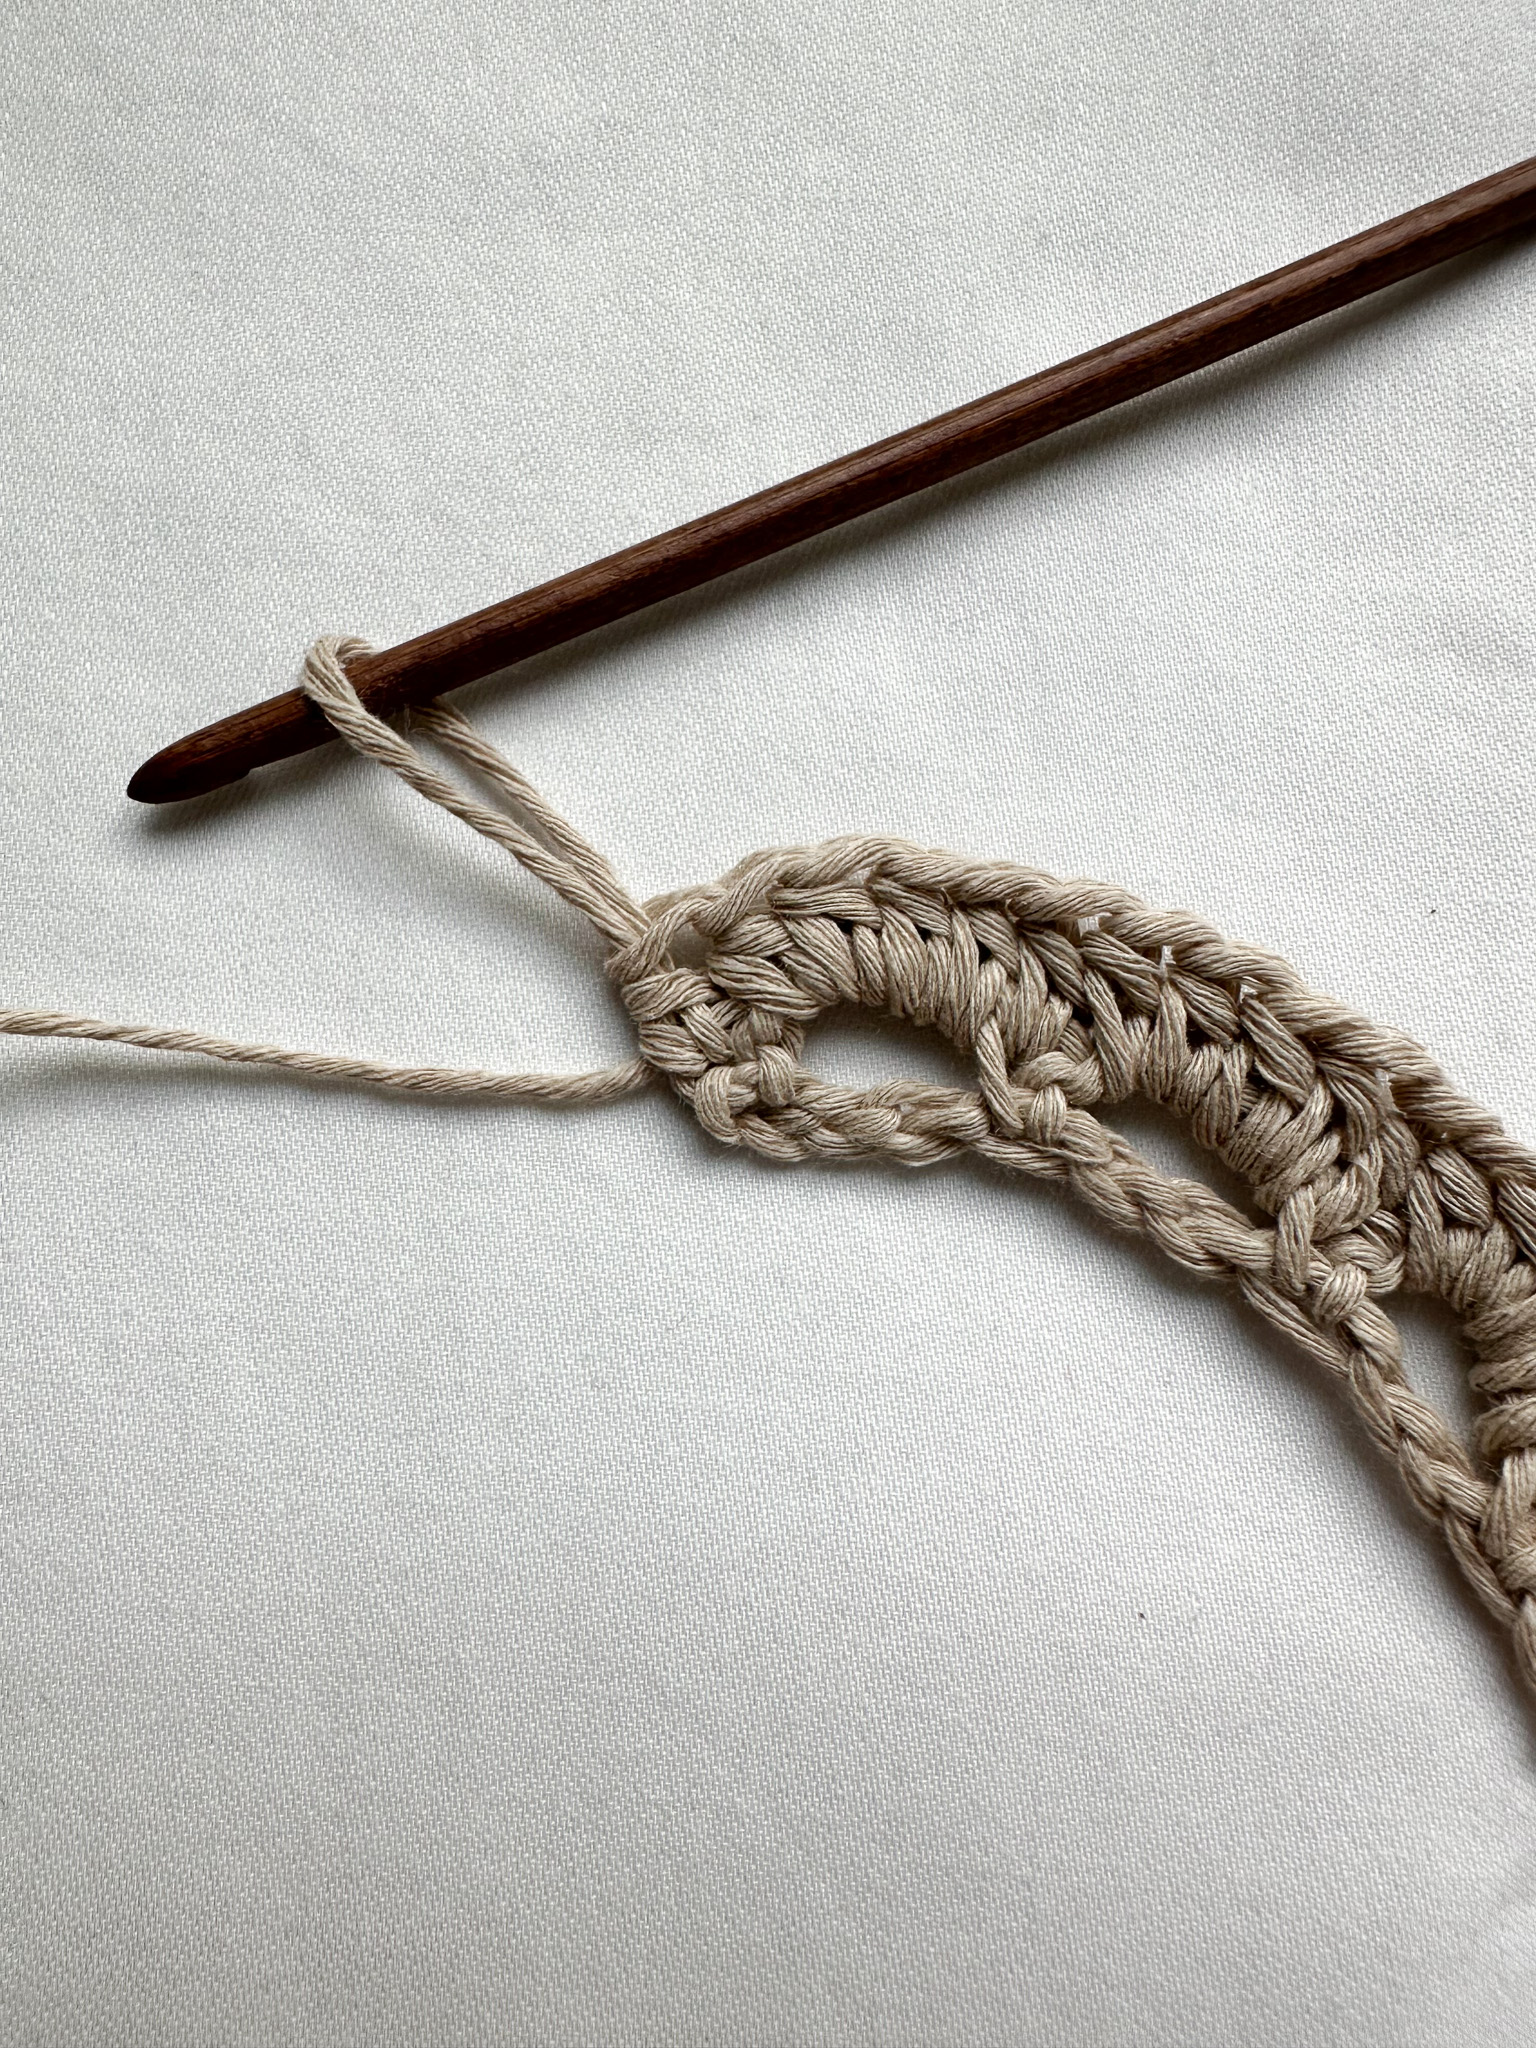
Row 3:
Make 5 chains, skip 2 stitches, and make 1 single crochet. This forms the first half arch.Make 5 chains, skip 4 stitches, and make 1 single crochet. This forms the first full arc.
Repeat this pattern until you have a total of 13/19 arches.
Make 2 chains, skip 2 stitches, and finish with a double crochet (dc) in the last stitch. This forms the second half arch. After Row 3, you should have 2 half arches and 13/19 full arches.
Make 2 chains and turn your work.

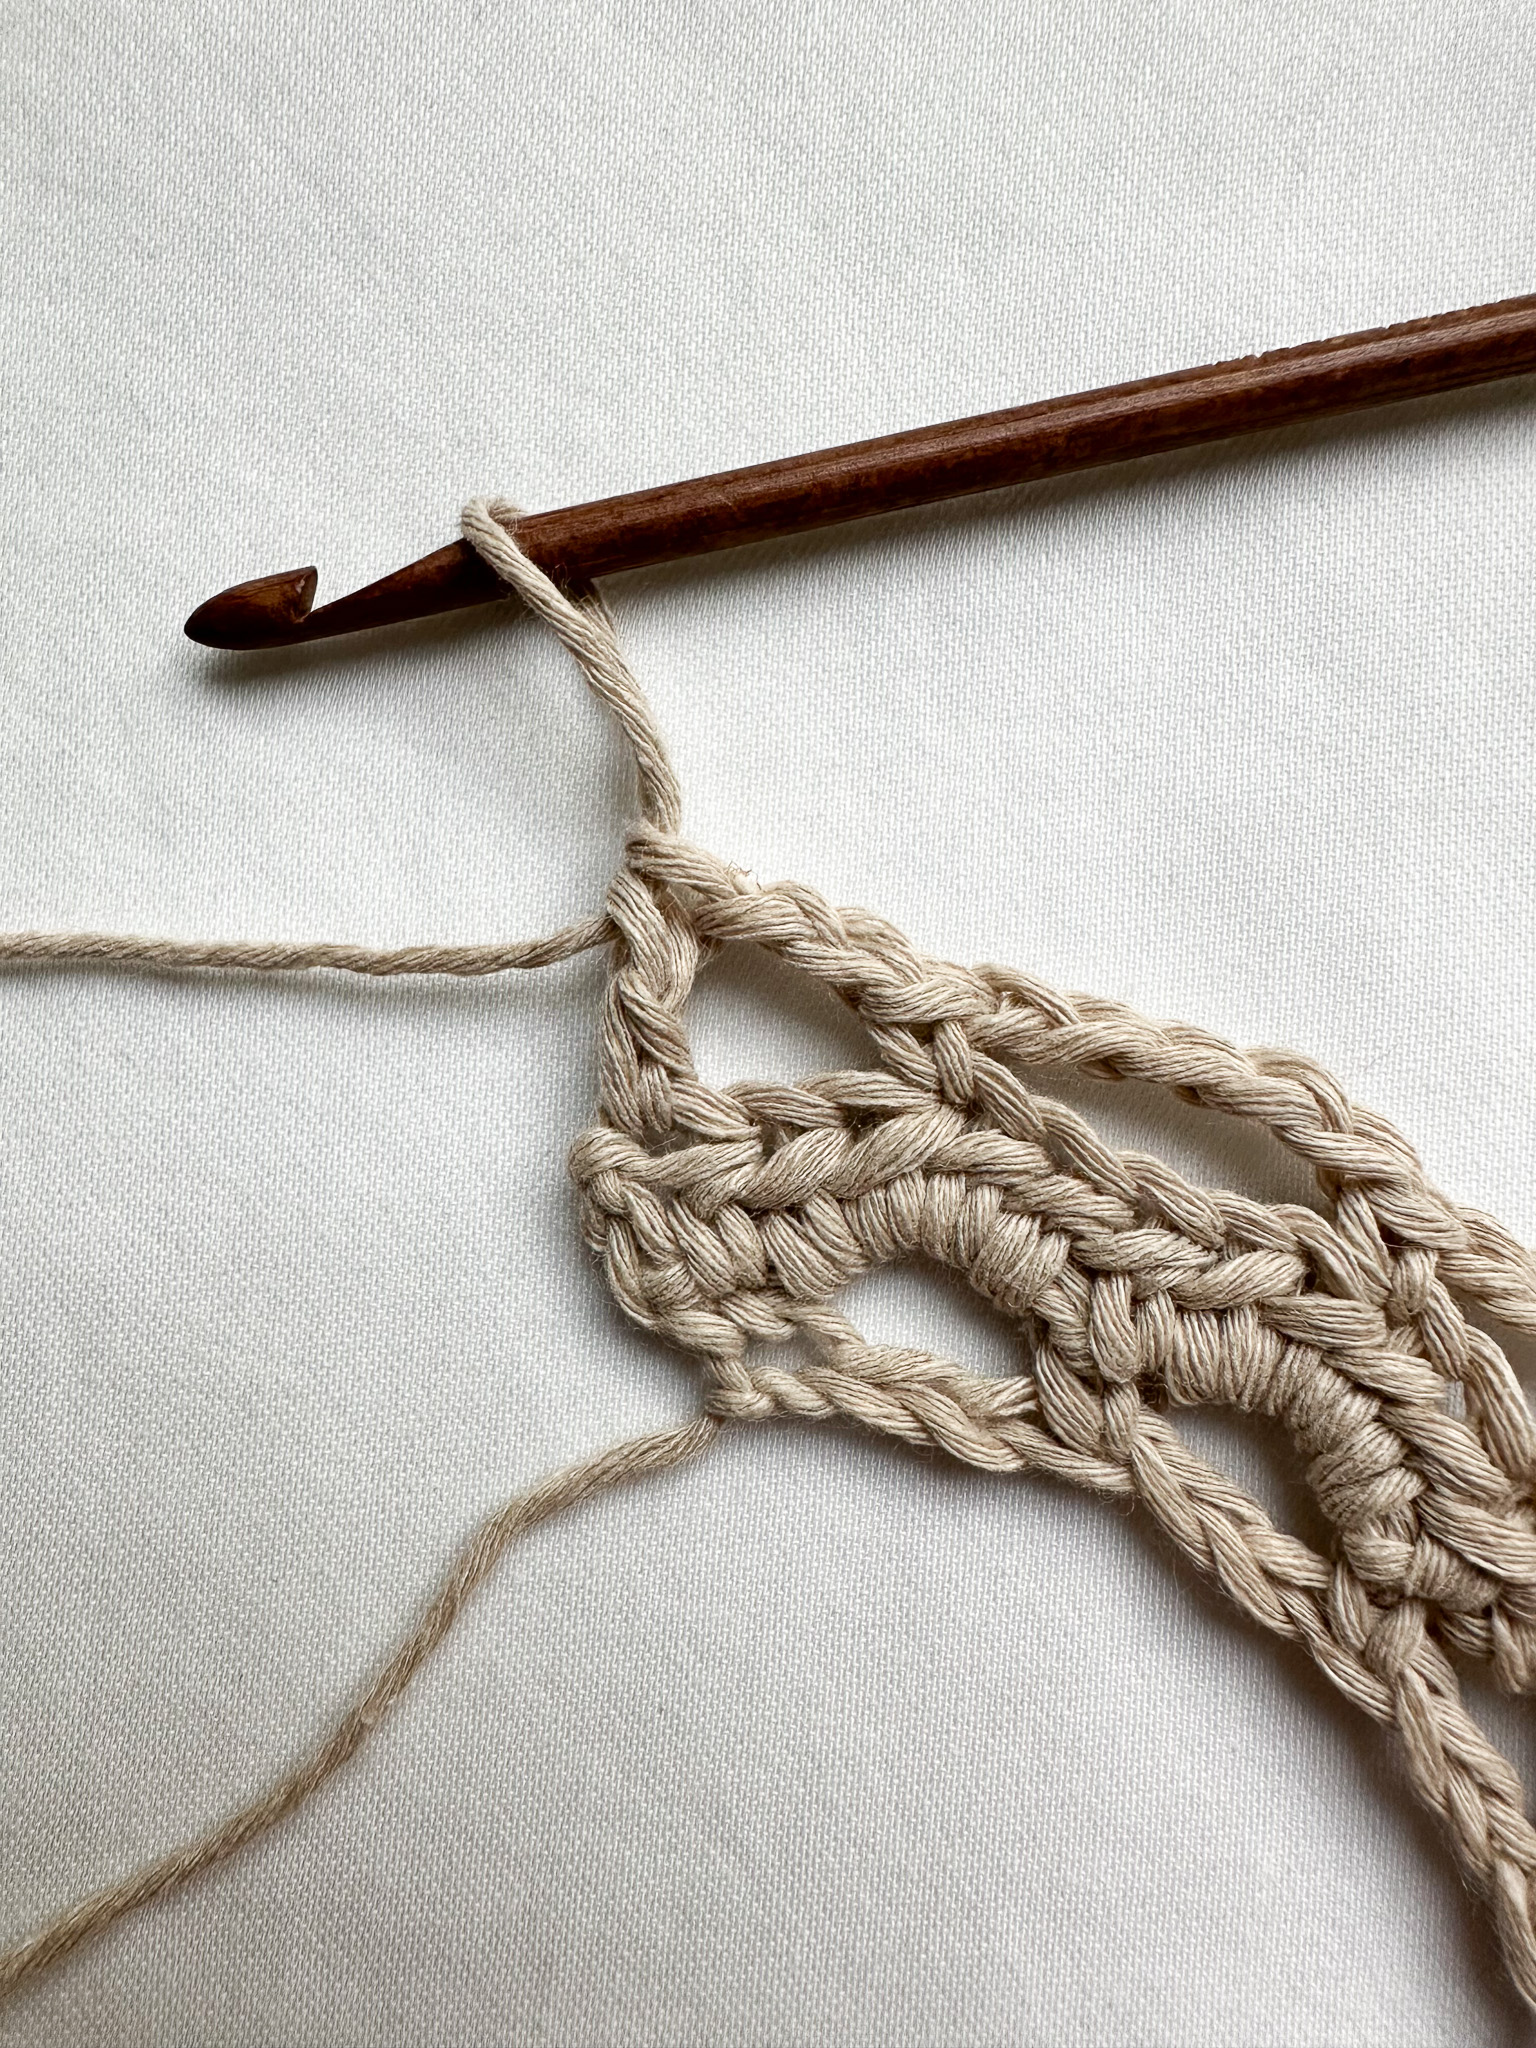
Row 4:
Work 3 half double crochets around the first half arch. Make 1 half double crochets in the single crochet between the arches.
Work 5 half double crochets around the next arch and finish with 1 half double crochets in the single crochet between arches. Continue this pattern around the row: 5 half double crochets on each full arch and 3 half double crochets on each half arch, with 1 half double crochets between each arch.
Make 1 chain and turn your work.
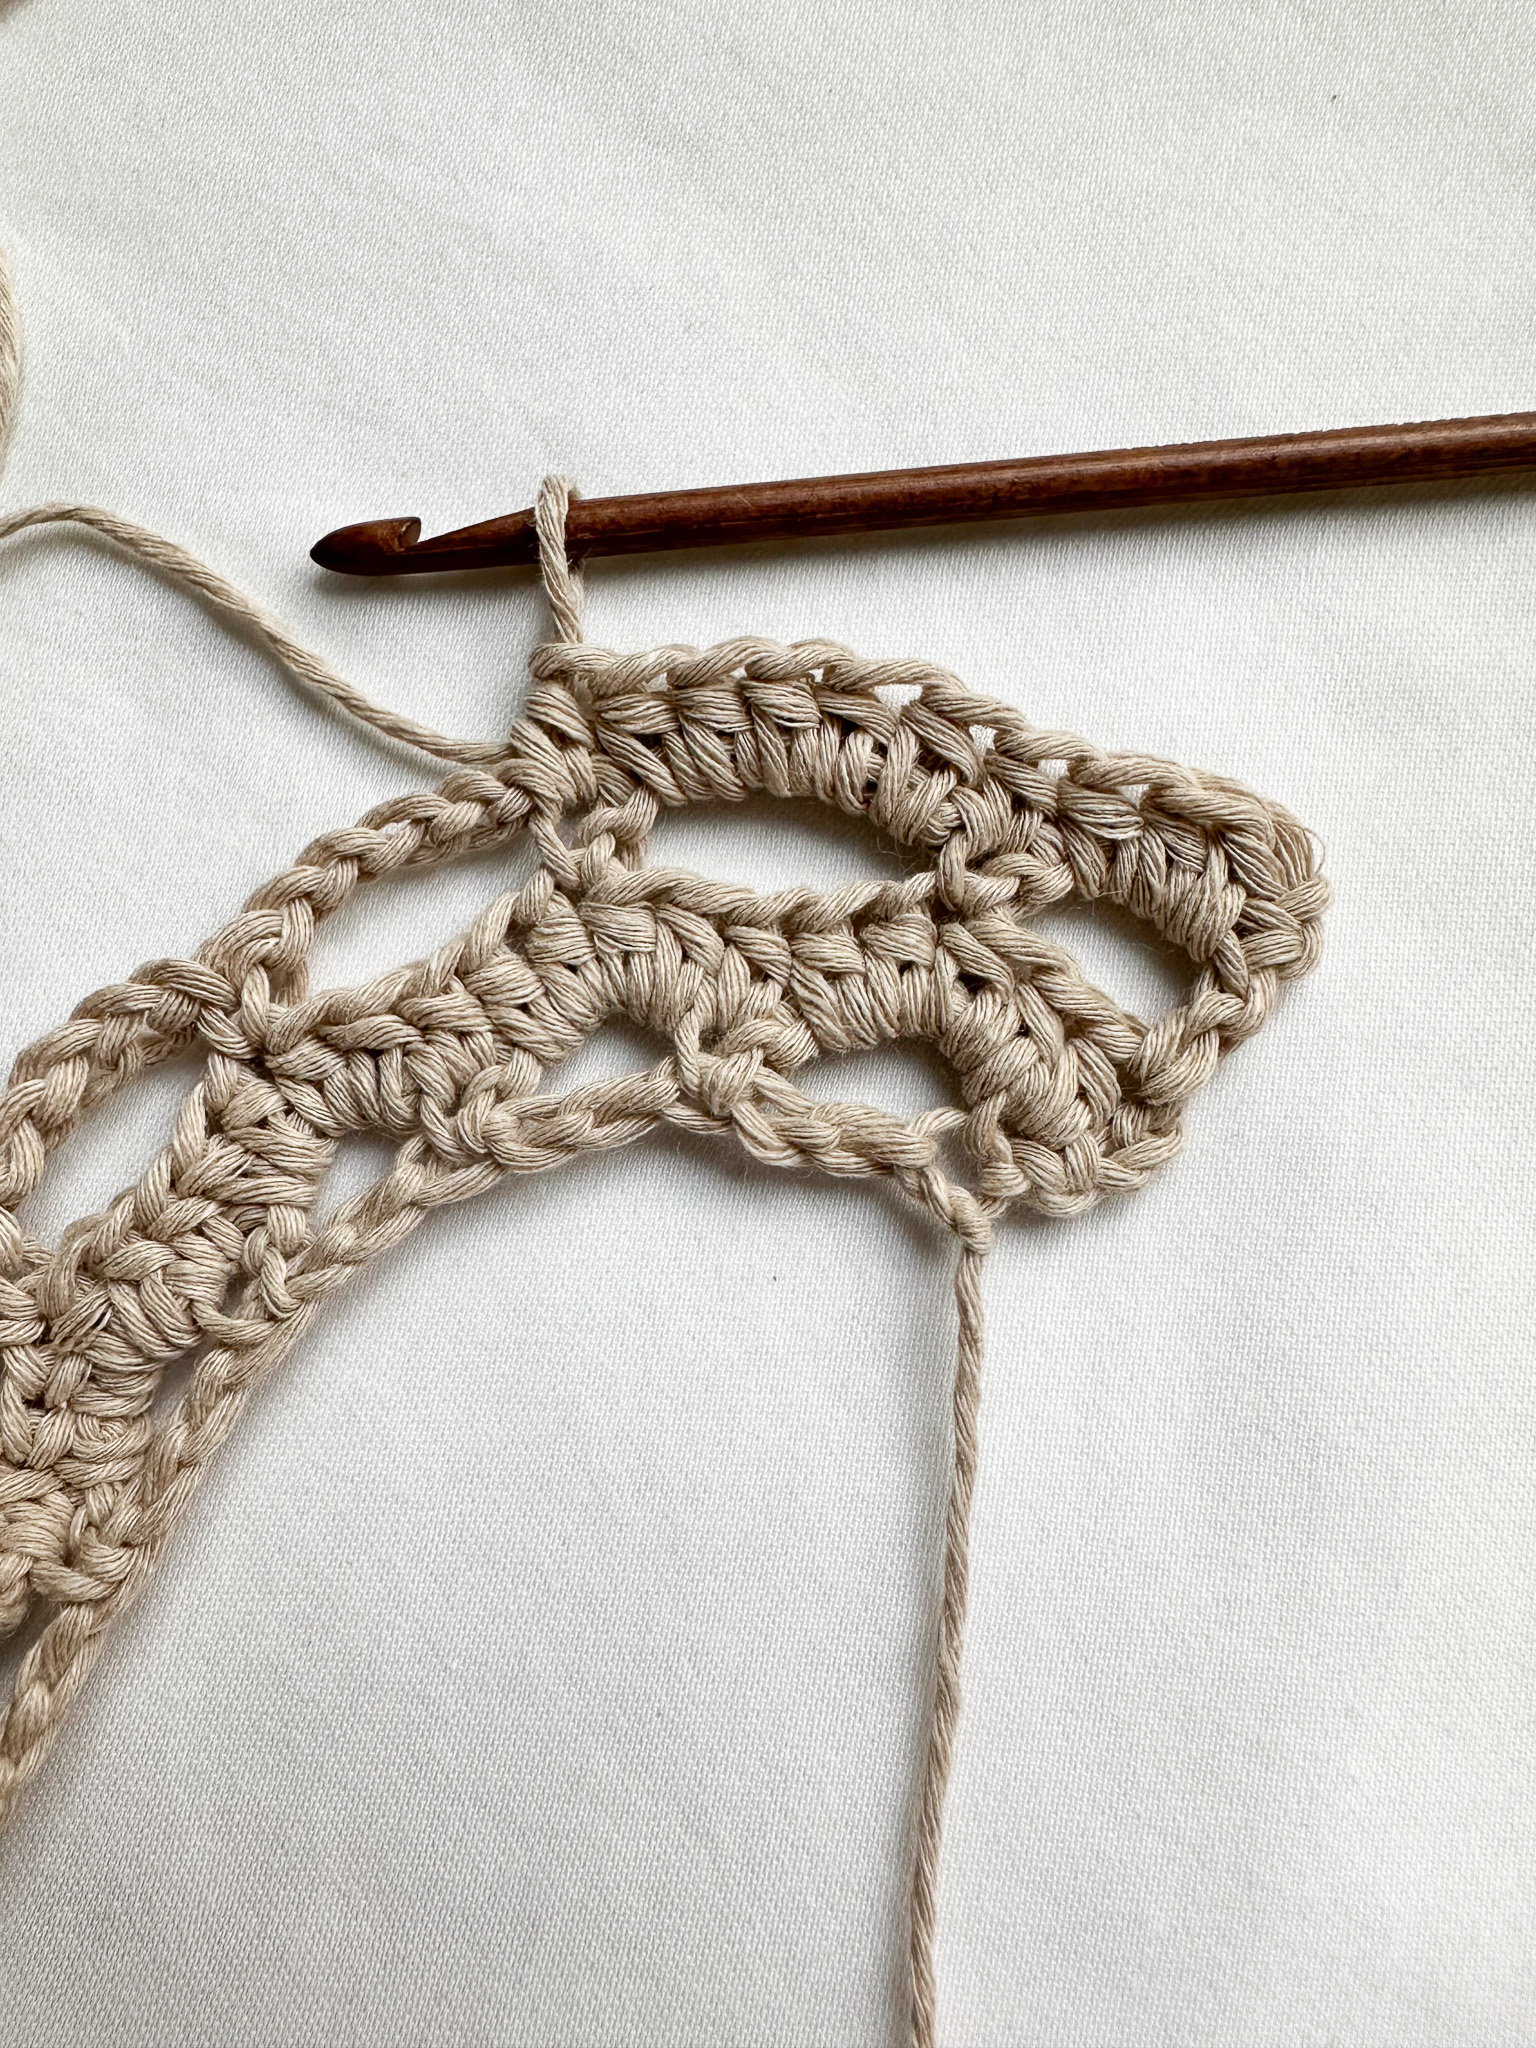
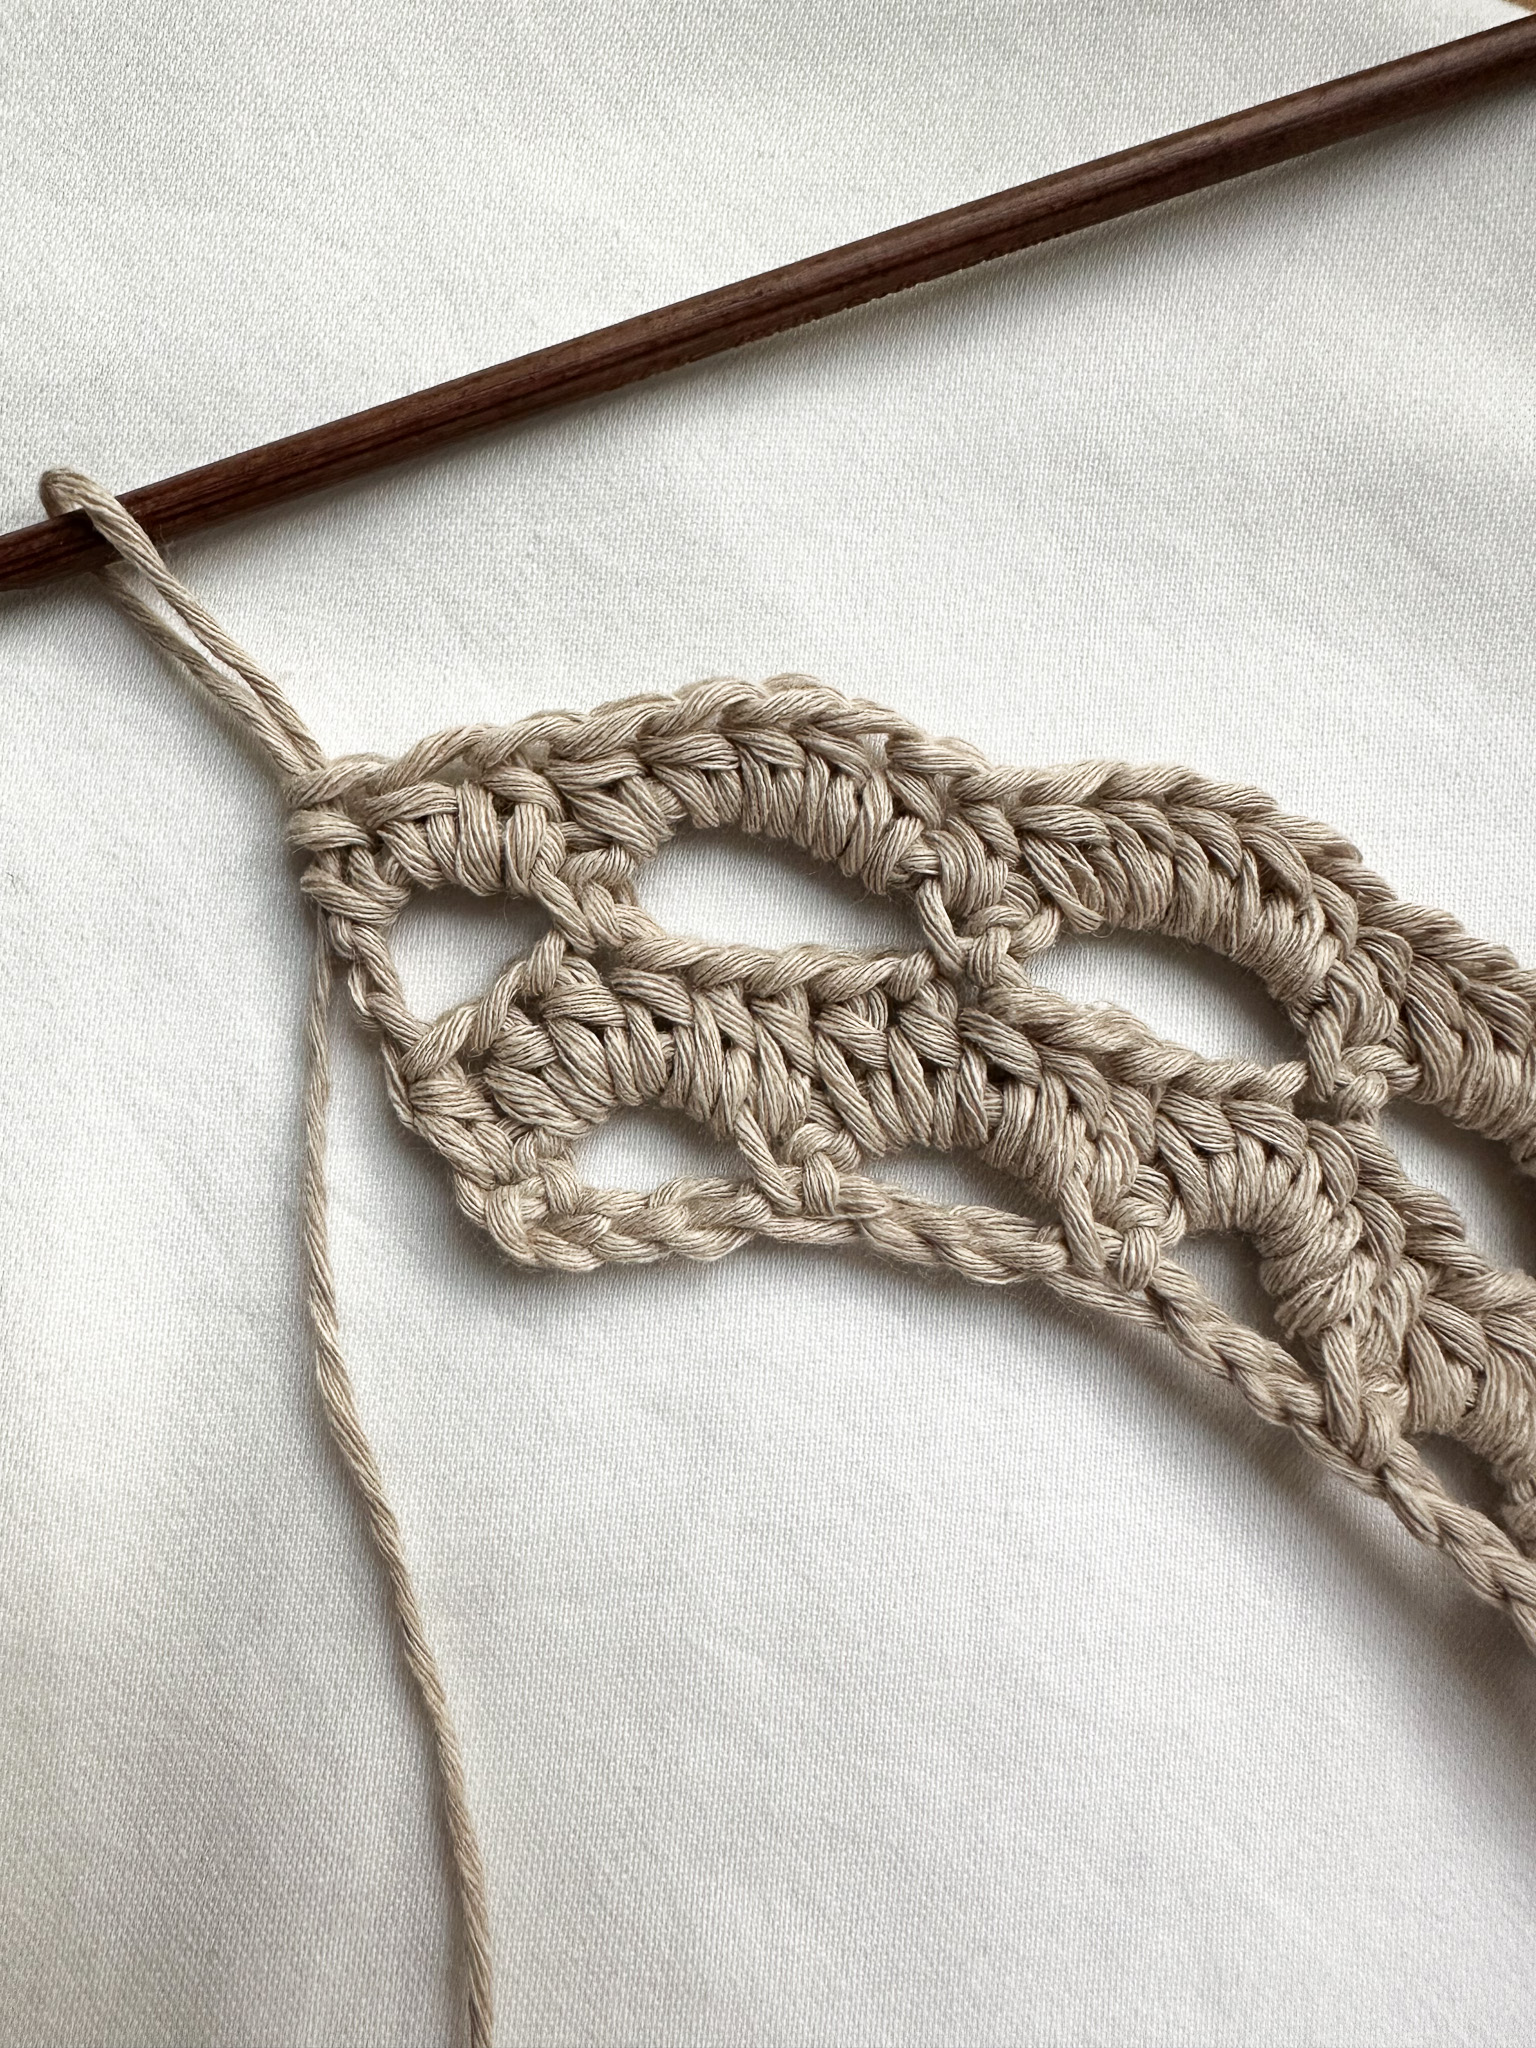
Row 5: Make 1 single crochet. Chain 6, skip 5 stitches, and make 1 single crochet. Chain 6, skip 5 stitches, and make 1 single crochet. Repeat this pattern across the row.
Chain 2 and turn your work.
Row 6: Make 1 half double crochet in the first stitch. Work 6 half double crochet around the first chain arch. Make 1 half double crochet in the single crochet between the first and second arch. Continue with 6 half double crochet around each arch and 1 half double crochet between arches.
Turn the work without adding a chain.
Row 7: Chain 7, skip 4 stitches, and make 1 sc – this forms the first half-arch. Chain 7, skip 6 stitches, and make 1 sc – this forms the first full arch.Repeat this pattern so you have 13/19 arches in total.Chain 4, skip 2 stitches, and finish with a dc in the last stitch – this forms the second half-arch. After row 7, you should have 2 half-arches and 3/19 full arches.
Chain 2 and turn.
Row 8: Work 4 hdc around the first half-arch. Make 1 hdc in the single crochet between arches. Work 7 hdc around the next arch and 1 hdc in the single crochet between arches. Continue this pattern across the row: 7 hdc on full arches and 4 hdc on half arches.
Chain 1 and turn.
Note: For the child size, skip Rows 9–10 (Step 5) and continue to the next step.
Row 9: Make 1 sc. Chain 8, skip 7 stitches, and make 1 sc. Chain 8, skip 7 stitches, and make 1 sc. Repeat this pattern across the row. Chain 2 and turn.
Row 10: Make 1 hdc in the first stitch. Work 8 hdc around the first chain arch. Make 1 hdc in the single crochet between the first and second arch. Continue with 8 hdc around each arch and 1 hdc between each arch. Chain 1 and turn.
Edging
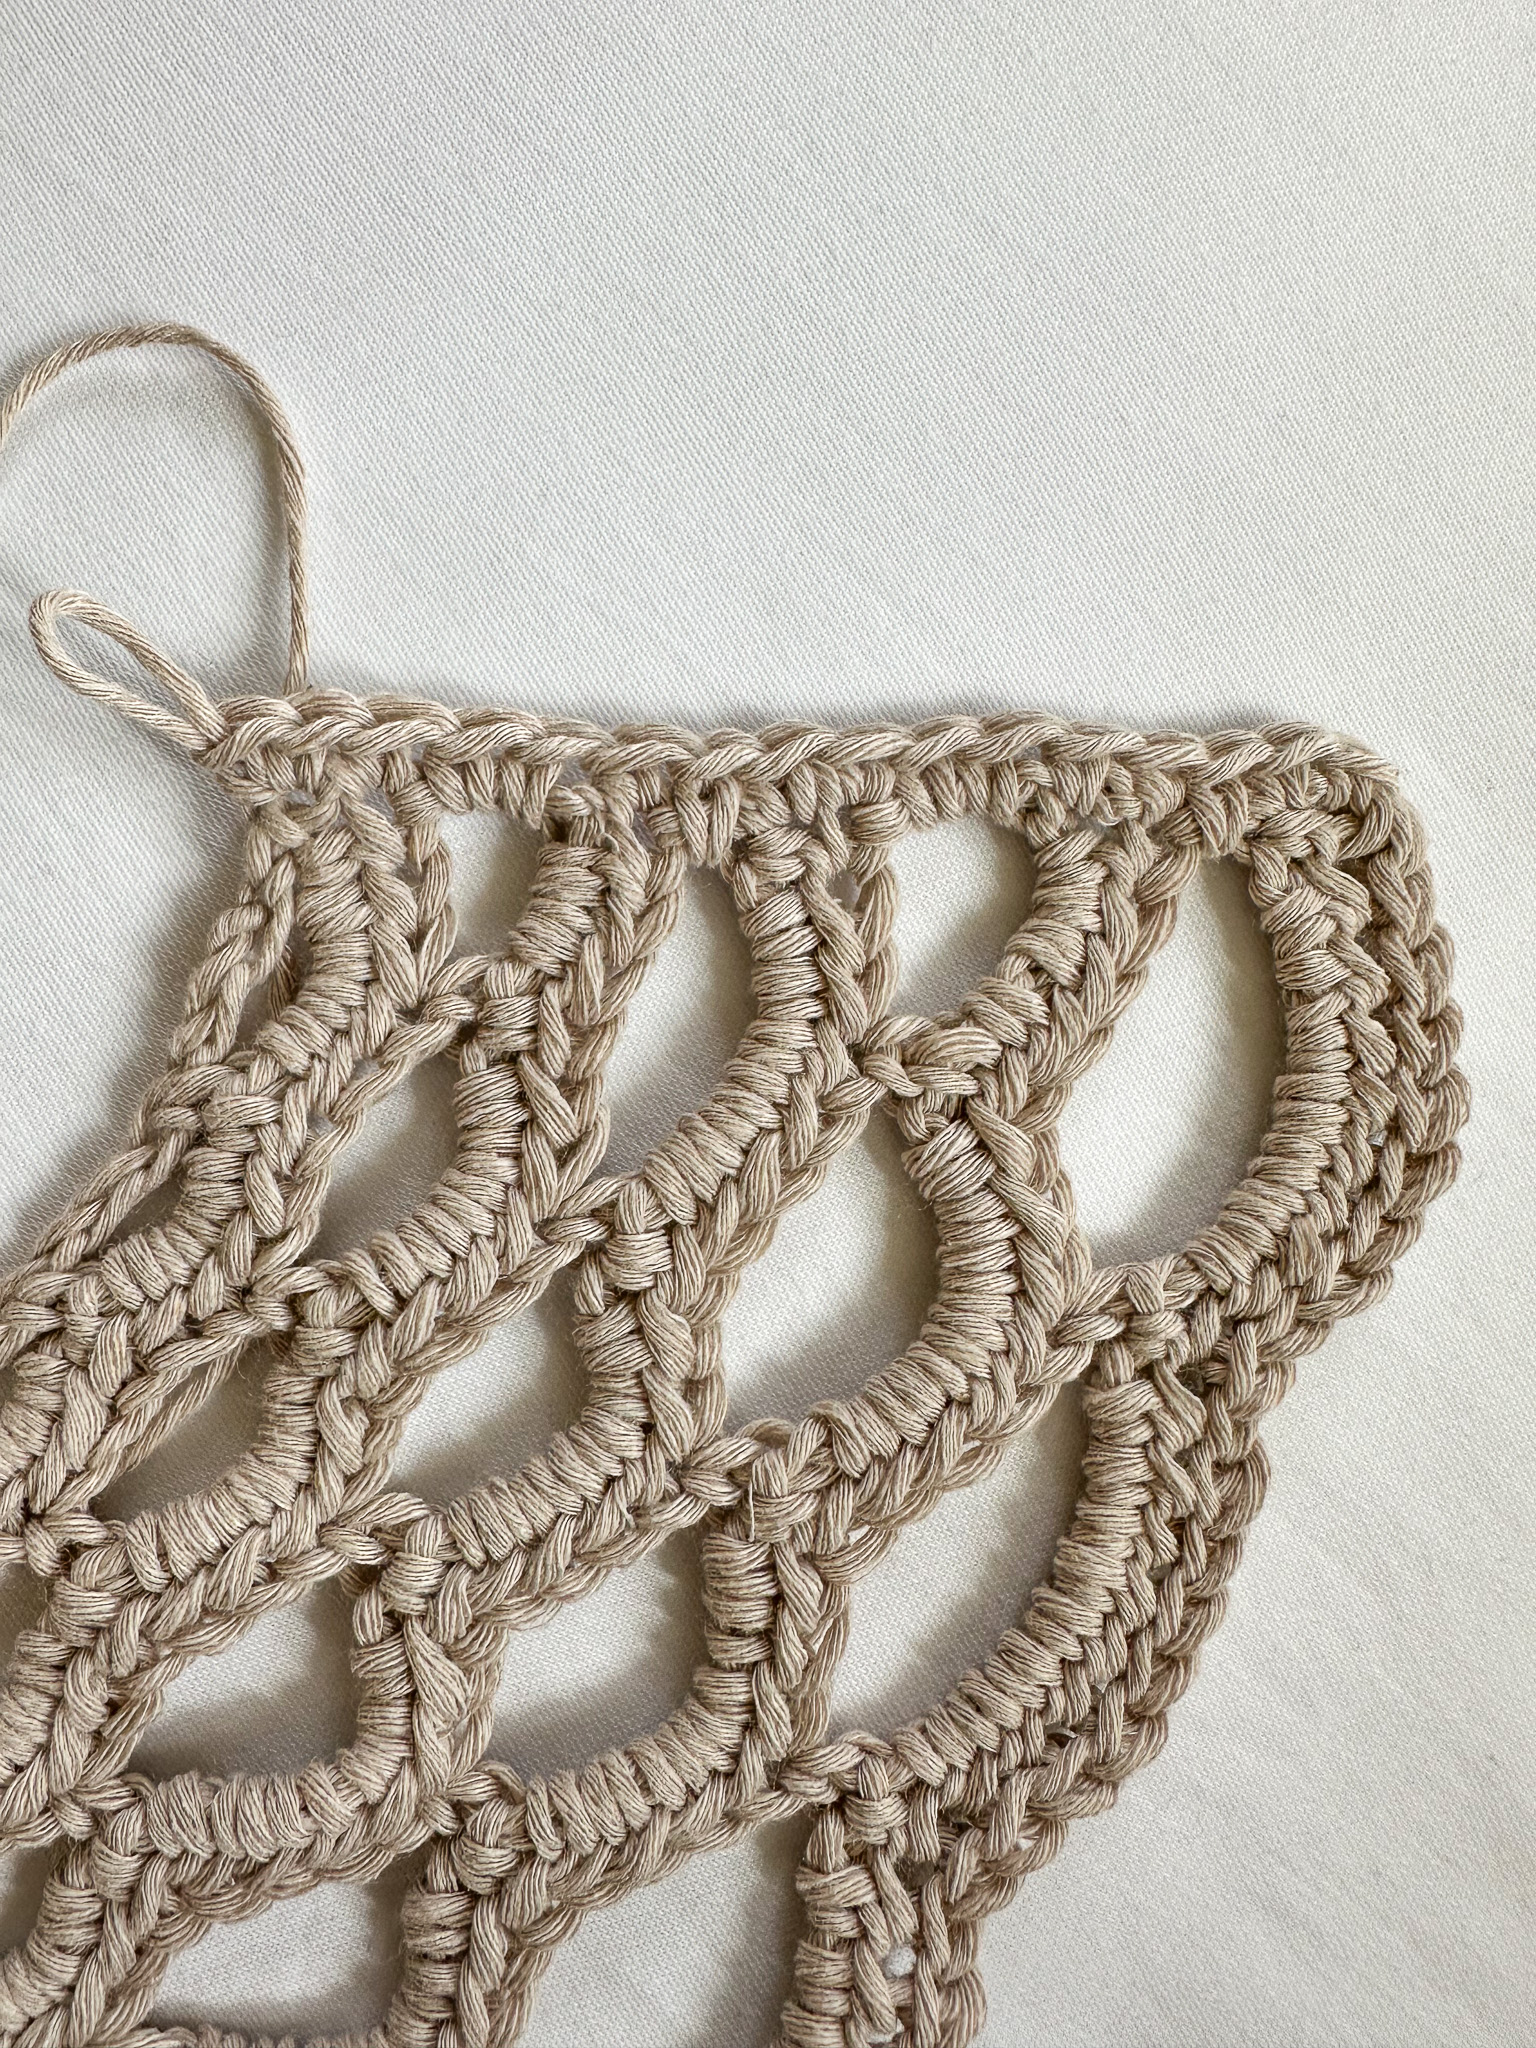
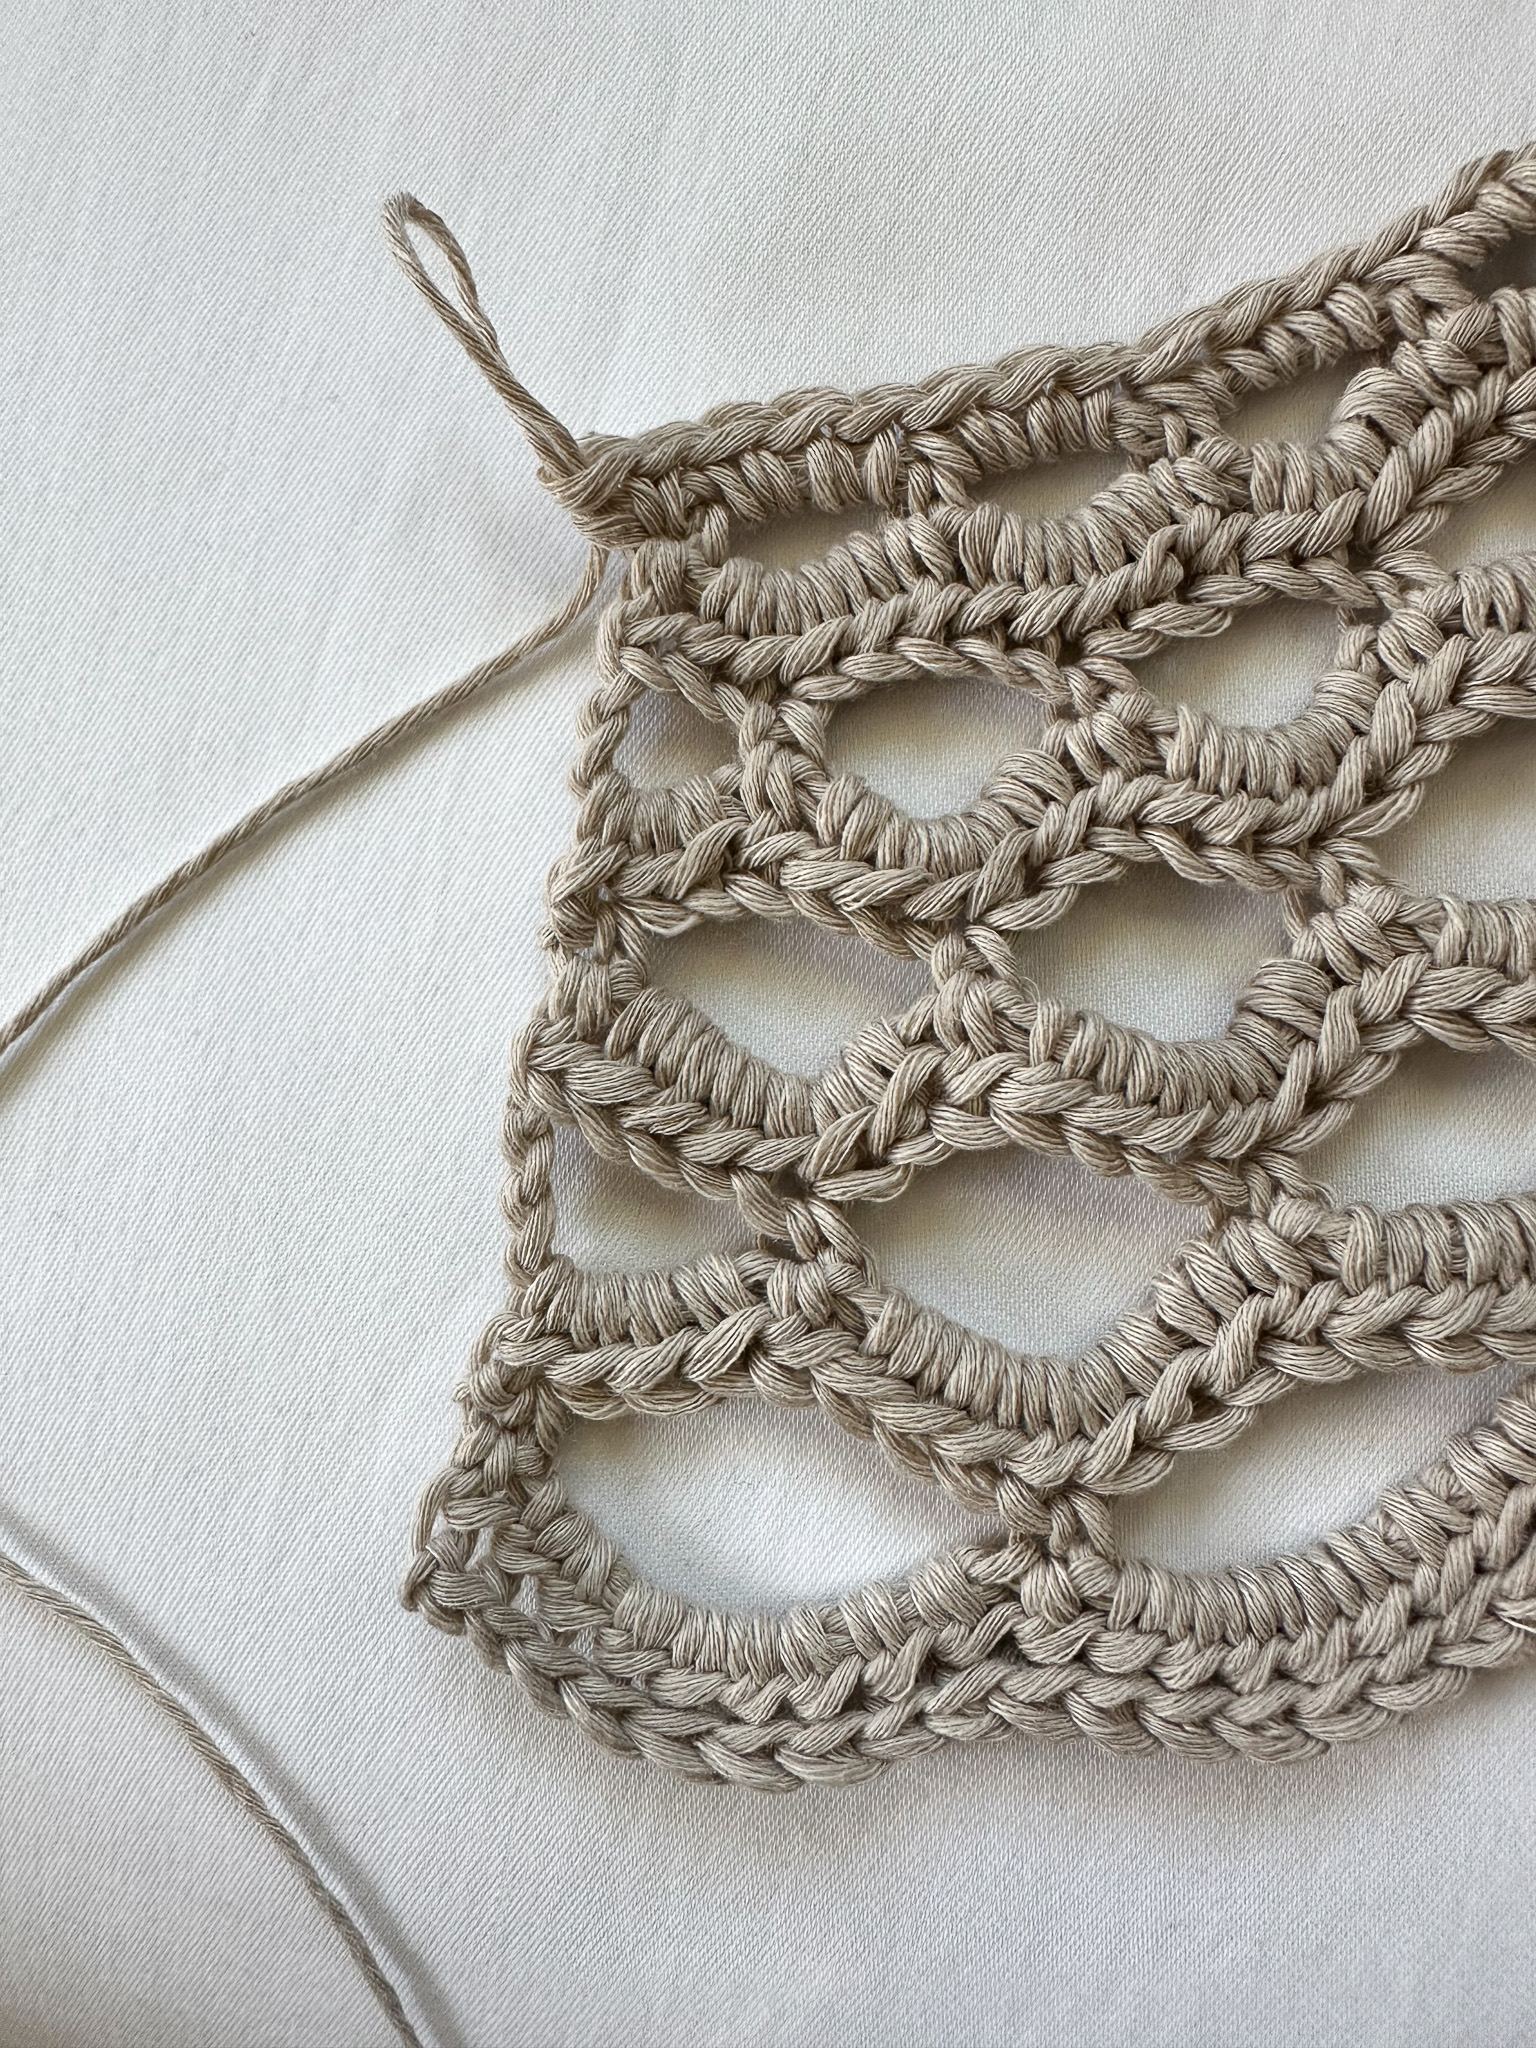
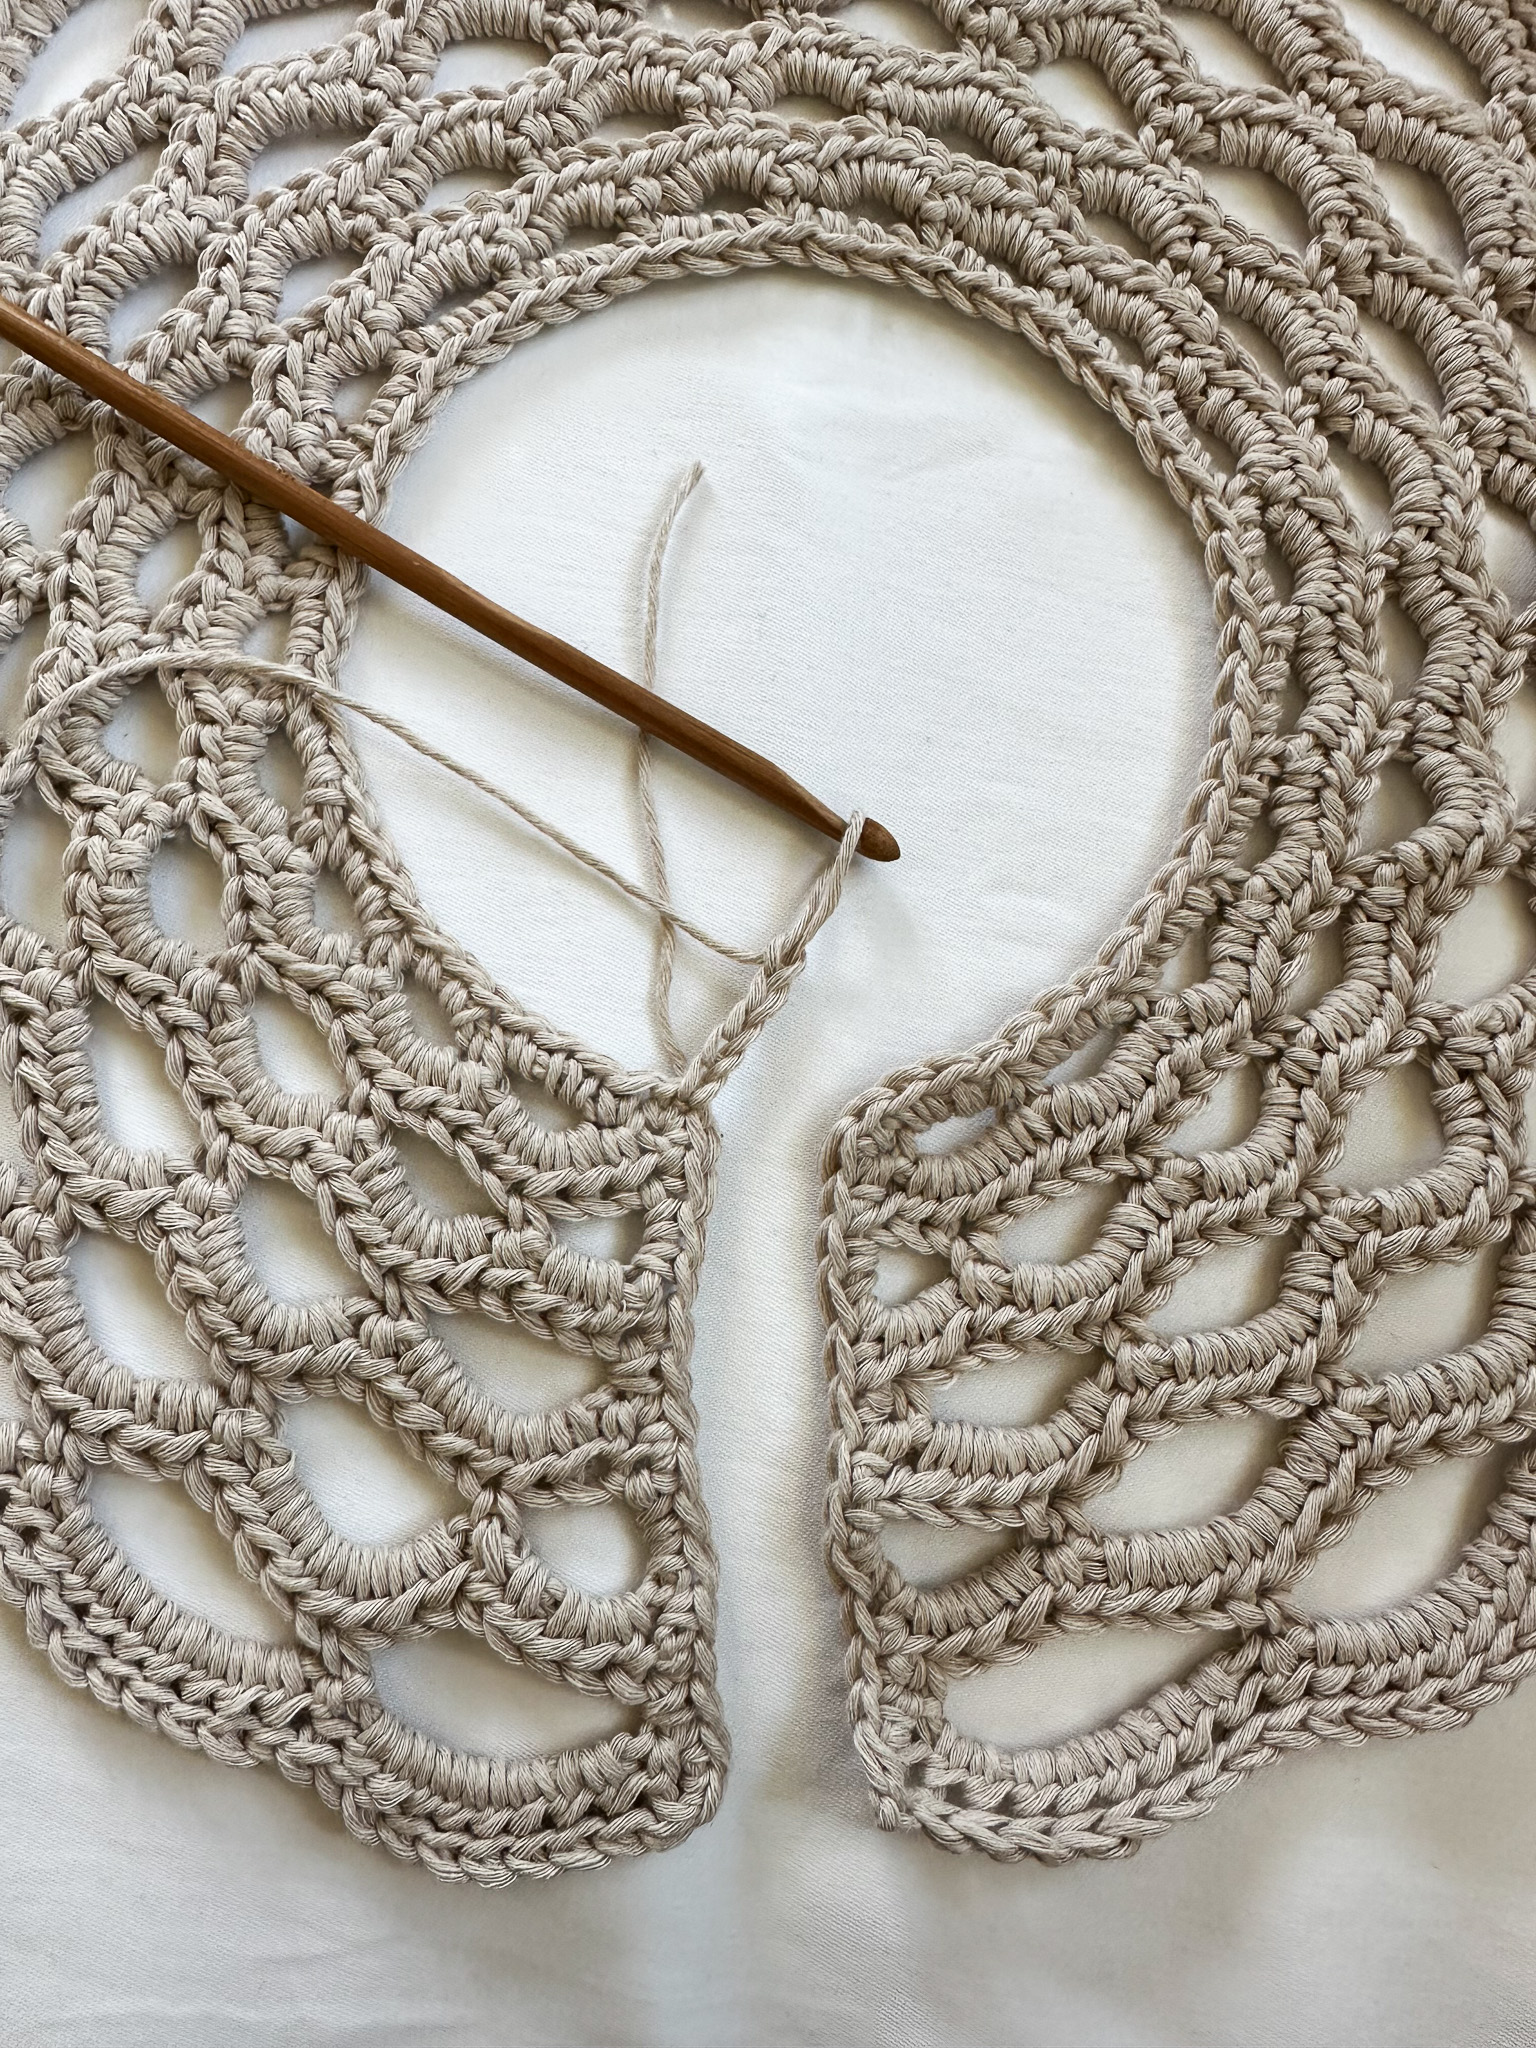
Work slip stitches along all arches. At the last stitch, make 2 single crochet in the corner, then continue with single crochet along the edge at the collar opening. Make 2 single crochet in the top corner, then continue with 3 single crochet per arch around the chain stitches at the neckline. Repeat with 2 single crochet in the opposite corner, and finish with single crochet along the other edge of the collar opening.
Cut the yarn and weave in the end on the back of the collar.
Ties
Pick up a loop at one of the corners.
Chain 50/60 sts.
Skip the first stitch, then work slip stitches (sl st) along the chain, and finish with a sl st into the edge of the collar. Cut the yarn and weave in the end on the back of the collar. Tie a double knot with the other yarn end and hide the ends.
Repeat to make a tie at the other corner.
Your collar is now finished! Great job ☺

Abbreviations
- MR = magic ring
- ch = chain
- sl st = slip stitch
- sc = single crochet
- dc = double crochet
- (...) = indicates the number of stitches in that round
- *...* = repeat everything within the asterisks the number of times specified
Pattern
Crocheting Granny Squares
Start by crocheting one test granny square. You will need to measure this square to determine how to crochet the remaining 15 squares. Everyone crochets with different tension, so to ensure your cardigan turns out the correct size, follow the instructions below carefully.
- If your square turns out larger than the measurements below, try using a 6 mm hook or crochet one round fewer on each square.
- If your square turns out too small, you can block it to the correct size, or crochet one extra round and measure the width.
- You can also try using single crochet stitches, but this will use more yarn and require extra work.
Size XS/S
- Crochet 7 rounds
- Each side should measure approx. 24–25 cm
- Total squares: 16
Size S/M
- Crochet 8 rounds
- Each side should measure approx. 26–27 cm
- Total squares: 16
Size L/XL
- Crochet 8–9 rounds
- Body squares: sides should measure 30–31 cm (9 rounds × 8 squares)
- Sleeve squares: sides should measure 26–27 cm (8 rounds × 8 squares)
Granny Squares
If you want your cardigan to be longer, you can continue crocheting granny stripes along the bottom edge.
You will make 16 granny squares in the color combinations of your choice. Two squares across should measure the width of your back (horizontally) and extend slightly down the arms. The fit is oversized.
Granny Squares Instructions
Make 16 squares. Squares for size S/M should measure approx. 24–26 cm.
Start with the color you want in the center of your squares. Make 1 magic ring (MR) or 4 chain stitches (ch) joined with a slip stitch (sl st) to form a ring.
Round 1: Ch 3 (counts as first dc), 2 dc, ch 1, *3 dc, ch 1* ×3. Join with sl st in the 3rd ch at the beginning of the round. 812)
Change color or continue with the same color.
Round 2: Attach yarn with sl st in a corner, ch 3 (counts as first dc), 2 dc, ch 1, 3 dc, *skip to next corner, 3 dc, ch 1, 3 dc* ×3. Join with sl st in the 3rd ch at the beginning of the round, fasten off and cut yarn (24)
Change color or continue with the same color.
Round 3
Attach yarn with sl st in a space in the middle of a side (not a corner), ch 3 (counts as first dc), 2 dc
- *skip to next corner, 3 dc, ch 1, 3 dc, skip to next middle space on the side, 3 dc* ×3
- Skip to next corner, 3 dc, ch 1, 3 dc
- Join with sl st in the 3rd ch at the beginning of the round, fasten off and cut yarn
Total stitches: 36 dc
Change color or continue with the same color.
Round 4
- Work as Round 3: 3 dc in each middle space,
- *3 dc, 2 ch, 3 dc* in each corner
- Fasten off and cut yarn
Total stitches: 48 dc
Change color or continue with the same color.
Round 5
- Work as Round 4: 3 dc in each middle space,
- *3 dc, 1 ch, 3 dc* in each corner
- Fasten off and cut yarn
Total stitches: 60 dc
Montering
Steg 1. När du är klar med dina rutor så lägger du dem som nedan schema och virkar ihop alla rutor med varandra. Virka ihop rutorna på rätsidan av rutorna (håll "fula" sidorna mot varandra när du virkar ihop).
Virka i de maskor som är närmast mot varandra. Så i bakre maskbågen av den första rutan och främre maskbågen av den bakre rutan. När du gjort detta får du ett stort stycke med alla rutor som sitter ihop. OBS! Virka INTE ihop de rutor som har blå markering i nedan schema (det är öppningen på din kofta). Se videon nedan för att se tekniken du kan använda för att virka ihop rutorna. Det finns flertalet tekniker och du kan använda den teknik du tycker är finast, detta är endast ett exempel.
Steg 2. Efter de du virkar ihop alla rutor så följer du stegen nedan om hur du sätter ihop hela stycket med alla rutor till en kofta.
a) Virka ihop de svarta/grå delarna med varandra. Detta blir en ärm.
b) Virka ihop de röda delarna med varandra. Detta blir andra ärmen.
c) Virka ihop de rosa delarna med varandra. Detta är nedanför ärmen och blir sidan på din kofta.
d) Virka ihop de beiga delarna med varandra. Detta är nedanför andra ärmen och blir andra sidan på din kofta.
Nu har du monterat hela koftan!

Sista steget är att virka band så att du kan knyta din kofta.
Rad 1: Virka en kedja av lm, så långt som du önskar ditt band.
Rad 2: Vänd och virka fm i alla lm, med start i 2:a lm. Virka hela vägen tills slutet av din kedja.
Totalt virkar du 2 rader per band. Du virkar totalt 4 st band om du vill kunna knyta både uppe i halsen och i midjan.
Fäst dem sedan uppe vid halsen och i midjan på var sin sida av koftan. Se bilden i steg 4 hur det ser ut när det är klart.
Din kofta är klar :)
Info:
This pattern is written in two sizes — one for children and one for adults. In the instructions, the sizes are given with the child size first, followed by the adult size (child/adult).
The neckline measures 30/42 cm (distance between the ties). The ties measure 28/34 cm.
Note: At the end of each row, make the required chain stitches before turning your work. These chains do not count as stitches in the pattern — skip them before continuing on the next row.
Step 1: Chain 44/62 stitches.
If you’re unsure how to crochet a chain, see the instructional video below.
Row 1: Skip the first stitch. Make 1 single crochet (sc) in the second stitch. If you’re unsure how to make a single crochet, see the instructional video below.
Next, chain 4, skip 2 stitches, and make 1 sc in the next stitch — you’ve now created a chain space. Chain 4 again, skip 2 stitches, and make 1 sc — another arch is formed.
Repeat this pattern until you have a total of 14/20 arches (child/adult).
Chain 2 and turn your work.


Row 2: Make 1 half double crochet in the first stitch.
(Note: The 2 chains you made when turning do not count as stitches — always skip them, even if it’s not mentioned in the pattern.)
If you’re unsure how to make a half double crochet, see the instructional video below.
Now make 4 half double crochet around the first chain space. Then make 1 half double crochet in the single crochet between the first and second arches. Continue by making 4 half double crochet around each chain space and 1 half double crochet between each arch.
Turn your work without making a chain.


Row 3:
Make 5 chains, skip 2 stitches, and make 1 single crochet. This forms the first half arch.Make 5 chains, skip 4 stitches, and make 1 single crochet. This forms the first full arc.
Repeat this pattern until you have a total of 13/19 arches.
Make 2 chains, skip 2 stitches, and finish with a double crochet (dc) in the last stitch. This forms the second half arch. After Row 3, you should have 2 half arches and 13/19 full arches.
Make 2 chains and turn your work.


Row 4:
Work 3 half double crochets around the first half arch. Make 1 half double crochets in the single crochet between the arches.
Work 5 half double crochets around the next arch and finish with 1 half double crochets in the single crochet between arches. Continue this pattern around the row: 5 half double crochets on each full arch and 3 half double crochets on each half arch, with 1 half double crochets between each arch.
Make 1 chain and turn your work.


Row 5: Make 1 single crochet. Chain 6, skip 5 stitches, and make 1 single crochet. Chain 6, skip 5 stitches, and make 1 single crochet. Repeat this pattern across the row.
Chain 2 and turn your work.
Row 6: Make 1 half double crochet in the first stitch. Work 6 half double crochet around the first chain arch. Make 1 half double crochet in the single crochet between the first and second arch. Continue with 6 half double crochet around each arch and 1 half double crochet between arches.
Turn the work without adding a chain.
Row 7: Chain 7, skip 4 stitches, and make 1 sc – this forms the first half-arch. Chain 7, skip 6 stitches, and make 1 sc – this forms the first full arch.Repeat this pattern so you have 13/19 arches in total.Chain 4, skip 2 stitches, and finish with a dc in the last stitch – this forms the second half-arch. After row 7, you should have 2 half-arches and 3/19 full arches.
Chain 2 and turn.
Row 8: Work 4 hdc around the first half-arch. Make 1 hdc in the single crochet between arches. Work 7 hdc around the next arch and 1 hdc in the single crochet between arches. Continue this pattern across the row: 7 hdc on full arches and 4 hdc on half arches.
Chain 1 and turn.
Note: For the child size, skip Rows 9–10 (Step 5) and continue to the next step.
Row 9: Make 1 sc. Chain 8, skip 7 stitches, and make 1 sc. Chain 8, skip 7 stitches, and make 1 sc. Repeat this pattern across the row. Chain 2 and turn.
Row 10: Make 1 hdc in the first stitch. Work 8 hdc around the first chain arch. Make 1 hdc in the single crochet between the first and second arch. Continue with 8 hdc around each arch and 1 hdc between each arch. Chain 1 and turn.
Edging
Work slip stitches along all arches. At the last stitch, make 2 single crochet in the corner, then continue with single crochet along the edge at the collar opening. Make 2 single crochet in the top corner, then continue with 3 single crochet per arch around the chain stitches at the neckline. Repeat with 2 single crochet in the opposite corner, and finish with single crochet along the other edge of the collar opening.
Cut the yarn and weave in the end on the back of the collar.


Ties
Pick up a loop at one of the corners.
Chain 50/60 sts.
Skip the first stitch, then work slip stitches (sl st) along the chain, and finish with a sl st into the edge of the collar. Cut the yarn and weave in the end on the back of the collar. Tie a double knot with the other yarn end and hide the ends.
Repeat to make a tie at the other corner.
Your collar is now finished! Great job ☺


Abbreviations
- MR = magic ring
- ch = chain
- sl st = slip stitch
- sc = single crochet
- dc = double crochet
- (...) = indicates the number of stitches in that round
- *...* = repeat everything within the asterisks the number of times specified
Pattern
Crocheting Granny Squares
Start by crocheting one test granny square. You will need to measure this square to determine how to crochet the remaining 15 squares. Everyone crochets with different tension, so to ensure your cardigan turns out the correct size, follow the instructions below carefully.
- If your square turns out larger than the measurements below, try using a 6 mm hook or crochet one round fewer on each square.
- If your square turns out too small, you can block it to the correct size, or crochet one extra round and measure the width.
- You can also try using single crochet stitches, but this will use more yarn and require extra work.
Size XS/S
- Crochet 7 rounds
- Each side should measure approx. 24–25 cm
- Total squares: 16
Size S/M
- Crochet 8 rounds
- Each side should measure approx. 26–27 cm
- Total squares: 16
Size L/XL
- Crochet 8–9 rounds
- Body squares: sides should measure 30–31 cm (9 rounds × 8 squares)
- Sleeve squares: sides should measure 26–27 cm (8 rounds × 8 squares)
Granny Squares
If you want your cardigan to be longer, you can continue crocheting granny stripes along the bottom edge.
You will make 16 granny squares in the color combinations of your choice. Two squares across should measure the width of your back (horizontally) and extend slightly down the arms. The fit is oversized.
Granny Squares Instructions
Make 16 squares. Squares for size S/M should measure approx. 24–26 cm.
Start with the color you want in the center of your squares. Make 1 magic ring (MR) or 4 chain stitches (ch) joined with a slip stitch (sl st) to form a ring.
Round 1: Ch 3 (counts as first dc), 2 dc, ch 1, *3 dc, ch 1* ×3. Join with sl st in the 3rd ch at the beginning of the round. 812)
Change color or continue with the same color.
Round 2: Attach yarn with sl st in a corner, ch 3 (counts as first dc), 2 dc, ch 1, 3 dc, *skip to next corner, 3 dc, ch 1, 3 dc* ×3. Join with sl st in the 3rd ch at the beginning of the round, fasten off and cut yarn (24)
Change color or continue with the same color.
Round 3
Attach yarn with sl st in a space in the middle of a side (not a corner), ch 3 (counts as first dc), 2 dc
- *skip to next corner, 3 dc, ch 1, 3 dc, skip to next middle space on the side, 3 dc* ×3
- Skip to next corner, 3 dc, ch 1, 3 dc
- Join with sl st in the 3rd ch at the beginning of the round, fasten off and cut yarn
Total stitches: 36 dc
Change color or continue with the same color.
Round 4
- Work as Round 3: 3 dc in each middle space,
- *3 dc, 2 ch, 3 dc* in each corner
- Fasten off and cut yarn
Total stitches: 48 dc
Change color or continue with the same color.
Round 5
- Work as Round 4: 3 dc in each middle space,
- *3 dc, 1 ch, 3 dc* in each corner
- Fasten off and cut yarn
Total stitches: 60 dc
Montering
Steg 1. När du är klar med dina rutor så lägger du dem som nedan schema och virkar ihop alla rutor med varandra. Virka ihop rutorna på rätsidan av rutorna (håll "fula" sidorna mot varandra när du virkar ihop).
Virka i de maskor som är närmast mot varandra. Så i bakre maskbågen av den första rutan och främre maskbågen av den bakre rutan. När du gjort detta får du ett stort stycke med alla rutor som sitter ihop. OBS! Virka INTE ihop de rutor som har blå markering i nedan schema (det är öppningen på din kofta). Se videon nedan för att se tekniken du kan använda för att virka ihop rutorna. Det finns flertalet tekniker och du kan använda den teknik du tycker är finast, detta är endast ett exempel.
Steg 2. Efter de du virkar ihop alla rutor så följer du stegen nedan om hur du sätter ihop hela stycket med alla rutor till en kofta.
a) Virka ihop de svarta/grå delarna med varandra. Detta blir en ärm.
b) Virka ihop de röda delarna med varandra. Detta blir andra ärmen.
c) Virka ihop de rosa delarna med varandra. Detta är nedanför ärmen och blir sidan på din kofta.
d) Virka ihop de beiga delarna med varandra. Detta är nedanför andra ärmen och blir andra sidan på din kofta.
Nu har du monterat hela koftan!

Sista steget är att virka band så att du kan knyta din kofta.
Rad 1: Virka en kedja av lm, så långt som du önskar ditt band.
Rad 2: Vänd och virka fm i alla lm, med start i 2:a lm. Virka hela vägen tills slutet av din kedja.
Totalt virkar du 2 rader per band. Du virkar totalt 4 st band om du vill kunna knyta både uppe i halsen och i midjan.
Fäst dem sedan uppe vid halsen och i midjan på var sin sida av koftan. Se bilden i steg 4 hur det ser ut när det är klart.
Din kofta är klar :)
The rights to this pattern belong to MYO Make Your Own. The pattern or its pictures may not be copied, shared or resold either in parts or in its entirety, but you may sell items you have crocheted from this pattern. If you have questions about the pattern, contact MYO at hello@makeyourown.se.

%20(4).jpg)
.jpg)
%252520(6).webp)


