
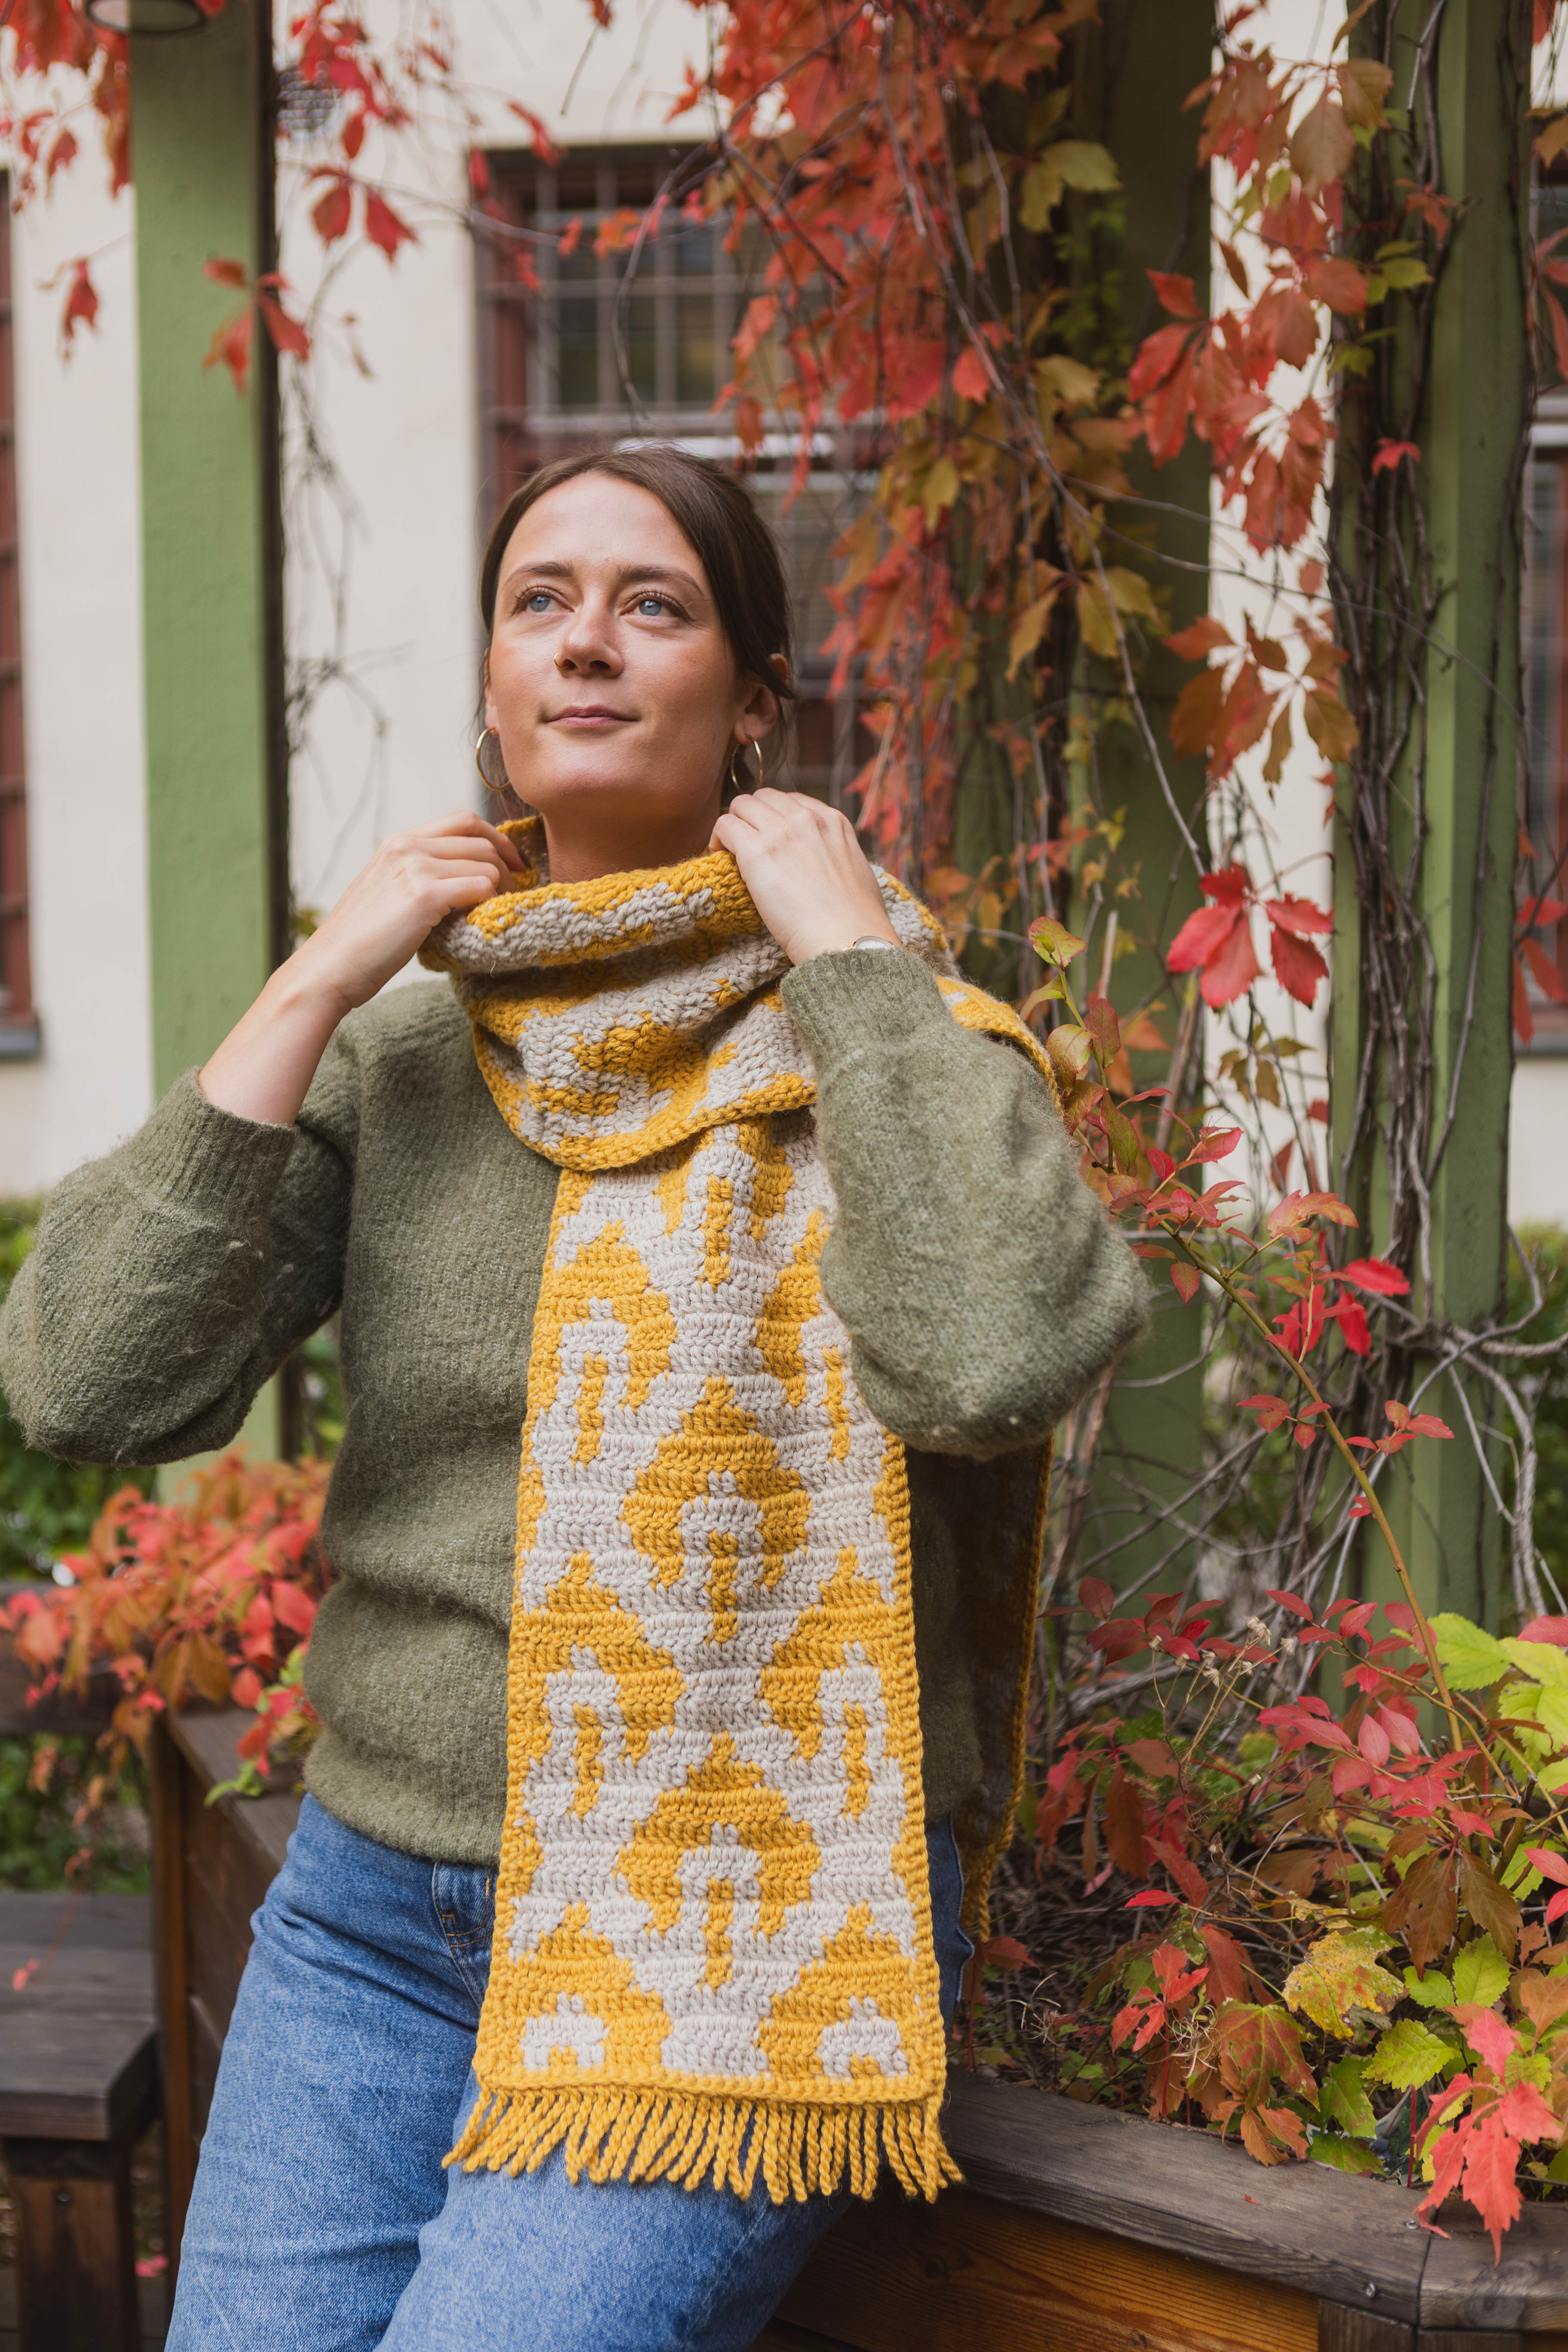
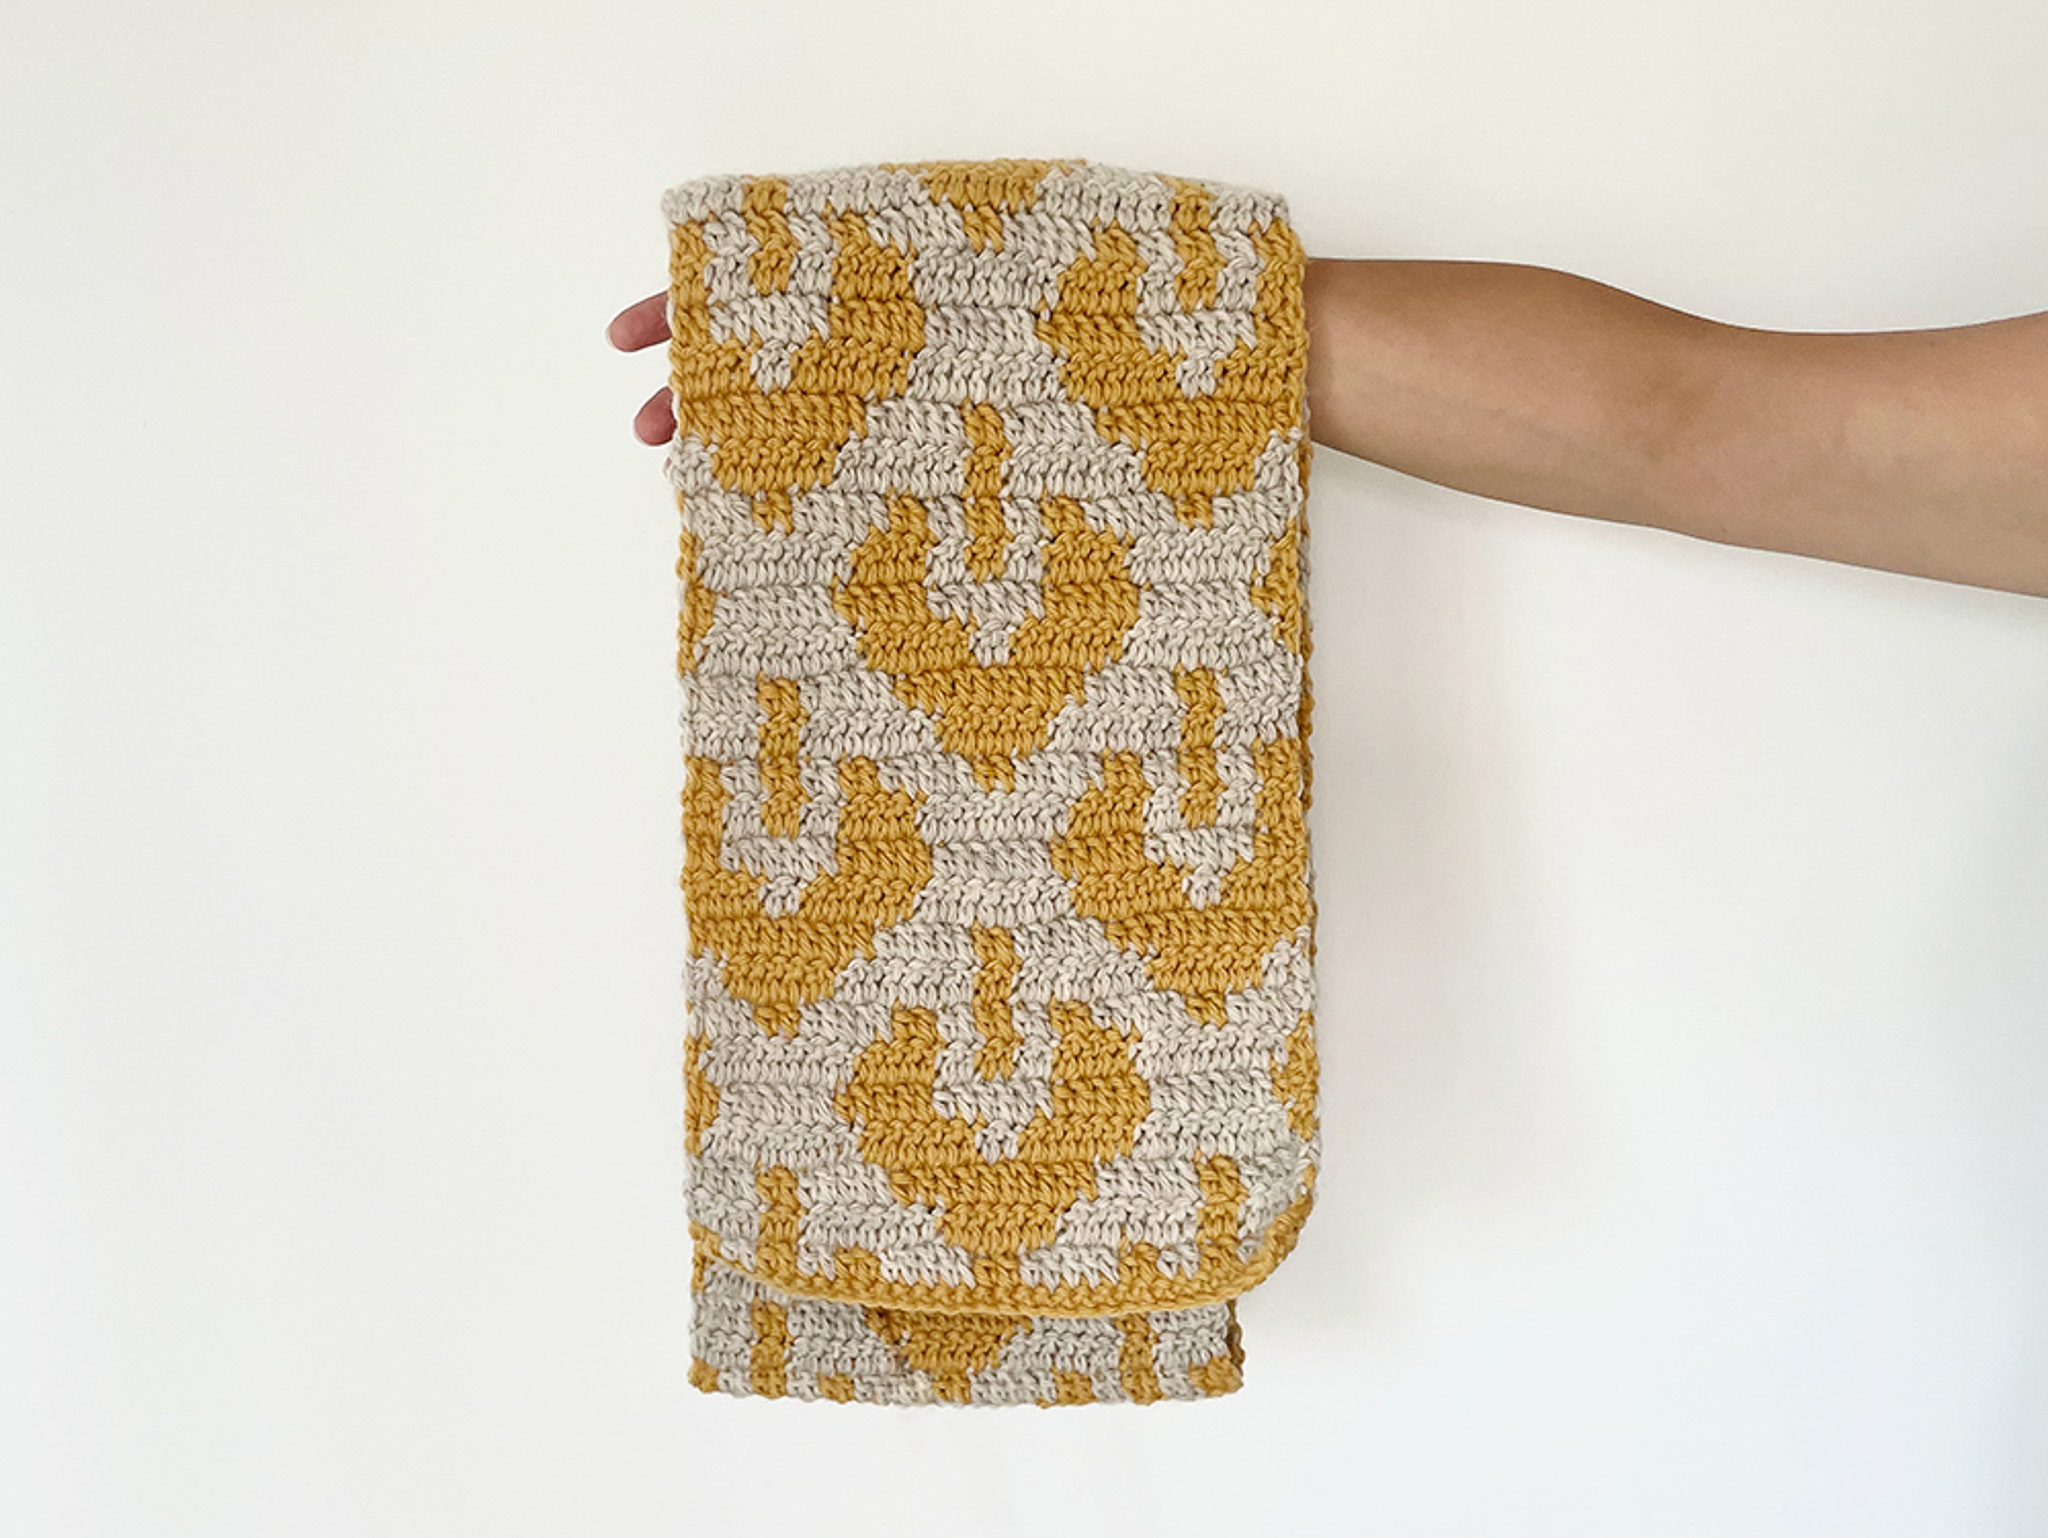
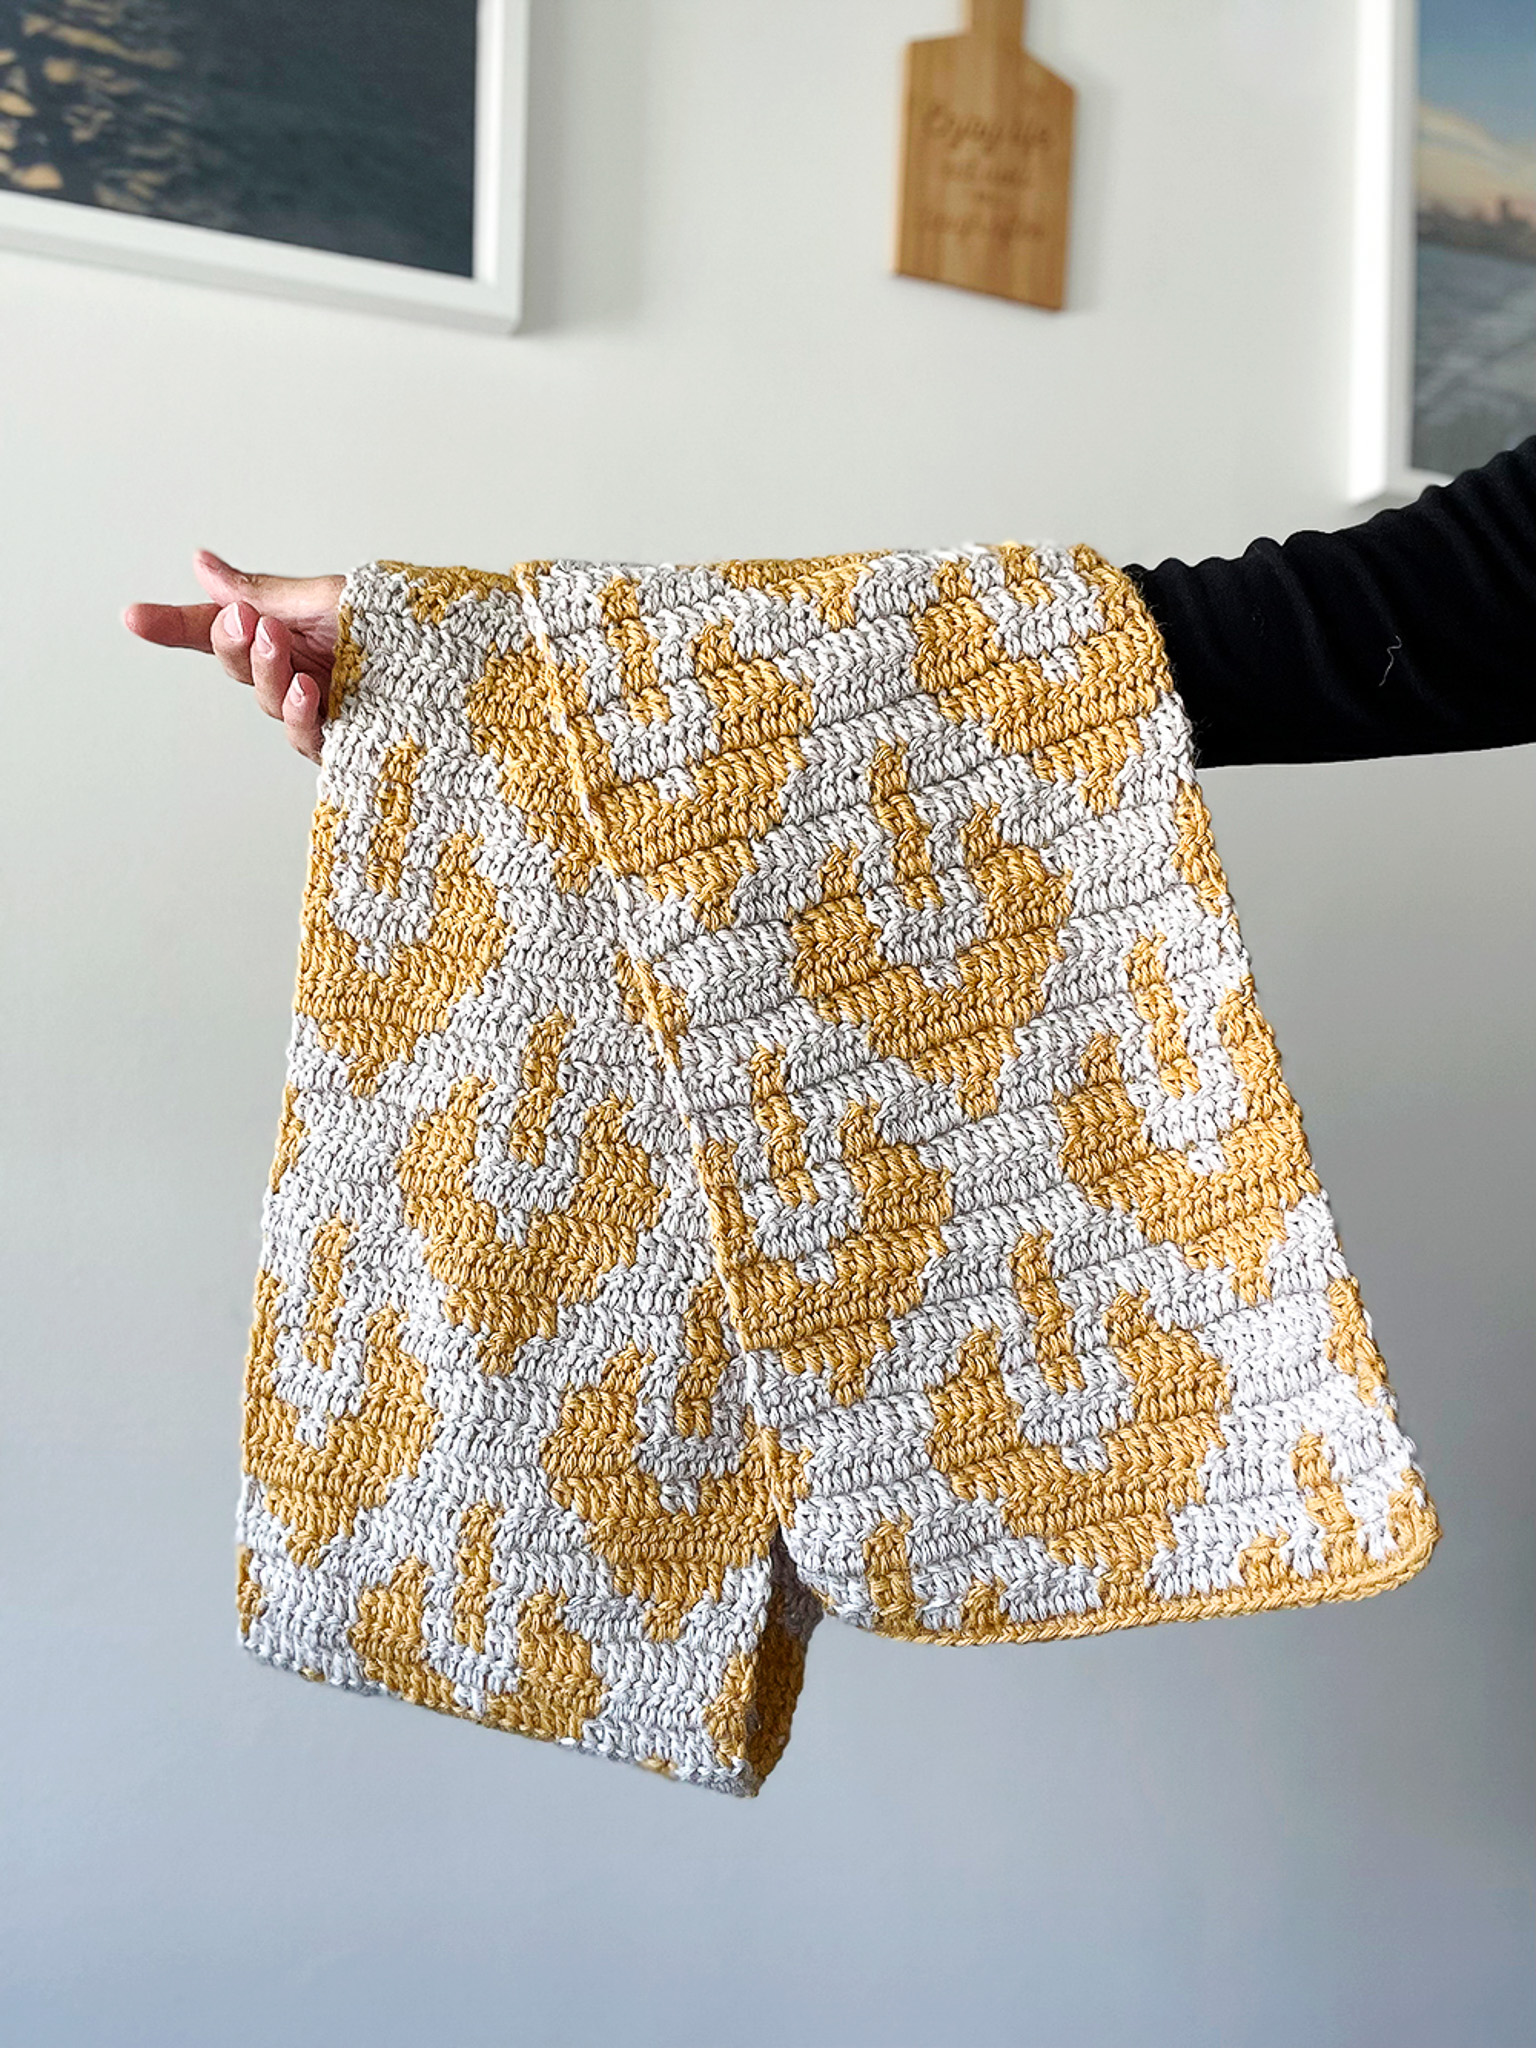
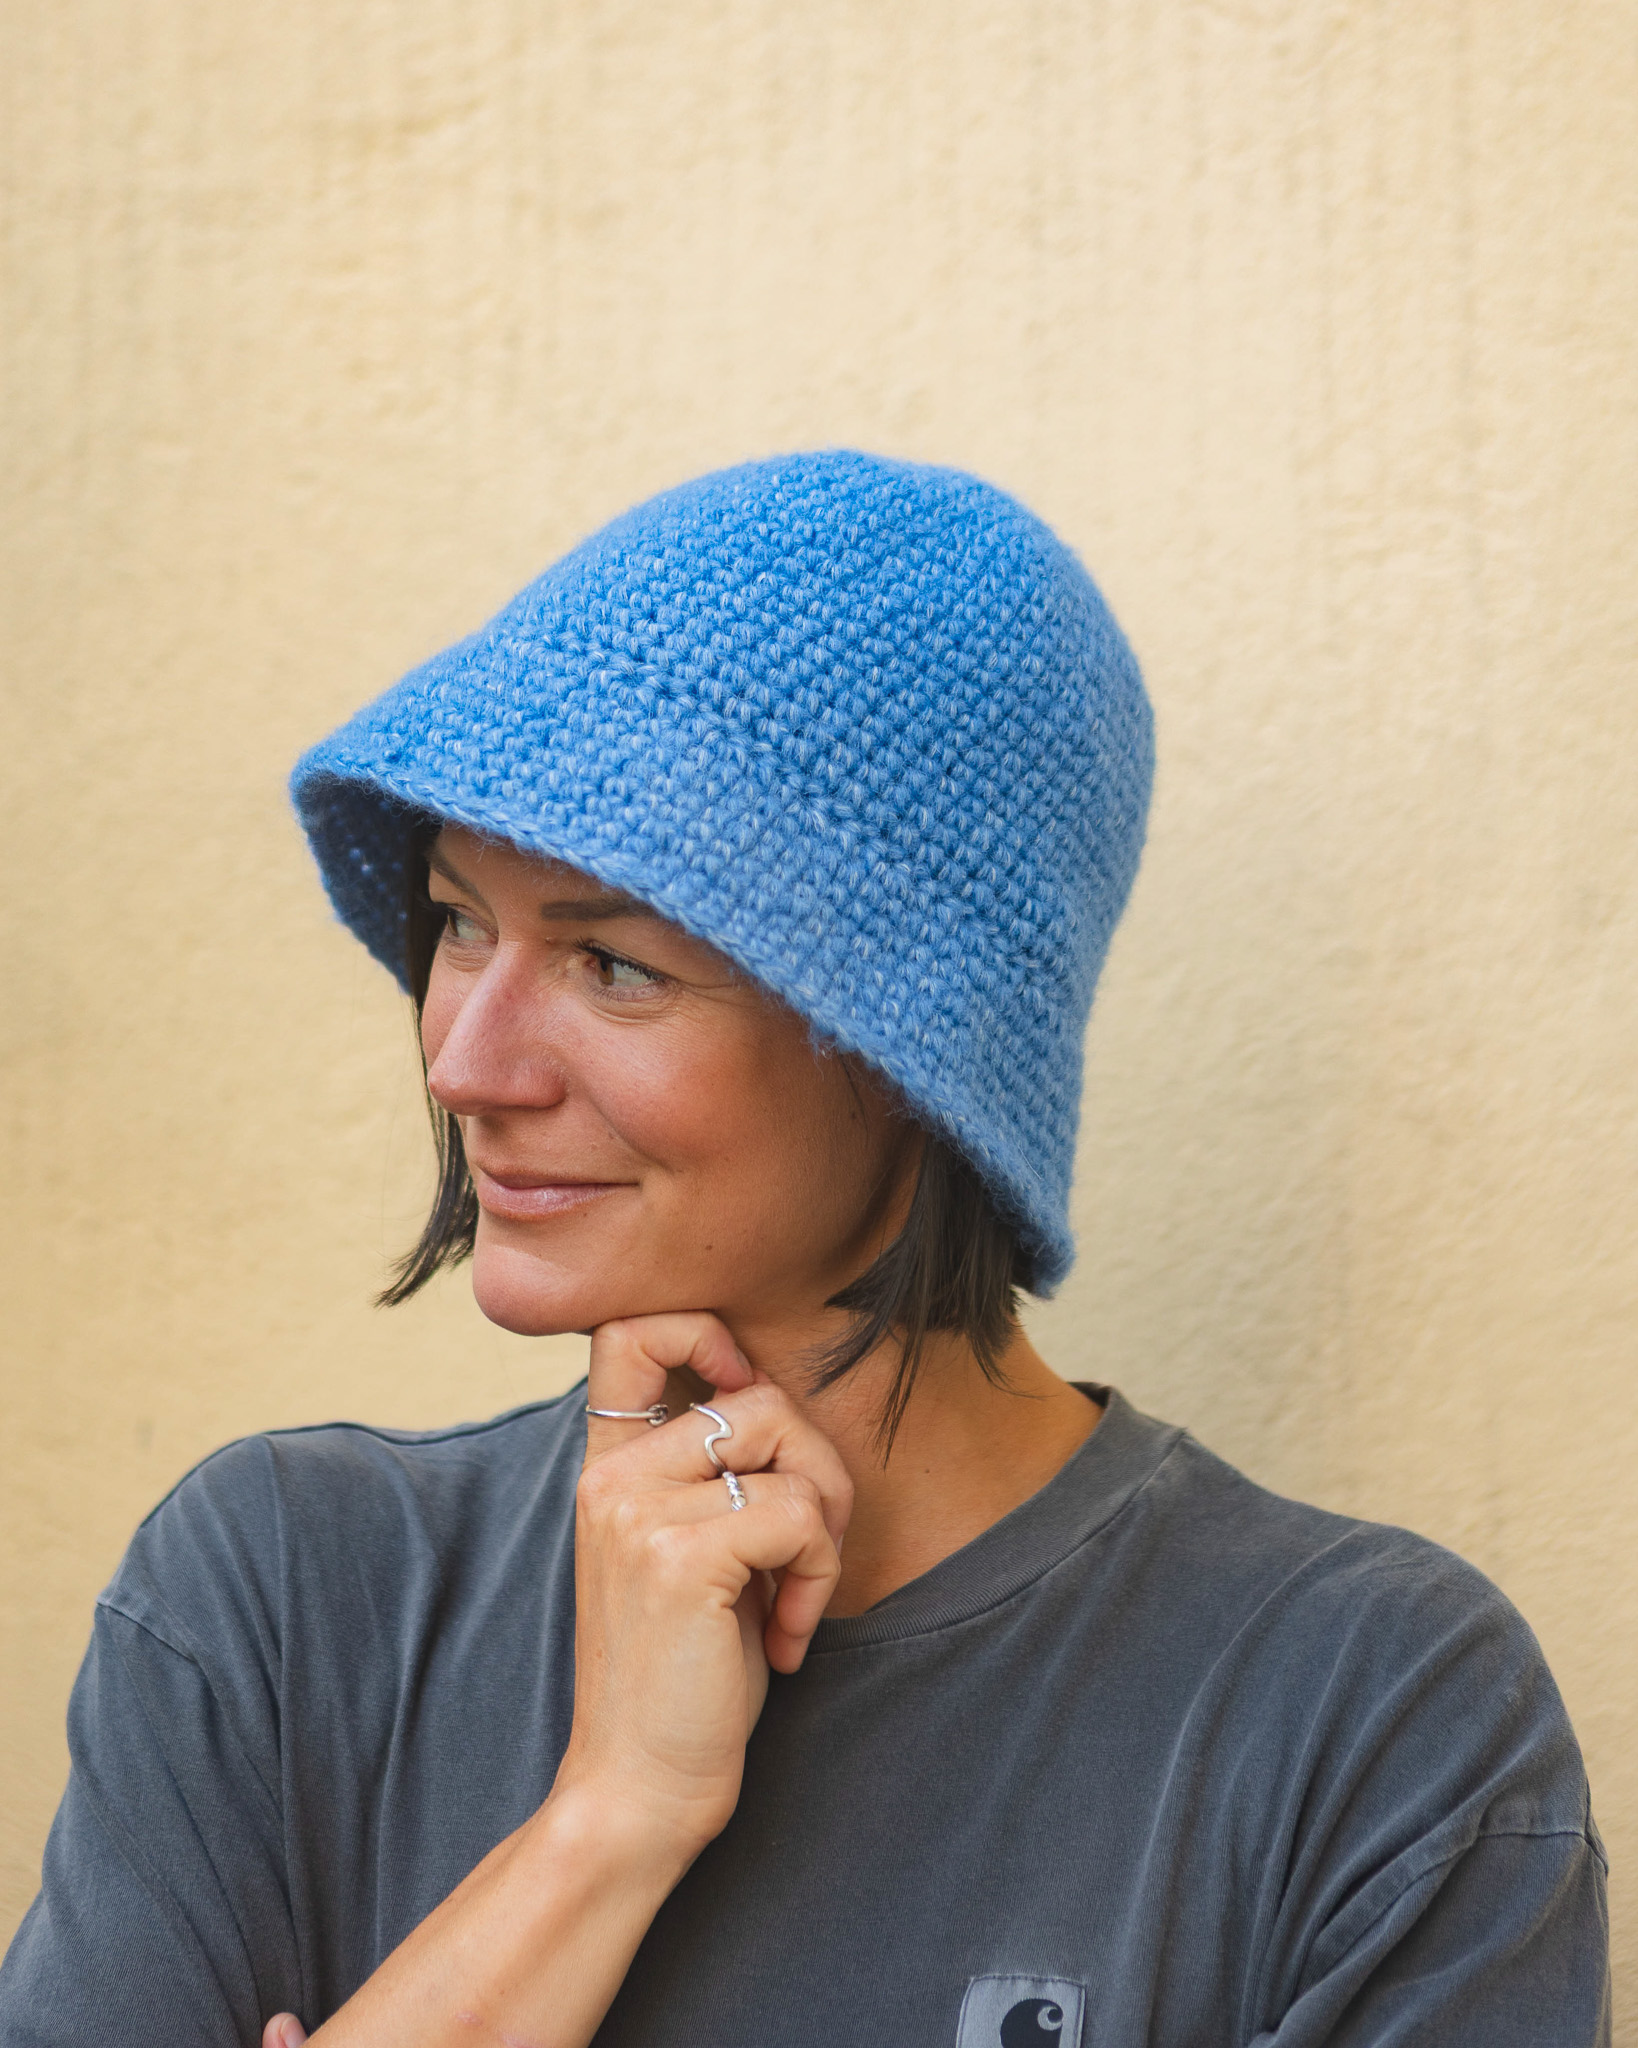
Crochet scarf “Rory”
Crochet a cozy and beautiful scarf
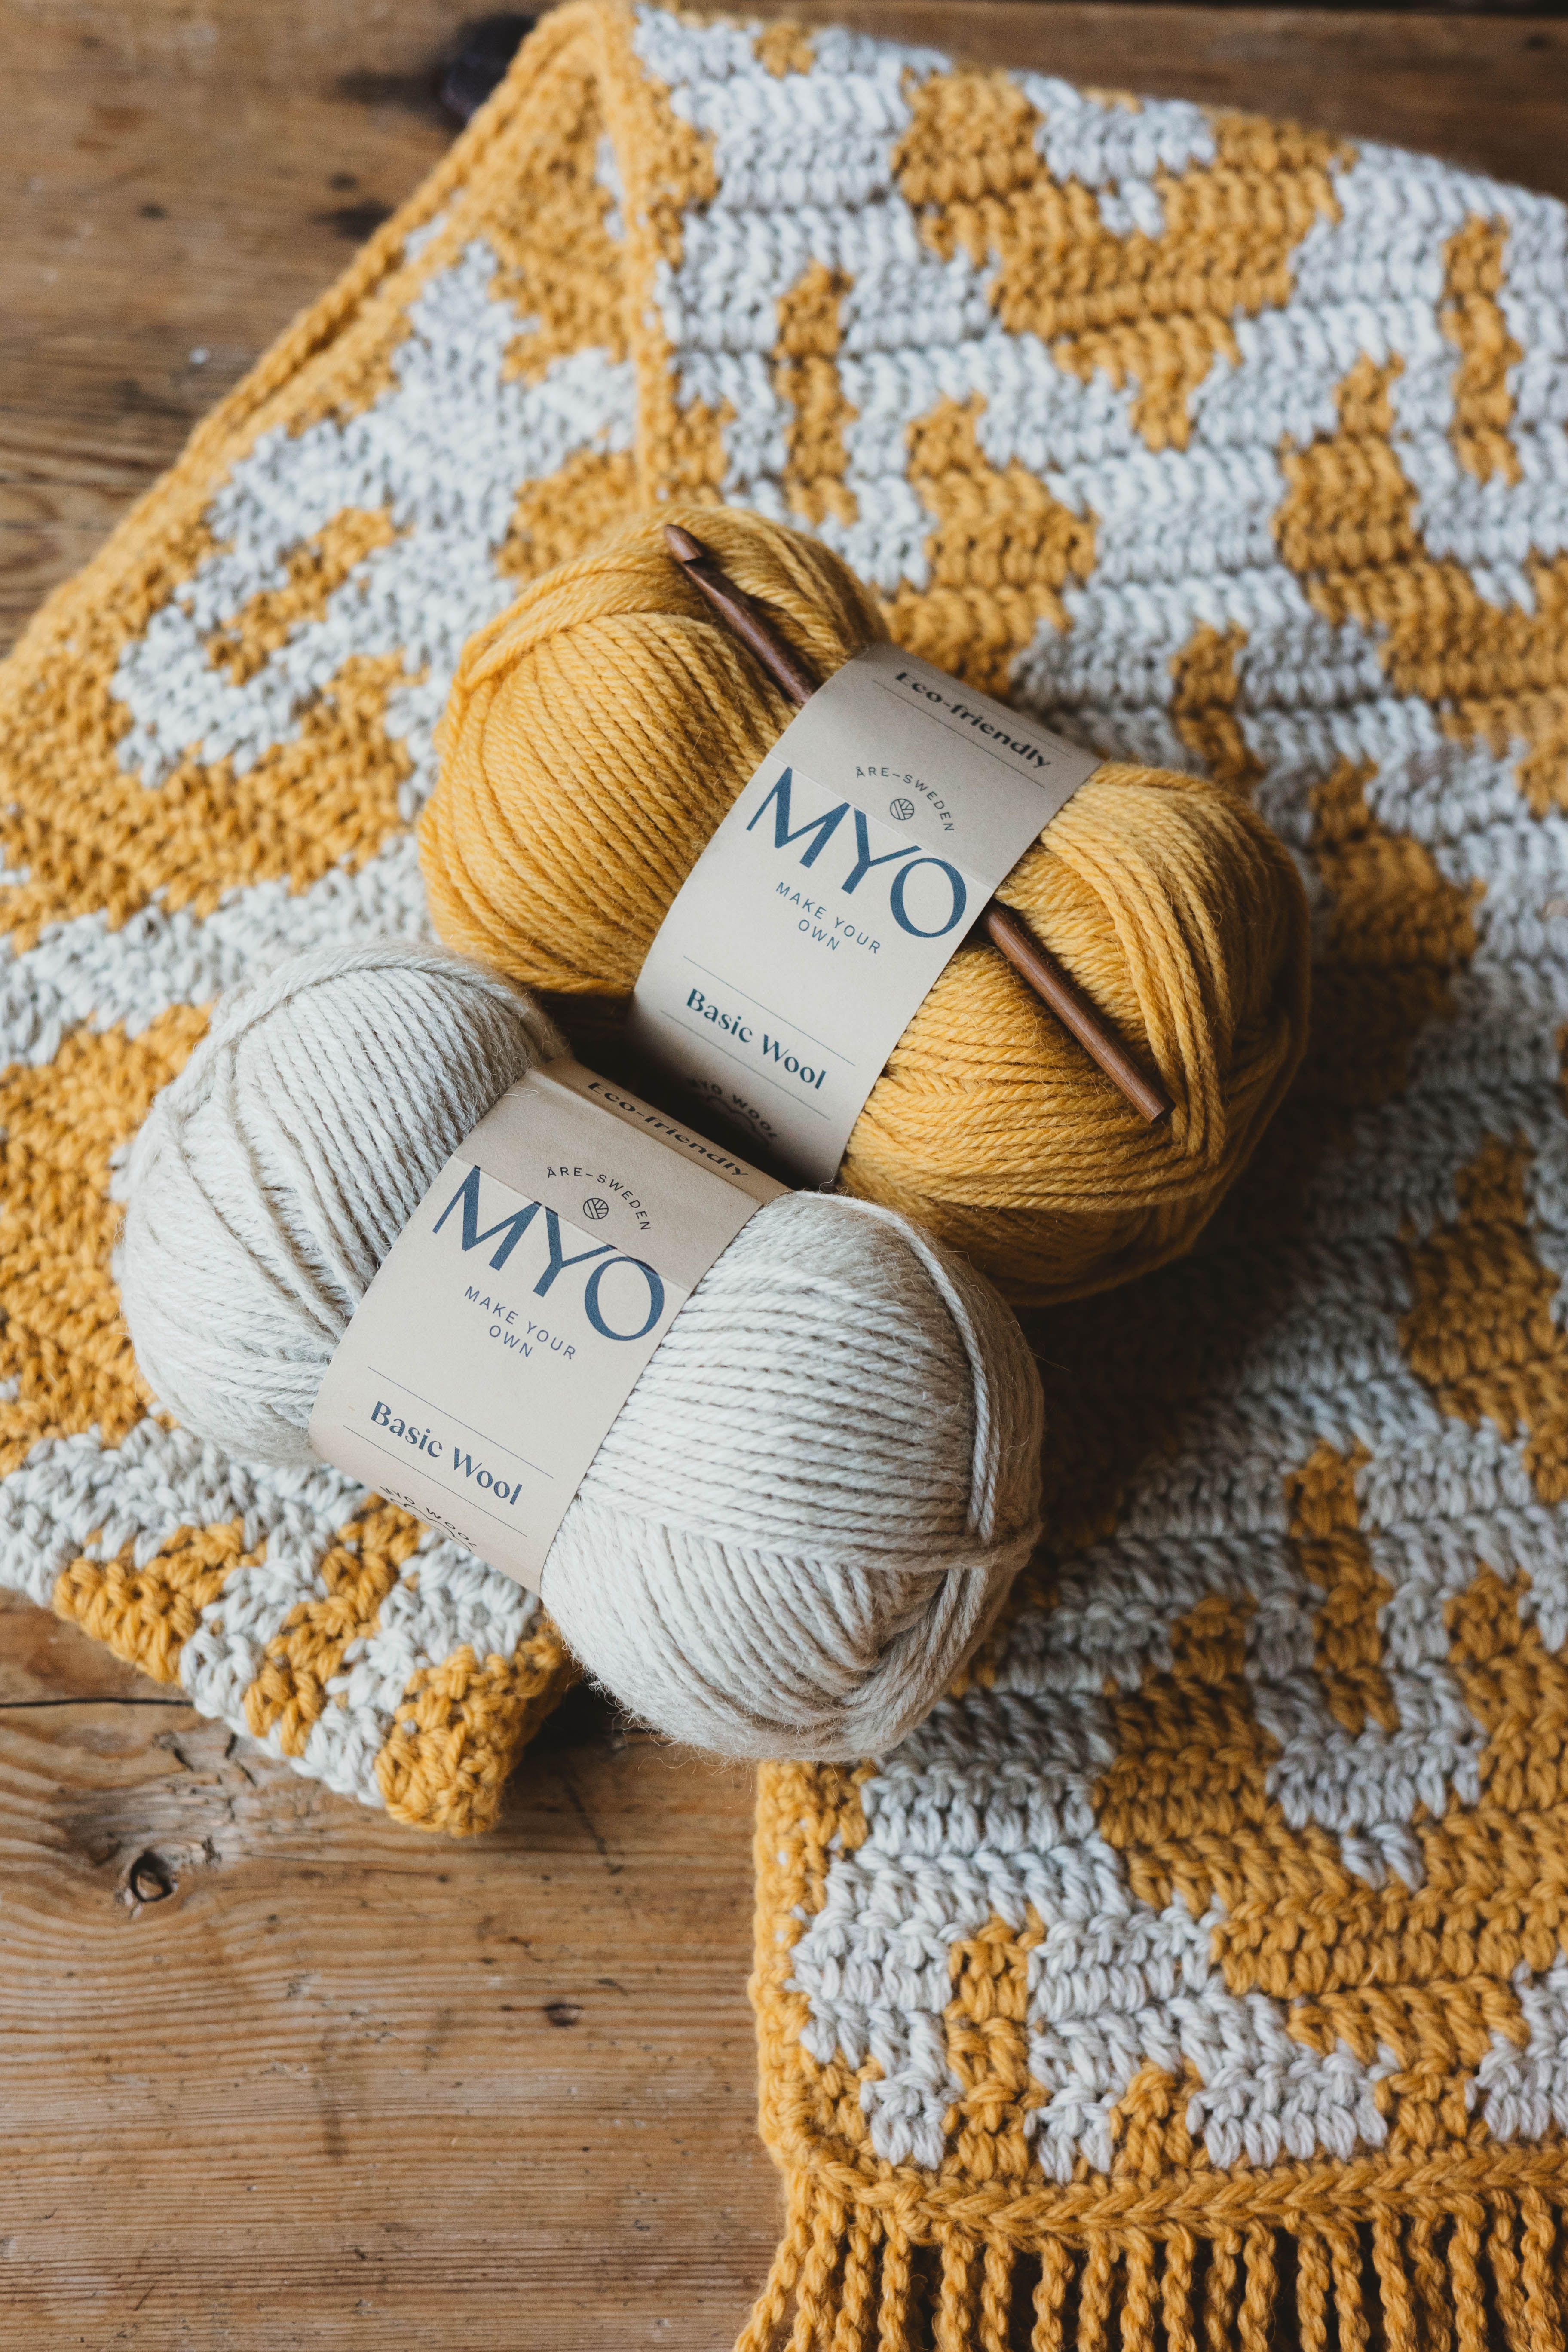
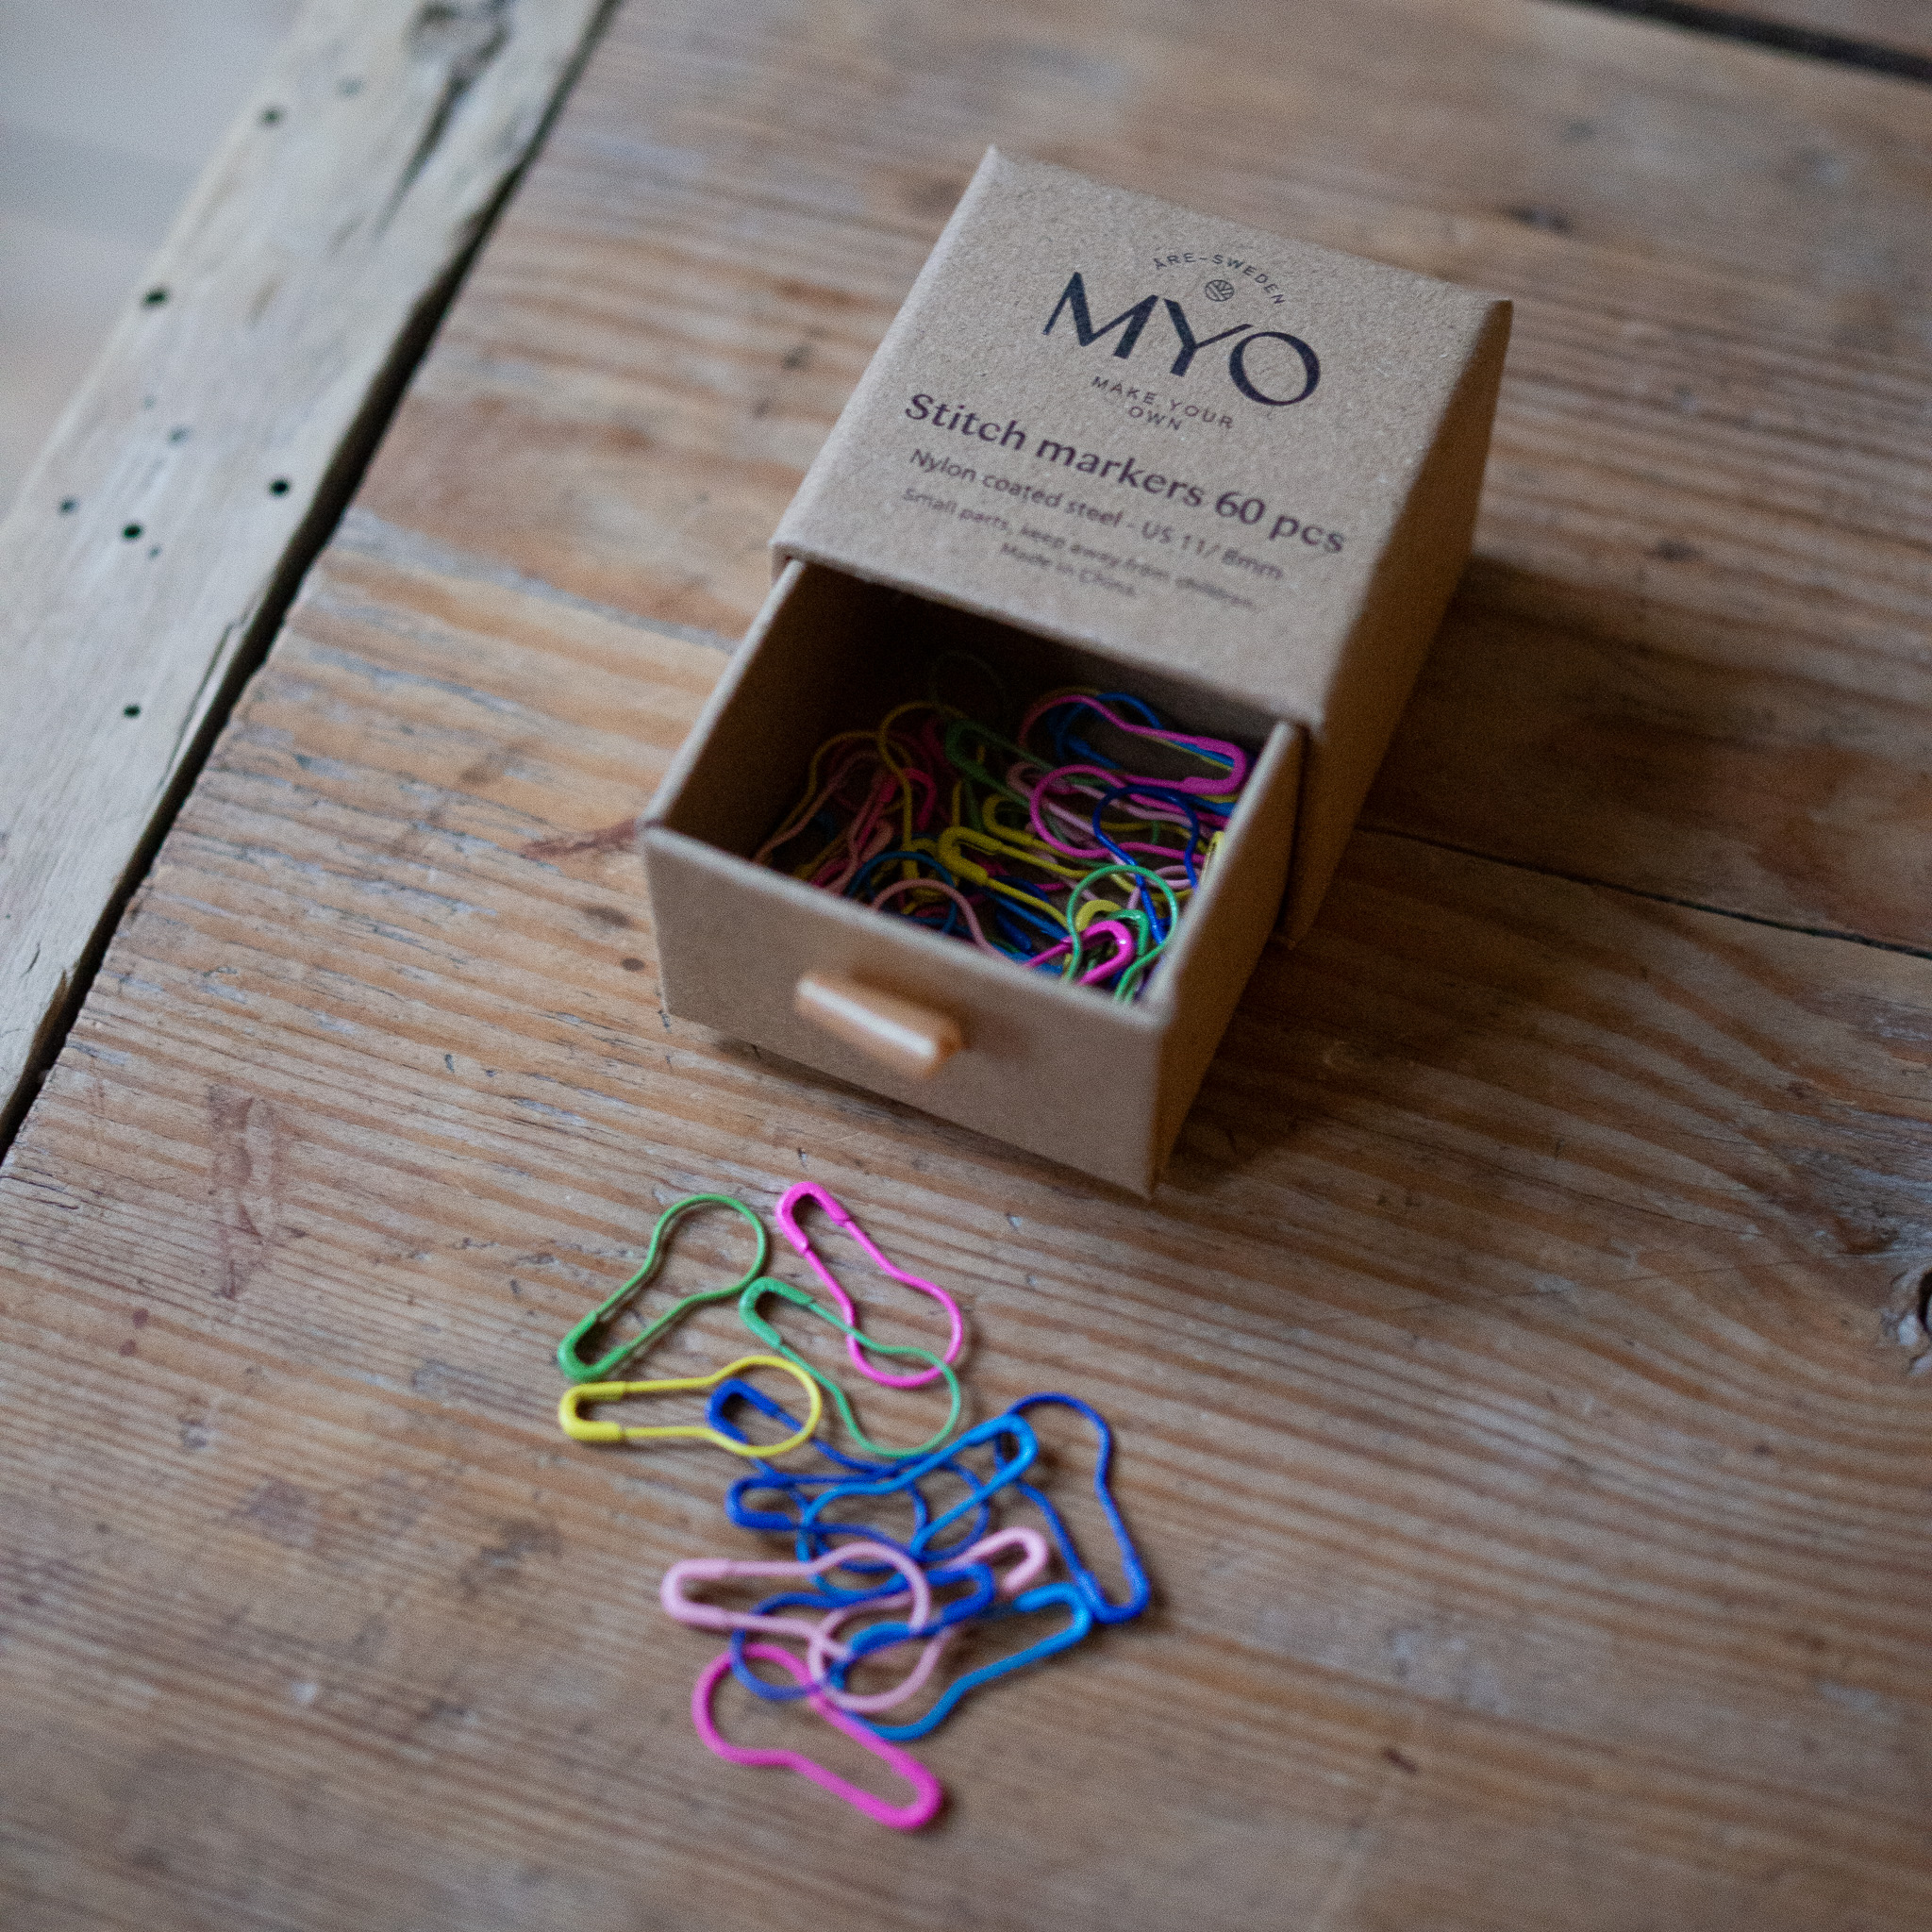
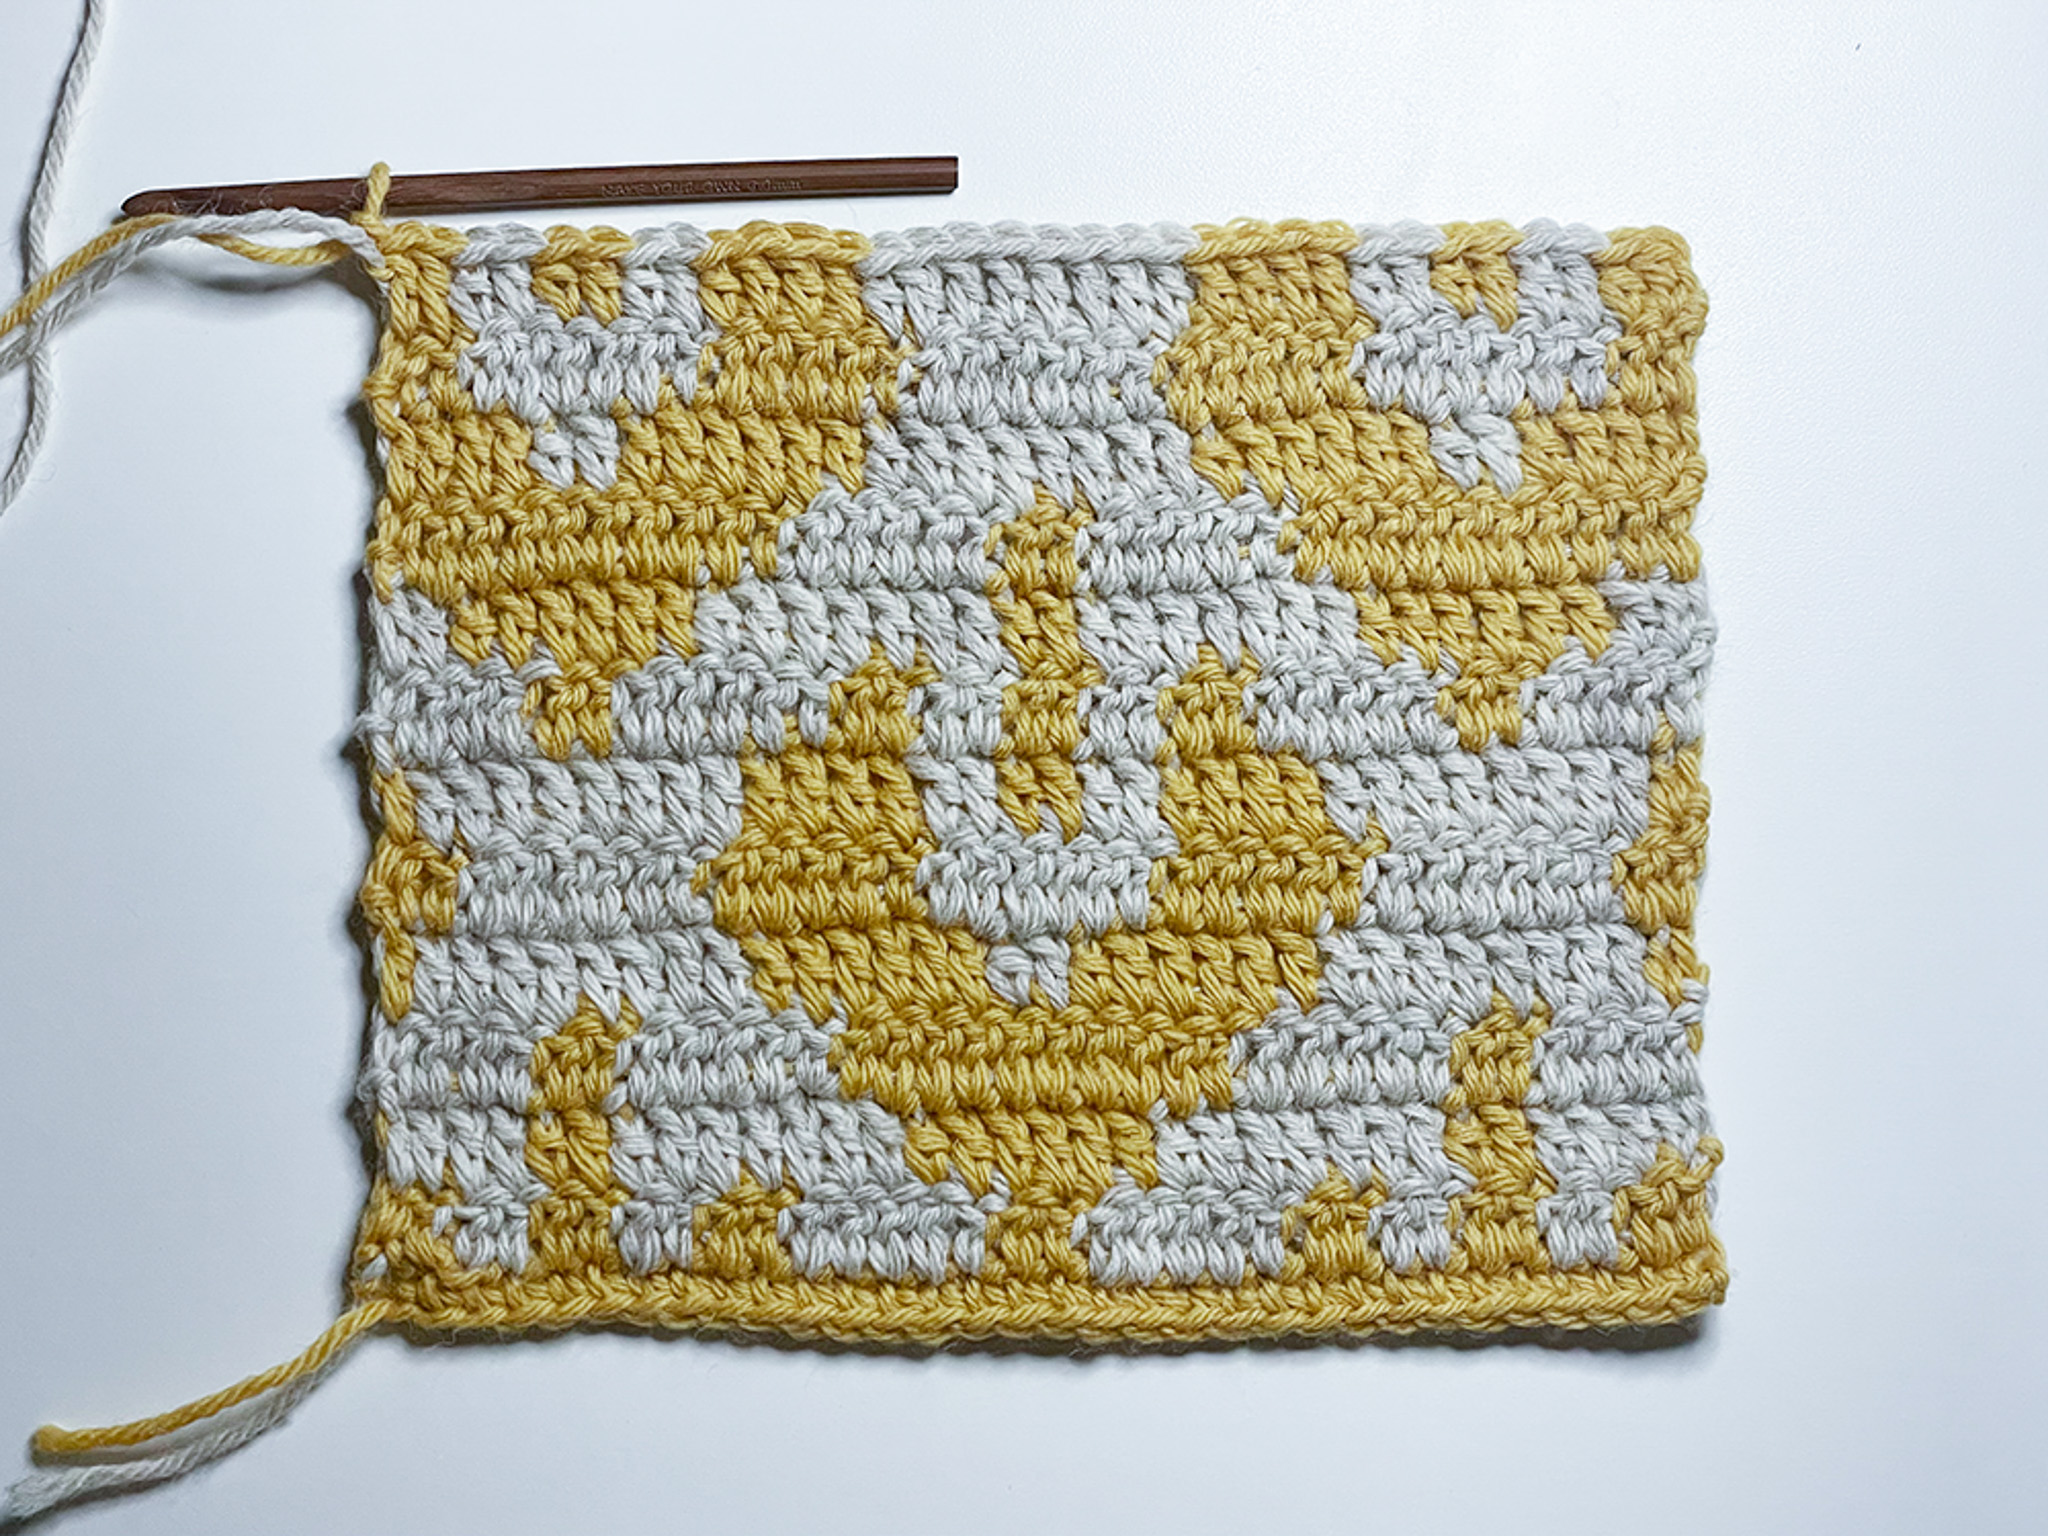
Here is a pattern perfect for those who want to try crocheting with two colors! The scarf is worked flat, and the pattern repeats in twelve steps, making it ideal for beginners wanting to learn colorwork. It’s just as fun for experienced crocheters who want quick results with a pattern that looks more complicated than it actually is. You can choose to try a technique that gives your scarf straight side edges — or crochet as you usually do. You will need MYO Basic Wool, a 6 mm crochet hook, a sewing needle (to weave in loose ends), scissors, and optionally 1-2 stitch markers.
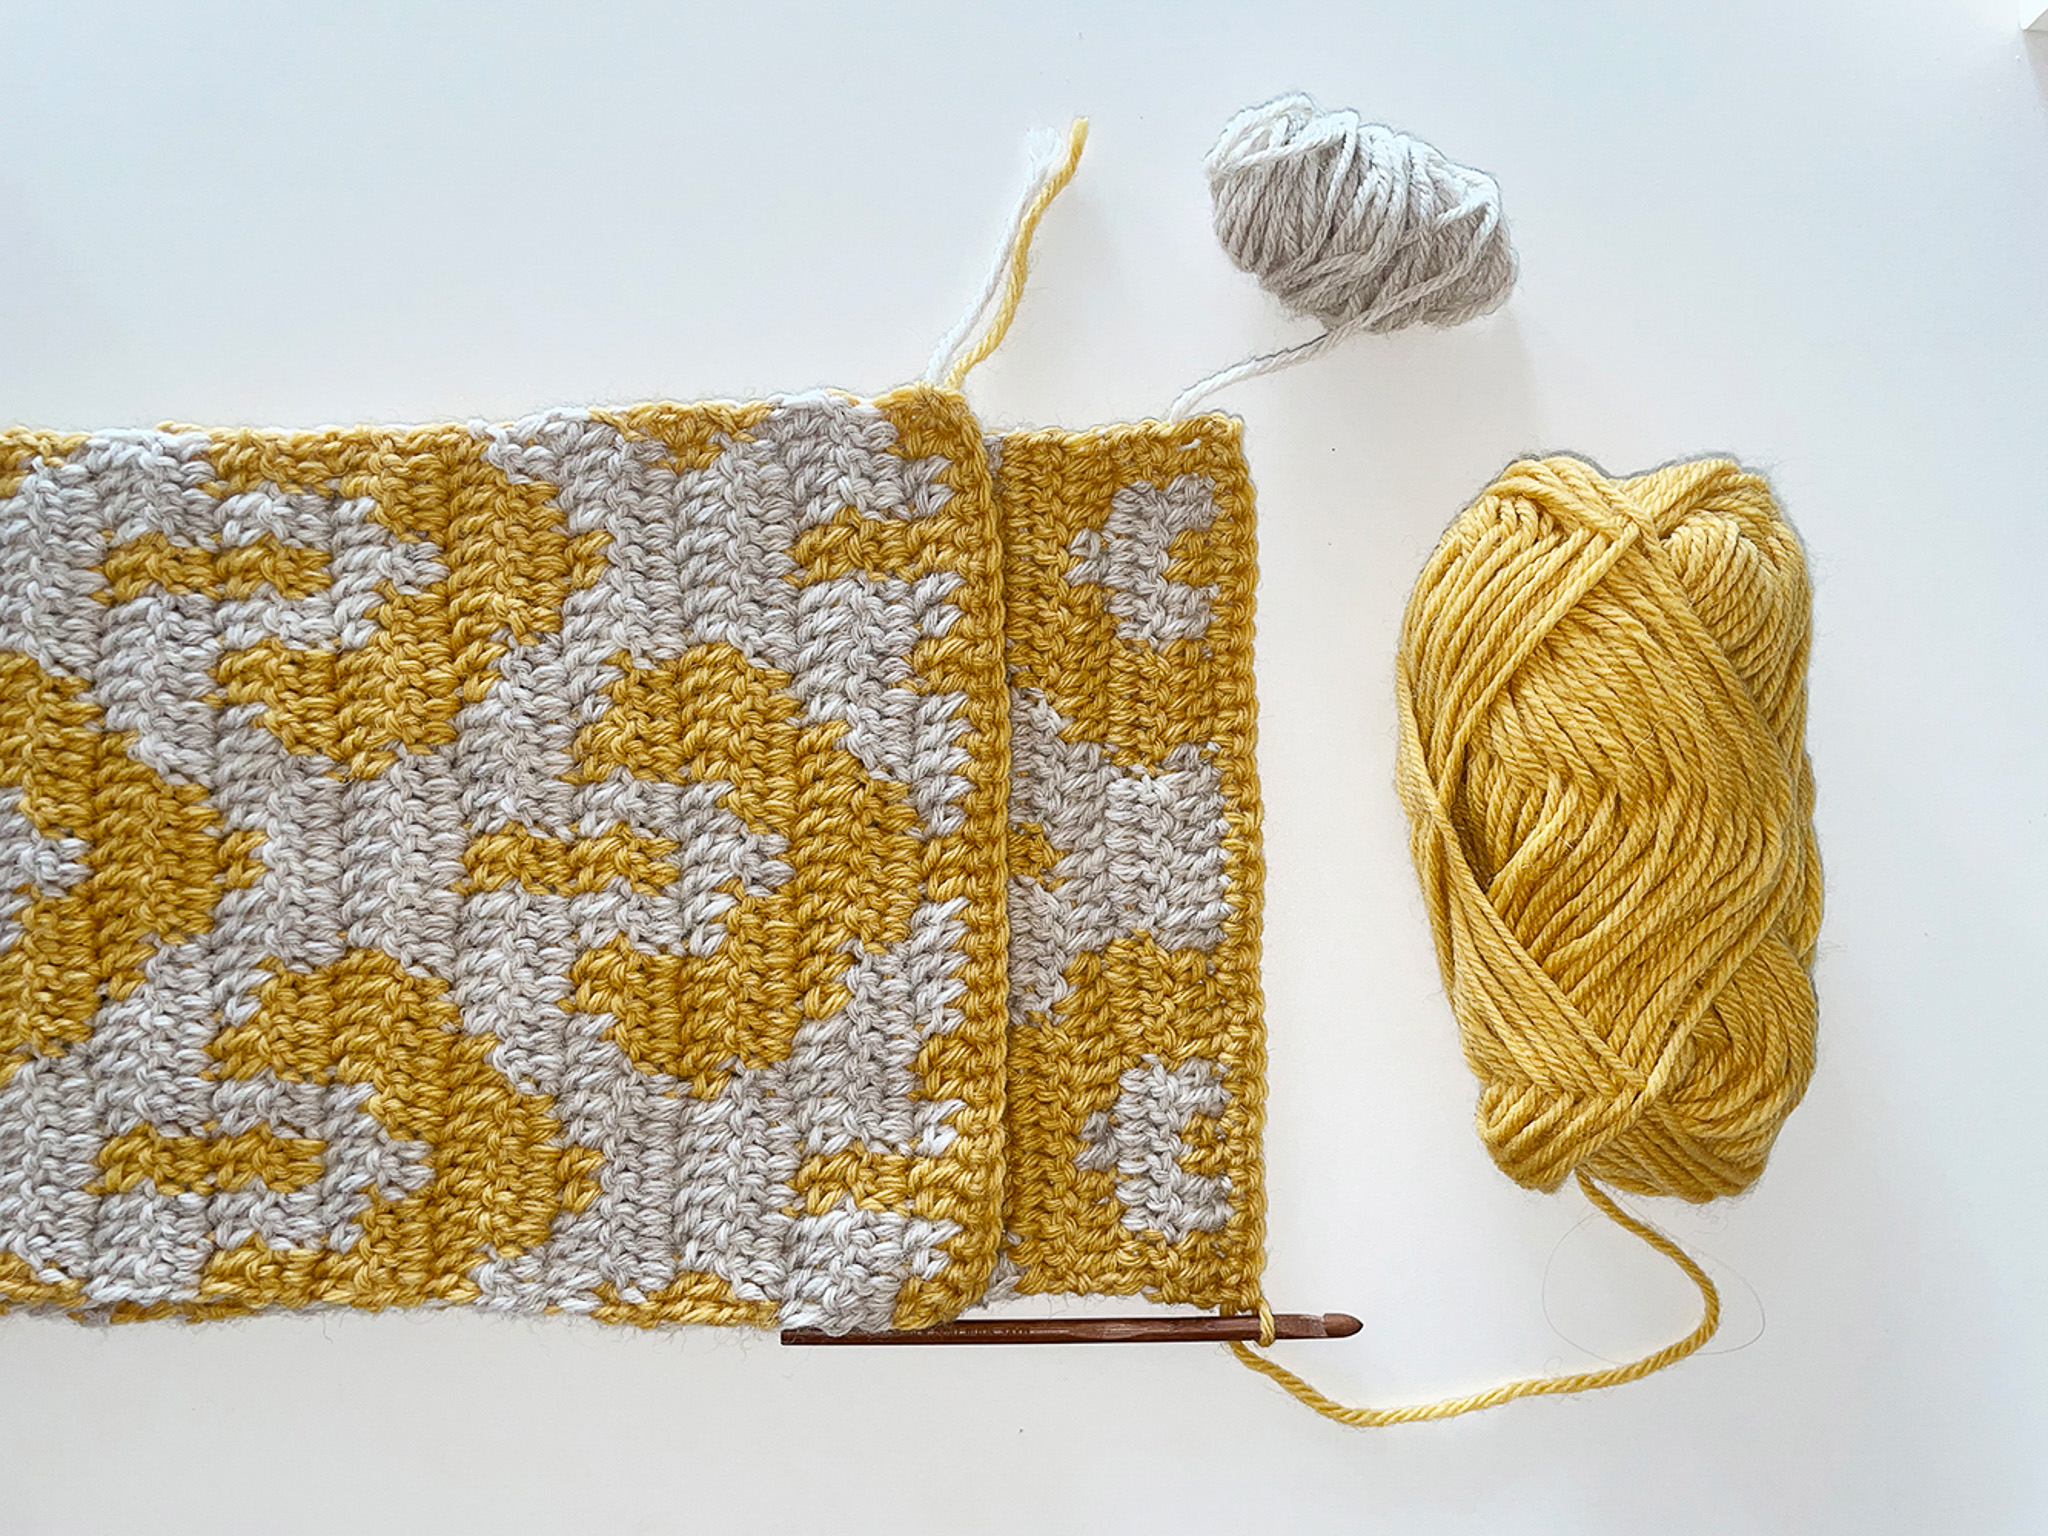
Yarn Consumption: About 400 g for a scarf approximately 23 cm wide and 176 cm long (without fringes). You will need more of the background color (beige) than the pattern color (rusty yellow). If you want to make the pattern about 17 cm longer (which is one more repeat of rows 2 through 13), you will need an extra skein of beige. For longer scarves with more repeats, you will need more skeins of both colors — but of course, it also depends on your tension (how tight or loose you crochet).
Note: In this instruction, we use videos from our technique school along with pictures. However, videos are available only for certain steps.

Here's how to do it
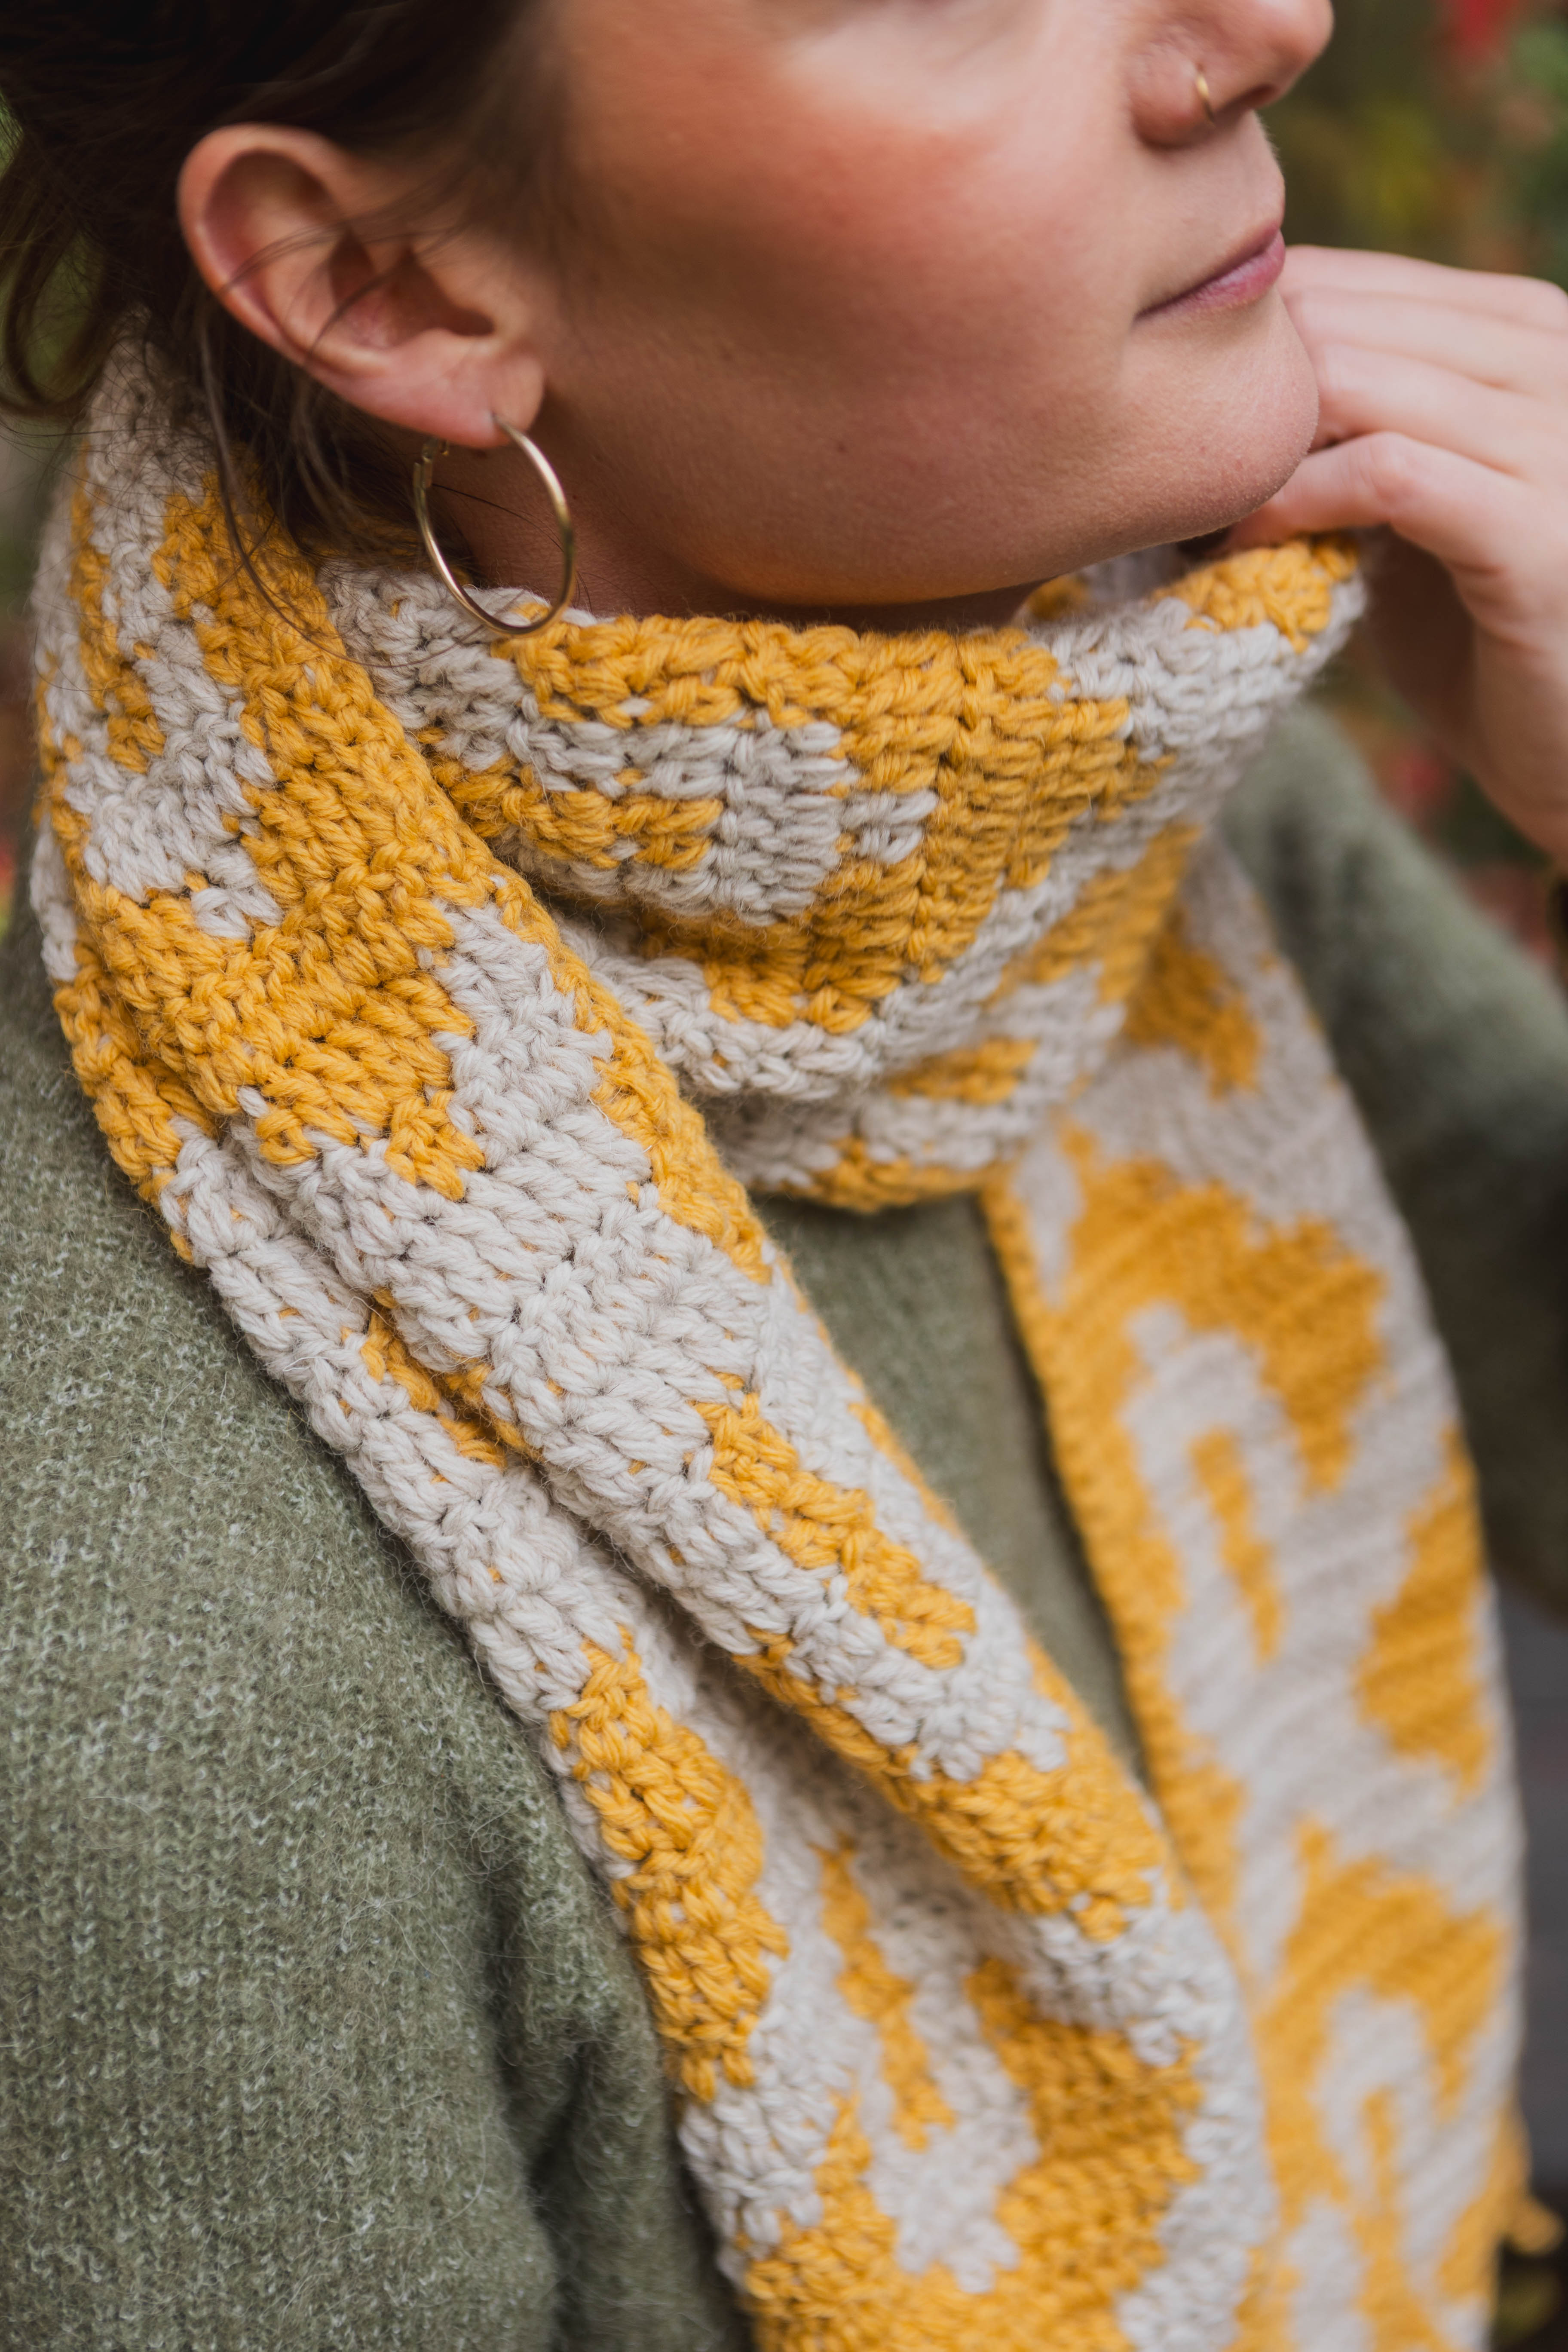
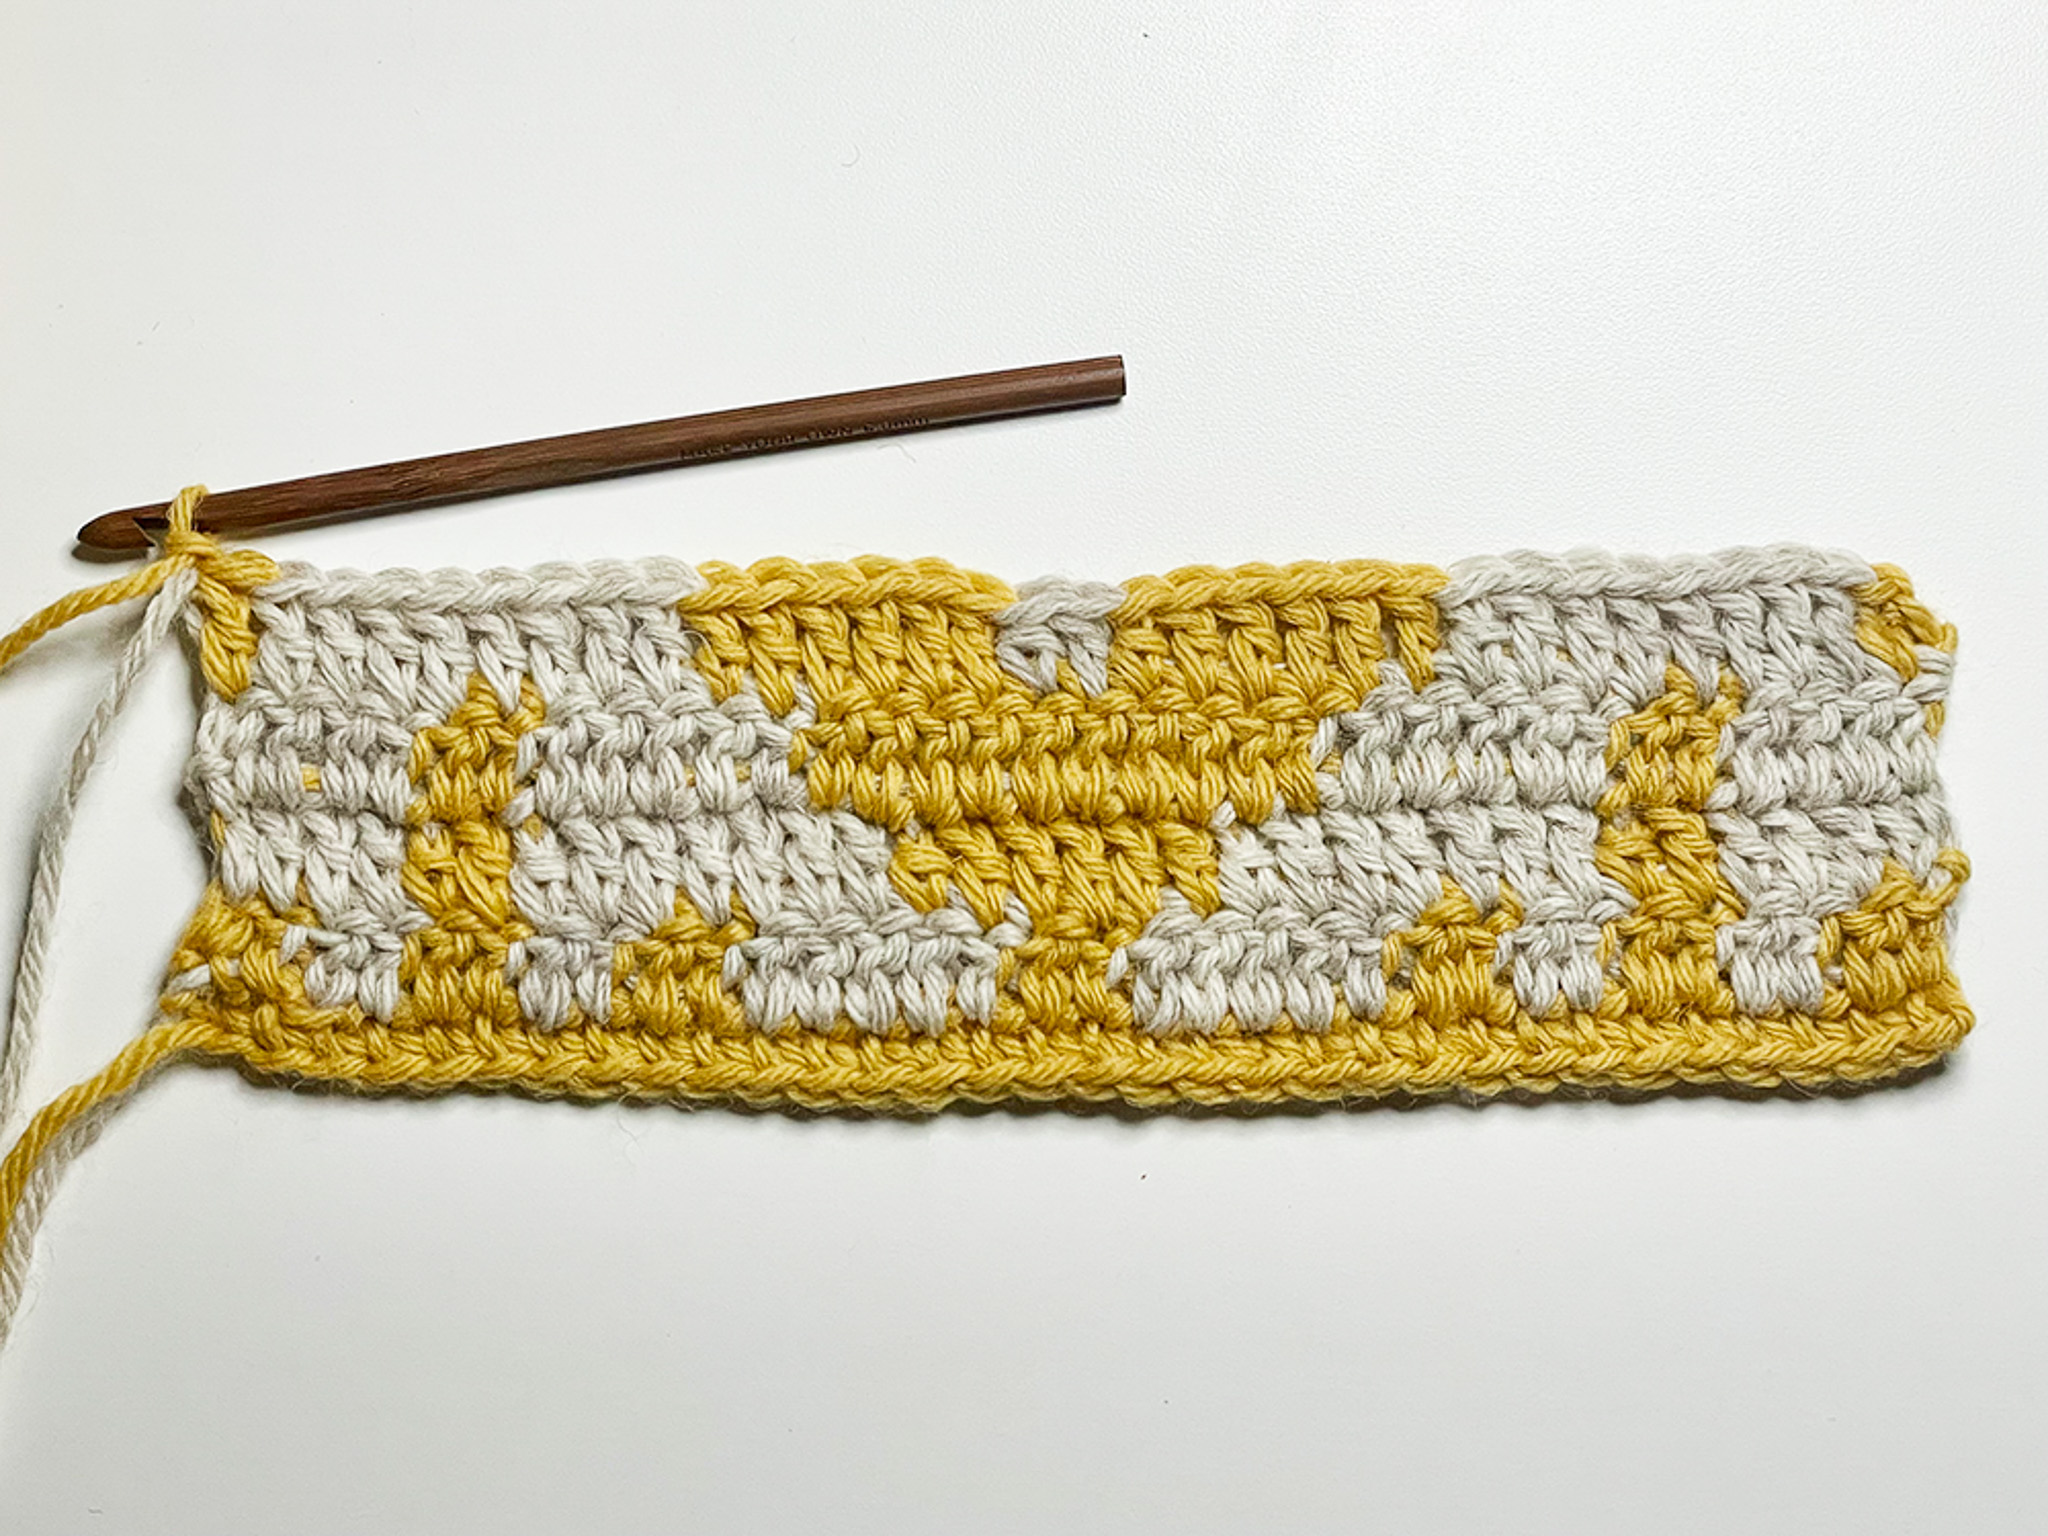
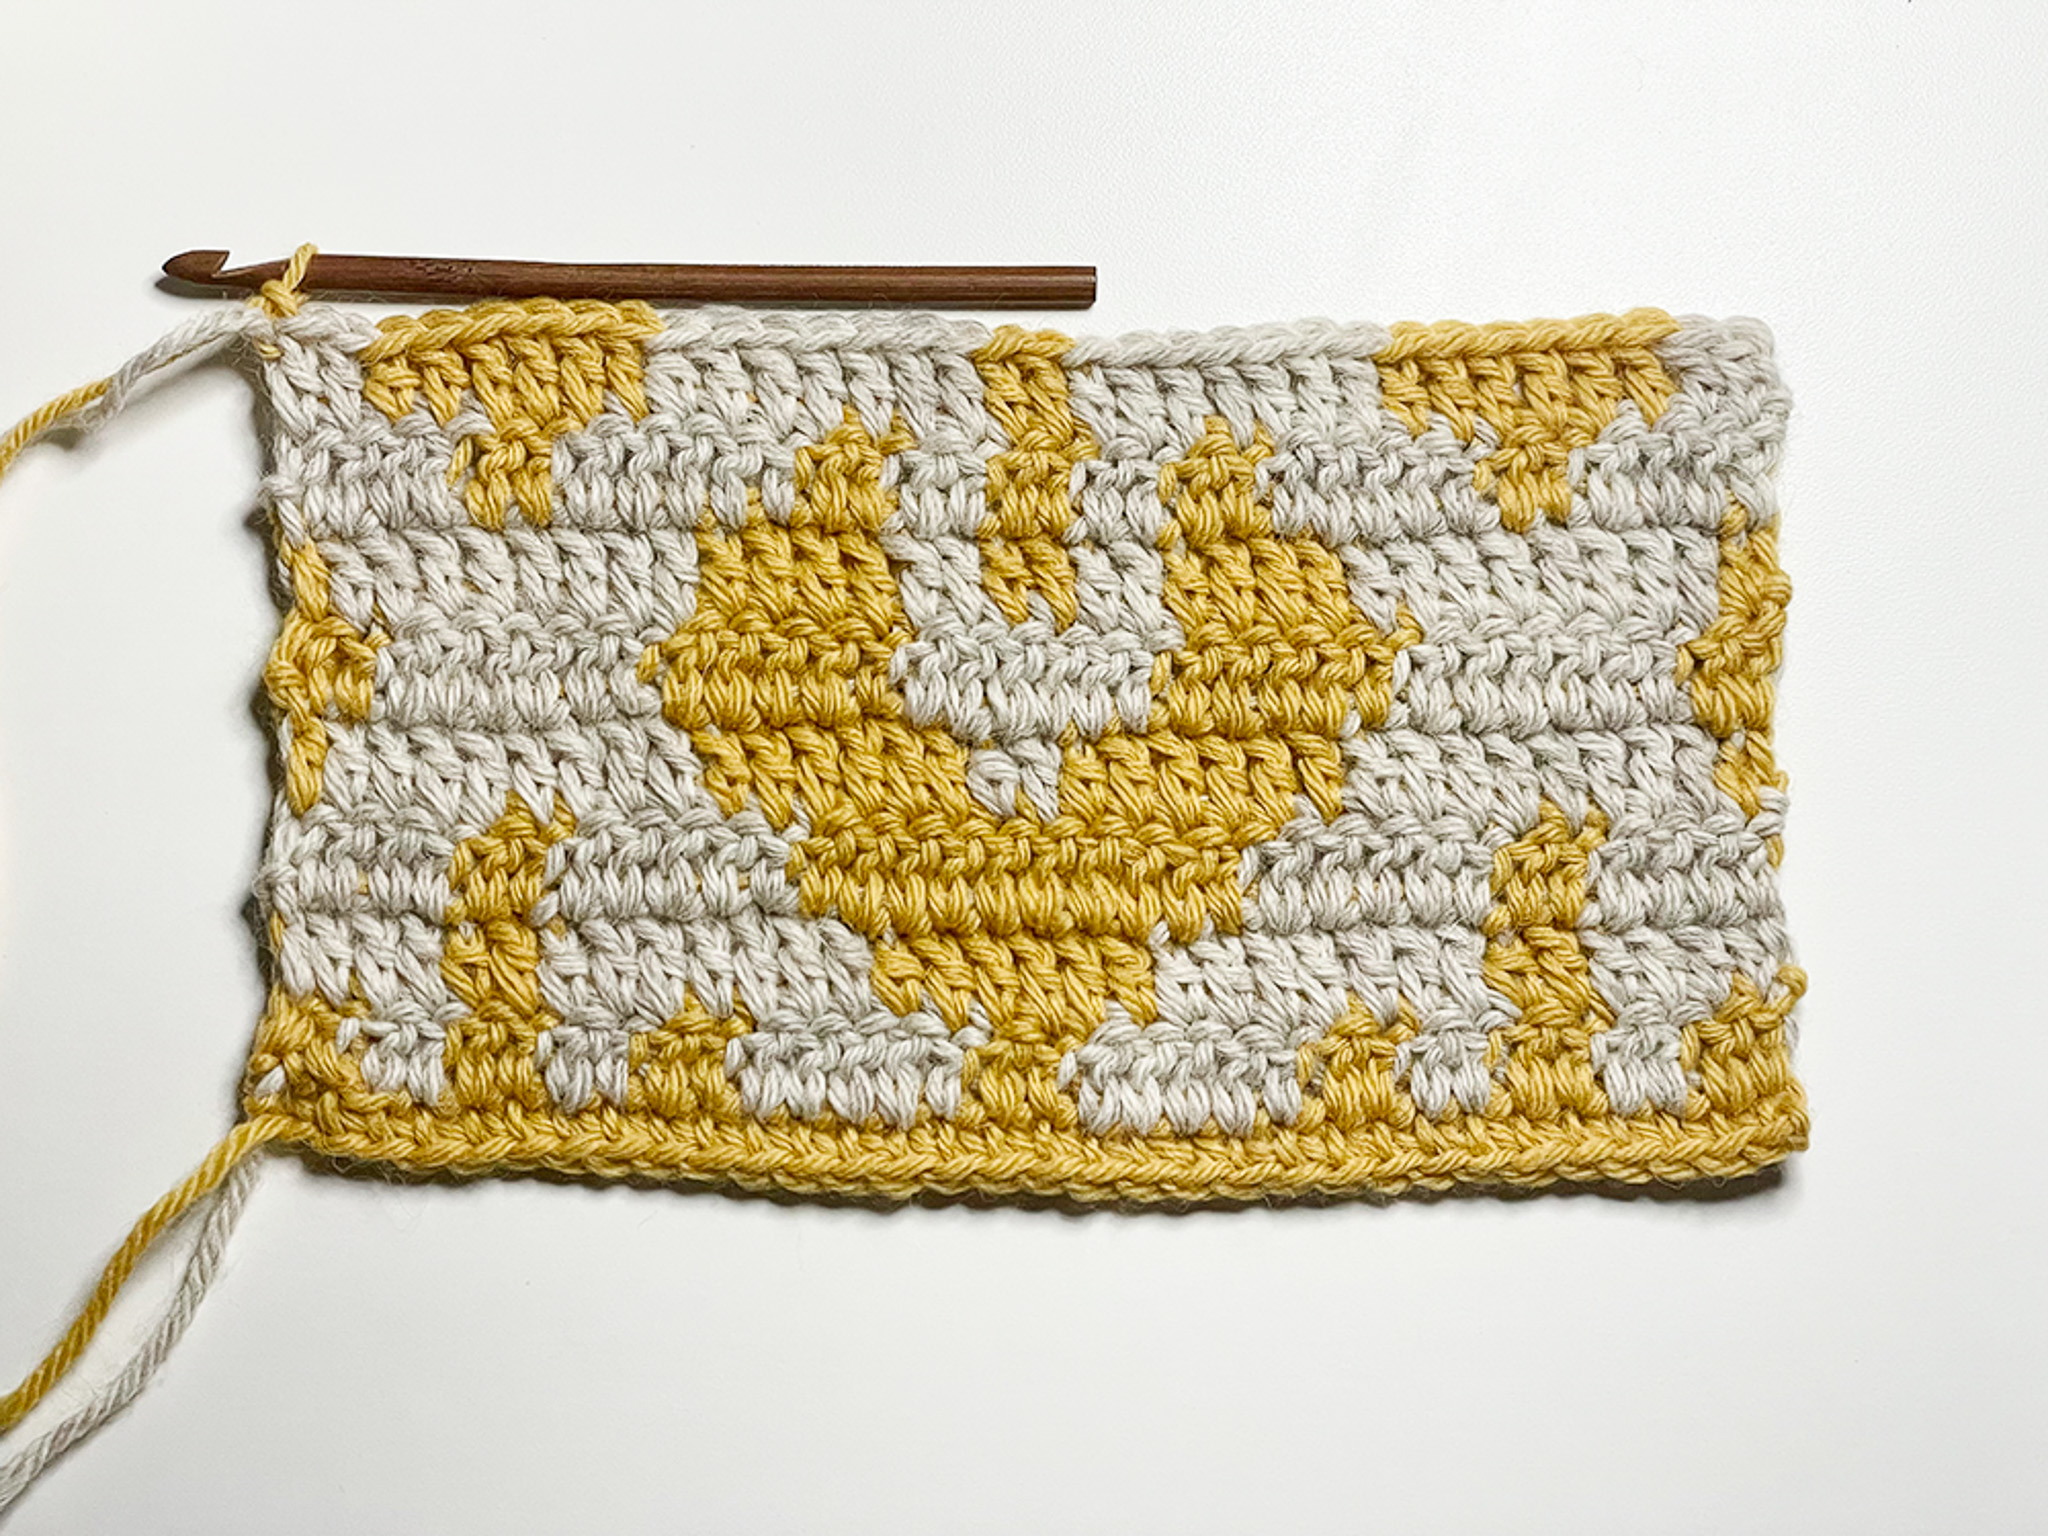
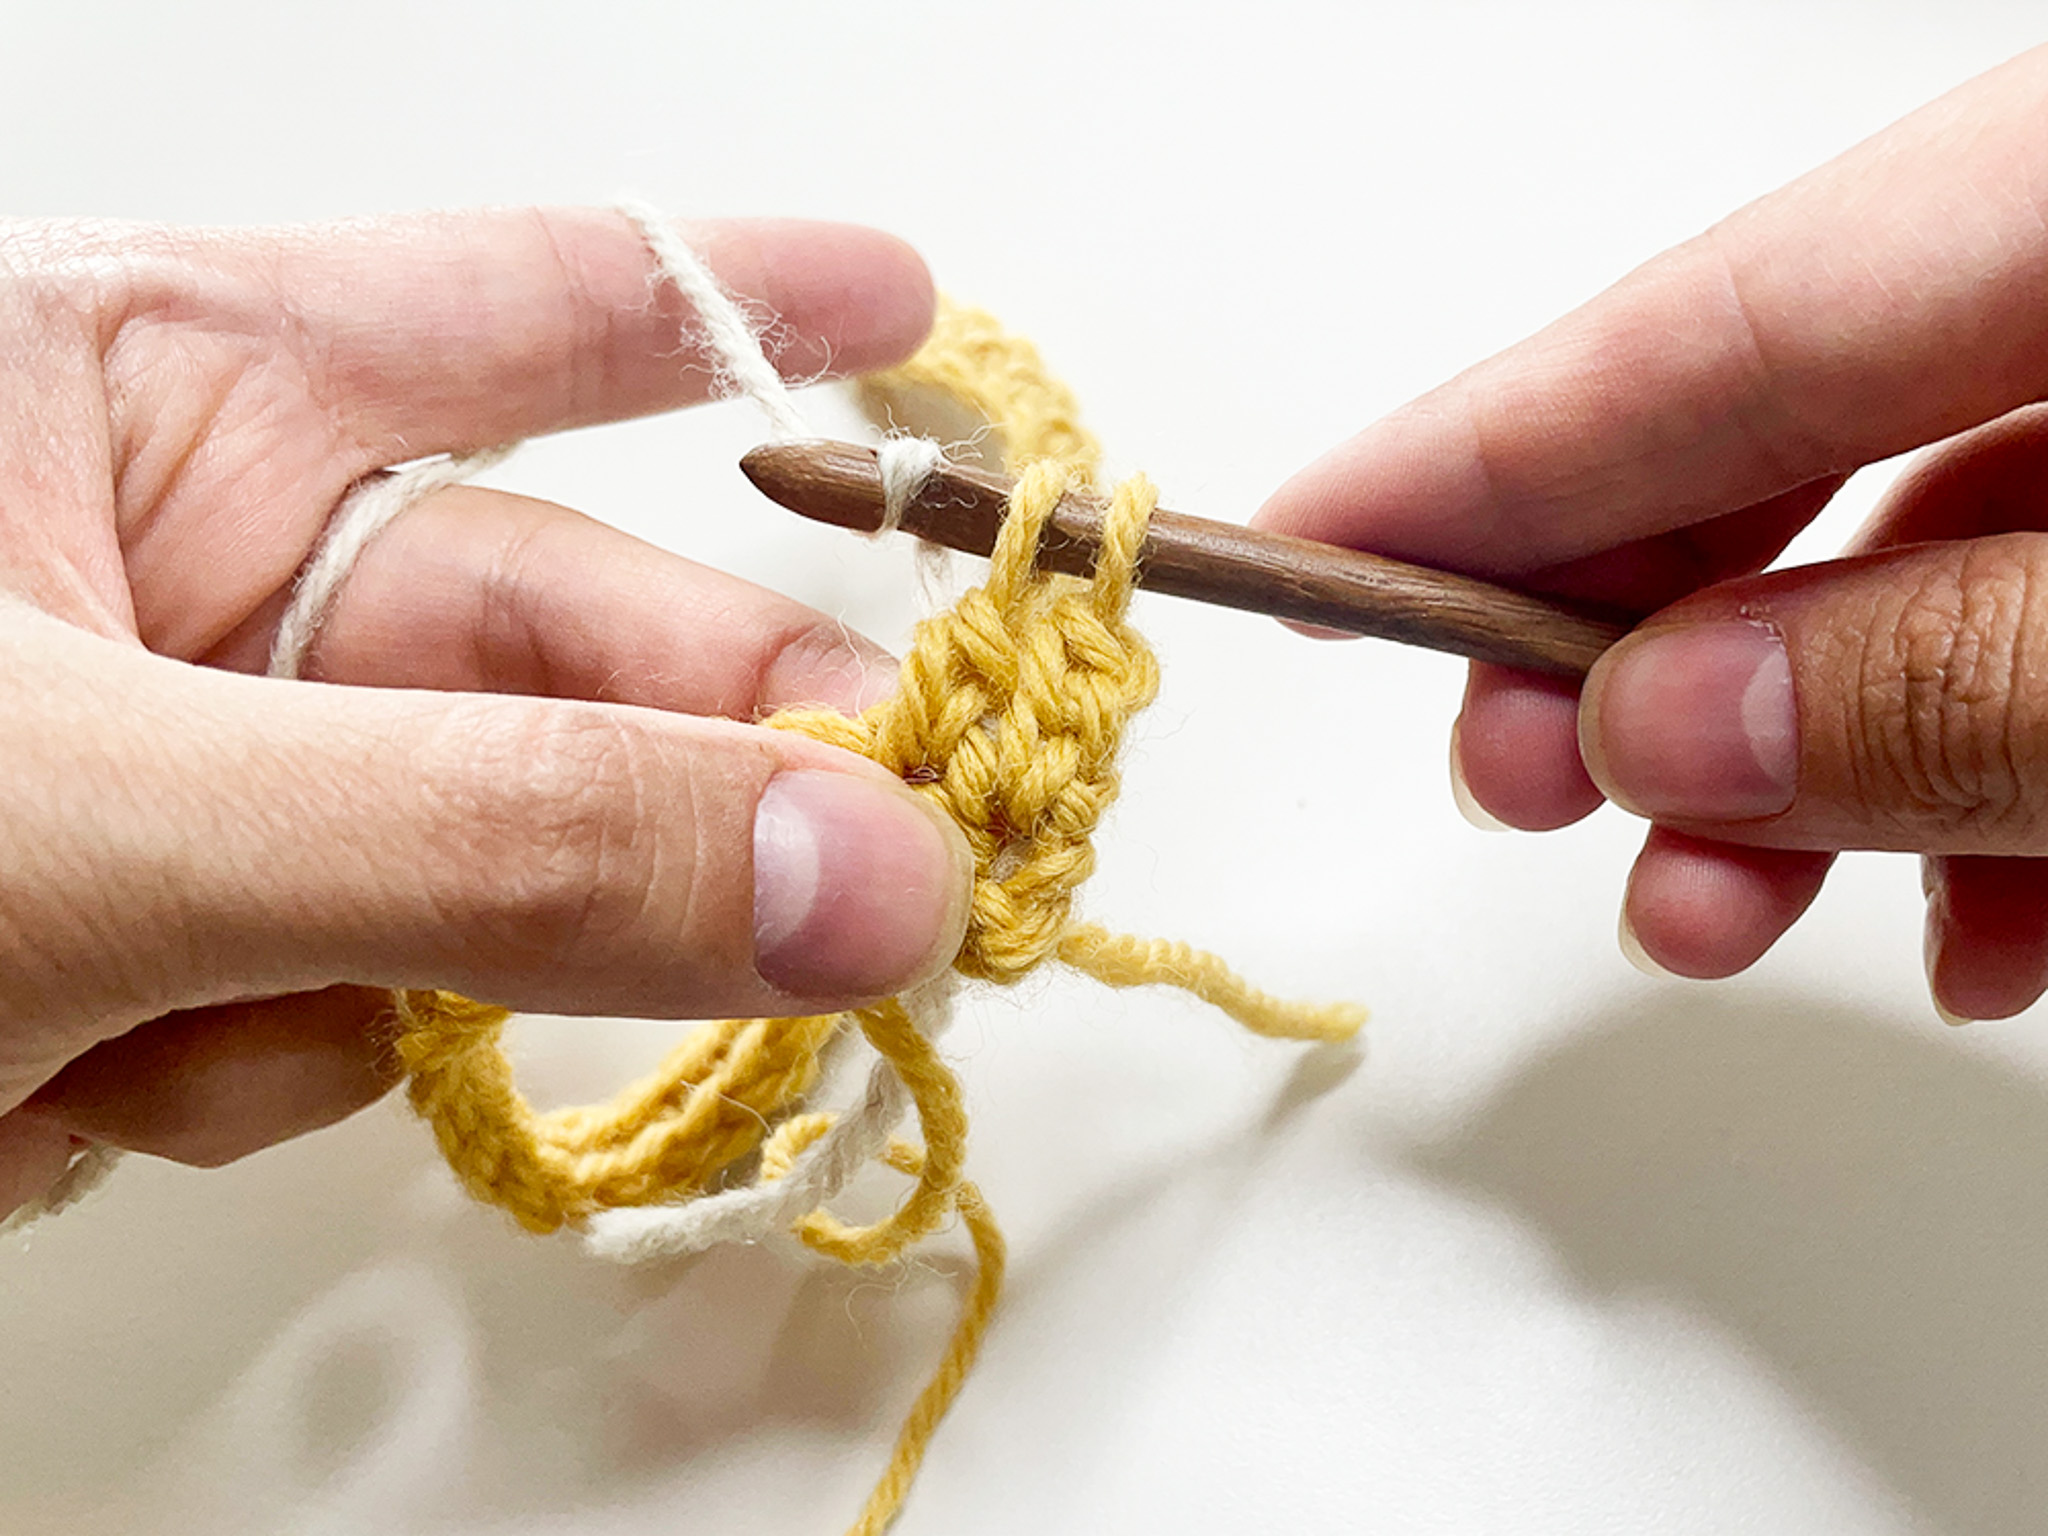
The scarf is crocheted flat. Most of the scarf is made with double crochets, with only the first and last rows worked in single crochet. The challenges of this pattern are: Keeping track of the two yarn balls you’re juggling through the pattern so they don’t get tangled. Remembering to carry the “inactive yarn.” Changing color before finishing the last single crochet of the active color. / Michelle

This is what you need:
Here you can directly purchase the material for the product. Please note that the instruction is digital and appears here on the page (no written instruction).


.jpg)
Unleash your creativity
For only 85kr per month you get access to all our 300+ beginner-friendly instructions for crochet, knitting and macrame.
A perfect way to get started with your new hobby!

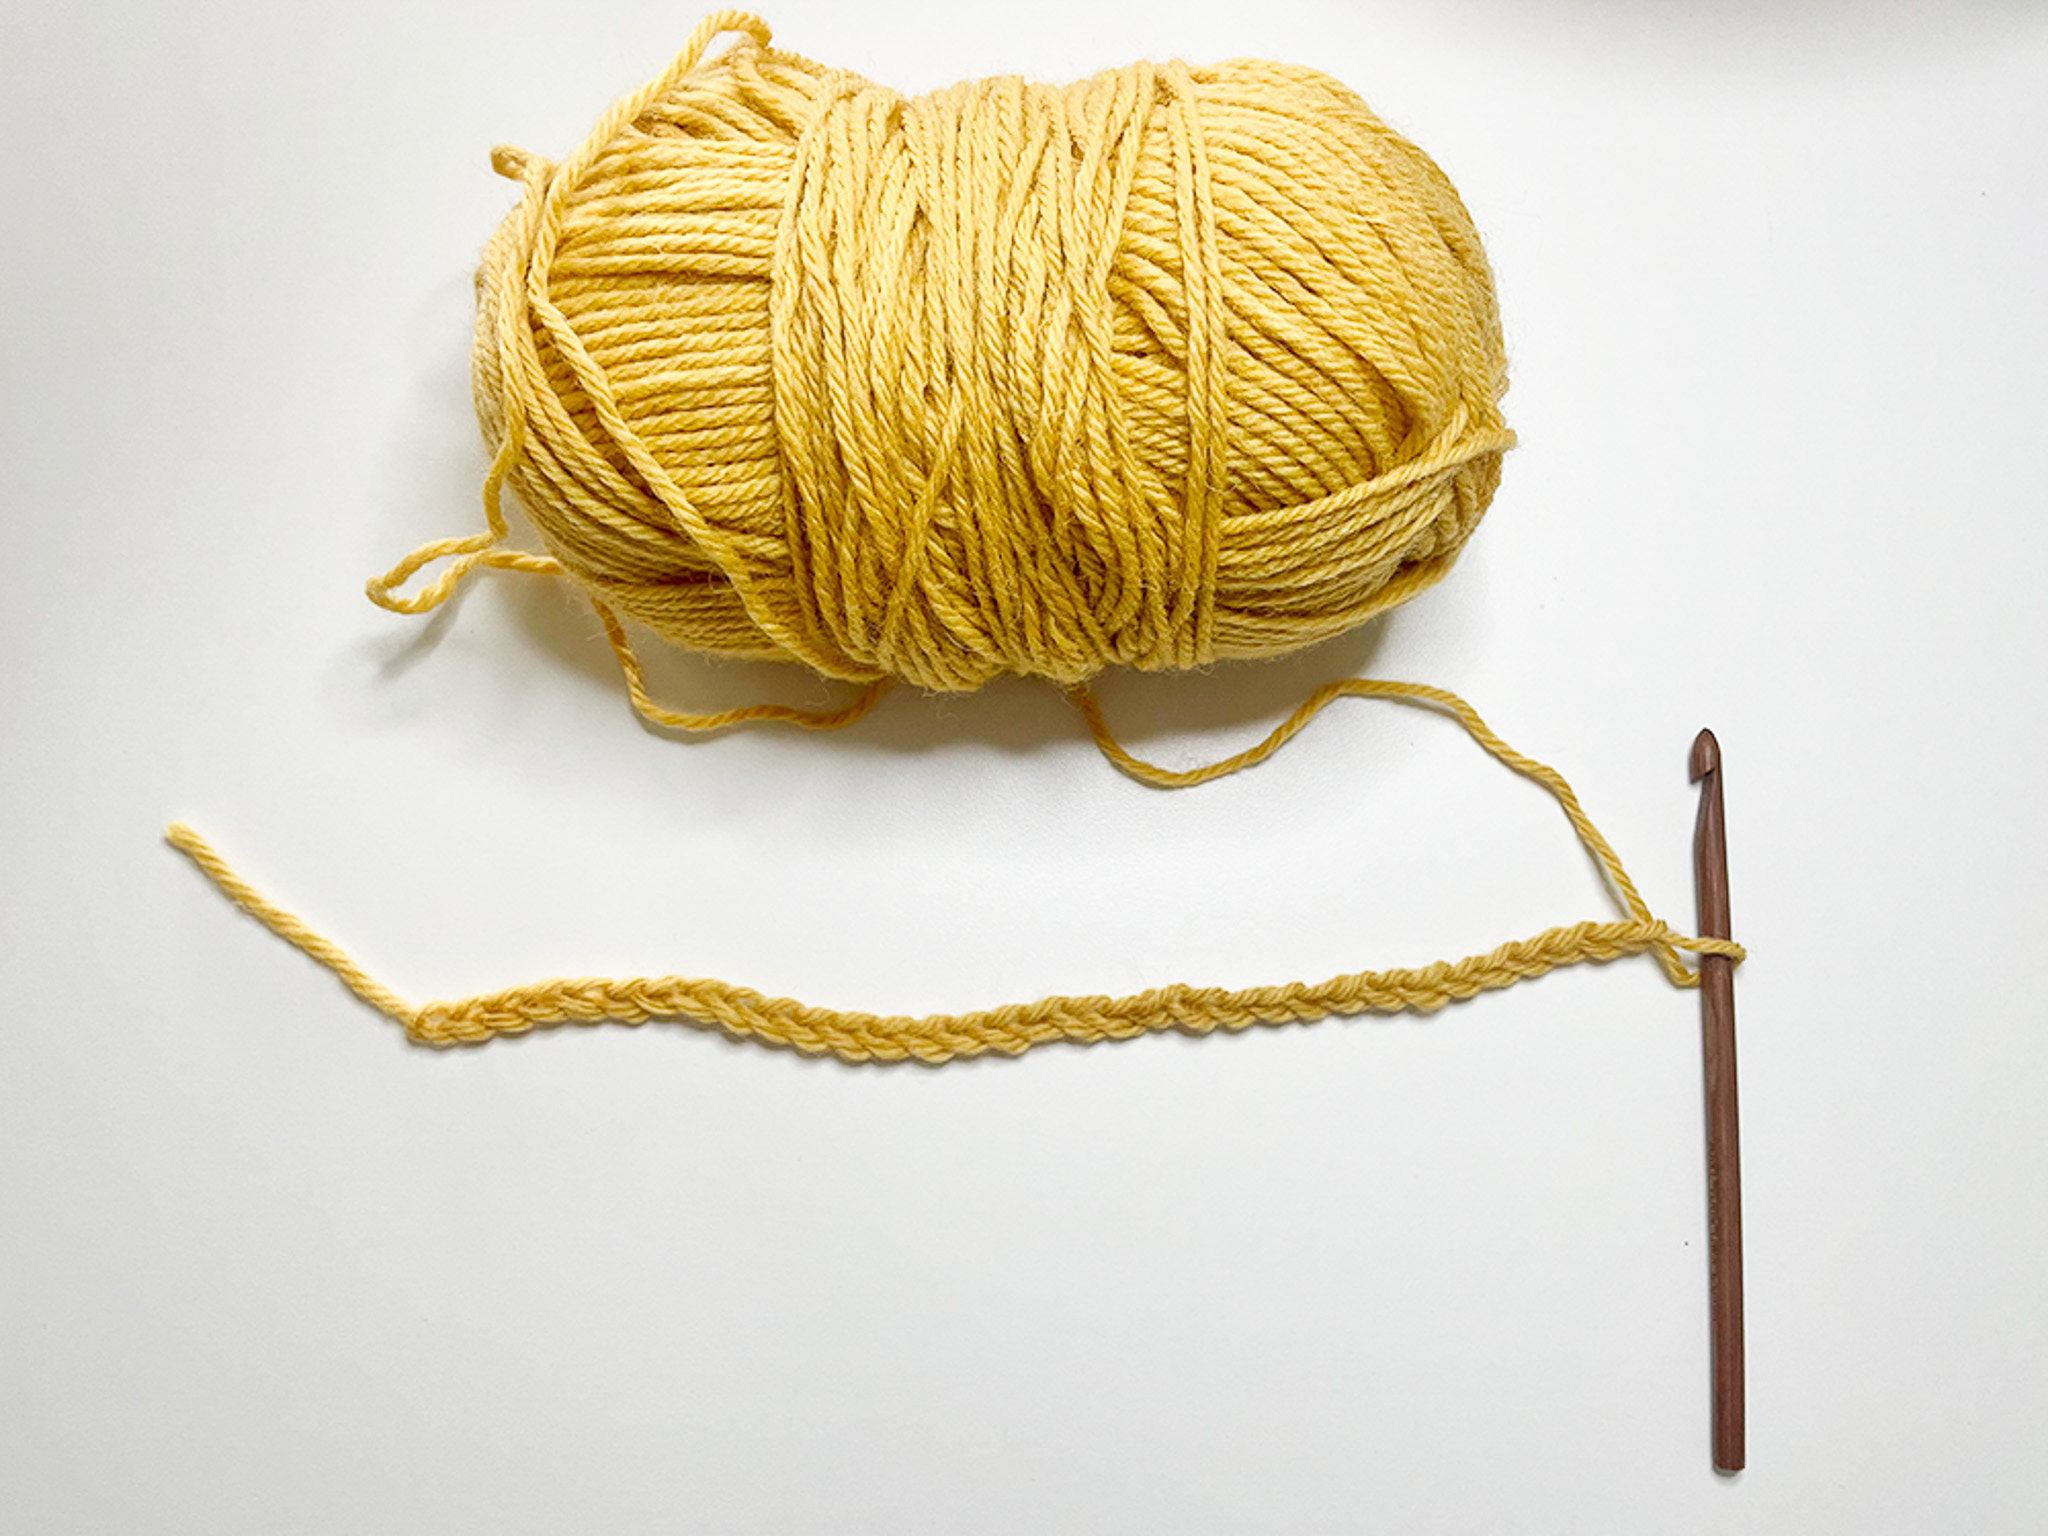
Row 0: Start by making a foundation chain of 33 chains with the yellow color (33). If you’re unsure how to crochet a chain, see the video below.
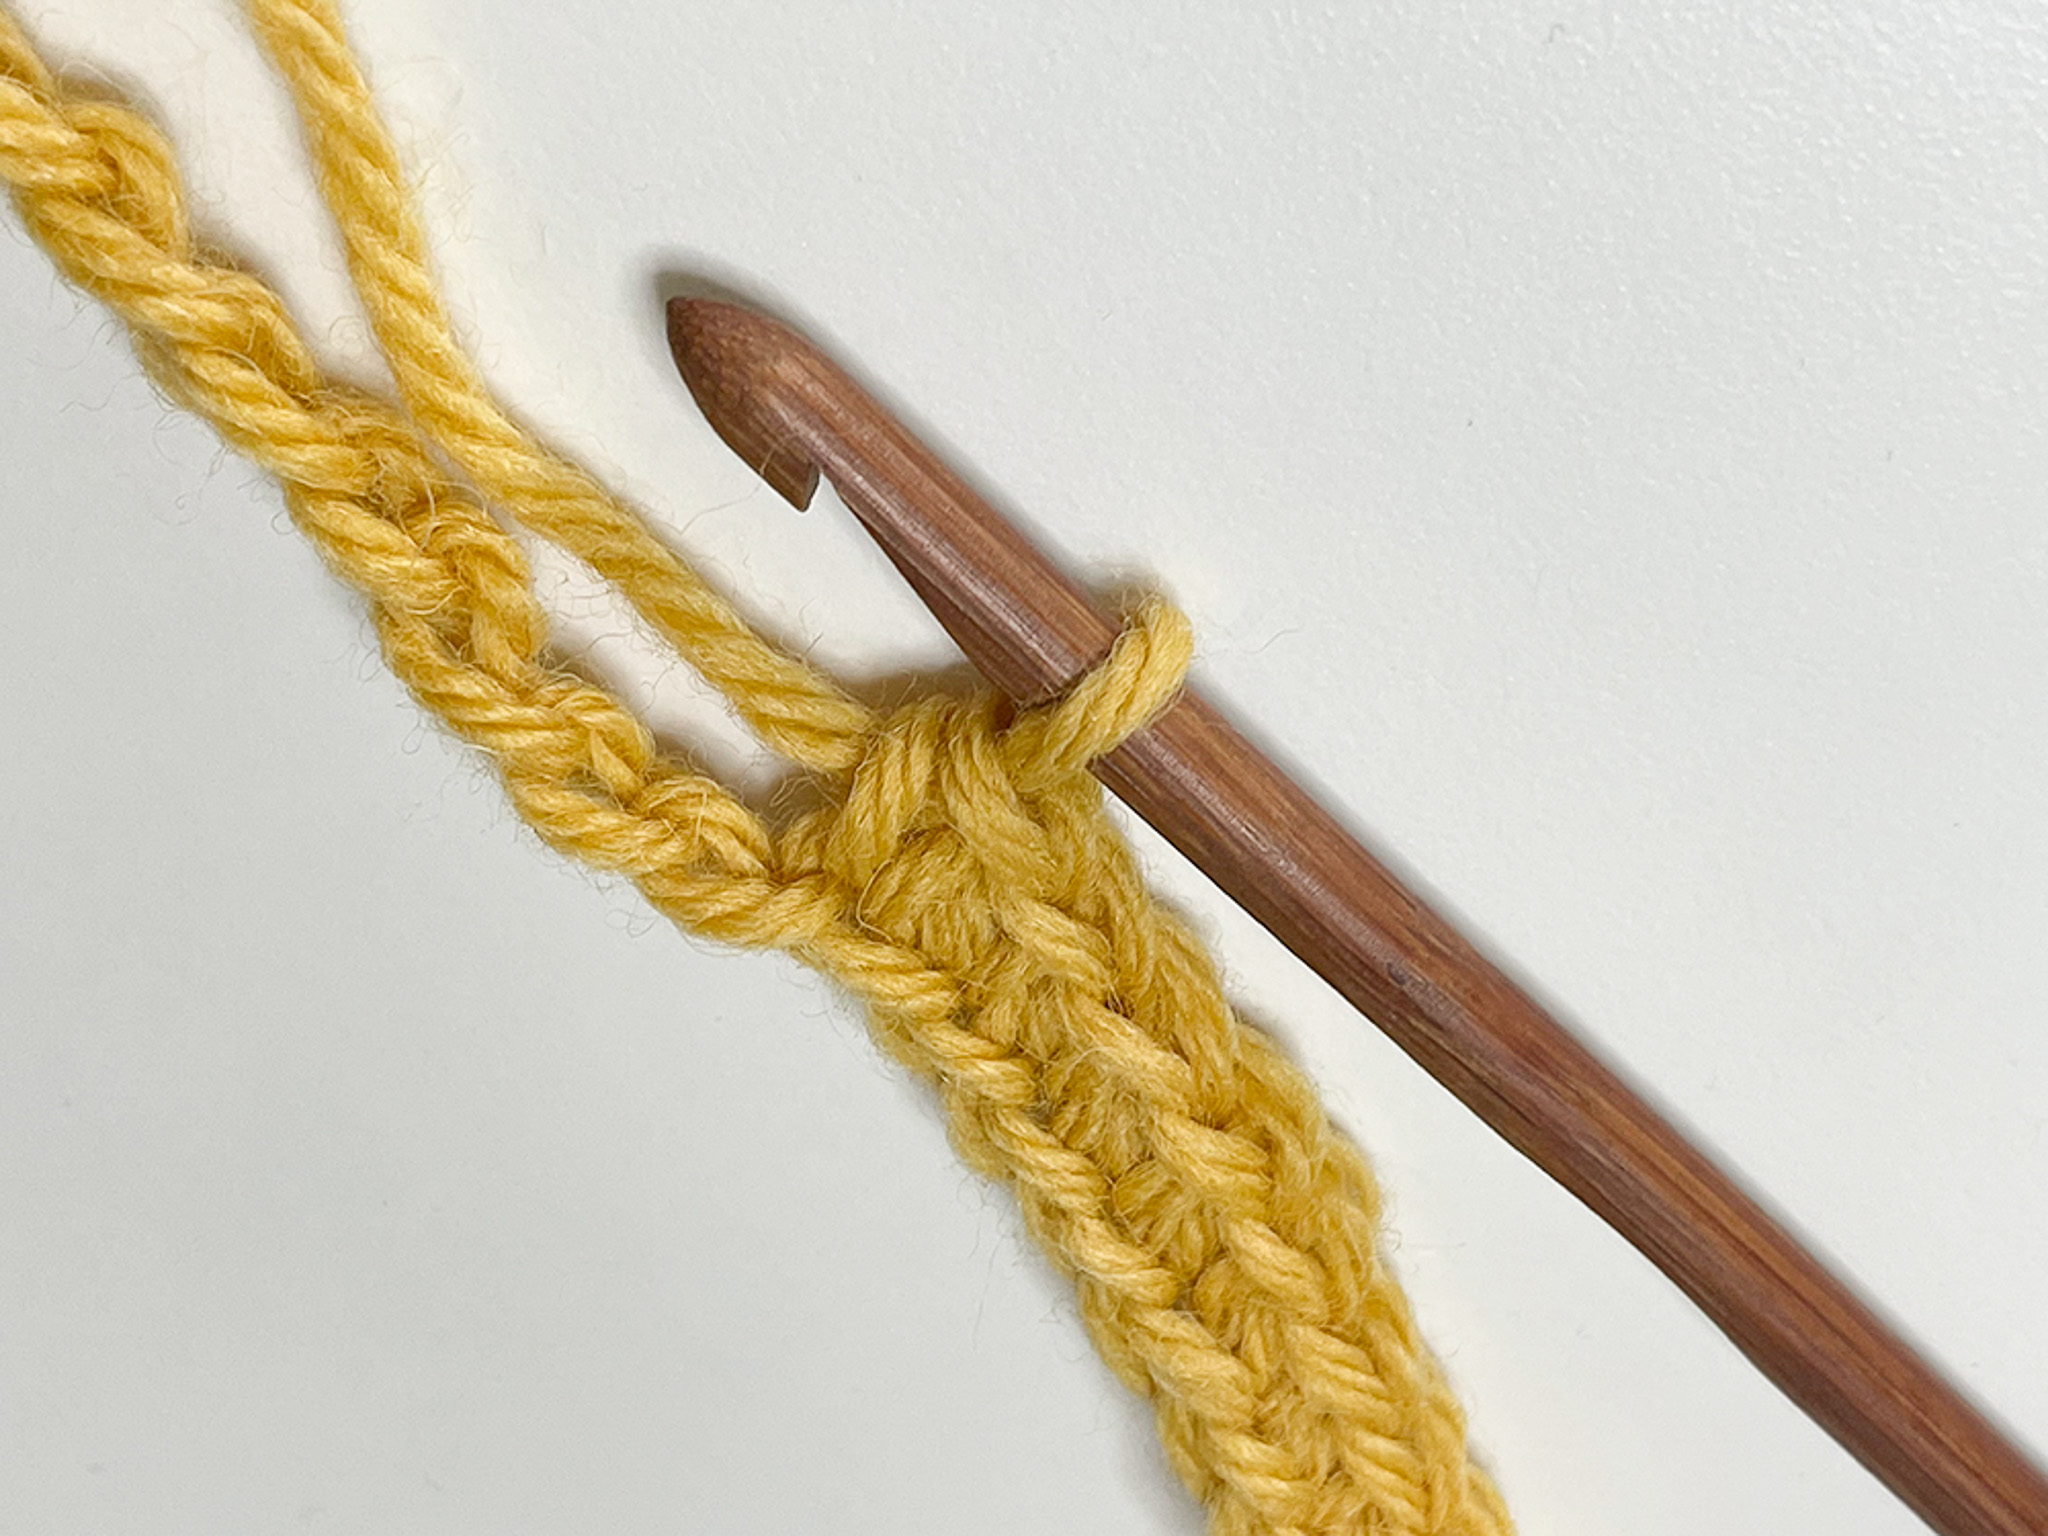
Row 1: Make 32 yellow single crochets in the back loop of the foundation chain.
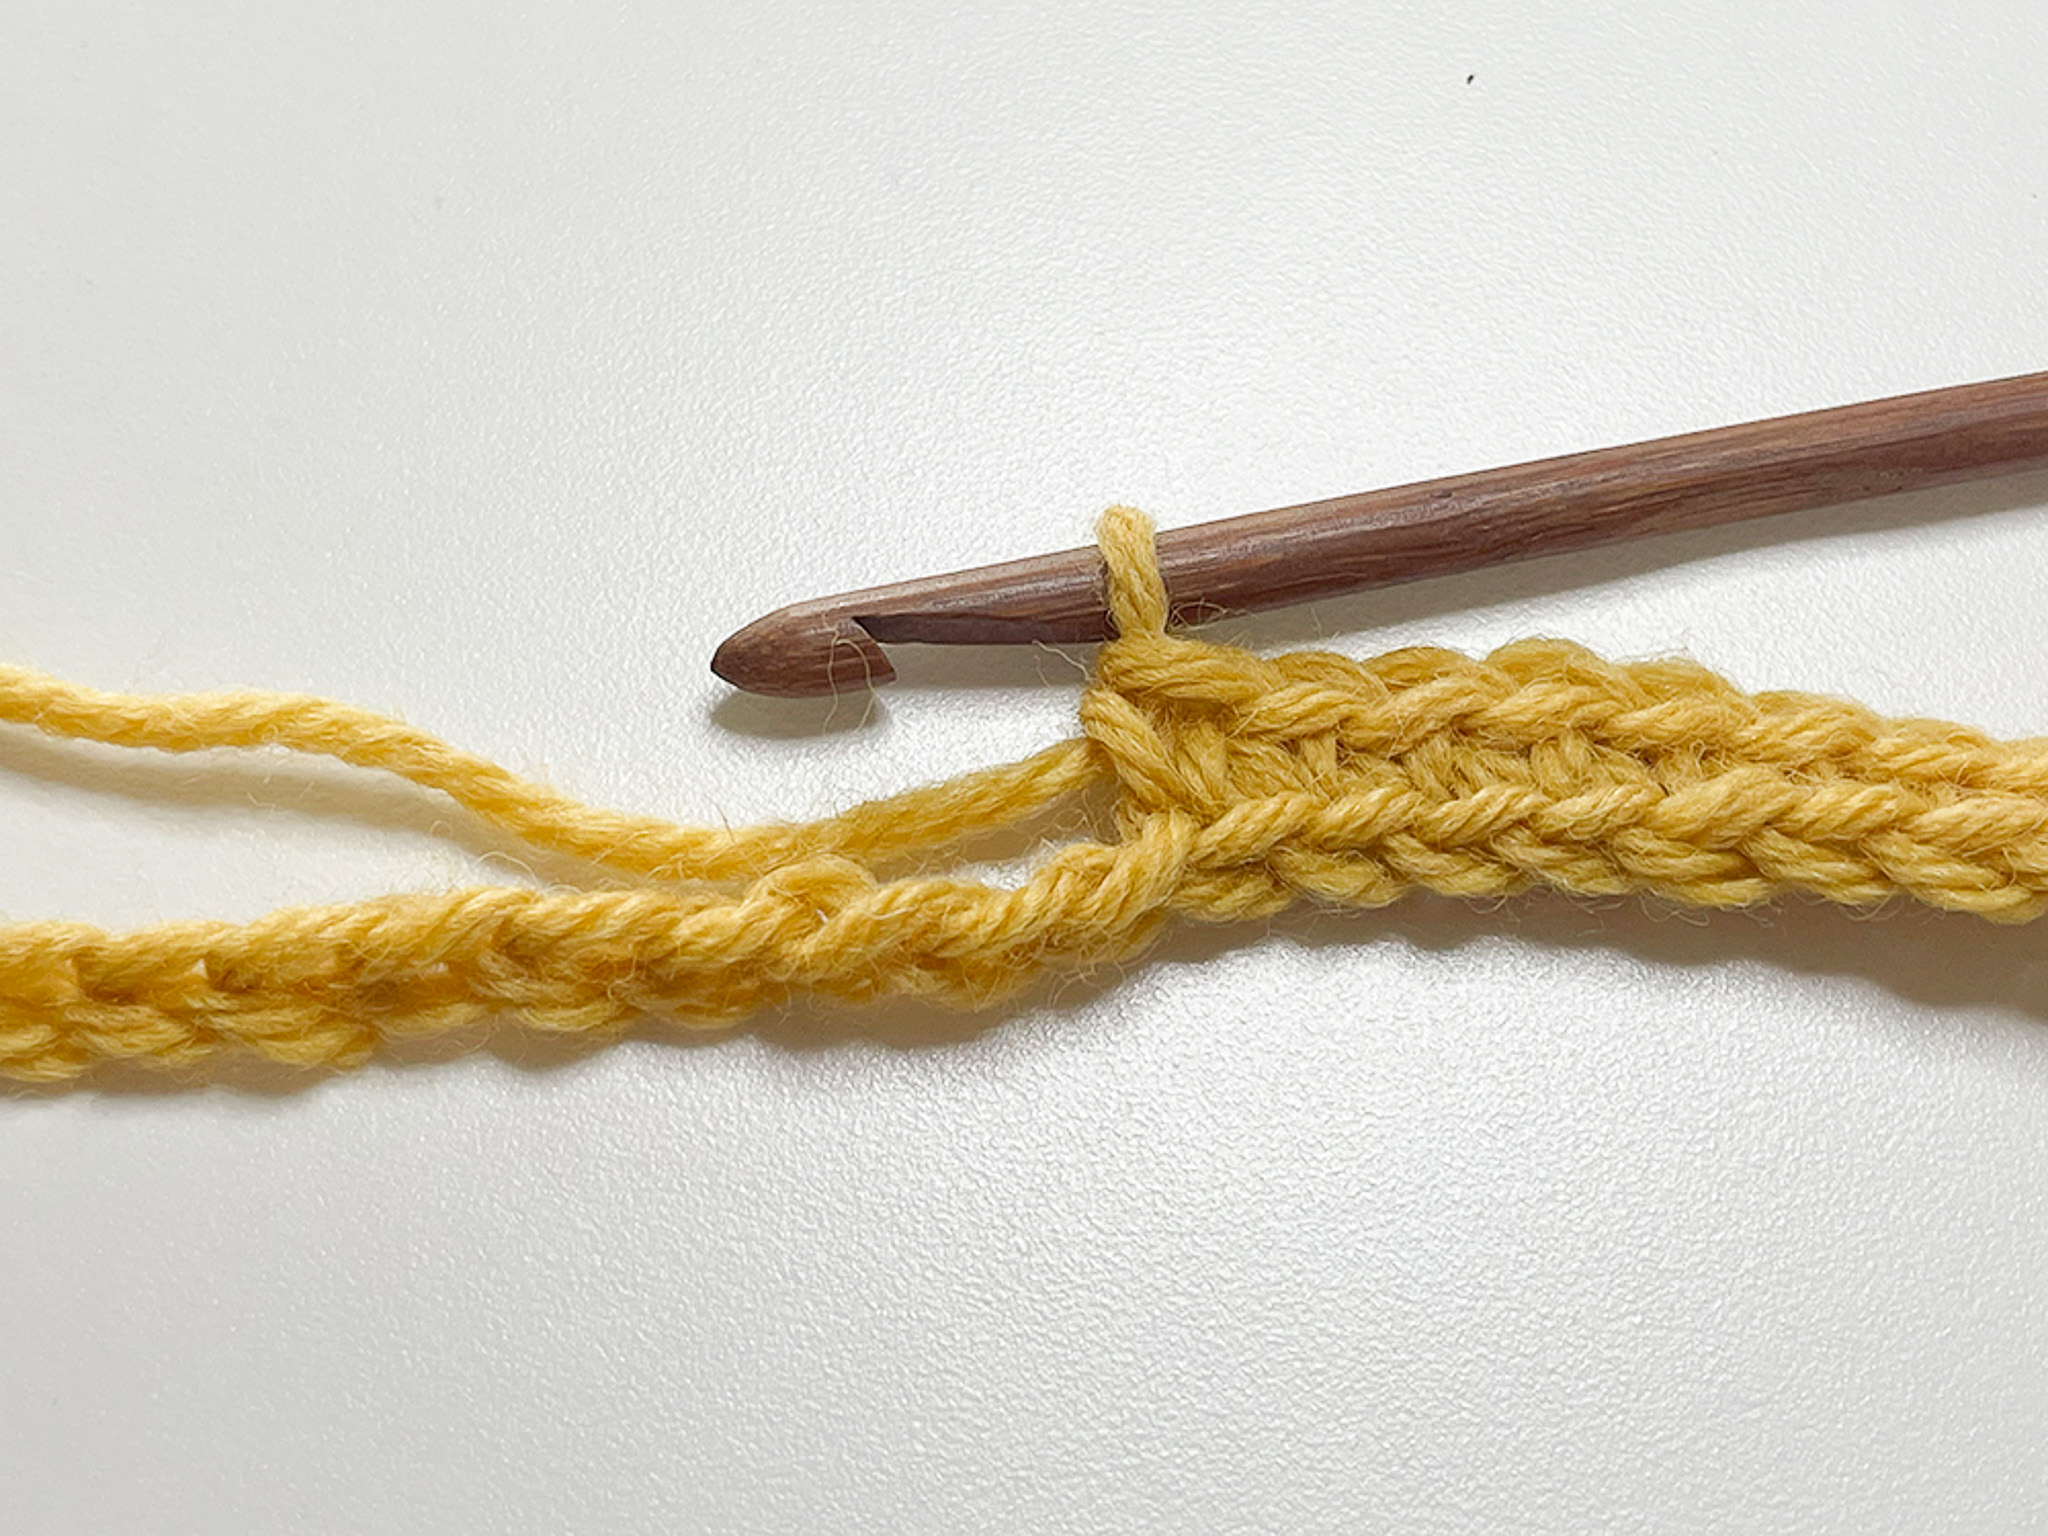
When you reach the end of the row, lay the beige yarn over the yellow yarn so it can be slightly secured for the next row.
Finish with 2 yellow chains. NOTE: Before you turn, read the description below. If you choose to make straight edges, follow the instructions from step two where you insert your hook into the second stitch/loop. (32)
If you want nice straight edges, you can use the technique described below, otherwise, you can do it as you usually do — for example: when you finish your row, chain 2, turn your work, and start a new row by making a double crochet in the first single crochet of the new row.
For straight edges, you need to pay attention to how you finish your row and how you start the new row.
Here’s how to do it:
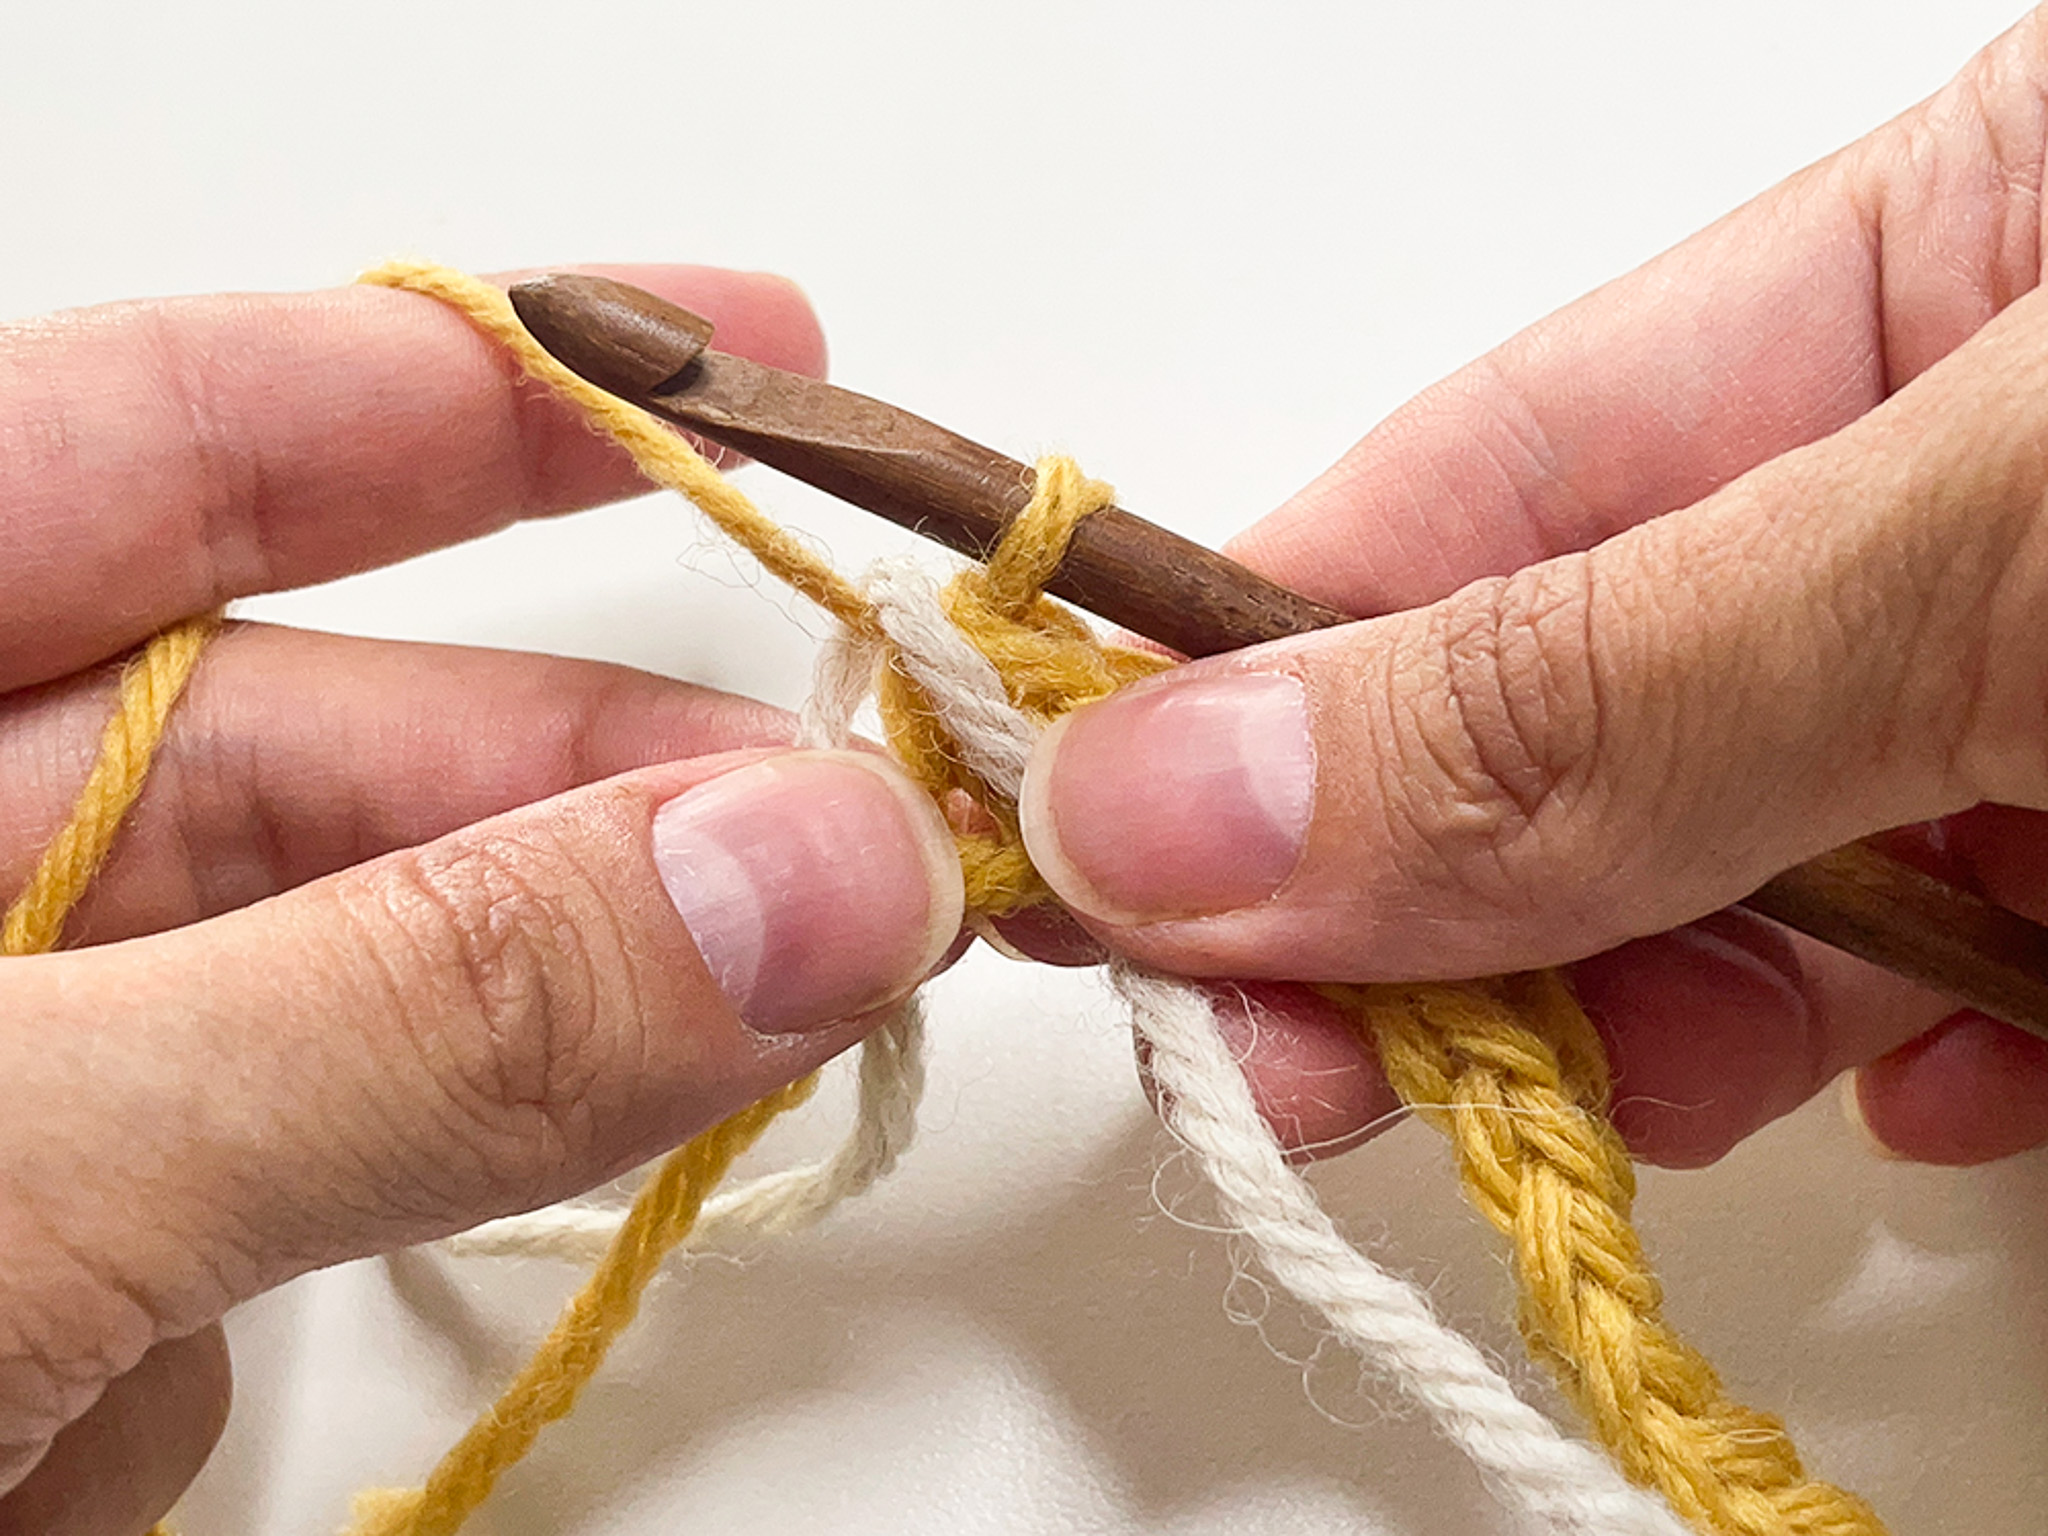
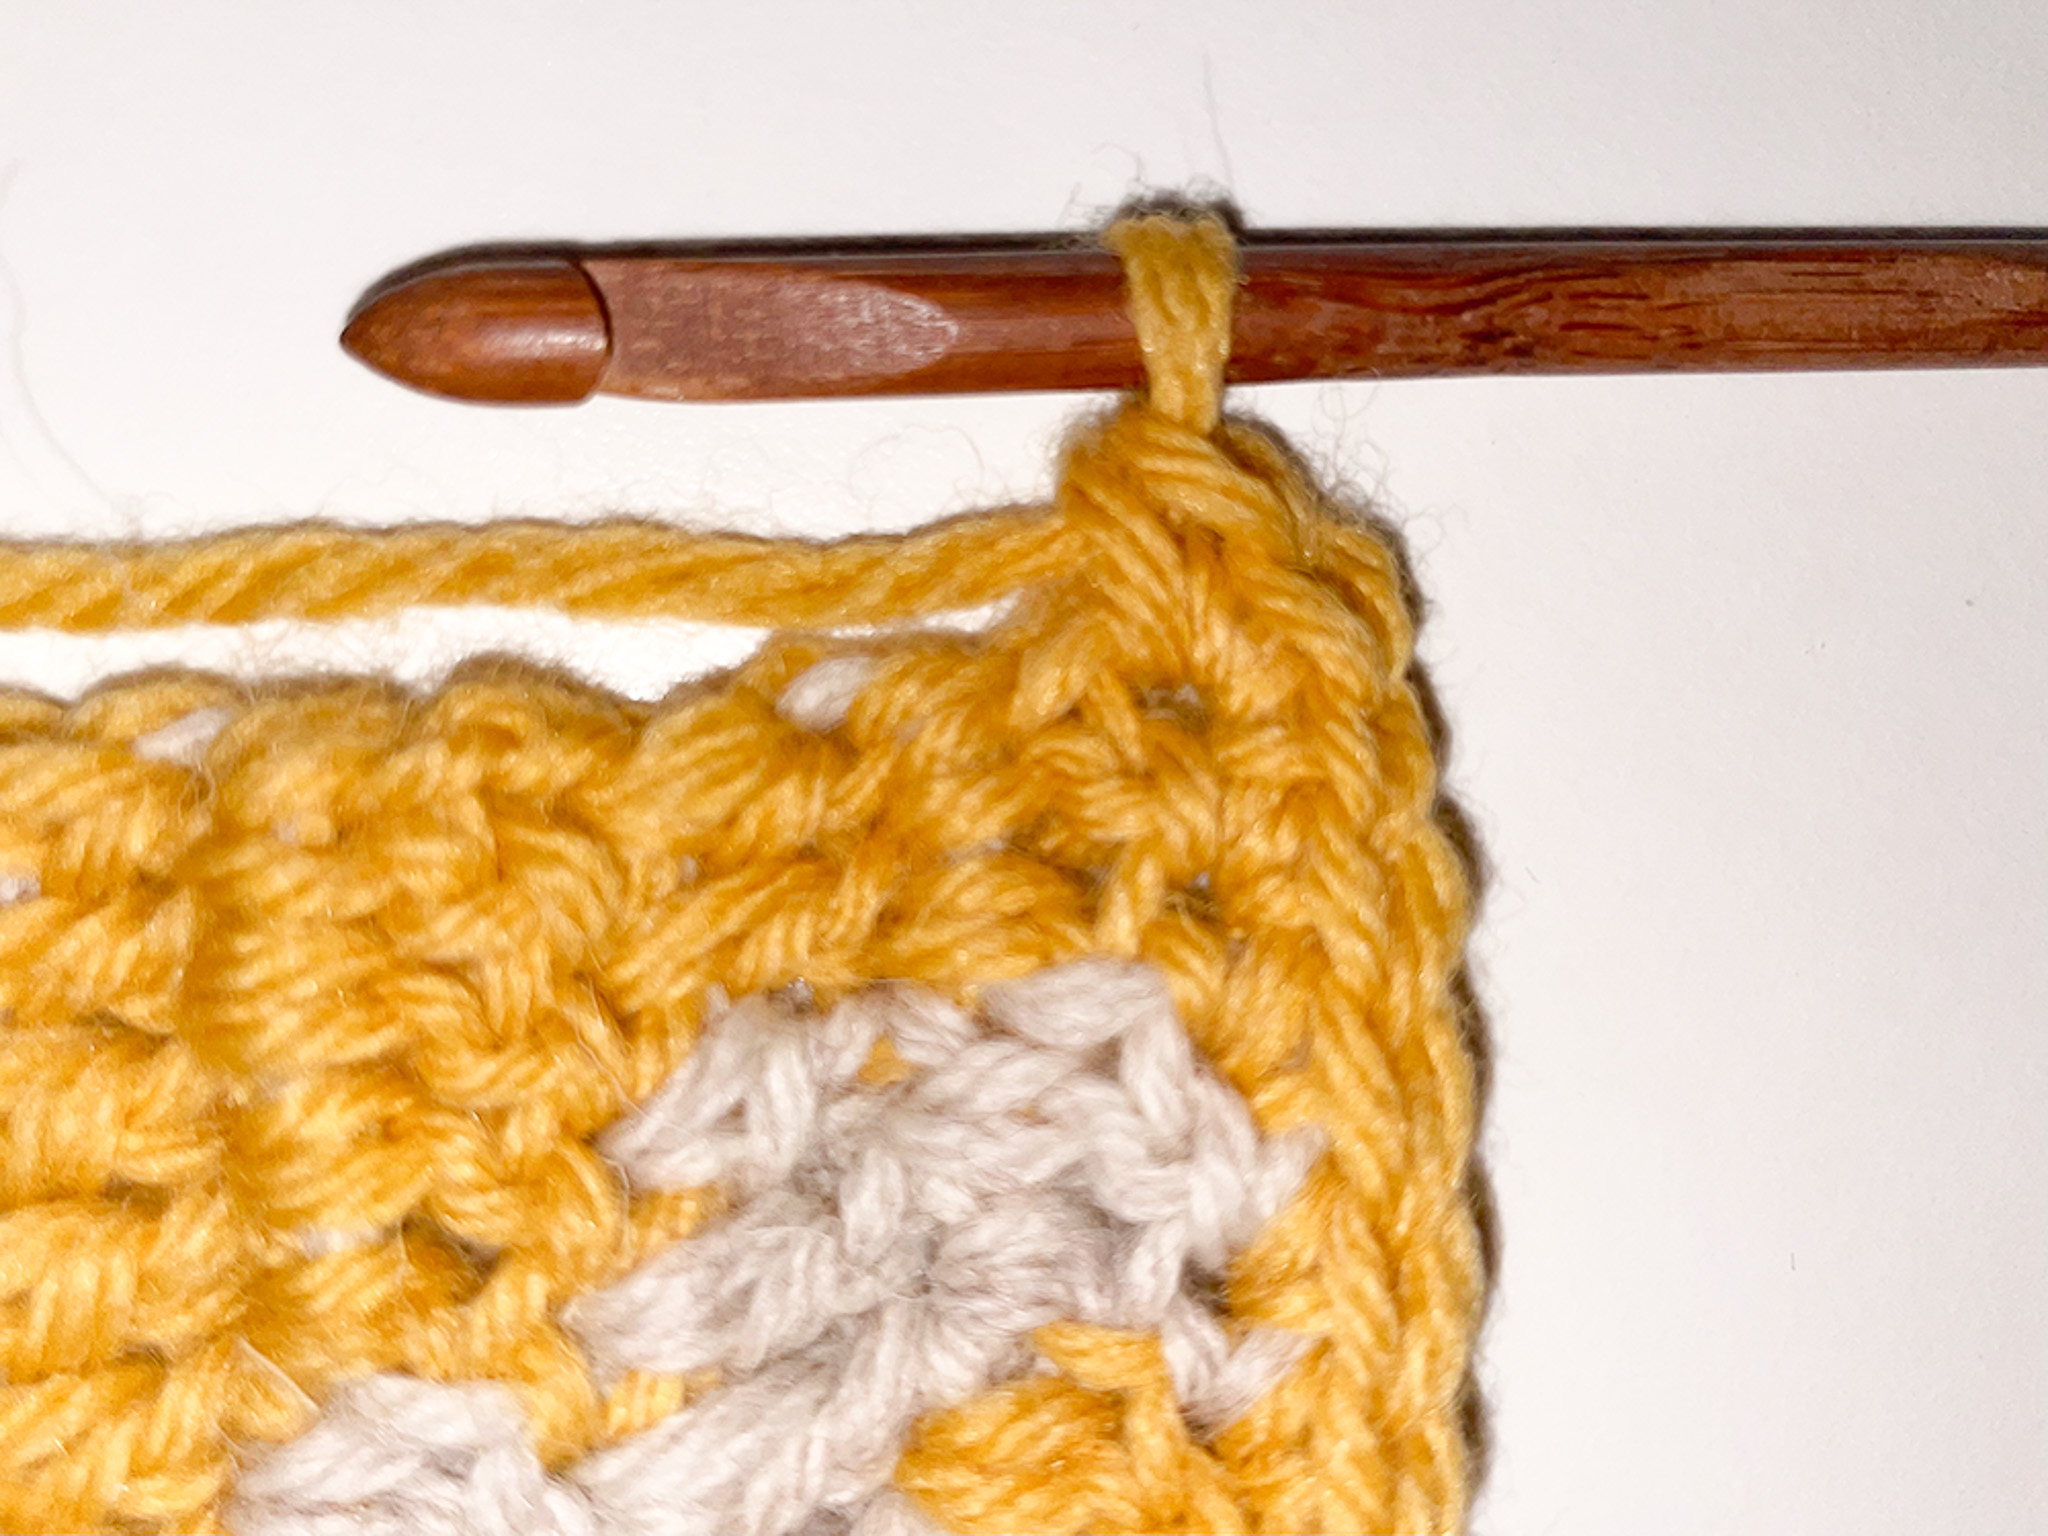
When you have one double crochet left on the row, start a double crochet as usual, but instead of going into the next stitch as you normally do, insert your hook only through the outer loop (the one closest to you) and then through the side loop on the edge. Yarn over and finish your doublecrochet as usual. Then chain 2.
Insert your hook into the second stitch/loop from the hook, yarn over and pull through.
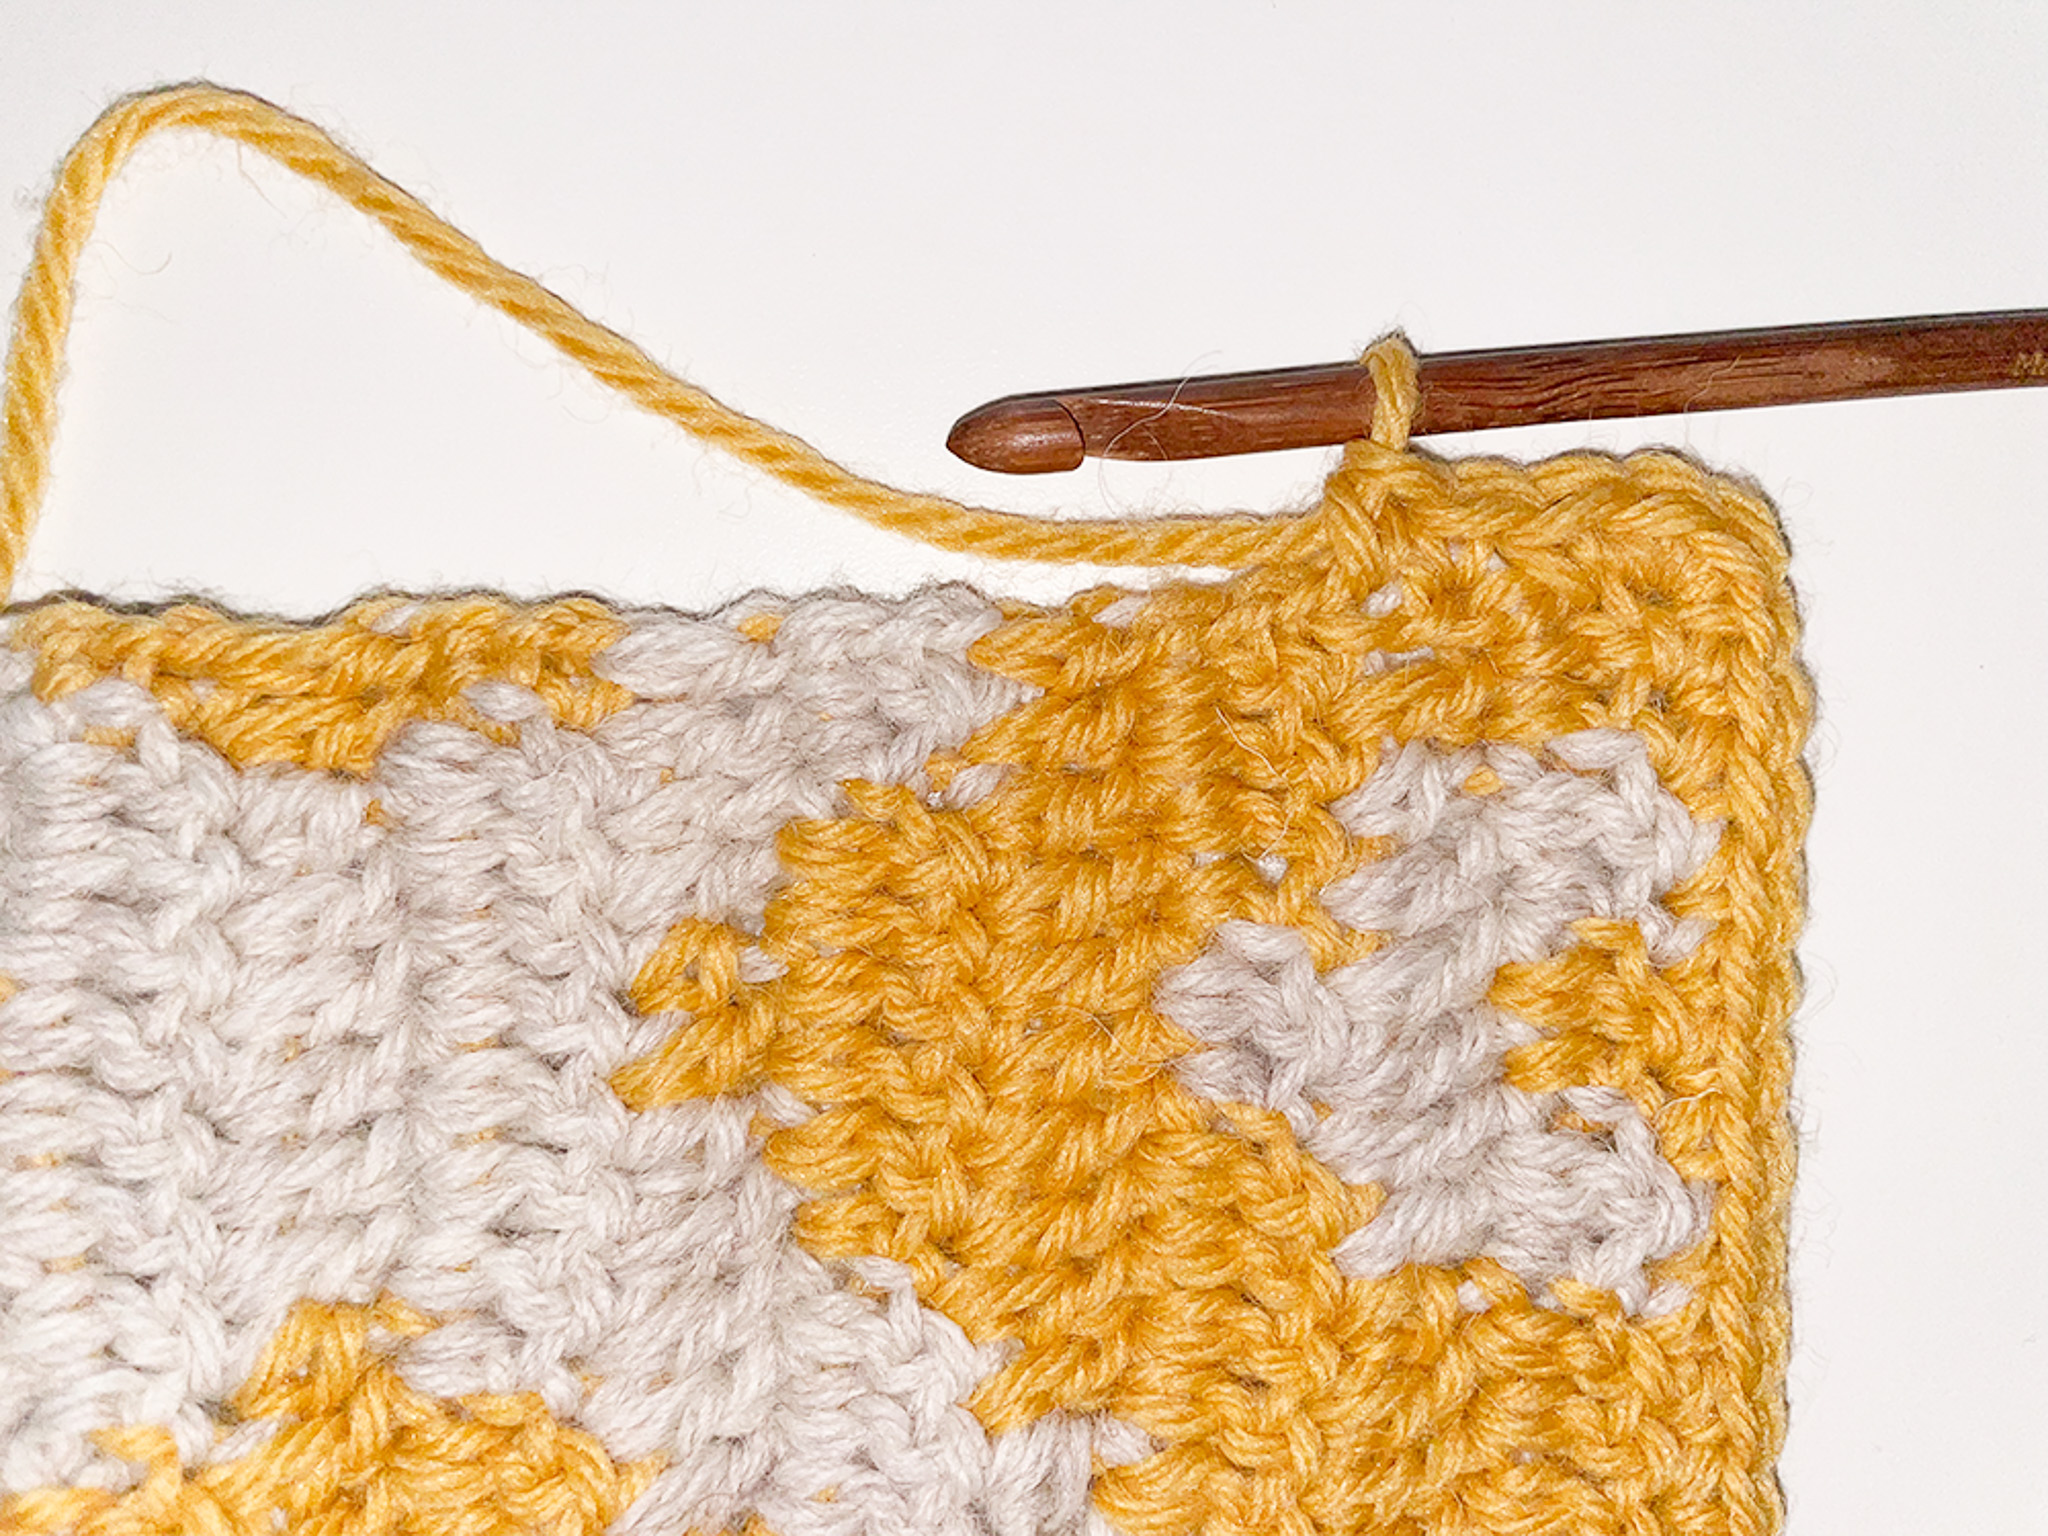
Turn your entire work — now you’re ready to finish the first dc of the new row. Insert your hook directly into the first stitch, yarn over and pull through, yarn over and pull through 2 loops, yarn over and pull through 2 loops again.
Continue with regular double crochets after that.
Remember to do a color change before finishing the last dc — see Video below.
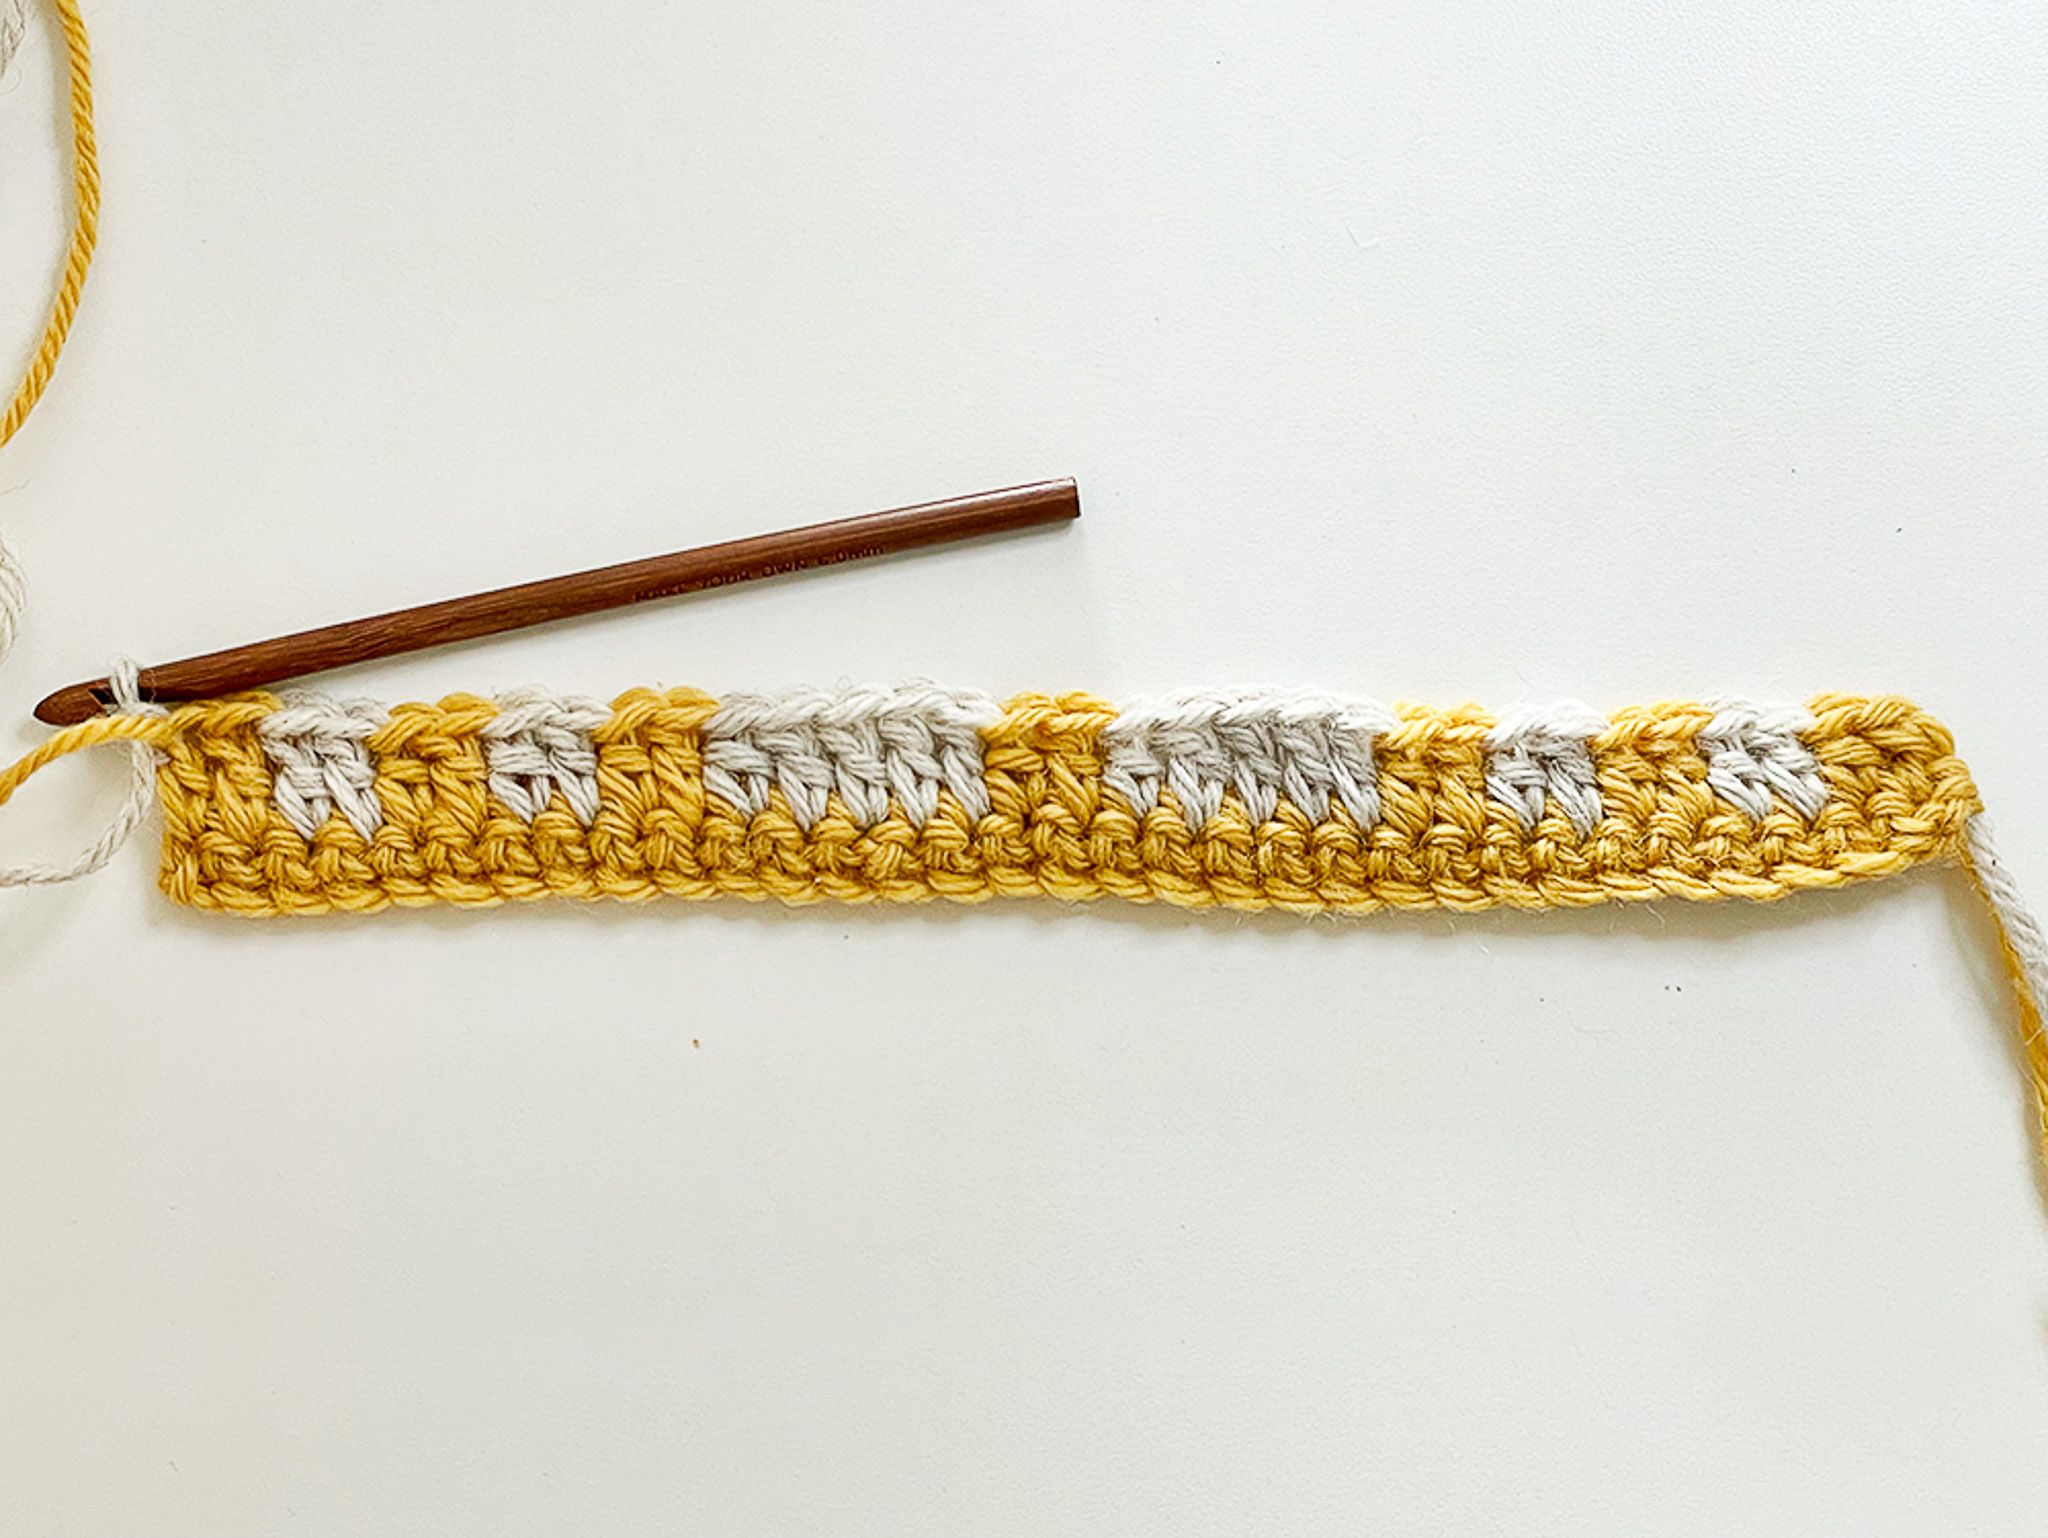
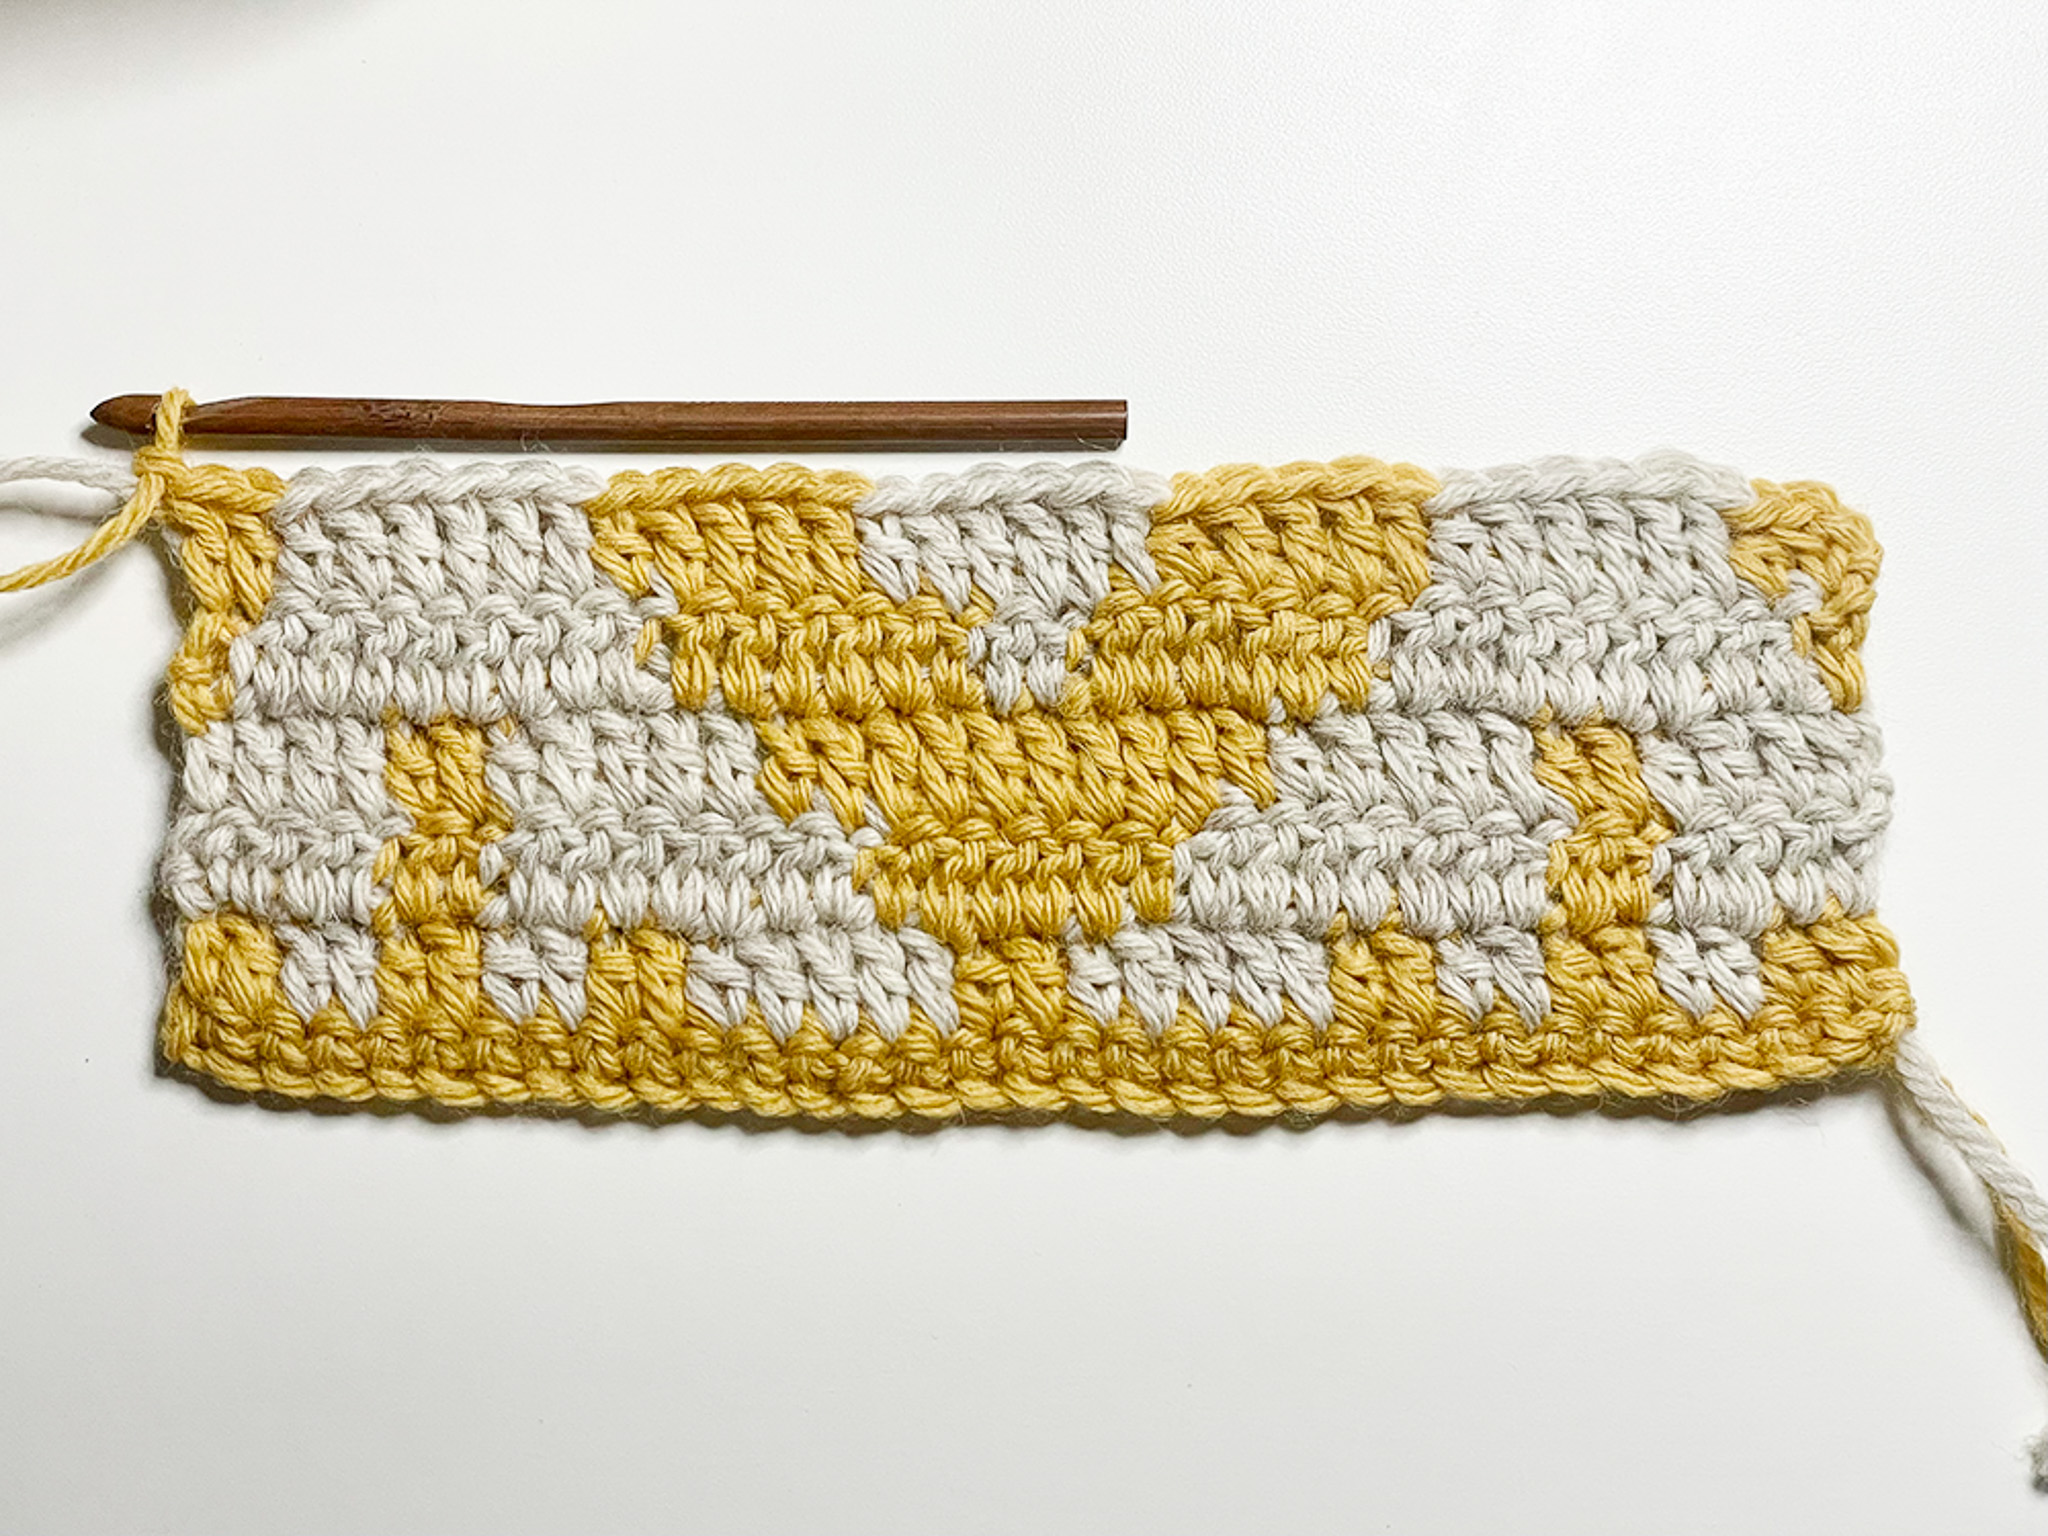
Row 2:
Make 2 yellow double crochet, change color.
Make 2 beige double crochet, change color.
Make 2 yellow double crochet.
Make 2 beige double crochet.
Make 2 yellow double crochet.
Make 5 beige double crochet.
Make 2 yellow double crochet.
Make 5 beige double crochet.
Make 2 yellow double crochet.
Make 2 beige double crochet.
Make 2 yellow double crochet.
Make 2 beige double crochet.
Make 2 yellow double crochet.
Finish the row as previously described with straight edges or as you prefer. Remember the next row starts with beige. Turn. (32)
If unsure how to work double crochet, see the video below. For color changes, see the video in the previous step.
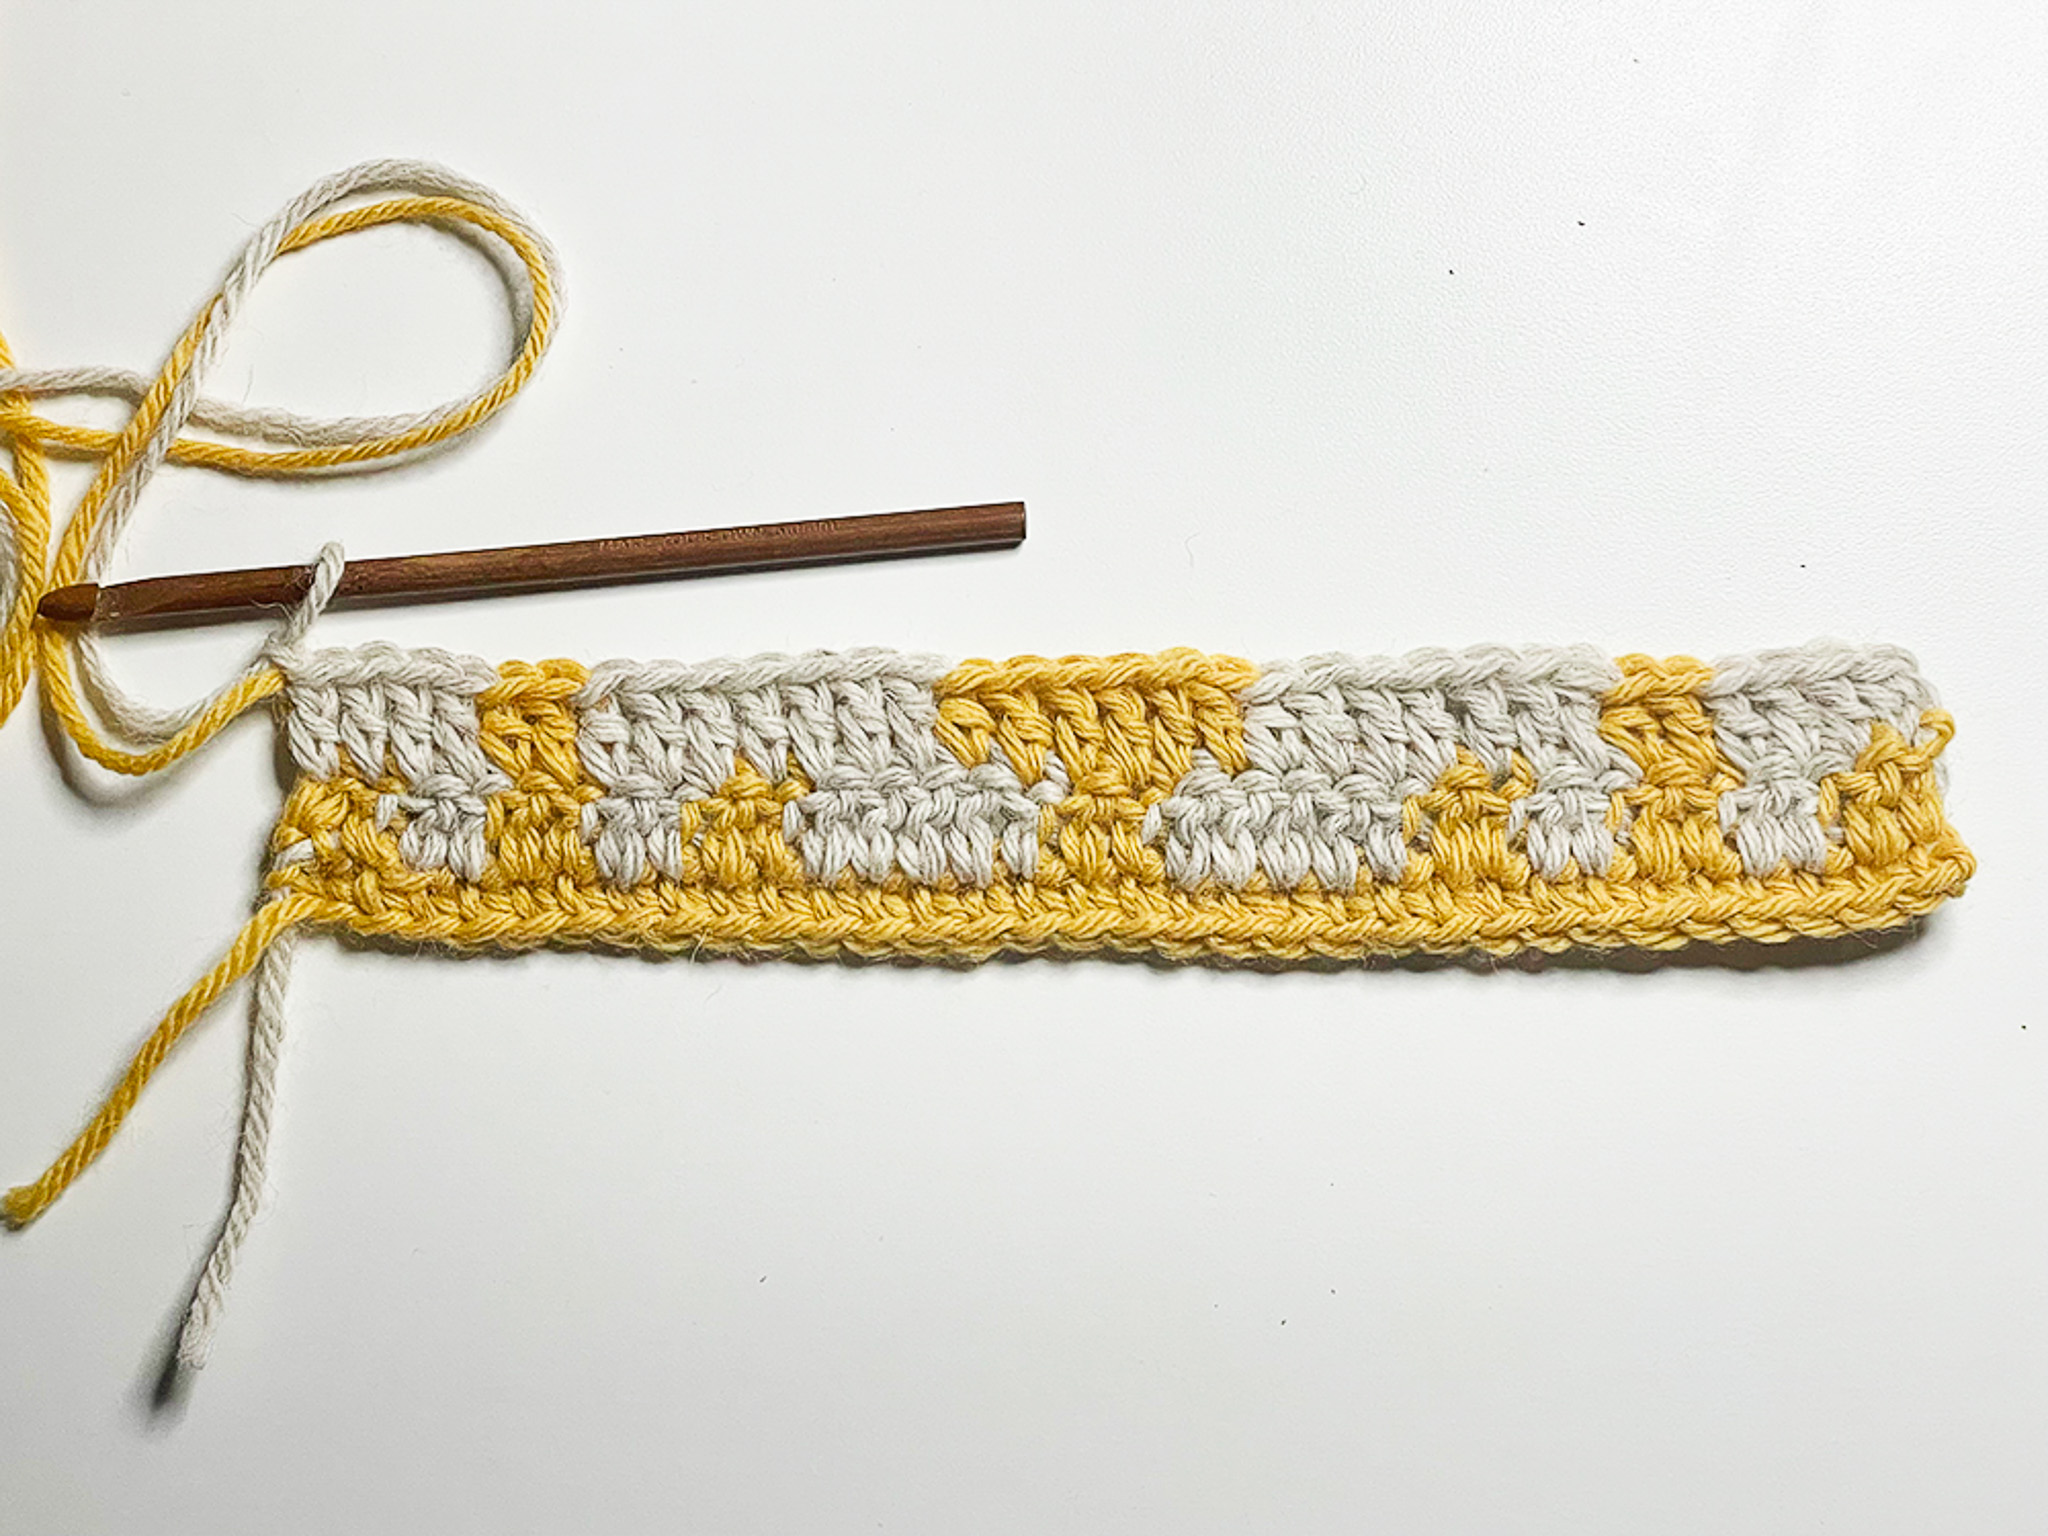
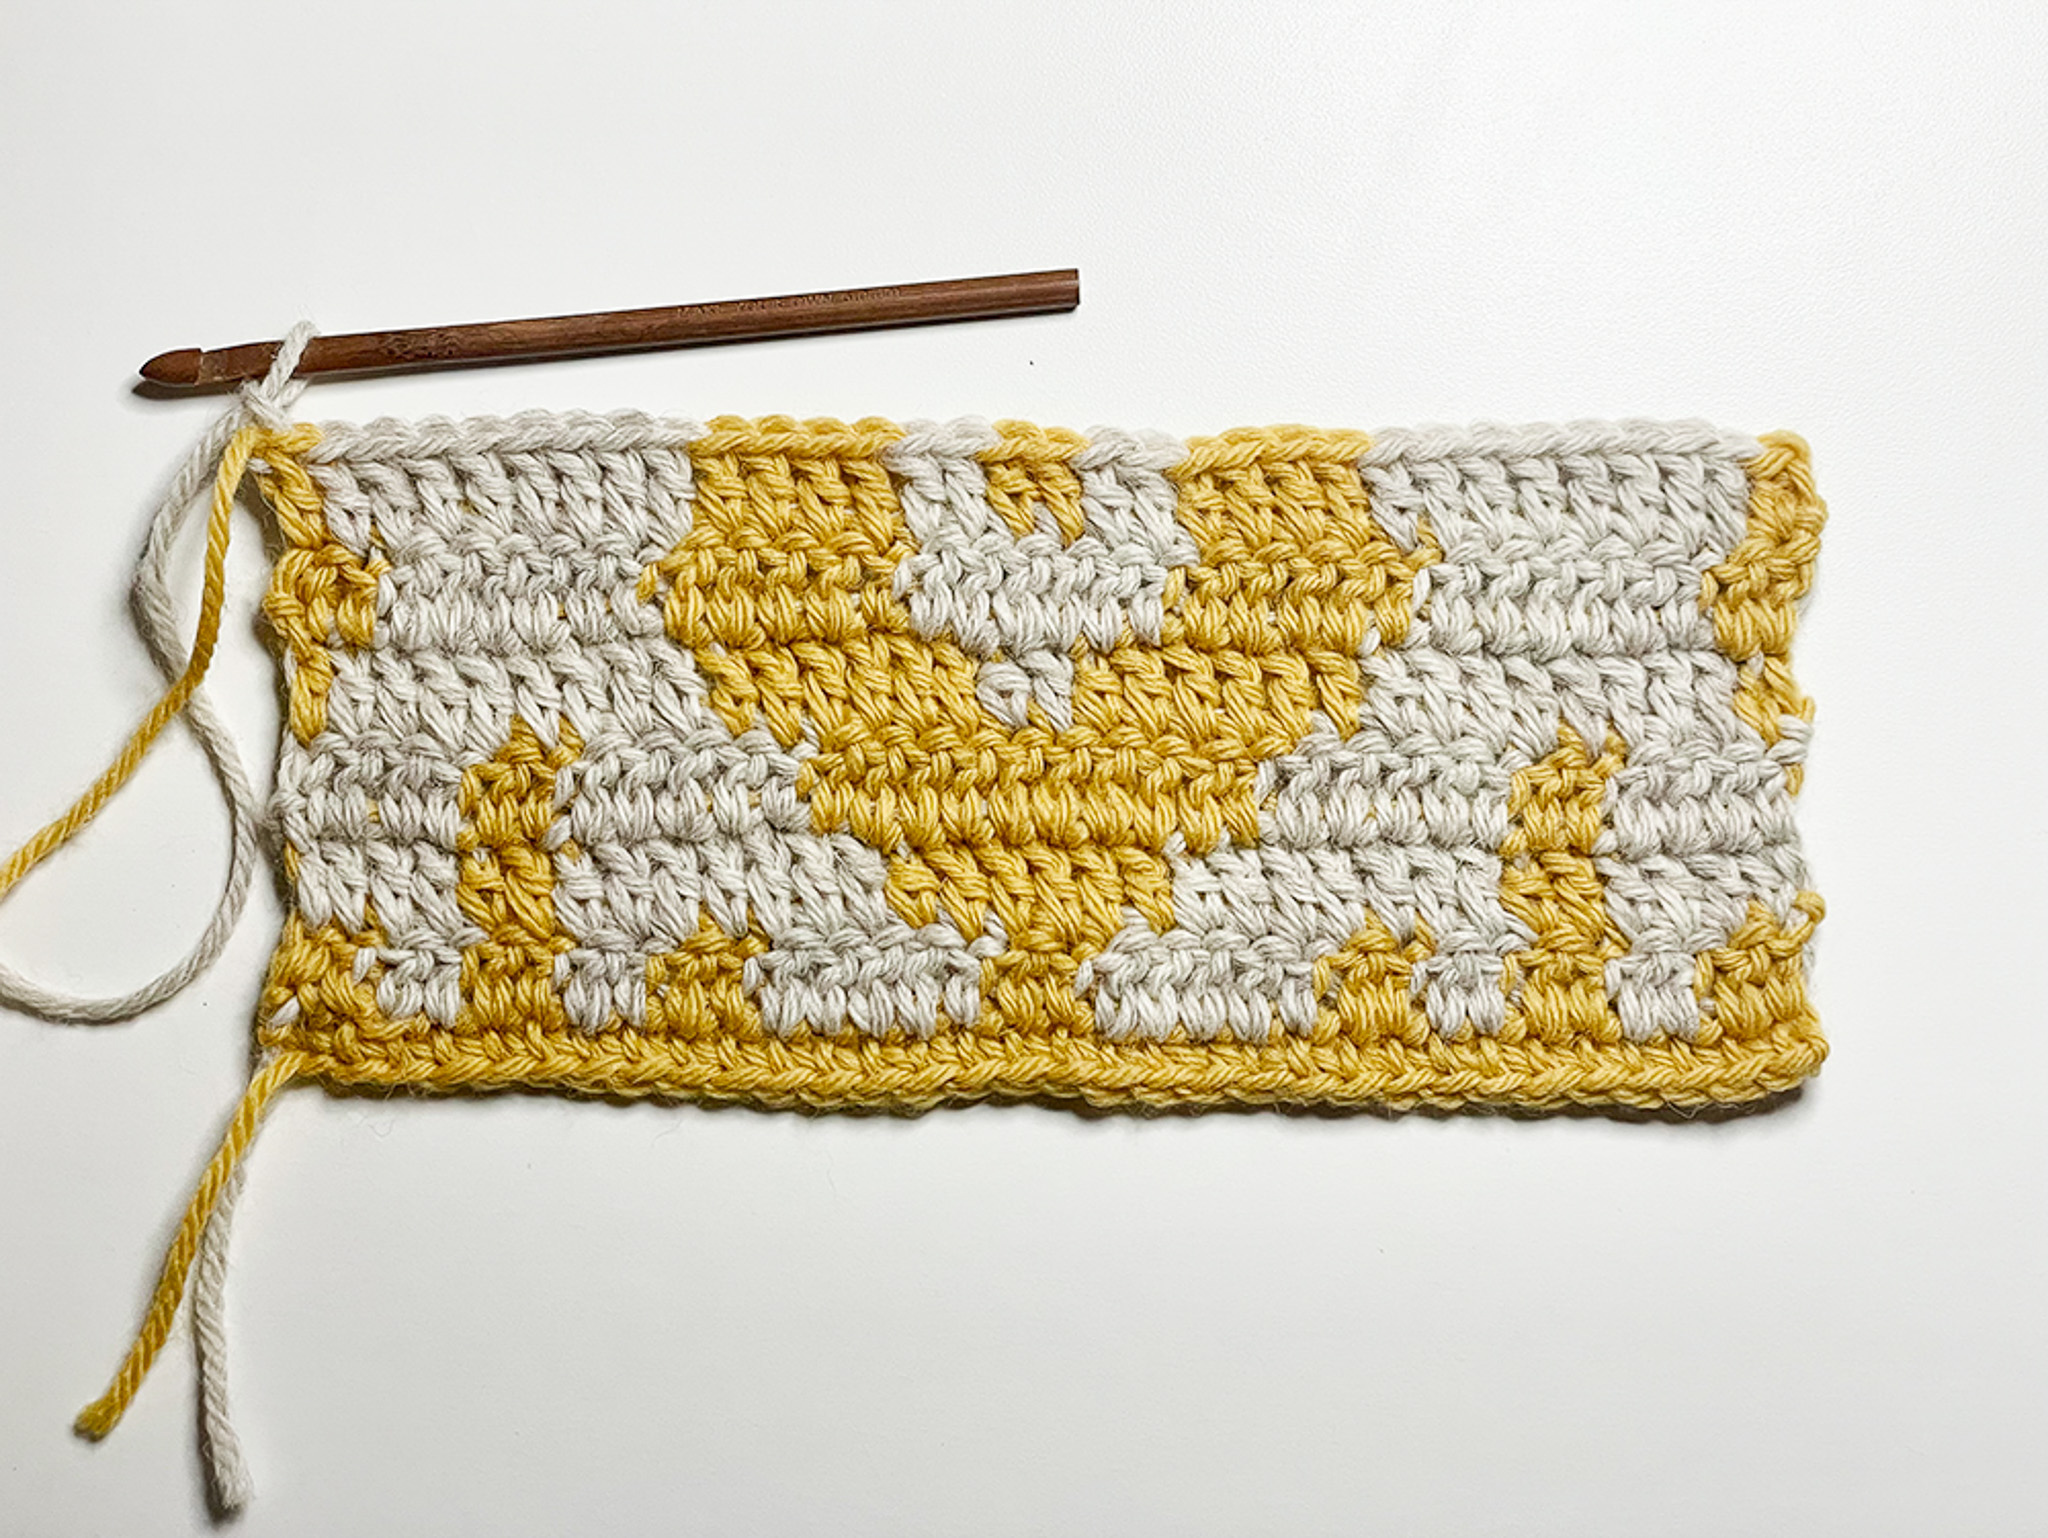
Row 3:
Make 4 beige double crochet (Remember: The first double crochet is already made if you chose the technique for straight edges).
Make 2 yellow double crochet.
Make 7 beige double crochet.
Make 6 yellow double crochet.
Make 7 beige double crochet.
Make 2 yellow double crochet.
Make 4 beige double crochet.
Finish the row as you wish and remember the next row starts with beige. (Note: The pictures do not show how it looks with straight edges). Turn. (32)
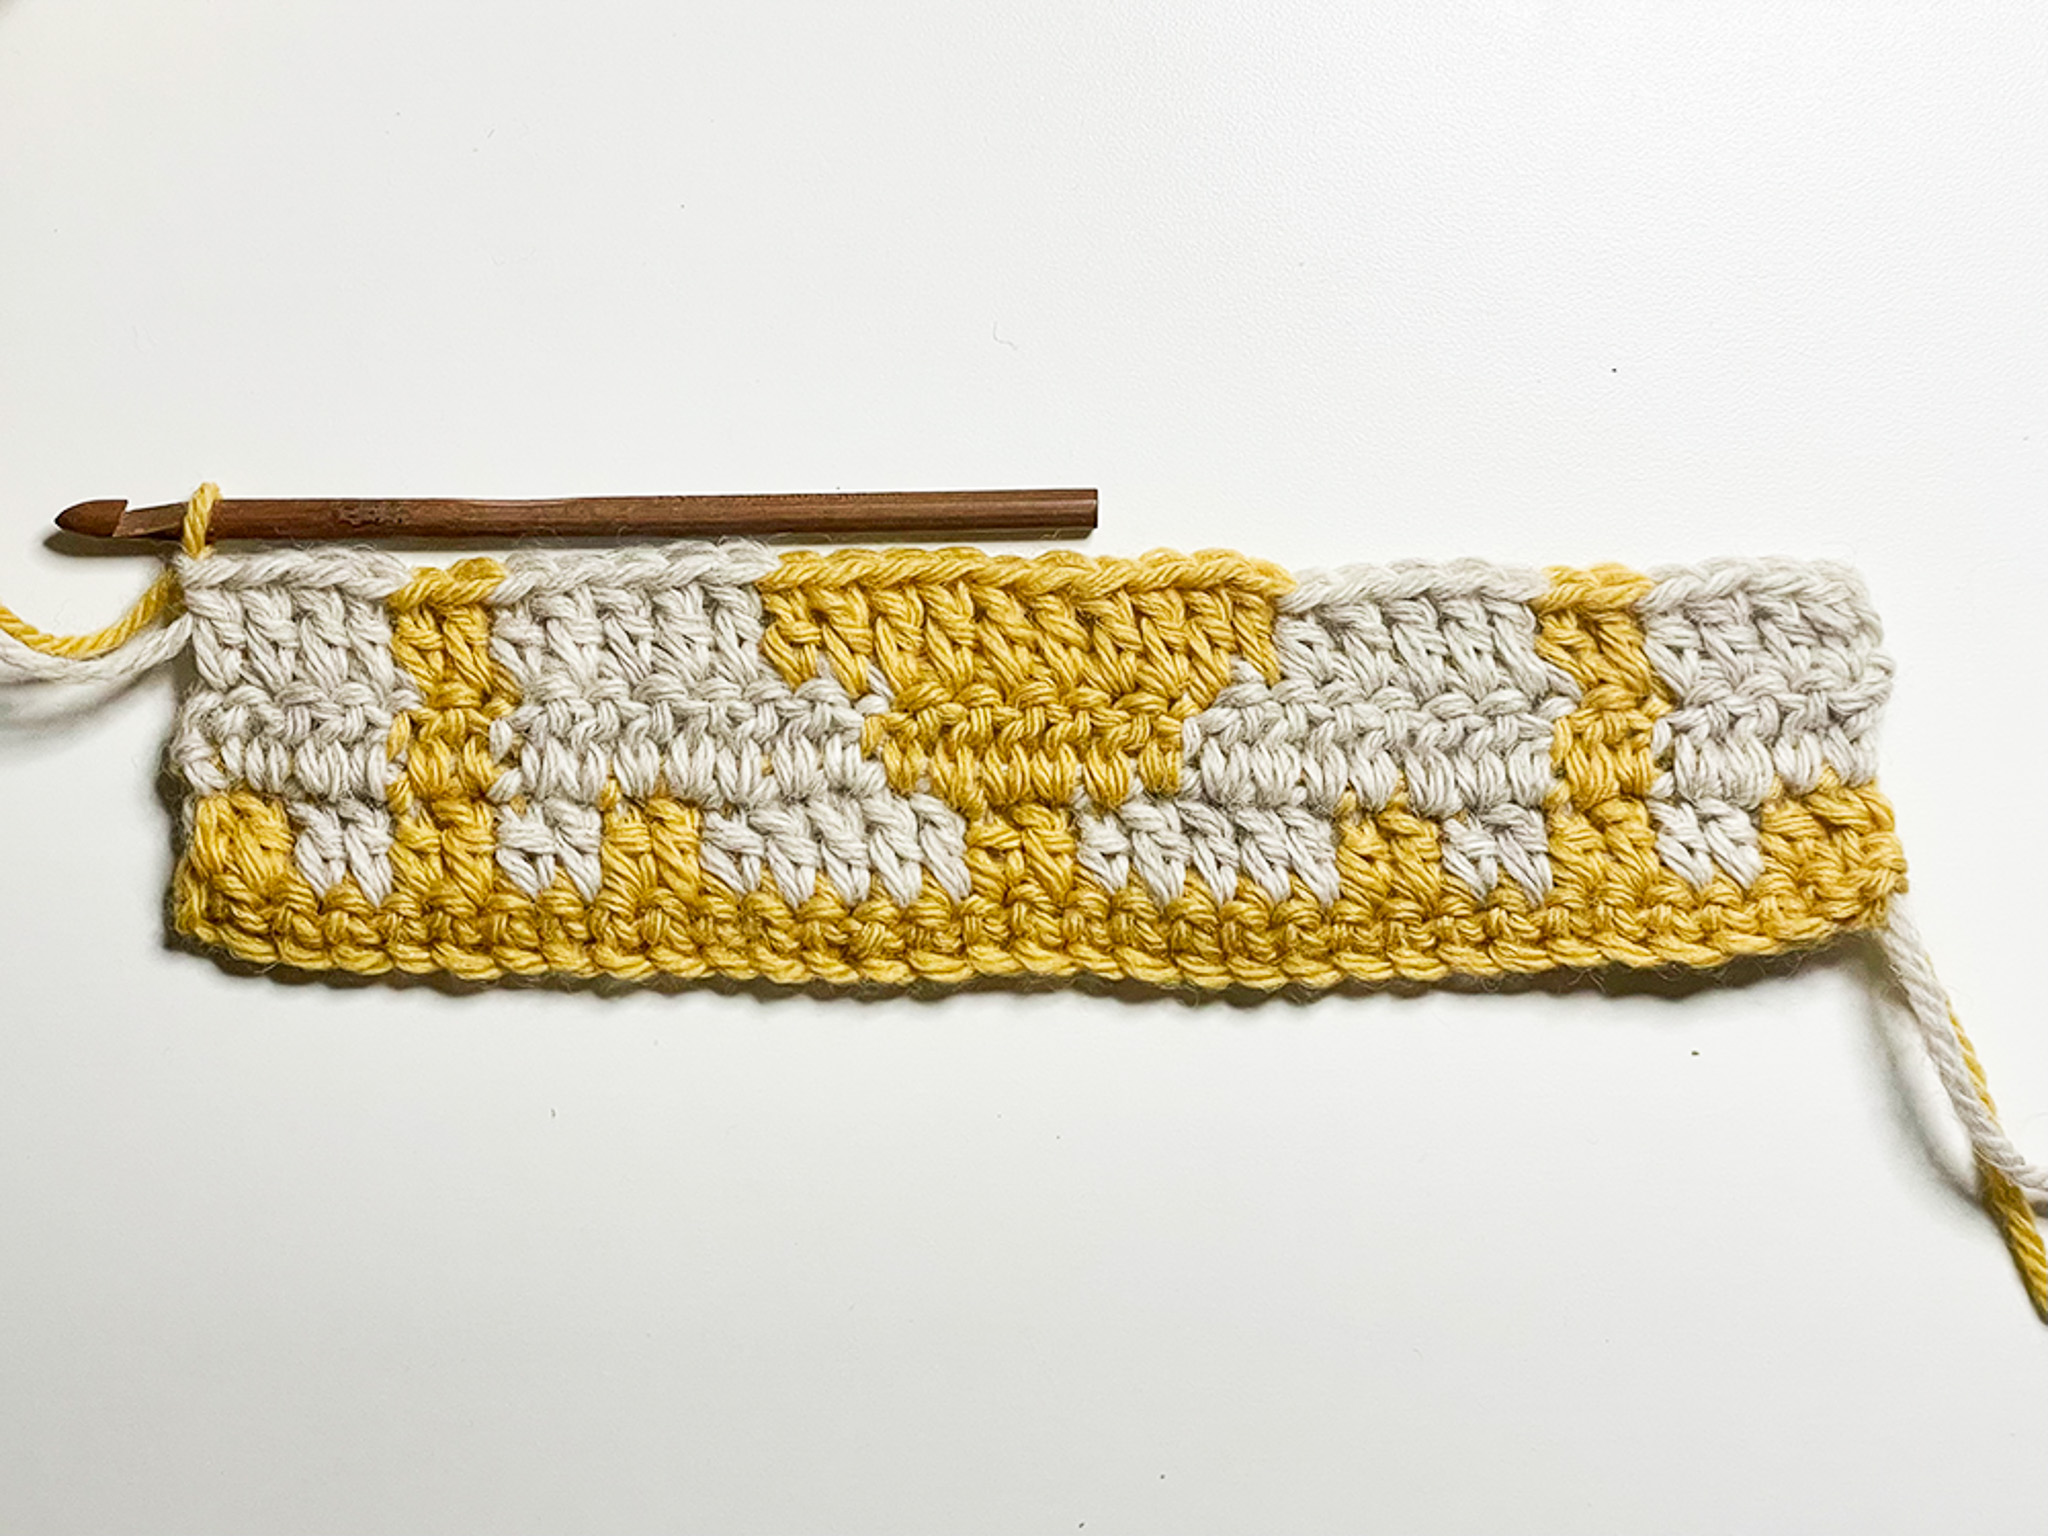
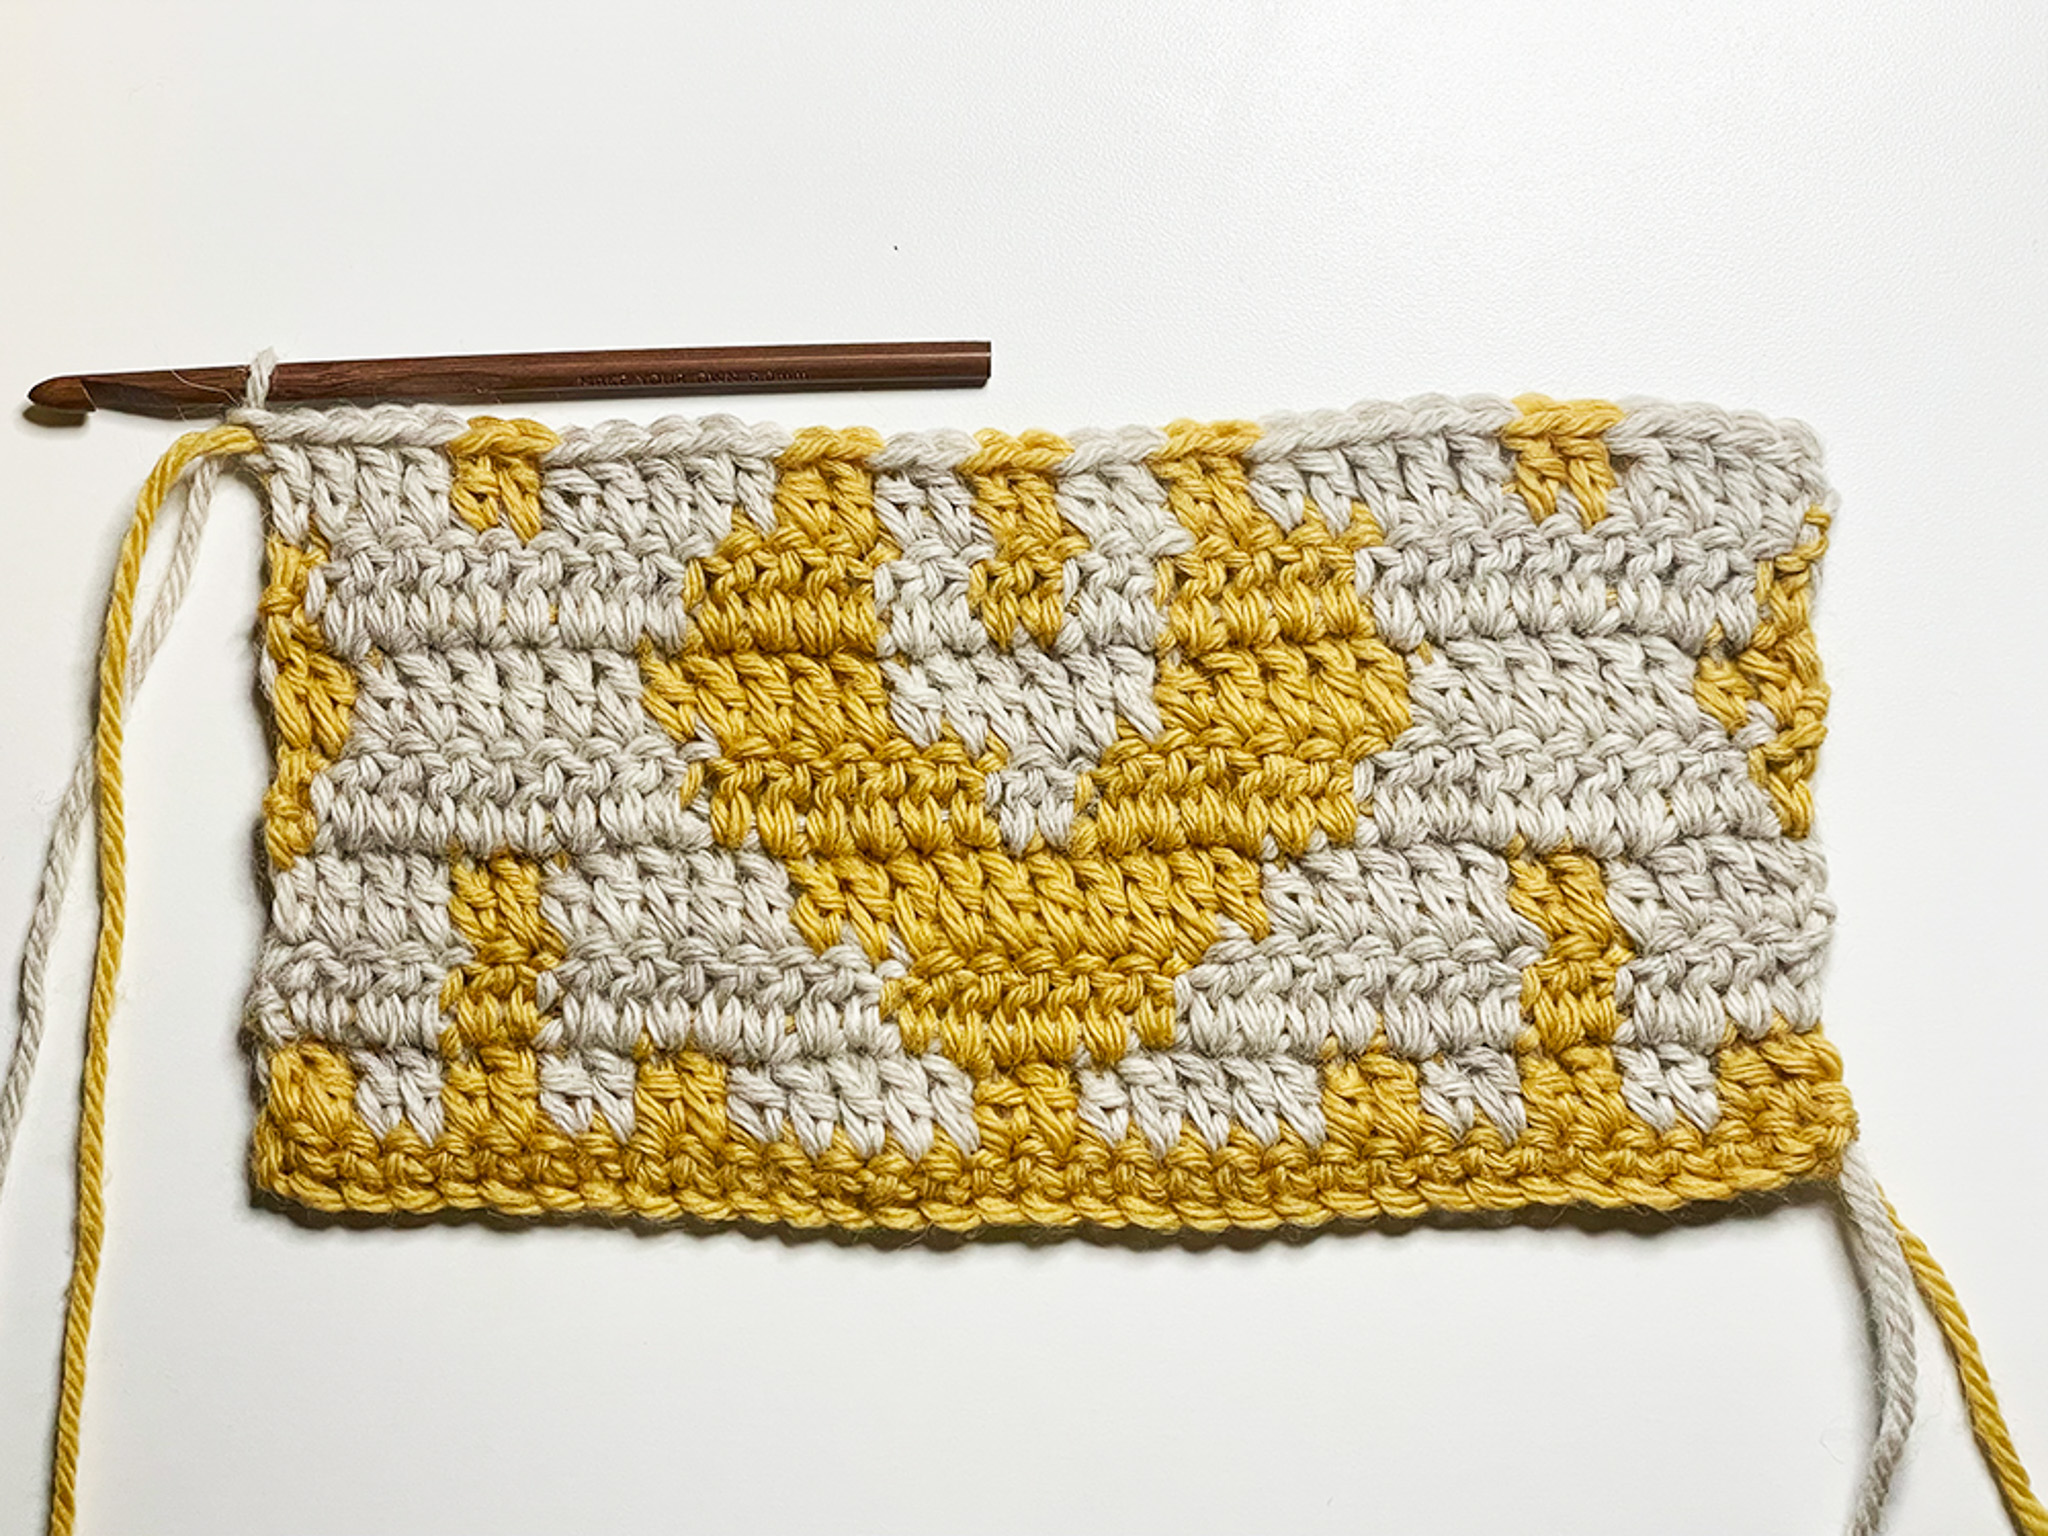
Row 4:
Make 4 beige double crochet.
Make 2 yellow double crochet.
Make 5 beige double crochet.
Make 10 yellow double crochet.
Make 5 beige double crochet.
Make 2 yellow double crochet.
Make 4 beige double crochet.
Finish as desired, next row starts with yellow. (Note: The pictures do not show how it looks with straight edges). Turn. (32)
Row 5:
Make 1 yellow double crochet (Remember: If you have chosen the straight edge technique, do not finish this double crochet completely as you will be changing to beige).
Make 8 beige double crochet.
Make 6 yellow double crochet.
Make 2 beige double crochet.
Make 6 yellow double crochet.
Make 8 beige double crochet.
Make 1 yellow double crochet.
Finish as desired, next row starts with yellow. (Note: The pictures do not show how it looks with straight edges). Turn. (32)
Row 6:
Make 2 yellow double crochet.
Make 6 beige double crochet.
Make 5 yellow double crochet.
Make 6 beige double crochet.
Make 5 yellow double crochet.
Make 6 beige double crochet.
Make 2 yellow double crochet.
Finish as desired, next row starts with yellow. (Note: The pictures do not show how it looks with straight edges). Turn. (32)
Row 7:
Make 1 yellow double crochet (Remember: If you chose the straight edge technique, do not finish this stitch completely as you will change to beige).
Make 8 beige double crochet.
Make 4 yellow double crochet.
Make 2 beige double crochet.
Make 2 yellow double crochet.
Make 2 beige double crochet.
Make 4 yellow double crochet.
Make 8 beige double crochet.
Make 1 yellow double crochet.
Finish as desired, next row starts with beige. (Note: Pictures do not show how it looks with straight edges). Turn. (32)
Row 8:
Make 4 beige double crochet.
Make 2 yellow double crochet.
Make 5 beige double crochet.
Make 2 yellow double crochet.
Make 2 beige double crochet.
Make 2 yellow double crochet.
Make 2 beige double crochet.
Make 2 yellow double crochet.
Make 5 beige double crochet.
Make 2 yellow double crochet.
Make 4 beige double crochet.
Finish as desired, next row starts with beige. (Note: Pictures do not show how it looks with straight edges). Turn. (32)
Row 9:
Make 2 beige double crochets.
Make 6 yellow double crochets.
Make 7 beige double crochets.
Make 2 yellow double crochets.
Make 7 beige double crochets.
Make 6 yellow double crochets.
Make 2 beige double crochets.
Finish as desired; the next row begins with yellow yarn. (Note: The pictures do not show how it looks with straight side edges.) Turn. (32)
Row 10:
Make 10 yellow double crochets.
Make 5 beige double crochets.
Make 2 yellow double crochets.
Make 5 beige double crochets.
Make 10 yellow double crochets.
Finish as desired; the next row begins with yellow yarn. (Note: The pictures do not show how it looks with straight side edges.) Turn. (32)
Row 11:
Make 4 yellow double crochets.
Make 2 beige double crochets.
Make 6 yellow double crochets.
Make 8 beige double crochets.
Make 6 yellow double crochets.
Make 2 beige double crochets.
Make 4 yellow double crochets.
Finish as desired; the next row begins with yellow yarn. (Note: The pictures do not show how it looks with straight side edges.) Turn. (32)
Row 12:
Make 2 yellow double crochets.
Make 6 beige double crochets.
Make 5 yellow double crochets.
Make 6 beige double crochets.
Make 5 yellow double crochets.
Make 6 beige double crochets.
Make 2 yellow double crochets.
Finish as desired; the next row begins with yellow yarn. (Note: The pictures do not show how it looks with straight side edges.) Turn. (32)
Row 13:
Make 2 yellow double crochets.
Make 2 beige double crochets.
Make 2 yellow double crochets.
Make 2 beige double crochets.
Make 4 yellow double crochets.
Make 8 beige double crochets.
Make 4 yellow double crochets.
Make 2 beige double crochets.
Make 2 yellow double crochets.
Make 2 beige double crochets.
Make 2 yellow double crochets.
Finish as desired; the next row begins with yellow yarn. (Note: The pictures do not show how it looks with straight side edges.) Turn. (32)
Now the pattern starts again from Row 2.
We will repeat the pattern between Rows 2 and 13 a total of 10 times – that is, 9 more times.
You can always repeat the steps further if you want an even longer scarf, but you will then need more yarn.
Row 122: Drop the beige yarn. The last row of your scarf should have 32 yellow single crochets, so that it matches the other end. (32)
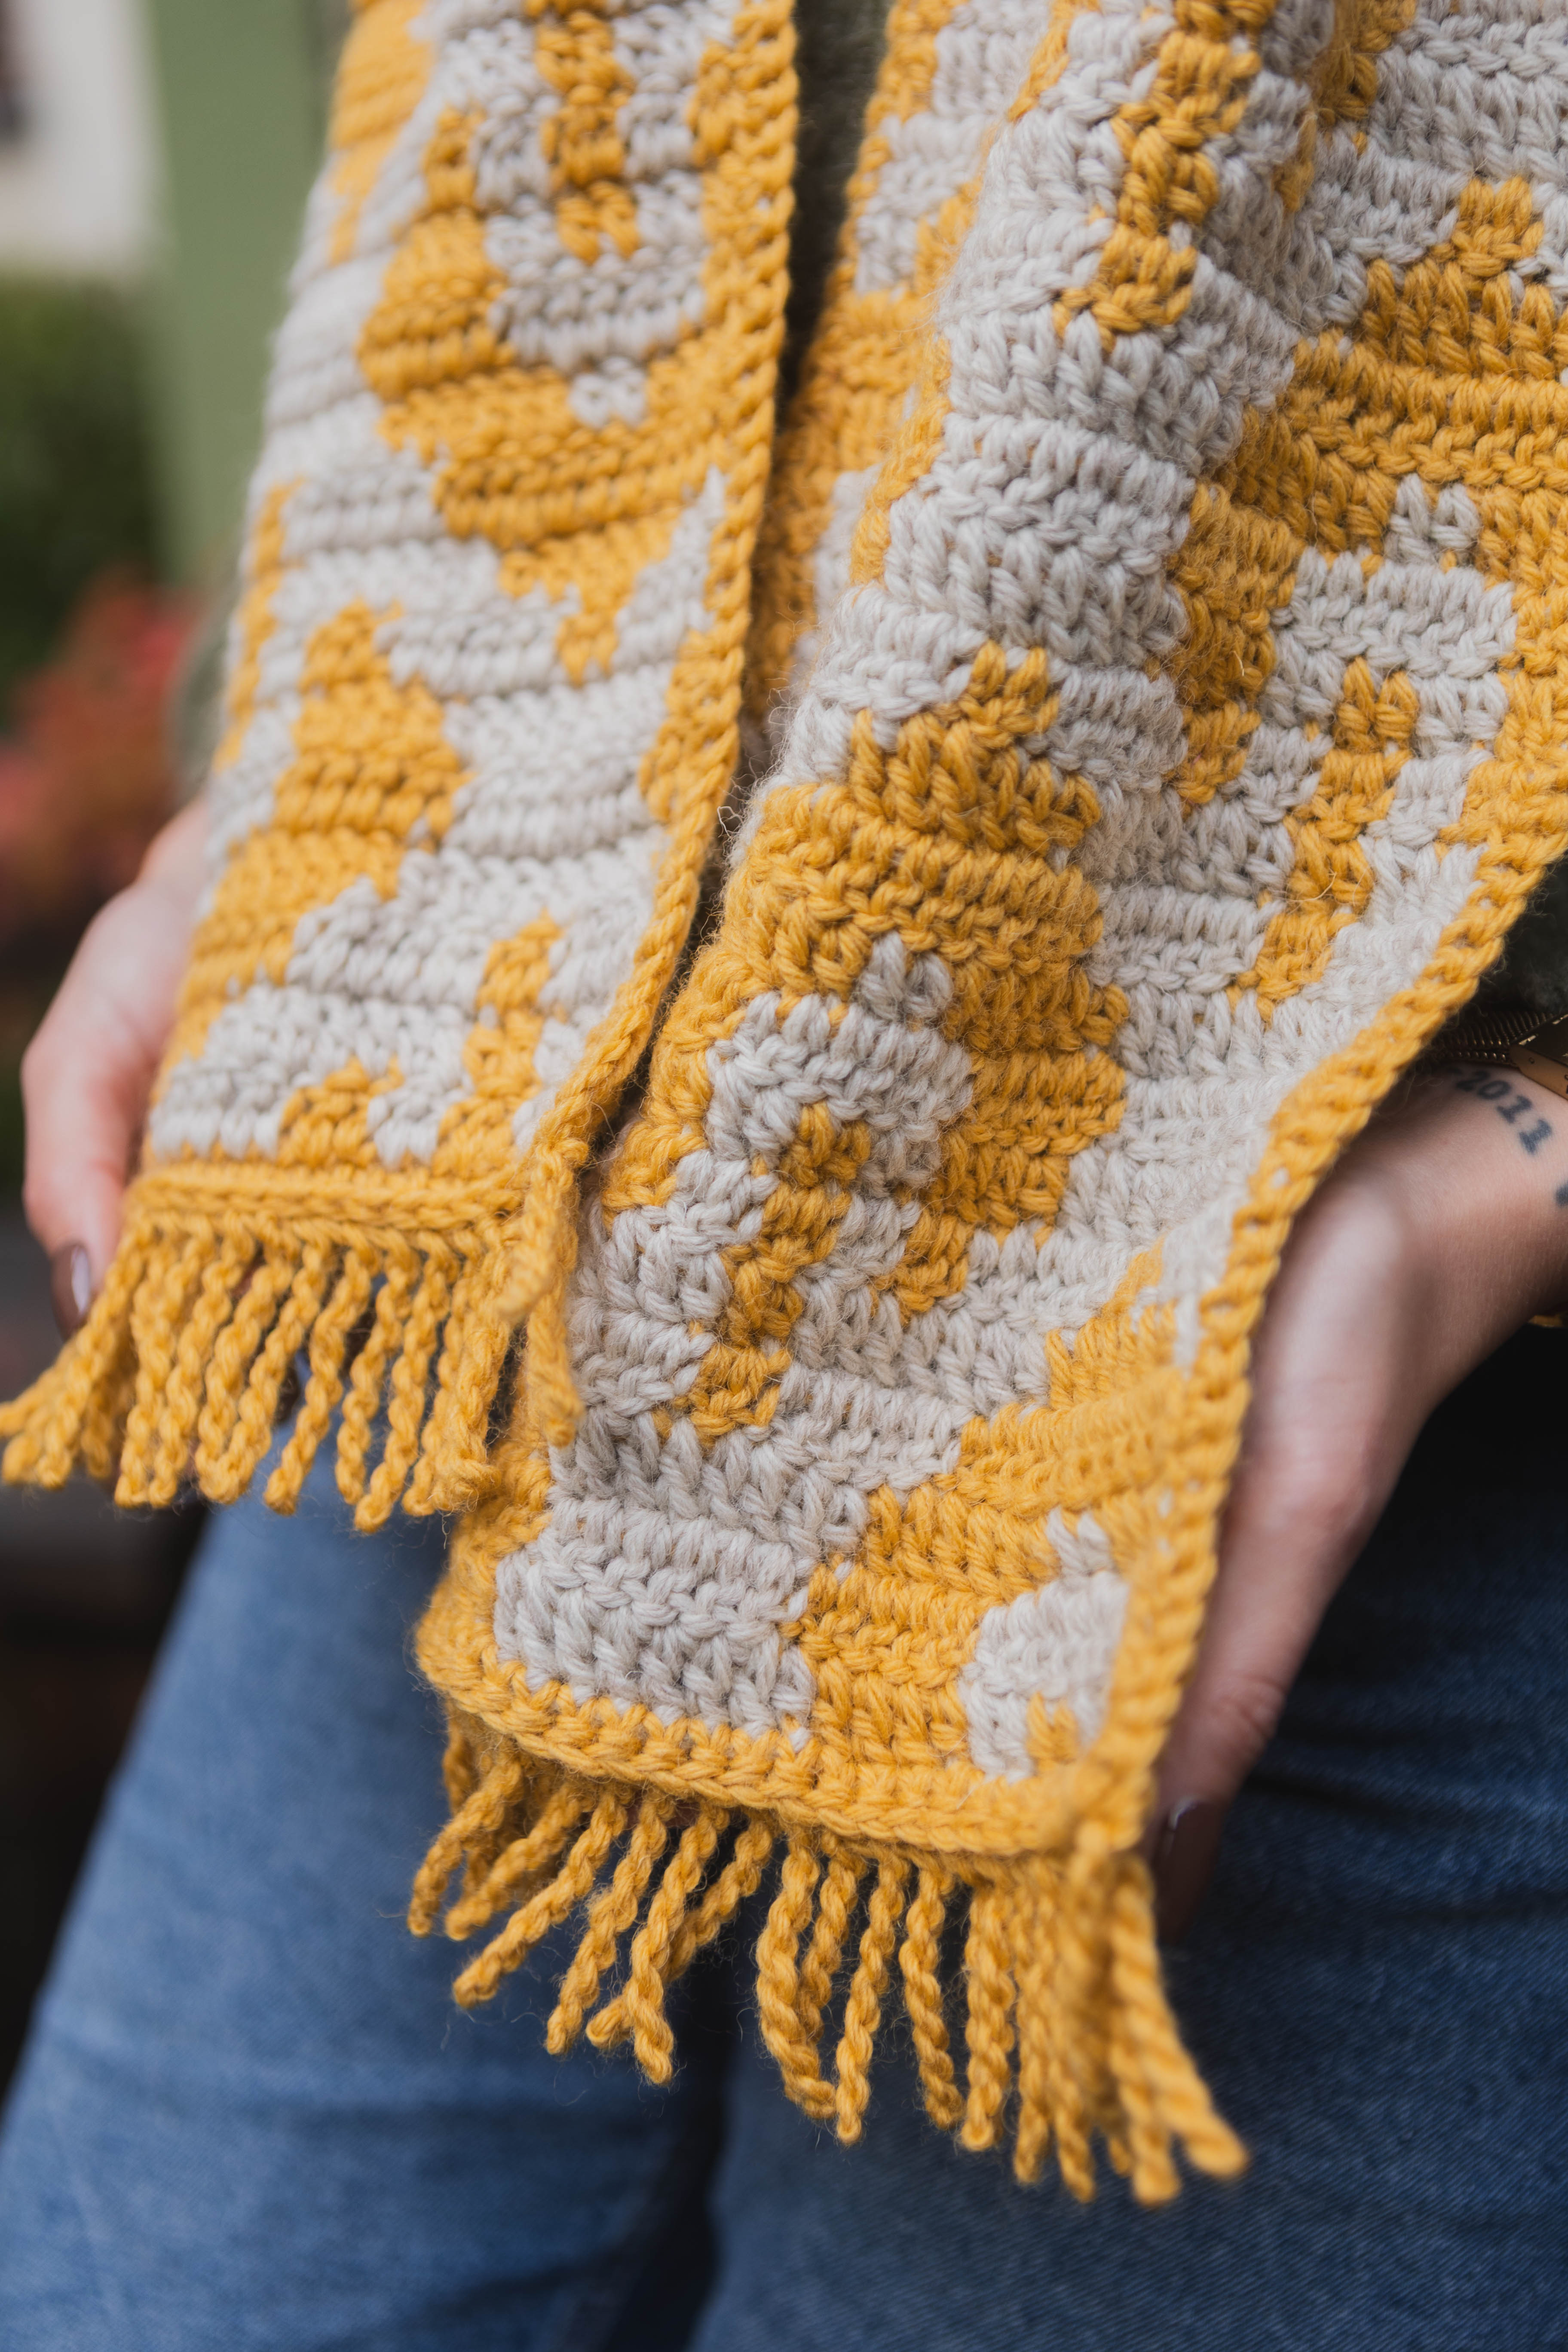
Now you can choose whether you want your scarf to have fringes or not.
If you feel finished, it’s time to weave in all loose ends. If you’re unsure how to fasten off, see the video below.
With fringes (and border): You can choose to make only the fringes or crochet all the way around to give your scarf a nice edging. In the pattern, we crochet around. Make two additional yellow single crochets in the same stitch as your last single crochet.
It’s time to make single crochets along the long side. One double crochet provides space for two single crochets.
There should be 244 single crochets on each long side.
Make sure to place the stitches in the outer strands as much as possible. When you reach the end of one long side, make one more single crochet in the same stitch. This is also the stitch where you will pull out the loop for your first twisted fringe.
It’s now time to make the first row of fringes. In the pattern, we have chosen to make Twisted Fringe. These are made with slip stitches – see the video below (How to make the fringe in the Rory pattern).
- Insert the hook into the stitch and yarn over.
- Pull up a loop until it measures about 15 cm (about the length of MYO’s crochet hook).
- Twist the loop around the hook 20 times.
- Fold the twisted loop in half.
- Insert the hook into the next single crochet and make a slip stitch.
- From your slip stitch, pull up a loop – in other words, repeat from step 2.
- Continue this way in the remaining single crochets, all the way to the end of the row.
- There should be at least 32 fringes, but you can add one more if it feels like there is room.
- The scarf in the picture has 33 twisted fringes on each end.
Then make 244 single crochets along the other long side and repeat the fringe process on the final end. Weave in all loose ends securely.
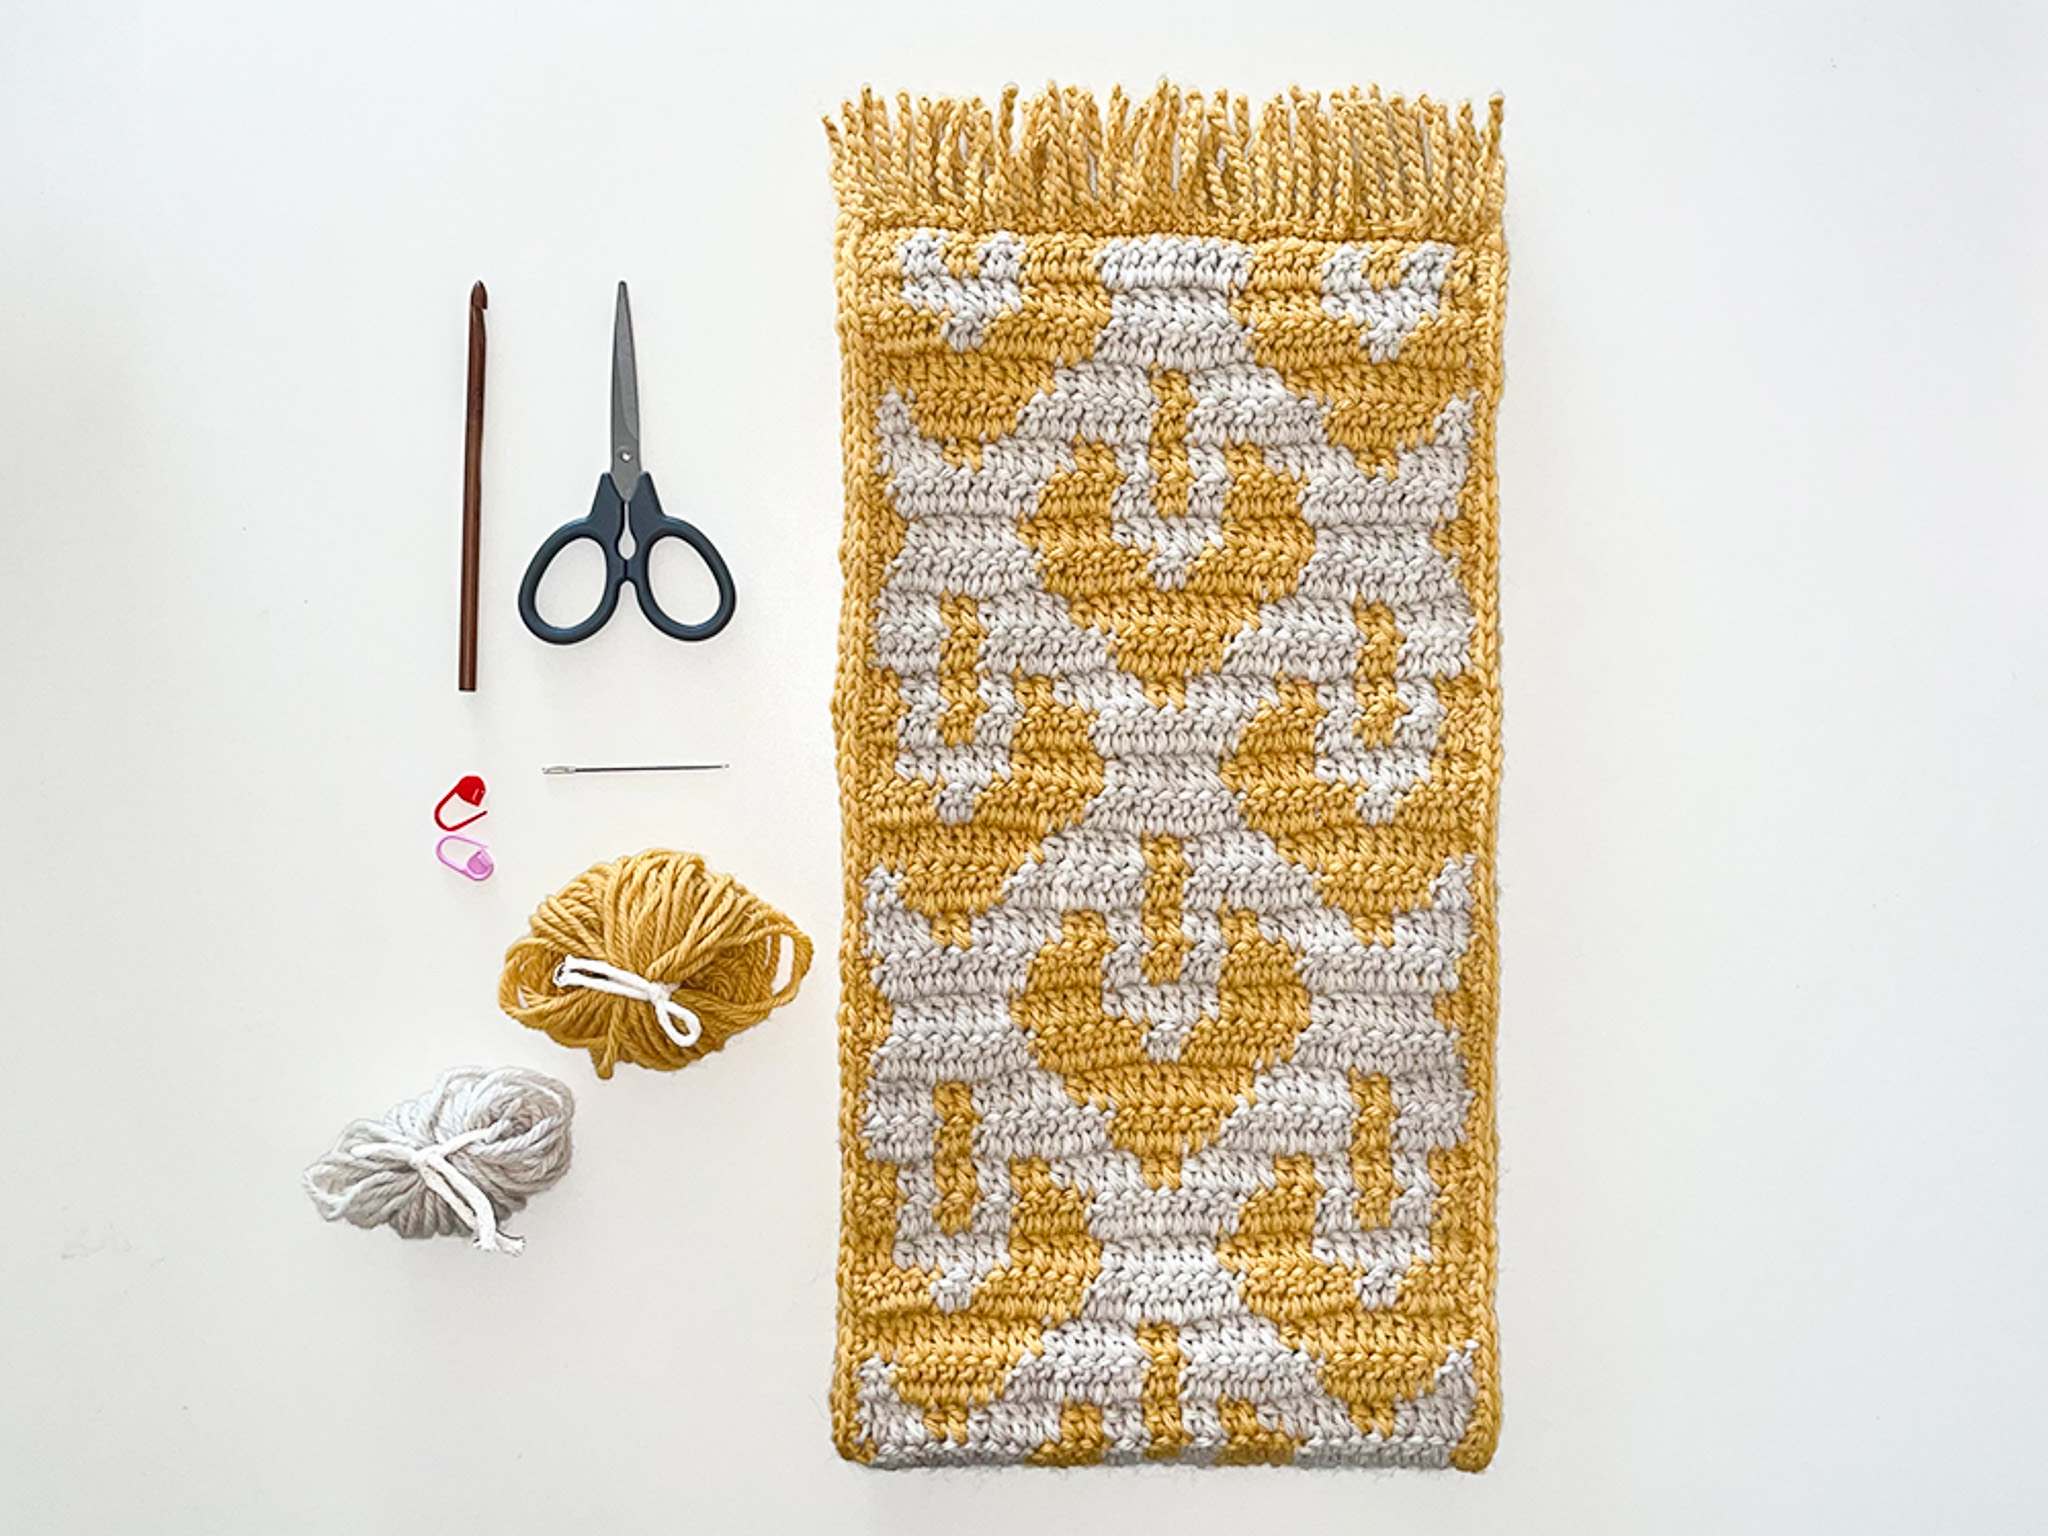
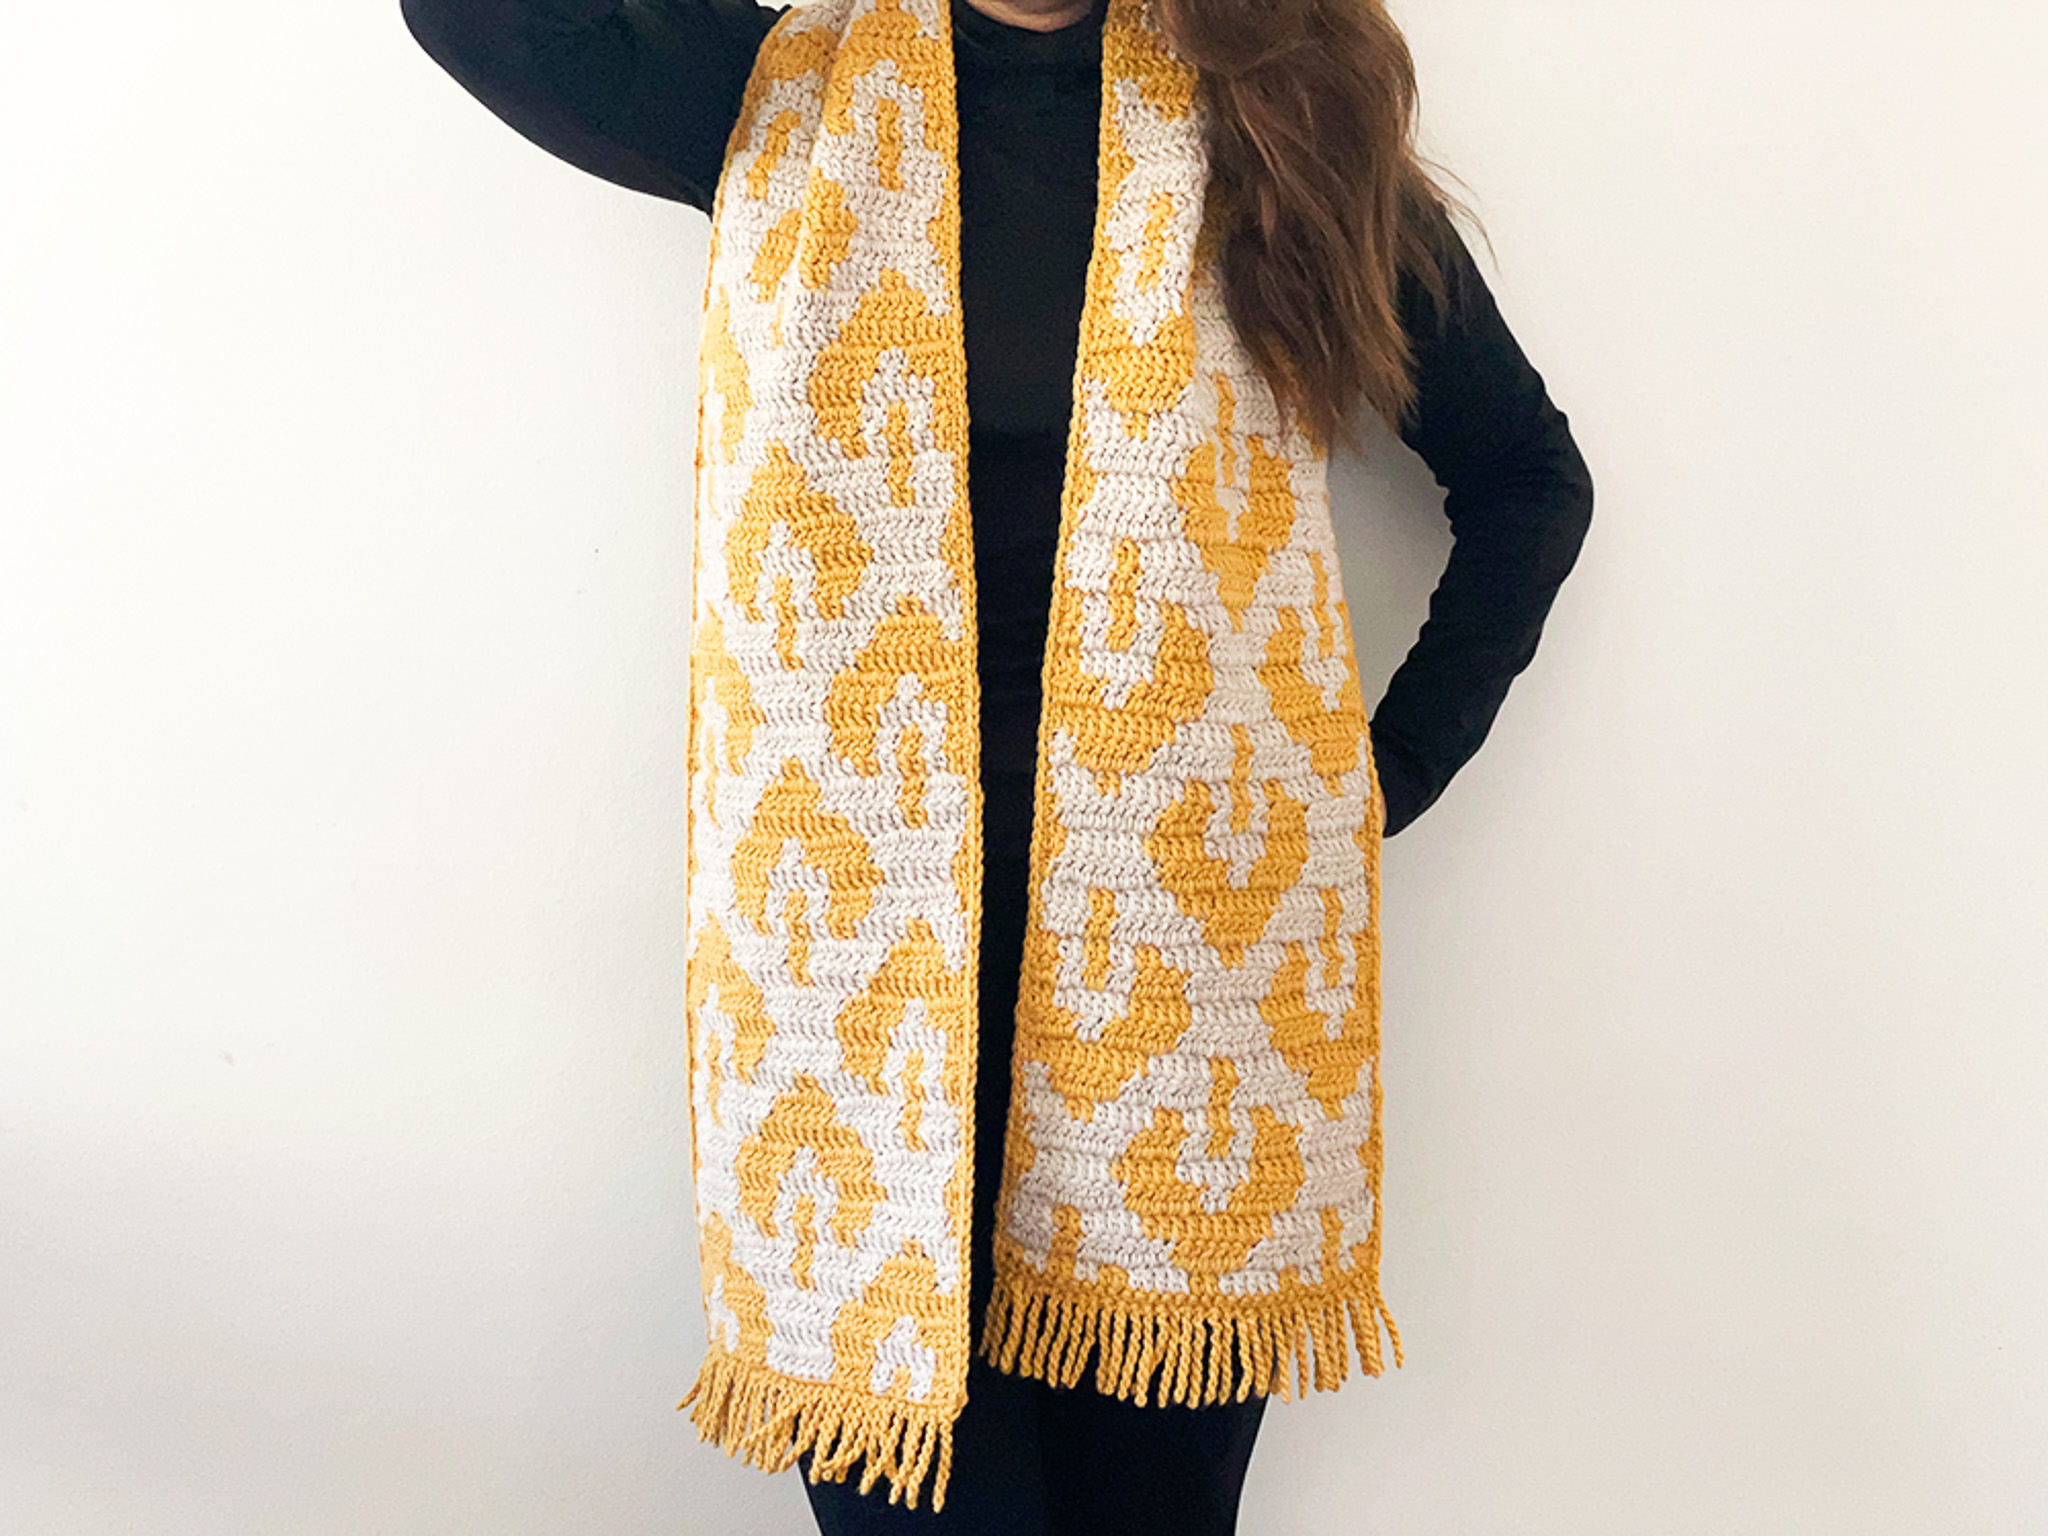
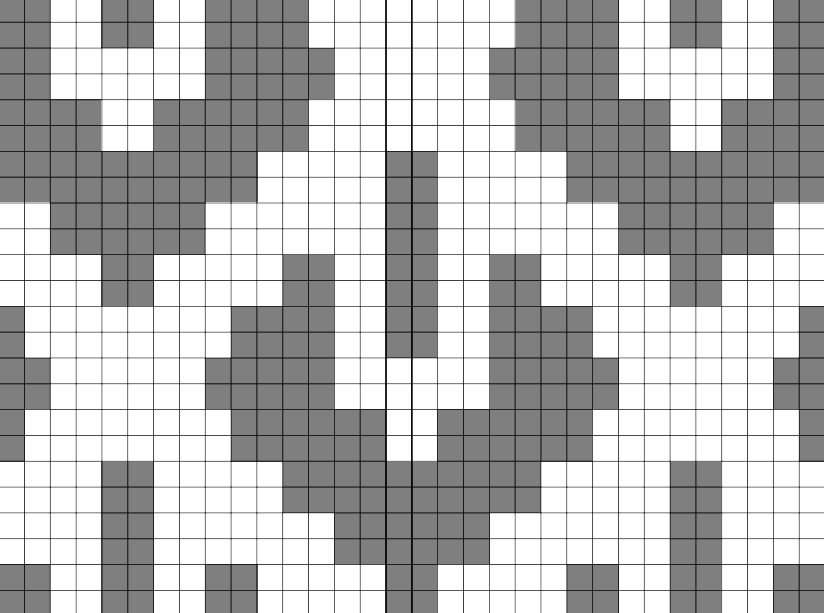
Diagram över mönstret:
Crochet Terms: This is the advanced section of the pattern. If you need help along the way, refer to the simpler section.
Abbreviations (US terms):
sc = single crochet (fm – fast maska)
sl st = slip stitch (sm – smygmaska)
ch = chain (lm – luftmaska)
dc = double crochet (st – stolpe)
(…) = total number of stitches on the row
*…* = repeat the instructions between the asterisks
Row 0: With yellow yarn, ch 33. (33)
Row 1: Work 32 yellow sc in the back loop of the chains.
When you reach the end of the row, place the beige yarn over the yellow so that it can be secured slightly for the next row. Finish with ch 2 in yellow.
Note: Before turning, read the instructions below.
If you choose to make straight side edges, follow the description from step two, where you insert the hook into the second stitch/loop. (32)
If you want nice, straight edges, you can use the technique described below; otherwise, you can continue as usual – for example:
When you have finished your row, ch 2, turn your project, and start a new row by making a dc (double crochet) in the first sc of the new row.
For straight side edges, you need to pay attention to how you finish your row and how you start the next one – see the video in the simpler section of the pattern.
Here’s how:
When you have 1 dc left on the row, start the stitch as usual, but instead of inserting the hook under both loops, insert it only through the front loop (the one closest to you) and then through the side loop on the edge. Yarn over and finish the dc as usual.
Then ch 2. Insert the hook into the second ch from the hook, yarn over, and pull through. Turn the whole project – now you’re going to finish the first dc of the new row:
Insert the hook directly into the first stitch, yarn over and pull through, yarn over and pull through two loops, yarn over again and pull through the last two loops.
Continue with regular dc stitches.
Remember: make the color change before completing the last dc.
In the simpler section of the pattern, there’s a video showing how to change colors.
Row 2:
Make 2 yellow dc,
2 beige dc,
2 yellow dc,
2 beige dc,
2 yellow dc,
5 beige dc,
2 yellow dc,
5 beige dc,
2 yellow dc,
2 beige dc,
2 yellow dc,
2 beige dc,
2 yellow dc.
Finish the row as previously described for straight edges, or in the way you prefer.
Note that the next row begins with beige yarn. Turn. (32)
Row 3:
Make 4 beige dc (Remember: if you’re using the straight-edge technique, the first dc is already made).
Make 2 yellow dc.
Make 7 beige dc.
Make 6 yellow dc.
Make 7 beige dc.
Make 2 yellow dc.
Make 4 beige dc.
Finish the row as you prefer, keeping in mind that the next row begins with beige yarn.
Note: The pictures do not show how it looks with straight side edges. Turn. (32)
Row 4:
Make 4 beige dc.
Make 2 yellow dc.
Make 5 beige dc.
Make 10 yellow dc.
Make 5 beige dc.
Make 2 yellow dc.
Make 4 beige dc.
Finish as desired; the next row begins with yellow yarn.
Note: The pictures do not show how it looks with straight side edges. Turn. (32)
Row 5:
Make 1 yellow dc
(Remember: if you’re using the straight-edge technique, don’t finish this dc completely, as you’ll need to change to beige).
Make 8 beige dc.
Make 6 yellow dc.
Make 2 beige dc.
Make 6 yellow dc.
Make 8 beige dc.
Make 1 yellow dc.
Finish as desired; the next row begins with yellow yarn.
Note: The pictures do not show how it looks with straight side edges. Turn. (32)
Row 6:
Make 2 yellow dc.
Make 6 beige dc.
Make 5 yellow dc.
Make 6 beige dc.
Make 5 yellow dc.
Make 6 beige dc.
Make 2 yellow dc.
Finish as desired; the next row begins with yellow yarn.
Note: The pictures do not show how it looks with straight side edges. Turn. (32)
Row 7:
Make 1 yellow dc
(Remember: if you’re using the straight-edge technique, don’t finish this dc completely, as you’ll need to change to beige).
Make 8 beige dc.
Make 4 yellow dc.
Make 2 beige dc.
Make 2 yellow dc.
Make 2 beige dc.
Make 4 yellow dc.
Make 8 beige dc.
Make 1 yellow dc.
Finish as desired; the next row begins with beige yarn.
Note: The pictures do not show how it looks with straight side edges. Turn. (32)
Row 8:
Make 4 beige dc.
Make 2 yellow dc.
Make 5 beige dc.
Make 2 yellow dc.
Make 2 beige dc.
Make 2 yellow dc.
Make 2 beige dc.
Make 2 yellow dc.
Make 5 beige dc.
Make 2 yellow dc.
Make 4 beige dc.
Finish as desired; the next row begins with beige yarn.
Note: The pictures do not show how it looks with straight side edges. Turn. (32)
Row 9:
Make 2 beige dc.
Make 6 yellow dc.
Make 7 beige dc.
Make 2 yellow dc.
Make 7 beige dc.
Make 6 yellow dc.
Make 2 beige dc.
Finish as desired; the next row begins with yellow yarn.
Note: The pictures do not show how it looks with straight side edges. Turn. (32)
Row 10:
Make 10 yellow dc.
Make 5 beige dc.
Make 2 yellow dc.
Make 5 beige dc.
Make 10 yellow dc.
Finish as desired; the next row begins with yellow yarn.
Note: The pictures do not show how it looks with straight side edges. Turn. (32)
Row 11:
Make 4 yellow dc.
Make 2 beige dc.
Make 6 yellow dc.
Make 8 beige dc.
Make 6 yellow dc.
Make 2 beige dc.
Make 4 yellow dc.
Finish as desired; the next row begins with yellow yarn.
Note: The pictures do not show how it looks with straight side edges. Turn. (32)
Row 12:
Make 2 yellow dc.
Make 6 beige dc.
Make 5 yellow dc.
Make 6 beige dc.
Make 5 yellow dc.
Make 6 beige dc.
Make 2 yellow dc.
Finish as desired; the next row begins with yellow yarn.
Note: The pictures do not show how it looks with straight side edges. Turn. (32)
Row 13:
Make 2 yellow dc.
Make 2 beige dc.
Make 2 yellow dc.
Make 2 beige dc.
Make 4 yellow dc.
Make 8 beige dc.
Make 4 yellow dc.
Make 2 beige dc.
Make 2 yellow dc.
Make 2 beige dc.
Make 2 yellow dc.
Finish as desired; the next row begins with yellow yarn.
Note: The pictures do not show how it looks with straight side edges. Turn. (32)
Now the pattern repeats from Row 2.
We will repeat the pattern between Rows 2 and 13 a total of 10 times – that is, 9 more times.
You can always repeat the steps again if you’d like an even longer scarf, but you will then need more yarn.
Row 122: Drop the white yarn. The last row of your scarf should have 32 yellow sc so that it matches the other end. (32)
Now you can decide whether you want to add fringes to your scarf or not.
If you feel finished, it’s time to weave in all loose ends.
With fringes (and edging)
You can choose to make only the fringes, or crochet all the way around to give your scarf a neat border. In this pattern, we crochet around.
Make 2 additional yellow sc in the same st as your last sc.
It’s time to make sc along the long side. One dc provides space for 2 sc. There should be 244 sc on each long side. Make sure to place the stitches in the outer strands as much as possible.
When you reach the end of one long side, make 1 more sc in the same sc. This is also the stitch where you will pull up the loop for your first twisted fringe.
Now it’s time to make the first row of fringes. In this pattern, we’ve chosen Twisted Fringe. These are made with sl st – see the video below:
- Insert the hook into the stitch, yo (yarn over).
- Pull up a loop until it measures about 15 cm (about the length of MYO’s crochet hook).
- Twist the loop around the hook 20 times.
- Fold the twisted loop in half.
- Insert the hook into the next sc and make a sl st.
- From your sl st, pull up a loop – repeat from Step 2.
Continue like this in the remaining sc, all the way to the end of the row.
There should be at least 32 fringes, but you can add one more if there’s room. The scarf in the picture has 33 twisted fringes on each end.
Then make 244 sc along the other long side and repeat the fringe process on the final end. Weave in all loose ends securely.
All done!
The rights to this pattern belong to MYO Make Your Own. The pattern or its pictures may not be copied, shared or resold either in parts or in its entirety, but you may sell items you have crocheted from this pattern. If you have questions about the pattern, contact MYO at hello@makeyourown.se.
Row 0: Start by making a foundation chain of 33 chains with the yellow color (33). If you’re unsure how to crochet a chain, see the video below.
Row 1: Make 32 yellow single crochets in the back loop of the foundation chain.
When you reach the end of the row, lay the beige yarn over the yellow yarn so it can be slightly secured for the next row.
Finish with 2 yellow chains. NOTE: Before you turn, read the description below. If you choose to make straight edges, follow the instructions from step two where you insert your hook into the second stitch/loop. (32)
If you want nice straight edges, you can use the technique described below, otherwise, you can do it as you usually do — for example: when you finish your row, chain 2, turn your work, and start a new row by making a double crochet in the first single crochet of the new row.
For straight edges, you need to pay attention to how you finish your row and how you start the new row.
Here’s how to do it:
When you have one double crochet left on the row, start a double crochet as usual, but instead of going into the next stitch as you normally do, insert your hook only through the outer loop (the one closest to you) and then through the side loop on the edge. Yarn over and finish your doublecrochet as usual. Then chain 2.
Insert your hook into the second stitch/loop from the hook, yarn over and pull through.
Turn your entire work — now you’re ready to finish the first dc of the new row. Insert your hook directly into the first stitch, yarn over and pull through, yarn over and pull through 2 loops, yarn over and pull through 2 loops again.
Continue with regular double crochets after that.
Remember to do a color change before finishing the last dc — see Video below.
Row 2:
Make 2 yellow double crochet, change color.
Make 2 beige double crochet, change color.
Make 2 yellow double crochet.
Make 2 beige double crochet.
Make 2 yellow double crochet.
Make 5 beige double crochet.
Make 2 yellow double crochet.
Make 5 beige double crochet.
Make 2 yellow double crochet.
Make 2 beige double crochet.
Make 2 yellow double crochet.
Make 2 beige double crochet.
Make 2 yellow double crochet.
Finish the row as previously described with straight edges or as you prefer. Remember the next row starts with beige. Turn. (32)
If unsure how to work double crochet, see the video below. For color changes, see the video in the previous step.
Row 3:
Make 4 beige double crochet (Remember: The first double crochet is already made if you chose the technique for straight edges).
Make 2 yellow double crochet.
Make 7 beige double crochet.
Make 6 yellow double crochet.
Make 7 beige double crochet.
Make 2 yellow double crochet.
Make 4 beige double crochet.
Finish the row as you wish and remember the next row starts with beige. (Note: The pictures do not show how it looks with straight edges). Turn. (32)
Row 4:
Make 4 beige double crochet.
Make 2 yellow double crochet.
Make 5 beige double crochet.
Make 10 yellow double crochet.
Make 5 beige double crochet.
Make 2 yellow double crochet.
Make 4 beige double crochet.
Finish as desired, next row starts with yellow. (Note: The pictures do not show how it looks with straight edges). Turn. (32)
Row 5:
Make 1 yellow double crochet (Remember: If you have chosen the straight edge technique, do not finish this double crochet completely as you will be changing to beige).
Make 8 beige double crochet.
Make 6 yellow double crochet.
Make 2 beige double crochet.
Make 6 yellow double crochet.
Make 8 beige double crochet.
Make 1 yellow double crochet.
Finish as desired, next row starts with yellow. (Note: The pictures do not show how it looks with straight edges). Turn. (32)
Row 6:
Make 2 yellow double crochet.
Make 6 beige double crochet.
Make 5 yellow double crochet.
Make 6 beige double crochet.
Make 5 yellow double crochet.
Make 6 beige double crochet.
Make 2 yellow double crochet.
Finish as desired, next row starts with yellow. (Note: The pictures do not show how it looks with straight edges). Turn. (32)
Row 7:
Make 1 yellow double crochet (Remember: If you chose the straight edge technique, do not finish this stitch completely as you will change to beige).
Make 8 beige double crochet.
Make 4 yellow double crochet.
Make 2 beige double crochet.
Make 2 yellow double crochet.
Make 2 beige double crochet.
Make 4 yellow double crochet.
Make 8 beige double crochet.
Make 1 yellow double crochet.
Finish as desired, next row starts with beige. (Note: Pictures do not show how it looks with straight edges). Turn. (32)
Row 8:
Make 4 beige double crochet.
Make 2 yellow double crochet.
Make 5 beige double crochet.
Make 2 yellow double crochet.
Make 2 beige double crochet.
Make 2 yellow double crochet.
Make 2 beige double crochet.
Make 2 yellow double crochet.
Make 5 beige double crochet.
Make 2 yellow double crochet.
Make 4 beige double crochet.
Finish as desired, next row starts with beige. (Note: Pictures do not show how it looks with straight edges). Turn. (32)
Row 9:
Make 2 beige double crochets.
Make 6 yellow double crochets.
Make 7 beige double crochets.
Make 2 yellow double crochets.
Make 7 beige double crochets.
Make 6 yellow double crochets.
Make 2 beige double crochets.
Finish as desired; the next row begins with yellow yarn. (Note: The pictures do not show how it looks with straight side edges.) Turn. (32)
Row 10:
Make 10 yellow double crochets.
Make 5 beige double crochets.
Make 2 yellow double crochets.
Make 5 beige double crochets.
Make 10 yellow double crochets.
Finish as desired; the next row begins with yellow yarn. (Note: The pictures do not show how it looks with straight side edges.) Turn. (32)
Row 11:
Make 4 yellow double crochets.
Make 2 beige double crochets.
Make 6 yellow double crochets.
Make 8 beige double crochets.
Make 6 yellow double crochets.
Make 2 beige double crochets.
Make 4 yellow double crochets.
Finish as desired; the next row begins with yellow yarn. (Note: The pictures do not show how it looks with straight side edges.) Turn. (32)
Row 12:
Make 2 yellow double crochets.
Make 6 beige double crochets.
Make 5 yellow double crochets.
Make 6 beige double crochets.
Make 5 yellow double crochets.
Make 6 beige double crochets.
Make 2 yellow double crochets.
Finish as desired; the next row begins with yellow yarn. (Note: The pictures do not show how it looks with straight side edges.) Turn. (32)
Row 13:
Make 2 yellow double crochets.
Make 2 beige double crochets.
Make 2 yellow double crochets.
Make 2 beige double crochets.
Make 4 yellow double crochets.
Make 8 beige double crochets.
Make 4 yellow double crochets.
Make 2 beige double crochets.
Make 2 yellow double crochets.
Make 2 beige double crochets.
Make 2 yellow double crochets.
Finish as desired; the next row begins with yellow yarn. (Note: The pictures do not show how it looks with straight side edges.) Turn. (32)
Now the pattern starts again from Row 2.
We will repeat the pattern between Rows 2 and 13 a total of 10 times – that is, 9 more times.
You can always repeat the steps further if you want an even longer scarf, but you will then need more yarn.
Row 122: Drop the beige yarn. The last row of your scarf should have 32 yellow single crochets, so that it matches the other end. (32)
Now you can choose whether you want your scarf to have fringes or not.
If you feel finished, it’s time to weave in all loose ends. If you’re unsure how to fasten off, see the video below.
With fringes (and border): You can choose to make only the fringes or crochet all the way around to give your scarf a nice edging. In the pattern, we crochet around. Make two additional yellow single crochets in the same stitch as your last single crochet.
It’s time to make single crochets along the long side. One double crochet provides space for two single crochets.
There should be 244 single crochets on each long side.
Make sure to place the stitches in the outer strands as much as possible. When you reach the end of one long side, make one more single crochet in the same stitch. This is also the stitch where you will pull out the loop for your first twisted fringe.
It’s now time to make the first row of fringes. In the pattern, we have chosen to make Twisted Fringe. These are made with slip stitches – see the video below (How to make the fringe in the Rory pattern).
- Insert the hook into the stitch and yarn over.
- Pull up a loop until it measures about 15 cm (about the length of MYO’s crochet hook).
- Twist the loop around the hook 20 times.
- Fold the twisted loop in half.
- Insert the hook into the next single crochet and make a slip stitch.
- From your slip stitch, pull up a loop – in other words, repeat from step 2.
- Continue this way in the remaining single crochets, all the way to the end of the row.
- There should be at least 32 fringes, but you can add one more if it feels like there is room.
- The scarf in the picture has 33 twisted fringes on each end.
Then make 244 single crochets along the other long side and repeat the fringe process on the final end. Weave in all loose ends securely.
Diagram över mönstret:
Crochet Terms: This is the advanced section of the pattern. If you need help along the way, refer to the simpler section.
Abbreviations (US terms):
sc = single crochet (fm – fast maska)
sl st = slip stitch (sm – smygmaska)
ch = chain (lm – luftmaska)
dc = double crochet (st – stolpe)
(…) = total number of stitches on the row
*…* = repeat the instructions between the asterisks
Row 0: With yellow yarn, ch 33. (33)
Row 1: Work 32 yellow sc in the back loop of the chains.
When you reach the end of the row, place the beige yarn over the yellow so that it can be secured slightly for the next row. Finish with ch 2 in yellow.
Note: Before turning, read the instructions below.
If you choose to make straight side edges, follow the description from step two, where you insert the hook into the second stitch/loop. (32)
If you want nice, straight edges, you can use the technique described below; otherwise, you can continue as usual – for example:
When you have finished your row, ch 2, turn your project, and start a new row by making a dc (double crochet) in the first sc of the new row.
For straight side edges, you need to pay attention to how you finish your row and how you start the next one – see the video in the simpler section of the pattern.
Here’s how:
When you have 1 dc left on the row, start the stitch as usual, but instead of inserting the hook under both loops, insert it only through the front loop (the one closest to you) and then through the side loop on the edge. Yarn over and finish the dc as usual.
Then ch 2. Insert the hook into the second ch from the hook, yarn over, and pull through. Turn the whole project – now you’re going to finish the first dc of the new row:
Insert the hook directly into the first stitch, yarn over and pull through, yarn over and pull through two loops, yarn over again and pull through the last two loops.
Continue with regular dc stitches.
Remember: make the color change before completing the last dc.
In the simpler section of the pattern, there’s a video showing how to change colors.
Row 2:
Make 2 yellow dc,
2 beige dc,
2 yellow dc,
2 beige dc,
2 yellow dc,
5 beige dc,
2 yellow dc,
5 beige dc,
2 yellow dc,
2 beige dc,
2 yellow dc,
2 beige dc,
2 yellow dc.
Finish the row as previously described for straight edges, or in the way you prefer.
Note that the next row begins with beige yarn. Turn. (32)
Row 3:
Make 4 beige dc (Remember: if you’re using the straight-edge technique, the first dc is already made).
Make 2 yellow dc.
Make 7 beige dc.
Make 6 yellow dc.
Make 7 beige dc.
Make 2 yellow dc.
Make 4 beige dc.
Finish the row as you prefer, keeping in mind that the next row begins with beige yarn.
Note: The pictures do not show how it looks with straight side edges. Turn. (32)
Row 4:
Make 4 beige dc.
Make 2 yellow dc.
Make 5 beige dc.
Make 10 yellow dc.
Make 5 beige dc.
Make 2 yellow dc.
Make 4 beige dc.
Finish as desired; the next row begins with yellow yarn.
Note: The pictures do not show how it looks with straight side edges. Turn. (32)
Row 5:
Make 1 yellow dc
(Remember: if you’re using the straight-edge technique, don’t finish this dc completely, as you’ll need to change to beige).
Make 8 beige dc.
Make 6 yellow dc.
Make 2 beige dc.
Make 6 yellow dc.
Make 8 beige dc.
Make 1 yellow dc.
Finish as desired; the next row begins with yellow yarn.
Note: The pictures do not show how it looks with straight side edges. Turn. (32)
Row 6:
Make 2 yellow dc.
Make 6 beige dc.
Make 5 yellow dc.
Make 6 beige dc.
Make 5 yellow dc.
Make 6 beige dc.
Make 2 yellow dc.
Finish as desired; the next row begins with yellow yarn.
Note: The pictures do not show how it looks with straight side edges. Turn. (32)
Row 7:
Make 1 yellow dc
(Remember: if you’re using the straight-edge technique, don’t finish this dc completely, as you’ll need to change to beige).
Make 8 beige dc.
Make 4 yellow dc.
Make 2 beige dc.
Make 2 yellow dc.
Make 2 beige dc.
Make 4 yellow dc.
Make 8 beige dc.
Make 1 yellow dc.
Finish as desired; the next row begins with beige yarn.
Note: The pictures do not show how it looks with straight side edges. Turn. (32)
Row 8:
Make 4 beige dc.
Make 2 yellow dc.
Make 5 beige dc.
Make 2 yellow dc.
Make 2 beige dc.
Make 2 yellow dc.
Make 2 beige dc.
Make 2 yellow dc.
Make 5 beige dc.
Make 2 yellow dc.
Make 4 beige dc.
Finish as desired; the next row begins with beige yarn.
Note: The pictures do not show how it looks with straight side edges. Turn. (32)
Row 9:
Make 2 beige dc.
Make 6 yellow dc.
Make 7 beige dc.
Make 2 yellow dc.
Make 7 beige dc.
Make 6 yellow dc.
Make 2 beige dc.
Finish as desired; the next row begins with yellow yarn.
Note: The pictures do not show how it looks with straight side edges. Turn. (32)
Row 10:
Make 10 yellow dc.
Make 5 beige dc.
Make 2 yellow dc.
Make 5 beige dc.
Make 10 yellow dc.
Finish as desired; the next row begins with yellow yarn.
Note: The pictures do not show how it looks with straight side edges. Turn. (32)
Row 11:
Make 4 yellow dc.
Make 2 beige dc.
Make 6 yellow dc.
Make 8 beige dc.
Make 6 yellow dc.
Make 2 beige dc.
Make 4 yellow dc.
Finish as desired; the next row begins with yellow yarn.
Note: The pictures do not show how it looks with straight side edges. Turn. (32)
Row 12:
Make 2 yellow dc.
Make 6 beige dc.
Make 5 yellow dc.
Make 6 beige dc.
Make 5 yellow dc.
Make 6 beige dc.
Make 2 yellow dc.
Finish as desired; the next row begins with yellow yarn.
Note: The pictures do not show how it looks with straight side edges. Turn. (32)
Row 13:
Make 2 yellow dc.
Make 2 beige dc.
Make 2 yellow dc.
Make 2 beige dc.
Make 4 yellow dc.
Make 8 beige dc.
Make 4 yellow dc.
Make 2 beige dc.
Make 2 yellow dc.
Make 2 beige dc.
Make 2 yellow dc.
Finish as desired; the next row begins with yellow yarn.
Note: The pictures do not show how it looks with straight side edges. Turn. (32)
Now the pattern repeats from Row 2.
We will repeat the pattern between Rows 2 and 13 a total of 10 times – that is, 9 more times.
You can always repeat the steps again if you’d like an even longer scarf, but you will then need more yarn.
Row 122: Drop the white yarn. The last row of your scarf should have 32 yellow sc so that it matches the other end. (32)
Now you can decide whether you want to add fringes to your scarf or not.
If you feel finished, it’s time to weave in all loose ends.
With fringes (and edging)
You can choose to make only the fringes, or crochet all the way around to give your scarf a neat border. In this pattern, we crochet around.
Make 2 additional yellow sc in the same st as your last sc.
It’s time to make sc along the long side. One dc provides space for 2 sc. There should be 244 sc on each long side. Make sure to place the stitches in the outer strands as much as possible.
When you reach the end of one long side, make 1 more sc in the same sc. This is also the stitch where you will pull up the loop for your first twisted fringe.
Now it’s time to make the first row of fringes. In this pattern, we’ve chosen Twisted Fringe. These are made with sl st – see the video below:
- Insert the hook into the stitch, yo (yarn over).
- Pull up a loop until it measures about 15 cm (about the length of MYO’s crochet hook).
- Twist the loop around the hook 20 times.
- Fold the twisted loop in half.
- Insert the hook into the next sc and make a sl st.
- From your sl st, pull up a loop – repeat from Step 2.
Continue like this in the remaining sc, all the way to the end of the row.
There should be at least 32 fringes, but you can add one more if there’s room. The scarf in the picture has 33 twisted fringes on each end.
Then make 244 sc along the other long side and repeat the fringe process on the final end. Weave in all loose ends securely.
All done!
The rights to this pattern belong to MYO Make Your Own. The pattern or its pictures may not be copied, shared or resold either in parts or in its entirety, but you may sell items you have crocheted from this pattern. If you have questions about the pattern, contact MYO at hello@makeyourown.se.


Share your creations with us
Thank you!
Your comment was sent!