
Table Runner “Lucia”
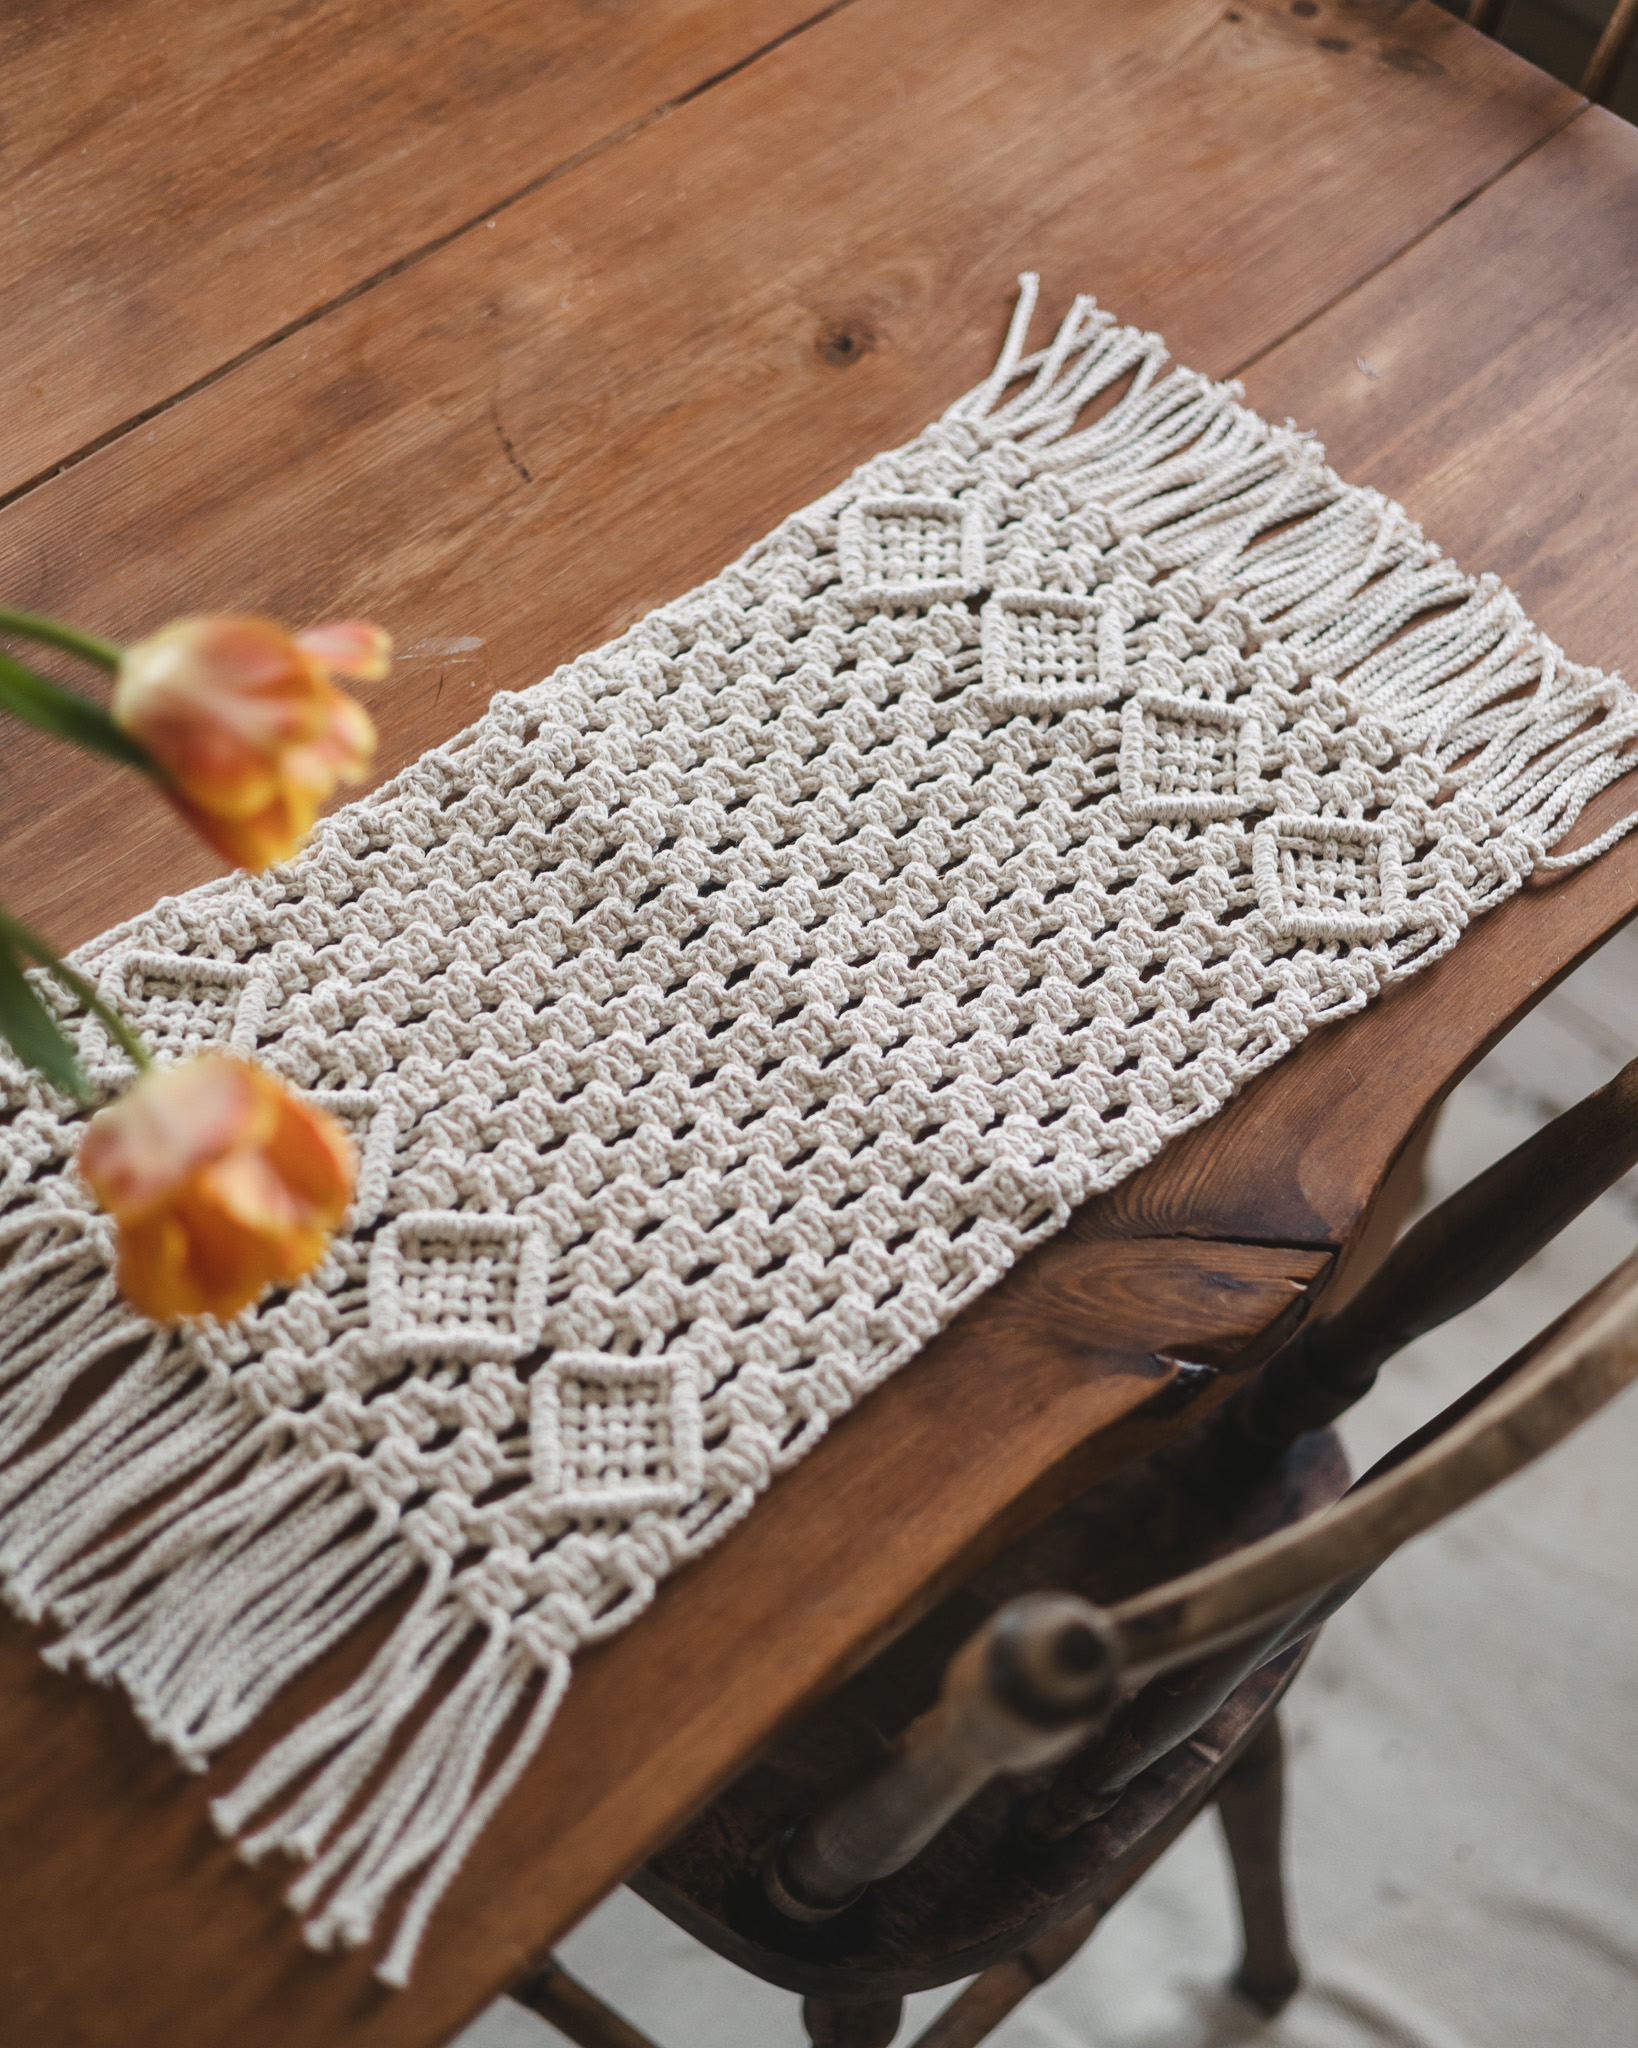
Crochet a fun and stylish table runner with various techniques!
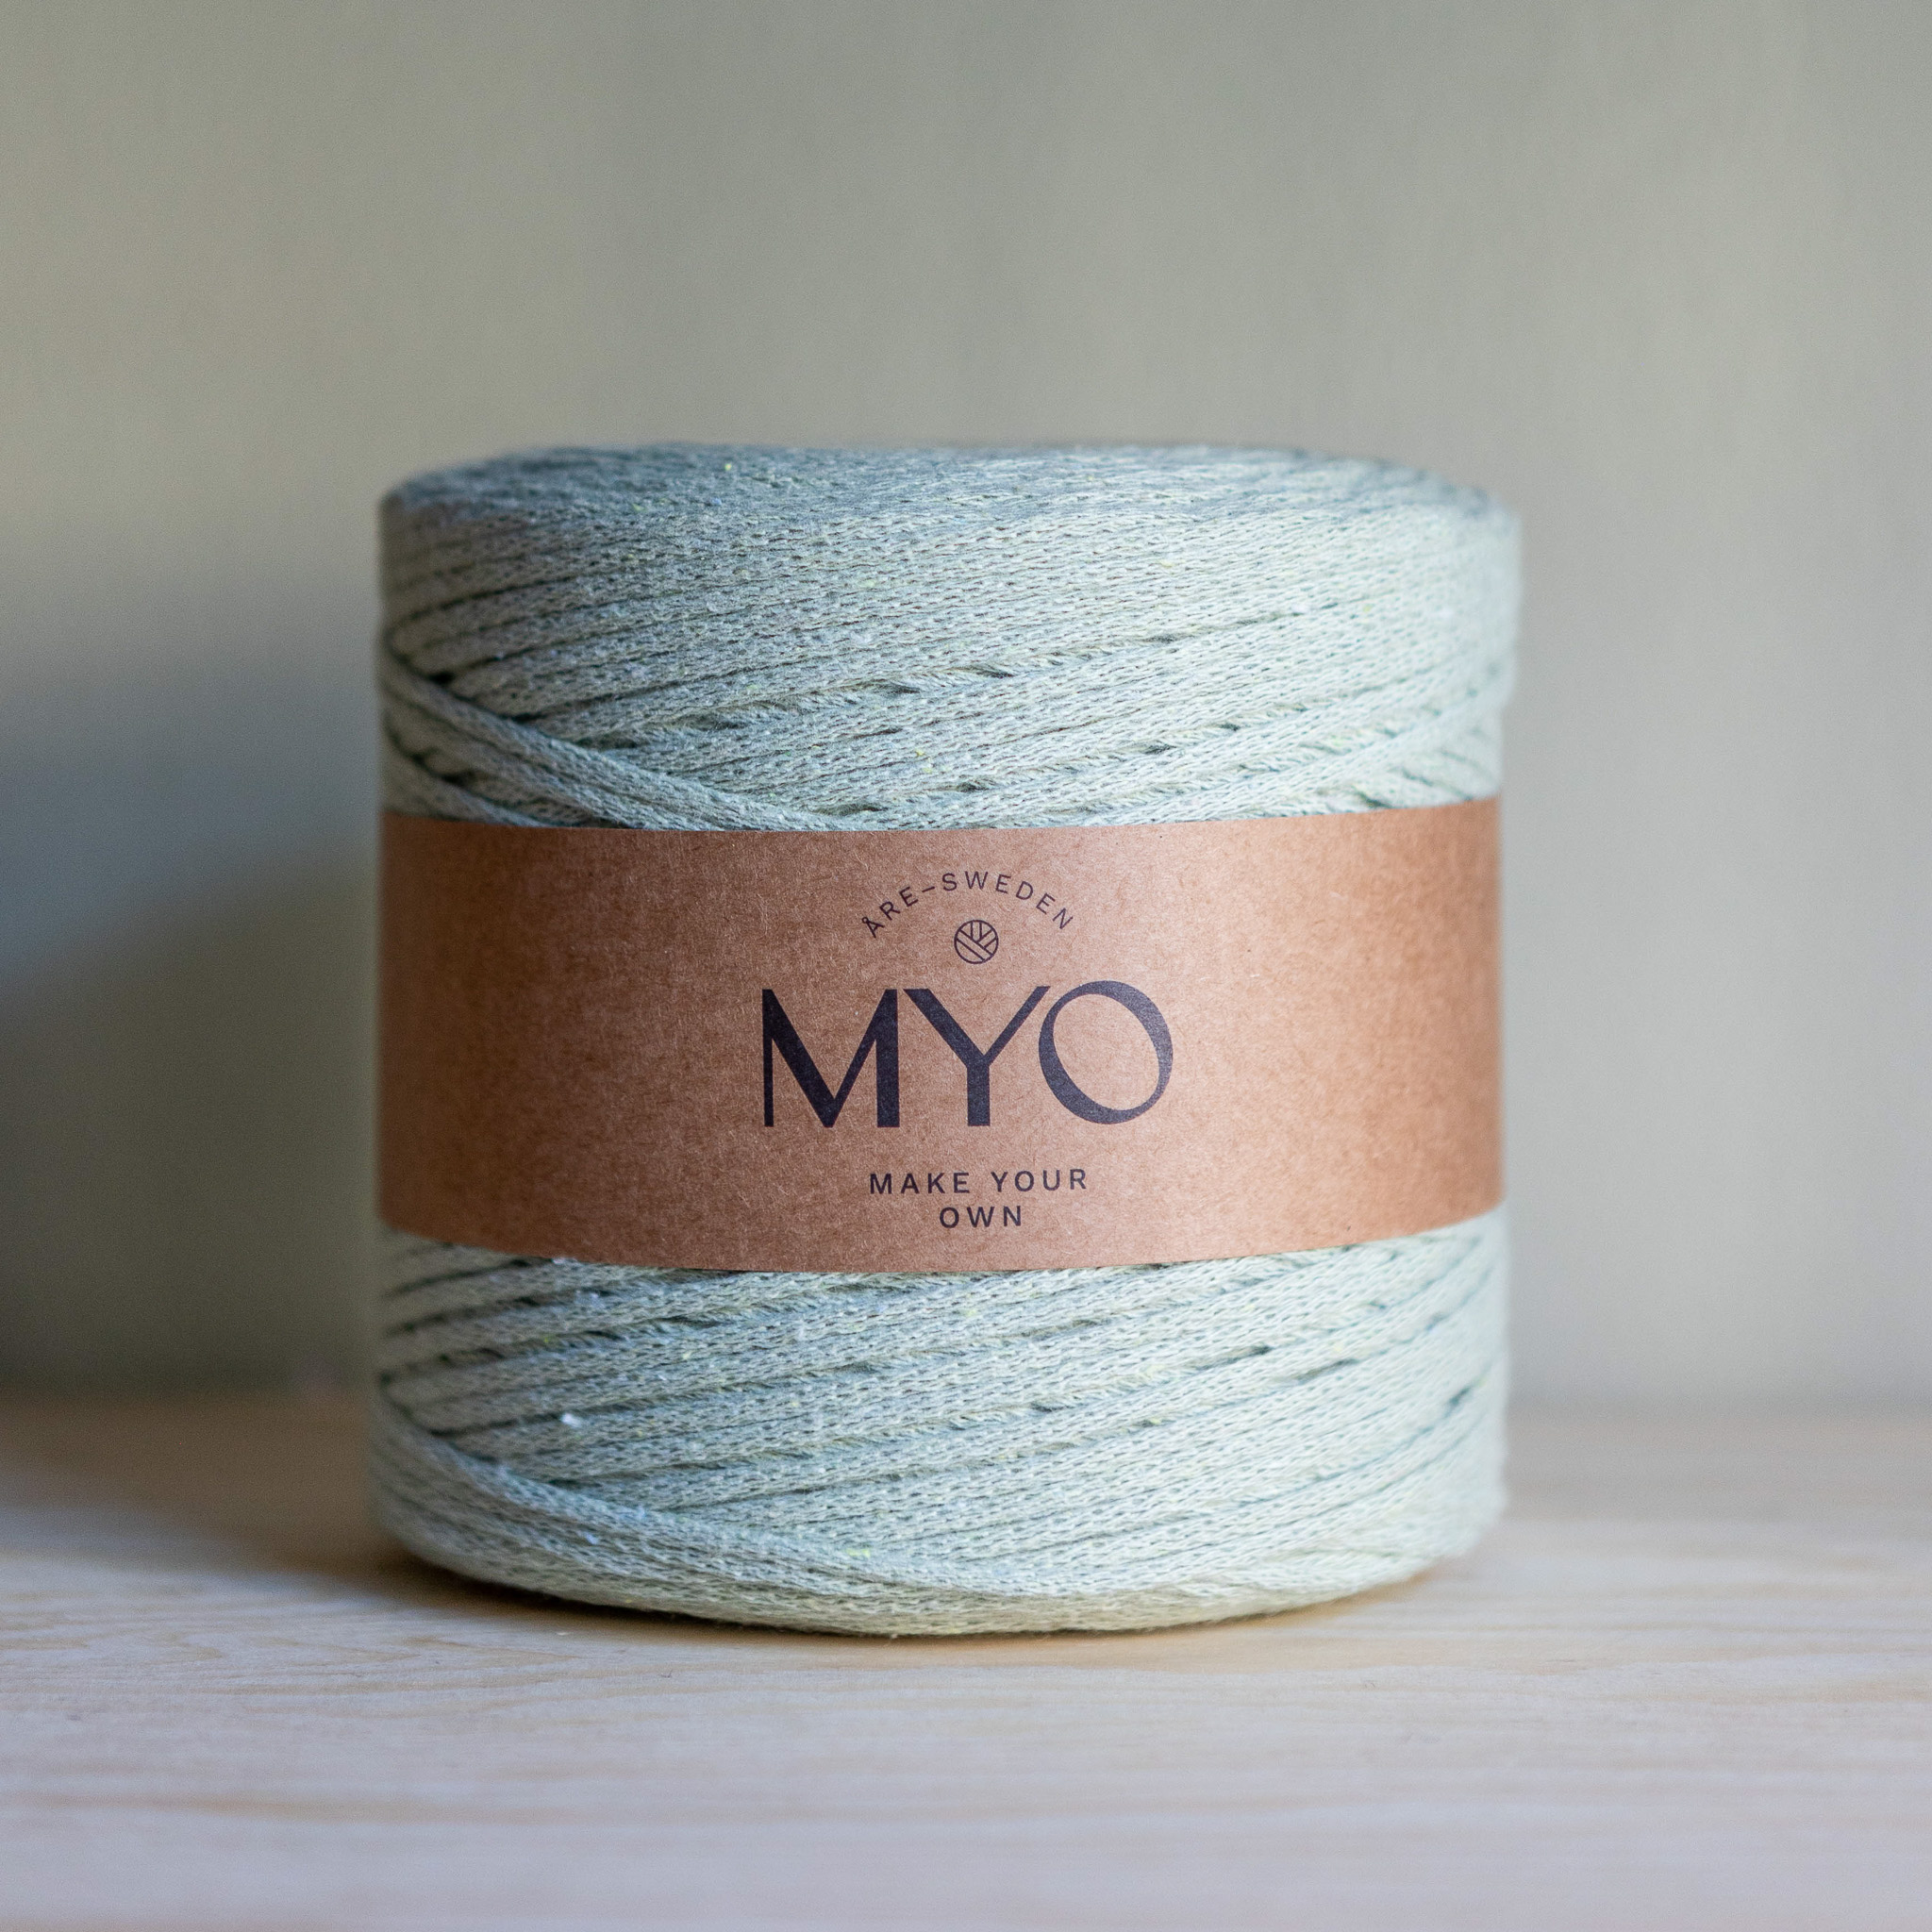
This table runner is a joy to crochet! You'll get to try different techniques along the way, giving the runner a beautiful and unique look. It looks stunning in burgundy as a Christmas decoration. You’ll need EKO nano tube yarn and a 6 mm crochet hook. You can make the runner longer or shorter, but it should be at least around 50 cm in length. The runner in the image is approximately 33 x 80 cm. It’s helpful to have some crochet experience before starting this project, as it involves several techniques.
Yarn Consumption: Approximately 475 grams. The amount of yarn needed will vary depending on how tightly you crochet and the length of the runner you choose to make.
Note that we in this instruction uses videos from out technique library. If you’re looking for a full-length video tutorial on how to crochet a table runner, see table runner Viola.
%20(1).jpg)
Here's how to do it
The table runner is crocheted in one continuous piece. First, you crochet one edge, which will be about 25 cm. Then, you crochet the middle section to your desired length, and finally, you complete the runner with the other edge, also around 25 cm. This means the shortest possible length for the runner is about 50 cm. With multiple techniques used throughout, this project is both fun and a bit challenging to crochet :) The finished runner has a beautiful texture with all these different techniques, and I hope you enjoy making it as much as I do!/ Lizette

This is what you need:
Here you can directly purchase the material for the product. Please note that the instruction is digital and appears here on the page (no written instruction).

.jpg)
Your next favorite project is waiting
Get access to this pattern and over 300 other beginner-friendly projects for crochet, knitting, and macramé.
Then 85 SEK/month. Cancel anytime.

Row 1: Crochet a chain with an even number of chain stitches. Measure your work to ensure the desired width. For reference, the table runner in the photo has 42 chain stitches. If you're unsure how to start with a slip knot and chain stitches, check out the two videos below for guidance.
Row 2: Skip the first stitch and start in the second stitch. Crochet 41 single crochets, then chain 1 and turn. If you're unsure how to crochet single crochets, see the video below.
From now on, you should always have 41 stitches in each row. Be sure to count each row, as it's easy to miss a stitch, which would make the runner uneven.
Row 3: Now we’re going to start crocheting "Moss Stitches." Start in the second stitch. Make a single crochet, then chain 1 and skip one stitch on the work. Crochet a single crochet in the next stitch. Continue this pattern across the row, skipping every other stitch. The last stitch should be a single crochet before you chain 1 and turn the work. You should have a total of 41 stitches. If you're unsure about this technique (Moss Stitch), refer to the video below.
Rows 4-6 (3 rows): Make a single crochet in the “space” created by the chain from the previous row. Chain 1, then make a single crochet in the next space. Continue in this way. Make a single crochet in the last stitch, then chain 1 and turn. See the video below if you're unsure.
Row 7: Start in the second stitch and make single crochets across the row. Make one single crochet in each single crochet from the previous row and one single crochet in each chain space. Continue to the end of the row. Chain 1 and turn.


Row 8: Start in the 2nd stitch and crochet 41 half double crochets. If you’re unsure how to make a half double crochet, refer to the video below. End with 1 chain stitch and turn your work.
Row 9: Now, with the back side facing you, start in the 2nd stitch. Crochet 40 single crochets into the front loop of each stitch. If you look at your work, you’ll notice that the stitch is slightly tilted backward, and you can see a loop closest to you. This is sometimes called the 3rd loop. Work your single crochets into this loop. To check if you're doing it correctly, look at the front of your work to ensure the stitches form a line across the front. For the last stitch, crochet a single crochet into the regular stitch, not the loop closest to you. This is important to avoid creating a gap on the edge. End with 1 chain stitch and turn your work.


Row 10: Start in the 2nd stitch. Crochet 41 half double crochets. Chain 1 and turn.
Row 11: Now you have the back side facing you as you crochet. Start in the 2nd stitch. Crochet as in Row 9. Crochet 40 single crochets in the loop that is in front of the stitch. To check if you did it correctly, look at the front to ensure the stitch forms a stripe. In the last stitch, crochet a single crochet in the regular stitch (not the loop closest to you). Chain 1 and turn.
Row 12: Now we are going to crochet "Moss Stitches." Start in the 2nd stitch. Crochet a single crochet. Then crochet a chain stitch and skip one stitch on the work, crochet a single crochet in the next stitch. Continue across the row. Chain 1 and turn. You should have 41 stitches total.
Row 13-14 (2 rows): Crochet a single crochet in the "hole" formed where you crocheted the chain stitch from the previous row. Crochet a chain stitch, then crochet a single crochet in the next hole. Continue like this. Crochet a single crochet in the last stitch, then chain 1 and turn.
Row 15: Now the back side faces you. Start in the 2nd stitch and crochet single crochets across the row. A single crochet in the previous row's single crochet, then a single crochet in the hole. Continue. Chain 1 and turn.
Row 16: Start in the 2nd stitch. Crochet 41 half double crochets. Chain 1 and turn.
Row 17: Now the back side faces you again. Start in the 2nd stitch and crochet as you did in Row 11. Crochet 40 single crochets in the loop in front of the stitch. To check if you did it correctly, look at the front to ensure the stitch forms a stripe. In the last stitch, crochet a single crochet in the regular stitch (not the loop closest to you). Crochet 2 chain stitches and turn.
Row 18: Now we will crochet the Star Stitch. It’s important to have the front side facing you when you crochet. The Star Stitch is the most difficult technique to crochet in this pattern, so please check the video below if you're unsure. There are also a few pictures further down. On this row, it's easy to miss a stitch. You should have 20 stars when you're finished.
Go into the back loop of the 2nd chain and pick up yarn on your hook. Then, go into the front loop of the same stitch and pick up yarn on your hook. You should now have 3 loops on your hook.
Now go into the next 3 stitches on your work and pick up yarn in each. You should have 6 loops on your hook. Yarn over and pull through all loops. Crochet 1 chain stitch. The hole formed after the chain stitch is called the "eye."
Now go into the eye and pick up yarn. Then, go into the stitch between the eye and the stitch from the previous row and pick up yarn. Go into the stitch from the previous row and pick up yarn (this is a stitch we've crocheted in before). Then, go into the next 2 (unworked) stitches and pick up yarn. You should now have 6 loops on your hook. Yarn over and pull through all loops. Crochet 1 chain stitch. Continue like this until you have 2 stitches left on the row.
When you have 2 stitches left on your hook, crochet the last star. But instead of working into the last 2 unworked stitches, you will go into just 1 of them. This means you will have 1 stitch left on the row (this is important). You will then only have 5 loops on your hook for this stitch.
In the last stitch, crochet a half double crochet and then chain 1 and turn. Check that you have 20 stars and 1 half double crochet on the row.
Row 19: Now you have the back side facing you as we crochet the last of the two Star Stitch rows. Crochet 2 single crochets in each eye. You should have crocheted a total of 40 stitches. There’s one last stitch on the row; it may be hard to see from the top. Crochet 1 single crochet in it. Chain 1 and turn.


Row 20: You should have the front side facing you. Crochet 41 single crochets. Chain 1 and turn.
Row 21: Now we will crochet "Moss Stitches." Start in the 2nd stitch. Crochet 1 single crochet. Then, crochet 1 chain stitch and skip 1 stitch on the work, crochet a single crochet in the next stitch. Continue in this way across the row. Crochet 1 chain stitch and turn. You should have 41 stitches in total.
Rows 22-24 (3 rows): Crochet 1 single crochet in the "hole" that was formed where you crocheted a chain stitch in the previous row. Crochet 1 chain stitch and then a single crochet in the next hole. Continue like this. Crochet a single crochet in the last stitch before you crochet 1 chain stitch and turn.
Row 25: You now have the back side facing you. Start in the 2nd stitch and crochet single crochets across the row. Crochet 1 single crochet in the single crochet from the previous row, and then crochet 1 single crochet in the hole. Continue. Crochet 1 chain stitch and turn. Check that you have 41 stitches in the row.
Row 26: Repeat row 18 from step 6.
Row 27: Repeat row 19 from step 6.
The last part of the table runner will be approximately as long as the length of your work so far. For reference, it’s about 25 cm. If you want to know the exact length, measure your work now.
Row 28: Now we will crochet "Moss Stitches." Start in the 2nd stitch. Crochet 1 single crochet. Then, crochet 1 chain stitch and skip 1 stitch on the work, crochet a single crochet in the next stitch. Continue in this way across the row. Crochet 1 chain stitch and turn. You should have 41 stitches in total.
Row 29 and onward: Crochet 1 single crochet in the "hole" that was formed where you crocheted a chain stitch in the previous row. Crochet 1 chain stitch, and then crochet 1 single crochet in the next hole. Continue like this. Crochet a single crochet in the last stitch before you crochet 1 chain stitch and turn. Repeat row 29 until you are satisfied with the length of your table runner, keeping in mind that you need to crochet about 25 cm more. For reference, I crocheted 28 rows.
When you start Row 1 (for the final section), be sure to have the back side facing you.
Row 1: You now have the back side facing you (important). Start in the 2nd stitch and crochet single crochet stitches across the row. Crochet 1 single crochet in the previous row's single crochet stitch, then crochet 1 single crochet in the hole. Continue in this way. Crochet 2 chain stitches and turn. Check that you have 41 stitches on the row.
Row 2: Repeat Row 18 (from step 6).
Row 3: Repeat Row 19 (from step 6).
Row 4: You have the front side facing you. Crochet 41 single crochets. 1 chain stitch and turn.
Row 5: Now we will crochet "Moss Stitches." Start in the 2nd stitch. Crochet 1 single crochet. Then crochet 1 chain stitch and skip 1 stitch on the work, crochet 1 single crochet in the next stitch. Continue across the row. Crochet 1 chain stitch and turn. You should have 41 stitches.
Rows 6-8 (3 rows): Crochet 1 single crochet in the "hole" formed where you crocheted a chain stitch in the previous row. Crochet 1 chain stitch, and then crochet 1 single crochet in the next hole. Continue in this way. Crochet a single crochet in the last stitch before crocheting 1 chain stitch and turning.
Row 9: You now have the back side facing you. Start in the 2nd stitch and crochet single crochets across the row. Crochet 1 single crochet in the previous row's single crochet, then crochet 1 single crochet in the hole. Continue in this way. Crochet 2 chain stitches and turn. Check that you have 41 stitches on the row.
Row 10: Repeat Row 18 (from step 6).
Row 11: Repeat Row 19 (from step 6).
Row 12: Start in the 2nd stitch. Crochet 41 half double crochets. Crochet 1 chain stitch and turn.
Row 13: You now have the back side facing you while crocheting. Start in the 2nd stitch. Crochet as you did in Row 17. Crochet 40 single crochets in the stitch loop in front of the actual stitch. To check if you did it correctly, you can look at the front side to see that the stitch appears as a line across. In the last stitch, crochet a single crochet into the regular stitch, not the one nearest to you. Crochet 1 chain stitch and turn.
Row 14: Have the right side facing you. Start in the 2nd stitch. Crochet 41 half double crochets. Crochet 1 chain stitch and turn.
Row 15: Now we will crochet "Moss Stitches." Start in the 2nd stitch. Crochet 1 single crochet. Then crochet 1 chain stitch and skip 1 stitch on the work, crochet 1 single crochet in the next stitch. Continue across the row. Crochet 1 chain stitch and turn. You should have 41 stitches.
Rows 16-17 (2 rows): Crochet 1 single crochet in the "hole" formed where you crocheted a chain stitch in the previous row. Crochet 1 chain stitch, then crochet 1 single crochet in the next hole. Continue in this way. Crochet a single crochet in the last stitch before crocheting 1 chain stitch and turning.
Row 18: Have the right side facing you. Start in the 2nd stitch. Crochet 41 half double crochets. Crochet 1 chain stitch and turn.
Row 19: You now have the back side facing you when you crochet. Start in the 2nd stitch. Crochet as in Row 13 above. Crochet 40 single crochets in the stitch loop that is in front of the actual stitch. To check if you've done it correctly, look at the front side to see if the stitch lays as a line across. In the last stitch, crochet 1 single crochet in the regular stitch, not in the loop nearest to you. Crochet 1 chain stitch and turn.
Row 20: Have the right side facing you. Start in the 2nd stitch. Crochet 41 half double crochets. Crochet 1 chain stitch and turn.
Row 21: You now have the back side facing you when you crochet. Start in the 2nd stitch. Crochet as in Row 19 above. Crochet 40 single crochets in the stitch loop that is in front of the actual stitch. To check if you've done it correctly, look at the front side to see if the stitch lays as a line across. In the last stitch, crochet 1 single crochet in the regular stitch, not in the loop nearest to you. Crochet 1 chain stitch and turn.
Row 22: Now we will crochet "Moss Stitches." Start in the 2nd stitch. Crochet 1 single crochet. Then crochet 1 chain stitch and skip 1 stitch on the work, crochet 1 single crochet in the next stitch. Continue across the row. You should have 41 stitches.
Rows 23-25 (3 rows): Crochet 1 single crochet in the "hole" formed where you crocheted a chain stitch in the previous row. Crochet 1 chain stitch, then crochet 1 single crochet in the next hole. Continue in this way. Crochet a single crochet in the last stitch before crocheting 1 chain stitch and turning.
Row 26: Have the right side facing you. Start in the 2nd stitch. Crochet 41 half double crochets. Crochet 1 chain stitch and fasten off the yarn. If you're unsure how to fasten off, see the video below.
Now you're done! I hope you enjoyed making this table runner and found it fun, maybe even a little challenging, to crochet all these techniques. It would be so fun to see your table runner — feel free to share it by tagging @makeyourown.se on social media.
Instructions Using Crochet Terms
This section uses crochet terminology and abbreviations. If you need additional help along the way, refer to the simplified instructions above.
Abbreviations
- st = stitch
- ch = chain
- sc = single crochet
- hdc = half double crochet
- sk = skip
- BLO = back loop only
- FLO = front loop only
- (...) = number of stitches in the row
- *...* Repeat
Pattern
Row 1: Chain an even number of stitches. Measure your work. For reference, the cloth shown in the photos has 42 ch.
Row 2: Starting in the 2nd ch from the hook, 41 sc, ch 1, turn.
From this point on, you should have 41 stitches in every row. It is important to count your stitches on every row, as it is easy to accidentally miss a stitch, which will make the cloth uneven.
Row 3: We are now going to start working Moss Stitch.
Starting in the 2nd ch from the hook, *sc, ch 1, sk 1 st*, repeat from *...* across the row and work 1 sc in the last st. Ch 1, turn.
Rows 4–6 (3 rows): Work 1 sc into the “space” created by the ch-1 space from the previous row. Ch 1, 1 sc into the next space. Continue across the row. Work 1 sc into the last st. Ch 1, turn.
Row 7: Starting in the 2nd ch from the hook, work 1 sc in each stitch across. Ch 1, turn.
Row 8: Starting in the 2nd ch from the hook, 41 hdc. Ch 1, turn.
Row 9: You now have the wrong side facing you. Starting in the 2nd ch from the hook, work 40 sc into the loop that is in front of the stitch itself.
If you look at your work, the stitch has tilted slightly toward the back and you can see a loop closest to you. This is sometimes called the third loop. Insert your hook into this loop and work a sc. To check that you have done this correctly, look at the front of your work. The stitches should form a raised line across the front.
In the last stitch, work 1 sc as normal, not into the loop closest to you. This is important, as otherwise the edge will have an uneven step. Ch 1, turn.
Row 10: Starting in the 2nd ch from the hook, 41 hdc. Ch 1, turn.
Row 11: You now have the wrong side facing you. Starting in the 2nd ch from the hook, work as in Row 9. Work 40 sc into the loop that is in front of the stitch itself.
If you look at your work, the stitch has tilted slightly toward the back and you can see a loop closest to you. This is sometimes called the third loop. Insert your hook into this loop and work a sc. To check that you have done this correctly, look at the front of your work. The stitches should form a raised line across the front.
Row 12: Starting in the 2nd ch from the hook, *sc, ch 1, sk 1 st*. Repeat from *...* across the row. Sc in the last st, ch 1, turn.
Rows 13–14 (2 rows): Work 1 sc into the “space” created by the ch-1 space from the previous row. Ch 1, 1 sc into the next space. Continue across the row. Work 1 sc in the last st. Ch 1, turn.
Row 15: You now have the wrong side facing you. Starting in the 2nd ch from the hook, 1 sc in each stitch across. Ch 1, turn.
Row 16: Starting in the 2nd ch from the hook, 41 hdc. Ch 1, turn.
Row 17: You now have the wrong side facing you. Starting in the 2nd ch from the hook, work 40 sc into the loop that is in front of the stitch itself.
If you look at your work, the stitch has tilted slightly toward the back and you can see a loop closest to you. This is sometimes called the third loop. Insert your hook into this loop and work a sc. To check that you have done this correctly, look at the front of your work. The stitches should form a raised line across the front.
In the last stitch, work 1 sc as normal, not into the loop closest to you. This is important, as otherwise the edge will have an uneven step. Ch 2, turn.
Row 18: We are now going to work Star Stitch. It is important that you have the right side facing you when working this row. Star Stitch is the most challenging technique in this pattern, so refer to the photos or technique video in the simplified section if you are unsure. It is easy to miss a stitch on this row. You should have 20 stars when you are finished.
Insert your hook into the BLO of the 2nd ch and pull up a loop. Insert your hook into the FLO of the same stitch and pull up a loop. You now have 3 loops on your hook.
Insert your hook into each of the next 3 stitches and pull up a loop each time. You now have 6 loops on your hook. Yarn over and pull through all 6 loops. Ch 1. The space created after making the chain is called the “eye.”
Insert your hook into the eye and pull up a loop. Insert your hook into the stitch between the eye and the stitch from the previous row and pull up a loop. Insert your hook into the stitch from the previous row and pull up a loop (this is a stitch we have already worked into). Insert your hook into the next 2 unworked stitches and pull up a loop each time.
You now have 6 loops on your hook. Yarn over and pull through all 6 loops. Ch 1.
Continue in the same way until you have 2 stitches remaining in the row.
When you have 2 stitches remaining, work the final star. However, instead of working into both of the last 2 unworked stitches, only work into 1 of them, leaving 1 stitch unworked at the end of the row. This is important. You will have only 5 loops on your hook for this final star.
In the last stitch, work 1 hdc, ch 1, turn. Check that you have 20 stars and 1 hdc across the row.
Row 19: You now have the wrong side facing you. Work 2 sc into each eye. Work 1 sc into the last stitch (look from above if it is difficult to see). Ch 1, turn.
Row 20: You have the right side facing you. Work 41 sc. Ch 1, turn.
Row 21: Starting in the 2nd ch from the hook, *sc, ch 1, sk 1 st*, repeat from *...* across the entire row. Finish with 1 sc in the last stitch. Ch 1, turn.
Rows 22–24 (3 rows): Work 1 sc into the “space” created by the ch-1 space from the previous row. Ch 1, 1 sc into the next space. Continue across the row. Work 1 sc into the last stitch. Ch 1, turn.
Row 25: You now have the wrong side facing you. Starting in the 2nd ch from the hook, work 1 sc in each stitch across. Ch 1, turn.
Row 26: We are now going to work Star Stitch. It is important that you have the right side facing you when working this row. Star Stitch is the most challenging technique in this pattern, so refer to the photos or technique video in the simplified section if you are unsure. It is easy to miss a stitch on this row. You should have 20 stars when you are finished.
Insert your hook into the BLO of the 2nd ch and pull up a loop. Insert your hook into the FLO of the same stitch and pull up a loop. You now have 3 loops on your hook.
Insert your hook into each of the next 3 stitches and pull up a loop each time. You now have 6 loops on your hook. Yarn over and pull through all 6 loops. Ch 1. The space created after making the chain is called the “eye.”
Insert your hook into the eye and pull up a loop. Insert your hook into the stitch between the eye and the stitch from the previous row and pull up a loop. Insert your hook into the stitch from the previous row and pull up a loop (this is a stitch we have already worked into). Insert your hook into the next 2 unworked stitches and pull up a loop each time.
You now have 6 loops on your hook. Yarn over and pull through all 6 loops. Ch 1.
Continue in the same way until you have 2 stitches remaining in the row.
When you have 2 stitches remaining, work the final star. However, instead of working into both of the last 2 unworked stitches, only work into 1 of them, leaving 1 stitch unworked at the end of the row. This is important. You will have only 5 loops on your hook for this final star.
In the last stitch, work 1 hdc, ch 1, turn. Check that you have 20 stars and 1 hdc across the row.
Row 27: You now have the wrong side facing you. Work 2 sc into each eye. Work 1 sc into the last stitch (look from above if it is difficult to see). Ch 1, turn.
The final section of the cloth will be approximately the same length as the section you have just crocheted. For reference, it is approximately 10 in. If you want to know the exact length, measure your work now.
Row 28: Starting in the 2nd ch from the hook, *sc, ch 1, sk 1 st*, repeat from *...* across the entire row. Finish with 1 sc in the last stitch. Ch 1, turn.
Center Section
This section should be worked to the length you want your cloth to be. Keep in mind that the final section will be approximately the same length as the first section after Row 27.
Row 29 and onward: Work 1 sc into the “space” created by the ch-1 space from the previous row. Ch 1, 1 sc into the next space. Repeat across the row. Work 1 sc into the last stitch. Ch 1, turn.
Repeat Row 29 until you are happy with the length of your cloth. Remember that you should crochet approximately another 10 in. For reference, I crocheted 28 rows.
Before starting Row 1 below (the final section), make sure the wrong side is facing you.
We are now starting the final end of the cloth. It is important that you have the correct side facing you when crocheting, so follow the instructions carefully. If you have ended up on the wrong side, you can work an extra row of sc where you are instead of unraveling your work. This is important so that the pattern appears on the right side.
Final Section
Row 1: You now have the wrong side facing you (important). Starting in the 2nd ch from the hook, work 1 sc in each stitch across. Ch 2, turn. Check that you have 41 stitches across the row.
Row 2: We are now going to work Star Stitch. It is important that you have the right side facing you when working this row. Star Stitch is the most challenging technique in this pattern, so refer to the photos or technique video in the simplified section if you are unsure. It is easy to miss a stitch on this row. You should have 20 stars when you are finished.
Insert your hook into the BLO of the 2nd ch and pull up a loop. Insert your hook into the FLO of the same stitch and pull up a loop. You now have 3 loops on your hook.
Insert your hook into each of the next 3 stitches and pull up a loop each time. You now have 6 loops on your hook. Yarn over and pull through all 6 loops. Ch 1. The space created after making the chain is called the “eye.”
Insert your hook into the eye and pull up a loop. Insert your hook into the stitch between the eye and the stitch from the previous row and pull up a loop. Insert your hook into the stitch from the previous row and pull up a loop (this is a stitch we have already worked into). Insert your hook into the next 2 unworked stitches and pull up a loop each time.
You now have 6 loops on your hook. Yarn over and pull through all 6 loops. Ch 1.
Continue in the same way until you have 2 stitches remaining in the row.
When you have 2 stitches remaining, work the final star. However, instead of working into both of the last 2 unworked stitches, only work into 1 of them, leaving 1 stitch unworked at the end of the row. This is important. You will have only 5 loops on your hook for this final star.
In the last stitch, work 1 hdc, ch 1, turn. Check that you have 20 stars and 1 hdc across the row.
Row 3: You now have the wrong side facing you. Work 2 sc into each eye. Work 1 sc into the last stitch (look from above if it is difficult to see). Ch 1, turn.
Row 4: You have the right side facing you. Work 41 sc. Ch 1, turn.
Row 5: Starting in the 2nd ch from the hook, *sc, ch 1, sk 1 st*, repeat from *...* across the entire row. Finish with 1 sc in the last stitch. Ch 1, turn.
Rows 6–8 (3 rows): Work 1 sc into the “space” created by the ch-1 space from the previous row. Ch 1, 1 sc into the next space. Repeat across the row. Work 1 sc into the last stitch. Ch 1, turn.
Row 9: You now have the wrong side facing you. Starting in the 2nd ch from the hook, work 1 sc in each stitch across. Ch 2, turn. Check that you have 41 stitches across the row.
Row 10: We are now going to work Star Stitch. It is important that you have the right side facing you when working this row. Star Stitch is the most challenging technique in this pattern, so refer to the photos or technique video in the simplified section if you are unsure. It is easy to miss a stitch on this row. You should have 20 stars when you are finished.
Insert your hook into the BLO of the 2nd ch and pull up a loop. Insert your hook into the FLO of the same stitch and pull up a loop. You now have 3 loops on your hook.
Insert your hook into each of the next 3 stitches and pull up a loop each time. You now have 6 loops on your hook. Yarn over and pull through all 6 loops. Ch 1. The space created after making the chain is called the “eye.”
Insert your hook into the eye and pull up a loop. Insert your hook into the stitch between the eye and the stitch from the previous row and pull up a loop. Insert your hook into the stitch from the previous row and pull up a loop (this is a stitch we have already worked into). Insert your hook into the next 2 unworked stitches and pull up a loop each time.
You now have 6 loops on your hook. Yarn over and pull through all 6 loops. Ch 1.
Continue in the same way until you have 2 stitches remaining in the row.
When you have 2 stitches remaining, work the final star. However, instead of working into both of the last 2 unworked stitches, only work into 1 of them, leaving 1 stitch unworked at the end of the row. This is important. You will have only 5 loops on your hook for this final star.
In the last stitch, work 1 hdc, ch 1, turn. Check that you have 20 stars and 1 hdc across the row.
Row 11: You now have the wrong side facing you. Work 2 sc into each eye. Work 1 sc into the last stitch (look from above if it is difficult to see). Ch 1, turn.
Row 12: Starting in the 2nd ch from the hook, 41 hdc. Ch 1, turn.
Row 13: You now have the wrong side facing you. Starting in the 2nd ch from the hook, work 40 sc into the loop that is in front of the stitch itself.
If you look at your work, the stitch has tilted slightly toward the back and you can see a loop closest to you. This is sometimes called the third loop. Insert your hook into this loop and work a sc. To check that you have done this correctly, look at the front of your work. The stitches should form a raised line across the front.
In the last stitch, work 1 sc as normal, not into the loop closest to you. This is important, as otherwise the edge will have an uneven step. Ch 1, turn.
Row 14: With the right side facing you, starting in the 2nd ch from the hook, 41 hdc. Ch 1, turn.
Row 15: Starting in the 2nd ch from the hook, *sc, ch 1, sk 1 st*, repeat from *...* across the entire row. Finish with 1 sc in the last stitch. Ch 1, turn.
Rows 16–17 (2 rows): Work 1 sc into the “space” created by the ch-1 space from the previous row. Ch 1, 1 sc into the next space. Repeat across the row. Work 1 sc into the last stitch. Ch 1, turn.
Row 18: With the right side facing you, starting in the 2nd ch from the hook, 41 hdc. Ch 1, turn.
Row 19: You now have the wrong side facing you. Starting in the 2nd ch from the hook, work 40 sc into the loop that is in front of the stitch itself.
If you look at your work, the stitch has tilted slightly toward the back and you can see a loop closest to you. This is sometimes called the third loop. Insert your hook into this loop and work a sc. To check that you have done this correctly, look at the front of your work. The stitches should form a raised line across the front.
Row 20: With the right side facing you, starting in the 2nd ch from the hook, 41 hdc. Ch 1, turn.
Row 21: You now have the wrong side facing you. Starting in the 2nd ch from the hook, work 40 sc into the loop that is in front of the stitch itself.
If you look at your work, the stitch has tilted slightly toward the back and you can see a loop closest to you. This is sometimes called the third loop. Insert your hook into this loop and work a sc. To check that you have done this correctly, look at the front of your work. The stitches should form a raised line across the front.
Row 22: Starting in the 2nd ch from the hook, *sc, ch 1, sk 1 st*, repeat from *...* across the entire row. Finish with 1 sc in the last stitch. Ch 1, turn.
Rows 23–25 (3 rows): Work 1 sc into the “space” created by the ch-1 space from the previous row. Ch 1, 1 sc into the next space. Repeat across the row. Work 1 sc into the last stitch. Ch 1, turn.
Row 26: With the right side facing you, starting in the 2nd ch from the hook, 41 hdc. Ch 1 and fasten off.
You are now finished! I hope you love your cloth and enjoyed working through all these techniques — perhaps with a little challenge along the way. :)
The rights to this pattern belong to MYO Make Your Own. The pattern or its pictures may not be copied, shared or resold either in parts or in its entirety, but you may sell items you have crocheted from this pattern. If you have questions about the pattern, contact MYO at hello@makeyourown.se.
Row 1: Crochet a chain with an even number of chain stitches. Measure your work to ensure the desired width. For reference, the table runner in the photo has 42 chain stitches. If you're unsure how to start with a slip knot and chain stitches, check out the two videos below for guidance.
Row 2: Skip the first stitch and start in the second stitch. Crochet 41 single crochets, then chain 1 and turn. If you're unsure how to crochet single crochets, see the video below.
From now on, you should always have 41 stitches in each row. Be sure to count each row, as it's easy to miss a stitch, which would make the runner uneven.
Row 3: Now we’re going to start crocheting "Moss Stitches." Start in the second stitch. Make a single crochet, then chain 1 and skip one stitch on the work. Crochet a single crochet in the next stitch. Continue this pattern across the row, skipping every other stitch. The last stitch should be a single crochet before you chain 1 and turn the work. You should have a total of 41 stitches. If you're unsure about this technique (Moss Stitch), refer to the video below.
Rows 4-6 (3 rows): Make a single crochet in the “space” created by the chain from the previous row. Chain 1, then make a single crochet in the next space. Continue in this way. Make a single crochet in the last stitch, then chain 1 and turn. See the video below if you're unsure.
Row 7: Start in the second stitch and make single crochets across the row. Make one single crochet in each single crochet from the previous row and one single crochet in each chain space. Continue to the end of the row. Chain 1 and turn.
Row 8: Start in the 2nd stitch and crochet 41 half double crochets. If you’re unsure how to make a half double crochet, refer to the video below. End with 1 chain stitch and turn your work.
Row 9: Now, with the back side facing you, start in the 2nd stitch. Crochet 40 single crochets into the front loop of each stitch. If you look at your work, you’ll notice that the stitch is slightly tilted backward, and you can see a loop closest to you. This is sometimes called the 3rd loop. Work your single crochets into this loop. To check if you're doing it correctly, look at the front of your work to ensure the stitches form a line across the front. For the last stitch, crochet a single crochet into the regular stitch, not the loop closest to you. This is important to avoid creating a gap on the edge. End with 1 chain stitch and turn your work.
Row 10: Start in the 2nd stitch. Crochet 41 half double crochets. Chain 1 and turn.
Row 11: Now you have the back side facing you as you crochet. Start in the 2nd stitch. Crochet as in Row 9. Crochet 40 single crochets in the loop that is in front of the stitch. To check if you did it correctly, look at the front to ensure the stitch forms a stripe. In the last stitch, crochet a single crochet in the regular stitch (not the loop closest to you). Chain 1 and turn.
Row 12: Now we are going to crochet "Moss Stitches." Start in the 2nd stitch. Crochet a single crochet. Then crochet a chain stitch and skip one stitch on the work, crochet a single crochet in the next stitch. Continue across the row. Chain 1 and turn. You should have 41 stitches total.
Row 13-14 (2 rows): Crochet a single crochet in the "hole" formed where you crocheted the chain stitch from the previous row. Crochet a chain stitch, then crochet a single crochet in the next hole. Continue like this. Crochet a single crochet in the last stitch, then chain 1 and turn.
Row 15: Now the back side faces you. Start in the 2nd stitch and crochet single crochets across the row. A single crochet in the previous row's single crochet, then a single crochet in the hole. Continue. Chain 1 and turn.
Row 16: Start in the 2nd stitch. Crochet 41 half double crochets. Chain 1 and turn.
Row 17: Now the back side faces you again. Start in the 2nd stitch and crochet as you did in Row 11. Crochet 40 single crochets in the loop in front of the stitch. To check if you did it correctly, look at the front to ensure the stitch forms a stripe. In the last stitch, crochet a single crochet in the regular stitch (not the loop closest to you). Crochet 2 chain stitches and turn.
Row 18: Now we will crochet the Star Stitch. It’s important to have the front side facing you when you crochet. The Star Stitch is the most difficult technique to crochet in this pattern, so please check the video below if you're unsure. There are also a few pictures further down. On this row, it's easy to miss a stitch. You should have 20 stars when you're finished.
Go into the back loop of the 2nd chain and pick up yarn on your hook. Then, go into the front loop of the same stitch and pick up yarn on your hook. You should now have 3 loops on your hook.
Now go into the next 3 stitches on your work and pick up yarn in each. You should have 6 loops on your hook. Yarn over and pull through all loops. Crochet 1 chain stitch. The hole formed after the chain stitch is called the "eye."
Now go into the eye and pick up yarn. Then, go into the stitch between the eye and the stitch from the previous row and pick up yarn. Go into the stitch from the previous row and pick up yarn (this is a stitch we've crocheted in before). Then, go into the next 2 (unworked) stitches and pick up yarn. You should now have 6 loops on your hook. Yarn over and pull through all loops. Crochet 1 chain stitch. Continue like this until you have 2 stitches left on the row.
When you have 2 stitches left on your hook, crochet the last star. But instead of working into the last 2 unworked stitches, you will go into just 1 of them. This means you will have 1 stitch left on the row (this is important). You will then only have 5 loops on your hook for this stitch.
In the last stitch, crochet a half double crochet and then chain 1 and turn. Check that you have 20 stars and 1 half double crochet on the row.
Row 19: Now you have the back side facing you as we crochet the last of the two Star Stitch rows. Crochet 2 single crochets in each eye. You should have crocheted a total of 40 stitches. There’s one last stitch on the row; it may be hard to see from the top. Crochet 1 single crochet in it. Chain 1 and turn.
Row 20: You should have the front side facing you. Crochet 41 single crochets. Chain 1 and turn.
Row 21: Now we will crochet "Moss Stitches." Start in the 2nd stitch. Crochet 1 single crochet. Then, crochet 1 chain stitch and skip 1 stitch on the work, crochet a single crochet in the next stitch. Continue in this way across the row. Crochet 1 chain stitch and turn. You should have 41 stitches in total.
Rows 22-24 (3 rows): Crochet 1 single crochet in the "hole" that was formed where you crocheted a chain stitch in the previous row. Crochet 1 chain stitch and then a single crochet in the next hole. Continue like this. Crochet a single crochet in the last stitch before you crochet 1 chain stitch and turn.
Row 25: You now have the back side facing you. Start in the 2nd stitch and crochet single crochets across the row. Crochet 1 single crochet in the single crochet from the previous row, and then crochet 1 single crochet in the hole. Continue. Crochet 1 chain stitch and turn. Check that you have 41 stitches in the row.
Row 26: Repeat row 18 from step 6.
Row 27: Repeat row 19 from step 6.
The last part of the table runner will be approximately as long as the length of your work so far. For reference, it’s about 25 cm. If you want to know the exact length, measure your work now.
Row 28: Now we will crochet "Moss Stitches." Start in the 2nd stitch. Crochet 1 single crochet. Then, crochet 1 chain stitch and skip 1 stitch on the work, crochet a single crochet in the next stitch. Continue in this way across the row. Crochet 1 chain stitch and turn. You should have 41 stitches in total.
Row 29 and onward: Crochet 1 single crochet in the "hole" that was formed where you crocheted a chain stitch in the previous row. Crochet 1 chain stitch, and then crochet 1 single crochet in the next hole. Continue like this. Crochet a single crochet in the last stitch before you crochet 1 chain stitch and turn. Repeat row 29 until you are satisfied with the length of your table runner, keeping in mind that you need to crochet about 25 cm more. For reference, I crocheted 28 rows.
When you start Row 1 (for the final section), be sure to have the back side facing you.
Row 1: You now have the back side facing you (important). Start in the 2nd stitch and crochet single crochet stitches across the row. Crochet 1 single crochet in the previous row's single crochet stitch, then crochet 1 single crochet in the hole. Continue in this way. Crochet 2 chain stitches and turn. Check that you have 41 stitches on the row.
Row 2: Repeat Row 18 (from step 6).
Row 3: Repeat Row 19 (from step 6).
Row 4: You have the front side facing you. Crochet 41 single crochets. 1 chain stitch and turn.
Row 5: Now we will crochet "Moss Stitches." Start in the 2nd stitch. Crochet 1 single crochet. Then crochet 1 chain stitch and skip 1 stitch on the work, crochet 1 single crochet in the next stitch. Continue across the row. Crochet 1 chain stitch and turn. You should have 41 stitches.
Rows 6-8 (3 rows): Crochet 1 single crochet in the "hole" formed where you crocheted a chain stitch in the previous row. Crochet 1 chain stitch, and then crochet 1 single crochet in the next hole. Continue in this way. Crochet a single crochet in the last stitch before crocheting 1 chain stitch and turning.
Row 9: You now have the back side facing you. Start in the 2nd stitch and crochet single crochets across the row. Crochet 1 single crochet in the previous row's single crochet, then crochet 1 single crochet in the hole. Continue in this way. Crochet 2 chain stitches and turn. Check that you have 41 stitches on the row.
Row 10: Repeat Row 18 (from step 6).
Row 11: Repeat Row 19 (from step 6).
Row 12: Start in the 2nd stitch. Crochet 41 half double crochets. Crochet 1 chain stitch and turn.
Row 13: You now have the back side facing you while crocheting. Start in the 2nd stitch. Crochet as you did in Row 17. Crochet 40 single crochets in the stitch loop in front of the actual stitch. To check if you did it correctly, you can look at the front side to see that the stitch appears as a line across. In the last stitch, crochet a single crochet into the regular stitch, not the one nearest to you. Crochet 1 chain stitch and turn.
Row 14: Have the right side facing you. Start in the 2nd stitch. Crochet 41 half double crochets. Crochet 1 chain stitch and turn.
Row 15: Now we will crochet "Moss Stitches." Start in the 2nd stitch. Crochet 1 single crochet. Then crochet 1 chain stitch and skip 1 stitch on the work, crochet 1 single crochet in the next stitch. Continue across the row. Crochet 1 chain stitch and turn. You should have 41 stitches.
Rows 16-17 (2 rows): Crochet 1 single crochet in the "hole" formed where you crocheted a chain stitch in the previous row. Crochet 1 chain stitch, then crochet 1 single crochet in the next hole. Continue in this way. Crochet a single crochet in the last stitch before crocheting 1 chain stitch and turning.
Row 18: Have the right side facing you. Start in the 2nd stitch. Crochet 41 half double crochets. Crochet 1 chain stitch and turn.
Row 19: You now have the back side facing you when you crochet. Start in the 2nd stitch. Crochet as in Row 13 above. Crochet 40 single crochets in the stitch loop that is in front of the actual stitch. To check if you've done it correctly, look at the front side to see if the stitch lays as a line across. In the last stitch, crochet 1 single crochet in the regular stitch, not in the loop nearest to you. Crochet 1 chain stitch and turn.
Row 20: Have the right side facing you. Start in the 2nd stitch. Crochet 41 half double crochets. Crochet 1 chain stitch and turn.
Row 21: You now have the back side facing you when you crochet. Start in the 2nd stitch. Crochet as in Row 19 above. Crochet 40 single crochets in the stitch loop that is in front of the actual stitch. To check if you've done it correctly, look at the front side to see if the stitch lays as a line across. In the last stitch, crochet 1 single crochet in the regular stitch, not in the loop nearest to you. Crochet 1 chain stitch and turn.
Row 22: Now we will crochet "Moss Stitches." Start in the 2nd stitch. Crochet 1 single crochet. Then crochet 1 chain stitch and skip 1 stitch on the work, crochet 1 single crochet in the next stitch. Continue across the row. You should have 41 stitches.
Rows 23-25 (3 rows): Crochet 1 single crochet in the "hole" formed where you crocheted a chain stitch in the previous row. Crochet 1 chain stitch, then crochet 1 single crochet in the next hole. Continue in this way. Crochet a single crochet in the last stitch before crocheting 1 chain stitch and turning.
Row 26: Have the right side facing you. Start in the 2nd stitch. Crochet 41 half double crochets. Crochet 1 chain stitch and fasten off the yarn. If you're unsure how to fasten off, see the video below.
Now you're done! I hope you enjoyed making this table runner and found it fun, maybe even a little challenging, to crochet all these techniques. It would be so fun to see your table runner — feel free to share it by tagging @makeyourown.se on social media.
Instructions Using Crochet Terms
This section uses crochet terminology and abbreviations. If you need additional help along the way, refer to the simplified instructions above.
Abbreviations
- st = stitch
- ch = chain
- sc = single crochet
- hdc = half double crochet
- sk = skip
- BLO = back loop only
- FLO = front loop only
- (...) = number of stitches in the row
- *...* Repeat
Pattern
Row 1: Chain an even number of stitches. Measure your work. For reference, the cloth shown in the photos has 42 ch.
Row 2: Starting in the 2nd ch from the hook, 41 sc, ch 1, turn.
From this point on, you should have 41 stitches in every row. It is important to count your stitches on every row, as it is easy to accidentally miss a stitch, which will make the cloth uneven.
Row 3: We are now going to start working Moss Stitch.
Starting in the 2nd ch from the hook, *sc, ch 1, sk 1 st*, repeat from *...* across the row and work 1 sc in the last st. Ch 1, turn.
Rows 4–6 (3 rows): Work 1 sc into the “space” created by the ch-1 space from the previous row. Ch 1, 1 sc into the next space. Continue across the row. Work 1 sc into the last st. Ch 1, turn.
Row 7: Starting in the 2nd ch from the hook, work 1 sc in each stitch across. Ch 1, turn.
Row 8: Starting in the 2nd ch from the hook, 41 hdc. Ch 1, turn.
Row 9: You now have the wrong side facing you. Starting in the 2nd ch from the hook, work 40 sc into the loop that is in front of the stitch itself.
If you look at your work, the stitch has tilted slightly toward the back and you can see a loop closest to you. This is sometimes called the third loop. Insert your hook into this loop and work a sc. To check that you have done this correctly, look at the front of your work. The stitches should form a raised line across the front.
In the last stitch, work 1 sc as normal, not into the loop closest to you. This is important, as otherwise the edge will have an uneven step. Ch 1, turn.
Row 10: Starting in the 2nd ch from the hook, 41 hdc. Ch 1, turn.
Row 11: You now have the wrong side facing you. Starting in the 2nd ch from the hook, work as in Row 9. Work 40 sc into the loop that is in front of the stitch itself.
If you look at your work, the stitch has tilted slightly toward the back and you can see a loop closest to you. This is sometimes called the third loop. Insert your hook into this loop and work a sc. To check that you have done this correctly, look at the front of your work. The stitches should form a raised line across the front.
Row 12: Starting in the 2nd ch from the hook, *sc, ch 1, sk 1 st*. Repeat from *...* across the row. Sc in the last st, ch 1, turn.
Rows 13–14 (2 rows): Work 1 sc into the “space” created by the ch-1 space from the previous row. Ch 1, 1 sc into the next space. Continue across the row. Work 1 sc in the last st. Ch 1, turn.
Row 15: You now have the wrong side facing you. Starting in the 2nd ch from the hook, 1 sc in each stitch across. Ch 1, turn.
Row 16: Starting in the 2nd ch from the hook, 41 hdc. Ch 1, turn.
Row 17: You now have the wrong side facing you. Starting in the 2nd ch from the hook, work 40 sc into the loop that is in front of the stitch itself.
If you look at your work, the stitch has tilted slightly toward the back and you can see a loop closest to you. This is sometimes called the third loop. Insert your hook into this loop and work a sc. To check that you have done this correctly, look at the front of your work. The stitches should form a raised line across the front.
In the last stitch, work 1 sc as normal, not into the loop closest to you. This is important, as otherwise the edge will have an uneven step. Ch 2, turn.
Row 18: We are now going to work Star Stitch. It is important that you have the right side facing you when working this row. Star Stitch is the most challenging technique in this pattern, so refer to the photos or technique video in the simplified section if you are unsure. It is easy to miss a stitch on this row. You should have 20 stars when you are finished.
Insert your hook into the BLO of the 2nd ch and pull up a loop. Insert your hook into the FLO of the same stitch and pull up a loop. You now have 3 loops on your hook.
Insert your hook into each of the next 3 stitches and pull up a loop each time. You now have 6 loops on your hook. Yarn over and pull through all 6 loops. Ch 1. The space created after making the chain is called the “eye.”
Insert your hook into the eye and pull up a loop. Insert your hook into the stitch between the eye and the stitch from the previous row and pull up a loop. Insert your hook into the stitch from the previous row and pull up a loop (this is a stitch we have already worked into). Insert your hook into the next 2 unworked stitches and pull up a loop each time.
You now have 6 loops on your hook. Yarn over and pull through all 6 loops. Ch 1.
Continue in the same way until you have 2 stitches remaining in the row.
When you have 2 stitches remaining, work the final star. However, instead of working into both of the last 2 unworked stitches, only work into 1 of them, leaving 1 stitch unworked at the end of the row. This is important. You will have only 5 loops on your hook for this final star.
In the last stitch, work 1 hdc, ch 1, turn. Check that you have 20 stars and 1 hdc across the row.
Row 19: You now have the wrong side facing you. Work 2 sc into each eye. Work 1 sc into the last stitch (look from above if it is difficult to see). Ch 1, turn.
Row 20: You have the right side facing you. Work 41 sc. Ch 1, turn.
Row 21: Starting in the 2nd ch from the hook, *sc, ch 1, sk 1 st*, repeat from *...* across the entire row. Finish with 1 sc in the last stitch. Ch 1, turn.
Rows 22–24 (3 rows): Work 1 sc into the “space” created by the ch-1 space from the previous row. Ch 1, 1 sc into the next space. Continue across the row. Work 1 sc into the last stitch. Ch 1, turn.
Row 25: You now have the wrong side facing you. Starting in the 2nd ch from the hook, work 1 sc in each stitch across. Ch 1, turn.
Row 26: We are now going to work Star Stitch. It is important that you have the right side facing you when working this row. Star Stitch is the most challenging technique in this pattern, so refer to the photos or technique video in the simplified section if you are unsure. It is easy to miss a stitch on this row. You should have 20 stars when you are finished.
Insert your hook into the BLO of the 2nd ch and pull up a loop. Insert your hook into the FLO of the same stitch and pull up a loop. You now have 3 loops on your hook.
Insert your hook into each of the next 3 stitches and pull up a loop each time. You now have 6 loops on your hook. Yarn over and pull through all 6 loops. Ch 1. The space created after making the chain is called the “eye.”
Insert your hook into the eye and pull up a loop. Insert your hook into the stitch between the eye and the stitch from the previous row and pull up a loop. Insert your hook into the stitch from the previous row and pull up a loop (this is a stitch we have already worked into). Insert your hook into the next 2 unworked stitches and pull up a loop each time.
You now have 6 loops on your hook. Yarn over and pull through all 6 loops. Ch 1.
Continue in the same way until you have 2 stitches remaining in the row.
When you have 2 stitches remaining, work the final star. However, instead of working into both of the last 2 unworked stitches, only work into 1 of them, leaving 1 stitch unworked at the end of the row. This is important. You will have only 5 loops on your hook for this final star.
In the last stitch, work 1 hdc, ch 1, turn. Check that you have 20 stars and 1 hdc across the row.
Row 27: You now have the wrong side facing you. Work 2 sc into each eye. Work 1 sc into the last stitch (look from above if it is difficult to see). Ch 1, turn.
The final section of the cloth will be approximately the same length as the section you have just crocheted. For reference, it is approximately 10 in. If you want to know the exact length, measure your work now.
Row 28: Starting in the 2nd ch from the hook, *sc, ch 1, sk 1 st*, repeat from *...* across the entire row. Finish with 1 sc in the last stitch. Ch 1, turn.
Center Section
This section should be worked to the length you want your cloth to be. Keep in mind that the final section will be approximately the same length as the first section after Row 27.
Row 29 and onward: Work 1 sc into the “space” created by the ch-1 space from the previous row. Ch 1, 1 sc into the next space. Repeat across the row. Work 1 sc into the last stitch. Ch 1, turn.
Repeat Row 29 until you are happy with the length of your cloth. Remember that you should crochet approximately another 10 in. For reference, I crocheted 28 rows.
Before starting Row 1 below (the final section), make sure the wrong side is facing you.
We are now starting the final end of the cloth. It is important that you have the correct side facing you when crocheting, so follow the instructions carefully. If you have ended up on the wrong side, you can work an extra row of sc where you are instead of unraveling your work. This is important so that the pattern appears on the right side.
Final Section
Row 1: You now have the wrong side facing you (important). Starting in the 2nd ch from the hook, work 1 sc in each stitch across. Ch 2, turn. Check that you have 41 stitches across the row.
Row 2: We are now going to work Star Stitch. It is important that you have the right side facing you when working this row. Star Stitch is the most challenging technique in this pattern, so refer to the photos or technique video in the simplified section if you are unsure. It is easy to miss a stitch on this row. You should have 20 stars when you are finished.
Insert your hook into the BLO of the 2nd ch and pull up a loop. Insert your hook into the FLO of the same stitch and pull up a loop. You now have 3 loops on your hook.
Insert your hook into each of the next 3 stitches and pull up a loop each time. You now have 6 loops on your hook. Yarn over and pull through all 6 loops. Ch 1. The space created after making the chain is called the “eye.”
Insert your hook into the eye and pull up a loop. Insert your hook into the stitch between the eye and the stitch from the previous row and pull up a loop. Insert your hook into the stitch from the previous row and pull up a loop (this is a stitch we have already worked into). Insert your hook into the next 2 unworked stitches and pull up a loop each time.
You now have 6 loops on your hook. Yarn over and pull through all 6 loops. Ch 1.
Continue in the same way until you have 2 stitches remaining in the row.
When you have 2 stitches remaining, work the final star. However, instead of working into both of the last 2 unworked stitches, only work into 1 of them, leaving 1 stitch unworked at the end of the row. This is important. You will have only 5 loops on your hook for this final star.
In the last stitch, work 1 hdc, ch 1, turn. Check that you have 20 stars and 1 hdc across the row.
Row 3: You now have the wrong side facing you. Work 2 sc into each eye. Work 1 sc into the last stitch (look from above if it is difficult to see). Ch 1, turn.
Row 4: You have the right side facing you. Work 41 sc. Ch 1, turn.
Row 5: Starting in the 2nd ch from the hook, *sc, ch 1, sk 1 st*, repeat from *...* across the entire row. Finish with 1 sc in the last stitch. Ch 1, turn.
Rows 6–8 (3 rows): Work 1 sc into the “space” created by the ch-1 space from the previous row. Ch 1, 1 sc into the next space. Repeat across the row. Work 1 sc into the last stitch. Ch 1, turn.
Row 9: You now have the wrong side facing you. Starting in the 2nd ch from the hook, work 1 sc in each stitch across. Ch 2, turn. Check that you have 41 stitches across the row.
Row 10: We are now going to work Star Stitch. It is important that you have the right side facing you when working this row. Star Stitch is the most challenging technique in this pattern, so refer to the photos or technique video in the simplified section if you are unsure. It is easy to miss a stitch on this row. You should have 20 stars when you are finished.
Insert your hook into the BLO of the 2nd ch and pull up a loop. Insert your hook into the FLO of the same stitch and pull up a loop. You now have 3 loops on your hook.
Insert your hook into each of the next 3 stitches and pull up a loop each time. You now have 6 loops on your hook. Yarn over and pull through all 6 loops. Ch 1. The space created after making the chain is called the “eye.”
Insert your hook into the eye and pull up a loop. Insert your hook into the stitch between the eye and the stitch from the previous row and pull up a loop. Insert your hook into the stitch from the previous row and pull up a loop (this is a stitch we have already worked into). Insert your hook into the next 2 unworked stitches and pull up a loop each time.
You now have 6 loops on your hook. Yarn over and pull through all 6 loops. Ch 1.
Continue in the same way until you have 2 stitches remaining in the row.
When you have 2 stitches remaining, work the final star. However, instead of working into both of the last 2 unworked stitches, only work into 1 of them, leaving 1 stitch unworked at the end of the row. This is important. You will have only 5 loops on your hook for this final star.
In the last stitch, work 1 hdc, ch 1, turn. Check that you have 20 stars and 1 hdc across the row.
Row 11: You now have the wrong side facing you. Work 2 sc into each eye. Work 1 sc into the last stitch (look from above if it is difficult to see). Ch 1, turn.
Row 12: Starting in the 2nd ch from the hook, 41 hdc. Ch 1, turn.
Row 13: You now have the wrong side facing you. Starting in the 2nd ch from the hook, work 40 sc into the loop that is in front of the stitch itself.
If you look at your work, the stitch has tilted slightly toward the back and you can see a loop closest to you. This is sometimes called the third loop. Insert your hook into this loop and work a sc. To check that you have done this correctly, look at the front of your work. The stitches should form a raised line across the front.
In the last stitch, work 1 sc as normal, not into the loop closest to you. This is important, as otherwise the edge will have an uneven step. Ch 1, turn.
Row 14: With the right side facing you, starting in the 2nd ch from the hook, 41 hdc. Ch 1, turn.
Row 15: Starting in the 2nd ch from the hook, *sc, ch 1, sk 1 st*, repeat from *...* across the entire row. Finish with 1 sc in the last stitch. Ch 1, turn.
Rows 16–17 (2 rows): Work 1 sc into the “space” created by the ch-1 space from the previous row. Ch 1, 1 sc into the next space. Repeat across the row. Work 1 sc into the last stitch. Ch 1, turn.
Row 18: With the right side facing you, starting in the 2nd ch from the hook, 41 hdc. Ch 1, turn.
Row 19: You now have the wrong side facing you. Starting in the 2nd ch from the hook, work 40 sc into the loop that is in front of the stitch itself.
If you look at your work, the stitch has tilted slightly toward the back and you can see a loop closest to you. This is sometimes called the third loop. Insert your hook into this loop and work a sc. To check that you have done this correctly, look at the front of your work. The stitches should form a raised line across the front.
Row 20: With the right side facing you, starting in the 2nd ch from the hook, 41 hdc. Ch 1, turn.
Row 21: You now have the wrong side facing you. Starting in the 2nd ch from the hook, work 40 sc into the loop that is in front of the stitch itself.
If you look at your work, the stitch has tilted slightly toward the back and you can see a loop closest to you. This is sometimes called the third loop. Insert your hook into this loop and work a sc. To check that you have done this correctly, look at the front of your work. The stitches should form a raised line across the front.
Row 22: Starting in the 2nd ch from the hook, *sc, ch 1, sk 1 st*, repeat from *...* across the entire row. Finish with 1 sc in the last stitch. Ch 1, turn.
Rows 23–25 (3 rows): Work 1 sc into the “space” created by the ch-1 space from the previous row. Ch 1, 1 sc into the next space. Repeat across the row. Work 1 sc into the last stitch. Ch 1, turn.
Row 26: With the right side facing you, starting in the 2nd ch from the hook, 41 hdc. Ch 1 and fasten off.
You are now finished! I hope you love your cloth and enjoyed working through all these techniques — perhaps with a little challenge along the way. :)
The rights to this pattern belong to MYO Make Your Own. The pattern or its pictures may not be copied, shared or resold either in parts or in its entirety, but you may sell items you have crocheted from this pattern. If you have questions about the pattern, contact MYO at hello@makeyourown.se.

.jpg)
Share your creations with us
Thank you!
Your comment was sent!