
Crochet flower pot “Amalia”
Decorate your home with nice crochet pots
MYO Flower Pot “Amalia” is a great project for those who are beginners and want a relatively easy project to crochet, but also look forward to learning the basic crochet technique. Crocheting a pot is a beautiful and easy way to give a new life to old flower pots.
For this project, you will need a flower pot to cover. If your pot is over 20cm in diameter at the bottom, choose a larger roll of yarn (EKO Medium 1000g). By following the instruction, you will be able to adapt the size perfectly to your pot. If you have a roll EKO mini or EKO Nano at home, you can also use these yarns with a suitable crochet hook, the technique is the same.


Here's how to do it

This is what you need:
Here you can directly purchase the material for the product. Please note that the instruction is digital and appears here on the page (no written instruction).

EKO Medium Tube yarn | 1000g
A medium-thick tube yarn for crocheting, made of 80% recycled cotton
Buy product
.jpg)
Unleash your creativity
For only 85kr per month you get access to all our 300+ beginner-friendly instructions for crochet, knitting and macrame.
A perfect way to get started with your new hobby!

In this instruction, we make the flowerpot by starting from the middle of the bottom and then going up on the sides. You need a pot that is at least 12 cm in diameter at the bottom.
First step: “The Inner Ring”
Hold the yarn in your right hand. Twist the yarn around your fingers of your left hand three times. Use your crochet to get under the first two loops and hook the third with your crochet hook. Carefully pull the yarn through the two finger loops.

Now the loop on the crochet hooks holds together the double “inner ring”. Carefully detach it from your fingers and pull the yarn you have around your left finger through the loop that holds your crochet hook.

Bottom
Now it's time for the second round: Pass the crochet through the innermost ring and pull the yarn through, you have two loops on the crochet hook. Grab the yarn again and pull it through both loops. Now you only have one loop on the crochet hook. This is called single crochet. Crochet so that you have 8 stitches around your inner ring.
Now we want the bottom to grow in size and then we add extra single stitches on this lap. Go through the same “hole” that you used before and make another single crochet in the same place. Repeat with the next loop. At this point, double the number of stitches from row 1 to row 2. Continue this around the entire ring until you get back to where you started.

After completing the lap, test whether the size already matches your flower pot. The side should look like in the picture (this pot is 12 cm in diameter). If the bottom is too small, continue to make it larger by adding extra stitches according to the following methods:

Round 3: Make two single crochet in every other stitch (between these you only make one stitch as usual)
Round 4: Make two single crochet in every 3 stitches
Round 5: Do not add this row - just crochet one stitch in each stitch
Round 6: Make two single crochet every 4 stitches
Round 7: Make two single crochet in every 5 stitches
Round 8: Make two single crochet in every 6 stitches
Round 9: Make two single crochet in every 7 stitches
Crochet as many laps as you need to make the size of the bottom match your pot.
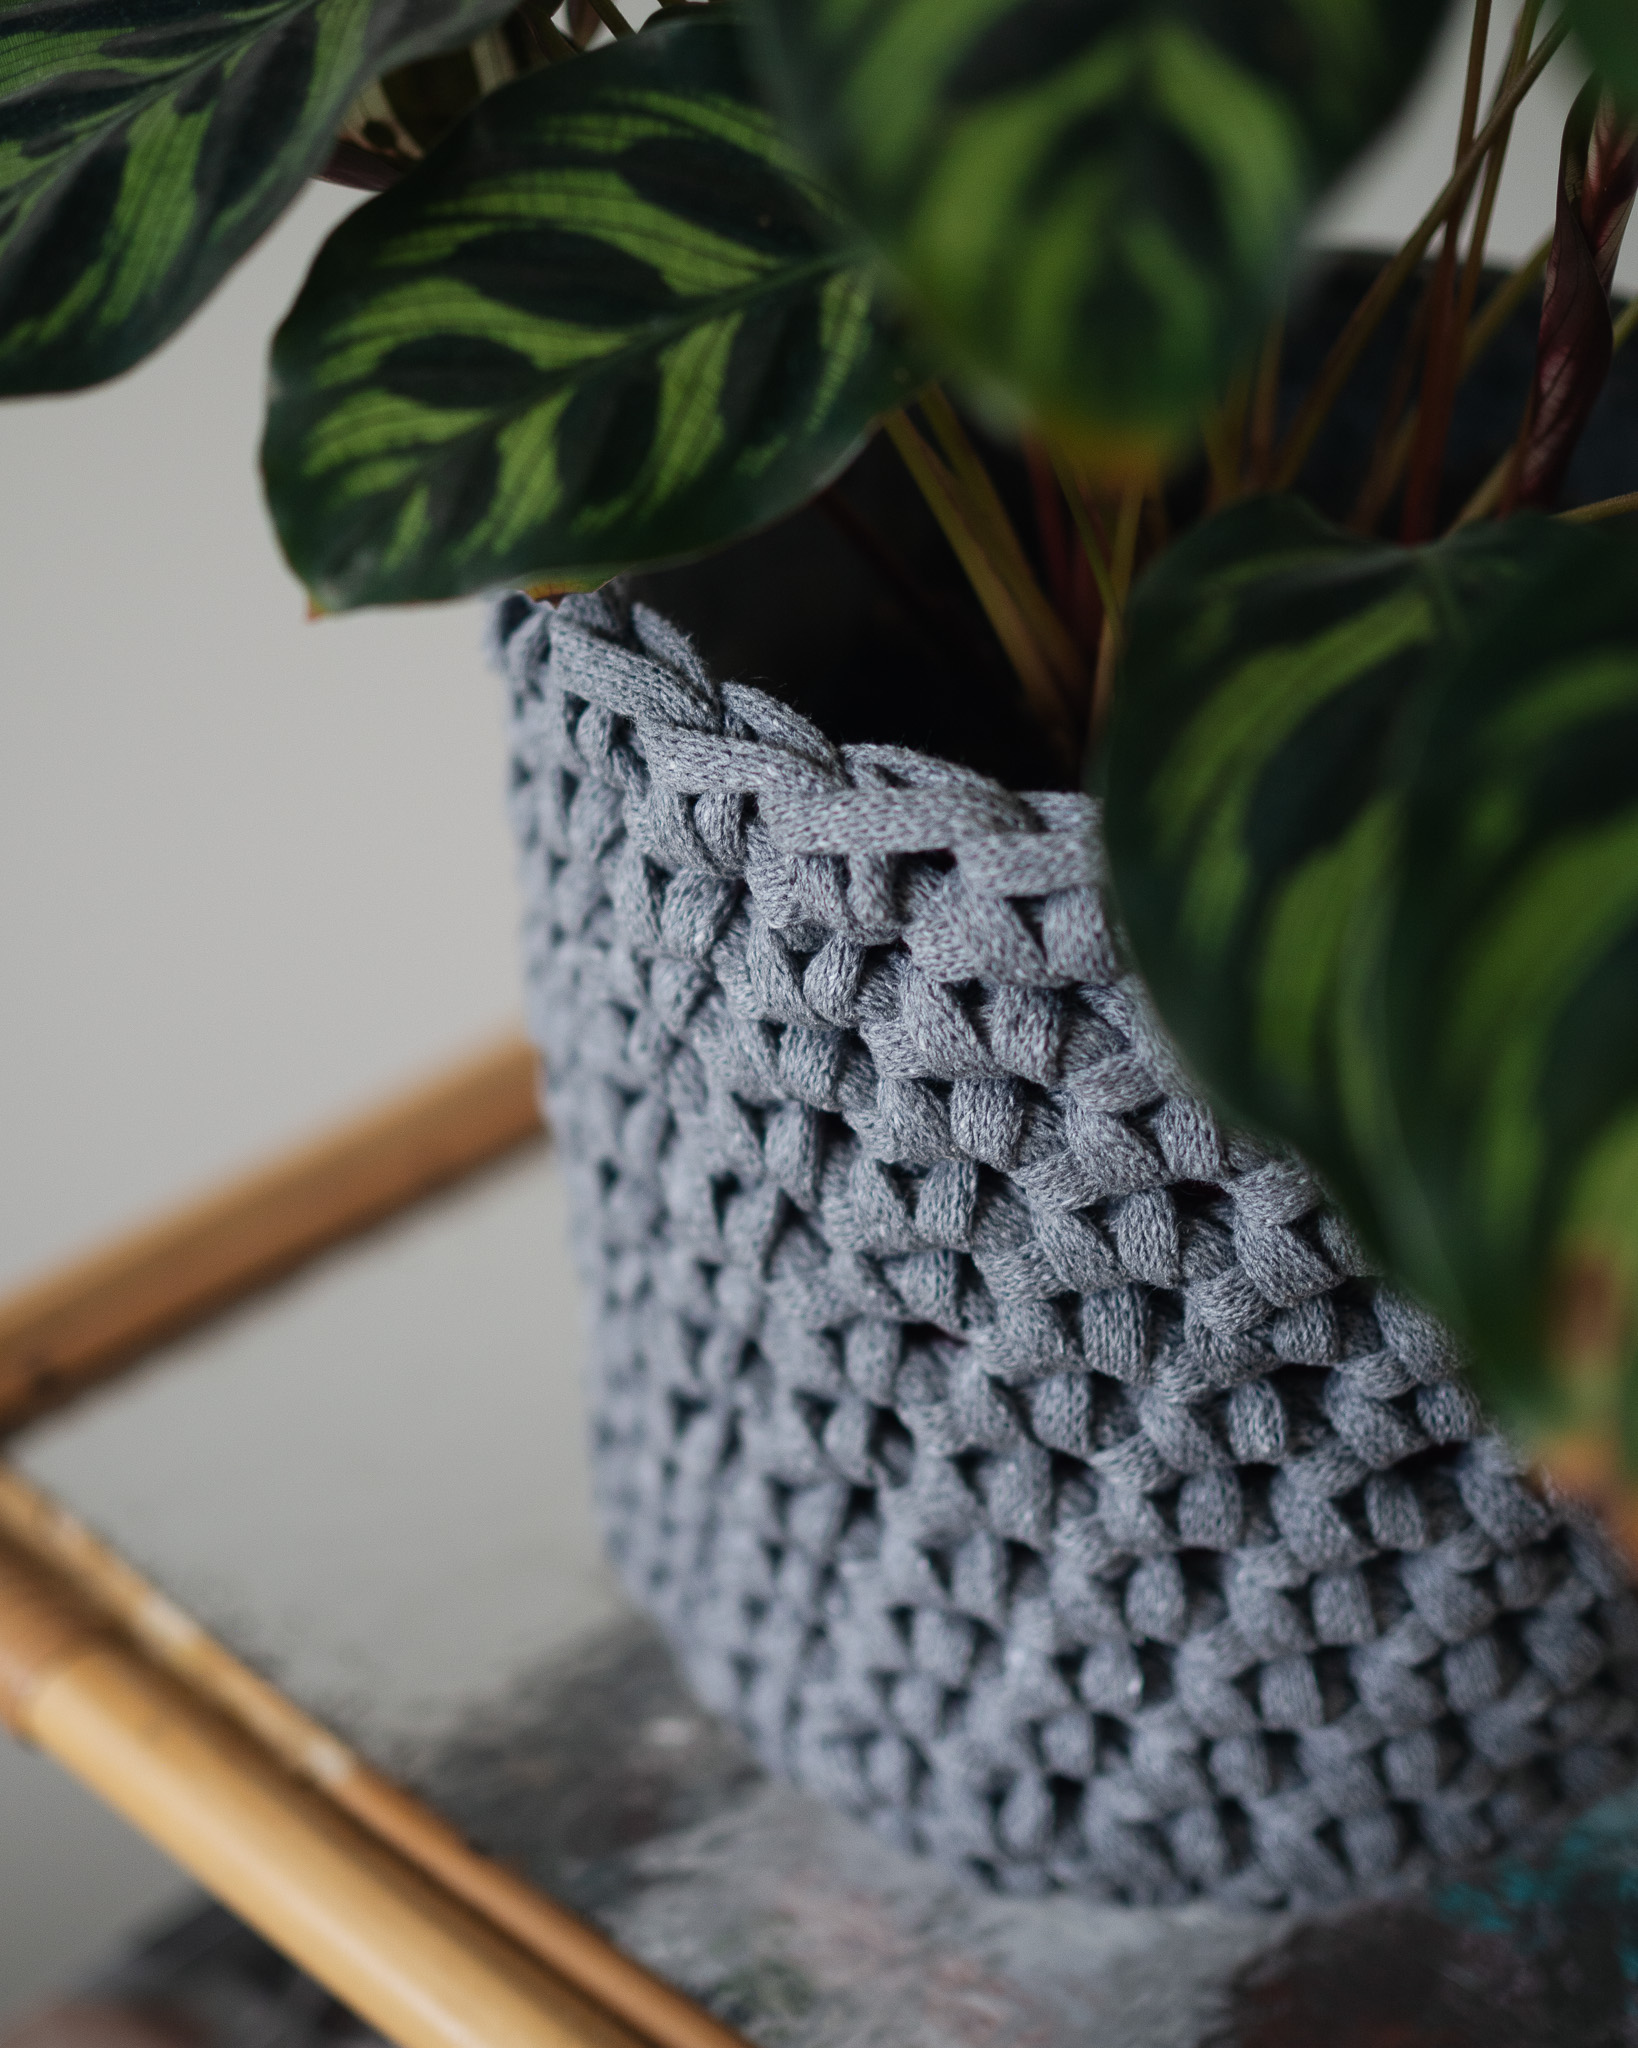
The side
Look at the back of your work. You see loops that are close to each other as in the picture. Pass through the loop with your crochet hook again and pull through both loops. If you use exactly the same technique as before, but grab loops from the “inside” of the bottom edge to make the basket rise up. Crochet around the entire bottom.

The rest is simple. Once you have “turned up" the side, you continue to crochet as before, but only go through the stitches you have closest to your crochet (do not take anything from the inside). Continue until the side is high enough to cover your flower pot, testing along the way.

Closing
To finish, cut the yarn and leave a 5-10 cm tail. Tie the remaining tail in a knot around the last stitch to prevent it from tearing up. Pull and cut the tail by threading it through some nearby loops - or just let it hang on the inside of your flower pot.
You're done with your pot! Good job:)

Crochet Terms – Abbreviations
MR = magic ring
st = stitch
ch = chain
sc = single crochet
inc = increase (2 sc in the same stitch)
blo = back loop only
*...* = repeat everything between asterisks as indicated
Let's crochet a flower pot cover! If you need help along the way, check out the simpler version of this pattern. In this case, there are no images, so refer to the full-length video tutorial.
Pattern
Round 1: 8 sc into a MR (8)
Round 2: inc x8 (16)
Tip: Continuously test your work against your pot to know when the base is big enough. When it fits, skip to Round 10 to start the sides.
Round 3: *1 sc, inc* x8 (24)
Round 4: *2 sc, inc* x8 (32)
Round 5: 32 sc (32)
Round 6: *3 sc, inc* x8 (40)
Round 7: *4 sc, inc* x8 (48)
Round 8: *5 sc, inc* x8 (56)
Round 9: *6 sc, inc* x8 (64)
Start the sides
Round 10: Work 1 sc into the blo and into the loop behind the blo (this gives the edge structure for the side).
Round 11 and onward: Work 1 sc in each st until the cover is as tall as you want it to be.
🎉 Your flower pot cover is finished! Great job!
The rights to this pattern belong to MYO Make Your Own. The pattern or its pictures may not be copied, shared or resold either in parts or in its entirety, but you may sell items you have crocheted from this pattern. If you have questions about the pattern, contact MYO at hello@makeyourown.se.
In this instruction, we make the flowerpot by starting from the middle of the bottom and then going up on the sides. You need a pot that is at least 12 cm in diameter at the bottom.
First step: “The Inner Ring”
Hold the yarn in your right hand. Twist the yarn around your fingers of your left hand three times. Use your crochet to get under the first two loops and hook the third with your crochet hook. Carefully pull the yarn through the two finger loops.
Now the loop on the crochet hooks holds together the double “inner ring”. Carefully detach it from your fingers and pull the yarn you have around your left finger through the loop that holds your crochet hook.
Bottom
Now it's time for the second round: Pass the crochet through the innermost ring and pull the yarn through, you have two loops on the crochet hook. Grab the yarn again and pull it through both loops. Now you only have one loop on the crochet hook. This is called single crochet. Crochet so that you have 8 stitches around your inner ring.
Now we want the bottom to grow in size and then we add extra single stitches on this lap. Go through the same “hole” that you used before and make another single crochet in the same place. Repeat with the next loop. At this point, double the number of stitches from row 1 to row 2. Continue this around the entire ring until you get back to where you started.
After completing the lap, test whether the size already matches your flower pot. The side should look like in the picture (this pot is 12 cm in diameter). If the bottom is too small, continue to make it larger by adding extra stitches according to the following methods:
Round 3: Make two single crochet in every other stitch (between these you only make one stitch as usual)
Round 4: Make two single crochet in every 3 stitches
Round 5: Do not add this row - just crochet one stitch in each stitch
Round 6: Make two single crochet every 4 stitches
Round 7: Make two single crochet in every 5 stitches
Round 8: Make two single crochet in every 6 stitches
Round 9: Make two single crochet in every 7 stitches
Crochet as many laps as you need to make the size of the bottom match your pot.
The side
Look at the back of your work. You see loops that are close to each other as in the picture. Pass through the loop with your crochet hook again and pull through both loops. If you use exactly the same technique as before, but grab loops from the “inside” of the bottom edge to make the basket rise up. Crochet around the entire bottom.
The rest is simple. Once you have “turned up" the side, you continue to crochet as before, but only go through the stitches you have closest to your crochet (do not take anything from the inside). Continue until the side is high enough to cover your flower pot, testing along the way.
Closing
To finish, cut the yarn and leave a 5-10 cm tail. Tie the remaining tail in a knot around the last stitch to prevent it from tearing up. Pull and cut the tail by threading it through some nearby loops - or just let it hang on the inside of your flower pot.
You're done with your pot! Good job:)
Crochet Terms – Abbreviations
MR = magic ring
st = stitch
ch = chain
sc = single crochet
inc = increase (2 sc in the same stitch)
blo = back loop only
*...* = repeat everything between asterisks as indicated
Let's crochet a flower pot cover! If you need help along the way, check out the simpler version of this pattern. In this case, there are no images, so refer to the full-length video tutorial.
Pattern
Round 1: 8 sc into a MR (8)
Round 2: inc x8 (16)
Tip: Continuously test your work against your pot to know when the base is big enough. When it fits, skip to Round 10 to start the sides.
Round 3: *1 sc, inc* x8 (24)
Round 4: *2 sc, inc* x8 (32)
Round 5: 32 sc (32)
Round 6: *3 sc, inc* x8 (40)
Round 7: *4 sc, inc* x8 (48)
Round 8: *5 sc, inc* x8 (56)
Round 9: *6 sc, inc* x8 (64)
Start the sides
Round 10: Work 1 sc into the blo and into the loop behind the blo (this gives the edge structure for the side).
Round 11 and onward: Work 1 sc in each st until the cover is as tall as you want it to be.
🎉 Your flower pot cover is finished! Great job!
The rights to this pattern belong to MYO Make Your Own. The pattern or its pictures may not be copied, shared or resold either in parts or in its entirety, but you may sell items you have crocheted from this pattern. If you have questions about the pattern, contact MYO at hello@makeyourown.se.


.jpg)


Share your creations with us
Thank you!
Your comment was sent!