
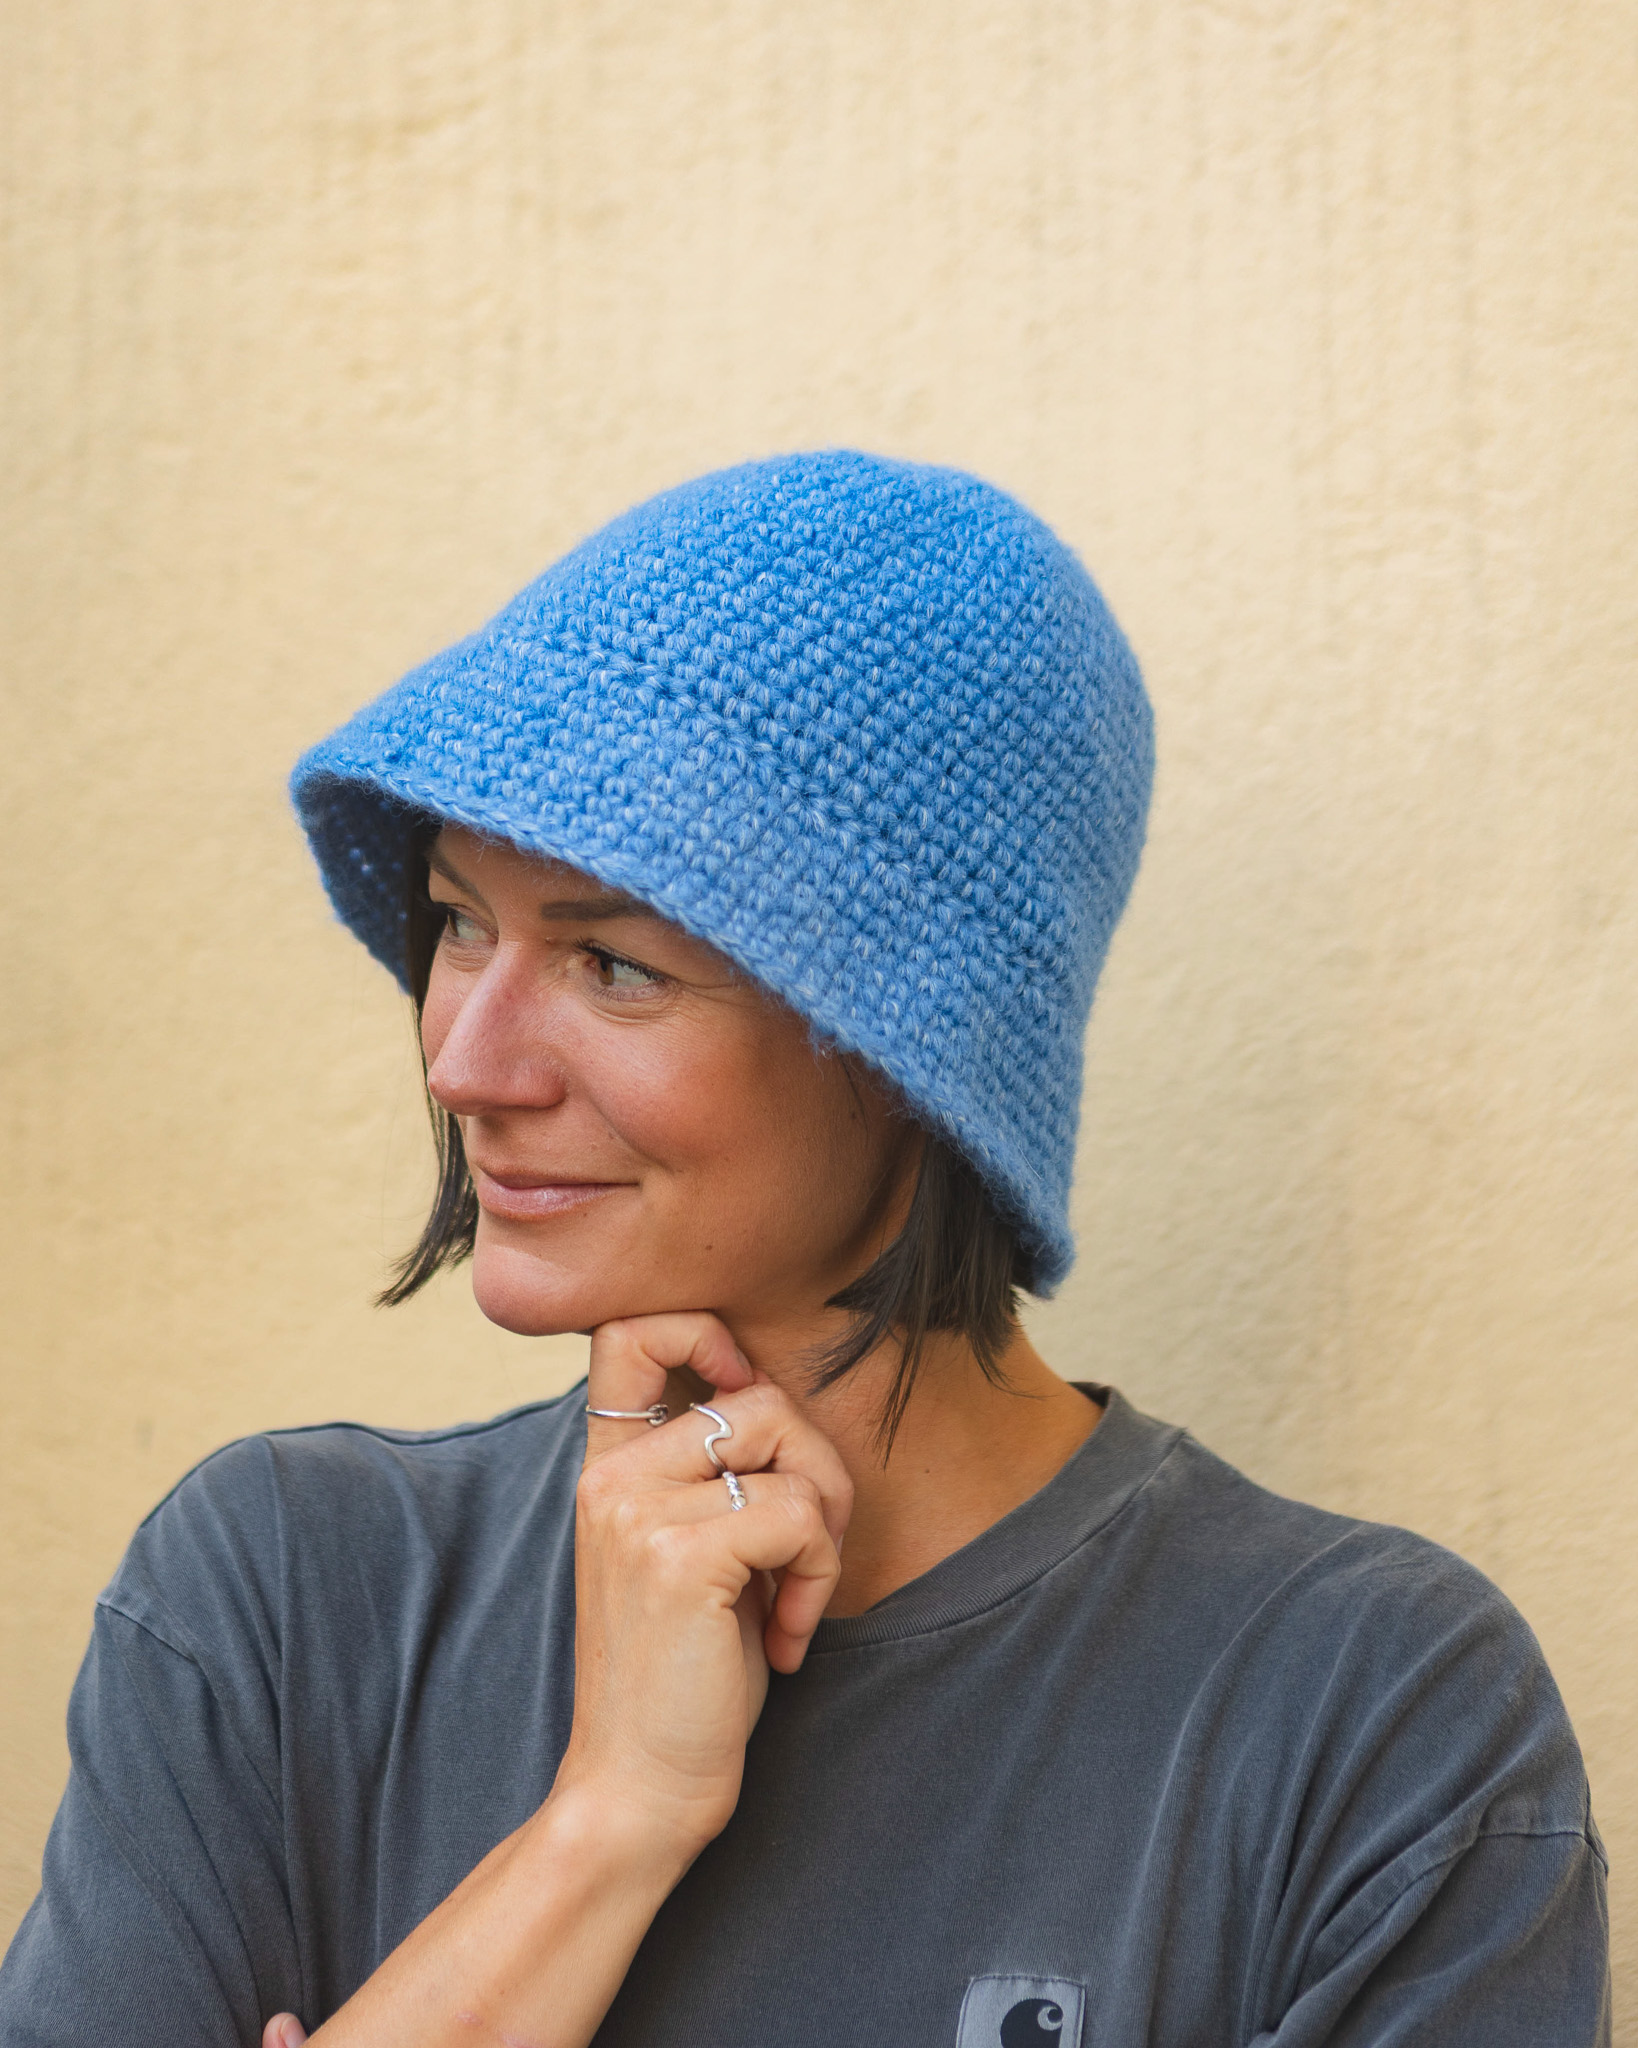
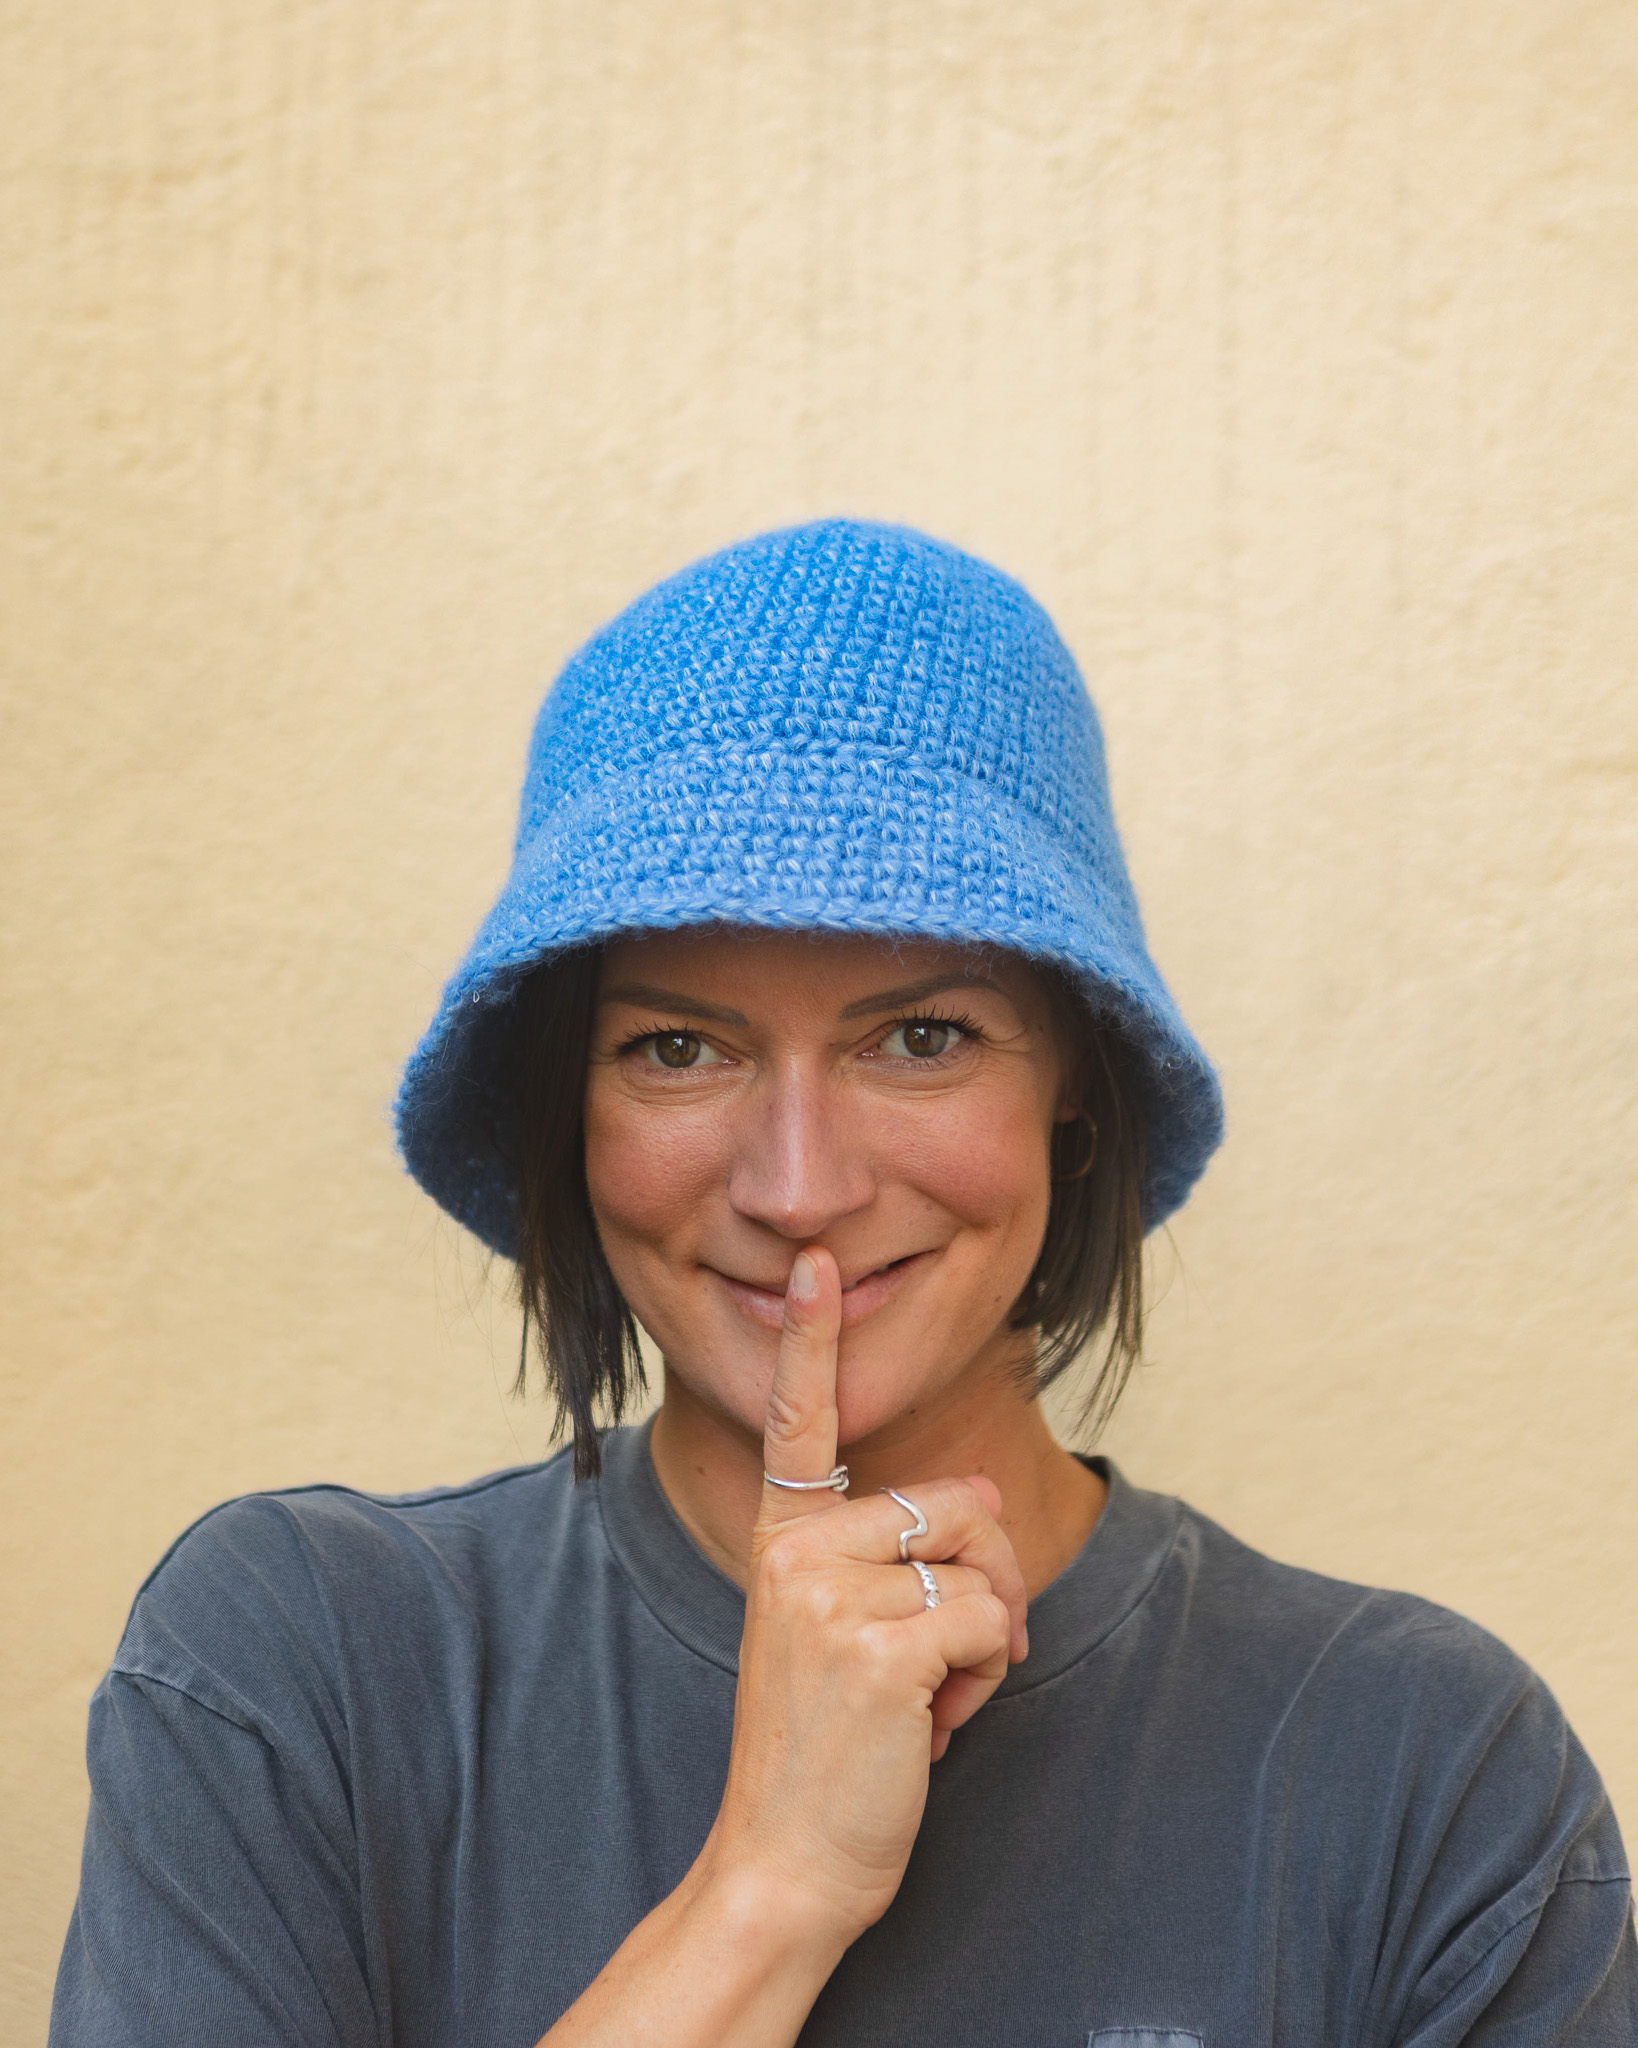
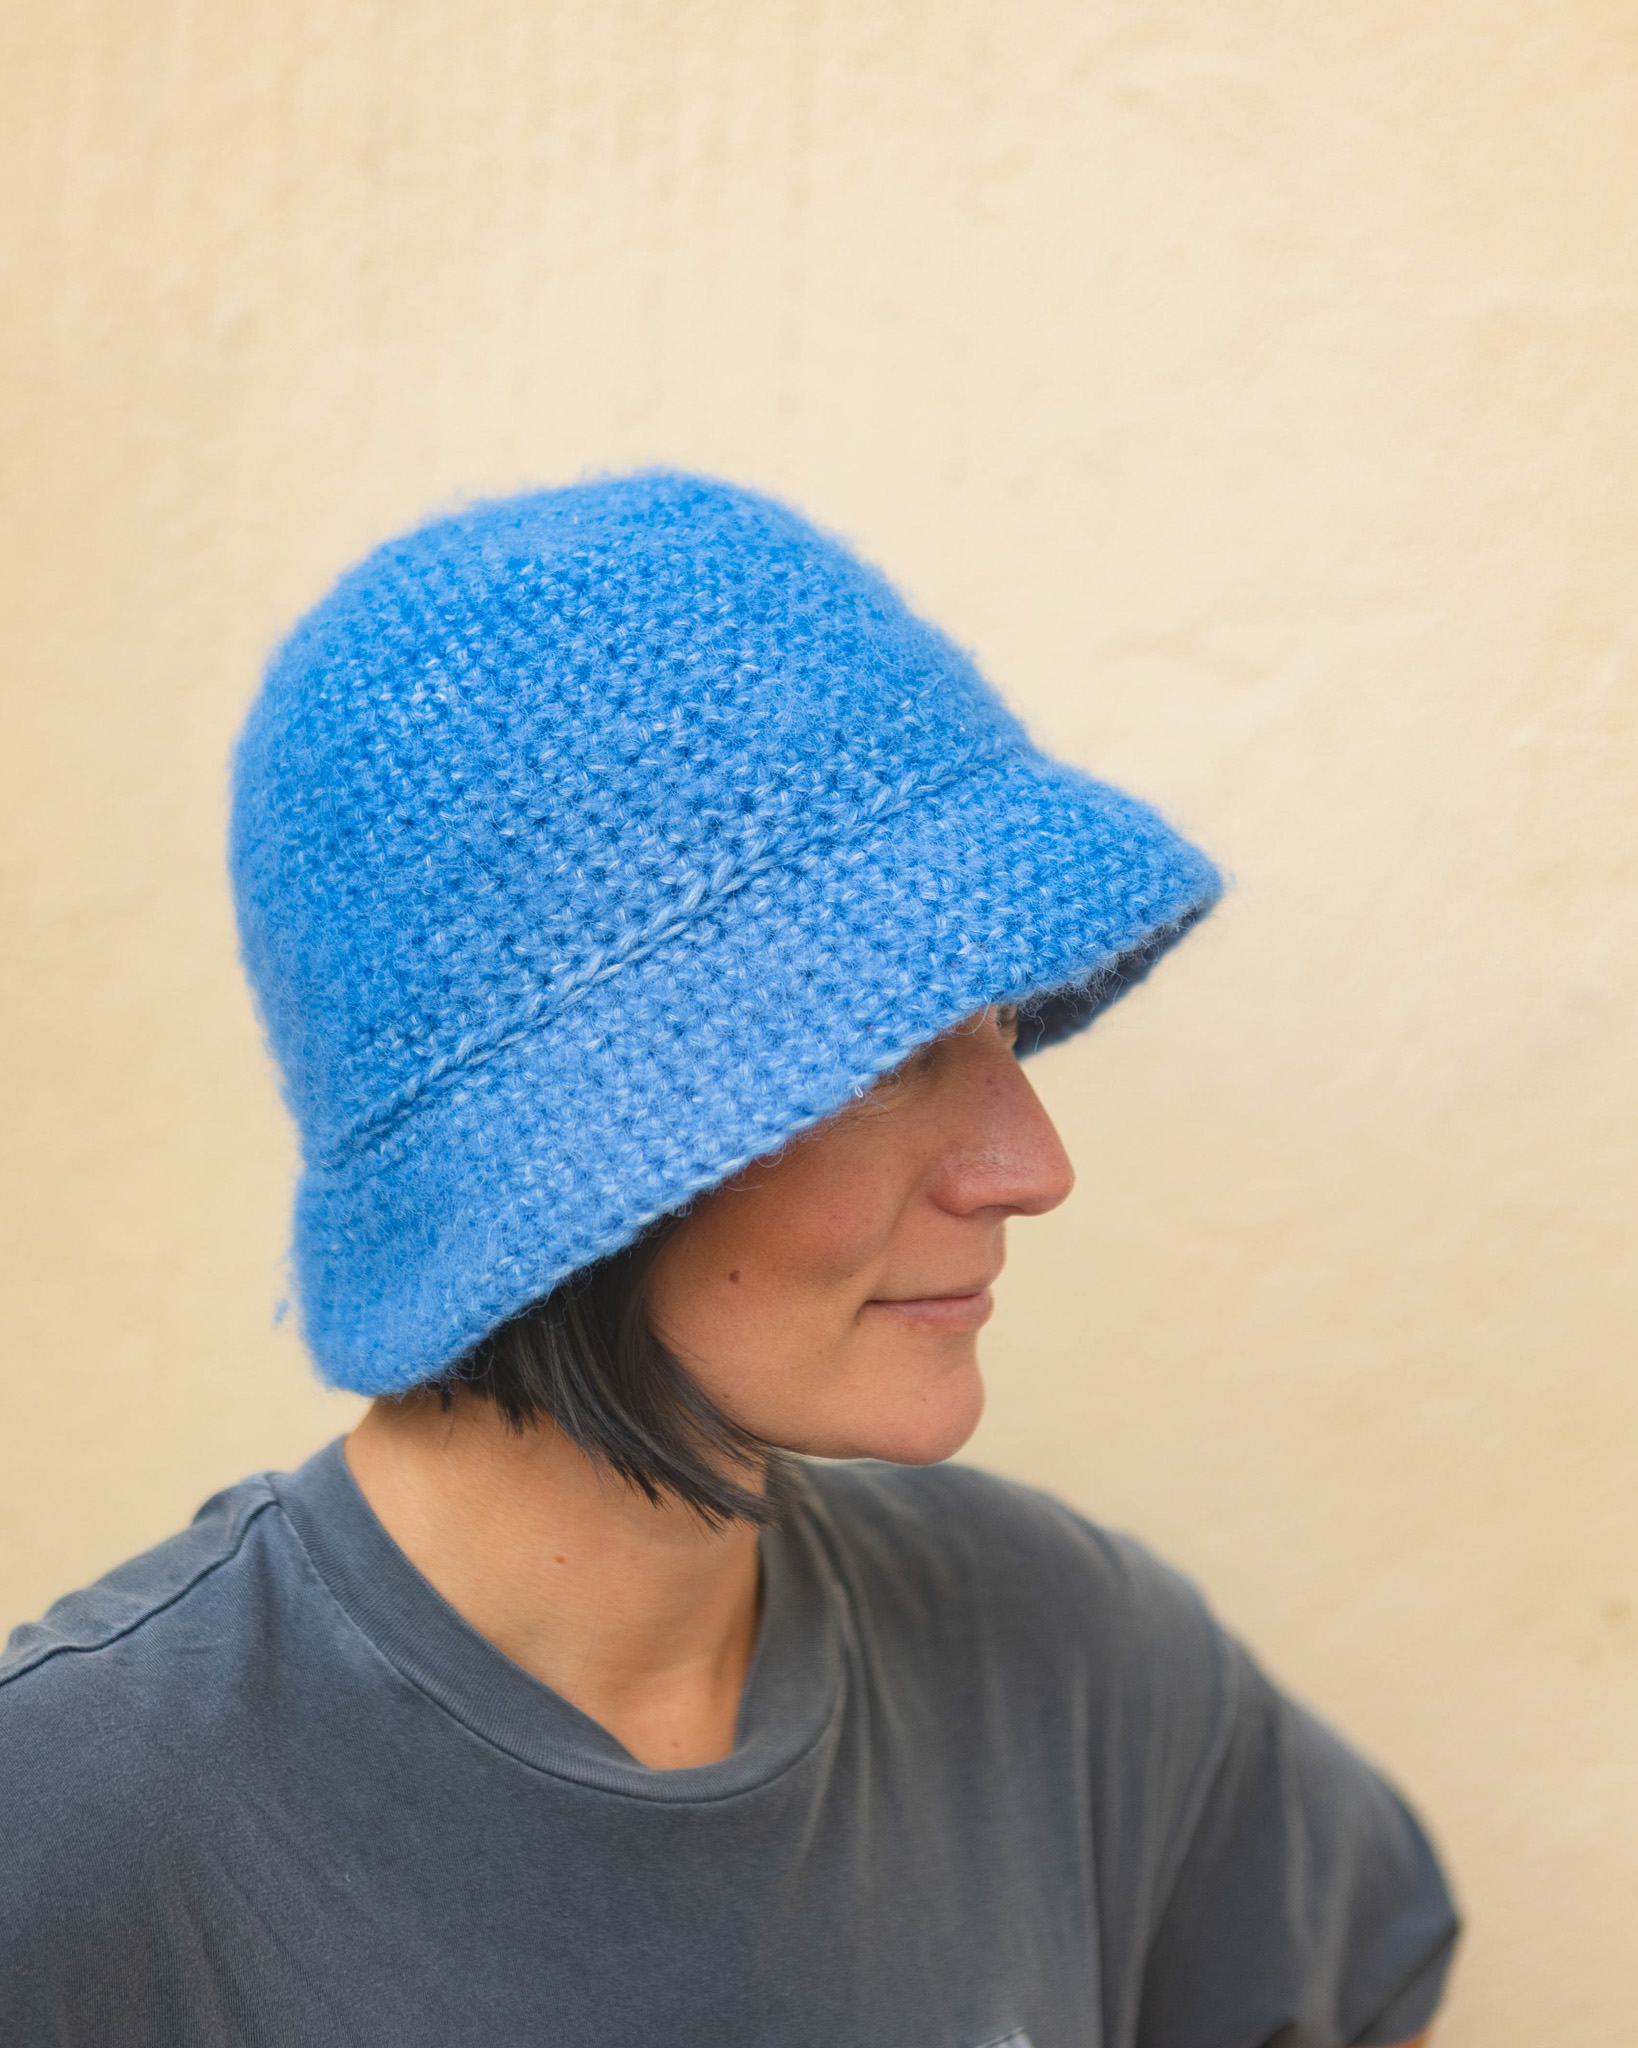
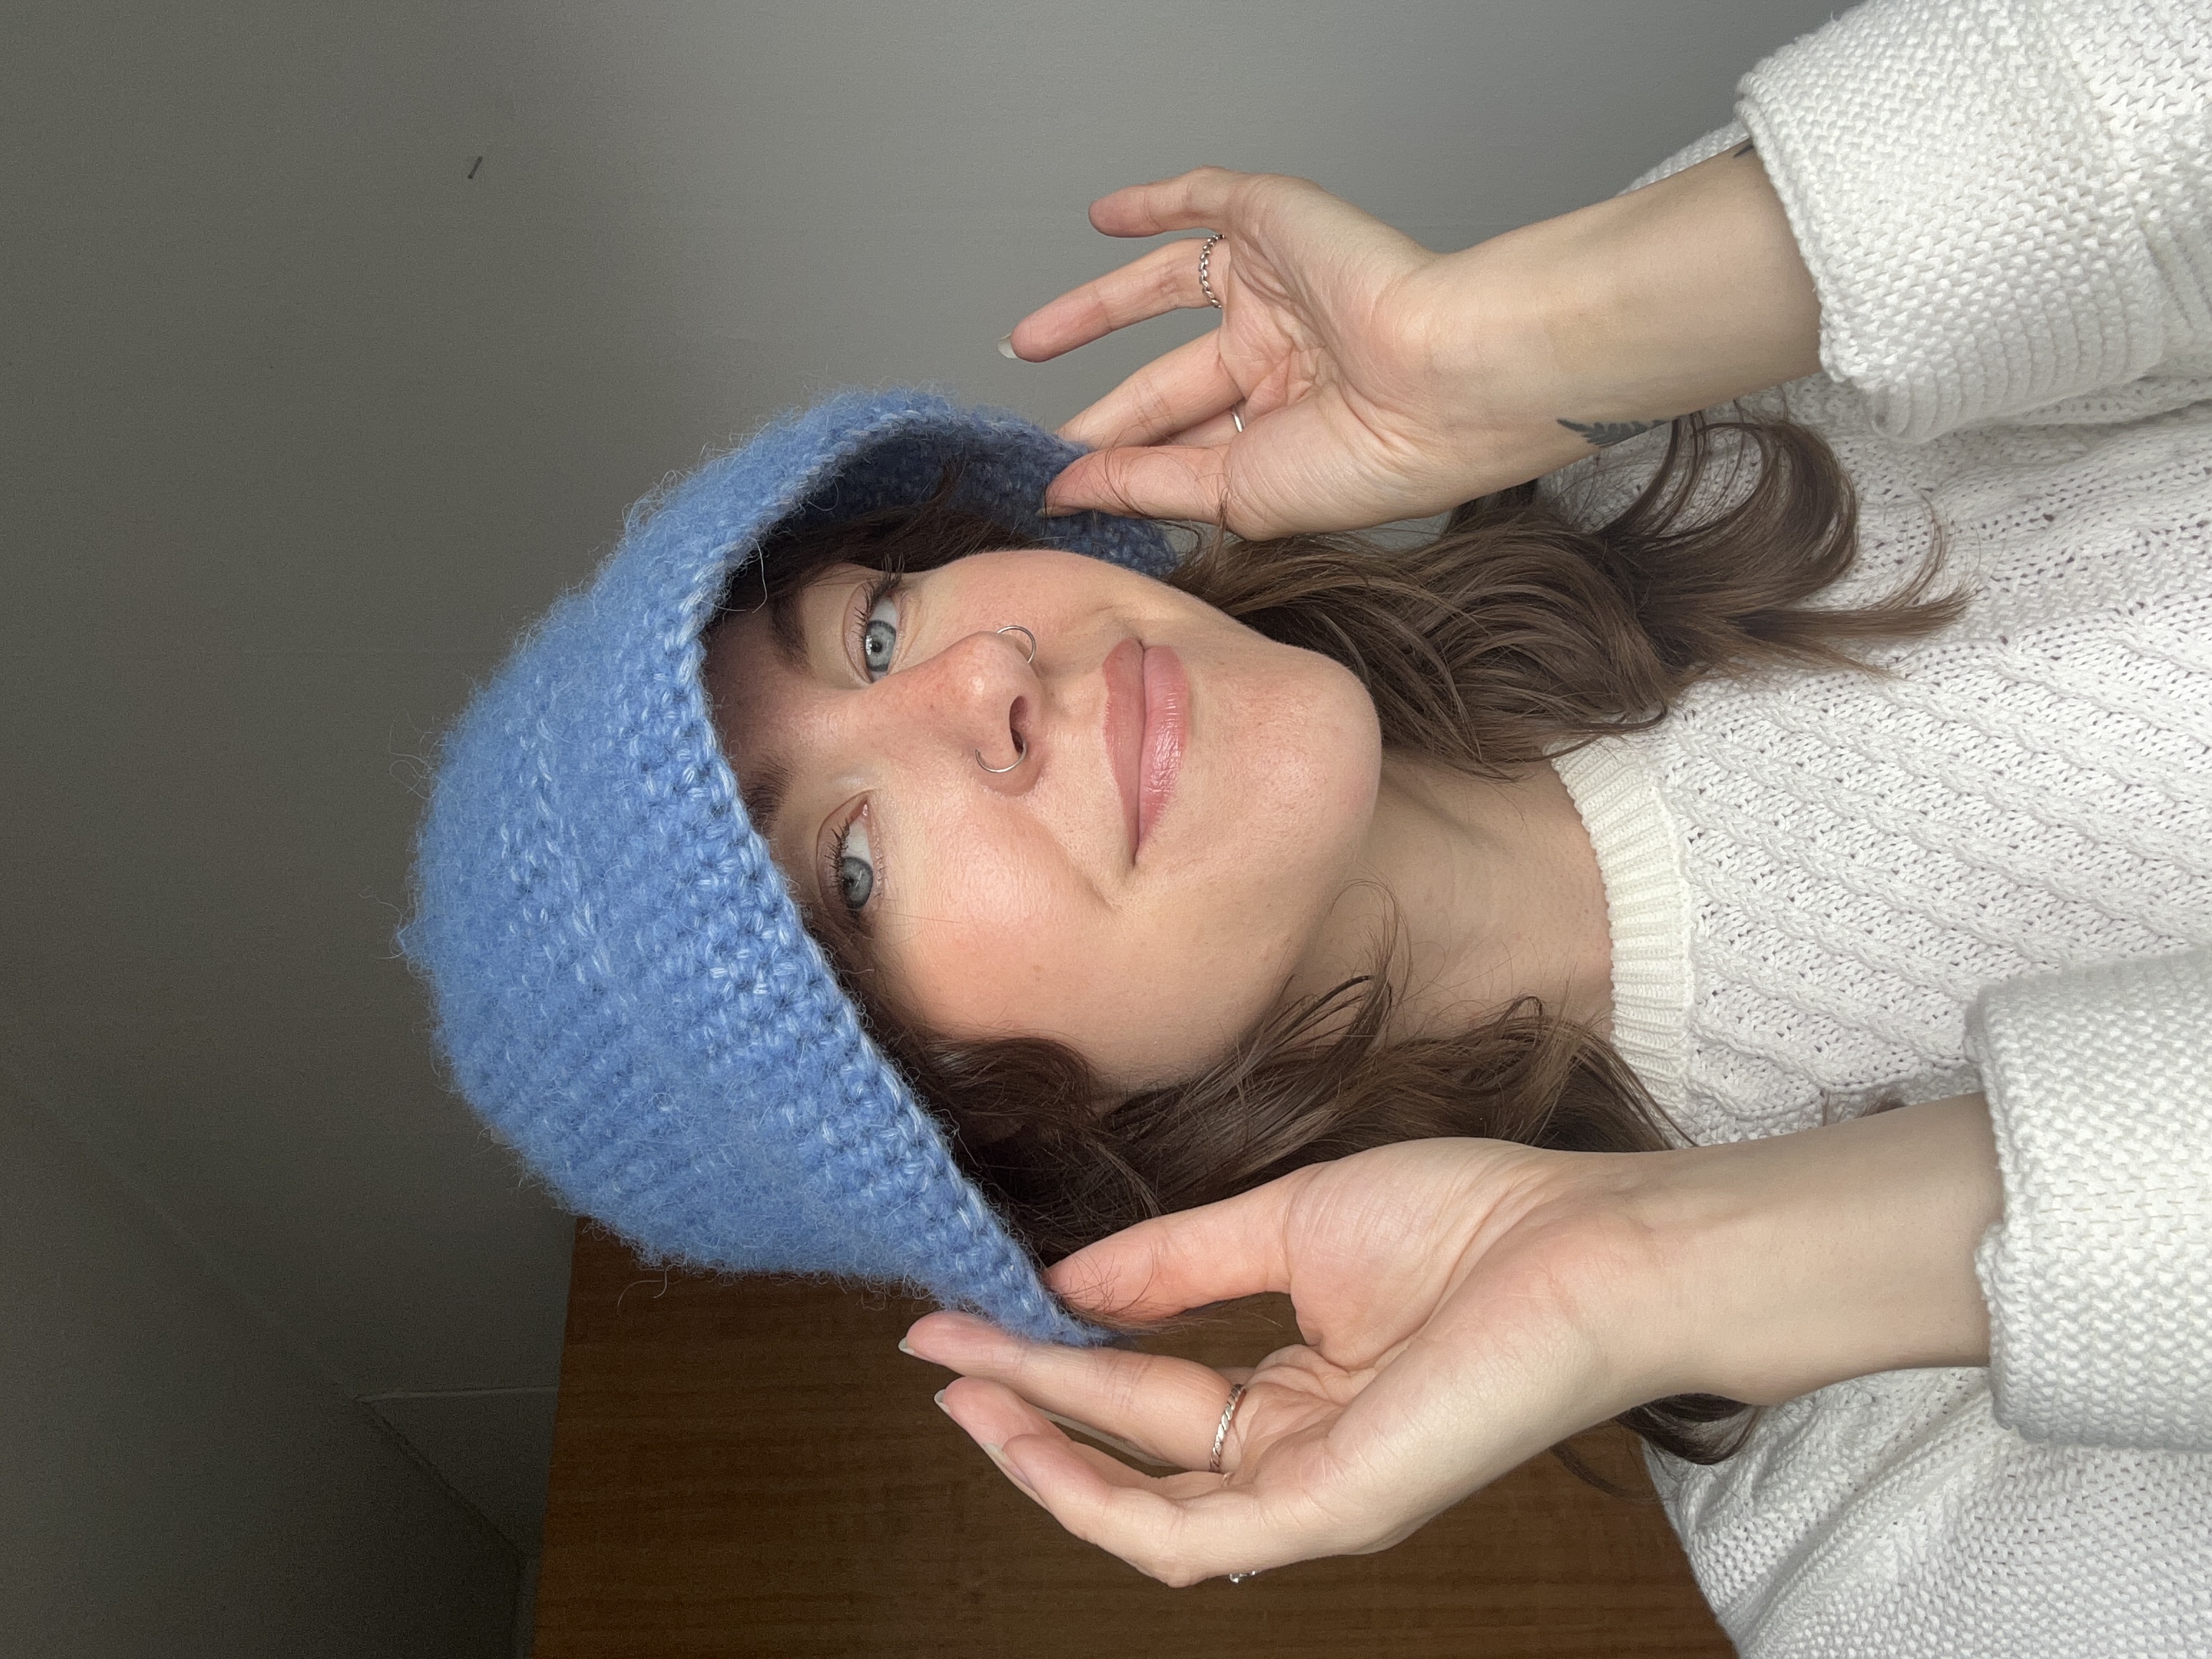
Bucket hat "Buffy"
A cool and modern accessory that suits both city life and winter walks.
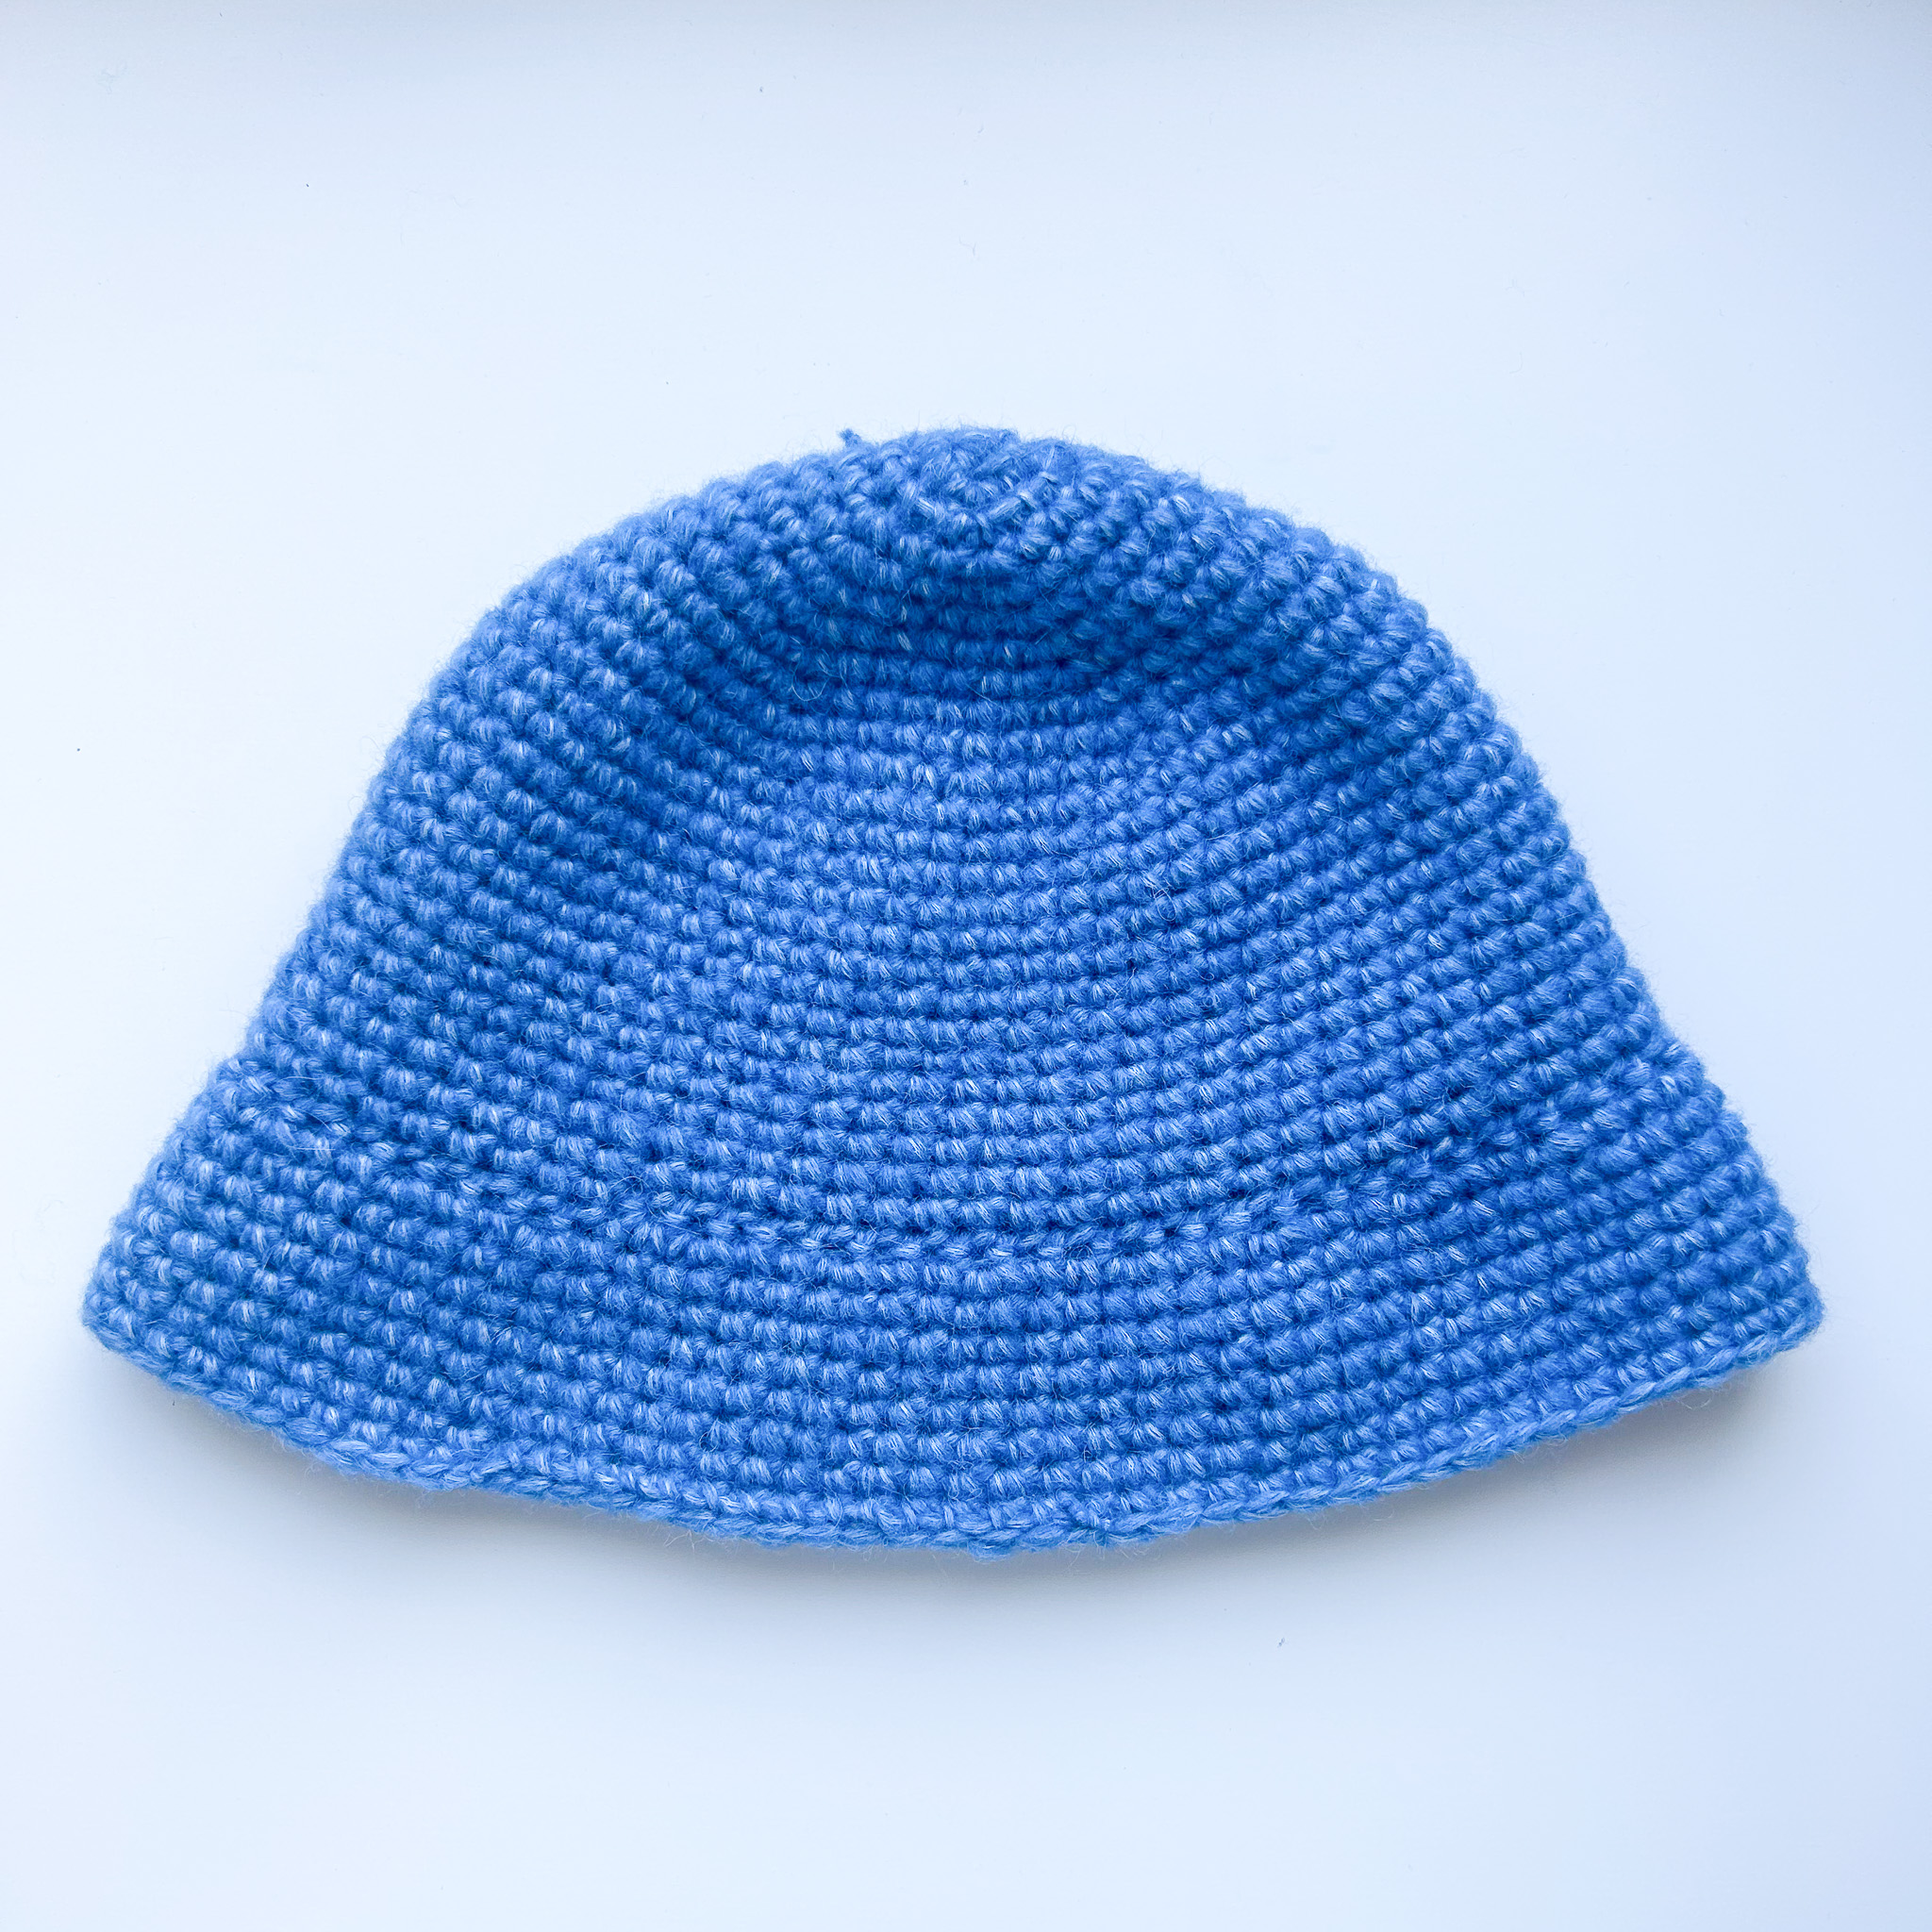
This fluffy bucket hat is the perfect accessory to keep your head and ears warm when the weather gets a bit chilly! It’s crocheted using the wonderfully soft yarn Dreamy Blend, which, when brushed out, creates a lovely fluffy effect. It’s a fun and relatively quick project that gives you a stylish accessory to brighten up your fall/winter outfit—or even a summer evening. Besides the Dreamy Blend yarn, you’ll need a 5 mm crochet hook, a stitch marker, and a brush or comb. The finished hat measures approximately 23 cm in height from crown to brim edge, with a circumference of about 54 cm. The hat fits best if your head circumference is between 54–58 cm, but you can add or remove rows to adjust the size.
This pattern is created by @handmadebyhannalouise.
Yarn consumption: Approximately 80–100 g depending on how tightly you crochet and the size.
Please note that this instruction uses videos from our technique library along with images.
Here's how to do it
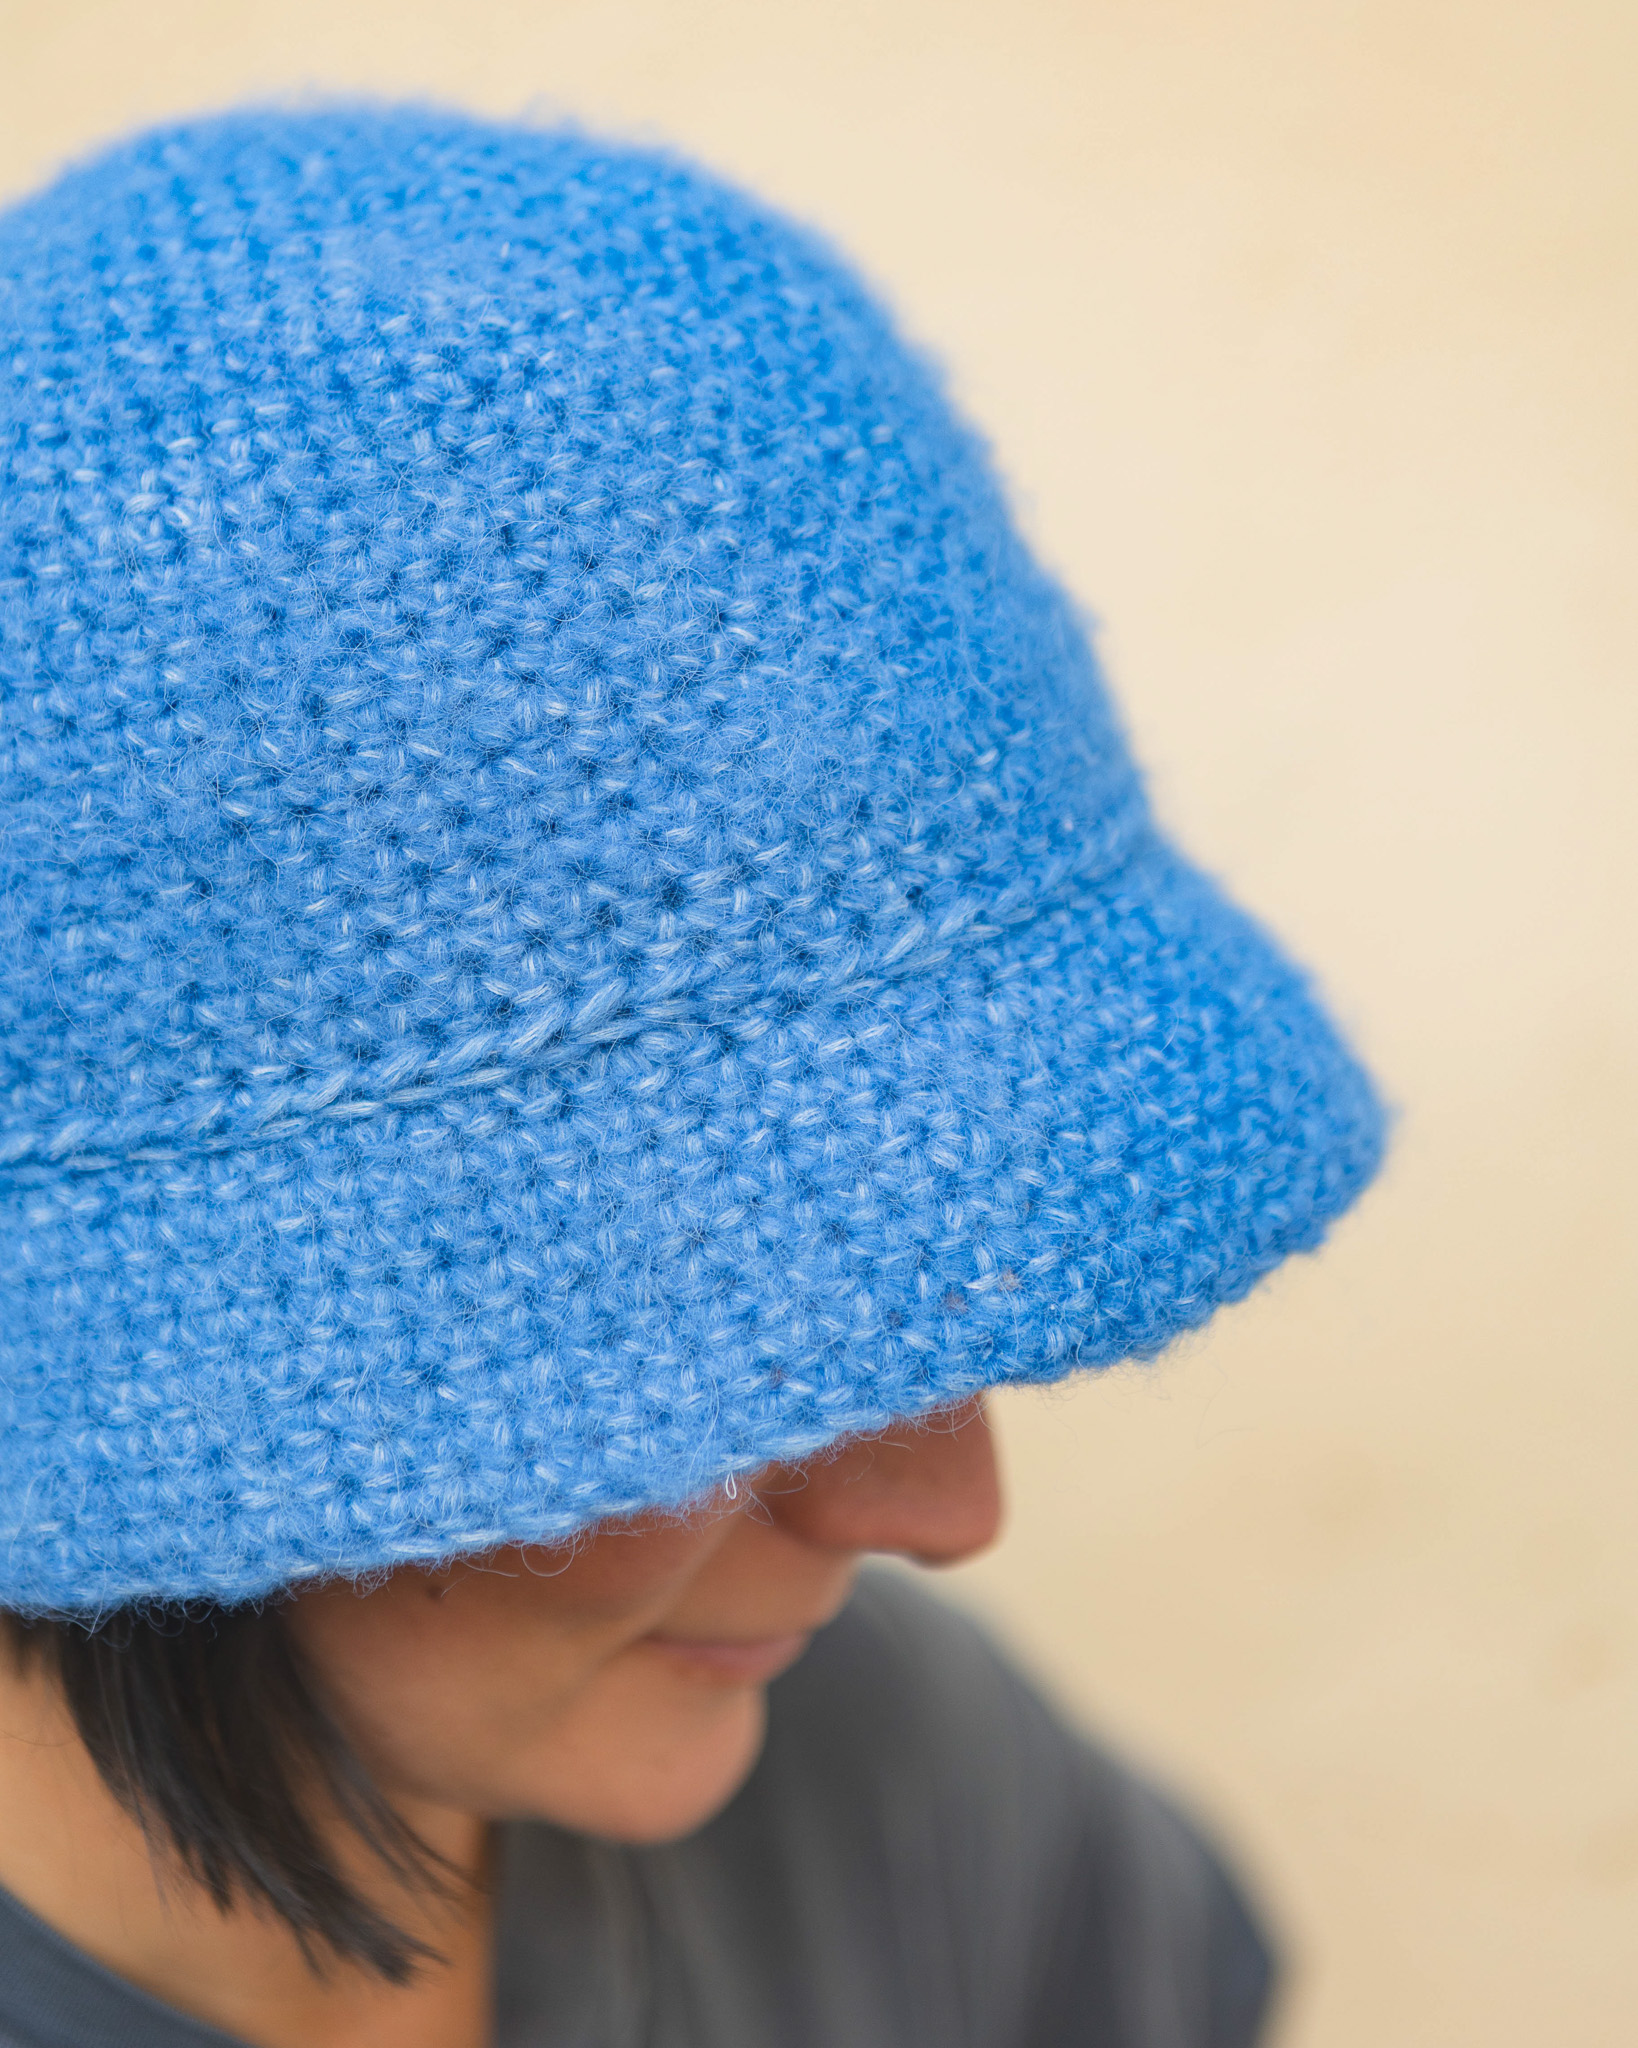
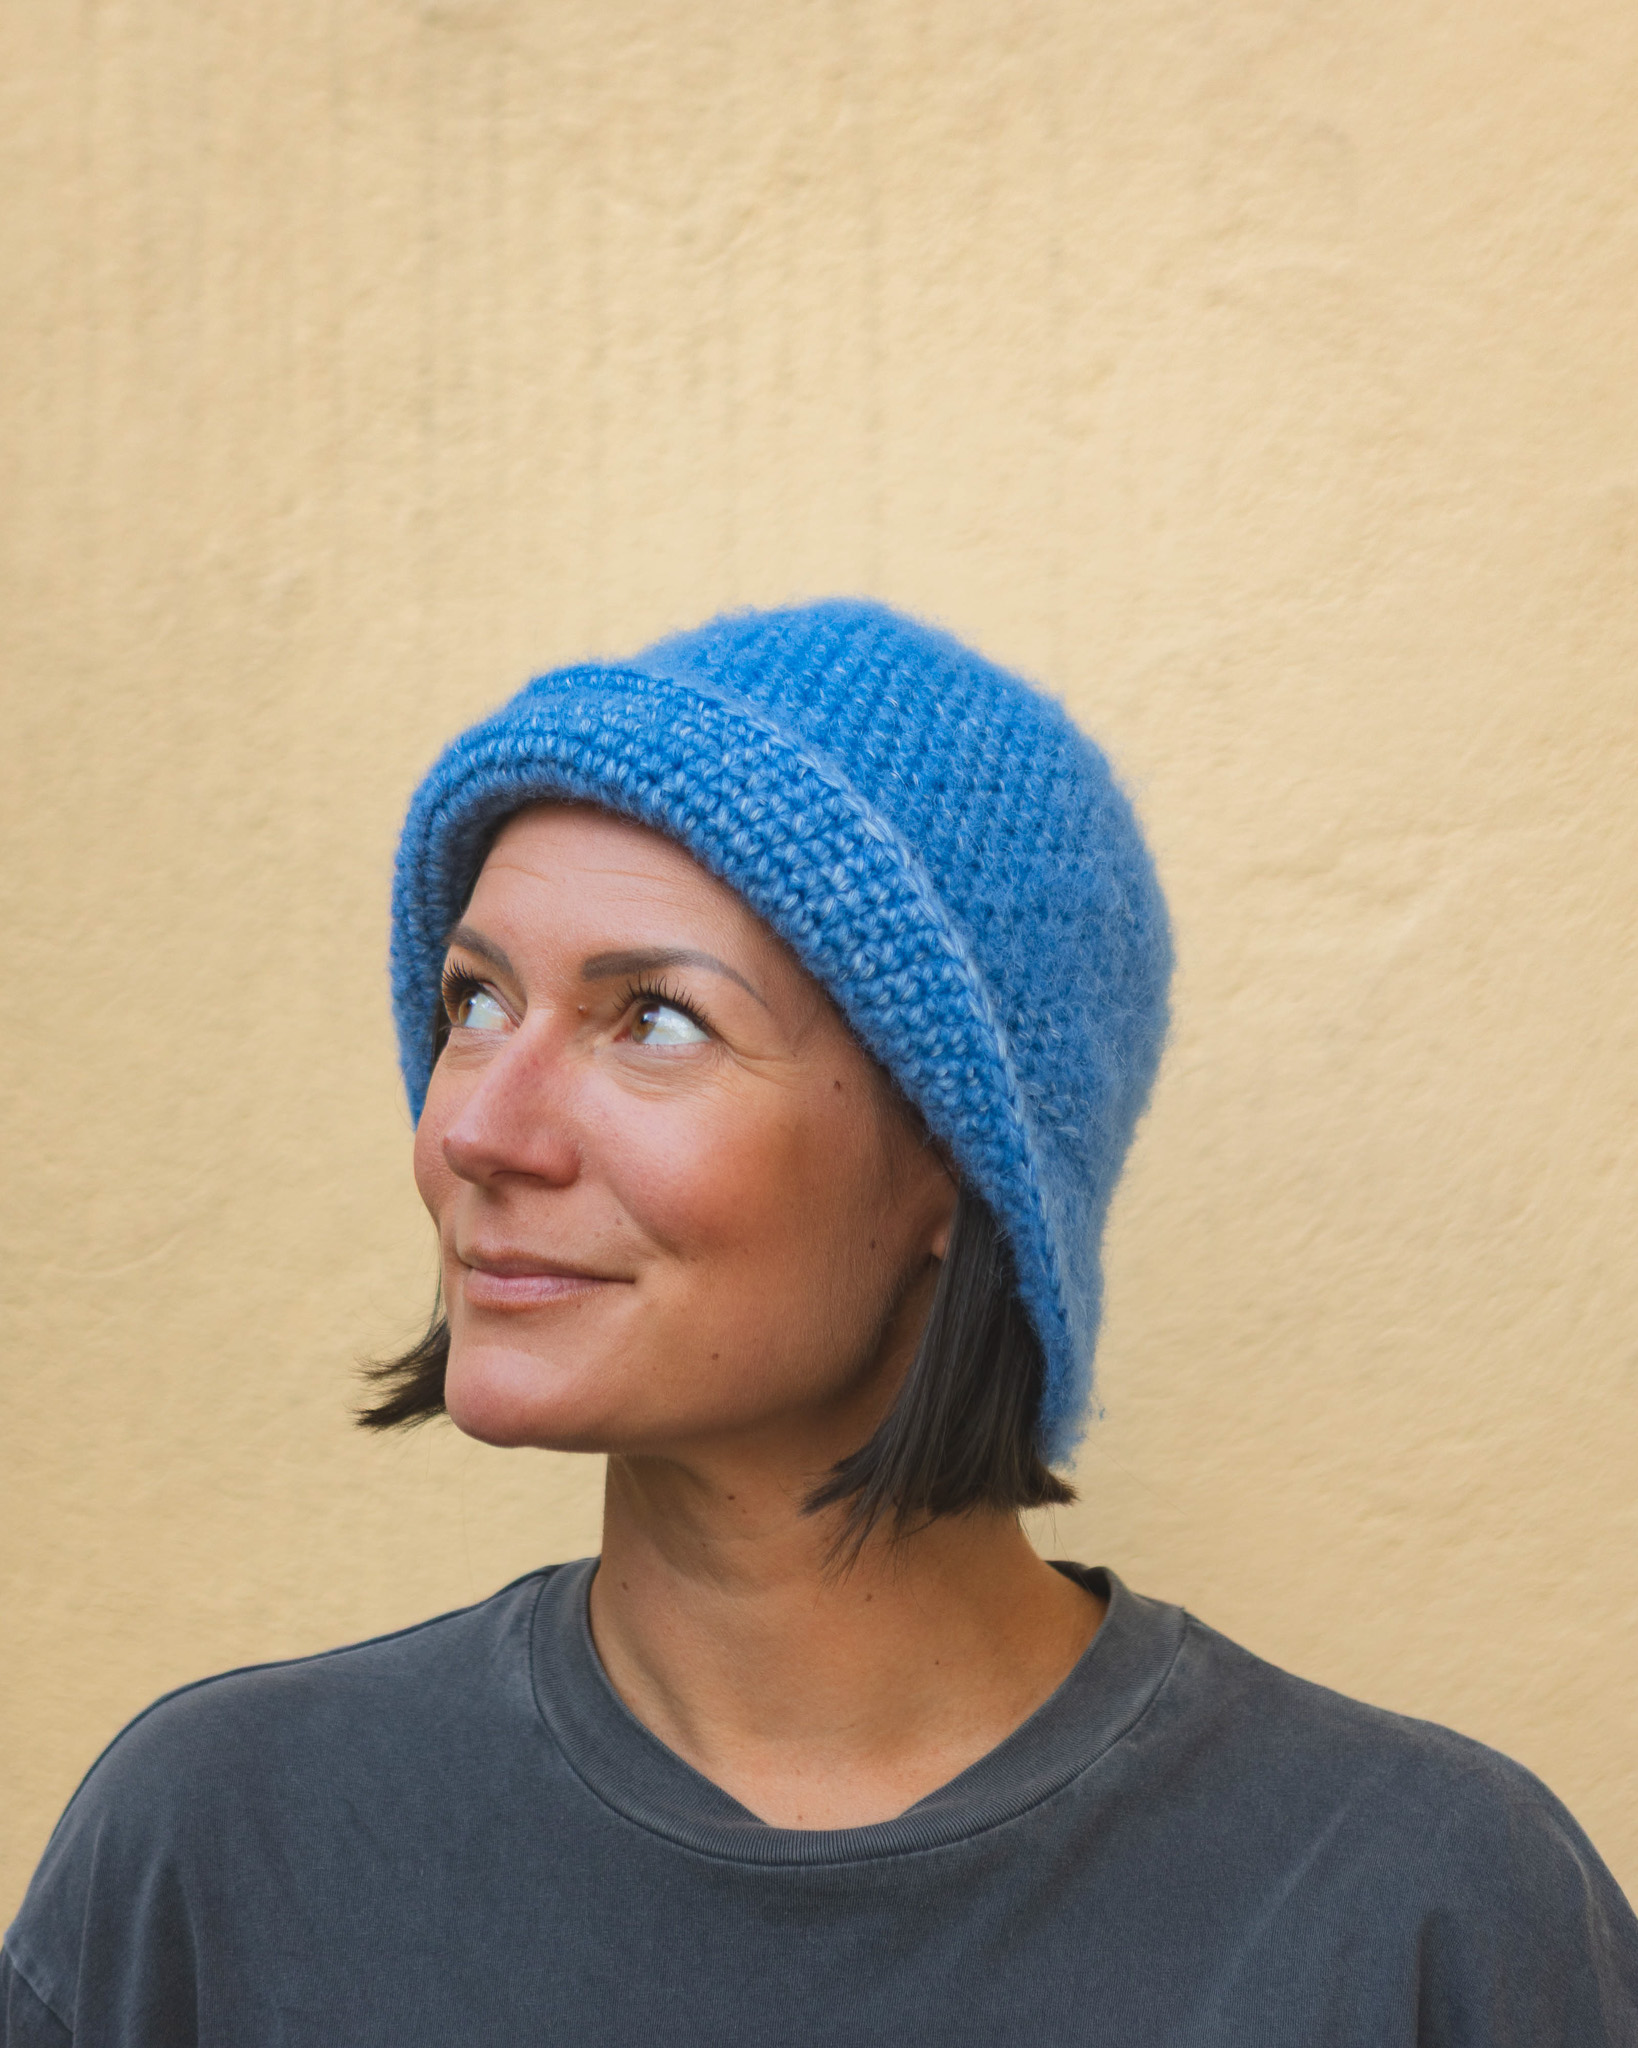
The hat is crocheted in one piece, starting at the top of the crown and working outward and downward toward the brim. The rounds are worked continuously in the round, eliminating the risk of a visible seam at the beginning of each new round.The entire hat is crocheted in single crochet stitches, but there is also an option to add a stylish “braided” edge where the brim starts. This edge is made with slip stitches with yarn overs. The side facing you as you crochet will be the “wrong side,” and the other side will be the “right side.” The hat fits best a head circumference of 54–58 cm but can easily be adjusted in size by working fewer or more rounds and increases. The pattern is beginner-friendly with lots of pictures and details to make it easy to follow! / Hanna

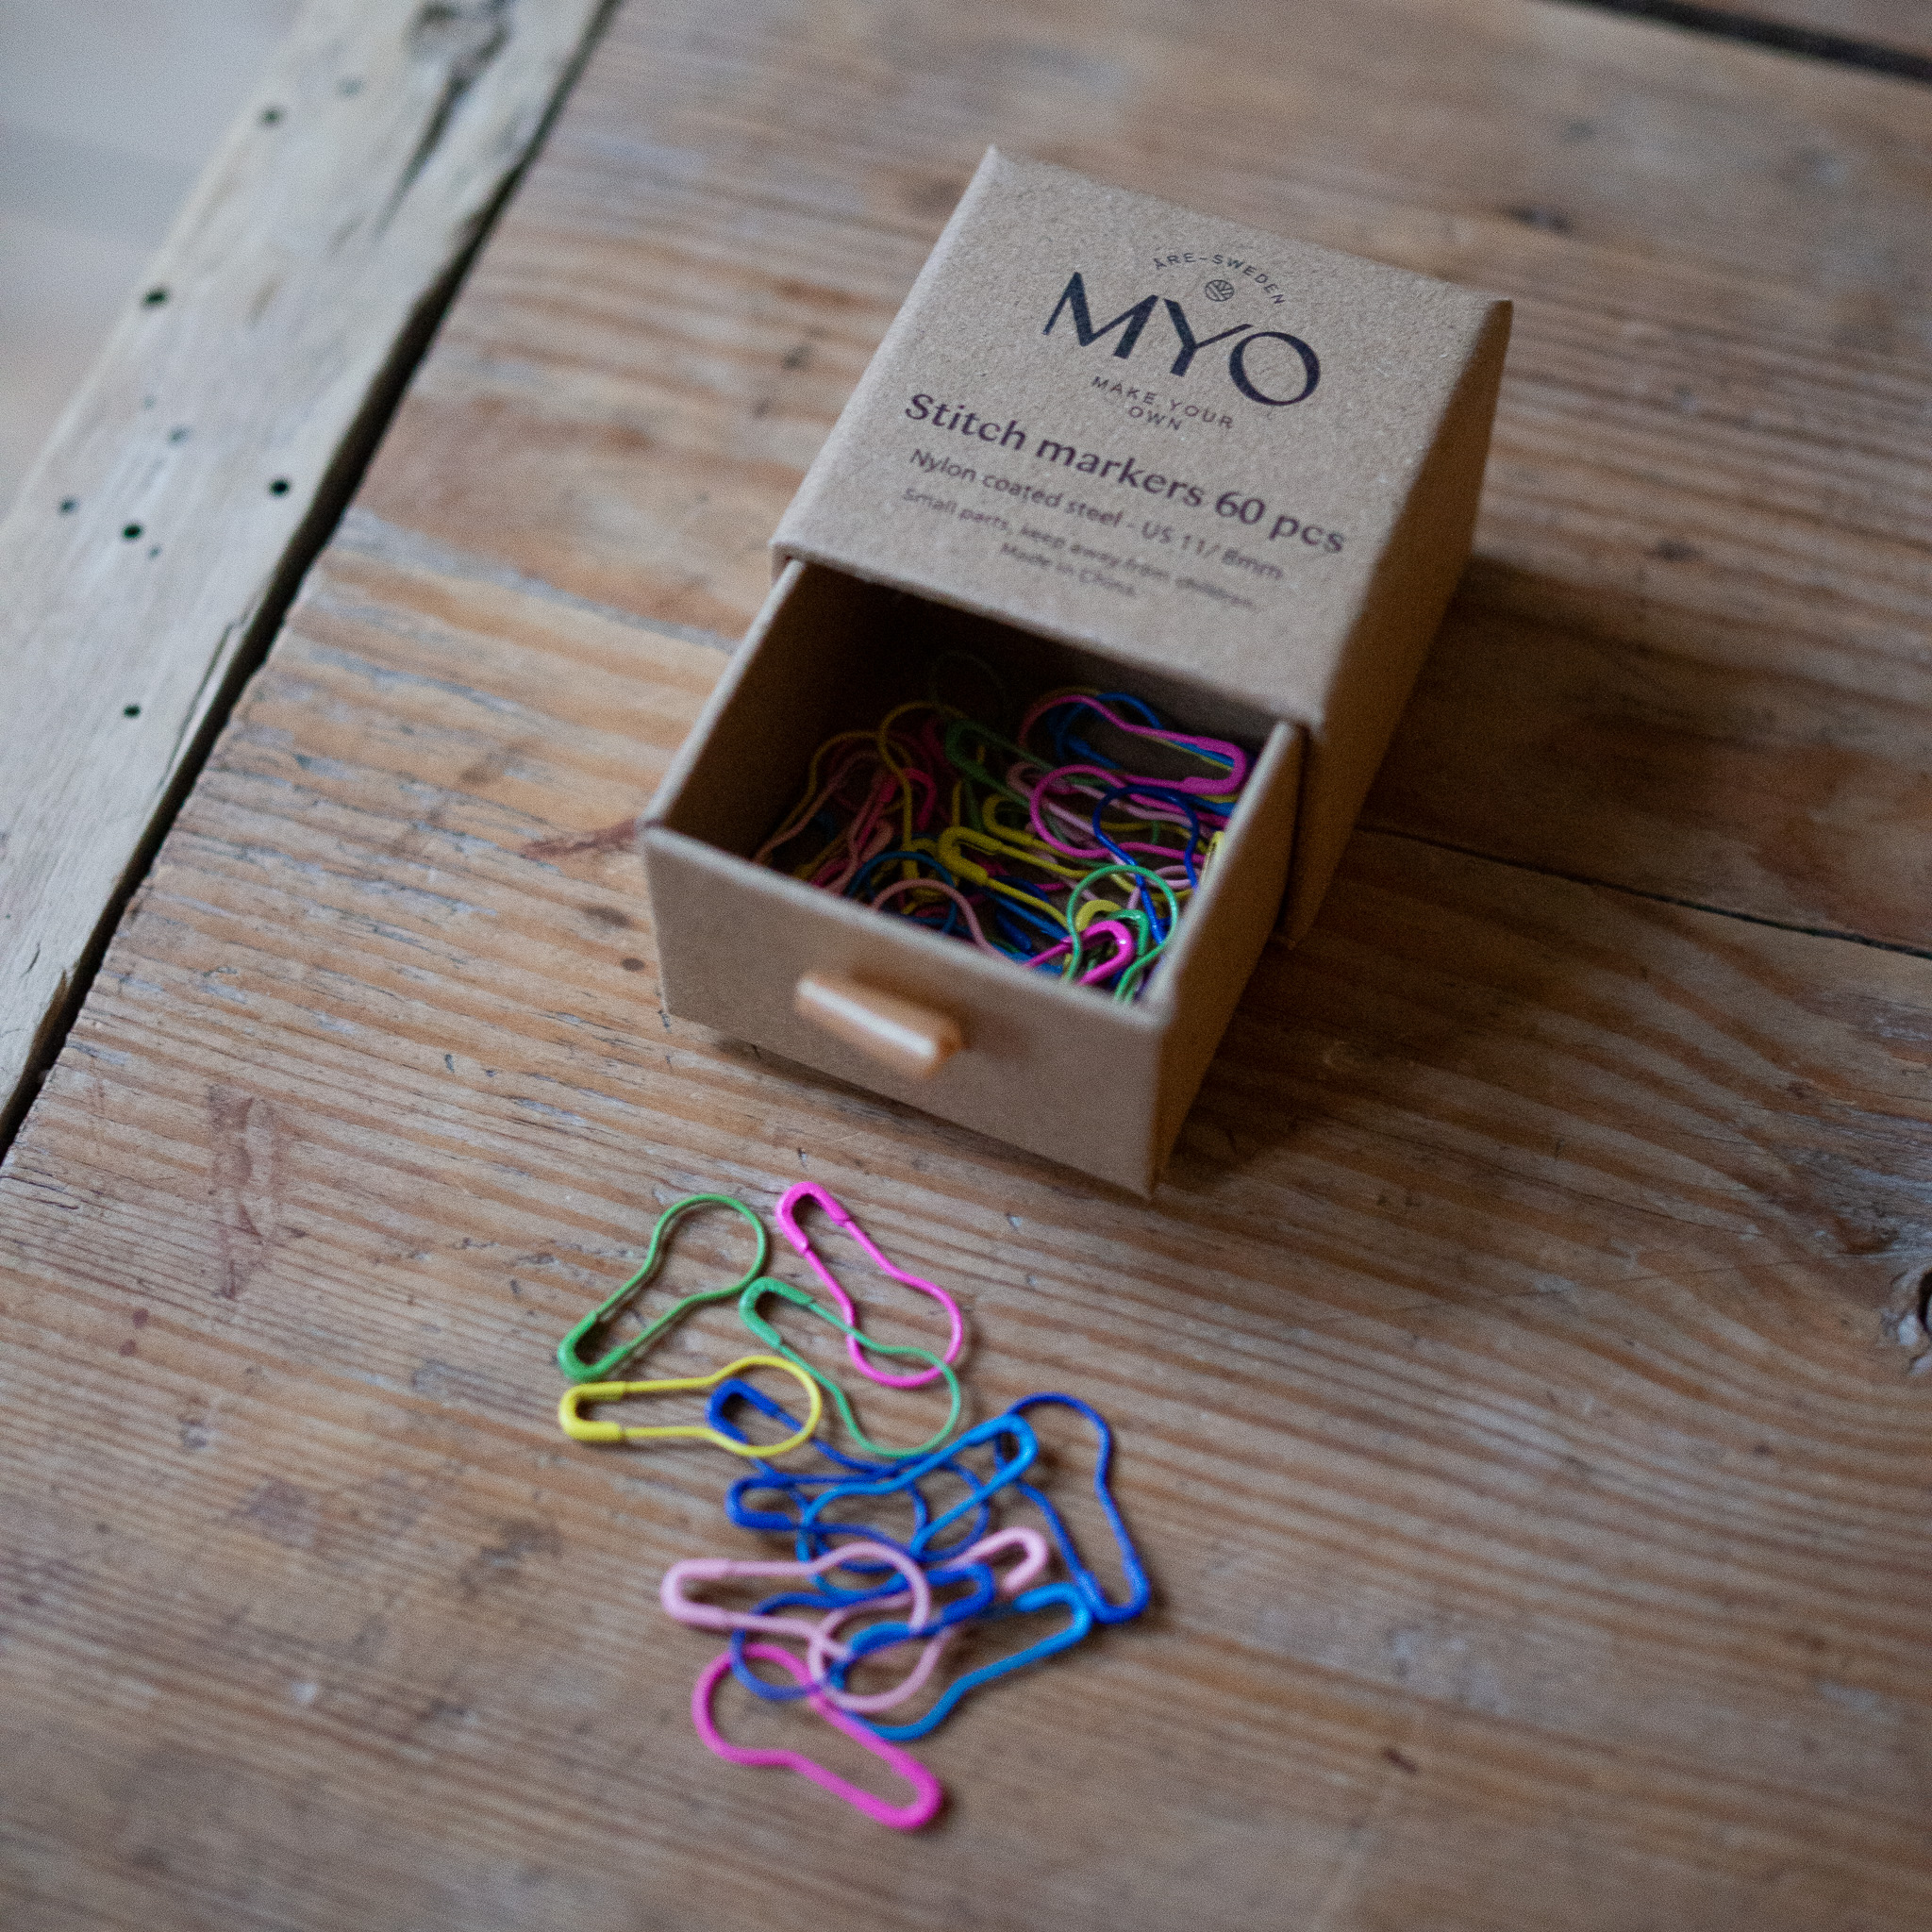
This is what you need:
Here you can directly purchase the material for the product. Please note that the instruction is digital and appears here on the page (no written instruction).

MYO Dreamy blend | 50g
A soft blend yarn that consists of 40% cotton, 35% superfine alpaca, and 25% wool.
Buy product
.jpg)
Unleash your creativity
For only 85kr per month you get access to all our 300+ beginner-friendly instructions for crochet, knitting and macrame.
A perfect way to get started with your new hobby!

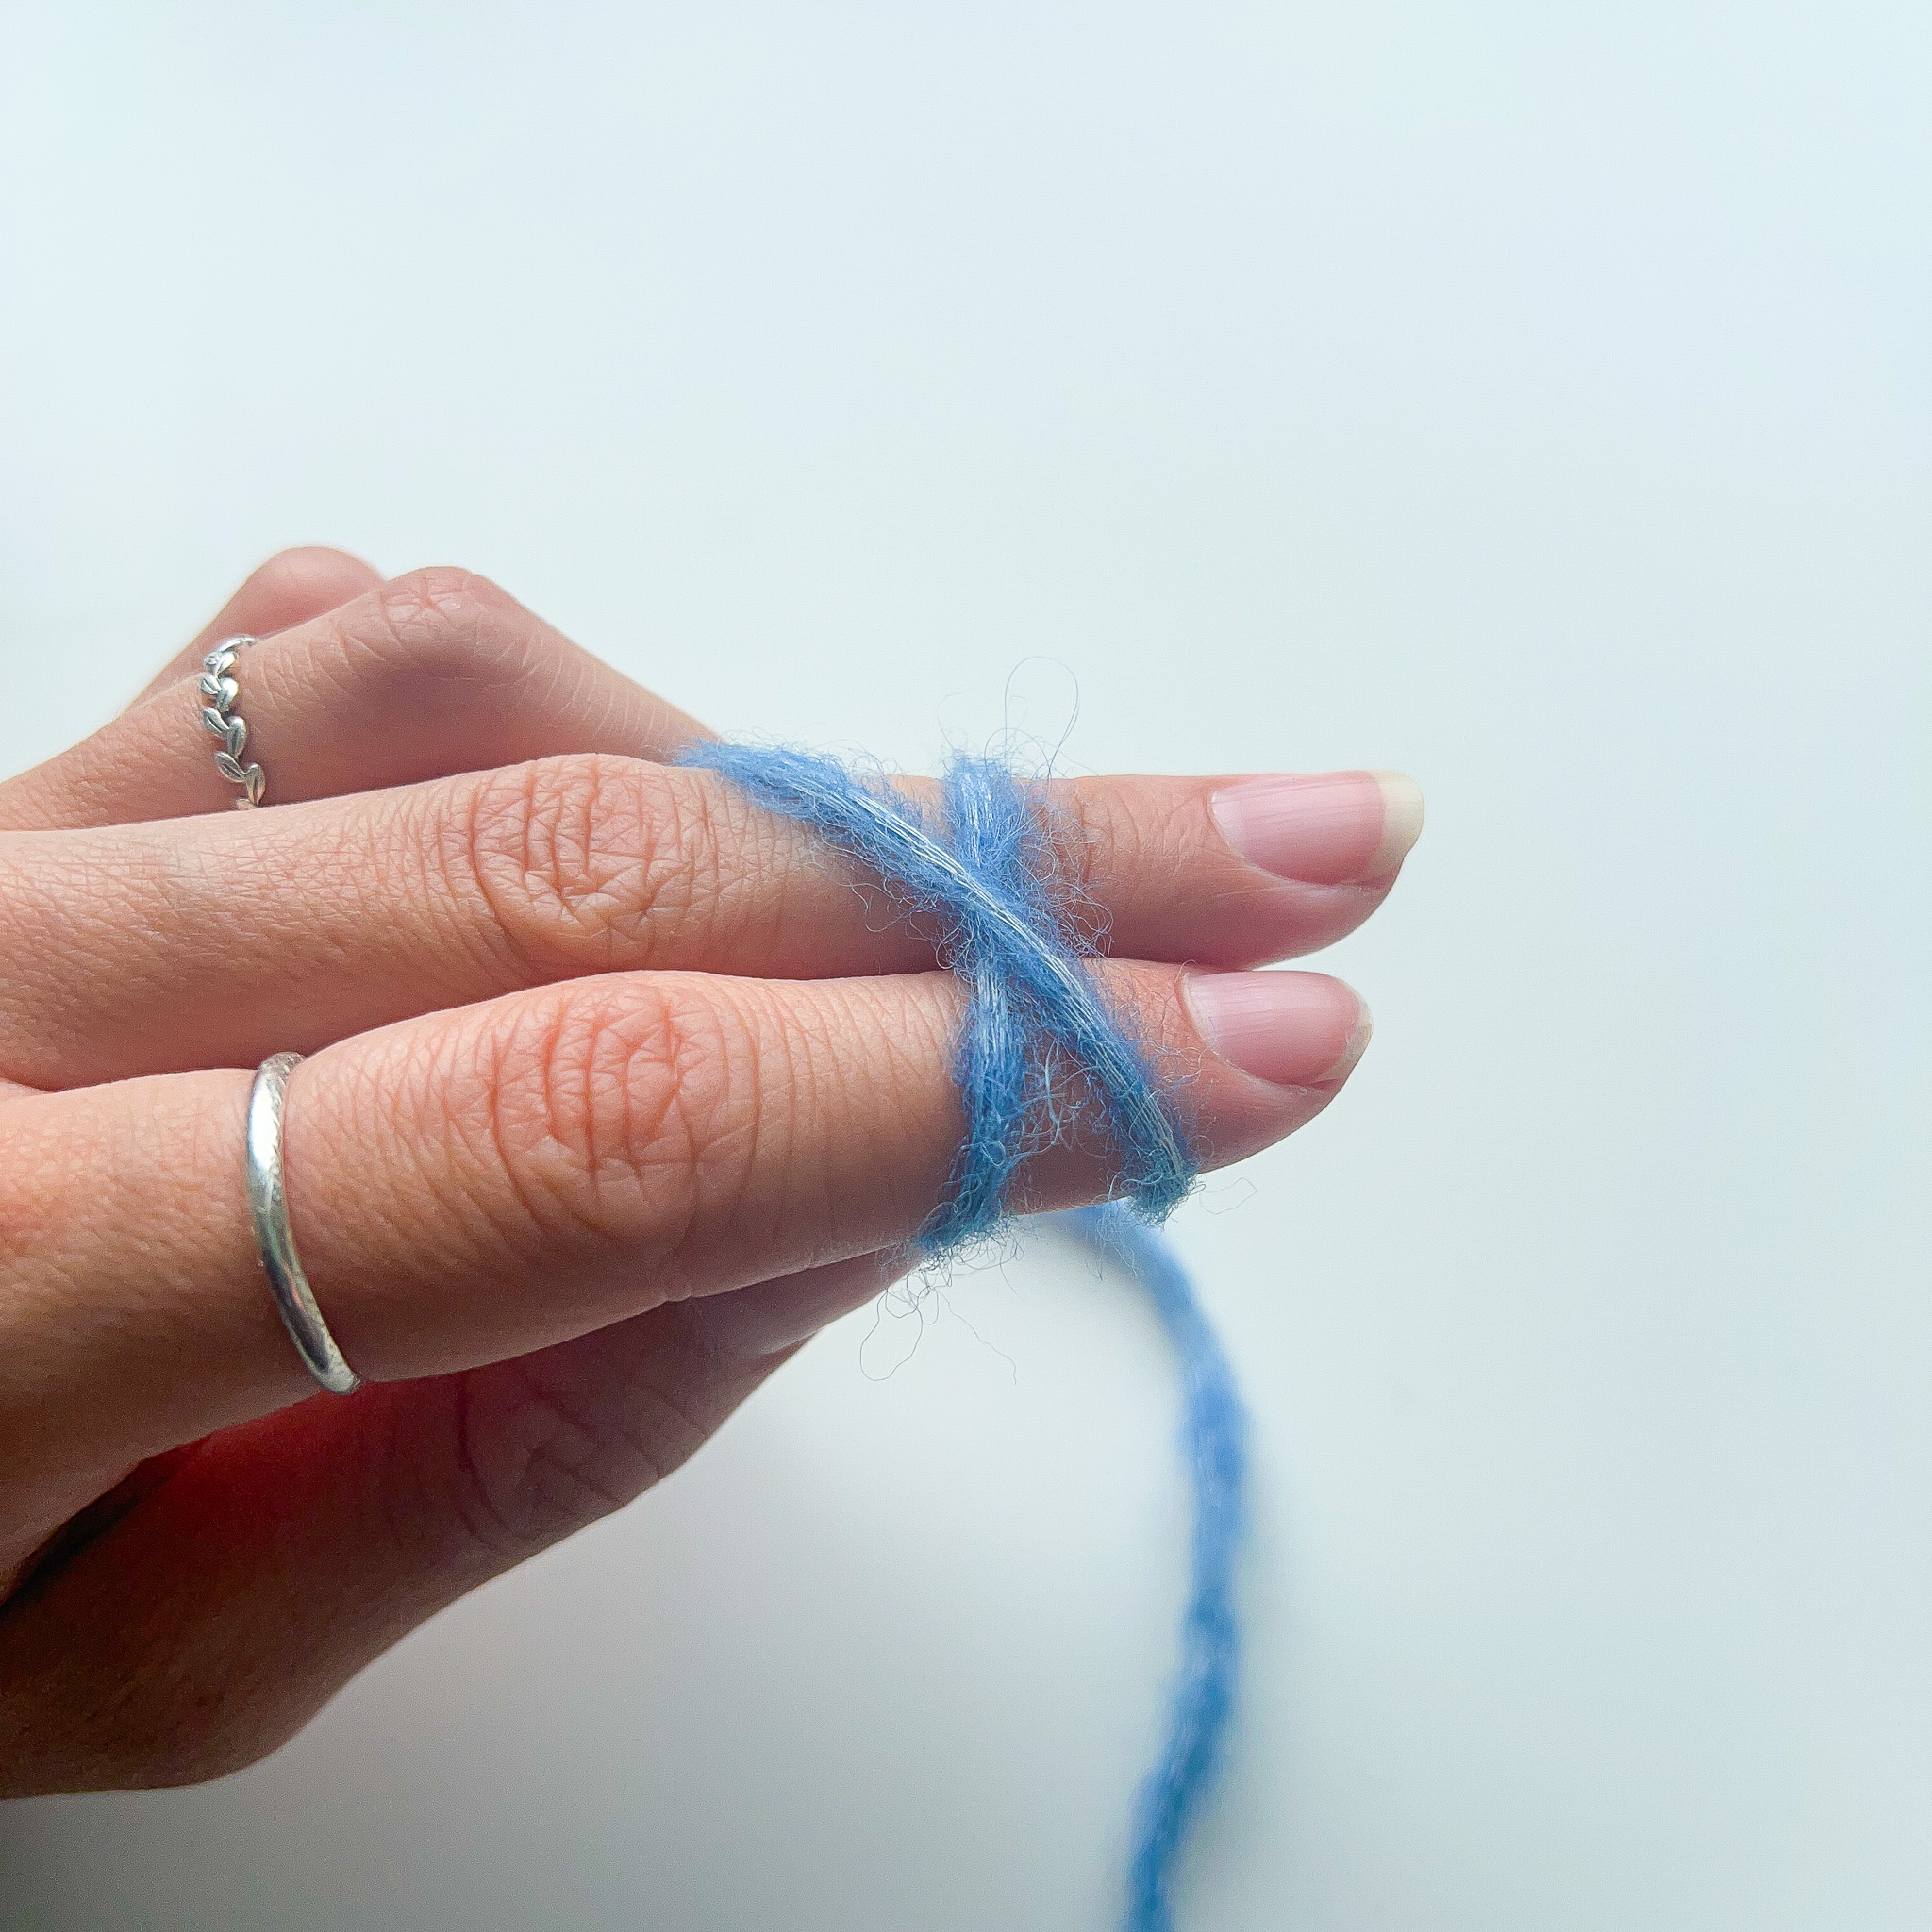
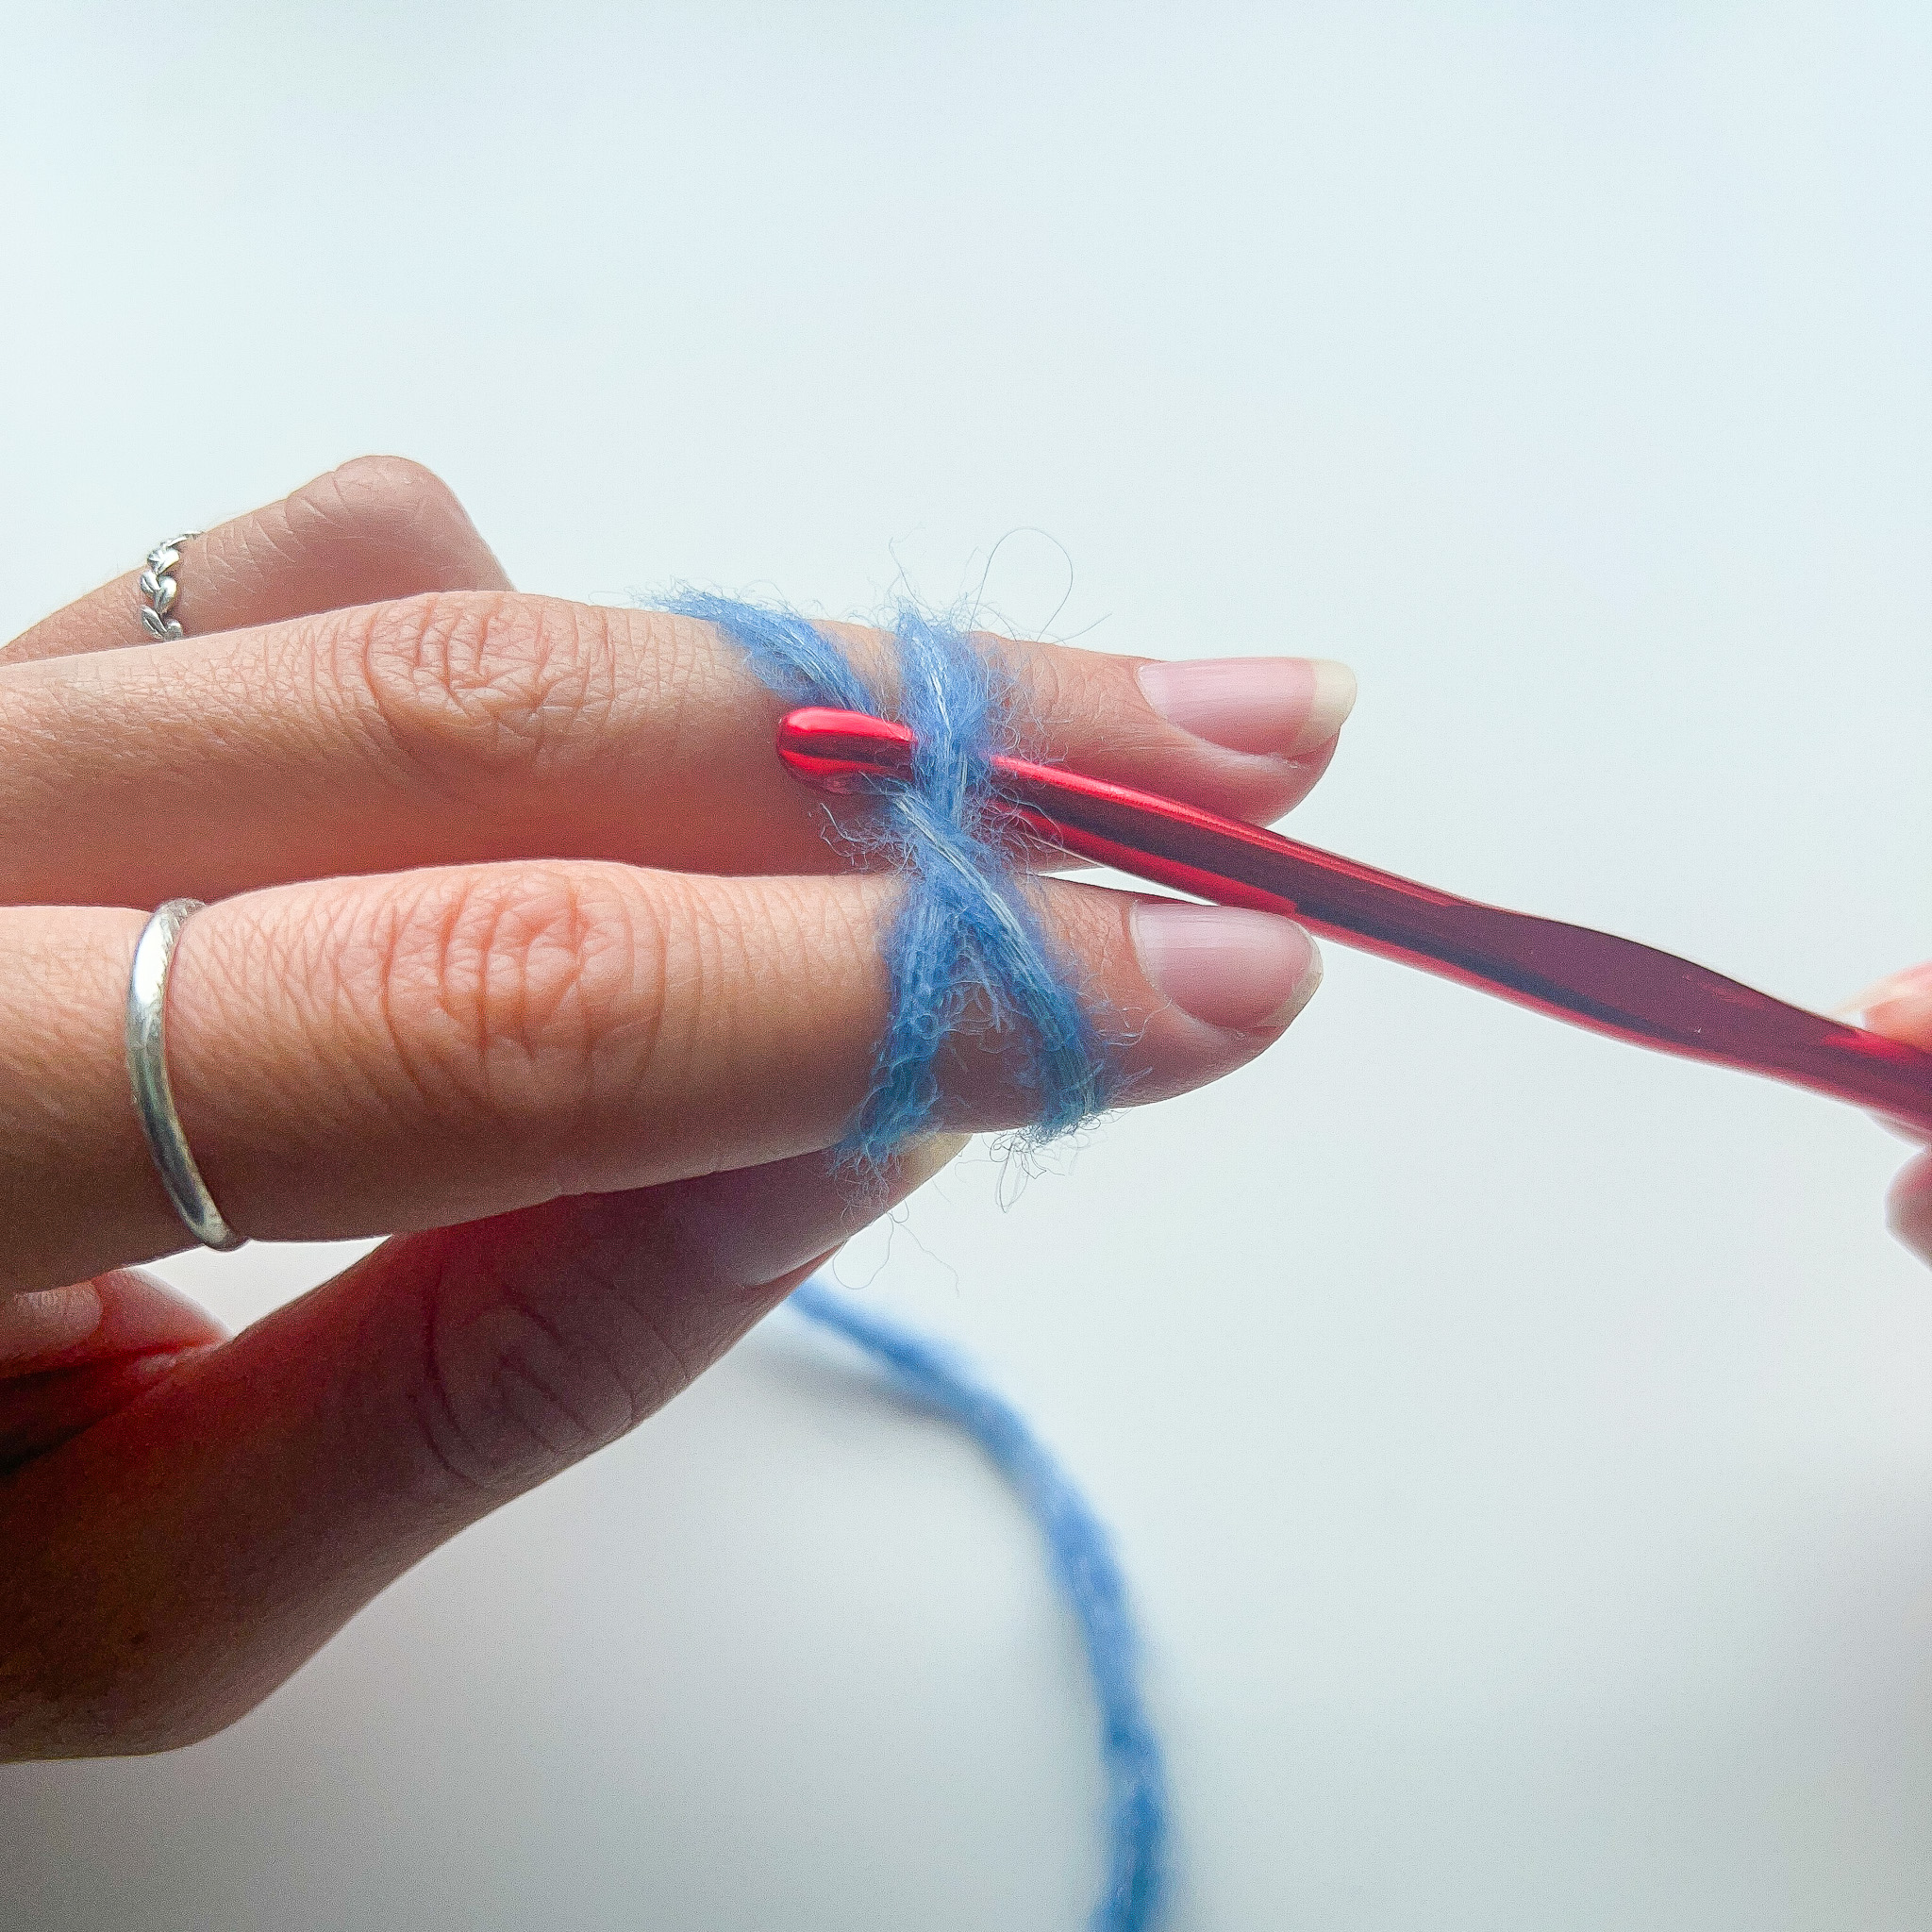
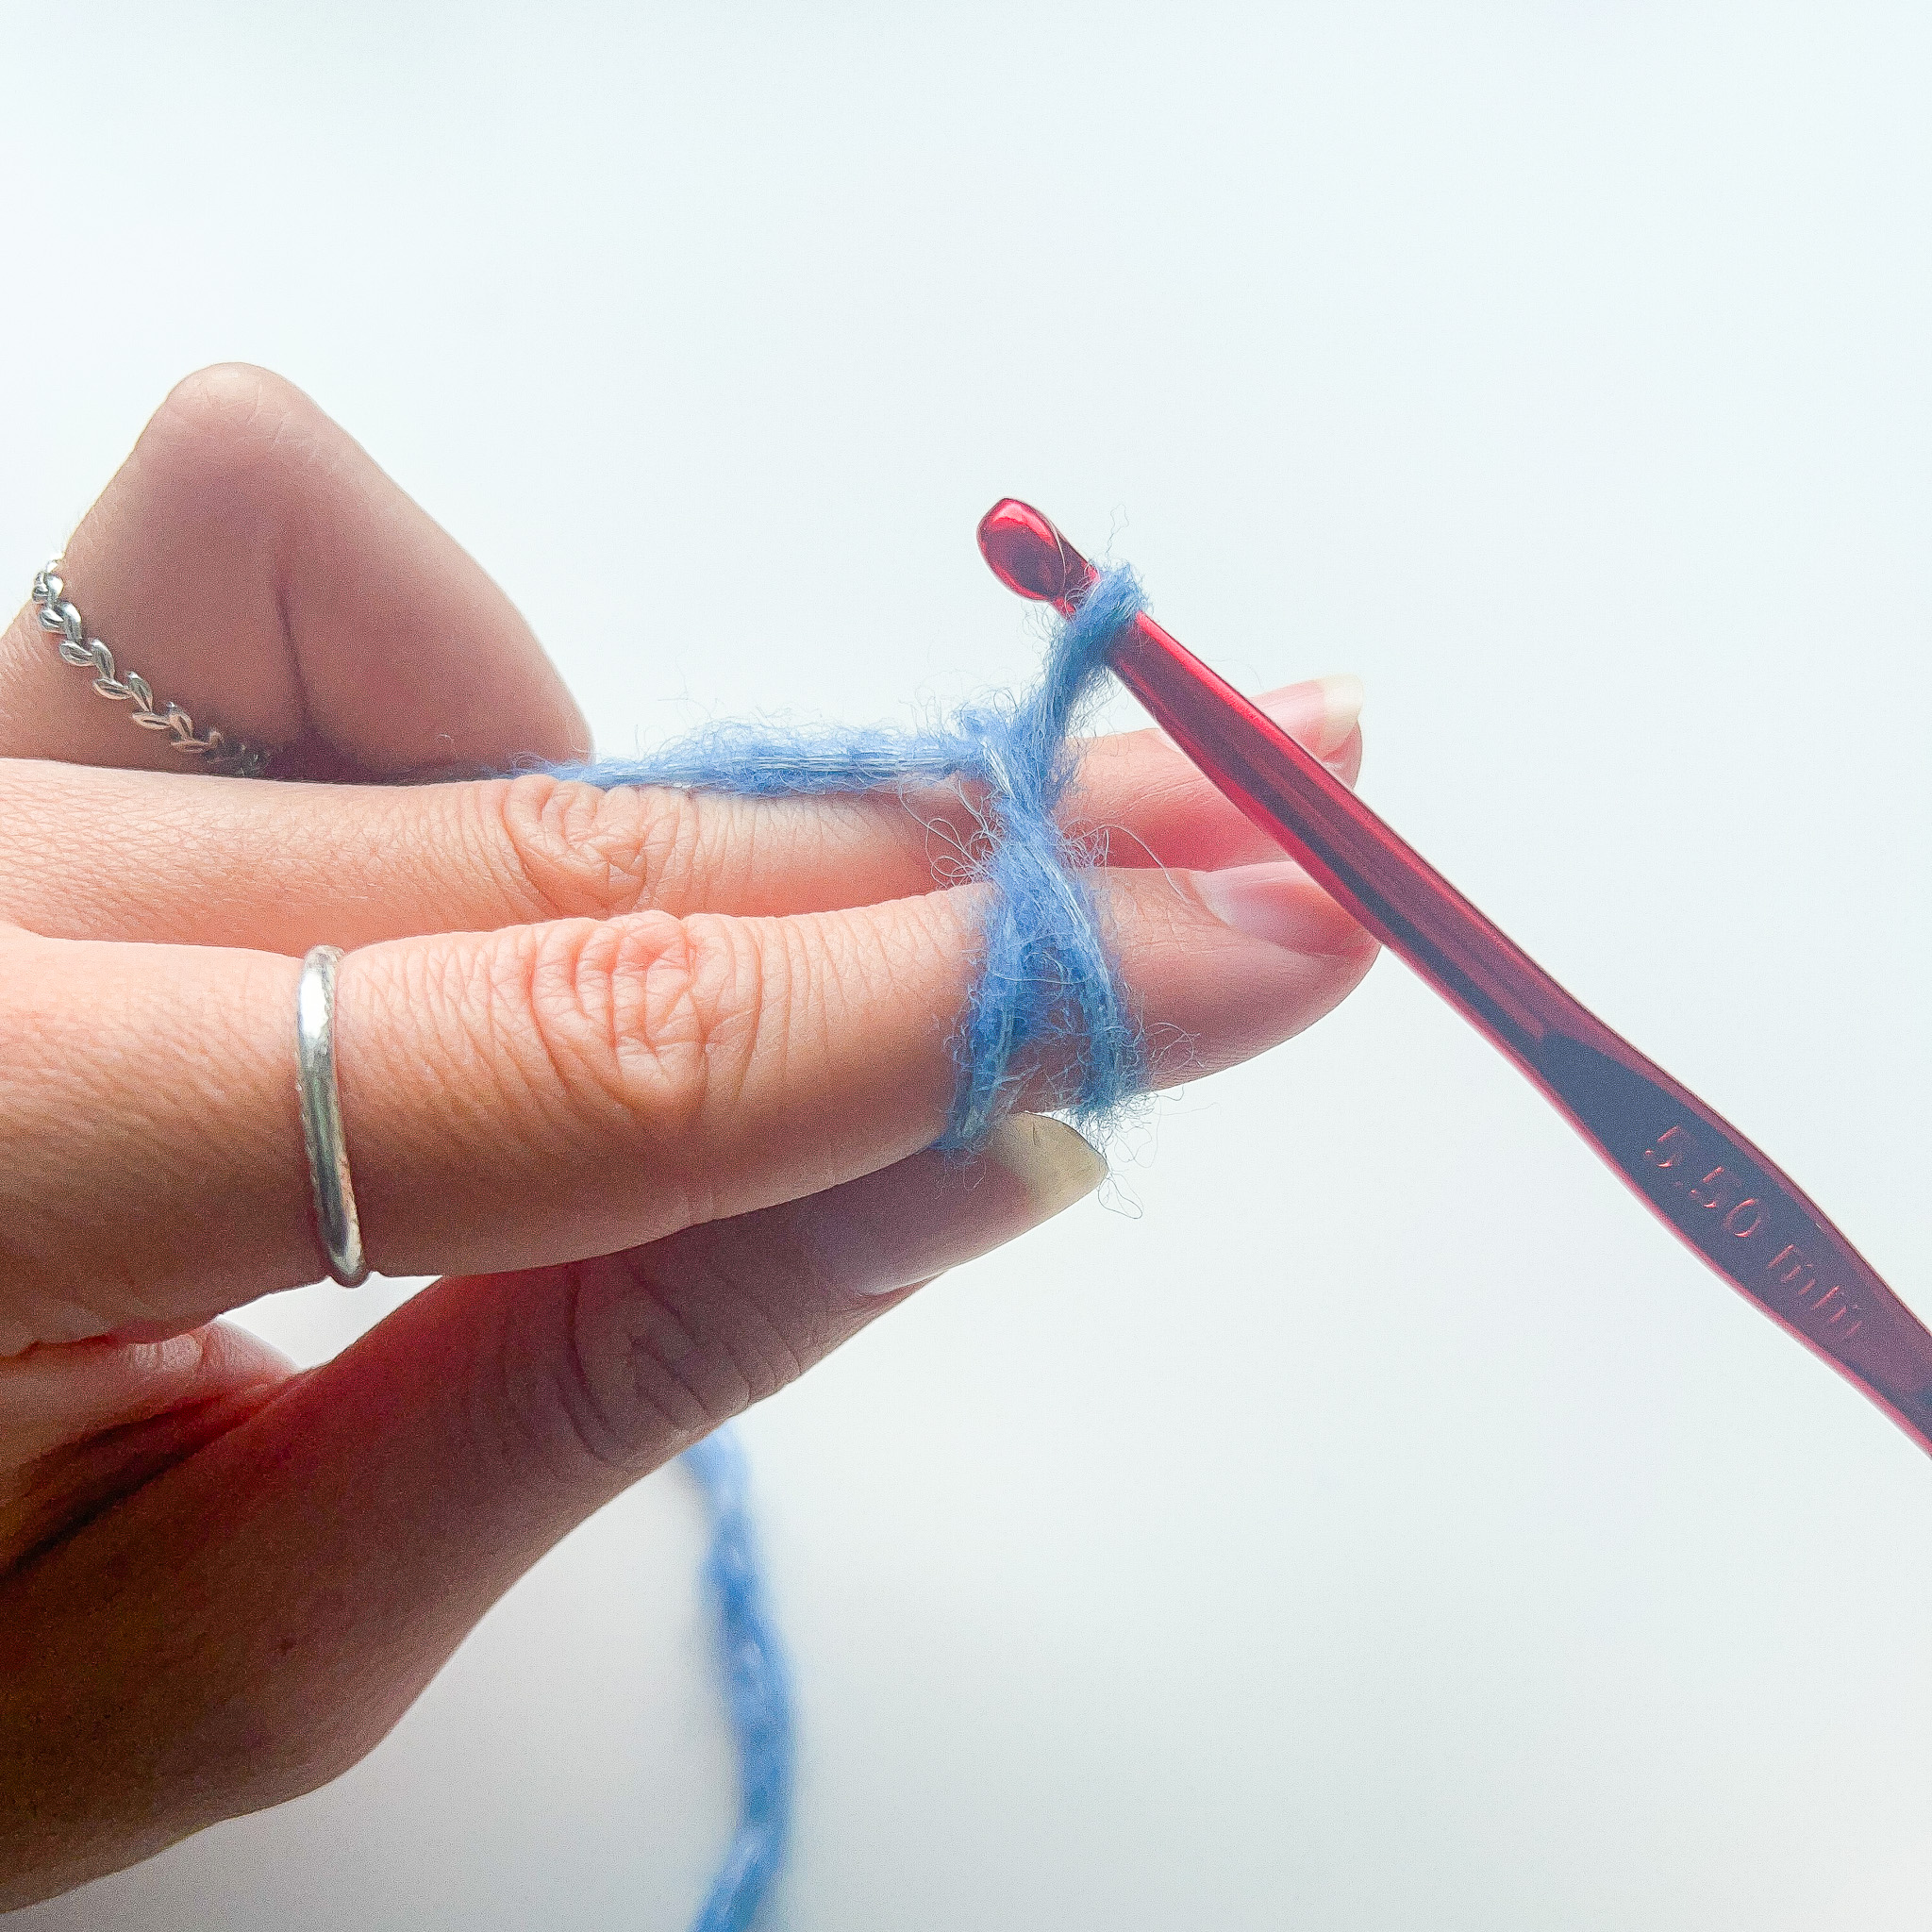
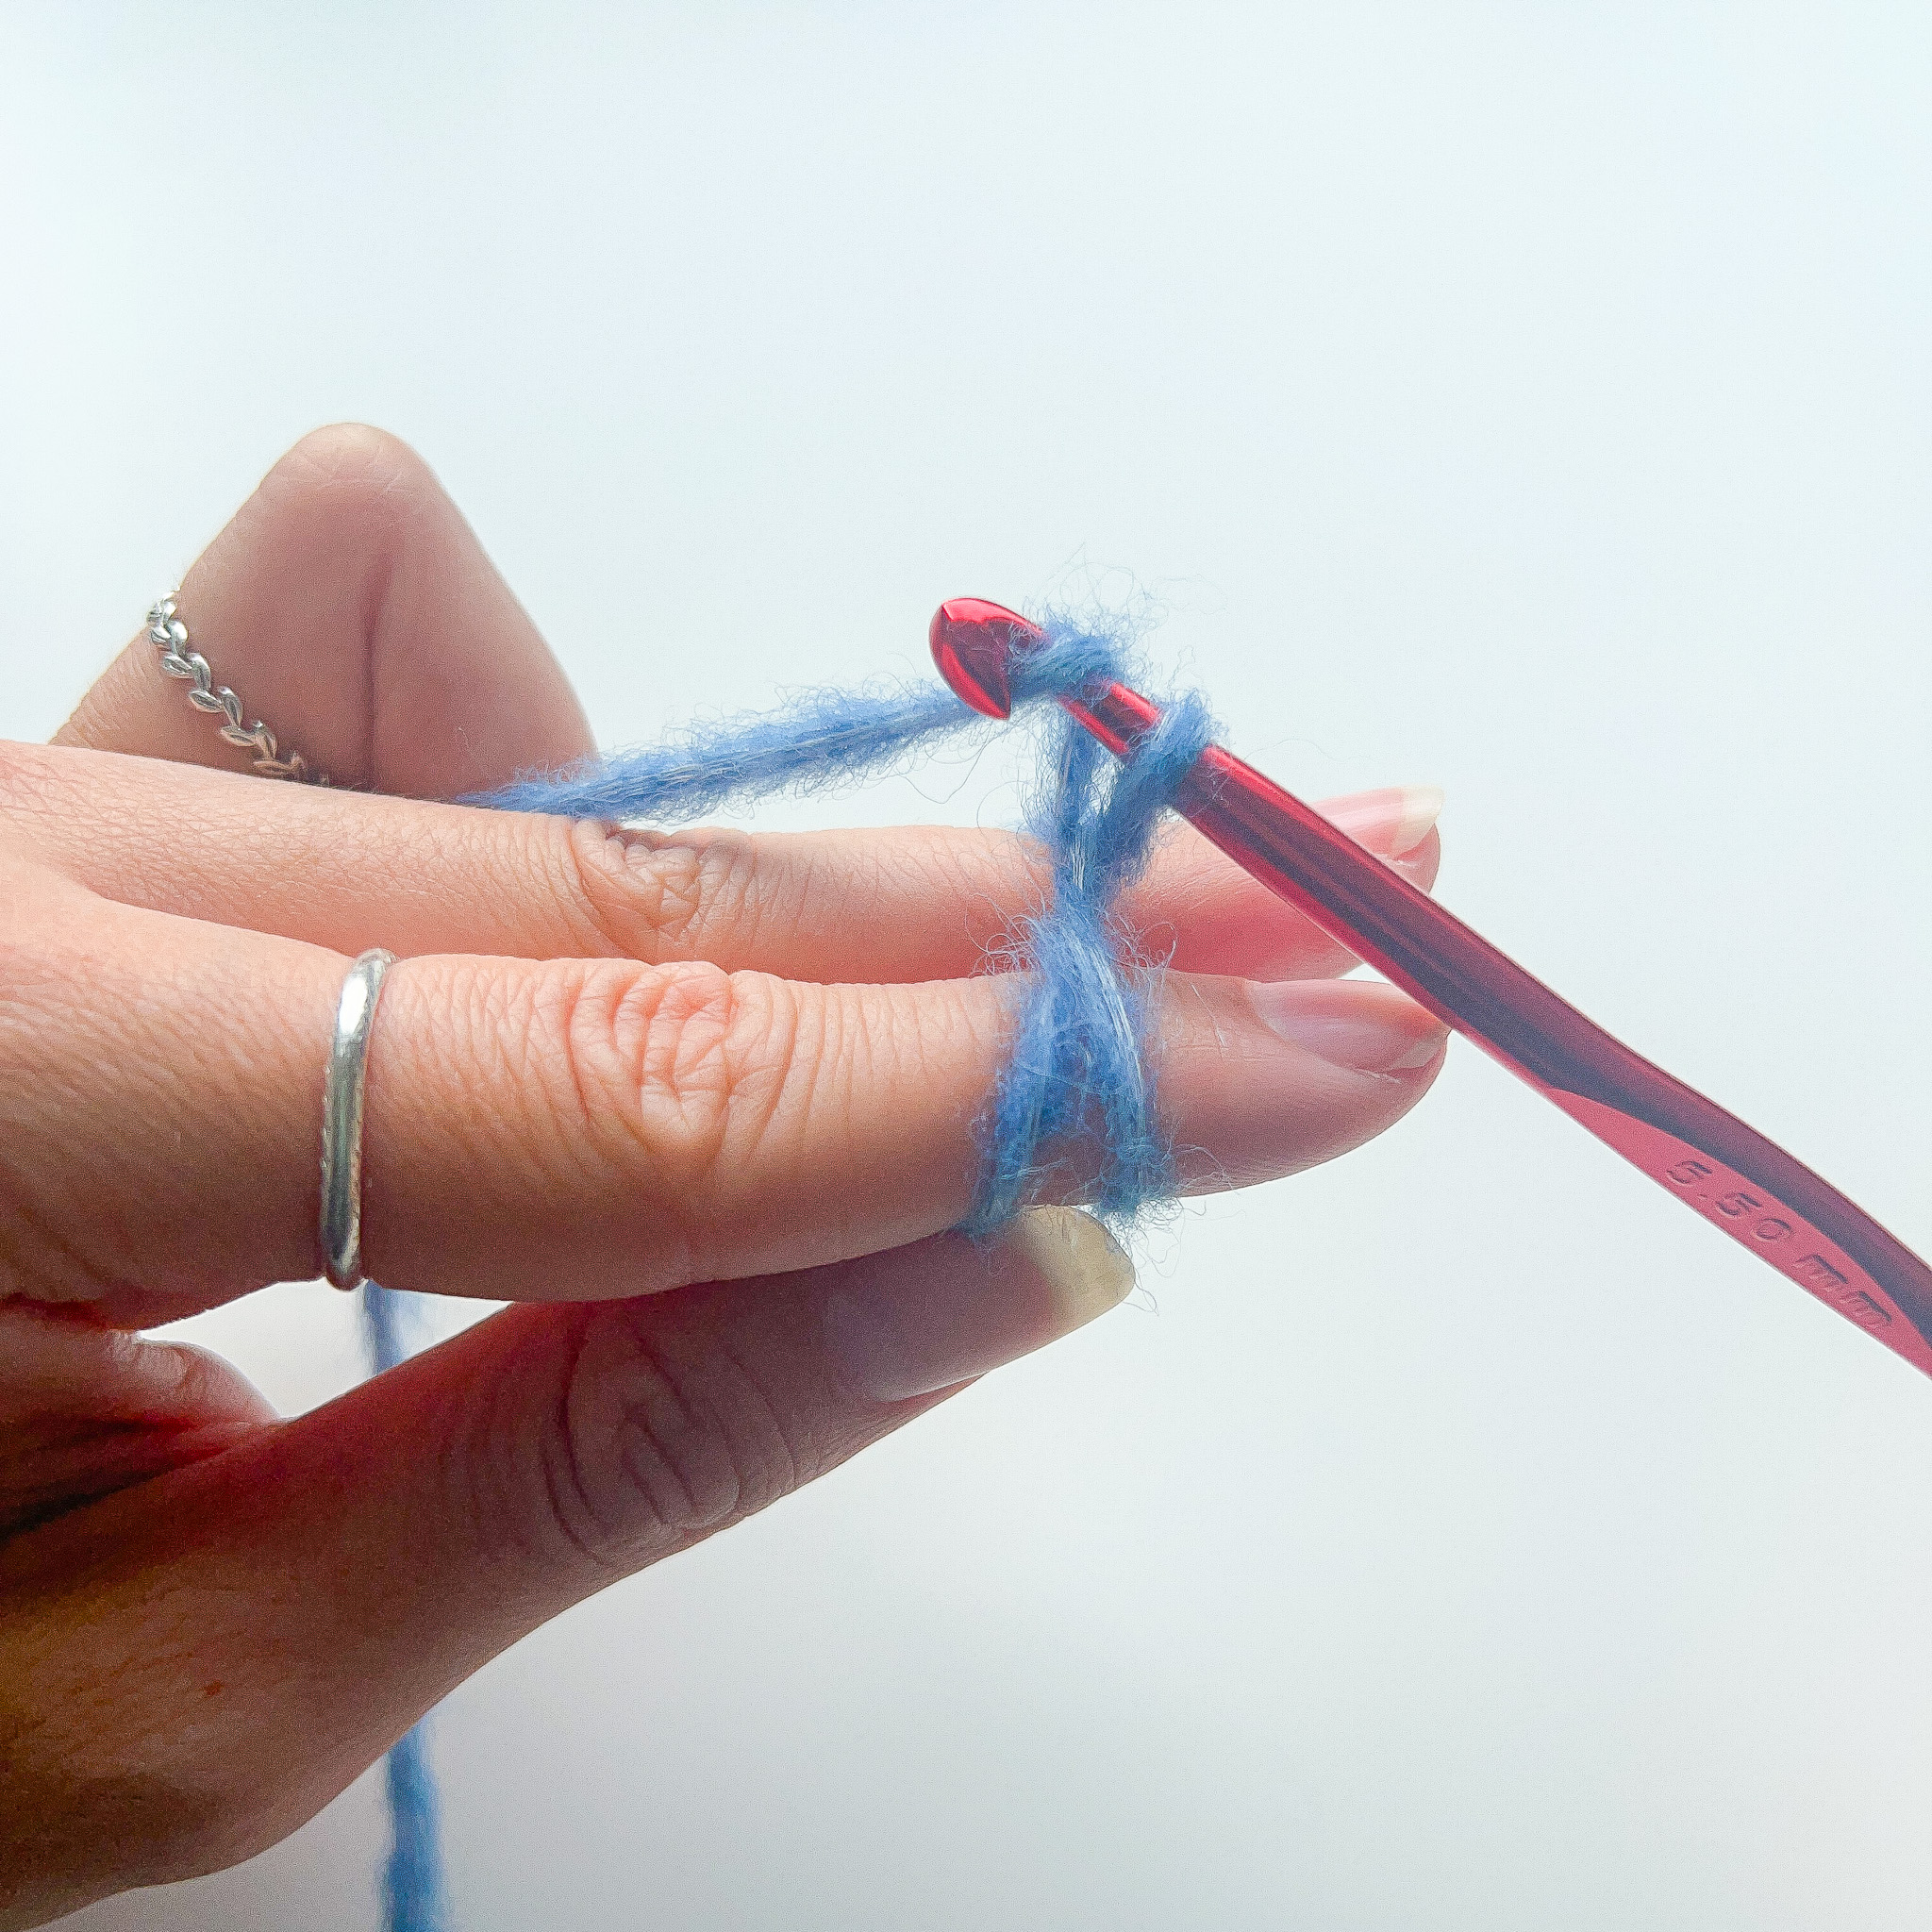
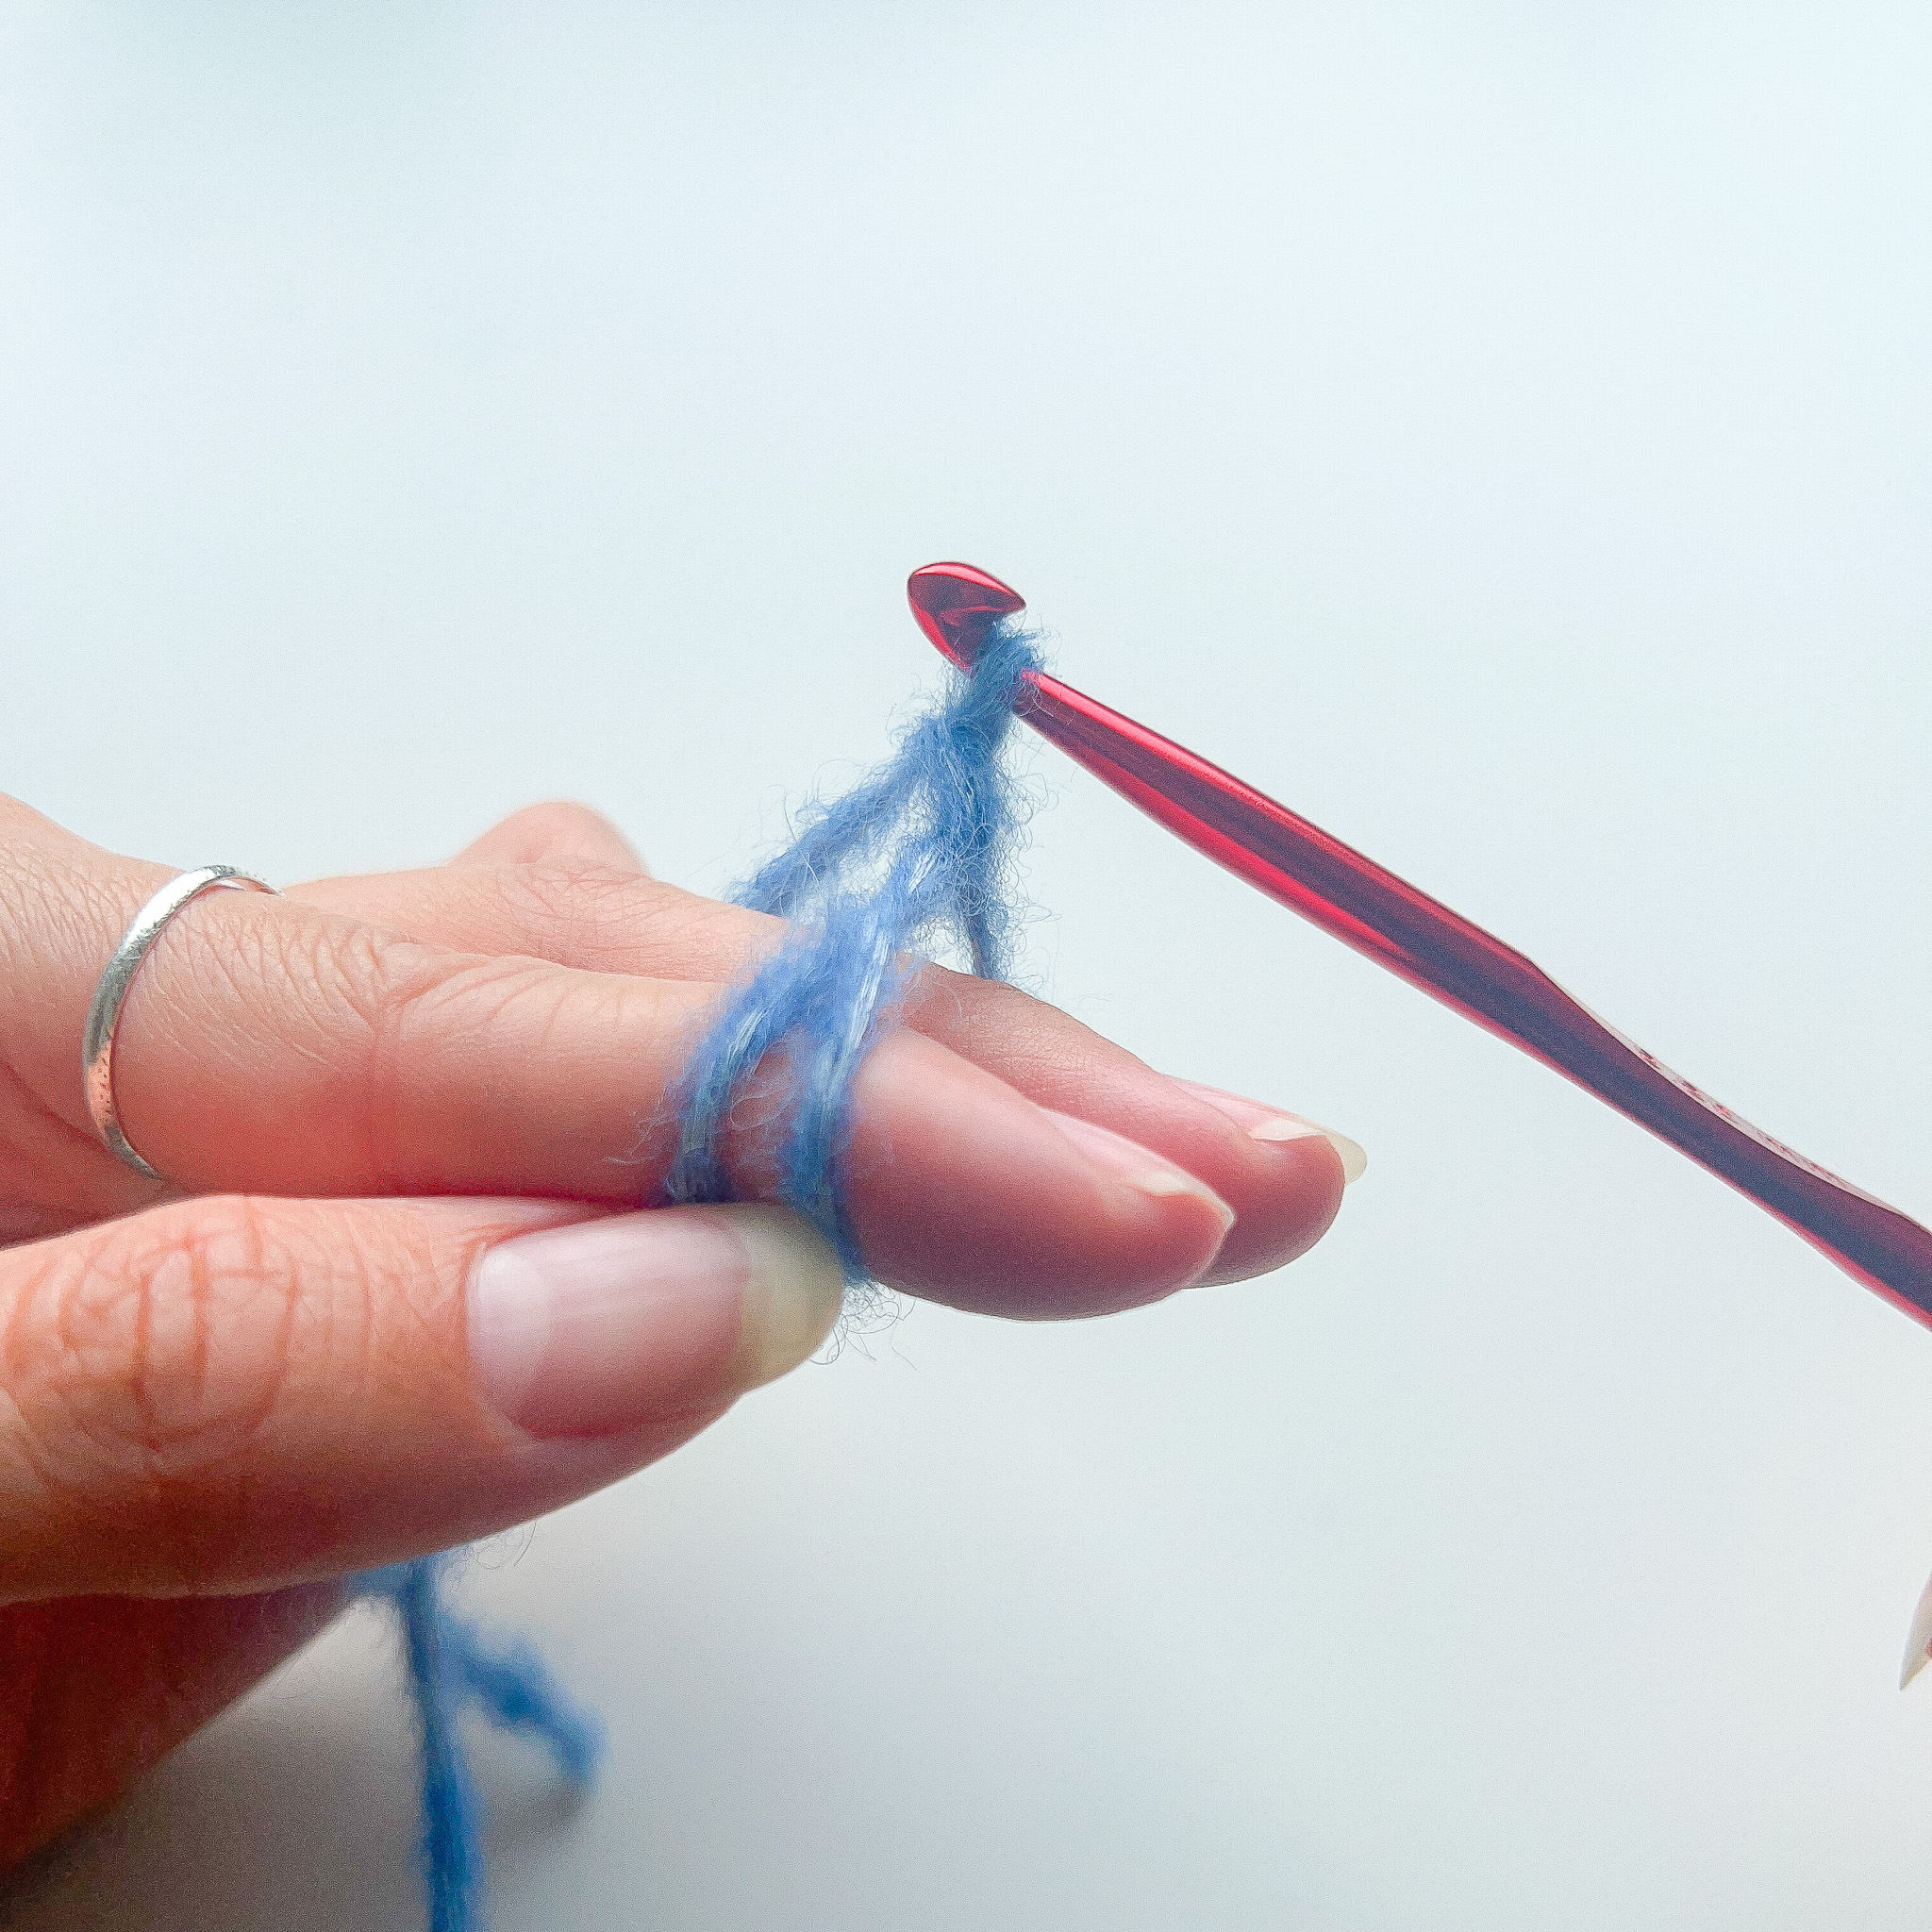
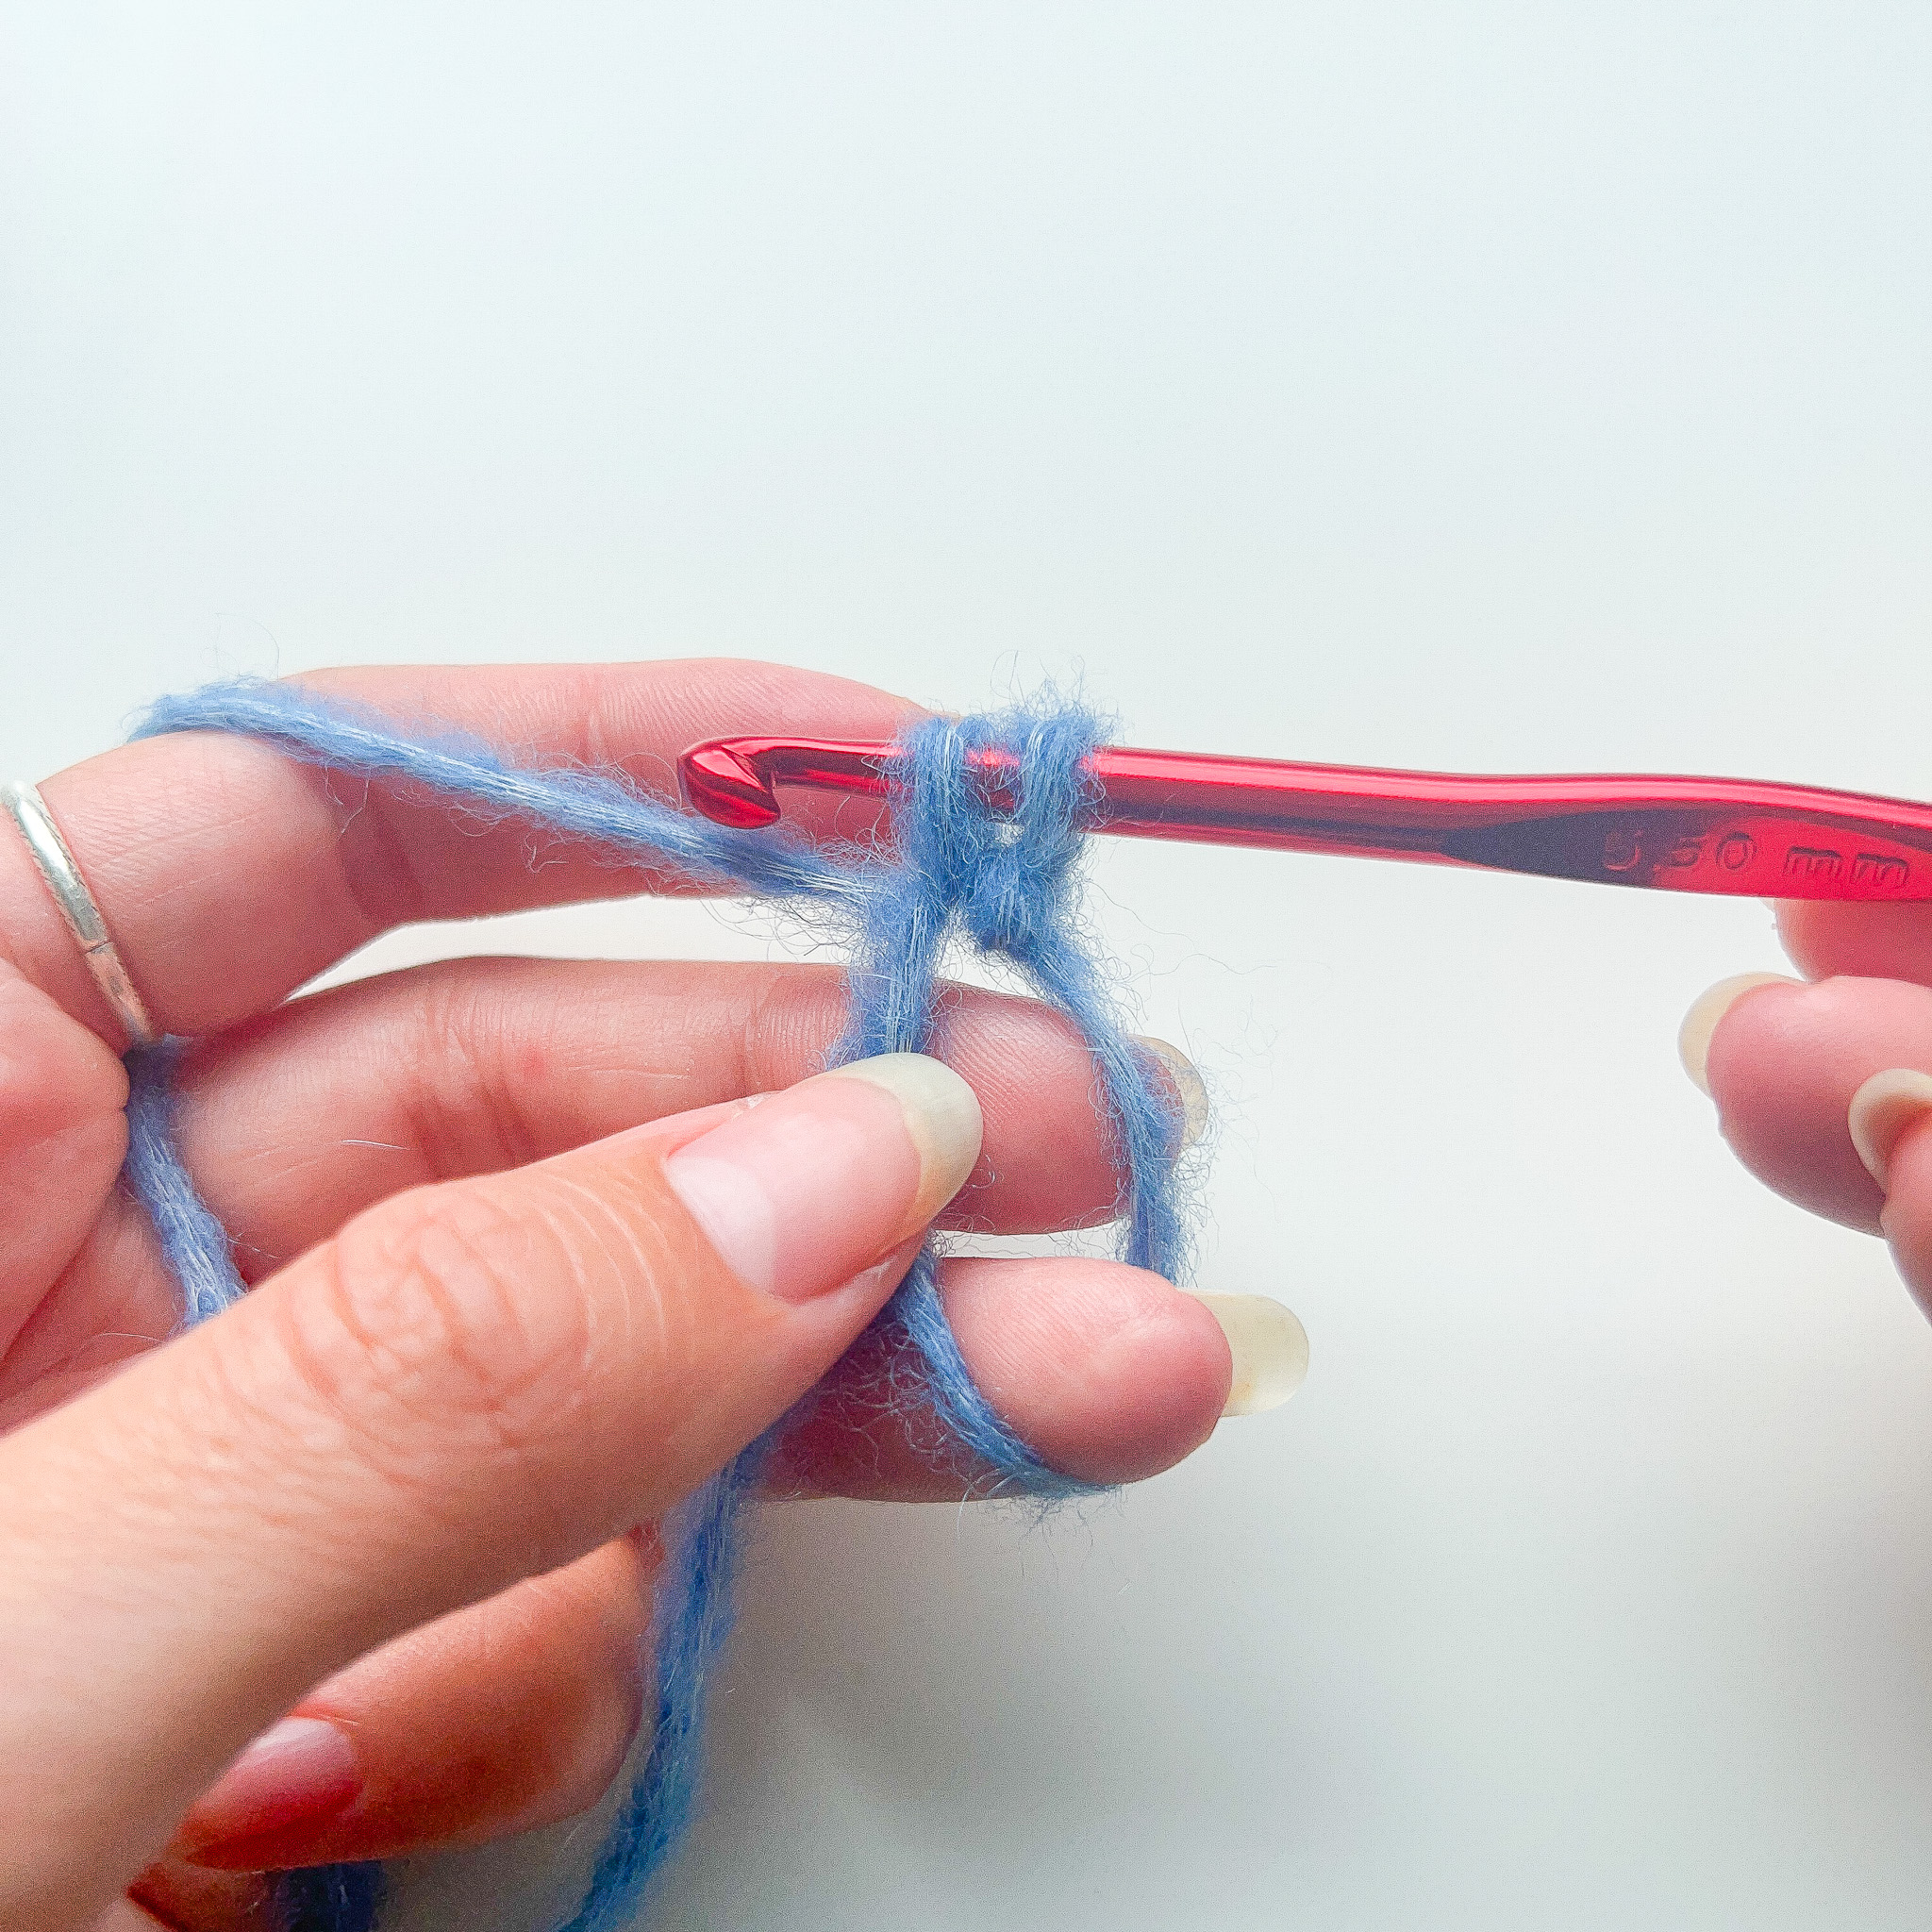
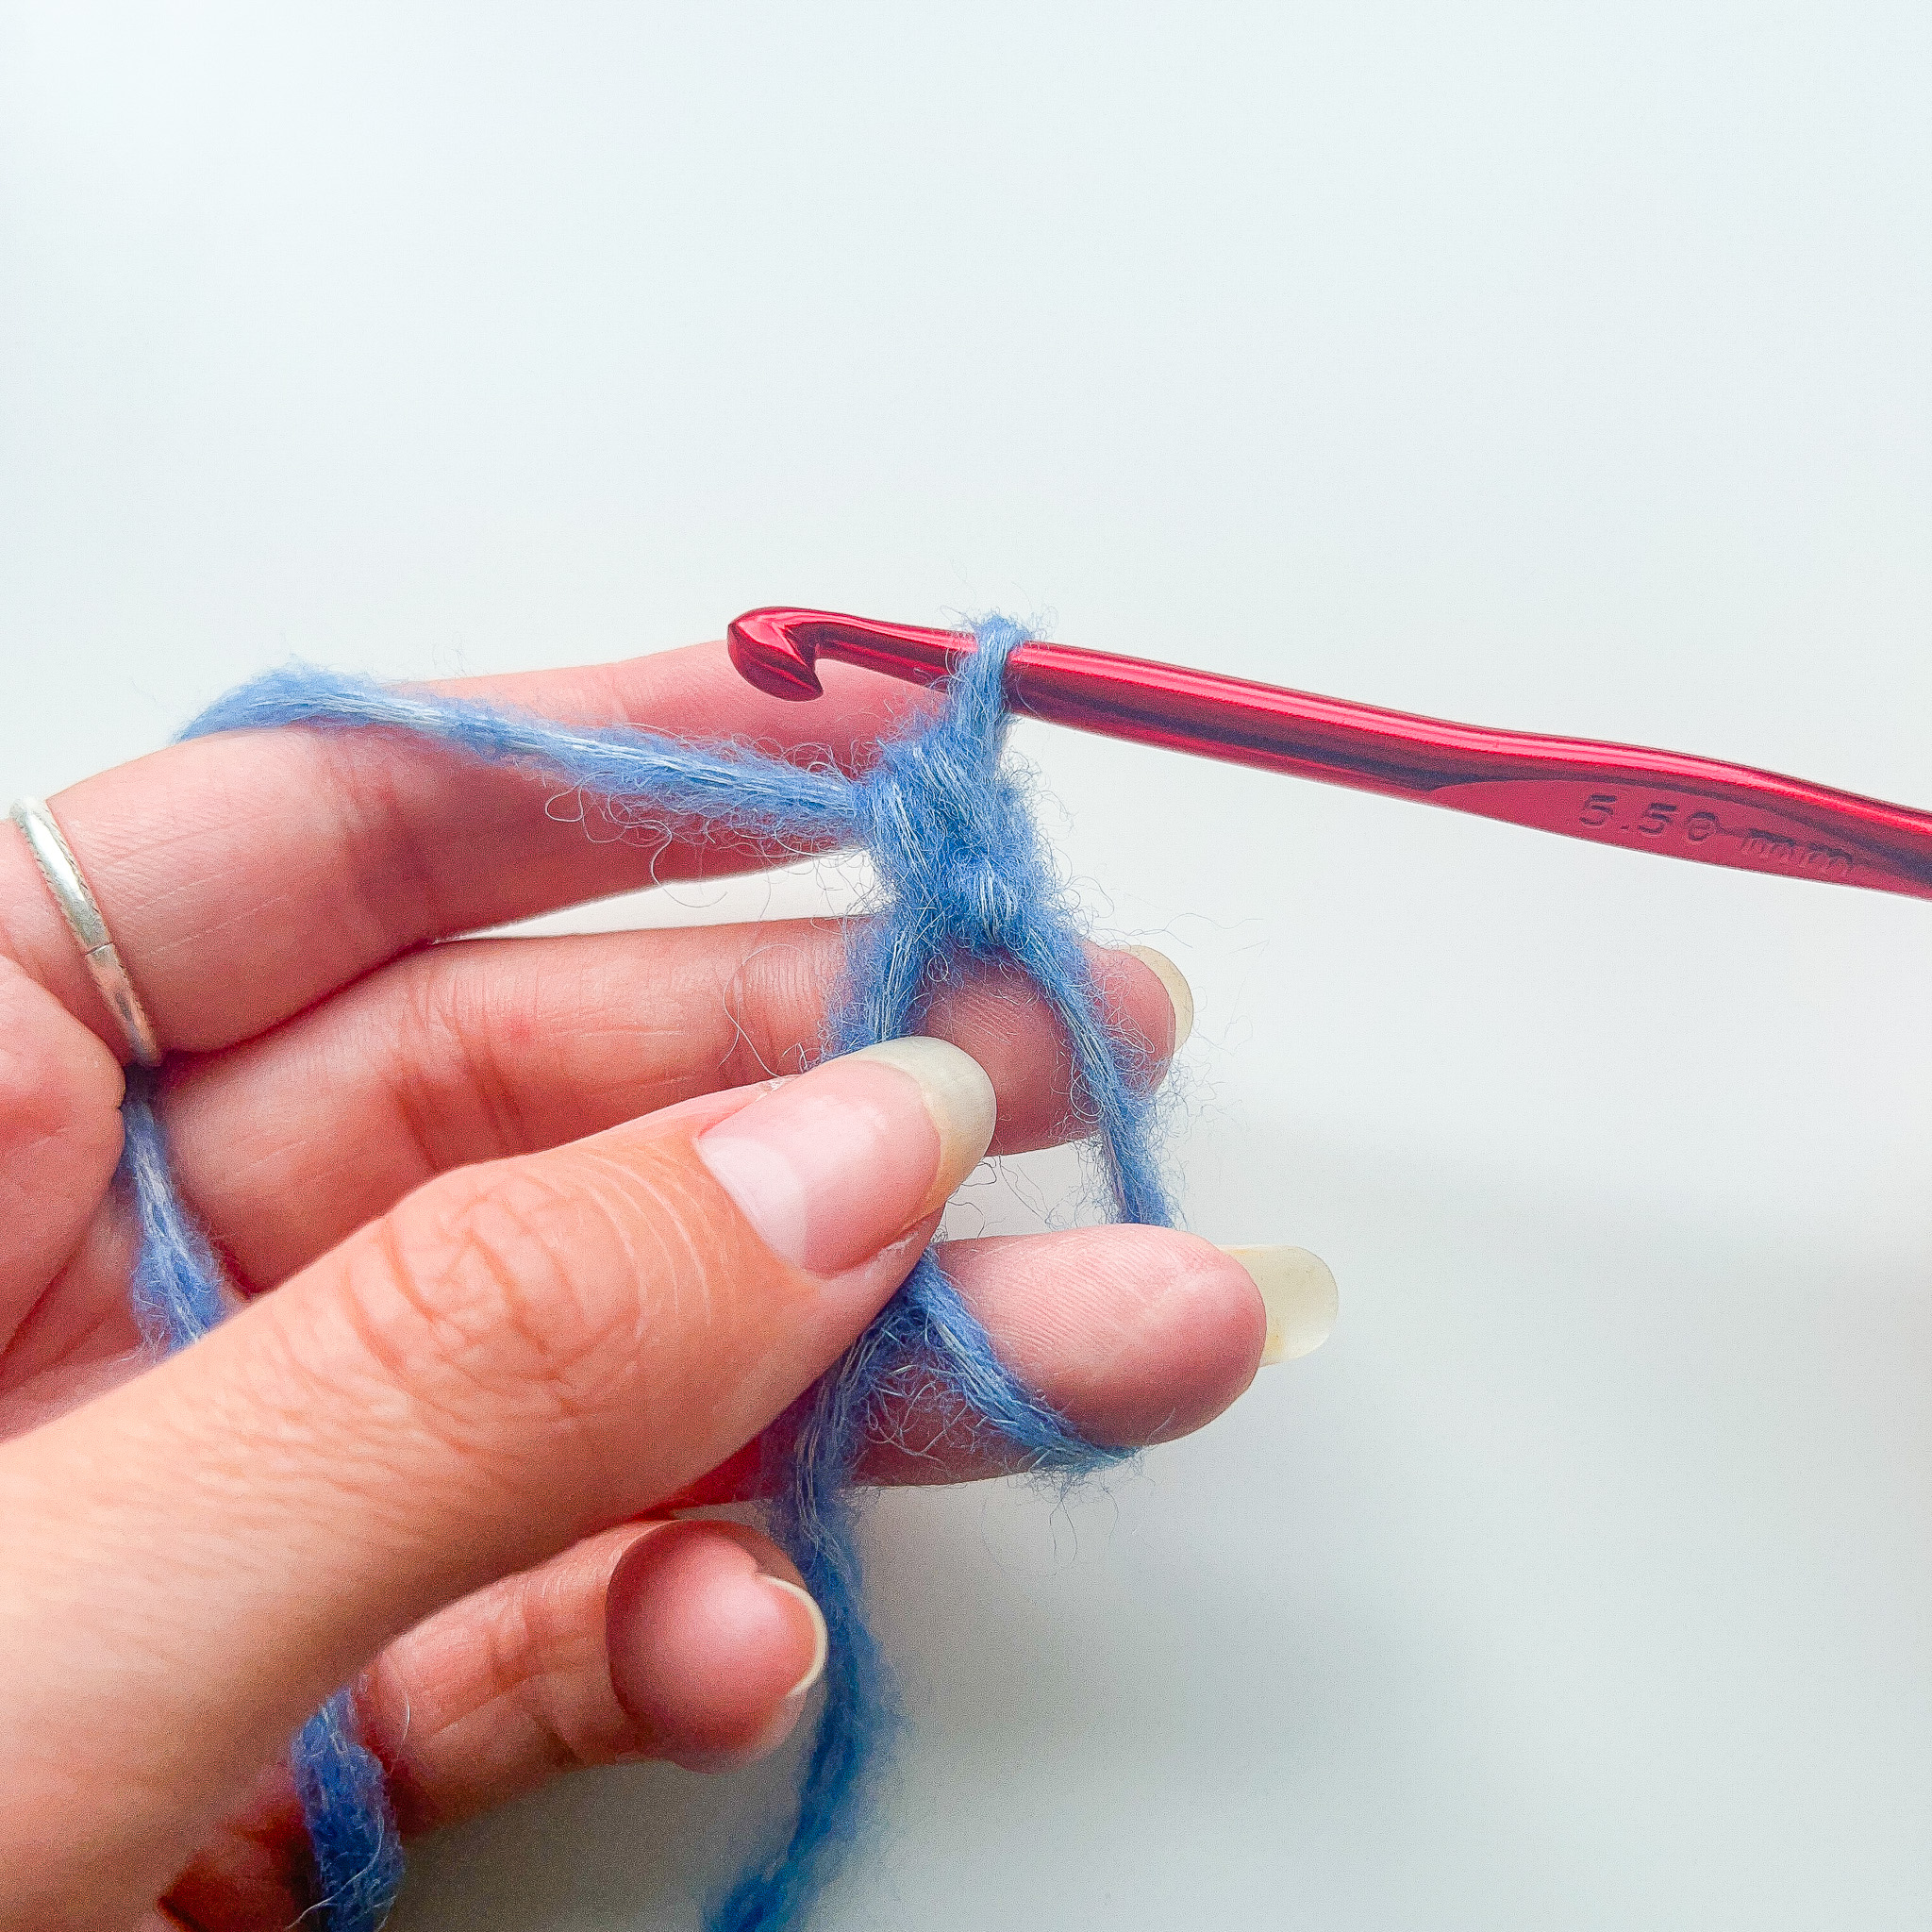
Start: Make a “magic ring” by wrapping the yarn one and a half times around two fingers, creating an “X” on top of your fingers. Insert the crochet hook under the upper right “leg” of the X and grab the upper left “leg.” Pull up a loop, yarn over (wrap the yarn around the hook once), and pull through the loop on your hook. Gently remove your fingers from the ring. You have now made a magic ring!
If you want to see a video on how to make a magic ring with single crochet, see the video below.
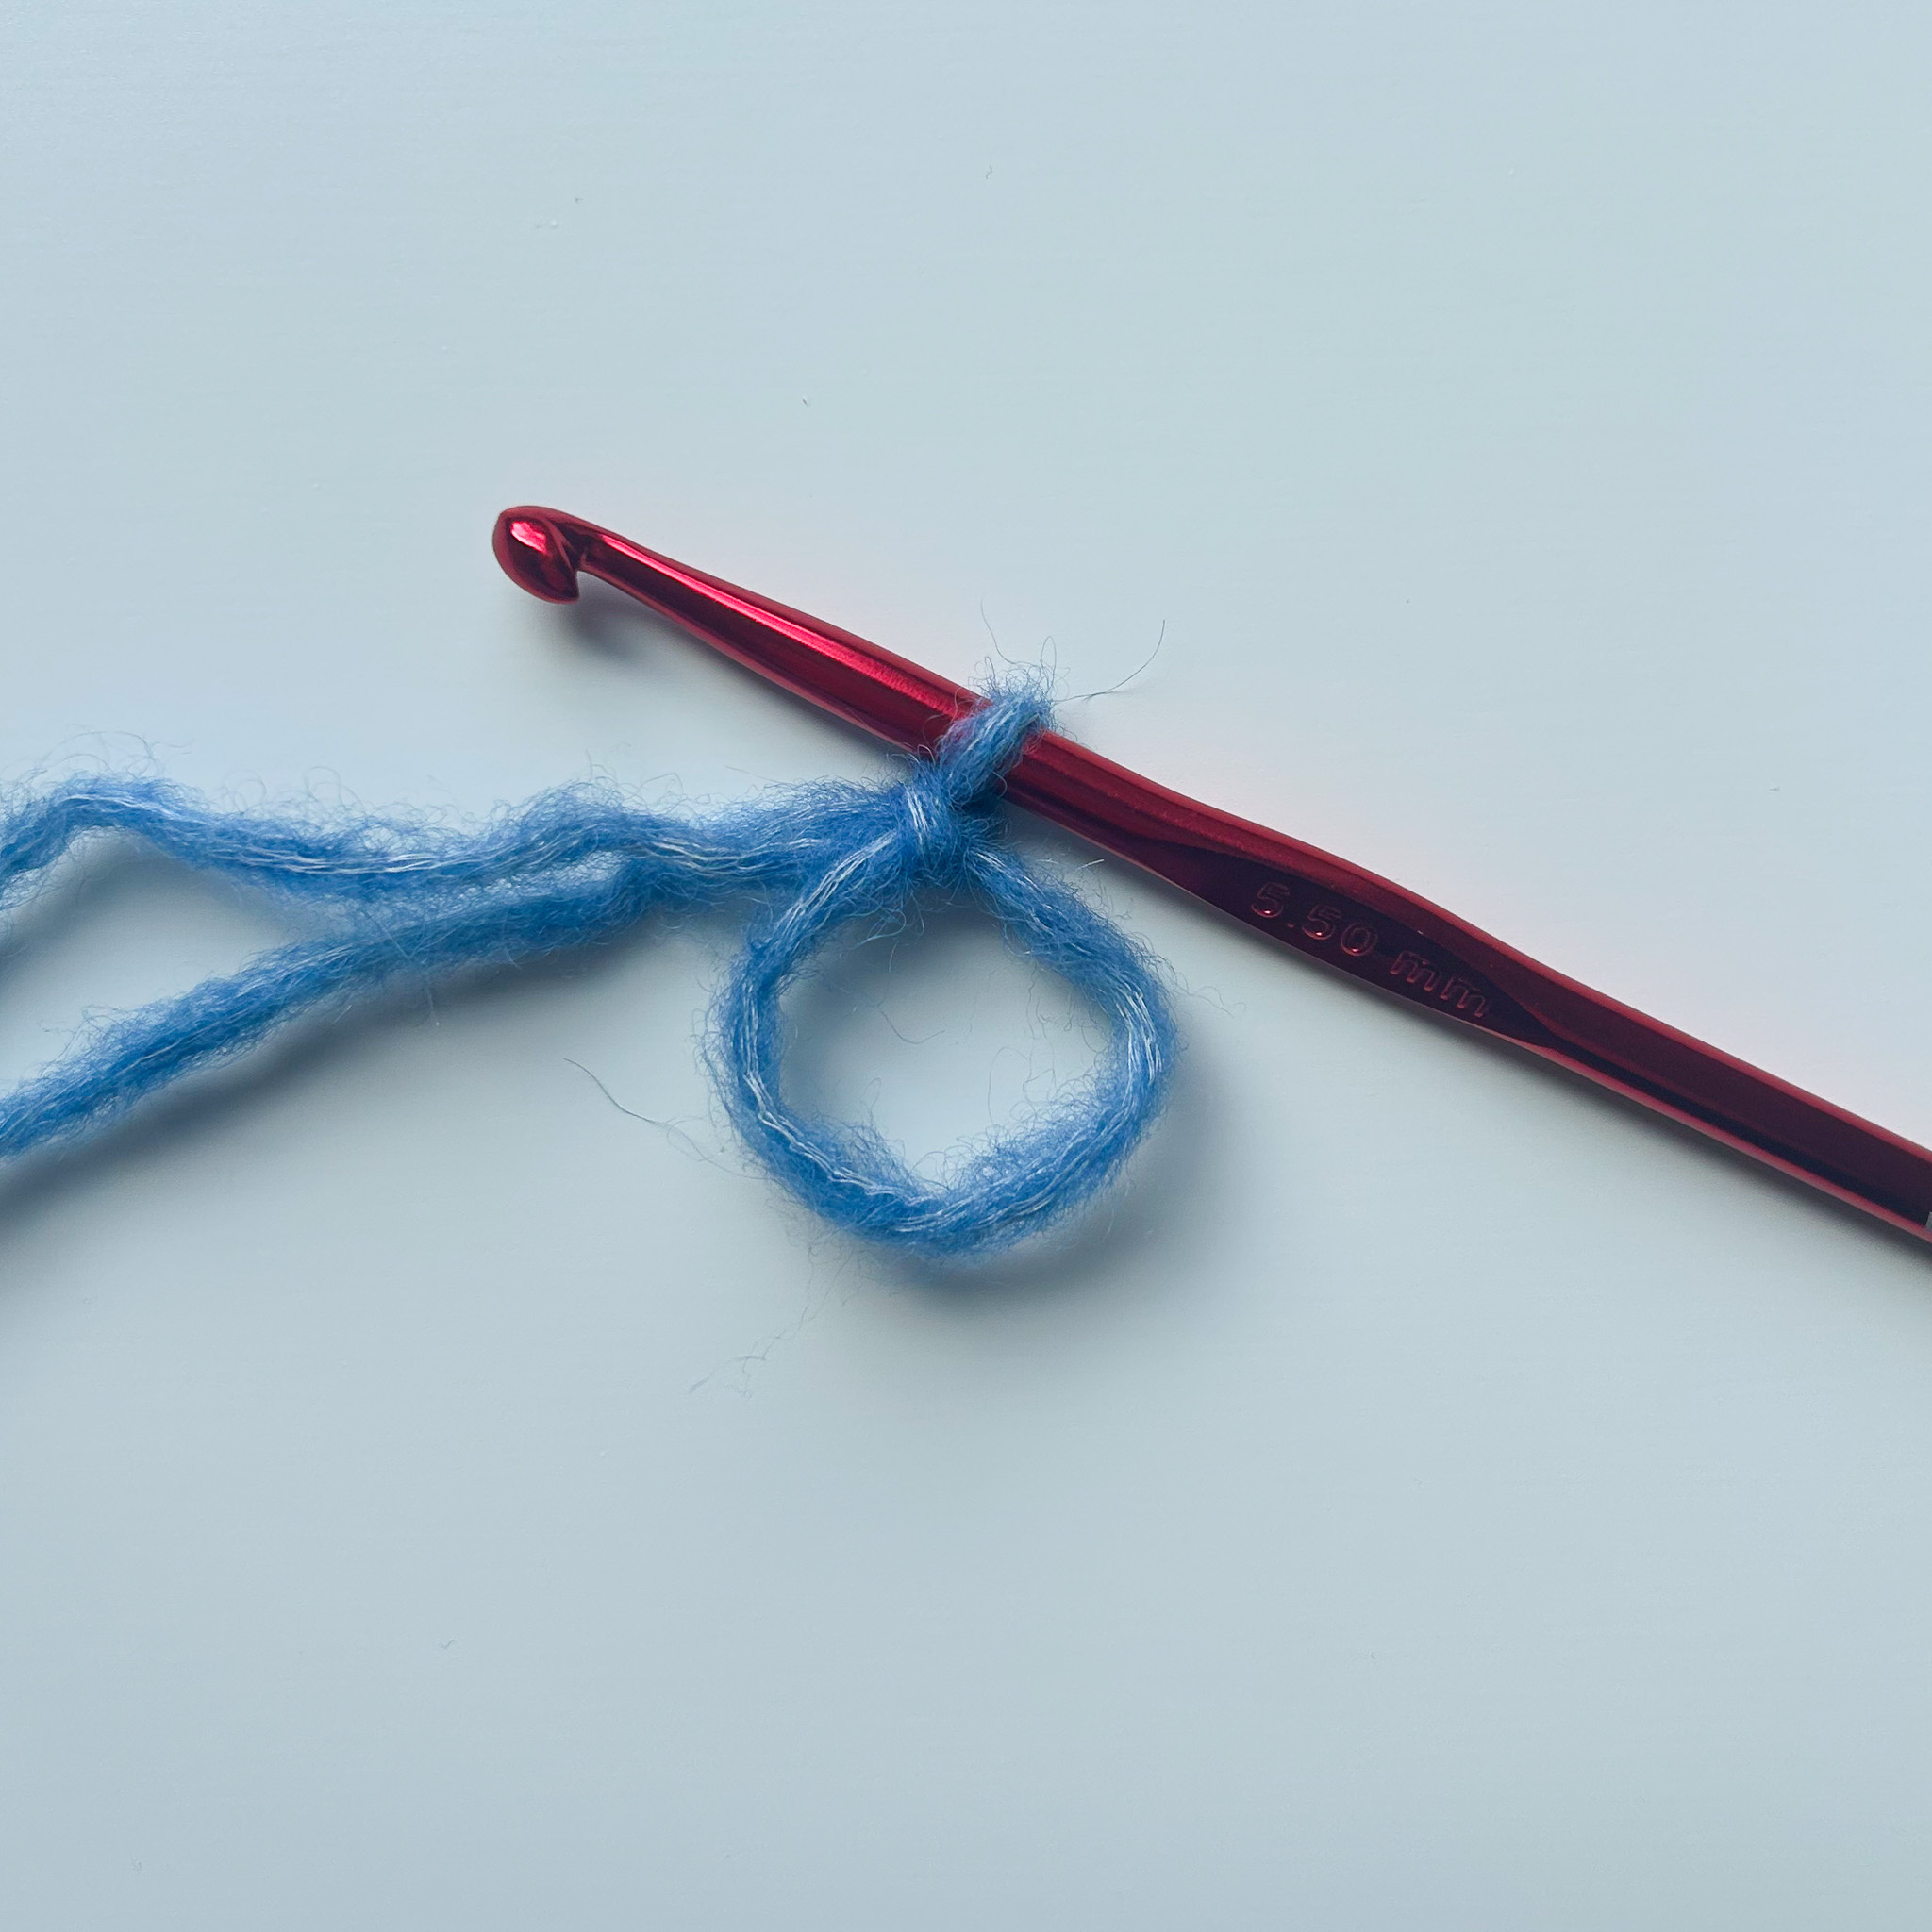
Round 1: Crochet 6 single crochets into the ring. Total 6 stitches.
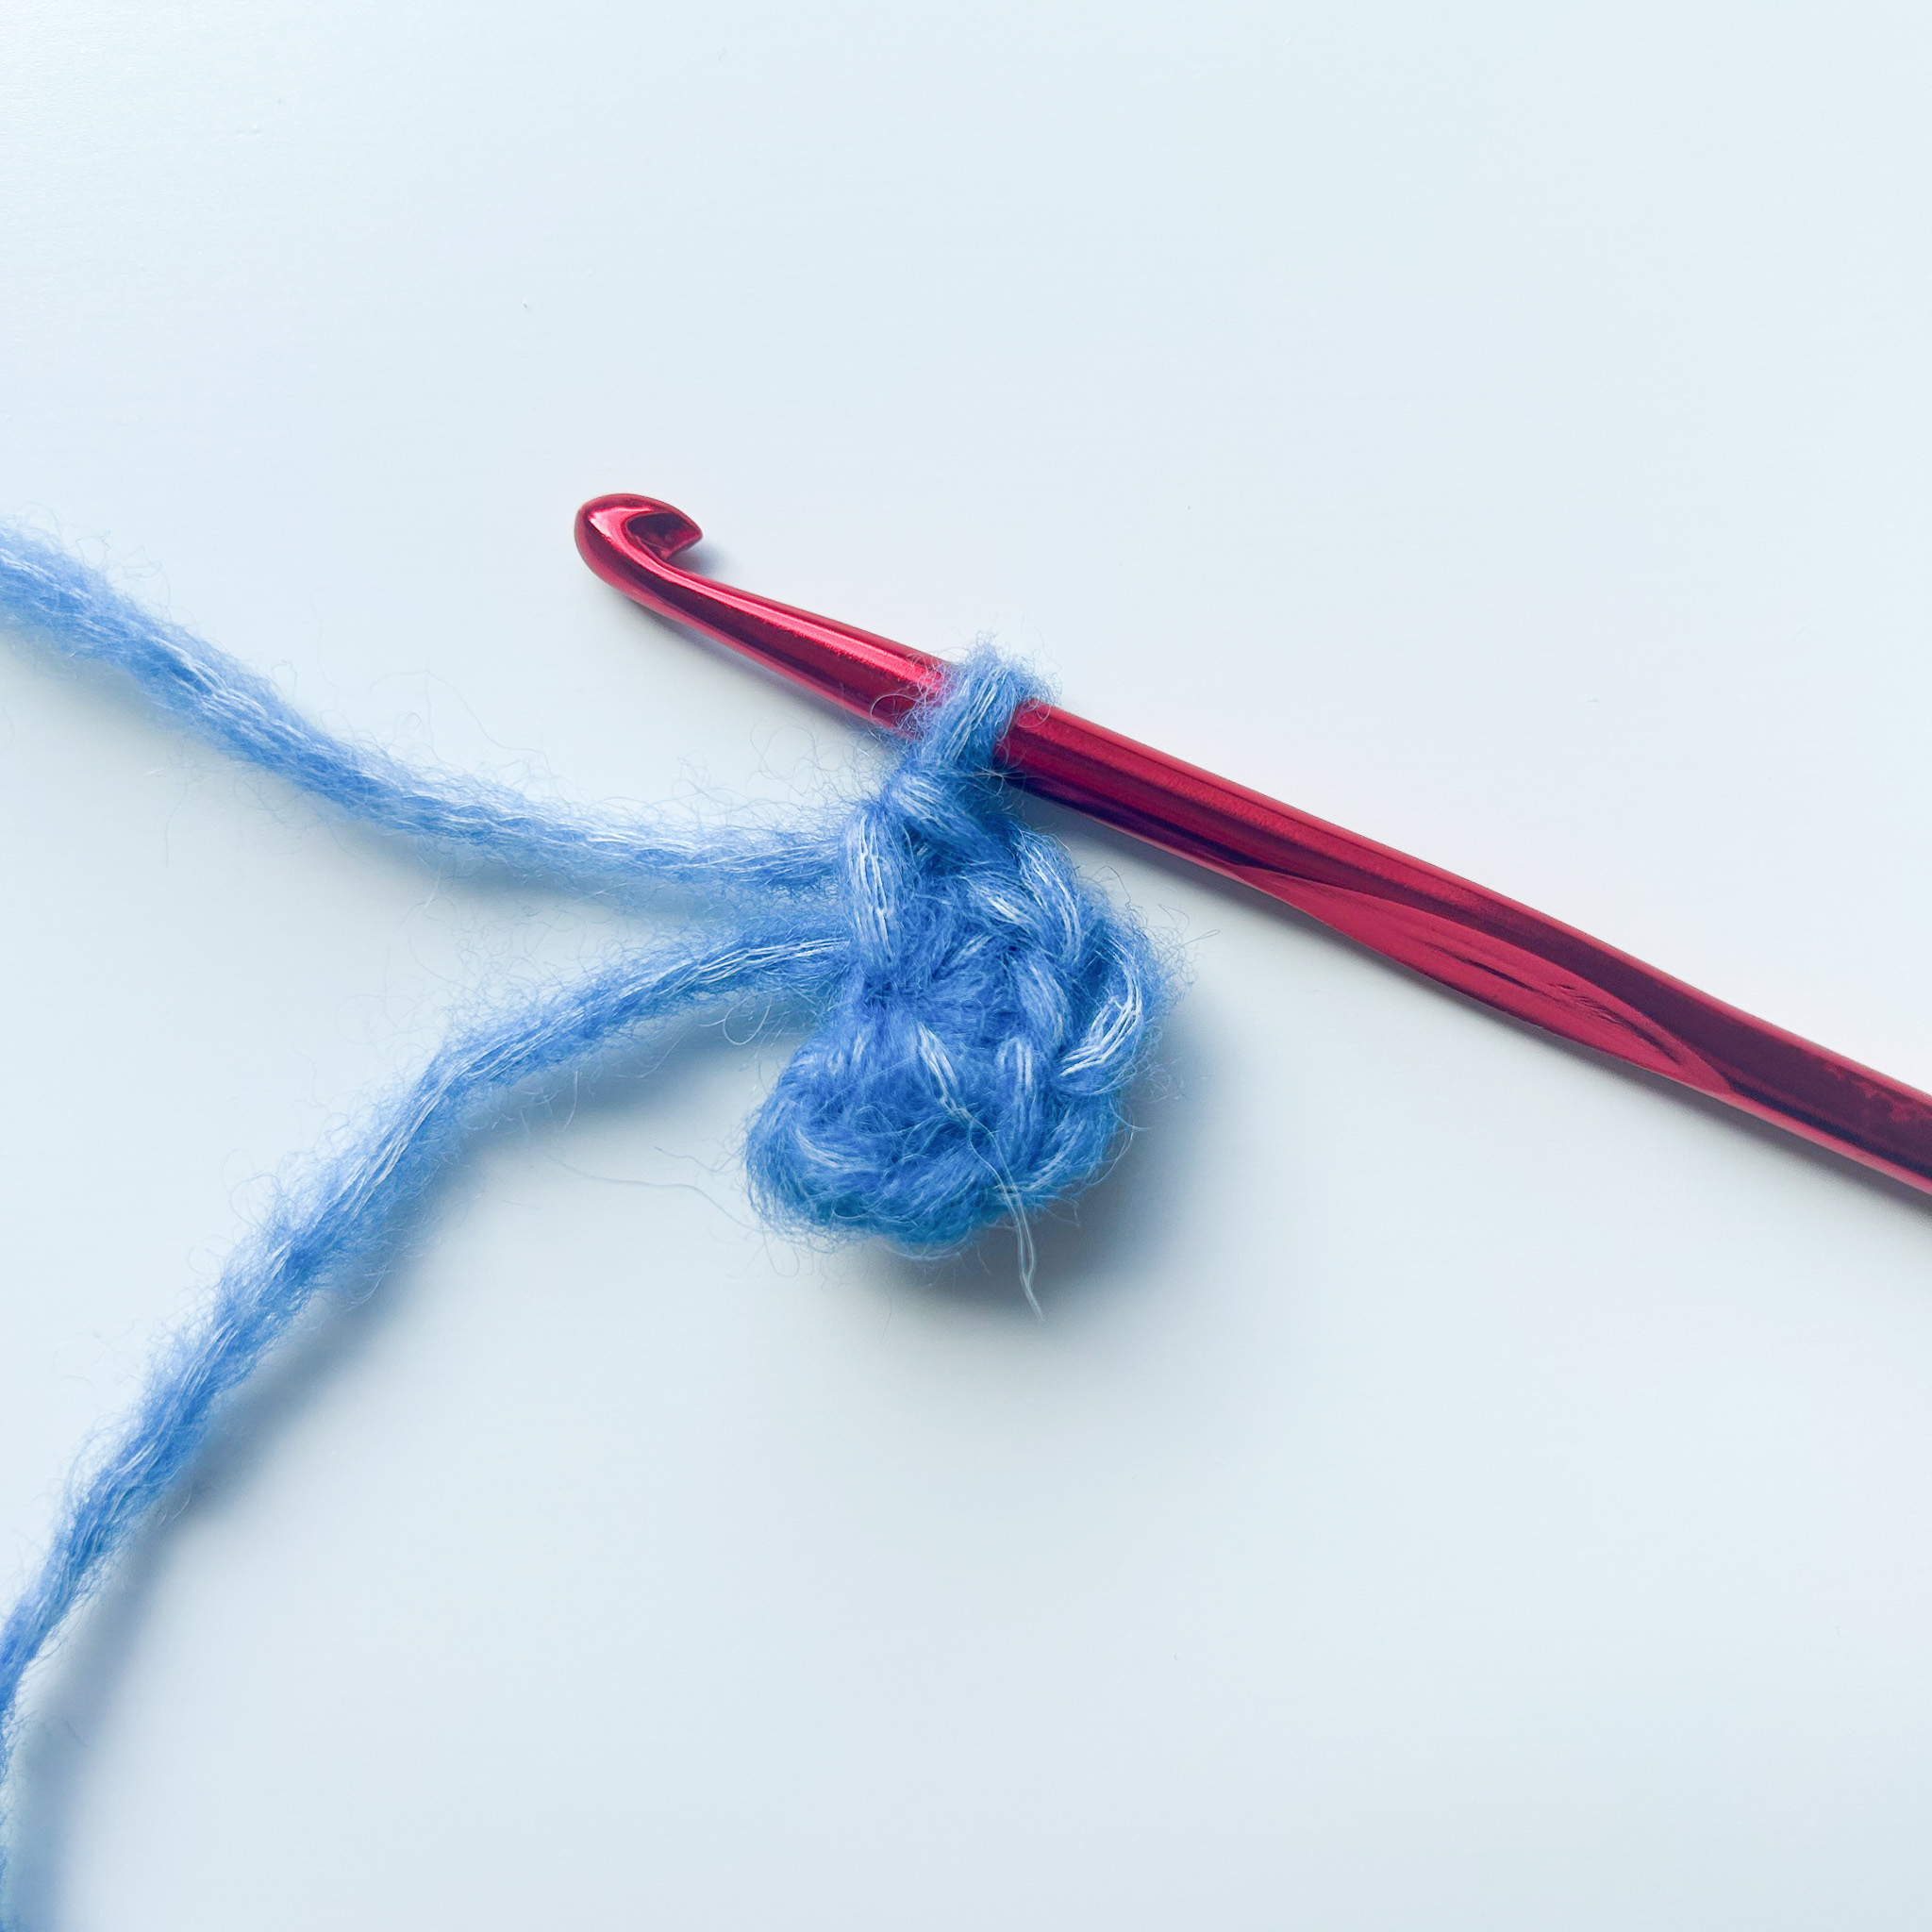
Round 2: Crochet 2 single crochets in the first stitch you made (this is called an increase). Place a stitch marker in the first of these two stitches to keep track of the beginning of the round. Then continue with 2 single crochets in each remaining stitch until you reach the marker again. Total 12 stitches.
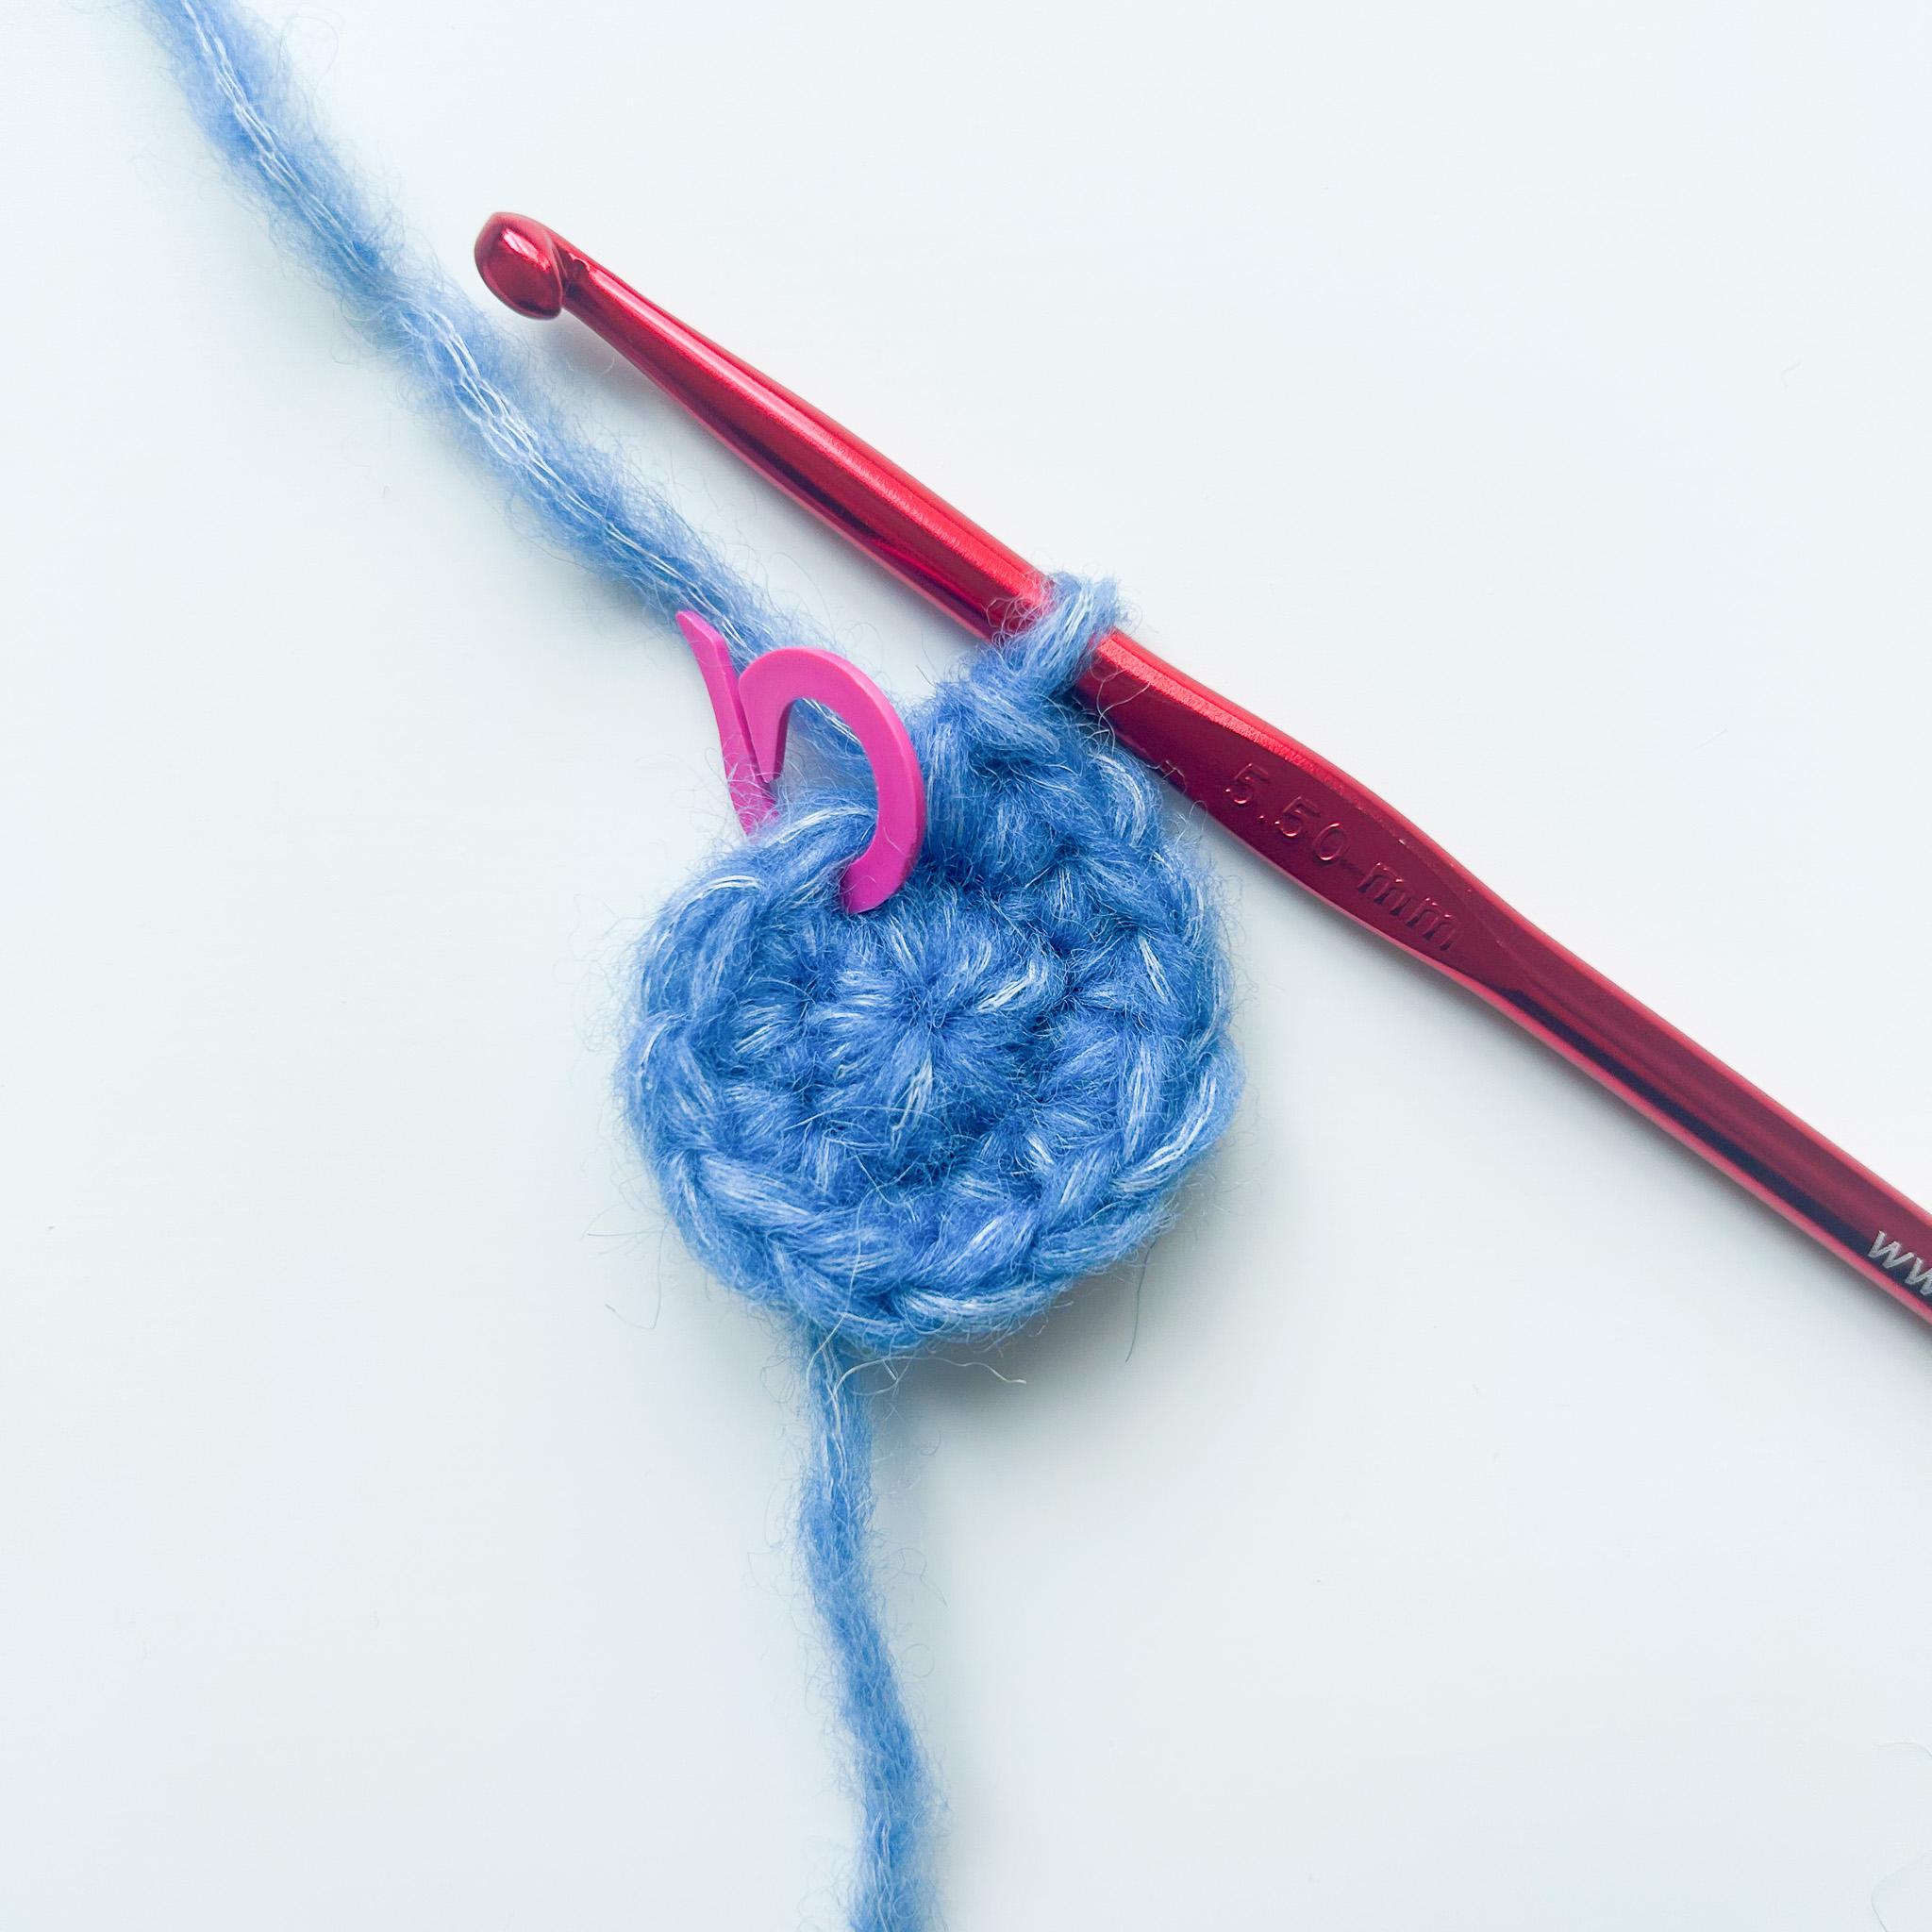
Round 3: Remove the marker, crochet 1 single crochet and place the marker in this new stitch. Then make 2 single crochets in the next stitch. Continue to increase in every other stitch until you reach the marker. Total 18 stitches.
Round 4: Just like the previous round, crochet 1 single crochet in the stitch with the marker and move the marker to this new stitch. Crochet 1 single crochet in the next stitch and 2 single crochets in the following stitch. Continue to increase in every third stitch until you reach the marker. Total 24 stitches.
Round 5: Crochet 1 single crochet in the stitch with the marker and move the marker to this new stitch. Crochet 2 single crochets in each of the next two stitches, then 2 single crochets in the following stitch (increase). Continue making an increase in every fourth stitch until you reach the marker. Total 30 stitches.
Round 6: Crochet 1 sc in the stitch with the marker and move the marker to this new stitch. Crochet 3 sc in the next 3 stitches, then 2 sc in the following stitch (increase). Continue making an increase in every 5th stitch until you reach the marker. Total 36 stitches.
Round 7: Crochet 1 sc in the stitch with the marker and move the marker to this new stitch. Crochet 4 sc in the next 4 stitches, then 2 sc in the following stitch (increase). Continue making an increase in every 6th stitch until you reach the marker. Total 42 stitches.
Round 8: Crochet 1 sc in the stitch with the marker and move the marker to this new stitch. Crochet 5 sc in the next 5 stitches, then 2 sc in the following stitch (increase). Continue making an increase in every 7th stitch until you reach the marker. Total 48 stitches.
Round 9: Crochet 1 sc in the stitch with the marker and move the marker to this new stitch. Crochet 6 sc in the next 6 stitches, then 2 sc in the following stitch (increase). Continue making an increase in every 8th stitch until you reach the marker. Total 54 stitches.
Round 10: Crochet 1 sc in the stitch with the marker and move the marker to this new stitch. Crochet 7 sc in the next 7 stitches, then 2 sc in the following stitch (increase). Continue making an increase in every 9th stitch until you reach the marker. Total 60 stitches.
Make more or fewer rounds to adjust the hat’s width.
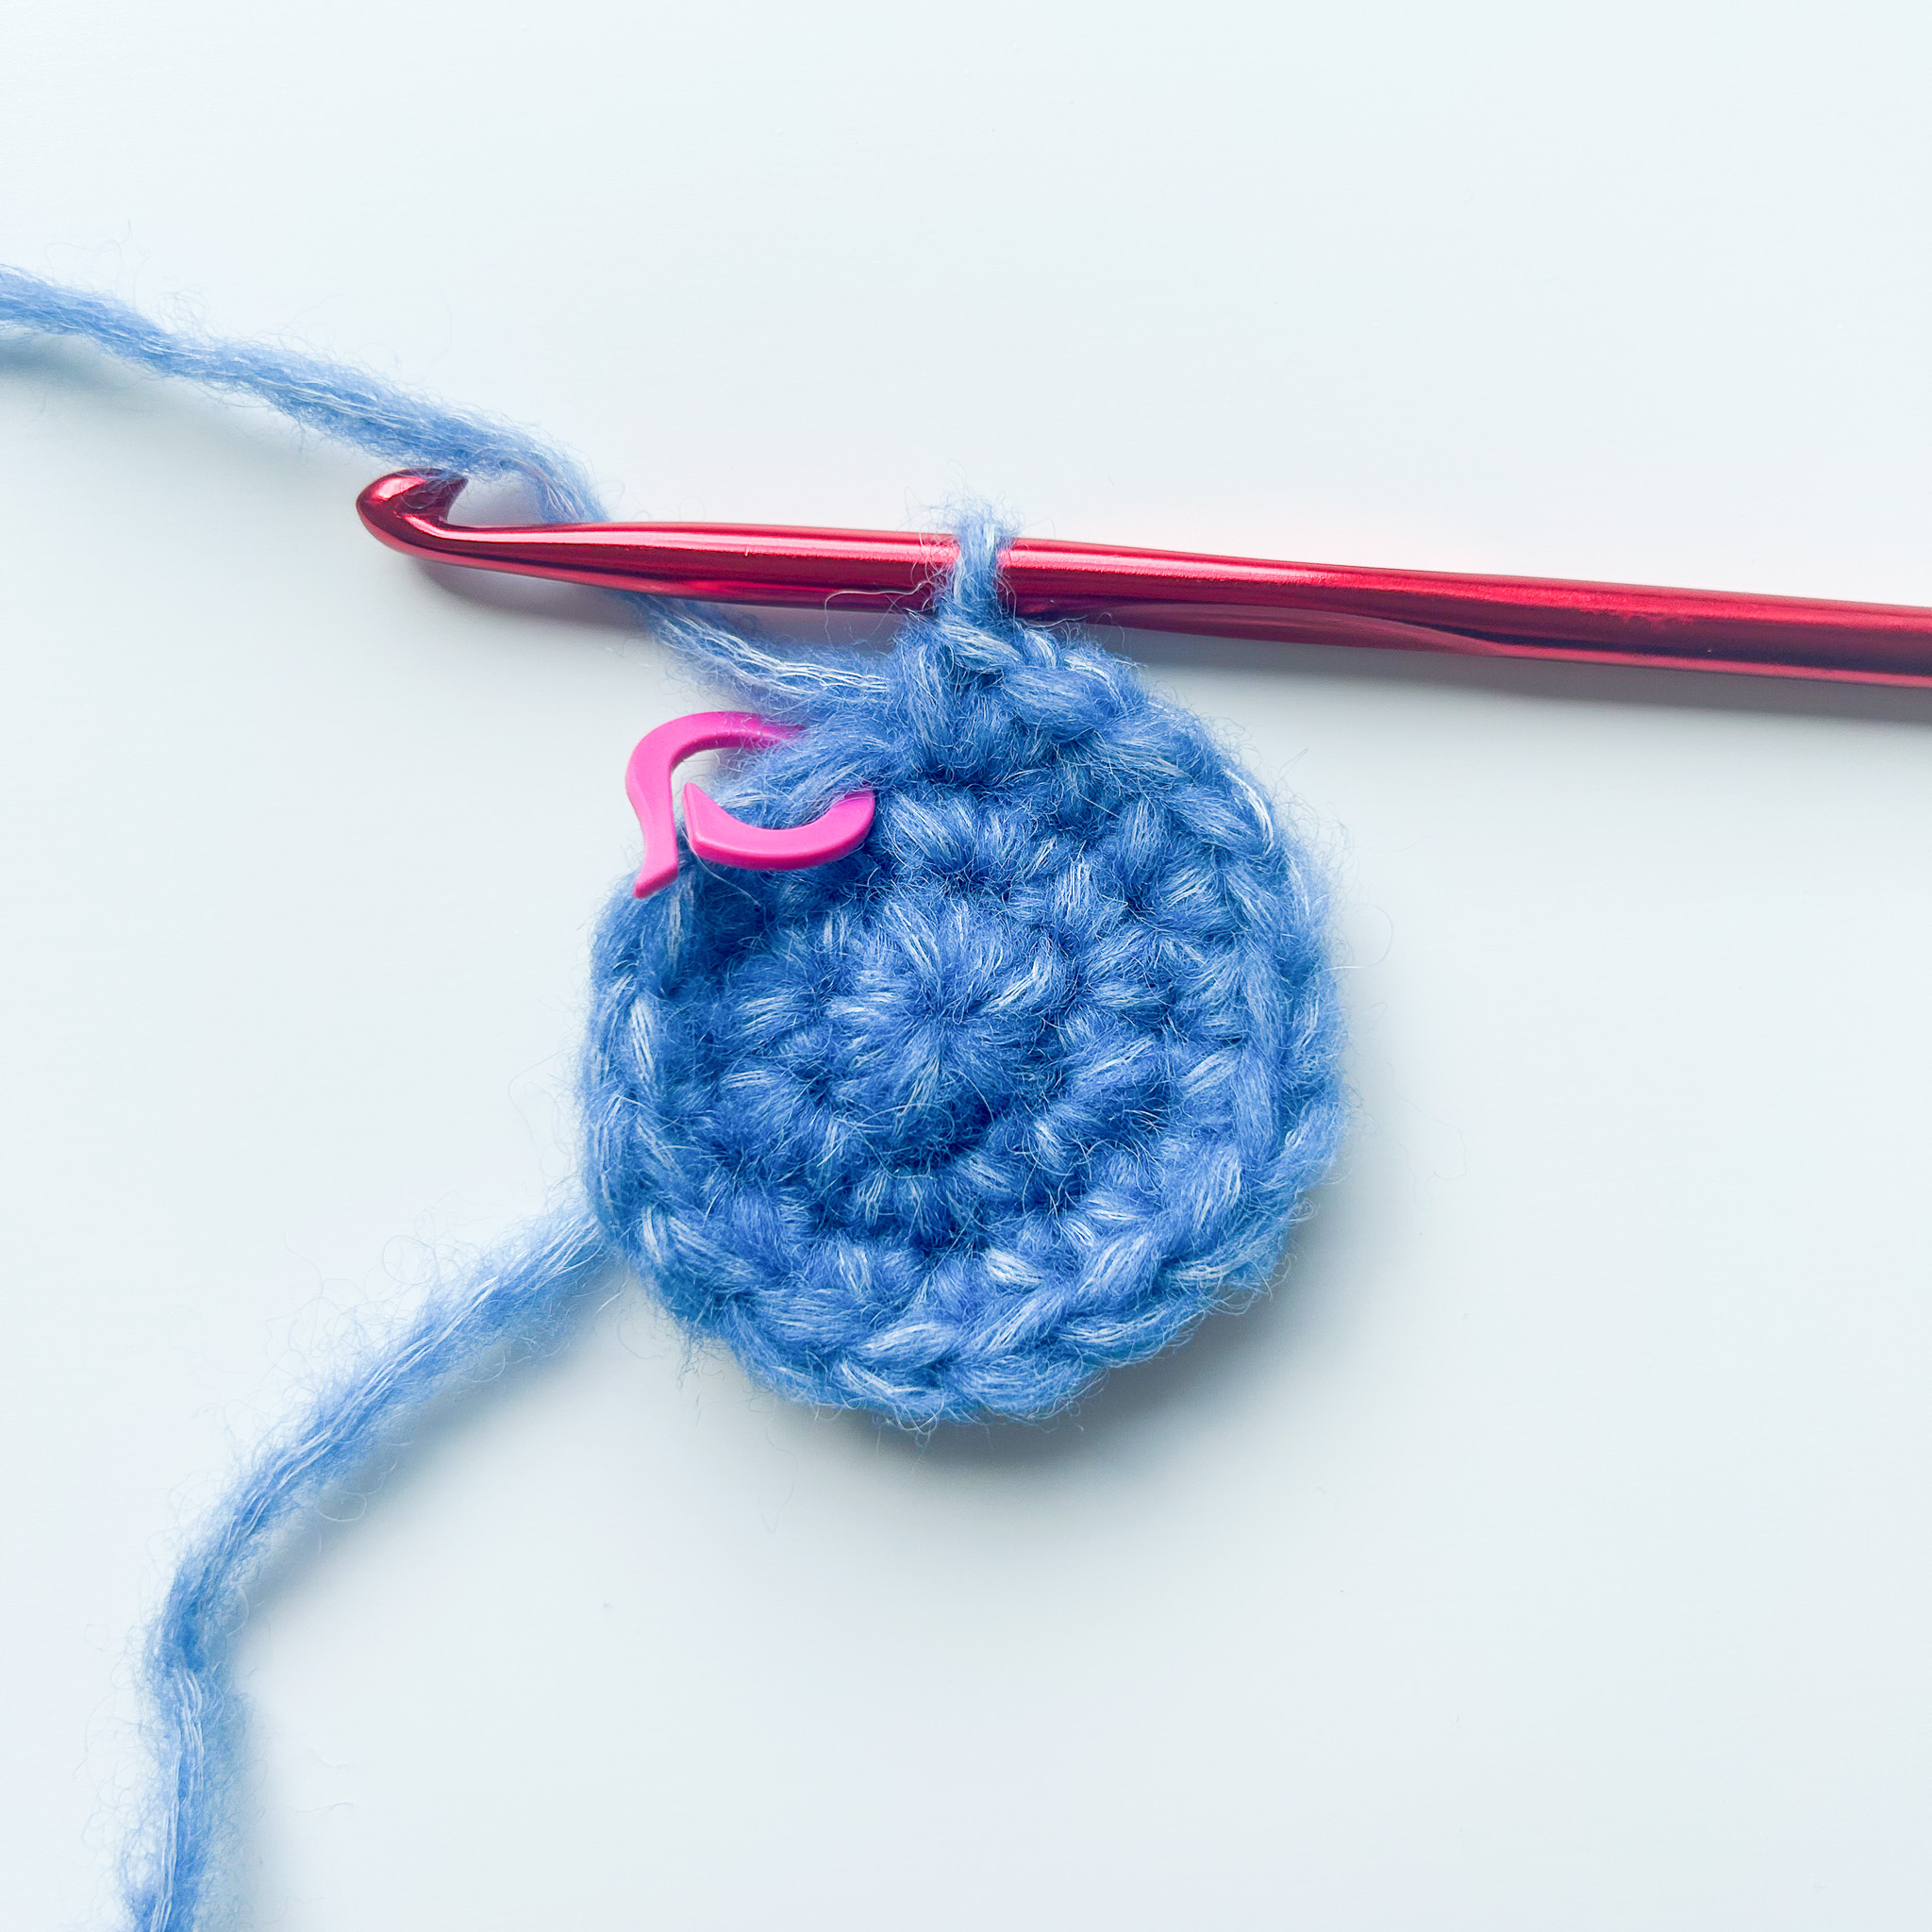
Round 11: Continue to always move the marker to the first stitch of the new round. This round, make a total of only 3 increases. Crochet single crochets all the way around and make an increase in stitch numbers 5, 25, and 45. Total 63 stitches.
Or, if you have worked more or fewer rounds than 10, place these 3 increases evenly spaced around the round.
Round 12: Again, we will make only 3 increases. Make an increase in stitch numbers 16, 37, and 58. Total 66 stitches.
Or, if you worked more or fewer rounds than 10 in step 7, you can place these 3 increases evenly spaced.
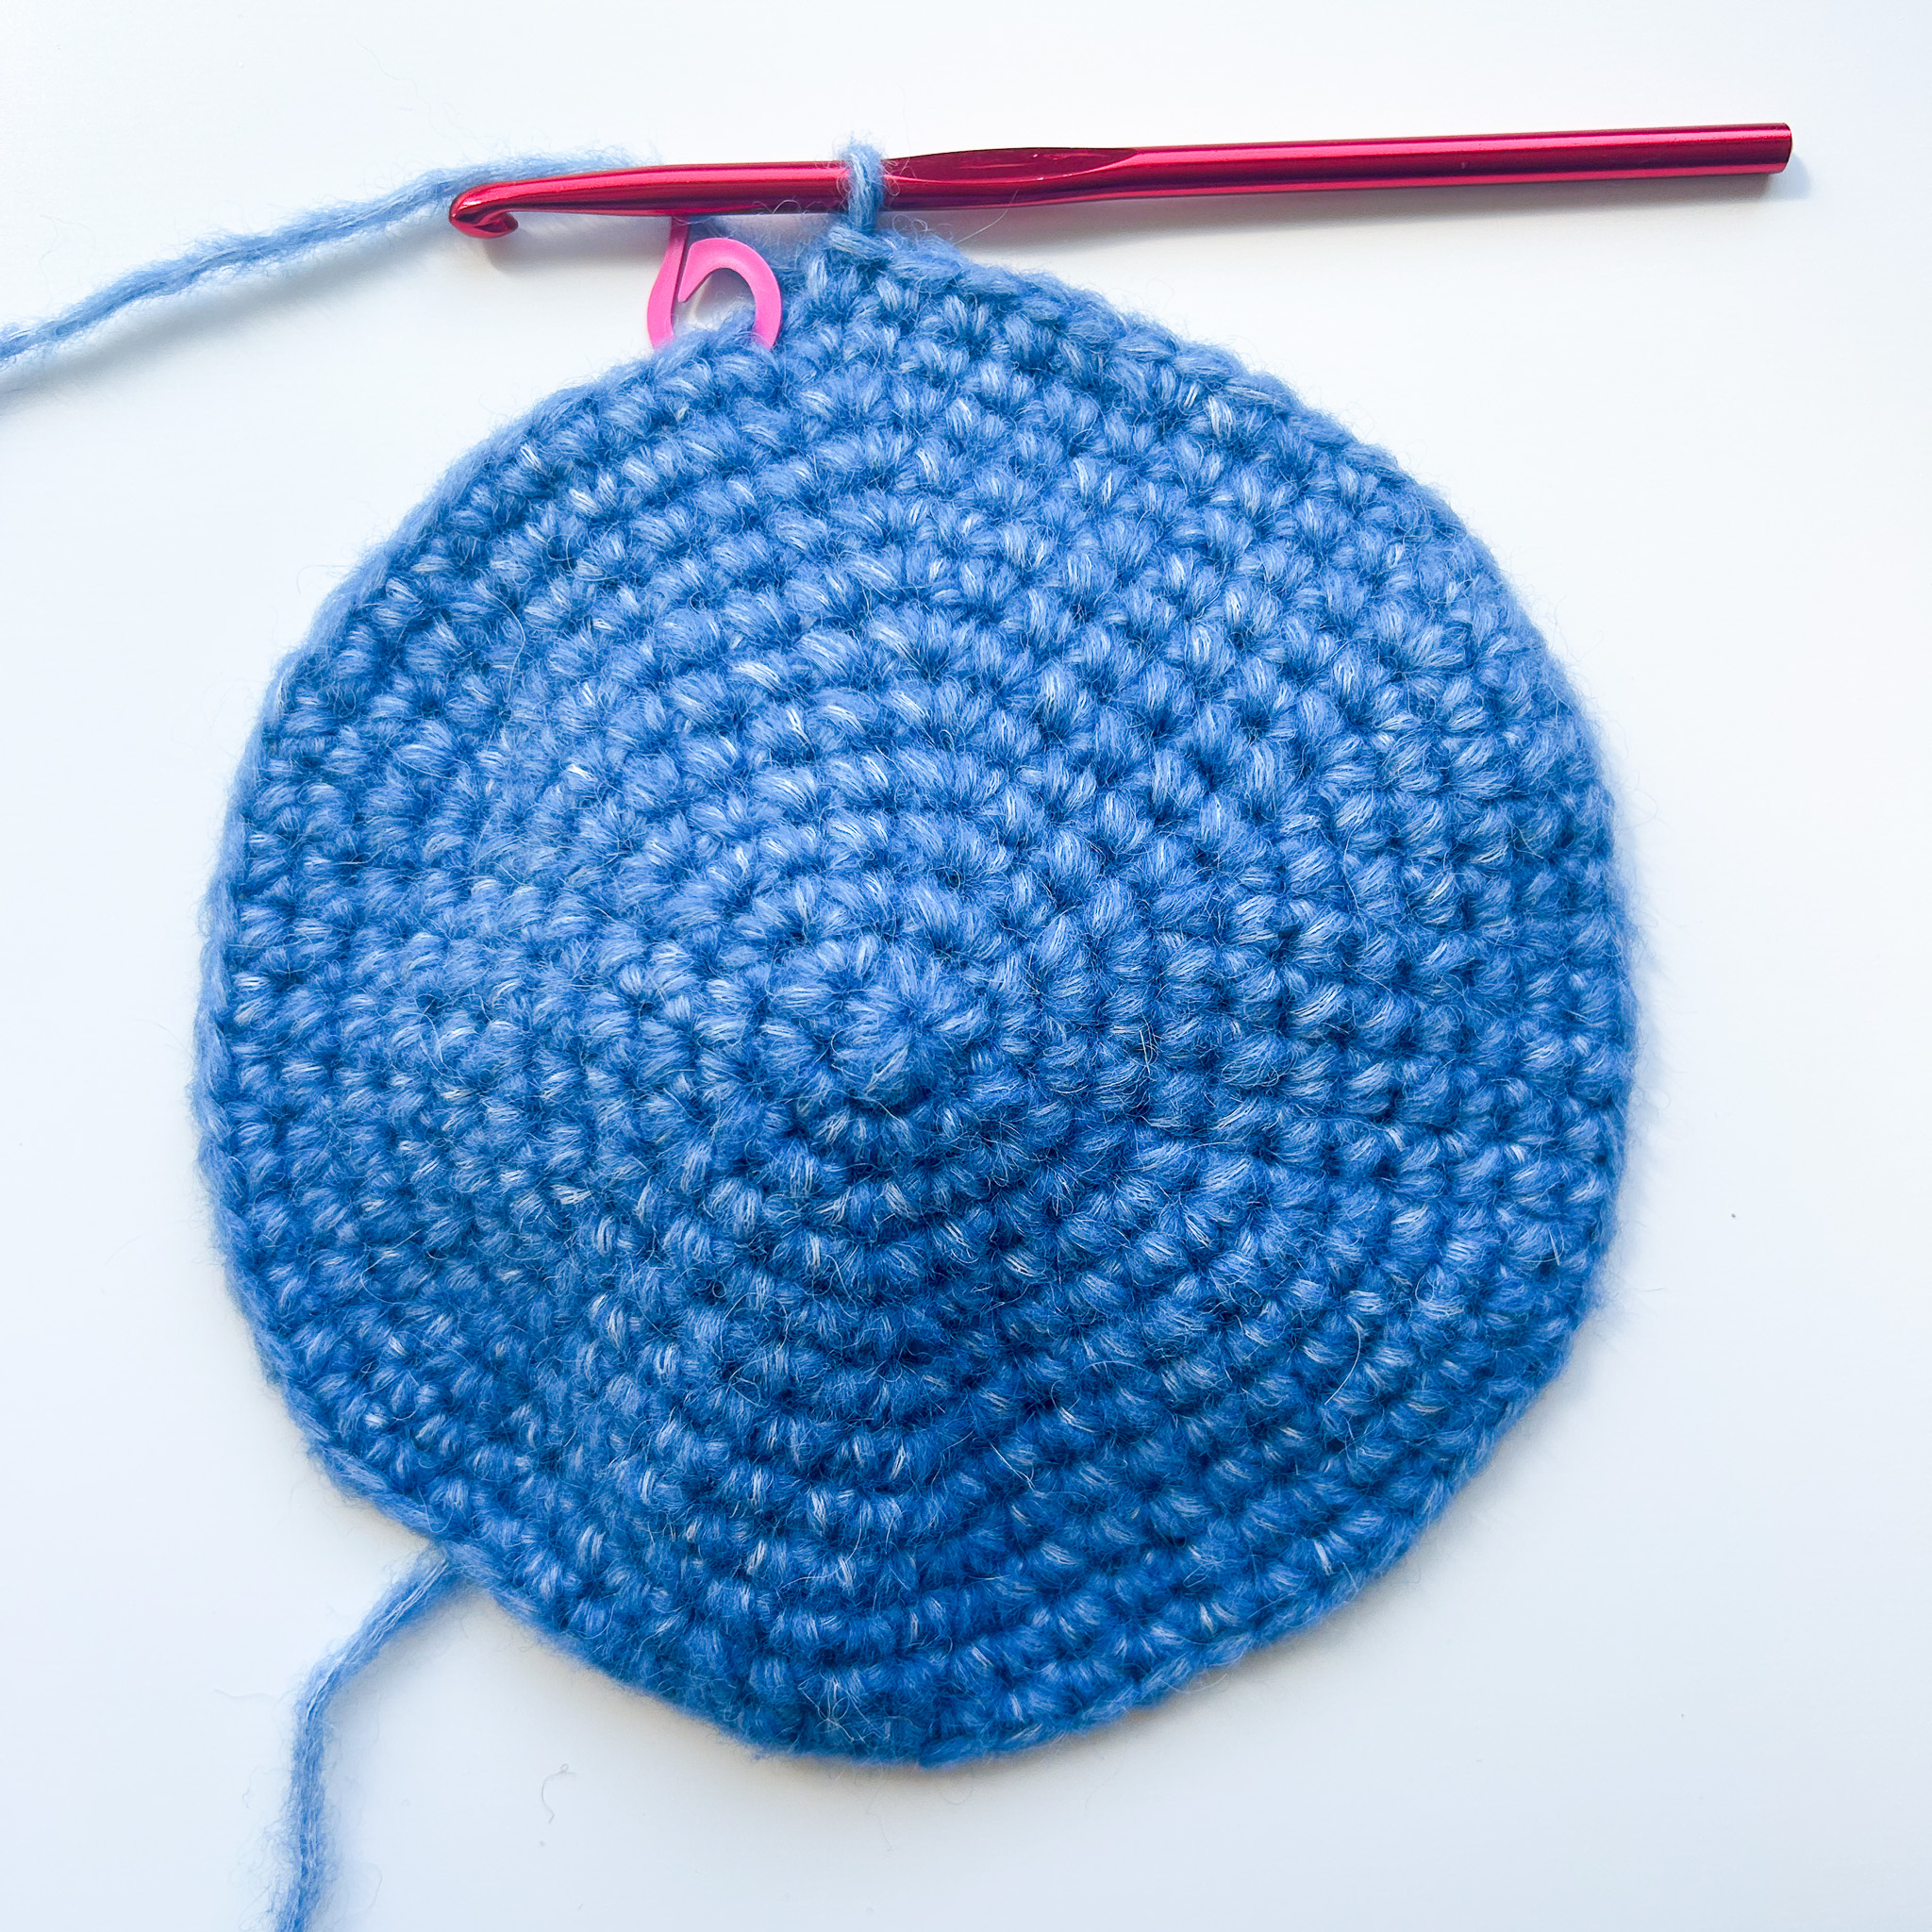
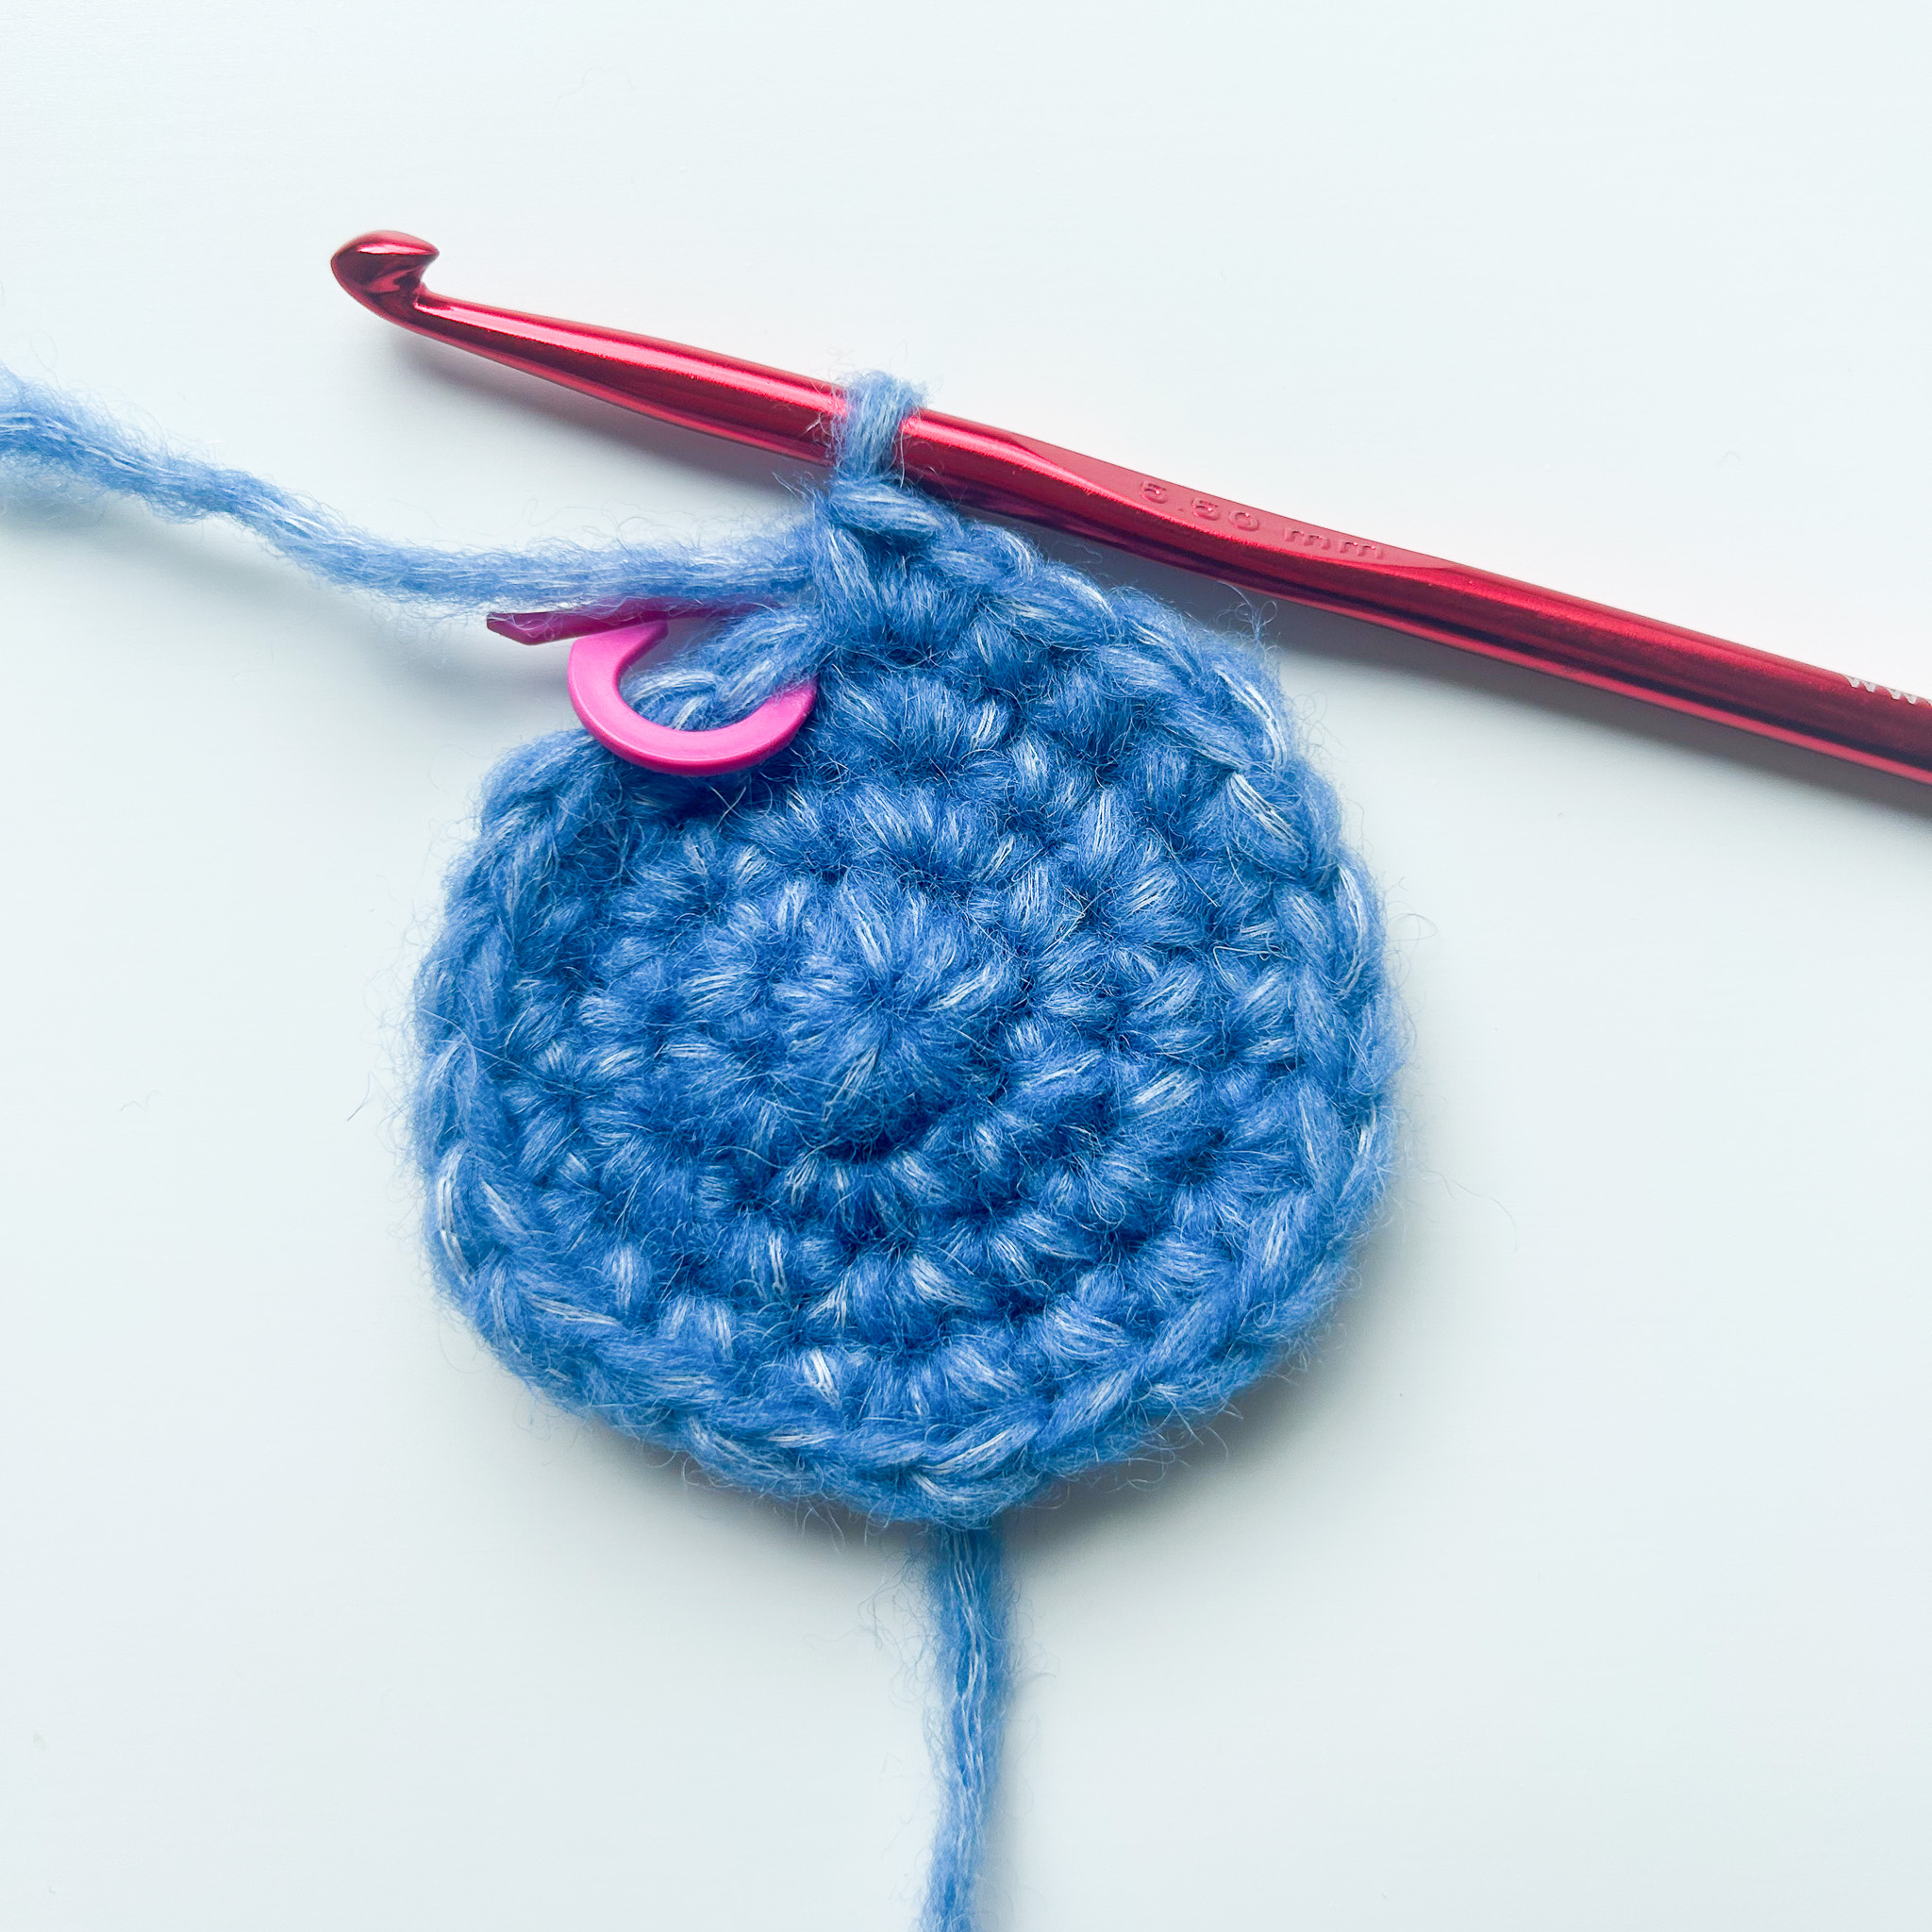
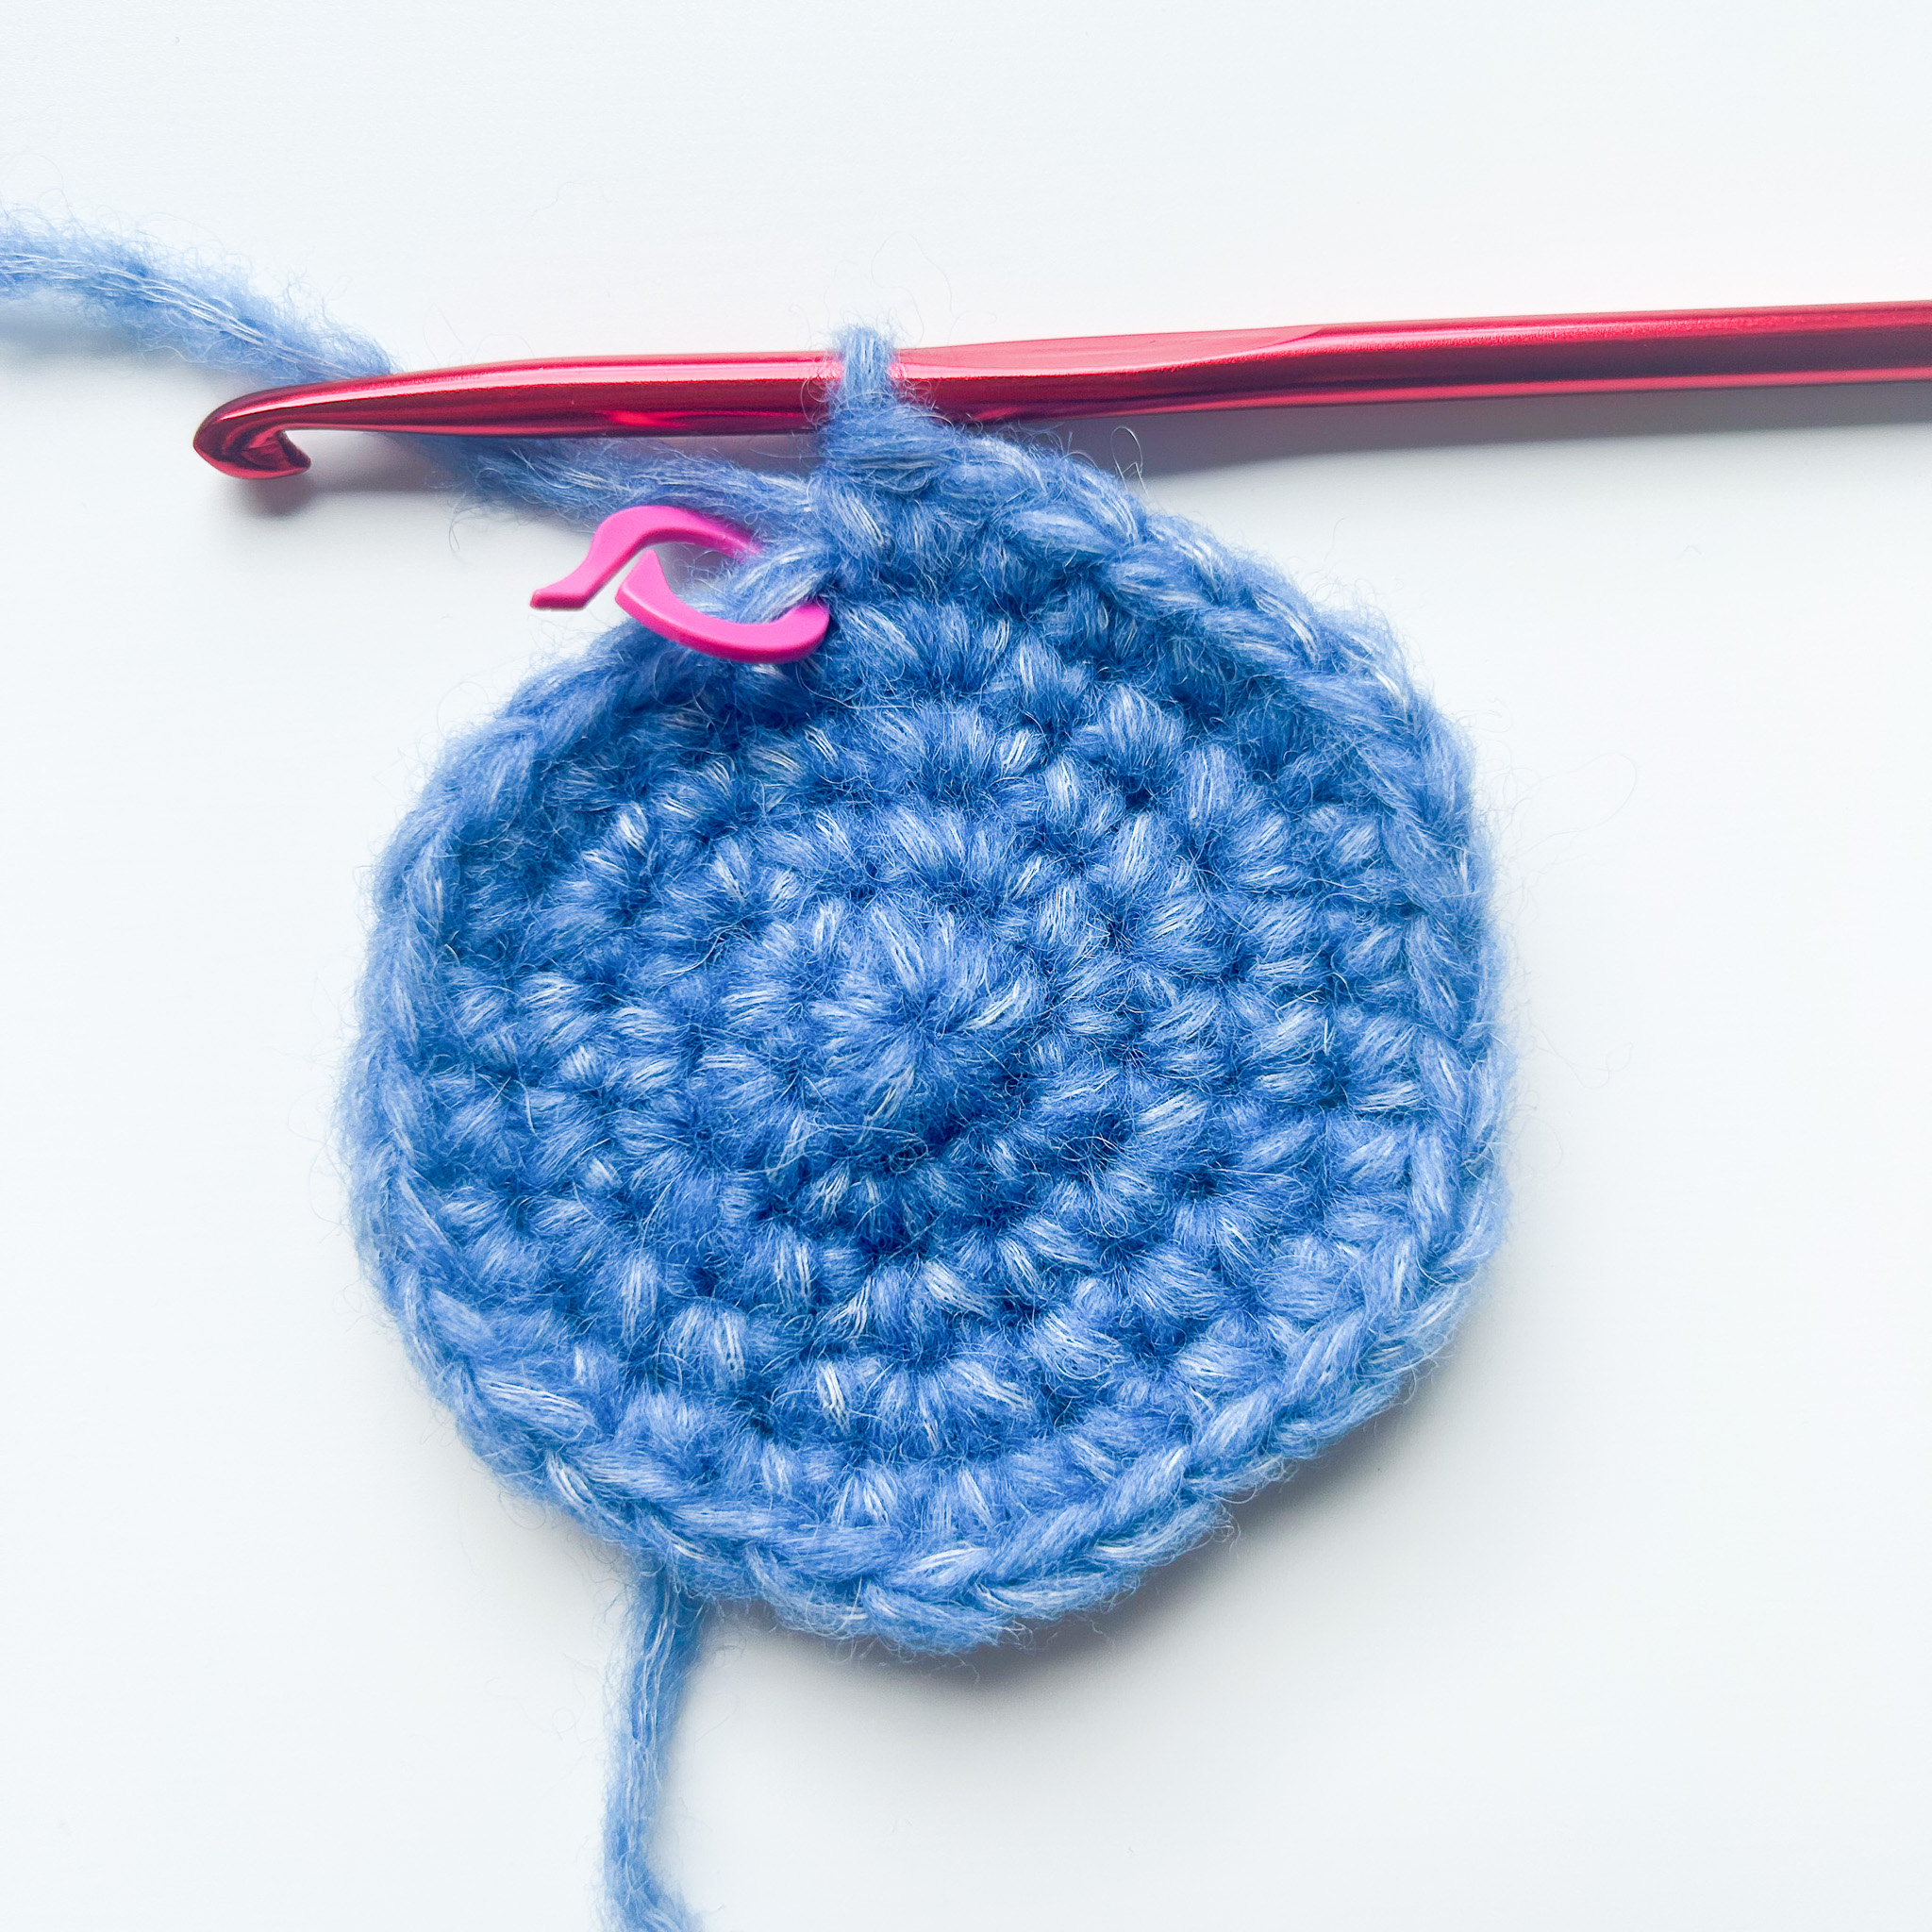
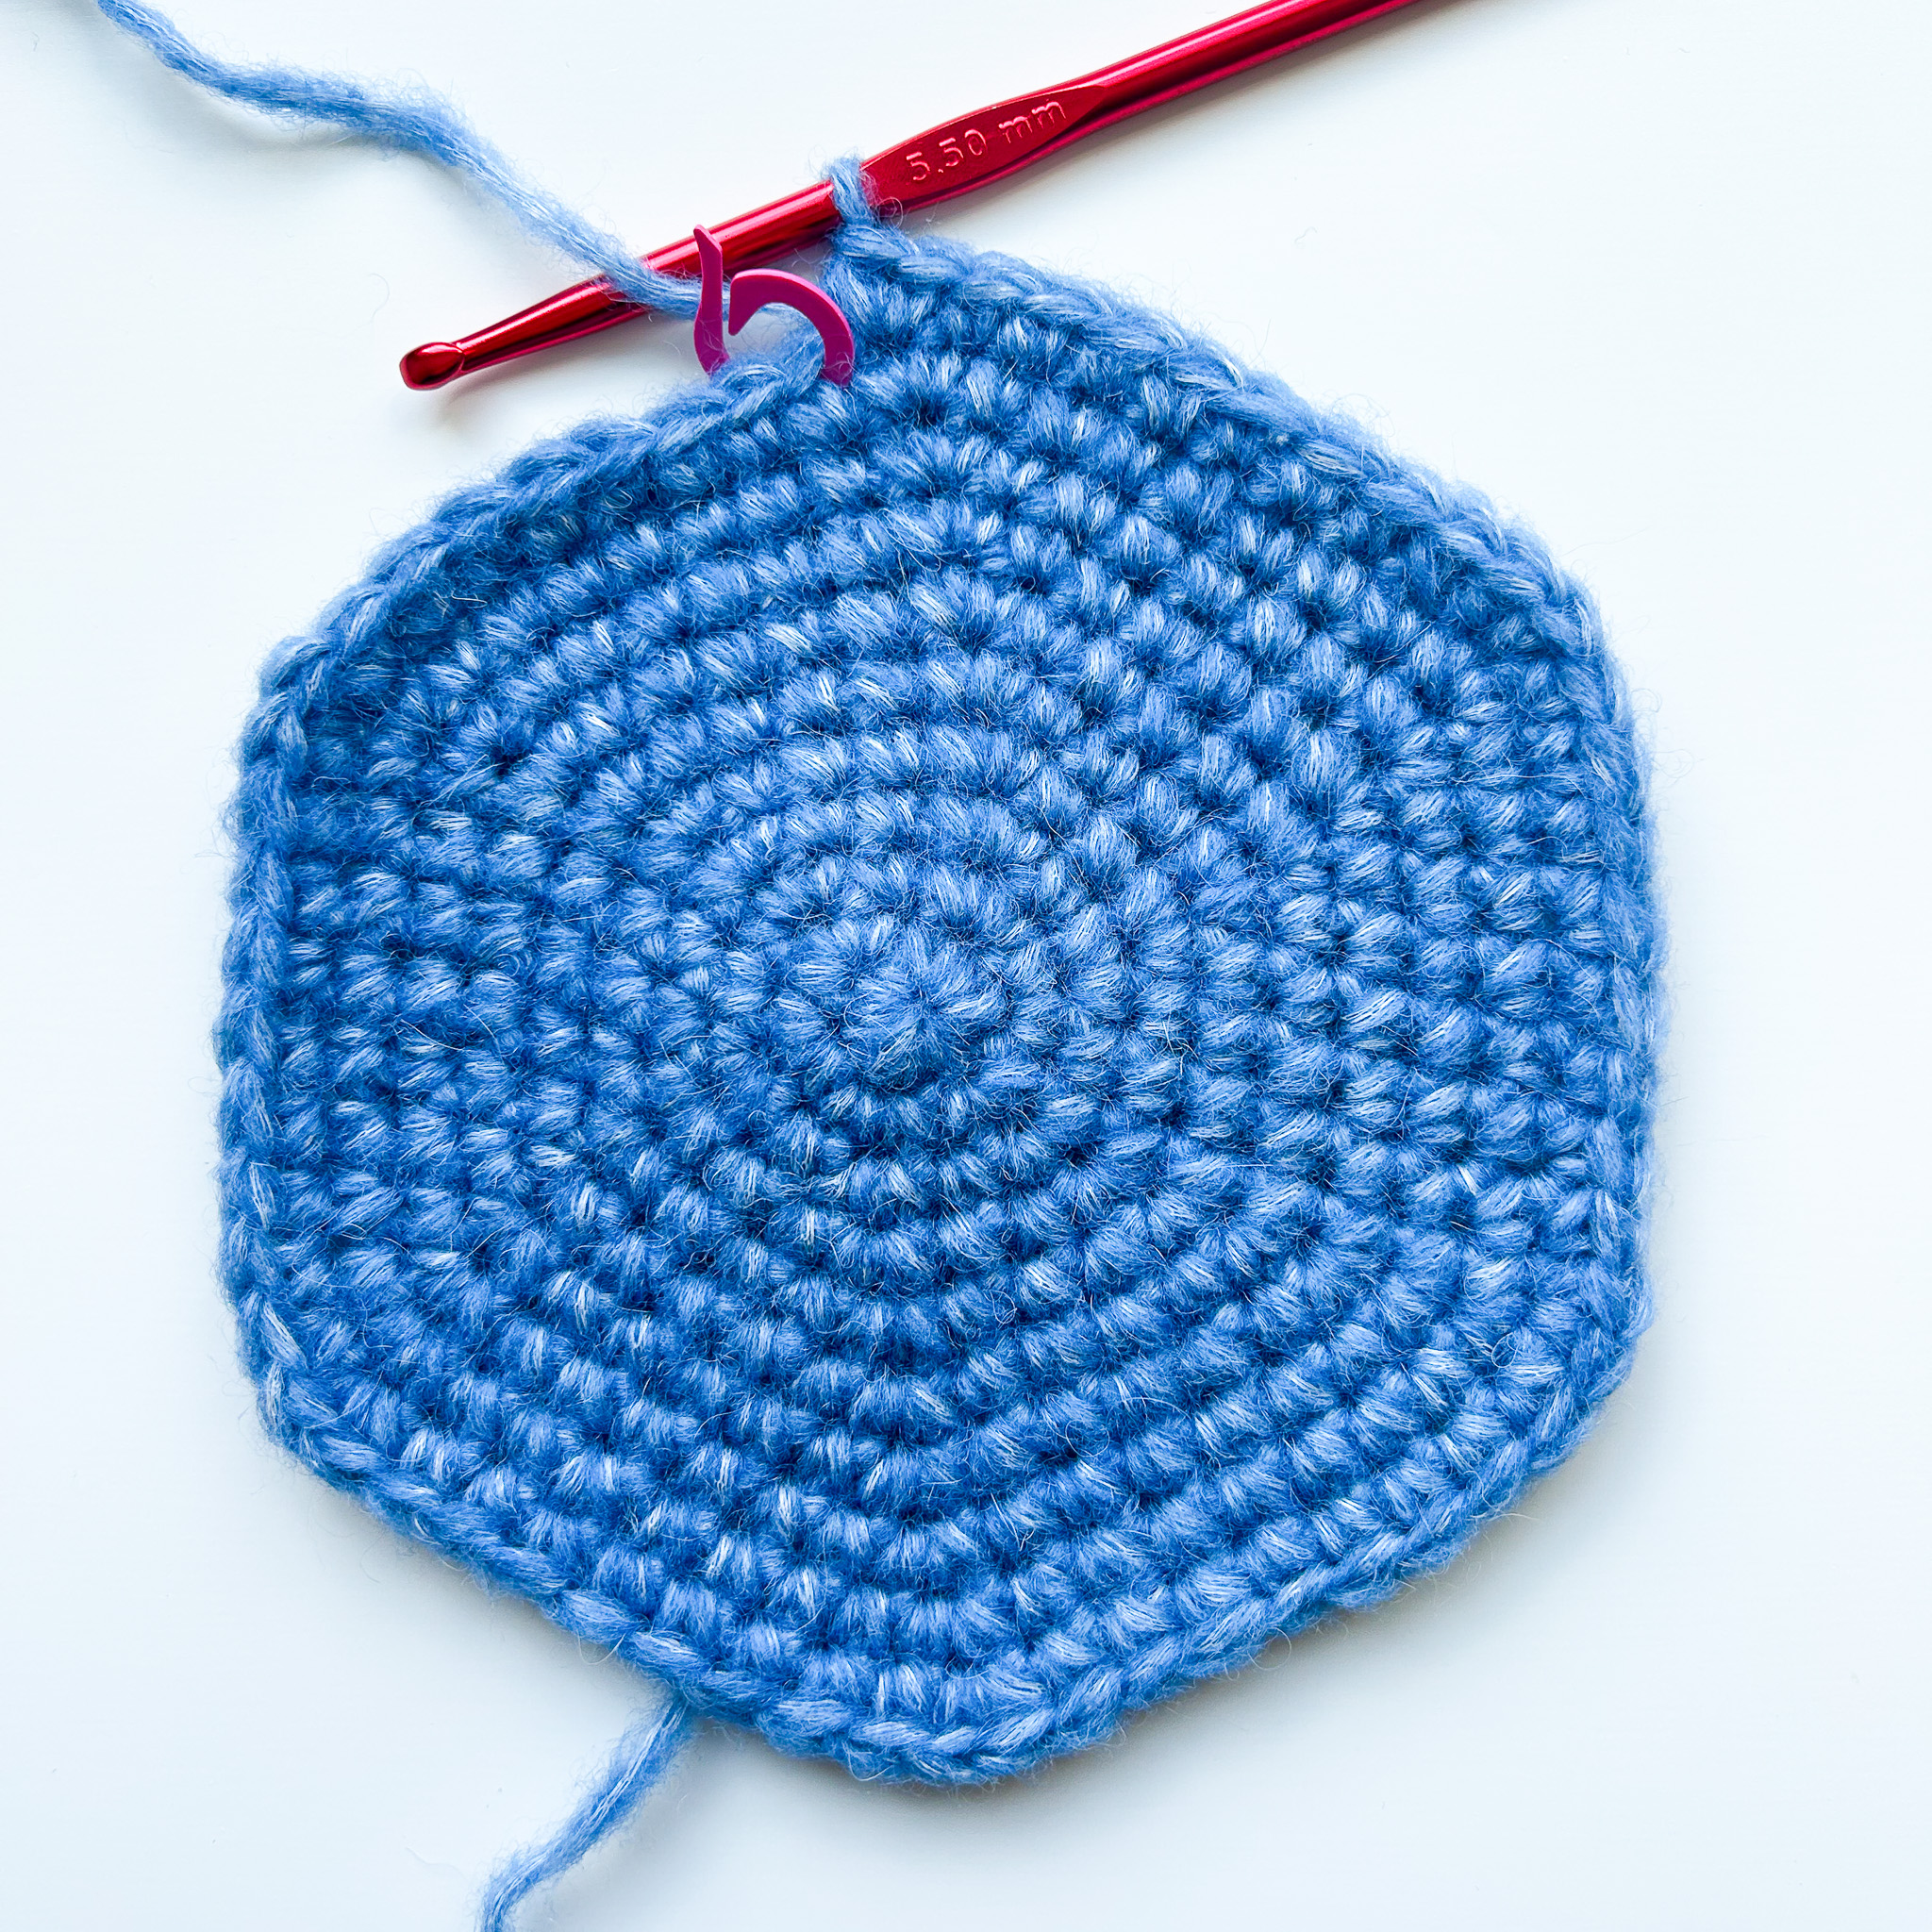
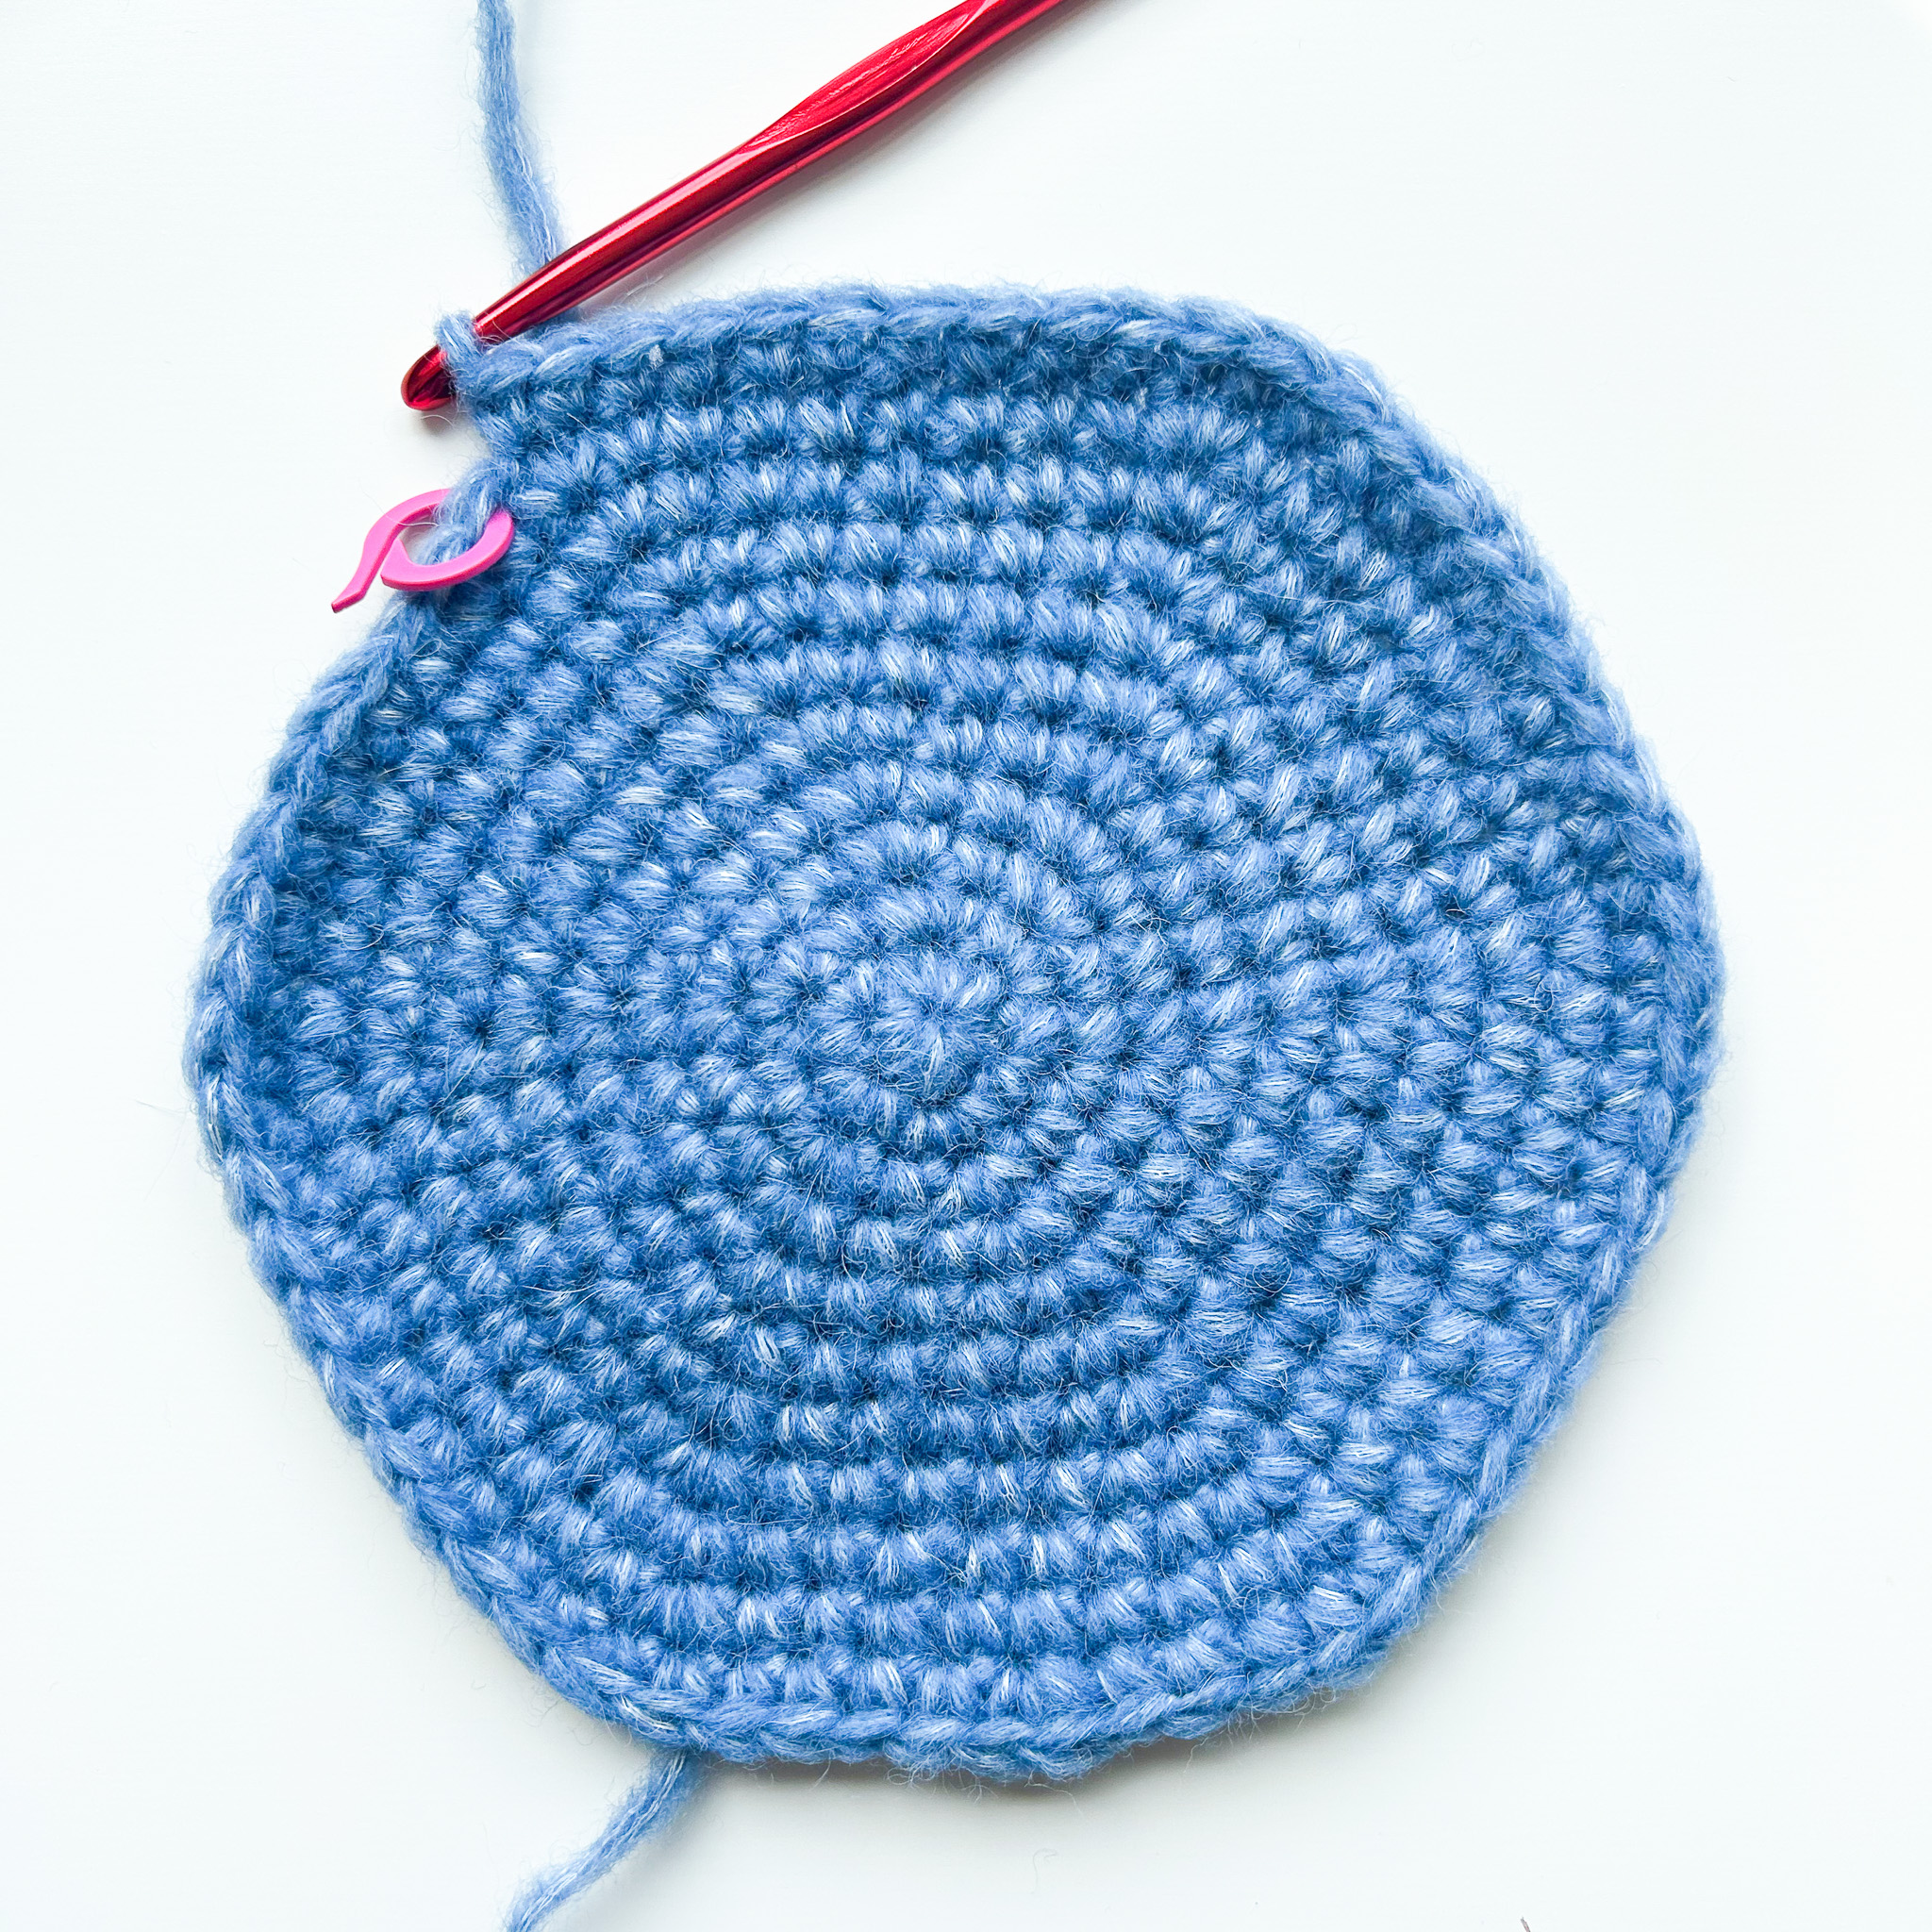
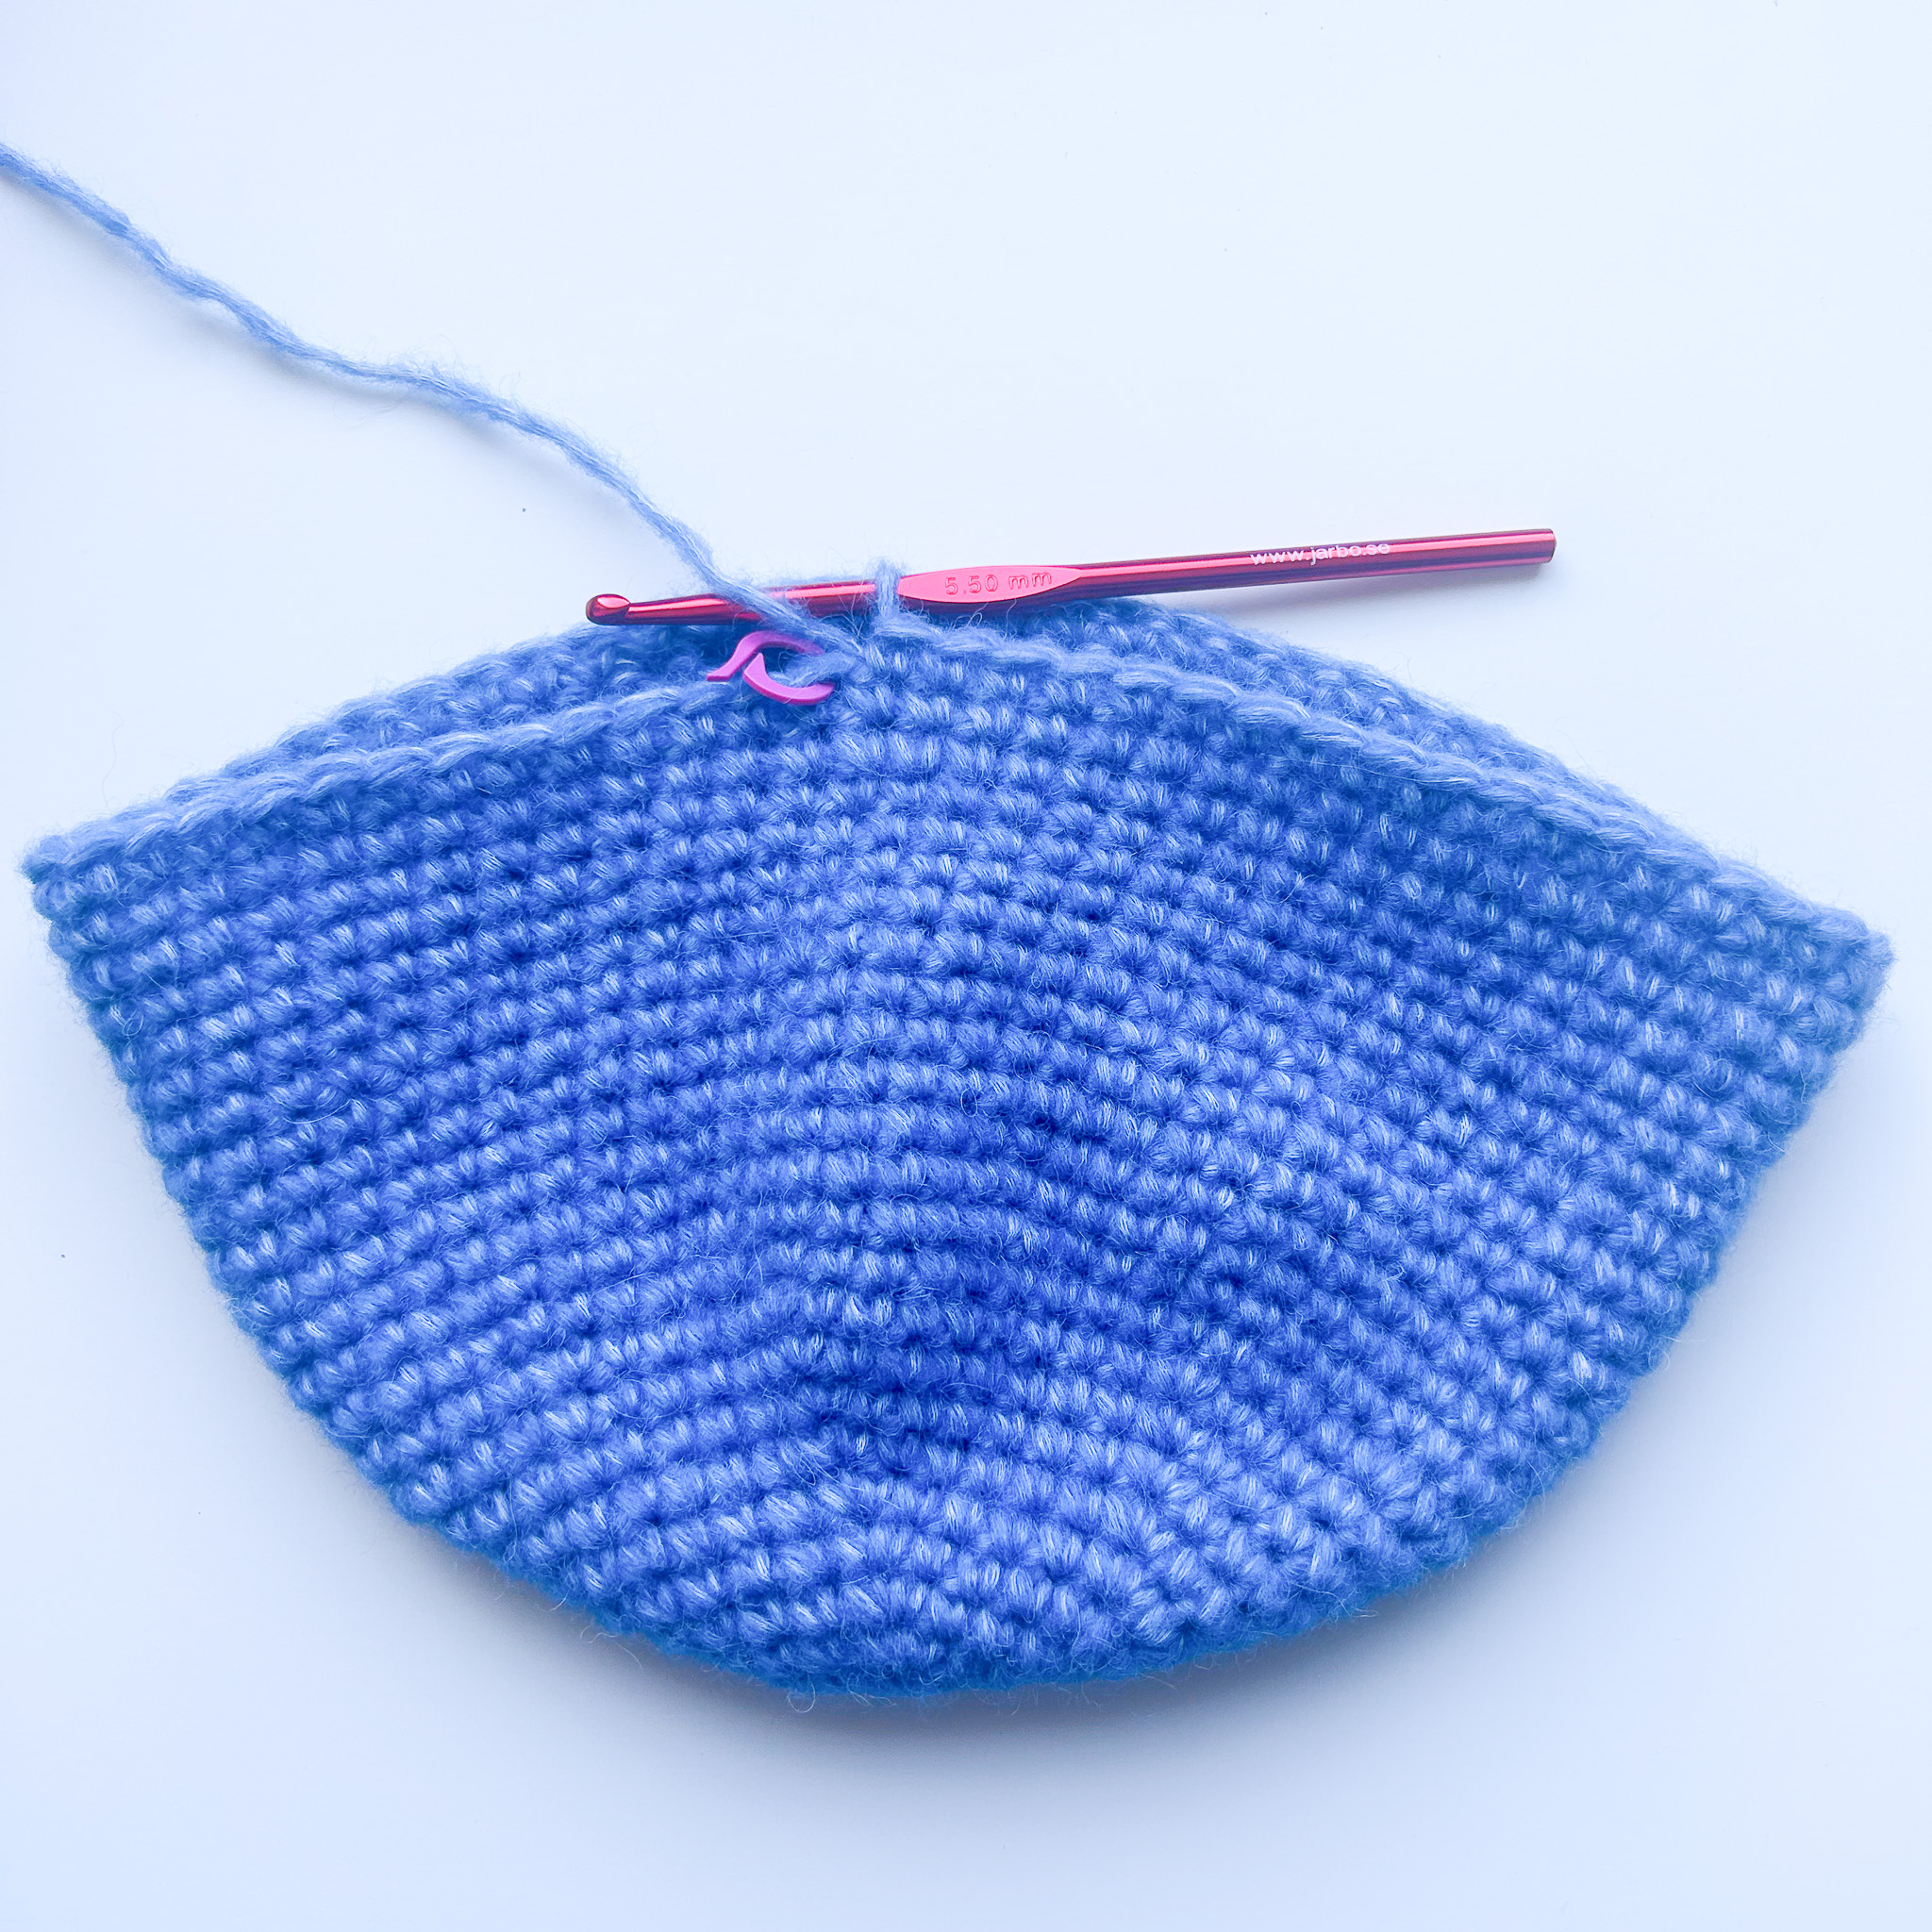
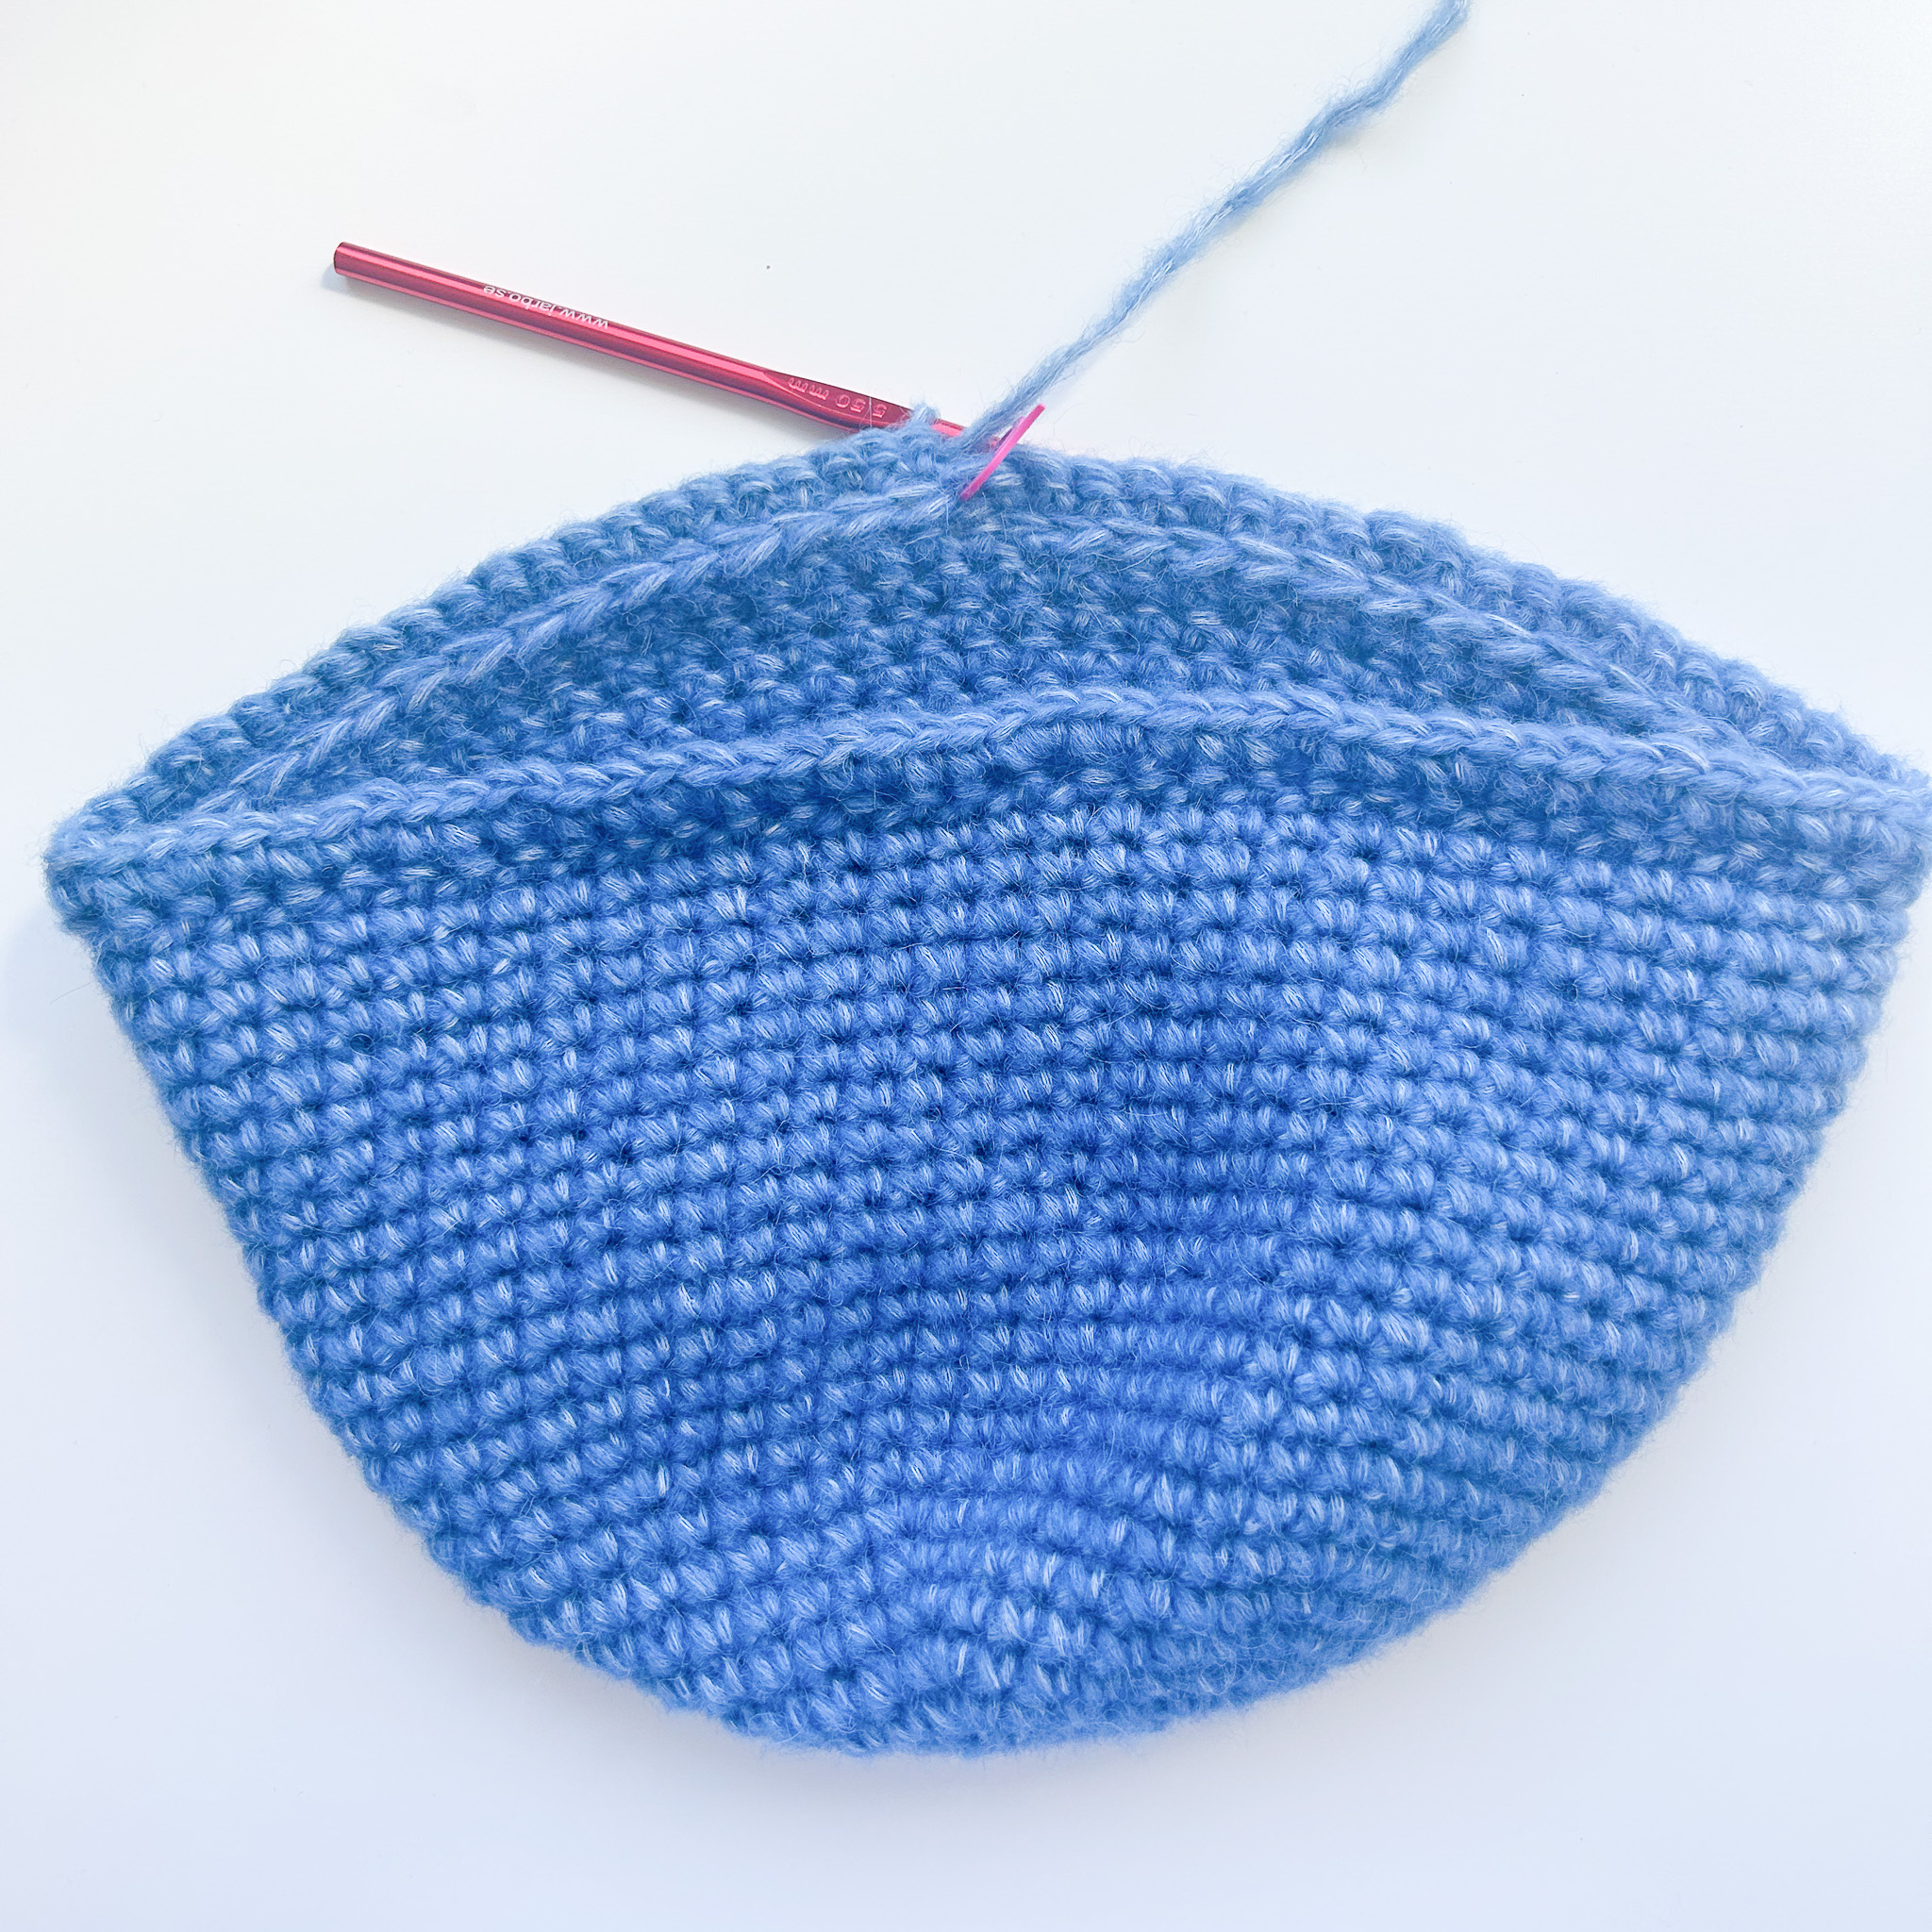
Rounds 13-25: The top of the hat is now complete, and we will start crocheting the sides. Continue working rounds of single crochets without any increases. Work a total of 13 rounds. Remember to move the stitch marker so it always sits in the first stitch of each round. Adjust the number of rounds to change the length of the hat. The brim should reach roughly the top of your ears. Total 66 stitches.
The next two rounds are to create the slightly flared brim of the hat, and there are two options depending on whether you want to make a defined edge or not.
You can either continue with only single crochets and skip the edge (Option 1), or you can make one round of yarn-over slip stitches first, which creates a nice border marking where the brim begins (Option 2). The second option is a bit more challenging but looks really nice!
Option 1
Round 26/1: Crochet one more round of single crochets without increases.
Round 27/1: Then, on the next round, start increasing for the brim. Make an increase of single crochets in every third stitch until you return to the marker. Total 88 stitches. You can add more increases if you want a more flared brim. Then continue from step 12.
Option 2:
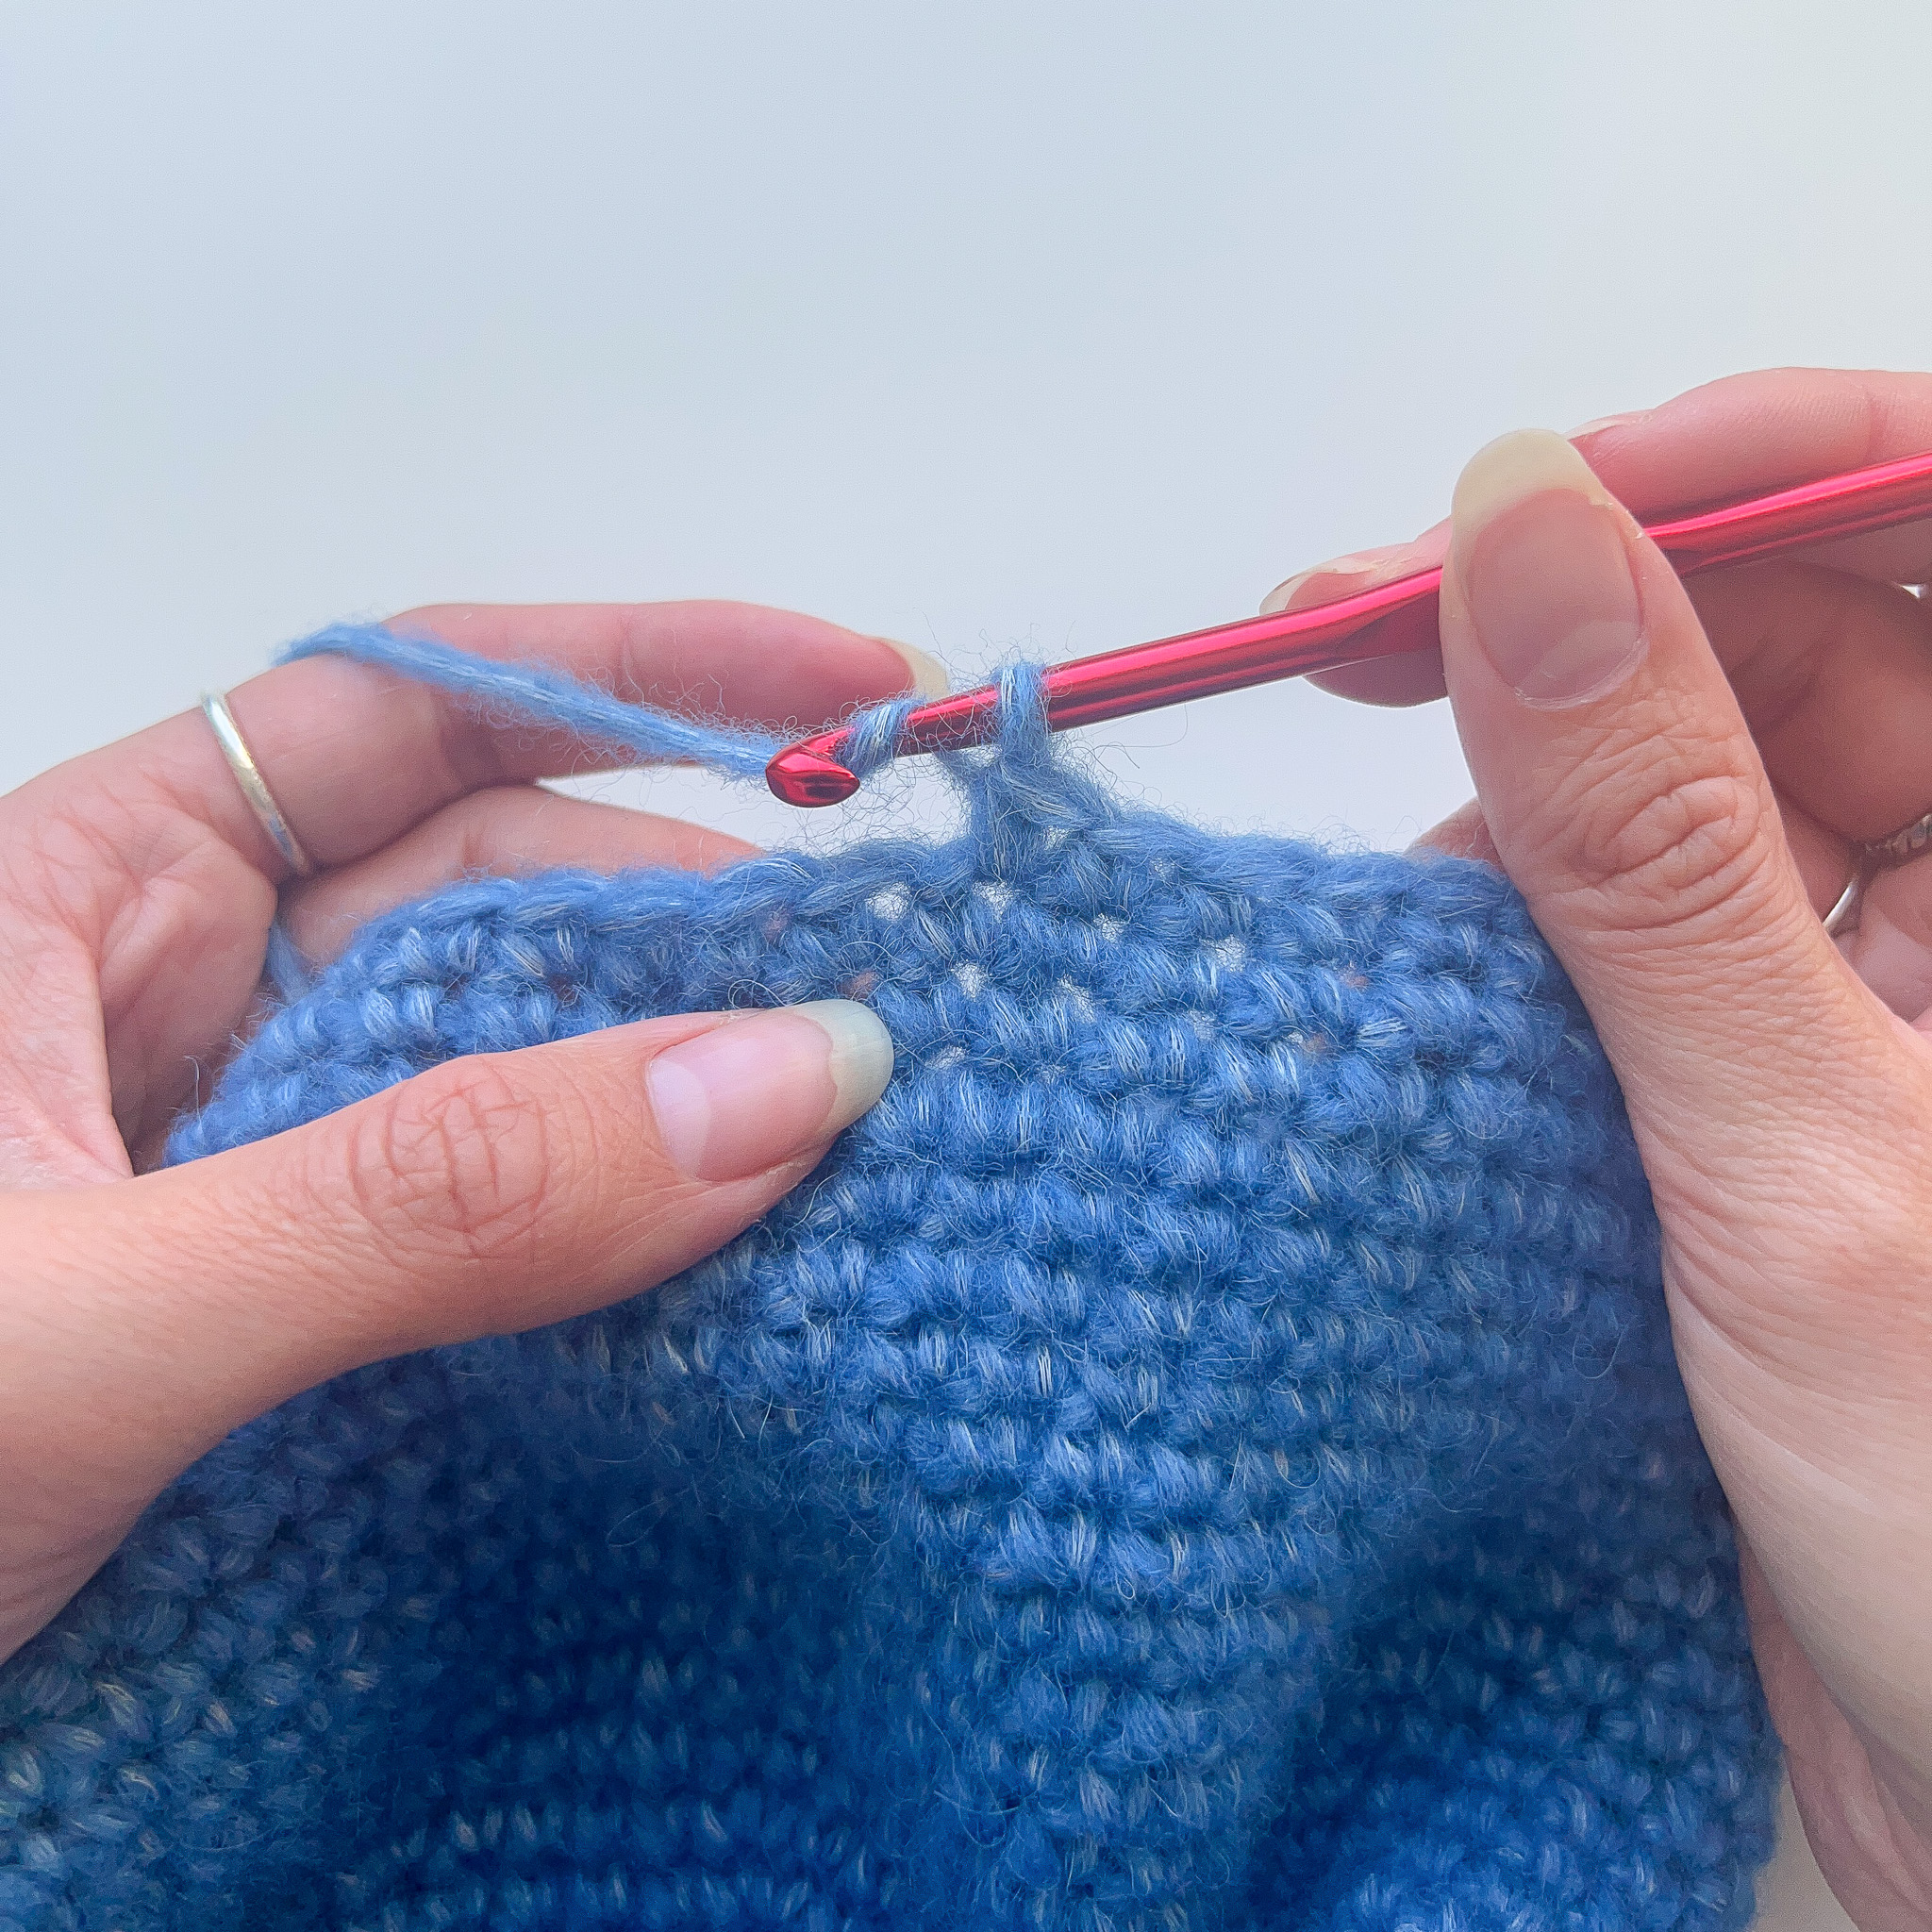
We will now make one round of “yarn-over slip stitches,” which is exactly what it sounds like: a regular slip stitch but with a yarn over first.
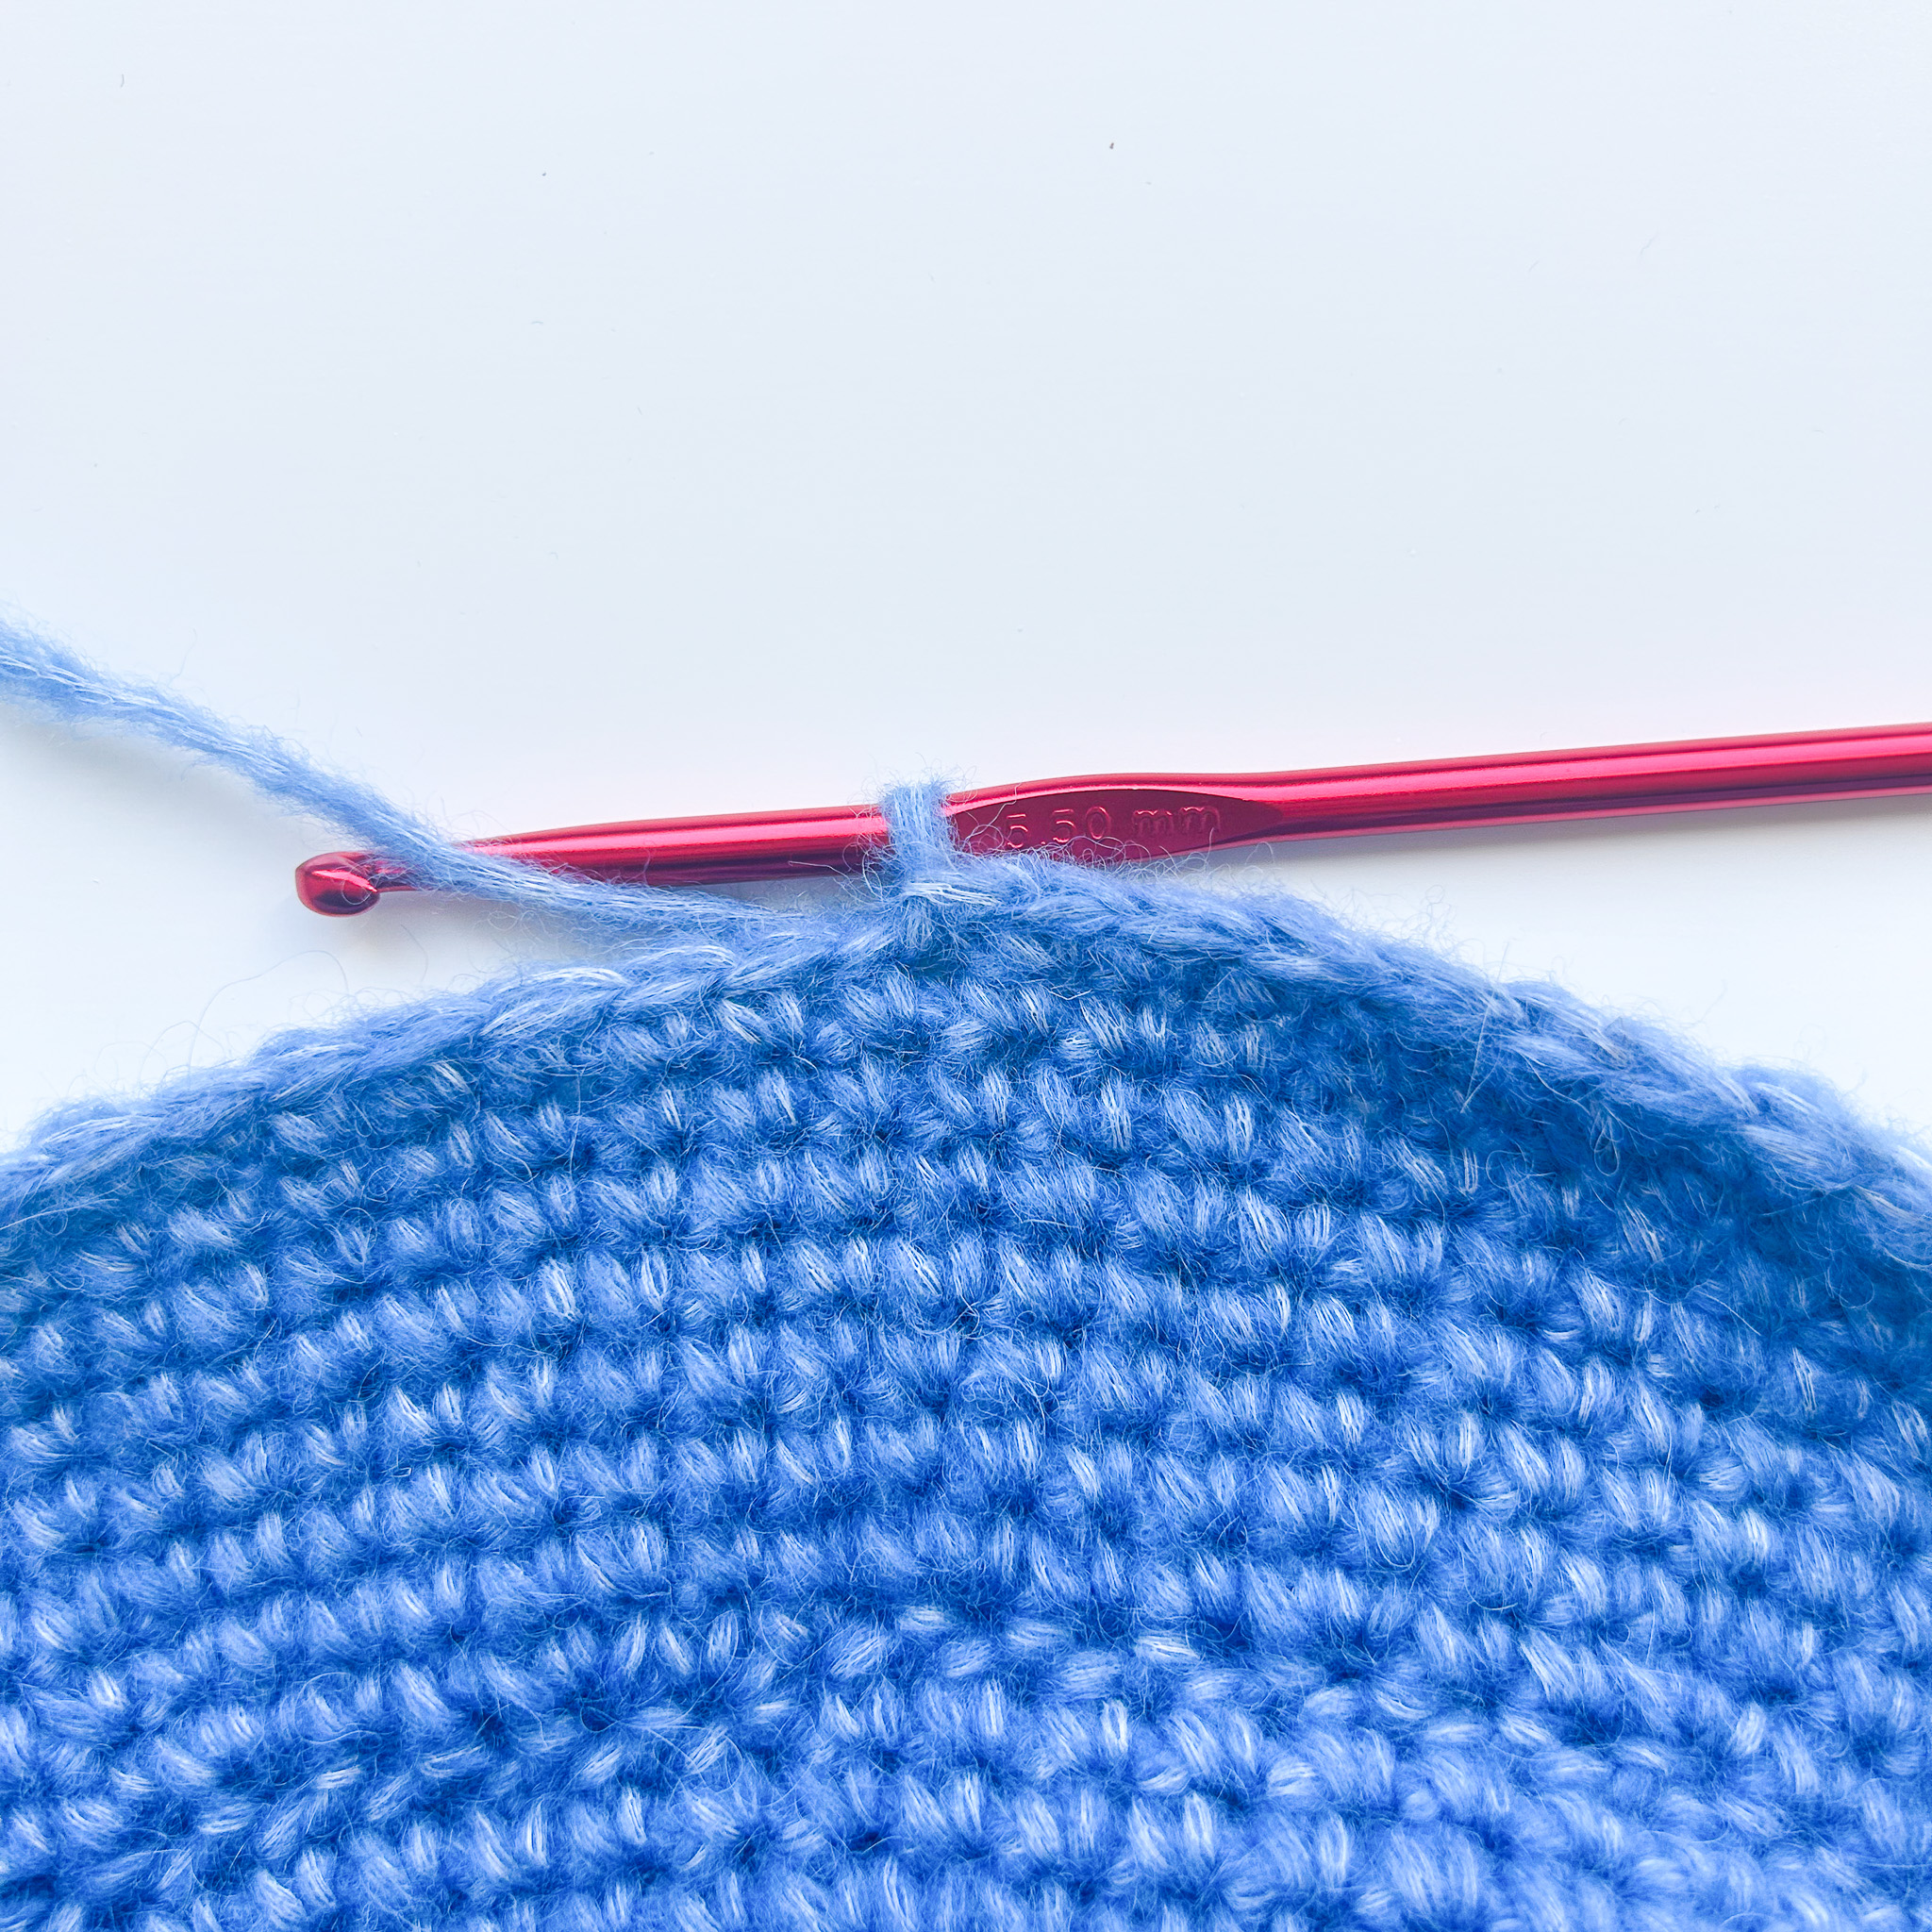
Round 26/2: Start by making a yarn over (wrap the yarn around the hook once), then insert the hook into the first stitch, yarn over again and pull up a loop (you now have three loops on the hook). Pull through the two inner loops so that only one loop remains on the hook. This is a yarn-over slip stitch. If you want to see a video on this (Yarn Over Slip Stitch), see the video below.
Repeat.

Round 27/2: On the next round, we will start increasing for the brim and return to working single crochets. However, you won’t insert the hook through the whole stitch as usual — instead, you will insert it only through the front loop of the stitch. This is the loop closest to you if you have the wrong side of the hat facing outwards (as shown in my pictures).
Work single crochets in the front loop of every stitch around the round, making an increase in every third stitch until you reach the marker.
On the wrong side, you should see a nice “braided” edge. Total 88 stitches.
You can make more increases for an even wider brim. Then continue with step 12. If you're unsure which is the front loop only, see the video below.
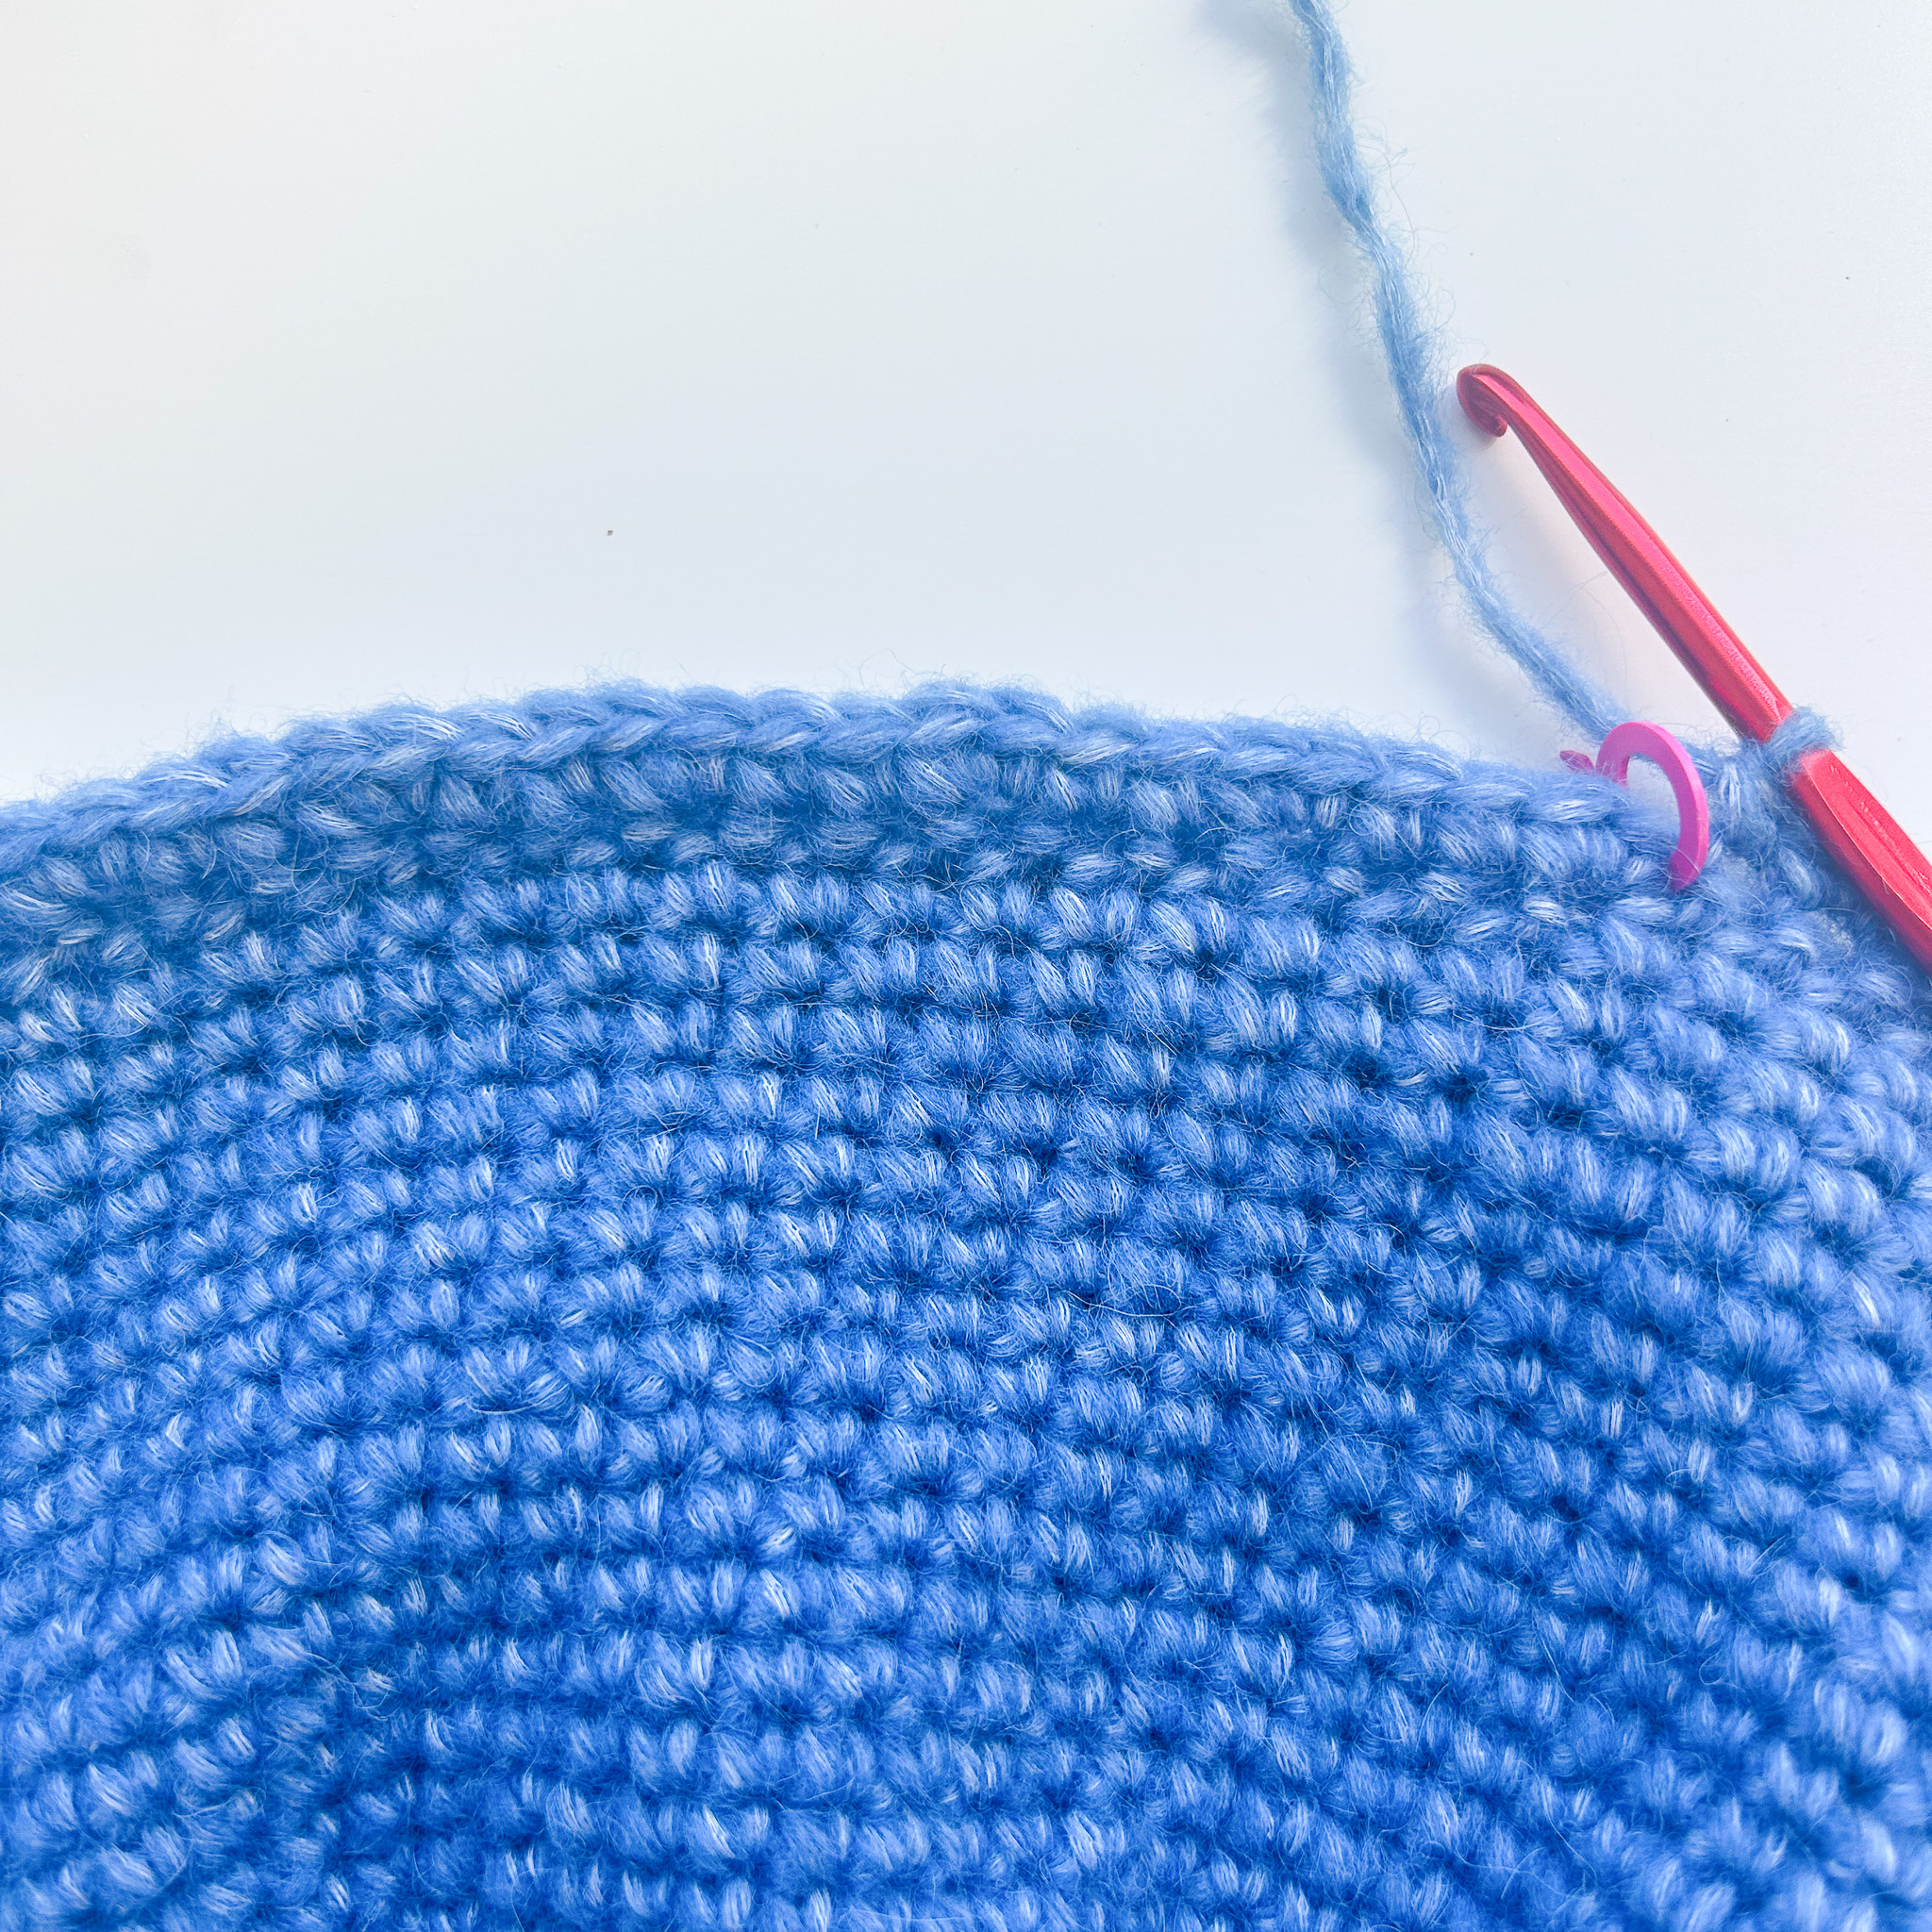
Rounds 29–35: Crochet 1 sc in each sc from the previous round. Repeat this until you have made 7 rounds on the brim, or until you are happy with the brim’s length.
Make a slip stitch into the stitch with the marker.
Then cut the yarn and pull it through the loop, tightening it to make a knot.
If you’re unsure how to crochet a slip stitch, see the video below.
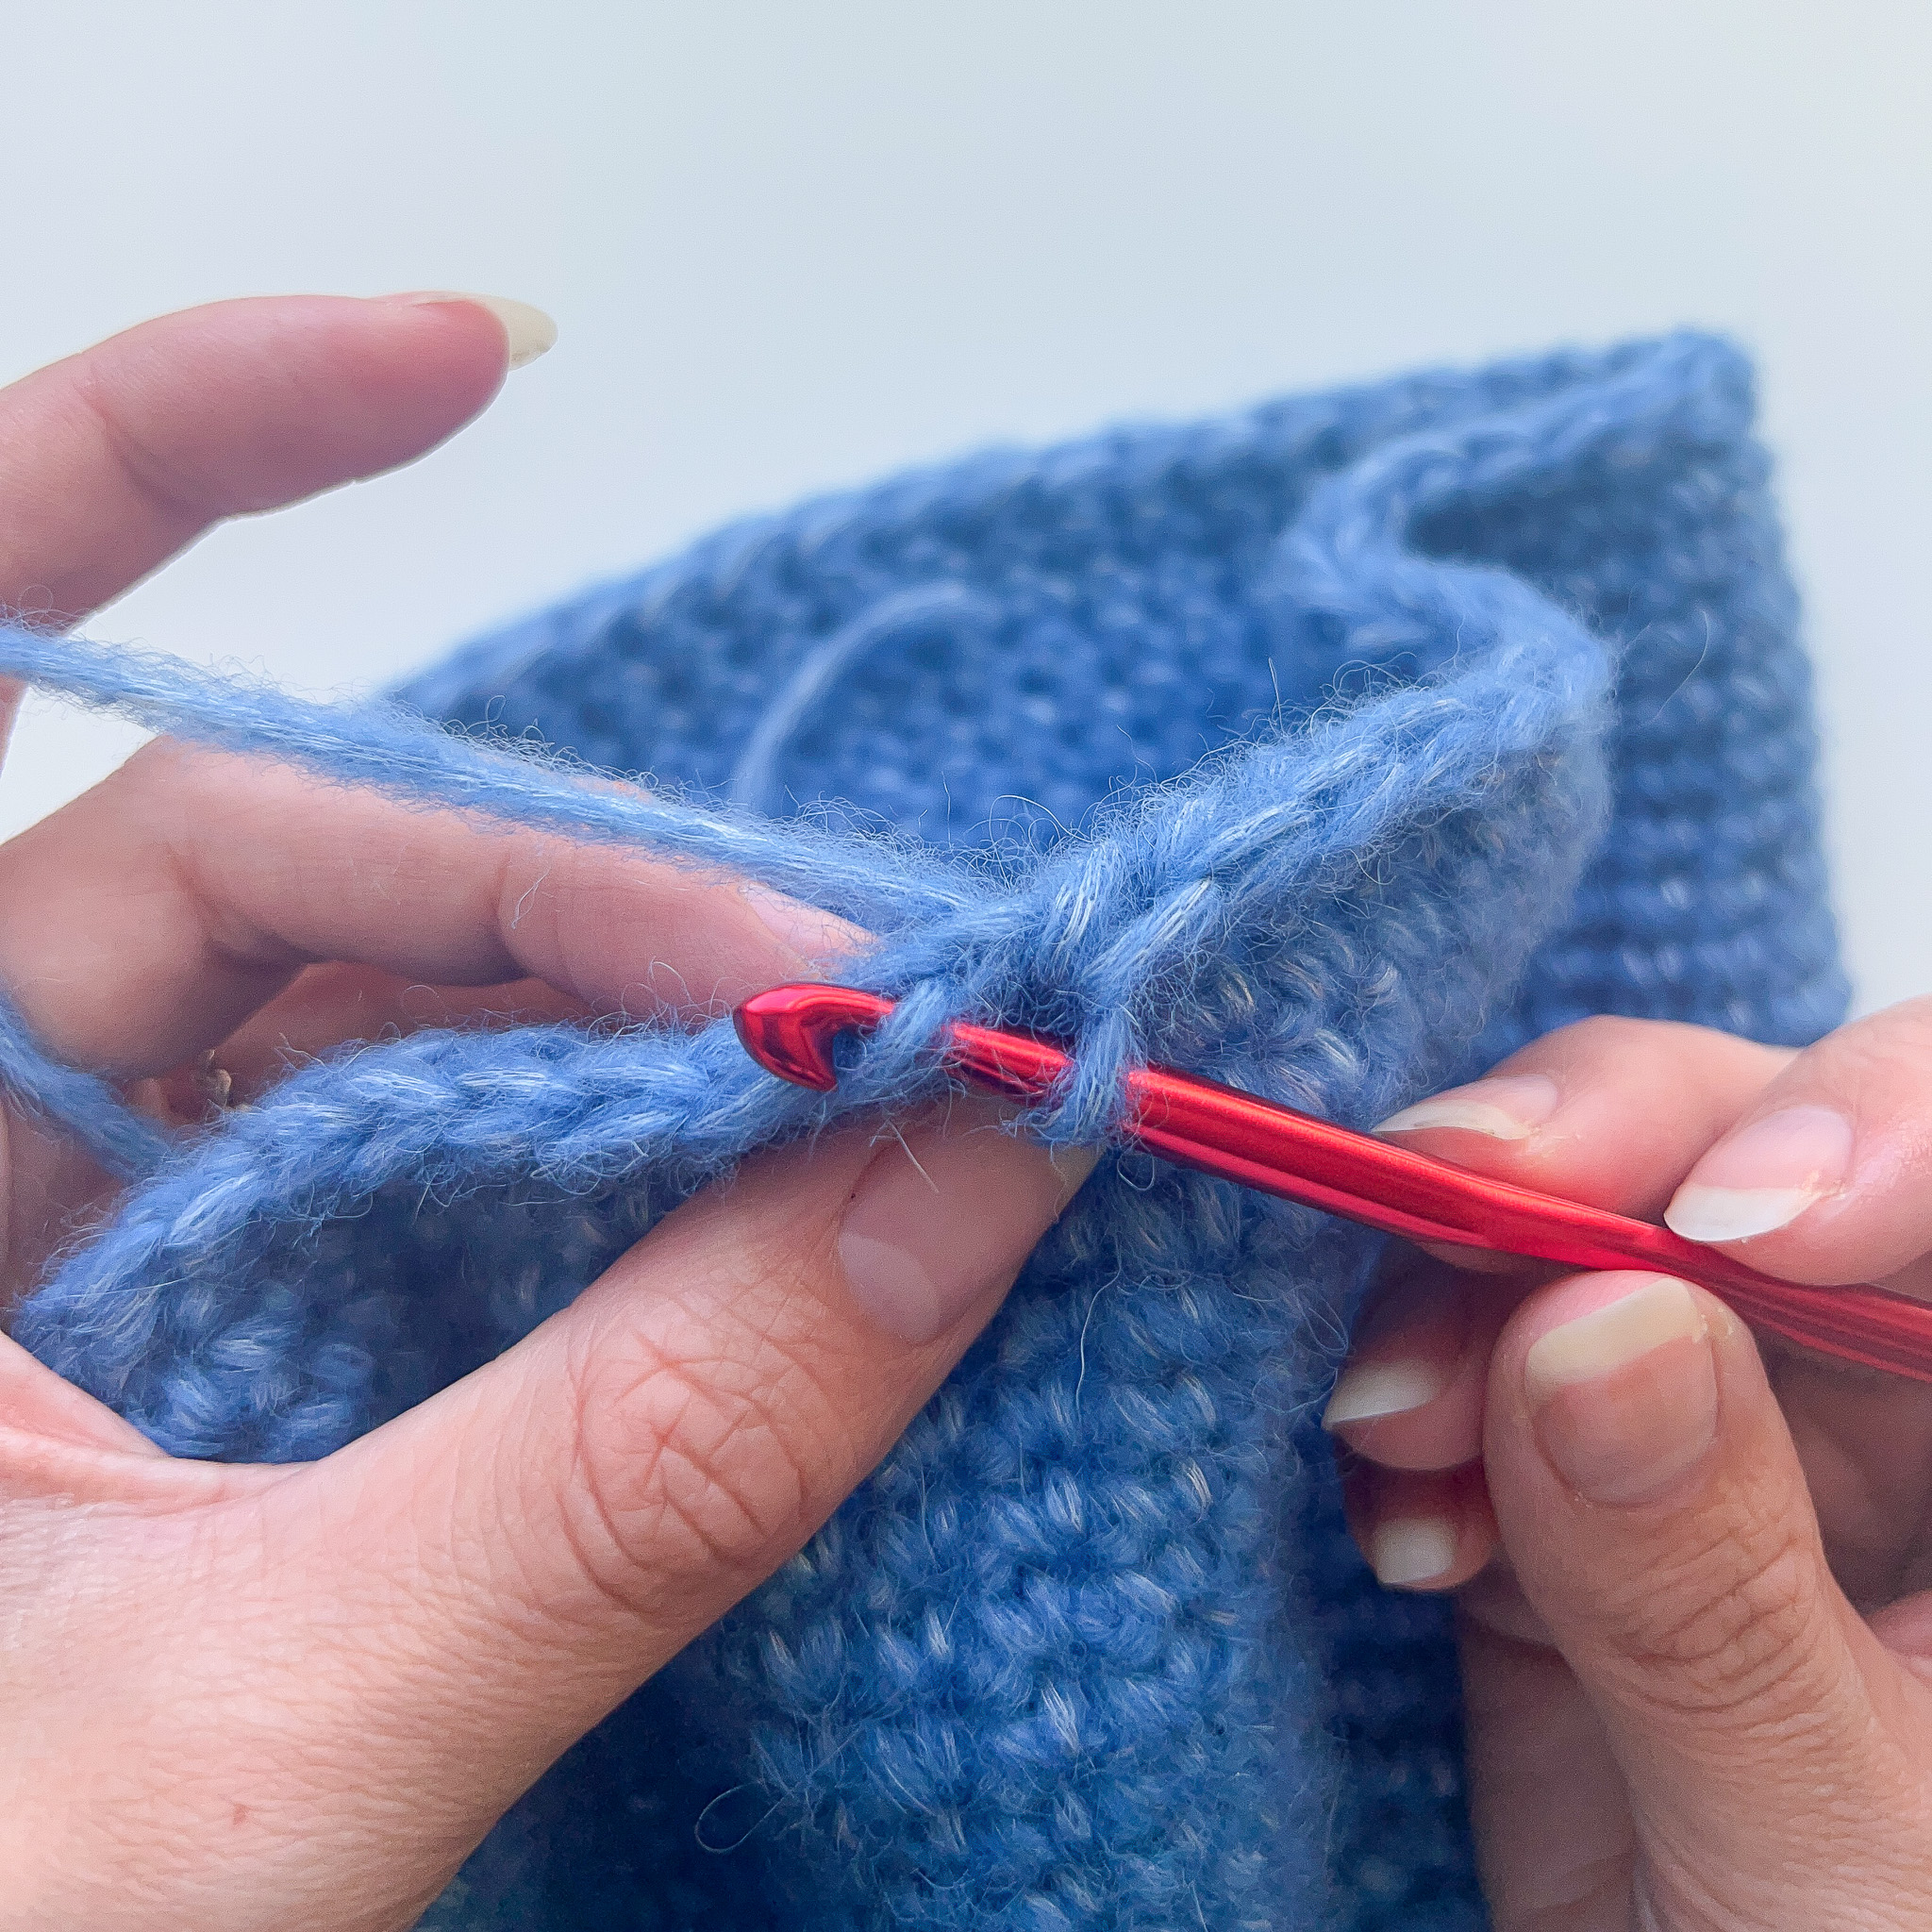
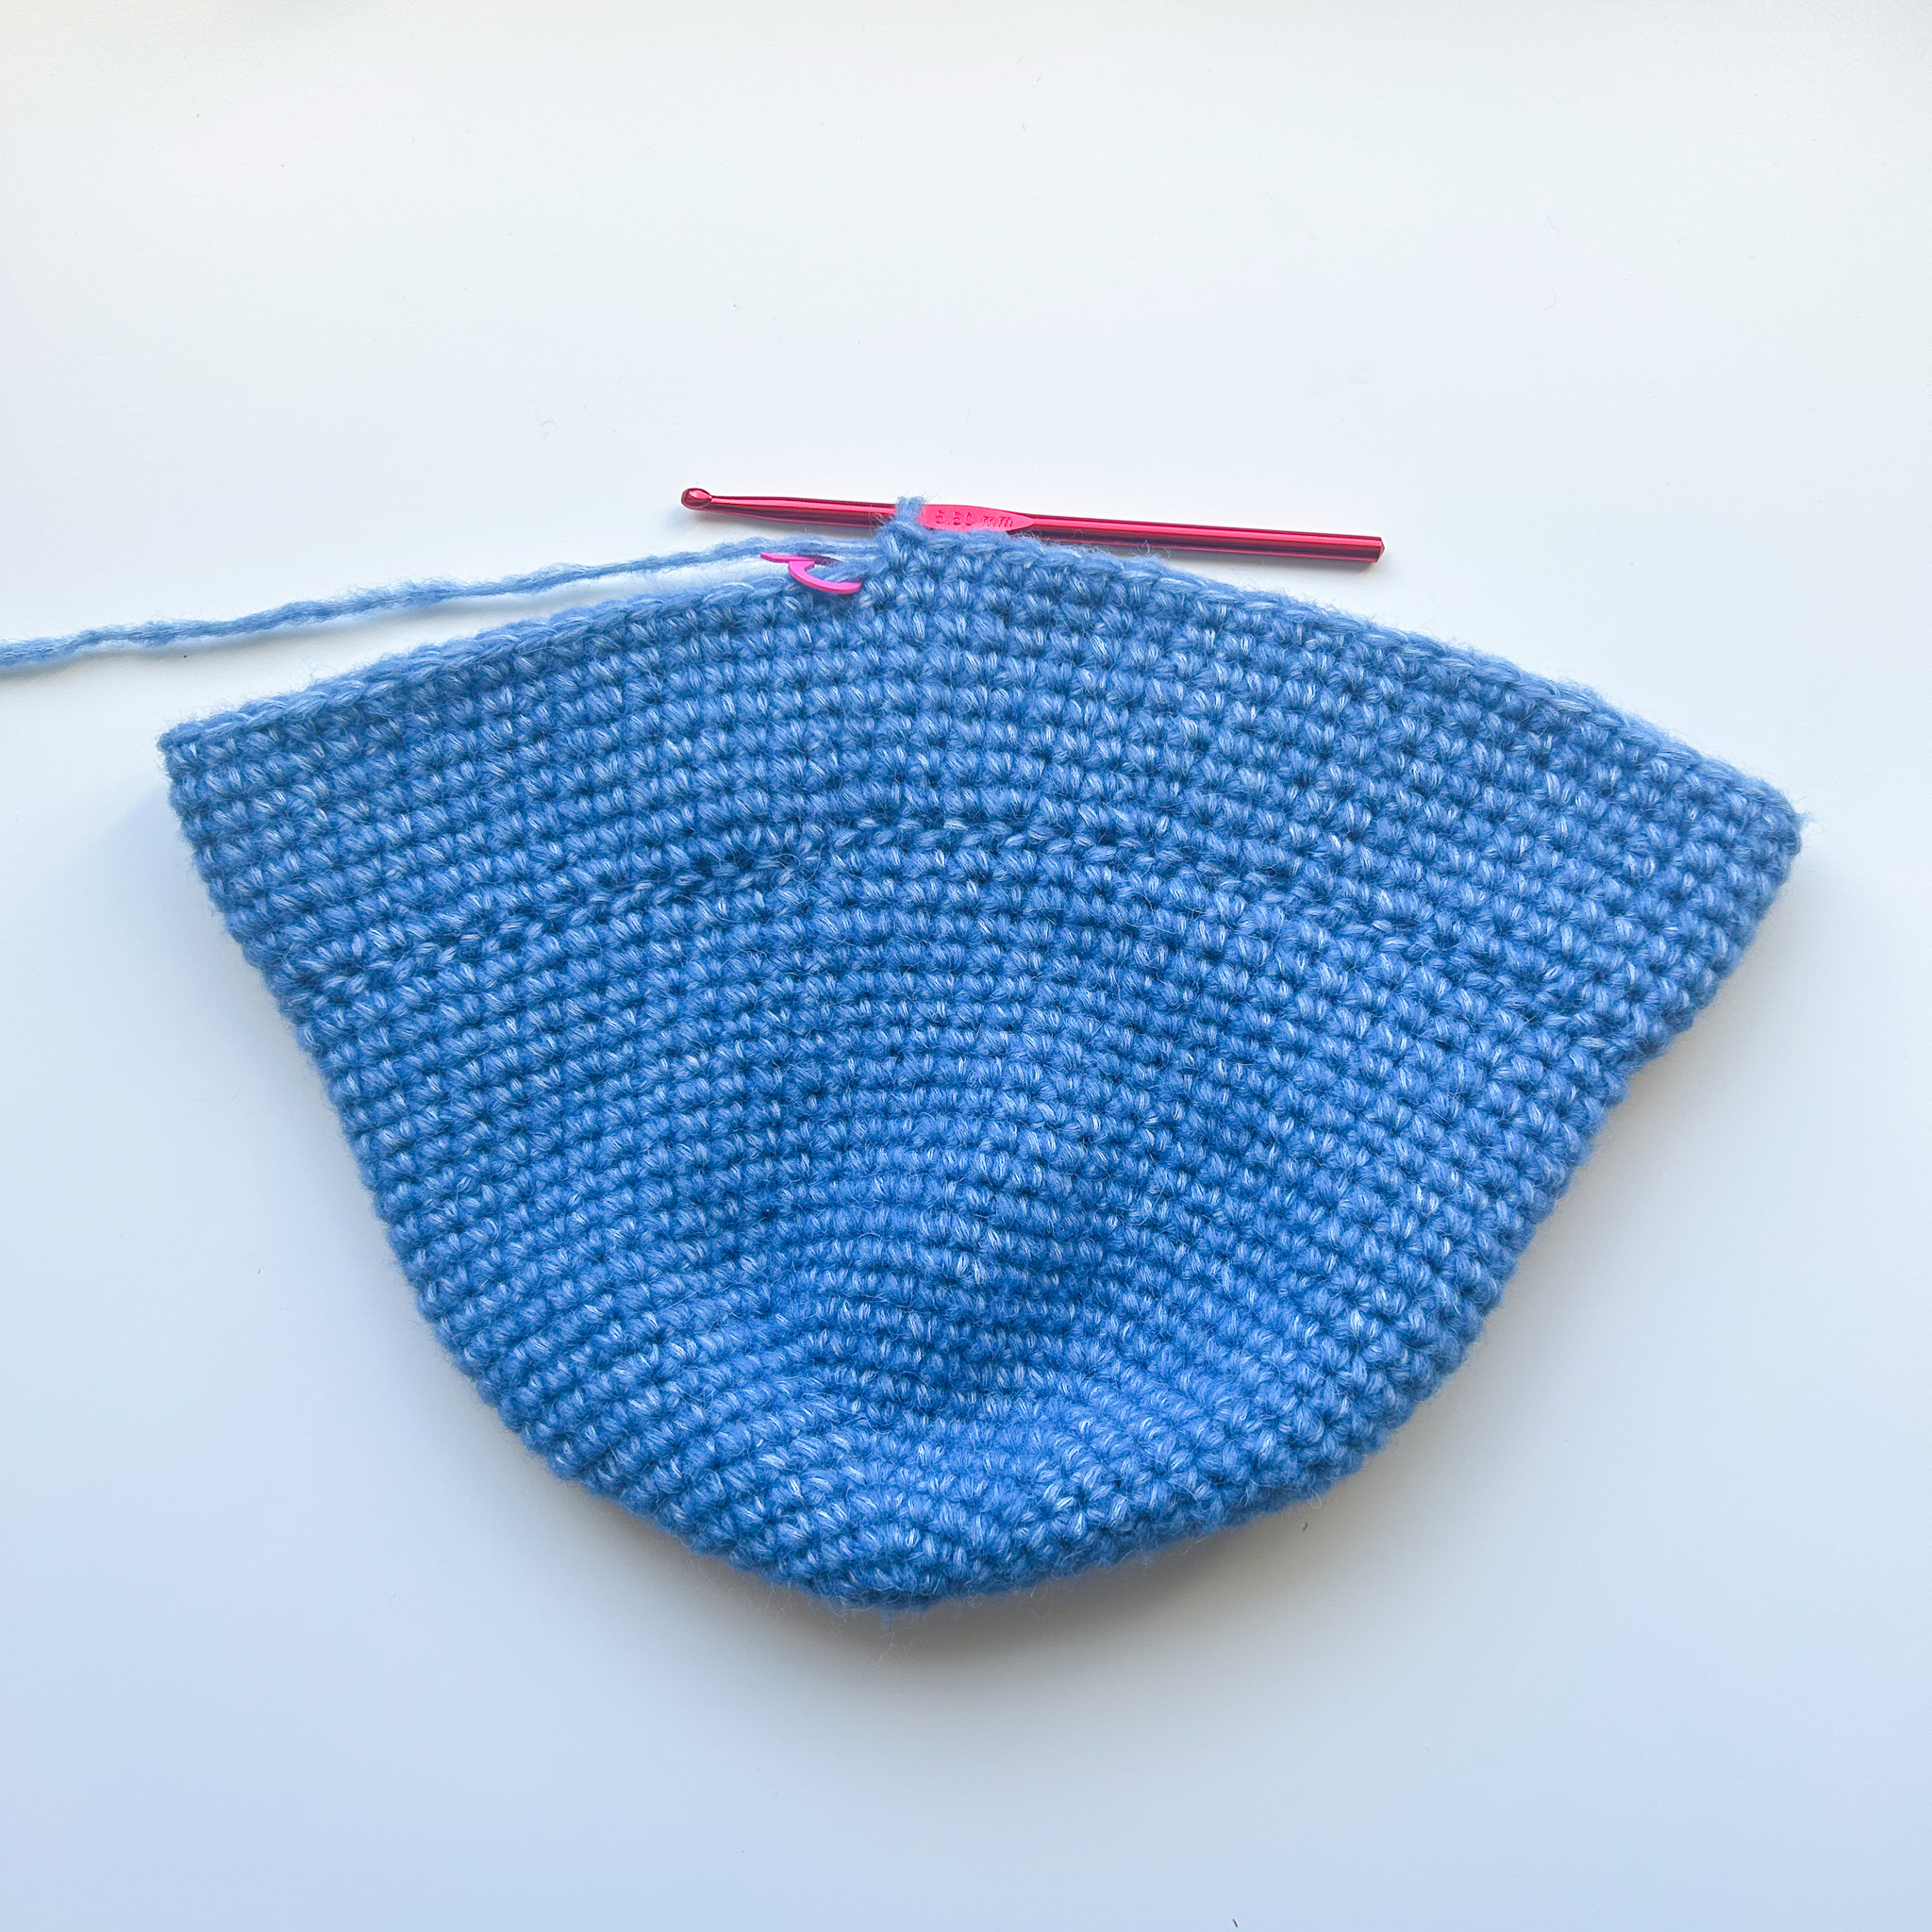
Great job! You’ve now finished the crocheted part of the hat! The final step is to secure all your yarn ends by weaving them in. If you’re unsure how to fasten off your yarn ends, watch the video below.
After that, take a brush or comb and start brushing out the right side of the hat. This will make it really fluffy and soft! Brush in short but firm strokes all over the hat until you’re happy with the fluffiness.

Abbreviations
Below is the pattern with abbreviations. If you need help along the way, see the simpler version.
MR = magic ring
st = stitch
ch = chain
sl st= slip stitch
sc = single crochet
hst = half double crochet
bmb = back loop only
inc= increase
(…) = indicates the number of stitches in the current round
*...* = repeat everything inside ... the indicated number of times
[...] = everything inside [...] is worked into the same stitch
Round 1: Make a MR. Crochet 6 sc in the ring and pull the tail to close it. (6)
Always place your marker in the first stitch of the round so you know where it starts/ends.
Round 2: Inc x6 (12)
Round 3: *1 sc, inc* x6 (18)
Round 4: *2 sc, inc* x6 (24)
Round 5: *3 sc, inc* x6 (30)
Round 6: *4 sc, inc* x6 (36)
Round 7: *5 sc, inc* x6 (42)
Round 8: *6 sc, inc* x6 (48)
Round 9: *7 sc, inc* x6 (54)
Round 10: *8 sc, inc* x6 (60)
Make more or fewer rounds to adjust the width of the hat.
Keep moving the stitch marker to the first stitch of each new round.
We will now do a total of 3 increases over the next two rounds.
Round 11: Sc all around and increase in stitch #5, #25, and #45. Total 63 sts. Or, if you have made more/fewer rounds than 10, place these 3 increases evenly spaced.
Round 12: Sc all around and increase in stitch #16, #37, and #58. Total 66 sts. Or, if you made more/fewer rounds than 10 at step 7, place these 3 increases evenly spaced.
The top of the hat is now complete and we will start crocheting the sides.
Rounds 13-25: Continue with rounds of 1 sc in each st, i.e., no increases. Work a total of 13 rounds. Make more/fewer rounds to adjust the length of the hat.The brim should reach roughly to the top of your ears. (66 sts)
The next two rounds are to create the slightly flared brim of the hat, and here you have two options depending on whether you want a defined edge or not.
You can either continue with just sc and skip the edging (Option 1), or you can do a round of yarn-over slip stitches first, which creates a nice edge marking where the brim starts (Option 2). The second option is a bit trickier but looks really beautiful!
Option 1:
Round 26/1: Work one more round of sc without increases (66 sts)
Round 27/1: Now it’s time to increase for the brim. Make an increase by working 2 sc in every 3rd st (88 sts)
You can do more increases for an even more flared brim.
Option 2:
Round 26/2: We will now work one round of “yarn-over slip stitches,” which is exactly as it sounds — a regular slip stitch but with an extra yarn over first. Do this in every stitch from the previous round.
Round 27/2: Now we’ll start increasing for the brim and switch back to working sc. However, instead of inserting the hook through the whole stitch as usual, insert it only into the front loop.
Work sc in the front loop of every stitch around, making an increase by working 2 sc in every 3rd stitch until you reach the marker. On the wrong side, you should see a nice “braided” edge. (88 sts)
You can make more increases for an even more flared brim. Then continue with step 12.
Rounds 28–34: Work 1 sc in each stitch. Repeat until you have worked 7 rounds on the brim or until you are satisfied with the brim length.
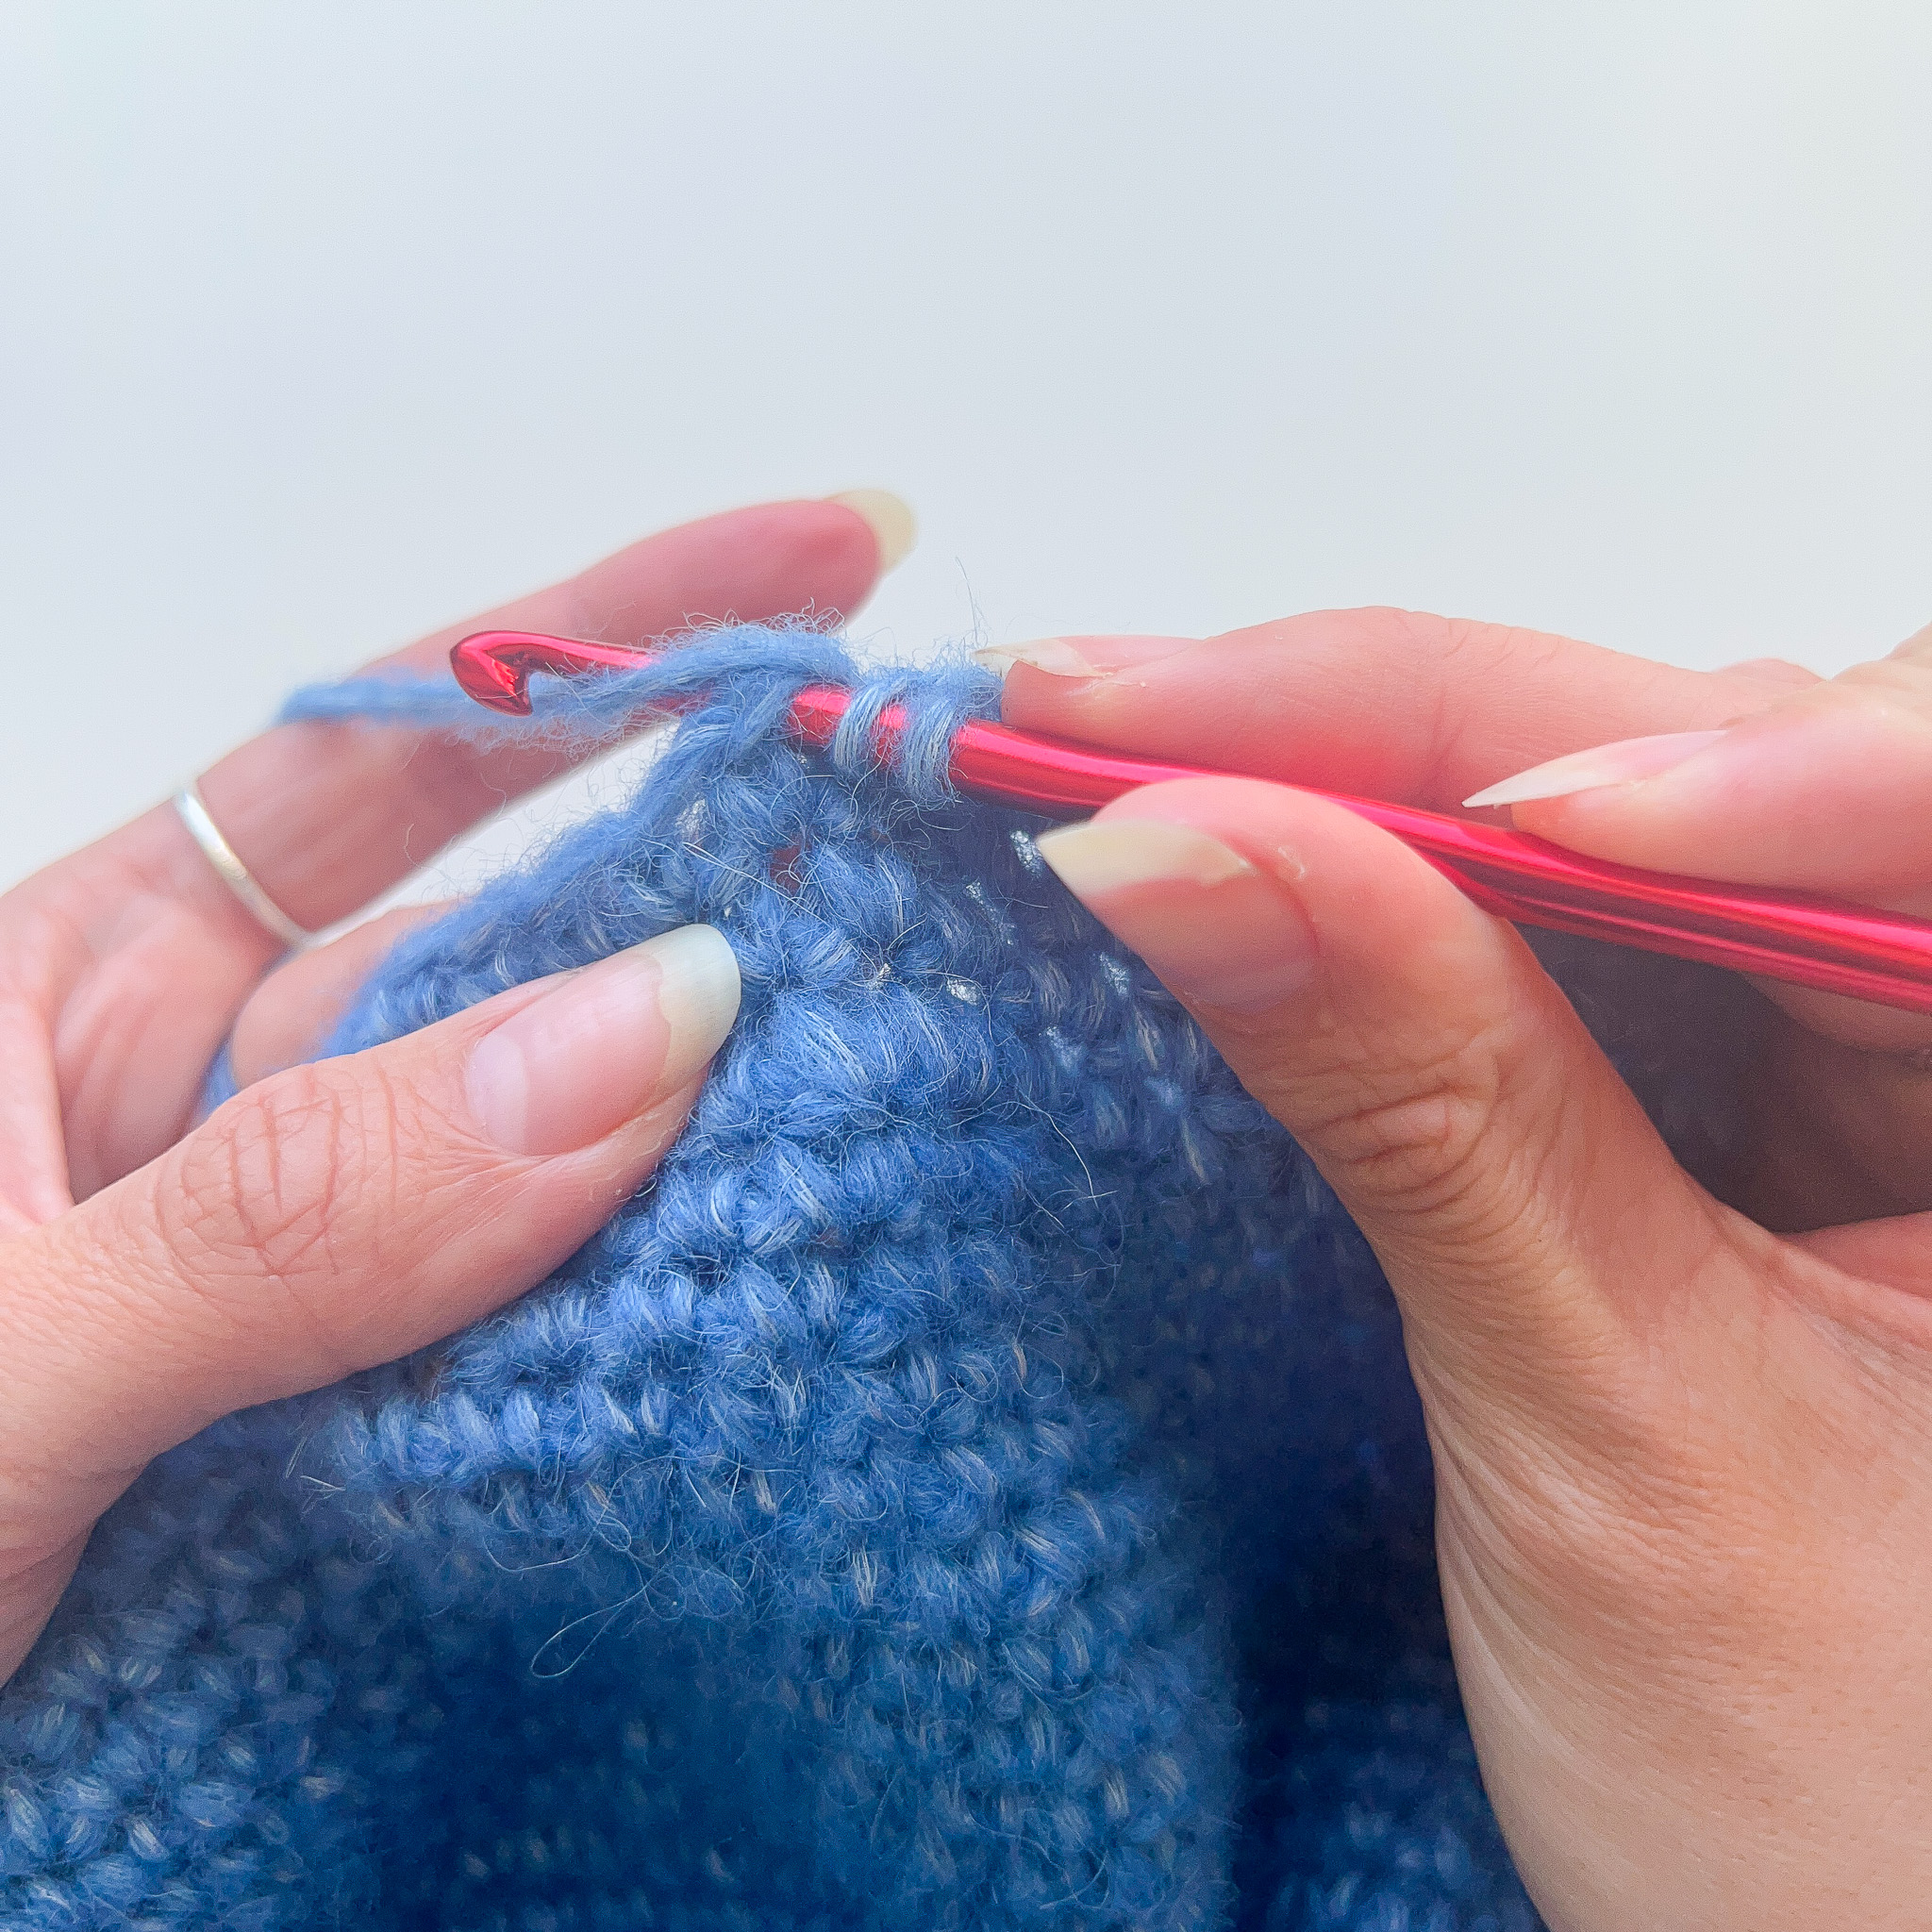
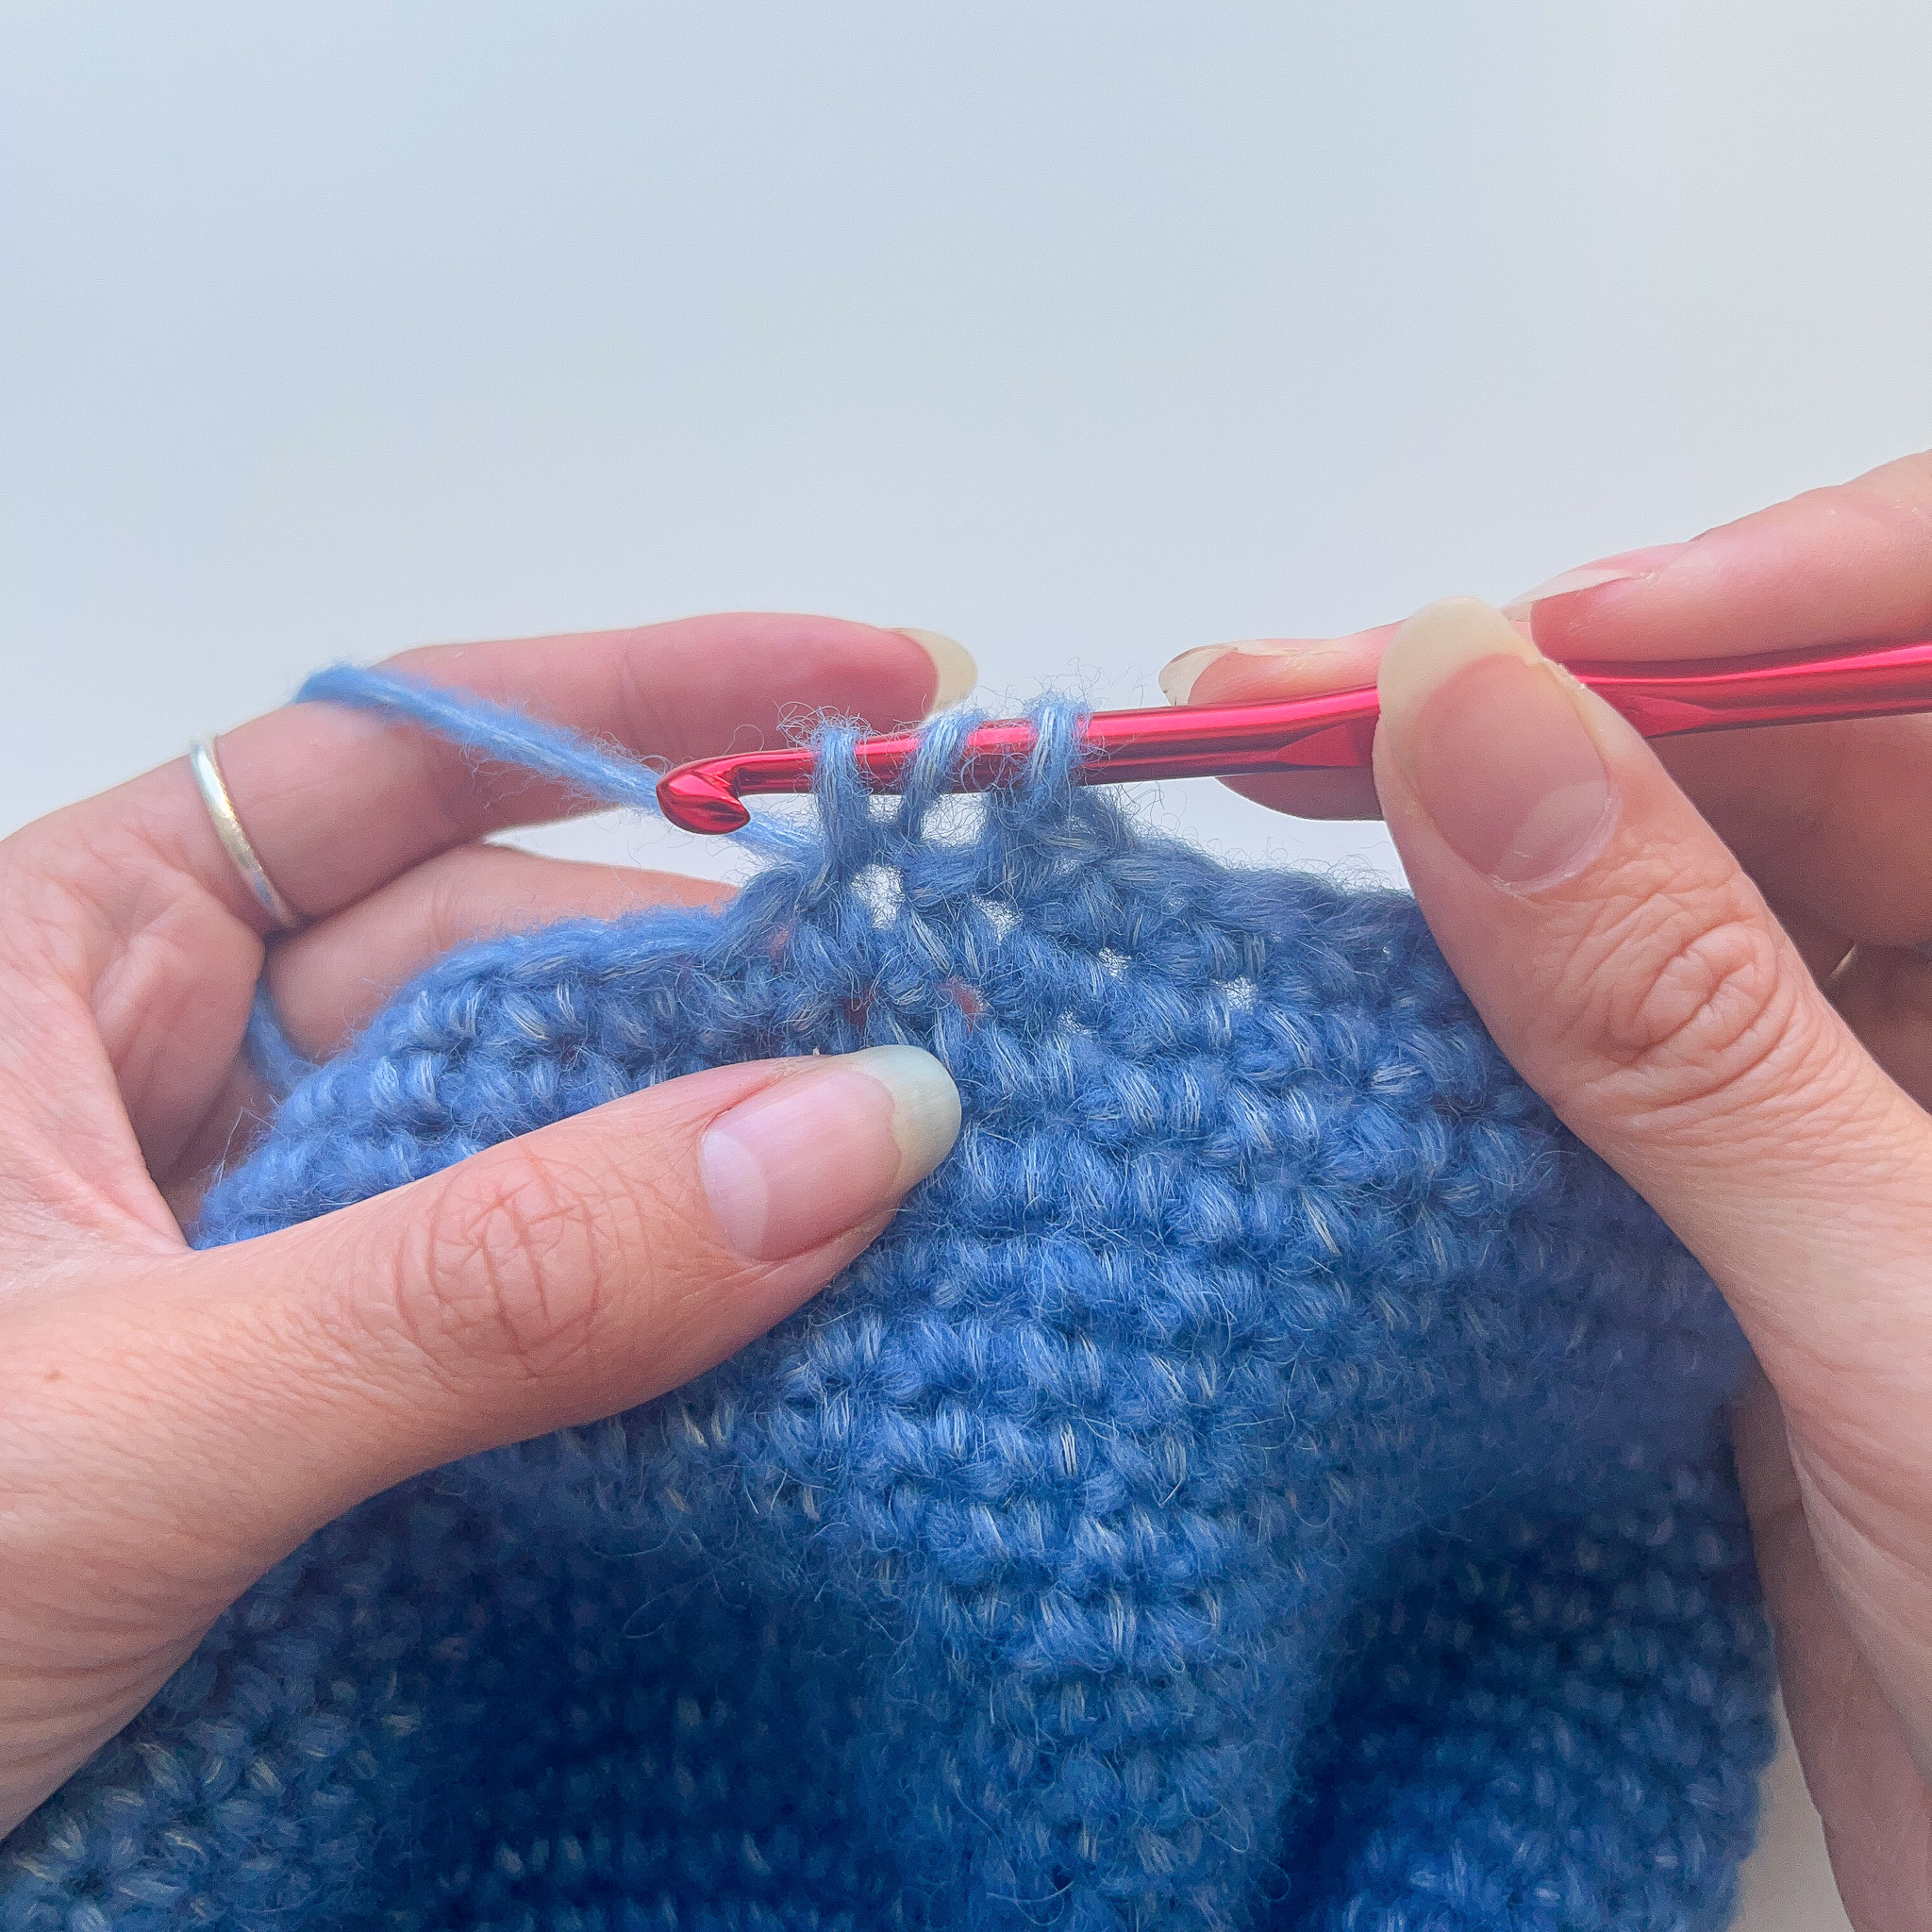
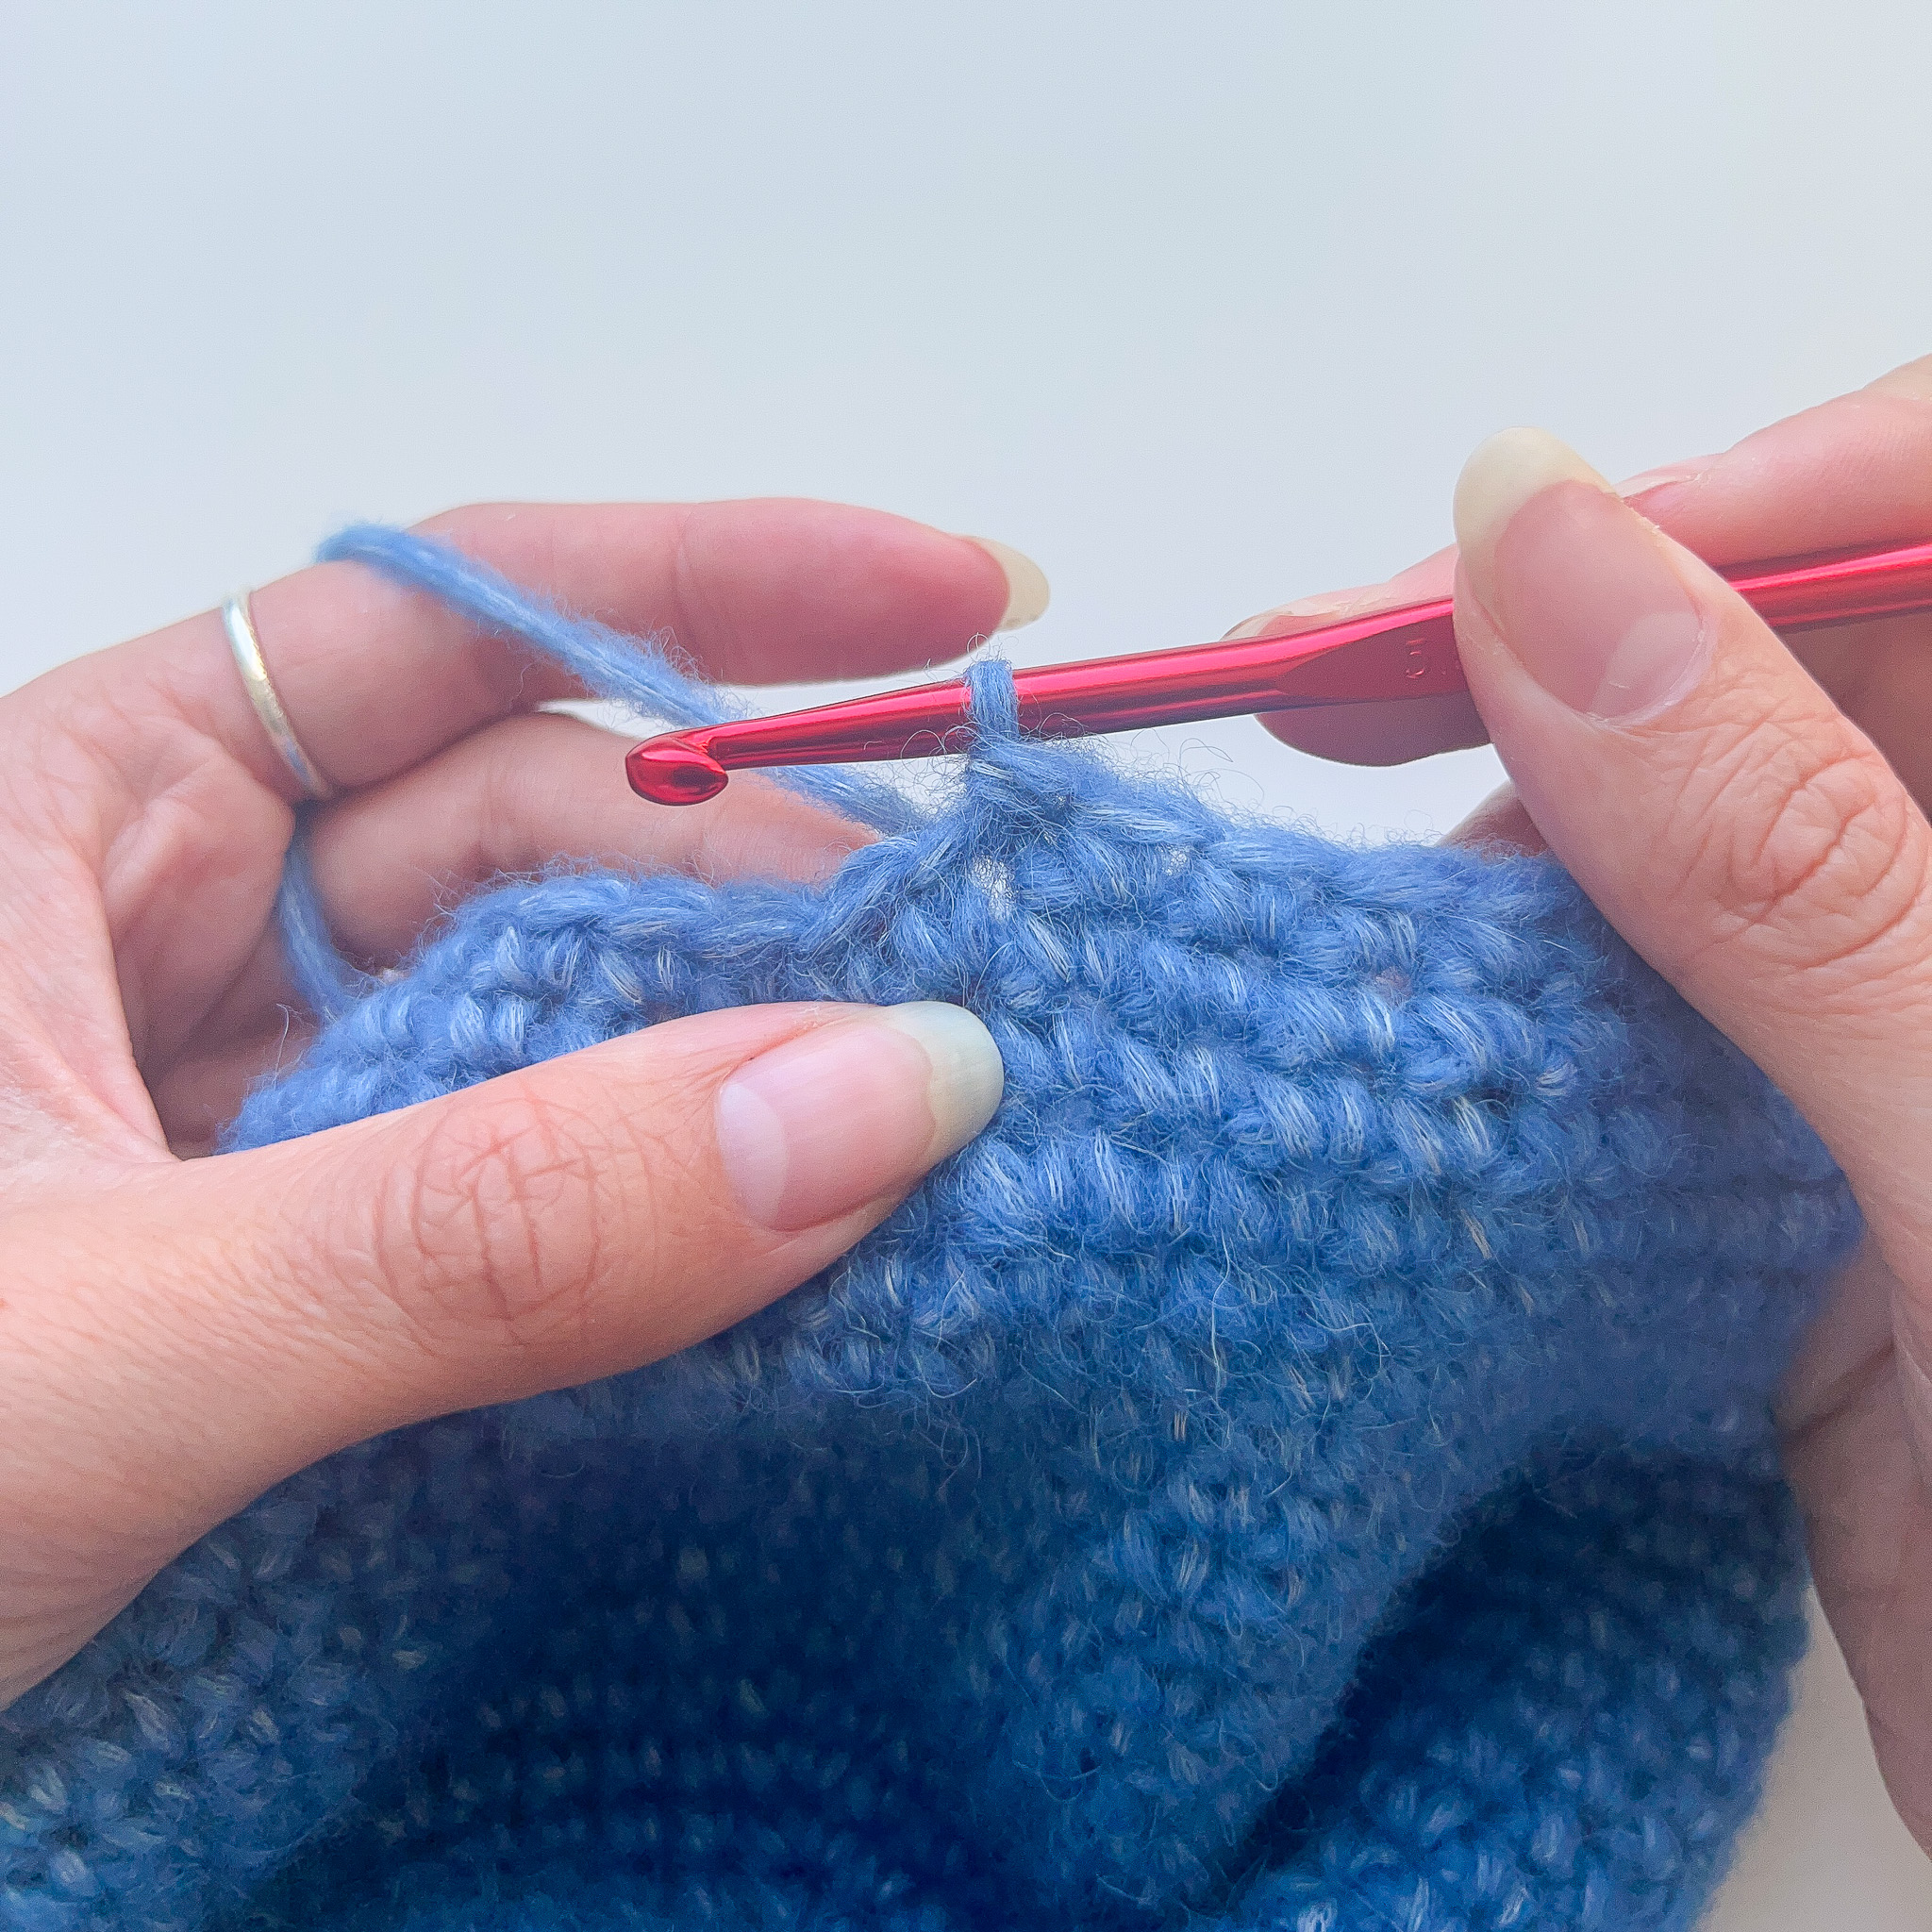
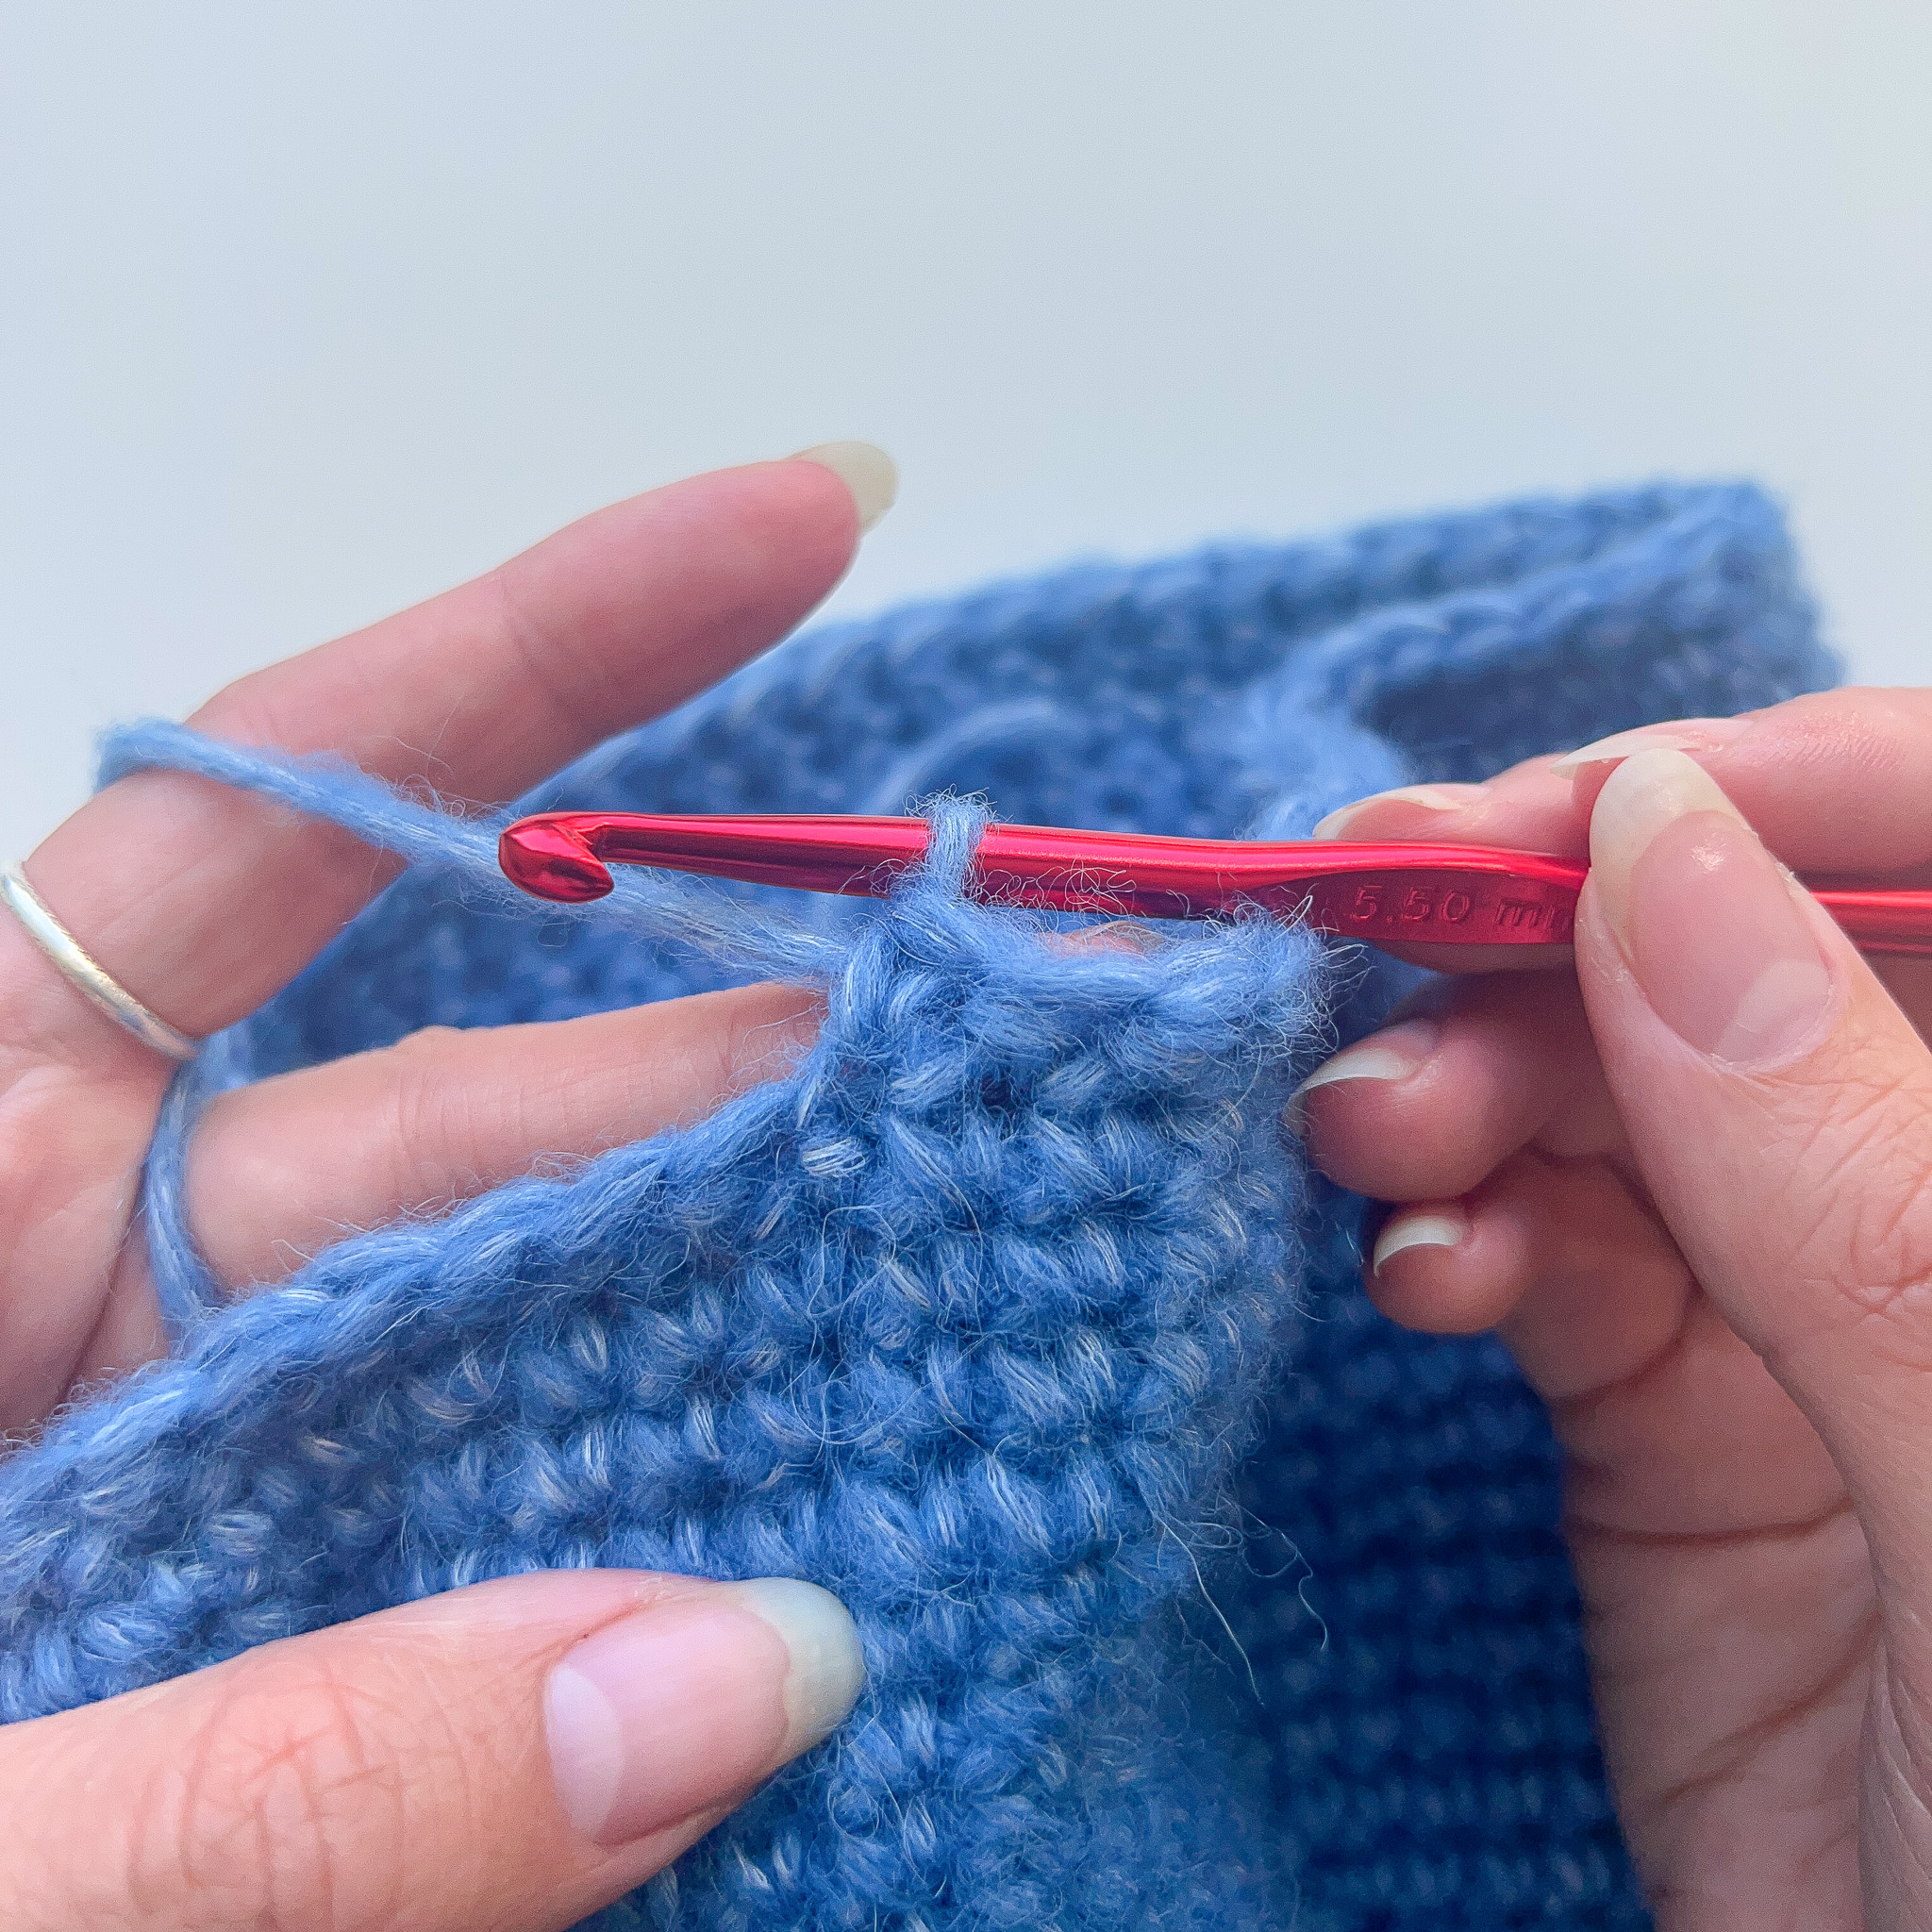
Slip stitch in the first stitch, cut the yarn, and pull through.
Well done! You have now finished the crocheted part of the hat! The second-to-last step is to secure all the yarn ends by weaving them in with a tapestry needle.
The final step is to take a brush or comb and start brushing out the right side of the hat. This will make it really fluffy and soft! Brush in short but firm strokes all over the hat until you’re happy with the fluffiness.
The rights to this pattern belong to MYO Make Your Own. The pattern or its pictures may not be copied, shared or resold either in parts or in its entirety, but you may sell items you have crocheted from this pattern. If you have questions about the pattern, contact MYO at hello@makeyourown.se.
Start: Make a “magic ring” by wrapping the yarn one and a half times around two fingers, creating an “X” on top of your fingers. Insert the crochet hook under the upper right “leg” of the X and grab the upper left “leg.” Pull up a loop, yarn over (wrap the yarn around the hook once), and pull through the loop on your hook. Gently remove your fingers from the ring. You have now made a magic ring!
If you want to see a video on how to make a magic ring with single crochet, see the video below.
Round 1: Crochet 6 single crochets into the ring. Total 6 stitches.
Round 2: Crochet 2 single crochets in the first stitch you made (this is called an increase). Place a stitch marker in the first of these two stitches to keep track of the beginning of the round. Then continue with 2 single crochets in each remaining stitch until you reach the marker again. Total 12 stitches.
Round 3: Remove the marker, crochet 1 single crochet and place the marker in this new stitch. Then make 2 single crochets in the next stitch. Continue to increase in every other stitch until you reach the marker. Total 18 stitches.
Round 4: Just like the previous round, crochet 1 single crochet in the stitch with the marker and move the marker to this new stitch. Crochet 1 single crochet in the next stitch and 2 single crochets in the following stitch. Continue to increase in every third stitch until you reach the marker. Total 24 stitches.
Round 5: Crochet 1 single crochet in the stitch with the marker and move the marker to this new stitch. Crochet 2 single crochets in each of the next two stitches, then 2 single crochets in the following stitch (increase). Continue making an increase in every fourth stitch until you reach the marker. Total 30 stitches.
Round 6: Crochet 1 sc in the stitch with the marker and move the marker to this new stitch. Crochet 3 sc in the next 3 stitches, then 2 sc in the following stitch (increase). Continue making an increase in every 5th stitch until you reach the marker. Total 36 stitches.
Round 7: Crochet 1 sc in the stitch with the marker and move the marker to this new stitch. Crochet 4 sc in the next 4 stitches, then 2 sc in the following stitch (increase). Continue making an increase in every 6th stitch until you reach the marker. Total 42 stitches.
Round 8: Crochet 1 sc in the stitch with the marker and move the marker to this new stitch. Crochet 5 sc in the next 5 stitches, then 2 sc in the following stitch (increase). Continue making an increase in every 7th stitch until you reach the marker. Total 48 stitches.
Round 9: Crochet 1 sc in the stitch with the marker and move the marker to this new stitch. Crochet 6 sc in the next 6 stitches, then 2 sc in the following stitch (increase). Continue making an increase in every 8th stitch until you reach the marker. Total 54 stitches.
Round 10: Crochet 1 sc in the stitch with the marker and move the marker to this new stitch. Crochet 7 sc in the next 7 stitches, then 2 sc in the following stitch (increase). Continue making an increase in every 9th stitch until you reach the marker. Total 60 stitches.
Make more or fewer rounds to adjust the hat’s width.
Round 11: Continue to always move the marker to the first stitch of the new round. This round, make a total of only 3 increases. Crochet single crochets all the way around and make an increase in stitch numbers 5, 25, and 45. Total 63 stitches.
Or, if you have worked more or fewer rounds than 10, place these 3 increases evenly spaced around the round.
Round 12: Again, we will make only 3 increases. Make an increase in stitch numbers 16, 37, and 58. Total 66 stitches.
Or, if you worked more or fewer rounds than 10 in step 7, you can place these 3 increases evenly spaced.
Rounds 13-25: The top of the hat is now complete, and we will start crocheting the sides. Continue working rounds of single crochets without any increases. Work a total of 13 rounds. Remember to move the stitch marker so it always sits in the first stitch of each round. Adjust the number of rounds to change the length of the hat. The brim should reach roughly the top of your ears. Total 66 stitches.
The next two rounds are to create the slightly flared brim of the hat, and there are two options depending on whether you want to make a defined edge or not.
You can either continue with only single crochets and skip the edge (Option 1), or you can make one round of yarn-over slip stitches first, which creates a nice border marking where the brim begins (Option 2). The second option is a bit more challenging but looks really nice!
Option 1
Round 26/1: Crochet one more round of single crochets without increases.
Round 27/1: Then, on the next round, start increasing for the brim. Make an increase of single crochets in every third stitch until you return to the marker. Total 88 stitches. You can add more increases if you want a more flared brim. Then continue from step 12.
Option 2:
We will now make one round of “yarn-over slip stitches,” which is exactly what it sounds like: a regular slip stitch but with a yarn over first.
Round 26/2: Start by making a yarn over (wrap the yarn around the hook once), then insert the hook into the first stitch, yarn over again and pull up a loop (you now have three loops on the hook). Pull through the two inner loops so that only one loop remains on the hook. This is a yarn-over slip stitch. If you want to see a video on this (Yarn Over Slip Stitch), see the video below.
Repeat.
Round 27/2: On the next round, we will start increasing for the brim and return to working single crochets. However, you won’t insert the hook through the whole stitch as usual — instead, you will insert it only through the front loop of the stitch. This is the loop closest to you if you have the wrong side of the hat facing outwards (as shown in my pictures).
Work single crochets in the front loop of every stitch around the round, making an increase in every third stitch until you reach the marker.
On the wrong side, you should see a nice “braided” edge. Total 88 stitches.
You can make more increases for an even wider brim. Then continue with step 12. If you're unsure which is the front loop only, see the video below.
Rounds 29–35: Crochet 1 sc in each sc from the previous round. Repeat this until you have made 7 rounds on the brim, or until you are happy with the brim’s length.
Make a slip stitch into the stitch with the marker.
Then cut the yarn and pull it through the loop, tightening it to make a knot.
If you’re unsure how to crochet a slip stitch, see the video below.
Great job! You’ve now finished the crocheted part of the hat! The final step is to secure all your yarn ends by weaving them in. If you’re unsure how to fasten off your yarn ends, watch the video below.
After that, take a brush or comb and start brushing out the right side of the hat. This will make it really fluffy and soft! Brush in short but firm strokes all over the hat until you’re happy with the fluffiness.
Abbreviations
Below is the pattern with abbreviations. If you need help along the way, see the simpler version.
MR = magic ring
st = stitch
ch = chain
sl st= slip stitch
sc = single crochet
hst = half double crochet
bmb = back loop only
inc= increase
(…) = indicates the number of stitches in the current round
*...* = repeat everything inside ... the indicated number of times
[...] = everything inside [...] is worked into the same stitch
Round 1: Make a MR. Crochet 6 sc in the ring and pull the tail to close it. (6)
Always place your marker in the first stitch of the round so you know where it starts/ends.
Round 2: Inc x6 (12)
Round 3: *1 sc, inc* x6 (18)
Round 4: *2 sc, inc* x6 (24)
Round 5: *3 sc, inc* x6 (30)
Round 6: *4 sc, inc* x6 (36)
Round 7: *5 sc, inc* x6 (42)
Round 8: *6 sc, inc* x6 (48)
Round 9: *7 sc, inc* x6 (54)
Round 10: *8 sc, inc* x6 (60)
Make more or fewer rounds to adjust the width of the hat.
Keep moving the stitch marker to the first stitch of each new round.
We will now do a total of 3 increases over the next two rounds.
Round 11: Sc all around and increase in stitch #5, #25, and #45. Total 63 sts. Or, if you have made more/fewer rounds than 10, place these 3 increases evenly spaced.
Round 12: Sc all around and increase in stitch #16, #37, and #58. Total 66 sts. Or, if you made more/fewer rounds than 10 at step 7, place these 3 increases evenly spaced.
The top of the hat is now complete and we will start crocheting the sides.
Rounds 13-25: Continue with rounds of 1 sc in each st, i.e., no increases. Work a total of 13 rounds. Make more/fewer rounds to adjust the length of the hat.The brim should reach roughly to the top of your ears. (66 sts)
The next two rounds are to create the slightly flared brim of the hat, and here you have two options depending on whether you want a defined edge or not.
You can either continue with just sc and skip the edging (Option 1), or you can do a round of yarn-over slip stitches first, which creates a nice edge marking where the brim starts (Option 2). The second option is a bit trickier but looks really beautiful!
Option 1:
Round 26/1: Work one more round of sc without increases (66 sts)
Round 27/1: Now it’s time to increase for the brim. Make an increase by working 2 sc in every 3rd st (88 sts)
You can do more increases for an even more flared brim.
Option 2:
Round 26/2: We will now work one round of “yarn-over slip stitches,” which is exactly as it sounds — a regular slip stitch but with an extra yarn over first. Do this in every stitch from the previous round.
Round 27/2: Now we’ll start increasing for the brim and switch back to working sc. However, instead of inserting the hook through the whole stitch as usual, insert it only into the front loop.
Work sc in the front loop of every stitch around, making an increase by working 2 sc in every 3rd stitch until you reach the marker. On the wrong side, you should see a nice “braided” edge. (88 sts)
You can make more increases for an even more flared brim. Then continue with step 12.
Rounds 28–34: Work 1 sc in each stitch. Repeat until you have worked 7 rounds on the brim or until you are satisfied with the brim length.
Slip stitch in the first stitch, cut the yarn, and pull through.
Well done! You have now finished the crocheted part of the hat! The second-to-last step is to secure all the yarn ends by weaving them in with a tapestry needle.
The final step is to take a brush or comb and start brushing out the right side of the hat. This will make it really fluffy and soft! Brush in short but firm strokes all over the hat until you’re happy with the fluffiness.
The rights to this pattern belong to MYO Make Your Own. The pattern or its pictures may not be copied, shared or resold either in parts or in its entirety, but you may sell items you have crocheted from this pattern. If you have questions about the pattern, contact MYO at hello@makeyourown.se.


Share your creations with us
Thank you!
Your comment was sent!