
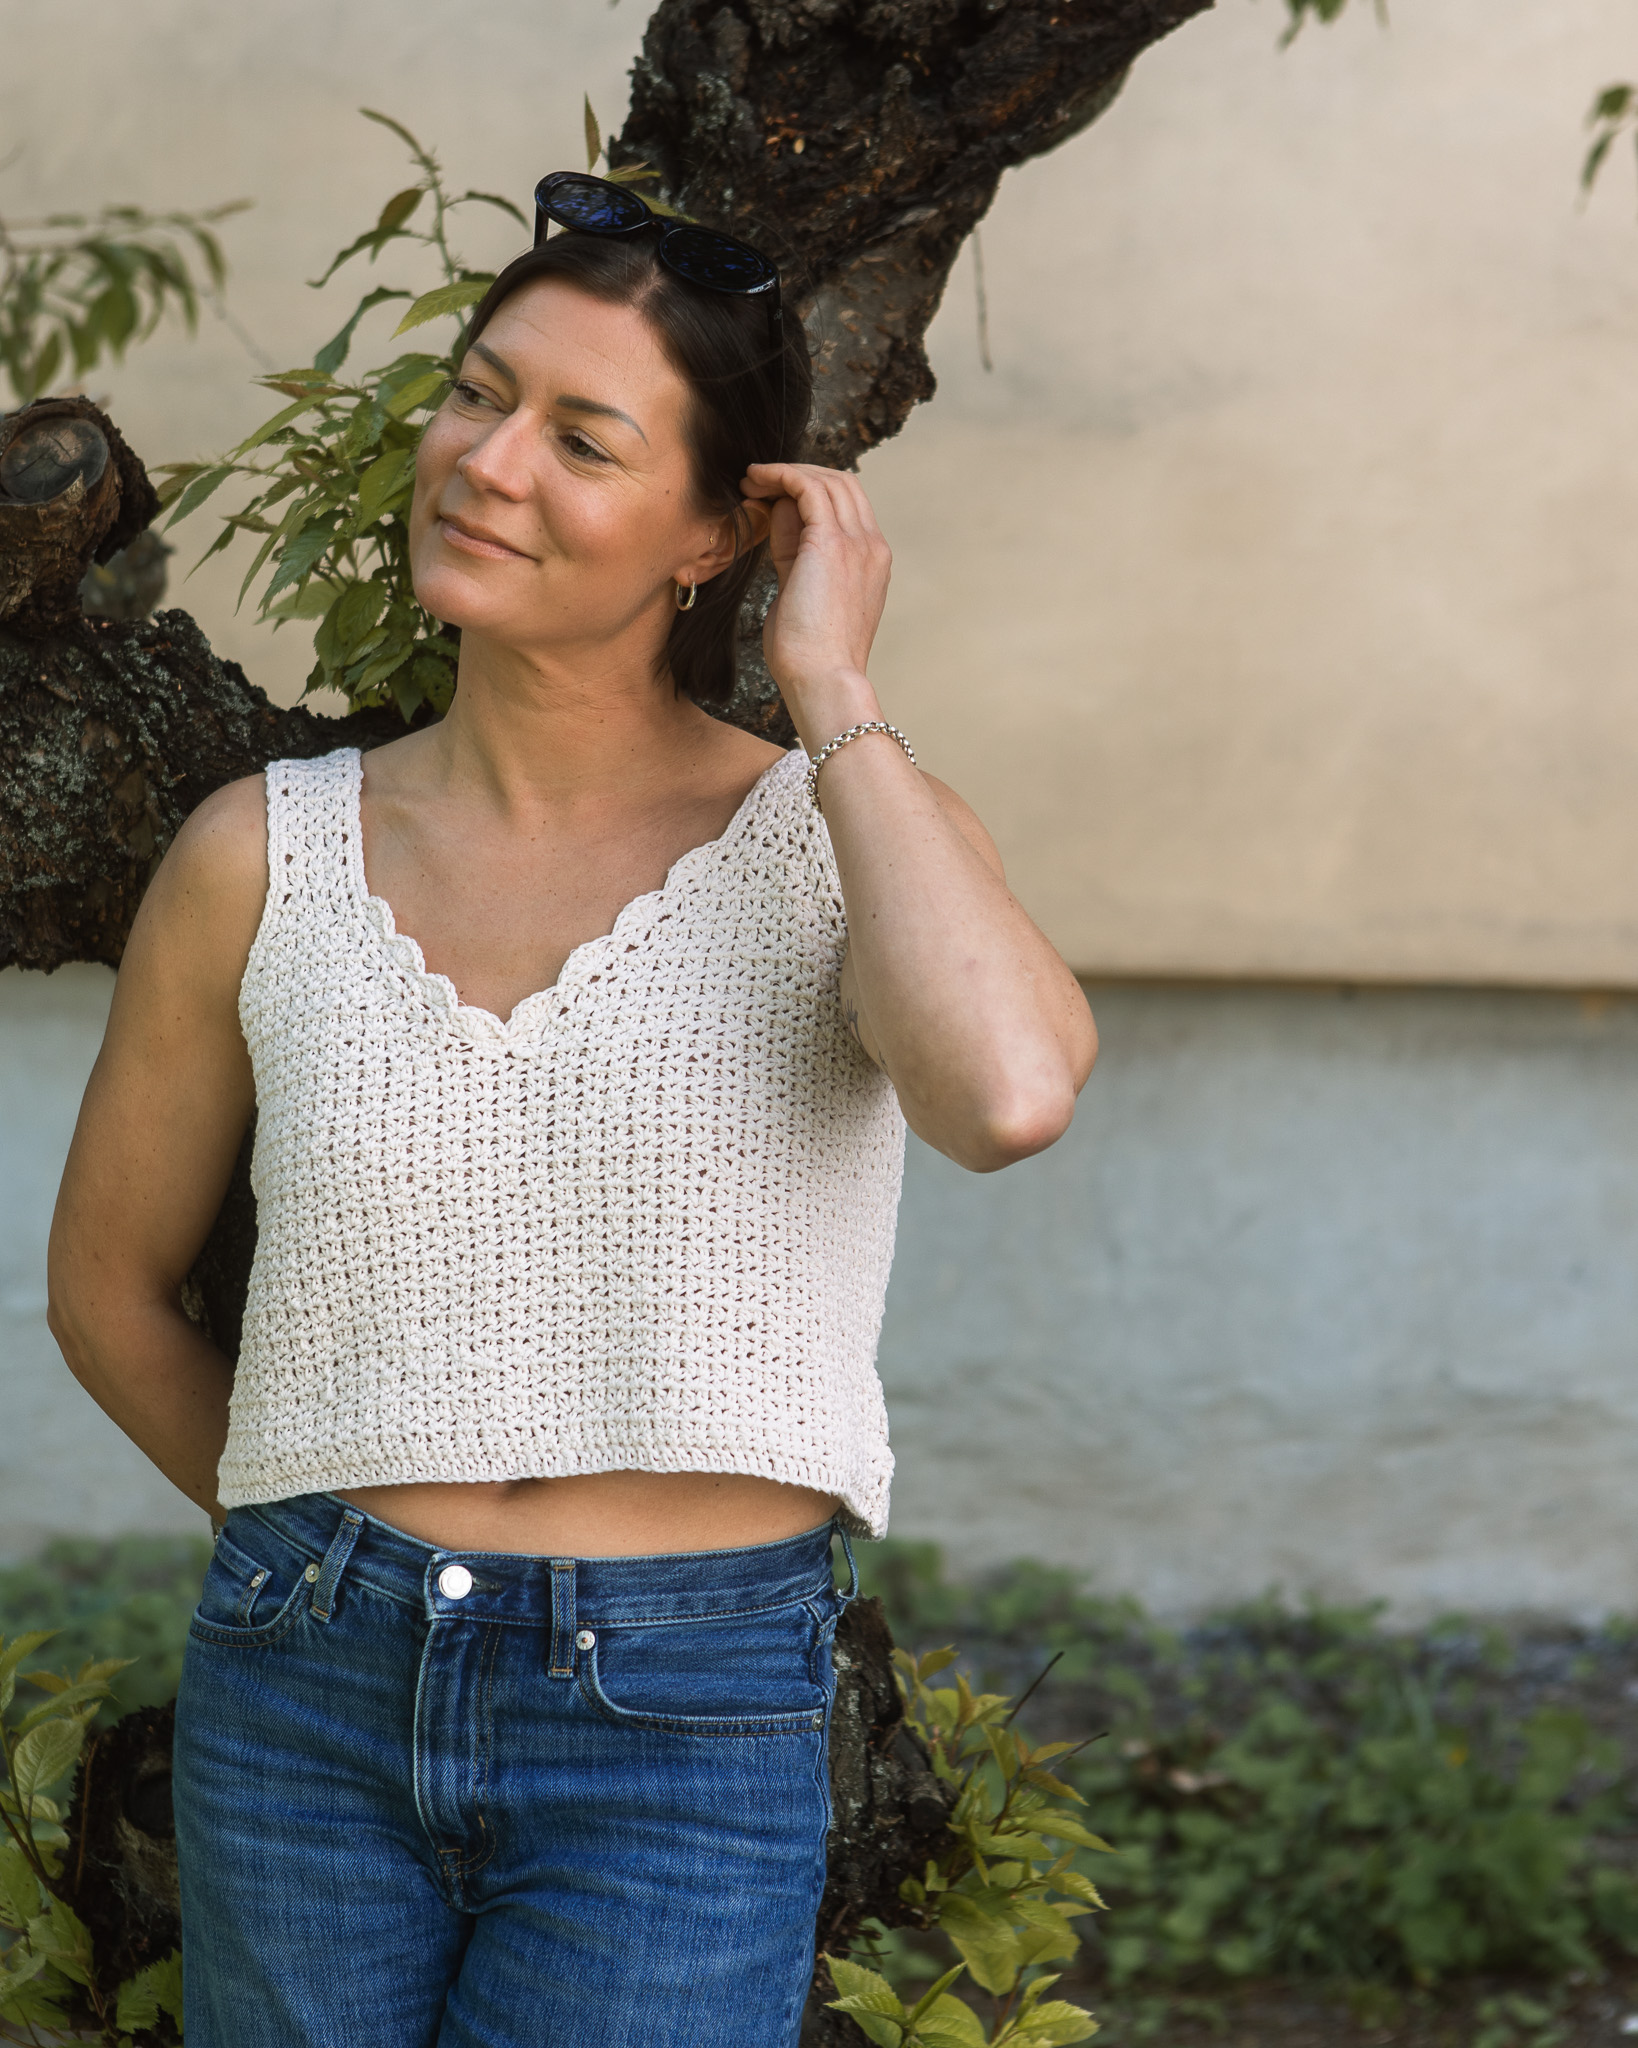
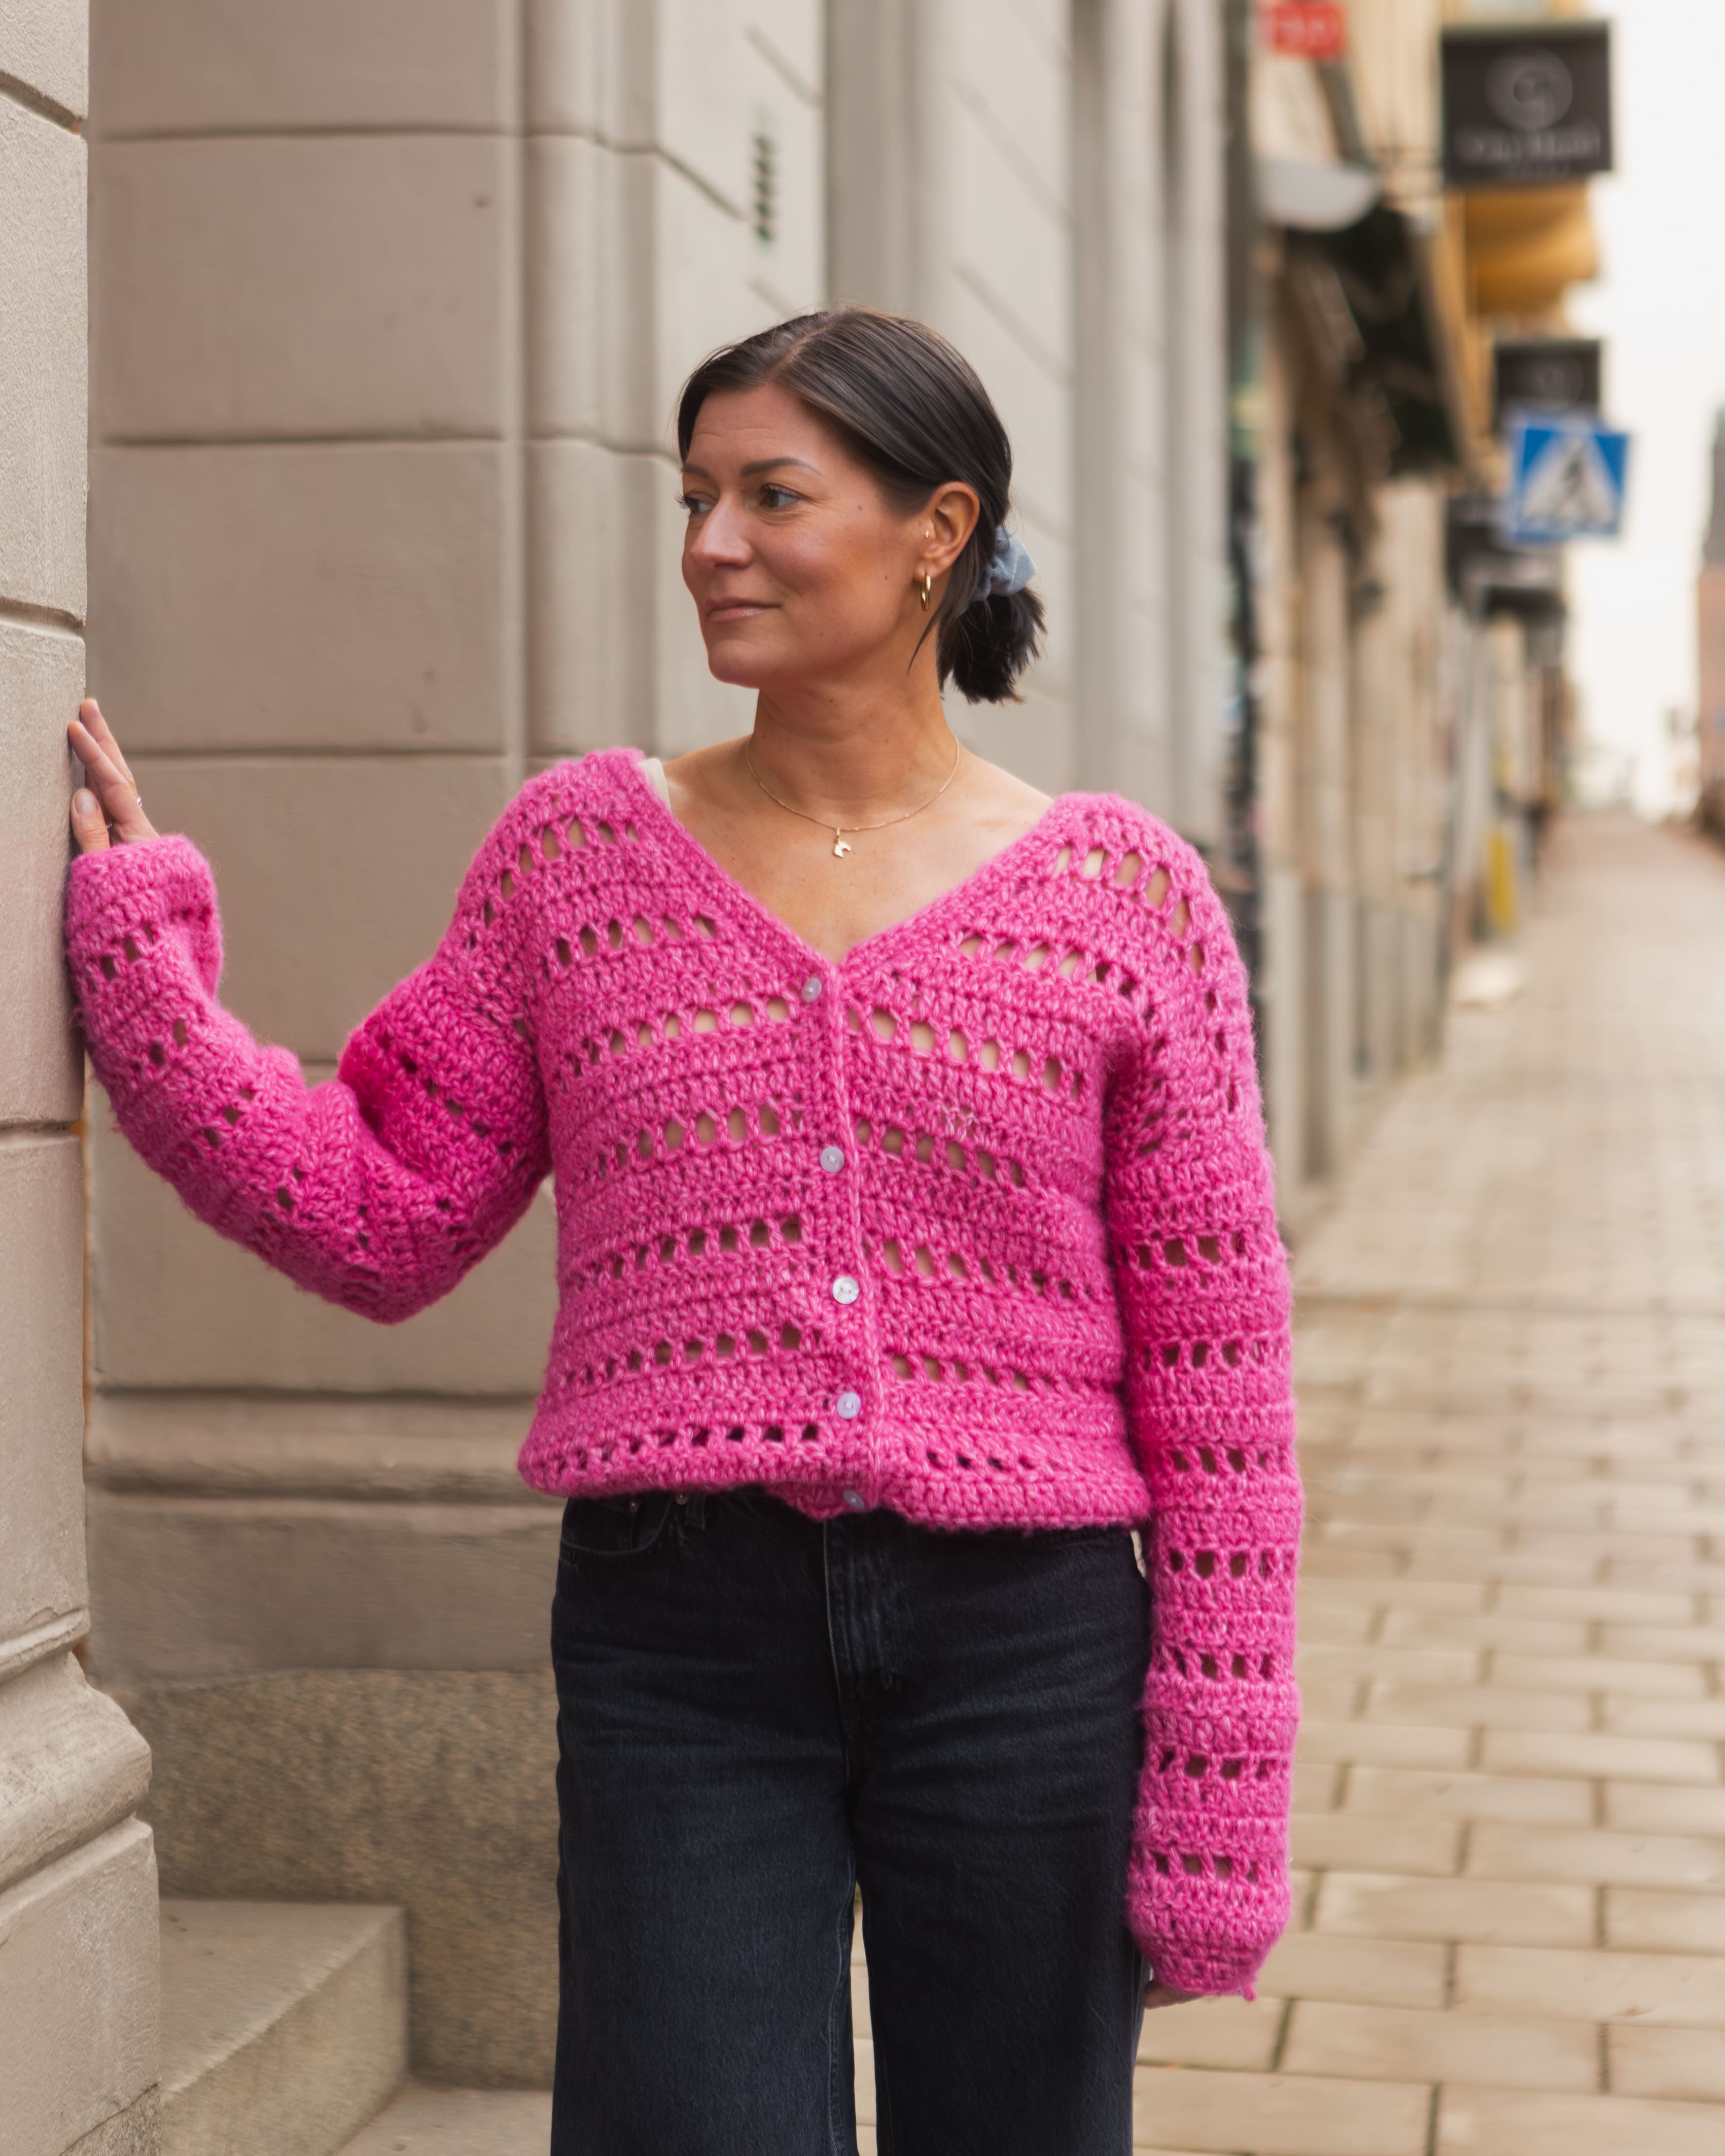
Crochet top "Maija"
Crochet a beautiful top in linen!
Unleash your creativity by crocheting a top where you decide on the look yourself by varying different techniques along the way. This top has been crocheted in MYO's new linen yarn called “LIN” and is sold in 500g rolls. Lin is an amazing material as it becomes softer over time, and can be washed over and over again. When crocheting the top, you will also learn some new techniques (simple ones) that you can later use in other projects. You need a crochet hook 5-6 mm for this yarn.
Yarn Consumption: For the top, which is size S/M, you need about 350g of yarn.
Note that we in this instruction uses videos from out technique library. If you are looking for a full instruction video for a crocheted vest, we suggest the top Stella.

Here's how to do it
We have done this instruction with a new method, using our short instructional videos that are available in our new “School of Technology”. It's good if you have crochet before, but if you need support, you can watch the videos explaining each step and techniques along the way. The linen is not at all difficult to crochet, the parts are quite simple to figure out, and the size can be adjusted according to your own body. You crochet the front and back as separate parts and the shoulder straps as separate parts. Last, attach all parts together. Have fun! /oona

This is what you need:
Here you can directly purchase the material for the product. Please note that the instruction is digital and appears here on the page (no written instruction).


.jpg)
Unleash your creativity
For only 85kr per month you get access to all our 300+ beginner-friendly instructions for crochet, knitting and macrame.
A perfect way to get started with your new hobby!

TIP: How to get the right size for your garment
1. Make a Gauge Swatch and Measure Your Gauge
Crochet a gauge swatch using the stitch pattern specified in the pattern and measure how many stitches fit within 10 cm (4 inches). Once you know your gauge, you can calculate how many stitches you need to achieve the desired width of your garment.
How to do it: Chain enough stitches to make a swatch approximately 12–15 cm (5–6 inches) wide, then crochet at least three rows. Measure a section that is 10 cm (4 inches) wide and count the number of stitches within that section.
Once you know the number of stitches per 10 cm (4 inches), divide that number by 10 to find the number of stitches per centimeter. Then multiply this number by the desired width of your garment in centimeters. The result tells you how many stitches you need to start with to achieve the desired width.
Note: Be sure to adjust the stitch count according to the pattern instructions. Some patterns, for example, require an even number of stitches or a stitch count that is a multiple of a specific number.
2. Keep Your Crochet Tension in Mind
The size and drape of a garment—especially one made with double crochet stitches or other taller stitches—are greatly affected by your crochet tension and hook size. If you tend to crochet tightly, consider using a larger hook. This will help you achieve the correct measurements and create a fabric with a softer, more fluid drape.
We start with the front side of the linen.
Start by crocheting a chain that is as long as you wish so that the front part of the top is as wide as you wish. A tip is to take a tank top or t-shirt that you have at home and that has a good size, and use it as a reference! If you do not know how to crochet a chain, you can see below video:
At the next stage, we crochet row two with single crochets. Start in the second loop on your crochet hook. You follow the chain you just crocheted and make as many stitches as you have in the chain (minus one as you skipped the first loop). How to crochet single crochets, see below. Do not forget to chain one before turning and starting the third row. Chain one in the end of each row if starting with a single crochet. If starting with a double crochet or half-double crochet, chain two.
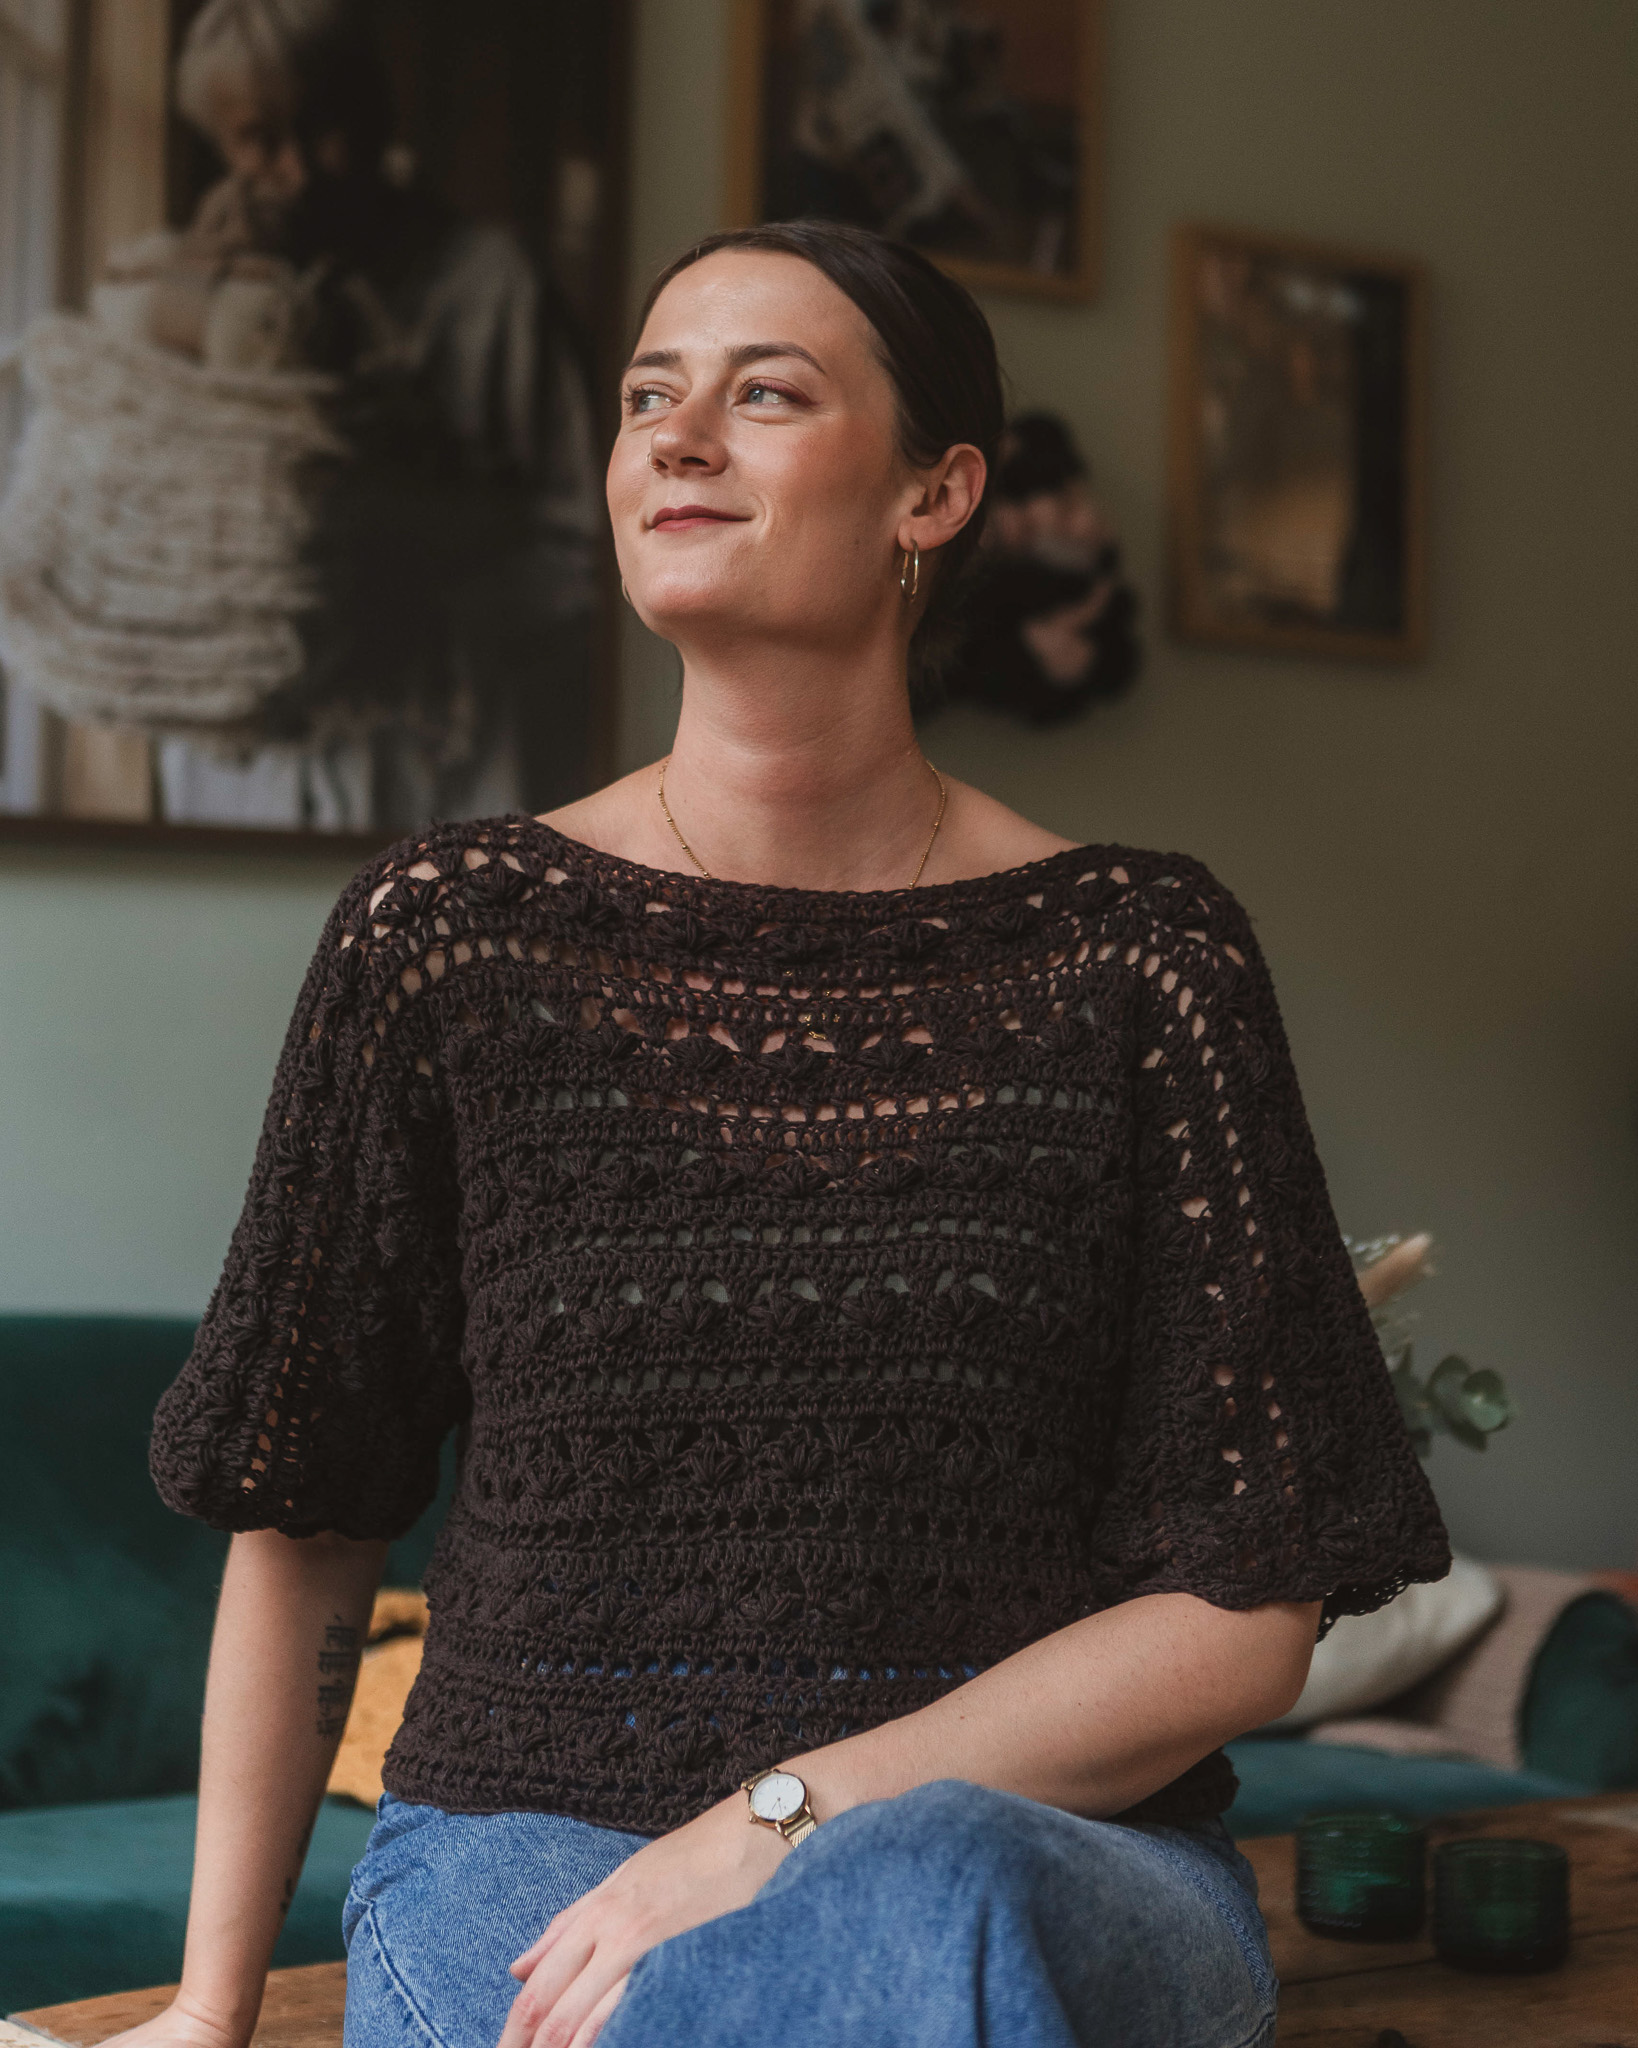
All the following rows you crochet using varying techniques, mix just as you like! Example - the linen has been crocheted with changing technique almost every row. In this top, we have used single crochets, half double crochet and double crochets.
.jpeg)
How to crochet half double crochets:
How to crochet double crochets:
I crocheted the upper part over the top using the “Grit stitch” technique, it gives a very nice, almost slightly heart-shaped texture.
How to crochet grit stitch:
You're done with the front when you're happy with the size. Measure against your own body. Then you can cut the yarn (pull through the loop that holds your crochet hook and tie a knot around a stitch in the inside of the part). Start with the back using exactly the same technique that you did the front with, by alternating different techniques.
NOTE! When you start with the back, make sure you have exactly the same number of stitches in your chain as you had when you started the front!
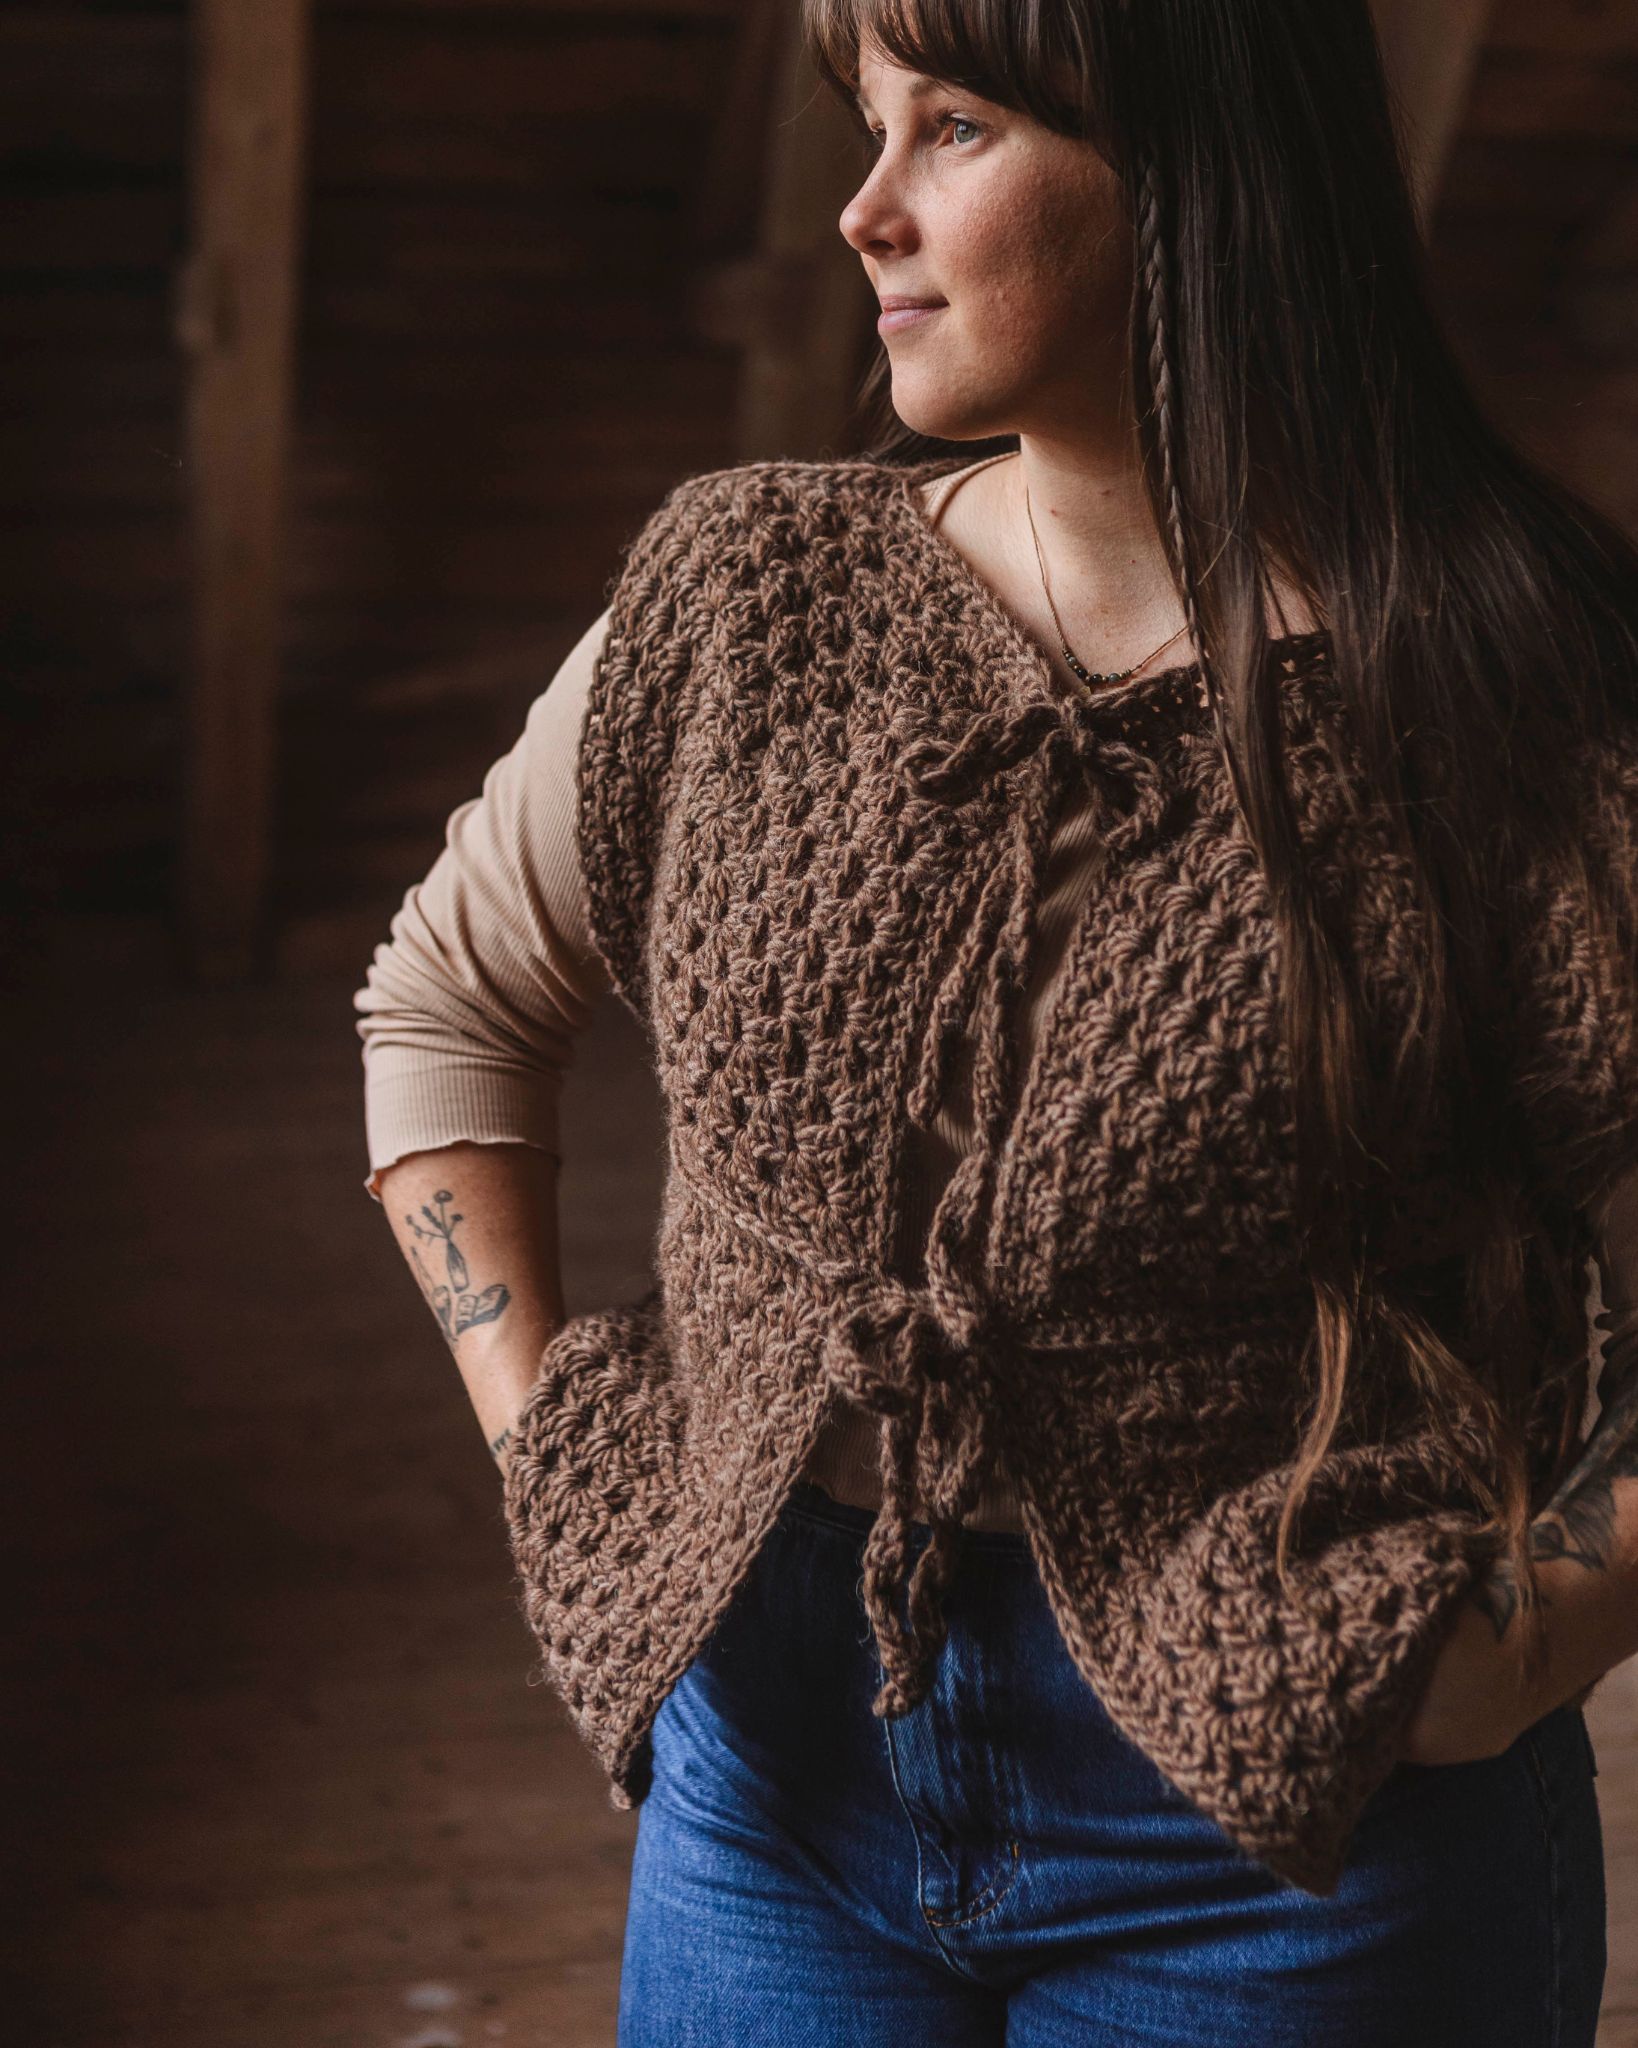
Shoulder straps
When both the front and back are ready, crochet the shoulder straps. The shoulder straps in the picture is made in half double crochets. Start making a chain of 9, and crocheted back and forth until you are satisfied with the length. If you want thinner straps, use less than 9 loops on your chain.
Remember to alwaws chain two before your turn and crochet the next row, if using half double crochets. You can also crochet the straps in e.g. single crochets if you prefer. Videos for both techniques can be found in the previous steps.
Attach the top
When you have made the front piecce, back piece and the shoulder straps, you need to attach them together. You attach the front and back parts together first. Turn the parts over so that you have the wrong sides out, and crochet single crochets along the sides. Match the stitches on both sides and attach them together.
Finally, attach the shoulder straps. You can attach them with your crochet hook or use a larger needle if you have them at home, and sew them on.
Then you're done with your top! :)


ATTERN DESCRIPTION – US Terms Abbreviations
This part of the pattern uses abbreviations. If you need more guidance, see the beginner-friendly section of the pattern.
Abbreviations
sc = single crochet
ch = chain
hdc = half double crochet
dc = double crochet
sl st = slip stitch
sk = skip
st = stitch
TIP: How to get the right size for your garment
1. Make a Gauge Swatch and Measure Your Gauge
Crochet a gauge swatch using the stitch pattern specified in the pattern and measure how many stitches fit within 10 cm (4 inches). Once you know your gauge, you can calculate how many stitches you need to achieve the desired width of your garment.
How to do it: Chain enough stitches to make a swatch approximately 12–15 cm (5–6 inches) wide, then crochet at least three rows. Measure a section that is 10 cm (4 inches) wide and count the number of stitches within that section.
Once you know the number of stitches per 10 cm (4 inches), divide that number by 10 to find the number of stitches per centimeter. Then multiply this number by the desired width of your garment in centimeters. The result tells you how many stitches you need to start with to achieve the desired width.
Note: Be sure to adjust the stitch count according to the pattern instructions. Some patterns, for example, require an even number of stitches or a stitch count that is a multiple of a specific number.
2. Keep Your Crochet Tension in Mind
The size and drape of a garment—especially one made with double crochet stitches or other taller stitches—are greatly affected by your crochet tension and hook size. If you tend to crochet tightly, consider using a larger hook. This will help you achieve the correct measurements and create a fabric with a softer, more fluid drape.
Front and Back (crocheted the same way, two pieces that are joined together later)
We will start with the front of the top.
Row 1: Ch a foundation chain as long as you want the front piece to be wide. One tip is to take a tank top or t-shirt you already have that fits well and use it as a reference. Write down how many chains you made so you know for your second piece.
Row 2: Start in the 2nd ch from the hook. Work 1 sc in each ch across. From now on, you will have the same number of stitches for all rows. End with 1 ch and turn.
Row 3 and onward: All following rows are worked using varying techniques—mix them however you like! In the top shown in the photos, the stitch technique changes almost every row. It alternates between single crochet, half double crochet, and double crochet.
The upper part over the bust is worked in Grit Stitch, which creates a very nice, almost heart-shaped texture. The Grit Stitch is worked as: 2 sc in the same stitch, skip 1 stitch.
You are done with the front once you are happy with the height of the top. Measure against your own body, then cut the yarn.
Back: Begin the back using exactly the same techniques you used for the front, alternating stitches as you like.
NOTE: When starting the back, make sure your foundation chain has the exact same number of stitches as you had for the front!
Shoulder Straps:
Once both the front and back pieces are finished, you can crochet the shoulder straps.
In the top shown in the photos, the straps are worked in half double crochet (hdc).
Row 1: Ch 9 (or as many chains as you want for the width of the strap). Ch 1, turn.
Row 2: Start in the second ch from the hook, hdc in each ch across. Ch 1, turn.
Repeat Row 2 until the straps reach the desired length. You can also crochet the straps in single crochet (sc) if you prefer.
Assembly:
Now it’s time to join all four pieces: front and back, and the two shoulder straps.
First, join the front and back pieces. Place them wrong sides together and crochet sc along the sides. Make sure to align the stitches on both sides as you work them together.
Finally, attach the shoulder straps. They can be crocheted on directly or sewn in place using a larger yarn needle if you have one.
And now your top is finished! :)
The rights to this pattern belong to MYO Make Your Own. The pattern or its pictures may not be copied, shared or resold either in parts or in its entirety, but you may sell items you have crocheted from this pattern. If you have questions about the pattern, contact MYO at hello@makeyourown.se.
TIP: How to get the right size for your garment
1. Make a Gauge Swatch and Measure Your Gauge
Crochet a gauge swatch using the stitch pattern specified in the pattern and measure how many stitches fit within 10 cm (4 inches). Once you know your gauge, you can calculate how many stitches you need to achieve the desired width of your garment.
How to do it: Chain enough stitches to make a swatch approximately 12–15 cm (5–6 inches) wide, then crochet at least three rows. Measure a section that is 10 cm (4 inches) wide and count the number of stitches within that section.
Once you know the number of stitches per 10 cm (4 inches), divide that number by 10 to find the number of stitches per centimeter. Then multiply this number by the desired width of your garment in centimeters. The result tells you how many stitches you need to start with to achieve the desired width.
Note: Be sure to adjust the stitch count according to the pattern instructions. Some patterns, for example, require an even number of stitches or a stitch count that is a multiple of a specific number.
2. Keep Your Crochet Tension in Mind
The size and drape of a garment—especially one made with double crochet stitches or other taller stitches—are greatly affected by your crochet tension and hook size. If you tend to crochet tightly, consider using a larger hook. This will help you achieve the correct measurements and create a fabric with a softer, more fluid drape.
We start with the front side of the linen.
Start by crocheting a chain that is as long as you wish so that the front part of the top is as wide as you wish. A tip is to take a tank top or t-shirt that you have at home and that has a good size, and use it as a reference! If you do not know how to crochet a chain, you can see below video:
At the next stage, we crochet row two with single crochets. Start in the second loop on your crochet hook. You follow the chain you just crocheted and make as many stitches as you have in the chain (minus one as you skipped the first loop). How to crochet single crochets, see below. Do not forget to chain one before turning and starting the third row. Chain one in the end of each row if starting with a single crochet. If starting with a double crochet or half-double crochet, chain two.
All the following rows you crochet using varying techniques, mix just as you like! Example - the linen has been crocheted with changing technique almost every row. In this top, we have used single crochets, half double crochet and double crochets.
How to crochet half double crochets:
How to crochet double crochets:
I crocheted the upper part over the top using the “Grit stitch” technique, it gives a very nice, almost slightly heart-shaped texture.
How to crochet grit stitch:
You're done with the front when you're happy with the size. Measure against your own body. Then you can cut the yarn (pull through the loop that holds your crochet hook and tie a knot around a stitch in the inside of the part). Start with the back using exactly the same technique that you did the front with, by alternating different techniques.
NOTE! When you start with the back, make sure you have exactly the same number of stitches in your chain as you had when you started the front!
Shoulder straps
When both the front and back are ready, crochet the shoulder straps. The shoulder straps in the picture is made in half double crochets. Start making a chain of 9, and crocheted back and forth until you are satisfied with the length. If you want thinner straps, use less than 9 loops on your chain.
Remember to alwaws chain two before your turn and crochet the next row, if using half double crochets. You can also crochet the straps in e.g. single crochets if you prefer. Videos for both techniques can be found in the previous steps.
Attach the top
When you have made the front piecce, back piece and the shoulder straps, you need to attach them together. You attach the front and back parts together first. Turn the parts over so that you have the wrong sides out, and crochet single crochets along the sides. Match the stitches on both sides and attach them together.
Finally, attach the shoulder straps. You can attach them with your crochet hook or use a larger needle if you have them at home, and sew them on.
Then you're done with your top! :)
ATTERN DESCRIPTION – US Terms Abbreviations
This part of the pattern uses abbreviations. If you need more guidance, see the beginner-friendly section of the pattern.
Abbreviations
sc = single crochet
ch = chain
hdc = half double crochet
dc = double crochet
sl st = slip stitch
sk = skip
st = stitch
TIP: How to get the right size for your garment
1. Make a Gauge Swatch and Measure Your Gauge
Crochet a gauge swatch using the stitch pattern specified in the pattern and measure how many stitches fit within 10 cm (4 inches). Once you know your gauge, you can calculate how many stitches you need to achieve the desired width of your garment.
How to do it: Chain enough stitches to make a swatch approximately 12–15 cm (5–6 inches) wide, then crochet at least three rows. Measure a section that is 10 cm (4 inches) wide and count the number of stitches within that section.
Once you know the number of stitches per 10 cm (4 inches), divide that number by 10 to find the number of stitches per centimeter. Then multiply this number by the desired width of your garment in centimeters. The result tells you how many stitches you need to start with to achieve the desired width.
Note: Be sure to adjust the stitch count according to the pattern instructions. Some patterns, for example, require an even number of stitches or a stitch count that is a multiple of a specific number.
2. Keep Your Crochet Tension in Mind
The size and drape of a garment—especially one made with double crochet stitches or other taller stitches—are greatly affected by your crochet tension and hook size. If you tend to crochet tightly, consider using a larger hook. This will help you achieve the correct measurements and create a fabric with a softer, more fluid drape.
Front and Back (crocheted the same way, two pieces that are joined together later)
We will start with the front of the top.
Row 1: Ch a foundation chain as long as you want the front piece to be wide. One tip is to take a tank top or t-shirt you already have that fits well and use it as a reference. Write down how many chains you made so you know for your second piece.
Row 2: Start in the 2nd ch from the hook. Work 1 sc in each ch across. From now on, you will have the same number of stitches for all rows. End with 1 ch and turn.
Row 3 and onward: All following rows are worked using varying techniques—mix them however you like! In the top shown in the photos, the stitch technique changes almost every row. It alternates between single crochet, half double crochet, and double crochet.
The upper part over the bust is worked in Grit Stitch, which creates a very nice, almost heart-shaped texture. The Grit Stitch is worked as: 2 sc in the same stitch, skip 1 stitch.
You are done with the front once you are happy with the height of the top. Measure against your own body, then cut the yarn.
Back: Begin the back using exactly the same techniques you used for the front, alternating stitches as you like.
NOTE: When starting the back, make sure your foundation chain has the exact same number of stitches as you had for the front!
Shoulder Straps:
Once both the front and back pieces are finished, you can crochet the shoulder straps.
In the top shown in the photos, the straps are worked in half double crochet (hdc).
Row 1: Ch 9 (or as many chains as you want for the width of the strap). Ch 1, turn.
Row 2: Start in the second ch from the hook, hdc in each ch across. Ch 1, turn.
Repeat Row 2 until the straps reach the desired length. You can also crochet the straps in single crochet (sc) if you prefer.
Assembly:
Now it’s time to join all four pieces: front and back, and the two shoulder straps.
First, join the front and back pieces. Place them wrong sides together and crochet sc along the sides. Make sure to align the stitches on both sides as you work them together.
Finally, attach the shoulder straps. They can be crocheted on directly or sewn in place using a larger yarn needle if you have one.
And now your top is finished! :)
The rights to this pattern belong to MYO Make Your Own. The pattern or its pictures may not be copied, shared or resold either in parts or in its entirety, but you may sell items you have crocheted from this pattern. If you have questions about the pattern, contact MYO at hello@makeyourown.se.
%20(5).jpg)
Share your creations with us
Thank you!
Your comment was sent!