
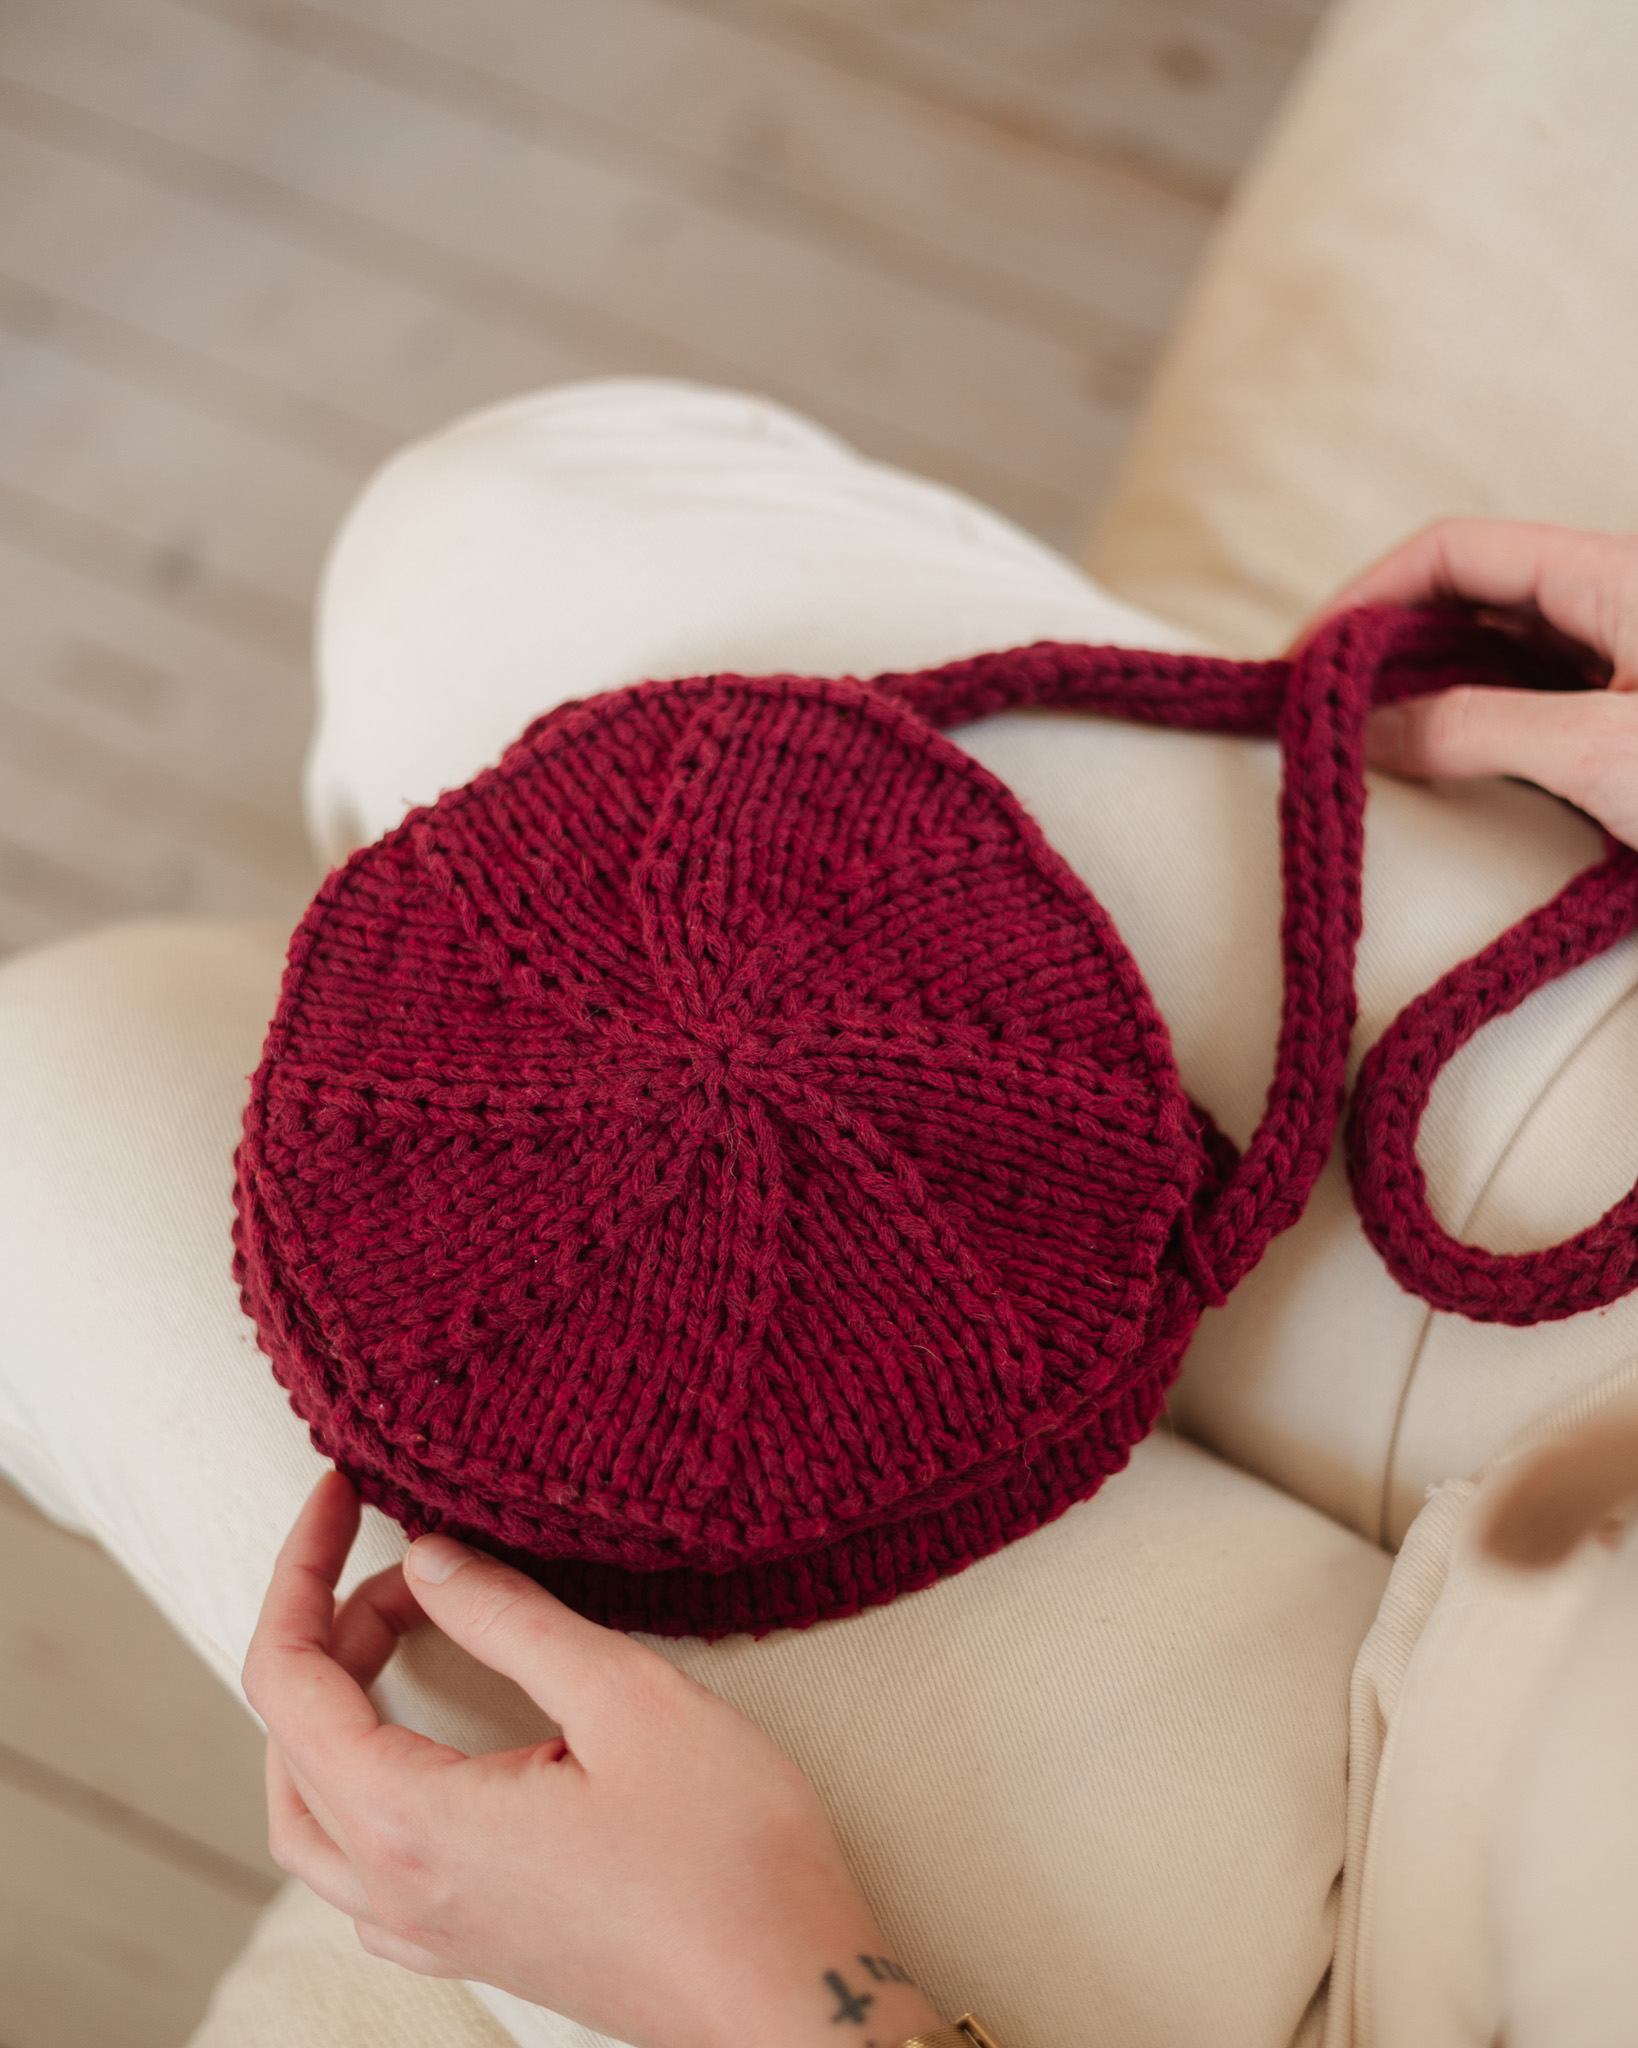
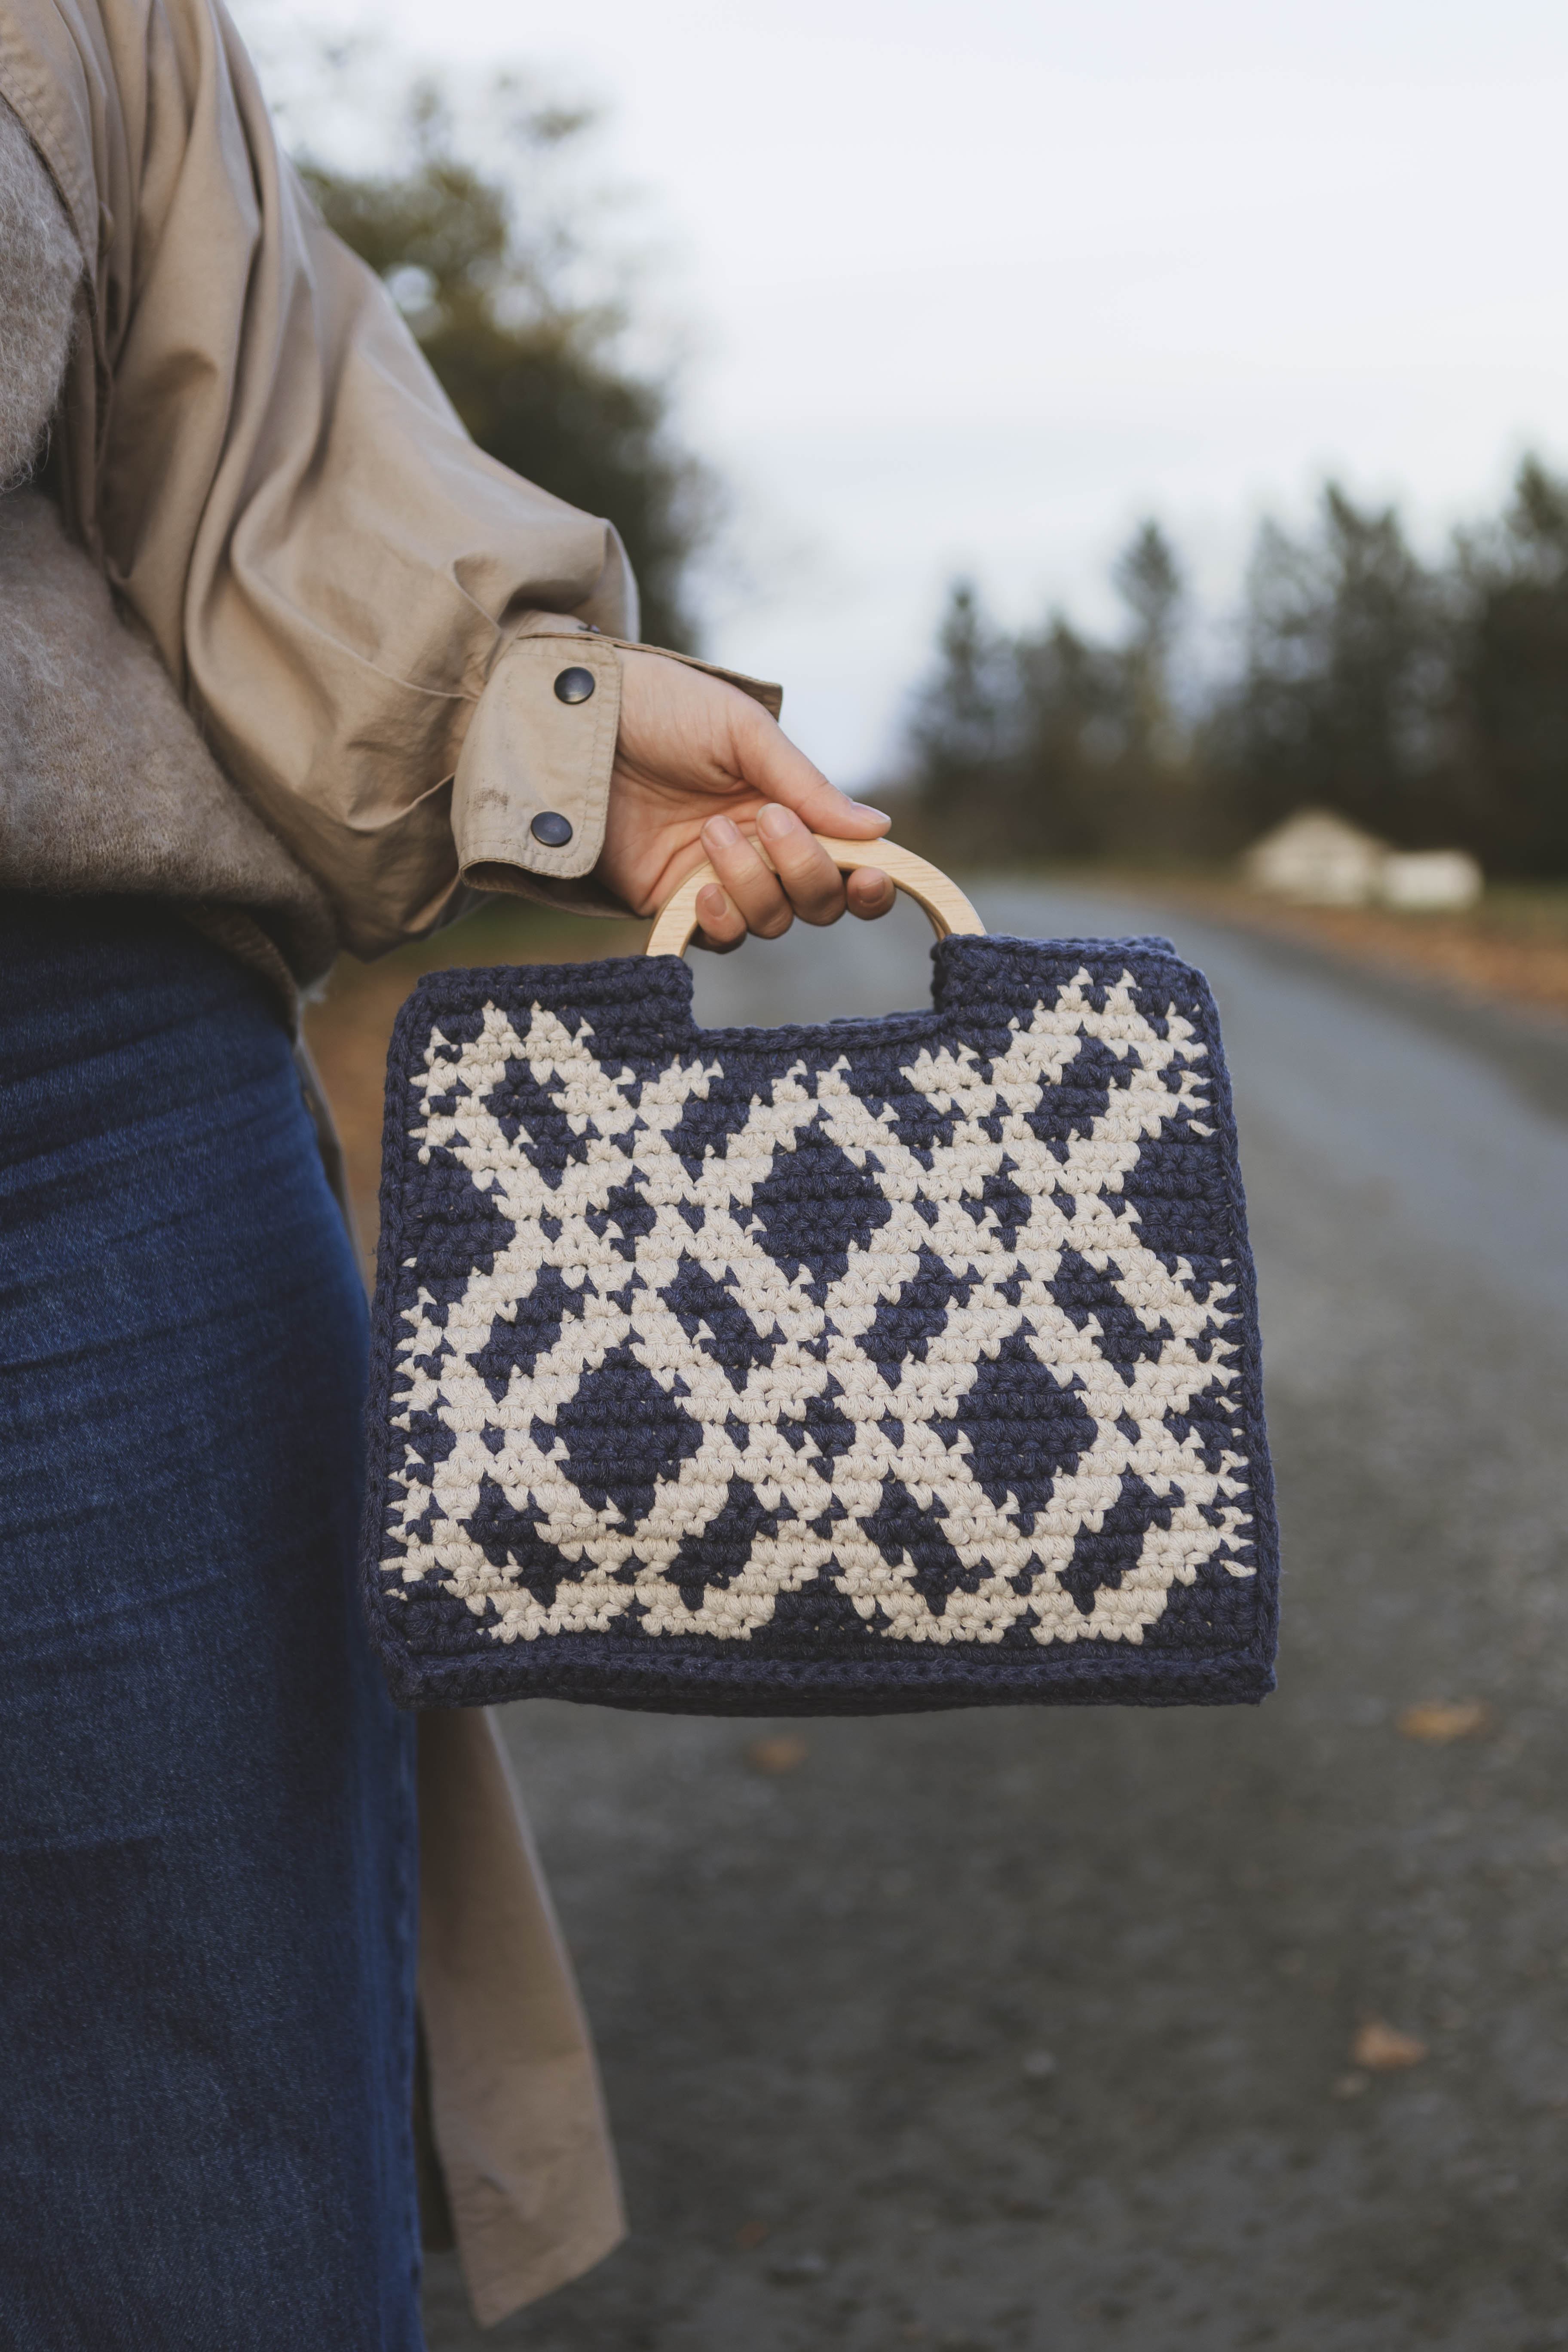
Crochet bag “Phenelope”
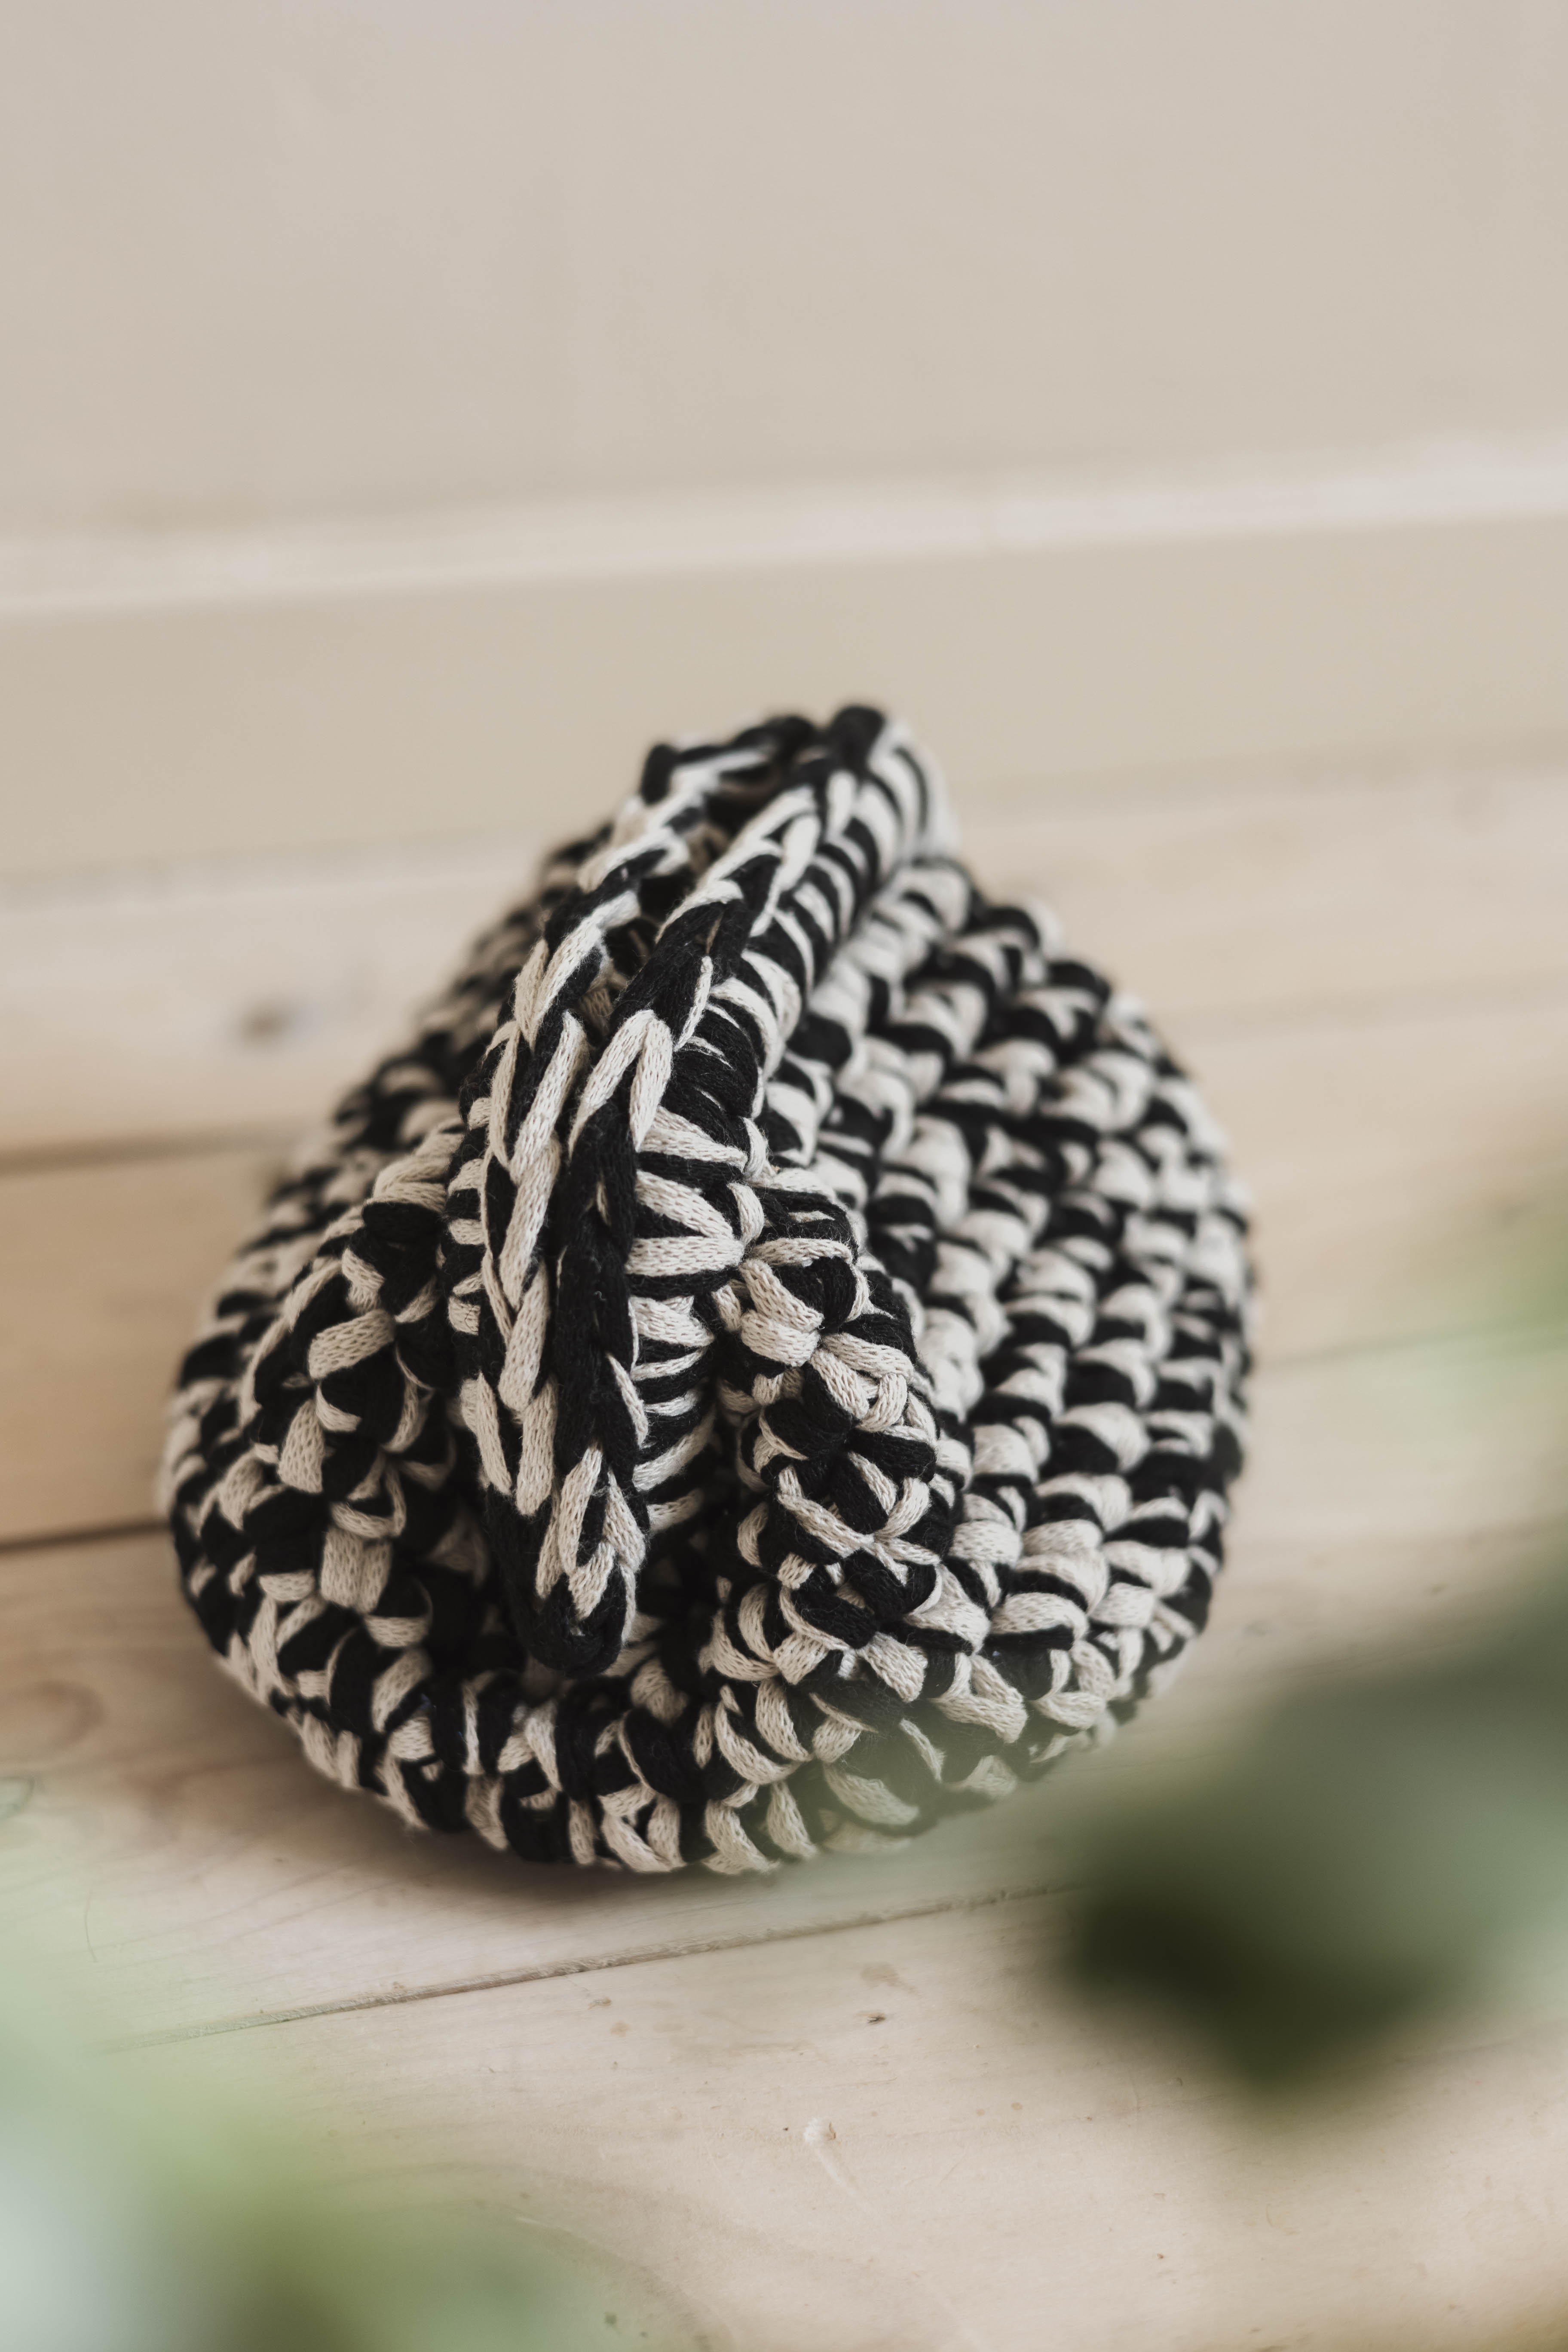
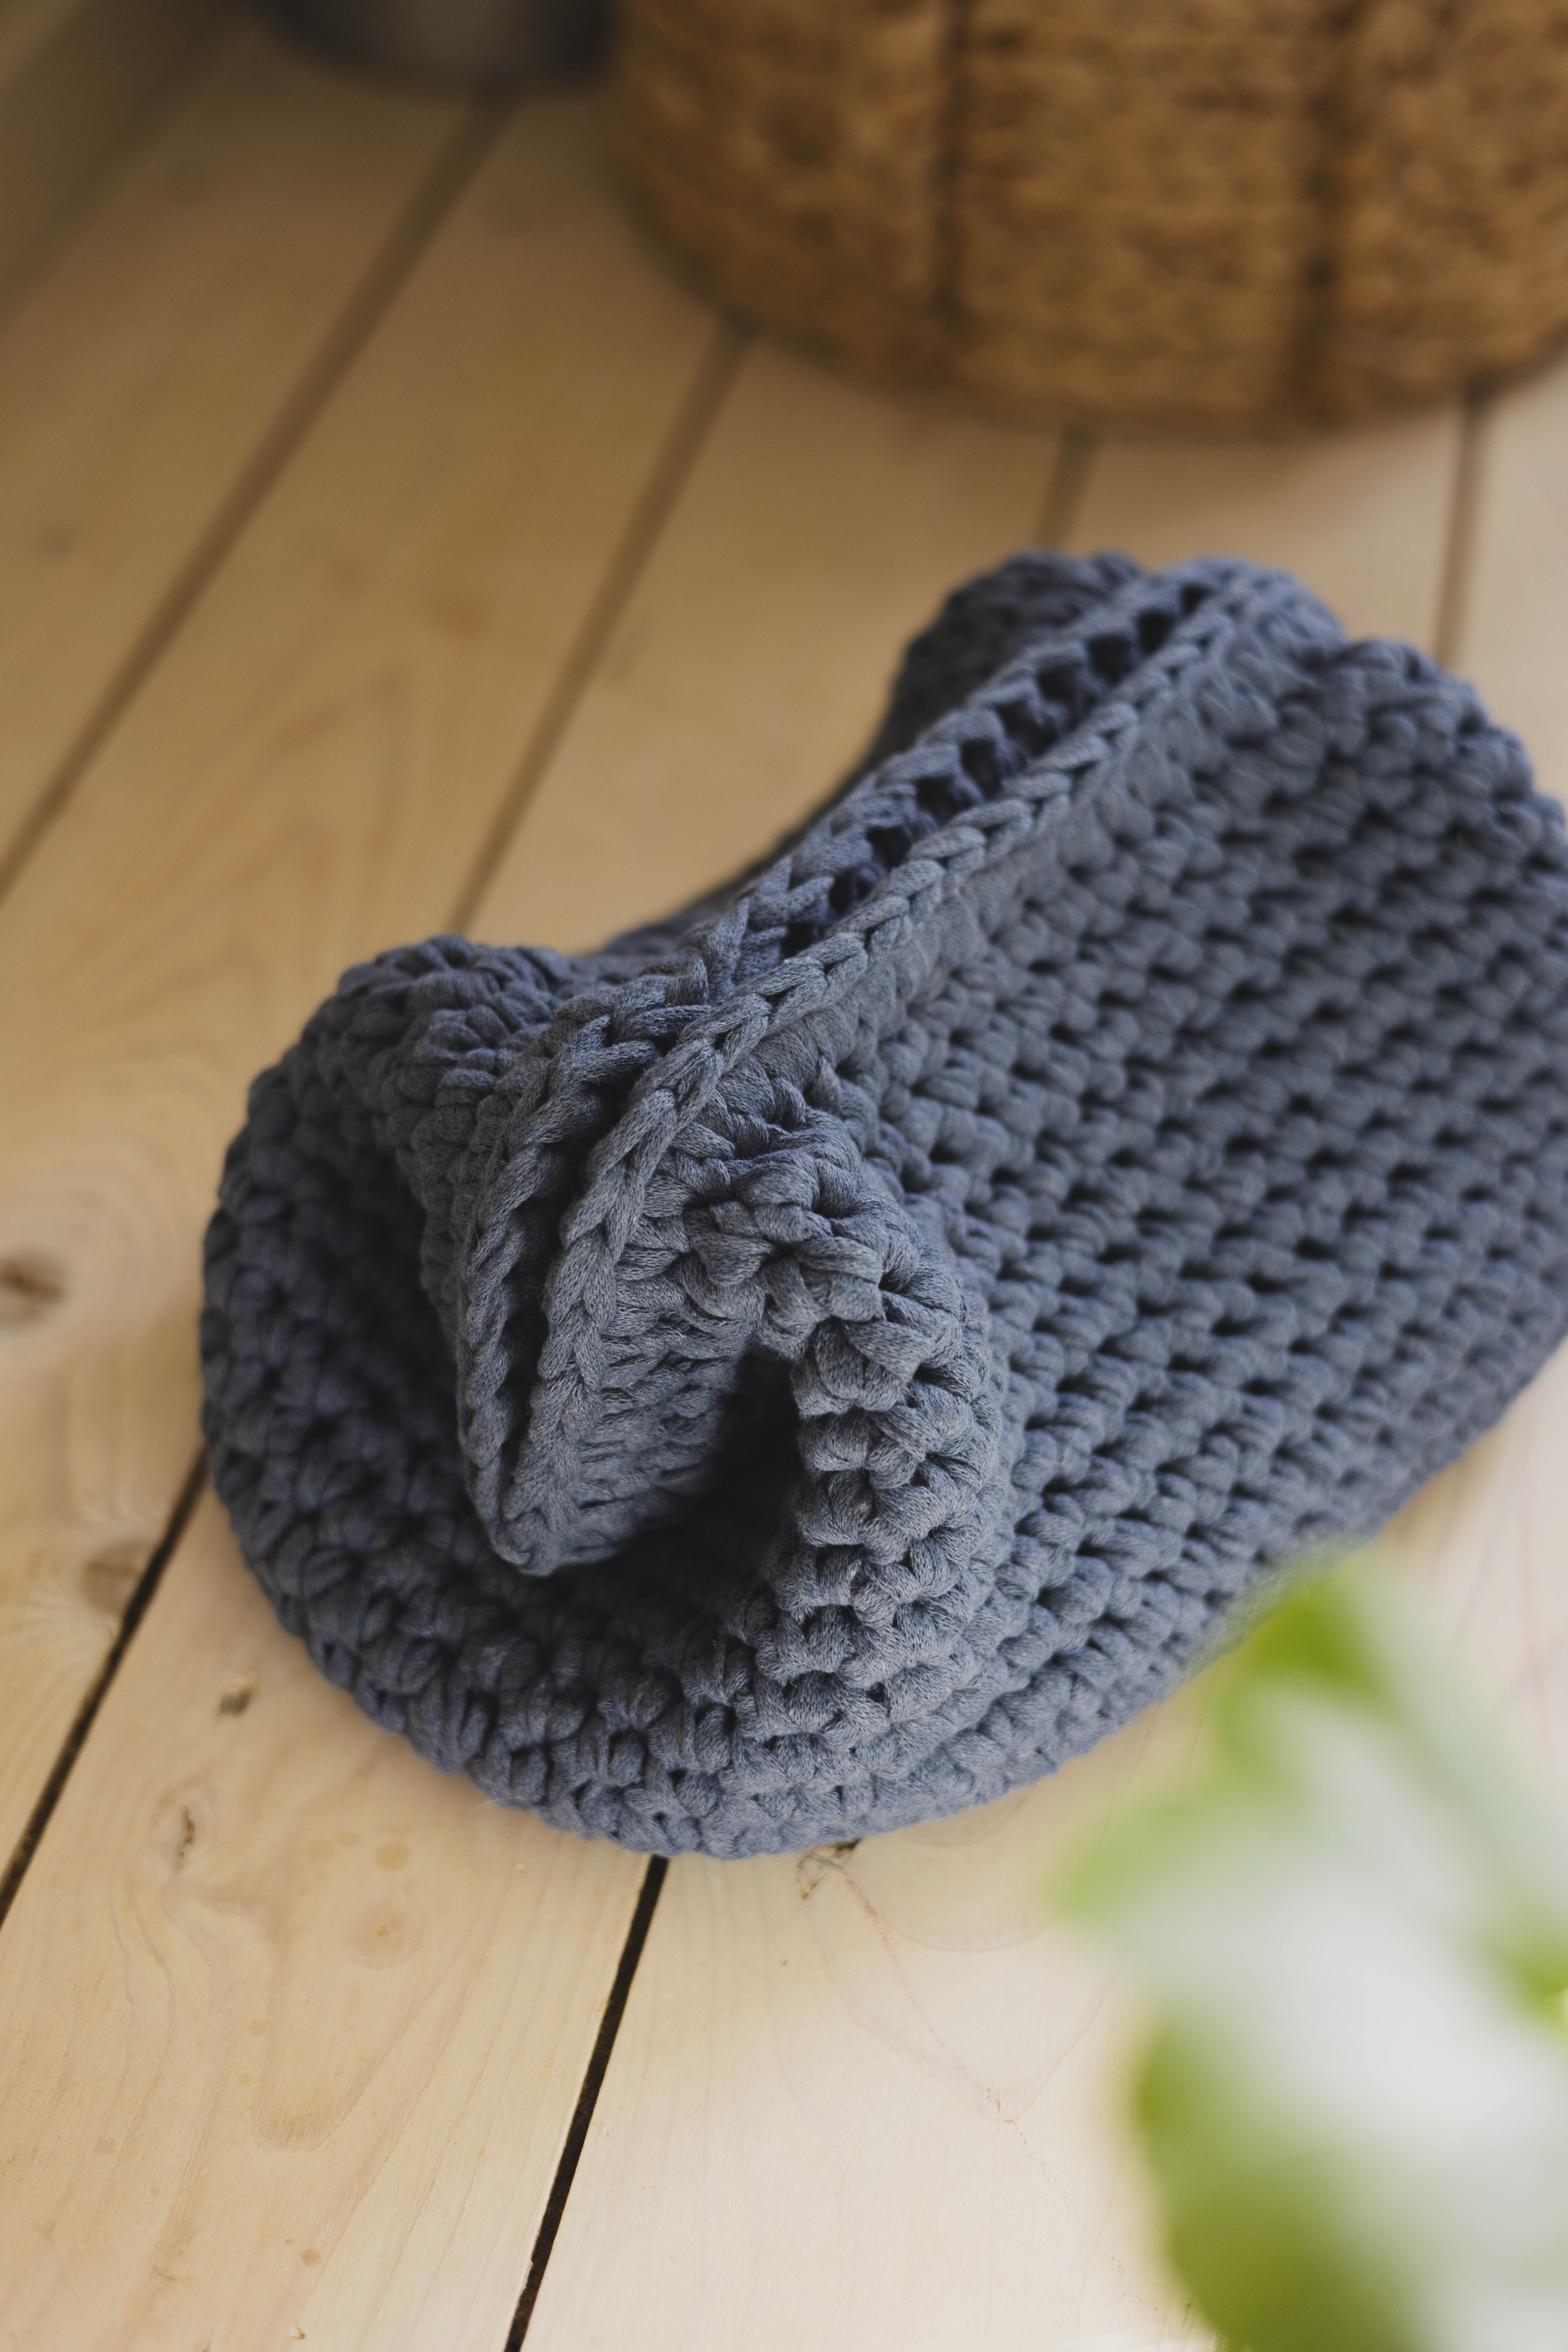
Crochet Your Own Unique Baguette Bag with Eko Mini.
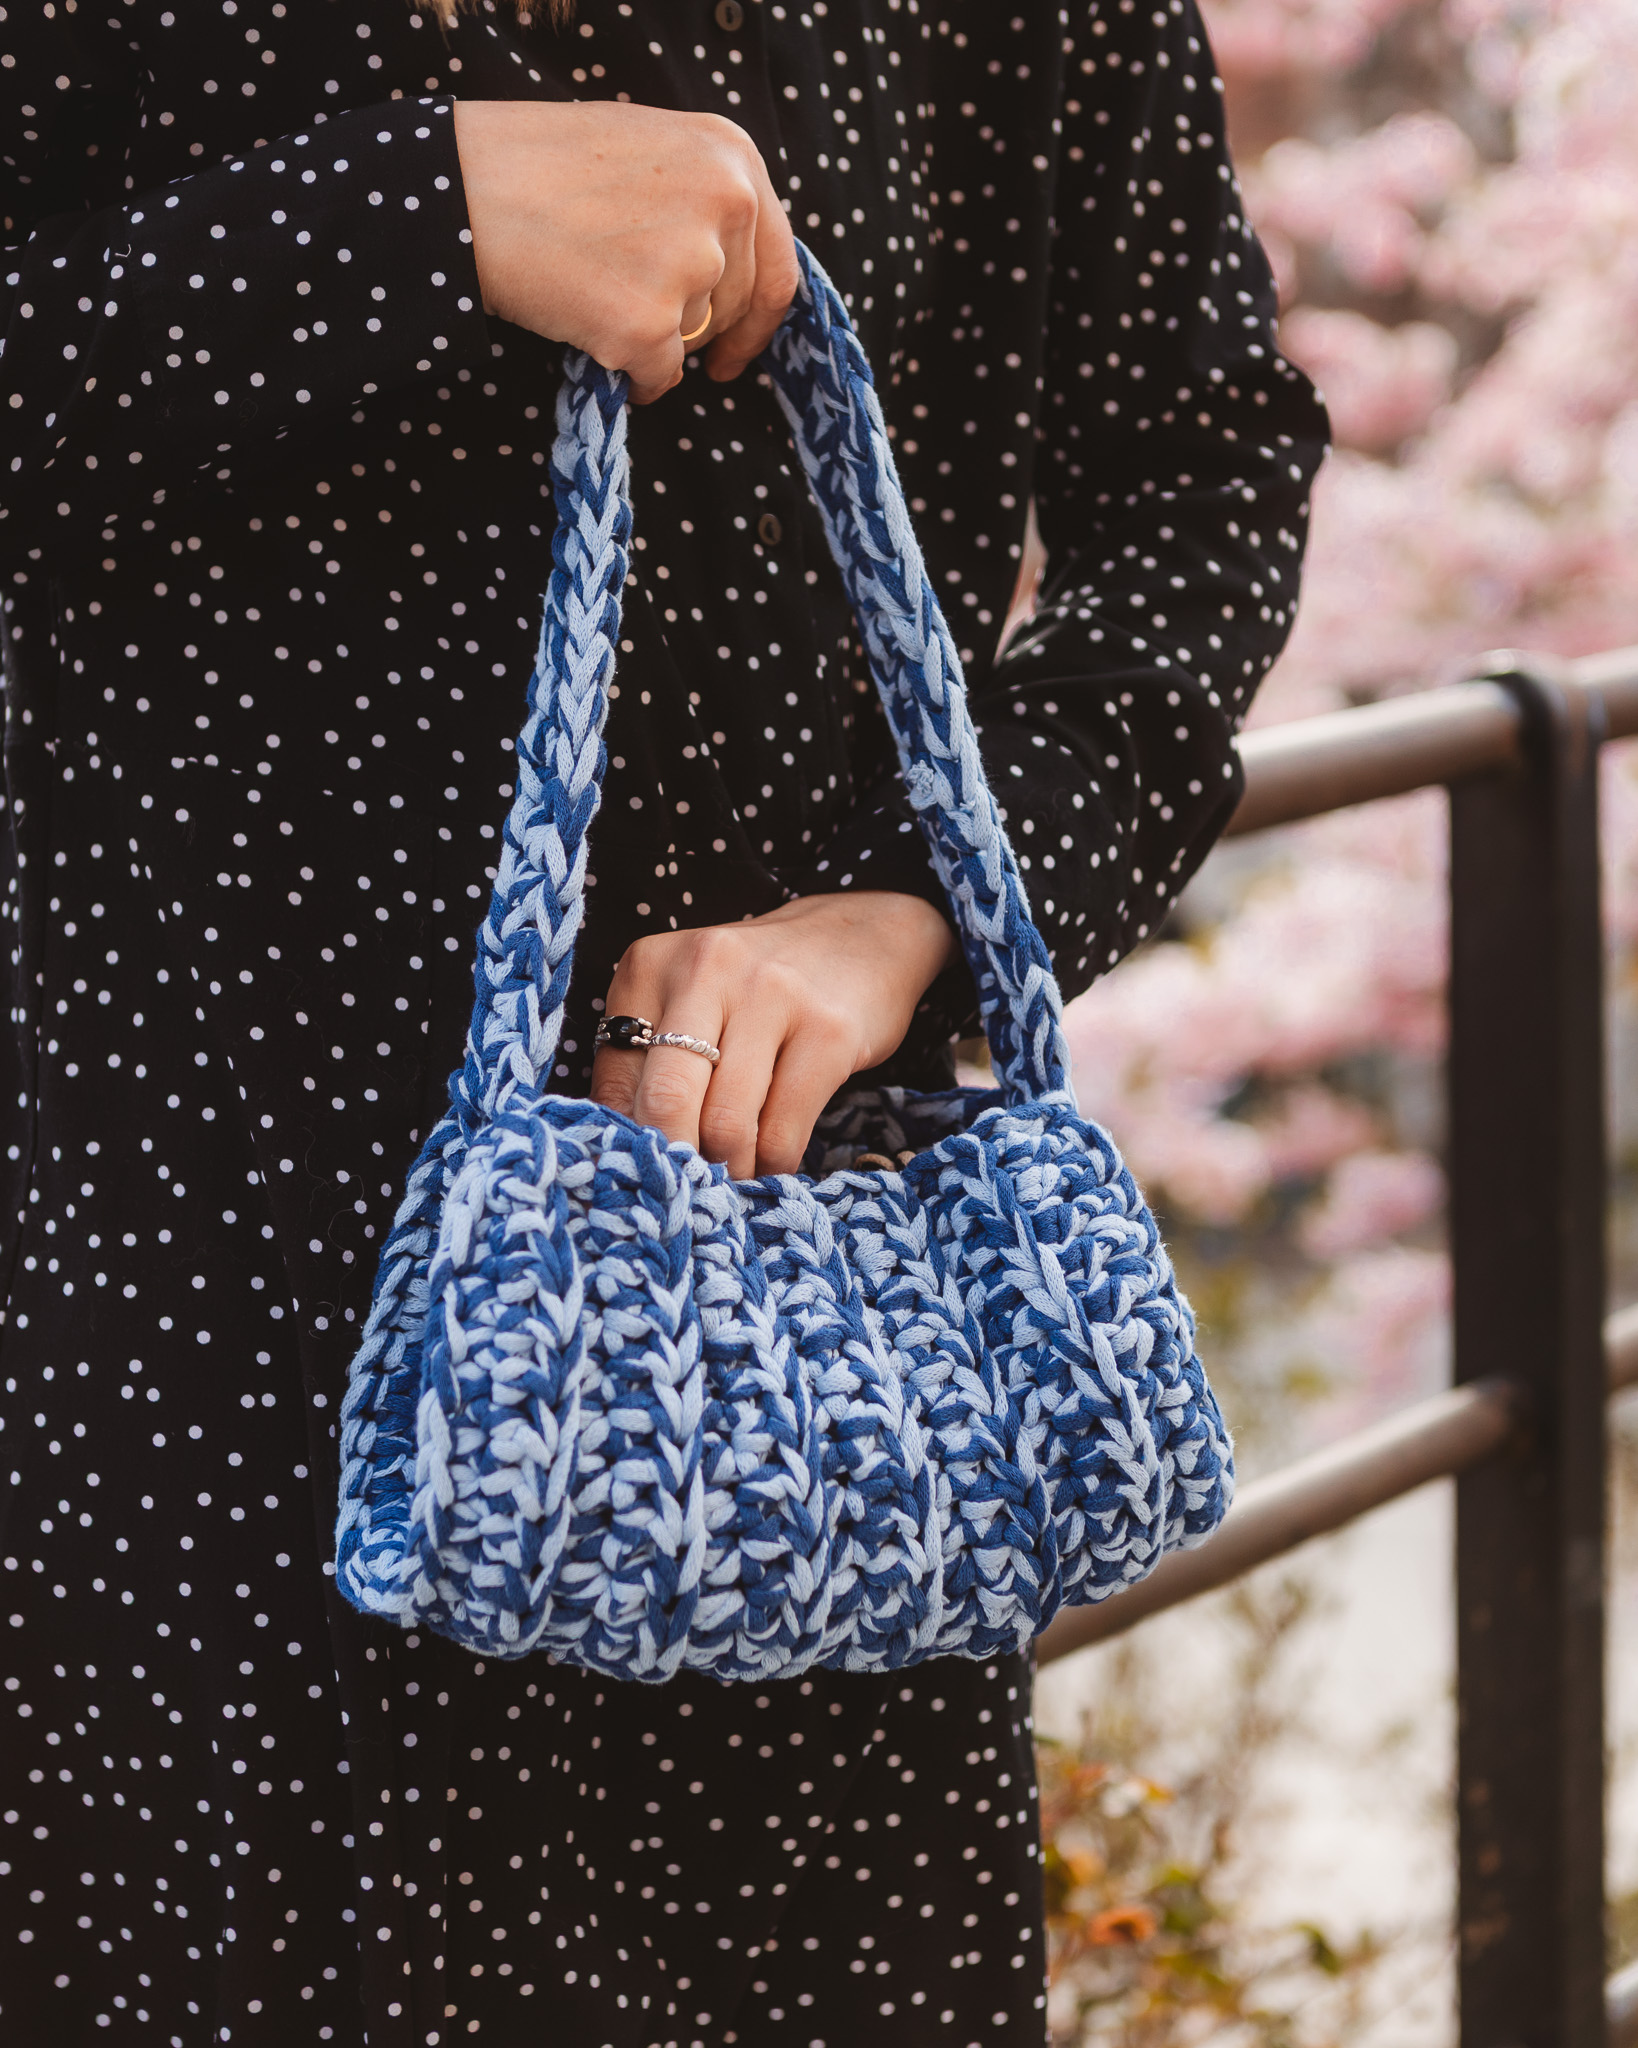
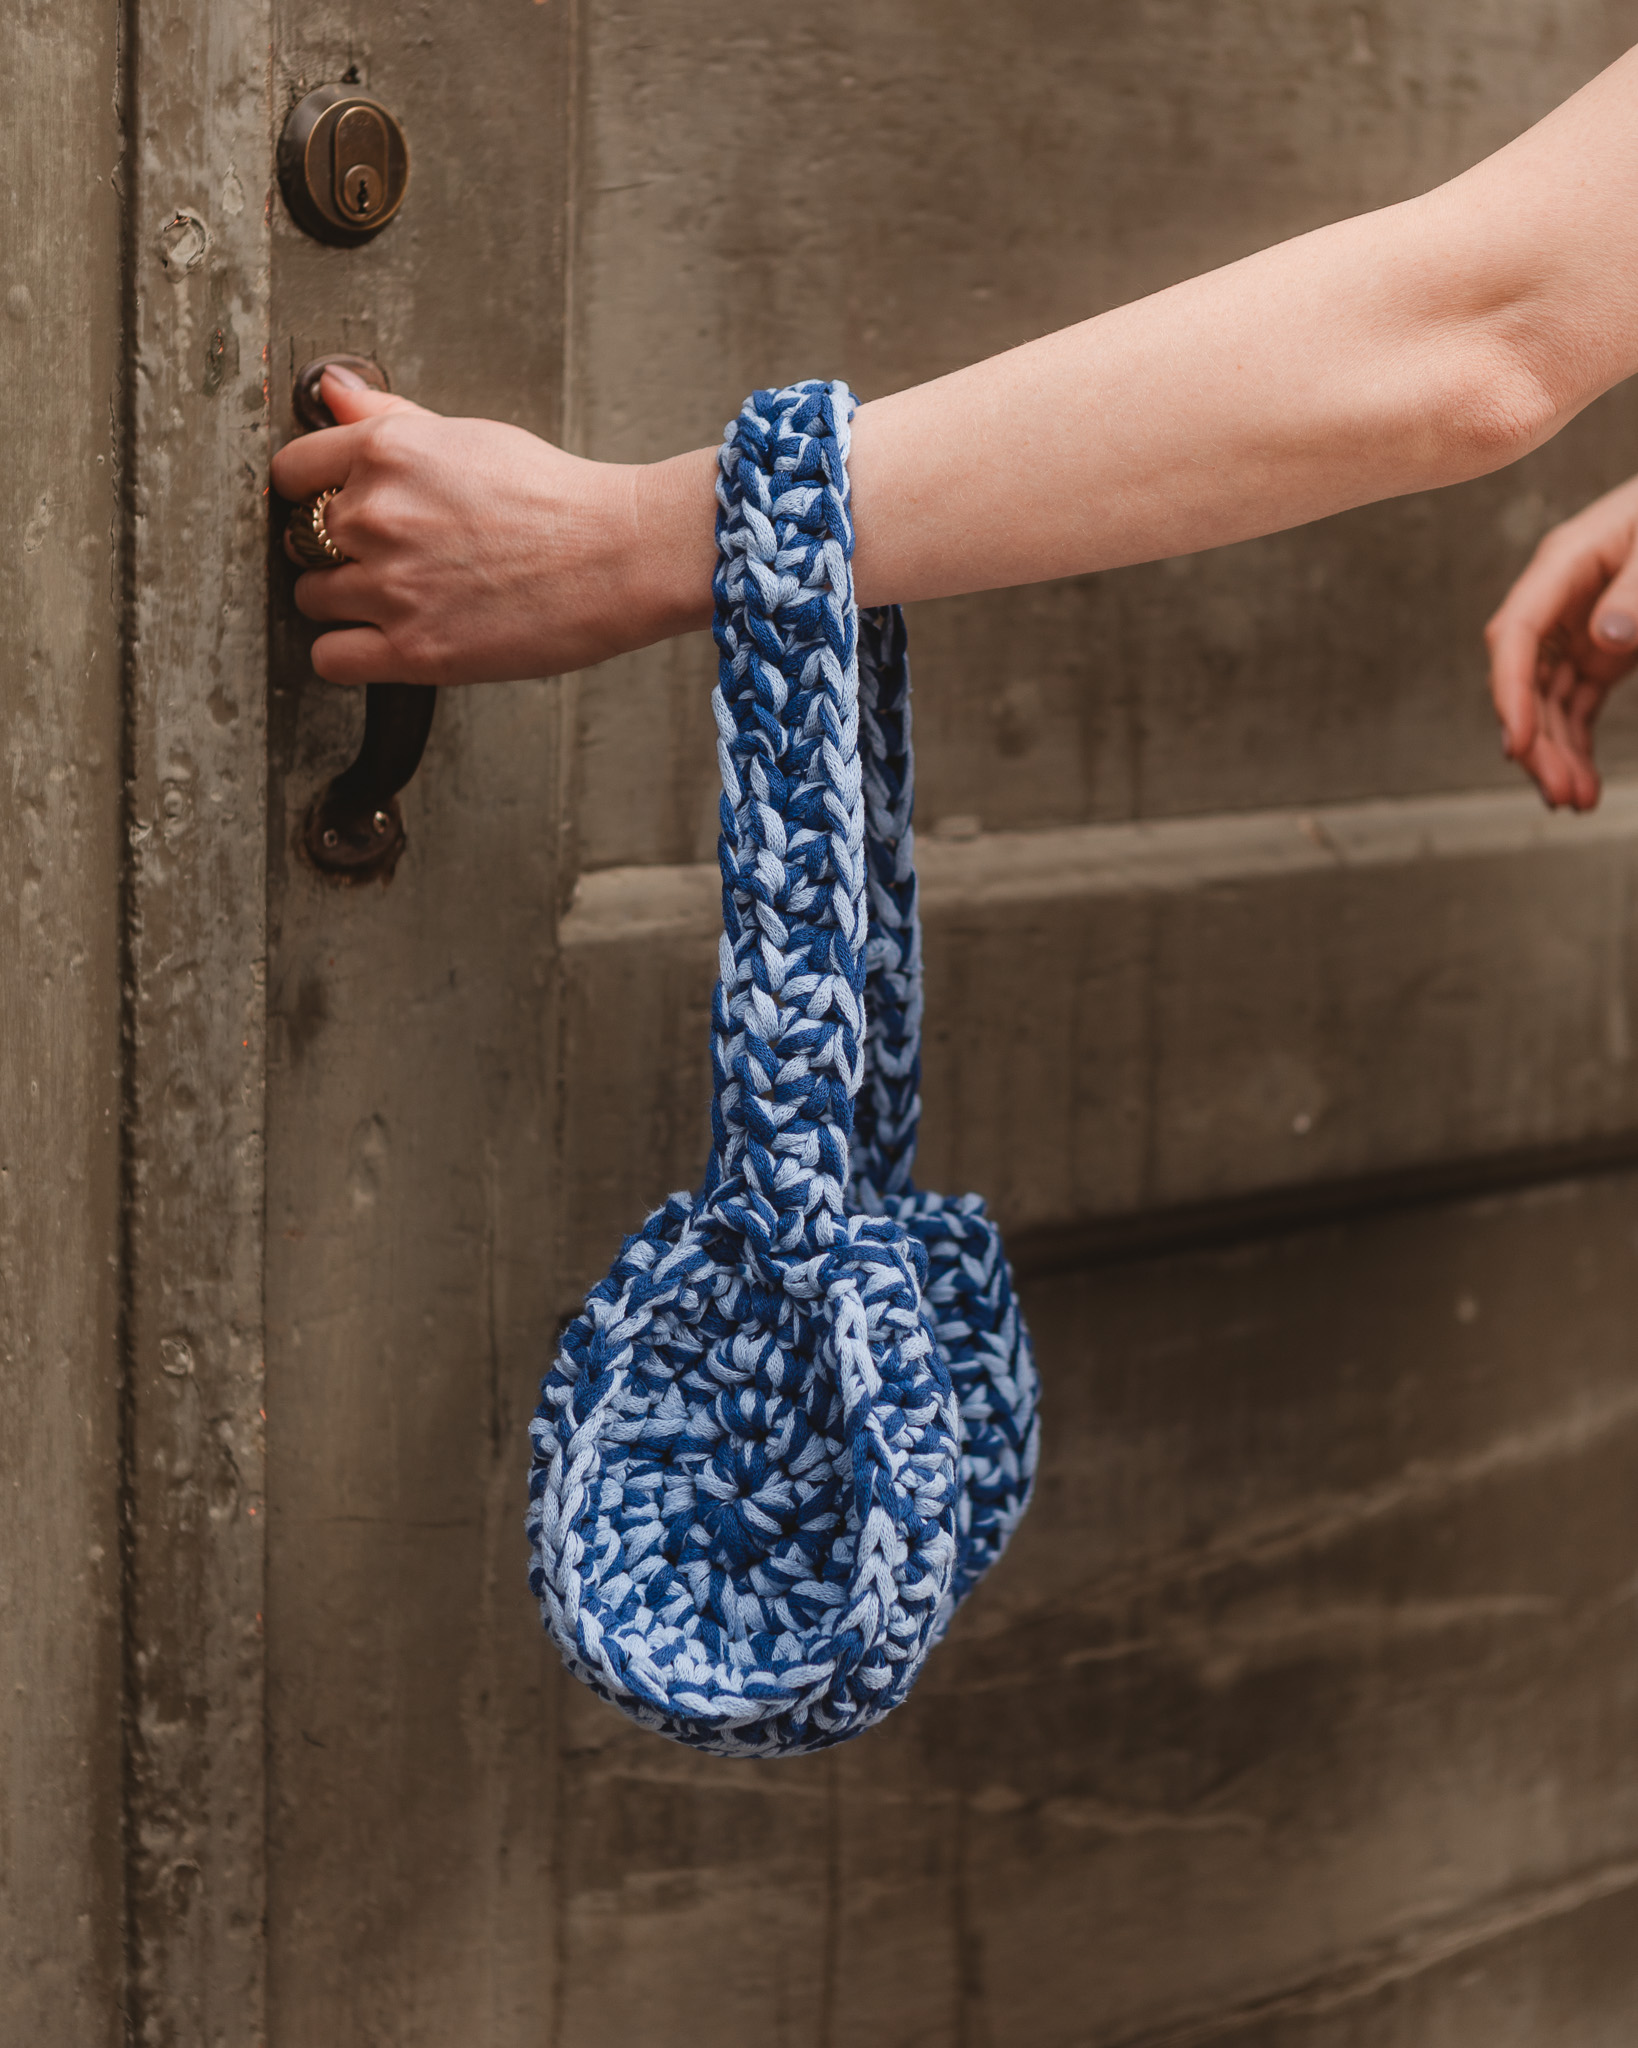
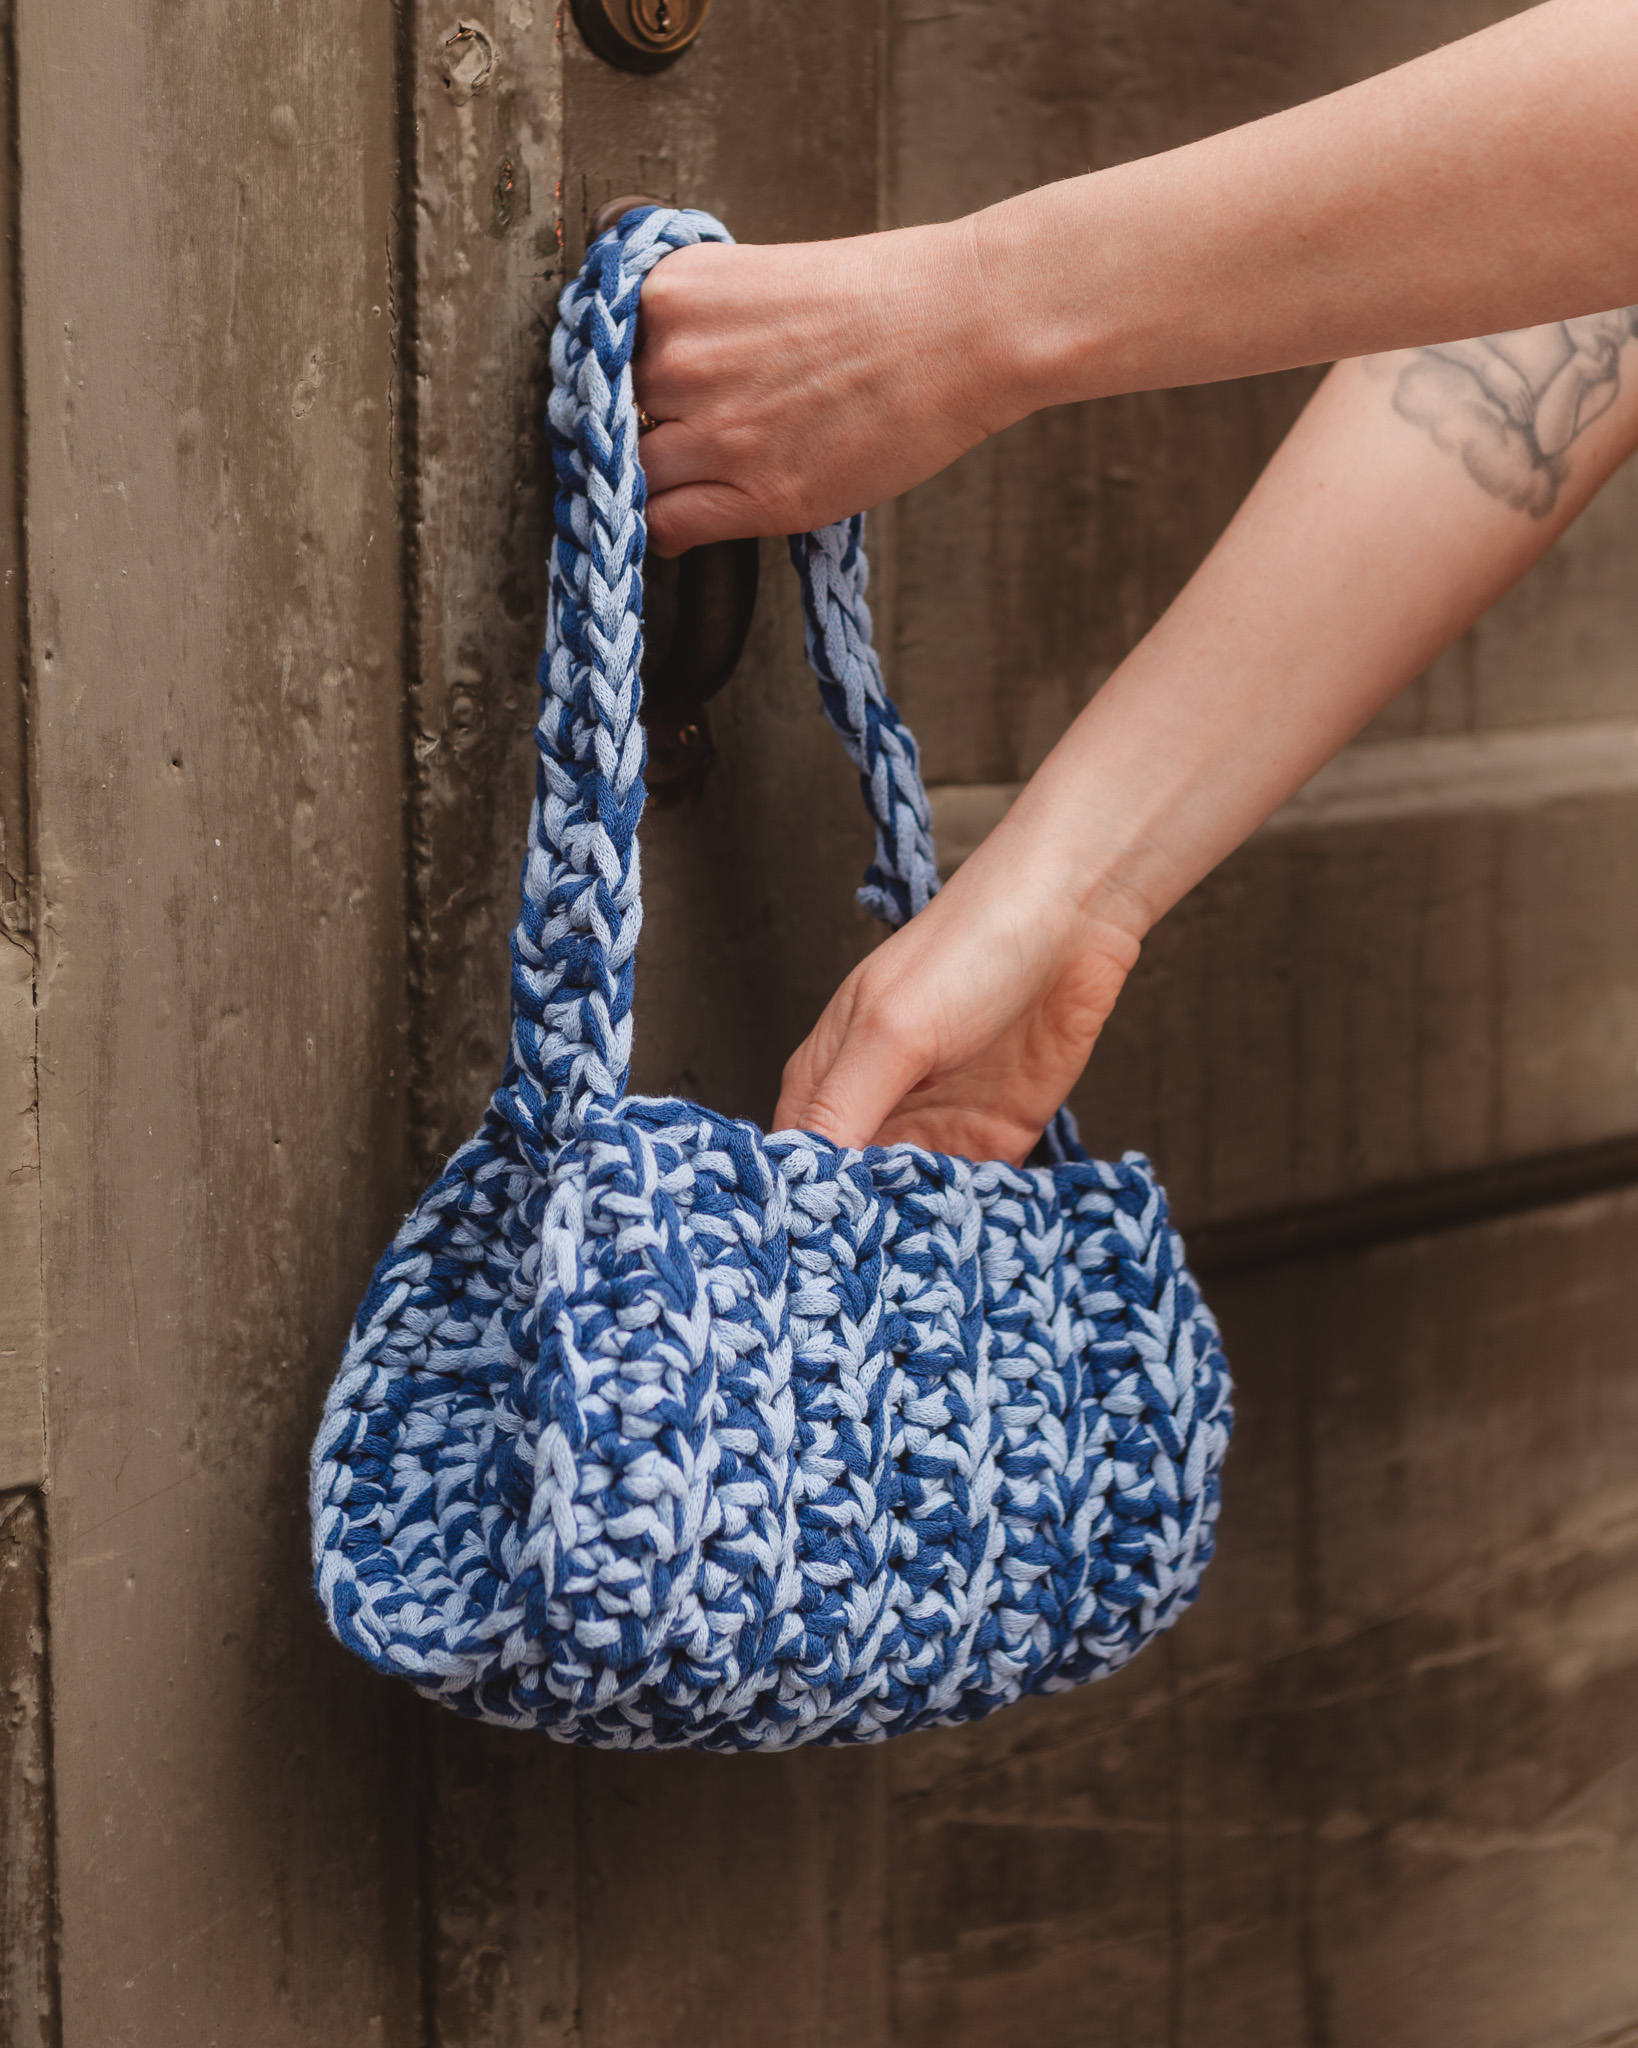
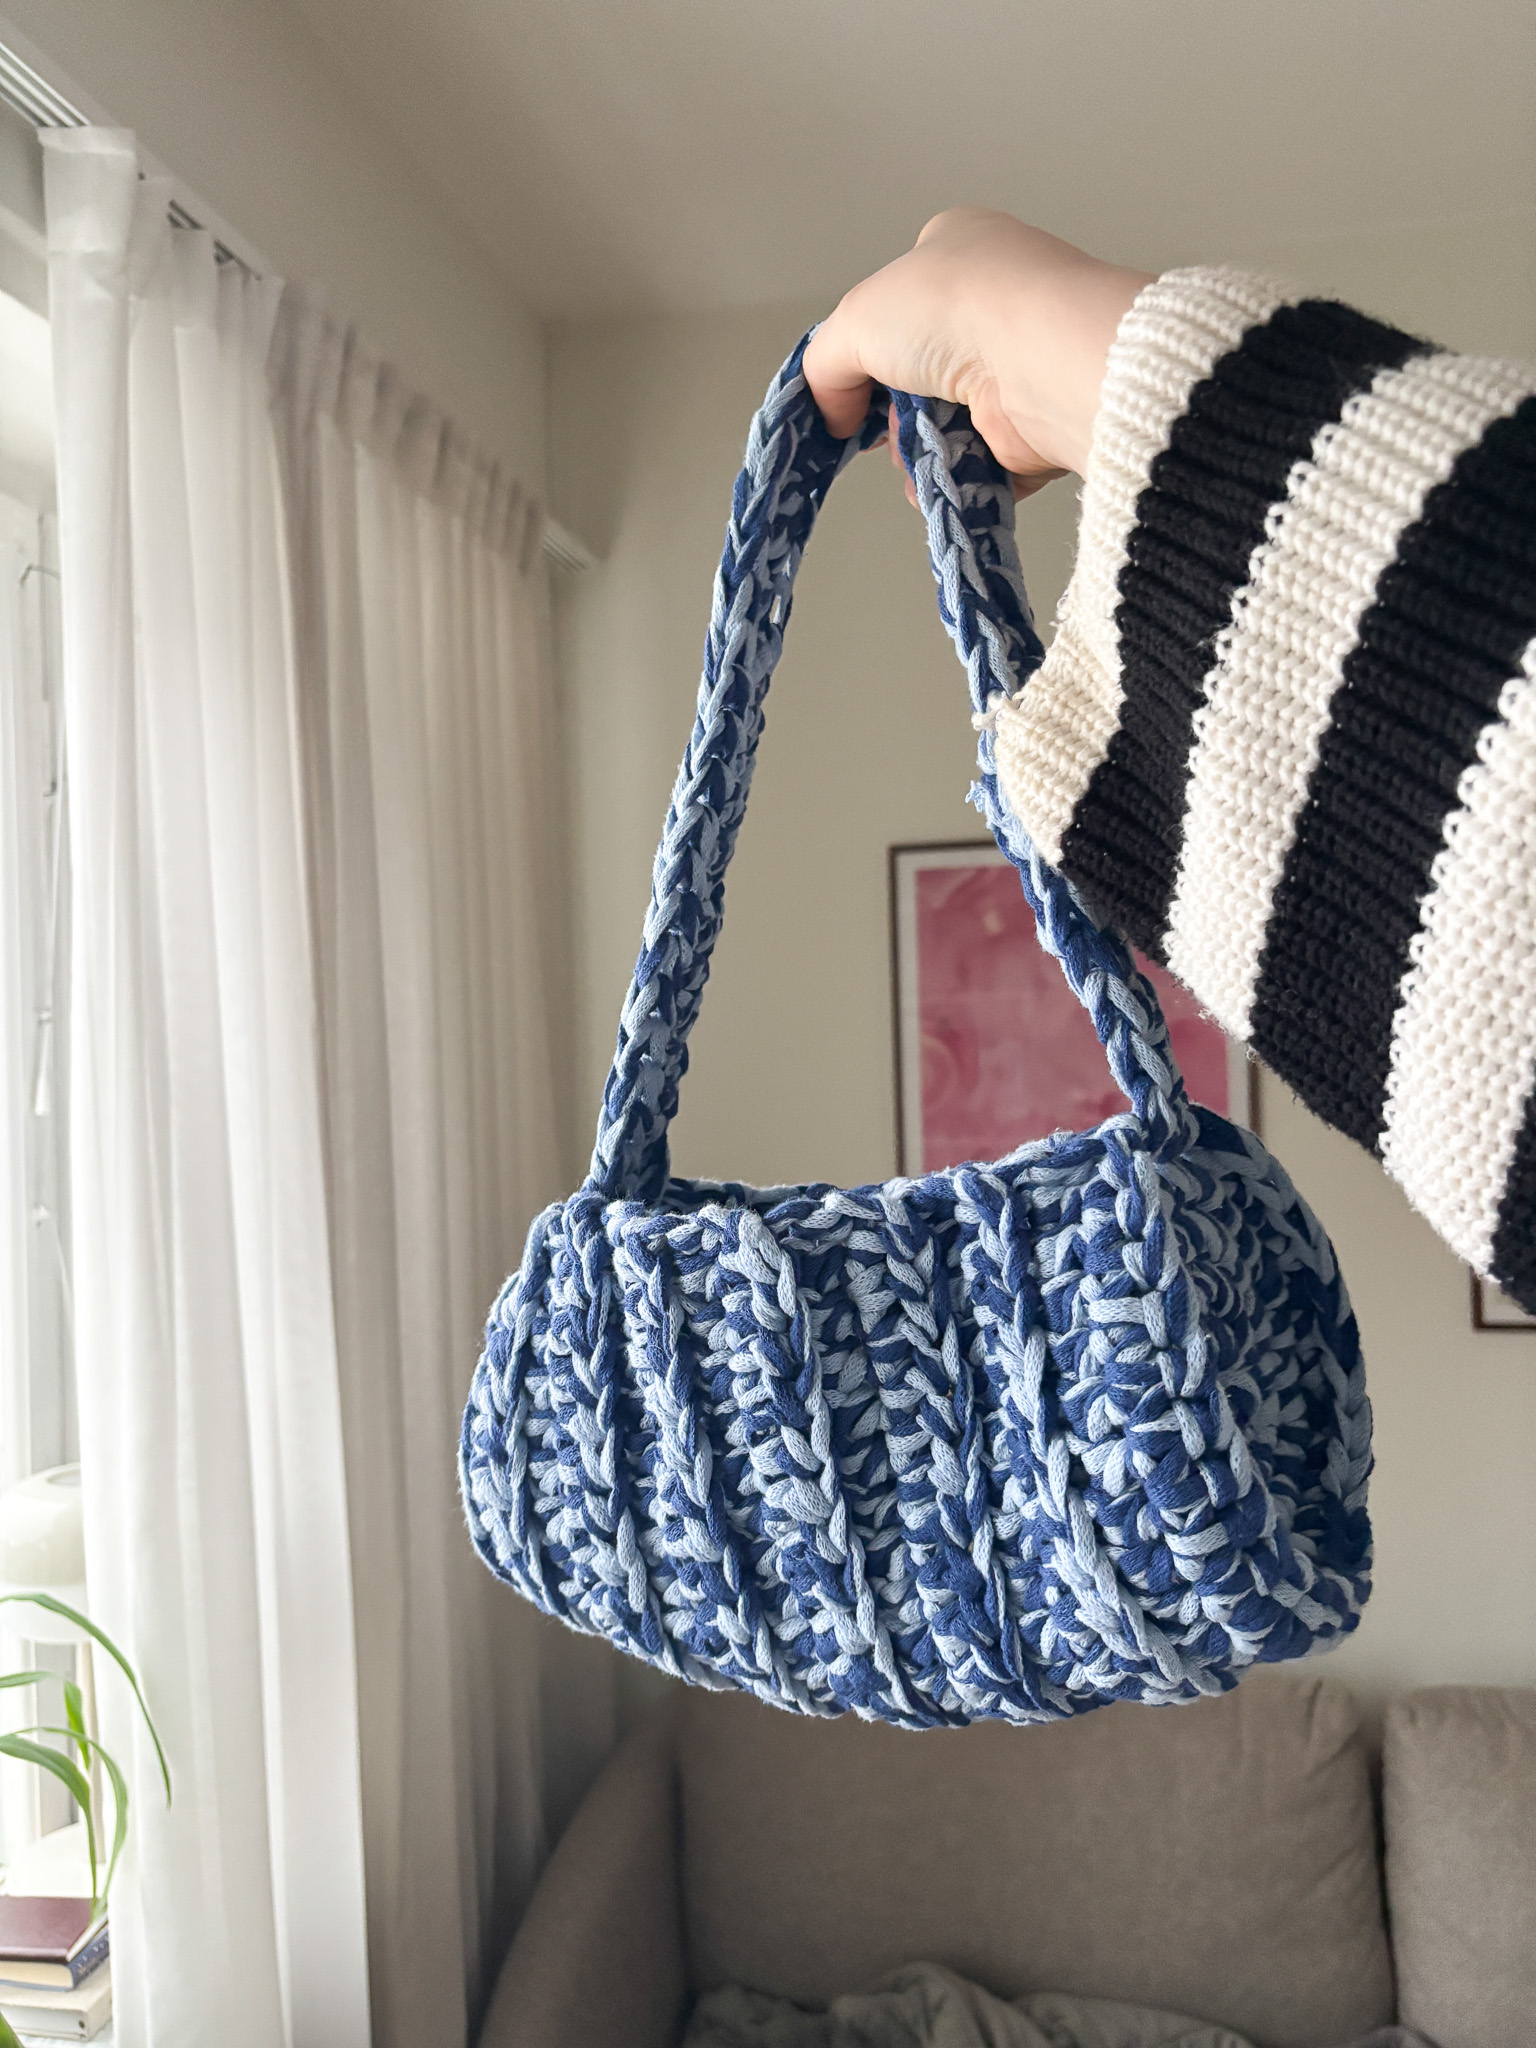
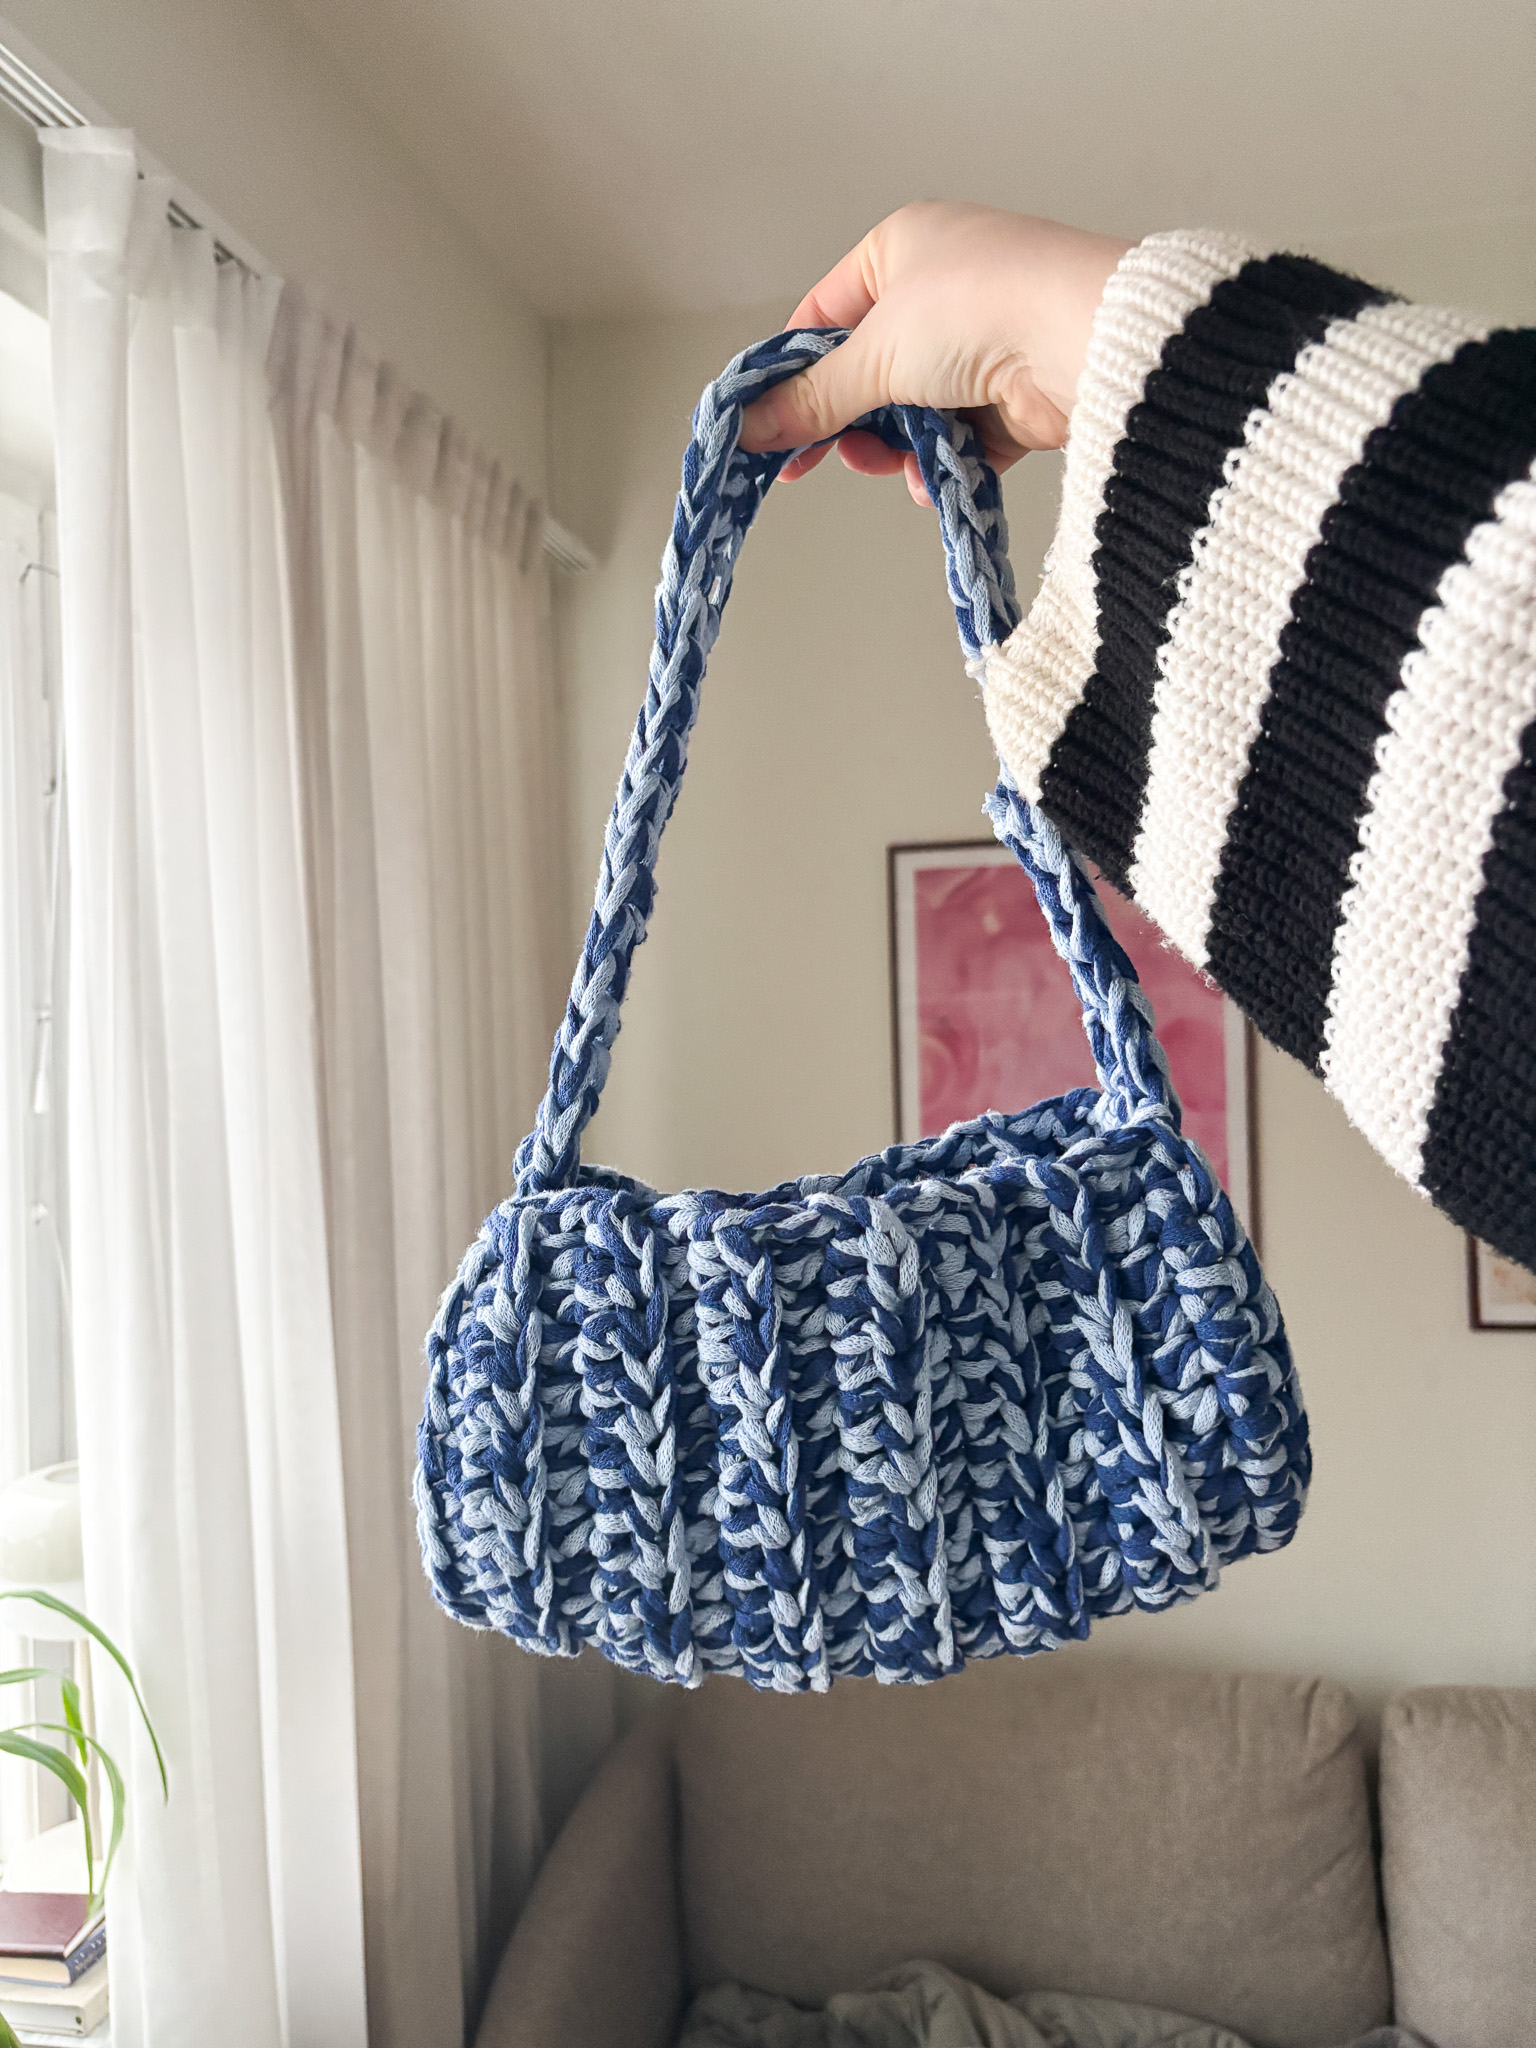
Crochet a one-of-a-kind baguette bag perfect for any occasion. Create your dream bag by combining your two favorite colors of MYO’s EKO Mini yarn. This is the perfect bag to fit everything you need for a night out. All you need are two tubes of our EKO Mini yarn (we are using the colors "Chalk Blue" and "Bright Blue"), a 10 mm crochet hook, and optionally some stitch markers to make crocheting easier! The finished bag measures approximately 25 cm in height, 26 cm in width, and 12 cm in depth. The shoulder strap is approximately 55 cm long and 4 cm wide.
Yarn Consumption: Approximately 400 g of EKO Mini tube yarn in total, 200 g of each color if you choose two colors.
Note: In this instruction, we use videos from our technique library along with images.


Here's how to do it
The bag is crocheted in three separate pieces, which are then joined together, creating a beautiful finished result. I hope you’ll want to try it and crochet your dream bag! Good luck! /Sara
.jpg)
This is what you need:
Here you can directly purchase the material for the product. Please note that the instruction is digital and appears here on the page (no written instruction).

EKO Mini tube yarn | 1000g
Narrow "Ribbon" yarn for crocheting, made of 80% recycled cotton
Buy product
.jpg)
Unleash your creativity
For only 85kr per month you get access to all our 300+ beginner-friendly instructions for crochet, knitting and macrame.
A perfect way to get started with your new hobby!

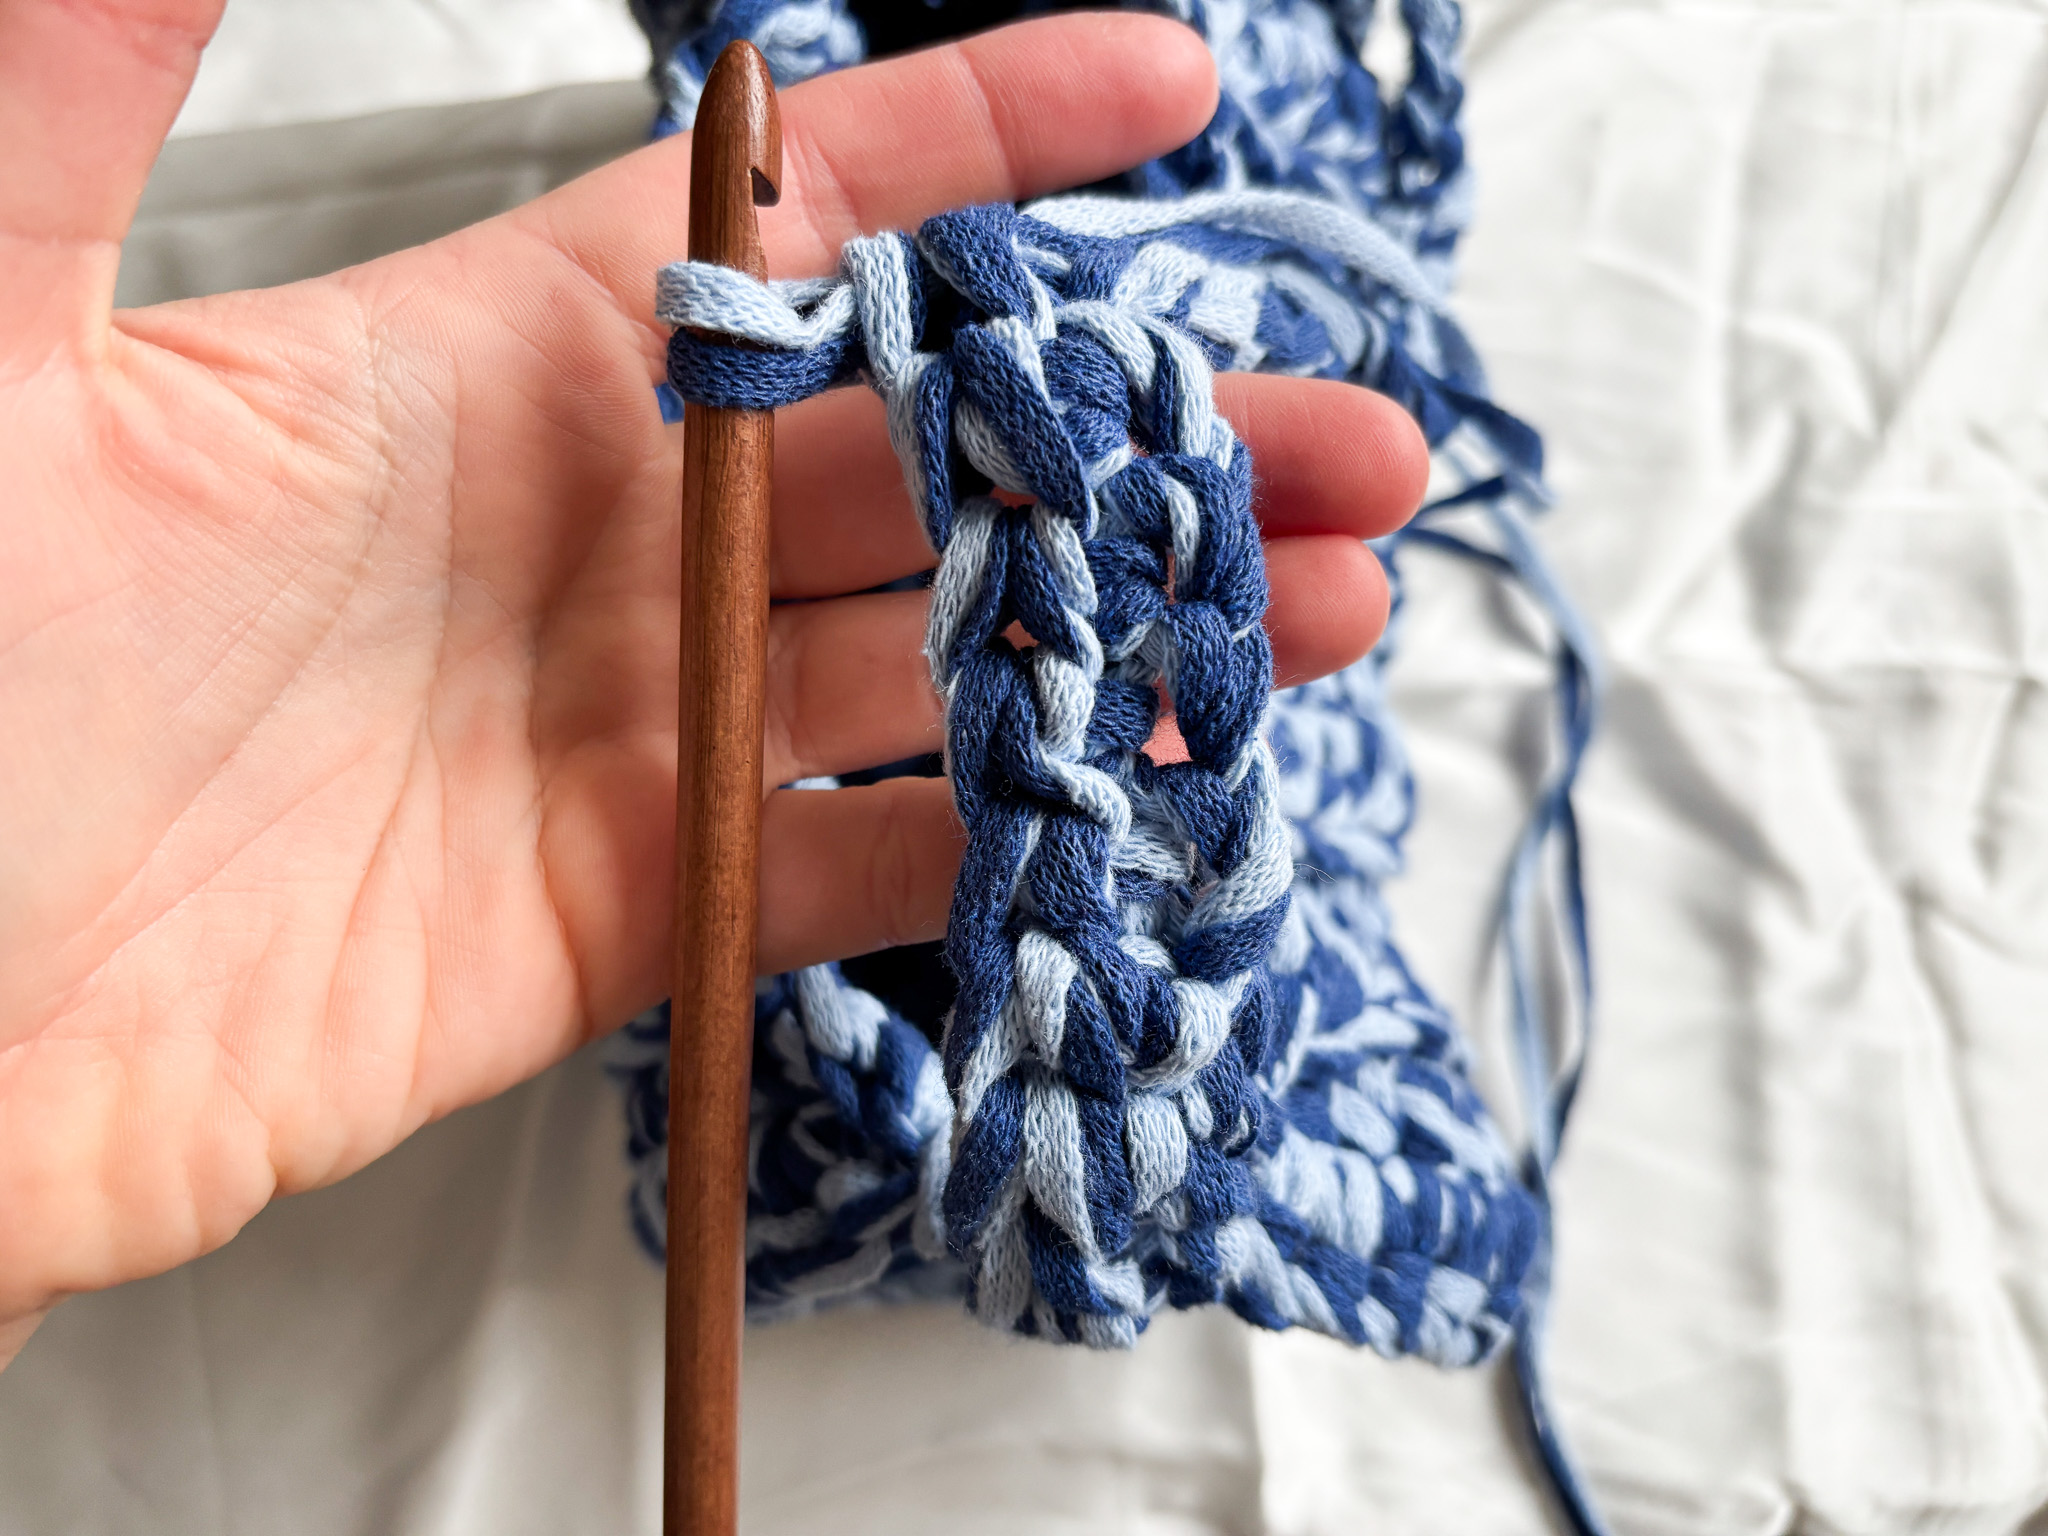
You start by crocheting two circles that will form the sides of the bag. Then we crochet the main body of the bag! After that, we join all three pieces together and finish by crocheting the shoulder strap — and then you have your very own crocheted bag.
Begin by making two circles, one for each side of the bag. Each circle is crocheted separately, and this process is done twice.
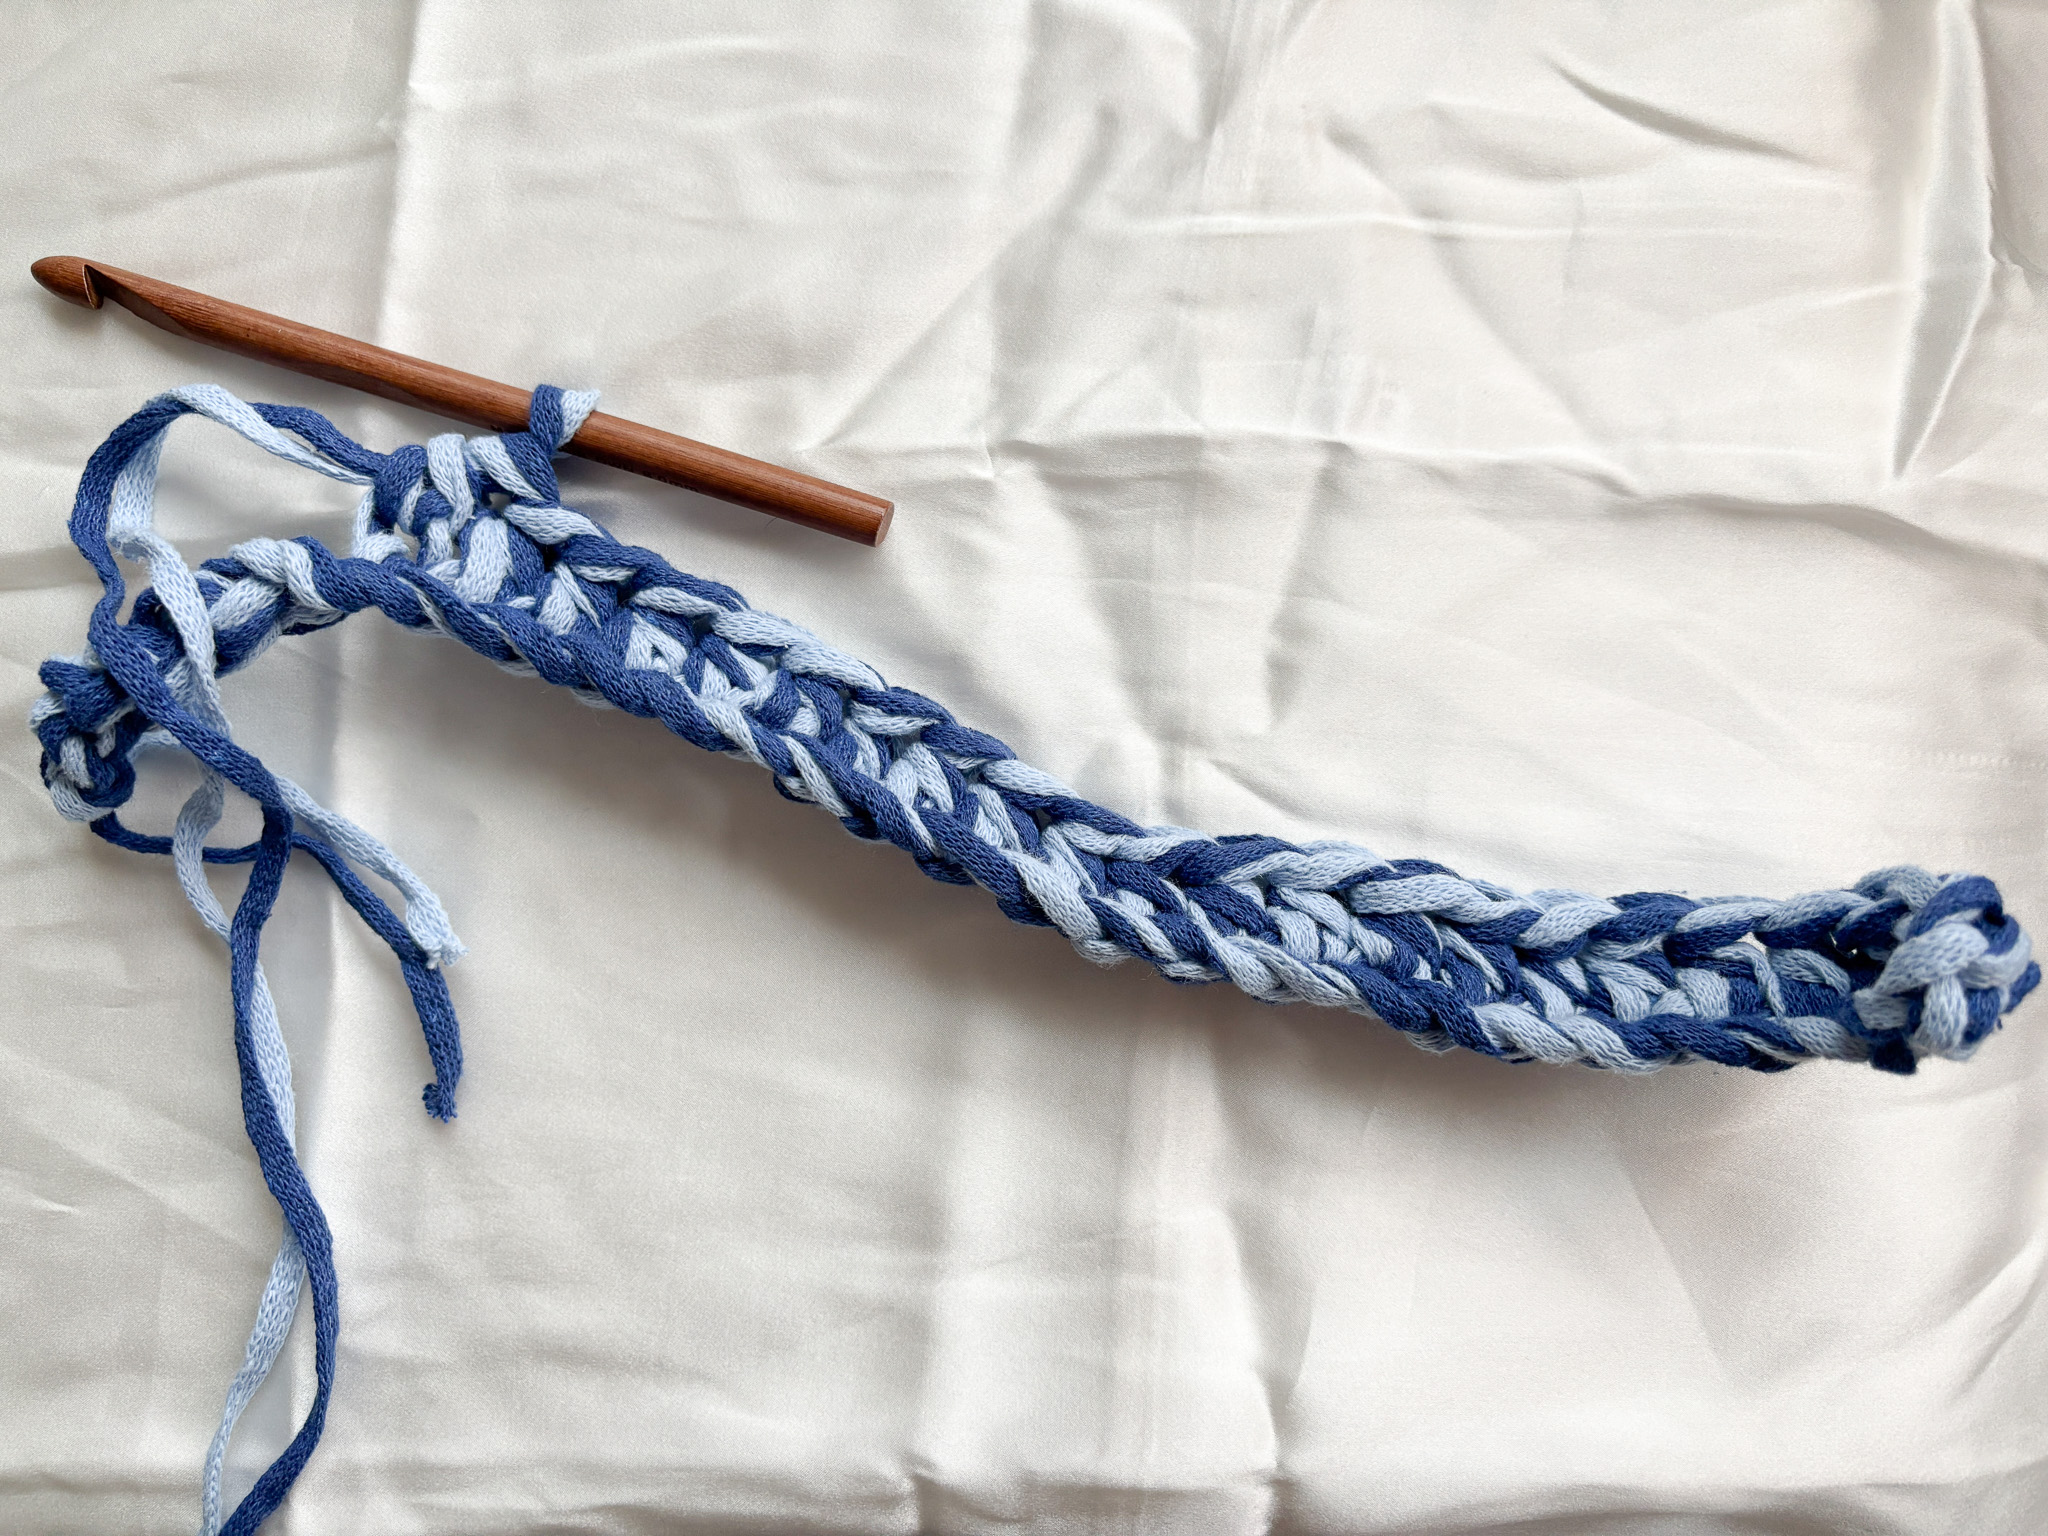
Round 1: Start with a magic ring. In the magic ring, crochet six single crochet stitches. If you’re unsure how to work a magic ring with single crochet stitches, see the video below.
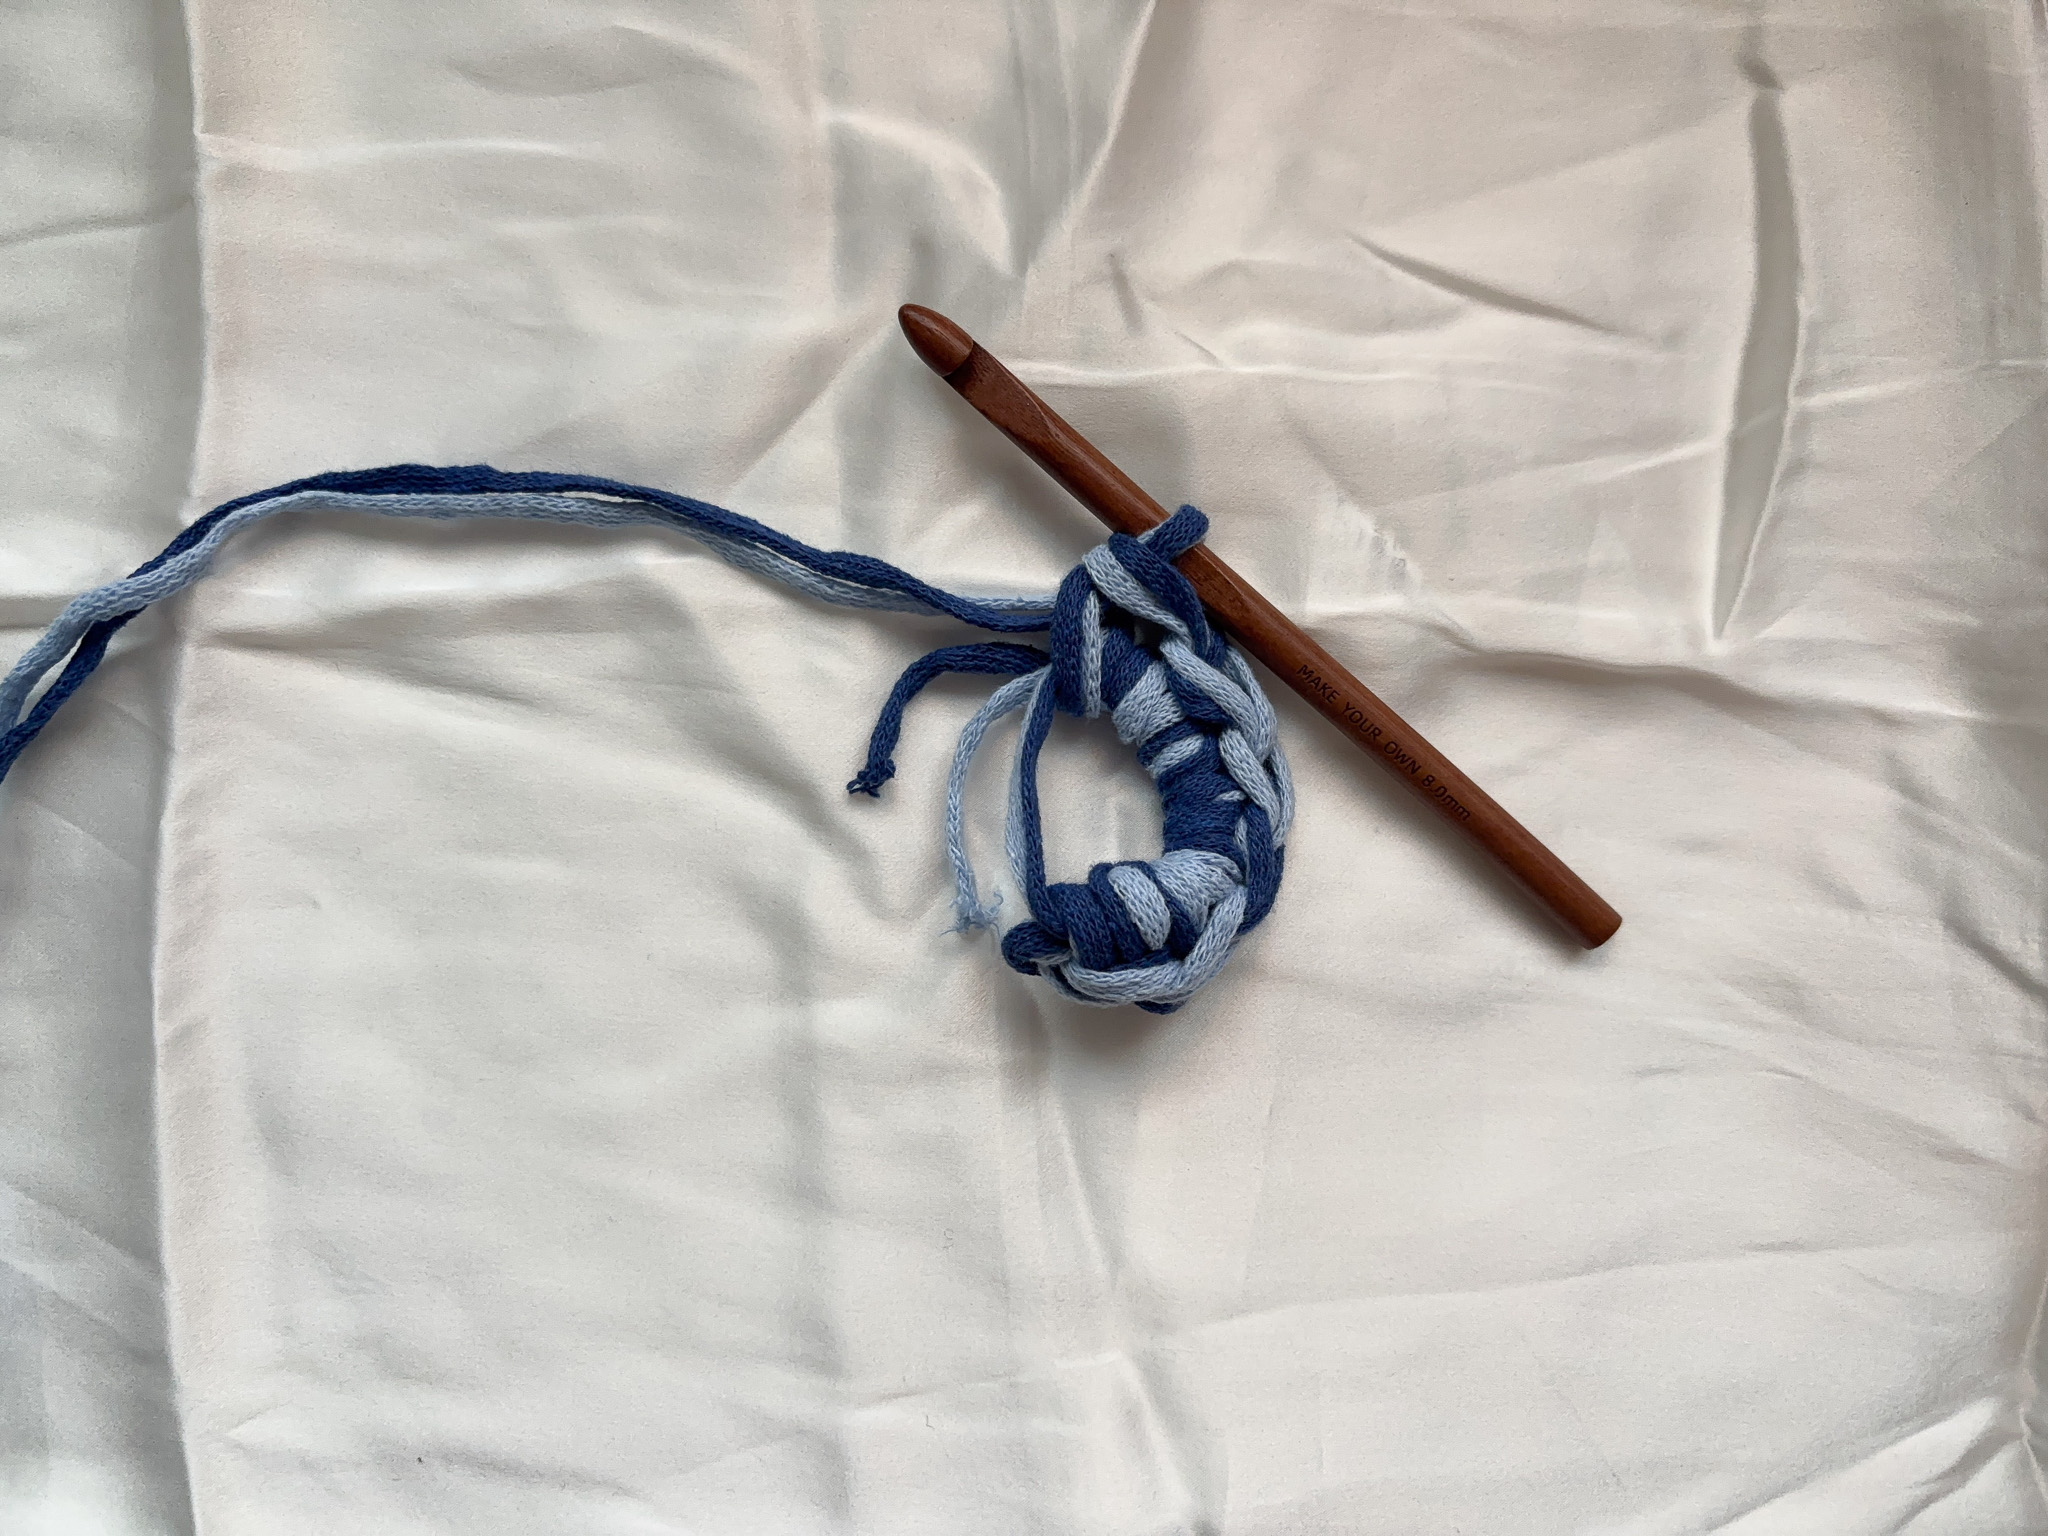
Round 2: Start in the same stitch as the slip stitch. Work an increase — two single crochet stitches in each stitch around. To make it easier, you can place a stitch marker in the first stitch so you know where the round begins.
You will have a total of 12 stitches in this round. If you are unsure how to work an increase, see the video below.


Round 3: *Work 1 single crochet in the first stitch. In the next stitch, work an increase by making 2 single crochet stitches in the same stitch*. Repeat between *…* a total of 6 times.
You will have a total of 18 stitches in this round.

Round 4: *Work 2 single crochet stitches. In the third stitch, make an increase by working 2 single crochet stitches in the same stitch*. Repeat between *…* a total of 6 times.
You will have a total of 24 stitches in this round.
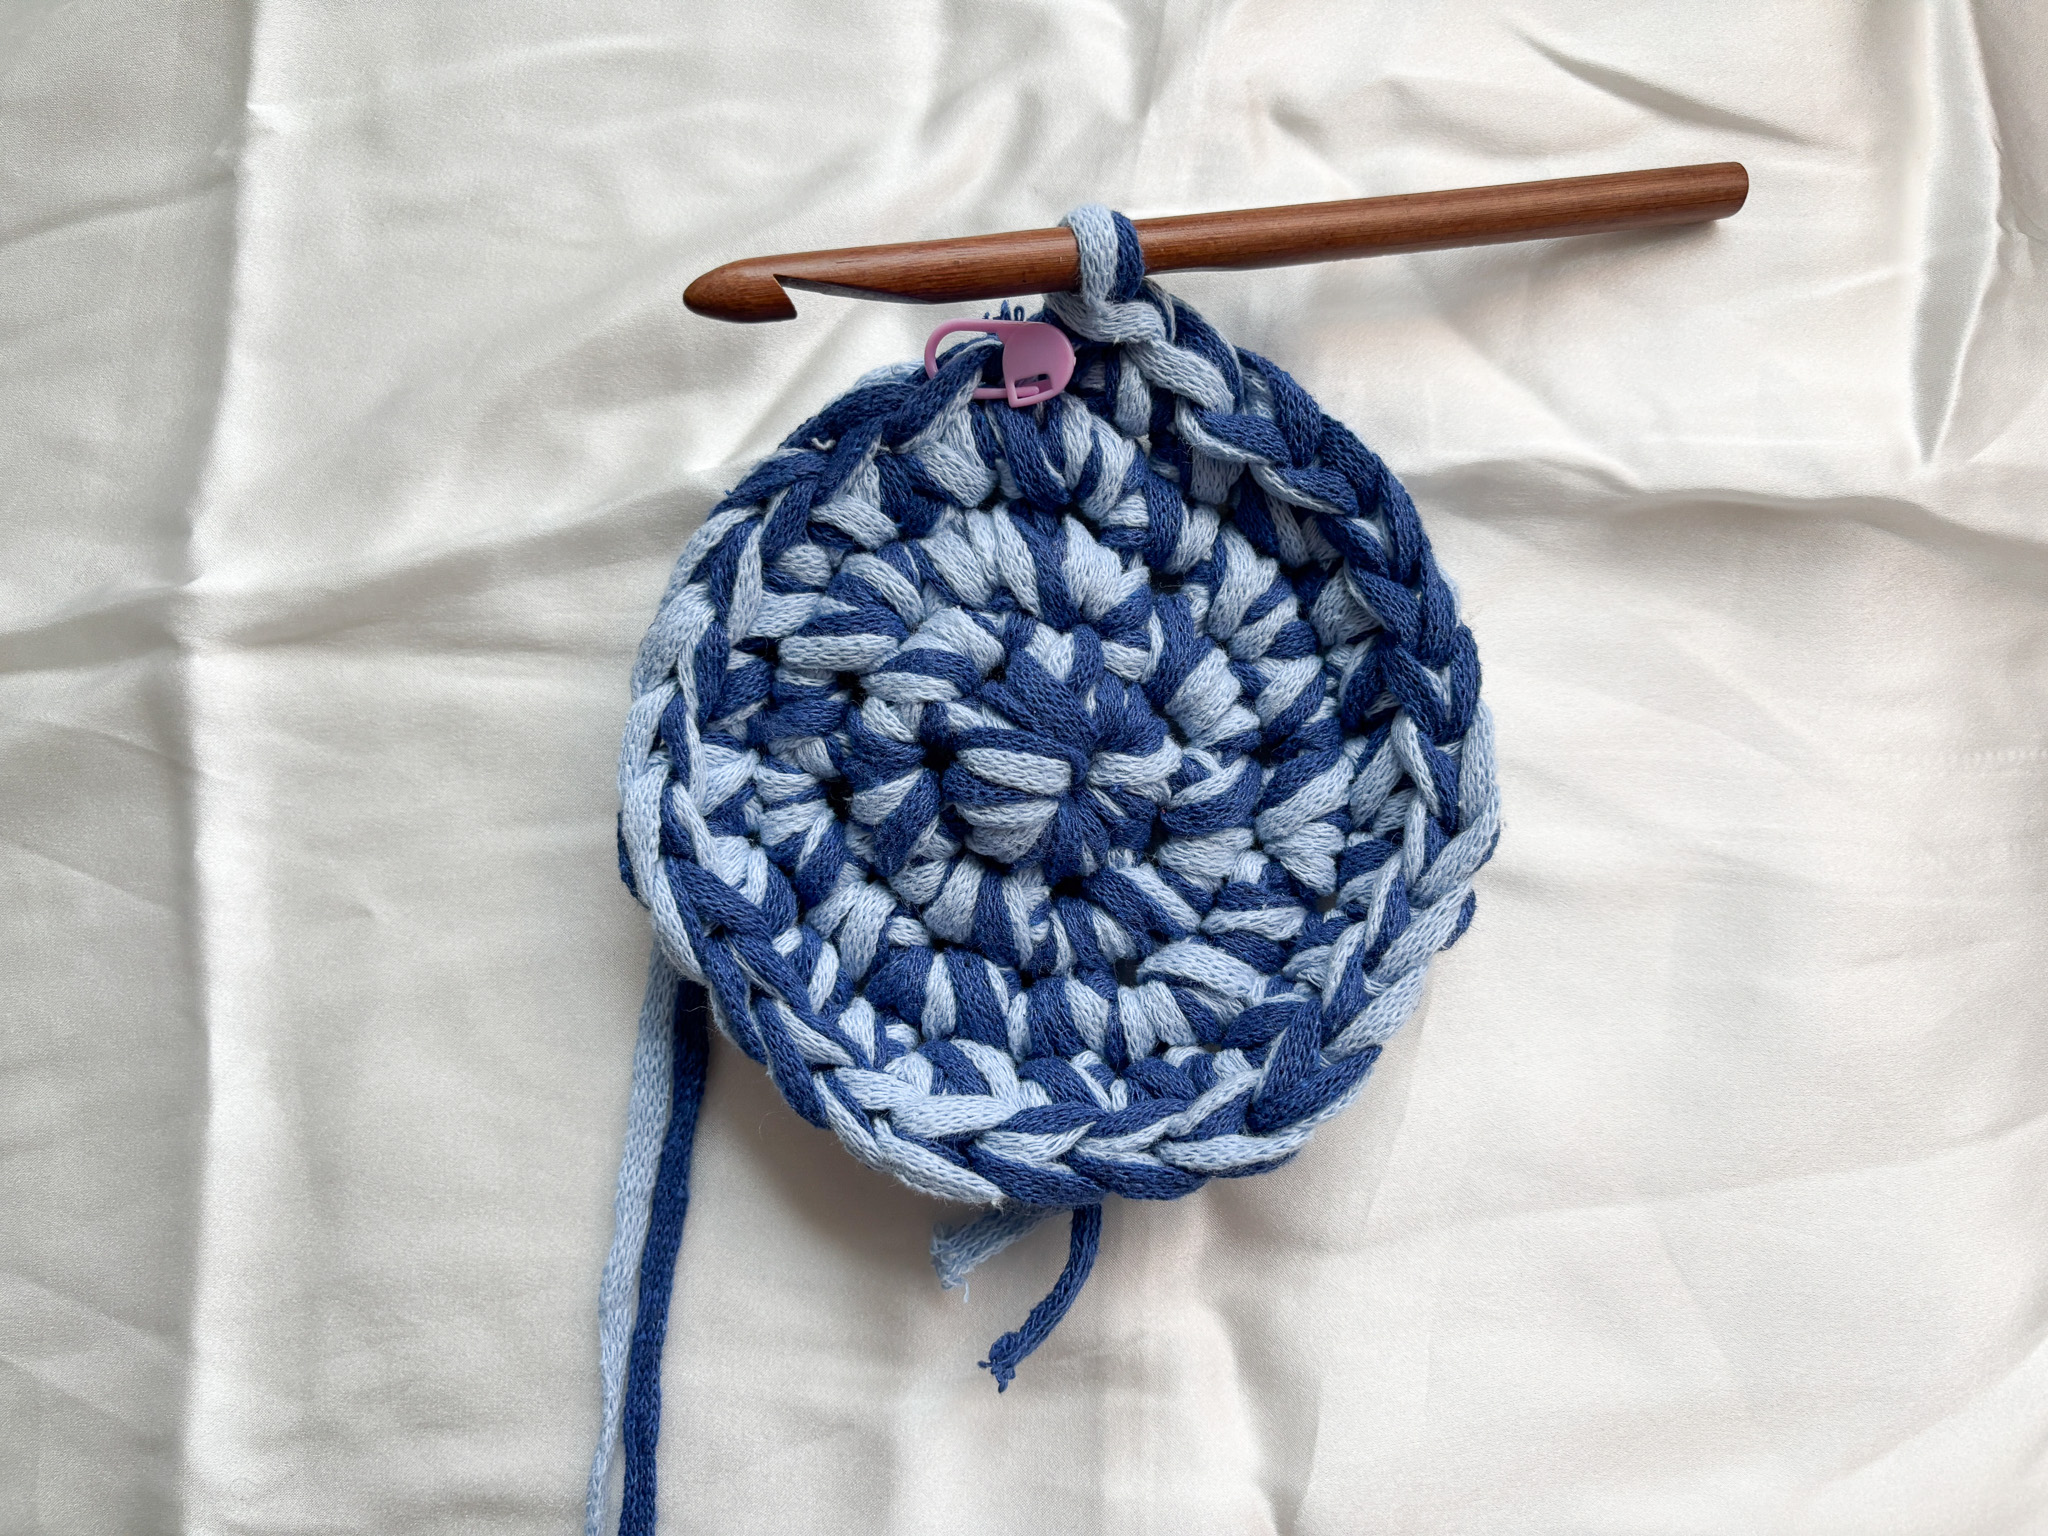
When you have finished Round 4, join with a slip stitch.
Cut the yarn and pull it through the loop to secure it. Then weave in the yarn ends on the back of the circle, tucking them into the stitches so they are hidden and held securely in place.
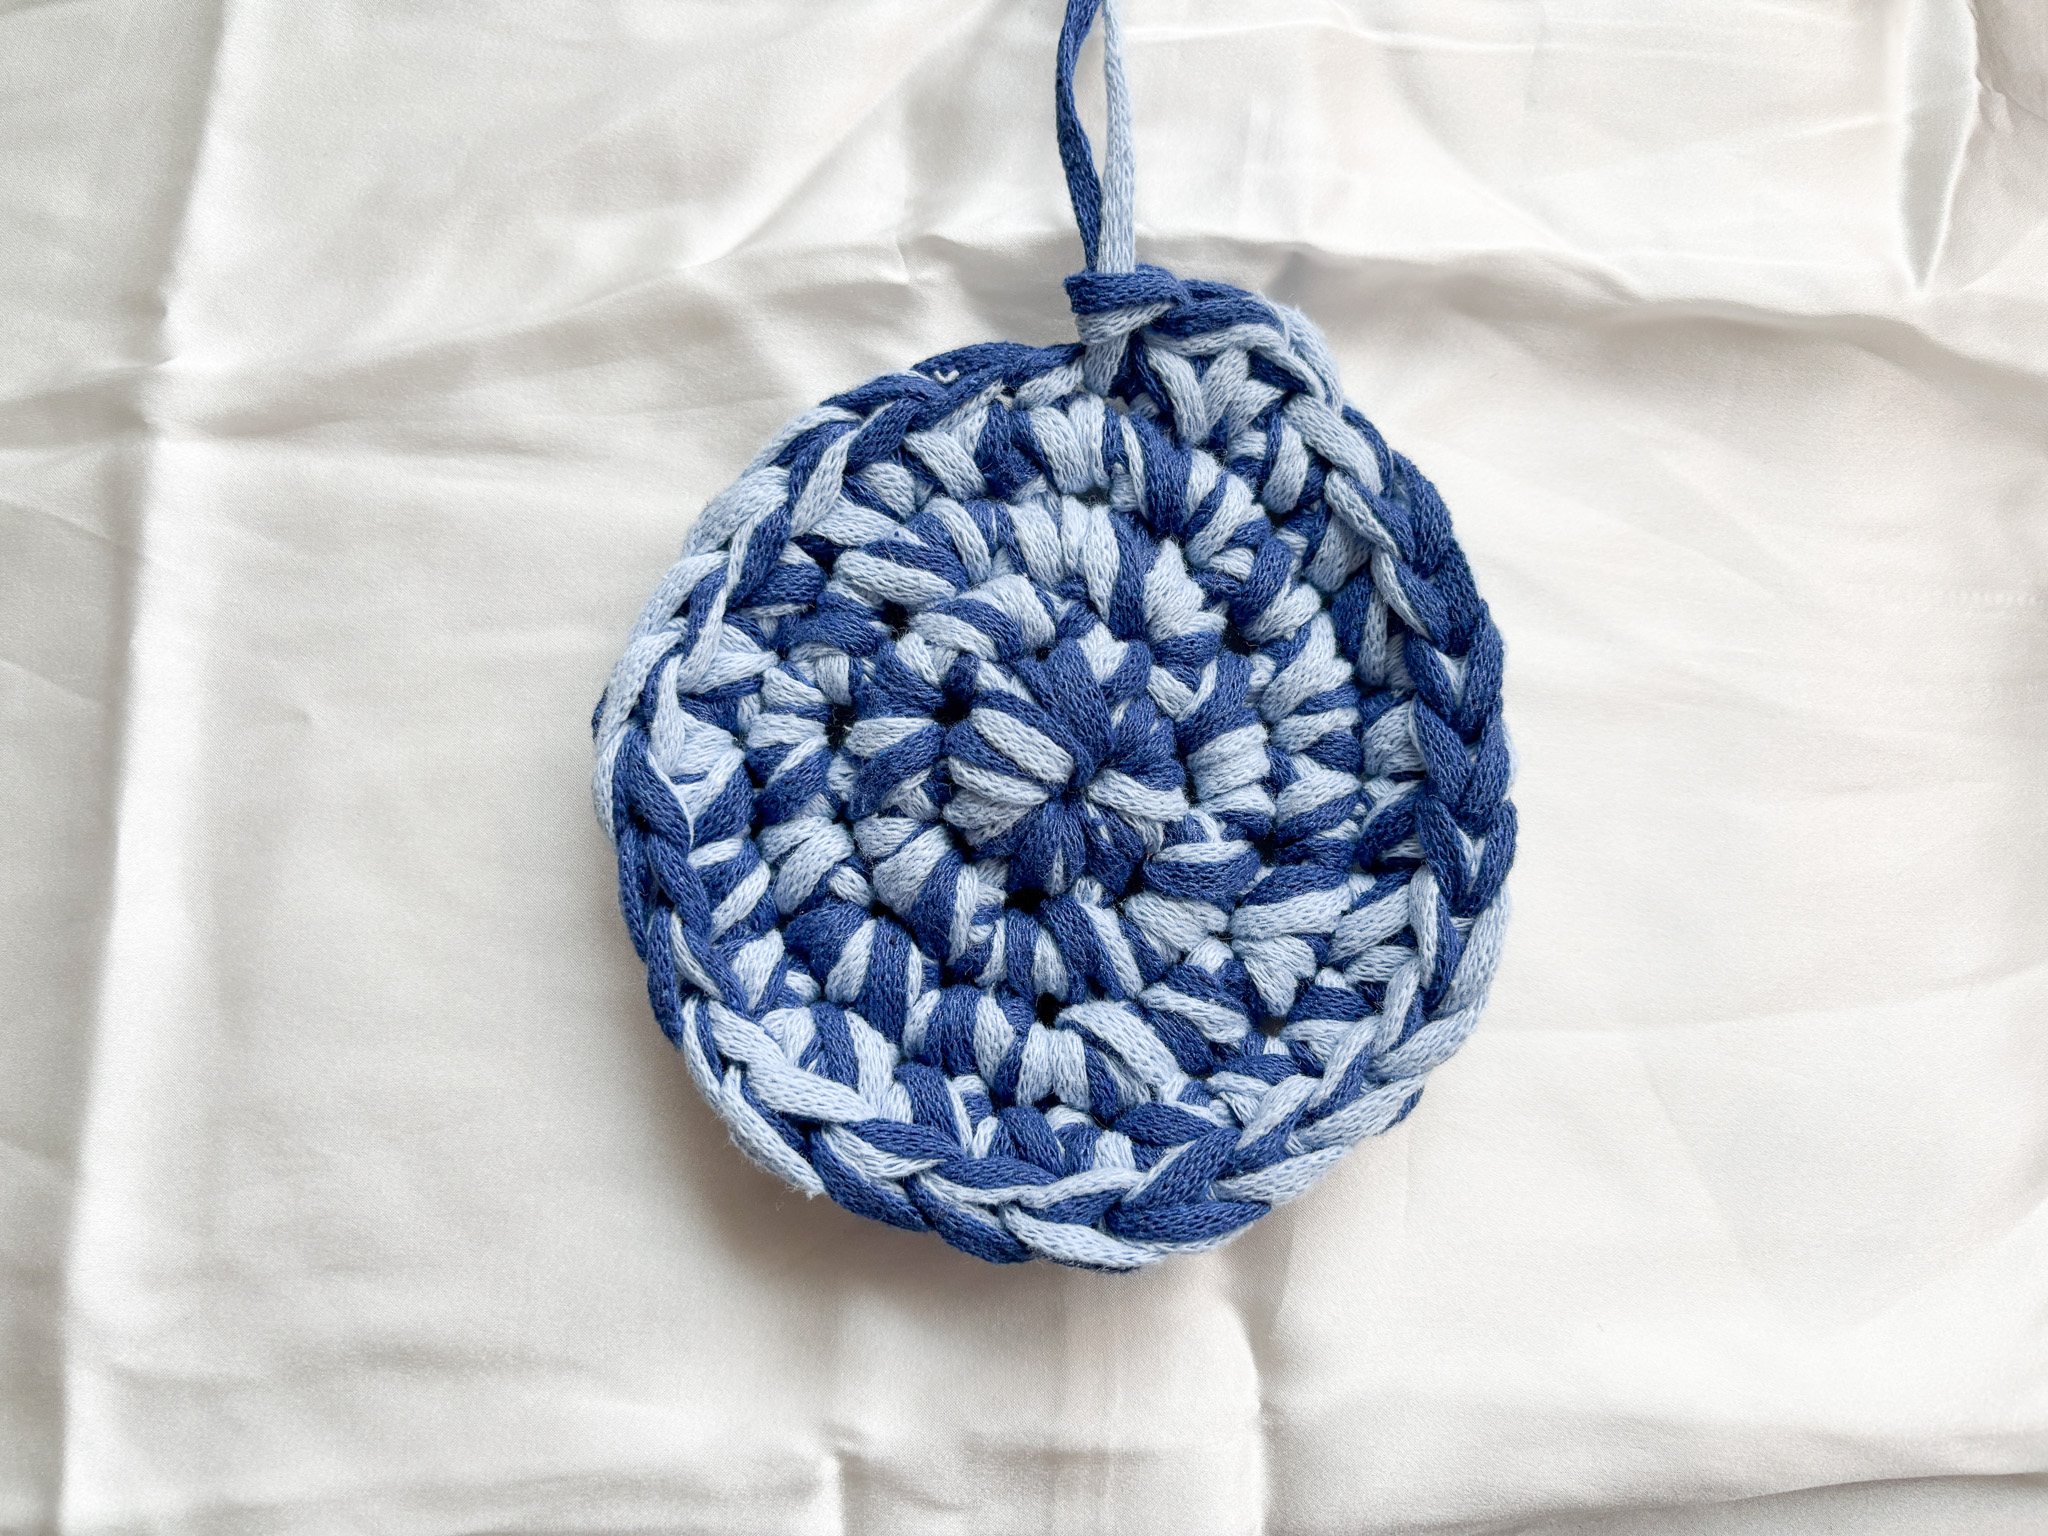
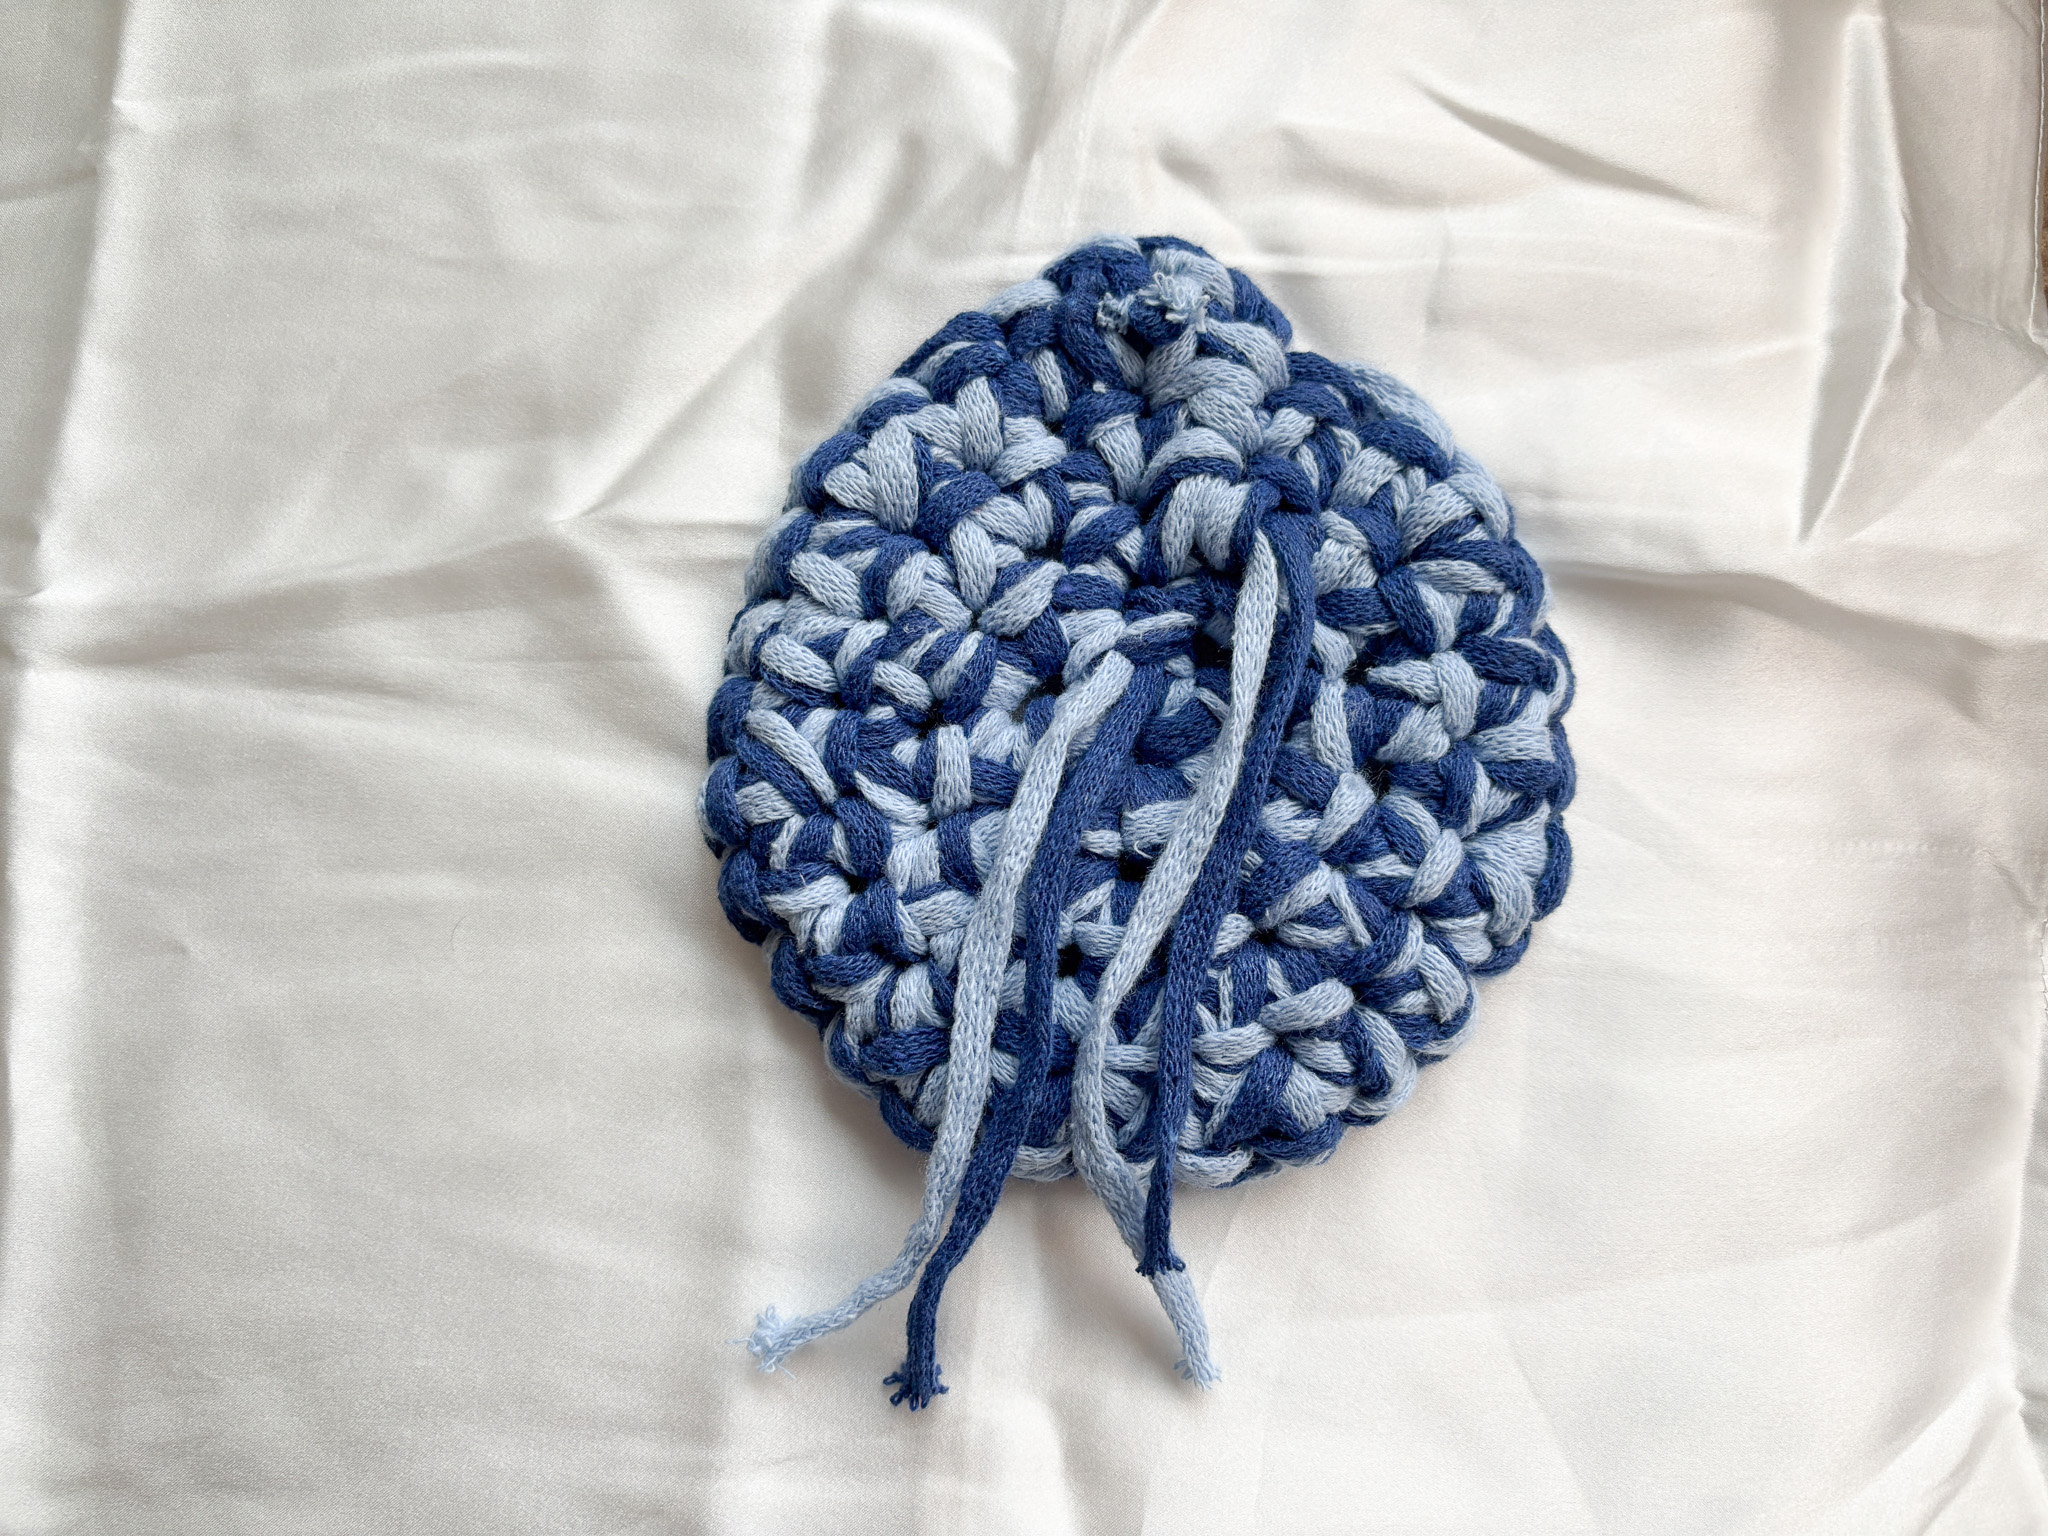
You will make a total of two circles by repeating the entire set of instructions twice.

Main Body of the Bag:
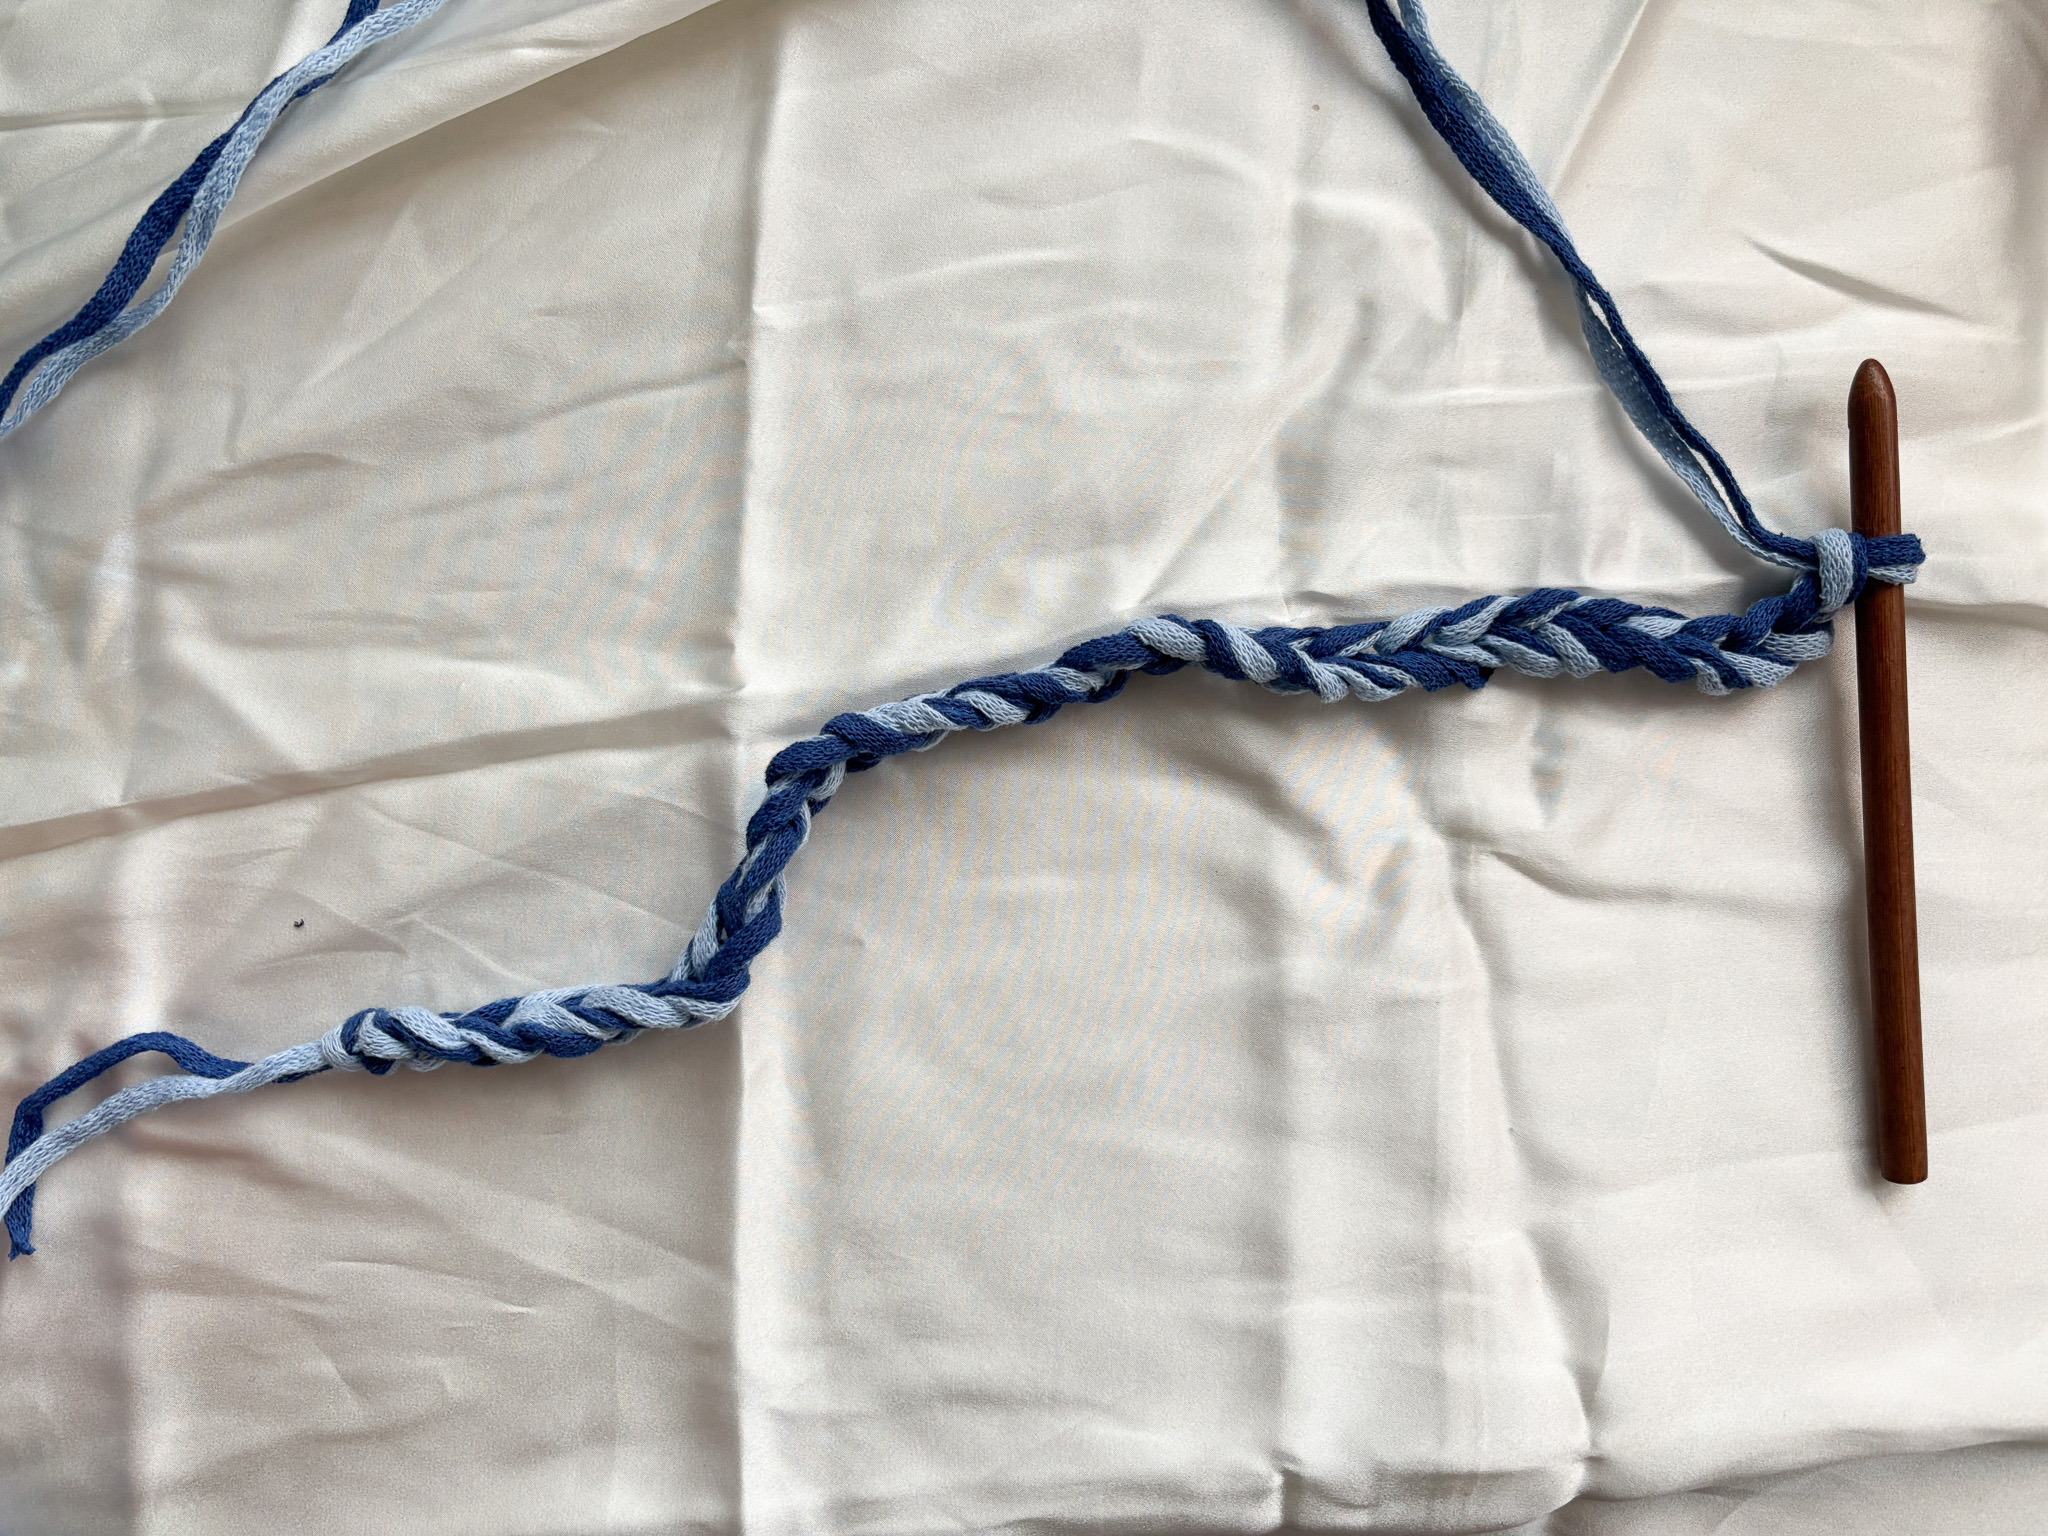
Now you will start working on the main part of the bag. Begin by making a slip knot and then work a foundation chain of 28 chains.
If you are unsure how to make a chain, see the video below.
Row 1:
Once your foundation chain is complete, start working half double crochets. Work back along the chain, beginning in the second chain from the hook. In this first row, make one half double crochet in each chain across the entire foundation chain.
When you reach the last chain, make one chain stitch. This chain acts as a turning chain and gives the corner a little extra room so your work doesn’t pull in.
If you are unsure how to make half double crochets, see the video below.

Row 2:
Turn your work. In this row, work half double crochets only in the back loop of each stitch across the entire row.
Working in the back loop only gives the piece a defined texture.
If you are unsure which loop is the back loop, see the video below.
When the entire row is finished, end with a chain stitch to serve as a turning chain.
From now on, continue working by alternating these two rows:
- On every other row, work half double crochets in every stitch.
- On the alternate rows, work half double crochets only in the back loop of each stitch.
End each row with a turning chain before turning your work.
You will work a total of six rows of half double crochets in every stitch and six rows of half double crochets in the back loop only.
These rows are worked alternately, giving a total of twelve rows for this section.
Continue until all six rows of each type are completed.
(Do not cut the yarn when this section is finished!)

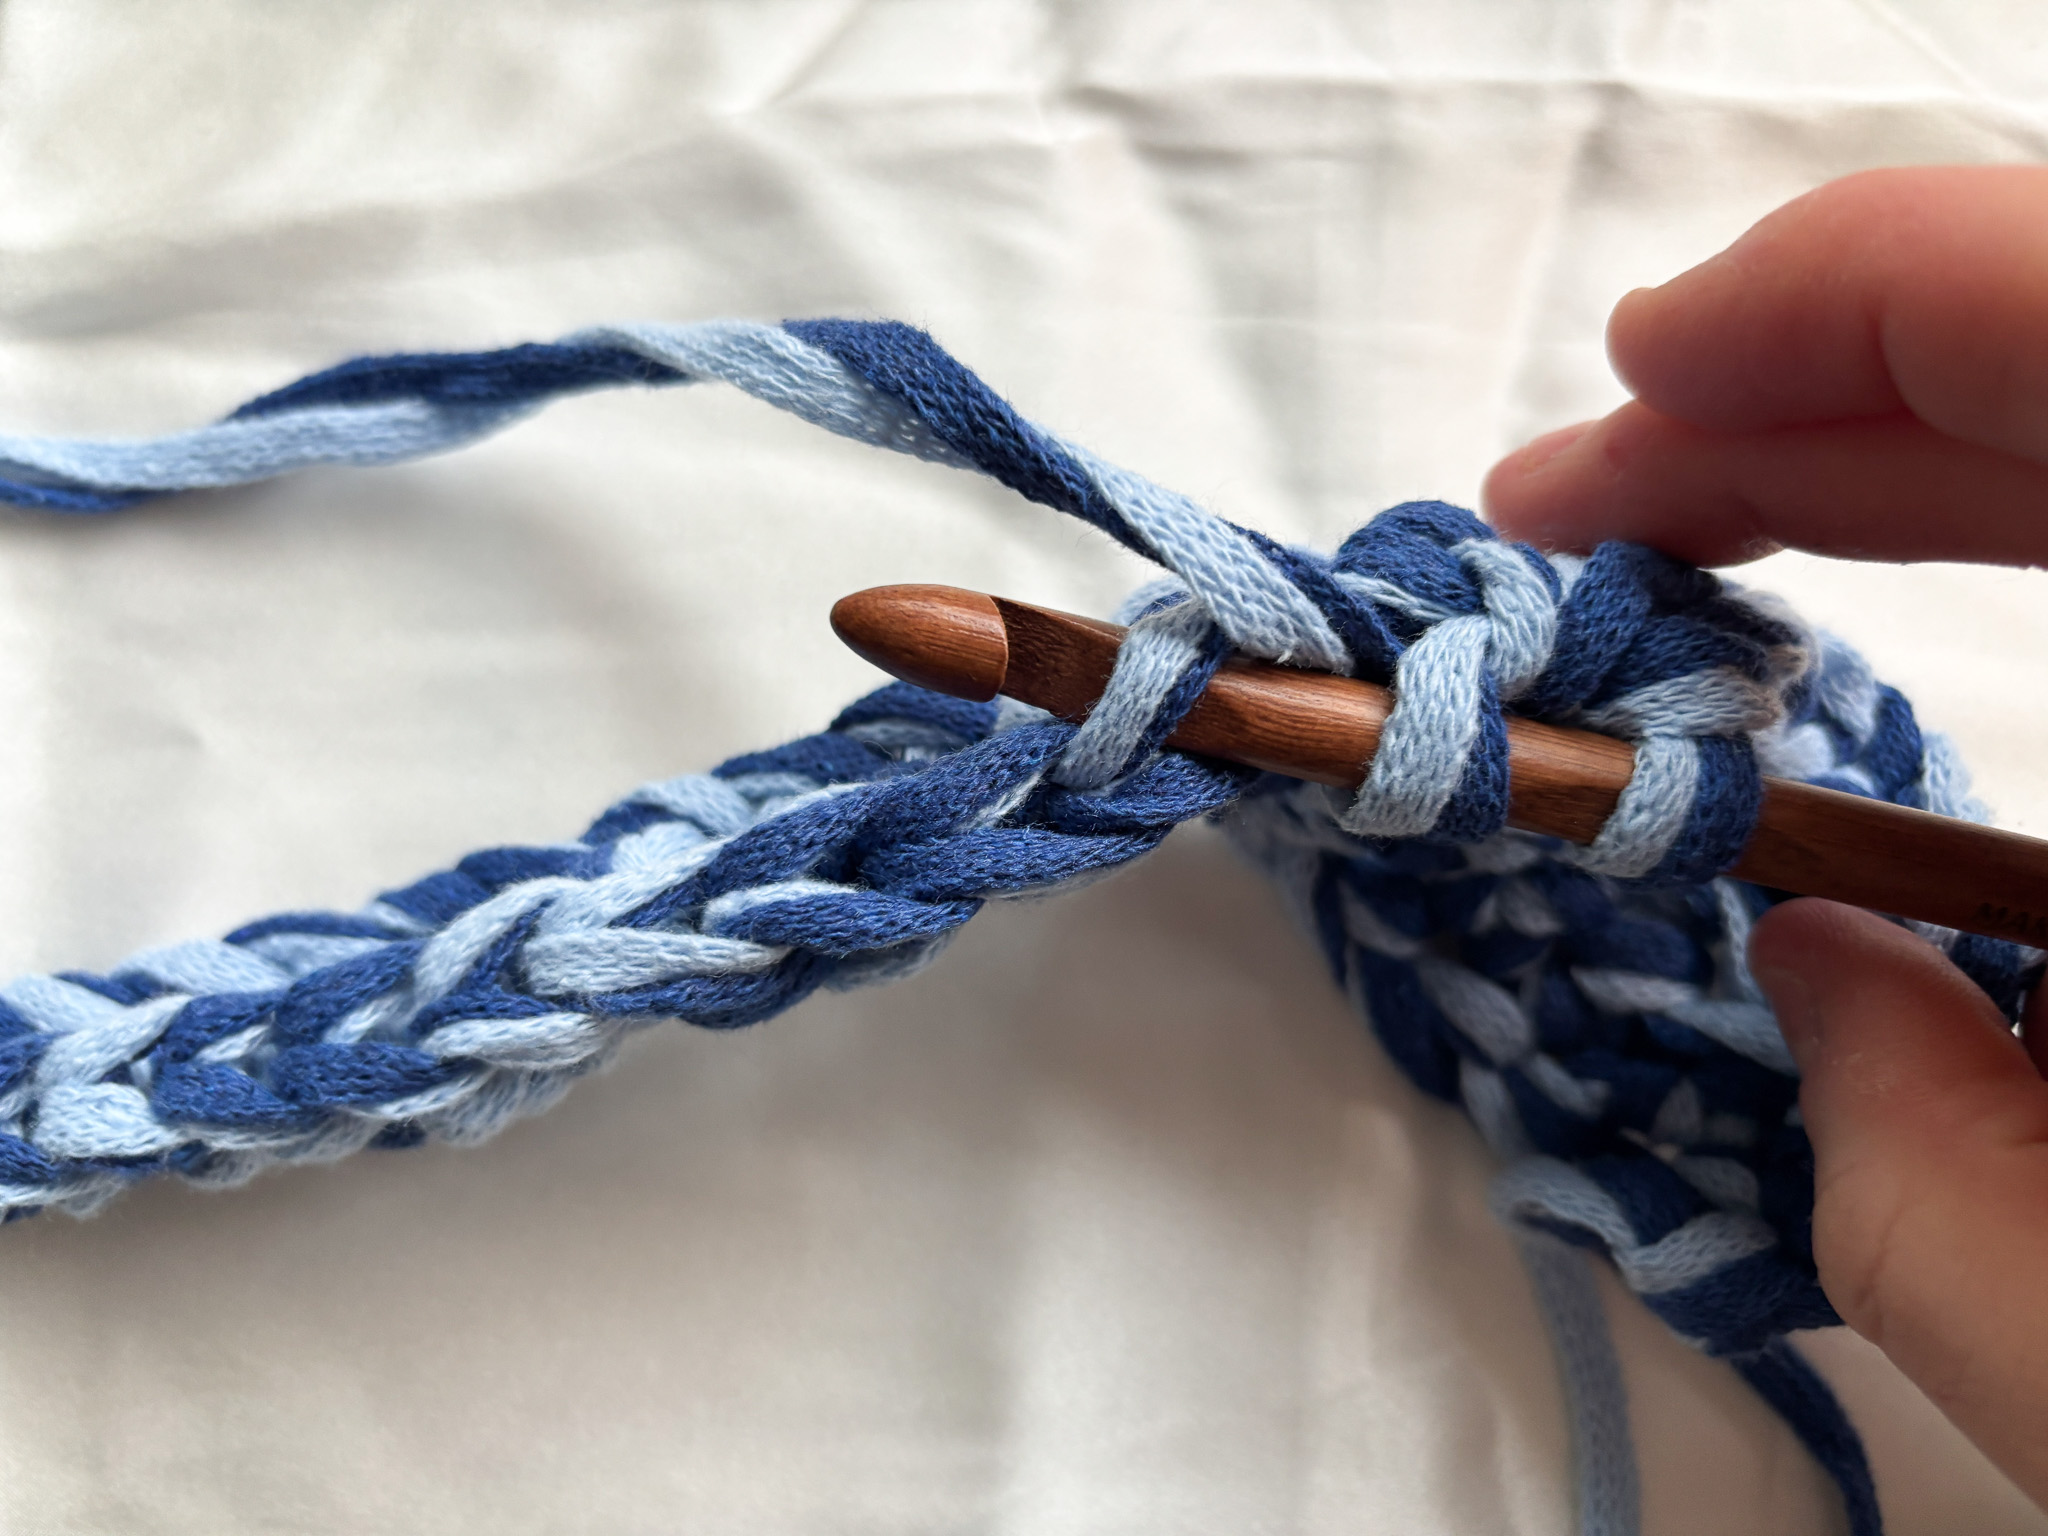
Joining the Sides to the Main Bag Piece:
Now the two round pieces you crocheted earlier will be attached to the sides of the main body. This step shapes the bag and gives it its characteristic baguette form.
Start by placing one round piece against the short edge of the bag body, with the right sides facing the same direction.
Insert your hook through a stitch in the bag body and through the corresponding stitch in the round piece.
Yarn over (using the yarn still attached to the main bag, since we did not cut it) and pull through to make a slip stitch, securing the two pieces together.


Once the yarn is attached, continue working single crochet stitches around the entire edge.
Insert your hook through both the main bag body and the round side piece in each stitch, yarn over, and pull through to make a single crochet that holds the pieces together. Work stitch by stitch around the entire side, making sure the edges lie evenly against each other.
When you reach the end, work a single crochet in the last stitch, then secure it one more time by inserting your hook slightly higher into the side, yarn over, and make a slip stitch to reinforce the attachment.
Finish by cutting the yarn and weaving in the ends on the inside of the bag.
Repeat the same process on the other side of the bag with the second round side piece.
To start on the other side, place a loop on your hook. Insert the hook through a stitch in the bag body and the corresponding stitch in the round piece. Yarn over and pull through to make a slip stitch, securing the side, then continue working single crochet stitches around the edge just like you did on the first side.
Once both sides are attached, the bag takes its finished baguette shape.

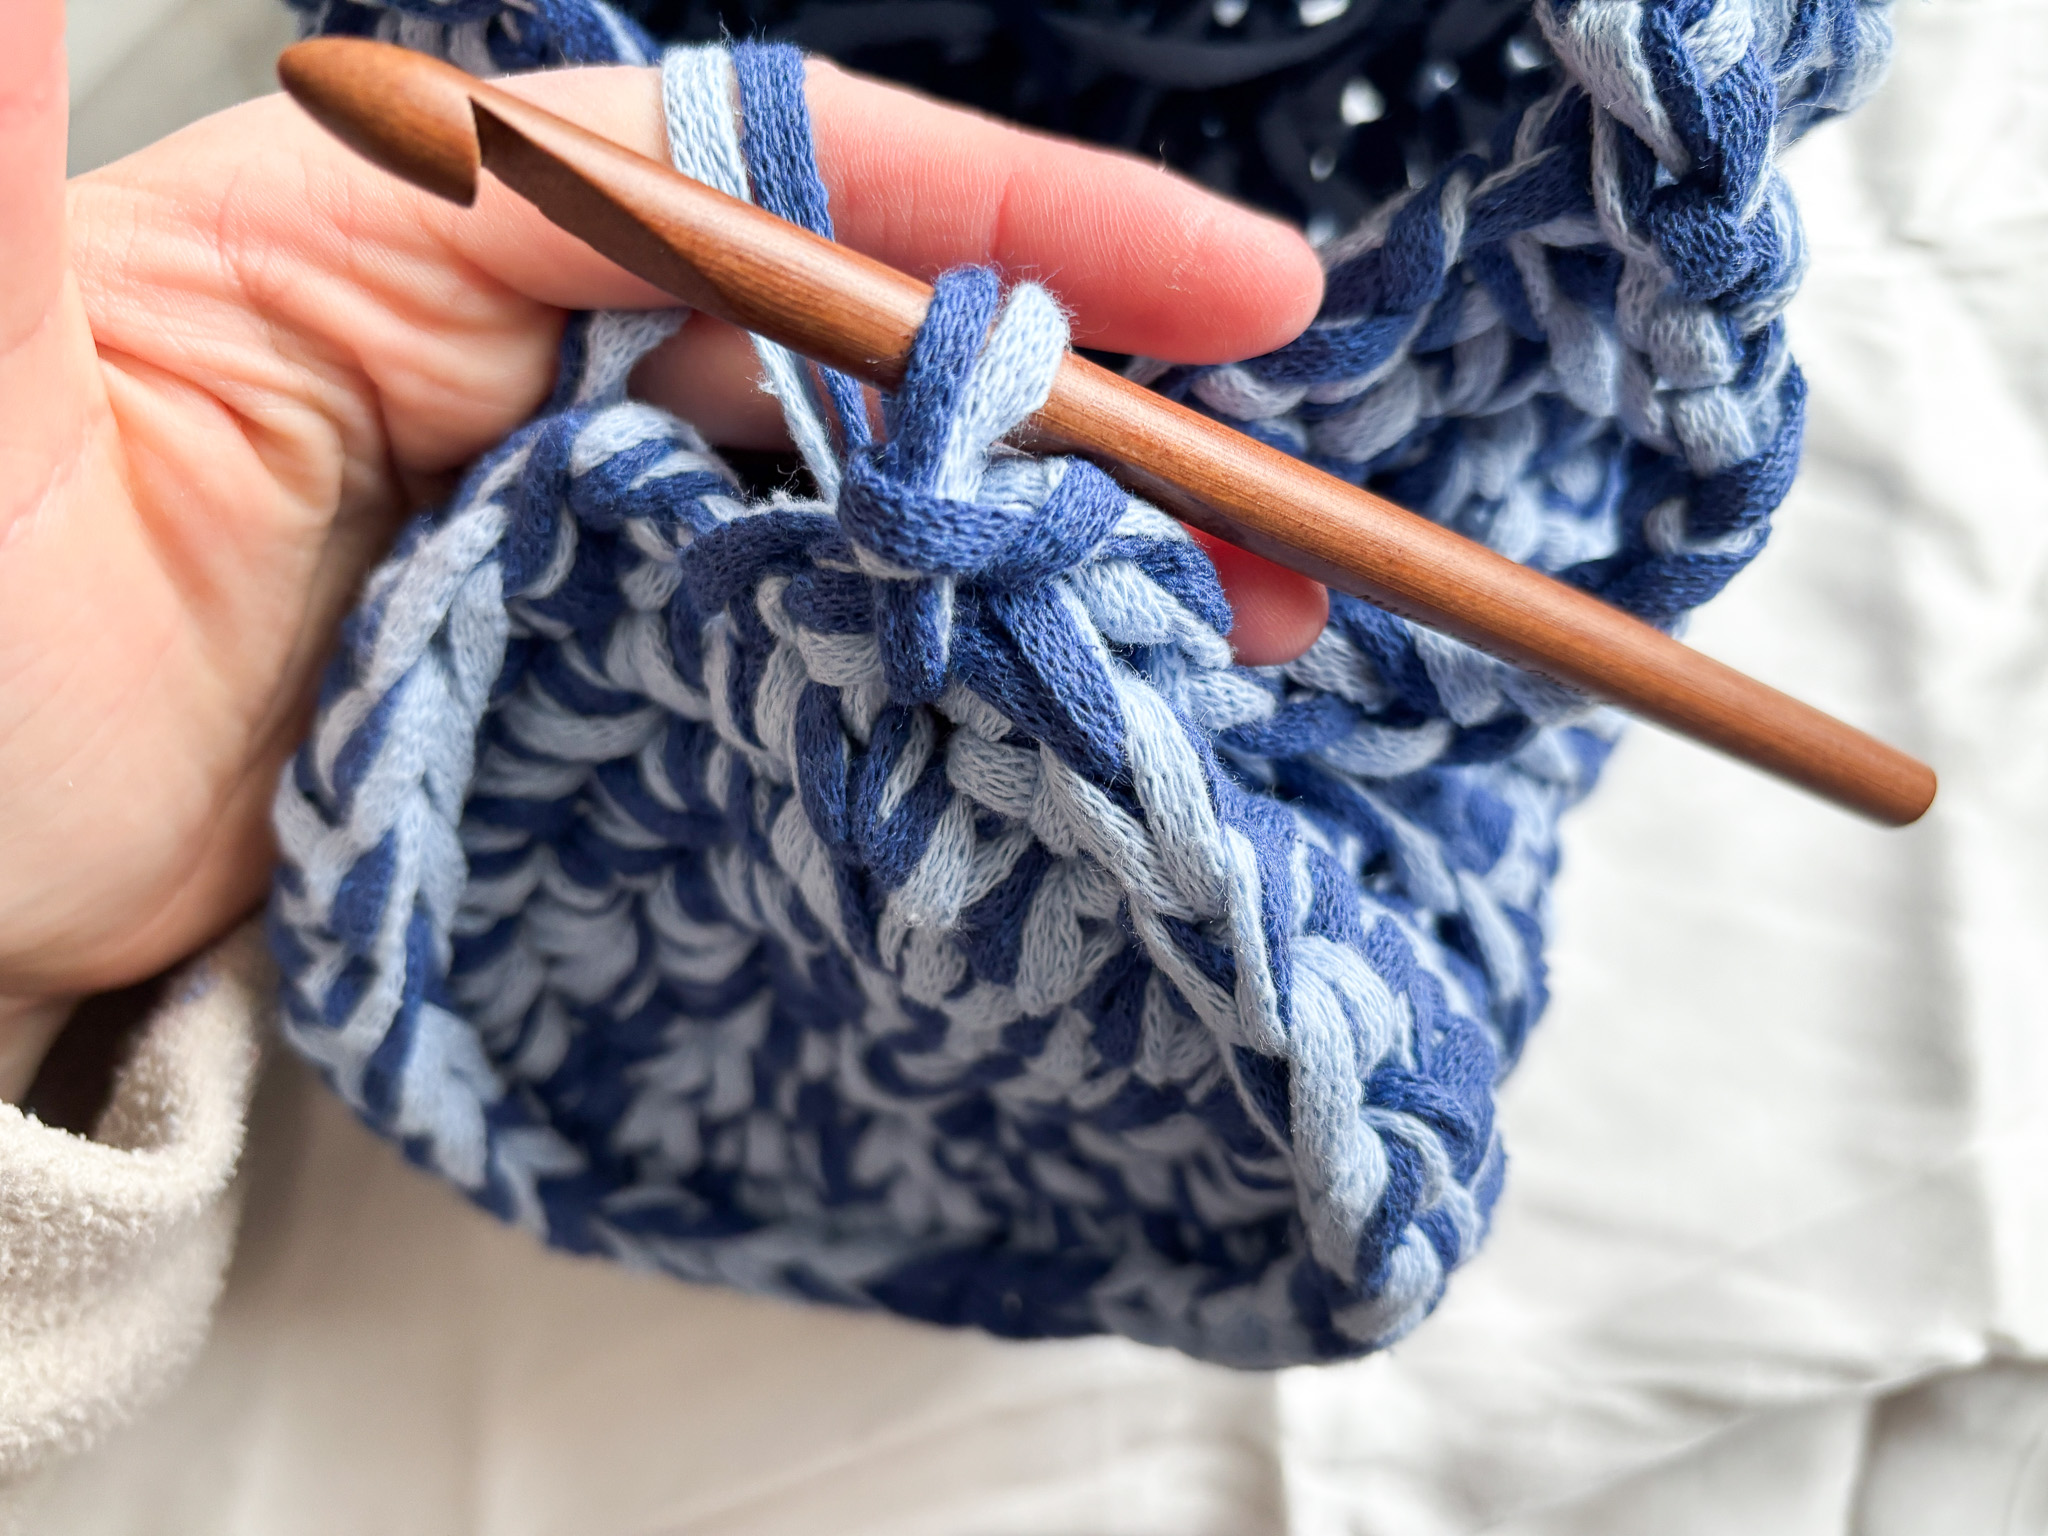
Shoulder Strap:
Attach the yarn to the edge of one side of the bag by making a loop around the hook and securing it with a slip stitch. Chain 35 stitches to create the strap. When the chain is complete, insert the hook into the edge on the opposite side of the bag and secure it with a slip stitch.

Turn your work and work half double crochets all the way back along the chain. When you reach the edge, join with a slip stitch.
Turn your work once more and work half double crochets along the entire strap back to the opposite side. Join with a slip stitch at the edge.
The strap is worked entirely in half double crochets around the chain foundation, giving the shoulder strap a sturdy and even structure.
When the strap is finished, fasten off the yarn securely and pull the last stitch tight. Cut the yarn and weave in the ends on the inside of the bag.
Your work is now complete!
Crochet Terms (US)
If you need extra help along the way, see the easier version.
Abbreviations:
- ch = chain
- sl st = slip stitch
- sc = single crochet
- hdc = half double crochet
- inc = increase (2 stitches in the same stitch)
- BLO = back loop
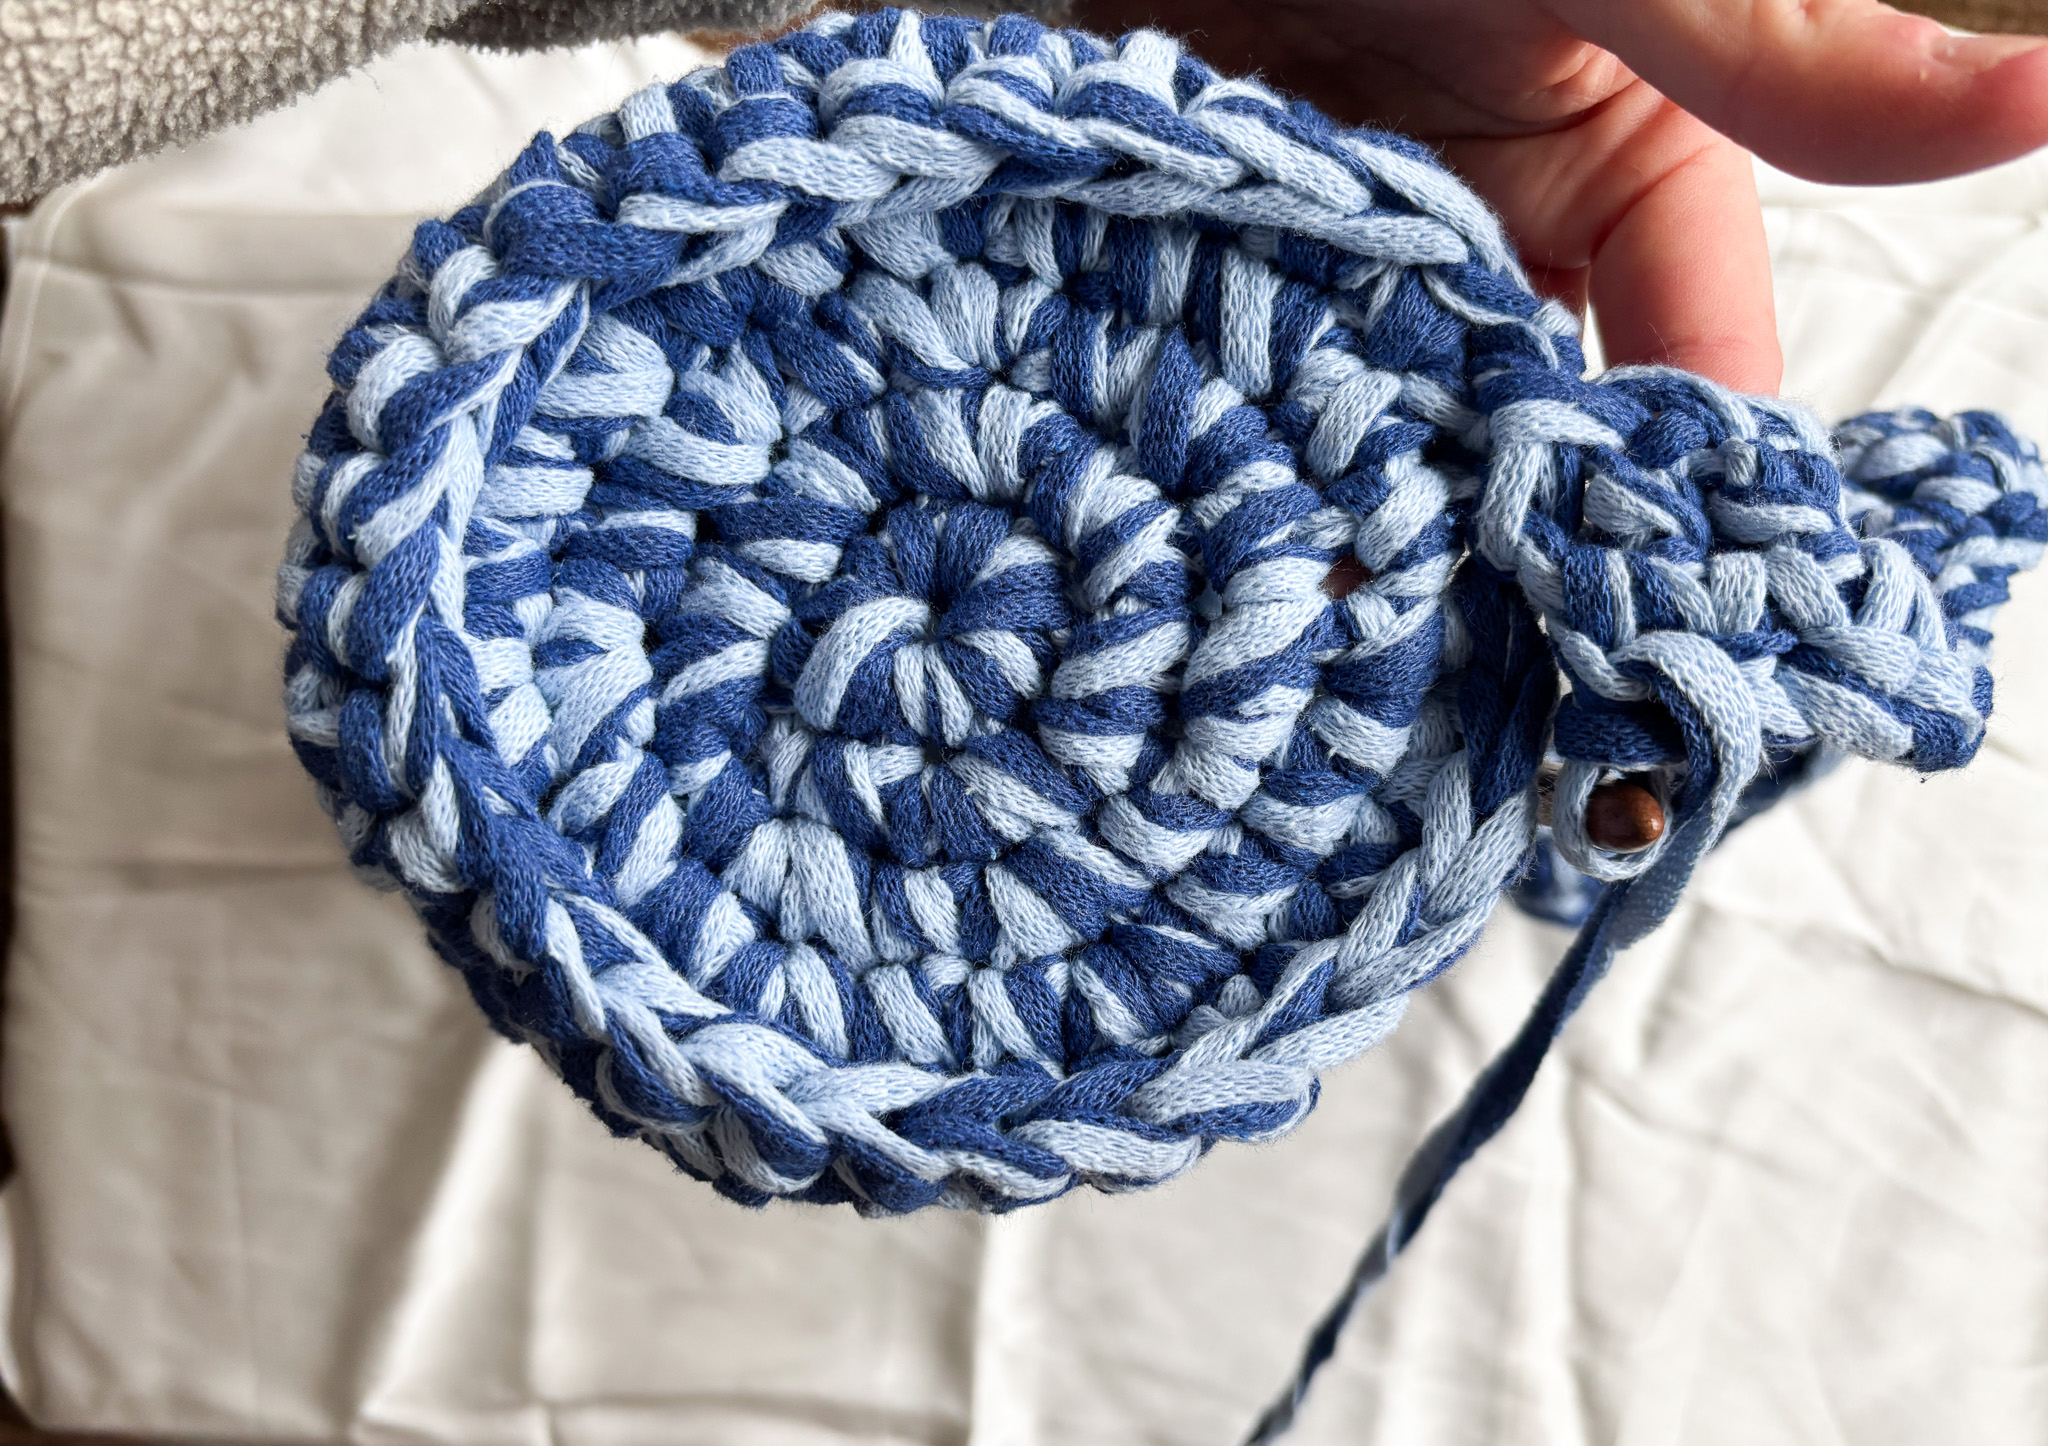
Crochet the Bag Sides (2 Circles)
Each circle is worked separately. Repeat the following steps twice to make two circles.
Make a magic ring.
Round 1: Work 6 sc in the magic ring. (6 sts)
Round 2: Inc in each stitch around. (12 sts)
Round 3: *1 sc, inc* x6 (18 sts)
Round 4: *2 sc, inc* x6 (24 sts)
Fasten off, pull the yarn through the last loop, and weave in the ends on the back of the circle.
You should now have 2 identical circles.
Main Part of the Bag
Foundation: Ch 28.
Row 1: 1 hdc in each ch across. Ch 1, turn.
Row 2: 1 hdc in BLO in each st across. Ch 1, turn.
Continue:
Alternate these two rows:
Row 1: 1 hdc in every stitch
Row 2: 1 hdc in BLO
Work a total of:
- 6 rows hdc in every stitch (Row 1 type)
- 6 rows hdc in back loop only (Row 2 type)
Note: Do not cut the yarn when this part is finished.
Attach the round pieces to the short sides of the bag body.
Side 1:
- Place the circle against the short side of the bag, RS together.
- Insert your hook through one stitch in the bag body and the corresponding stitch in the circle.
- Yarn over and pull through to make 1 sl st to secure.
- Continue crocheting st (stitch) around the circle:
- Insert the hook through both layers at the same time
- Crochet stitch for stitch around the circle
- Finish with 1 extra sl st to secure.
- Fasten off and weave in the ends on the inside.

Other side: Attach the yarn again. Repeat the exact same steps with the other circle.

Shoulder strap: Attach the yarn to the edge on one side with 1 sl st. Chain 35. Attach to the opposite side with 1 sl st.
Round 1: Turn the work. Single crochet (sc) in each chain back. Join with 1 sl st at the edge.
Round 2: Turn again. Single crochet in each stitch all the way back. Join with 1 sl st.The shoulder strap is thus crocheted in sc around the chain, which makes it sturdy and even.

Finishing: Secure all threads carefully on the inside of the bag. Cut the yarn. The bag is now finished!
The rights to this pattern belong to MYO Make Your Own. The pattern or its pictures may not be copied, shared or resold either in parts or in its entirety, but you may sell items you have crocheted from this pattern. If you have questions about the pattern, contact MYO at hello@makeyourown.se.
You start by crocheting two circles that will form the sides of the bag. Then we crochet the main body of the bag! After that, we join all three pieces together and finish by crocheting the shoulder strap — and then you have your very own crocheted bag.
Begin by making two circles, one for each side of the bag. Each circle is crocheted separately, and this process is done twice.
Round 1: Start with a magic ring. In the magic ring, crochet six single crochet stitches. If you’re unsure how to work a magic ring with single crochet stitches, see the video below.
Round 2: Start in the same stitch as the slip stitch. Work an increase — two single crochet stitches in each stitch around. To make it easier, you can place a stitch marker in the first stitch so you know where the round begins.
You will have a total of 12 stitches in this round. If you are unsure how to work an increase, see the video below.
Round 3: *Work 1 single crochet in the first stitch. In the next stitch, work an increase by making 2 single crochet stitches in the same stitch*. Repeat between *…* a total of 6 times.
You will have a total of 18 stitches in this round.
Round 4: *Work 2 single crochet stitches. In the third stitch, make an increase by working 2 single crochet stitches in the same stitch*. Repeat between *…* a total of 6 times.
You will have a total of 24 stitches in this round.
When you have finished Round 4, join with a slip stitch.
Cut the yarn and pull it through the loop to secure it. Then weave in the yarn ends on the back of the circle, tucking them into the stitches so they are hidden and held securely in place.
You will make a total of two circles by repeating the entire set of instructions twice.
Main Body of the Bag:
Now you will start working on the main part of the bag. Begin by making a slip knot and then work a foundation chain of 28 chains.
If you are unsure how to make a chain, see the video below.
Row 1:
Once your foundation chain is complete, start working half double crochets. Work back along the chain, beginning in the second chain from the hook. In this first row, make one half double crochet in each chain across the entire foundation chain.
When you reach the last chain, make one chain stitch. This chain acts as a turning chain and gives the corner a little extra room so your work doesn’t pull in.
If you are unsure how to make half double crochets, see the video below.
Row 2:
Turn your work. In this row, work half double crochets only in the back loop of each stitch across the entire row.
Working in the back loop only gives the piece a defined texture.
If you are unsure which loop is the back loop, see the video below.
When the entire row is finished, end with a chain stitch to serve as a turning chain.
From now on, continue working by alternating these two rows:
- On every other row, work half double crochets in every stitch.
- On the alternate rows, work half double crochets only in the back loop of each stitch.
End each row with a turning chain before turning your work.
You will work a total of six rows of half double crochets in every stitch and six rows of half double crochets in the back loop only.
These rows are worked alternately, giving a total of twelve rows for this section.
Continue until all six rows of each type are completed.
(Do not cut the yarn when this section is finished!)
Joining the Sides to the Main Bag Piece:
Now the two round pieces you crocheted earlier will be attached to the sides of the main body. This step shapes the bag and gives it its characteristic baguette form.
Start by placing one round piece against the short edge of the bag body, with the right sides facing the same direction.
Insert your hook through a stitch in the bag body and through the corresponding stitch in the round piece.
Yarn over (using the yarn still attached to the main bag, since we did not cut it) and pull through to make a slip stitch, securing the two pieces together.
Once the yarn is attached, continue working single crochet stitches around the entire edge.
Insert your hook through both the main bag body and the round side piece in each stitch, yarn over, and pull through to make a single crochet that holds the pieces together. Work stitch by stitch around the entire side, making sure the edges lie evenly against each other.
When you reach the end, work a single crochet in the last stitch, then secure it one more time by inserting your hook slightly higher into the side, yarn over, and make a slip stitch to reinforce the attachment.
Finish by cutting the yarn and weaving in the ends on the inside of the bag.
Repeat the same process on the other side of the bag with the second round side piece.
To start on the other side, place a loop on your hook. Insert the hook through a stitch in the bag body and the corresponding stitch in the round piece. Yarn over and pull through to make a slip stitch, securing the side, then continue working single crochet stitches around the edge just like you did on the first side.
Once both sides are attached, the bag takes its finished baguette shape.
Shoulder Strap:
Attach the yarn to the edge of one side of the bag by making a loop around the hook and securing it with a slip stitch. Chain 35 stitches to create the strap. When the chain is complete, insert the hook into the edge on the opposite side of the bag and secure it with a slip stitch.
Turn your work and work half double crochets all the way back along the chain. When you reach the edge, join with a slip stitch.
Turn your work once more and work half double crochets along the entire strap back to the opposite side. Join with a slip stitch at the edge.
The strap is worked entirely in half double crochets around the chain foundation, giving the shoulder strap a sturdy and even structure.
When the strap is finished, fasten off the yarn securely and pull the last stitch tight. Cut the yarn and weave in the ends on the inside of the bag.
Your work is now complete!
Crochet Terms (US)
If you need extra help along the way, see the easier version.
Abbreviations:
- ch = chain
- sl st = slip stitch
- sc = single crochet
- hdc = half double crochet
- inc = increase (2 stitches in the same stitch)
- BLO = back loop
Crochet the Bag Sides (2 Circles)
Each circle is worked separately. Repeat the following steps twice to make two circles.
Make a magic ring.
Round 1: Work 6 sc in the magic ring. (6 sts)
Round 2: Inc in each stitch around. (12 sts)
Round 3: *1 sc, inc* x6 (18 sts)
Round 4: *2 sc, inc* x6 (24 sts)
Fasten off, pull the yarn through the last loop, and weave in the ends on the back of the circle.
You should now have 2 identical circles.
Main Part of the Bag
Foundation: Ch 28.
Row 1: 1 hdc in each ch across. Ch 1, turn.
Row 2: 1 hdc in BLO in each st across. Ch 1, turn.
Continue:
Alternate these two rows:
Row 1: 1 hdc in every stitch
Row 2: 1 hdc in BLO
Work a total of:
- 6 rows hdc in every stitch (Row 1 type)
- 6 rows hdc in back loop only (Row 2 type)
Note: Do not cut the yarn when this part is finished.
Attach the round pieces to the short sides of the bag body.
Side 1:
- Place the circle against the short side of the bag, RS together.
- Insert your hook through one stitch in the bag body and the corresponding stitch in the circle.
- Yarn over and pull through to make 1 sl st to secure.
- Continue crocheting st (stitch) around the circle:
- Insert the hook through both layers at the same time
- Crochet stitch for stitch around the circle
- Finish with 1 extra sl st to secure.
- Fasten off and weave in the ends on the inside.
Other side: Attach the yarn again. Repeat the exact same steps with the other circle.
Shoulder strap: Attach the yarn to the edge on one side with 1 sl st. Chain 35. Attach to the opposite side with 1 sl st.
Round 1: Turn the work. Single crochet (sc) in each chain back. Join with 1 sl st at the edge.
Round 2: Turn again. Single crochet in each stitch all the way back. Join with 1 sl st.The shoulder strap is thus crocheted in sc around the chain, which makes it sturdy and even.
Finishing: Secure all threads carefully on the inside of the bag. Cut the yarn. The bag is now finished!
The rights to this pattern belong to MYO Make Your Own. The pattern or its pictures may not be copied, shared or resold either in parts or in its entirety, but you may sell items you have crocheted from this pattern. If you have questions about the pattern, contact MYO at hello@makeyourown.se.


Share your creations with us
Thank you!
Your comment was sent!