
Crocheted fox “Nils”
Crochet a cute little decorative fox!
This little fox is perfect for a children's room, perhaps alongside the monkey "Olof" and the bunny "Leia." This is crocheted in EKO Nano with a 6 mm crochet hook. This pattern includes many different steps and can be challenging for a complete beginner. A tip is to first crochet the bunny "Leia," which has a full-length video where you can see all the steps.
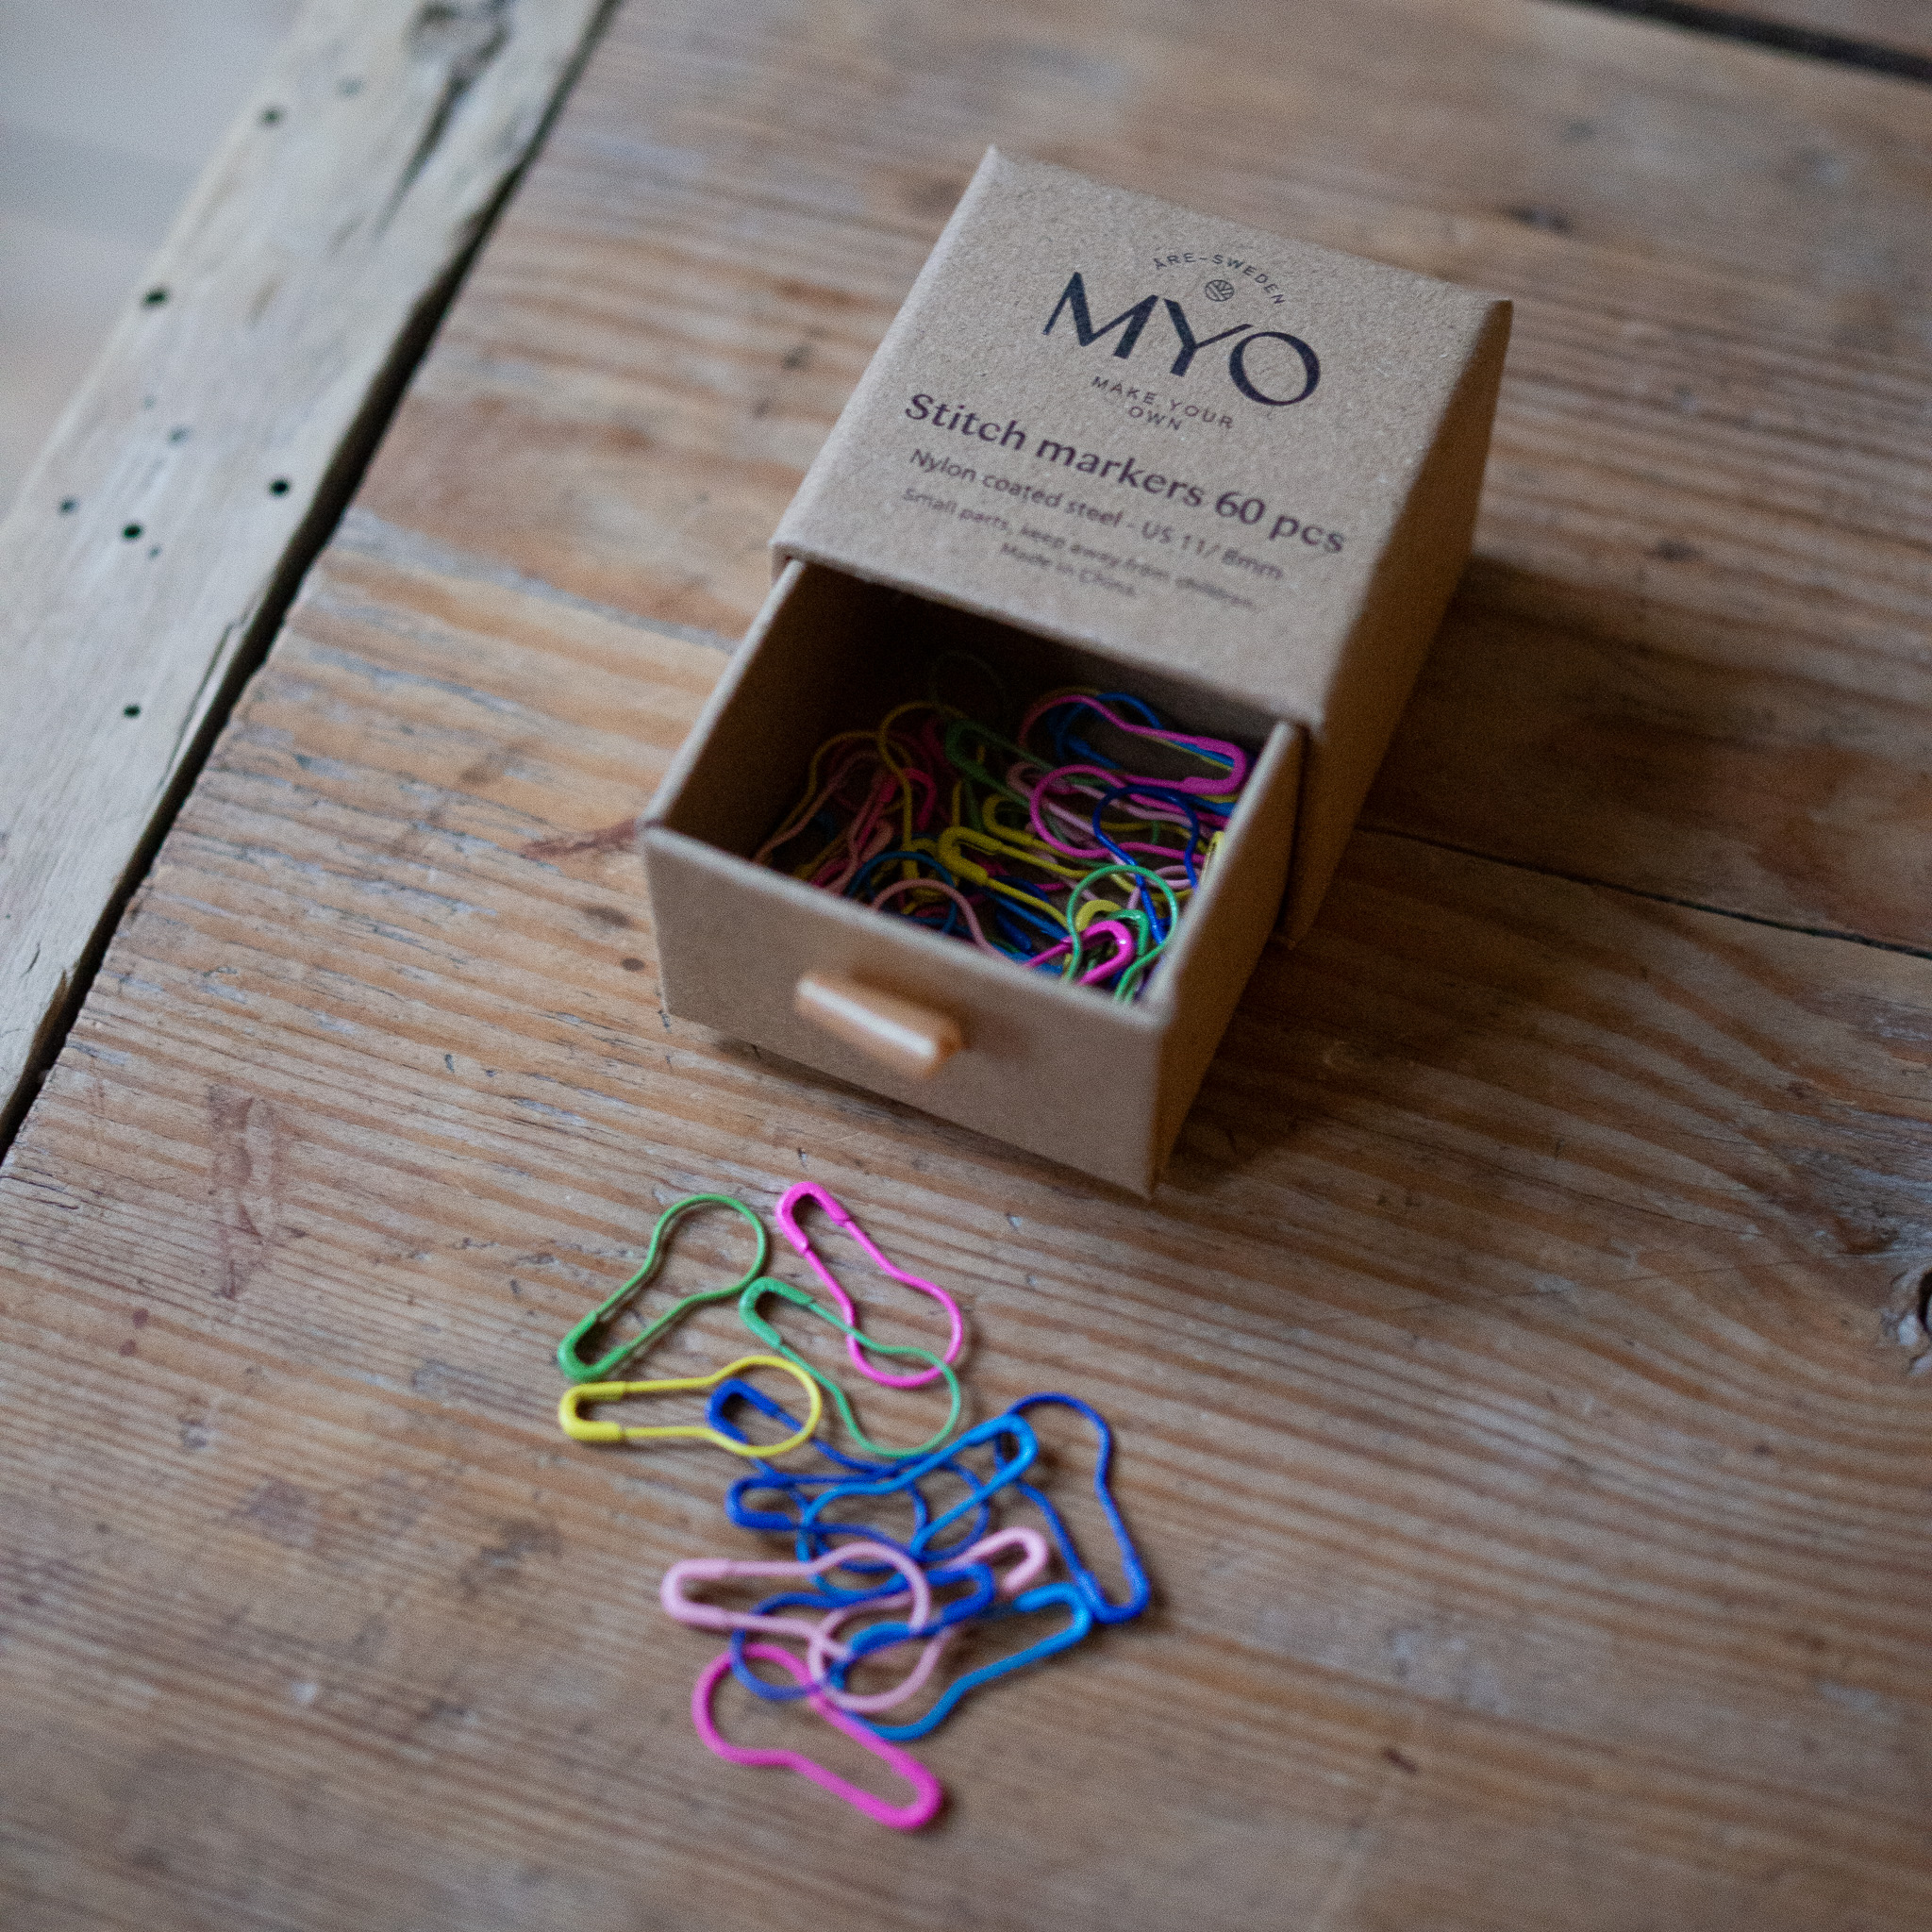
In addition to yarn and a crochet hook, you will need something to stuff the fox with— we use fiberfill stuffing. You will also need a stitch marker, a needle, and black, thin yarn to embroider the eyes. Keep in mind that the fox is meant for decoration only; if you want it to be a toy to play with, you need to ensure it's safe enough for that.
Yarn Consumption: EKO Nano Tube yarn about 125g of "Orange" and 50g of "Nature White." You will also need about 50g of stuffing. The yarn usage may vary depending on how tightly you crochet.
Please note that in this guide, we use videos from our technique library. If you are looking for a full-length video for a crocheted animal, we recommend the bunny "Leia".


Here's how to do it
The fox is crocheted in separate parts. We start with the legs, then the tail, followed by the arms. Once these are finished, we begin the body. As we work on the body, we attach the legs, tail, and arms (so they don’t need to be sewn on separately). Then we crochet the head and all the parts for the head. These are then attached together, and in the end, the eyes are embroidered. At the end, you’ll have a cute little fox 🦊 /Lizette

This is what you need:
Here you can directly purchase the material for the product. Please note that the instruction is digital and appears here on the page (no written instruction).


.jpg)
Unleash your creativity
For only 85kr per month you get access to all our 300+ beginner-friendly instructions for crochet, knitting and macrame.
A perfect way to get started with your new hobby!

STEP 1 - LEGS
We start by crocheting two legs, which are crocheted in the same way. Begin crocheting with white yarn. We start with the foot.Crochet 4 chain stitches. If you are unsure how to make a slip knot and then crochet 4 chain stitches, see the video below.
Round 1: Now start crocheting on the chain. Skip the first chain and begin in the 2nd chain. This means you will have three chains to crochet into. In the first two, crochet 1 single crochet in each chain, and in the last chain, crochet 4 single crochets in the same chain. Then, round the chain and crochet back on the other side. You will have two chains to crochet into: crochet 1 single crochet in the first chain, and in the last chain, crochet 4 single crochets. In total, you will have 11 stitches. Place a stitch marker in your last stitch.


If you are unsure how to crochet single crochets, see the video below. If you are unsure what we mean by crocheting on the other side of the chain, you can see an example of it in the video below.
Round 2: Crochet 1 single crochet in the next two stitches. In the next three stitches, crochet 2 single crochets in each stitch. Then crochet 1 single crochet in the next four stitches. In the last two stitches, crochet 2 single crochets in each stitch. In total, you will have 16 stitches in the round. Place your stitch marker back in the last stitch.

Round 3: Crochet 16 single crochets in the back loop only. If you are unsure how to crochet in the back loop only, see the video below. Always move the stitch marker so that it sits in the last stitch of each round.

Round 5: Crochet 5 single crochets in the next 5 stitches. Then crochet a decrease. Finally, crochet 9 single crochets until you are back at the start. Place the stitch marker in your last stitch. If you are unsure how to crochet a decrease, see the video below.
Round 6: Crochet 3 single crochets. Then crochet two decreases. Finally, crochet 8 single crochets. In total, you will have 13 stitches in the round.
Round 7: Crochet 1 single crochet. Then crochet three decreases. Finally, crochet 6 single crochets. In total, you will have 10 stitches in the round.

Now, change color to orange.To do this, in your last stitch, complete the final pull-through with the new color. Unravel the last stitch and do it again, but for the final pull-through, use the new color and pull it through instead.

Rounds 8-17: Crochet 1 single crochet in each stitch (10 single crochets) in each round for a total of 7 rounds.
Stuff the foot with cotton stuffing, and fill the leg with only a little stuffing. Too much stuffing won't work well, as it will cause the legs to not sit nicely.
Crochet four single crochets so that you are at the front of the leg.

Flatten the leg and crochet it together through both layers with four single crochets. It is important that you crochet together with four stitches.

Cut the yarn and secure it. If you are unsure how to fasten off, see the video below.

STEP 2 - ARMS (white and orange)
Next, we will crochet two arms, both crocheted the same way. Start crocheting with white yarn.
Round 1: Crochet 6 single crochets in a magic ring. If you are unsure how to crochet a magic ring, see the video below (Magic Ring with Single Crochet).


Round 2: Crochet 2 single crochets in each stitch. In total, you will have 12 stitches in the round.

Round 3: Crochet 1 single crochet in each stitch. In total, you will have 12 stitches in the round.
Round 4: Crochet 1 single crochet, then make a decrease. Repeat this 4 times in total. You will have 8 stitches in the round. Change color to orange.
Rounds 5-11: Crochet 1 single crochet in each stitch for a total of 7 rounds. Finish with 1 chain stitch. You will have 8 stitches in the round.
Stuff the hand lightly with cotton stuffing, but leave the arm unstuffed.
Flatten the arm and crochet through both layers with 3 single crochets to close the arm. Then, fasten off the yarn.
STEP 3 - TAIL (white and orange)
Next, we will crochet a tail. Start crocheting with white yarn.
Round 1: Crochet 6 single crochets in a magic ring.
Round 2: Crochet 1 single crochet in the first stitch. Then crochet 2 single crochets in the second stitch. Repeat this (increase every other stitch) around the round. You will have 9 stitches in the round.
Round 3: Crochet 2 single crochets in the first two stitches. Then crochet 2 single crochets in the same stitch in the third stitch. Repeat this (increase every third stitch) around the round. You will have 12 stitches in the round.
Round 4: For this round, we will crochet alternating white and orange stitches. This may be tricky. If it’s difficult with the frequent color changes, you can crochet with only orange yarn.
Start with a white stitch, then crochet 1 orange single crochet. Continue this pattern around the round. You will have 12 stitches in total.

Continue with only orange yarn from now on.
Round 5: Crochet 3 single crochets in the first 3 stitches. Then crochet 2 single crochets in the same stitch in the 4th stitch. Repeat this (increase in every 4th stitch) around the round. You will have 15 stitches in the round.

Rounds 6-7: Crochet 1 single crochet in each stitch. Crochet two rounds in the same way. You will have 15 stitches in each round.

Round 8: Crochet 3 single crochets in the first 3 stitches. Then crochet one decrease. Repeat this (decrease in every 4th stitch) around the round. You will have 12 stitches in the round.
Round 9: Crochet 5 single crochets, then one decrease. Crochet 5 single crochets. You will have 11 stitches in the round.
Round 10: Crochet 9 single crochets, then one decrease. You will have 10 stitches in the round.
Round 11: Crochet 4 single crochets, then one decrease. Crochet 4 single crochets. You will have 9 stitches in the round.
Round 12: Crochet 2 single crochets, then one decrease. Crochet 3 single crochets, then one decrease. You will have 7 stitches in the round.
Fill the tail a little.
Flatten the tail and crochet through both layers with 3 single crochets to close the tail. Then fasten off the yarn.

STEP 4 - BODY (orange)
Now we will crochet the body, and as we crochet, we will attach the arms and legs directly to the body, so you won’t have to sew them on later.
Round 1: Crochet 6 single crochets in a magic ring.
Round 2: Crochet two single crochets in each stitch. You will have 12 stitches in the round.
Round 3: Crochet 1 single crochet in the first stitch. Then crochet two single crochets in the next stitch. Repeat this (increase in every second stitch) around the round. You will have 18 stitches in the round.
Round 4: Crochet two single crochets in the first stitch. Then crochet two single crochets in the same stitch in the next stitch. Repeat this (increase in every third stitch) around the round. You will have 24 stitches in the round.
Round 5-6: Crochet 1 single crochet in each stitch for two rounds. You will have 24 stitches in the round.
Round 7: Now we will attach the legs to the body. Crochet 8 single crochets. Then take the first leg and lay it parallel to the body so that the foot is facing you. Now, crochet in the next 4 stitches but through both the leg and the body. This will attach the first leg to the body. Crochet 8 single crochets. Then do the same with the second leg. The last 4 stitches will go through both the leg and the body. Be sure that the feet are pointing in the same direction as the first leg.


Varv 8: Virka 15 fasta maskor. Nu ska vi virka genom både kroppen och svansen med tre fasta maskor. Tänk på att den fina sidan av svansen ska vara utåt. Virka sedan 6 fasta maskor. Totalt har du 24 maskor på varvet.


Round 9: Crochet 4 single crochets. Then crochet a decrease. Repeat: 4 single crochets and then a decrease for a total of 4 times. You should have 20 stitches on the round.
Round 10: Crochet 20 single crochets, one in each stitch. You should have 20 stitches on the round.
Round 11: Crochet 2 single crochets. Then crochet a decrease. Repeat: 2 single crochets and then a decrease for a total of 5 times. You should have 15 stitches on the round.
Round 12: Now we will attach the arms to the body in the same way we attached the legs.
- Crochet 5 single crochets.
- Then take the first arm and place it parallel to the body. Now, crochet through the next 3 stitches, crocheting through both the arm and the body. The first arm is now attached to the body.
- Crochet 5 single crochets.
- Now there are only 2 stitches left in the round, but we will crochet through the next 3 stitches (one stitch extra).
- Attach the second arm in the same way. Crochet through the next 3 stitches (arm and body). We will now start round 13 here instead.
Round 13: Crochet 1 single crochet, then crochet a decrease. Repeat: 1 single crochet and then a decrease for a total of 5 times. You should have 10 stitches on the round.
Fill the body and cut the yarn, leaving a long end for assembly later.

STEP 5 - HEAD (orange and white)
Start with orange yarn.
Round 1: Crochet 6 single crochets in a magic ring.
Round 2: Crochet 2 single crochets in each stitch. You should have 12 stitches in the round.
Round 3: Crochet 1 single crochet in the first stitch, then crochet 2 single crochets in the second stitch. Repeat this (increase in every second stitch) around. You should have 18 stitches in the round.
Round 4: Crochet 2 single crochets in the first 2 stitches, then crochet 2 single crochets in the next stitch. Repeat this (increase in every third stitch) around. You should have 24 stitches in the round.
Rounds 5-8: Crochet 1 single crochet in each stitch for 4 rounds. You should have 24 stitches in each round.
Now, switch to white yarn.
Round 9: Crochet 3 single crochets in the first 3 stitches, then crochet 2 single crochets in the second stitch. Repeat this (increase in every fourth stitch) around. You should have 30 stitches in the round.
Round 10: Crochet 1 single crochet in each stitch. You should have 30 stitches in the round.
Round 11: Crochet 1 single crochet, then crochet a decrease. Repeat: 1 single crochet and a decrease for a total of 10 times. You should have 20 stitches in the round.
Round 12: Crochet 10 decreases. You should have 10 stitches left in the round.
Fill the head with stuffing. Cut the yarn and fasten off.
Let me know if you need further assistance or clarifications!

STEP 6 - EARS (white and orange):
Start with white yarn.
Round 1: Crochet 4 single crochets in a magic ring.
Round 2: Crochet 1 single crochet in the first stitch, then crochet 2 single crochets in the second stitch. Repeat this once. You should have 6 stitches in the round.
Switch to orange yarn.
Round 3: Crochet 2 single crochets in the first 2 stitches, then crochet 2 single crochets in the third stitch. Repeat this once. You should have 8 stitches in the round.
Round 4: Crochet 2 single crochets in the first 3 stitches, then crochet 2 single crochets in the fourth stitch. Repeat this once. You should have 10 stitches in the round.
Cut the yarn and leave a tail for assembly. Crochet a second ear.
STEP 7 - NOSE (white):
Round 1: Crochet 6 single crochets in a magic ring.
Round 2: Crochet 2 single crochets in the first 2 stitches, then crochet 2 single crochets in the third stitch. Repeat this once. You should have 8 stitches in the round.
Round 3: Crochet 3 single crochets in the first 3 stitches, then crochet 2 single crochets in the fourth stitch. Repeat this once. You should have 10 stitches in the round.
Cut the yarn and leave a tail for assembly.
ASSEMBLY:
Assembly Tip: A good tip for assembly is to first place the parts to be attached using something like a needle. By placing them first, before actually attaching them, you can check if the placement looks good and also make adjustments if needed.
1. Attach the ears to the head: Attach the ears between rounds 3-6 (or wherever you feel they look good). Attach them by going up and down with the needle between the ear and the head. Make sure the ear is securely attached. Then, attach the second ear and ensure there are the same number of stitches between the ears on both the front and back, so they are centered. Once done, pull the yarn tails into the head's opening. Tie a knot and hide the yarn ends inside the head.


2. Attach the nose to the head between rounds 8-11. Pin it in place. Make sure it’s centered between the ears. Be careful not to stretch or pull the nose while attaching it. Once you've attached half of the nose, you can insert a little stuffing or white yarn ends to fill it (if needed), then continue attaching it. Once you're done, pull the yarn end through the opening of the head, tie it with the other yarn end, and hide both ends inside the head.

3. Embroider a small black nose on the white part of the nose. Use thin black yarn or thick thread for this. I usually embroider it in a "V" shape. Once done, pull the yarn end through the opening of the head, tie it with the other yarn end, and hide both ends inside the head.

. Embroider a few white lines on the fox's forehead. Once done, pull the yarn end through the opening of the head, tie it with the other yarn end, and hide both ends inside the head.

5. Embroider the eyes. This part is a bit tricky, but check the images below for reference. Mark where you want to embroider the eyes, I usually do it between rounds 8-9. There are 6 stitches between the eyes. Using black yarn, embroider vertically where you want the eyes to be. Continue until the eyes form a round shape.

Then, take white yarn and embroider a stripe on the outside of the black.

Then, I embroider a small white stripe in the middle of the eye.

Then, I take the black yarn again and embroider a black stripe outside the white stripe.

Then, I embroider eyelashes, starting from the top of the eye, slightly diagonally down.


6. Embroider the eyebrows diagonally across round 6, just above the eyes.

7. Attach the body and head together.
Sometimes, you may need to add a little more stuffing as you attach the parts. The number of stitches on the last rounds of both the body and head should be the same, so you can go up and down through the stitches, securing the parts tightly together. Once the head and body are attached, secure the last yarn end at the back of the body.
I usually tie a knot around a stitch in the neck area of the fox and then thread the yarn end inside the body, hiding it there. If you have a long yarn end left, cut it off.
Your fox is now complete! 😊 Feel free to share your result!
Abbreviations:
MR = Magic ring
st = stitch
ch = chain stitch
sl st = slip stitch
sc = single crochet
hdc = half double crochet
blo = back loop only
inc = increase, two single crochets in each
dec = decrease
(…) = indicates the number of stitches in the current row
*...* = Everything within ... is repeated the specified number of times
[...] = Everything within [...] is crocheted in the same stitch
We’re going to crochet a cute fox! If you need help along the way, check out the easier version of this pattern.
Leg (2 pieces - orange and white)
Start with white yarn.
Round 1: Ch 4.
Round 2: 2 sc, 4 sc in the same st (top st), 1 sc, 4 sc in the last st. (11)
Round 3: 2 sc, inc x3, 4 sc, inc x2. (16)
Round 4: 16 sc. (16)
Round 5: 5 sc, dec, 9 sc. (15)
Round 6: 3 sc, dec x3, 8 sc. (13)
Round 7: 1 sc, dec x3, 6 sc. (10)
Switch to orange yarn.
Round 8-17: 10 sc. (10, 7 rounds)
Stuff the foot with a little stuffing.
Round 18: 4 sc to the front of the leg. Flatten the leg and crochet through both layers with 4 sc to close. (Important: crochet through with 4 sts, do not add a stitch).
Fasten off and weave in ends.
The leg is complete! Make one more.
Arm (2 pieces - orange and white)
Start with white yarn.
Round 1: 6 sc in MR.
Round 2: Inc x6. (12)
Round 3: 12 sc. (12)
Round 4: *1 sc, dec* x4. (8)
Switch to orange yarn.
Round 5-11: 8 sc. (8, 7 rounds)
Stuff the hand lightly with stuffing, but leave the arm mostly unstuffed.
Round 12: Flatten the arm and crochet through both layers with 3 sc to close.
Fasten off and weave in ends.
The arm is complete!
Tail (white and orange)
Start with white yarn.
Round 1: 6 sc in MR.
Round 2: *1 sc, inc* x3. (9)
Round 3: *2 sc, inc* x3. (12)
For Round 4, alternate between white and orange for every stitch.
Round 4: *1 sc in white, 1 sc in orange* x6. (12)
From now on, use only orange.
Round 5: *3 sc, inc* x3. (15)
Round 6-7: 15 sc. (15, 2 rounds)
Round 8: *3 sc, dec* x3. (12)
Round 9: 5 sc, dec, 5 sc. (11)
Round 10: 9 sc, dec. (10)
Round 11: 4 sc, dec, 4 sc. (9)
Round 12: 2 sc, dec, 3 sc. (7)
Stuff the tail lightly.
Round 13: Flatten the tail and crochet 3 sc through both layers.
Fasten off and weave in ends.
The tail is complete!

Body (orange)
While crocheting the body, we will attach the legs, tail, and arms.
Round 1: 6 sc in MR
Round 2: Inc x6 (12)
Round 3: *1 sc, inc* x6 (18)
Round 4: *2 sc, inc* x6 (24)
Round 5-6: 24 sc (24, 2 rounds)
Now we will attach the legs to the body.
Round 7: 8 sc. Then take the first leg and place it parallel to the body so that the foot is facing you. Crochet 4 sc through both the leg and the body. Crochet 8 sc. Then do the same with the second leg. For the last 4 sts, crochet through both the leg and the body. Make sure the foot is facing the same direction as the first one.
The body is now attached with the legs!
We will attach the tail to the body on round 8.
Round 8: 15 sc. Then crochet 3 sc through both the tail and the body. Make sure the right side of the tail is facing outward. Crochet 6 sc. (24 sts)
Round 9: *4 sc, dec* x4 (20)
Round 10: 20 sc (20)
Round 11: *2 sc, dec* x5 (15)
Now we will attach the arms to the body in the same way as we attached the legs.
Round 12: 5 sc. Then crochet 3 sc through both the arm and the body. 5 sc.
Now there are only 2 stitches left in the round, but we will crochet through the next 3 stitches (one extra stitch). 3 sc through both the arm and the body.
We will now begin Round 13 here instead. (15)
Round 13: *1 sc, dec* x5 (10)
Fill the body. Cut the yarn, but leave a long end for later assembly.
Head (orange and white)
Start with orange.
Round 1: 6 sc in MR
Round 2: Inc x6 (12)
Round 3: *1 sc, inc* x6 (18)
Round 4: *2 sc, inc* x6 (24)
Round 5-8: 24 sc (24, 4 rounds)
Switch to white yarn.
Round 9: *3 sc, inc* x6 (30)
Round 10: 30 sc (30)
Round 11: *1 sc, dec* x10 (20)
Round 12: Dec x10 (10)
Fill the head. Cut the yarn and secure it.
Ears (2 pcs, white and orange)
Start with white.
Round 1: 4 sc in MR
Round 2: *1 sc, inc* x2 (6)
Switch to orange yarn.
Round 3: *2 sc, inc* x2 (8)
Round 4: *3 sc, inc* x2 (10)
Cut the yarn and leave a long end for assembly.

Nose (white)
Round 1: 6 sc in MR
Round 2: *2 sc, inc* x2 (8)
Round 3: *3 sc, inc* x2 (10)
Cut the yarn and leave a long end for assembly.

Assembly
A tip for the assembly is to first place the parts you need to attach with something like a pin. If you place them first, before attaching, you can check that the placement is correct and adjust it if needed.
1. Attach the ears to the head
Attach the ears between rounds 3-6 (or wherever you think they look good). Secure the ears by stitching up and down between the ear and the head. Make sure the ear is firmly attached. After attaching the first ear, position the second one, ensuring there are the same number of stitches between the ears on the front and back, so they are centered. When you're done, pull the yarn ends into the opening of the head. Tie a knot and then hide the yarn ends inside the head.
2. Attach the nose to the head. Attach the nose to the head between rounds 8-11. Pin it in place. Make sure that it is centered between the ears. Be careful not to stretch or pull the nose when attaching it. Once half is attached, you can add a bit of stuffing or white yarn ends to fill it (if needed), then continue attaching the rest. When you're done, pull the yarn end into the opening of the head, tie it with the other yarn end, and hide both ends inside the head.

3.
3. Embroider a small black nose on the white nose
Embroider with thin black yarn or thick thread. I usually embroider it in a "V" shape. Pull the yarn end into the opening of the head, tie it with the other yarn end, and hide both ends inside the head.
4. Embroider some white lines on the fox's forehead.
Pull the yarn end into the opening of the head, tie it with the other yarn end, and hide both ends inside the head.
5. Embroider the eyes. This can be a bit tricky, but see the pictures below for guidance. Mark where you want to embroider the eyes; I place them between rounds 8-9 with 6 stitches between the eyes. Use black yarn to embroider up and down where you want the eye to sit. Continue until the eye has a round shape.
Then take white yarn and embroider a line on the outside of the black.
Then, embroider a small white line in the middle of the eye.
Then, take the black yarn again and embroider a black line outside the white line.
Then, embroider eyelashes, starting from the top of the eye, slightly diagonally down.
6. Embroider eyebrows diagonally over round 6, just above the eyes.
Attach the body and head together. Sometimes, you may need to add a little more filling while you attach the parts. Both the body and head have the same number of stitches on the last rounds. So, go up and down between the stitches and carefully attach the parts to each other. Then, secure the last yarn end on the back of the body. I usually tie a knot around a stitch at the neck of the fox and then take the yarn end inside the body and hide it there. Cut off the yarn if you have a long end remaining.
Your fox is now finished :)
The rights to this pattern belong to MYO Make Your Own. The pattern or its pictures may not be copied, shared or resold either in parts or in its entirety, but you may sell items you have crocheted from this pattern. If you have questions about the pattern, contact MYO at hello@makeyourown.se.
STEP 1 - LEGS
We start by crocheting two legs, which are crocheted in the same way. Begin crocheting with white yarn. We start with the foot.Crochet 4 chain stitches. If you are unsure how to make a slip knot and then crochet 4 chain stitches, see the video below.
Round 1: Now start crocheting on the chain. Skip the first chain and begin in the 2nd chain. This means you will have three chains to crochet into. In the first two, crochet 1 single crochet in each chain, and in the last chain, crochet 4 single crochets in the same chain. Then, round the chain and crochet back on the other side. You will have two chains to crochet into: crochet 1 single crochet in the first chain, and in the last chain, crochet 4 single crochets. In total, you will have 11 stitches. Place a stitch marker in your last stitch.
If you are unsure how to crochet single crochets, see the video below. If you are unsure what we mean by crocheting on the other side of the chain, you can see an example of it in the video below.
Round 2: Crochet 1 single crochet in the next two stitches. In the next three stitches, crochet 2 single crochets in each stitch. Then crochet 1 single crochet in the next four stitches. In the last two stitches, crochet 2 single crochets in each stitch. In total, you will have 16 stitches in the round. Place your stitch marker back in the last stitch.
Round 3: Crochet 16 single crochets in the back loop only. If you are unsure how to crochet in the back loop only, see the video below. Always move the stitch marker so that it sits in the last stitch of each round.
Round 5: Crochet 5 single crochets in the next 5 stitches. Then crochet a decrease. Finally, crochet 9 single crochets until you are back at the start. Place the stitch marker in your last stitch. If you are unsure how to crochet a decrease, see the video below.
Round 6: Crochet 3 single crochets. Then crochet two decreases. Finally, crochet 8 single crochets. In total, you will have 13 stitches in the round.
Round 7: Crochet 1 single crochet. Then crochet three decreases. Finally, crochet 6 single crochets. In total, you will have 10 stitches in the round.
Now, change color to orange.To do this, in your last stitch, complete the final pull-through with the new color. Unravel the last stitch and do it again, but for the final pull-through, use the new color and pull it through instead.
Rounds 8-17: Crochet 1 single crochet in each stitch (10 single crochets) in each round for a total of 7 rounds.
Stuff the foot with cotton stuffing, and fill the leg with only a little stuffing. Too much stuffing won't work well, as it will cause the legs to not sit nicely.
Crochet four single crochets so that you are at the front of the leg.
Flatten the leg and crochet it together through both layers with four single crochets. It is important that you crochet together with four stitches.
Cut the yarn and secure it. If you are unsure how to fasten off, see the video below.
STEP 2 - ARMS (white and orange)
Next, we will crochet two arms, both crocheted the same way. Start crocheting with white yarn.
Round 1: Crochet 6 single crochets in a magic ring. If you are unsure how to crochet a magic ring, see the video below (Magic Ring with Single Crochet).
Round 2: Crochet 2 single crochets in each stitch. In total, you will have 12 stitches in the round.
Round 3: Crochet 1 single crochet in each stitch. In total, you will have 12 stitches in the round.
Round 4: Crochet 1 single crochet, then make a decrease. Repeat this 4 times in total. You will have 8 stitches in the round. Change color to orange.
Rounds 5-11: Crochet 1 single crochet in each stitch for a total of 7 rounds. Finish with 1 chain stitch. You will have 8 stitches in the round.
Stuff the hand lightly with cotton stuffing, but leave the arm unstuffed.
Flatten the arm and crochet through both layers with 3 single crochets to close the arm. Then, fasten off the yarn.
STEP 3 - TAIL (white and orange)
Next, we will crochet a tail. Start crocheting with white yarn.
Round 1: Crochet 6 single crochets in a magic ring.
Round 2: Crochet 1 single crochet in the first stitch. Then crochet 2 single crochets in the second stitch. Repeat this (increase every other stitch) around the round. You will have 9 stitches in the round.
Round 3: Crochet 2 single crochets in the first two stitches. Then crochet 2 single crochets in the same stitch in the third stitch. Repeat this (increase every third stitch) around the round. You will have 12 stitches in the round.
Round 4: For this round, we will crochet alternating white and orange stitches. This may be tricky. If it’s difficult with the frequent color changes, you can crochet with only orange yarn.
Start with a white stitch, then crochet 1 orange single crochet. Continue this pattern around the round. You will have 12 stitches in total.
Continue with only orange yarn from now on.
Round 5: Crochet 3 single crochets in the first 3 stitches. Then crochet 2 single crochets in the same stitch in the 4th stitch. Repeat this (increase in every 4th stitch) around the round. You will have 15 stitches in the round.
Rounds 6-7: Crochet 1 single crochet in each stitch. Crochet two rounds in the same way. You will have 15 stitches in each round.
Round 8: Crochet 3 single crochets in the first 3 stitches. Then crochet one decrease. Repeat this (decrease in every 4th stitch) around the round. You will have 12 stitches in the round.
Round 9: Crochet 5 single crochets, then one decrease. Crochet 5 single crochets. You will have 11 stitches in the round.
Round 10: Crochet 9 single crochets, then one decrease. You will have 10 stitches in the round.
Round 11: Crochet 4 single crochets, then one decrease. Crochet 4 single crochets. You will have 9 stitches in the round.
Round 12: Crochet 2 single crochets, then one decrease. Crochet 3 single crochets, then one decrease. You will have 7 stitches in the round.
Fill the tail a little.
Flatten the tail and crochet through both layers with 3 single crochets to close the tail. Then fasten off the yarn.
STEP 4 - BODY (orange)
Now we will crochet the body, and as we crochet, we will attach the arms and legs directly to the body, so you won’t have to sew them on later.
Round 1: Crochet 6 single crochets in a magic ring.
Round 2: Crochet two single crochets in each stitch. You will have 12 stitches in the round.
Round 3: Crochet 1 single crochet in the first stitch. Then crochet two single crochets in the next stitch. Repeat this (increase in every second stitch) around the round. You will have 18 stitches in the round.
Round 4: Crochet two single crochets in the first stitch. Then crochet two single crochets in the same stitch in the next stitch. Repeat this (increase in every third stitch) around the round. You will have 24 stitches in the round.
Round 5-6: Crochet 1 single crochet in each stitch for two rounds. You will have 24 stitches in the round.
Round 7: Now we will attach the legs to the body. Crochet 8 single crochets. Then take the first leg and lay it parallel to the body so that the foot is facing you. Now, crochet in the next 4 stitches but through both the leg and the body. This will attach the first leg to the body. Crochet 8 single crochets. Then do the same with the second leg. The last 4 stitches will go through both the leg and the body. Be sure that the feet are pointing in the same direction as the first leg.
Varv 8: Virka 15 fasta maskor. Nu ska vi virka genom både kroppen och svansen med tre fasta maskor. Tänk på att den fina sidan av svansen ska vara utåt. Virka sedan 6 fasta maskor. Totalt har du 24 maskor på varvet.
Round 9: Crochet 4 single crochets. Then crochet a decrease. Repeat: 4 single crochets and then a decrease for a total of 4 times. You should have 20 stitches on the round.
Round 10: Crochet 20 single crochets, one in each stitch. You should have 20 stitches on the round.
Round 11: Crochet 2 single crochets. Then crochet a decrease. Repeat: 2 single crochets and then a decrease for a total of 5 times. You should have 15 stitches on the round.
Round 12: Now we will attach the arms to the body in the same way we attached the legs.
- Crochet 5 single crochets.
- Then take the first arm and place it parallel to the body. Now, crochet through the next 3 stitches, crocheting through both the arm and the body. The first arm is now attached to the body.
- Crochet 5 single crochets.
- Now there are only 2 stitches left in the round, but we will crochet through the next 3 stitches (one stitch extra).
- Attach the second arm in the same way. Crochet through the next 3 stitches (arm and body). We will now start round 13 here instead.
Round 13: Crochet 1 single crochet, then crochet a decrease. Repeat: 1 single crochet and then a decrease for a total of 5 times. You should have 10 stitches on the round.
Fill the body and cut the yarn, leaving a long end for assembly later.
STEP 5 - HEAD (orange and white)
Start with orange yarn.
Round 1: Crochet 6 single crochets in a magic ring.
Round 2: Crochet 2 single crochets in each stitch. You should have 12 stitches in the round.
Round 3: Crochet 1 single crochet in the first stitch, then crochet 2 single crochets in the second stitch. Repeat this (increase in every second stitch) around. You should have 18 stitches in the round.
Round 4: Crochet 2 single crochets in the first 2 stitches, then crochet 2 single crochets in the next stitch. Repeat this (increase in every third stitch) around. You should have 24 stitches in the round.
Rounds 5-8: Crochet 1 single crochet in each stitch for 4 rounds. You should have 24 stitches in each round.
Now, switch to white yarn.
Round 9: Crochet 3 single crochets in the first 3 stitches, then crochet 2 single crochets in the second stitch. Repeat this (increase in every fourth stitch) around. You should have 30 stitches in the round.
Round 10: Crochet 1 single crochet in each stitch. You should have 30 stitches in the round.
Round 11: Crochet 1 single crochet, then crochet a decrease. Repeat: 1 single crochet and a decrease for a total of 10 times. You should have 20 stitches in the round.
Round 12: Crochet 10 decreases. You should have 10 stitches left in the round.
Fill the head with stuffing. Cut the yarn and fasten off.
Let me know if you need further assistance or clarifications!
STEP 6 - EARS (white and orange):
Start with white yarn.
Round 1: Crochet 4 single crochets in a magic ring.
Round 2: Crochet 1 single crochet in the first stitch, then crochet 2 single crochets in the second stitch. Repeat this once. You should have 6 stitches in the round.
Switch to orange yarn.
Round 3: Crochet 2 single crochets in the first 2 stitches, then crochet 2 single crochets in the third stitch. Repeat this once. You should have 8 stitches in the round.
Round 4: Crochet 2 single crochets in the first 3 stitches, then crochet 2 single crochets in the fourth stitch. Repeat this once. You should have 10 stitches in the round.
Cut the yarn and leave a tail for assembly. Crochet a second ear.
STEP 7 - NOSE (white):
Round 1: Crochet 6 single crochets in a magic ring.
Round 2: Crochet 2 single crochets in the first 2 stitches, then crochet 2 single crochets in the third stitch. Repeat this once. You should have 8 stitches in the round.
Round 3: Crochet 3 single crochets in the first 3 stitches, then crochet 2 single crochets in the fourth stitch. Repeat this once. You should have 10 stitches in the round.
Cut the yarn and leave a tail for assembly.
ASSEMBLY:
Assembly Tip: A good tip for assembly is to first place the parts to be attached using something like a needle. By placing them first, before actually attaching them, you can check if the placement looks good and also make adjustments if needed.
1. Attach the ears to the head: Attach the ears between rounds 3-6 (or wherever you feel they look good). Attach them by going up and down with the needle between the ear and the head. Make sure the ear is securely attached. Then, attach the second ear and ensure there are the same number of stitches between the ears on both the front and back, so they are centered. Once done, pull the yarn tails into the head's opening. Tie a knot and hide the yarn ends inside the head.
2. Attach the nose to the head between rounds 8-11. Pin it in place. Make sure it’s centered between the ears. Be careful not to stretch or pull the nose while attaching it. Once you've attached half of the nose, you can insert a little stuffing or white yarn ends to fill it (if needed), then continue attaching it. Once you're done, pull the yarn end through the opening of the head, tie it with the other yarn end, and hide both ends inside the head.
3. Embroider a small black nose on the white part of the nose. Use thin black yarn or thick thread for this. I usually embroider it in a "V" shape. Once done, pull the yarn end through the opening of the head, tie it with the other yarn end, and hide both ends inside the head.
. Embroider a few white lines on the fox's forehead. Once done, pull the yarn end through the opening of the head, tie it with the other yarn end, and hide both ends inside the head.
5. Embroider the eyes. This part is a bit tricky, but check the images below for reference. Mark where you want to embroider the eyes, I usually do it between rounds 8-9. There are 6 stitches between the eyes. Using black yarn, embroider vertically where you want the eyes to be. Continue until the eyes form a round shape.
Then, take white yarn and embroider a stripe on the outside of the black.
Then, I embroider a small white stripe in the middle of the eye.
Then, I take the black yarn again and embroider a black stripe outside the white stripe.
Then, I embroider eyelashes, starting from the top of the eye, slightly diagonally down.
6. Embroider the eyebrows diagonally across round 6, just above the eyes.
7. Attach the body and head together.
Sometimes, you may need to add a little more stuffing as you attach the parts. The number of stitches on the last rounds of both the body and head should be the same, so you can go up and down through the stitches, securing the parts tightly together. Once the head and body are attached, secure the last yarn end at the back of the body.
I usually tie a knot around a stitch in the neck area of the fox and then thread the yarn end inside the body, hiding it there. If you have a long yarn end left, cut it off.
Your fox is now complete! 😊 Feel free to share your result!
Abbreviations:
MR = Magic ring
st = stitch
ch = chain stitch
sl st = slip stitch
sc = single crochet
hdc = half double crochet
blo = back loop only
inc = increase, two single crochets in each
dec = decrease
(…) = indicates the number of stitches in the current row
*...* = Everything within ... is repeated the specified number of times
[...] = Everything within [...] is crocheted in the same stitch
We’re going to crochet a cute fox! If you need help along the way, check out the easier version of this pattern.
Leg (2 pieces - orange and white)
Start with white yarn.
Round 1: Ch 4.
Round 2: 2 sc, 4 sc in the same st (top st), 1 sc, 4 sc in the last st. (11)
Round 3: 2 sc, inc x3, 4 sc, inc x2. (16)
Round 4: 16 sc. (16)
Round 5: 5 sc, dec, 9 sc. (15)
Round 6: 3 sc, dec x3, 8 sc. (13)
Round 7: 1 sc, dec x3, 6 sc. (10)
Switch to orange yarn.
Round 8-17: 10 sc. (10, 7 rounds)
Stuff the foot with a little stuffing.
Round 18: 4 sc to the front of the leg. Flatten the leg and crochet through both layers with 4 sc to close. (Important: crochet through with 4 sts, do not add a stitch).
Fasten off and weave in ends.
The leg is complete! Make one more.
Arm (2 pieces - orange and white)
Start with white yarn.
Round 1: 6 sc in MR.
Round 2: Inc x6. (12)
Round 3: 12 sc. (12)
Round 4: *1 sc, dec* x4. (8)
Switch to orange yarn.
Round 5-11: 8 sc. (8, 7 rounds)
Stuff the hand lightly with stuffing, but leave the arm mostly unstuffed.
Round 12: Flatten the arm and crochet through both layers with 3 sc to close.
Fasten off and weave in ends.
The arm is complete!
Tail (white and orange)
Start with white yarn.
Round 1: 6 sc in MR.
Round 2: *1 sc, inc* x3. (9)
Round 3: *2 sc, inc* x3. (12)
For Round 4, alternate between white and orange for every stitch.
Round 4: *1 sc in white, 1 sc in orange* x6. (12)
From now on, use only orange.
Round 5: *3 sc, inc* x3. (15)
Round 6-7: 15 sc. (15, 2 rounds)
Round 8: *3 sc, dec* x3. (12)
Round 9: 5 sc, dec, 5 sc. (11)
Round 10: 9 sc, dec. (10)
Round 11: 4 sc, dec, 4 sc. (9)
Round 12: 2 sc, dec, 3 sc. (7)
Stuff the tail lightly.
Round 13: Flatten the tail and crochet 3 sc through both layers.
Fasten off and weave in ends.
The tail is complete!
Body (orange)
While crocheting the body, we will attach the legs, tail, and arms.
Round 1: 6 sc in MR
Round 2: Inc x6 (12)
Round 3: *1 sc, inc* x6 (18)
Round 4: *2 sc, inc* x6 (24)
Round 5-6: 24 sc (24, 2 rounds)
Now we will attach the legs to the body.
Round 7: 8 sc. Then take the first leg and place it parallel to the body so that the foot is facing you. Crochet 4 sc through both the leg and the body. Crochet 8 sc. Then do the same with the second leg. For the last 4 sts, crochet through both the leg and the body. Make sure the foot is facing the same direction as the first one.
The body is now attached with the legs!
We will attach the tail to the body on round 8.
Round 8: 15 sc. Then crochet 3 sc through both the tail and the body. Make sure the right side of the tail is facing outward. Crochet 6 sc. (24 sts)
Round 9: *4 sc, dec* x4 (20)
Round 10: 20 sc (20)
Round 11: *2 sc, dec* x5 (15)
Now we will attach the arms to the body in the same way as we attached the legs.
Round 12: 5 sc. Then crochet 3 sc through both the arm and the body. 5 sc.
Now there are only 2 stitches left in the round, but we will crochet through the next 3 stitches (one extra stitch). 3 sc through both the arm and the body.
We will now begin Round 13 here instead. (15)
Round 13: *1 sc, dec* x5 (10)
Fill the body. Cut the yarn, but leave a long end for later assembly.
Head (orange and white)
Start with orange.
Round 1: 6 sc in MR
Round 2: Inc x6 (12)
Round 3: *1 sc, inc* x6 (18)
Round 4: *2 sc, inc* x6 (24)
Round 5-8: 24 sc (24, 4 rounds)
Switch to white yarn.
Round 9: *3 sc, inc* x6 (30)
Round 10: 30 sc (30)
Round 11: *1 sc, dec* x10 (20)
Round 12: Dec x10 (10)
Fill the head. Cut the yarn and secure it.
Ears (2 pcs, white and orange)
Start with white.
Round 1: 4 sc in MR
Round 2: *1 sc, inc* x2 (6)
Switch to orange yarn.
Round 3: *2 sc, inc* x2 (8)
Round 4: *3 sc, inc* x2 (10)
Cut the yarn and leave a long end for assembly.
Nose (white)
Round 1: 6 sc in MR
Round 2: *2 sc, inc* x2 (8)
Round 3: *3 sc, inc* x2 (10)
Cut the yarn and leave a long end for assembly.
Assembly
A tip for the assembly is to first place the parts you need to attach with something like a pin. If you place them first, before attaching, you can check that the placement is correct and adjust it if needed.
1. Attach the ears to the head
Attach the ears between rounds 3-6 (or wherever you think they look good). Secure the ears by stitching up and down between the ear and the head. Make sure the ear is firmly attached. After attaching the first ear, position the second one, ensuring there are the same number of stitches between the ears on the front and back, so they are centered. When you're done, pull the yarn ends into the opening of the head. Tie a knot and then hide the yarn ends inside the head.
2. Attach the nose to the head. Attach the nose to the head between rounds 8-11. Pin it in place. Make sure that it is centered between the ears. Be careful not to stretch or pull the nose when attaching it. Once half is attached, you can add a bit of stuffing or white yarn ends to fill it (if needed), then continue attaching the rest. When you're done, pull the yarn end into the opening of the head, tie it with the other yarn end, and hide both ends inside the head.
3.
3. Embroider a small black nose on the white nose
Embroider with thin black yarn or thick thread. I usually embroider it in a "V" shape. Pull the yarn end into the opening of the head, tie it with the other yarn end, and hide both ends inside the head.
4. Embroider some white lines on the fox's forehead.
Pull the yarn end into the opening of the head, tie it with the other yarn end, and hide both ends inside the head.
5. Embroider the eyes. This can be a bit tricky, but see the pictures below for guidance. Mark where you want to embroider the eyes; I place them between rounds 8-9 with 6 stitches between the eyes. Use black yarn to embroider up and down where you want the eye to sit. Continue until the eye has a round shape.
Then take white yarn and embroider a line on the outside of the black.
Then, embroider a small white line in the middle of the eye.
Then, take the black yarn again and embroider a black line outside the white line.
Then, embroider eyelashes, starting from the top of the eye, slightly diagonally down.
6. Embroider eyebrows diagonally over round 6, just above the eyes.
Attach the body and head together. Sometimes, you may need to add a little more filling while you attach the parts. Both the body and head have the same number of stitches on the last rounds. So, go up and down between the stitches and carefully attach the parts to each other. Then, secure the last yarn end on the back of the body. I usually tie a knot around a stitch at the neck of the fox and then take the yarn end inside the body and hide it there. Cut off the yarn if you have a long end remaining.
Your fox is now finished :)
The rights to this pattern belong to MYO Make Your Own. The pattern or its pictures may not be copied, shared or resold either in parts or in its entirety, but you may sell items you have crocheted from this pattern. If you have questions about the pattern, contact MYO at hello@makeyourown.se.
%20(1).jpg)

Share your creations with us
Thank you!
Your comment was sent!