
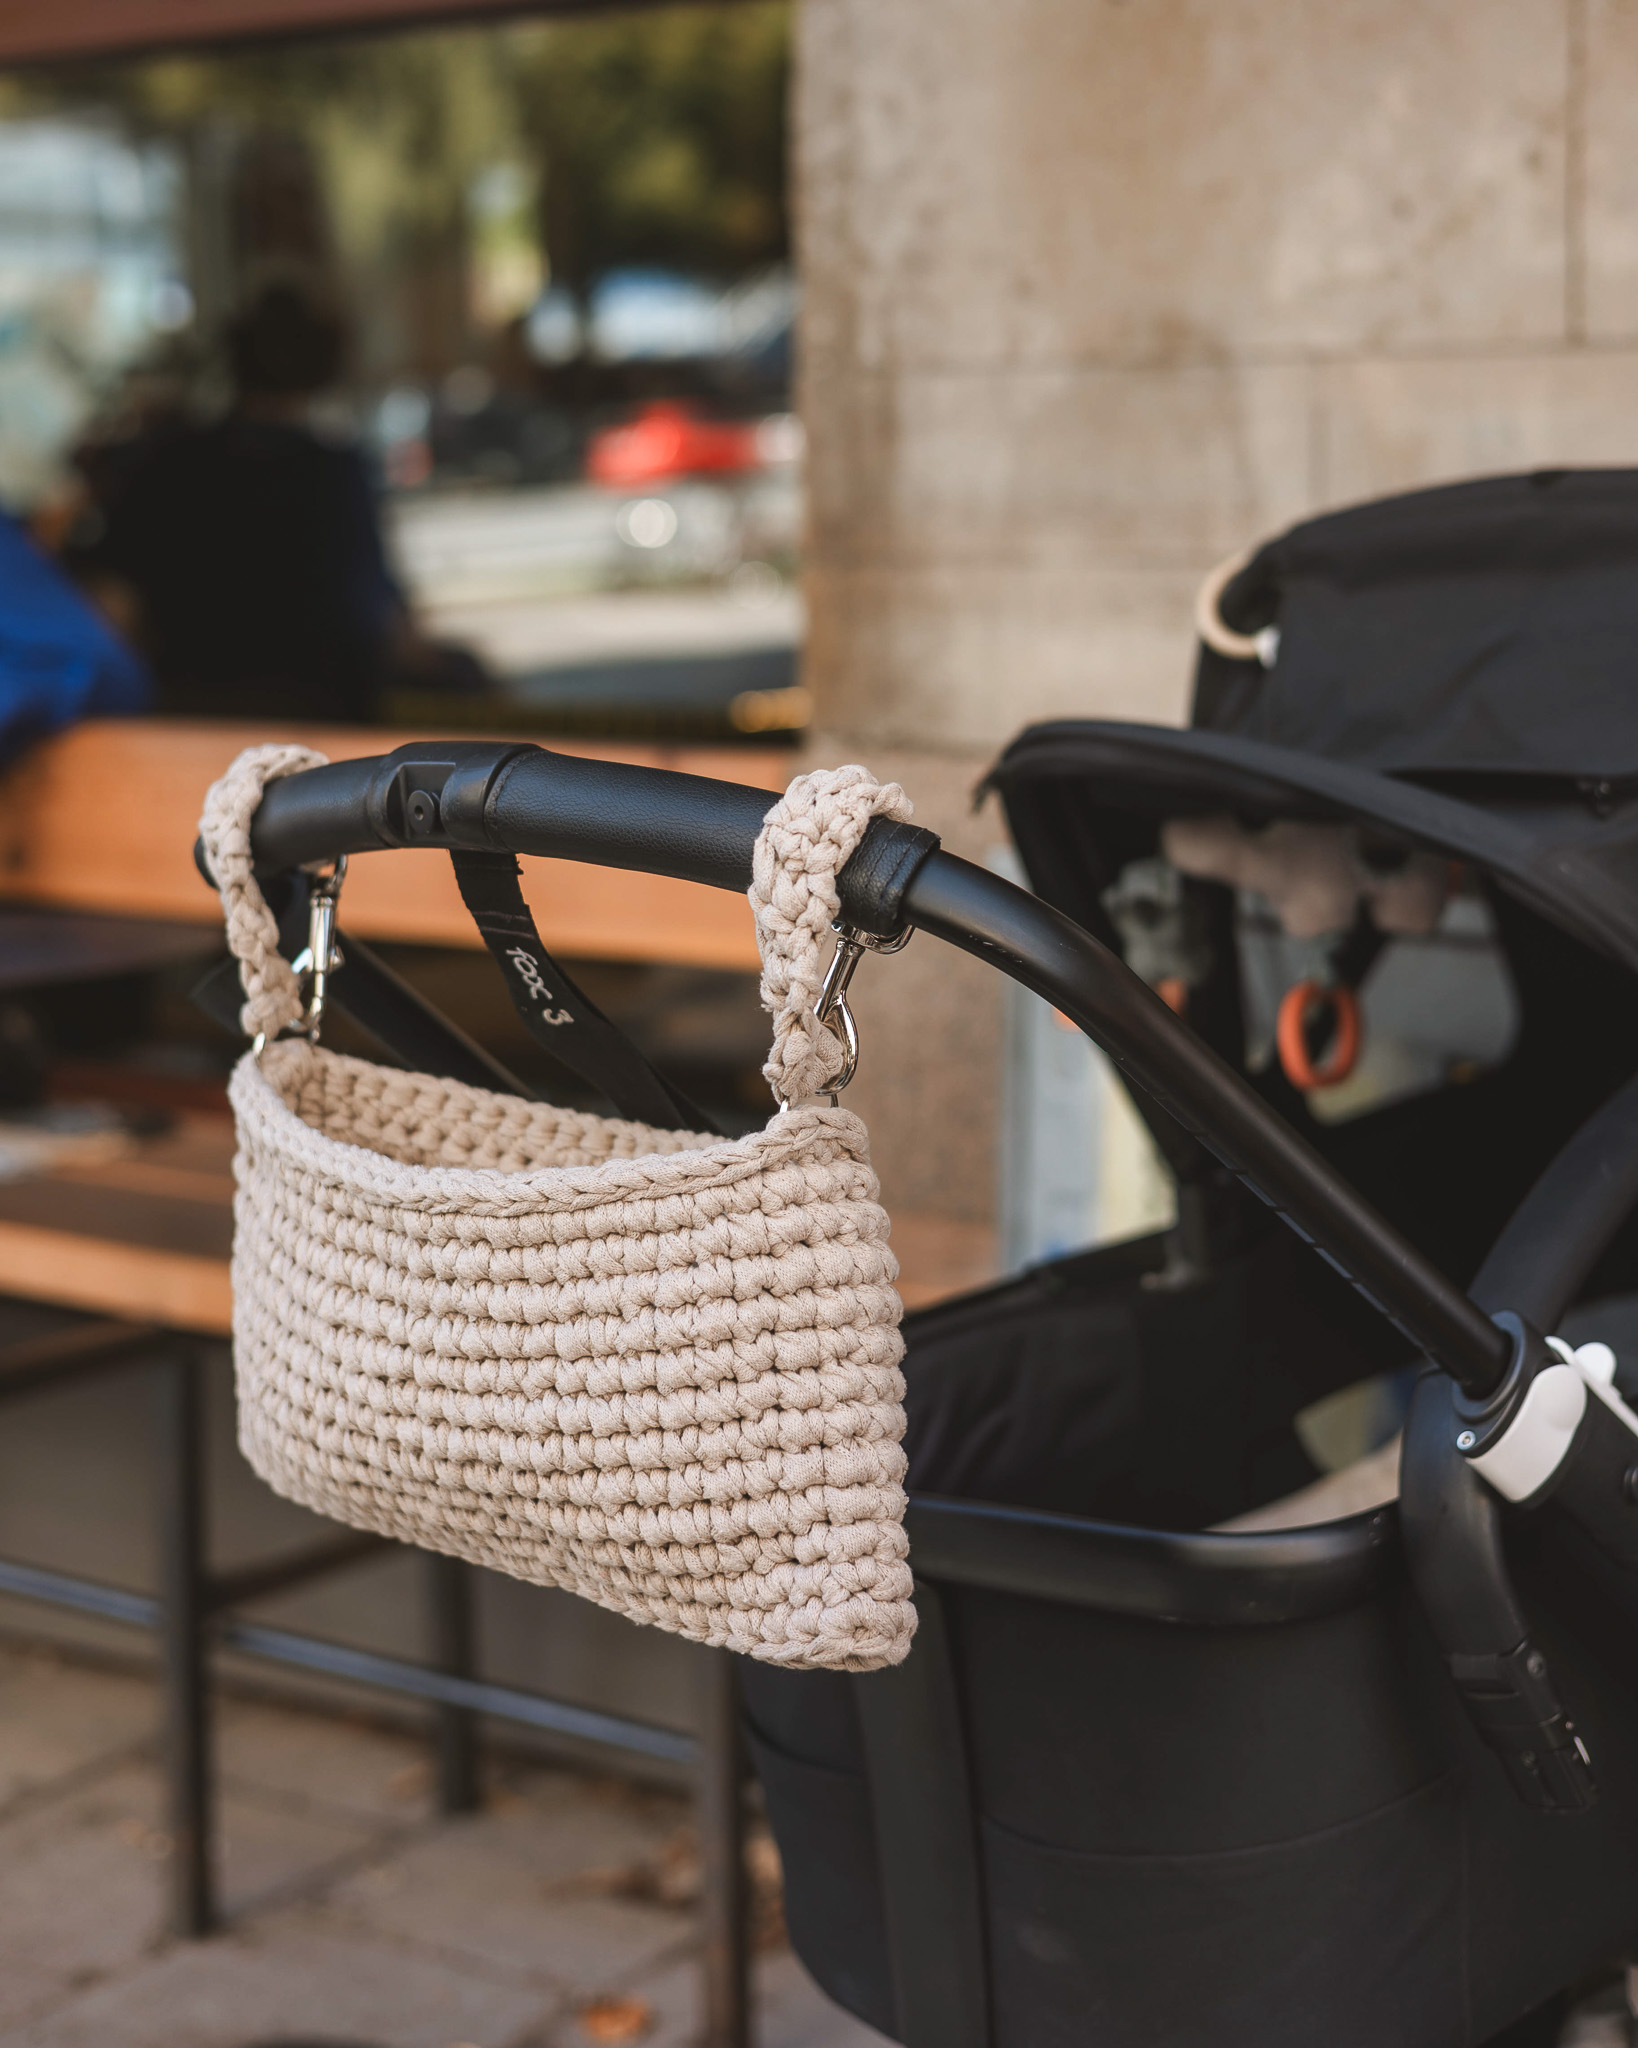
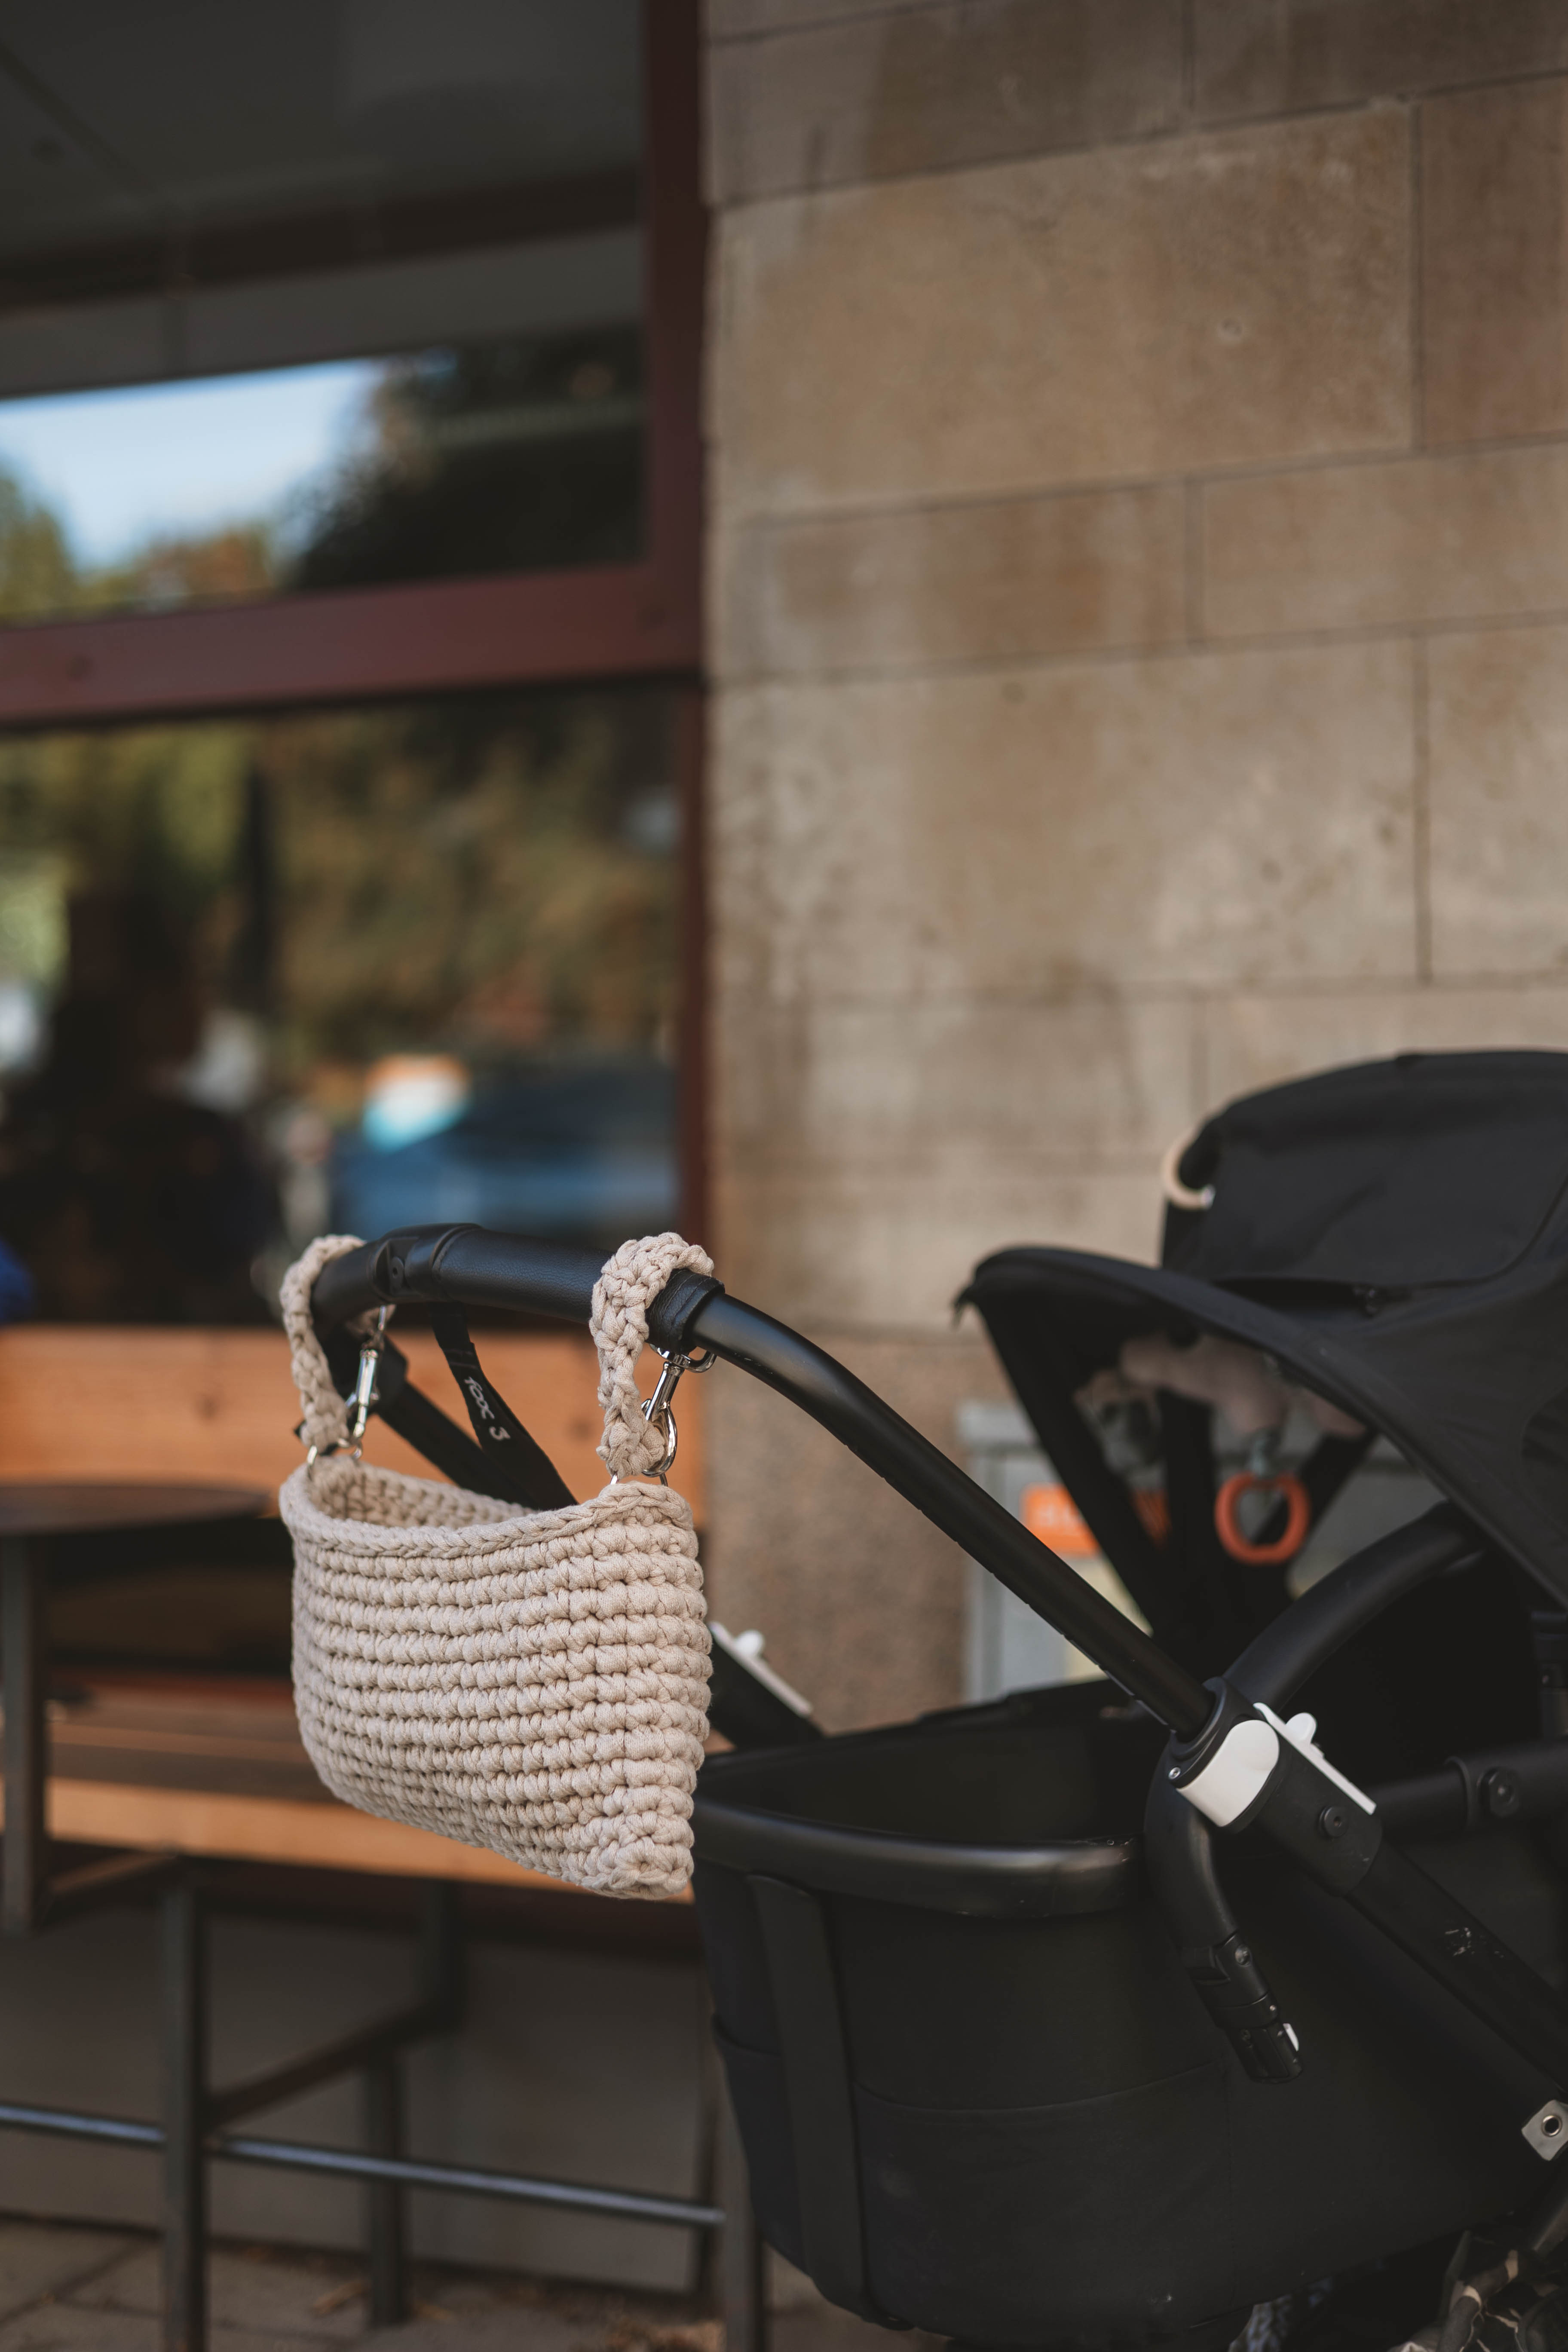
Stroller organizer “Robine”
Crochet a Practical Stroller Organizer
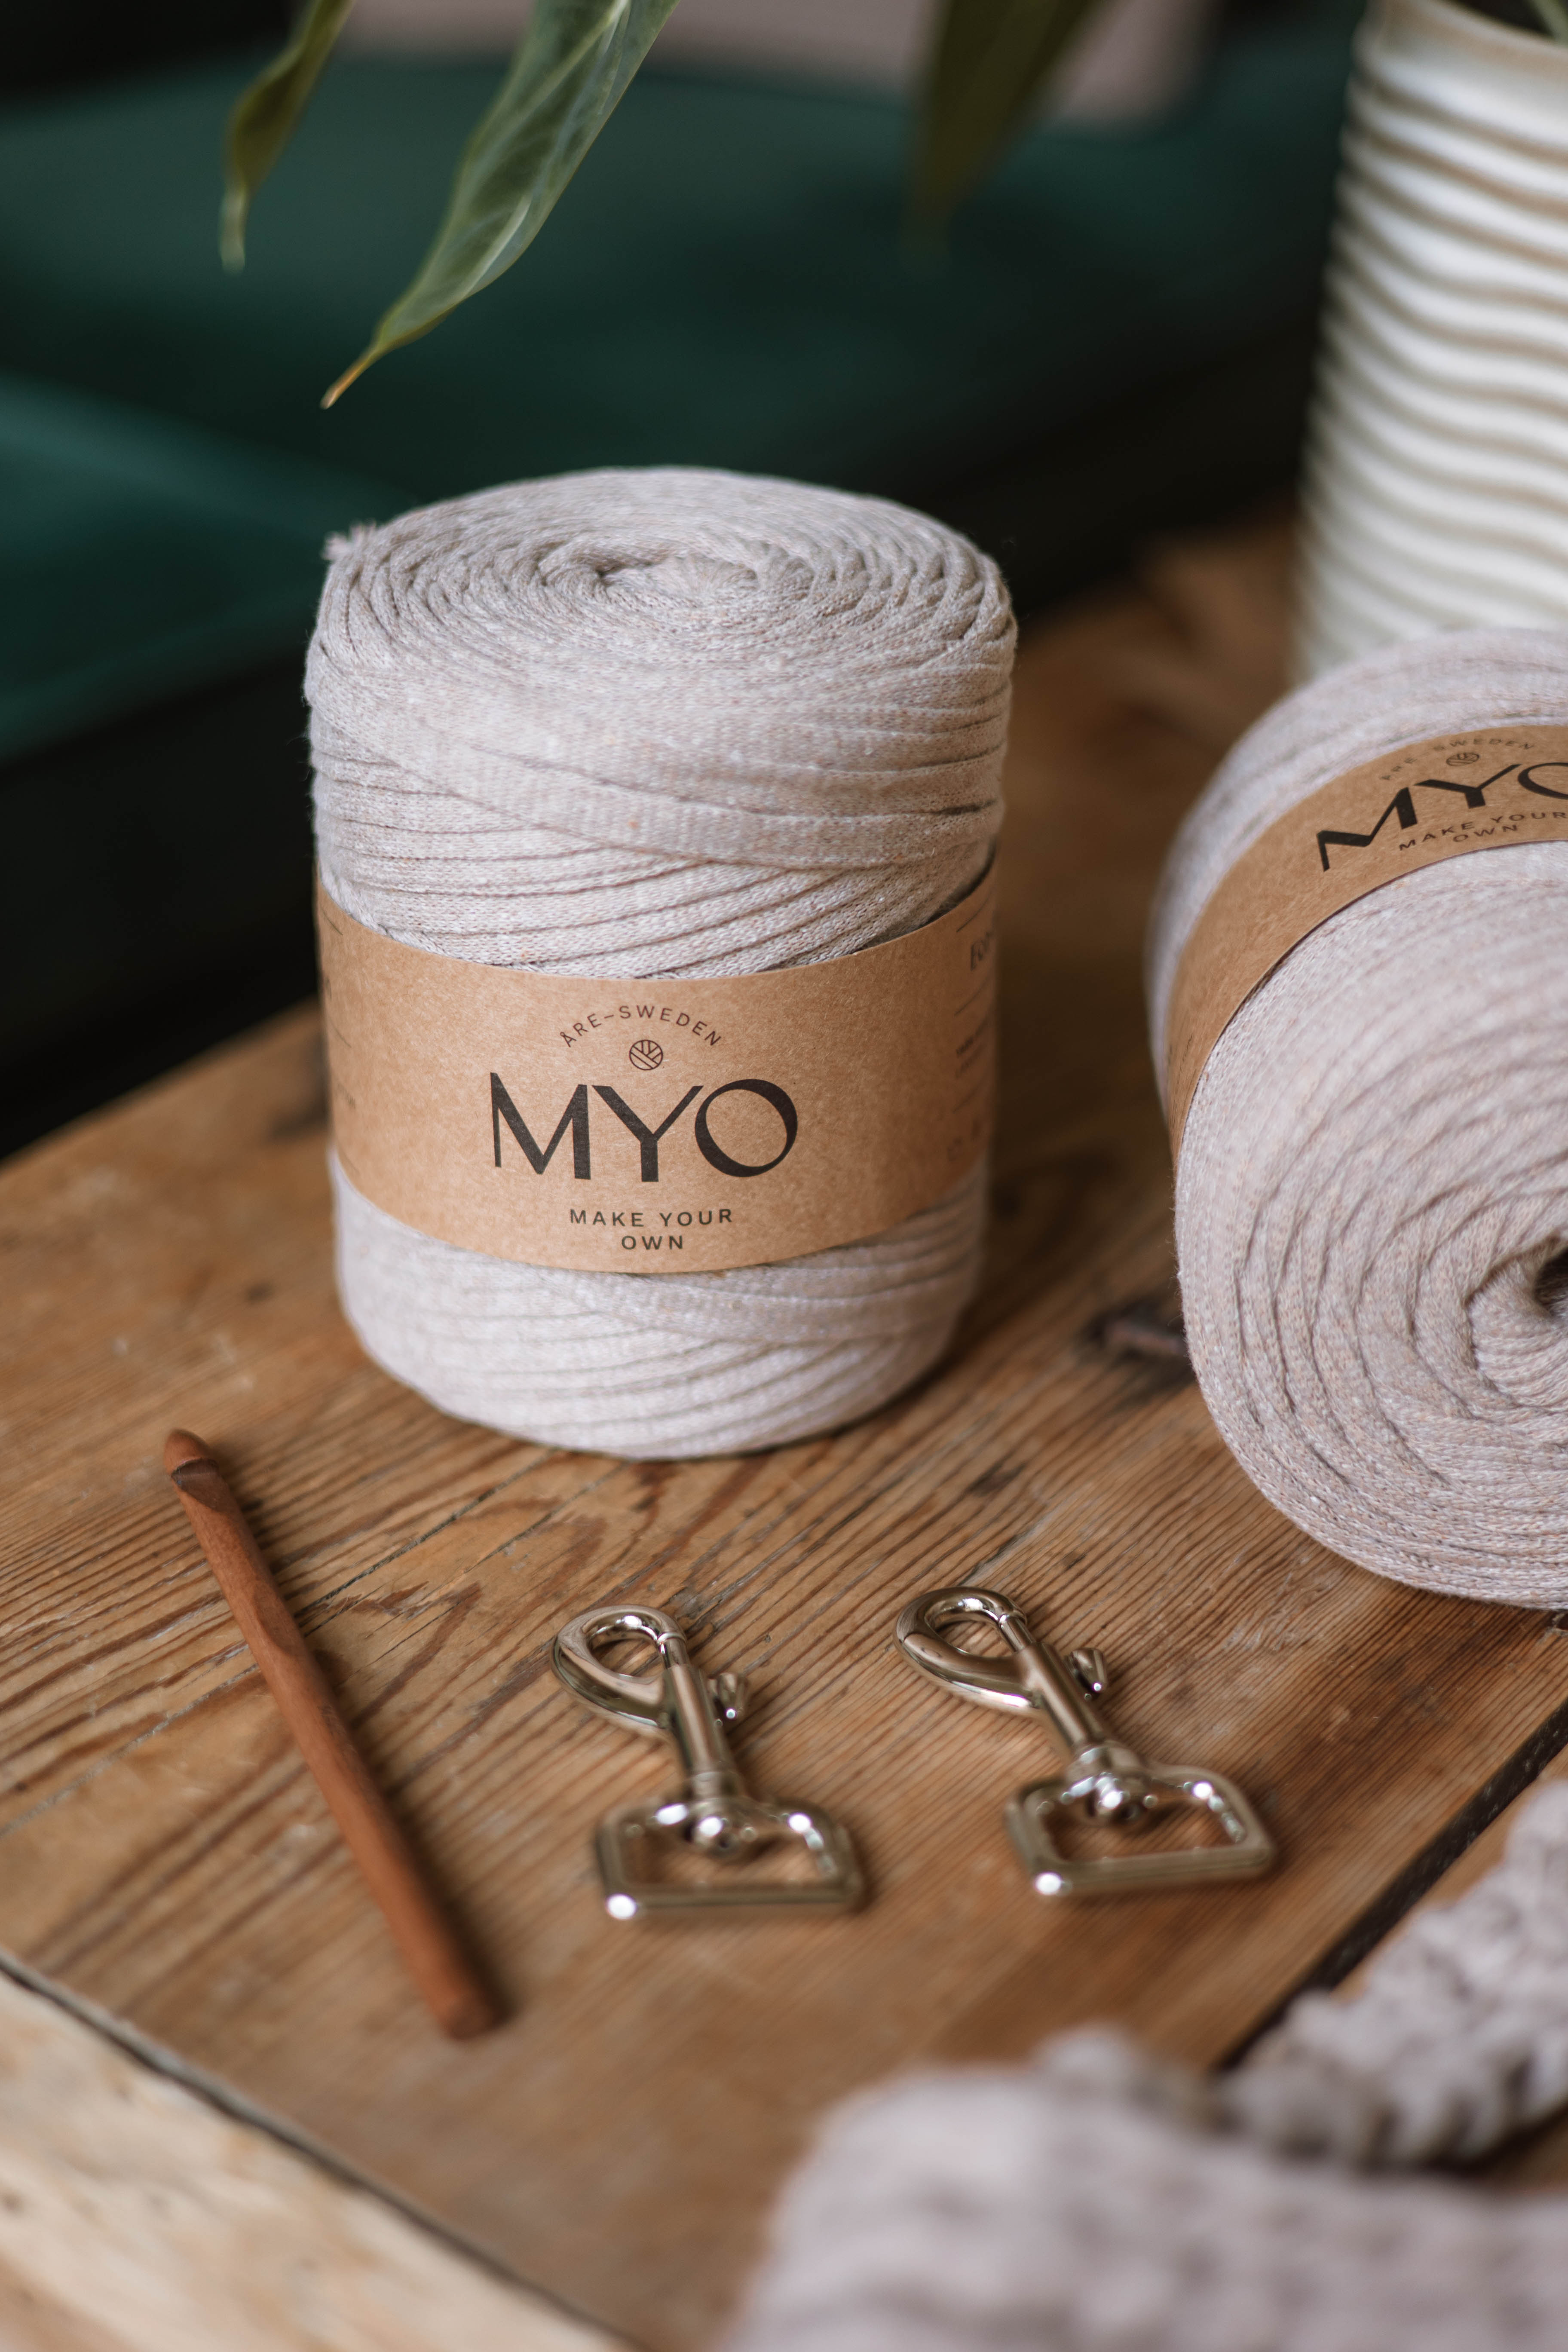
Anyone who takes walks with a stroller knows how many things you want to quickly set down and have easily accessible. What could be better than a stroller organizer? This one is very easy to crochet and super practical to have on your stroller. You will need EKO Ribbon yarn, 2 D-rings, 2 swivel hooks, and an 8 mm crochet hook.
Yarn Consumption: 1 roll (500g) of EKO Ribbon.
Please note that in this pattern, we use videos from our technique library along with explanatory images.
Here's how to do it
You start by crocheting the pocket of the stroller organizer. Then you attach the D-rings and crochet the handles, and finally, you attach the swivel hooks. This organizer is easy to customize to whatever size you want./Lizette

This is what you need:
Here you can directly purchase the material for the product. Please note that the instruction is digital and appears here on the page (no written instruction).


.jpg)
Unleash your creativity
For only 85kr per month you get access to all our 300+ beginner-friendly instructions for crochet, knitting and macrame.
A perfect way to get started with your new hobby!

Row 1: Chain 26 stitches. If you want a larger pocket, chain more stitches; if you want a smaller pocket, chain fewer stitches. If you’re unsure how to make a chain, see the video below.
Round 2: Now we start crocheting in the round. Work one round around the chain. Crochet 24 single crochets along the first side of the chain (that is, the number of chains minus 2). In the last stitch, crochet 4 single crochets in the same stitch.
Then crochet along the other side of the chain: 23 single crochets, and in the last stitch, crochet 4 single crochets in the same stitch. You should have a total of 55 stitches. Having a few more or fewer stitches won’t affect the pattern, but this stitch count will be important to keep for the rest of the rounds.
If you’re unsure how to single crochet or how to crochet around a chain, please see the video below.
Round 3: Crochet a border round. Crochet 55 single crochets (or the same number of stitches you had in the previous round) in the back loops only and in the loop right behind the back loop. If you’re unsure how to crochet a border round, check the video below.
Round 4–14: Crochet 55 single crochets for 11 rounds.
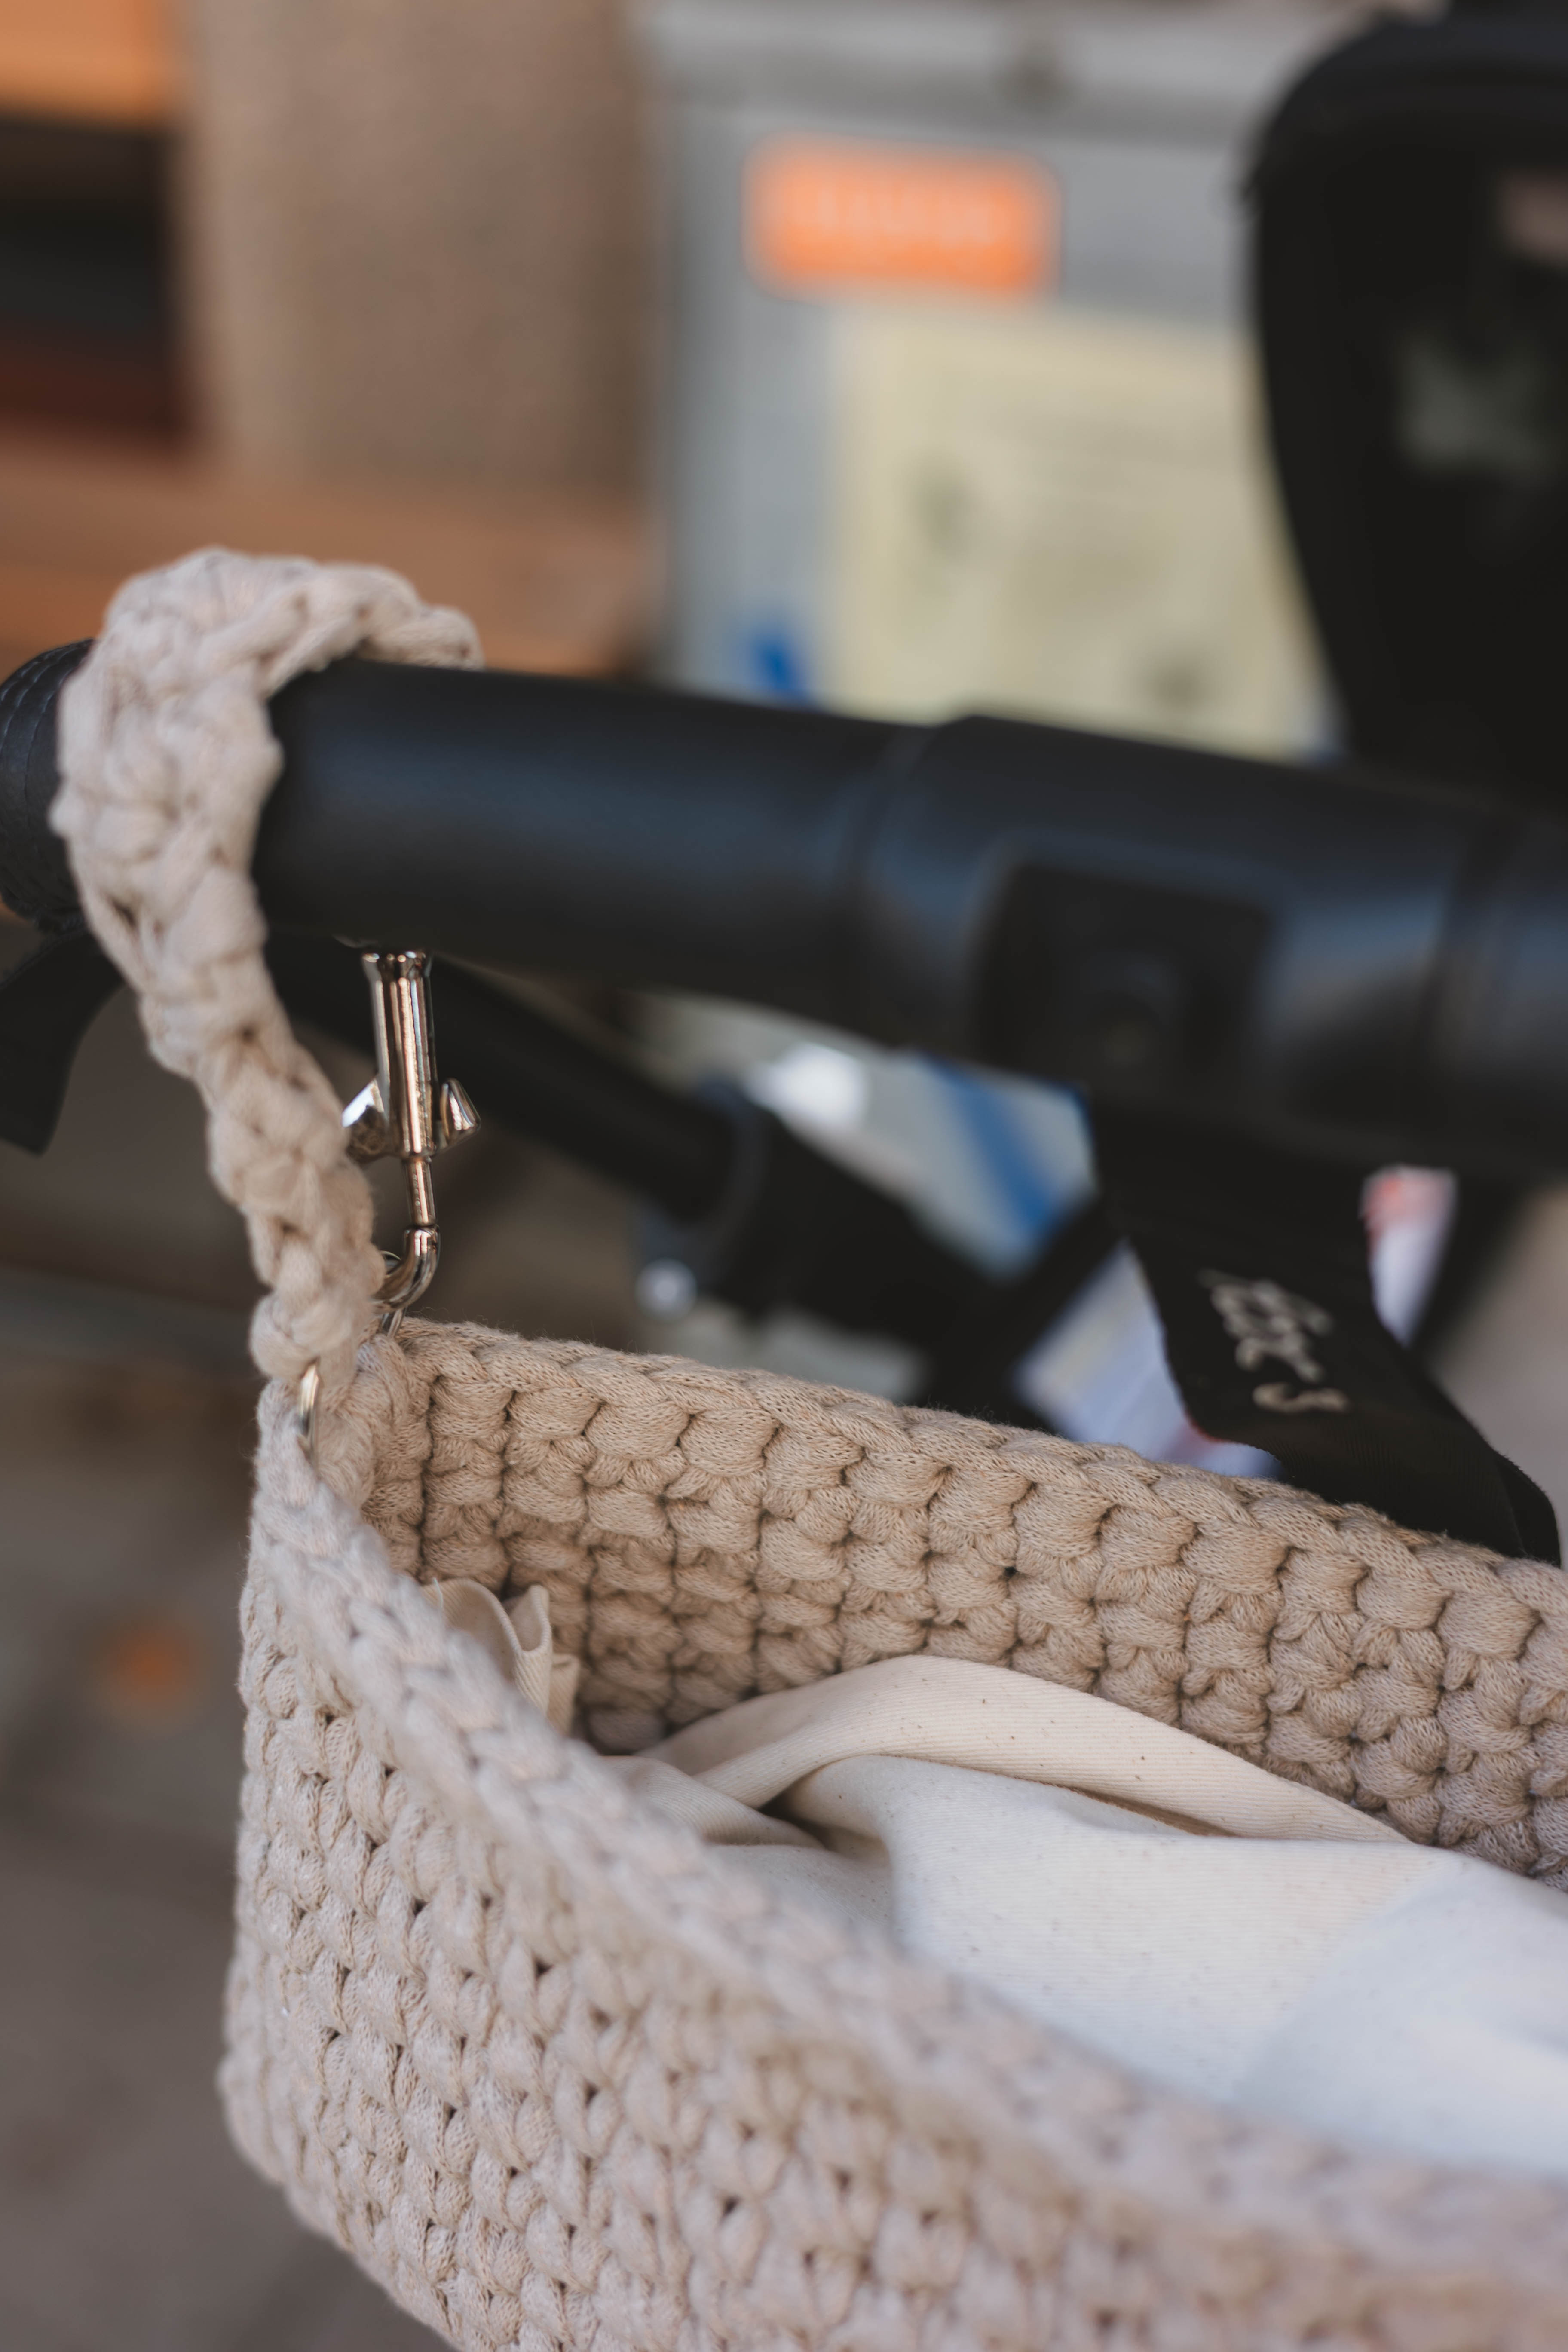
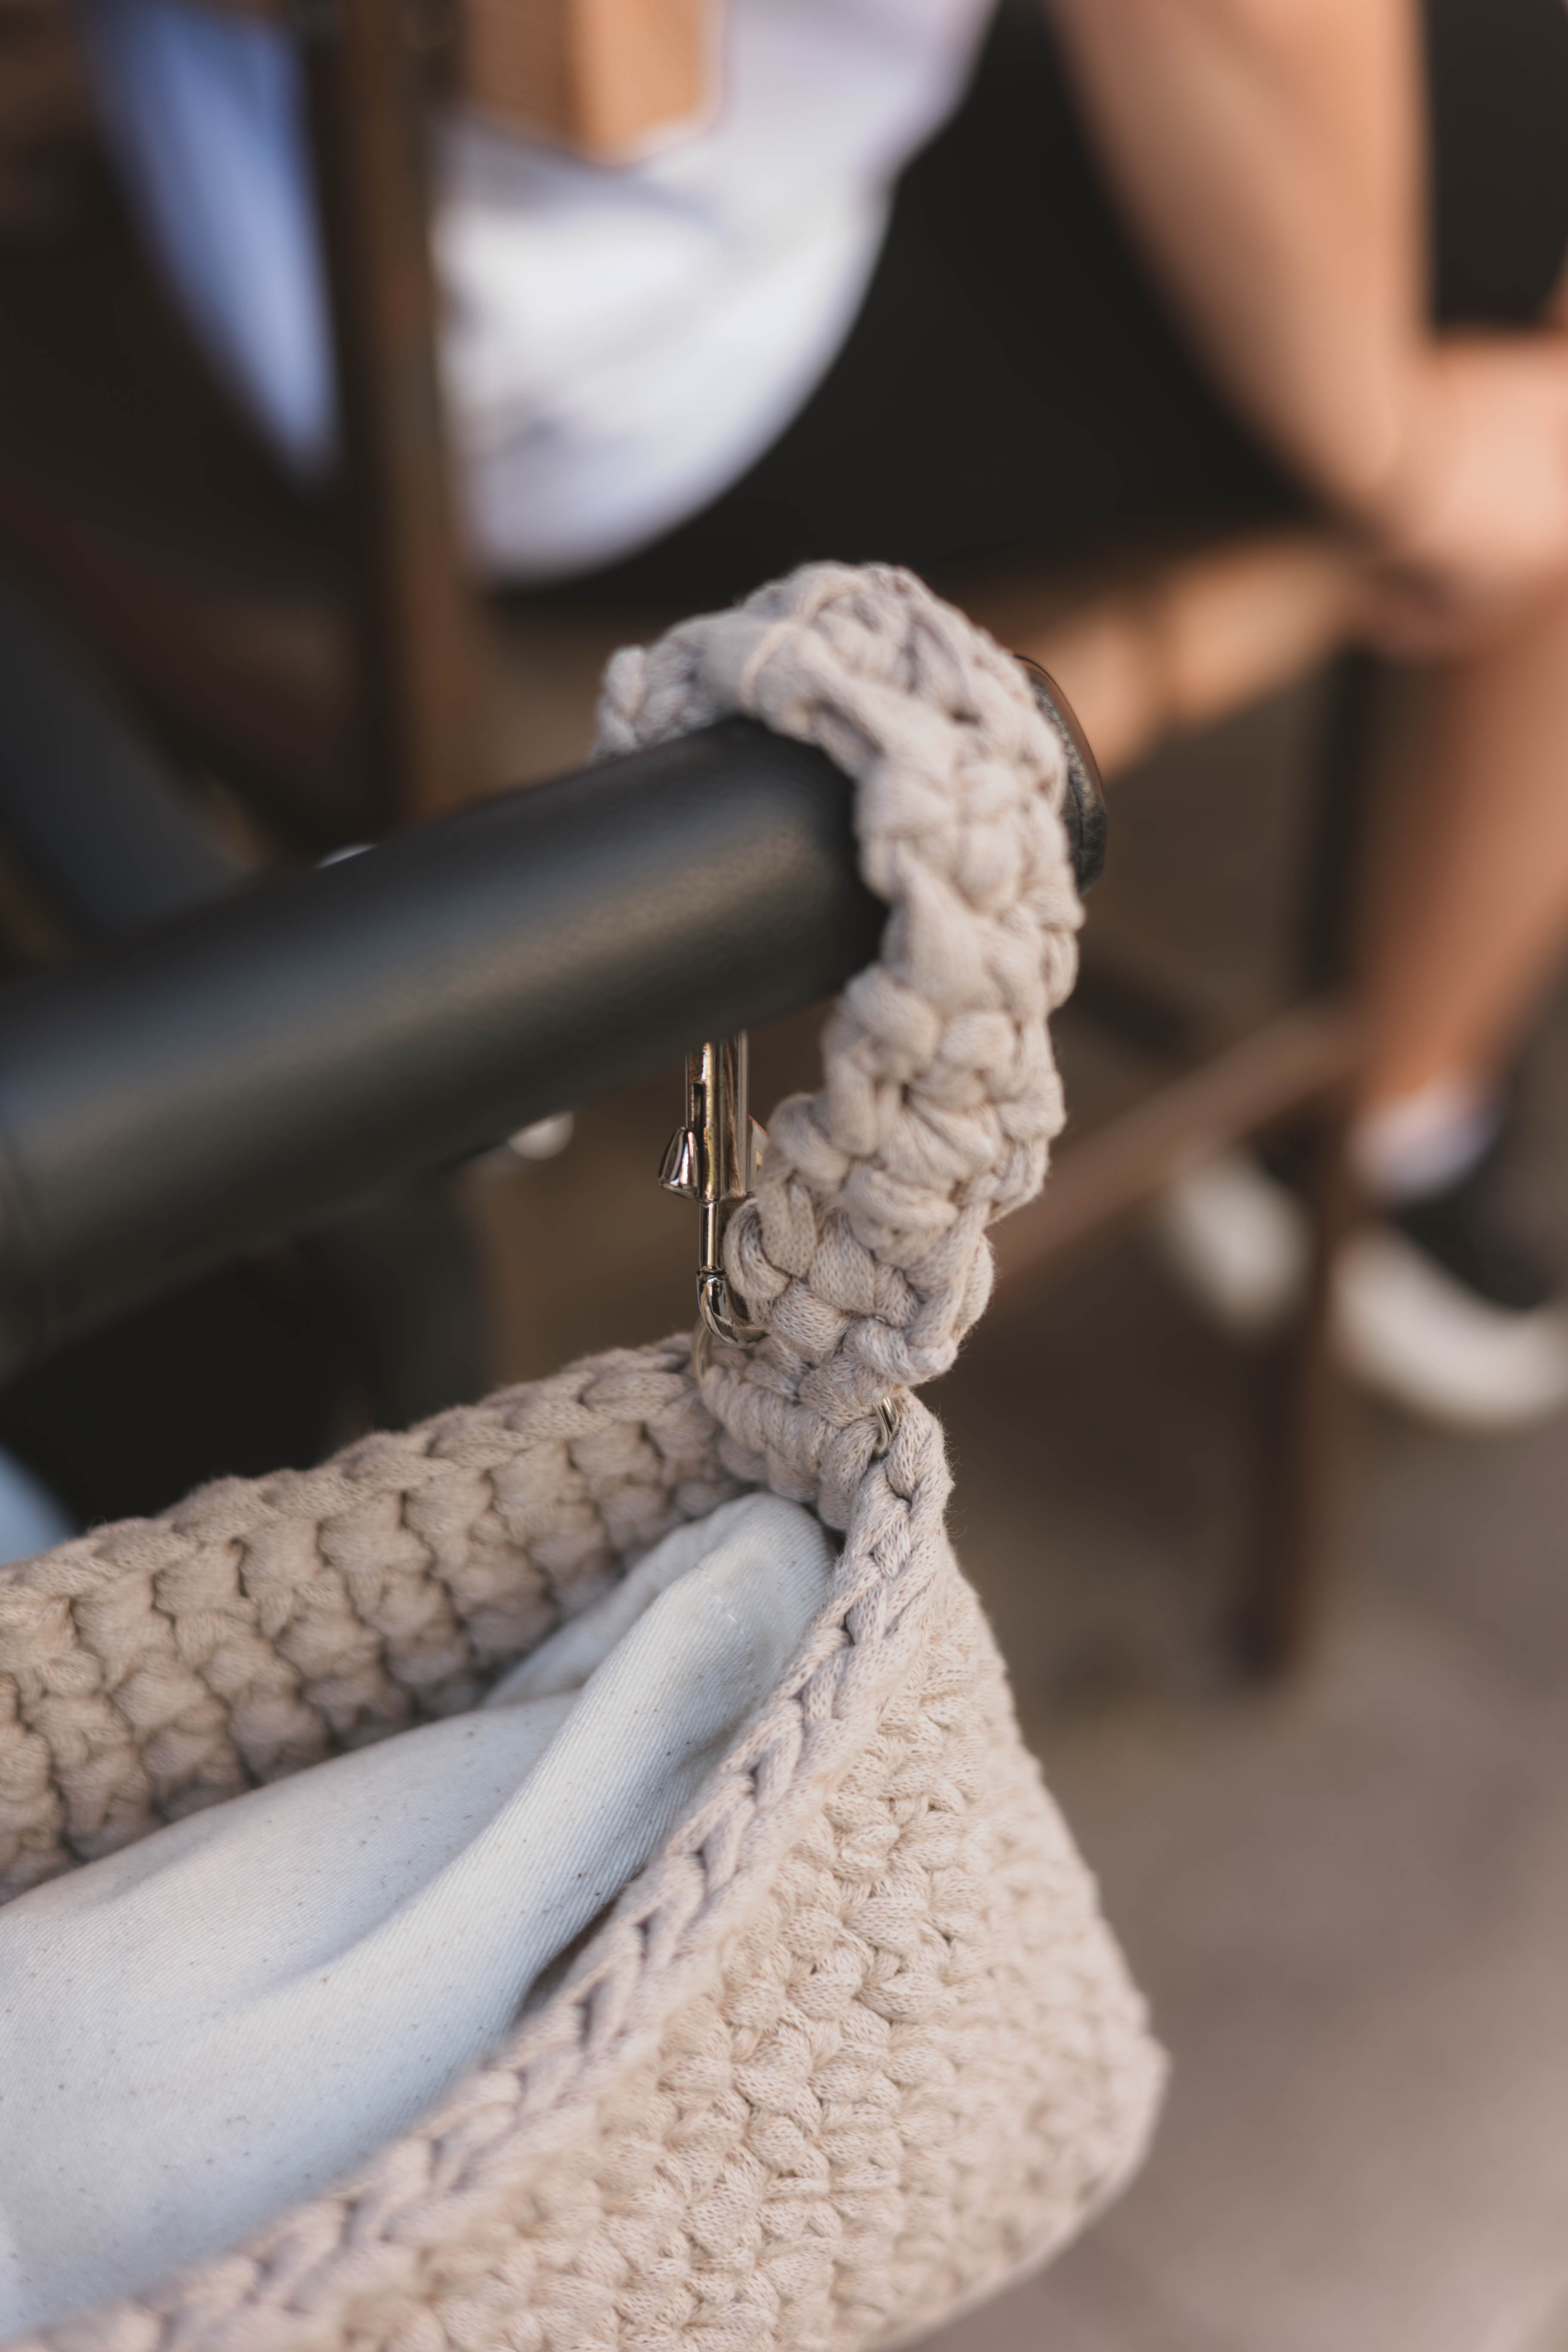
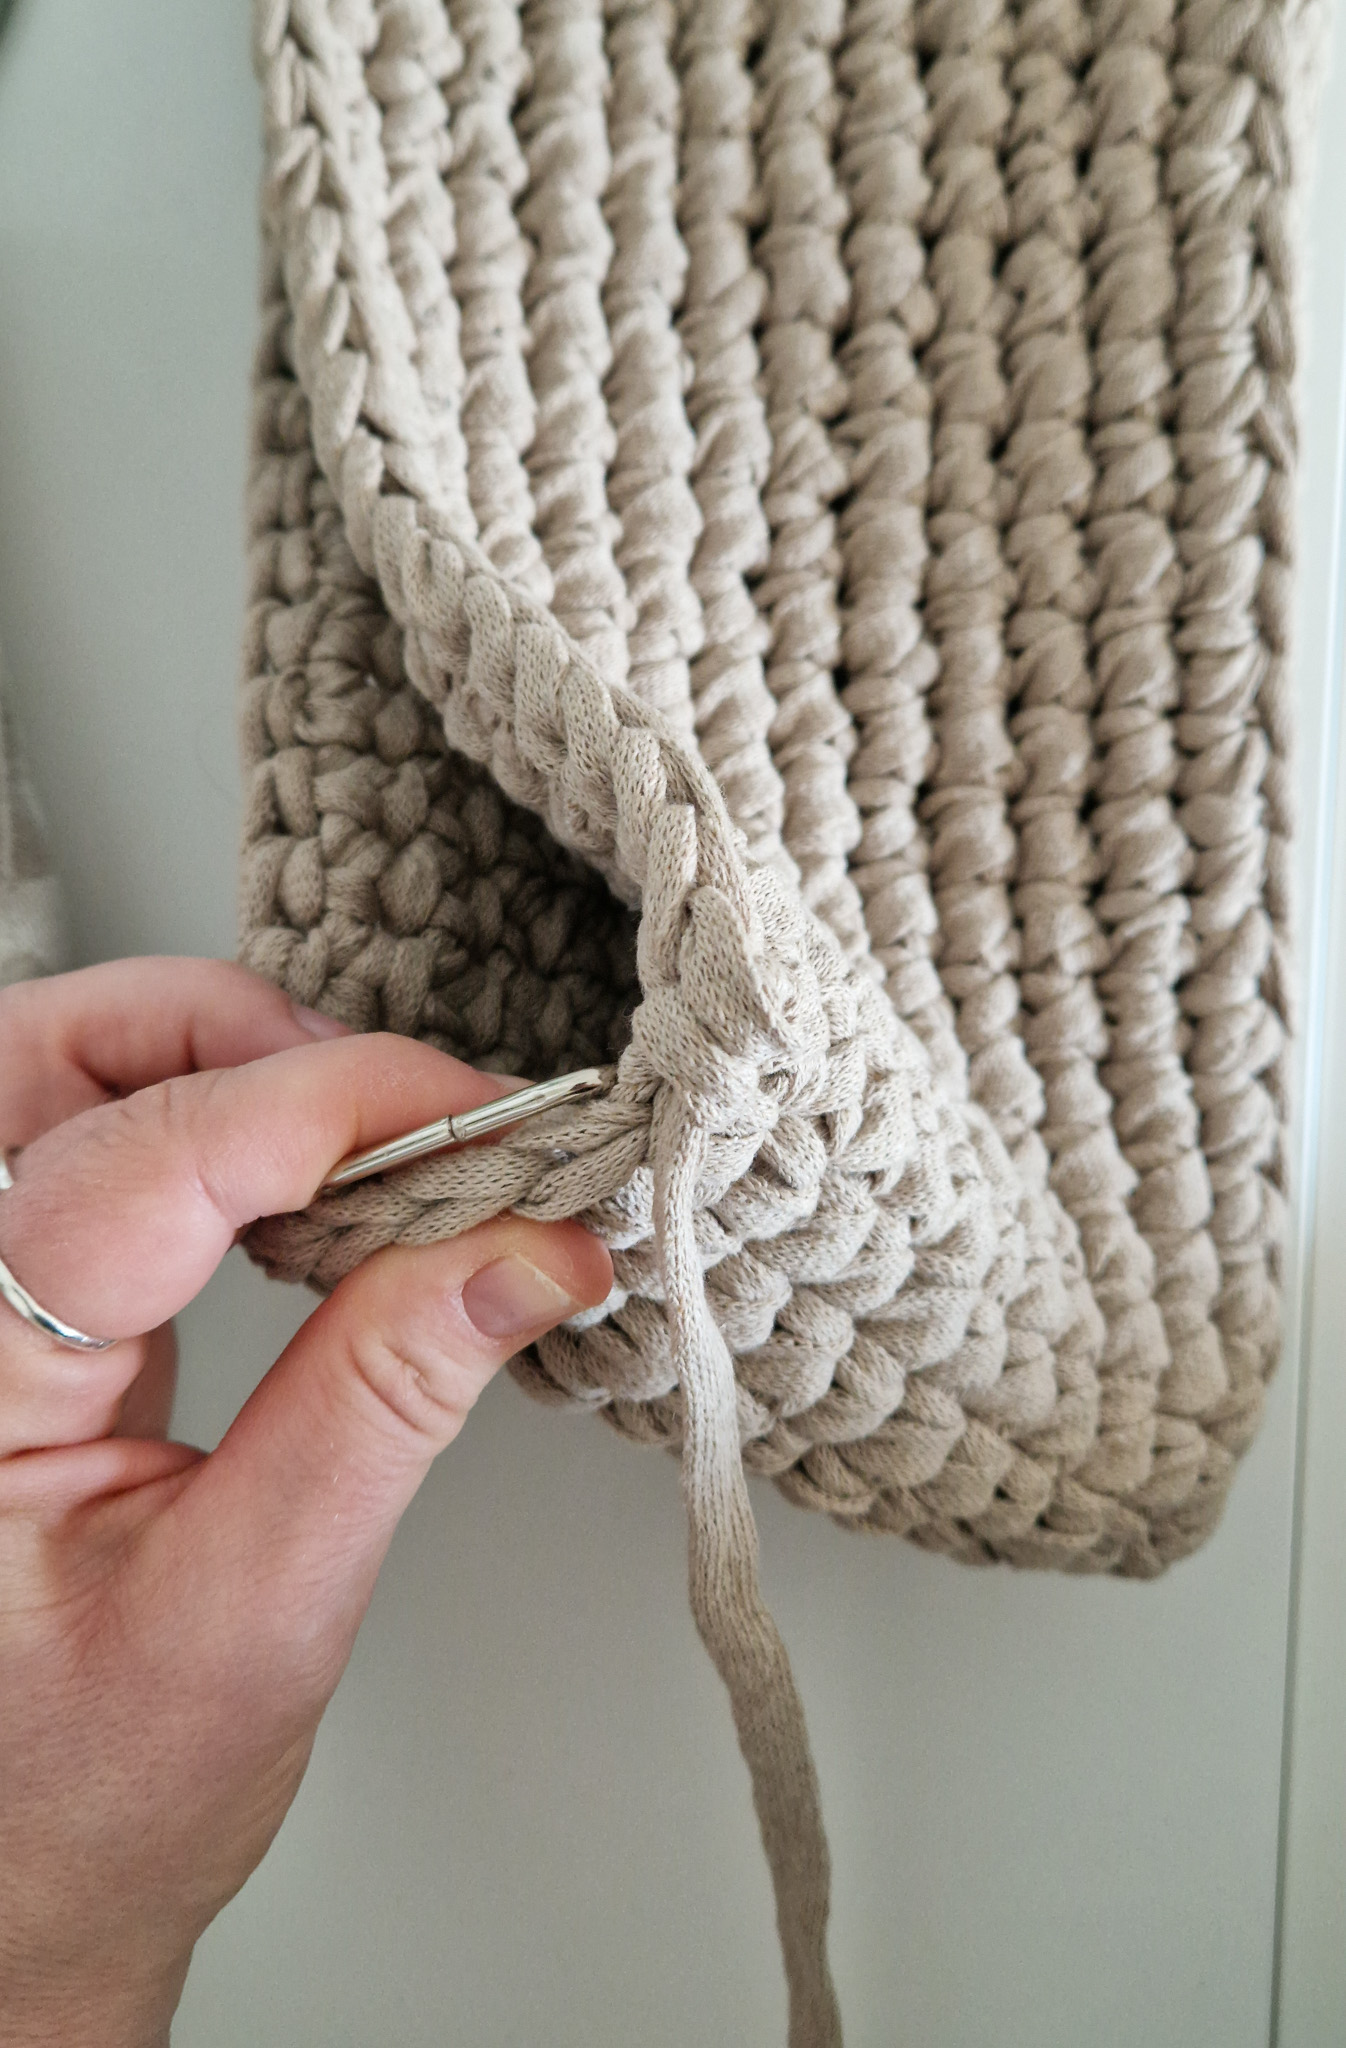
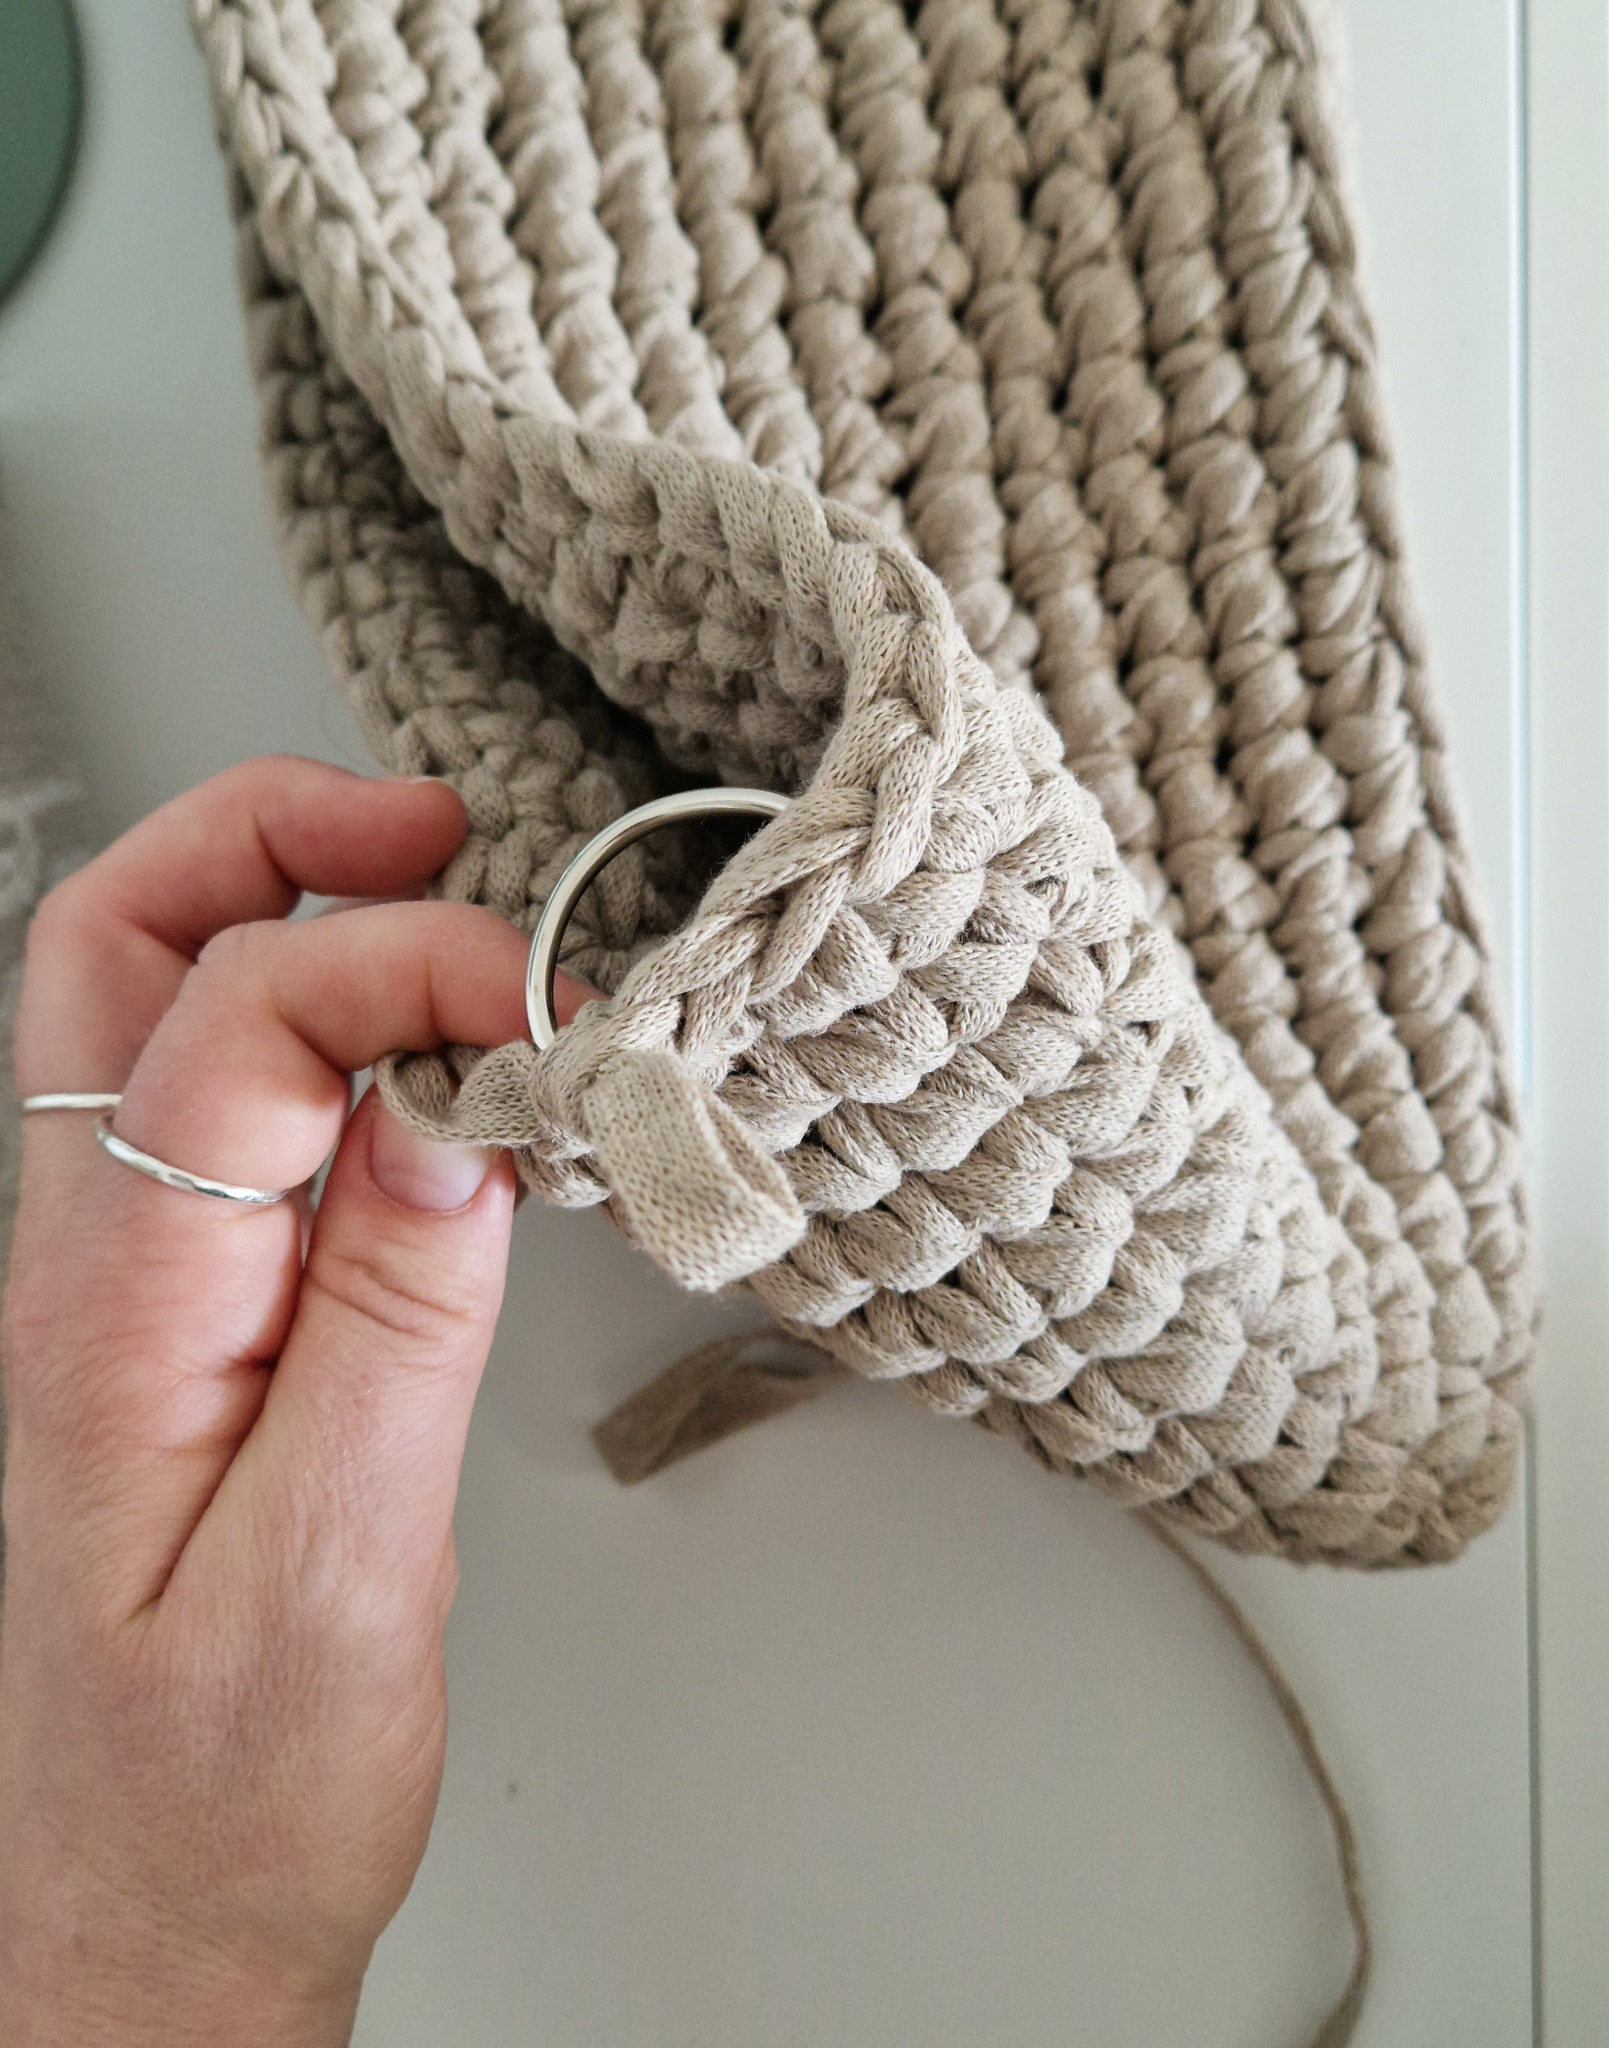
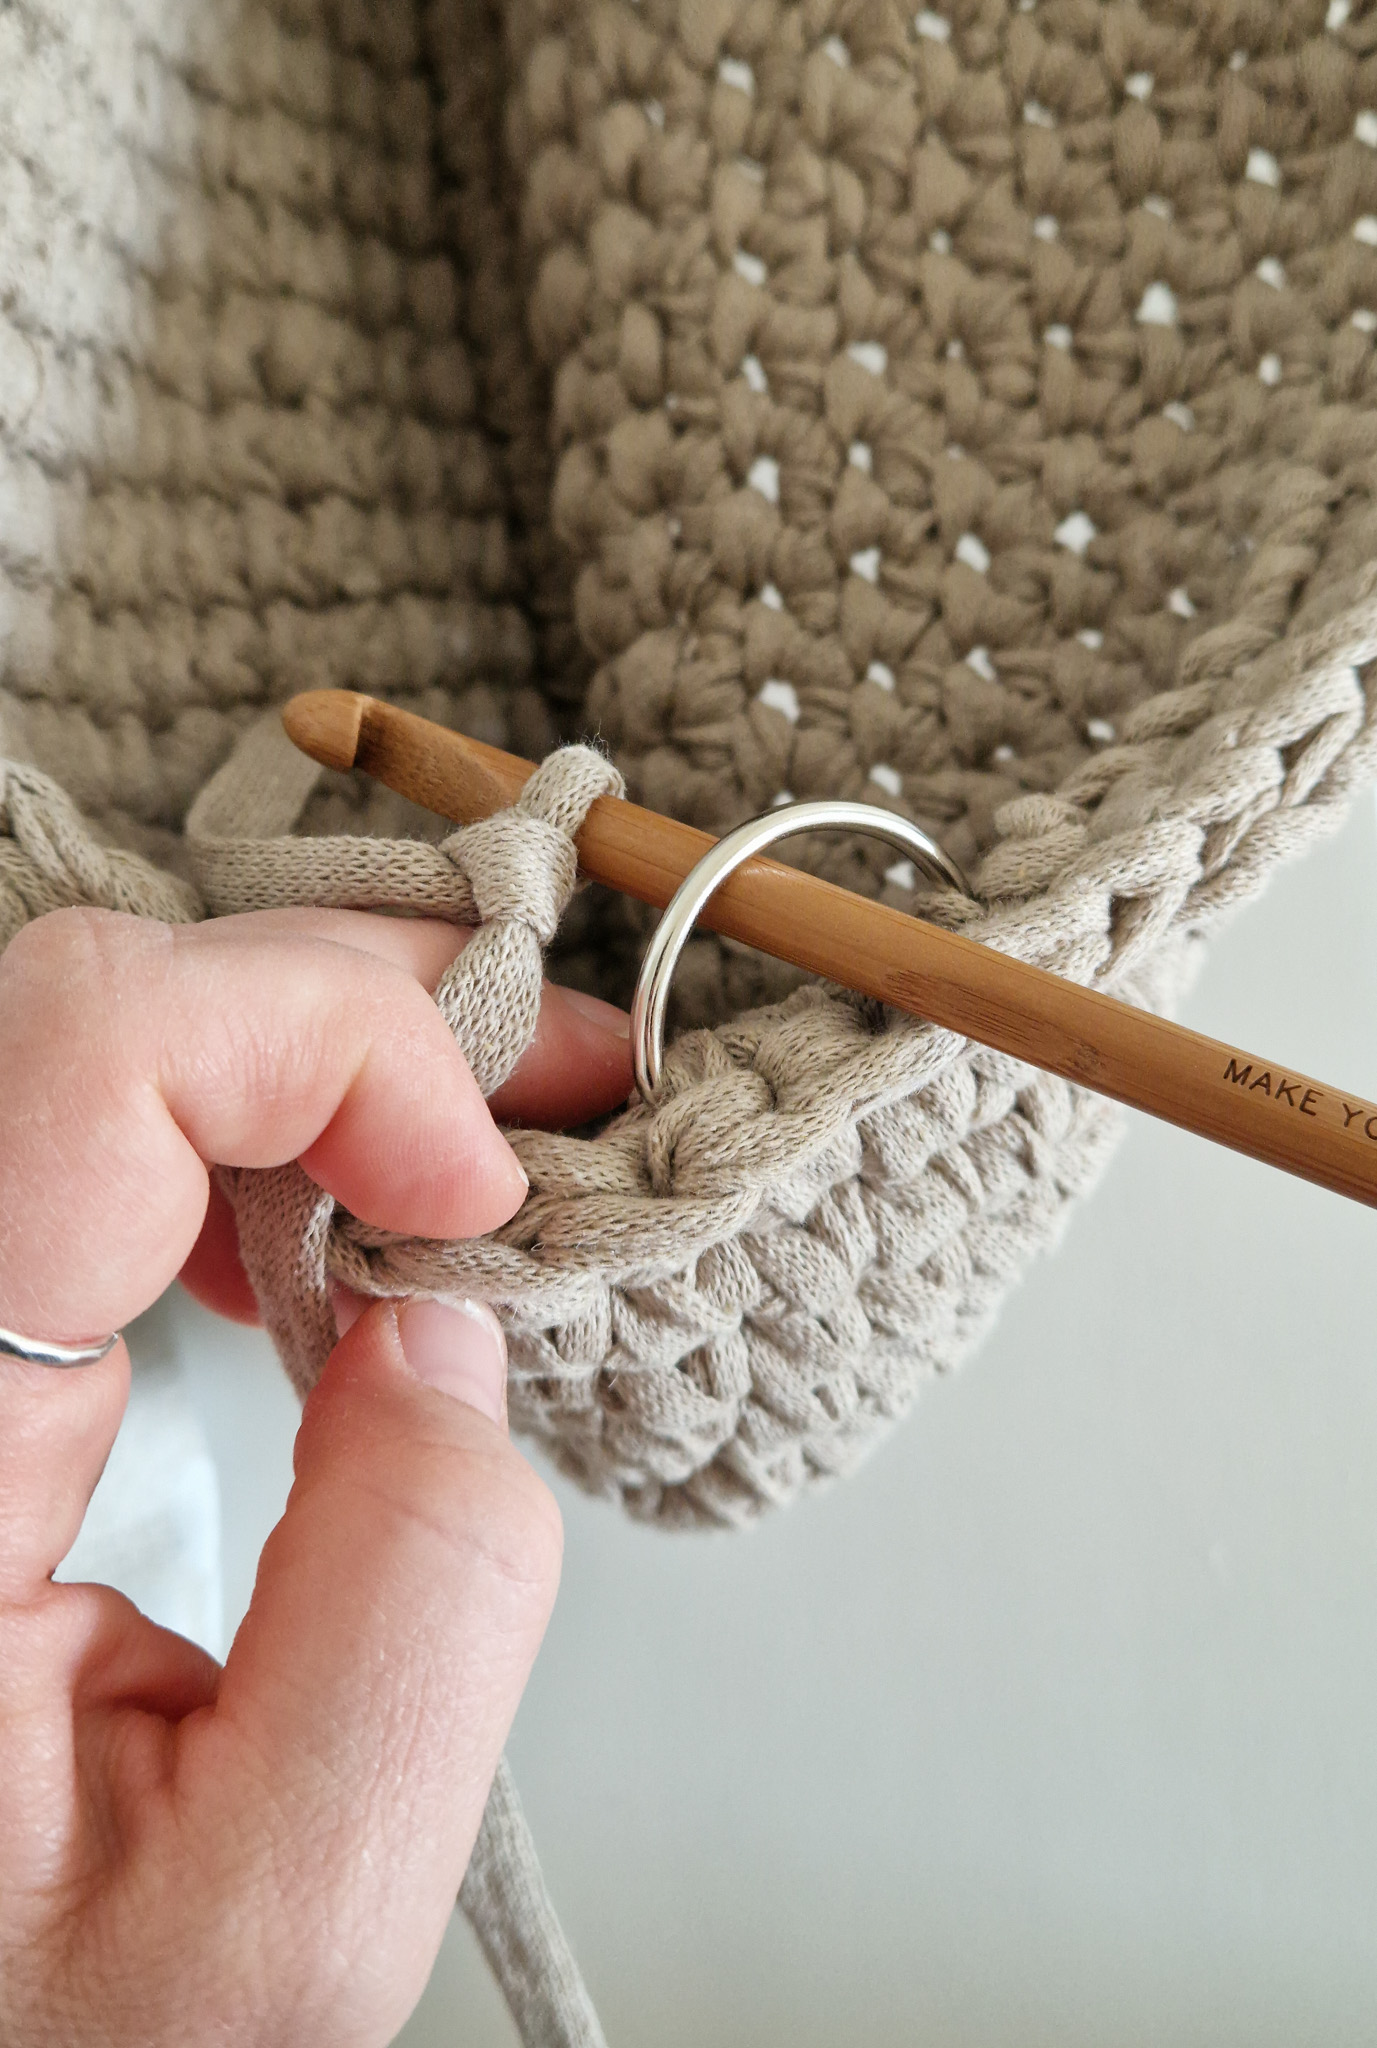
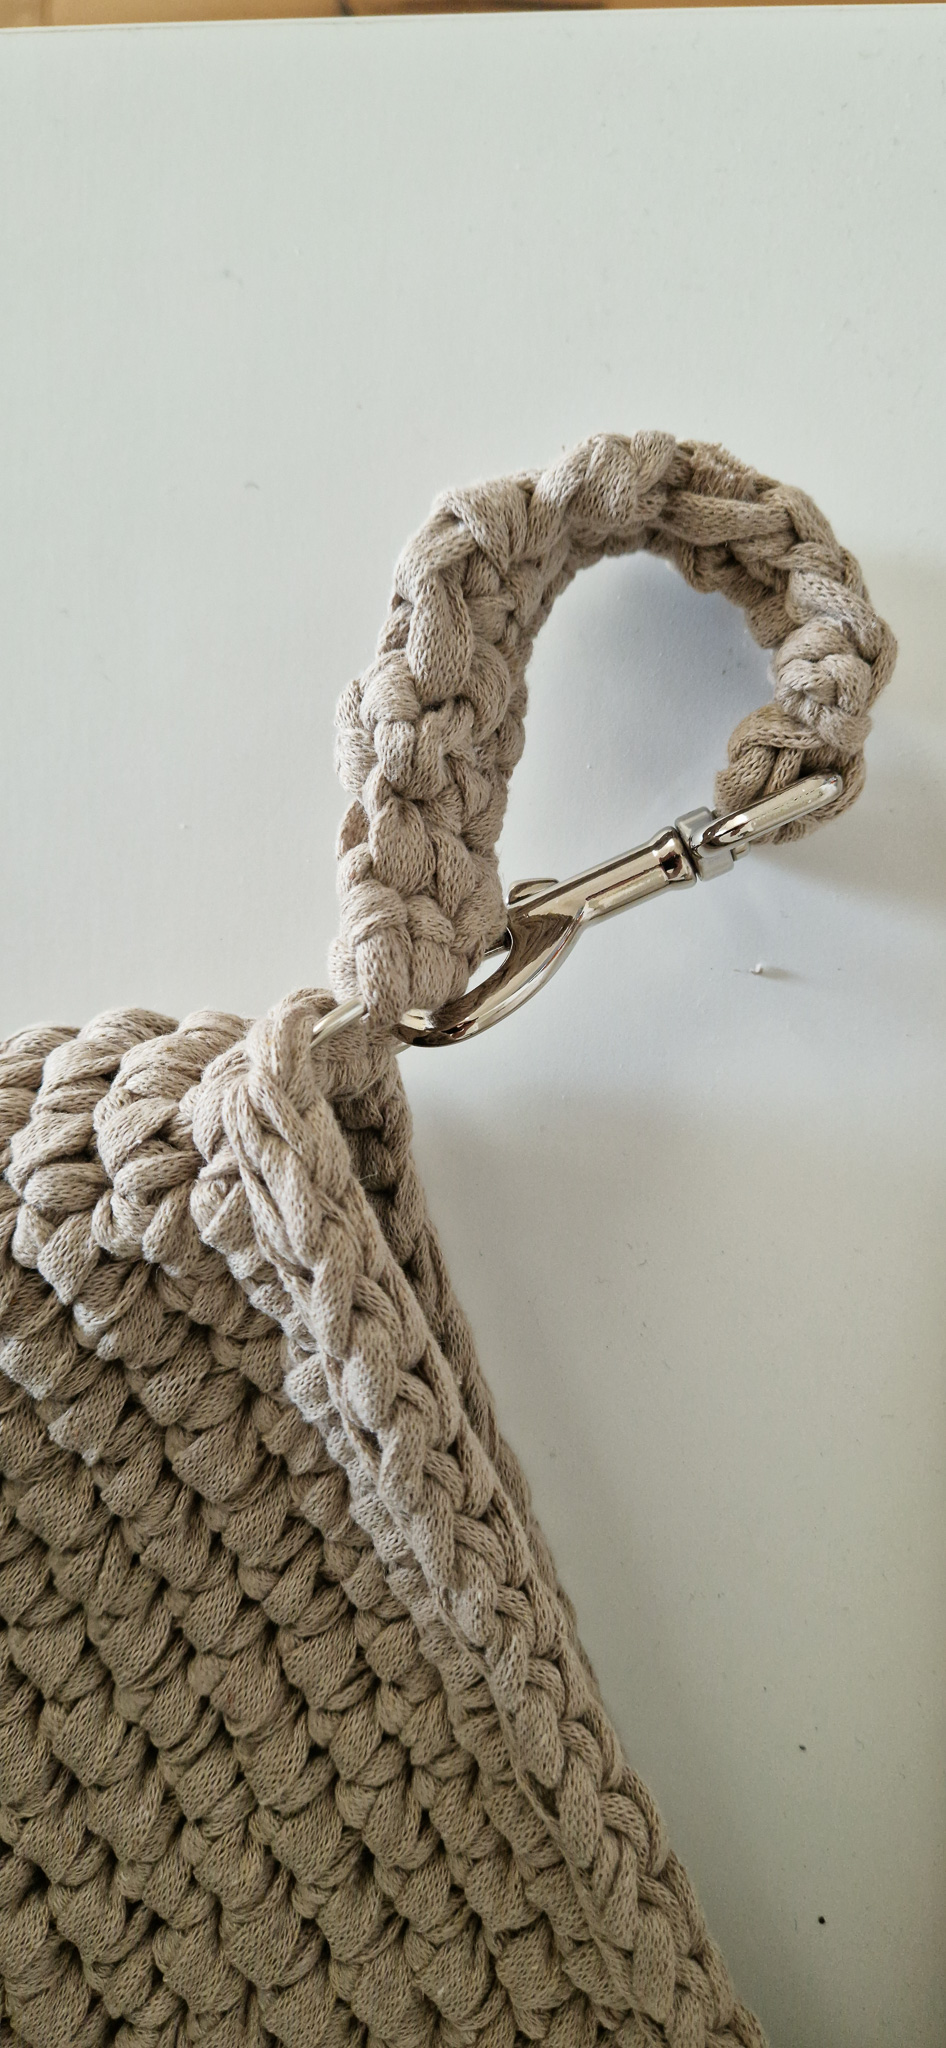
Round 15: Now it’s time to attach the D-rings. Make sure you’re in the stitch before the edge and that you have three single crochets on the edge of the organizer. You may need to unravel one or more stitches to do this. Place the straight side of the D-ring parallel on the inside with the three stitches, and crochet three single crochets through both the stitches and the D-ring to secure it. The D-ring should be positioned on the inside of the organizer.
Then, crochet slip stitches until you reach the other side where you have three stitches you haven’t worked into yet. Attach the second D-ring the same way as the first. After securing the second D-ring, continue slip stitching until you reach the start again.
Cut the yarn and weave in the ends. If you’re unsure how to do this, see the video below (Fasten off).
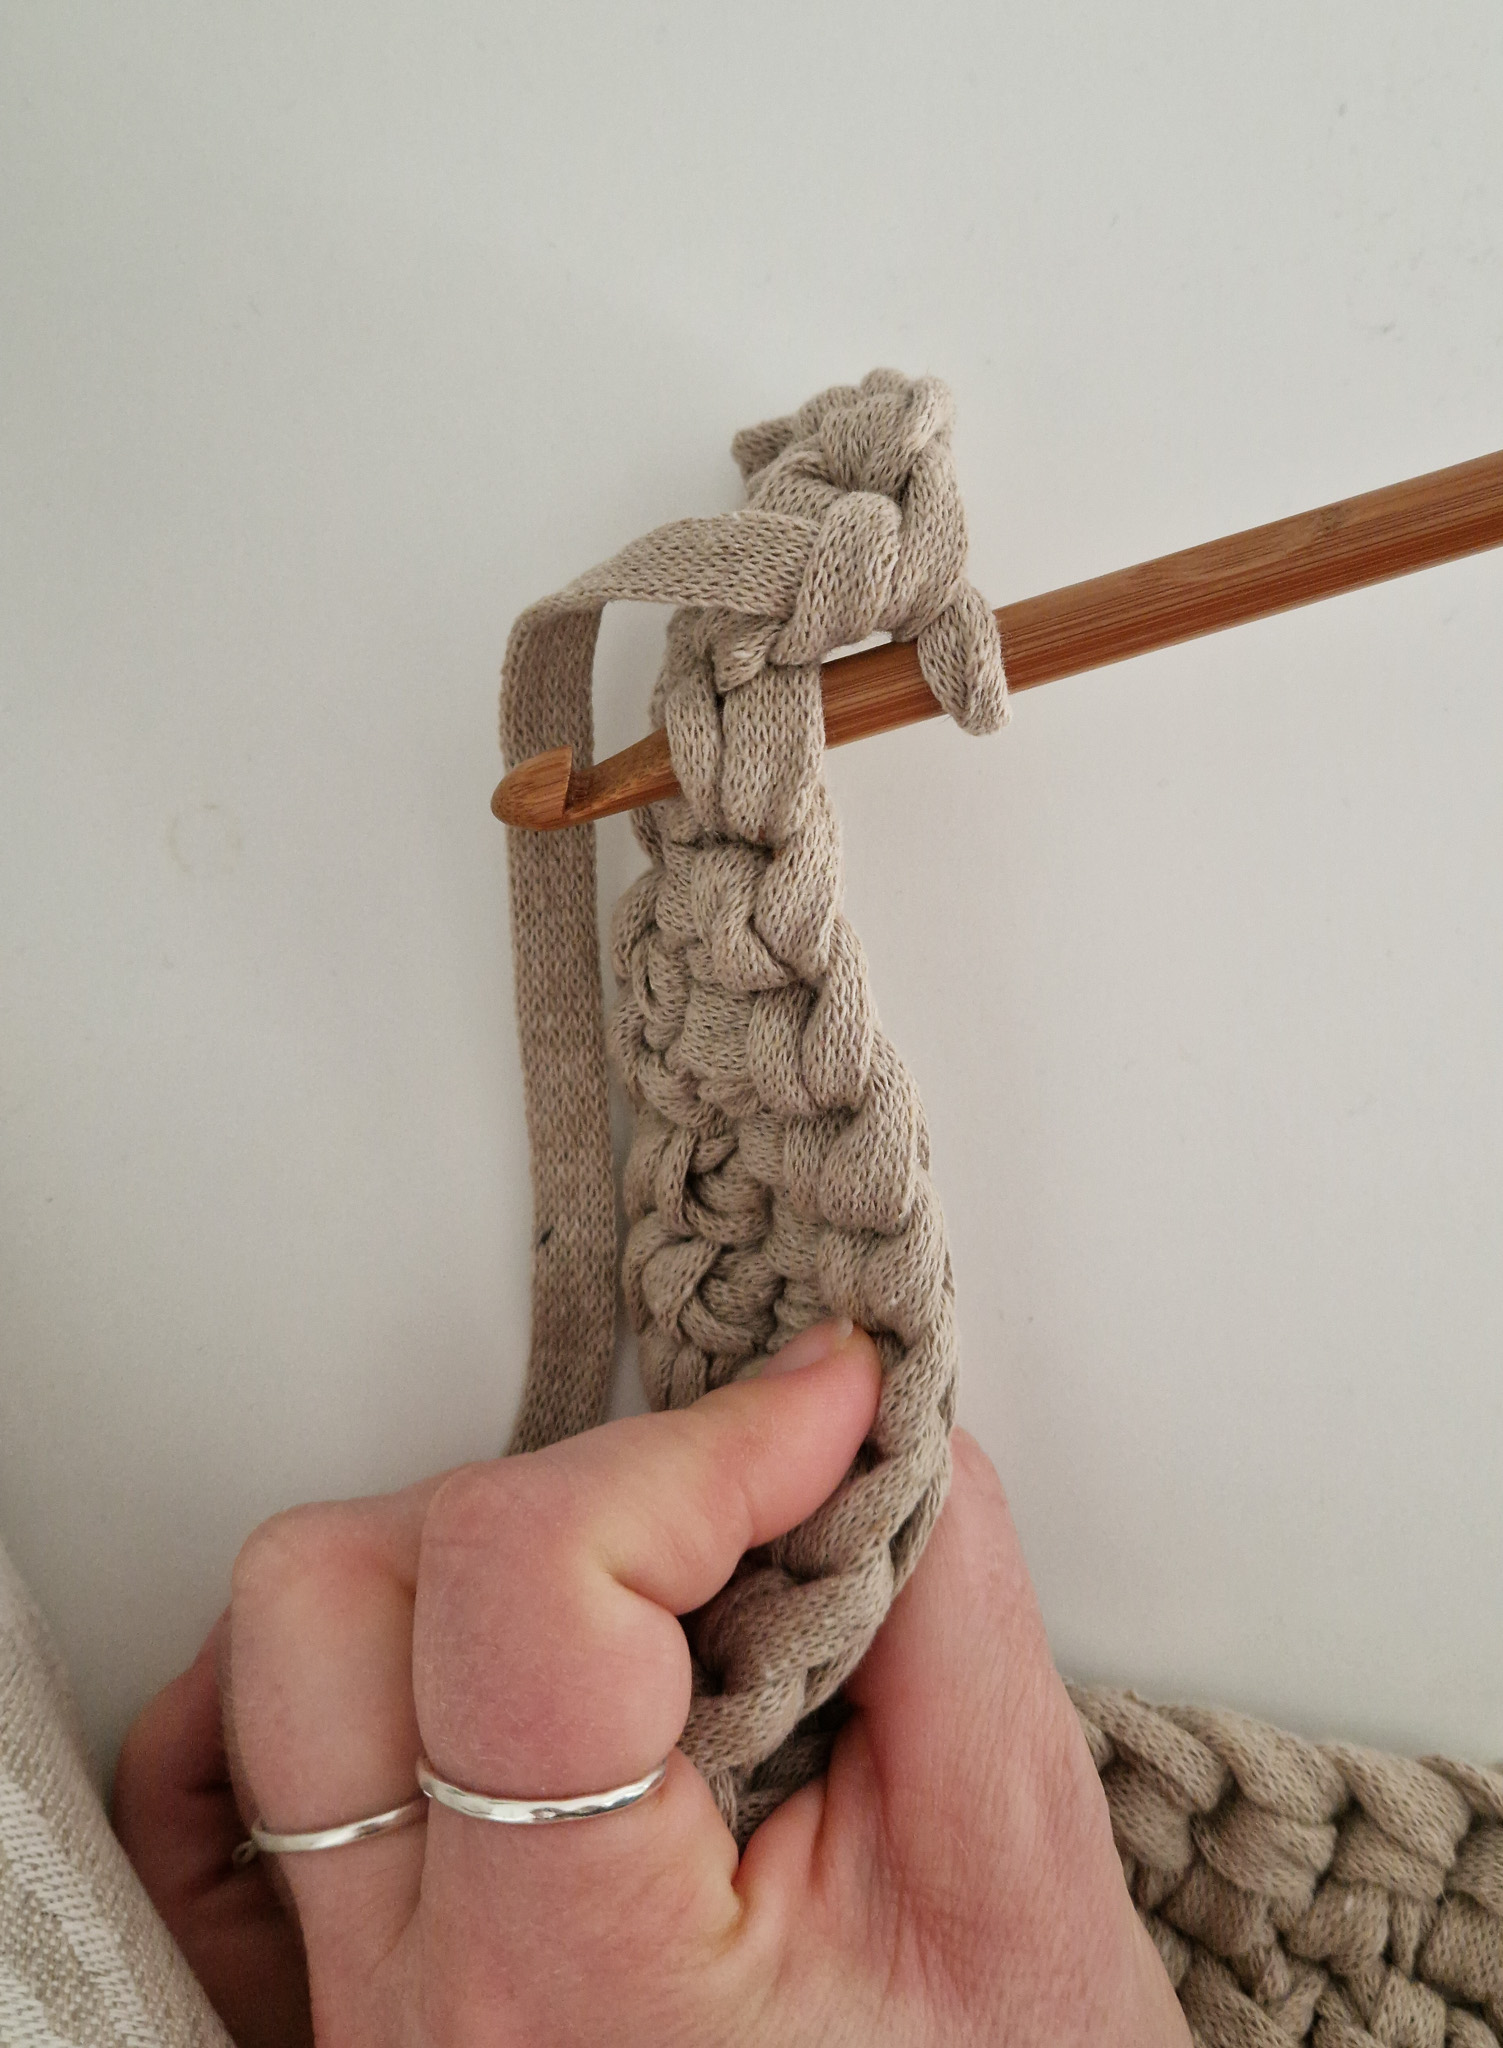
Now we’ll crochet the handles on the D-rings. The length of the handles depends on how long you want them to be. Make them long enough to fit your stroller.
Row 1: Start with a slip knot. If you’re unsure how to make one, watch the video below.
Then, crochet 2 single crochets around one of the D-rings. After that, make 1 chain stitch.
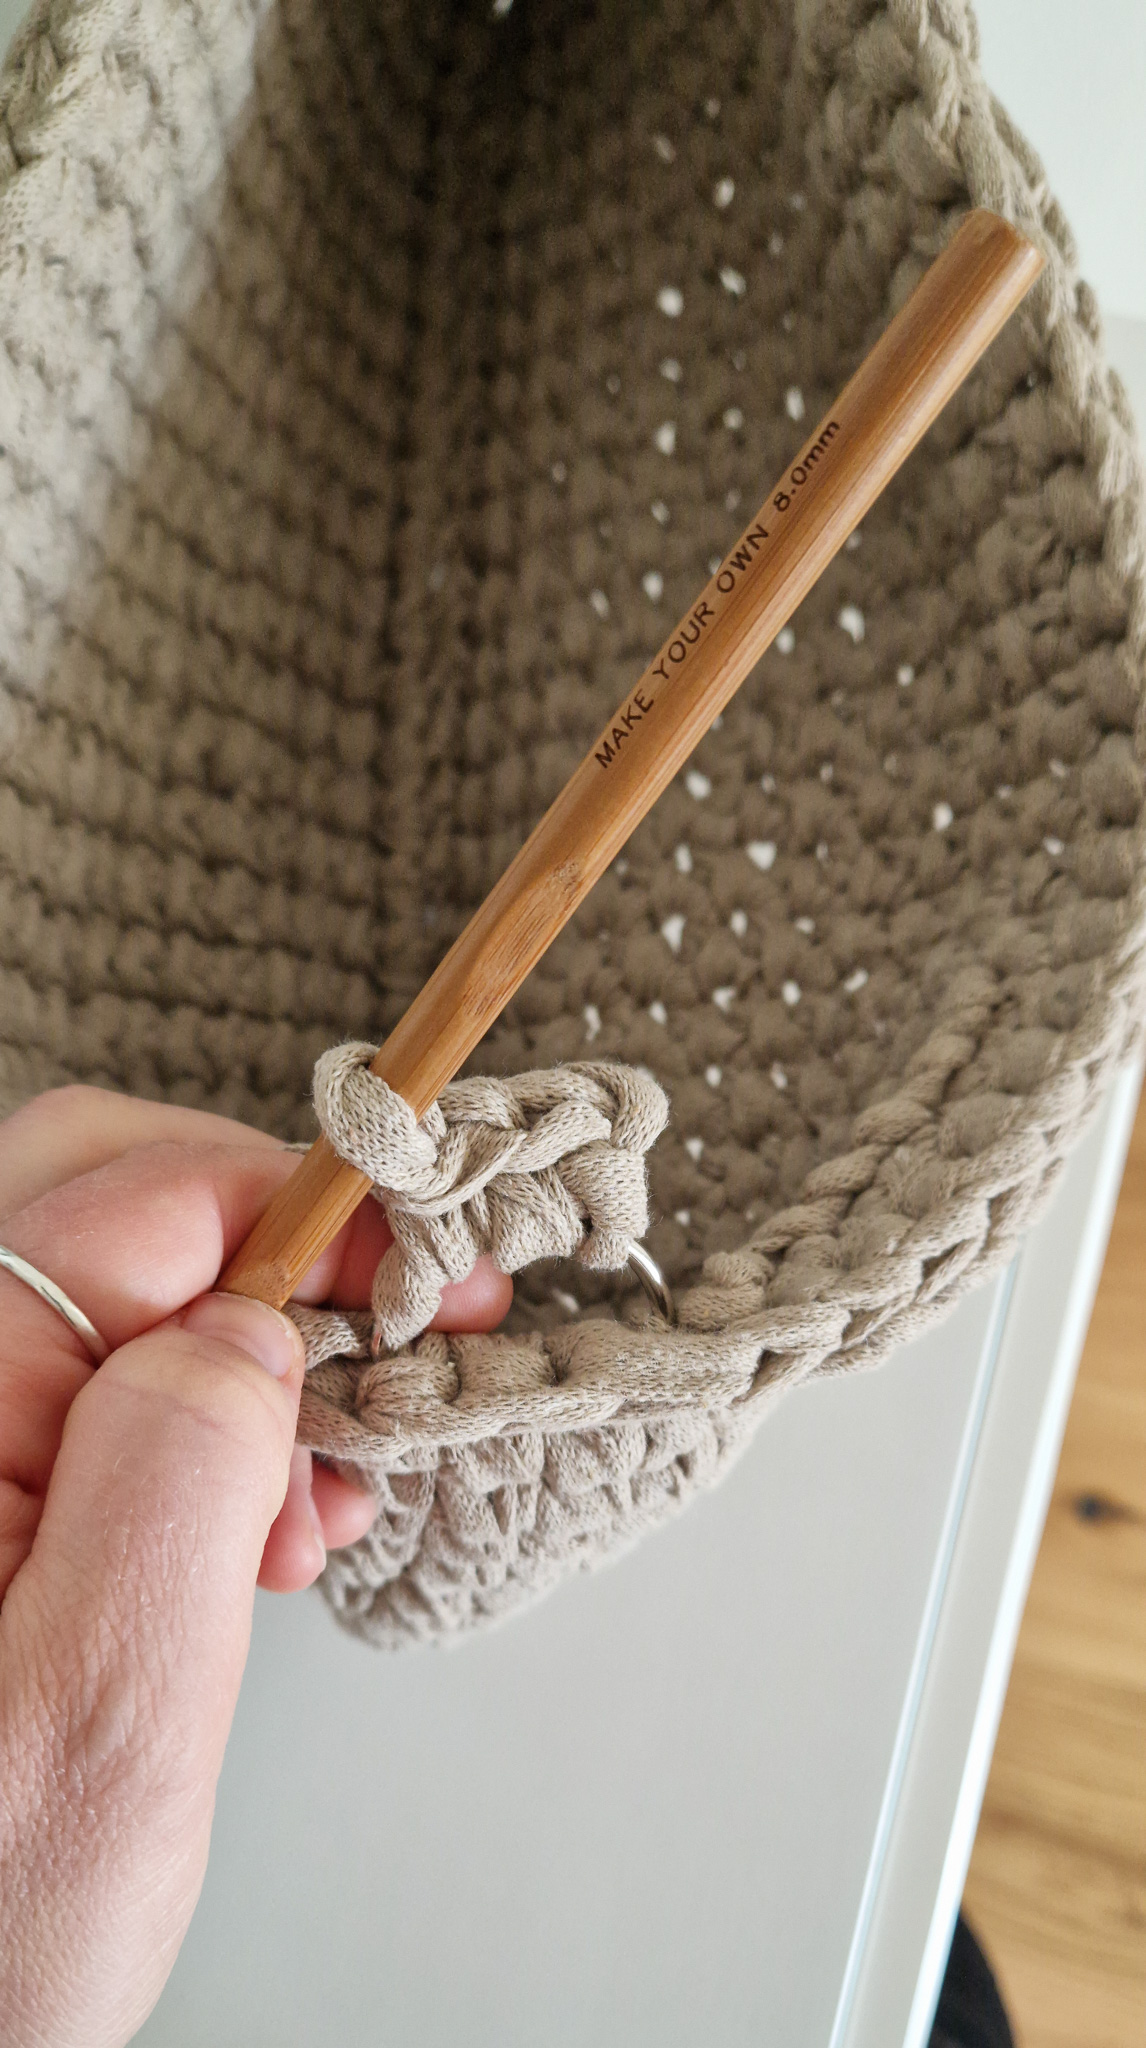
Row 2 and onwards: Skip the chain stitch you just made, then crochet 2 single crochets in each of the next two stitches. Continue this for as many rows as you want to make the handles the desired length.
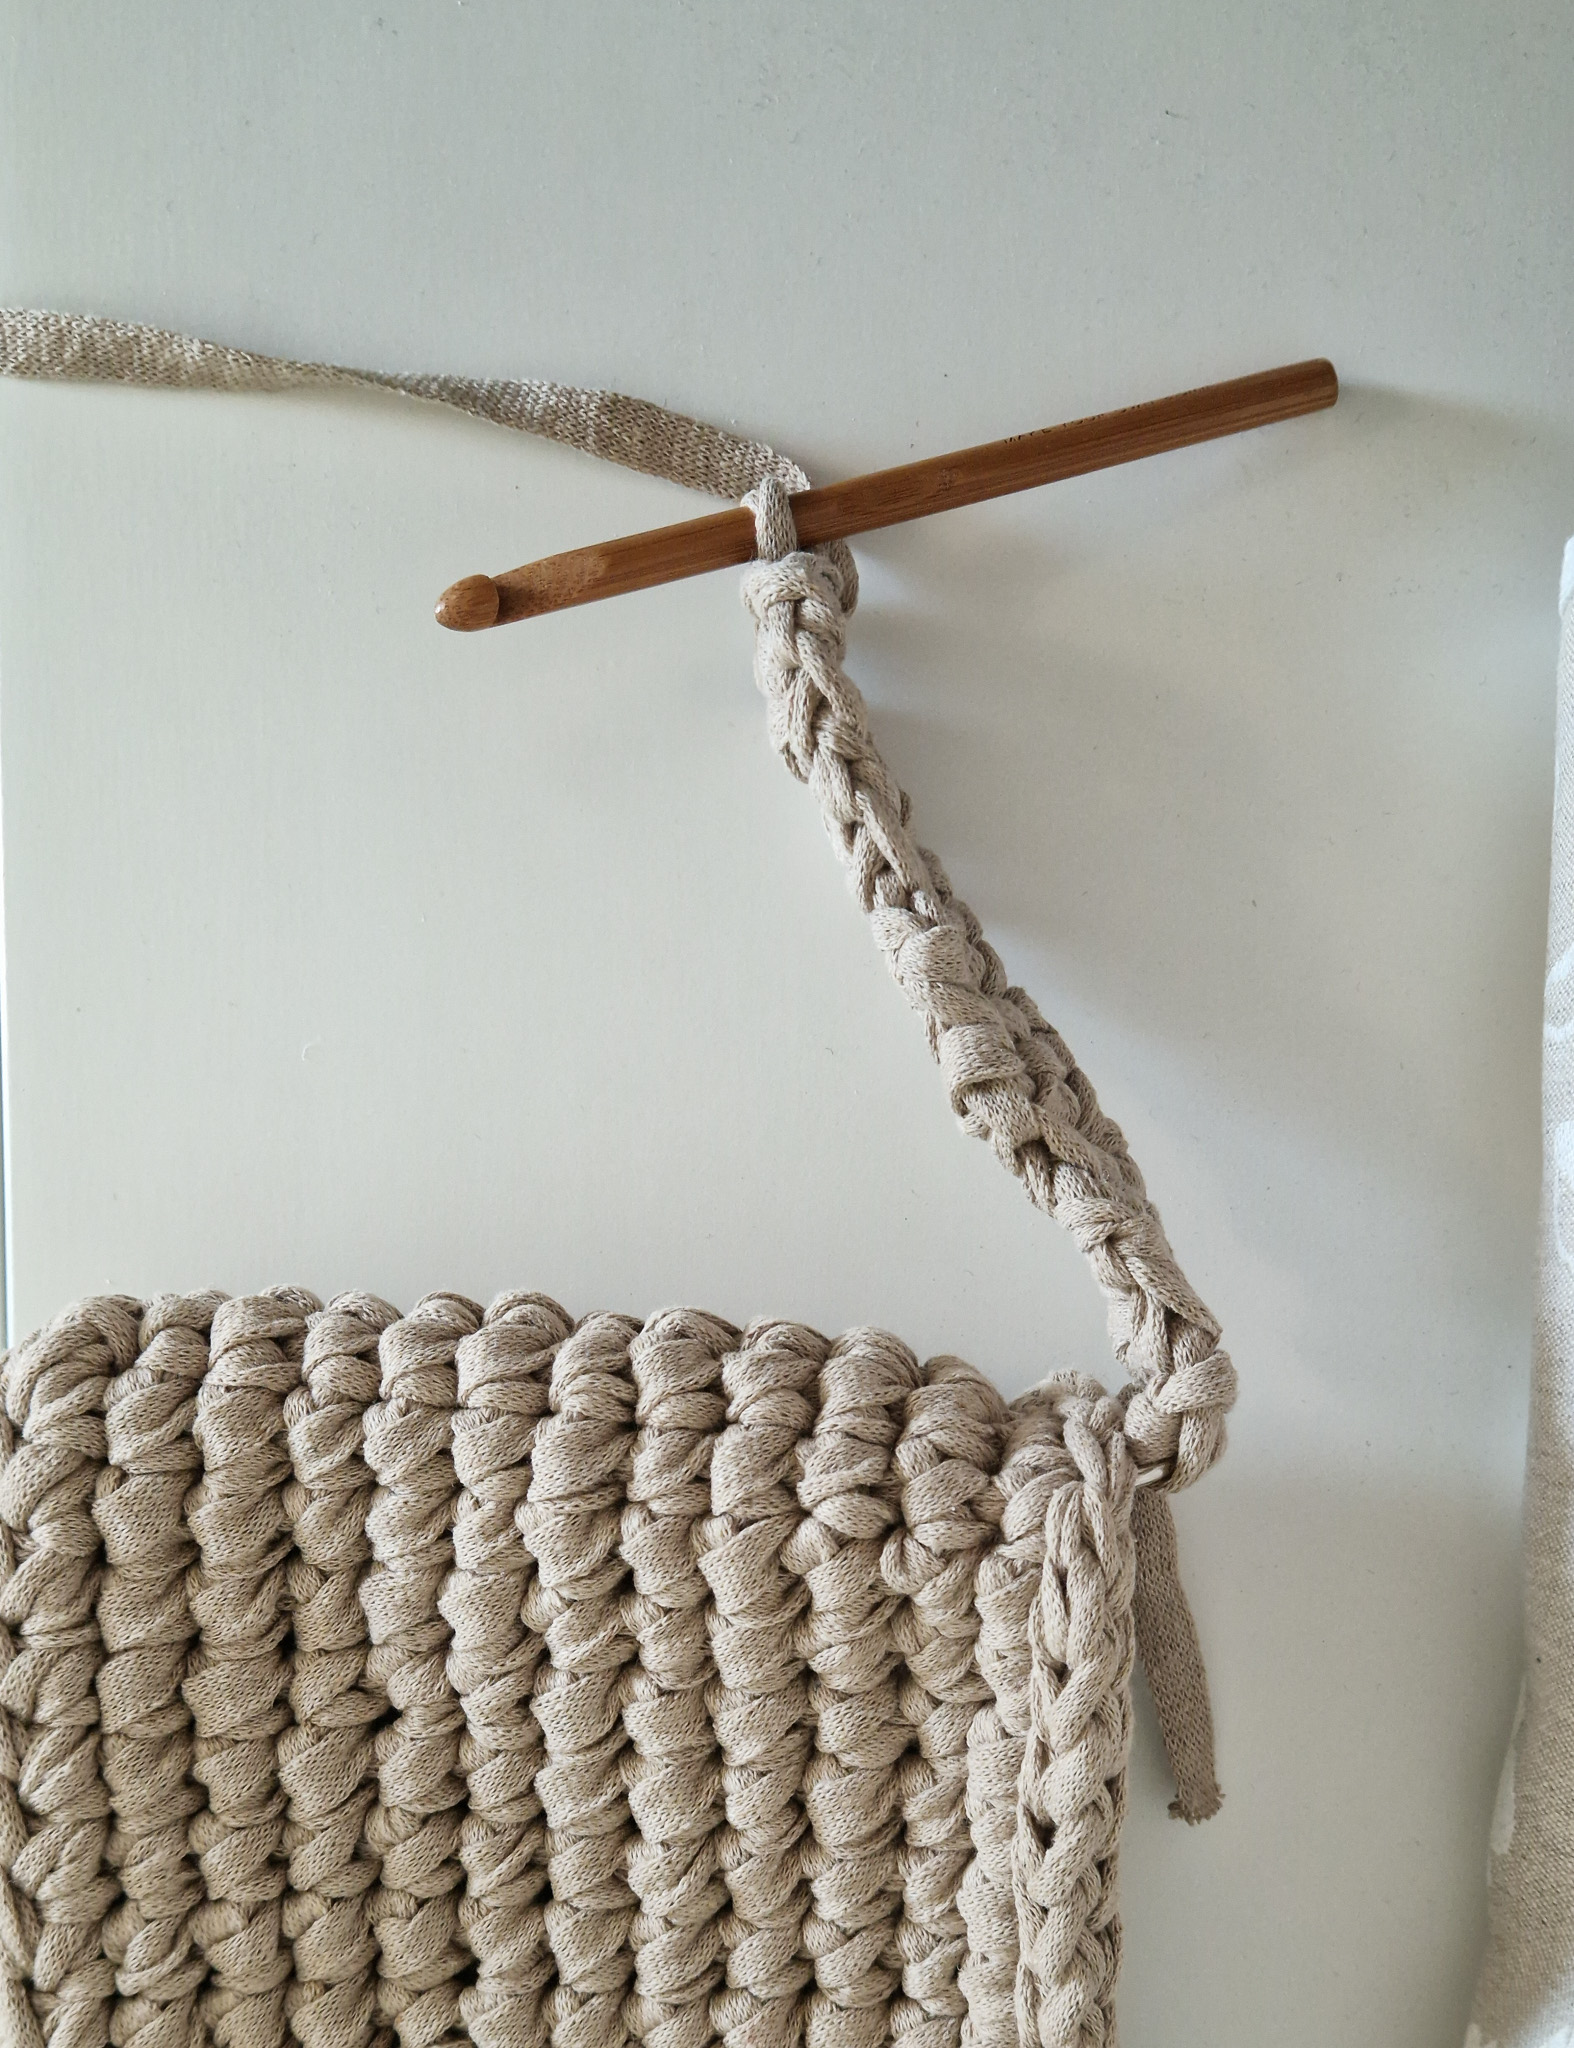
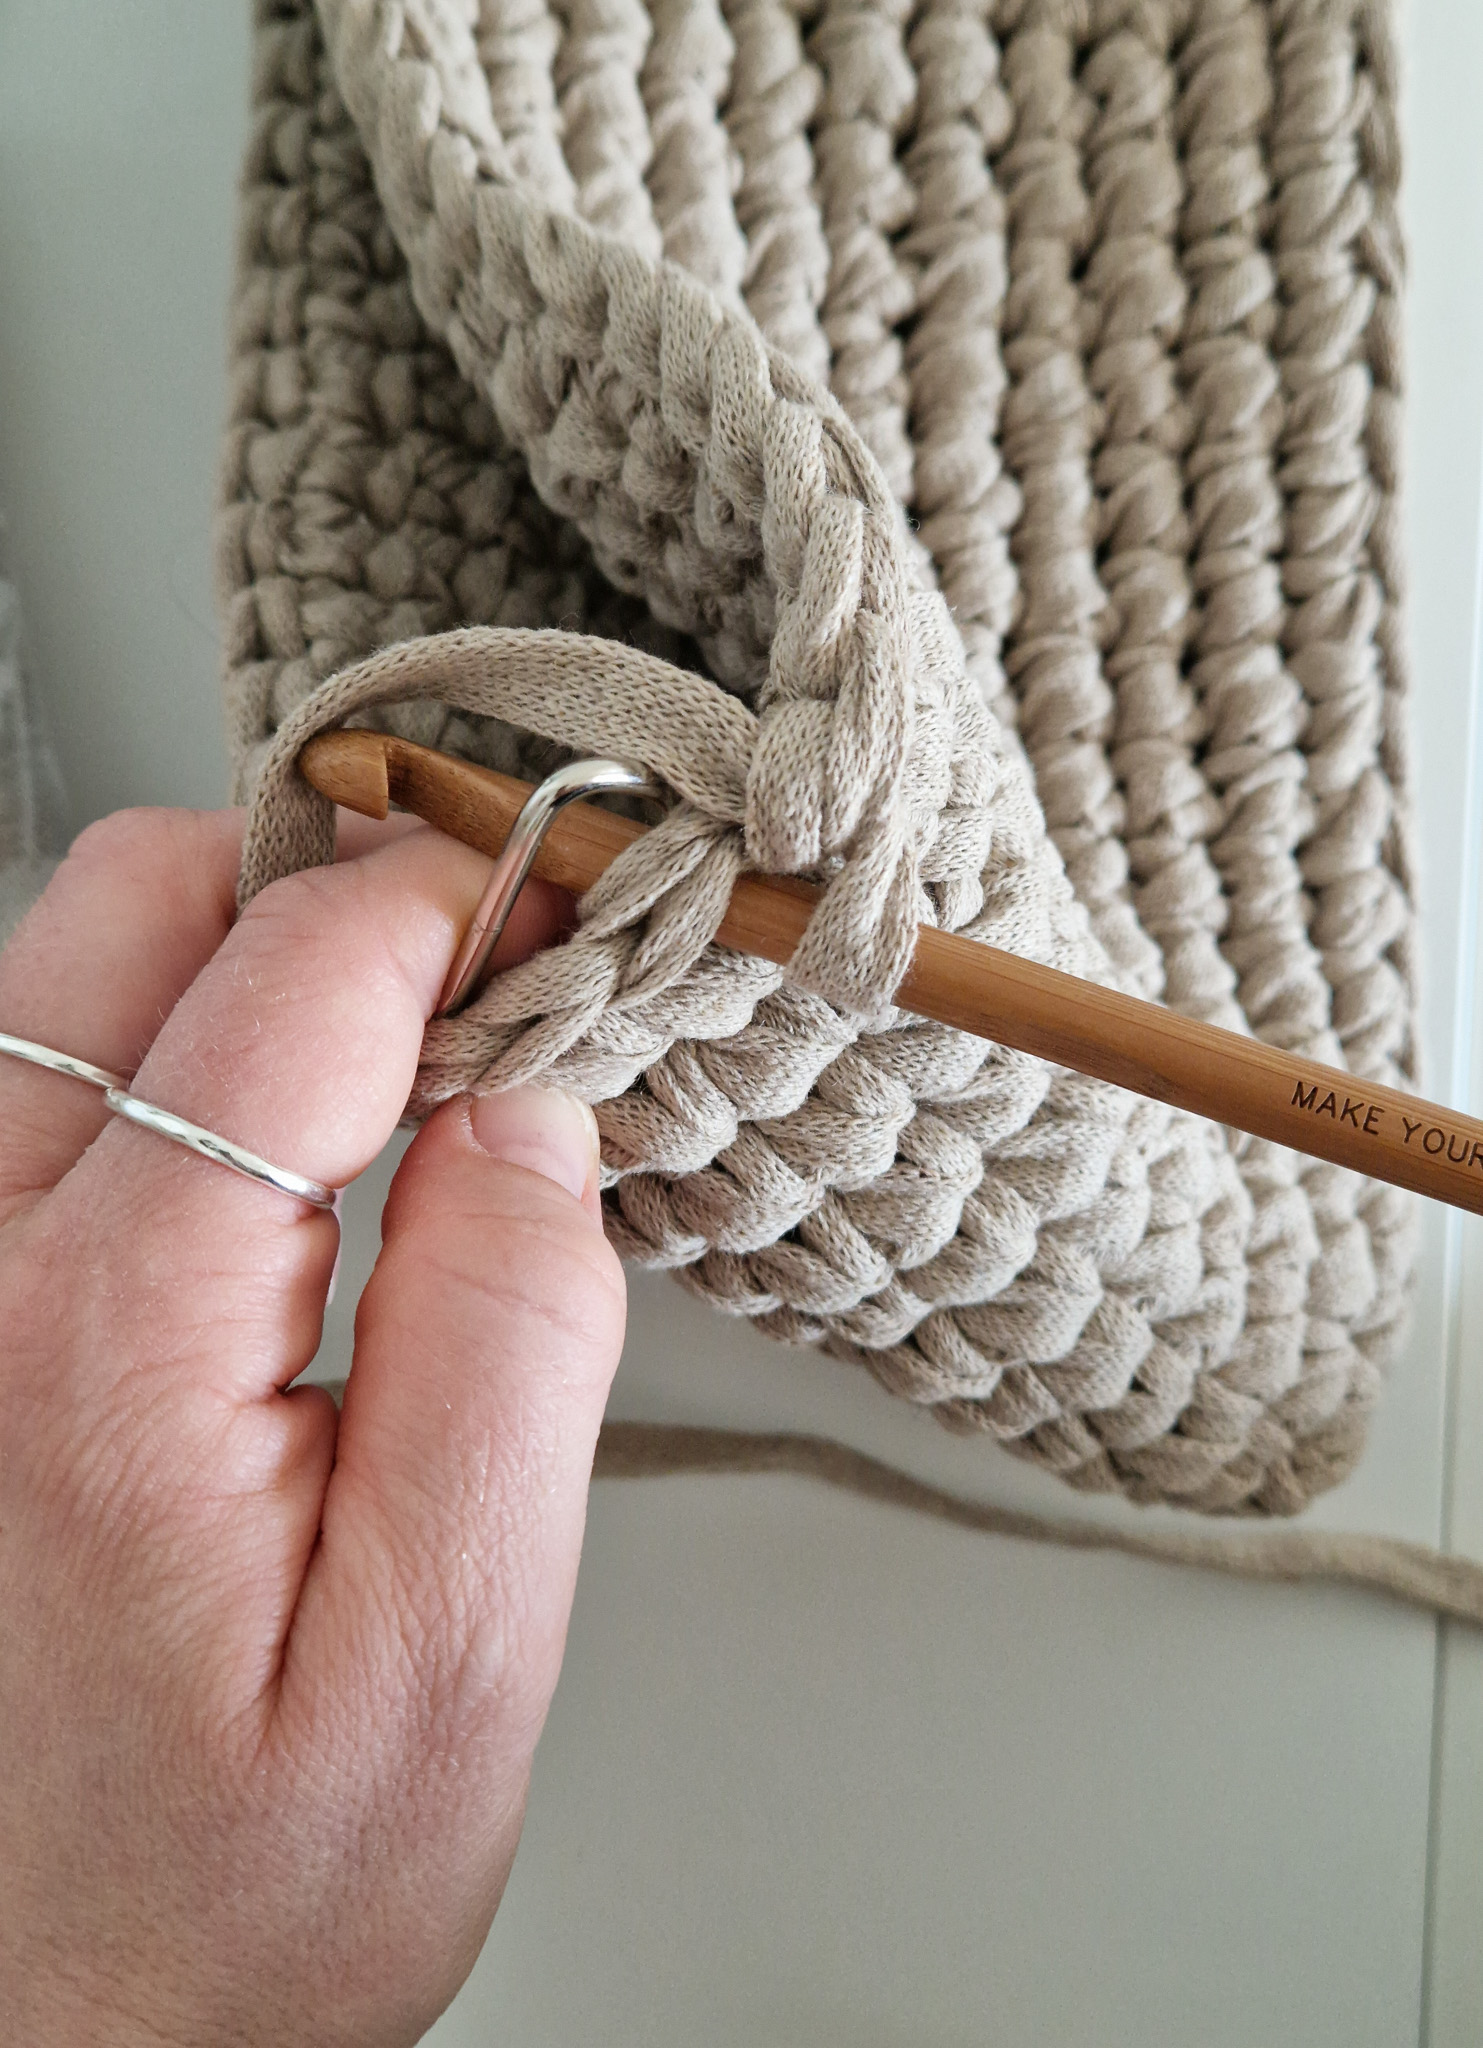
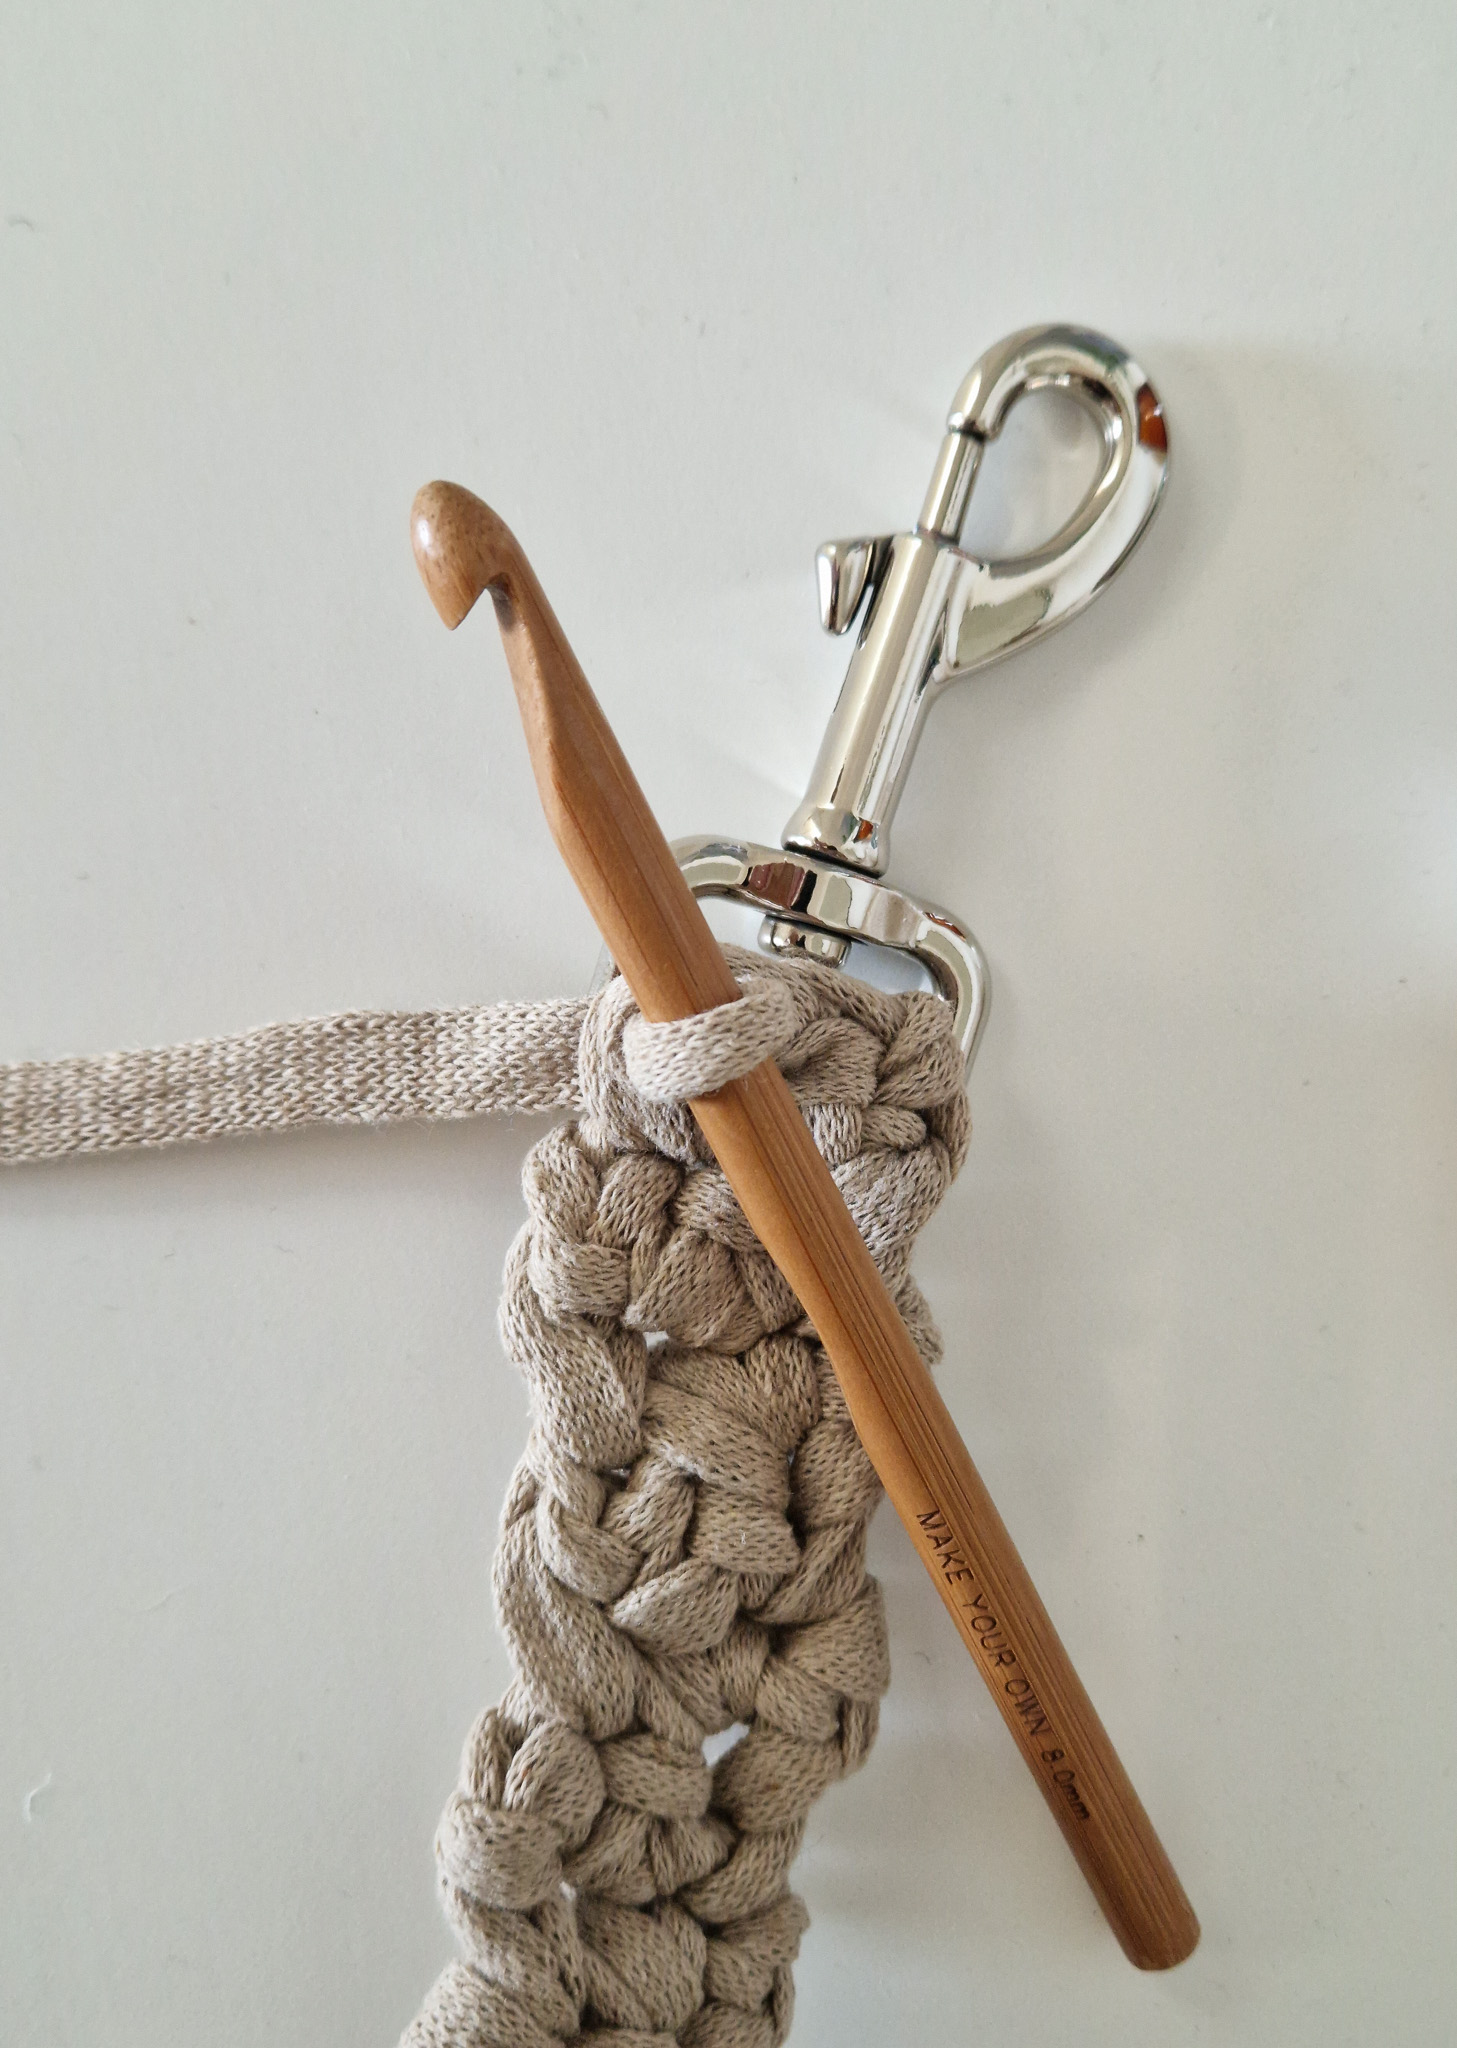
When you have reached your desired length, it's time to attach the swivel hook. Place the swivel hook parallel to the strap and crochet 2 single crochets through both the stitches and the hook to secure it in place.

Now do the same with the other strap.
You’re done! :)
Crochet Terms
This section of the pattern only contains abbreviations for crochet terms. If you need help along the way, please see our simplified version of this pattern.
st = stitch
ch = chain stitch
sl st = slip stitch
sc = single crochet
blo = back loop only
(...) = indicates the number of stitches in the current round
Row 1: 26 ch, turn. (26)
Round 2: 24 sc, 4 sc in the same st in last stitch. Then work on the other side. 23 sc, 4 sc in last st (55)
Round 3: 55 sc in the blo and 3rd loop (the loop behind the blo). (55)
Rounds 4-14: Crochet 55 sc (55 sts) for 11 rounds.
Round 15: Now it’s time to attach the D-rings. Make sure you are in the stitch just before the edge and that you have 3 sc along the edge of the organizer. You may need to unravel one or more stitches to get this right. Place the flat side of the D-ring parallel on the inside with the 3 sts, and crochet 3 sc through both the bag and the D-ring.
Continue crocheting sl st until you reach 3 sc on the other edge. Attach the second D-ring the same way. Crochet sl st until you reach the starting point again.
Cut off and secure the yarn.
Crochet the straps on the D-rings. The length is up to you.
Row 1: 2 sc on the D-ring. Ch 1. (2 sts) Turn.
Row 2 and onwards: Start in the 2nd st; crochet 2 sc (2 sts). Ch 1. Turn.
When you have reached your desired length, it’s time to attach the swivel hook.
Place the swivel hook parallel to the strap and crochet 2 sc through both layers to secure it.
Now do the same with the other strap.
You’re done!
The rights to this pattern belong to MYO Make Your Own. The pattern or its pictures may not be copied, shared or resold either in parts or in its entirety, but you may sell items you have crocheted from this pattern. If you have questions about the pattern, contact MYO at hello@makeyourown.se.
Row 1: Chain 26 stitches. If you want a larger pocket, chain more stitches; if you want a smaller pocket, chain fewer stitches. If you’re unsure how to make a chain, see the video below.
Round 2: Now we start crocheting in the round. Work one round around the chain. Crochet 24 single crochets along the first side of the chain (that is, the number of chains minus 2). In the last stitch, crochet 4 single crochets in the same stitch.
Then crochet along the other side of the chain: 23 single crochets, and in the last stitch, crochet 4 single crochets in the same stitch. You should have a total of 55 stitches. Having a few more or fewer stitches won’t affect the pattern, but this stitch count will be important to keep for the rest of the rounds.
If you’re unsure how to single crochet or how to crochet around a chain, please see the video below.
Round 3: Crochet a border round. Crochet 55 single crochets (or the same number of stitches you had in the previous round) in the back loops only and in the loop right behind the back loop. If you’re unsure how to crochet a border round, check the video below.
Round 4–14: Crochet 55 single crochets for 11 rounds.
Round 15: Now it’s time to attach the D-rings. Make sure you’re in the stitch before the edge and that you have three single crochets on the edge of the organizer. You may need to unravel one or more stitches to do this. Place the straight side of the D-ring parallel on the inside with the three stitches, and crochet three single crochets through both the stitches and the D-ring to secure it. The D-ring should be positioned on the inside of the organizer.
Then, crochet slip stitches until you reach the other side where you have three stitches you haven’t worked into yet. Attach the second D-ring the same way as the first. After securing the second D-ring, continue slip stitching until you reach the start again.
Cut the yarn and weave in the ends. If you’re unsure how to do this, see the video below (Fasten off).
Now we’ll crochet the handles on the D-rings. The length of the handles depends on how long you want them to be. Make them long enough to fit your stroller.
Row 1: Start with a slip knot. If you’re unsure how to make one, watch the video below.
Then, crochet 2 single crochets around one of the D-rings. After that, make 1 chain stitch.
Row 2 and onwards: Skip the chain stitch you just made, then crochet 2 single crochets in each of the next two stitches. Continue this for as many rows as you want to make the handles the desired length.
When you have reached your desired length, it's time to attach the swivel hook. Place the swivel hook parallel to the strap and crochet 2 single crochets through both the stitches and the hook to secure it in place.
Now do the same with the other strap.
You’re done! :)
Crochet Terms
This section of the pattern only contains abbreviations for crochet terms. If you need help along the way, please see our simplified version of this pattern.
st = stitch
ch = chain stitch
sl st = slip stitch
sc = single crochet
blo = back loop only
(...) = indicates the number of stitches in the current round
Row 1: 26 ch, turn. (26)
Round 2: 24 sc, 4 sc in the same st in last stitch. Then work on the other side. 23 sc, 4 sc in last st (55)
Round 3: 55 sc in the blo and 3rd loop (the loop behind the blo). (55)
Rounds 4-14: Crochet 55 sc (55 sts) for 11 rounds.
Round 15: Now it’s time to attach the D-rings. Make sure you are in the stitch just before the edge and that you have 3 sc along the edge of the organizer. You may need to unravel one or more stitches to get this right. Place the flat side of the D-ring parallel on the inside with the 3 sts, and crochet 3 sc through both the bag and the D-ring.
Continue crocheting sl st until you reach 3 sc on the other edge. Attach the second D-ring the same way. Crochet sl st until you reach the starting point again.
Cut off and secure the yarn.
Crochet the straps on the D-rings. The length is up to you.
Row 1: 2 sc on the D-ring. Ch 1. (2 sts) Turn.
Row 2 and onwards: Start in the 2nd st; crochet 2 sc (2 sts). Ch 1. Turn.
When you have reached your desired length, it’s time to attach the swivel hook.
Place the swivel hook parallel to the strap and crochet 2 sc through both layers to secure it.
Now do the same with the other strap.
You’re done!
The rights to this pattern belong to MYO Make Your Own. The pattern or its pictures may not be copied, shared or resold either in parts or in its entirety, but you may sell items you have crocheted from this pattern. If you have questions about the pattern, contact MYO at hello@makeyourown.se.
%20(1).jpg)


Share your creations with us
Thank you!
Your comment was sent!