
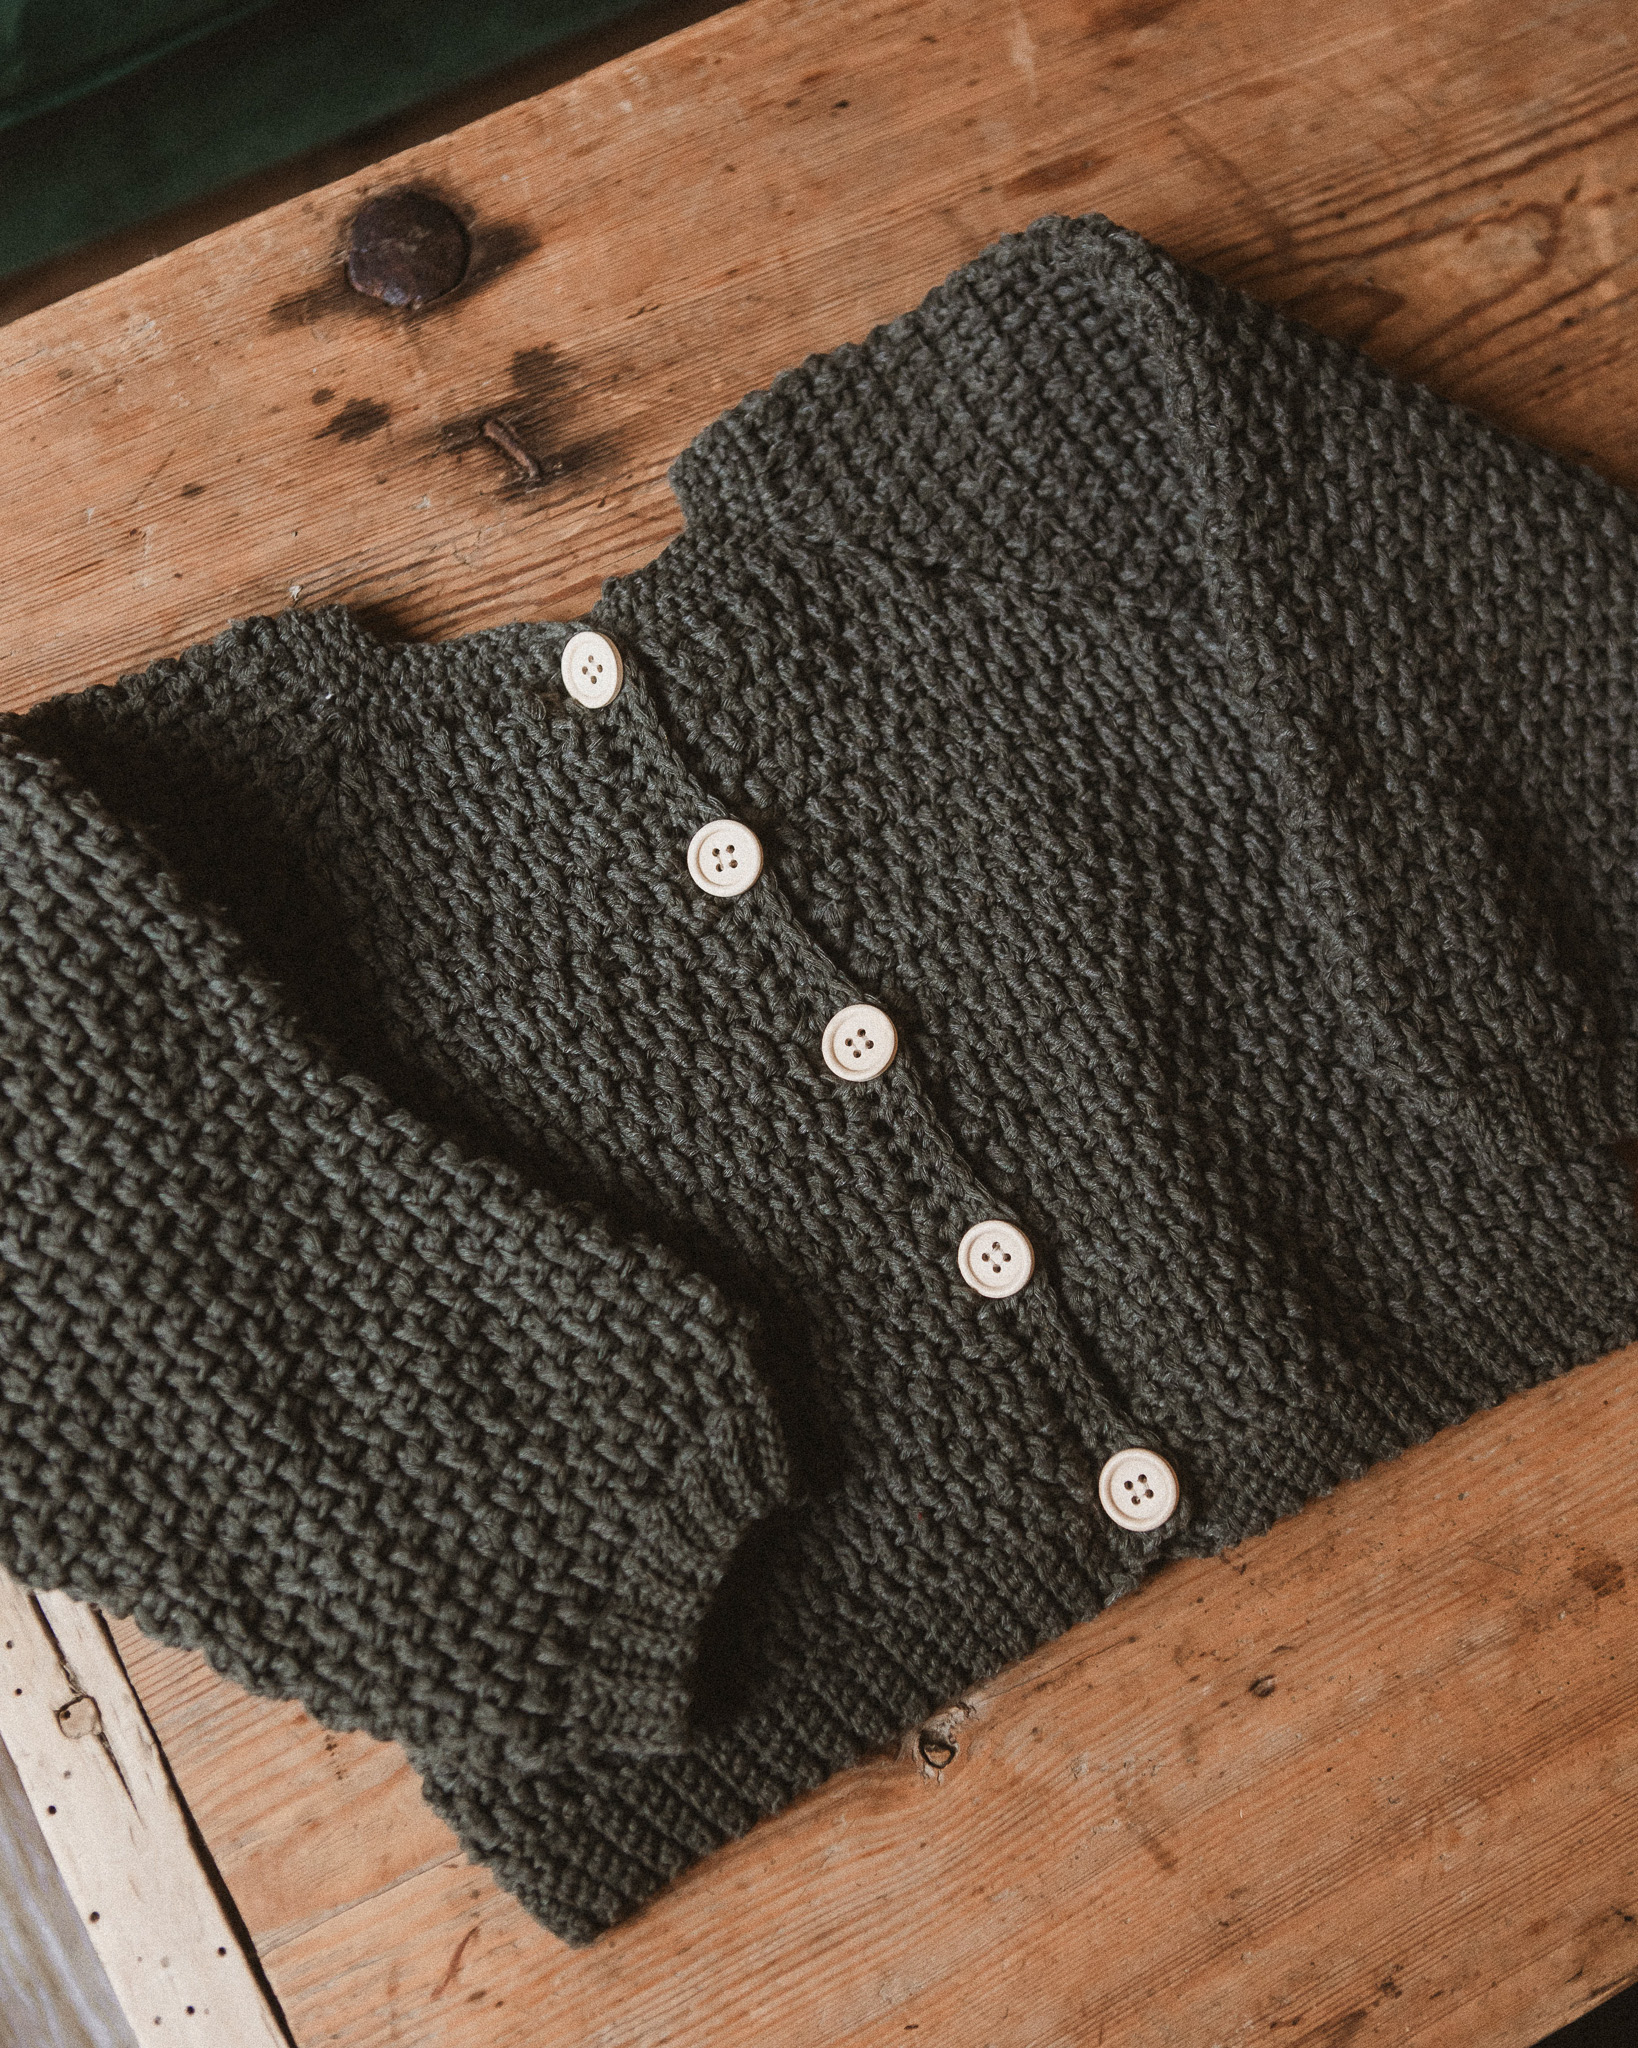
Baby cardigan “Alma”
Crochet This Adorably Cute Baby Cardigan!
Are you looking for a cute baby cardigan for your baby or perhaps want to crochet a cardigan as a gift? Then this one is perfect. It's wonderfully soft, warm, and so cute. The cardigan is crocheted in Dreamy Blend (we used Dusty Green in the picture) with a 6 mm crochet hook. You’ll also need 4-5 buttons with a diameter of about 20 mm, a needle, and thread. This cardigan pairs perfectly with the baby pants "Olle."
Yarn Consumption: Size 62/68 = approx. 150 g. Size 74/80 = approx. 180 g. The yarn requirement depends on how tightly you crochet, so it may vary.
Please note that in this pattern, we use videos from our technique library along with explanatory images.


Here's how to do it
The cardigan is crocheted from top to bottom with double crochets in rows, along with raglan increases for the yoke. Once the front and back pieces are crocheted in one continuous piece, you then add the puff sleeves. Lastly, the hood is crocheted with ears, if desired. If you prefer not to have a hood, you can skip that step and make a cardigan without the hood. Good luck! /Johanna
%20(4).jpg)
This is what you need:
Here you can directly purchase the material for the product. Please note that the instruction is digital and appears here on the page (no written instruction).

MYO Dreamy blend | 50g
A soft blend yarn that consists of 40% cotton, 35% superfine alpaca, and 25% wool.
Buy product
.jpg)
Unleash your creativity
For only 85kr per month you get access to all our 300+ beginner-friendly instructions for crochet, knitting and macrame.
A perfect way to get started with your new hobby!

INFO
In the instructions, the smaller size will be listed first, with the larger size in parentheses, for example: Chain 39 (51) stitches. 39 applies to size 62/68 and 51 to size 74/80.
This cardigan is crocheted in rows with double crochets and a stacked single crochet as the first stitch in each row (which counts as 1 stitch). After finishing a row, you turn the piece and crochet the next row with double crochets on top of the previous one. Instead of using a turning chain (ch) when turning, a stacked single crochet is made. See the video below (stacked single crochet) if you're unsure. Unless otherwise specified in the pattern, the first double crochet in each row should always be a stacked single crochet!
Watch out for the last double crochet before turning!
It’s easy to miss the last double crochet on each row. If this is missed, the pieces will not be straight. See the pictures below. The first picture shows when a double crochet is missing, and the second picture shows how it should look.


What is a corner?
This sweater is crocheted with raglan increases, which creates the "line" between the neck and the armpit. To make a raglan increase, you need to increase 1 double crochet on each side of the line. This will be referred to as a "corner" in the pattern to shorten the text and make it easier to read. If you want, you can mark each corner (the chain stitch) with a stitch marker to make it easier to see where the corner is.
How to make a corner:
When you’ve made a double crochet in the last stitch (thus reaching the chain stitch for the corner on the previous row), make a double crochet in the large hole that the corner forms. Then make 1 chain stitch and a double crochet into the same large hole. Now you’ve created a corner above the corner from the previous row.
Note! It’s easy to accidentally miss the last double crochet before the corner, so be careful to make sure all the double crochets are included. See the first picture below.


Step 1: Chain 39 (51) stitches. If you're unsure how to crochet a chain, please watch the video below.
First row crochet:
1. 1 stacked single crochet in the second stitch from the hook (skip the first stitch). If you're unsure how to do a stacked single crochet, check out the video below (Stacked Single Crochet).
2) 5 (7) double crochets. If you're unsure how to crochet double crochets, please watch the video below.
3) 1 double crochet, 1 chain stitch, 1 double crochet in the same stitch (this forms the first corner).
4) 5 (7) double crochets.
5) 1 double crochet, 1 chain stitch, 1 double crochet in the same stitch.
6) 12 (16) double crochets.
7) 1 double crochet, 1 chain stitch, 1 double crochet in the same stitch.
8) 5 (7) double crochets.
9) 1 double crochet, 1 chain stitch, 1 double crochet in the same stitch.
10) 6 (8) double crochets.
Now you’ve completed the first row and formed 4 corners. These corners will create the 4 raglan lines.
Step 2
Now, continue crocheting 1 double crochet in each stitch, except for the corners where you will make a new corner. Follow the instructions below:
When you've made a double crochet in the last stitch (and thus reached the chain stitch for the corner from the previous row), make a double crochet in the large space that the corner creates. Make 1 chain stitch and then another double crochet in the same large space. Now you've made a corner above the corner from the previous row.
Note: It’s easy to accidentally miss the last double crochet before the corner, so be observant to make sure all the double crochets are included. See the first picture below.
Here’s how Row 2 should look:
1) 7 (9) double crochets
2) Corner
3) 7 (9) double crochets
4) Corner
5) 14 (18) double crochets
6) Corner
7) 7 (9) double crochets
8) Corner
9) 7 (9) double crochets
Continue in the same way for a total of 7 rows. After that, the yoke and all raglan increases will be complete.


Step 3
Row 8
Make 13 (15) double crochets. Now you’ve reached the chain stitch in the first corner. Fold the piece in half so that the corners meet (see the picture below Step 2). Crochet the next double crochet in the first double crochet after the chain stitch of the second corner. By doing this, you skip all the double crochets between corners 1 and 2, and this will form one of the sleeves.


Crochet all the double crochets on the back piece until you reach the chain stitch of the third corner.
Repeat the process above, i.e., crochet the third and fourth corners together to create the second sleeve. Crochet the remaining double crochets on the row (a total of 13 (15) after the armhole). You should now have 52 (60) double crochets without any corners.
Crochet 52 (60) double crochets back and forth for a total of 7 (9) rows or as long as you wish the sweater to be. Remember to count the ribbing at the bottom of the sweater, which is about 2 cm (or as wide as you desire).

Step 4 - Ribbing
Unsure how to crochet a ribbed edge (see the video below if you’re unsure). Start at the lower right corner of the front piece.
Step 1: Make a chain with the number of chain stitches you want +1, in this example, 3+1 stitches (4 stitches).
Step 2: Skip the first chain stitch and then crochet 3 single crochets back down the chain towards the sweater. Make 2 slip stitches in the sweater edge. Turn the sweater.
Step 3: Skip the 2 slip stitches you just made, and crochet 3 slip stitches in the back loop only (the loop farthest from you). Make 1 chain stitch. Turn the sweater.
If you're unsure which is the back loop (Back Loop Only), see the video below.
Step 4: Skip the chain stitch, crochet 3 single crochets in the back loop only (the loop farthest from you). Make 2 slip stitches in the sweater edge, then turn the sweater.
Repeat Step 4 and Step 5 until you’ve worked all the way around.
Note that when the front of the cardigan is facing up and you're working towards the cardigan, you crochet single crochets, and when the back of the cardigan is facing up and you're working away from the edge, you crochet slip stitches.
Check occasionally that you're still keeping 3 stitches wide, as it’s easy to miss a stitch after a few rows, and the edge might become uneven.
Step 5
Now you will crochet along the vertical edges in the middle of the sweater. The edge where the buttons will be fastened is done in one way, and the edge where the buttonholes will go is done in another way.
Edge with buttons:
Start at the top near the neckline on the left front piece. Make a loop and pull it through at the top corner. Make two chain stitches and then crochet half double crochets along the entire edge, including the ribbing. Try to spread the half double crochets evenly along the edge so that it becomes even and straight, about 3 half double crochets per two rows of double crochets on the front piece. The exact number of stitches doesn't matter.

Now, place the buttons you want on the sweater and decide where you want them to be positioned. Place markers at the same height as the buttons on both front pieces.

Edge with buttonholes:
Start at the bottom, at the ribbed edge. Do the same as for the previous edge, but use single crochets instead of half double crochets. The exact number of stitches doesn’t matter here either. When you reach the top, make two chain stitches and turn the piece.
Now, crochet half double crochets all the way back down to the lower edge. Each time you reach a marker (where a buttonhole is to be placed), make a chain stitch instead of a half double crochet, thus skipping one stitch. Continue in this manner along the entire edge. Cut the yarn and fasten the end.

Now, attach the buttons at the markers using an appropriate thickness of thread and needle. Make sure that the position of the buttons still aligns with the buttonholes you just made. Tie 3 tight knots and secure the threads.
Step 6 - Sleeves
The sleeves will now be made by continuing along the double crochets that you skipped over at the last raglan increase. You should have 19 (21) double crochets between the chain stitches at the corners. Then, there will be a gap between double crochet 1 and 19 (21) in the armpit, where you need to pick up/create 5 (7) new double crochets to prevent a hole from forming.
At the beginning and end of each round, there will be a visible line (like a seam). Therefore, avoid starting at the top, where it will be visible. Start in the armpit, slightly towards the back side. There, you won’t have the stitches from double crochet 1-19 (21) to work in, so you’ll need to pick up a stitch wherever it fits. It’s a little easier to start with the right sleeve.
Round 1: Turn the sweater upside down with the back side facing up. Make a loop on the hook and pick up a stitch at a place that fits in the armpit. Make a stacked single crochet. This will always count as the first stitch of this row/round.

Make 1 (2) more double crochets, picking them up wherever it fits. You should then be at double crochet 1 from the "raglan round." Make 3 (3) more double crochets, i.e., a total of 5 (6) double crochets. Then, make two double crochets in the same stitch (an increase).

Repeat (5 (6) double crochets + 1 increase) 2 more times. You should now have 3 (3) remaining double crochets from the raglan round. Make those 3 double crochets, then pick up 2 (3) more double crochets + 1 increase where it fits in the armhole. You should now be at the stacked single crochet that started the round. Double-check that you have 28 (32) double crochets in total for this first round on the sleeve. Do not make a slip stitch to "close the round," as this will create a shift in the seam.
Round 2: In this round, you will make (6 (7) double crochets + 1 increase) a total of 4 times. As always, start with a stacked single crochet in the stacked stitch from the previous round.
Note: It’s easy to pick the wrong stitch here since the stacked single crochet creates two pairs of loops. See the picture with the needle as a marker for which pair of loops is the correct one.
By the time you finish this round, you should have 32 (36) double crochets in total.

Round 3-5: Make 32 (36) double crochets in a total of 3 rounds. Always start with the stacked single crochet, and do not make a slip stitch between the rounds.
Round 6: Make 6 (7) double crochets, then a decrease (i.e., crochet two double crochets together). Repeat this 4 times. By the end of the round, you should have 28 (32) double crochets. To make a decrease double crochet; make a double crochet in the first stitch BUT do not make the last pull through. Make a double crochet in the next stitch BUT do not make the last pull through. Pick up yarn and pull through all loops.
Round 7: Crochet 28 (32) double crochets around the entire round.
Round 8: Now, you’ll be making decreases with Single Crochet (not double crochets). Make 14 (16) decreases, which will result in 14 (16) stitches when you’ve completed the round. Finish with a slip stitch in the first stitch of the round. Do not cut the yarn, continue directly into the ribbing.
If you’re unsure how to do a decrease or slip stitch, you can check out the video below!
Ribbing
Now make 4 chain stitches to start and make a ribbing exactly the same way as on the bottom edge of the sweater.
Repeat the same steps for the left sleeve. Keep in mind to start a bit more towards the back side of the armhole so that the seam is as hidden as possible. You may need to adjust the number of stitches you pick up before you reach stitch 1 from the “raglan round,” which is perfectly fine. It is important to always follow the pattern of 5 (6) stitches + 1 increase on the first round. The pattern repeats 4 times in total to reach 28 (32) stitches when the round is finished.
Step 7 – Hood
Round 1: Make a loop on the crochet hook and pick it up at the corner of the neckline on the front piece with the buttonholes (right side). Make two double crochet stitches along the button band edge, then continue with one double crochet stitch in each stitch around the neckline.

On the edge with the buttons, make one double crochet. You should now be at the other corner and should have 49 (53) double crochet stitches in the round.
Round 2
In this round, you will make 5 increases (two double crochet stitches in the same stitch). Make 7 (8) double crochet stitches, then one increase (two double crochet stitches in the same stitch). Repeat this five times. You should then have 9 (8) stitches left in the round. Crochet these 9 (8) double crochet stitches. You should now have a total of 54 (58) double crochet stitches.
Round 3
Make 8 (9) double crochet stitches, then one increase (two double crochet stitches in the same stitch). Repeat this five times. Crochet the remaining 9 (8) stitches. You should now have a total of 59 (63) double crochet stitches.
Rounds 4–8
Crochet 59 (63) double crochet stitches for a total of five rounds.
Round 9
Make 15 (17) double crochet stitches. Make (three double crochet stitches followed by one decrease) a total of six times. Crochet the remaining 14 (16) stitches. You should now have a total of 53 (57) double crochet stitches.
Round 10
Make 14 (16) double crochet stitches. Make (two double crochet stitches followed by one decrease) a total of six times. Crochet the remaining 15 (17) stitches. You should now have a total of 47 (51) double crochet stitches.
Round 11
Make 15 (17) double crochet stitches. Make (one double crochet stitch followed by one decrease) a total of six times. Crochet the remaining 14 (16) stitches. You should now have a total of 41 (45) double crochet stitches.
Round 12
Make 15 (17) double crochet stitches. Make six decreases. Crochet the remaining 14 (16) stitches. You should now have a total of 35 (39) double crochet stitches.
Leave a long tail and cut the yarn. Now place the edges together and sew the hood closed using the tail. Thread the yarn through the top loops of the stitches, as shown in the image. Secure the yarn and cut the end.

Step 8 – Front Edge of the Hood
Fold the front edge of the hood, narrow at the bottom and wider at the top of the head, about 1 (2) cm. Sew the edge in place with a long piece of yarn. Then make another fold and sew it down in the same way. Fold as much as you wish; in the picture, the fold is 4 cm at its widest.

Step 9 – Ears (Make 2)
Make 6 single crochets in a magic ring. Join with a slip stitch in the first stitch to close the ring. A tip is to crochet with the starting yarn tail in the next round to avoid having to weave it in later.
Chain 3, this counts as the first double crochet of the round. Make another double crochet in the same stitch.
Then, make 4 more increases in double crochet, meaning 2 double crochets in the same stitch. Do not crochet the 6th stitch.
You should now have 10 double crochets in total in the round.

Finish the Ears:
Leave a long yarn tail to sew the ear onto the hood and cut off the excess yarn.
Sew the ears onto the hood where you prefer. In the image, the ears are sewn between rounds 9-11.

The sweater is now complete! Great job ☺ Feel free to share your pictures!
Abbreviations:
MR = magic ring
st = stitch
Ch = chain stitch
sl st = slip stitch
sc = single crochet
hdc = half double crochet
dc = double crochet
blo = back loop only
(…) = indicates the number of stitches in the current row
*...* = Everything within ... is repeated the specified number of times
[...] = Everything within [...] is crocheted in the same stitch
We’re going to crochet a cozy baby cardigan! If you need help along the way, check out the easier version of this pattern.
INFO
In the pattern, the smaller size will be listed first, with the larger size in parentheses. For example: "Chain 39 (51) stitches." Here, 39 is for size 62/68, and 51 is for size 74/80.
This sweater is crocheted in rows/rounds with double crochets (stolpar) and a stacked single crochet as the first stitch of each row. After completing one row, turn the piece and crochet the next row of double crochets over the previous one. Instead of using a turning chain (air stitch) to turn the work, use a stacked single crochet. Watch the video below to see how it's done. If the pattern doesn't specify otherwise, the first double crochet in each row should always be a stacked single crochet!
Watch out for the last double crochet before turning!
It's easy to miss the last double crochet on each row. If you skip it, the pieces won’t be straight. See the images below. The first image shows when a stitch is missed, and the second image shows how it should look.
What is a corner?
This sweater is crocheted with raglan increases, which create the line between the neck and the armpit. To make a raglan increase, you need to add one double crochet on each side of the line. This will be referred to as a "corner" in the pattern to simplify the text and make it easier to read.Here’s how you make a corner:
- Once you've made a double crochet in the last stitch of the row (and thus reached the chain for the corner from the row below), make a double crochet in the large space the corner creates.
- Then, make a chain stitch, and crochet another double crochet into the same large space.
Now, you’ve made a corner above the corner from the previous row. Note! It’s easy to accidentally miss the last double crochet before the corner, so be careful to make sure all the double crochets are included. See the first picture below for what it should look like.
Step 1
Ch 39 (51).
Round 1: Sk 1st st, start in 2nd st. 6 (8) dc, with the 1st st being a stacked sc, [1 dc, 1 ch, 1 dc], 5 (7) dc, [1 dc, 1 ch, 1 dc], 12 (16) dc, [1 dc, 1 ch, 1 dc],
5 (7) dc, *1 dc, [1 dc, 1 ch, 1 dc], 6 (8) dc.
Round 2: 7 (9) dc, [1 dc, 1 ch, 1 dc] in ch sp, 7 (9) dc, [1 dc, 1 ch, 1 dc] in ch sp, 14 (18) dc, [1 dc, 1 ch, 1 dc] in ch sp, 7 (9) dc, [1 dc, 1 ch, 1 dc] in ch sp, 7 (9) dc.
Round 3: 8 (10) dc, [1 dc, 1 ch, 1 dc] in ch sp, 9 (11) dc, [1 dc, 1 ch, 1 dc] in ch sp, 16 (20) dc, [1 dc, 1 ch, 1 dc] in ch sp, 9 (11) dc, [1 dc, 1 ch, 1 dc] in ch sp, 8 (10) dc.
Round 4-7: Continue in the same manner for a total of 7 rounds. Dc in each st, except in ch spaces where you do 2 dc with 1 ch in between.
Now the yoke and all raglan increases are complete.
Step 2
Round 8: 13 (15) dc. Fold the piece in half so the corners align (see picture). Skip chain space + 19 (21) dc + ch, 26 (30) dc, skip chain space + 19 (21) dc + ch,
13 (15) dc. (52 (60) sts total).
Round 9-15 (17): 52 (60) dc for 7 (9) rnds or to the desired length. Remember to include the ribbing at the bottom of the sweater, which is approx. 2 cm (or as wide as you prefer).
Step 3
When you're happy with the length of the cardigan, it's time for the ribbing. In the picture, the ribbing is 3 sts wide, but if you want it narrower or thicker, adjust the number of sts you start with.
Step 1: Ch 4, turn.
Step 2: 3 sc, 2 sl st in edge. Turn.
Step 3: Skip 2 sl st, 3 sl st in blo. Ch 1, turn.
Step 4: 3 sc in blo, 2 sl st in edge. Turn.
Repeat Step 3 and Step 4 around the entire edge.
For the final round. Fasten off and cut the yarn.
Step 4
Now, crochet along the vertical edges in the middle of the sweater. The edge for the buttons will be made one way, and the edge for the buttonholes will be made another way.
Button edge:
Start at the top of the left front piece at the neck. Make a loop and pull it through at the top corner. Ch 2, make hdc (half double crochet) along the entire edge, including the ribbing. Try to distribute the hdc evenly along the edge so it’s smooth and straight. You should aim for around 3 hdc over two rows of dc (double crochet) on the front piece. The exact number of stitches doesn’t matter.
Place the buttons you want on the sweater and decide where to position them. Place markers at the same height as the buttons on both front pieces.
Buttonhole edge:
Start from the bottom, at the ribbed edge. Do the same as the button edge, but use sc (single crochet) instead of hdc. Again, the number of stitches doesn’t matter. When you reach the top, ch 2 and turn.
Now, crochet hdc all the way back to the bottom. At each marker, skip one st and ch 1 instead. Continue in this way along the entire edge. Cut the yarn and fasten the end.
Now, sew the buttons onto the markers using an appropriate thickness of yarn and needle. Make sure the button placement matches the buttonholes you just made. Tie 3 firm knots and secure the threads.
Step 5 – Sleeves
Now, crochet the sleeves by continuing on the double crochets that you skipped over at the last raglan increase. You should have 19 (21) dc between the ch stitches in the corners. There will be a hole between dc 1 and dc 19 (21) in the armpit where you need to pick up 5 (7) new dc to prevent a hole. At the beginning and end of each round, there will be a visible line (like a seam), so avoid starting on the top where it will be visible. Start at the armpit, a little towards the back. You won’t have the stitches from dc 1–19 (21) to crochet into, so you will need to pick up a stitch somewhere that works. It’s a bit easier to start with the right sleeve.
Turn the sweater upside down with the back side facing up. Make a loop on the hook and pick it up at a stitch that fits in the armpit.
Round 1: *5 (6) dc, inc* x4. (28 (32))
As always, start with a stacked slip stitch. Do NOT use a slip stitch to close the round. Remember, you need to pick up a total of 5 (7) stitches in the armpit.
Round 2: *6 (7) dc, inc* x4. (32 (36))
Rounds 3–5: 32 (36) dc for a total of 3 rounds.
Round 6: *6 (7) dc, decrease* x4 times. (28 (32))
Round 7: 28 (32) dc.
Round 8: Dec x14 (16) with sc (not dc). (14 (16))
Don’t cut the yarn but continue directly with the ribbing.
Ribbing
Now, chain 4 ch and make a ribbed edge exactly the same way as the bottom edge of the sweater. Repeat the same steps for the left sleeve. Make sure to start a little towards the back side in the armpit, so the seam is as inconspicuous as possible. You may need to adjust the number of dc you pick up before reaching the first dc from the "raglan round," which is perfectly fine.
It’s important to always follow the pattern 5 (6) dc, increase for the first round, repeating it 4 times to reach 28 (32) dc when the round is complete.
Step 6 - Hood
Round 1:
Make a loop on your hook and pick it up at the corner of the neck/collar line on the front piece with the buttonholes (right side). Make 2 dc along the buttonhole edge, and continue with 1 dc in each stitch around the whole round. For the button edge, make 1 dc. You should now be at the second corner and should have 49 (53) dc in total for the round.
Round 2: *7 (8) dc, inc* x5, 9 (8) dc. (54 (58))
Round 3: *8 (9) dc, inc* x5, 9 (8) dc. (59 (63))
Rounds 4-8: 59 (63) dc for a total of 5 rounds.
Round 9: 15 (17) dc, *3 dc, dec* x6, 14 (16) dc. (53 (57))
Round 10: 14 (16) dc, *2 dc, dec* x6, 15 (17) dc. (47 (51))
Round 11: 15 (17) dc, *1 dc, dec* x6, 14 (16) dc. (41 (45))
Round 12: 14 (16) dc, decrease x6, 15 (17) dc. (35 (49))
Save a long thread and cut off. Now, lay the edges against each other and sew the hood together using the yarn. Thread the yarn between the top loops of the stitches, see the picture. Secure the yarn and cut off.
Step 7 - Front Edge of the Hood
Make a fold on the front edge, narrower at the bottom and wider at the top of the head, approximately 1 (2) cm. Sew the edge in place using a long thread. Then, make another fold and sew it in place in the same way. Fold as much as you desire; in the picture, the fold is 4 cm at its widest.
Step 8 - Ears (2 pieces)
Round 1: 6 sc in a MR, sl st in the first st.
Round 2: [3 ch, 1 dc], inc with dc x4. Skip the last st of the round (10).
Leave a long thread to attach the ear with and cut off. Sew the ears onto the hood where you prefer. In the picture, they are sewn between rounds 9-11.
The sweater is now finished! Great job! 😊
The rights to this pattern belong to MYO Make Your Own. The pattern or its pictures may not be copied, shared or resold either in parts or in its entirety, but you may sell items you have crocheted from this pattern. If you have questions about the pattern, contact MYO at hello@makeyourown.se.
INFO
In the instructions, the smaller size will be listed first, with the larger size in parentheses, for example: Chain 39 (51) stitches. 39 applies to size 62/68 and 51 to size 74/80.
This cardigan is crocheted in rows with double crochets and a stacked single crochet as the first stitch in each row (which counts as 1 stitch). After finishing a row, you turn the piece and crochet the next row with double crochets on top of the previous one. Instead of using a turning chain (ch) when turning, a stacked single crochet is made. See the video below (stacked single crochet) if you're unsure. Unless otherwise specified in the pattern, the first double crochet in each row should always be a stacked single crochet!
Watch out for the last double crochet before turning!
It’s easy to miss the last double crochet on each row. If this is missed, the pieces will not be straight. See the pictures below. The first picture shows when a double crochet is missing, and the second picture shows how it should look.
What is a corner?
This sweater is crocheted with raglan increases, which creates the "line" between the neck and the armpit. To make a raglan increase, you need to increase 1 double crochet on each side of the line. This will be referred to as a "corner" in the pattern to shorten the text and make it easier to read. If you want, you can mark each corner (the chain stitch) with a stitch marker to make it easier to see where the corner is.
How to make a corner:
When you’ve made a double crochet in the last stitch (thus reaching the chain stitch for the corner on the previous row), make a double crochet in the large hole that the corner forms. Then make 1 chain stitch and a double crochet into the same large hole. Now you’ve created a corner above the corner from the previous row.
Note! It’s easy to accidentally miss the last double crochet before the corner, so be careful to make sure all the double crochets are included. See the first picture below.
Step 1: Chain 39 (51) stitches. If you're unsure how to crochet a chain, please watch the video below.
First row crochet:
1. 1 stacked single crochet in the second stitch from the hook (skip the first stitch). If you're unsure how to do a stacked single crochet, check out the video below (Stacked Single Crochet).
2) 5 (7) double crochets. If you're unsure how to crochet double crochets, please watch the video below.
3) 1 double crochet, 1 chain stitch, 1 double crochet in the same stitch (this forms the first corner).
4) 5 (7) double crochets.
5) 1 double crochet, 1 chain stitch, 1 double crochet in the same stitch.
6) 12 (16) double crochets.
7) 1 double crochet, 1 chain stitch, 1 double crochet in the same stitch.
8) 5 (7) double crochets.
9) 1 double crochet, 1 chain stitch, 1 double crochet in the same stitch.
10) 6 (8) double crochets.
Now you’ve completed the first row and formed 4 corners. These corners will create the 4 raglan lines.
Step 2
Now, continue crocheting 1 double crochet in each stitch, except for the corners where you will make a new corner. Follow the instructions below:
When you've made a double crochet in the last stitch (and thus reached the chain stitch for the corner from the previous row), make a double crochet in the large space that the corner creates. Make 1 chain stitch and then another double crochet in the same large space. Now you've made a corner above the corner from the previous row.
Note: It’s easy to accidentally miss the last double crochet before the corner, so be observant to make sure all the double crochets are included. See the first picture below.
Here’s how Row 2 should look:
1) 7 (9) double crochets
2) Corner
3) 7 (9) double crochets
4) Corner
5) 14 (18) double crochets
6) Corner
7) 7 (9) double crochets
8) Corner
9) 7 (9) double crochets
Continue in the same way for a total of 7 rows. After that, the yoke and all raglan increases will be complete.
Step 3
Row 8
Make 13 (15) double crochets. Now you’ve reached the chain stitch in the first corner. Fold the piece in half so that the corners meet (see the picture below Step 2). Crochet the next double crochet in the first double crochet after the chain stitch of the second corner. By doing this, you skip all the double crochets between corners 1 and 2, and this will form one of the sleeves.
Crochet all the double crochets on the back piece until you reach the chain stitch of the third corner.
Repeat the process above, i.e., crochet the third and fourth corners together to create the second sleeve. Crochet the remaining double crochets on the row (a total of 13 (15) after the armhole). You should now have 52 (60) double crochets without any corners.
Crochet 52 (60) double crochets back and forth for a total of 7 (9) rows or as long as you wish the sweater to be. Remember to count the ribbing at the bottom of the sweater, which is about 2 cm (or as wide as you desire).
Step 4 - Ribbing
Unsure how to crochet a ribbed edge (see the video below if you’re unsure). Start at the lower right corner of the front piece.
Step 1: Make a chain with the number of chain stitches you want +1, in this example, 3+1 stitches (4 stitches).
Step 2: Skip the first chain stitch and then crochet 3 single crochets back down the chain towards the sweater. Make 2 slip stitches in the sweater edge. Turn the sweater.
Step 3: Skip the 2 slip stitches you just made, and crochet 3 slip stitches in the back loop only (the loop farthest from you). Make 1 chain stitch. Turn the sweater.
If you're unsure which is the back loop (Back Loop Only), see the video below.
Step 4: Skip the chain stitch, crochet 3 single crochets in the back loop only (the loop farthest from you). Make 2 slip stitches in the sweater edge, then turn the sweater.
Repeat Step 4 and Step 5 until you’ve worked all the way around.
Note that when the front of the cardigan is facing up and you're working towards the cardigan, you crochet single crochets, and when the back of the cardigan is facing up and you're working away from the edge, you crochet slip stitches.
Check occasionally that you're still keeping 3 stitches wide, as it’s easy to miss a stitch after a few rows, and the edge might become uneven.
Step 5
Now you will crochet along the vertical edges in the middle of the sweater. The edge where the buttons will be fastened is done in one way, and the edge where the buttonholes will go is done in another way.
Edge with buttons:
Start at the top near the neckline on the left front piece. Make a loop and pull it through at the top corner. Make two chain stitches and then crochet half double crochets along the entire edge, including the ribbing. Try to spread the half double crochets evenly along the edge so that it becomes even and straight, about 3 half double crochets per two rows of double crochets on the front piece. The exact number of stitches doesn't matter.
Now, place the buttons you want on the sweater and decide where you want them to be positioned. Place markers at the same height as the buttons on both front pieces.
Edge with buttonholes:
Start at the bottom, at the ribbed edge. Do the same as for the previous edge, but use single crochets instead of half double crochets. The exact number of stitches doesn’t matter here either. When you reach the top, make two chain stitches and turn the piece.
Now, crochet half double crochets all the way back down to the lower edge. Each time you reach a marker (where a buttonhole is to be placed), make a chain stitch instead of a half double crochet, thus skipping one stitch. Continue in this manner along the entire edge. Cut the yarn and fasten the end.
Now, attach the buttons at the markers using an appropriate thickness of thread and needle. Make sure that the position of the buttons still aligns with the buttonholes you just made. Tie 3 tight knots and secure the threads.
Step 6 - Sleeves
The sleeves will now be made by continuing along the double crochets that you skipped over at the last raglan increase. You should have 19 (21) double crochets between the chain stitches at the corners. Then, there will be a gap between double crochet 1 and 19 (21) in the armpit, where you need to pick up/create 5 (7) new double crochets to prevent a hole from forming.
At the beginning and end of each round, there will be a visible line (like a seam). Therefore, avoid starting at the top, where it will be visible. Start in the armpit, slightly towards the back side. There, you won’t have the stitches from double crochet 1-19 (21) to work in, so you’ll need to pick up a stitch wherever it fits. It’s a little easier to start with the right sleeve.
Round 1: Turn the sweater upside down with the back side facing up. Make a loop on the hook and pick up a stitch at a place that fits in the armpit. Make a stacked single crochet. This will always count as the first stitch of this row/round.
Make 1 (2) more double crochets, picking them up wherever it fits. You should then be at double crochet 1 from the "raglan round." Make 3 (3) more double crochets, i.e., a total of 5 (6) double crochets. Then, make two double crochets in the same stitch (an increase).
Repeat (5 (6) double crochets + 1 increase) 2 more times. You should now have 3 (3) remaining double crochets from the raglan round. Make those 3 double crochets, then pick up 2 (3) more double crochets + 1 increase where it fits in the armhole. You should now be at the stacked single crochet that started the round. Double-check that you have 28 (32) double crochets in total for this first round on the sleeve. Do not make a slip stitch to "close the round," as this will create a shift in the seam.
Round 2: In this round, you will make (6 (7) double crochets + 1 increase) a total of 4 times. As always, start with a stacked single crochet in the stacked stitch from the previous round.
Note: It’s easy to pick the wrong stitch here since the stacked single crochet creates two pairs of loops. See the picture with the needle as a marker for which pair of loops is the correct one.
By the time you finish this round, you should have 32 (36) double crochets in total.
Round 3-5: Make 32 (36) double crochets in a total of 3 rounds. Always start with the stacked single crochet, and do not make a slip stitch between the rounds.
Round 6: Make 6 (7) double crochets, then a decrease (i.e., crochet two double crochets together). Repeat this 4 times. By the end of the round, you should have 28 (32) double crochets. To make a decrease double crochet; make a double crochet in the first stitch BUT do not make the last pull through. Make a double crochet in the next stitch BUT do not make the last pull through. Pick up yarn and pull through all loops.
Round 7: Crochet 28 (32) double crochets around the entire round.
Round 8: Now, you’ll be making decreases with Single Crochet (not double crochets). Make 14 (16) decreases, which will result in 14 (16) stitches when you’ve completed the round. Finish with a slip stitch in the first stitch of the round. Do not cut the yarn, continue directly into the ribbing.
If you’re unsure how to do a decrease or slip stitch, you can check out the video below!
Ribbing
Now make 4 chain stitches to start and make a ribbing exactly the same way as on the bottom edge of the sweater.
Repeat the same steps for the left sleeve. Keep in mind to start a bit more towards the back side of the armhole so that the seam is as hidden as possible. You may need to adjust the number of stitches you pick up before you reach stitch 1 from the “raglan round,” which is perfectly fine. It is important to always follow the pattern of 5 (6) stitches + 1 increase on the first round. The pattern repeats 4 times in total to reach 28 (32) stitches when the round is finished.
Step 7 – Hood
Round 1: Make a loop on the crochet hook and pick it up at the corner of the neckline on the front piece with the buttonholes (right side). Make two double crochet stitches along the button band edge, then continue with one double crochet stitch in each stitch around the neckline.
On the edge with the buttons, make one double crochet. You should now be at the other corner and should have 49 (53) double crochet stitches in the round.
Round 2
In this round, you will make 5 increases (two double crochet stitches in the same stitch). Make 7 (8) double crochet stitches, then one increase (two double crochet stitches in the same stitch). Repeat this five times. You should then have 9 (8) stitches left in the round. Crochet these 9 (8) double crochet stitches. You should now have a total of 54 (58) double crochet stitches.
Round 3
Make 8 (9) double crochet stitches, then one increase (two double crochet stitches in the same stitch). Repeat this five times. Crochet the remaining 9 (8) stitches. You should now have a total of 59 (63) double crochet stitches.
Rounds 4–8
Crochet 59 (63) double crochet stitches for a total of five rounds.
Round 9
Make 15 (17) double crochet stitches. Make (three double crochet stitches followed by one decrease) a total of six times. Crochet the remaining 14 (16) stitches. You should now have a total of 53 (57) double crochet stitches.
Round 10
Make 14 (16) double crochet stitches. Make (two double crochet stitches followed by one decrease) a total of six times. Crochet the remaining 15 (17) stitches. You should now have a total of 47 (51) double crochet stitches.
Round 11
Make 15 (17) double crochet stitches. Make (one double crochet stitch followed by one decrease) a total of six times. Crochet the remaining 14 (16) stitches. You should now have a total of 41 (45) double crochet stitches.
Round 12
Make 15 (17) double crochet stitches. Make six decreases. Crochet the remaining 14 (16) stitches. You should now have a total of 35 (39) double crochet stitches.
Leave a long tail and cut the yarn. Now place the edges together and sew the hood closed using the tail. Thread the yarn through the top loops of the stitches, as shown in the image. Secure the yarn and cut the end.
Step 8 – Front Edge of the Hood
Fold the front edge of the hood, narrow at the bottom and wider at the top of the head, about 1 (2) cm. Sew the edge in place with a long piece of yarn. Then make another fold and sew it down in the same way. Fold as much as you wish; in the picture, the fold is 4 cm at its widest.
Step 9 – Ears (Make 2)
Make 6 single crochets in a magic ring. Join with a slip stitch in the first stitch to close the ring. A tip is to crochet with the starting yarn tail in the next round to avoid having to weave it in later.
Chain 3, this counts as the first double crochet of the round. Make another double crochet in the same stitch.
Then, make 4 more increases in double crochet, meaning 2 double crochets in the same stitch. Do not crochet the 6th stitch.
You should now have 10 double crochets in total in the round.
Finish the Ears:
Leave a long yarn tail to sew the ear onto the hood and cut off the excess yarn.
Sew the ears onto the hood where you prefer. In the image, the ears are sewn between rounds 9-11.
The sweater is now complete! Great job ☺ Feel free to share your pictures!
Abbreviations:
MR = magic ring
st = stitch
Ch = chain stitch
sl st = slip stitch
sc = single crochet
hdc = half double crochet
dc = double crochet
blo = back loop only
(…) = indicates the number of stitches in the current row
*...* = Everything within ... is repeated the specified number of times
[...] = Everything within [...] is crocheted in the same stitch
We’re going to crochet a cozy baby cardigan! If you need help along the way, check out the easier version of this pattern.
INFO
In the pattern, the smaller size will be listed first, with the larger size in parentheses. For example: "Chain 39 (51) stitches." Here, 39 is for size 62/68, and 51 is for size 74/80.
This sweater is crocheted in rows/rounds with double crochets (stolpar) and a stacked single crochet as the first stitch of each row. After completing one row, turn the piece and crochet the next row of double crochets over the previous one. Instead of using a turning chain (air stitch) to turn the work, use a stacked single crochet. Watch the video below to see how it's done. If the pattern doesn't specify otherwise, the first double crochet in each row should always be a stacked single crochet!
Watch out for the last double crochet before turning!
It's easy to miss the last double crochet on each row. If you skip it, the pieces won’t be straight. See the images below. The first image shows when a stitch is missed, and the second image shows how it should look.
What is a corner?
This sweater is crocheted with raglan increases, which create the line between the neck and the armpit. To make a raglan increase, you need to add one double crochet on each side of the line. This will be referred to as a "corner" in the pattern to simplify the text and make it easier to read.Here’s how you make a corner:
- Once you've made a double crochet in the last stitch of the row (and thus reached the chain for the corner from the row below), make a double crochet in the large space the corner creates.
- Then, make a chain stitch, and crochet another double crochet into the same large space.
Now, you’ve made a corner above the corner from the previous row. Note! It’s easy to accidentally miss the last double crochet before the corner, so be careful to make sure all the double crochets are included. See the first picture below for what it should look like.
Step 1
Ch 39 (51).
Round 1: Sk 1st st, start in 2nd st. 6 (8) dc, with the 1st st being a stacked sc, [1 dc, 1 ch, 1 dc], 5 (7) dc, [1 dc, 1 ch, 1 dc], 12 (16) dc, [1 dc, 1 ch, 1 dc],
5 (7) dc, *1 dc, [1 dc, 1 ch, 1 dc], 6 (8) dc.
Round 2: 7 (9) dc, [1 dc, 1 ch, 1 dc] in ch sp, 7 (9) dc, [1 dc, 1 ch, 1 dc] in ch sp, 14 (18) dc, [1 dc, 1 ch, 1 dc] in ch sp, 7 (9) dc, [1 dc, 1 ch, 1 dc] in ch sp, 7 (9) dc.
Round 3: 8 (10) dc, [1 dc, 1 ch, 1 dc] in ch sp, 9 (11) dc, [1 dc, 1 ch, 1 dc] in ch sp, 16 (20) dc, [1 dc, 1 ch, 1 dc] in ch sp, 9 (11) dc, [1 dc, 1 ch, 1 dc] in ch sp, 8 (10) dc.
Round 4-7: Continue in the same manner for a total of 7 rounds. Dc in each st, except in ch spaces where you do 2 dc with 1 ch in between.
Now the yoke and all raglan increases are complete.
Step 2
Round 8: 13 (15) dc. Fold the piece in half so the corners align (see picture). Skip chain space + 19 (21) dc + ch, 26 (30) dc, skip chain space + 19 (21) dc + ch,
13 (15) dc. (52 (60) sts total).
Round 9-15 (17): 52 (60) dc for 7 (9) rnds or to the desired length. Remember to include the ribbing at the bottom of the sweater, which is approx. 2 cm (or as wide as you prefer).
Step 3
When you're happy with the length of the cardigan, it's time for the ribbing. In the picture, the ribbing is 3 sts wide, but if you want it narrower or thicker, adjust the number of sts you start with.
Step 1: Ch 4, turn.
Step 2: 3 sc, 2 sl st in edge. Turn.
Step 3: Skip 2 sl st, 3 sl st in blo. Ch 1, turn.
Step 4: 3 sc in blo, 2 sl st in edge. Turn.
Repeat Step 3 and Step 4 around the entire edge.
For the final round. Fasten off and cut the yarn.
Step 4
Now, crochet along the vertical edges in the middle of the sweater. The edge for the buttons will be made one way, and the edge for the buttonholes will be made another way.
Button edge:
Start at the top of the left front piece at the neck. Make a loop and pull it through at the top corner. Ch 2, make hdc (half double crochet) along the entire edge, including the ribbing. Try to distribute the hdc evenly along the edge so it’s smooth and straight. You should aim for around 3 hdc over two rows of dc (double crochet) on the front piece. The exact number of stitches doesn’t matter.
Place the buttons you want on the sweater and decide where to position them. Place markers at the same height as the buttons on both front pieces.
Buttonhole edge:
Start from the bottom, at the ribbed edge. Do the same as the button edge, but use sc (single crochet) instead of hdc. Again, the number of stitches doesn’t matter. When you reach the top, ch 2 and turn.
Now, crochet hdc all the way back to the bottom. At each marker, skip one st and ch 1 instead. Continue in this way along the entire edge. Cut the yarn and fasten the end.
Now, sew the buttons onto the markers using an appropriate thickness of yarn and needle. Make sure the button placement matches the buttonholes you just made. Tie 3 firm knots and secure the threads.
Step 5 – Sleeves
Now, crochet the sleeves by continuing on the double crochets that you skipped over at the last raglan increase. You should have 19 (21) dc between the ch stitches in the corners. There will be a hole between dc 1 and dc 19 (21) in the armpit where you need to pick up 5 (7) new dc to prevent a hole. At the beginning and end of each round, there will be a visible line (like a seam), so avoid starting on the top where it will be visible. Start at the armpit, a little towards the back. You won’t have the stitches from dc 1–19 (21) to crochet into, so you will need to pick up a stitch somewhere that works. It’s a bit easier to start with the right sleeve.
Turn the sweater upside down with the back side facing up. Make a loop on the hook and pick it up at a stitch that fits in the armpit.
Round 1: *5 (6) dc, inc* x4. (28 (32))
As always, start with a stacked slip stitch. Do NOT use a slip stitch to close the round. Remember, you need to pick up a total of 5 (7) stitches in the armpit.
Round 2: *6 (7) dc, inc* x4. (32 (36))
Rounds 3–5: 32 (36) dc for a total of 3 rounds.
Round 6: *6 (7) dc, decrease* x4 times. (28 (32))
Round 7: 28 (32) dc.
Round 8: Dec x14 (16) with sc (not dc). (14 (16))
Don’t cut the yarn but continue directly with the ribbing.
Ribbing
Now, chain 4 ch and make a ribbed edge exactly the same way as the bottom edge of the sweater. Repeat the same steps for the left sleeve. Make sure to start a little towards the back side in the armpit, so the seam is as inconspicuous as possible. You may need to adjust the number of dc you pick up before reaching the first dc from the "raglan round," which is perfectly fine.
It’s important to always follow the pattern 5 (6) dc, increase for the first round, repeating it 4 times to reach 28 (32) dc when the round is complete.
Step 6 - Hood
Round 1:
Make a loop on your hook and pick it up at the corner of the neck/collar line on the front piece with the buttonholes (right side). Make 2 dc along the buttonhole edge, and continue with 1 dc in each stitch around the whole round. For the button edge, make 1 dc. You should now be at the second corner and should have 49 (53) dc in total for the round.
Round 2: *7 (8) dc, inc* x5, 9 (8) dc. (54 (58))
Round 3: *8 (9) dc, inc* x5, 9 (8) dc. (59 (63))
Rounds 4-8: 59 (63) dc for a total of 5 rounds.
Round 9: 15 (17) dc, *3 dc, dec* x6, 14 (16) dc. (53 (57))
Round 10: 14 (16) dc, *2 dc, dec* x6, 15 (17) dc. (47 (51))
Round 11: 15 (17) dc, *1 dc, dec* x6, 14 (16) dc. (41 (45))
Round 12: 14 (16) dc, decrease x6, 15 (17) dc. (35 (49))
Save a long thread and cut off. Now, lay the edges against each other and sew the hood together using the yarn. Thread the yarn between the top loops of the stitches, see the picture. Secure the yarn and cut off.
Step 7 - Front Edge of the Hood
Make a fold on the front edge, narrower at the bottom and wider at the top of the head, approximately 1 (2) cm. Sew the edge in place using a long thread. Then, make another fold and sew it in place in the same way. Fold as much as you desire; in the picture, the fold is 4 cm at its widest.
Step 8 - Ears (2 pieces)
Round 1: 6 sc in a MR, sl st in the first st.
Round 2: [3 ch, 1 dc], inc with dc x4. Skip the last st of the round (10).
Leave a long thread to attach the ear with and cut off. Sew the ears onto the hood where you prefer. In the picture, they are sewn between rounds 9-11.
The sweater is now finished! Great job! 😊
The rights to this pattern belong to MYO Make Your Own. The pattern or its pictures may not be copied, shared or resold either in parts or in its entirety, but you may sell items you have crocheted from this pattern. If you have questions about the pattern, contact MYO at hello@makeyourown.se.
%20(1).jpg)

Share your creations with us
Thank you!
Your comment was sent!