
Crochet crib pocket “Viggo”
Crochet a Practical and Pretty Crib Pocket
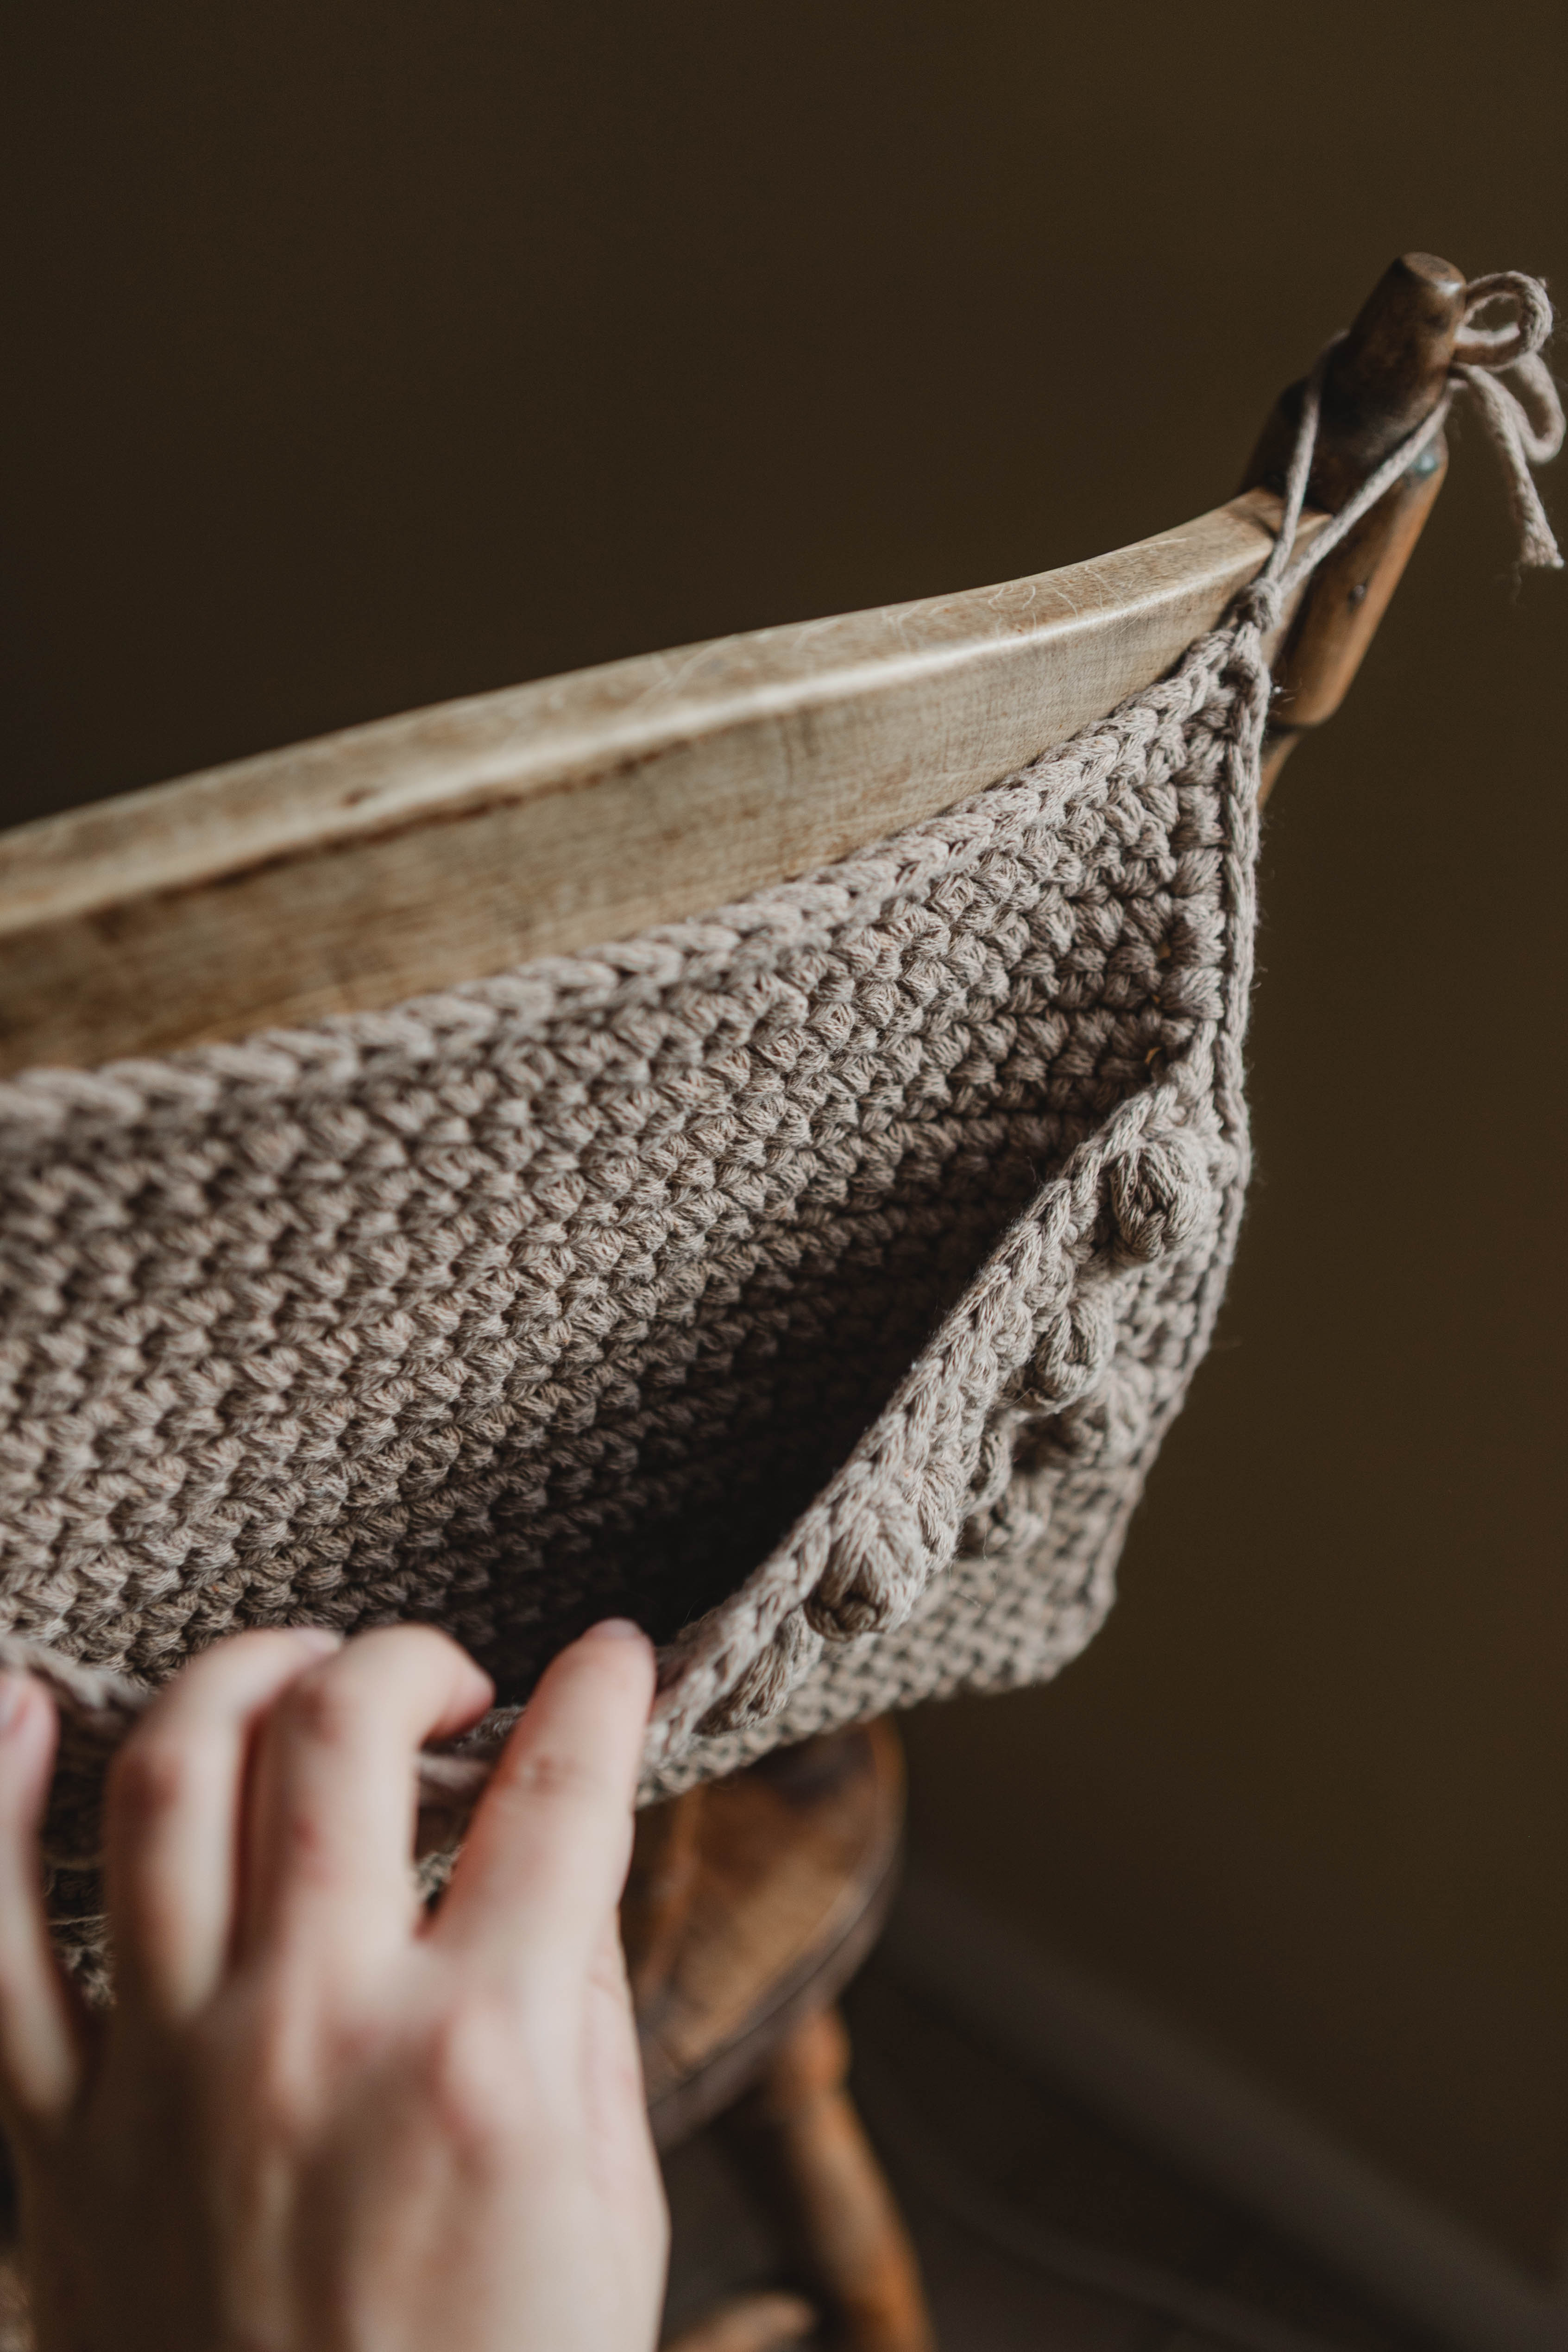
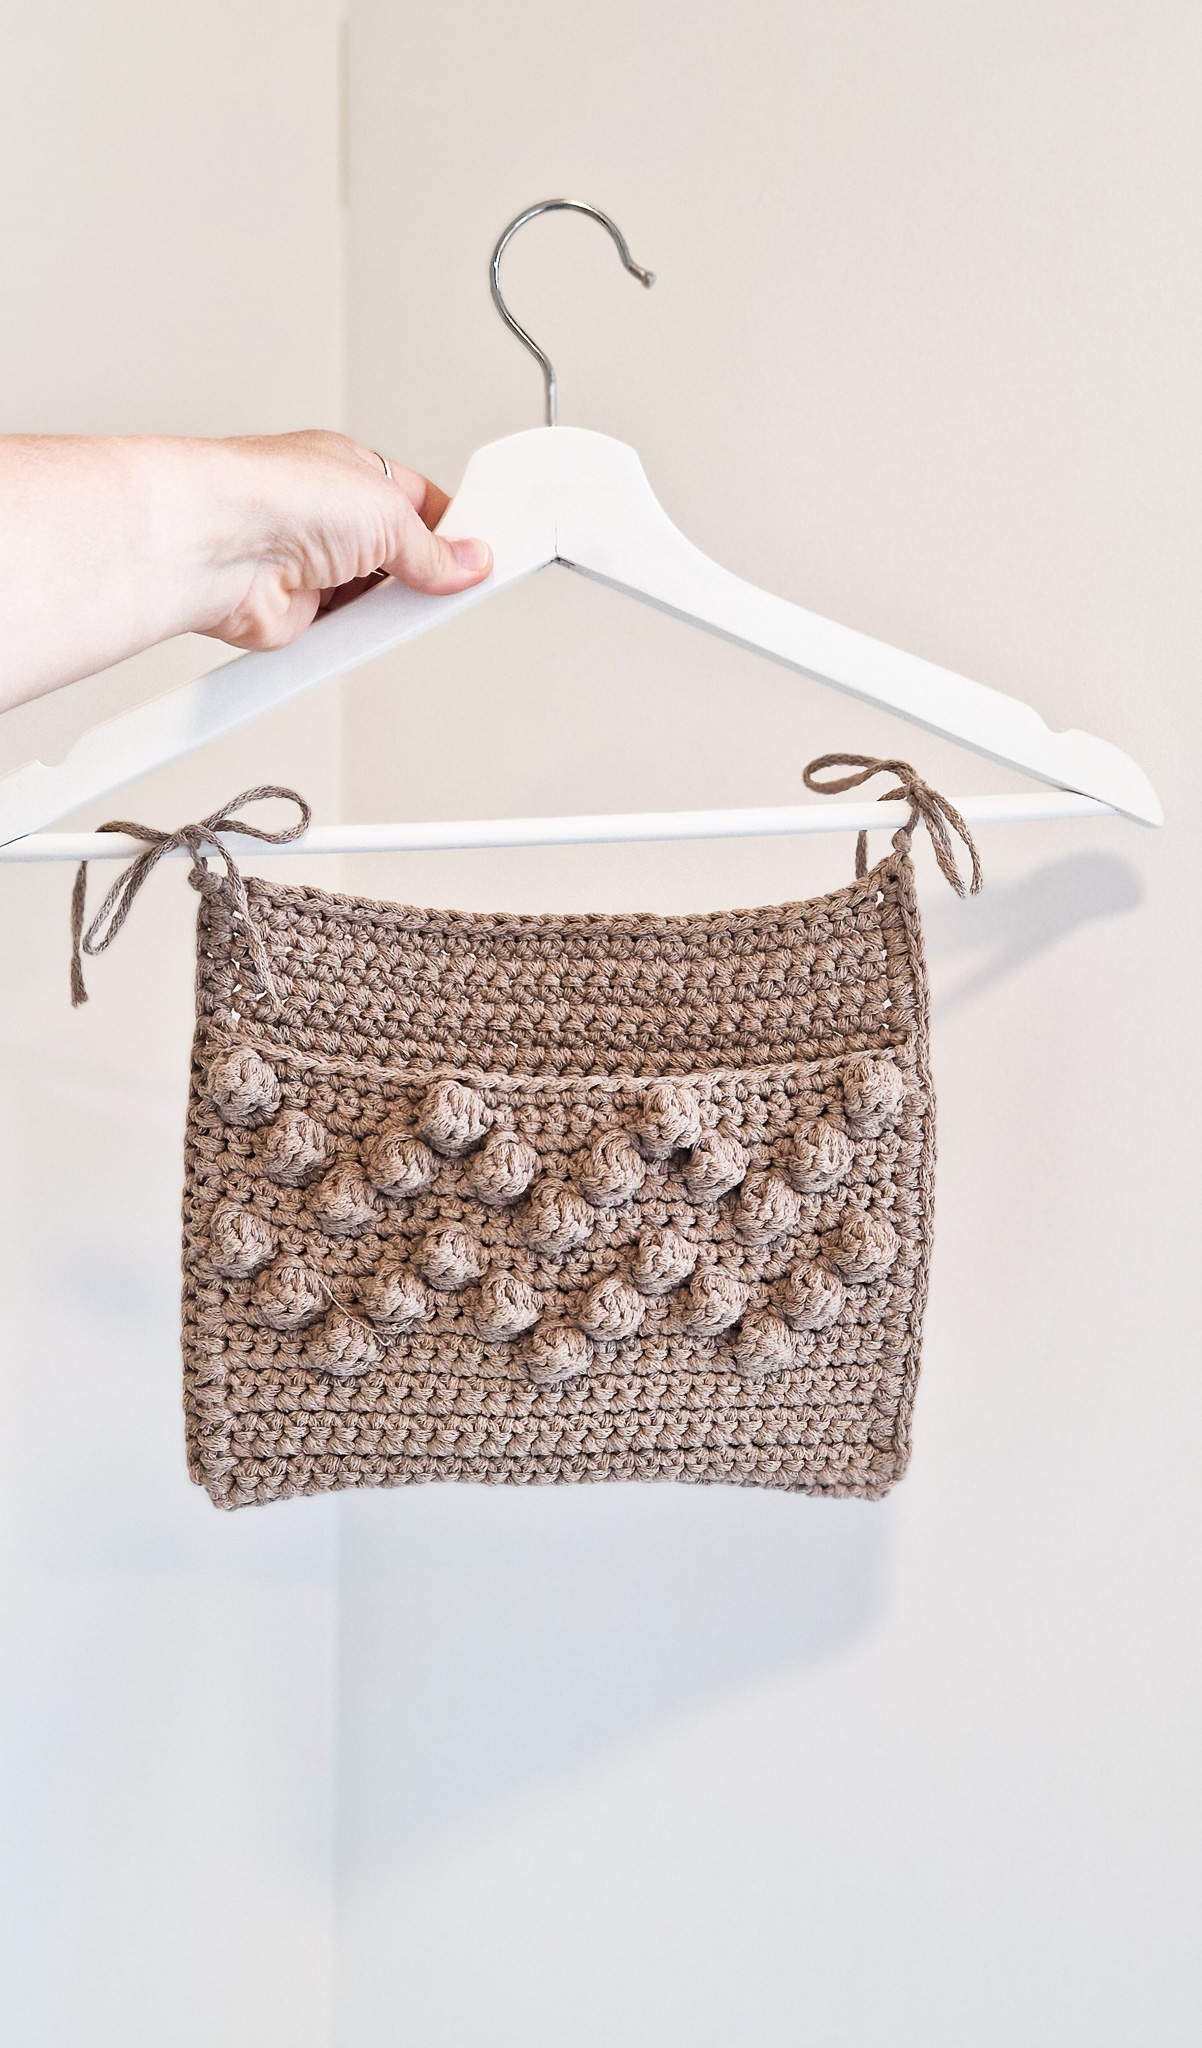
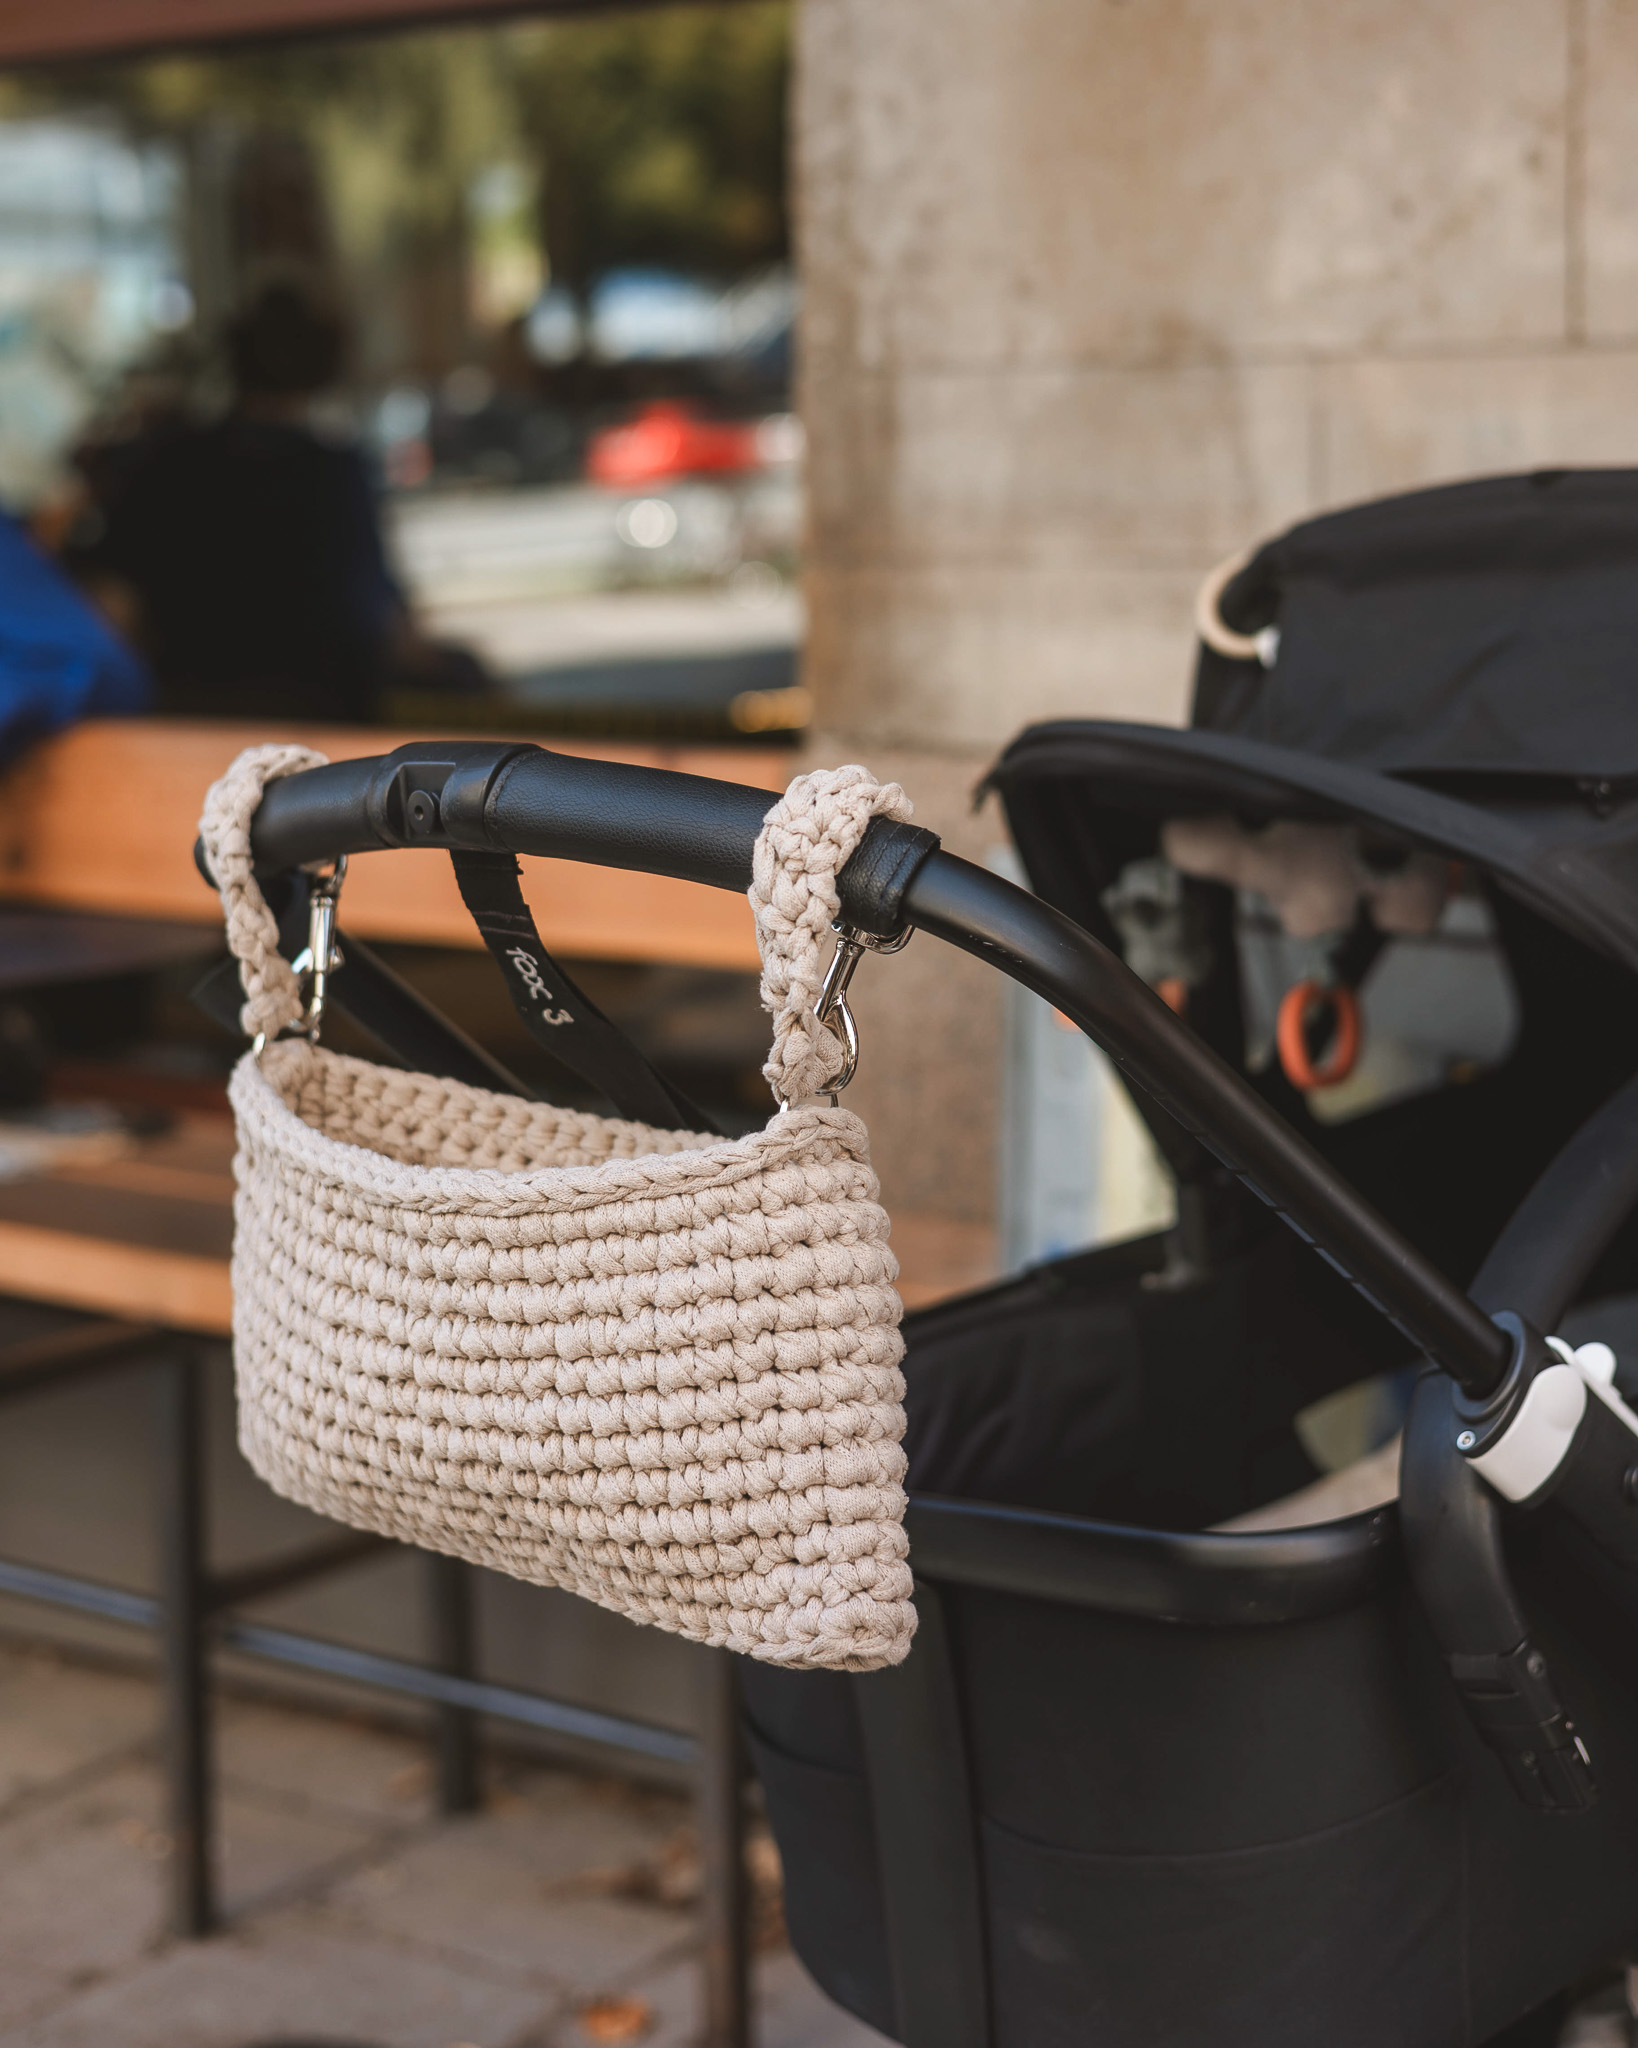
This crocheted crib pocket is both a beautiful and functional addition to the nursery. Perfect for hanging on the crib to store pacifiers, a lovey, diapers, or other small items you want to keep close at hand. The pocket is attached with ties, so you can easily fasten it wherever it fits best. You can also easily adjust the depth of the pocket to suit your needs. A perfect combination of practicality and aesthetics — and a lovely gift for a new parent. You’ll need EKO Nano yarn and a 6 mm crochet hook, then you're ready to start crocheting.
Yarn Consumption: approx. 200g


Here's how to do it
Simple and practical, yet with pretty bubble details. The first part requires a bit of focus to get the bubbles in the right place, but after that the pattern is super easy. The perfect combo. /Lizette

This is what you need:
Here you can directly purchase the material for the product. Please note that the instruction is digital and appears here on the page (no written instruction).


.jpg)
Unleash your creativity
For only 85kr per month you get access to all our 300+ beginner-friendly instructions for crochet, knitting and macrame.
A perfect way to get started with your new hobby!

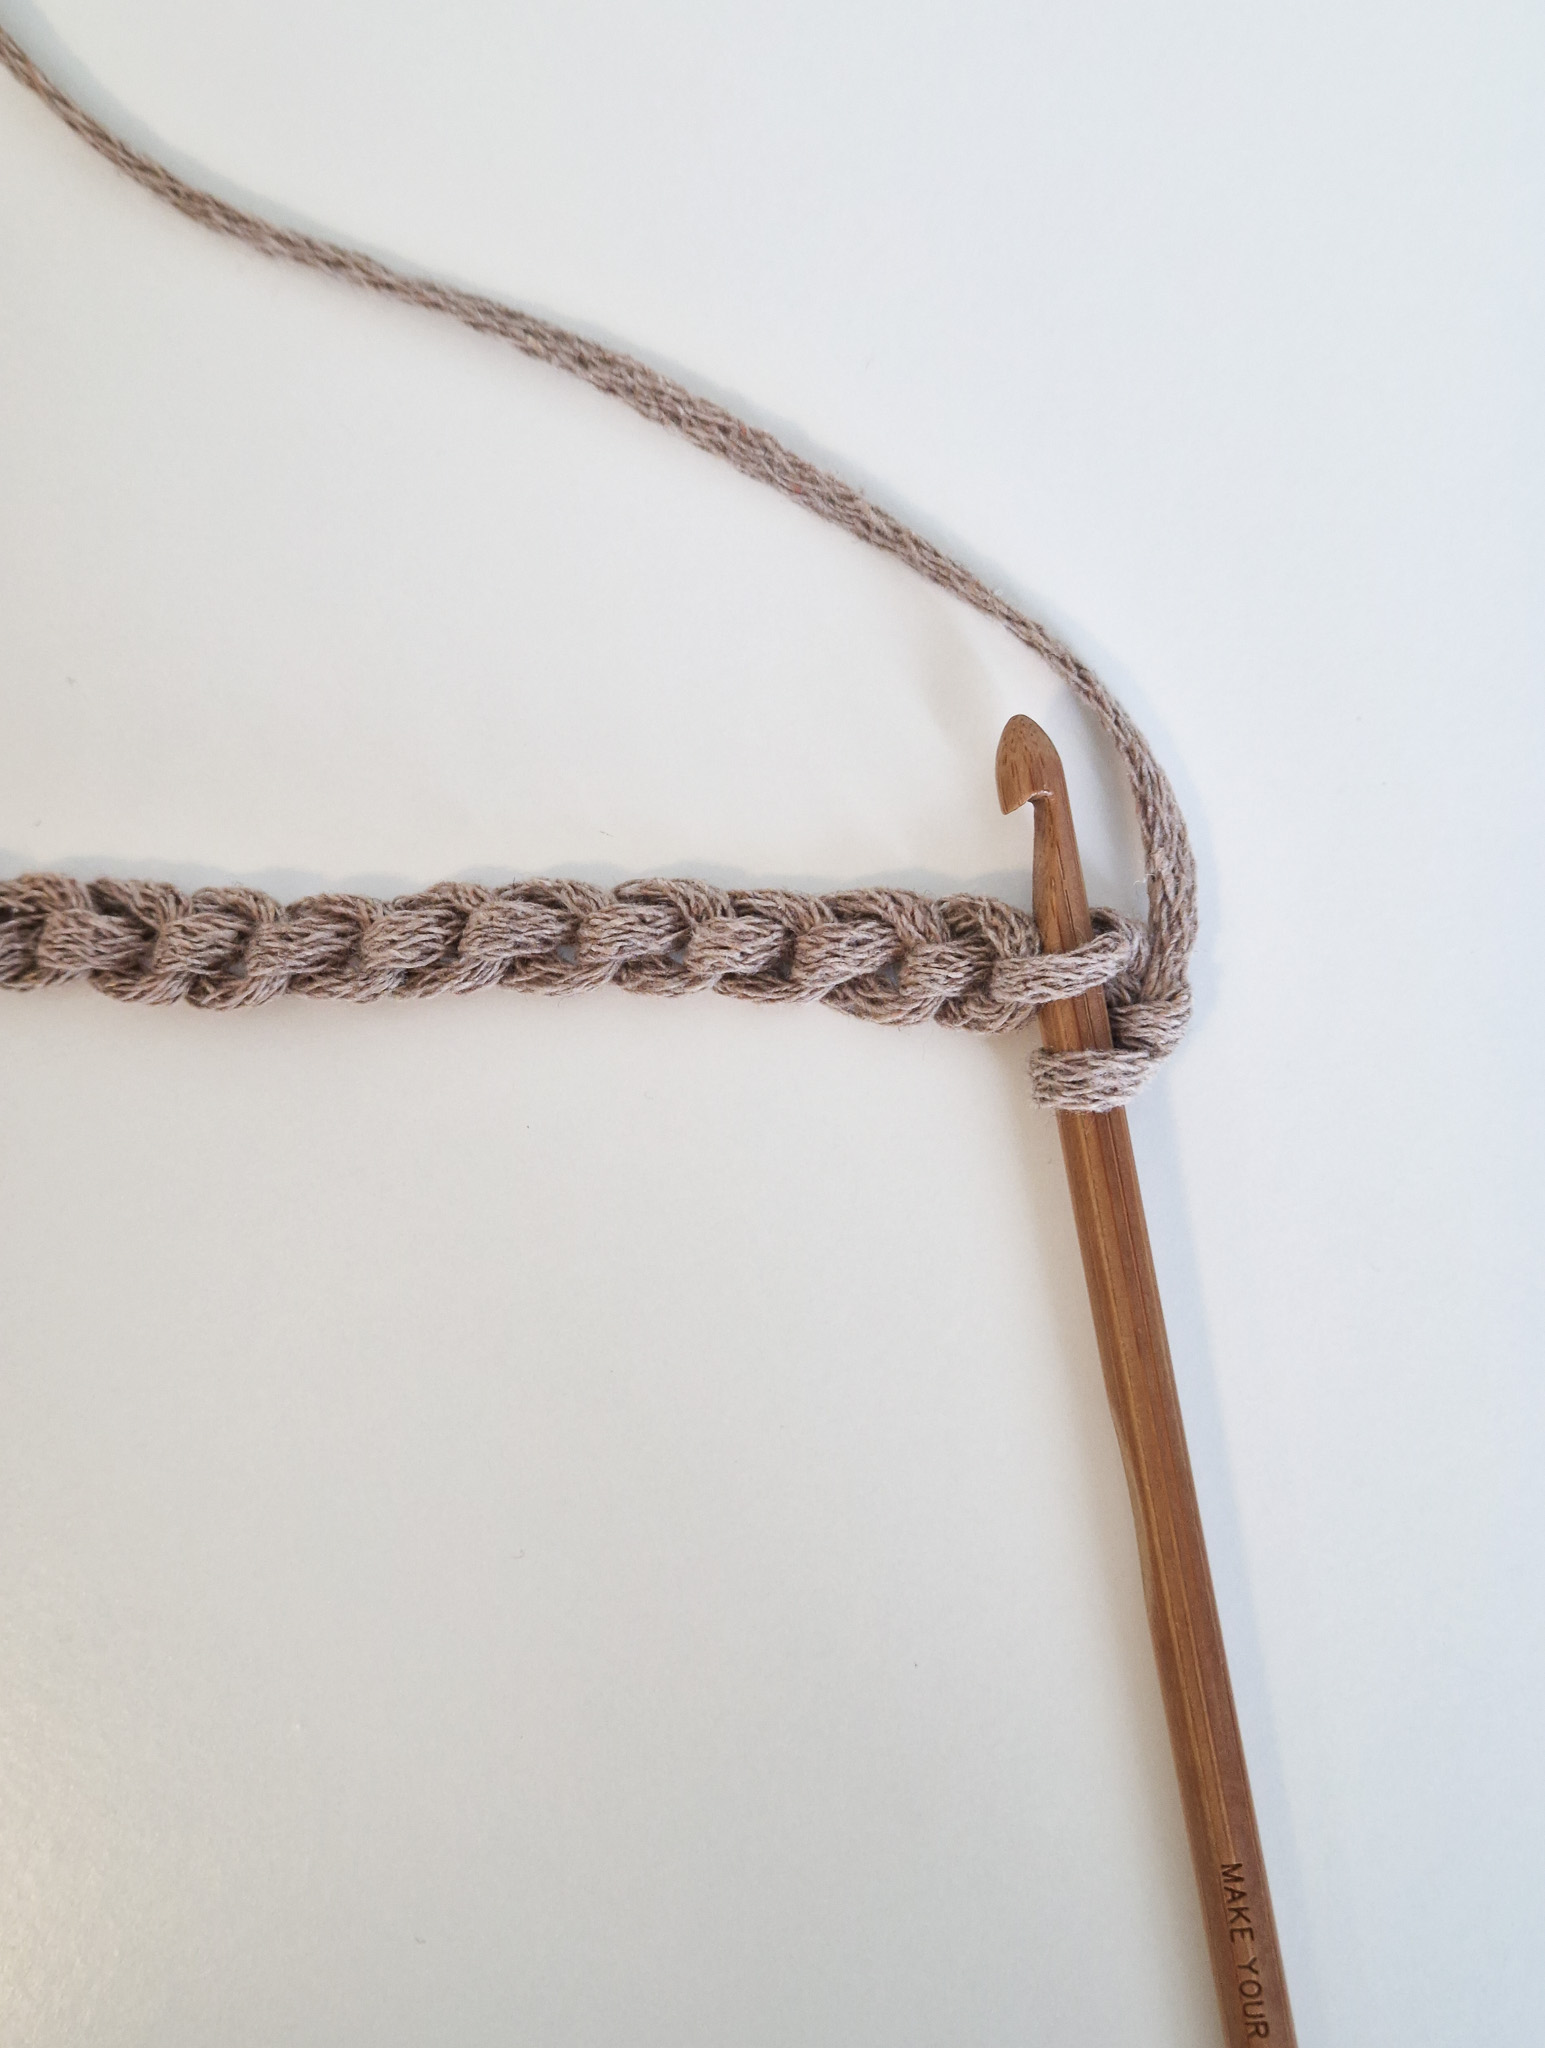
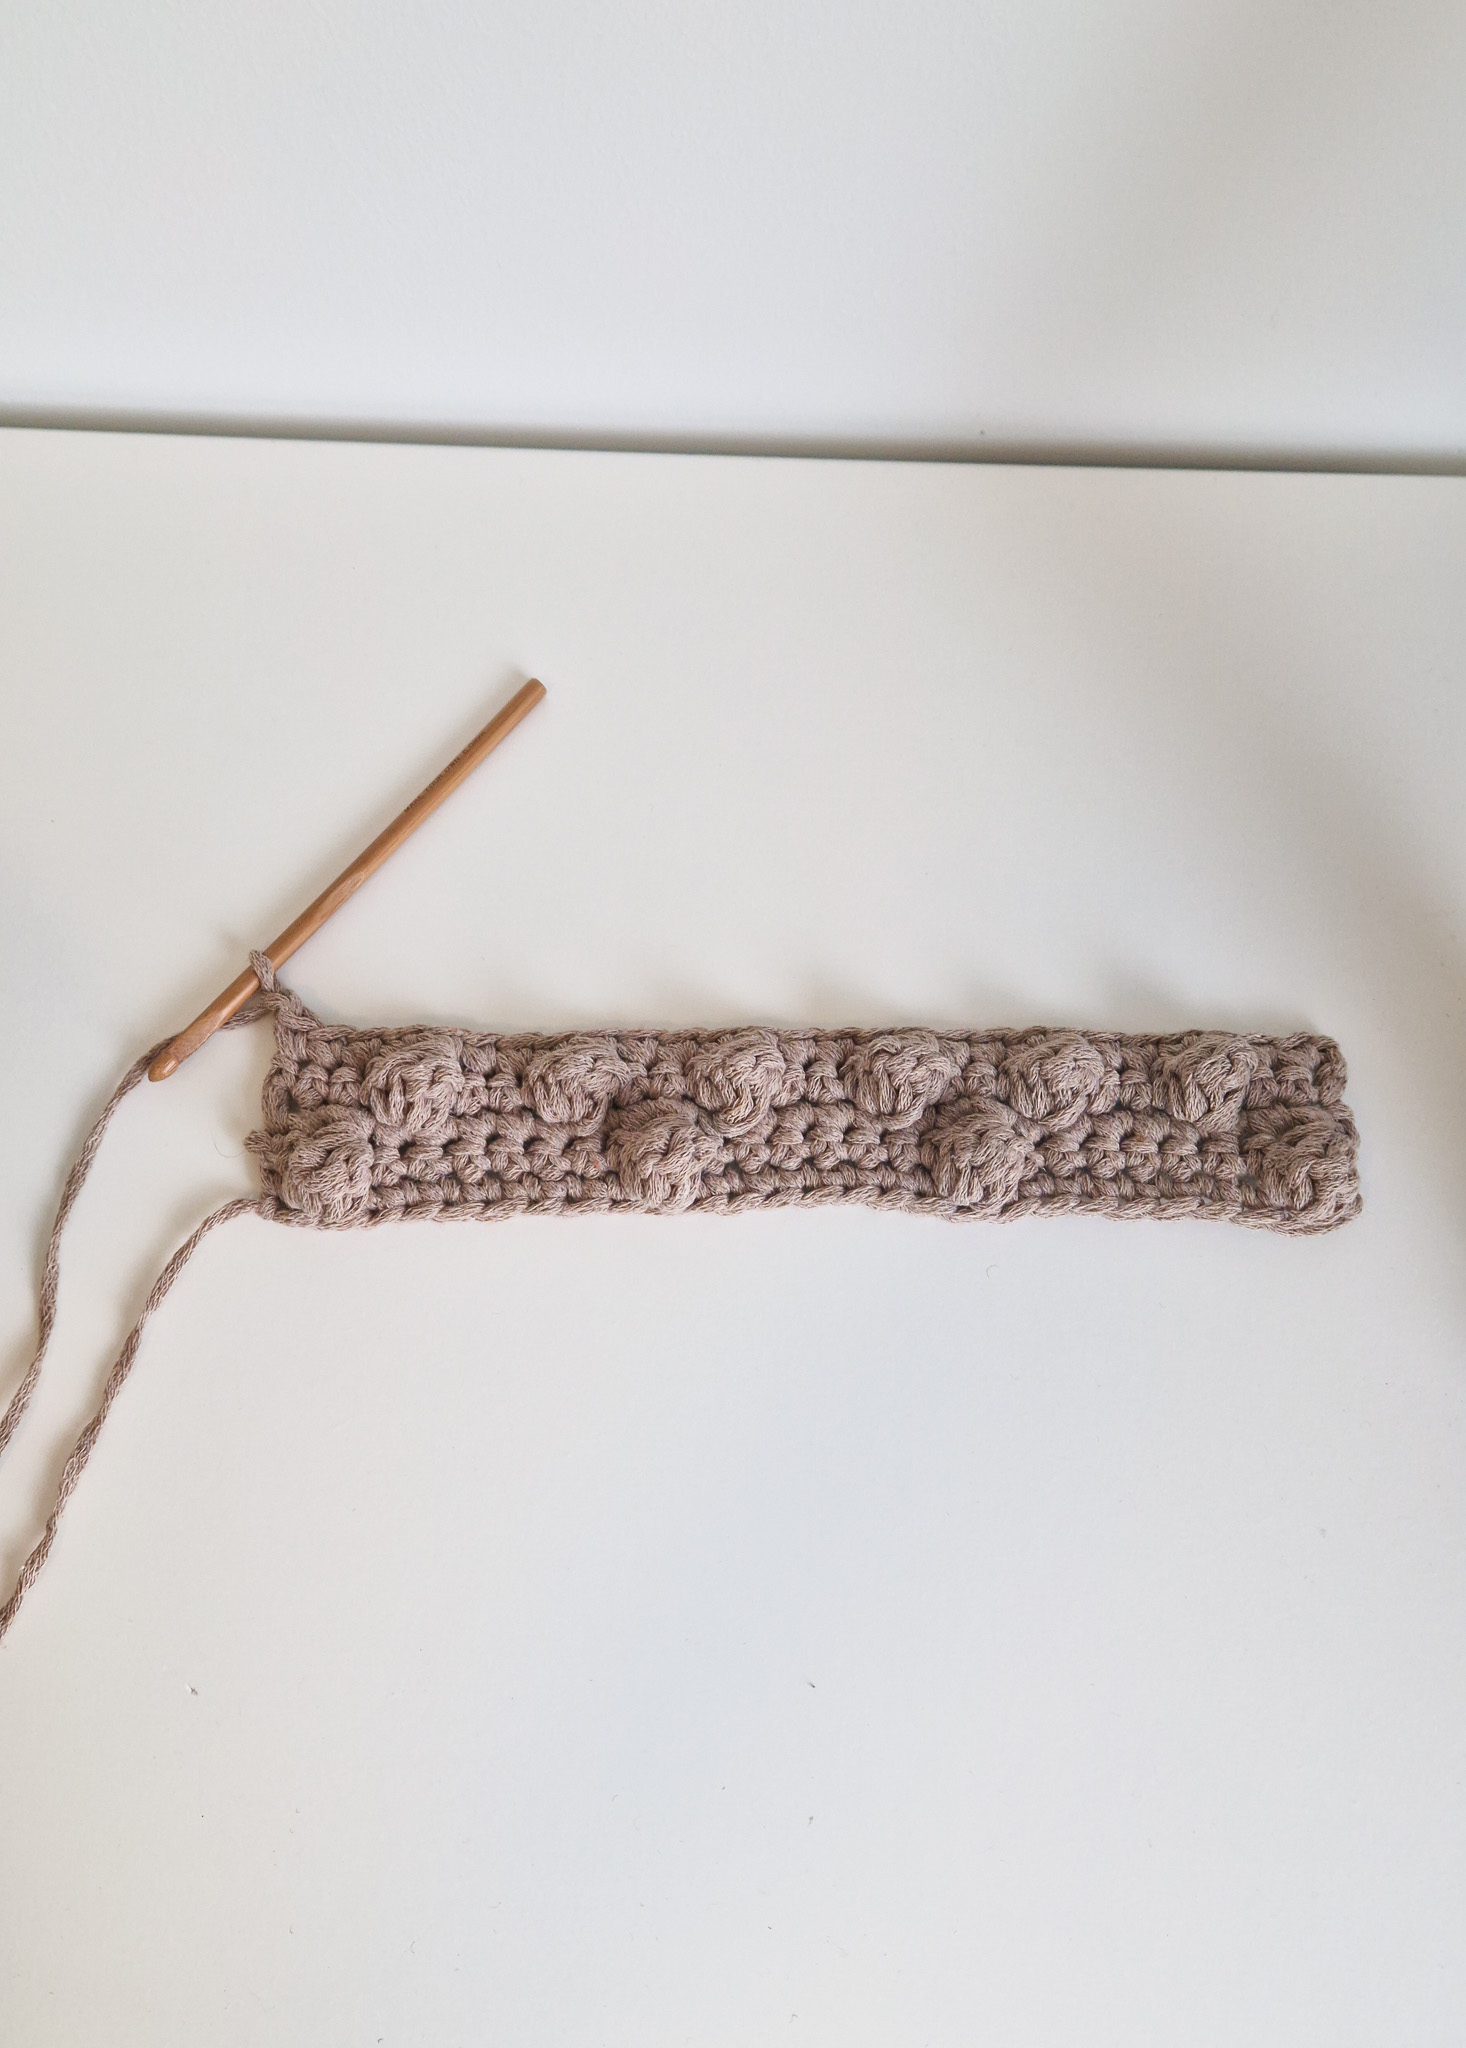
Row 1: Chain 28. If you're unsure how to crochet a chain, see the video below.

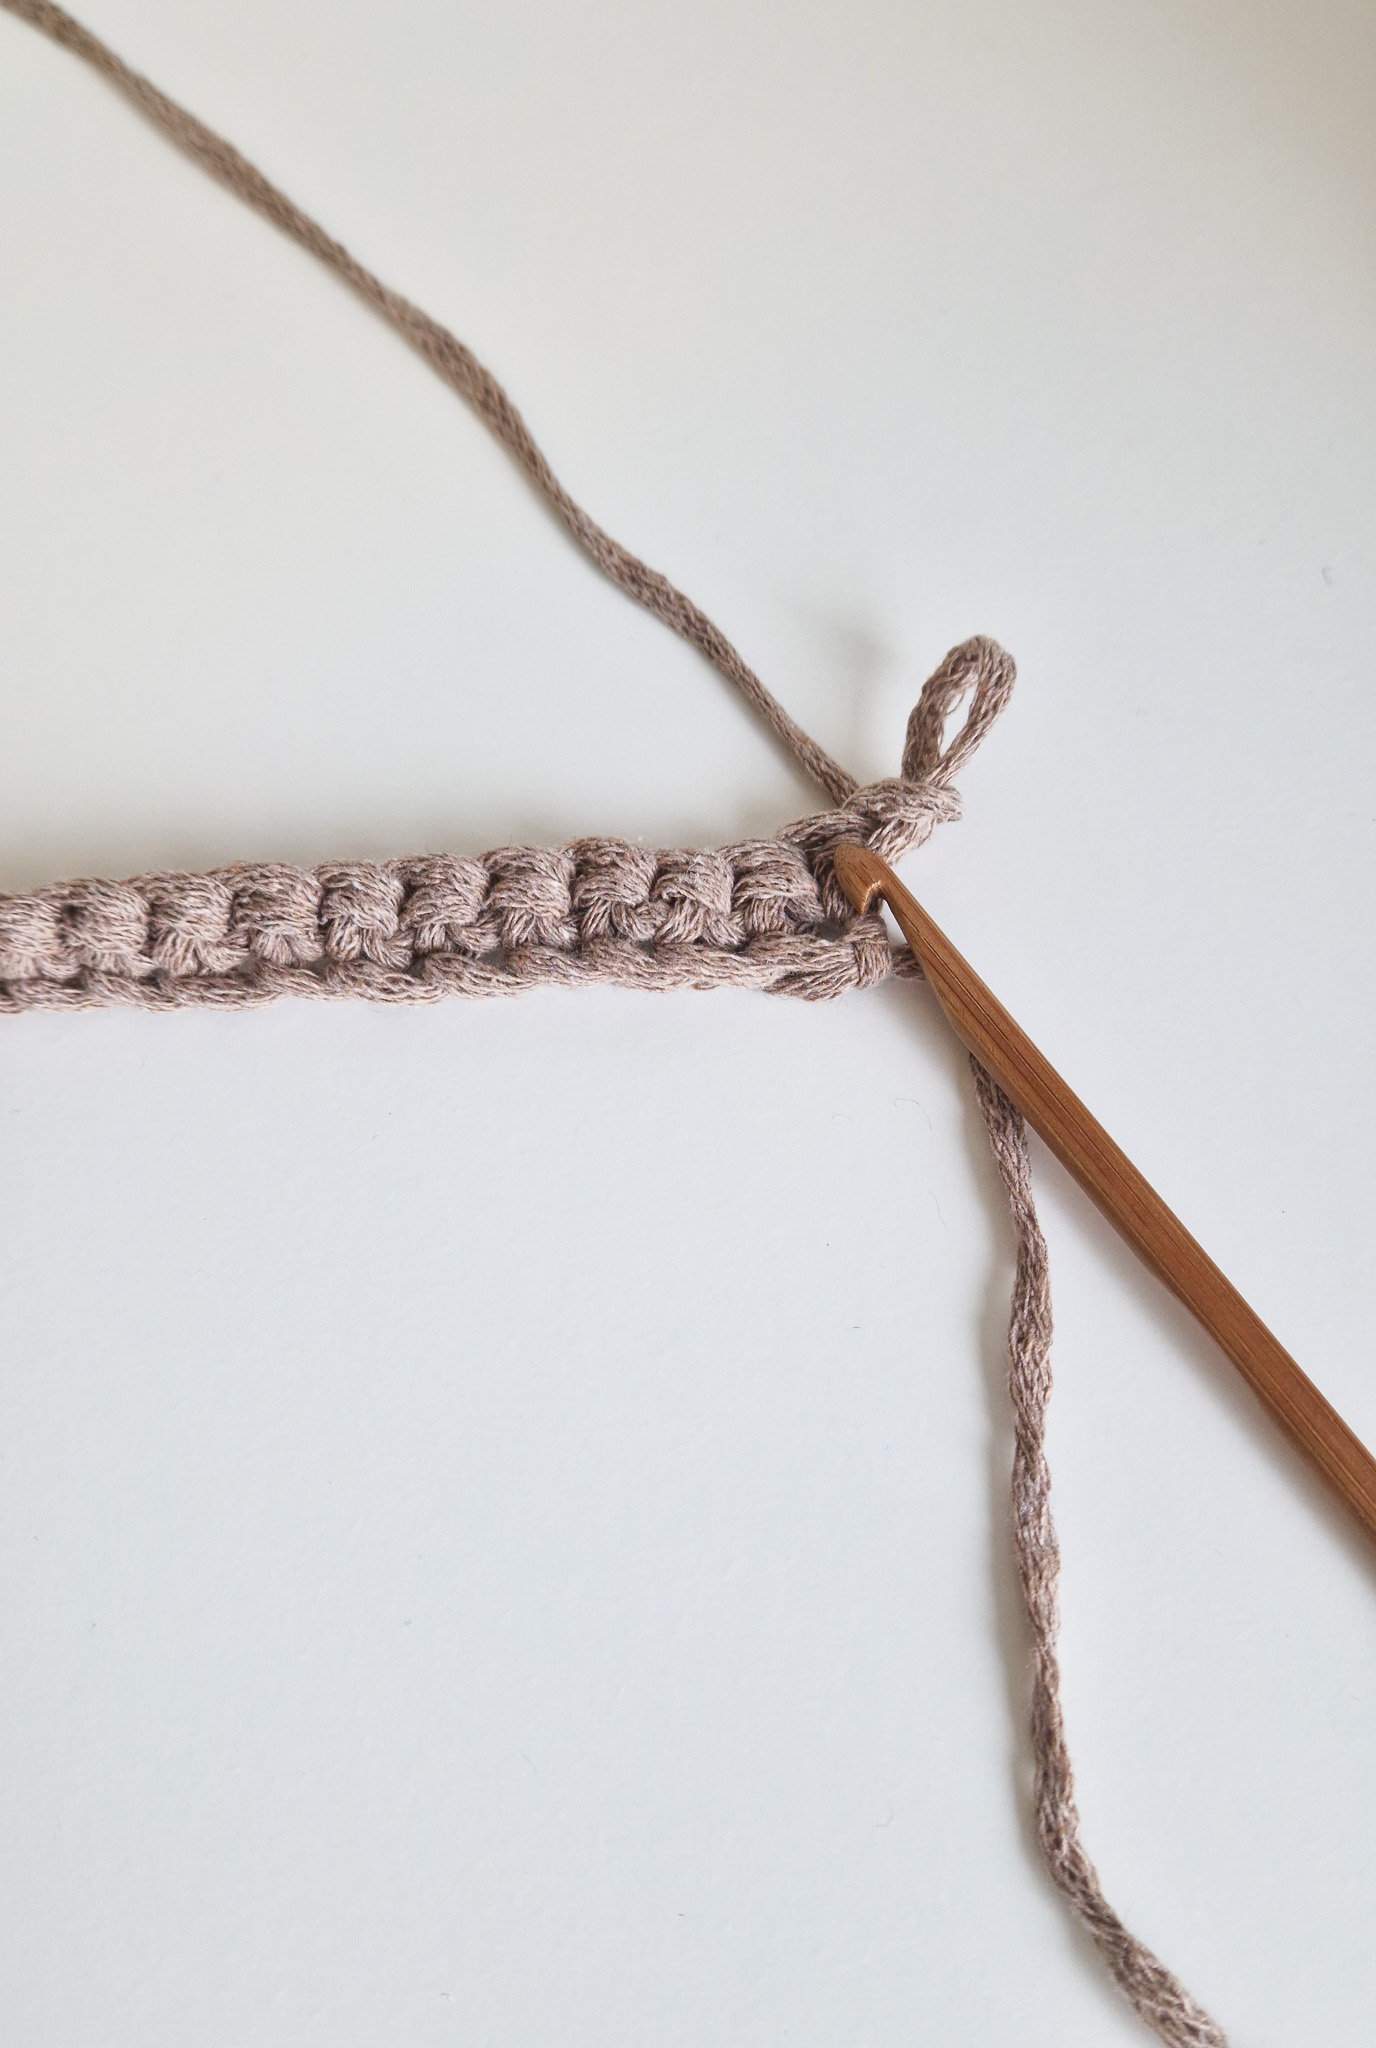
Row 2: Start crocheting into the second chain from your hook. You’ll now crochet into the back bumps of the chain. If you find that difficult, you can crochet into the regular top loop instead — but working into the back bumps gives a neater finish.
Crochet 1 single crochet (sc) into each stitch across. Chain 1 and turn your work. You should now have 27 stitches in total (the chain at the end does not count as a stitch). If you're unsure how to crochet single crochet stitches, see the video below.
Row 3: Crochet 1 single crochet. *Then crochet 1 bobble stitch and 7 single crochets*. Repeat what’s inside the *...* a total of three times. Then crochet 1 bobble stitch and 1 single crochet.
Chain 1 and turn your work.You should have 27 stitches in total. If you're unsure how to crochet a bobble stitch, see below.


Row 4: Crochet 1 single crochet in each stitch across. You should have 27 stitches in total.
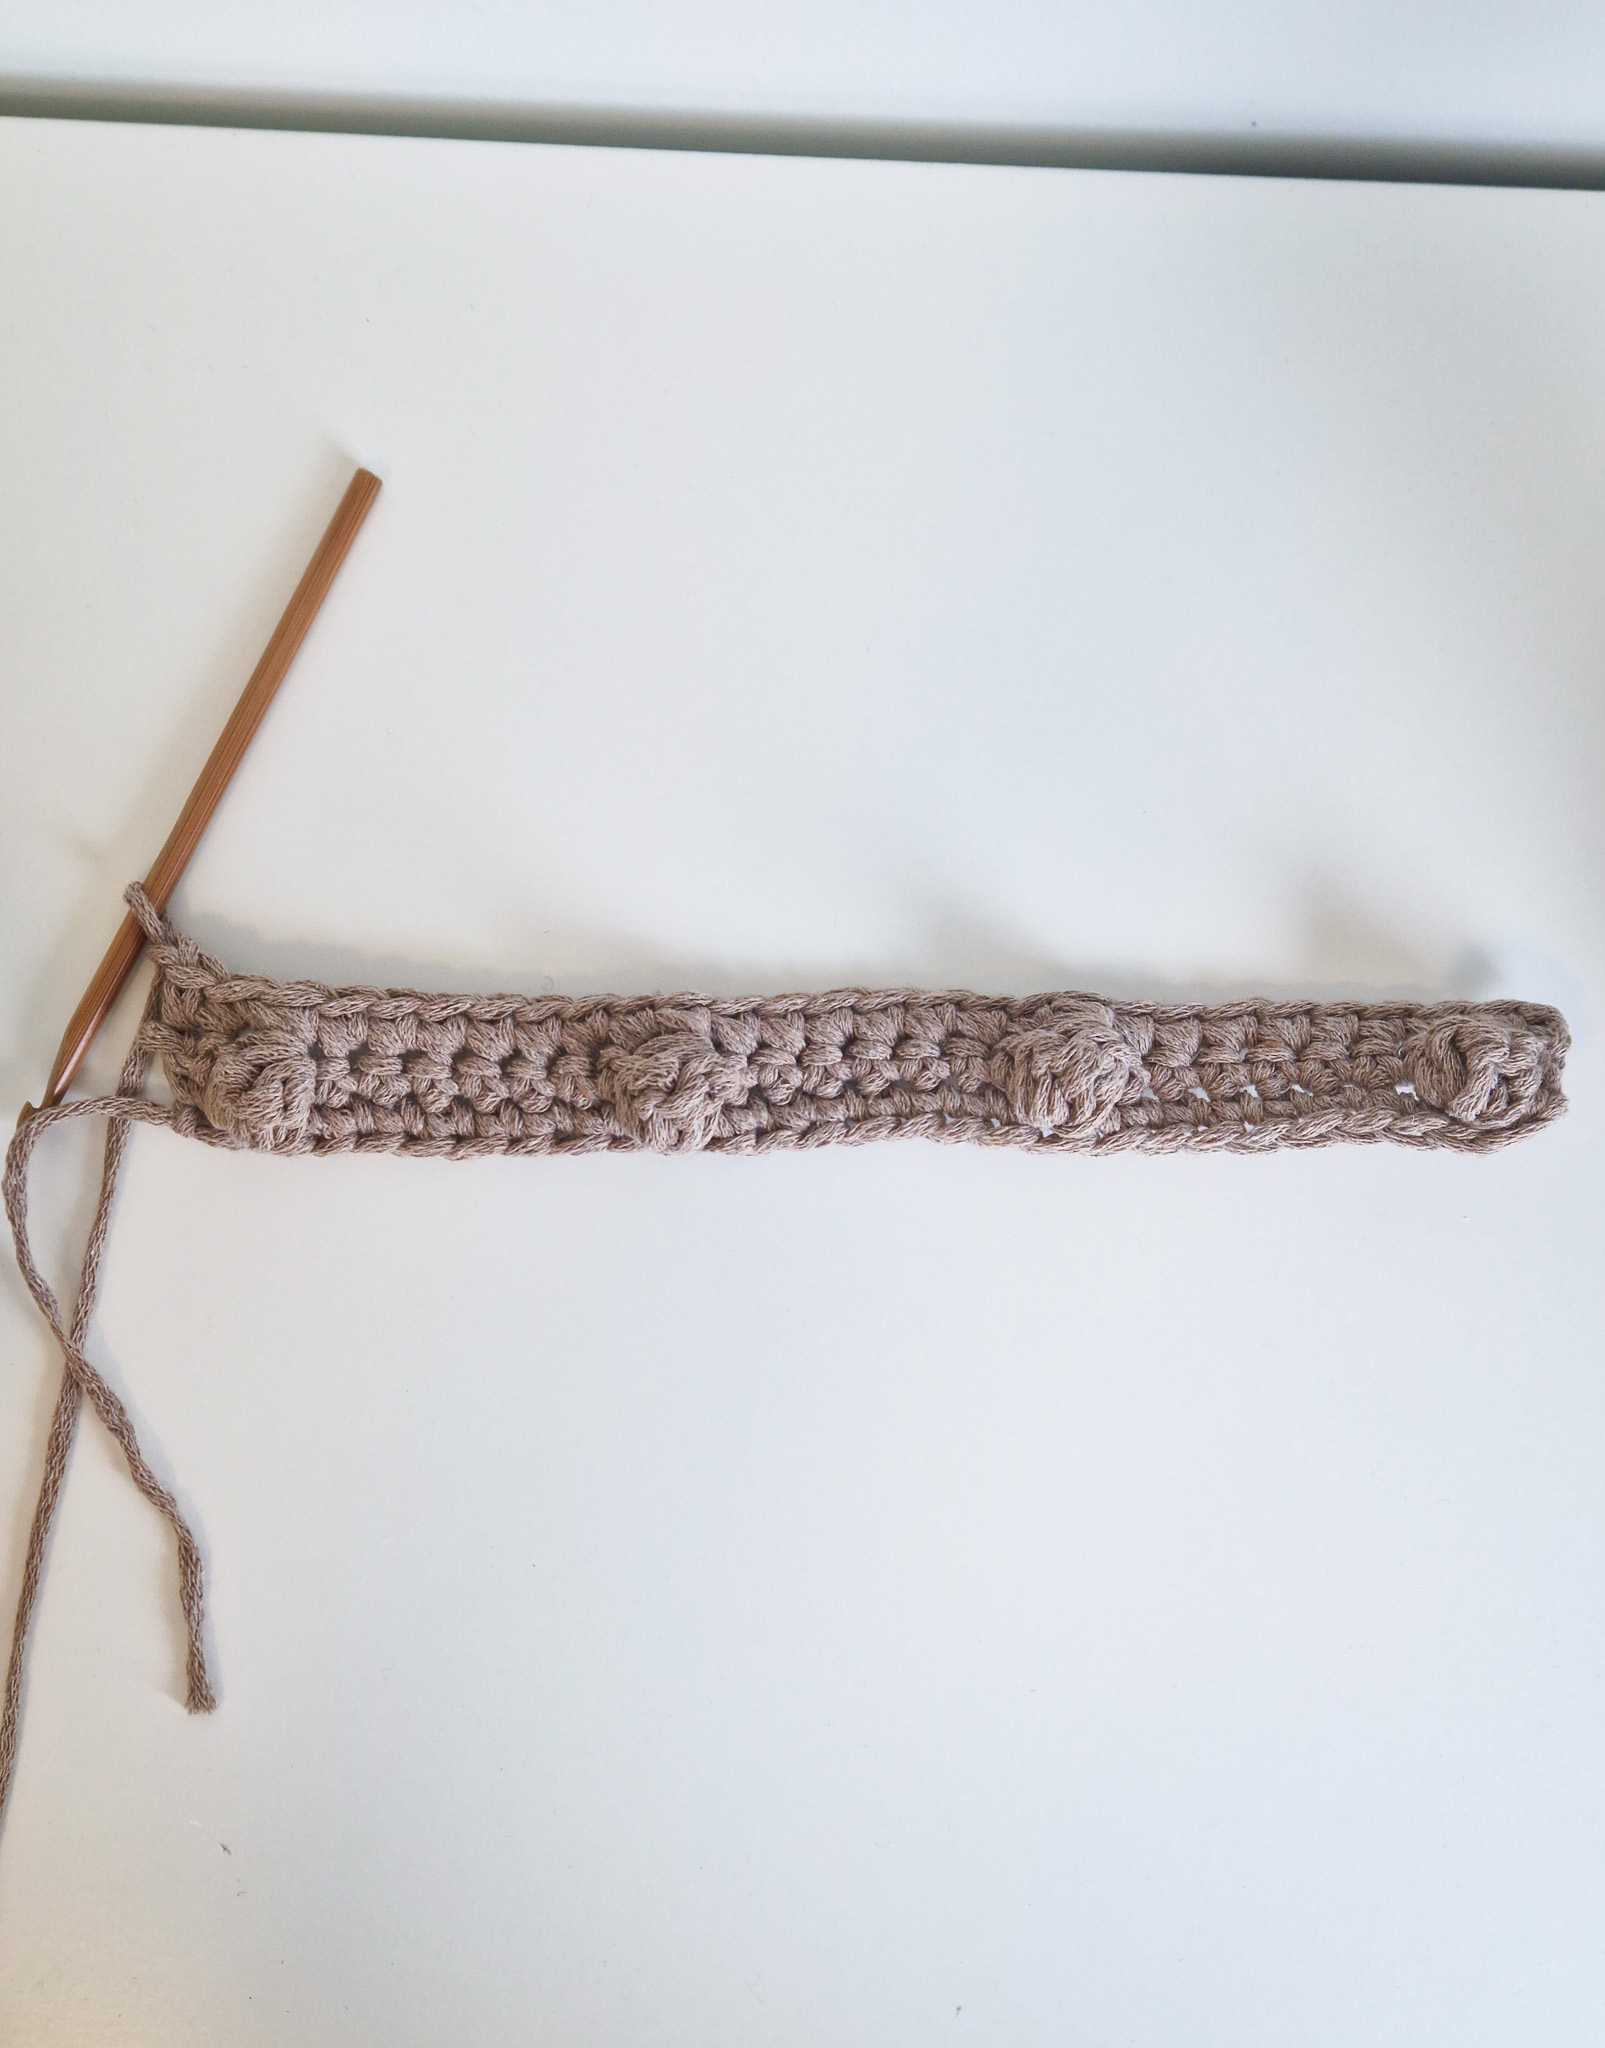
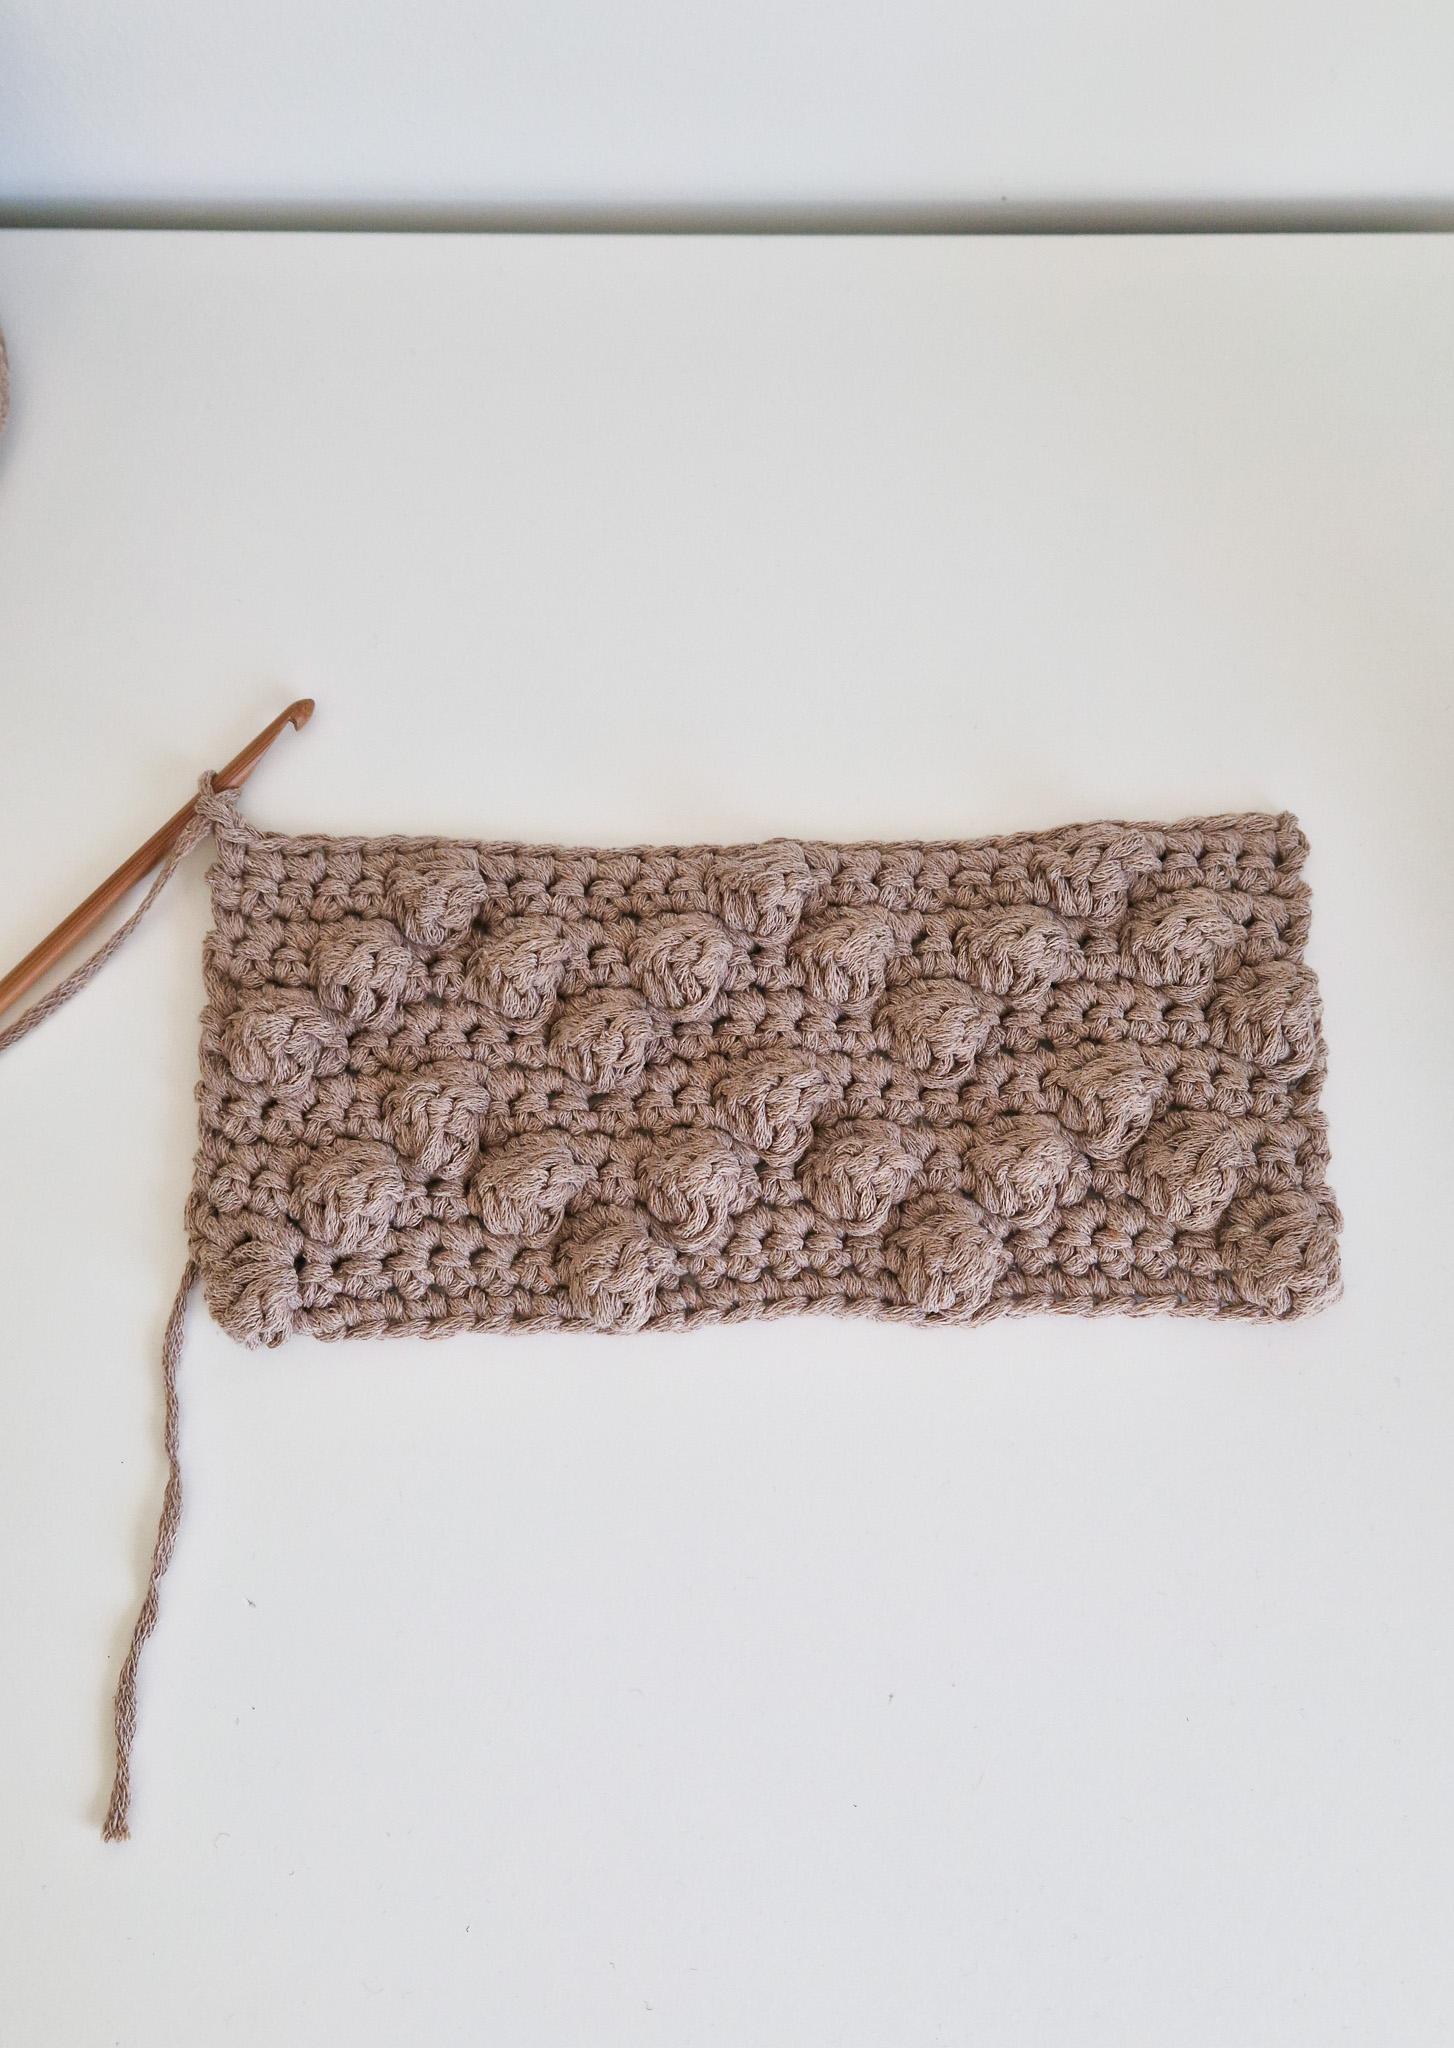
Row 5: *Crochet 3 single crochets, then 1 bobble stitch*. Repeat what’s inside the *...* a total of six times. Then crochet 3 single crochets. Chain 1 and turn your work. You should have 27 stitches in total.

Row 6: Crochet 1 single crochet in each stitch across. You should have 27 stitches in total.
Row 7: Crochet 5 single crochets. *Crochet 1 bobble stitch, then 7 single crochets*. Repeat what’s inside the *...* a total of two times. Then crochet 1 bobble stitch and 5 single crochets. Chain 1 and turn your work. You should have 27 stitches in total.

Row 8: Crochet 1 single crochet in each stitch across. You should have 27 stitches in total.

Now you will crochet Rows 3–8 one more time before moving on to the next step.
Rows 15–46: Crochet 1 single crochet in each stitch for a total of about 32 rows.
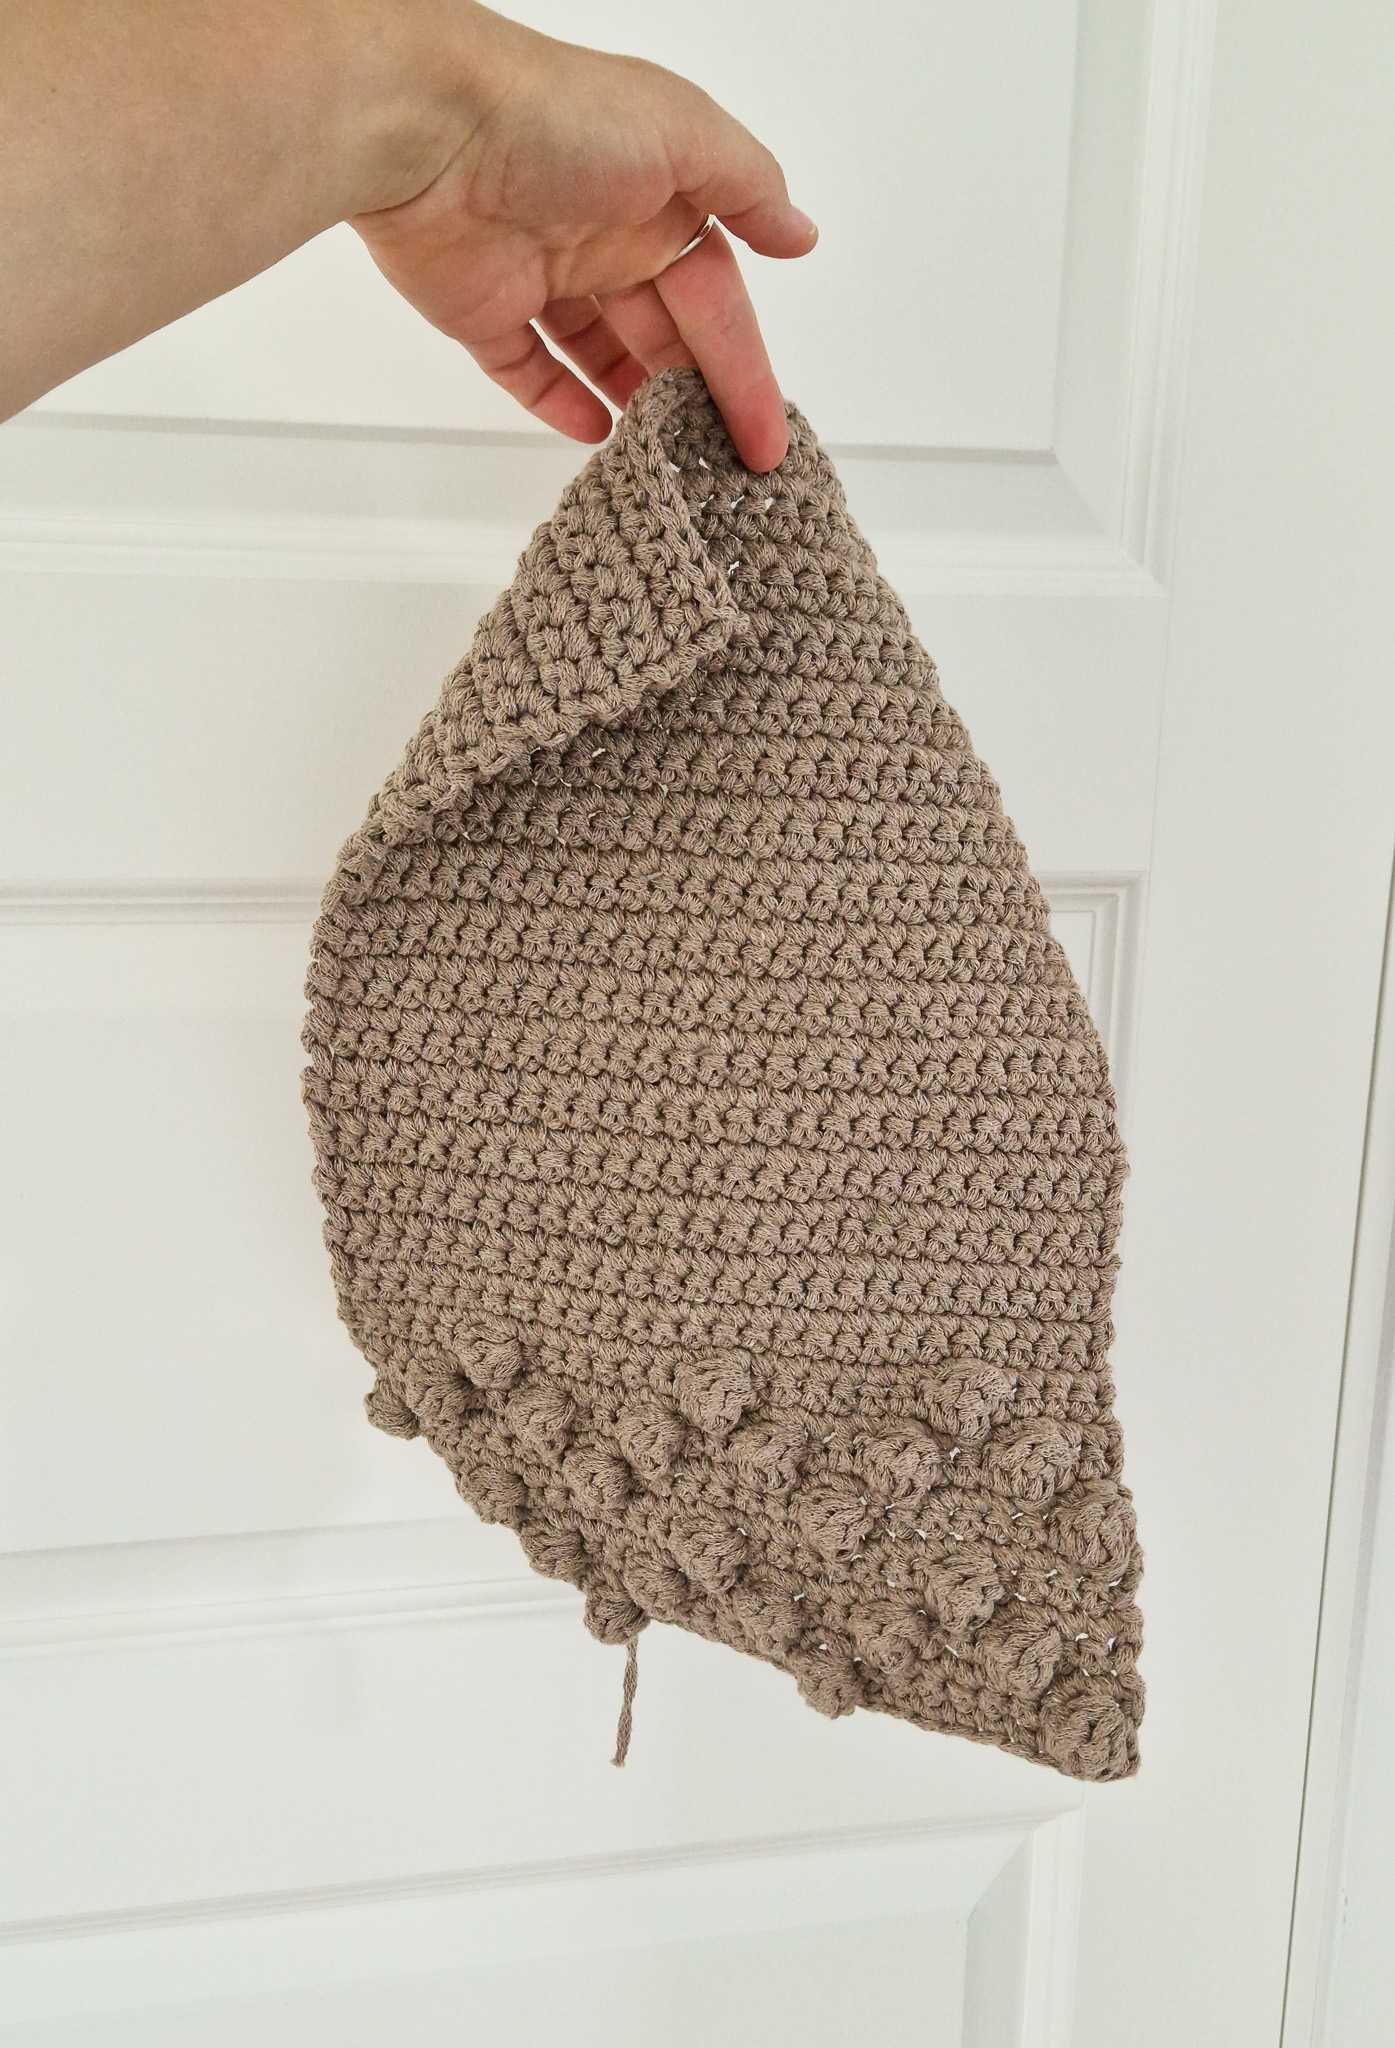
Row 47: When crocheting the last row, have the wrong side facing you. Crochet 27 slip stitches.If you’re unsure how to crochet a slip stitch, see the video below.
Cut the yarn and fasten off.If you’re unsure how to do this, see the video below.
Blocking:
Since your rectangle may not be perfectly straight, we recommend blocking your pocket before assembly. Here’s a tip on how to do it:
- Soak your work.
- Let it absorb water, and when it’s wet, gently squeeze out as much water as you can. Then place it in a towel and carefully wring out more water.
- When ready, stretch and pin your work on a yoga mat, large cushion, or similar, securing it with pins to hold it in place. Make sure it is as even as possible (the bobbles may take up a bit more space sometimes, making one side larger, but try to adjust this during blocking).
- Let it dry completely.

Assembly:
Fold your pocket as you wish. I chose to have the pretty bobble part about 6–7 rows down. Of course, this is up to you. Secure stitch markers at the bottom and top so it doesn’t shift.
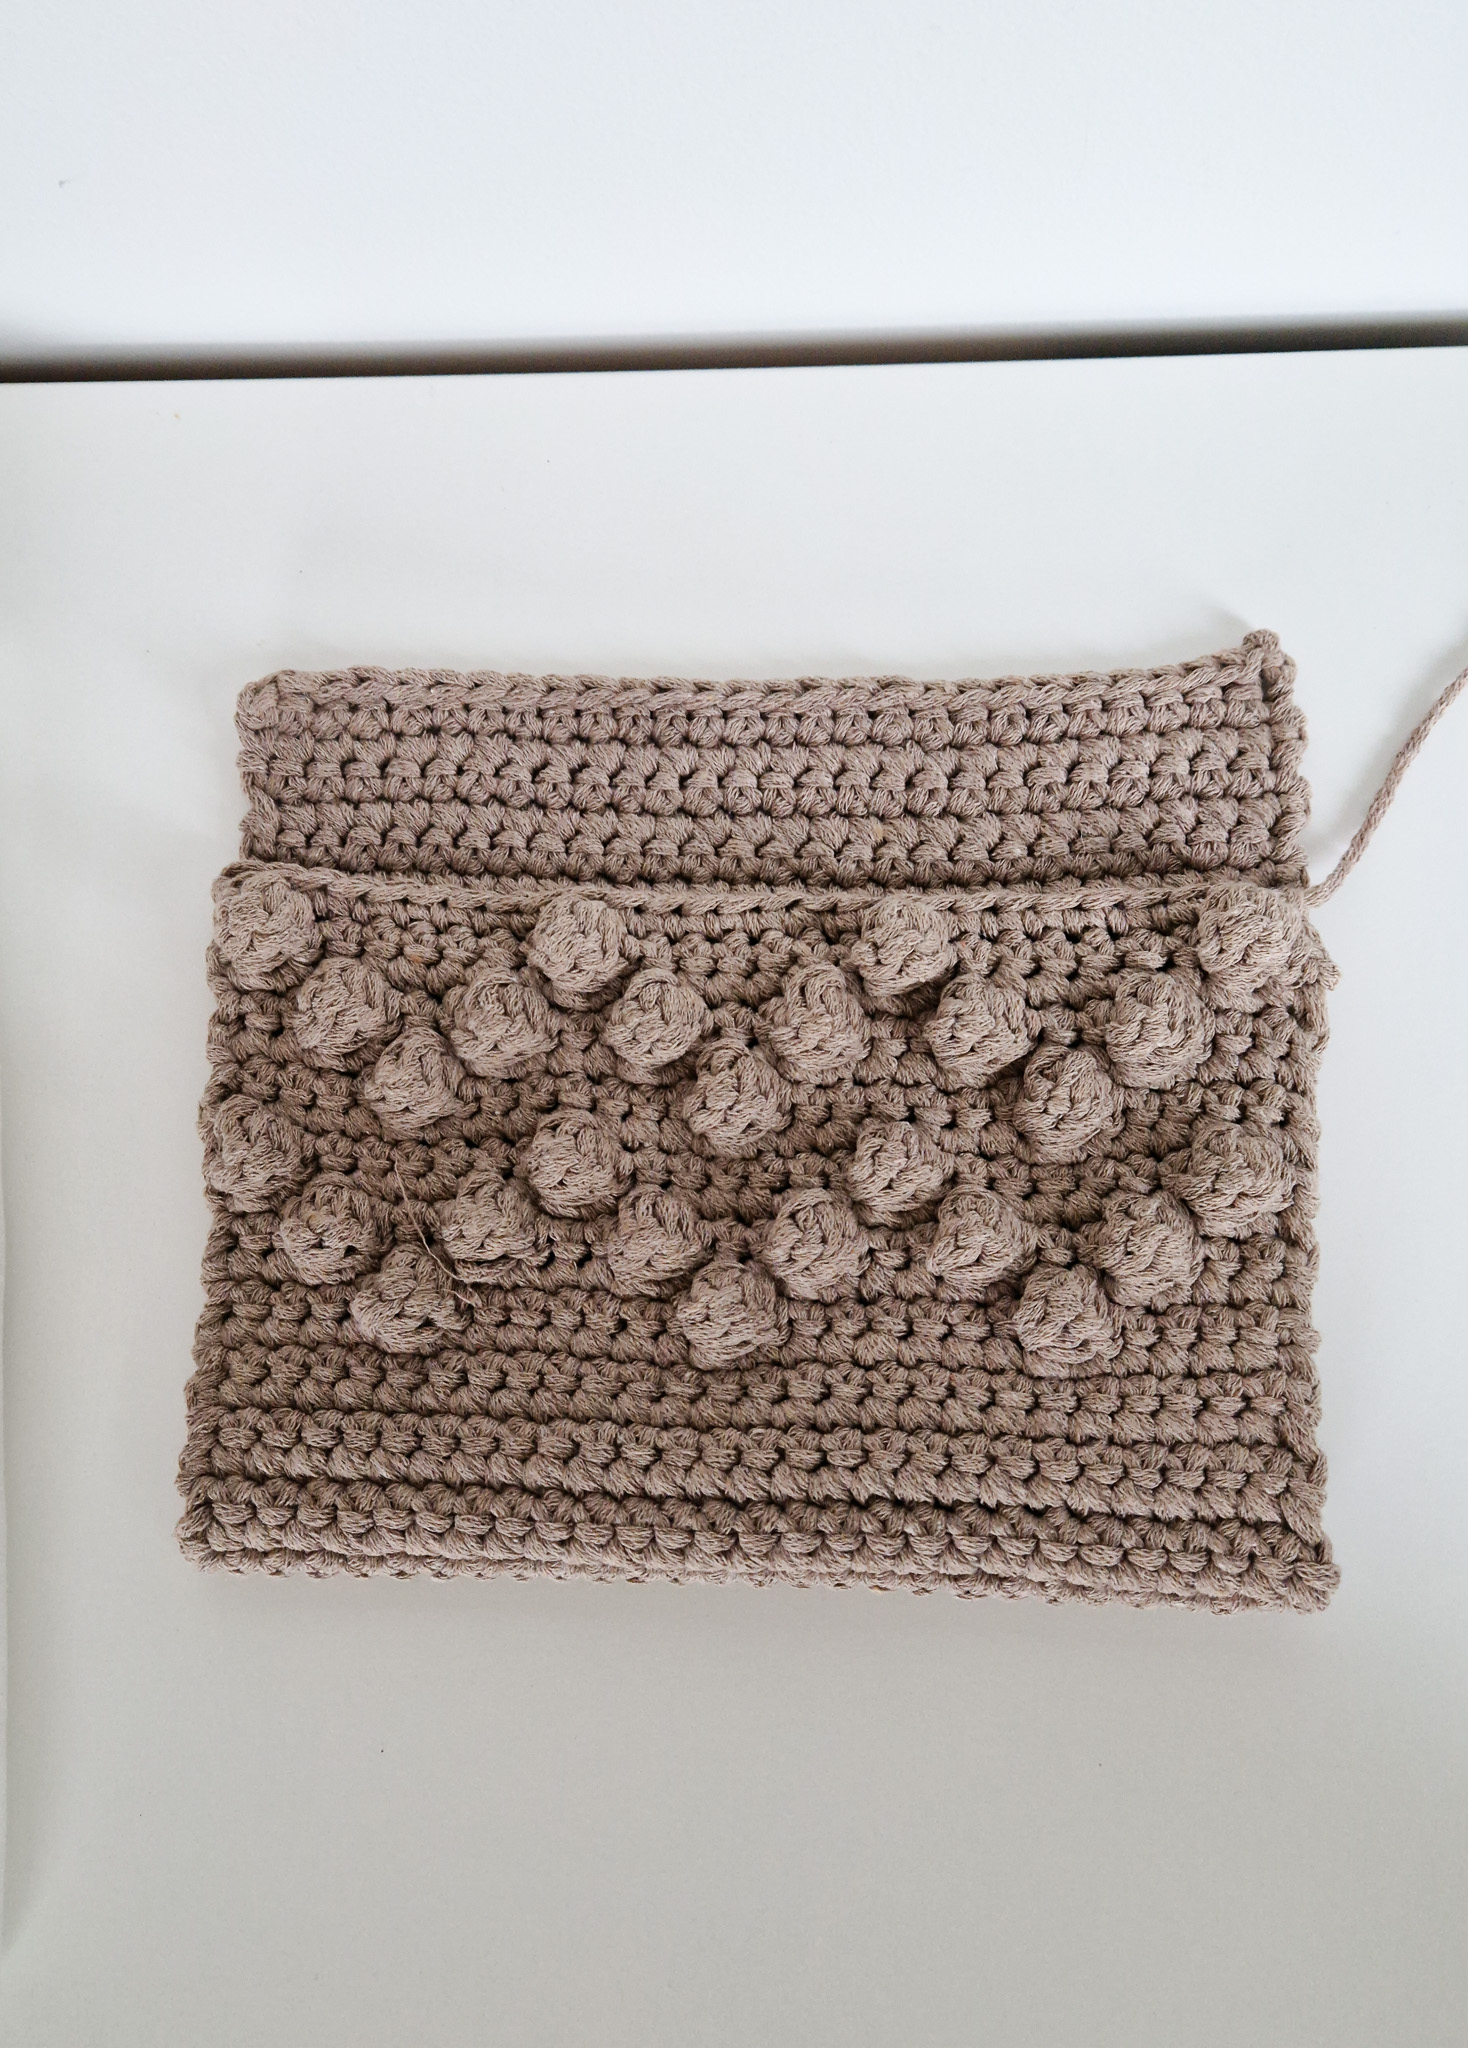

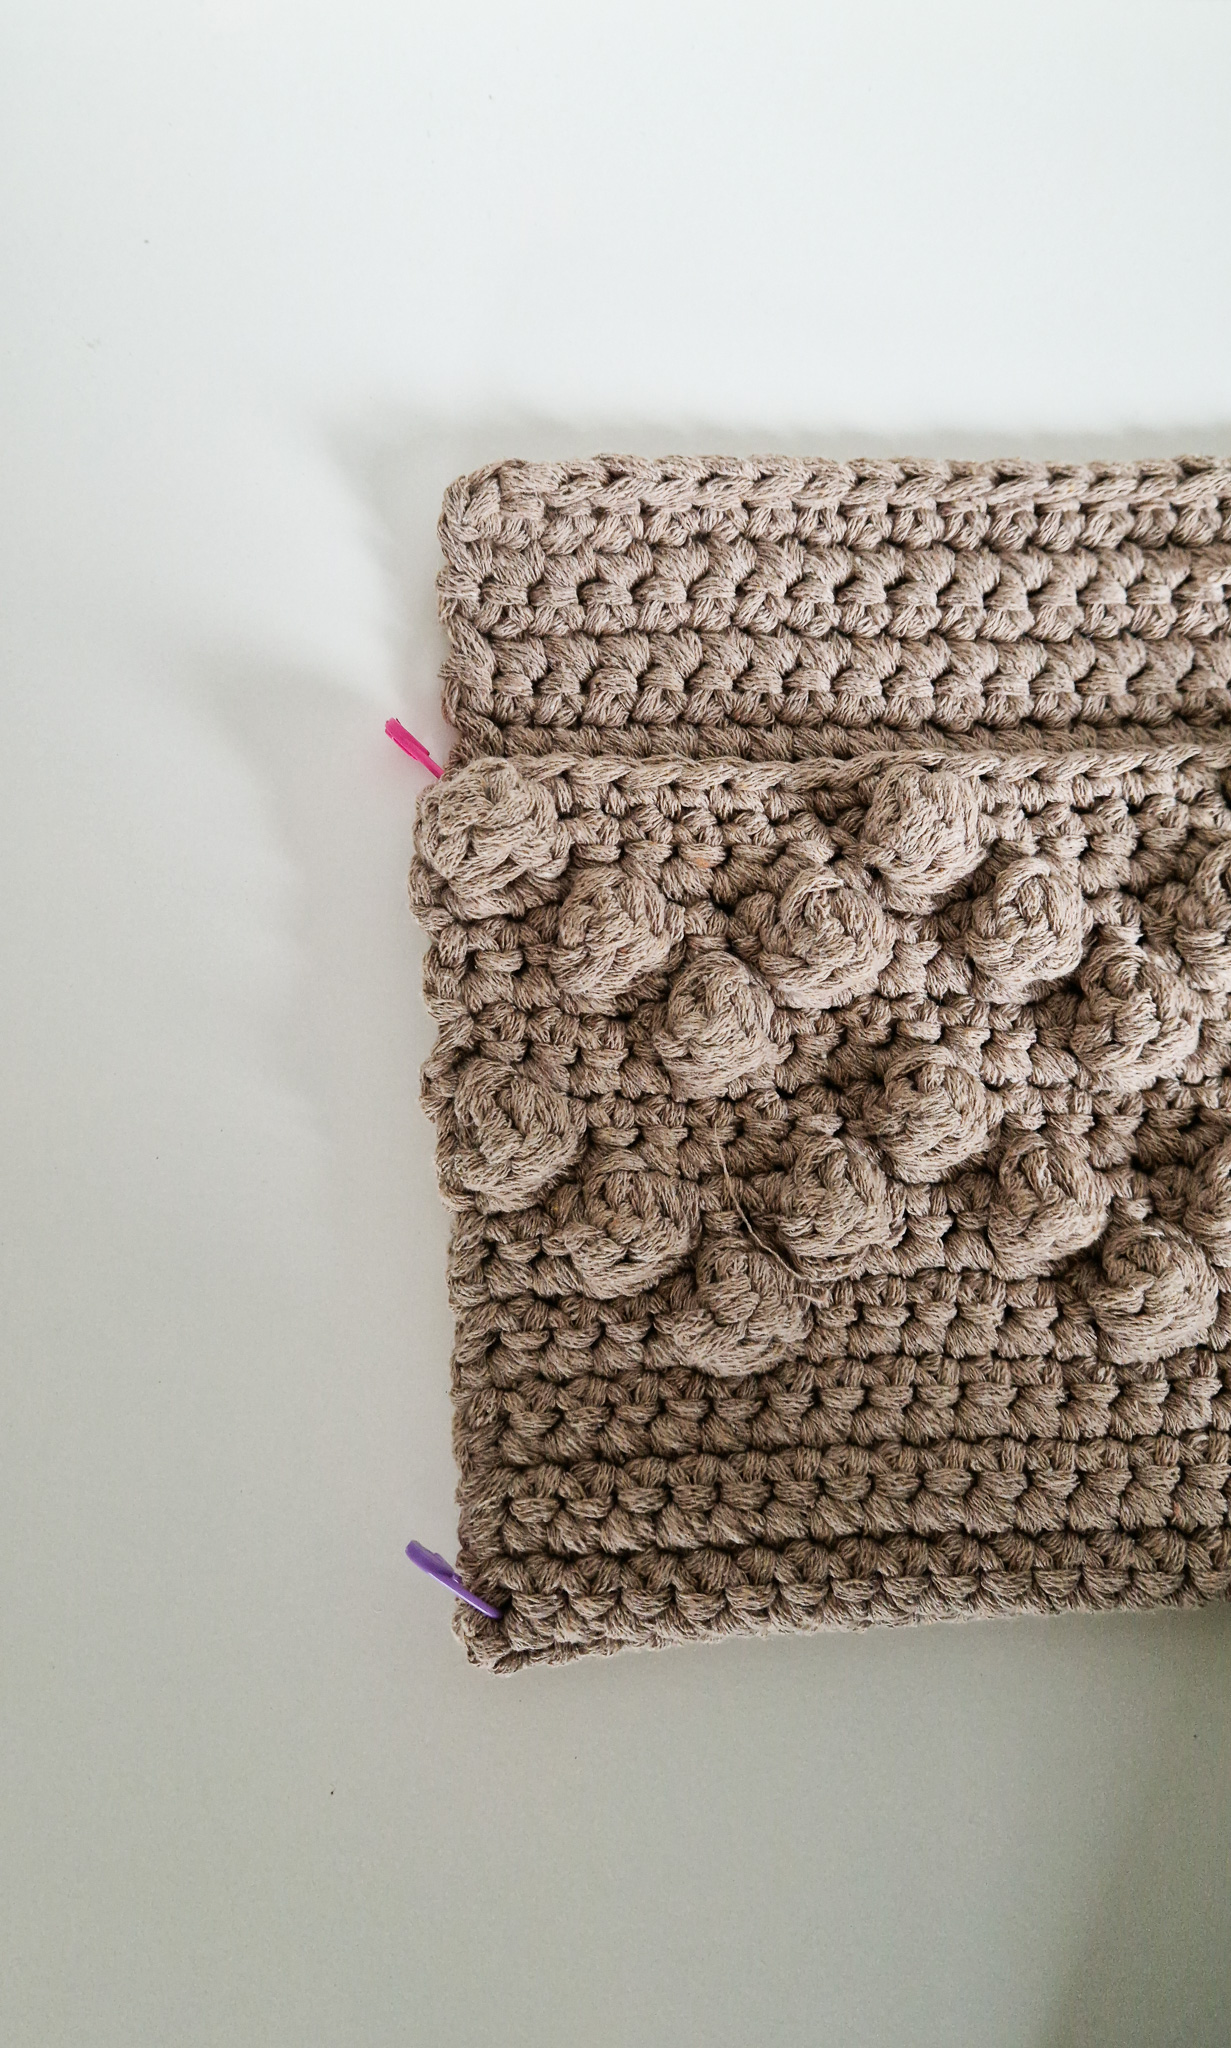
Start in a corner at the bottom of the pocket. Crochet single crochets through both layers and continue until you reach the top. Cut the yarn and fasten off. Do the same on the other side.

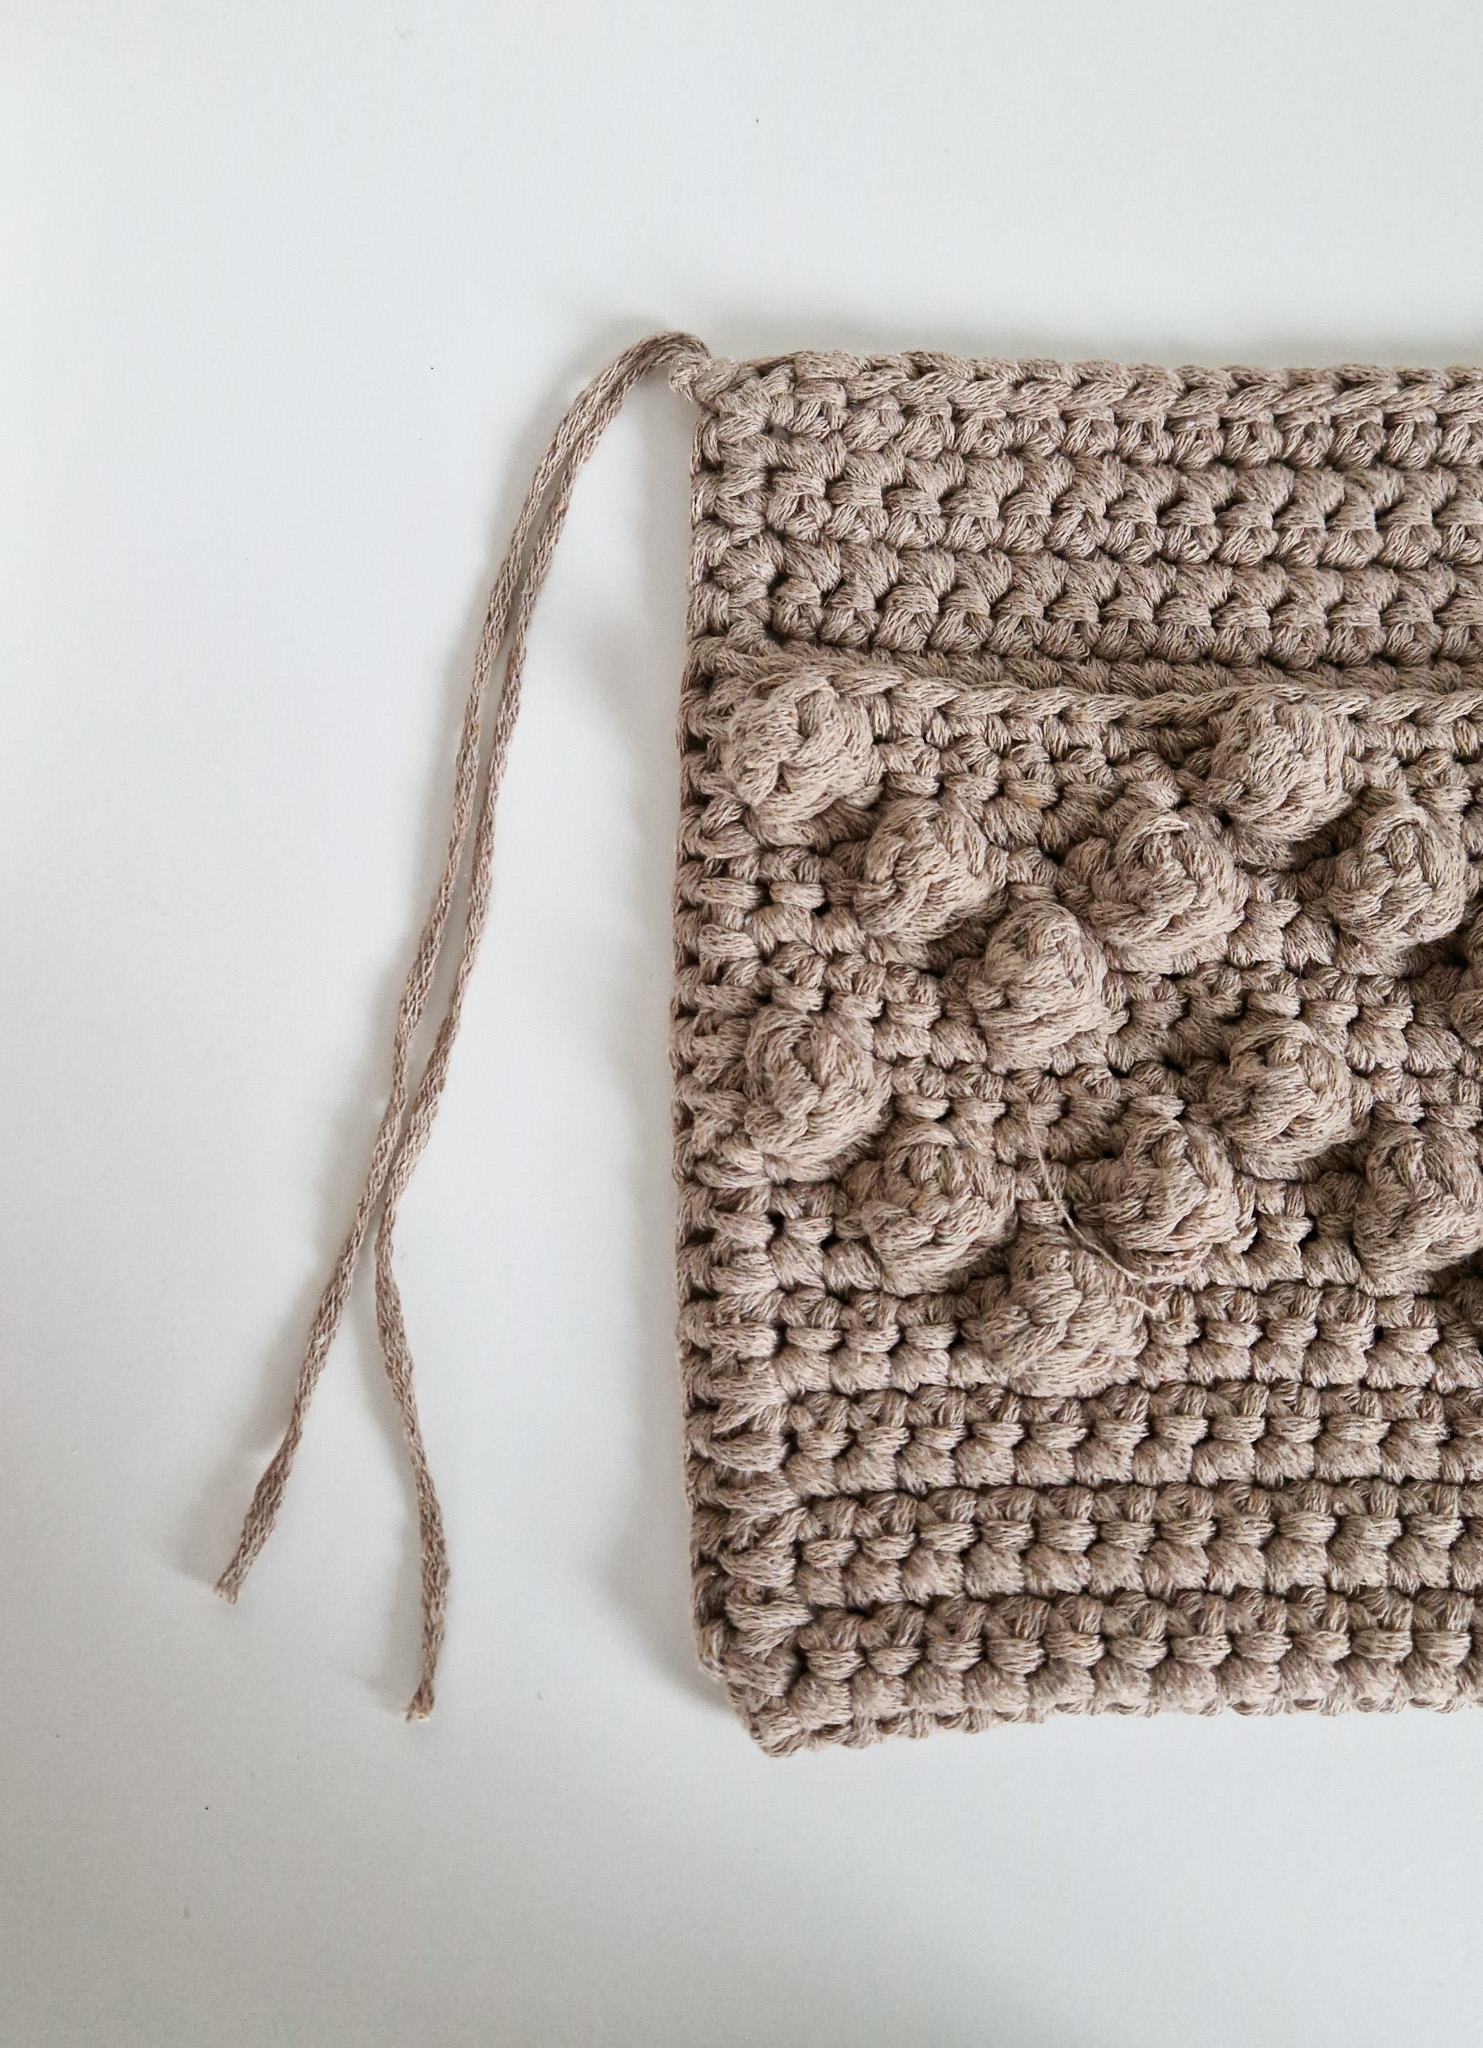
Then take a yarn end and tie a knot at the top so it can be used for fastening.
You are done :)
Crochet Terms
This is the advanced part of the pattern. If you need help along the way, see the simpler section.
Abbreviations:
sc = single crochet
sl st = slip stitch
ch = chain
bobble st = bobble stitch
(...) = total stitches in the round
*…* = repeat what’s inside the …
Row 1: Ch 28 (28)
Row 2: Start in 2nd ch from hook and work into the “bump” on the back side: 27 sc (27)
Row 3: 1 sc, *1 bobble st, 7 sc* x3, 1 bobble st, 1 sc, ch 1, turn. (27)
Row 4: 27 sc. ch 1, turn. (27)
Row 5: *3 sc, 1 bobble st* x6, 3 sc. ch 1, turn. (27)
Row 6: 27 sc. (27) ch 1, turn.
Row 7: 5 sc, *1 bobble st, 7 sc* x2 times, 1 bobble st, 5 sc. Ch 1, turn. (27)
Row 8: 27 sc (27) ch 1, turn.
Repeat Rows 3 to 8 once more.
Rows 15–46: 27 sc (27) — work 32 rows.
Row 47: With the wrong side facing you, work 27 sl st (27).
Blocking:
Since your rectangle might not be perfectly straight, I recommend blocking your pocket before assembly. Here’s a tip on how to do it:
- Soak your work in water.
- Let it absorb water, then gently squeeze out as much water as possible without twisting. Lay it flat on a towel and carefully roll the towel to press out more moisture.
- When ready, stretch and pin your work onto a yoga mat, large cushion, or similar surface to hold it in place. Try to make it as even as possible — the bobbles might take up a bit more space on one side, so adjust that during blocking.
- Let it dry completely.
Assembly:
Fold your pocket as you prefer. I chose to have the pretty bobble section about 6–7 rows down from the top, but of course, this is up to you.
Start at one bottom corner of the pocket. Work single crochet (sc) stitches through both layers, stitching up to the top edge. Cut the yarn and fasten off.
Repeat the same on the other side.
Then take a yarn tail and tie a knot at the top so you can use it to fasten the pocket in place.
You are done :)
The rights to this pattern belong to MYO Make Your Own. The pattern or its pictures may not be copied, shared or resold either in parts or in its entirety, but you may sell items you have crocheted from this pattern. If you have questions about the pattern, contact MYO at hello@makeyourown.se.
Row 1: Chain 28. If you're unsure how to crochet a chain, see the video below.
Row 2: Start crocheting into the second chain from your hook. You’ll now crochet into the back bumps of the chain. If you find that difficult, you can crochet into the regular top loop instead — but working into the back bumps gives a neater finish.
Crochet 1 single crochet (sc) into each stitch across. Chain 1 and turn your work. You should now have 27 stitches in total (the chain at the end does not count as a stitch). If you're unsure how to crochet single crochet stitches, see the video below.
Row 3: Crochet 1 single crochet. *Then crochet 1 bobble stitch and 7 single crochets*. Repeat what’s inside the *...* a total of three times. Then crochet 1 bobble stitch and 1 single crochet.
Chain 1 and turn your work.You should have 27 stitches in total. If you're unsure how to crochet a bobble stitch, see below.
Row 4: Crochet 1 single crochet in each stitch across. You should have 27 stitches in total.
Row 5: *Crochet 3 single crochets, then 1 bobble stitch*. Repeat what’s inside the *...* a total of six times. Then crochet 3 single crochets. Chain 1 and turn your work. You should have 27 stitches in total.
Row 6: Crochet 1 single crochet in each stitch across. You should have 27 stitches in total.
Row 7: Crochet 5 single crochets. *Crochet 1 bobble stitch, then 7 single crochets*. Repeat what’s inside the *...* a total of two times. Then crochet 1 bobble stitch and 5 single crochets. Chain 1 and turn your work. You should have 27 stitches in total.
Row 8: Crochet 1 single crochet in each stitch across. You should have 27 stitches in total.
Now you will crochet Rows 3–8 one more time before moving on to the next step.
Rows 15–46: Crochet 1 single crochet in each stitch for a total of about 32 rows.
Row 47: When crocheting the last row, have the wrong side facing you. Crochet 27 slip stitches.If you’re unsure how to crochet a slip stitch, see the video below.
Cut the yarn and fasten off.If you’re unsure how to do this, see the video below.
Blocking:
Since your rectangle may not be perfectly straight, we recommend blocking your pocket before assembly. Here’s a tip on how to do it:
- Soak your work.
- Let it absorb water, and when it’s wet, gently squeeze out as much water as you can. Then place it in a towel and carefully wring out more water.
- When ready, stretch and pin your work on a yoga mat, large cushion, or similar, securing it with pins to hold it in place. Make sure it is as even as possible (the bobbles may take up a bit more space sometimes, making one side larger, but try to adjust this during blocking).
- Let it dry completely.
Assembly:
Fold your pocket as you wish. I chose to have the pretty bobble part about 6–7 rows down. Of course, this is up to you. Secure stitch markers at the bottom and top so it doesn’t shift.
Start in a corner at the bottom of the pocket. Crochet single crochets through both layers and continue until you reach the top. Cut the yarn and fasten off. Do the same on the other side.
Then take a yarn end and tie a knot at the top so it can be used for fastening.
You are done :)
Crochet Terms
This is the advanced part of the pattern. If you need help along the way, see the simpler section.
Abbreviations:
sc = single crochet
sl st = slip stitch
ch = chain
bobble st = bobble stitch
(...) = total stitches in the round
*…* = repeat what’s inside the …
Row 1: Ch 28 (28)
Row 2: Start in 2nd ch from hook and work into the “bump” on the back side: 27 sc (27)
Row 3: 1 sc, *1 bobble st, 7 sc* x3, 1 bobble st, 1 sc, ch 1, turn. (27)
Row 4: 27 sc. ch 1, turn. (27)
Row 5: *3 sc, 1 bobble st* x6, 3 sc. ch 1, turn. (27)
Row 6: 27 sc. (27) ch 1, turn.
Row 7: 5 sc, *1 bobble st, 7 sc* x2 times, 1 bobble st, 5 sc. Ch 1, turn. (27)
Row 8: 27 sc (27) ch 1, turn.
Repeat Rows 3 to 8 once more.
Rows 15–46: 27 sc (27) — work 32 rows.
Row 47: With the wrong side facing you, work 27 sl st (27).
Blocking:
Since your rectangle might not be perfectly straight, I recommend blocking your pocket before assembly. Here’s a tip on how to do it:
- Soak your work in water.
- Let it absorb water, then gently squeeze out as much water as possible without twisting. Lay it flat on a towel and carefully roll the towel to press out more moisture.
- When ready, stretch and pin your work onto a yoga mat, large cushion, or similar surface to hold it in place. Try to make it as even as possible — the bobbles might take up a bit more space on one side, so adjust that during blocking.
- Let it dry completely.
Assembly:
Fold your pocket as you prefer. I chose to have the pretty bobble section about 6–7 rows down from the top, but of course, this is up to you.
Start at one bottom corner of the pocket. Work single crochet (sc) stitches through both layers, stitching up to the top edge. Cut the yarn and fasten off.
Repeat the same on the other side.
Then take a yarn tail and tie a knot at the top so you can use it to fasten the pocket in place.
You are done :)
The rights to this pattern belong to MYO Make Your Own. The pattern or its pictures may not be copied, shared or resold either in parts or in its entirety, but you may sell items you have crocheted from this pattern. If you have questions about the pattern, contact MYO at hello@makeyourown.se.
%20(1).jpg)

Share your creations with us
Thank you!
Your comment was sent!