
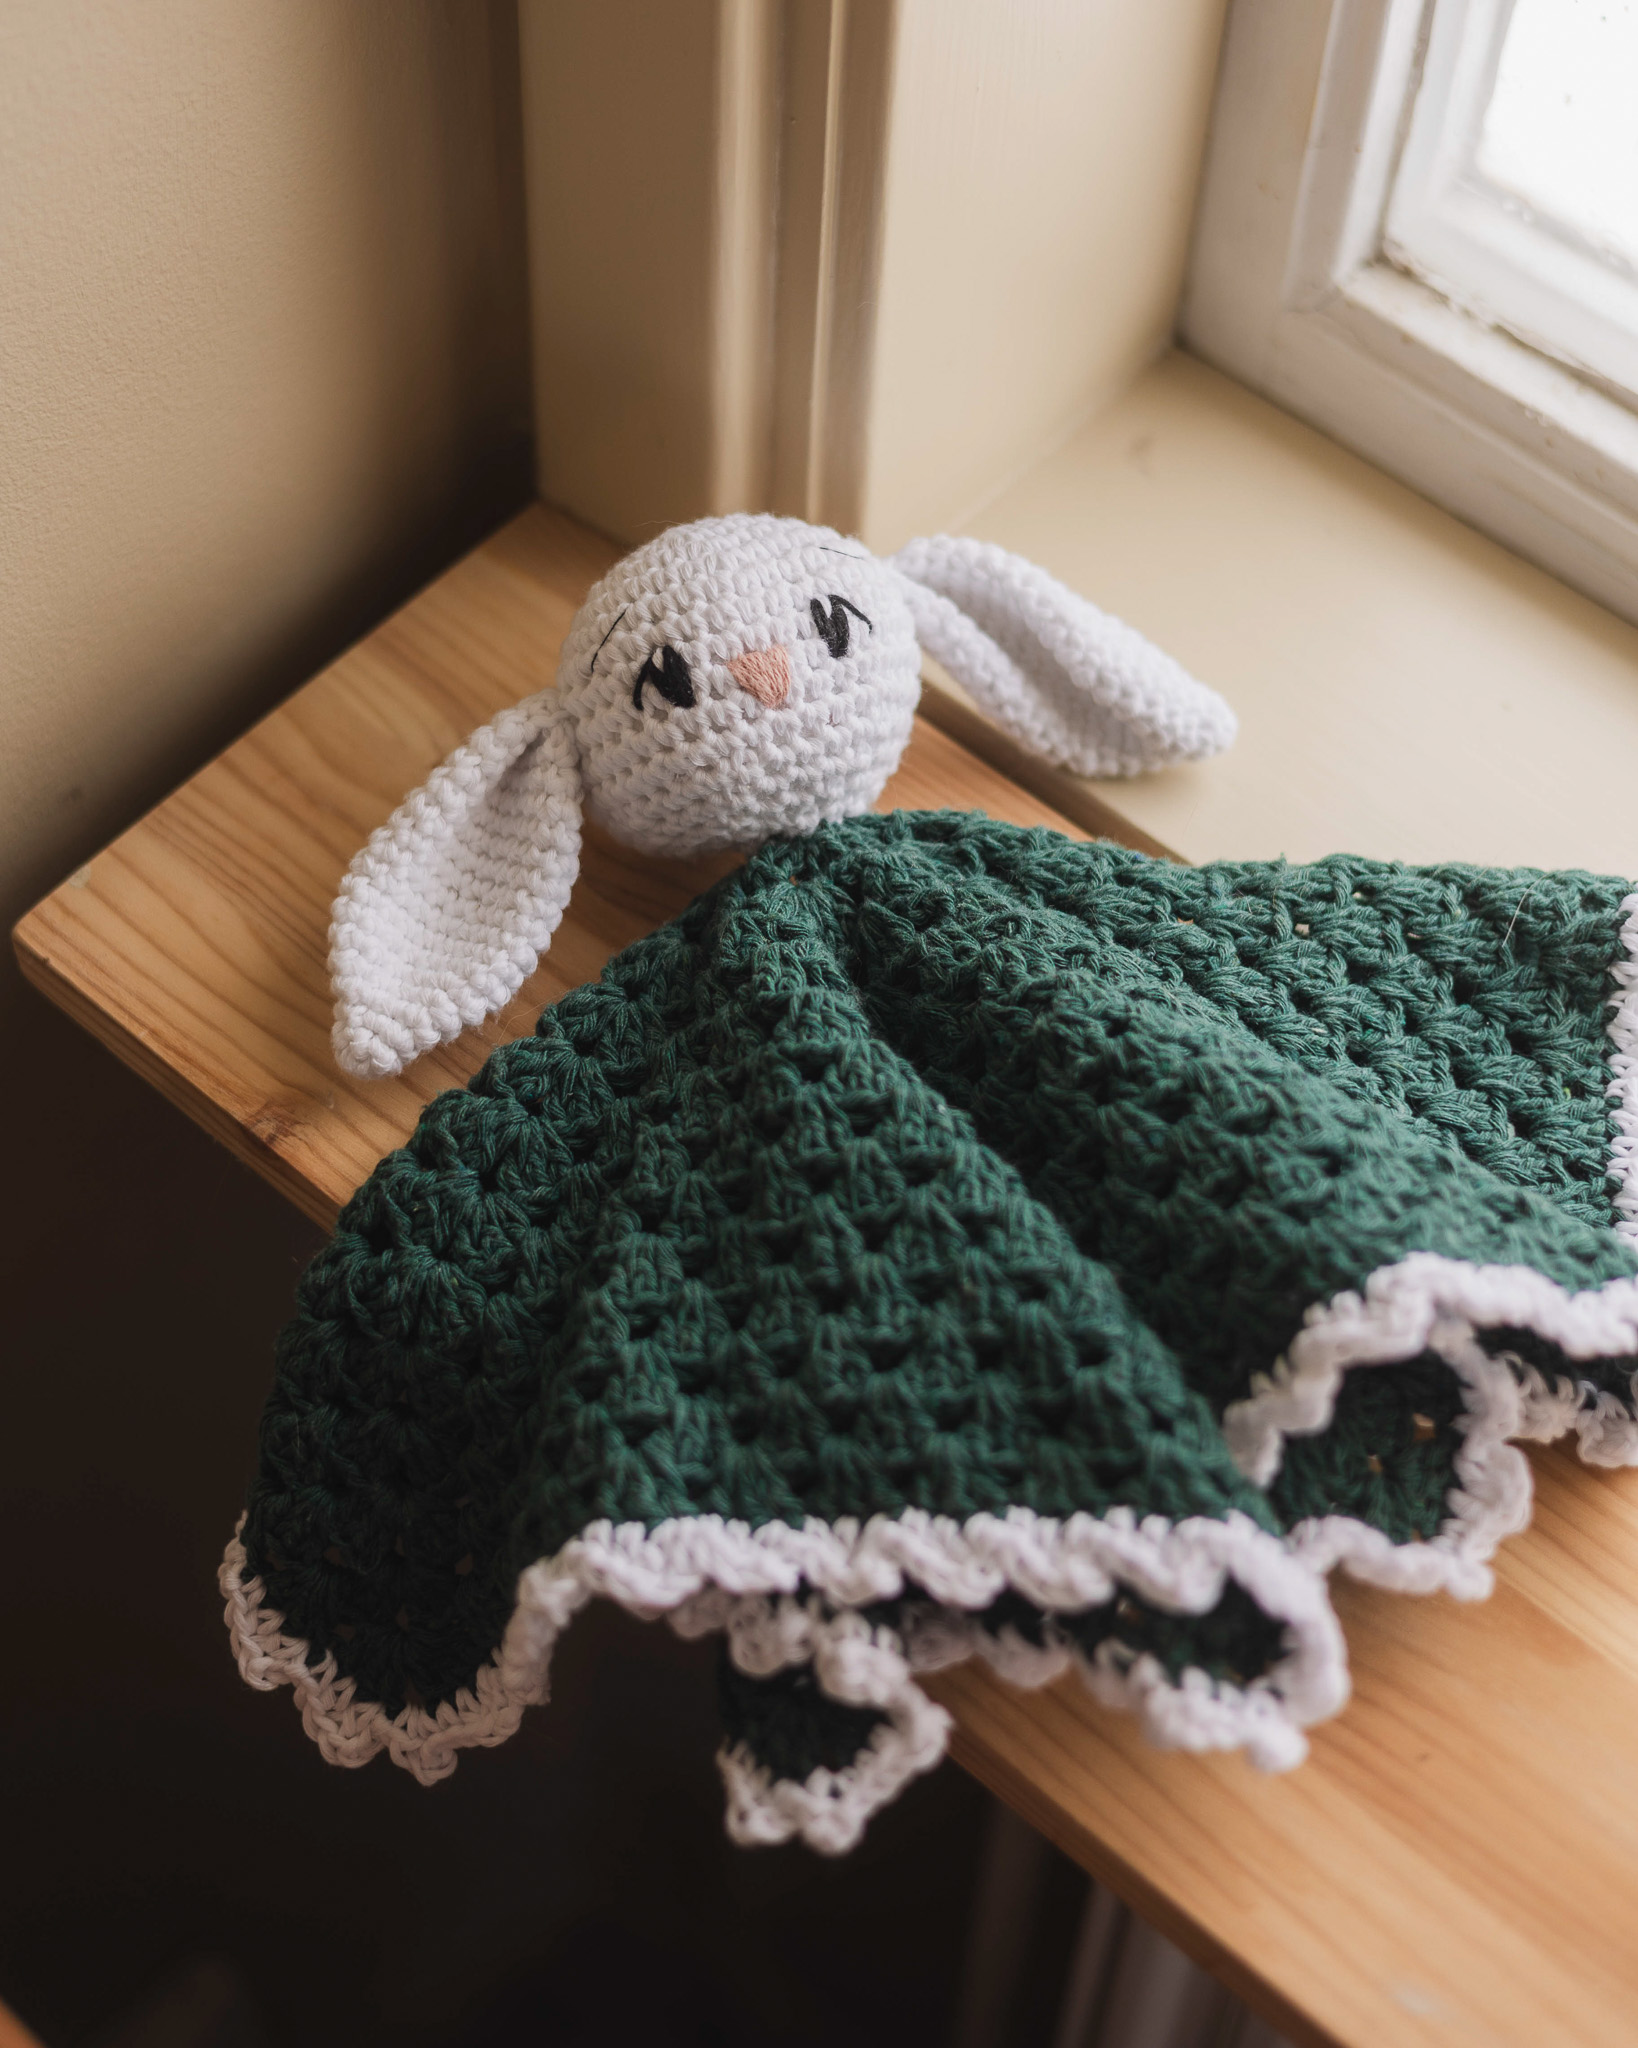
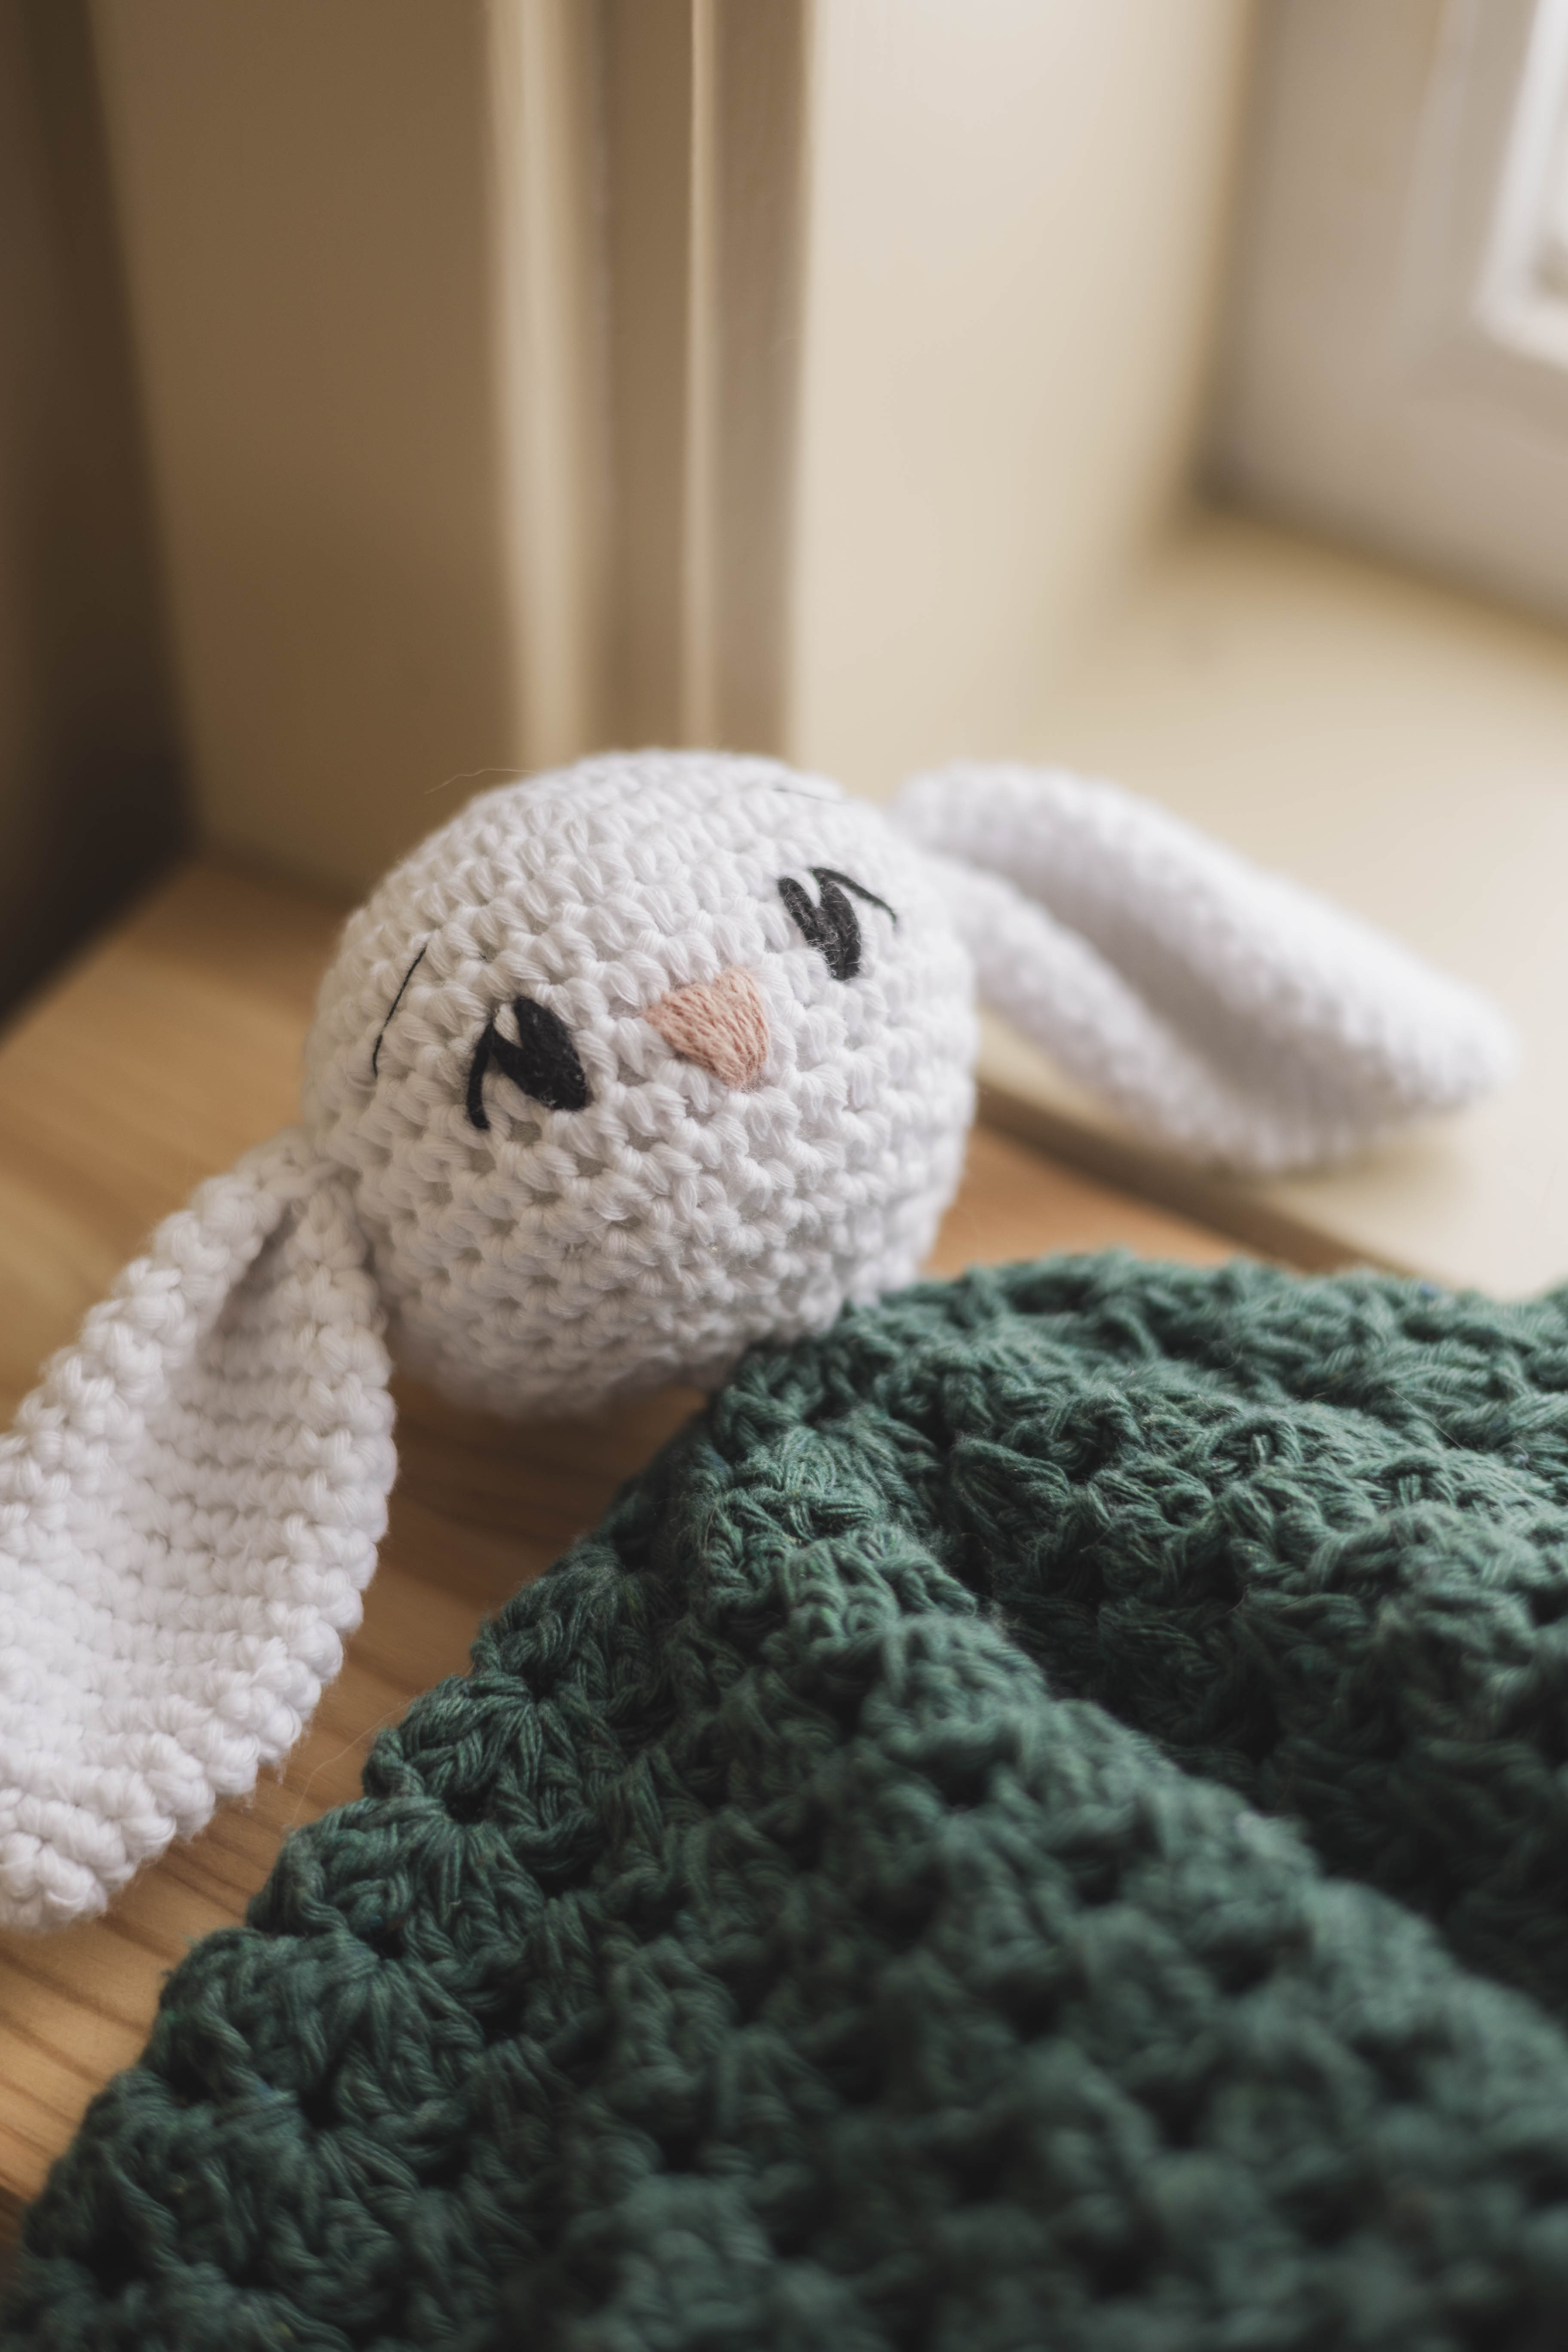
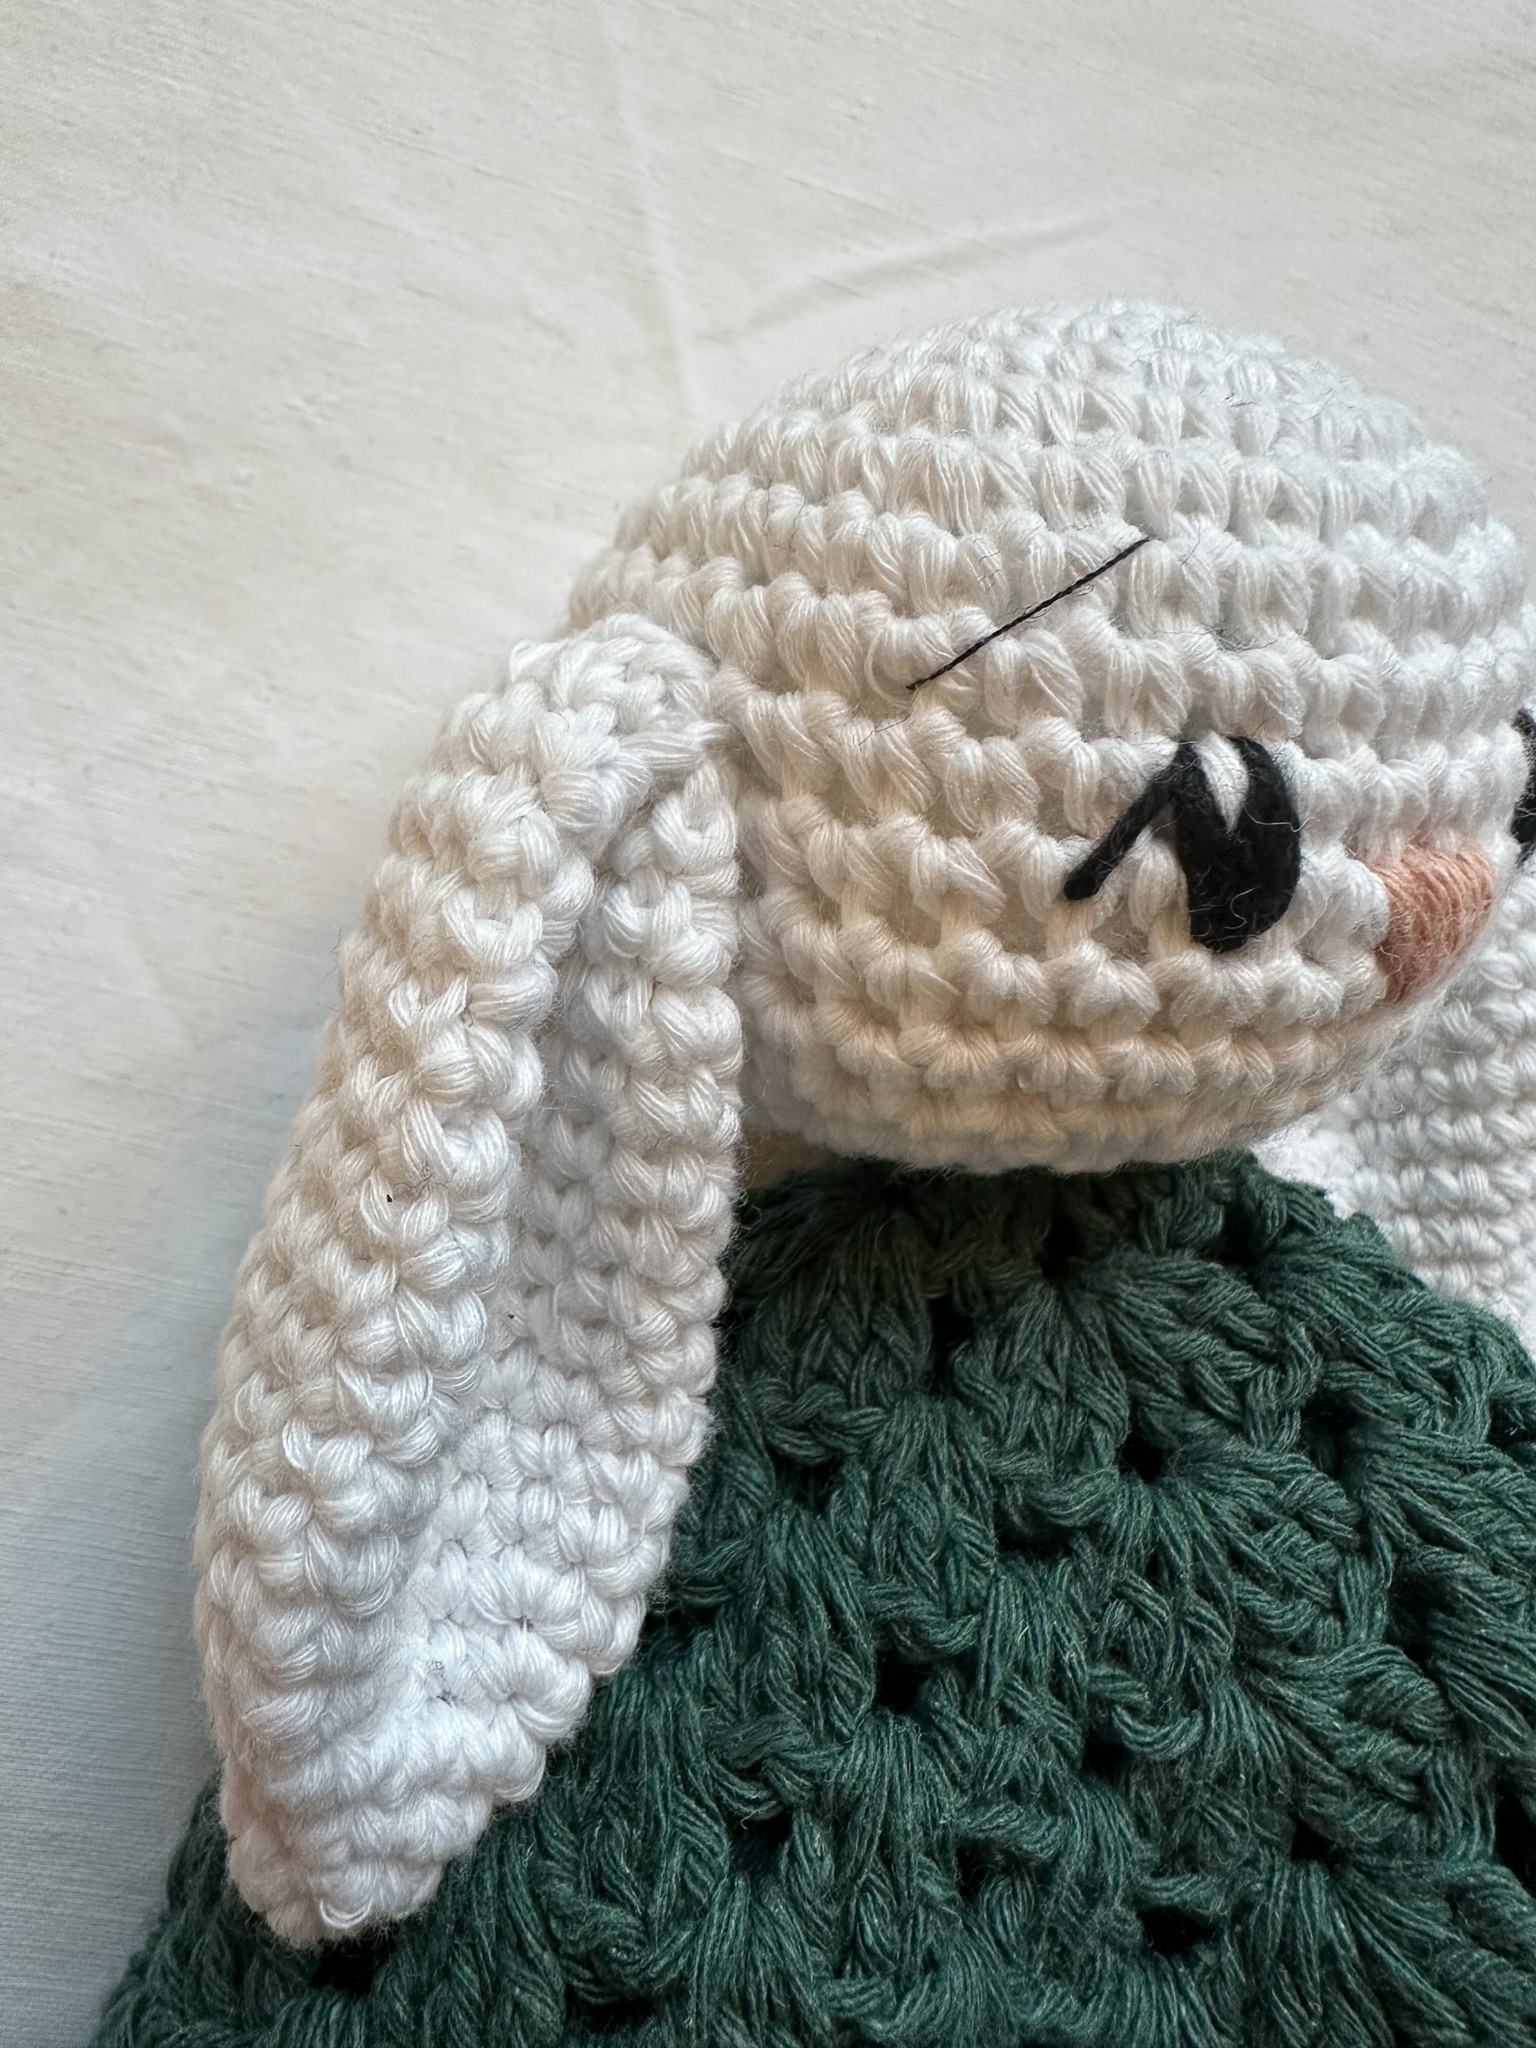
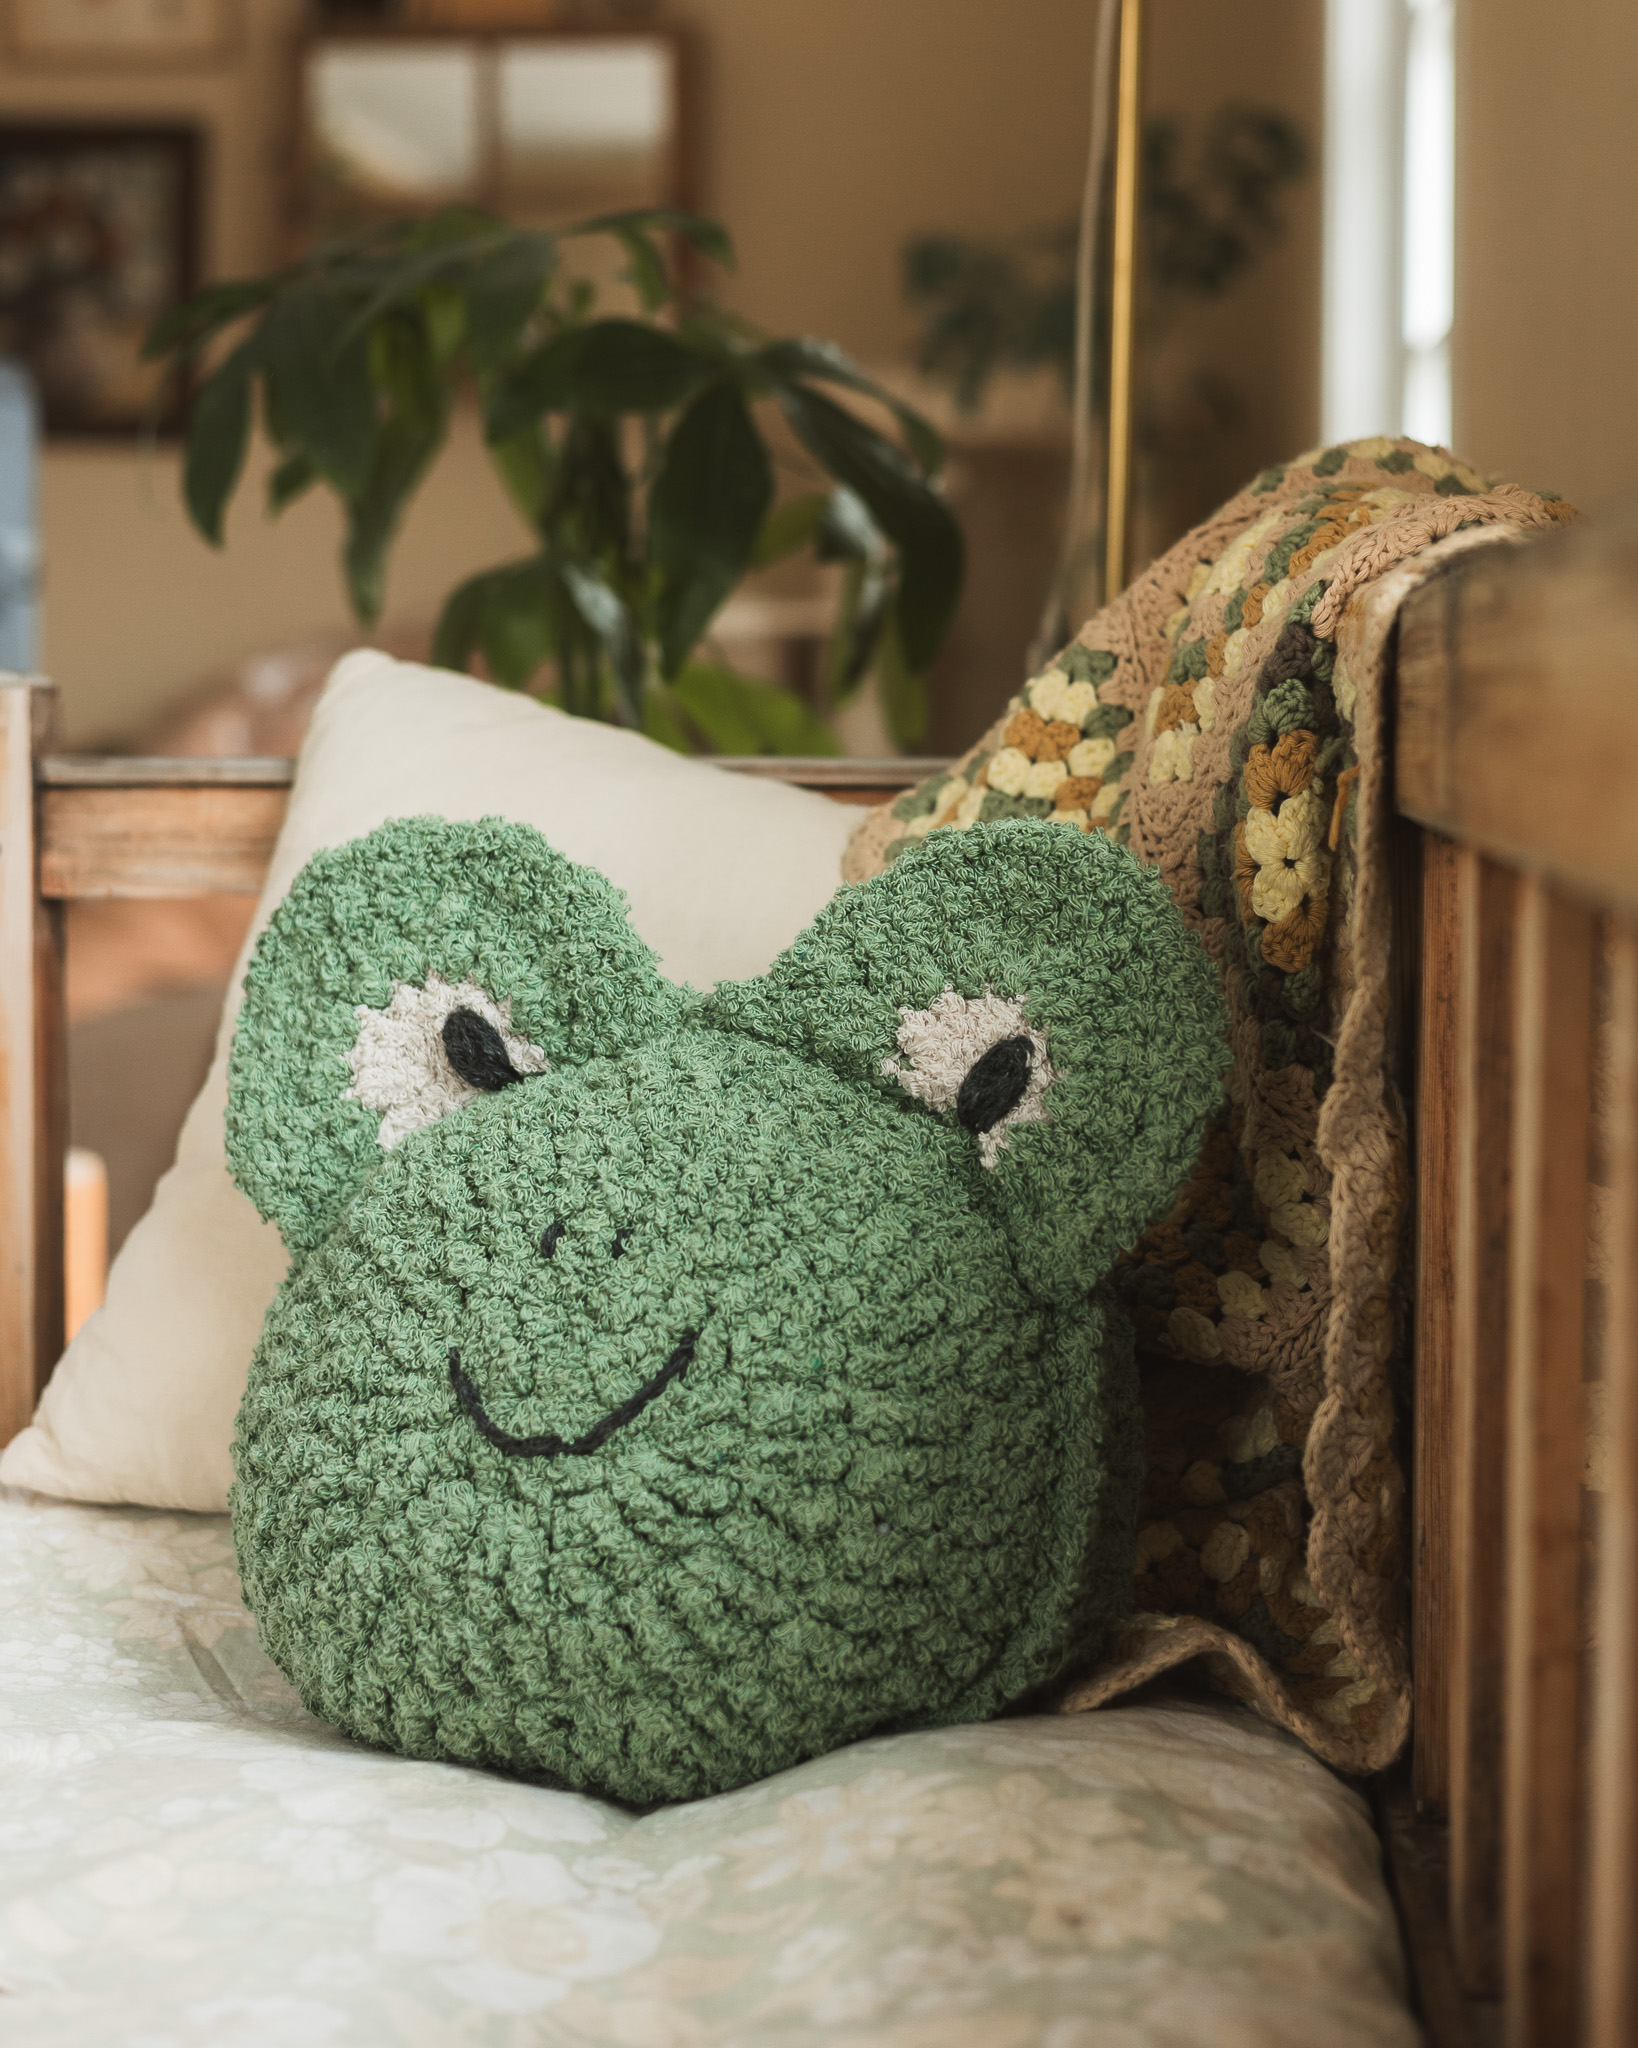
Comfort blanket “Sigge”
Crochet a cute bunny comfort blanket
This bunny comfort blanket is a simple and fun project that is suitable for beginners, as it only uses basic techniques such as single crochet and double crochet stitches. It is crocheted in the soft and washable cotton yarn Cotton Cloud. A perfect gift for a newborn baby, or why not for an expecting mom and dad at a baby shower. It can easily be customized with the colors you like, as well as the facial expression and type of eyes you want your bunny to have. You will need Cotton Cloud yarn, a 3.5 mm crochet hook (you can use a 4 mm hook for the blanket if you prefer). You will also need stuffing/fiberfill for the head, a needle for embroidering the eyes and nose, and some black and pink yarn for the eyes and nose. Sewing thread works nicely for embroidering the eyebrows.
Yarn Consumption: approximately 140 g total.
Please note that in this pattern, we use videos from our technique library together with images.
Here's how to do it
Hope you want to try making your own comfort blanket! Good luck! /Johanna
%20(4).jpg)
This is what you need:
Here you can directly purchase the material for the product. Please note that the instruction is digital and appears here on the page (no written instruction).

Cotton Cloud | 100 g
A slightly thinner cotton yarn that works perfectly for clothes, accessories and amigurumi.
Buy product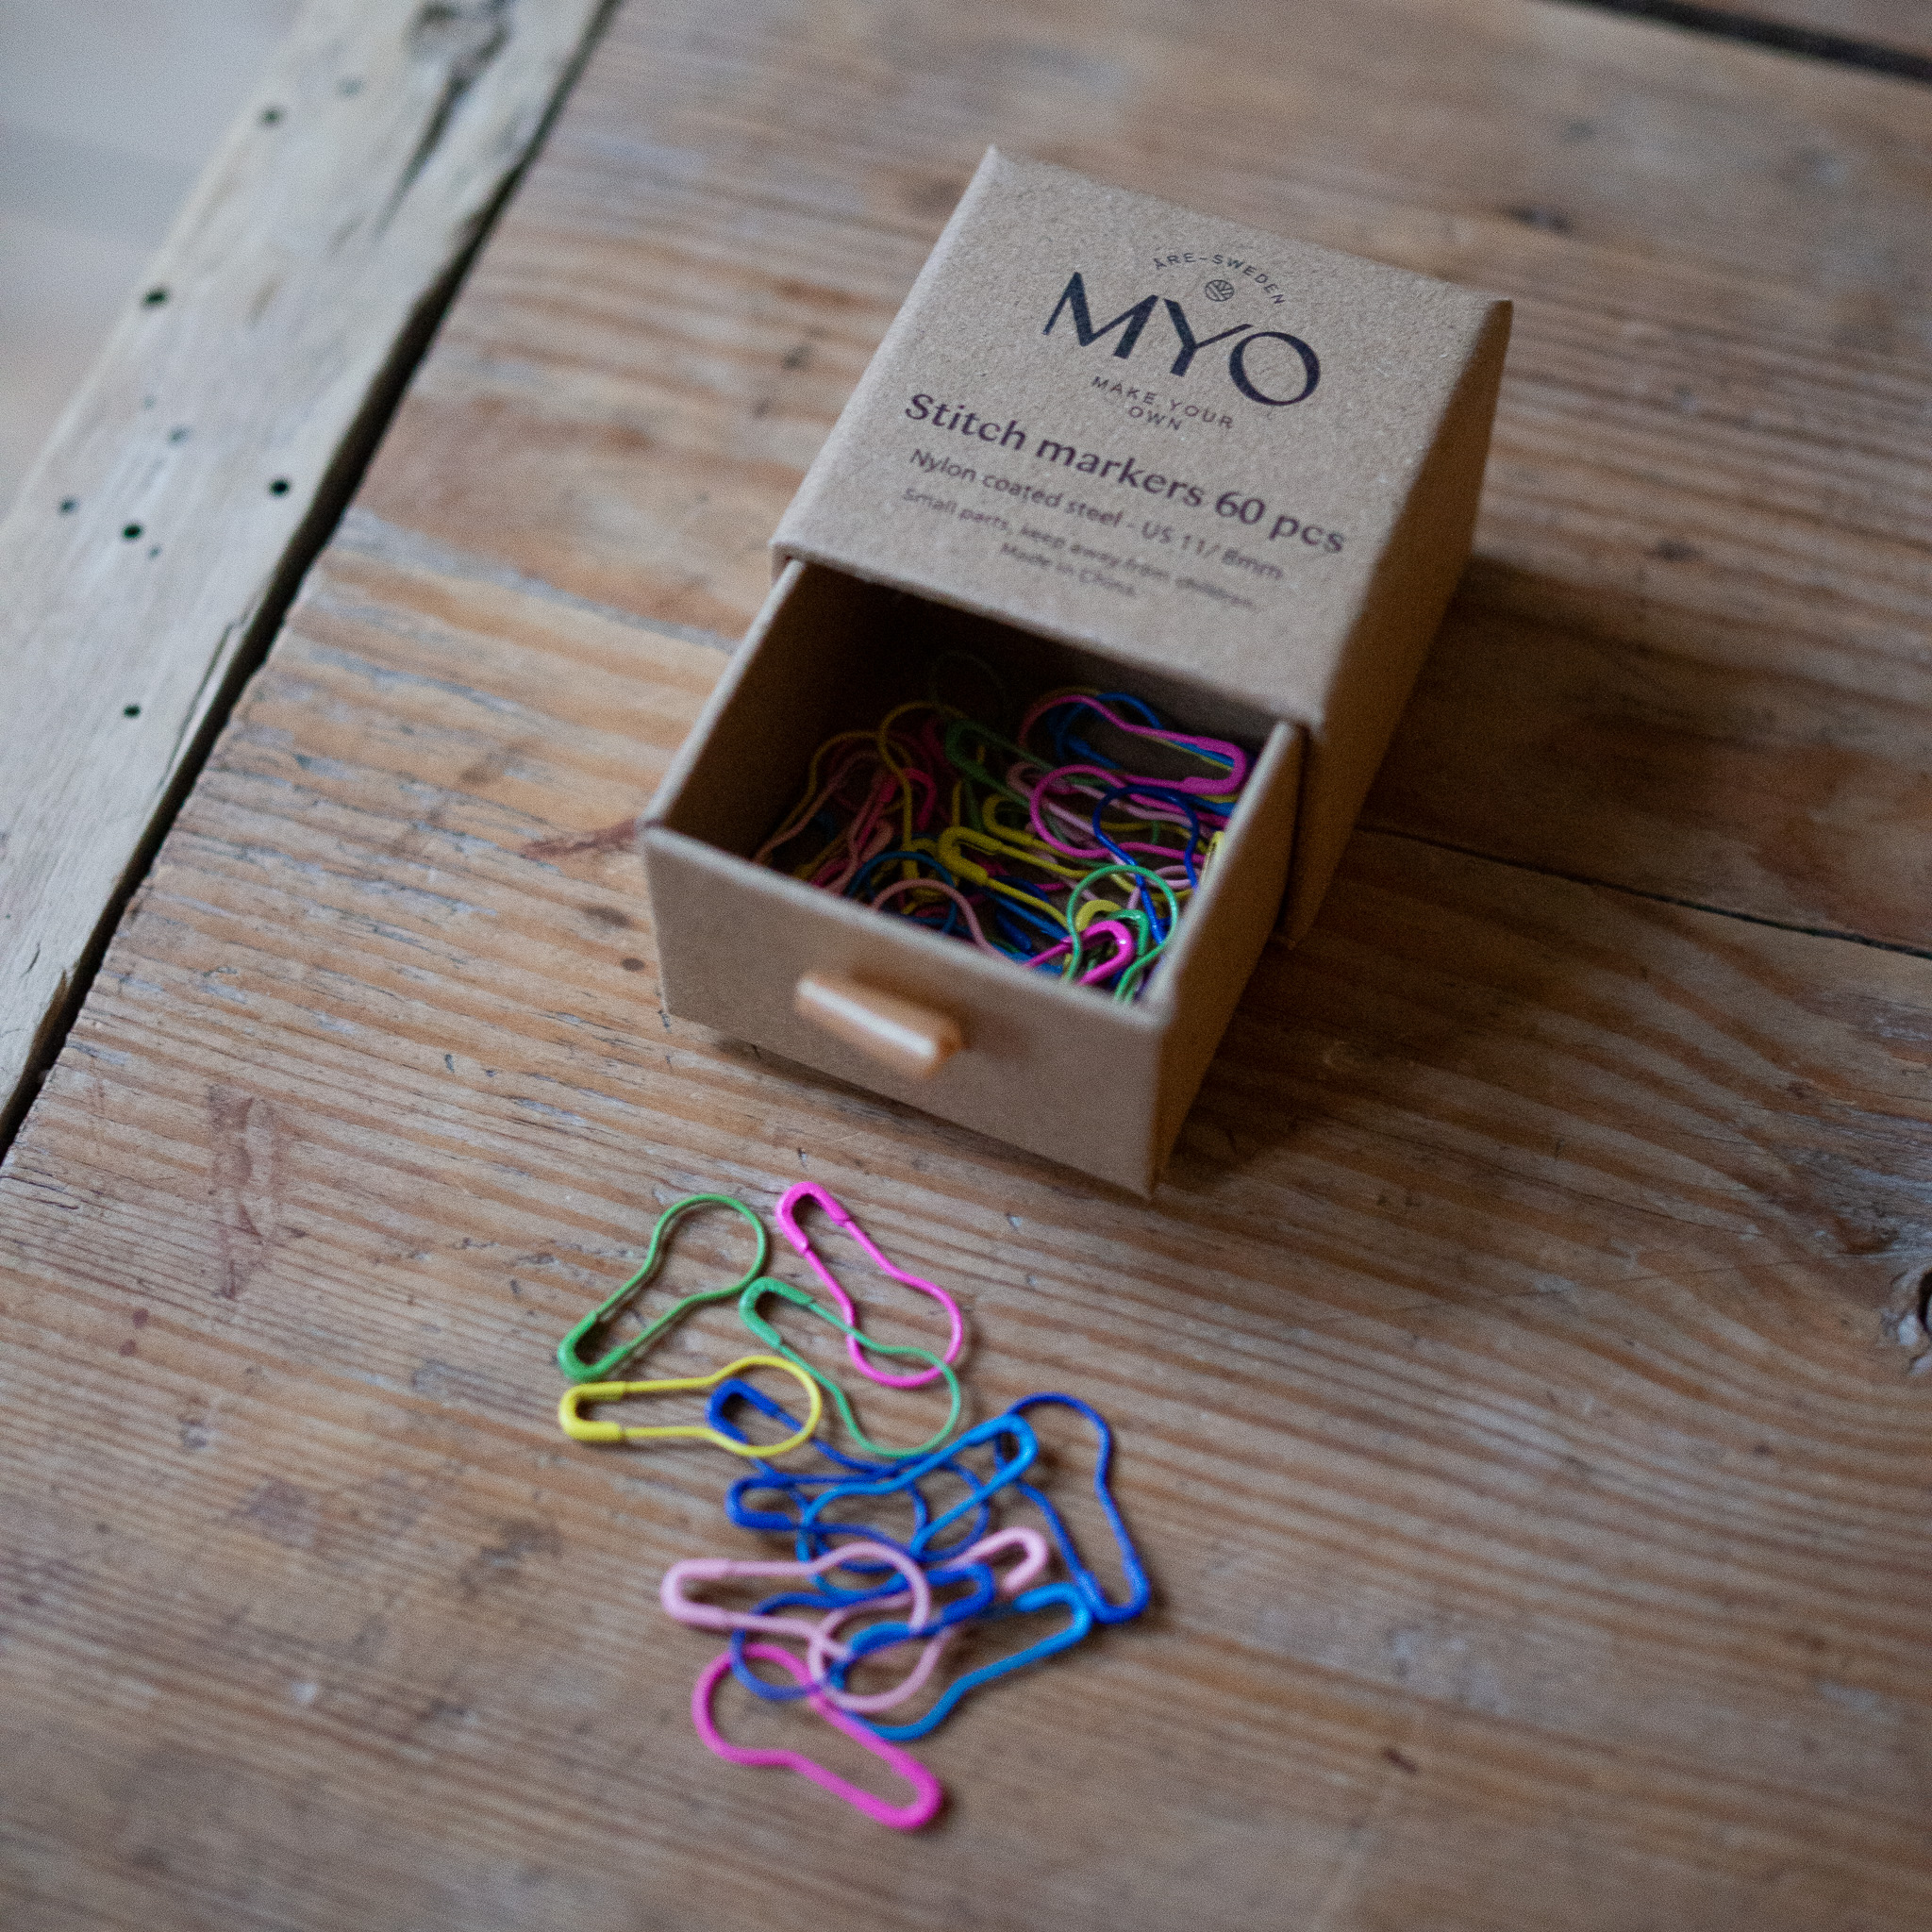
.jpg)
Unleash your creativity
For only 85kr per month you get access to all our 300+ beginner-friendly instructions for crochet, knitting and macrame.
A perfect way to get started with your new hobby!

Safety Information – Crocheted comfort blanket
Secure all yarn ends carefully so that no loose parts can come undone. The product should only be used under adult supervision. It is your responsibility as the maker to ensure that safety guidelines are followed and that the comfort blanket is used in a safe manner.
Tips for keeping track of rounds
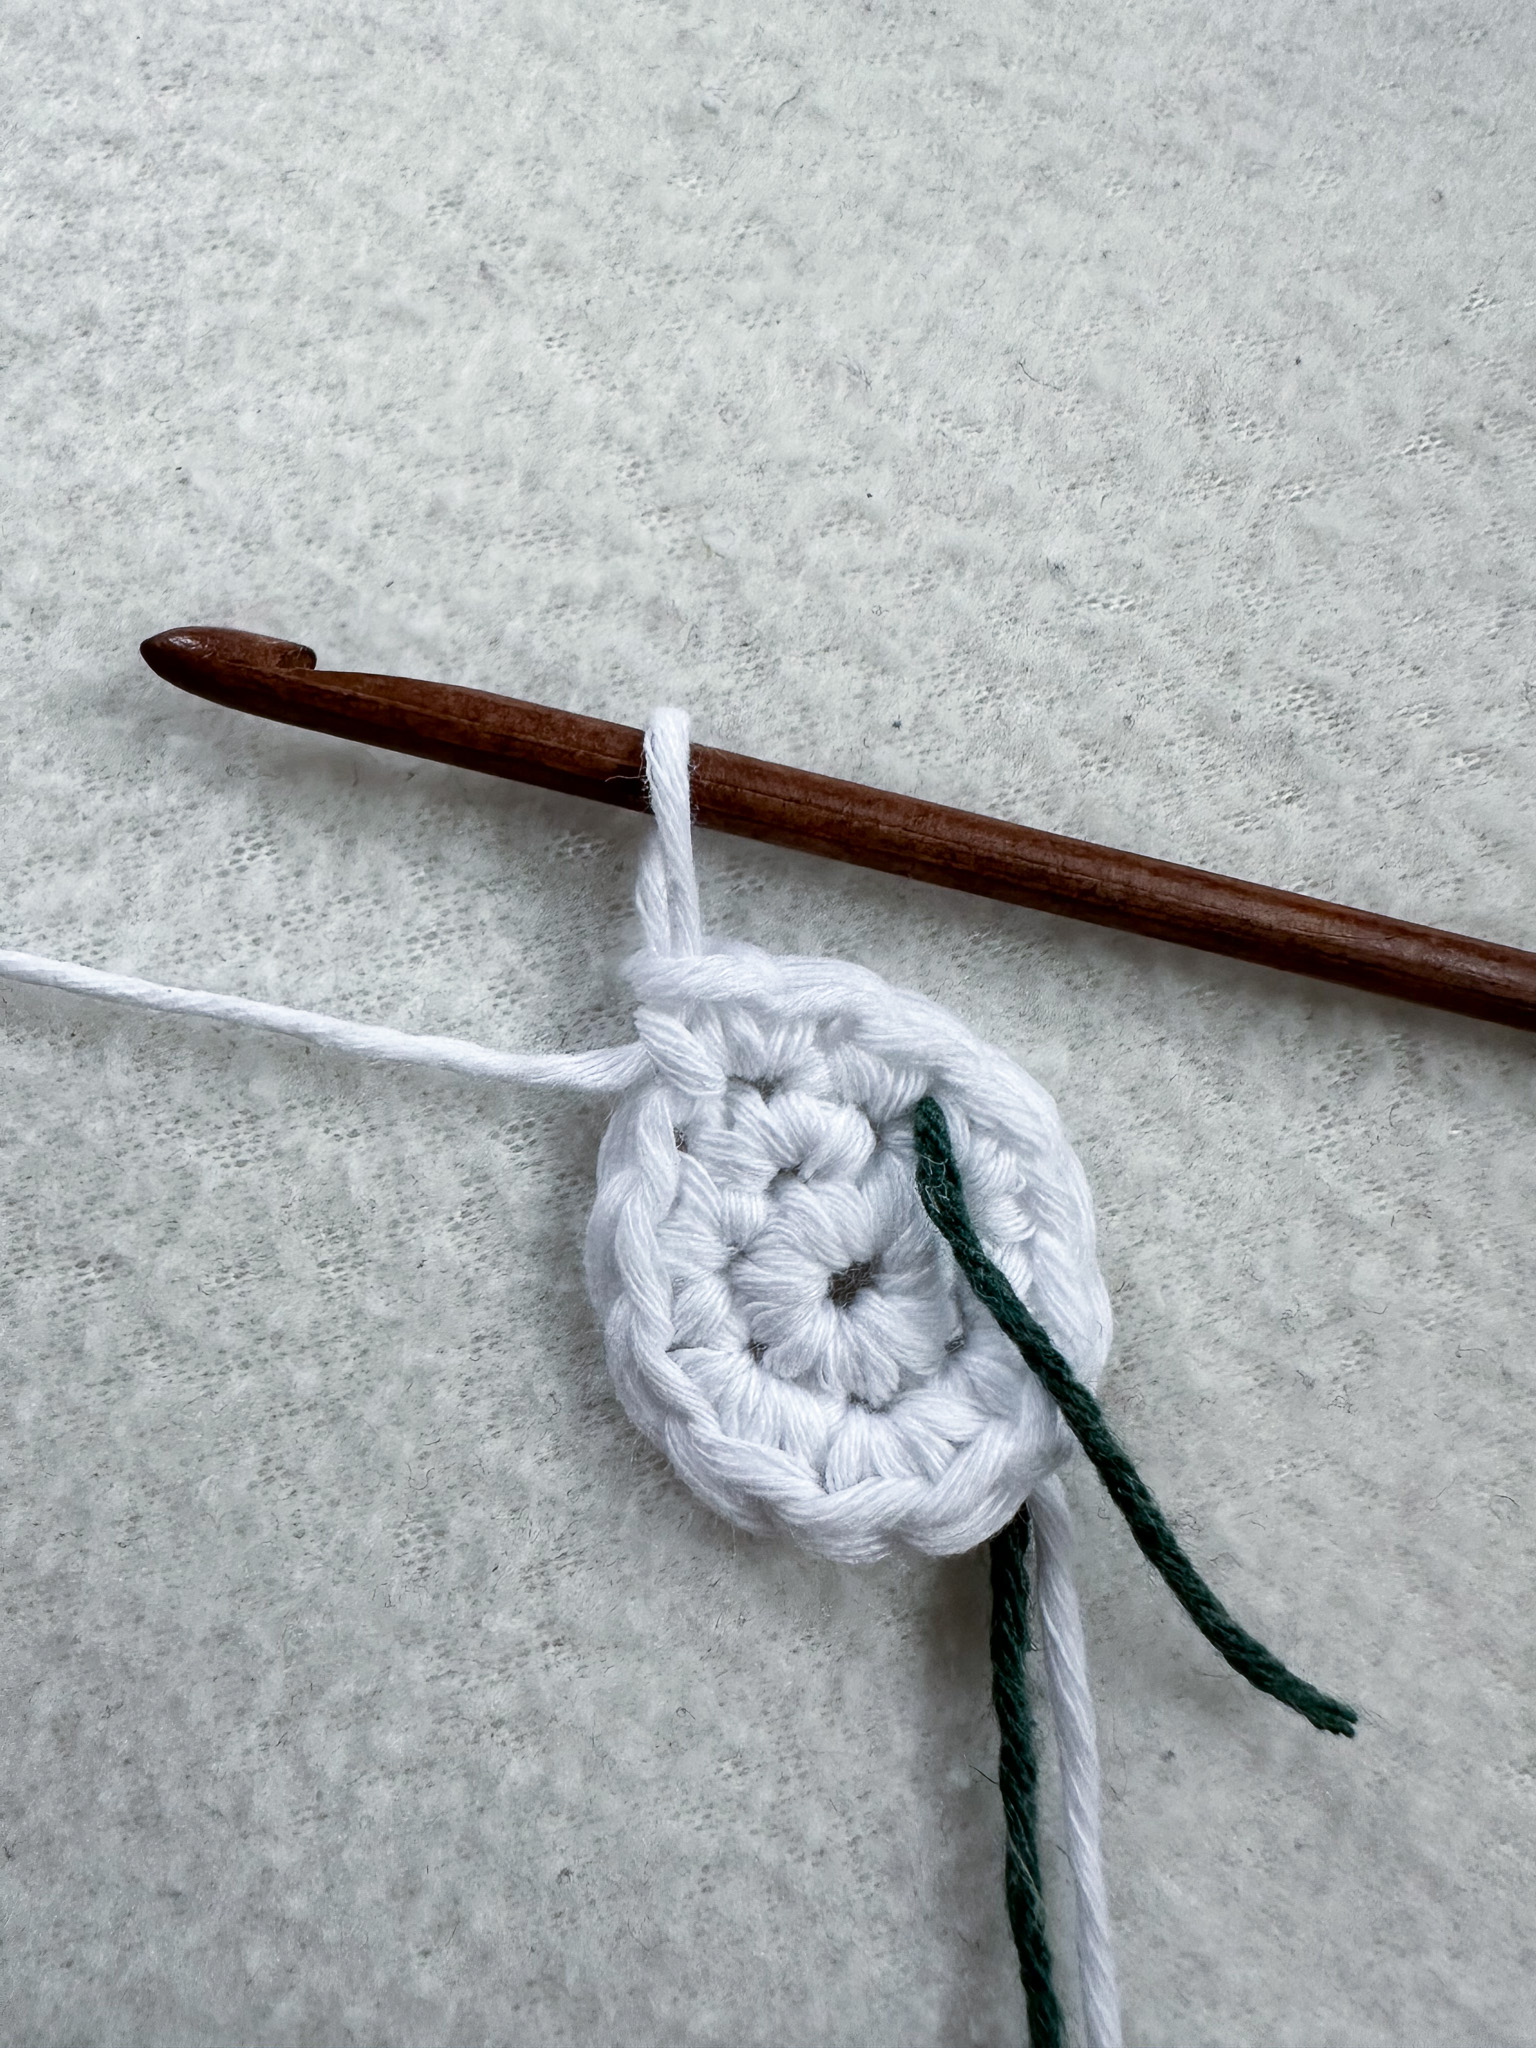
Use a stitch marker and place it in the last stitch of the round to keep track of when a round is complete. As an alternative to a marker, you can cut a short piece of yarn, preferably in a different color from the one you are crocheting with, and place it under the working yarn (the yarn coming from your skein) before you make the first stitch of each round. This way, stitch 1 of each round will end up just to the left of the yarn strand, making it easy to see when you have completed the round. You can then pull out the strand and place it under the yarn again to mark the beginning of the next round. In the instruction images, a dark green yarn strand is used for this purpose.
Head (white yarn)
Round 1: Crochet 6 single crochet stitches into a magic ring. If you are unsure how to crochet a magic ring with single crochet stitches, see the video below.
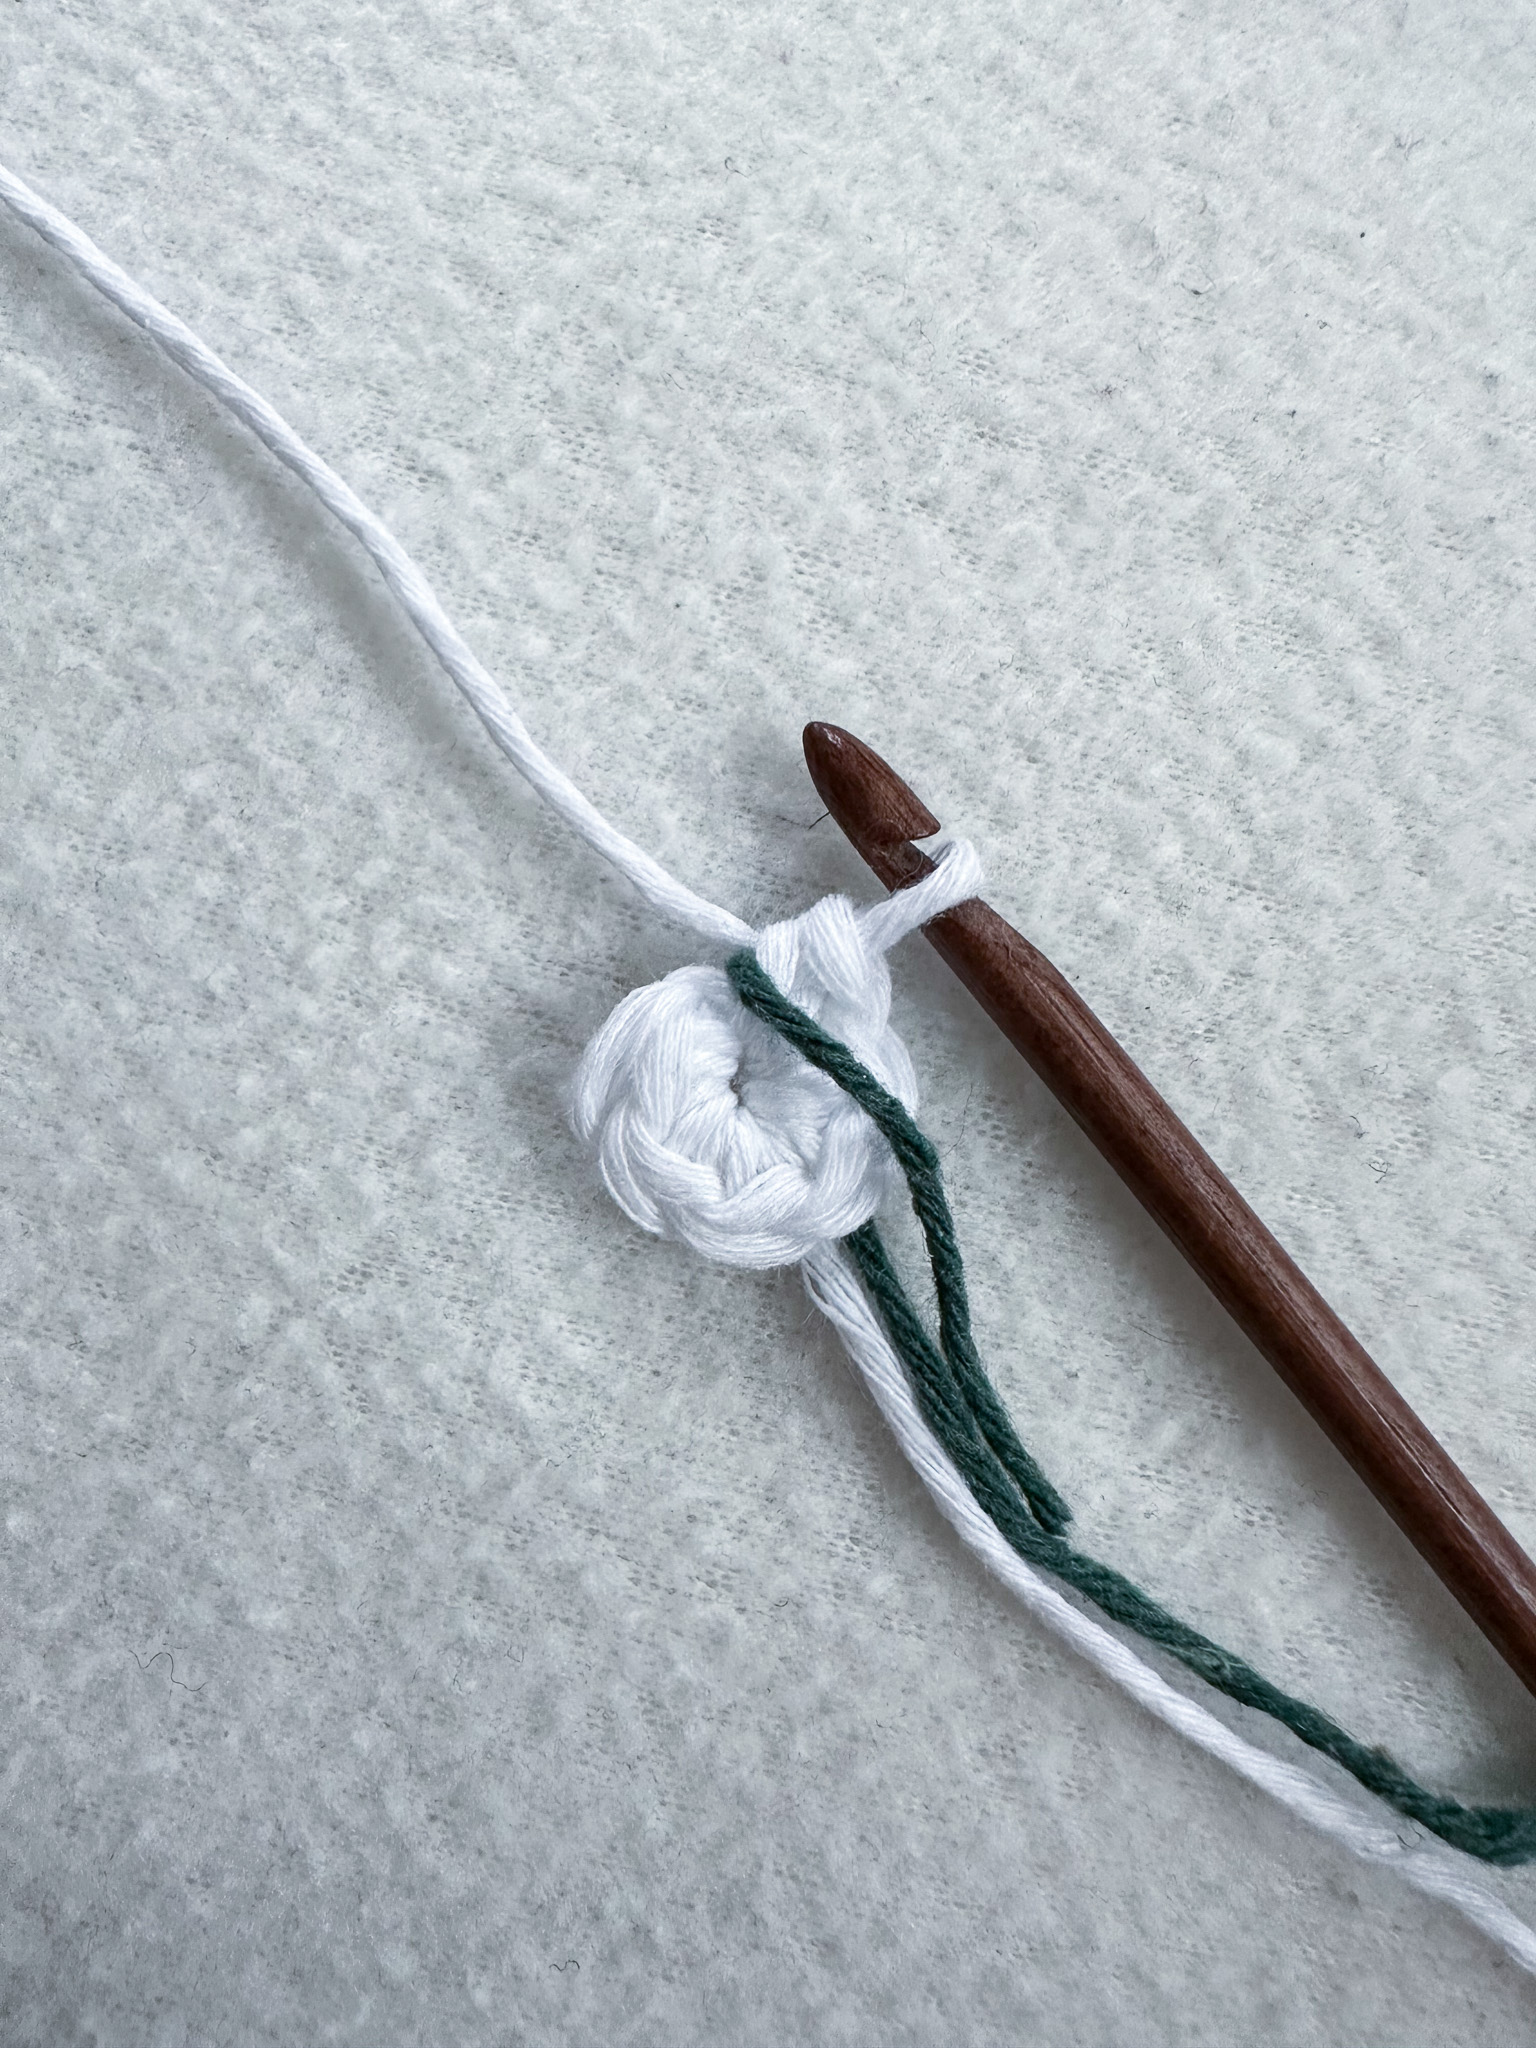
Round 2: Crochet two single crochet stitches in each stitch. You will have a total of 12 stitches in the round.
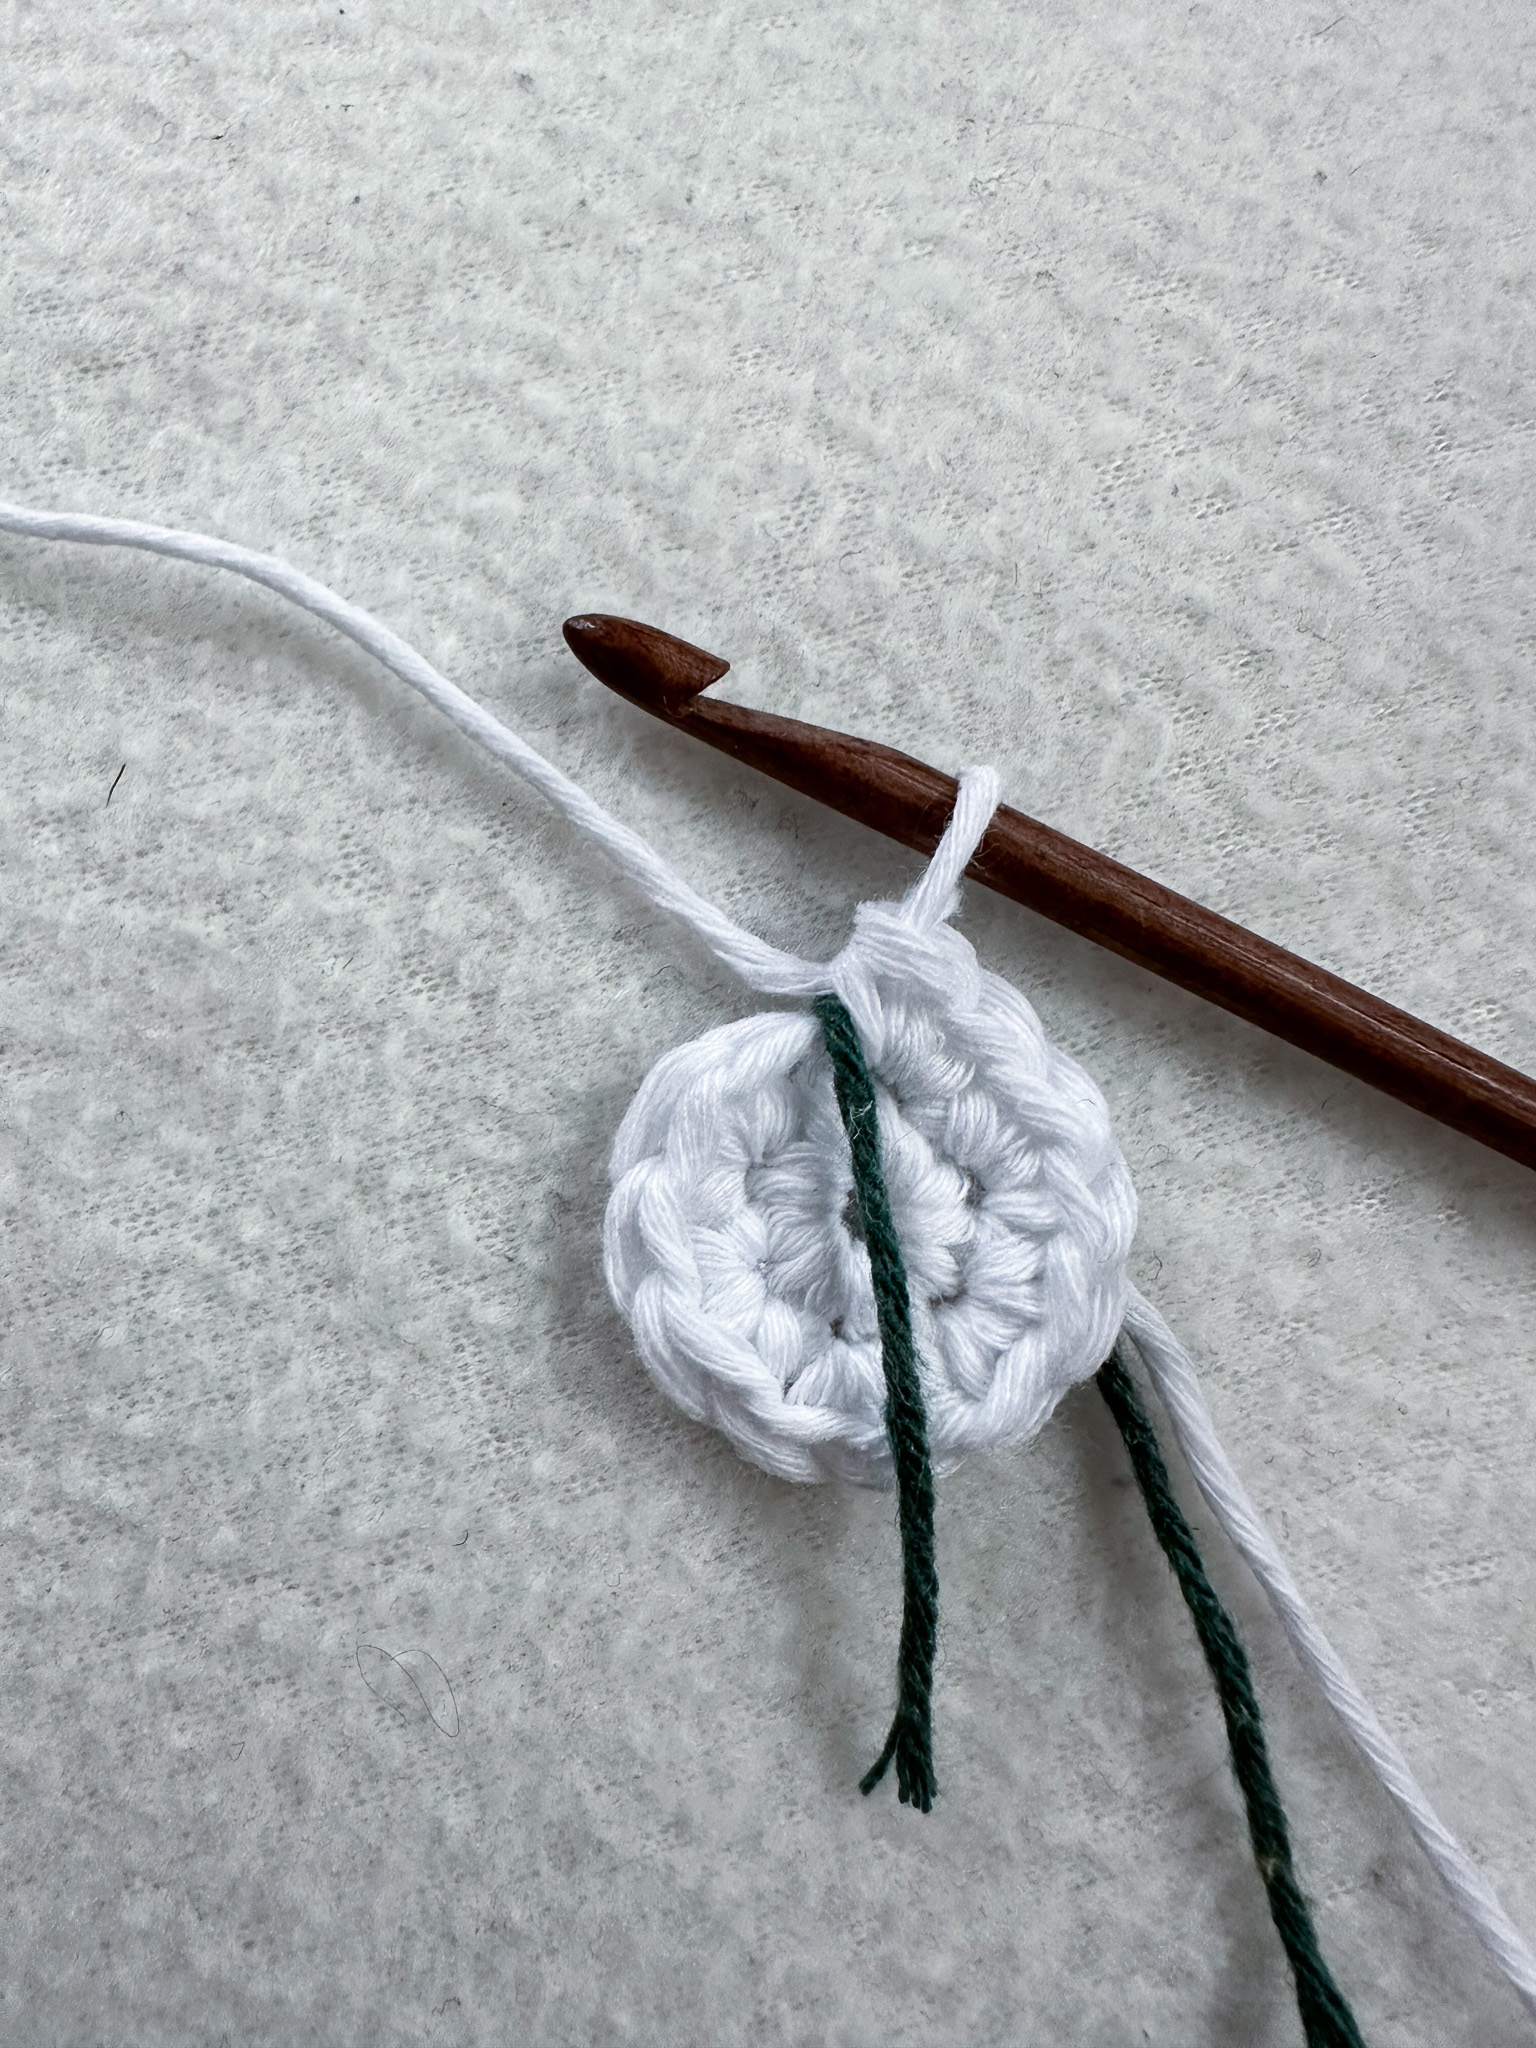
Round 3: Crochet one single crochet in the first stitch. Then crochet two single crochet stitches in the second stitch (an increase). Repeat this pattern (increase in every other stitch) around. You will have a total of 18 stitches in the round.
Round 4: Crochet one single crochet in each of the first two stitches. Then crochet two single crochet stitches in the third stitch. Repeat this pattern (increase in every third stitch) around. You will have a total of 24 stitches in the round.
Round 5: Crochet one single crochet in each of the first three stitches. Then crochet two single crochet stitches in the fourth stitch. Repeat this pattern (increase in every fourth stitch) around. You will have a total of 30 stitches in the round.
Round 6: Crochet one single crochet in each of the first four stitches. Then crochet two single crochet stitches in the fifth stitch. Repeat this pattern around. You will have a total of 36 stitches in the round.
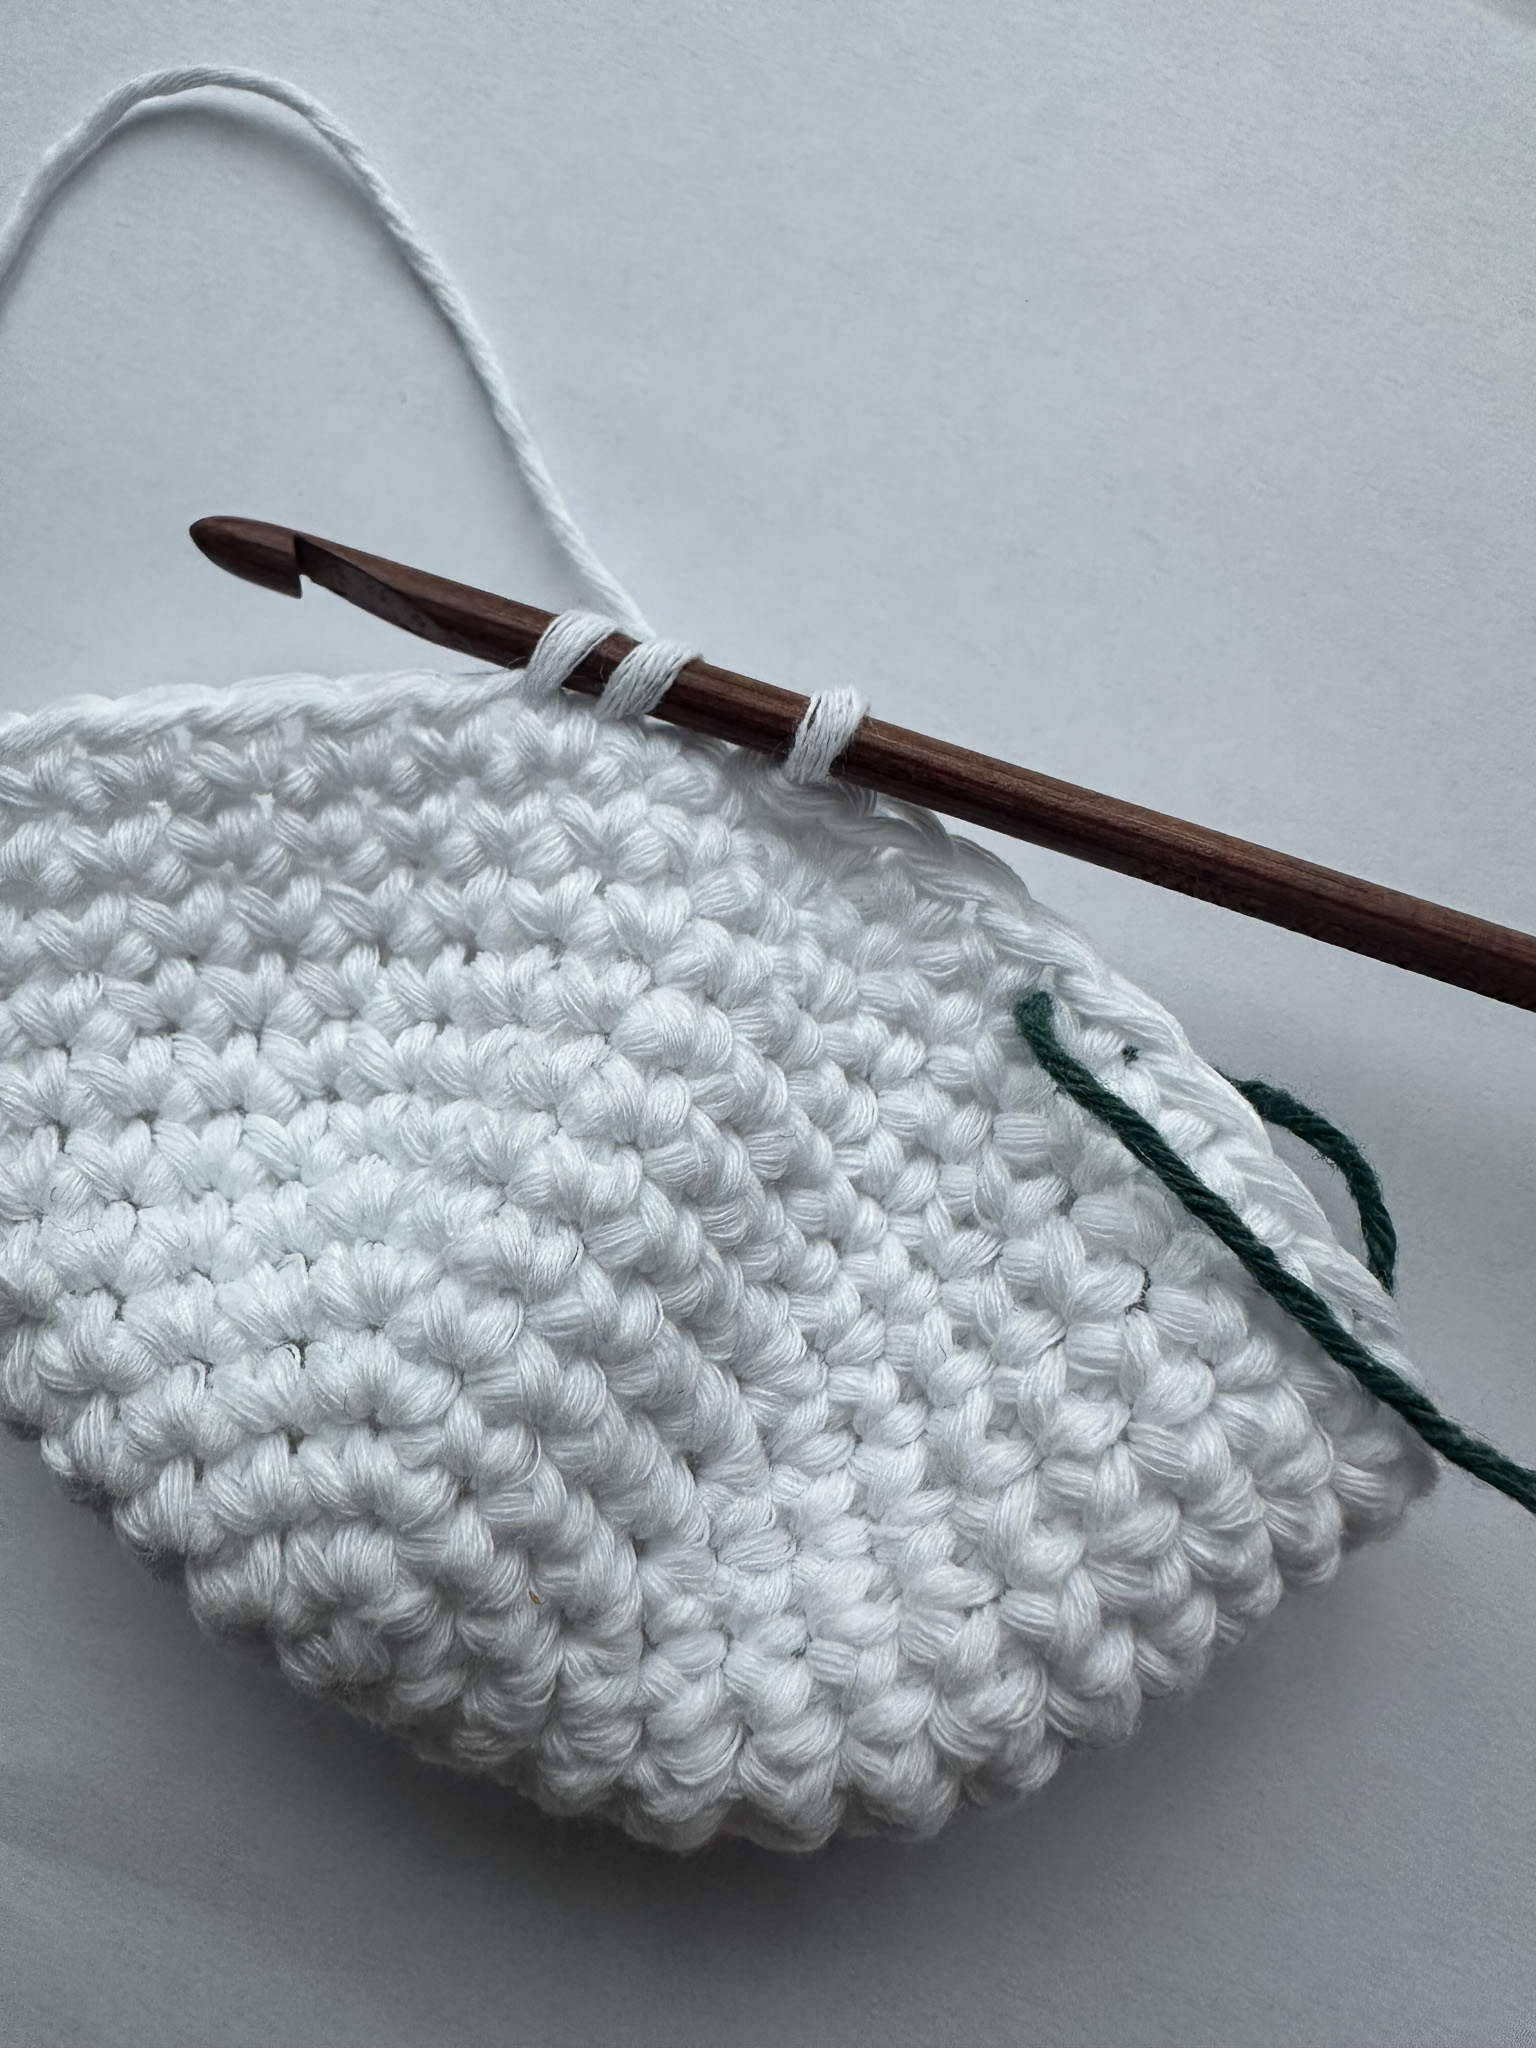
Round 7–12: Crochet 36 single crochet stitches (1 single crochet in each stitch) for a total of 6 rounds.
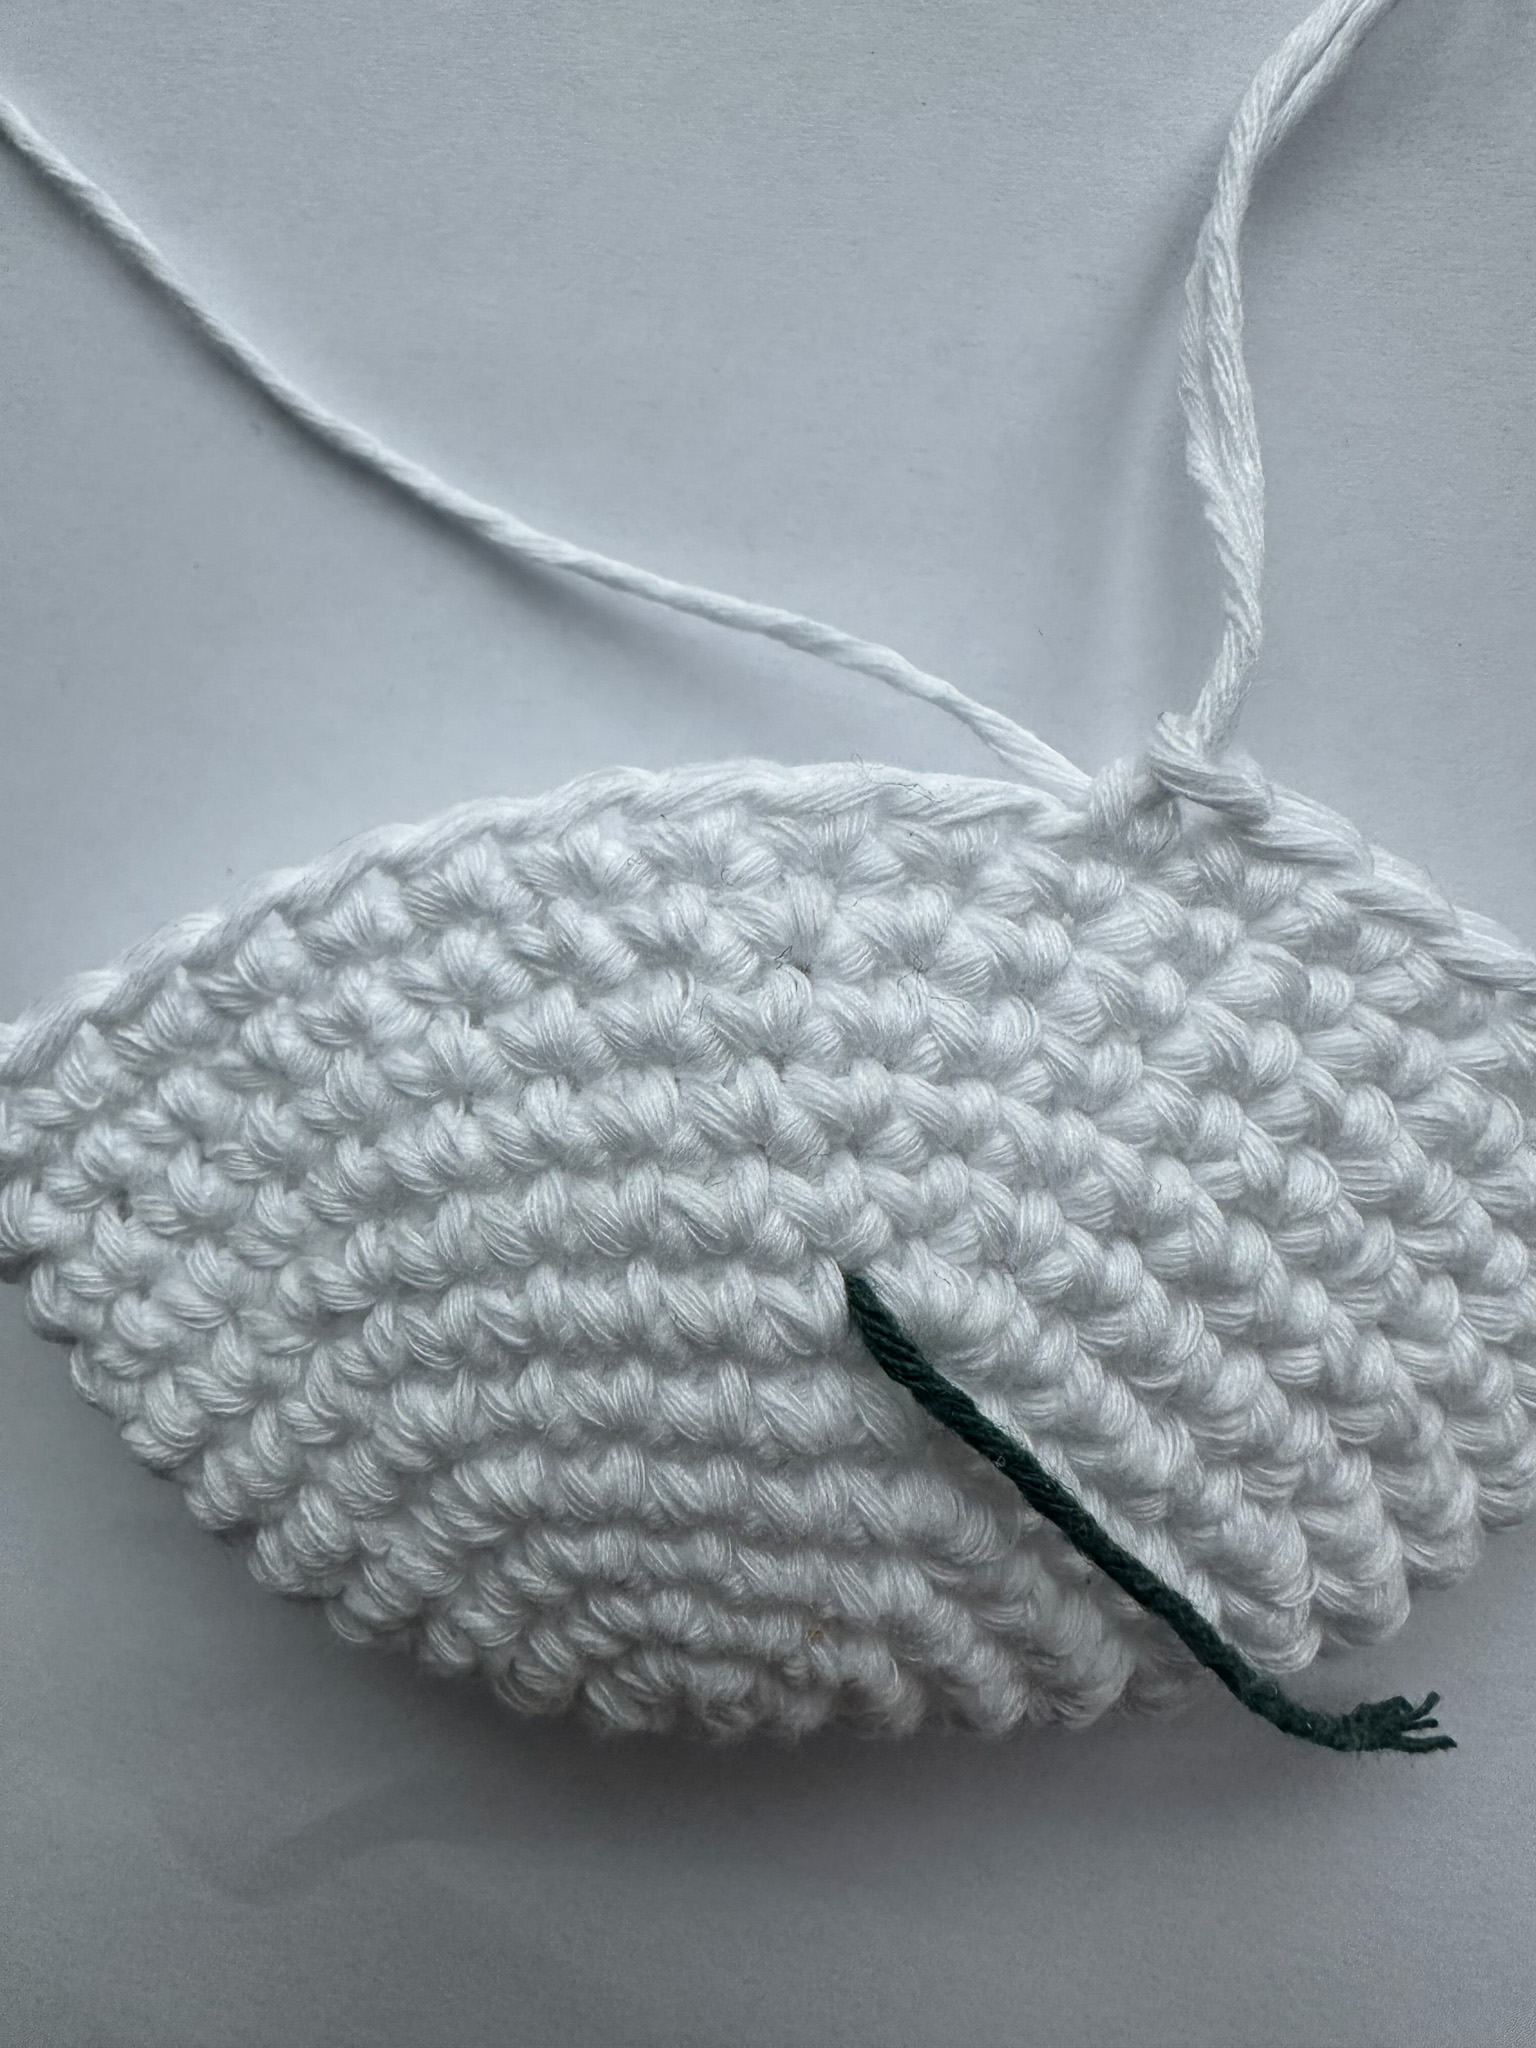
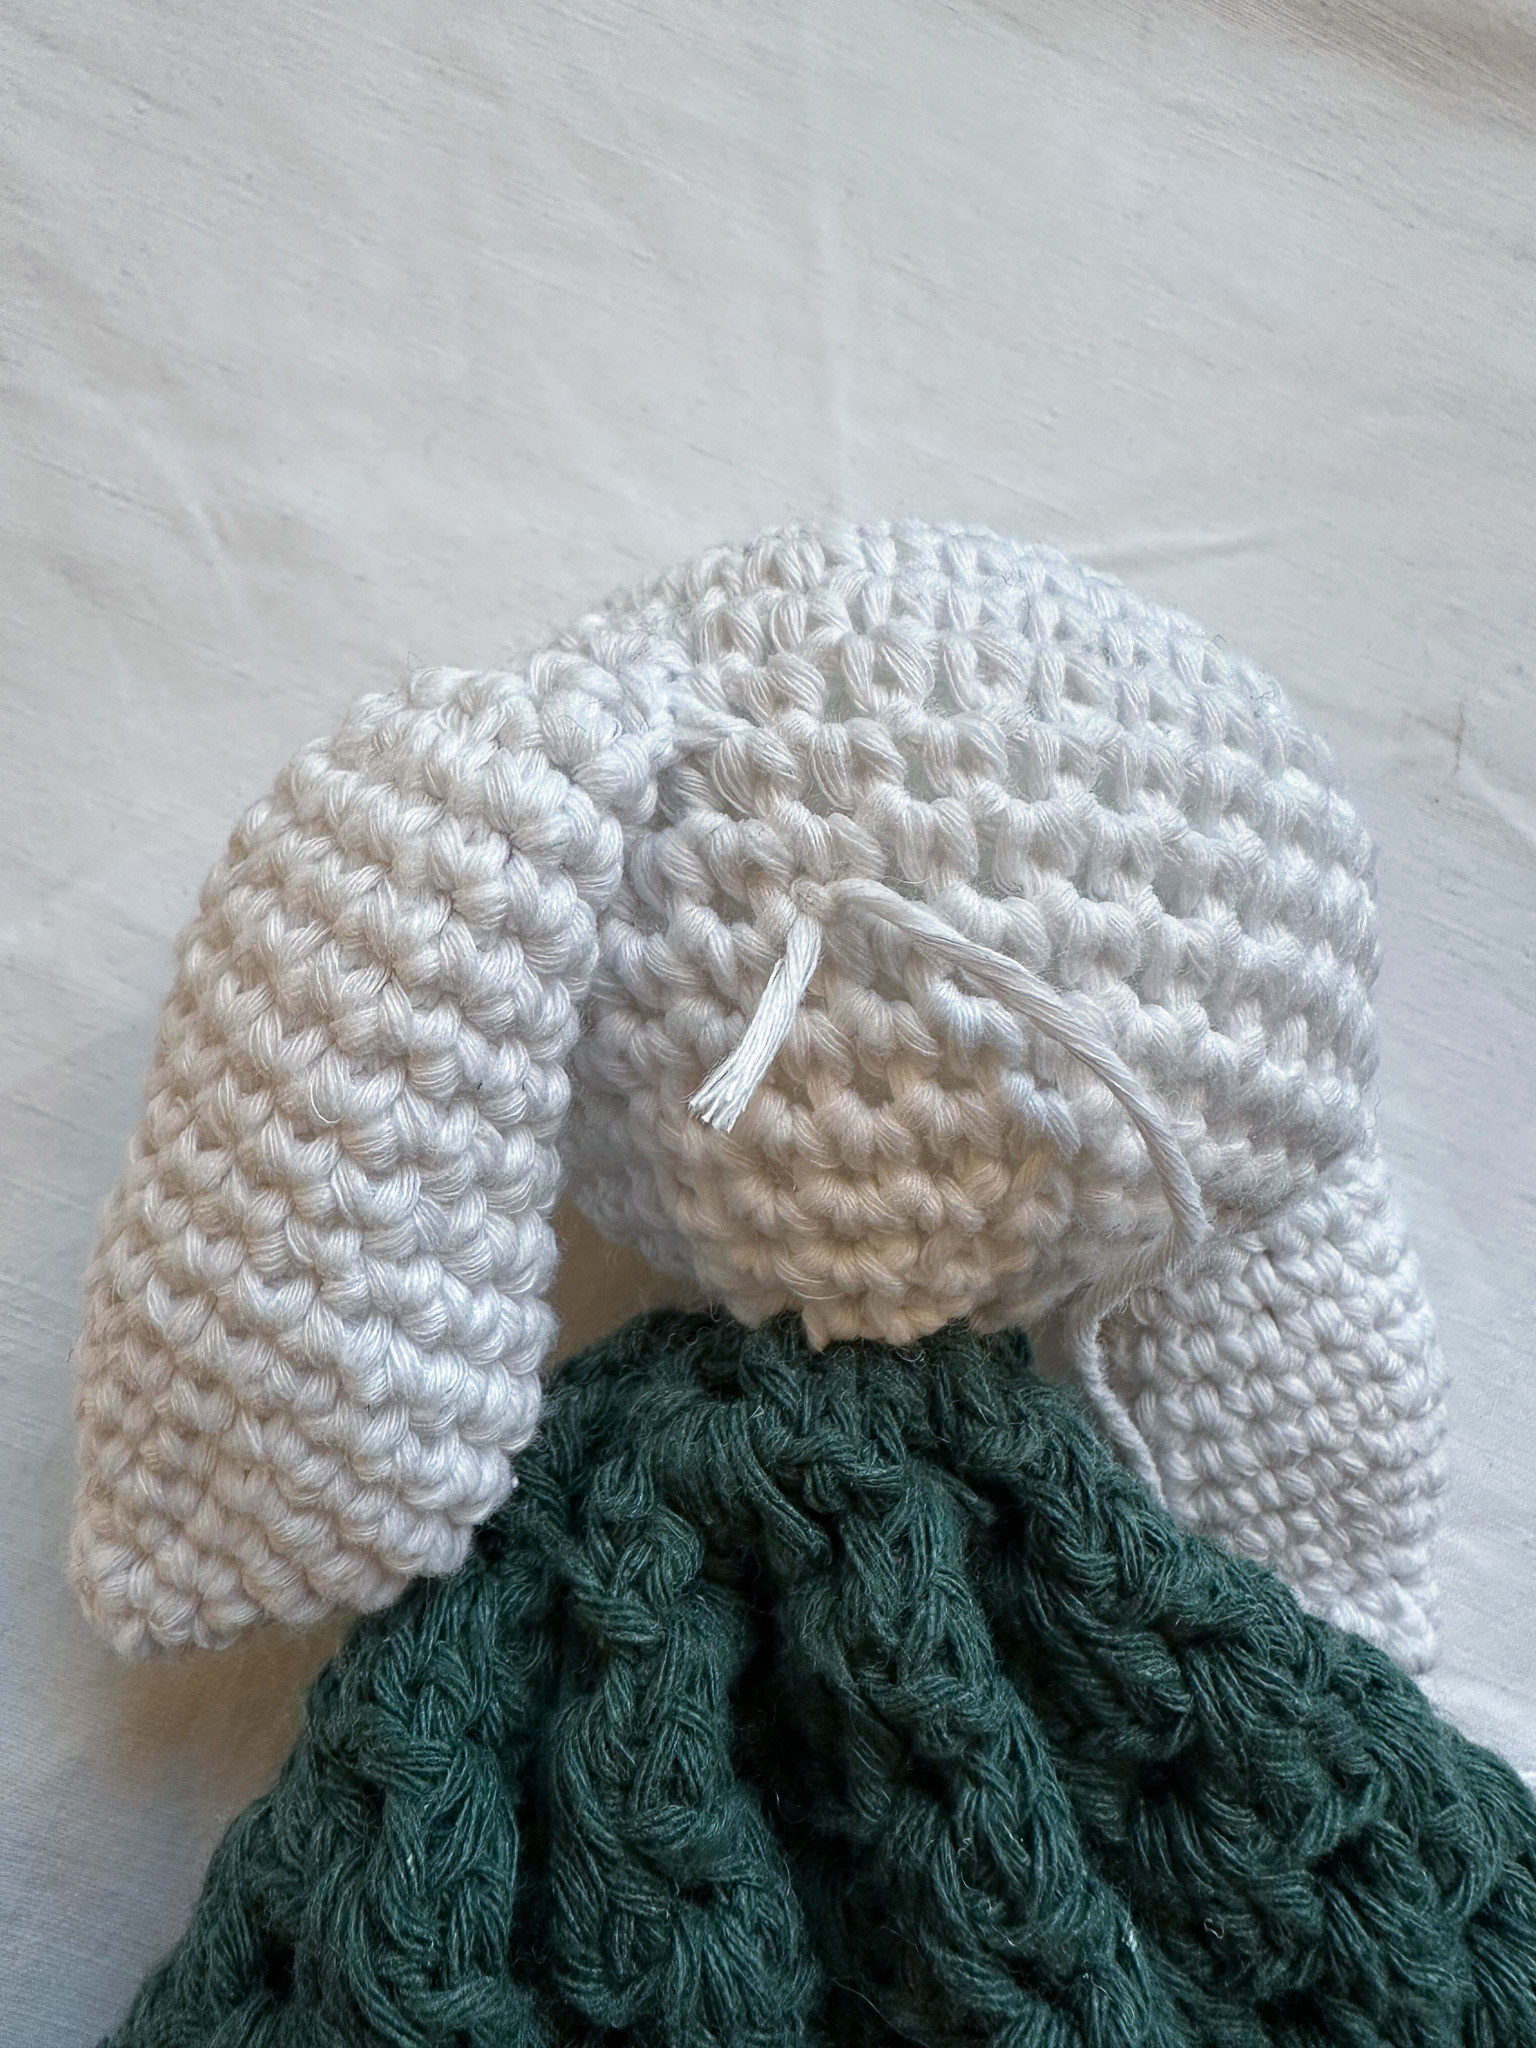
A helpful tip is to keep the marker yarn in place after the first single crochet of round 7, making it easier to count how many rounds you have completed. The markings in the image below show stitch 1 of each round.
Round 13: Crochet one single crochet in each of the first four stitches. The next two stitches (stitches 5 and 6) are crocheted together as one single crochet (a decrease). Repeat this pattern (decrease in every fifth stitch) around. You will have a total of 30 stitches in the round.
If you are unsure how to crochet a decrease, see the video below.
Round 14: Crochet one single crochet in each of the first three stitches. Then make a decrease. Repeat this pattern (decrease in every 4th and 5th stitch) around. You will have a total of 24 stitches in the round.
Round 15: Crochet one single crochet in each of the first two stitches. Then make a decrease. Repeat this pattern (decrease in every 3rd and 4th stitch) around. You will have a total of 18 stitches in the round.
Now begin stuffing the head with fiberfill. Do not stuff too tightly, as this can create gaps between the stitches, but also not too loosely, or the head will lose its shape.
Round 16: Crochet one single crochet, then make a decrease. Repeat this pattern (decrease in every other stitch) around. You will have a total of 12 stitches in the round.
Add more fiberfill until no more will fit. You get a nicer and firmer shape when the head is well stuffed but you don´t want it to create gaps between the stitches..
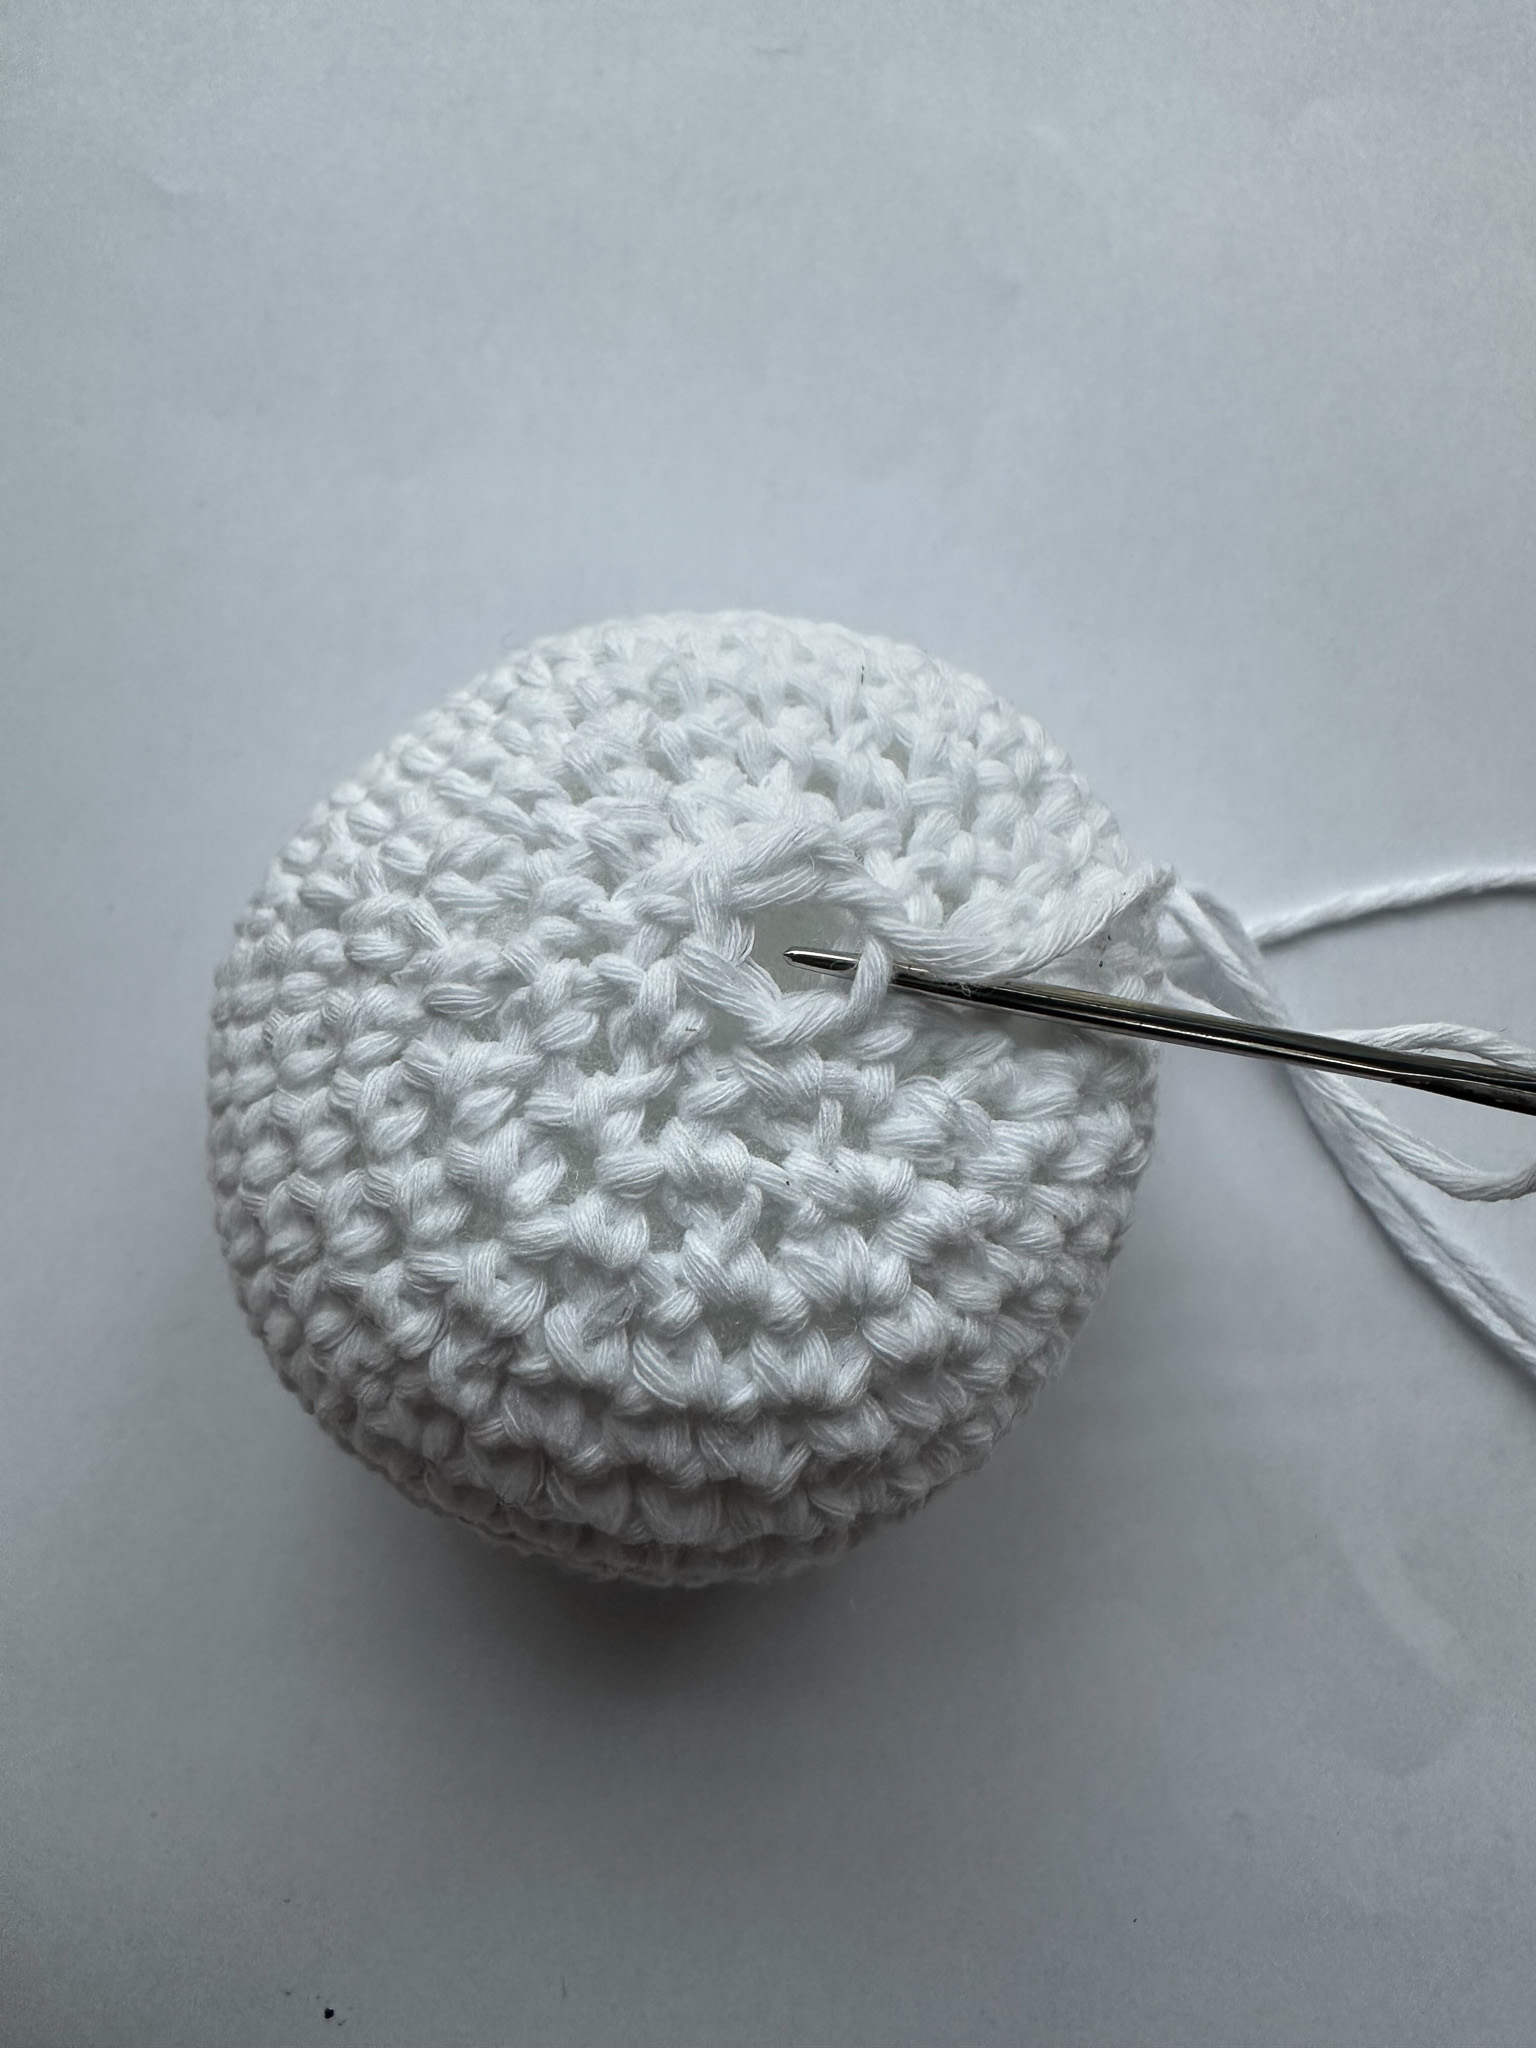
Round 17: Make 6 decreases. You will have a total of 6 stitches in the round. Fasten off and cut the yarn, but leave a long yarn tail. If you like, you can close the small opening with the yarn tail and a needle for a few stitches. Do not cut the tail, as it will be used to sew the head onto the blanket.
Ears – make 2 (white yarn)
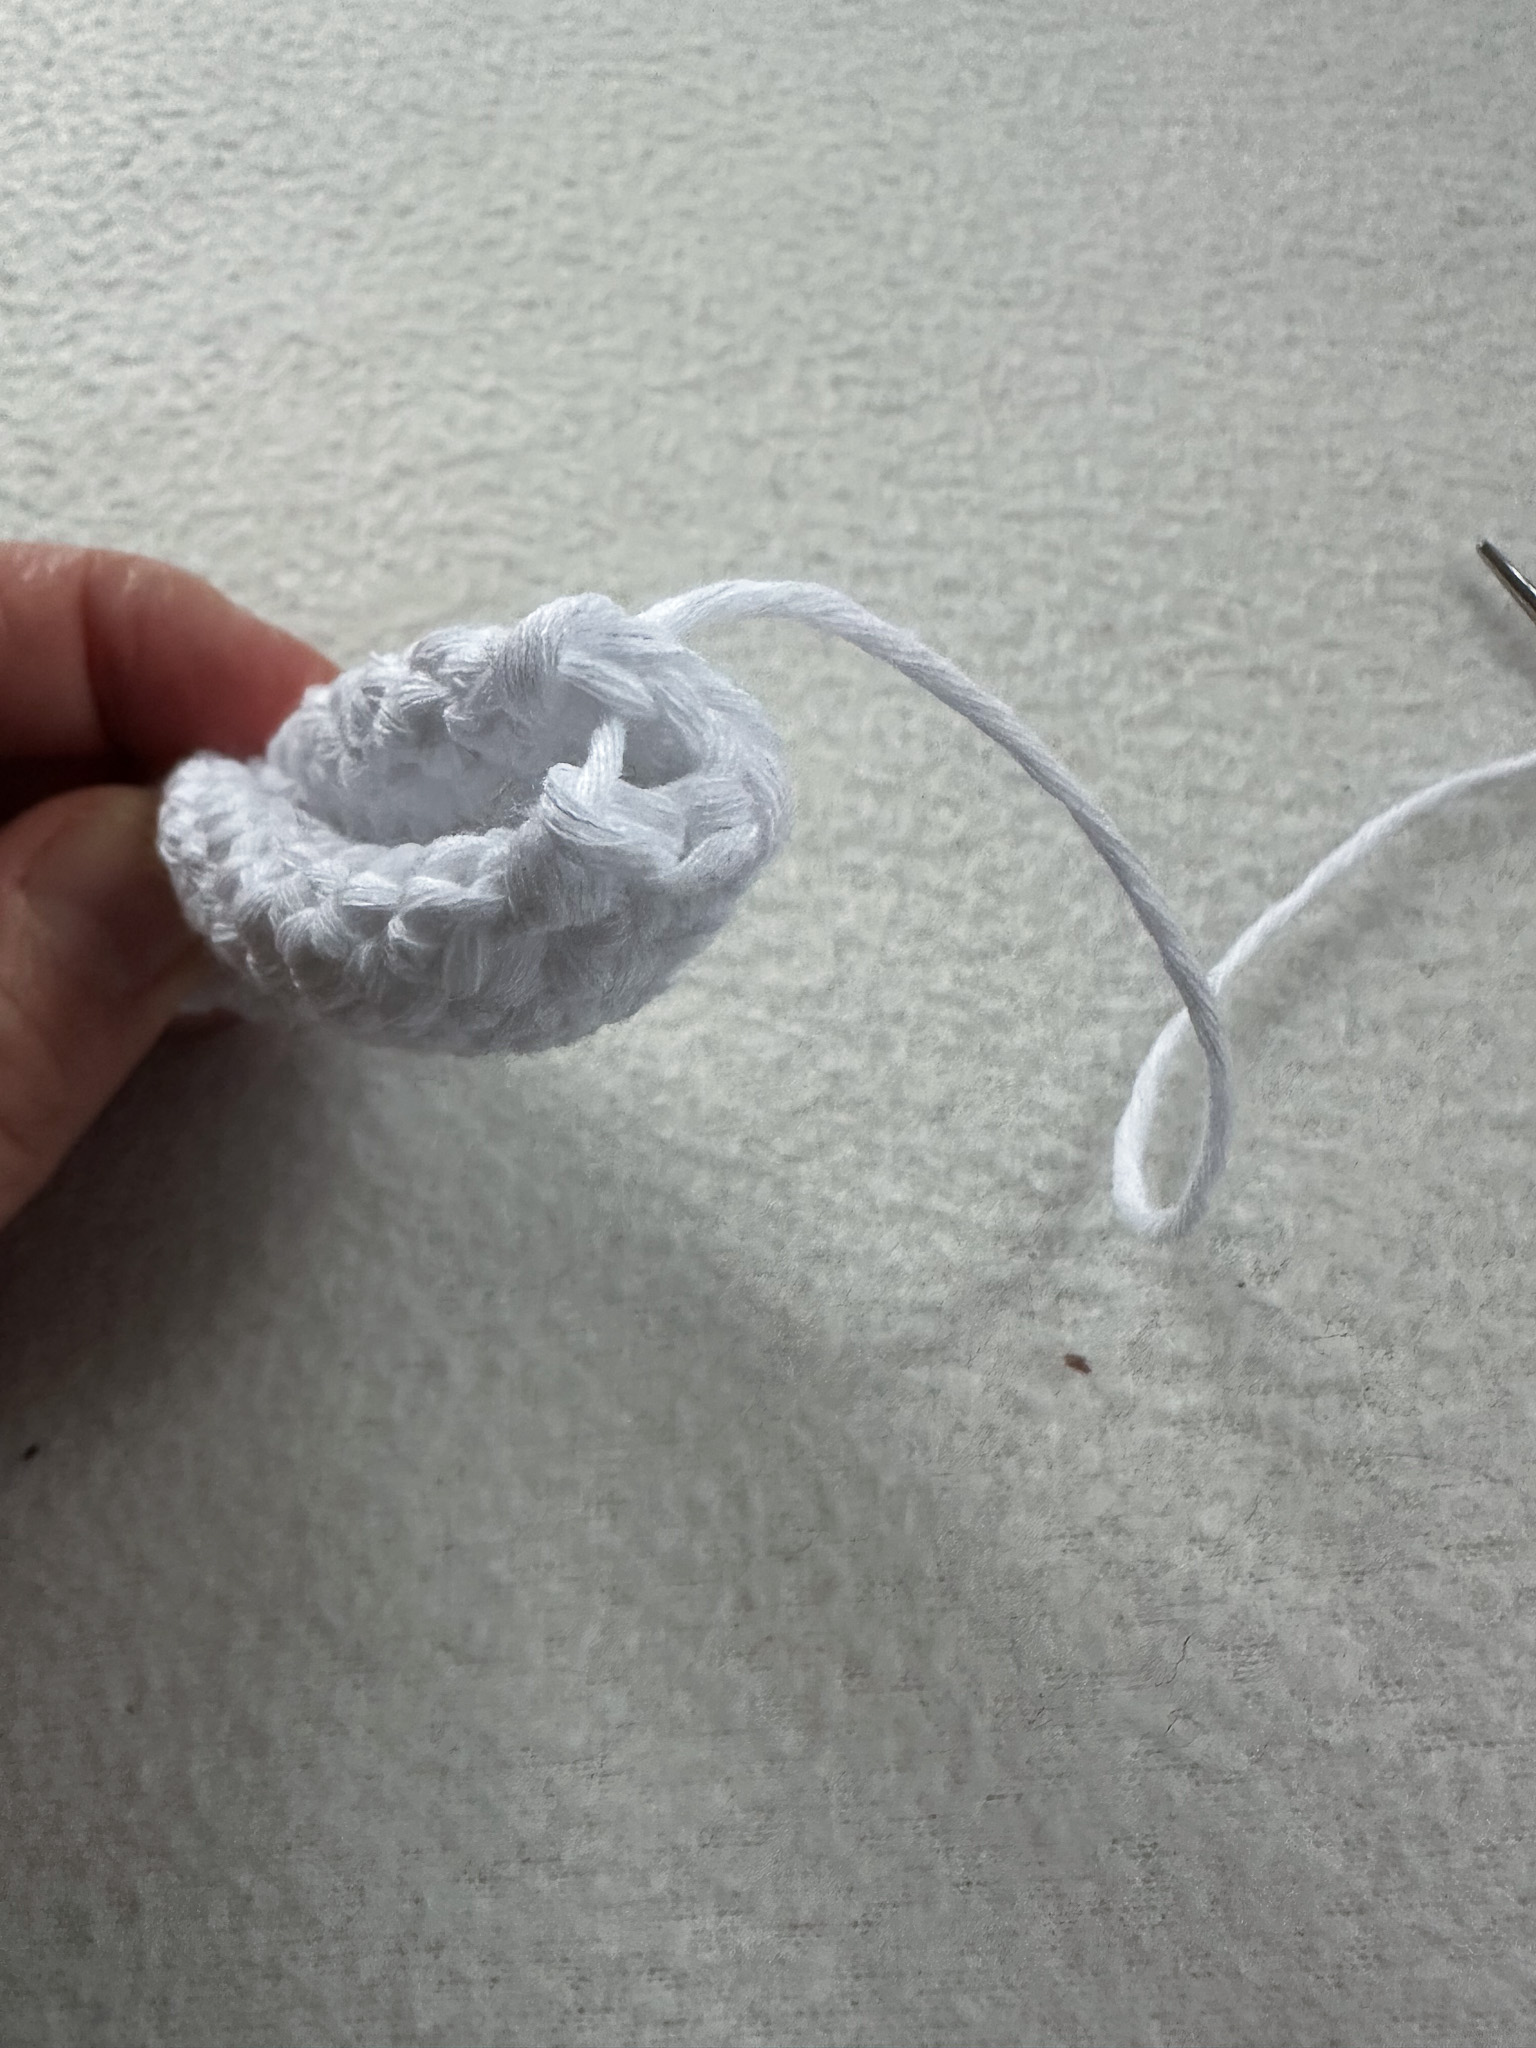
Round 1: Crochet 6 single crochet stitches into a magic ring.
Round 2: Crochet one single crochet in each stitch. You will have a total of 6 stitches in the round.
Round 3: Crochet one single crochet in the first stitch. Then crochet two single crochet stitches in the second stitch (an increase). Repeat this pattern (increase in every other stitch) around. You will have a total of 9 stitches in the round.
Round 4: Crochet one single crochet in each of the first two stitches. Then crochet two single crochet stitches in the third stitch. Repeat this pattern (increase in every third stitch) around. You will have a total of 12 stitches in the round.
Round 5: Crochet one single crochet in each of the first three stitches. Then crochet two single crochet stitches in the fourth stitch. Repeat this pattern (increase in every fourth stitch) around. You will have a total of 15 stitches in the round.
Round 6: Crochet one single crochet in each of the first four stitches. Then crochet two single crochet stitches in the fifth stitch. Repeat this pattern around. You will have a total of 18 stitches in the round.
Round 7–15: Crochet 18 single crochet stitches (1 single crochet in each stitch) for a total of 9 rounds. A helpful tip is to keep the marker yarn in place after the first single crochet of round 7 to make it easier to count how many rounds you have completed.
Round 16: Crochet one single crochet in each of the first four stitches. The next two stitches (stitches 5 and 6) are crocheted together as one single crochet (a decrease). Repeat this pattern (decrease in every fifth stitch) around. You will have a total of 15 stitches in the round.
Round 17: Crochet one single crochet in each of the first three stitches, then make a decrease. Repeat this pattern (decrease in every fourth stitch) around. You will have a total of 12 stitches in the round.
Lay the ear flat and crochet it closed with 5 single crochet stitches through both layers. Fasten off and cut the yarn, but leave a long yarn tail.
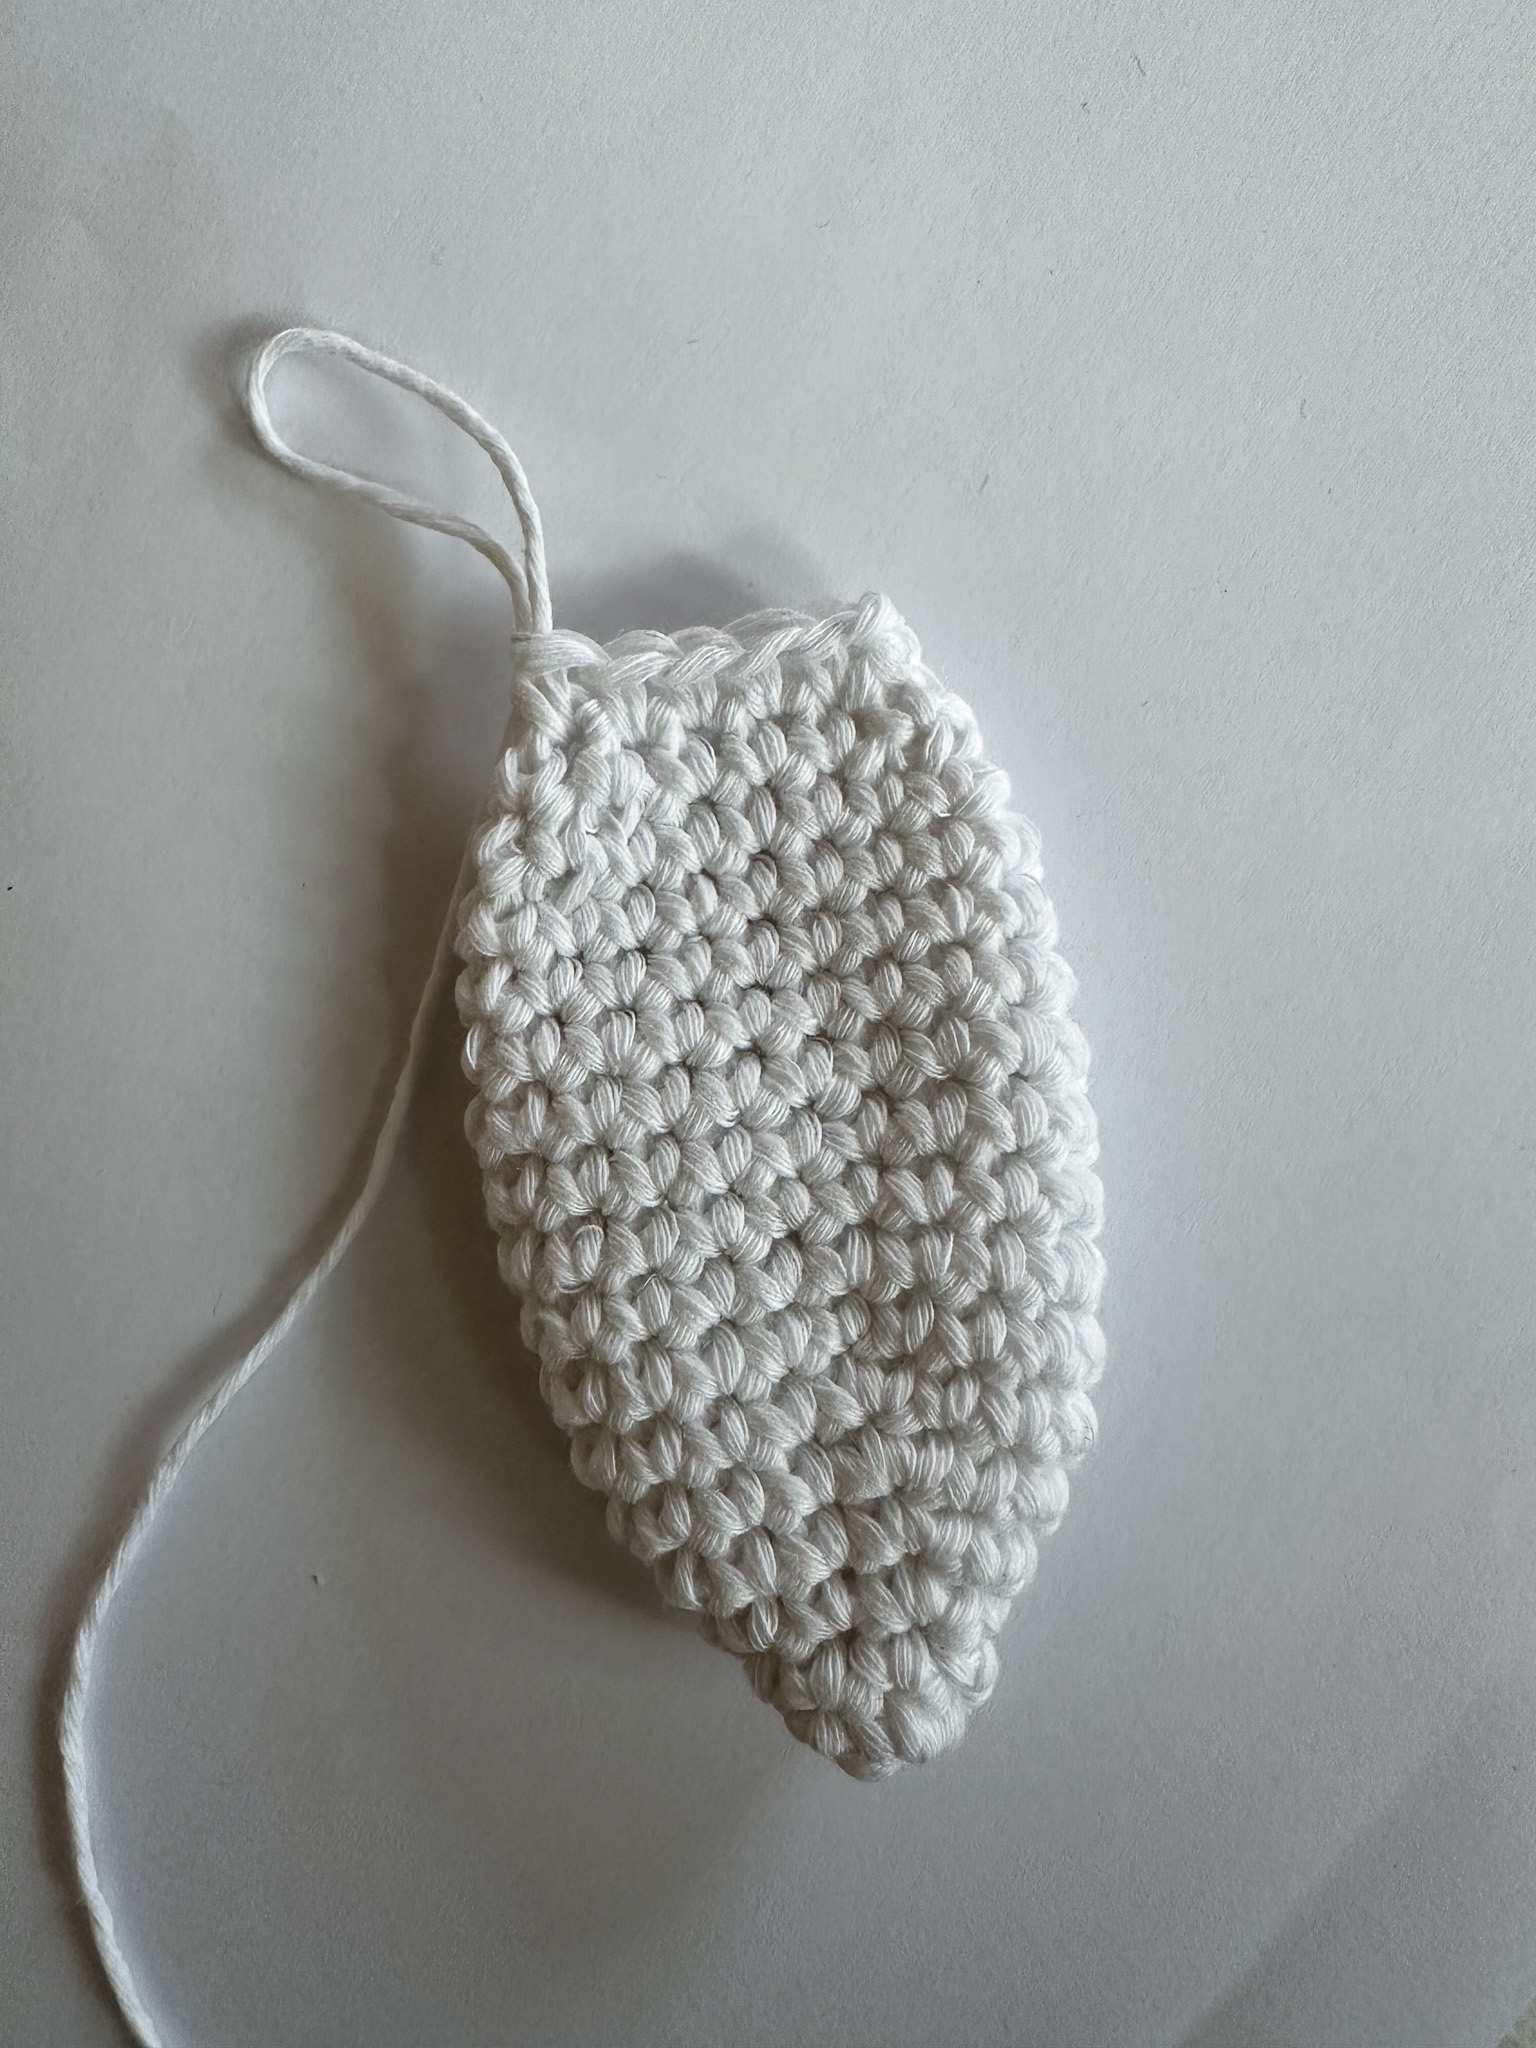
Then fold the ear in half and pull the yarn through to hold the ear together in its folded position. Keep the yarn tail to sew the ear onto the head.
Now you will sew on the eyes and embroider the face. The order below is designed to make it easiest to center everything and keep it straight.
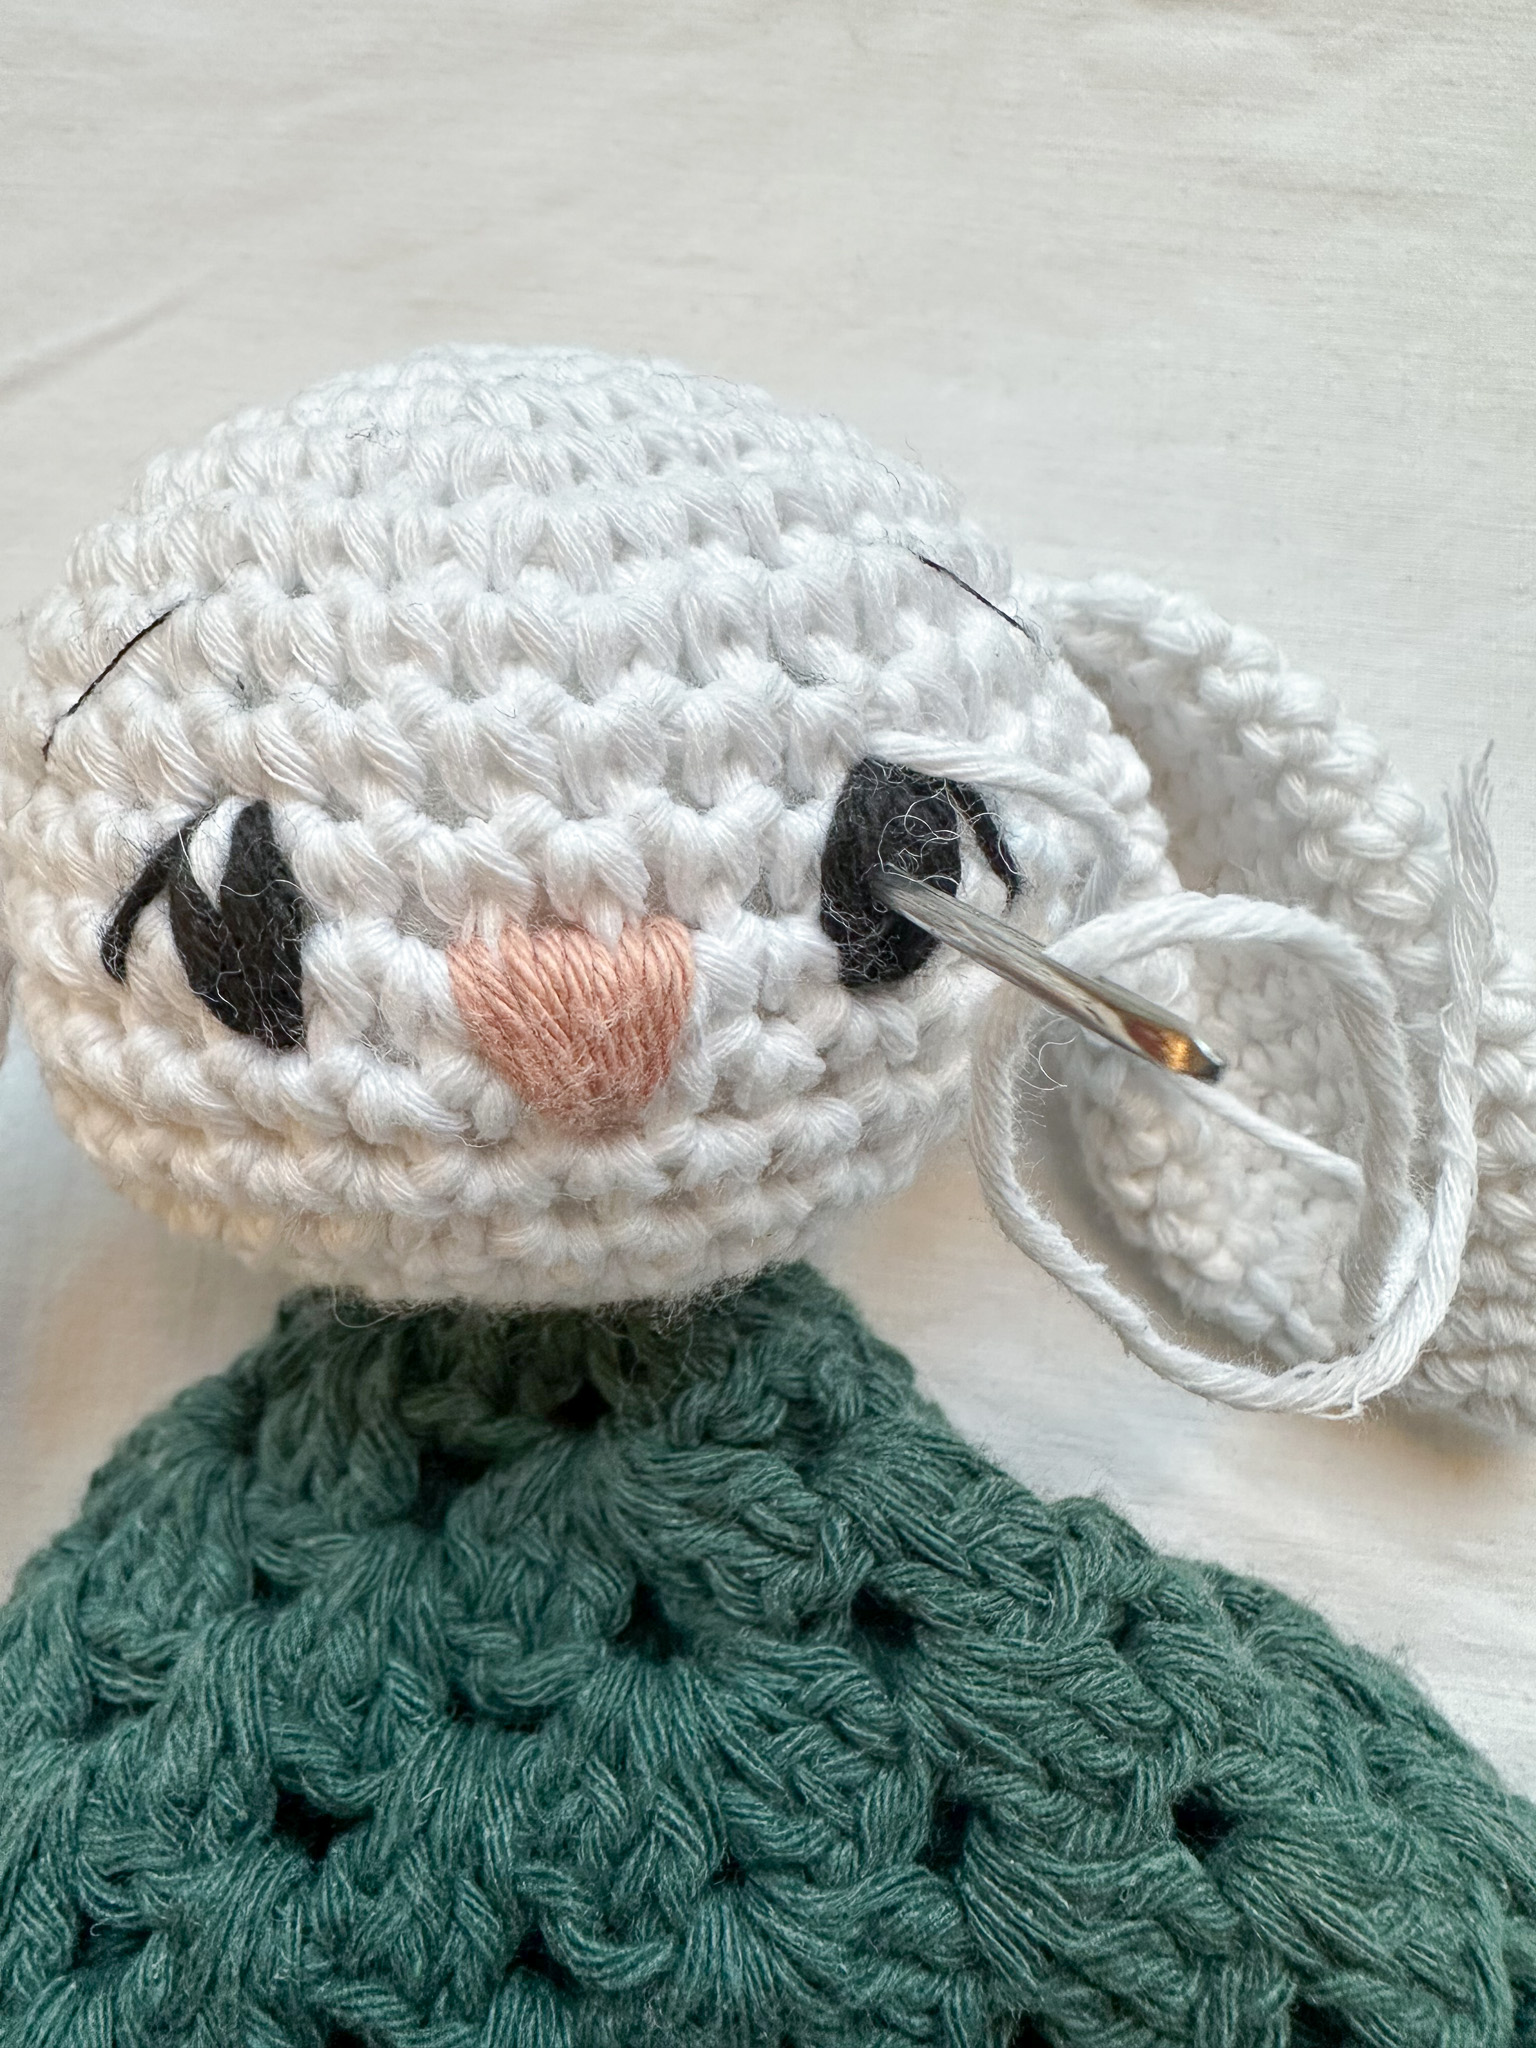
Sew on the ears
Make sure to attach the ears securely and tightly, tying knots! Loose ears can pose a safety risk.
Pin the ears approximately 8 rounds down from the magic ring at the top of the head. Start by pinning both ears in place before sewing them on. Check that the ears are positioned evenly in terms of height and width. When you are satisfied with the placement, sew both ears securely. Make sure the folds in the ears are facing the same direction.
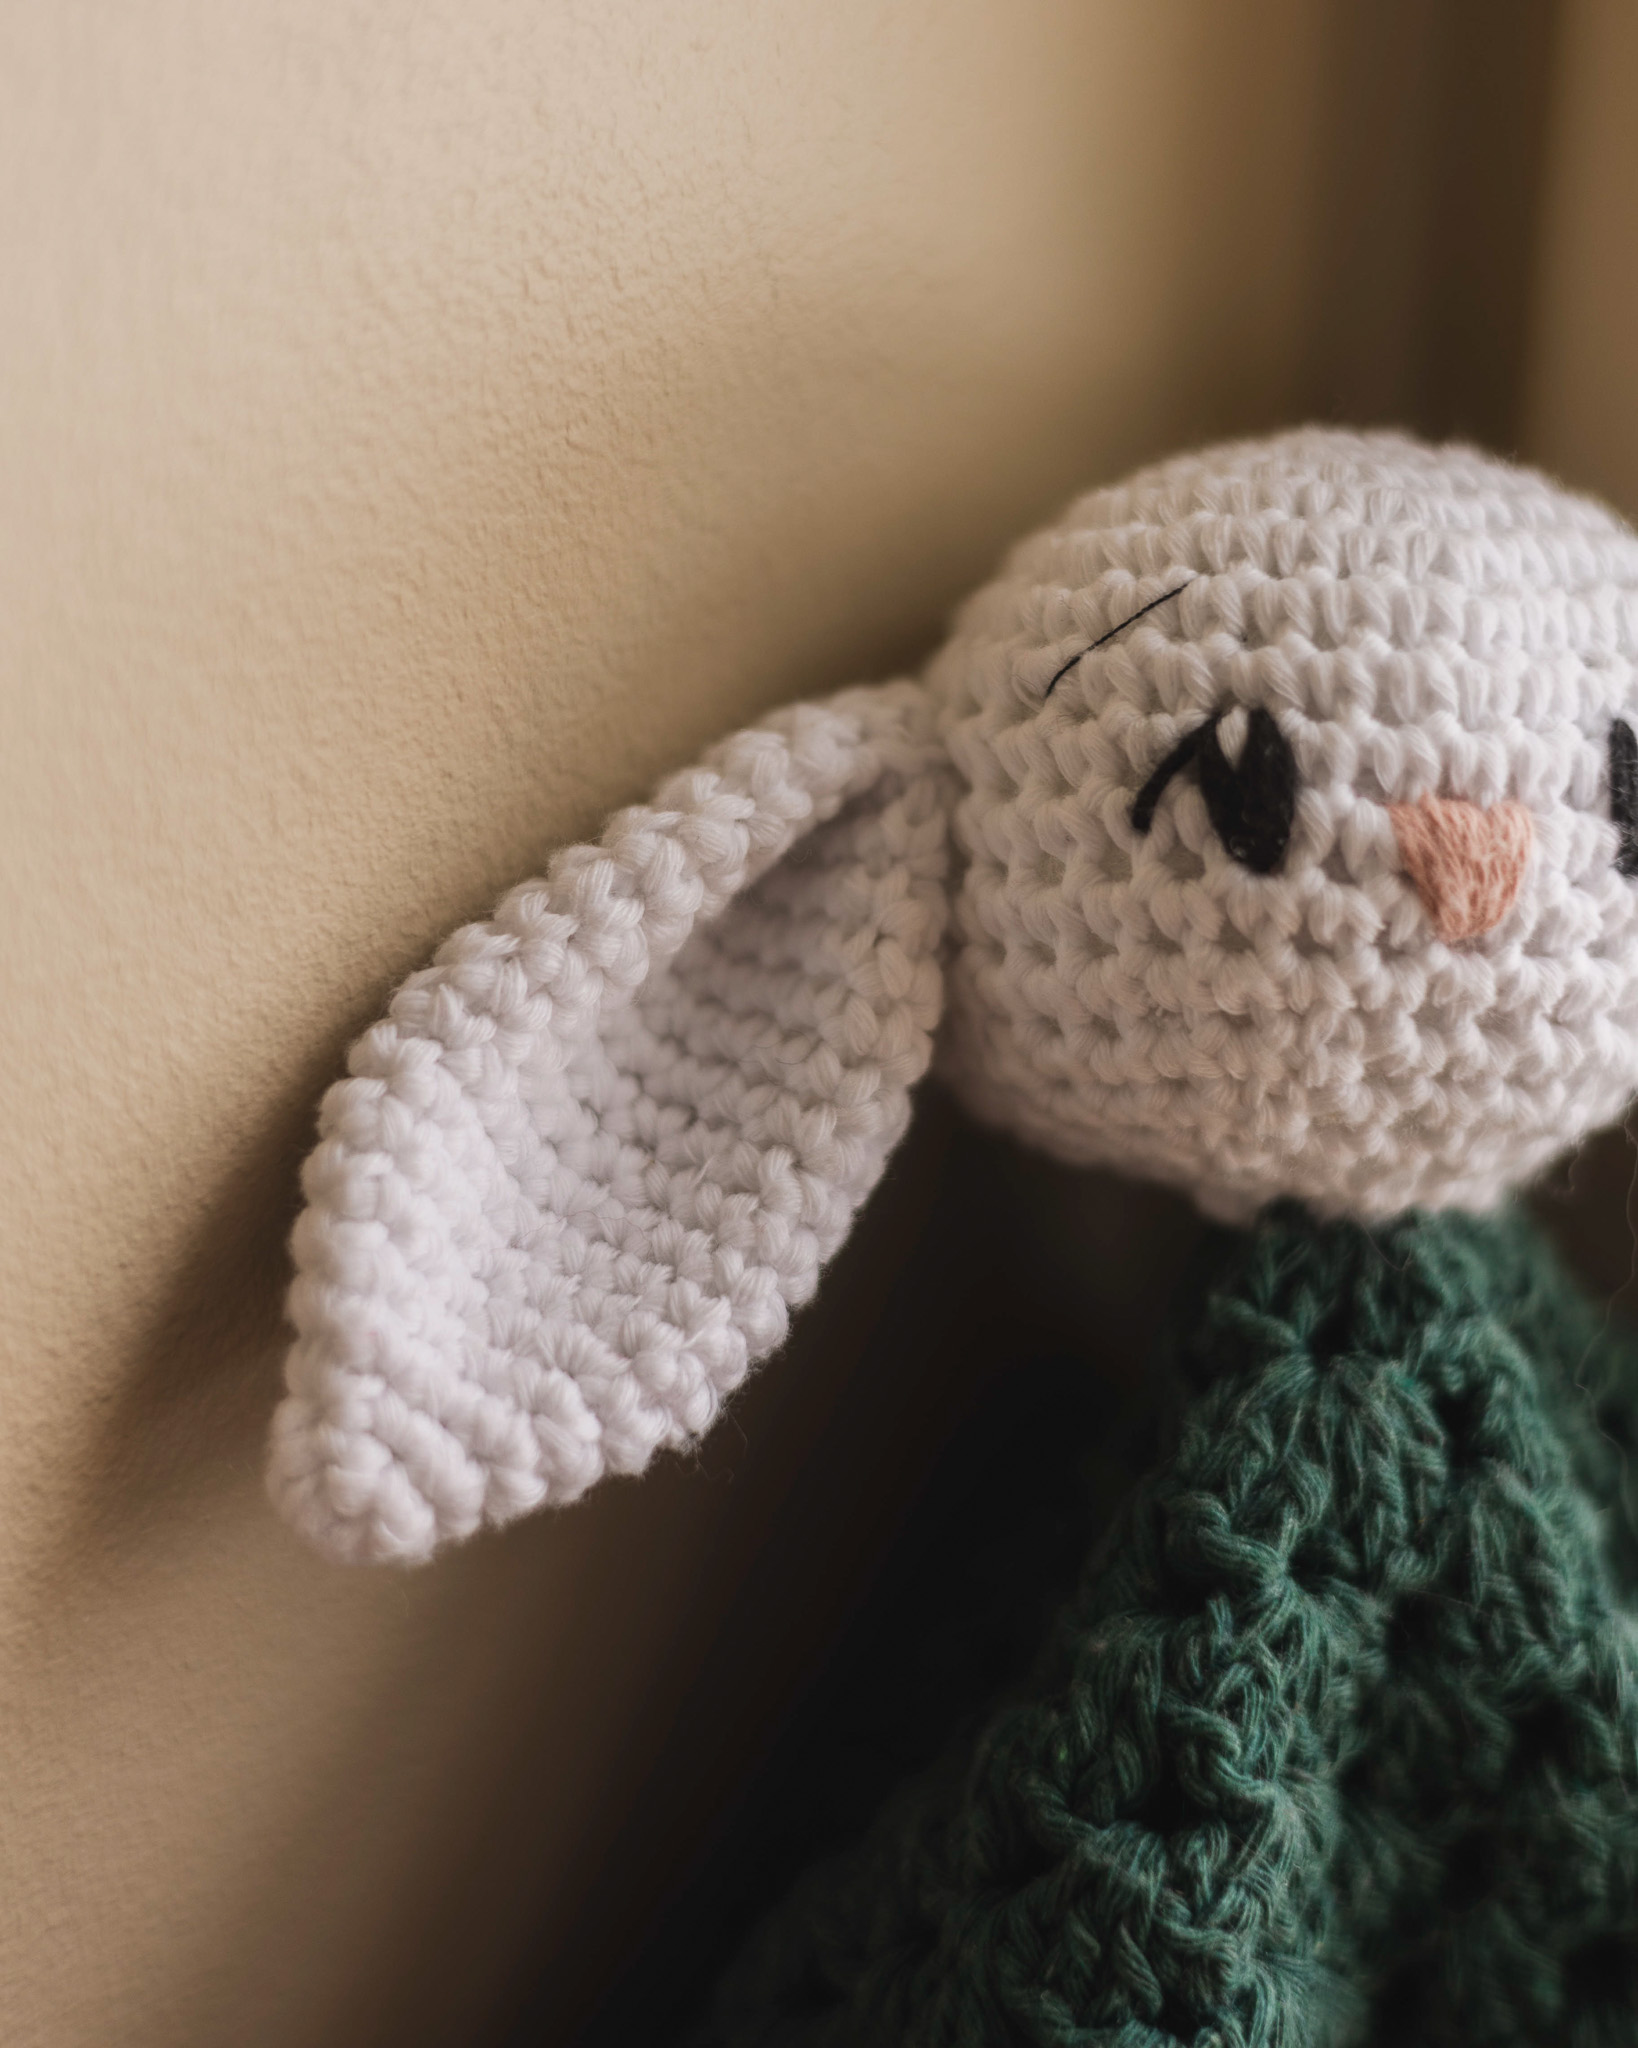
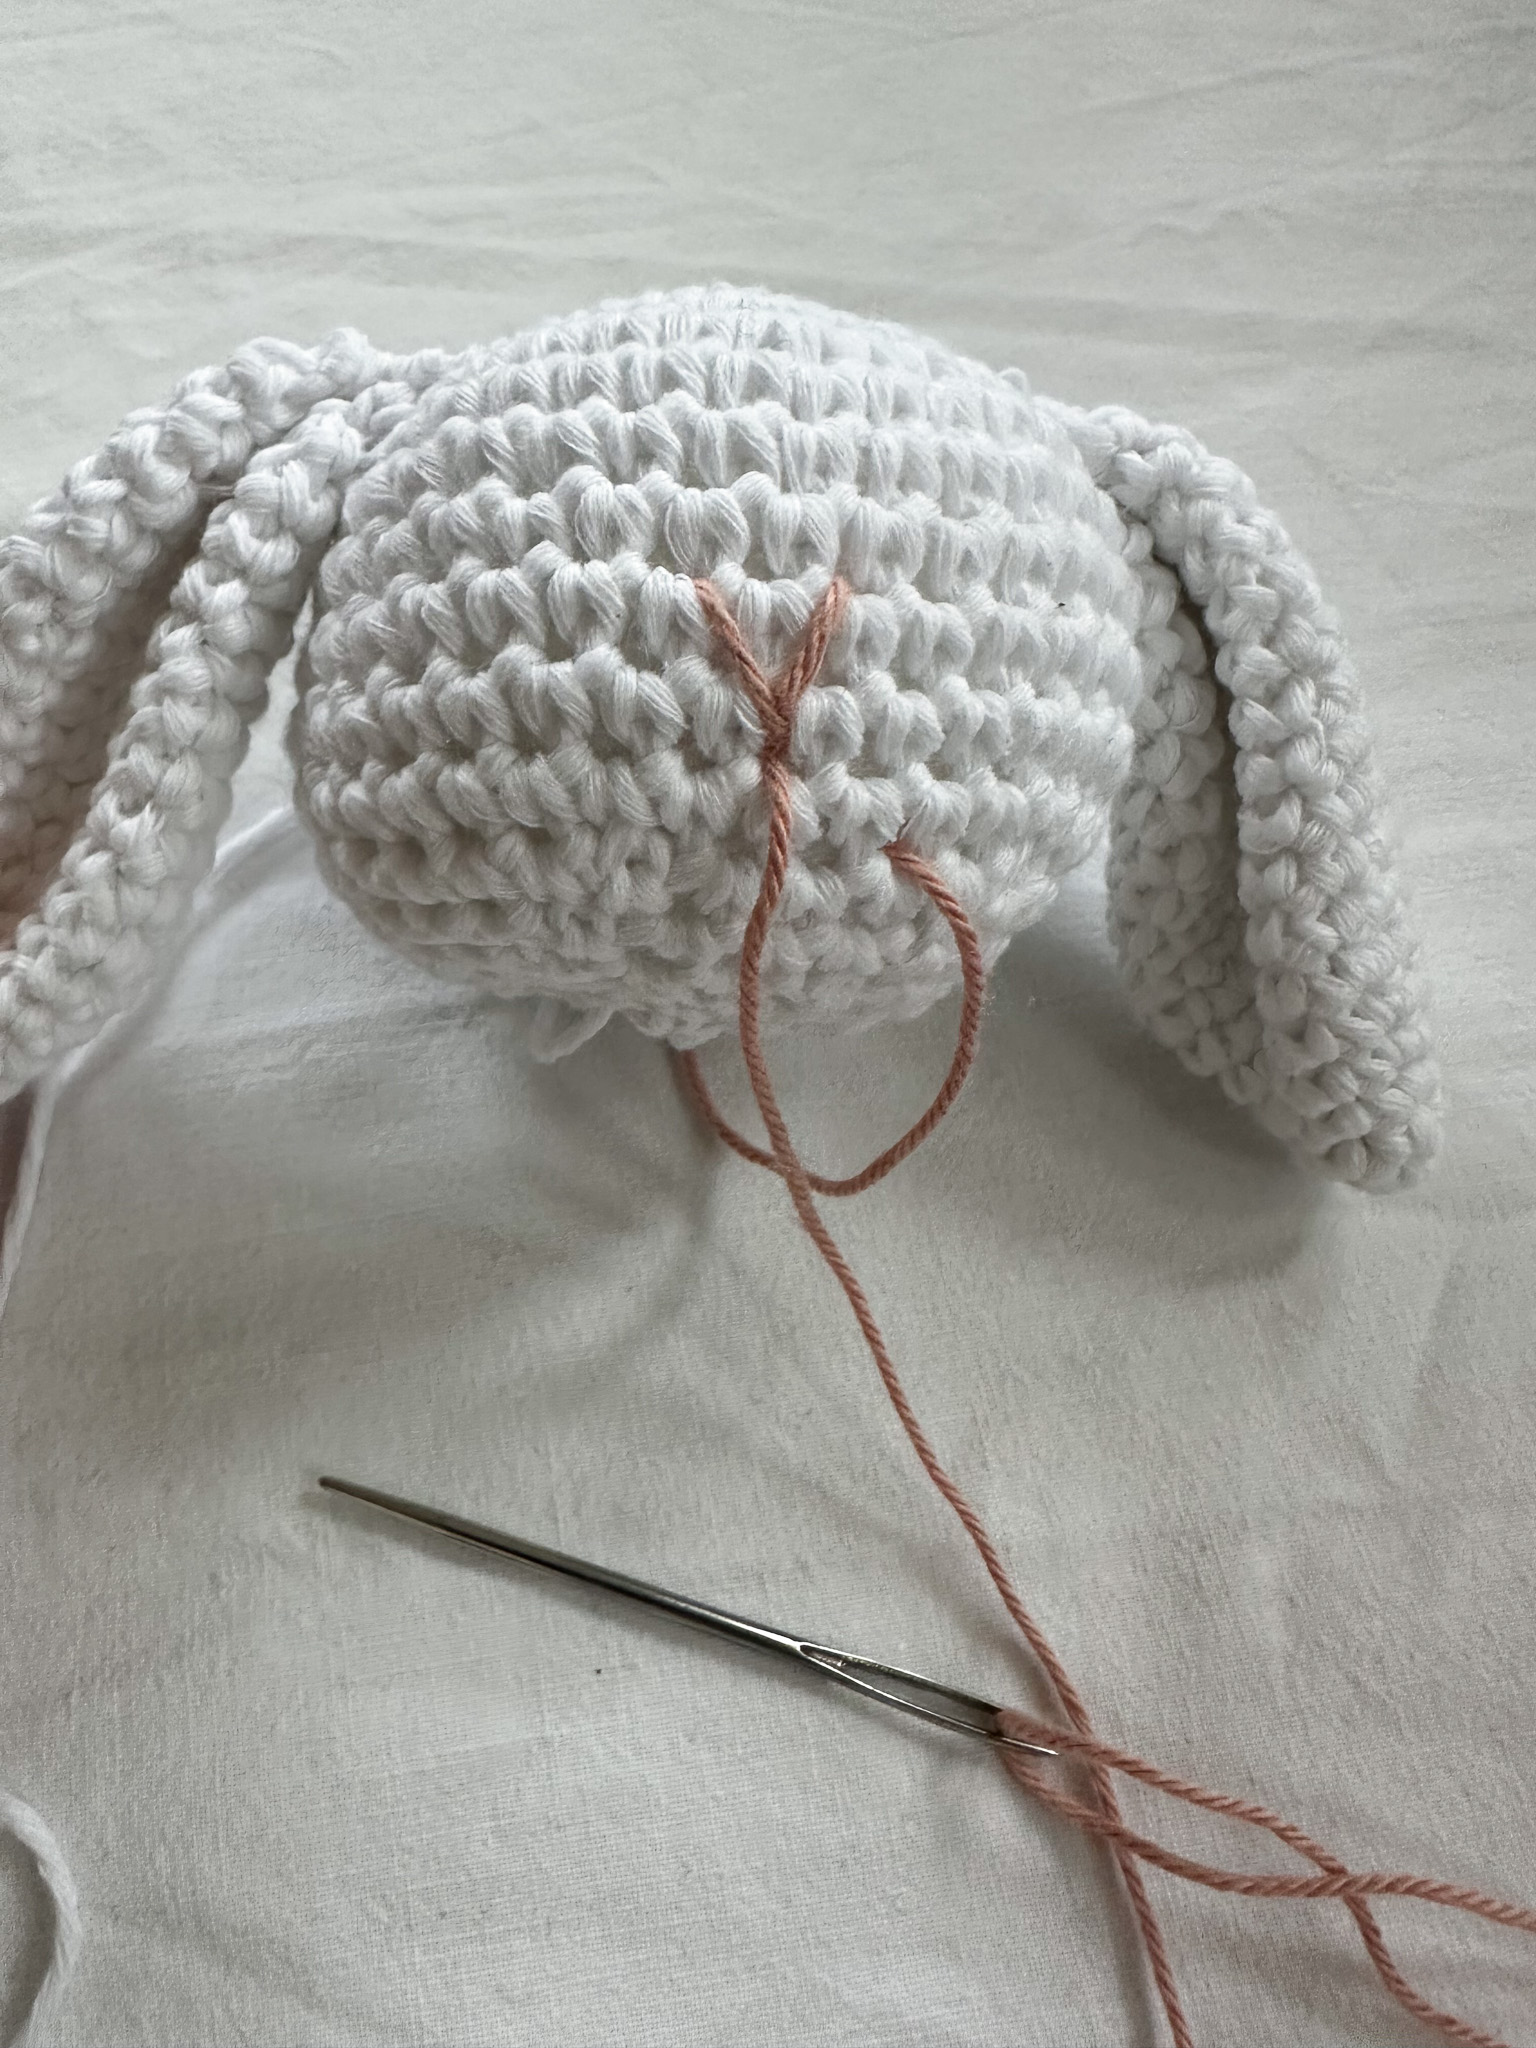
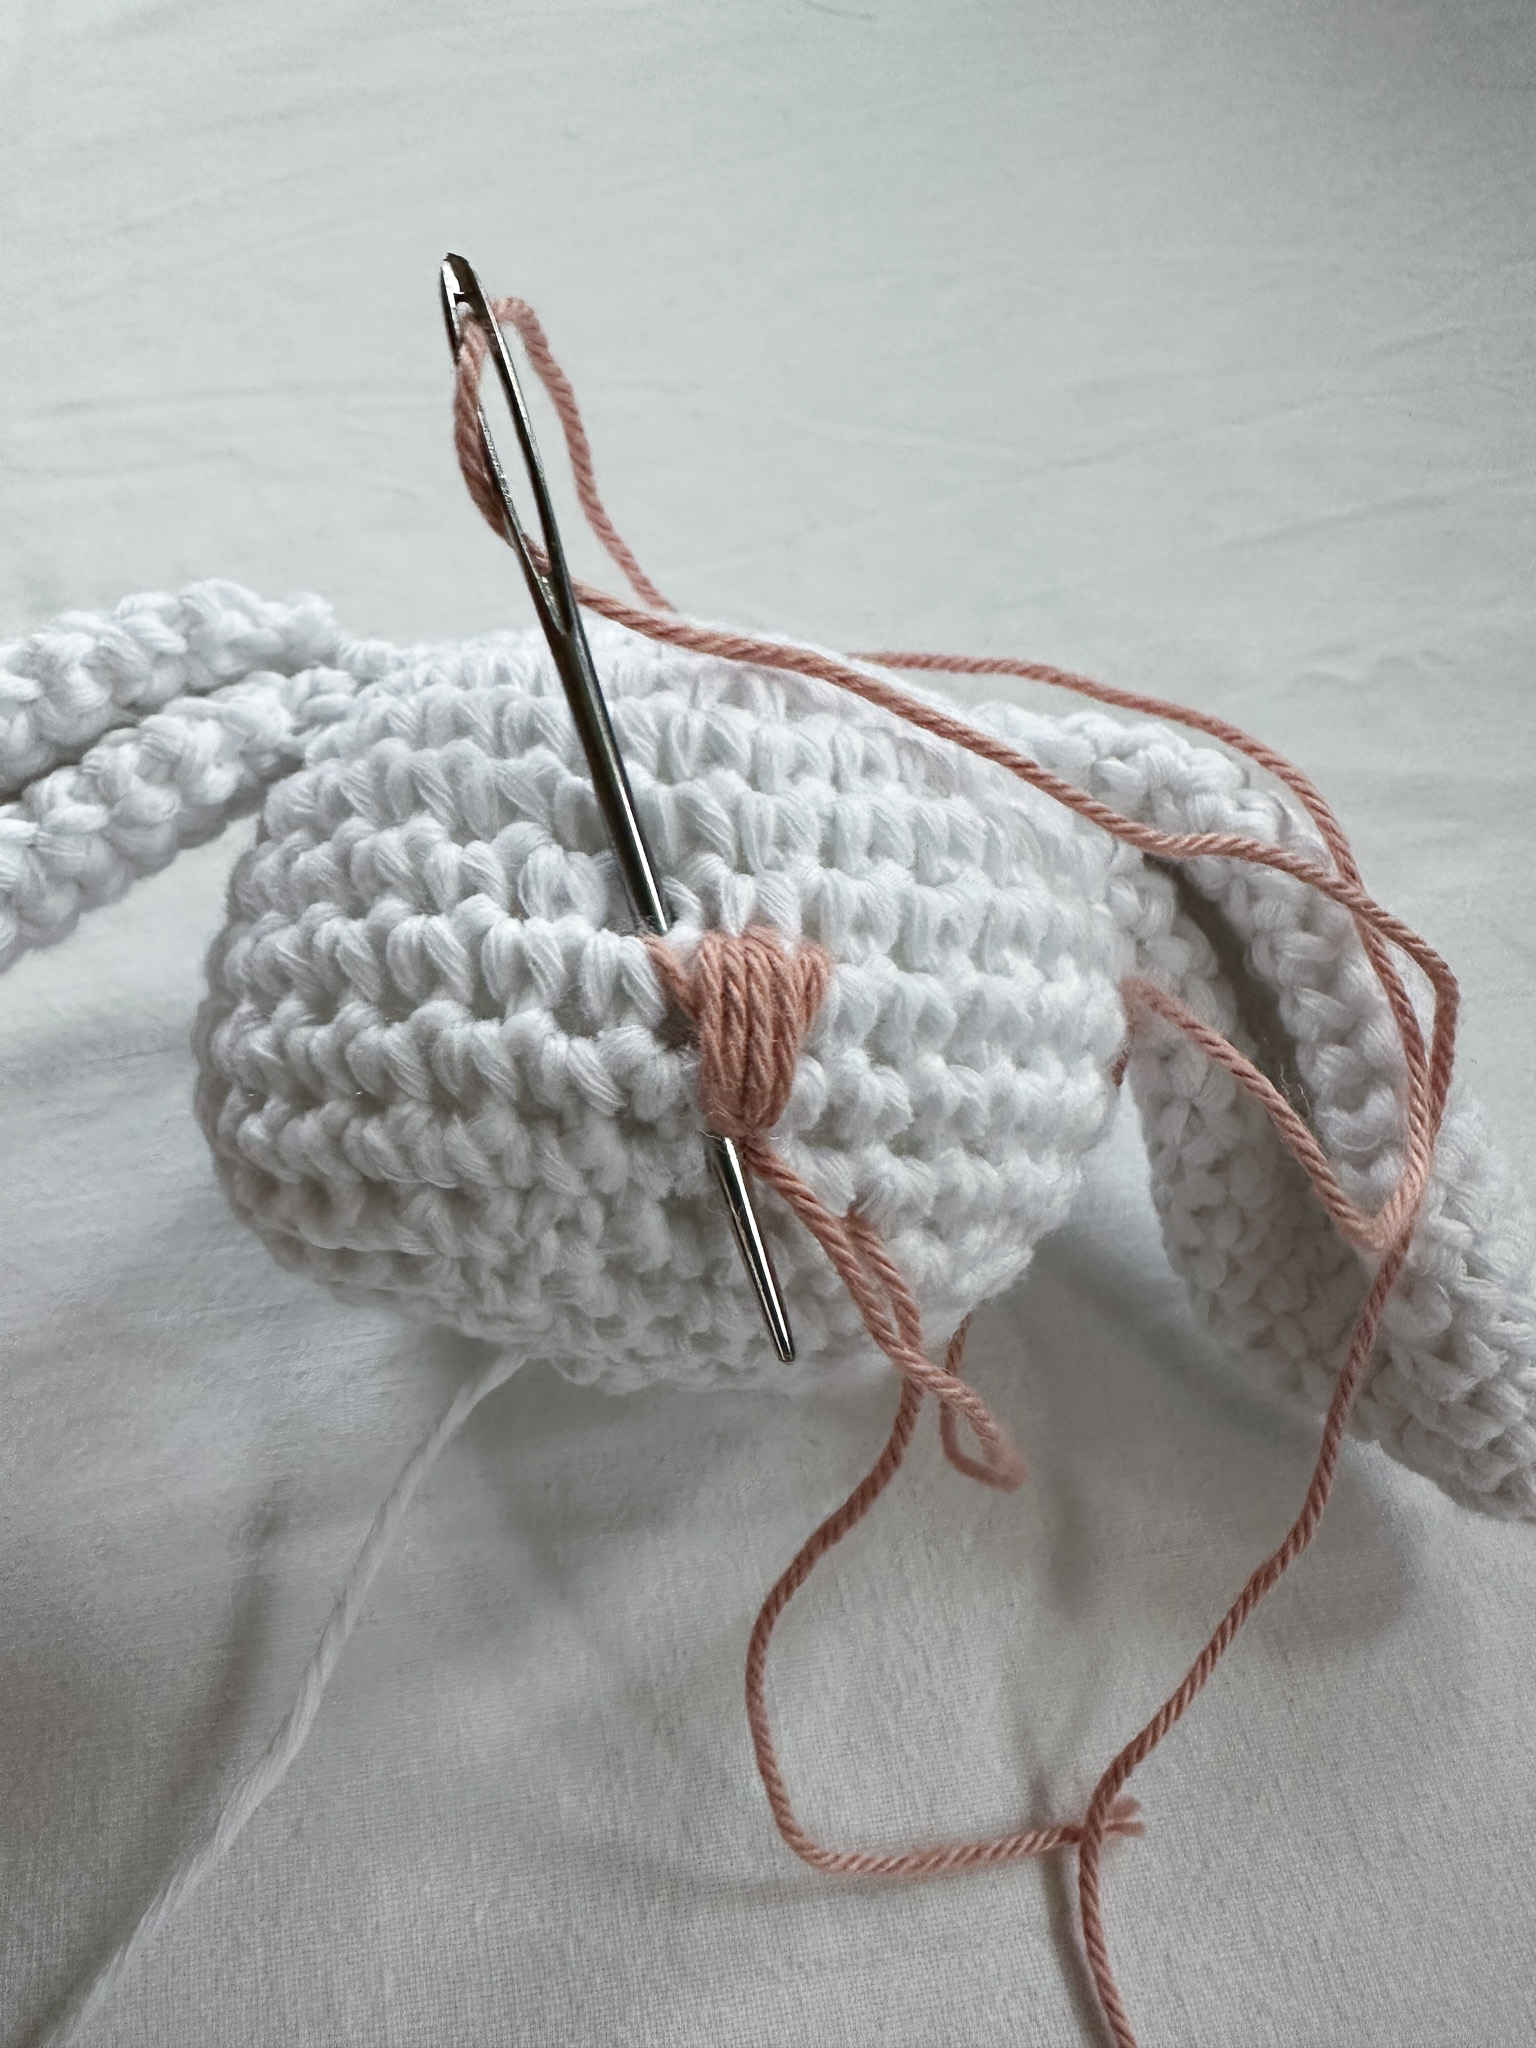
Embroider the nose
Start by placing pins at the corners where you want the nose, forming a triangle. The bottom pin should be centered between the ears, just below round 9. The two top pins should be placed above round 7, approximately 2 single crochet stitches apart. Embroider the nose between the pins using a piece of pink yarn.
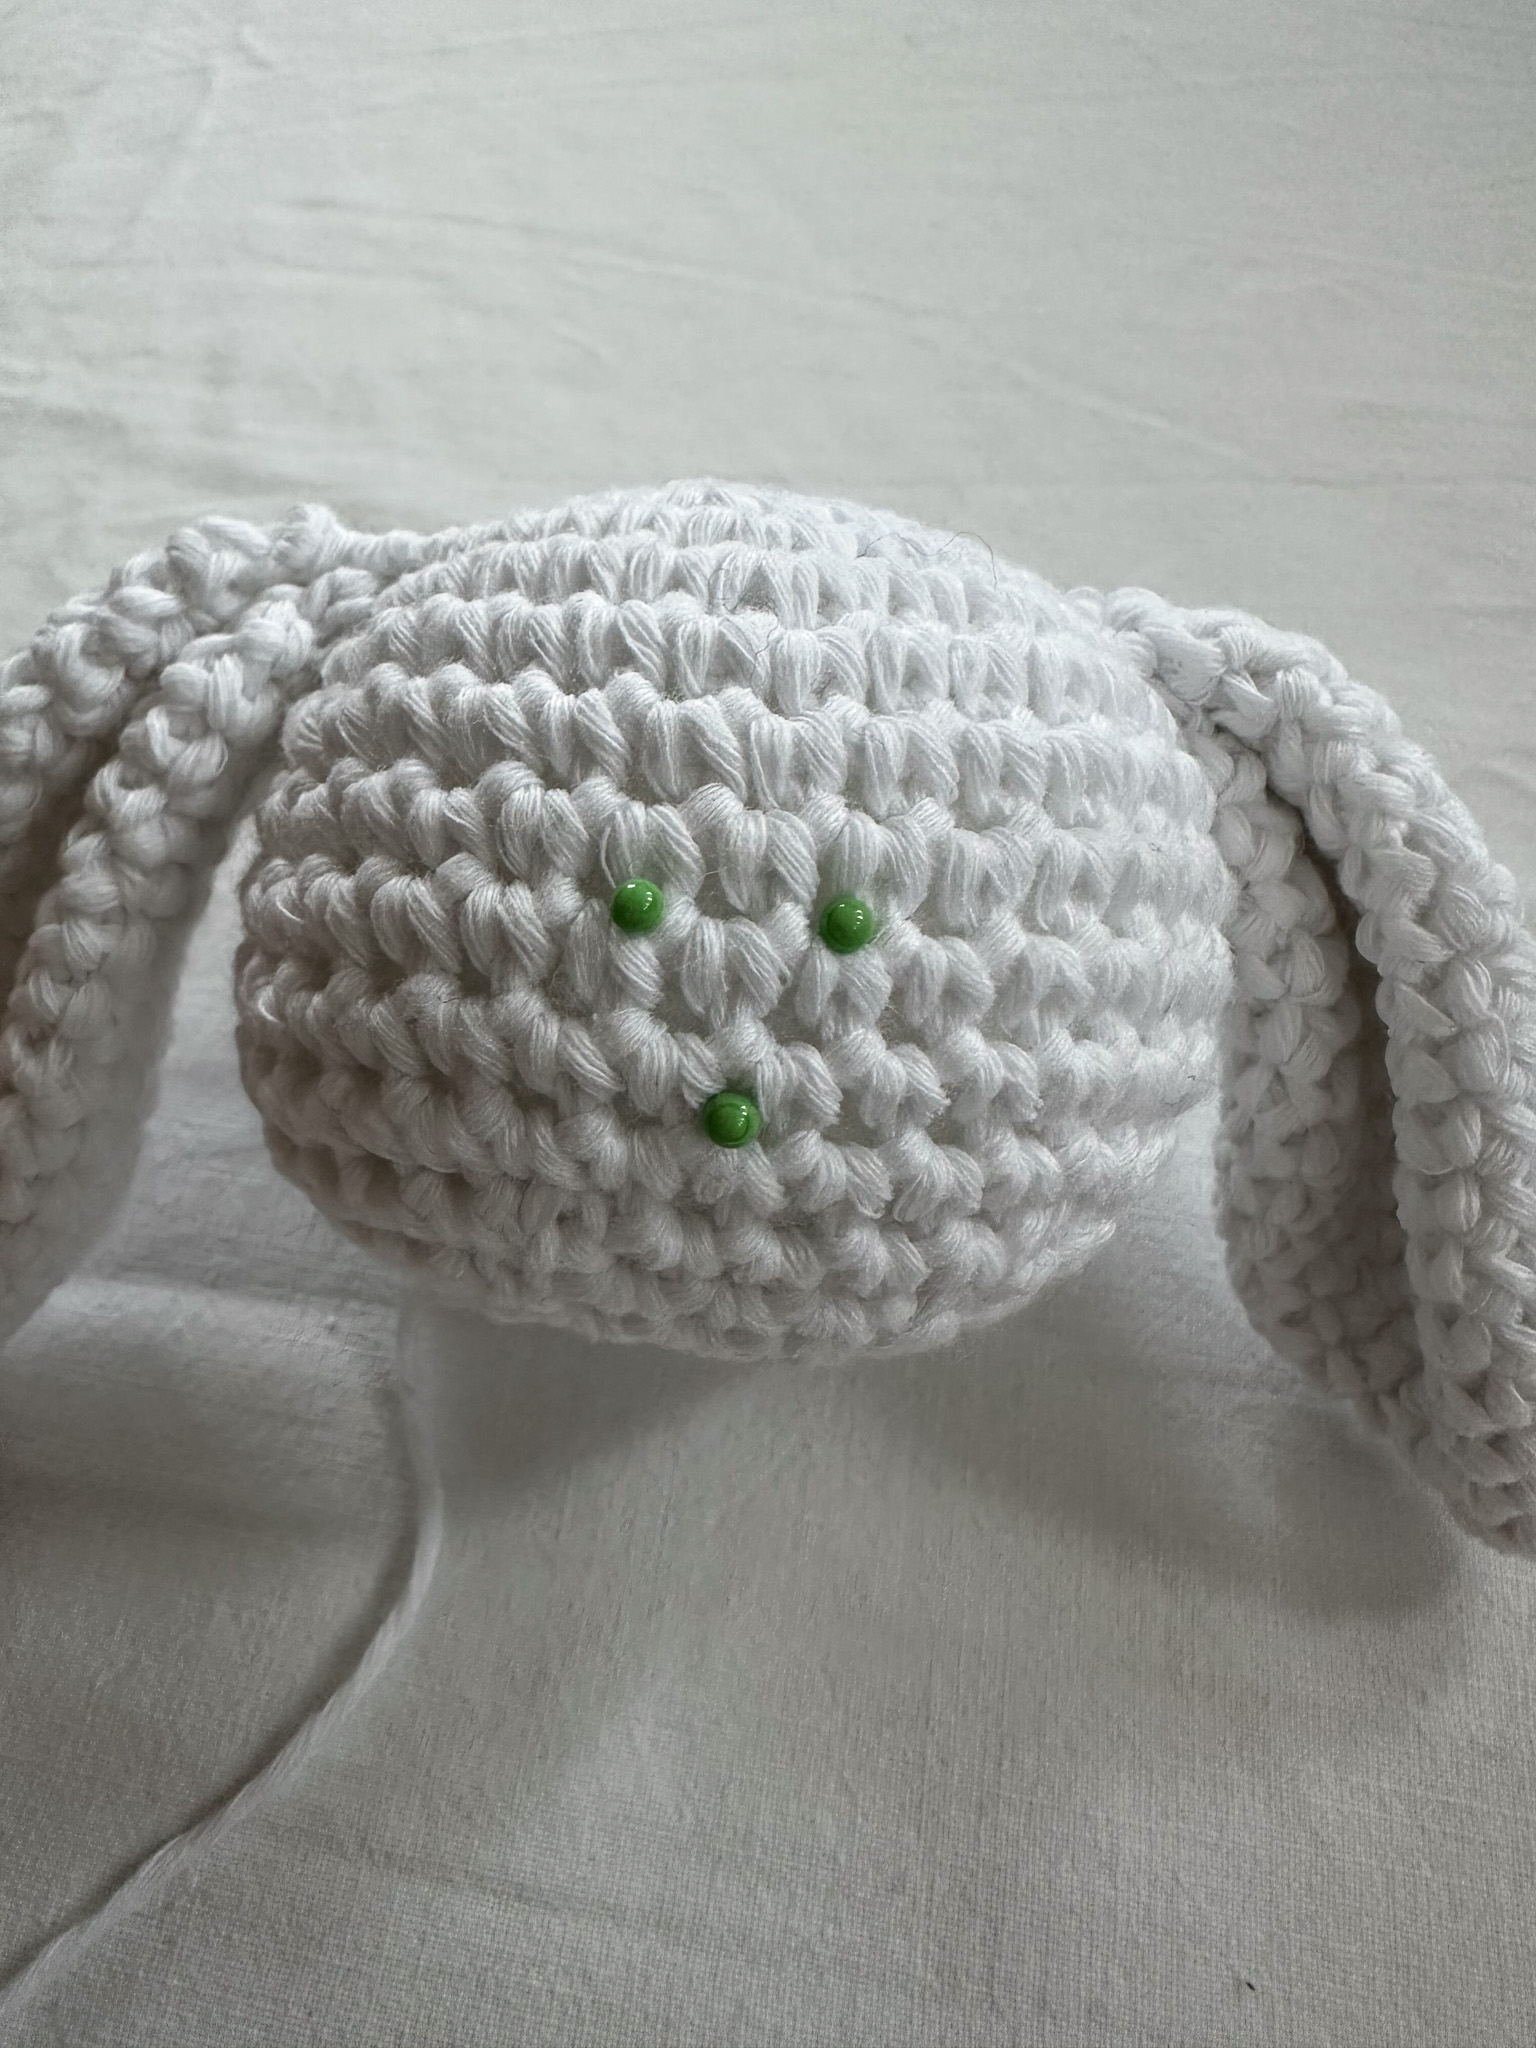
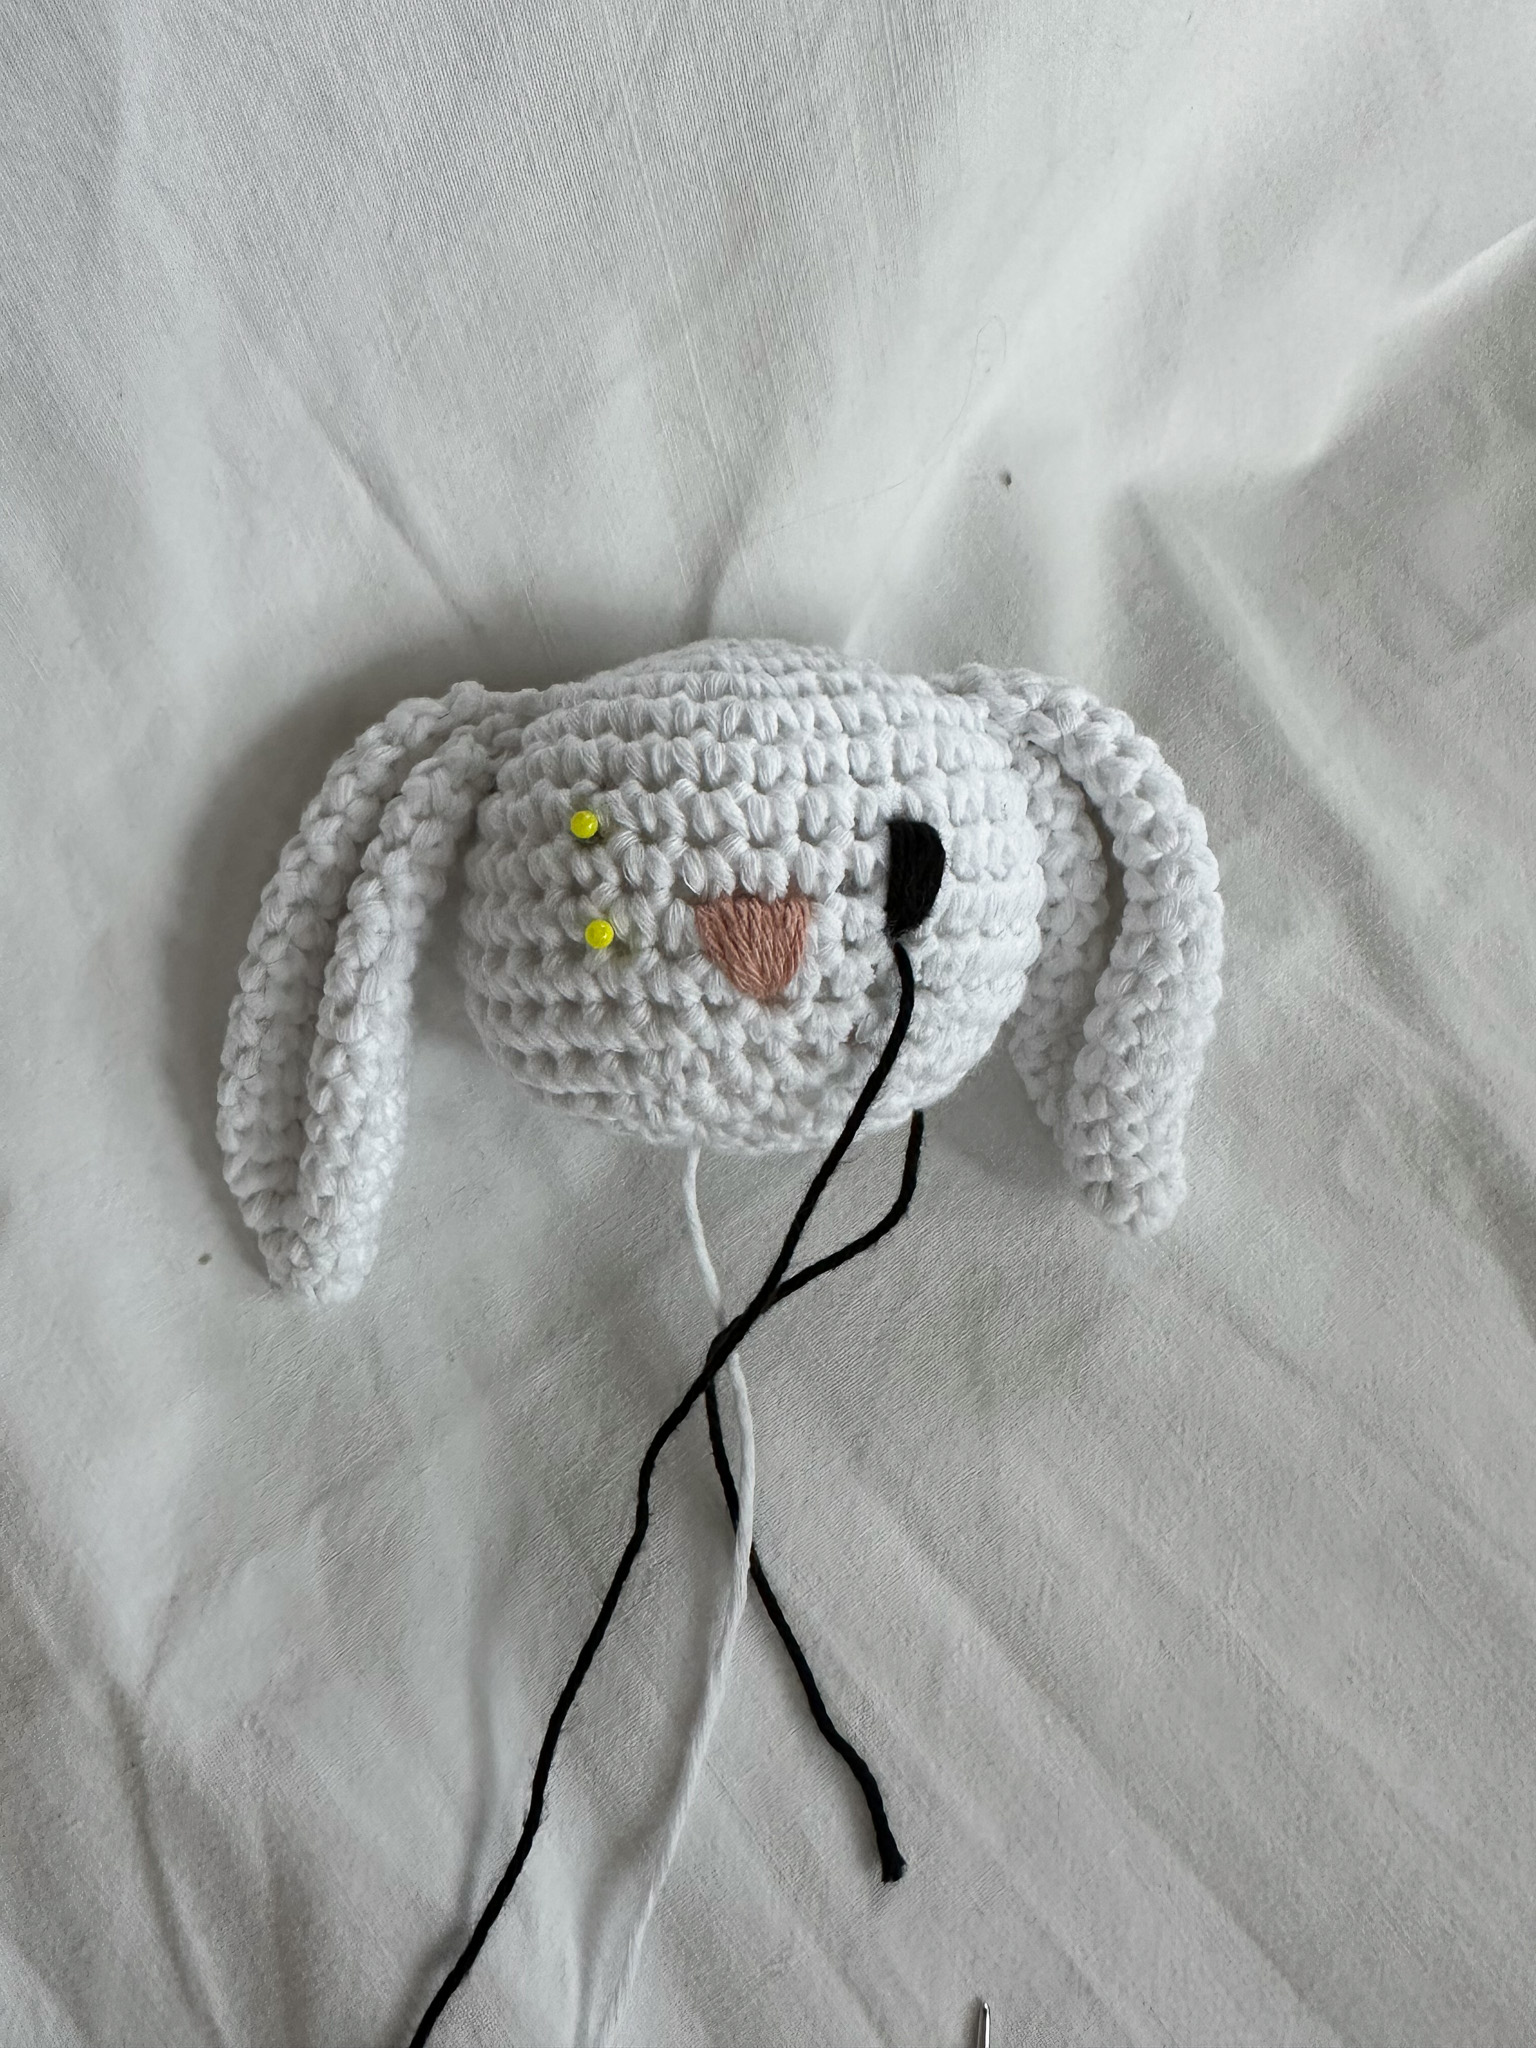
Embroider the eyes
Start by placing pins to test the placement of the eyes. The bottom pins should be just below round 8, two single crochet stitches to each side of the nose. The top pins should be placed 2 rounds directly above the bottom pins. Using black yarn, embroider back and forth several times between the pins until the eyes reach the desired size.
Place the needle just one single crochet to the side of the eye where you want an eyelash. Insert the needle at the top of the eye. Take the opportunity to come out at the start of the next eye and embroider that eye as well. Secure the yarn.

Next, take a piece of white yarn and bring the needle out at the top of the eye. Then insert the needle back into the center of the eye. Secure the yarn.
Embroider the eyebrows
Use a thin black thread, such as sewing thread. Position the eyebrows starting 2 rounds above the top of the eyes, and ending approximately 3 single crochet stitches and 2 rounds below. Secure the thread.
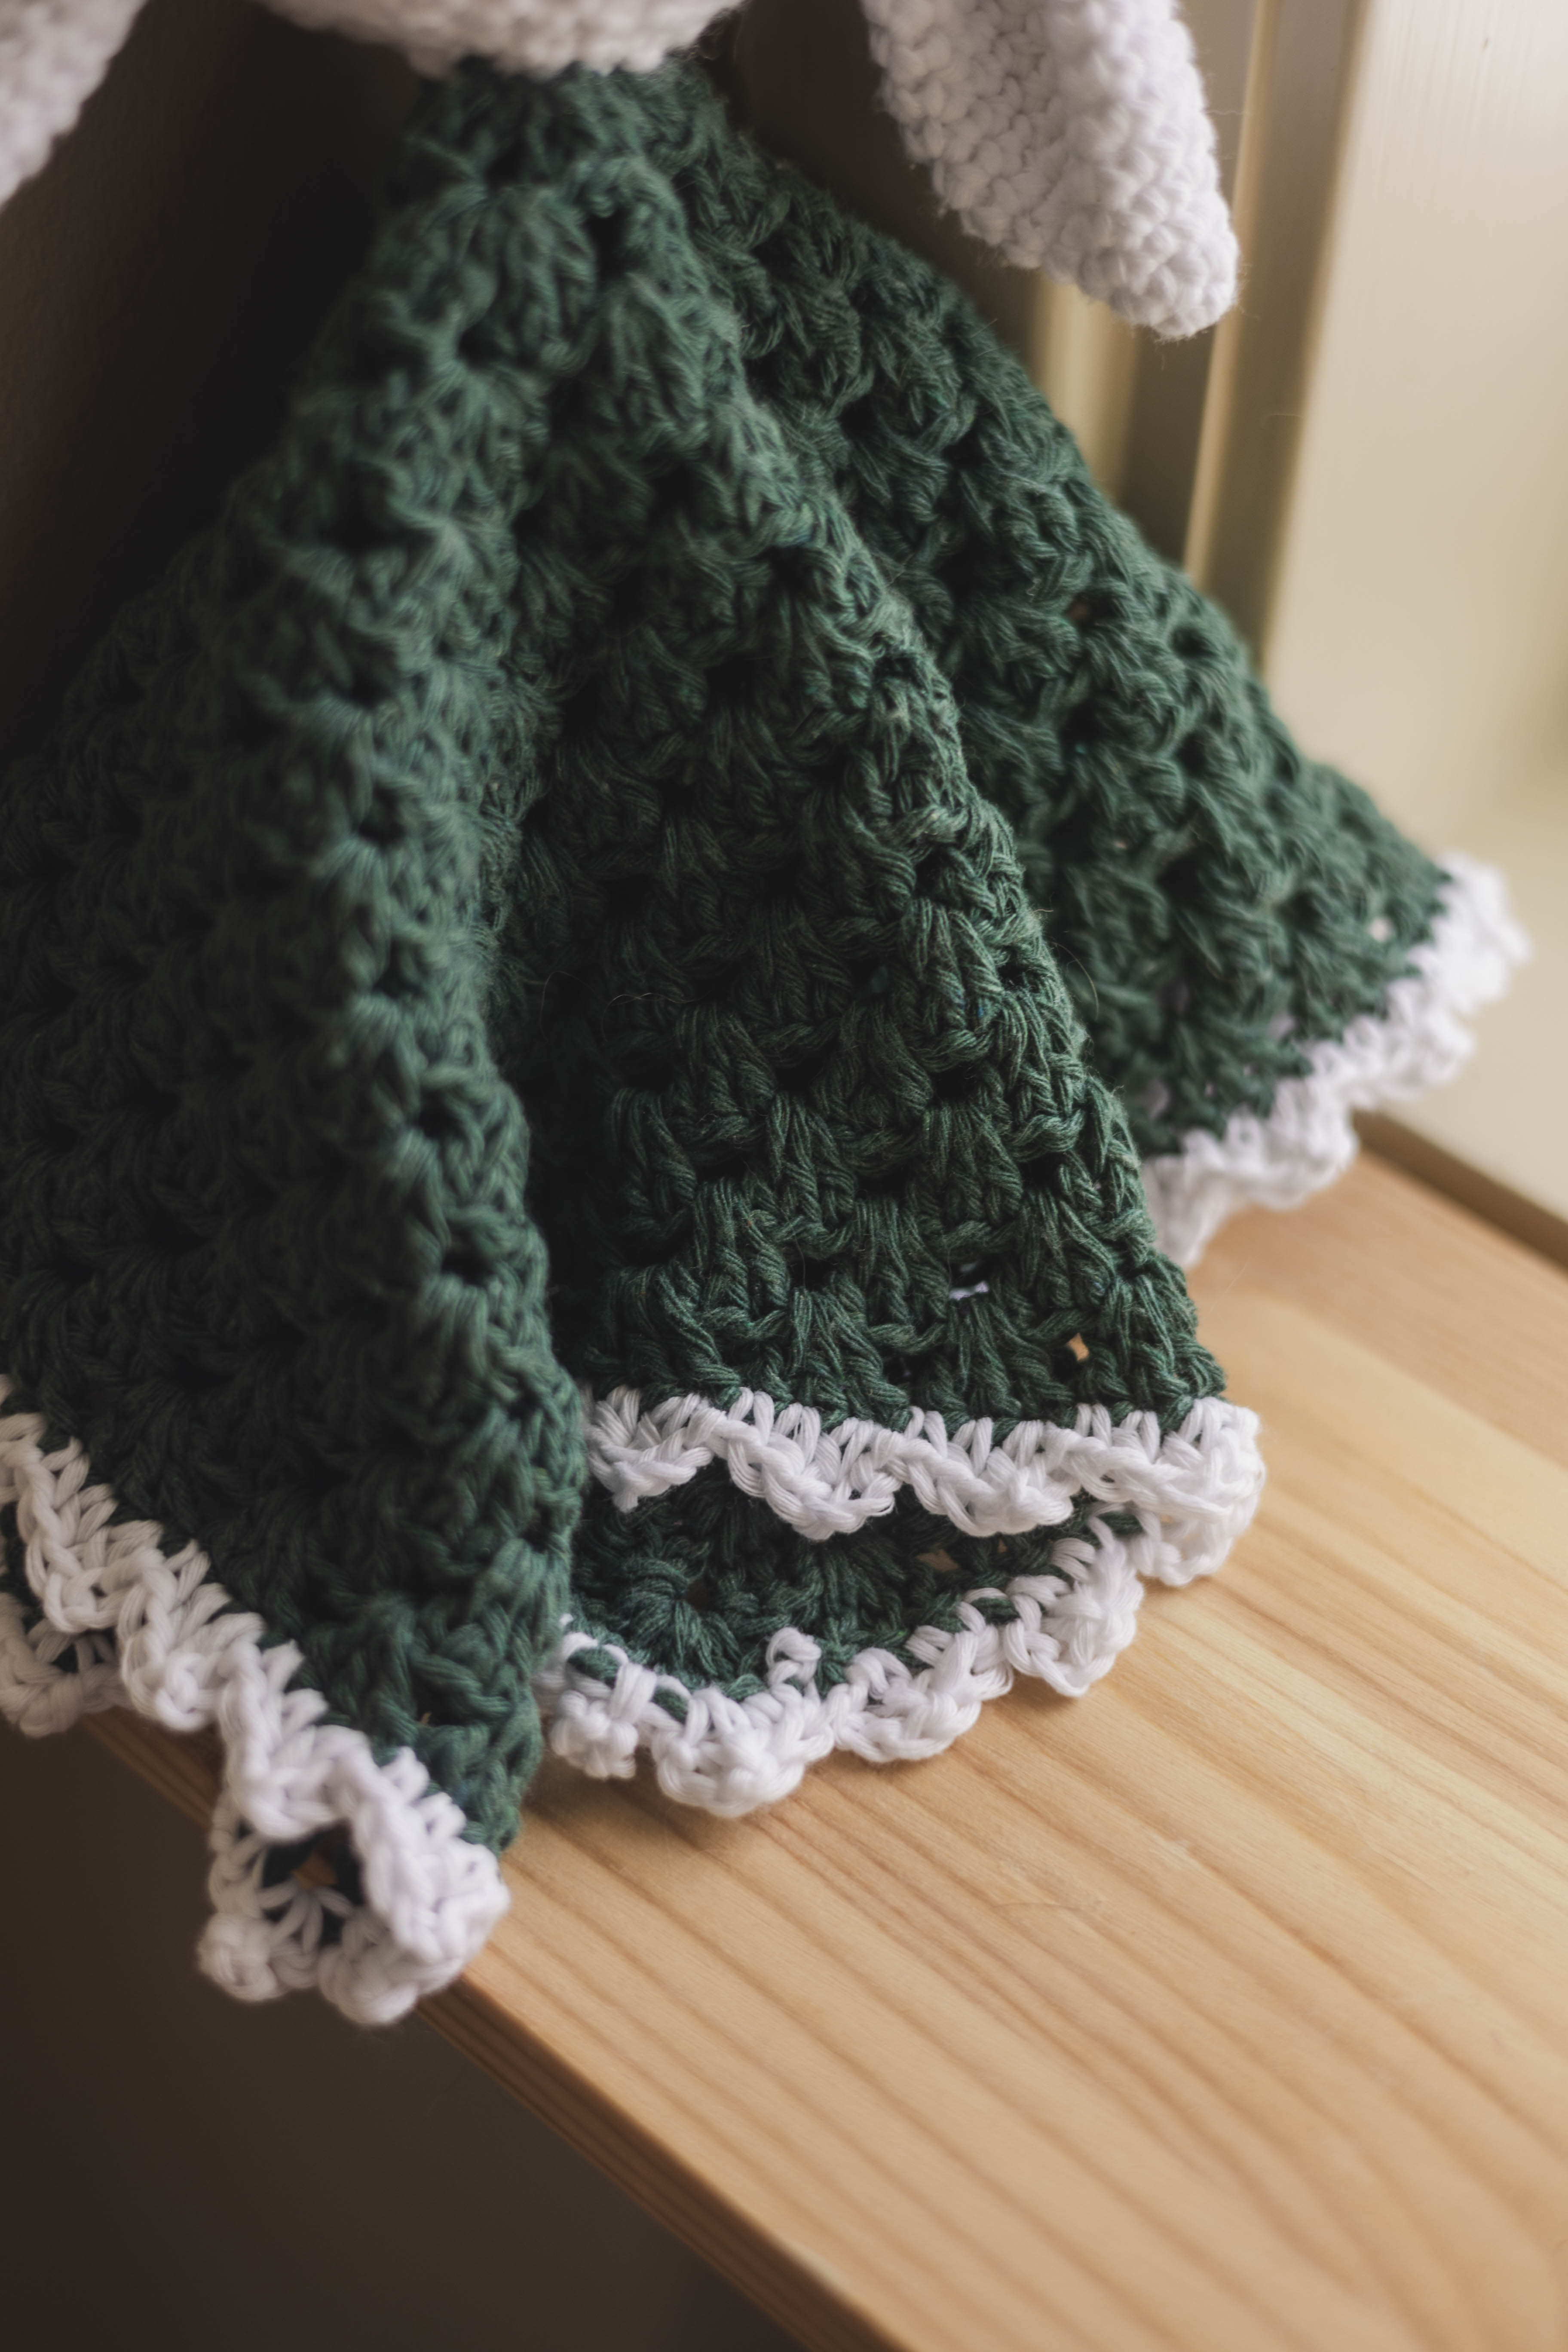
Blanket
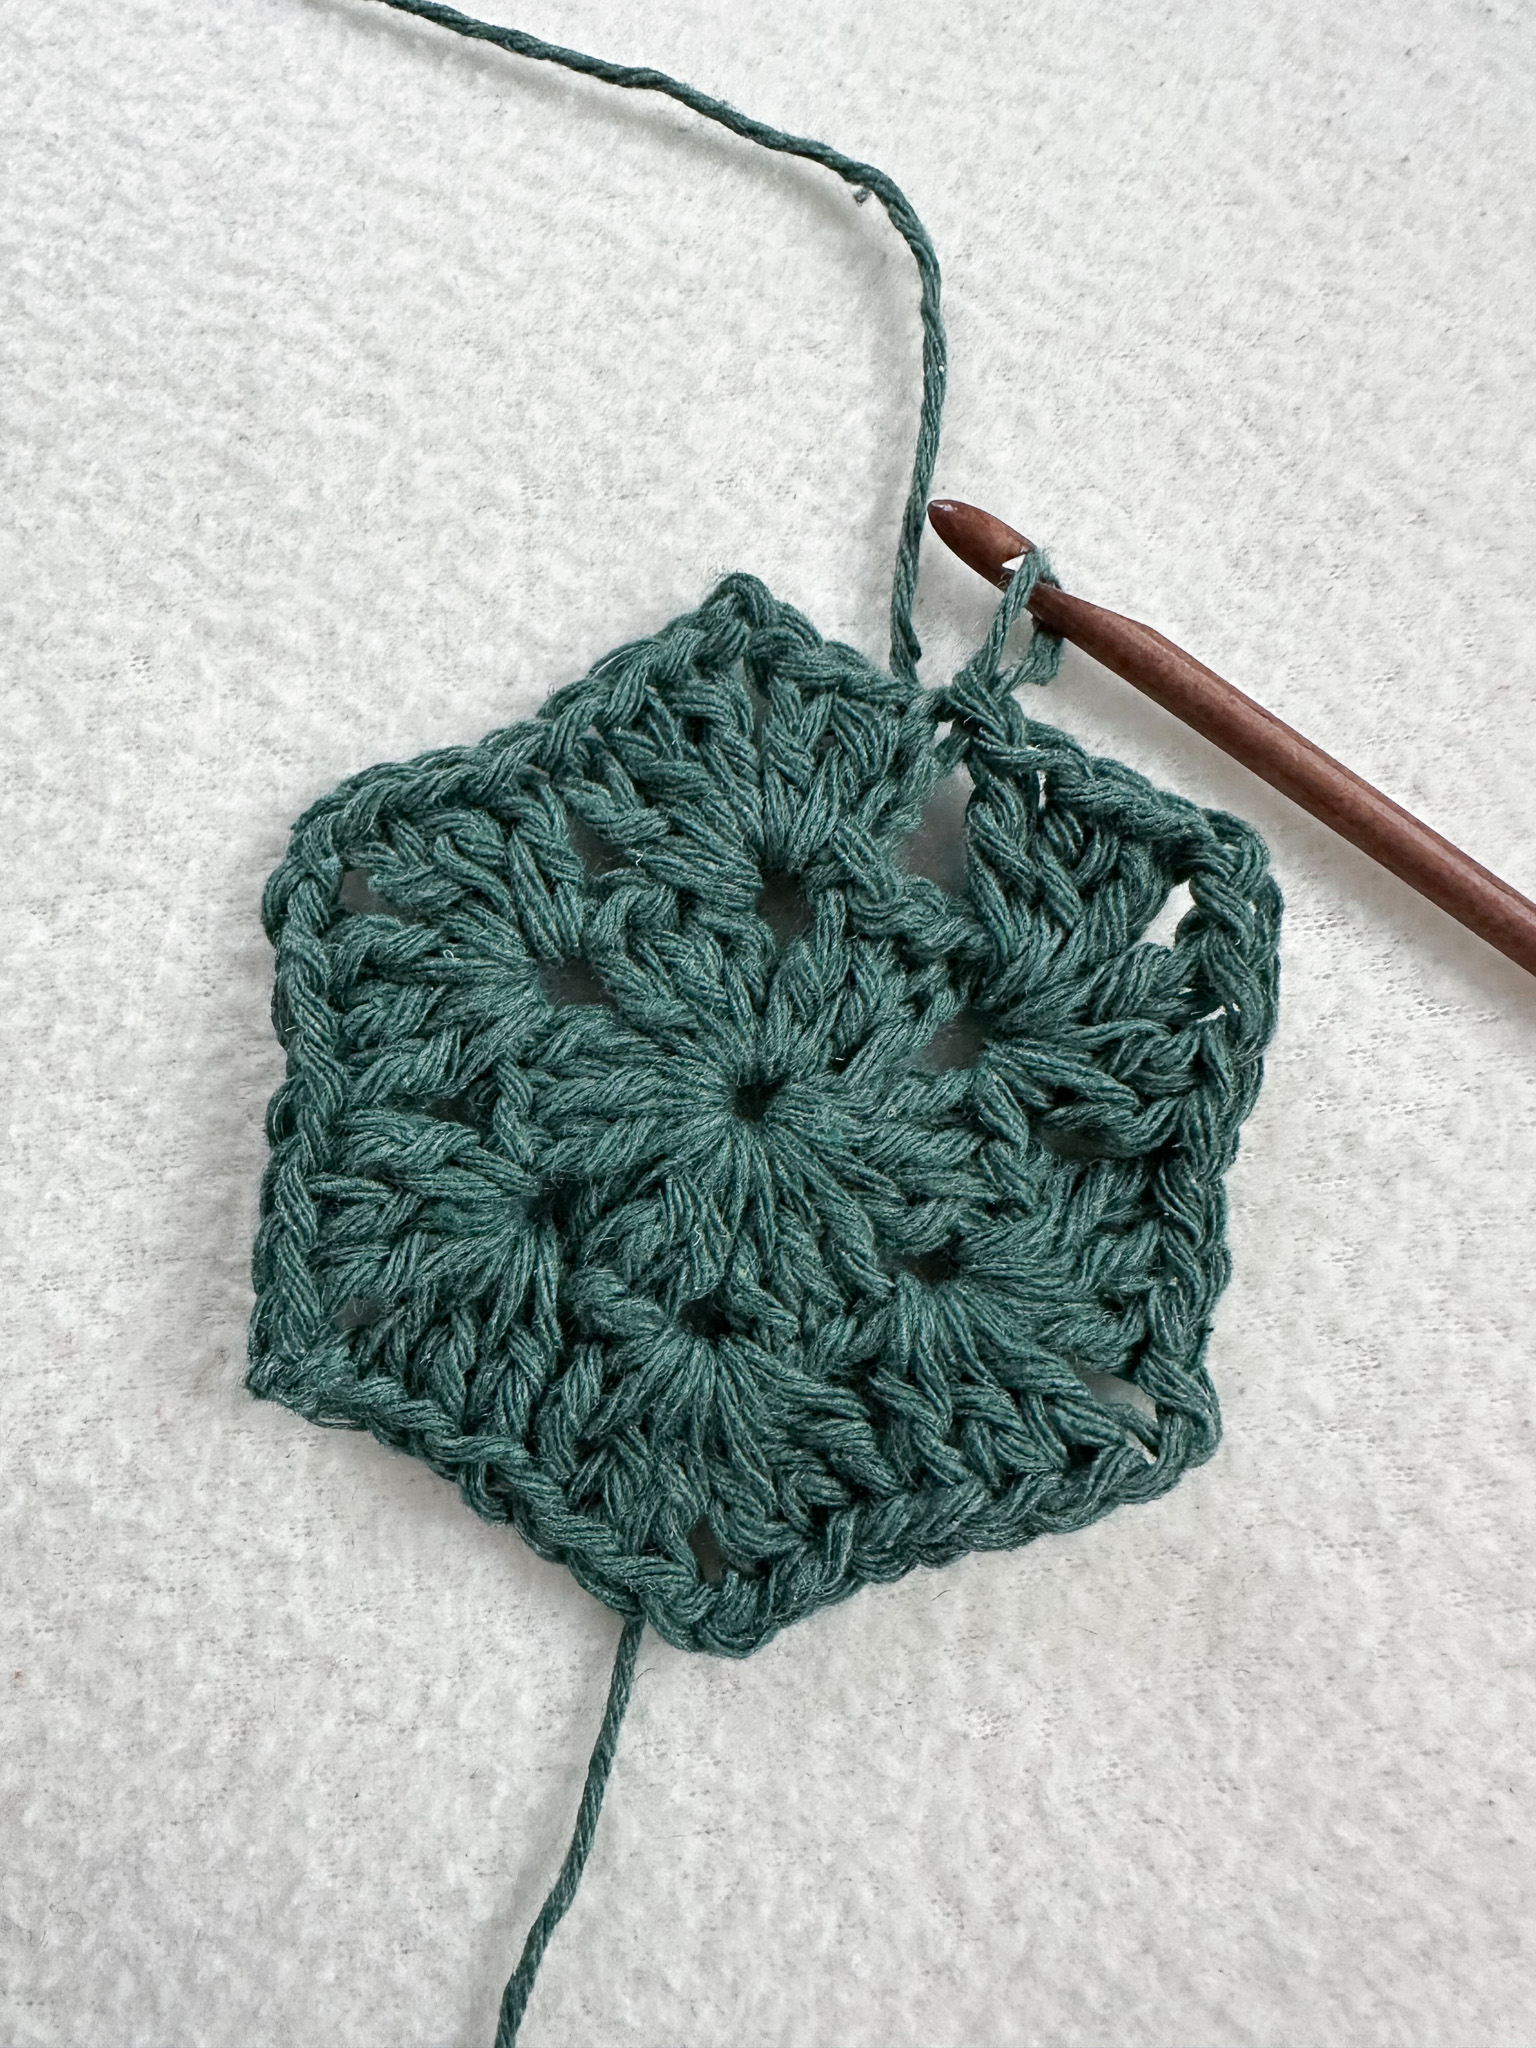
This lovey blanket is worked like a granny square but with 6 corners instead of 4.
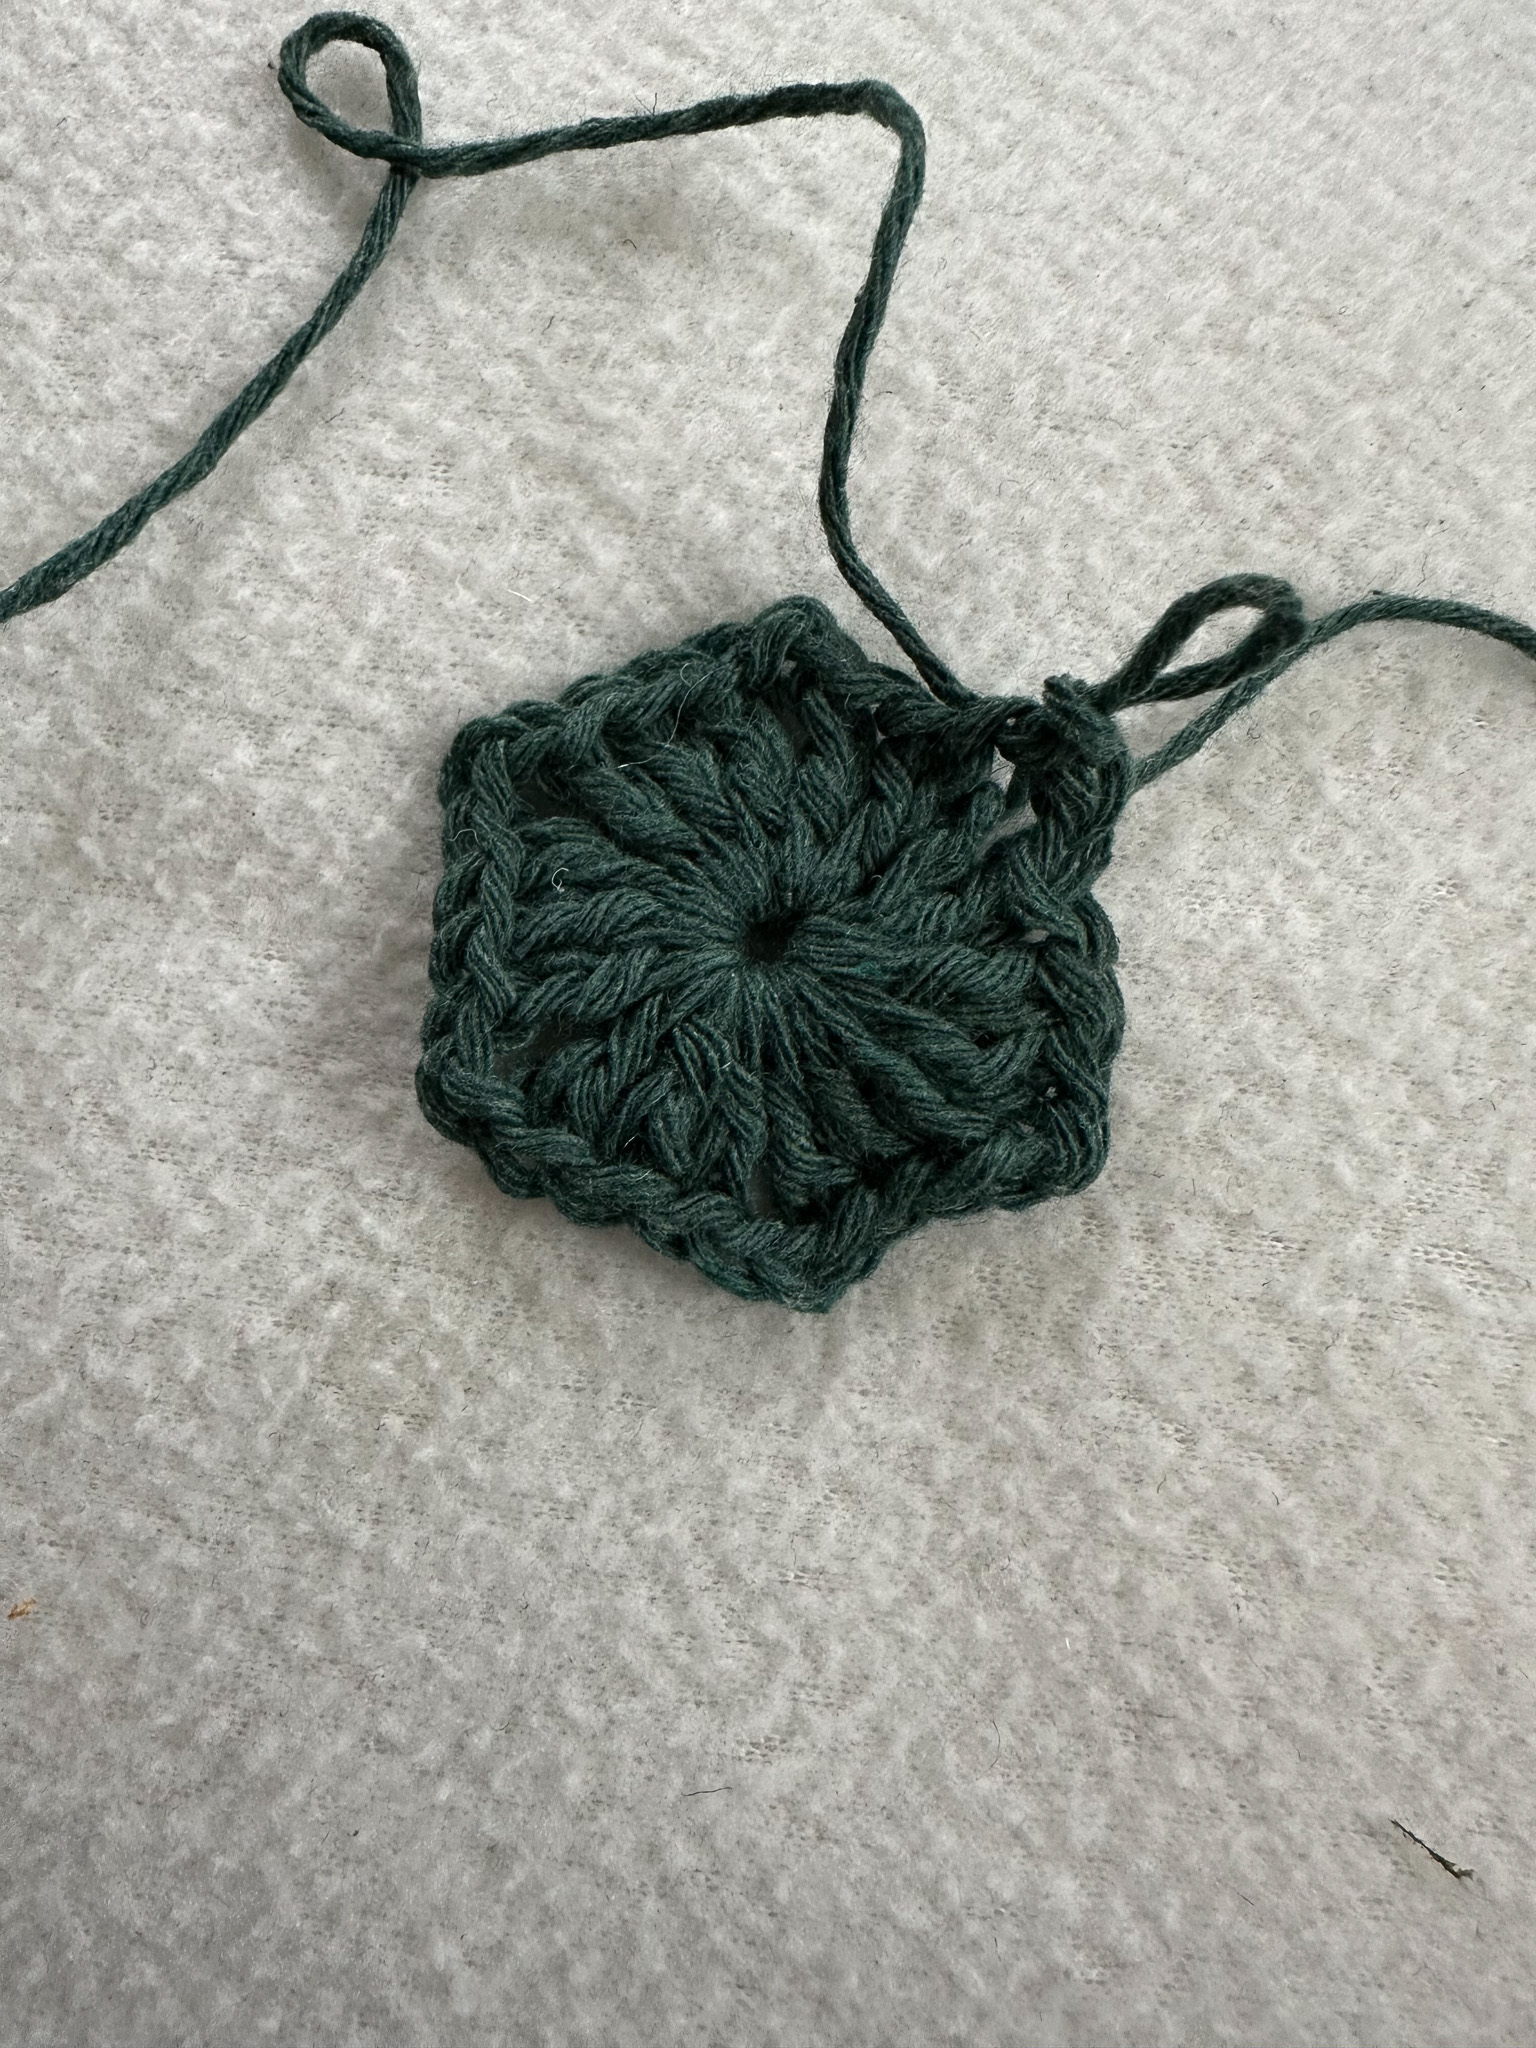
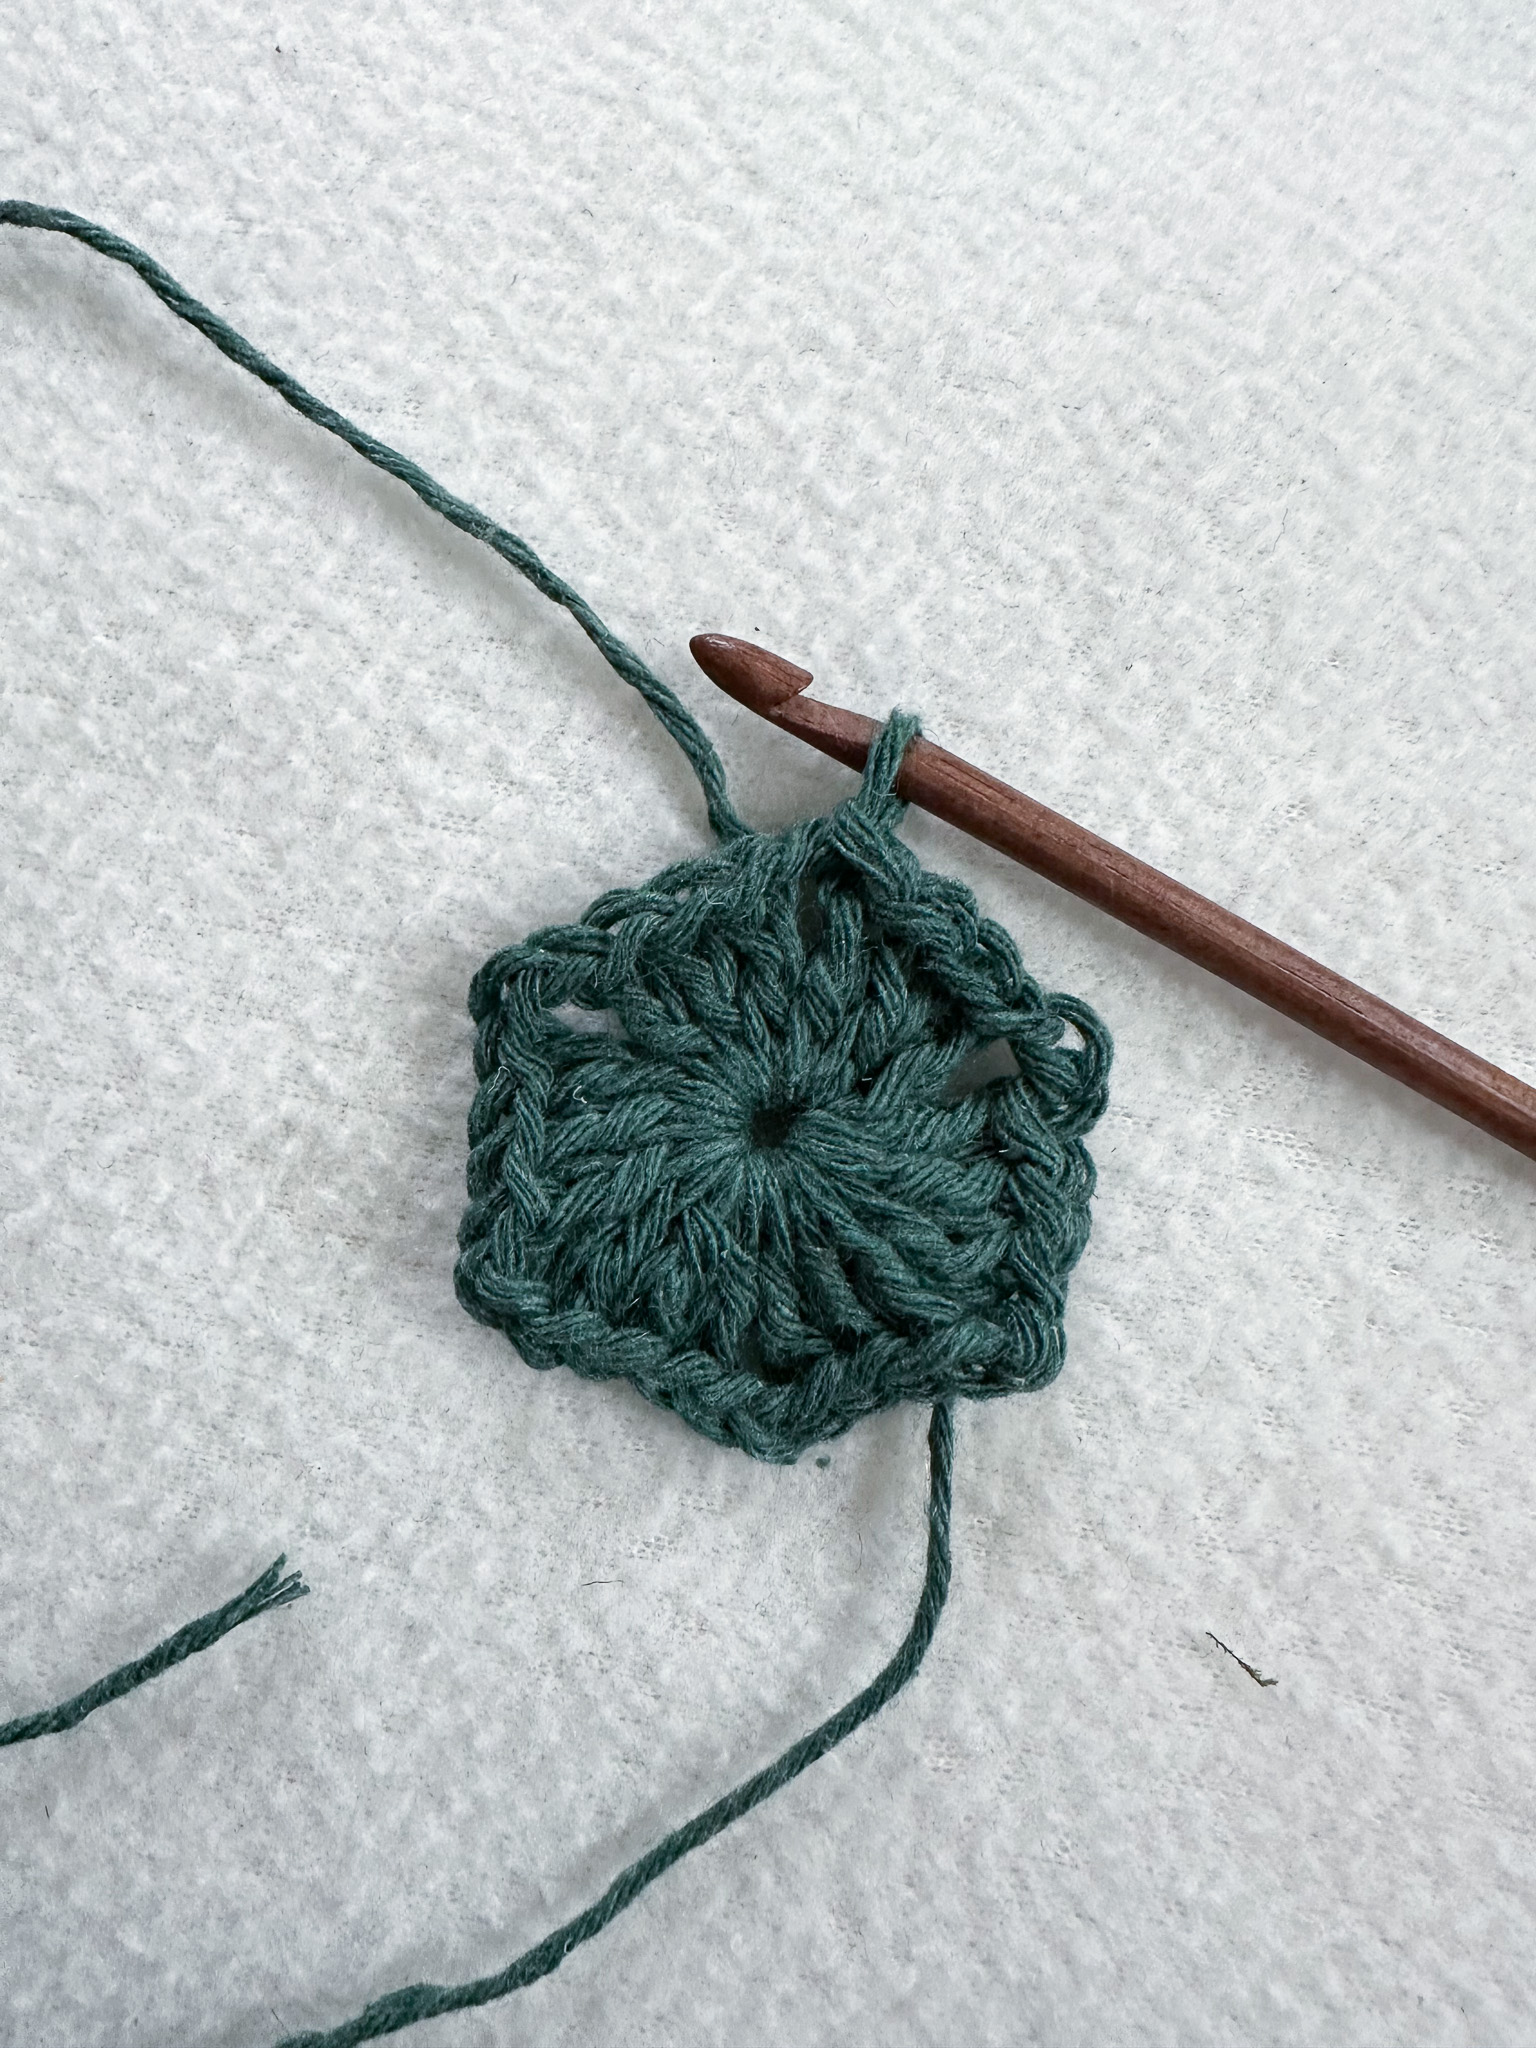
Round 1: Crochet a magic ring. Begin in the ring with 3 chain stitches (counts as the first double crochet), then crochet 2 double crochet stitches. This forms the first double crochet group. Chain 2, then repeat this pattern (3 double crochet + 2 chain stitches) a total of 6 times. Join with a slip stitch in the third chain from the beginning.
You should have 6 double crochet groups with 3 double crochet stitches in each group in this round.
If you are unsure how to crochet double crochet stitches or slip stitches, see the videos below.
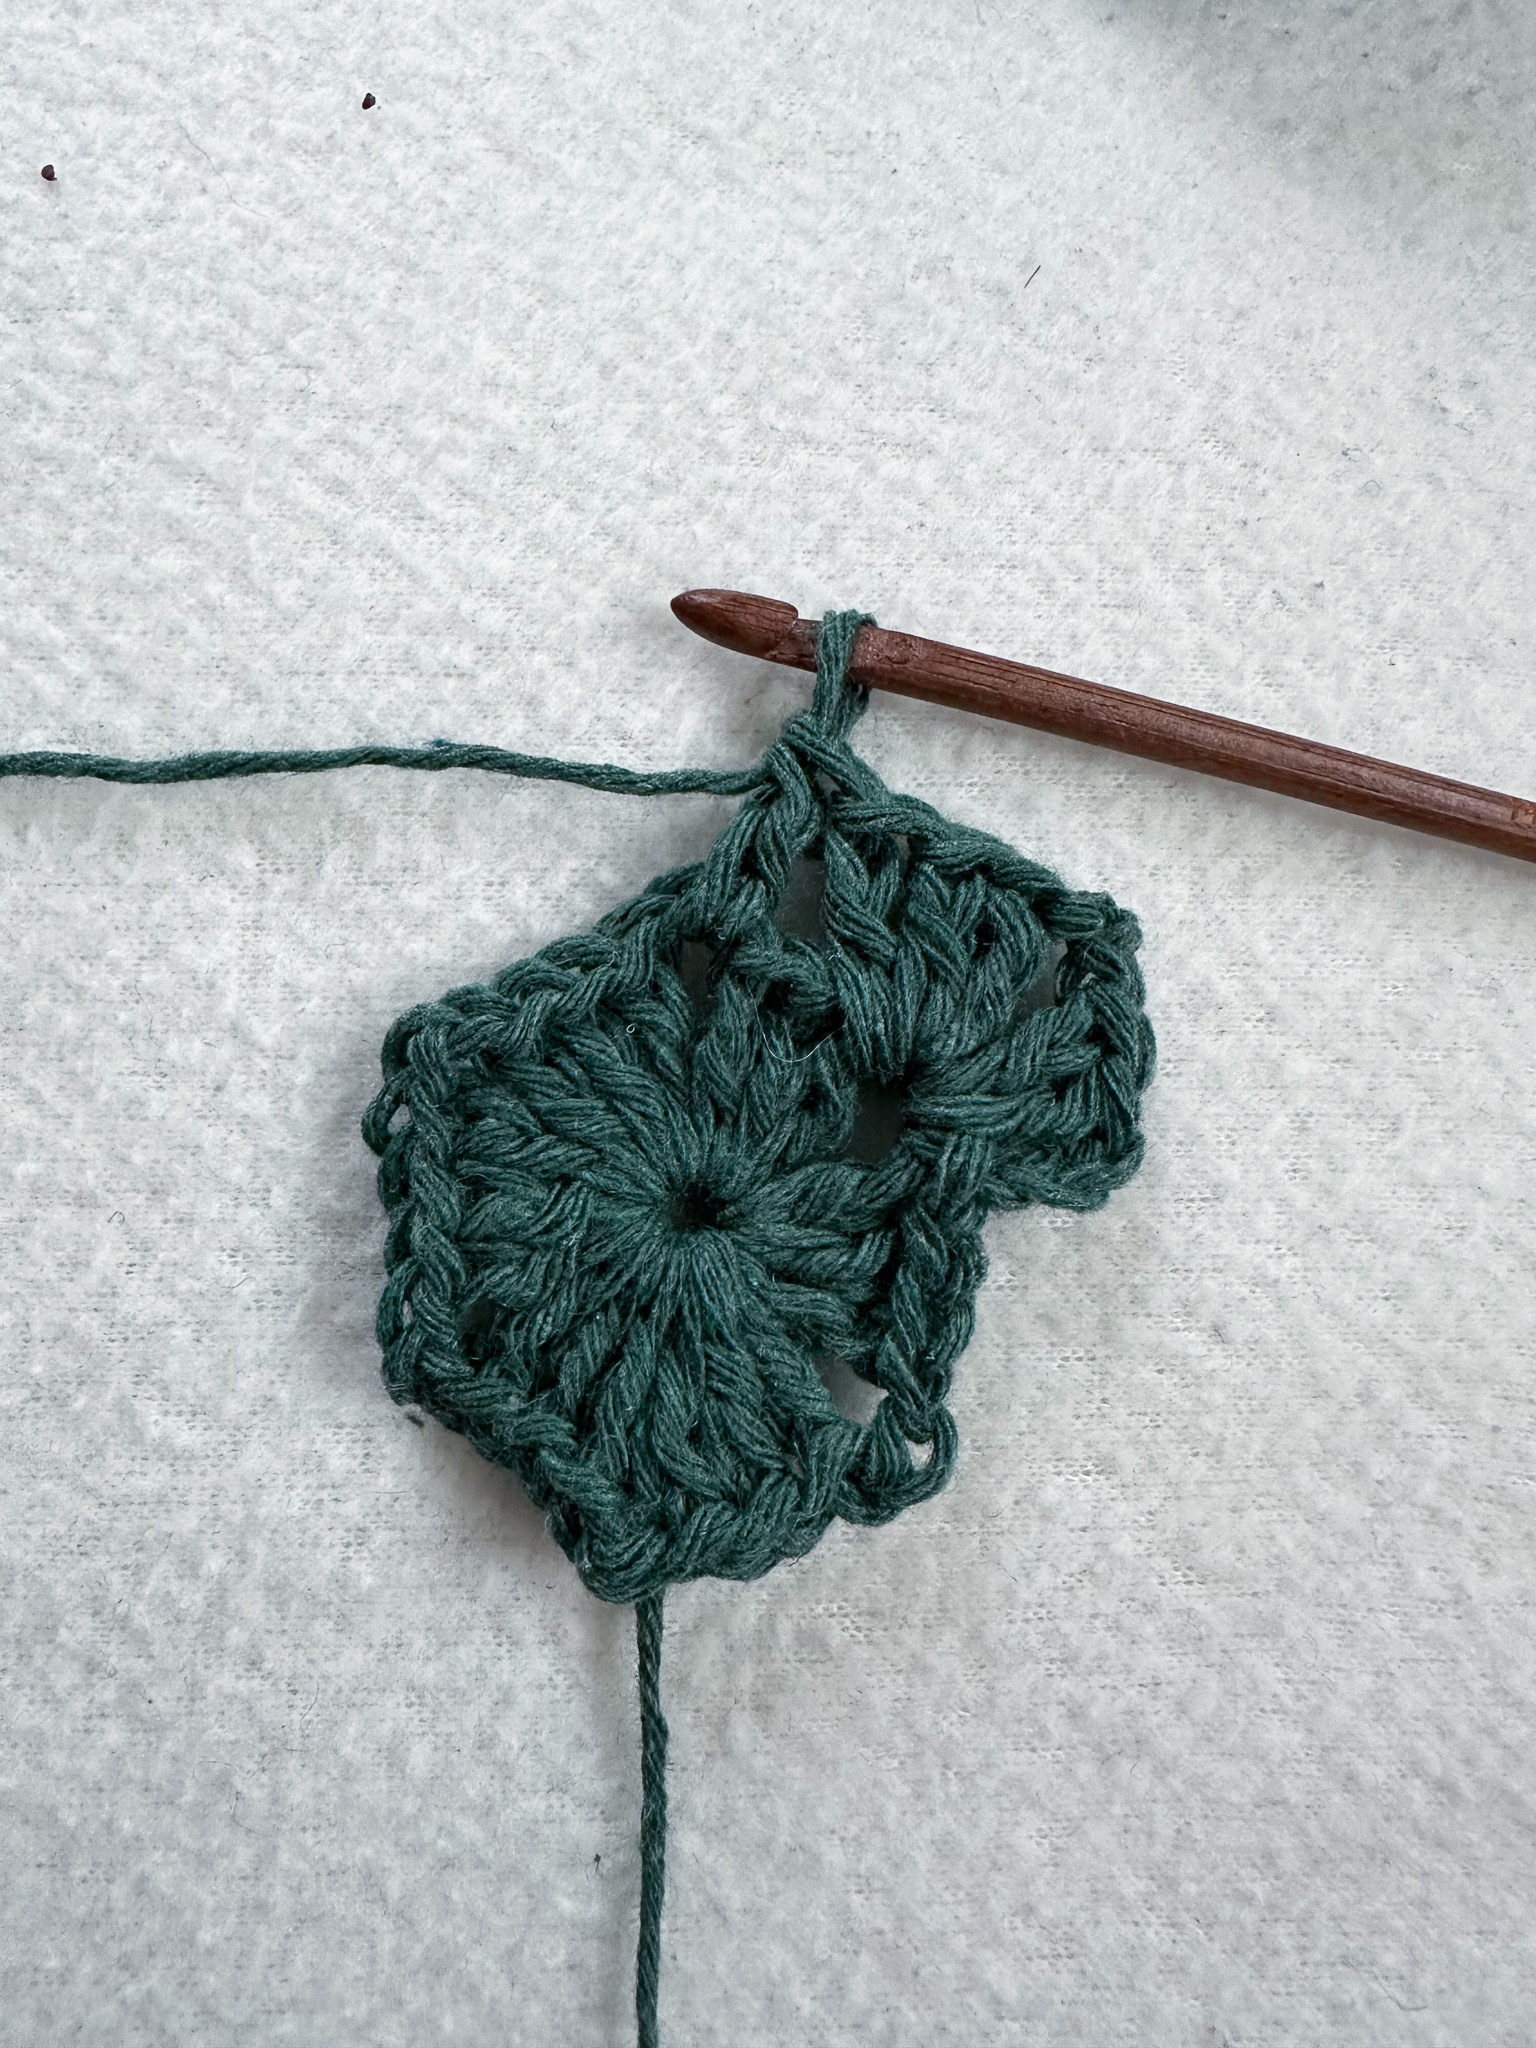
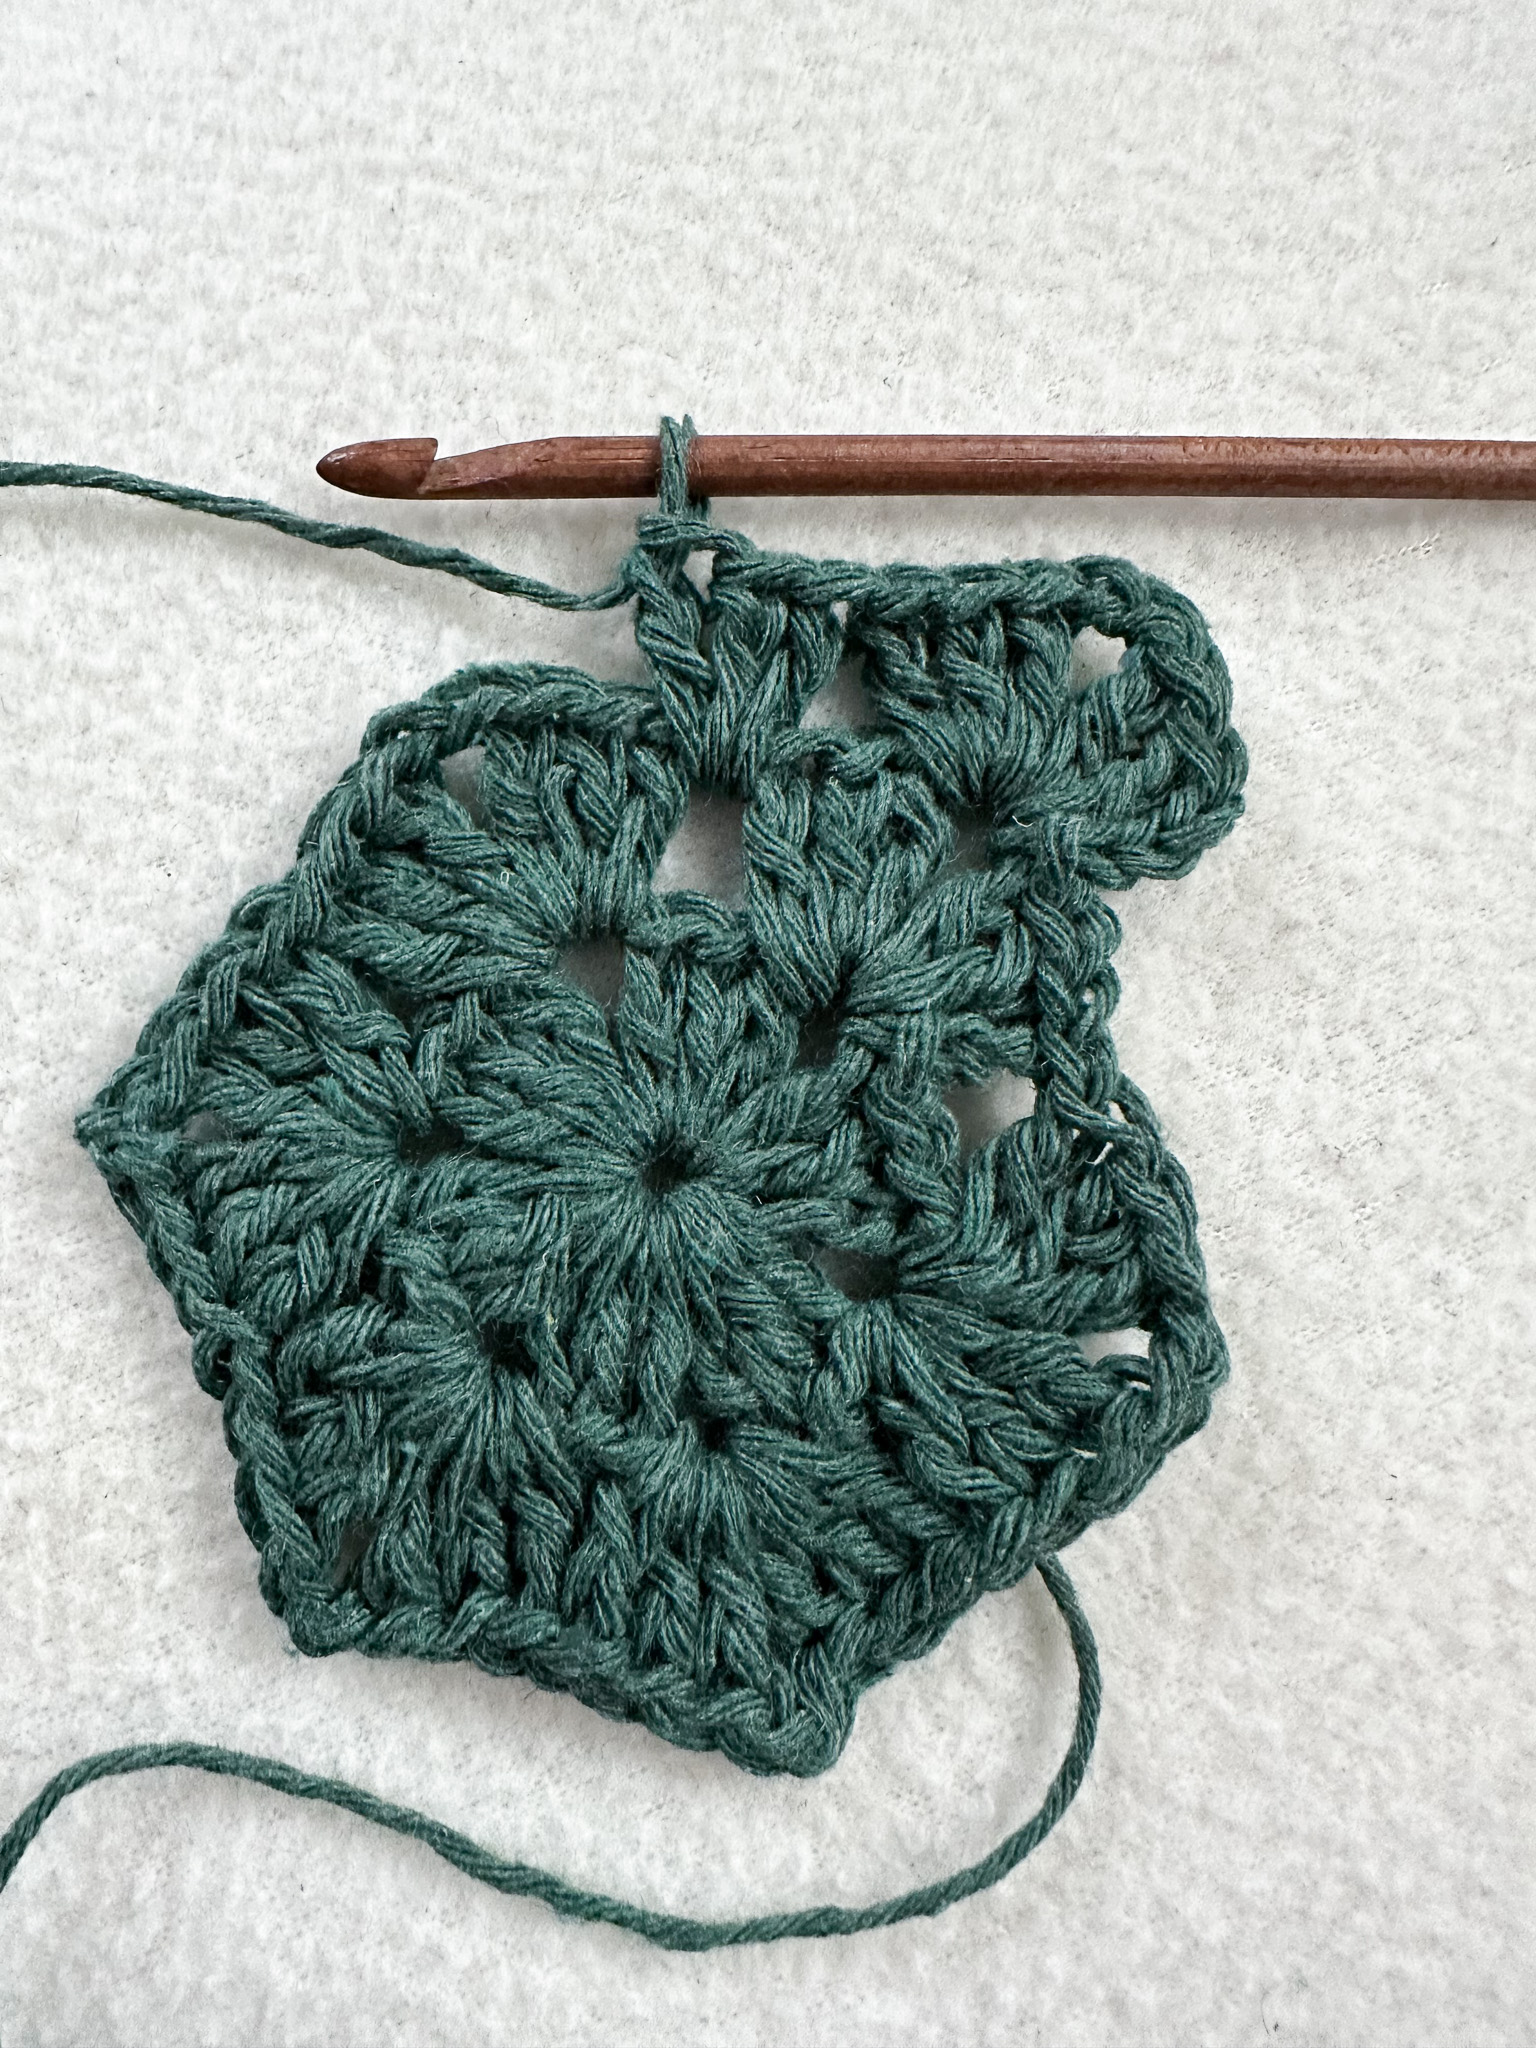
Round 2: Each new round begins in a corner (which is the chain-2 space between two double crochet groups). Work slip stitches until you reach the corner (about 3 slip stitches).
Work a slip stitch into the chain-2 space, then chain 3 (counts as the first double crochet). Crochet 2 double crochet stitches, chain 2, and 3 double crochet stitches into the corner (the chain-2 space). This forms one corner.
Move to the next corner and crochet 3 double crochet stitches, chain 2, and 3 double crochet stitches into the corner. Repeat this for all 6 corners. (Note: Do not chain between corners.)
Join with a slip stitch in the third chain from the beginning. You should have 12 double crochet groups with 3 double crochet stitches in each group for this round.
Round 3: Work slip stitches until you reach the next corner. Crochet 3 double crochet stitches (the first stitch counts as 3 chain stitches), chain 2, and 3 double crochet stitches into the corner.
The next space will be the chain-2 space between corners; here, crochet 3 double crochet stitches (one double crochet group).
Then crochet the next corner in the same way as the first, and continue around the round. Corners are worked as 3 double crochet stitches, chain 2, and 3 double crochet stitches in the same space. Between corners, crochet 3 double crochet stitches (one double crochet group).
Join with a slip stitch in the third chain from the beginning. You should have 18 double crochet groups with 3 double crochet stitches in each group for this round.
Rounds 4–13 (or as many rounds as you wish): Work the rounds in the same way as round 3. All corners are worked with 3 double crochet stitches, chain 2, and 3 double crochet stitches in the same space, and between corners, work a double crochet group in each chain-2 space. Start and end each round with slip stitches as described above.
After round 13, you should have a total of 78 double crochet groups in the round (13 double crochet groups between each corner).
If you want the edge of the blanket to be a different color, make the very last pull-through of the slip stitch with the new color. Do not cut the yarn; continue directly on the edge in next step.
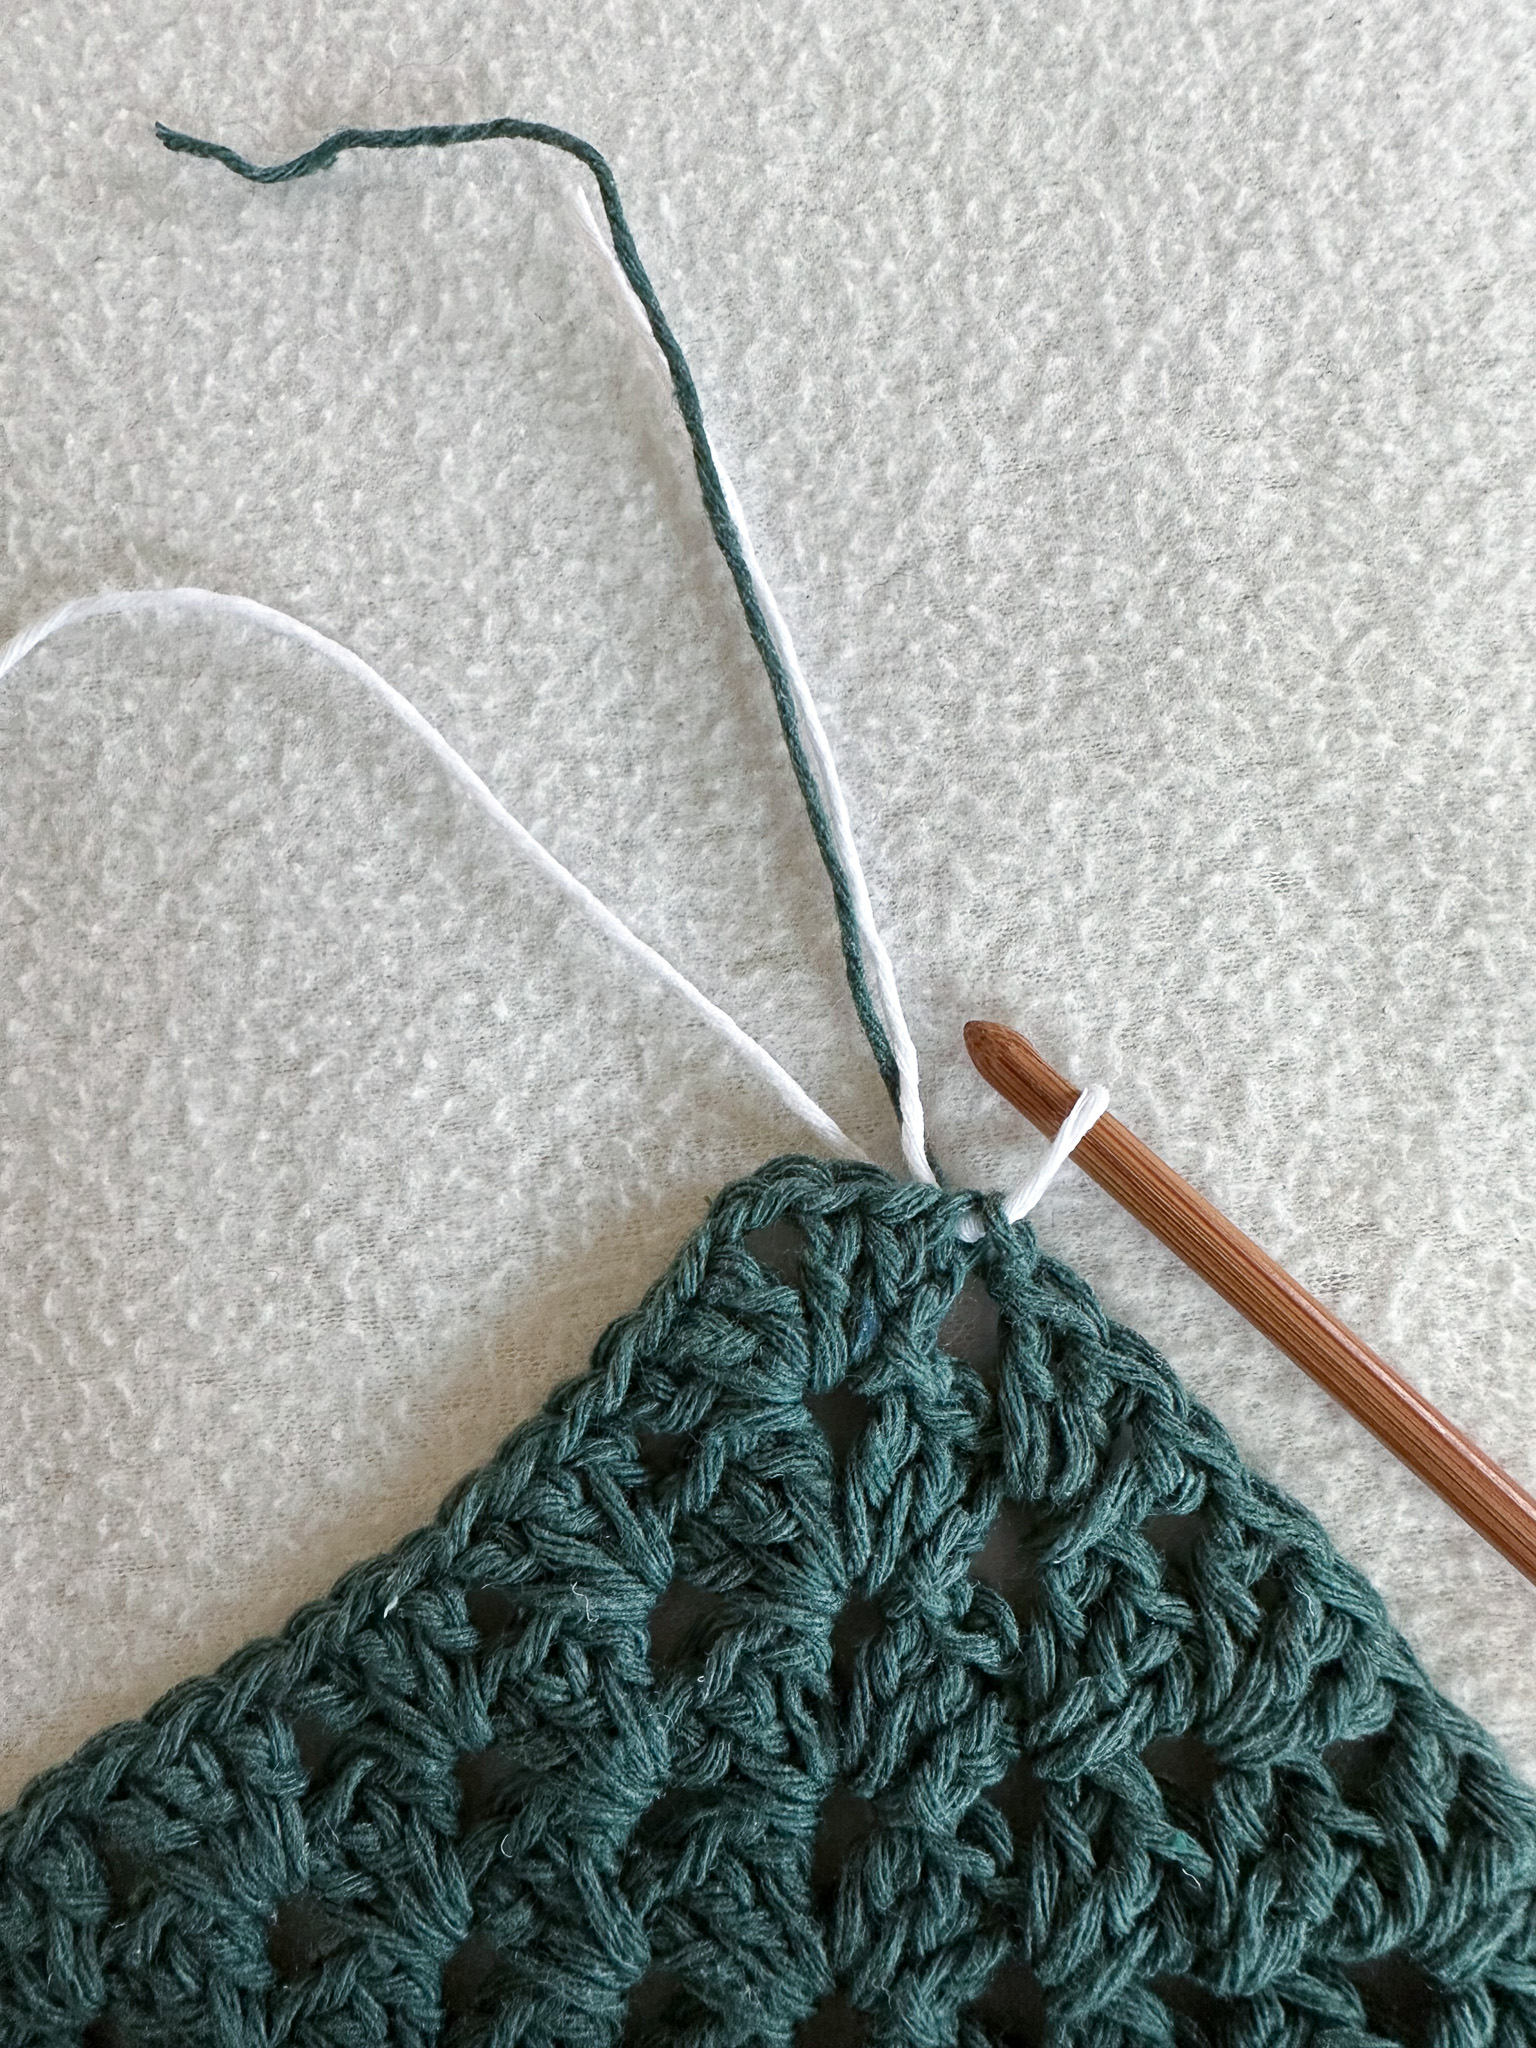
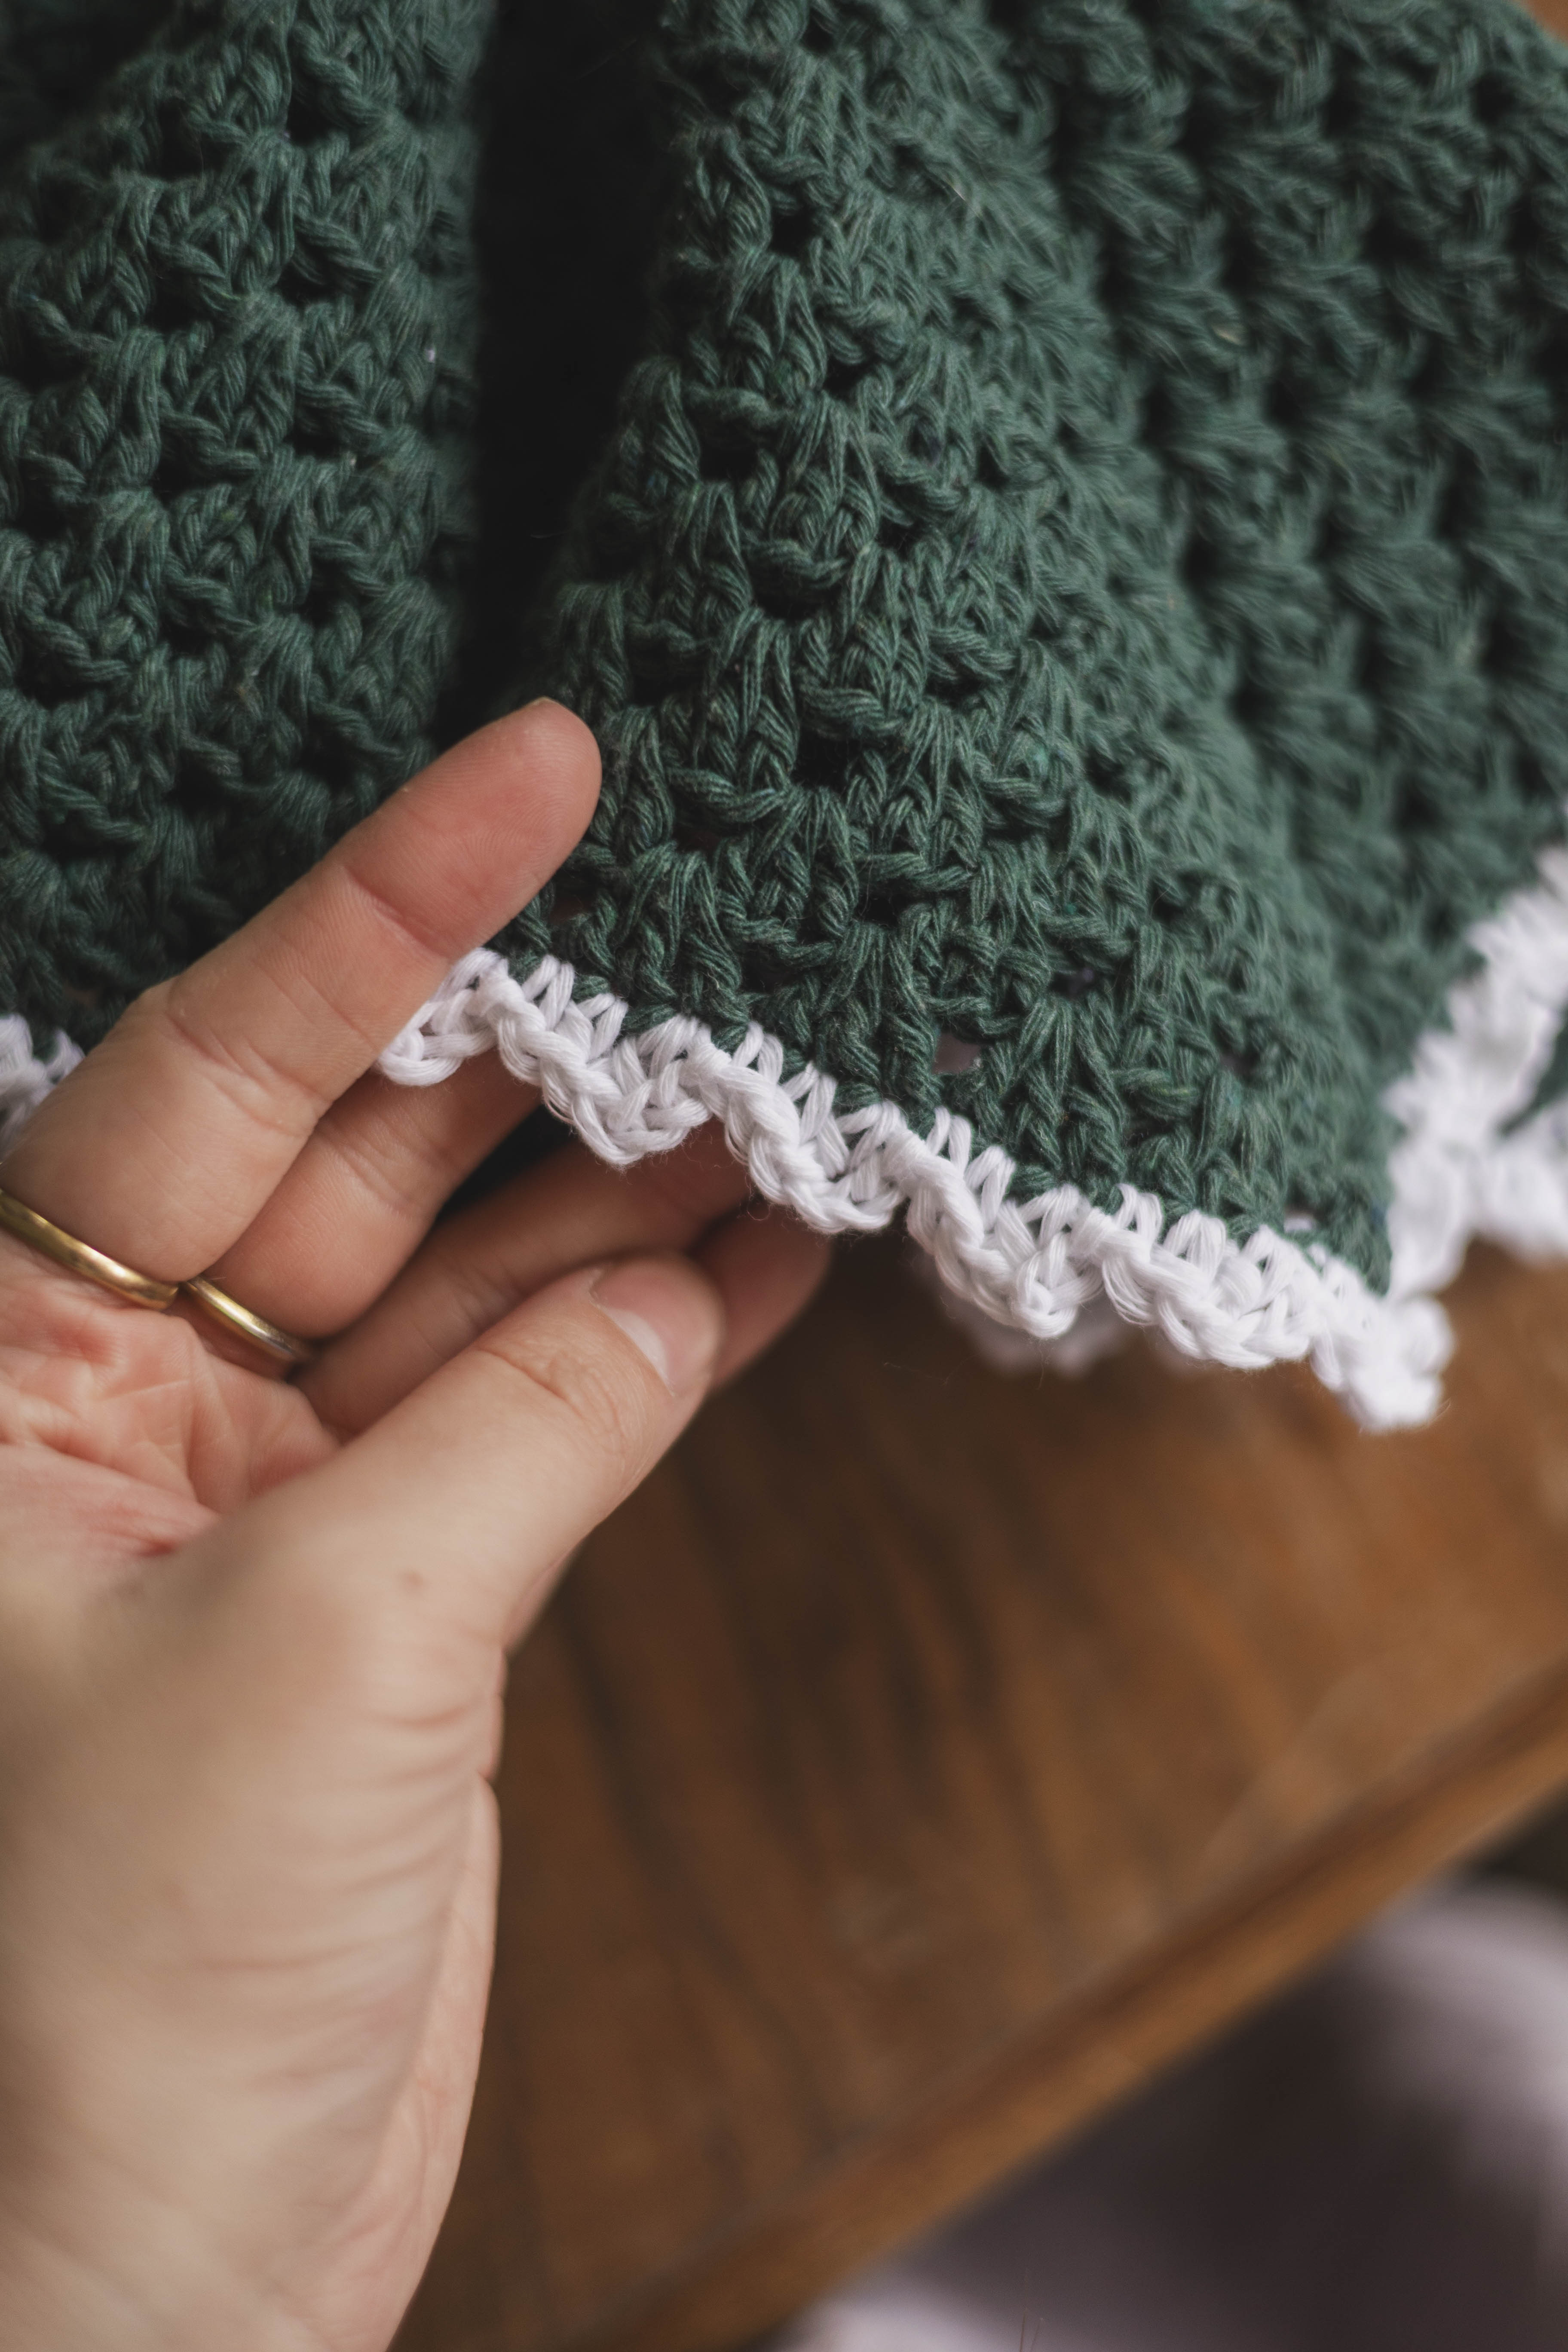
Edge Around the Lovey Blanket
The edge is a pattern of arches that are 3 stitches wide. Make sure these three stitches are worked directly over a double crochet group (3 double crochet stitches) from the previous round. This way, you will have the same number of edge arches as double crochet groups. At the chain-2 corner space, use a different technique as described below.
Starting the edge:
If you have changed color, the new color should now be on your hook. Begin by making a single crochet in the same stitch where you just worked a slip stitch. This will be the first stitch of the first double crochet group in the round below.
Then, make a half double crochet in the next stitch. In the last stitch of the double crochet group below, first work a double crochet. Then chain 3 and make a slip stitch in the same stitch where you just worked the double crochet. This forms the first arch. You should now be at the first corner.
If you are unsure how to crochet a half double crochet, see the video below.
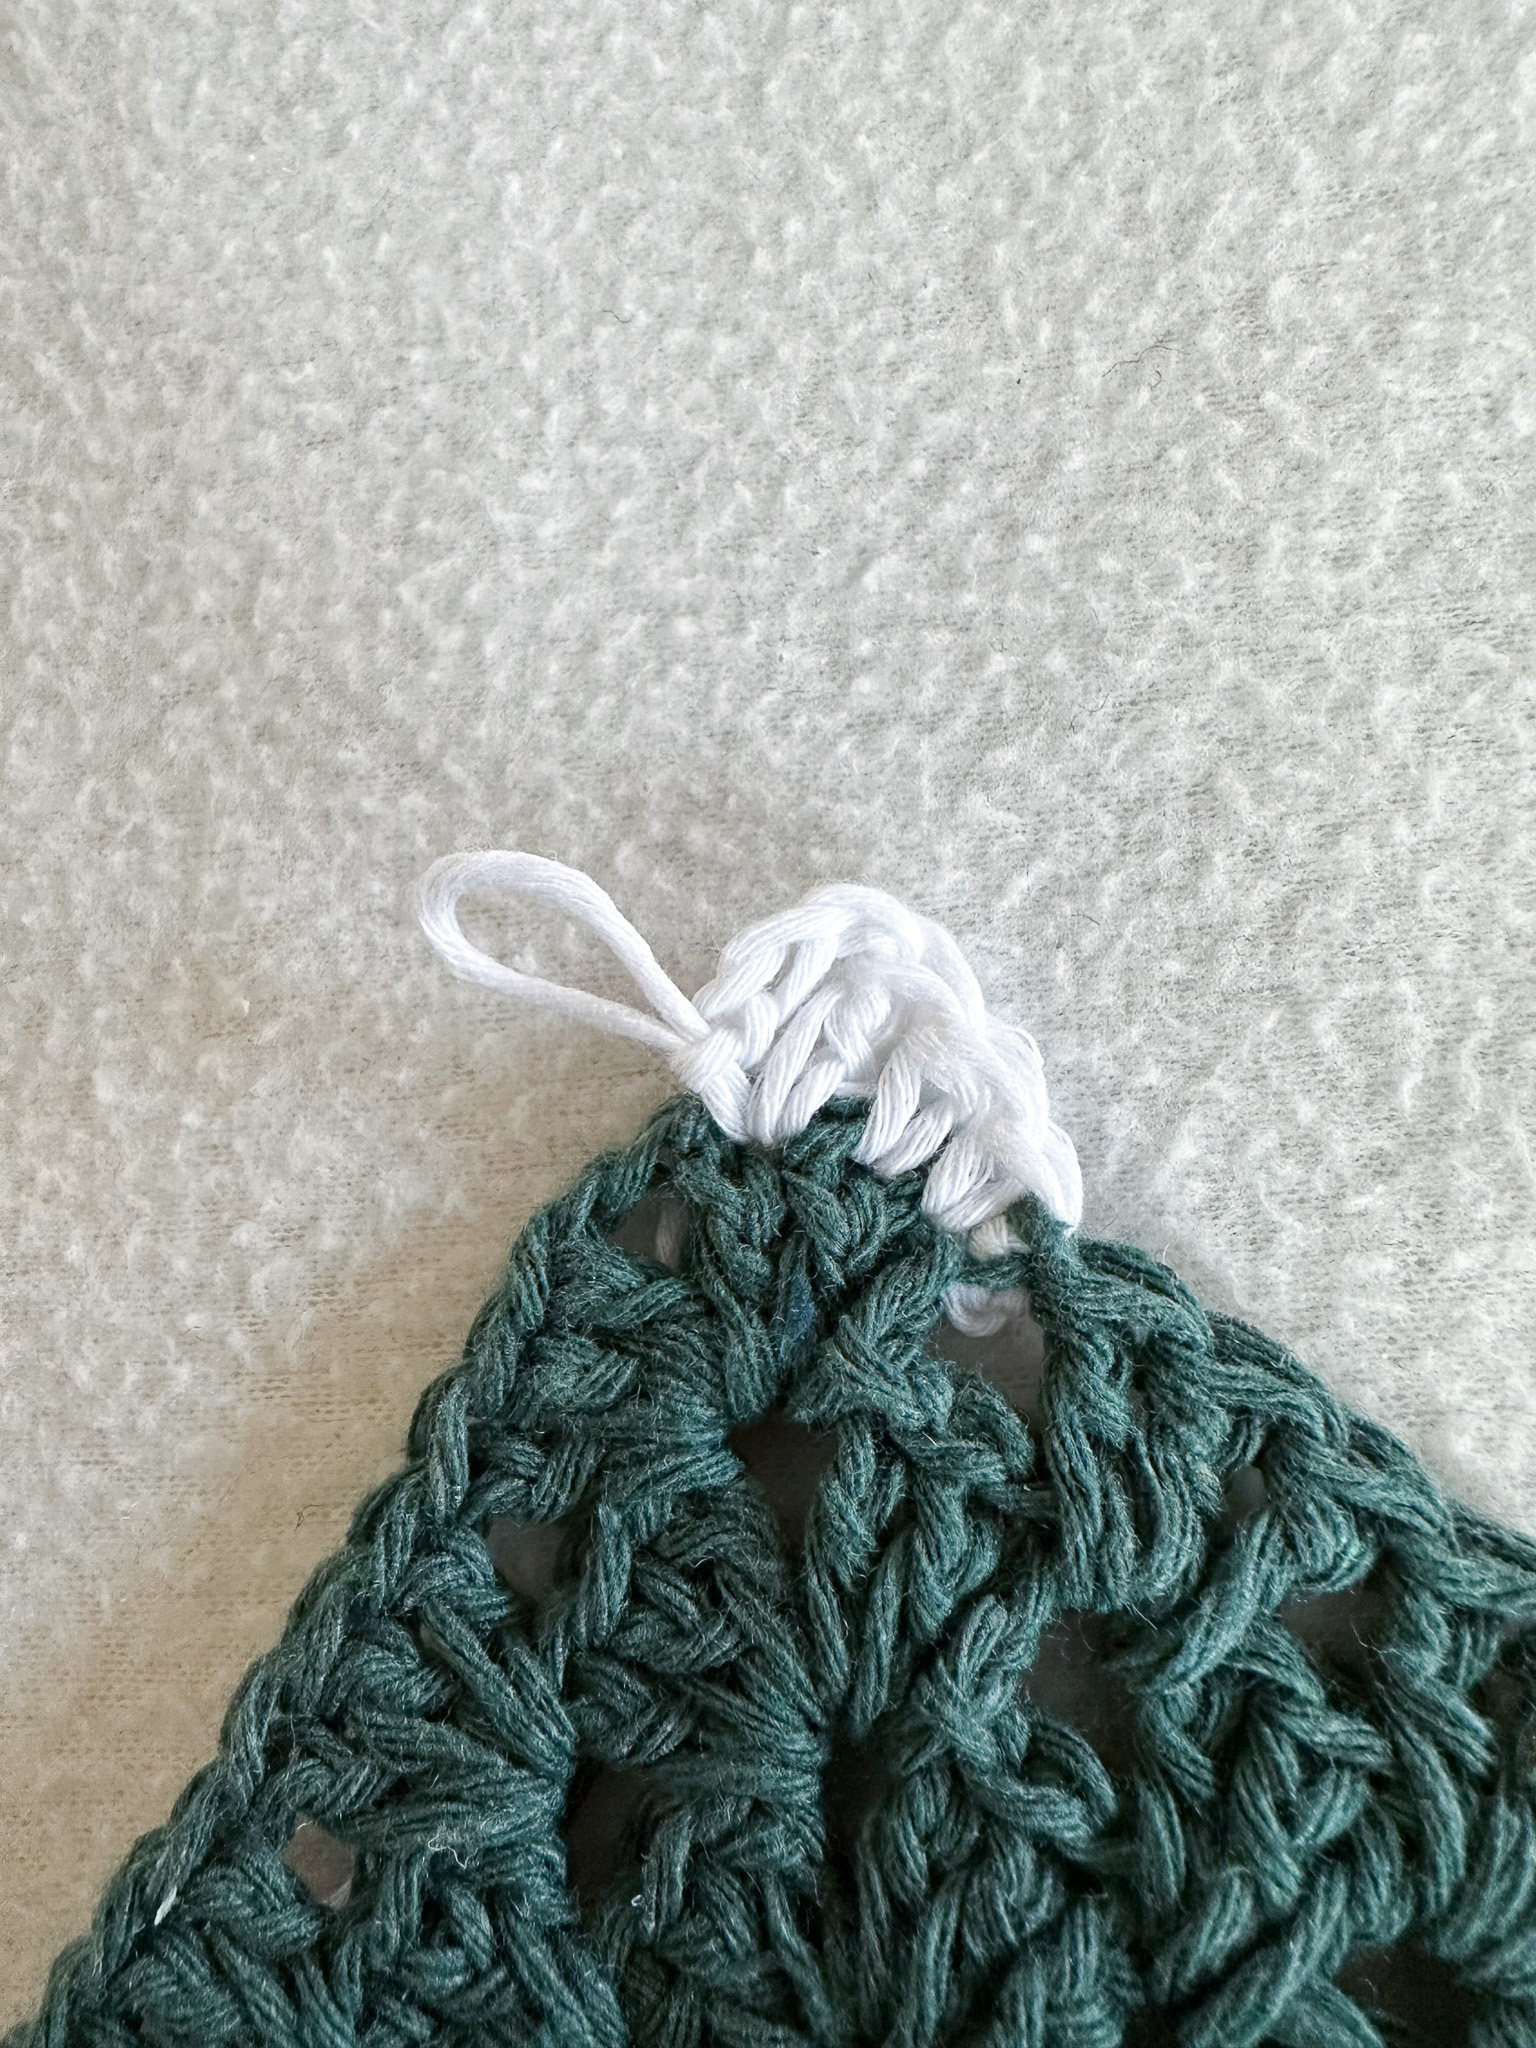
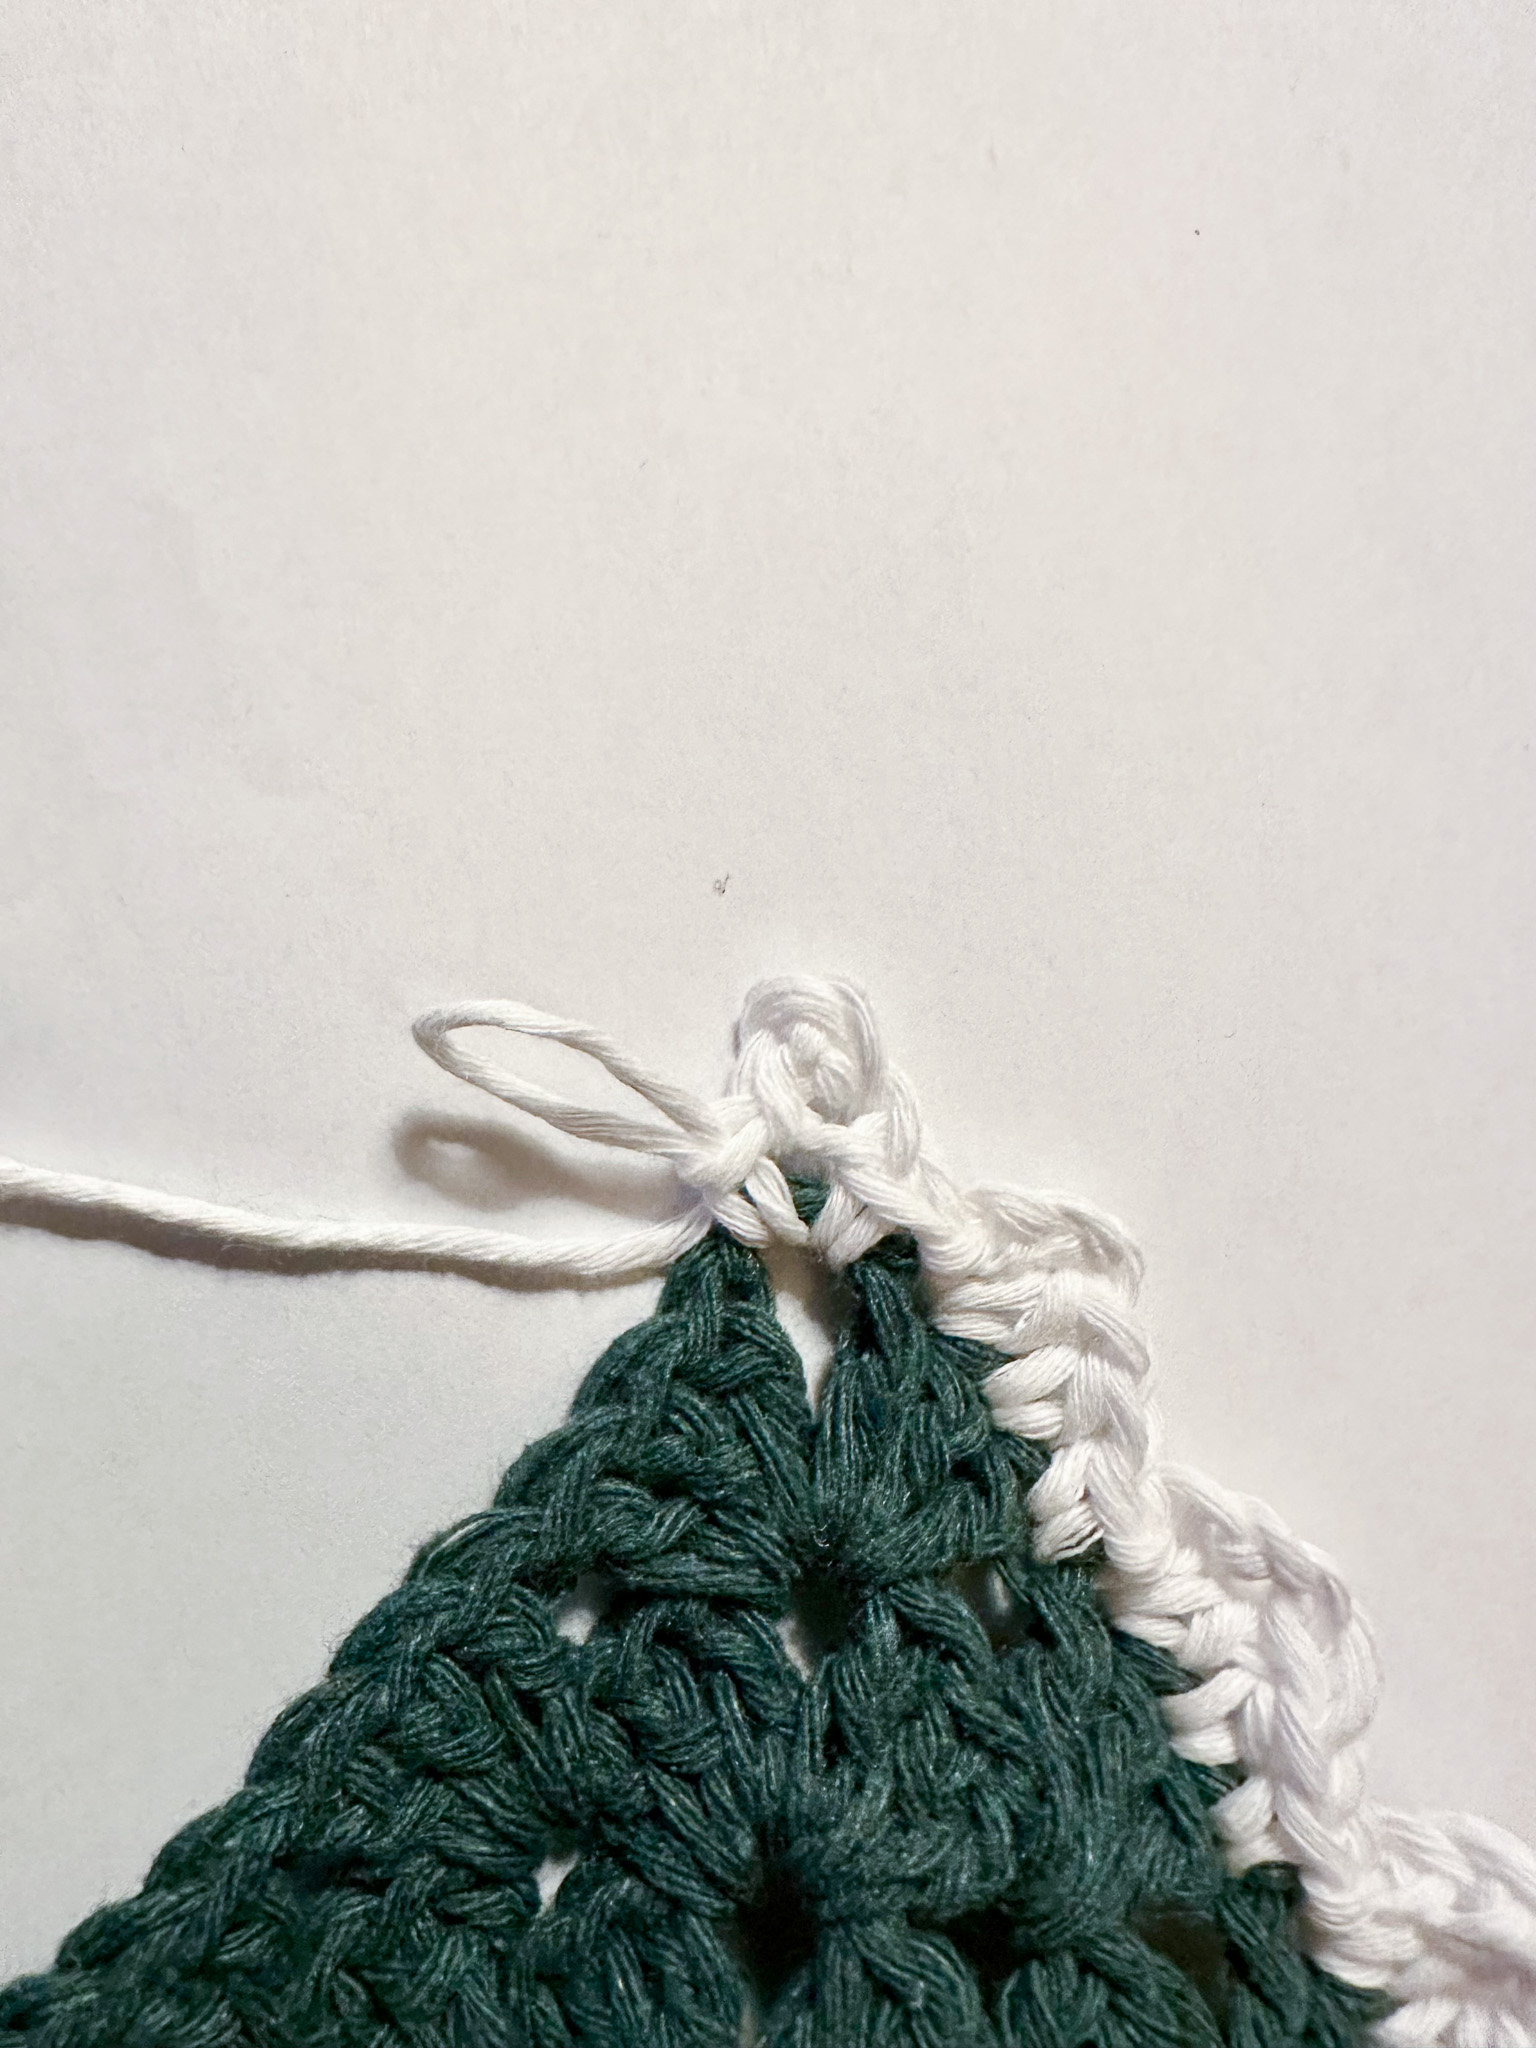
Corners: Crochet 1 single crochet into the chain-2 space. Chain 5 and make a slip stitch in the first chain to form a point. Finish with another single crochet in the corner. This creates a pointed corner. Repeat this technique on all corners.
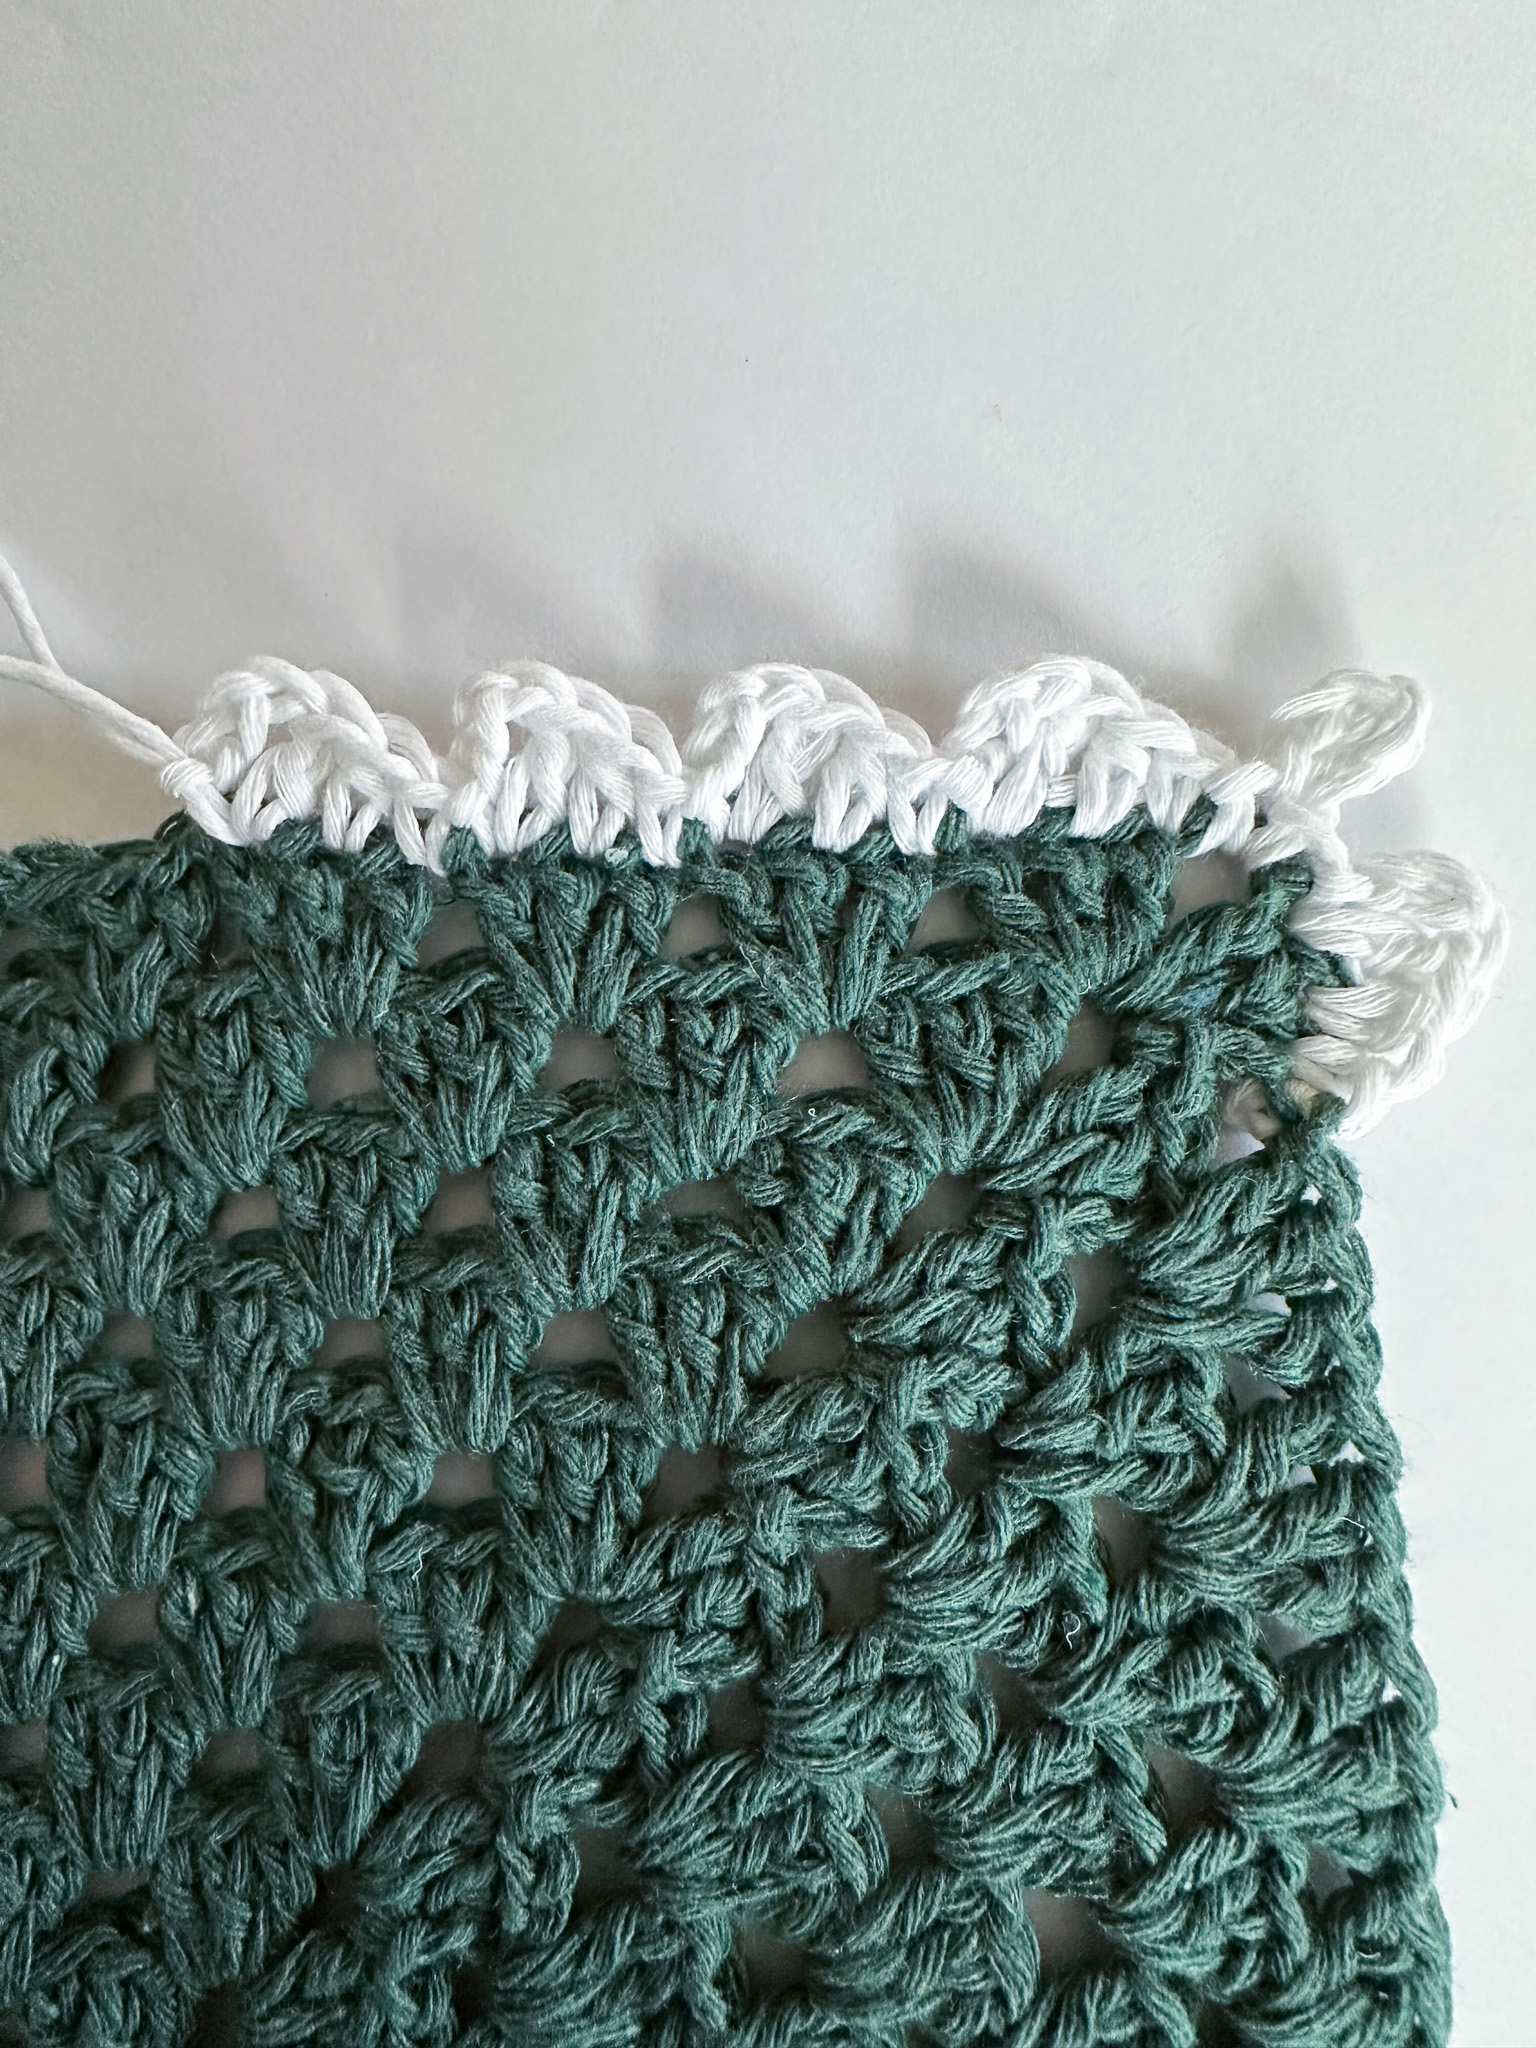
Long sides: On the long sides, make arches the same way as you did at the start of the edge. One arch consists of: 1 single crochet, 1 half double crochet, (1 double crochet + 3 chain stitches + 1 slip stitch in the same stitch). Repeat 13 times (or as many double crochet groups as you have) along each side.
Repeat the corner and side pattern around the entire lovey blanket until you reach the starting point of the edge. Cut the yarn and weave in the ends.
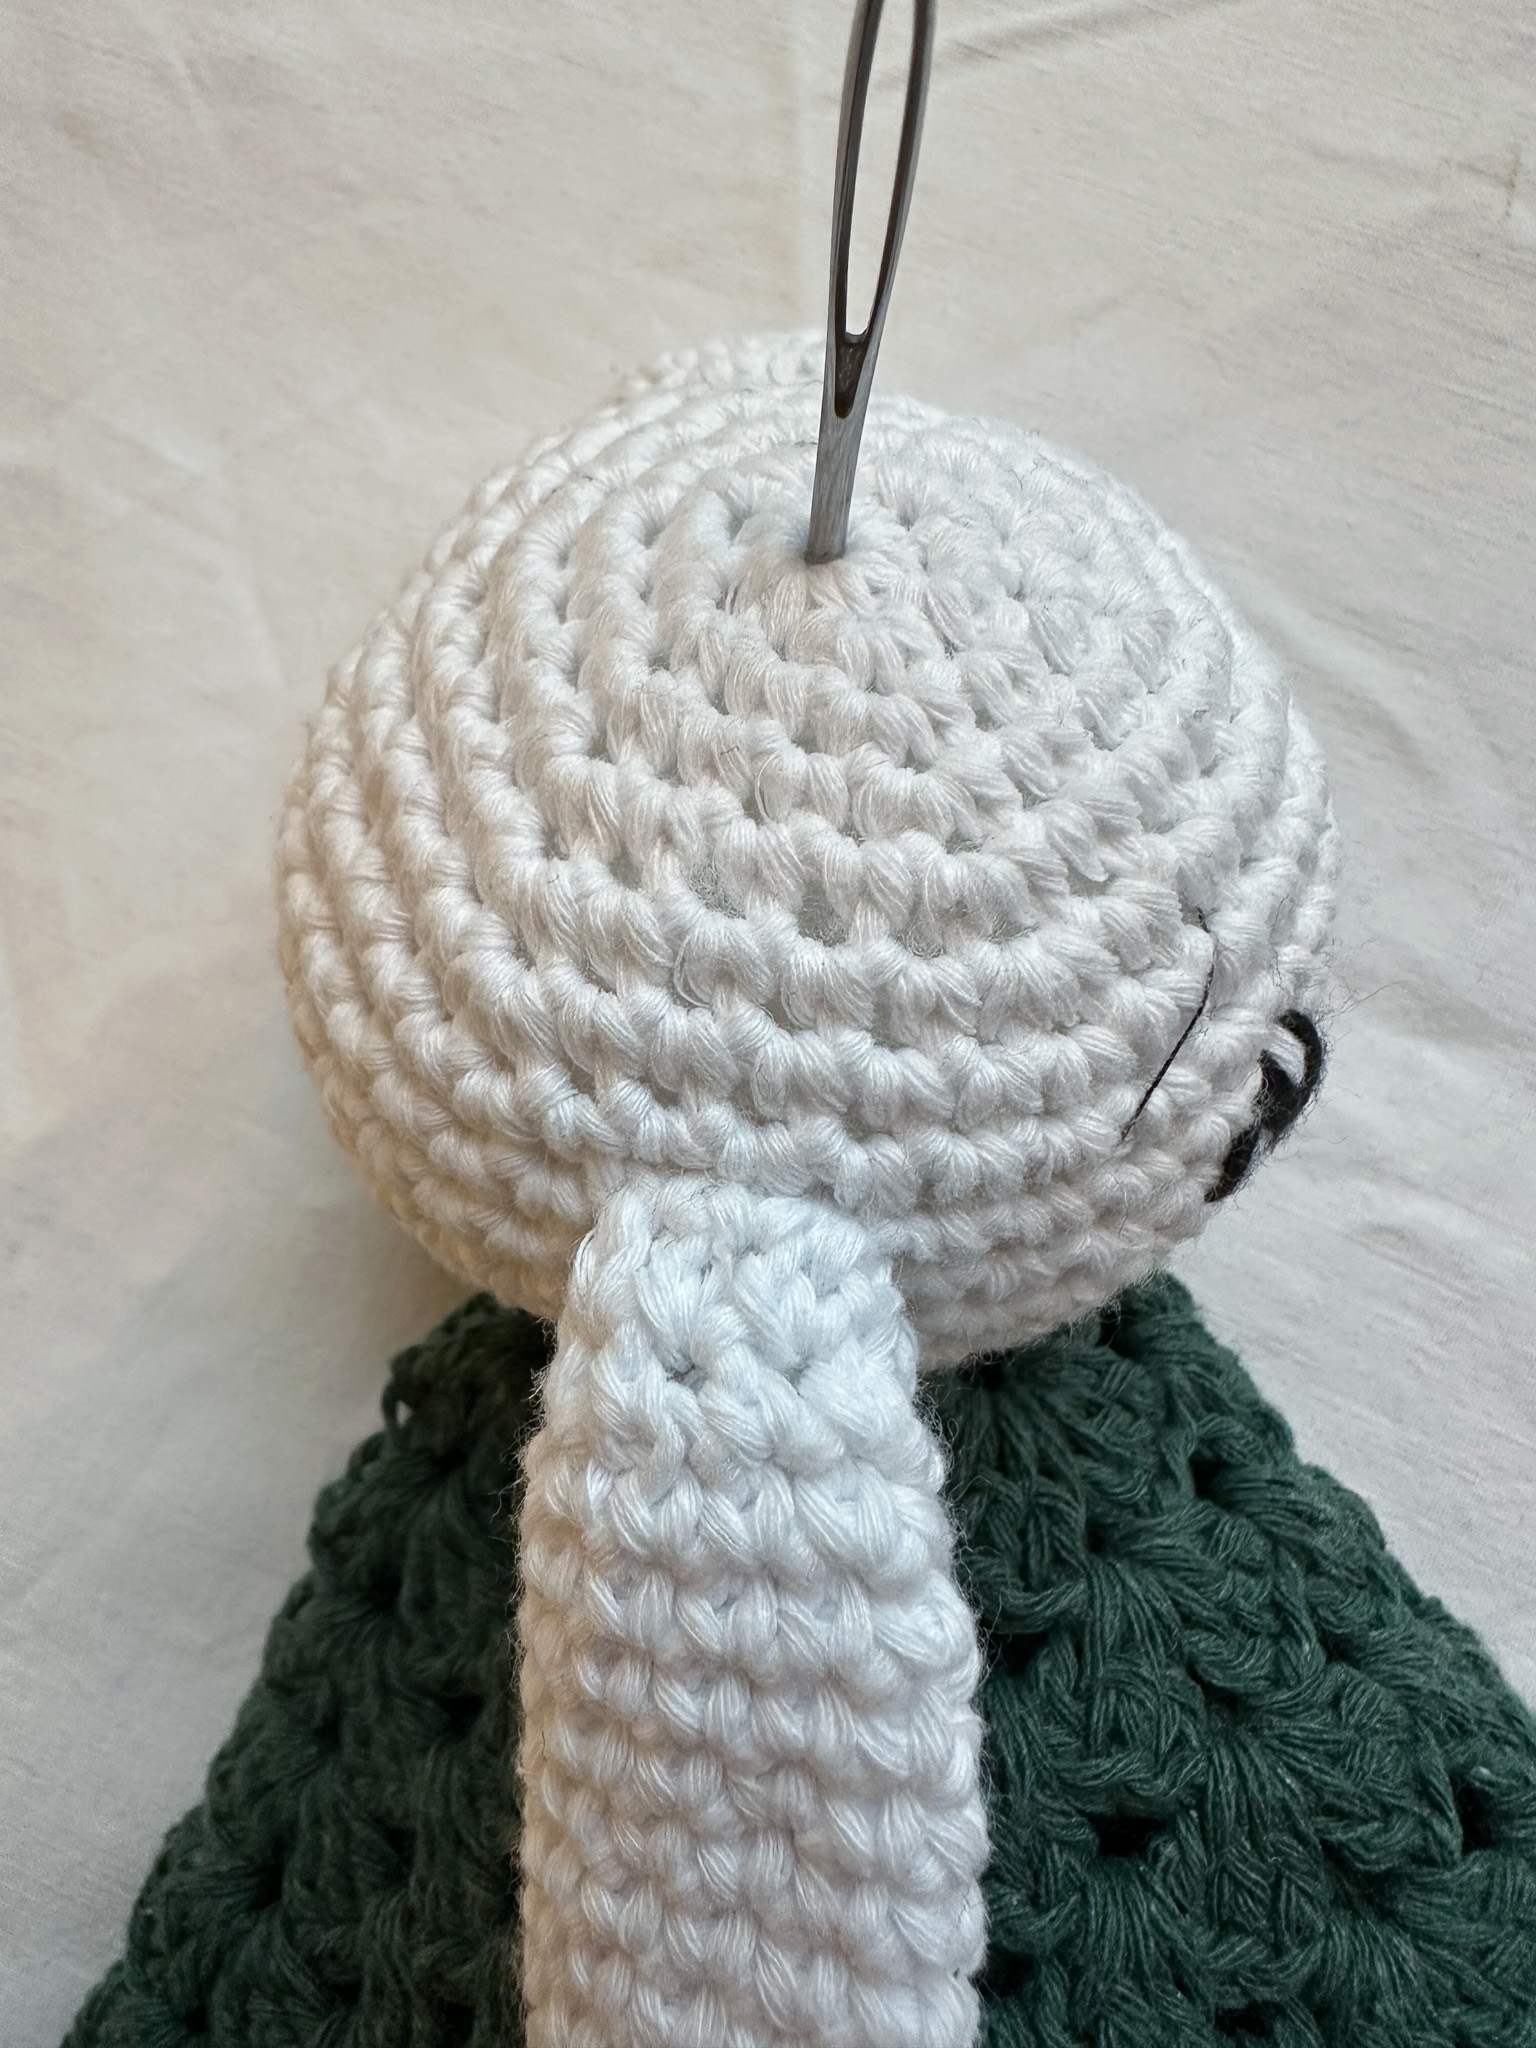
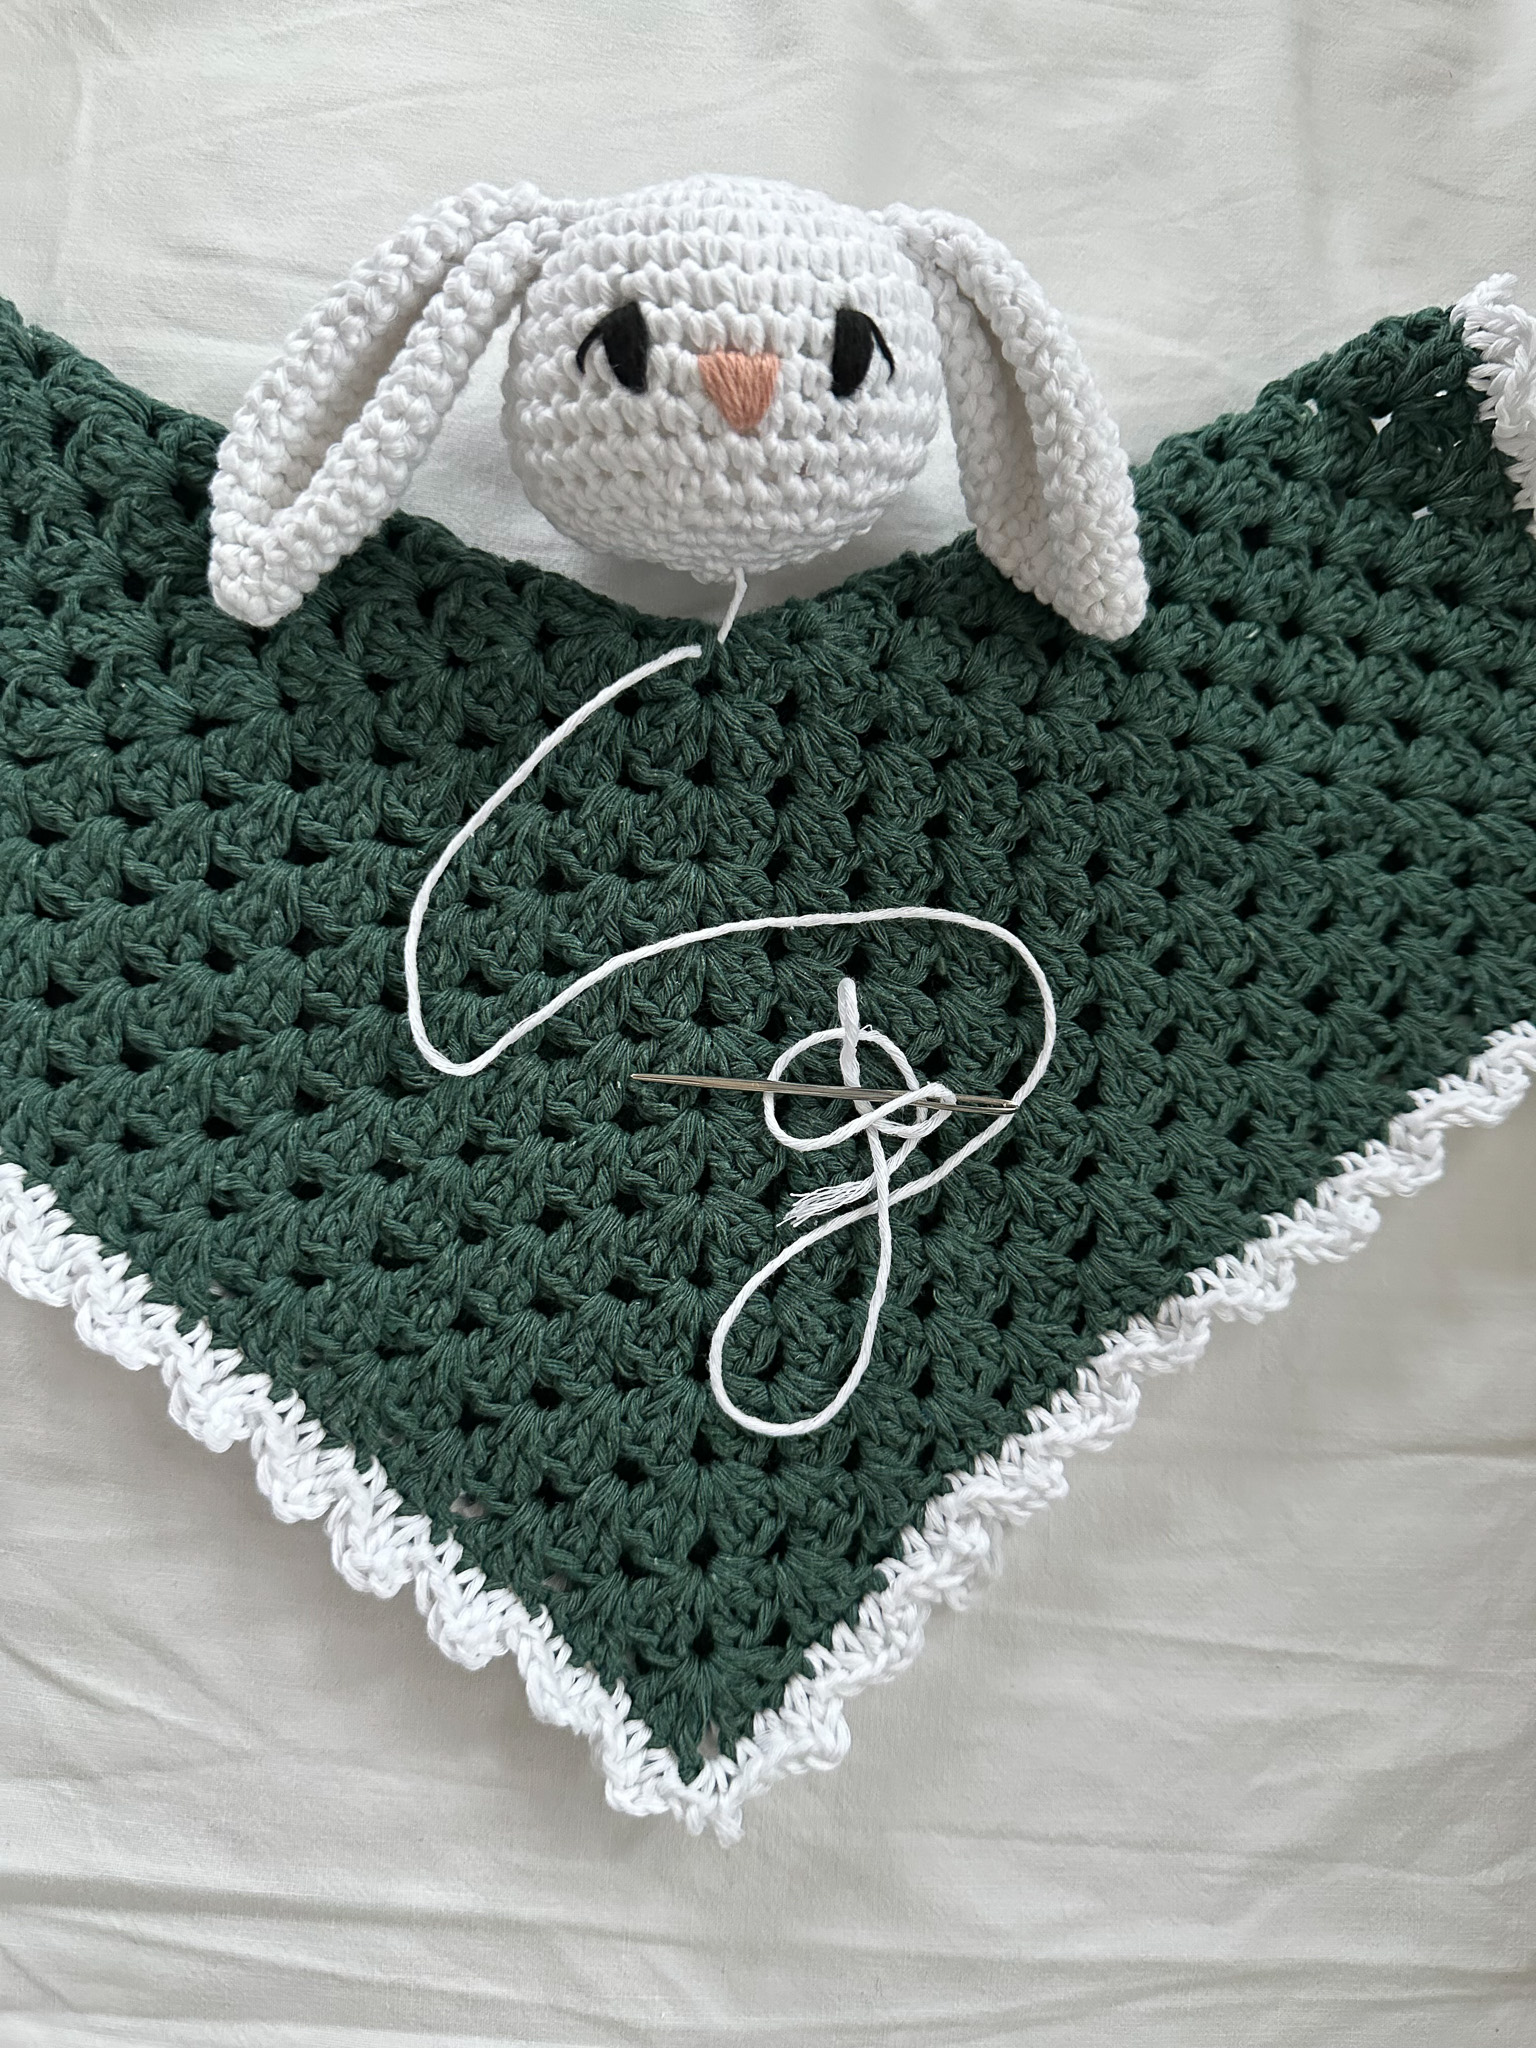
Sew the head in the center of the blanket using the long yarn tail from the head. Make sure to sew it securely and tightly so it does not come loose.
If you are using different colors for the head and the blanket, be careful not to sew all the way through the blanket, so the head’s color does not show on the underside. Insert the needle with the yarn through the head, tie a few tight knots at the back, then cut the yarn and tuck the knot inside the head to hide it.
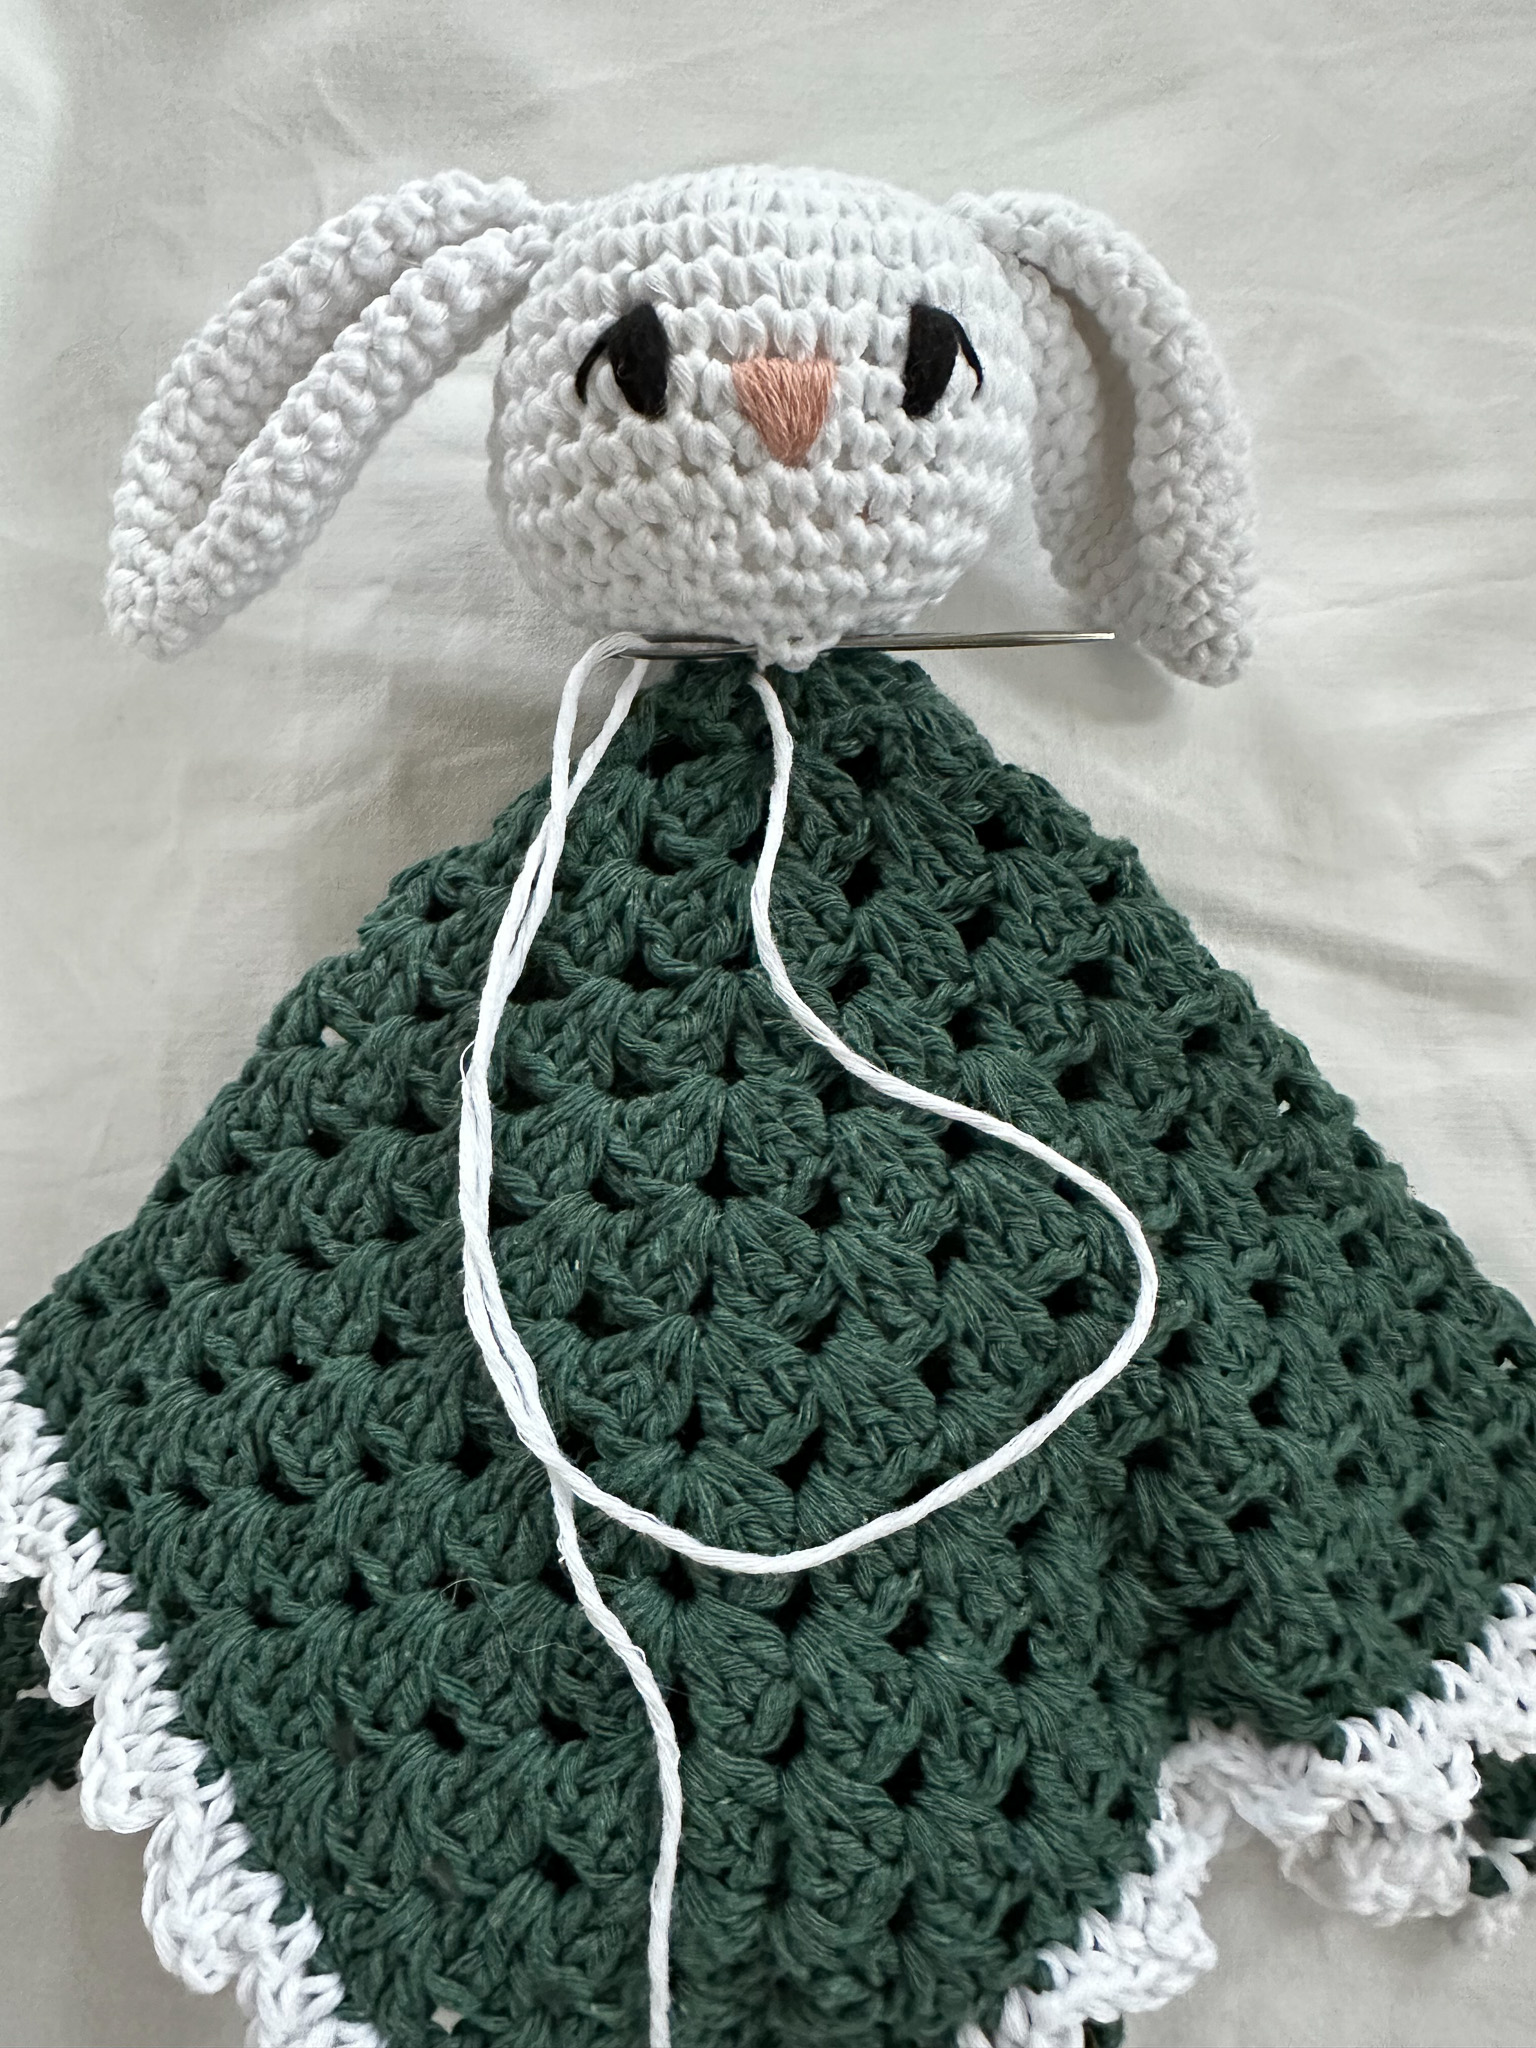
Your comfort blanket is done!
Crochet Terminology
This section only contains crochet terms. If you need more help along the way, see the simpler version.
Abbreviations:
- MR = Magic Ring
- sc = Single Crochet
- inc = Increase (2 sc in same st)
- dec = Decrease (2 sc together in same st)
- hdc = Half Double Crochet
- dc = Double Crochet
- sl st = Slip Stitch
- ch = Chain
- (..) = Total number of stitches in the round
- [..] = Everything inside is worked in the same stitch
- *…* = Repeat the instructions inside the asterisks
Safety Information – Crocheted Lovey
Secure all yarn ends so no loose parts can come off. The product should only be used under adult supervision. As the maker, it is your responsibility to follow safety guidelines and ensure the lovey is used safely.
Tips for Keeping Track of Rounds
Use a stitch marker in the last stitch of each round to keep track of rounds. As an alternative, cut a short piece of yarn (preferably a contrasting color) and place it under the working yarn before starting the first stitch of each round. This way, stitch 1 of each round will be just to the left of the yarn end, making it easy to see when you’ve gone all the way around. You can then pull out the yarn and place it under the work again as the start of the next round. In the instructions, a dark green yarn end is used for this purpose.
Head (white yarn)
Round 1: 6 sc in MR
Round 2: inc x6 (12)
Round 3: *1 sc, inc* x6 (18)
Round 4: *2 sc, inc* x6 (24)
Round 5: *3 sc, inc* x6 (30)
Round 6: *4 sc, inc* x6 (36)
Round 7–12: 36 sc (1 sc in each st) for 6 rounds
Round 13: *4 sc, dec* x6 (30)
Round 14: *3 sc, dec* x6 (24)
Round 15: *2 sc, dec* x6 (18)
Start stuffing the head with fiberfill.
Round 16: *1 sc, dec* x6 (12)
Add more fiberfill until the head is fully stuffed. Filling firmly gives a nicer, firmer shape.
Round 17: dec x6 (6)
Fasten off and cut the yarn, leaving a long yarn tail. If you like, you can close the small hole by sewing a few stitches with the yarn tail. Do not cut the tail, as it will be used to sew the head onto the blanket.
Ears (make 2) – White Yarn
Round 1: 6 sc in MR
Round 2: 6 sc (6)
Round 3: *1 sc, inc* x3 (9)
Round 4: *2 sc, inc* x3 (12)
Round 5: *3 sc, inc* x3 (15)
Round 6: *4 sc, inc* x3 (18)
Round 7–15: 18 sc (1 sc in each st) for 9 rounds
Round 16: *4 sc, dec* x3 (15)
Round 17: *3 sc, dec* x3 (12)
Fold the ear flat and crochet the two layers together with 5 sc. Fasten off and leave a long yarn tail for sewing the ears onto the head.
Fold the ear in half and pull the yarn tail through to hold the ear folded. Keep the yarn tail for sewing the ear onto the head.
Sewing on the Ears
Pin the ears approximately 8 rounds down from the MR at the top of the head. Pin both ears in place before sewing. Check that the ears are positioned evenly in width and height and are not too low. Once you’re happy with the placement, sew both ears securely onto the head. Make sure the fold/crease of each ear is facing the same direction.
Embroider the Nose
Start by placing pins at the corners of where you want the nose, in a triangular shape. Place the bottom pin centered between the ears, below round 9. The two top pins should be above round 7, about 2 sc apart.
Embroider the nose between the pins using a piece of pink yarn.
Embroider the Eyes
Start by placing pins to test the placement of the eyes. Place the bottom pins below round 8, 2 sc away from each side of the nose. Place the top pins 2 rounds directly above the bottom pins.
Embroider the eyes with black yarn, stitching back and forth several times until the eyes reach the desired
Insert the needle just 1 sc to the side of the eye where you want an eyelash. Bring the needle out at the top of the eye.
Use the same thread to come out at the start of the next eye and embroider that eyelash as well. Secure the thread when finished.
Take a piece of white yarn and bring the needle out at the top of the eye. Insert the needle back into the center of the eye. Secure the thread.
Embroider the Eyebrows
Take a thin black thread, such as sewing thread. Position the eyebrows starting 2 rounds above the top of the eye and ending about 3 sc in and 2 rounds below. Secure the thread when finished.
Blanket
This blanket is made like a granny square but with 6 corners instead of 4.
Make a MR.
Round 1:
- Ch 3 (counts as first dc), 2 dc, ch 2, 3 dc—all in the magic ring (this forms the first corner).
- *3 dc, ch 2* repeat 5 more times.
- Join with sl st to the top of the beginning ch-3.
Note: You should have 6 groups of 3 dc in this round.
Round 2:
- Sl st 3 times to reach the next corner (the ch-2 space).
- Ch 3 (counts as first dc), 2 dc, ch 2, 3 dc—all in the ch-2 space (this forms the corner).
- *Skip to the next corner, 3 dc, ch 2, 3 dc—all in the ch-2 space*; repeat 5 more times.
- Join with sl st to the top of the beginning ch-3.
Note: You should now have 12 groups of 3 dc in this round.
Round 3:
- Sl st 3 times to reach the next corner.
- Ch 3 (counts as first dc), 2 dc, ch 2, 3 dc in the corner (ch-2 space).
- Skip to the next “space” between two dc groups and work 3 dc.
- *3 dc, ch 2, 3 dc in the next corner, 3 dc in the space between dc groups*; repeat 5 more times.
- Join with sl st to the top of the beginning ch-3.
Note: You should now have 18 groups of 3 dc in this round.
Round 4:
- Sl st 3 times to reach the next corner.
- In the corner: Ch 3 (counts as first dc), 2 dc, ch 2, 3 dc.
- Work 3 dc in each of the next 2 spaces between corners.
- *3 dc, ch 2, 3 dc in the next corner, 3 dc in each of the next 2 spaces between corners*; repeat 5 more times.
- Join with sl st to the top of the beginning ch-3.
Note: You should now have 24 groups of 3 dc in this round.
Round 5–as large as you want:
- Continue the same pattern: 2 dc groups with ch-2 in each corner, and 1 dc group in each space along the sides between corners.
- Continue for as many rounds as you like.
- In the photo example, there are 13 dc groups between each corner on each side, totaling 78 dc groups overall.
Tip for a color change: If you want the last round to be a different color, make the final pull-through of the sl st with the new color. Do not cut the yarn—continue directly with the border in the next step.
Border Around the Lovey
The border is a repeating pattern of 3 stitches: 1 sc, 1 hdc, 1 dc + ch. Make sure these 3 stitches are worked directly on top of a dc group (3 dc) from the last round. This way, you’ll have the same number of scallops as there are dc groups.
At the corner ch-2 spaces, use a slightly different technique.
Starting the border:
- Work 1 sc in the same stitch where you just did the joining sl st,
- 1 hdc in the next stitch,
- [1 dc, ch 3, 1 sl st] in the corner space.
Corner 1
In the corner ch-2 space, work: [1 sc, ch 5, 1 sc in the first sl st, 1 sc]
This creates a pointed scallop in the corner.
Side 1
Repeat across the side: * 1 sc, 1 hdc, [1 dc, ch 3, 1 sl st] * 13 times (makes 13 scallops).
Corners + Sides 2–6
- Repeat the corner and side pattern around the entire lovey until you reach the beginning of the border.
- Fasten off the yarn and weave in all ends.
Attach the Head
- Sew the head in the center of the lovey using the long yarn tail from the head.
- Tip: If the head and blanket are different colors, avoid going all the way through the blanket so the color does not show on the back side.
- Insert the needle through the head, tie several tight knots on the back, cut the yarn, and tuck the knots inside the head to hide them.
Done :)
The rights to this pattern belong to MYO Make Your Own. The pattern or its pictures may not be copied, shared or resold either in parts or in its entirety, but you may sell items you have crocheted from this pattern. If you have questions about the pattern, contact MYO at hello@makeyourown.se.
Safety Information – Crocheted comfort blanket
Secure all yarn ends carefully so that no loose parts can come undone. The product should only be used under adult supervision. It is your responsibility as the maker to ensure that safety guidelines are followed and that the comfort blanket is used in a safe manner.
Tips for keeping track of rounds
Use a stitch marker and place it in the last stitch of the round to keep track of when a round is complete. As an alternative to a marker, you can cut a short piece of yarn, preferably in a different color from the one you are crocheting with, and place it under the working yarn (the yarn coming from your skein) before you make the first stitch of each round. This way, stitch 1 of each round will end up just to the left of the yarn strand, making it easy to see when you have completed the round. You can then pull out the strand and place it under the yarn again to mark the beginning of the next round. In the instruction images, a dark green yarn strand is used for this purpose.
Head (white yarn)
Round 1: Crochet 6 single crochet stitches into a magic ring. If you are unsure how to crochet a magic ring with single crochet stitches, see the video below.
Round 2: Crochet two single crochet stitches in each stitch. You will have a total of 12 stitches in the round.
Round 3: Crochet one single crochet in the first stitch. Then crochet two single crochet stitches in the second stitch (an increase). Repeat this pattern (increase in every other stitch) around. You will have a total of 18 stitches in the round.
Round 4: Crochet one single crochet in each of the first two stitches. Then crochet two single crochet stitches in the third stitch. Repeat this pattern (increase in every third stitch) around. You will have a total of 24 stitches in the round.
Round 5: Crochet one single crochet in each of the first three stitches. Then crochet two single crochet stitches in the fourth stitch. Repeat this pattern (increase in every fourth stitch) around. You will have a total of 30 stitches in the round.
Round 6: Crochet one single crochet in each of the first four stitches. Then crochet two single crochet stitches in the fifth stitch. Repeat this pattern around. You will have a total of 36 stitches in the round.
Round 7–12: Crochet 36 single crochet stitches (1 single crochet in each stitch) for a total of 6 rounds.
A helpful tip is to keep the marker yarn in place after the first single crochet of round 7, making it easier to count how many rounds you have completed. The markings in the image below show stitch 1 of each round.
Round 13: Crochet one single crochet in each of the first four stitches. The next two stitches (stitches 5 and 6) are crocheted together as one single crochet (a decrease). Repeat this pattern (decrease in every fifth stitch) around. You will have a total of 30 stitches in the round.
If you are unsure how to crochet a decrease, see the video below.
Round 14: Crochet one single crochet in each of the first three stitches. Then make a decrease. Repeat this pattern (decrease in every 4th and 5th stitch) around. You will have a total of 24 stitches in the round.
Round 15: Crochet one single crochet in each of the first two stitches. Then make a decrease. Repeat this pattern (decrease in every 3rd and 4th stitch) around. You will have a total of 18 stitches in the round.
Now begin stuffing the head with fiberfill. Do not stuff too tightly, as this can create gaps between the stitches, but also not too loosely, or the head will lose its shape.
Round 16: Crochet one single crochet, then make a decrease. Repeat this pattern (decrease in every other stitch) around. You will have a total of 12 stitches in the round.
Add more fiberfill until no more will fit. You get a nicer and firmer shape when the head is well stuffed but you don´t want it to create gaps between the stitches..
Round 17: Make 6 decreases. You will have a total of 6 stitches in the round. Fasten off and cut the yarn, but leave a long yarn tail. If you like, you can close the small opening with the yarn tail and a needle for a few stitches. Do not cut the tail, as it will be used to sew the head onto the blanket.
Ears – make 2 (white yarn)
Round 1: Crochet 6 single crochet stitches into a magic ring.
Round 2: Crochet one single crochet in each stitch. You will have a total of 6 stitches in the round.
Round 3: Crochet one single crochet in the first stitch. Then crochet two single crochet stitches in the second stitch (an increase). Repeat this pattern (increase in every other stitch) around. You will have a total of 9 stitches in the round.
Round 4: Crochet one single crochet in each of the first two stitches. Then crochet two single crochet stitches in the third stitch. Repeat this pattern (increase in every third stitch) around. You will have a total of 12 stitches in the round.
Round 5: Crochet one single crochet in each of the first three stitches. Then crochet two single crochet stitches in the fourth stitch. Repeat this pattern (increase in every fourth stitch) around. You will have a total of 15 stitches in the round.
Round 6: Crochet one single crochet in each of the first four stitches. Then crochet two single crochet stitches in the fifth stitch. Repeat this pattern around. You will have a total of 18 stitches in the round.
Round 7–15: Crochet 18 single crochet stitches (1 single crochet in each stitch) for a total of 9 rounds. A helpful tip is to keep the marker yarn in place after the first single crochet of round 7 to make it easier to count how many rounds you have completed.
Round 16: Crochet one single crochet in each of the first four stitches. The next two stitches (stitches 5 and 6) are crocheted together as one single crochet (a decrease). Repeat this pattern (decrease in every fifth stitch) around. You will have a total of 15 stitches in the round.
Round 17: Crochet one single crochet in each of the first three stitches, then make a decrease. Repeat this pattern (decrease in every fourth stitch) around. You will have a total of 12 stitches in the round.
Lay the ear flat and crochet it closed with 5 single crochet stitches through both layers. Fasten off and cut the yarn, but leave a long yarn tail.
Then fold the ear in half and pull the yarn through to hold the ear together in its folded position. Keep the yarn tail to sew the ear onto the head.
Now you will sew on the eyes and embroider the face. The order below is designed to make it easiest to center everything and keep it straight.
Sew on the ears
Make sure to attach the ears securely and tightly, tying knots! Loose ears can pose a safety risk.
Pin the ears approximately 8 rounds down from the magic ring at the top of the head. Start by pinning both ears in place before sewing them on. Check that the ears are positioned evenly in terms of height and width. When you are satisfied with the placement, sew both ears securely. Make sure the folds in the ears are facing the same direction.
Embroider the nose
Start by placing pins at the corners where you want the nose, forming a triangle. The bottom pin should be centered between the ears, just below round 9. The two top pins should be placed above round 7, approximately 2 single crochet stitches apart. Embroider the nose between the pins using a piece of pink yarn.
Embroider the eyes
Start by placing pins to test the placement of the eyes. The bottom pins should be just below round 8, two single crochet stitches to each side of the nose. The top pins should be placed 2 rounds directly above the bottom pins. Using black yarn, embroider back and forth several times between the pins until the eyes reach the desired size.
Place the needle just one single crochet to the side of the eye where you want an eyelash. Insert the needle at the top of the eye. Take the opportunity to come out at the start of the next eye and embroider that eye as well. Secure the yarn.
Next, take a piece of white yarn and bring the needle out at the top of the eye. Then insert the needle back into the center of the eye. Secure the yarn.
Embroider the eyebrows
Use a thin black thread, such as sewing thread. Position the eyebrows starting 2 rounds above the top of the eyes, and ending approximately 3 single crochet stitches and 2 rounds below. Secure the thread.
Blanket
This lovey blanket is worked like a granny square but with 6 corners instead of 4.
Round 1: Crochet a magic ring. Begin in the ring with 3 chain stitches (counts as the first double crochet), then crochet 2 double crochet stitches. This forms the first double crochet group. Chain 2, then repeat this pattern (3 double crochet + 2 chain stitches) a total of 6 times. Join with a slip stitch in the third chain from the beginning.
You should have 6 double crochet groups with 3 double crochet stitches in each group in this round.
If you are unsure how to crochet double crochet stitches or slip stitches, see the videos below.
Round 2: Each new round begins in a corner (which is the chain-2 space between two double crochet groups). Work slip stitches until you reach the corner (about 3 slip stitches).
Work a slip stitch into the chain-2 space, then chain 3 (counts as the first double crochet). Crochet 2 double crochet stitches, chain 2, and 3 double crochet stitches into the corner (the chain-2 space). This forms one corner.
Move to the next corner and crochet 3 double crochet stitches, chain 2, and 3 double crochet stitches into the corner. Repeat this for all 6 corners. (Note: Do not chain between corners.)
Join with a slip stitch in the third chain from the beginning. You should have 12 double crochet groups with 3 double crochet stitches in each group for this round.
Round 3: Work slip stitches until you reach the next corner. Crochet 3 double crochet stitches (the first stitch counts as 3 chain stitches), chain 2, and 3 double crochet stitches into the corner.
The next space will be the chain-2 space between corners; here, crochet 3 double crochet stitches (one double crochet group).
Then crochet the next corner in the same way as the first, and continue around the round. Corners are worked as 3 double crochet stitches, chain 2, and 3 double crochet stitches in the same space. Between corners, crochet 3 double crochet stitches (one double crochet group).
Join with a slip stitch in the third chain from the beginning. You should have 18 double crochet groups with 3 double crochet stitches in each group for this round.
Rounds 4–13 (or as many rounds as you wish): Work the rounds in the same way as round 3. All corners are worked with 3 double crochet stitches, chain 2, and 3 double crochet stitches in the same space, and between corners, work a double crochet group in each chain-2 space. Start and end each round with slip stitches as described above.
After round 13, you should have a total of 78 double crochet groups in the round (13 double crochet groups between each corner).
If you want the edge of the blanket to be a different color, make the very last pull-through of the slip stitch with the new color. Do not cut the yarn; continue directly on the edge in next step.
Edge Around the Lovey Blanket
The edge is a pattern of arches that are 3 stitches wide. Make sure these three stitches are worked directly over a double crochet group (3 double crochet stitches) from the previous round. This way, you will have the same number of edge arches as double crochet groups. At the chain-2 corner space, use a different technique as described below.
Starting the edge:
If you have changed color, the new color should now be on your hook. Begin by making a single crochet in the same stitch where you just worked a slip stitch. This will be the first stitch of the first double crochet group in the round below.
Then, make a half double crochet in the next stitch. In the last stitch of the double crochet group below, first work a double crochet. Then chain 3 and make a slip stitch in the same stitch where you just worked the double crochet. This forms the first arch. You should now be at the first corner.
If you are unsure how to crochet a half double crochet, see the video below.
Corners: Crochet 1 single crochet into the chain-2 space. Chain 5 and make a slip stitch in the first chain to form a point. Finish with another single crochet in the corner. This creates a pointed corner. Repeat this technique on all corners.
Long sides: On the long sides, make arches the same way as you did at the start of the edge. One arch consists of: 1 single crochet, 1 half double crochet, (1 double crochet + 3 chain stitches + 1 slip stitch in the same stitch). Repeat 13 times (or as many double crochet groups as you have) along each side.
Repeat the corner and side pattern around the entire lovey blanket until you reach the starting point of the edge. Cut the yarn and weave in the ends.
Sew the head in the center of the blanket using the long yarn tail from the head. Make sure to sew it securely and tightly so it does not come loose.
If you are using different colors for the head and the blanket, be careful not to sew all the way through the blanket, so the head’s color does not show on the underside. Insert the needle with the yarn through the head, tie a few tight knots at the back, then cut the yarn and tuck the knot inside the head to hide it.
Your comfort blanket is done!
Crochet Terminology
This section only contains crochet terms. If you need more help along the way, see the simpler version.
Abbreviations:
- MR = Magic Ring
- sc = Single Crochet
- inc = Increase (2 sc in same st)
- dec = Decrease (2 sc together in same st)
- hdc = Half Double Crochet
- dc = Double Crochet
- sl st = Slip Stitch
- ch = Chain
- (..) = Total number of stitches in the round
- [..] = Everything inside is worked in the same stitch
- *…* = Repeat the instructions inside the asterisks
Safety Information – Crocheted Lovey
Secure all yarn ends so no loose parts can come off. The product should only be used under adult supervision. As the maker, it is your responsibility to follow safety guidelines and ensure the lovey is used safely.
Tips for Keeping Track of Rounds
Use a stitch marker in the last stitch of each round to keep track of rounds. As an alternative, cut a short piece of yarn (preferably a contrasting color) and place it under the working yarn before starting the first stitch of each round. This way, stitch 1 of each round will be just to the left of the yarn end, making it easy to see when you’ve gone all the way around. You can then pull out the yarn and place it under the work again as the start of the next round. In the instructions, a dark green yarn end is used for this purpose.
Head (white yarn)
Round 1: 6 sc in MR
Round 2: inc x6 (12)
Round 3: *1 sc, inc* x6 (18)
Round 4: *2 sc, inc* x6 (24)
Round 5: *3 sc, inc* x6 (30)
Round 6: *4 sc, inc* x6 (36)
Round 7–12: 36 sc (1 sc in each st) for 6 rounds
Round 13: *4 sc, dec* x6 (30)
Round 14: *3 sc, dec* x6 (24)
Round 15: *2 sc, dec* x6 (18)
Start stuffing the head with fiberfill.
Round 16: *1 sc, dec* x6 (12)
Add more fiberfill until the head is fully stuffed. Filling firmly gives a nicer, firmer shape.
Round 17: dec x6 (6)
Fasten off and cut the yarn, leaving a long yarn tail. If you like, you can close the small hole by sewing a few stitches with the yarn tail. Do not cut the tail, as it will be used to sew the head onto the blanket.
Ears (make 2) – White Yarn
Round 1: 6 sc in MR
Round 2: 6 sc (6)
Round 3: *1 sc, inc* x3 (9)
Round 4: *2 sc, inc* x3 (12)
Round 5: *3 sc, inc* x3 (15)
Round 6: *4 sc, inc* x3 (18)
Round 7–15: 18 sc (1 sc in each st) for 9 rounds
Round 16: *4 sc, dec* x3 (15)
Round 17: *3 sc, dec* x3 (12)
Fold the ear flat and crochet the two layers together with 5 sc. Fasten off and leave a long yarn tail for sewing the ears onto the head.
Fold the ear in half and pull the yarn tail through to hold the ear folded. Keep the yarn tail for sewing the ear onto the head.
Sewing on the Ears
Pin the ears approximately 8 rounds down from the MR at the top of the head. Pin both ears in place before sewing. Check that the ears are positioned evenly in width and height and are not too low. Once you’re happy with the placement, sew both ears securely onto the head. Make sure the fold/crease of each ear is facing the same direction.
Embroider the Nose
Start by placing pins at the corners of where you want the nose, in a triangular shape. Place the bottom pin centered between the ears, below round 9. The two top pins should be above round 7, about 2 sc apart.
Embroider the nose between the pins using a piece of pink yarn.
Embroider the Eyes
Start by placing pins to test the placement of the eyes. Place the bottom pins below round 8, 2 sc away from each side of the nose. Place the top pins 2 rounds directly above the bottom pins.
Embroider the eyes with black yarn, stitching back and forth several times until the eyes reach the desired
Insert the needle just 1 sc to the side of the eye where you want an eyelash. Bring the needle out at the top of the eye.
Use the same thread to come out at the start of the next eye and embroider that eyelash as well. Secure the thread when finished.
Take a piece of white yarn and bring the needle out at the top of the eye. Insert the needle back into the center of the eye. Secure the thread.
Embroider the Eyebrows
Take a thin black thread, such as sewing thread. Position the eyebrows starting 2 rounds above the top of the eye and ending about 3 sc in and 2 rounds below. Secure the thread when finished.
Blanket
This blanket is made like a granny square but with 6 corners instead of 4.
Make a MR.
Round 1:
- Ch 3 (counts as first dc), 2 dc, ch 2, 3 dc—all in the magic ring (this forms the first corner).
- *3 dc, ch 2* repeat 5 more times.
- Join with sl st to the top of the beginning ch-3.
Note: You should have 6 groups of 3 dc in this round.
Round 2:
- Sl st 3 times to reach the next corner (the ch-2 space).
- Ch 3 (counts as first dc), 2 dc, ch 2, 3 dc—all in the ch-2 space (this forms the corner).
- *Skip to the next corner, 3 dc, ch 2, 3 dc—all in the ch-2 space*; repeat 5 more times.
- Join with sl st to the top of the beginning ch-3.
Note: You should now have 12 groups of 3 dc in this round.
Round 3:
- Sl st 3 times to reach the next corner.
- Ch 3 (counts as first dc), 2 dc, ch 2, 3 dc in the corner (ch-2 space).
- Skip to the next “space” between two dc groups and work 3 dc.
- *3 dc, ch 2, 3 dc in the next corner, 3 dc in the space between dc groups*; repeat 5 more times.
- Join with sl st to the top of the beginning ch-3.
Note: You should now have 18 groups of 3 dc in this round.
Round 4:
- Sl st 3 times to reach the next corner.
- In the corner: Ch 3 (counts as first dc), 2 dc, ch 2, 3 dc.
- Work 3 dc in each of the next 2 spaces between corners.
- *3 dc, ch 2, 3 dc in the next corner, 3 dc in each of the next 2 spaces between corners*; repeat 5 more times.
- Join with sl st to the top of the beginning ch-3.
Note: You should now have 24 groups of 3 dc in this round.
Round 5–as large as you want:
- Continue the same pattern: 2 dc groups with ch-2 in each corner, and 1 dc group in each space along the sides between corners.
- Continue for as many rounds as you like.
- In the photo example, there are 13 dc groups between each corner on each side, totaling 78 dc groups overall.
Tip for a color change: If you want the last round to be a different color, make the final pull-through of the sl st with the new color. Do not cut the yarn—continue directly with the border in the next step.
Border Around the Lovey
The border is a repeating pattern of 3 stitches: 1 sc, 1 hdc, 1 dc + ch. Make sure these 3 stitches are worked directly on top of a dc group (3 dc) from the last round. This way, you’ll have the same number of scallops as there are dc groups.
At the corner ch-2 spaces, use a slightly different technique.
Starting the border:
- Work 1 sc in the same stitch where you just did the joining sl st,
- 1 hdc in the next stitch,
- [1 dc, ch 3, 1 sl st] in the corner space.
Corner 1
In the corner ch-2 space, work: [1 sc, ch 5, 1 sc in the first sl st, 1 sc]
This creates a pointed scallop in the corner.
Side 1
Repeat across the side: * 1 sc, 1 hdc, [1 dc, ch 3, 1 sl st] * 13 times (makes 13 scallops).
Corners + Sides 2–6
- Repeat the corner and side pattern around the entire lovey until you reach the beginning of the border.
- Fasten off the yarn and weave in all ends.
Attach the Head
- Sew the head in the center of the lovey using the long yarn tail from the head.
- Tip: If the head and blanket are different colors, avoid going all the way through the blanket so the color does not show on the back side.
- Insert the needle through the head, tie several tight knots on the back, cut the yarn, and tuck the knots inside the head to hide them.
Done :)
The rights to this pattern belong to MYO Make Your Own. The pattern or its pictures may not be copied, shared or resold either in parts or in its entirety, but you may sell items you have crocheted from this pattern. If you have questions about the pattern, contact MYO at hello@makeyourown.se.
%20(1).jpg)


Share your creations with us
Thank you!
Your comment was sent!