Du kommer att förlora åtkomst till våra instruktioner och medlemsrabatter. Vi hoppas att du vill stanna kvar, men förstår om det inte känns rätt just nu - du är alltid välkommen tillbaka! :)

Buy your material here

You can buy the materials and needles we use at makeyourown.semakeyourown.se

Go to shop
Copyright © 2022 Make Your Own
Please verify your email address by clicking on the link sent to youremail@gmail.com or resubmit.
patterns

Baby bonnet “Alicia”

Crochet a cute baby bonnet.

Create this adorable little baby bonnet using our soft and cozy yarn, Dreamy Blend. This baby hat is enjoyable to make and includes a slightly more intricate stitch, perfect for those looking to try a more technical pattern. However, it's easy to follow with the help of descriptions, photos, and technique videos. The pattern includes two sizes: one suitable for a 1-4 month-old baby and another for a 4-9 month-old baby. In addition to MYO Dreamy Blend, you'll need a 6 mm crochet hook and a stitch marker. The color used in the pattern is Cinnamon.

Yarn Consumption: Approximately 35-45 g of MYO Dreamy Blend. The amount of yarn needed depends on your crochet tension, so you may require more than 35-45 g.

Please note that in this instruction, we use videos from our technique school along with explanatory images. If you're looking for a full-length video for a hat, you can, for example, crochet the Maria hat in a small size (keep in mind that you'll need to adjust the size yourself).

Baby bonnet “Alicia”

This is what you need:

MYO Dreamy blend | 50g

Ett mjukt blandgarn som består av 40% bomull, 35% superfine alpacka och 25% ull

Köp produkt

Crochet hook 6mm

Bamboo Crochet Hook

Köp produkt

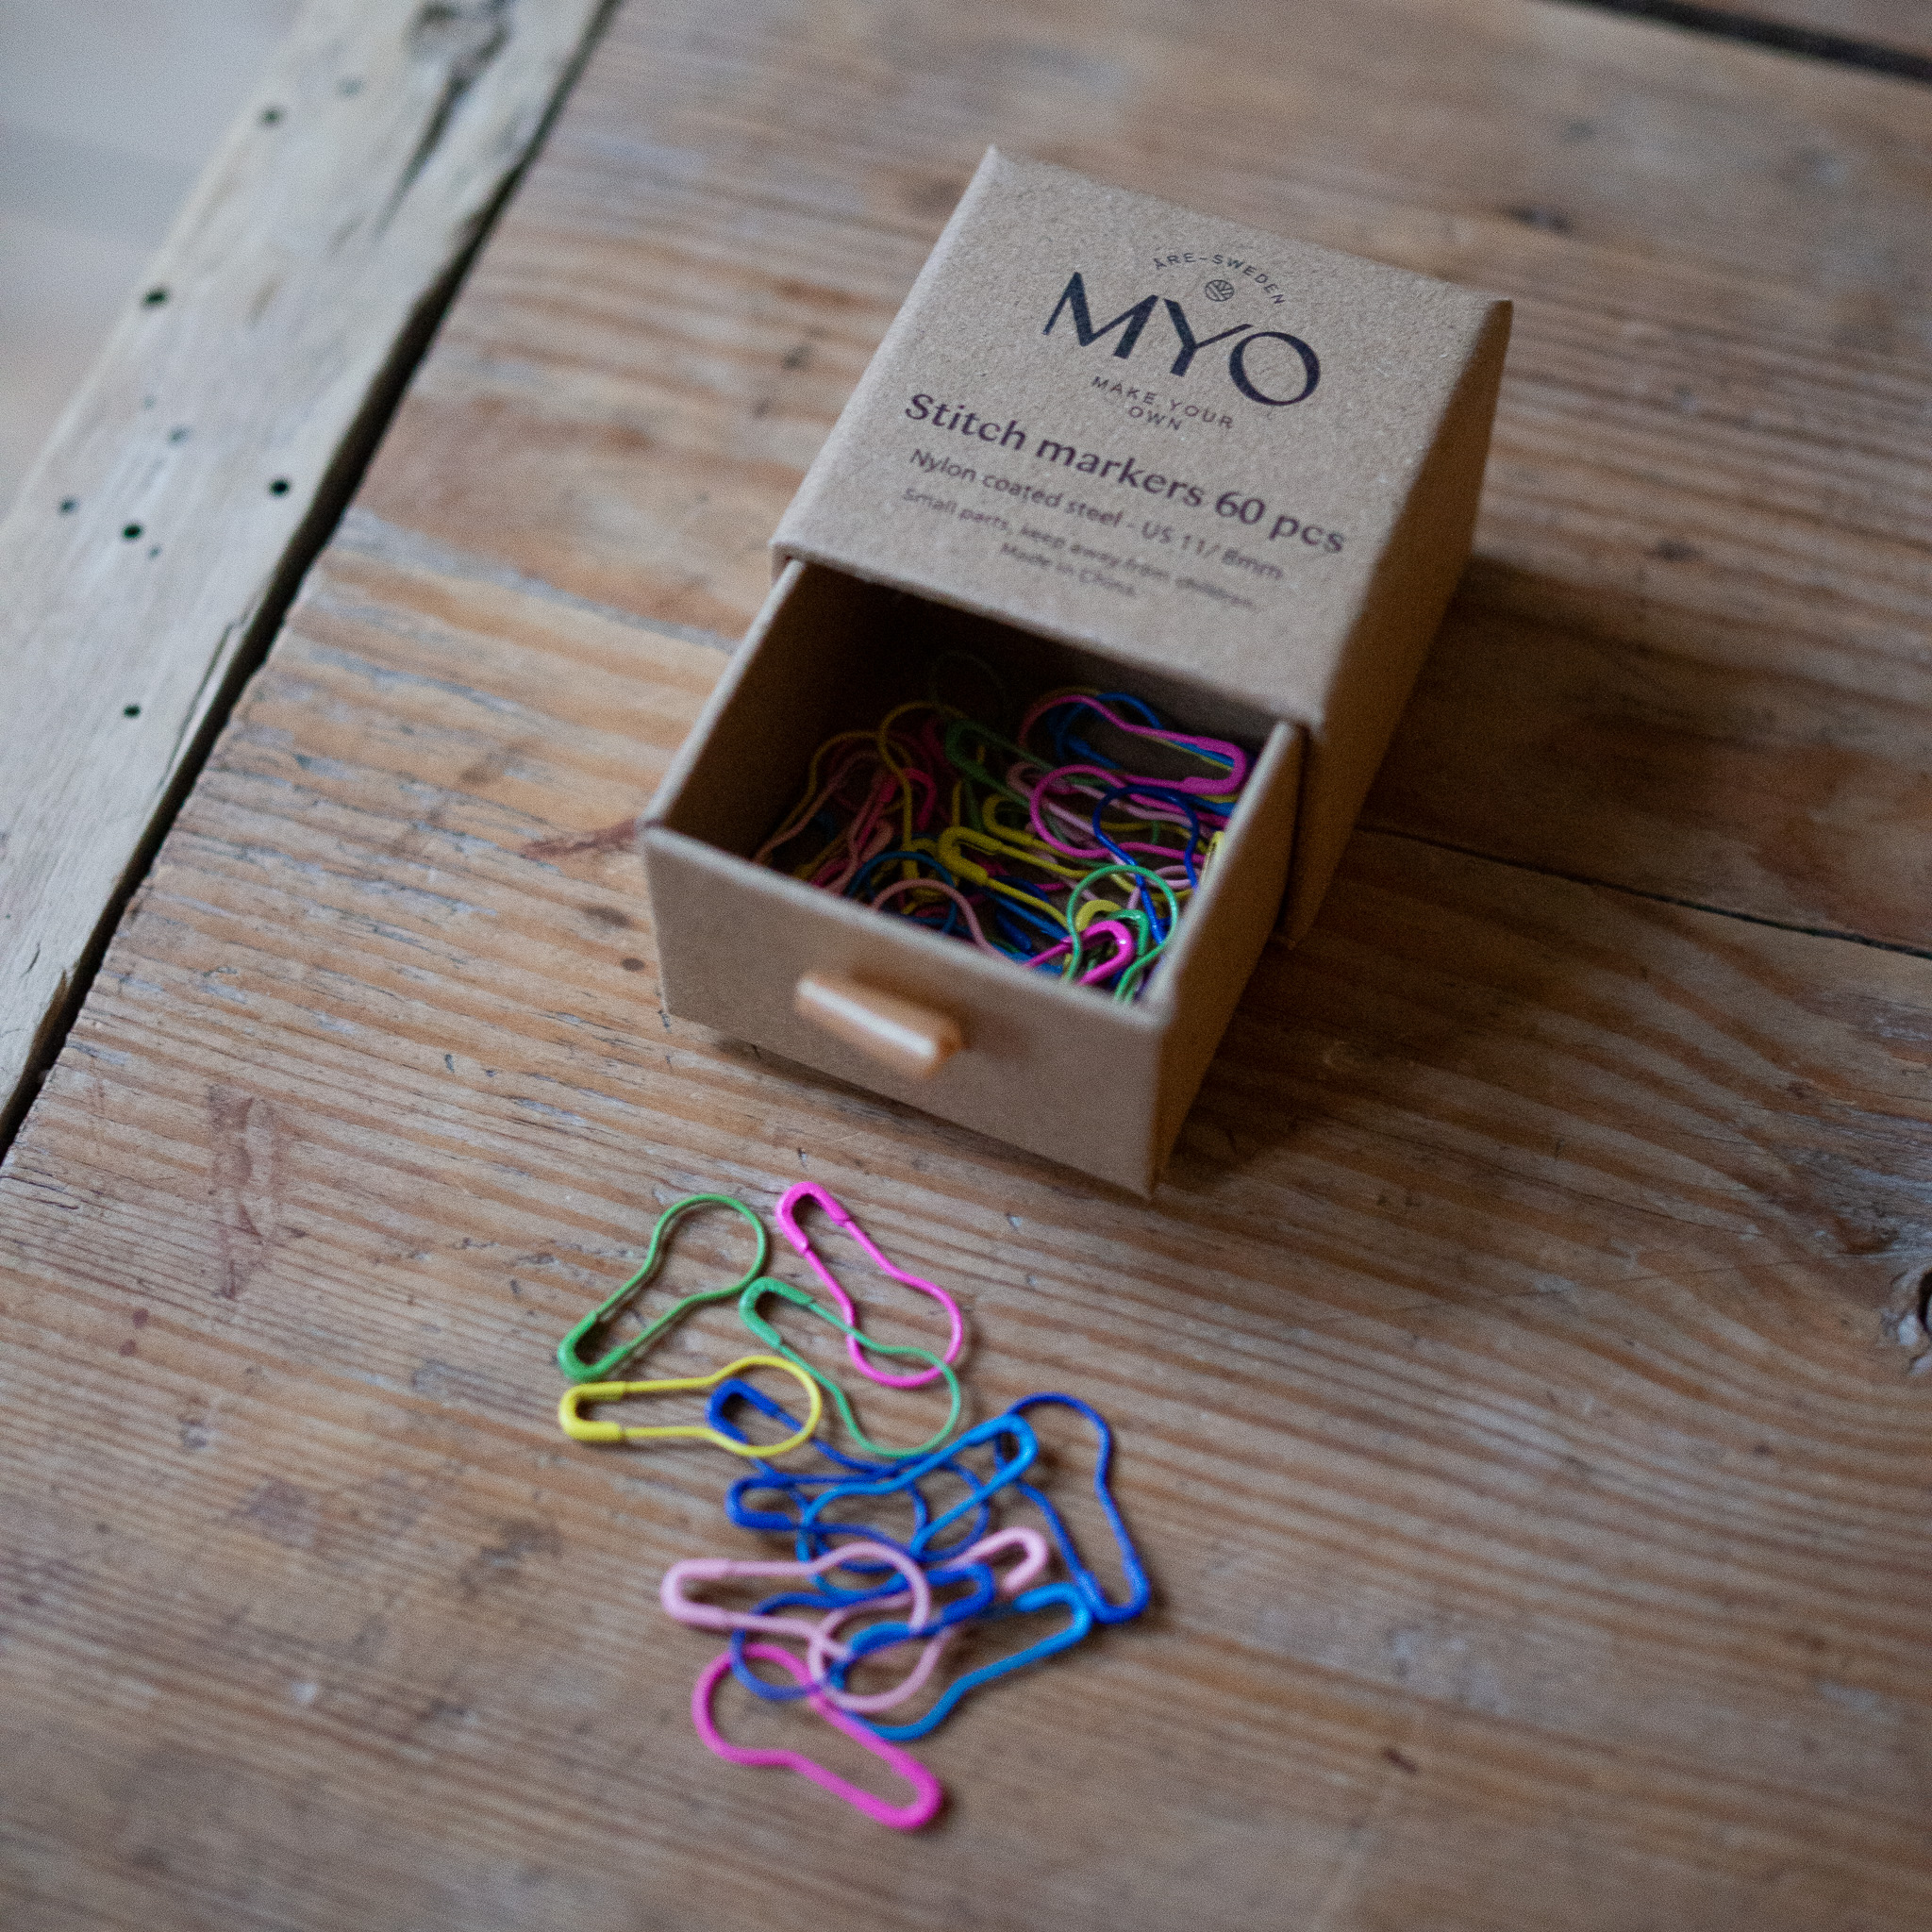
Stickmarkörer / Säkerhetsnålar

De här små markörerna i stål påminner om säkerhetsnålar – de är lätta att flytta och pålitliga när du placerat dem.

Köp produkt

Here's how to do it

This lovely baby bonnet is made with MYO's soft and delightful Dreamy Blend yarn, making it a perfect gift for a little baby! The pattern includes two sizes: one suitable for a 1-4 month-old baby and another for a 4-9 month-old baby. The entire bonnet is crocheted in one piece, so there's no need to sew together different parts or weave in many ends. This project works up fairly quickly, allowing you to explore various crochet techniques.

Johanna Hall

Sign up to see the full instruction

This instruction is exclusive content for those who have an active membership with MYO. By being a member, you get access to all our 100+ instructions, technology tips, etc., but also membership offers and priority to new product launches. At the same time, you help us develop the instructions page further and release new instructions every week.

Becoming a member is easy and works like a subscription (price: 80 kr/mo), if you want to test our instructions first, we have a number of free instructions available for everyone.

Welcome to our wonderful team of creators! /The Girls from MYO

Steg 1

The bonnet is available in two sizes. The smaller size fits a 1-4 month-old baby with a head circumference of approximately 40-42 cm. The larger size fits a 4-9 month-old baby with a head circumference of approximately 44-46 cm. The pattern will indicate when to choose the size; until then, the bonnet is crocheted the same way for both sizes.

Step 1

Begin with a magic circle, which is the same size for both sizes. Create a magic ring with 8 half double crochet stitches. If you're unsure how to crochet a magic ring with half double crochet stitches, please refer to the video below.

To keep track of the beginning and end of each round, you can use a thread or marker in a contrasting color. Place the thread to the left of the last stitch; this marks the beginning of the next round. Move the thread up with each round to maintain accurate positioning. This method helps ensure that increases and decreases occur in the correct places, maintaining the integrity of your project.

Round 1: Work two half double crochets into each stitch around. You should have 16 stitches at the end of the round. Move the marker to the beginning of the new round (to the left of the last stitch).

Steg 2

Round 2: Crochet one half double crochet into the first stitch. Then crochet two half double crochets into the second stitch. Repeat this pattern seven more times (throughout the round) so that you have a total of 24 stitches (between the needle and the beginning of the round). Move the thread/marker to the beginning of the new round.

Round 3: Crochet one half double crochet in each of the first two stitches. In the third stitch, crochet two half double crochets. Repeat this pattern seven more times (around the round) so that you have a total of 32 stitches. Move the thread/marker as before.

Round 4: Crochet one half double crochet in each of the first three stitches. In the fourth stitch, crochet two half double crochets. Repeat this pattern seven more times (around the round) so that you have a total of 40 stitches.

Steg 3

From now on, you will crochet in rows, back and forth, instead of in rounds. If you haven't already, replace the thread with a stitch marker.

Row 5: Crochet one half double crochet (hdc) in the first four stitches (place a stitch marker in the first stitch of this row). In the fifth stitch, crochet two hdc. Repeat this pattern five more times. Then, crochet one hdc in the next four stitches. You should have 40 stitches from the stitch with the stitch marker to the hdc on the hook. Skip the remaining six stitches in the row.

Note that the last 6 stitches before the marker are not crocheted.

Chain 2 and turn.

The next row is crocheted differently depending on size.

Row 6

  • Small size (40-42 cm): Crochet two half double crochets in the first stitch. Then, crochet one half double crochet in each remaining stitch across the row. You should have 41 stitches. Crochet two chain stitches and turn.
  • Large size (44-46 cm): Crochet one half double crochet in the first five stitches. Then, crochet two half double crochet in the sixth stitch. Repeat this pattern a total of seven times. You should have 47 stitches. Crochet two chain stitches and turn.
Steg 4

Step 3 - Star Stitch

From now on, you will crochet back and forth, maintaining a total of 41 or 47 stitches, depending on the size. Every other row will consist of star stitches, and the alternating rows will consist of single crochet stitches. The star stitch rows can be a bit tricky, so have a look at the video in the next step for guidance. There are also pictures to guide you. Please note that the first star stitch is done slightly differently in the pattern compared to the video. Follow the pattern and images for the first star stitch.

Row 7 (Star Stitch Row):

If you're unsure how to crochet star stitches, please refer to the video in the next step (Star Stitches). Keep in mind that the first star stitch is done differently, so we recommend looking at the images for the first star stitch and then watching the video for the remaining star stitches.

Start with the first star stitch, which is done differently from the others.

  1. Yarn over your crochet needle.

2. Insert the needle into the first stitch, make a new yarn over, and pull the needle back. You should then have three loops on the needle.

3. Make a new yarn over and insert the needle into the next stitch, make a new yarn over, and pull the needle back. You should then have 5 loops in total on the needle. Make one more yarn over and pull the thread through all the loops.

  1. Chain 1
Steg 5

For the remaining stitches in the row, you should crochet regular star stitches and finish with a double crochet in the very last stitch. See the video below on how to crochet star stitches.

Start by going down and picking up the yarn in the 'eye,' the hole that formed when you crocheted the chain stitch. Then go into the loop between the 'eye' and the stitch on the project and pick up the yarn. Next, go down into the stitch on the project (this is the stitch we've crocheted into before) and pick up the yarn. Pick up the yarn in the next two stitches (these are unworked). You now have 6 stitches on the hook. Crochet 1 chain stitch and continue until you have 1 stitch left in the row. See the image below with arrows; if you're unsure, we recommend watching the video.

In the last stitch,  make a double crochet.

Summary:

Small size: first star stitch + 19 star stitches + 1 double crochet (total of 41 stitches).

Large size: first star stitch + 22 star stitches + 1 double crochet (total of 47 stitches). Finish the star round with 1 chain stitch and turn.

Steg 6

Step 4

Round 8: Crochet a single crochet in each stitch, for a total of 41 or 47 stitches depending on the size. Finish with 2 chain stitches and turn.

Round 9: see round 7.

Round 10: see round 8.

Round 11: see round 7.

Round 12: see round 8

Round 13: see round 7.

If you want the bonnet deeper, you can crochet 2 more rounds. Crochet round 8, then round 7 again.

Round 14: Now finish this section with an edge made of crab stitches. You crochet single crochets backwards. See the video below if you are unsure. Crochet 1 crab stitch per stitch around the round. Do not cut the yarn.

Steg 7

TIES

Now you will crochet the edge along the bottom of the neck of the bonnet. Crochet single crochets along the neck edge (from one corner where the last crab stitch was made to the other corner where the first crab stitch was made). Here, you may need to pick up stitches at an even distance on the sides where there are no stitches. In the smaller size, crochet about 30 stitches in total, and for the larger size, about 35 stitches. The exact number is not so important. Write down how many stitches there are in total.

Steg 8

Step 6

Now you have reached the other corner and will make the first tie. Crochet 30 chain stitches in a row.

Then crochet 29 slip stitches starting from the second stitch from the hook. When you reach the corner, crochet single crochets along the edge (beginning of step 7).

Steg 9

Step 7

When you return to the corner, you will crochet back along the neckline.

This time, you will make a total of 5 decreases evenly spaced along the neckline. If you're unsure how to crochet a decrease, see the video below.

If you made 30 stitches along the neckline earlier: Crochet 4 single crochets, then make a decrease (i.e., crochet two stitches together). Repeat this 5 times. You should then have 25 stitches.

If you made 35 stitches along the neckline earlier: Crochet 5 single crochets, then make a decrease (i.e., crochet two stitches together). Repeat this 5 times. You should then have 30 stitches.

If you had a different number of stitches, you will need to adjust how many single crochets you make between the decreases. You can also adjust and make more decreases if you want the bonnet to fit tighter around the neck.

Steg 10

Step 8

Now you have reached the second corner and will repeat step 6 to make the second tie. After the 29 slip stitches on the tie, make one more slip stitch to the bonnet's corner and cut the yarn.

Secure the yarn on the inside of the bonnet. If you're unsure how to fasten off, see the video below.

You are done :)

Steg 1

The bonnet is available in two sizes. The smaller size fits a 1-4 month-old baby with a head circumference of approximately 40-42 cm. The larger size fits a 4-9 month-old baby with a head circumference of approximately 44-46 cm. The pattern will indicate when to choose the size; until then, the bonnet is crocheted the same way for both sizes.

Step 1

Begin with a magic circle, which is the same size for both sizes. Create a magic ring with 8 half double crochet stitches. If you're unsure how to crochet a magic ring with half double crochet stitches, please refer to the video below.

To keep track of the beginning and end of each round, you can use a thread or marker in a contrasting color. Place the thread to the left of the last stitch; this marks the beginning of the next round. Move the thread up with each round to maintain accurate positioning. This method helps ensure that increases and decreases occur in the correct places, maintaining the integrity of your project.

Round 1: Work two half double crochets into each stitch around. You should have 16 stitches at the end of the round. Move the marker to the beginning of the new round (to the left of the last stitch).

Steg 2

Round 2: Crochet one half double crochet into the first stitch. Then crochet two half double crochets into the second stitch. Repeat this pattern seven more times (throughout the round) so that you have a total of 24 stitches (between the needle and the beginning of the round). Move the thread/marker to the beginning of the new round.

Round 3: Crochet one half double crochet in each of the first two stitches. In the third stitch, crochet two half double crochets. Repeat this pattern seven more times (around the round) so that you have a total of 32 stitches. Move the thread/marker as before.

Round 4: Crochet one half double crochet in each of the first three stitches. In the fourth stitch, crochet two half double crochets. Repeat this pattern seven more times (around the round) so that you have a total of 40 stitches.

Steg 3

From now on, you will crochet in rows, back and forth, instead of in rounds. If you haven't already, replace the thread with a stitch marker.

Row 5: Crochet one half double crochet (hdc) in the first four stitches (place a stitch marker in the first stitch of this row). In the fifth stitch, crochet two hdc. Repeat this pattern five more times. Then, crochet one hdc in the next four stitches. You should have 40 stitches from the stitch with the stitch marker to the hdc on the hook. Skip the remaining six stitches in the row.

Note that the last 6 stitches before the marker are not crocheted.

Chain 2 and turn.

The next row is crocheted differently depending on size.

Row 6

  • Small size (40-42 cm): Crochet two half double crochets in the first stitch. Then, crochet one half double crochet in each remaining stitch across the row. You should have 41 stitches. Crochet two chain stitches and turn.
  • Large size (44-46 cm): Crochet one half double crochet in the first five stitches. Then, crochet two half double crochet in the sixth stitch. Repeat this pattern a total of seven times. You should have 47 stitches. Crochet two chain stitches and turn.
Steg 4

Step 3 - Star Stitch

From now on, you will crochet back and forth, maintaining a total of 41 or 47 stitches, depending on the size. Every other row will consist of star stitches, and the alternating rows will consist of single crochet stitches. The star stitch rows can be a bit tricky, so have a look at the video in the next step for guidance. There are also pictures to guide you. Please note that the first star stitch is done slightly differently in the pattern compared to the video. Follow the pattern and images for the first star stitch.

Row 7 (Star Stitch Row):

If you're unsure how to crochet star stitches, please refer to the video in the next step (Star Stitches). Keep in mind that the first star stitch is done differently, so we recommend looking at the images for the first star stitch and then watching the video for the remaining star stitches.

Start with the first star stitch, which is done differently from the others.

  1. Yarn over your crochet needle.

2. Insert the needle into the first stitch, make a new yarn over, and pull the needle back. You should then have three loops on the needle.

3. Make a new yarn over and insert the needle into the next stitch, make a new yarn over, and pull the needle back. You should then have 5 loops in total on the needle. Make one more yarn over and pull the thread through all the loops.

  1. Chain 1
Steg 5

For the remaining stitches in the row, you should crochet regular star stitches and finish with a double crochet in the very last stitch. See the video below on how to crochet star stitches.

Start by going down and picking up the yarn in the 'eye,' the hole that formed when you crocheted the chain stitch. Then go into the loop between the 'eye' and the stitch on the project and pick up the yarn. Next, go down into the stitch on the project (this is the stitch we've crocheted into before) and pick up the yarn. Pick up the yarn in the next two stitches (these are unworked). You now have 6 stitches on the hook. Crochet 1 chain stitch and continue until you have 1 stitch left in the row. See the image below with arrows; if you're unsure, we recommend watching the video.

In the last stitch,  make a double crochet.

Summary:

Small size: first star stitch + 19 star stitches + 1 double crochet (total of 41 stitches).

Large size: first star stitch + 22 star stitches + 1 double crochet (total of 47 stitches). Finish the star round with 1 chain stitch and turn.

Steg 6

Step 4

Round 8: Crochet a single crochet in each stitch, for a total of 41 or 47 stitches depending on the size. Finish with 2 chain stitches and turn.

Round 9: see round 7.

Round 10: see round 8.

Round 11: see round 7.

Round 12: see round 8

Round 13: see round 7.

If you want the bonnet deeper, you can crochet 2 more rounds. Crochet round 8, then round 7 again.

Round 14: Now finish this section with an edge made of crab stitches. You crochet single crochets backwards. See the video below if you are unsure. Crochet 1 crab stitch per stitch around the round. Do not cut the yarn.

Steg 7

TIES

Now you will crochet the edge along the bottom of the neck of the bonnet. Crochet single crochets along the neck edge (from one corner where the last crab stitch was made to the other corner where the first crab stitch was made). Here, you may need to pick up stitches at an even distance on the sides where there are no stitches. In the smaller size, crochet about 30 stitches in total, and for the larger size, about 35 stitches. The exact number is not so important. Write down how many stitches there are in total.

Steg 8

Step 6

Now you have reached the other corner and will make the first tie. Crochet 30 chain stitches in a row.

Then crochet 29 slip stitches starting from the second stitch from the hook. When you reach the corner, crochet single crochets along the edge (beginning of step 7).

Steg 9

Step 7

When you return to the corner, you will crochet back along the neckline.

This time, you will make a total of 5 decreases evenly spaced along the neckline. If you're unsure how to crochet a decrease, see the video below.

If you made 30 stitches along the neckline earlier: Crochet 4 single crochets, then make a decrease (i.e., crochet two stitches together). Repeat this 5 times. You should then have 25 stitches.

If you made 35 stitches along the neckline earlier: Crochet 5 single crochets, then make a decrease (i.e., crochet two stitches together). Repeat this 5 times. You should then have 30 stitches.

If you had a different number of stitches, you will need to adjust how many single crochets you make between the decreases. You can also adjust and make more decreases if you want the bonnet to fit tighter around the neck.

Steg 10

Step 8

Now you have reached the second corner and will repeat step 6 to make the second tie. After the 29 slip stitches on the tie, make one more slip stitch to the bonnet's corner and cut the yarn.

Secure the yarn on the inside of the bonnet. If you're unsure how to fasten off, see the video below.

You are done :)

The rights to this pattern belong to MYO Make Your Own. The pattern or its pictures may not be copied, shared or resold either in parts or in its entirety, but you may sell items you have crocheted from this pattern. If you have questions about the pattern, contact MYO at hello@makeyourown.se.

Baby bonnet “Alicia”

Crochet a cute baby bonnet.

Create this adorable little baby bonnet using our soft and cozy yarn, Dreamy Blend. This baby hat is enjoyable to make and includes a slightly more intricate stitch, perfect for those looking to try a more technical pattern. However, it's easy to follow with the help of descriptions, photos, and technique videos. The pattern includes two sizes: one suitable for a 1-4 month-old baby and another for a 4-9 month-old baby. In addition to MYO Dreamy Blend, you'll need a 6 mm crochet hook and a stitch marker. The color used in the pattern is Cinnamon.

Yarn Consumption: Approximately 35-45 g of MYO Dreamy Blend. The amount of yarn needed depends on your crochet tension, so you may require more than 35-45 g.

Please note that in this instruction, we use videos from our technique school along with explanatory images. If you're looking for a full-length video for a hat, you can, for example, crochet the Maria hat in a small size (keep in mind that you'll need to adjust the size yourself).

Baby bonnet “Alicia”
Steg 1

The bonnet is available in two sizes. The smaller size fits a 1-4 month-old baby with a head circumference of approximately 40-42 cm. The larger size fits a 4-9 month-old baby with a head circumference of approximately 44-46 cm. The pattern will indicate when to choose the size; until then, the bonnet is crocheted the same way for both sizes.

Step 1

Begin with a magic circle, which is the same size for both sizes. Create a magic ring with 8 half double crochet stitches. If you're unsure how to crochet a magic ring with half double crochet stitches, please refer to the video below.

To keep track of the beginning and end of each round, you can use a thread or marker in a contrasting color. Place the thread to the left of the last stitch; this marks the beginning of the next round. Move the thread up with each round to maintain accurate positioning. This method helps ensure that increases and decreases occur in the correct places, maintaining the integrity of your project.

Round 1: Work two half double crochets into each stitch around. You should have 16 stitches at the end of the round. Move the marker to the beginning of the new round (to the left of the last stitch).

Steg 2

Round 2: Crochet one half double crochet into the first stitch. Then crochet two half double crochets into the second stitch. Repeat this pattern seven more times (throughout the round) so that you have a total of 24 stitches (between the needle and the beginning of the round). Move the thread/marker to the beginning of the new round.

Round 3: Crochet one half double crochet in each of the first two stitches. In the third stitch, crochet two half double crochets. Repeat this pattern seven more times (around the round) so that you have a total of 32 stitches. Move the thread/marker as before.

Round 4: Crochet one half double crochet in each of the first three stitches. In the fourth stitch, crochet two half double crochets. Repeat this pattern seven more times (around the round) so that you have a total of 40 stitches.

Steg 3

From now on, you will crochet in rows, back and forth, instead of in rounds. If you haven't already, replace the thread with a stitch marker.

Row 5: Crochet one half double crochet (hdc) in the first four stitches (place a stitch marker in the first stitch of this row). In the fifth stitch, crochet two hdc. Repeat this pattern five more times. Then, crochet one hdc in the next four stitches. You should have 40 stitches from the stitch with the stitch marker to the hdc on the hook. Skip the remaining six stitches in the row.

Note that the last 6 stitches before the marker are not crocheted.

Chain 2 and turn.

The next row is crocheted differently depending on size.

Row 6

  • Small size (40-42 cm): Crochet two half double crochets in the first stitch. Then, crochet one half double crochet in each remaining stitch across the row. You should have 41 stitches. Crochet two chain stitches and turn.
  • Large size (44-46 cm): Crochet one half double crochet in the first five stitches. Then, crochet two half double crochet in the sixth stitch. Repeat this pattern a total of seven times. You should have 47 stitches. Crochet two chain stitches and turn.
Steg 4

Step 3 - Star Stitch

From now on, you will crochet back and forth, maintaining a total of 41 or 47 stitches, depending on the size. Every other row will consist of star stitches, and the alternating rows will consist of single crochet stitches. The star stitch rows can be a bit tricky, so have a look at the video in the next step for guidance. There are also pictures to guide you. Please note that the first star stitch is done slightly differently in the pattern compared to the video. Follow the pattern and images for the first star stitch.

Row 7 (Star Stitch Row):

If you're unsure how to crochet star stitches, please refer to the video in the next step (Star Stitches). Keep in mind that the first star stitch is done differently, so we recommend looking at the images for the first star stitch and then watching the video for the remaining star stitches.

Start with the first star stitch, which is done differently from the others.

  1. Yarn over your crochet needle.

2. Insert the needle into the first stitch, make a new yarn over, and pull the needle back. You should then have three loops on the needle.

3. Make a new yarn over and insert the needle into the next stitch, make a new yarn over, and pull the needle back. You should then have 5 loops in total on the needle. Make one more yarn over and pull the thread through all the loops.

  1. Chain 1
Steg 5

For the remaining stitches in the row, you should crochet regular star stitches and finish with a double crochet in the very last stitch. See the video below on how to crochet star stitches.

Start by going down and picking up the yarn in the 'eye,' the hole that formed when you crocheted the chain stitch. Then go into the loop between the 'eye' and the stitch on the project and pick up the yarn. Next, go down into the stitch on the project (this is the stitch we've crocheted into before) and pick up the yarn. Pick up the yarn in the next two stitches (these are unworked). You now have 6 stitches on the hook. Crochet 1 chain stitch and continue until you have 1 stitch left in the row. See the image below with arrows; if you're unsure, we recommend watching the video.

In the last stitch,  make a double crochet.

Summary:

Small size: first star stitch + 19 star stitches + 1 double crochet (total of 41 stitches).

Large size: first star stitch + 22 star stitches + 1 double crochet (total of 47 stitches). Finish the star round with 1 chain stitch and turn.

Steg 6

Step 4

Round 8: Crochet a single crochet in each stitch, for a total of 41 or 47 stitches depending on the size. Finish with 2 chain stitches and turn.

Round 9: see round 7.

Round 10: see round 8.

Round 11: see round 7.

Round 12: see round 8

Round 13: see round 7.

If you want the bonnet deeper, you can crochet 2 more rounds. Crochet round 8, then round 7 again.

Round 14: Now finish this section with an edge made of crab stitches. You crochet single crochets backwards. See the video below if you are unsure. Crochet 1 crab stitch per stitch around the round. Do not cut the yarn.

Steg 7

TIES

Now you will crochet the edge along the bottom of the neck of the bonnet. Crochet single crochets along the neck edge (from one corner where the last crab stitch was made to the other corner where the first crab stitch was made). Here, you may need to pick up stitches at an even distance on the sides where there are no stitches. In the smaller size, crochet about 30 stitches in total, and for the larger size, about 35 stitches. The exact number is not so important. Write down how many stitches there are in total.

Steg 8

Step 6

Now you have reached the other corner and will make the first tie. Crochet 30 chain stitches in a row.

Then crochet 29 slip stitches starting from the second stitch from the hook. When you reach the corner, crochet single crochets along the edge (beginning of step 7).

Steg 9

Step 7

When you return to the corner, you will crochet back along the neckline.

This time, you will make a total of 5 decreases evenly spaced along the neckline. If you're unsure how to crochet a decrease, see the video below.

If you made 30 stitches along the neckline earlier: Crochet 4 single crochets, then make a decrease (i.e., crochet two stitches together). Repeat this 5 times. You should then have 25 stitches.

If you made 35 stitches along the neckline earlier: Crochet 5 single crochets, then make a decrease (i.e., crochet two stitches together). Repeat this 5 times. You should then have 30 stitches.

If you had a different number of stitches, you will need to adjust how many single crochets you make between the decreases. You can also adjust and make more decreases if you want the bonnet to fit tighter around the neck.

Steg 10

Step 8

Now you have reached the second corner and will repeat step 6 to make the second tie. After the 29 slip stitches on the tie, make one more slip stitch to the bonnet's corner and cut the yarn.

Secure the yarn on the inside of the bonnet. If you're unsure how to fasten off, see the video below.

You are done :)

The rights to this pattern belong to MYO Make Your Own. The pattern or its pictures may not be copied, shared or resold either in parts or in its entirety, but you may sell items you have crocheted from this pattern. If you have questions about the pattern, contact MYO at hello@makeyourown.se.