
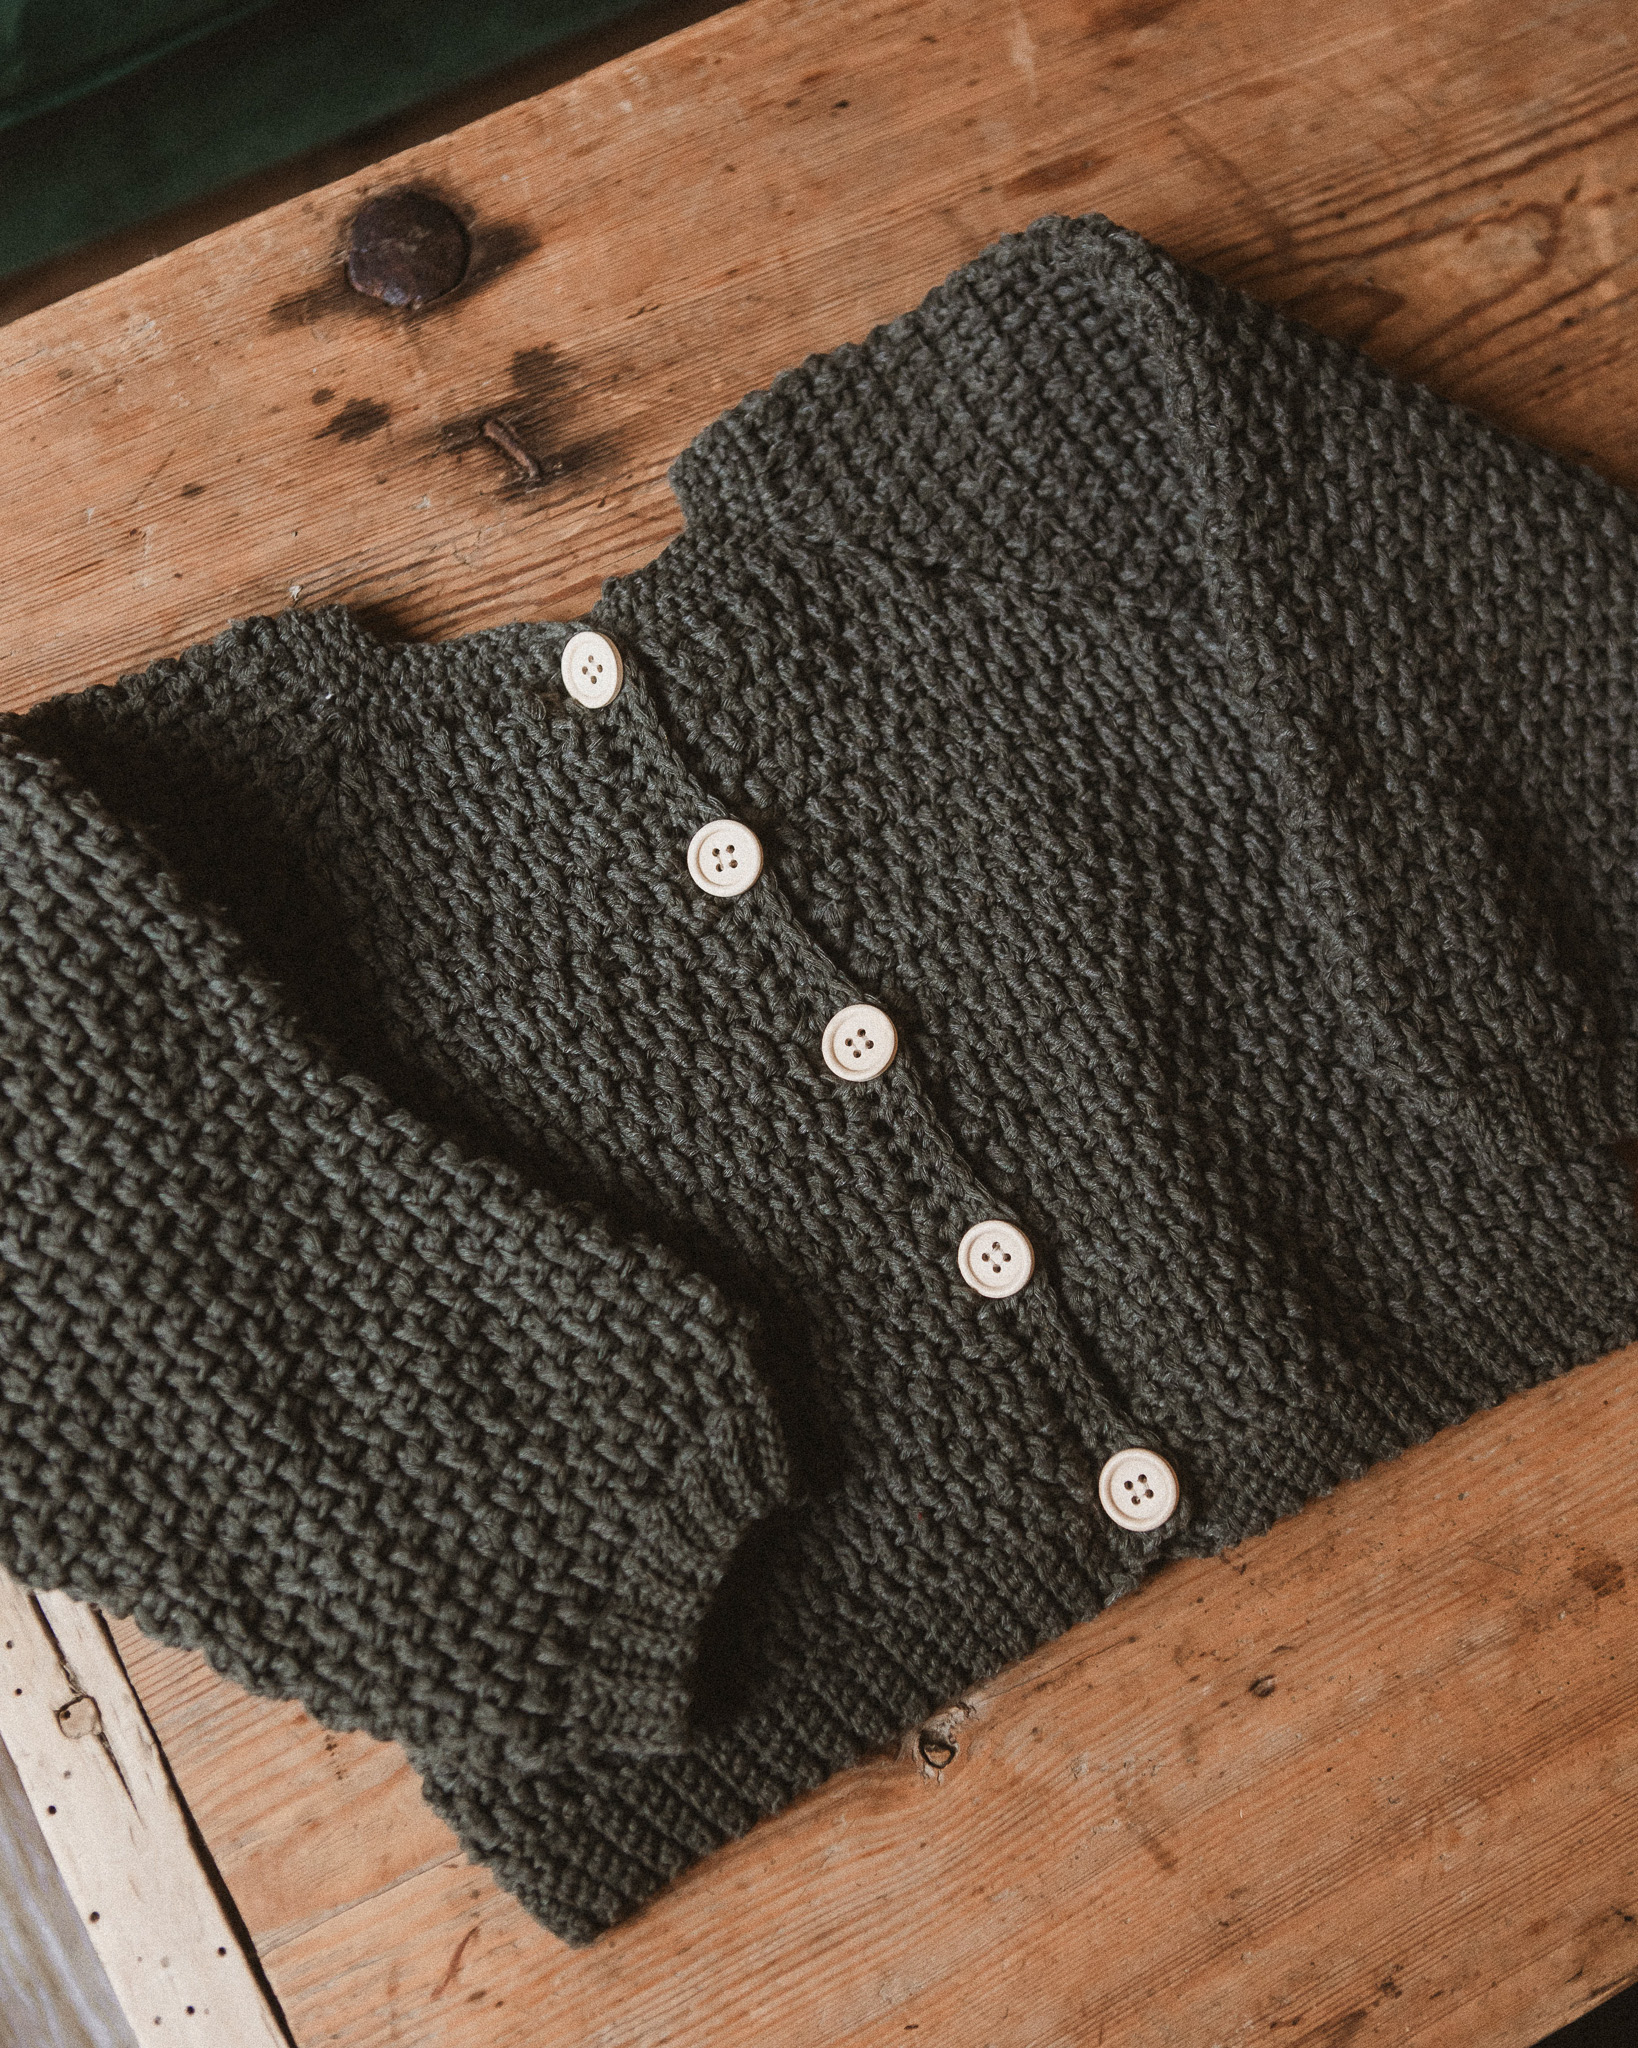
Crochet children's cardigan “Lykke”
Crochet a Beautiful Children’s Cardigan
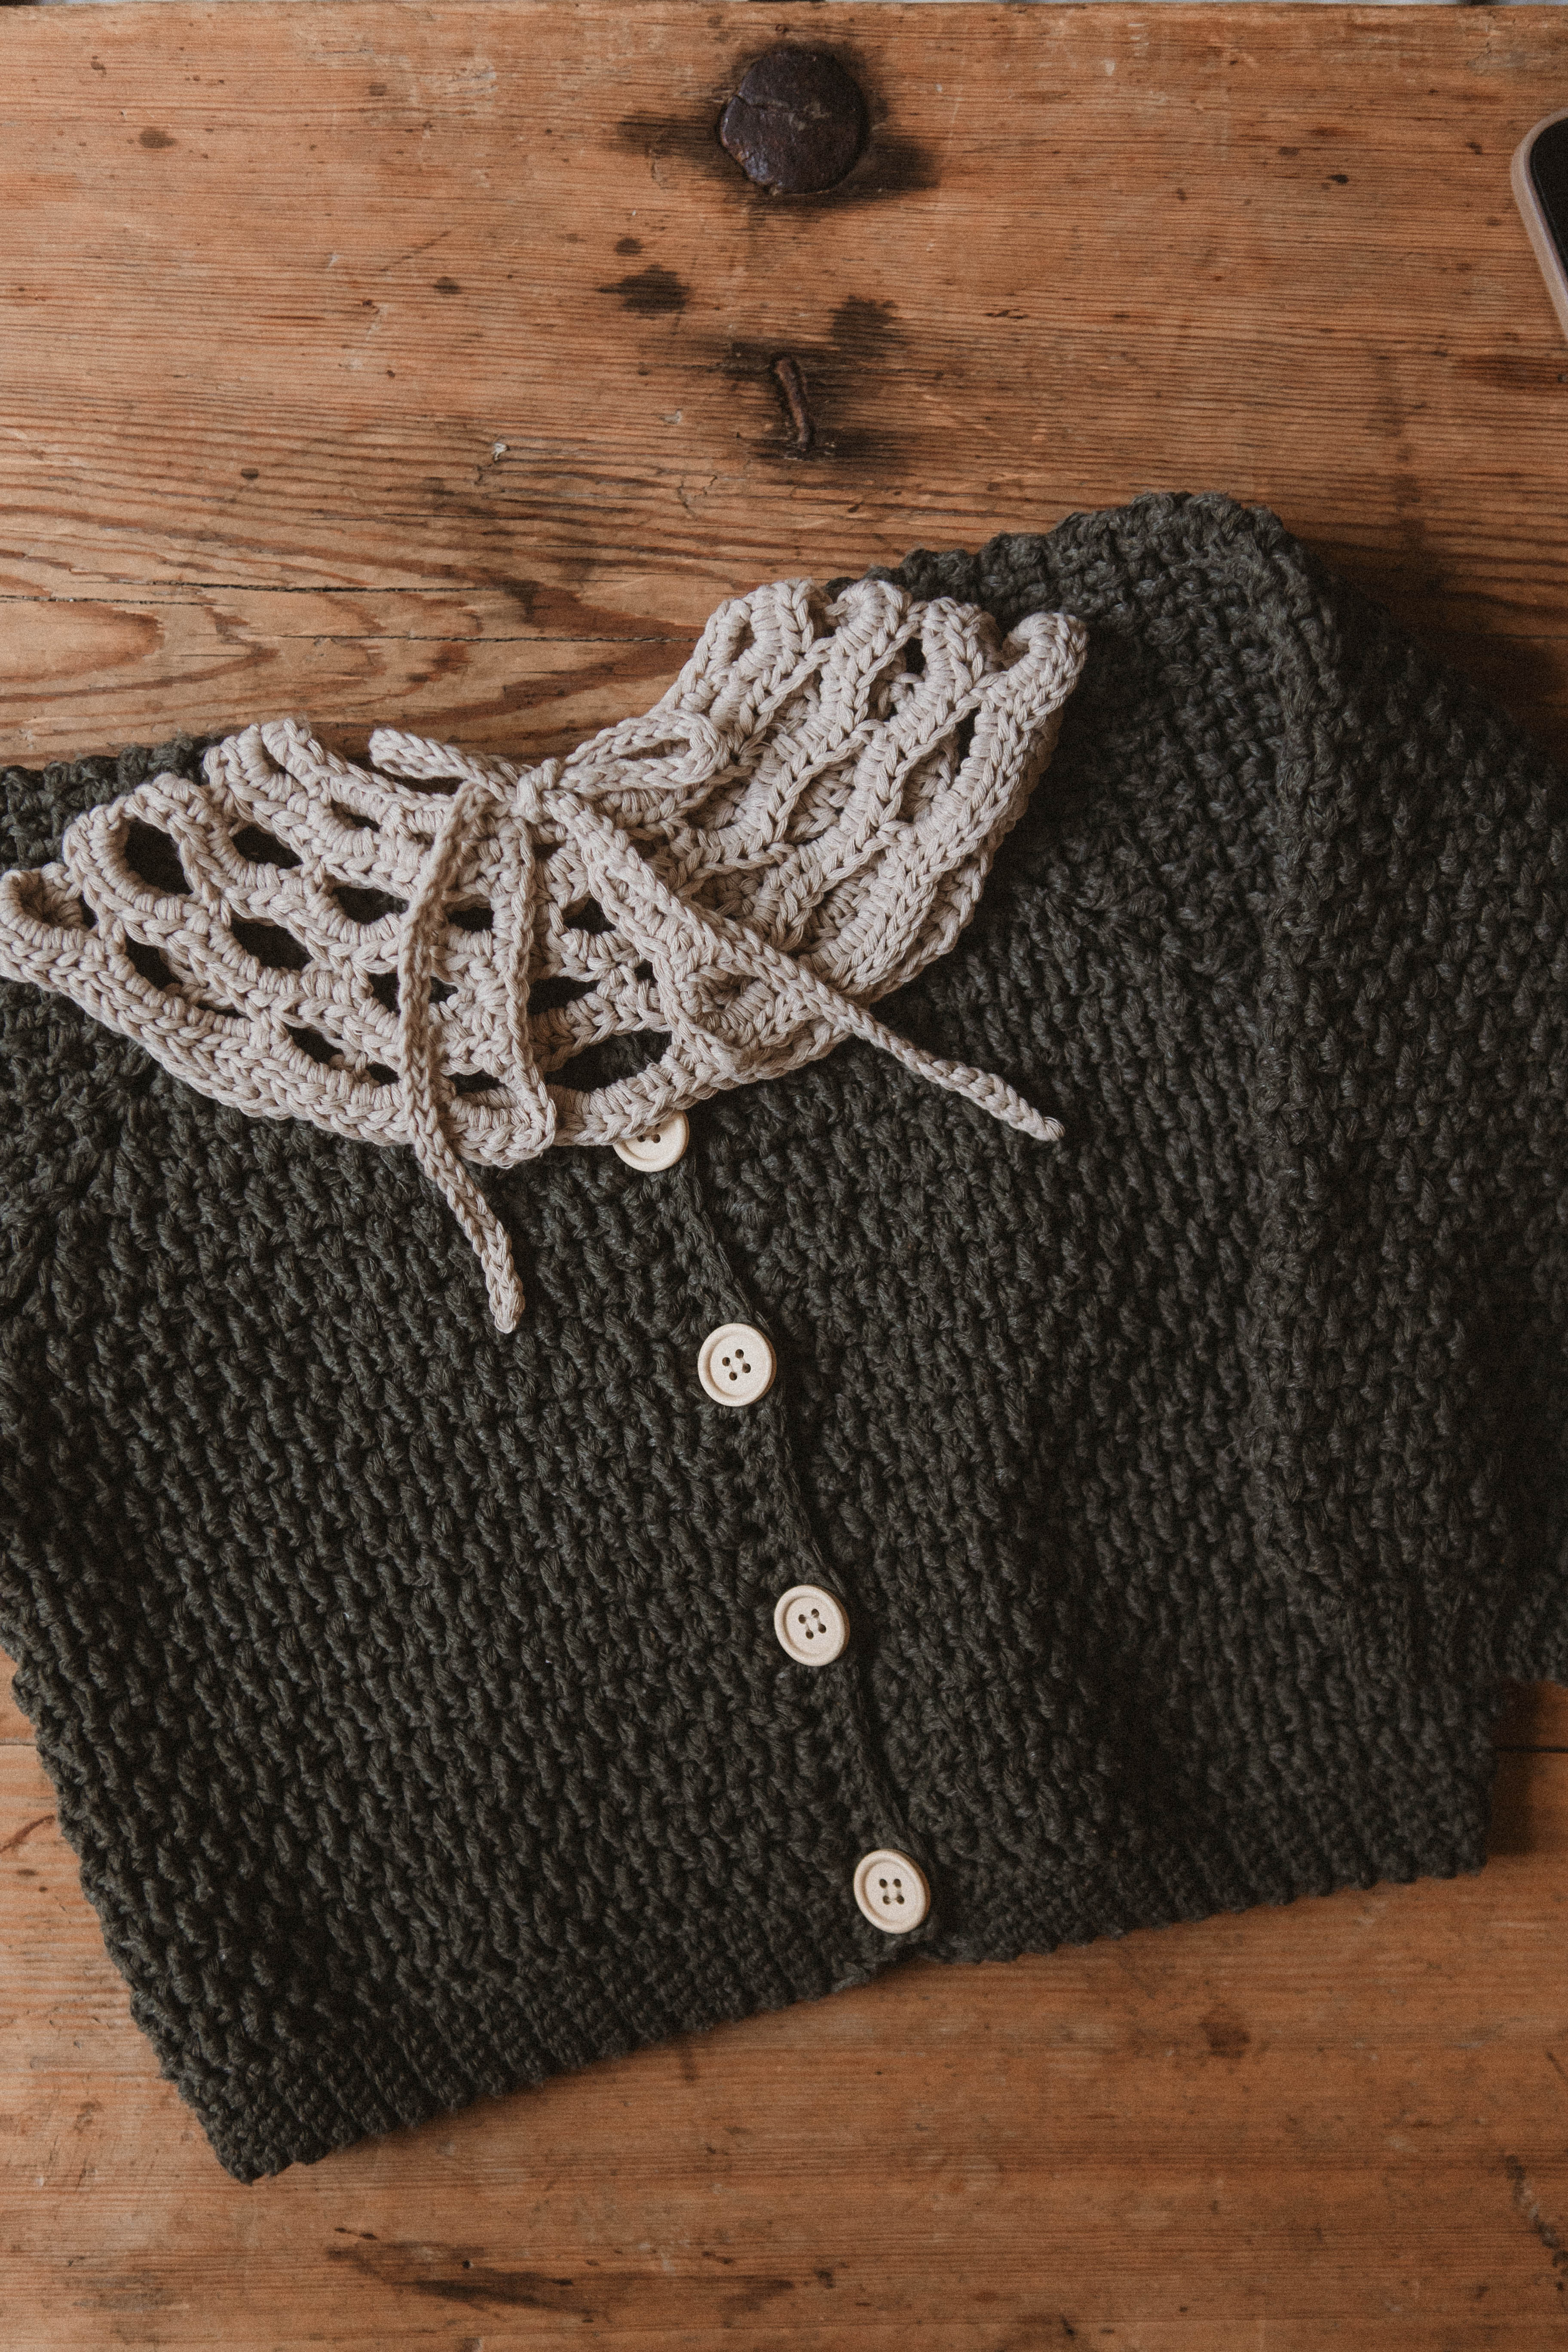
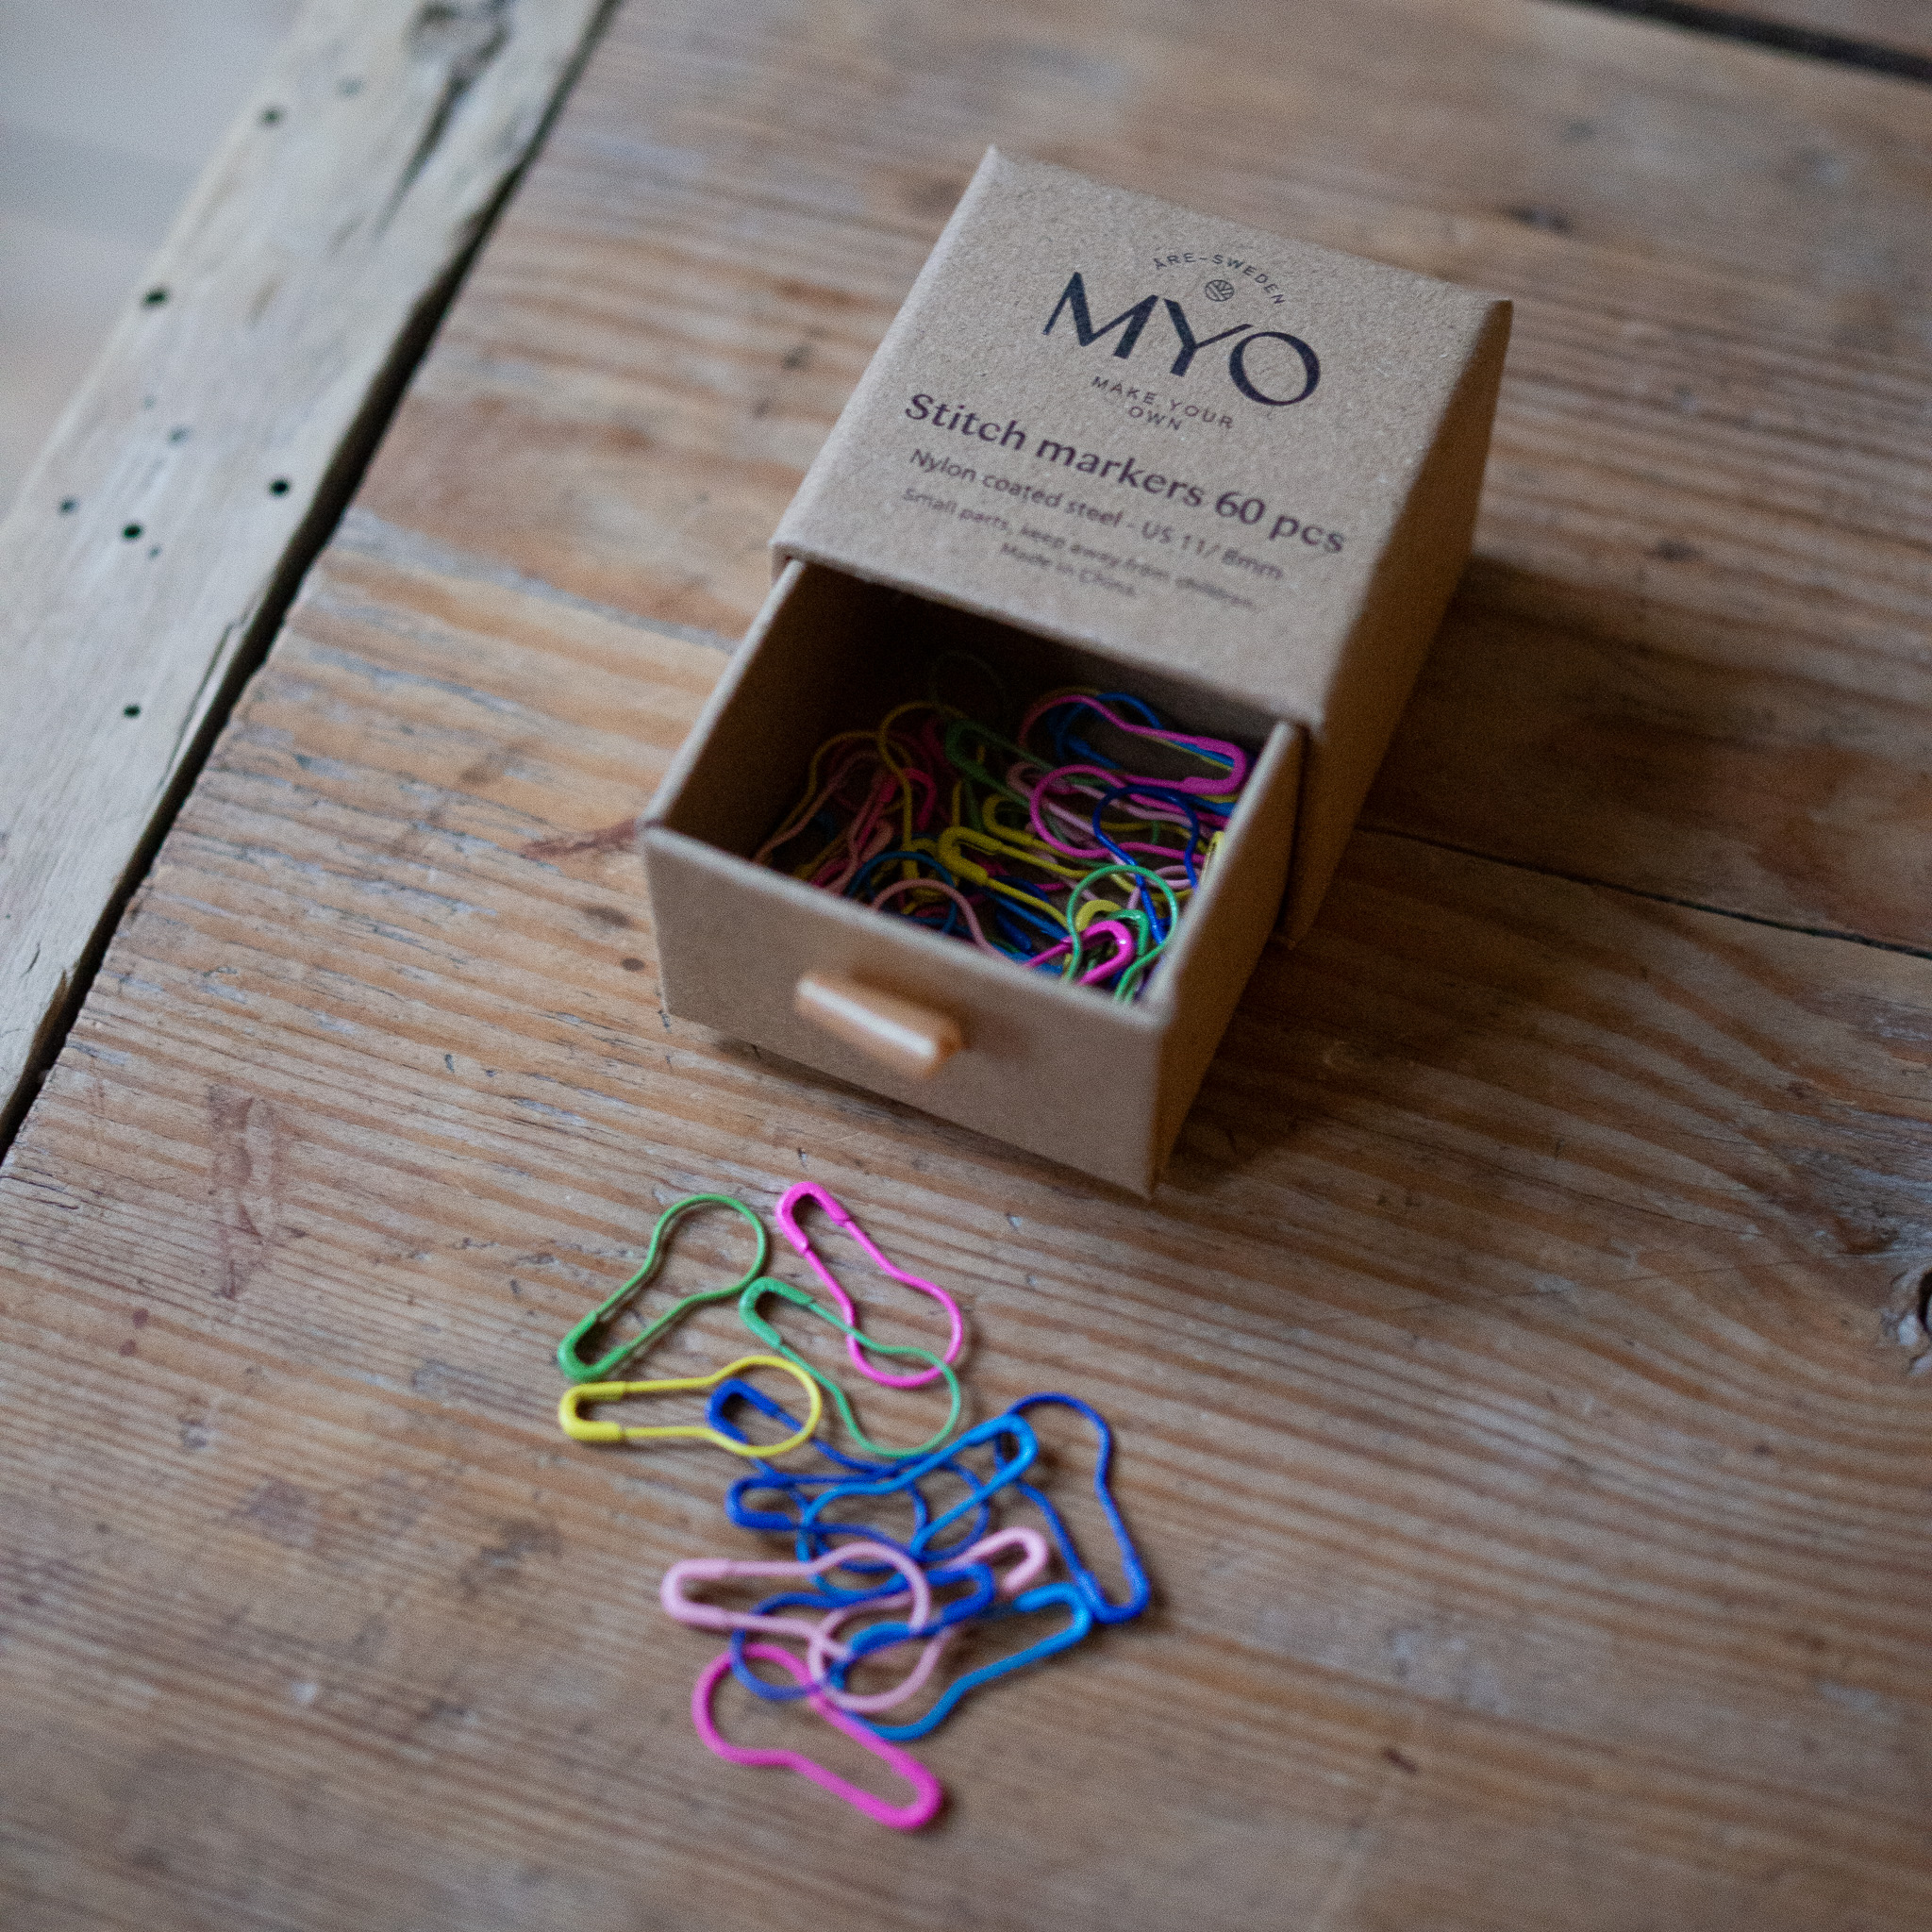
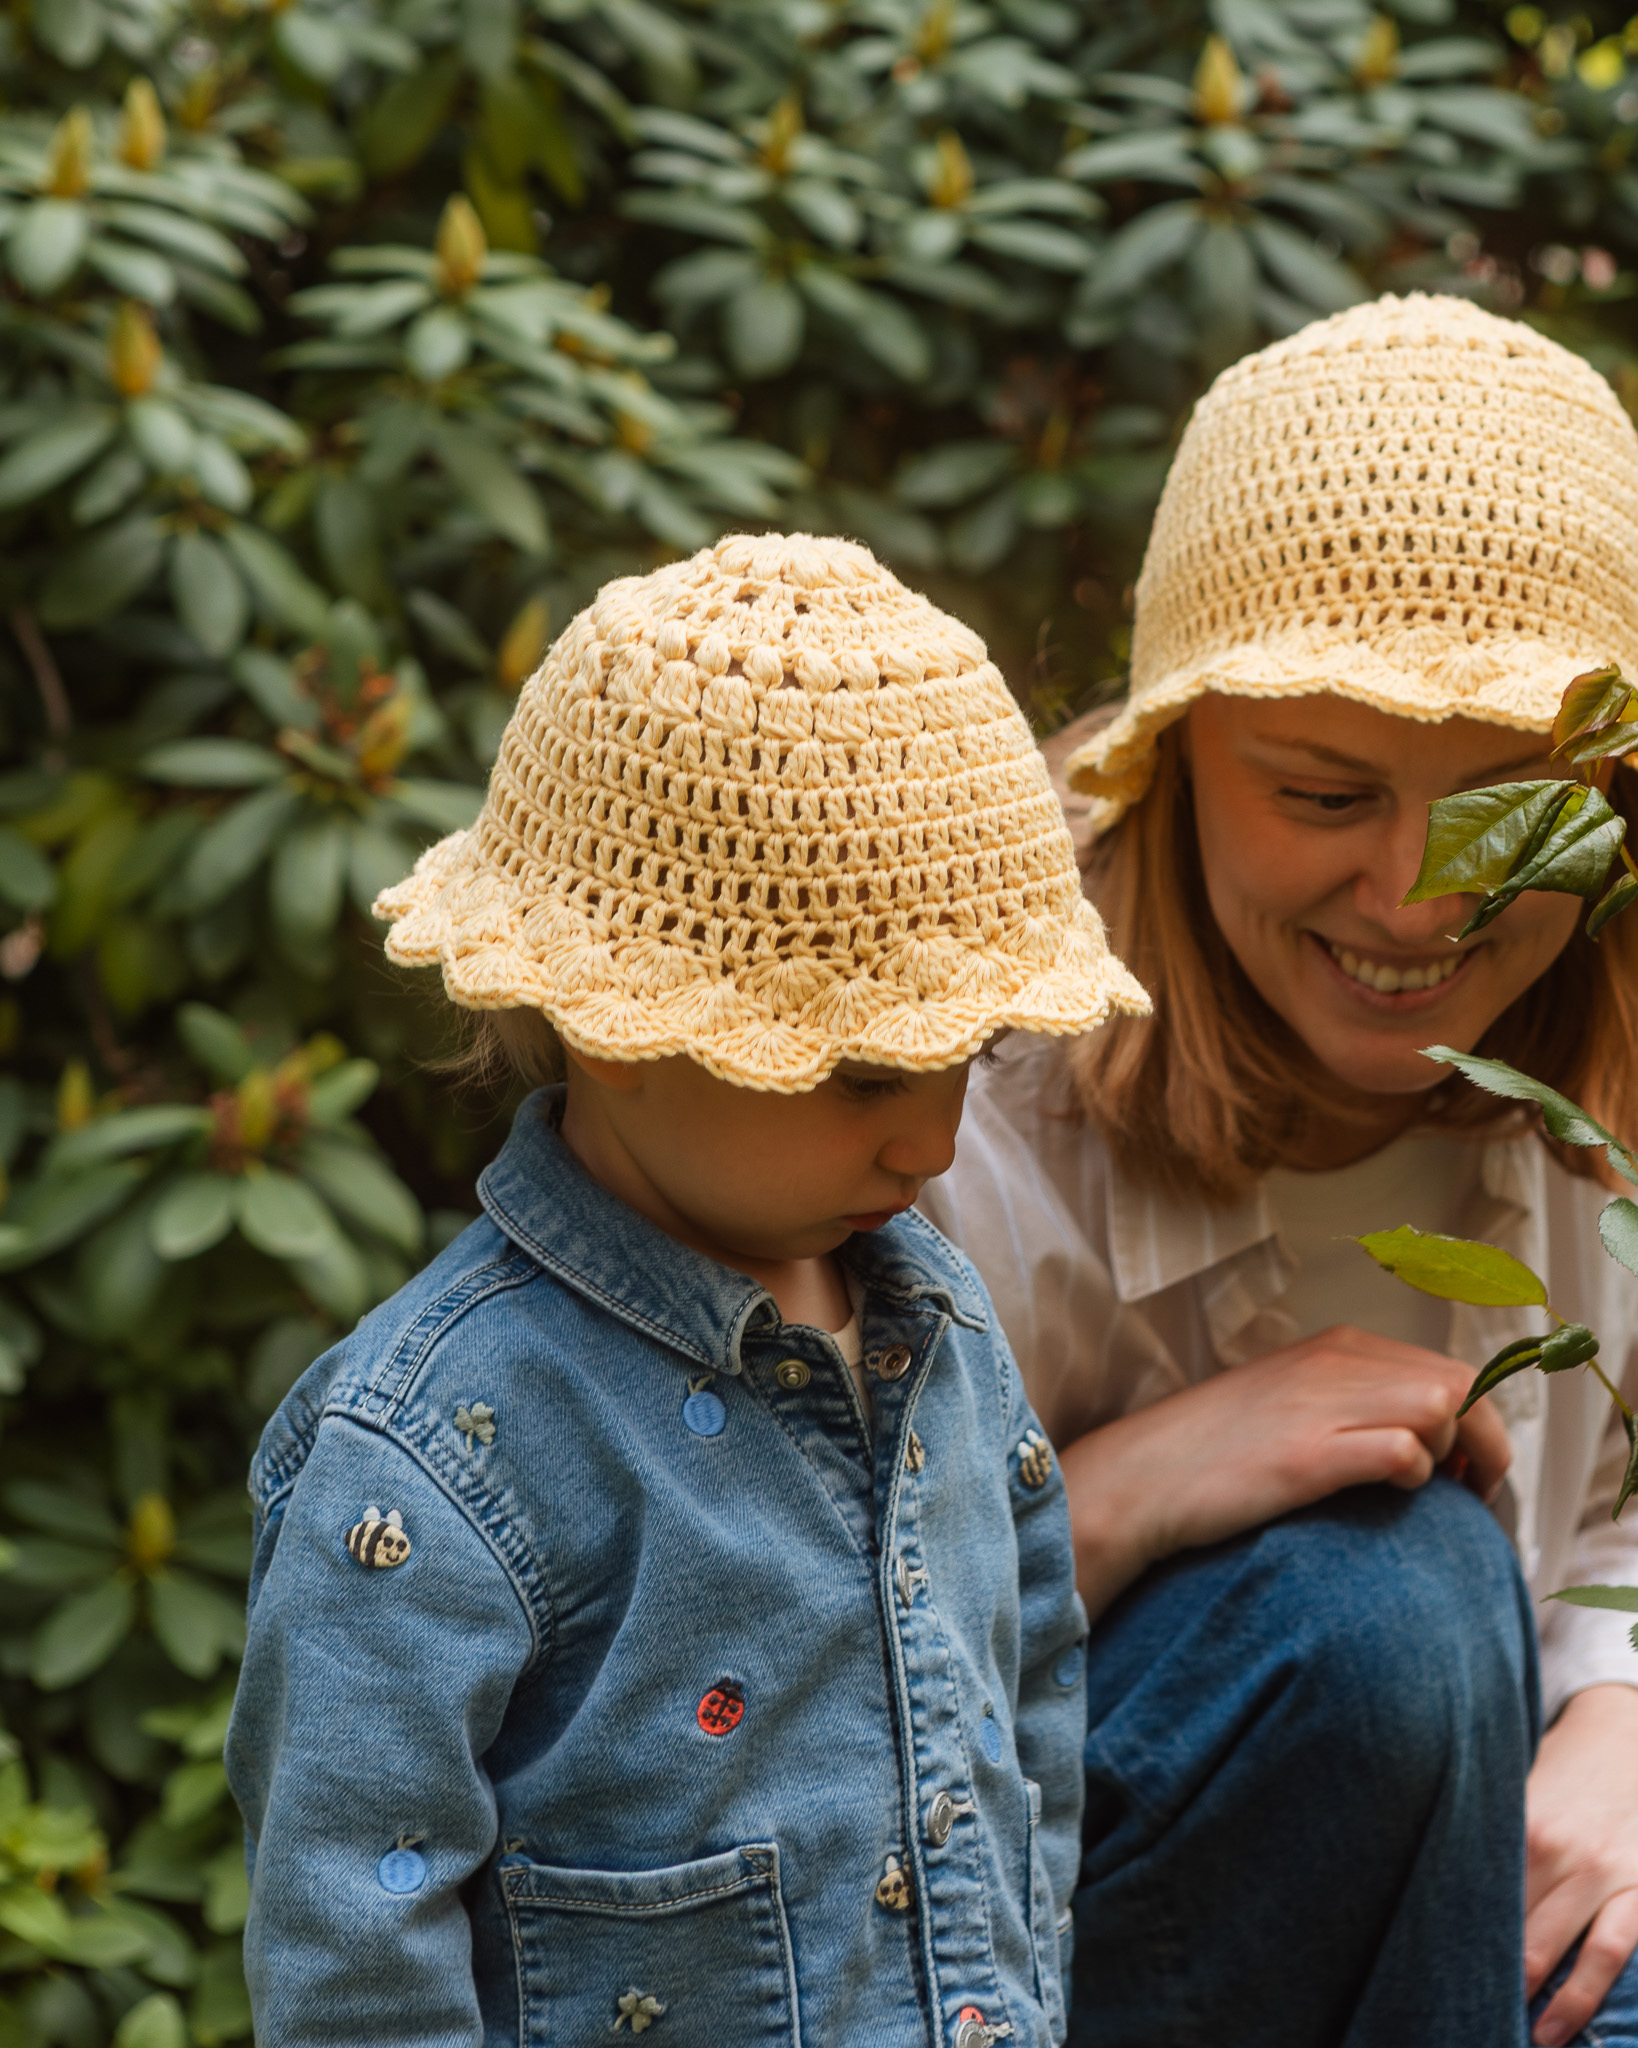
This lovely children’s cardigan can be worn together with the “Rakel” collar in child size, but of course it can also be used without the collar. The cardigan is made using slightly more advanced techniques, but we provide step-by-step photos to help you through the pattern. The instructions are written for size 98/104, suitable for a child around 3–4 years old. The sleeves and body can easily be adjusted to the length you prefer, and if you make them a bit longer, the cardigan will also fit a 5-year-old. You will need Cotton Cloud, a 4 mm crochet hook, stitch markers, scissors, about 5 buttons (2 cm in diameter), a tapestry needle, and thread and needle for sewing on the buttons. The cardigan is crocheted in the color Khaki Green, and the collar in beige (the collar is a separate pattern).
Yarn needed: Approximately 480 g for the cardigan shown in the photos — this may vary depending on the length you choose for the sleeves and cardigan.

Here's how to do it
The cardigan is crocheted from the top down with raglan increases on the yoke. The technique used is front and back post double crochet, alternating between front and back to create a beautiful texture and depth in the cardigan. Once the front and back panels have been crocheted together into one piece, you add a ribbed hem at the bottom, button bands with buttonholes, and finally the sleeves. The neckline of the cardigan has the same stitch count as the Rakel collar, making it easy to sew the collar onto the cardigan — or even crochet it directly onto the cardigan afterward if you want it to be permanently attached. If you find post stitches a bit tricky, you can use regular double crochet stitches instead, but the texture will look different. Good luck! / Johanna
%20(4).jpg)
This is what you need:
Here you can directly purchase the material for the product. Please note that the instruction is digital and appears here on the page (no written instruction).

Cotton Cloud | 100 g
A slightly thinner cotton yarn that works perfectly for clothes, accessories and amigurumi.
Buy product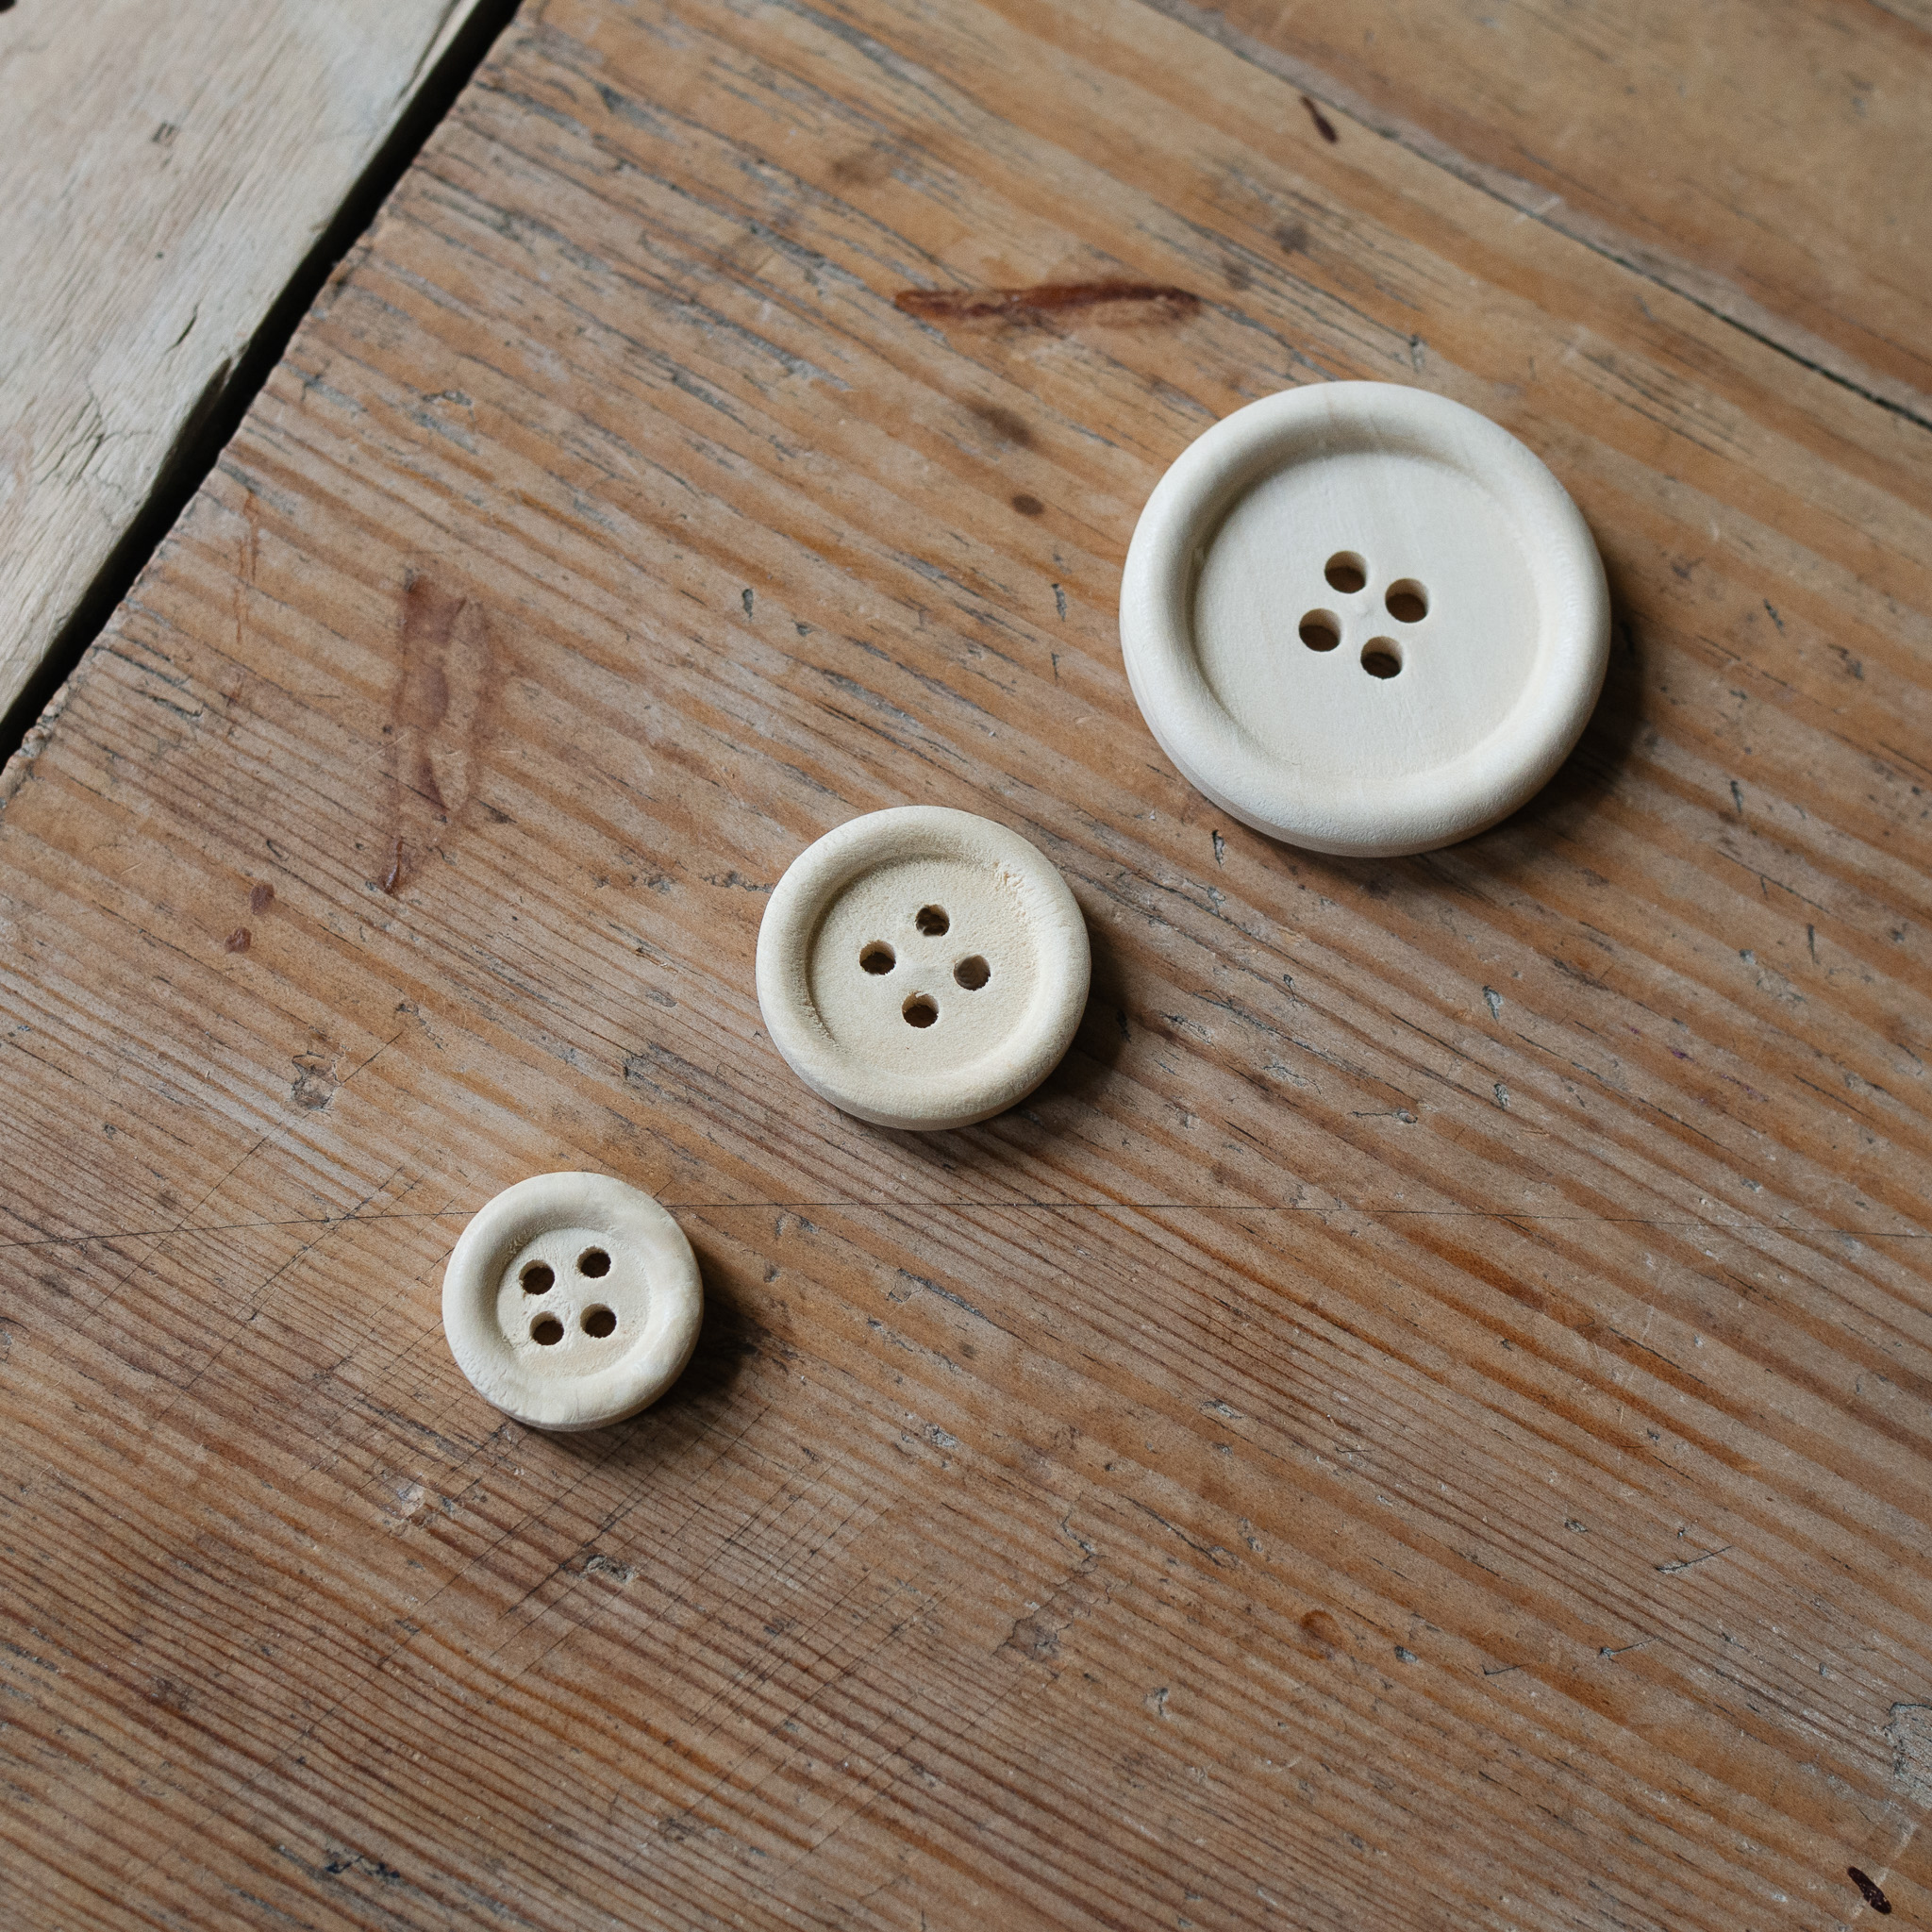

.jpg)
Unleash your creativity
For only 85kr per month you get access to all our 300+ beginner-friendly instructions for crochet, knitting and macrame.
A perfect way to get started with your new hobby!

Read this before you start!
The first stitch after turning
This sweater is crocheted in rows using front and back post stitches, and the first stitch of each row should be a stacked single crochet. Instead of using a turning chain after a row, you make a stacked single crochet at the beginning of the next row. See the video below for how to do this. Unless otherwise stated in the pattern, the first double crochet of every row should always be a stacked single crochet.
The last stitch before turning.
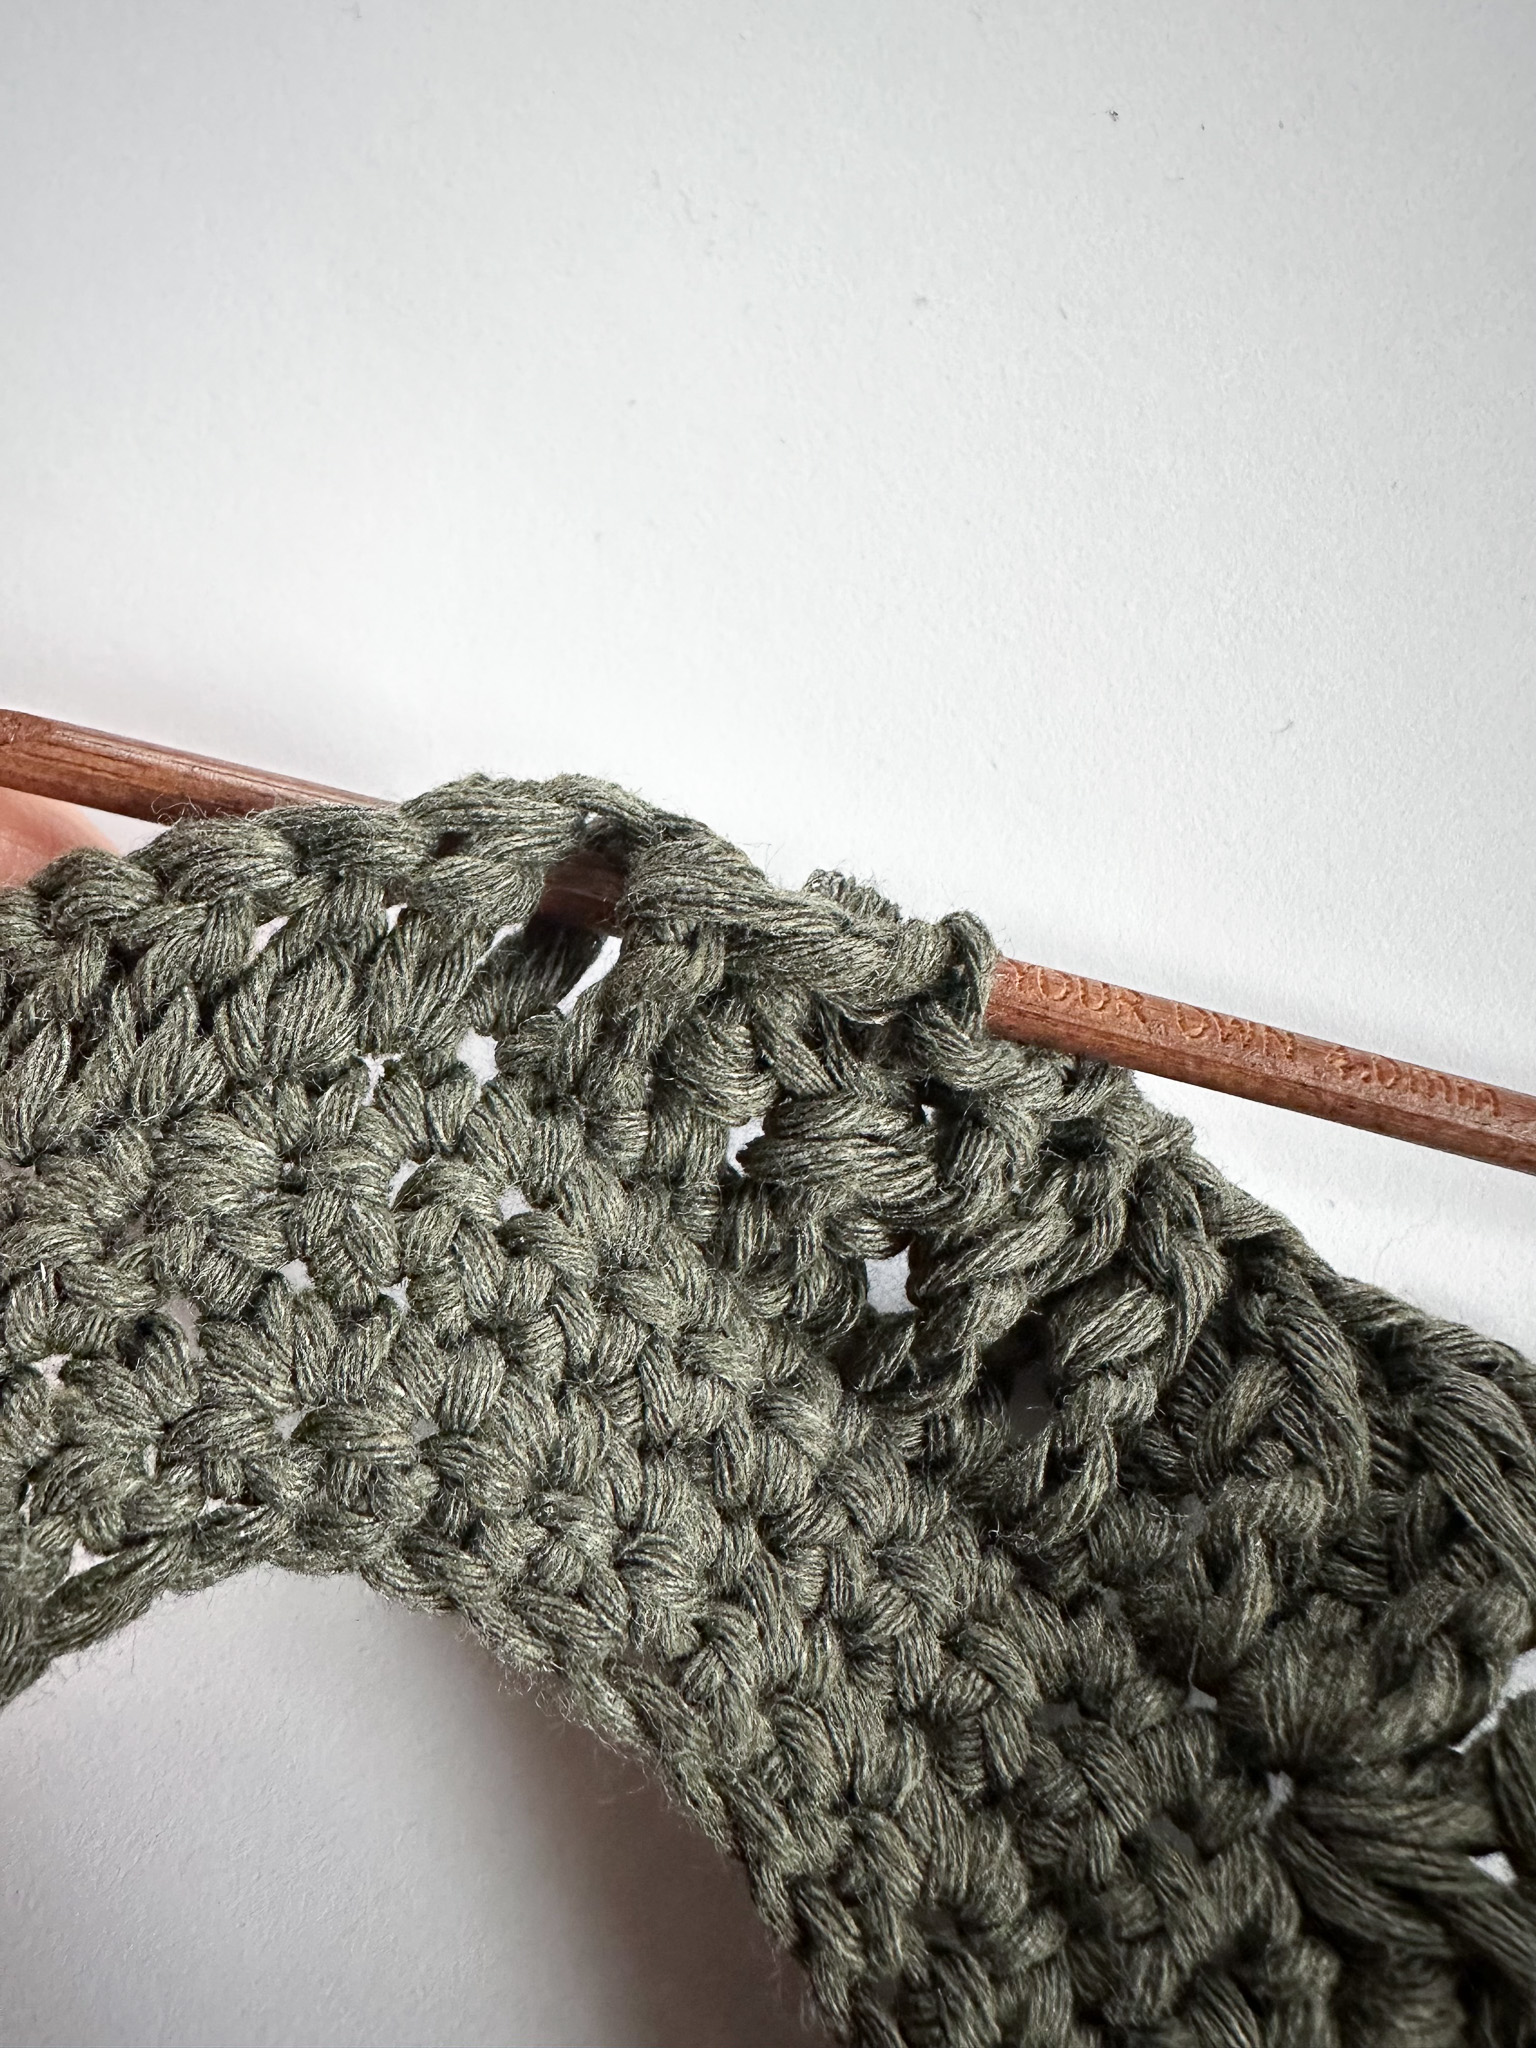
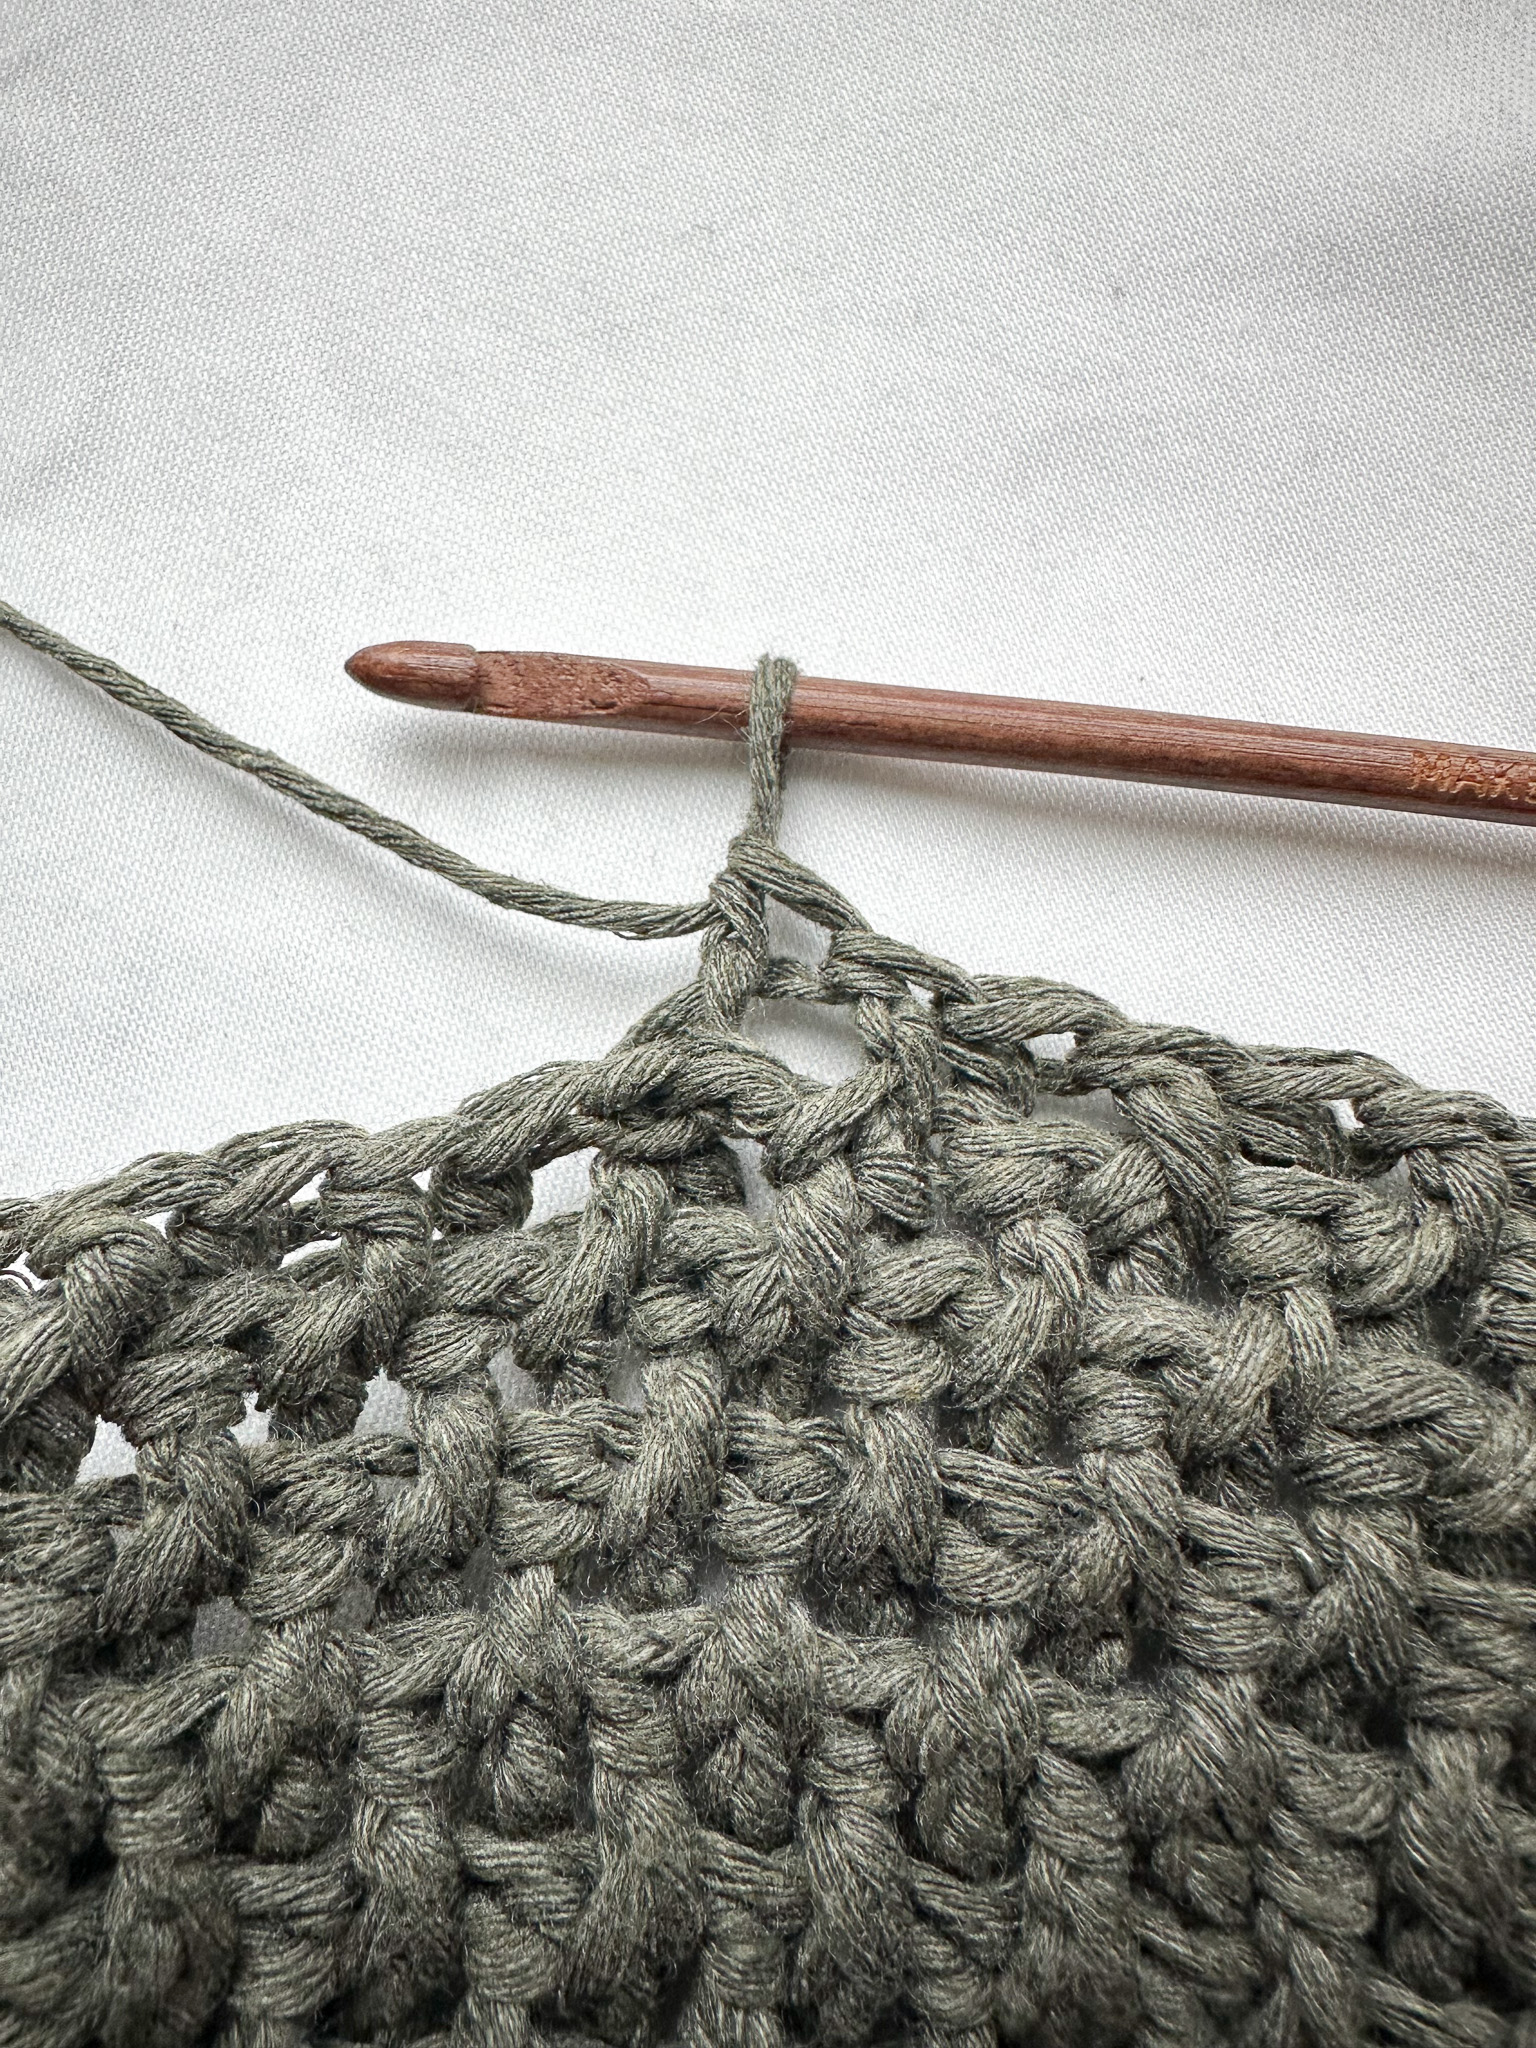
The last double crochet of each row cannot be made as a post stitch. Instead, it is worked as a regular double crochet into the space between the last two stitches of the previous row. See the picture below.
What is a corner?
This sweater is worked with raglan increases, which create the “line” between the neckline and the underarm. To make a raglan increase, you need to increase by 2 double crochets on each side of the line.
Here’s how to make a corner:
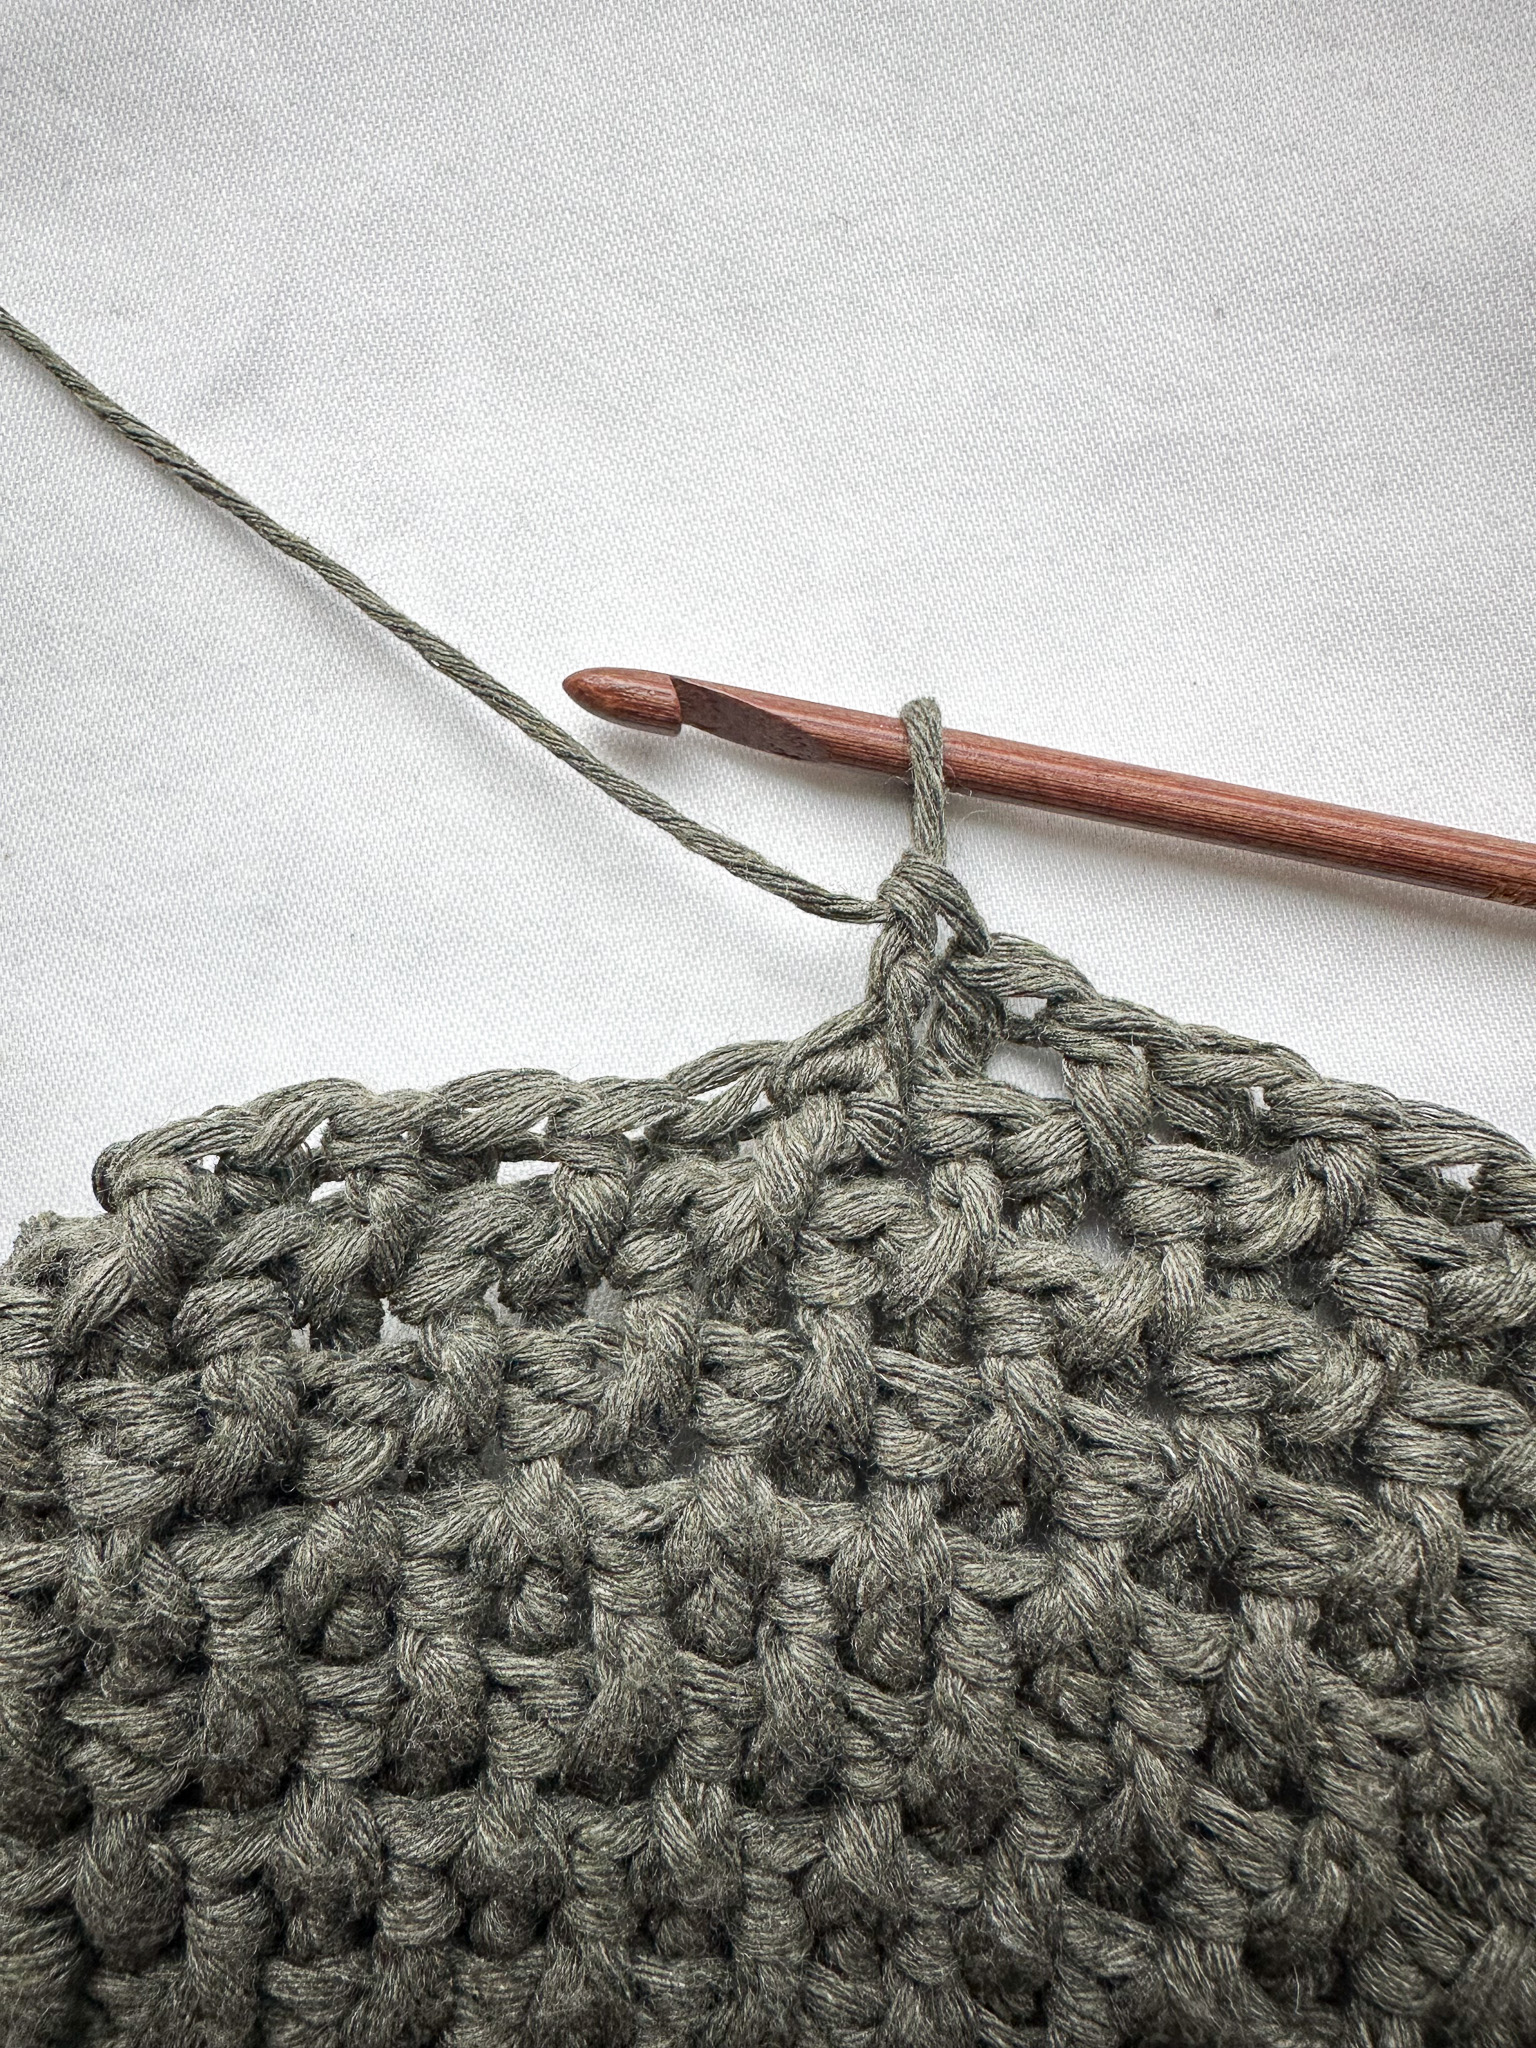
When you have worked a double crochet into the last stitch and reached the chain space in the corner of the row below, work [2 double crochets, 2 chains, 2 double crochets] into the chain space. You have now created a corner above the corner of the previous row.
Front Post Double Crochets (FPDC) / Relief Stitches
The technique used in this pattern is relief stitches, alternating in front and back. A relief stitch is like a regular double crochet, but you work around the post of the stitch from the previous row.
Front Post Double Crochet (FPDC):
Yarn over, insert the hook from front to back around the post of the stitch in the previous row, and bring it out on the other side so that the post is in front of your hook. Yarn over and pull up a loop (you now have 3 loops on your hook). Yarn over and pull through 2 loops, yarn over again and pull through the remaining 2 loops (just like a regular double crochet).

Back Post Double Crochet (BPDC) / Relief Stitch Back:
Worked the same way as a front post double crochet, but with the difference that you insert the hook from back to front around the post, then bring it out on the back side of the piece. The post sits behind the hook.
To create a wavy texture, always work a front post double crochet on top of a back post double crochet from the previous row. This alternates both within the row and between rows, creating a checkerboard-like pattern.
If the instructions say front/back, start with a front post double crochet. If they say back/front, start with a back post double crochet.
Let’s get started!
Neckline:
Chain 45 stitches. If you’re unsure how to make a chain, see the video below.
Row 1: Skip the first stitch. Work 5 single crochets, then 2 single crochets in the next stitch (an increase). Repeat 5 single crochets + 1 increase a total of 7 times. Work 2 single crochets in the last chain. You should now have completed the first row with a total of 51 stitches.
Chain 1 and turn. If you are unsure how to work a single crochet, see the video below.
Row 2: Skip the first stitch. Work 6 single crochets, then 2 single crochets in the next stitch (an increase). Repeat 6 single crochets + 1 increase a total of 7 times. Work 2 single crochets in the last chain. You should now have a total of 58 stitches. Chain 1 and turn.
Row 3: Skip the first stitch. Work 7 single crochets, then 2 single crochets in the next stitch (an increase). Repeat 7 single crochets + 1 increase a total of 7 times. Work 2 single crochets in the last chain. You should now have a total of 65 stitches. Chain 1 and turn.
Row 4: Skip the first stitch. Work 8 single crochets, then 2 single crochets in the next stitch (an increase). Repeat 8 single crochets + 1 increase a total of 7 times. Work 2 single crochets in the last chain. You should now have a total of 72 stitches. Chain 1 and turn.
Ok with raglan increases
Now the rows with raglan increases (corners) begin. In Row 5, work regular double crochets, but from Row 6 onward you start using front and back post stitches (relief stitches). Remember, the first stitch of each row should be a stacked single crochet (see Step 1). Don’t forget you can refer to Step 1 to see how to work relief stitches and corners.
Row 5: Start with 1 stacked single crochet, then work 8 double crochets. Now comes the first corner. Then work 14 double crochets, then the second corner. Work 22 double crochets, the third corner, 14 double crochets, the fourth corner, and finish the row with 9 double crochets. You should now have a total of 84 double crochets on the row.
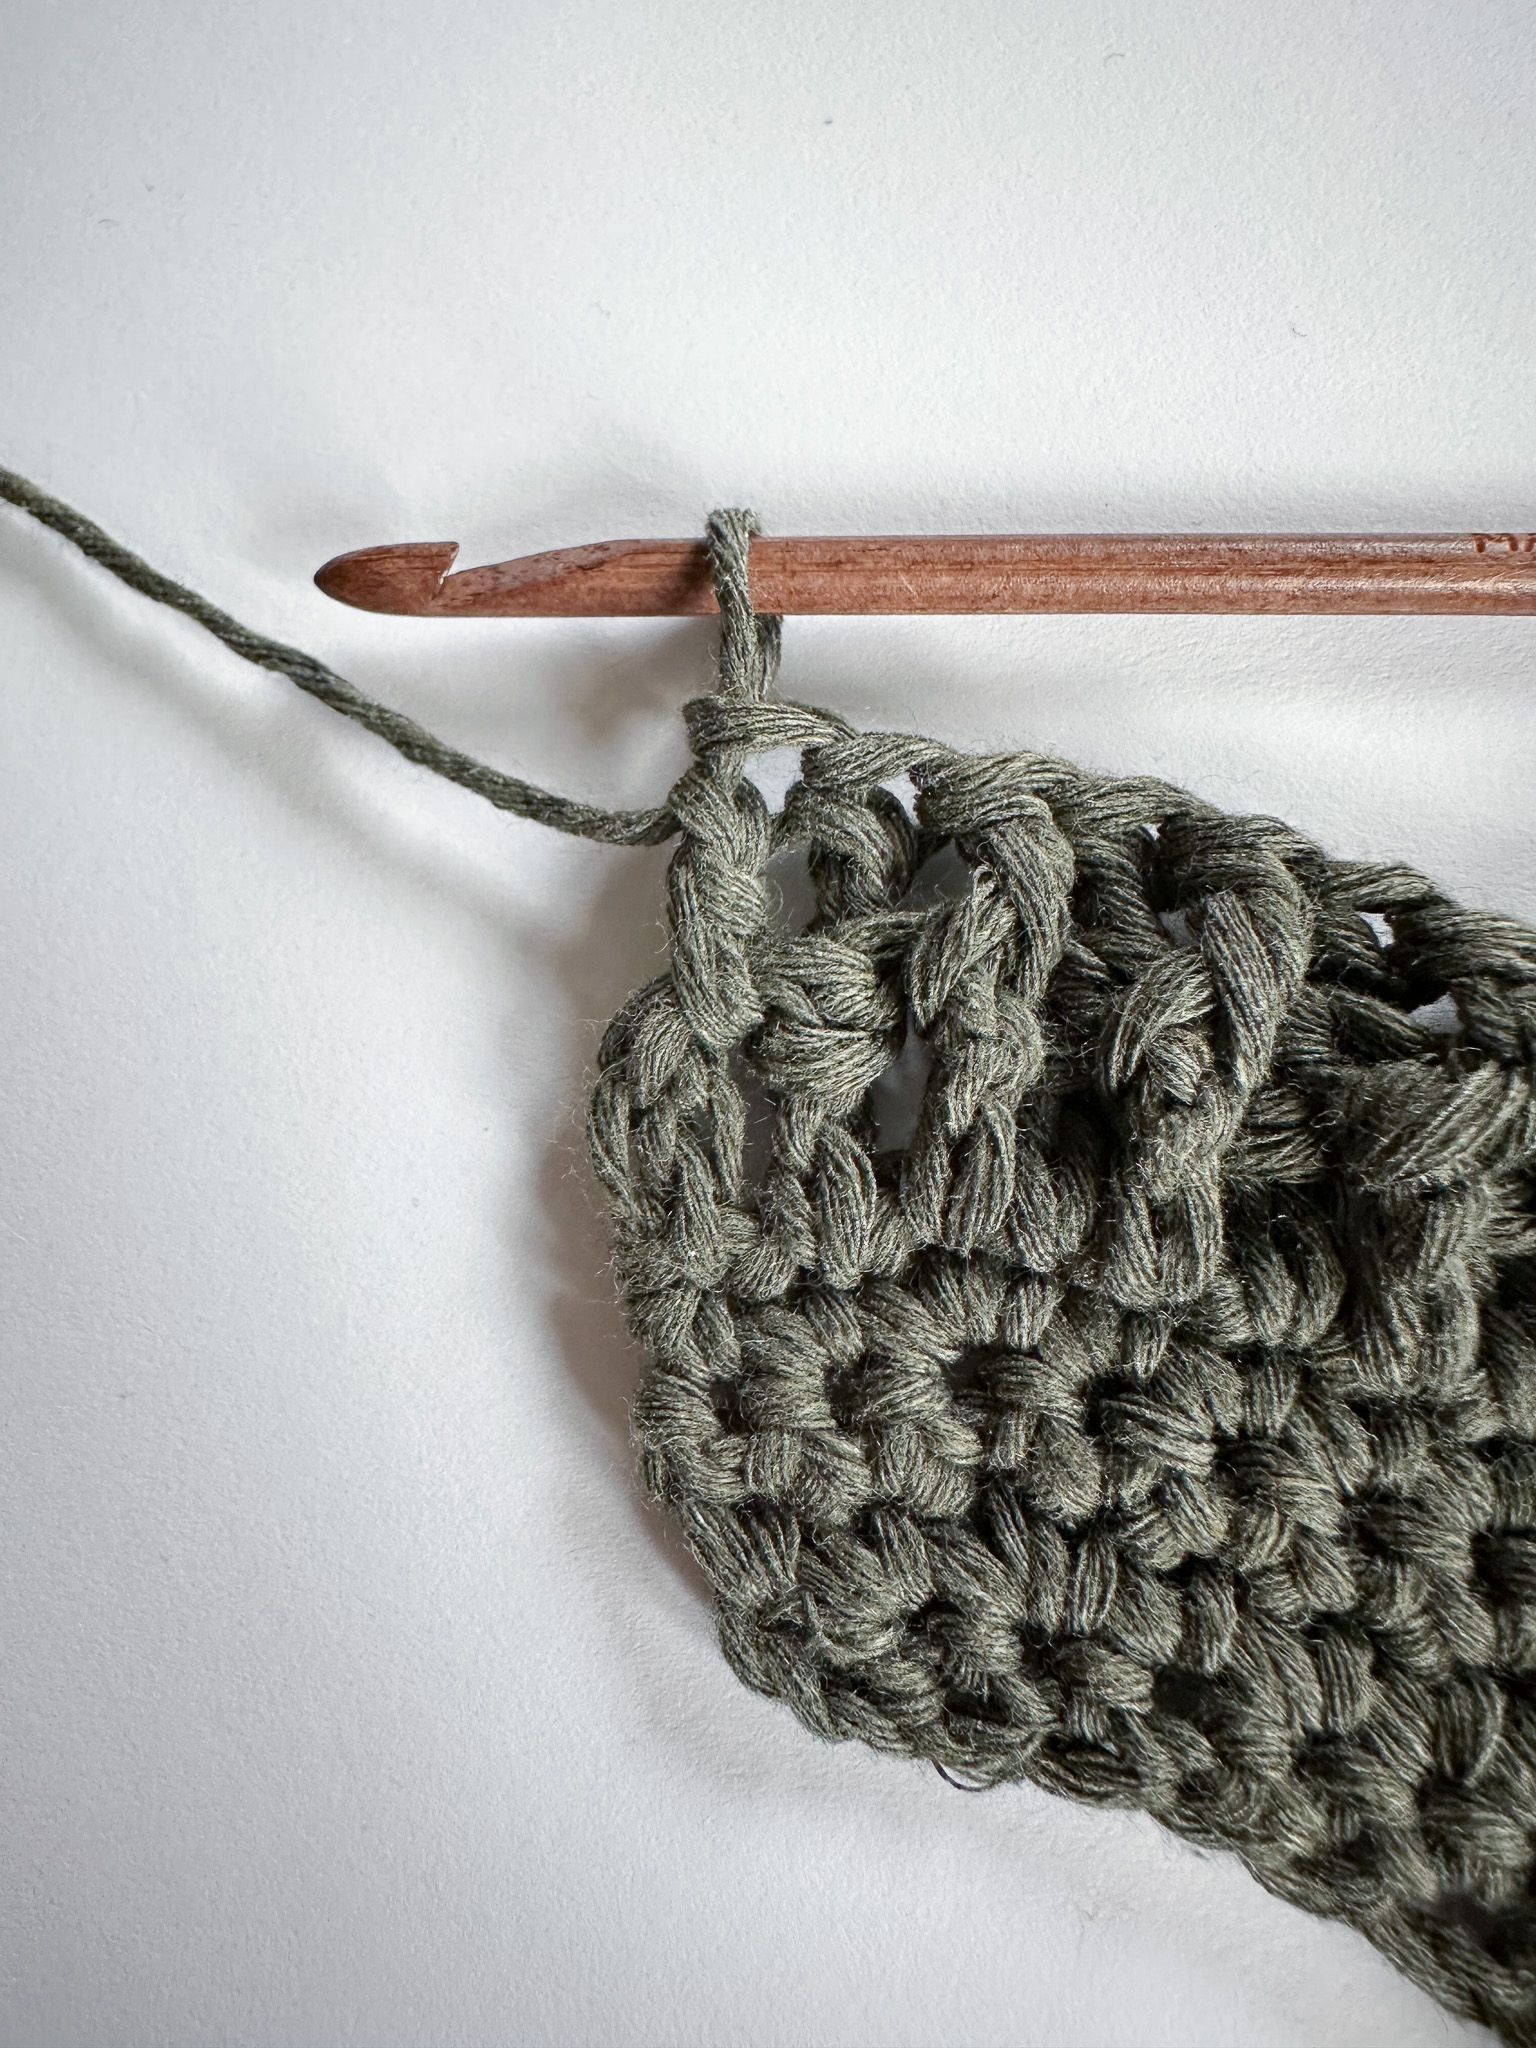
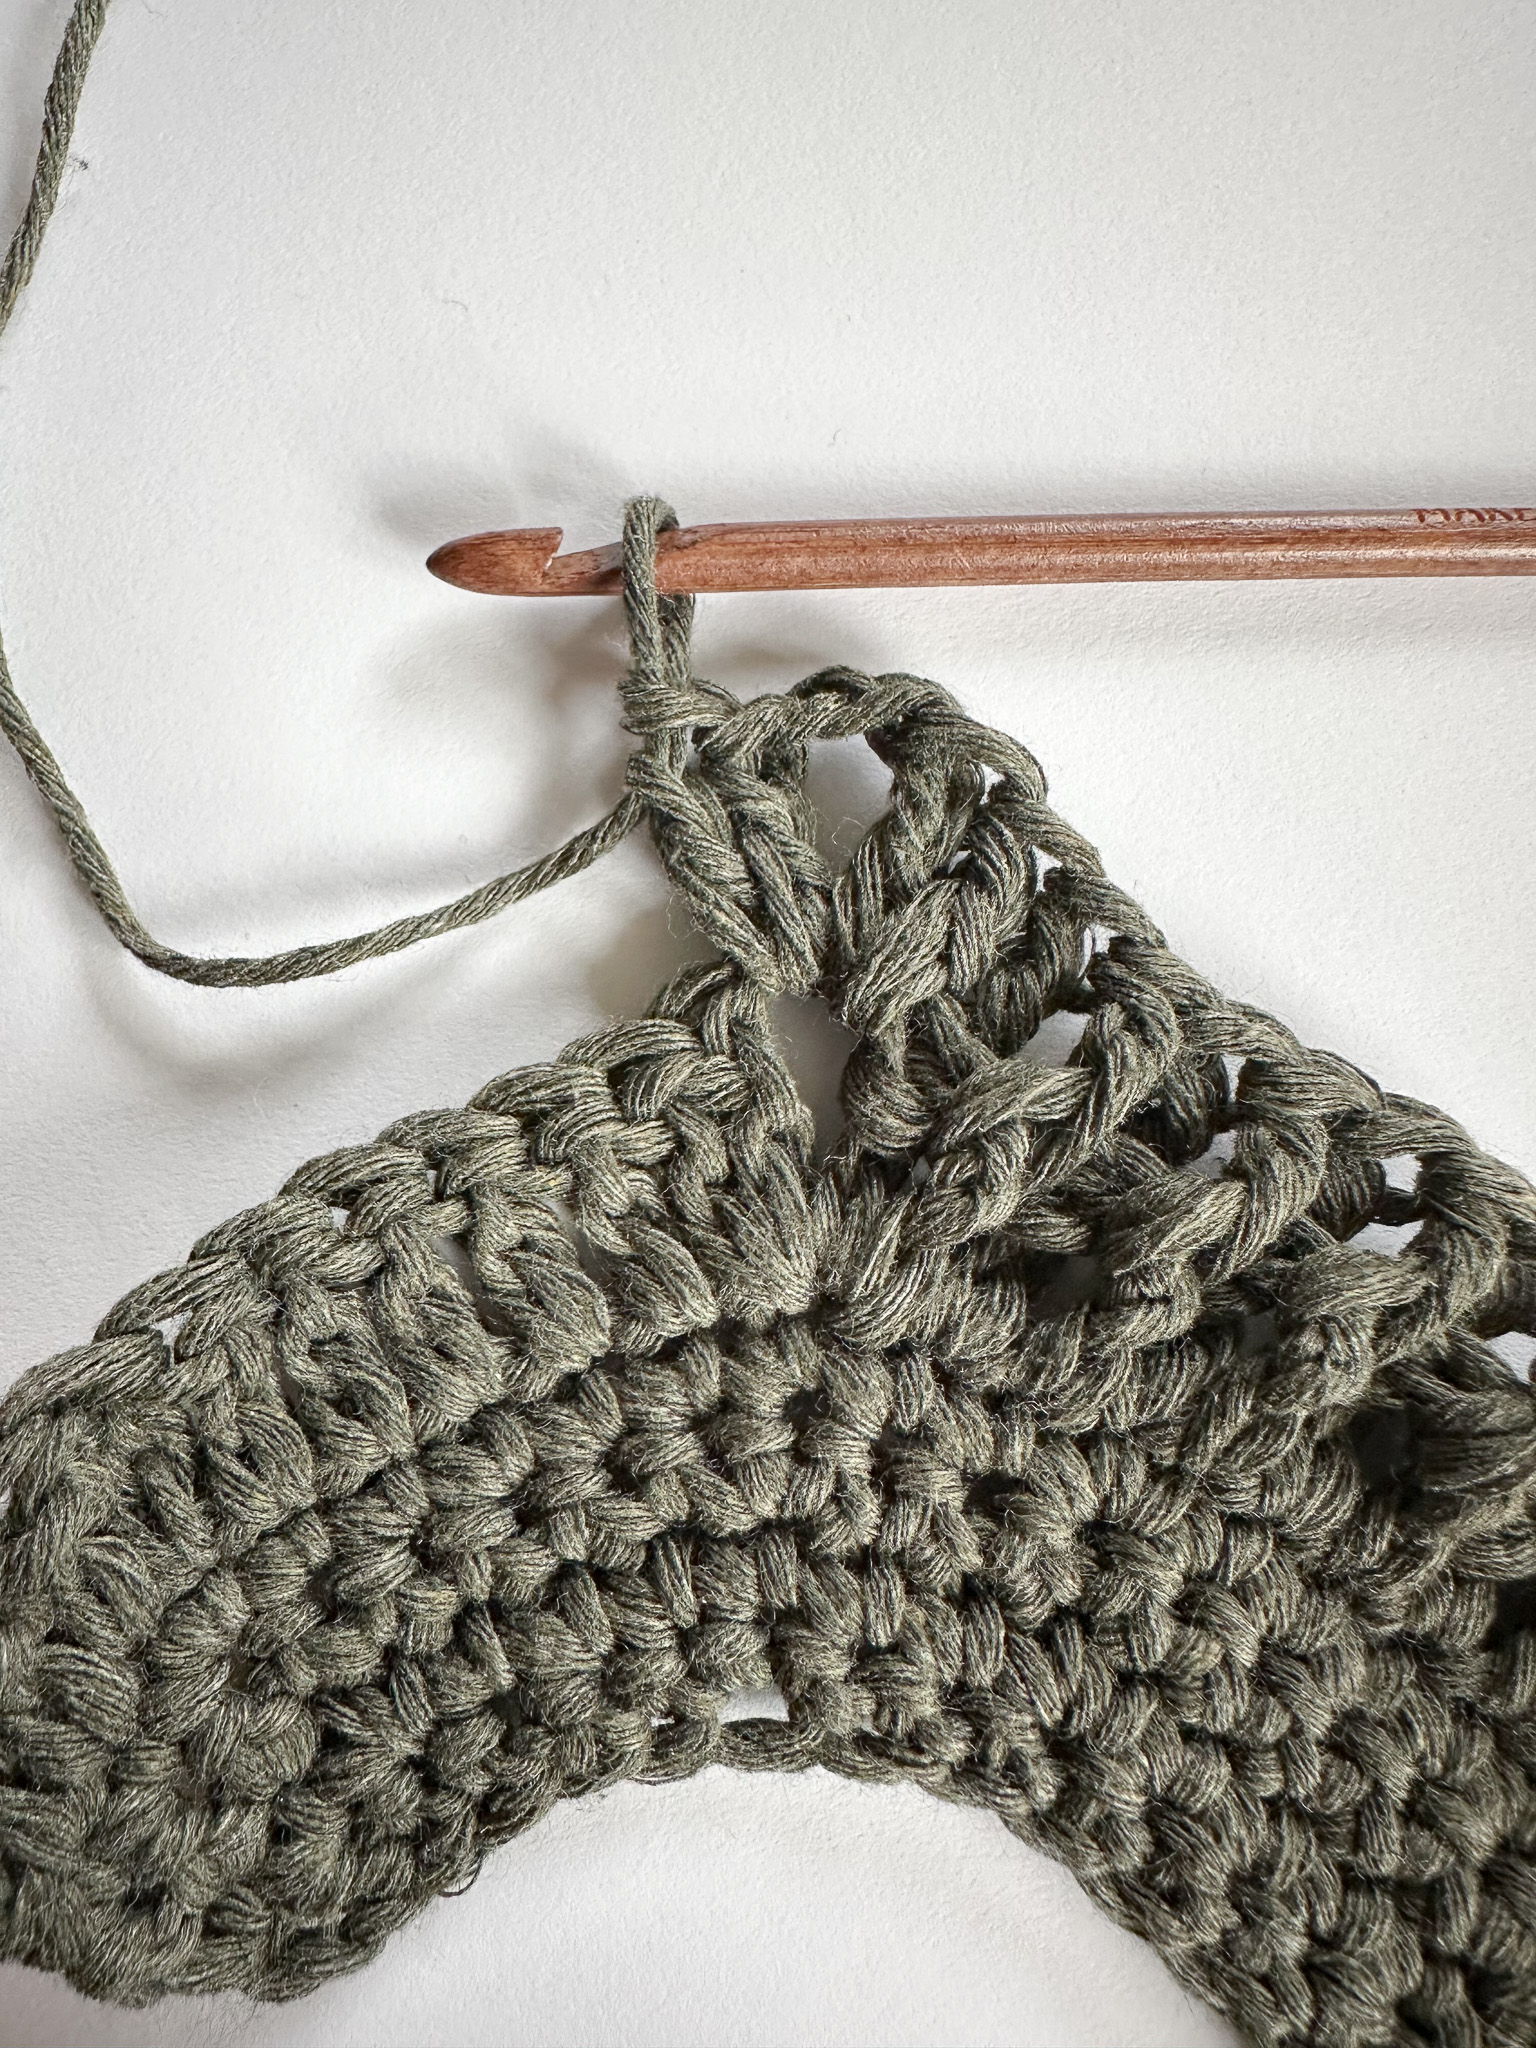
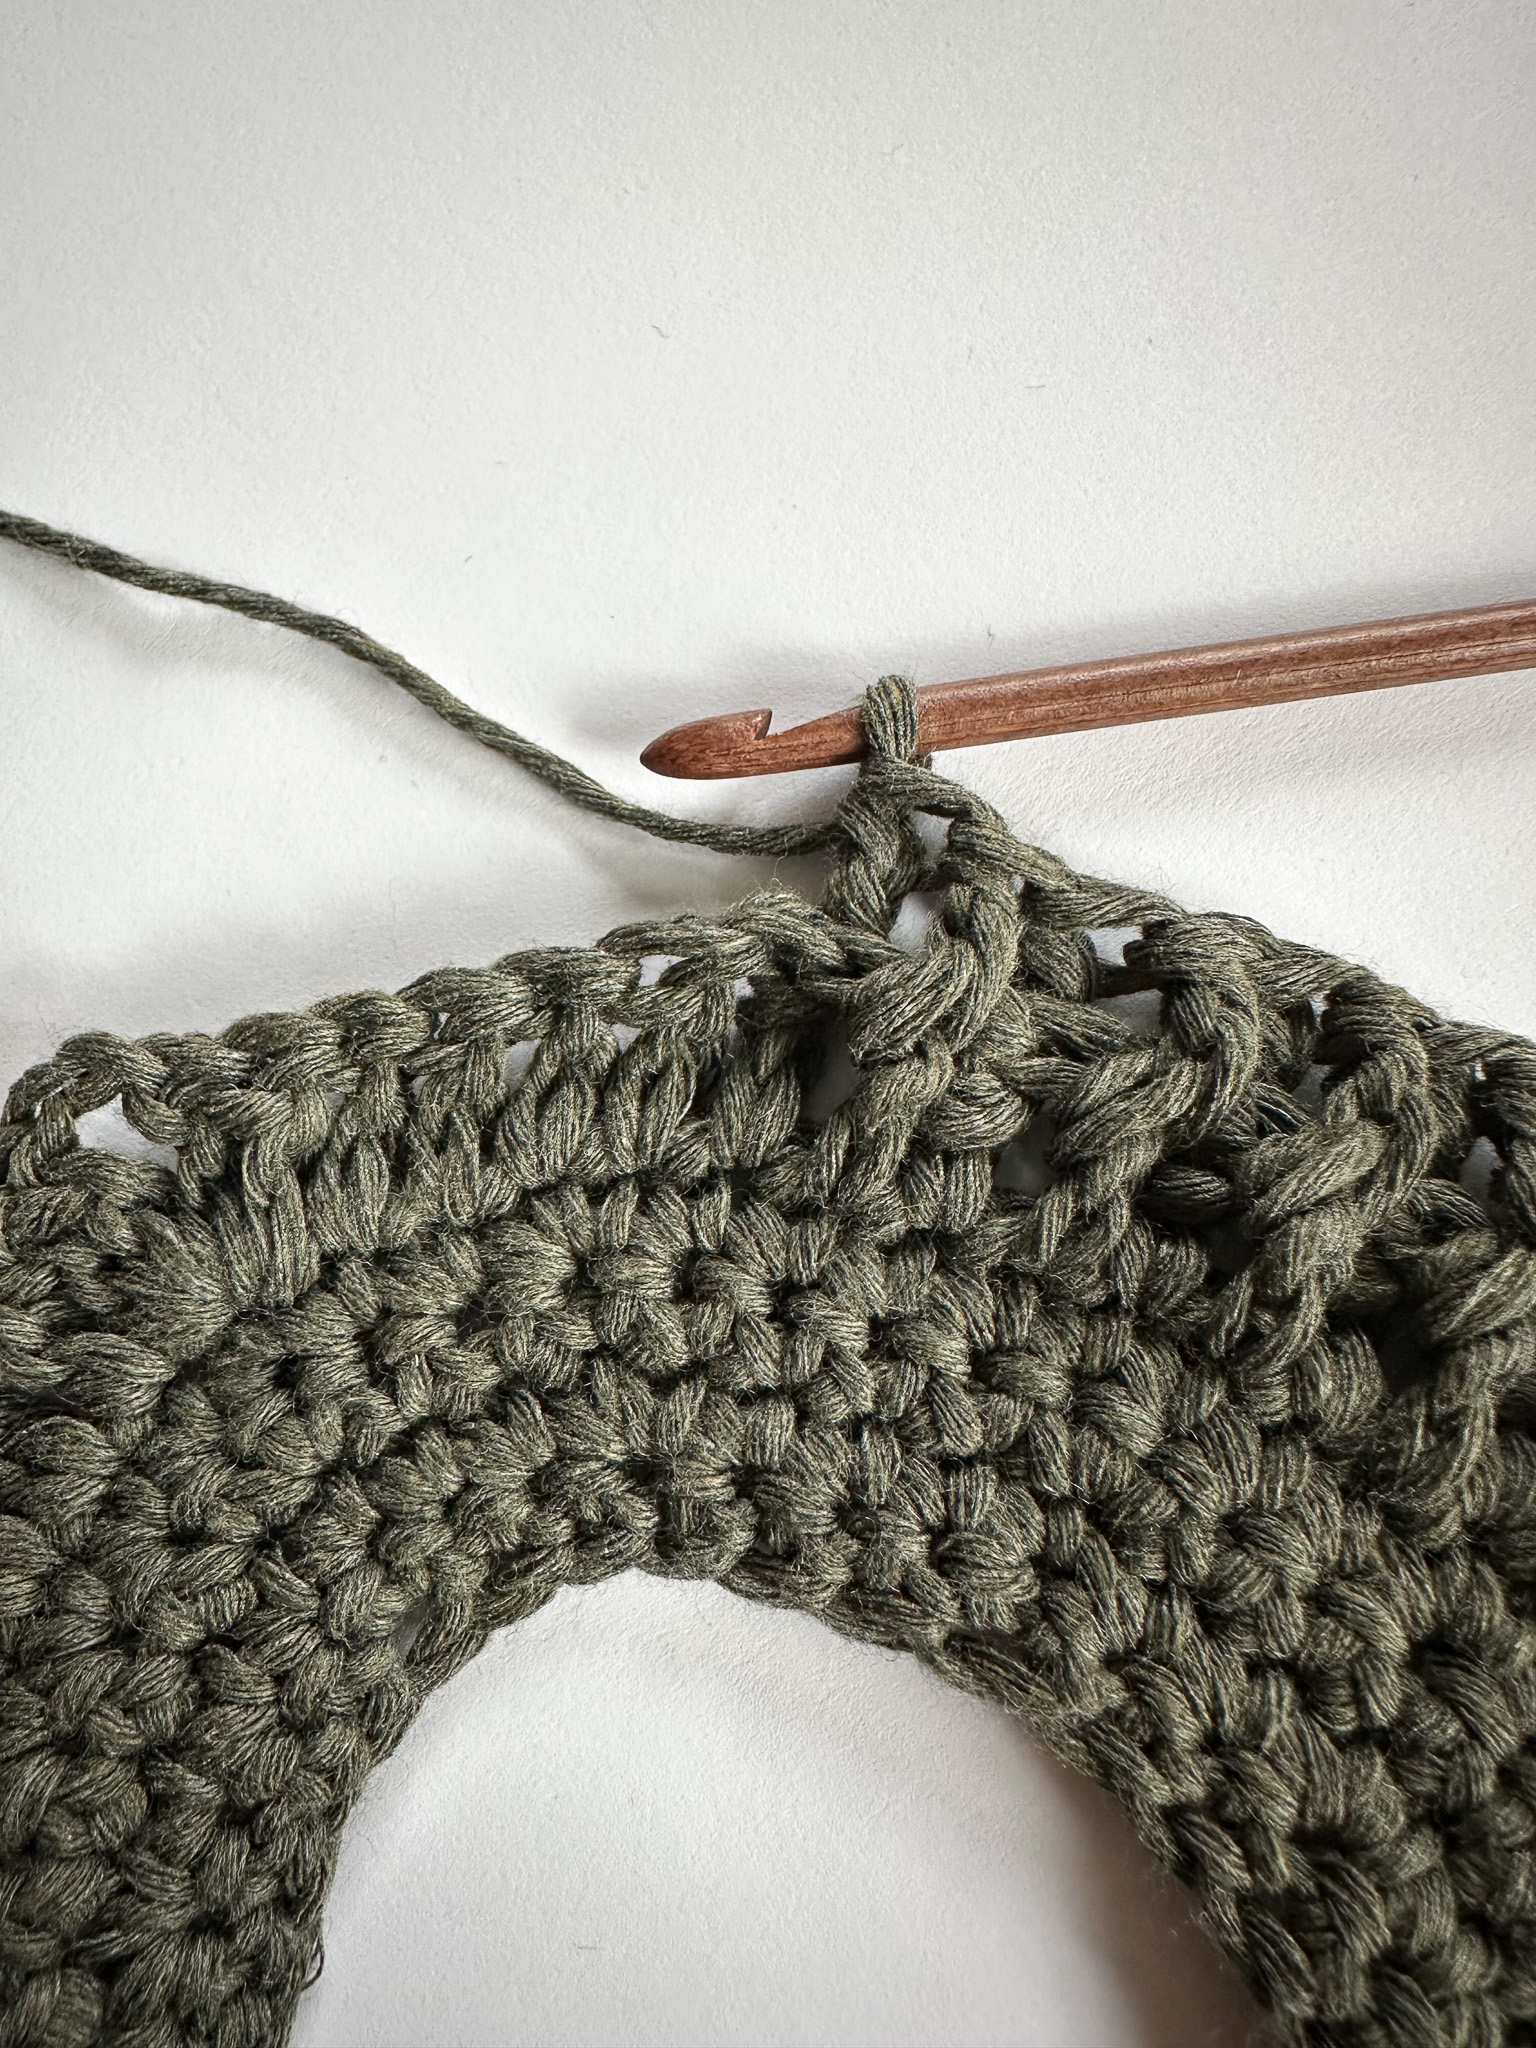
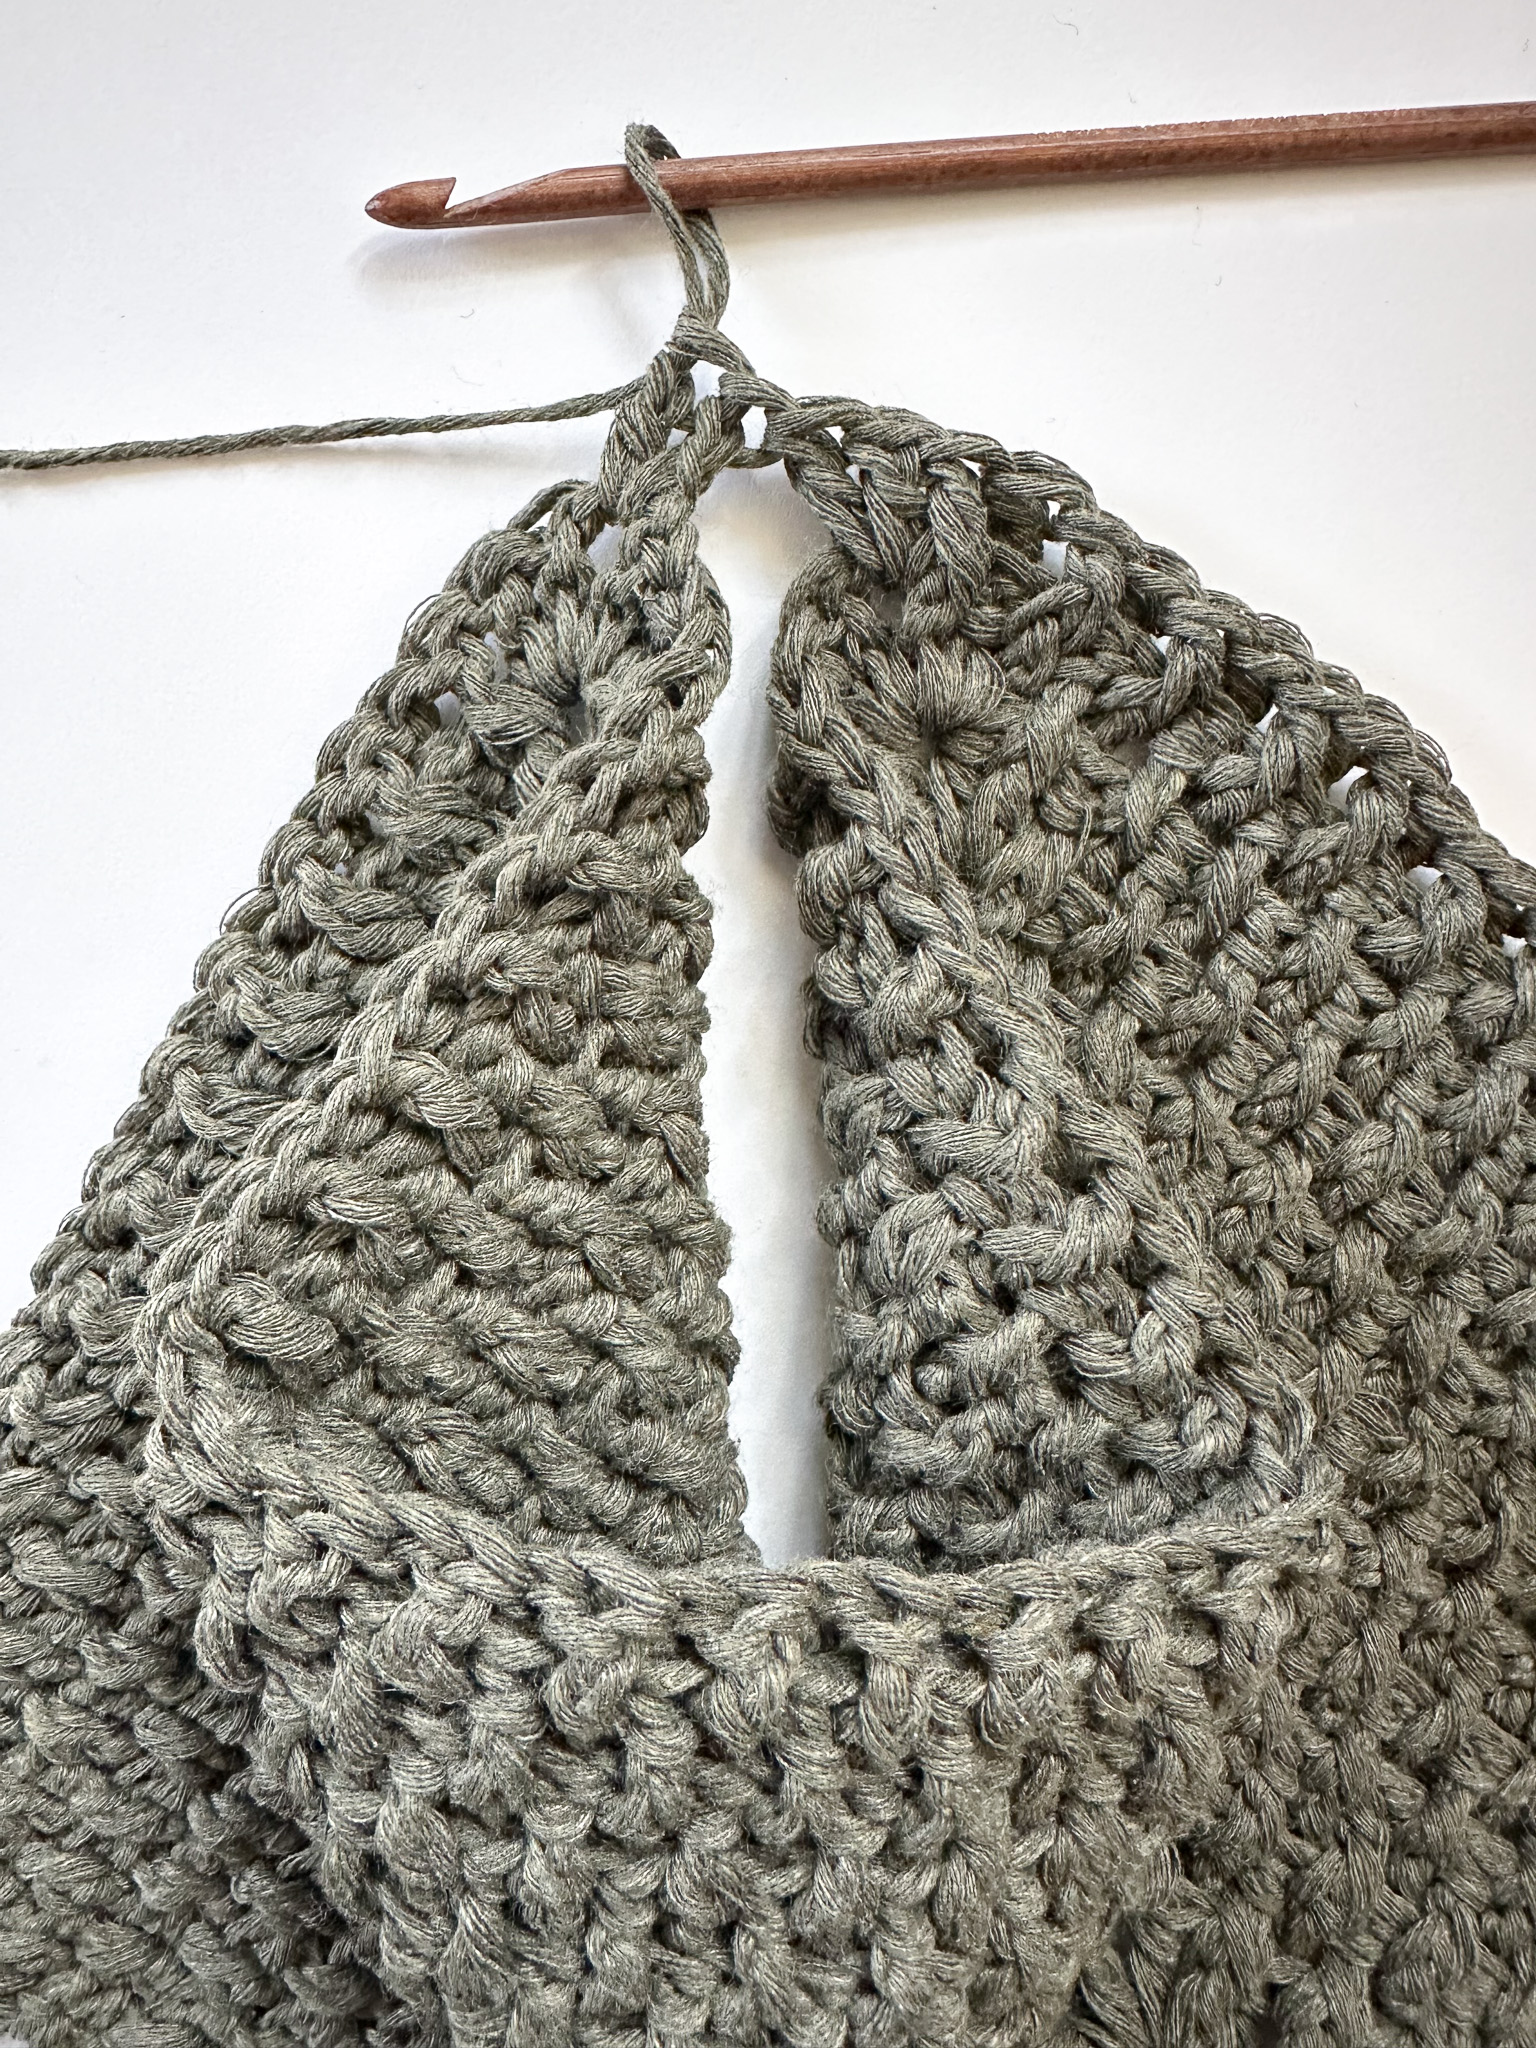
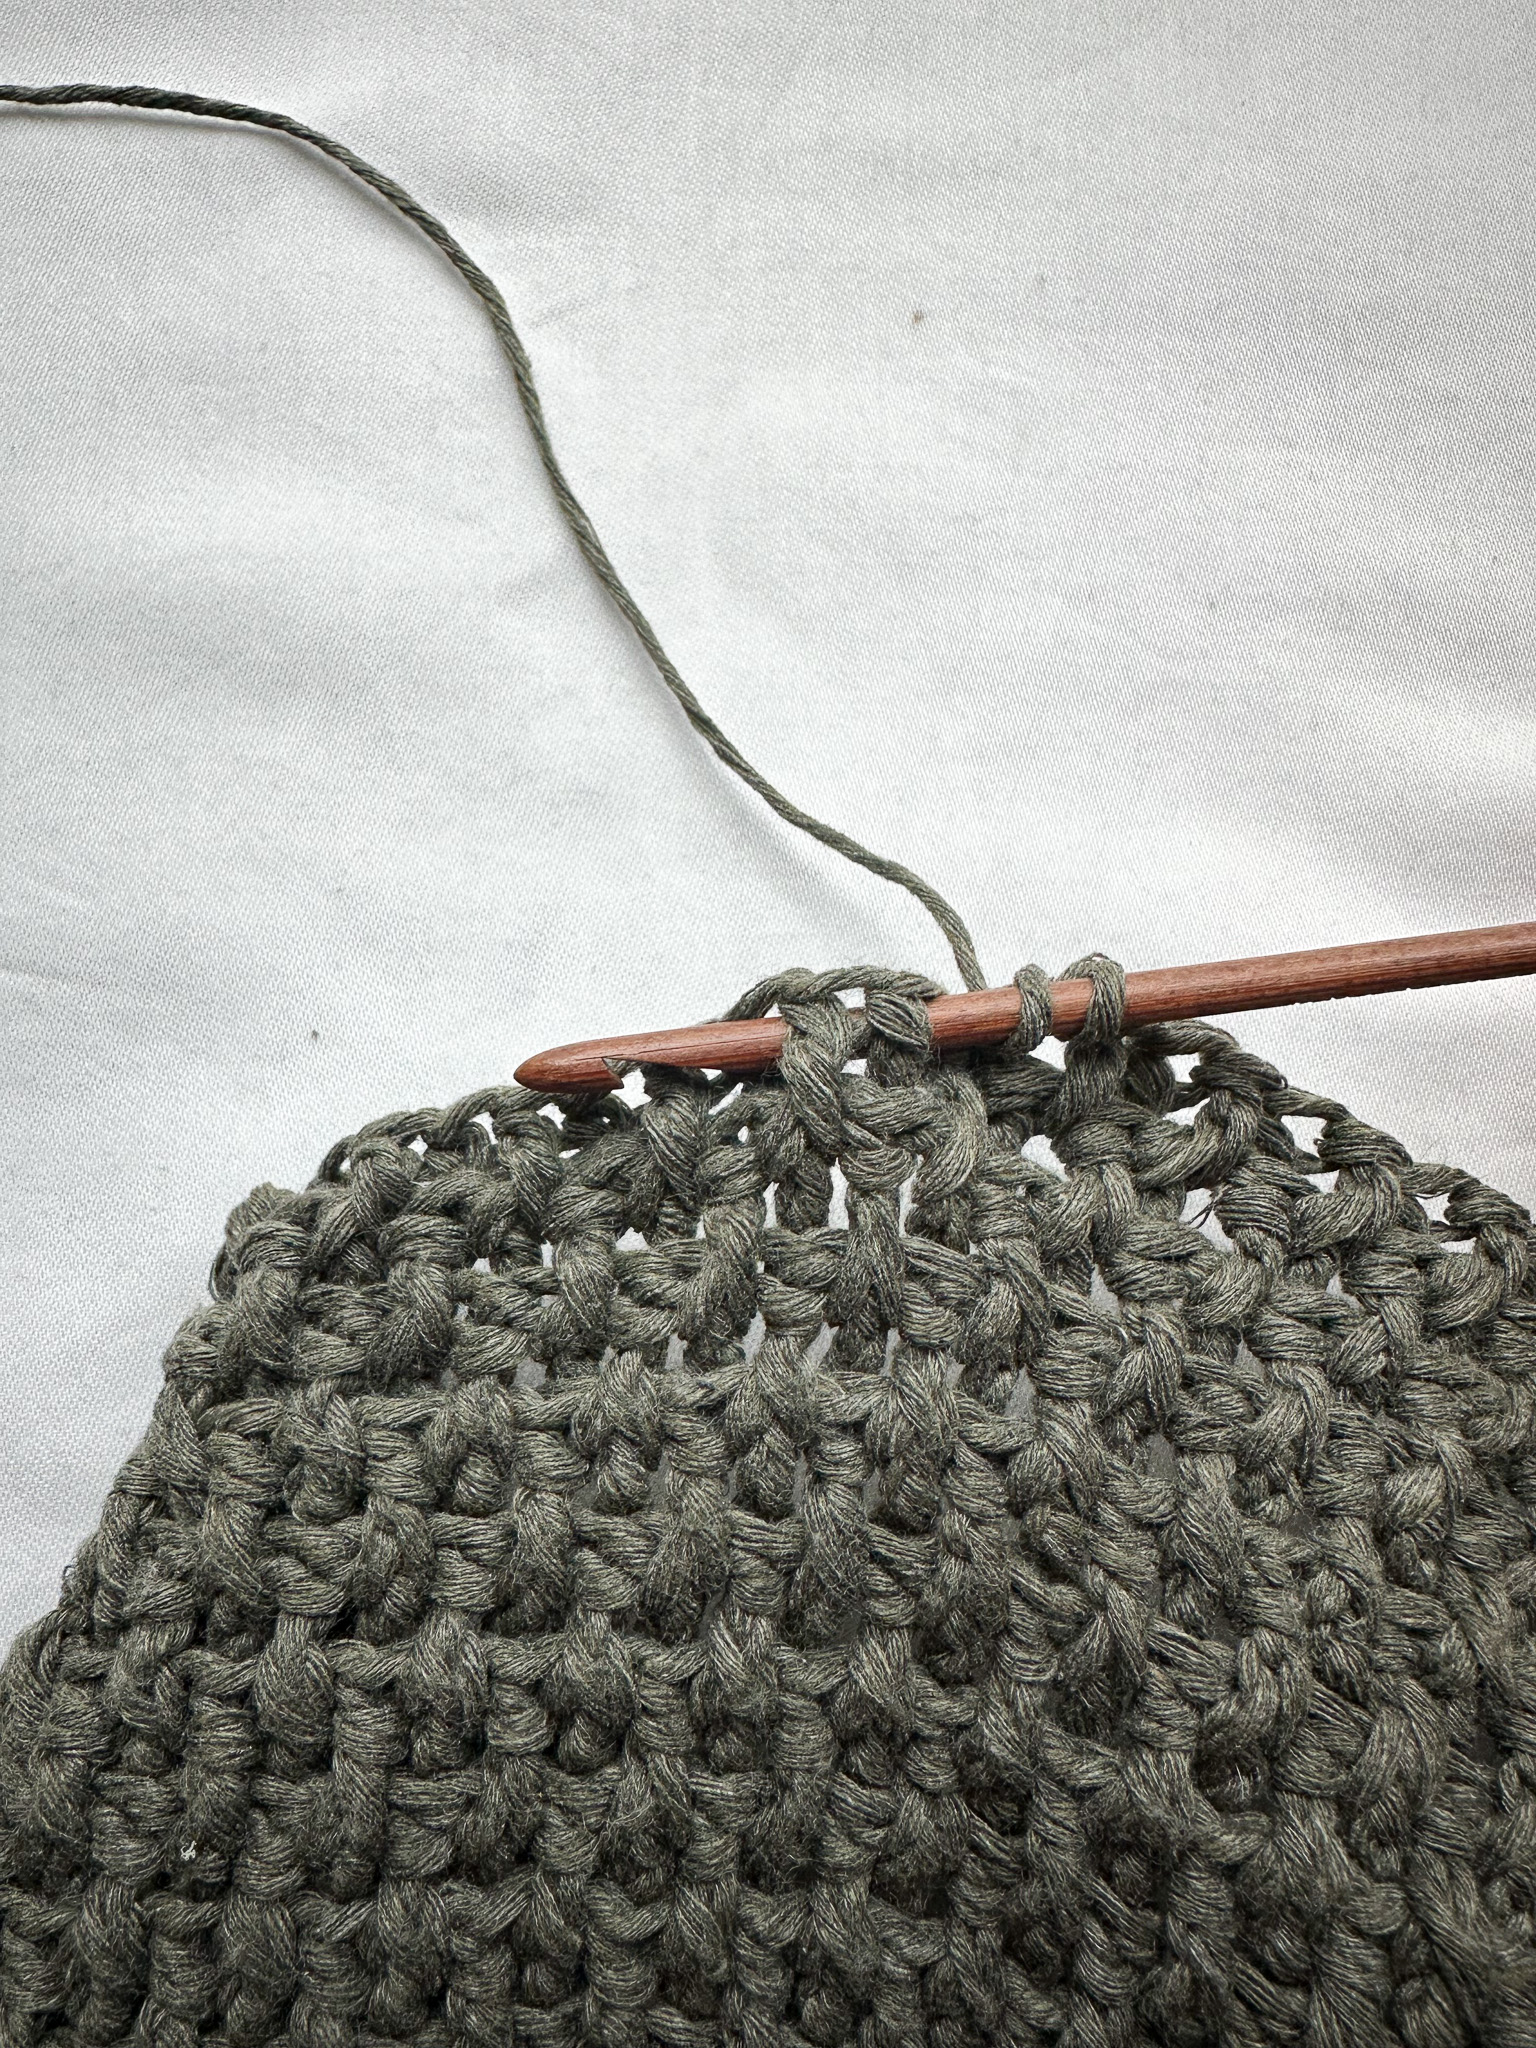
Row 6: 1 stacked single crochet, 1 front post double crochet, and 1 back post double crochet. Alternate front and back post double crochets until the first corner, where you work a corner increase. After the corner, continue alternating front and back post double crochets between corners. On this row, always start with a front post stitch immediately after the corners.
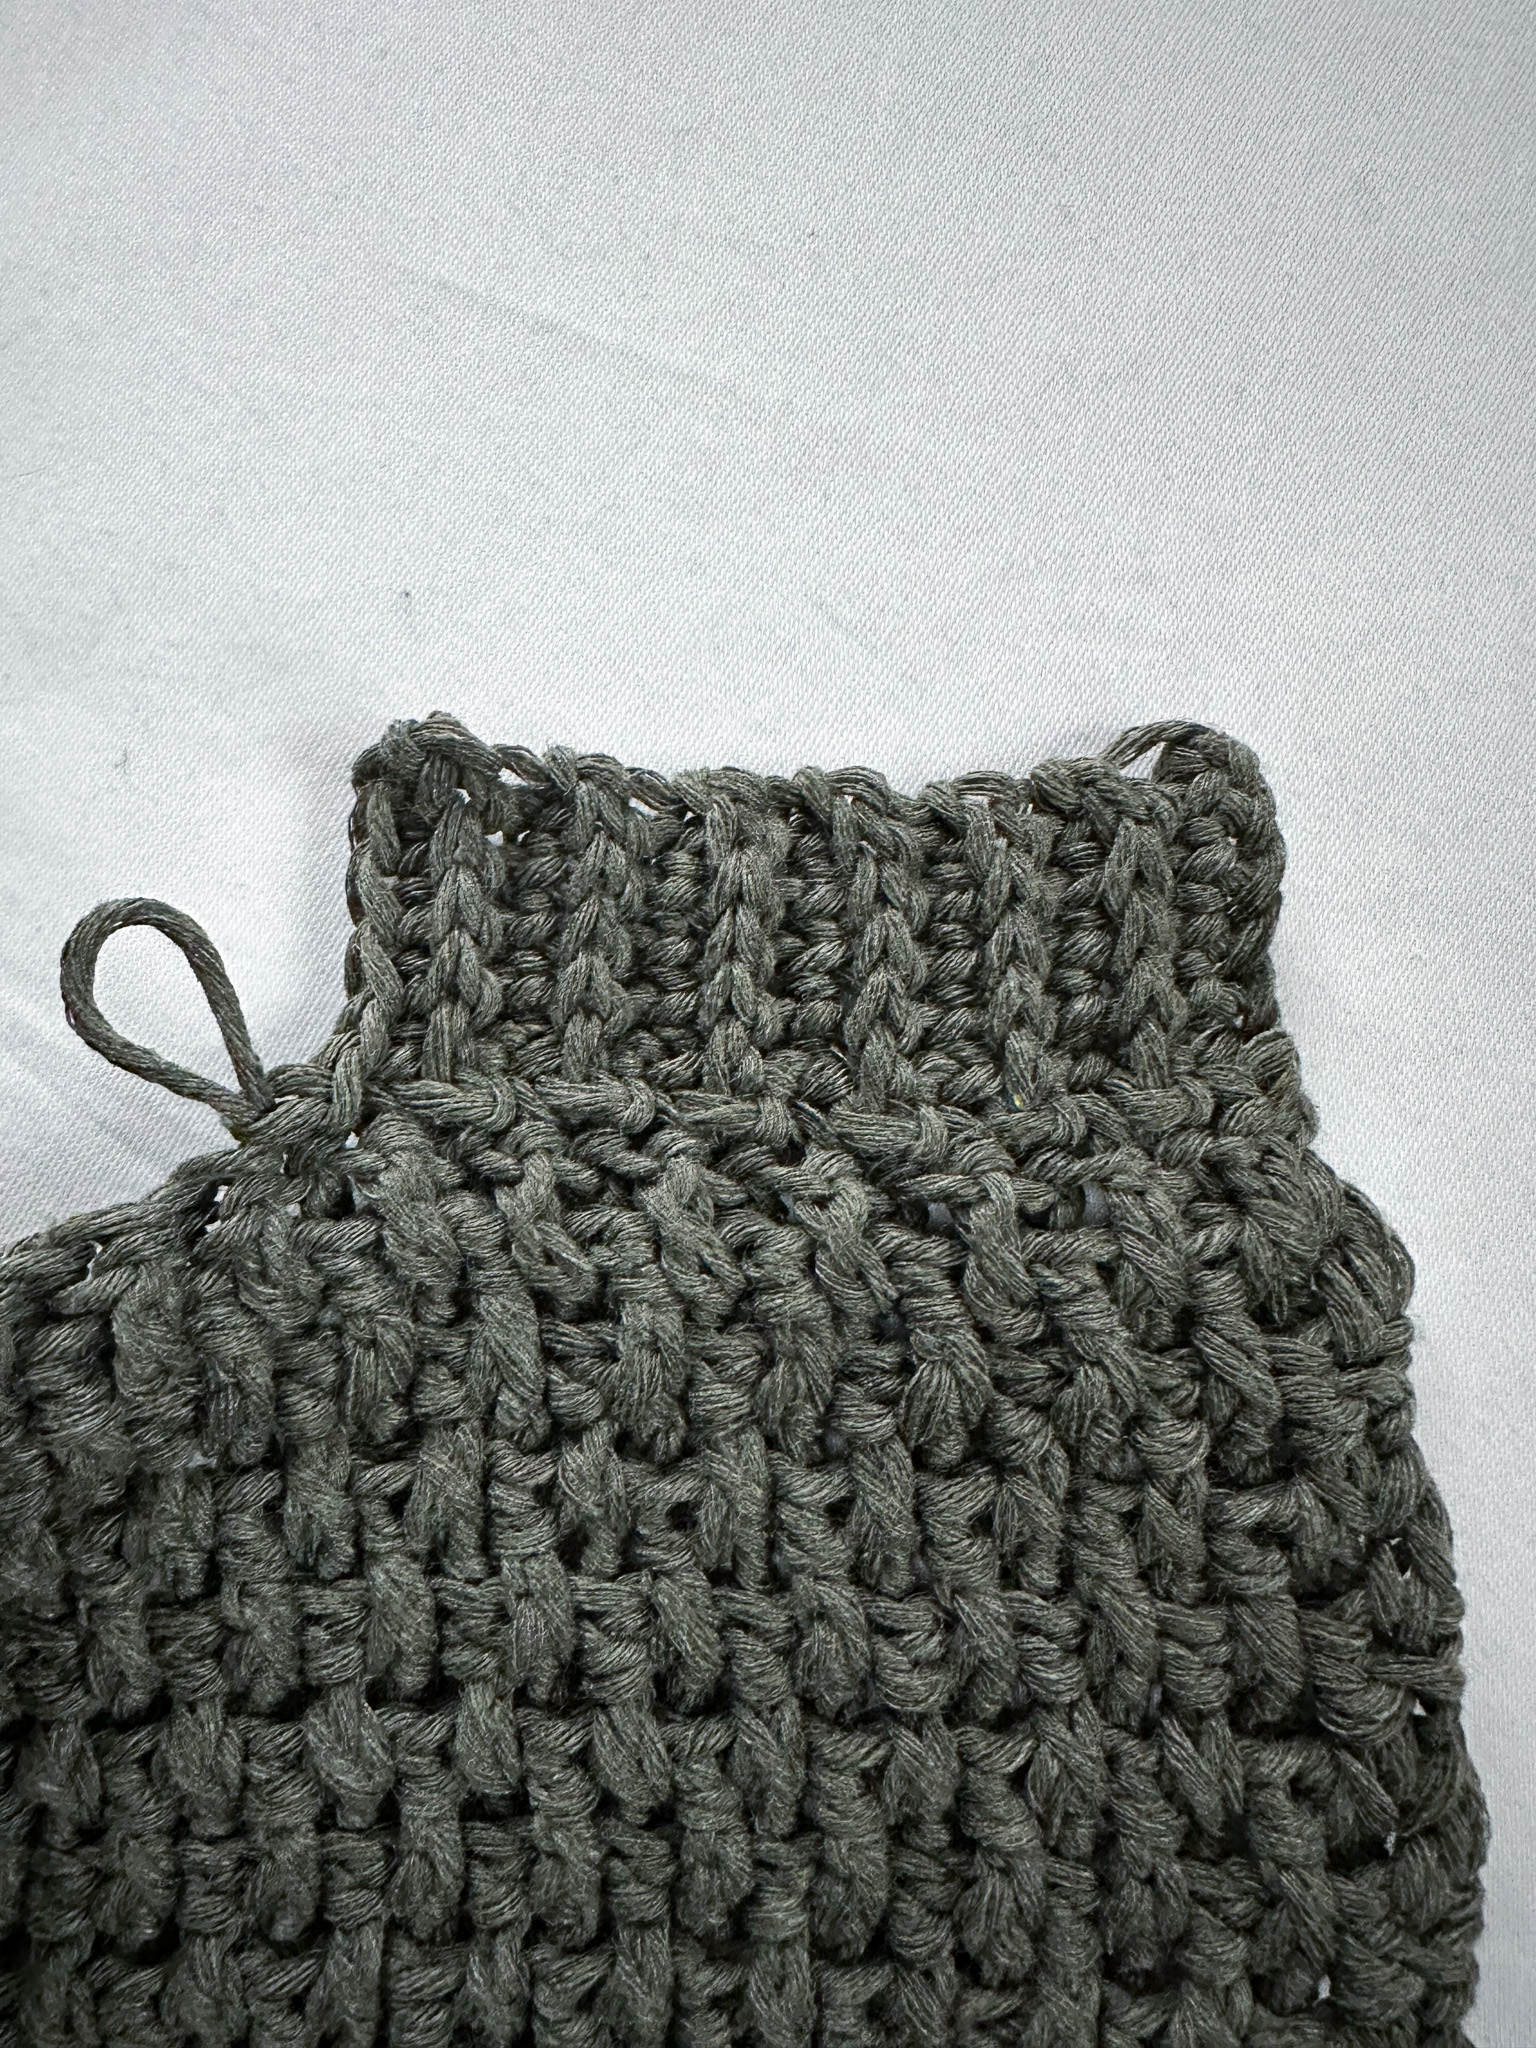
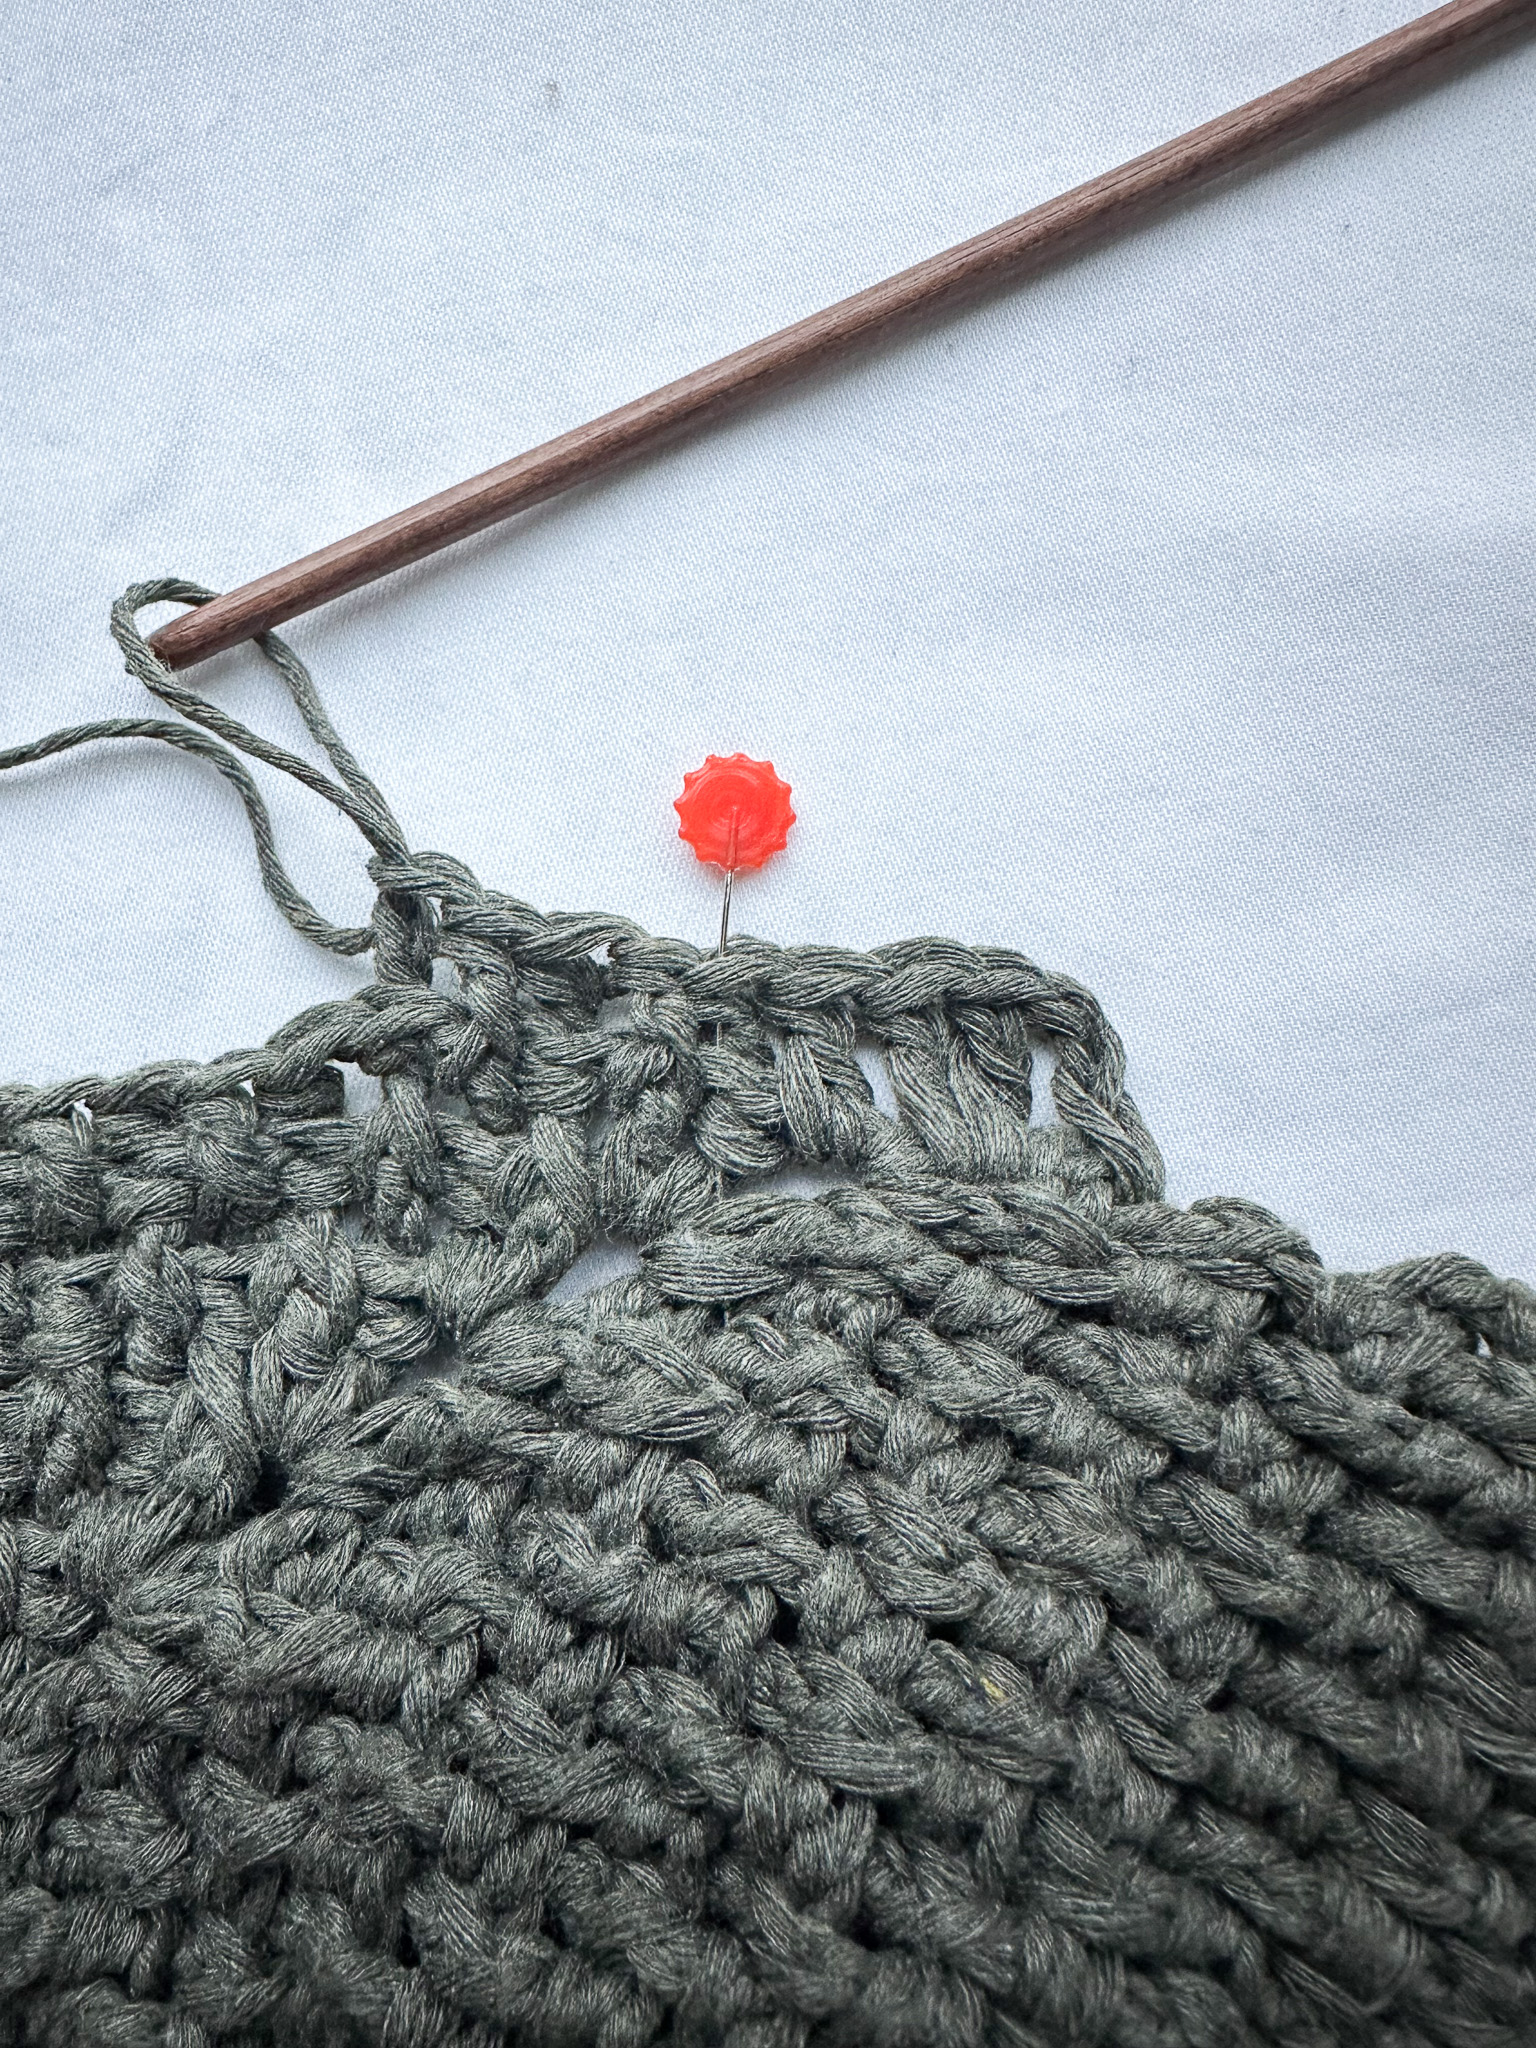
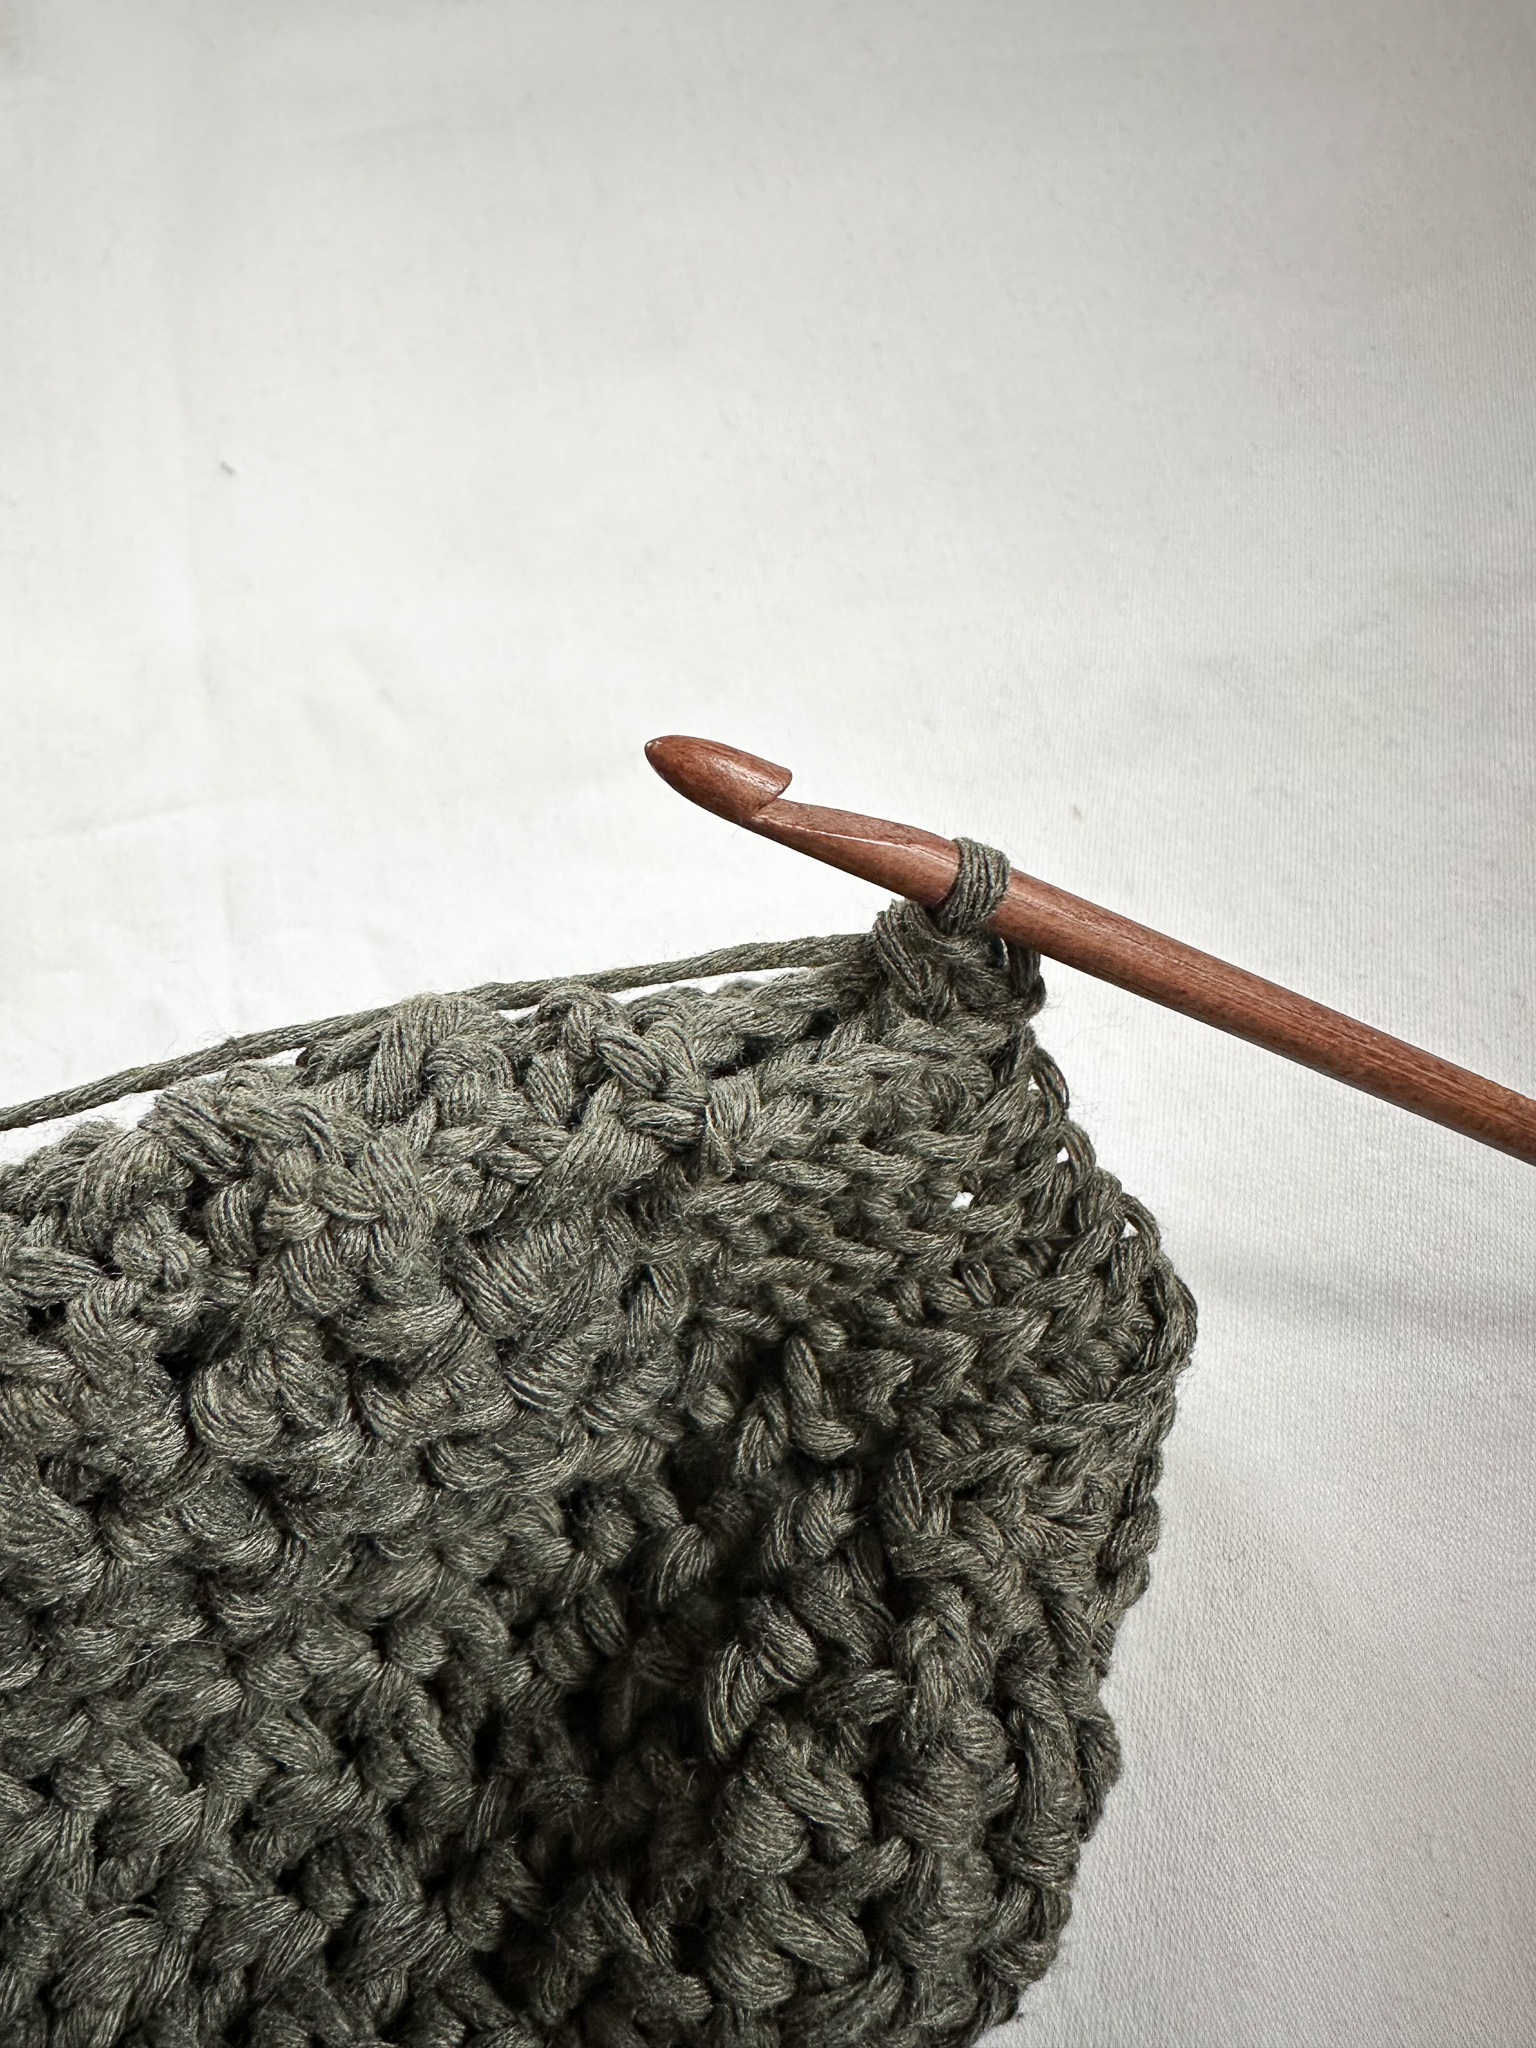
See the image for how it should look after Row 6.
Row 7: Do the same as Row 6, but start with a back post double crochet, then continue alternating back/front post double crochets across the row. On this row, always start with a back post stitch immediately after a corner.
Rows 8–14: Alternate Rows 6 and 7 until you have a total of 15 rows and 228 double crochets in total: (29 double crochet, corner, 54 double crochet, corner, 62 double crochet, corner, 54 double crochet, corner, 29 double crochet).
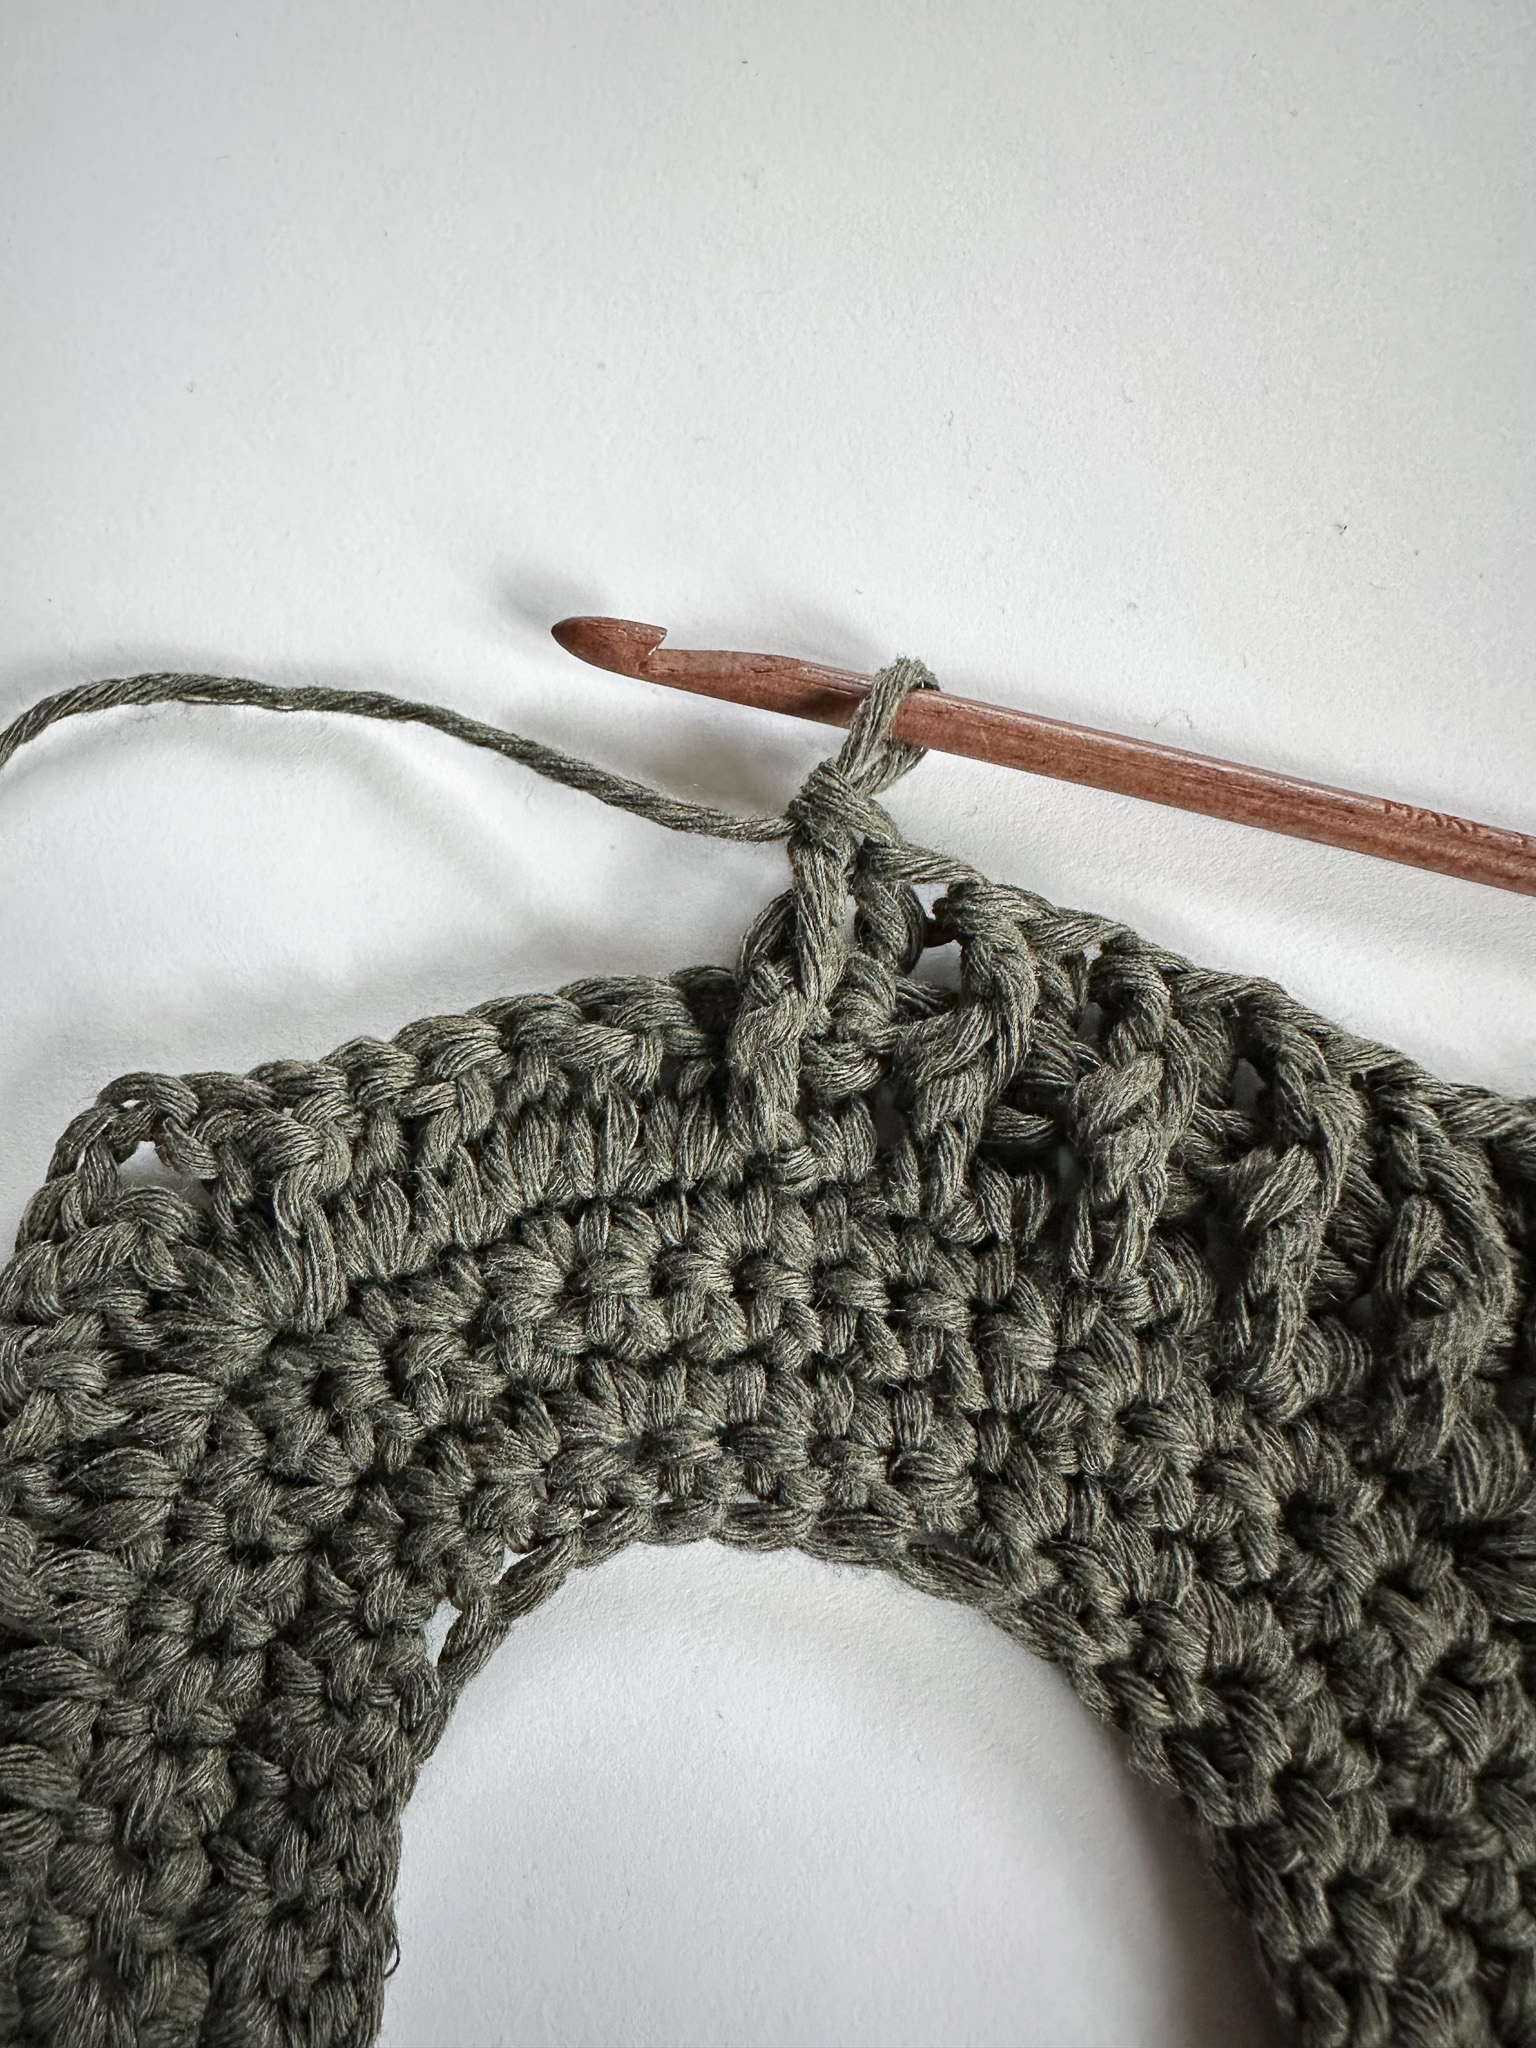
Row 15: Fold the piece in half so that the corners meet. Work back/front post double crochets up to the first corner. Make 2 double crochets in the chain space (this forms half a corner).
Row 15: Fold the piece in half so that the corners meet. Work back/front post double crochets up to the first corner. Make 2 double crochets in the chain space (this forms half a corner).
Continue alternating back/front post stitches on the back section, then join corners 3 and 4 in the same way as corners 1 and 2. You should now have a total of 128 stitches on the row.
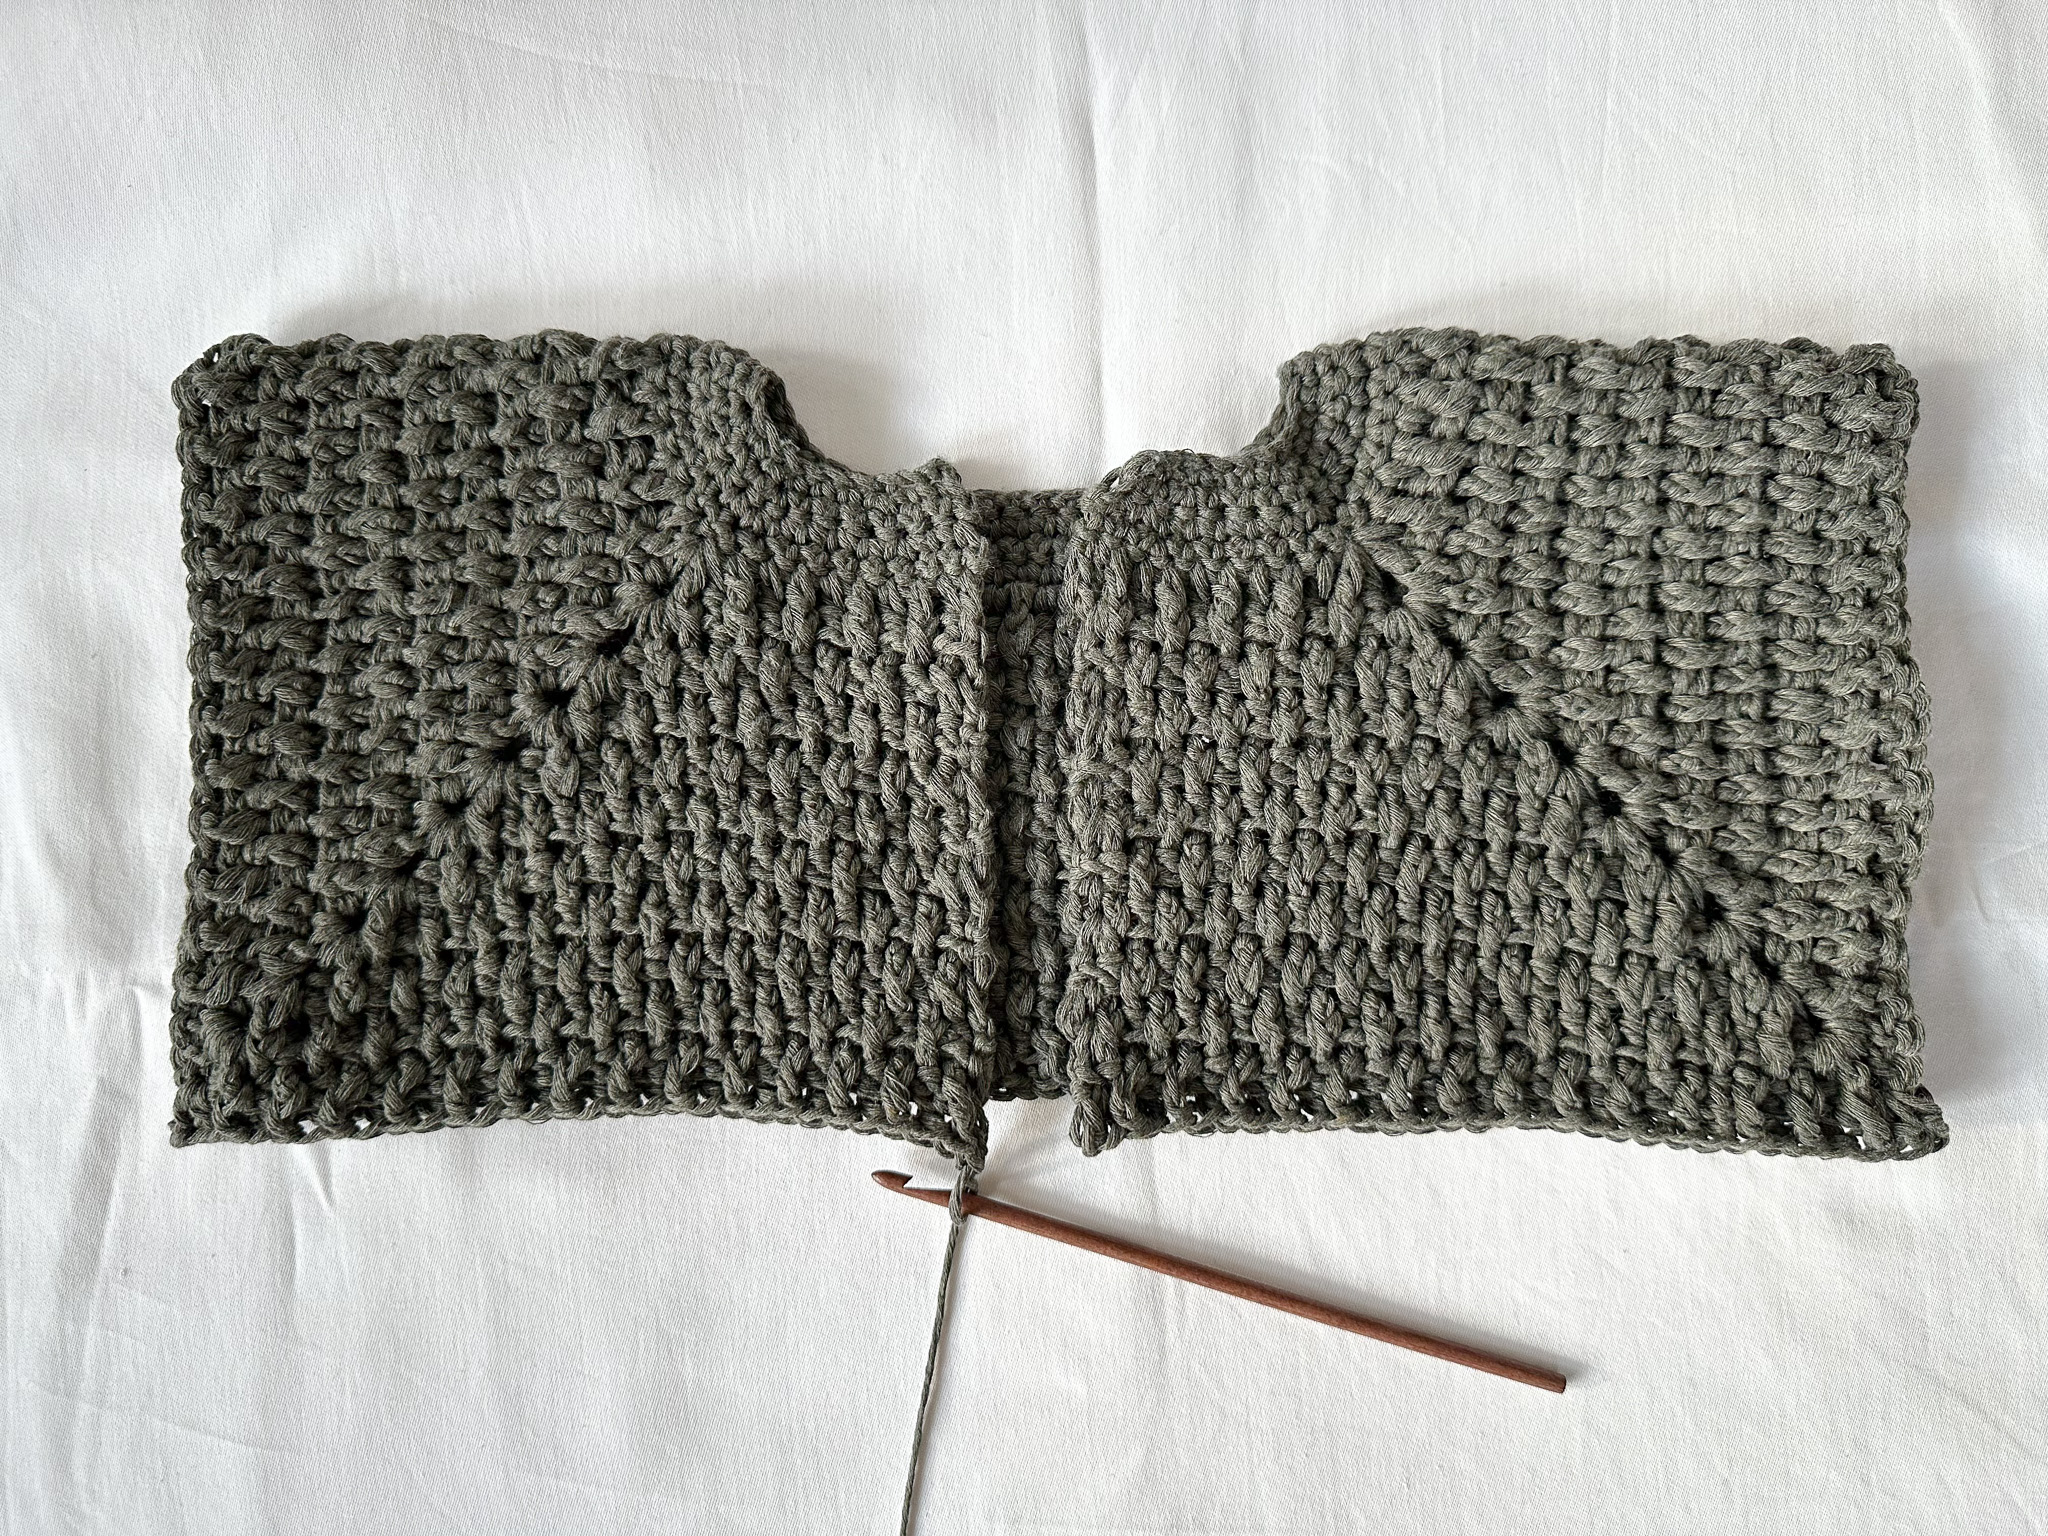
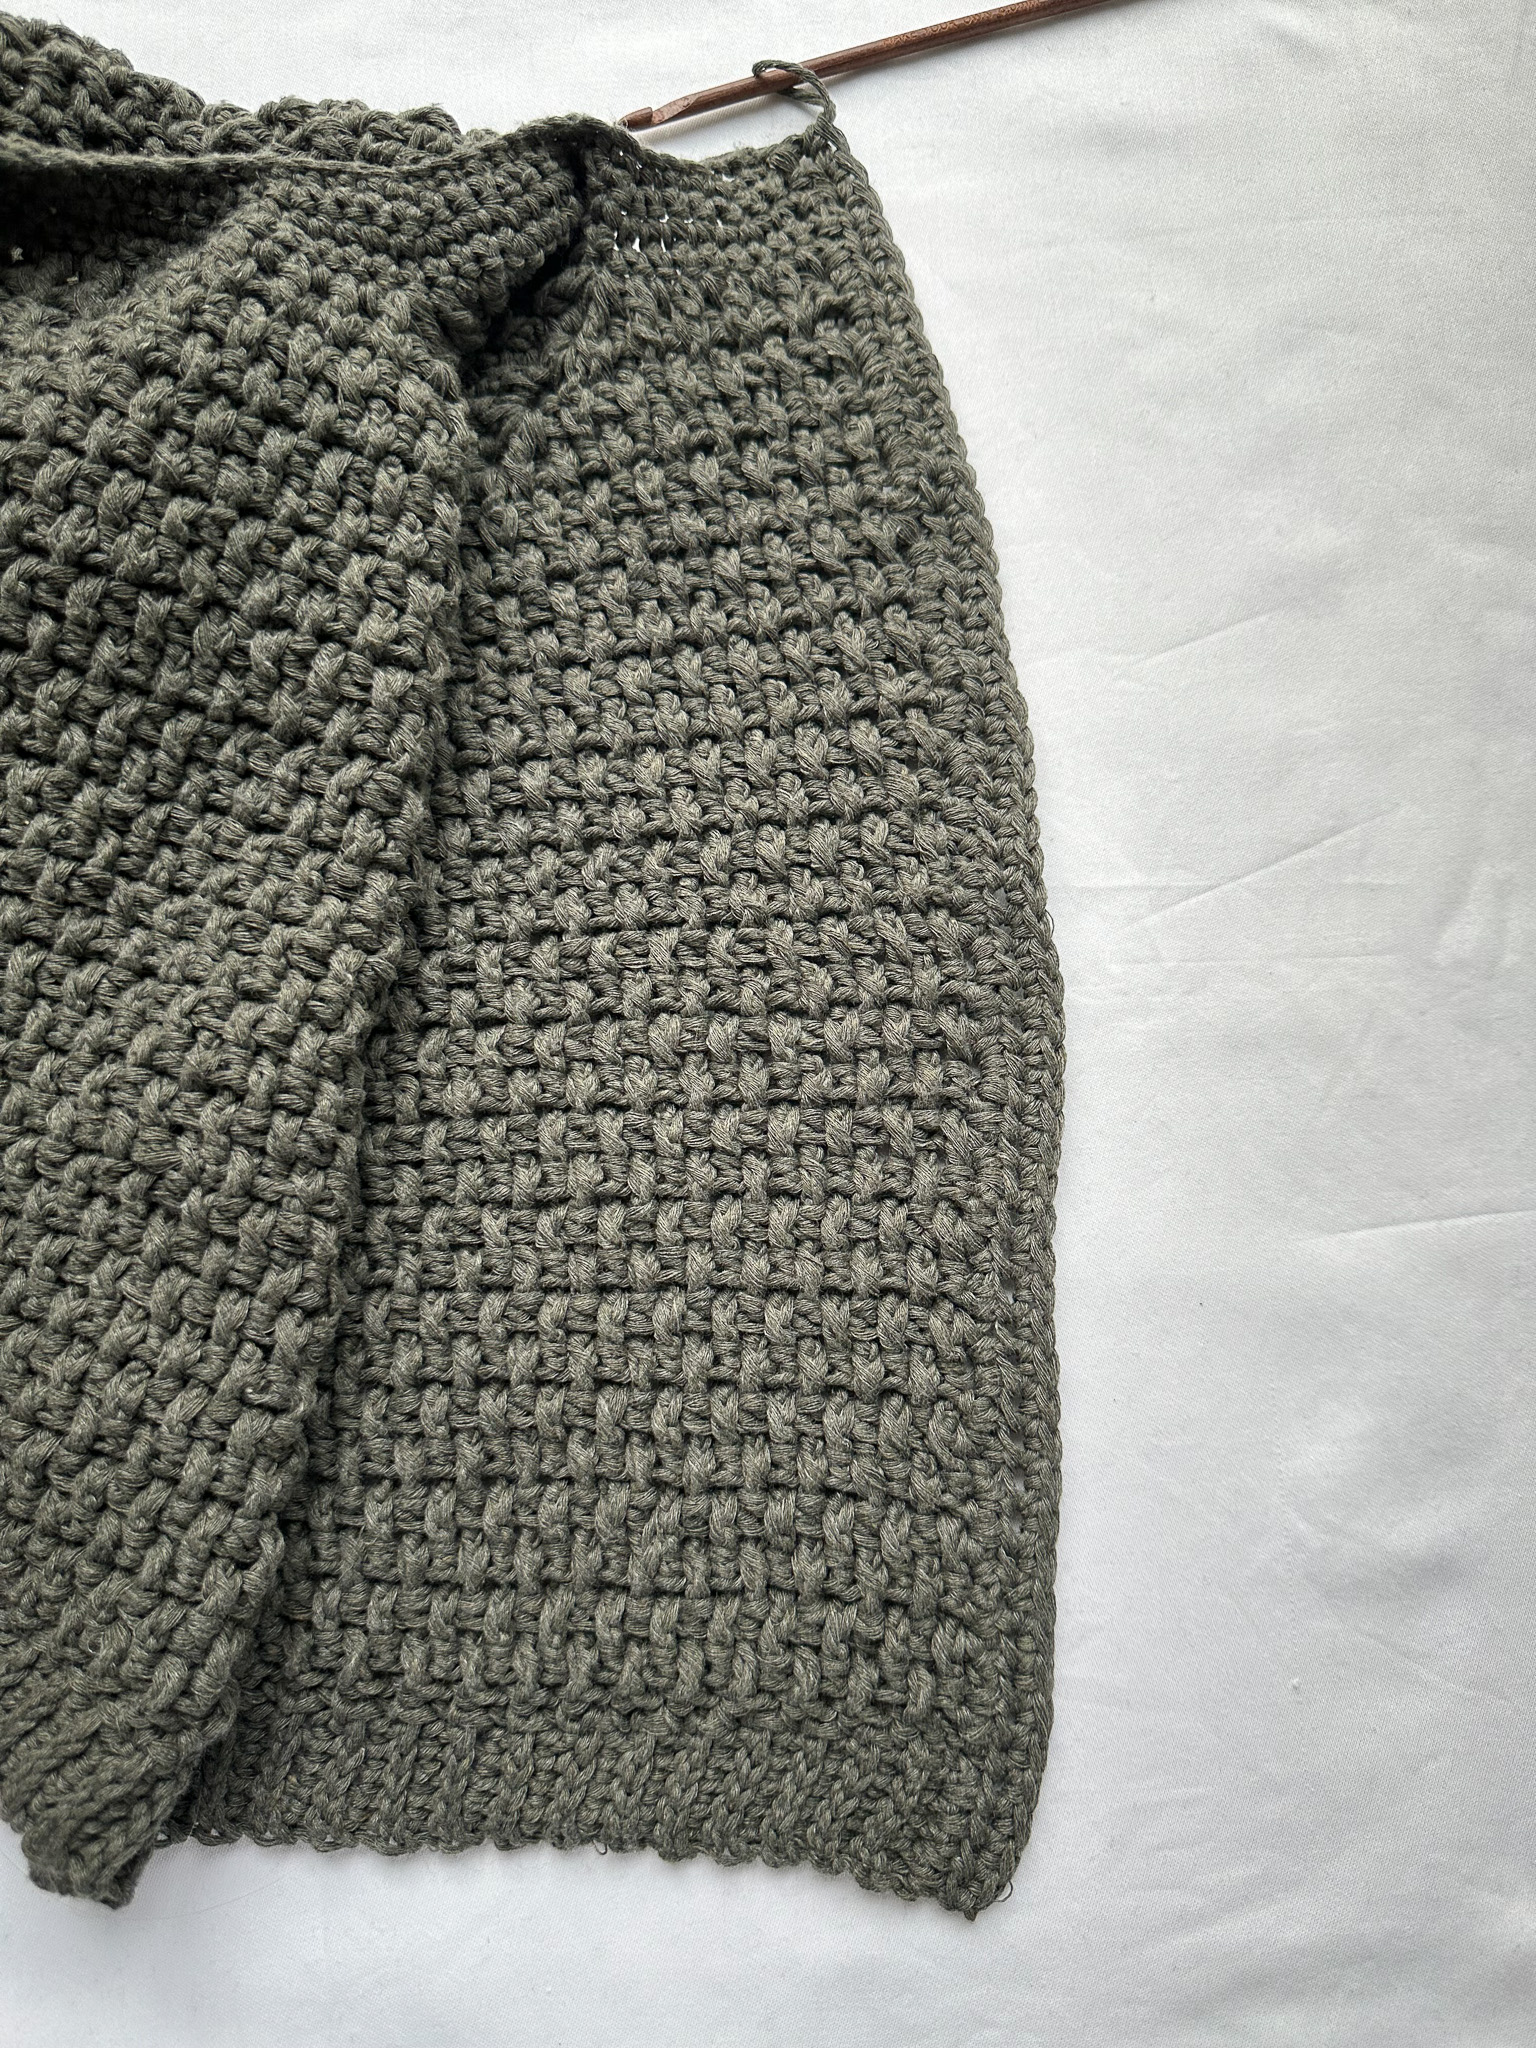
Rows 16–34: Crochet 128 double crochets back and forth for a total of 19 rows, or until the sweater reaches your desired length. The sweater in the photo measures 17 cm between rows 16–34. Keep in mind that the ribbing at the bottom of the sweater will be added later (about 2–2.5 cm, or as wide as you like). Do not cut the yarn.
When you’re happy with the length, it’s time to work the ribbing. In the photo, the ribbing is 5 stitches wide, but you can make it narrower or wider by adjusting the number of chains you start with.
Step 1: Make a chain with the number of stitches you want for the ribbing + 1. In this example, 5 + 1 chains (6 in total).

Step 2: Skip the first chain stitch, then single crochet 5 stitches back along the chain toward the sweater. Make 2 slip stitches into the edge of the sweater. Turn the sweater.
Step 3: Skip the 2 slip stitches you just made, and crochet 5 single crochets in the back loop only (the loop farthest from you). Chain 1. Turn the sweater.
Step 4: Skip the chain stitch, crochet 5 single crochets in the back loop only (the loop farthest from you). Make 2 slip stitches in the edge of the sweater, then turn the sweater.
Repeat steps 3 and 4 until you’ve gone all the way around. Occasionally check that you still have 5 stitches across—it's easy to miss a stitch after a few rounds, which can make the edge uneven.
Once you’ve gone all the way around, finish with one round of single crochets (as in step 4) and secure the yarn in the edge of the sweater with a slip stitch.
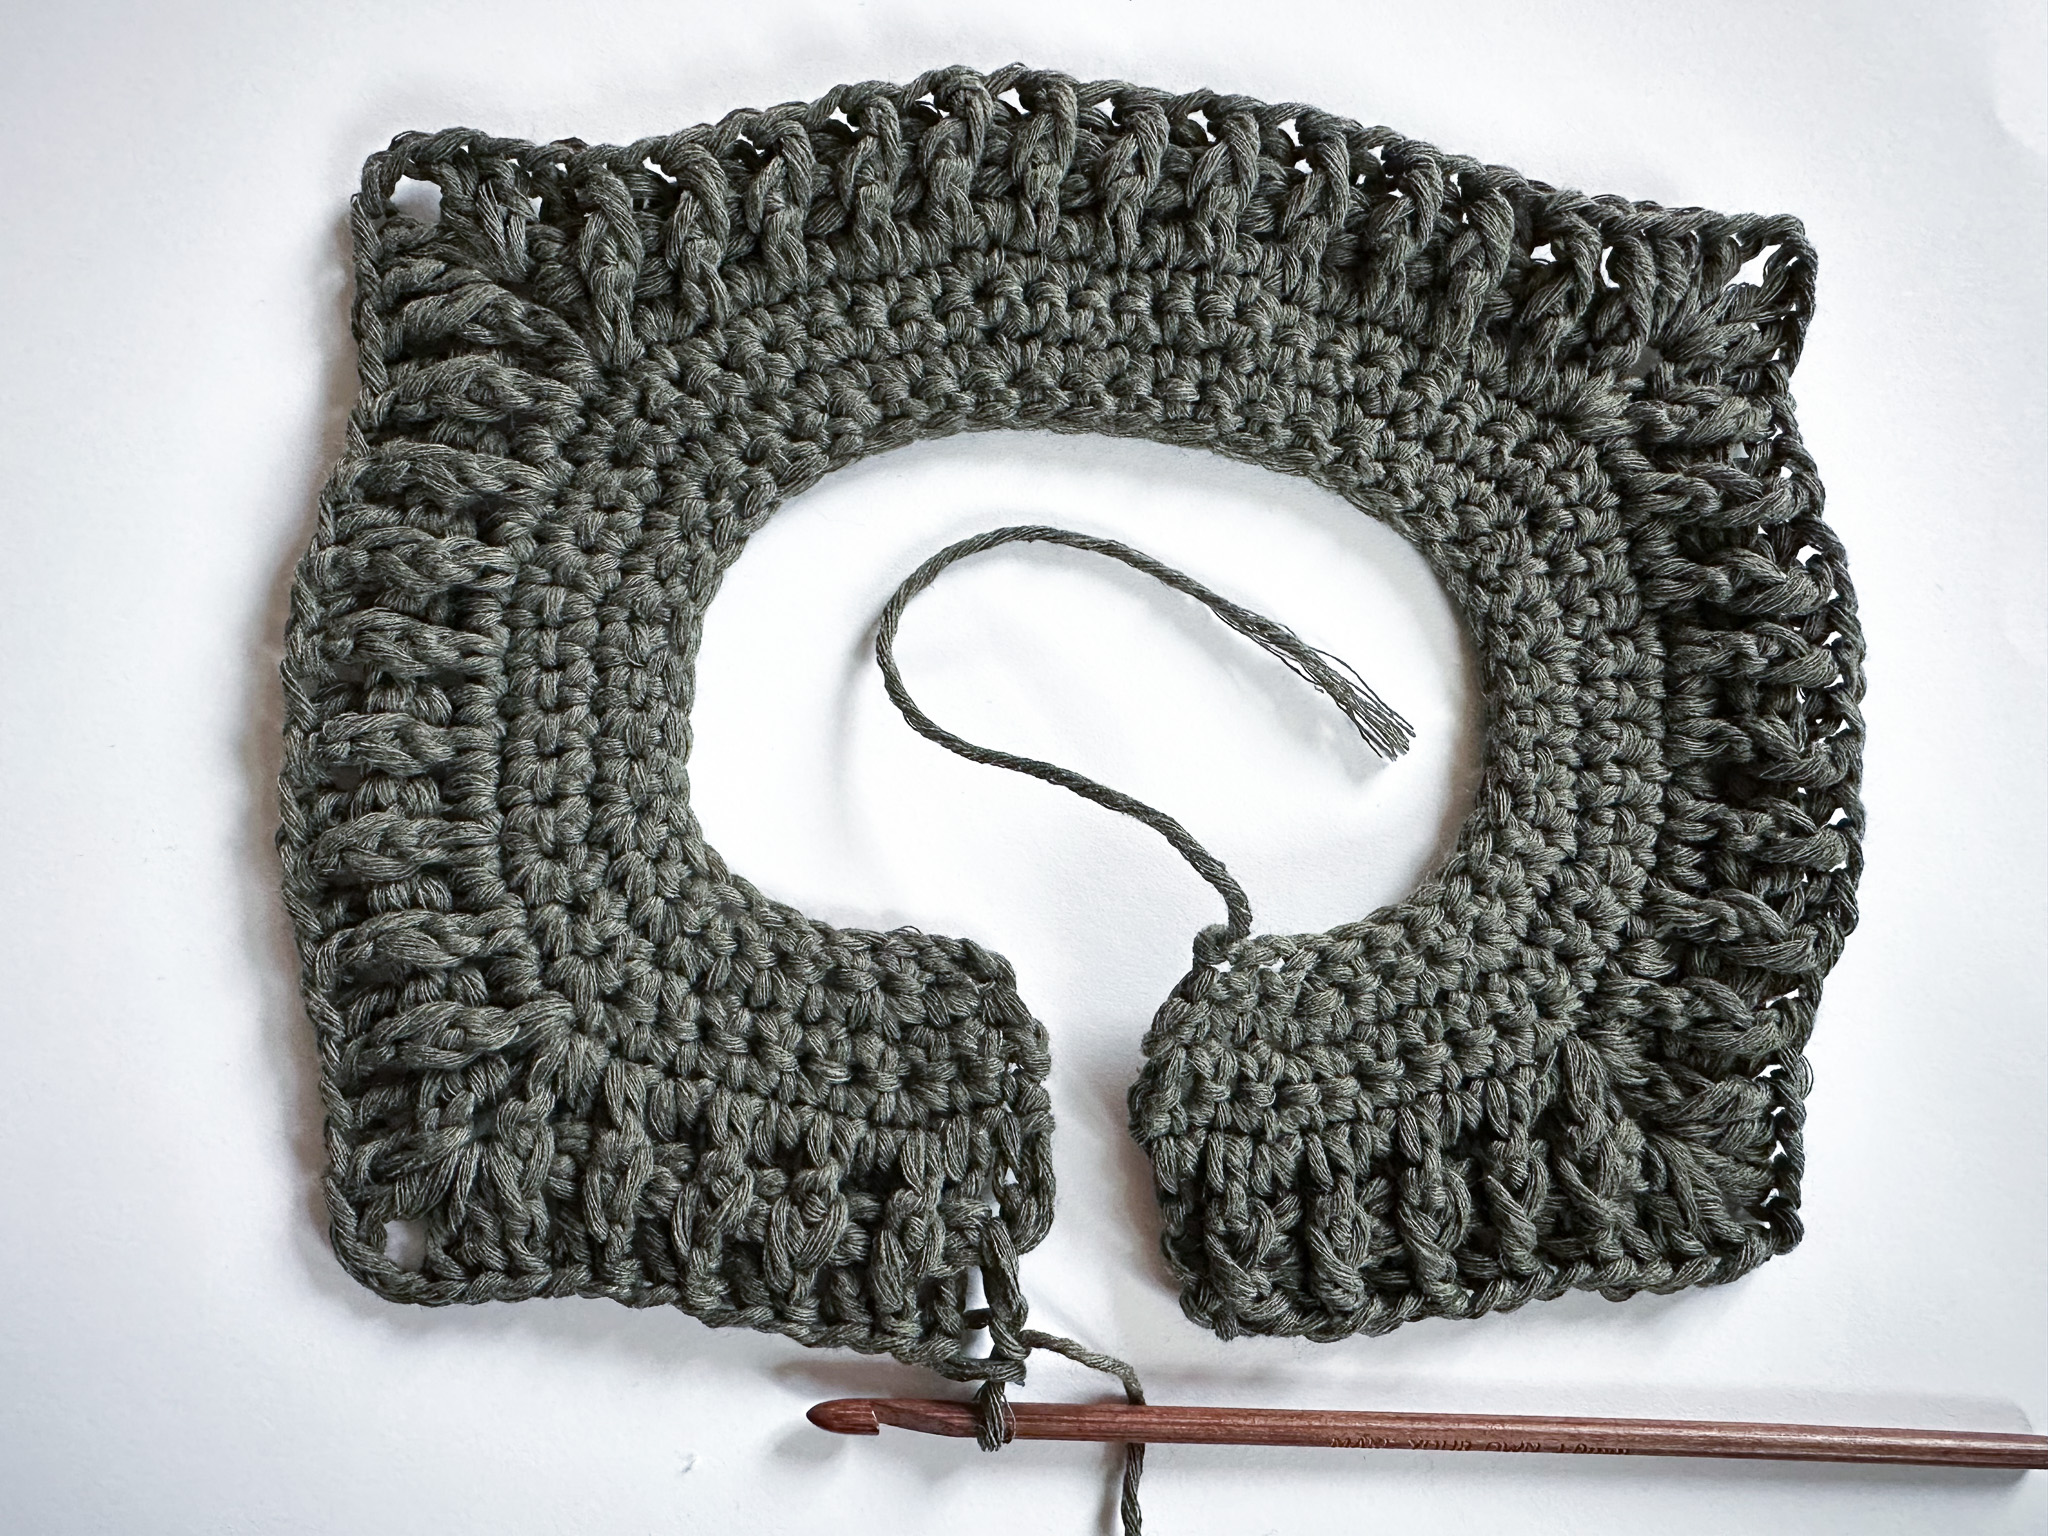
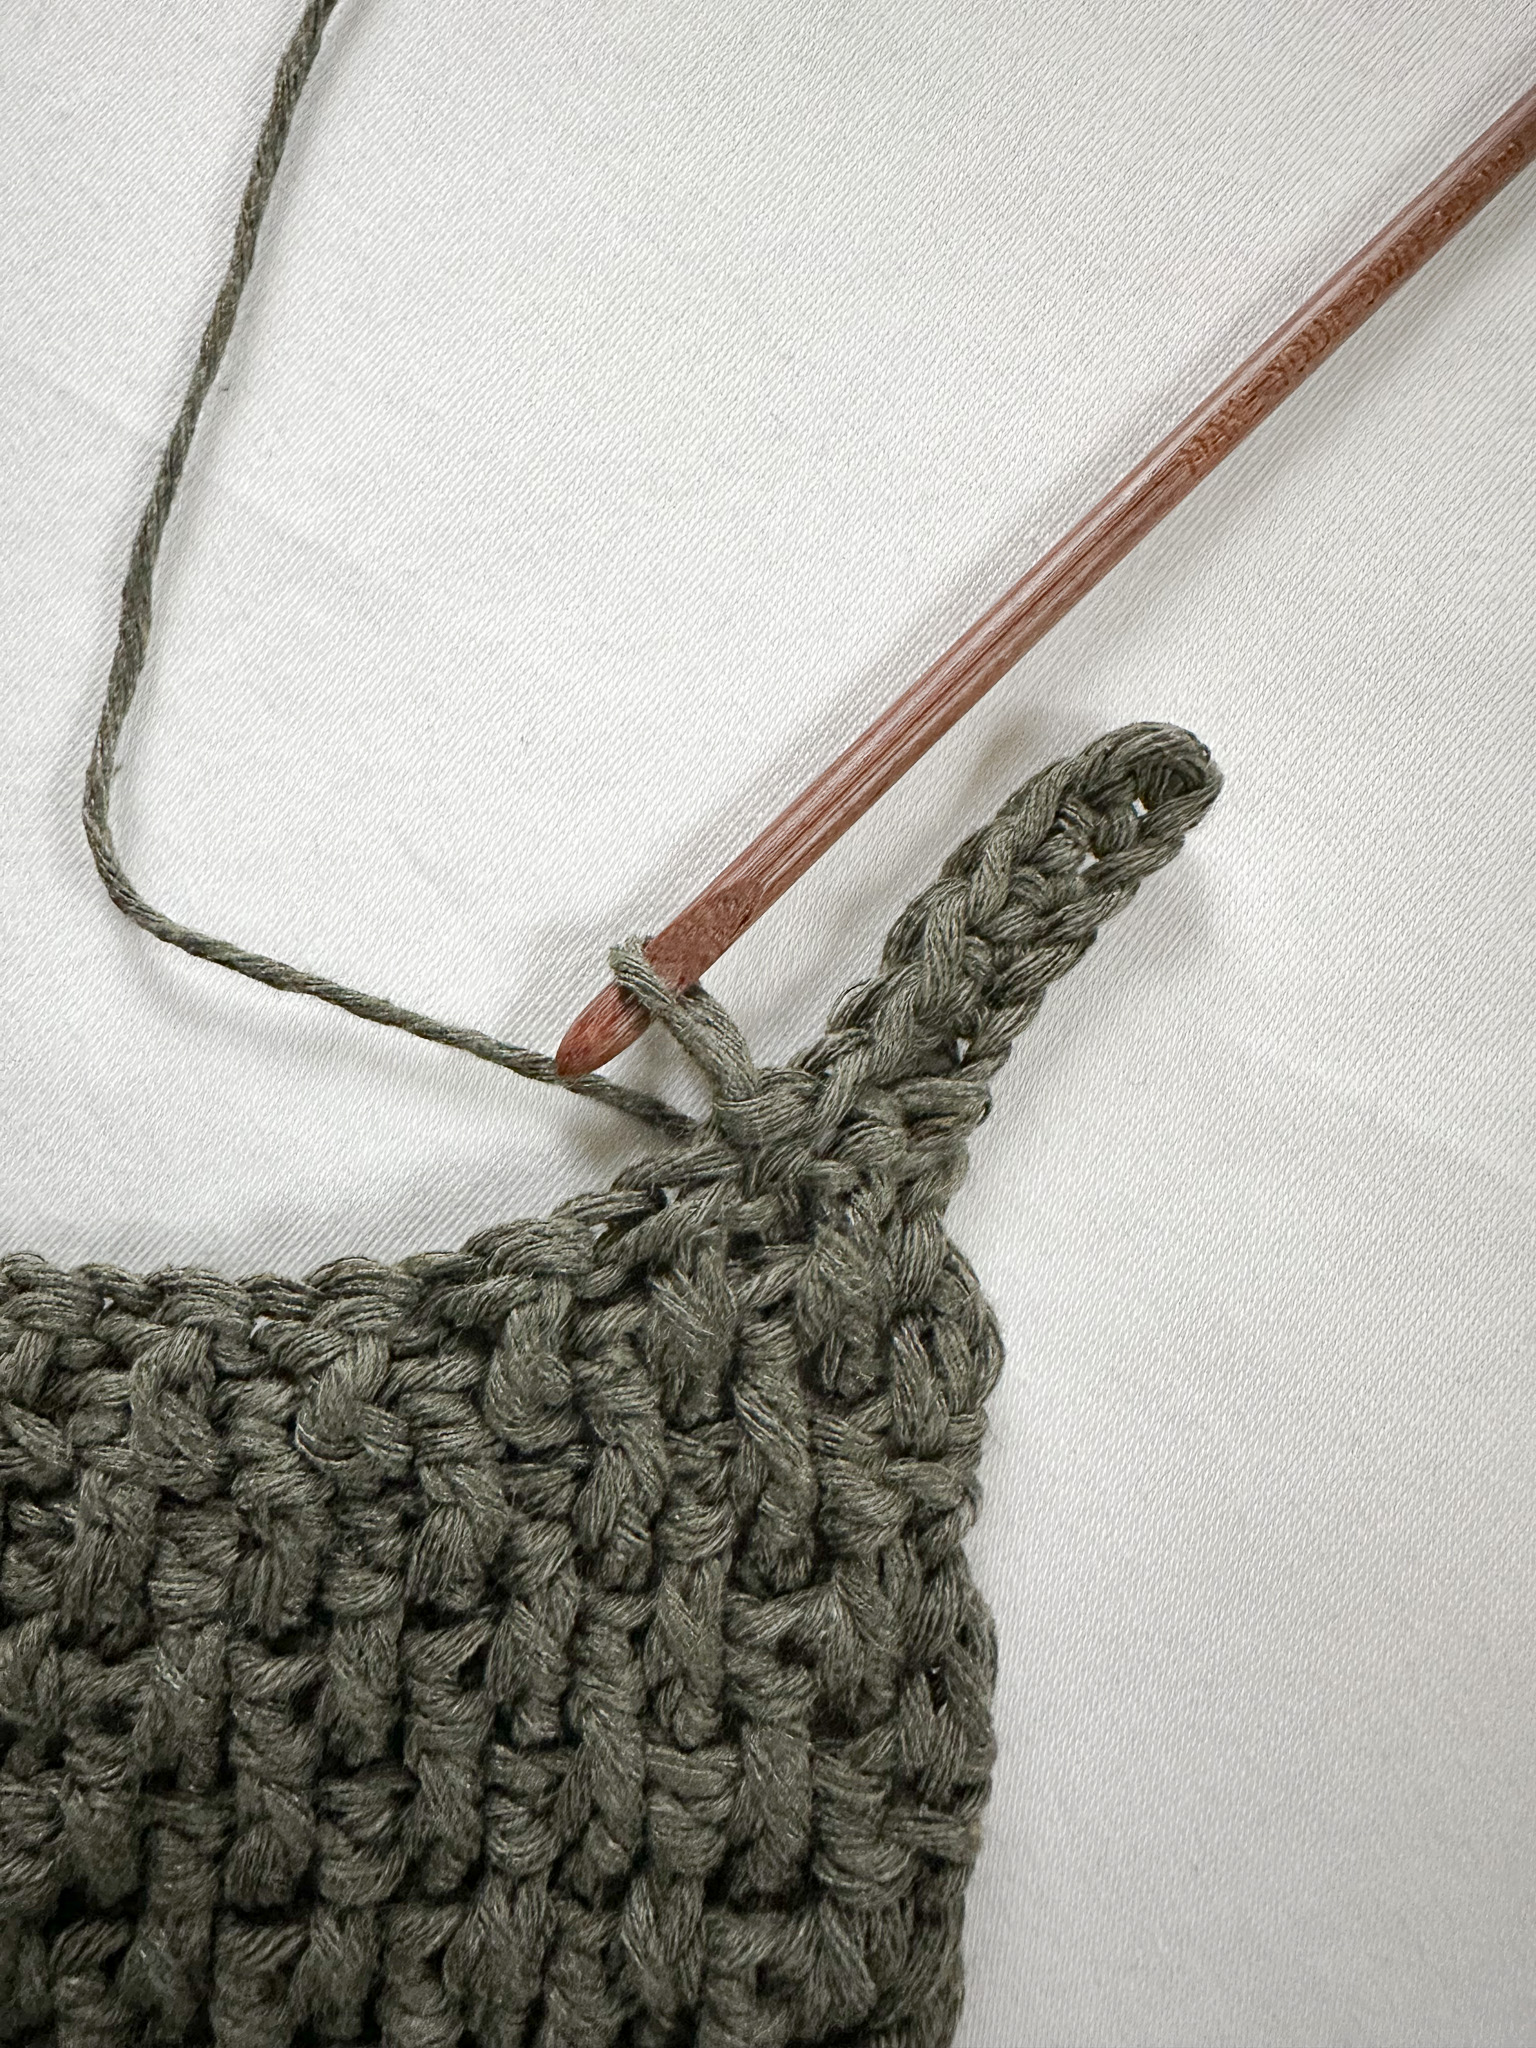
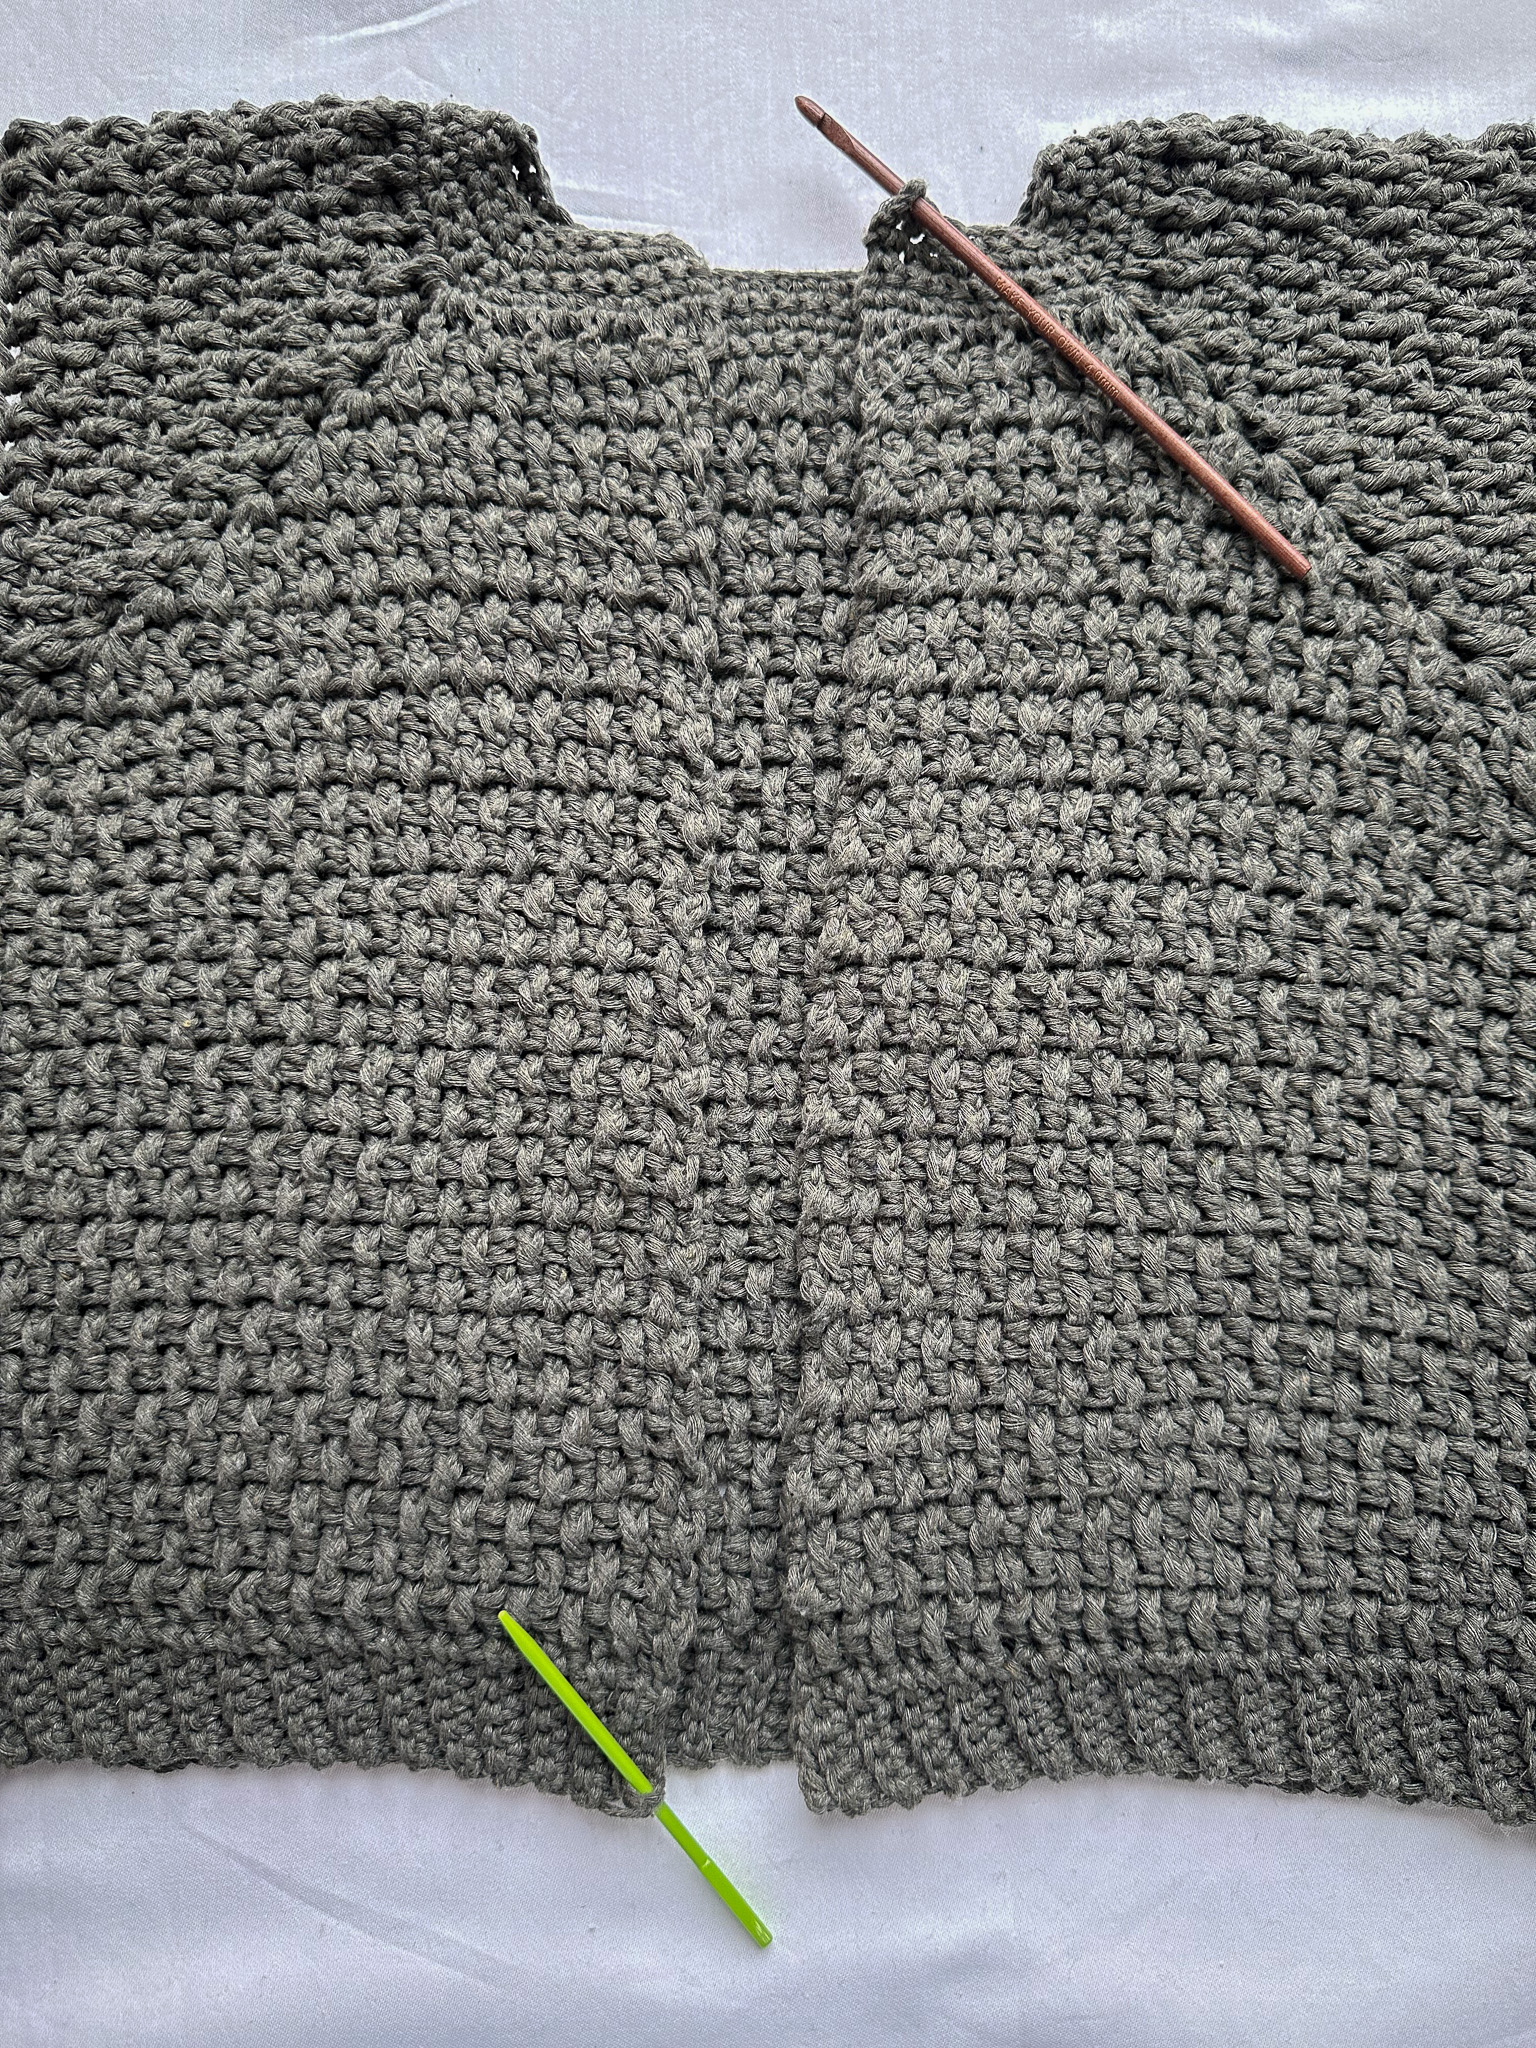
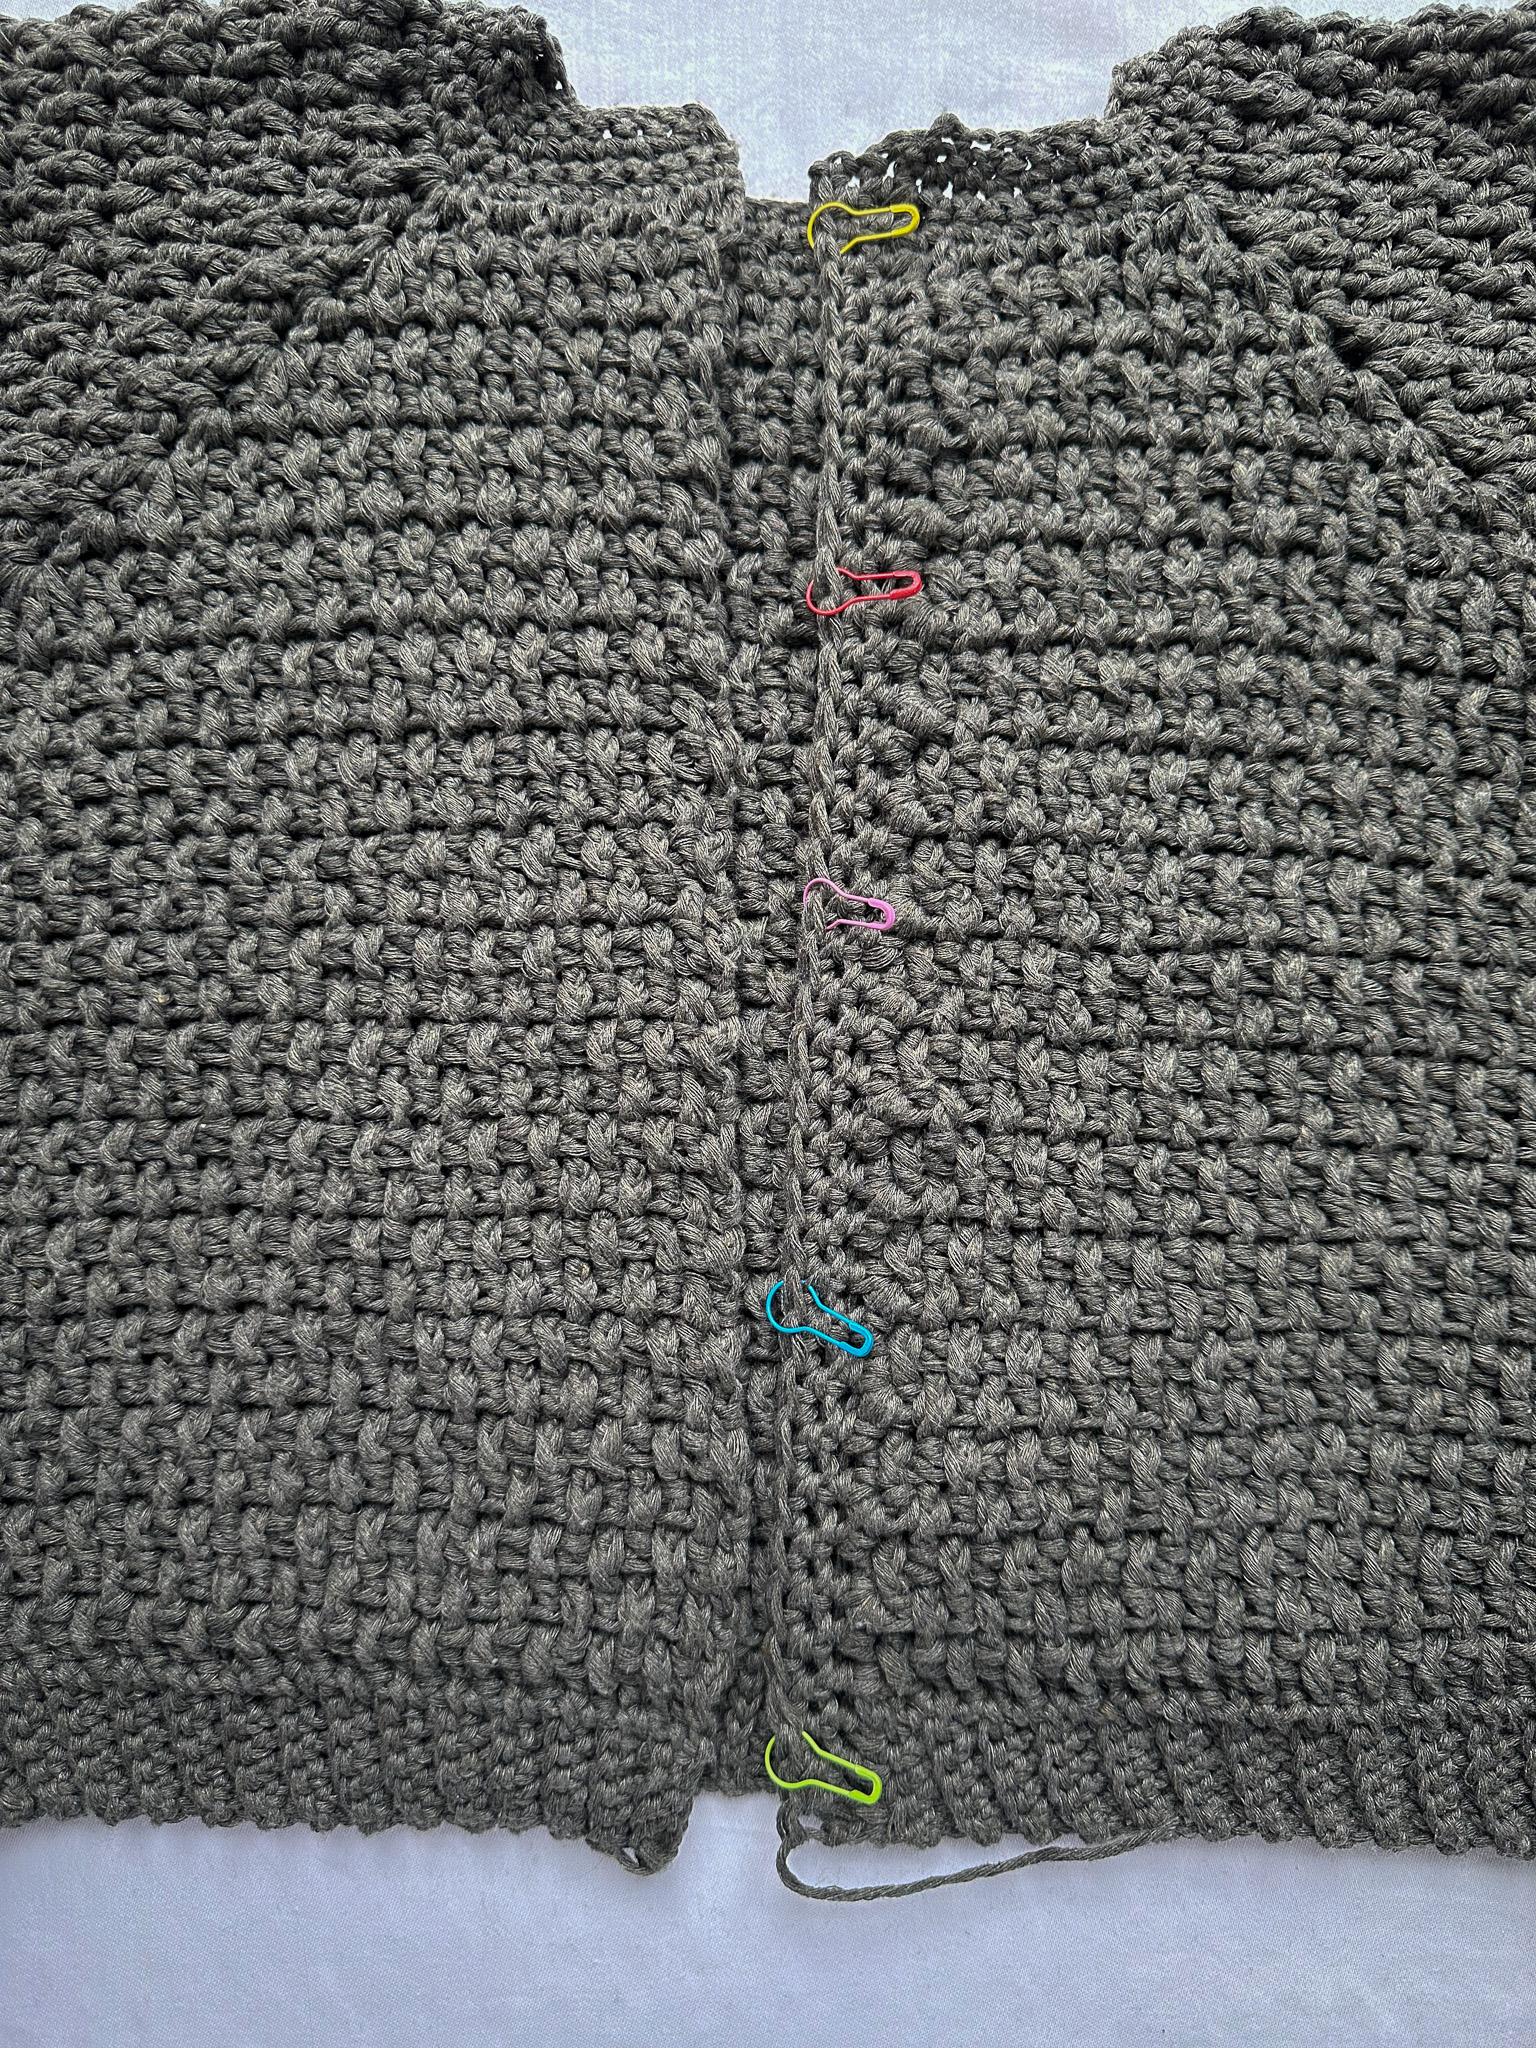
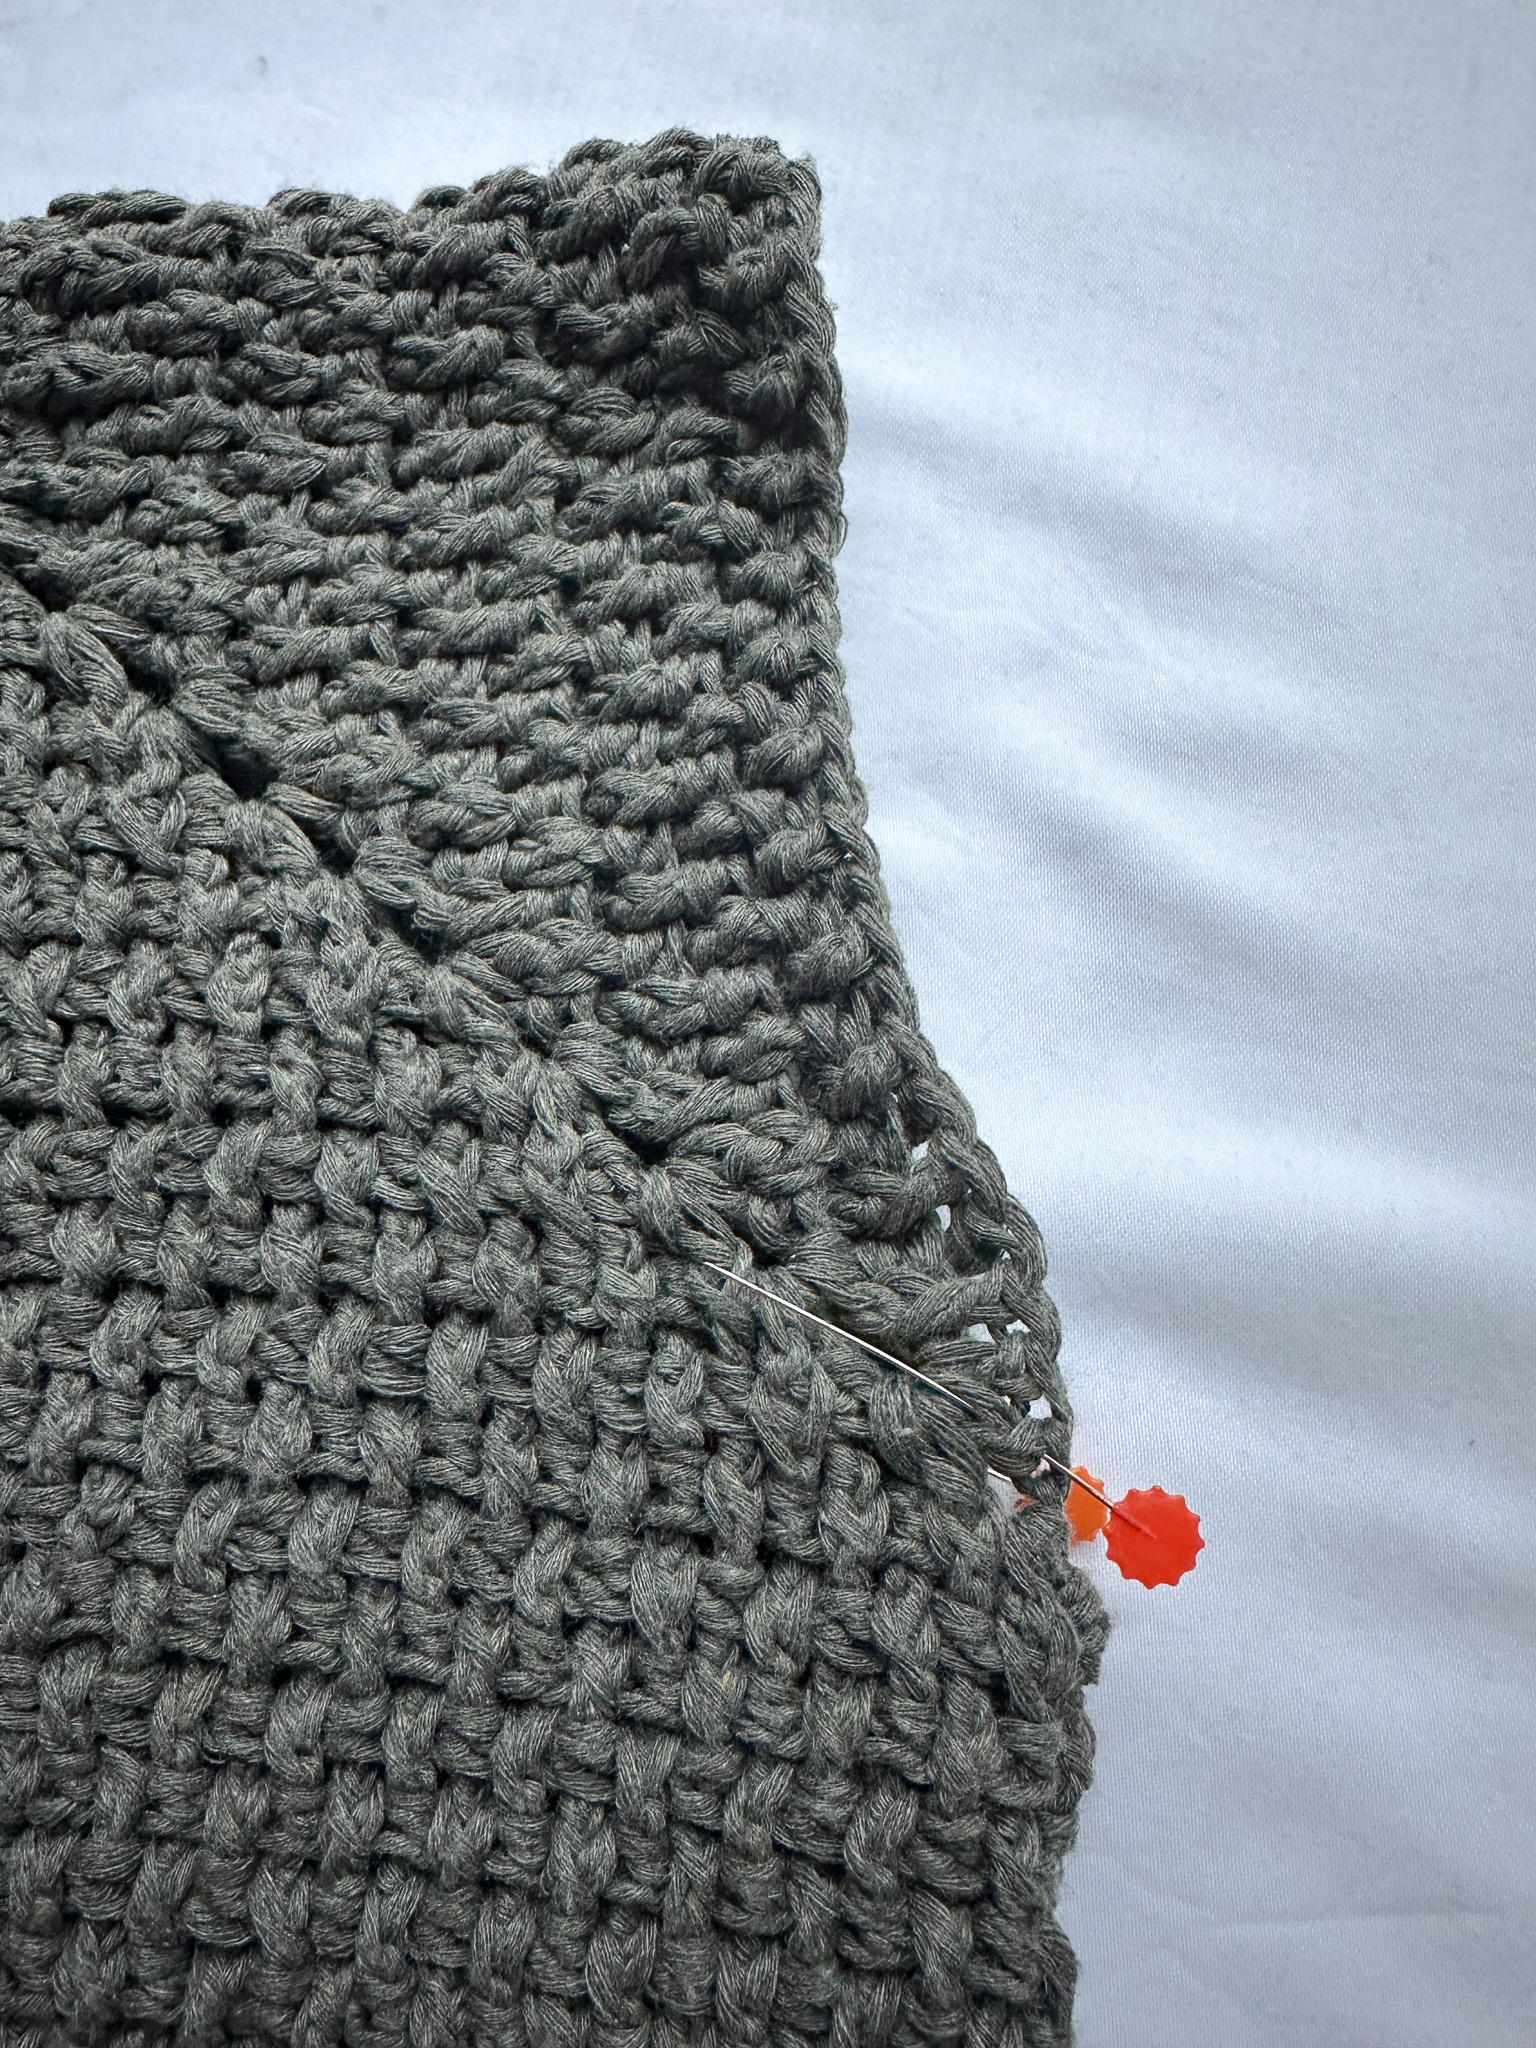
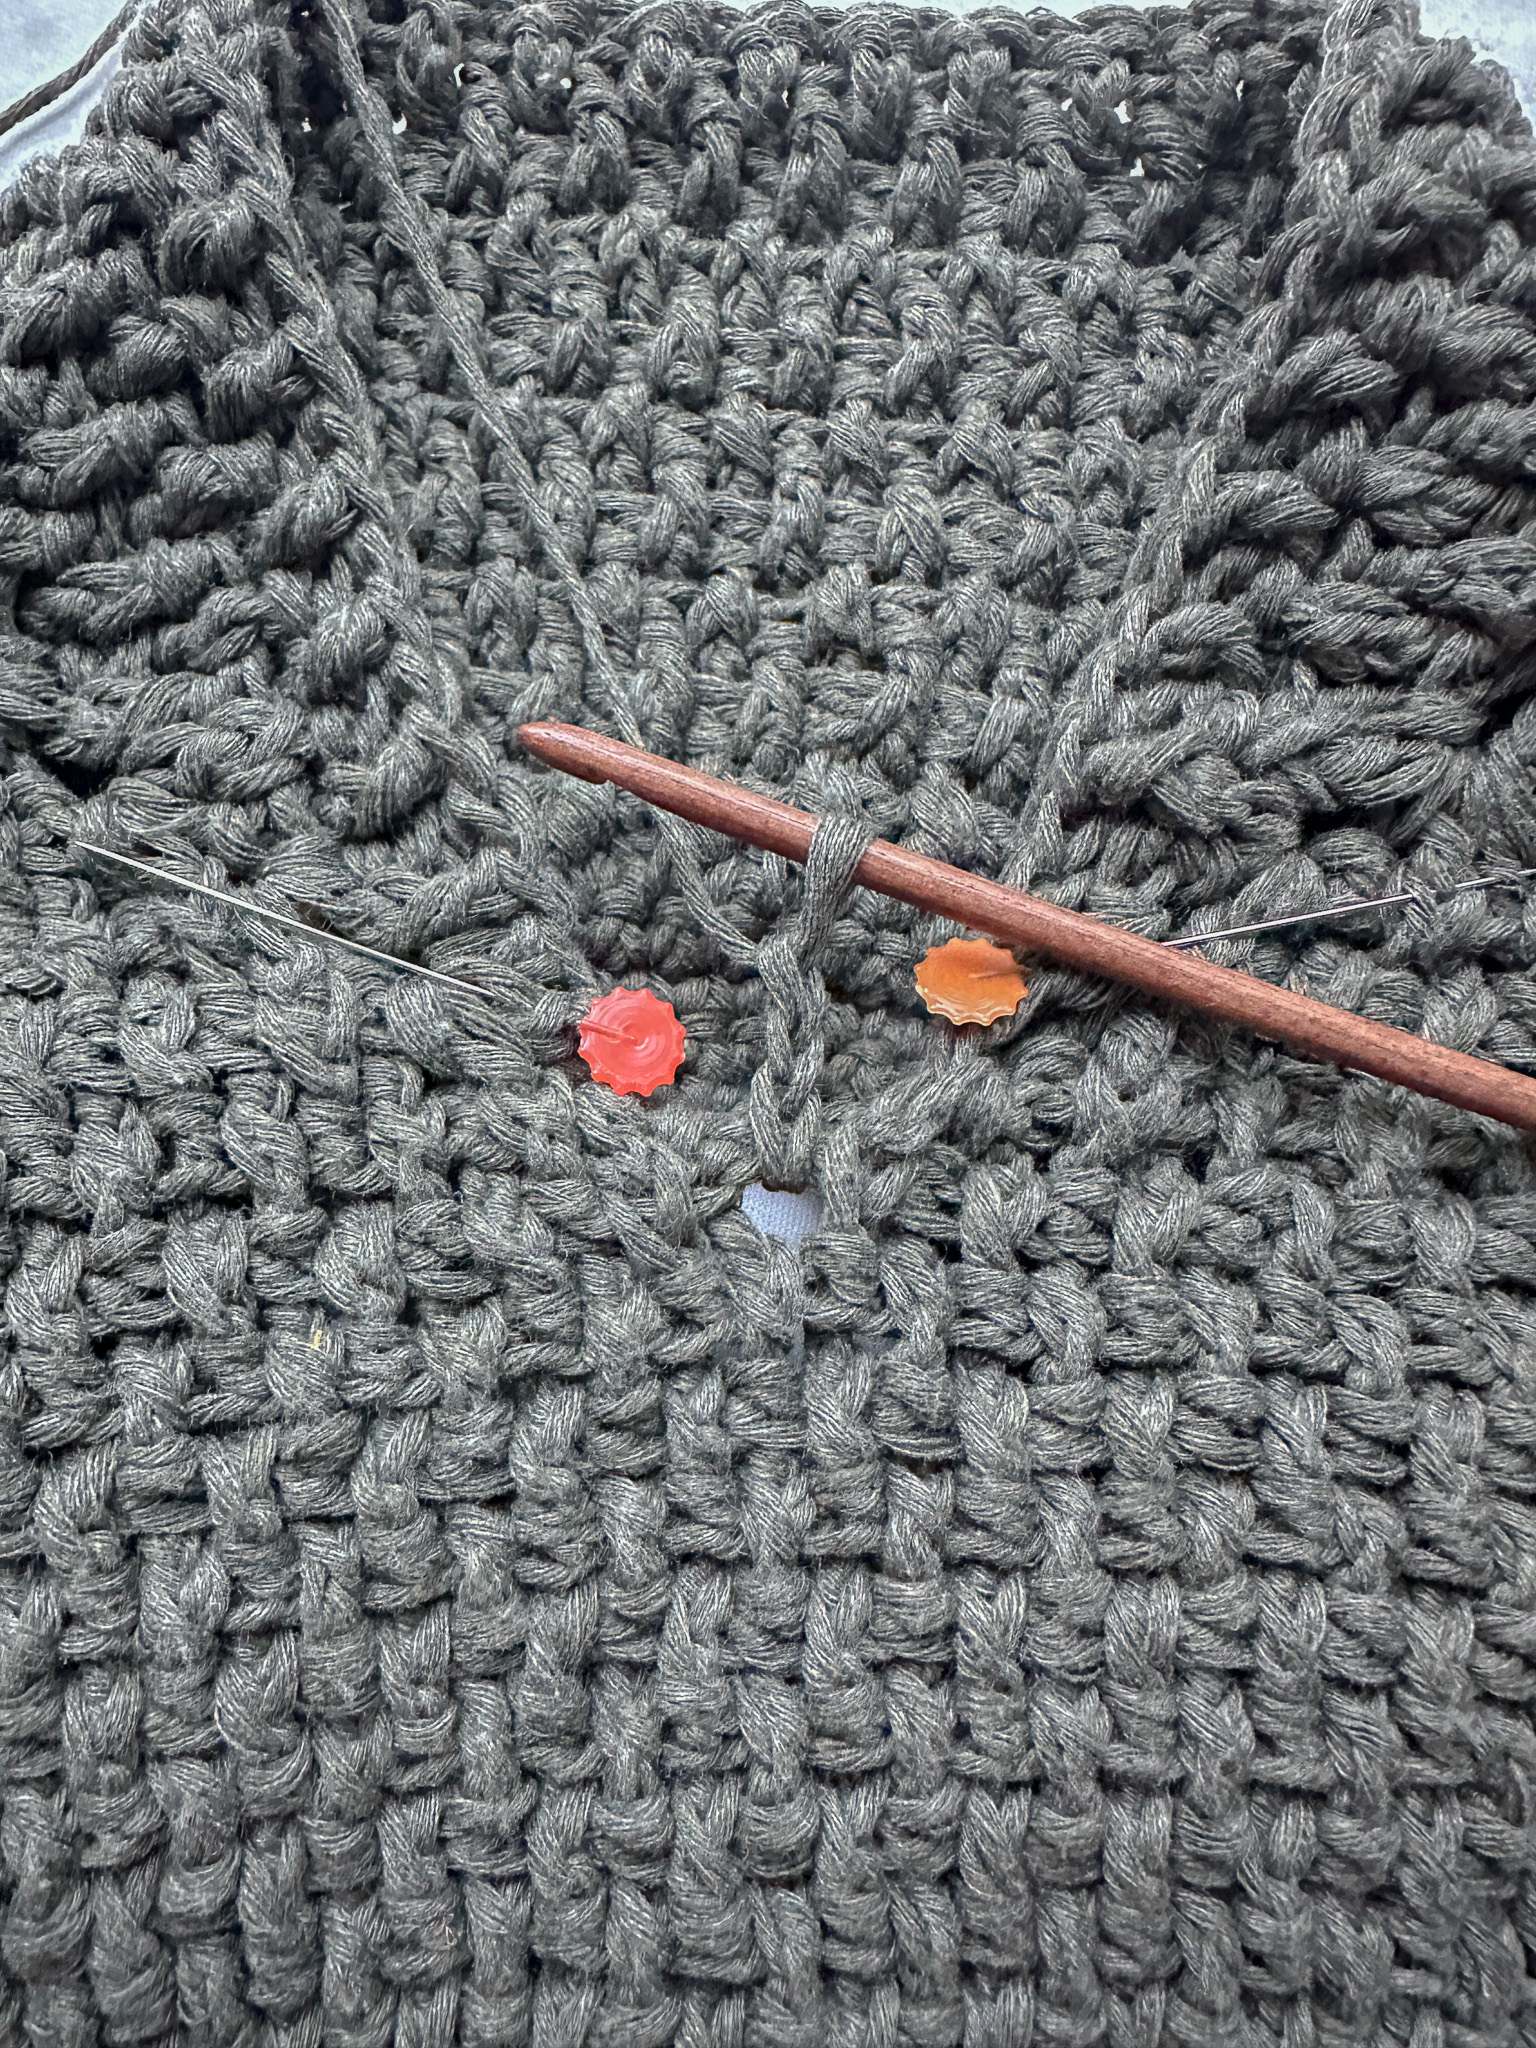
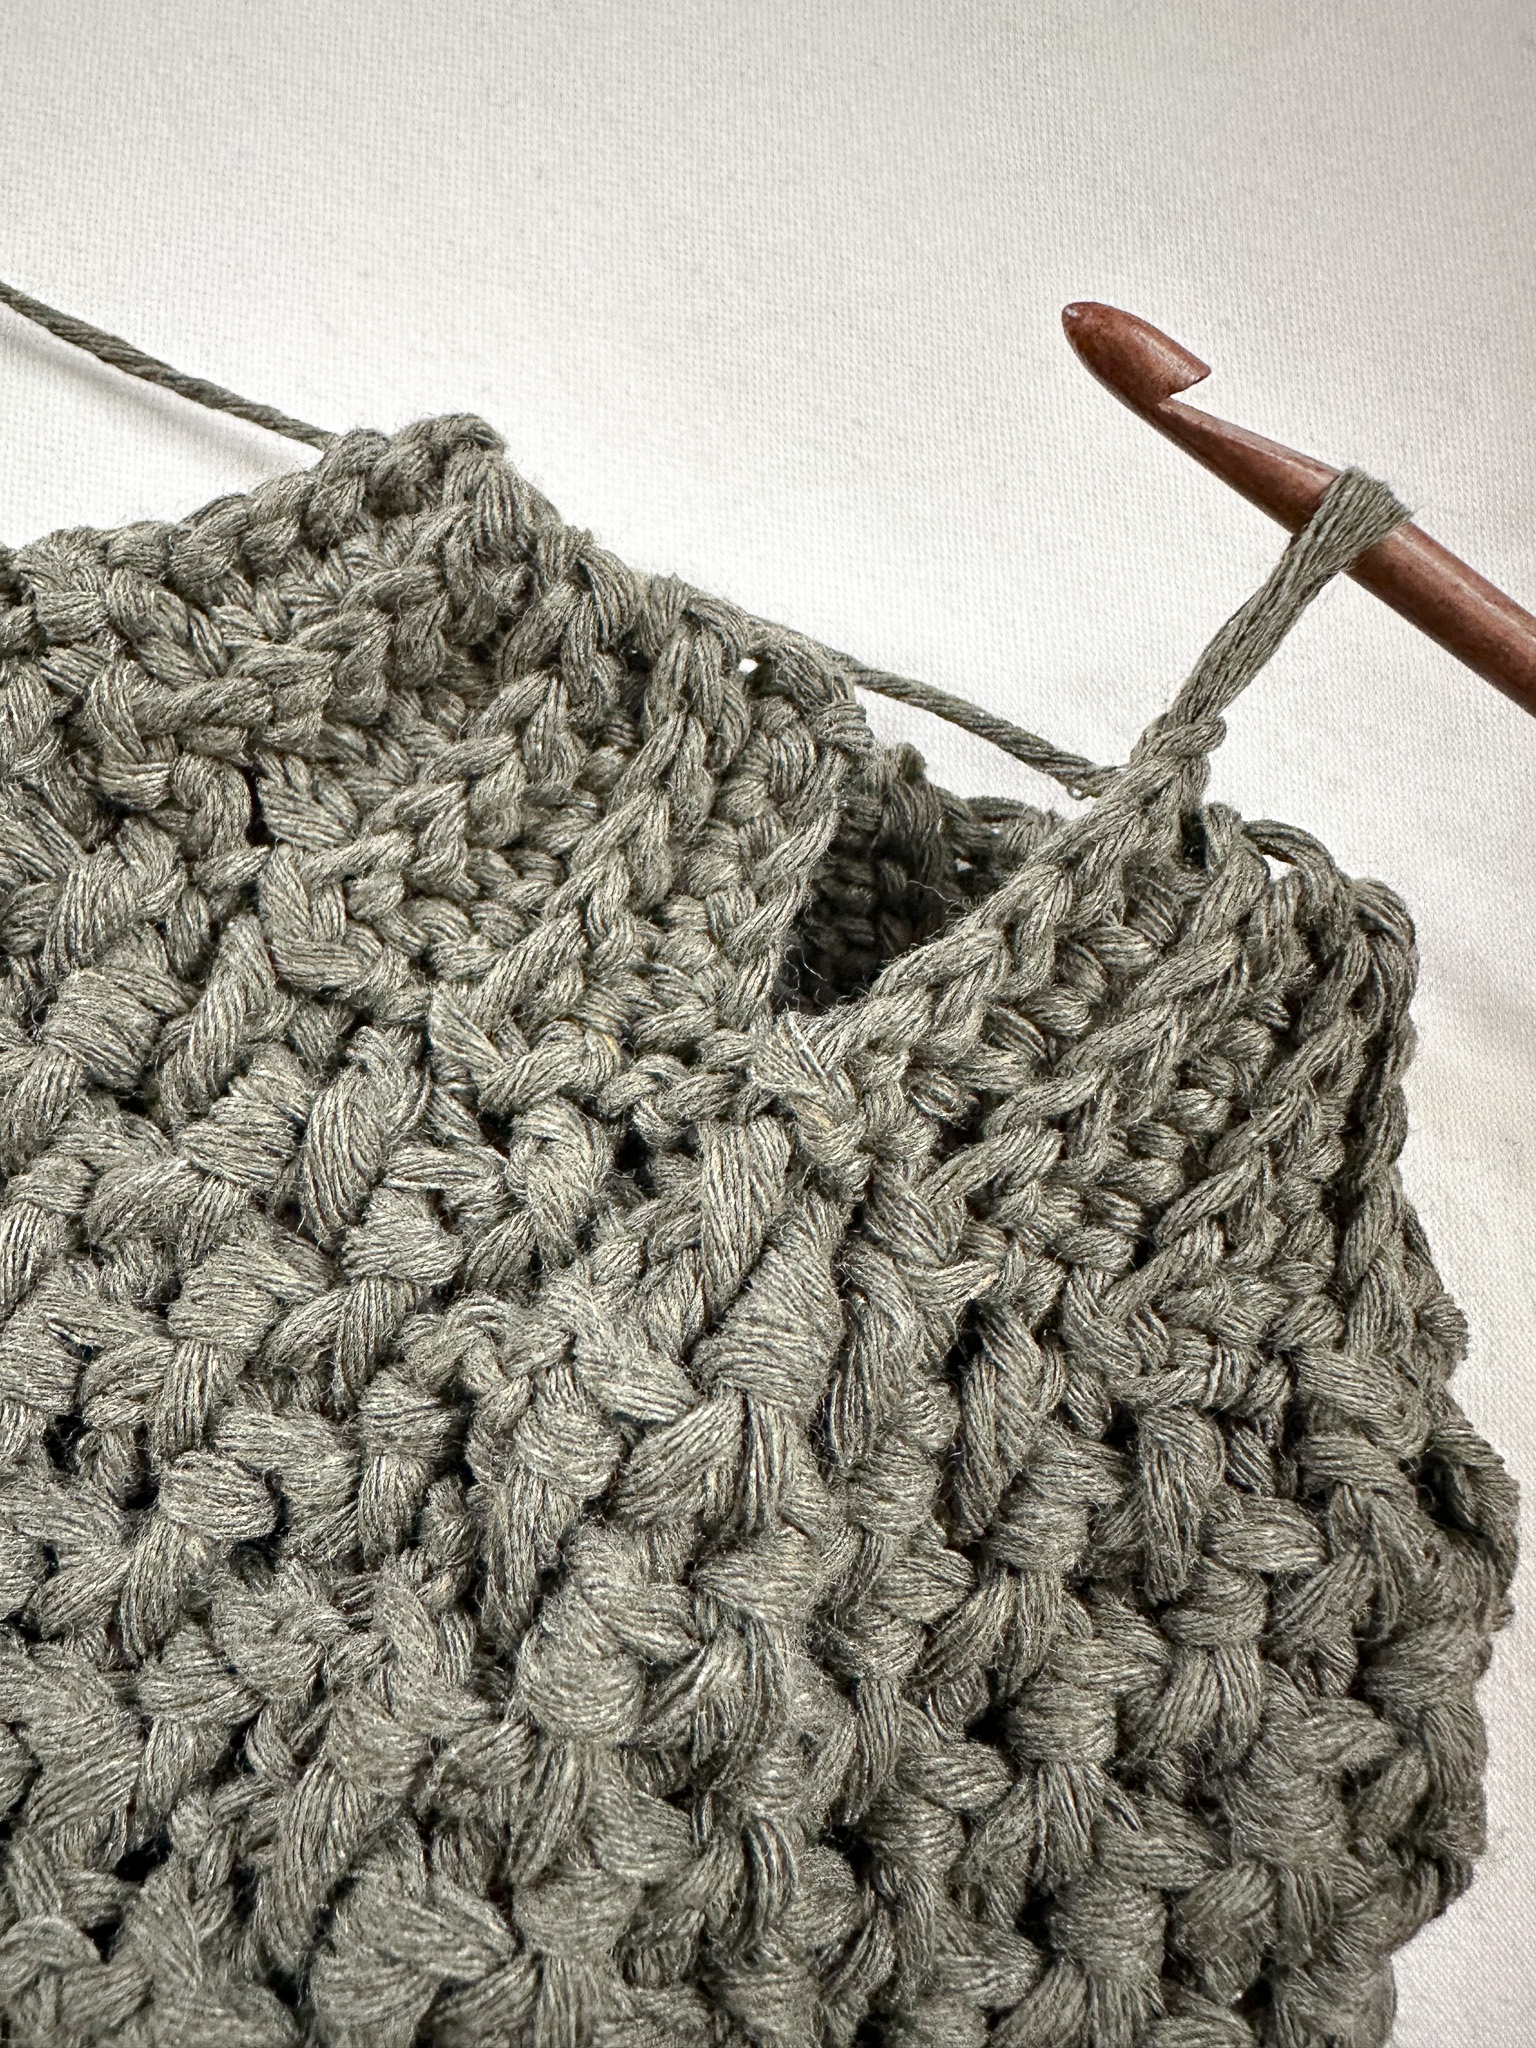
Now you will crochet along the vertical center edges of the sweater. The edge where the buttons will be attached is worked differently from the edge with the buttonholes. Which method to use depends on which side you start crocheting from, see the picture. The button edge starts at the top of the left side (marked by the wooden crochet hook). The buttonhole edge is worked starting from the bottom of the right side (marked by the green needle).
Button edge:
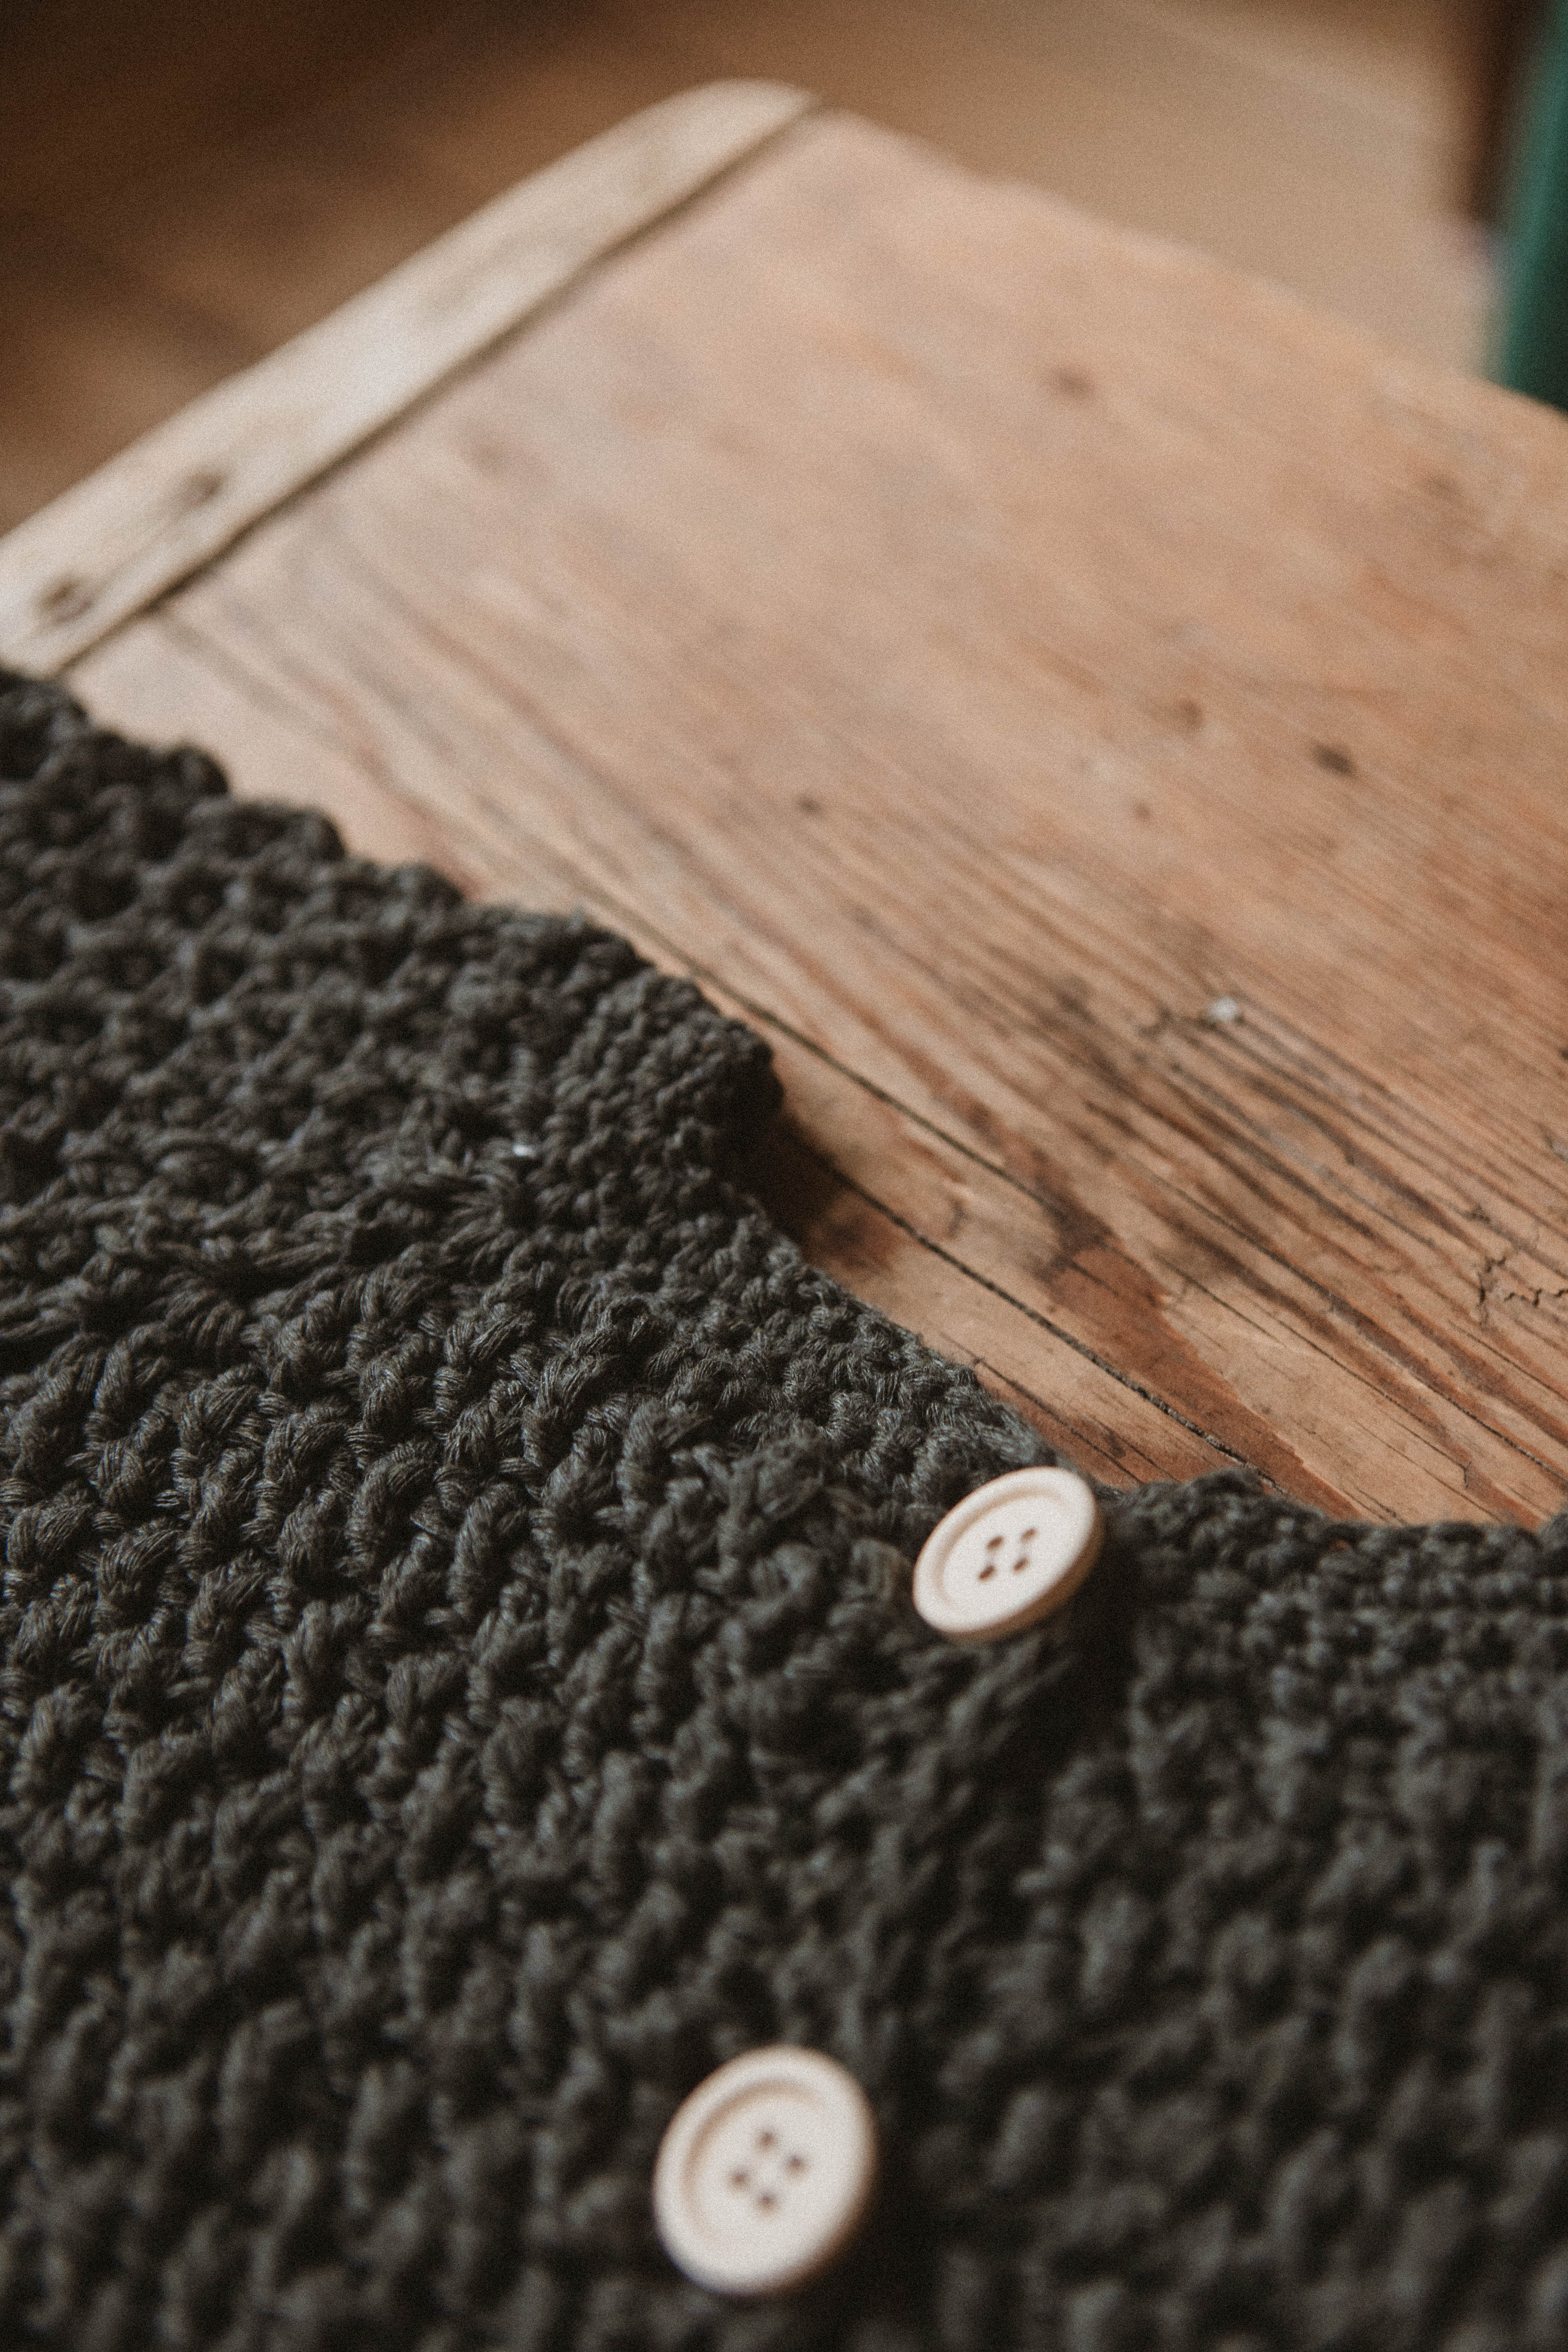
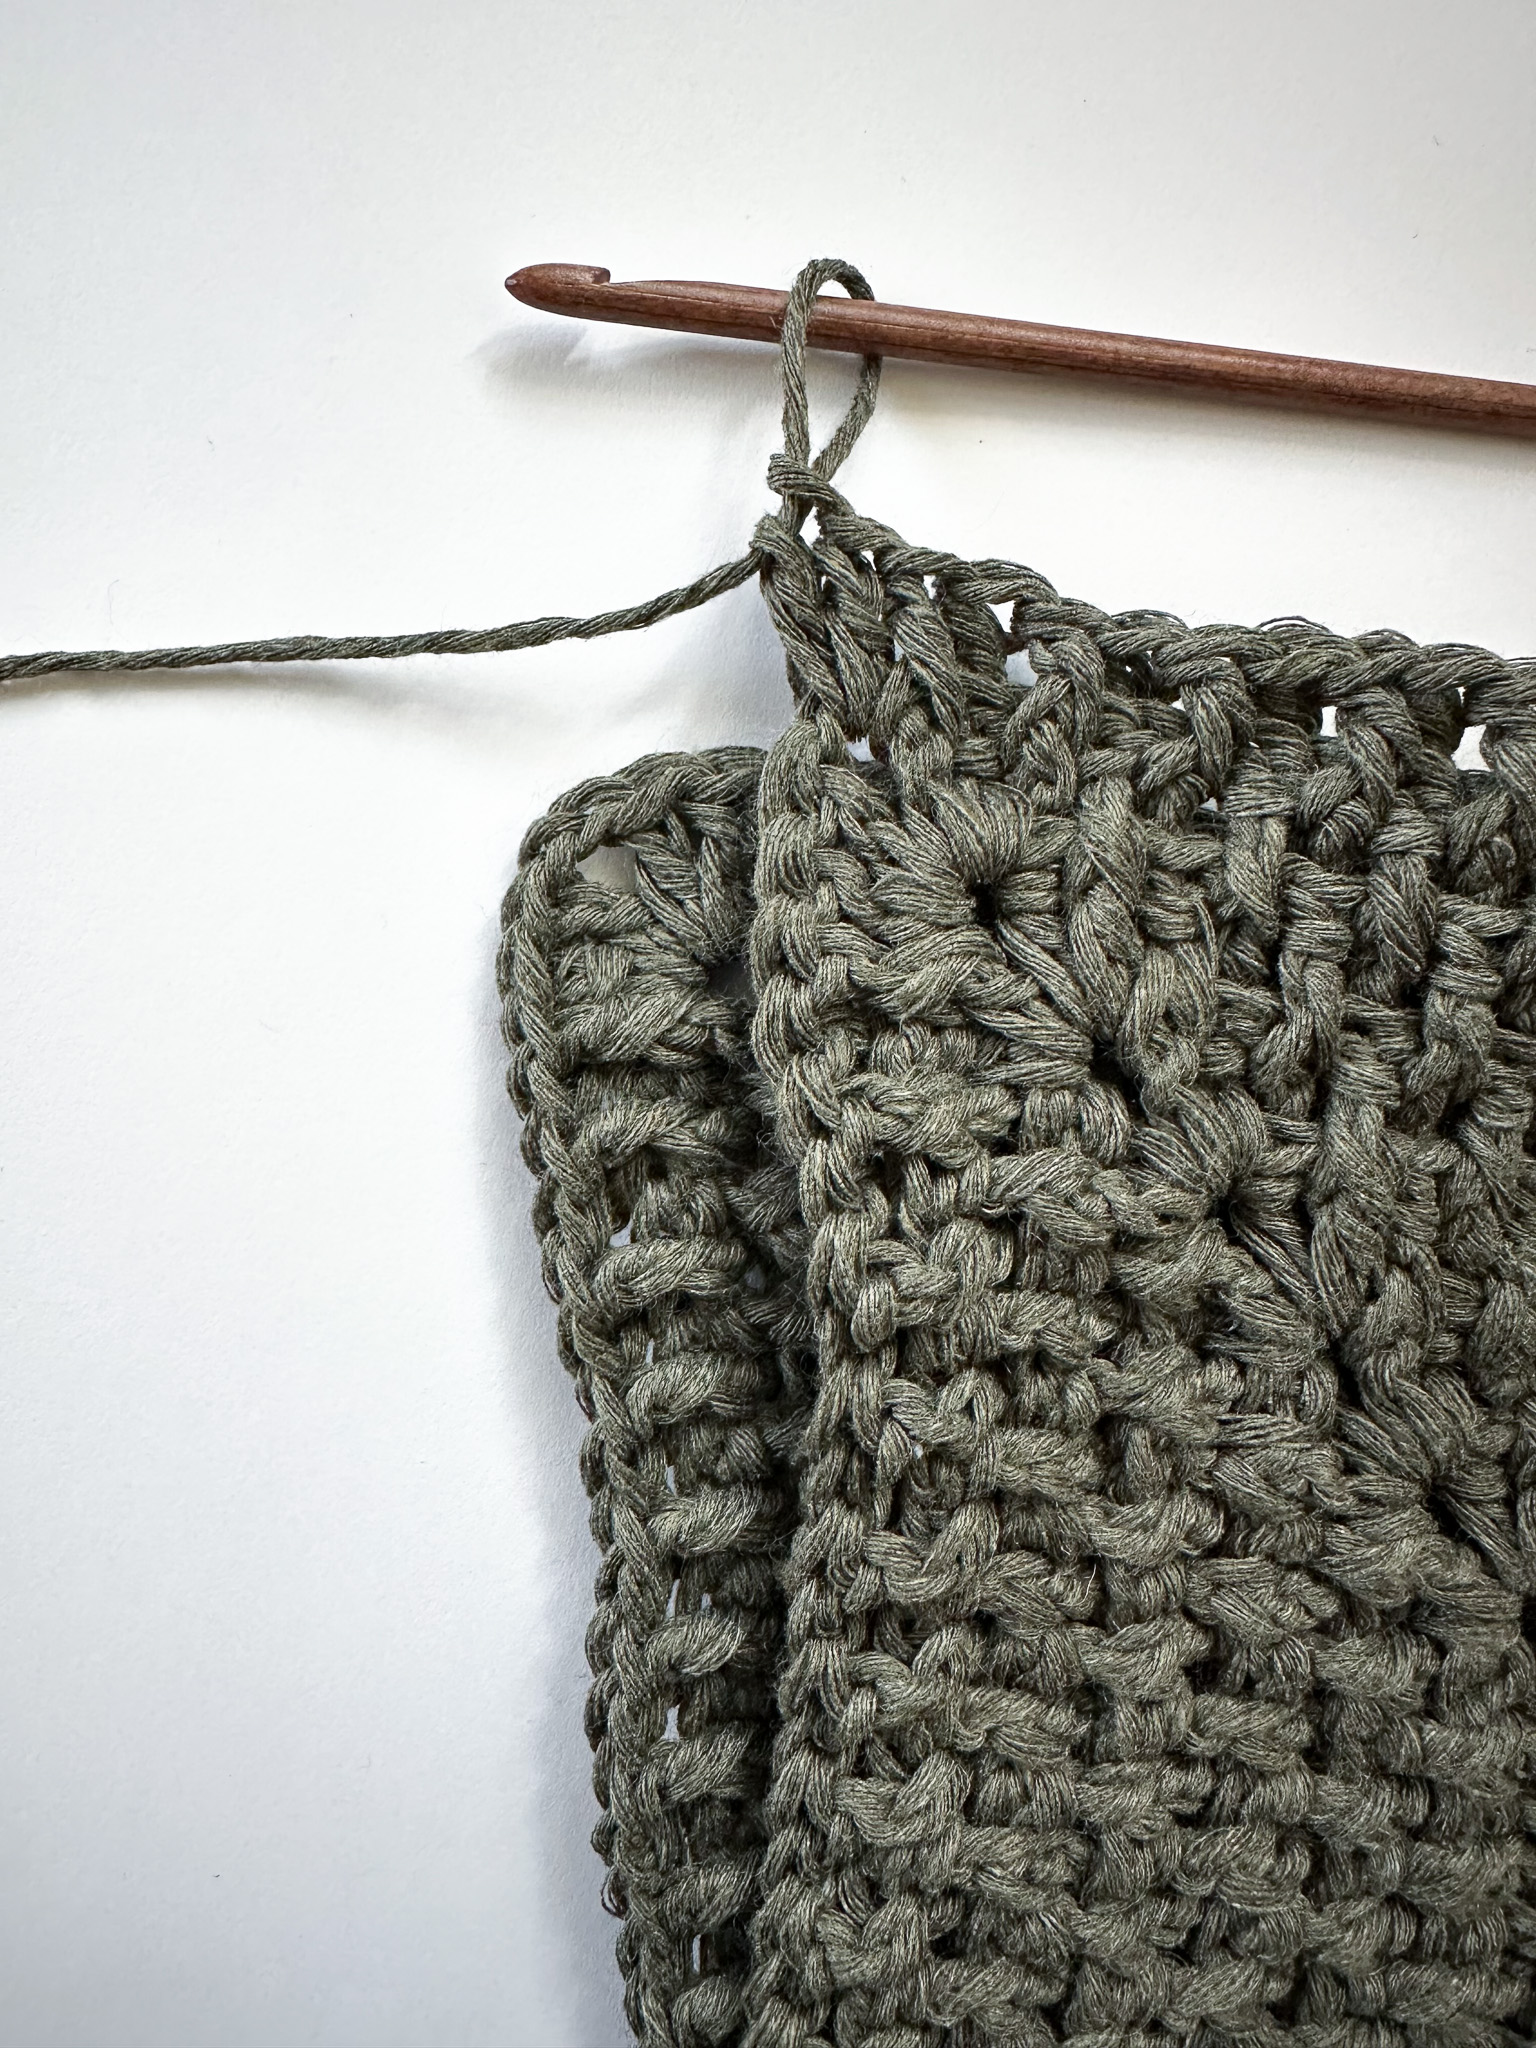
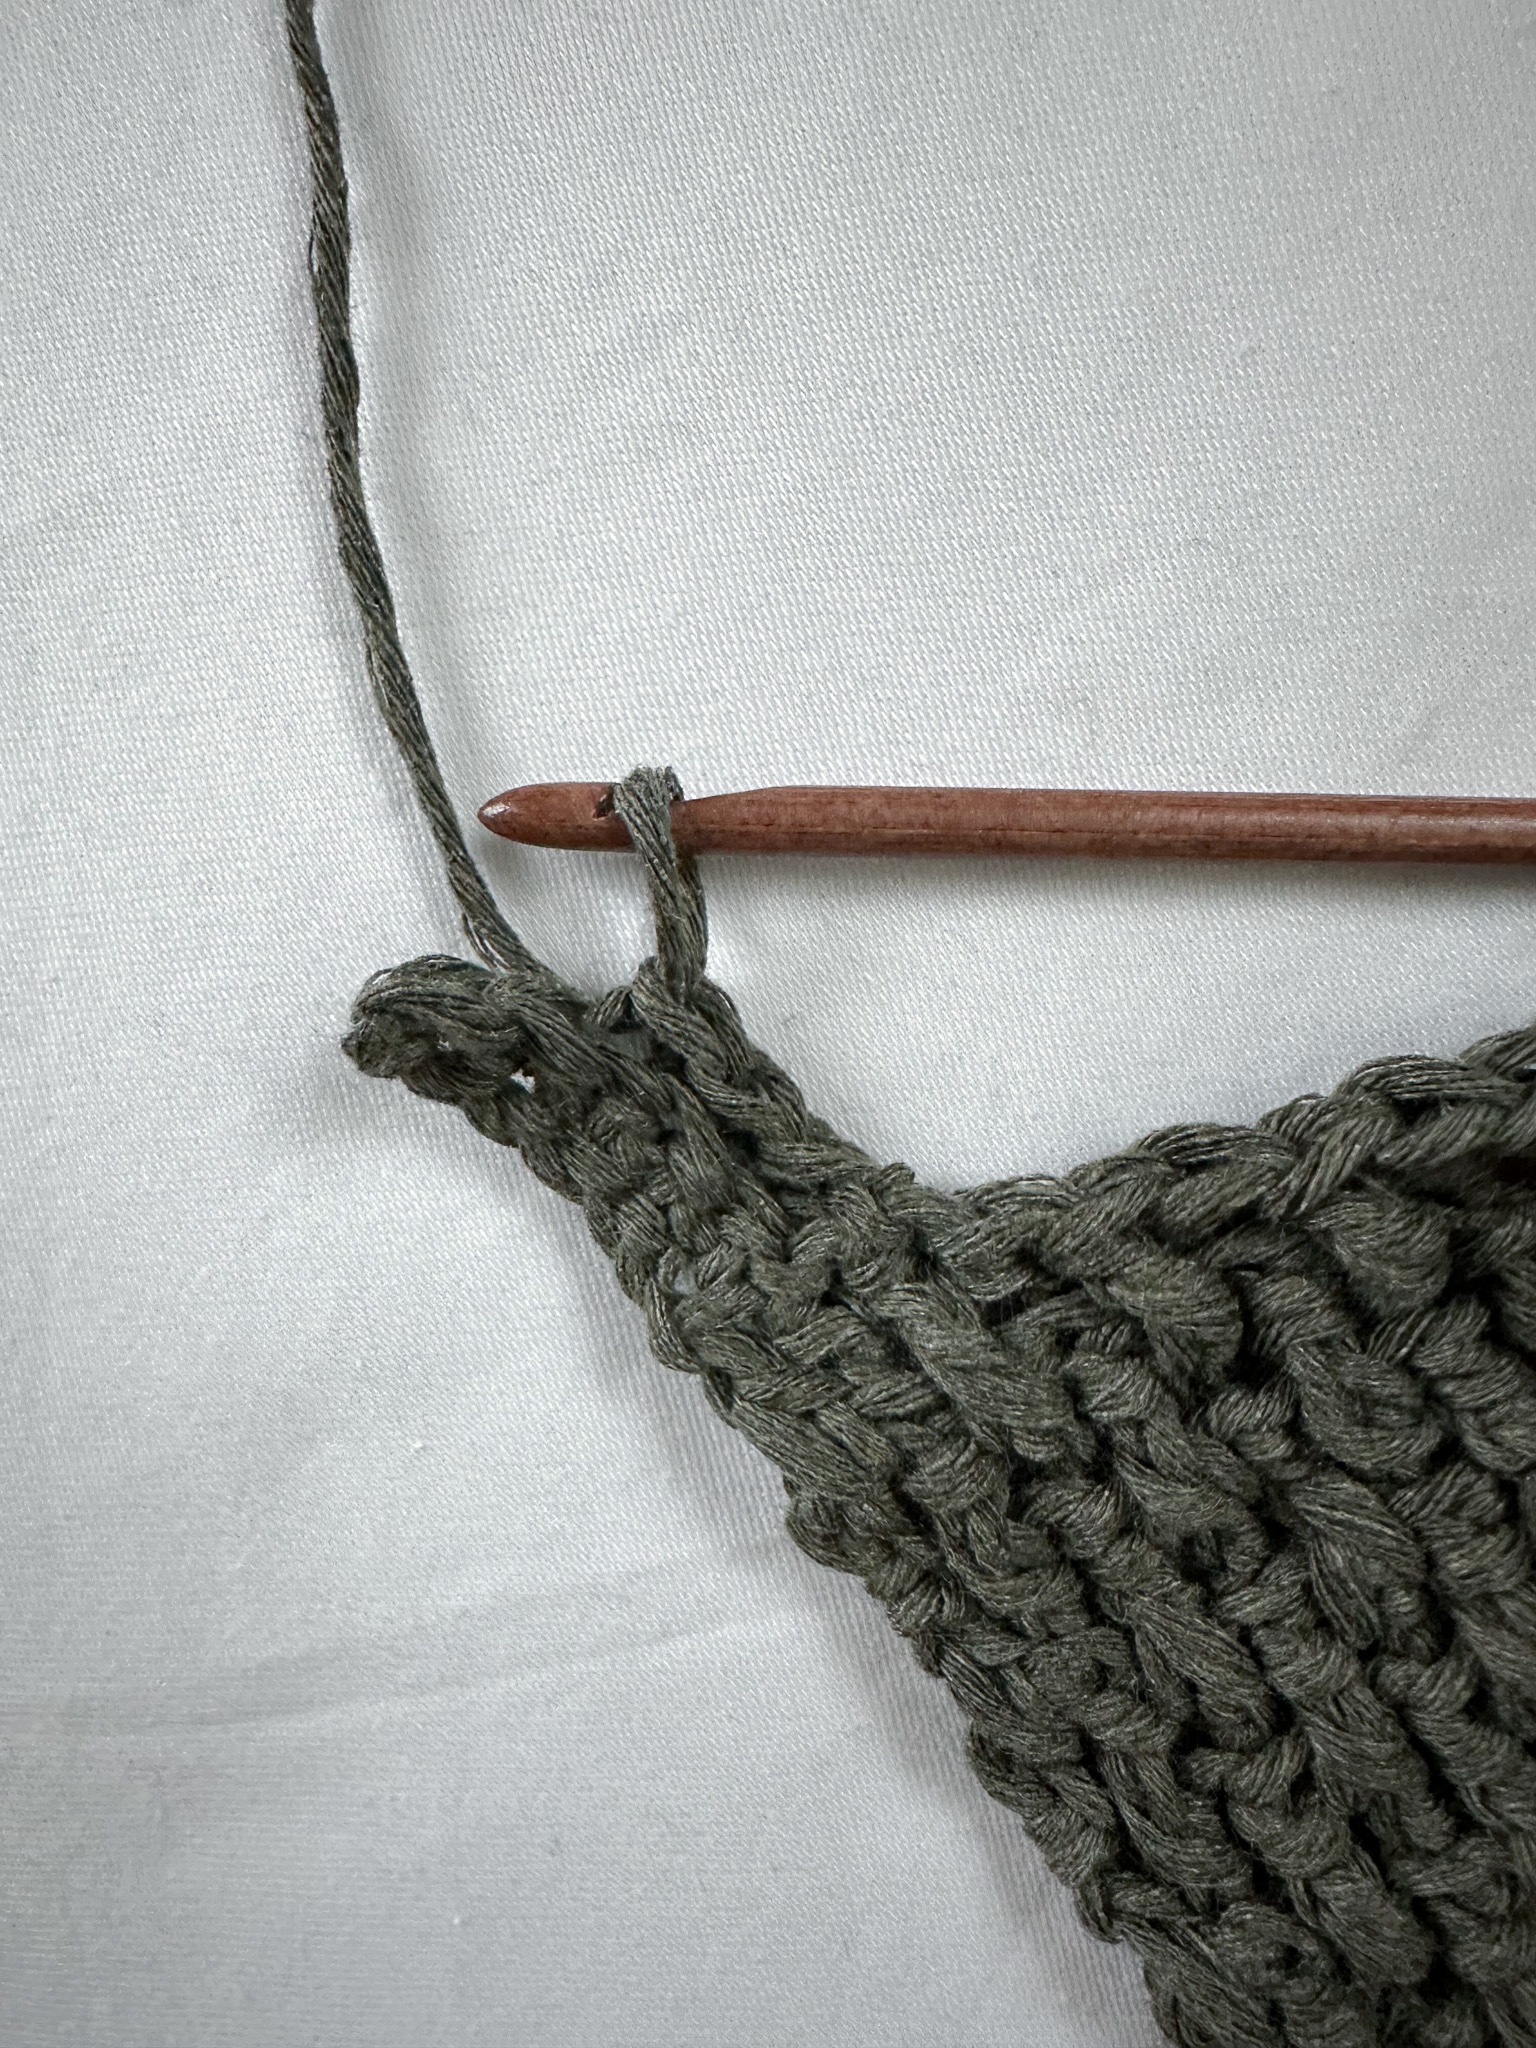
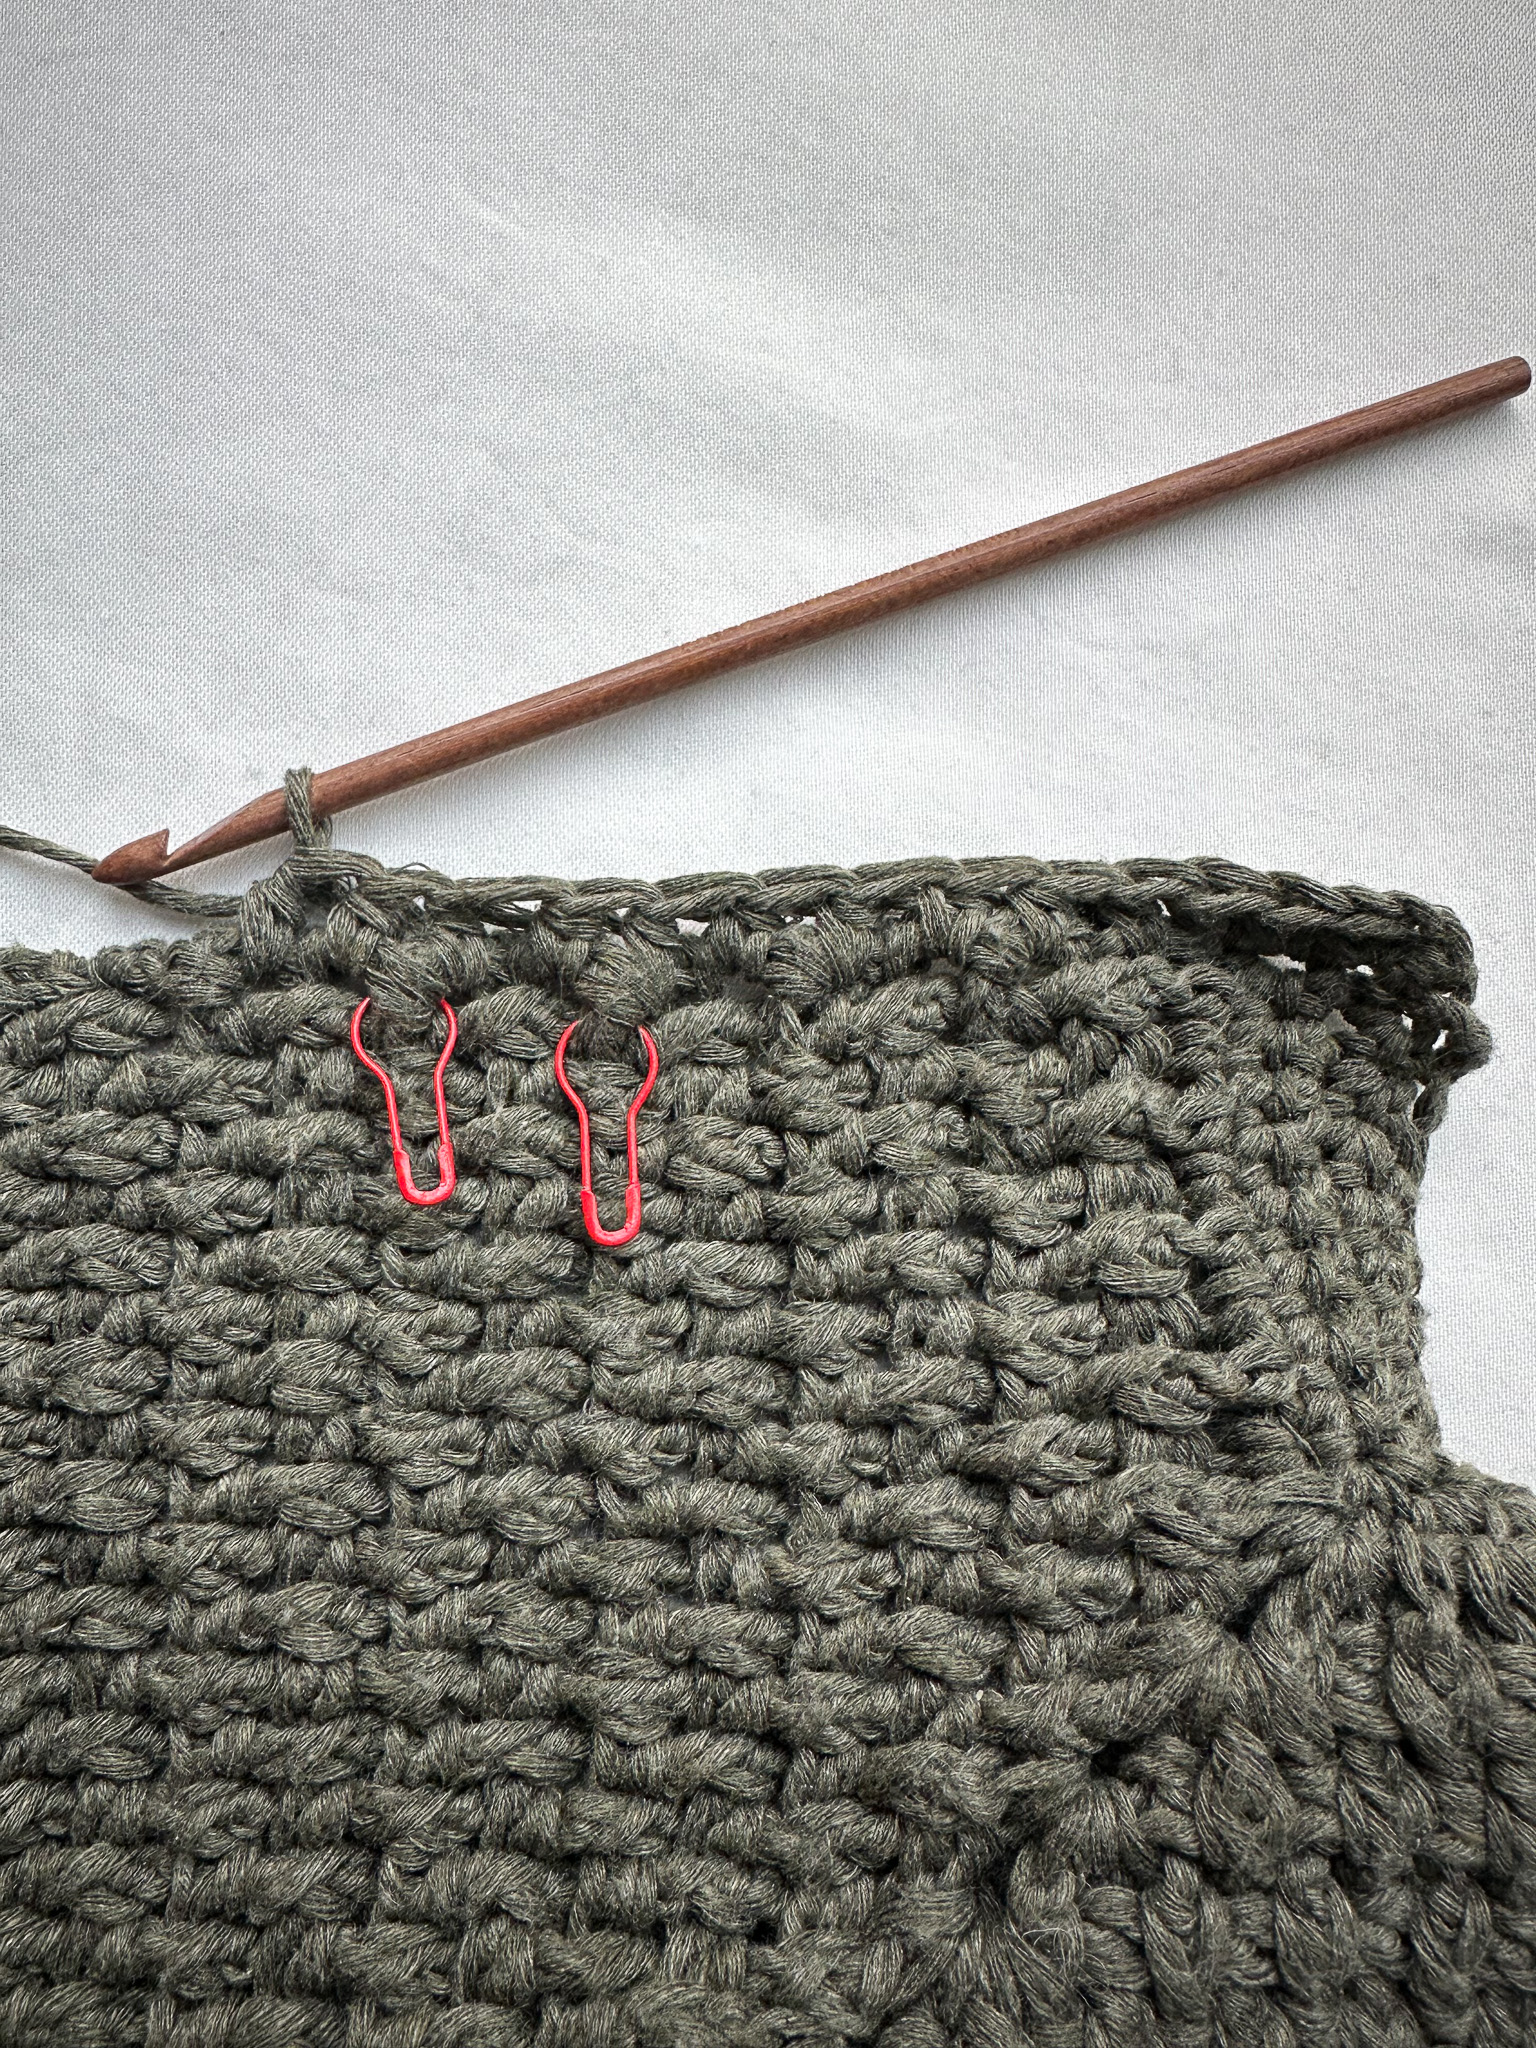
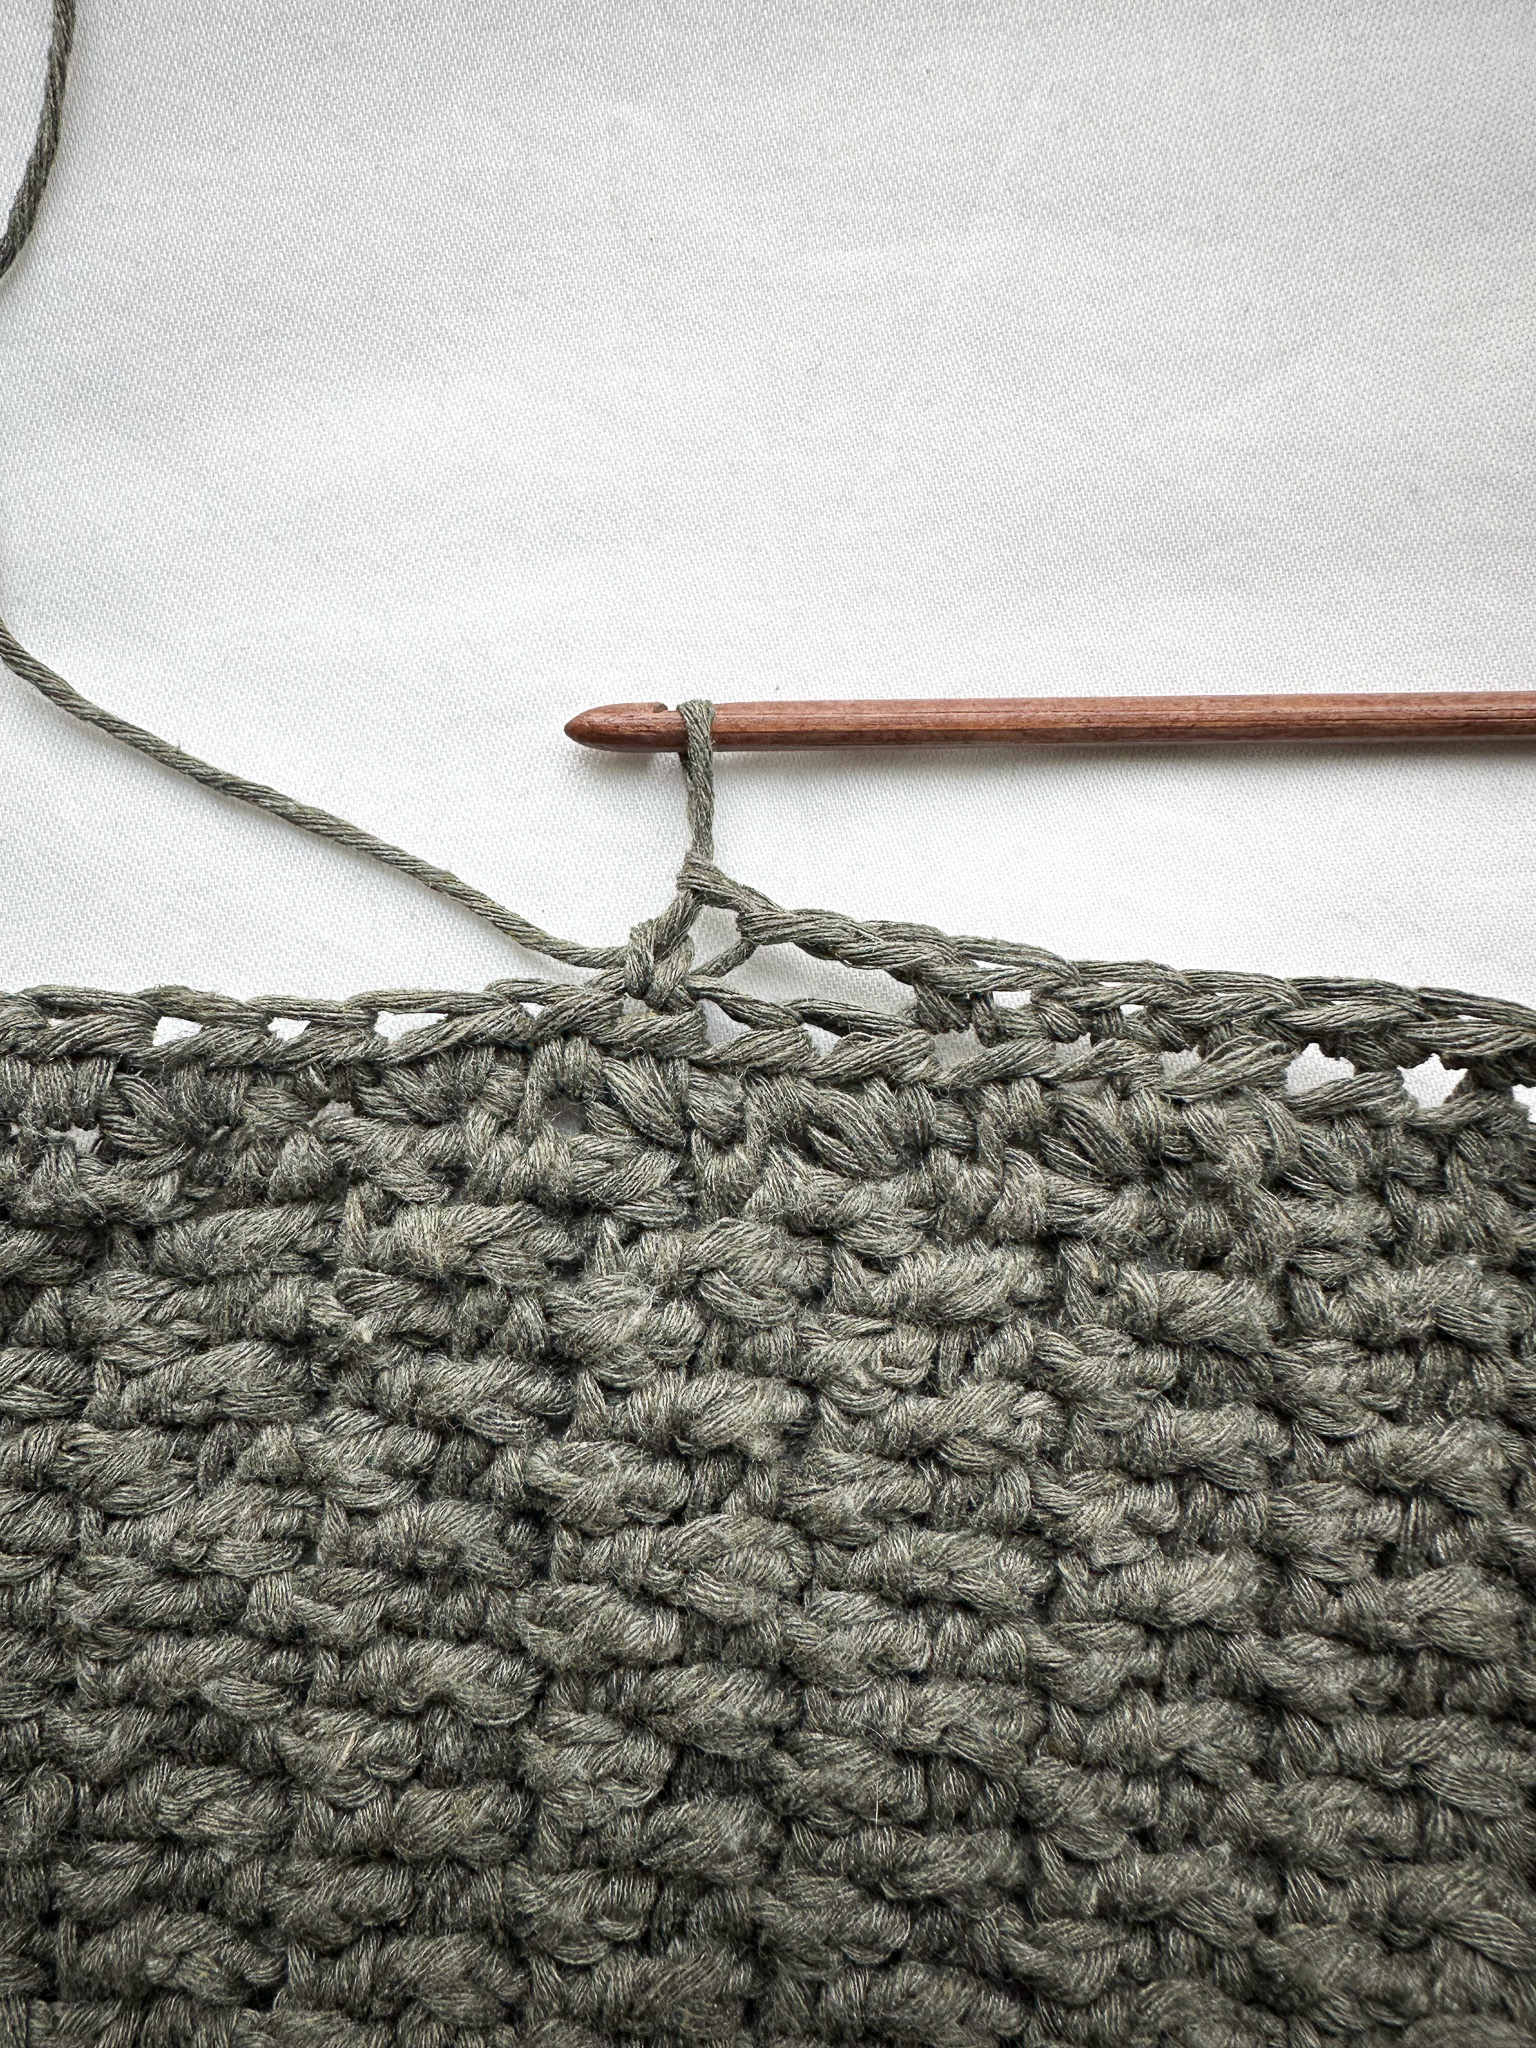
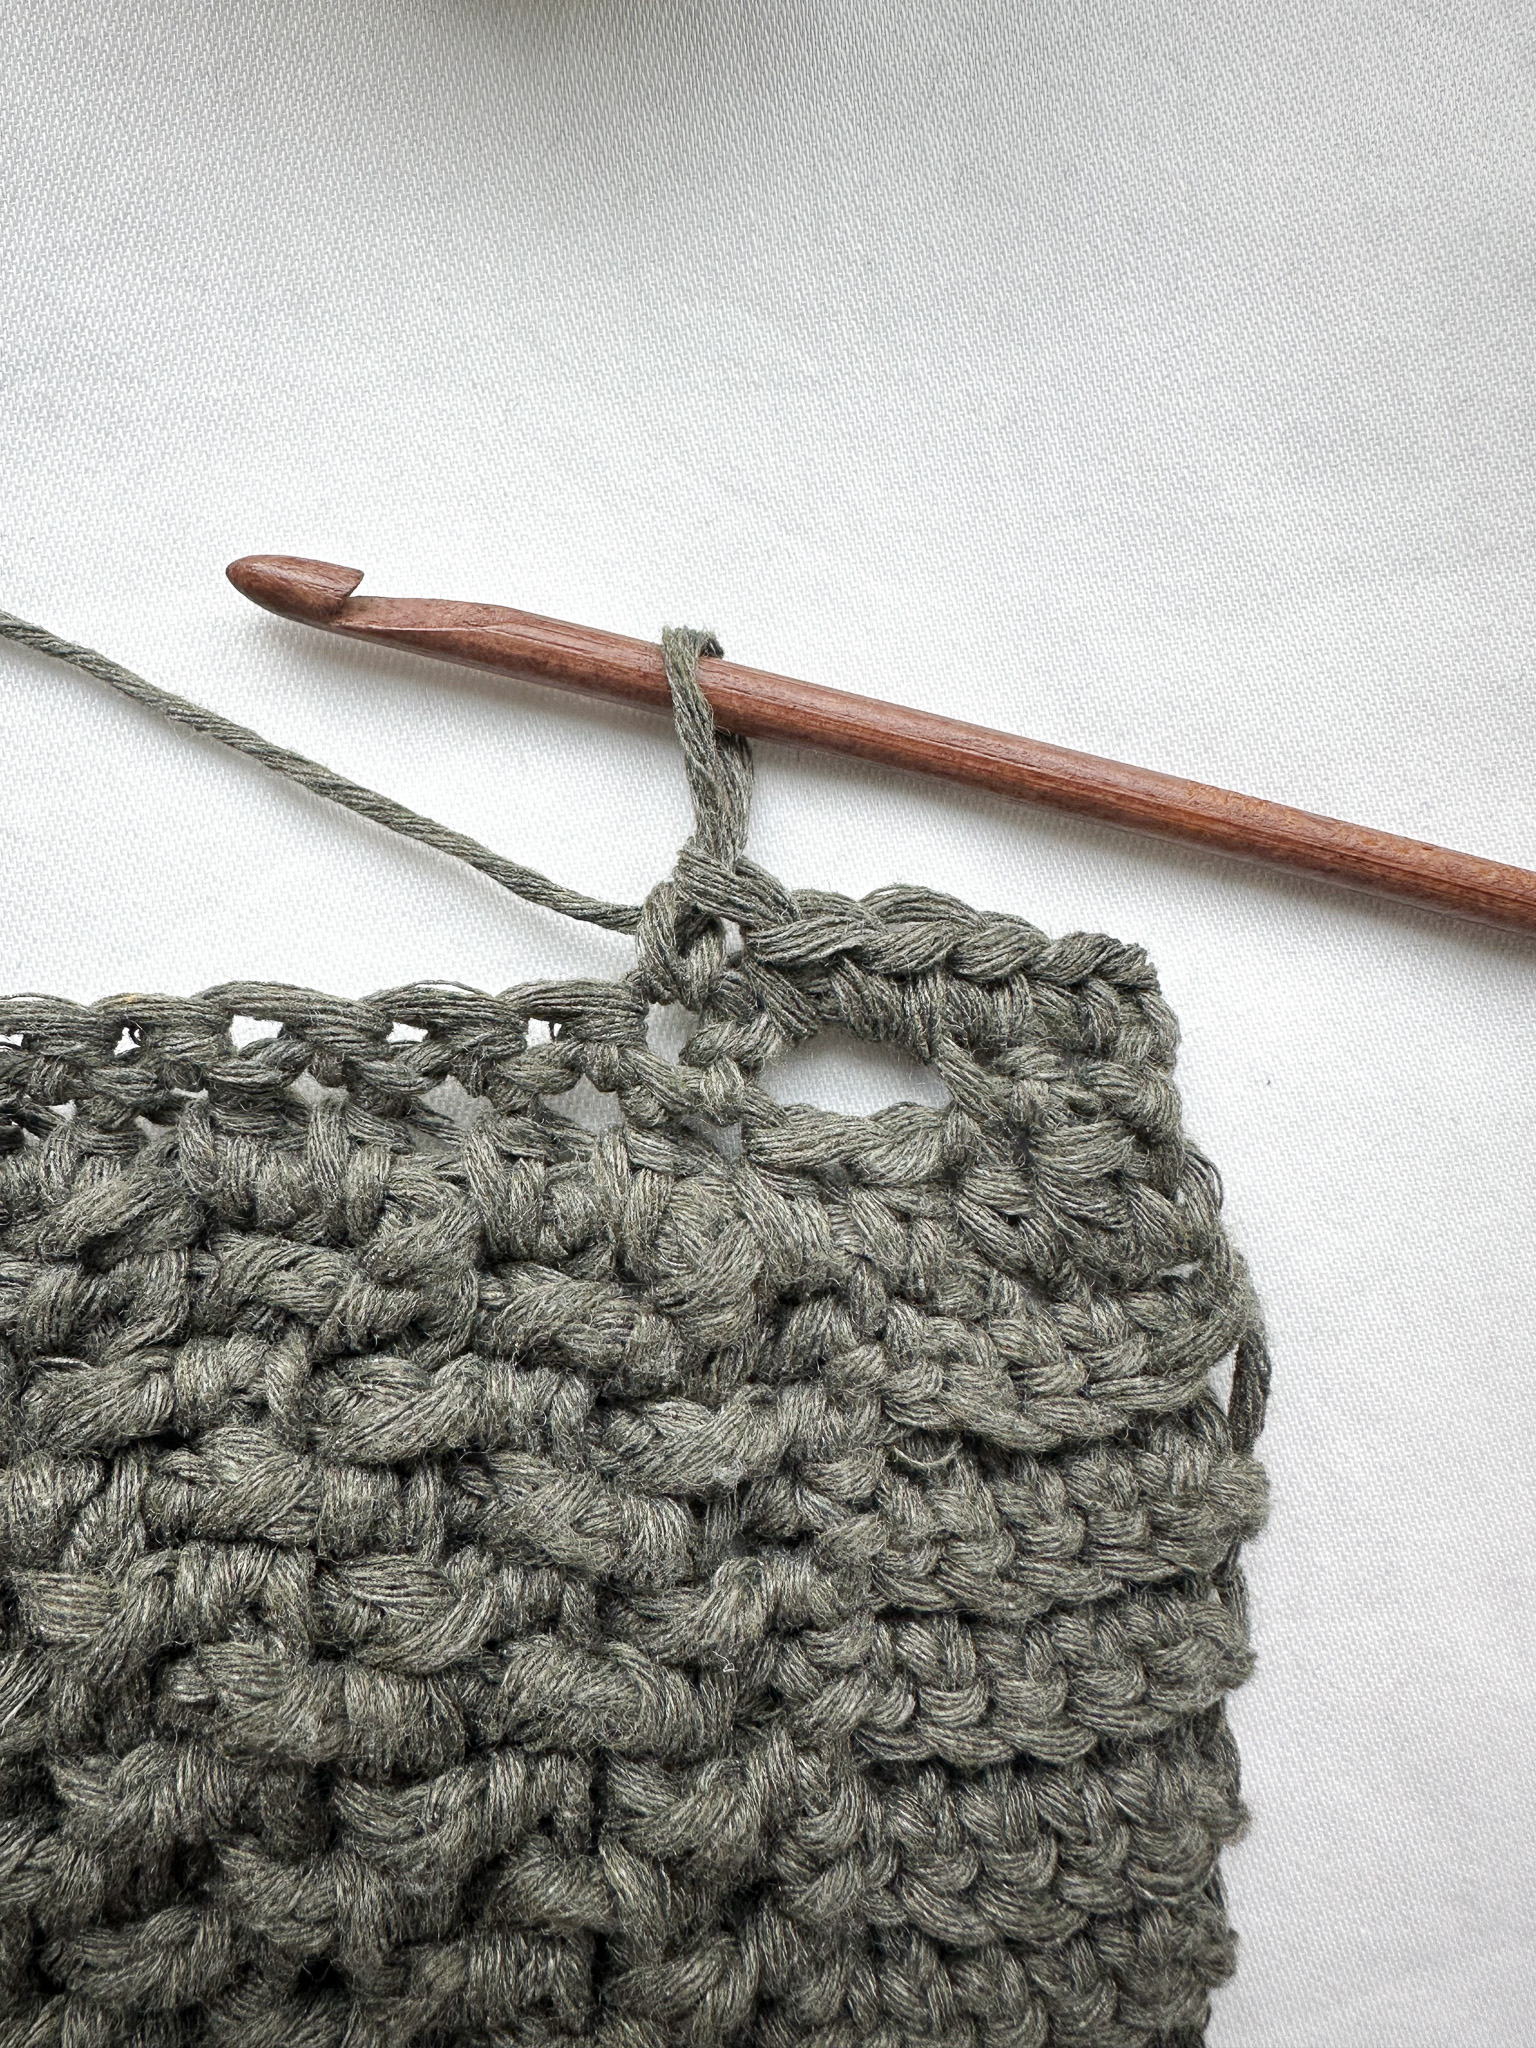
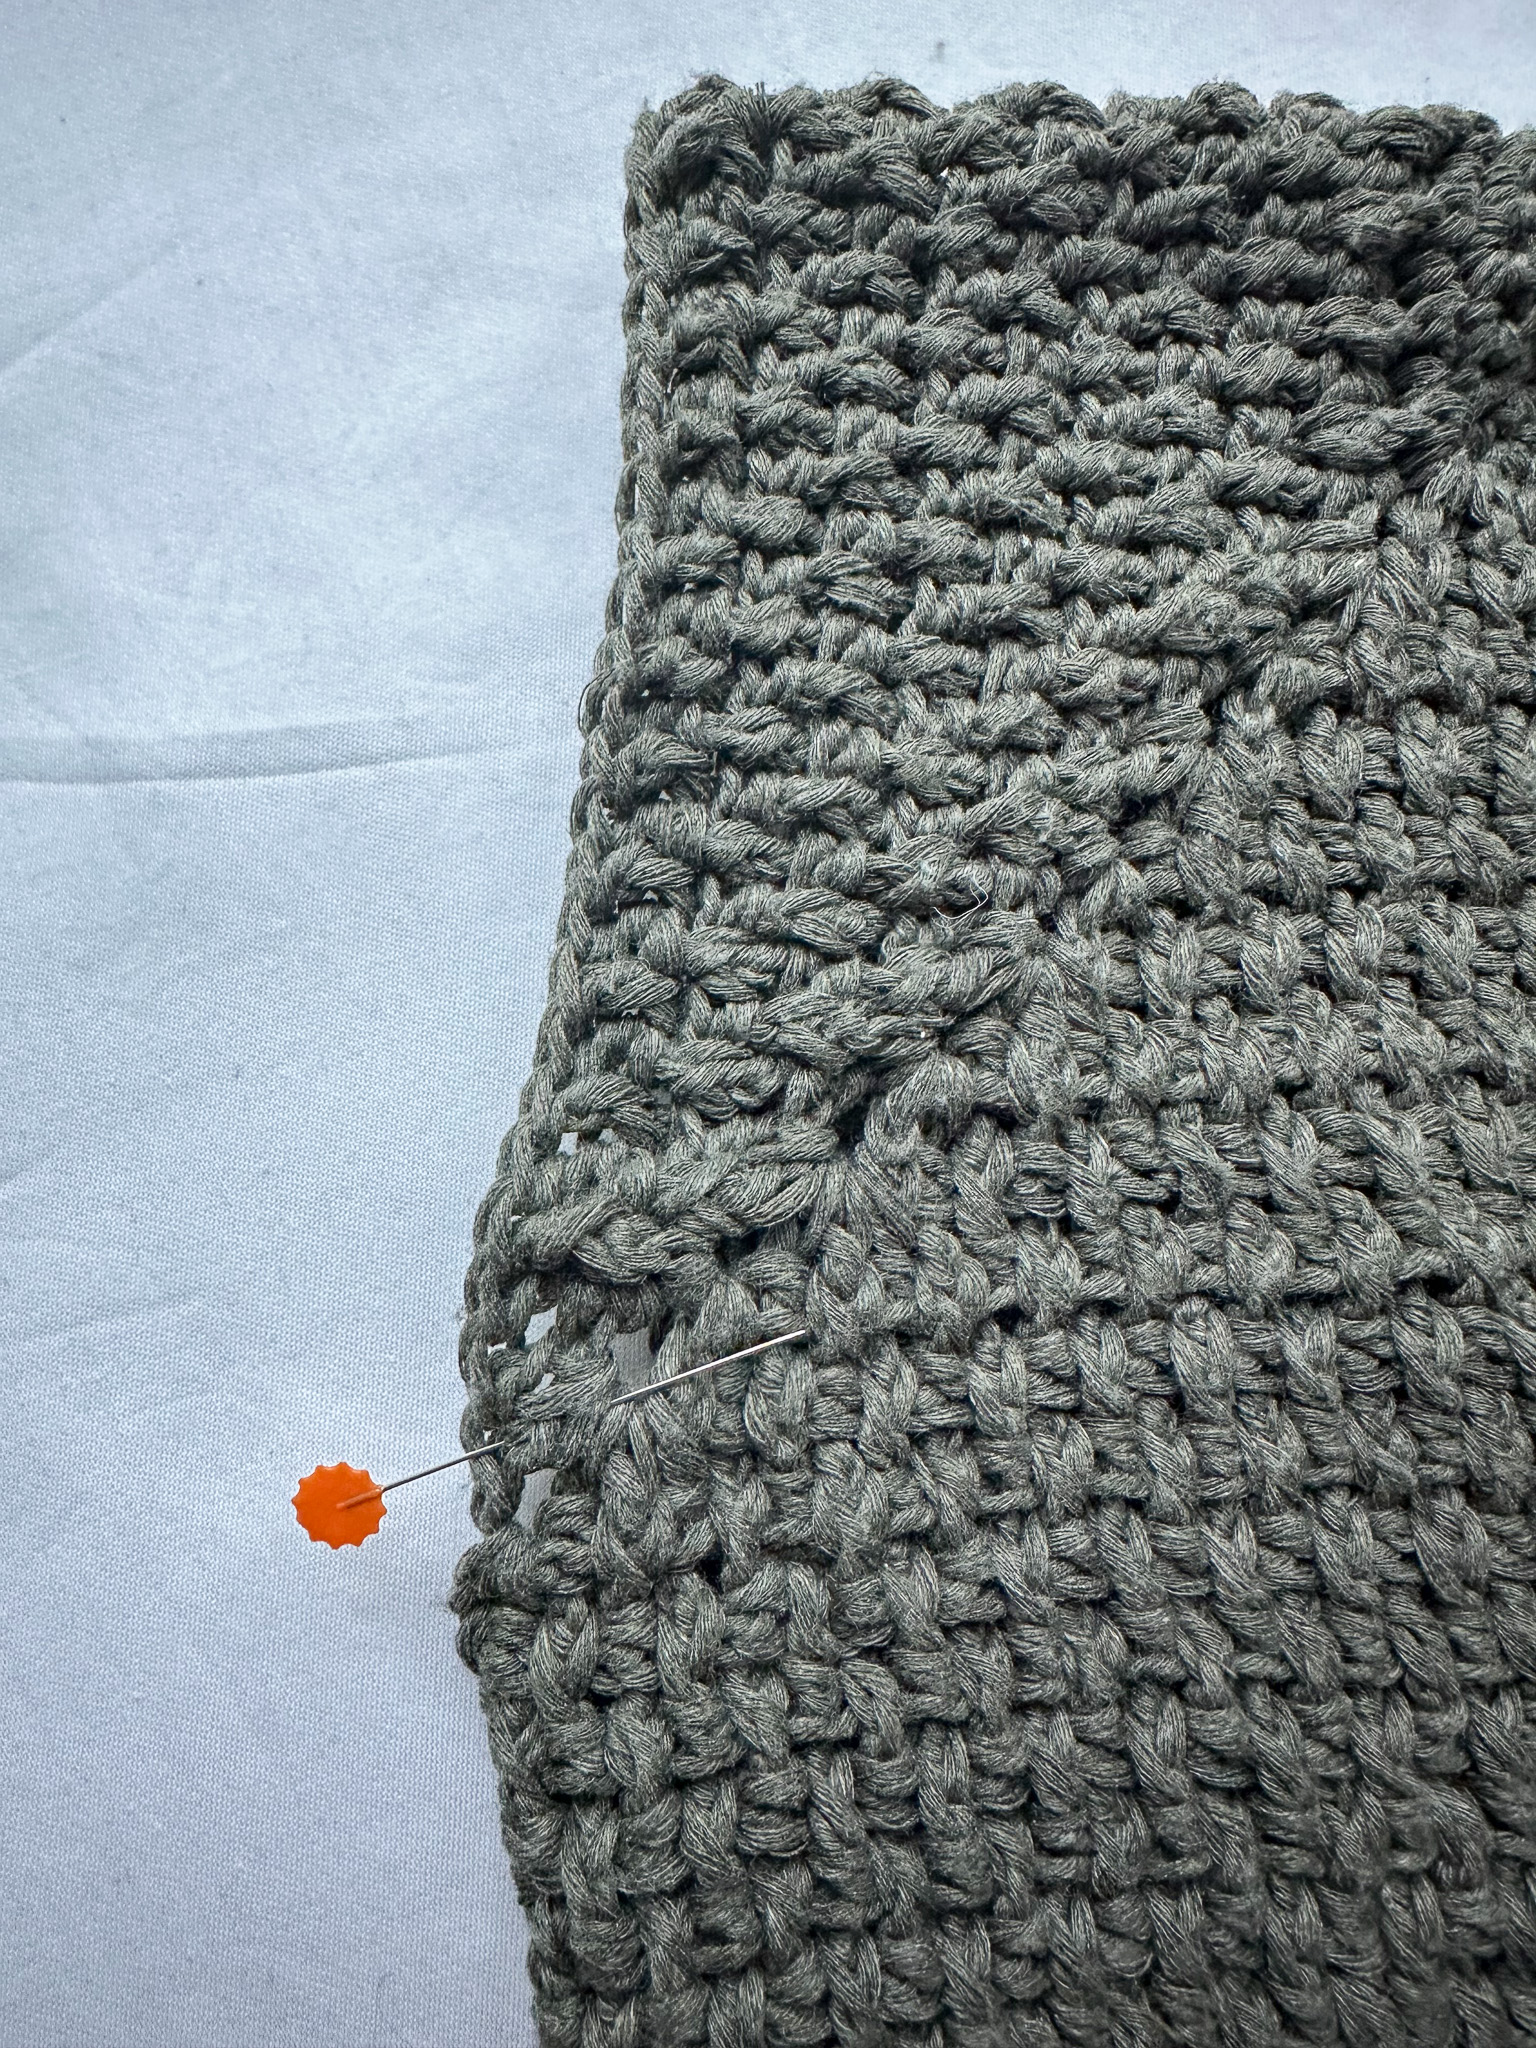
Row 1: Start at the top of the left front piece near the neckline. Make a loop and pull it through at the very top corner. Chain 2, then work half double crochets (hdc) along the entire edge, including the ribbing. Try to space the hdc evenly along the edge so it stays straight, roughly 1 half double crochet per row of stitches on the front piece. The exact number of stitches doesn’t matter, but make sure not to add too many half double crochet, or the edge will become uneven (see picture). Between the red markers, it’s suitable to place two half double crochet. Chain 1 and turn the piece.
Row 2: Work single crochets (sc) along the edge. Chain 1 and turn.
Row 3: Work another row of single crochets. Cut the yarn and fasten off.
Now lay out the buttons you want on the sweater and decide where you want them to be placed. Place stitch markers at the same height as the buttons.
Buttonhole Edge:
Row 1: Start from the bottom at the ribbed edge. Pick up a loop of yarn and chain 2. Work the first row the same way as the previous edge with half double crochets (hdc), trying to keep the edge straight and even. When you reach the top, chain 1 and turn the piece. Place markers where the buttonholes should be (at the same height as the markers on the opposite front piece).
Row 2: Work single crochets (sc) all the way back to the bottom edge. Each time you reach a marker (where a buttonhole should be), chain 2 instead of making 2 half double crochets, skipping two stitches. Continue this way across the row. Chain 1 and turn.
Row 3: Work one more row of single crochets (sc) across. Each time you reach a buttonhole, work 2 single crochets around the chain-2 space. Fasten off and weave in the ends.
Now attach the buttons at the markers/buttonholes using a thread and needle of suitable thickness. Make sure the positions of the buttons still align with the buttonholes you just made. A tip: start with the top and bottom buttons and work your way toward the middle to ensure they are evenly spaced.
Sleeves
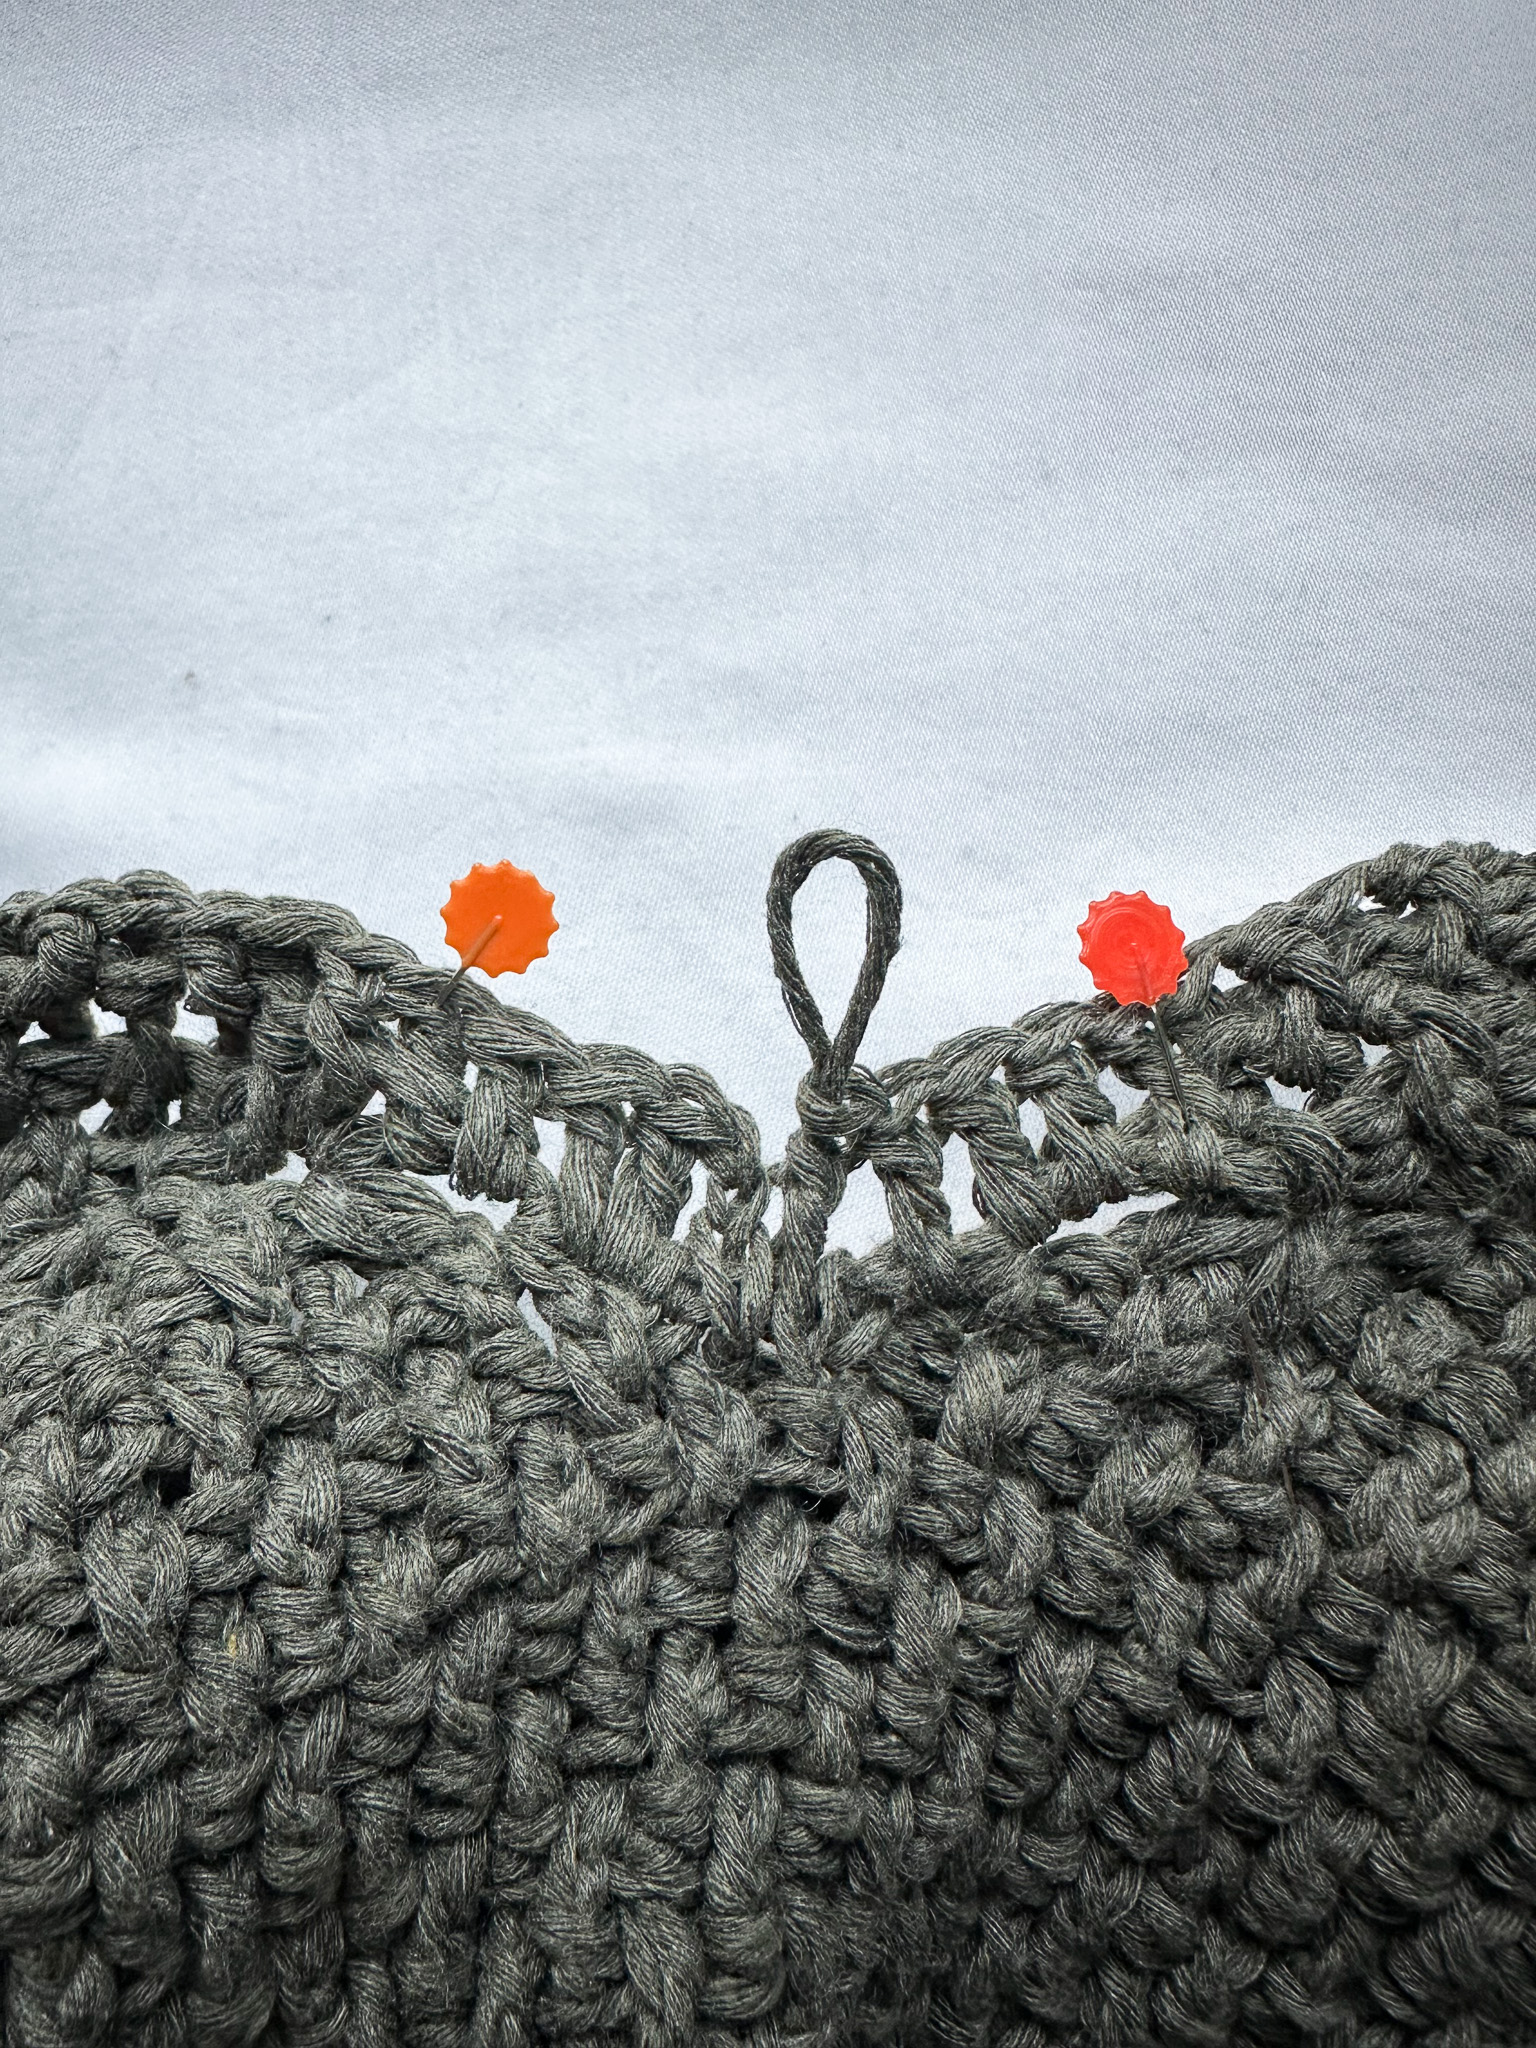
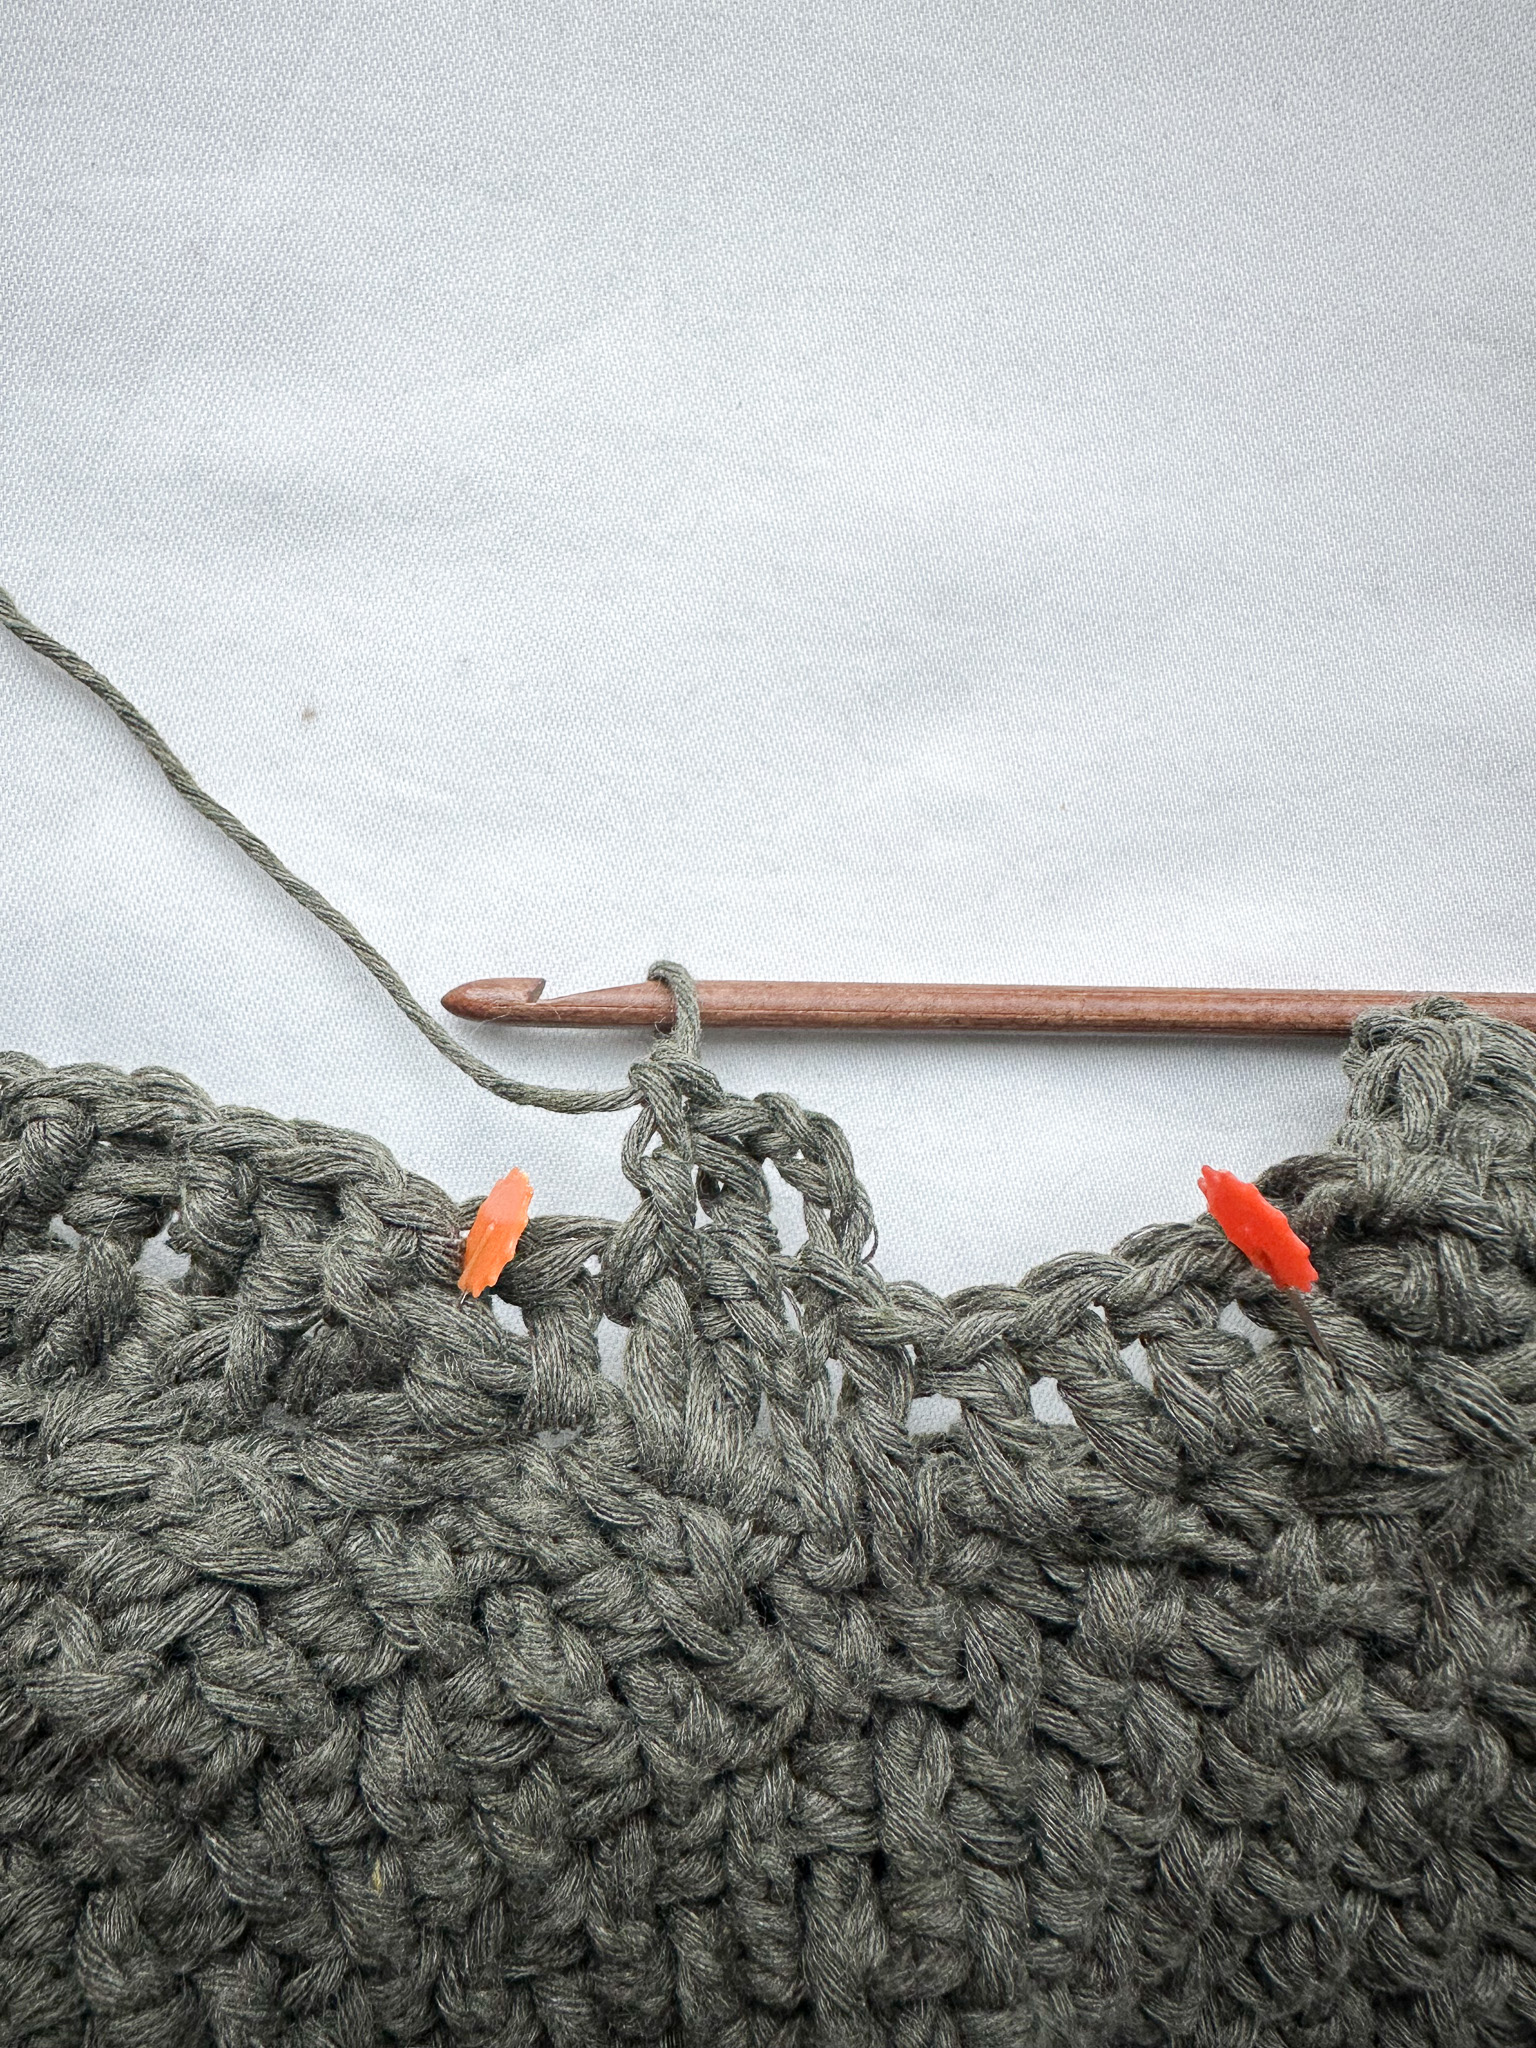
Now the sleeves are worked by continuing on the stitches you skipped on row 16 when you created the start of the sleeves. Each sleeve should have 54 stitches between the chains at the corners. The markers in the picture show where stitch 1 and stitch 54 are.
Between the markers (stitch 1 and 54) in the armhole, a gap has formed where you need to pick up/create 8 new stitches. At the beginning and end of each round, a visible line (like a seam) will form. Start in the middle of the armhole to hide the seam on the underside of the sleeve.
Decreases
To make the sleeve narrower, you will work decreases. When decreasing, work post stitches (reliefstolpar) around two stitches at once on the row below instead of just one. This way, two stitches become only one stitch on the row above—i.e., a decrease.
Always make two decreases next to each other, otherwise the pattern of alternating front and back post stitches will no longer align.
Here’s a video showing how to work decreases using front and back post double crochet.
Here are two images showing a front decrease (front post decrease).
Here are two images showing a back post decrease (back post relief decrease).

Each round on the sleeves begins with 3 chain stitches (instead of a stacked single crochet) and counts as the first double crochet of that round. Finish each round with a slip stitch into the 3rd chain of the starting chain.
Round 1: Make a loop on the hook and attach it to a stitch that aligns with the center of the underarm. Chain 3 (counts as the first stitch of the round). Then pick up 3 more double crochets so that you have a total of 4 stitches before the hook (stitch 1).
Then work 54 post stitches (back/front post) so that they follow the sleeve pattern, i.e., alternate back/front post opposite to the stitch on the previous round.
Then pick up 4 stitches between Post 54 and the start of Round 1. Make a slip stitch into the third chain of the first chain-3.
In total, you should have 54 back/front post stitches + 8 picked-up stitches (including the 3 chains) between the markers = 62 stitches in total.
Round 2: Chain 3, then work 61 back/front post stitches following the pattern. Slip stitch into the 3rd chain of the starting chain. Total stitches: 62.
Round 3: Chain 3, work 2 decreases (front/back post), then 53 back/front post stitches, and finish the round with 2 decreases (front/back post). Slip stitch into the 3rd chain. Total stitches: 58.
Rounds 4–7: Chain 3, work 57 back/front post stitches (start with back post on round 4). Slip stitch into the 3rd chain. Total stitches: 58 stitches for each of these 4 rounds.
Round 8: Chain 3, work 28 back/front post stitches, 2 decreases (back/front post), then 25 back/front post stitches. Slip stitch in the 3rd chain. Total stitches: 56.
Round 9: Chain 3, 2 decreases (front/back post), then 51 front/back post stitches. Slip stitch in the 3rd chain. Total stitches: 54.
Round 10: Chain 3, 53 back/front post stitches. Slip stitch in the 3rd chain. Total stitches: 54.
Round 11: Chain 3, 12 front/back post stitches, 2 decreases (front/back post), 22 front/back post stitches, 2 decreases (front/back post), 11 front/back post stitches. Total stitches: 50.
Round 12: Chain 3, 49 back/front post stitches. Slip stitch in the 3rd chain. Total stitches: 50.
Round 13: Chain 3, 18 front/back post stitches, 2 decreases (front/back post), 8 front/back post stitches, 2 decreases (front/back post), 15 front/back post stitches. Total stitches: 46.
Rounds 14–31: Chain 3, 45 back/front post stitches. Slip stitch in the 3rd chain. Total stitches: 46 per round for 18 rounds.
Note: Adjust the number of rounds to make the sleeves shorter or longer as desired. Do not cut the yarn.
Finish the sleeve with a cuff/rib in the same way as at the bottom of the sweater, with one exception: instead of making 2 slip stitches in the edge, make 3 slip stitches. This will make the sleeve more elastic.
Once you have worked all the way around, crochet the last row through both layers to join the ribbing. Cut the yarn and fasten off.
Now the sweater is finished! Great job ☺ If you want to crochet the Rakel collar and attach it to the sweater, it fits perfectly. The top of the sweater and the collar have the same number of stitches, so you can easily attach the collar to the sweater!
US Crochet Terms Description:
This part of the pattern consists of crochet terms. If you need help along the way, check out our simpler version with short technique videos.
Abbreviations (US terms):
- sc = single crochet
- inc = increase (2 sc in the same st)
- hdc = half double crochet
- dc = double crochet
- fpdc = front post double crochet
- bpdc = back post double crochet
- F/B = start with front post
- B/F = start with back post
- stsc = stacked single crochet
- BLO = back loop only
- sl st = slip stitch
- ch = chain
- sk = skip
- st(s) = stitch(es)
- (..) = total number of stitches on the row
- *…* = repeat what is inside …
- [...] = everything inside brackets is worked into the same stitch
Read This Before You Start!
First stitch after turning:
This sweater is worked in rows/rounds with post stitches, and the first stitch of each row should be a stacked single crochet (stsc). Instead of using a turning chain after a row, work a stsc at the beginning of the next row. If nothing else is indicated in the pattern, the first stitch of every row should always be a stsc.
Last stitch before turning:
The last stitch of each row cannot be worked as a post stitch. Instead, work it as a regular dc (double crochet) into the space between the last two stitches of the row below.
What is a corner?
This sweater is worked with raglan increases, which create the “line” between the neckline and the underarm. To make a raglan increase, you work 2 dc on each side of the line.
Here’s how to make a corner:
When you have worked a dc into the last stitch and reached the chain space in the corner of the row below, work [2 dc, 2 ch, 2 dc] into the chain space. You have now created a corner above the corner from the previous row.
Front Post Double Crochet (FPdc)
The technique used in this pattern is post stitches, alternating front and back. A post stitch is like a regular double crochet, but you work around the post of the stitch in the row below.
Front Post (FPdc):
- Yarn over, insert your hook from front to back around the post of the stitch in the row below, and pull the hook through so that the post is in front of your hook.
- Yarn over and pull through (you now have 3 loops on your hook).
- Yarn over, pull through 2 loops.
- Yarn over and pull through the remaining 2 loops — just like a regular double crochet.
Back Post Double Crochet (BPdc)
The back post double crochet is worked the same way as the front post, but with a key difference: insert your hook from back to front around the post of the stitch, then bring the hook out to the back of the work. The post will now sit behind the hook.
To create a wavy texture, always work a front post stitch on top of a back post stitch from the previous row. This creates the alternating pattern both within the row and between rows, forming a grid-like texture.
- If the pattern says fr/bk, start with a front post.
- If the pattern says bk/fr, start with a back post.
Neckline: Chain 45.
Row 1: Ch 1, skip 1, *5 sc, increase (2 sc in next st)* repeat 7 times, 2 sc. (51 sts) Turn.
Row 2: Ch 1, skip 1, *6 sc, increase* repeat 7 times, 2 sc. (58 sts) Turn.
Row 3: Ch 1, skip 1, *7 sc, increase* repeat 7 times, 2 sc. (65 sts) Turn.
Row 4: Ch 1, skip 1, *8 sc, increase* repeat 7 times, 2 sc. (72 sts) Turn.
Yoke with raglan increases:
Row 5: 1 stsc, 8 dc, [2 dc, 2 ch, 2 dc] in ch-space, 14 dc, [2 dc, 2 ch, 2 dc] in ch-space, 22 dc, [2 dc, 2 ch, 2 dc] in ch-space, 14 dc, [2 dc, 2 ch, 2 dc] in ch-space, 9 dc. (84 sts)
Row 6: 1 stsc, *1 relst fr, 1 relst bk* ×5, [2 dc, 2 ch, 2 dc] in ch-space, *1 relst fr, 1 relst bk* ×9, [2 dc, 2 ch, 2 dc] in ch-space, *1 relst fr, 1 relst bk* ×13, [2 dc, 2 ch, 2 dc] in ch-space, *1 relst fr, 1 relst bk* ×9, [2 dc, 2 ch, 2 dc] in ch-space, *1 relst fr, 1 relst bk* ×5, 1 dc in the space between the last 2 dc. (100 sts)
Row 7: 1 stsc, *1 relst bk, 1 relst fr* ×6, [2 dc, 2 ch, 2 dc] in ch-space, *1 relst bk, 1 relst fr* ×11, [2 dc, 2 ch, 2 dc] in ch-space, *1 relst bk, 1 relst fr* ×15, [2 dc, 2 ch, 2 dc] in ch-space, *1 relst bk, 1 relst fr* ×11, [2 dc, 2 ch, 2 dc] in ch-space, *1 relst bk, 1 relst fr* ×6, 1 dc in the space between the last 2 dc. (100 sts)
Rows 8–14: Alternate Row 6 and Row 7 until you have a total of 15 rows and 228 dc in total (29 dc, corner, 54 dc, corner, 62 dc, corner, 54 dc, corner, 29 dc).
Row 15 (folded piece for raglan corners): 1 stsc, *1 relst bk, 1 relst fr* ×14, 2 dc in ch-space at 1st corner, dc 54, 2 dc in ch-space at 2nd corner, *1 relst bk, 1 relst fr* ×31, 2 dc in ch-space at 3rd corner, dc 54, 2 dc in ch-space at 4th corner, *1 relst bk, 1 relst fr* ×14, 1 dc in the space between the last 2 dc. (128 sts)
Row 16: 1 stsc, *1 relst bk, 1 relst fr* x63, 1 st in the space between the last 2 sts. (128)
Row 17: 1 stsc, *1 relst fr, 1 relst bk* x63, 1 st in the space between the last 2 sts. (128)
Rows 18–34: Repeat rows 16 and 17 for a total of 19 rows (starting from row 16) or until the sweater reaches your desired length. The sweater in the photo is 17 cm long between rows 16–34. Keep in mind that the ribbing at the bottom of the sweater will add approximately 2–2.5 cm (or the width you want). Do not cut the yarn.
Ribbing:
Adjust the width by changing the number of stitches you chain. In the photo, the ribbing is 5 sts wide.
Ch 6.
Row 1: 1 stsc, 5 sc, 2 sl sts in the edge. Turn.
Row 2: Ch 2, 5 sl sts in the back loops only (BLO), ch 1, turn.
Row 3: 1 stsc, 5 sc in BLO, 2 sl sts in the edge, turn.
Repeat steps 2 and 3 around. Check occasionally that you are keeping 5 sts across; it’s easy to lose a stitch after a few rounds, which will make the ribbing uneven.
Finishing the ribbing:
Once you’ve gone all the way around, finish with 1 row of sc (step 4) and fasten off the yarn at the edge of the sweater with a sl st.
Step 6 – Button bands:
Now you will work along the vertical center edges of the sweater.
- The edge for sewing on buttons is worked differently from the edge for buttonholes.
- Which edge to start on depends on the side you are working from (see picture).
- The button edge starts at the top of the left front (where the wooden hook marker is).
- The buttonhole edge starts at the bottom of the right front (where the green marker is).
Button Band:
Row 1: Ch 2, hdc evenly along the edge (about 1 hdc per row of dc). Ch 1, turn.
- The exact number of stitches doesn’t matter, but it’s important not to make too many hdc, or the band will become uneven.
- Between the red markers, it’s suitable to work 2 hdc.
Row 2: Sc in each stitch across. Ch 1, turn.
Row 3: Sc in each stitch across. Fasten off.
- Now lay out the buttons you want to use on the sweater and decide where they should sit.
- Place stitch markers at the same height as the buttons.
Buttonhole Edge: Start from the bottom, at the ribbing. Pick up a loop of yarn in the corner.
Row 1: Ch 2, hdc along the edge, about 1 hdc per row of stitches. Ch 1, turn.
- Place markers where the buttonholes should be (at the same height as the markers on the other front piece).
Row 2: Sc in each stitch across except at the markers (where a buttonhole should be).
- At each buttonhole marker: hdc 2, ch 2. Ch 1, turn.
Row 3: Sc in each stitch across. At the ch-2 spaces (buttonhole loops), work 2 sc around the ch-2.
- Fasten off and weave in ends.
Sew on the buttons: Attach the buttons at the markers/buttonholes using a suitable thickness of thread and needle. Make sure the buttons still align with the buttonholes you just made. A tip is to start with the top and bottom buttons and work your way toward the middle to keep spacing even.
Sleeves: The sleeves are worked by continuing on the stitches you skipped on row 16 when starting the sleeve openings. Each sleeve should have 54 stitches between the corner chains. The markers in the picture show where stitch 1 and stitch 54 are. Between these markers (stitches 1 and 54) in the armhole, a gap has formed where you need to pick up/create 8 new stitches. At the beginning and end of each round, a visible line (like a seam) will form. To hide this seam, start in the middle of the armhole on the underside of the sleeve.
Decreases:
The sleeves require decreases to make them narrower. When making decreases, work front or back post double crochets (relief dc) around two stitches at the same time from the previous row, instead of just one. This way, two stitches become one on the current row, creating a decrease.
Always work two decreases next to each other, otherwise the alternating front/back post pattern will no longer align properly.
Two reference images for front post decreases:
Two reference images for back post decreases:
Sleeve rounds:
Each round on the sleeves begins with ch 3, which counts as the first dc of the round. Finish each round with a sl st into the third chain of the starting ch-3.
Round 1:
Ch 3 in the middle of the armhole, pick up 3 dc before the first stitch (this is the first stitch in the chain space), work 54 relst bk/fr to follow the pattern on the sleeve, pick up 4 more dc, sl st into the 3rd chain of the first dc. Total: 62 stitches.
Round 2: Ch 3, work 61 relst bk/fr around. Sl st into the 3rd ch of the starting ch-3. Total: 62 stitches.
Round 3: Ch 3, 2 dec relst fr/bk, 53 relst fr/bk, 2 dec relst fr/bk, sl st in 3rd ch of starting ch-3. Total: 58 sts.
Rounds 4–7: Ch 3, 57 relst bk/fr (alternate starting with bk/fr each round), sl st in 3rd ch of starting ch-3. Total: 58 sts per round.
Round 8: Ch 3, 28 relst bk/fr, 2 dec relst bk/fr, 25 relst bk/fr, sl st in 3rd ch of starting ch-3. Total: 56 sts.
Round 9: Ch 3, 2 dec relst fr/bk, 51 relst fr/bk, sl st in 3rd ch of starting ch-3. Total: 54 sts.
Round 10: Ch 3, 53 relst bk/fr, sl st in 3rd ch of starting ch-3. Total: 54 sts.
Round 11: Ch 3, 12 relst fr/bk, 2 dec relst fr/bk, 22 relst fr/bk, 2 dec relst fr/bk, 11 relst fr/bk, sl st in 3rd ch of starting ch-3. Total: 50 sts.
Round 12: Ch 3, 49 relst bk/fr, sl st in 3rd ch of starting ch-3. Total: 50 sts.
Round 13: Ch 3, 18 relst fr/bk, 2 dec relst fr/bk, 8 relst fr/bk, 2 dec relst fr/bk, 15 relst fr/bk, sl st in 3rd ch of starting ch-3. Total: 46 sts.
Rounds 14–31: Ch 3, 45 relst bk/fr, sl st in 3rd ch of starting ch-3. Total: 46 sts per round (repeat for 18 rounds or adjust sleeve length as desired).
Do not cut yarn.
Finishing the Sleeve Cuffs (Ribbing)
Work ribbing the same way as the bottom of the sweater, with one adjustment:
- Instead of 2 sl sts at the edge, make 3 sl sts for a stretchier cuff.
- After completing a round around, work the last row through both layers to join the ribbing.
- Fasten off and weave in ends.
Finishing the Sweater
- The sweater is now complete! 👏
- If you want to add the Rakel collar, it fits perfectly. The top of the sweater and the collar have the same stitch count, so attaching it is easy. You can also crochet the collar directly onto the sweater for a permanent attachment.
If you want, I can combine the full sweater and sleeve instructions into one clean US crochet pattern ready to use or print, with all abbreviations and stitch countsDo you want me to do that?
The rights to this pattern belong to MYO Make Your Own. The pattern or its pictures may not be copied, shared or resold either in parts or in its entirety, but you may sell items you have crocheted from this pattern. If you have questions about the pattern, contact MYO at hello@makeyourown.se.
Read this before you start!
The first stitch after turning
This sweater is crocheted in rows using front and back post stitches, and the first stitch of each row should be a stacked single crochet. Instead of using a turning chain after a row, you make a stacked single crochet at the beginning of the next row. See the video below for how to do this. Unless otherwise stated in the pattern, the first double crochet of every row should always be a stacked single crochet.
The last stitch before turning.
The last double crochet of each row cannot be made as a post stitch. Instead, it is worked as a regular double crochet into the space between the last two stitches of the previous row. See the picture below.
What is a corner?
This sweater is worked with raglan increases, which create the “line” between the neckline and the underarm. To make a raglan increase, you need to increase by 2 double crochets on each side of the line.
Here’s how to make a corner:
When you have worked a double crochet into the last stitch and reached the chain space in the corner of the row below, work [2 double crochets, 2 chains, 2 double crochets] into the chain space. You have now created a corner above the corner of the previous row.
Front Post Double Crochets (FPDC) / Relief Stitches
The technique used in this pattern is relief stitches, alternating in front and back. A relief stitch is like a regular double crochet, but you work around the post of the stitch from the previous row.
Front Post Double Crochet (FPDC):
Yarn over, insert the hook from front to back around the post of the stitch in the previous row, and bring it out on the other side so that the post is in front of your hook. Yarn over and pull up a loop (you now have 3 loops on your hook). Yarn over and pull through 2 loops, yarn over again and pull through the remaining 2 loops (just like a regular double crochet).
Back Post Double Crochet (BPDC) / Relief Stitch Back:
Worked the same way as a front post double crochet, but with the difference that you insert the hook from back to front around the post, then bring it out on the back side of the piece. The post sits behind the hook.
To create a wavy texture, always work a front post double crochet on top of a back post double crochet from the previous row. This alternates both within the row and between rows, creating a checkerboard-like pattern.
If the instructions say front/back, start with a front post double crochet. If they say back/front, start with a back post double crochet.
Let’s get started!
Neckline:
Chain 45 stitches. If you’re unsure how to make a chain, see the video below.
Row 1: Skip the first stitch. Work 5 single crochets, then 2 single crochets in the next stitch (an increase). Repeat 5 single crochets + 1 increase a total of 7 times. Work 2 single crochets in the last chain. You should now have completed the first row with a total of 51 stitches.
Chain 1 and turn. If you are unsure how to work a single crochet, see the video below.
Row 2: Skip the first stitch. Work 6 single crochets, then 2 single crochets in the next stitch (an increase). Repeat 6 single crochets + 1 increase a total of 7 times. Work 2 single crochets in the last chain. You should now have a total of 58 stitches. Chain 1 and turn.
Row 3: Skip the first stitch. Work 7 single crochets, then 2 single crochets in the next stitch (an increase). Repeat 7 single crochets + 1 increase a total of 7 times. Work 2 single crochets in the last chain. You should now have a total of 65 stitches. Chain 1 and turn.
Row 4: Skip the first stitch. Work 8 single crochets, then 2 single crochets in the next stitch (an increase). Repeat 8 single crochets + 1 increase a total of 7 times. Work 2 single crochets in the last chain. You should now have a total of 72 stitches. Chain 1 and turn.
Ok with raglan increases
Now the rows with raglan increases (corners) begin. In Row 5, work regular double crochets, but from Row 6 onward you start using front and back post stitches (relief stitches). Remember, the first stitch of each row should be a stacked single crochet (see Step 1). Don’t forget you can refer to Step 1 to see how to work relief stitches and corners.
Row 5: Start with 1 stacked single crochet, then work 8 double crochets. Now comes the first corner. Then work 14 double crochets, then the second corner. Work 22 double crochets, the third corner, 14 double crochets, the fourth corner, and finish the row with 9 double crochets. You should now have a total of 84 double crochets on the row.
Row 6: 1 stacked single crochet, 1 front post double crochet, and 1 back post double crochet. Alternate front and back post double crochets until the first corner, where you work a corner increase. After the corner, continue alternating front and back post double crochets between corners. On this row, always start with a front post stitch immediately after the corners.
See the image for how it should look after Row 6.
Row 7: Do the same as Row 6, but start with a back post double crochet, then continue alternating back/front post double crochets across the row. On this row, always start with a back post stitch immediately after a corner.
Rows 8–14: Alternate Rows 6 and 7 until you have a total of 15 rows and 228 double crochets in total: (29 double crochet, corner, 54 double crochet, corner, 62 double crochet, corner, 54 double crochet, corner, 29 double crochet).
Row 15: Fold the piece in half so that the corners meet. Work back/front post double crochets up to the first corner. Make 2 double crochets in the chain space (this forms half a corner).
Row 15: Fold the piece in half so that the corners meet. Work back/front post double crochets up to the first corner. Make 2 double crochets in the chain space (this forms half a corner).
Continue alternating back/front post stitches on the back section, then join corners 3 and 4 in the same way as corners 1 and 2. You should now have a total of 128 stitches on the row.
Rows 16–34: Crochet 128 double crochets back and forth for a total of 19 rows, or until the sweater reaches your desired length. The sweater in the photo measures 17 cm between rows 16–34. Keep in mind that the ribbing at the bottom of the sweater will be added later (about 2–2.5 cm, or as wide as you like). Do not cut the yarn.
When you’re happy with the length, it’s time to work the ribbing. In the photo, the ribbing is 5 stitches wide, but you can make it narrower or wider by adjusting the number of chains you start with.
Step 1: Make a chain with the number of stitches you want for the ribbing + 1. In this example, 5 + 1 chains (6 in total).
Step 2: Skip the first chain stitch, then single crochet 5 stitches back along the chain toward the sweater. Make 2 slip stitches into the edge of the sweater. Turn the sweater.
Step 3: Skip the 2 slip stitches you just made, and crochet 5 single crochets in the back loop only (the loop farthest from you). Chain 1. Turn the sweater.
Step 4: Skip the chain stitch, crochet 5 single crochets in the back loop only (the loop farthest from you). Make 2 slip stitches in the edge of the sweater, then turn the sweater.
Repeat steps 3 and 4 until you’ve gone all the way around. Occasionally check that you still have 5 stitches across—it's easy to miss a stitch after a few rounds, which can make the edge uneven.
Once you’ve gone all the way around, finish with one round of single crochets (as in step 4) and secure the yarn in the edge of the sweater with a slip stitch.
Now you will crochet along the vertical center edges of the sweater. The edge where the buttons will be attached is worked differently from the edge with the buttonholes. Which method to use depends on which side you start crocheting from, see the picture. The button edge starts at the top of the left side (marked by the wooden crochet hook). The buttonhole edge is worked starting from the bottom of the right side (marked by the green needle).
Button edge:
Row 1: Start at the top of the left front piece near the neckline. Make a loop and pull it through at the very top corner. Chain 2, then work half double crochets (hdc) along the entire edge, including the ribbing. Try to space the hdc evenly along the edge so it stays straight, roughly 1 half double crochet per row of stitches on the front piece. The exact number of stitches doesn’t matter, but make sure not to add too many half double crochet, or the edge will become uneven (see picture). Between the red markers, it’s suitable to place two half double crochet. Chain 1 and turn the piece.
Row 2: Work single crochets (sc) along the edge. Chain 1 and turn.
Row 3: Work another row of single crochets. Cut the yarn and fasten off.
Now lay out the buttons you want on the sweater and decide where you want them to be placed. Place stitch markers at the same height as the buttons.
Buttonhole Edge:
Row 1: Start from the bottom at the ribbed edge. Pick up a loop of yarn and chain 2. Work the first row the same way as the previous edge with half double crochets (hdc), trying to keep the edge straight and even. When you reach the top, chain 1 and turn the piece. Place markers where the buttonholes should be (at the same height as the markers on the opposite front piece).
Row 2: Work single crochets (sc) all the way back to the bottom edge. Each time you reach a marker (where a buttonhole should be), chain 2 instead of making 2 half double crochets, skipping two stitches. Continue this way across the row. Chain 1 and turn.
Row 3: Work one more row of single crochets (sc) across. Each time you reach a buttonhole, work 2 single crochets around the chain-2 space. Fasten off and weave in the ends.
Now attach the buttons at the markers/buttonholes using a thread and needle of suitable thickness. Make sure the positions of the buttons still align with the buttonholes you just made. A tip: start with the top and bottom buttons and work your way toward the middle to ensure they are evenly spaced.
Sleeves
Now the sleeves are worked by continuing on the stitches you skipped on row 16 when you created the start of the sleeves. Each sleeve should have 54 stitches between the chains at the corners. The markers in the picture show where stitch 1 and stitch 54 are.
Between the markers (stitch 1 and 54) in the armhole, a gap has formed where you need to pick up/create 8 new stitches. At the beginning and end of each round, a visible line (like a seam) will form. Start in the middle of the armhole to hide the seam on the underside of the sleeve.
Decreases
To make the sleeve narrower, you will work decreases. When decreasing, work post stitches (reliefstolpar) around two stitches at once on the row below instead of just one. This way, two stitches become only one stitch on the row above—i.e., a decrease.
Always make two decreases next to each other, otherwise the pattern of alternating front and back post stitches will no longer align.
Here’s a video showing how to work decreases using front and back post double crochet.
Here are two images showing a front decrease (front post decrease).
Here are two images showing a back post decrease (back post relief decrease).
Each round on the sleeves begins with 3 chain stitches (instead of a stacked single crochet) and counts as the first double crochet of that round. Finish each round with a slip stitch into the 3rd chain of the starting chain.
Round 1: Make a loop on the hook and attach it to a stitch that aligns with the center of the underarm. Chain 3 (counts as the first stitch of the round). Then pick up 3 more double crochets so that you have a total of 4 stitches before the hook (stitch 1).
Then work 54 post stitches (back/front post) so that they follow the sleeve pattern, i.e., alternate back/front post opposite to the stitch on the previous round.
Then pick up 4 stitches between Post 54 and the start of Round 1. Make a slip stitch into the third chain of the first chain-3.
In total, you should have 54 back/front post stitches + 8 picked-up stitches (including the 3 chains) between the markers = 62 stitches in total.
Round 2: Chain 3, then work 61 back/front post stitches following the pattern. Slip stitch into the 3rd chain of the starting chain. Total stitches: 62.
Round 3: Chain 3, work 2 decreases (front/back post), then 53 back/front post stitches, and finish the round with 2 decreases (front/back post). Slip stitch into the 3rd chain. Total stitches: 58.
Rounds 4–7: Chain 3, work 57 back/front post stitches (start with back post on round 4). Slip stitch into the 3rd chain. Total stitches: 58 stitches for each of these 4 rounds.
Round 8: Chain 3, work 28 back/front post stitches, 2 decreases (back/front post), then 25 back/front post stitches. Slip stitch in the 3rd chain. Total stitches: 56.
Round 9: Chain 3, 2 decreases (front/back post), then 51 front/back post stitches. Slip stitch in the 3rd chain. Total stitches: 54.
Round 10: Chain 3, 53 back/front post stitches. Slip stitch in the 3rd chain. Total stitches: 54.
Round 11: Chain 3, 12 front/back post stitches, 2 decreases (front/back post), 22 front/back post stitches, 2 decreases (front/back post), 11 front/back post stitches. Total stitches: 50.
Round 12: Chain 3, 49 back/front post stitches. Slip stitch in the 3rd chain. Total stitches: 50.
Round 13: Chain 3, 18 front/back post stitches, 2 decreases (front/back post), 8 front/back post stitches, 2 decreases (front/back post), 15 front/back post stitches. Total stitches: 46.
Rounds 14–31: Chain 3, 45 back/front post stitches. Slip stitch in the 3rd chain. Total stitches: 46 per round for 18 rounds.
Note: Adjust the number of rounds to make the sleeves shorter or longer as desired. Do not cut the yarn.
Finish the sleeve with a cuff/rib in the same way as at the bottom of the sweater, with one exception: instead of making 2 slip stitches in the edge, make 3 slip stitches. This will make the sleeve more elastic.
Once you have worked all the way around, crochet the last row through both layers to join the ribbing. Cut the yarn and fasten off.
Now the sweater is finished! Great job ☺ If you want to crochet the Rakel collar and attach it to the sweater, it fits perfectly. The top of the sweater and the collar have the same number of stitches, so you can easily attach the collar to the sweater!
US Crochet Terms Description:
This part of the pattern consists of crochet terms. If you need help along the way, check out our simpler version with short technique videos.
Abbreviations (US terms):
- sc = single crochet
- inc = increase (2 sc in the same st)
- hdc = half double crochet
- dc = double crochet
- fpdc = front post double crochet
- bpdc = back post double crochet
- F/B = start with front post
- B/F = start with back post
- stsc = stacked single crochet
- BLO = back loop only
- sl st = slip stitch
- ch = chain
- sk = skip
- st(s) = stitch(es)
- (..) = total number of stitches on the row
- *…* = repeat what is inside …
- [...] = everything inside brackets is worked into the same stitch
Read This Before You Start!
First stitch after turning:
This sweater is worked in rows/rounds with post stitches, and the first stitch of each row should be a stacked single crochet (stsc). Instead of using a turning chain after a row, work a stsc at the beginning of the next row. If nothing else is indicated in the pattern, the first stitch of every row should always be a stsc.
Last stitch before turning:
The last stitch of each row cannot be worked as a post stitch. Instead, work it as a regular dc (double crochet) into the space between the last two stitches of the row below.
What is a corner?
This sweater is worked with raglan increases, which create the “line” between the neckline and the underarm. To make a raglan increase, you work 2 dc on each side of the line.
Here’s how to make a corner:
When you have worked a dc into the last stitch and reached the chain space in the corner of the row below, work [2 dc, 2 ch, 2 dc] into the chain space. You have now created a corner above the corner from the previous row.
Front Post Double Crochet (FPdc)
The technique used in this pattern is post stitches, alternating front and back. A post stitch is like a regular double crochet, but you work around the post of the stitch in the row below.
Front Post (FPdc):
- Yarn over, insert your hook from front to back around the post of the stitch in the row below, and pull the hook through so that the post is in front of your hook.
- Yarn over and pull through (you now have 3 loops on your hook).
- Yarn over, pull through 2 loops.
- Yarn over and pull through the remaining 2 loops — just like a regular double crochet.
Back Post Double Crochet (BPdc)
The back post double crochet is worked the same way as the front post, but with a key difference: insert your hook from back to front around the post of the stitch, then bring the hook out to the back of the work. The post will now sit behind the hook.
To create a wavy texture, always work a front post stitch on top of a back post stitch from the previous row. This creates the alternating pattern both within the row and between rows, forming a grid-like texture.
- If the pattern says fr/bk, start with a front post.
- If the pattern says bk/fr, start with a back post.
Neckline: Chain 45.
Row 1: Ch 1, skip 1, *5 sc, increase (2 sc in next st)* repeat 7 times, 2 sc. (51 sts) Turn.
Row 2: Ch 1, skip 1, *6 sc, increase* repeat 7 times, 2 sc. (58 sts) Turn.
Row 3: Ch 1, skip 1, *7 sc, increase* repeat 7 times, 2 sc. (65 sts) Turn.
Row 4: Ch 1, skip 1, *8 sc, increase* repeat 7 times, 2 sc. (72 sts) Turn.
Yoke with raglan increases:
Row 5: 1 stsc, 8 dc, [2 dc, 2 ch, 2 dc] in ch-space, 14 dc, [2 dc, 2 ch, 2 dc] in ch-space, 22 dc, [2 dc, 2 ch, 2 dc] in ch-space, 14 dc, [2 dc, 2 ch, 2 dc] in ch-space, 9 dc. (84 sts)
Row 6: 1 stsc, *1 relst fr, 1 relst bk* ×5, [2 dc, 2 ch, 2 dc] in ch-space, *1 relst fr, 1 relst bk* ×9, [2 dc, 2 ch, 2 dc] in ch-space, *1 relst fr, 1 relst bk* ×13, [2 dc, 2 ch, 2 dc] in ch-space, *1 relst fr, 1 relst bk* ×9, [2 dc, 2 ch, 2 dc] in ch-space, *1 relst fr, 1 relst bk* ×5, 1 dc in the space between the last 2 dc. (100 sts)
Row 7: 1 stsc, *1 relst bk, 1 relst fr* ×6, [2 dc, 2 ch, 2 dc] in ch-space, *1 relst bk, 1 relst fr* ×11, [2 dc, 2 ch, 2 dc] in ch-space, *1 relst bk, 1 relst fr* ×15, [2 dc, 2 ch, 2 dc] in ch-space, *1 relst bk, 1 relst fr* ×11, [2 dc, 2 ch, 2 dc] in ch-space, *1 relst bk, 1 relst fr* ×6, 1 dc in the space between the last 2 dc. (100 sts)
Rows 8–14: Alternate Row 6 and Row 7 until you have a total of 15 rows and 228 dc in total (29 dc, corner, 54 dc, corner, 62 dc, corner, 54 dc, corner, 29 dc).
Row 15 (folded piece for raglan corners): 1 stsc, *1 relst bk, 1 relst fr* ×14, 2 dc in ch-space at 1st corner, dc 54, 2 dc in ch-space at 2nd corner, *1 relst bk, 1 relst fr* ×31, 2 dc in ch-space at 3rd corner, dc 54, 2 dc in ch-space at 4th corner, *1 relst bk, 1 relst fr* ×14, 1 dc in the space between the last 2 dc. (128 sts)
Row 16: 1 stsc, *1 relst bk, 1 relst fr* x63, 1 st in the space between the last 2 sts. (128)
Row 17: 1 stsc, *1 relst fr, 1 relst bk* x63, 1 st in the space between the last 2 sts. (128)
Rows 18–34: Repeat rows 16 and 17 for a total of 19 rows (starting from row 16) or until the sweater reaches your desired length. The sweater in the photo is 17 cm long between rows 16–34. Keep in mind that the ribbing at the bottom of the sweater will add approximately 2–2.5 cm (or the width you want). Do not cut the yarn.
Ribbing:
Adjust the width by changing the number of stitches you chain. In the photo, the ribbing is 5 sts wide.
Ch 6.
Row 1: 1 stsc, 5 sc, 2 sl sts in the edge. Turn.
Row 2: Ch 2, 5 sl sts in the back loops only (BLO), ch 1, turn.
Row 3: 1 stsc, 5 sc in BLO, 2 sl sts in the edge, turn.
Repeat steps 2 and 3 around. Check occasionally that you are keeping 5 sts across; it’s easy to lose a stitch after a few rounds, which will make the ribbing uneven.
Finishing the ribbing:
Once you’ve gone all the way around, finish with 1 row of sc (step 4) and fasten off the yarn at the edge of the sweater with a sl st.
Step 6 – Button bands:
Now you will work along the vertical center edges of the sweater.
- The edge for sewing on buttons is worked differently from the edge for buttonholes.
- Which edge to start on depends on the side you are working from (see picture).
- The button edge starts at the top of the left front (where the wooden hook marker is).
- The buttonhole edge starts at the bottom of the right front (where the green marker is).
Button Band:
Row 1: Ch 2, hdc evenly along the edge (about 1 hdc per row of dc). Ch 1, turn.
- The exact number of stitches doesn’t matter, but it’s important not to make too many hdc, or the band will become uneven.
- Between the red markers, it’s suitable to work 2 hdc.
Row 2: Sc in each stitch across. Ch 1, turn.
Row 3: Sc in each stitch across. Fasten off.
- Now lay out the buttons you want to use on the sweater and decide where they should sit.
- Place stitch markers at the same height as the buttons.
Buttonhole Edge: Start from the bottom, at the ribbing. Pick up a loop of yarn in the corner.
Row 1: Ch 2, hdc along the edge, about 1 hdc per row of stitches. Ch 1, turn.
- Place markers where the buttonholes should be (at the same height as the markers on the other front piece).
Row 2: Sc in each stitch across except at the markers (where a buttonhole should be).
- At each buttonhole marker: hdc 2, ch 2. Ch 1, turn.
Row 3: Sc in each stitch across. At the ch-2 spaces (buttonhole loops), work 2 sc around the ch-2.
- Fasten off and weave in ends.
Sew on the buttons: Attach the buttons at the markers/buttonholes using a suitable thickness of thread and needle. Make sure the buttons still align with the buttonholes you just made. A tip is to start with the top and bottom buttons and work your way toward the middle to keep spacing even.
Sleeves: The sleeves are worked by continuing on the stitches you skipped on row 16 when starting the sleeve openings. Each sleeve should have 54 stitches between the corner chains. The markers in the picture show where stitch 1 and stitch 54 are. Between these markers (stitches 1 and 54) in the armhole, a gap has formed where you need to pick up/create 8 new stitches. At the beginning and end of each round, a visible line (like a seam) will form. To hide this seam, start in the middle of the armhole on the underside of the sleeve.
Decreases:
The sleeves require decreases to make them narrower. When making decreases, work front or back post double crochets (relief dc) around two stitches at the same time from the previous row, instead of just one. This way, two stitches become one on the current row, creating a decrease.
Always work two decreases next to each other, otherwise the alternating front/back post pattern will no longer align properly.
Two reference images for front post decreases:
Two reference images for back post decreases:
Sleeve rounds:
Each round on the sleeves begins with ch 3, which counts as the first dc of the round. Finish each round with a sl st into the third chain of the starting ch-3.
Round 1:
Ch 3 in the middle of the armhole, pick up 3 dc before the first stitch (this is the first stitch in the chain space), work 54 relst bk/fr to follow the pattern on the sleeve, pick up 4 more dc, sl st into the 3rd chain of the first dc. Total: 62 stitches.
Round 2: Ch 3, work 61 relst bk/fr around. Sl st into the 3rd ch of the starting ch-3. Total: 62 stitches.
Round 3: Ch 3, 2 dec relst fr/bk, 53 relst fr/bk, 2 dec relst fr/bk, sl st in 3rd ch of starting ch-3. Total: 58 sts.
Rounds 4–7: Ch 3, 57 relst bk/fr (alternate starting with bk/fr each round), sl st in 3rd ch of starting ch-3. Total: 58 sts per round.
Round 8: Ch 3, 28 relst bk/fr, 2 dec relst bk/fr, 25 relst bk/fr, sl st in 3rd ch of starting ch-3. Total: 56 sts.
Round 9: Ch 3, 2 dec relst fr/bk, 51 relst fr/bk, sl st in 3rd ch of starting ch-3. Total: 54 sts.
Round 10: Ch 3, 53 relst bk/fr, sl st in 3rd ch of starting ch-3. Total: 54 sts.
Round 11: Ch 3, 12 relst fr/bk, 2 dec relst fr/bk, 22 relst fr/bk, 2 dec relst fr/bk, 11 relst fr/bk, sl st in 3rd ch of starting ch-3. Total: 50 sts.
Round 12: Ch 3, 49 relst bk/fr, sl st in 3rd ch of starting ch-3. Total: 50 sts.
Round 13: Ch 3, 18 relst fr/bk, 2 dec relst fr/bk, 8 relst fr/bk, 2 dec relst fr/bk, 15 relst fr/bk, sl st in 3rd ch of starting ch-3. Total: 46 sts.
Rounds 14–31: Ch 3, 45 relst bk/fr, sl st in 3rd ch of starting ch-3. Total: 46 sts per round (repeat for 18 rounds or adjust sleeve length as desired).
Do not cut yarn.
Finishing the Sleeve Cuffs (Ribbing)
Work ribbing the same way as the bottom of the sweater, with one adjustment:
- Instead of 2 sl sts at the edge, make 3 sl sts for a stretchier cuff.
- After completing a round around, work the last row through both layers to join the ribbing.
- Fasten off and weave in ends.
Finishing the Sweater
- The sweater is now complete! 👏
- If you want to add the Rakel collar, it fits perfectly. The top of the sweater and the collar have the same stitch count, so attaching it is easy. You can also crochet the collar directly onto the sweater for a permanent attachment.
If you want, I can combine the full sweater and sleeve instructions into one clean US crochet pattern ready to use or print, with all abbreviations and stitch countsDo you want me to do that?
The rights to this pattern belong to MYO Make Your Own. The pattern or its pictures may not be copied, shared or resold either in parts or in its entirety, but you may sell items you have crocheted from this pattern. If you have questions about the pattern, contact MYO at hello@makeyourown.se.
%20(1).jpg)


Share your creations with us
Thank you!
Your comment was sent!