
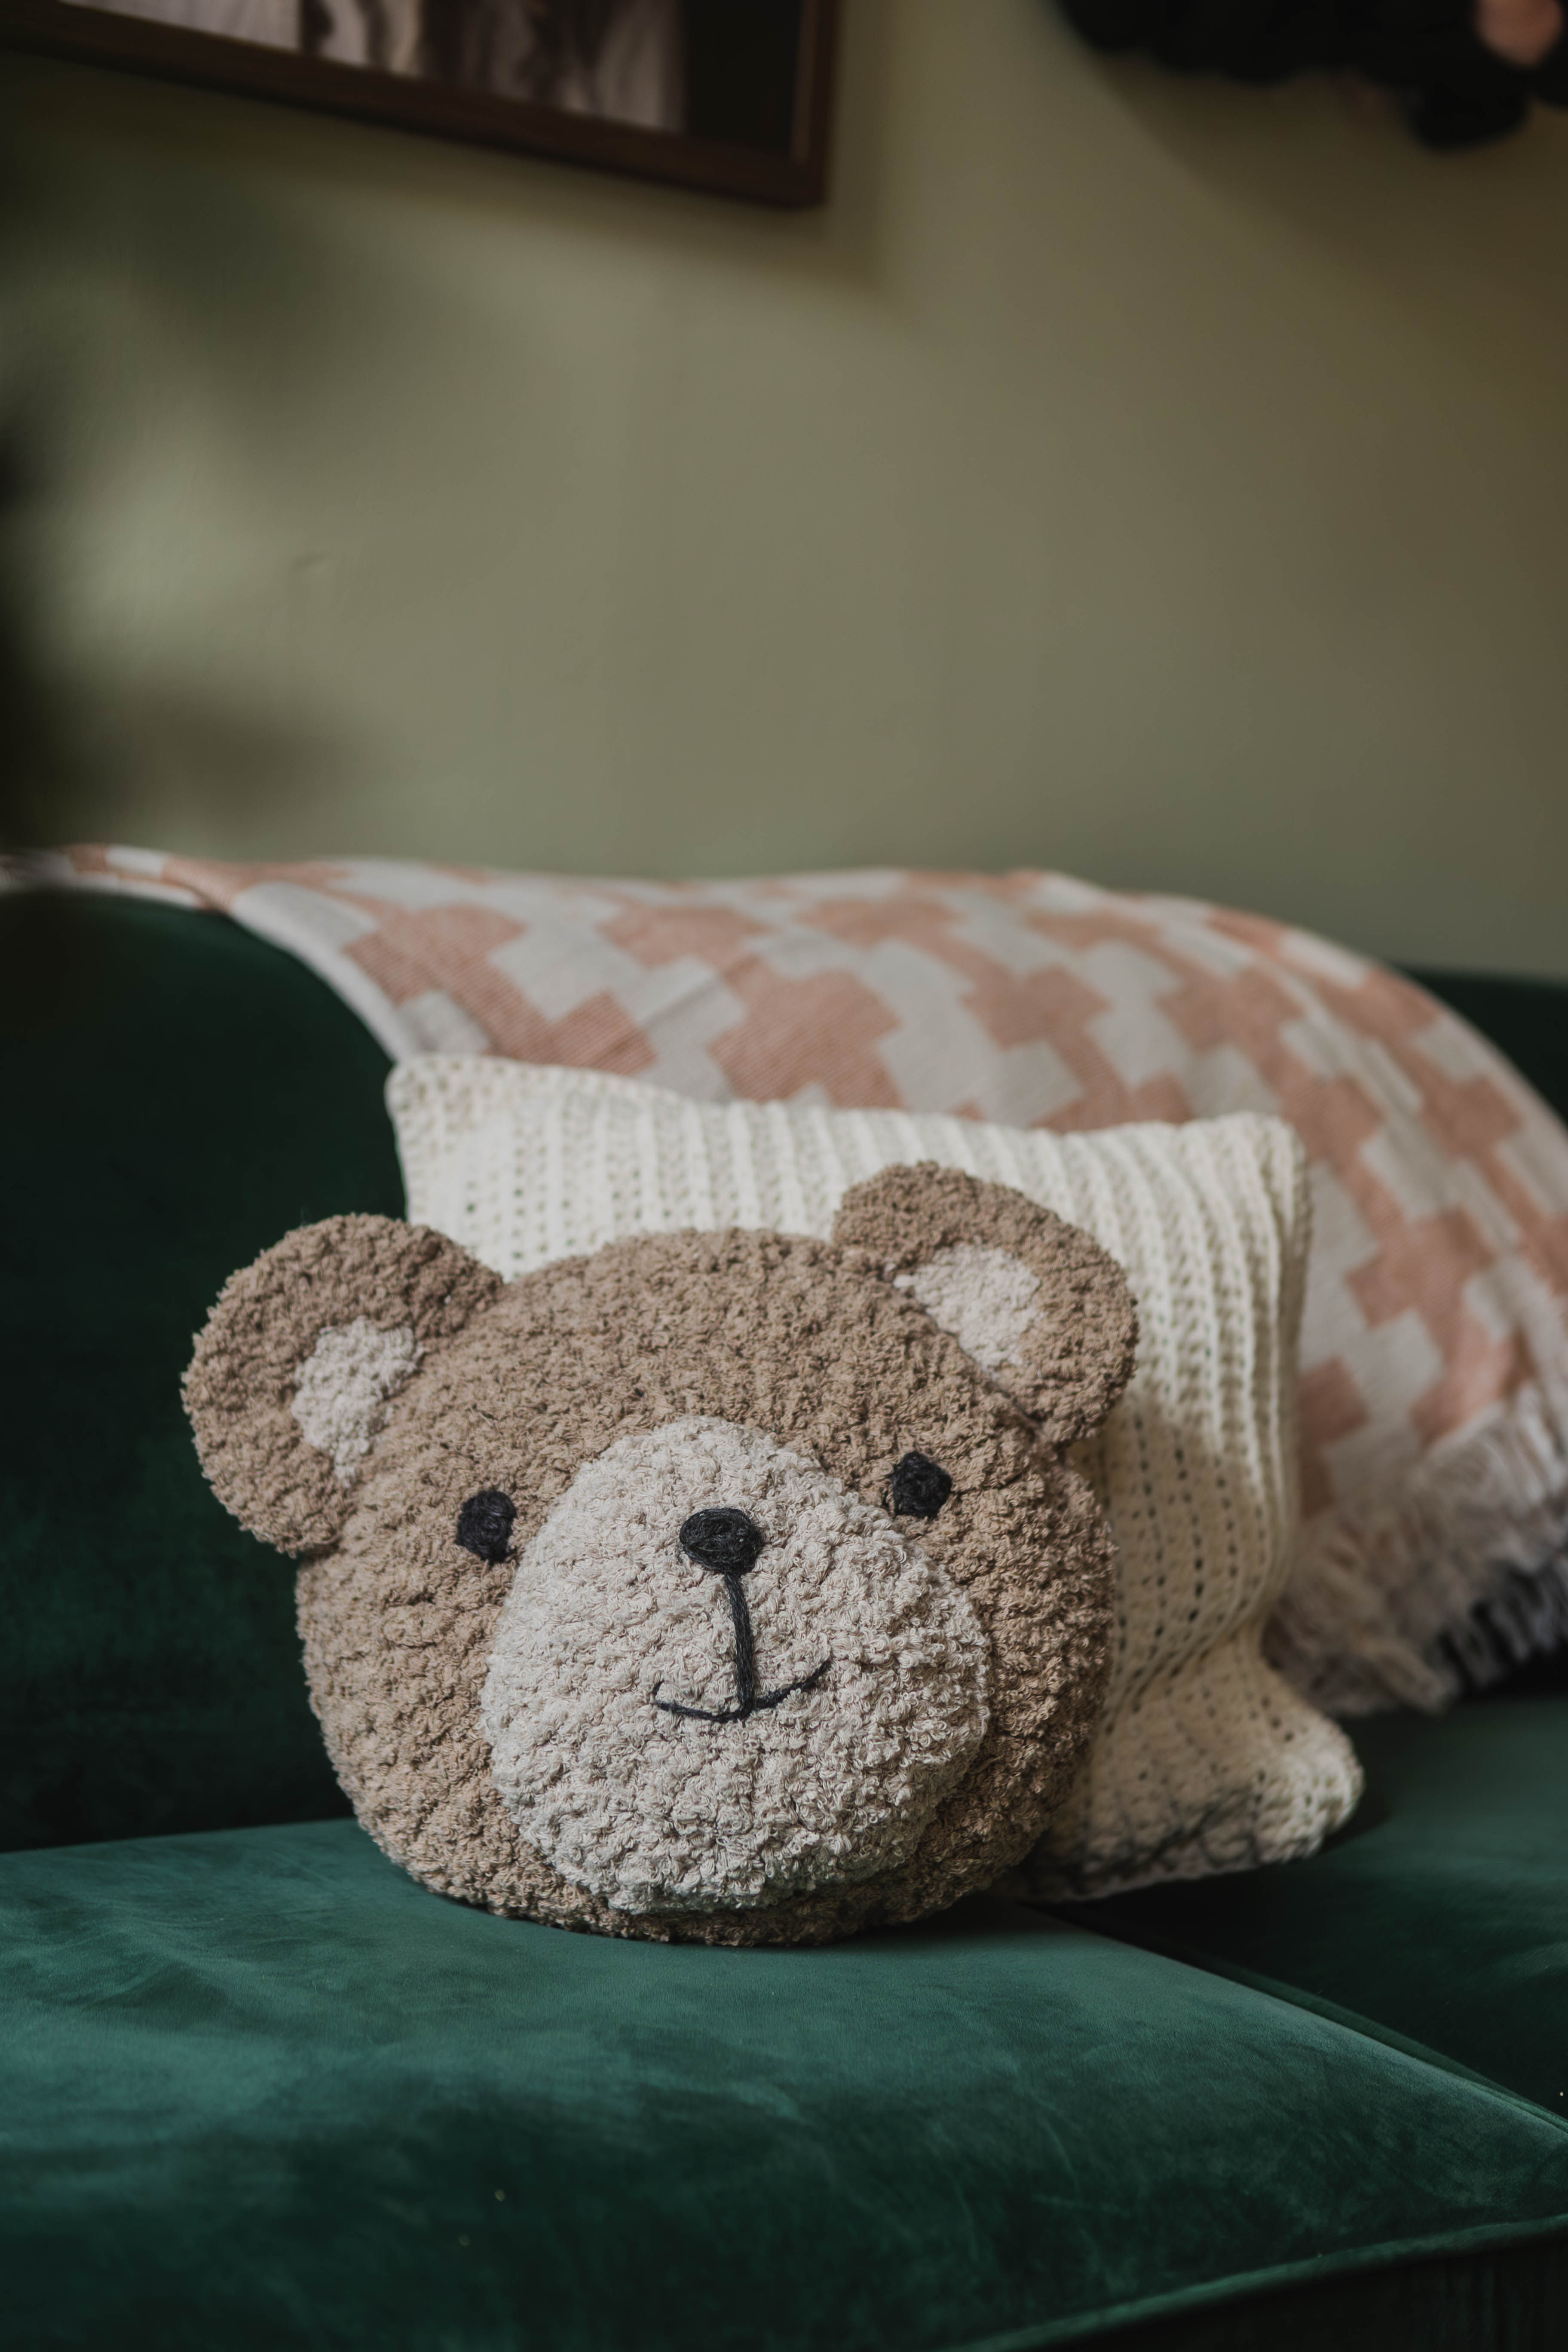
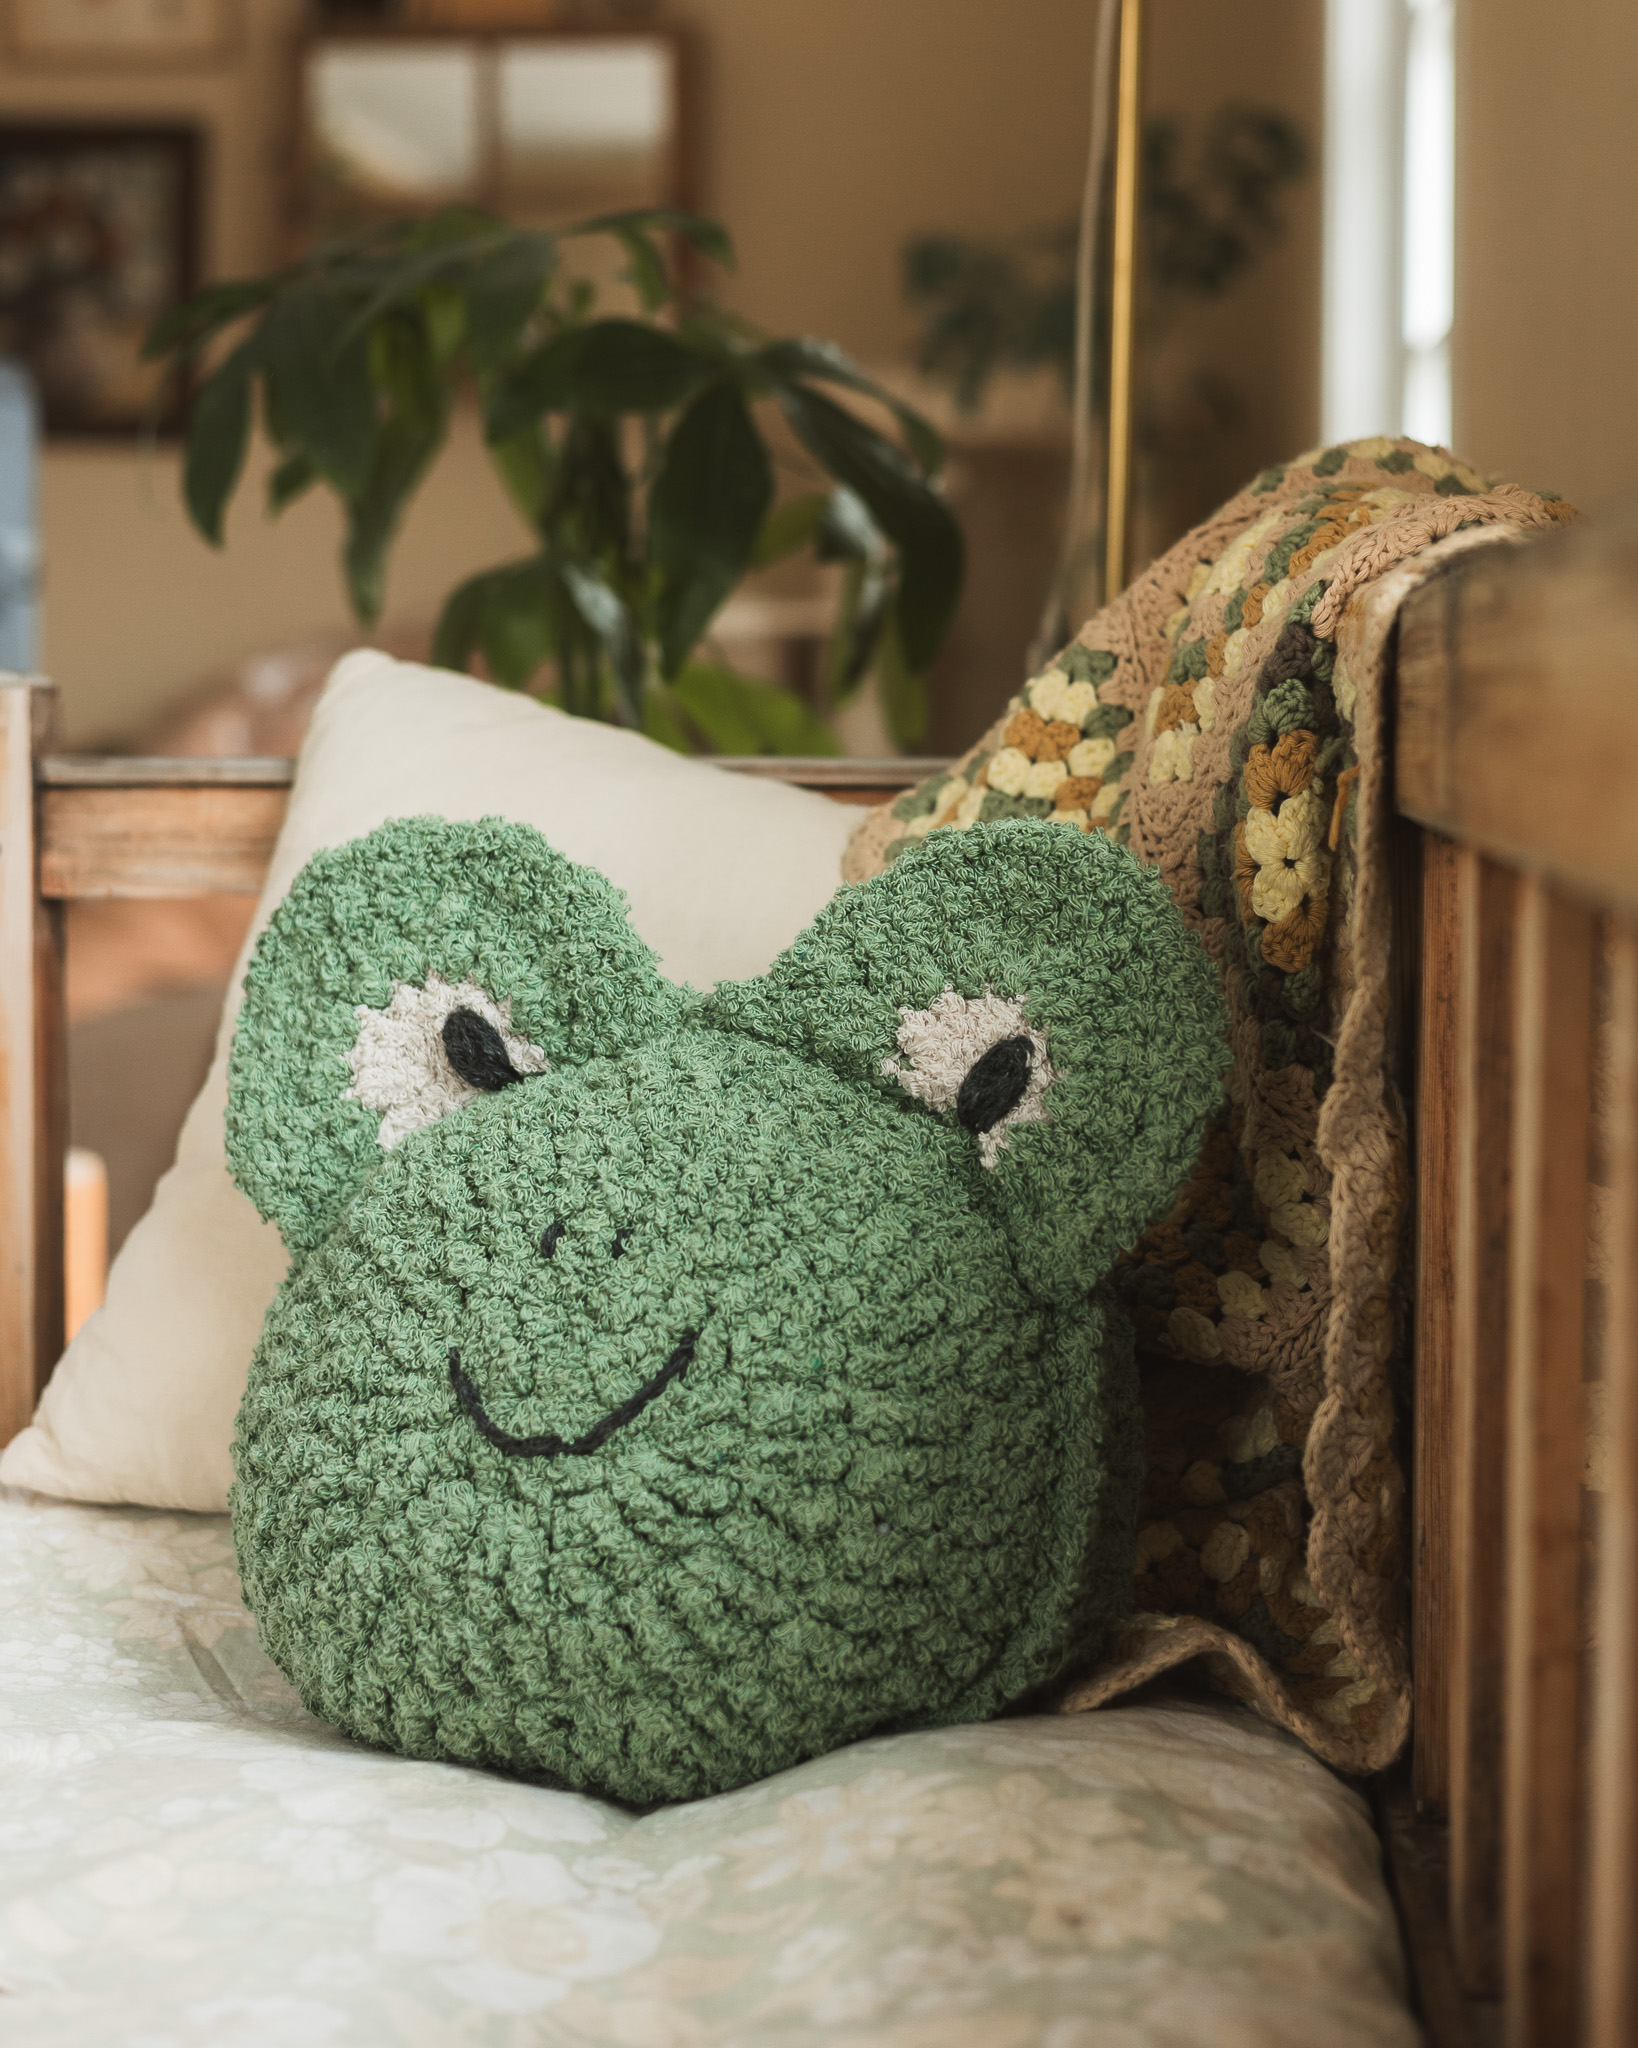
Crochet bear pillow “Noa”
Crochet a cute bear pillow 🐻
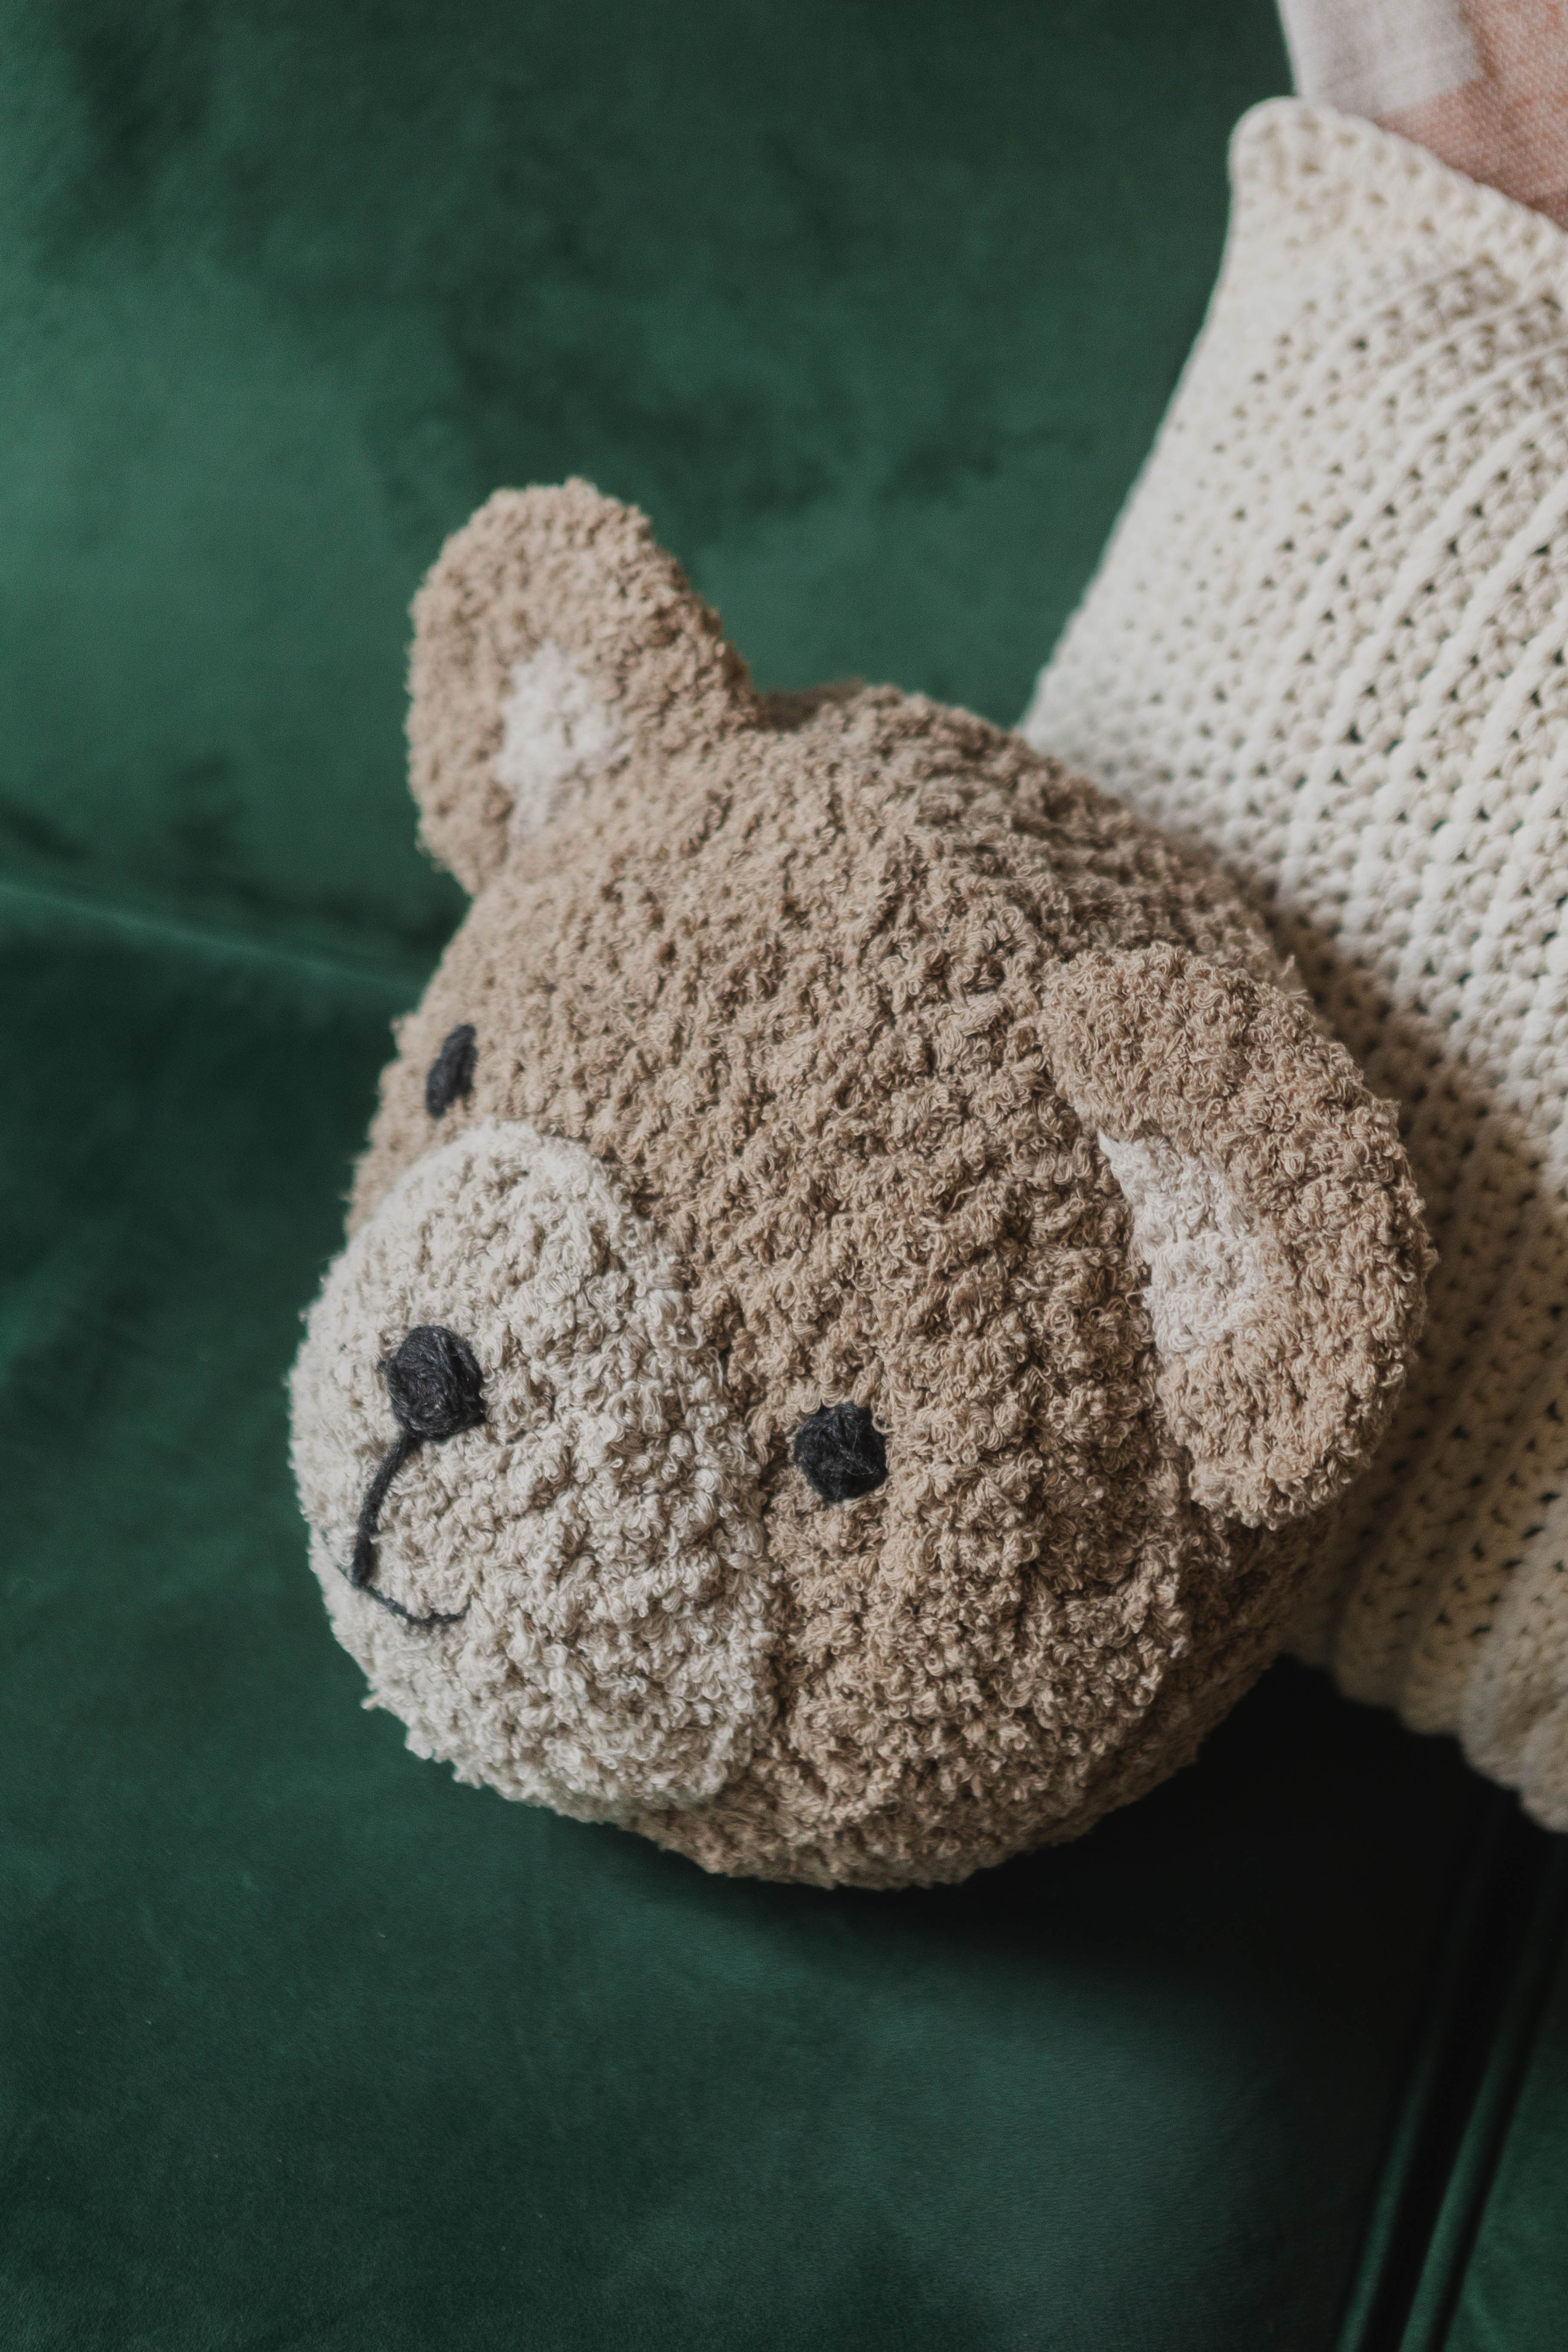
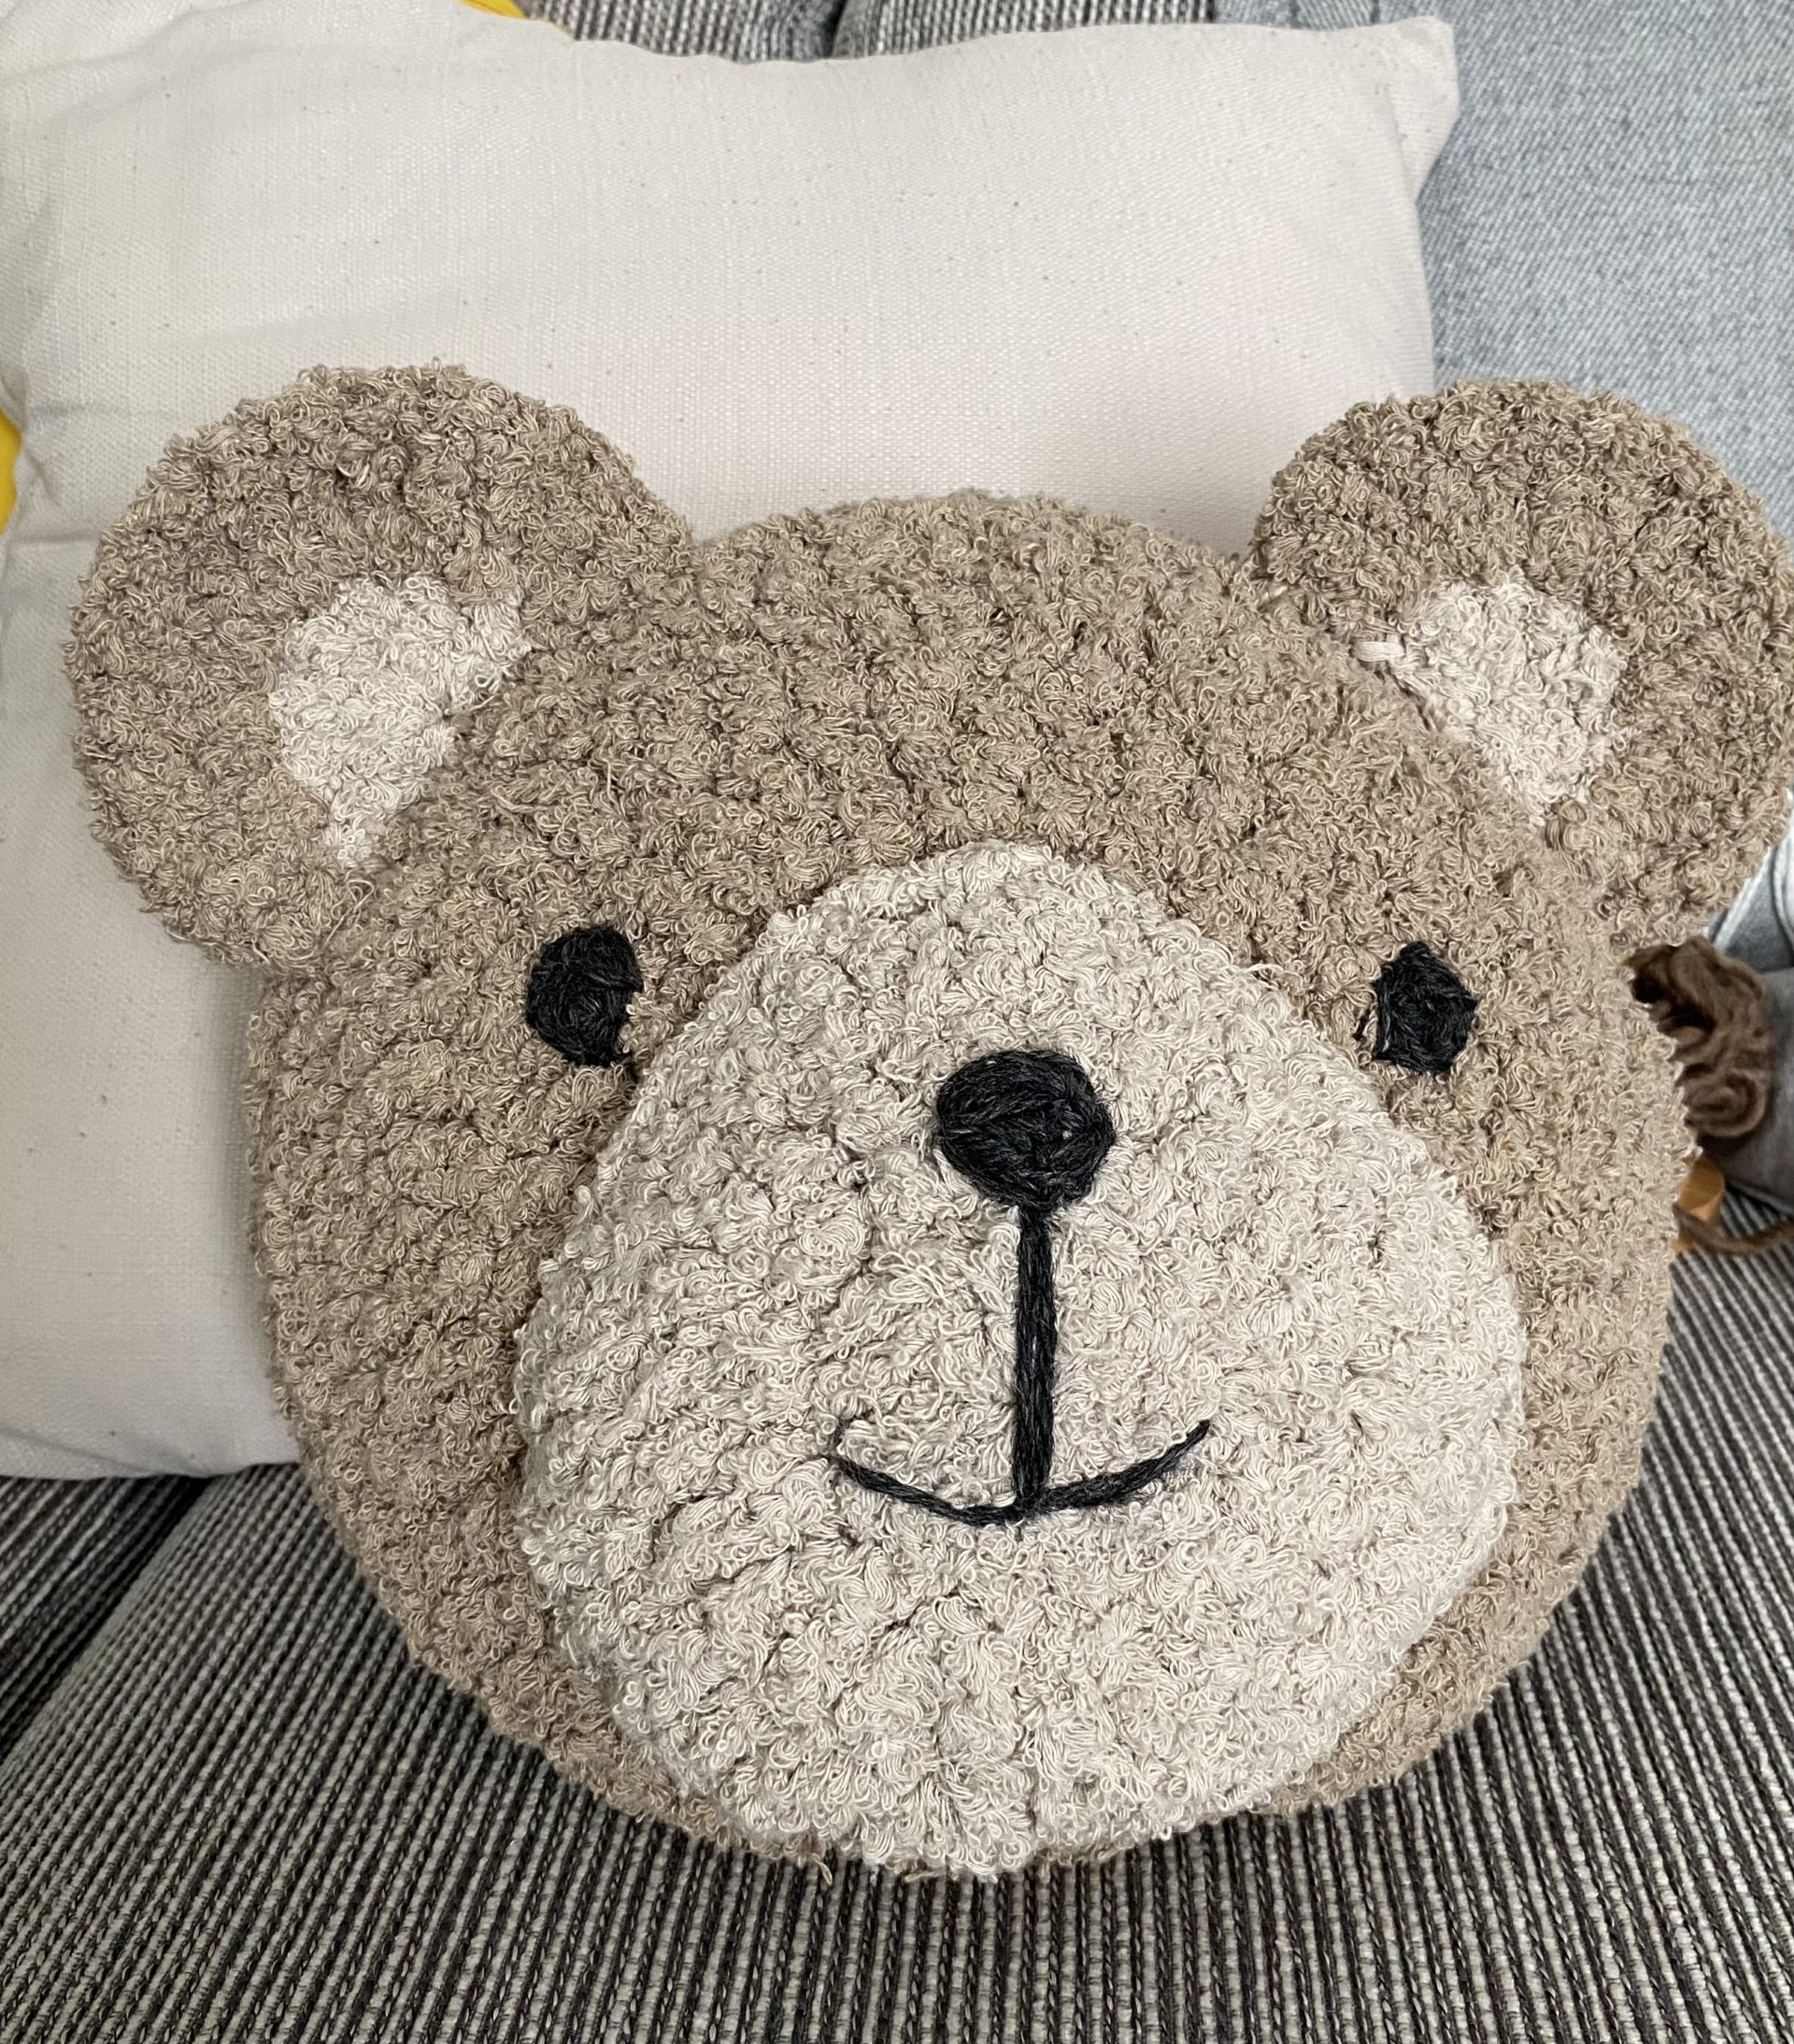
Crochet this adorable bear pillow for the kids’ room. It will quickly become a favorite in the cozy corner or as a decorative touch on the bed. Make it in soft colors to match the room’s style, and create a friendly little bear that brings comfort and charm. The pillow measures approximately 35 cm (14 in) in diameter.
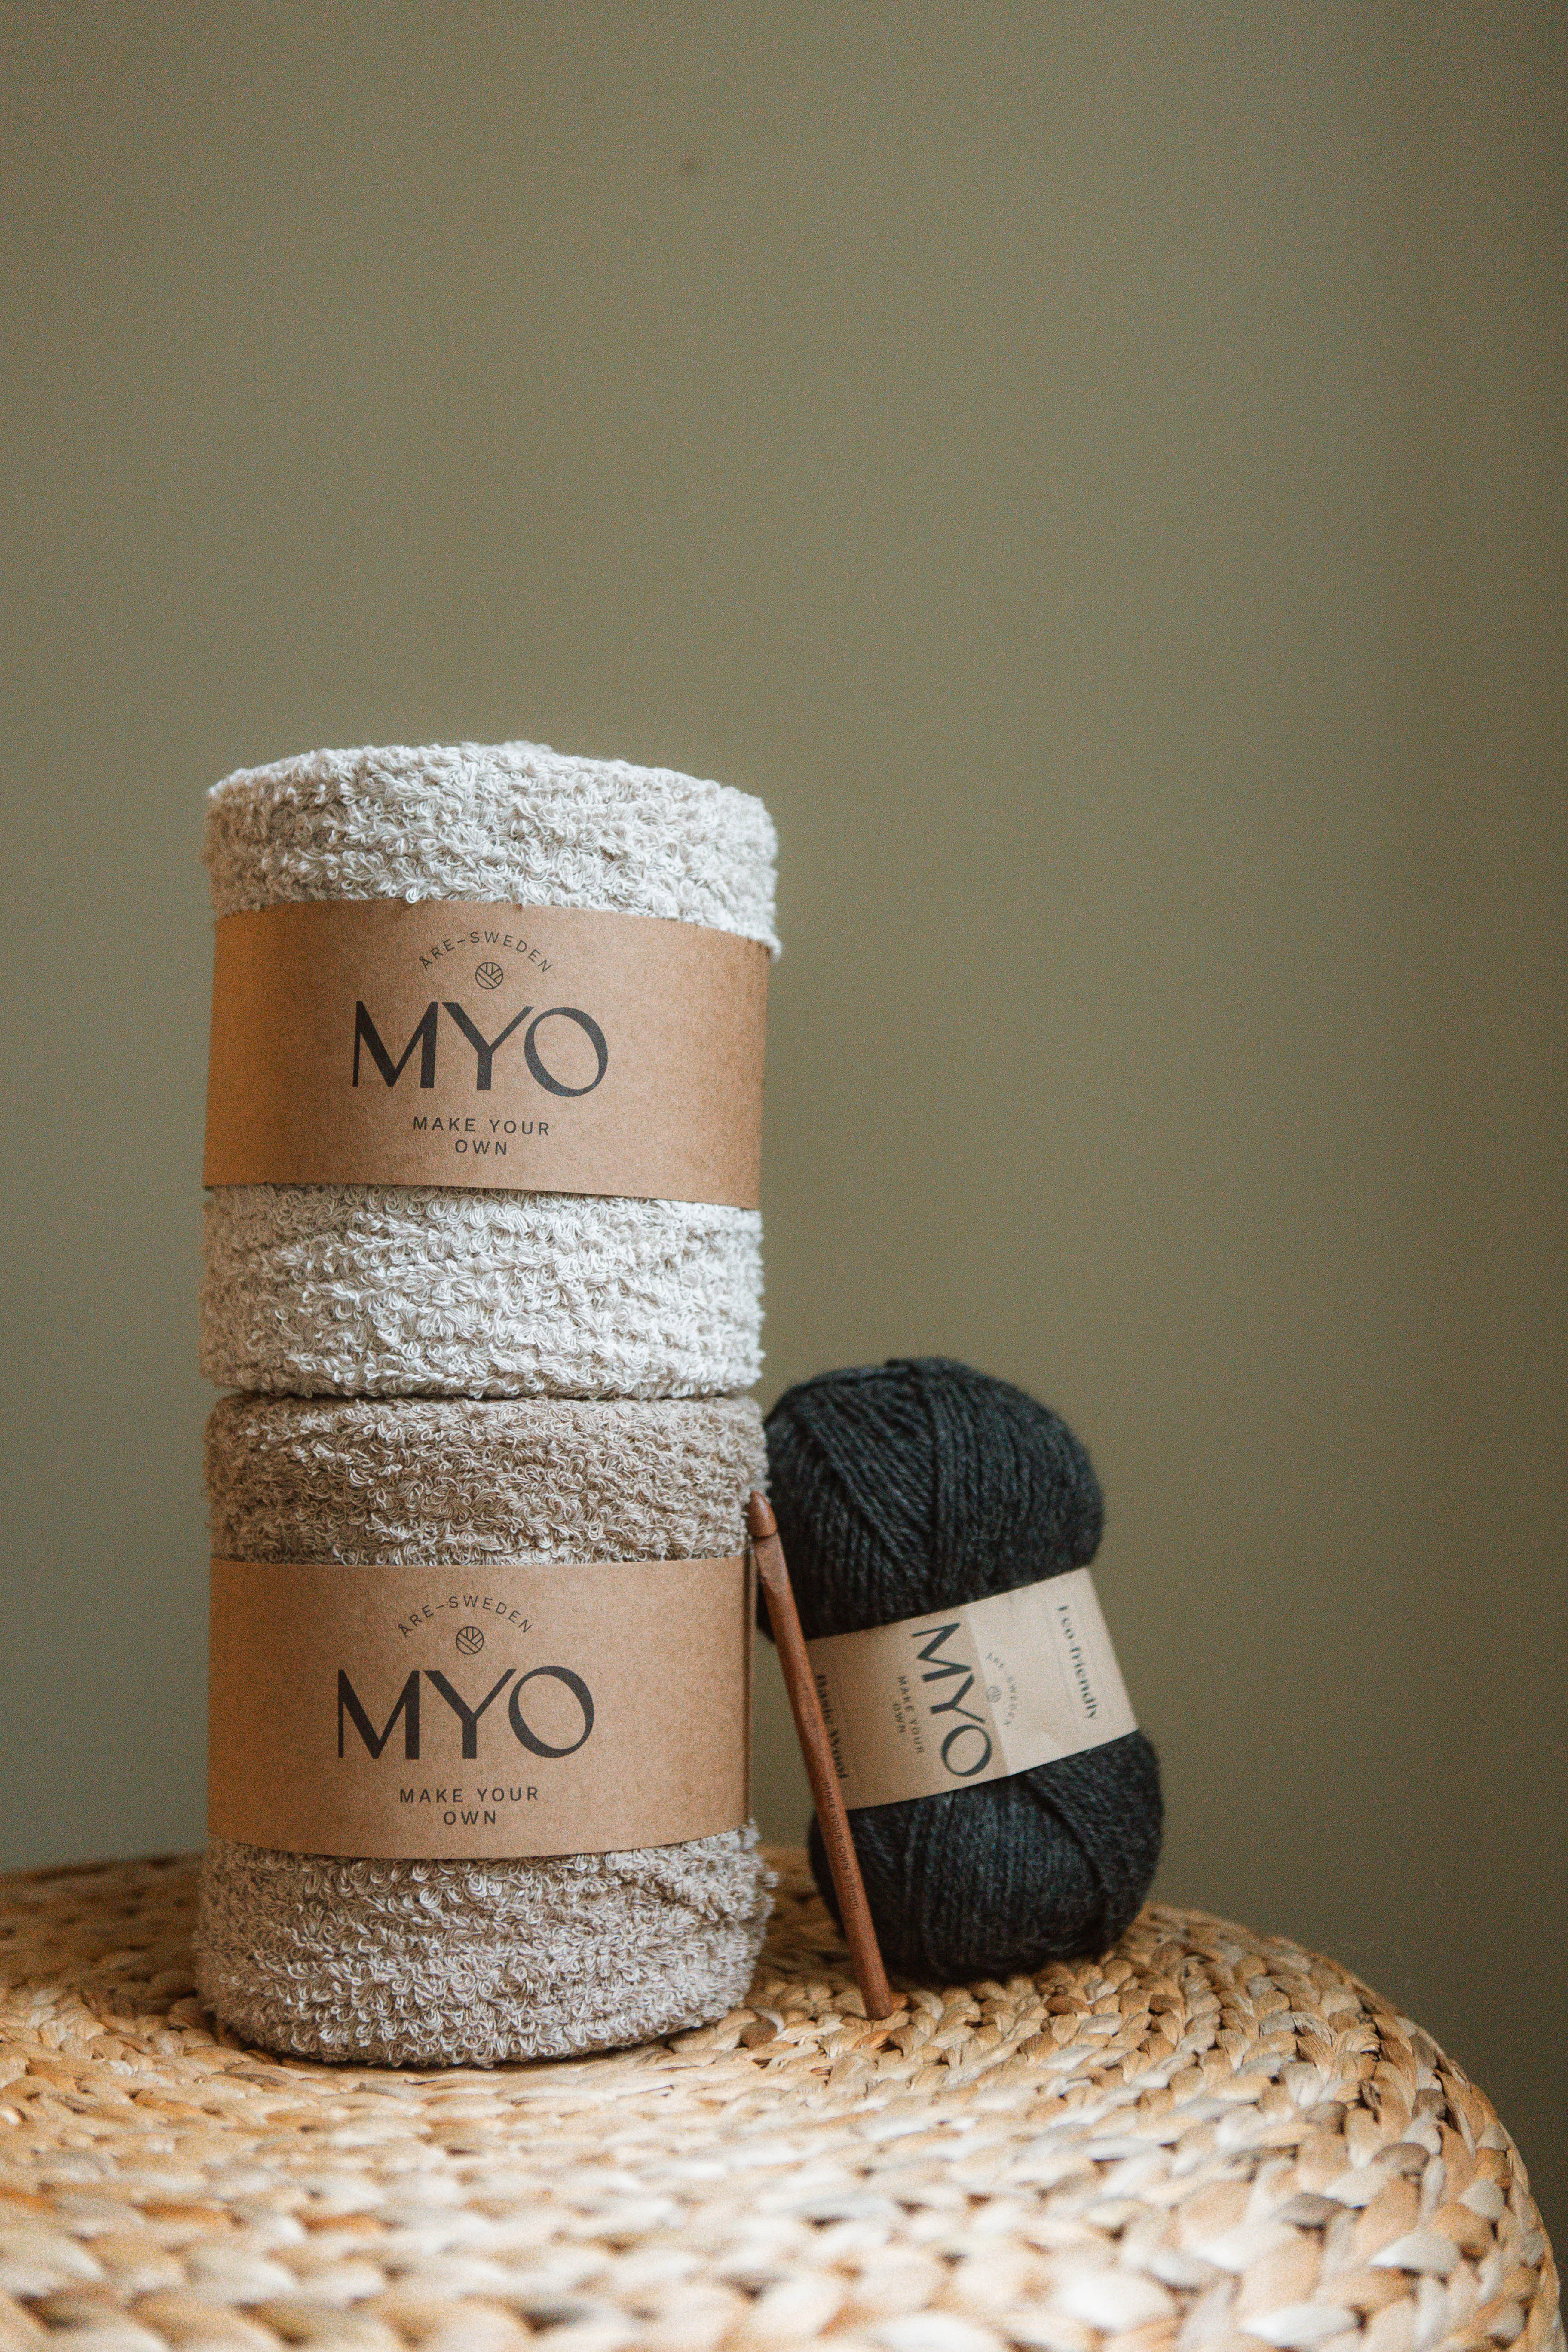
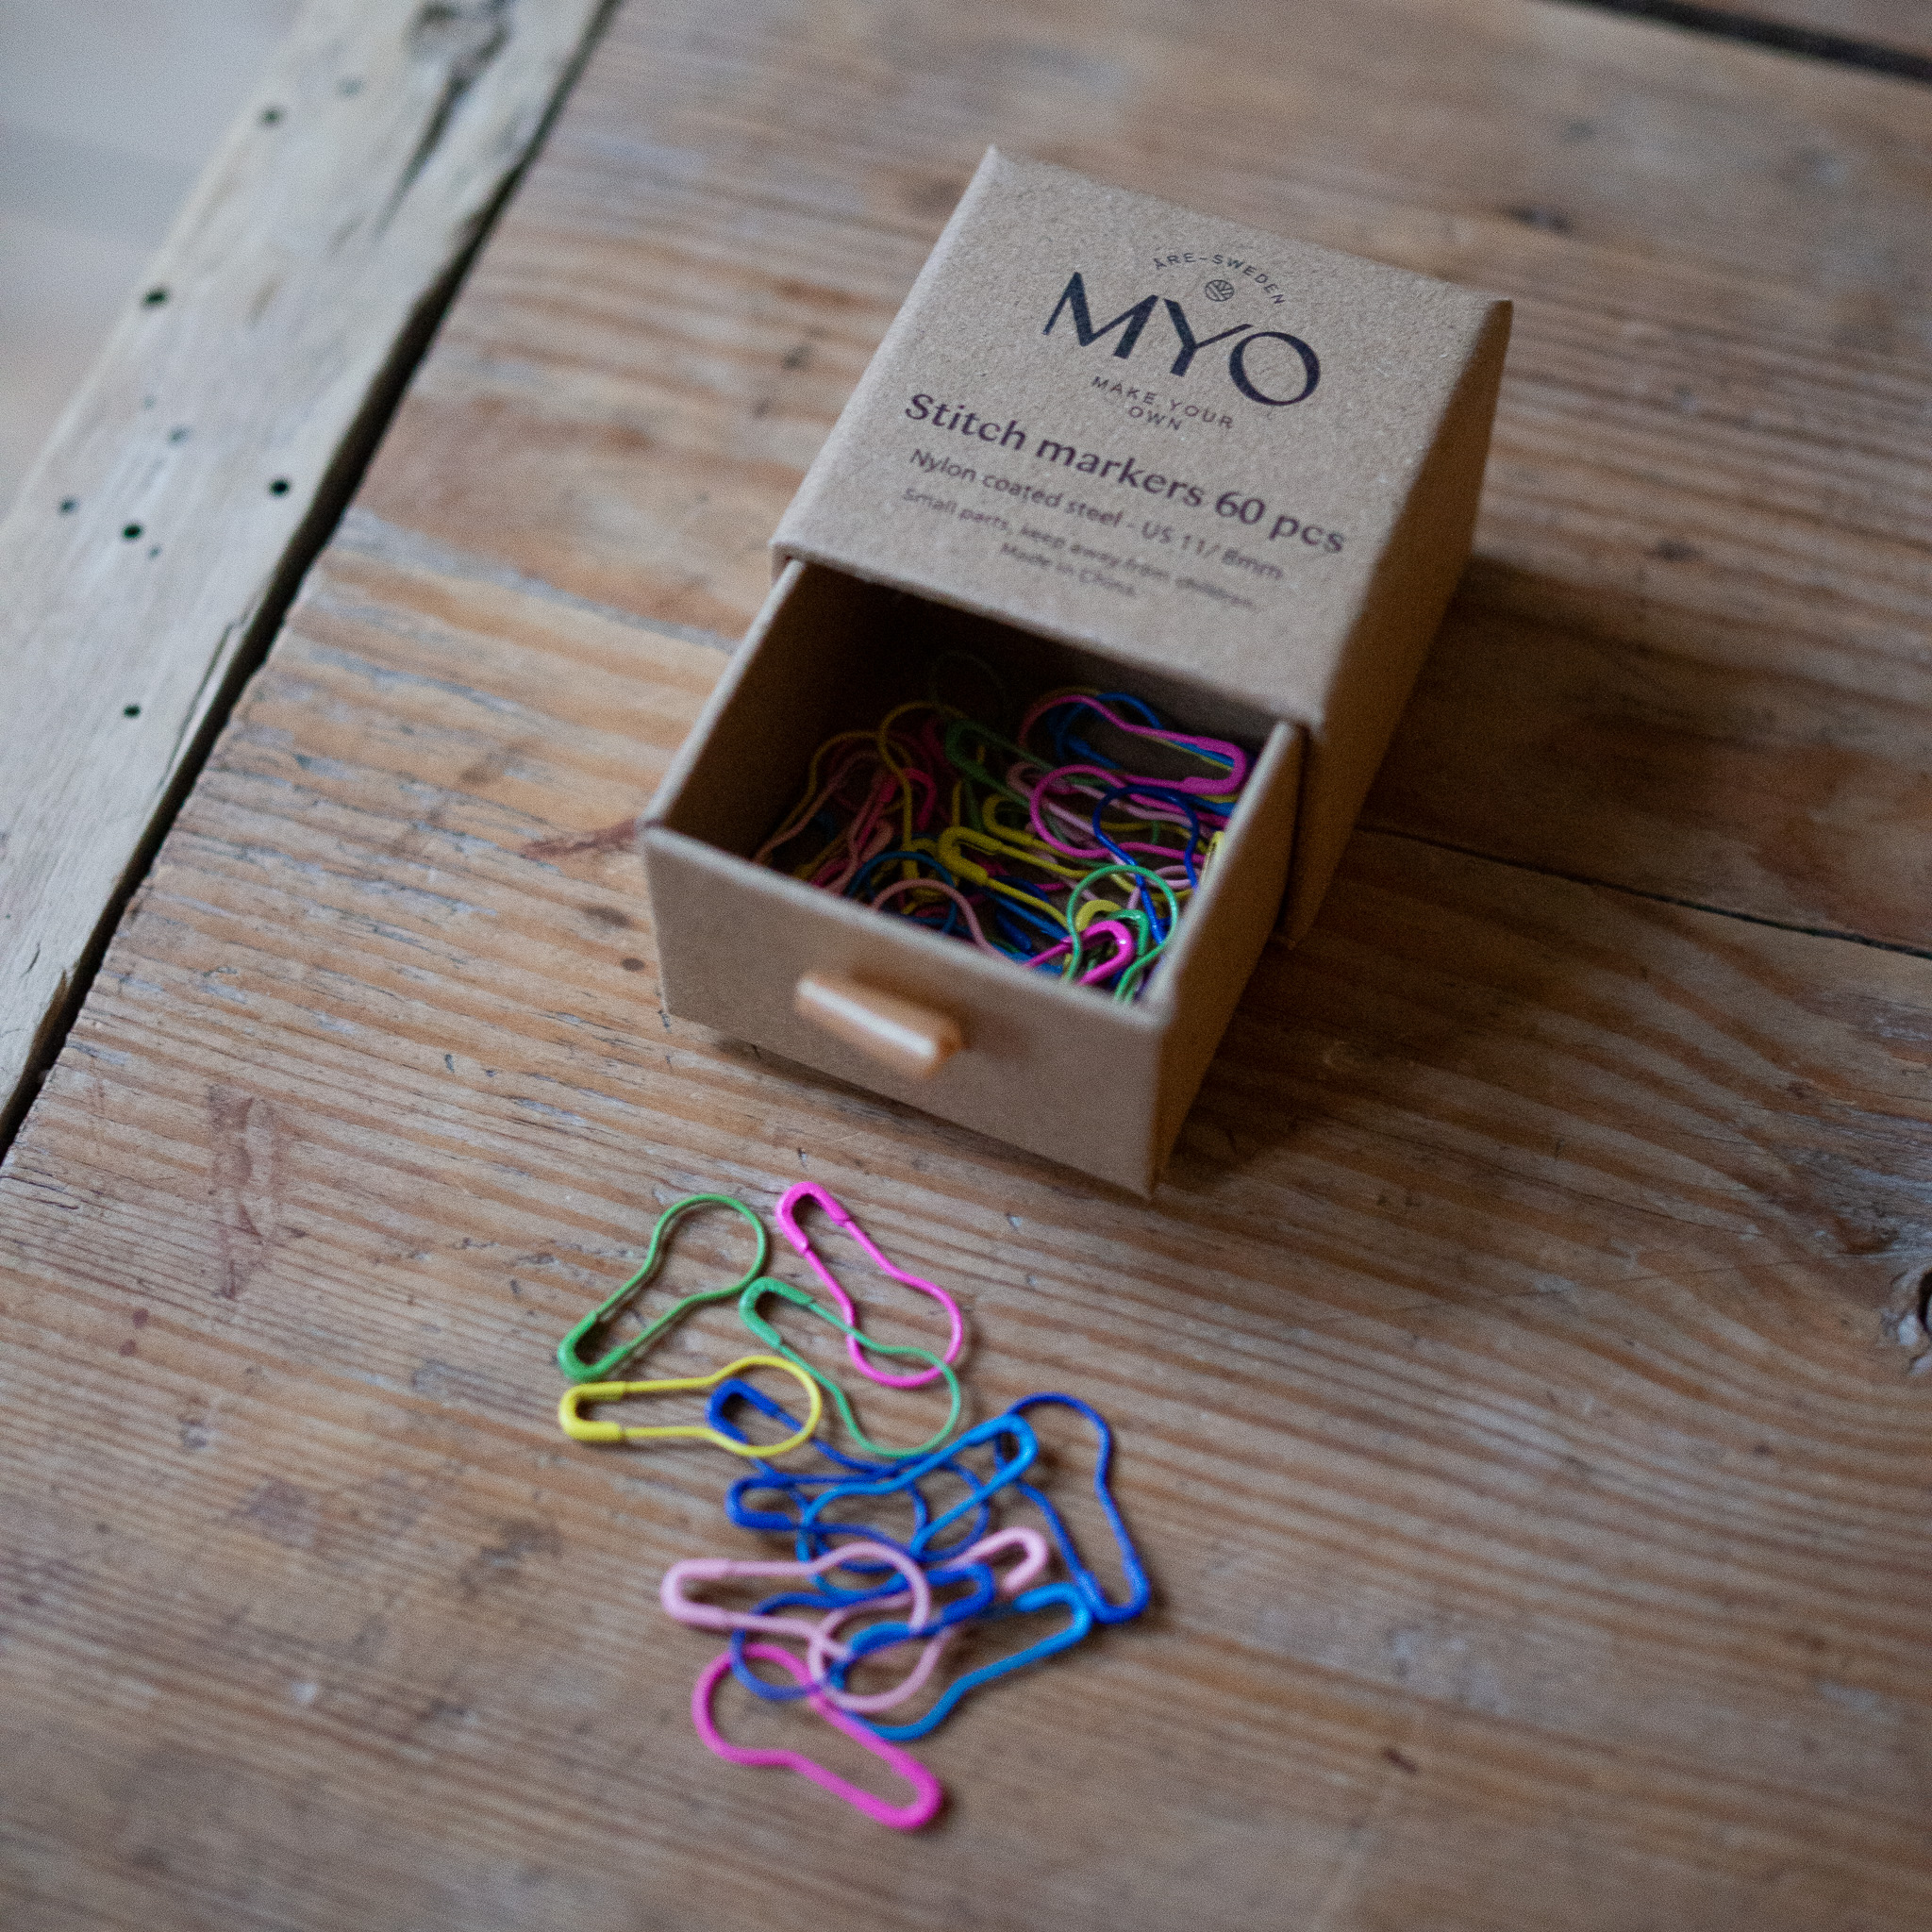
You will need terry yarn in green and greige, as well as Basic Wool for the embroidery, a size 8 mm crochet hook, yarn needle, and stitch marker. You’ll also need stuffing — such as pillow filling, yarn scraps, or even an old blanket you no longer use!
Yarn Consumption: 750 g (about 600 g for the main color and 150 g for the nose and ears). For embroidery with Basic Wool, about 20 g depending on how much you wish to embroider.
Please note that this pattern includes both step-by-step videos from our technique library.

Here's how to do it
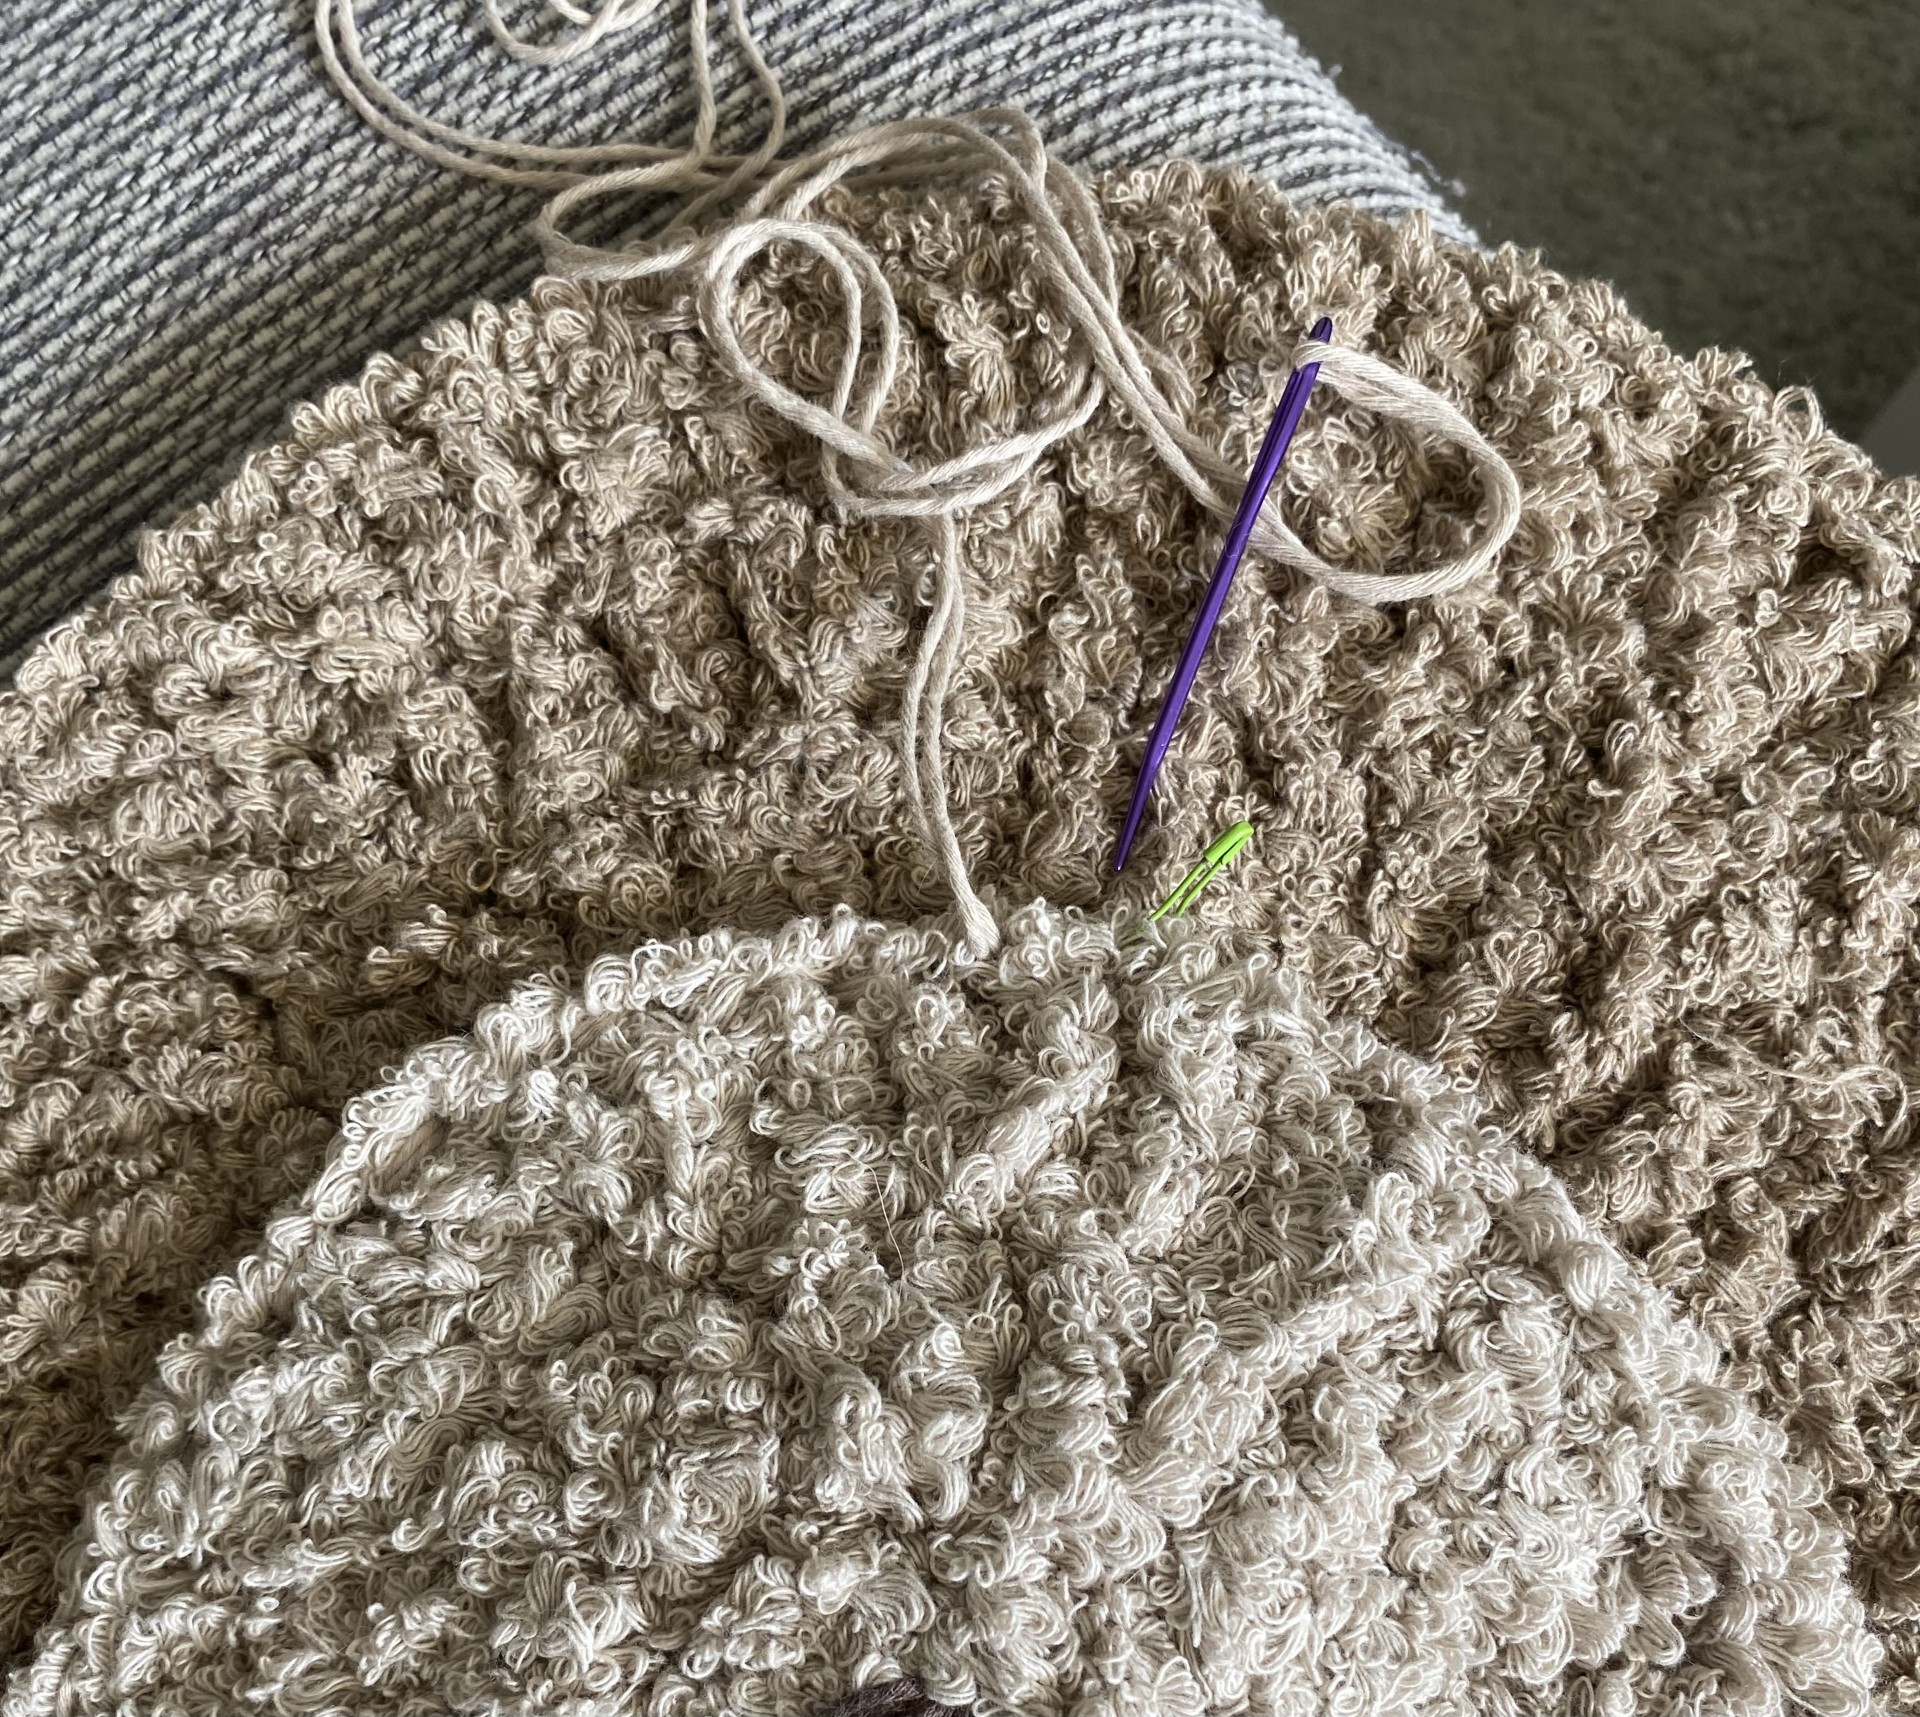
The pillow is crocheted in separate pieces that are then sewn together. It can be tricky to see the stitches when working with terry yarn, which makes it a bit of a challenge — but you can also feel the stitches instead, and count them that way. If you prefer, you can use a yarn needle and Cotton Cloud yarn to sew the pieces together — it’s an easier option. / Emma
%20(1).jpg)
This is what you need:
Here you can directly purchase the material for the product. Please note that the instruction is digital and appears here on the page (no written instruction).

EKO Froté Craft yarn | 1200g
A soft and lovely terry yarn that is ideal for crocheting, knitting or weaving carpets and towels
Buy product
.jpg)
Unleash your creativity
For only 85kr per month you get access to all our 300+ beginner-friendly instructions for crochet, knitting and macrame.
A perfect way to get started with your new hobby!

Head
First, you’ll crochet two round pieces that will form the head. Use your main color for this part.
Round 1:
Start by making a magic ring. This yarn is quite thick, so here’s a tip — gently pull on the yarn end to make it a little thinner right where the magic ring will be. This makes it easier to tighten and close the ring later.
Alternatively, you can chain 3 stitches and join them with a slip stitch into the first chain. You can then crochet into this chain ring instead.
If you need help, you can find both methods explained below — the Magic Ring and the Chain Ring.
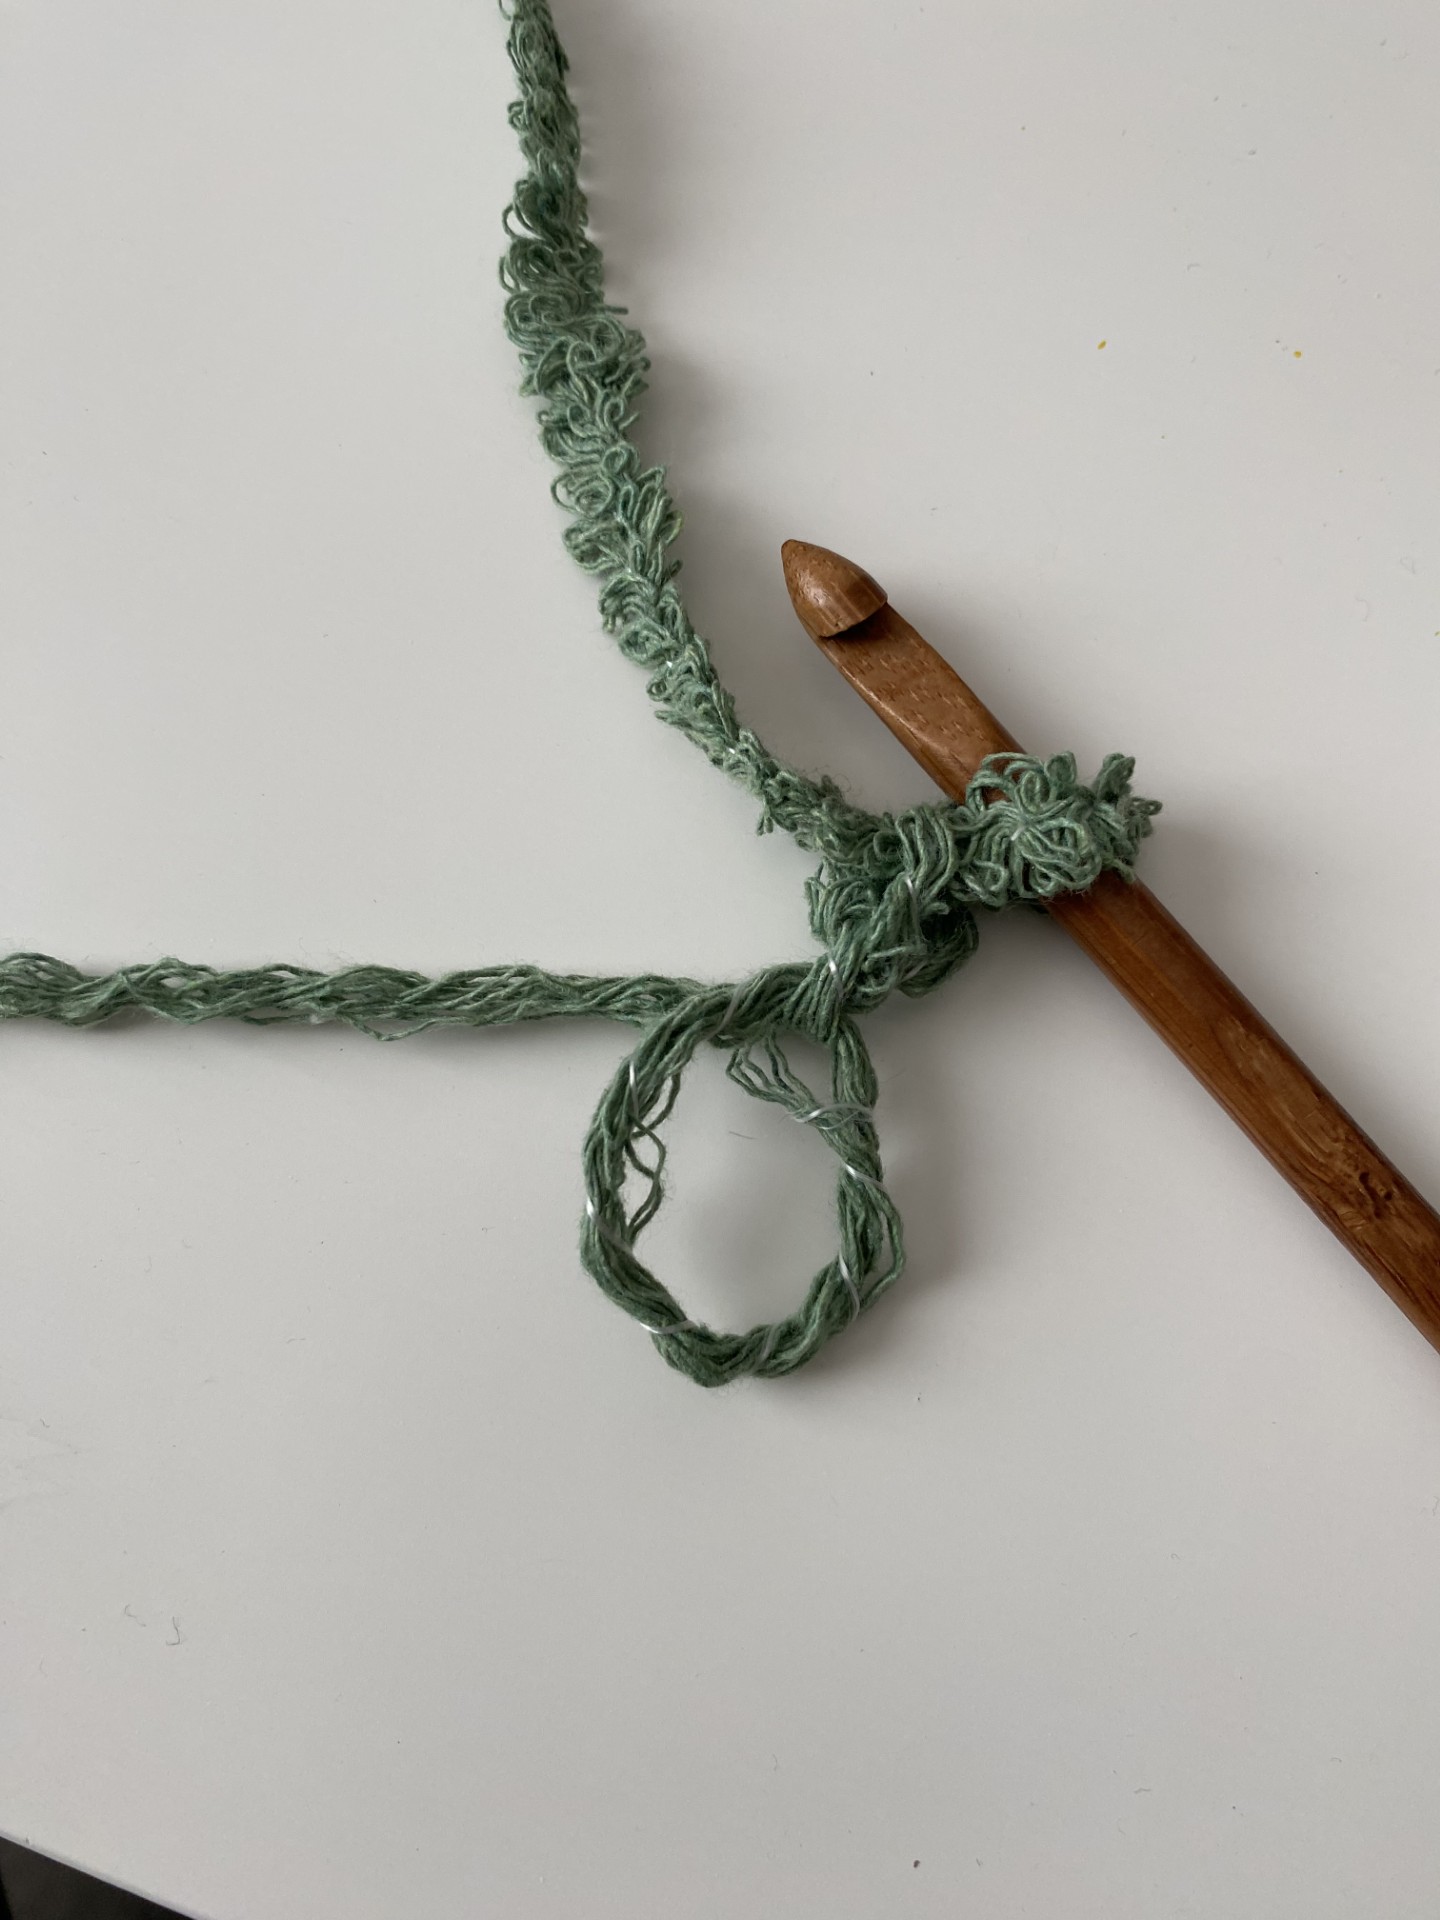
Continue by making 3 chain stitches to count as the first double crochet. Then crochet 11 double crochets into the magic ring, so you have 12 double crochets in total for the first round. Finish the round with a slip stitch into the third chain you made at the beginning of the round.
If you’re unsure how to make a double crochet, see the video below.
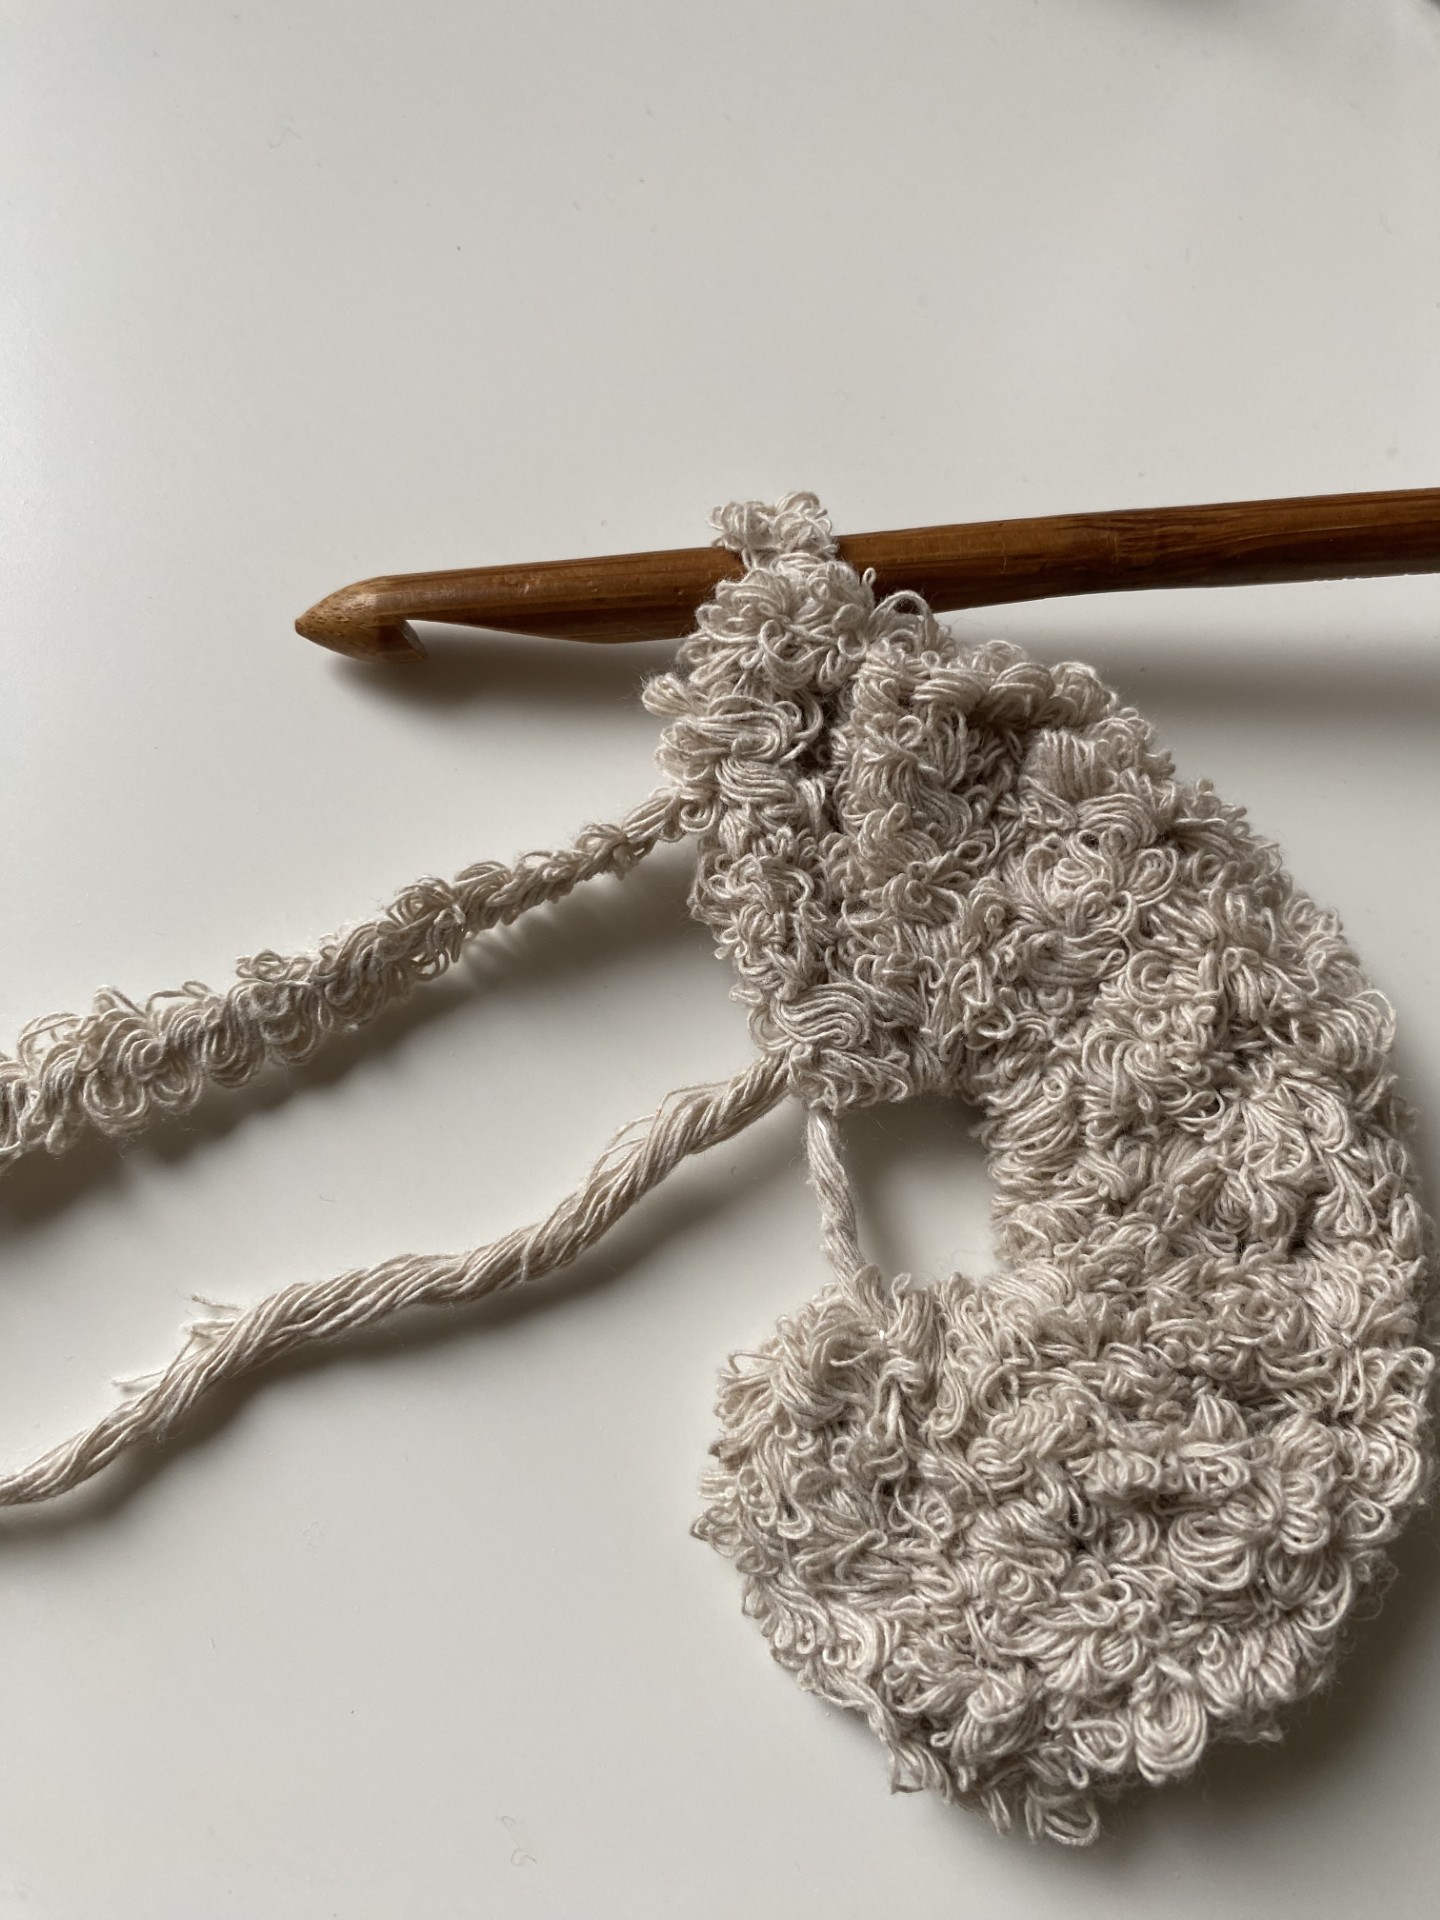
Round 2: In this round, the circle will double in stitches. Start with 3 chain stitches (counts as the first double crochet) and make 1 double crochet in the same stitch. Now increase by crocheting 2 double crochets in each stitch all the way around. You should have a total of 24 double crochets at the end of the round.
Finish the round the same way as before with a slip stitch.
Round 3: Increase in every second stitch. Start with 3 chain stitches (counts as first double crochet), then 2 double crochets in the next stitch, 1 double crochet in the following stitch, 2 double crochets in the next, and repeat around. You should have 36 double crochets at the end of this round. Finish with a slip stitch.
Round 4: Increase in every third stitch. Start with 3 chain stitches, then 1 double crochet, 2 double crochets in the same stitch, 1 double crochet, 1 double crochet, 2 double crochets in the next stitch, and continue this pattern around. You should have 48 double crochets. Finish as before.
Round 5: Increase in every fourth stitch. Start with 3 chain stitches, then 1 double crochet, 1 double crochet, 2 double crochets in the same stitch, 1 double crochet, 1 double crochet, 1 double crochet, 2 double crochets in the next stitch, and repeat around. You should have 60 double crochets. Finish with a slip stitch.
If this is your first piece, you can make 1 chain stitch, cut the yarn, and fasten off.
If this is your second piece, continue as follows:
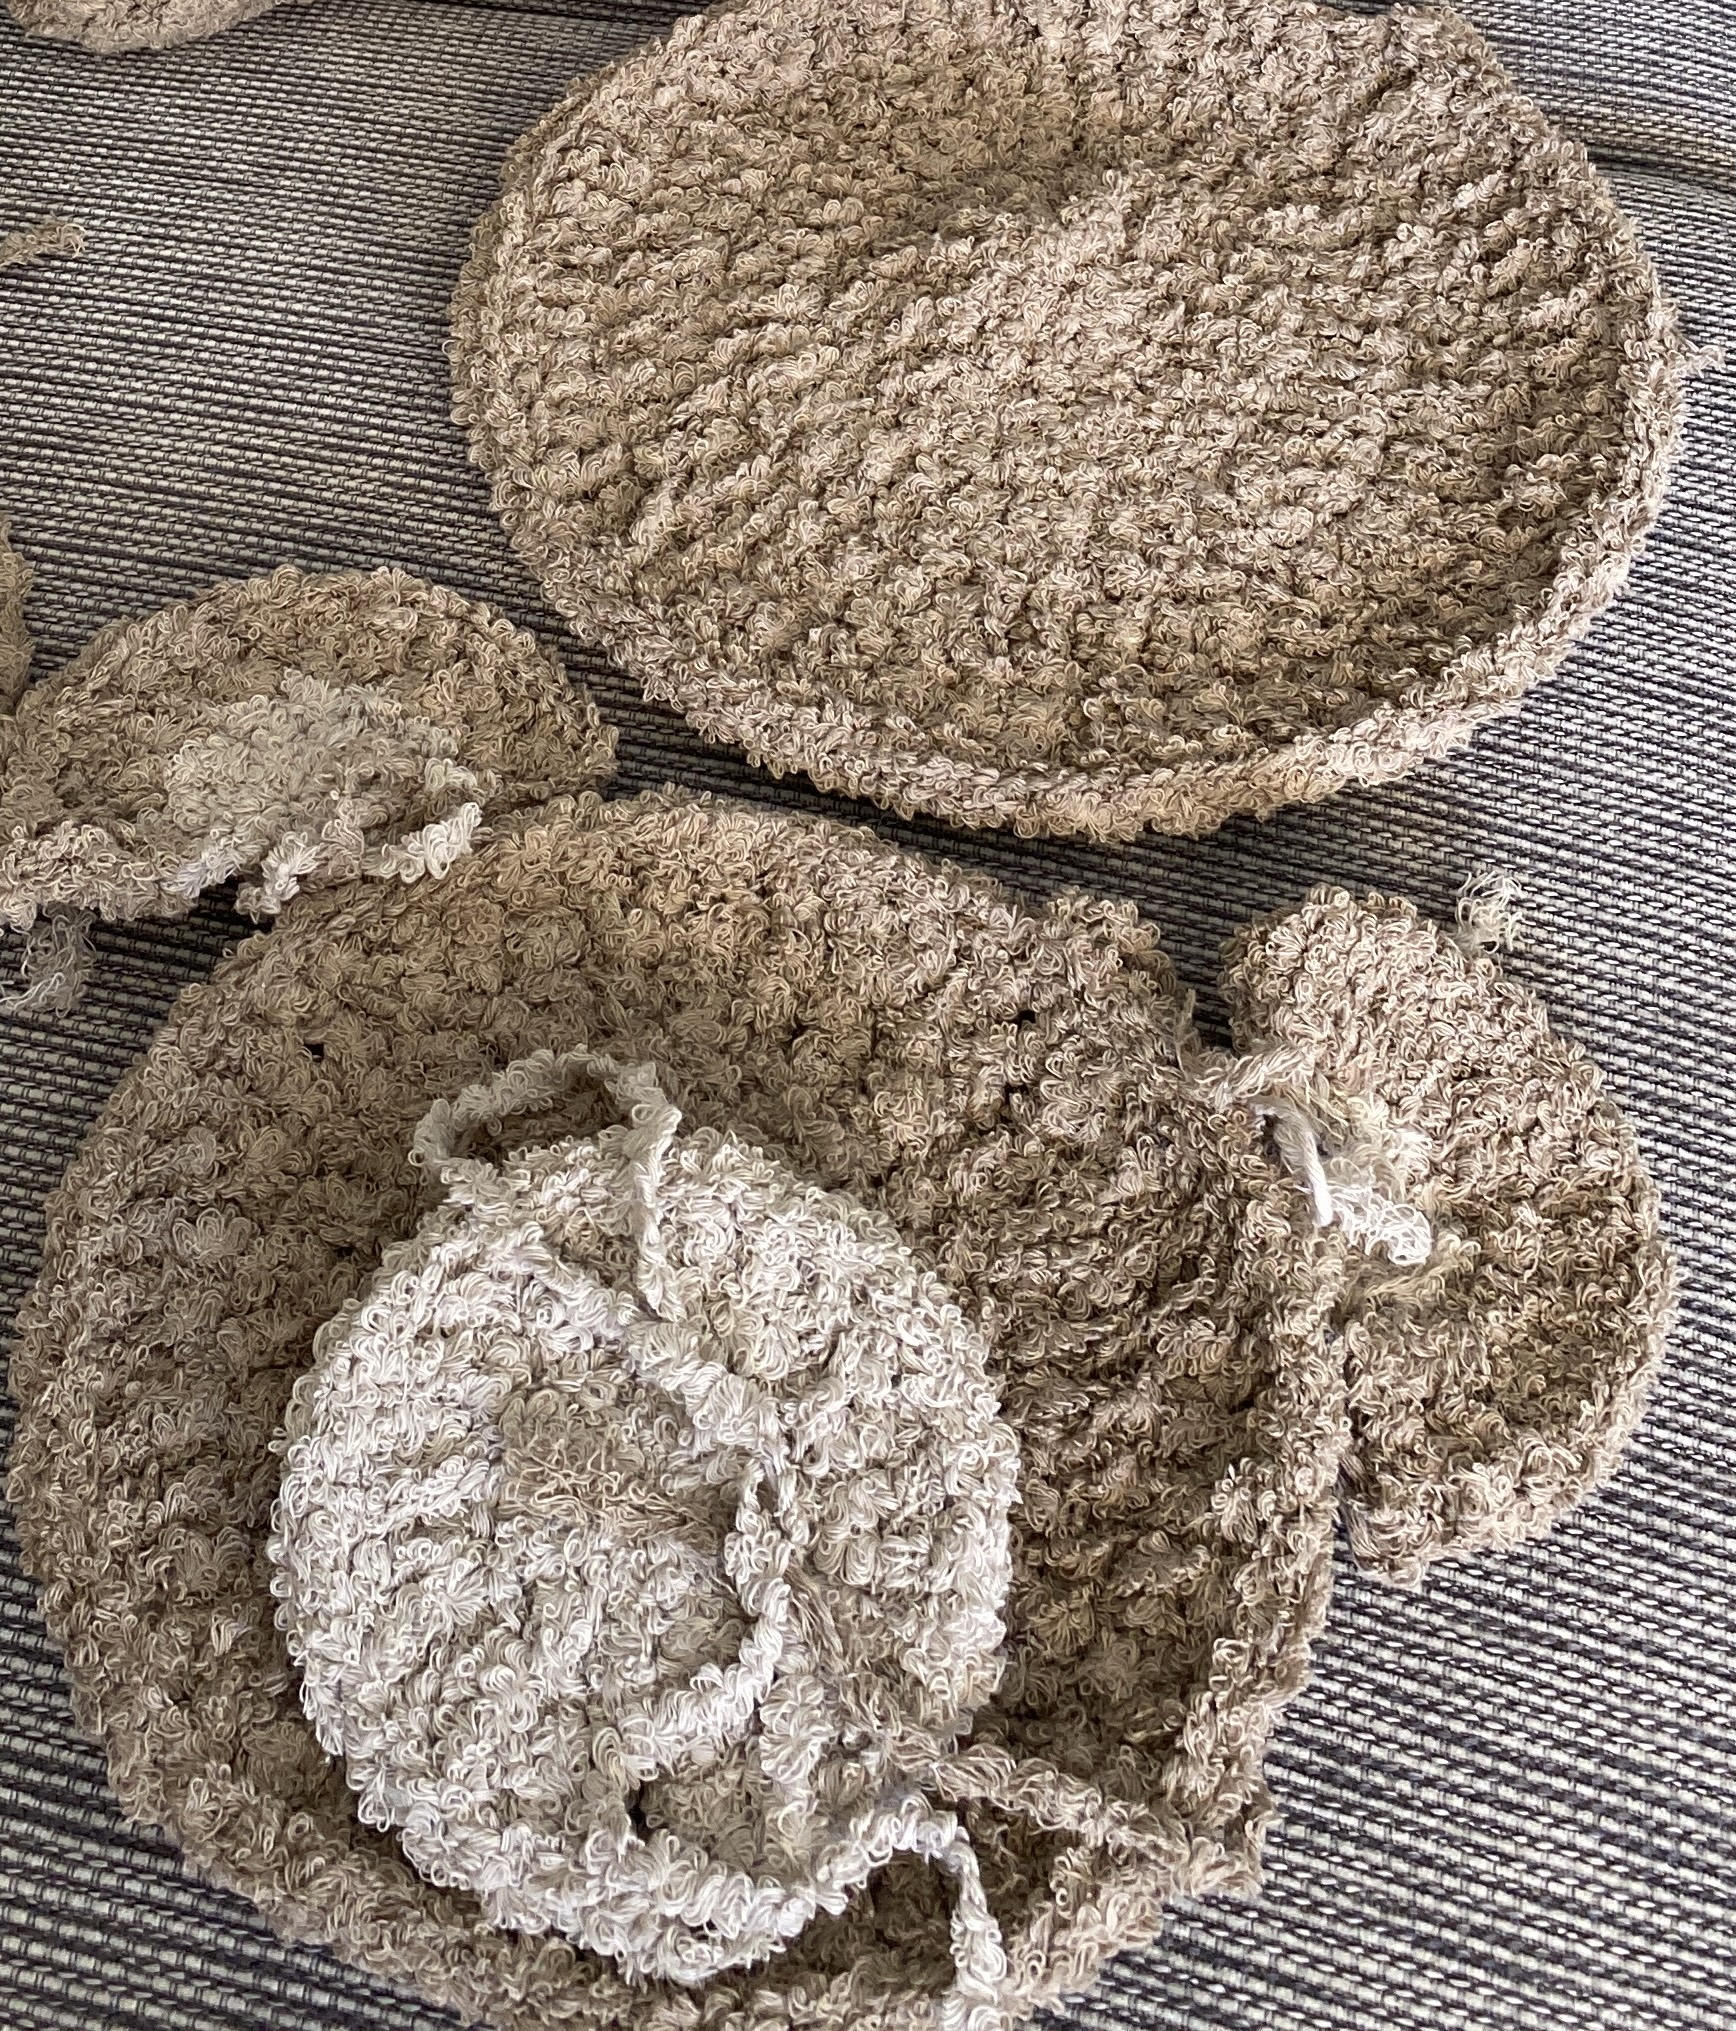
Rounds 6–7: On one of the circles, crochet a border so the circles can become a pillow that can be stuffed. Start each round with 3 chain stitches as the first double crochet, then 1 double crochet in each stitch (60 dc). Since there are no increases, the stitch count stays the same as in Round 5, creating a rounded edge on this circle.
Muzzle:
Now switch to the color you want for the nose. This is a round piece, similar to the head parts, but only worked through Round 3.
Round 1: Start with a magic ring or a chain ring. Crochet 3 chain stitches (counts as first double crochet), then 11 double crochets in the ring, giving a total of 12 double crochets in the first round. Finish with a slip stitch in the third chain of the starting chains.
Round 2: The circle will now double in stitches. Start with 3 chain stitches (counts as first double crochet), then 1 double crochet in the same stitch. Continue to increase by working 2 double crochets in each stitch all the way around. You should have 24 double crochets at the end of the round. Finish with a slip stitch as before.
Round 3: Increase in every second stitch. Start with 3 chain stitches (counts as first double crochet), then 2 double crochets in the next stitch, 1 double crochet in the next, 2 double crochets in the following stitch, and repeat around. You should have 36 double crochets. Finish as before.
The nose is now complete. You can cut the yarn, or leave a long tail to later sew or crochet the nose onto the head. Alternatively, you can use a different yarn, like Cotton Cloud, to sew it on.
Ears
The ears are first crocheted in the same color as the nose for Round 1, then in Round 2 you switch to the head color.
Round 1: Make a magic ring. Crochet 3 chain stitches and 7 double crochets into the ring. In the last double crochet, change to the head color. Make 3 chain stitches and pull the magic ring closed so that it forms roughly a half-moon shape, then turn your work.
If you’re unsure how to change colors, see the video linked below.
Round 2: Continue with double crochets, increasing in each stitch so that the ear becomes larger. Finish the round with 1 chain stitch and cut the yarn, leaving a long tail to sew or crochet the ear onto the head later.
Now crochet a second ear in the same way.
Assembly: Nose on the Bear:
Attach the nose before joining the head pieces. First, place the nose where you want it. Use stitch markers to secure it around a few stitches so it stays in the correct position.
Begin attaching the nose, checking as you go to make sure it’s still positioned correctly. You can sew it with a large darning needle and thinner yarn, like Cotton Cloud, or use your crochet hook with the terry yarn, sewing up and down through both the nose and the head.
When you’re about halfway around, start stuffing the nose with a little filling. You don’t need much—just enough to give shape. The more stuffing you add, the firmer the “pillow on pillow” effect becomes. You can continue adding stuffing as you go. Once the nose is fully attached, secure the yarn carefully and firmly.
The Head:
Start by assembling the head using the two large round pieces. You have two options: crochet them together with single crochets for a defined edge, or sew them together for a more invisible seam.
Make sure the right sides are facing out on both pieces. Join the rounded edge to the flat round piece. It can be helpful to use stitch markers in a few spots to ensure everything aligns evenly, making sure both pieces have the same number of stitches.
To crochet them together, make a slip knot and begin working single crochets through both pieces (or sew them together if you prefer). It doesn’t matter exactly where you start.
When you’ve worked about two-thirds around, begin stuffing the pillow. Continue adding stuffing until you’re happy with the shape, then finish joining the pieces completely. Secure the yarn carefully once you’ve gone all the way around.
If you’re unsure how to make a slip knot, see the video below.
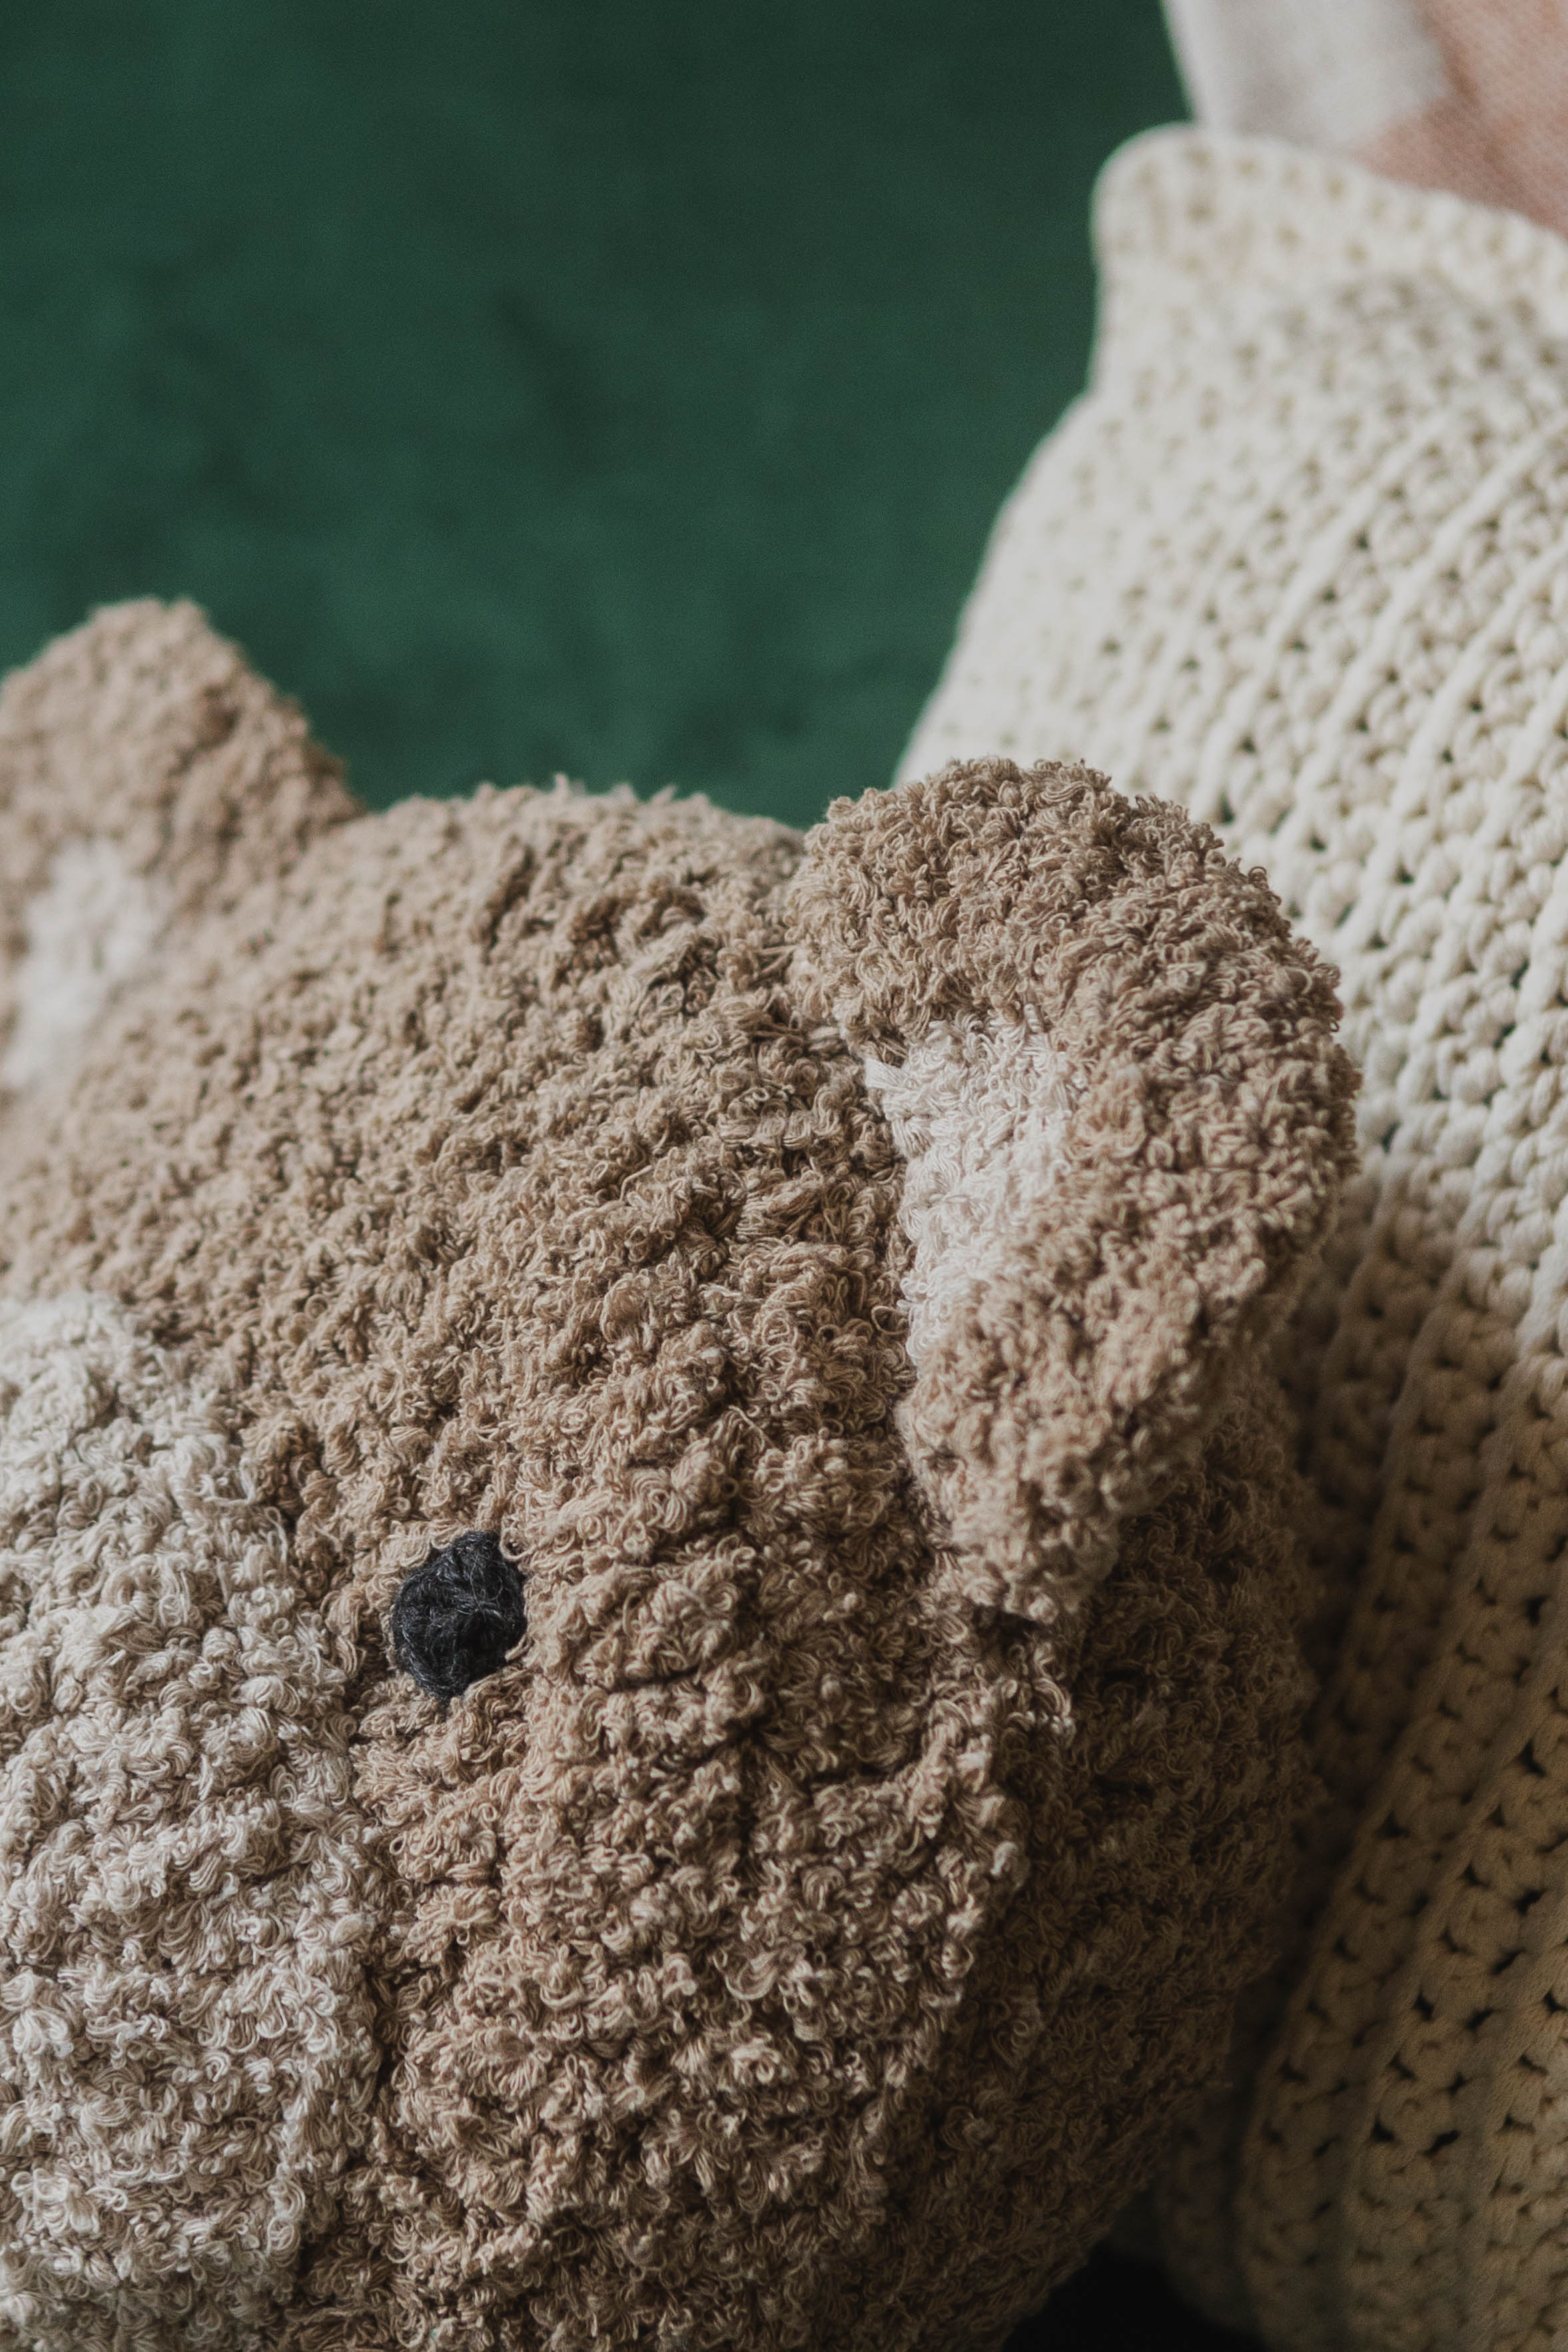
Embroidering & Attaching the Eyes
Before you start attaching the ears, it’s a good idea to position all the pieces with pins or stitch markers to ensure everything is centered and spaced properly.
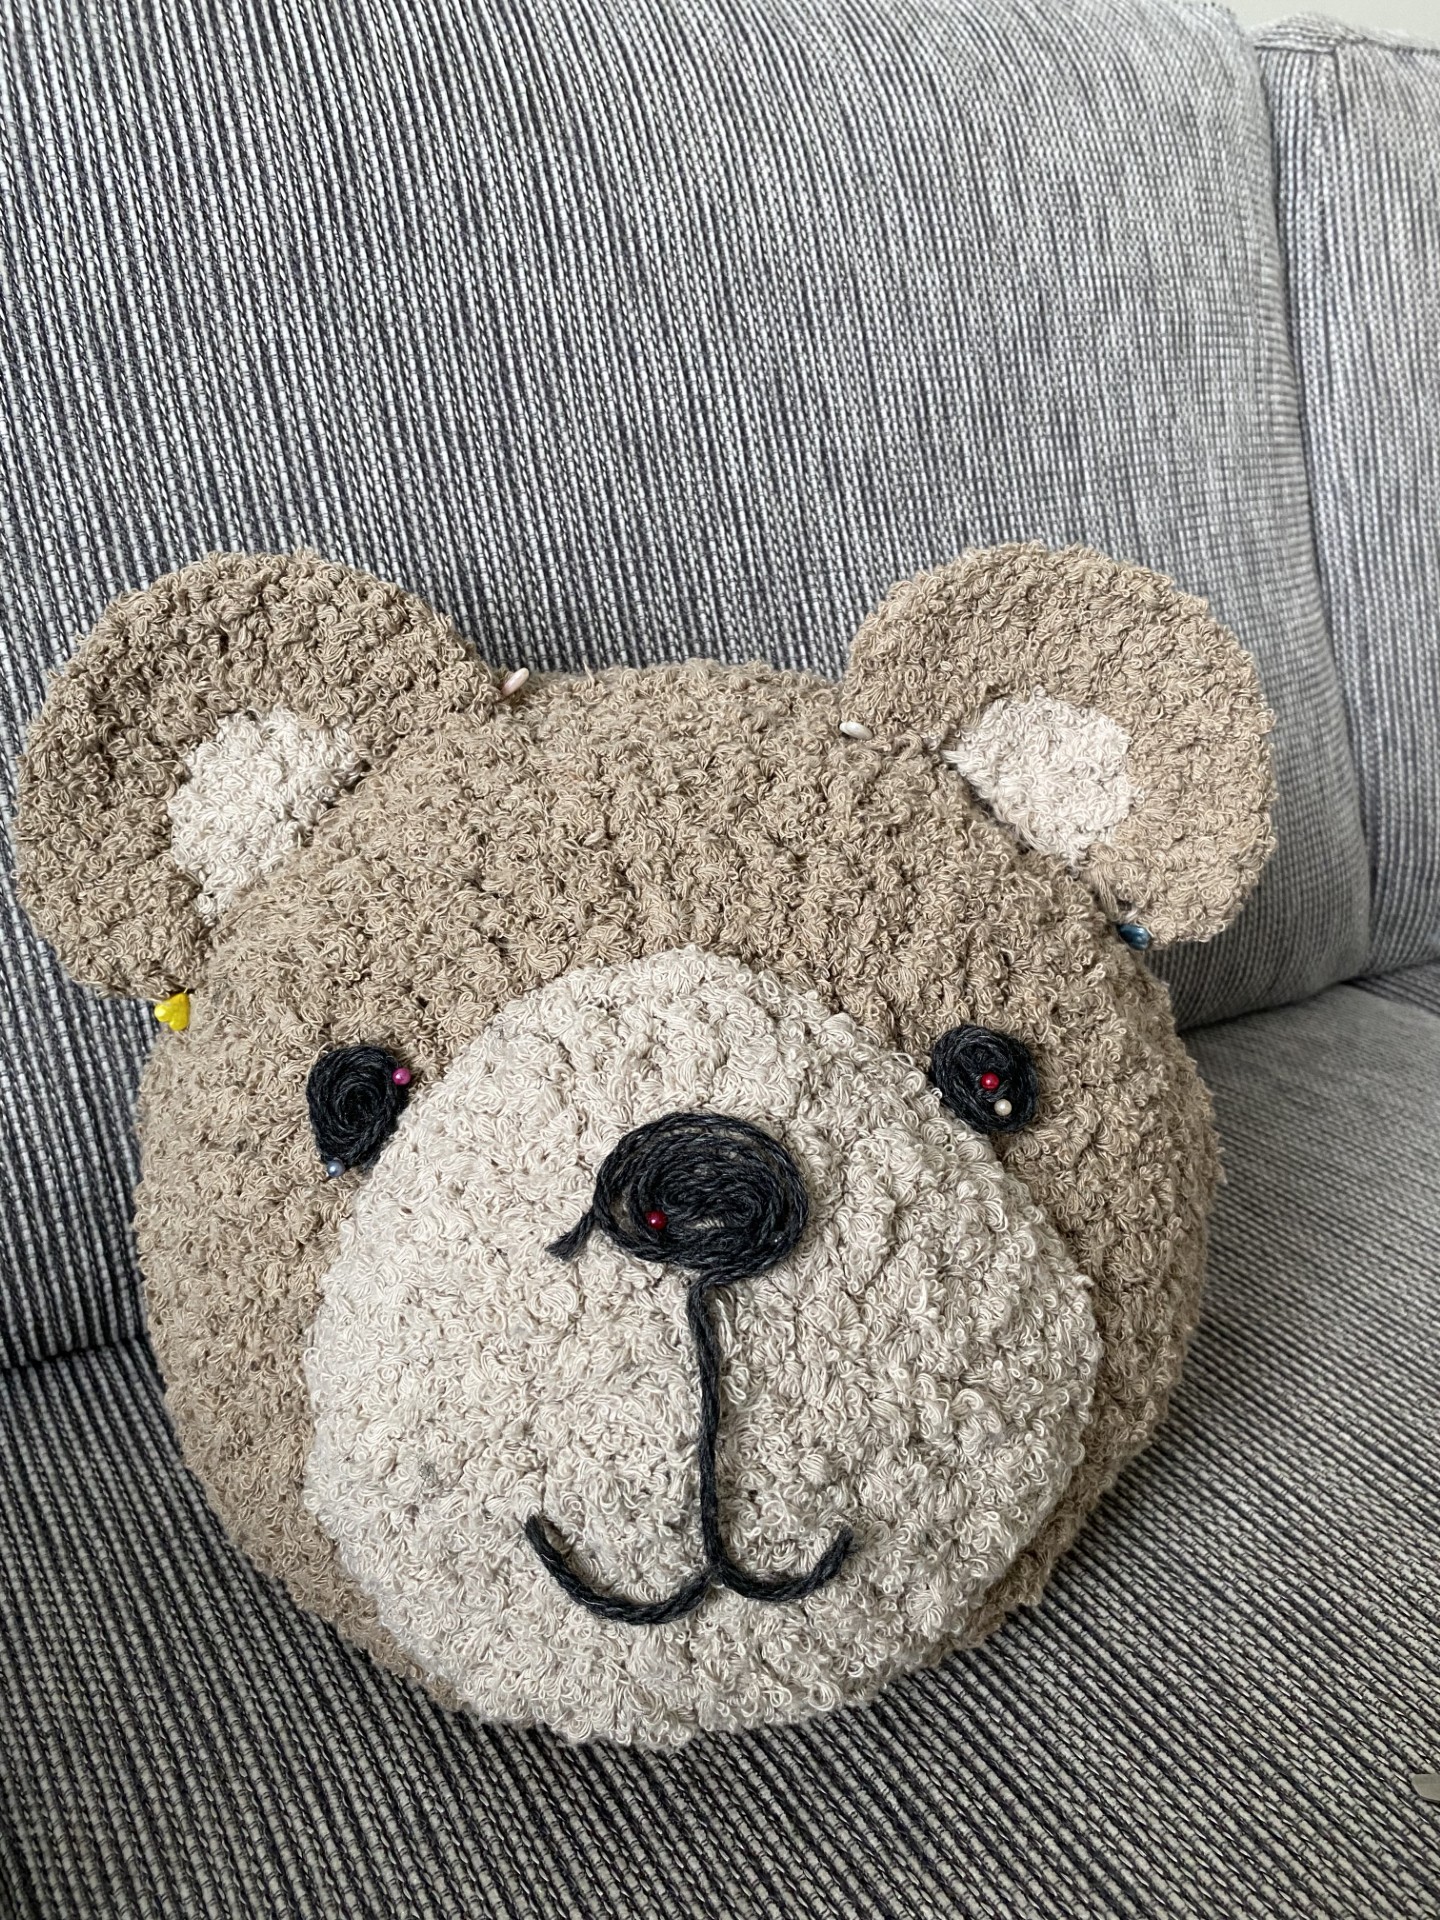
Eyes, Nose & Mouth
For the eyes, nose, and mouth, you can use small yarn scraps to position them before you start embroidering. Attach the ears using the yarn tail you left, either with your crochet hook as a needle or with thinner yarn and a tapestry needle. Make sure to secure and tie off the yarn ends carefully so nothing unravels.
When embroidering, keep it simple if you’re not used to embroidery. Start by pinning the outlines and laying out the yarn to see how it looks. Then sew short stitches following the pins for a cleaner shape. Feel free to test and redo until you’re happy.
Your pillow is now complete! 🐻✨
Description with Crochet Terms
This part of the pattern uses standard crochet terms. If you need extra help, see the simpler section.
Abbreviations:
ch – chain
sc – single crochet
sl st – slip stitch
inc dc – increase with double crochet
dc – double crochet
st – stitch
(...) – total stitches in the round
Head, make two pieces:
Yarn color: Beige
Round 1: MR, ch 3, 11 dc (12)
Finish each round with a sl st in the 3rd ch from the start. This applies to all rounds for the head.
Round 2: ch 3, 1 dc in same st as ch 3, inc dc ×11 (24)
Round 3: ch 3, 1 dc in same st as ch 3, 1 dc, *inc dc, 1 dc* ×11 (36)
Round 4: ch 3, *inc dc, 2 dc* ×11, inc dc, 1 dc (48)
Round 5: ch 3, *inc dc, 3 dc* ×11, inc dc, 2 dc (60)
On one of your two head pieces, continue to crochet two more rounds:
Rounds 6–7: ch 3, 59 dc (60)
Cut and fasten off the yarn.
Muzzle:
Yarn color: Greige
Round 1: MR, ch 3, 11 dc (12)
Finish each round with a sl st in the 3rd ch from the start. This applies to all rounds for the muzzle.
Round 2: ch 3, 1 dc in same st as ch 3, inc dc ×11 (24)
Round 3: ch 3, 1 dc in same st as ch 3, 1 dc, *inc dc, 1 dc* ×11 (36)
Ears (make two):
Start with Greige.
Round 1: MR, ch 2, 7 dc (8). Turn.
Change to Beige.
Round 2: ch 3, inc dc ×7 (15)
Fasten off yarn.
Assembly: Nose on the bear:
Attach the nose before joining the head. Begin by placing the nose where you want it. Use stitch markers to secure it in a few spots so it stays in the correct position.
Head Assembly:
Start by joining the head with the two large round pieces. You have two options: crochet them together with single crochets for a defined edge, or sew them together for a more invisible seam.
Make sure the right sides of both pieces face out, aligning the rounded edge with the flat circle. It can be helpful to secure with stitch markers in a few spots to ensure even alignment, but both pieces should have the same number of stitches.
Join by making a slip knot and working single crochets through both layers (or sew them together). It doesn’t matter exactly where you start. When you’ve completed about 2/3 of the round, begin stuffing the pillow. Continue stuffing until you are satisfied, then finish joining the pieces, securing firmly all the way around.
Attaching Ears & Embroidery:
Before attaching the ears, place all pieces with pins or stitch markers to check that they are centered and evenly spaced. Attach the ears using the yarn tail you left, either with the crochet hook as a needle or a thinner yarn and a tapestry needle.
Secure and tie off the yarn ends carefully to ensure they don’t come loose. For the eyes, nose, and mouth, you can use small yarn pieces to mark placement before you begin embroidery.
Finishing Embroidery:
Embroider the final details, keeping it simple if you’re not experienced with embroidery. Start by pinning the outlines and laying out the yarn to see if it looks right. Then stitch short lines to follow the pins and shape more accurately. Feel free to experiment and start over if you’re not satisfied.
Your pillow is now complete!
The rights to this pattern belong to MYO Make Your Own. The pattern or its pictures may not be copied, shared or resold either in parts or in its entirety, but you may sell items you have crocheted from this pattern. If you have questions about the pattern, contact MYO at hello@makeyourown.se.
Head
First, you’ll crochet two round pieces that will form the head. Use your main color for this part.
Round 1:
Start by making a magic ring. This yarn is quite thick, so here’s a tip — gently pull on the yarn end to make it a little thinner right where the magic ring will be. This makes it easier to tighten and close the ring later.
Alternatively, you can chain 3 stitches and join them with a slip stitch into the first chain. You can then crochet into this chain ring instead.
If you need help, you can find both methods explained below — the Magic Ring and the Chain Ring.
Continue by making 3 chain stitches to count as the first double crochet. Then crochet 11 double crochets into the magic ring, so you have 12 double crochets in total for the first round. Finish the round with a slip stitch into the third chain you made at the beginning of the round.
If you’re unsure how to make a double crochet, see the video below.
Round 2: In this round, the circle will double in stitches. Start with 3 chain stitches (counts as the first double crochet) and make 1 double crochet in the same stitch. Now increase by crocheting 2 double crochets in each stitch all the way around. You should have a total of 24 double crochets at the end of the round.
Finish the round the same way as before with a slip stitch.
Round 3: Increase in every second stitch. Start with 3 chain stitches (counts as first double crochet), then 2 double crochets in the next stitch, 1 double crochet in the following stitch, 2 double crochets in the next, and repeat around. You should have 36 double crochets at the end of this round. Finish with a slip stitch.
Round 4: Increase in every third stitch. Start with 3 chain stitches, then 1 double crochet, 2 double crochets in the same stitch, 1 double crochet, 1 double crochet, 2 double crochets in the next stitch, and continue this pattern around. You should have 48 double crochets. Finish as before.
Round 5: Increase in every fourth stitch. Start with 3 chain stitches, then 1 double crochet, 1 double crochet, 2 double crochets in the same stitch, 1 double crochet, 1 double crochet, 1 double crochet, 2 double crochets in the next stitch, and repeat around. You should have 60 double crochets. Finish with a slip stitch.
If this is your first piece, you can make 1 chain stitch, cut the yarn, and fasten off.
If this is your second piece, continue as follows:
Rounds 6–7: On one of the circles, crochet a border so the circles can become a pillow that can be stuffed. Start each round with 3 chain stitches as the first double crochet, then 1 double crochet in each stitch (60 dc). Since there are no increases, the stitch count stays the same as in Round 5, creating a rounded edge on this circle.
Muzzle:
Now switch to the color you want for the nose. This is a round piece, similar to the head parts, but only worked through Round 3.
Round 1: Start with a magic ring or a chain ring. Crochet 3 chain stitches (counts as first double crochet), then 11 double crochets in the ring, giving a total of 12 double crochets in the first round. Finish with a slip stitch in the third chain of the starting chains.
Round 2: The circle will now double in stitches. Start with 3 chain stitches (counts as first double crochet), then 1 double crochet in the same stitch. Continue to increase by working 2 double crochets in each stitch all the way around. You should have 24 double crochets at the end of the round. Finish with a slip stitch as before.
Round 3: Increase in every second stitch. Start with 3 chain stitches (counts as first double crochet), then 2 double crochets in the next stitch, 1 double crochet in the next, 2 double crochets in the following stitch, and repeat around. You should have 36 double crochets. Finish as before.
The nose is now complete. You can cut the yarn, or leave a long tail to later sew or crochet the nose onto the head. Alternatively, you can use a different yarn, like Cotton Cloud, to sew it on.
Ears
The ears are first crocheted in the same color as the nose for Round 1, then in Round 2 you switch to the head color.
Round 1: Make a magic ring. Crochet 3 chain stitches and 7 double crochets into the ring. In the last double crochet, change to the head color. Make 3 chain stitches and pull the magic ring closed so that it forms roughly a half-moon shape, then turn your work.
If you’re unsure how to change colors, see the video linked below.
Round 2: Continue with double crochets, increasing in each stitch so that the ear becomes larger. Finish the round with 1 chain stitch and cut the yarn, leaving a long tail to sew or crochet the ear onto the head later.
Now crochet a second ear in the same way.
Assembly: Nose on the Bear:
Attach the nose before joining the head pieces. First, place the nose where you want it. Use stitch markers to secure it around a few stitches so it stays in the correct position.
Begin attaching the nose, checking as you go to make sure it’s still positioned correctly. You can sew it with a large darning needle and thinner yarn, like Cotton Cloud, or use your crochet hook with the terry yarn, sewing up and down through both the nose and the head.
When you’re about halfway around, start stuffing the nose with a little filling. You don’t need much—just enough to give shape. The more stuffing you add, the firmer the “pillow on pillow” effect becomes. You can continue adding stuffing as you go. Once the nose is fully attached, secure the yarn carefully and firmly.
The Head:
Start by assembling the head using the two large round pieces. You have two options: crochet them together with single crochets for a defined edge, or sew them together for a more invisible seam.
Make sure the right sides are facing out on both pieces. Join the rounded edge to the flat round piece. It can be helpful to use stitch markers in a few spots to ensure everything aligns evenly, making sure both pieces have the same number of stitches.
To crochet them together, make a slip knot and begin working single crochets through both pieces (or sew them together if you prefer). It doesn’t matter exactly where you start.
When you’ve worked about two-thirds around, begin stuffing the pillow. Continue adding stuffing until you’re happy with the shape, then finish joining the pieces completely. Secure the yarn carefully once you’ve gone all the way around.
If you’re unsure how to make a slip knot, see the video below.
Embroidering & Attaching the Eyes
Before you start attaching the ears, it’s a good idea to position all the pieces with pins or stitch markers to ensure everything is centered and spaced properly.
Eyes, Nose & Mouth
For the eyes, nose, and mouth, you can use small yarn scraps to position them before you start embroidering. Attach the ears using the yarn tail you left, either with your crochet hook as a needle or with thinner yarn and a tapestry needle. Make sure to secure and tie off the yarn ends carefully so nothing unravels.
When embroidering, keep it simple if you’re not used to embroidery. Start by pinning the outlines and laying out the yarn to see how it looks. Then sew short stitches following the pins for a cleaner shape. Feel free to test and redo until you’re happy.
Your pillow is now complete! 🐻✨
Description with Crochet Terms
This part of the pattern uses standard crochet terms. If you need extra help, see the simpler section.
Abbreviations:
ch – chain
sc – single crochet
sl st – slip stitch
inc dc – increase with double crochet
dc – double crochet
st – stitch
(...) – total stitches in the round
Head, make two pieces:
Yarn color: Beige
Round 1: MR, ch 3, 11 dc (12)
Finish each round with a sl st in the 3rd ch from the start. This applies to all rounds for the head.
Round 2: ch 3, 1 dc in same st as ch 3, inc dc ×11 (24)
Round 3: ch 3, 1 dc in same st as ch 3, 1 dc, *inc dc, 1 dc* ×11 (36)
Round 4: ch 3, *inc dc, 2 dc* ×11, inc dc, 1 dc (48)
Round 5: ch 3, *inc dc, 3 dc* ×11, inc dc, 2 dc (60)
On one of your two head pieces, continue to crochet two more rounds:
Rounds 6–7: ch 3, 59 dc (60)
Cut and fasten off the yarn.
Muzzle:
Yarn color: Greige
Round 1: MR, ch 3, 11 dc (12)
Finish each round with a sl st in the 3rd ch from the start. This applies to all rounds for the muzzle.
Round 2: ch 3, 1 dc in same st as ch 3, inc dc ×11 (24)
Round 3: ch 3, 1 dc in same st as ch 3, 1 dc, *inc dc, 1 dc* ×11 (36)
Ears (make two):
Start with Greige.
Round 1: MR, ch 2, 7 dc (8). Turn.
Change to Beige.
Round 2: ch 3, inc dc ×7 (15)
Fasten off yarn.
Assembly: Nose on the bear:
Attach the nose before joining the head. Begin by placing the nose where you want it. Use stitch markers to secure it in a few spots so it stays in the correct position.
Head Assembly:
Start by joining the head with the two large round pieces. You have two options: crochet them together with single crochets for a defined edge, or sew them together for a more invisible seam.
Make sure the right sides of both pieces face out, aligning the rounded edge with the flat circle. It can be helpful to secure with stitch markers in a few spots to ensure even alignment, but both pieces should have the same number of stitches.
Join by making a slip knot and working single crochets through both layers (or sew them together). It doesn’t matter exactly where you start. When you’ve completed about 2/3 of the round, begin stuffing the pillow. Continue stuffing until you are satisfied, then finish joining the pieces, securing firmly all the way around.
Attaching Ears & Embroidery:
Before attaching the ears, place all pieces with pins or stitch markers to check that they are centered and evenly spaced. Attach the ears using the yarn tail you left, either with the crochet hook as a needle or a thinner yarn and a tapestry needle.
Secure and tie off the yarn ends carefully to ensure they don’t come loose. For the eyes, nose, and mouth, you can use small yarn pieces to mark placement before you begin embroidery.
Finishing Embroidery:
Embroider the final details, keeping it simple if you’re not experienced with embroidery. Start by pinning the outlines and laying out the yarn to see if it looks right. Then stitch short lines to follow the pins and shape more accurately. Feel free to experiment and start over if you’re not satisfied.
Your pillow is now complete!
The rights to this pattern belong to MYO Make Your Own. The pattern or its pictures may not be copied, shared or resold either in parts or in its entirety, but you may sell items you have crocheted from this pattern. If you have questions about the pattern, contact MYO at hello@makeyourown.se.
%20(1).jpg)


Share your creations with us
Thank you!
Your comment was sent!