
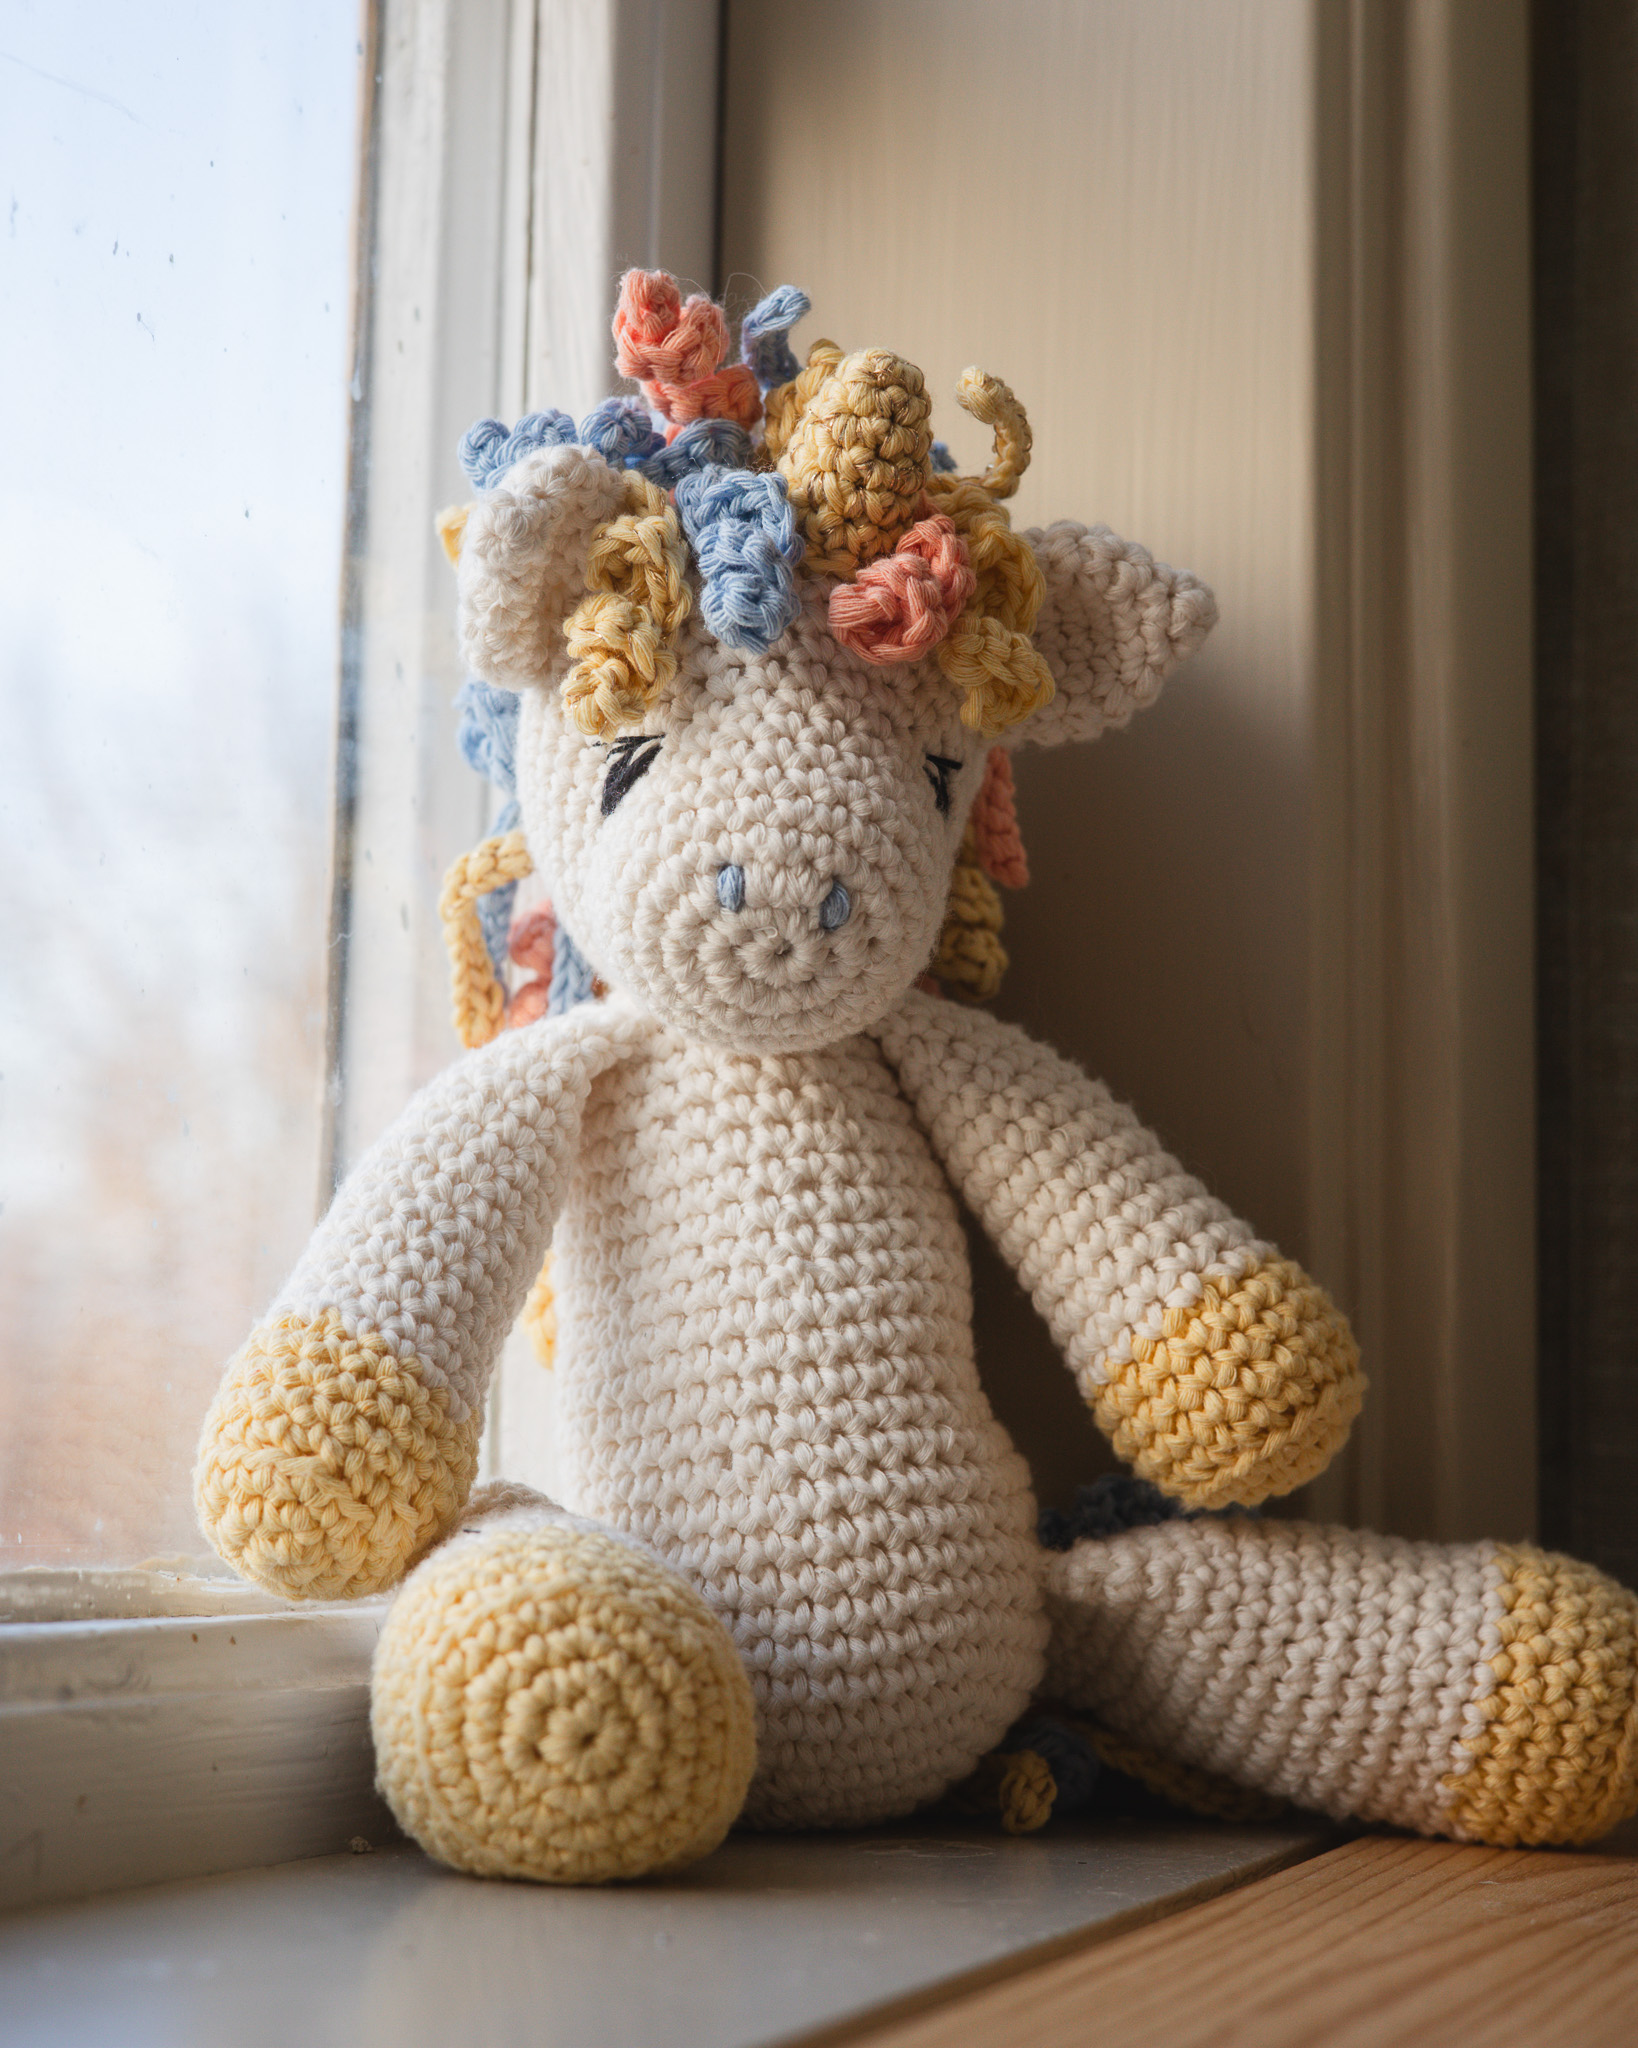
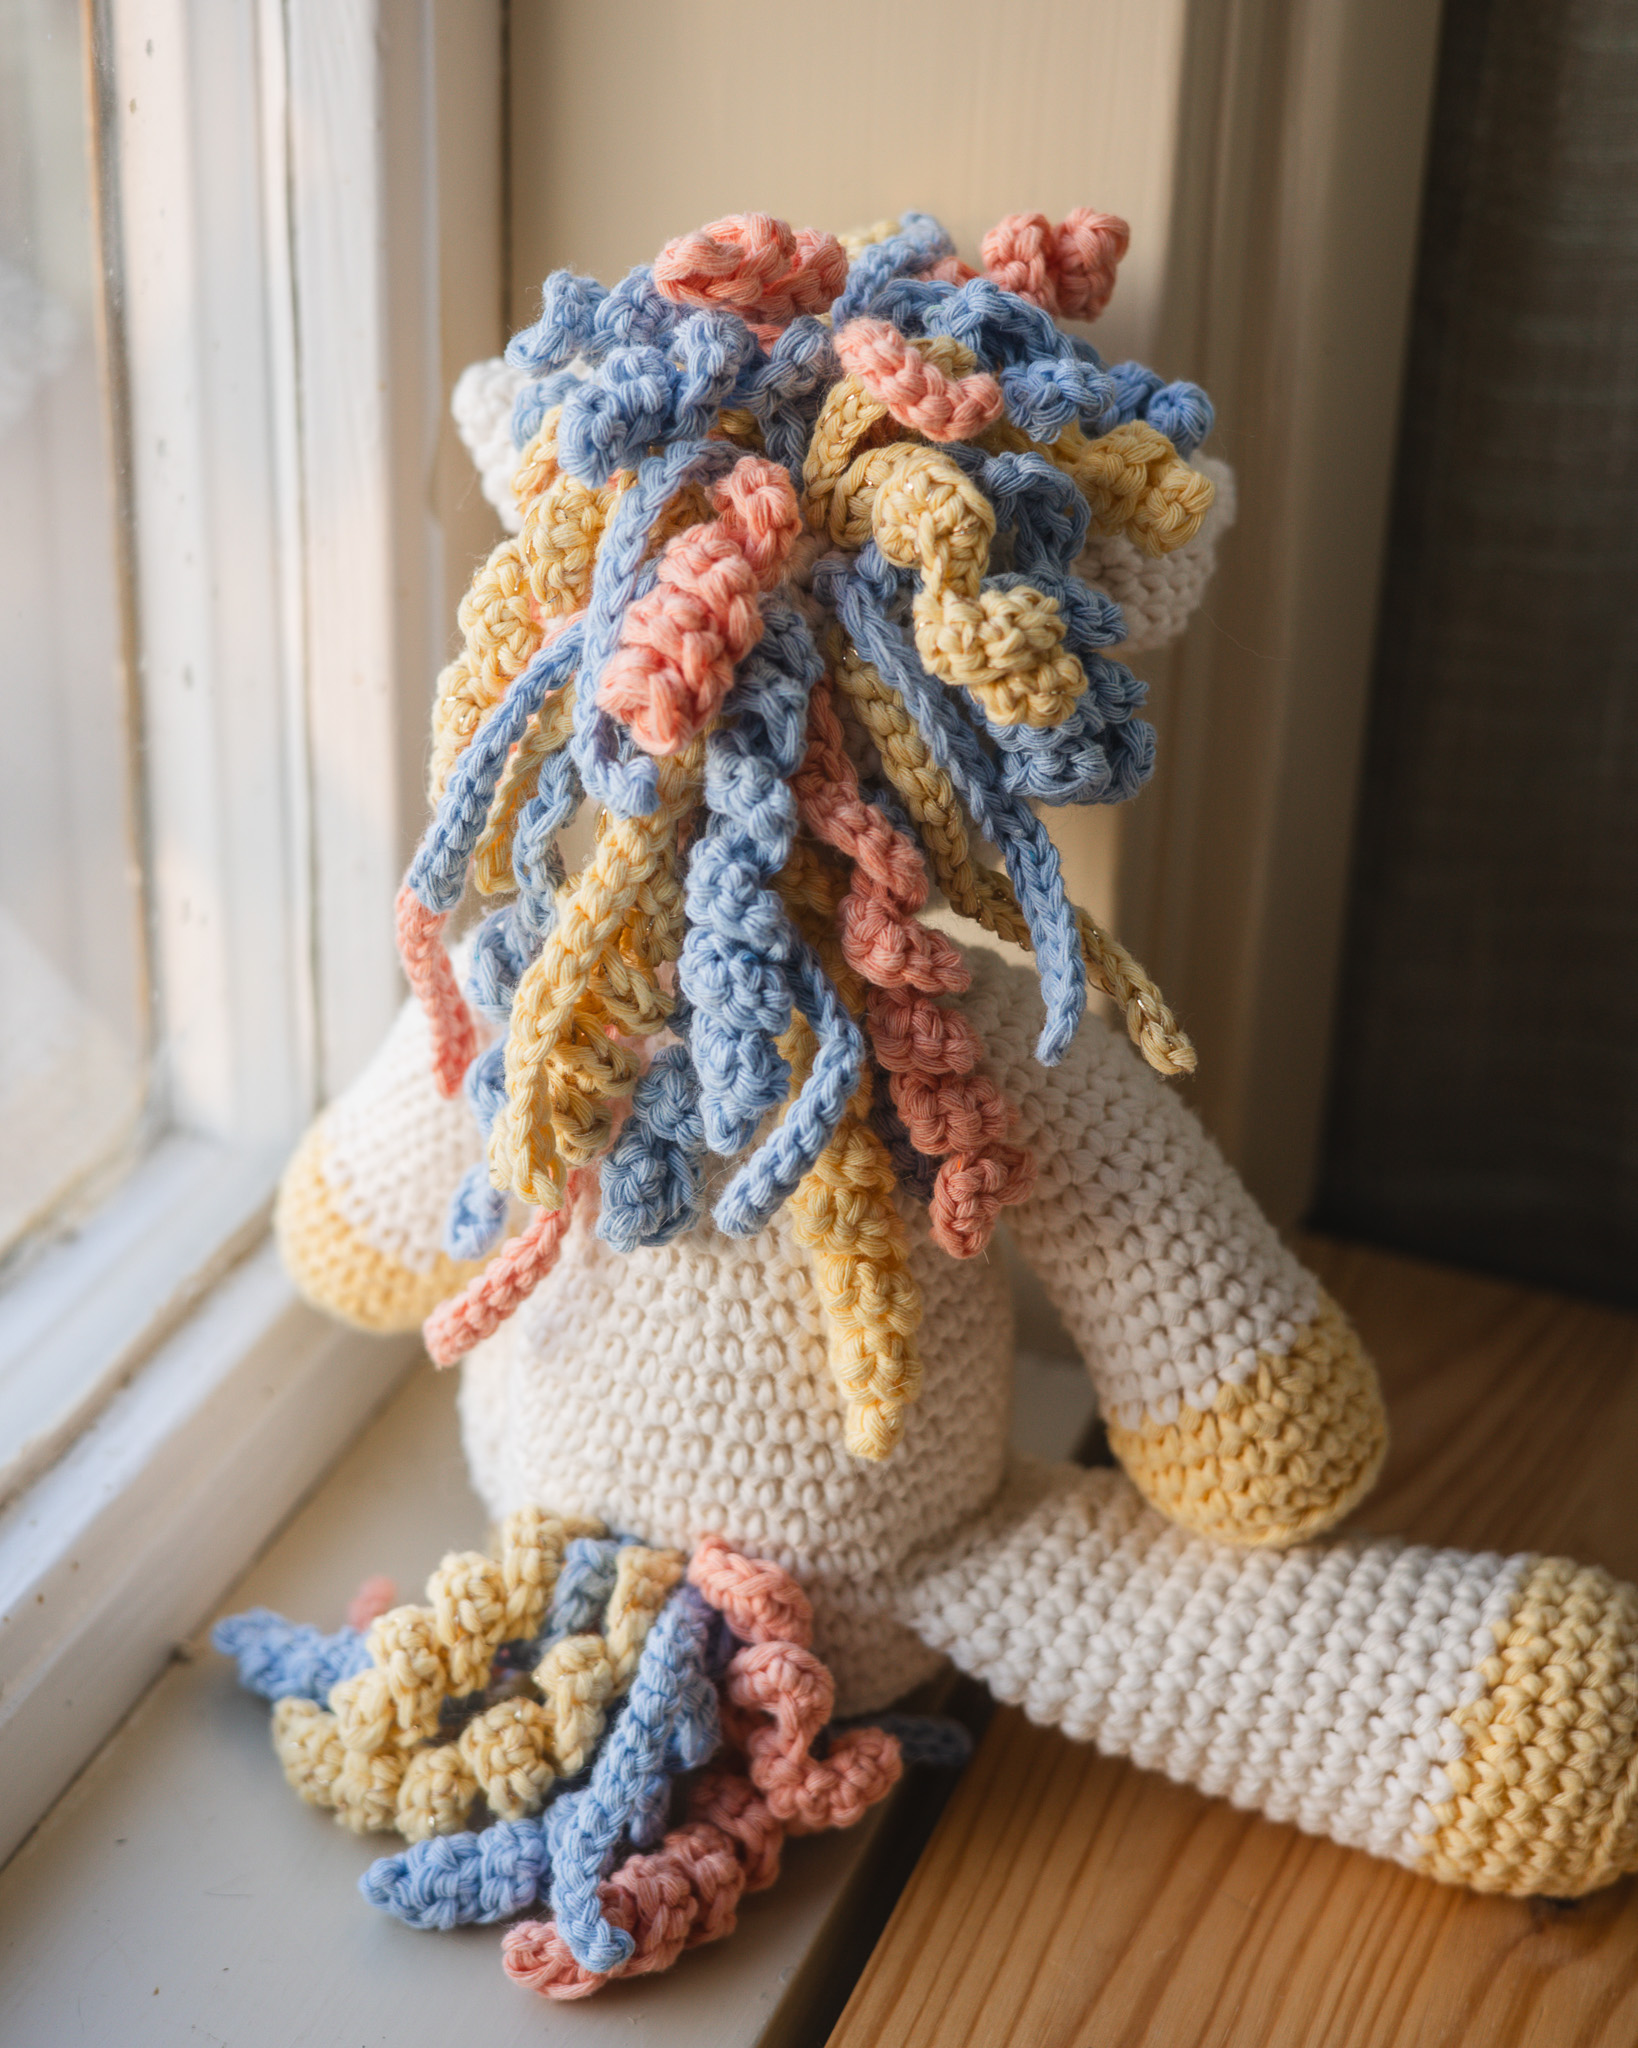
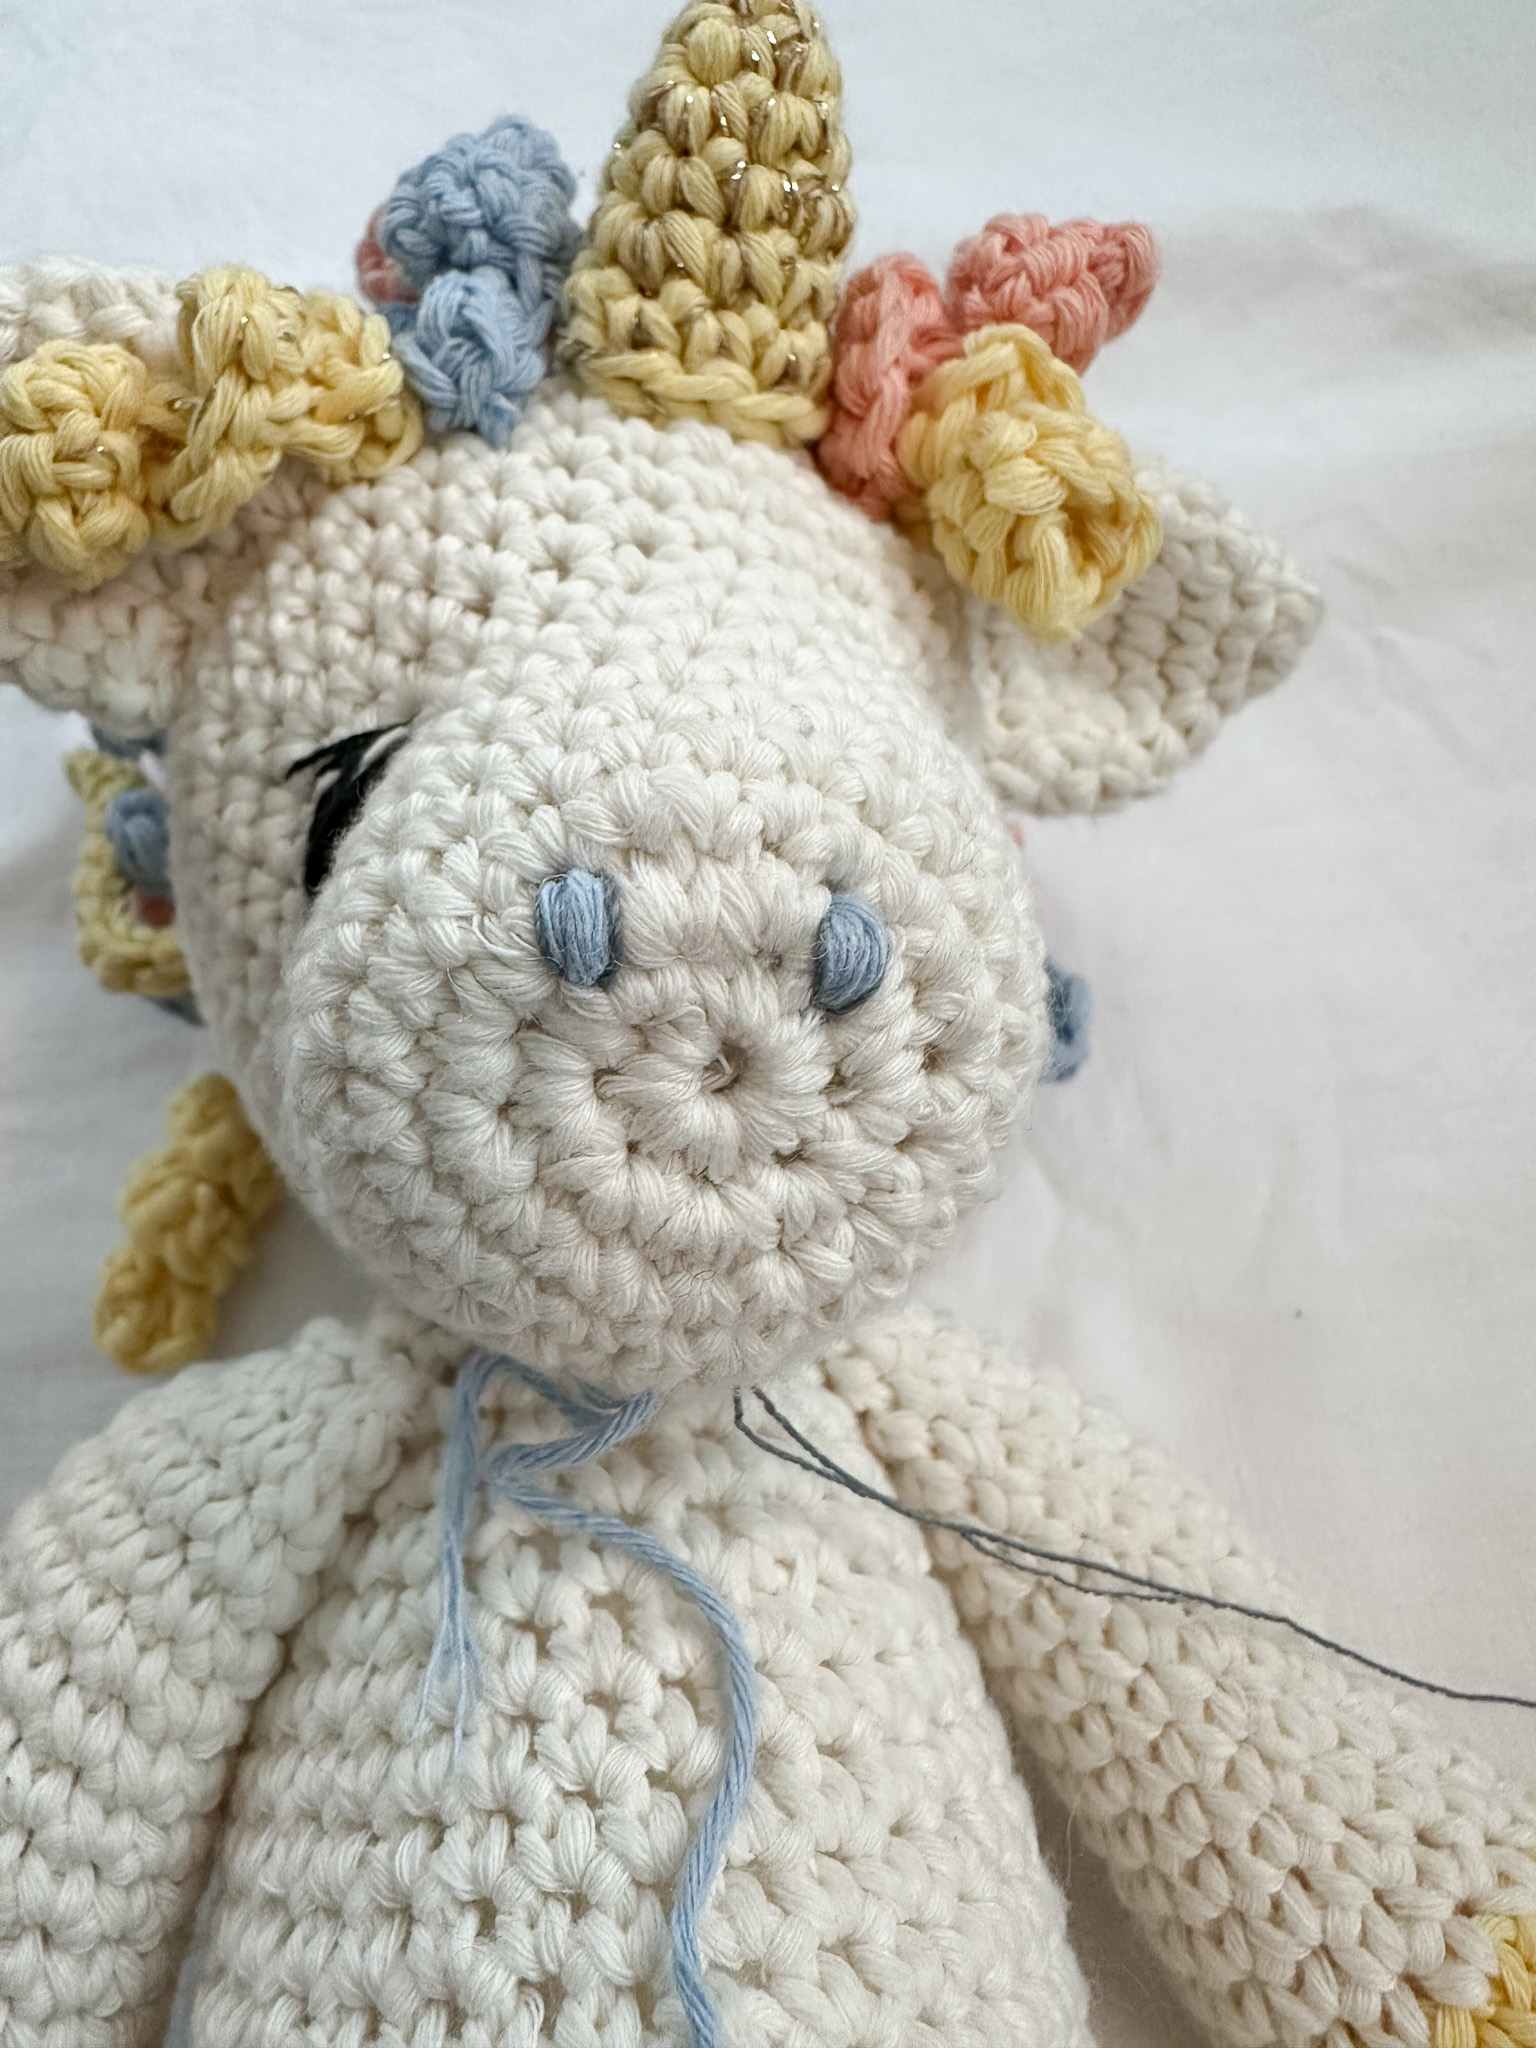
Crocheted unicorn “Joy”
Crochet a Cute Unicorn 🦄
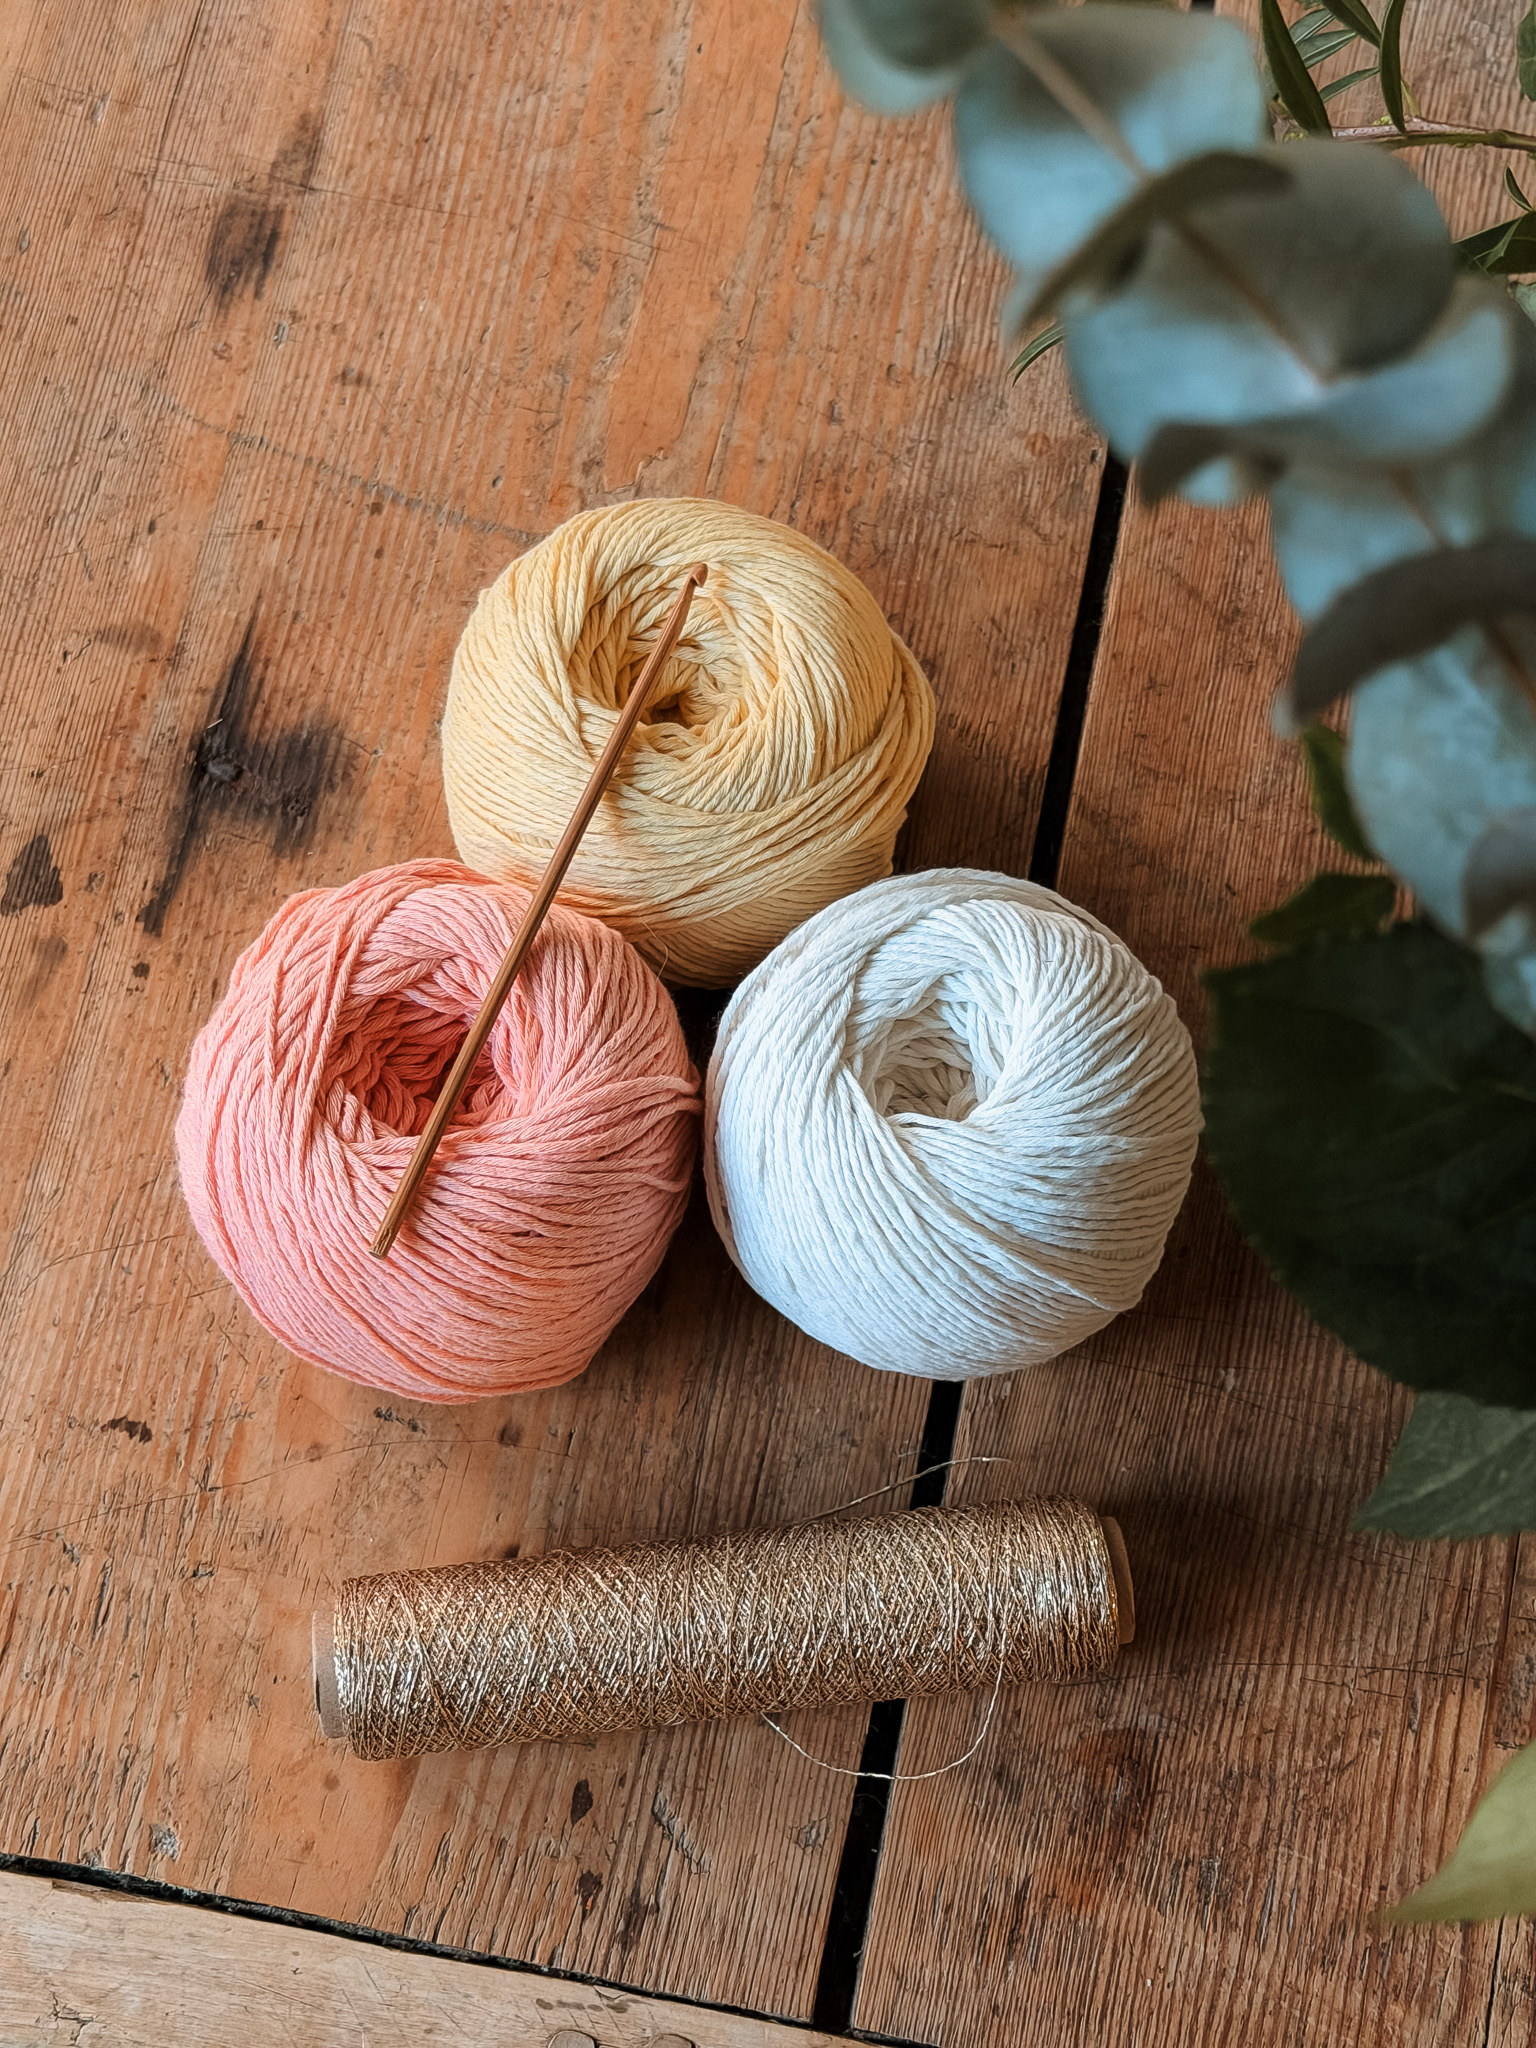
This unicorn is a fun project and makes the perfect gift for any unicorn lover! It is crocheted using the soft and washable cotton yarn Cotton Cloud and can easily be customized with the colors you prefer to make the unicorn more personal. Perfect for anyone who wants to challenge themselves by learning how to crochet a stuffed toy! You will need Cotton Cloud yarn and glitter yarn (optional), a 3.5 mm crochet hook, stuffing, black yarn for embroidering the eyes, and sewing thread for the eyelashes and nose. We used the colors: “Cloud” (base color), “Light Blue,” “Peachy,” “Light Yellow,” and gold glitter yarn for the horn and mane/tail.
Yarn Consumption: The finished unicorn weighs a total of 177 g (including stuffing). You will need almost one full skein of the base color.
Note: In this instruction, we use videos from our technique library along with images.
Here's how to do it
The unicorn is crocheted in separate parts that are then assembled. There are videos showing how to attach the arms and legs to the body, as well as how to attach the head to the body. We hope you’d like to try making your own unicorn! Good luck! /Johanna Hall
%20(4).jpg)
This is what you need:
Here you can directly purchase the material for the product. Please note that the instruction is digital and appears here on the page (no written instruction).

Cotton Cloud | 100 g
A slightly thinner cotton yarn that works perfectly for clothes, accessories and amigurumi.
Buy product
.jpg)
Unleash your creativity
For only 85kr per month you get access to all our 300+ beginner-friendly instructions for crochet, knitting and macrame.
A perfect way to get started with your new hobby!

Safety
Secure all yarn ends carefully so nothing can come undone. Always check that the unicorn is intact and safe to use before giving it to a child. The mane and tail must not be made longer than stated in the pattern, as this may pose a safety risk.
If you sell or give away the finished product, you are responsible for informing the recipient about these safety instructions.
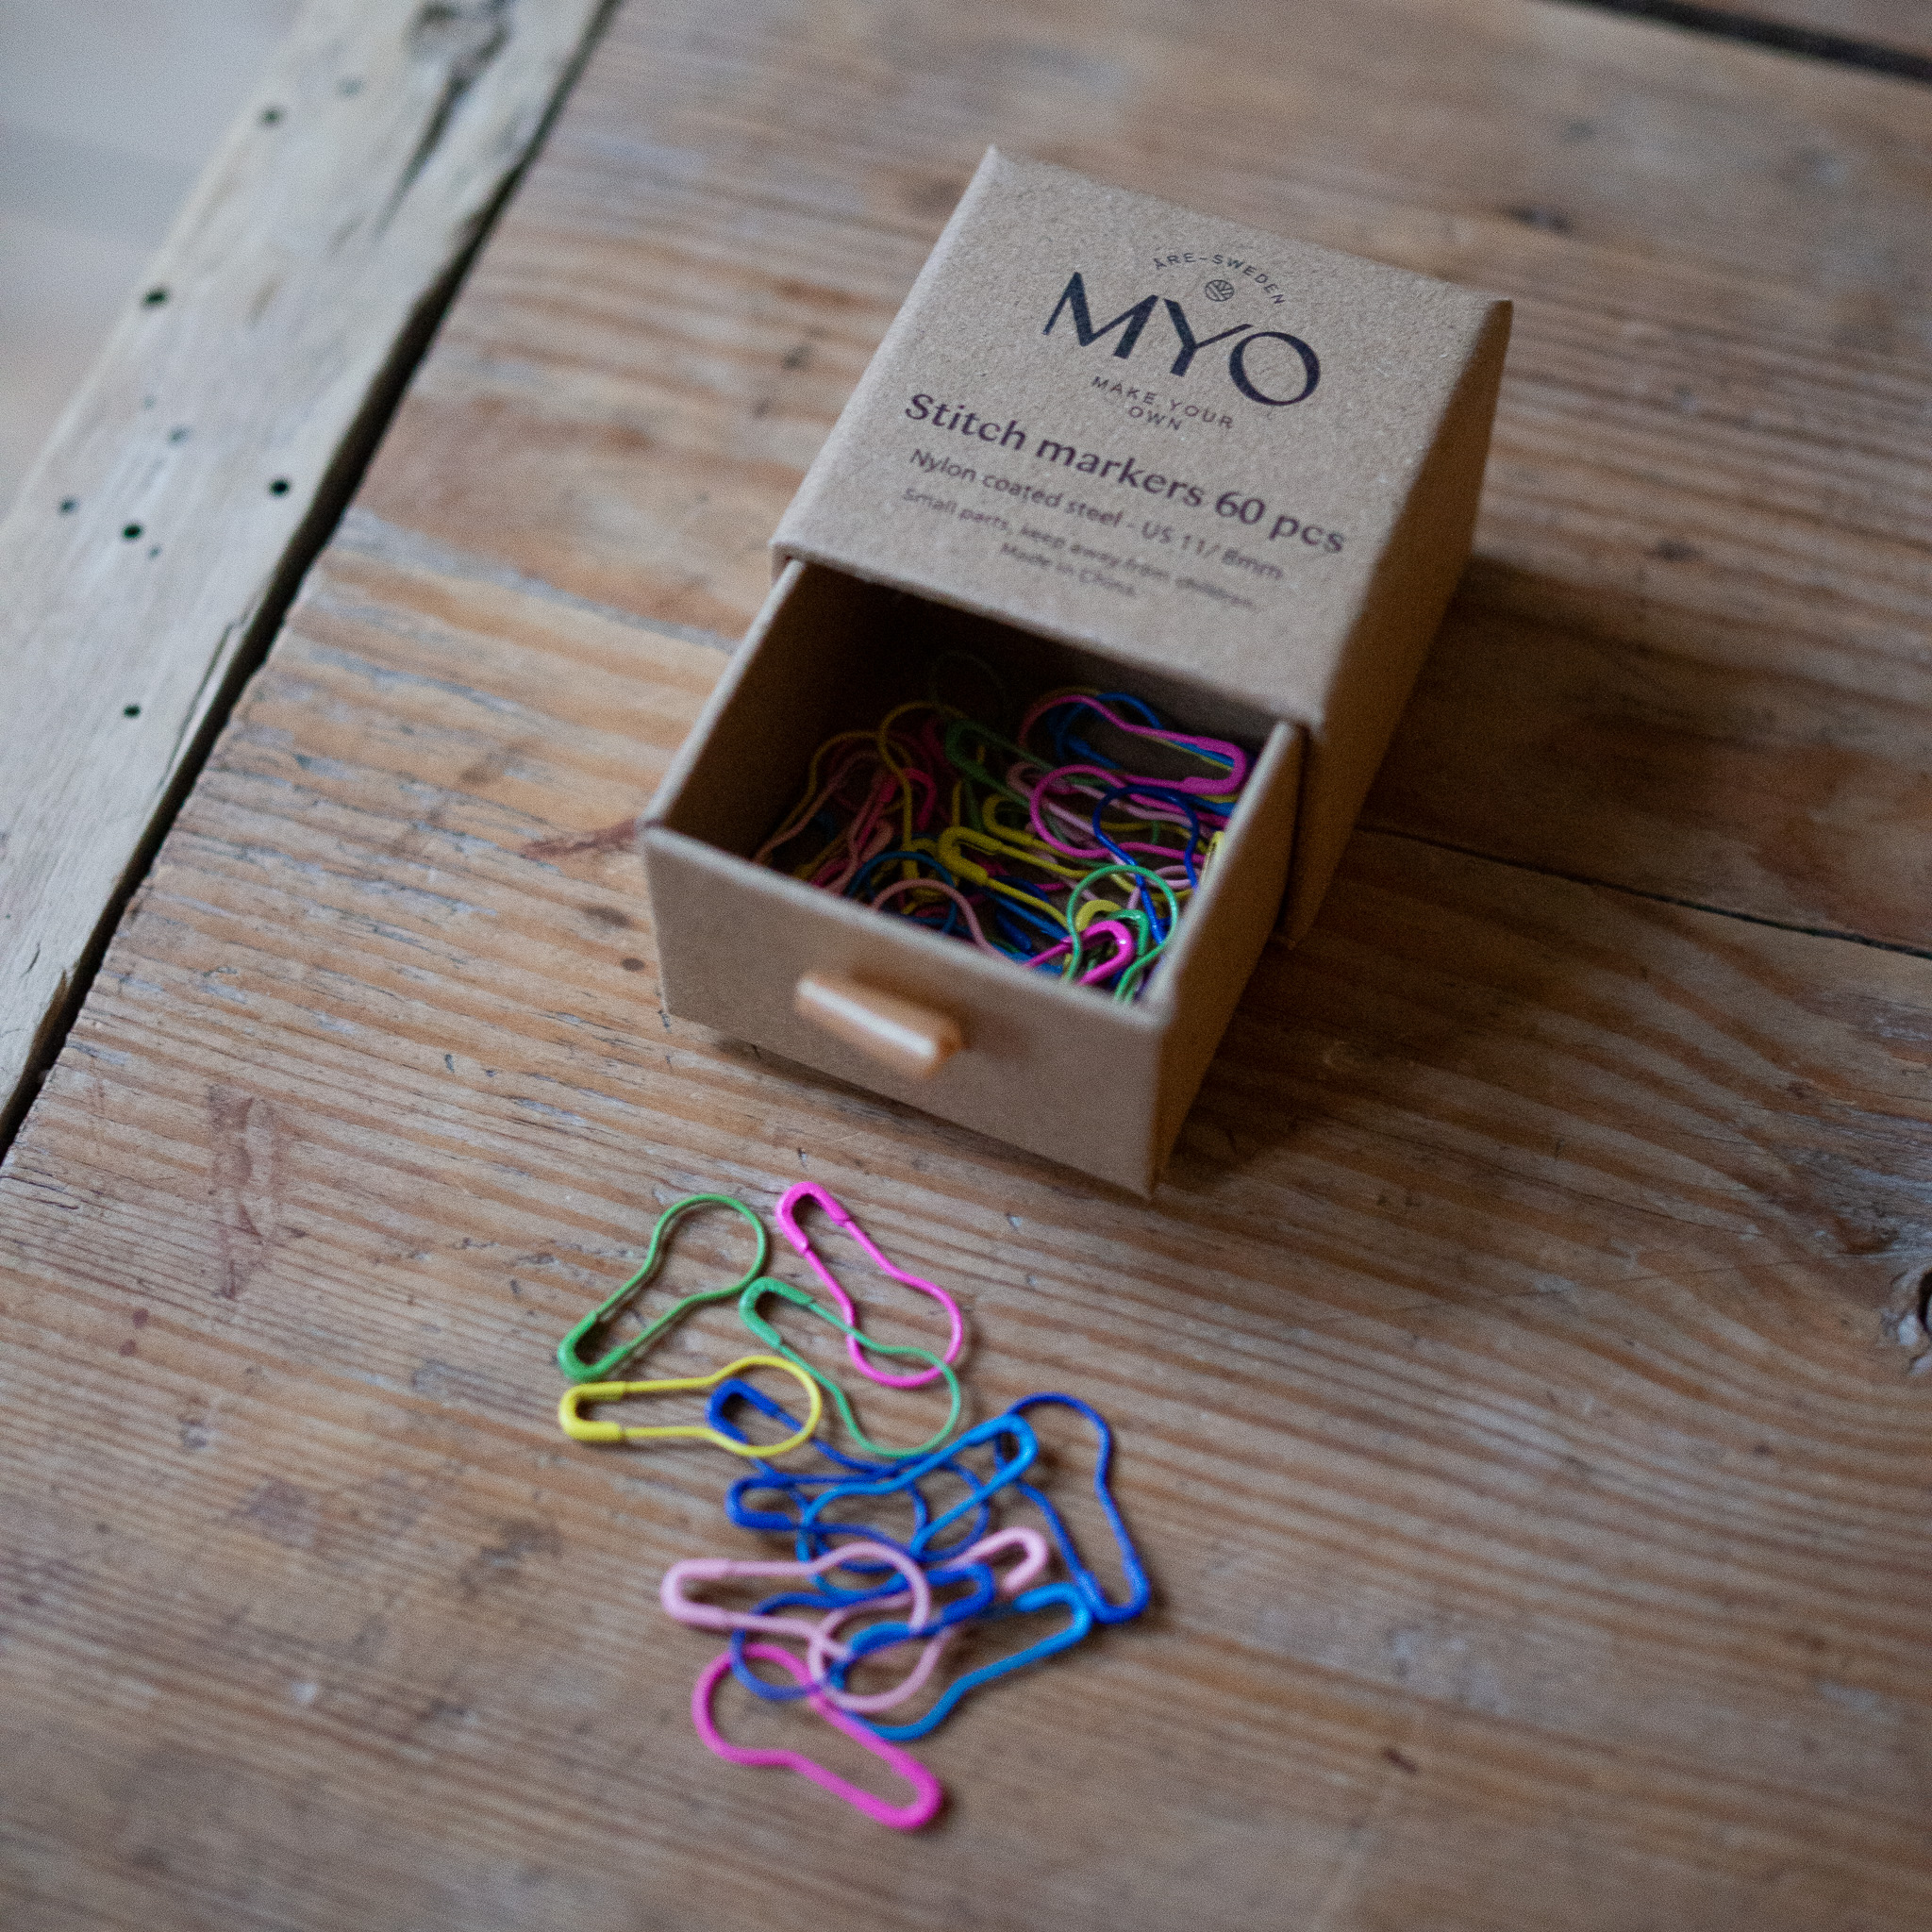
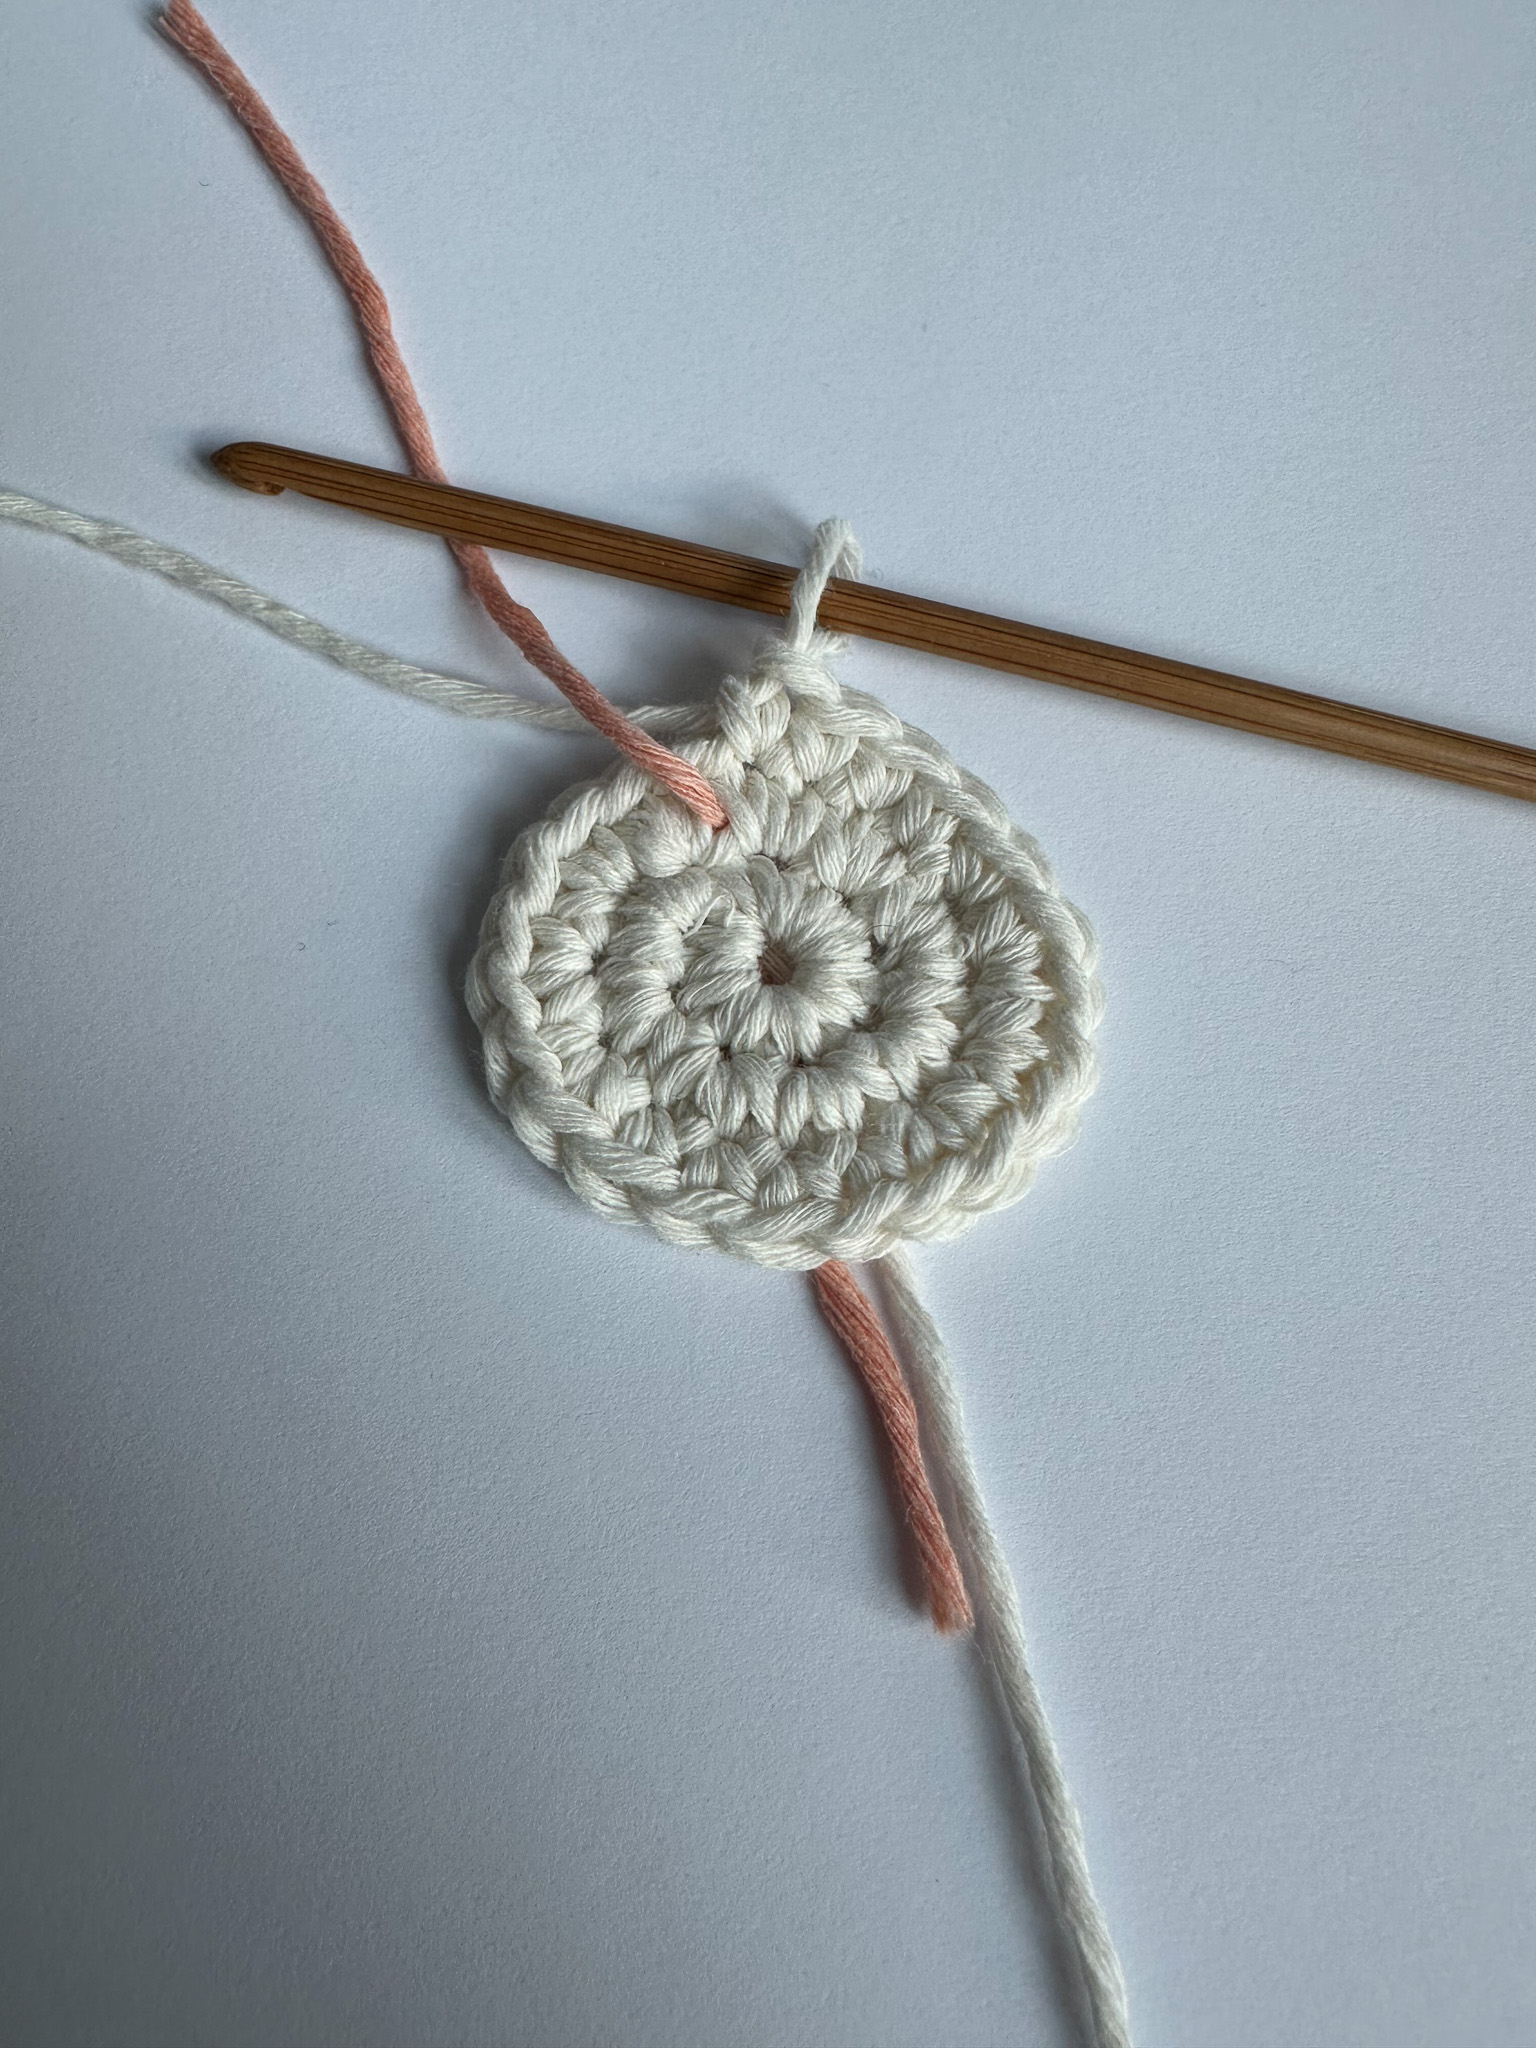
Tips for keeping track of the rounds
Use a stitch marker and place it in your last stitch. Alternatively, cut a piece of yarn (preferably in a different color from the one you are crocheting with) and place it under the yarn strand (coming from your yarn ball) before making the first stitch of each round.
This way, stitch 1 of each round will end up just to the left of the yarn end, making it easy to see when you have completed a round. Then you can pull out the yarn piece and place it under the yarn again at the beginning of the next round.
In the photos in the instructions, a pink yarn piece is used for this purpose.
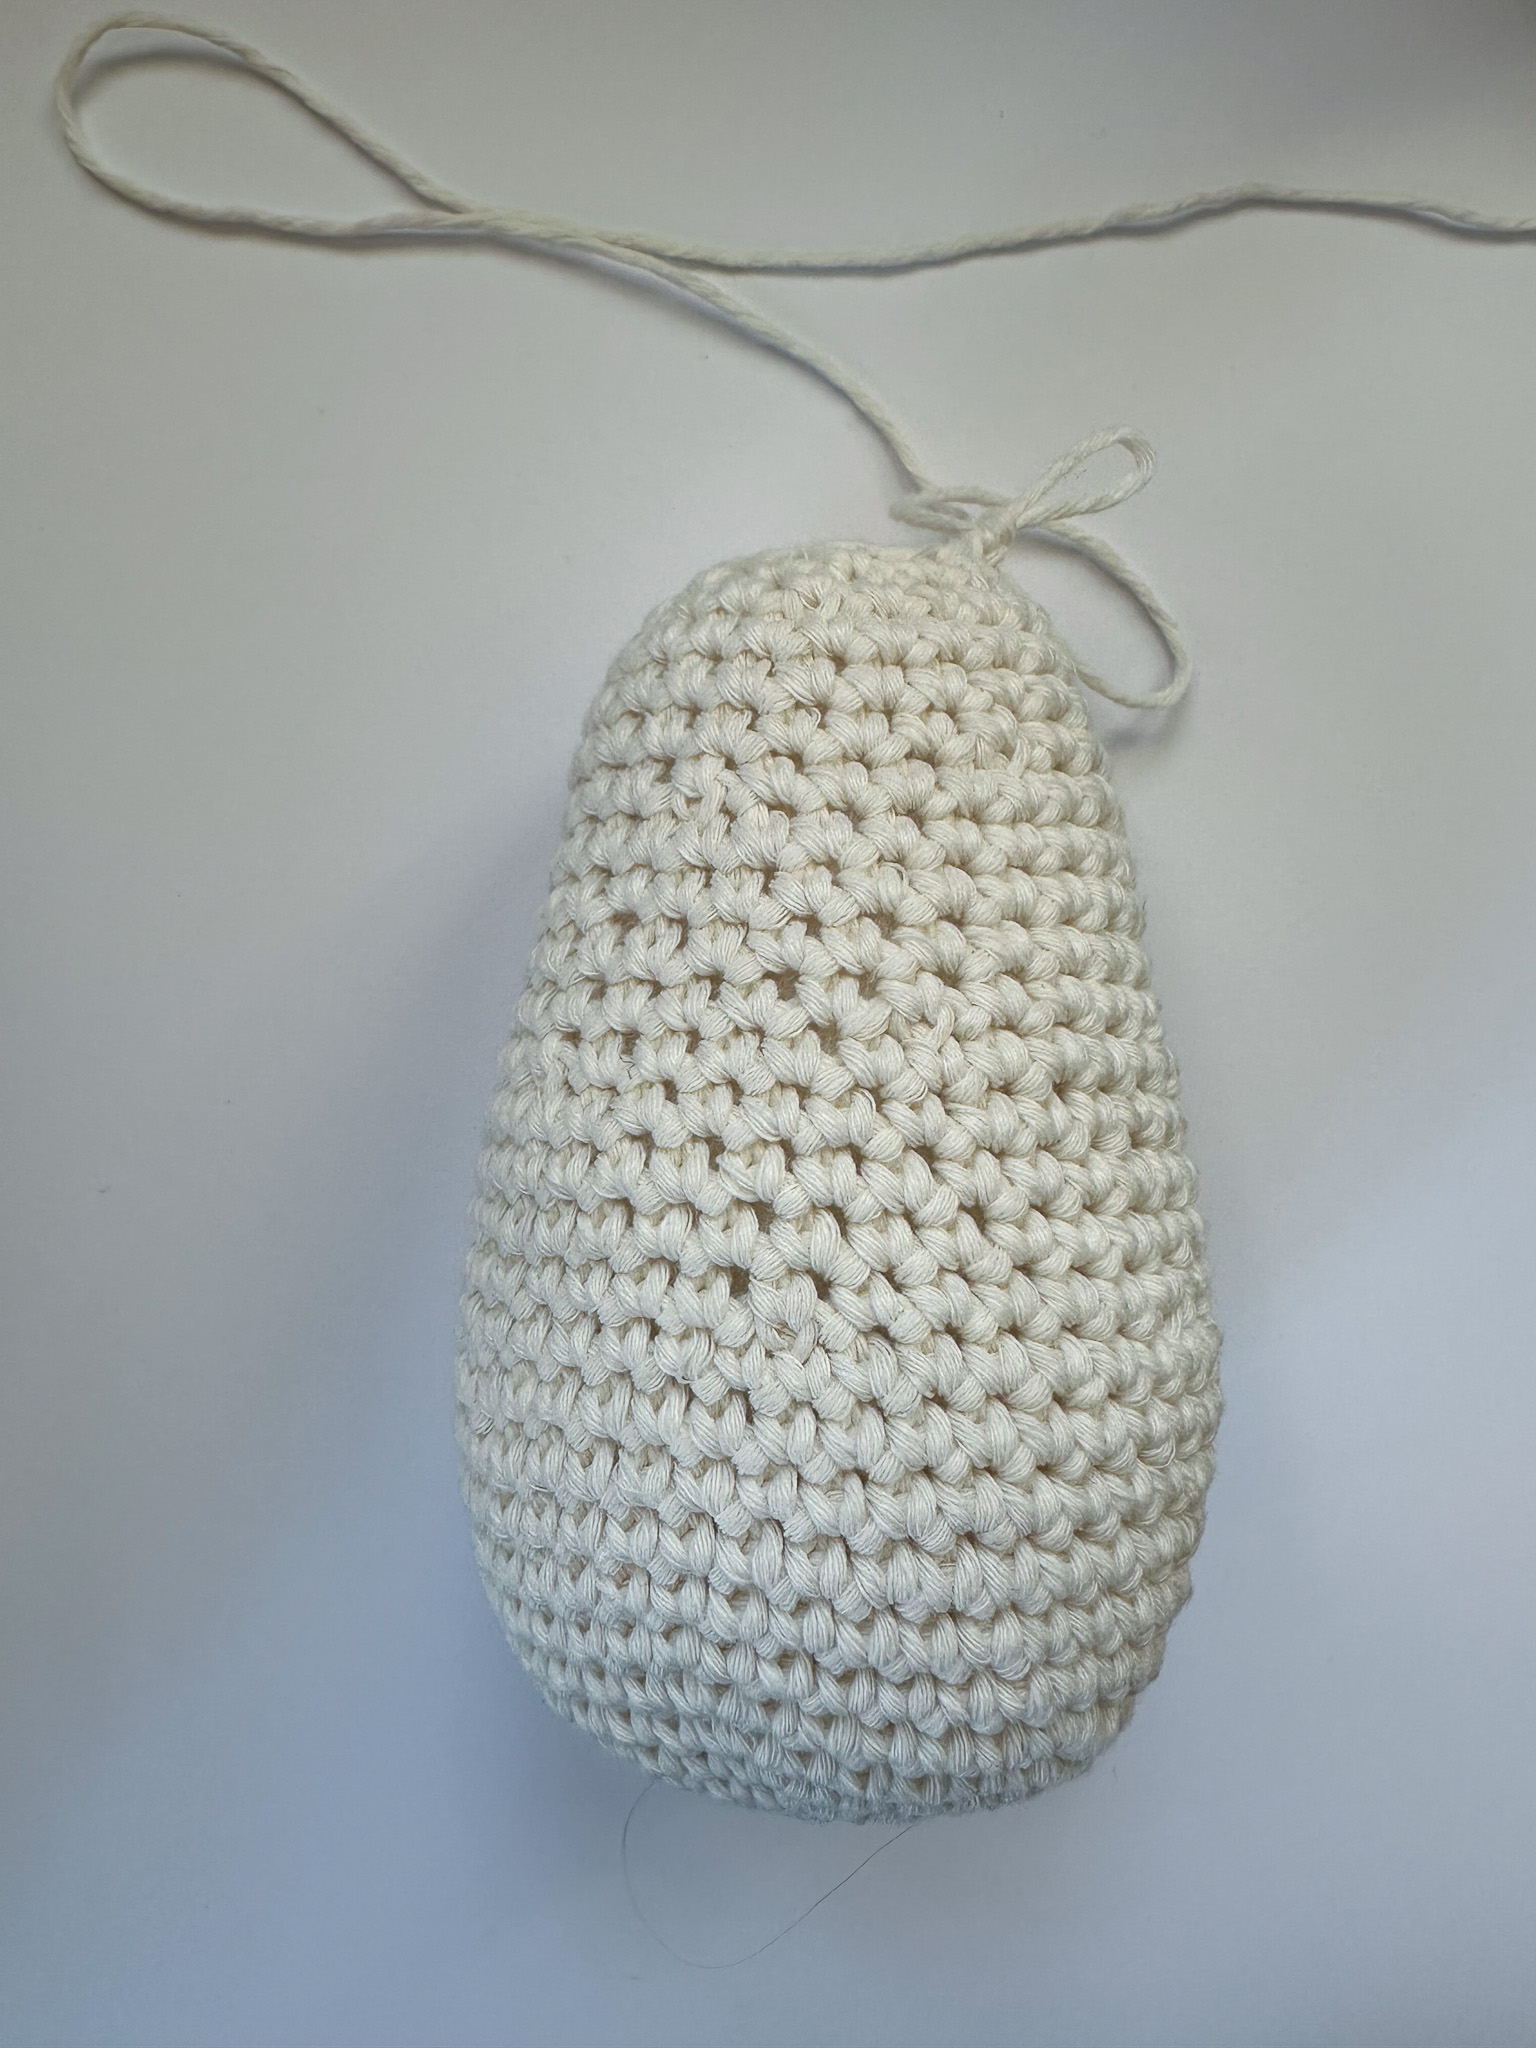
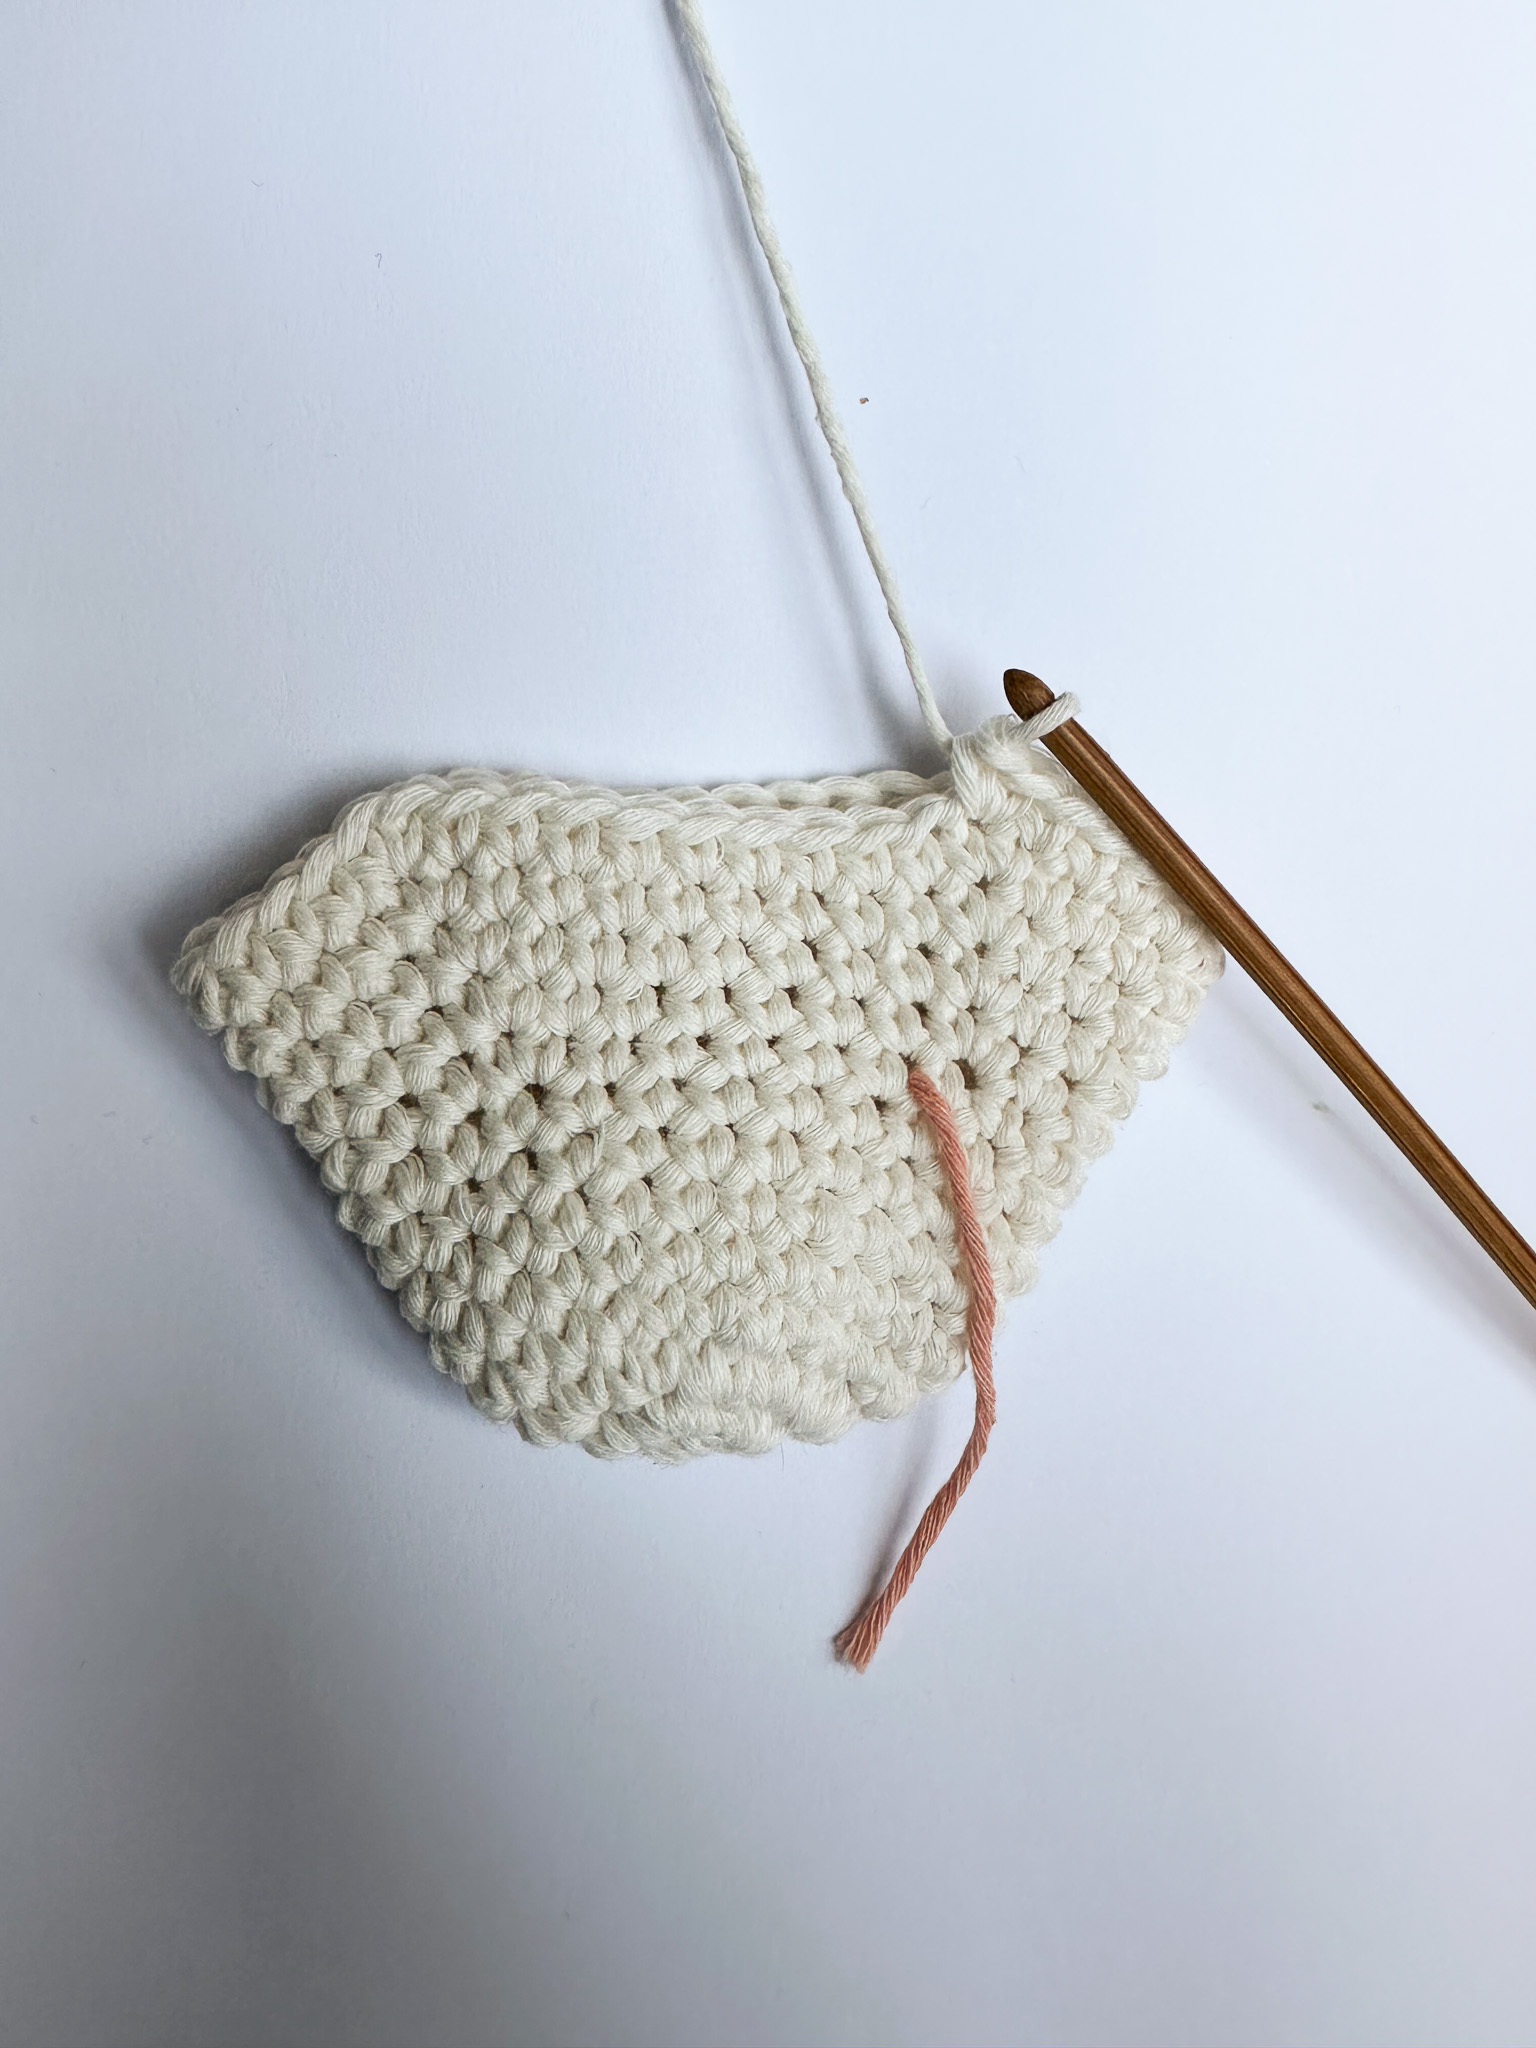
Body (white yarn)
Round 1: Crochet 6 single crochets into a magic ring. If you are unsure how to do this, see the video below (Magic Ring Single Crochet).
Round 2: Crochet 2 single crochets in each stitch. You will have 12 stitches in total in the round.
Round 3: Crochet 1 single crochet in the first stitch. Then crochet 2 single crochets in the 2nd stitch (an increase). Repeat this pattern (increase in every second stitch) all the way around. You will have 18 stitches in total in the round.
Round 4: Crochet 1 single crochet in each of the first 2 stitches. Then make an increase. Repeat this pattern (increase in every third stitch) all the way around. You will have 24 stitches in total in the round.
Round 5: Crochet 1 single crochet in each of the first 3 stitches. Then make an increase. Repeat this pattern (increase in every fourth stitch) all the way around. You will have 30 stitches in total in the round.
Round 6: Crochet 1 single crochet in each of the first 4 stitches, then make an increase. Repeat this pattern (increase in every 5th stitch) all the way around. You will have 36 stitches in total in the round.
Round 7: Crochet 1 single crochet in each of the first 5 stitches, then make an increase. Repeat this pattern (increase in every 6th stitch) all the way around. You will have 42 stitches in total in the round.
Rounds 8–13: Crochet 42 single crochets (1 single crochet in each stitch) for a total of 6 rounds. A tip is to keep the helper yarn before the first stitch of round 8 so it’s easier to count how many rounds you have made. Alternatively, keep the stitch marker in place.
Round 14: Crochet 1 single crochet in each of the first 5 stitches. Crochet the next 2 stitches together with a single crochet (a decrease, stitches 6 and 7). Repeat this pattern (decrease in every 6th stitch) all the way around. You will have 36 stitches in total in the round.
If you are unsure how to crochet a decrease, see the video below.
Rounds 15–18: Crochet 36 single crochets (1 single crochet in each stitch) for a total of 4 rounds.
Round 19: Crochet 1 single crochet in each of the first 4 stitches, then make a decrease. Repeat this pattern (decrease in stitches 5 and 6) all the way around. You will have 30 stitches in total in the round.
Rounds 20–23: Crochet 30 single crochets (1 single crochet in each stitch) for a total of 4 rounds.
Round 24: Crochet 1 single crochet in each of the first 3 stitches, then make a decrease. Repeat this pattern (decrease in every 4th stitch) all the way around. You will have 24 stitches in total in the round.
Rounds 25–27: Crochet 24 single crochets (1 single crochet in each stitch) for a total of 3 rounds.
Round 28: Crochet 1 single crochet in each of the first 2 stitches, then make a decrease. Repeat this pattern (decrease in every 3rd stitch) all the way around. You will have 18 stitches in total in the round.
Now begin stuffing the body with filling.
Round 29: Crochet 1 single crochet, then make a decrease. Repeat this pattern (decrease in every second stitch) all the way around. You will have 12 stitches in total in the round.
Add more stuffing until no more fits. You will get a nicer and firmer shape if you stuff it well. Just be careful not to push in too much so that the stuffing shows through between the stitches.
Finish off and cut the yarn, but leave a long yarn tail.
Head (white yarn)
Round 1: Crochet 8 single crochets into a magic ring.
Round 2: Crochet 2 single crochets in each stitch (increases). You will have 16 stitches in total in the round.
Round 3: Crochet 2 single crochets in each stitch (increases) for 4 stitches. Then crochet 4 single crochets. Repeat this once more, i.e., 4 increases followed by 4 single crochets. You will have 24 stitches in total in the round.
Rounds 4–8: Crochet 24 single crochets (1 single crochet in each stitch) for a total of 5 rounds.
Round 9: Crochet 1 single crochet in each of the first 5 stitches, then make an increase. Repeat this pattern (increase in every 6th stitch) all the way around. You will have 28 stitches in total in the round.
Round 10: Crochet 1 single crochet in each of the first 6 stitches, then make an increase. Repeat this pattern (increase in every 7th stitch) all the way around. You will have 32 stitches in total in the round.
Round 11: Crochet 1 single crochet in each of the first 7 stitches, then make an increase. Repeat this pattern (increase in every 8th stitch) all the way around. You will have 36 stitches in total in the round.
Round 12: Crochet 1 single crochet in each of the first 8 stitches, then make an increase. Repeat this pattern (increase in every 9th stitch) all the way around. You will have 40 stitches in total in the round.
Round 13: Crochet 1 single crochet in each of the first 9 stitches, then make an increase. Repeat this pattern (increase in every 10th stitch) all the way around. You will have 44 stitches in total in the round.
Rounds 14–17: Crochet 44 single crochets (1 single crochet in each stitch) for a total of 4 rounds.
Round 18: Crochet 13 single crochets. Crochet the next 2 stitches together as one single crochet (a decrease).
Crochet 20 single crochets. Crochet the next 2 stitches together as a decrease.
Crochet 7 single crochets.
You will have 42 stitches in total in the round.
Round 19: Crochet 1 single crochet in each of the first 5 stitches, then make a decrease. Repeat this pattern (decrease in every 6th stitch) all the way around. You will have 36 stitches in total in the round.
Round 20: Crochet 36 single crochets in one round.
Round 21: Crochet 1 single crochet in each of the first 4 stitches, then make a decrease. Repeat this pattern (decrease in every 5th stitch) all the way around. You will have 30 stitches in total in the round.
Round 22: Crochet 1 single crochet in each of the first 3 stitches, then make a decrease. Repeat this pattern (decrease in every 4th stitch) all the way around. You will have 24 stitches in total in the round.
Round 23: Crochet 1 single crochet in each of the first 2 stitches, then make a decrease. Repeat this pattern (decrease in every 3rd stitch) all the way around. You will have 18 stitches in total in the round.
Now begin stuffing the head with filling.
Round 24: Crochet 1 single crochet, then make a decrease. Repeat this pattern (decrease in every second stitch) all the way around. You will have 12 stitches in total in the round.
Add more stuffing until no more fits. You will get a nicer and firmer shape if you stuff it well. Make sure the stuffing does not show between the stitches.
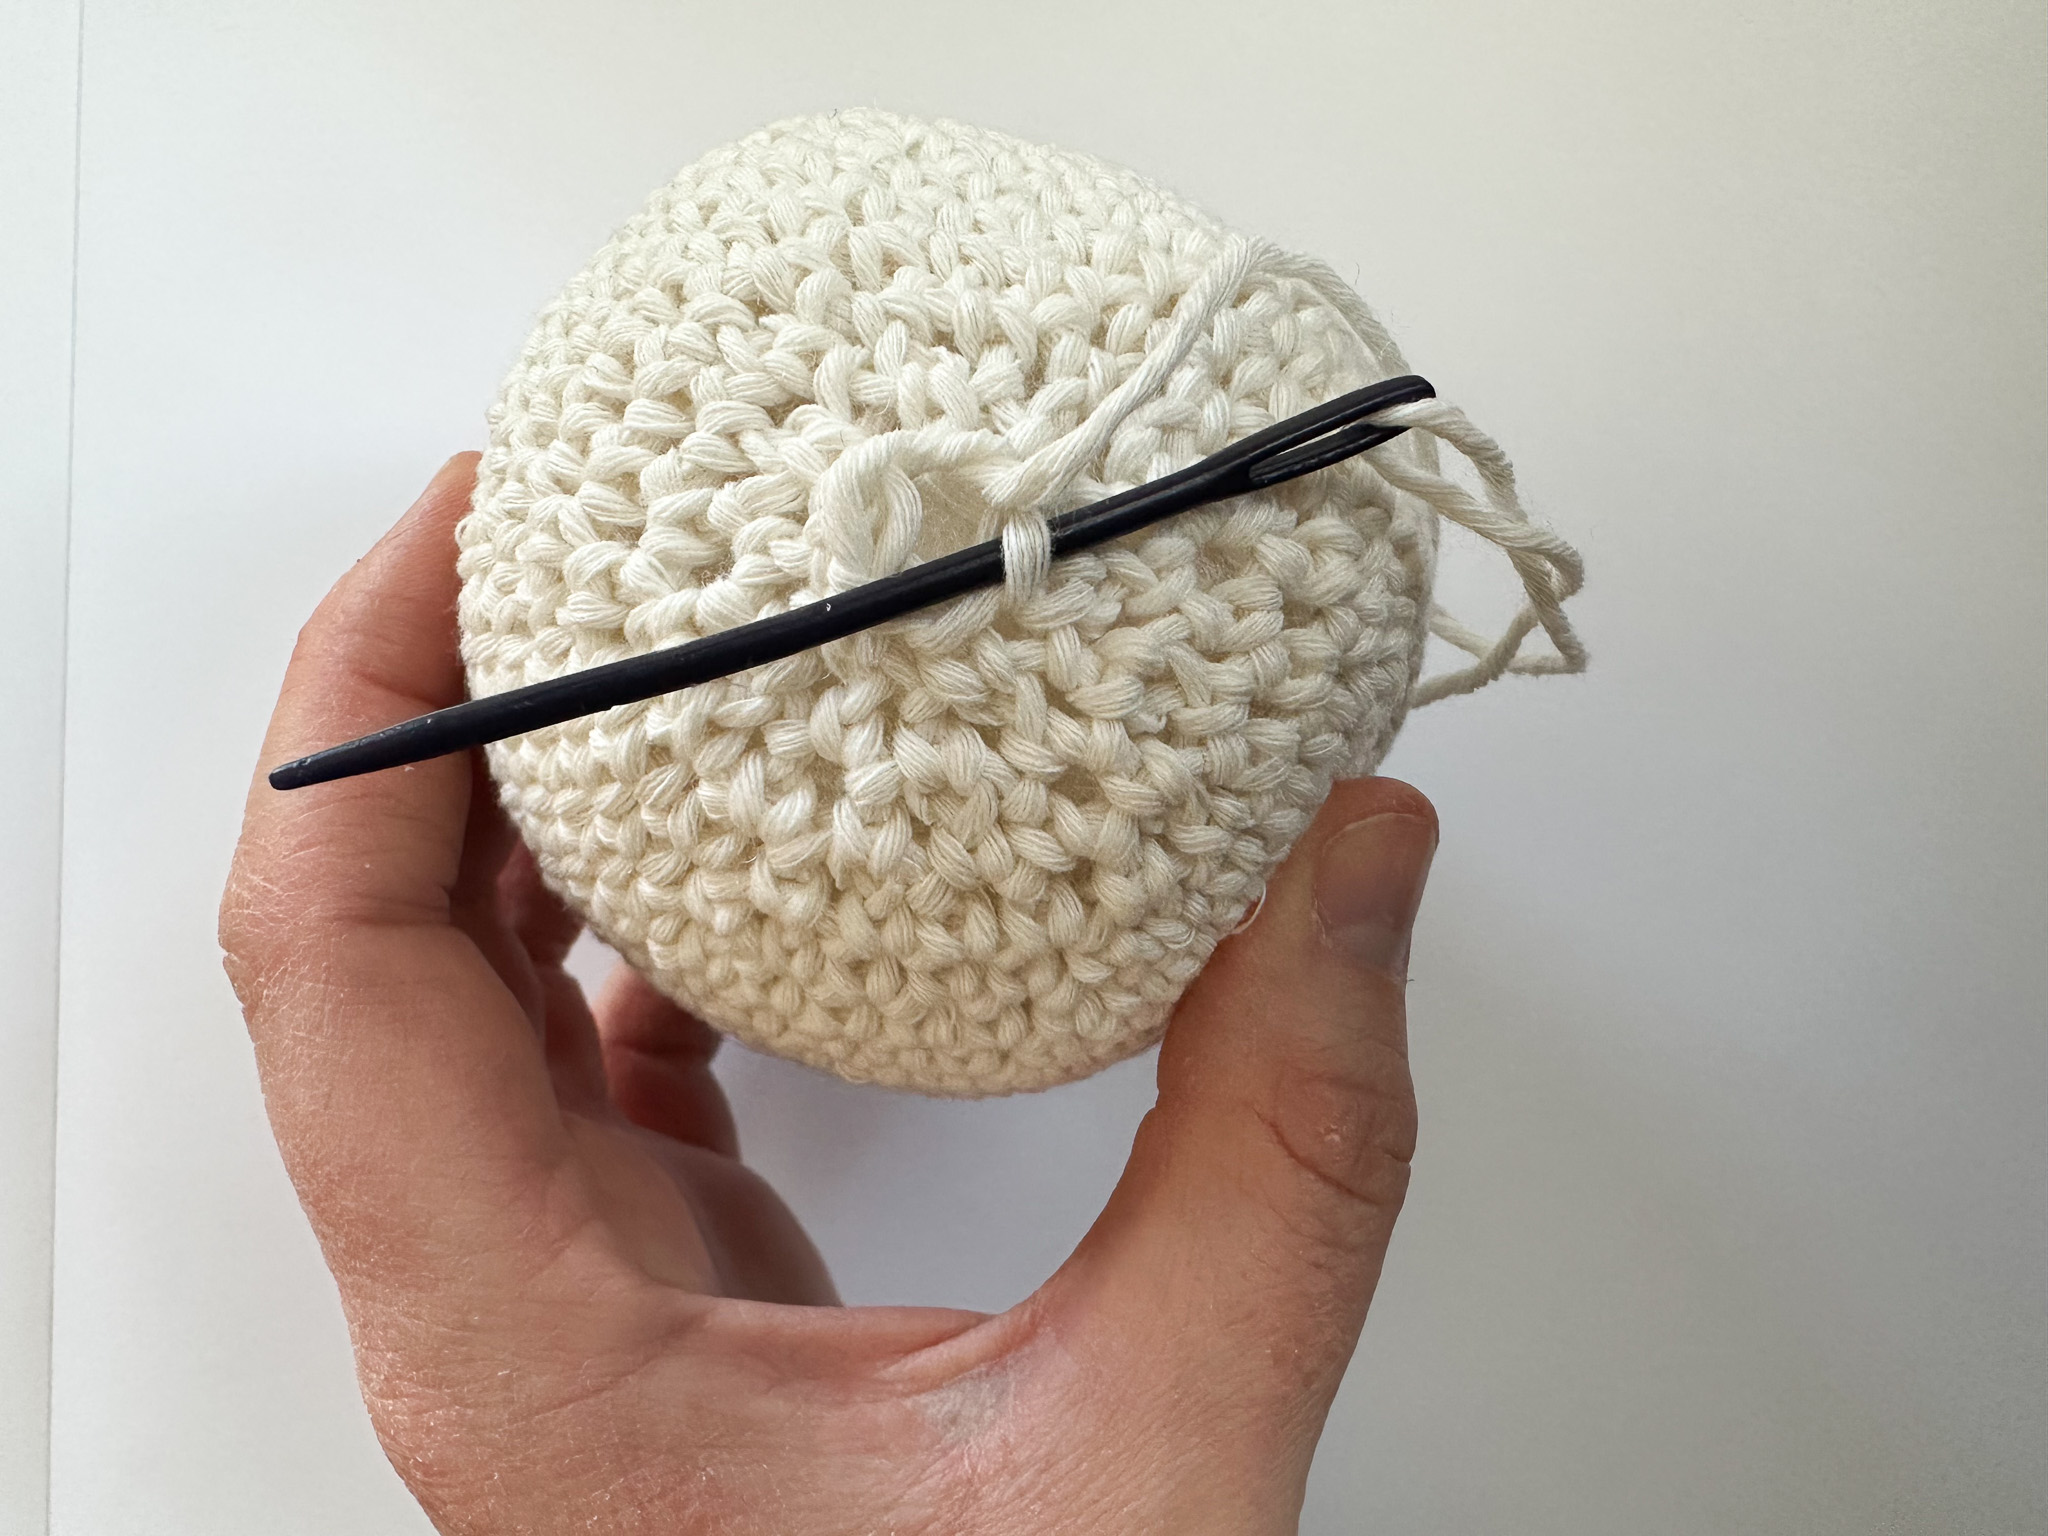
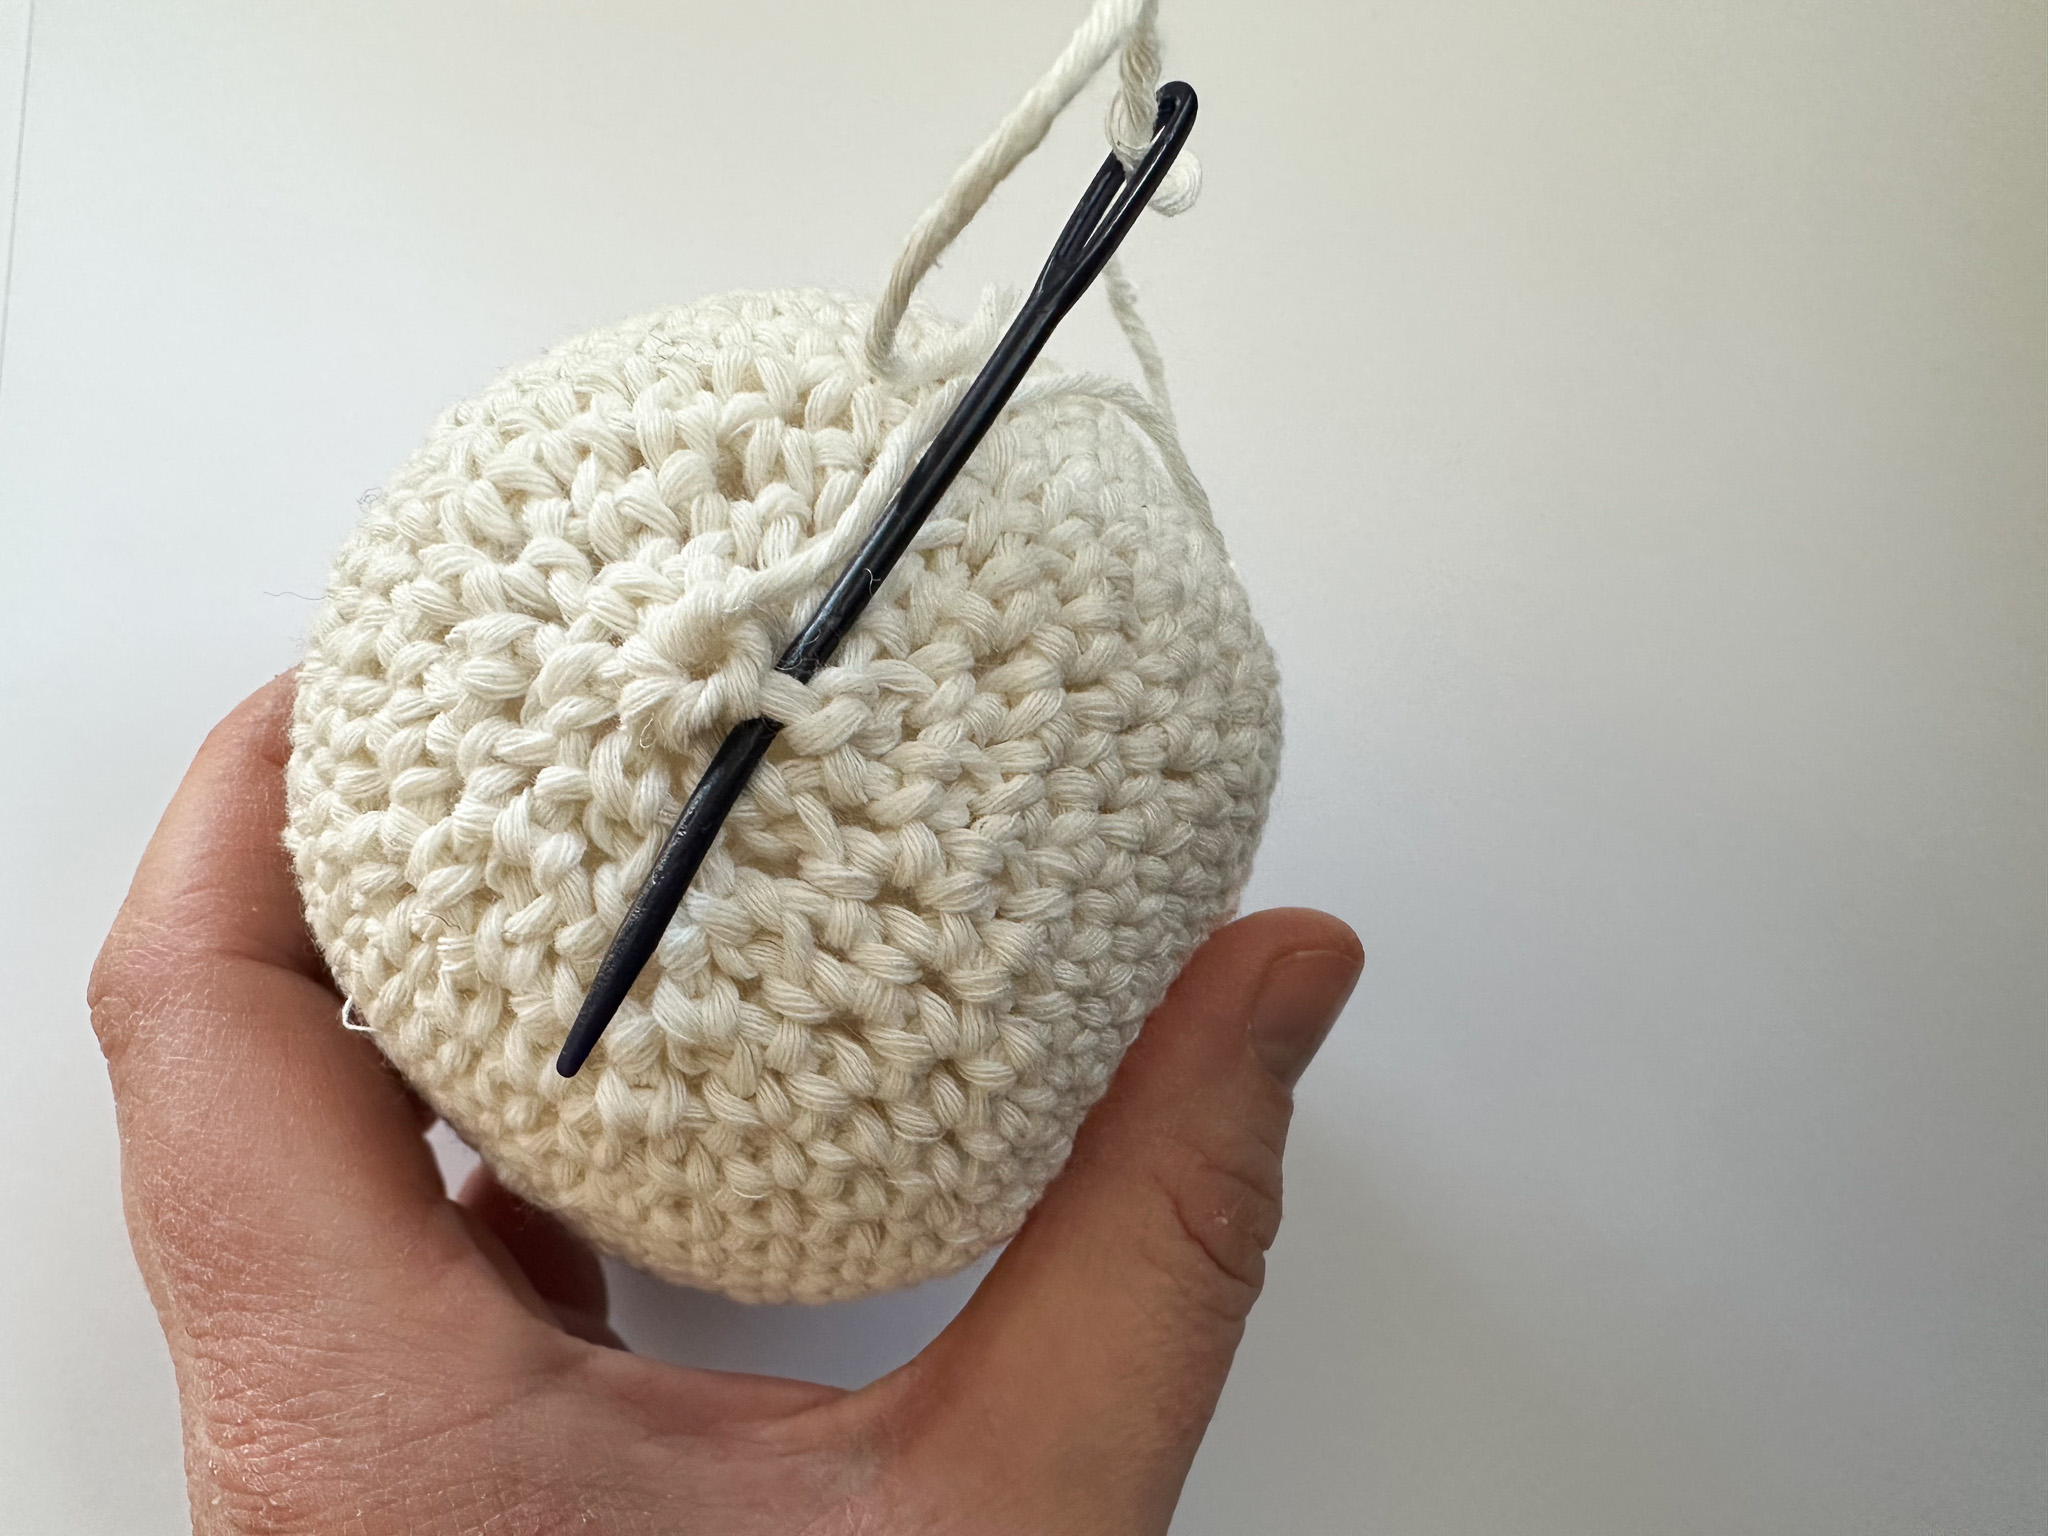
Round 25: Decrease in every stitch until you have 6 single crochets remaining.
Finish off but leave a long yarn tail. Thread the yarn onto a tapestry needle and go through the outer loop of each of the 6 remaining stitches in the round (go clockwise). Then pull the yarn tight to close the hole. Secure the end with a few tight knots and cut off the excess yarn.
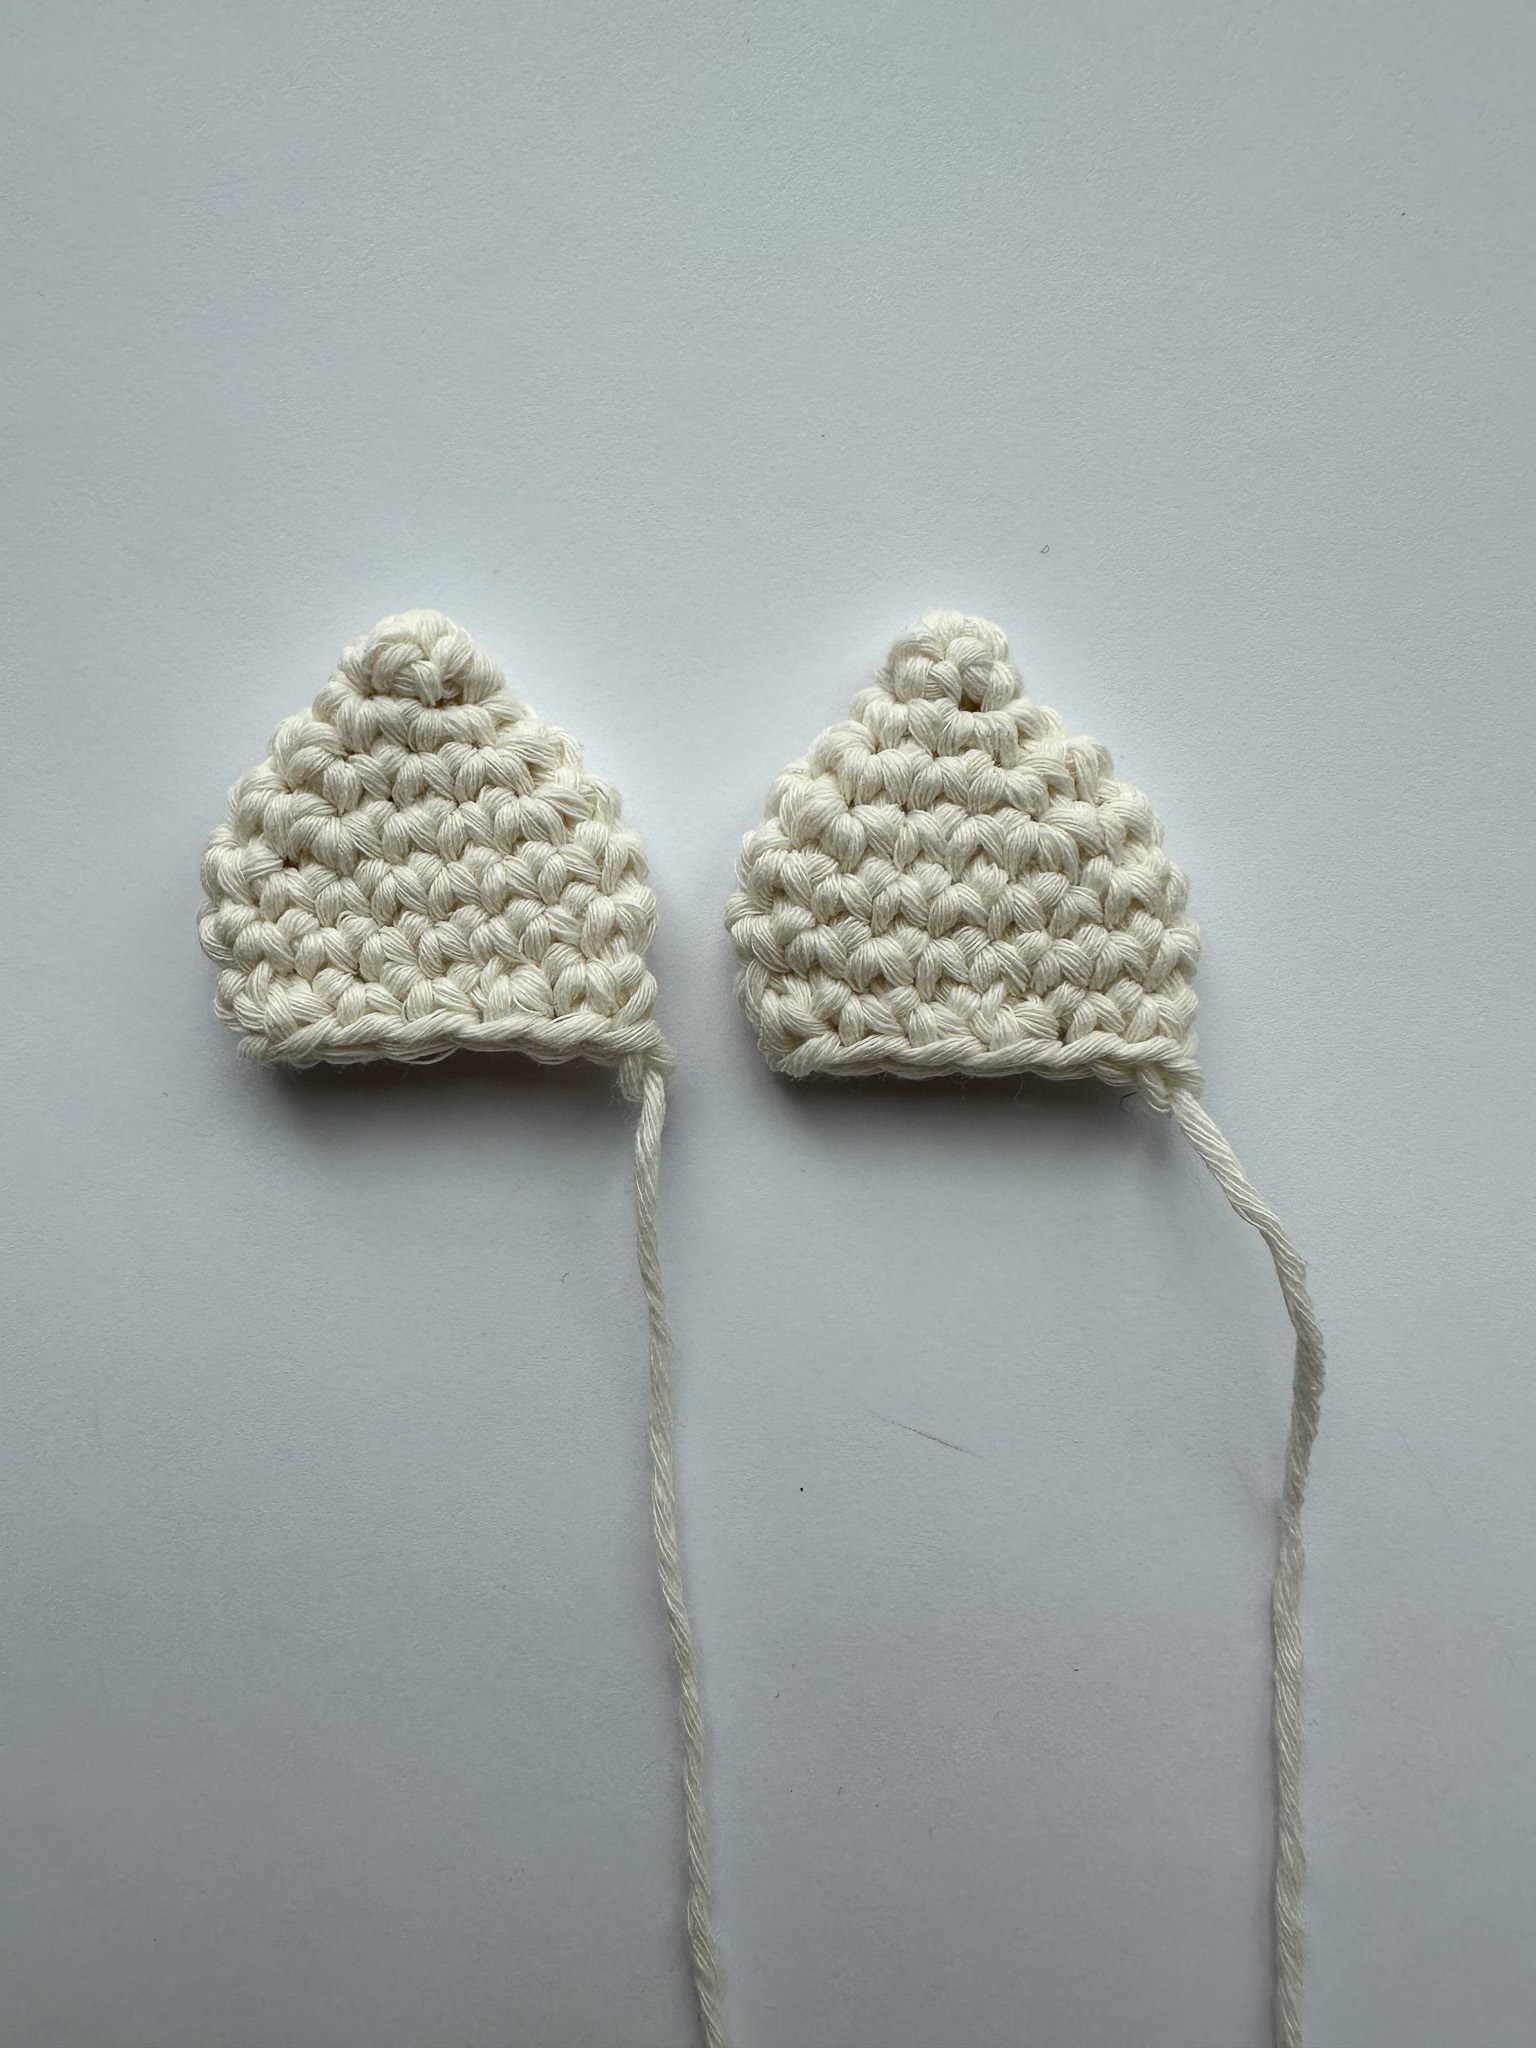
Ears – make 2 (white yarn)
Round 1: Crochet 4 single crochets into a magic ring.
Round 2: Crochet 1 single crochet in each stitch. You will have 4 stitches in total in the round.
Round 3: Crochet 2 single crochets in each stitch (increases). You will have 8 stitches in total in the round.
Round 4: Crochet 1 single crochet in the first stitch, then make an increase. Repeat this pattern (increase in every second stitch) all the way around. You will have 12 stitches in total in the round.
Round 5: Crochet 1 single crochet in each of the first 2 stitches, then make an increase. Repeat this pattern (increase in every third stitch) all the way around. You will have 16 stitches in total in the round.
Rounds 6–7: Crochet 16 single crochets (1 single crochet in each stitch) for a total of 2 rounds.
Round 8: Crochet 1 single crochet in each of the first 2 stitches, then make a decrease. Repeat this pattern (decrease in every third stitch) all the way around. You will have 12 stitches in total in the round.
Finish off and cut the yarn, but leave a long yarn tail.
Horn (yellow yarn + 2 strands of gold thread)
Round 1: Crochet 4 single crochets into a magic ring.
Round 2: Crochet 1 single crochet in the first stitch, then make an increase. Repeat this pattern (increase in every second stitch) all the way around. You will have 6 stitches in total in the round.
Round 3: Crochet 1 single crochet in each of the first 2 stitches, then make an increase. Repeat this pattern (increase in every third stitch) all the way around. You will have 8 stitches in total in the round.
Round 4: Crochet 1 single crochet in each stitch. You will have 8 stitches in total in the round.
Round 5: Crochet 1 single crochet in each of the first 3 stitches, then make an increase. Repeat this pattern (increase in every fourth stitch) all the way around. You will have 10 stitches in total in the round.
Round 6: Crochet 1 single crochet in each stitch. You will have 10 stitches in total in the round.
Finish with a slip stitch. Cut the yarn, but leave a long yarn tail. Attach the gold thread. The yellow yarn will be used to sew the horn onto the unicorn.
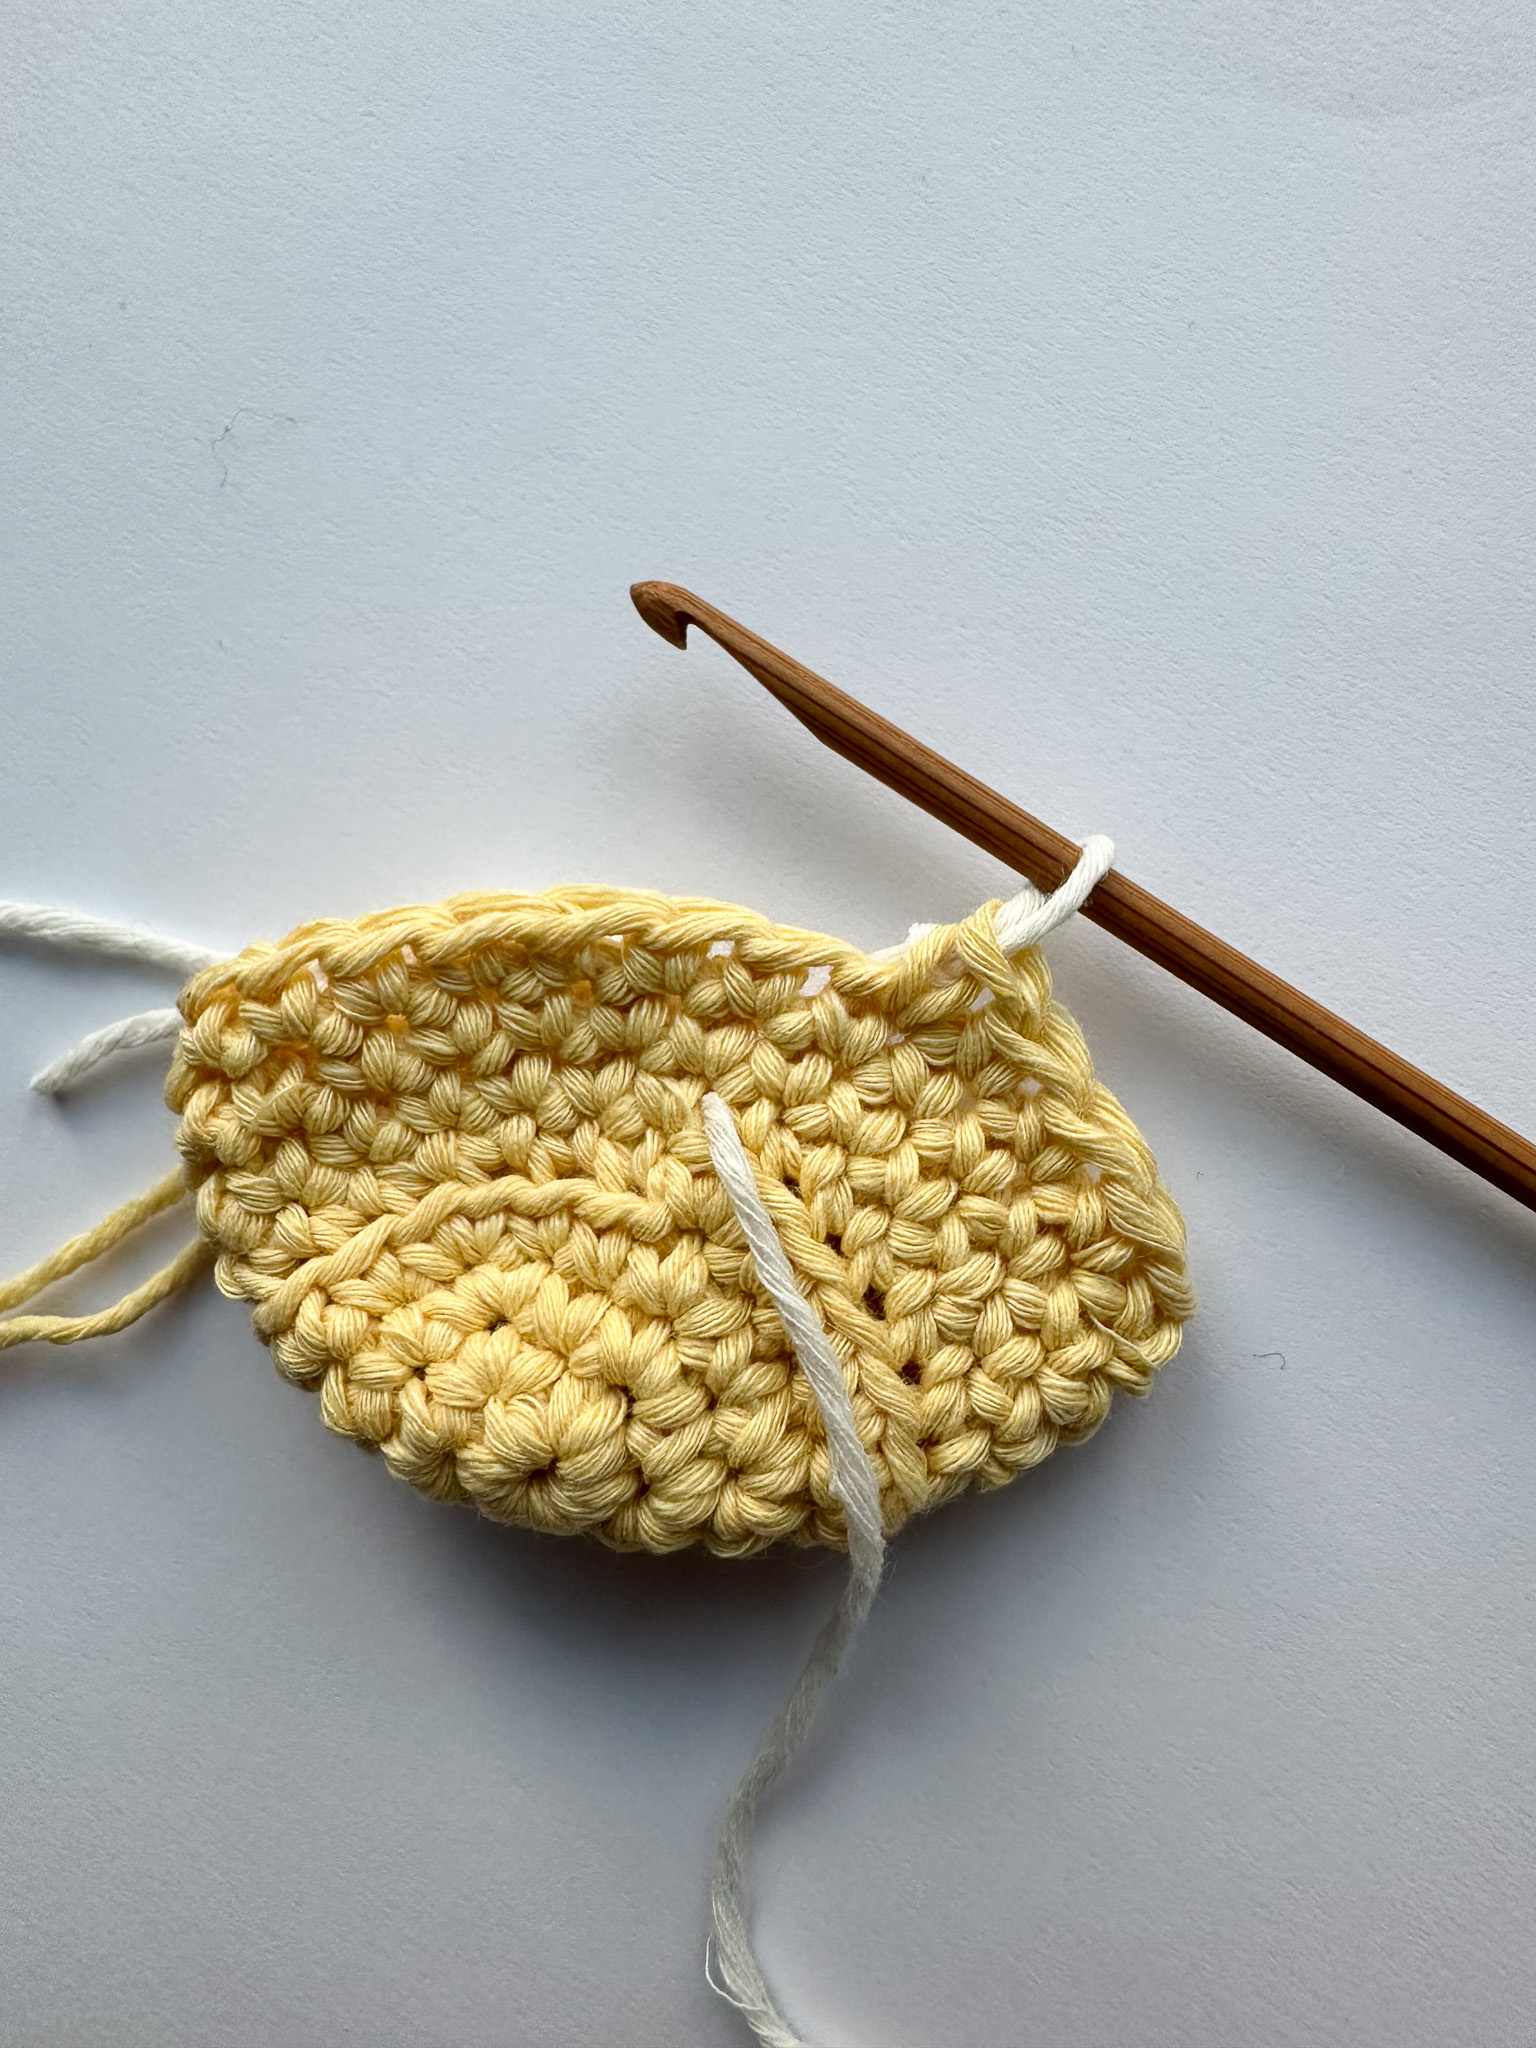
Legs – make 2 (yellow + white yarn)
Start with yellow yarn
Round 1: Crochet 6 single crochets into a magic ring.
Round 2: Make an increase in each stitch. You will have 12 stitches in total in the round.
Round 3: Crochet 1 single crochet in the first stitch, then make an increase. Repeat this pattern (increase in every second stitch) all the way around. You will have 18 stitches in total in the round.
Round 4: Crochet 1 single crochet in each of the first 2 stitches, then make an increase. Repeat this pattern (increase in every third stitch) all the way around. You will have 24 stitches in total in the round.
Round 5: Crochet 24 single crochets, but only in the back loop of each stitch (the outer loop of the two loops on each stitch). You will still have 24 stitches in total in the round.

Rounds 6–8: Crochet 24 single crochets (1 single crochet in each stitch) for a total of 3 rounds.
On the very last stitch of round 8, do not complete the final yarn-over with yellow yarn. Instead, make a slip knot with white yarn and complete the last yarn-over with white yarn. This completes the color change.
Round 9: Crochet 1 single crochet in each of the first 6 stitches, then make a decrease. Repeat this pattern (decrease in every 7th stitch) all the way around. You will have 21 stitches in total in the round.
Rounds 10–21: Crochet 21 single crochets (1 single crochet in each stitch) for a total of 12 rounds.
Round 22: Crochet 1 single crochet in each of the first 5 stitches, then make a decrease. Repeat this pattern (decrease in every 6th stitch) all the way around. You will have 18 stitches in total in the round.
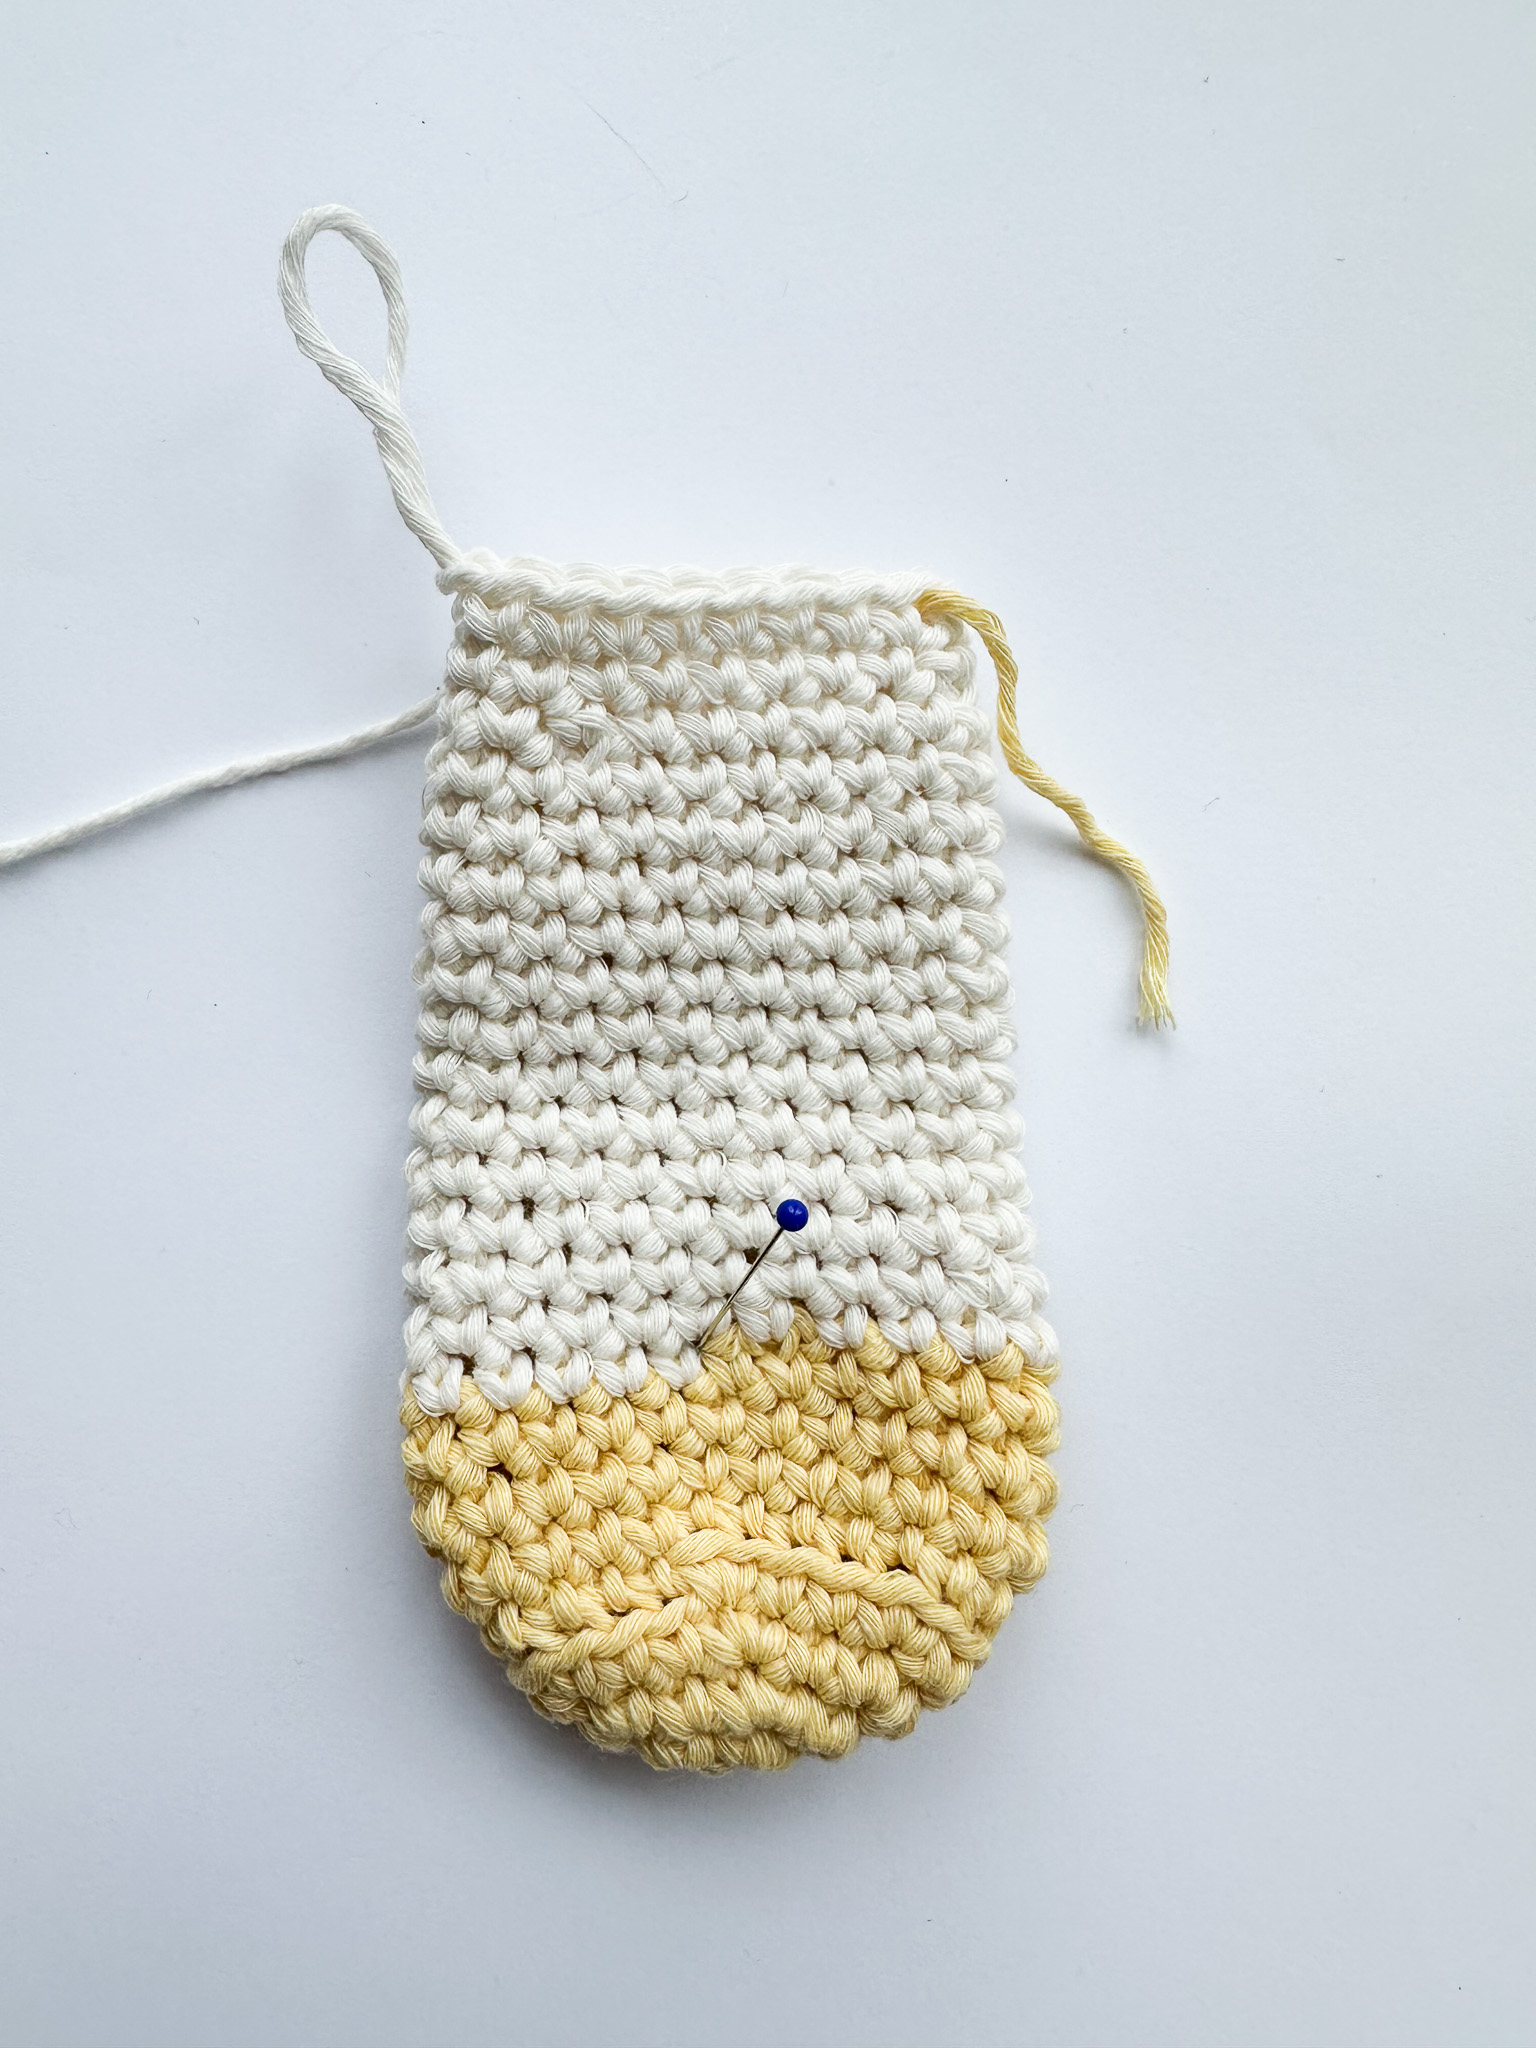
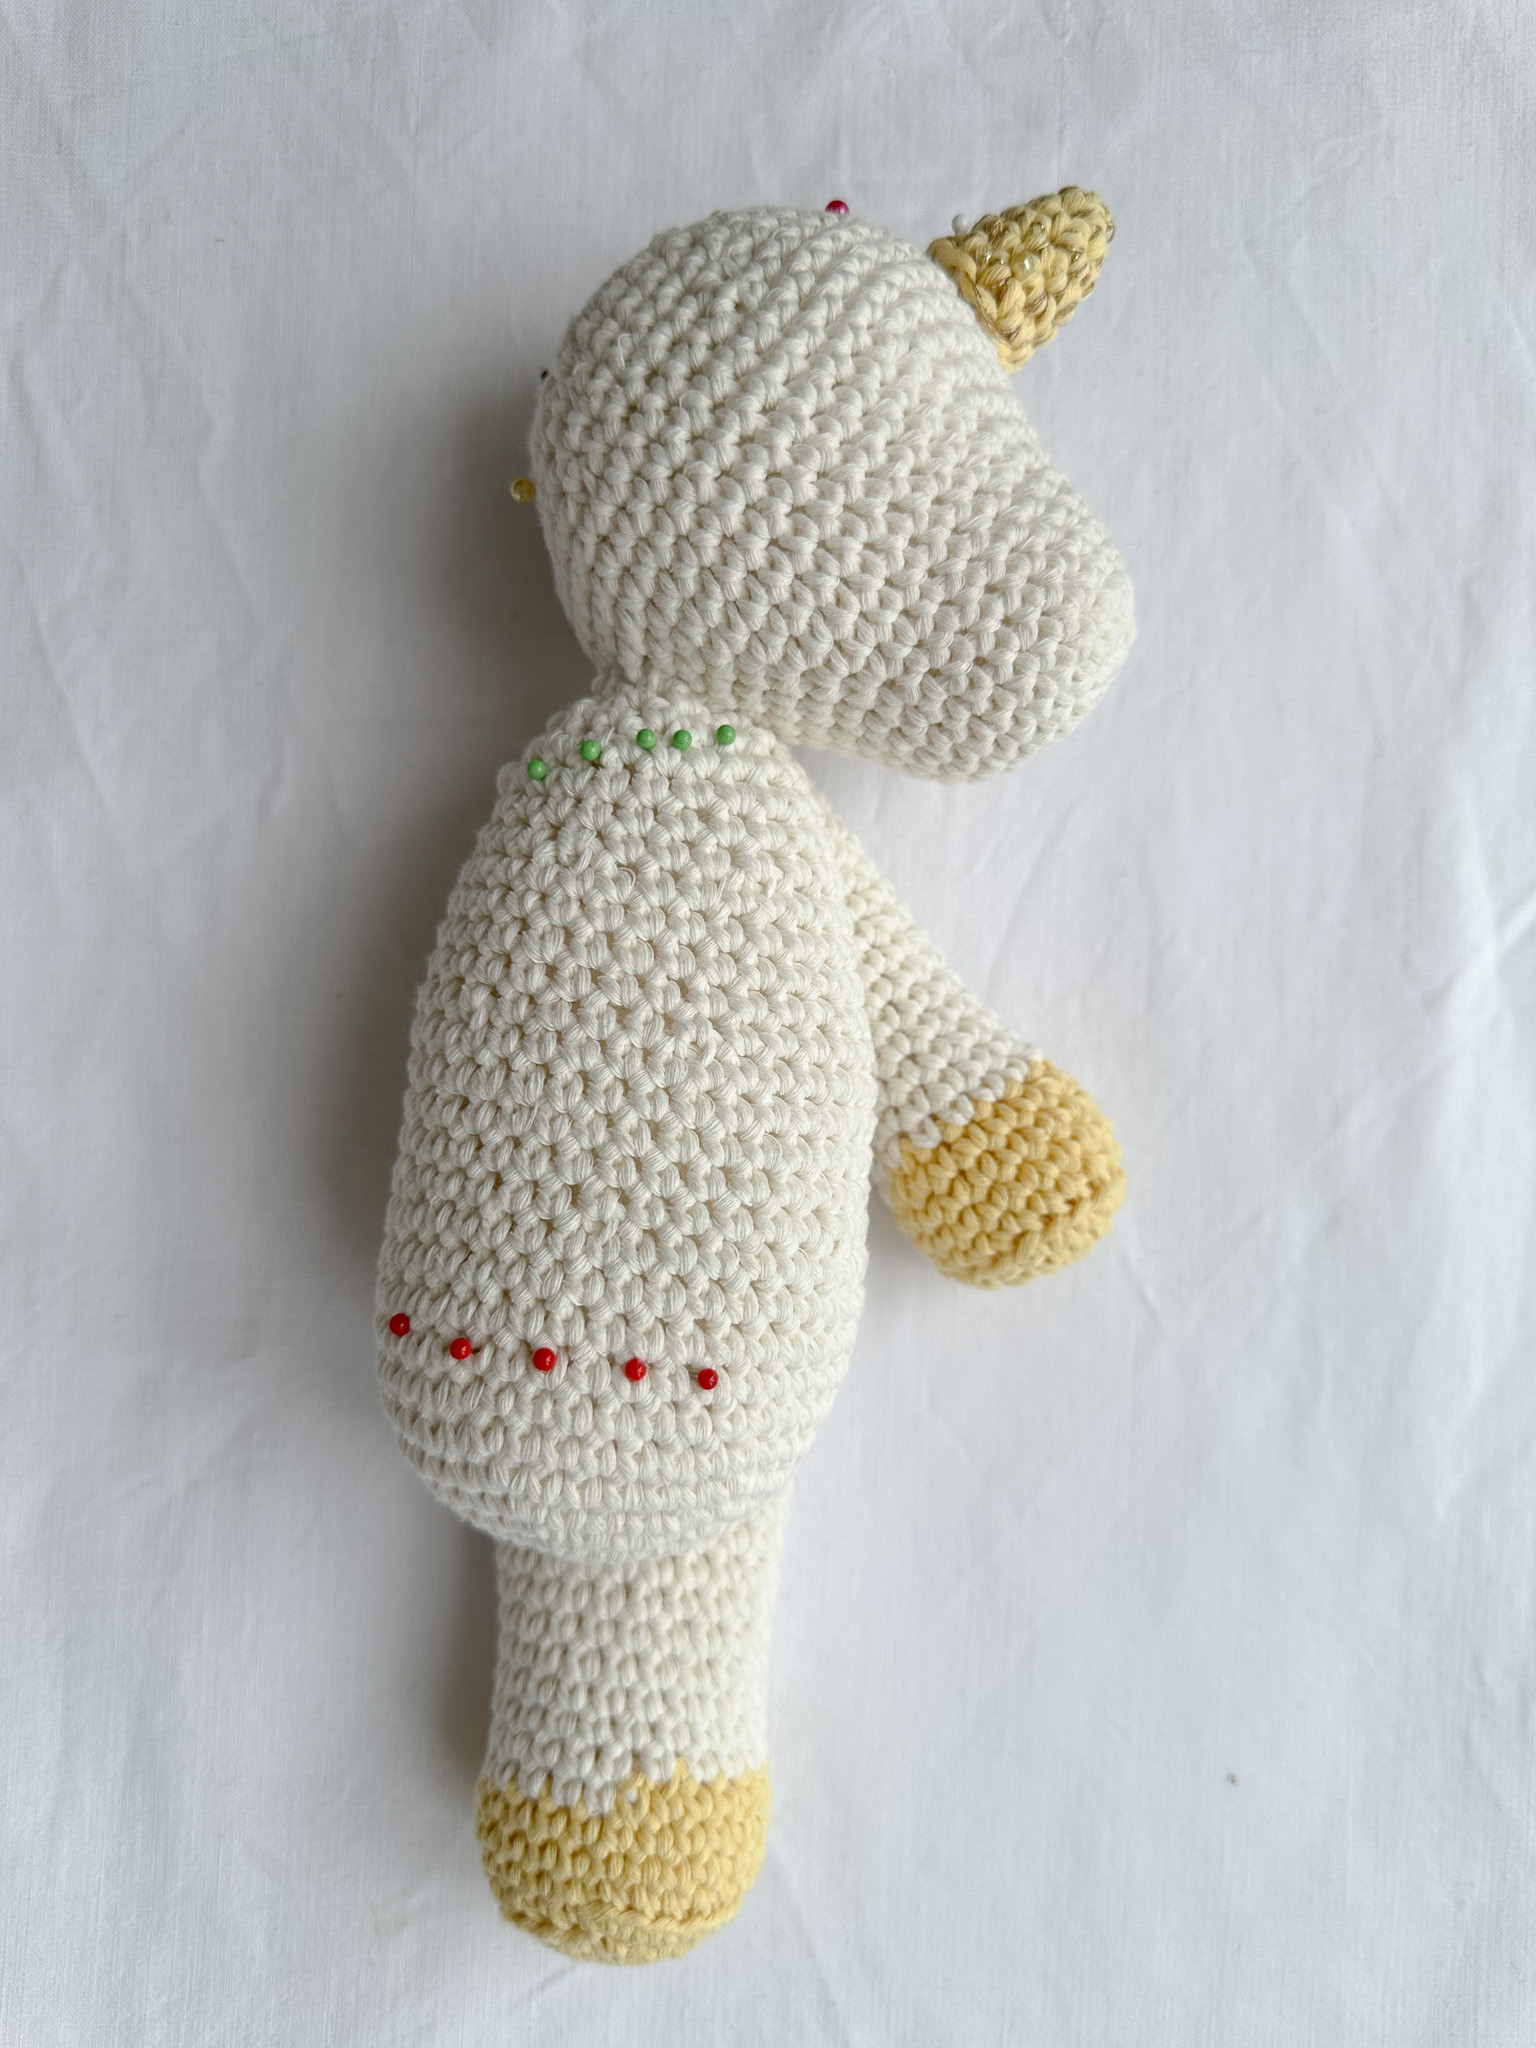
Next, crochet an additional 9 single crochets (about half a round) or as many as needed so that the color change seam ends up on the back of the leg (see needle in the photo).
Stuff the leg with filling up to about ⅔ of its height (see yellow needle in the photo). Flatten the leg and close it by crocheting 8 single crochets through both layers.
Leave a long yarn tail for sewing the leg onto the body.

Arms – make 2 (yellow + white yarn)
Start with yellow yarn
Round 1: Crochet 6 single crochets into a magic ring.
Round 2: Make an increase in each stitch. You will have 12 stitches in total in the round.
Round 3: Crochet 1 single crochet in the first stitch, then make an increase. Repeat this pattern (increase in every second stitch) all the way around. You will have 18 stitches in total in the round.
Round 4: Crochet 18 single crochets, but only in the back loop of each stitch (the outer loop of the two loops on each stitch). You will still have 18 stitches in total in the round.
If you are unsure how to crochet in the back loop only, see the video (Back Loop Only).
Rounds 5–7: Crochet 18 single crochets (1 single crochet in each stitch) for a total of 3 rounds.
On the very last stitch of round 7, do not complete the final yarn-over with yellow yarn. Instead, make a slip knot with white yarn and complete the last yarn-over with white yarn. This completes the color change.
Round 8: Crochet 1 single crochet in each of the first 4 stitches, then make a decrease. Repeat this pattern (decrease in every 6th stitch) all the way around. You will have 15 stitches in total in the round.
Rounds 9–21: Crochet 15 single crochets (1 single crochet in each stitch) for a total of 13 rounds.
Next, crochet an additional 7 single crochets (or as many as needed) so that the color change seam ends up on the back of the arm.
Stuff the arm with filling and close it by crocheting 6 single crochets through both layers.
Leave a long yarn tail for sewing the arm onto the body.
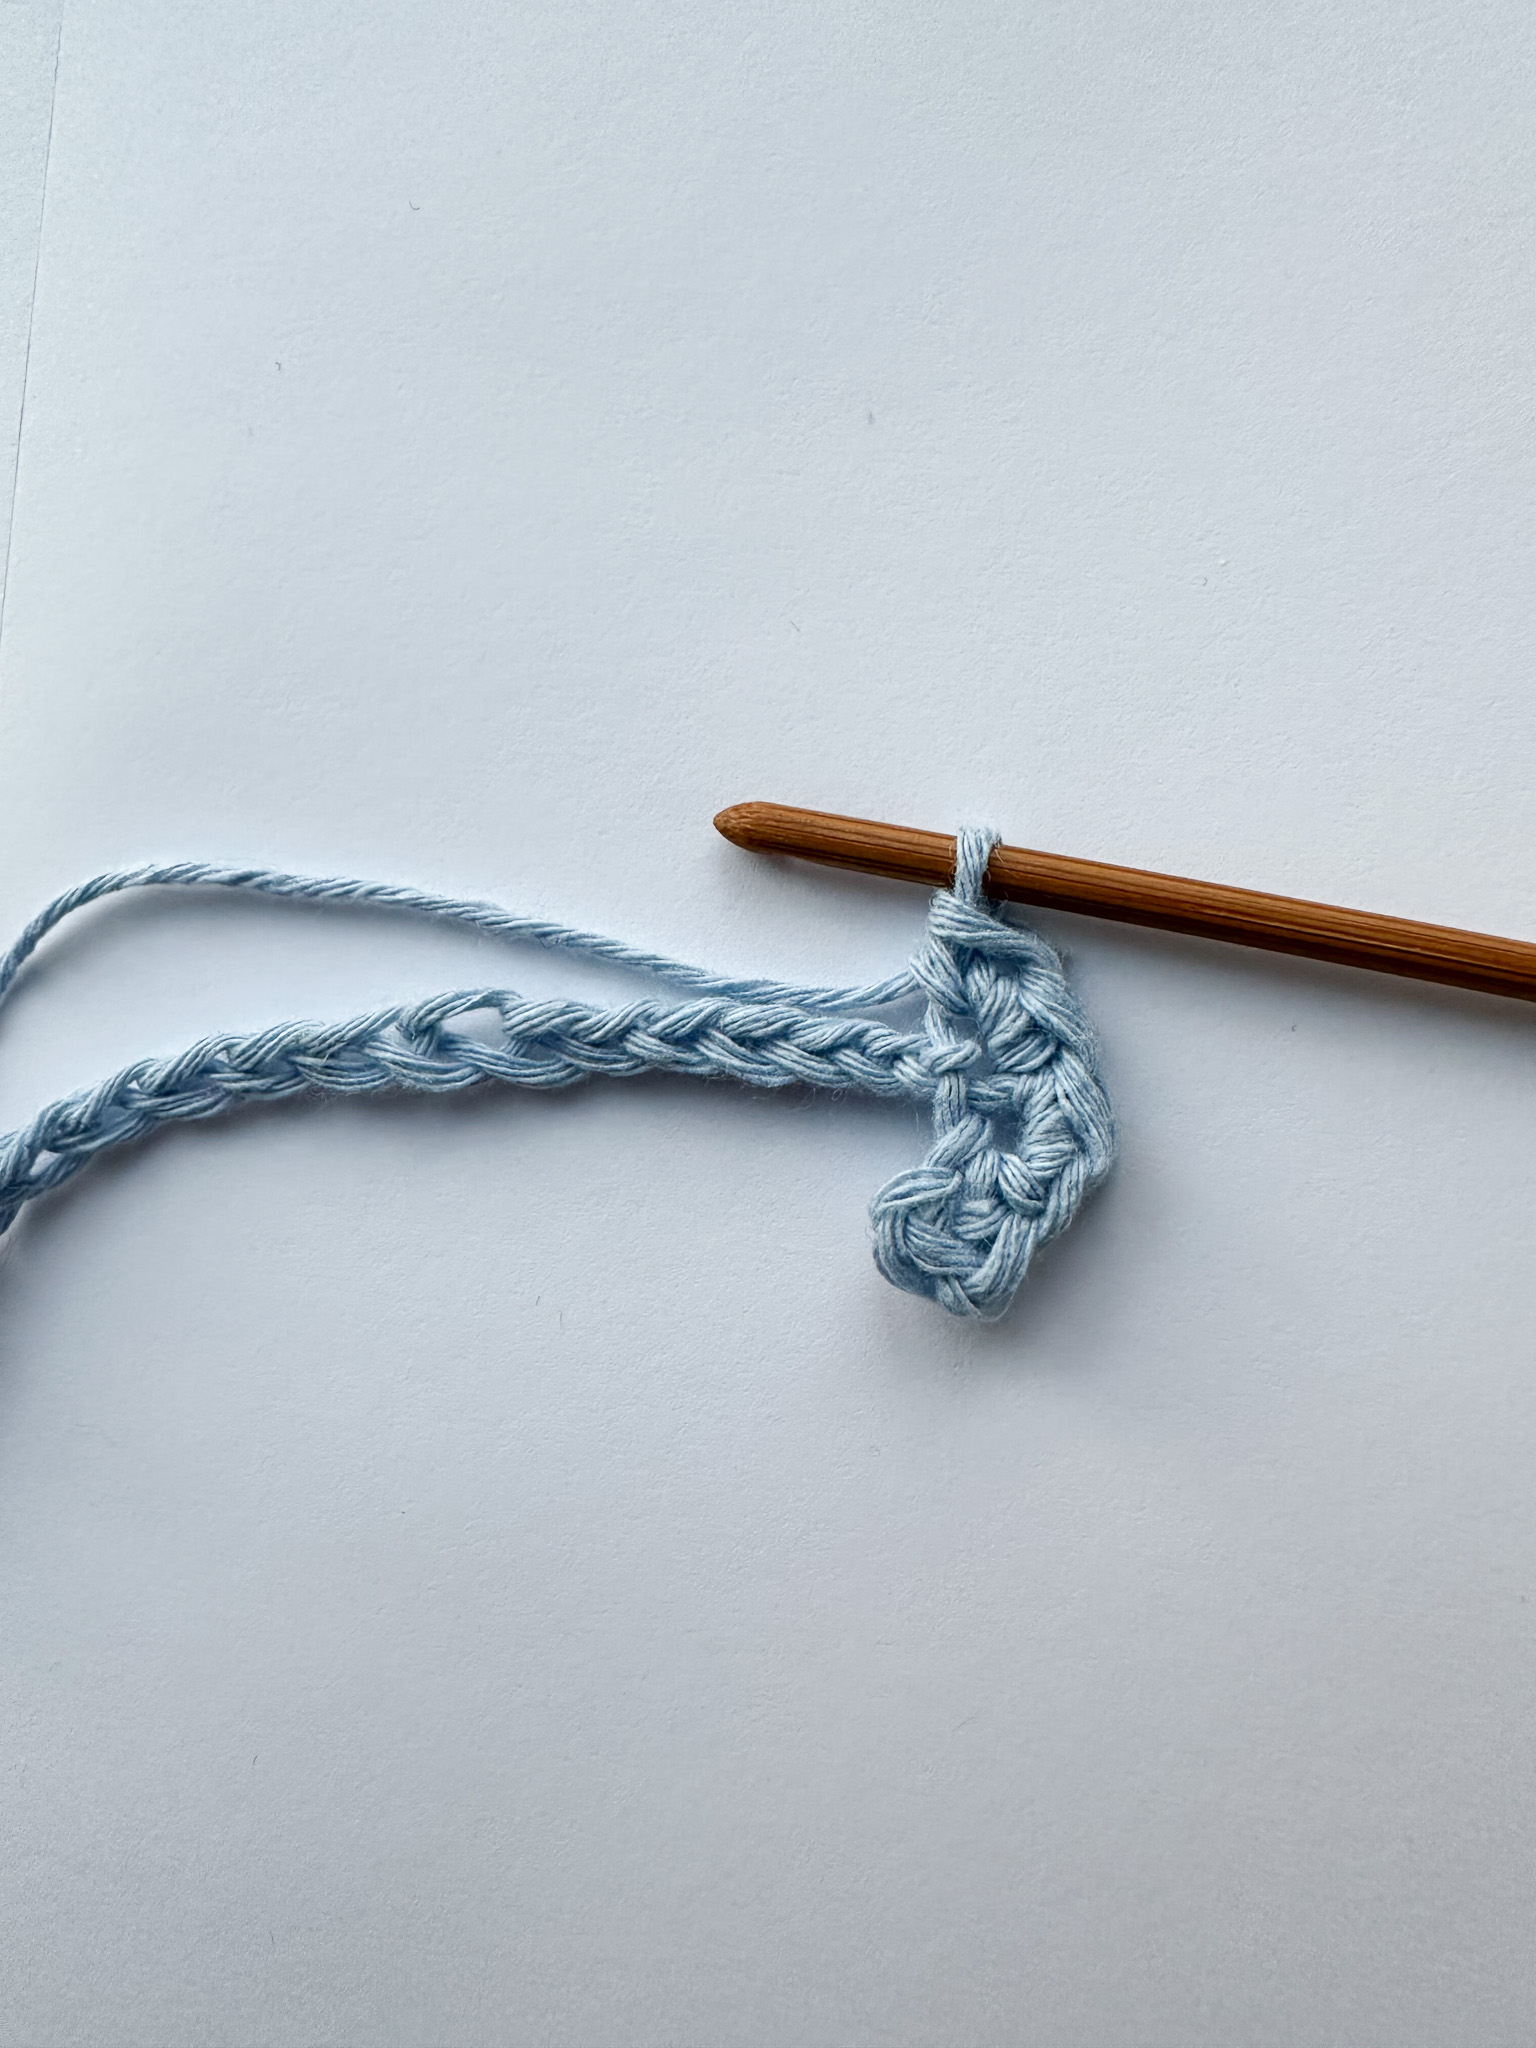
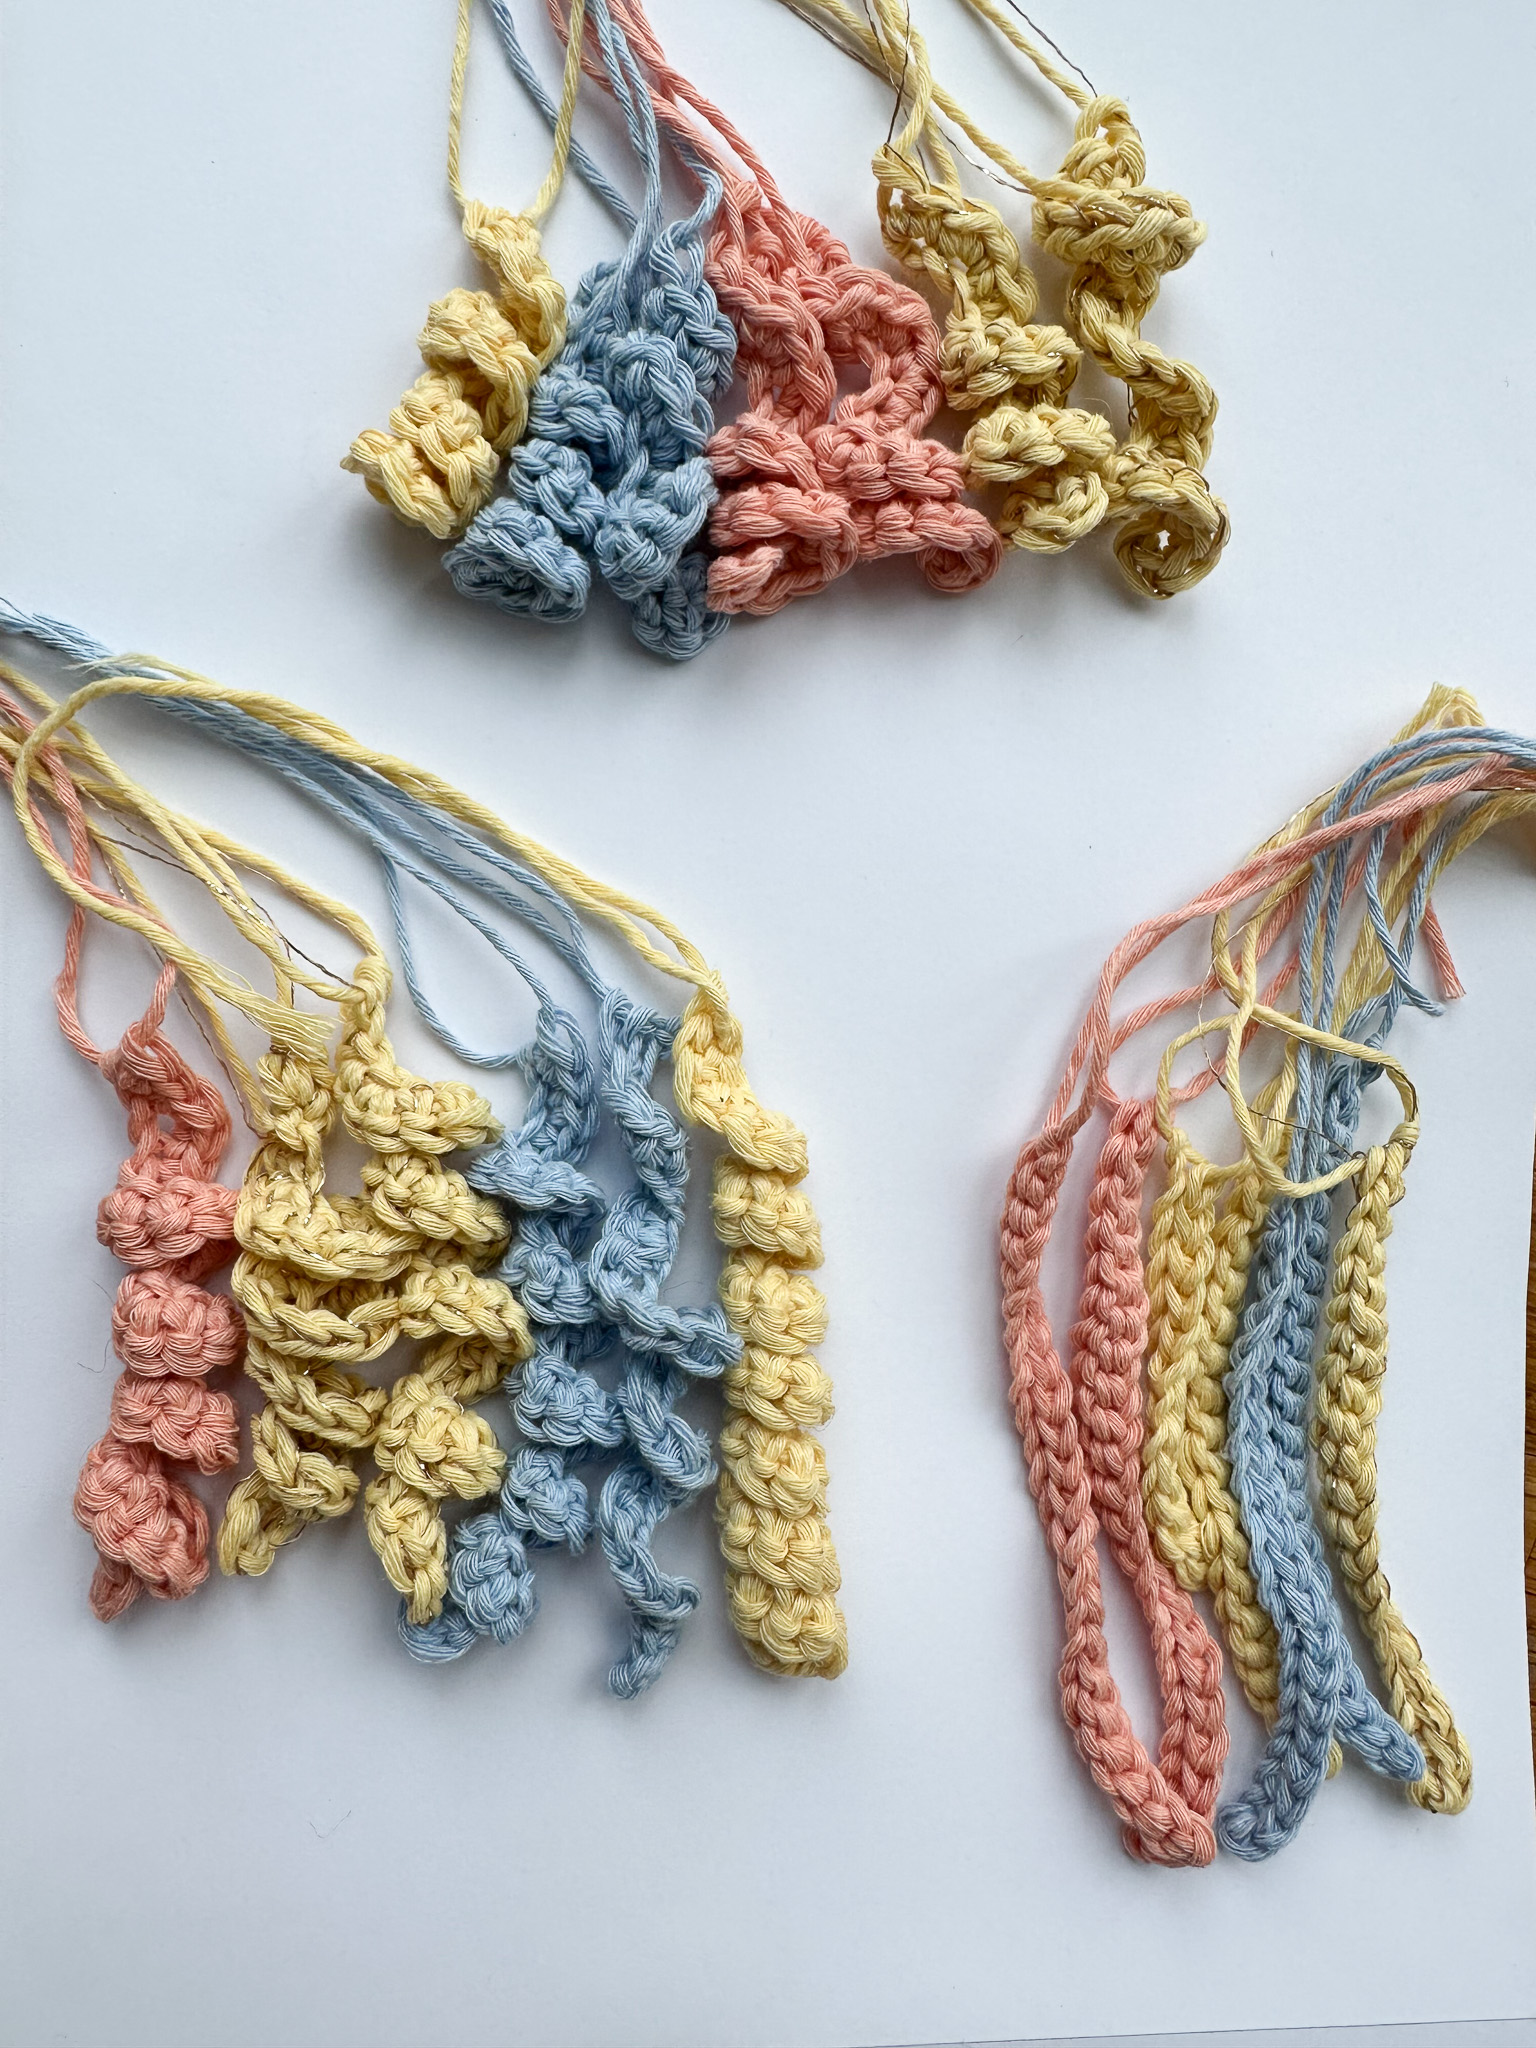
Mane and Tail (approx. 50 pieces)
For the mane and tail, create a mix of curled strands and straight lengths in different colors and lengths to give the hair a dynamic and full appearance.
- The longest lengths are 25 chain stitches, and the shortest lengths are 15 chain stitches.
- Use shorter lengths (15 chains) for the bangs and top of the head.
- As you move down the head, make the strands gradually longer, though the best result comes from mixing different lengths.
- For the tail, use strands about 20–22 chain stitches long.
Curled strands:
- Chain the desired number of stitches.
- Crochet 2 single crochets in each chain stitch.
- For an even tighter curl, crochet 3 single crochets in each chain stitch.
Leave a long yarn tail for attaching each strand to the unicorn.
Straight strands:
- Chain the desired number of stitches.
- Make a slip stitch in each chain stitch.
- Leave a long yarn tail for attaching each strand.
In the pictured unicorn, there are 40 strands in the mane and 12 strands in the tail.
Assembly
Tips: Watch the videos to see how to sew all the parts together.
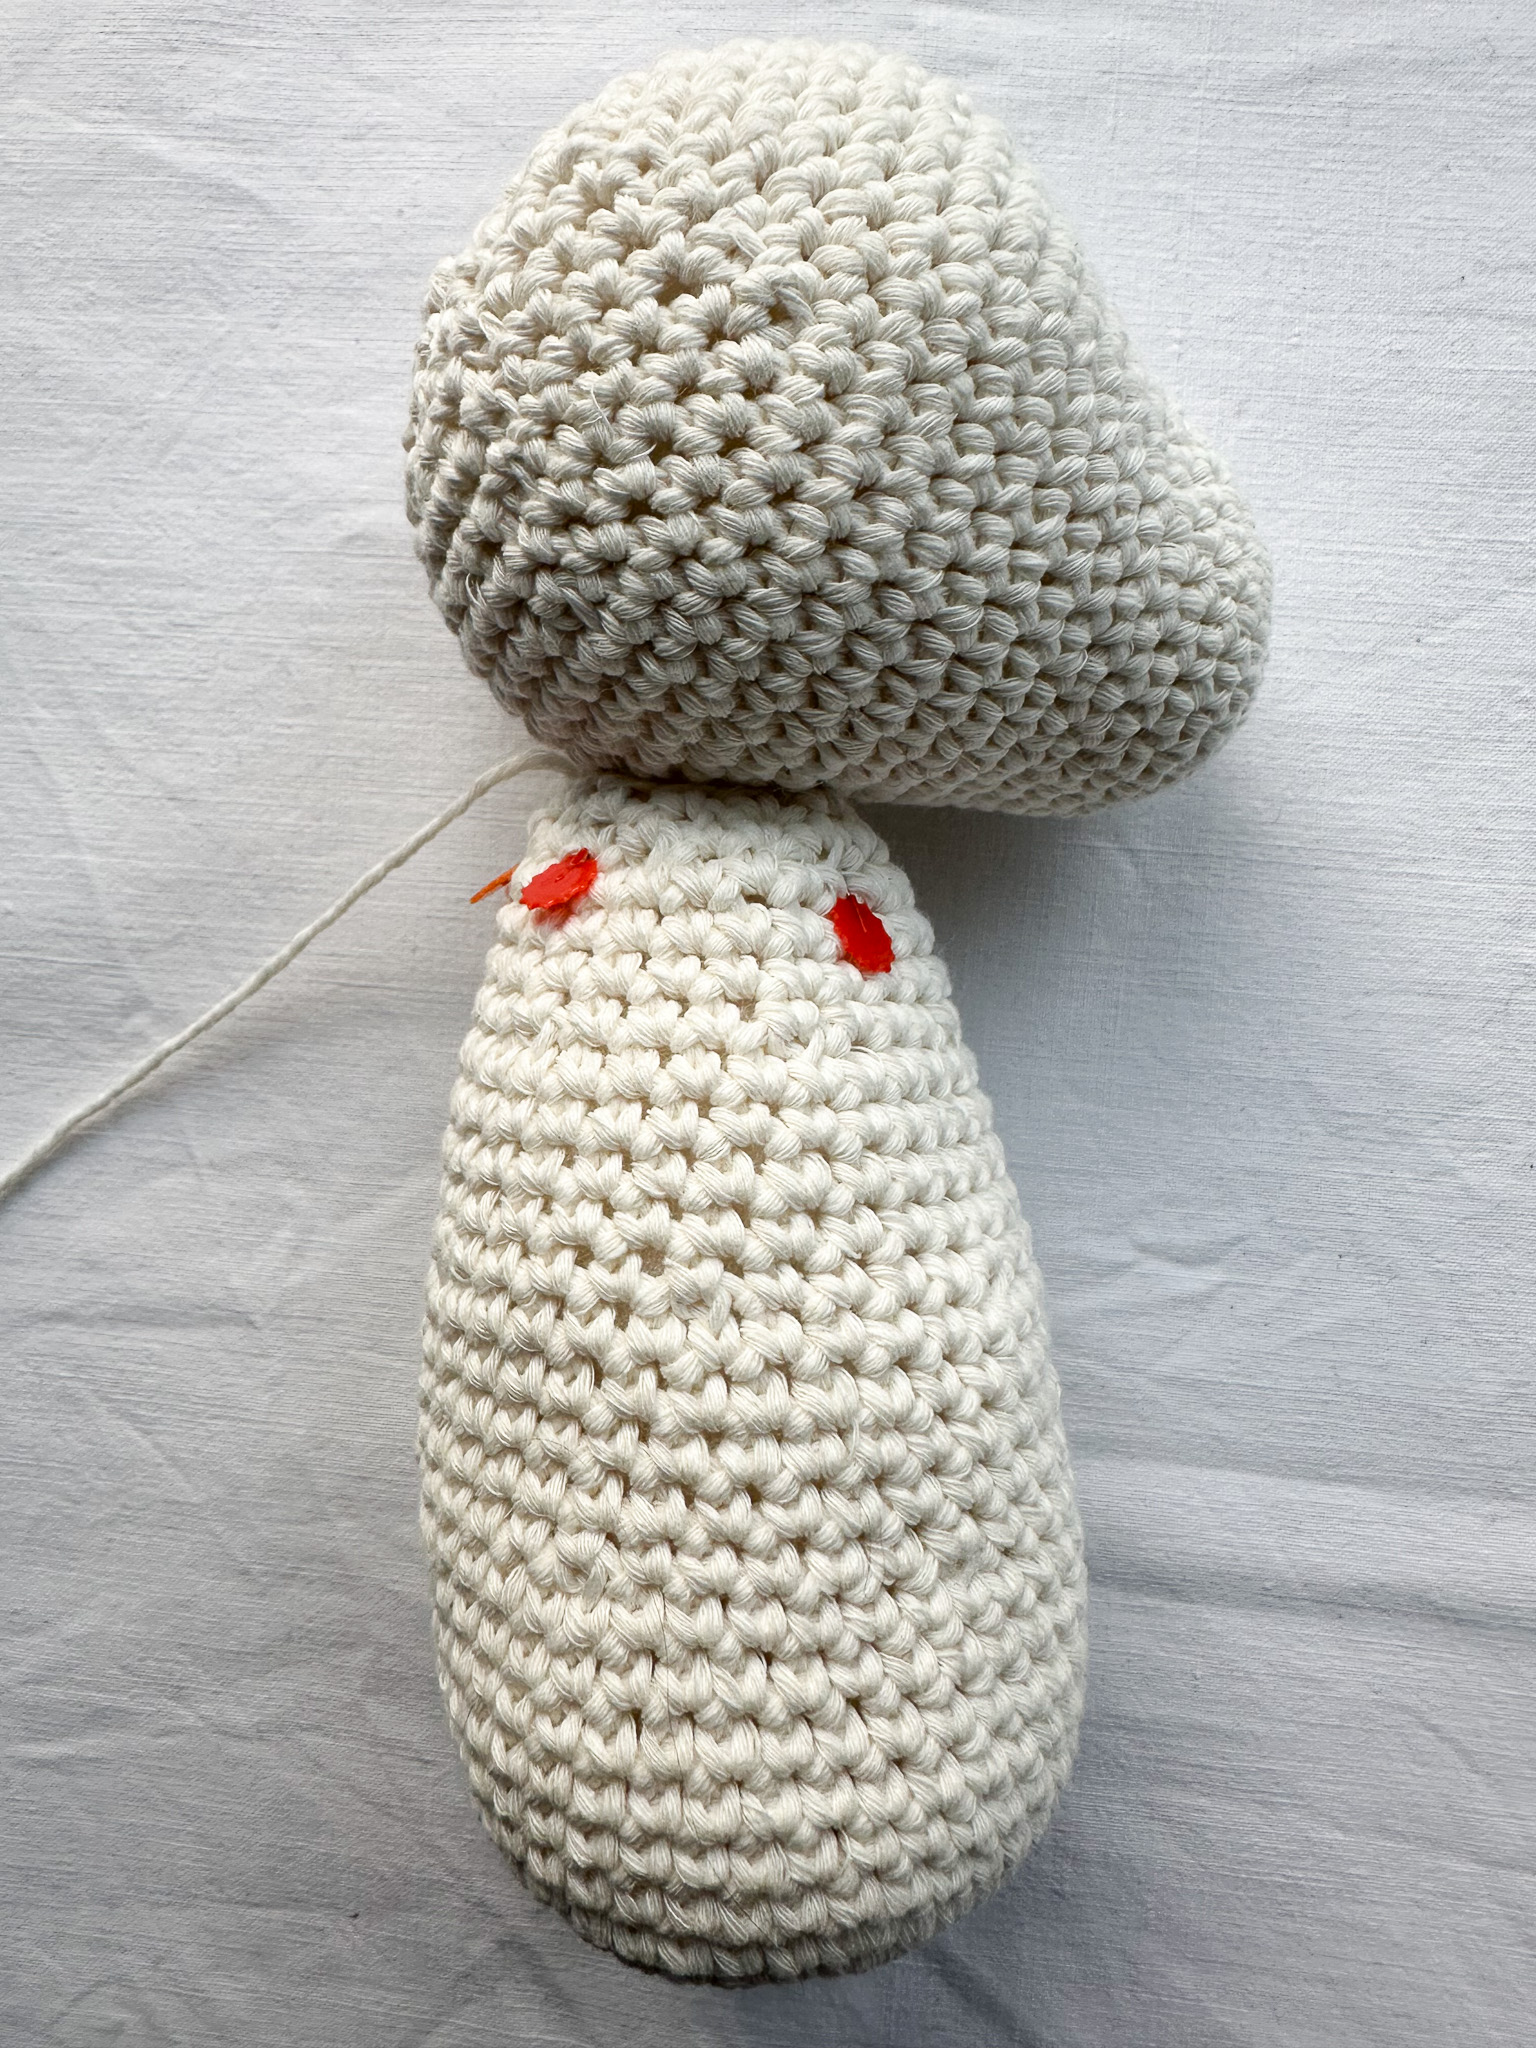
Start by attaching the head to the body.
- Position the head so that the muzzle tilts slightly downward rather than perfectly horizontal.
- The muzzle is slightly raised and not completely round, so rotate the head so that the muzzle lies horizontally.
- Use the yarn tail from the body to sew with.
- You may need to add a bit more stuffing in the neck before closing completely.
- Sew around 2 rounds to ensure the head is secure and does not tilt in any direction.
In the video below, all parts are already assembled, but in this pattern, we begin by attaching the head to the body.
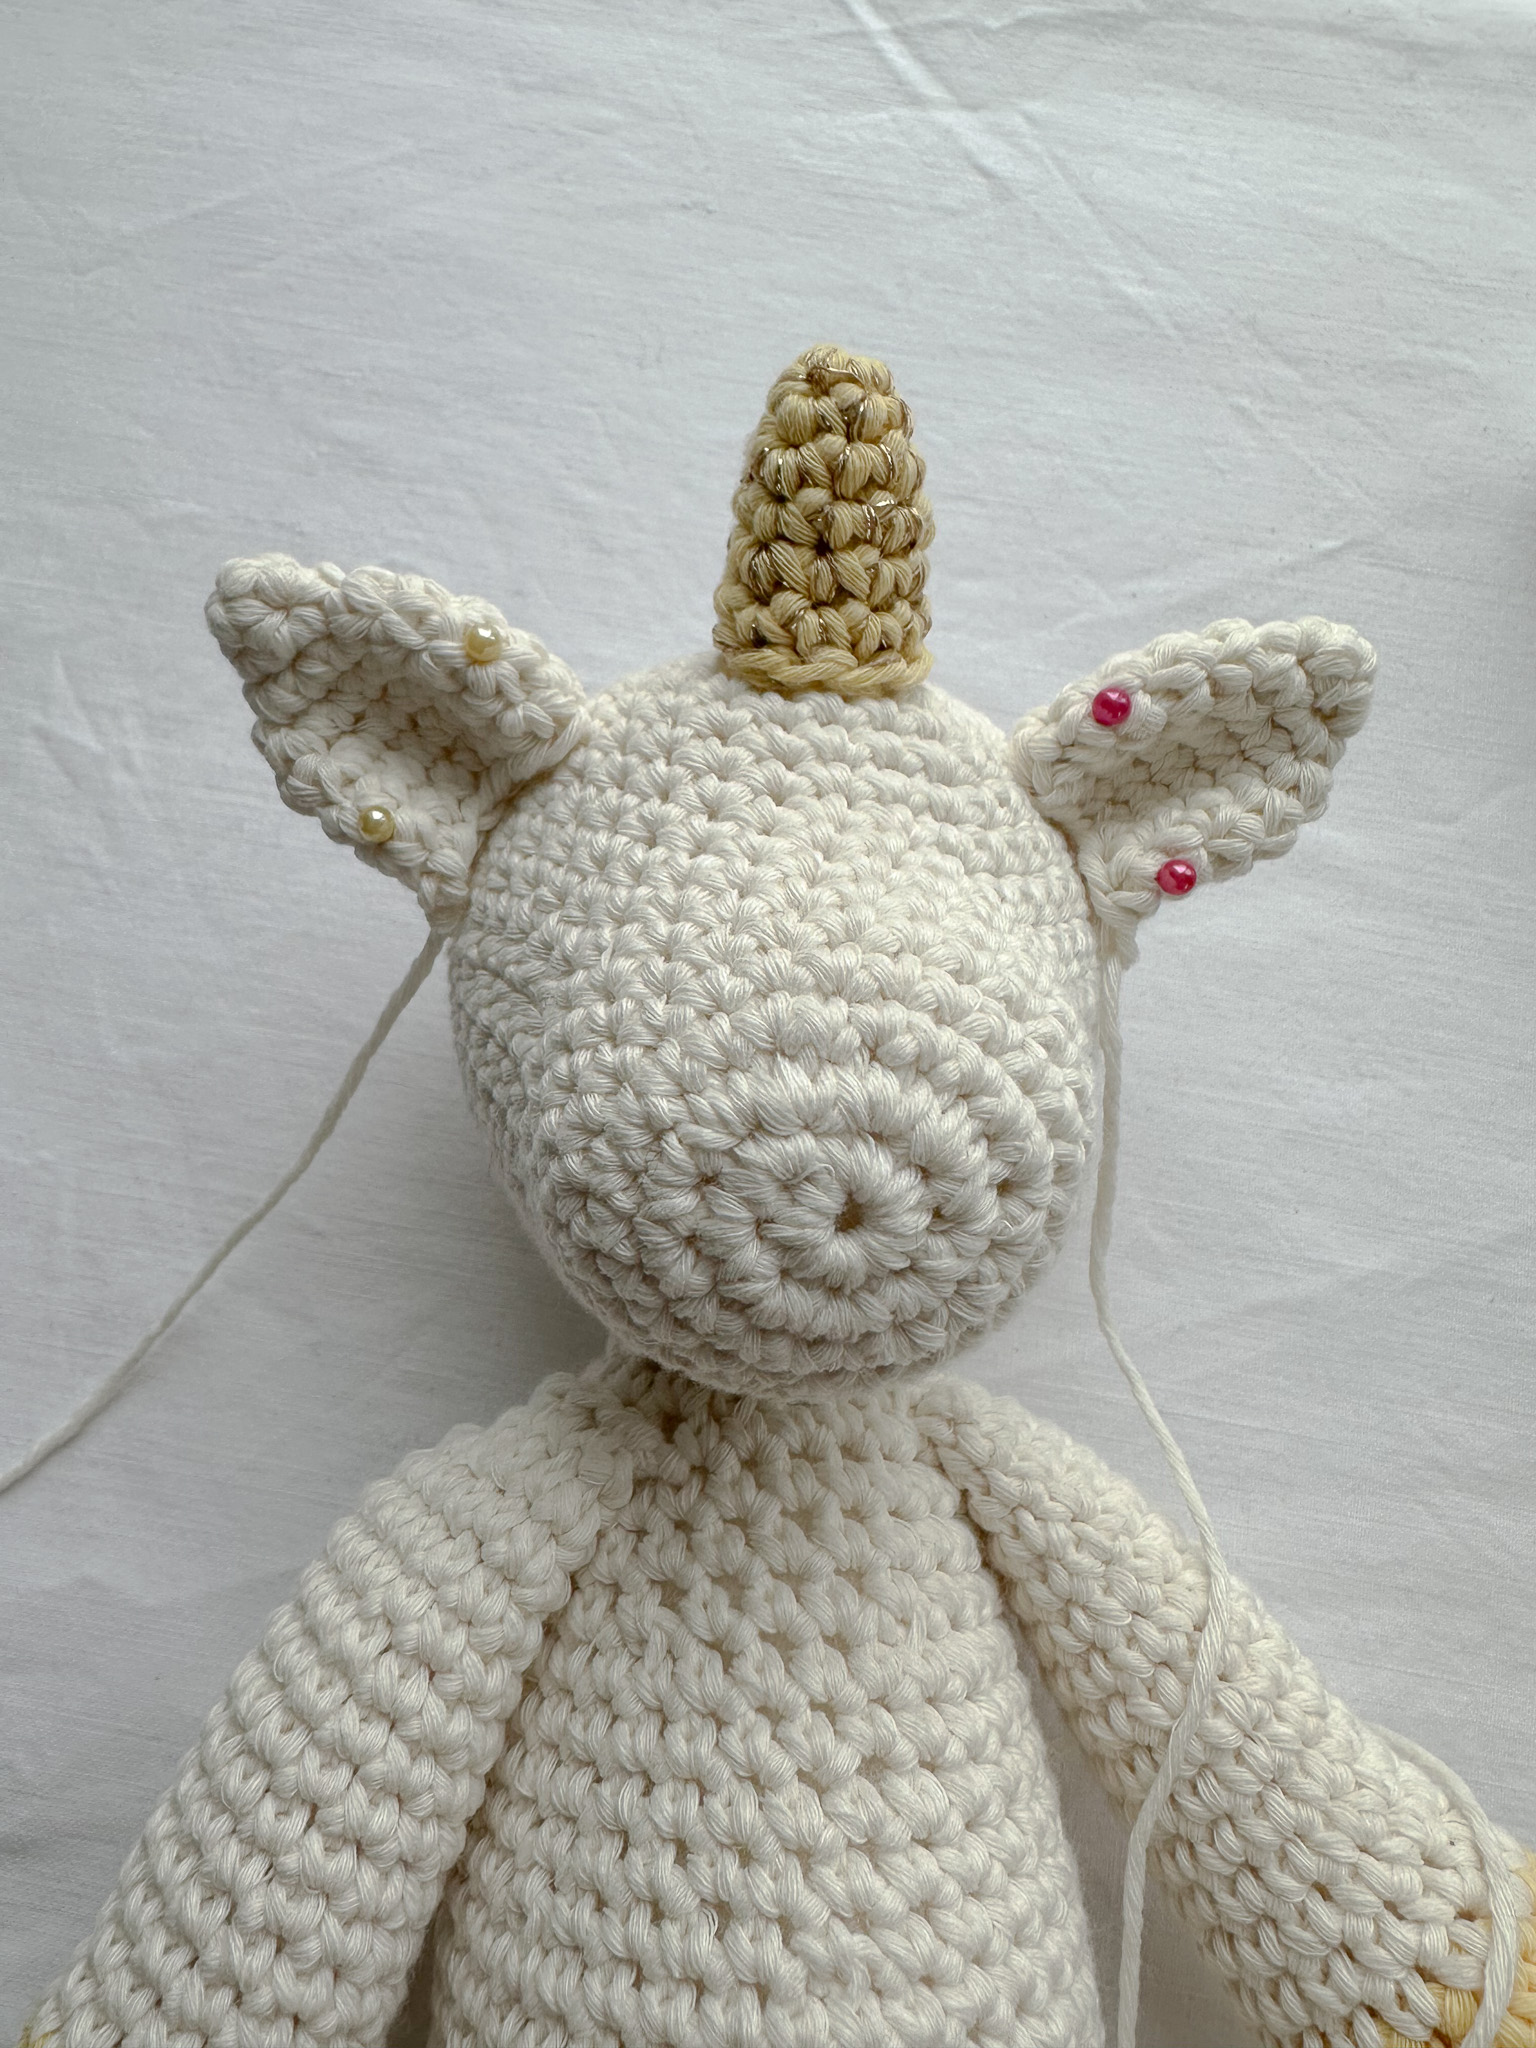
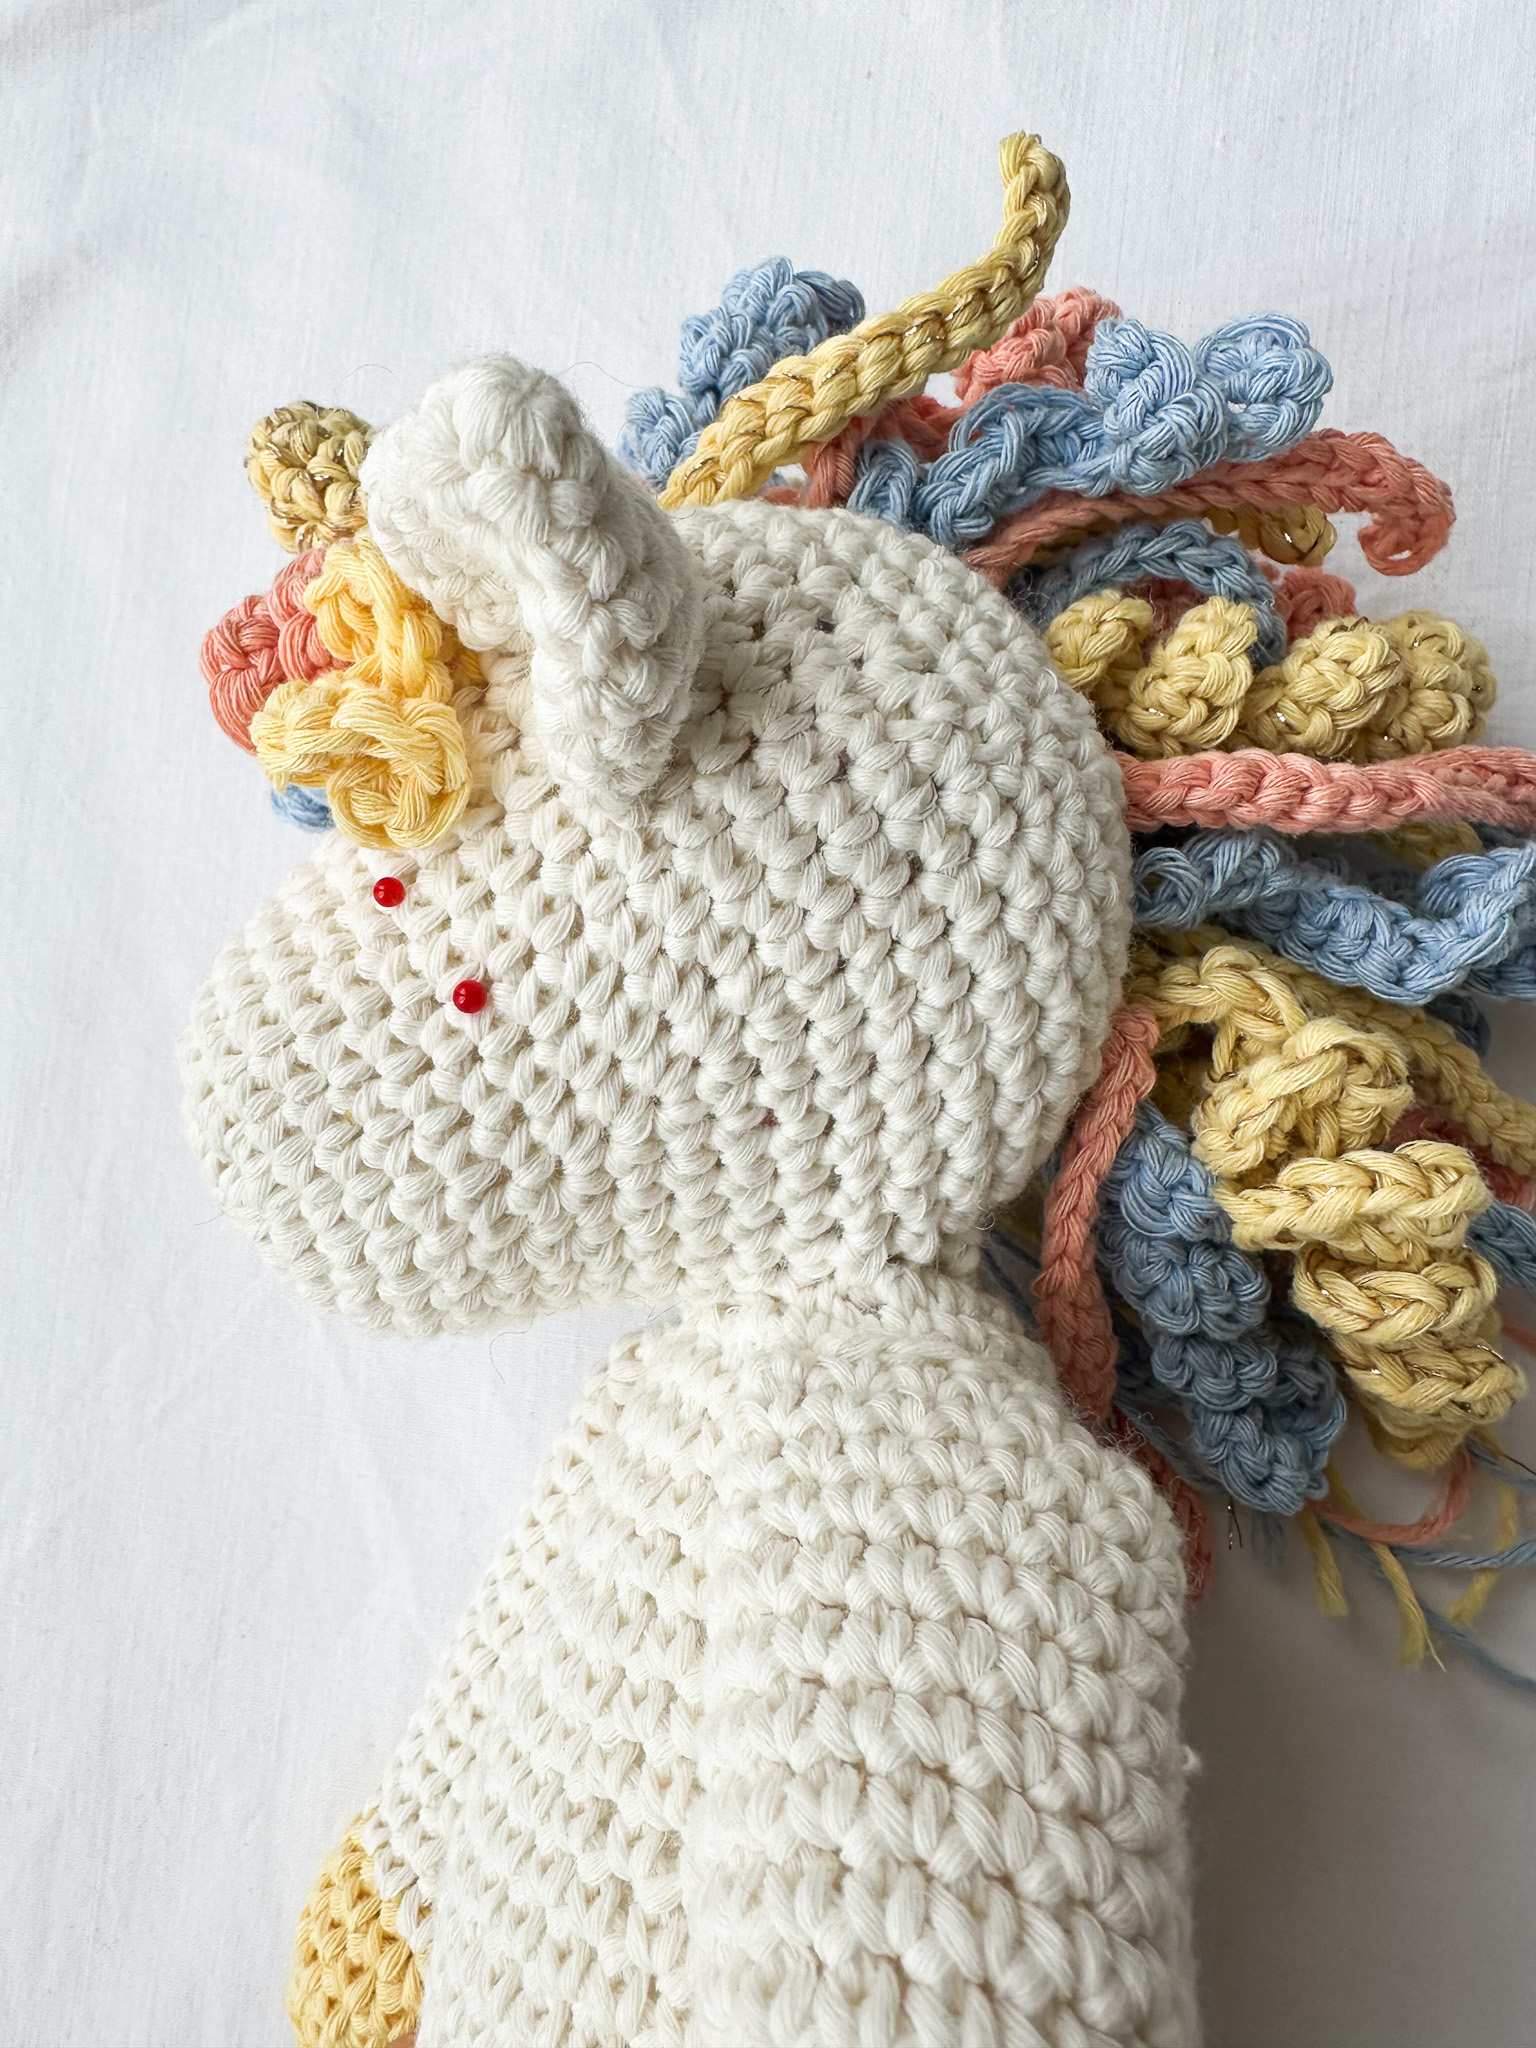
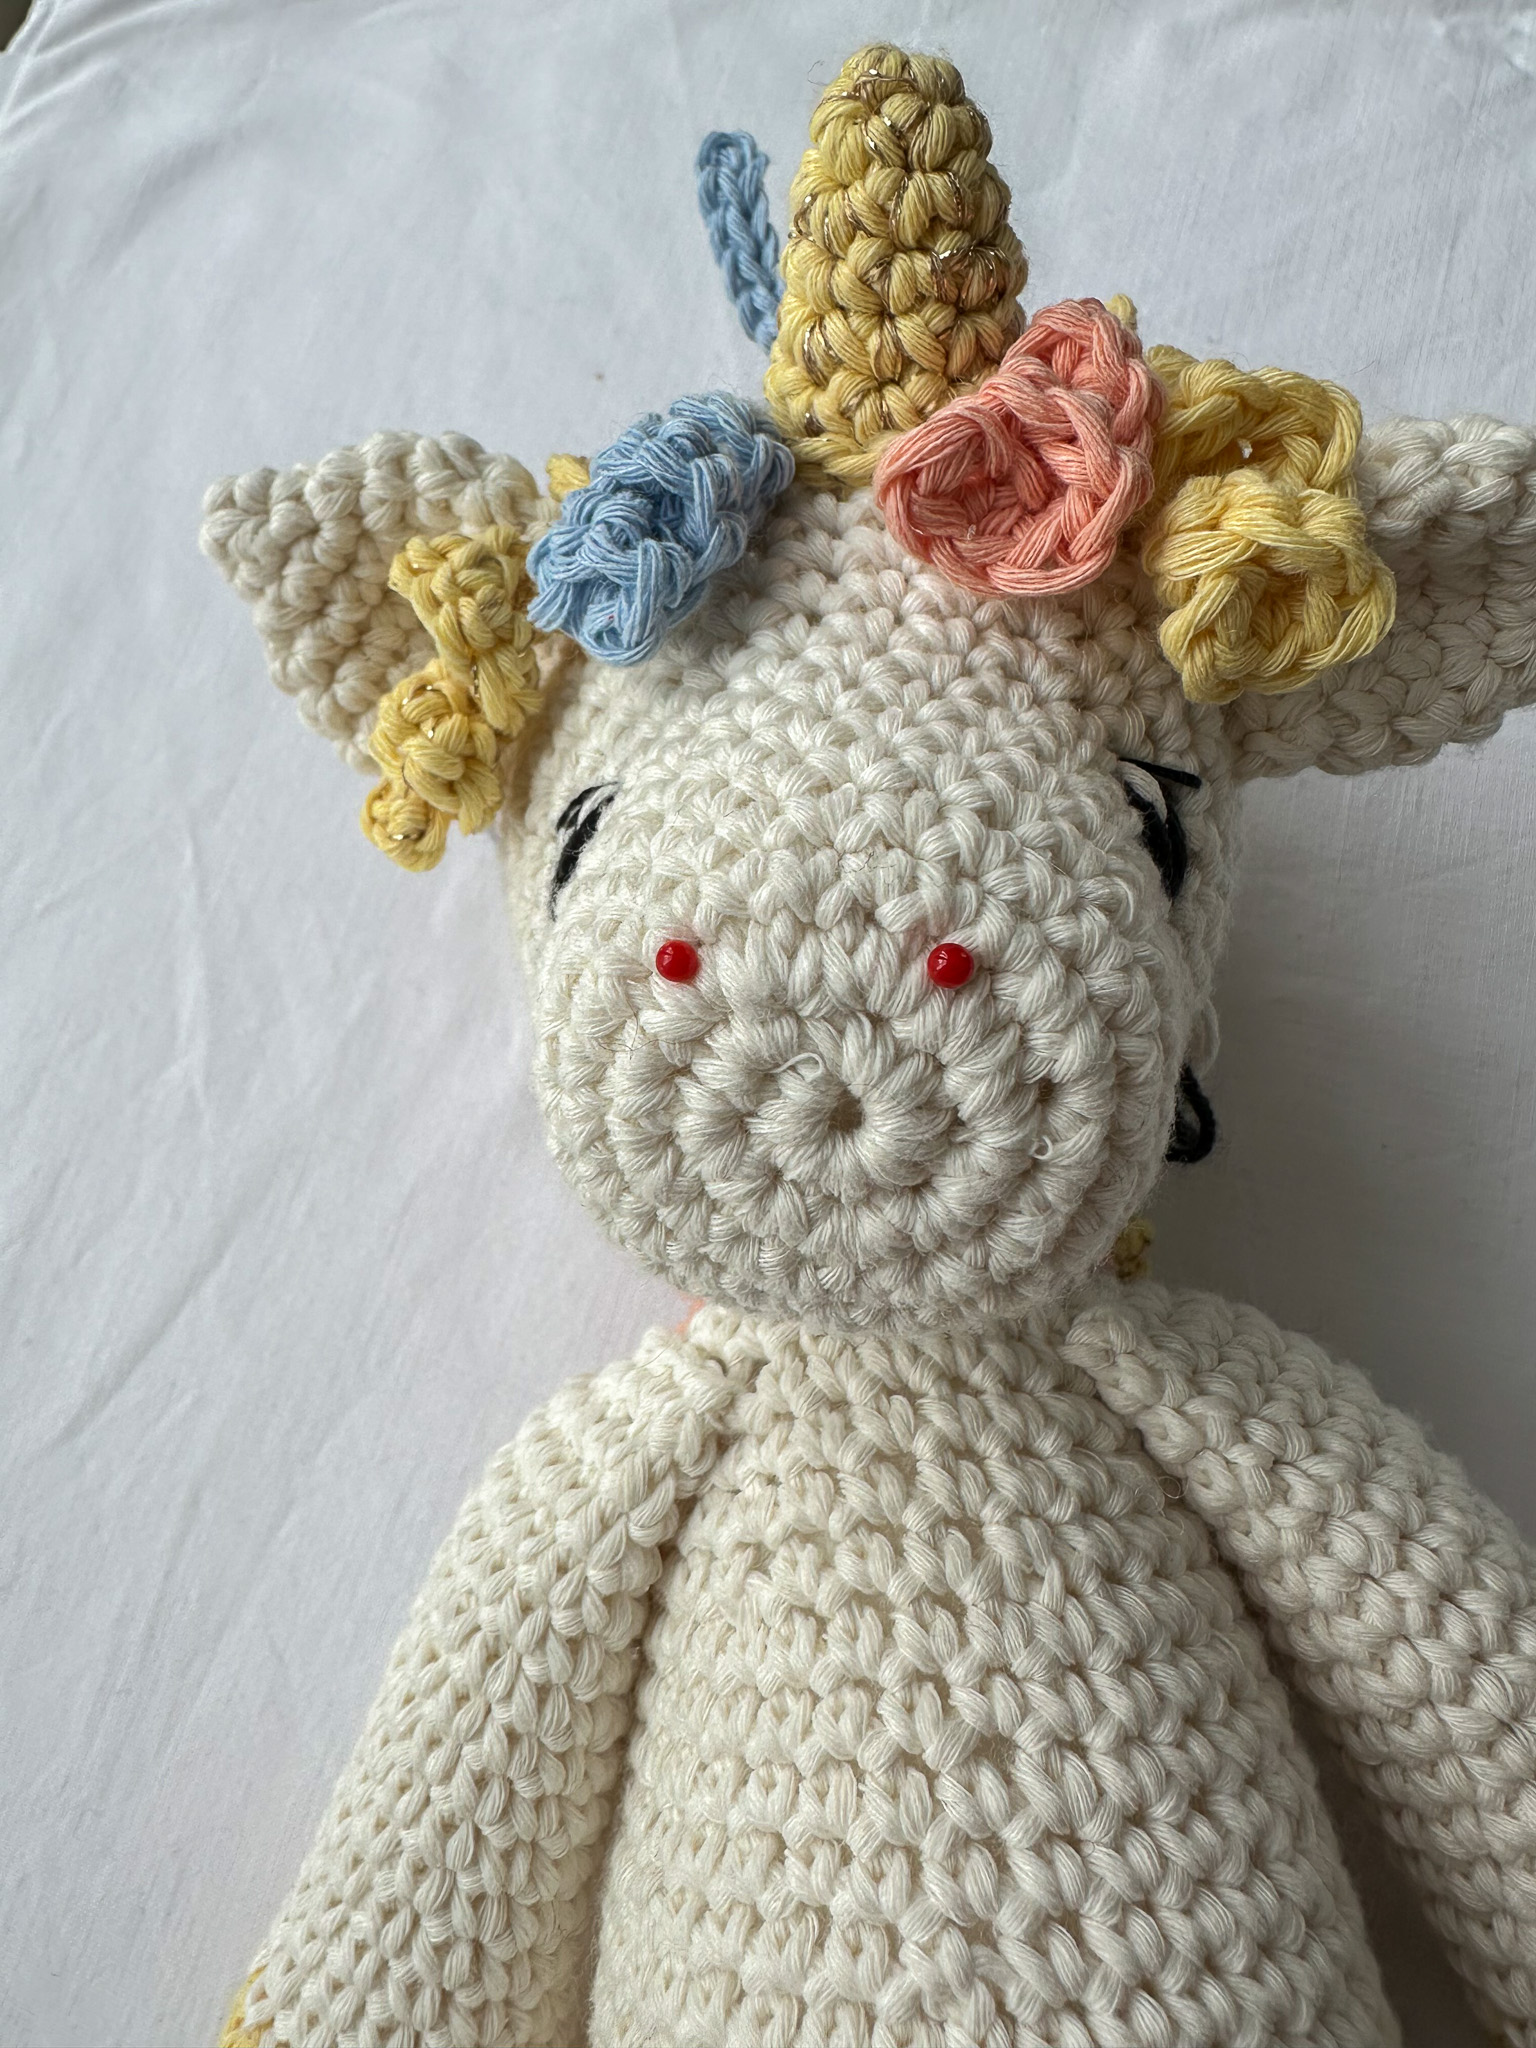
Sew the horn centered on the head, but angled slightly forward, approximately around rounds 12–15 of the head.
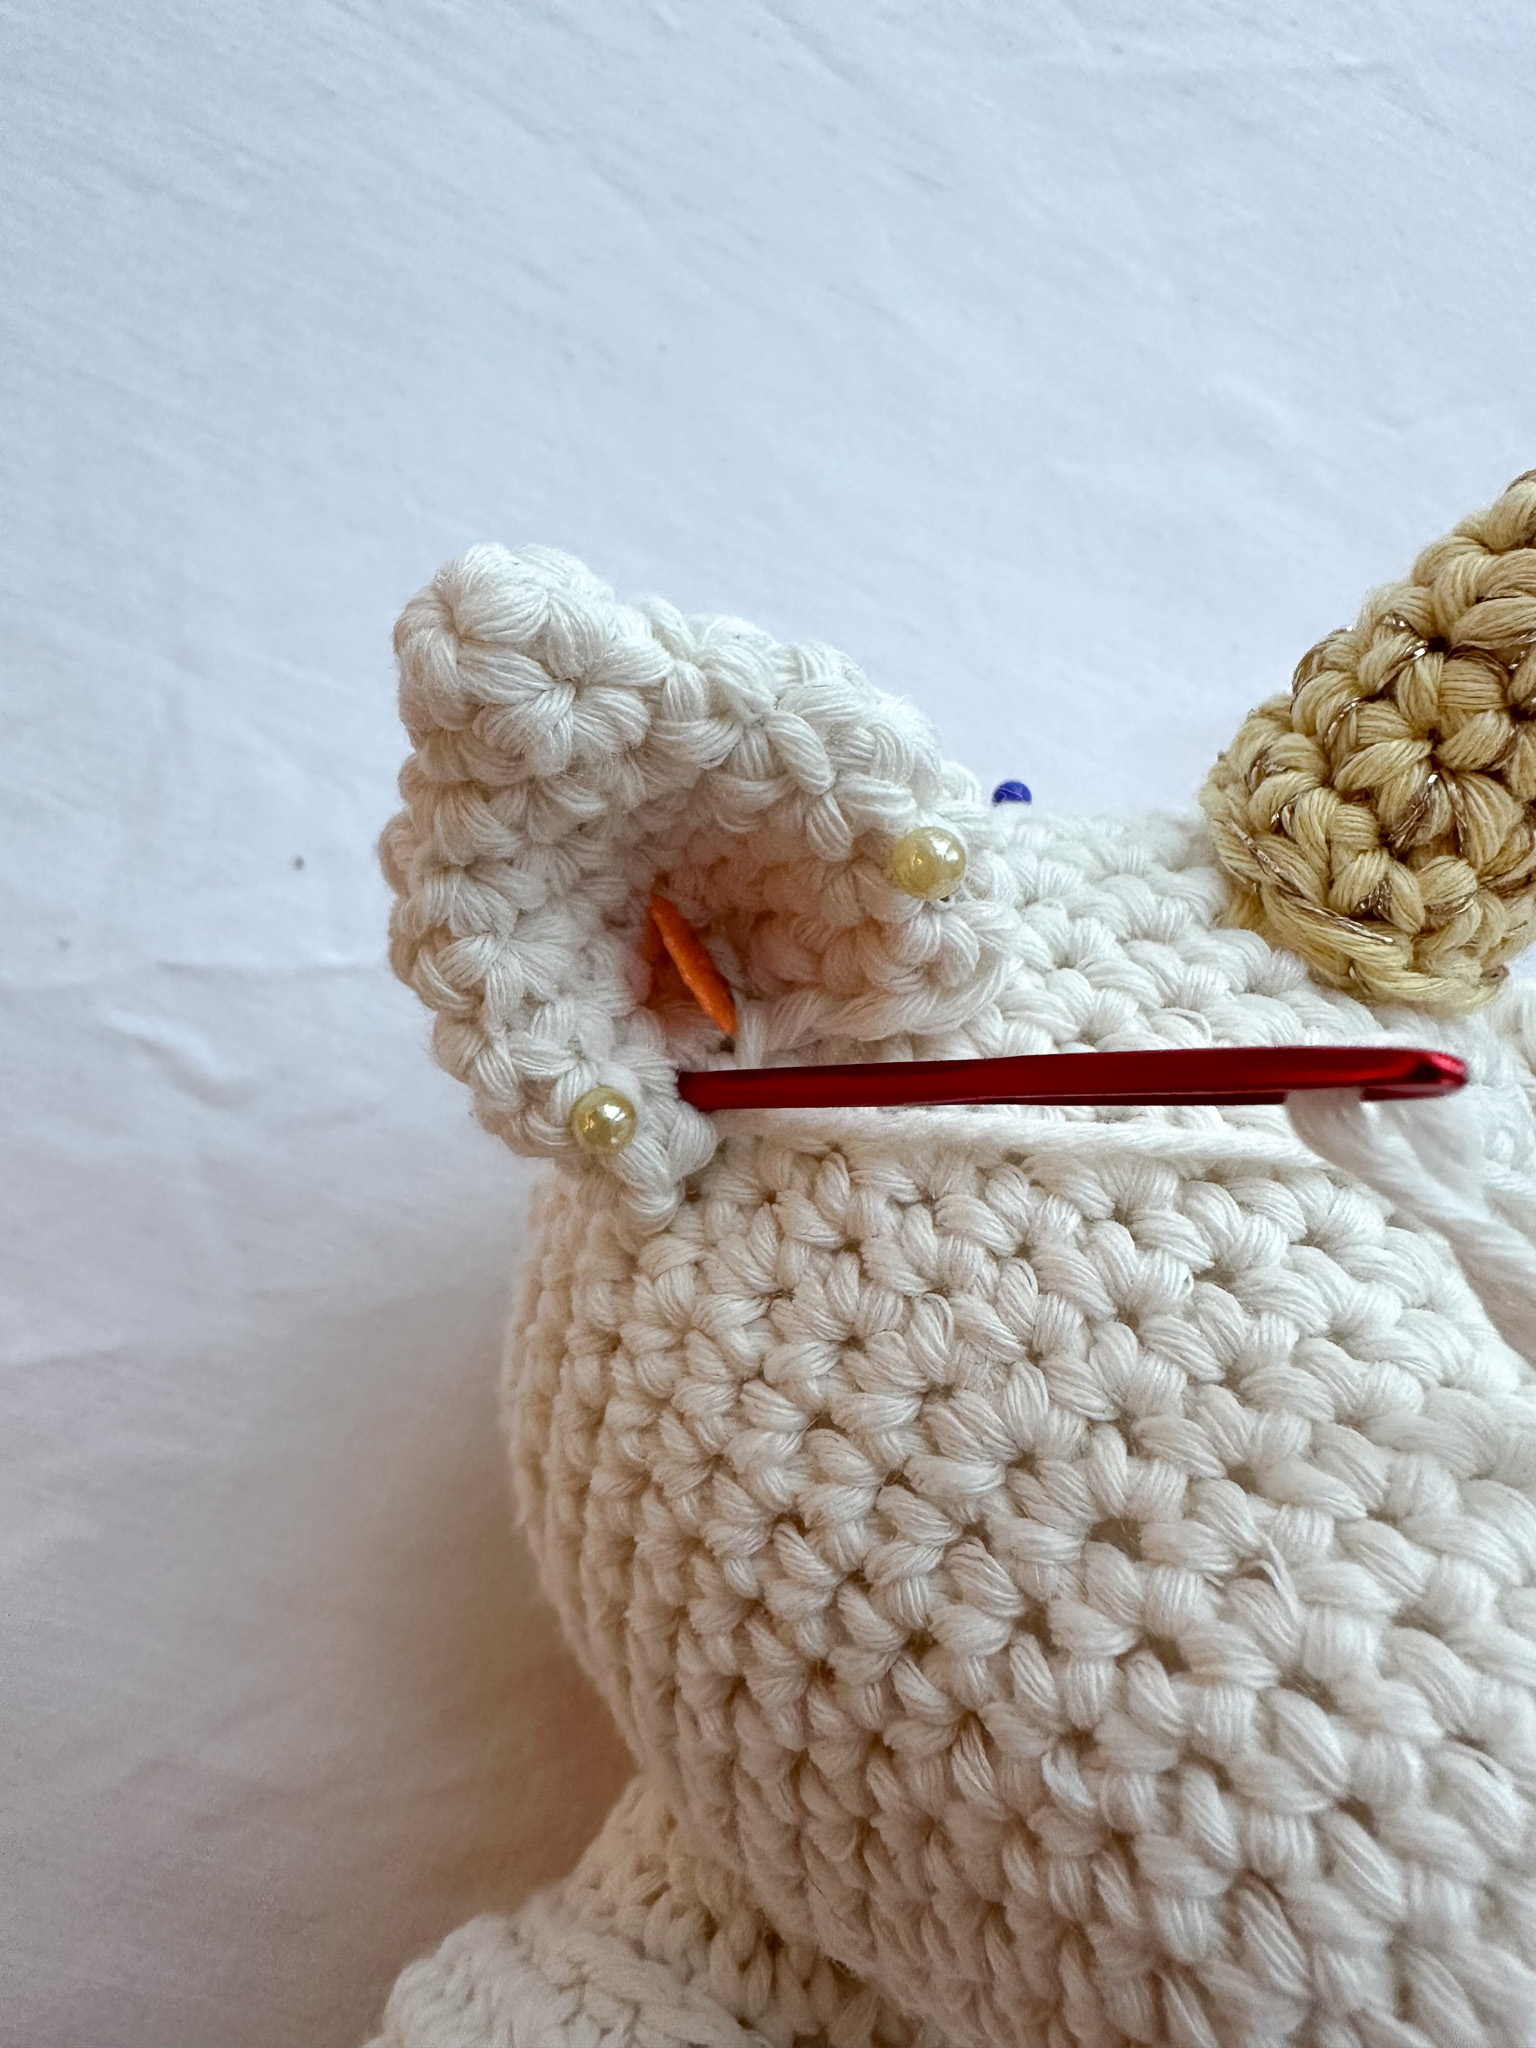
Before closing the opening, stuff the horn with fiberfill. Fold the ear slightly (C-shape) and sew the ears at the same height as the horn, with about 2–3 stitches between the horn and the ear. See the pictures for placement from the front and from the side. Try to maintain the C-shape while sewing the ear on, and make sure to sew through both layers.
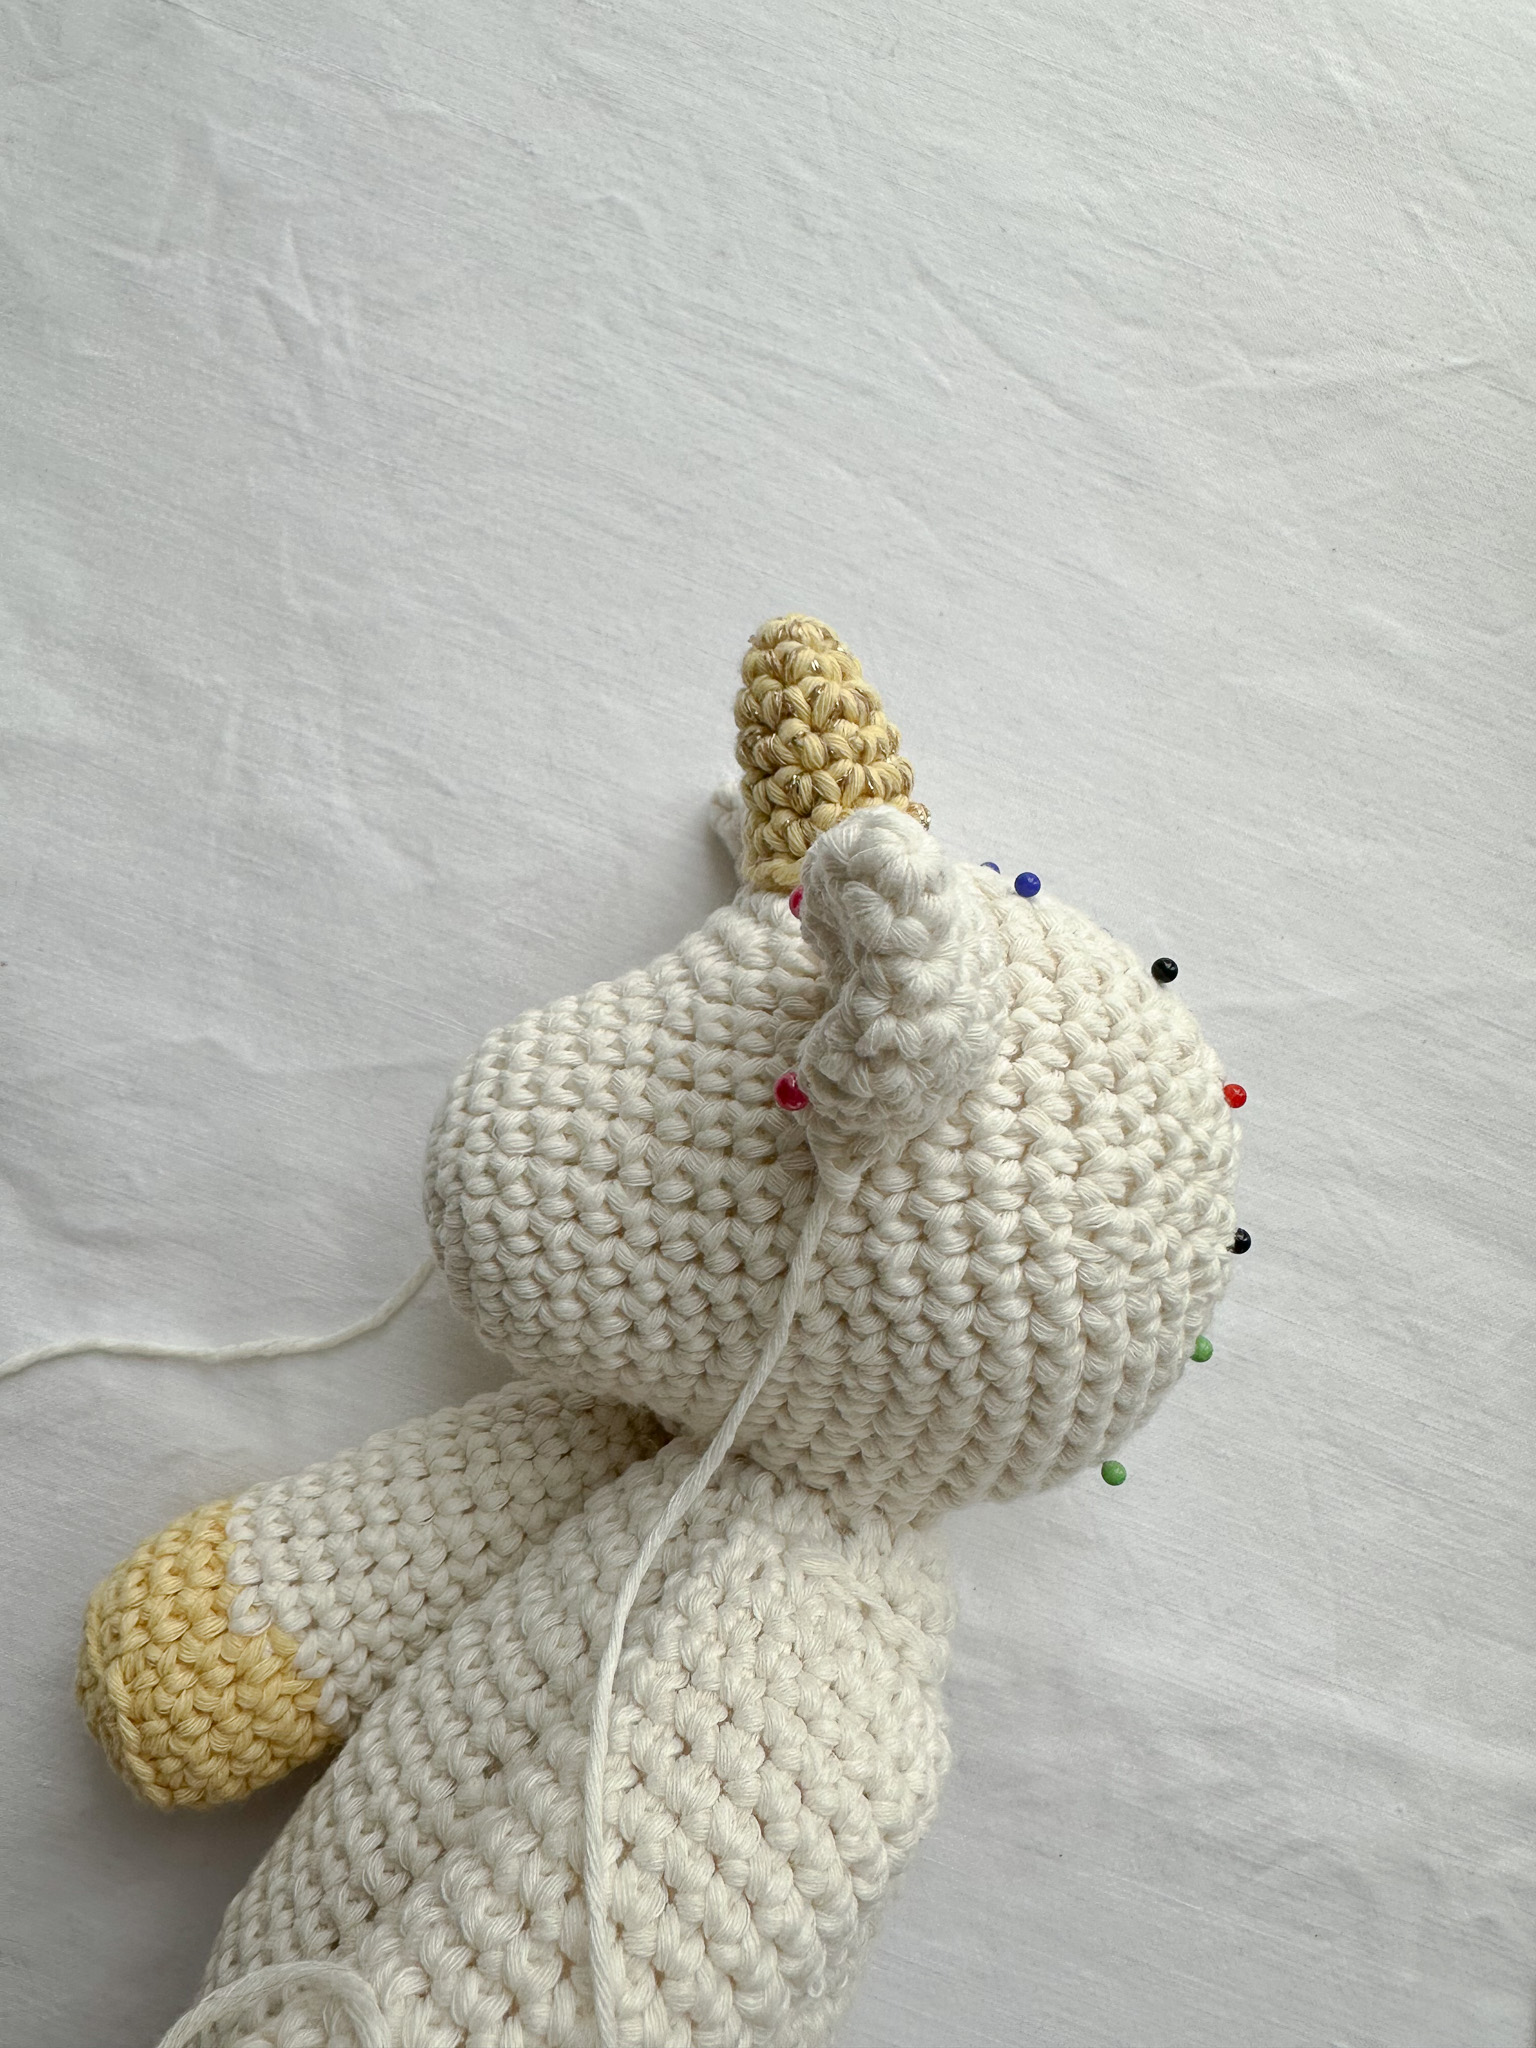
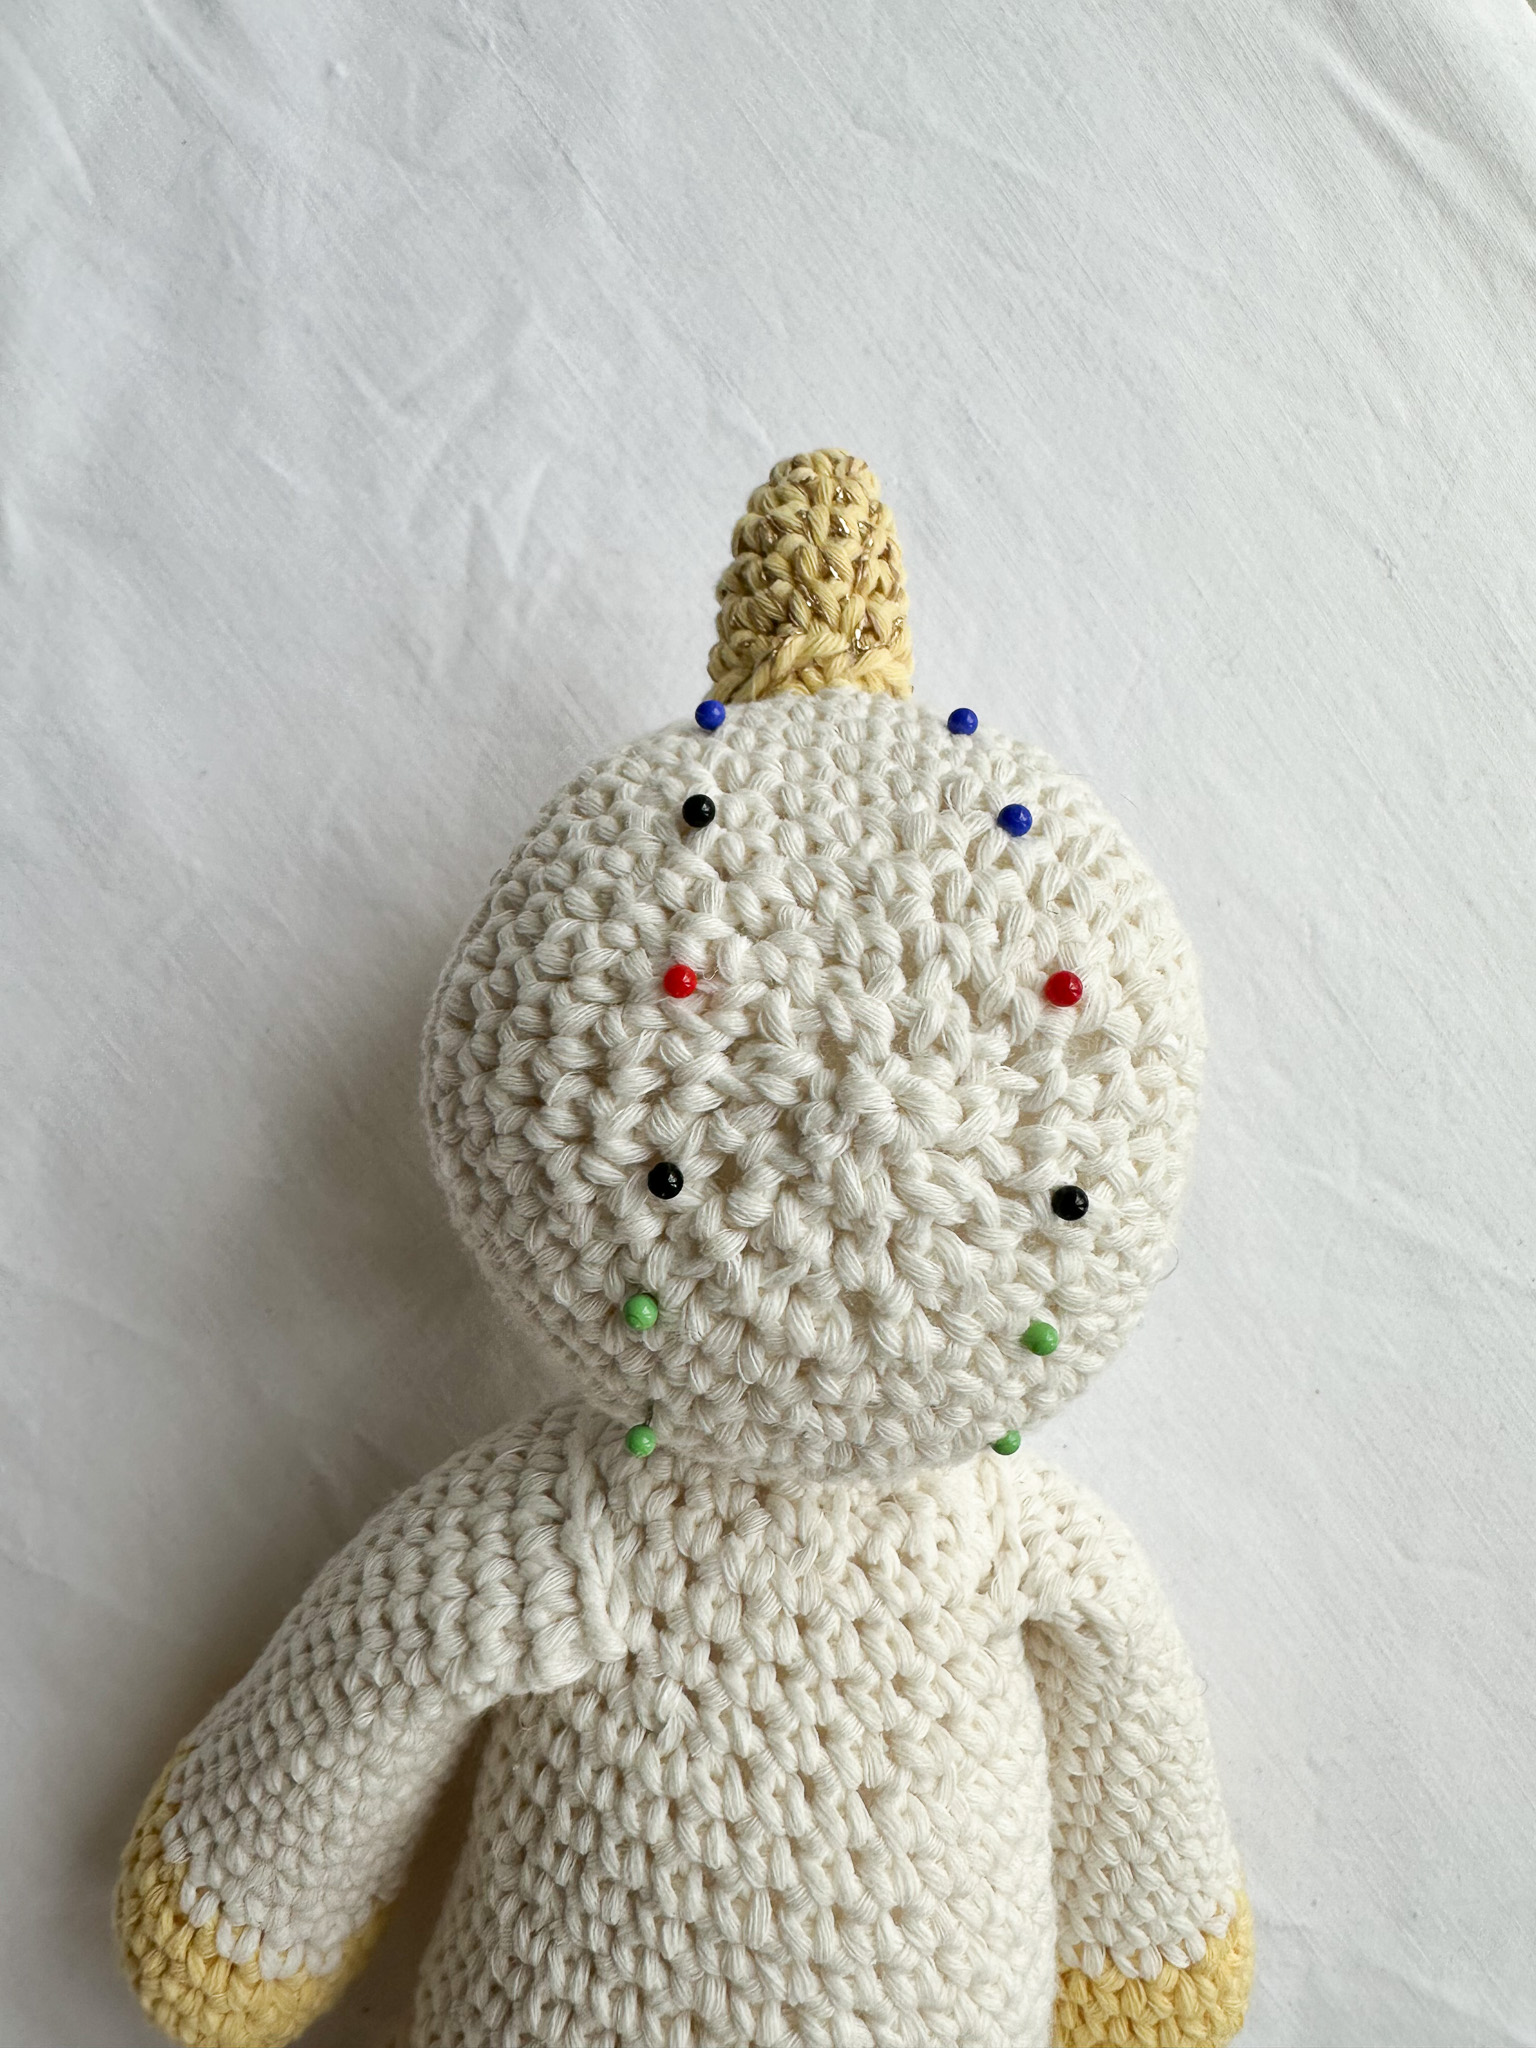
Pin both legs between rounds 9–10 on the body (counting from the magic ring at the bottom). Make sure to turn the color-change seam inward. Double-check carefully from several different angles that the legs are centered relative to the head’s position. Sew the legs in place.
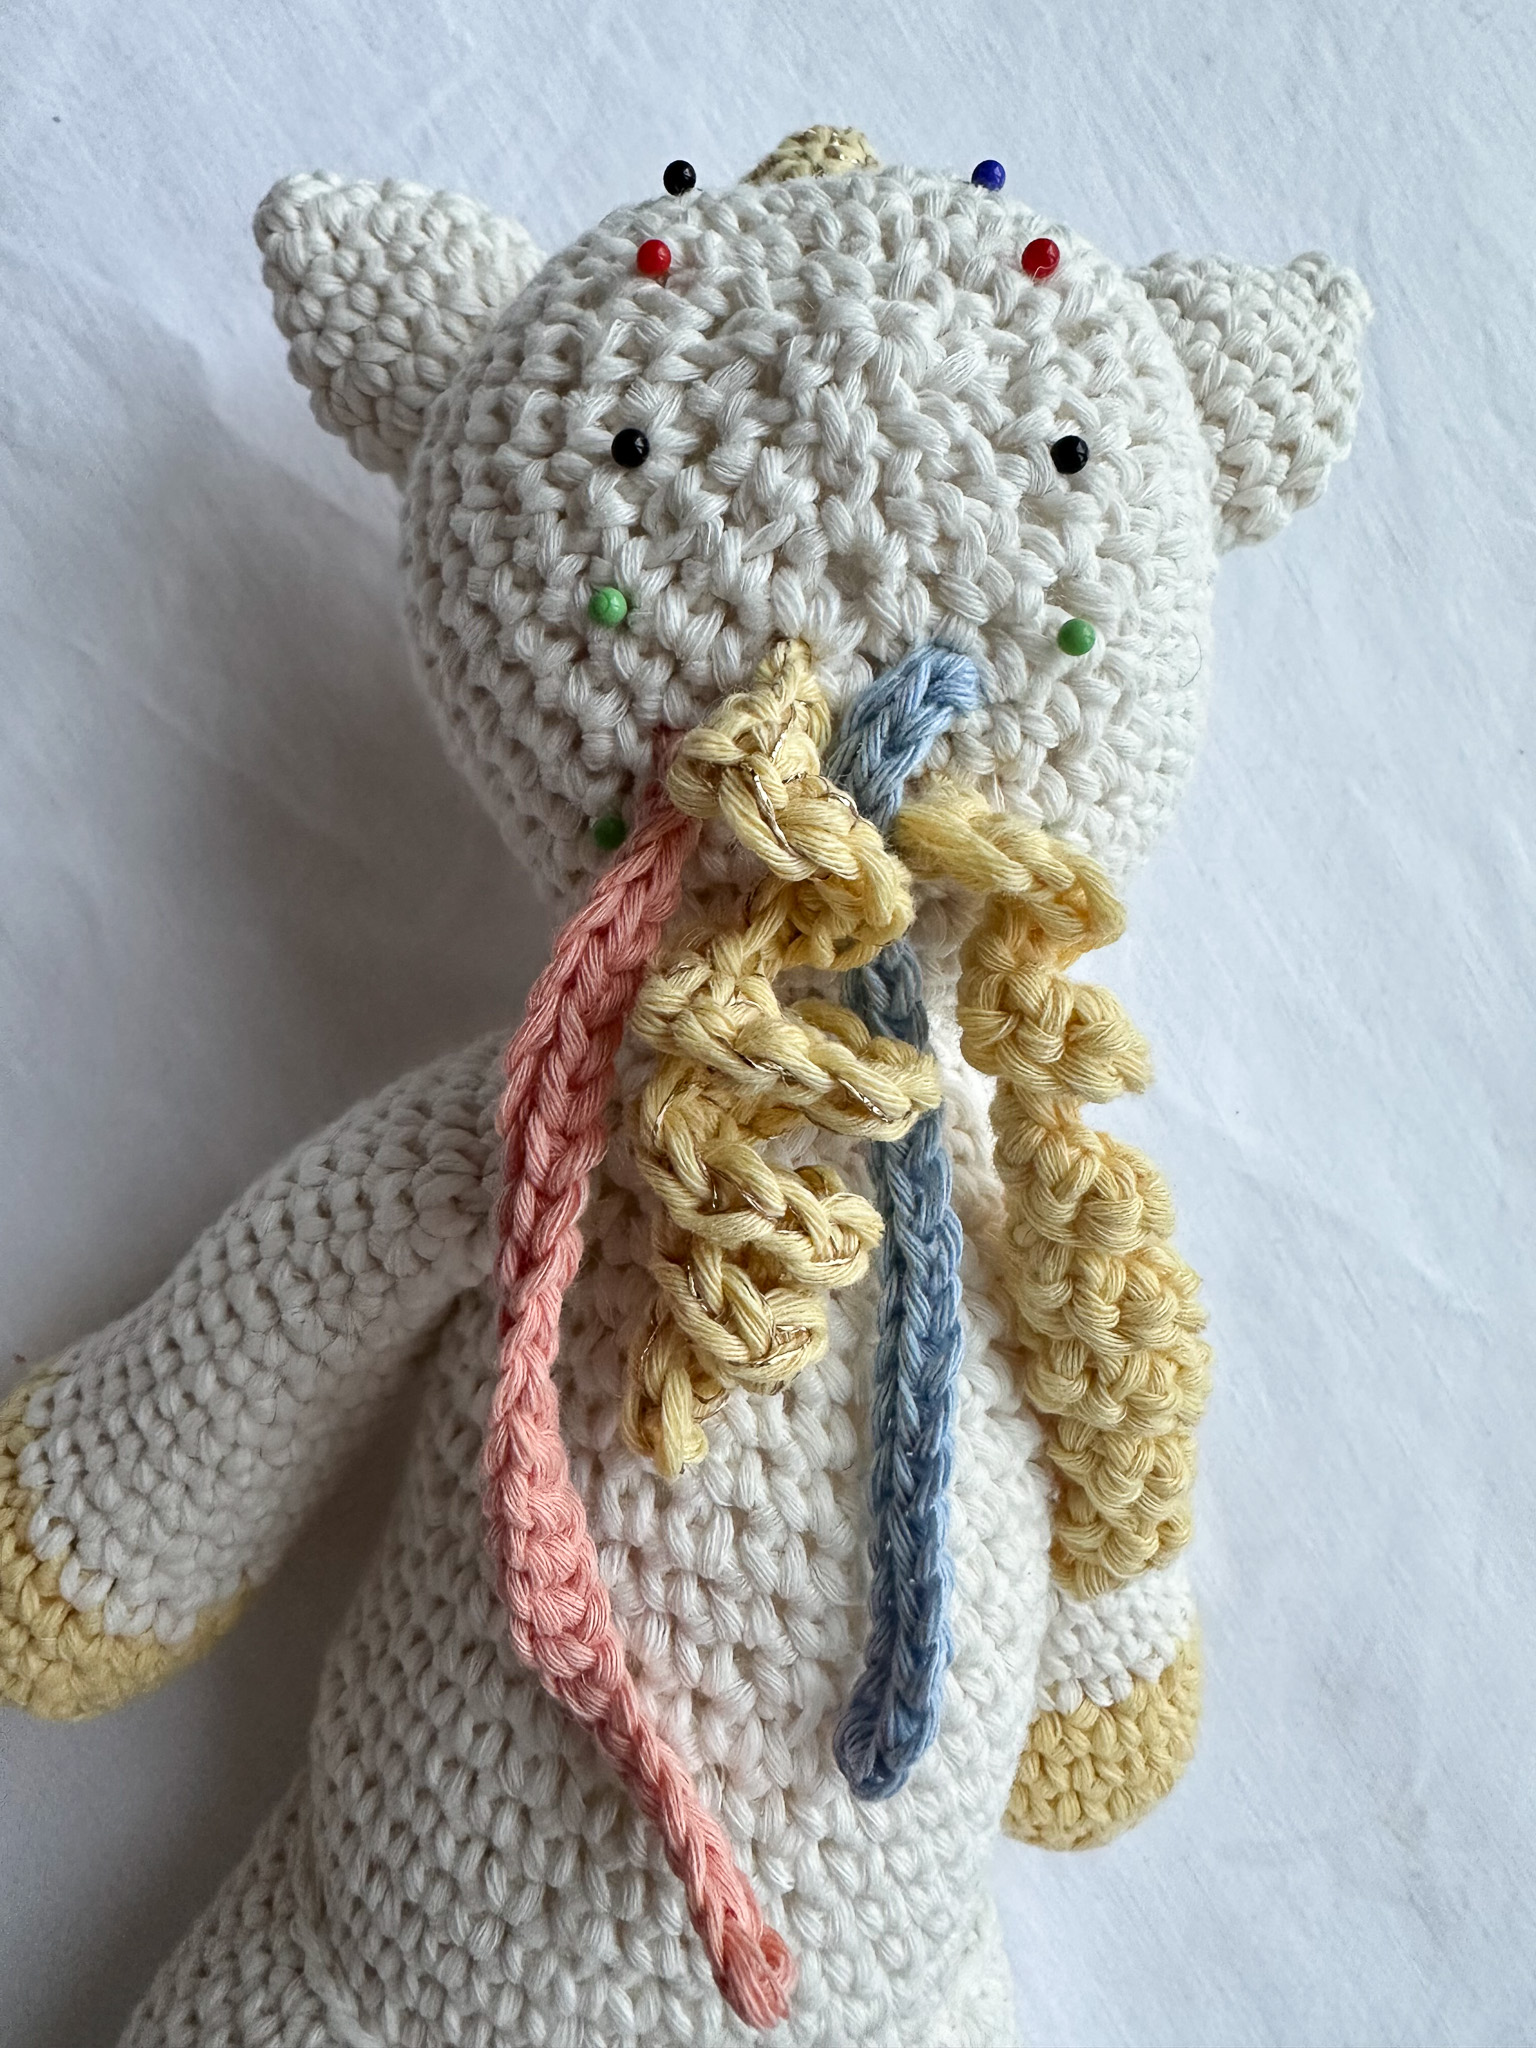
See the picture for where to pin the legs at the red pins and the arms at the green pins.
Pin both arms in a slightly angled position, see picture. This will place the arms slightly in front of the body. Carefully check that both arms are positioned the same and are centered relative to the head and the legs.
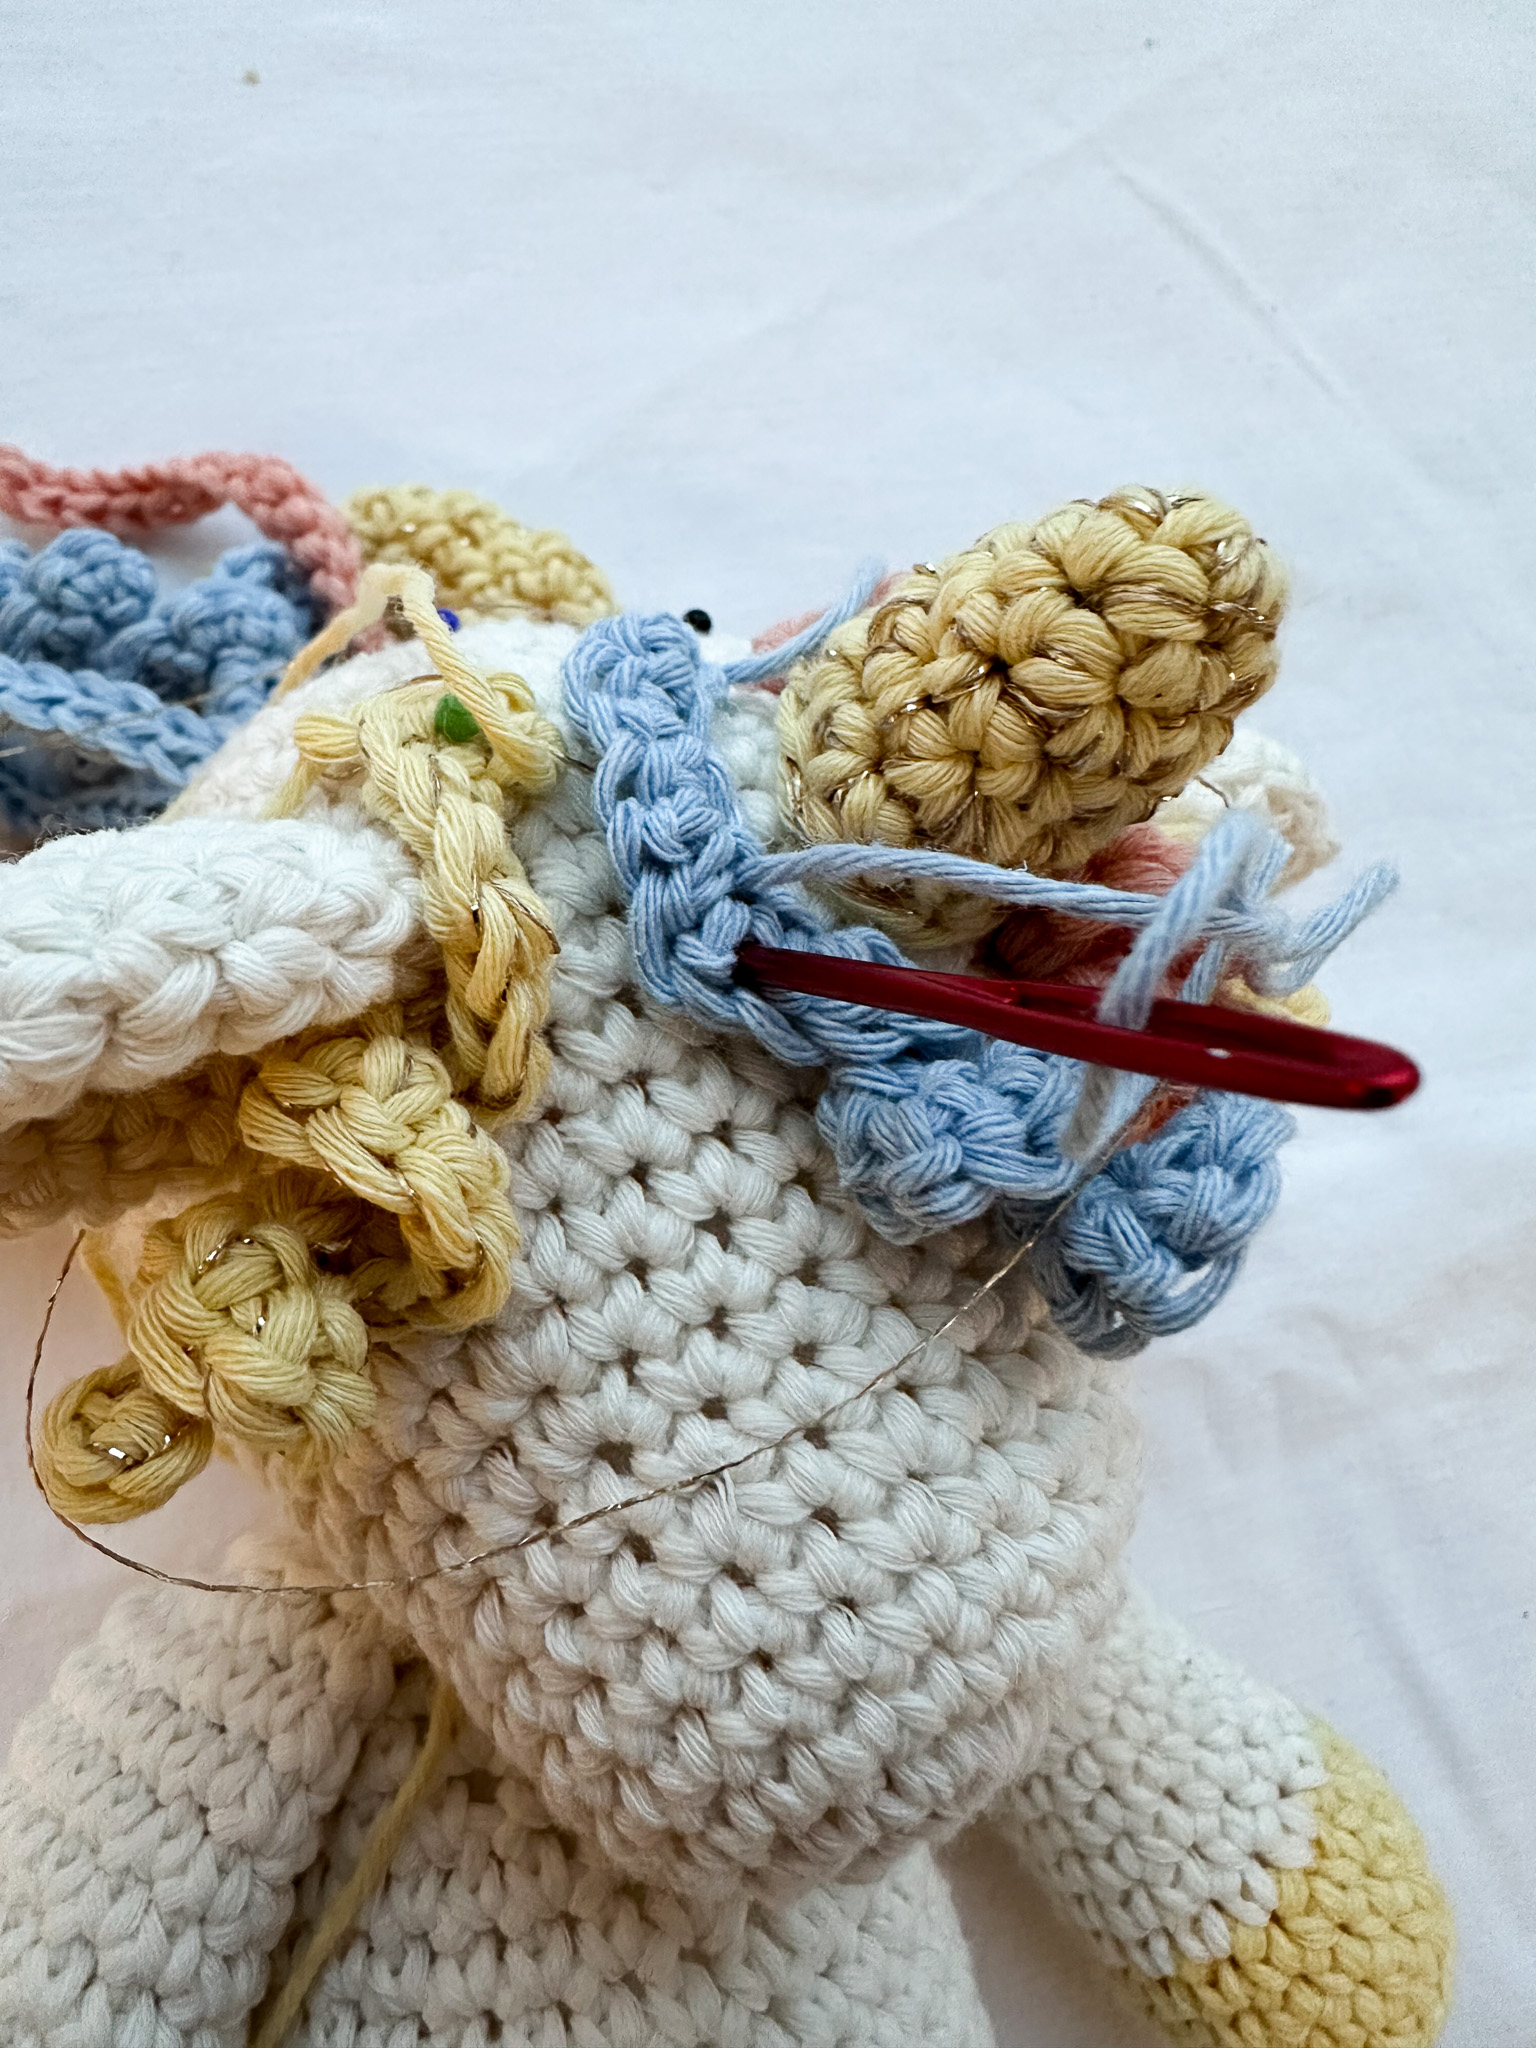
Now it’s time to sew on the mane. Start by pinning two edges along the entire head that you will stay within when attaching the strands.
It’s a bit easier to start from the bottom. Try to mix shapes, lengths, and colors to make the mane full. The closer you get to the horn, use shorter and shorter strands. Attach them by tying a tight knot 2–3 times. Secure the yarn ends.
Forelock (bangs): Sew on 4 short strands (15 chain stitches long) just behind the ear and horn. Also sew the strands down halfway so that the forelock stays forward toward the face and doesn’t fall back into the mane.
Sew the tail centered between the legs, between rounds 9–11 of the body (counting from the magic ring), and about 5 stitches wide. Use about 12 strands for the tail.
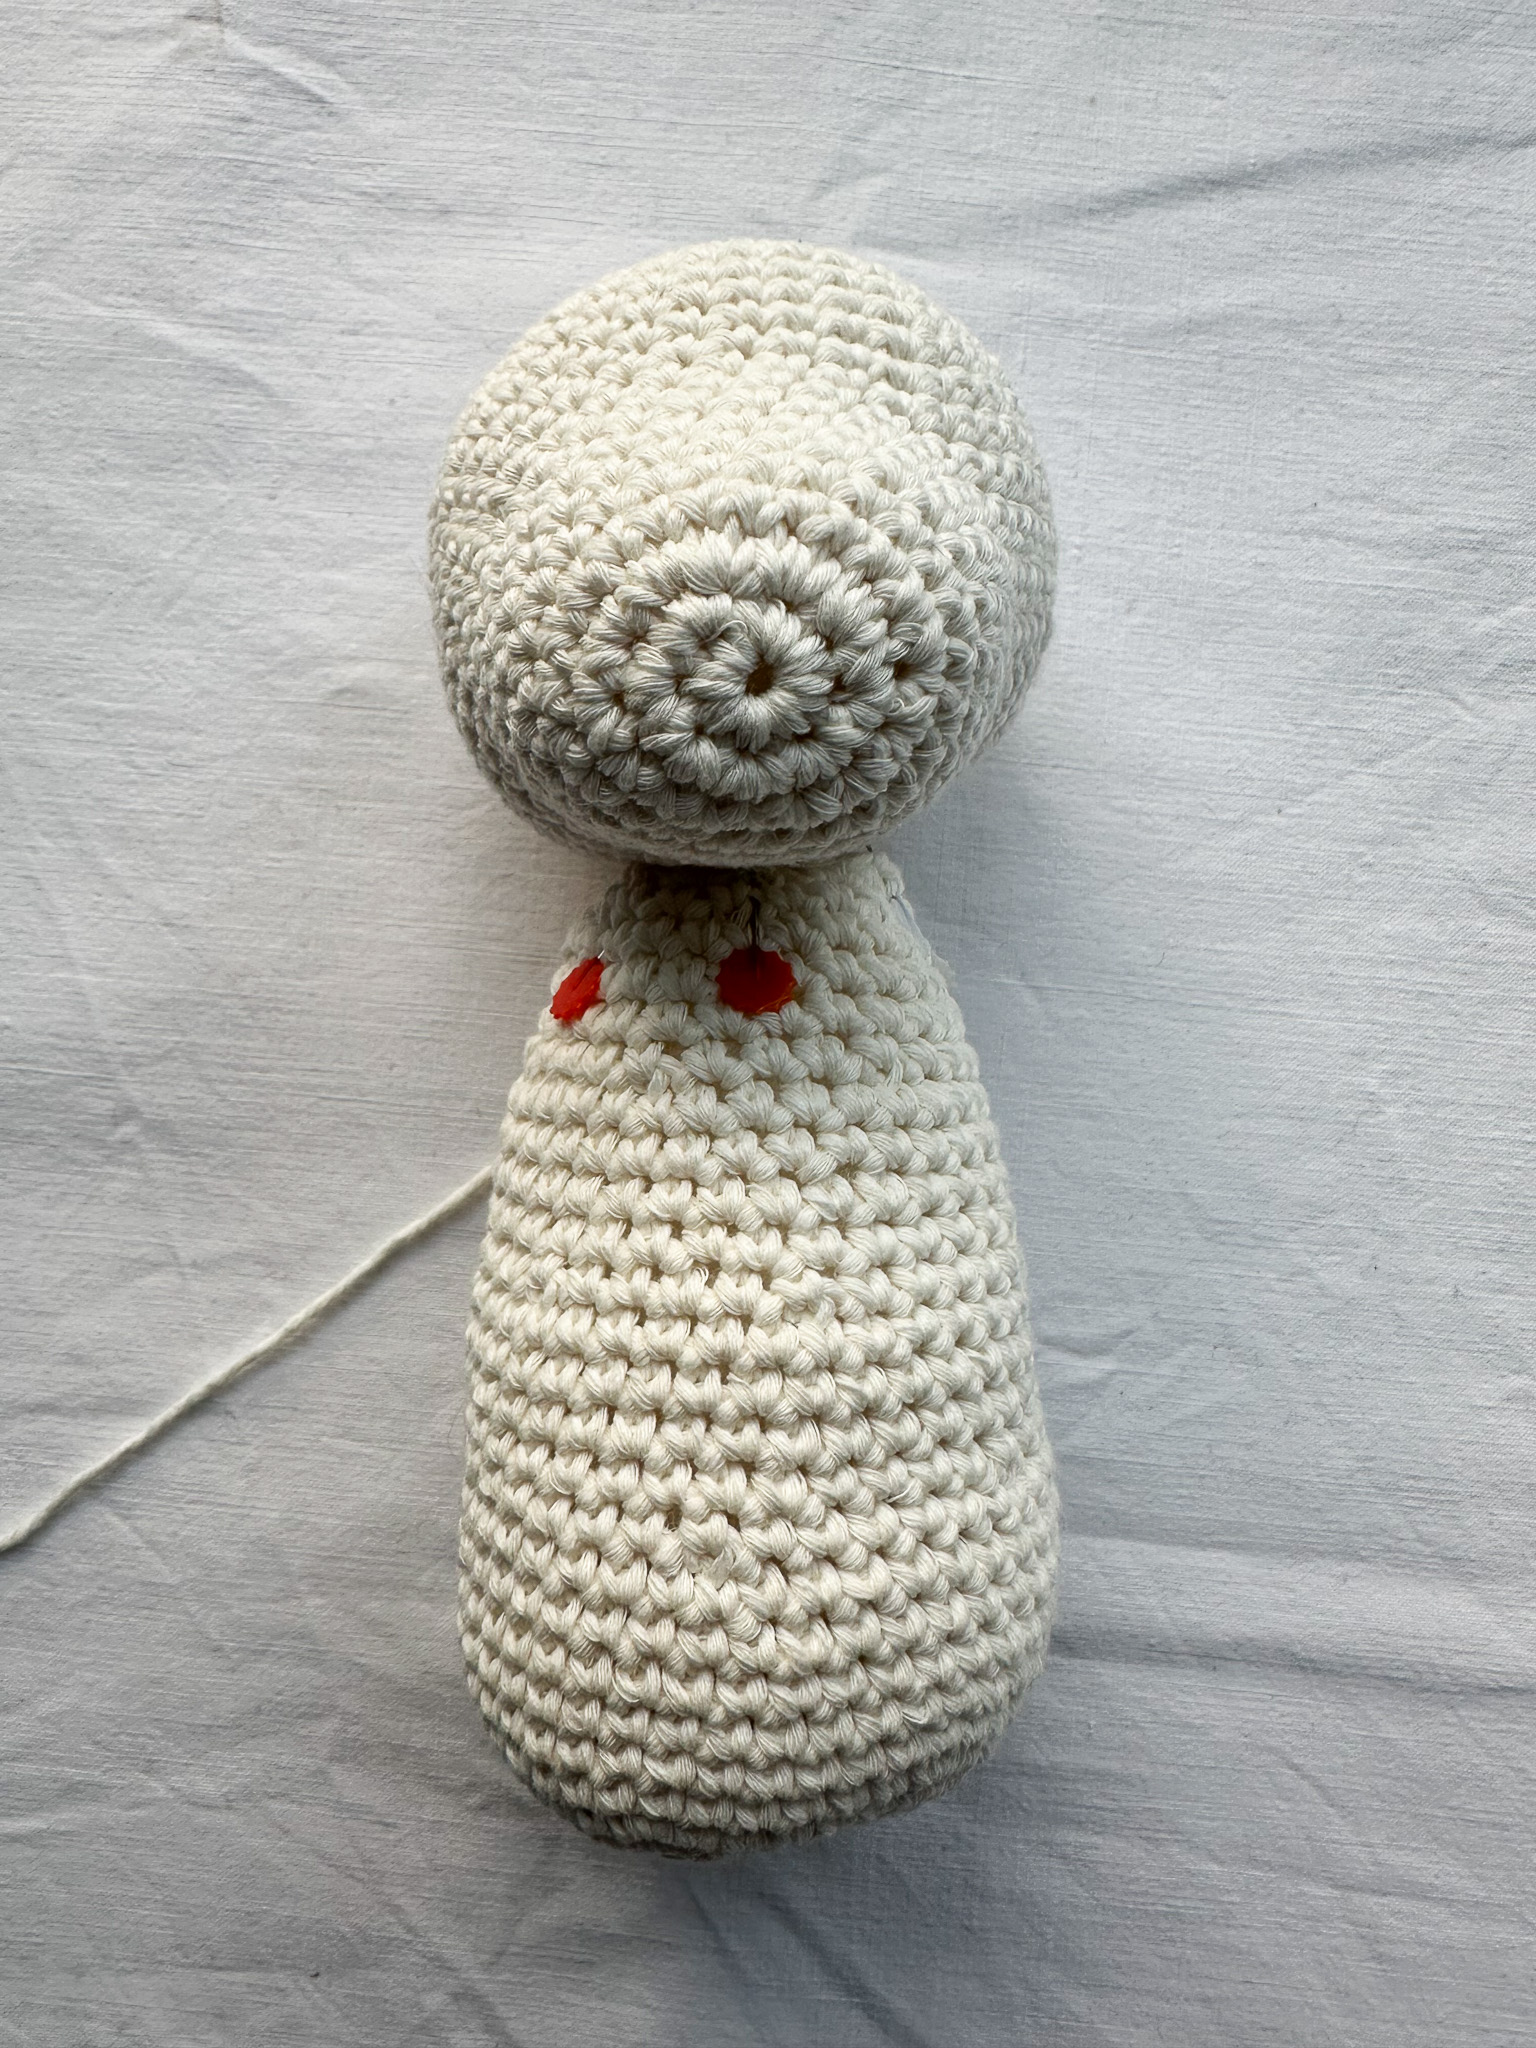
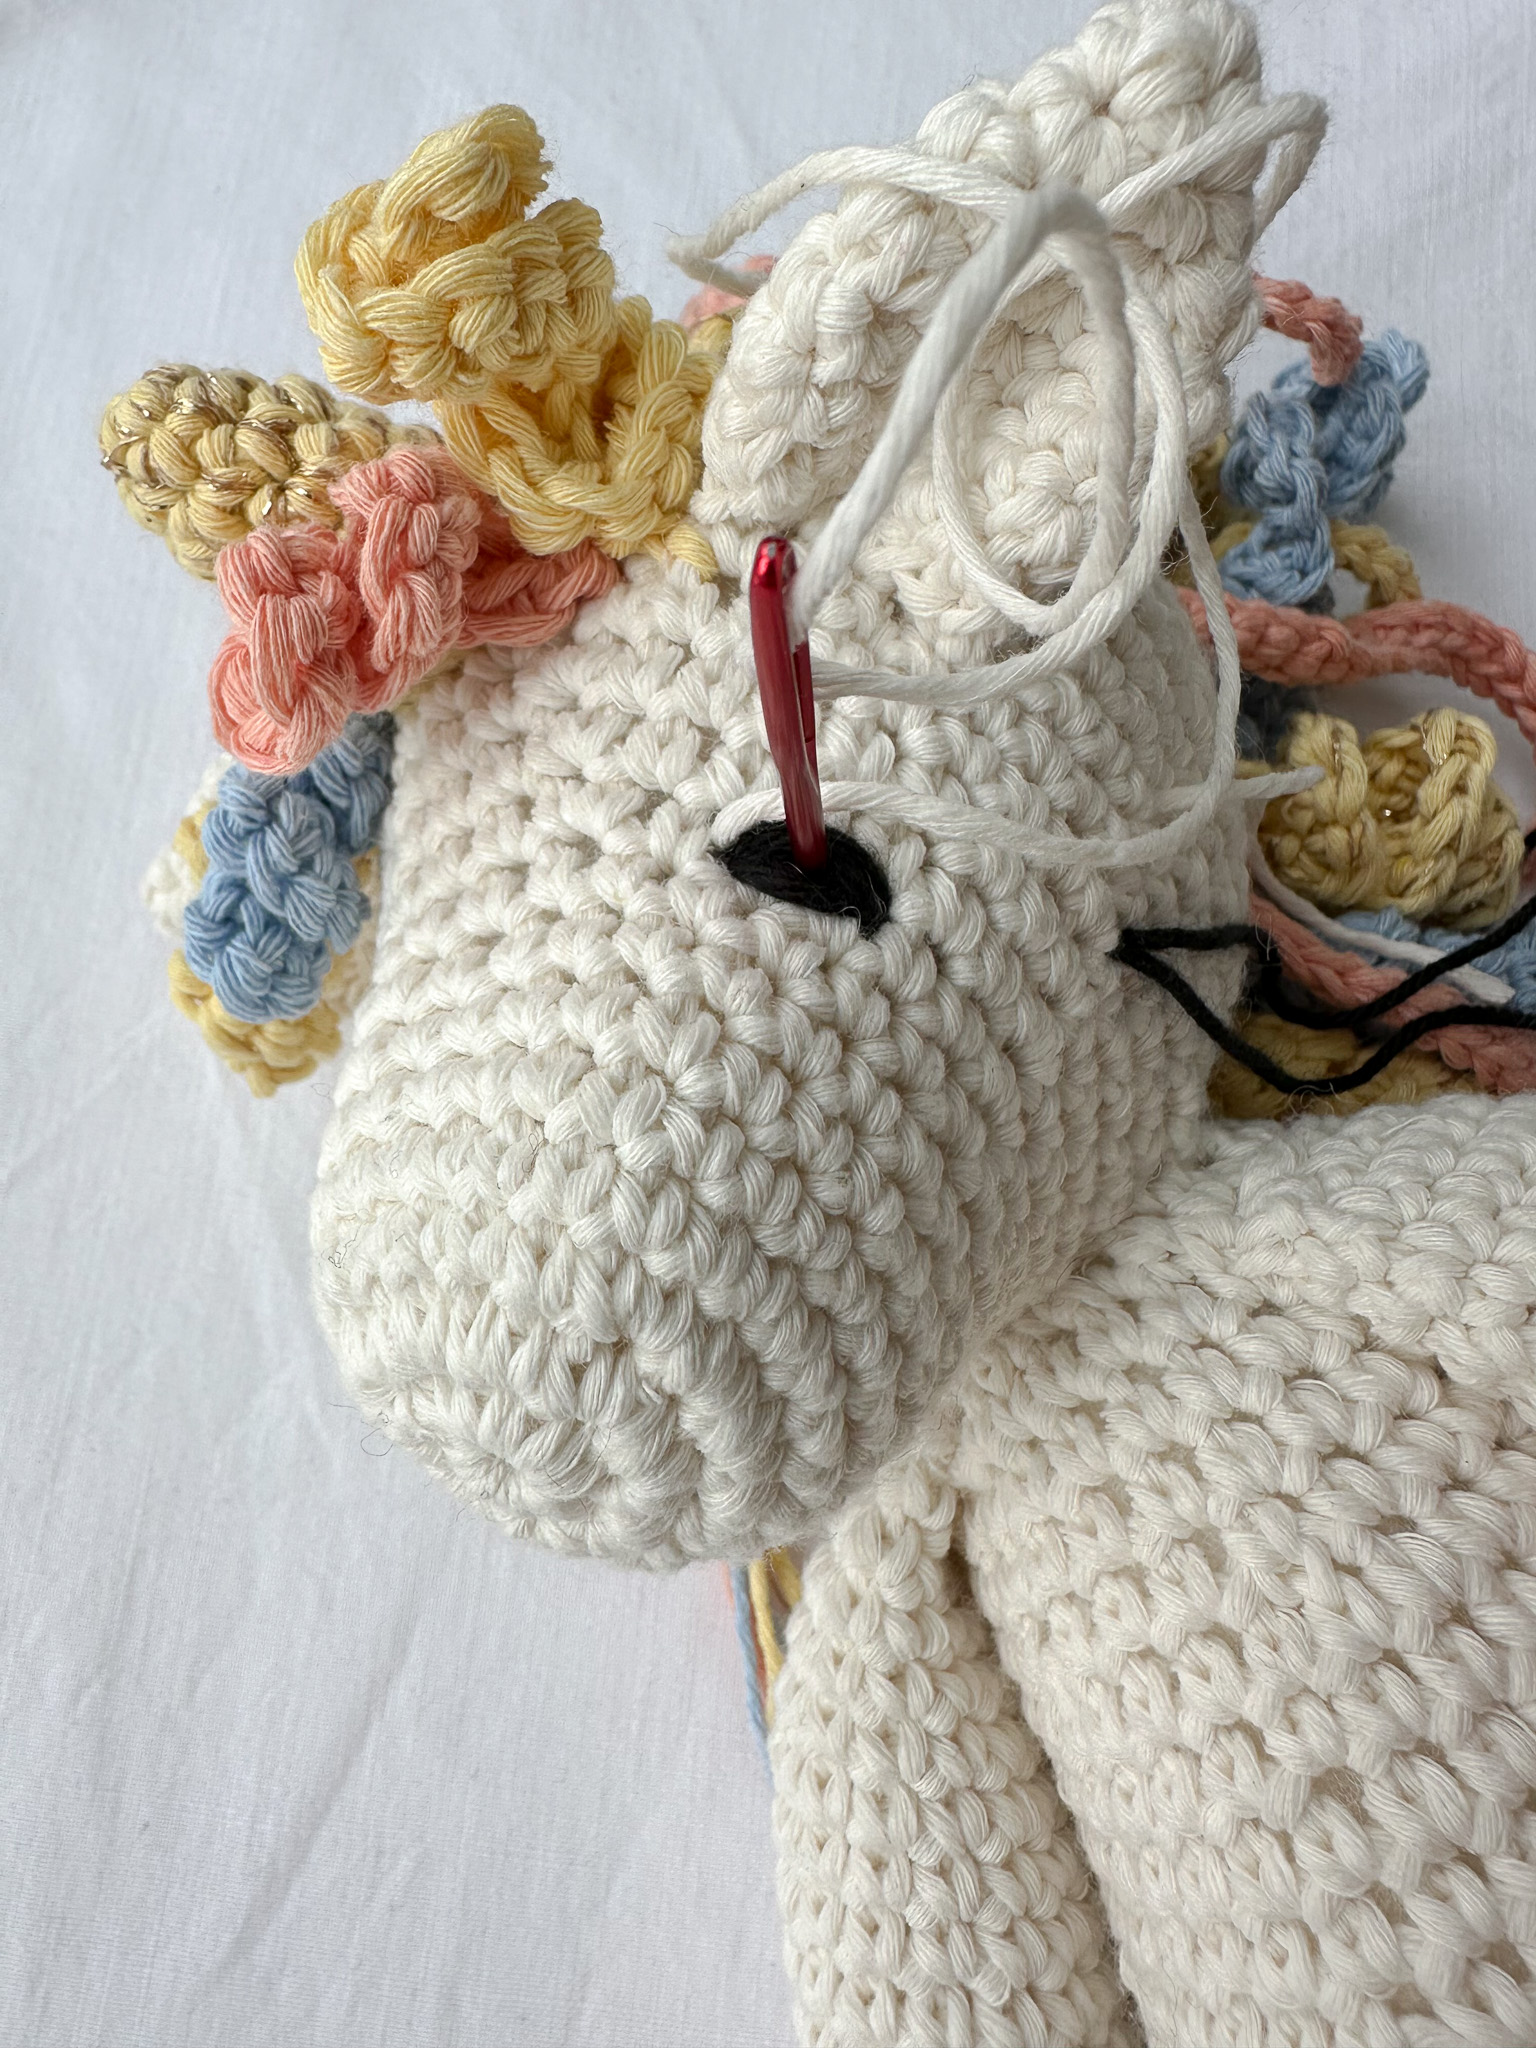
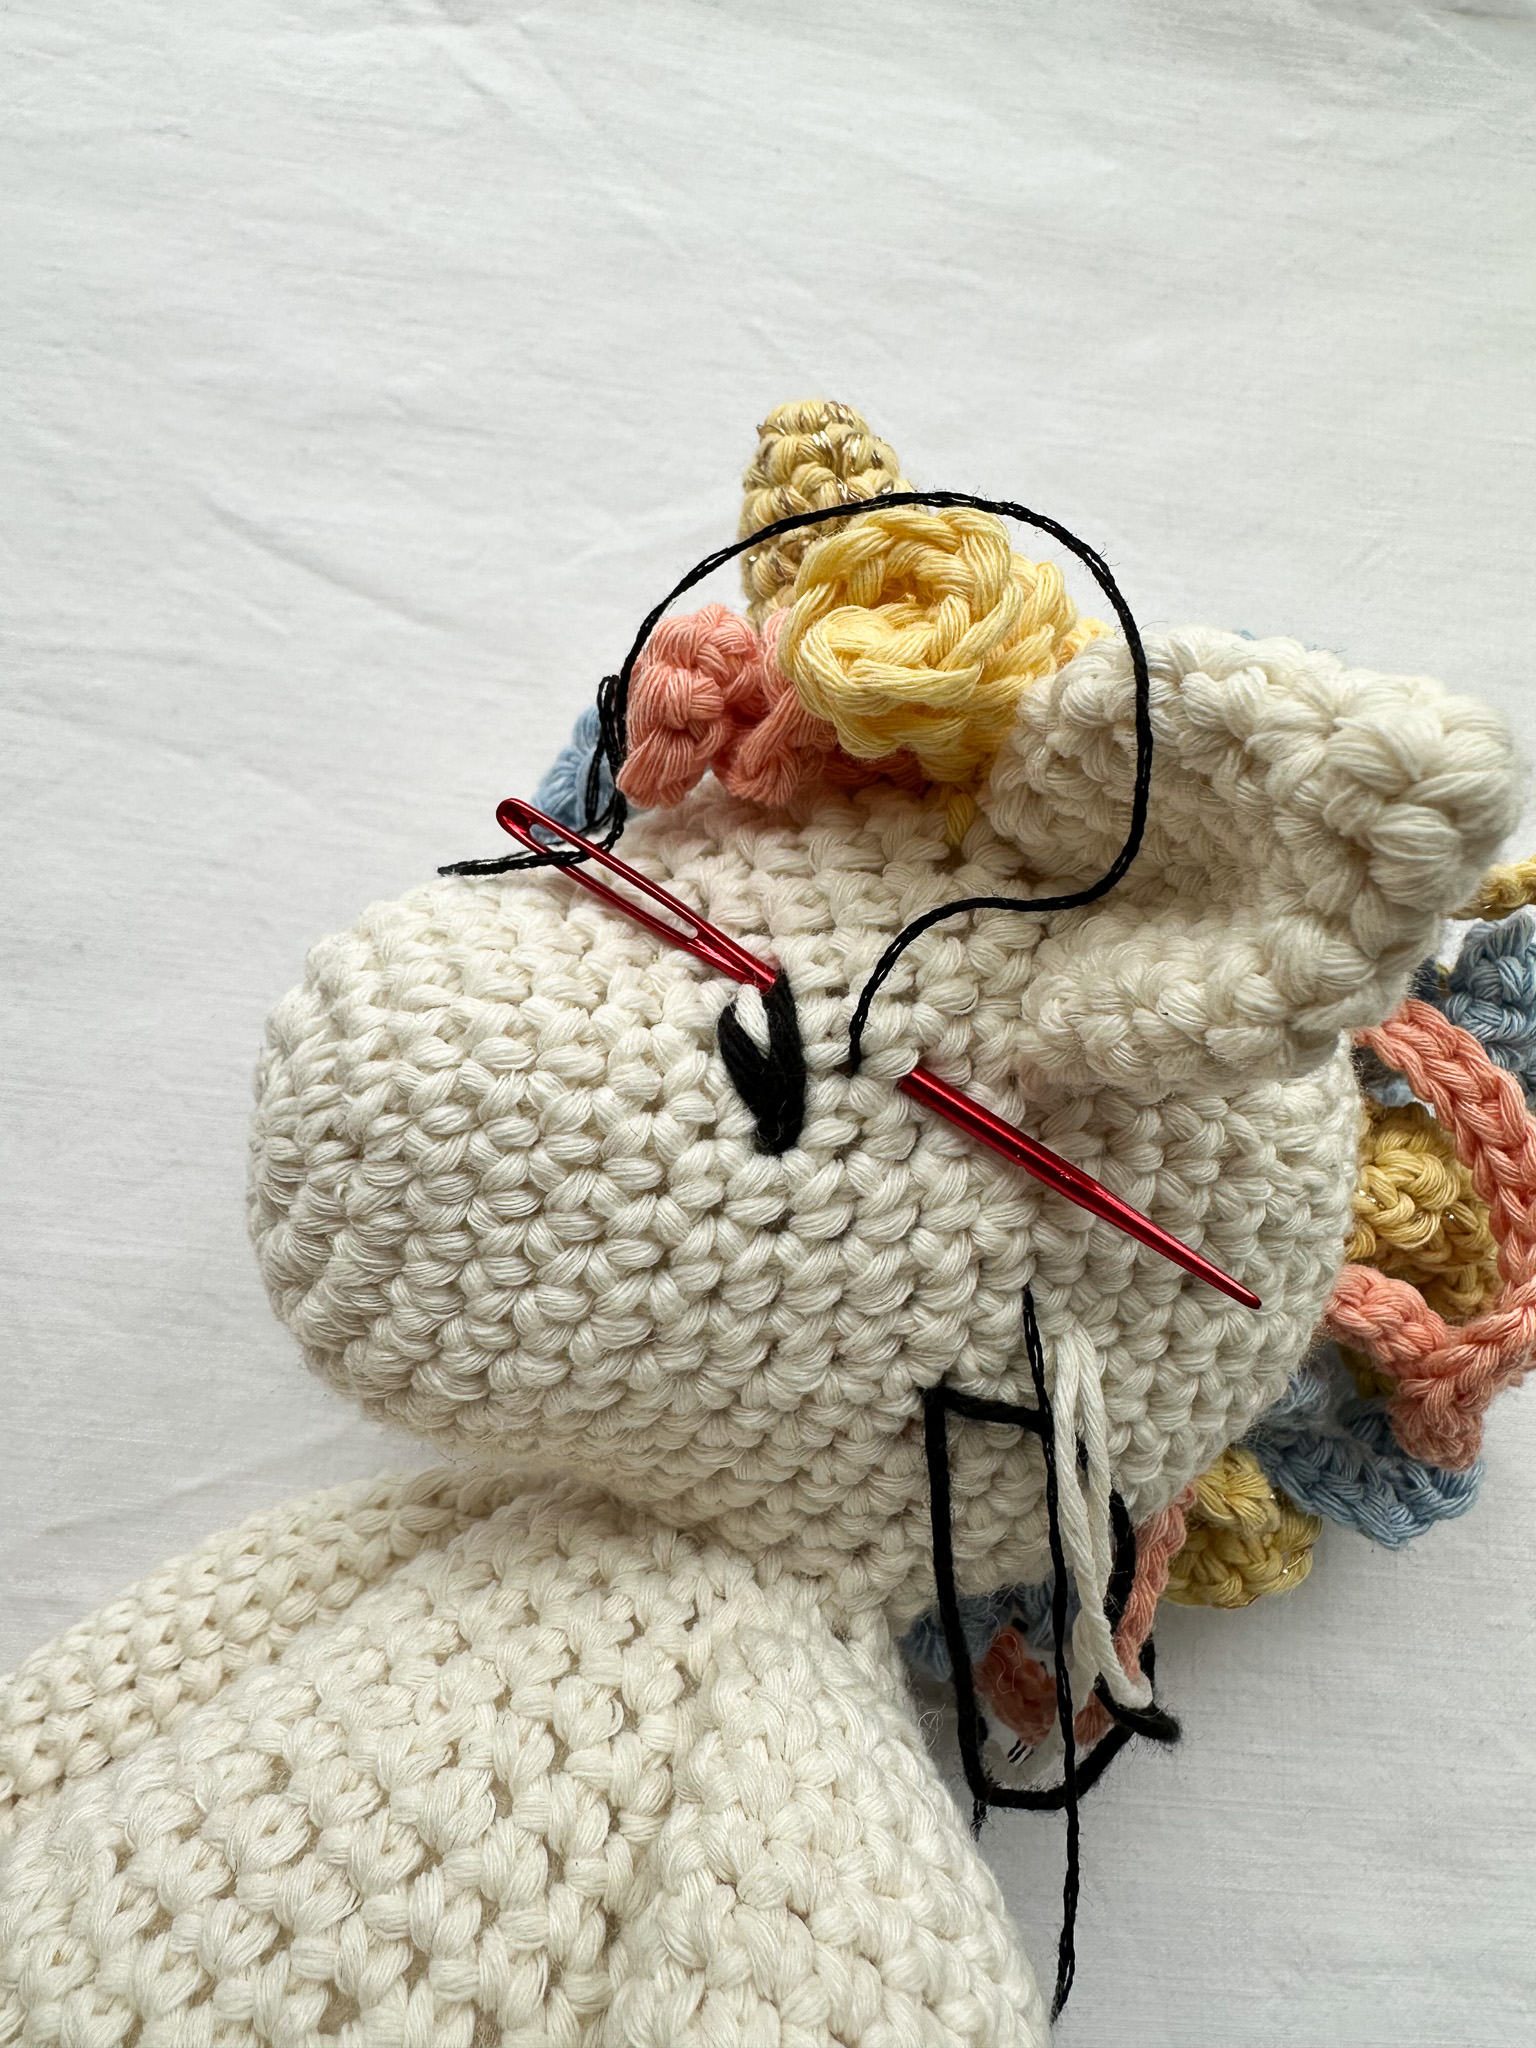
Embroider the eyes:
Start by placing pins to test the eye placement. Place the lower pins below row 8, 2 single crochet stitches on each side of the nose. Place the upper pins 2 rounds directly above the lower pins. Embroider back and forth with black yarn several times until the eye reaches the desired size.
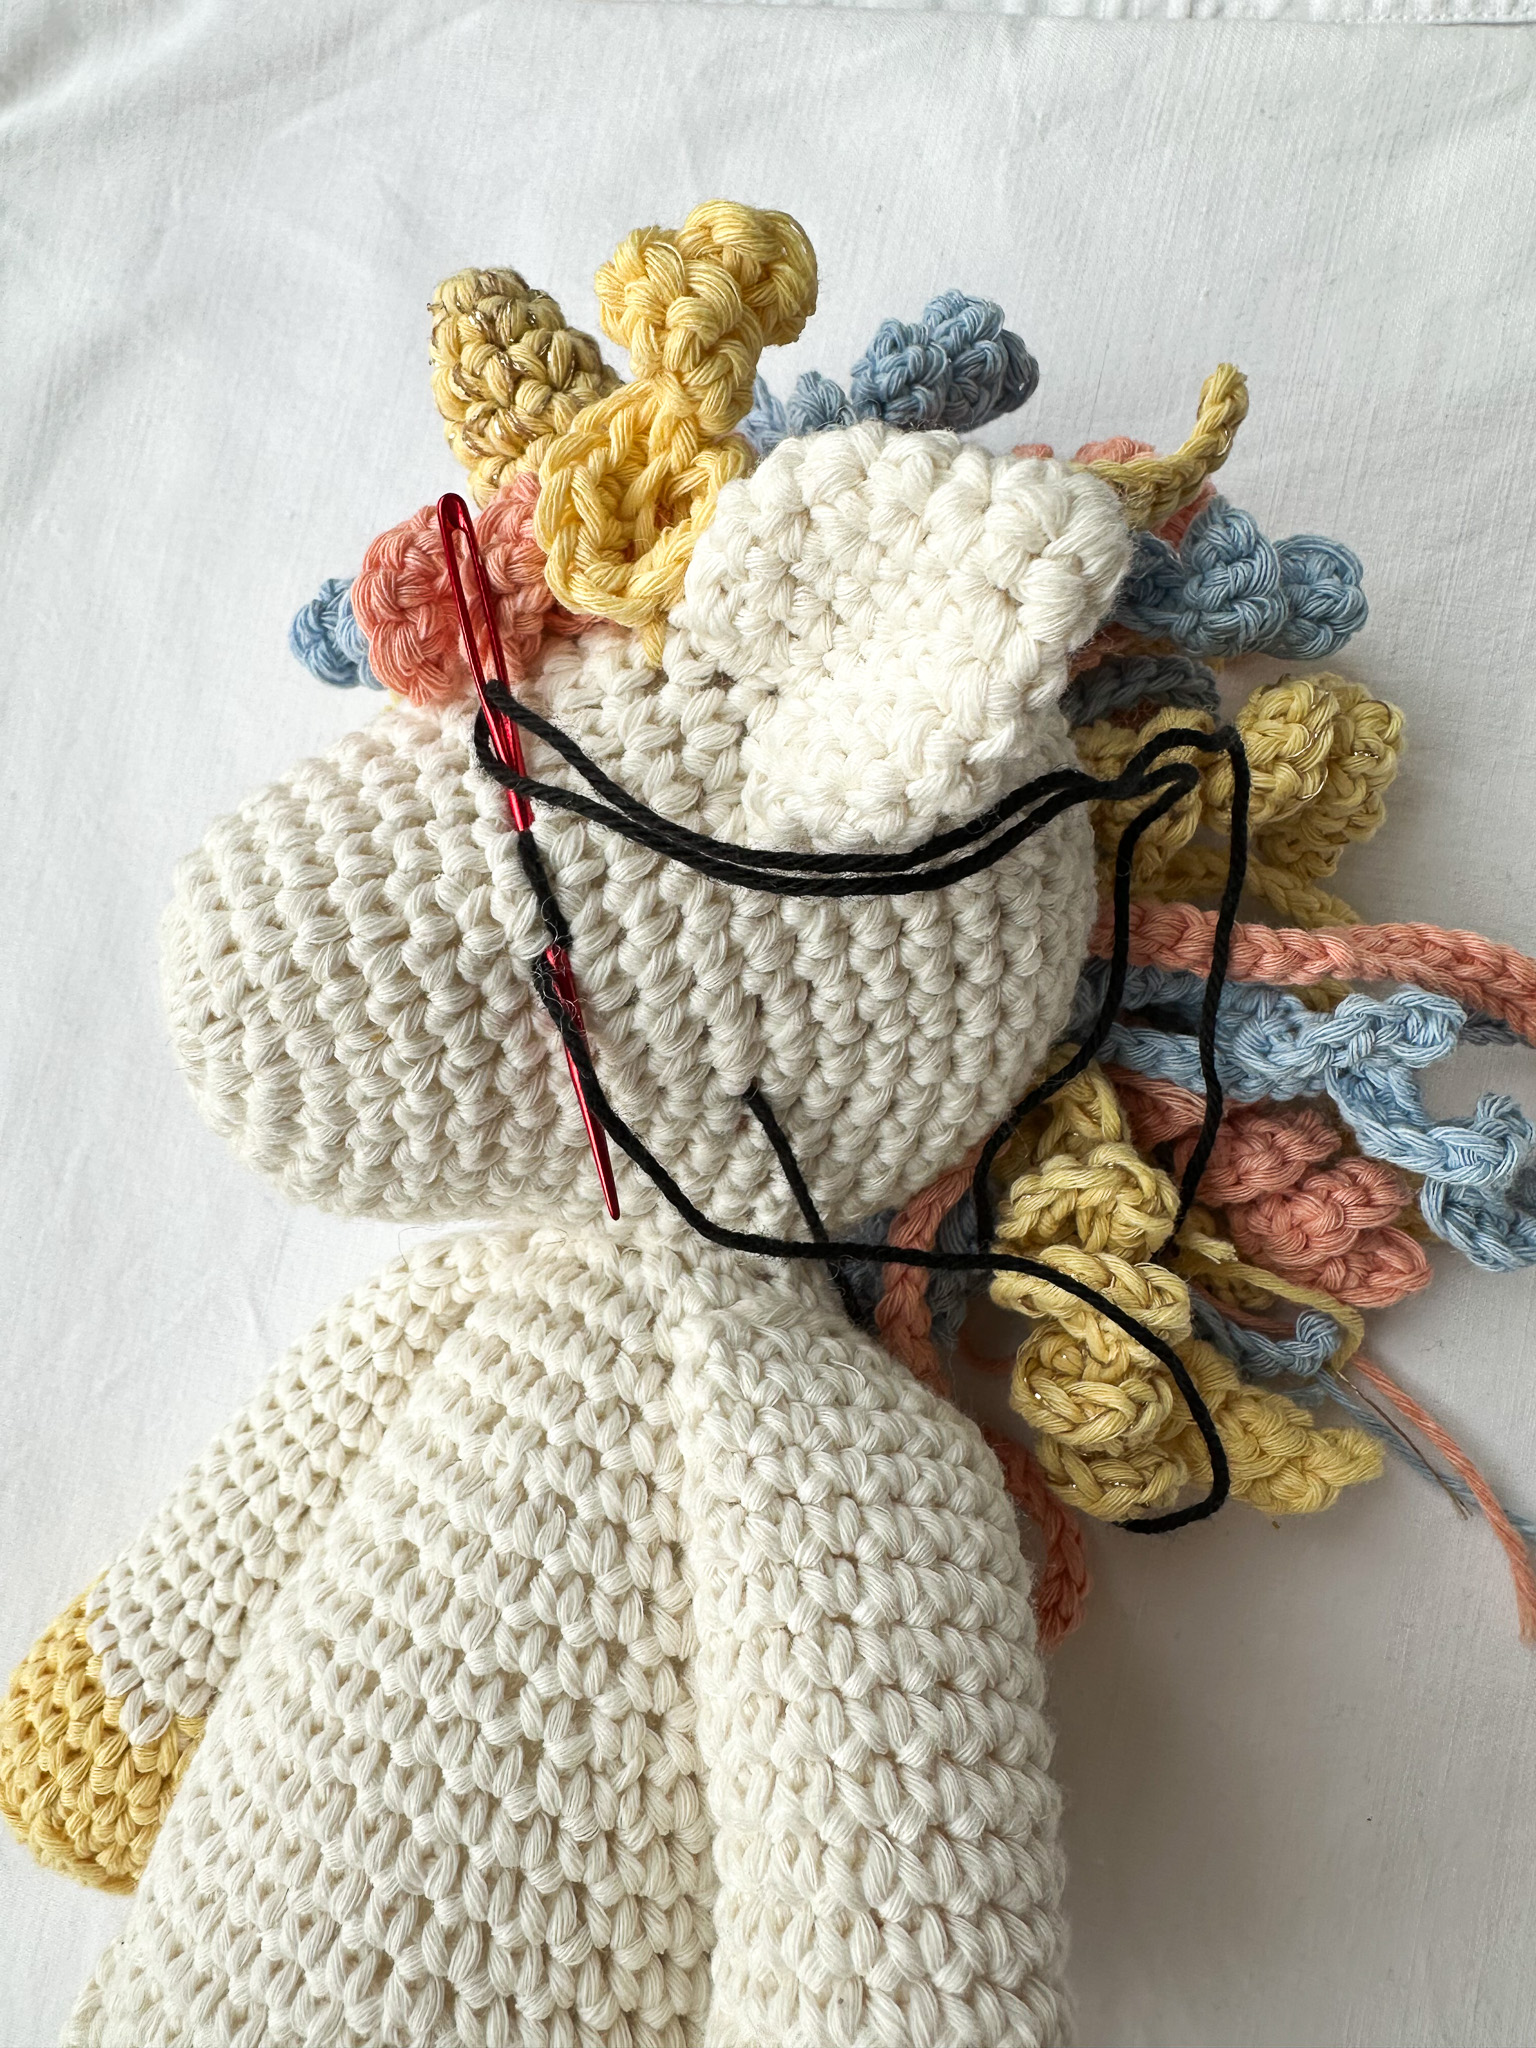
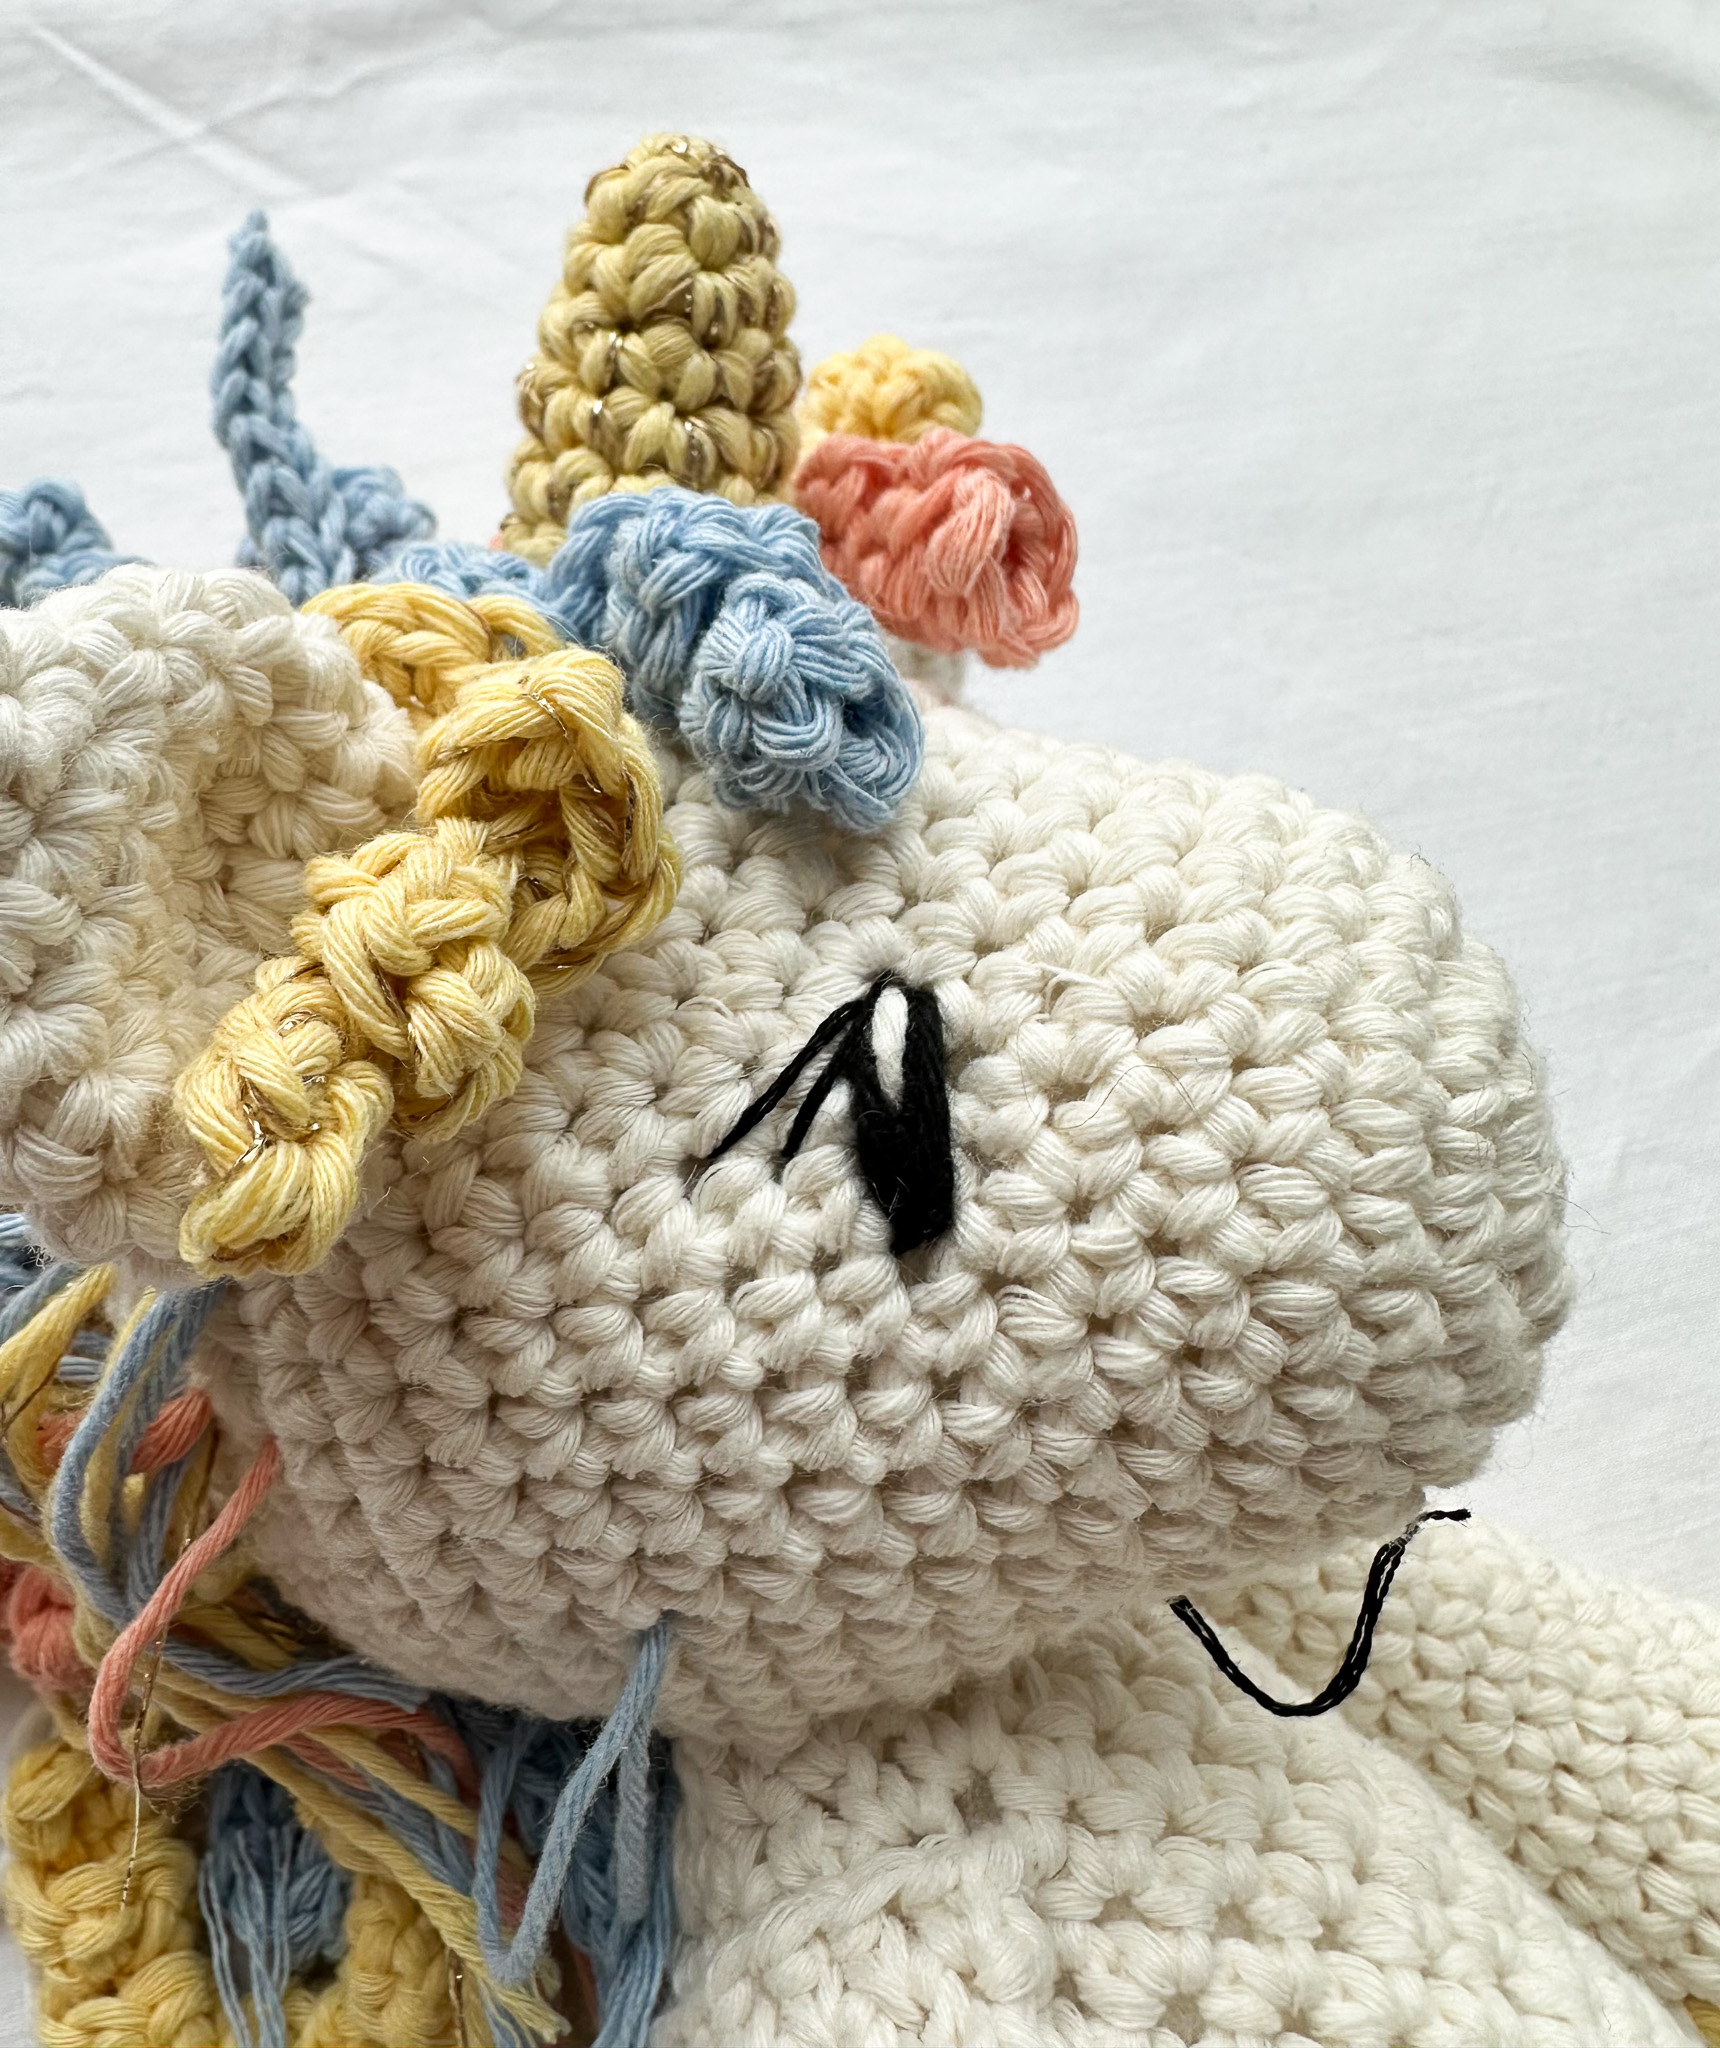
Then take a piece of white yarn and bring the needle out at the top of the eye. Then insert the needle back into the middle of the eye. Secure the yarn.
Embroider the eyelashes:
Use a thinner thread, for example, sewing thread or about 3 strands of embroidery floss. Bring the needle out about 1 single crochet to the side of the eye where you want an eyelash. Insert the needle at the top of the eye. Take the opportunity to bring the needle out at the start of the next eye and embroider that eye as well. Secure the thread.
Embroider the nostrils:
Place pins where you want the nostrils to be. Embroider about 3 rounds around one single crochet stitch with blue yarn. If you want them to stand out more, you can embroider with a thin sewing thread in a darker shade on the sides.
The Unicorn is done!
Instruktionstext (avancerad/termer):
his part of the instructions uses crochet terminology. If you need extra help along the way with more pictures and short videos, see the simpler section.
Abbreviations (US terms):
MR = Magic Ring
sc = Single Crochet
inc = 2 sc in the same stitch
dec = 2 sc together in the same stitch
sl st = Slip Stitch
ch = Chain
blo = Back Loop Only Crochet
st(s) = Stitch(es)
(..) = Total stitches in the round
[..] = All instructions inside brackets are worked in the same stitch
*…* = Repeat instructions inside the asterisks
Step 1 – Tip for keeping track of rounds:
Cut a small piece of yarn, preferably a different color than your working yarn, and place it under the working yarn before you start the first stitch of each round. This way, stitch 1 of each round will be just to the left of the yarn tail, making it easy to see when the round is complete. You can then move the tail under the yarn again to mark the start of the next round.
Body (white yarn)
Round 1: 6 sc in MR
Round 2: inc x6 (12)
Round 3: *1 sc, inc* x6 (18)
Round 4: *2 sc, inc* x6 (24)
Round 5: *3 sc, inc* x6 (30)
Round 6: *4 sc, inc* x6 (36)
Round 7: *5 sc, inc* x6 (42)
Rounds 8–13: 42 sc (6 rounds total)
Round 14: *5 sc, dec* x6 (36)
Rounds 15–18: 36 sc (4 rounds total)
Round 19: *4 sc, dec* x6 (30)
Rounds 20–23: 30 sc (4 rounds total)
Round 24: *3 sc, dec* x6 (24)
Rounds 25–27: 24 sc (3 rounds total)
Round 28: *2 sc, dec* x6 (18)
Start stuffing the body with fiberfill.
Round 29: *1 sc, dec* x6 (12)
Add more fiberfill until the body is fully stuffed. Proper stuffing will give a nicer and firmer shape. Finish off and cut the yarn, leaving a long tail for sewing.
Head (white yarn)
Round 1: 8 sc in MR
Round 2: inc x8 (16)
Round 3: *inc x4, 4 sc* x2 (24)
Rounds 4–8: 24 sc (5 rounds total)
Round 9: *5 sc, inc* x4 (28)
Round 10: *6 sc, inc* x4 (32)
Round 11: *7 sc, inc* x4 (36)
Round 12: *8 sc, inc* x4 (40)
Round 13: *9 sc, inc* x4 (44)
Rounds 14–17: 44 sc (4 rounds total)
Round 18: 13 sc, dec, 20 sc, dec, 7 sc (42)
Round 19: *5 sc, dec* x6 (36)
Round 20: 36 sc (36)
Round 21: *4 sc, dec* x6 (30)
Round 22: *3 sc, dec* x6 (24)
Round 23: *2 sc, dec* x6 (18)
Start stuffing the head with fiberfill.
Round 24: *1 sc, dec* x6 (12)
Add more fiberfill until the head is fully stuffed. Proper stuffing gives a nicer and firmer shape.
Round 25: dec x6 (6)
Finish off but leave a long yarn tail. Thread the tail onto a yarn needle and pass it through the BPdc of the 6 remaining stitches in the ring (clockwise). Pull the yarn tail tight to close the hole. Secure the end with a few tight knots and trim.
Ears – Make 2 (white yarn)
Round 1: 4 sc in MR
Round 2: 4 sc (4)
Round 3: inc x4 (8)
Round 4: *1 sc, inc* x4 (12)
Round 5: *2 sc, inc* x4 (16)
Rounds 6–7: 16 sc (2 rounds total)
Round 8: *2 sc, dec* x4 (12)
Finish off and cut the yarn, leaving a long tail for sewing.
Horn (yellow yarn + 2 strands of metallic gold thread)
Round 1: 4 sc in MR
Round 2: *1 sc, inc* x2 (6)
Round 3: *2 sc, inc* x2 (8)
Round 4: 8 sc (8)
Round 5: *3 sc, inc* x2 (10)
Round 6: 10 sc (10)
Finish with a sl st. Cut the yarn, leaving a long tail. Attach the gold thread. The yellow yarn is used later to sew the horn onto the head.
Legs – Make 2 (yellow + white yarn)
Start with yellow yarn:
Round 1: 6 sc in MR
Round 2: inc x6 (12)
Round 3: *1 sc, inc* x6 (18)
Round 4: *2 sc, inc* x6 (24)
Round 5: 24 sc in BPdc (24)
Rounds 6–8: 24 sc (3 rounds total)
Switch to white yarn:
Round 9: *6 sc, dec* x3 (21)
Rounds 10–21: 21 sc (12 rounds total)
Round 22: *5 sc, dec* x3 (18)
Crochet 9 more sc (or the number needed) so that the color change seam on the back of the leg is in the right place (see yellow pin in the picture).
Stuff the leg with fiberfill up to about ⅔ of its length (see yellow pin). Close the leg by working 8 sc through both layers. Leave a long yarn tail for sewing the leg onto the body.
Arms – Make 2 (yellow + white yarn)
Start with yellow yarn:
Round 1: 6 sc in MR
Round 2: inc x6 (12)
Round 3: *1 sc, inc* x6 (18)
Round 4: 18 sc in BPdc (18)
Rounds 5–7: 18 sc (3 rounds total)
Switch to white yarn:
Round 8: *4 sc, dec* x3 (15)
Rounds 9–21: 15 sc (13 rounds total)
Crochet 7 more sc (or the number needed) so that the color change seam on the back of the arm is in the correct place.
Stuff the arm with fiberfill and close it by working 6 sc through both layers. Leave a long yarn tail for sewing the arm onto the body.
Mane and Tail (about 50 strands total)
For the mane and tail, mix curled strands and straight strands in different lengths and colors to make the hair look full and dynamic.
- Longest strands: 25 ch
- Shortest strands: 15 ch
- For the forelock and top of the head, use the shortest strands (15 ch)
- The lower parts of the head use longer strands, but it looks best to mix lengths
- Tail strands: about 20–22 ch
Curled strands:
- Chain the desired number of stitches.
- Work 2 sc in each chain stitch.
- For tighter curls, you can do 3 sc in each chain stitch.
- Leave a long yarn tail for sewing.
Straight strands:
- Chain the desired number of stitches.
- Work 1 sl st in each chain stitch.
- Leave a long yarn tail for sewing.
The unicorn in the picture has 40 strands in the mane and 12 strands in the tail.
Assembly Tips
See the videos for how to sew all the parts together.
Start by attaching the head to the body:
- Position the head so the muzzle tilts slightly downward and is not completely horizontal.
- The muzzle is slightly raised and not fully round, so rotate the head as needed to make the muzzle lie horizontally.
- Use the yarn tail from the body for sewing.
- You may need to add a little more fiberfill in the neck before closing completely.
- Sew around two rounds to secure the head firmly so it does not tilt in any direction.
Attach the horn and ears:
- Sew the horn centered on the head, but angled slightly forward, around rounds 12–15 of the head.
- Before closing the hole, stuff the horn with fiberfill.
- Fold the ears slightly into a C-shape and sew them at the same height as the horn, leaving about 2–3 stitches between the horn and each ear.
- See the pictures for placement from front and side views.
- Try to maintain the C-shape when sewing the ears, and make sure to sew through both layers for stability.
Attach the legs and arms:
- Pin the legs:
- Pin both legs between rounds 9–10 of the body (counting from the magic ring at the bottom).
- Make sure to turn the color-change seam inward.
- Double-check from multiple angles that the legs are centered relative to the head.
- Sew the legs in place.
- Reference the picture:
- Legs are pinned at the red pins.
- Arms are pinned at the green pins.
Attach the arms:
- Pin both arms in a slightly angled position (see picture).
- This will place the arms slightly in front of the body.
- Carefully check that both arms are positioned the same and are centered relative to the head and legs.
Attach the mane:
- Now it’s time to sew on the mane.
- Start by pinning two edges along the entire head. These edges will act as a guide—you will stay within them when attaching the strands.
Sewing the mane:
- It’s a bit easier to start from the bottom of the head.
- Try to mix shapes, lengths, and colors to make the mane look full.
- The closer you get to the horn, use shorter and shorter strands.
- Attach each strand by tying a tight knot 2–3 times.
- Secure the yarn ends after knotting.
Forelock (bangs):
- Sew on 4 short strands (15 chains long) just behind the ear and horn.
- Also sew the strands halfway down so the forelock stays forward toward the face and doesn’t fall back into the mane.
Attach the tail:
- Sew the tail centered between the legs, between rounds 9–11 of the body (counting from the magic ring at the bottom).
- Make the tail about 5 stitches wide.
- Use approximately 12 strands for the tail.
Embroider the eyes:
- Start by placing pins to test the placement of the eyes.
- Place the lower pins below row 8, 2 sc from each side of the nose.
- Place the upper pins 2 rounds directly above the lower pins.
- Embroider back and forth with black yarn several times until the eyes reach the desired size.
- Take a piece of white yarn and bring the needle out at the top of the eye.
- Then insert the needle back into the center of the eye.
- Secure the yarn.
This creates the small highlight/shine in the eye.
Embroider the eyelashes:
- Use a thin thread, such as sewing thread or about 3 strands of embroidery floss.
- Bring the needle out about 1 sc to the side of the eye where you want the eyelash.
- Insert the needle at the top of the eye.
- Take the opportunity to bring the needle out at the start of the next eye and embroider that eye in the same way.
- Secure the thread.
Embroider the nostrils:
- Place pins where you want the nostrils to be.
- Embroider about 3 rounds around a single crochet stitch using blue yarn.
- If you want the nostrils to stand out more, you can embroider with a thin sewing thread in a darker shade on the sides.
The Unicorn is done!
The rights to this pattern belong to MYO Make Your Own. The pattern or its pictures may not be copied, shared or resold either in parts or in its entirety, but you may sell items you have crocheted from this pattern. If you have questions about the pattern, contact MYO at hello@makeyourown.se.
Safety
Secure all yarn ends carefully so nothing can come undone. Always check that the unicorn is intact and safe to use before giving it to a child. The mane and tail must not be made longer than stated in the pattern, as this may pose a safety risk.
If you sell or give away the finished product, you are responsible for informing the recipient about these safety instructions.
Tips for keeping track of the rounds
Use a stitch marker and place it in your last stitch. Alternatively, cut a piece of yarn (preferably in a different color from the one you are crocheting with) and place it under the yarn strand (coming from your yarn ball) before making the first stitch of each round.
This way, stitch 1 of each round will end up just to the left of the yarn end, making it easy to see when you have completed a round. Then you can pull out the yarn piece and place it under the yarn again at the beginning of the next round.
In the photos in the instructions, a pink yarn piece is used for this purpose.
Body (white yarn)
Round 1: Crochet 6 single crochets into a magic ring. If you are unsure how to do this, see the video below (Magic Ring Single Crochet).
Round 2: Crochet 2 single crochets in each stitch. You will have 12 stitches in total in the round.
Round 3: Crochet 1 single crochet in the first stitch. Then crochet 2 single crochets in the 2nd stitch (an increase). Repeat this pattern (increase in every second stitch) all the way around. You will have 18 stitches in total in the round.
Round 4: Crochet 1 single crochet in each of the first 2 stitches. Then make an increase. Repeat this pattern (increase in every third stitch) all the way around. You will have 24 stitches in total in the round.
Round 5: Crochet 1 single crochet in each of the first 3 stitches. Then make an increase. Repeat this pattern (increase in every fourth stitch) all the way around. You will have 30 stitches in total in the round.
Round 6: Crochet 1 single crochet in each of the first 4 stitches, then make an increase. Repeat this pattern (increase in every 5th stitch) all the way around. You will have 36 stitches in total in the round.
Round 7: Crochet 1 single crochet in each of the first 5 stitches, then make an increase. Repeat this pattern (increase in every 6th stitch) all the way around. You will have 42 stitches in total in the round.
Rounds 8–13: Crochet 42 single crochets (1 single crochet in each stitch) for a total of 6 rounds. A tip is to keep the helper yarn before the first stitch of round 8 so it’s easier to count how many rounds you have made. Alternatively, keep the stitch marker in place.
Round 14: Crochet 1 single crochet in each of the first 5 stitches. Crochet the next 2 stitches together with a single crochet (a decrease, stitches 6 and 7). Repeat this pattern (decrease in every 6th stitch) all the way around. You will have 36 stitches in total in the round.
If you are unsure how to crochet a decrease, see the video below.
Rounds 15–18: Crochet 36 single crochets (1 single crochet in each stitch) for a total of 4 rounds.
Round 19: Crochet 1 single crochet in each of the first 4 stitches, then make a decrease. Repeat this pattern (decrease in stitches 5 and 6) all the way around. You will have 30 stitches in total in the round.
Rounds 20–23: Crochet 30 single crochets (1 single crochet in each stitch) for a total of 4 rounds.
Round 24: Crochet 1 single crochet in each of the first 3 stitches, then make a decrease. Repeat this pattern (decrease in every 4th stitch) all the way around. You will have 24 stitches in total in the round.
Rounds 25–27: Crochet 24 single crochets (1 single crochet in each stitch) for a total of 3 rounds.
Round 28: Crochet 1 single crochet in each of the first 2 stitches, then make a decrease. Repeat this pattern (decrease in every 3rd stitch) all the way around. You will have 18 stitches in total in the round.
Now begin stuffing the body with filling.
Round 29: Crochet 1 single crochet, then make a decrease. Repeat this pattern (decrease in every second stitch) all the way around. You will have 12 stitches in total in the round.
Add more stuffing until no more fits. You will get a nicer and firmer shape if you stuff it well. Just be careful not to push in too much so that the stuffing shows through between the stitches.
Finish off and cut the yarn, but leave a long yarn tail.
Head (white yarn)
Round 1: Crochet 8 single crochets into a magic ring.
Round 2: Crochet 2 single crochets in each stitch (increases). You will have 16 stitches in total in the round.
Round 3: Crochet 2 single crochets in each stitch (increases) for 4 stitches. Then crochet 4 single crochets. Repeat this once more, i.e., 4 increases followed by 4 single crochets. You will have 24 stitches in total in the round.
Rounds 4–8: Crochet 24 single crochets (1 single crochet in each stitch) for a total of 5 rounds.
Round 9: Crochet 1 single crochet in each of the first 5 stitches, then make an increase. Repeat this pattern (increase in every 6th stitch) all the way around. You will have 28 stitches in total in the round.
Round 10: Crochet 1 single crochet in each of the first 6 stitches, then make an increase. Repeat this pattern (increase in every 7th stitch) all the way around. You will have 32 stitches in total in the round.
Round 11: Crochet 1 single crochet in each of the first 7 stitches, then make an increase. Repeat this pattern (increase in every 8th stitch) all the way around. You will have 36 stitches in total in the round.
Round 12: Crochet 1 single crochet in each of the first 8 stitches, then make an increase. Repeat this pattern (increase in every 9th stitch) all the way around. You will have 40 stitches in total in the round.
Round 13: Crochet 1 single crochet in each of the first 9 stitches, then make an increase. Repeat this pattern (increase in every 10th stitch) all the way around. You will have 44 stitches in total in the round.
Rounds 14–17: Crochet 44 single crochets (1 single crochet in each stitch) for a total of 4 rounds.
Round 18: Crochet 13 single crochets. Crochet the next 2 stitches together as one single crochet (a decrease).
Crochet 20 single crochets. Crochet the next 2 stitches together as a decrease.
Crochet 7 single crochets.
You will have 42 stitches in total in the round.
Round 19: Crochet 1 single crochet in each of the first 5 stitches, then make a decrease. Repeat this pattern (decrease in every 6th stitch) all the way around. You will have 36 stitches in total in the round.
Round 20: Crochet 36 single crochets in one round.
Round 21: Crochet 1 single crochet in each of the first 4 stitches, then make a decrease. Repeat this pattern (decrease in every 5th stitch) all the way around. You will have 30 stitches in total in the round.
Round 22: Crochet 1 single crochet in each of the first 3 stitches, then make a decrease. Repeat this pattern (decrease in every 4th stitch) all the way around. You will have 24 stitches in total in the round.
Round 23: Crochet 1 single crochet in each of the first 2 stitches, then make a decrease. Repeat this pattern (decrease in every 3rd stitch) all the way around. You will have 18 stitches in total in the round.
Now begin stuffing the head with filling.
Round 24: Crochet 1 single crochet, then make a decrease. Repeat this pattern (decrease in every second stitch) all the way around. You will have 12 stitches in total in the round.
Add more stuffing until no more fits. You will get a nicer and firmer shape if you stuff it well. Make sure the stuffing does not show between the stitches.
Round 25: Decrease in every stitch until you have 6 single crochets remaining.
Finish off but leave a long yarn tail. Thread the yarn onto a tapestry needle and go through the outer loop of each of the 6 remaining stitches in the round (go clockwise). Then pull the yarn tight to close the hole. Secure the end with a few tight knots and cut off the excess yarn.
Ears – make 2 (white yarn)
Round 1: Crochet 4 single crochets into a magic ring.
Round 2: Crochet 1 single crochet in each stitch. You will have 4 stitches in total in the round.
Round 3: Crochet 2 single crochets in each stitch (increases). You will have 8 stitches in total in the round.
Round 4: Crochet 1 single crochet in the first stitch, then make an increase. Repeat this pattern (increase in every second stitch) all the way around. You will have 12 stitches in total in the round.
Round 5: Crochet 1 single crochet in each of the first 2 stitches, then make an increase. Repeat this pattern (increase in every third stitch) all the way around. You will have 16 stitches in total in the round.
Rounds 6–7: Crochet 16 single crochets (1 single crochet in each stitch) for a total of 2 rounds.
Round 8: Crochet 1 single crochet in each of the first 2 stitches, then make a decrease. Repeat this pattern (decrease in every third stitch) all the way around. You will have 12 stitches in total in the round.
Finish off and cut the yarn, but leave a long yarn tail.
Horn (yellow yarn + 2 strands of gold thread)
Round 1: Crochet 4 single crochets into a magic ring.
Round 2: Crochet 1 single crochet in the first stitch, then make an increase. Repeat this pattern (increase in every second stitch) all the way around. You will have 6 stitches in total in the round.
Round 3: Crochet 1 single crochet in each of the first 2 stitches, then make an increase. Repeat this pattern (increase in every third stitch) all the way around. You will have 8 stitches in total in the round.
Round 4: Crochet 1 single crochet in each stitch. You will have 8 stitches in total in the round.
Round 5: Crochet 1 single crochet in each of the first 3 stitches, then make an increase. Repeat this pattern (increase in every fourth stitch) all the way around. You will have 10 stitches in total in the round.
Round 6: Crochet 1 single crochet in each stitch. You will have 10 stitches in total in the round.
Finish with a slip stitch. Cut the yarn, but leave a long yarn tail. Attach the gold thread. The yellow yarn will be used to sew the horn onto the unicorn.
Legs – make 2 (yellow + white yarn)
Start with yellow yarn
Round 1: Crochet 6 single crochets into a magic ring.
Round 2: Make an increase in each stitch. You will have 12 stitches in total in the round.
Round 3: Crochet 1 single crochet in the first stitch, then make an increase. Repeat this pattern (increase in every second stitch) all the way around. You will have 18 stitches in total in the round.
Round 4: Crochet 1 single crochet in each of the first 2 stitches, then make an increase. Repeat this pattern (increase in every third stitch) all the way around. You will have 24 stitches in total in the round.
Round 5: Crochet 24 single crochets, but only in the back loop of each stitch (the outer loop of the two loops on each stitch). You will still have 24 stitches in total in the round.
Rounds 6–8: Crochet 24 single crochets (1 single crochet in each stitch) for a total of 3 rounds.
On the very last stitch of round 8, do not complete the final yarn-over with yellow yarn. Instead, make a slip knot with white yarn and complete the last yarn-over with white yarn. This completes the color change.
Round 9: Crochet 1 single crochet in each of the first 6 stitches, then make a decrease. Repeat this pattern (decrease in every 7th stitch) all the way around. You will have 21 stitches in total in the round.
Rounds 10–21: Crochet 21 single crochets (1 single crochet in each stitch) for a total of 12 rounds.
Round 22: Crochet 1 single crochet in each of the first 5 stitches, then make a decrease. Repeat this pattern (decrease in every 6th stitch) all the way around. You will have 18 stitches in total in the round.
Next, crochet an additional 9 single crochets (about half a round) or as many as needed so that the color change seam ends up on the back of the leg (see needle in the photo).
Stuff the leg with filling up to about ⅔ of its height (see yellow needle in the photo). Flatten the leg and close it by crocheting 8 single crochets through both layers.
Leave a long yarn tail for sewing the leg onto the body.
Arms – make 2 (yellow + white yarn)
Start with yellow yarn
Round 1: Crochet 6 single crochets into a magic ring.
Round 2: Make an increase in each stitch. You will have 12 stitches in total in the round.
Round 3: Crochet 1 single crochet in the first stitch, then make an increase. Repeat this pattern (increase in every second stitch) all the way around. You will have 18 stitches in total in the round.
Round 4: Crochet 18 single crochets, but only in the back loop of each stitch (the outer loop of the two loops on each stitch). You will still have 18 stitches in total in the round.
If you are unsure how to crochet in the back loop only, see the video (Back Loop Only).
Rounds 5–7: Crochet 18 single crochets (1 single crochet in each stitch) for a total of 3 rounds.
On the very last stitch of round 7, do not complete the final yarn-over with yellow yarn. Instead, make a slip knot with white yarn and complete the last yarn-over with white yarn. This completes the color change.
Round 8: Crochet 1 single crochet in each of the first 4 stitches, then make a decrease. Repeat this pattern (decrease in every 6th stitch) all the way around. You will have 15 stitches in total in the round.
Rounds 9–21: Crochet 15 single crochets (1 single crochet in each stitch) for a total of 13 rounds.
Next, crochet an additional 7 single crochets (or as many as needed) so that the color change seam ends up on the back of the arm.
Stuff the arm with filling and close it by crocheting 6 single crochets through both layers.
Leave a long yarn tail for sewing the arm onto the body.
Mane and Tail (approx. 50 pieces)
For the mane and tail, create a mix of curled strands and straight lengths in different colors and lengths to give the hair a dynamic and full appearance.
- The longest lengths are 25 chain stitches, and the shortest lengths are 15 chain stitches.
- Use shorter lengths (15 chains) for the bangs and top of the head.
- As you move down the head, make the strands gradually longer, though the best result comes from mixing different lengths.
- For the tail, use strands about 20–22 chain stitches long.
Curled strands:
- Chain the desired number of stitches.
- Crochet 2 single crochets in each chain stitch.
- For an even tighter curl, crochet 3 single crochets in each chain stitch.
Leave a long yarn tail for attaching each strand to the unicorn.
Straight strands:
- Chain the desired number of stitches.
- Make a slip stitch in each chain stitch.
- Leave a long yarn tail for attaching each strand.
In the pictured unicorn, there are 40 strands in the mane and 12 strands in the tail.
Assembly
Tips: Watch the videos to see how to sew all the parts together.
Start by attaching the head to the body.
- Position the head so that the muzzle tilts slightly downward rather than perfectly horizontal.
- The muzzle is slightly raised and not completely round, so rotate the head so that the muzzle lies horizontally.
- Use the yarn tail from the body to sew with.
- You may need to add a bit more stuffing in the neck before closing completely.
- Sew around 2 rounds to ensure the head is secure and does not tilt in any direction.
In the video below, all parts are already assembled, but in this pattern, we begin by attaching the head to the body.
Sew the horn centered on the head, but angled slightly forward, approximately around rounds 12–15 of the head.
Before closing the opening, stuff the horn with fiberfill. Fold the ear slightly (C-shape) and sew the ears at the same height as the horn, with about 2–3 stitches between the horn and the ear. See the pictures for placement from the front and from the side. Try to maintain the C-shape while sewing the ear on, and make sure to sew through both layers.
Pin both legs between rounds 9–10 on the body (counting from the magic ring at the bottom). Make sure to turn the color-change seam inward. Double-check carefully from several different angles that the legs are centered relative to the head’s position. Sew the legs in place.
See the picture for where to pin the legs at the red pins and the arms at the green pins.
Pin both arms in a slightly angled position, see picture. This will place the arms slightly in front of the body. Carefully check that both arms are positioned the same and are centered relative to the head and the legs.
Now it’s time to sew on the mane. Start by pinning two edges along the entire head that you will stay within when attaching the strands.
It’s a bit easier to start from the bottom. Try to mix shapes, lengths, and colors to make the mane full. The closer you get to the horn, use shorter and shorter strands. Attach them by tying a tight knot 2–3 times. Secure the yarn ends.
Forelock (bangs): Sew on 4 short strands (15 chain stitches long) just behind the ear and horn. Also sew the strands down halfway so that the forelock stays forward toward the face and doesn’t fall back into the mane.
Sew the tail centered between the legs, between rounds 9–11 of the body (counting from the magic ring), and about 5 stitches wide. Use about 12 strands for the tail.
Embroider the eyes:
Start by placing pins to test the eye placement. Place the lower pins below row 8, 2 single crochet stitches on each side of the nose. Place the upper pins 2 rounds directly above the lower pins. Embroider back and forth with black yarn several times until the eye reaches the desired size.
Then take a piece of white yarn and bring the needle out at the top of the eye. Then insert the needle back into the middle of the eye. Secure the yarn.
Embroider the eyelashes:
Use a thinner thread, for example, sewing thread or about 3 strands of embroidery floss. Bring the needle out about 1 single crochet to the side of the eye where you want an eyelash. Insert the needle at the top of the eye. Take the opportunity to bring the needle out at the start of the next eye and embroider that eye as well. Secure the thread.
Embroider the nostrils:
Place pins where you want the nostrils to be. Embroider about 3 rounds around one single crochet stitch with blue yarn. If you want them to stand out more, you can embroider with a thin sewing thread in a darker shade on the sides.
The Unicorn is done!
Instruktionstext (avancerad/termer):
his part of the instructions uses crochet terminology. If you need extra help along the way with more pictures and short videos, see the simpler section.
Abbreviations (US terms):
MR = Magic Ring
sc = Single Crochet
inc = 2 sc in the same stitch
dec = 2 sc together in the same stitch
sl st = Slip Stitch
ch = Chain
blo = Back Loop Only Crochet
st(s) = Stitch(es)
(..) = Total stitches in the round
[..] = All instructions inside brackets are worked in the same stitch
*…* = Repeat instructions inside the asterisks
Step 1 – Tip for keeping track of rounds:
Cut a small piece of yarn, preferably a different color than your working yarn, and place it under the working yarn before you start the first stitch of each round. This way, stitch 1 of each round will be just to the left of the yarn tail, making it easy to see when the round is complete. You can then move the tail under the yarn again to mark the start of the next round.
Body (white yarn)
Round 1: 6 sc in MR
Round 2: inc x6 (12)
Round 3: *1 sc, inc* x6 (18)
Round 4: *2 sc, inc* x6 (24)
Round 5: *3 sc, inc* x6 (30)
Round 6: *4 sc, inc* x6 (36)
Round 7: *5 sc, inc* x6 (42)
Rounds 8–13: 42 sc (6 rounds total)
Round 14: *5 sc, dec* x6 (36)
Rounds 15–18: 36 sc (4 rounds total)
Round 19: *4 sc, dec* x6 (30)
Rounds 20–23: 30 sc (4 rounds total)
Round 24: *3 sc, dec* x6 (24)
Rounds 25–27: 24 sc (3 rounds total)
Round 28: *2 sc, dec* x6 (18)
Start stuffing the body with fiberfill.
Round 29: *1 sc, dec* x6 (12)
Add more fiberfill until the body is fully stuffed. Proper stuffing will give a nicer and firmer shape. Finish off and cut the yarn, leaving a long tail for sewing.
Head (white yarn)
Round 1: 8 sc in MR
Round 2: inc x8 (16)
Round 3: *inc x4, 4 sc* x2 (24)
Rounds 4–8: 24 sc (5 rounds total)
Round 9: *5 sc, inc* x4 (28)
Round 10: *6 sc, inc* x4 (32)
Round 11: *7 sc, inc* x4 (36)
Round 12: *8 sc, inc* x4 (40)
Round 13: *9 sc, inc* x4 (44)
Rounds 14–17: 44 sc (4 rounds total)
Round 18: 13 sc, dec, 20 sc, dec, 7 sc (42)
Round 19: *5 sc, dec* x6 (36)
Round 20: 36 sc (36)
Round 21: *4 sc, dec* x6 (30)
Round 22: *3 sc, dec* x6 (24)
Round 23: *2 sc, dec* x6 (18)
Start stuffing the head with fiberfill.
Round 24: *1 sc, dec* x6 (12)
Add more fiberfill until the head is fully stuffed. Proper stuffing gives a nicer and firmer shape.
Round 25: dec x6 (6)
Finish off but leave a long yarn tail. Thread the tail onto a yarn needle and pass it through the BPdc of the 6 remaining stitches in the ring (clockwise). Pull the yarn tail tight to close the hole. Secure the end with a few tight knots and trim.
Ears – Make 2 (white yarn)
Round 1: 4 sc in MR
Round 2: 4 sc (4)
Round 3: inc x4 (8)
Round 4: *1 sc, inc* x4 (12)
Round 5: *2 sc, inc* x4 (16)
Rounds 6–7: 16 sc (2 rounds total)
Round 8: *2 sc, dec* x4 (12)
Finish off and cut the yarn, leaving a long tail for sewing.
Horn (yellow yarn + 2 strands of metallic gold thread)
Round 1: 4 sc in MR
Round 2: *1 sc, inc* x2 (6)
Round 3: *2 sc, inc* x2 (8)
Round 4: 8 sc (8)
Round 5: *3 sc, inc* x2 (10)
Round 6: 10 sc (10)
Finish with a sl st. Cut the yarn, leaving a long tail. Attach the gold thread. The yellow yarn is used later to sew the horn onto the head.
Legs – Make 2 (yellow + white yarn)
Start with yellow yarn:
Round 1: 6 sc in MR
Round 2: inc x6 (12)
Round 3: *1 sc, inc* x6 (18)
Round 4: *2 sc, inc* x6 (24)
Round 5: 24 sc in BPdc (24)
Rounds 6–8: 24 sc (3 rounds total)
Switch to white yarn:
Round 9: *6 sc, dec* x3 (21)
Rounds 10–21: 21 sc (12 rounds total)
Round 22: *5 sc, dec* x3 (18)
Crochet 9 more sc (or the number needed) so that the color change seam on the back of the leg is in the right place (see yellow pin in the picture).
Stuff the leg with fiberfill up to about ⅔ of its length (see yellow pin). Close the leg by working 8 sc through both layers. Leave a long yarn tail for sewing the leg onto the body.
Arms – Make 2 (yellow + white yarn)
Start with yellow yarn:
Round 1: 6 sc in MR
Round 2: inc x6 (12)
Round 3: *1 sc, inc* x6 (18)
Round 4: 18 sc in BPdc (18)
Rounds 5–7: 18 sc (3 rounds total)
Switch to white yarn:
Round 8: *4 sc, dec* x3 (15)
Rounds 9–21: 15 sc (13 rounds total)
Crochet 7 more sc (or the number needed) so that the color change seam on the back of the arm is in the correct place.
Stuff the arm with fiberfill and close it by working 6 sc through both layers. Leave a long yarn tail for sewing the arm onto the body.
Mane and Tail (about 50 strands total)
For the mane and tail, mix curled strands and straight strands in different lengths and colors to make the hair look full and dynamic.
- Longest strands: 25 ch
- Shortest strands: 15 ch
- For the forelock and top of the head, use the shortest strands (15 ch)
- The lower parts of the head use longer strands, but it looks best to mix lengths
- Tail strands: about 20–22 ch
Curled strands:
- Chain the desired number of stitches.
- Work 2 sc in each chain stitch.
- For tighter curls, you can do 3 sc in each chain stitch.
- Leave a long yarn tail for sewing.
Straight strands:
- Chain the desired number of stitches.
- Work 1 sl st in each chain stitch.
- Leave a long yarn tail for sewing.
The unicorn in the picture has 40 strands in the mane and 12 strands in the tail.
Assembly Tips
See the videos for how to sew all the parts together.
Start by attaching the head to the body:
- Position the head so the muzzle tilts slightly downward and is not completely horizontal.
- The muzzle is slightly raised and not fully round, so rotate the head as needed to make the muzzle lie horizontally.
- Use the yarn tail from the body for sewing.
- You may need to add a little more fiberfill in the neck before closing completely.
- Sew around two rounds to secure the head firmly so it does not tilt in any direction.
Attach the horn and ears:
- Sew the horn centered on the head, but angled slightly forward, around rounds 12–15 of the head.
- Before closing the hole, stuff the horn with fiberfill.
- Fold the ears slightly into a C-shape and sew them at the same height as the horn, leaving about 2–3 stitches between the horn and each ear.
- See the pictures for placement from front and side views.
- Try to maintain the C-shape when sewing the ears, and make sure to sew through both layers for stability.
Attach the legs and arms:
- Pin the legs:
- Pin both legs between rounds 9–10 of the body (counting from the magic ring at the bottom).
- Make sure to turn the color-change seam inward.
- Double-check from multiple angles that the legs are centered relative to the head.
- Sew the legs in place.
- Reference the picture:
- Legs are pinned at the red pins.
- Arms are pinned at the green pins.
Attach the arms:
- Pin both arms in a slightly angled position (see picture).
- This will place the arms slightly in front of the body.
- Carefully check that both arms are positioned the same and are centered relative to the head and legs.
Attach the mane:
- Now it’s time to sew on the mane.
- Start by pinning two edges along the entire head. These edges will act as a guide—you will stay within them when attaching the strands.
Sewing the mane:
- It’s a bit easier to start from the bottom of the head.
- Try to mix shapes, lengths, and colors to make the mane look full.
- The closer you get to the horn, use shorter and shorter strands.
- Attach each strand by tying a tight knot 2–3 times.
- Secure the yarn ends after knotting.
Forelock (bangs):
- Sew on 4 short strands (15 chains long) just behind the ear and horn.
- Also sew the strands halfway down so the forelock stays forward toward the face and doesn’t fall back into the mane.
Attach the tail:
- Sew the tail centered between the legs, between rounds 9–11 of the body (counting from the magic ring at the bottom).
- Make the tail about 5 stitches wide.
- Use approximately 12 strands for the tail.
Embroider the eyes:
- Start by placing pins to test the placement of the eyes.
- Place the lower pins below row 8, 2 sc from each side of the nose.
- Place the upper pins 2 rounds directly above the lower pins.
- Embroider back and forth with black yarn several times until the eyes reach the desired size.
- Take a piece of white yarn and bring the needle out at the top of the eye.
- Then insert the needle back into the center of the eye.
- Secure the yarn.
This creates the small highlight/shine in the eye.
Embroider the eyelashes:
- Use a thin thread, such as sewing thread or about 3 strands of embroidery floss.
- Bring the needle out about 1 sc to the side of the eye where you want the eyelash.
- Insert the needle at the top of the eye.
- Take the opportunity to bring the needle out at the start of the next eye and embroider that eye in the same way.
- Secure the thread.
Embroider the nostrils:
- Place pins where you want the nostrils to be.
- Embroider about 3 rounds around a single crochet stitch using blue yarn.
- If you want the nostrils to stand out more, you can embroider with a thin sewing thread in a darker shade on the sides.
The Unicorn is done!
The rights to this pattern belong to MYO Make Your Own. The pattern or its pictures may not be copied, shared or resold either in parts or in its entirety, but you may sell items you have crocheted from this pattern. If you have questions about the pattern, contact MYO at hello@makeyourown.se.
%20(1).jpg)


Share your creations with us
Thank you!
Your comment was sent!