
Decoration Bunny “Leia”
Crochet the decorative bunny "Leia" – a charming addition to any child's room
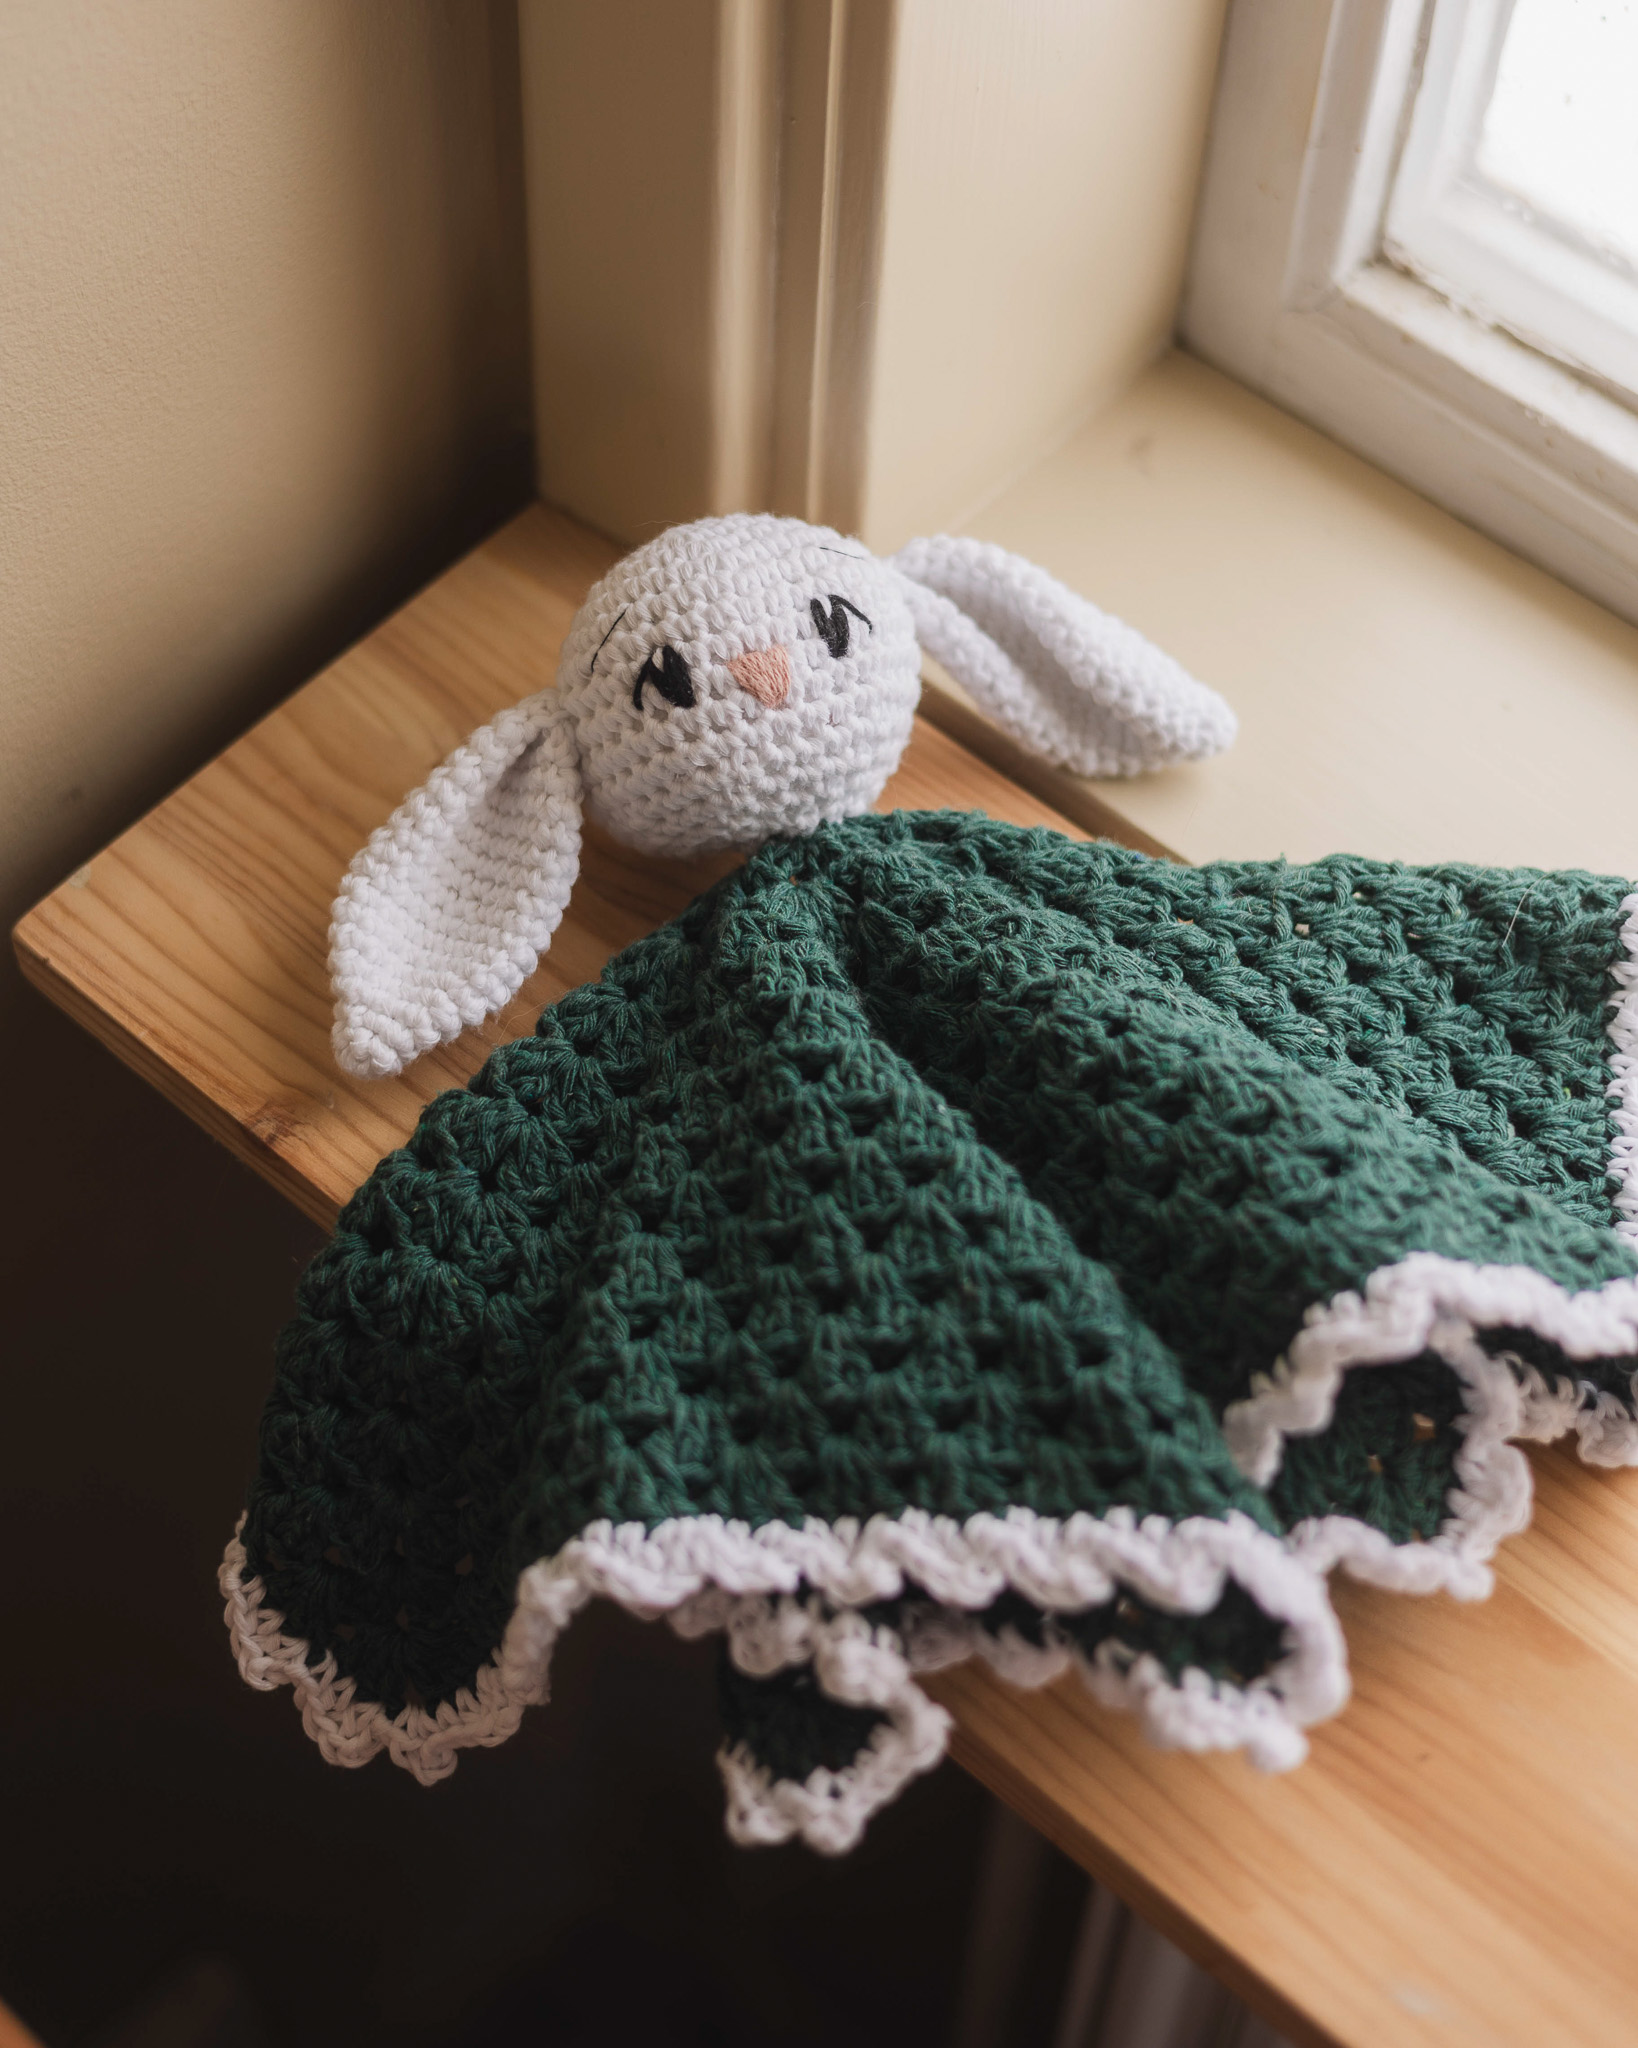
This is the perfect project if you'd like to try crocheting amigurumi (crocheted animals)! The bunny is approx 25 cm high. Every step is clearly explained in both the instructional video and the written pattern, making it easy for beginners to follow.
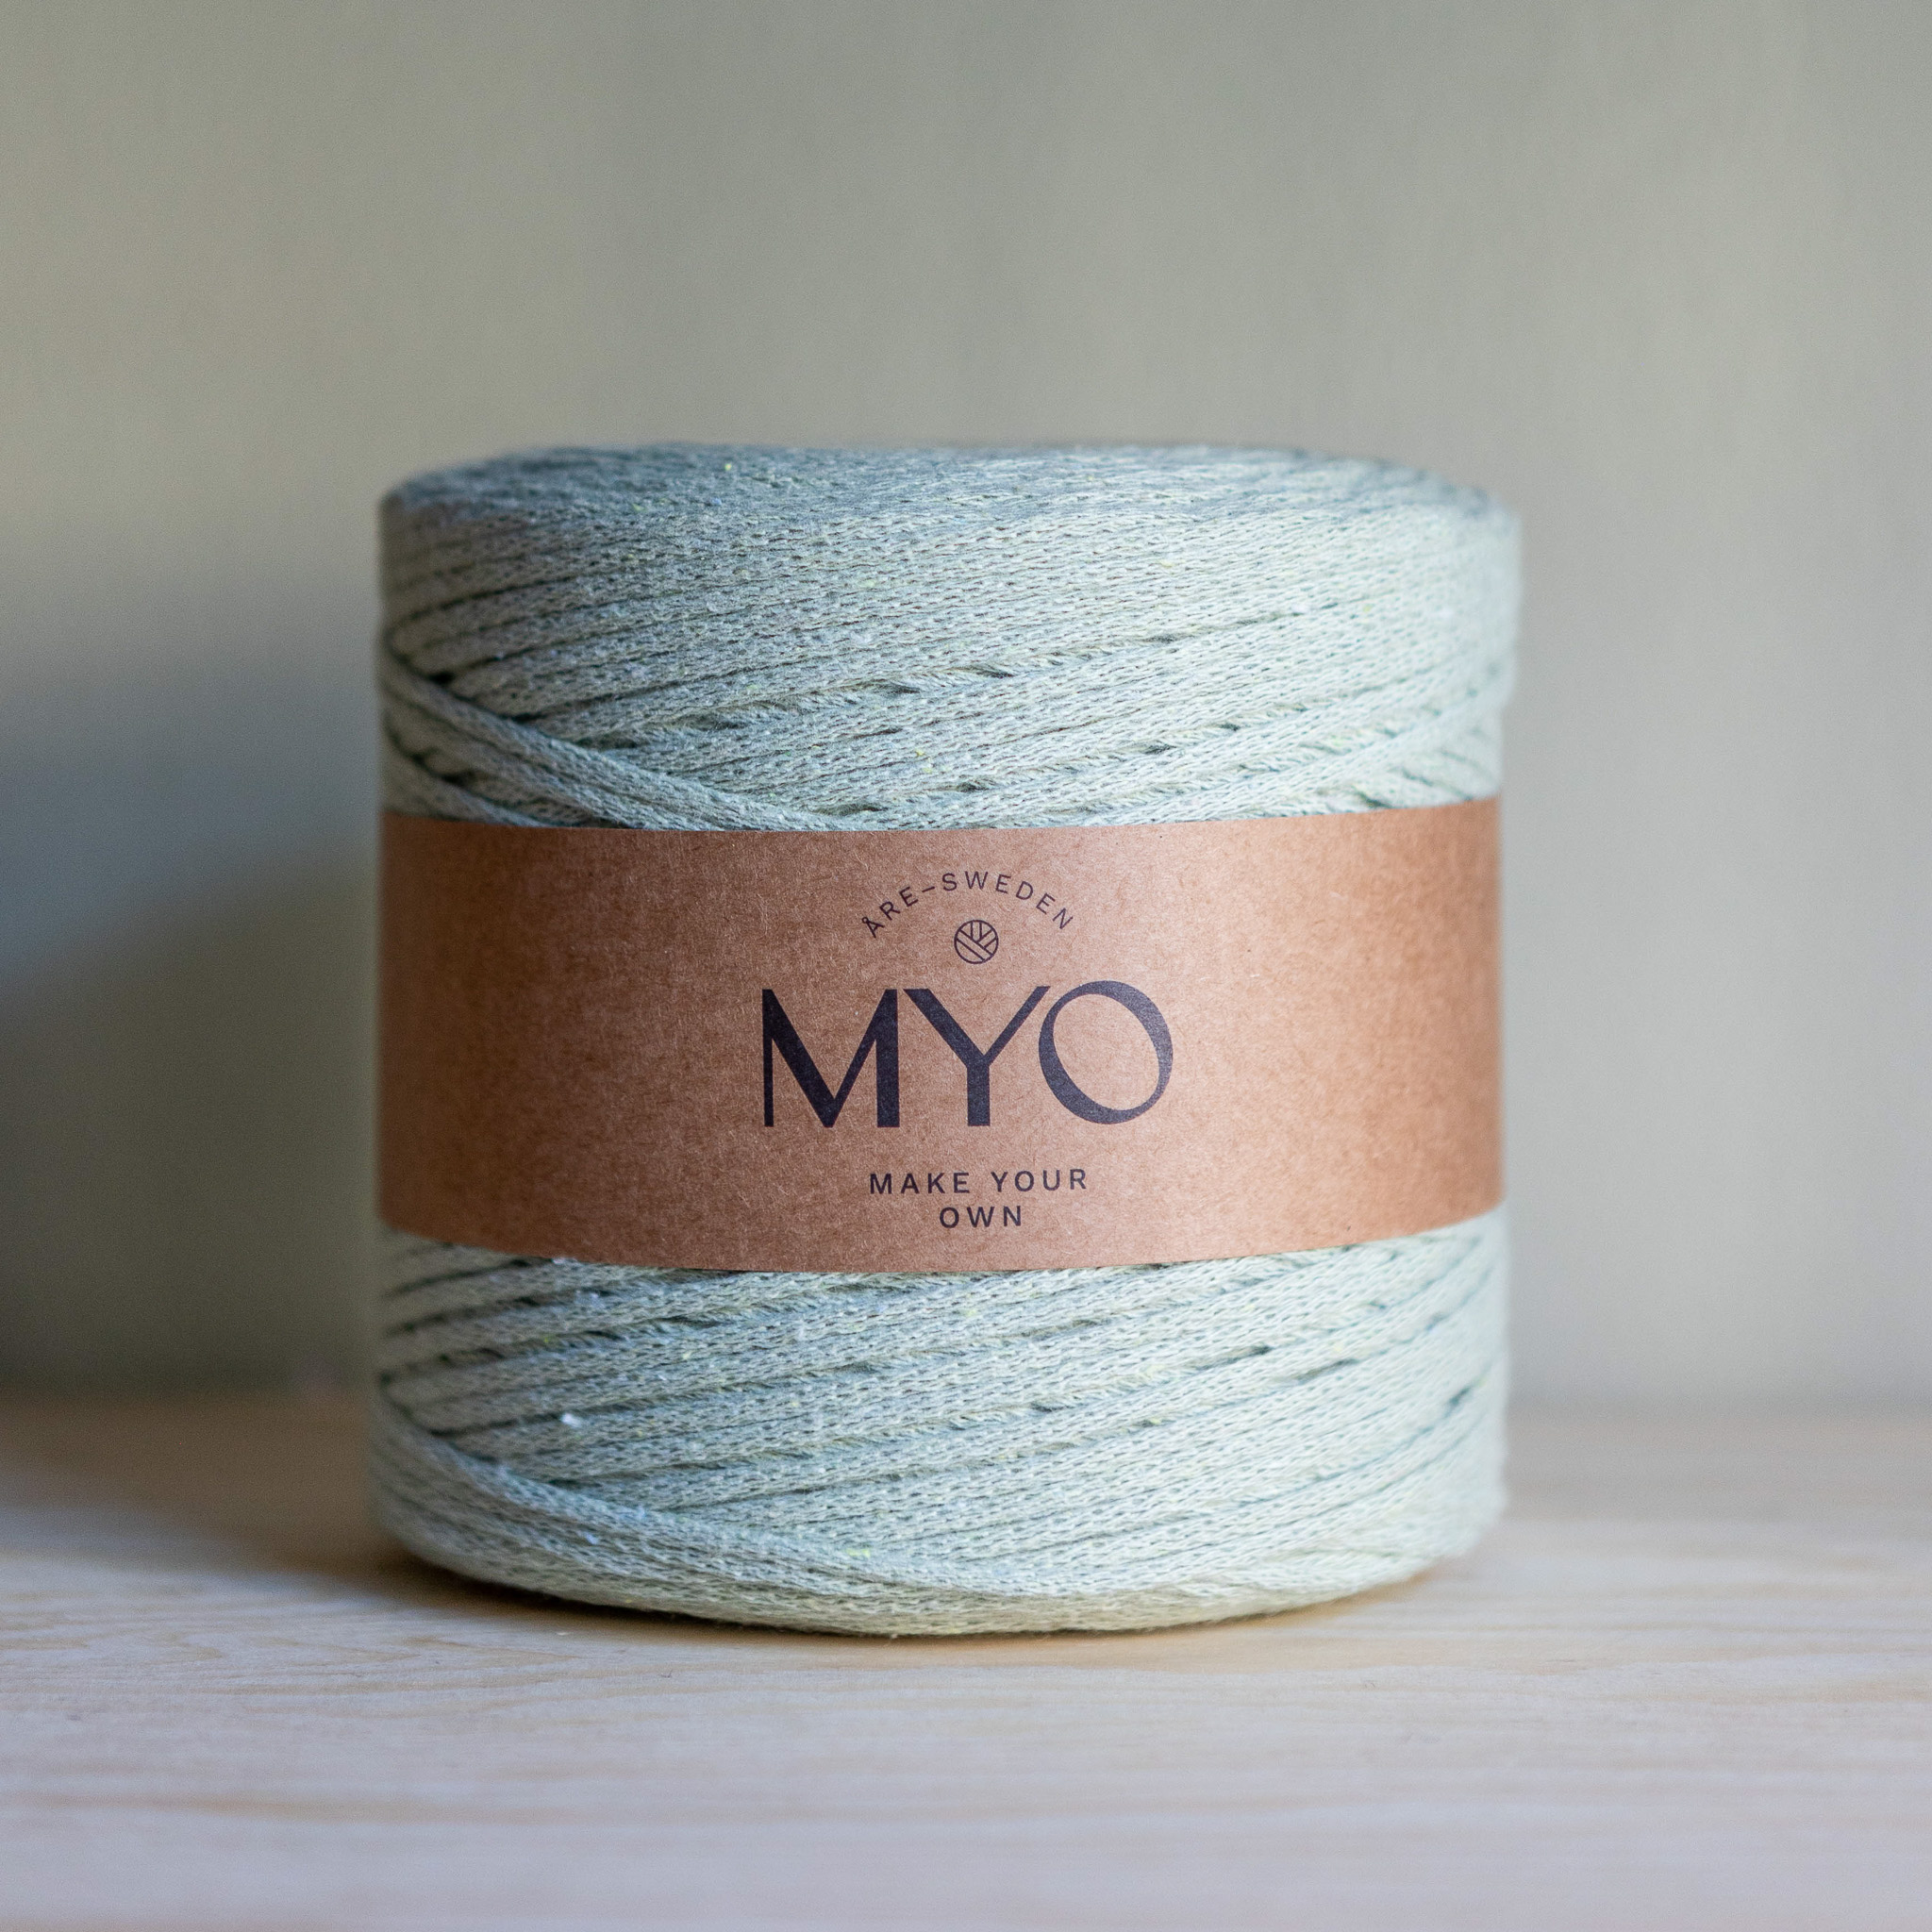
For this bunny, you will need EKO Nano Tube yarn, 6 mm bamboo crochet hook, stuffing, such as polyester fiberfill (40–50 g), a yarn needle, thin yarn for the eyes and nose, safety pins for assembly (optional). If you'd rather crochet a smaller bunny (approximately 8–10 cm / 3–4 inches tall), you can instead use Scheepjes Catona yarn, 2.5–3 mm crochet hook.Please note: The instructional video is available only for the EKO Nano version.
Yarn Consumption: Approximately 200–250 g in EKO Nano (about 30 g in Scheepjes Catona).

Here's how to do it
The large decorative bunny makes a lovely addition to a nursery or child's room. It can also be made as a weighted keepsake bunny matching a baby's birth weight. Simply fill the bunny with pellets or another weighted material until it reaches the desired weight. If you'd like to crochet a stroller toy or a small bunny (amigurumi), use Scheepjes Catona yarn with a 2.5 mm or 3 mm crochet hook. The only adjustment needed is for the head; the rest of the pattern remains the same. Please note that the accompanying video tutorial was created only for the EKO Nano version. Happy crocheting! – Lizette

This is what you need:
Here you can directly purchase the material for the product. Please note that the instruction is digital and appears here on the page (no written instruction).

.jpg)
Your next favorite project is waiting
Get access to this pattern and over 300 other beginner-friendly projects for crochet, knitting, and macramé.
Then 85 SEK/month. Cancel anytime.

Head
Magic Ring: Hold the yarn in your left hand and wrap it around your fingers three times. Insert your crochet hook under the first two loops and hook the third loop. Pull it under the two loops around your fingers, yarn over, and pull through. The loop on your hook now secures the double magic ring, and you're ready to begin the first round.
Round 1: Work 6 single crochet (sc) stitches into the magic ring. To make a single crochet, insert the hook into the ring, yarn over and pull up a loop, yarn over again, and pull through both loops on the hook. Repeat until you have 6 sc.
Round 2: Work 2 sc in each stitch around. You will have 12 stitches at the end of the round.
Round 3: Work 2 sc in every other stitch (increase, 1 sc). You will have 18 stitches.
Round 4: Work 2 sc in every 3rd stitch. You will have 24 stitches.
The pattern now differs depending on the yarn you are using. If using EKO Nano, continue below. If using Scheepjes Catona, skip to Round 5 in the Scheepjes Catona instructions.
Round 5–8 (EKO Nano): Work 1 sc in each stitch around with no increases. You will have 24 stitches in each round.
Round 9: Work 2 sc in every 4th stitch. You will have 30 stitches.
Round 10: Work 1 sc in each stitch around. You will have 30 stitches.
Round 11: Work 1 sc, then 1 invisible decrease around. To make an invisible decrease, insert the hook under the front loop only of the next stitch, then under the front loop only of the following stitch. Yarn over and pull through the first two loops, yarn over again and pull through the remaining loops. Repeat around. You will have 20 stitches.
Round 12: Work 10 invisible decreases. You will have 10 stitches. Finish with a slip stitch into the next stitch, cut the yarn, and leave a 10 cm (4 in) tail.
Finish by going down into the next stitch, picking up yarn and pulling straight through. Cut the yarn and save one (30 cm) yarn end that we will use for assembly.
Scheepjes Catona version:
Round 5: Work 2 sc in every 4th stitch. You will have 30 stitches.
Round 6–10: Work 1 sc in each stitch around. You will have 30 stitches in each round.
Round 11: Work 2 sc in every 5th stitch. You will have 36 stitches.
Round 12: Work 1 sc in each stitch around. You will have 36 stitches.
Round 13: Work 1 sc, then 1 invisible decrease around. You will have 24 stitches.
Round 14: Work 12 invisible decreases. You will have 12 stitches.
Round 15: Work 2 invisible decreases, leaving 10 stitches at the end of the round.
Finish by going down into the next stitch, picking up yarn and pulling straight through. Cut the yarn and save one (30 cm) yarn end that we will use for assembly.
Body
Get started - the innermost ring
You start the same way you did on the head with a magic/inner ring.
Top - First round
Now we will start crocheting the first round on the body of the rabbit with single stitches. Crochet a total of six double crochets. Round 1 is now complete!
Round 2: Now the bottom of the body will grow in size and therefore we start adding extra stitches. On this round we will make two single stitches in each stitch from round 1. A total of 12 stitches on round 2.
For the next round, continue to add extra single crochets according to the following pattern:
Round 3: Make two single crochets in every other stitch (between these you only make one stitch as usual). You should have a total of 18 stitches on the row.
Round 4: Make two single crochets in every 3rd stitch. You should have a total of 24 stitches on the round.
Rounds 5-8: Now the body should gain some height. These four rounds are crocheted with a single crochet in each stitch, no increases. This means that you should crochet 24 stitches on each round.
Round 9: Now we will decrease the hole on the body and will crochet decreases so that the opening is closed. Crochet four single crochets. After that, a decrease (invisible) is crocheted. A decrease is worked by passing under only the front loop of the next stitch and then passing under the front loop of the next stitch. You have three loops on the hook, pick up yarn and pull through one stitch and then pick up yarn and pull through all three stitches. Two stitches have now become one stitch. Continue crocheting four single crochets and then a decrease round out. You now have a total of 20 stitches on the round.
Round 10: This round is worked with a single crochet in each stitch, no increases. This means you will crochet 20 stitches on this round.
Round 11: Crochet two double crochets. After that, a decrease (invisible) is crocheted. Crochet two double crochets and then a decrease round out. You now have a total of 15 stitches on the row.
Round 12: This round is worked with a single crochet in each stitch, no increases. This means you will crochet 15 stitches on this round.
Round 13: Crochet a single crochet. After that, a decrease (invisible) is crocheted. Crochet a double crochet and then a decrease round out. You now have a total of 10 stitches on the round.
Finish by going down into the next stitch, picking up yarn and pulling straight through. Cut the yarn and save one (30 cm) yarn end that we will use for assembly.
Ears, make two
Get started - the innermost ring
Start in the same way as the body and head with a ring.
First round
Now we will start crocheting the first round of the rabbit´s ear with single crochets. Crochet six stitches in the innermost ring. Round 1 is now complete!
Round 2: Make two single crochets in every other stitch (between these you only make one stitch as usual). In total, you should have nine stitches on the row.
Round 3: This round is worked with a single crochet in each stitch, no increases. This means you will crochet nine stitches on this.
Round 4: Make two single crochets in every 3rd stitch. You should have a total of 12 stitches on the round.
Rounds 5-8: These four rounds are crocheted with a single crochet in each stitch, no increases. This means that you should crochet 12 stitches on each round.
Finish by going down into the next stitch, picking up yarn and pulling straight through. Cut the yarn and save one (30 cm) yarn end that we will use for assembly.
Tail
Get started - the innermost ring
Start in the same way as before with a ring.
First round
Now we will start crocheting the first round of the rabbit's tail with double crochets. Crochet six double crochets in the innermost ring. Round 1 is now complete!
Round 2: Make two single crochets in each stitch. You should have a total of 12 stitches on the round.
Round 3: This round is worked with a single crochet in each stitch, no increases. This means you will crochet 12 stitches on this.
Round 4: Crochet a single crochet. After that, a decrease (invisible) is crocheted. Crochet a single crochet and then a decrease round out. You now have a total of 8 stitches on the round.
Finish by going down into the next stitch, picking up yarn and pulling straight through. Cut the yarn and save one (30 cm) yarn end that we will use for assembly.
Arms, make two
Get started - the innermost ring
Start in the same way as before with a ring.
First round
Now we will start crocheting the first round on the rabbit´s arm with single crochets. Crochet six double crochets in the innermost ring. Round 1 is now complete!
Round 2: Now the arm will grow in size and we therefore start adding extra stitches. On this round we will make two single crochets in each stitch from round 1. In total you will have 12 stitches on round 2.
Round 3 : On this round, crochet a stitch in every stitch and that means you should have 12 stitches on the round.
Round 4: Crochet a single crochet. After that, a decrease (invisible) is crocheted. Crochet a single crochet and then a decrease round out. You now have a total of 8 stitches on the round.
Rounds 5-9: On this round we will crochet one stitch in each stitch and that means you will have 8 stitches on each round. You must crochet five rounds in total.
Stuff your arm with some cotton wool.
Then flatten the arm and crochet three to four single crochets through both layers, finishing with a loose loop.
Cut the yarn and leave about 30 cm which we will use for assembly later.
Leg, make two
The starting loop
Start by making a simple loop around the crochet hook. One way you can do this is to wrap the yarn around your index and middle finger and then pull the yarn up so that the loop locks when you tighten. Leave about 15 cm tail.
The chain
Adjust the size of the loop around your crochet hook. Now we will start crocheting the chain, use the crochet hook and pick up the yarn with the end that comes from the yarn roll (you temporarily have two loops on the crochet hook) and pull through so that a loop is formed (the first loop). Do this until you have crocheted 4 single loops.
Round 2
Now start following the chain back and crochet round 2. Skip the first loop and start going down in the loop that comes after. We are going to crochet single crochets so catch the yarn and pull through (you now temporarily have two loops on the hook). Pick up the yarn with the needle again and pull through both loops. Repeat one more time. Then crochet four stitches in the same stitch (which is the stitch at the top). Now you crochet on the other side of the chain, crochet a single crochet and then crochet four single crochets in the same stitch (in the last stitch). In total you have 11 stitches on this round.
Round 3: Now crochet two single crochets. After that, you crochet two single crochets in each stitch in the next three stitches. Then you crochet four single stitches and finish the round by crocheting two stitches in the same stitch in the last two stitches. You should have a total of 16 stitches on the row.
Round 4: Check your stitch, it consists of two lines. the anterior line is the front stitch and the posterior line is the back loop stitch. On this round we will crochet a single crochet in every stitch but only in the back loop.
Round 5: Start crocheting the round with five single crochets. Then you crochet a decrease (invisible). Then crochet nine double crochets. You now have a total of 15 stitches on the round.
Round 6: Start crocheting the round with three single crochets. Then you crochet two decreases (invisible). Then crochet eight single crochets. You now have a total of 13 stitches on the round.
Round 7: Start crocheting the round with a single crochet. Then you crochet three decreases (invisible). Then crochet six double crochets. You now have a total of 10 stitches on the round.
Stuff the foot with wadding.
Rounds 8-13: Crochet a single crochet in each stitch for a total of six rounds. Since we do not make any decrease or increase, you should have 10 stitches on each round.
Pick up a stitch so you are at the back of the foot.
Then flatten to the leg and work four double crochets through both layers, finishing with a loose loop. Cut the yarn and leave about 30 cm which we will use for assembly later.
Assembly
Start by placing safety pins where you want to attach the ears. Attach the ears centered on the head between rows 3 and 4. Using a needle and yarn end from the ears, begin by sewing a few stitches at the bottom of the ear so that the ear is folded. Then continue attaching the ear to the head by sewing up and down between the ear and the head. Make sure the ears are firmly in place.
Then embroider a nose and eyes, using thin yarn/thicker thread. The nose is embroidered on round 8 and as a V. The eyes are embroidered on round 7. To make it easier to embroider the nose and eyes, first mark with safety pins. In this way, you ensure that the nose ends up centered between the ears and the eyes end up the same distance from the nose. Remember that if you insert a safety pin, don´t forget to remove it so it doesn´t get lost in the rabbit.
Embroidering eyes and nose can be a bit tricky and you may have to start over at some point, don´t give up!
Then attach the legs to the body between rounds 4-7. Also attach the legs to the side of the body so that they sit firmly and do not dangle. Then fasten the arms one stitch above the legs between rounds 8-11. Attach the arm in line with the legs on the back of the body. Then attach the tail in the middle between the leg attachments on the back of the body. The last thing to attach is the head to the body. Go up the stitches on the last round on the head and then down the stitches on the last round on the body. Continue so the head sits firmly. Also fasten a little extra under the chin so that the rabbit looks down a little, then you can fasten in the penultimate round to the body.
You are now finished with your decorative rabbit, hope you are satisfied!
Abbreviations:
MR = Magic ring
st = stitch
sc = single crochet
ch = chain stitch
sl st = slip stitch
inc = increase (two stitches in the same stitch)
dec = decrease (two single crochets together in the front loops)
(...) = Indicates how many stitches should be on the round
*...* = Repeat everything within *...* for the specified number of times
[...] = All stitches within [ ] are worked into the same stitch
First, we will crochet all parts of the bunny, then we assemble all parts. This instruction does not include any pictures. If you need some help along the way, please see the full long video.
Head (EKO Nano)
Round 1: 6 sc in MR
Round 2: inc x6 (12)
Round 3: *1 sc, inc* x6 (18)
Round 4: *2 sc, inc* x6 (24)
Round 5-8: 24 sc (24, 4 rounds)
Round 9: *3 sc, inc* x6 (30)
Round 10: 30 sc (30)
Round 11: *1 sc, dec* x10 (20)
Round 12: dec x10 (10)
Stuff the head. Cut yarn and fasten off.
Head (Scheepjes Catona)
Round 1: 6 sc in MR
Round 2: inc x6 (12)
Round 3: *1 sc, inc* x6 (18)
Round 4: *2 sc, inc* x6 (24)
Round 5: *3 sc, inc* x6 (30)
Round 6-10: 30 sc (30, 5 rounds)
Round 11: *4 sc, inc* x6 (36)
Round 12: 36 sc (36)
Round 13: *1 sc, dec* x12 (24)
Round 14: dec x12 (12)
Round 15: dec x2 (finish here).
Stuff the head. Cut yarn and fasten off.
Body
Round 1: 6 sc in MR
Round 2: inc x6 (12)
Round 3: *1 sc, inc* x6 (18)
Round 4: *2 sc, inc* x6 (24)
Round 5-8: 24 fm (24, 4 rounds)
Round 9: *4 sc, dec* x4 (20)
Round 10: 20 sc (20)
Round 11: *2 fm, dec* x5 (15)
Round 12: 15 sc (15)
Round 13: *1 sc, dec* x5 (10)
Stuff the body. Cut off yarn but leave a tail for later assembly.
Ears (make 2)
Round 1: 6 fm in MR
Round 2: *1 sc, inc* x3 (9)
Round 3: 9 fm (9)
Round 4: *2 sc, inc* x3 (12)
Round 5-8: 12 sc (12, 4 rounds)
Finish with 1 sl st.
Cut yarn and leave a tail for assembly.
Tail
Round 1: 6 sc in MR
Round 2: inc x6 (12)
Round 3: 12 sc (12)
Round 4: *1 sc, dec* x4 (8)
Finish with 1 sm.
Cut yarn and leave a tail for assembly.
Arms (make 2)
Round 1: 6 sc in MR
Round 2: inc x6 (12)
Round 3: 12 sc (12)
Round 4: *1 sc, dec* x4 (8)
Round 5-11: 8 sc (8, 7 rounds)
Stuff the hand lightly with cotton, but leave the arm unstuffed.
Round 12: Flatten the arm and crochet through both layers with 3 fm. Fasten off.
Legs (make 2):
Row 1: 4 lm
Round 2: 2 sc, 4 sc in the same stitch at the top stitch. 1 sc, 4 sc in the last stitch (11)
Round 3: 2 sc, inc x3, 4 sc, inc x2 (16)
Round 4: 16 sc (16)
Round 5: 5 sc, dec, 9 sc (15)
Round 6: *3 sc, dec* x3, 8 sc (13)
Round 7: *1 sc, dec* x3, 6 sc (10)
Round 8-17: 10 sc (10, 7 rounds)
Stuff the foot lightly with cotton.
Round 18: Crochet 4 sc to the front of the leg. Flatten the leg and crochet through both layers with 4 sc. It is important to crochet 4 stitches together.
Fasten off.
Assembly:
- Start by placing safety pins where you want to attach the ears. Attach the ears centered on the head between rounds 3 and 4. Use a needle and the yarn tail from the ears to sew a few stitches along the bottom of the ear to make it fold. Continue attaching the ear by sewing up and down between the ear and head. Make sure the ears are securely attached.
- Next, embroider a nose and eyes using thin yarn/thicker thread. The nose is embroidered on round 8 as a ‘V’. The eyes are embroidered on round 7. To make it easier to mark the positions for the nose and eyes, place safety pins first. This will help ensure the nose is centered between the ears, and the eyes are equally spaced from the nose.
- Remember, if you insert a safety pin, don’t forget to remove it before finishing the assembly.
- Embroidering the eyes and nose can be tricky, so don't give up if you need to start over!
- Attach the legs to the body between rounds 4-7. Also, attach the legs to the side of the body to make sure they are sturdy and don’t dangle.
- If you prefer hanging legs, attach them vertically.
- Attach the arms one stitch above the legs between rounds 8-11. Attach the arms in line with the legs on the back of the body. If you’ve attached hanging legs, you can also attach the arms vertically.
- Attach the tail between the leg attachments on the back of the body.
- Finally, attach the head to the body. Make sure the head is securely in place. You can also add a little extra under the chin to make the bunny look slightly down, in which case you can attach it to the second-to-last round of the body.
Your bunny is done!
The rights to this pattern belong to MYO Make Your Own. The pattern or its pictures may not be copied, shared or resold either in parts or in its entirety, but you may sell items you have crocheted from this pattern. If you have questions about the pattern, contact MYO at hello@makeyourown.se.
Head
Magic Ring: Hold the yarn in your left hand and wrap it around your fingers three times. Insert your crochet hook under the first two loops and hook the third loop. Pull it under the two loops around your fingers, yarn over, and pull through. The loop on your hook now secures the double magic ring, and you're ready to begin the first round.
Round 1: Work 6 single crochet (sc) stitches into the magic ring. To make a single crochet, insert the hook into the ring, yarn over and pull up a loop, yarn over again, and pull through both loops on the hook. Repeat until you have 6 sc.
Round 2: Work 2 sc in each stitch around. You will have 12 stitches at the end of the round.
Round 3: Work 2 sc in every other stitch (increase, 1 sc). You will have 18 stitches.
Round 4: Work 2 sc in every 3rd stitch. You will have 24 stitches.
The pattern now differs depending on the yarn you are using. If using EKO Nano, continue below. If using Scheepjes Catona, skip to Round 5 in the Scheepjes Catona instructions.
Round 5–8 (EKO Nano): Work 1 sc in each stitch around with no increases. You will have 24 stitches in each round.
Round 9: Work 2 sc in every 4th stitch. You will have 30 stitches.
Round 10: Work 1 sc in each stitch around. You will have 30 stitches.
Round 11: Work 1 sc, then 1 invisible decrease around. To make an invisible decrease, insert the hook under the front loop only of the next stitch, then under the front loop only of the following stitch. Yarn over and pull through the first two loops, yarn over again and pull through the remaining loops. Repeat around. You will have 20 stitches.
Round 12: Work 10 invisible decreases. You will have 10 stitches. Finish with a slip stitch into the next stitch, cut the yarn, and leave a 10 cm (4 in) tail.
Finish by going down into the next stitch, picking up yarn and pulling straight through. Cut the yarn and save one (30 cm) yarn end that we will use for assembly.
Scheepjes Catona version:
Round 5: Work 2 sc in every 4th stitch. You will have 30 stitches.
Round 6–10: Work 1 sc in each stitch around. You will have 30 stitches in each round.
Round 11: Work 2 sc in every 5th stitch. You will have 36 stitches.
Round 12: Work 1 sc in each stitch around. You will have 36 stitches.
Round 13: Work 1 sc, then 1 invisible decrease around. You will have 24 stitches.
Round 14: Work 12 invisible decreases. You will have 12 stitches.
Round 15: Work 2 invisible decreases, leaving 10 stitches at the end of the round.
Finish by going down into the next stitch, picking up yarn and pulling straight through. Cut the yarn and save one (30 cm) yarn end that we will use for assembly.
Body
Get started - the innermost ring
You start the same way you did on the head with a magic/inner ring.
Top - First round
Now we will start crocheting the first round on the body of the rabbit with single stitches. Crochet a total of six double crochets. Round 1 is now complete!
Round 2: Now the bottom of the body will grow in size and therefore we start adding extra stitches. On this round we will make two single stitches in each stitch from round 1. A total of 12 stitches on round 2.
For the next round, continue to add extra single crochets according to the following pattern:
Round 3: Make two single crochets in every other stitch (between these you only make one stitch as usual). You should have a total of 18 stitches on the row.
Round 4: Make two single crochets in every 3rd stitch. You should have a total of 24 stitches on the round.
Rounds 5-8: Now the body should gain some height. These four rounds are crocheted with a single crochet in each stitch, no increases. This means that you should crochet 24 stitches on each round.
Round 9: Now we will decrease the hole on the body and will crochet decreases so that the opening is closed. Crochet four single crochets. After that, a decrease (invisible) is crocheted. A decrease is worked by passing under only the front loop of the next stitch and then passing under the front loop of the next stitch. You have three loops on the hook, pick up yarn and pull through one stitch and then pick up yarn and pull through all three stitches. Two stitches have now become one stitch. Continue crocheting four single crochets and then a decrease round out. You now have a total of 20 stitches on the round.
Round 10: This round is worked with a single crochet in each stitch, no increases. This means you will crochet 20 stitches on this round.
Round 11: Crochet two double crochets. After that, a decrease (invisible) is crocheted. Crochet two double crochets and then a decrease round out. You now have a total of 15 stitches on the row.
Round 12: This round is worked with a single crochet in each stitch, no increases. This means you will crochet 15 stitches on this round.
Round 13: Crochet a single crochet. After that, a decrease (invisible) is crocheted. Crochet a double crochet and then a decrease round out. You now have a total of 10 stitches on the round.
Finish by going down into the next stitch, picking up yarn and pulling straight through. Cut the yarn and save one (30 cm) yarn end that we will use for assembly.
Ears, make two
Get started - the innermost ring
Start in the same way as the body and head with a ring.
First round
Now we will start crocheting the first round of the rabbit´s ear with single crochets. Crochet six stitches in the innermost ring. Round 1 is now complete!
Round 2: Make two single crochets in every other stitch (between these you only make one stitch as usual). In total, you should have nine stitches on the row.
Round 3: This round is worked with a single crochet in each stitch, no increases. This means you will crochet nine stitches on this.
Round 4: Make two single crochets in every 3rd stitch. You should have a total of 12 stitches on the round.
Rounds 5-8: These four rounds are crocheted with a single crochet in each stitch, no increases. This means that you should crochet 12 stitches on each round.
Finish by going down into the next stitch, picking up yarn and pulling straight through. Cut the yarn and save one (30 cm) yarn end that we will use for assembly.
Tail
Get started - the innermost ring
Start in the same way as before with a ring.
First round
Now we will start crocheting the first round of the rabbit's tail with double crochets. Crochet six double crochets in the innermost ring. Round 1 is now complete!
Round 2: Make two single crochets in each stitch. You should have a total of 12 stitches on the round.
Round 3: This round is worked with a single crochet in each stitch, no increases. This means you will crochet 12 stitches on this.
Round 4: Crochet a single crochet. After that, a decrease (invisible) is crocheted. Crochet a single crochet and then a decrease round out. You now have a total of 8 stitches on the round.
Finish by going down into the next stitch, picking up yarn and pulling straight through. Cut the yarn and save one (30 cm) yarn end that we will use for assembly.
Arms, make two
Get started - the innermost ring
Start in the same way as before with a ring.
First round
Now we will start crocheting the first round on the rabbit´s arm with single crochets. Crochet six double crochets in the innermost ring. Round 1 is now complete!
Round 2: Now the arm will grow in size and we therefore start adding extra stitches. On this round we will make two single crochets in each stitch from round 1. In total you will have 12 stitches on round 2.
Round 3 : On this round, crochet a stitch in every stitch and that means you should have 12 stitches on the round.
Round 4: Crochet a single crochet. After that, a decrease (invisible) is crocheted. Crochet a single crochet and then a decrease round out. You now have a total of 8 stitches on the round.
Rounds 5-9: On this round we will crochet one stitch in each stitch and that means you will have 8 stitches on each round. You must crochet five rounds in total.
Stuff your arm with some cotton wool.
Then flatten the arm and crochet three to four single crochets through both layers, finishing with a loose loop.
Cut the yarn and leave about 30 cm which we will use for assembly later.
Leg, make two
The starting loop
Start by making a simple loop around the crochet hook. One way you can do this is to wrap the yarn around your index and middle finger and then pull the yarn up so that the loop locks when you tighten. Leave about 15 cm tail.
The chain
Adjust the size of the loop around your crochet hook. Now we will start crocheting the chain, use the crochet hook and pick up the yarn with the end that comes from the yarn roll (you temporarily have two loops on the crochet hook) and pull through so that a loop is formed (the first loop). Do this until you have crocheted 4 single loops.
Round 2
Now start following the chain back and crochet round 2. Skip the first loop and start going down in the loop that comes after. We are going to crochet single crochets so catch the yarn and pull through (you now temporarily have two loops on the hook). Pick up the yarn with the needle again and pull through both loops. Repeat one more time. Then crochet four stitches in the same stitch (which is the stitch at the top). Now you crochet on the other side of the chain, crochet a single crochet and then crochet four single crochets in the same stitch (in the last stitch). In total you have 11 stitches on this round.
Round 3: Now crochet two single crochets. After that, you crochet two single crochets in each stitch in the next three stitches. Then you crochet four single stitches and finish the round by crocheting two stitches in the same stitch in the last two stitches. You should have a total of 16 stitches on the row.
Round 4: Check your stitch, it consists of two lines. the anterior line is the front stitch and the posterior line is the back loop stitch. On this round we will crochet a single crochet in every stitch but only in the back loop.
Round 5: Start crocheting the round with five single crochets. Then you crochet a decrease (invisible). Then crochet nine double crochets. You now have a total of 15 stitches on the round.
Round 6: Start crocheting the round with three single crochets. Then you crochet two decreases (invisible). Then crochet eight single crochets. You now have a total of 13 stitches on the round.
Round 7: Start crocheting the round with a single crochet. Then you crochet three decreases (invisible). Then crochet six double crochets. You now have a total of 10 stitches on the round.
Stuff the foot with wadding.
Rounds 8-13: Crochet a single crochet in each stitch for a total of six rounds. Since we do not make any decrease or increase, you should have 10 stitches on each round.
Pick up a stitch so you are at the back of the foot.
Then flatten to the leg and work four double crochets through both layers, finishing with a loose loop. Cut the yarn and leave about 30 cm which we will use for assembly later.
Assembly
Start by placing safety pins where you want to attach the ears. Attach the ears centered on the head between rows 3 and 4. Using a needle and yarn end from the ears, begin by sewing a few stitches at the bottom of the ear so that the ear is folded. Then continue attaching the ear to the head by sewing up and down between the ear and the head. Make sure the ears are firmly in place.
Then embroider a nose and eyes, using thin yarn/thicker thread. The nose is embroidered on round 8 and as a V. The eyes are embroidered on round 7. To make it easier to embroider the nose and eyes, first mark with safety pins. In this way, you ensure that the nose ends up centered between the ears and the eyes end up the same distance from the nose. Remember that if you insert a safety pin, don´t forget to remove it so it doesn´t get lost in the rabbit.
Embroidering eyes and nose can be a bit tricky and you may have to start over at some point, don´t give up!
Then attach the legs to the body between rounds 4-7. Also attach the legs to the side of the body so that they sit firmly and do not dangle. Then fasten the arms one stitch above the legs between rounds 8-11. Attach the arm in line with the legs on the back of the body. Then attach the tail in the middle between the leg attachments on the back of the body. The last thing to attach is the head to the body. Go up the stitches on the last round on the head and then down the stitches on the last round on the body. Continue so the head sits firmly. Also fasten a little extra under the chin so that the rabbit looks down a little, then you can fasten in the penultimate round to the body.
You are now finished with your decorative rabbit, hope you are satisfied!
Abbreviations:
MR = Magic ring
st = stitch
sc = single crochet
ch = chain stitch
sl st = slip stitch
inc = increase (two stitches in the same stitch)
dec = decrease (two single crochets together in the front loops)
(...) = Indicates how many stitches should be on the round
*...* = Repeat everything within *...* for the specified number of times
[...] = All stitches within [ ] are worked into the same stitch
First, we will crochet all parts of the bunny, then we assemble all parts. This instruction does not include any pictures. If you need some help along the way, please see the full long video.
Head (EKO Nano)
Round 1: 6 sc in MR
Round 2: inc x6 (12)
Round 3: *1 sc, inc* x6 (18)
Round 4: *2 sc, inc* x6 (24)
Round 5-8: 24 sc (24, 4 rounds)
Round 9: *3 sc, inc* x6 (30)
Round 10: 30 sc (30)
Round 11: *1 sc, dec* x10 (20)
Round 12: dec x10 (10)
Stuff the head. Cut yarn and fasten off.
Head (Scheepjes Catona)
Round 1: 6 sc in MR
Round 2: inc x6 (12)
Round 3: *1 sc, inc* x6 (18)
Round 4: *2 sc, inc* x6 (24)
Round 5: *3 sc, inc* x6 (30)
Round 6-10: 30 sc (30, 5 rounds)
Round 11: *4 sc, inc* x6 (36)
Round 12: 36 sc (36)
Round 13: *1 sc, dec* x12 (24)
Round 14: dec x12 (12)
Round 15: dec x2 (finish here).
Stuff the head. Cut yarn and fasten off.
Body
Round 1: 6 sc in MR
Round 2: inc x6 (12)
Round 3: *1 sc, inc* x6 (18)
Round 4: *2 sc, inc* x6 (24)
Round 5-8: 24 fm (24, 4 rounds)
Round 9: *4 sc, dec* x4 (20)
Round 10: 20 sc (20)
Round 11: *2 fm, dec* x5 (15)
Round 12: 15 sc (15)
Round 13: *1 sc, dec* x5 (10)
Stuff the body. Cut off yarn but leave a tail for later assembly.
Ears (make 2)
Round 1: 6 fm in MR
Round 2: *1 sc, inc* x3 (9)
Round 3: 9 fm (9)
Round 4: *2 sc, inc* x3 (12)
Round 5-8: 12 sc (12, 4 rounds)
Finish with 1 sl st.
Cut yarn and leave a tail for assembly.
Tail
Round 1: 6 sc in MR
Round 2: inc x6 (12)
Round 3: 12 sc (12)
Round 4: *1 sc, dec* x4 (8)
Finish with 1 sm.
Cut yarn and leave a tail for assembly.
Arms (make 2)
Round 1: 6 sc in MR
Round 2: inc x6 (12)
Round 3: 12 sc (12)
Round 4: *1 sc, dec* x4 (8)
Round 5-11: 8 sc (8, 7 rounds)
Stuff the hand lightly with cotton, but leave the arm unstuffed.
Round 12: Flatten the arm and crochet through both layers with 3 fm. Fasten off.
Legs (make 2):
Row 1: 4 lm
Round 2: 2 sc, 4 sc in the same stitch at the top stitch. 1 sc, 4 sc in the last stitch (11)
Round 3: 2 sc, inc x3, 4 sc, inc x2 (16)
Round 4: 16 sc (16)
Round 5: 5 sc, dec, 9 sc (15)
Round 6: *3 sc, dec* x3, 8 sc (13)
Round 7: *1 sc, dec* x3, 6 sc (10)
Round 8-17: 10 sc (10, 7 rounds)
Stuff the foot lightly with cotton.
Round 18: Crochet 4 sc to the front of the leg. Flatten the leg and crochet through both layers with 4 sc. It is important to crochet 4 stitches together.
Fasten off.
Assembly:
- Start by placing safety pins where you want to attach the ears. Attach the ears centered on the head between rounds 3 and 4. Use a needle and the yarn tail from the ears to sew a few stitches along the bottom of the ear to make it fold. Continue attaching the ear by sewing up and down between the ear and head. Make sure the ears are securely attached.
- Next, embroider a nose and eyes using thin yarn/thicker thread. The nose is embroidered on round 8 as a ‘V’. The eyes are embroidered on round 7. To make it easier to mark the positions for the nose and eyes, place safety pins first. This will help ensure the nose is centered between the ears, and the eyes are equally spaced from the nose.
- Remember, if you insert a safety pin, don’t forget to remove it before finishing the assembly.
- Embroidering the eyes and nose can be tricky, so don't give up if you need to start over!
- Attach the legs to the body between rounds 4-7. Also, attach the legs to the side of the body to make sure they are sturdy and don’t dangle.
- If you prefer hanging legs, attach them vertically.
- Attach the arms one stitch above the legs between rounds 8-11. Attach the arms in line with the legs on the back of the body. If you’ve attached hanging legs, you can also attach the arms vertically.
- Attach the tail between the leg attachments on the back of the body.
- Finally, attach the head to the body. Make sure the head is securely in place. You can also add a little extra under the chin to make the bunny look slightly down, in which case you can attach it to the second-to-last round of the body.
Your bunny is done!
The rights to this pattern belong to MYO Make Your Own. The pattern or its pictures may not be copied, shared or resold either in parts or in its entirety, but you may sell items you have crocheted from this pattern. If you have questions about the pattern, contact MYO at hello@makeyourown.se.
%20(1).jpg)

Share your creations with us
Thank you!
Your comment was sent!