
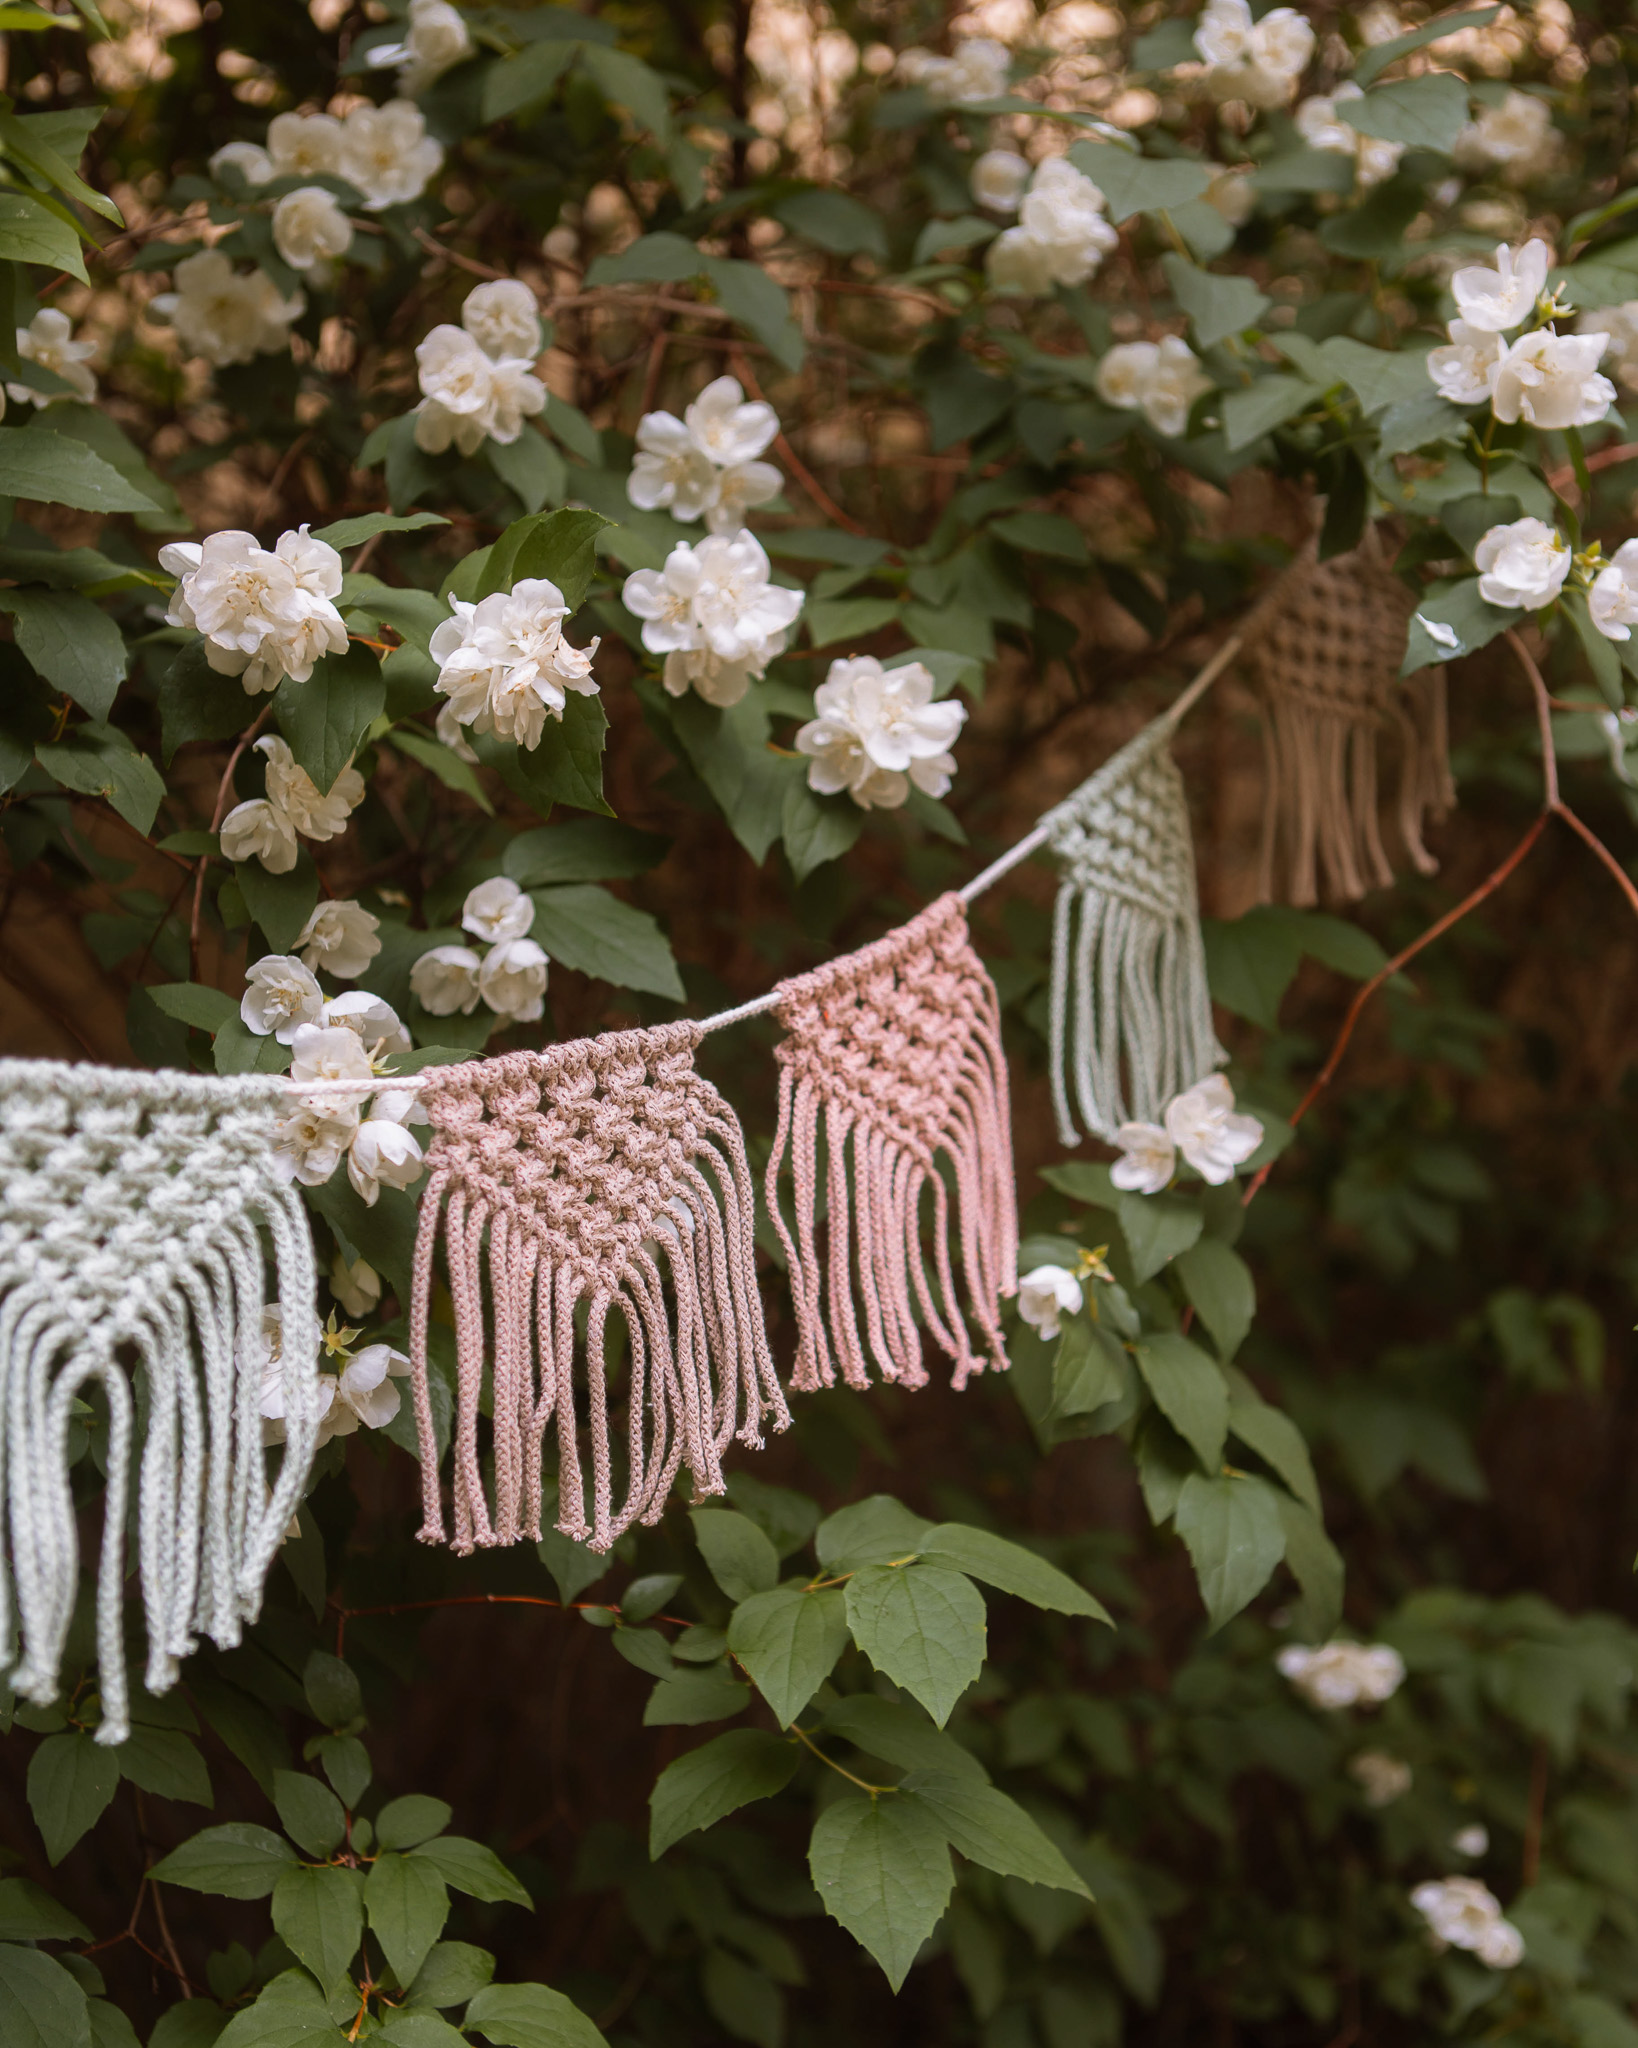
Crochet ampel “Millie”
Crochet a Hanging Planter
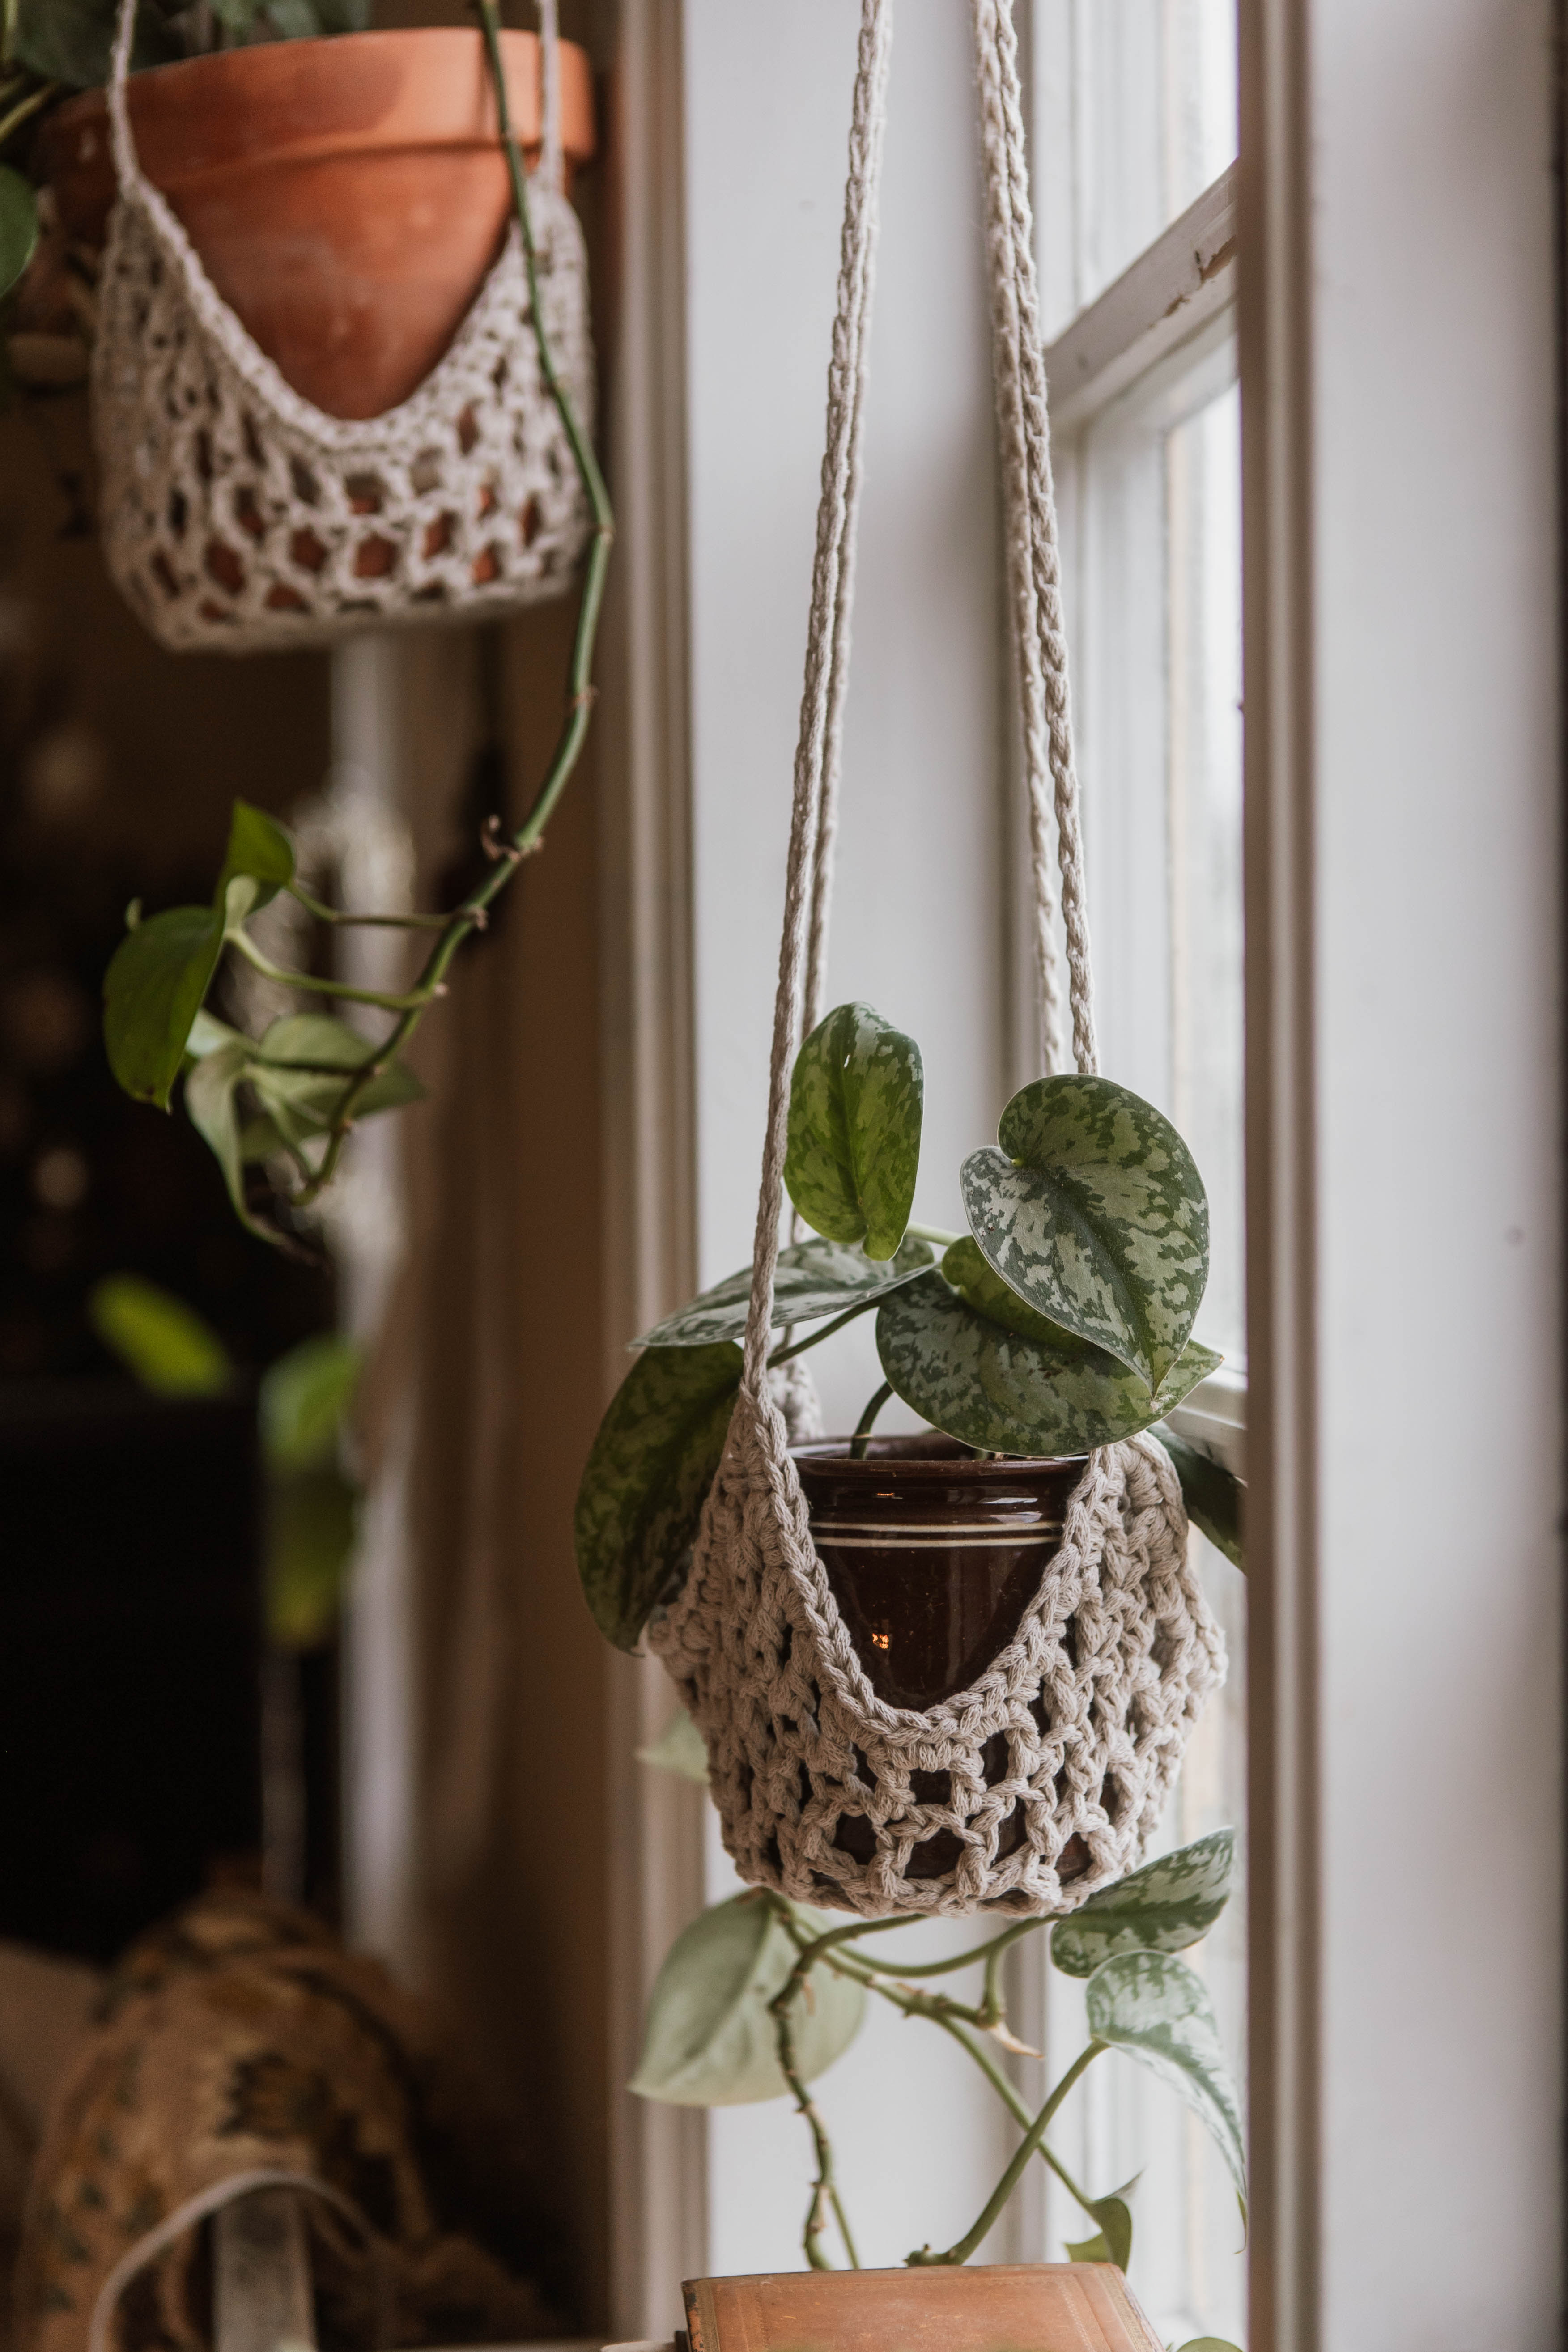
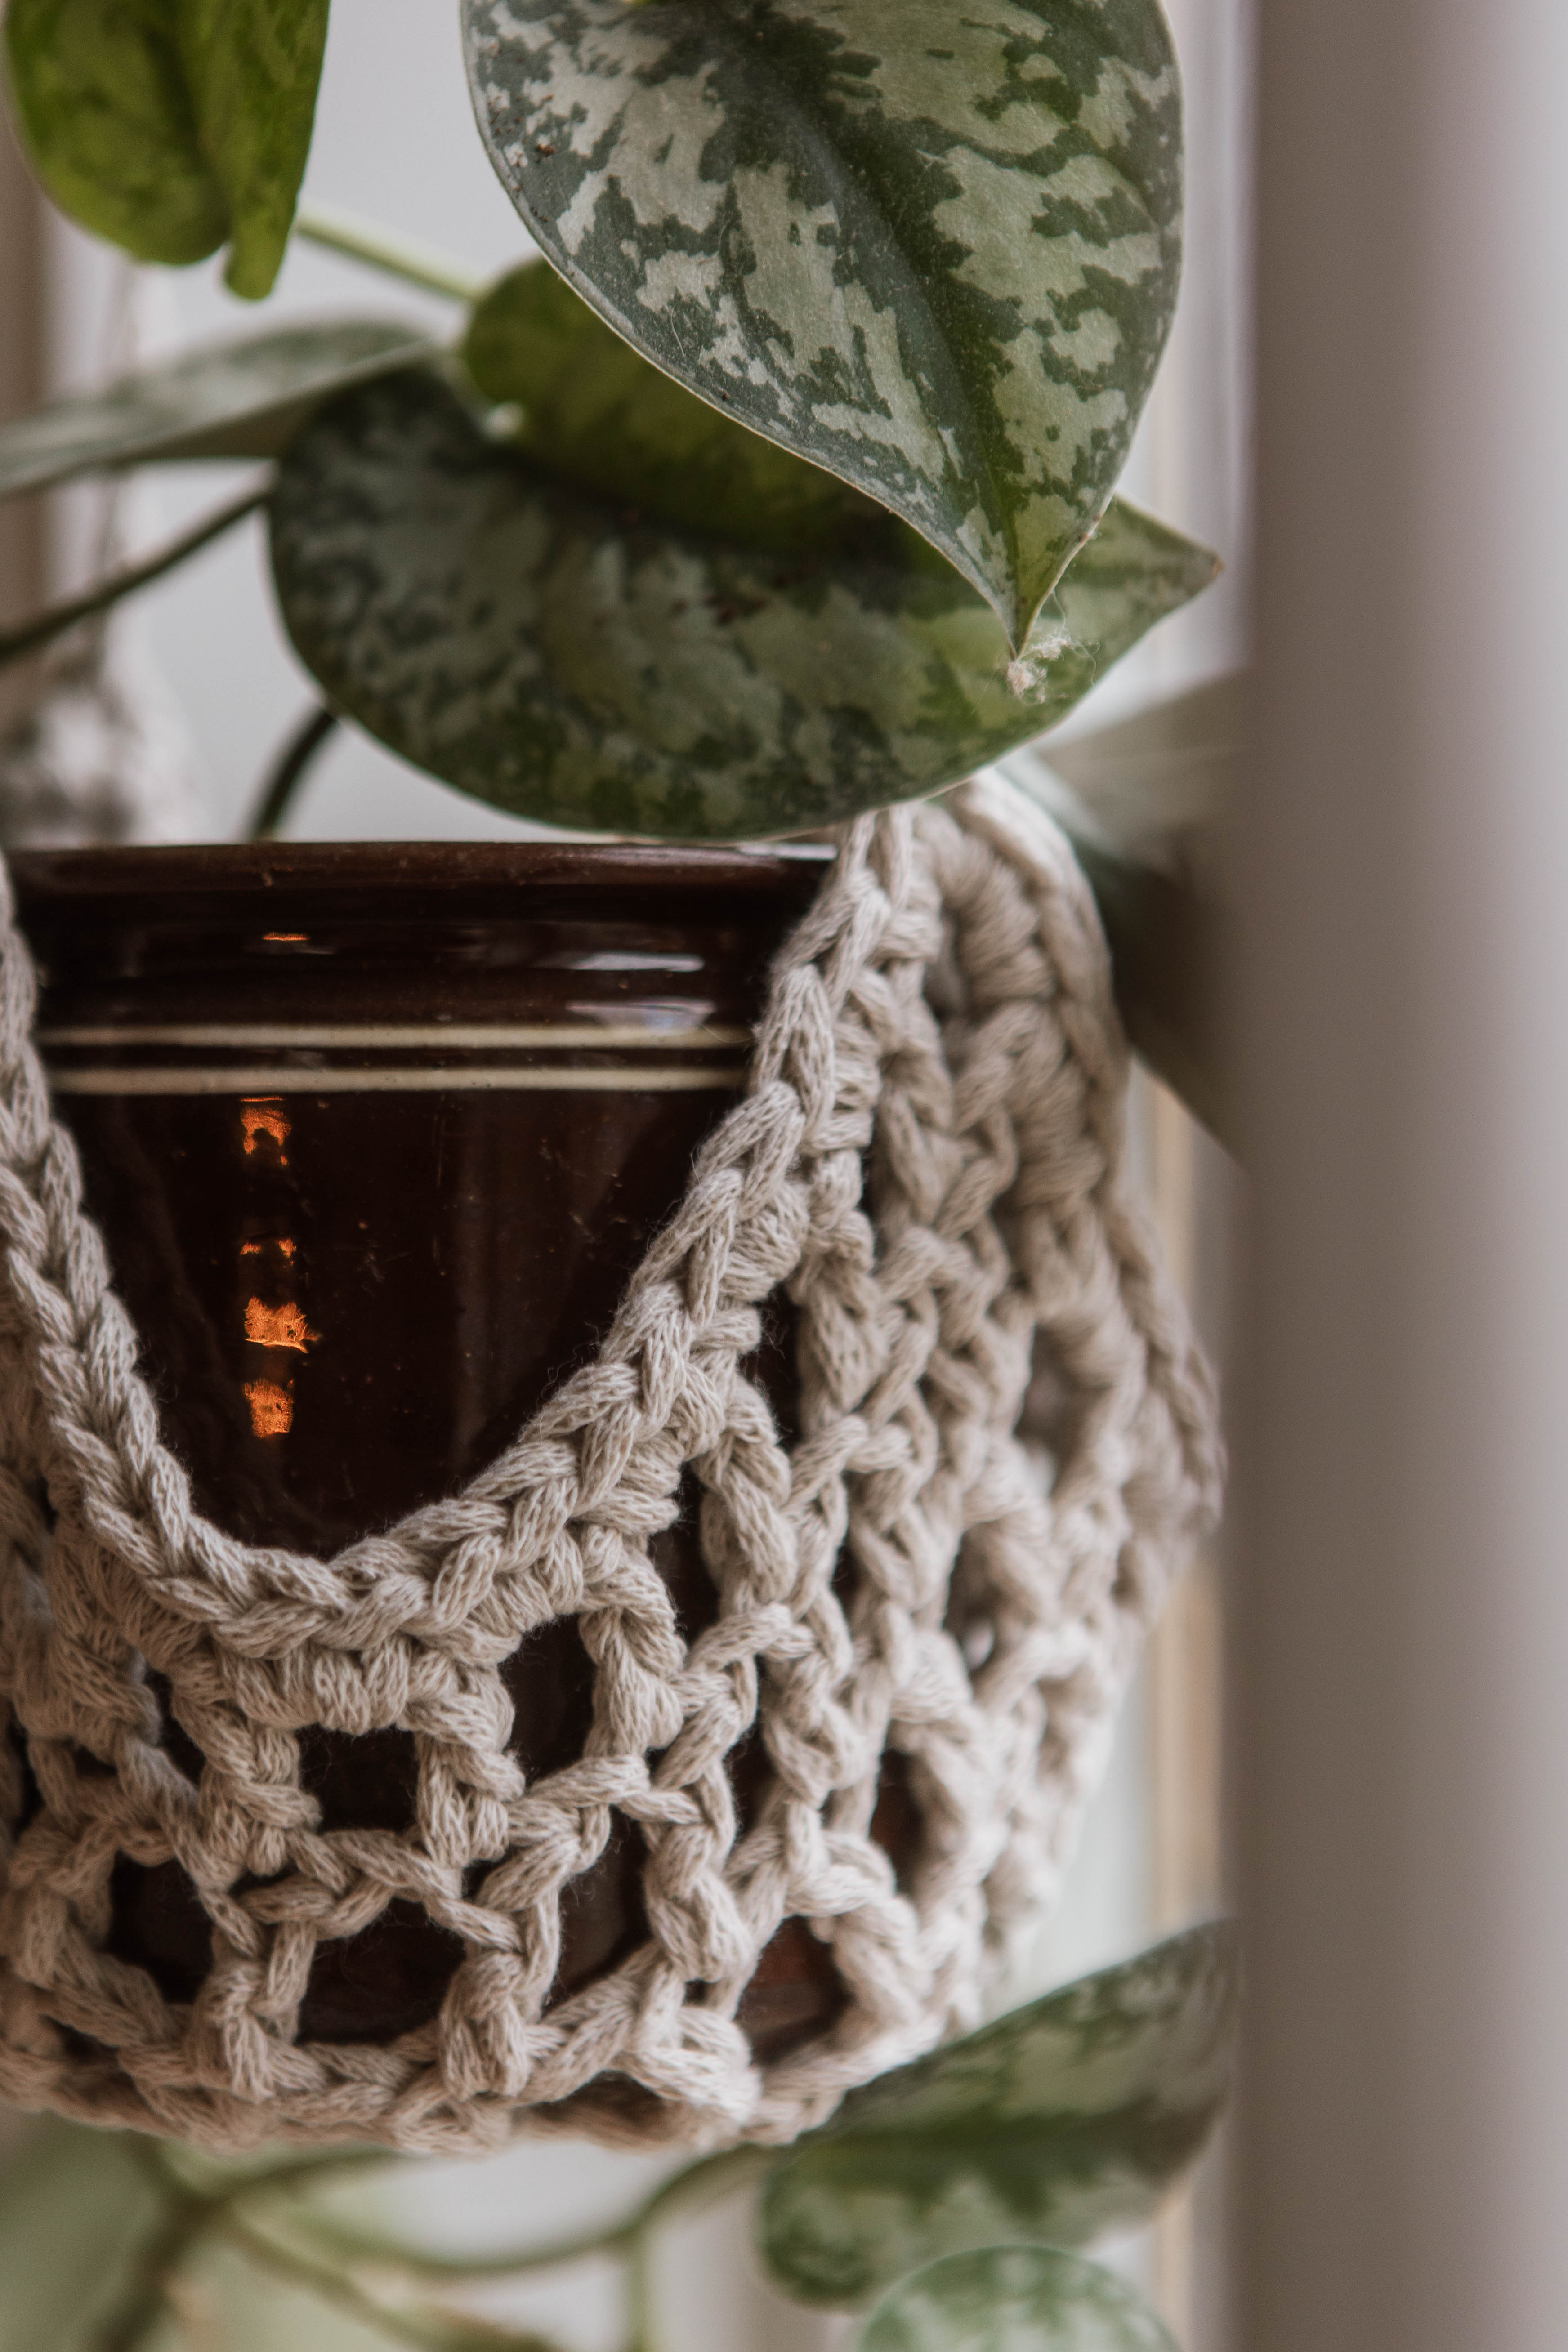
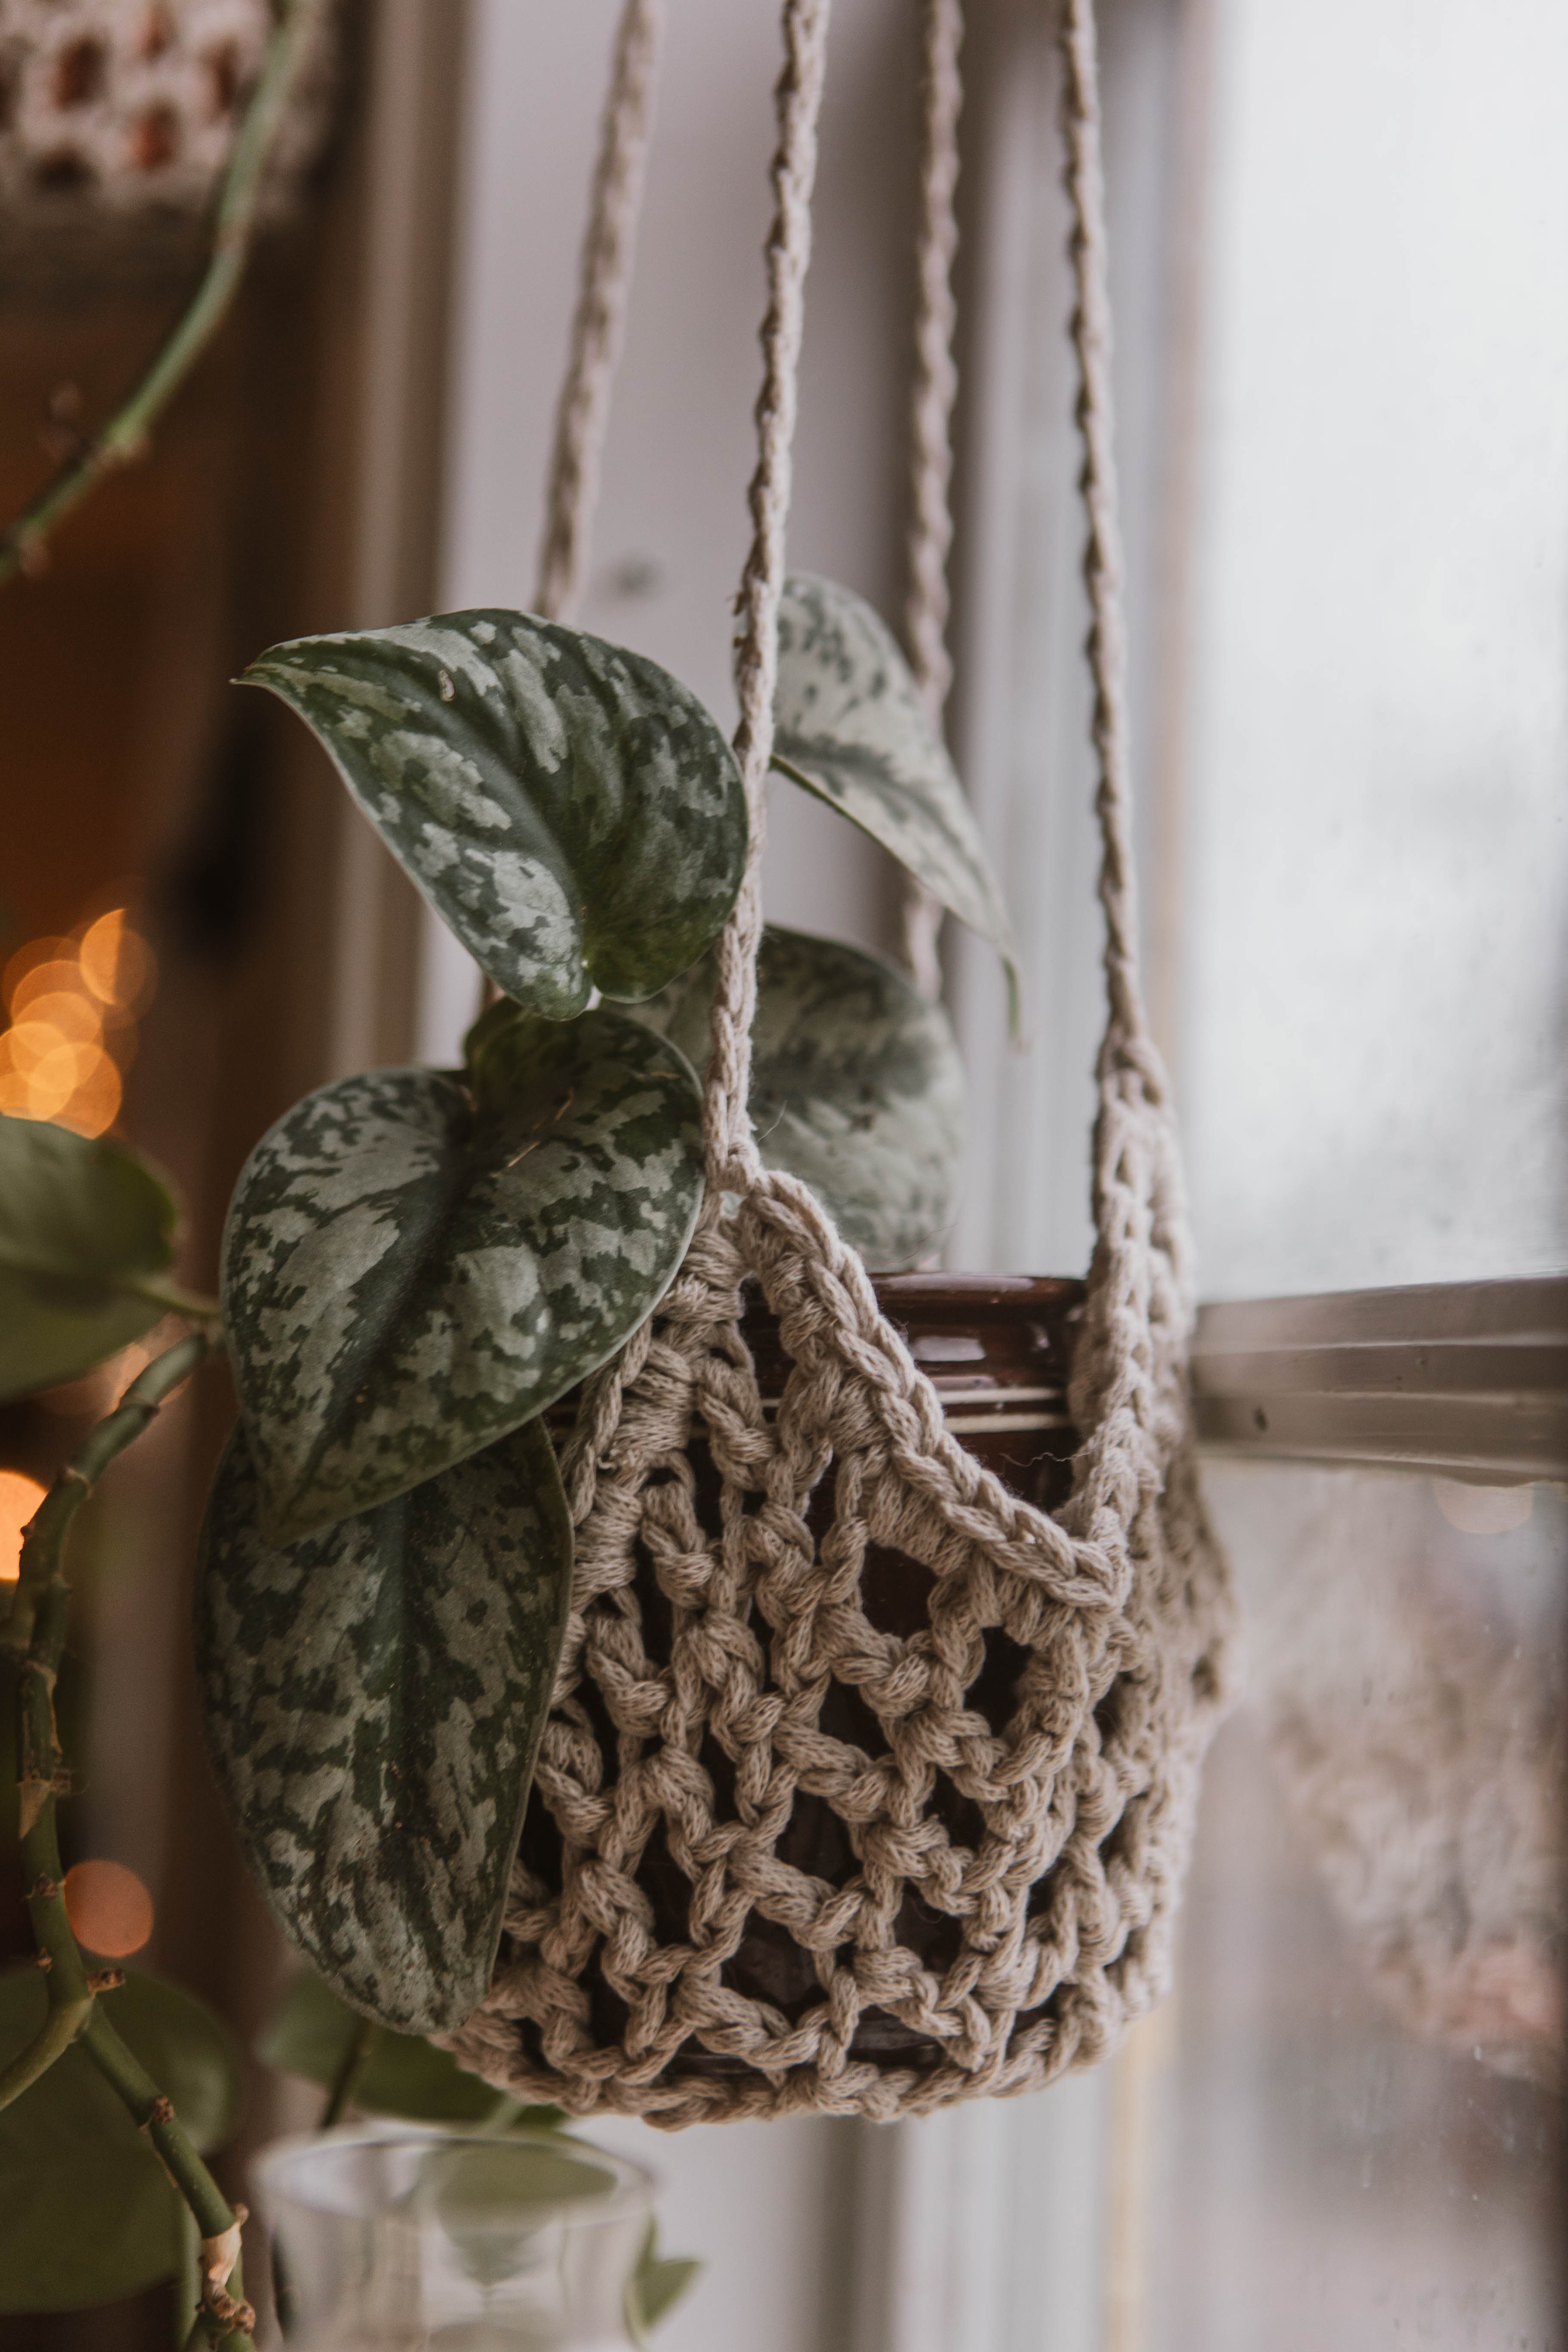
Crochet a lacy hanging planter, a home décor piece that takes your plants to new heights. It is simple, stylish, and perfect as a beginner project. The finished planter measures approximately 21 x 21 cm, and you can decide how long you want the hanging cords to be. You will need EKO Nano yarn and a 7 mm crochet hook. We have used the color “greige”.
Yarn Consumption: approximately 75 g
Please note that in this tutorial, we use videos from our technique school along with images.

Here's how to do it
First, crochet the base of the hanging planter and then your hanging cords. We hope you’ll enjoy trying out this simple project. /Rebecca

This is what you need:
Here you can directly purchase the material for the product. Please note that the instruction is digital and appears here on the page (no written instruction).


.jpg)
Unleash your creativity
For only 85kr per month you get access to all our 300+ beginner-friendly instructions for crochet, knitting and macrame.
A perfect way to get started with your new hobby!

Crochet the Base
Start by making a slip knot. Then, chain 26 stitches. If you’re unsure how to make a chain, see the video below.
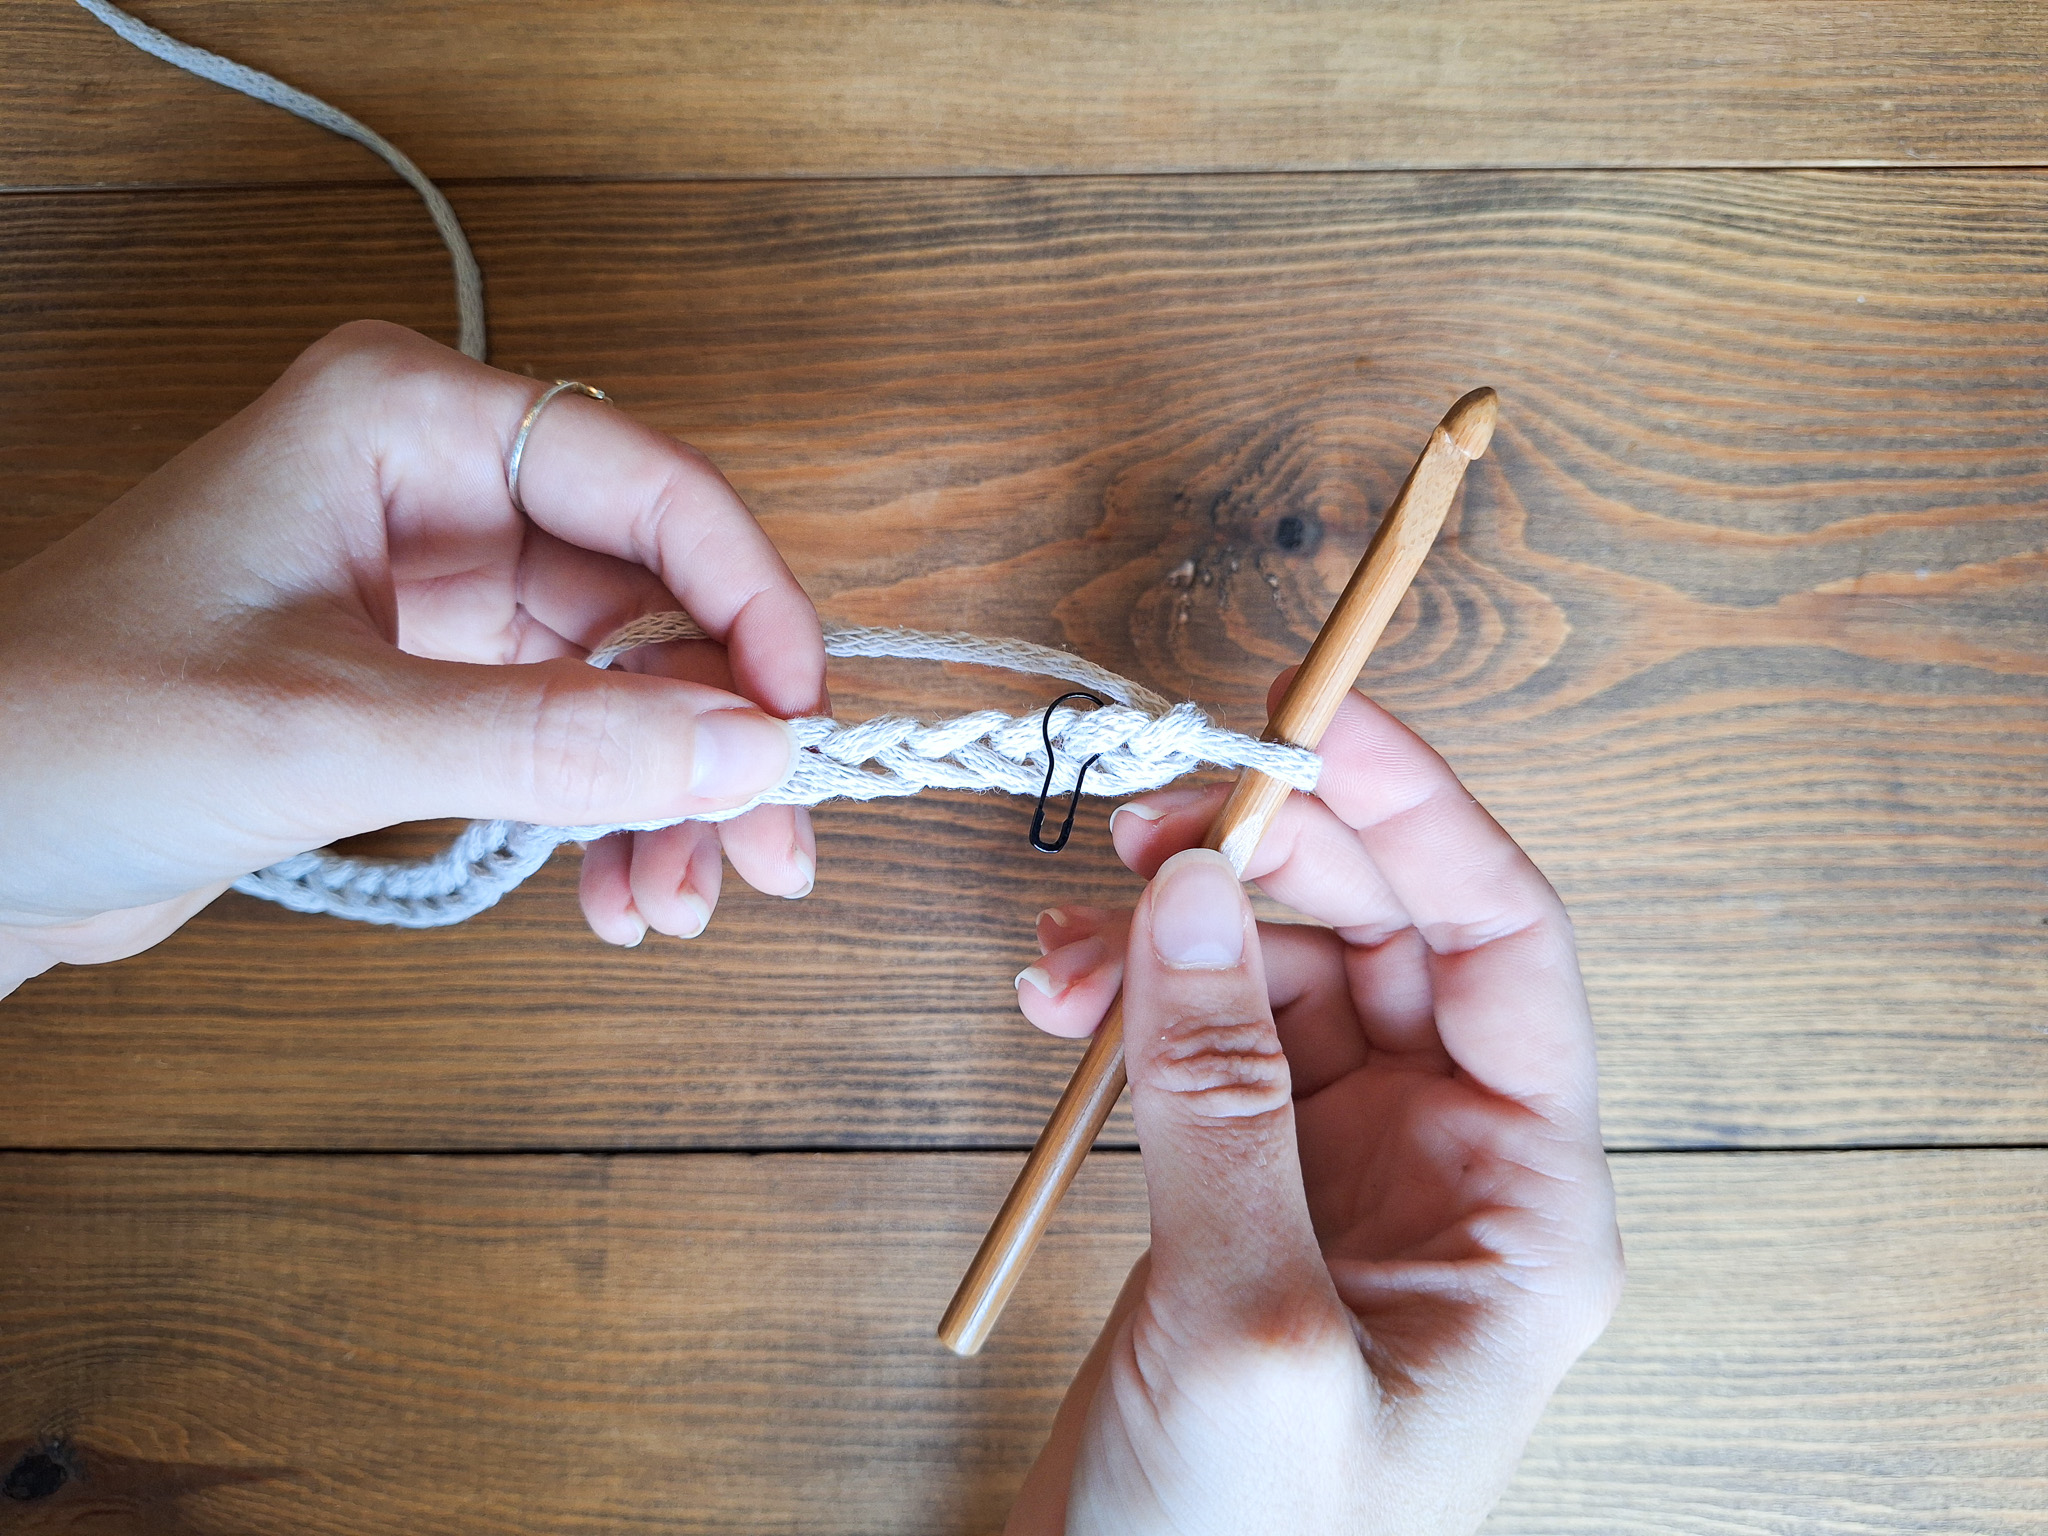
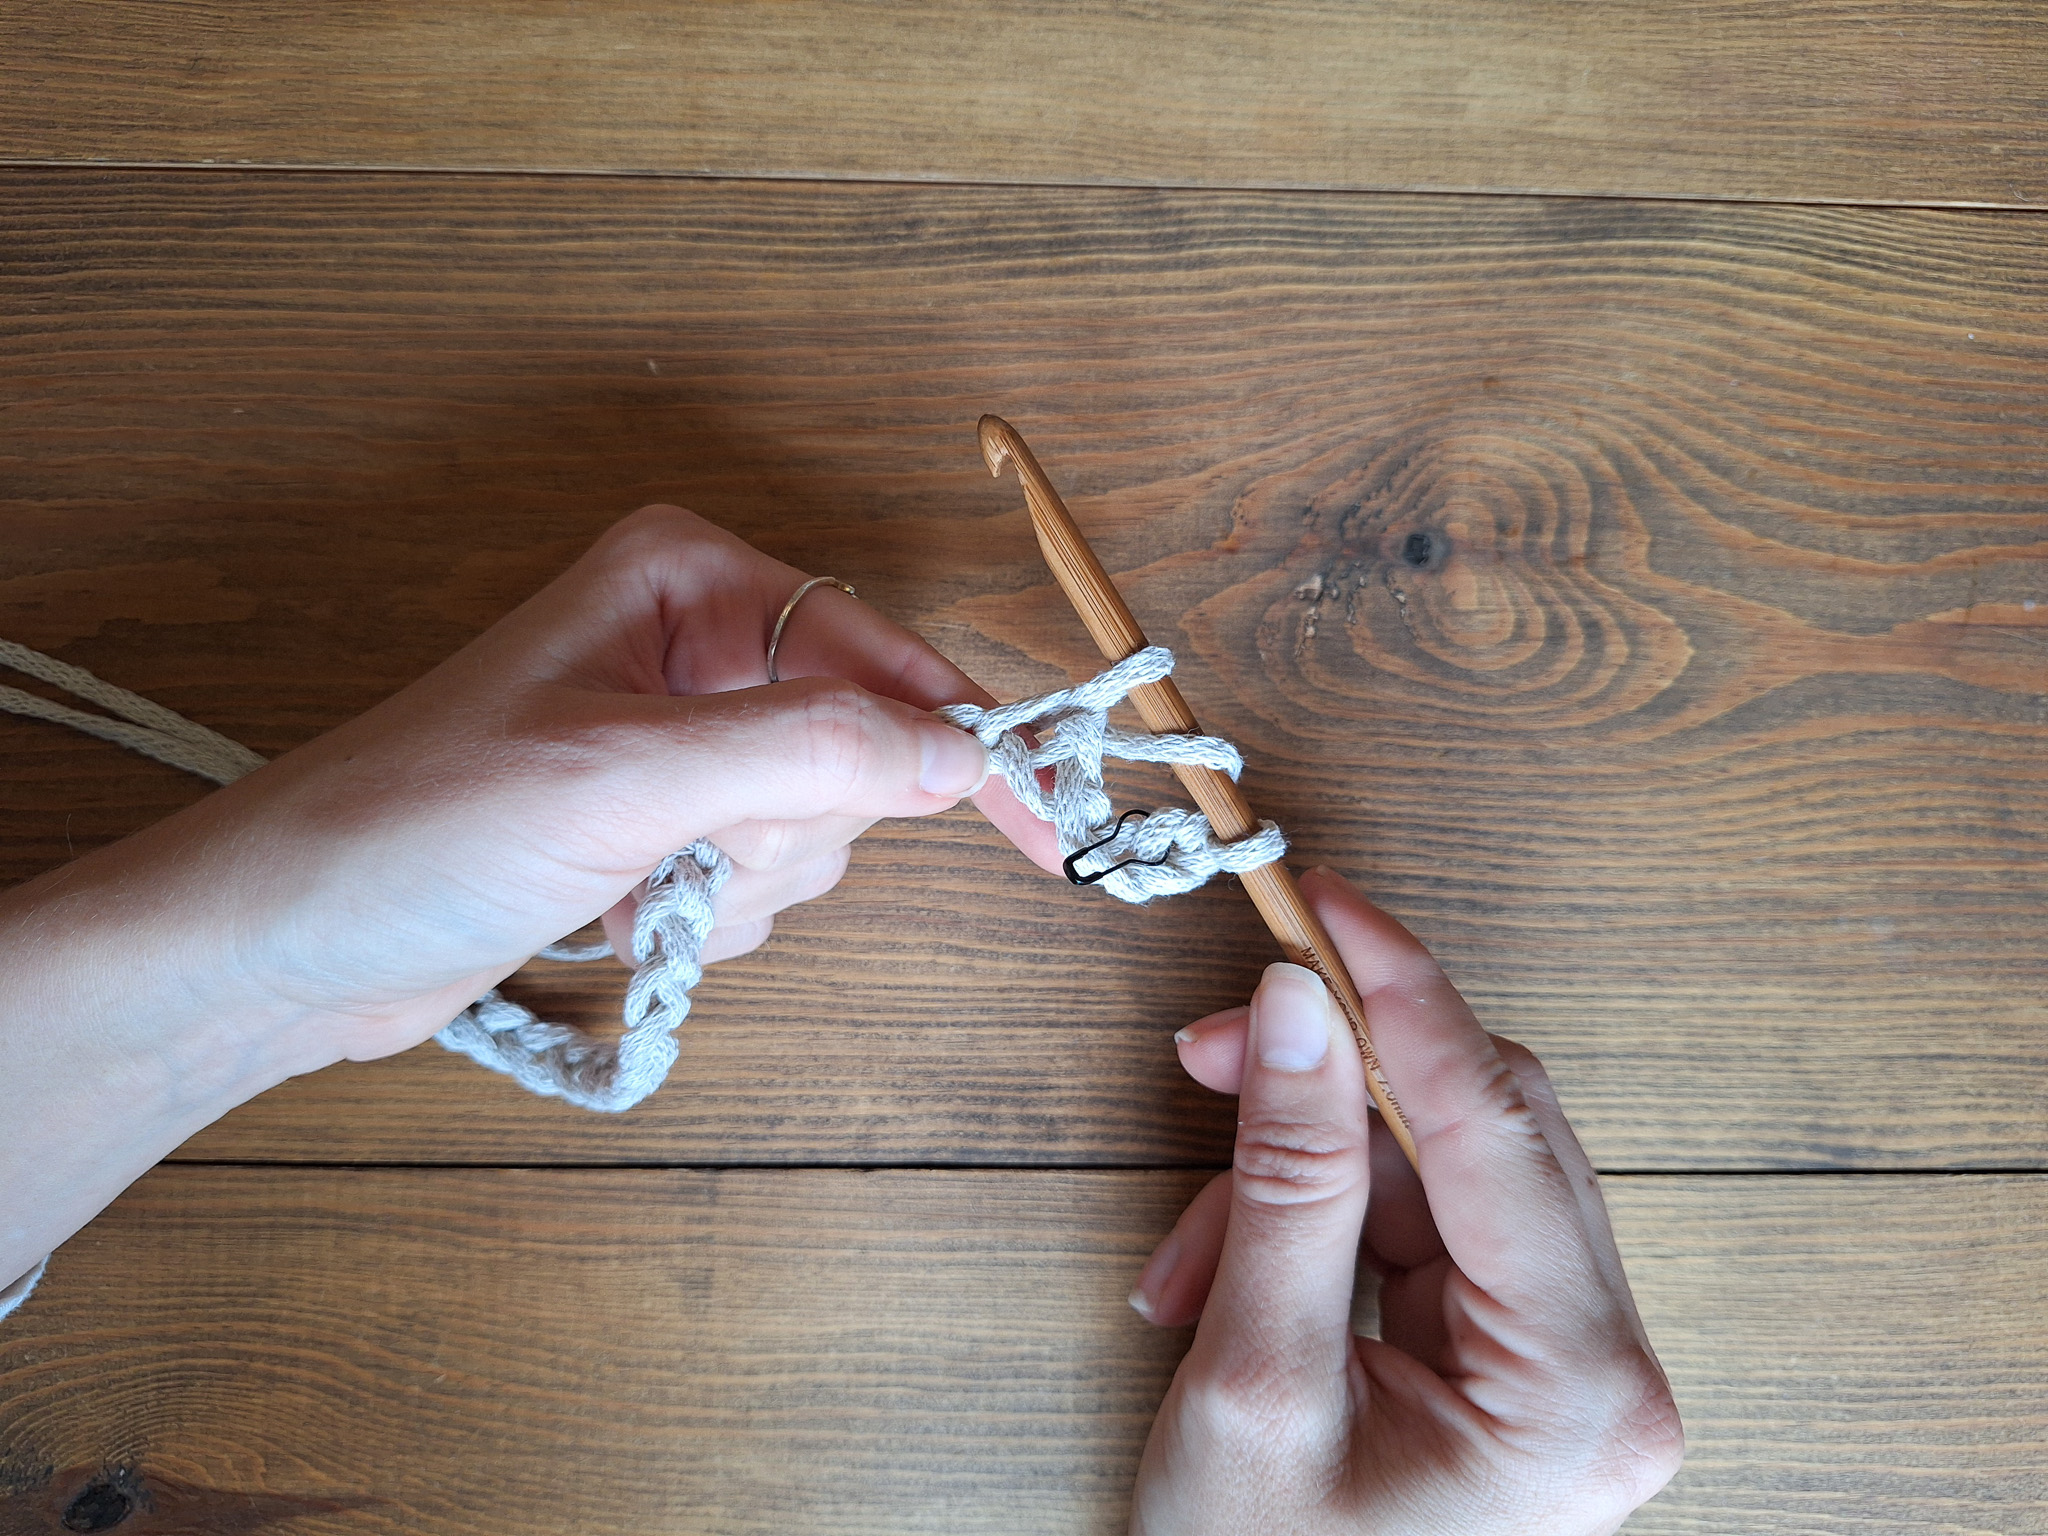
Row 1: In the 2nd stitch from the hook, place a marker. In the 6th stitch from the hook, work the first double crochet (dc) + 1 chain. Continue by working double crochet + 1 chain in every other stitch. Finish the row by chaining 3 and turn your work. You should now have 12 double crochets in this row.
If you’re unsure how to work a double crochet, see the video below.

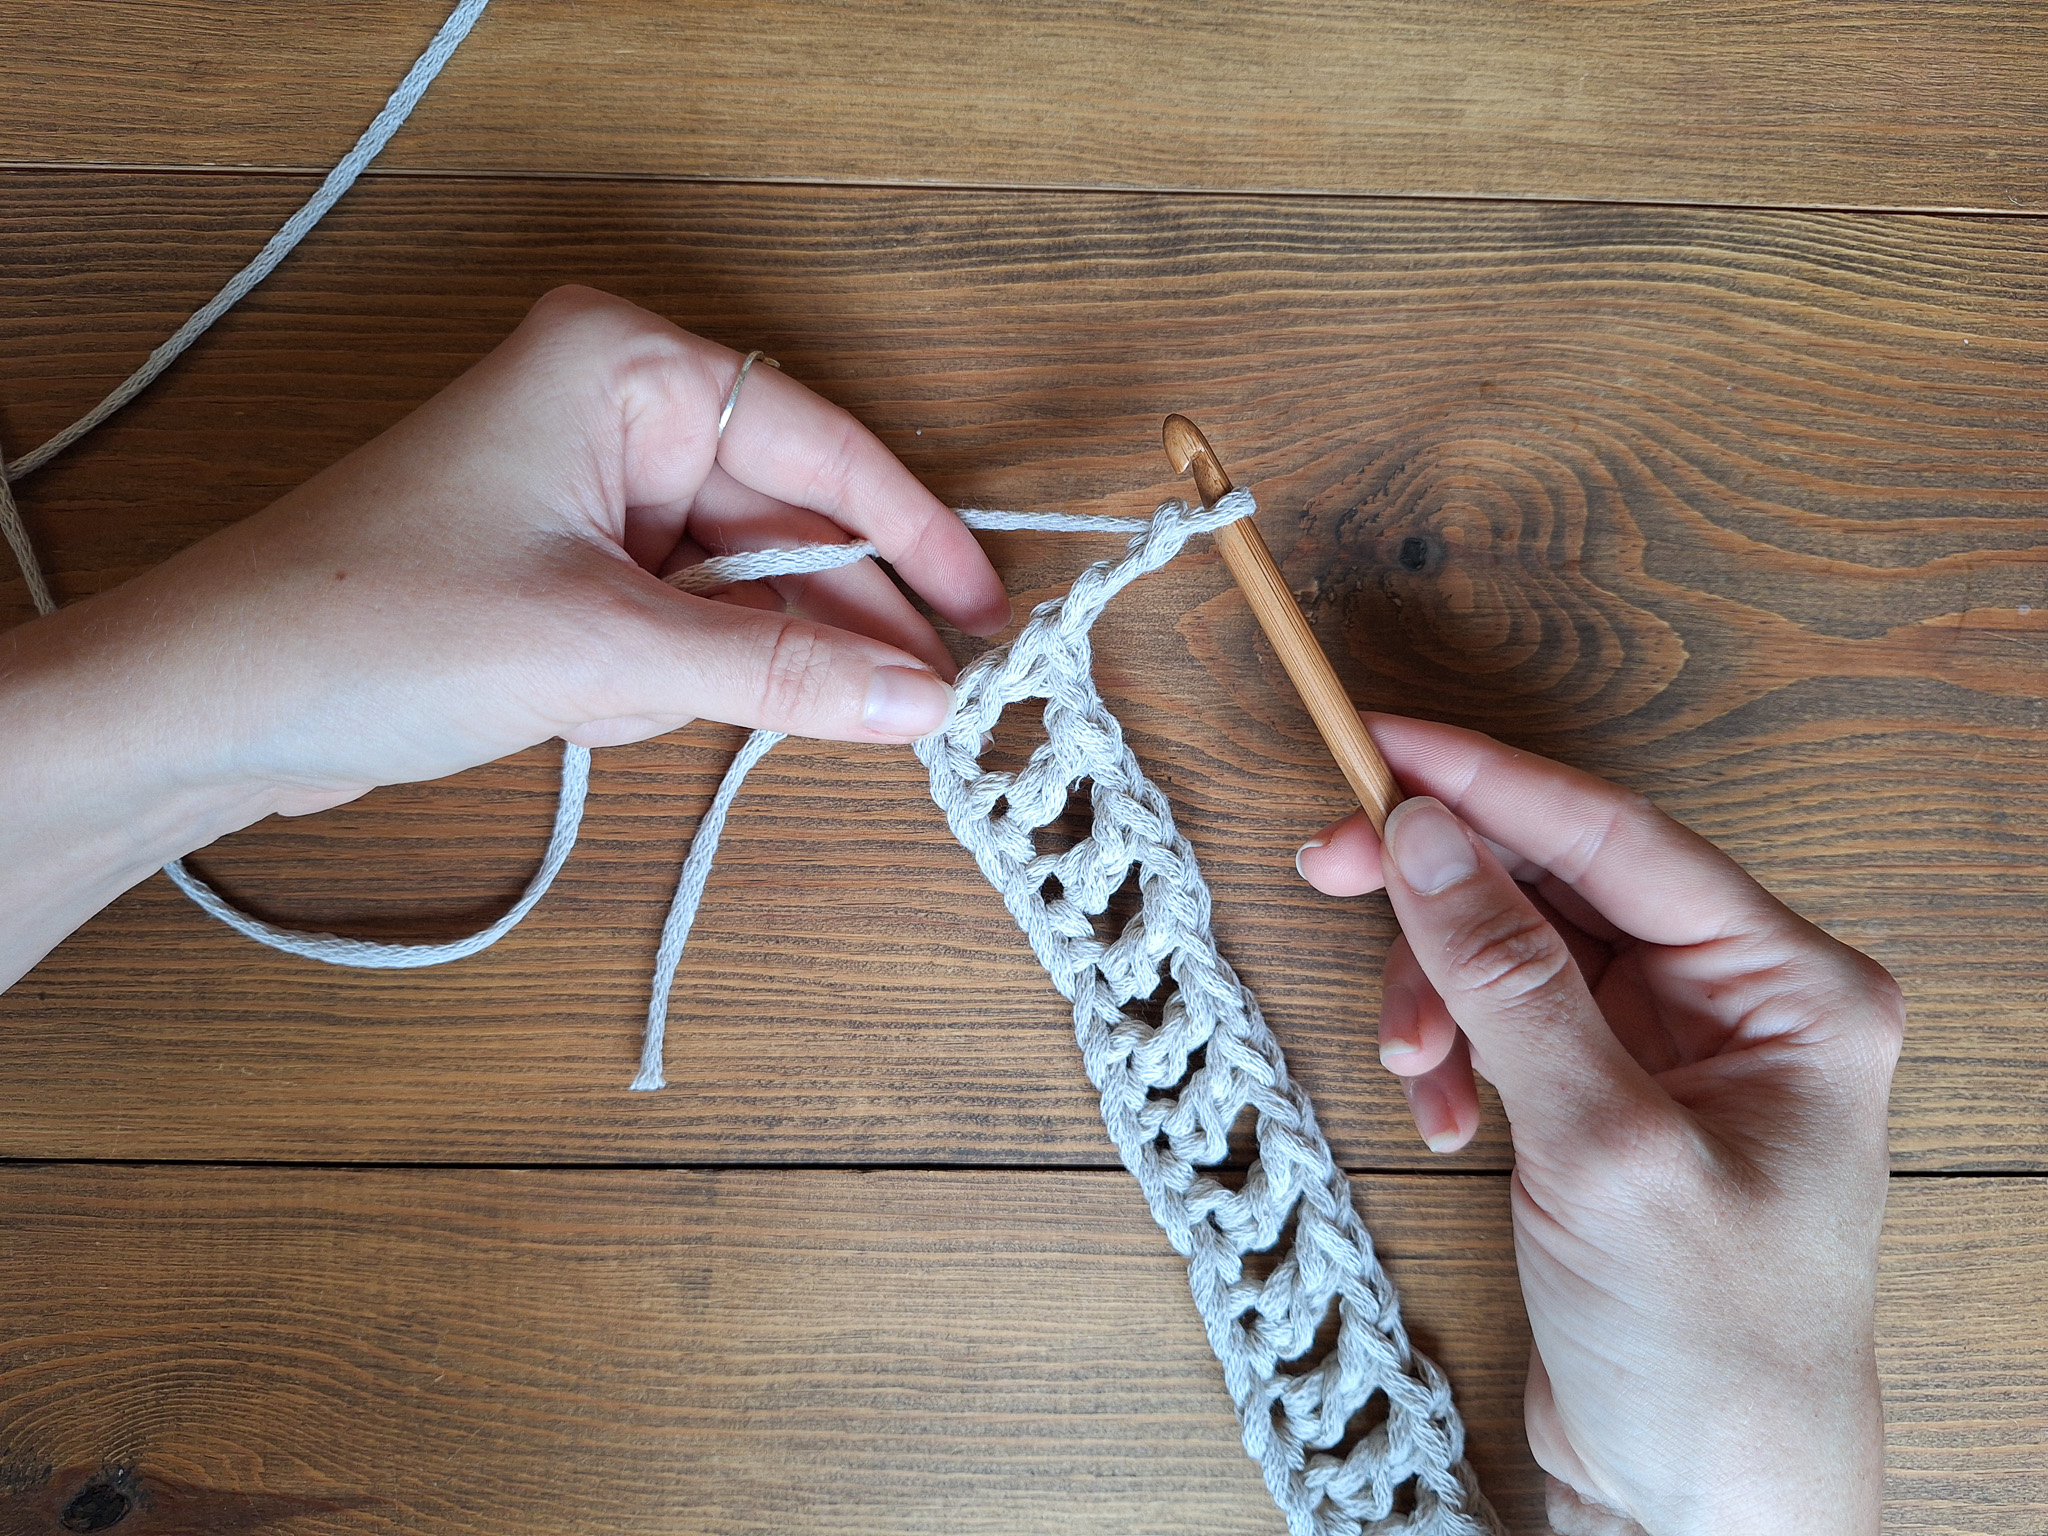
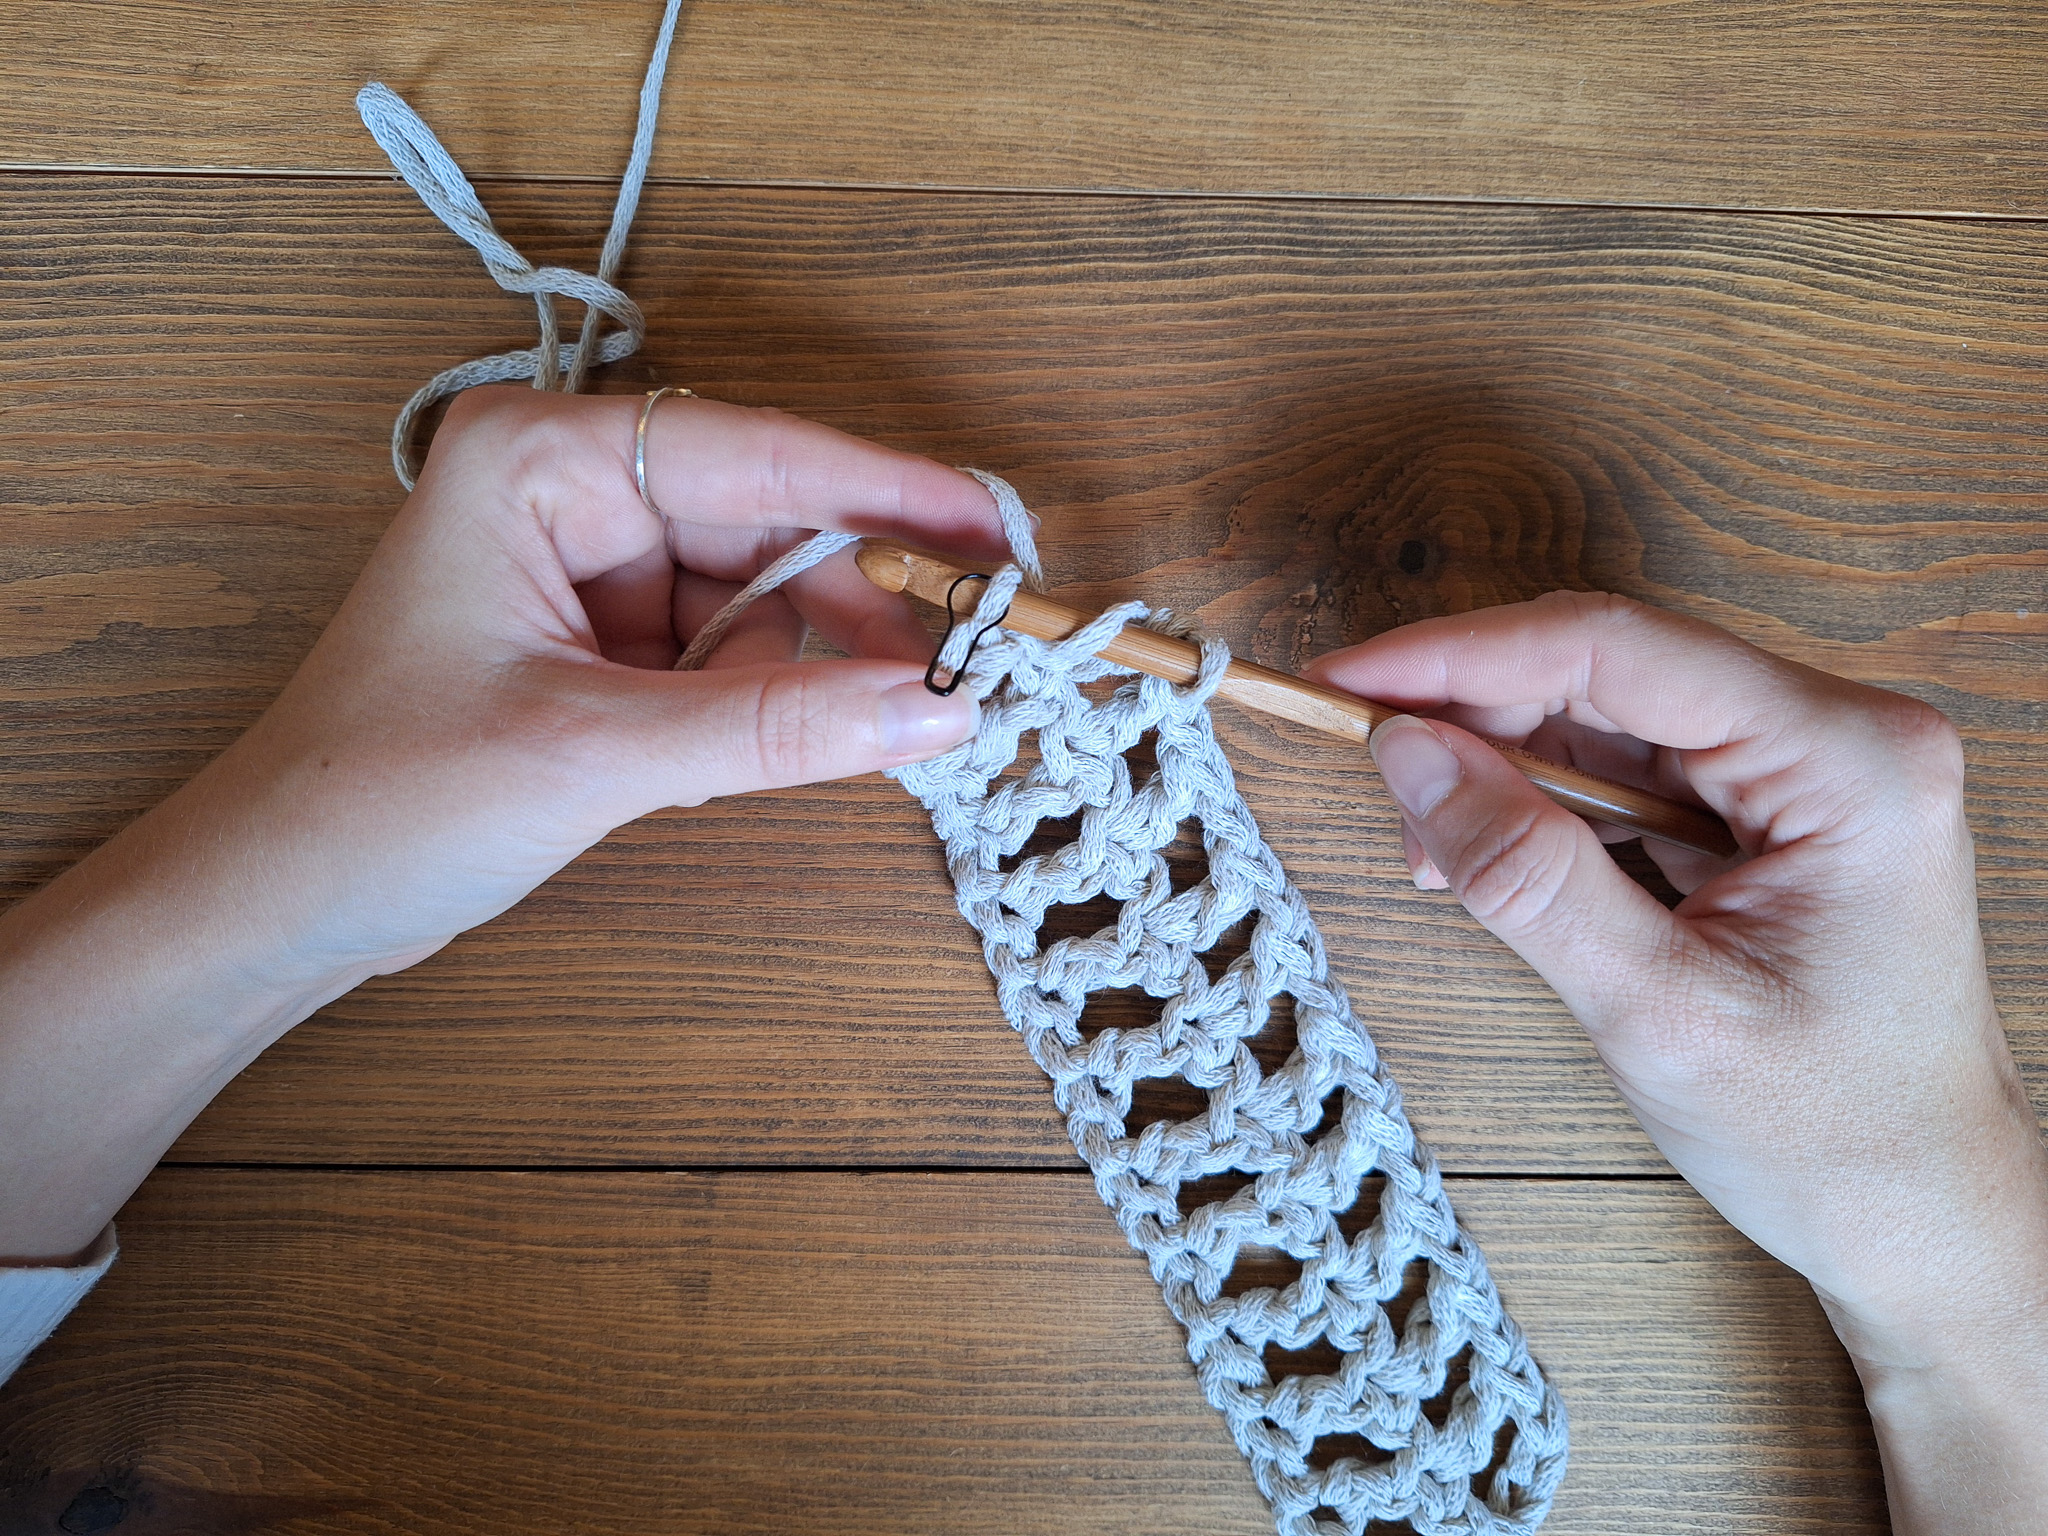
Row 2: Repeat Row 1. Work your double crochets into the dc from the previous row. Make the last double crochet in the stitch where you placed your marker. Ch 3 and turn your work.
Rows 3–9: Repeat Row 2 a total of 7 more times so that you form a square shape. Total: 9 rows.
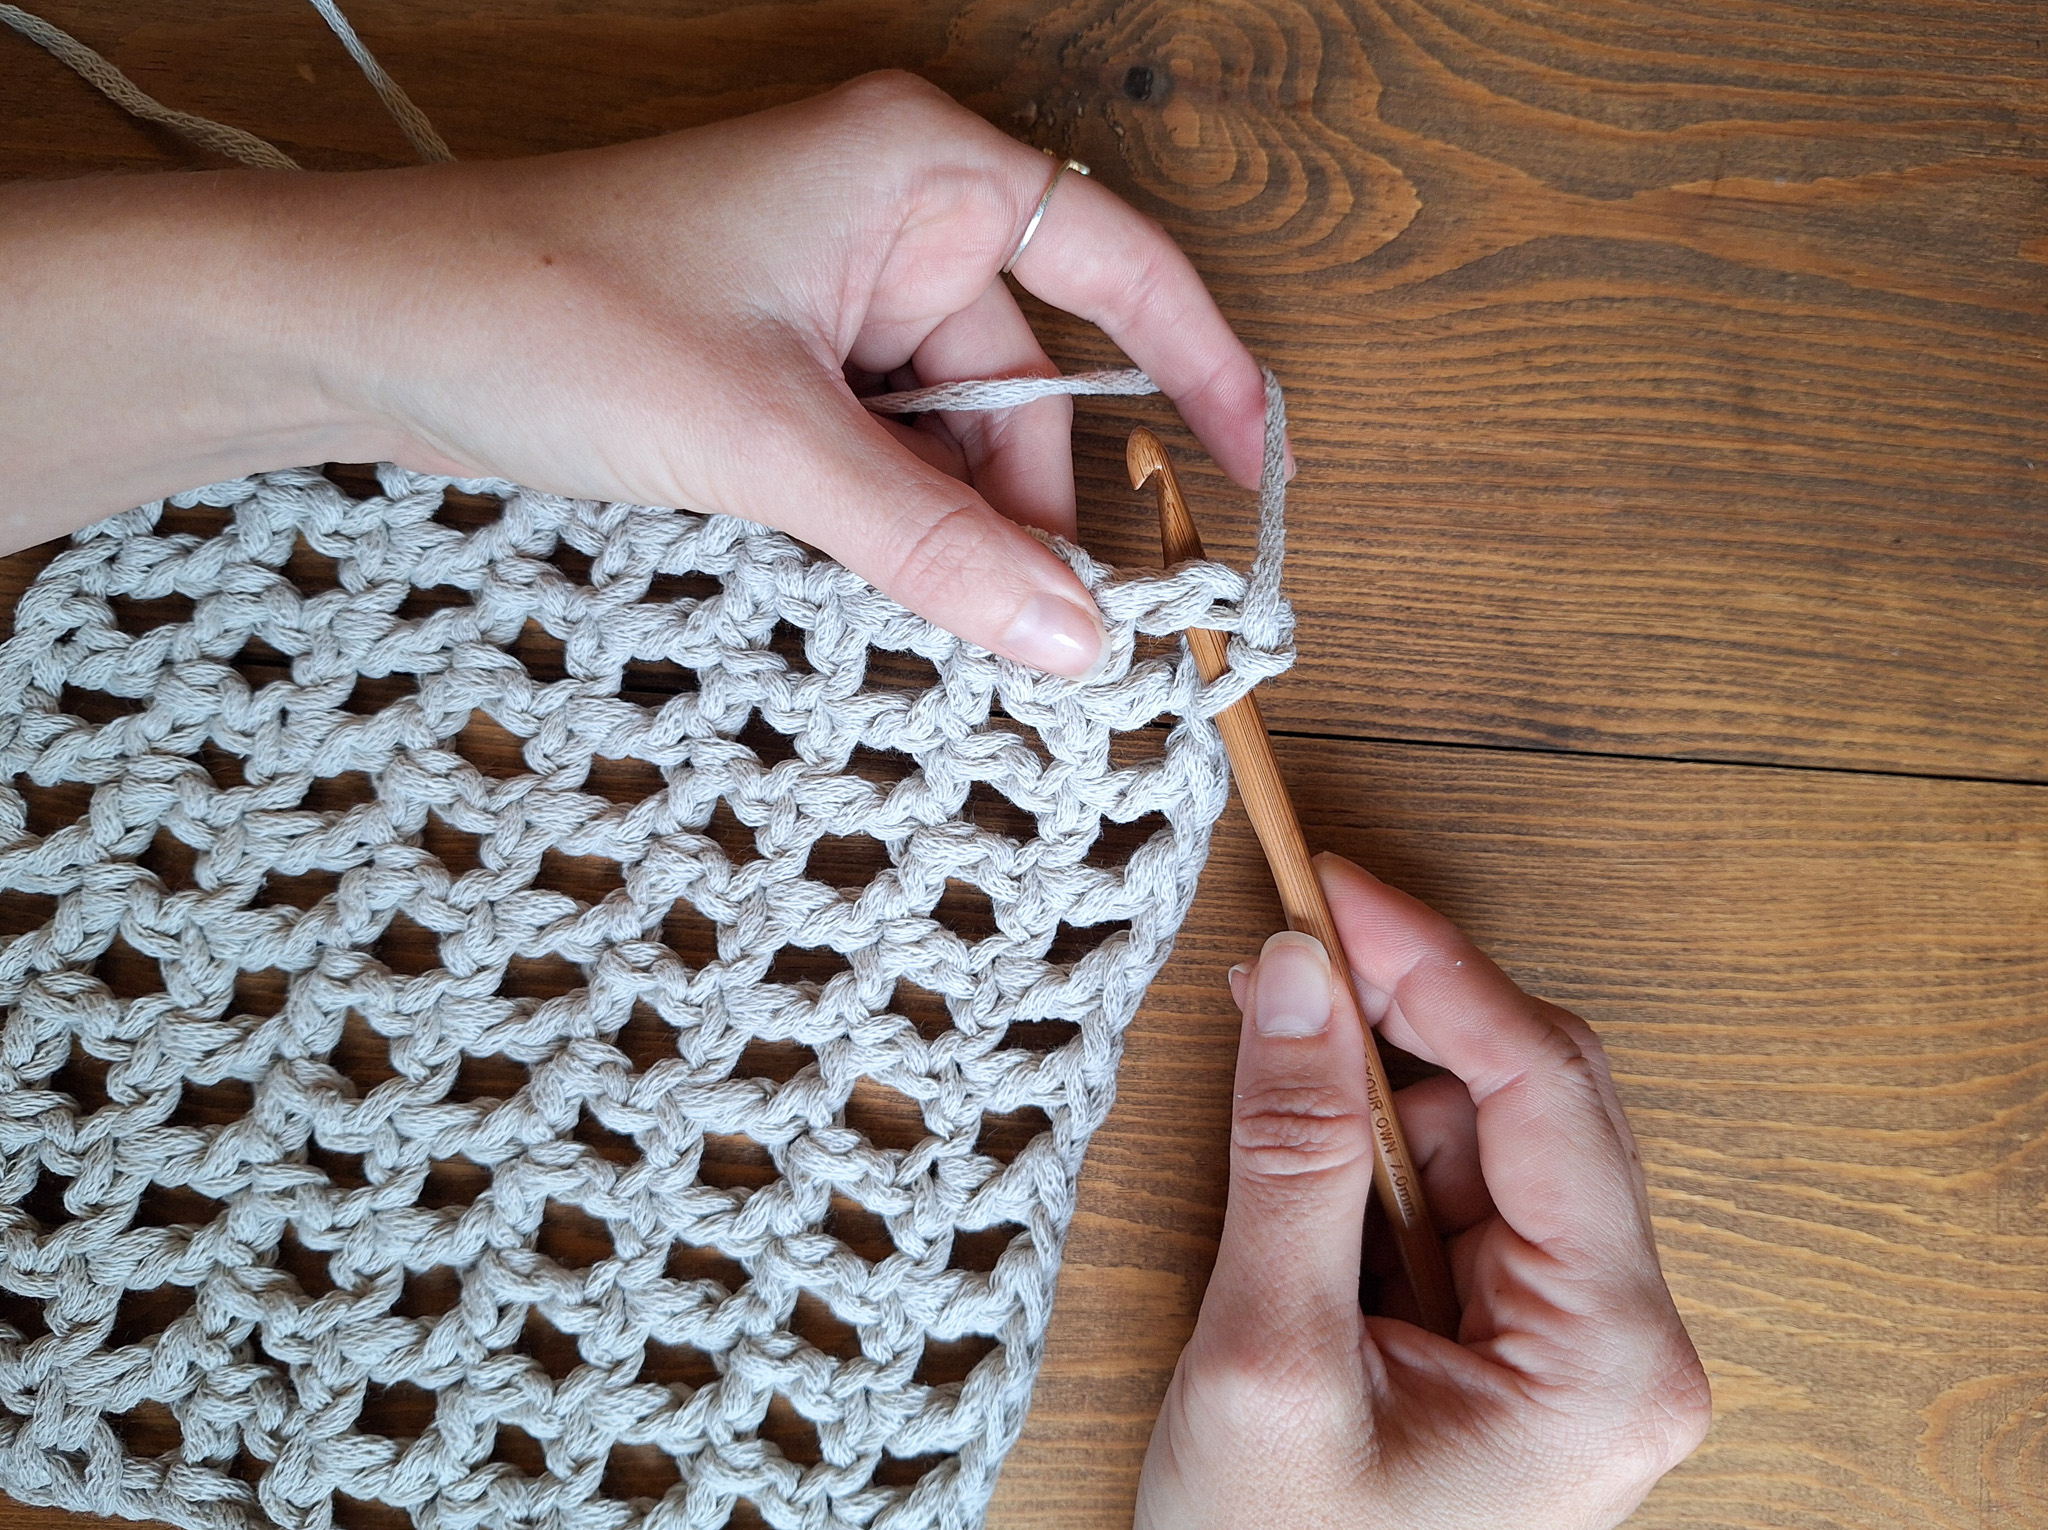
Crochet around the edge:
Starting from the corner where you ended, work 2 single crochets in each space all the way around. When you reach a corner, work 4 single crochet in the same space. If you’re unsure how to make a single crochet, see the video below. Finish the round with a slip stitch, but do not cut the yarn.
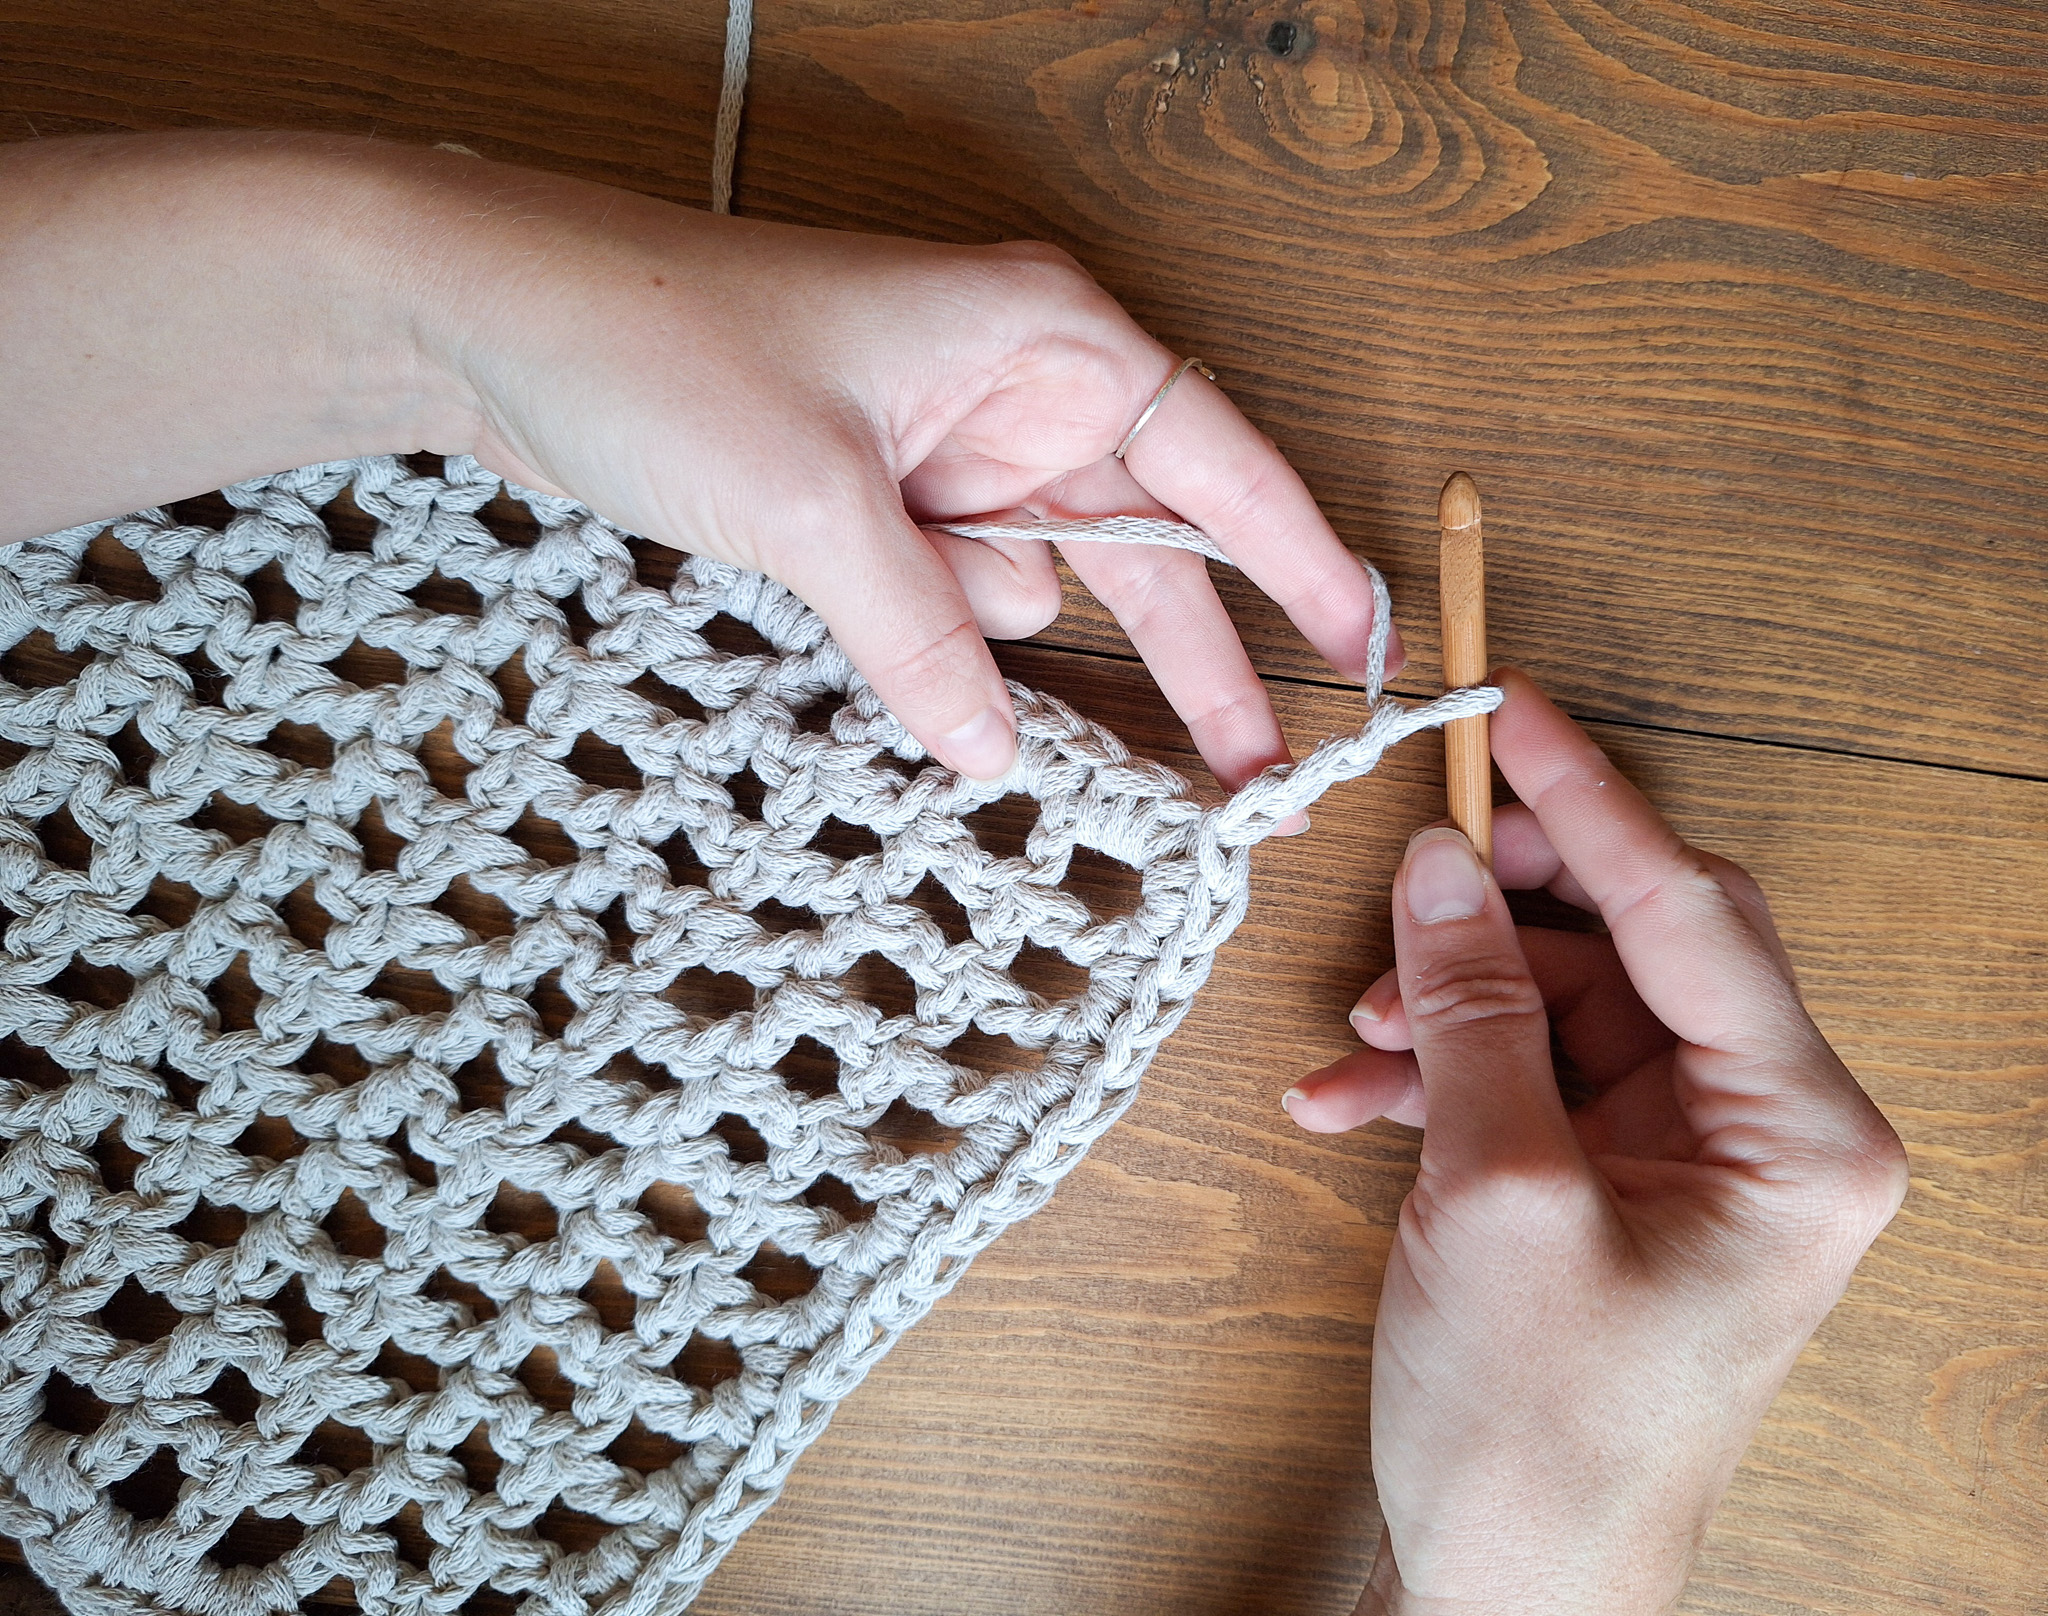
Crochet the hanging straps:
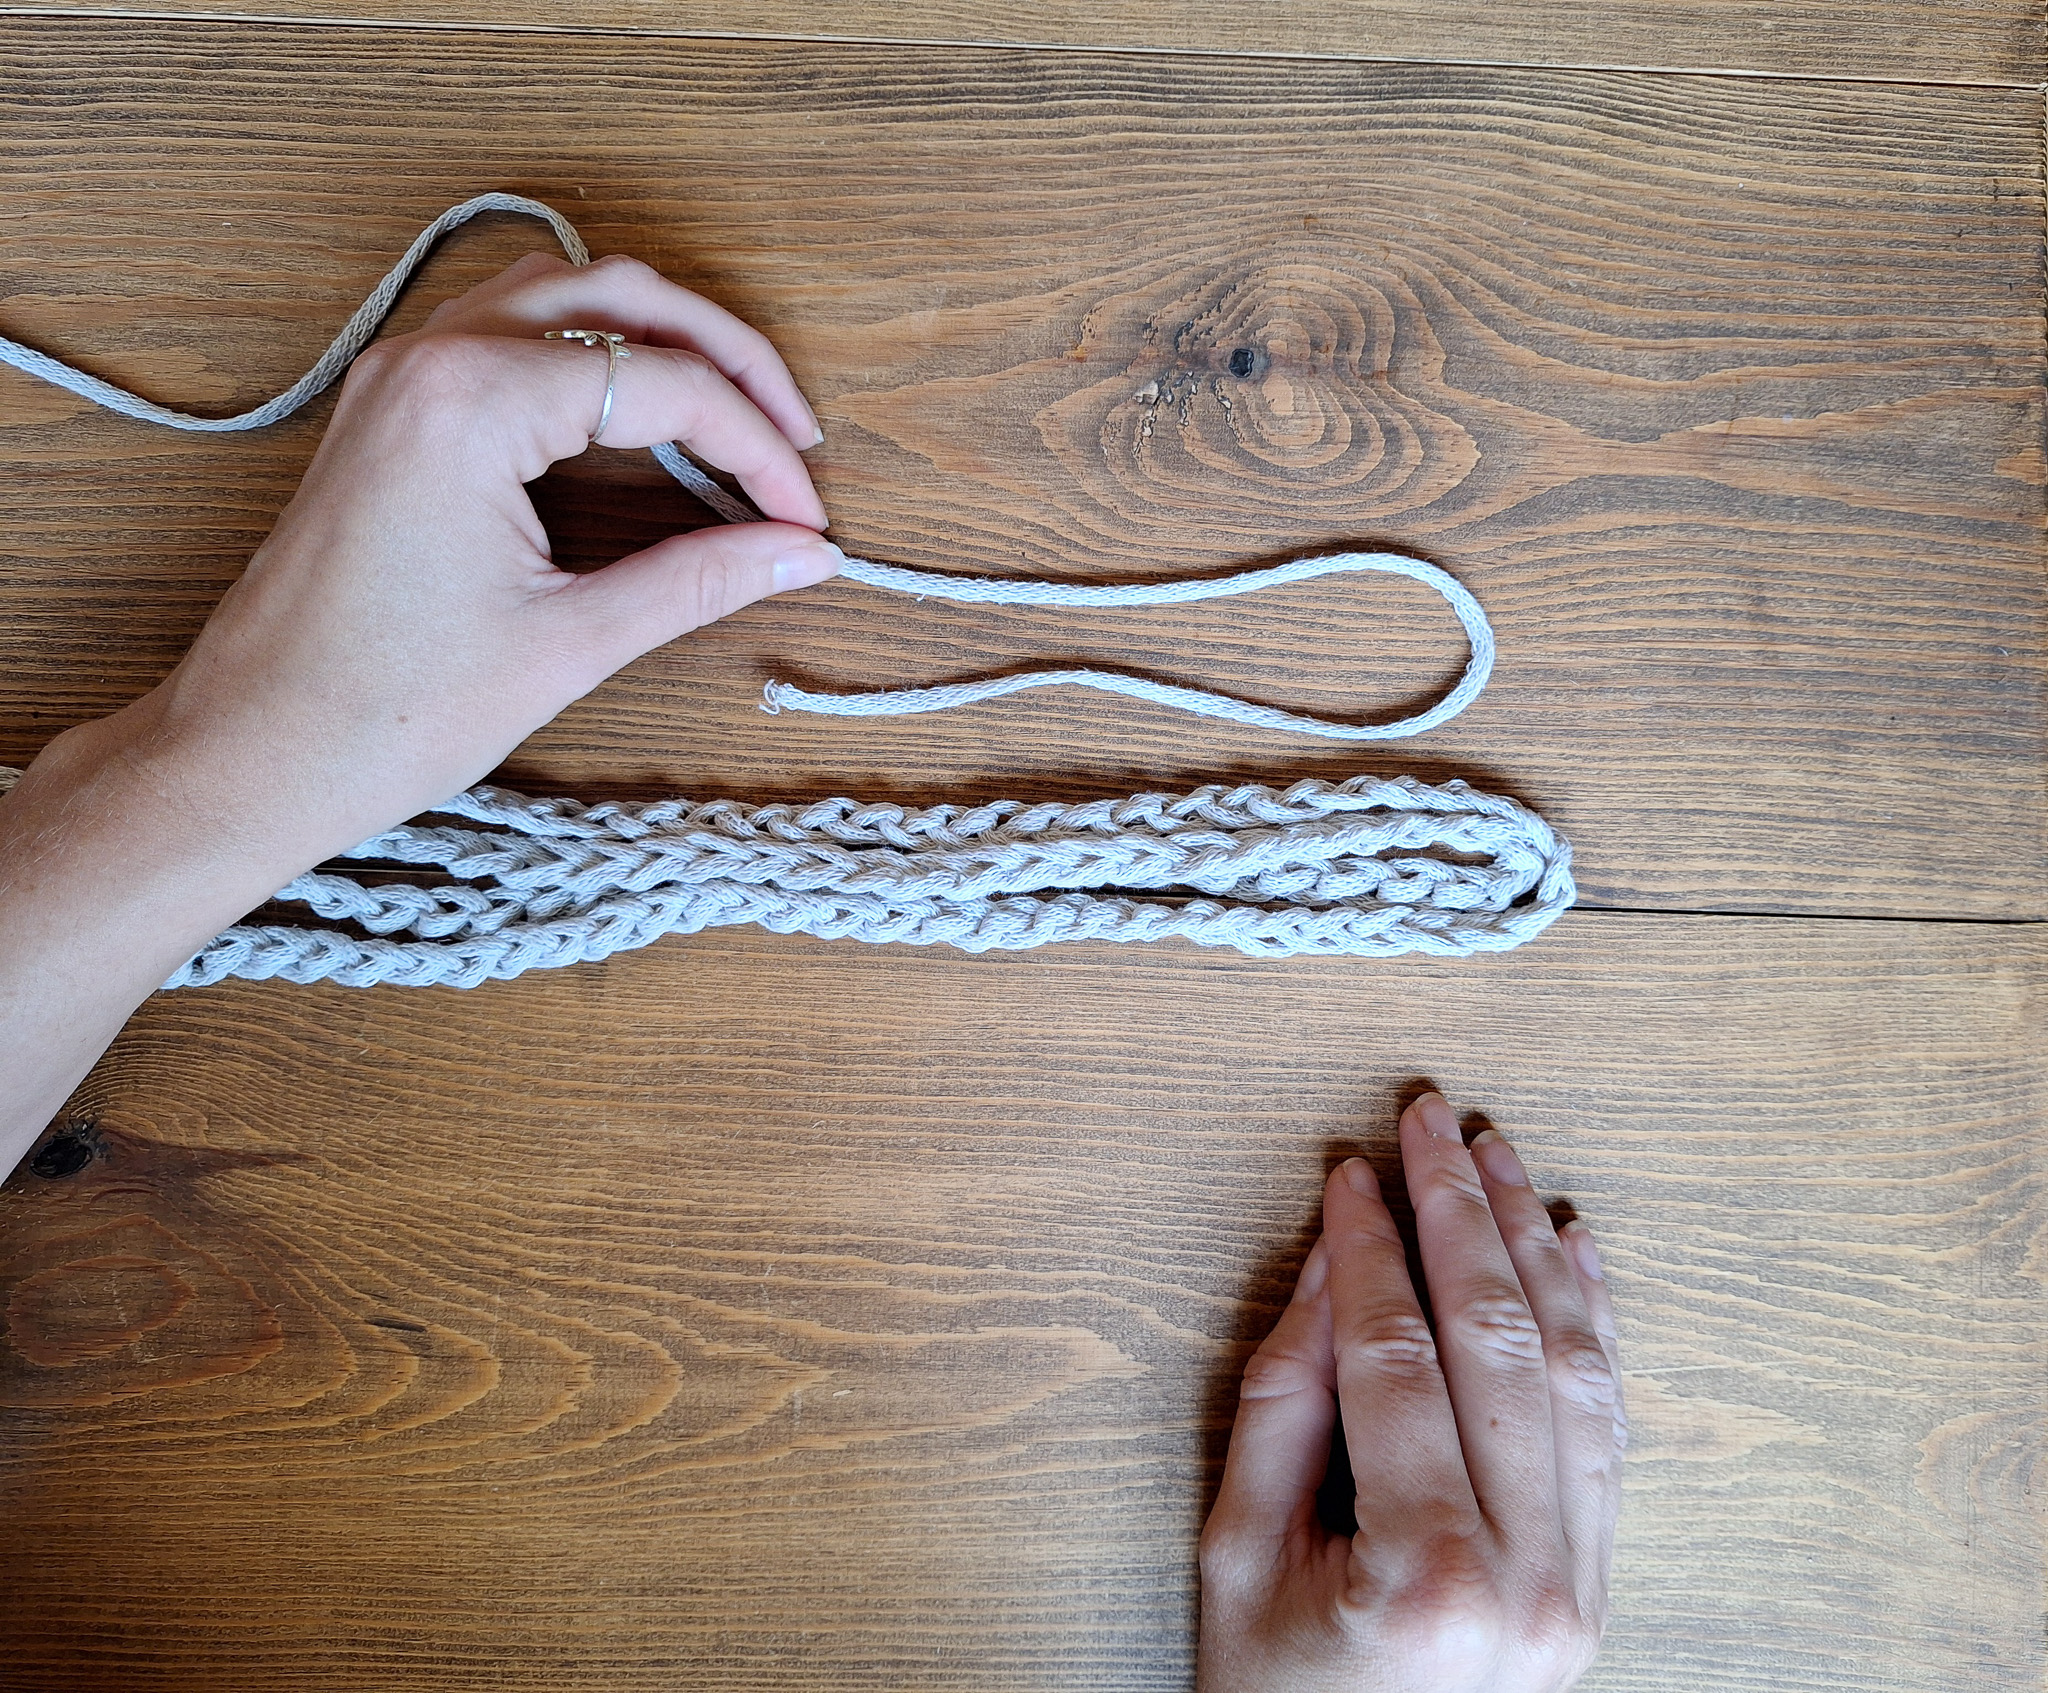
From the corner where you are, crochet your first hanging strap. You can make it any length you like. Keep in mind that the strap will be doubled, so the length you want × 2 is the length you should crochet. For reference, we crocheted 100 chains.
When your strap is the desired length, attach it to the opposite corner diagonally. Secure it with a slip stitch, then cut the yarn leaving about 15 cm. Make a knot by pulling the yarn through the loop, and then hide the tail between the stitches.
Repeat for the second strap.
Tip: We recommend tying a knot in the stitch where you start your chain before beginning, to ensure the hanging strap can hold the weight of your plant pot.
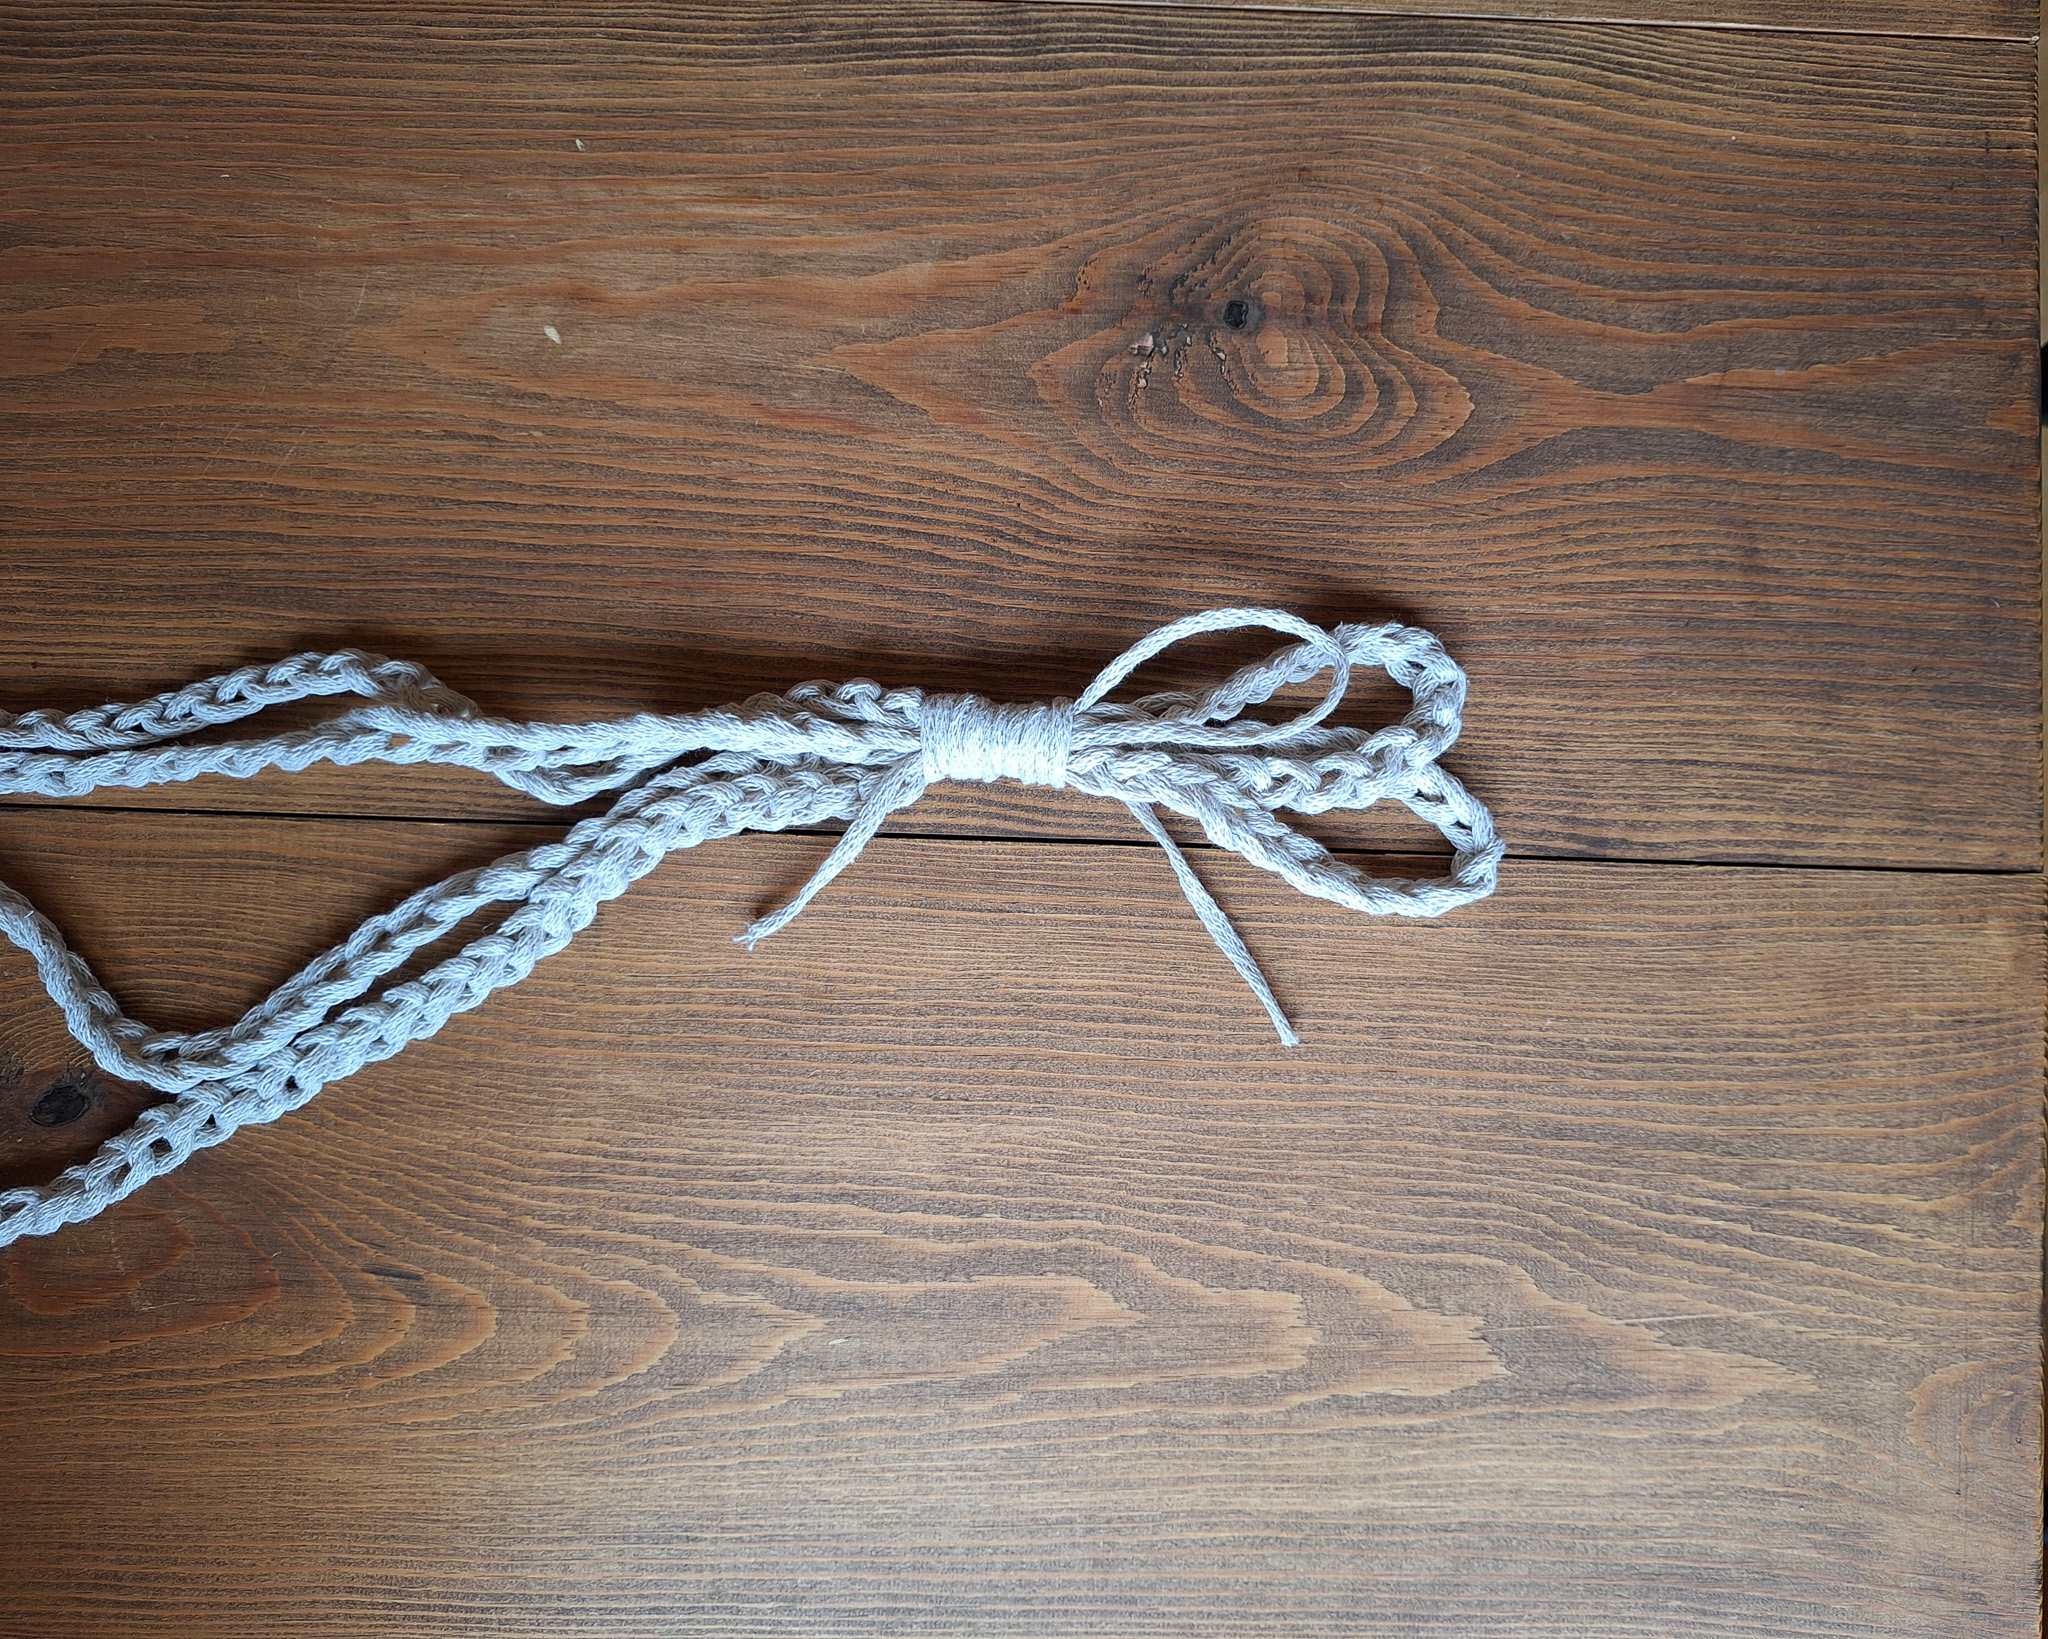
Once finished, you can hang your plant hanger as it is, or add a “wrap knot” (also called a “gathering knot”) about 10 cm from the top for extra decoration.

How to make the wrap knot:
- Cut a piece of yarn, about 30 cm long.
- Fold your yarn about 10 cm from the end to create a U-shape.
- Fold it again so you have a U at the top and bottom.
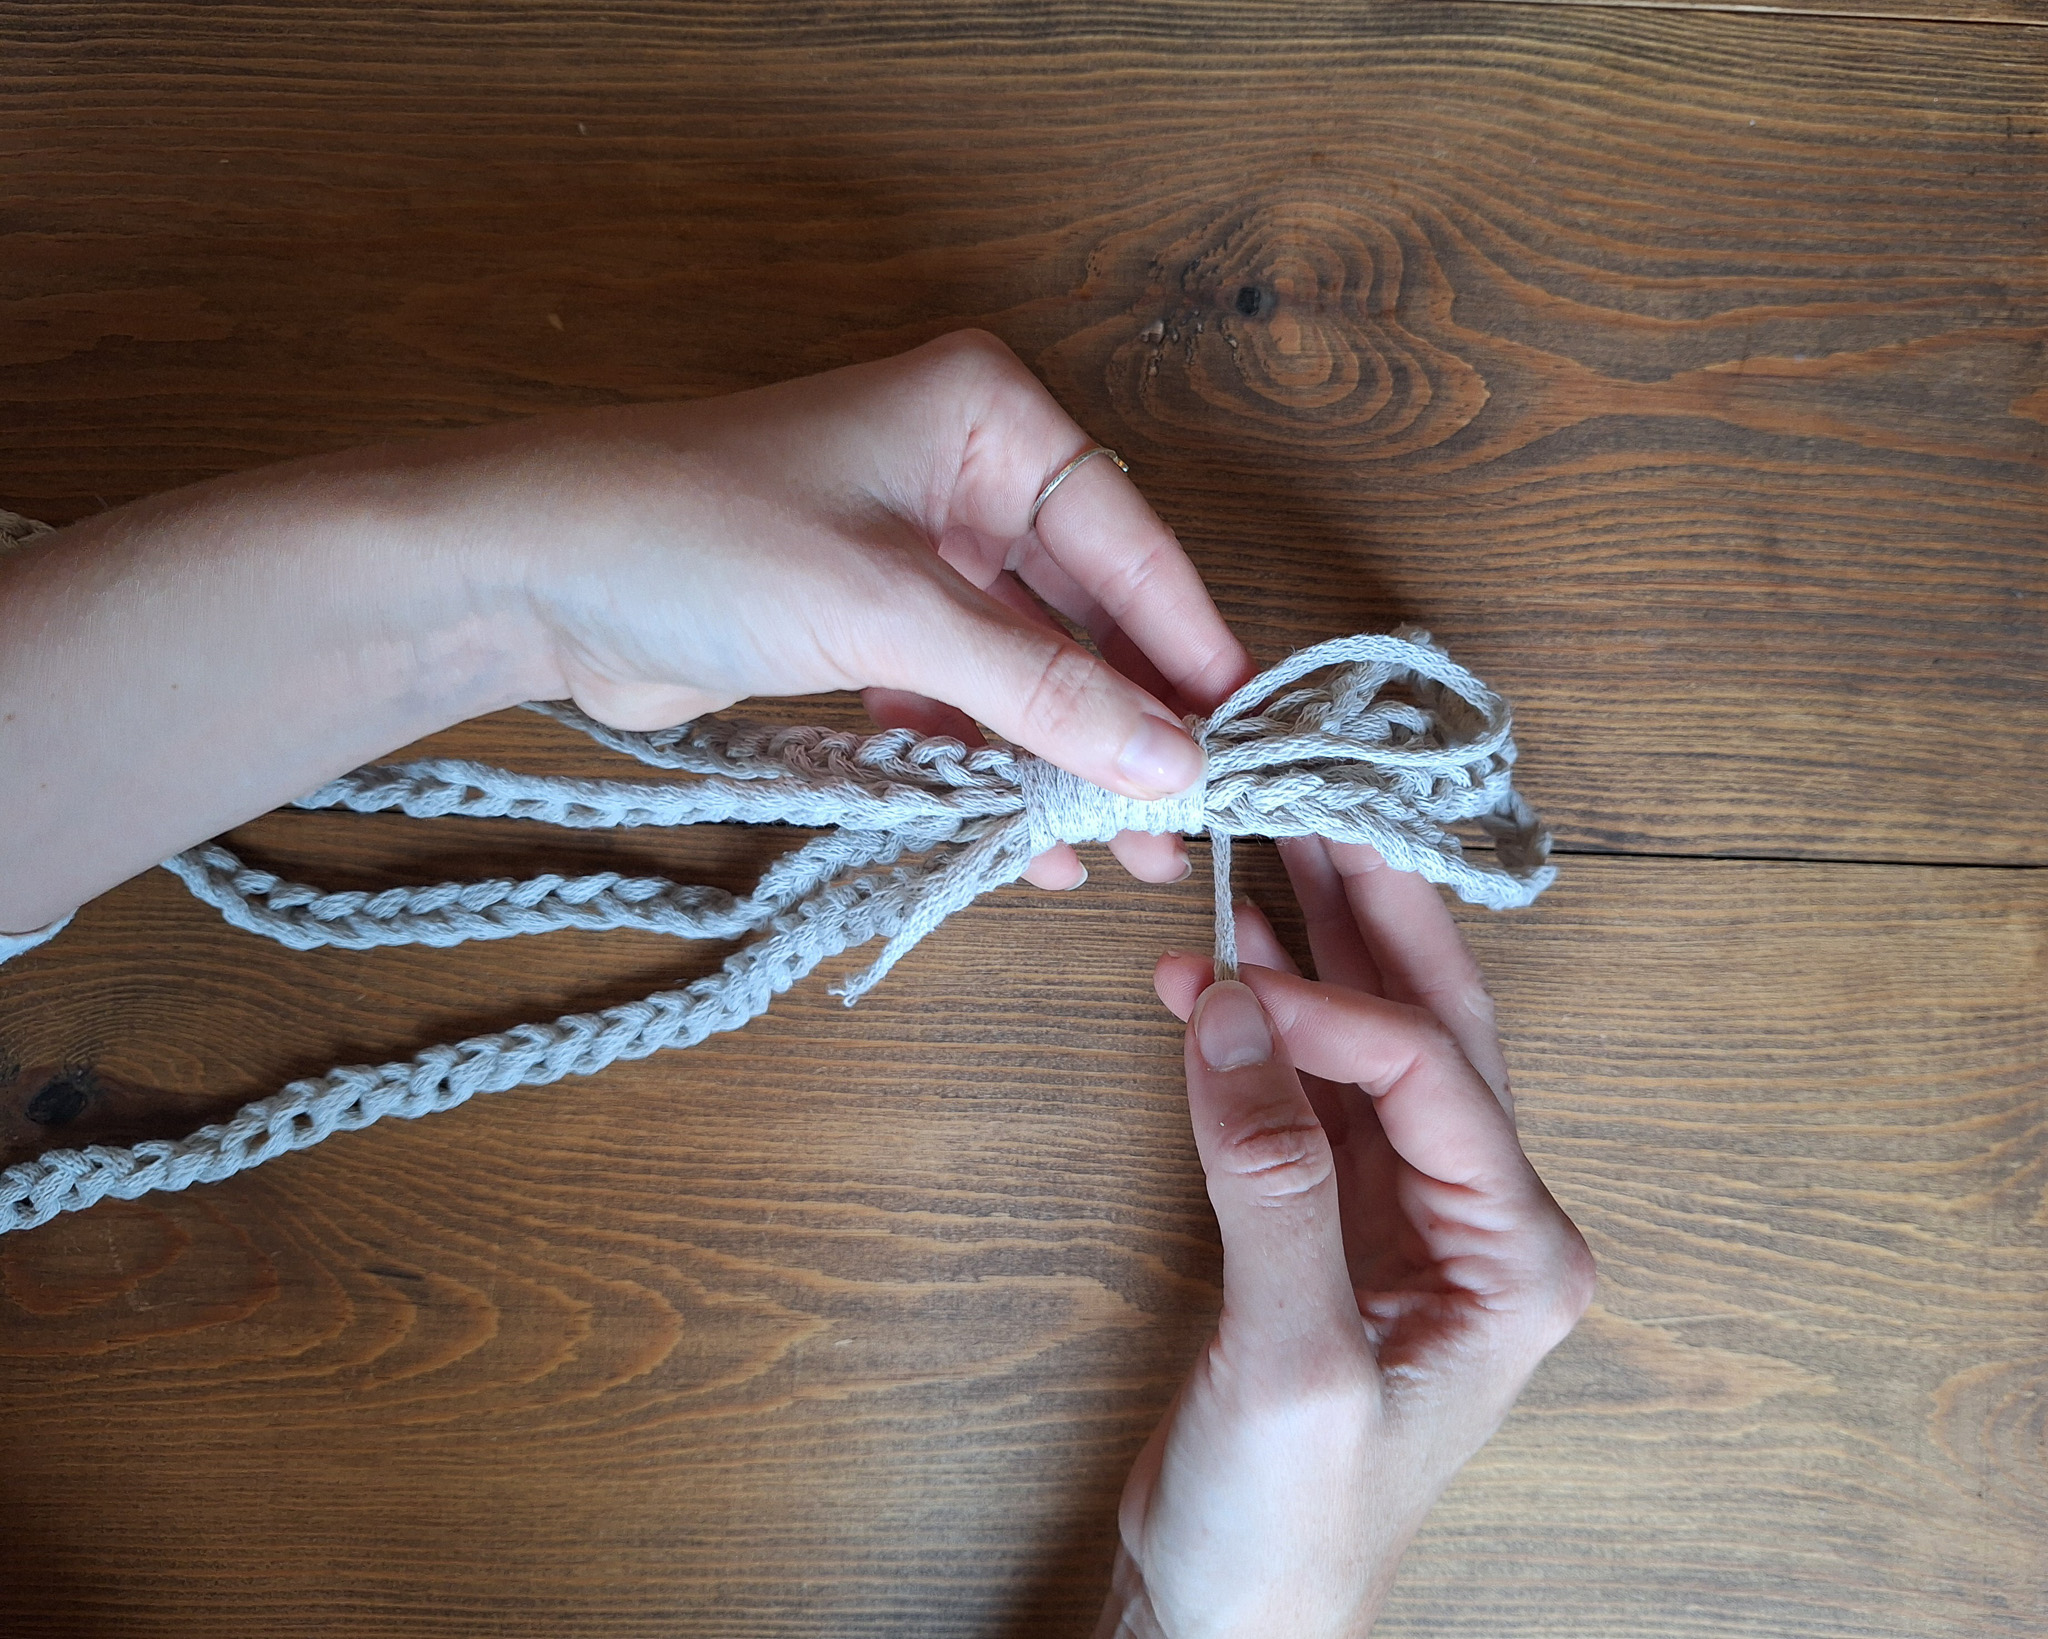
- Start from the bottom and wrap your yarn around all the strands (including the one used for the wrap knot).
- Wrap about 8 times, working your way upward.
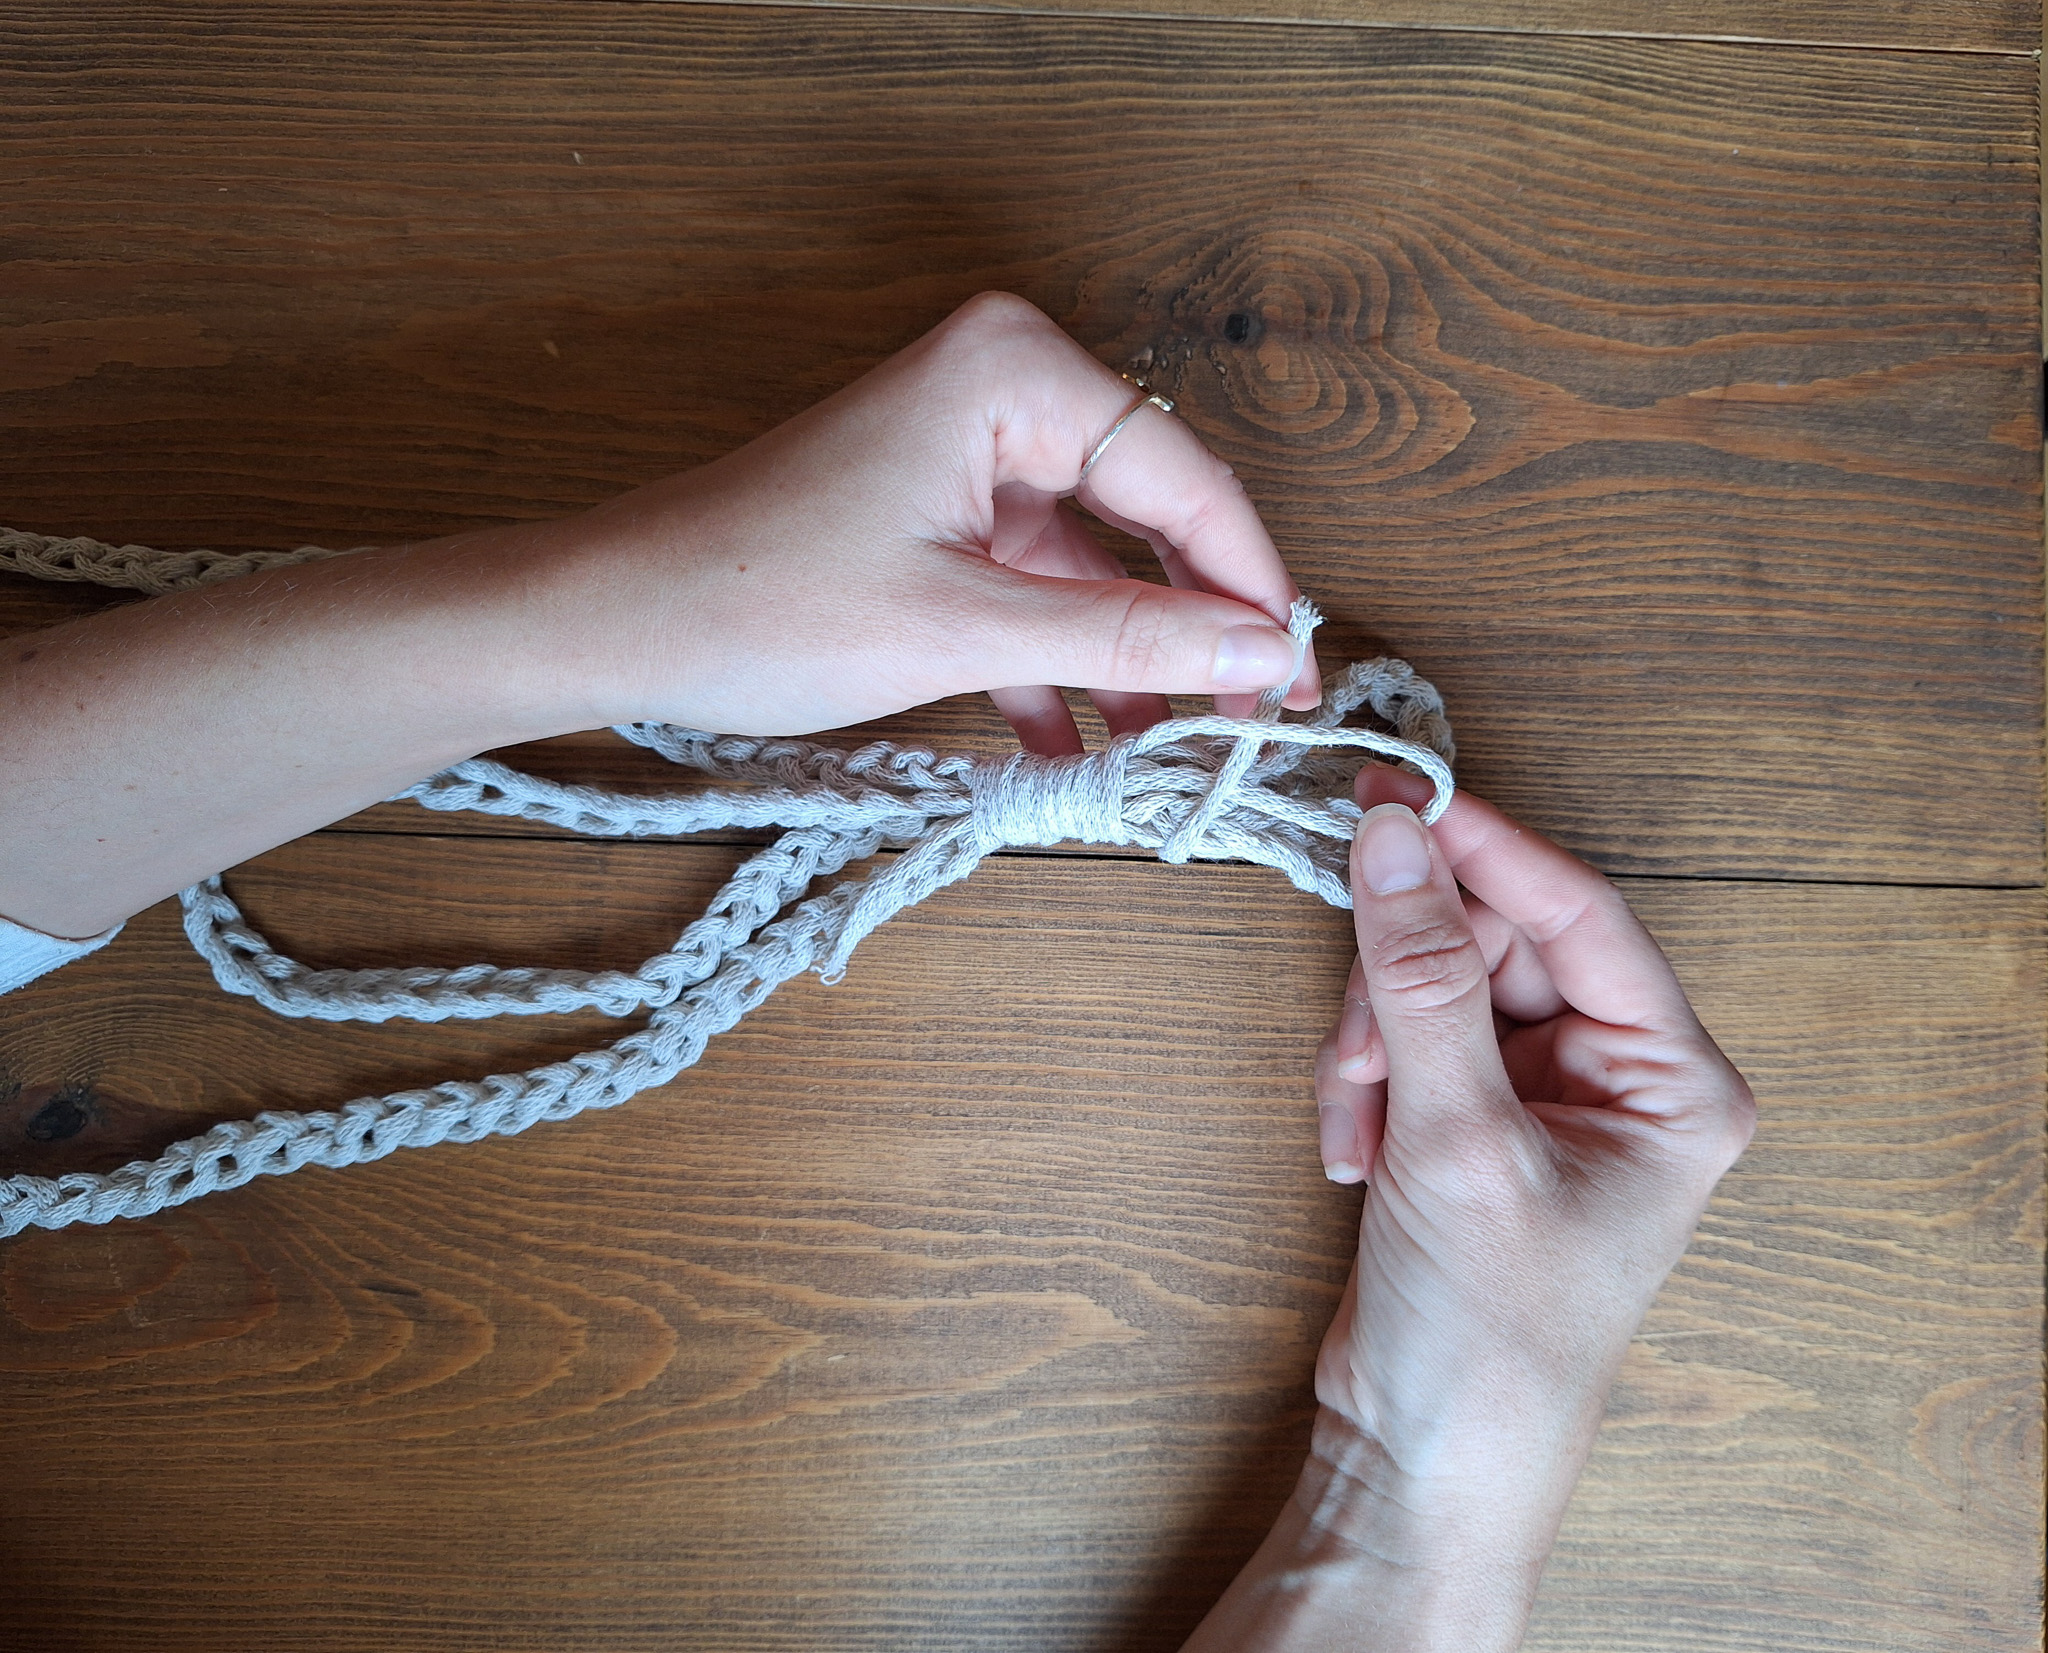
- Then thread the end of the yarn through the upper loop.
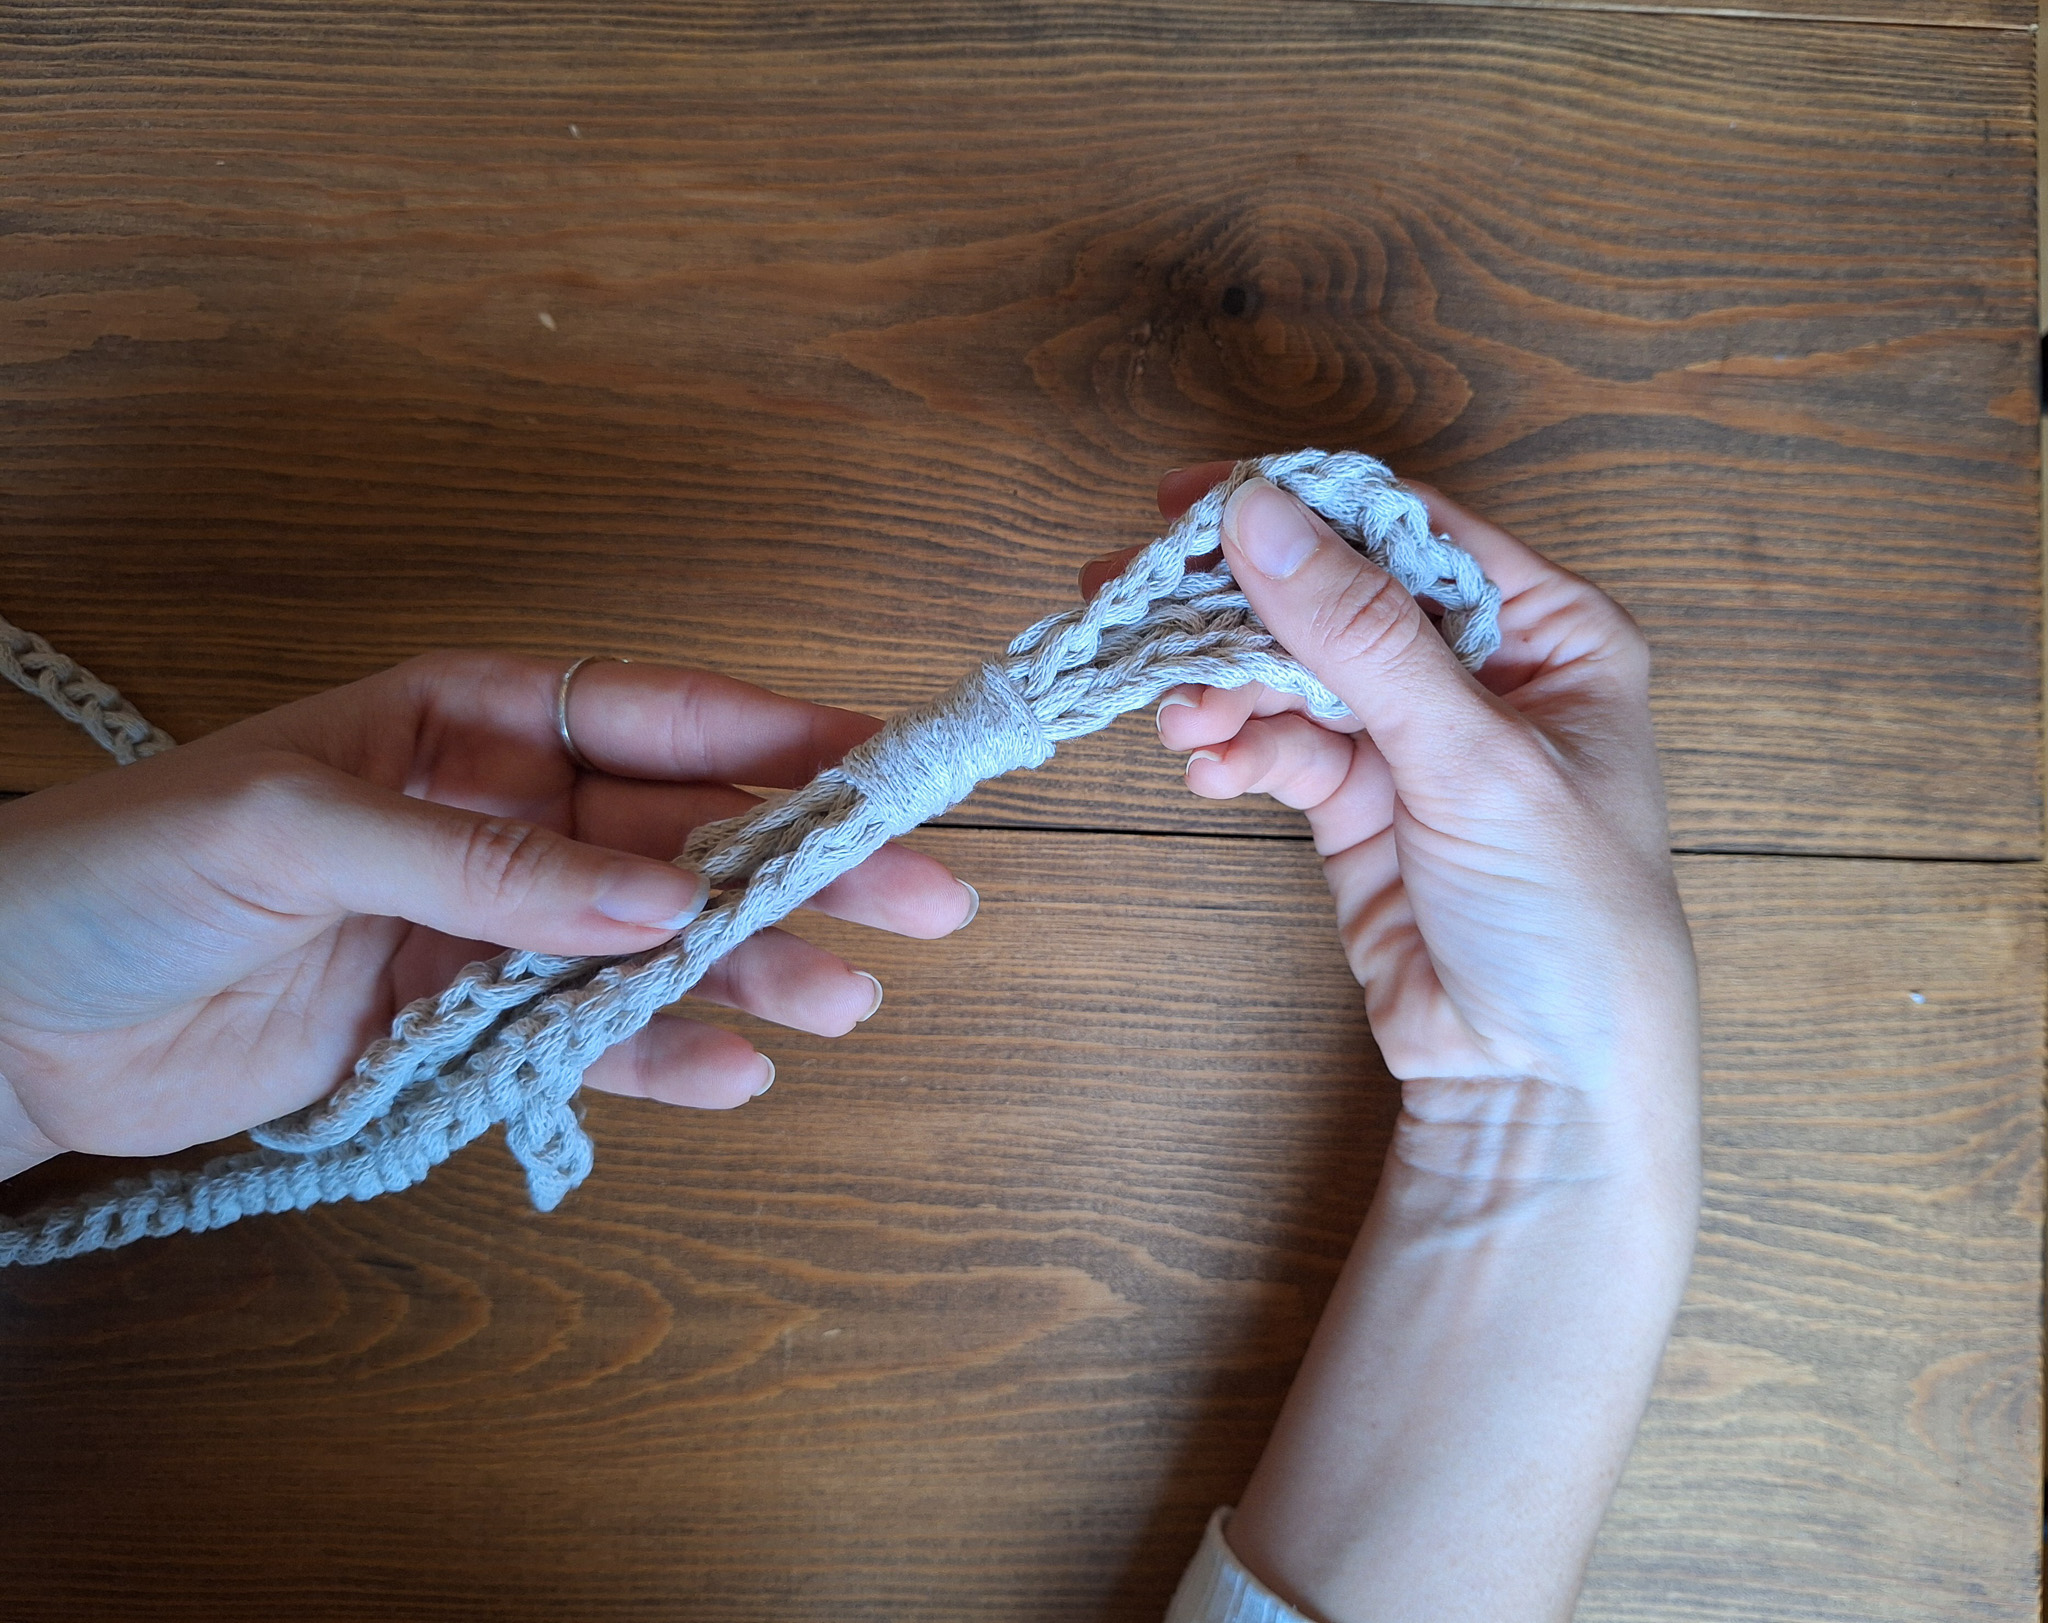
- Pull both ends—the top and bottom—so that the loop goes inside the knot.
- This locks the knot in place.
- Trim any excess yarn.
If you’re unsure, see the video (Wrap Knot) for guidance.
And that’s it—you’re done!
Abbreviations (US terms)
ch – Chain
sc – Single Crochet
sl st – Slip Stitch
dc – Double Crochet
st – Stitch
(...) – Number of stitches in the round
Crochet the base
Chain 26. In the 2nd chain from the hook, place a marker.
Row 1: Begin in the 6th chain from the hook. Work 1 dc + ch 1, then continue working 1 dc + ch 1 in every other stitch. Ch 3 and turn your work (12). Place a marker in the 2nd stitch from the hook.
Row 2: Repeat Row 1. Work your dc into the dc from the previous row. Make the last dc in the stitch where you placed your marker. Ch 3 and turn your work.
Rows 3–9: Repeat Row 2 a total of 7 more times. Total: 9 rows.
Crochet around the edge: From the corner where you finished, continue working 2 sc in each space all the way around. When you reach a corner, work 4 sc in the same space. End the round with 1 sl st, but do not cut the yarn.
Crochet the Hanging Strap:
From the corner where you are, now crochet your first hanging strap. You can make it as long as you like. Keep in mind that the cord will be folded in half, so the length you want ×2. For reference, we used 100 ch.
Once you’ve crocheted a strap long enough, attach it to the opposite corner diagonally. Secure it in the opposite corner with 1 sl st and cut the yarn. Make a knot by pulling the yarn through the loop, then tuck the end between the stitches.
Repeat for the second hanging strap. Tip: I recommend starting your new yarn with a knot before you begin crocheting so that the hanger can support the weight of your plant pot.
When finished, you can either hang your macramé plant holder as it is or make a wrap knot (also called a gathering knot) about 10 cm from the top.
How to make the wrap knot (gathering knot):
- Cut a piece of yarn about 30 cm long.
- Fold the yarn about 10 cm from the end to make a “U” shape. Fold it again so you have a “U” at the top and bottom.
- Starting from the bottom, wrap the yarn around all the cords (including the one you are using to make the wrap knot).
- Wrap approximately 8 times, working your way upward.
- Thread the end of the cord through the top loop.
- Pull both ends—the top and bottom—so that the loop is tucked inside the knot.
- Trim any excess yarn sticking out.
Your knot is now secure and finished!
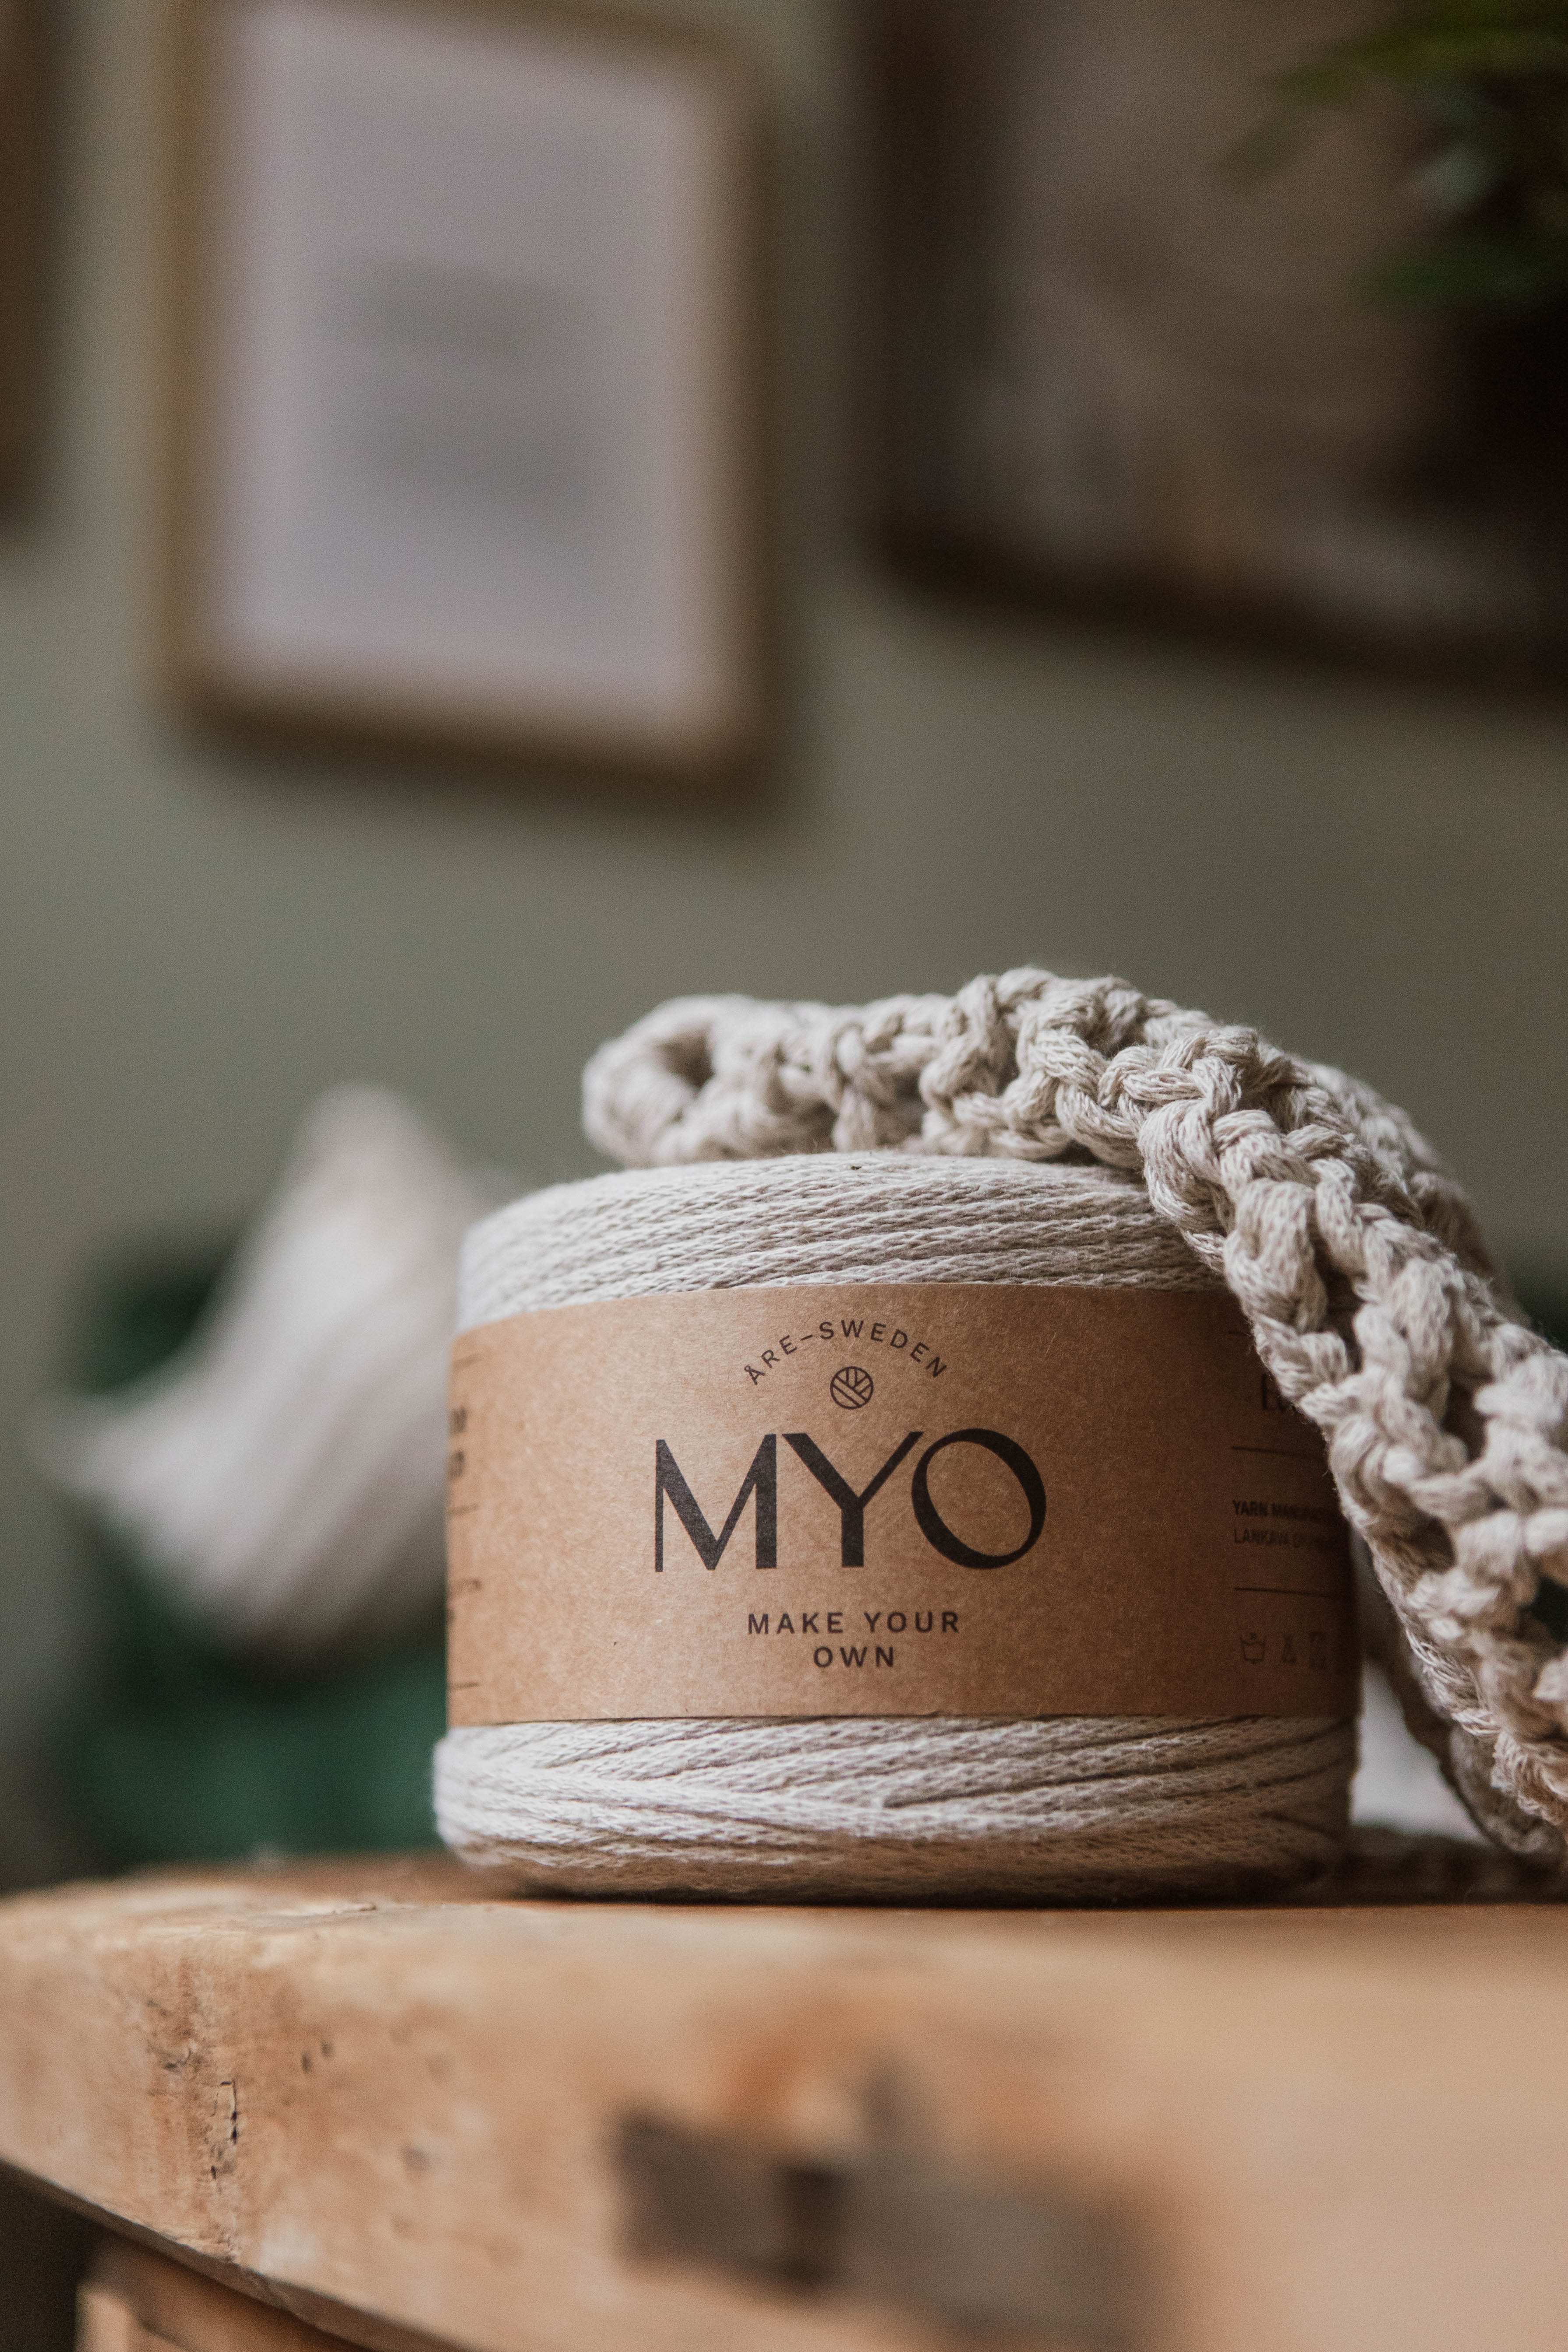
The rights to this pattern belong to MYO Make Your Own. The pattern or its pictures may not be copied, shared or resold either in parts or in its entirety, but you may sell items you have crocheted from this pattern. If you have questions about the pattern, contact MYO at hello@makeyourown.se.
Crochet the Base
Start by making a slip knot. Then, chain 26 stitches. If you’re unsure how to make a chain, see the video below.
Row 1: In the 2nd stitch from the hook, place a marker. In the 6th stitch from the hook, work the first double crochet (dc) + 1 chain. Continue by working double crochet + 1 chain in every other stitch. Finish the row by chaining 3 and turn your work. You should now have 12 double crochets in this row.
If you’re unsure how to work a double crochet, see the video below.
Row 2: Repeat Row 1. Work your double crochets into the dc from the previous row. Make the last double crochet in the stitch where you placed your marker. Ch 3 and turn your work.
Rows 3–9: Repeat Row 2 a total of 7 more times so that you form a square shape. Total: 9 rows.
Crochet around the edge:
Starting from the corner where you ended, work 2 single crochets in each space all the way around. When you reach a corner, work 4 single crochet in the same space. If you’re unsure how to make a single crochet, see the video below. Finish the round with a slip stitch, but do not cut the yarn.
Crochet the hanging straps:
From the corner where you are, crochet your first hanging strap. You can make it any length you like. Keep in mind that the strap will be doubled, so the length you want × 2 is the length you should crochet. For reference, we crocheted 100 chains.
When your strap is the desired length, attach it to the opposite corner diagonally. Secure it with a slip stitch, then cut the yarn leaving about 15 cm. Make a knot by pulling the yarn through the loop, and then hide the tail between the stitches.
Repeat for the second strap.
Tip: We recommend tying a knot in the stitch where you start your chain before beginning, to ensure the hanging strap can hold the weight of your plant pot.
Once finished, you can hang your plant hanger as it is, or add a “wrap knot” (also called a “gathering knot”) about 10 cm from the top for extra decoration.
How to make the wrap knot:
- Cut a piece of yarn, about 30 cm long.
- Fold your yarn about 10 cm from the end to create a U-shape.
- Fold it again so you have a U at the top and bottom.
- Start from the bottom and wrap your yarn around all the strands (including the one used for the wrap knot).
- Wrap about 8 times, working your way upward.
- Then thread the end of the yarn through the upper loop.
- Pull both ends—the top and bottom—so that the loop goes inside the knot.
- This locks the knot in place.
- Trim any excess yarn.
If you’re unsure, see the video (Wrap Knot) for guidance.
And that’s it—you’re done!
Abbreviations (US terms)
ch – Chain
sc – Single Crochet
sl st – Slip Stitch
dc – Double Crochet
st – Stitch
(...) – Number of stitches in the round
Crochet the base
Chain 26. In the 2nd chain from the hook, place a marker.
Row 1: Begin in the 6th chain from the hook. Work 1 dc + ch 1, then continue working 1 dc + ch 1 in every other stitch. Ch 3 and turn your work (12). Place a marker in the 2nd stitch from the hook.
Row 2: Repeat Row 1. Work your dc into the dc from the previous row. Make the last dc in the stitch where you placed your marker. Ch 3 and turn your work.
Rows 3–9: Repeat Row 2 a total of 7 more times. Total: 9 rows.
Crochet around the edge: From the corner where you finished, continue working 2 sc in each space all the way around. When you reach a corner, work 4 sc in the same space. End the round with 1 sl st, but do not cut the yarn.
Crochet the Hanging Strap:
From the corner where you are, now crochet your first hanging strap. You can make it as long as you like. Keep in mind that the cord will be folded in half, so the length you want ×2. For reference, we used 100 ch.
Once you’ve crocheted a strap long enough, attach it to the opposite corner diagonally. Secure it in the opposite corner with 1 sl st and cut the yarn. Make a knot by pulling the yarn through the loop, then tuck the end between the stitches.
Repeat for the second hanging strap. Tip: I recommend starting your new yarn with a knot before you begin crocheting so that the hanger can support the weight of your plant pot.
When finished, you can either hang your macramé plant holder as it is or make a wrap knot (also called a gathering knot) about 10 cm from the top.
How to make the wrap knot (gathering knot):
- Cut a piece of yarn about 30 cm long.
- Fold the yarn about 10 cm from the end to make a “U” shape. Fold it again so you have a “U” at the top and bottom.
- Starting from the bottom, wrap the yarn around all the cords (including the one you are using to make the wrap knot).
- Wrap approximately 8 times, working your way upward.
- Thread the end of the cord through the top loop.
- Pull both ends—the top and bottom—so that the loop is tucked inside the knot.
- Trim any excess yarn sticking out.
Your knot is now secure and finished!
The rights to this pattern belong to MYO Make Your Own. The pattern or its pictures may not be copied, shared or resold either in parts or in its entirety, but you may sell items you have crocheted from this pattern. If you have questions about the pattern, contact MYO at hello@makeyourown.se.


.jpg)


Share your creations with us
Thank you!
Your comment was sent!