
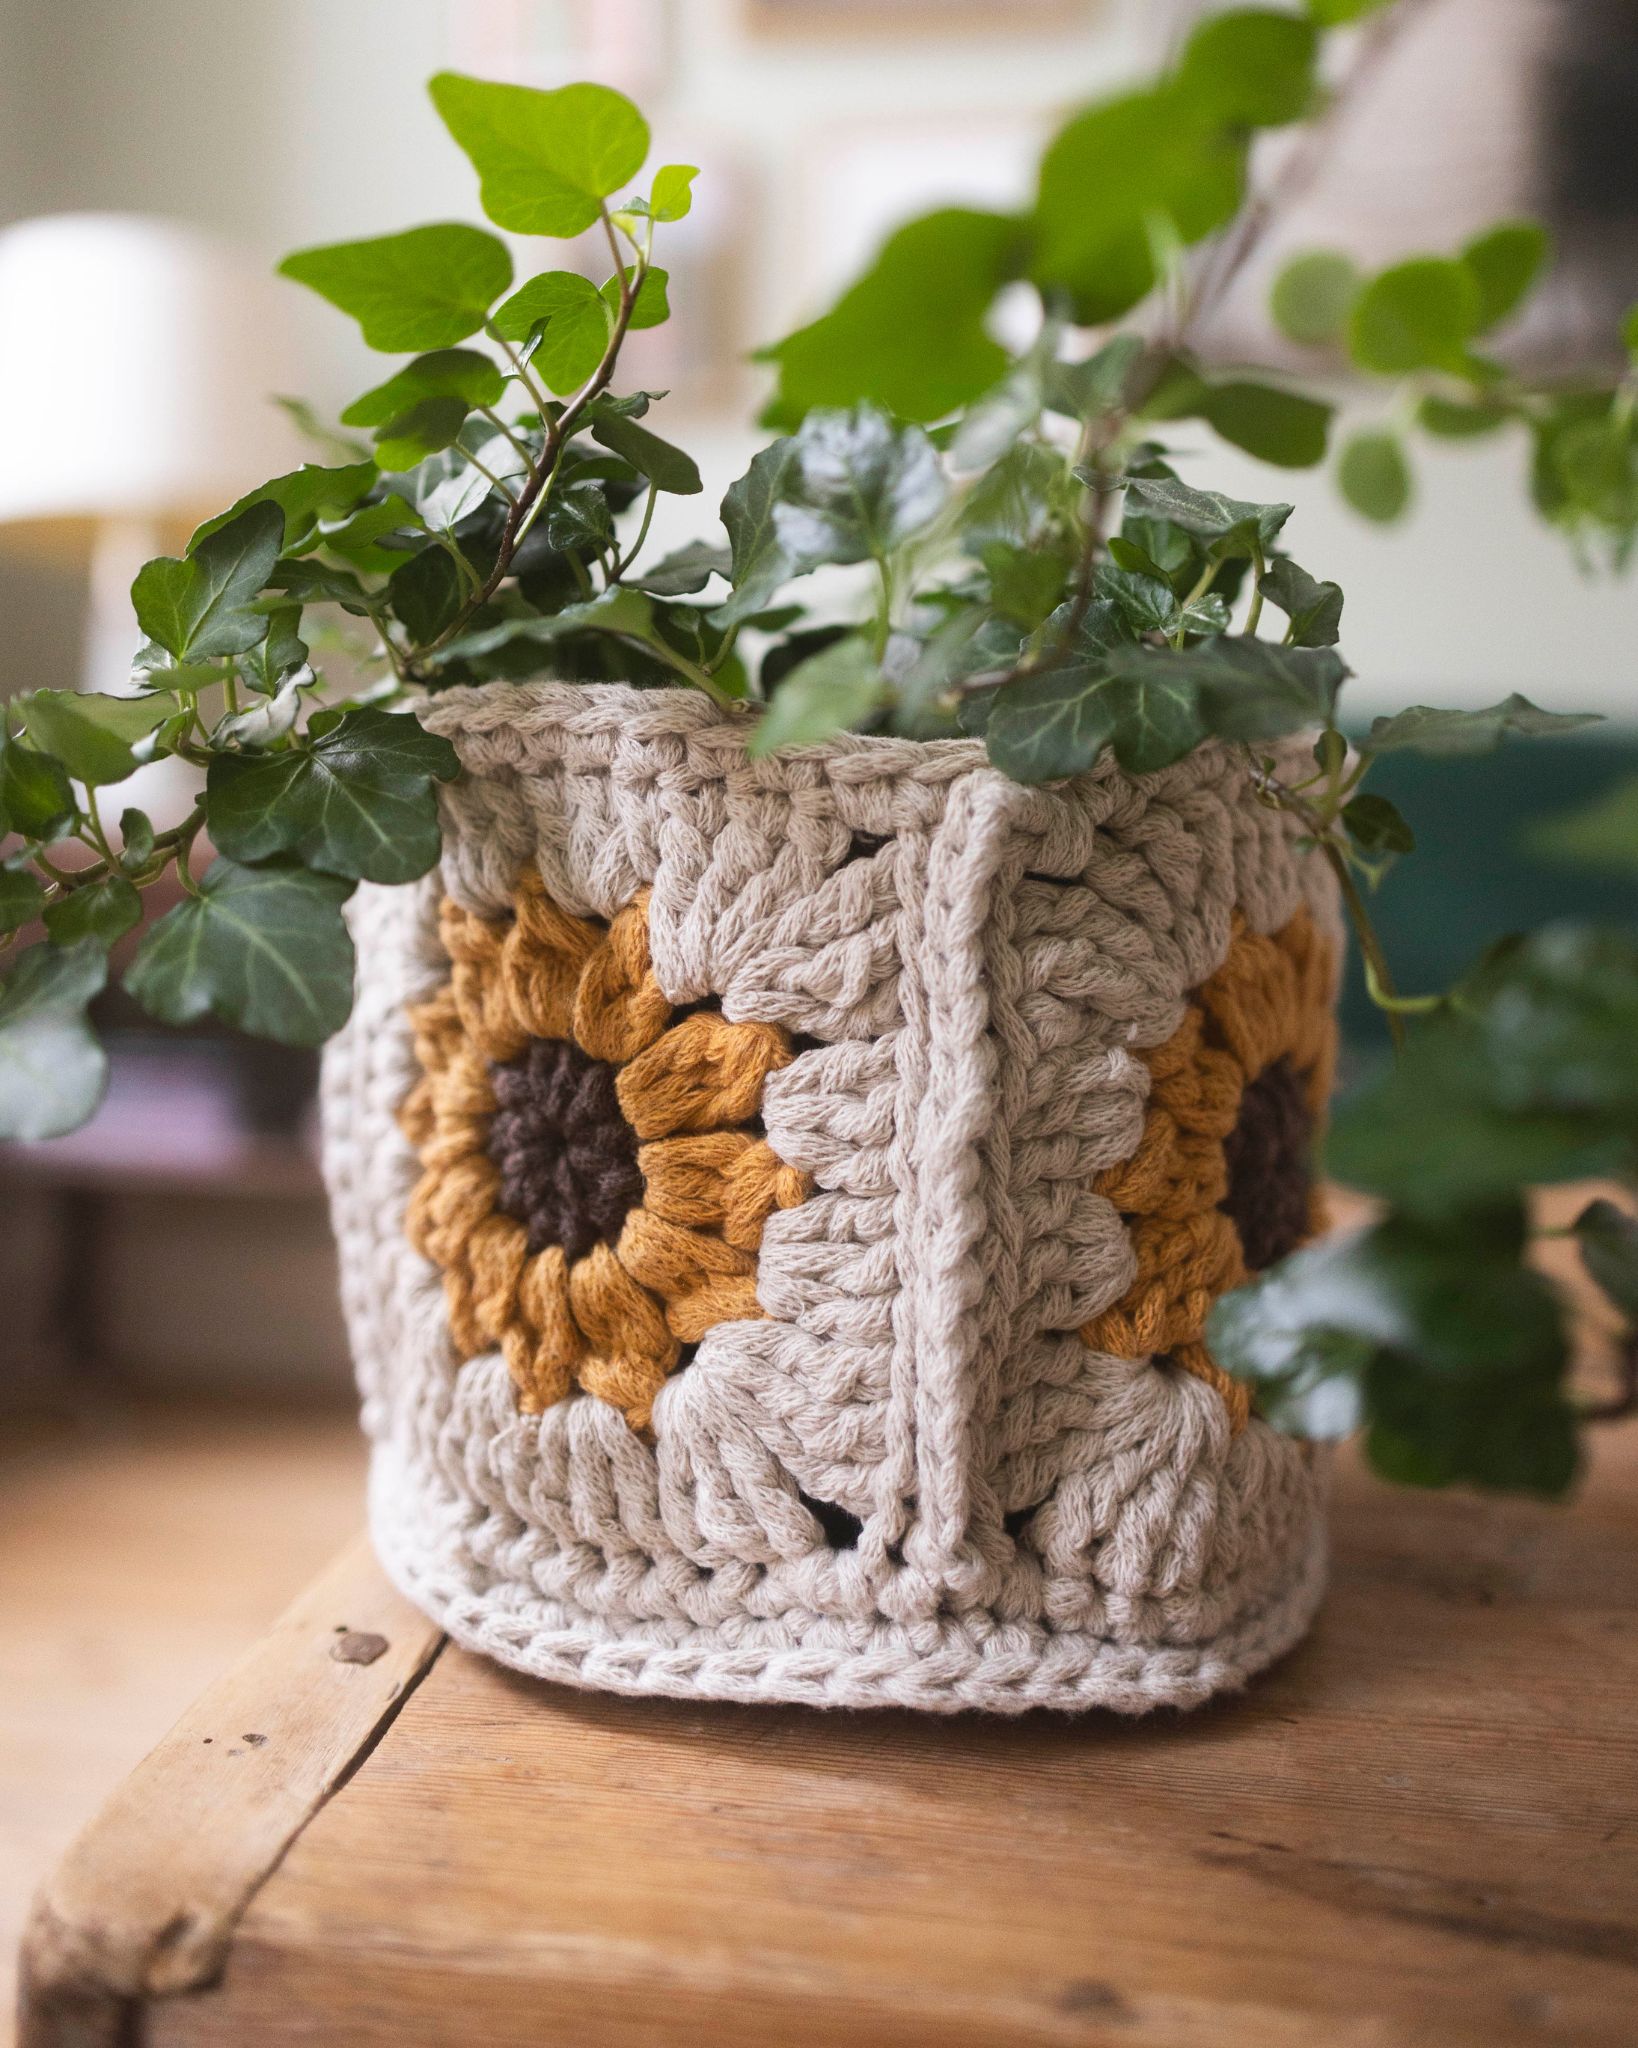
Sunflower Flower Pot “Sunny”
Crochet flower pots with sunflowers!
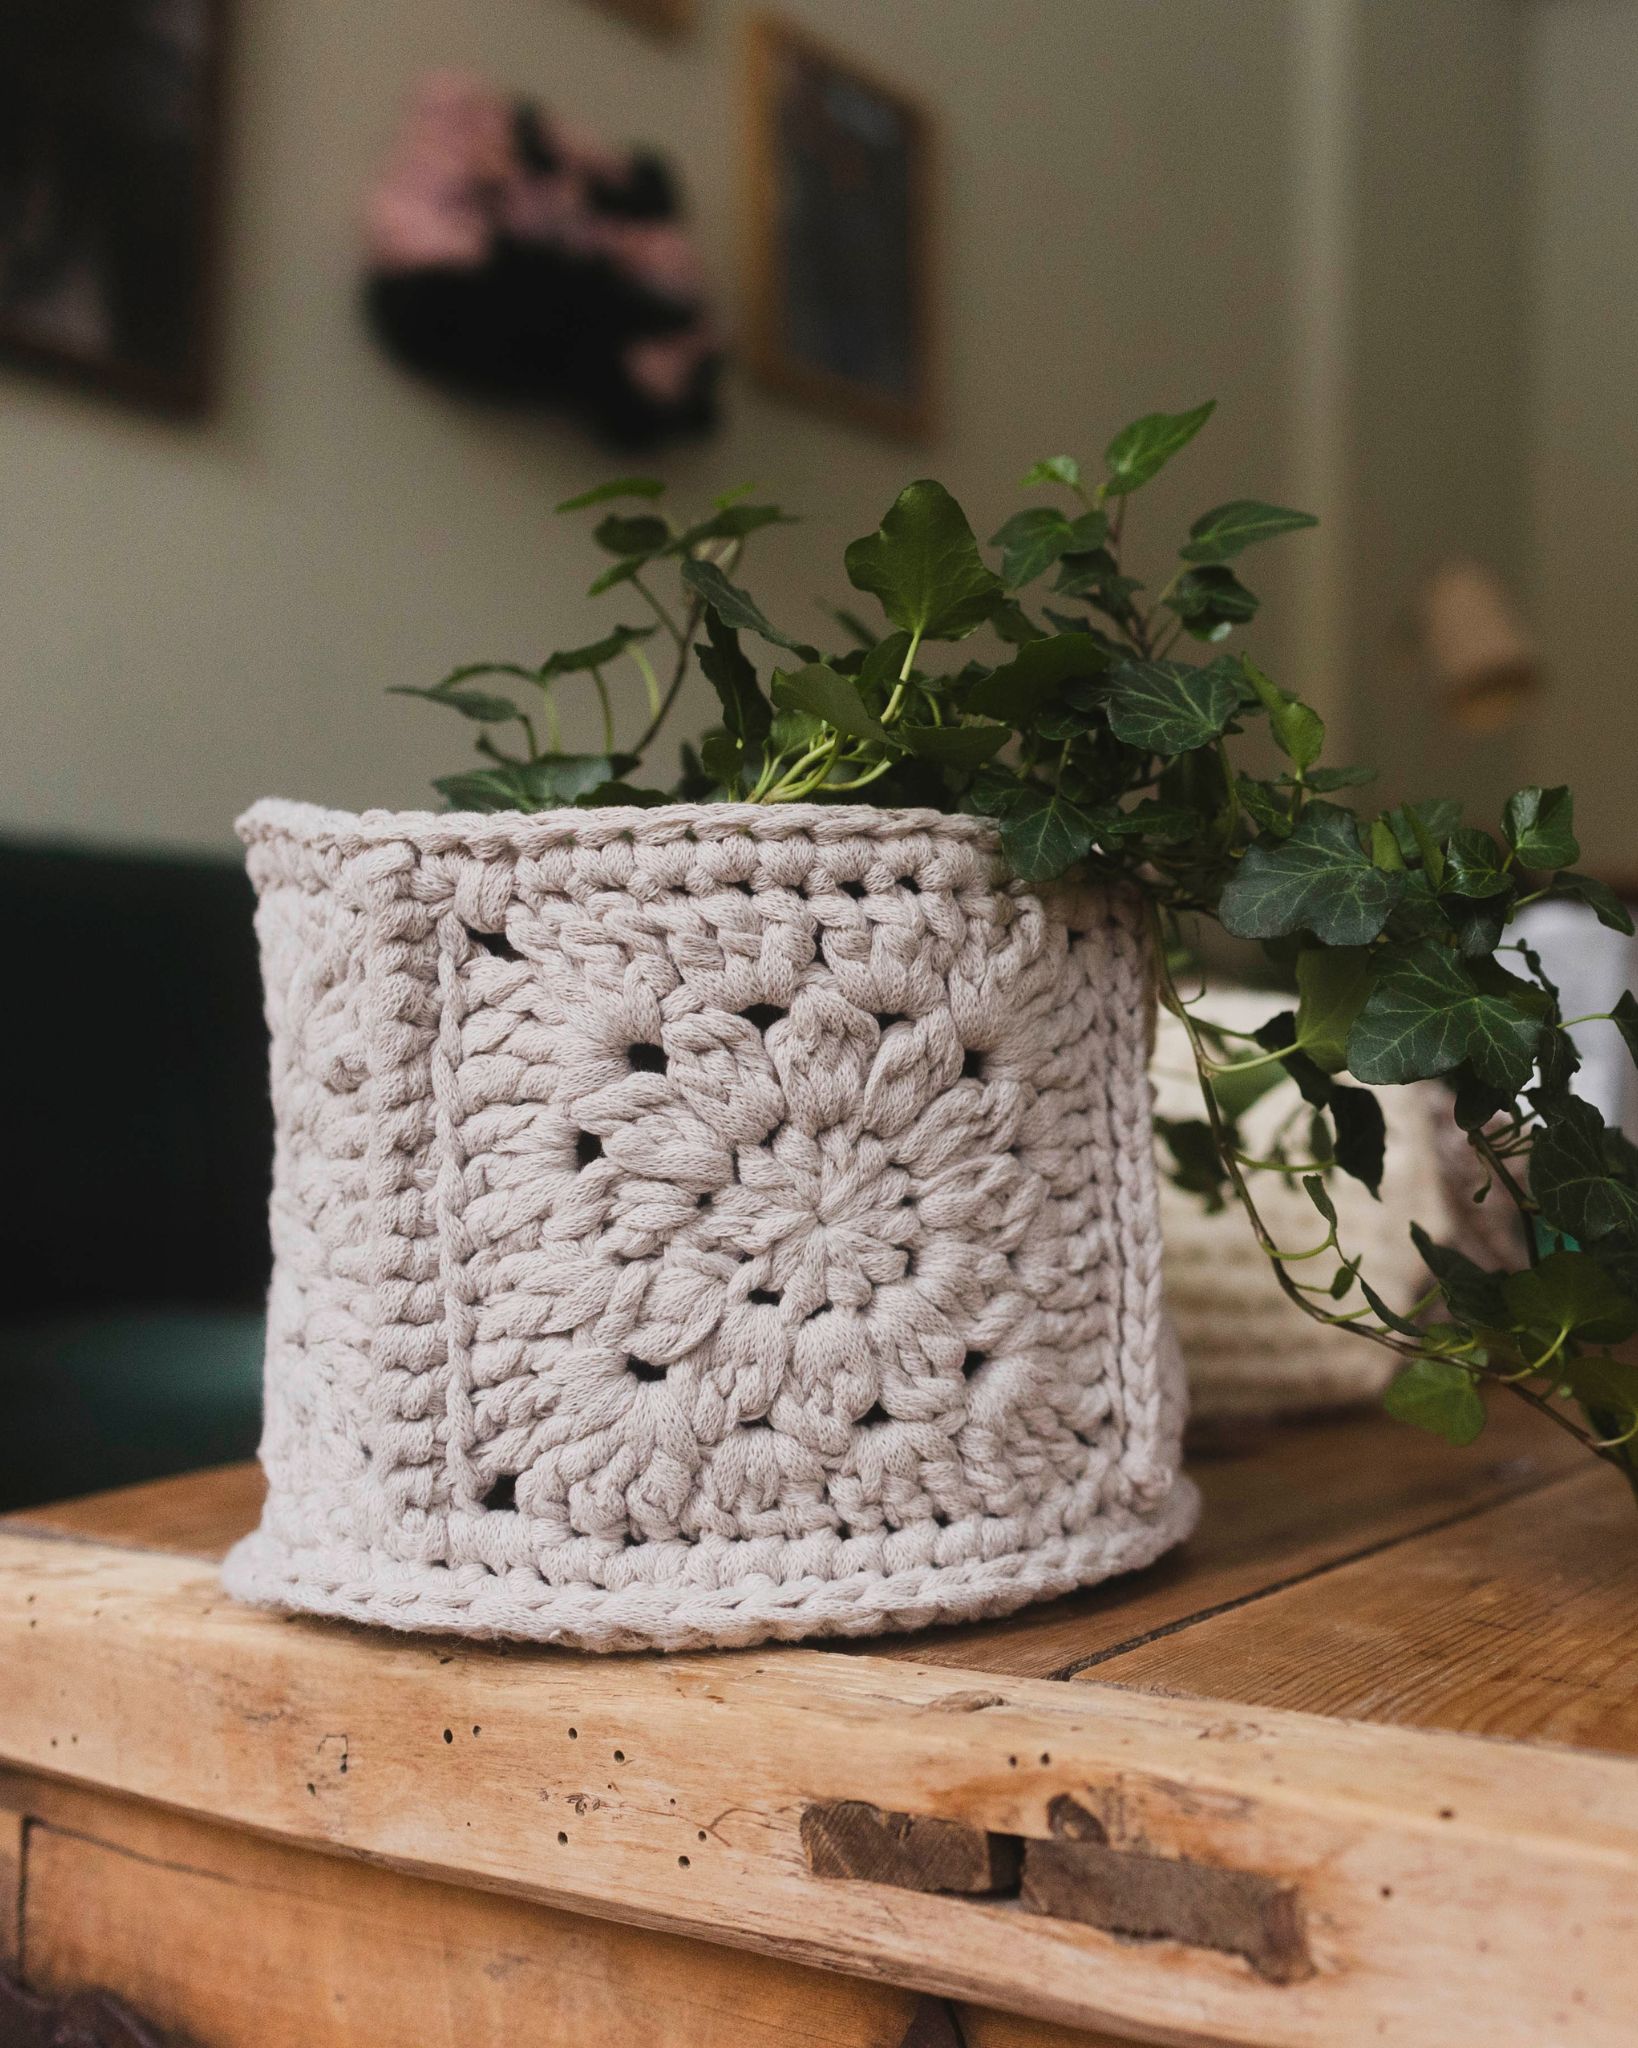
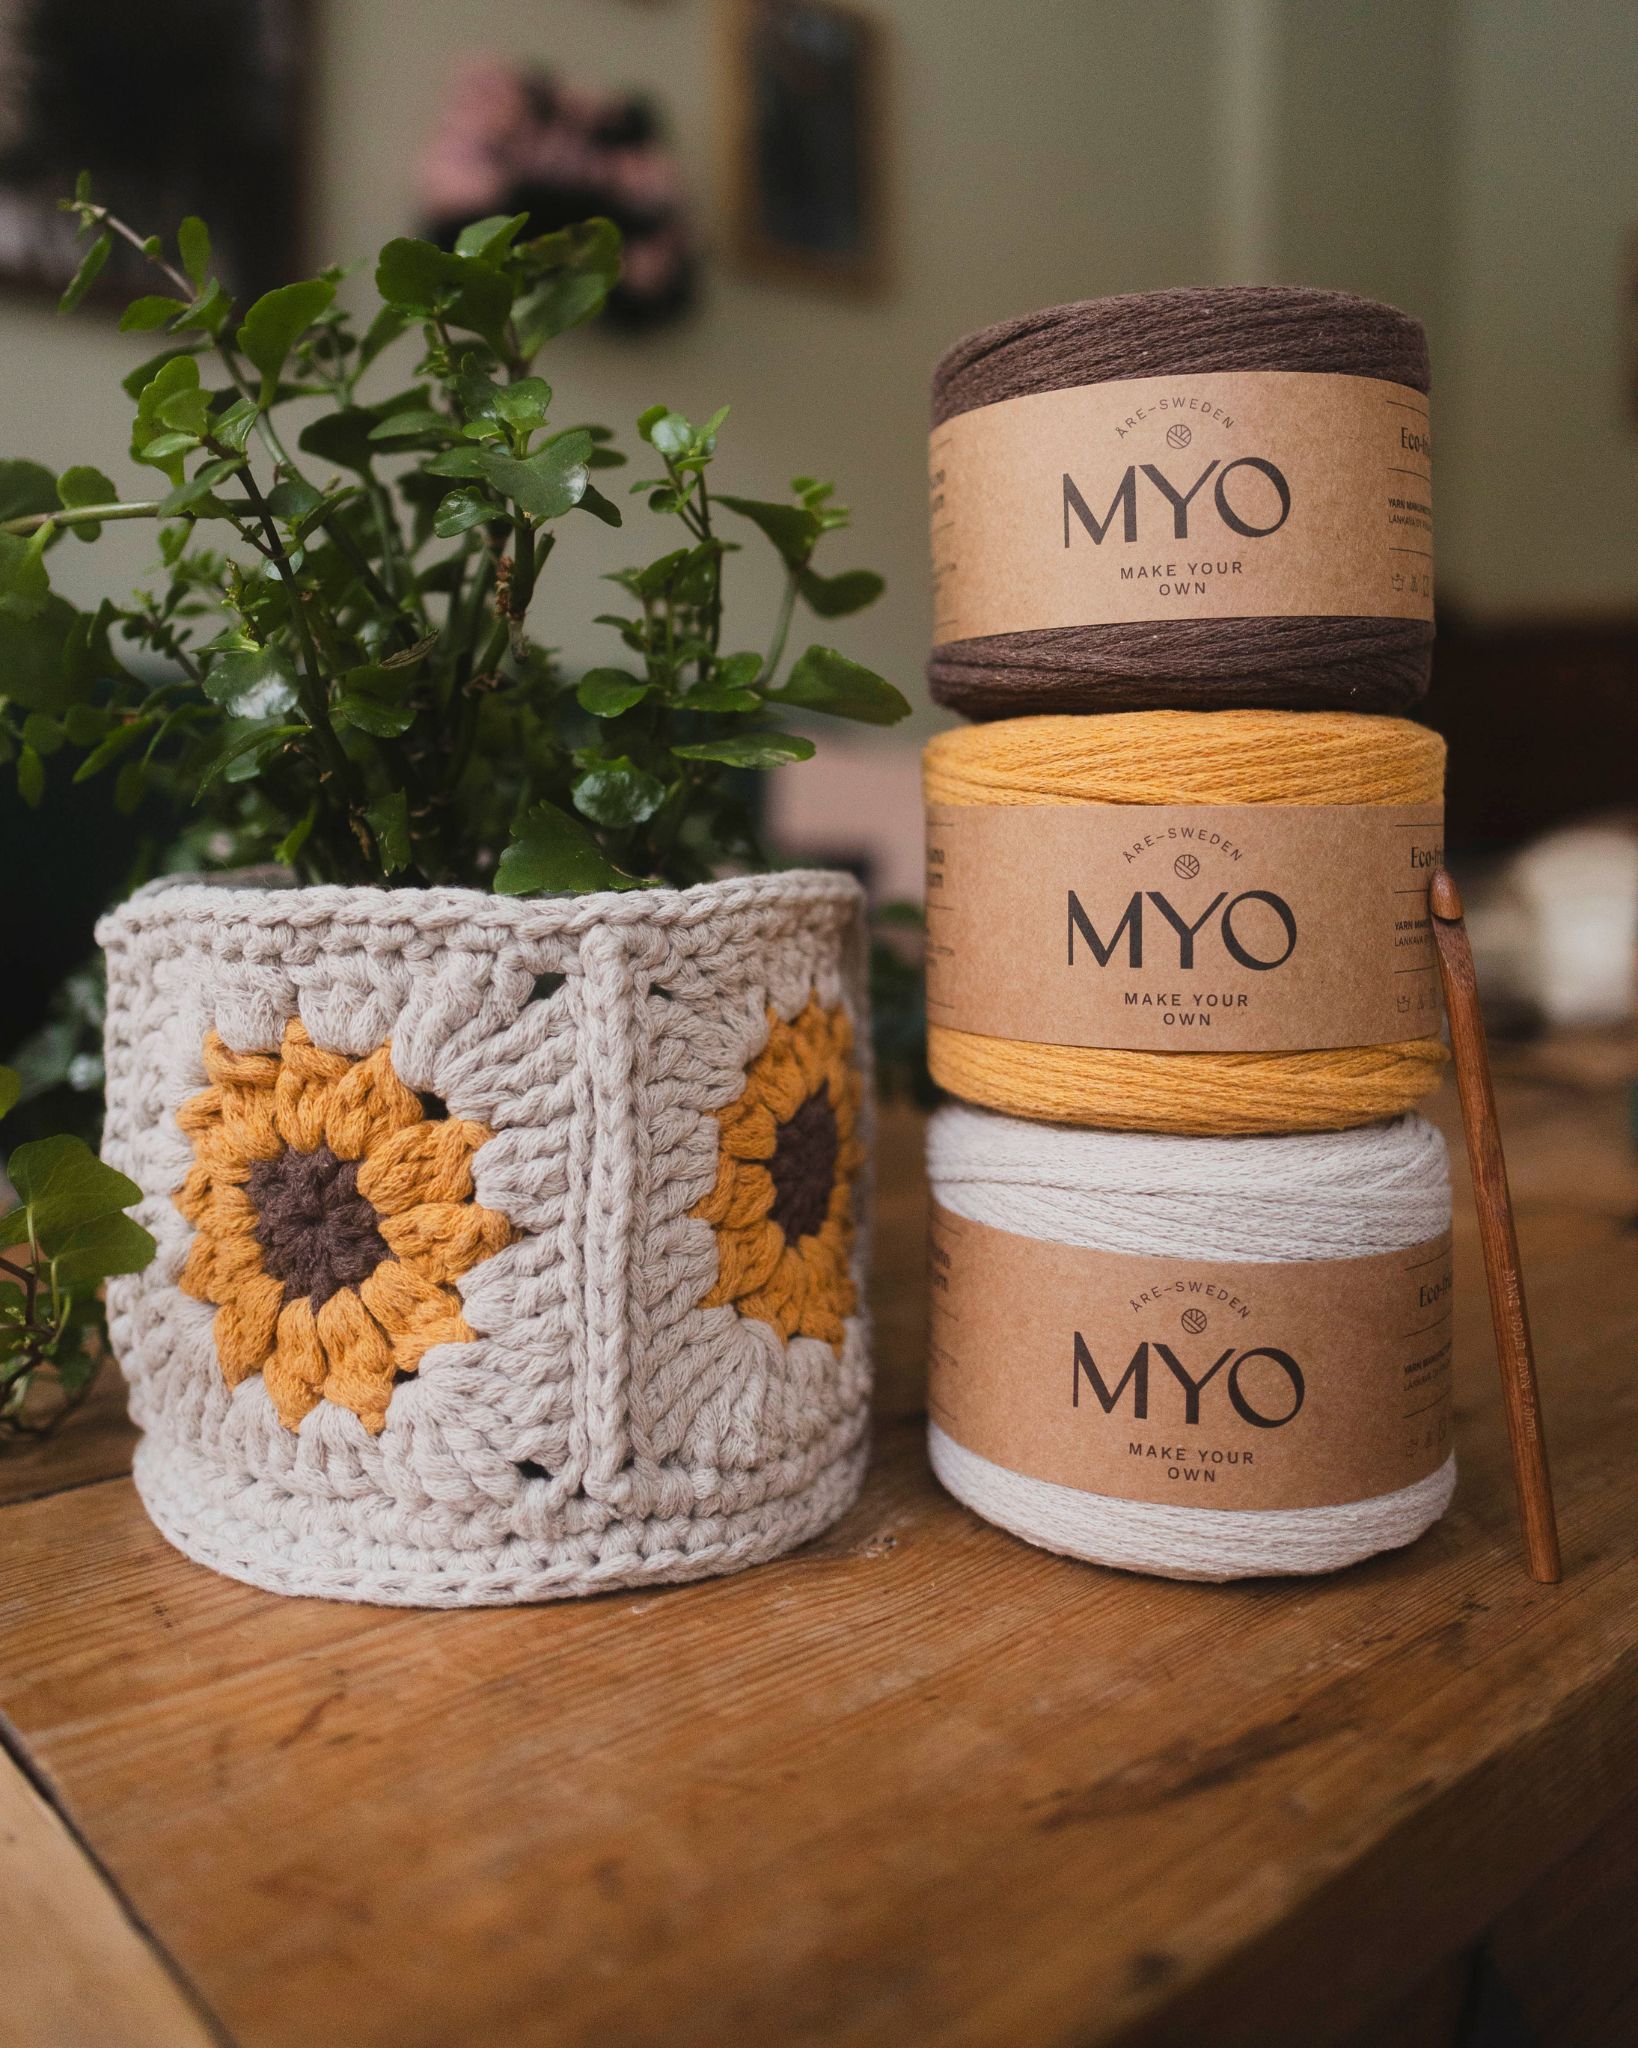
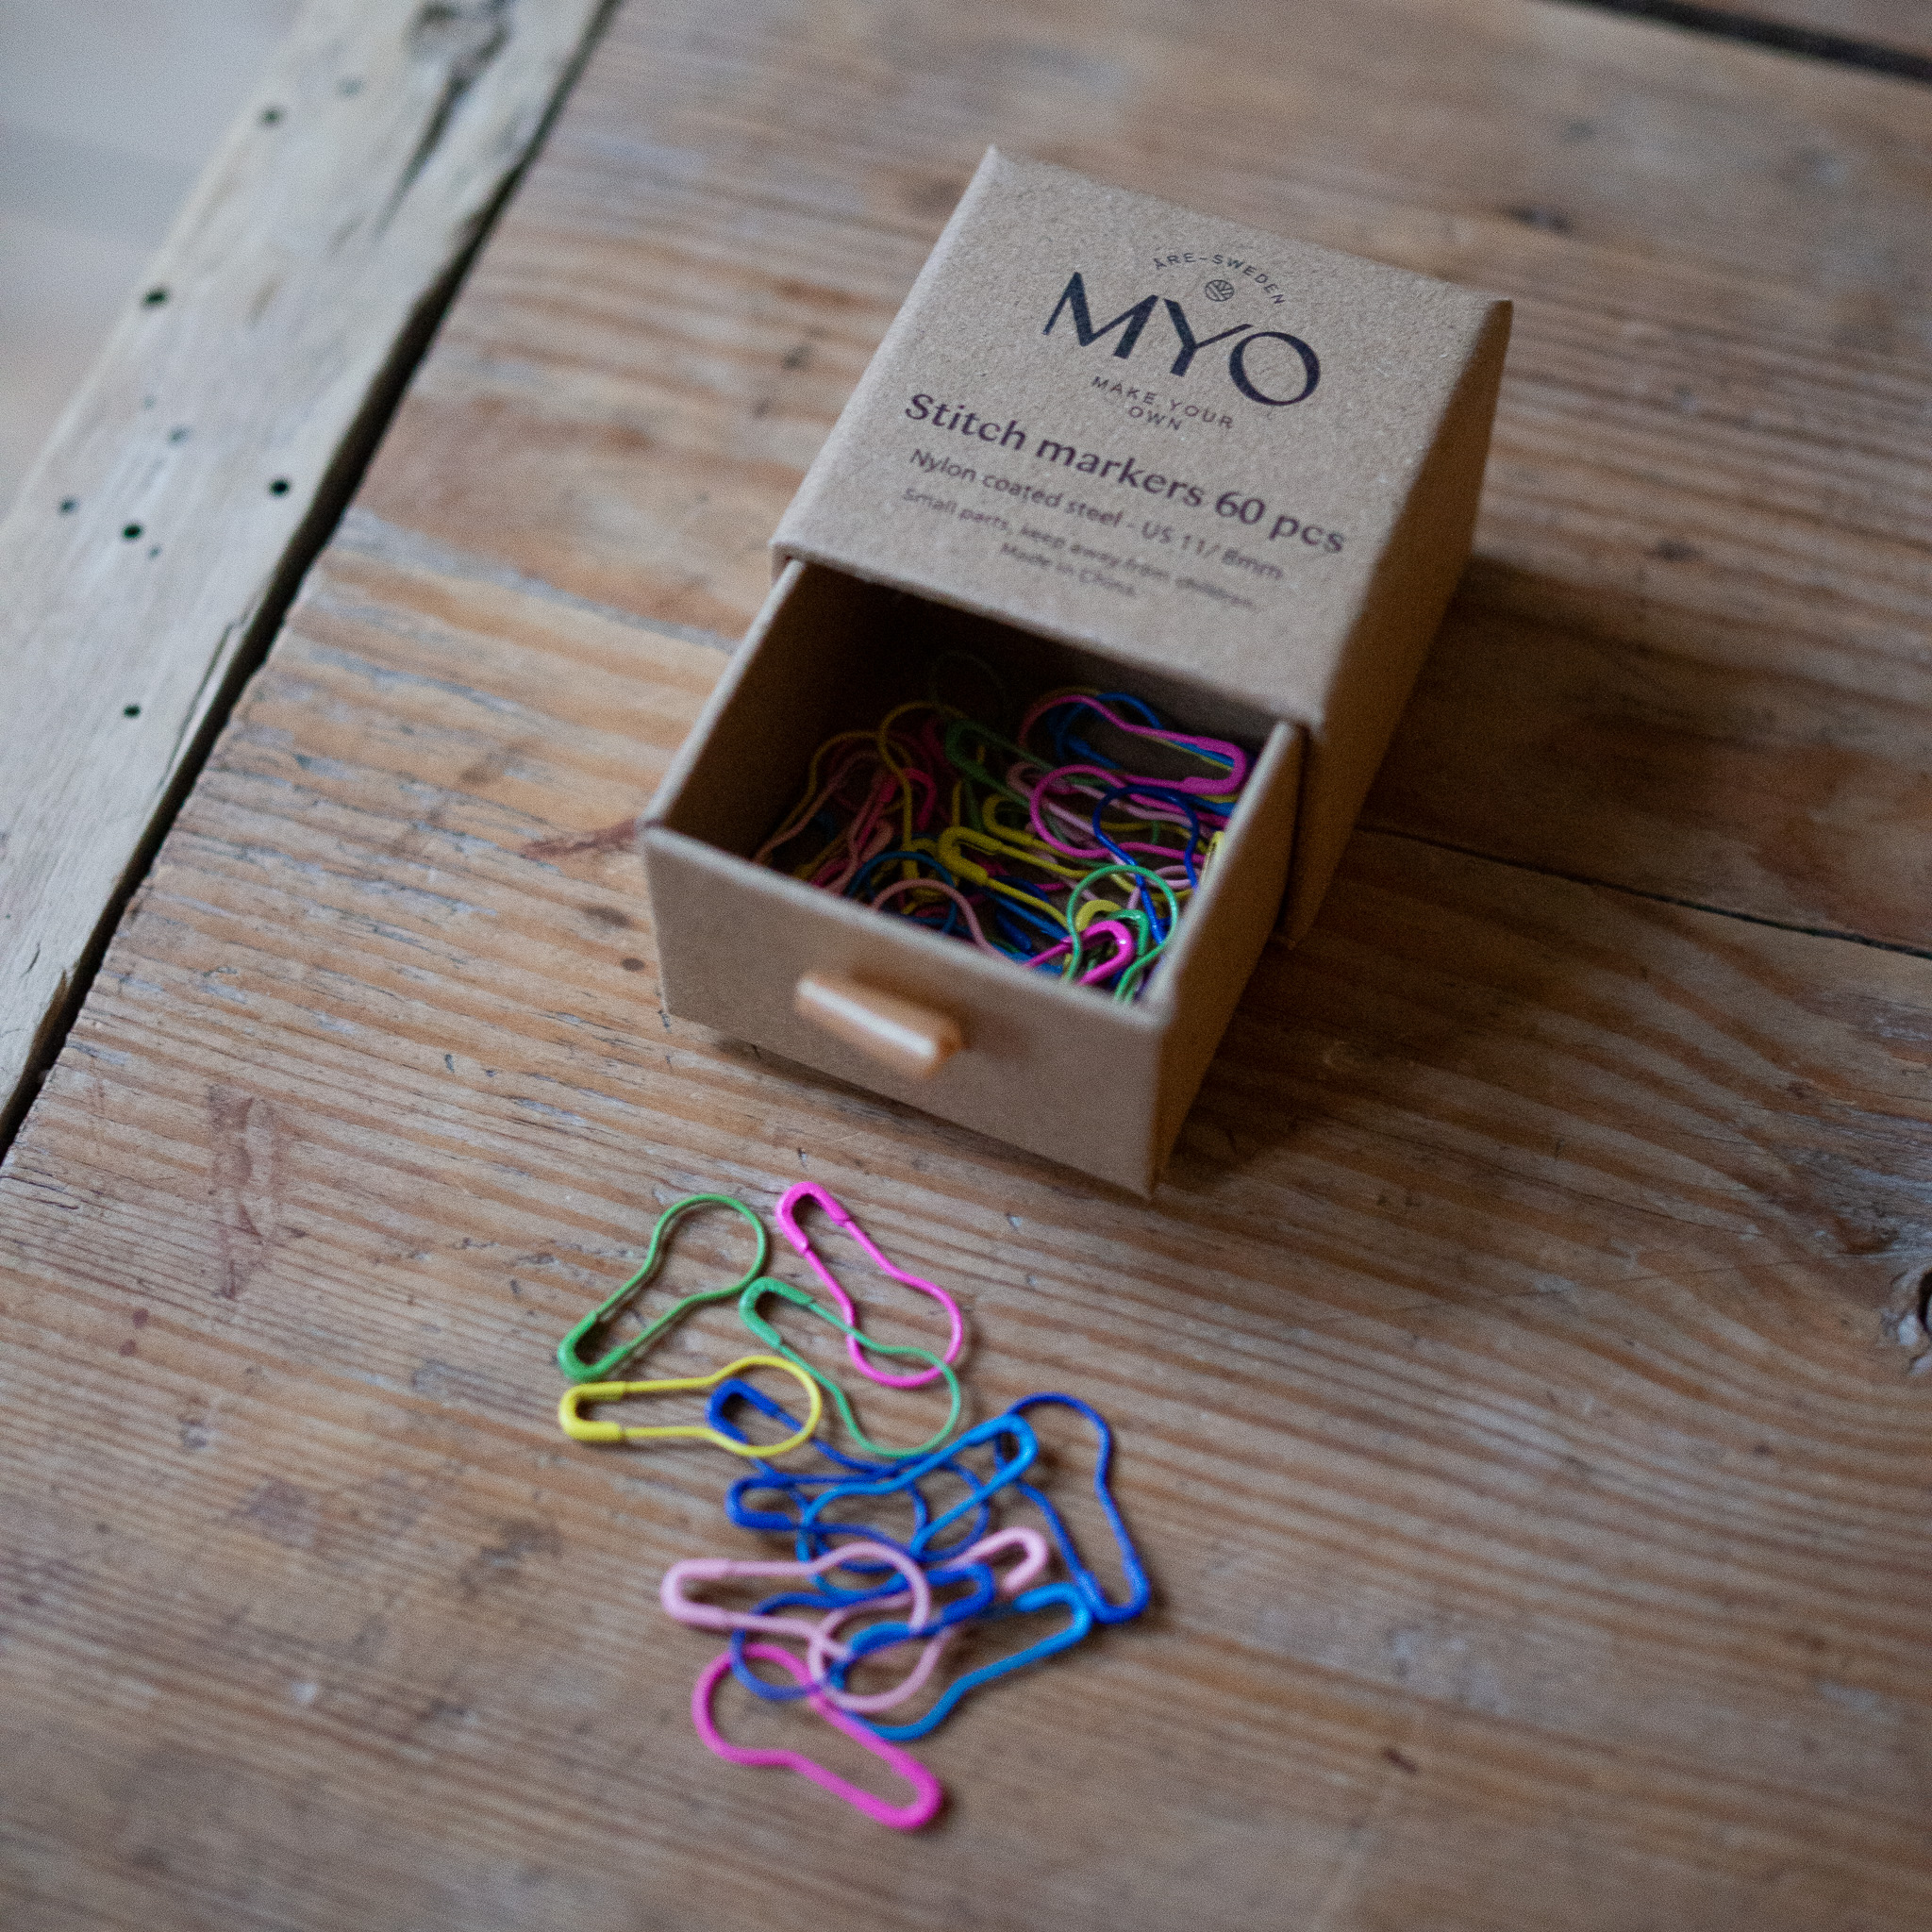
How can you not feel happy when you see lovely flowers in a beautiful patterned pot? This pattern is designed to quickly change the feeling in your home—making it cheerful, soft, and cozy. The flower pots measure approximately 20 cm in diameter and 15 cm in height when made in EKO Mini, and about 17 cm in diameter and 15 cm in height when made in EKO Nano. You will need EKO Mini or EKO Nano yarn, together with a 7 mm crochet hook for EKO Mini or a 6 mm crochet hook for EKO Nano. You will also need scissors and stitch markers, and optionally a yarn needle. For reference, we use the colors “Greige” in EKO Mini and “Cacao,” “Rusty Yellow,” and “Greige” in EKO Nano.
Yarn Consumption: EKO Mini: approx. 250 g. EKO Nano: approx. 200 g (Cacao approx. 15 g, Rusty Yellow approx. 55 g, Greige approx. 130 g)
Please note that in this pattern we use videos from our technique school together with images.

Here's how to do it
This is a simple pattern consisting of 4 sunflower squares that are assembled together with a round bottom:) /Emma
%20(1).jpg)
This is what you need:
Here you can directly purchase the material for the product. Please note that the instruction is digital and appears here on the page (no written instruction).


.jpg)
Unleash your creativity
For only 85kr per month you get access to all our 300+ beginner-friendly instructions for crochet, knitting and macrame.
A perfect way to get started with your new hobby!

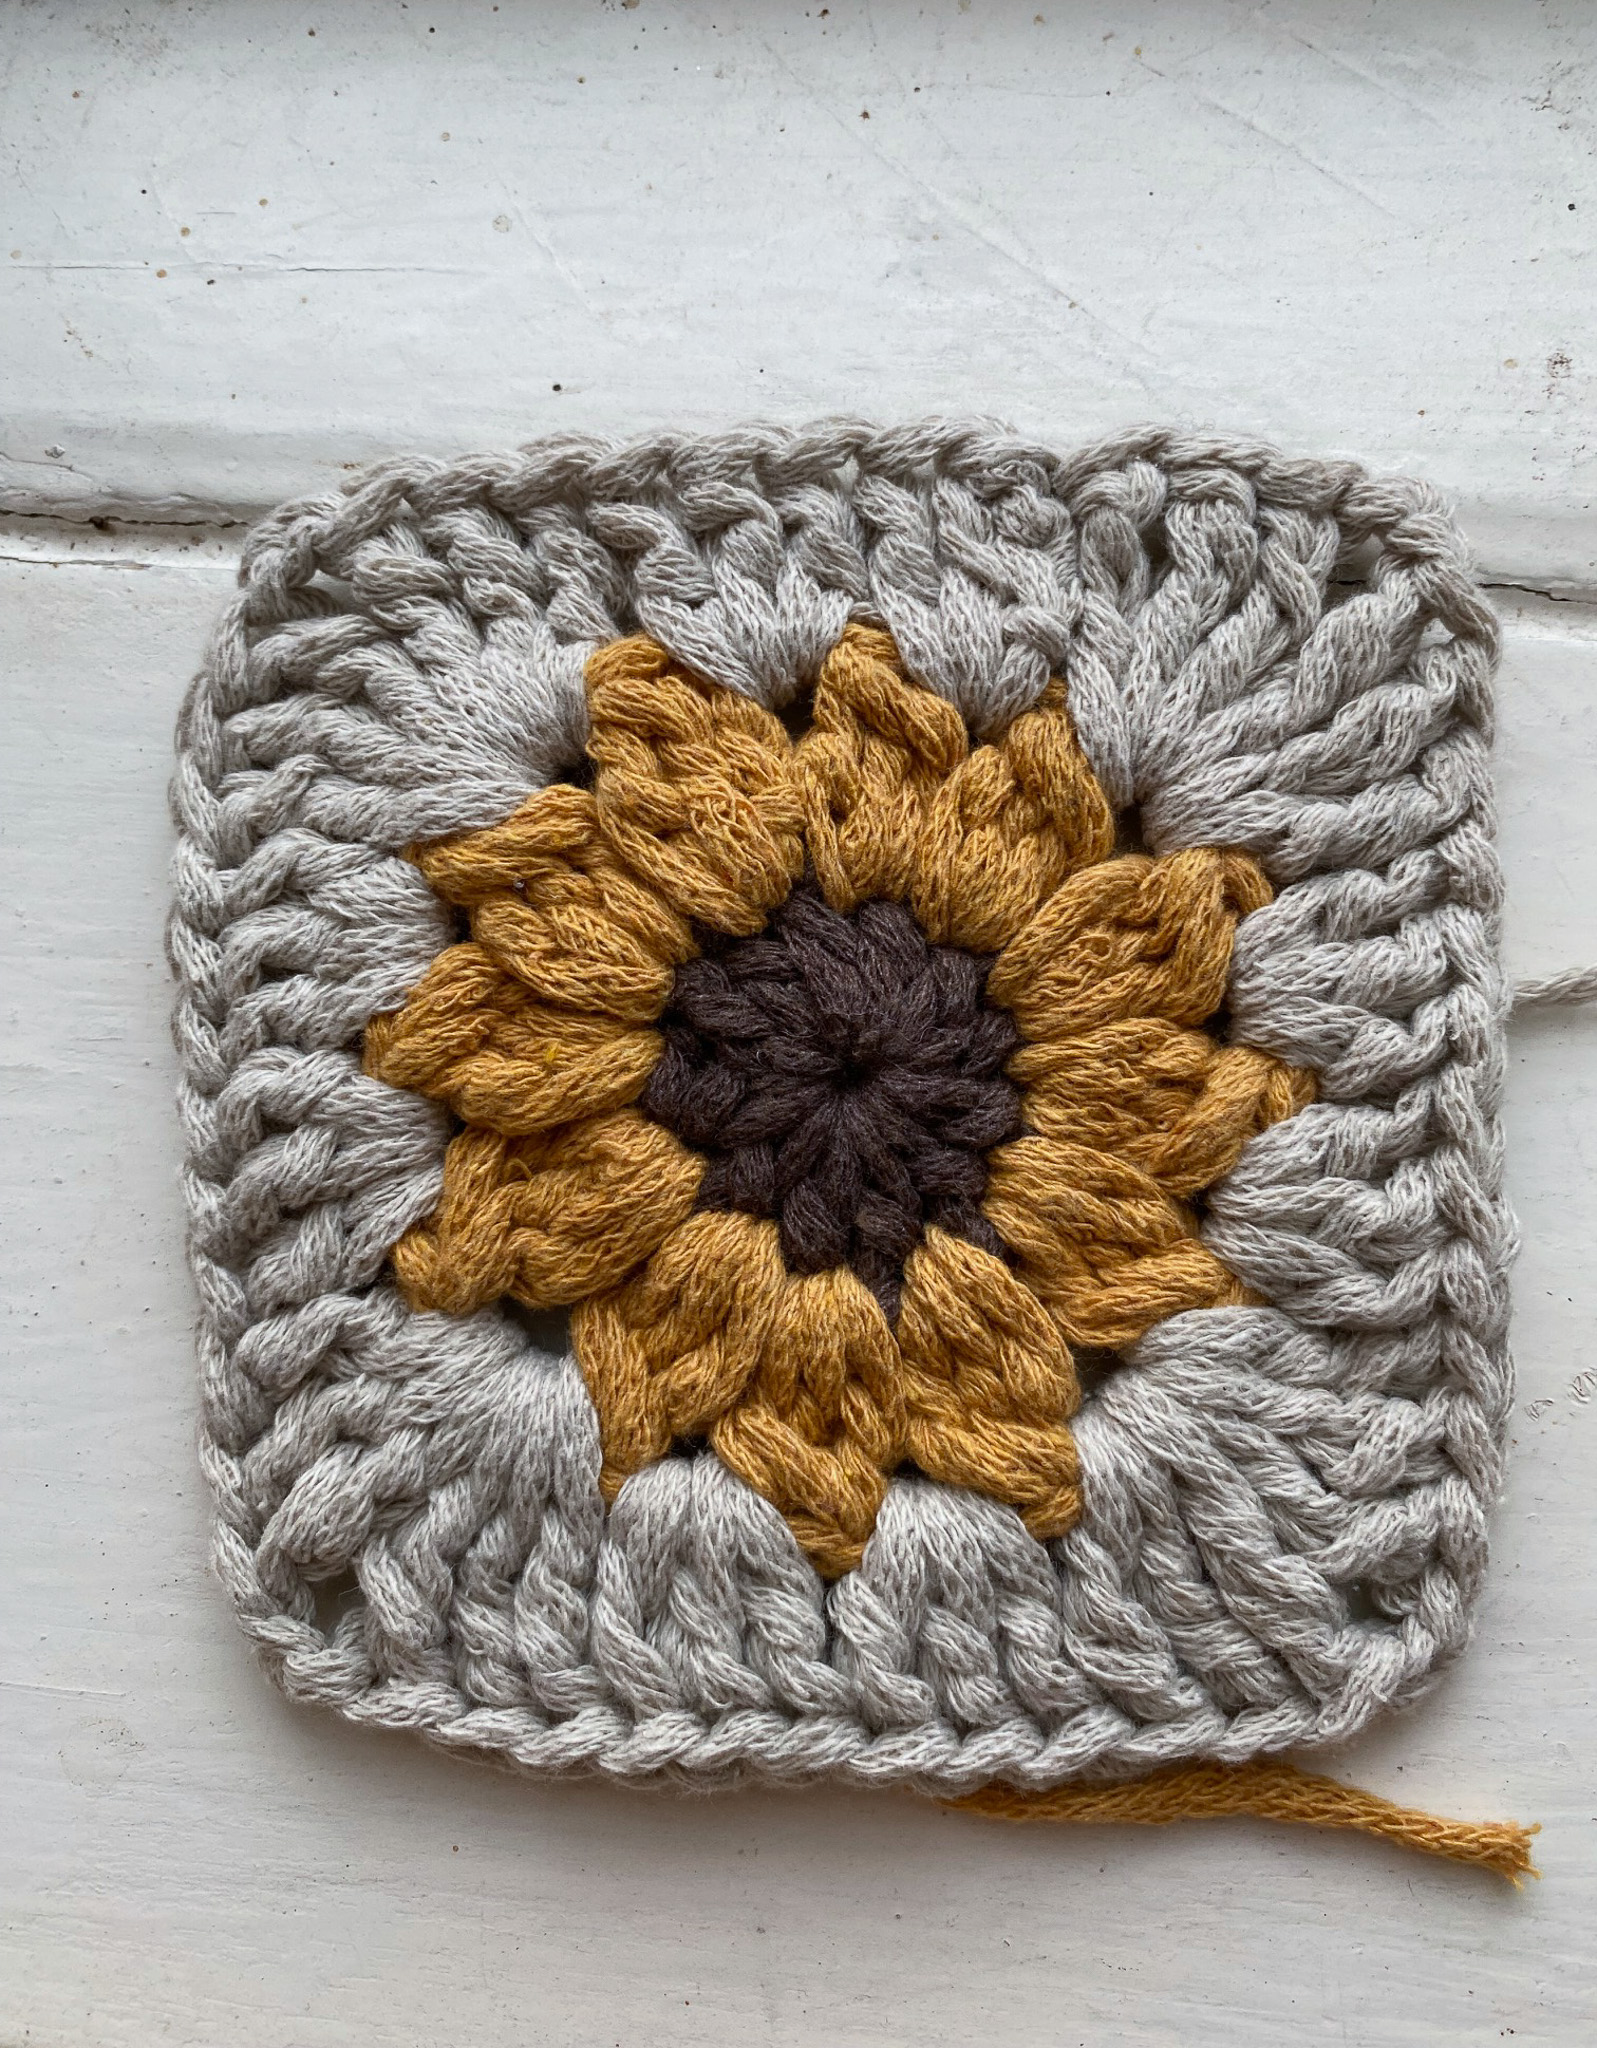
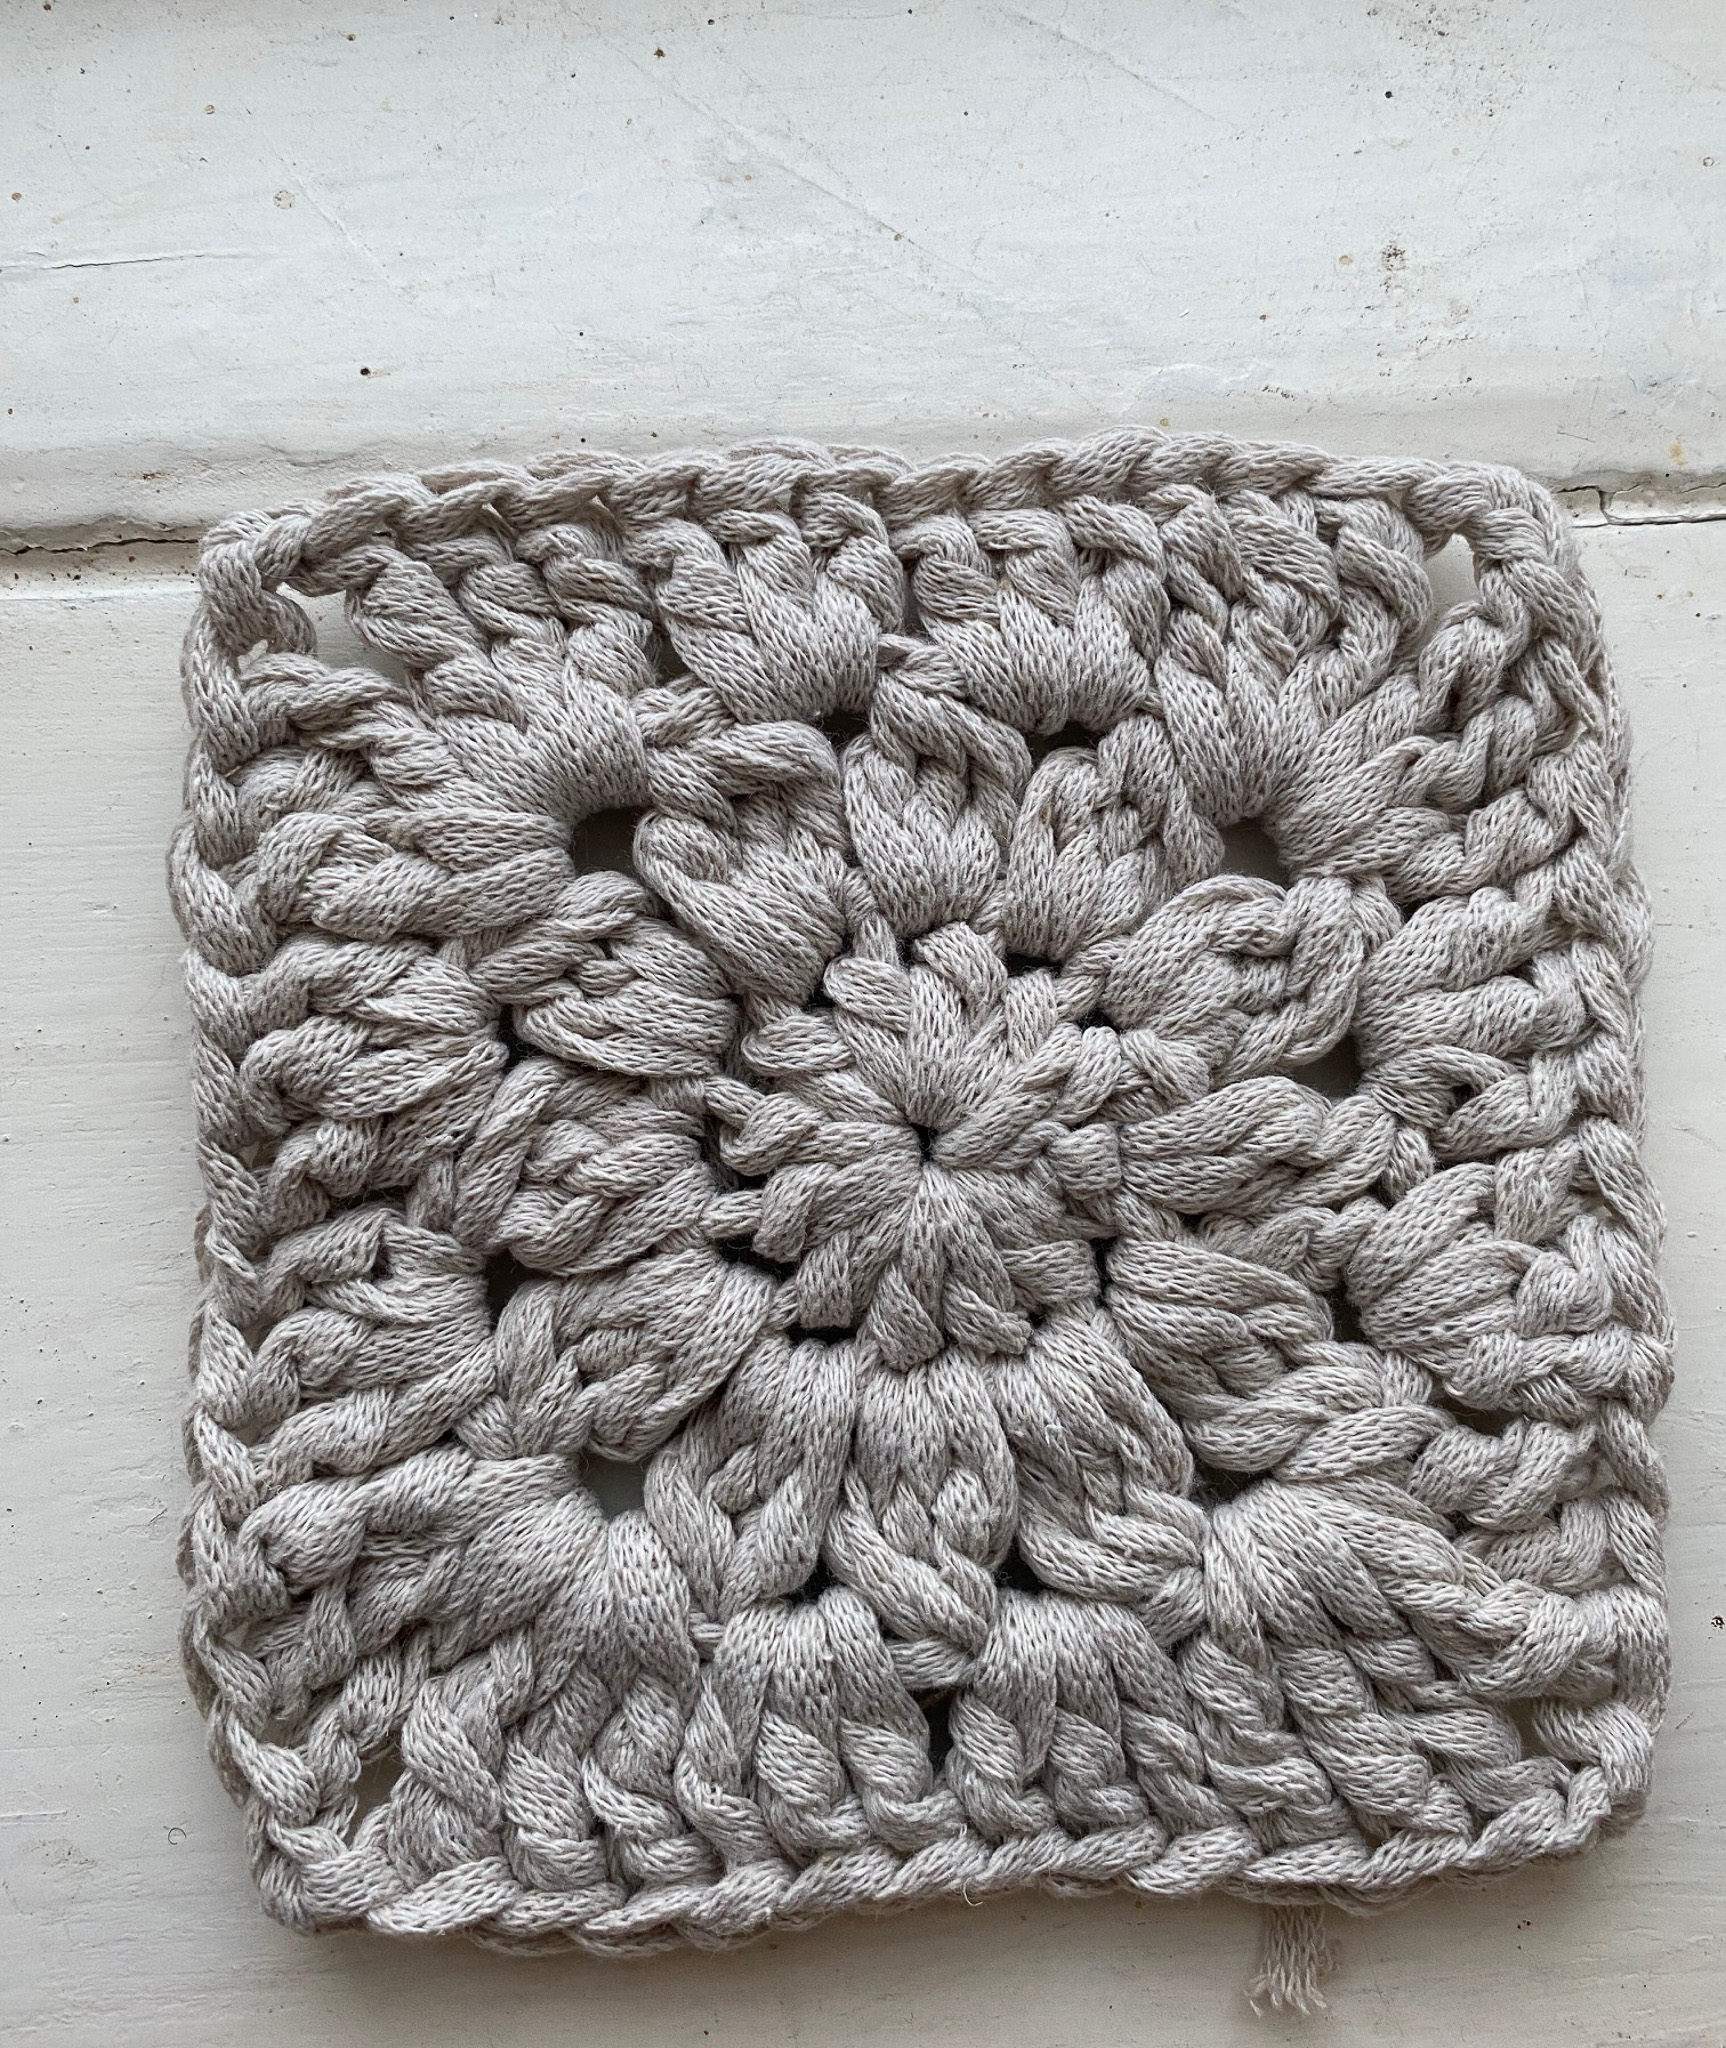
Sides – the squares
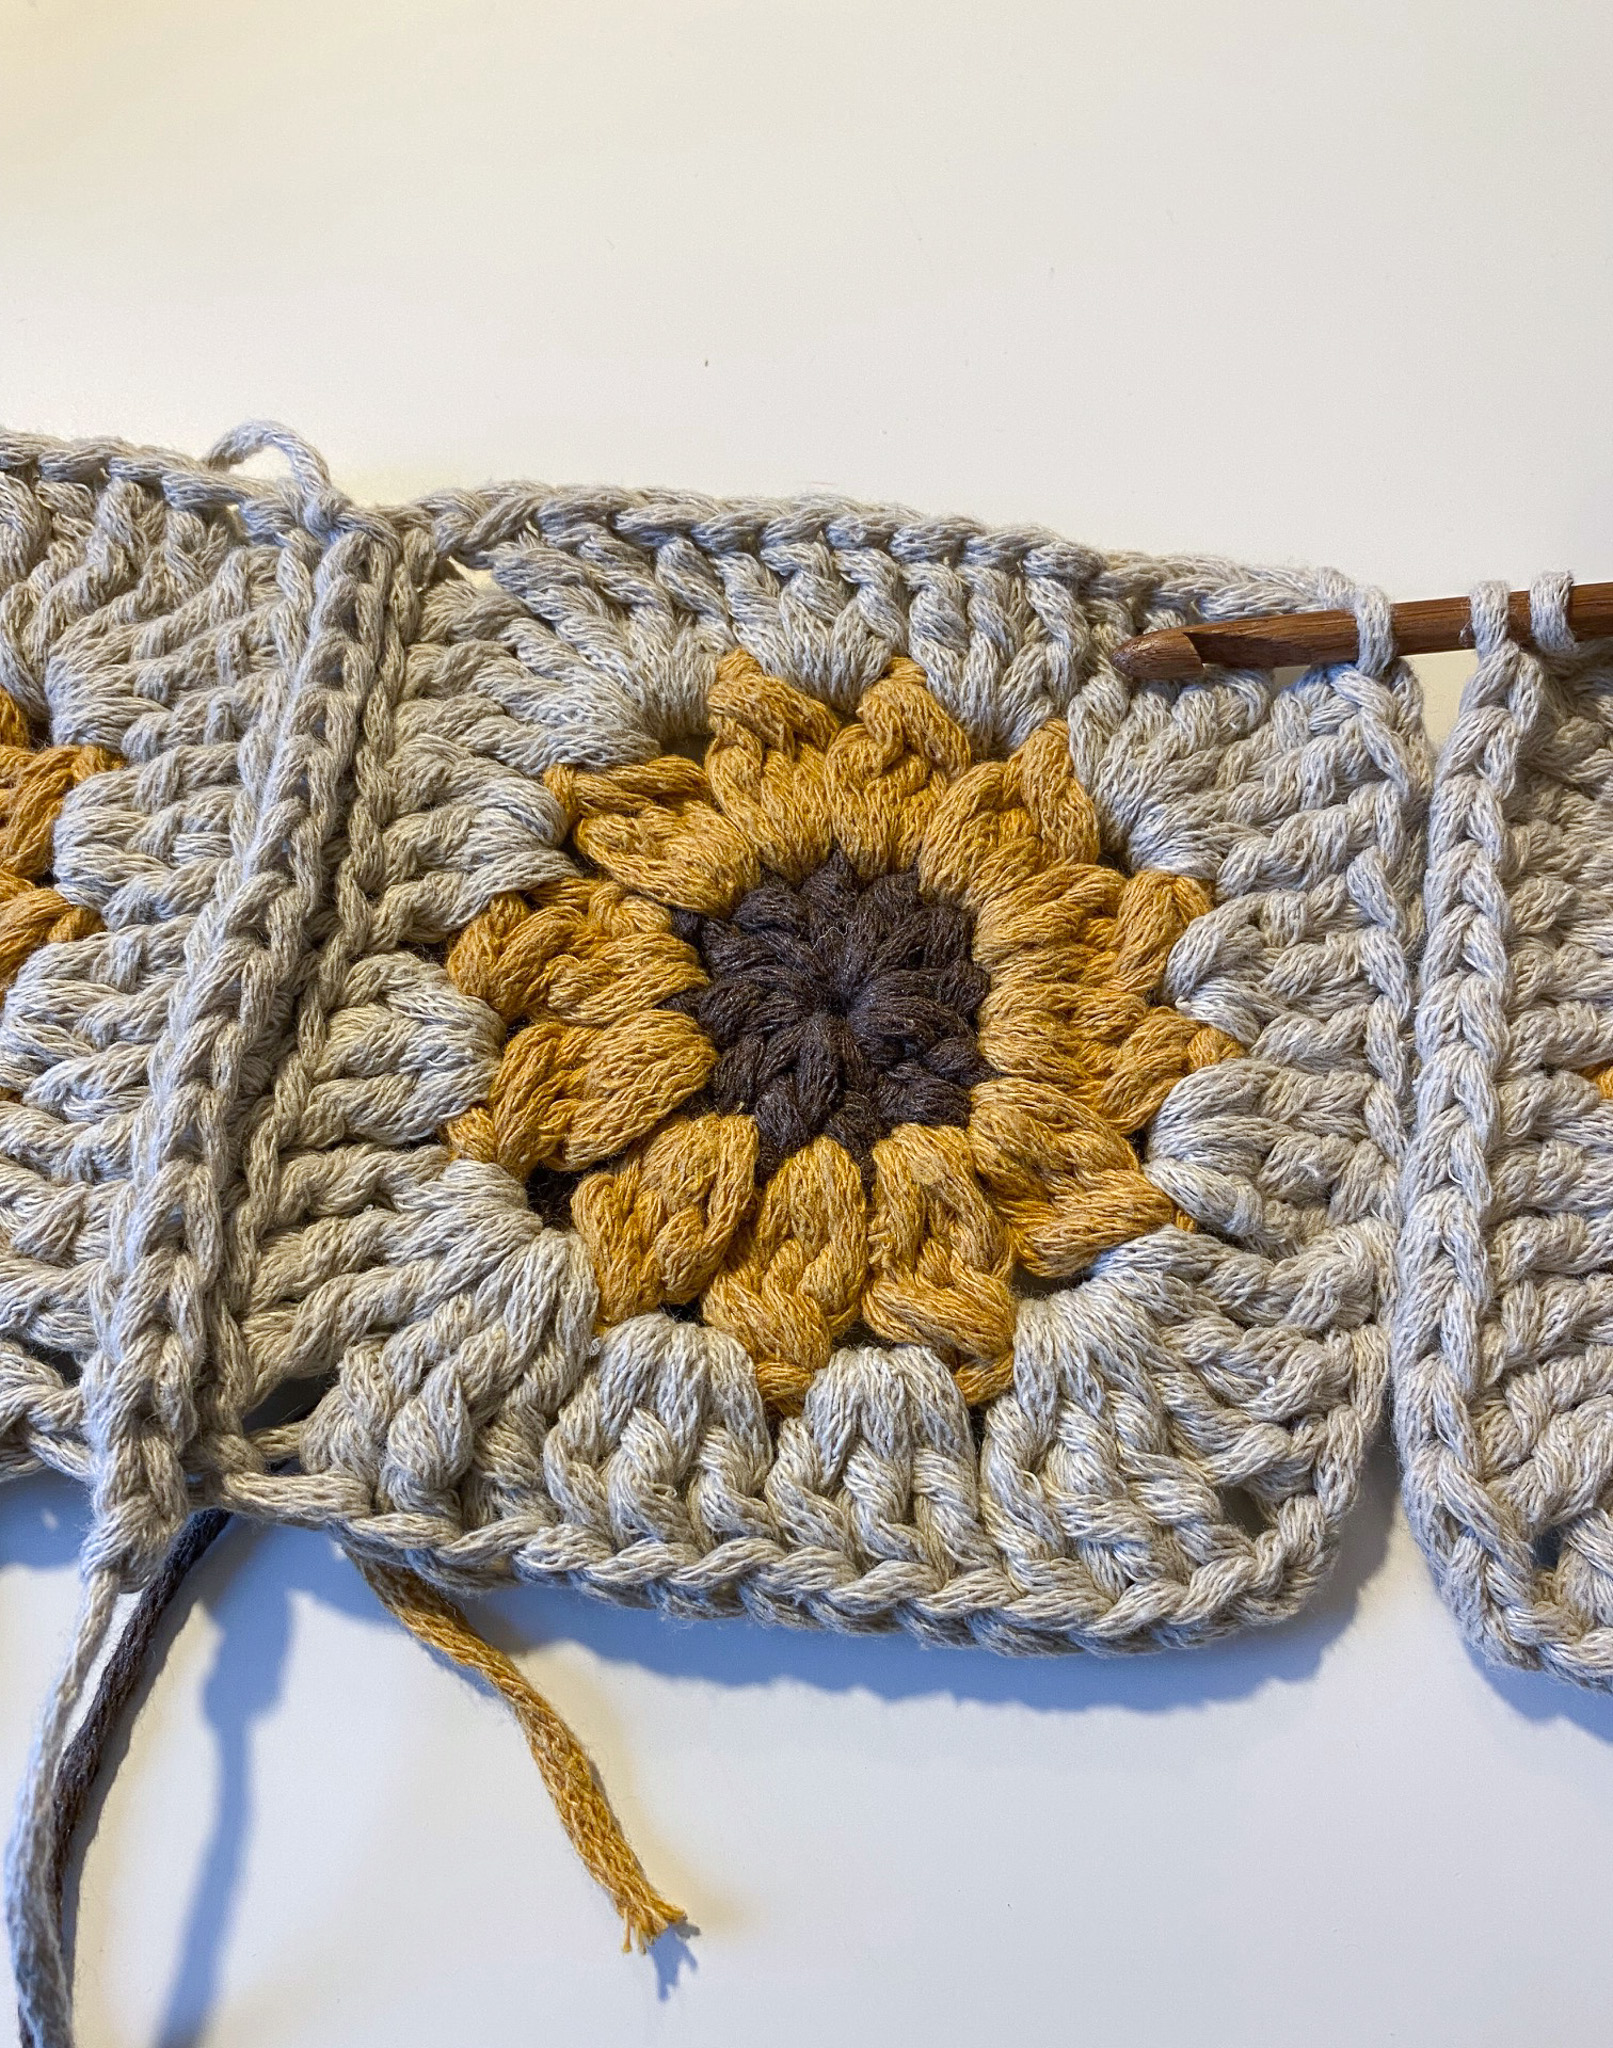
Crochet 4 sunflower squares. If you need help with how to crochet a sunflower square, see the video below: “Sunflower Square”. You can crochet in a single color or use different colors; the instructions below describe using different colors.
Round 1:
Start with Cacao. Make a magic ring. Crochet 3 chain stitches, which count as the first half double crochet. Then crochet 11 half double crochets. You will have a total of 12 half double crochets (including the chains that replace one stitch). Finish with a slip stitch in the last chain from the start. Cut the yarn and fasten off.
Round 2:
Now use Rusty Yellow. Make a slip knot. Attach the yarn in a stitch and crochet 2 chain stitches. We will now make clusters of three double crochets. After the 2 chains, crochet one double crochet but skip the final yarn-over pull-through. Repeat this one more time so you have two partially completed double crochets plus the 2 chains. Then pull through all loops on the hook. Crochet 1 chain stitch.
Continue making clusters of three unfinished double crochets in each stitch from the previous round, so that you end up with 12 clusters. Make a slip stitch in the second chain from the beginning of the round, cut the yarn, and fasten off.
Round 3:
Now use Greige. Make a slip knot and start in a hole. Crochet 3 chain stitches, which count as the first double crochet. Crochet 2 more double crochets. Go to the next space and crochet 3 double crochets. Go to the third space and crochet (in the same space) 3 treble crochets, 2 chain stitches, 3 treble crochets (this forms a corner of the square).
Each side of the square consists of three spaces. Repeat these three spaces so that you have four sides of the square. In the first and second spaces, crochet 3 double crochets (no chain stitches in between), and in the corner space crochet (in the same space) 3 treble crochets, 2 chain stitches, 3 treble crochets.
Finish with a slip stitch in the third chain from the beginning of the round, cut the yarn, and fasten off.
Now crochet three more identical squares!
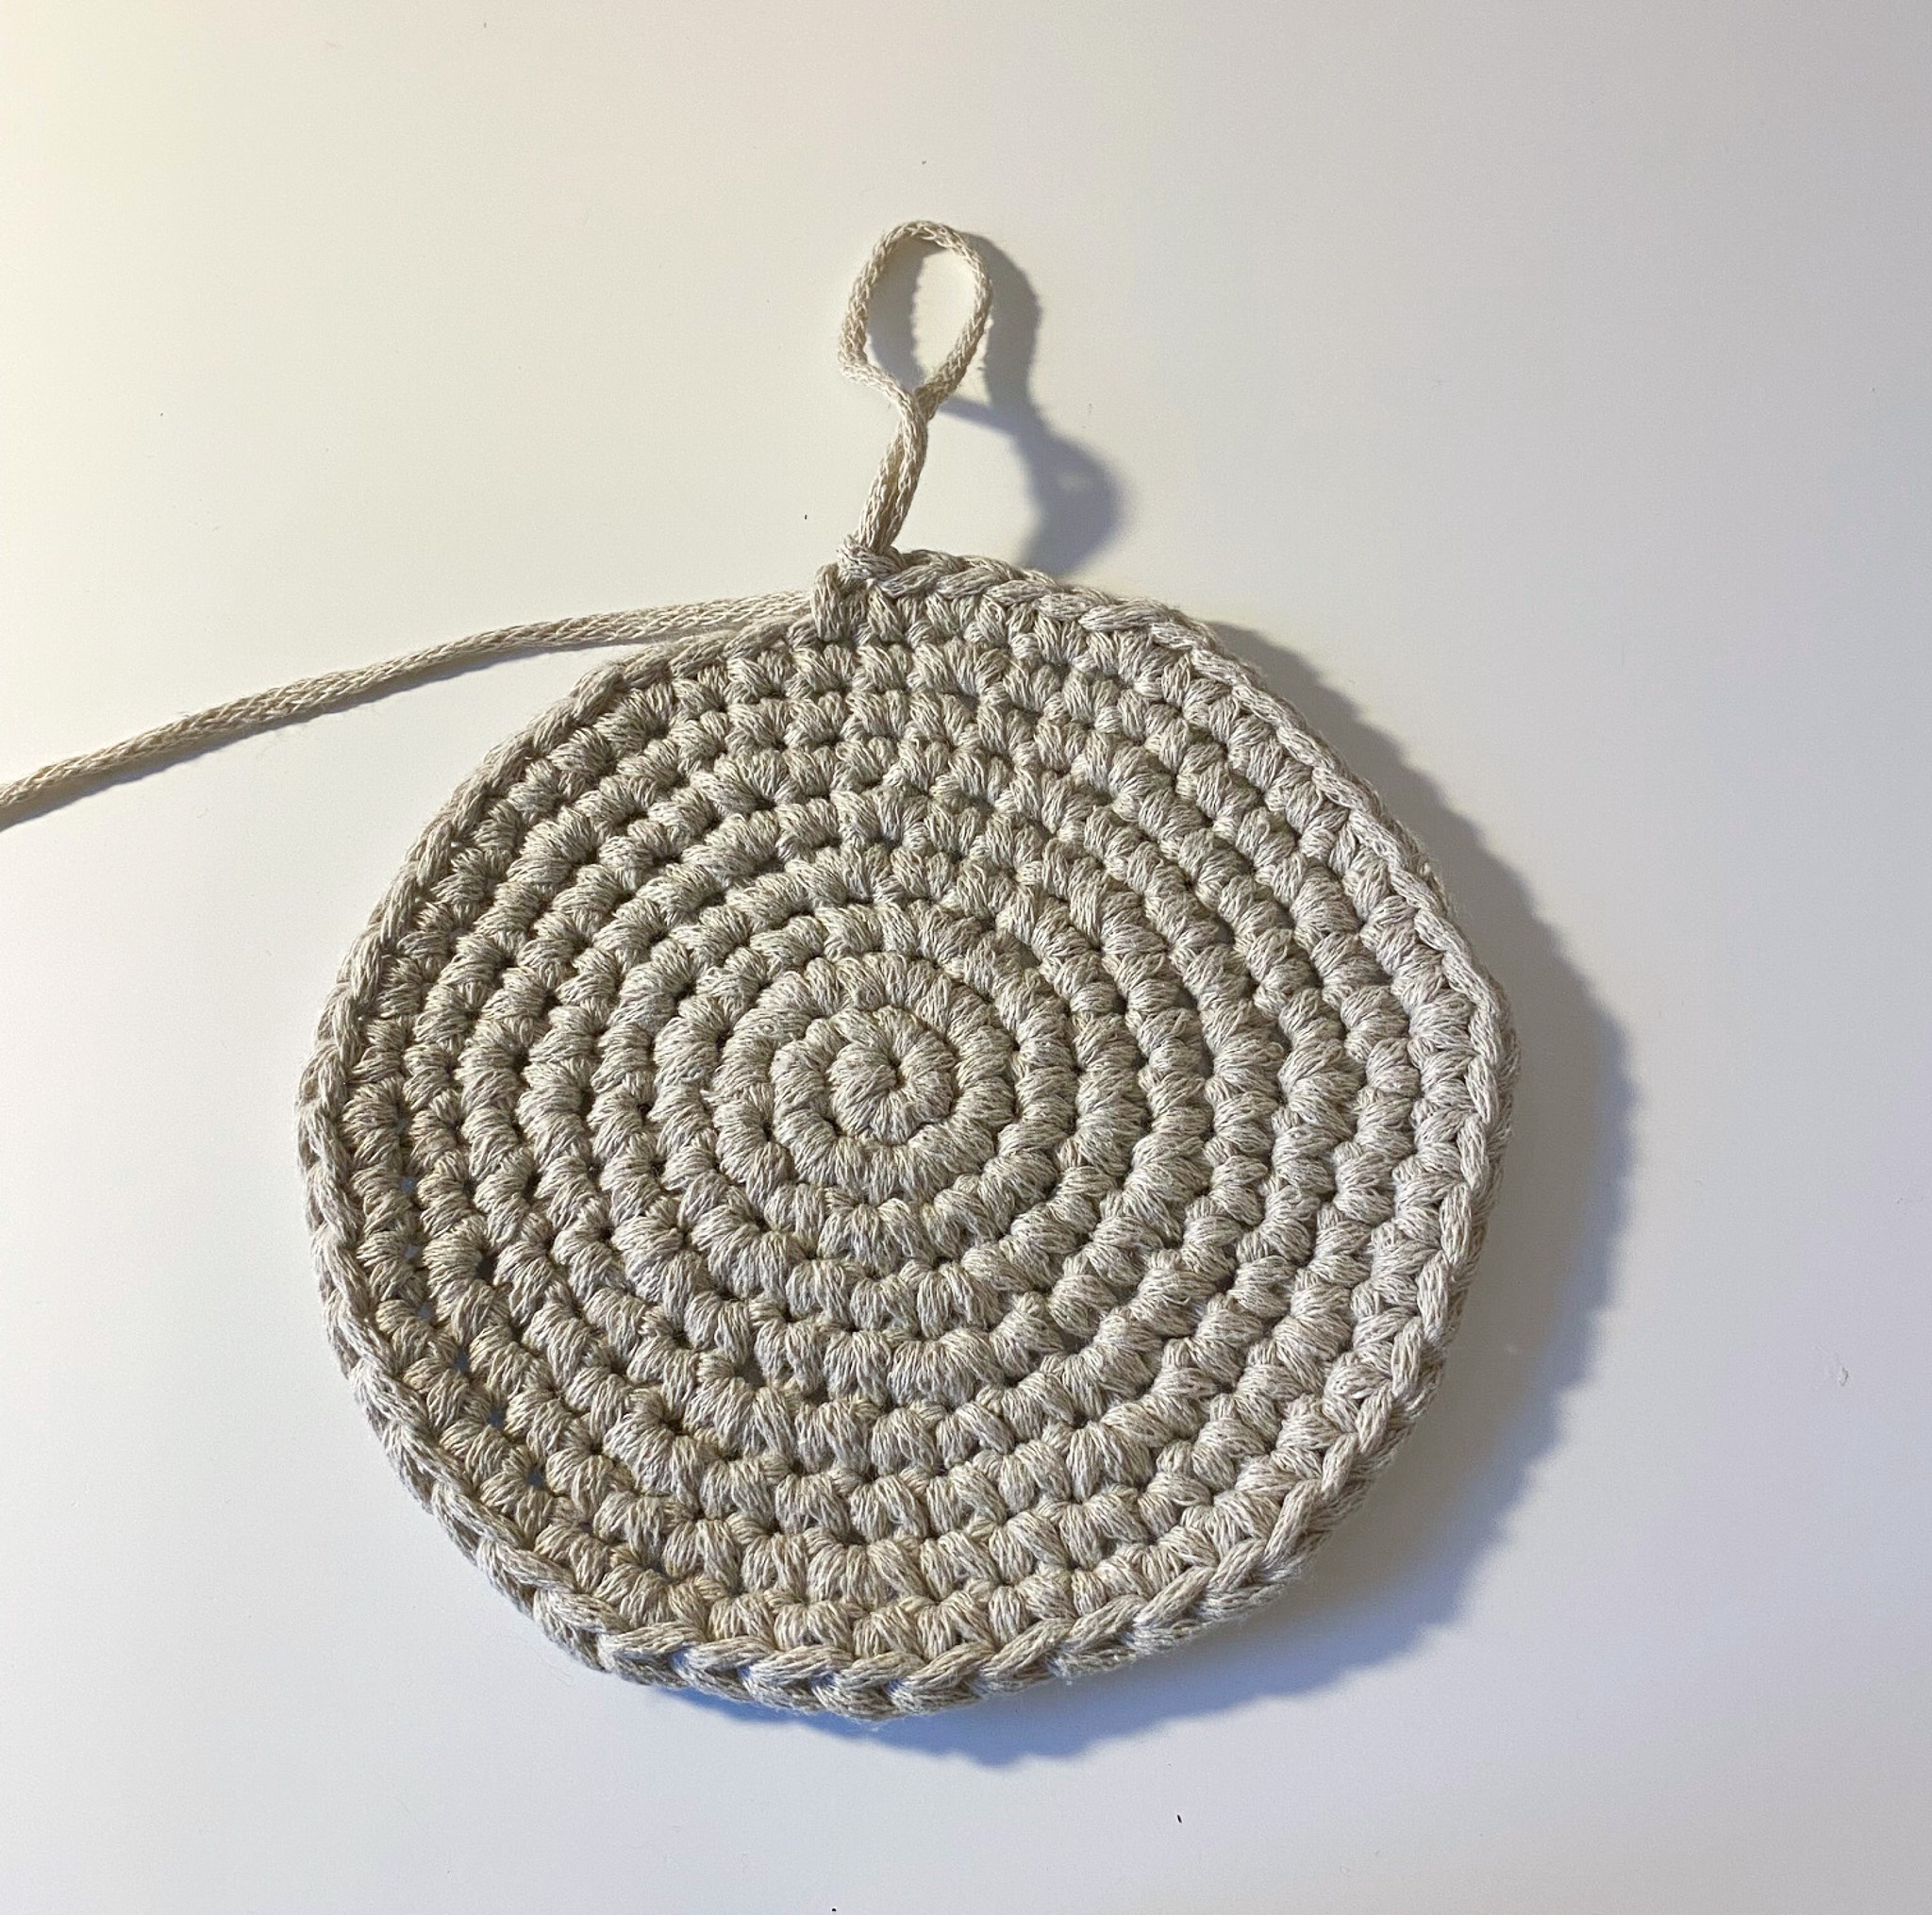
Base:
Round 1:
Use Greige and start by making a magic ring. Crochet 6 single crochets into the magic ring. Pull the yarn tail to close the ring. Continue directly with round 2—do not join with a slip stitch. Mark the first or last stitch of the round so you can see where the round begins/ends.
Round 2:
Crochet 2 single crochets in each stitch around, for a total of 12 stitches.
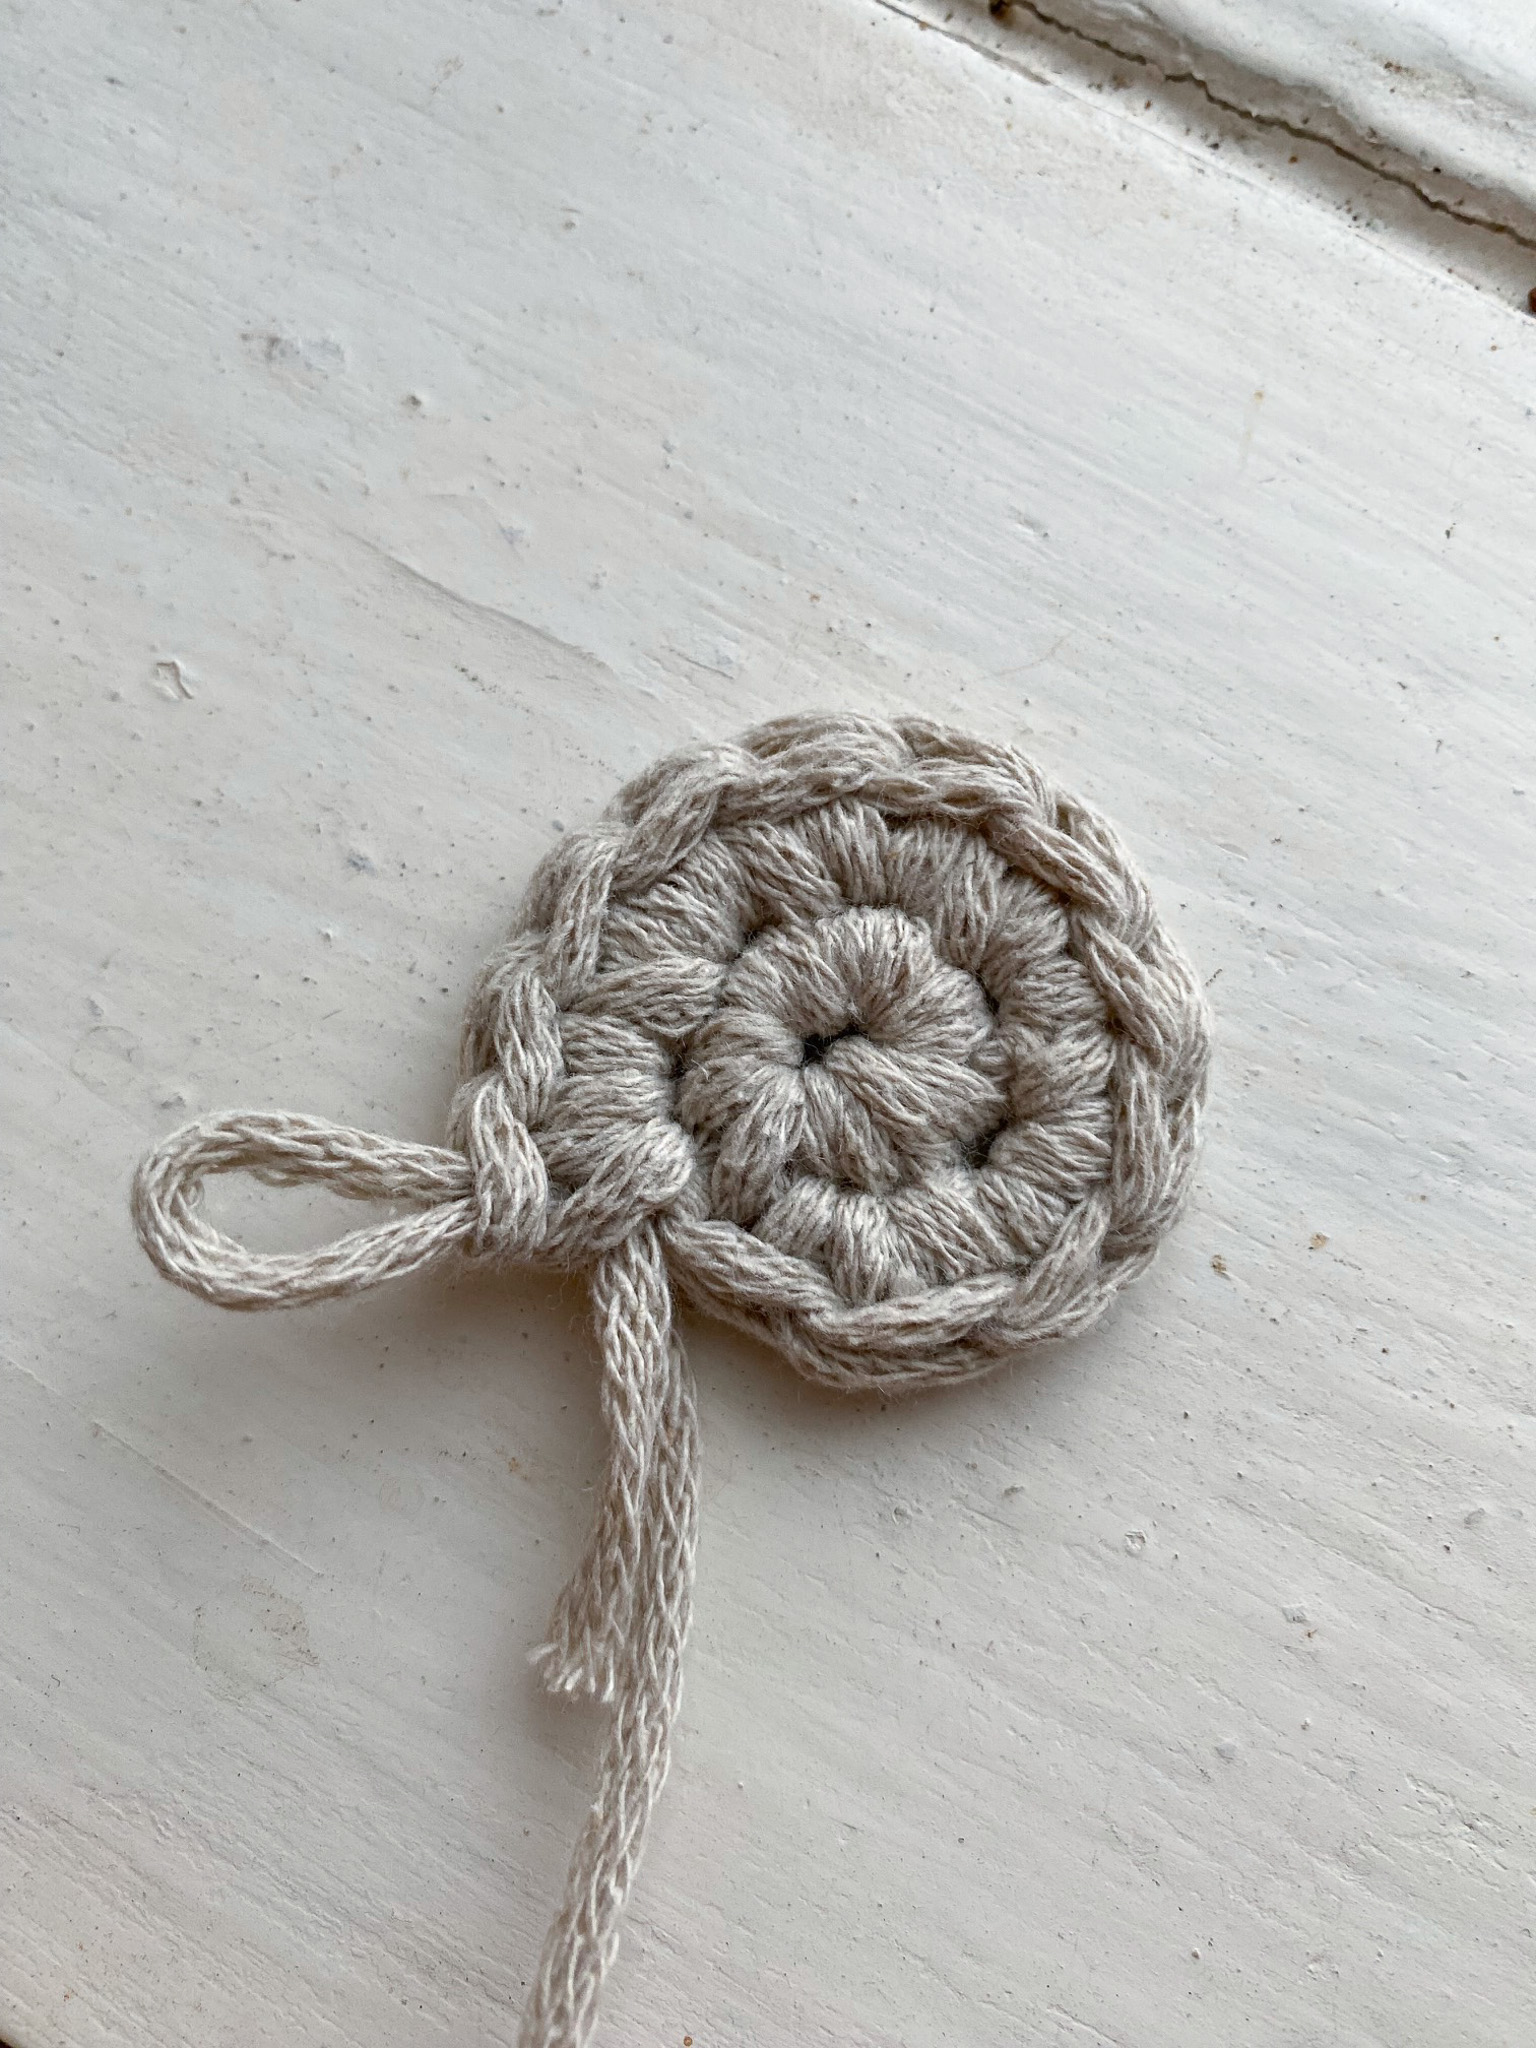
Round 3: Continue by crocheting 2 single crochets in the same stitch in every other stitch. In the alternating stitches, crochet 1 single crochet. Total: 18 stitches.
Round 4: Crochet 2 single crochets in the same stitch in every third stitch. Between these increases, crochet 1 single crochet in each stitch. Total: 24 stitches.
Round 5: Crochet 2 single crochets in the same stitch in every fourth stitch. Between these increases, crochet 1 single crochet in each stitch. Total: 30 stitches.
Round 6: Crochet 2 single crochets in the same stitch in every fifth stitch. Between these increases, crochet 1 single crochet in each stitch. Total: 36 stitches.
Round 7: Crochet 2 single crochets in the same stitch in every sixth stitch. Between these increases, crochet 1 single crochet in each stitch. Total: 42 stitches.
Round 8: Crochet 2 single crochets in the same stitch in every seventh stitch. Between these increases, crochet 1 single crochet in each stitch. Total: 48 stitches.
Round 9: Crochet 2 single crochets in the same stitch in every eighth stitch. Between these increases, crochet 1 single crochet in each stitch. Total: 54 stitches.
Round 10: Crochet 26 single crochets, increase in the next stitch. Repeat this once more, for a total of 56 stitches in the round.
When round 10 is complete, cut the yarn and fasten off. The base is now finished!
Assembly
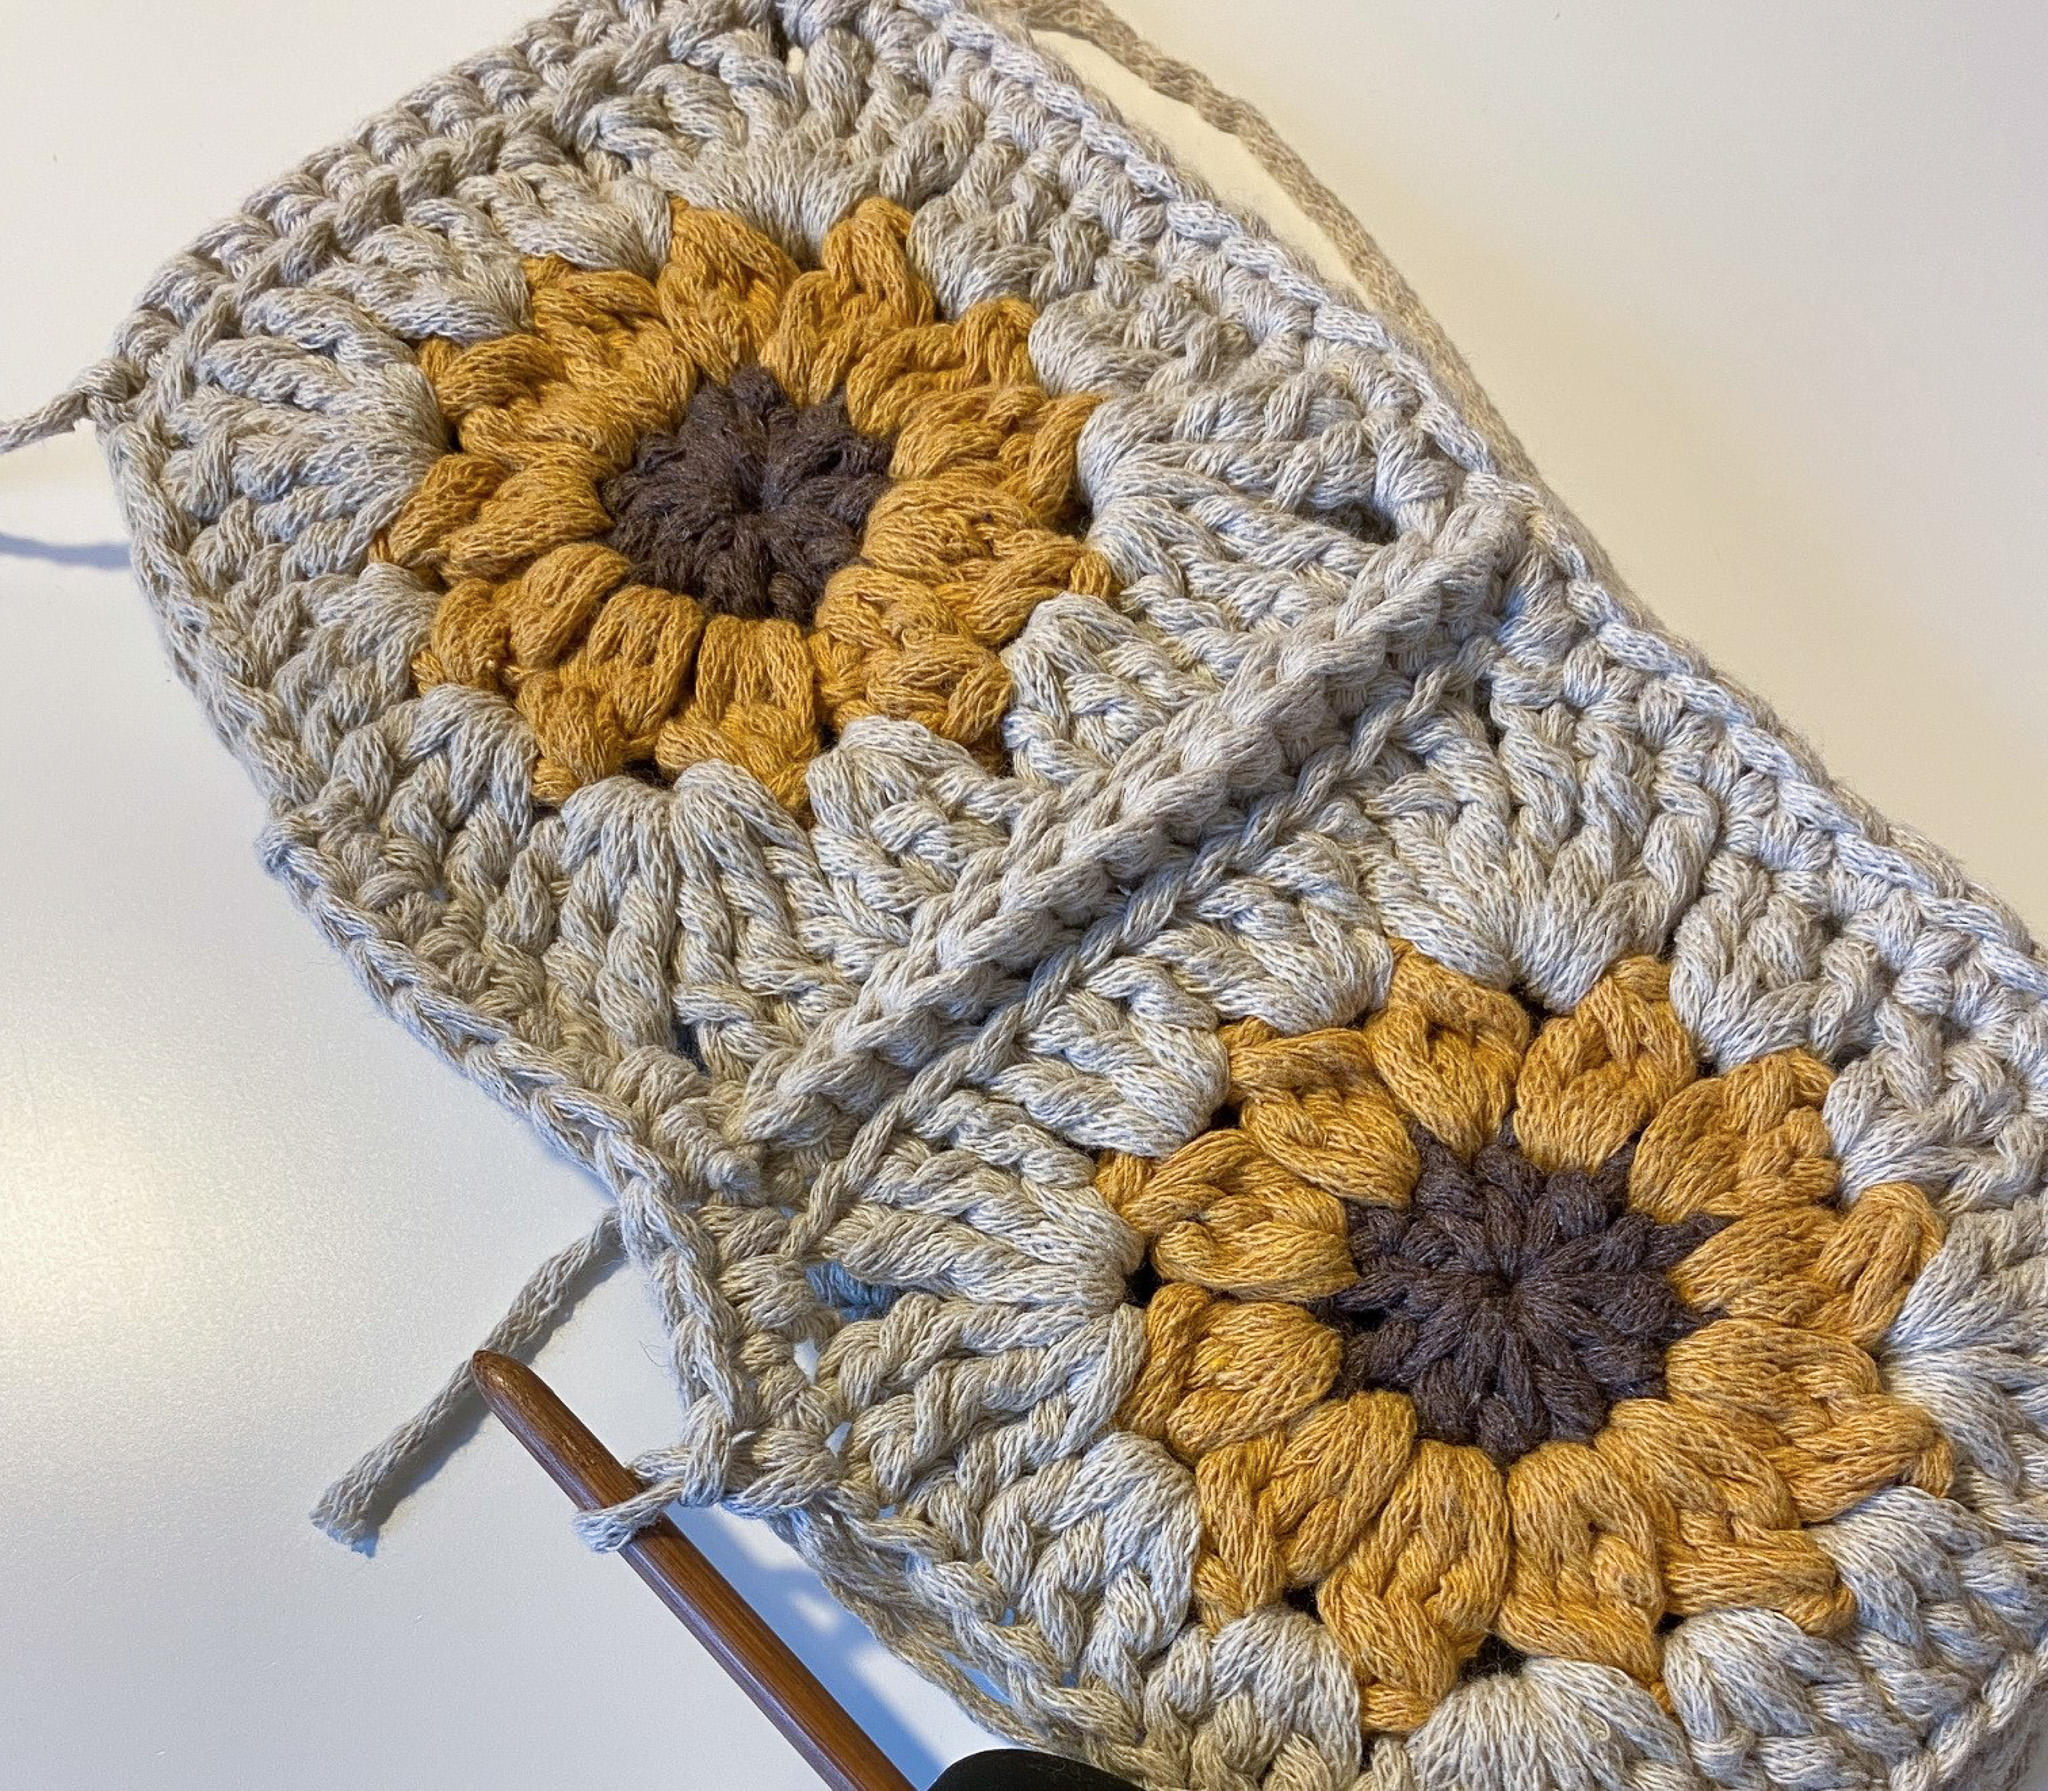
Start by crocheting the squares together side by side, working only in the back loops, using single crochets. If you’re unsure how to join squares in this way, see the video below: “Attach Squares: Single Crochet.”
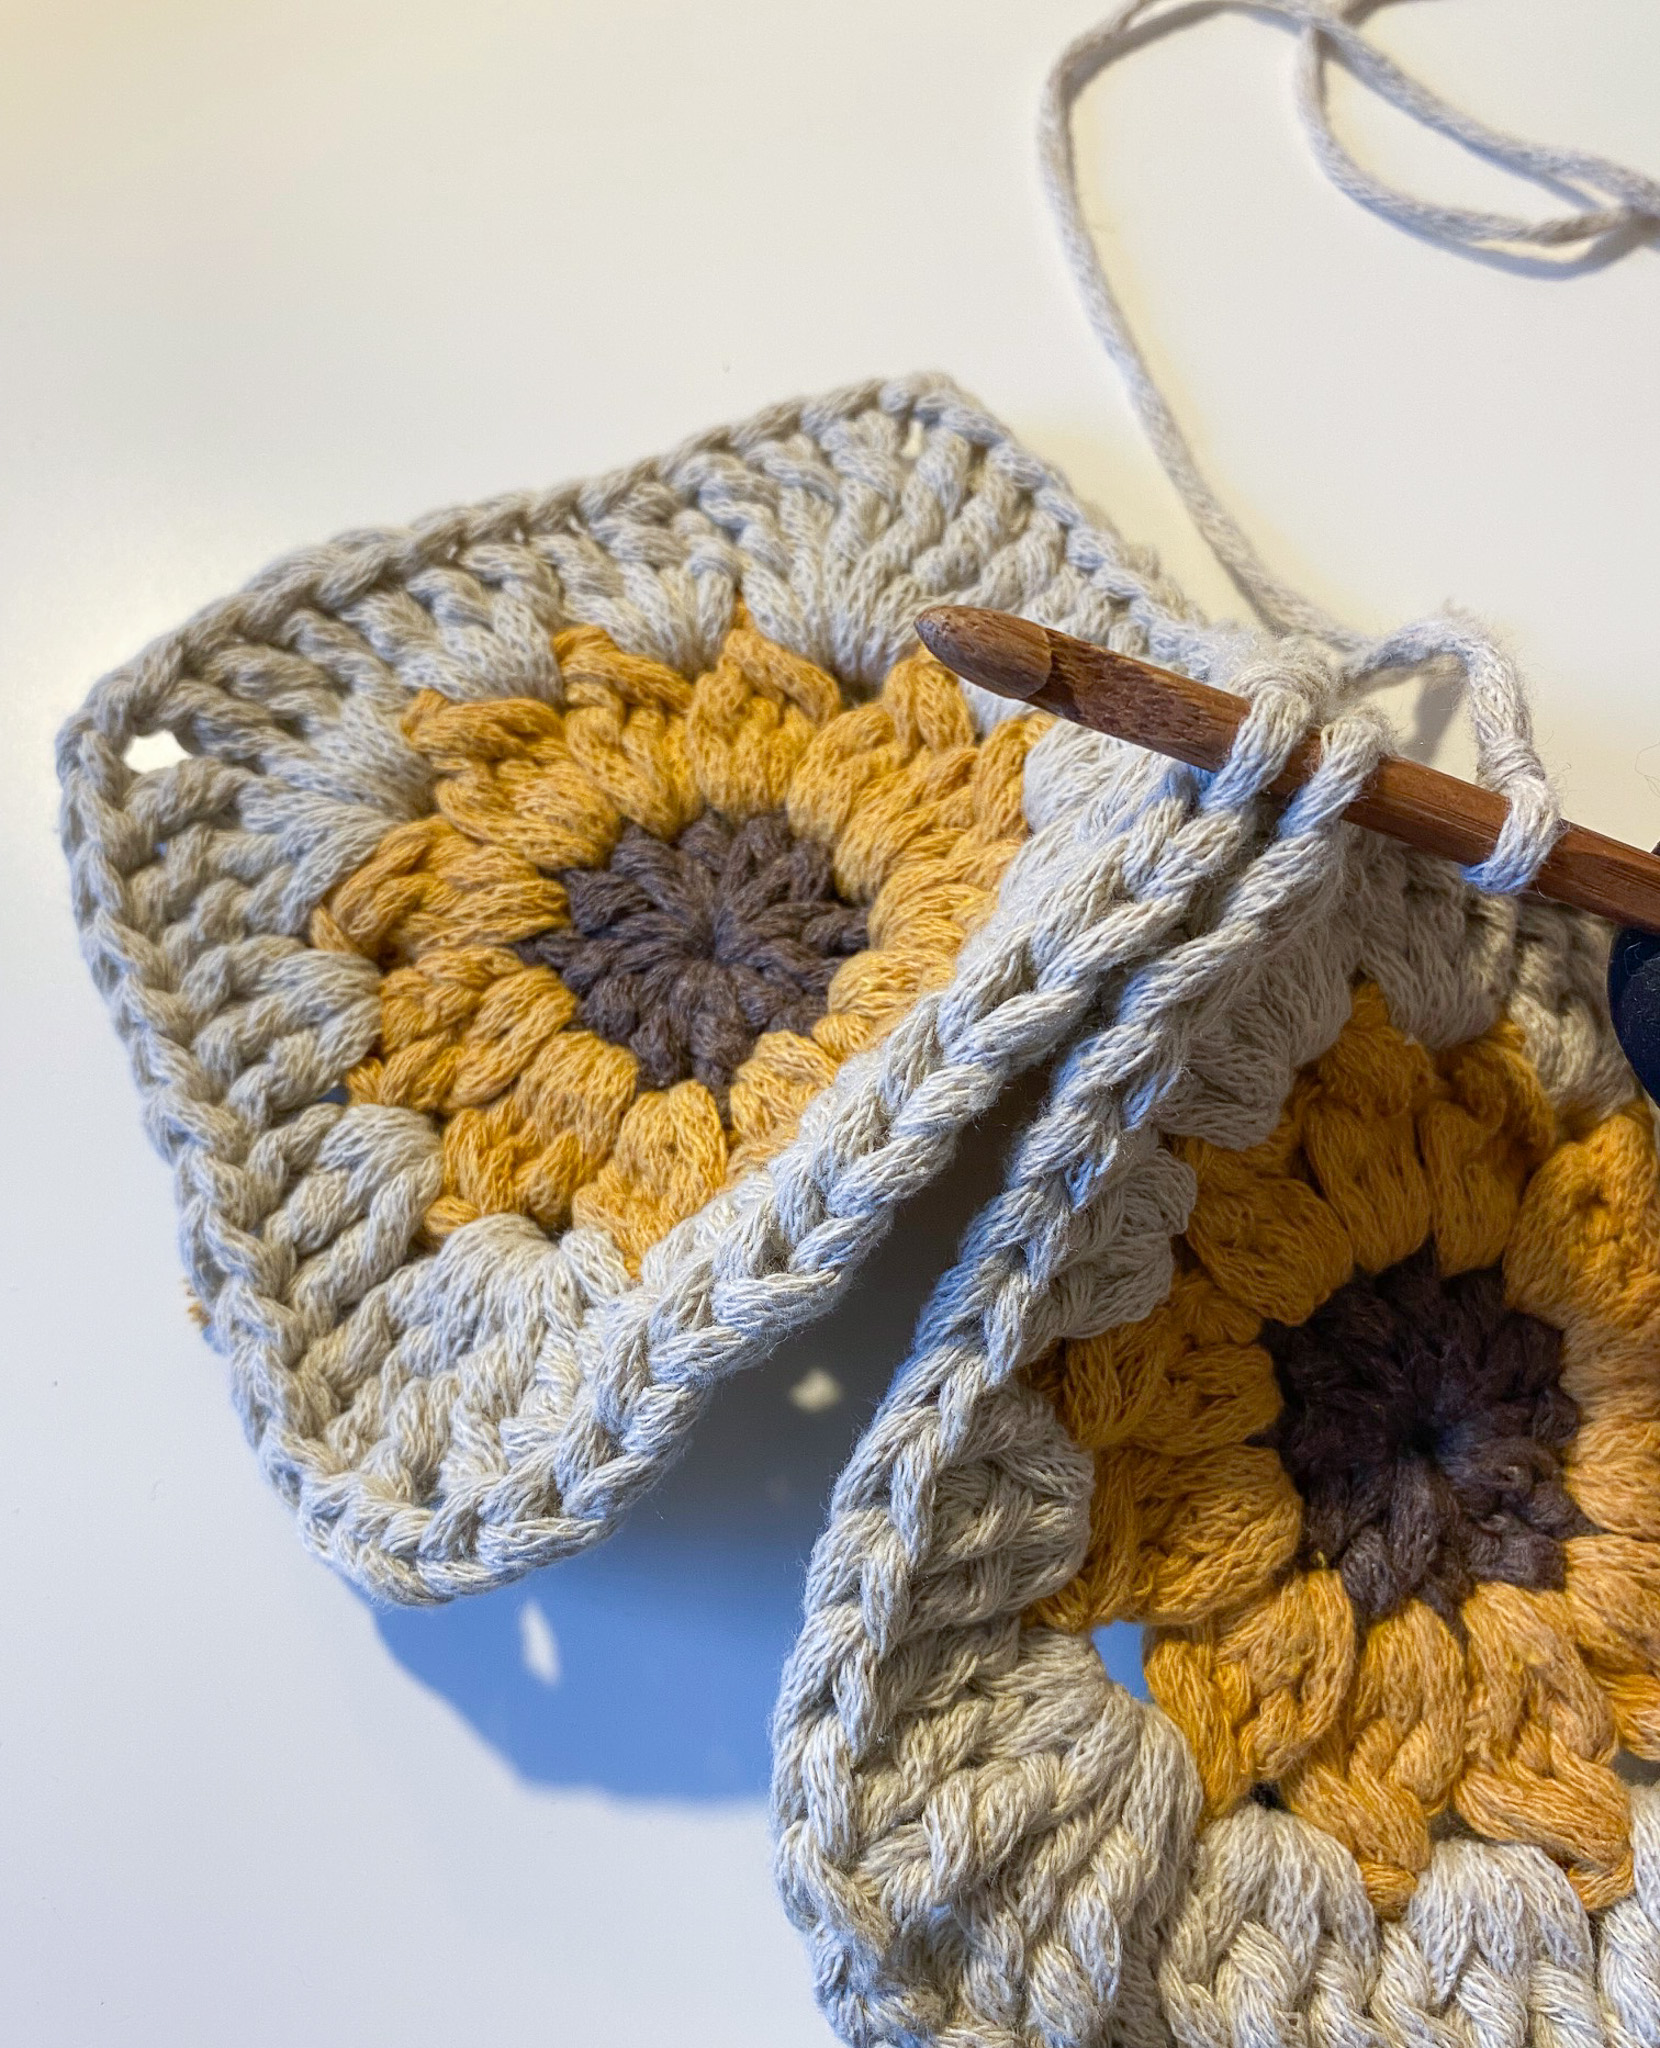
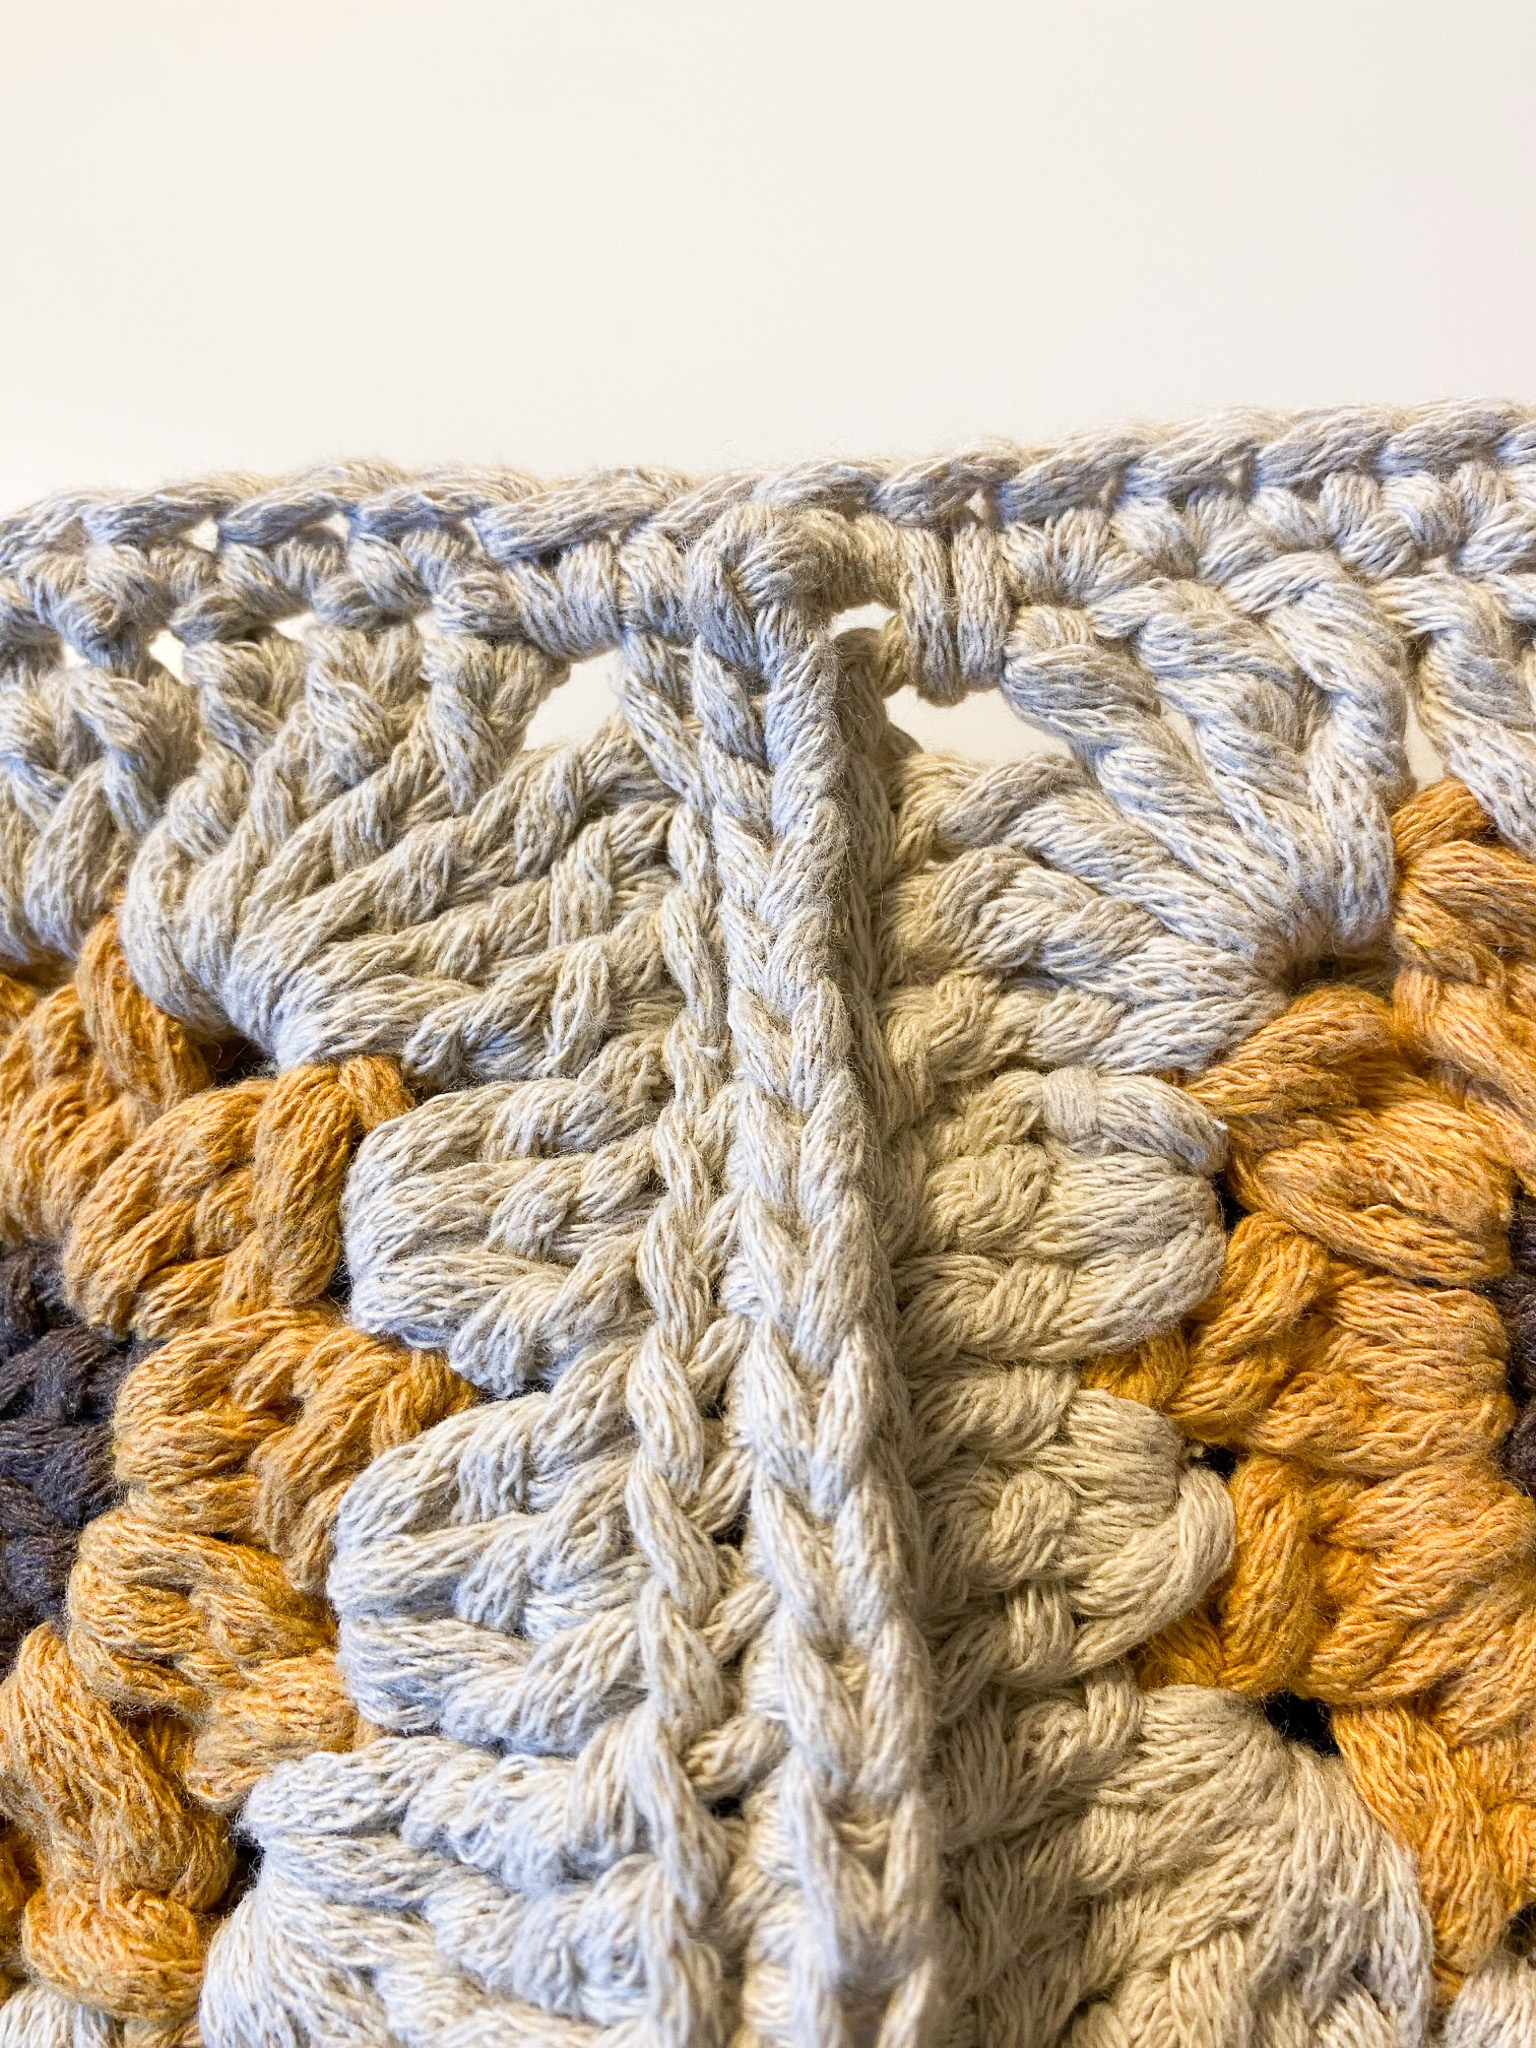
Crochet the squares together from corner to corner. Make sure to work in the same direction for all squares so that the stitches face the same way.
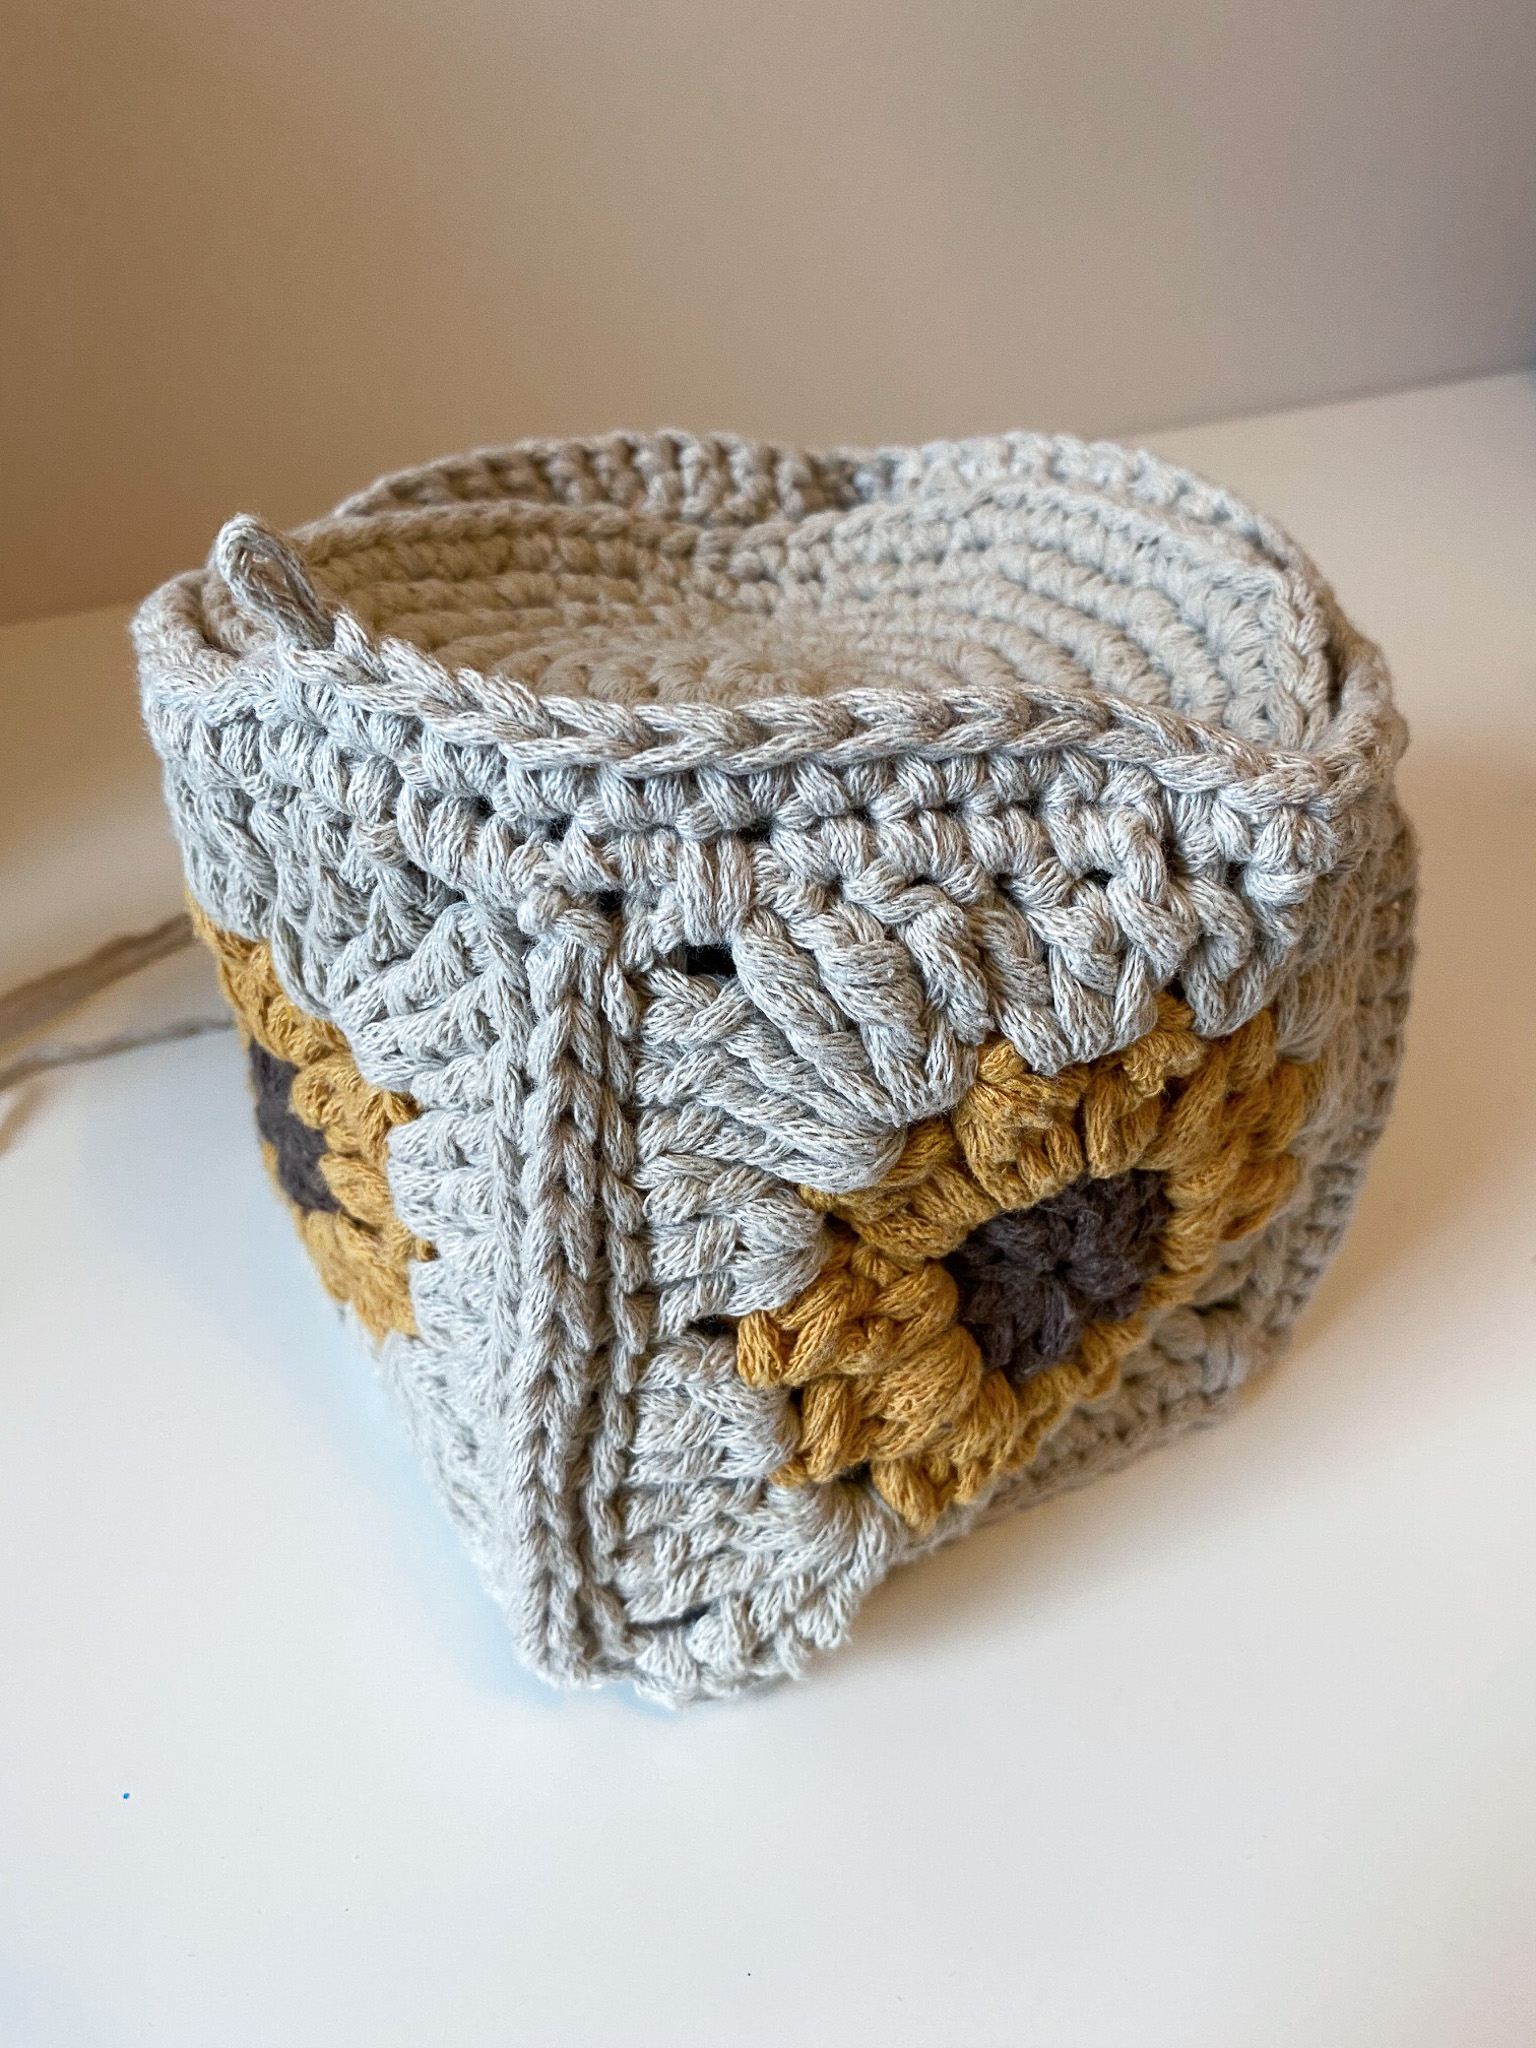
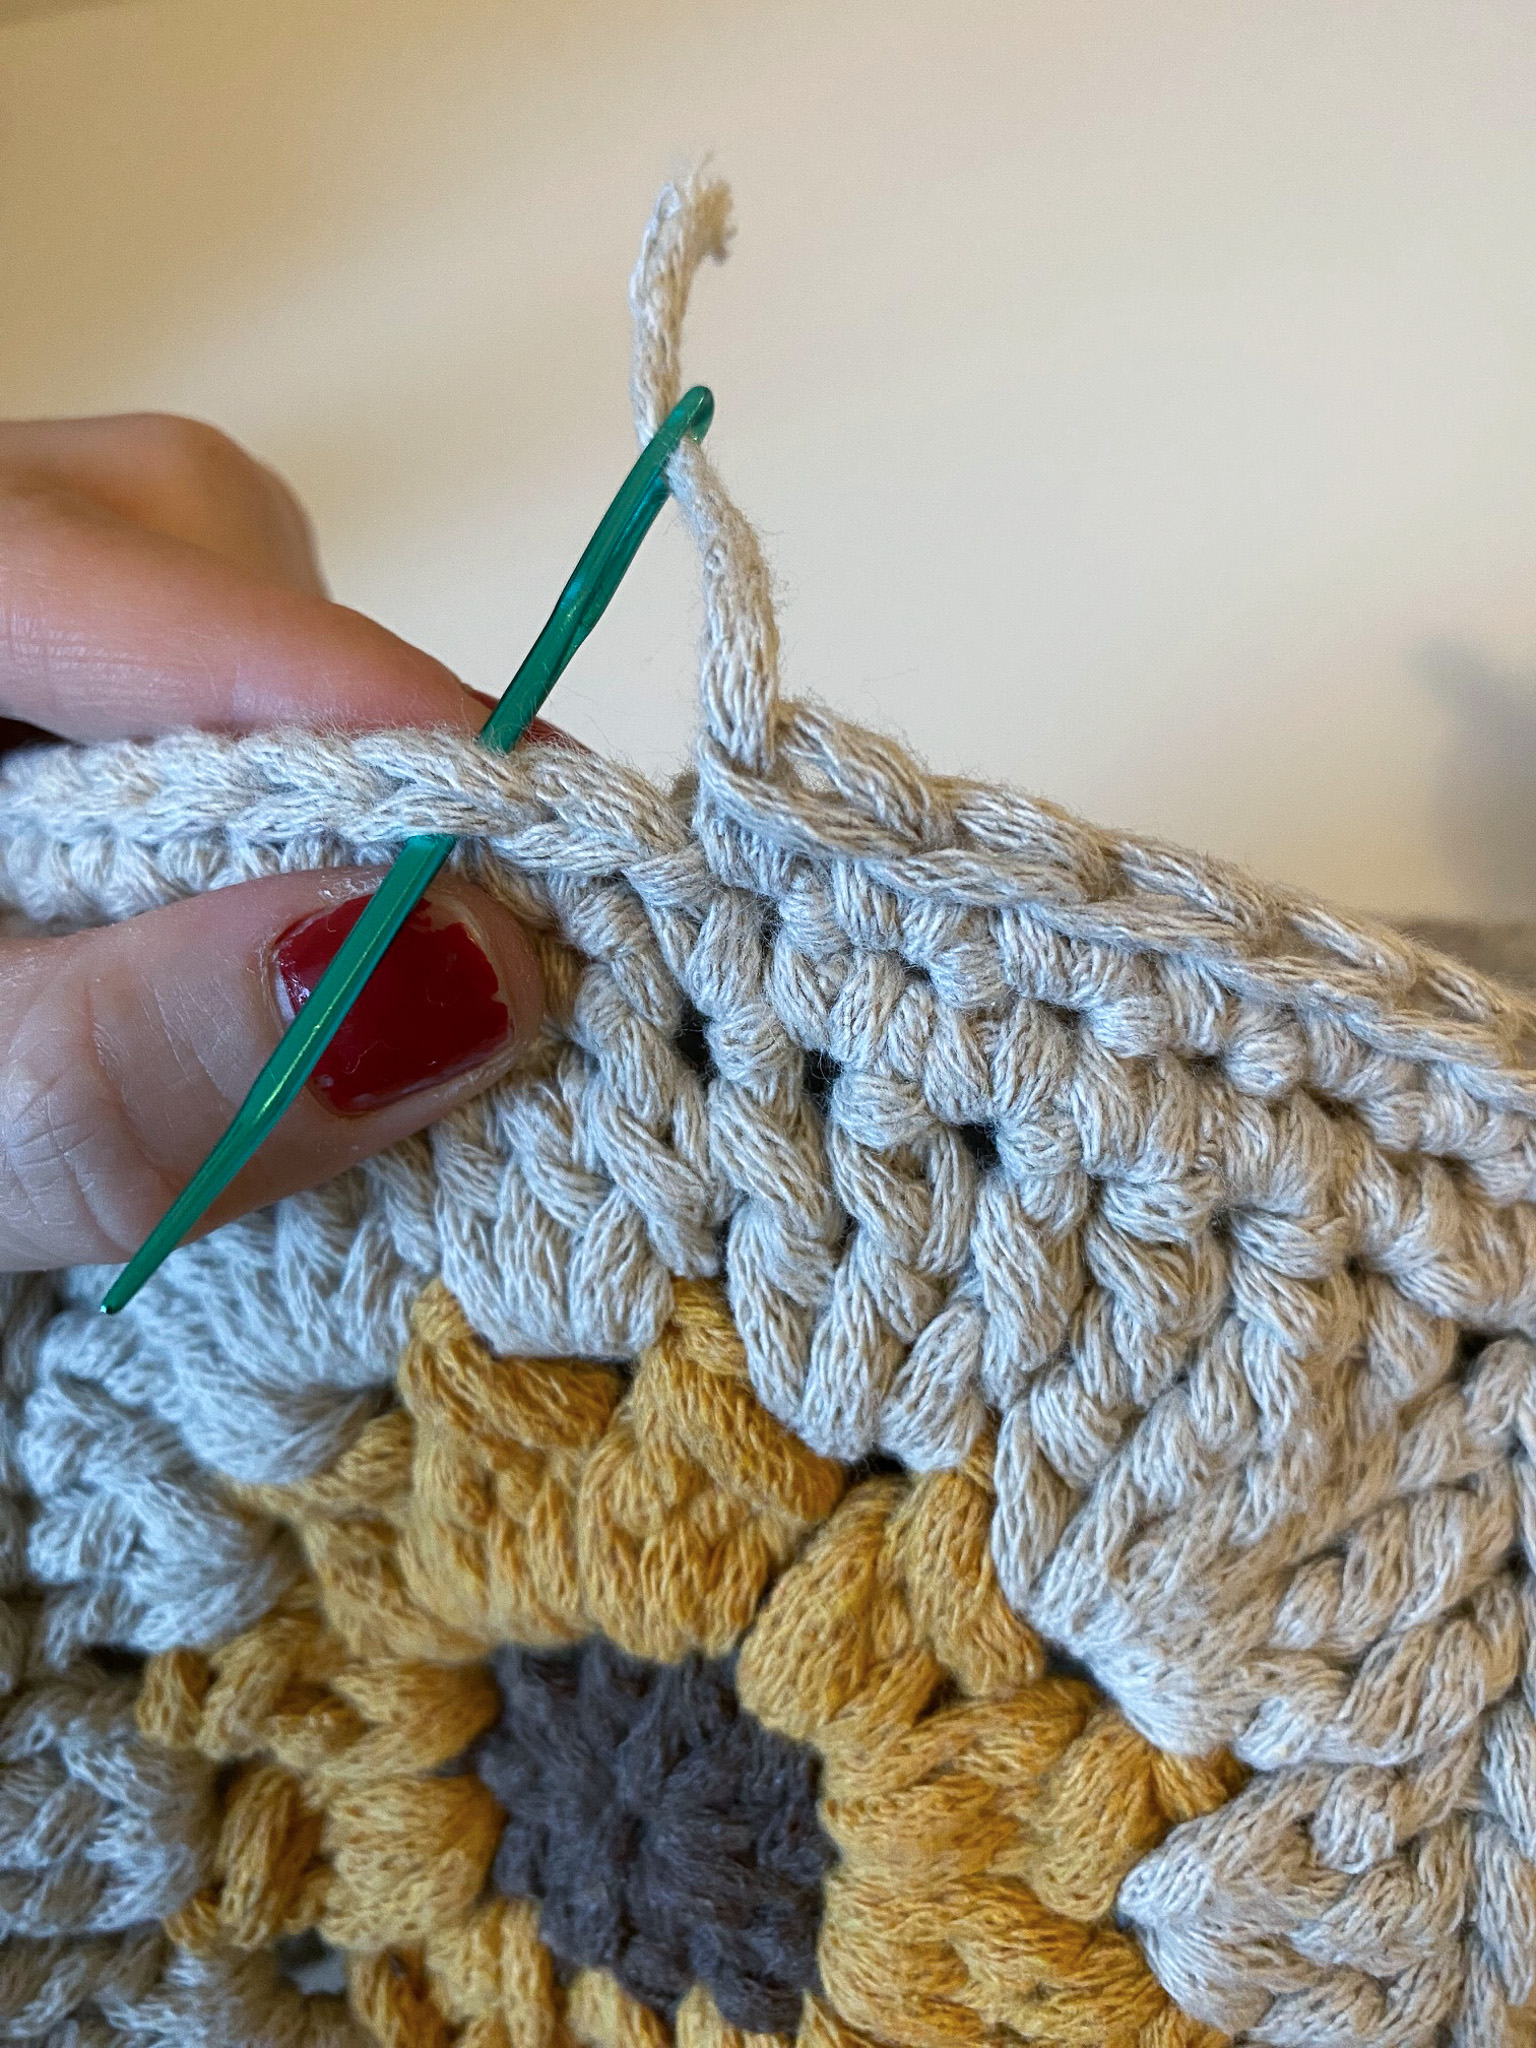
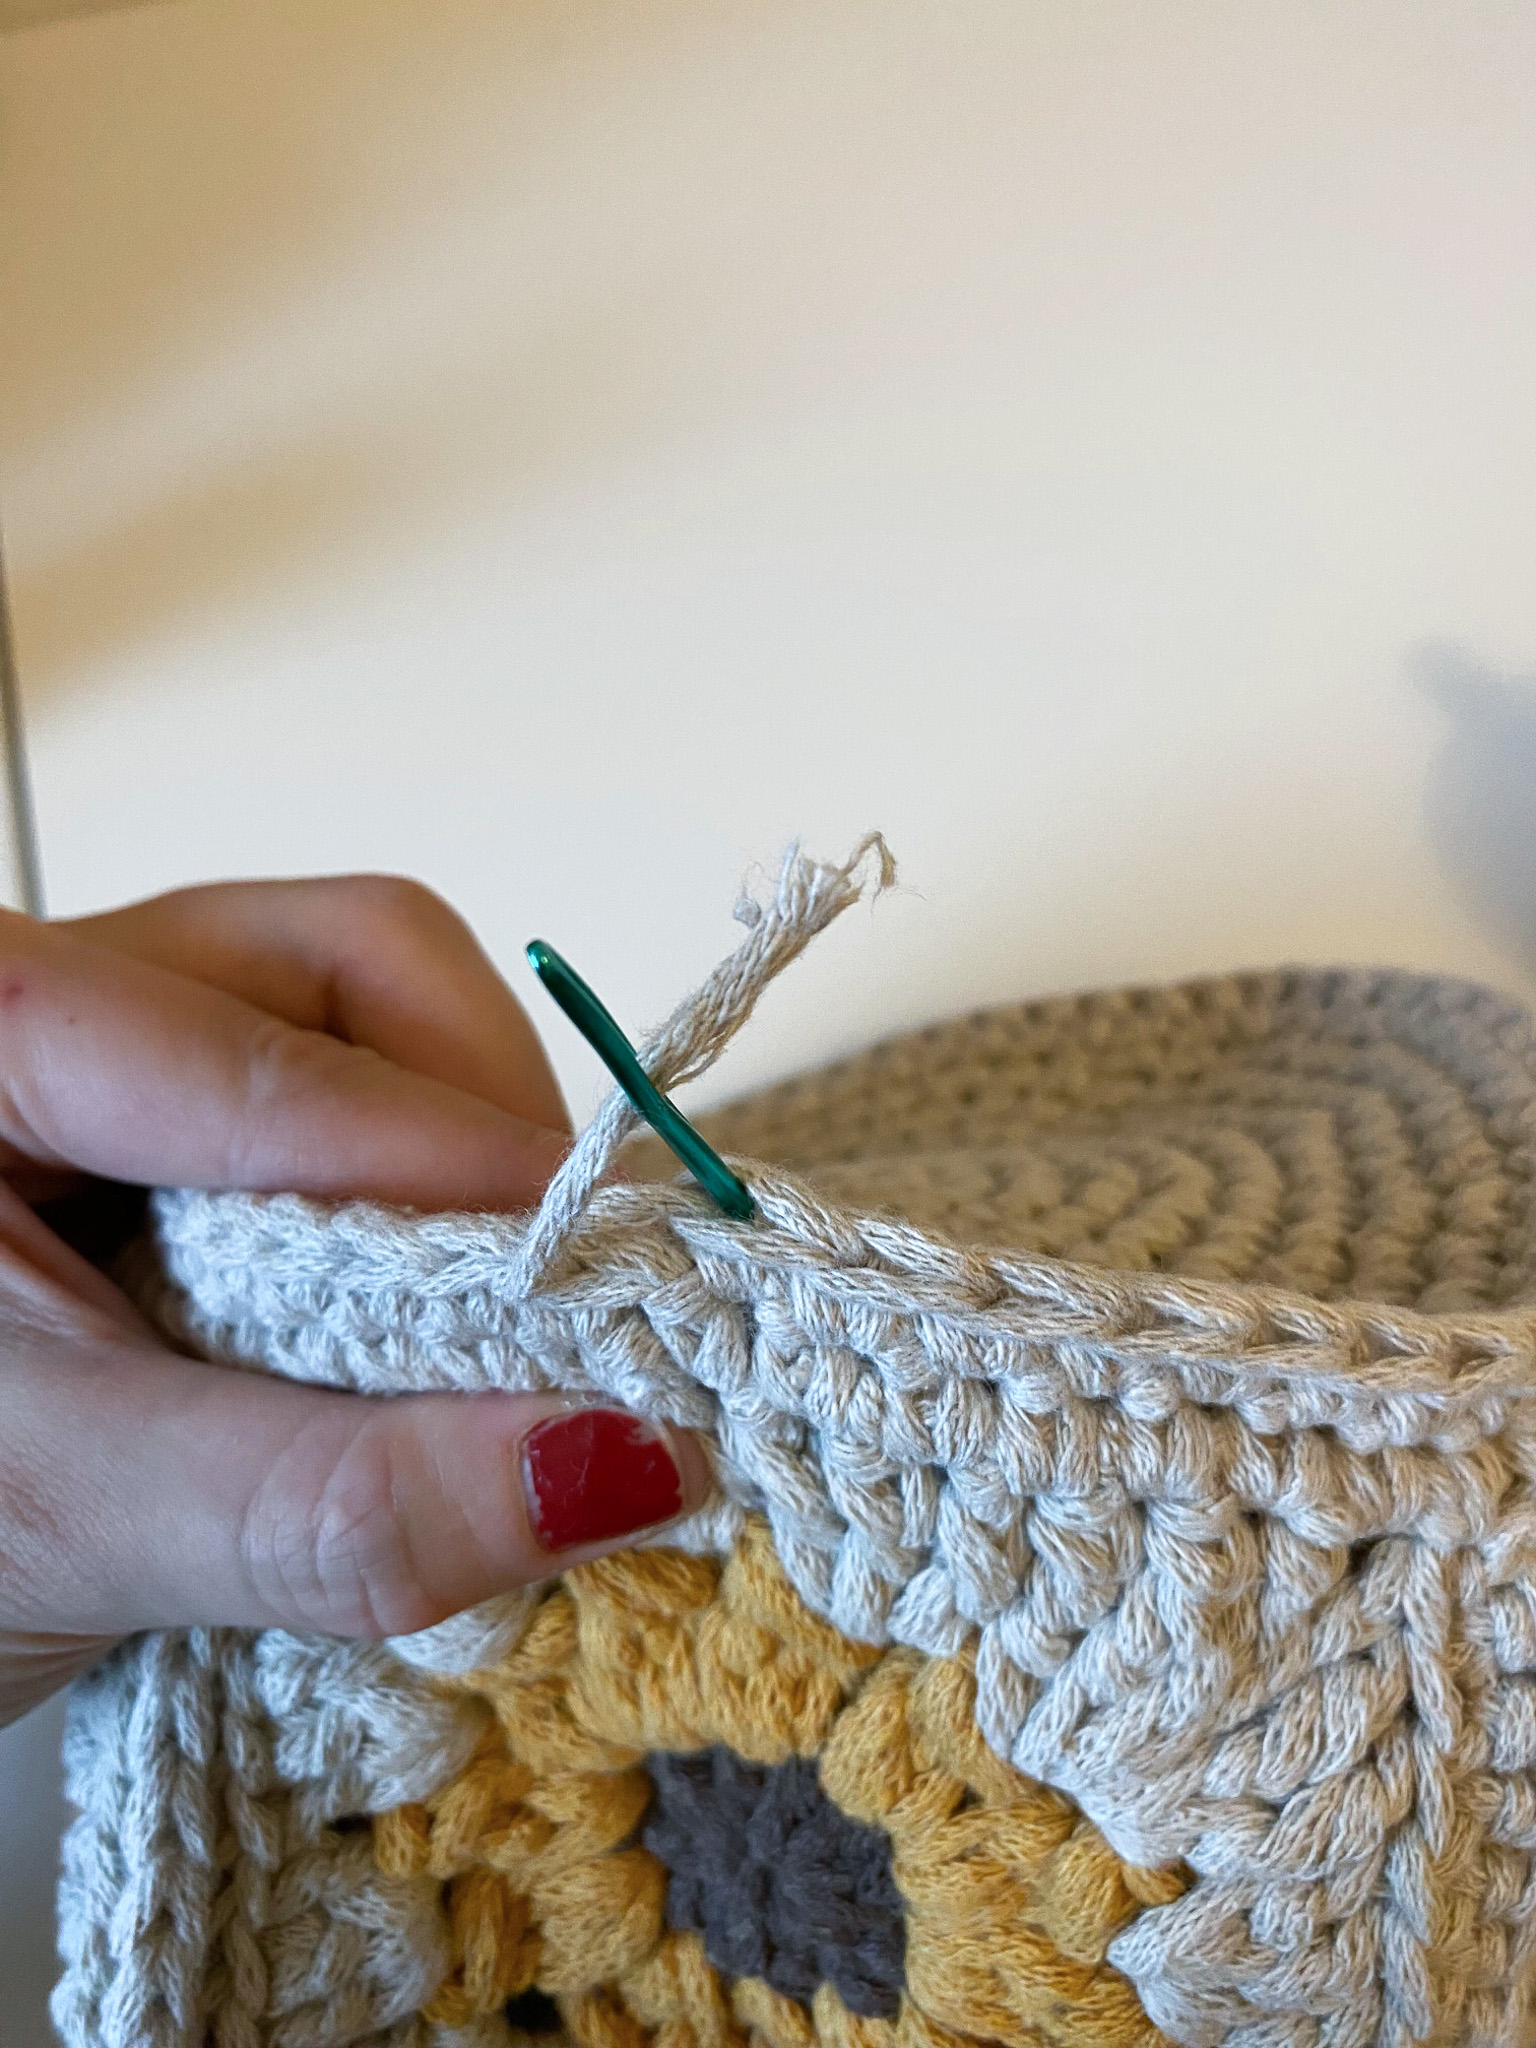
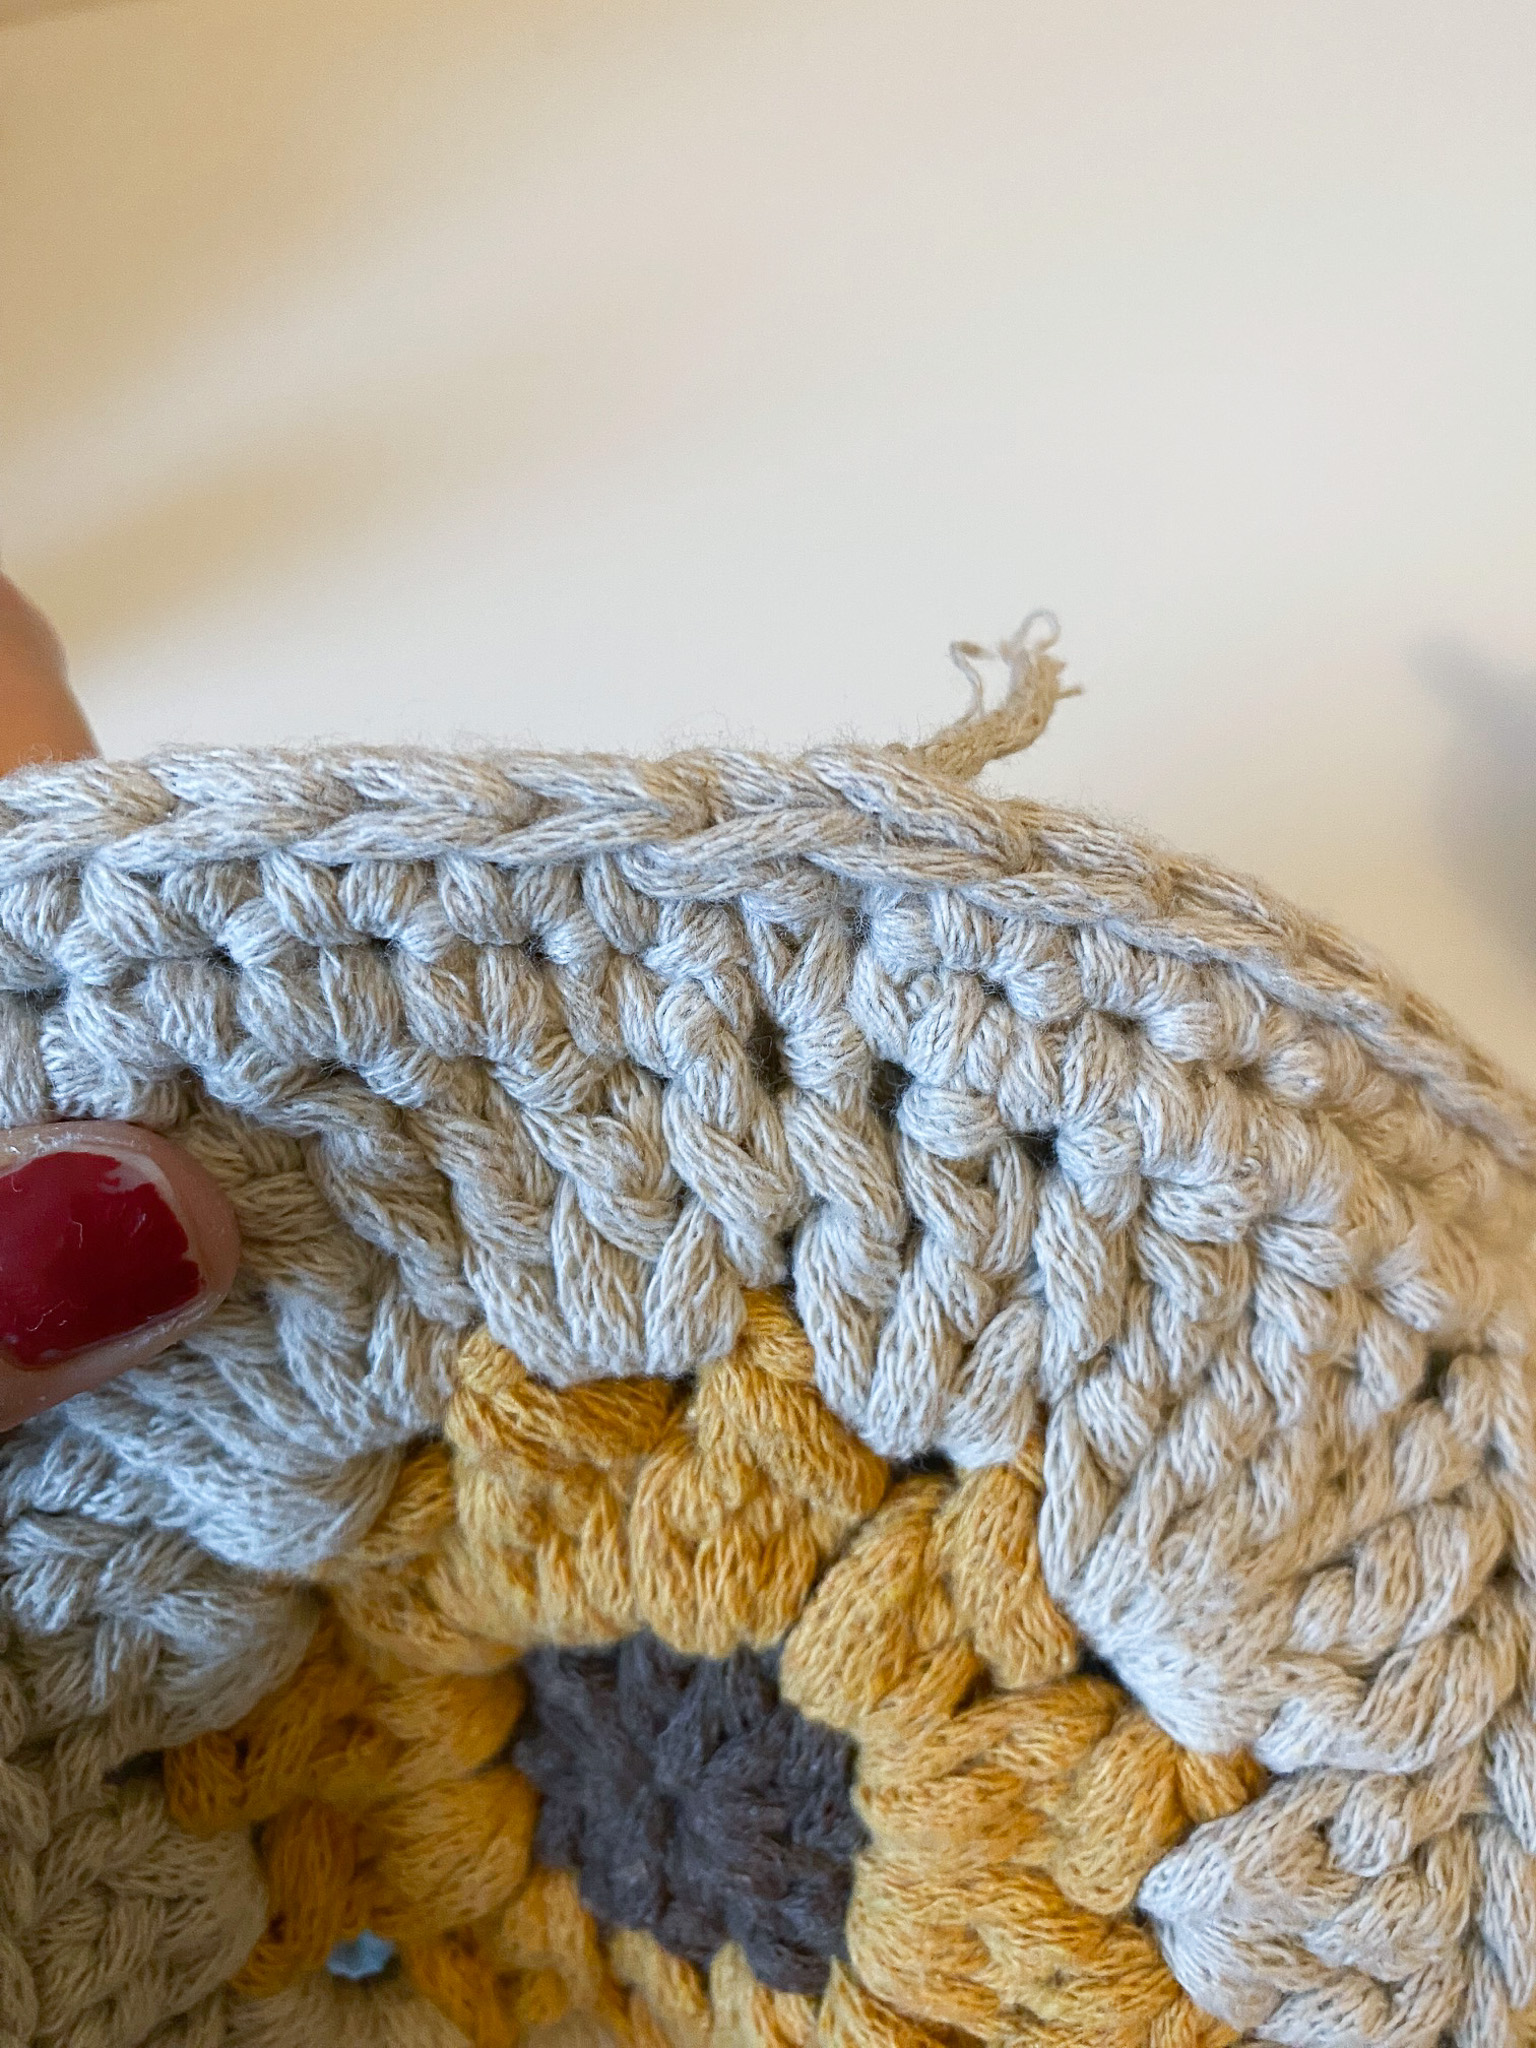
When all four sides are joined, continue by crocheting around the top edge for a neater finish. If you want a taller pot, you can crochet additional rounds using only single crochets.
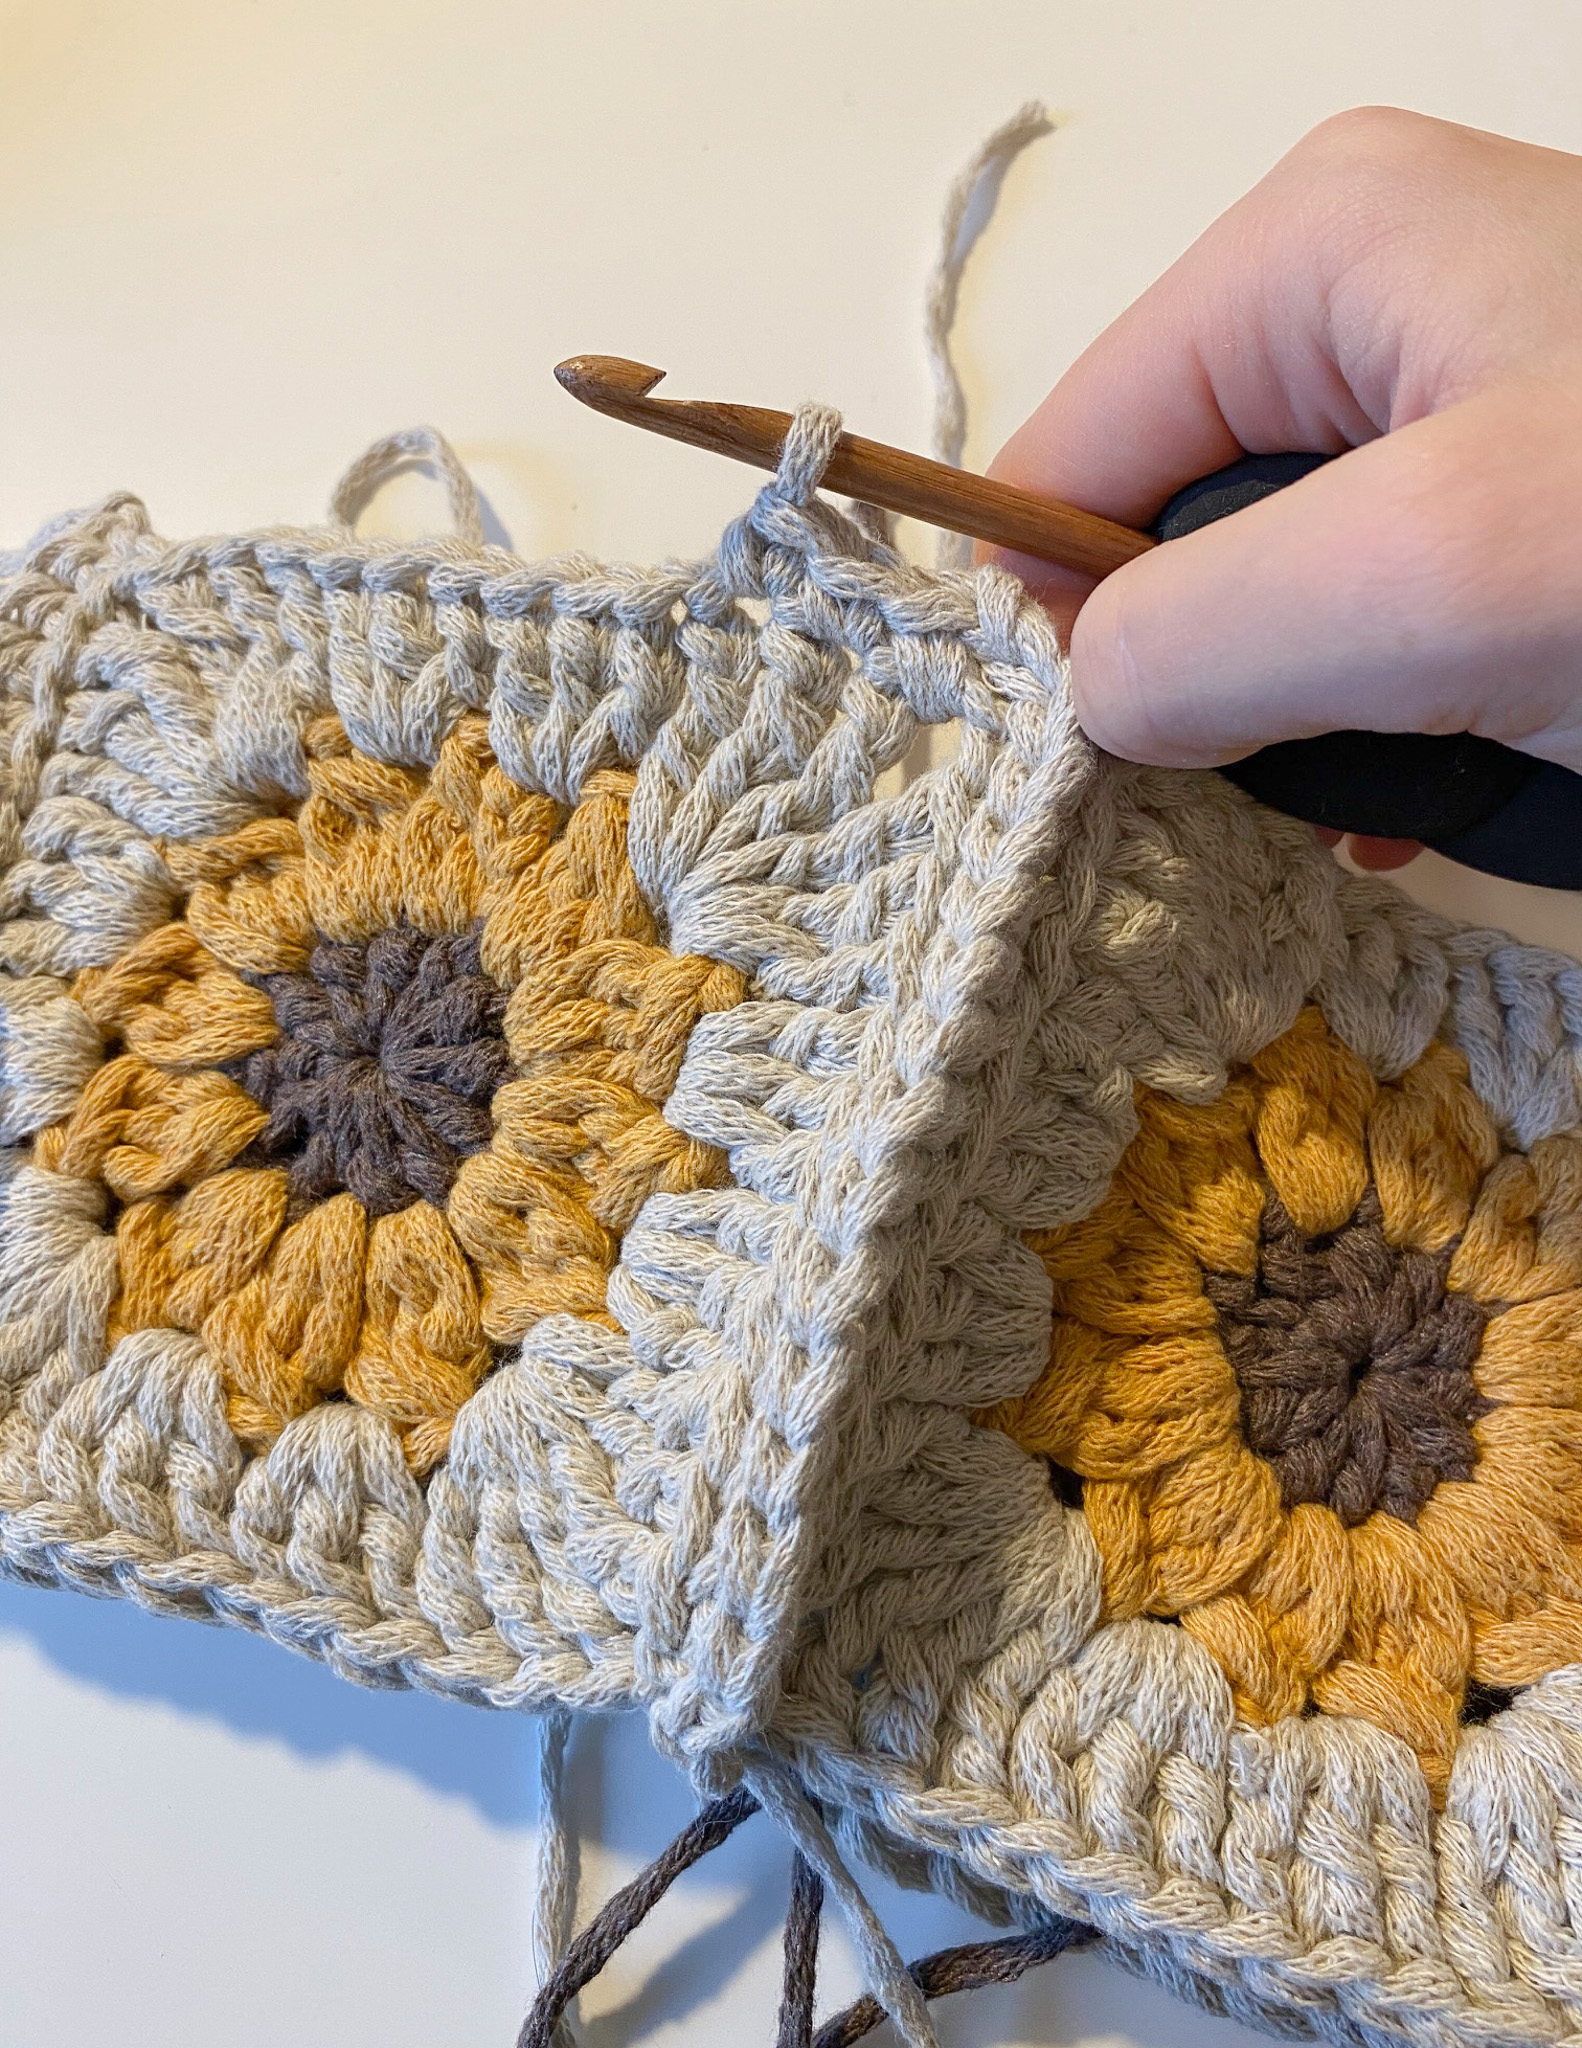
At the joins, you can work one single crochet in the corner space of the square, one single crochet on each side of the join, and then one single crochet in the next corner space.
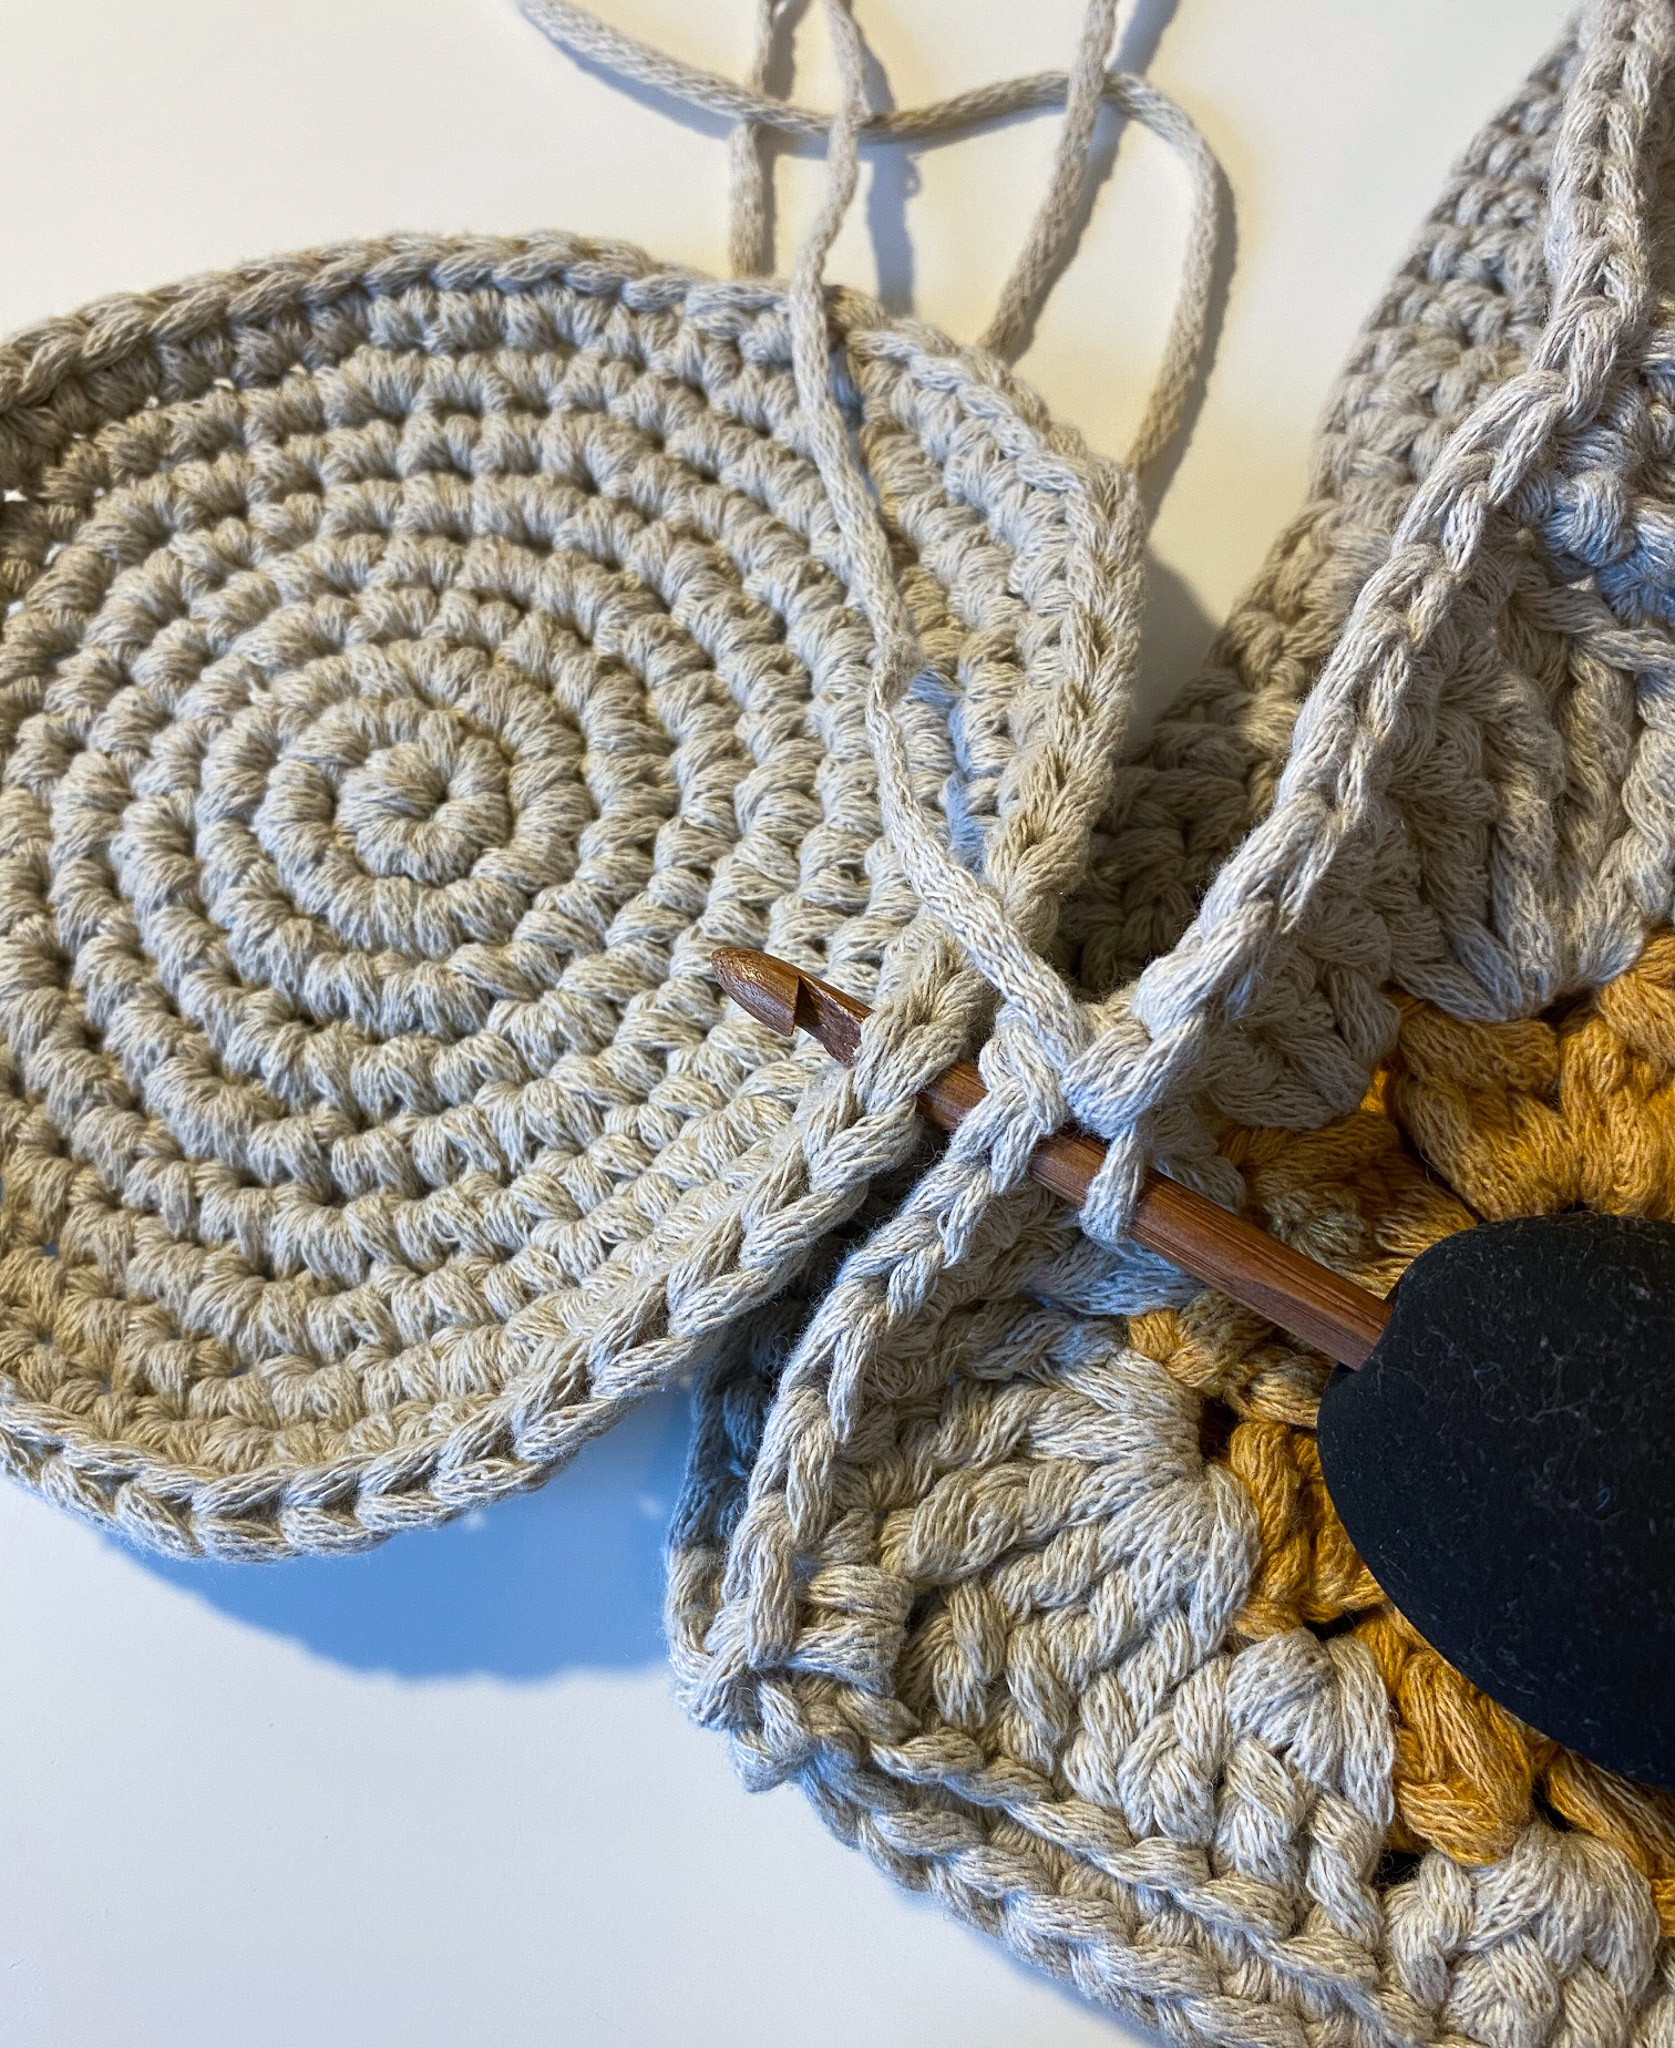
Work single crochets along the lower edge as well, in the same way as you just did on the upper edge, so that you can then join it to the base.
You can now count the stitches along the edge and along the base to make sure they are the same number (56). If they don’t match exactly, you can redo and decrease/increase the last round of single crochets on either the base or the side edge.
Attach the base in roughly the same way as you joined the sides, but this time work through both loops of the stitches.
Crochet single crochets through the sides and the base all the way around. Finish with a slip stitch or by “sewing it invisibly.”
Secure firmly with a knot. Fasten all yarn ends.
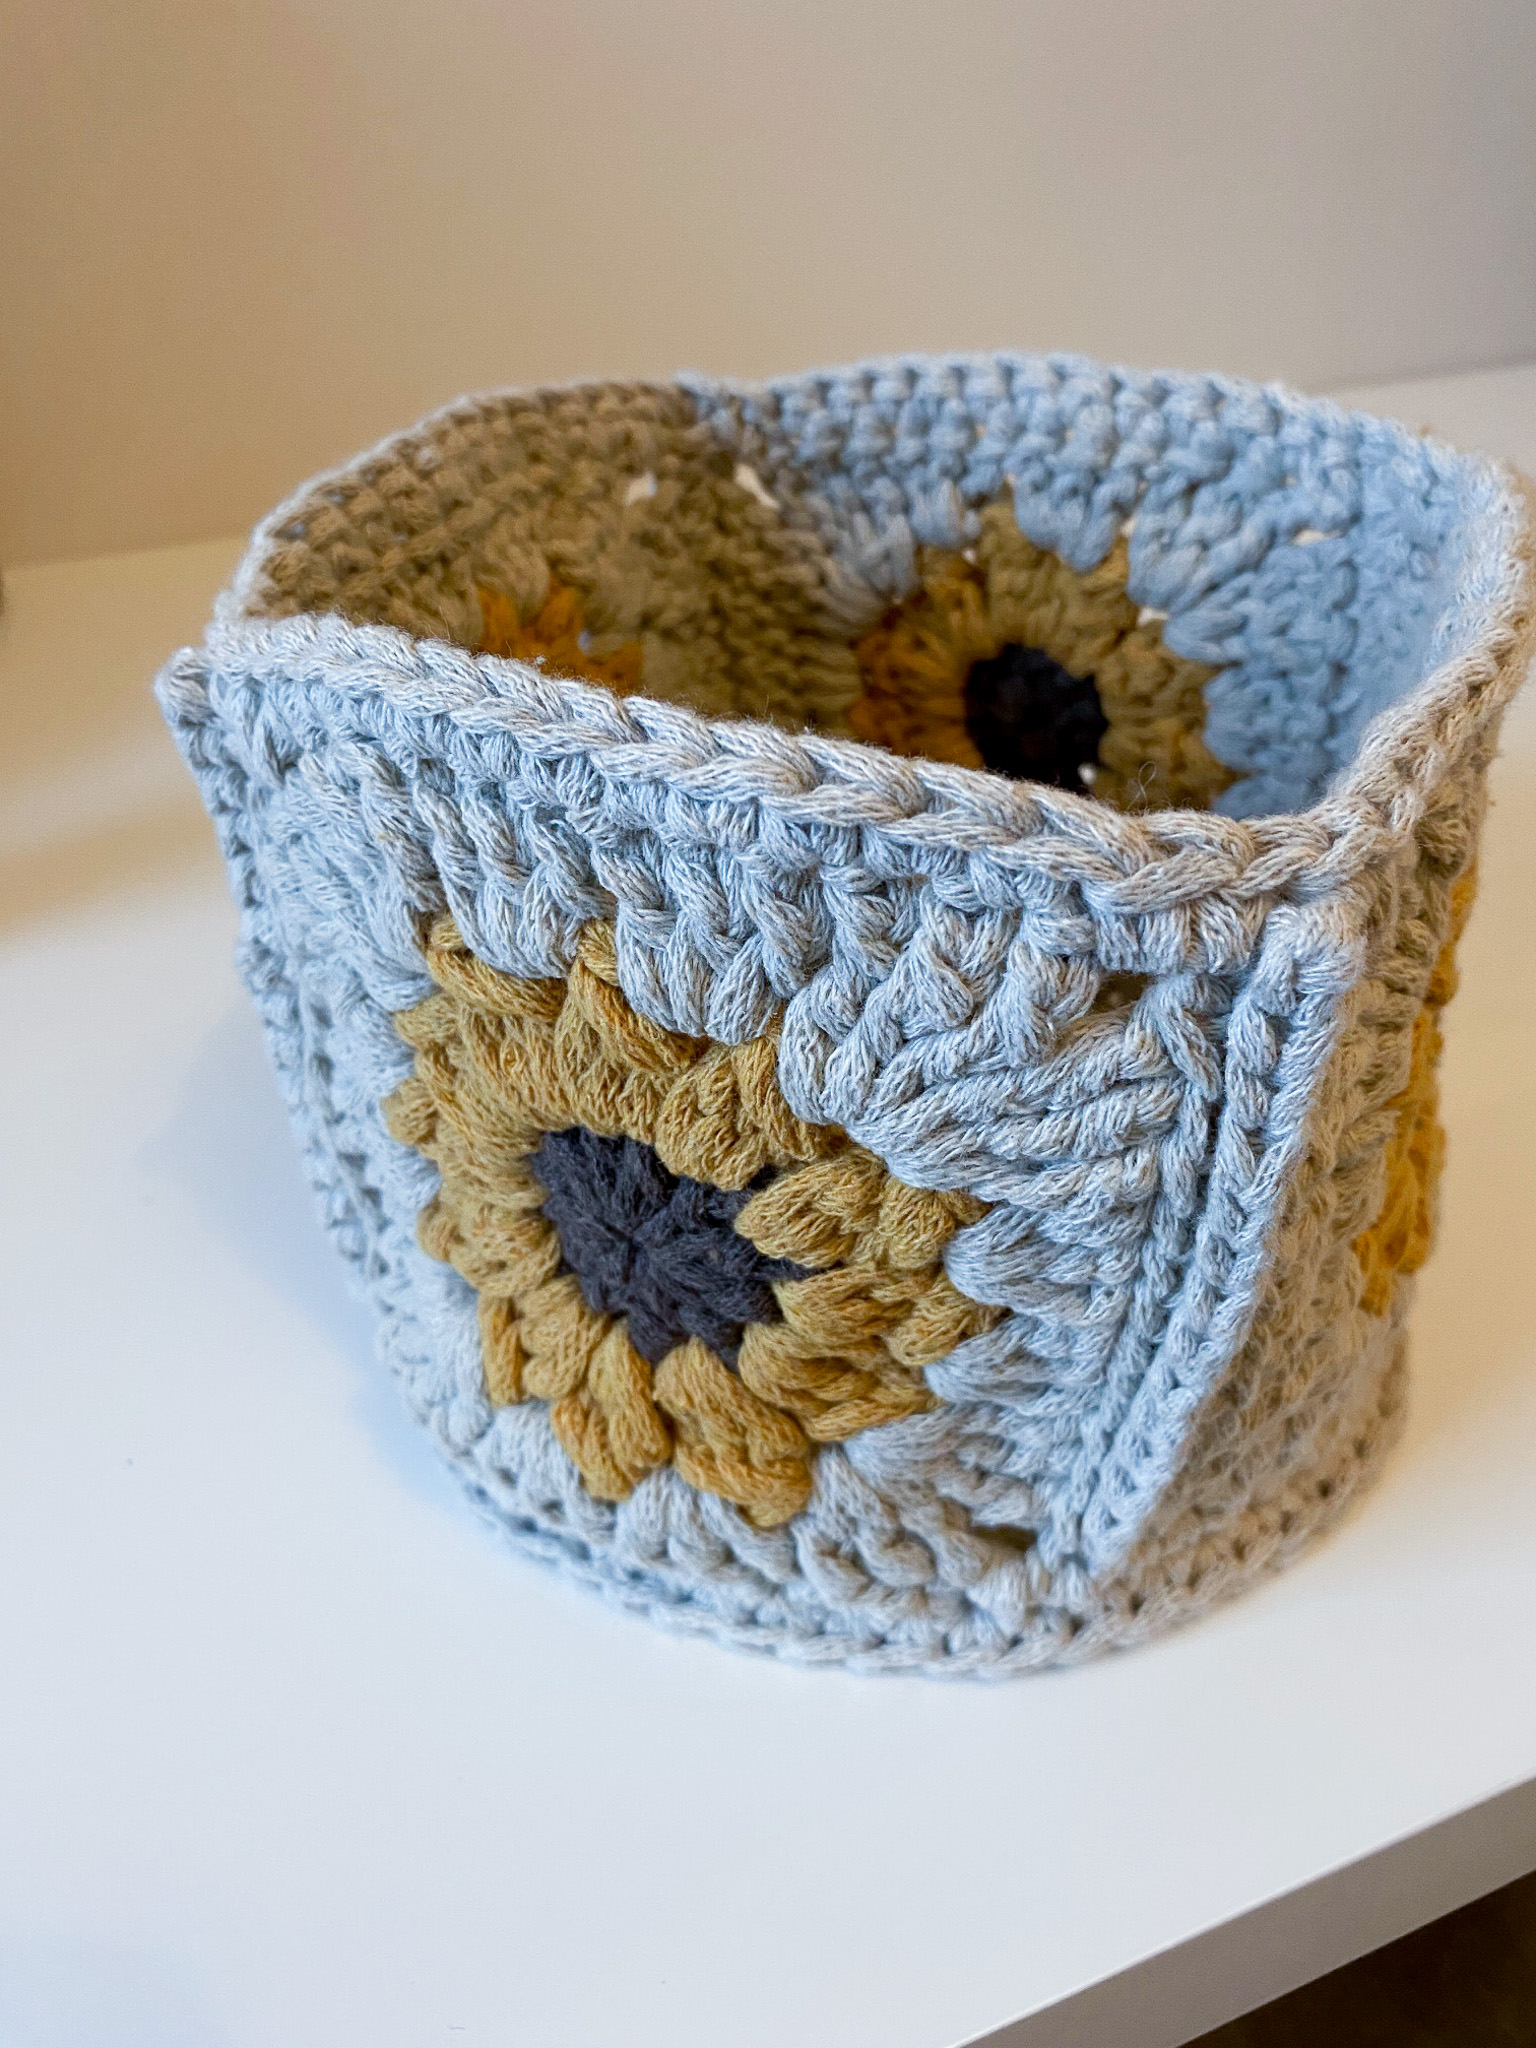
We have steamed the pot to achieve a better shape, but you can also dampen it with a little water, place it inside a plant pot, and shape it as you like. Let it dry, and it’s finished!
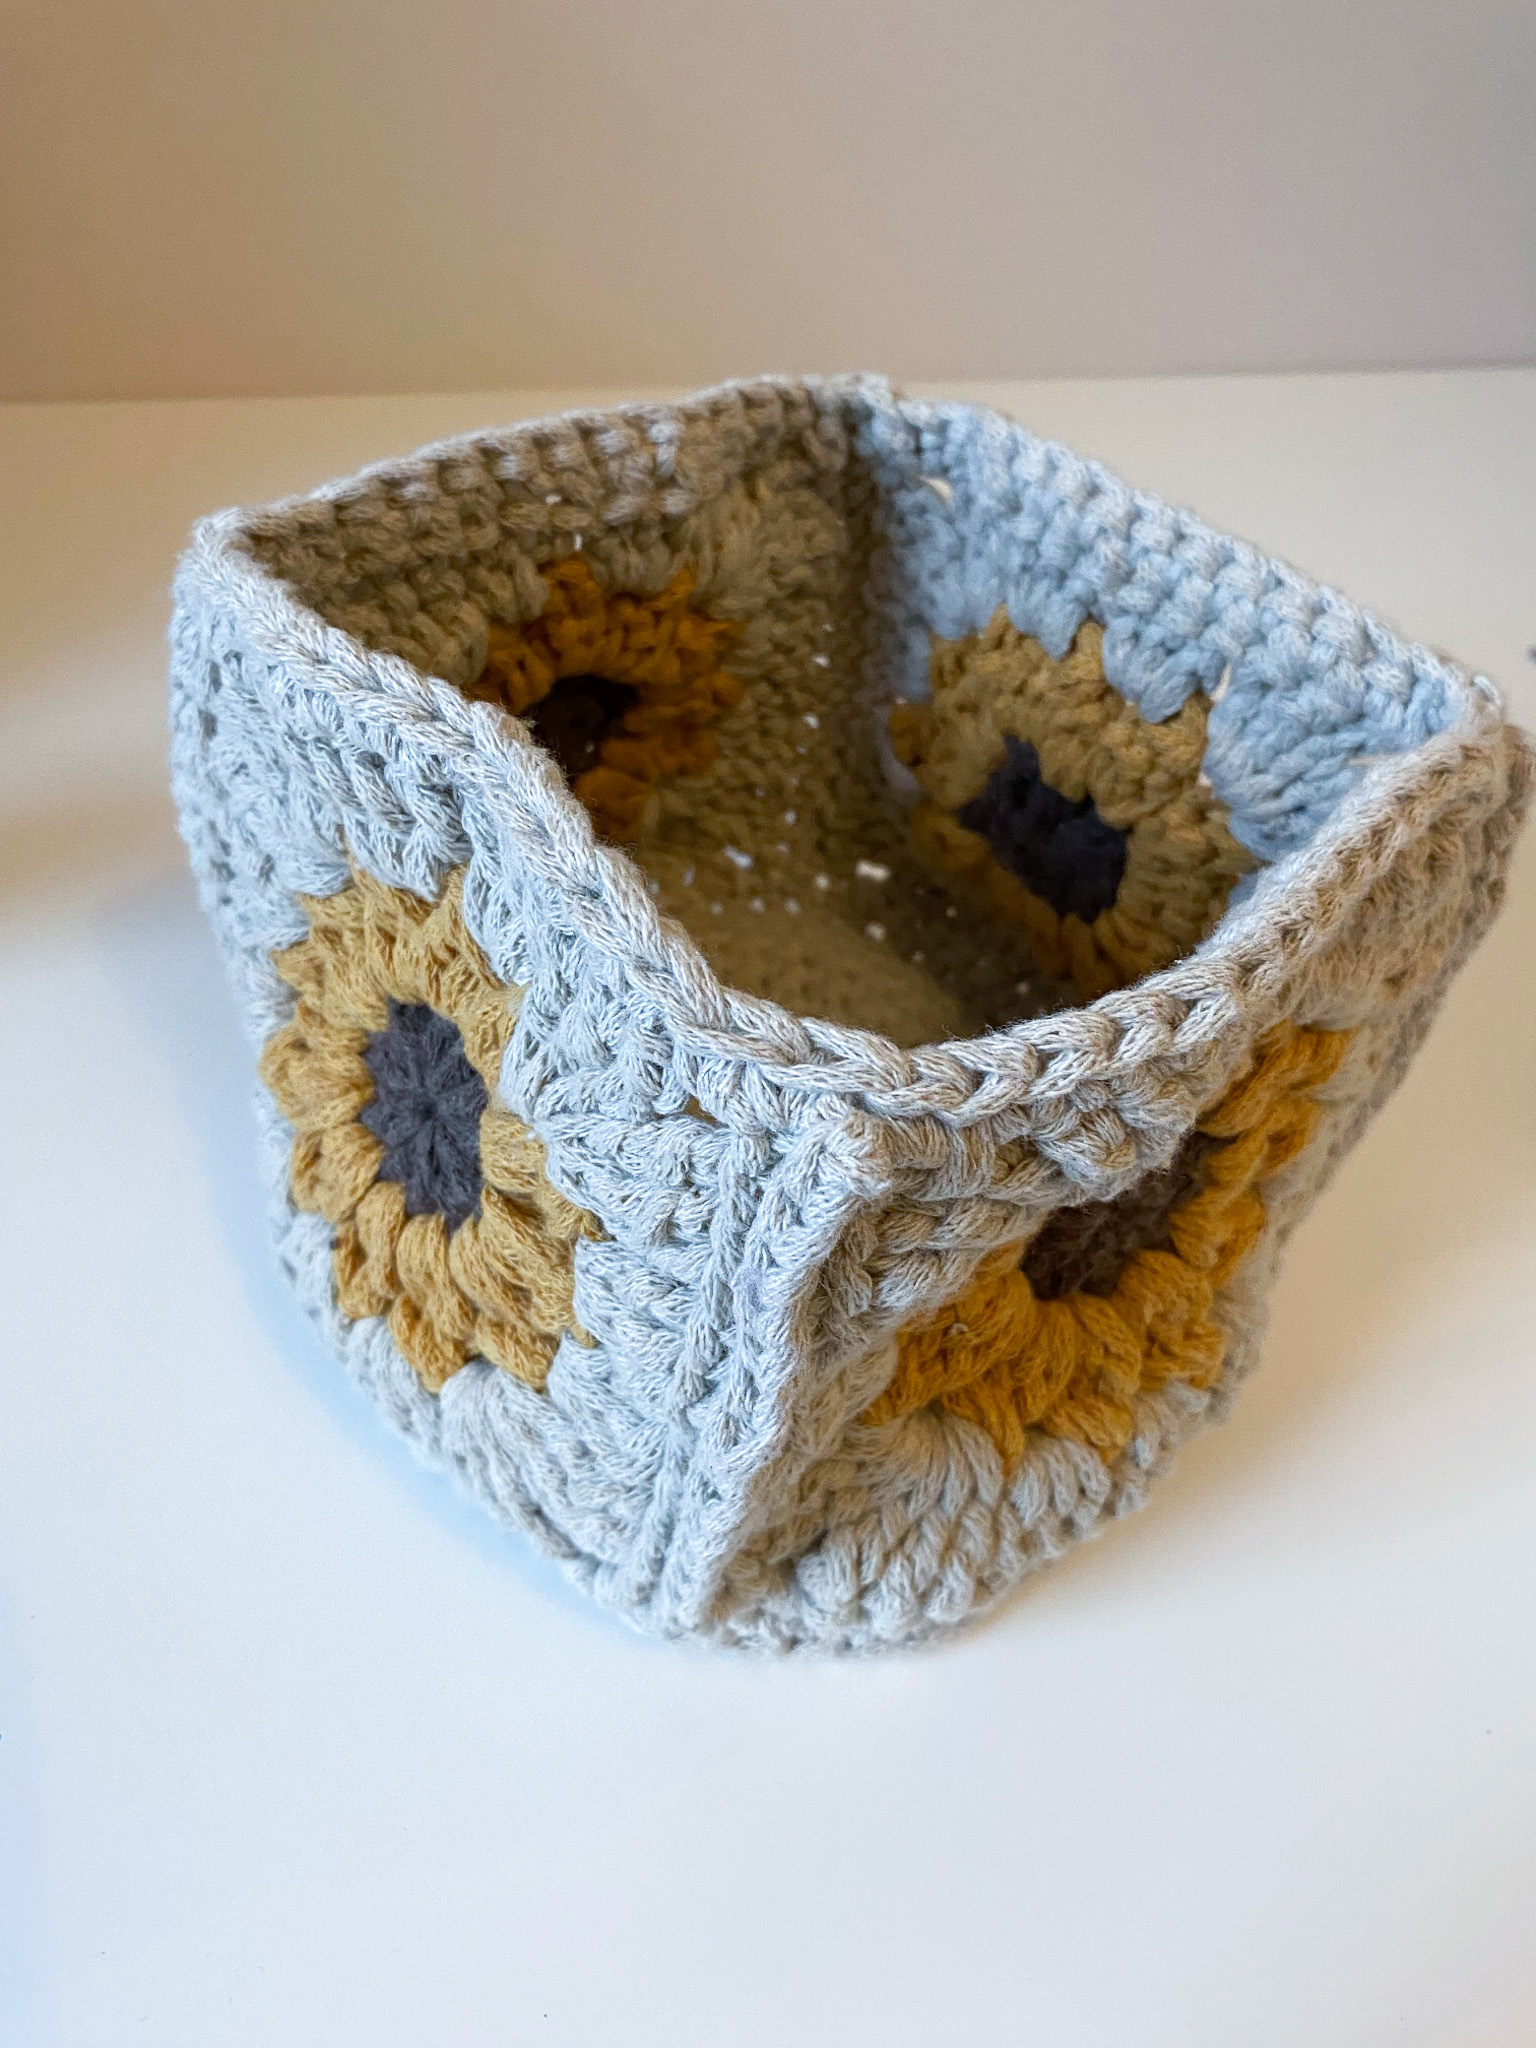
Before steaming:
After steaming:
Pattern with Crochet Terms
This section uses crochet terms. If you need more help, see the easier instructions.
Abbreviations:
MR = magic ring
ch = chain
sl st = slip stitch
sc = single crochet
hdc = half double crochet
dc = double crochet
tr = treble (triple) crochet
BLO = back loop only
(…) = number of stitches in the round
*…* = repeat everything between *…* the indicated number of times
[…] = work everything in the same stitch
Leaf = A leaf is made by crocheting 4 double crochets together in the same stitch. The 4 stitches are joined both at the top and the bottom, forming a circular shape. It is made as follows:
- Yarn over and insert the hook into the stitch. Yarn over and pull through so that you have three loops on the hook.
- Yarn over again and pull through the first two loops. You should now have 2 loops left. You have now made your first double crochet (but skip the final yarn-over-and-pull-through step).
- Repeat steps 1 and 2 until you have 4 double crochets / 5 loops on the hook.
- Yarn over and pull through all 5 loops.
Note! The first leaf of the round begins with 3 chain stitches instead of a double crochet.
Sunflower Square – Make 4
Instructions:
- Begin with the color you want in the center of your squares. Make 1 MR.
Round 1: Ch 2 (counts as first dc), 11 hdc in MR, sl st in 2nd ch. Fasten off and change color.
Round 2: Join yarn with sl st in first stitch of previous round. Work *Leaf, ch 1* x12. Sl st in the first stitch of the round. Fasten off. Total: 12 leaves + 12 chains. Change color.
Round 3: Join yarn with sl st in a space from previous round. Ch 3 (counts as first dc), 2 dc in the same space. Skip to next space, 3 dc in same space. Skip to next space, work 3 tr, ch 2, 3 tr in same space (forms a corner). *3 dc in next space, 3 dc in next space, skip to next space, 3 tr, ch 2, 3 tr in same space* x3. Sl st in 3rd ch from beginning of round. Fasten off.

Base
Round 1: 6 sc in a MR (6)
Round 2: increase in each stitch around (2 sc in each stitch) × 6 = 12 sc
Round 3: *1 sc, inc* × 6 = 18 sc
Round 4: *2 sc, inc* × 6 = 24 sc
Round 5: *3 sc, inc* × 6 = 30 sc
Round 6: *4 sc, inc* × 6 = 36 sc
Round 7: *5 sc, inc* × 6 = 42 sc
Round 8: *6 sc, inc* × 6 = 48 sc
Round 9: *7 sc, inc* × 6 = 54 sc
Round 10: *26 sc, inc* × 2 = 56 sc
Fasten off and weave in the end.
Assembly
Start by crocheting the squares together side by side, working only in the BLO (back loops only) with sc.
Join the squares from corner to corner.
Make sure to work in the same direction for all squares so that the stitches are aligned consistently.
Finishing & Assembly
- Once all four sides are joined, continue crocheting around the top edge for a neater finish.
- At the joins, you can work 1 sc in the corner space of the square, 1 sc on each side of the seam, and then 1 sc in the next corner space.
- If you want a taller pot, you can crochet additional rounds of sc only.
- Work sc along the bottom edge as well, in the same way as the top edge.
- Count the stitches along the sides and the base to make sure they are equal (56). If they don’t match exactly, adjust by increasing or decreasing the last round of sc on either the base or the sides.
- Join the base to the lower edge of the pot with sc through both loops of the stitches.
- Finish with a slip stitch or by “sewing it invisibly.”
- Fasten off securely.
Fasten all yarn ends. We have steam blocked the pot to achieve a better shape, but you can also lightly dampen it with water, place it inside a plant pot, and shape it as desired. Let it dry completely, and it’s finished!
Before steaming:
After steaming:
The rights to this pattern belong to MYO Make Your Own. The pattern or its pictures may not be copied, shared or resold either in parts or in its entirety, but you may sell items you have crocheted from this pattern. If you have questions about the pattern, contact MYO at hello@makeyourown.se.
Sides – the squares
Crochet 4 sunflower squares. If you need help with how to crochet a sunflower square, see the video below: “Sunflower Square”. You can crochet in a single color or use different colors; the instructions below describe using different colors.
Round 1:
Start with Cacao. Make a magic ring. Crochet 3 chain stitches, which count as the first half double crochet. Then crochet 11 half double crochets. You will have a total of 12 half double crochets (including the chains that replace one stitch). Finish with a slip stitch in the last chain from the start. Cut the yarn and fasten off.
Round 2:
Now use Rusty Yellow. Make a slip knot. Attach the yarn in a stitch and crochet 2 chain stitches. We will now make clusters of three double crochets. After the 2 chains, crochet one double crochet but skip the final yarn-over pull-through. Repeat this one more time so you have two partially completed double crochets plus the 2 chains. Then pull through all loops on the hook. Crochet 1 chain stitch.
Continue making clusters of three unfinished double crochets in each stitch from the previous round, so that you end up with 12 clusters. Make a slip stitch in the second chain from the beginning of the round, cut the yarn, and fasten off.
Round 3:
Now use Greige. Make a slip knot and start in a hole. Crochet 3 chain stitches, which count as the first double crochet. Crochet 2 more double crochets. Go to the next space and crochet 3 double crochets. Go to the third space and crochet (in the same space) 3 treble crochets, 2 chain stitches, 3 treble crochets (this forms a corner of the square).
Each side of the square consists of three spaces. Repeat these three spaces so that you have four sides of the square. In the first and second spaces, crochet 3 double crochets (no chain stitches in between), and in the corner space crochet (in the same space) 3 treble crochets, 2 chain stitches, 3 treble crochets.
Finish with a slip stitch in the third chain from the beginning of the round, cut the yarn, and fasten off.
Now crochet three more identical squares!
Base:
Round 1:
Use Greige and start by making a magic ring. Crochet 6 single crochets into the magic ring. Pull the yarn tail to close the ring. Continue directly with round 2—do not join with a slip stitch. Mark the first or last stitch of the round so you can see where the round begins/ends.
Round 2:
Crochet 2 single crochets in each stitch around, for a total of 12 stitches.
Round 3: Continue by crocheting 2 single crochets in the same stitch in every other stitch. In the alternating stitches, crochet 1 single crochet. Total: 18 stitches.
Round 4: Crochet 2 single crochets in the same stitch in every third stitch. Between these increases, crochet 1 single crochet in each stitch. Total: 24 stitches.
Round 5: Crochet 2 single crochets in the same stitch in every fourth stitch. Between these increases, crochet 1 single crochet in each stitch. Total: 30 stitches.
Round 6: Crochet 2 single crochets in the same stitch in every fifth stitch. Between these increases, crochet 1 single crochet in each stitch. Total: 36 stitches.
Round 7: Crochet 2 single crochets in the same stitch in every sixth stitch. Between these increases, crochet 1 single crochet in each stitch. Total: 42 stitches.
Round 8: Crochet 2 single crochets in the same stitch in every seventh stitch. Between these increases, crochet 1 single crochet in each stitch. Total: 48 stitches.
Round 9: Crochet 2 single crochets in the same stitch in every eighth stitch. Between these increases, crochet 1 single crochet in each stitch. Total: 54 stitches.
Round 10: Crochet 26 single crochets, increase in the next stitch. Repeat this once more, for a total of 56 stitches in the round.
When round 10 is complete, cut the yarn and fasten off. The base is now finished!
Assembly
Start by crocheting the squares together side by side, working only in the back loops, using single crochets. If you’re unsure how to join squares in this way, see the video below: “Attach Squares: Single Crochet.”
Crochet the squares together from corner to corner. Make sure to work in the same direction for all squares so that the stitches face the same way.
When all four sides are joined, continue by crocheting around the top edge for a neater finish. If you want a taller pot, you can crochet additional rounds using only single crochets.
At the joins, you can work one single crochet in the corner space of the square, one single crochet on each side of the join, and then one single crochet in the next corner space.
Work single crochets along the lower edge as well, in the same way as you just did on the upper edge, so that you can then join it to the base.
You can now count the stitches along the edge and along the base to make sure they are the same number (56). If they don’t match exactly, you can redo and decrease/increase the last round of single crochets on either the base or the side edge.
Attach the base in roughly the same way as you joined the sides, but this time work through both loops of the stitches.
Crochet single crochets through the sides and the base all the way around. Finish with a slip stitch or by “sewing it invisibly.”
Secure firmly with a knot. Fasten all yarn ends.
We have steamed the pot to achieve a better shape, but you can also dampen it with a little water, place it inside a plant pot, and shape it as you like. Let it dry, and it’s finished!
Before steaming:
After steaming:
Pattern with Crochet Terms
This section uses crochet terms. If you need more help, see the easier instructions.
Abbreviations:
MR = magic ring
ch = chain
sl st = slip stitch
sc = single crochet
hdc = half double crochet
dc = double crochet
tr = treble (triple) crochet
BLO = back loop only
(…) = number of stitches in the round
*…* = repeat everything between *…* the indicated number of times
[…] = work everything in the same stitch
Leaf = A leaf is made by crocheting 4 double crochets together in the same stitch. The 4 stitches are joined both at the top and the bottom, forming a circular shape. It is made as follows:
- Yarn over and insert the hook into the stitch. Yarn over and pull through so that you have three loops on the hook.
- Yarn over again and pull through the first two loops. You should now have 2 loops left. You have now made your first double crochet (but skip the final yarn-over-and-pull-through step).
- Repeat steps 1 and 2 until you have 4 double crochets / 5 loops on the hook.
- Yarn over and pull through all 5 loops.
Note! The first leaf of the round begins with 3 chain stitches instead of a double crochet.
Sunflower Square – Make 4
Instructions:
- Begin with the color you want in the center of your squares. Make 1 MR.
Round 1: Ch 2 (counts as first dc), 11 hdc in MR, sl st in 2nd ch. Fasten off and change color.
Round 2: Join yarn with sl st in first stitch of previous round. Work *Leaf, ch 1* x12. Sl st in the first stitch of the round. Fasten off. Total: 12 leaves + 12 chains. Change color.
Round 3: Join yarn with sl st in a space from previous round. Ch 3 (counts as first dc), 2 dc in the same space. Skip to next space, 3 dc in same space. Skip to next space, work 3 tr, ch 2, 3 tr in same space (forms a corner). *3 dc in next space, 3 dc in next space, skip to next space, 3 tr, ch 2, 3 tr in same space* x3. Sl st in 3rd ch from beginning of round. Fasten off.
Base
Round 1: 6 sc in a MR (6)
Round 2: increase in each stitch around (2 sc in each stitch) × 6 = 12 sc
Round 3: *1 sc, inc* × 6 = 18 sc
Round 4: *2 sc, inc* × 6 = 24 sc
Round 5: *3 sc, inc* × 6 = 30 sc
Round 6: *4 sc, inc* × 6 = 36 sc
Round 7: *5 sc, inc* × 6 = 42 sc
Round 8: *6 sc, inc* × 6 = 48 sc
Round 9: *7 sc, inc* × 6 = 54 sc
Round 10: *26 sc, inc* × 2 = 56 sc
Fasten off and weave in the end.
Assembly
Start by crocheting the squares together side by side, working only in the BLO (back loops only) with sc.
Join the squares from corner to corner.
Make sure to work in the same direction for all squares so that the stitches are aligned consistently.
Finishing & Assembly
- Once all four sides are joined, continue crocheting around the top edge for a neater finish.
- At the joins, you can work 1 sc in the corner space of the square, 1 sc on each side of the seam, and then 1 sc in the next corner space.
- If you want a taller pot, you can crochet additional rounds of sc only.
- Work sc along the bottom edge as well, in the same way as the top edge.
- Count the stitches along the sides and the base to make sure they are equal (56). If they don’t match exactly, adjust by increasing or decreasing the last round of sc on either the base or the sides.
- Join the base to the lower edge of the pot with sc through both loops of the stitches.
- Finish with a slip stitch or by “sewing it invisibly.”
- Fasten off securely.
Fasten all yarn ends. We have steam blocked the pot to achieve a better shape, but you can also lightly dampen it with water, place it inside a plant pot, and shape it as desired. Let it dry completely, and it’s finished!
Before steaming:
After steaming:
The rights to this pattern belong to MYO Make Your Own. The pattern or its pictures may not be copied, shared or resold either in parts or in its entirety, but you may sell items you have crocheted from this pattern. If you have questions about the pattern, contact MYO at hello@makeyourown.se.


.jpg)


Share your creations with us
Thank you!
Your comment was sent!