
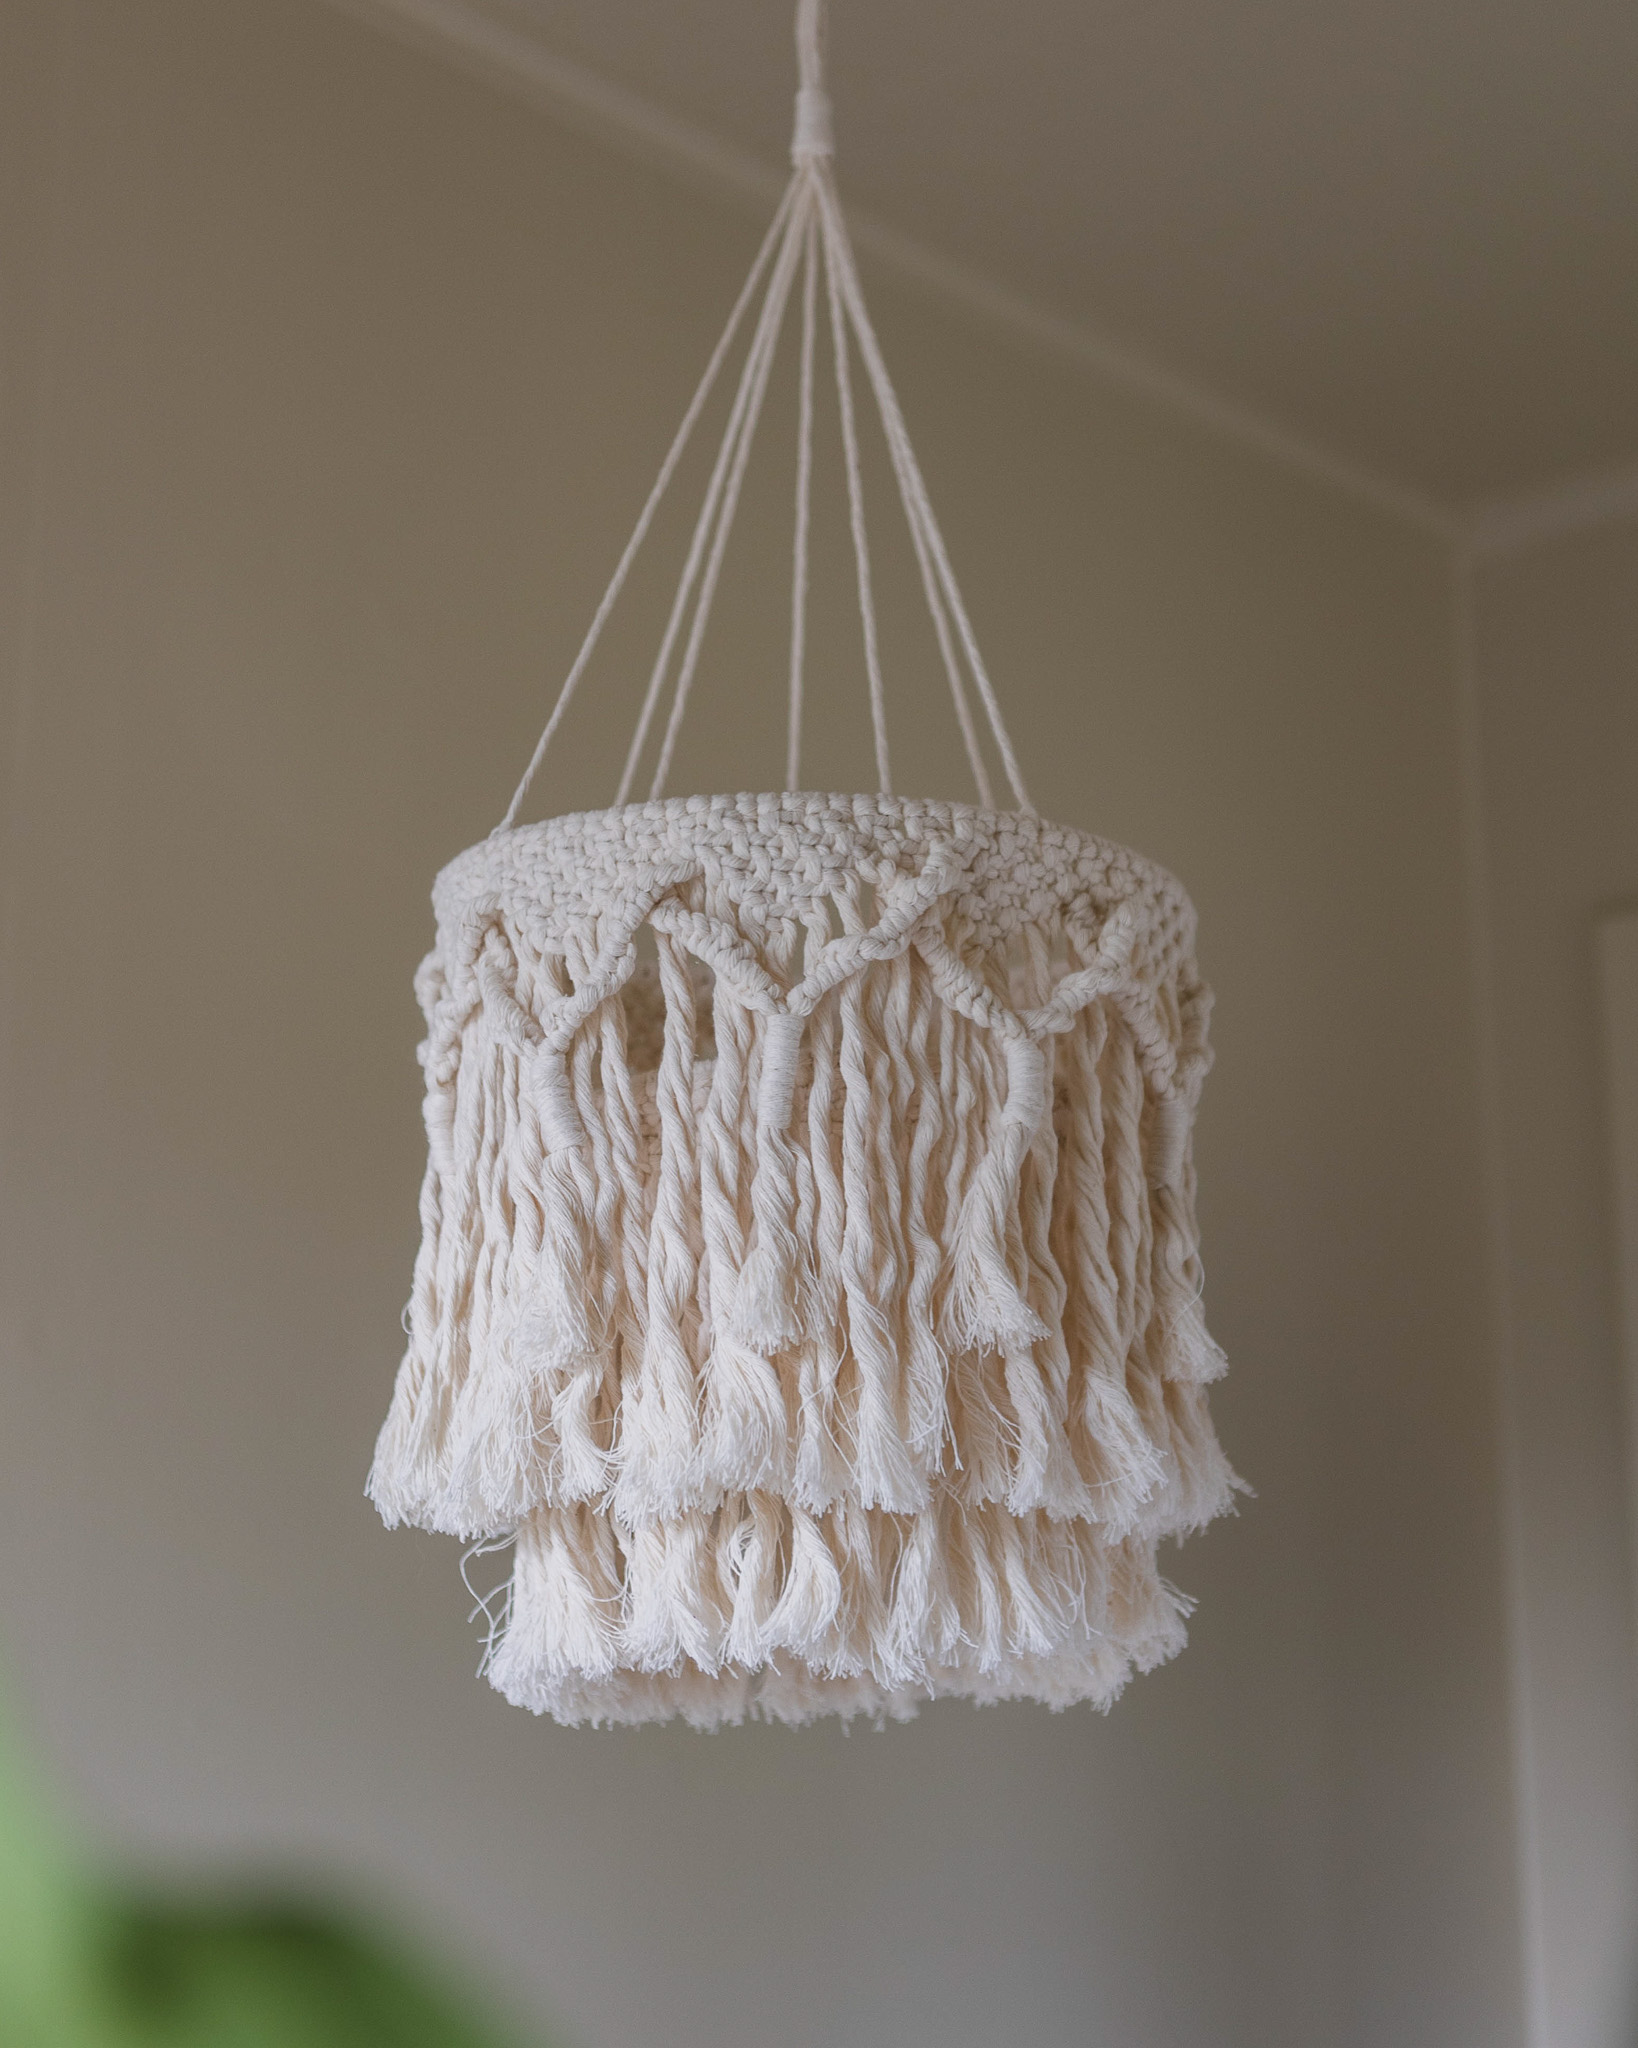
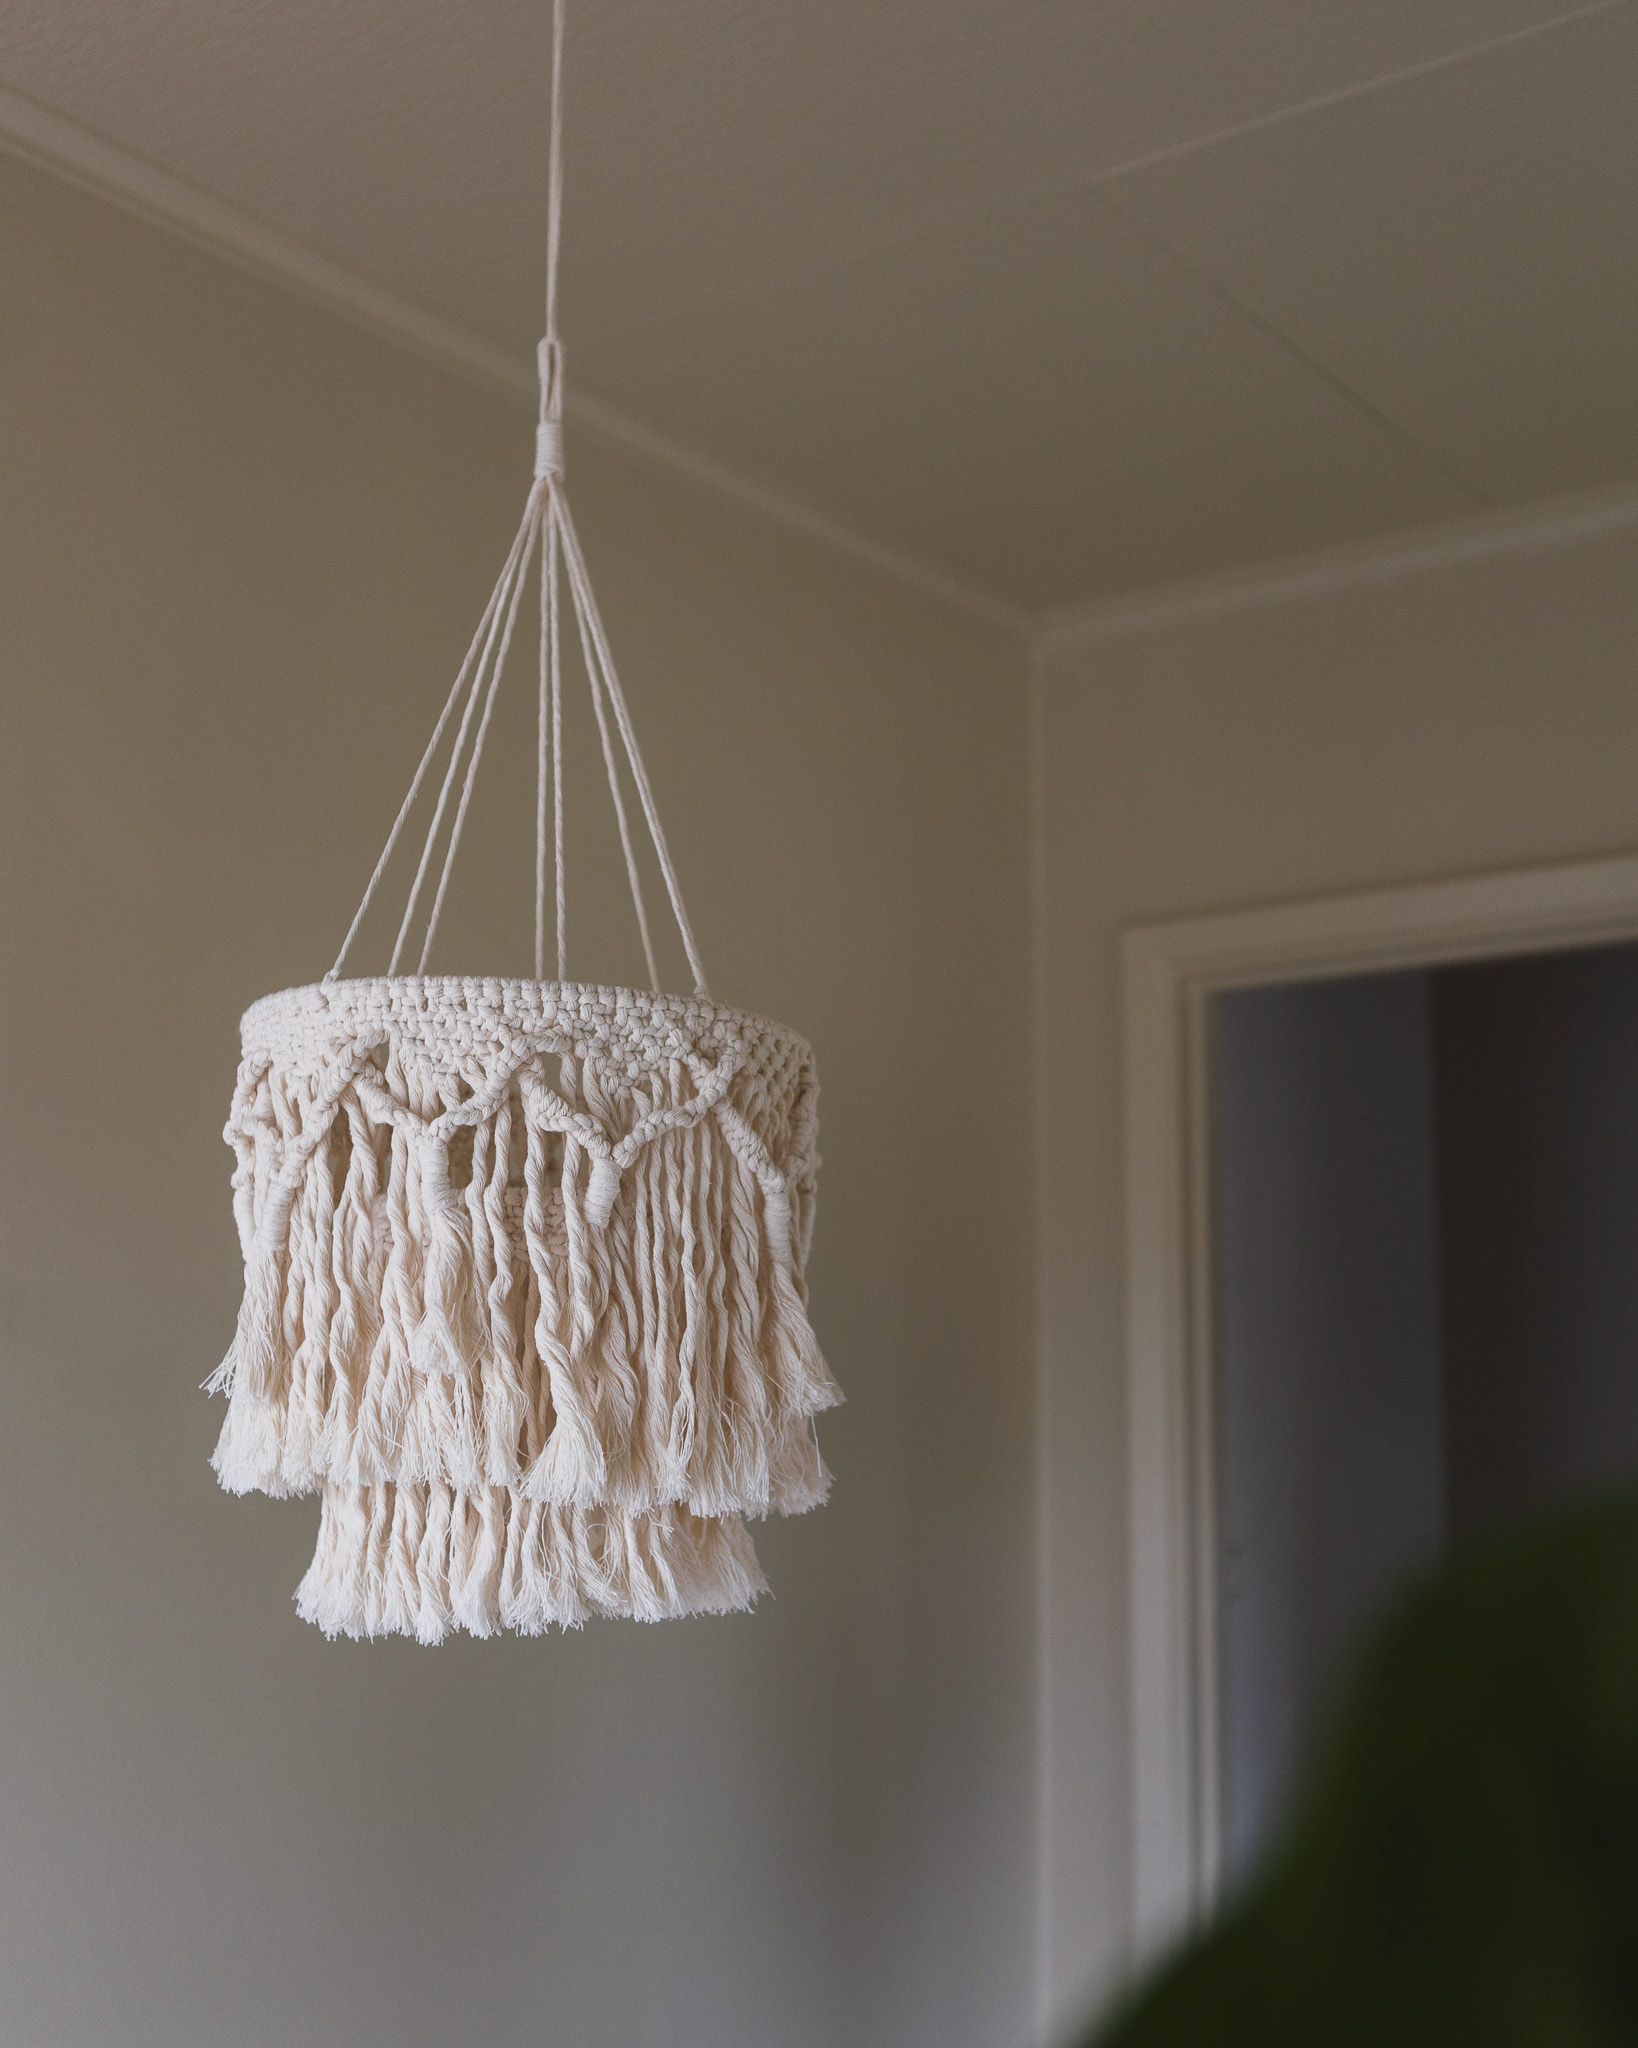
Macrame lampshade “Laura”
Tie a Beautiful Lampshade
Give your home a personal and soft touch with a handmade macramé lampshade! This pattern is suitable for both beginners and those with some macramé experience. Using simple knots and natural materials, you can transform an ordinary lampshade into a beautiful eye-catcher in the room. You’ll also have access to a full-length tutorial, perfect if you’re just starting out. You will need rings measuring 15 cm + 20 cm for a small lampshade, or 20 cm + 30 cm for a larger one.
For reference, the large lampshade is shown in the photos. The video tutorial demonstrates the smaller version.
Yarn Consumption: Approx. 1/5 roll of 4 mm Single Twisted cord. For reference, we used the color “Nature White.”

Here's how to do it
This lampshade can be made in different sizes. In the video, I used 15 cm + 20 cm rings, but you can use 20 cm + 30 cm rings instead (as shown in the photos). In Step 10, I explain how to adjust if you are making the larger version. /Rebecca

This is what you need:
Here you can directly purchase the material for the product. Please note that the instruction is digital and appears here on the page (no written instruction).

.jpg)
Unleash your creativity
For only 85kr per month you get access to all our 300+ beginner-friendly instructions for crochet, knitting and macrame.
A perfect way to get started with your new hobby!

Part 1: Small Ring – 15 cm
Number of cords: 56 cords, each 55 cm long.
Start by cutting all your cords before you begin.
Round 1: Attach each cord individually around the ring using a Lark’s Head Knot (LHK).
How to tie it:
Fold the cord in half, insert the folded part (the U-shape) behind the ring, then pull the ends through the loop to create a “tie-like” knot that is visible from the front.
Round 2:
Now it’s time to tie Right-Facing Square Knots (RFSK) all the way around.
How to tie it:
Use 4 cords – select 4 that come from two neighboring Lark’s Head Knots from the previous round.
Out of the 4 cords:
- Take the leftmost cord and lay it across the two middle cords in the shape of a number "4", and under the rightmost cord.
- Then take the rightmost cord, bring it under the two middle cords, and pull it through the large loop of the "4".
- Pull both outer cords tight.
Now repeat the same steps but mirrored – this is called the “P” side. You’ll now start from the right:
- Cross the right cord over the two center cords and under the left cord.
- Then take the left cord, pass it under the center cords and up through the “P” loop.
You’ve now completed one Right-Facing Square Knot (RFSK).
Tie a total of 24 RFSKs around the ring.
Round 3:
Now it’s time to tie the knots together with their neighbors. That means you take 2 cords from one RFSK and 2 cords from the adjacent one. Tie Right-Facing Square Knots (RFSK) all the way around.
When you’re done, comb out the cord ends and trim them to an even edge!
Part 2: Large Ring – 20 cm
Cords needed:
Lamp body: 70 cords total
– 56 cords: 75 cm
– 14 cords: 140 cm
Tassels (3 total): 8 cords: 35 cm
Hanging cords:
– 2 cords: 140 cm for the small ring
– 2 cords: 120 cm for the large ring
Step 1
Round 1: You will now tie sections – you’ll have a total of 7 sections evenly spaced around the ring. It's recommended to complete one section at a time to ensure correct cord placement. Below is the description for one section.
Each section consists of 10 cords: 8 short cords and 2 long cords.
The long cords are NOT folded in the middle. Instead, measure 55 cm and fold there. They are attached using a Lark’s Head Knot (LHK) around the bamboo ring in a specific order, viewed from left to right:
- Short cords go in positions: 1, 3, 4, 5, 6, 7, 8, 10
- Long cords go in positions: 2 and 9
(The short folded end of the long cords should face outward, toward the edge of the section.)
Round 2:
Tie 5 Right-Facing Square Knots (RFSK). You will have two loose cords on each outer edge of the section – that is completely correct.
Rounds 3–5:
Continue tying Right-Facing Square Knots (RFSK) downward to form a triangle shape, decreasing the number of knots in each row until you have 1 RFSK at the very tip.
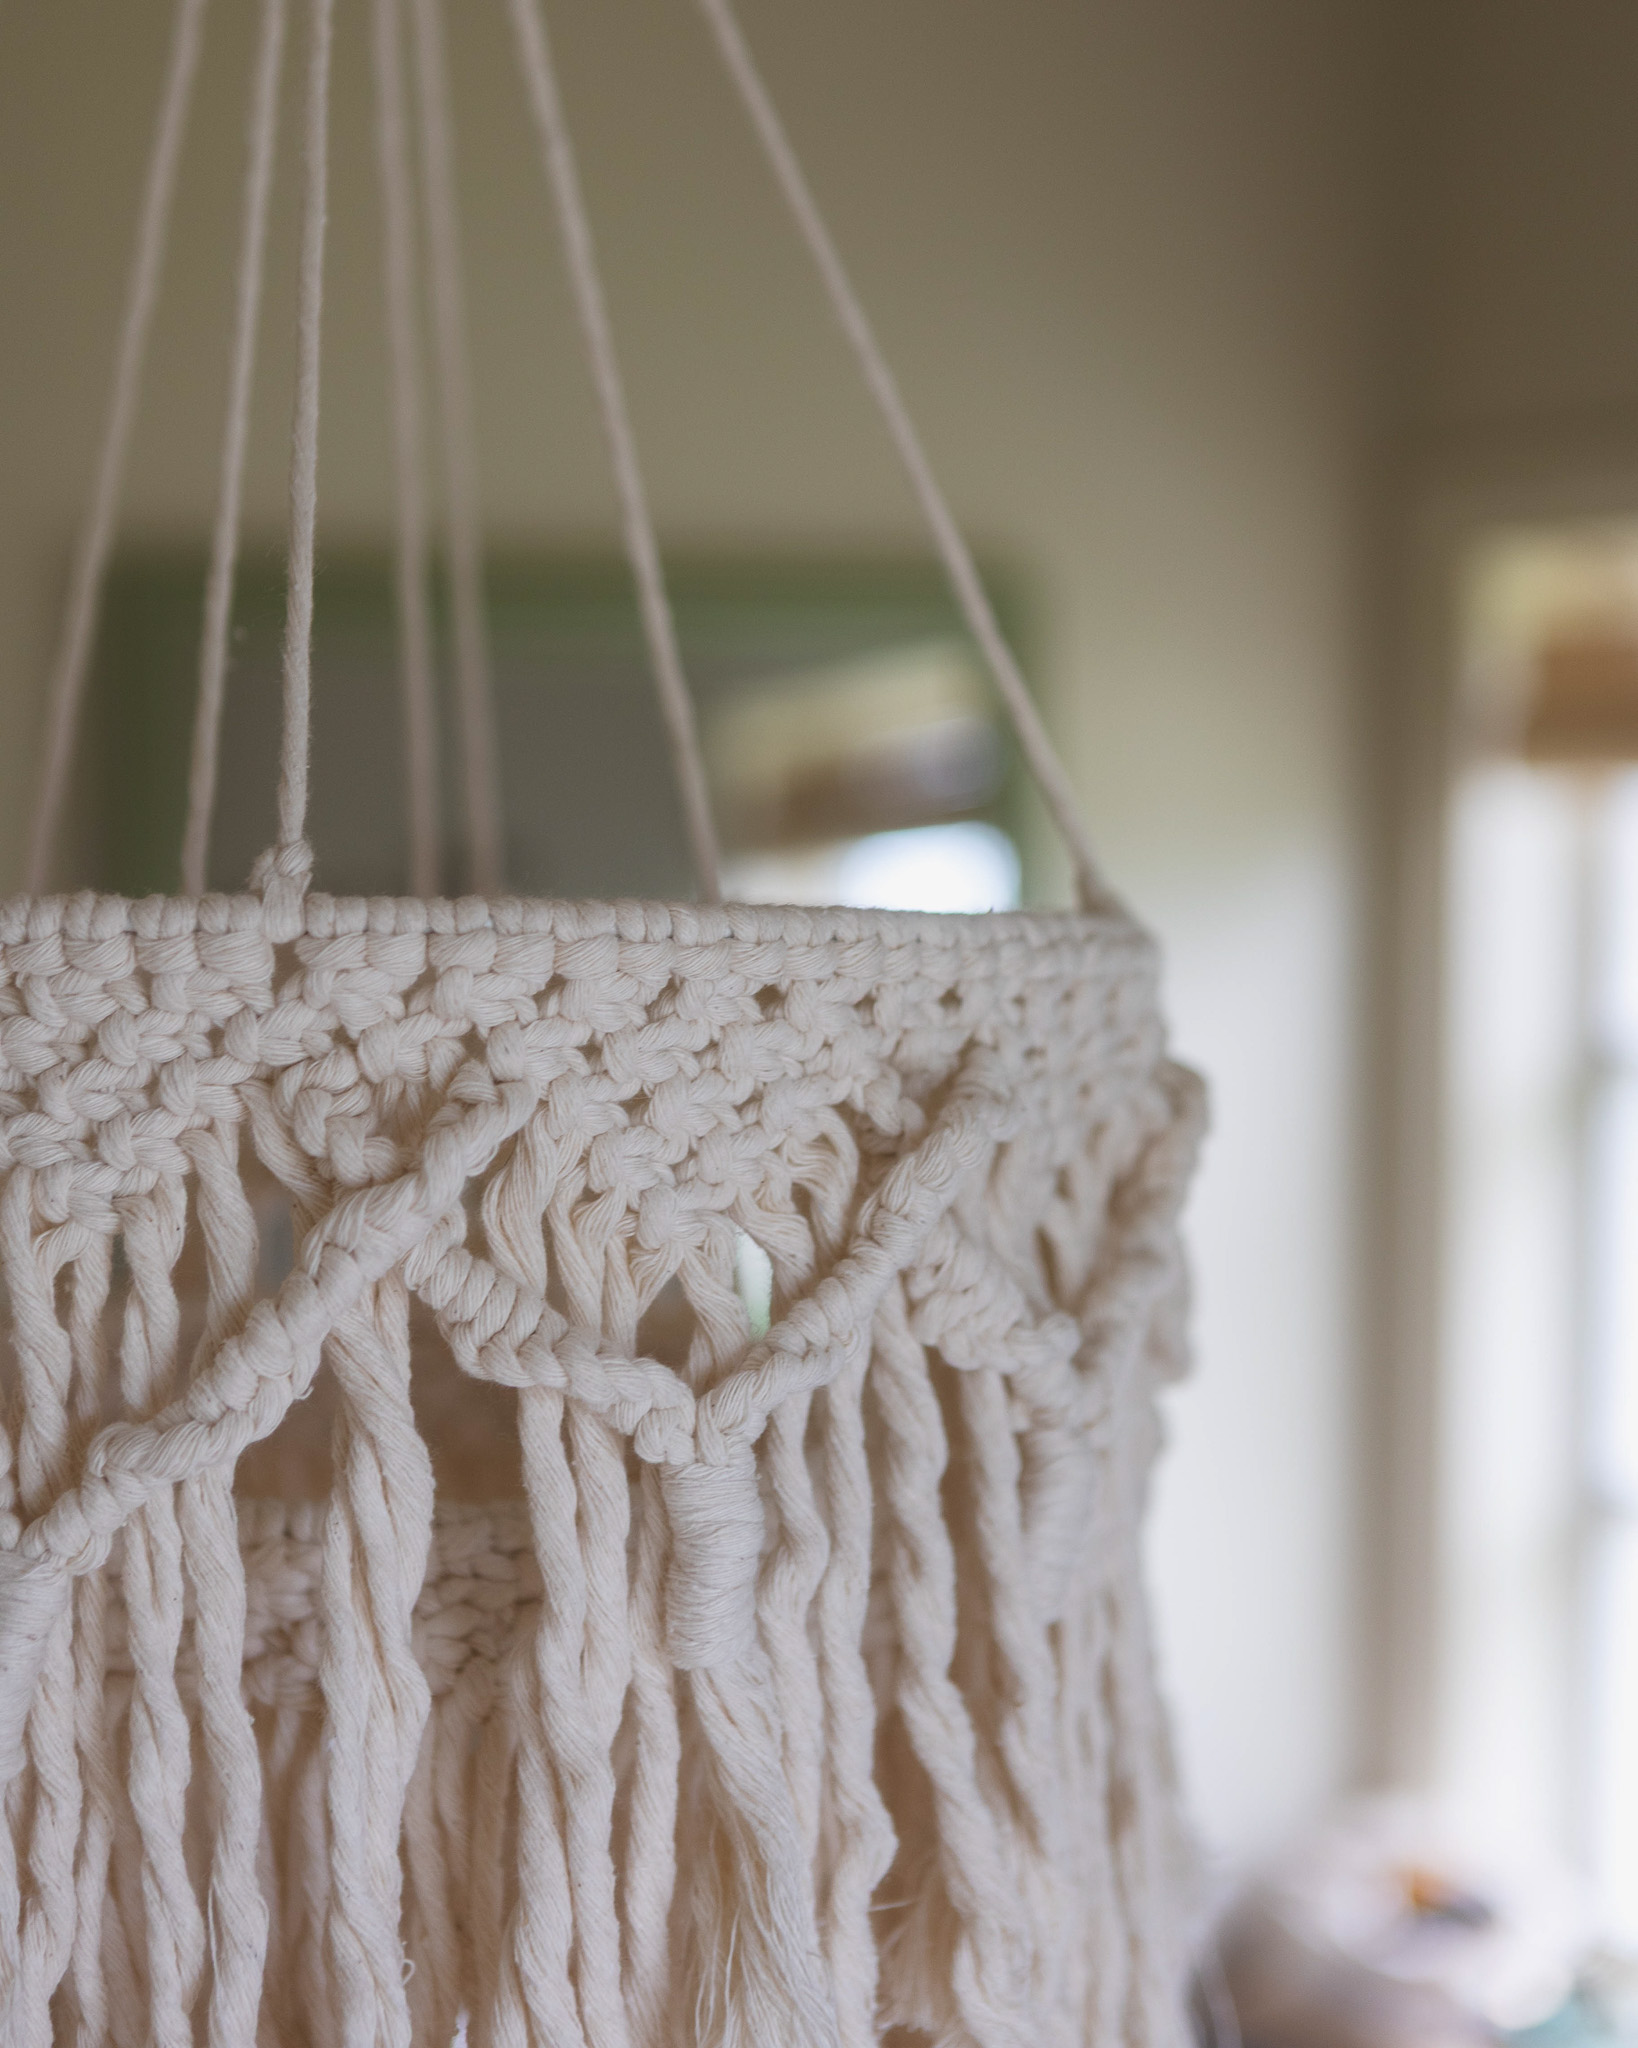
Step 2: Tying the Details
Now use the two long cords from the outermost knots of round 2. Here you will tie a long “band” on each side of the sections.
Here’s how: Take the two loose cords from the outermost knot on round 2, on the left side. Tie these two cords together using the Vertical Half Hitch Knot (VHHK).
How to tie a VHHK: The top cord is the static cord that you tie around, and the bottom cord is the one you tie with. Take the bottom cord and make a “P” shape over the top cord, fold under, pass through the loop, and tighten. Tie a total of 18 knots on your cord.
Repeat mirrored on the other side of the triangle. Instead of making a “P” shape, tie the knot as a “4”. Repeat on all edges and all sections around the round.
Step 4: Tassels
Now all the “bands” from the previous step will be tied together. Choose the bands from each side of a section/triangle. Tie them together with a Wrap Knot (WK).
Here’s how to make a Wrap Knot: Take a piece of yarn about 35 cm long. Fold one end about 6 cm to create a U-shape. The U-shape should point upward. Place this over the cords you want to tie together.
Fold the longest end upward about 2 cm from the bottom edge of the short folded end and wrap it around all the cords, including the knot’s own cords, about 4–5 times. Work your way upward.
Then thread the end through the loop and pull the lower end downward so your upper end is hidden. Cut both ends and slide your WK upward to the desired position.
Done! Repeat on all sections.
I recommend waiting to trim the length of your tassels until the very end when you finish trimming all edges.
Step 5: Hanging
You can choose how high or low you want to hang your lampshade — feel free to adjust and customize as you like. The measurements for the cords I used are listed at the beginning of the instructions and serve as a reference.
Tie the two longer cords at four places around the smaller bamboo ring. Make simple knots once, leaving them a bit loose.
Hang your ring on something so it can hang freely and adjust the knots until the ring is level. When you’re satisfied, tie an additional knot on each cord to secure them and trim the ends.
Finish by trimming the hanging cords evenly at the bottom.
Repeat the same process for the larger bamboo ring. Keep in mind that the cords may be slightly shorter here.
You decide how much height difference you want between your rings.
Step 6: Finishing
Tie a “Wrap Knot” around your hanging cords to create a loop at the top. You’ll need a cord about 40 cm long for this. Follow the instructions for the “Wrap Knot” (WK) from the previous step.
Done!
Tips for Making a Larger Version of the Lamp
You don’t necessarily need longer cords unless you want to make the hanging cords of the lamp significantly longer. In that case, I recommend adding 15–20 cm per cord and testing one section at a time to see the result before cutting all the cords for the entire project.
For the Large Ring:
When increasing the ring’s diameter, keep in mind that you need to add more sections. This can be adjusted as you go since each section is knotted individually.
For Increasing the Small Ring:
Simply add knots until the ring is full, making sure you have an even number of knots. I also made an extra round of RFSK knots, but that’s a matter of personal preference.
The rights to this pattern belong to MYO Make Your Own. The pattern or its pictures may not be copied, shared or resold either in parts or in its entirety, but you may sell items you have crocheted from this pattern. If you have questions about the pattern, contact MYO at hello@makeyourown.se.
Part 1: Small Ring – 15 cm
Number of cords: 56 cords, each 55 cm long.
Start by cutting all your cords before you begin.
Round 1: Attach each cord individually around the ring using a Lark’s Head Knot (LHK).
How to tie it:
Fold the cord in half, insert the folded part (the U-shape) behind the ring, then pull the ends through the loop to create a “tie-like” knot that is visible from the front.
Round 2:
Now it’s time to tie Right-Facing Square Knots (RFSK) all the way around.
How to tie it:
Use 4 cords – select 4 that come from two neighboring Lark’s Head Knots from the previous round.
Out of the 4 cords:
- Take the leftmost cord and lay it across the two middle cords in the shape of a number "4", and under the rightmost cord.
- Then take the rightmost cord, bring it under the two middle cords, and pull it through the large loop of the "4".
- Pull both outer cords tight.
Now repeat the same steps but mirrored – this is called the “P” side. You’ll now start from the right:
- Cross the right cord over the two center cords and under the left cord.
- Then take the left cord, pass it under the center cords and up through the “P” loop.
You’ve now completed one Right-Facing Square Knot (RFSK).
Tie a total of 24 RFSKs around the ring.
Round 3:
Now it’s time to tie the knots together with their neighbors. That means you take 2 cords from one RFSK and 2 cords from the adjacent one. Tie Right-Facing Square Knots (RFSK) all the way around.
When you’re done, comb out the cord ends and trim them to an even edge!
Part 2: Large Ring – 20 cm
Cords needed:
Lamp body: 70 cords total
– 56 cords: 75 cm
– 14 cords: 140 cm
Tassels (3 total): 8 cords: 35 cm
Hanging cords:
– 2 cords: 140 cm for the small ring
– 2 cords: 120 cm for the large ring
Step 1
Round 1: You will now tie sections – you’ll have a total of 7 sections evenly spaced around the ring. It's recommended to complete one section at a time to ensure correct cord placement. Below is the description for one section.
Each section consists of 10 cords: 8 short cords and 2 long cords.
The long cords are NOT folded in the middle. Instead, measure 55 cm and fold there. They are attached using a Lark’s Head Knot (LHK) around the bamboo ring in a specific order, viewed from left to right:
- Short cords go in positions: 1, 3, 4, 5, 6, 7, 8, 10
- Long cords go in positions: 2 and 9
(The short folded end of the long cords should face outward, toward the edge of the section.)
Round 2:
Tie 5 Right-Facing Square Knots (RFSK). You will have two loose cords on each outer edge of the section – that is completely correct.
Rounds 3–5:
Continue tying Right-Facing Square Knots (RFSK) downward to form a triangle shape, decreasing the number of knots in each row until you have 1 RFSK at the very tip.
Step 2: Tying the Details
Now use the two long cords from the outermost knots of round 2. Here you will tie a long “band” on each side of the sections.
Here’s how: Take the two loose cords from the outermost knot on round 2, on the left side. Tie these two cords together using the Vertical Half Hitch Knot (VHHK).
How to tie a VHHK: The top cord is the static cord that you tie around, and the bottom cord is the one you tie with. Take the bottom cord and make a “P” shape over the top cord, fold under, pass through the loop, and tighten. Tie a total of 18 knots on your cord.
Repeat mirrored on the other side of the triangle. Instead of making a “P” shape, tie the knot as a “4”. Repeat on all edges and all sections around the round.
Step 4: Tassels
Now all the “bands” from the previous step will be tied together. Choose the bands from each side of a section/triangle. Tie them together with a Wrap Knot (WK).
Here’s how to make a Wrap Knot: Take a piece of yarn about 35 cm long. Fold one end about 6 cm to create a U-shape. The U-shape should point upward. Place this over the cords you want to tie together.
Fold the longest end upward about 2 cm from the bottom edge of the short folded end and wrap it around all the cords, including the knot’s own cords, about 4–5 times. Work your way upward.
Then thread the end through the loop and pull the lower end downward so your upper end is hidden. Cut both ends and slide your WK upward to the desired position.
Done! Repeat on all sections.
I recommend waiting to trim the length of your tassels until the very end when you finish trimming all edges.
Step 5: Hanging
You can choose how high or low you want to hang your lampshade — feel free to adjust and customize as you like. The measurements for the cords I used are listed at the beginning of the instructions and serve as a reference.
Tie the two longer cords at four places around the smaller bamboo ring. Make simple knots once, leaving them a bit loose.
Hang your ring on something so it can hang freely and adjust the knots until the ring is level. When you’re satisfied, tie an additional knot on each cord to secure them and trim the ends.
Finish by trimming the hanging cords evenly at the bottom.
Repeat the same process for the larger bamboo ring. Keep in mind that the cords may be slightly shorter here.
You decide how much height difference you want between your rings.
Step 6: Finishing
Tie a “Wrap Knot” around your hanging cords to create a loop at the top. You’ll need a cord about 40 cm long for this. Follow the instructions for the “Wrap Knot” (WK) from the previous step.
Done!
Tips for Making a Larger Version of the Lamp
You don’t necessarily need longer cords unless you want to make the hanging cords of the lamp significantly longer. In that case, I recommend adding 15–20 cm per cord and testing one section at a time to see the result before cutting all the cords for the entire project.
For the Large Ring:
When increasing the ring’s diameter, keep in mind that you need to add more sections. This can be adjusted as you go since each section is knotted individually.
For Increasing the Small Ring:
Simply add knots until the ring is full, making sure you have an even number of knots. I also made an extra round of RFSK knots, but that’s a matter of personal preference.
The rights to this pattern belong to MYO Make Your Own. The pattern or its pictures may not be copied, shared or resold either in parts or in its entirety, but you may sell items you have crocheted from this pattern. If you have questions about the pattern, contact MYO at hello@makeyourown.se.


.jpg)


Share your creations with us
Thank you!
Your comment was sent!