
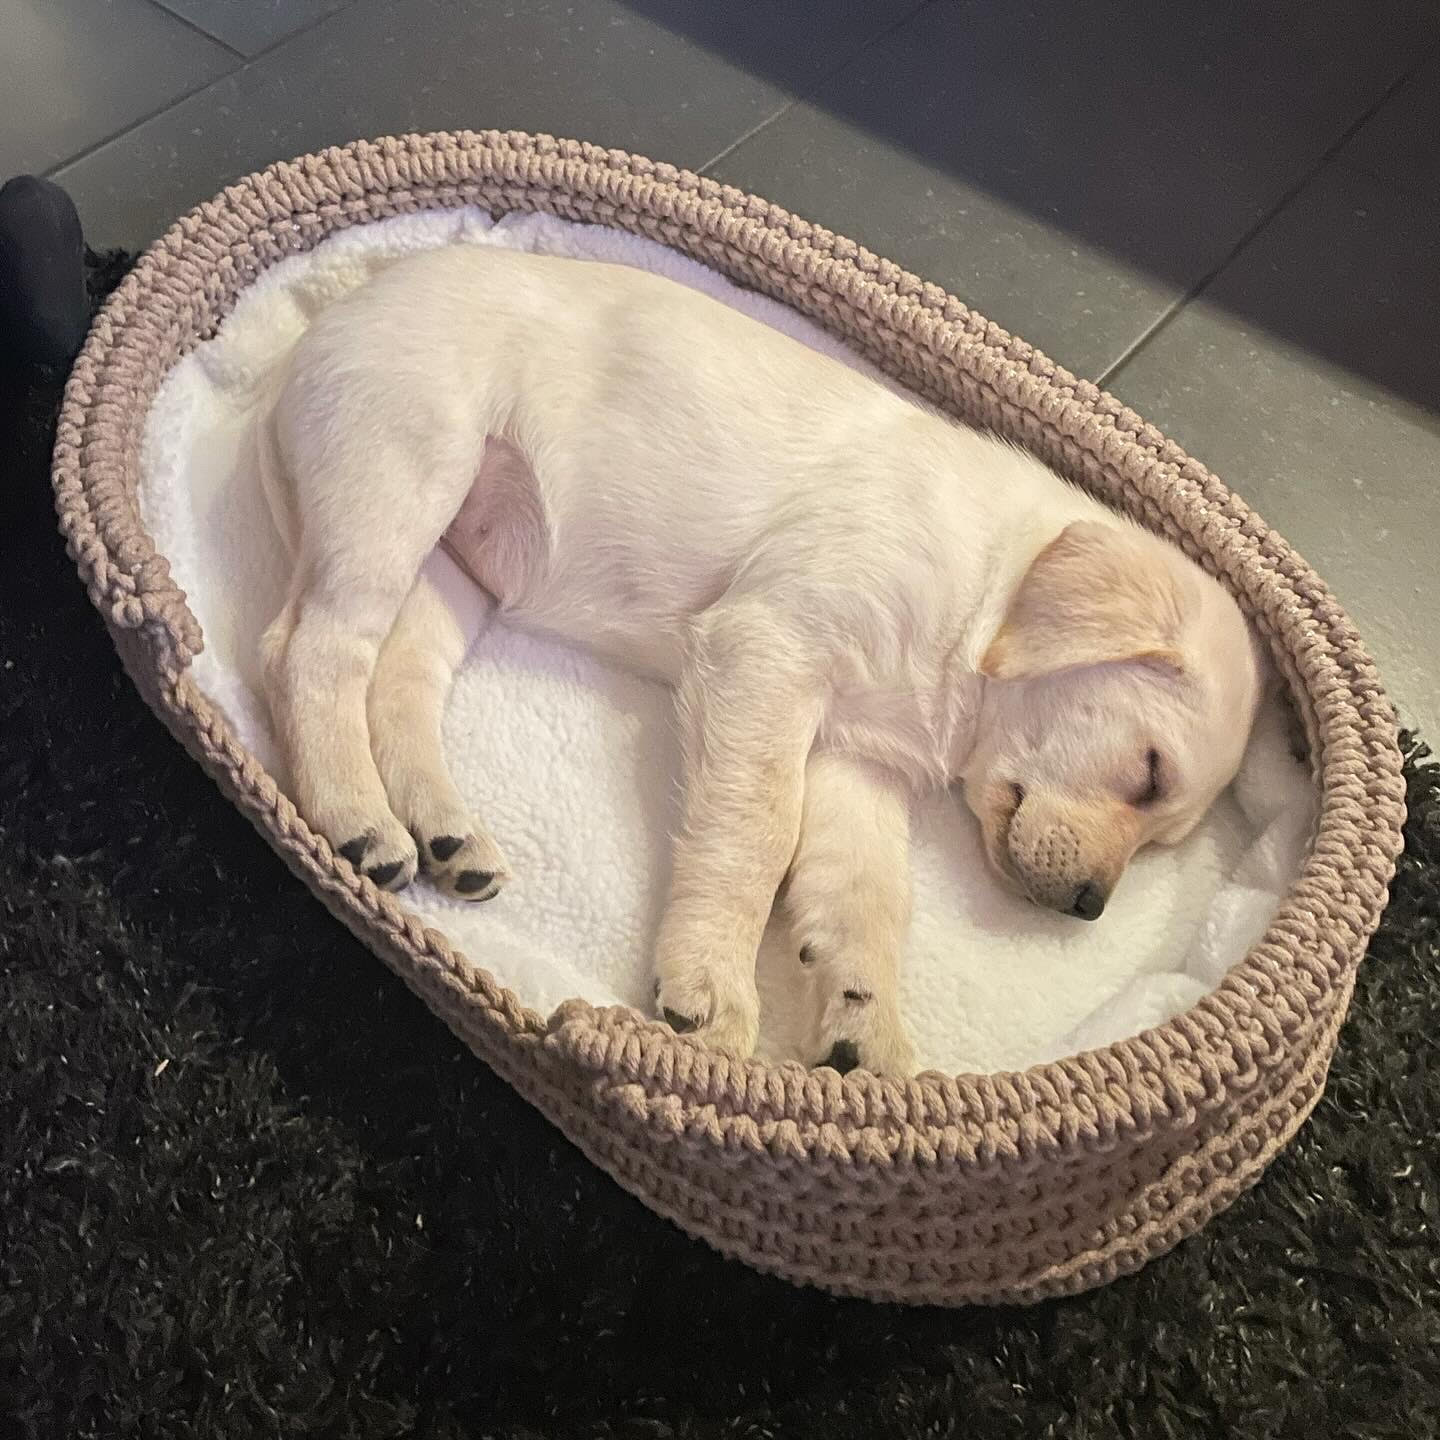
Dog basket “Bessy”
Crochet a Beautiful Dog Basket "Bessy"
Here’s a step-by-step guide to crochet a dog bed or cat bed that will not only be comfy but also look beautiful in your home. It’s both functional and stylish! Follow these instructions to create a cozy and stunning basket for your four-legged friend. You need: 1 roll of EKO Braided Rope 5mm (around 1 kg depending on size), flag line, crochet hook 8-10 mm, smaller crochet hook (about 4-5 mm) for the first round around the wooden base, a wooden base, oval or round, 40 cm in diameter (adjust size based on your dog or cat).
Yarn Consumption: 1 kg of Braided Rope (depending on the height of the basket and how tightly you crochet, yarn consumption may vary).
Note: This tutorial also includes video clips from our technical school, which offer more visual steps for certain techniques.

Here's how to do it
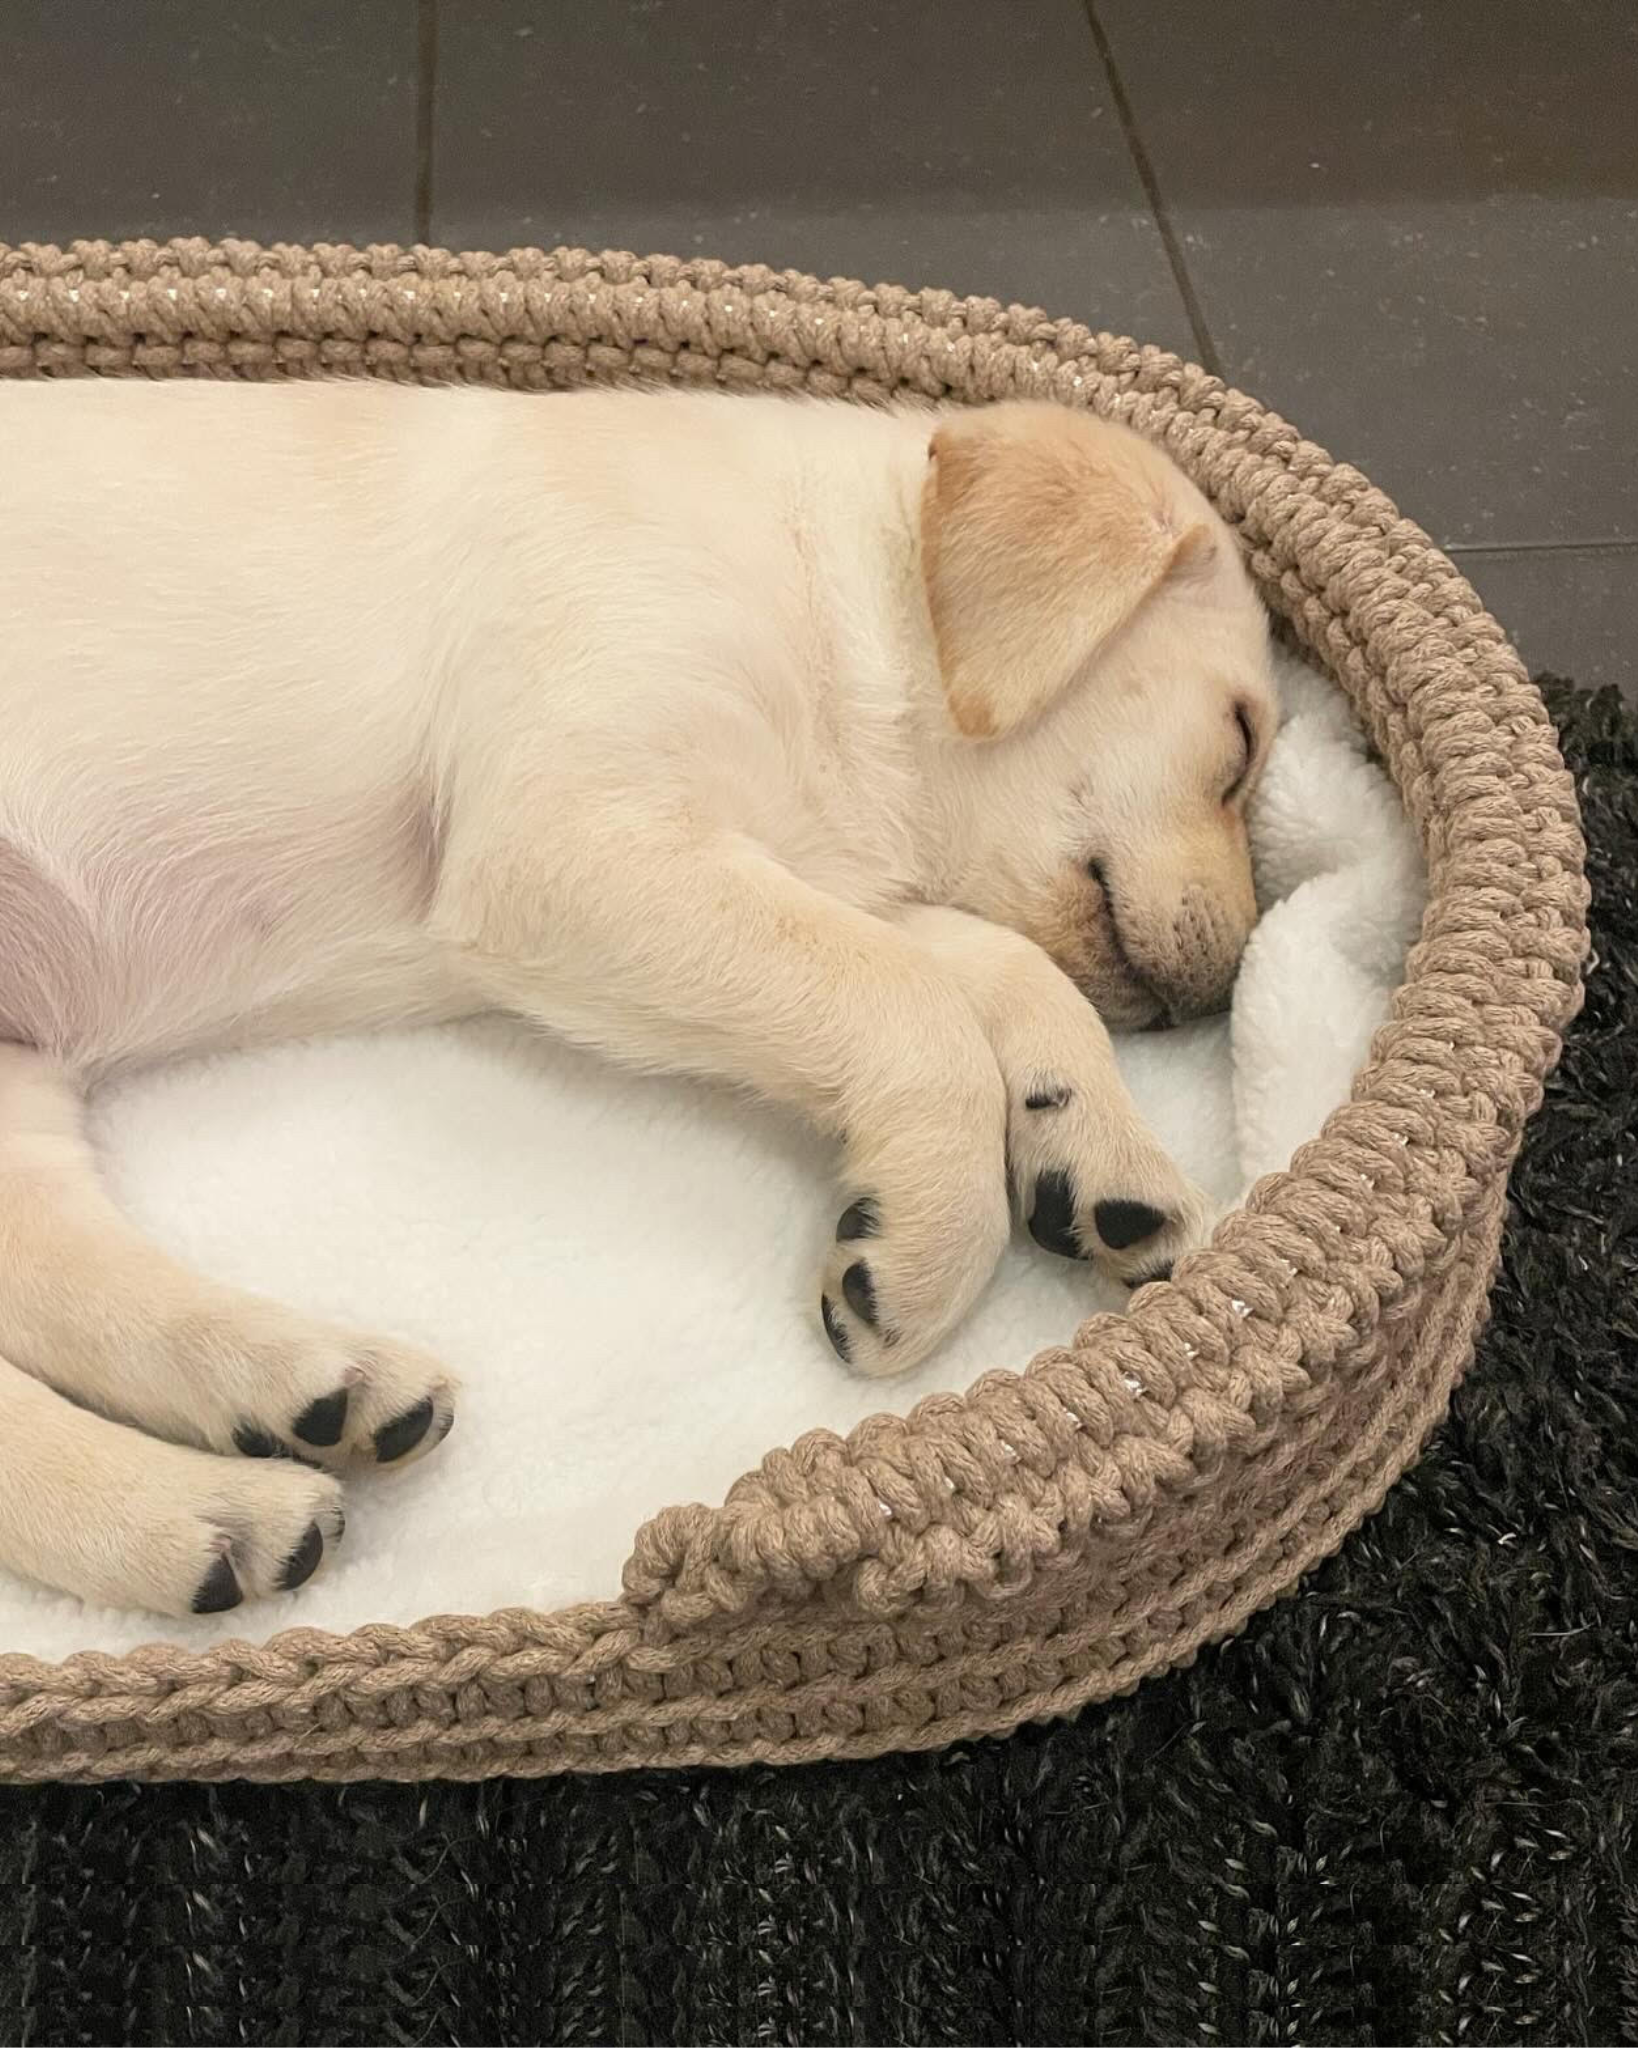
This dog bed is easy to crochet and fits perfectly into your home while ensuring that your dog or cat sleeps comfortably. /Pamela

This is what you need:
Here you can directly purchase the material for the product. Please note that the instruction is digital and appears here on the page (no written instruction).

EKO Braided rope 5mm | 1000g
Ideal for macramé work such as amples, bags, cord guards etc., but also for crocheting.
Buy product

Wooden basket bottom 40 x 75 cm
A stable basket bottom, perfect for baby nests or dog beds
Buy product.jpg)
Unleash your creativity
For only 85kr per month you get access to all our 300+ beginner-friendly instructions for crochet, knitting and macrame.
A perfect way to get started with your new hobby!

Pattern
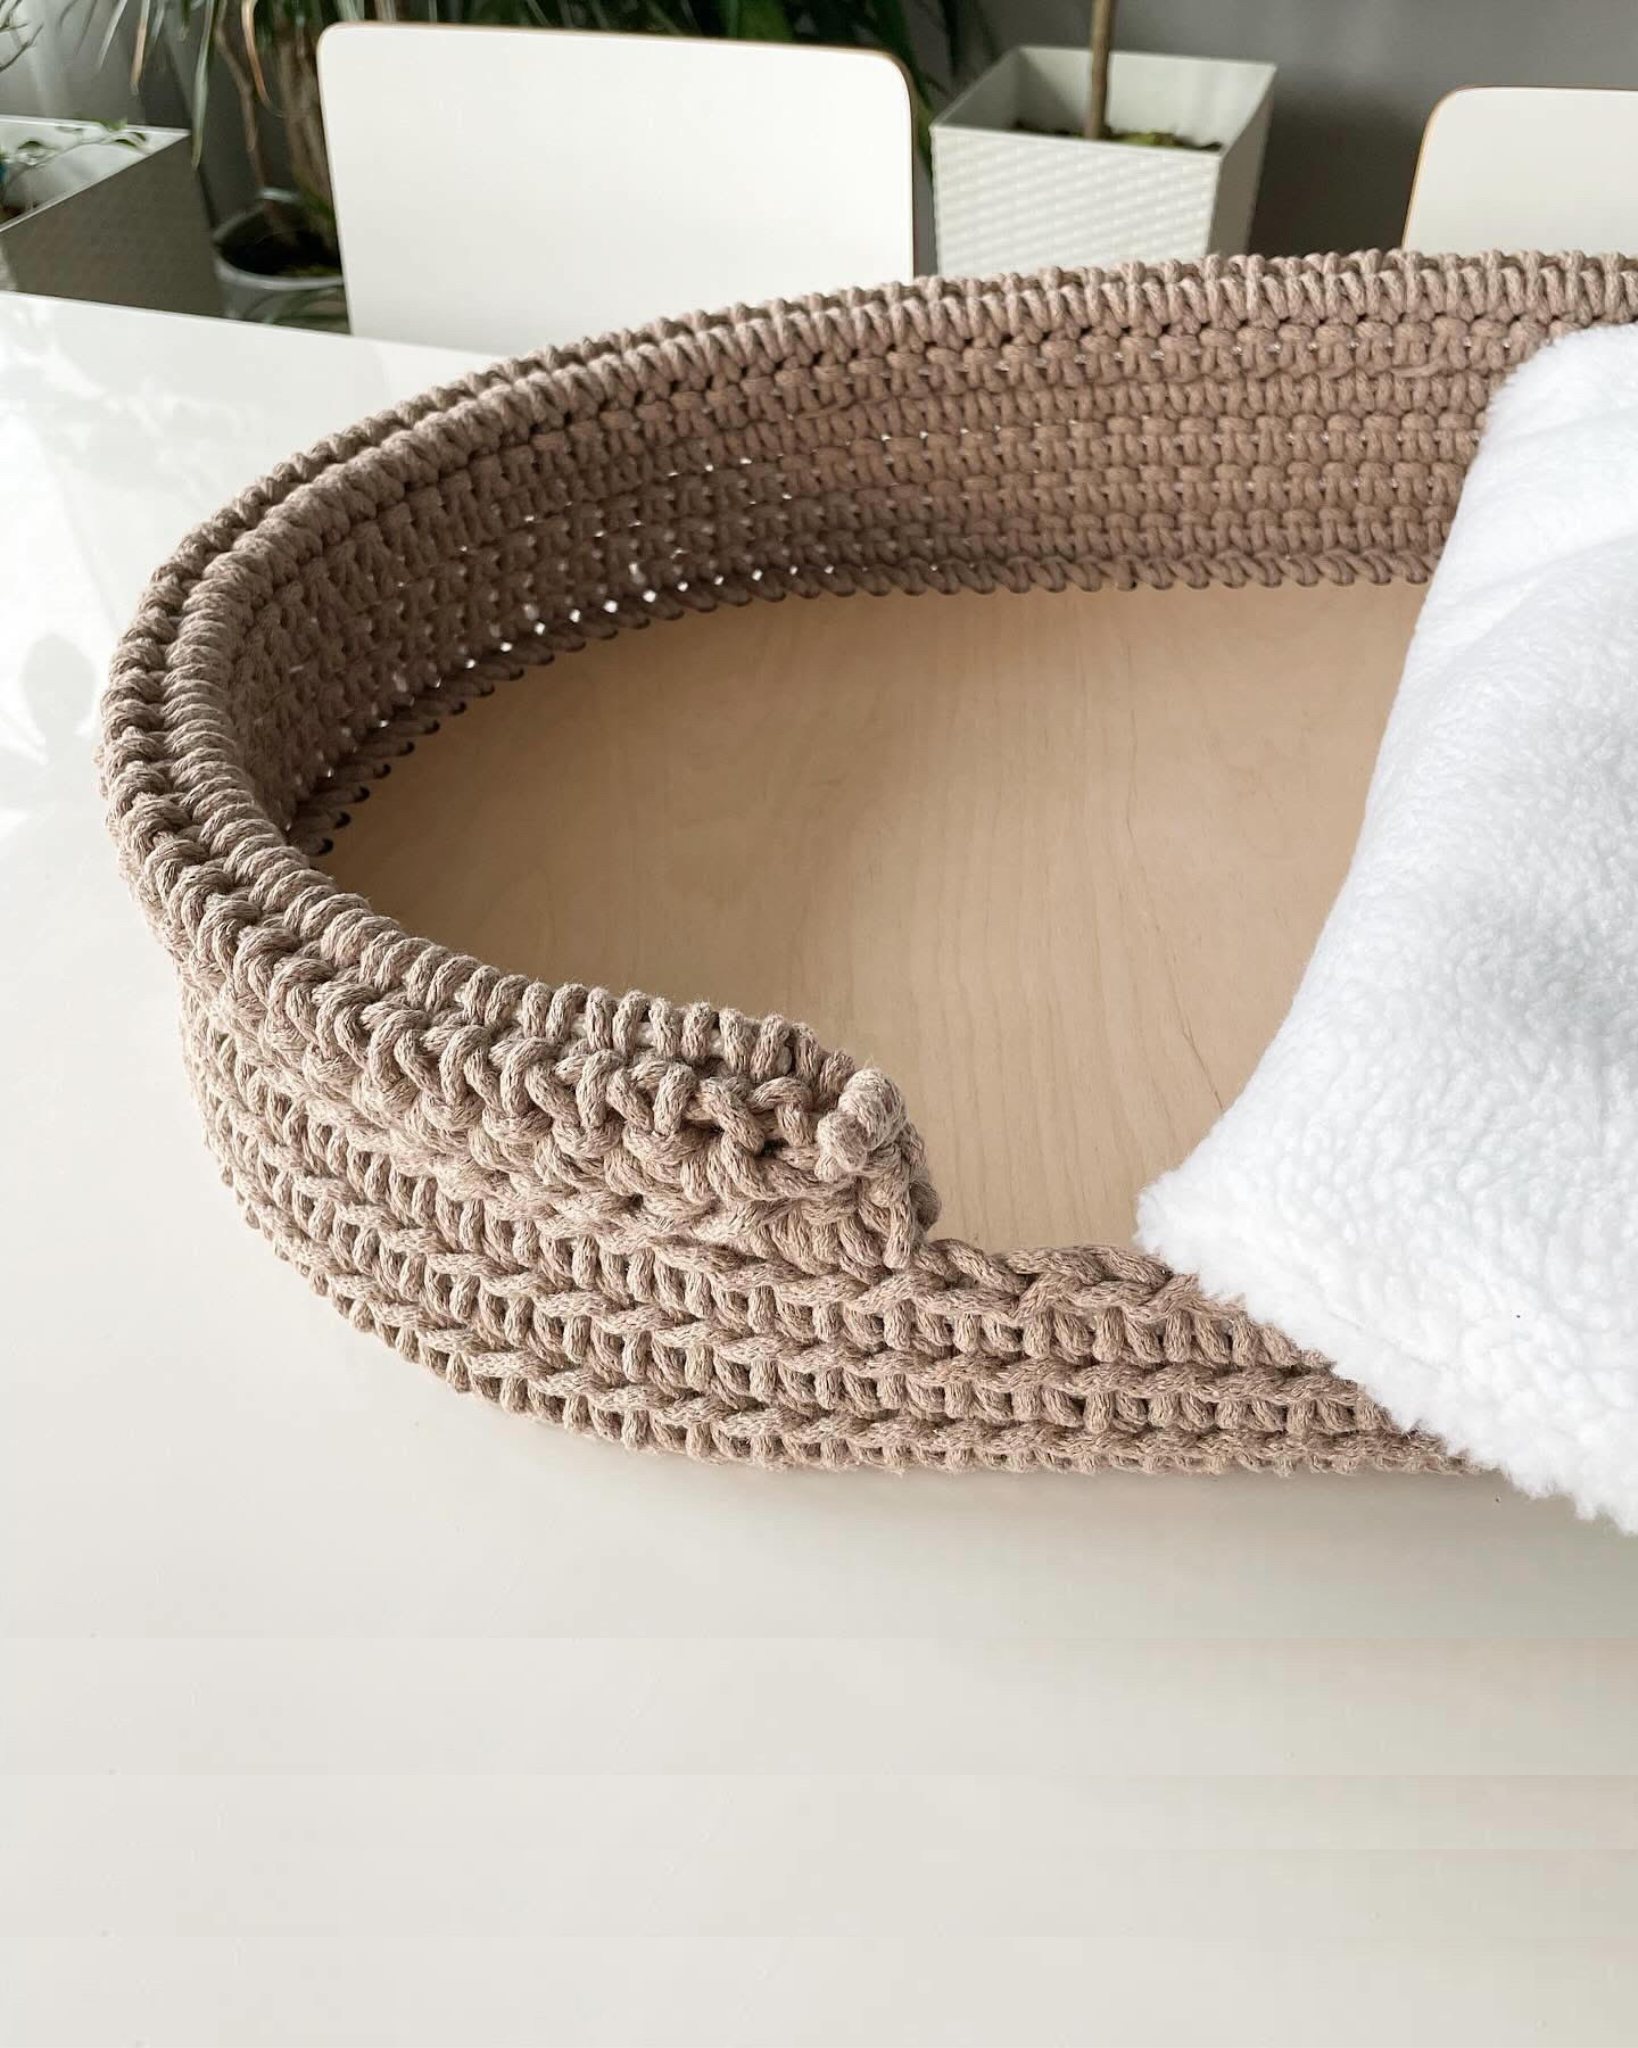
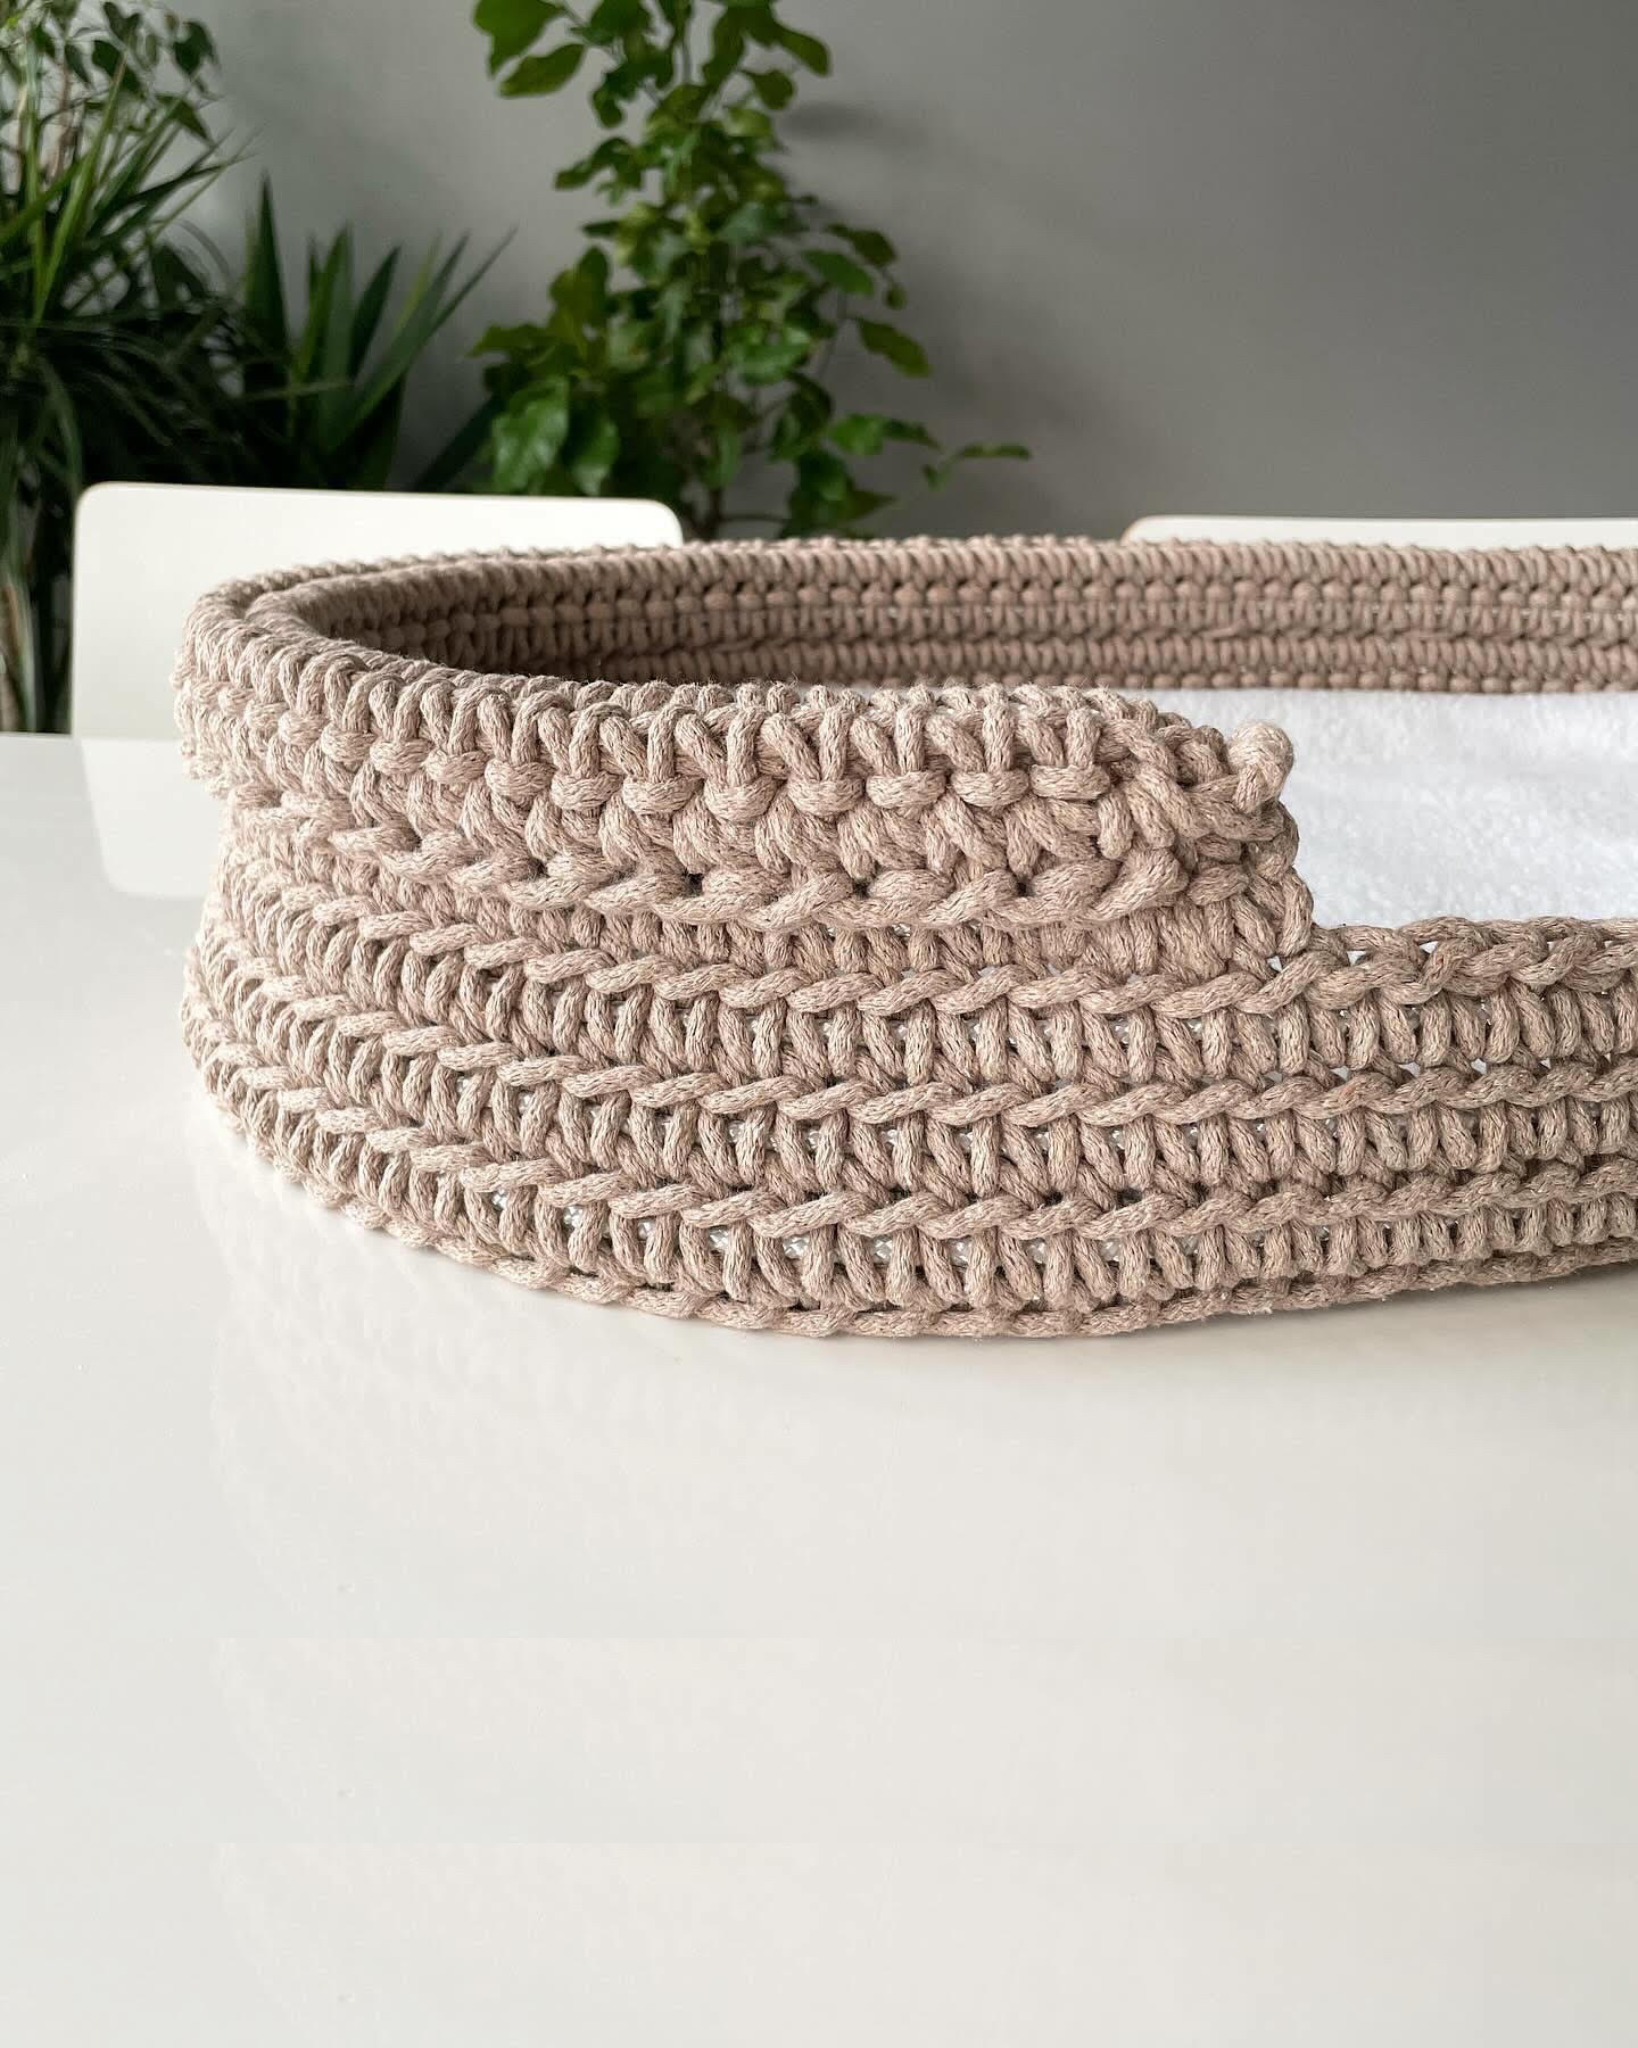
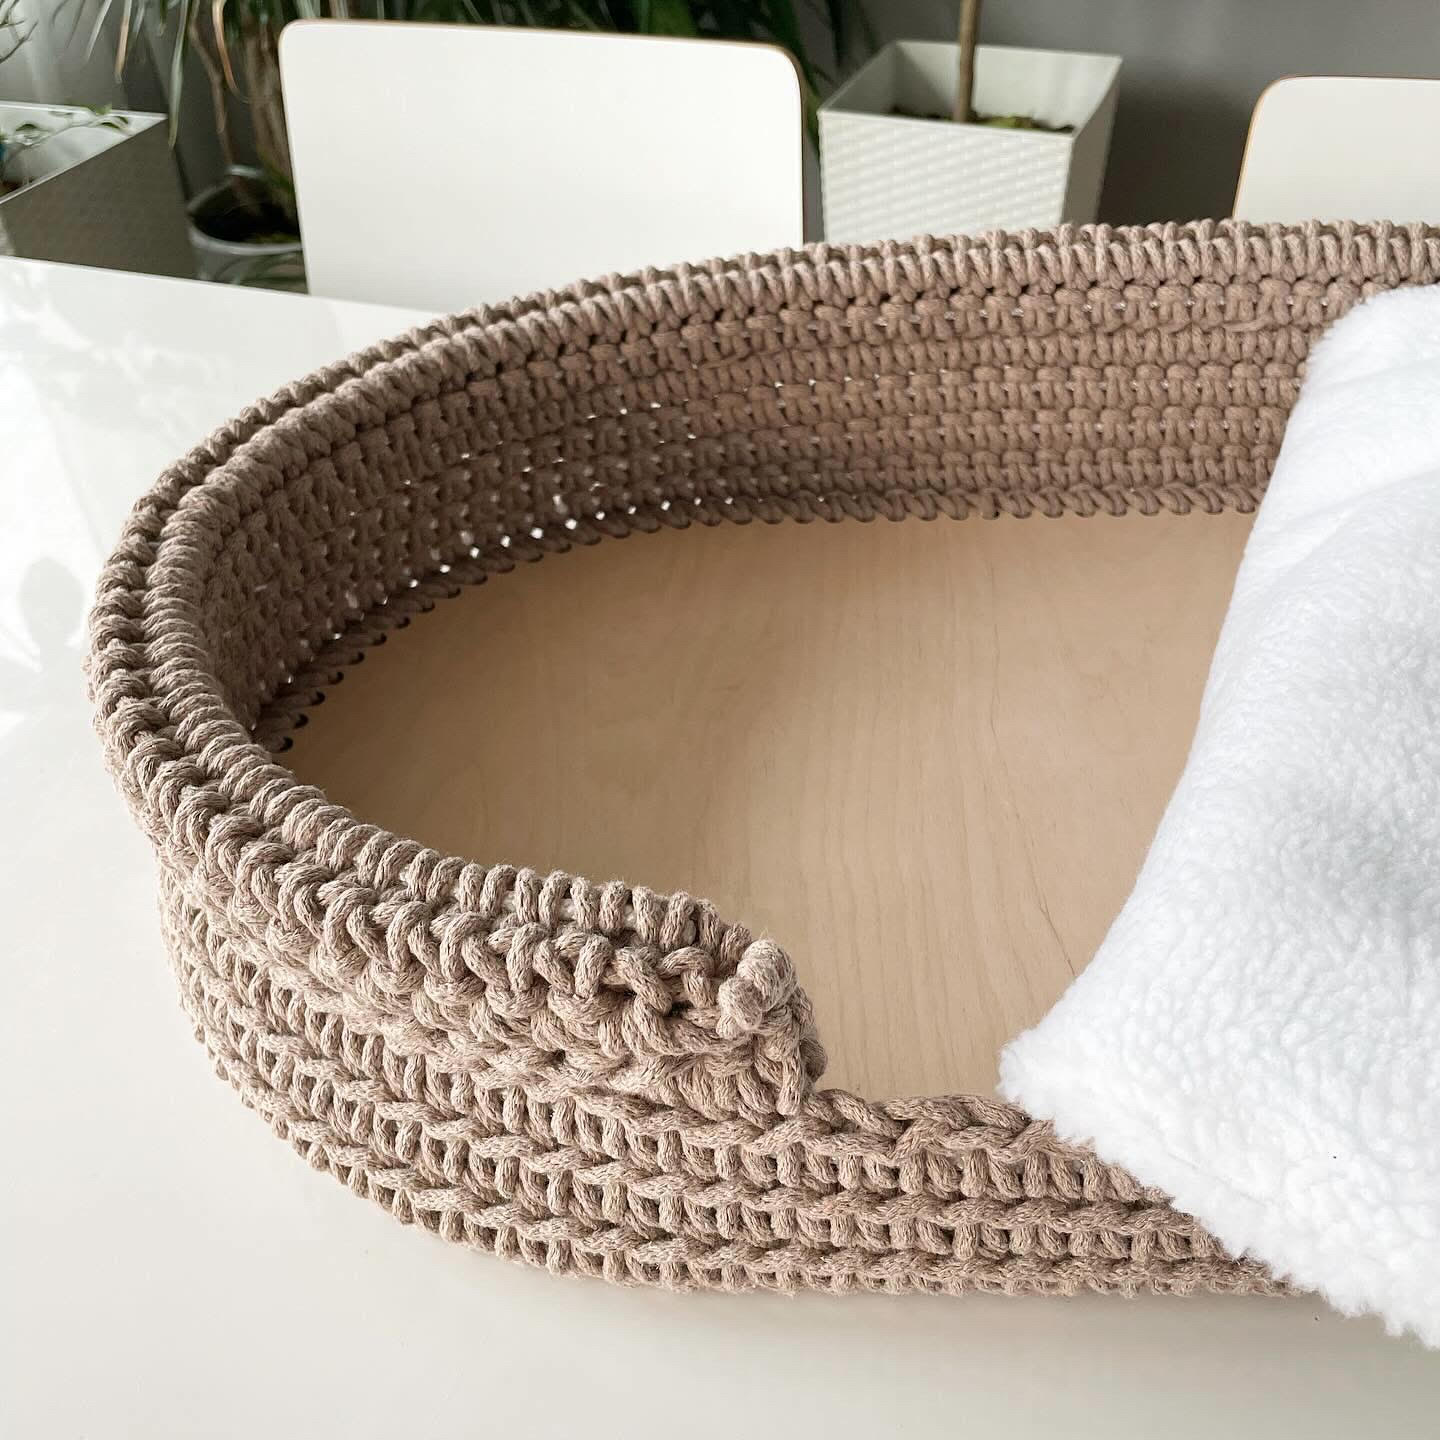
Round 1: Take your wooden base, either oval or large round, and crochet single crochets all the way around it. Use a smaller crochet hook than the one you will use for the rest of the project. Start on the long side, roughly where you want the opening of the basket to be later (see image below for reference). If you're unsure how to crochet around a wooden base, see the video below.
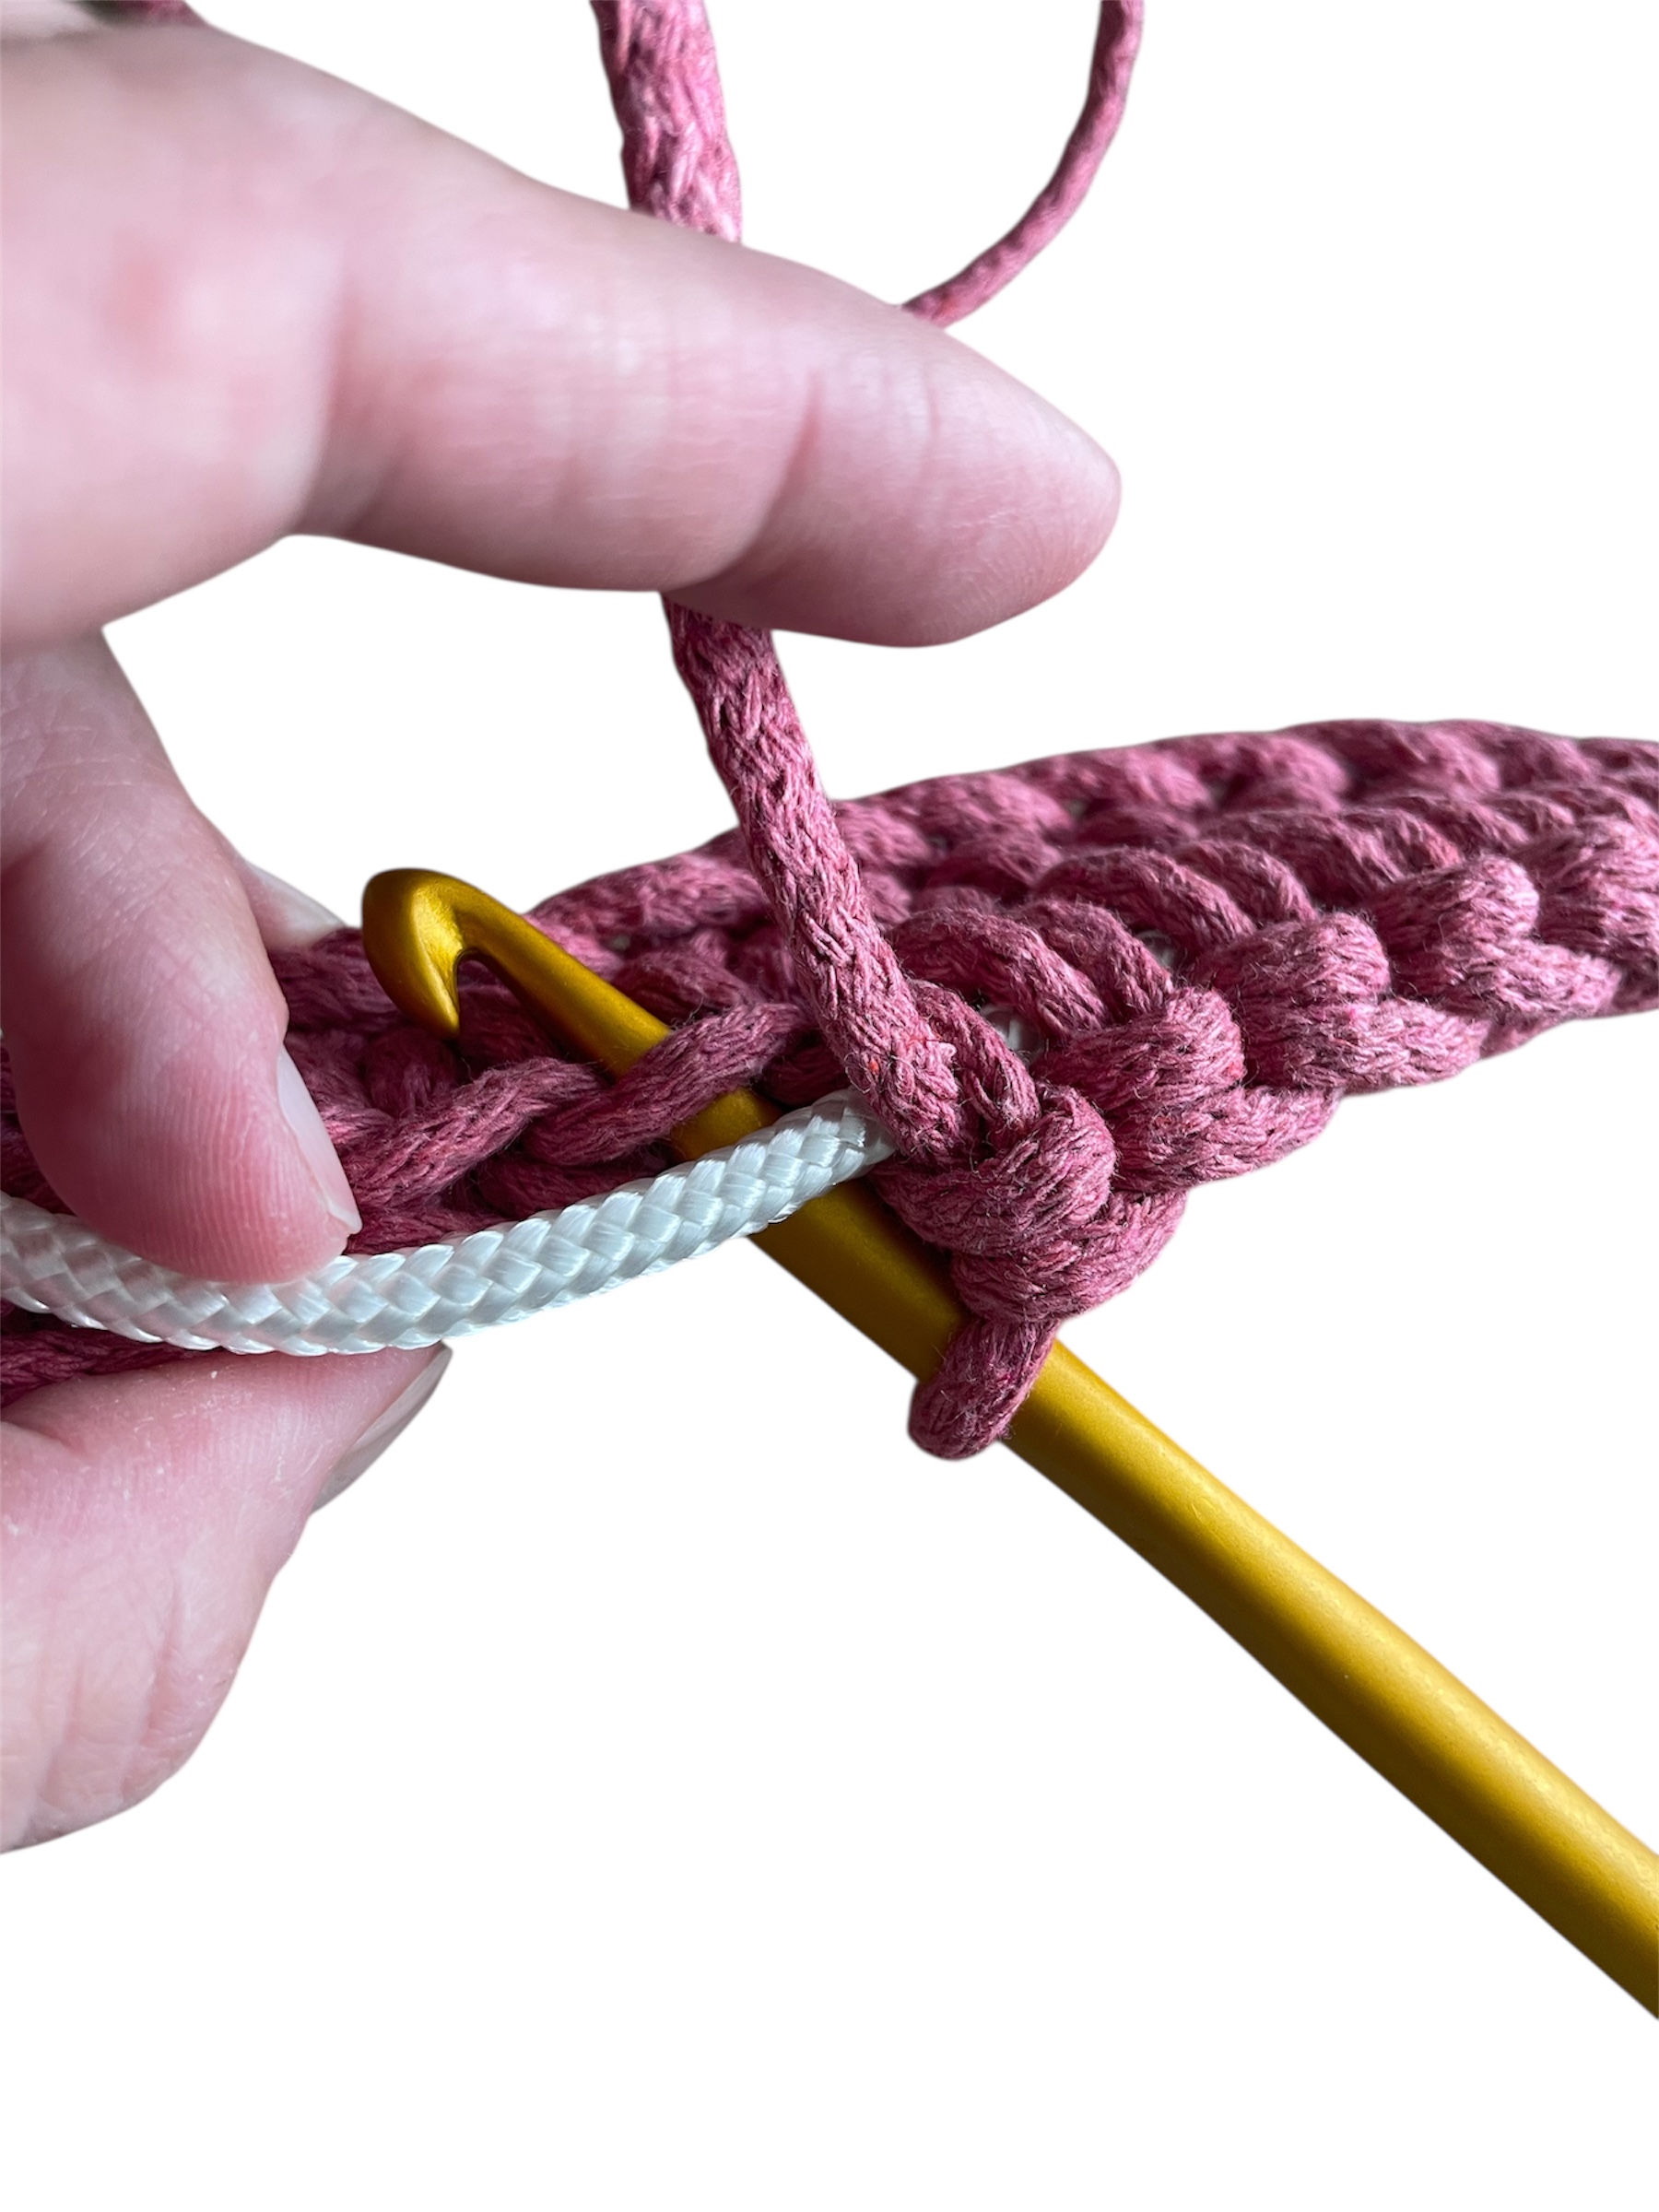
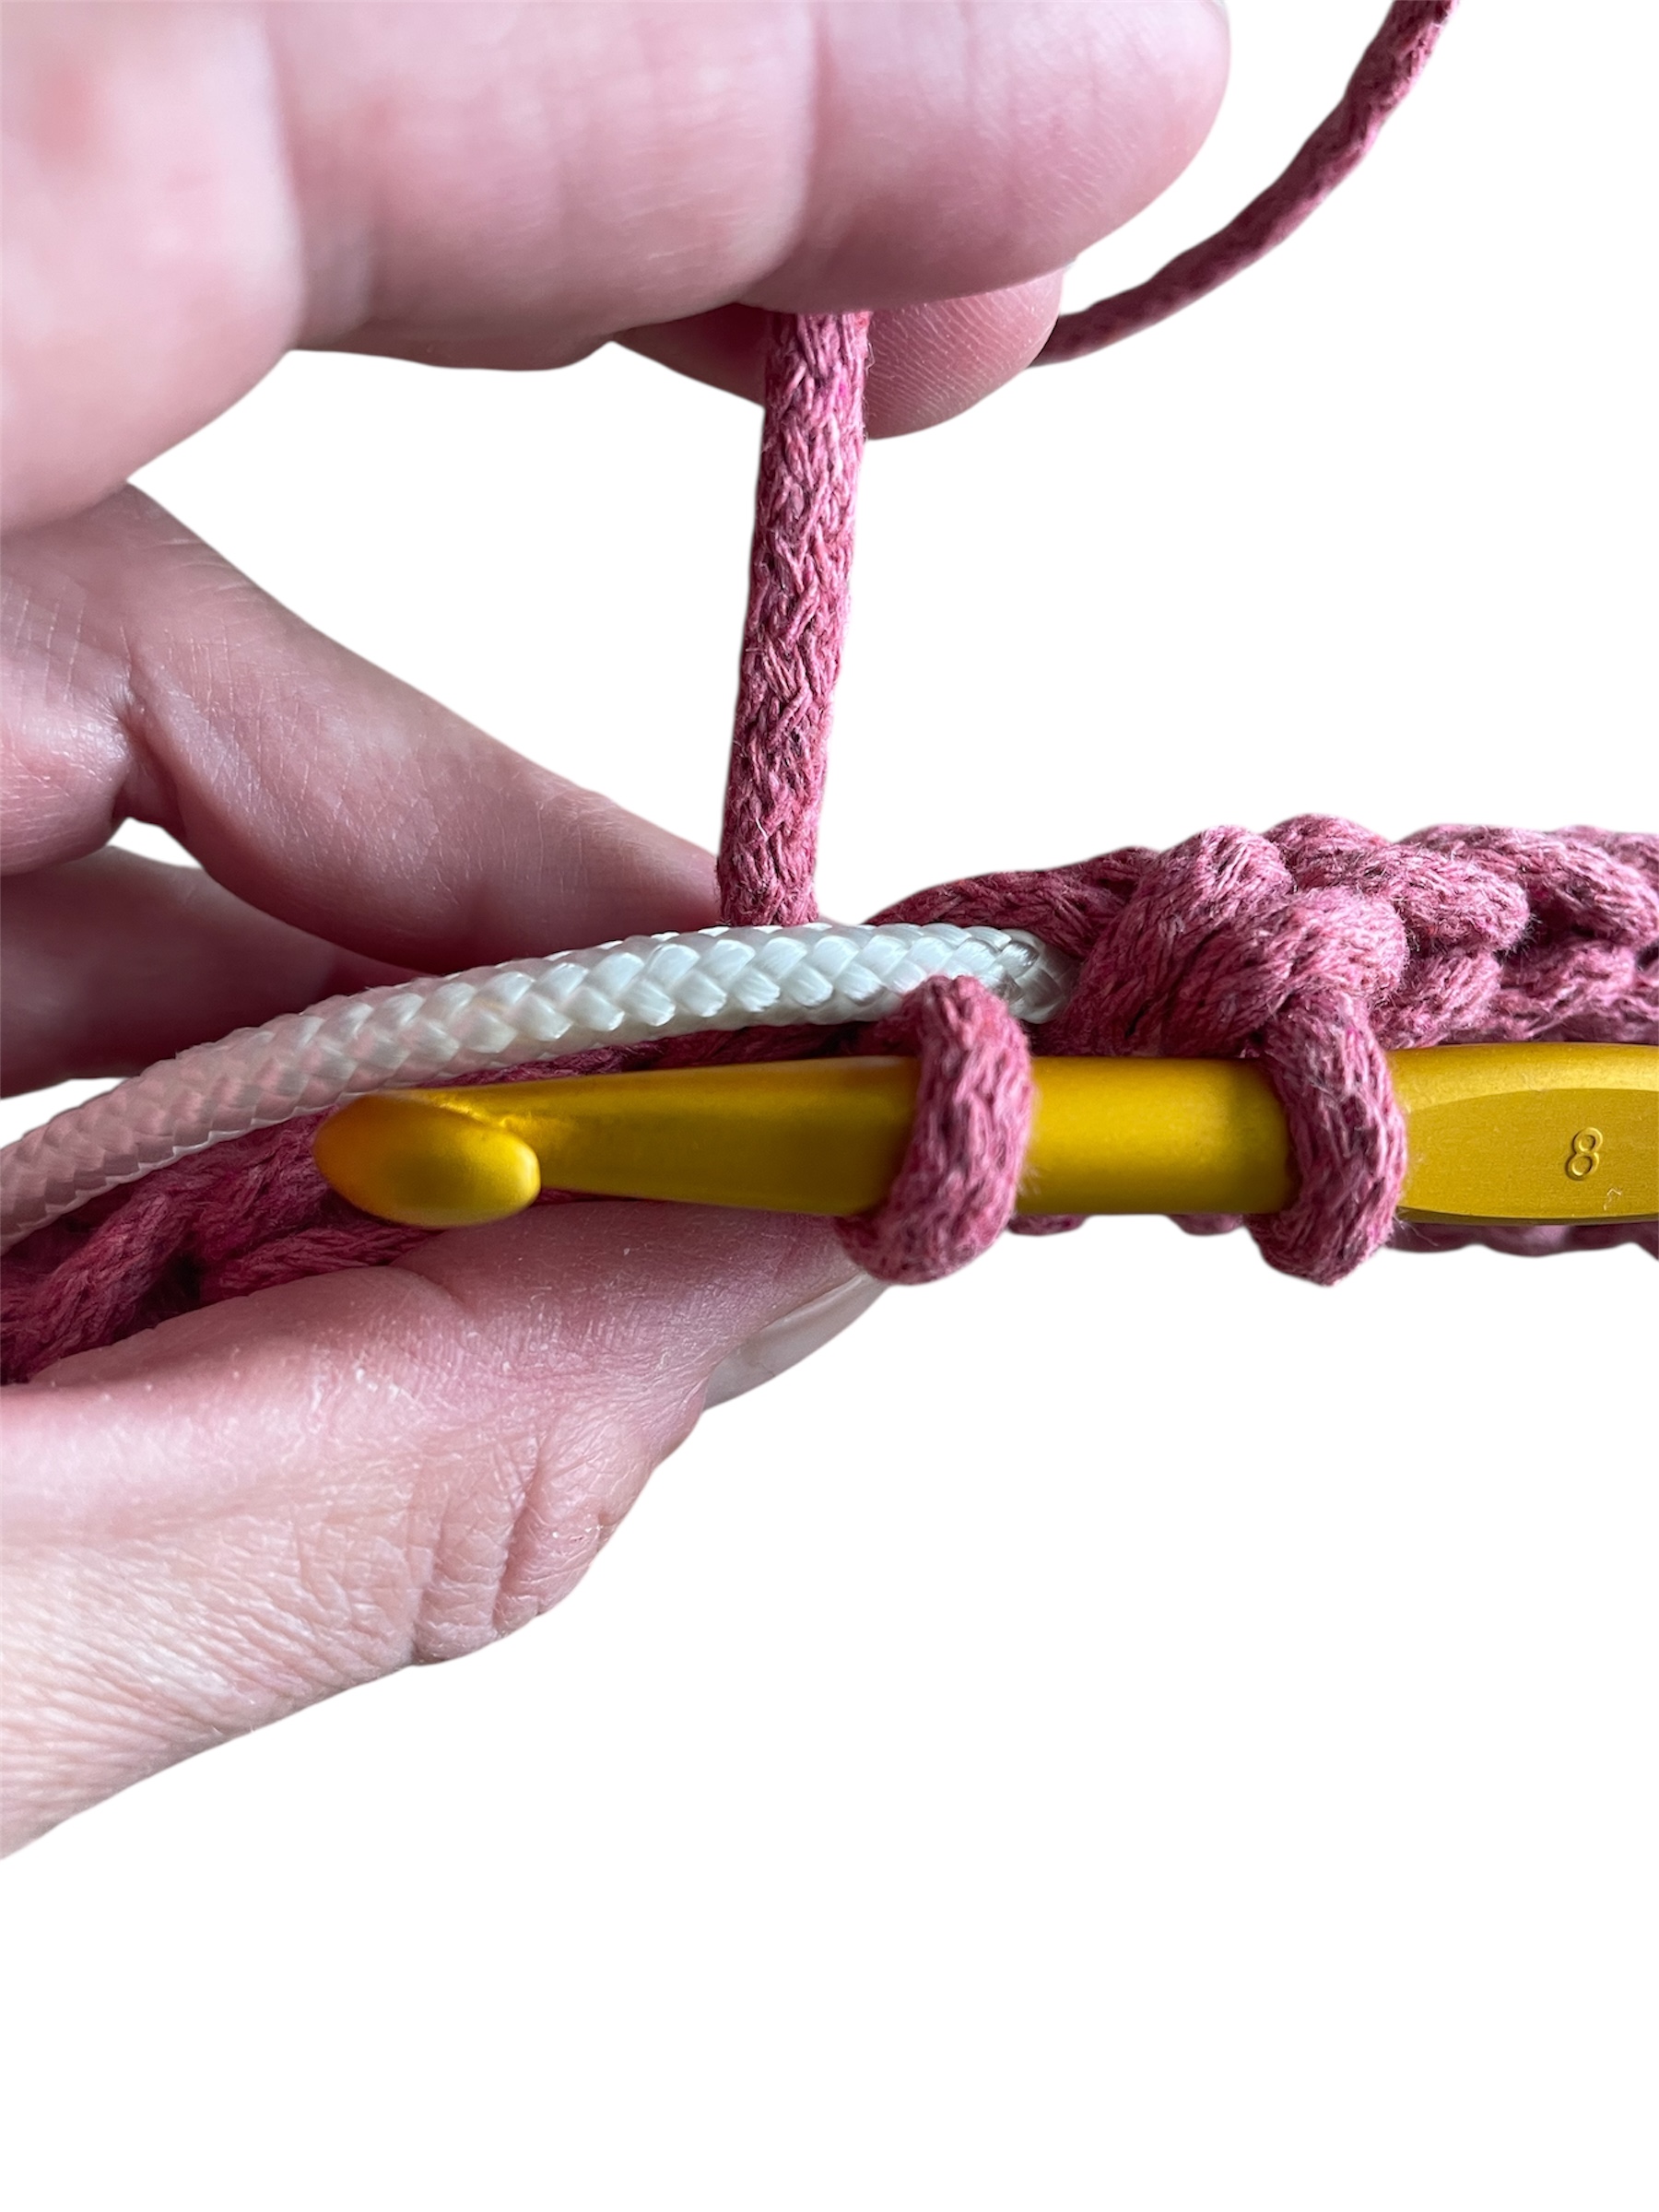
Once you have crocheted one round around the wooden base, you will start working with the flag line. Place the flag line parallel to round 1 and crochet around it in all upcoming rounds. This will make the basket more stable. See pictures below.
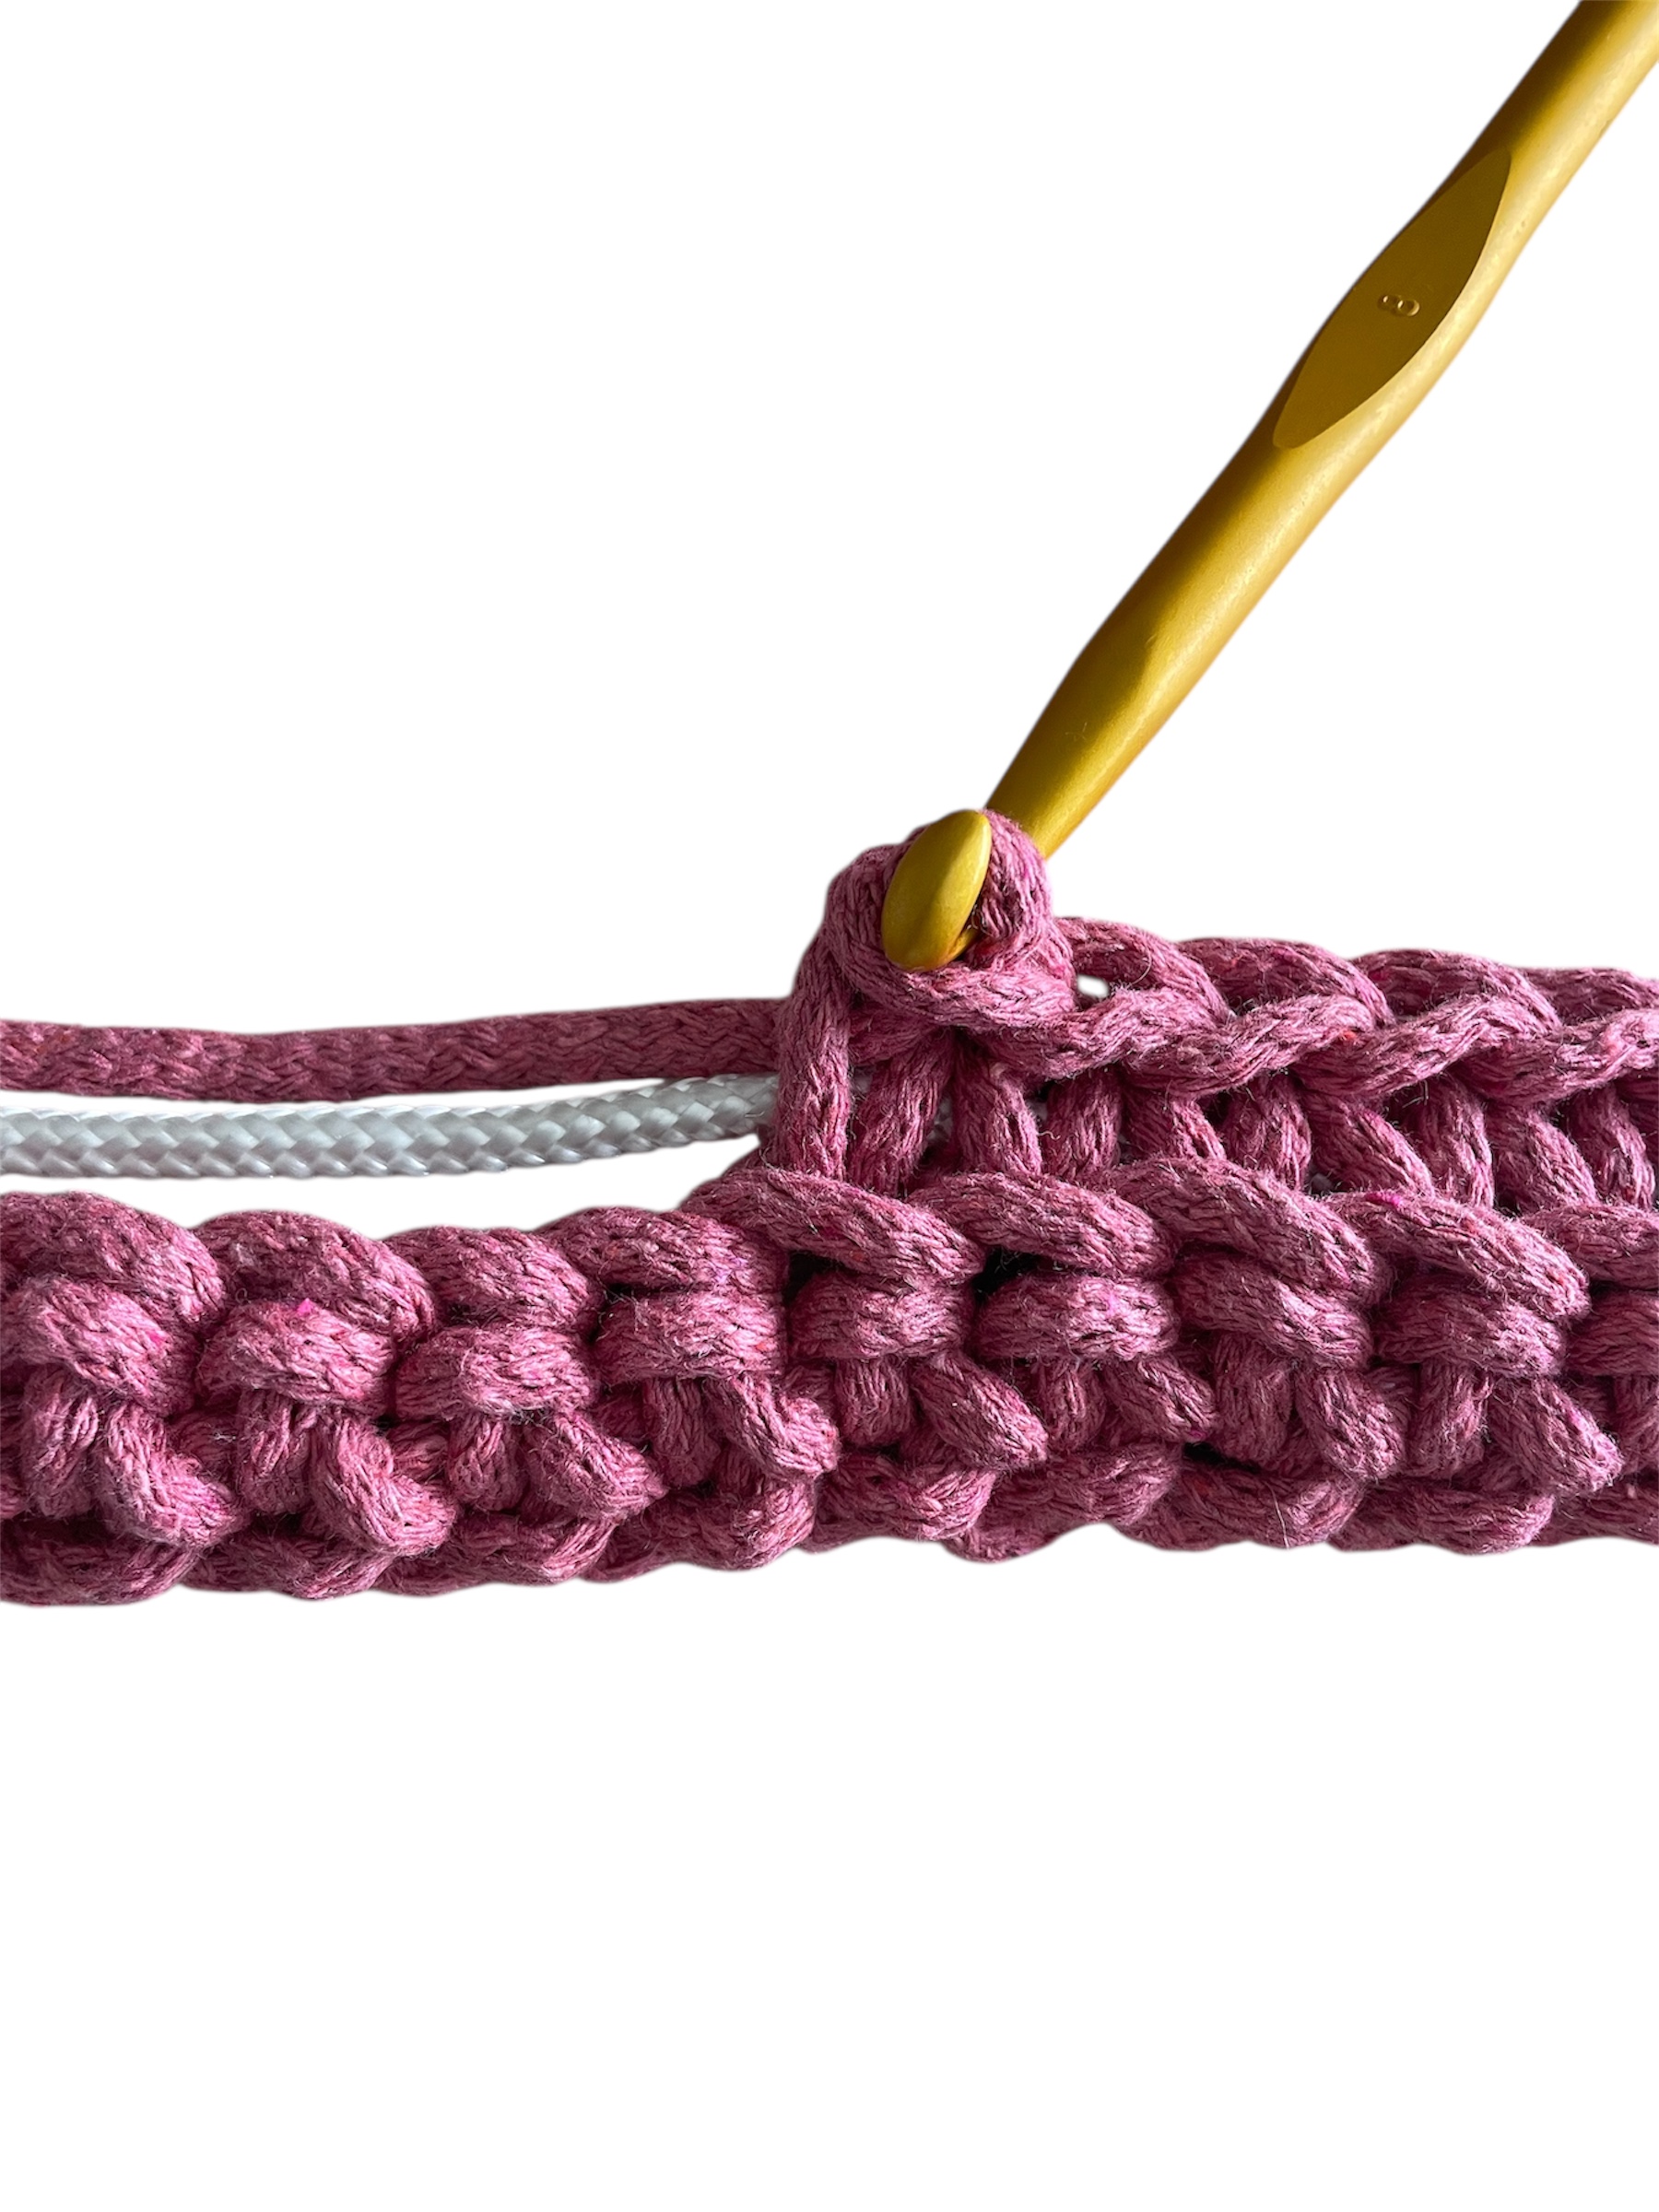
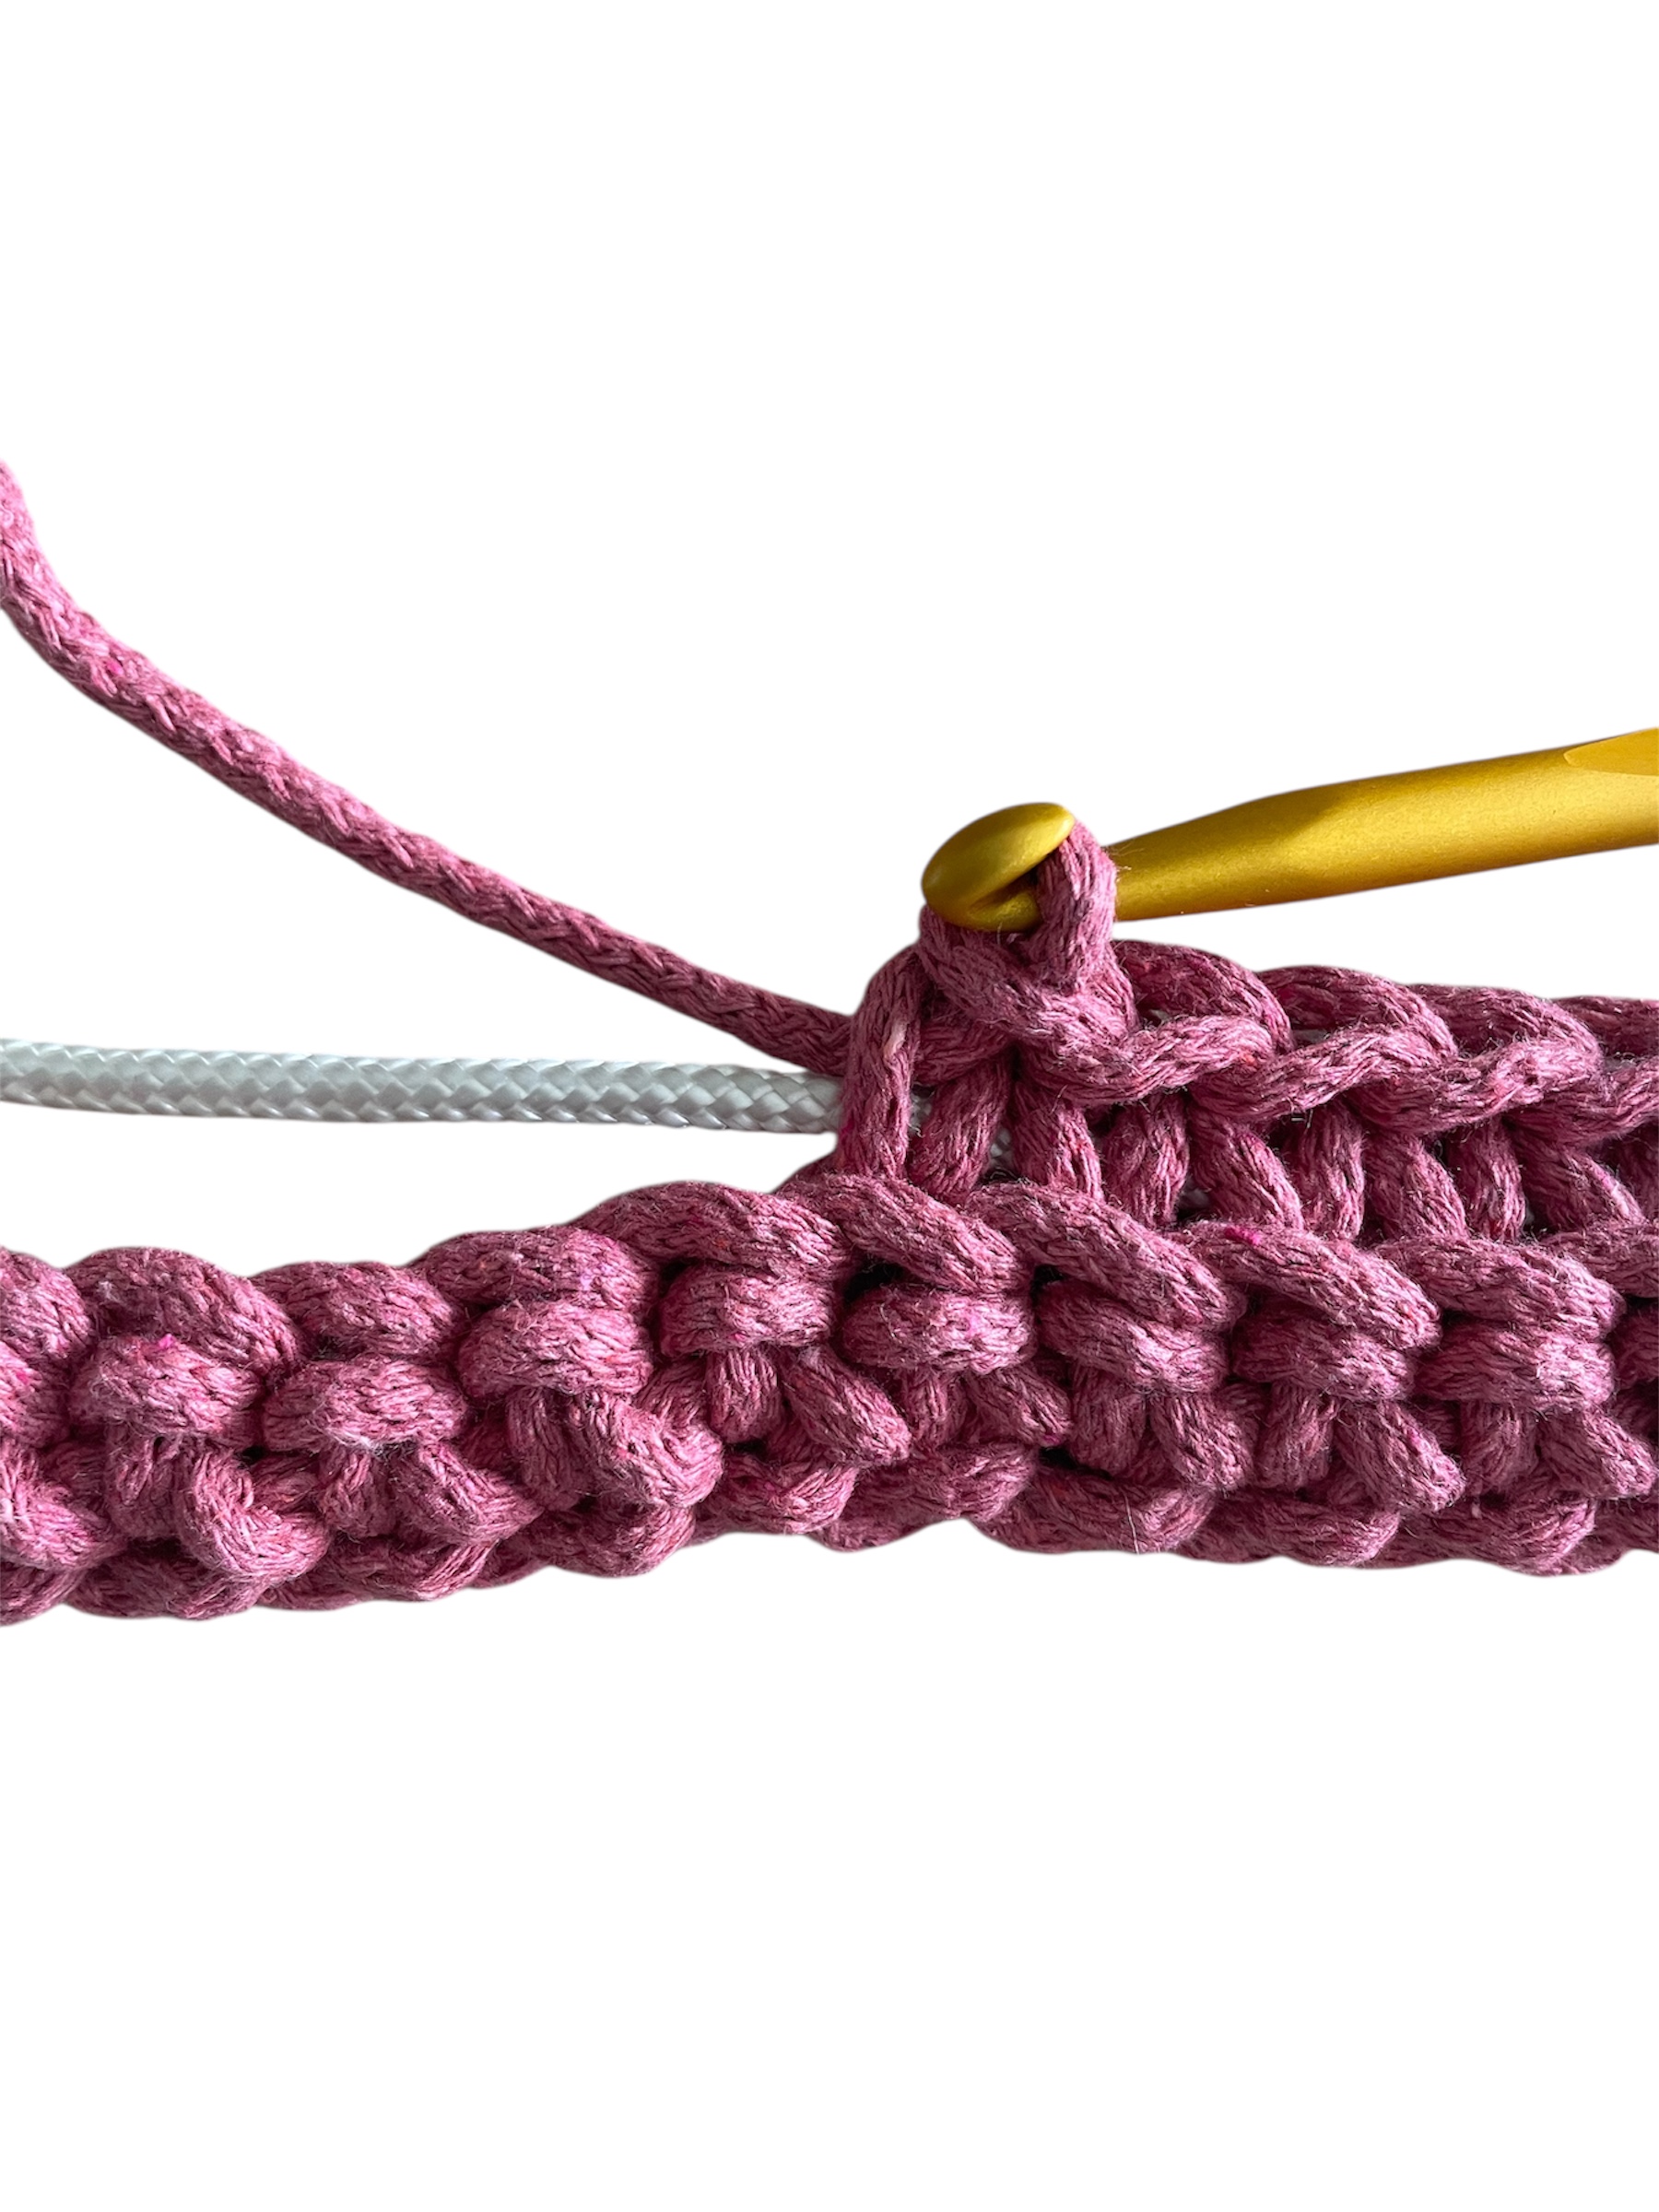
Rounds 2–4: Crochet one single crochet in each stitch, working in the back loop only. If you're unsure which loop is the back loop, refer to the video below.
Round 5: Now it's time to decide how large you want the opening to be. Crochet single crochets in the back loop only until you reach the point where you want the opening to end. Chain 1 and turn.
Round 6: Skip the chain you just made and crochet 1 single crochet in each stitch until you reach the point where the opening should begin. Chain 1 and turn.
Rounds 7–8 (or to your desired height): Skip the chain and crochet single crochets in the back loop only until you reach the other side. Chain 1 and turn.
In the example shown in the pictures, the edge is folded over, but this is optional and up to your preference.
Fasten off the yarn. If you're unsure how to fasten off, refer to the video below.
Now all that’s left is to make the bed cozy and hope your dog or cat loves it :)Feel free to share your finished result with us!
Crochet Terms – US Terminology
Abbreviations:
st = stitch
ch = chain
sc = single crochet
blo = back loop only
sk = skip
(…) = indicates the number of stitches in the current round/row
Now let’s crochet a cozy pet bed (perfect for both dogs and cats)!
Pattern
Round 1: Take your wooden base and crochet sc around it. Use a smaller hook than you’ll use for the rest of the bed. Start on the long side, approximately where you want the opening of the bed to begin later (see image below for placement of the opening).
Once you’ve crocheted around the entire base, it’s time to start working with the flag line. Lay the flag line parallel to Round 1 and crochet with it in all the following rounds. This will make the bed more stable. Use a crochet hook suitable for your yarn.
Rounds 2–4: 1 sc in each st, blo.
Round 5: Now it’s time to decide how large you want the opening to be. Crochet sc in blo until you reach the point where you want the opening to end. Ch 1, turn.
Round 6: Sk the ch you just made, and work 1 sc in each st until you reach where the opening should begin. Ch 1, turn.
Rounds 7–8 (or as tall as you'd like): Sk the ch, and crochet sc in blo until you reach the other side. Ch 1, turn.
In the photos, we’ve folded the edge over for a nice finish – but that’s completely up to you.
Fasten off the yarn. Now all that’s left is to make it comfy and cozy—and hope your dog or cat loves their new bed :)
Feel free to share your finished result with us!
The rights to this pattern belong to MYO Make Your Own. The pattern or its pictures may not be copied, shared or resold either in parts or in its entirety, but you may sell items you have crocheted from this pattern. If you have questions about the pattern, contact MYO at hello@makeyourown.se.
Pattern
Round 1: Take your wooden base, either oval or large round, and crochet single crochets all the way around it. Use a smaller crochet hook than the one you will use for the rest of the project. Start on the long side, roughly where you want the opening of the basket to be later (see image below for reference). If you're unsure how to crochet around a wooden base, see the video below.
Once you have crocheted one round around the wooden base, you will start working with the flag line. Place the flag line parallel to round 1 and crochet around it in all upcoming rounds. This will make the basket more stable. See pictures below.
Rounds 2–4: Crochet one single crochet in each stitch, working in the back loop only. If you're unsure which loop is the back loop, refer to the video below.
Round 5: Now it's time to decide how large you want the opening to be. Crochet single crochets in the back loop only until you reach the point where you want the opening to end. Chain 1 and turn.
Round 6: Skip the chain you just made and crochet 1 single crochet in each stitch until you reach the point where the opening should begin. Chain 1 and turn.
Rounds 7–8 (or to your desired height): Skip the chain and crochet single crochets in the back loop only until you reach the other side. Chain 1 and turn.
In the example shown in the pictures, the edge is folded over, but this is optional and up to your preference.
Fasten off the yarn. If you're unsure how to fasten off, refer to the video below.
Now all that’s left is to make the bed cozy and hope your dog or cat loves it :)Feel free to share your finished result with us!
Crochet Terms – US Terminology
Abbreviations:
st = stitch
ch = chain
sc = single crochet
blo = back loop only
sk = skip
(…) = indicates the number of stitches in the current round/row
Now let’s crochet a cozy pet bed (perfect for both dogs and cats)!
Pattern
Round 1: Take your wooden base and crochet sc around it. Use a smaller hook than you’ll use for the rest of the bed. Start on the long side, approximately where you want the opening of the bed to begin later (see image below for placement of the opening).
Once you’ve crocheted around the entire base, it’s time to start working with the flag line. Lay the flag line parallel to Round 1 and crochet with it in all the following rounds. This will make the bed more stable. Use a crochet hook suitable for your yarn.
Rounds 2–4: 1 sc in each st, blo.
Round 5: Now it’s time to decide how large you want the opening to be. Crochet sc in blo until you reach the point where you want the opening to end. Ch 1, turn.
Round 6: Sk the ch you just made, and work 1 sc in each st until you reach where the opening should begin. Ch 1, turn.
Rounds 7–8 (or as tall as you'd like): Sk the ch, and crochet sc in blo until you reach the other side. Ch 1, turn.
In the photos, we’ve folded the edge over for a nice finish – but that’s completely up to you.
Fasten off the yarn. Now all that’s left is to make it comfy and cozy—and hope your dog or cat loves their new bed :)
Feel free to share your finished result with us!
The rights to this pattern belong to MYO Make Your Own. The pattern or its pictures may not be copied, shared or resold either in parts or in its entirety, but you may sell items you have crocheted from this pattern. If you have questions about the pattern, contact MYO at hello@makeyourown.se.


.jpg)


Share your creations with us
Thank you!
Your comment was sent!