

Here's how to do it

This is what you need:
Here you can directly purchase the material for the product. Please note that the instruction is digital and appears here on the page (no written instruction).

.jpg)
Unleash your creativity
For only 85kr per month you get access to all our 300+ beginner-friendly instructions for crochet, knitting and macrame.
A perfect way to get started with your new hobby!

First, cut two lengths of cord – one 50 cm and one 150 cm. Fold the shorter piece in half and secure the top with a pin onto a soft surface, like a cork mat. Fold the longer piece in half and place it underneath the first piece. See video: 00:50.
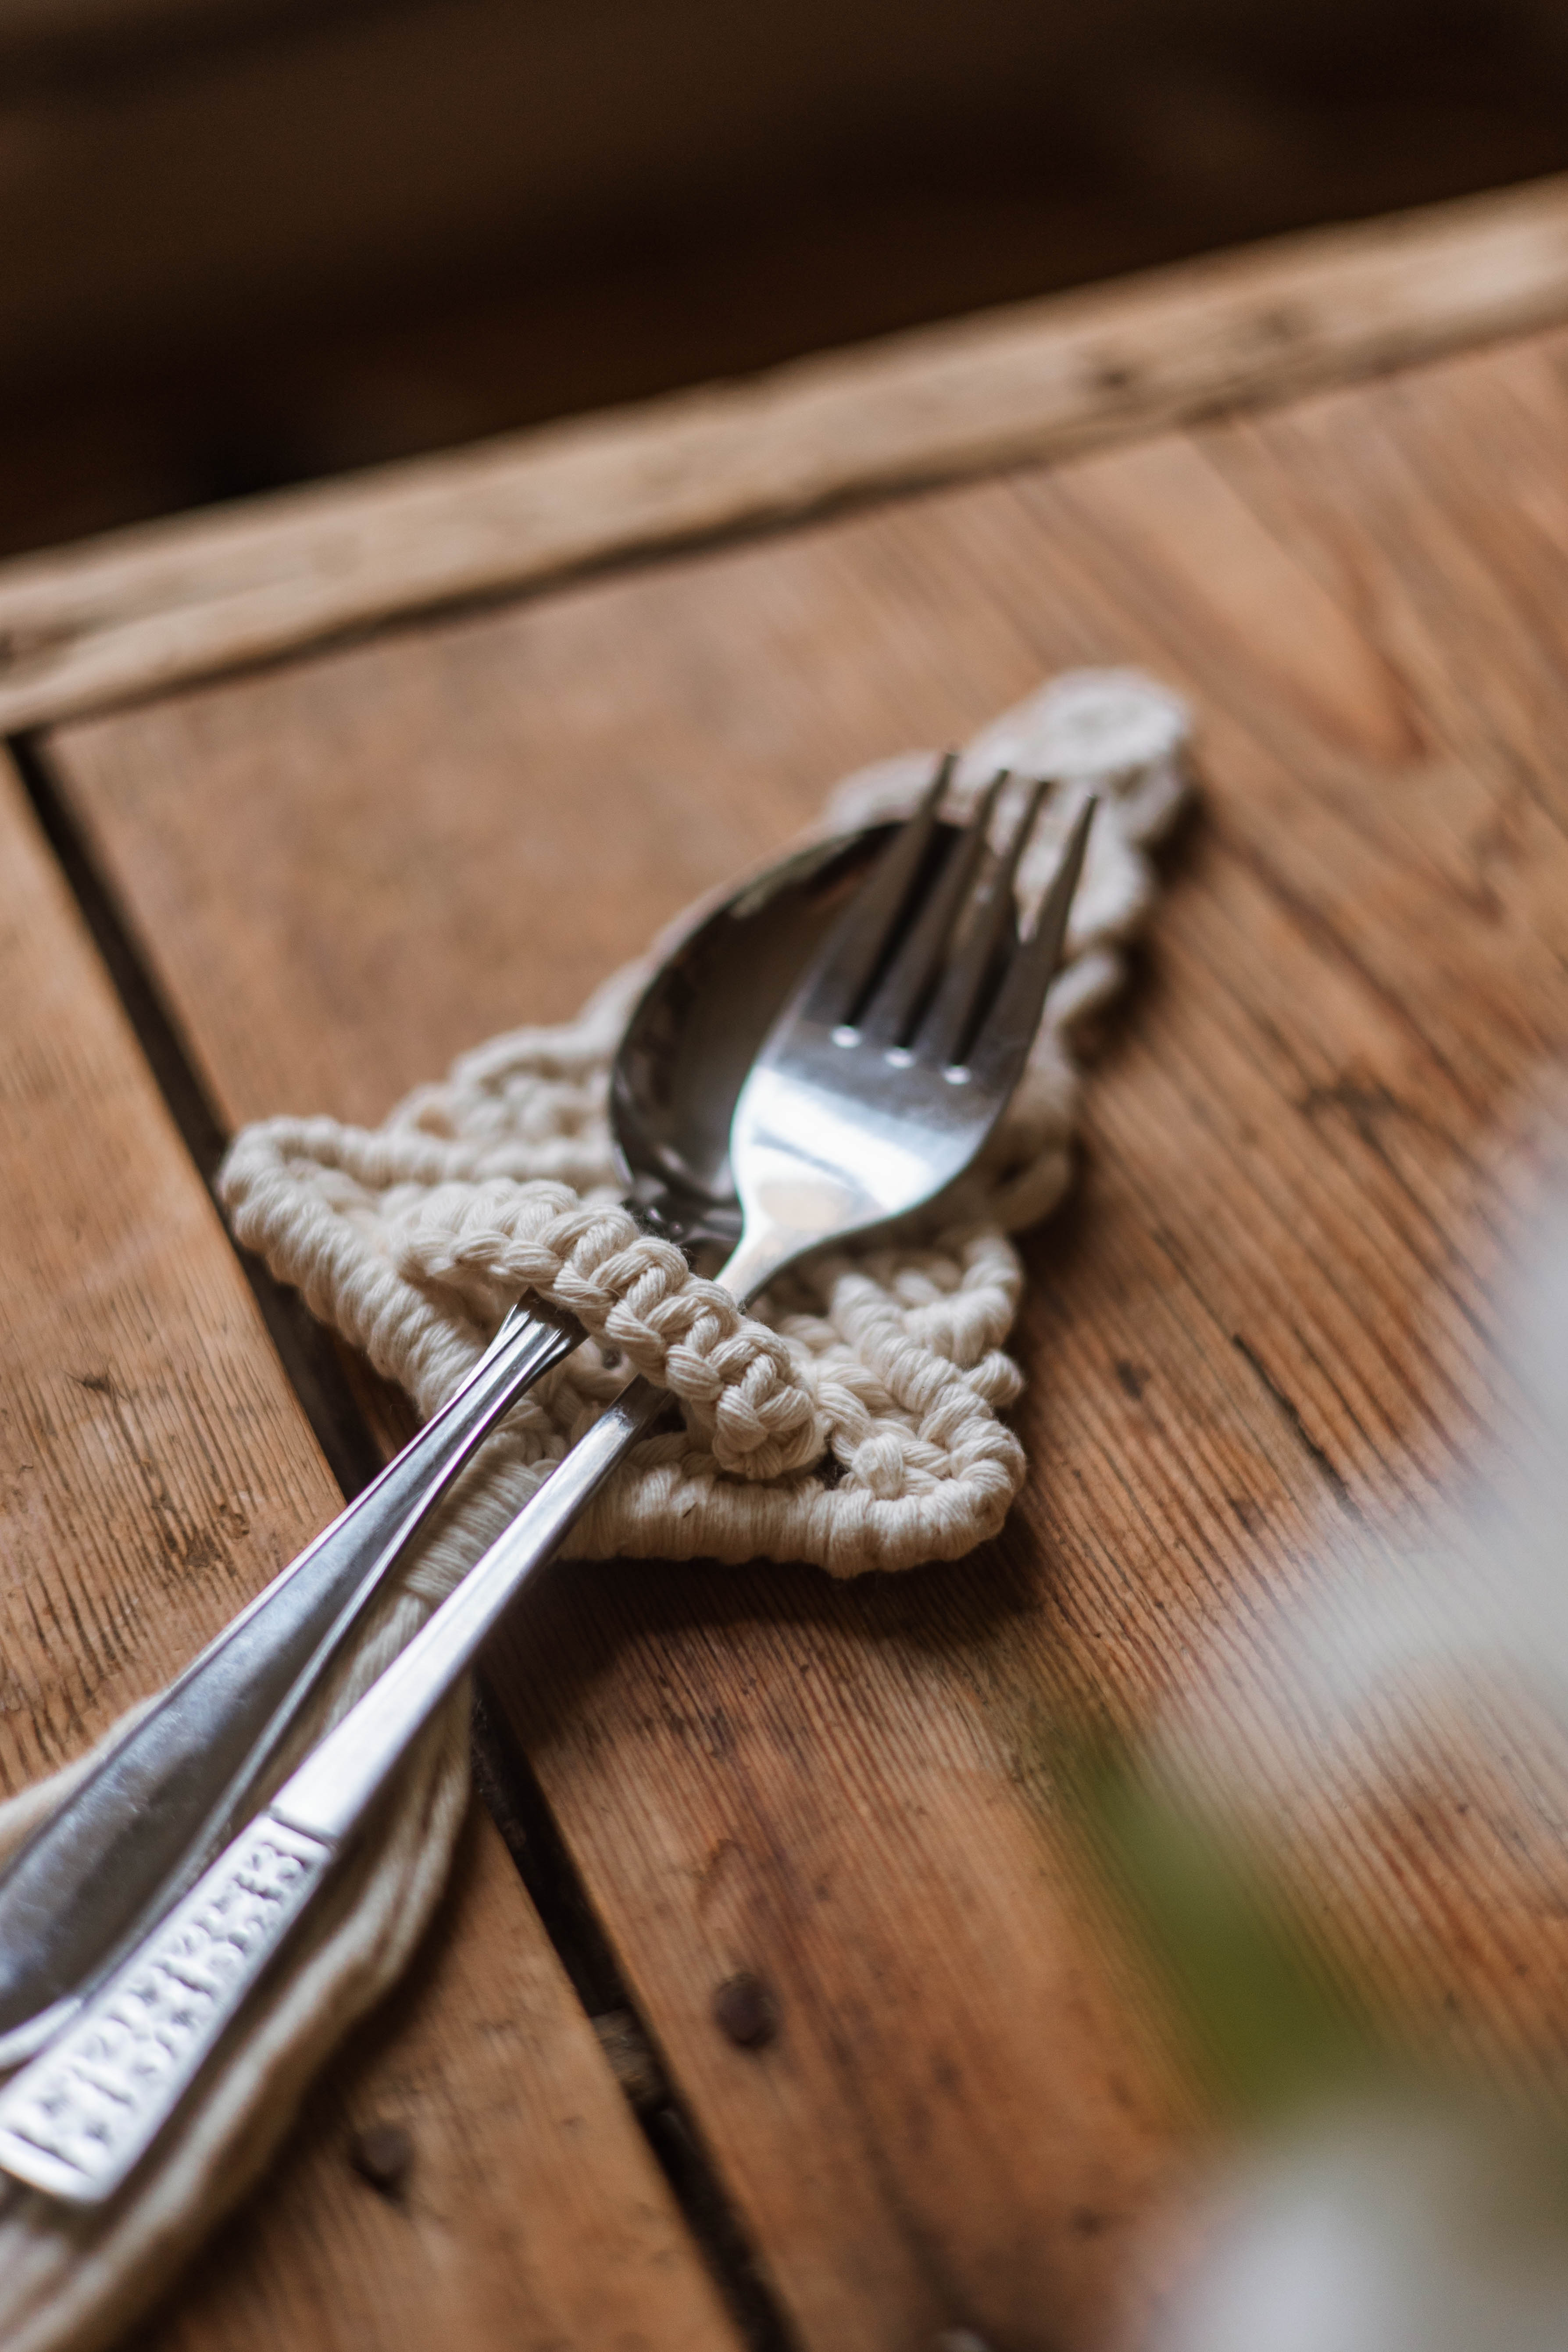
If you want to make a Christmas tree ornament, leave about 3 cm at the top. If you plan to use it to decorate napkins, leave about 5 cm.
Now we’ll make the knots. Start by tying a simple knot with the long cords around the shorter cords.
Square Knot – See video: 1:10
Now we’ll make our first square knot, which will be repeated for the entire tree. Start with the cord on the far right and make a “P” shape by placing it over the middle cord and under the cord on the far left. Then take the left cord, pass it under the middle cord and through the large loop of the “P.” Pull the cord all the way through the “P.” You have now made half of the square knot.
Next, place a finger in between to measure and ensure the correct distance between your first single knot and your square knot.
See video: 3:02
Now we’ll do the same, but the distance between the first square knot and the second should be about 2 fingers. Then increase to 3, 4, 5, and finally 6 fingers between knots. This way, you’ll get nicely spaced branches for your Christmas tree. Once you’ve measured the spacing and tied your square knot, slide the knot upward.
Cut another 50 cm length of cord. Separate the strands in the middle slightly to make it thinner, and discard the other half.
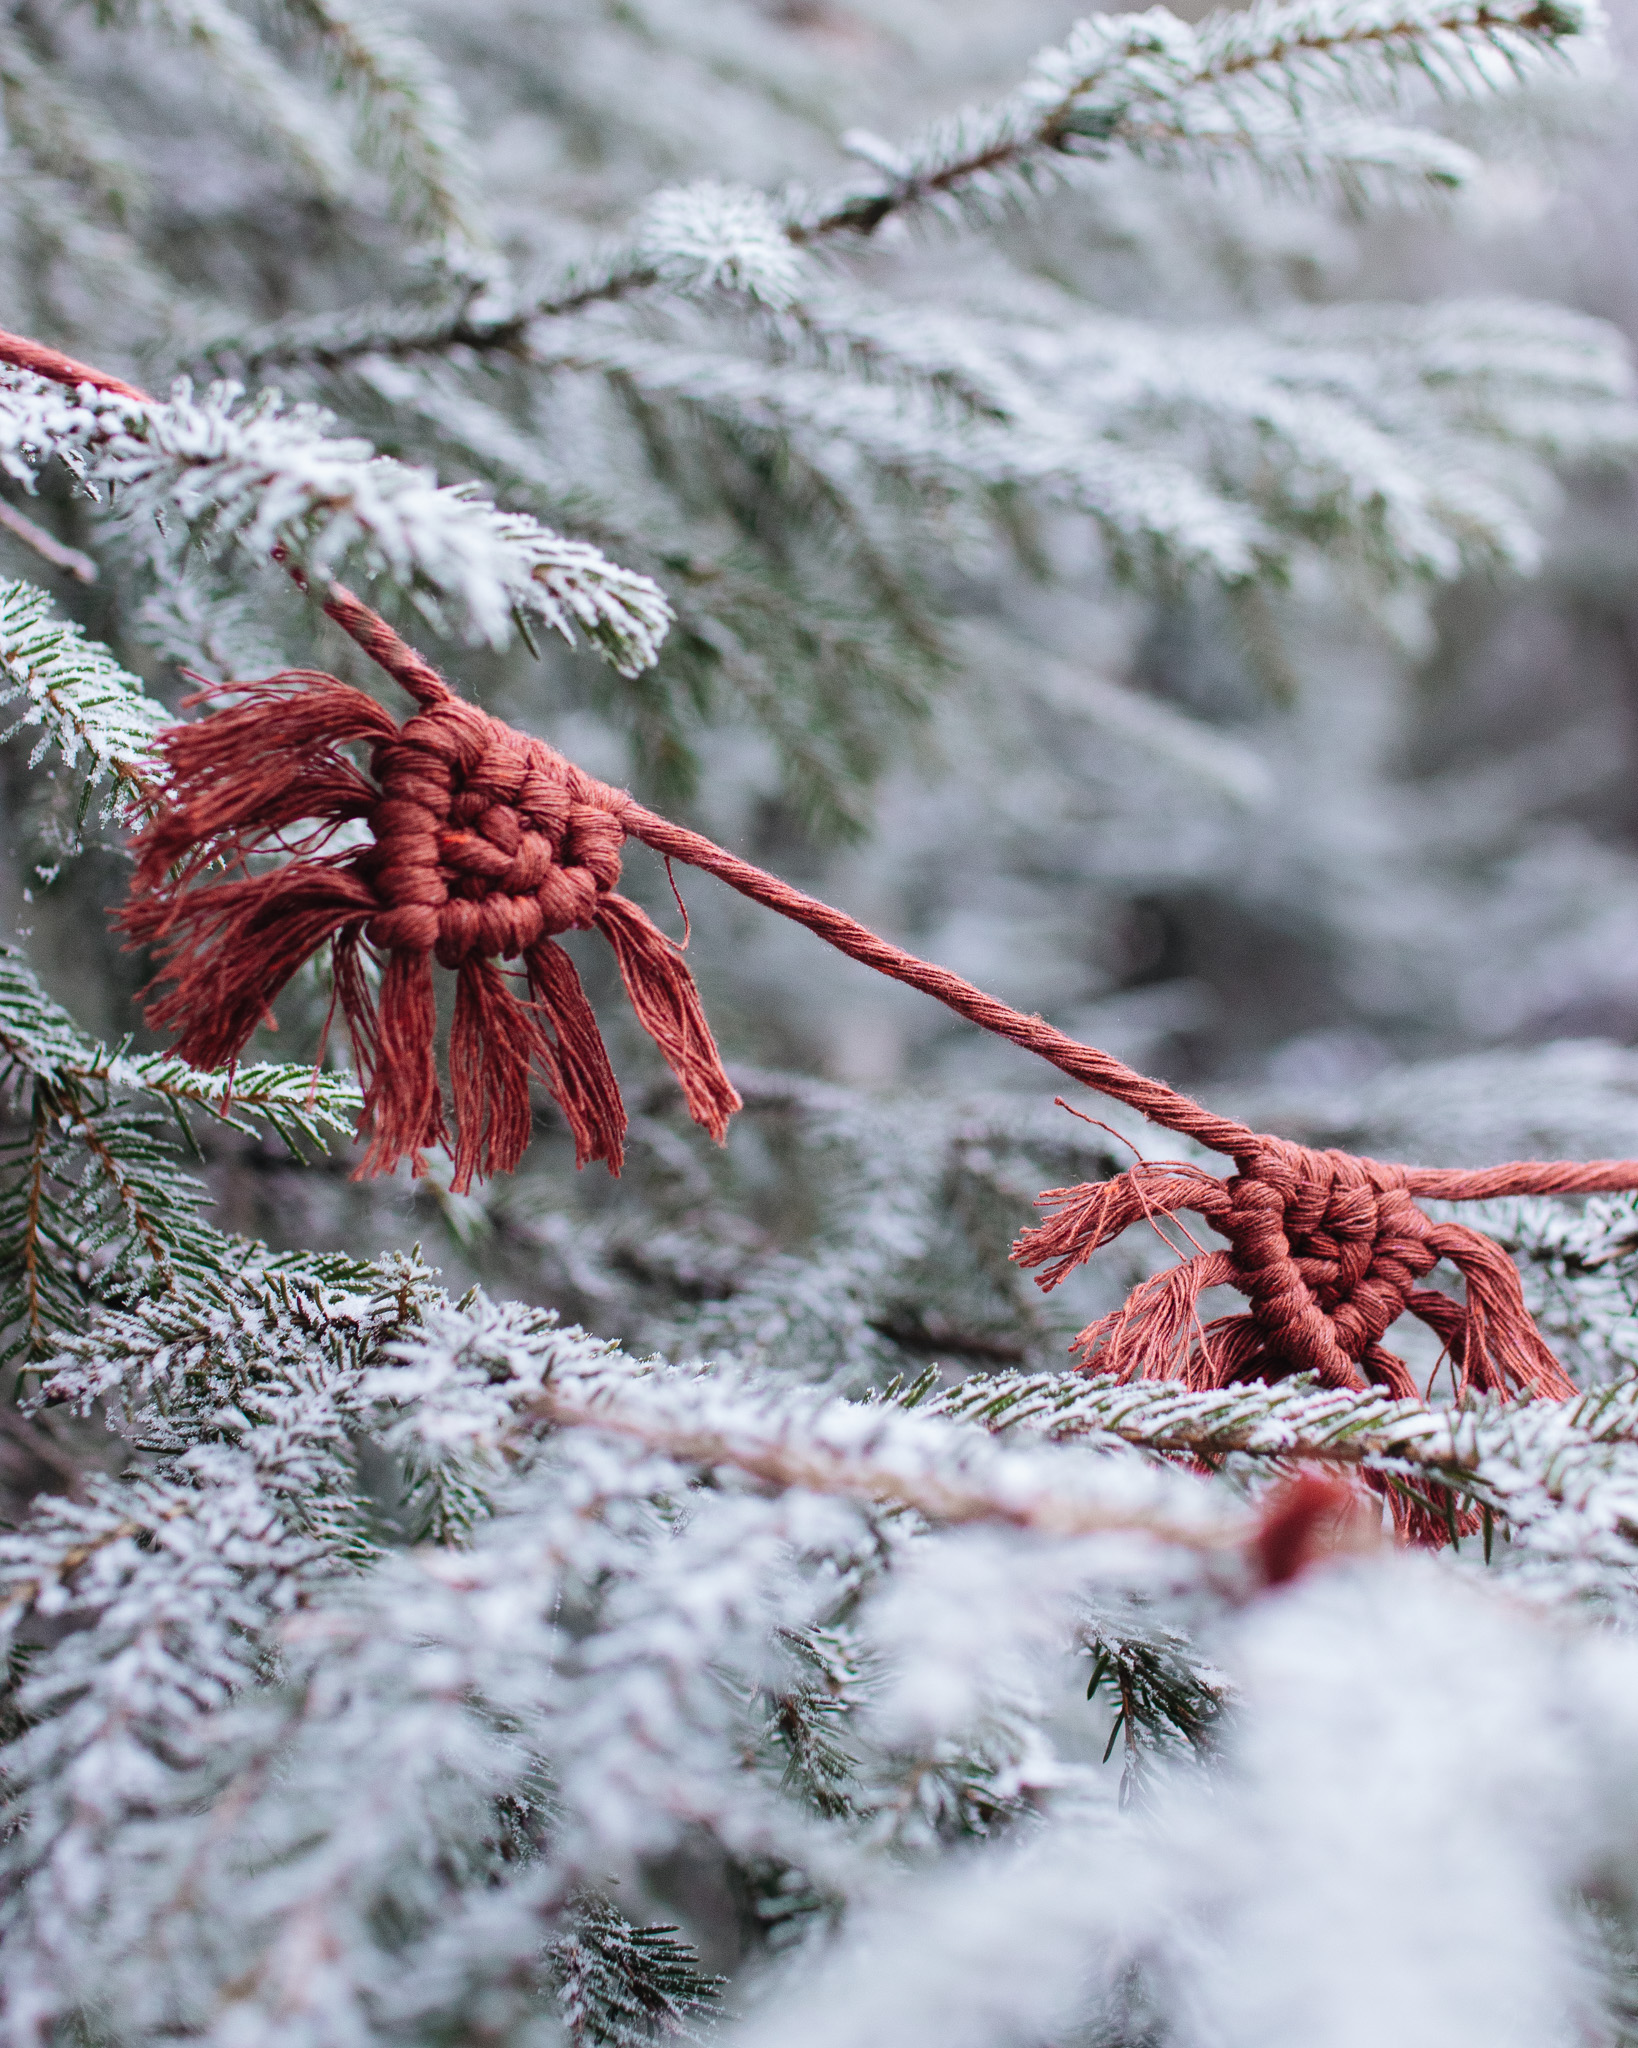
Fringe Knot – See video: 7:55
To secure the tree, make a loop on one side of the cord and place it over the other lengths, under the branches of the tree. Then wrap the long end around all the cords 4 times, finishing by tucking the end into the loop you created. Tighten on both sides. Adjust by sliding the knot upward toward the tree.
Trim any excess ends. Ready to hang on the Christmas tree! :)
The rights to this pattern belong to MYO Make Your Own. The pattern or its pictures may not be copied, shared or resold either in parts or in its entirety, but you may sell items you have crocheted from this pattern. If you have questions about the pattern, contact MYO at hello@makeyourown.se.
First, cut two lengths of cord – one 50 cm and one 150 cm. Fold the shorter piece in half and secure the top with a pin onto a soft surface, like a cork mat. Fold the longer piece in half and place it underneath the first piece. See video: 00:50.
If you want to make a Christmas tree ornament, leave about 3 cm at the top. If you plan to use it to decorate napkins, leave about 5 cm.
Now we’ll make the knots. Start by tying a simple knot with the long cords around the shorter cords.
Square Knot – See video: 1:10
Now we’ll make our first square knot, which will be repeated for the entire tree. Start with the cord on the far right and make a “P” shape by placing it over the middle cord and under the cord on the far left. Then take the left cord, pass it under the middle cord and through the large loop of the “P.” Pull the cord all the way through the “P.” You have now made half of the square knot.
Next, place a finger in between to measure and ensure the correct distance between your first single knot and your square knot.
See video: 3:02
Now we’ll do the same, but the distance between the first square knot and the second should be about 2 fingers. Then increase to 3, 4, 5, and finally 6 fingers between knots. This way, you’ll get nicely spaced branches for your Christmas tree. Once you’ve measured the spacing and tied your square knot, slide the knot upward.
Cut another 50 cm length of cord. Separate the strands in the middle slightly to make it thinner, and discard the other half.
Fringe Knot – See video: 7:55
To secure the tree, make a loop on one side of the cord and place it over the other lengths, under the branches of the tree. Then wrap the long end around all the cords 4 times, finishing by tucking the end into the loop you created. Tighten on both sides. Adjust by sliding the knot upward toward the tree.
Trim any excess ends. Ready to hang on the Christmas tree! :)
The rights to this pattern belong to MYO Make Your Own. The pattern or its pictures may not be copied, shared or resold either in parts or in its entirety, but you may sell items you have crocheted from this pattern. If you have questions about the pattern, contact MYO at hello@makeyourown.se.
%20(1).jpg)


Share your creations with us
Thank you!
Your comment was sent!