
Felted trivet "Tuva"
Crochet a beautiful, heat-resistant trivet and felt it for a lovely finish!
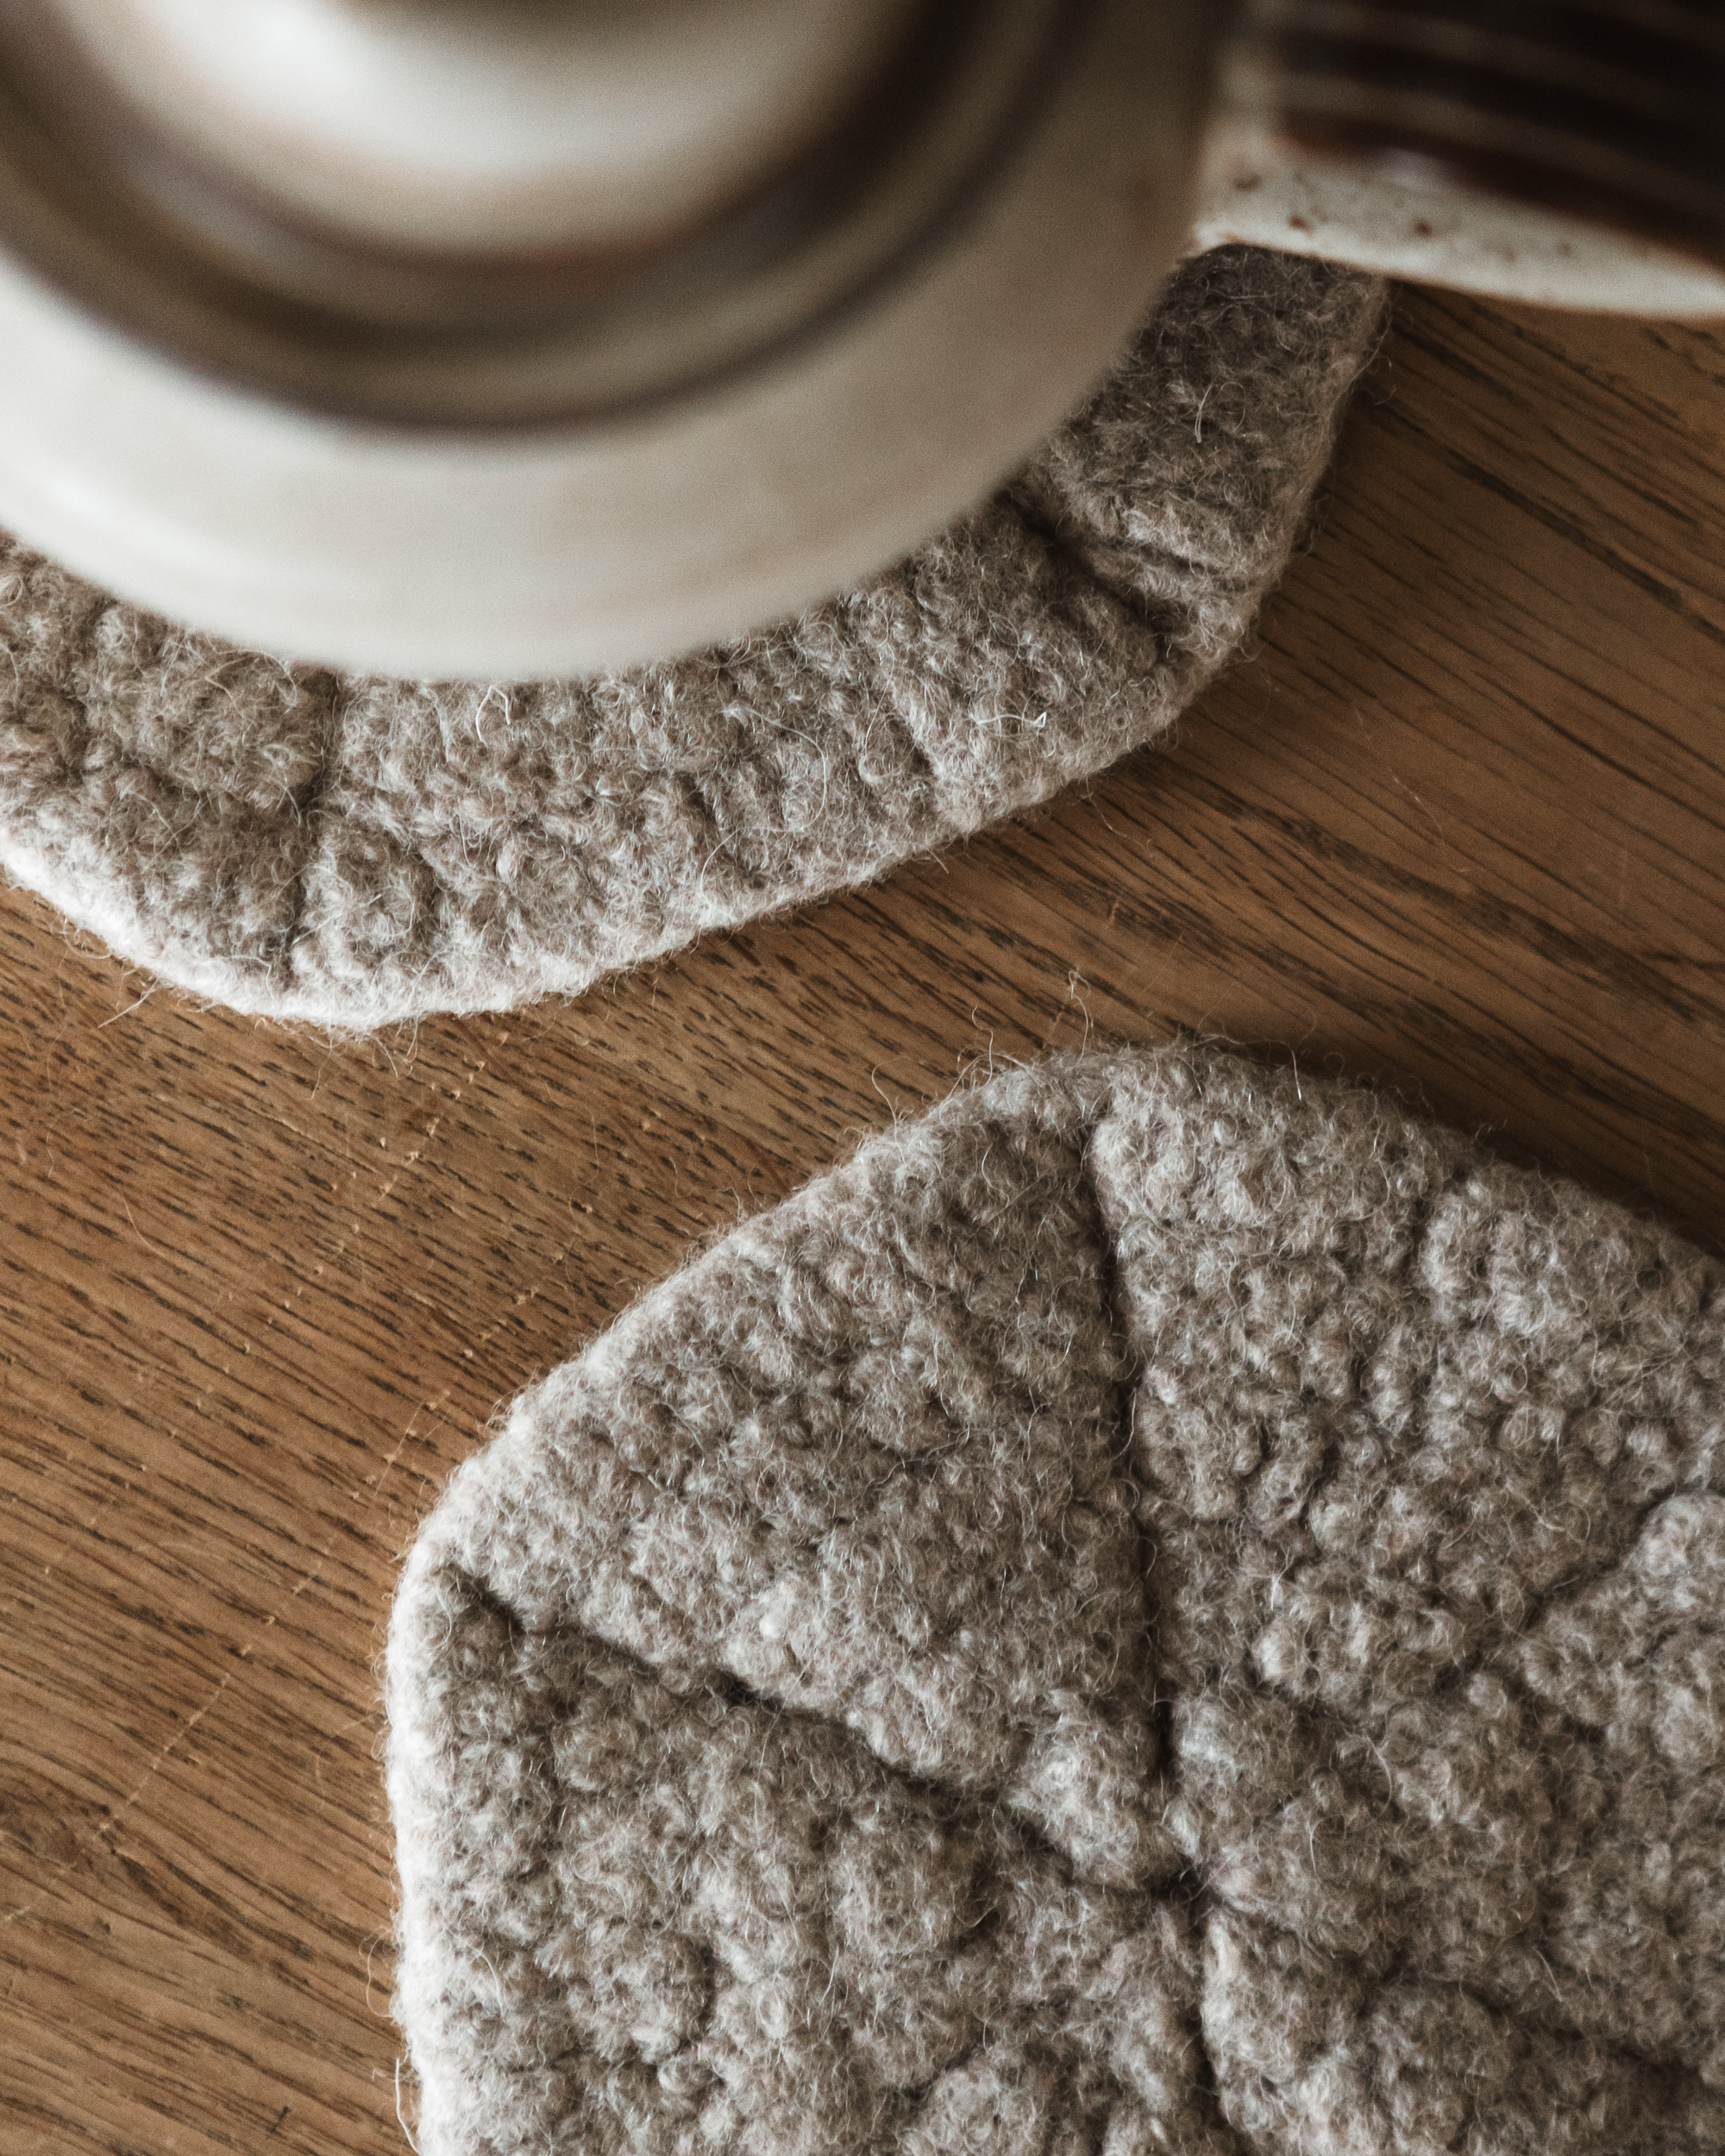
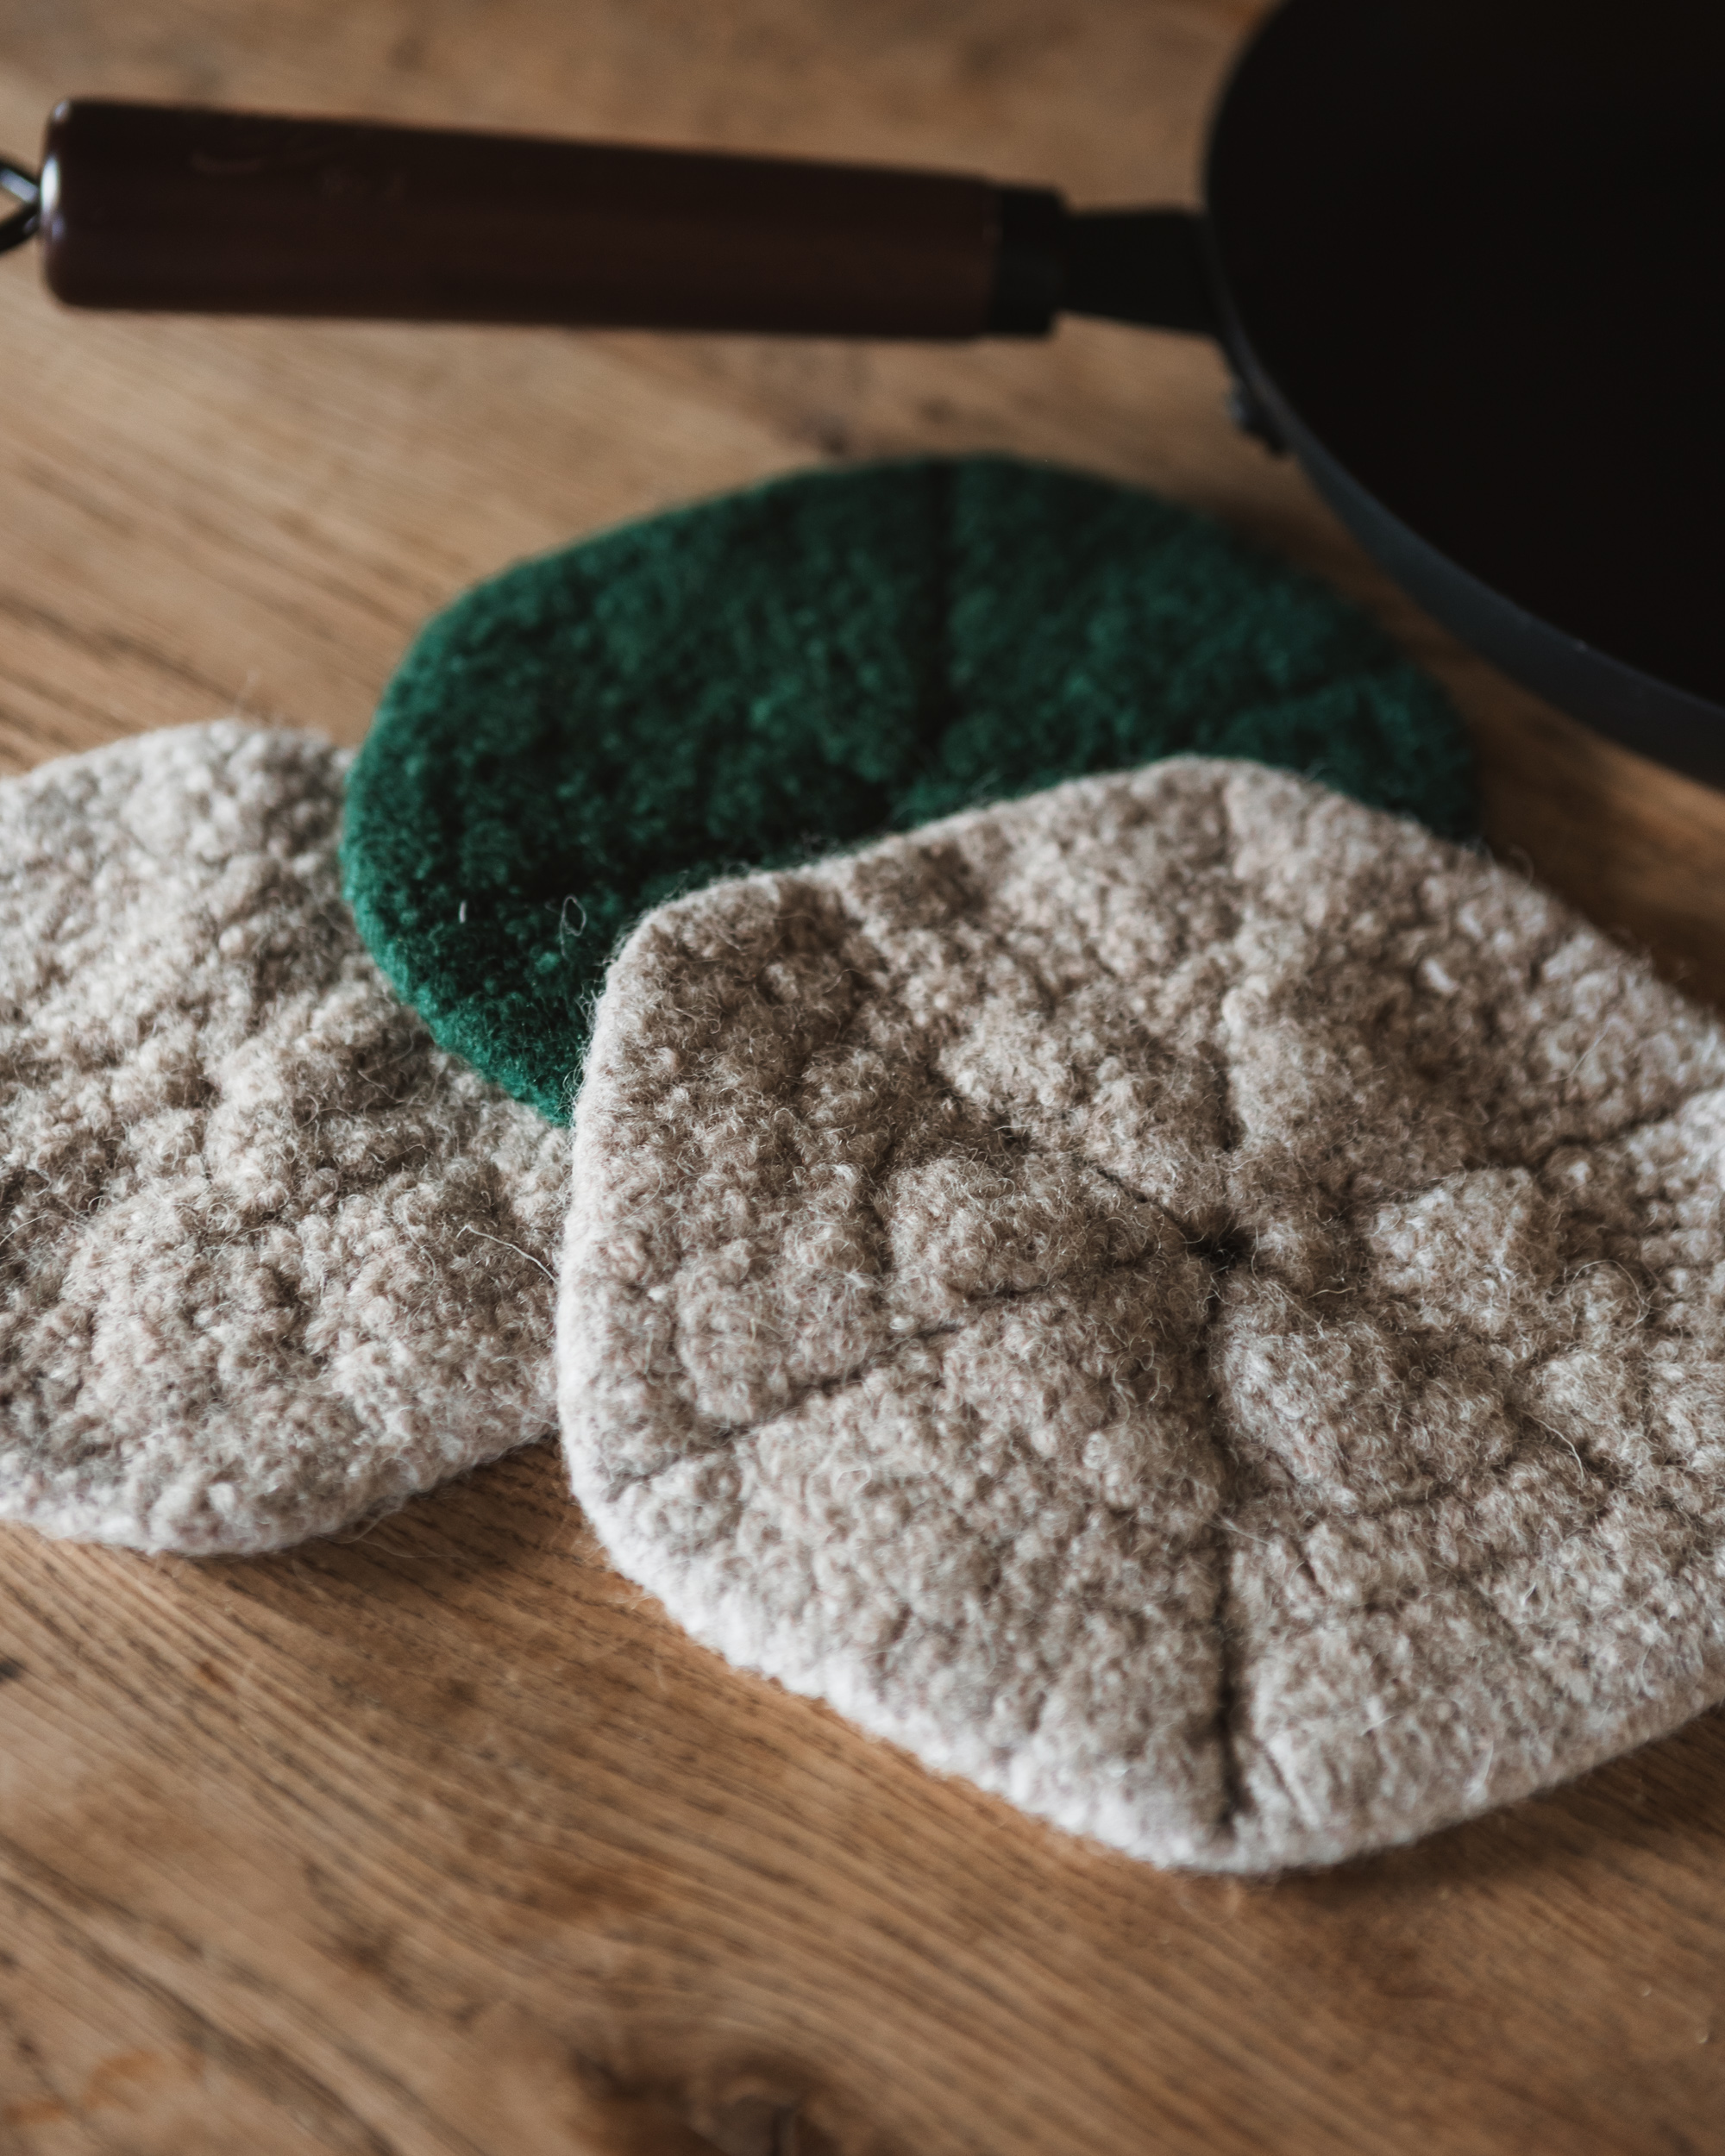
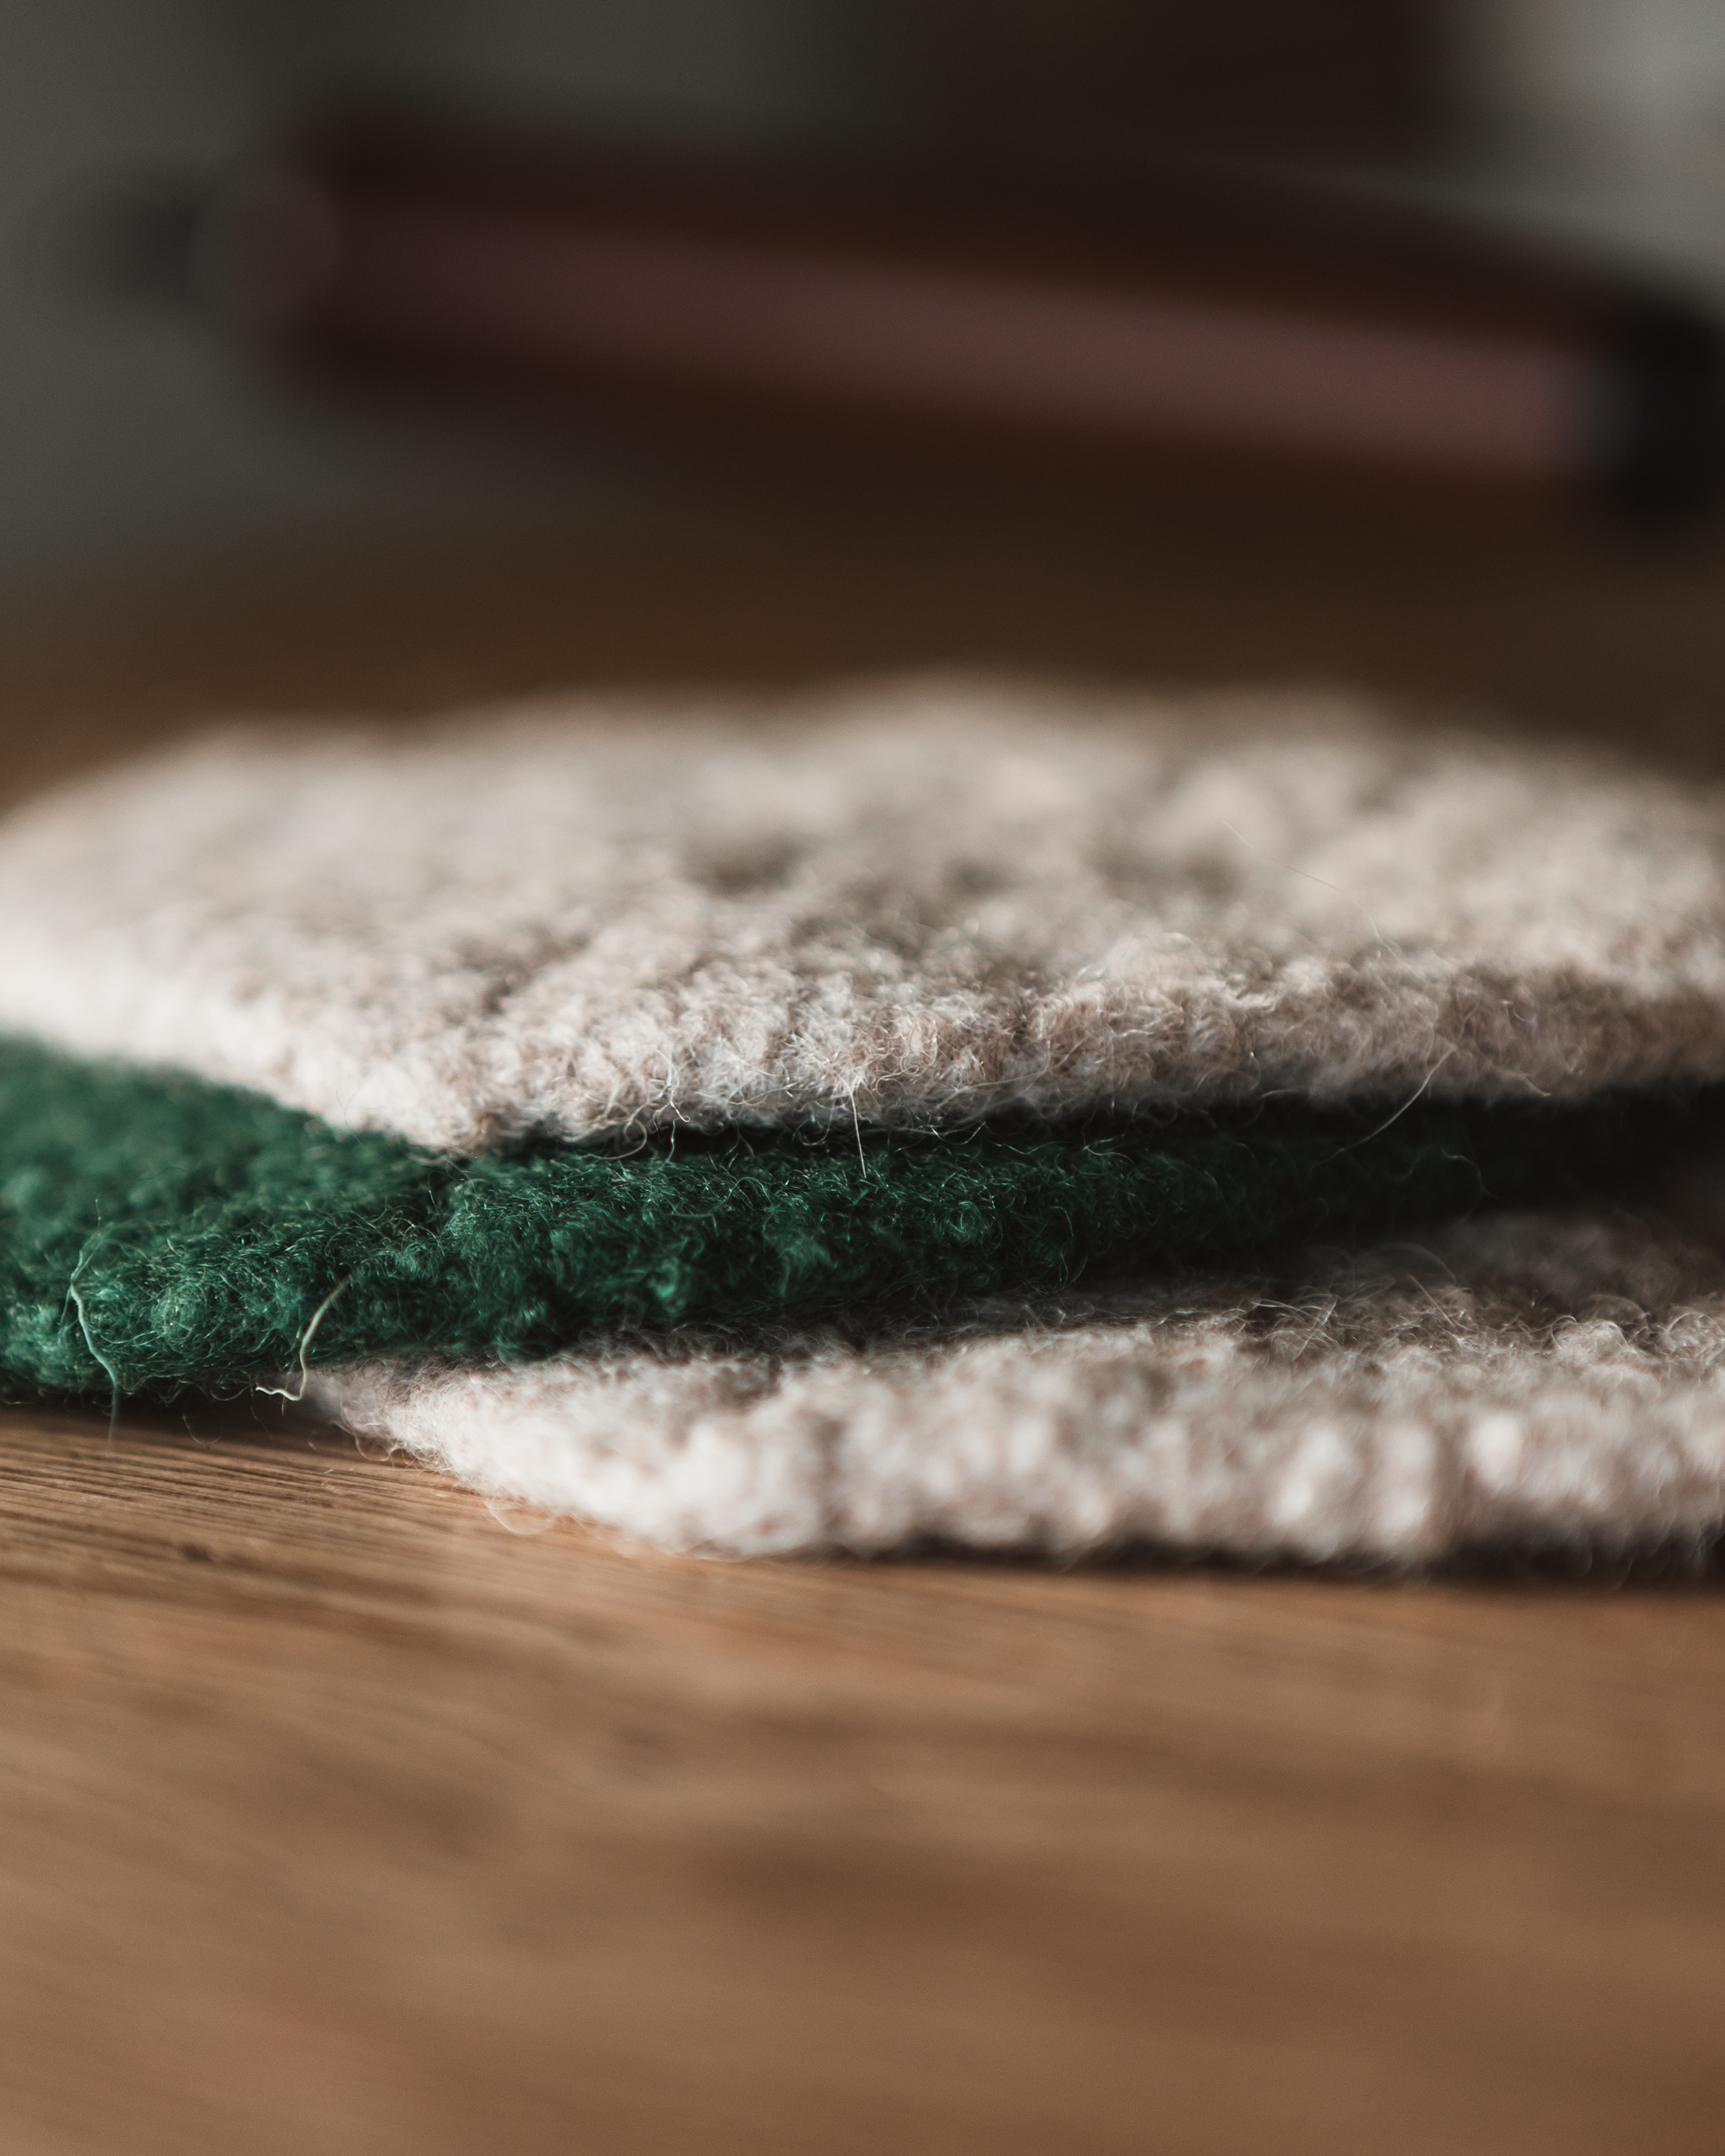
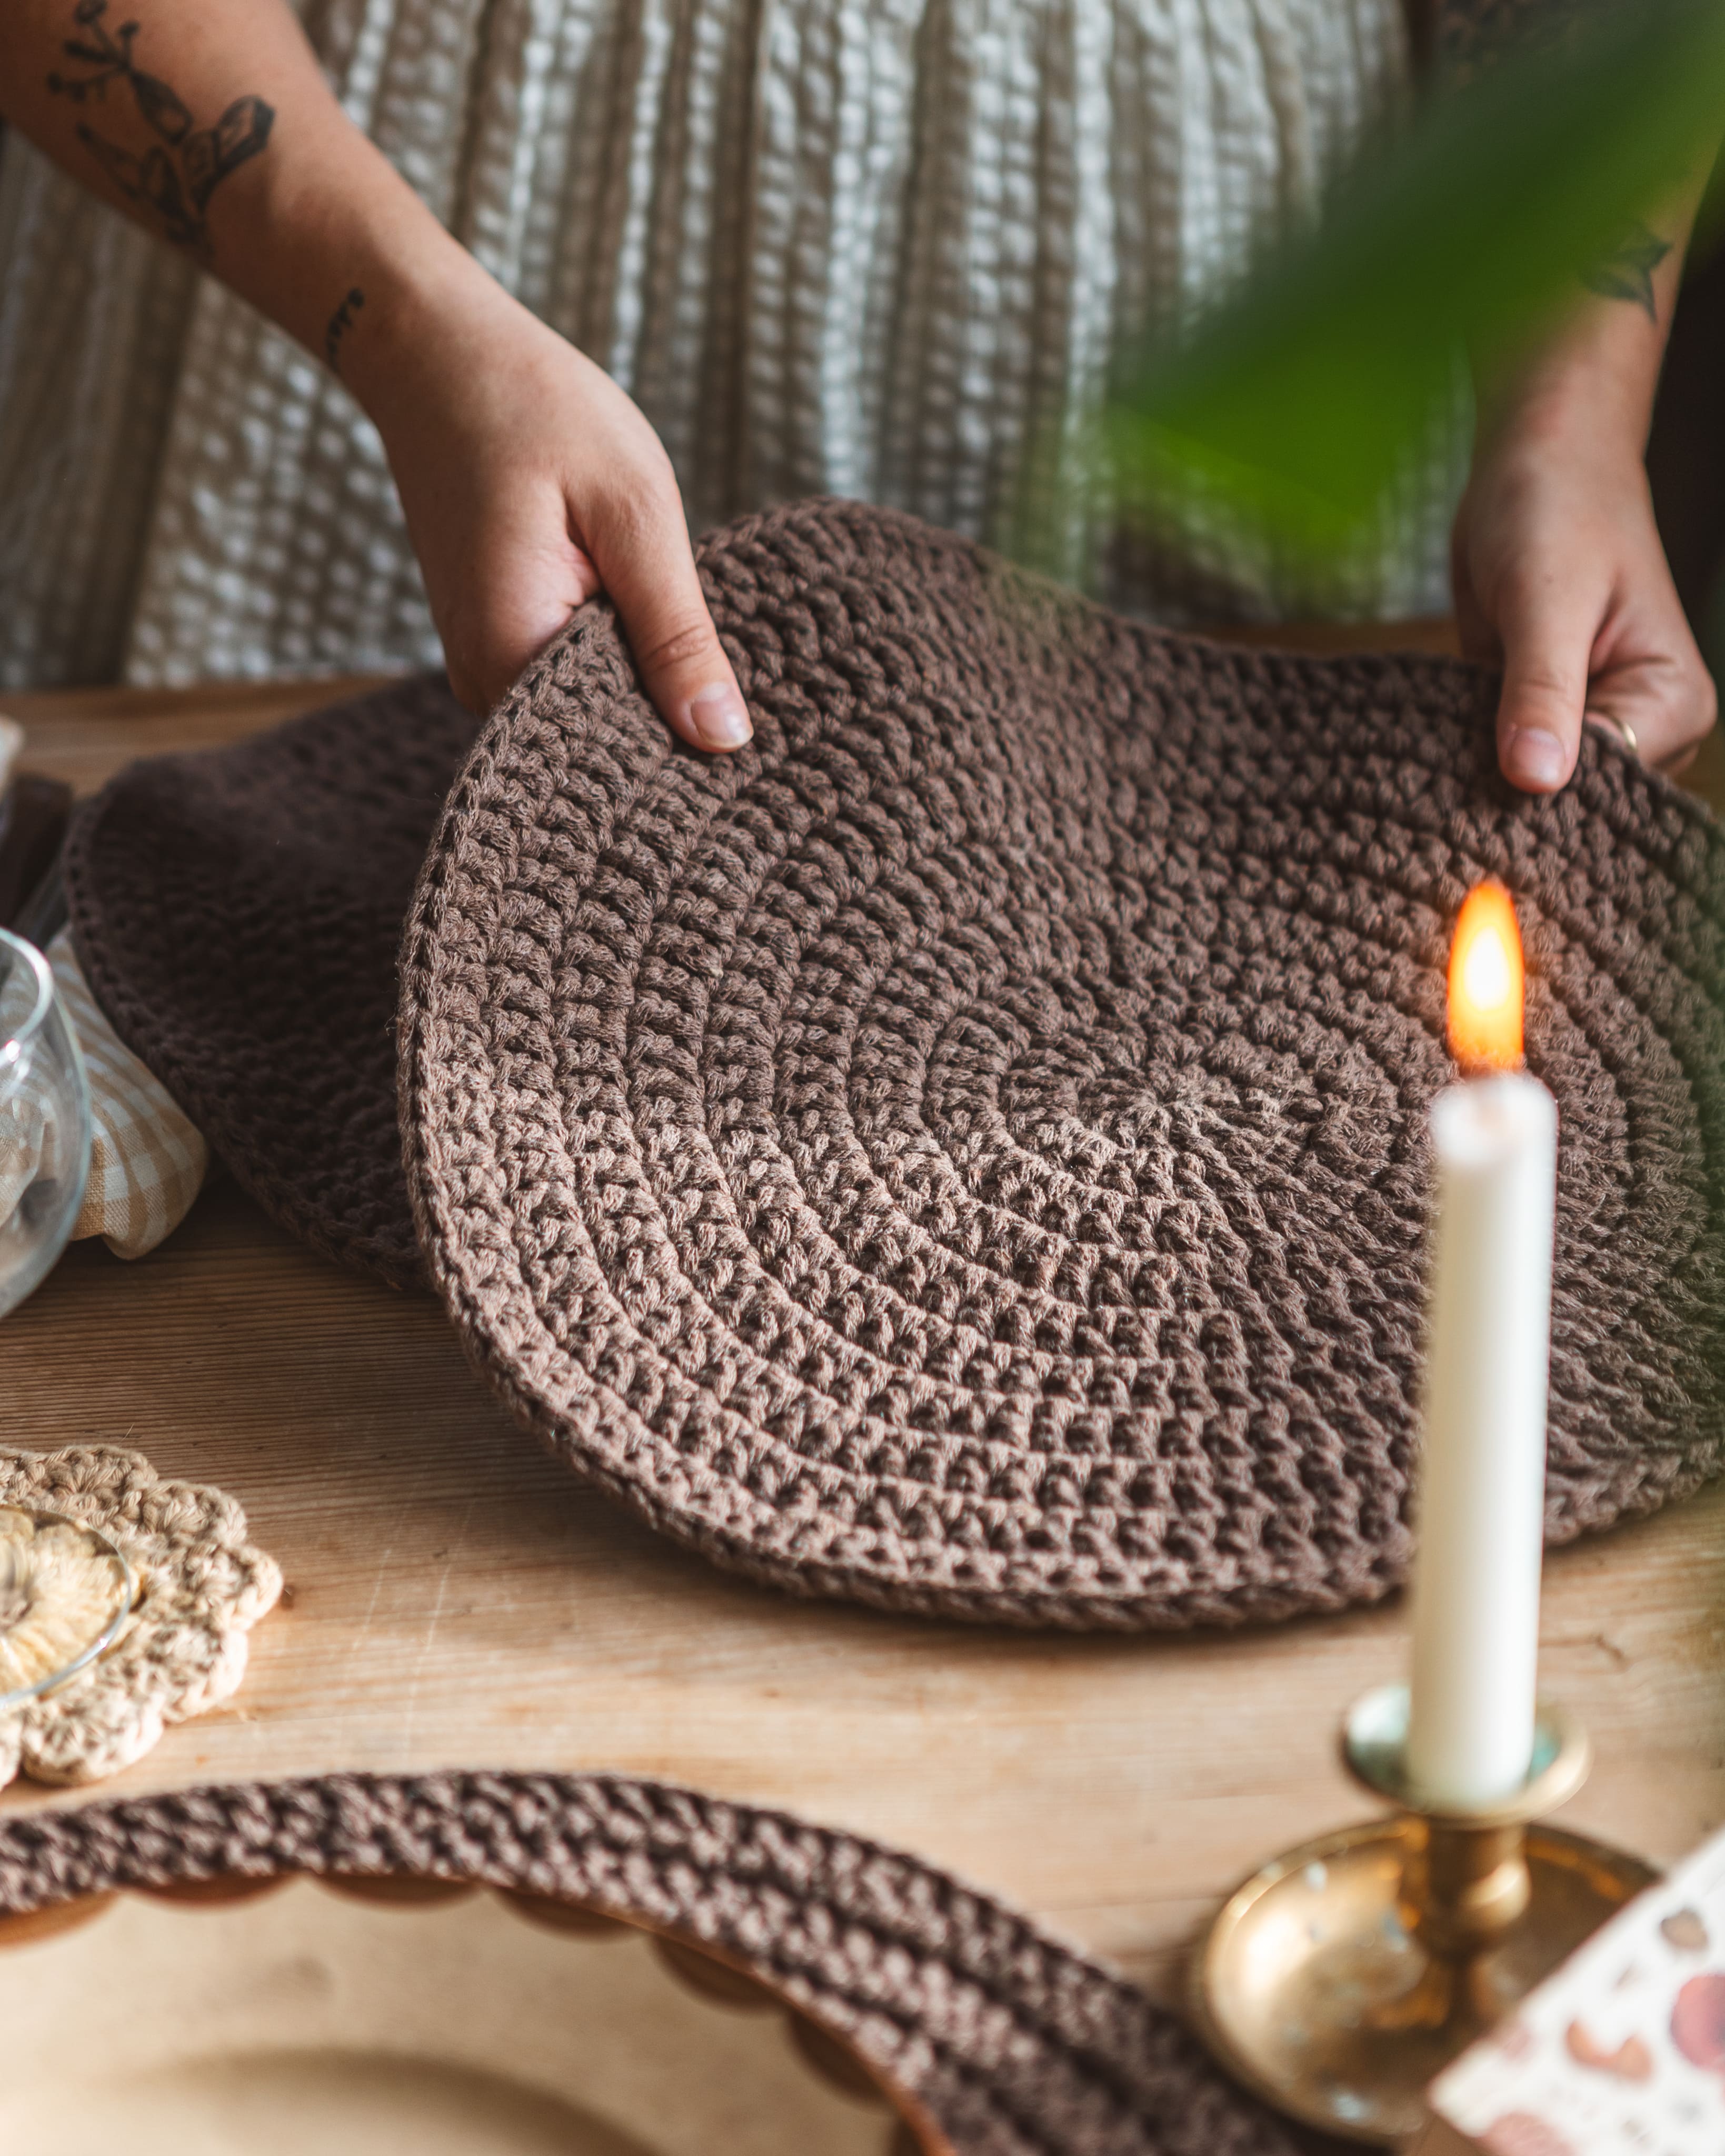
This hexagonal trivet is both fun and easy to crochet. Once felted, it becomes thick, soft and durable – perfect for use as a trivet or potholder. A lovely addition to your kitchen and a thoughtful handmade gift. It's also a great project if you want to try felting for the first time!
You will need Soft Wool and a 6 mm crochet hook. The colour used in the photos is Dark Green.
Yarn required: Approximately 45 g per trivet. Finished size after felting: approximately 19 cm in diameter.



Here's how to do it
You can easily adjust the size of your trivet by crocheting more or fewer rounds. Use the basic pattern as a starting point and follow the instructions to adapt it to your desired size. The trivet is felted by washing it in the washing machine at 40°C. Keep in mind that the item will shrink quite a bit during the felting process. A tip is to start by crocheting one trivet using the basic pattern and washing it according to the instructions before making any adjustments. This will give you an idea of how much your trivet shrinks and how your particular washing machine affects the felting process. /Rebecca

This is what you need:
Here you can directly purchase the material for the product. Please note that the instruction is digital and appears here on the page (no written instruction).


Your next favorite project is waiting
Get access to this pattern and over 300 other beginner-friendly projects for crochet, knitting, and macramé.
Then 85 SEK/month. Cancel anytime.

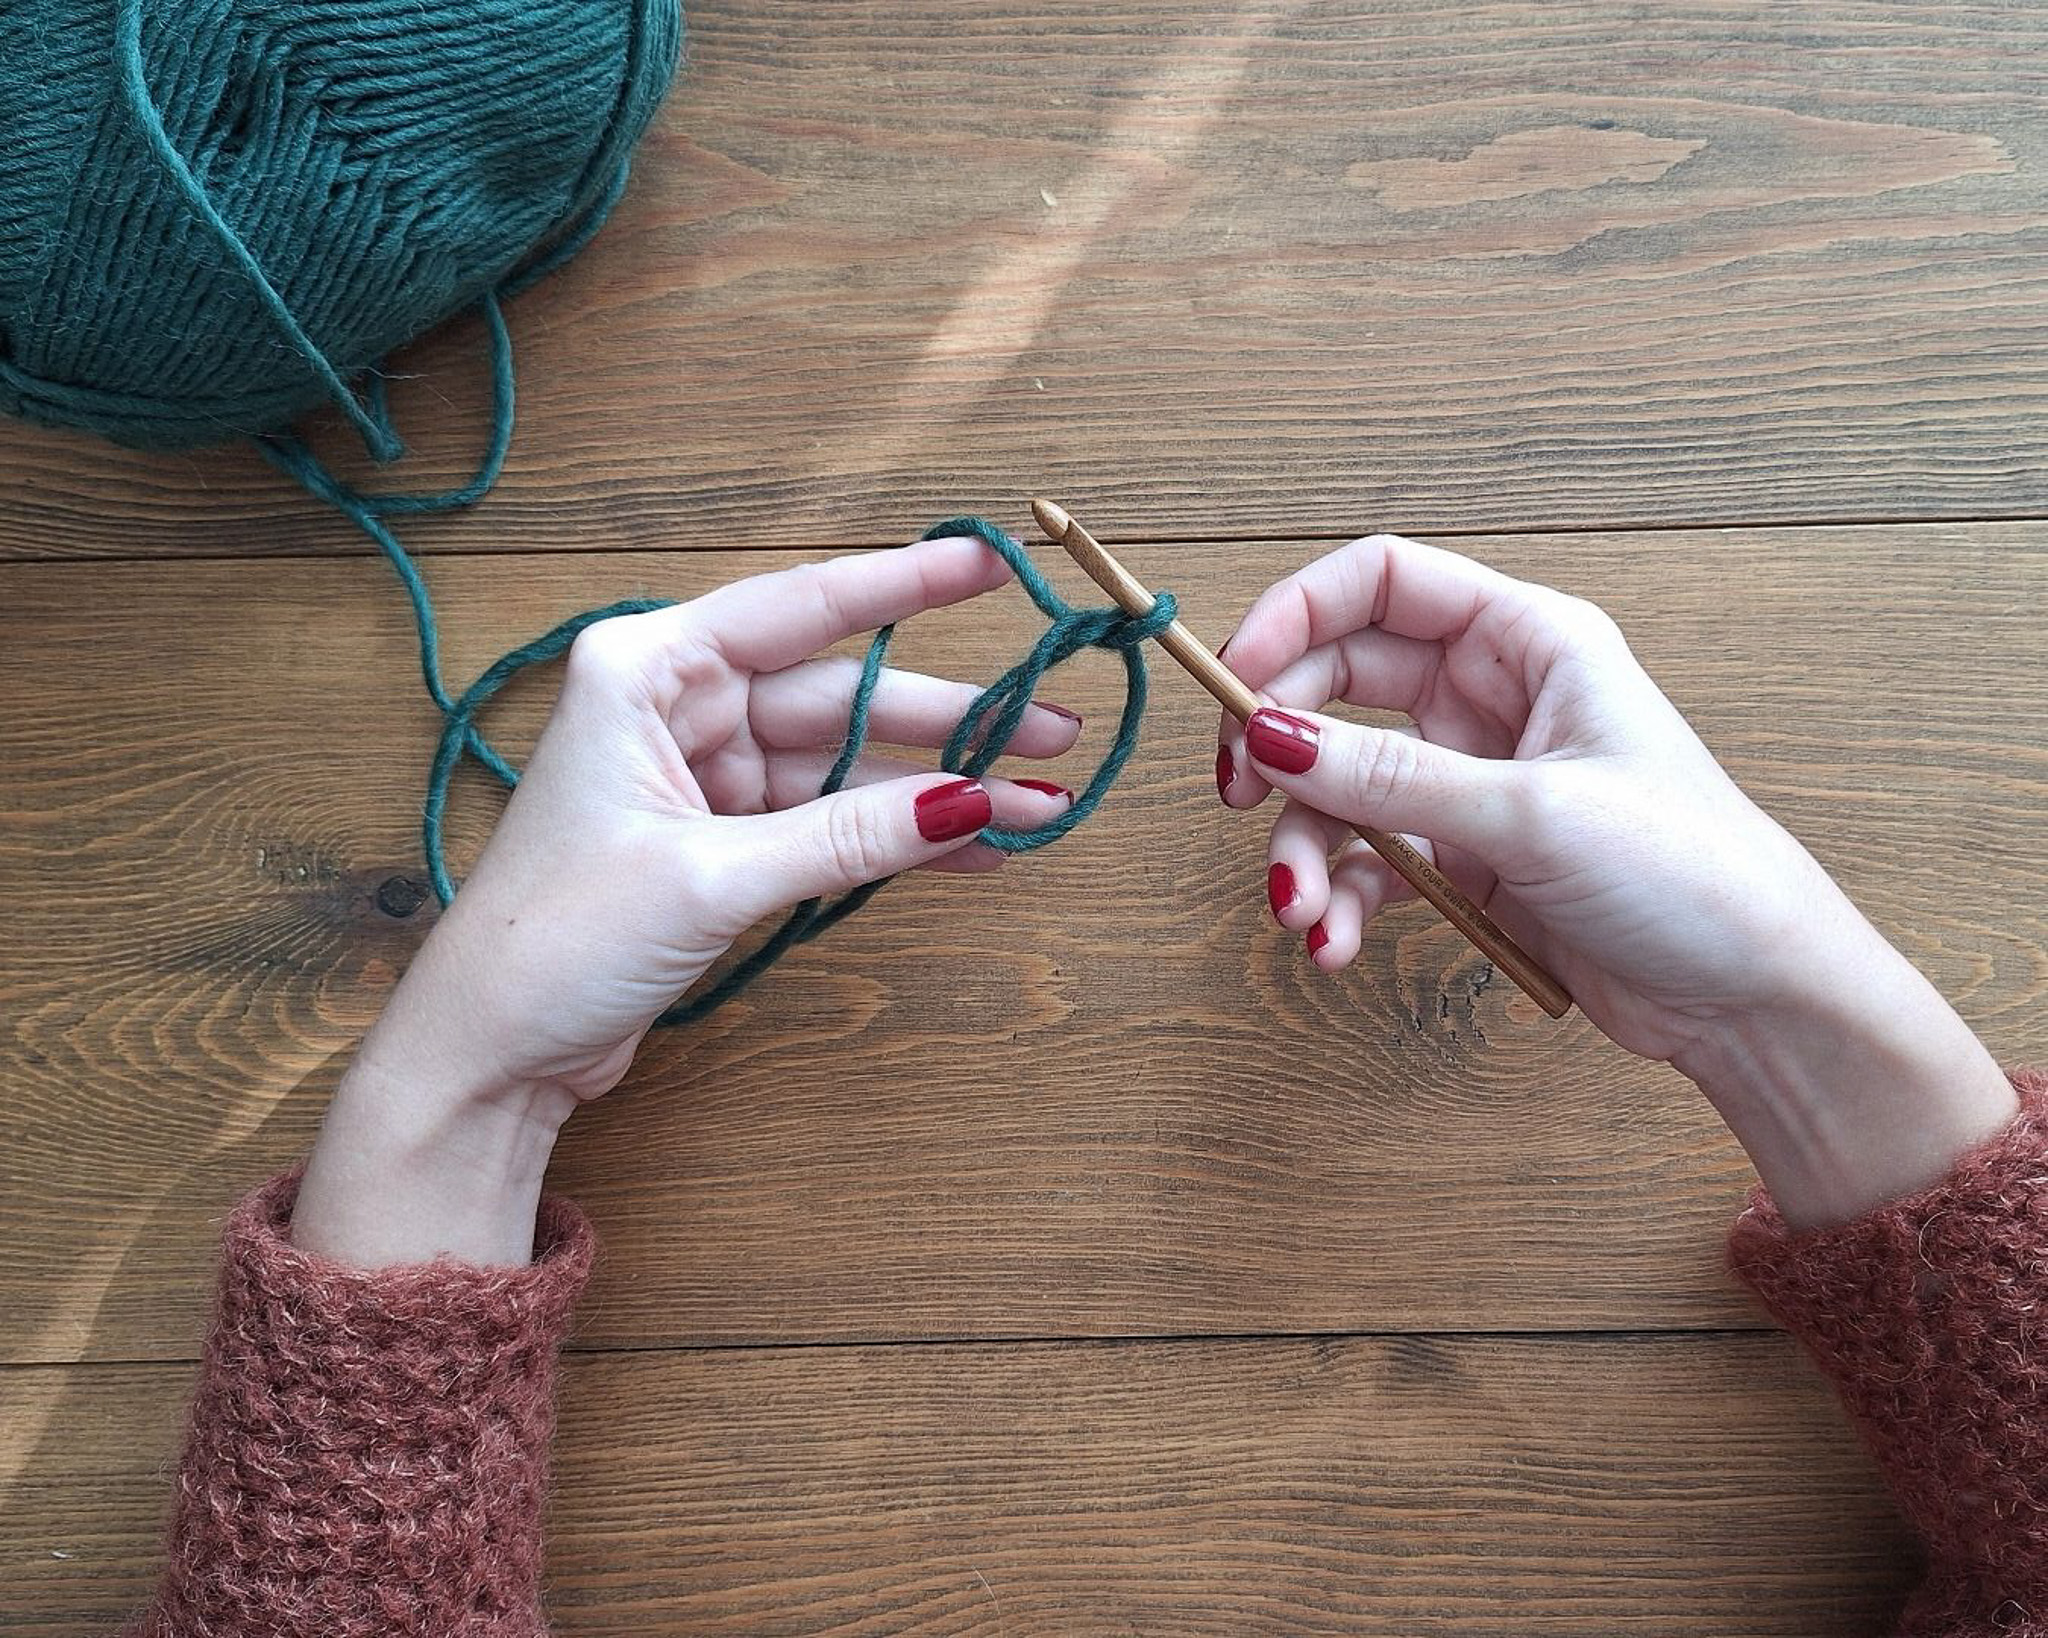
Round 1: Start with a magic ring and crochet 6 single crochet stitches into the ring. Pull the yarn tail to tighten the ring and close the hole in the centre.
If you're unsure how to make a magic ring, watch the video below: Magic Ring – Single Crochet.
Now finish the round with an invisible join. Remove the loop from your crochet hook. Insert the hook from back to front through the first stitch of the round and pull the yarn loop through to the back. Then place the loop back onto your crochet hook from the front.
You have now finished the round with a neat, almost invisible join!
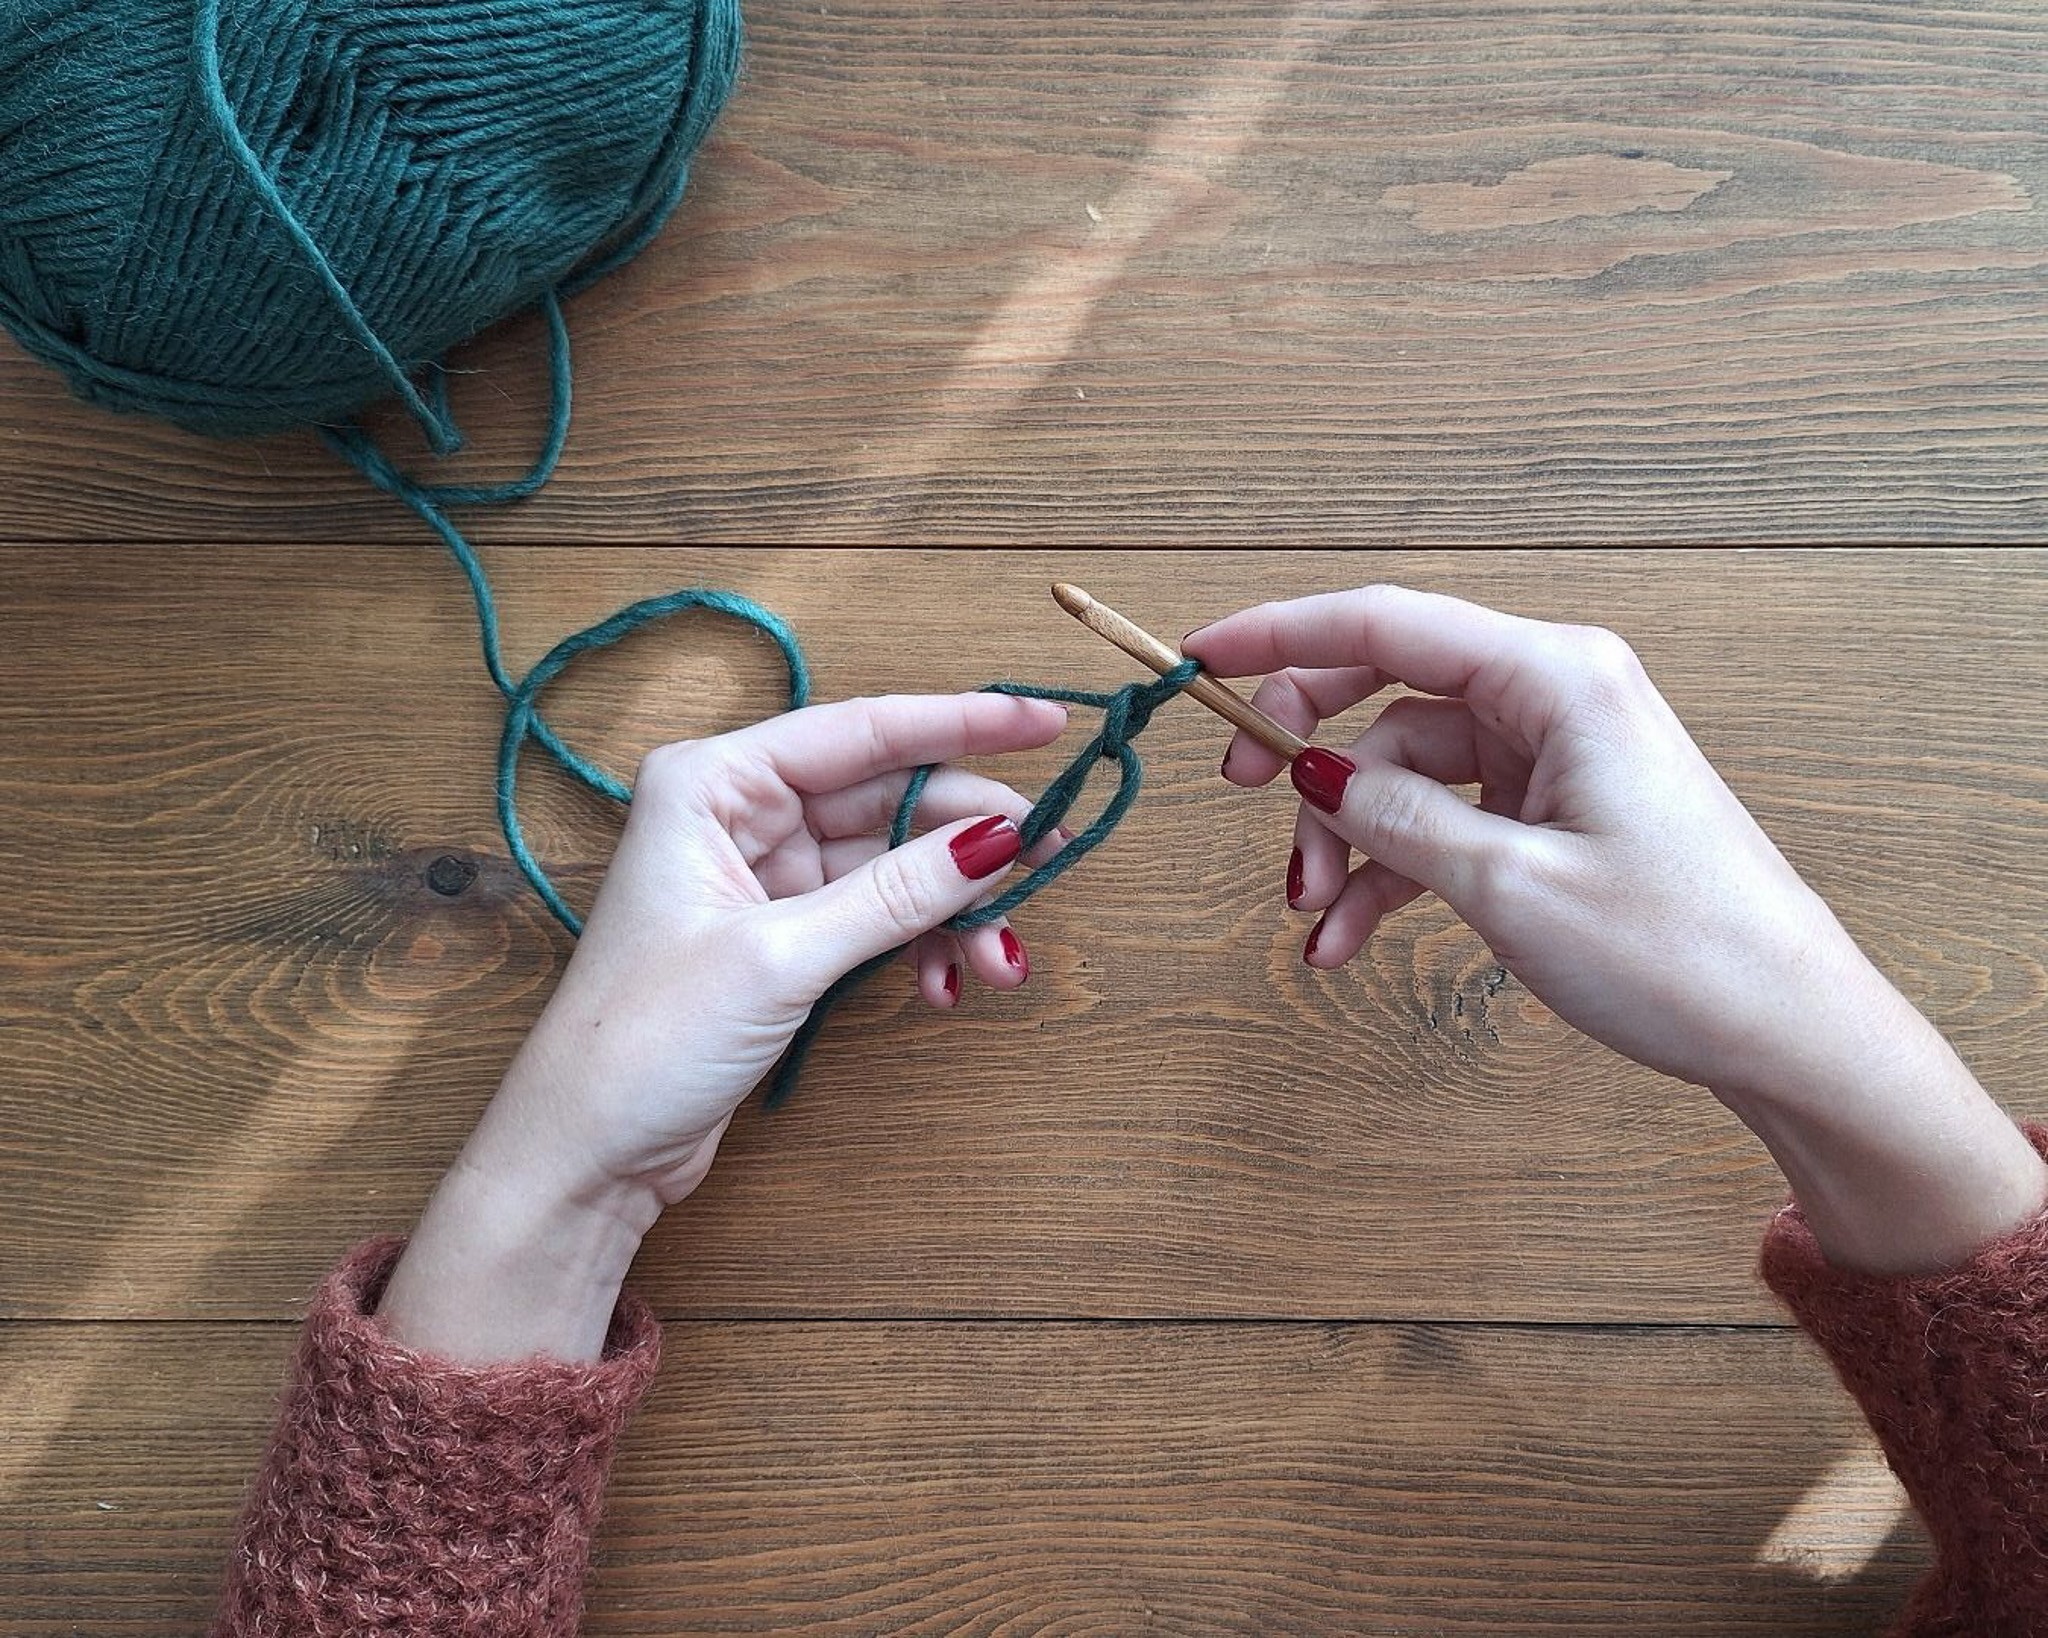
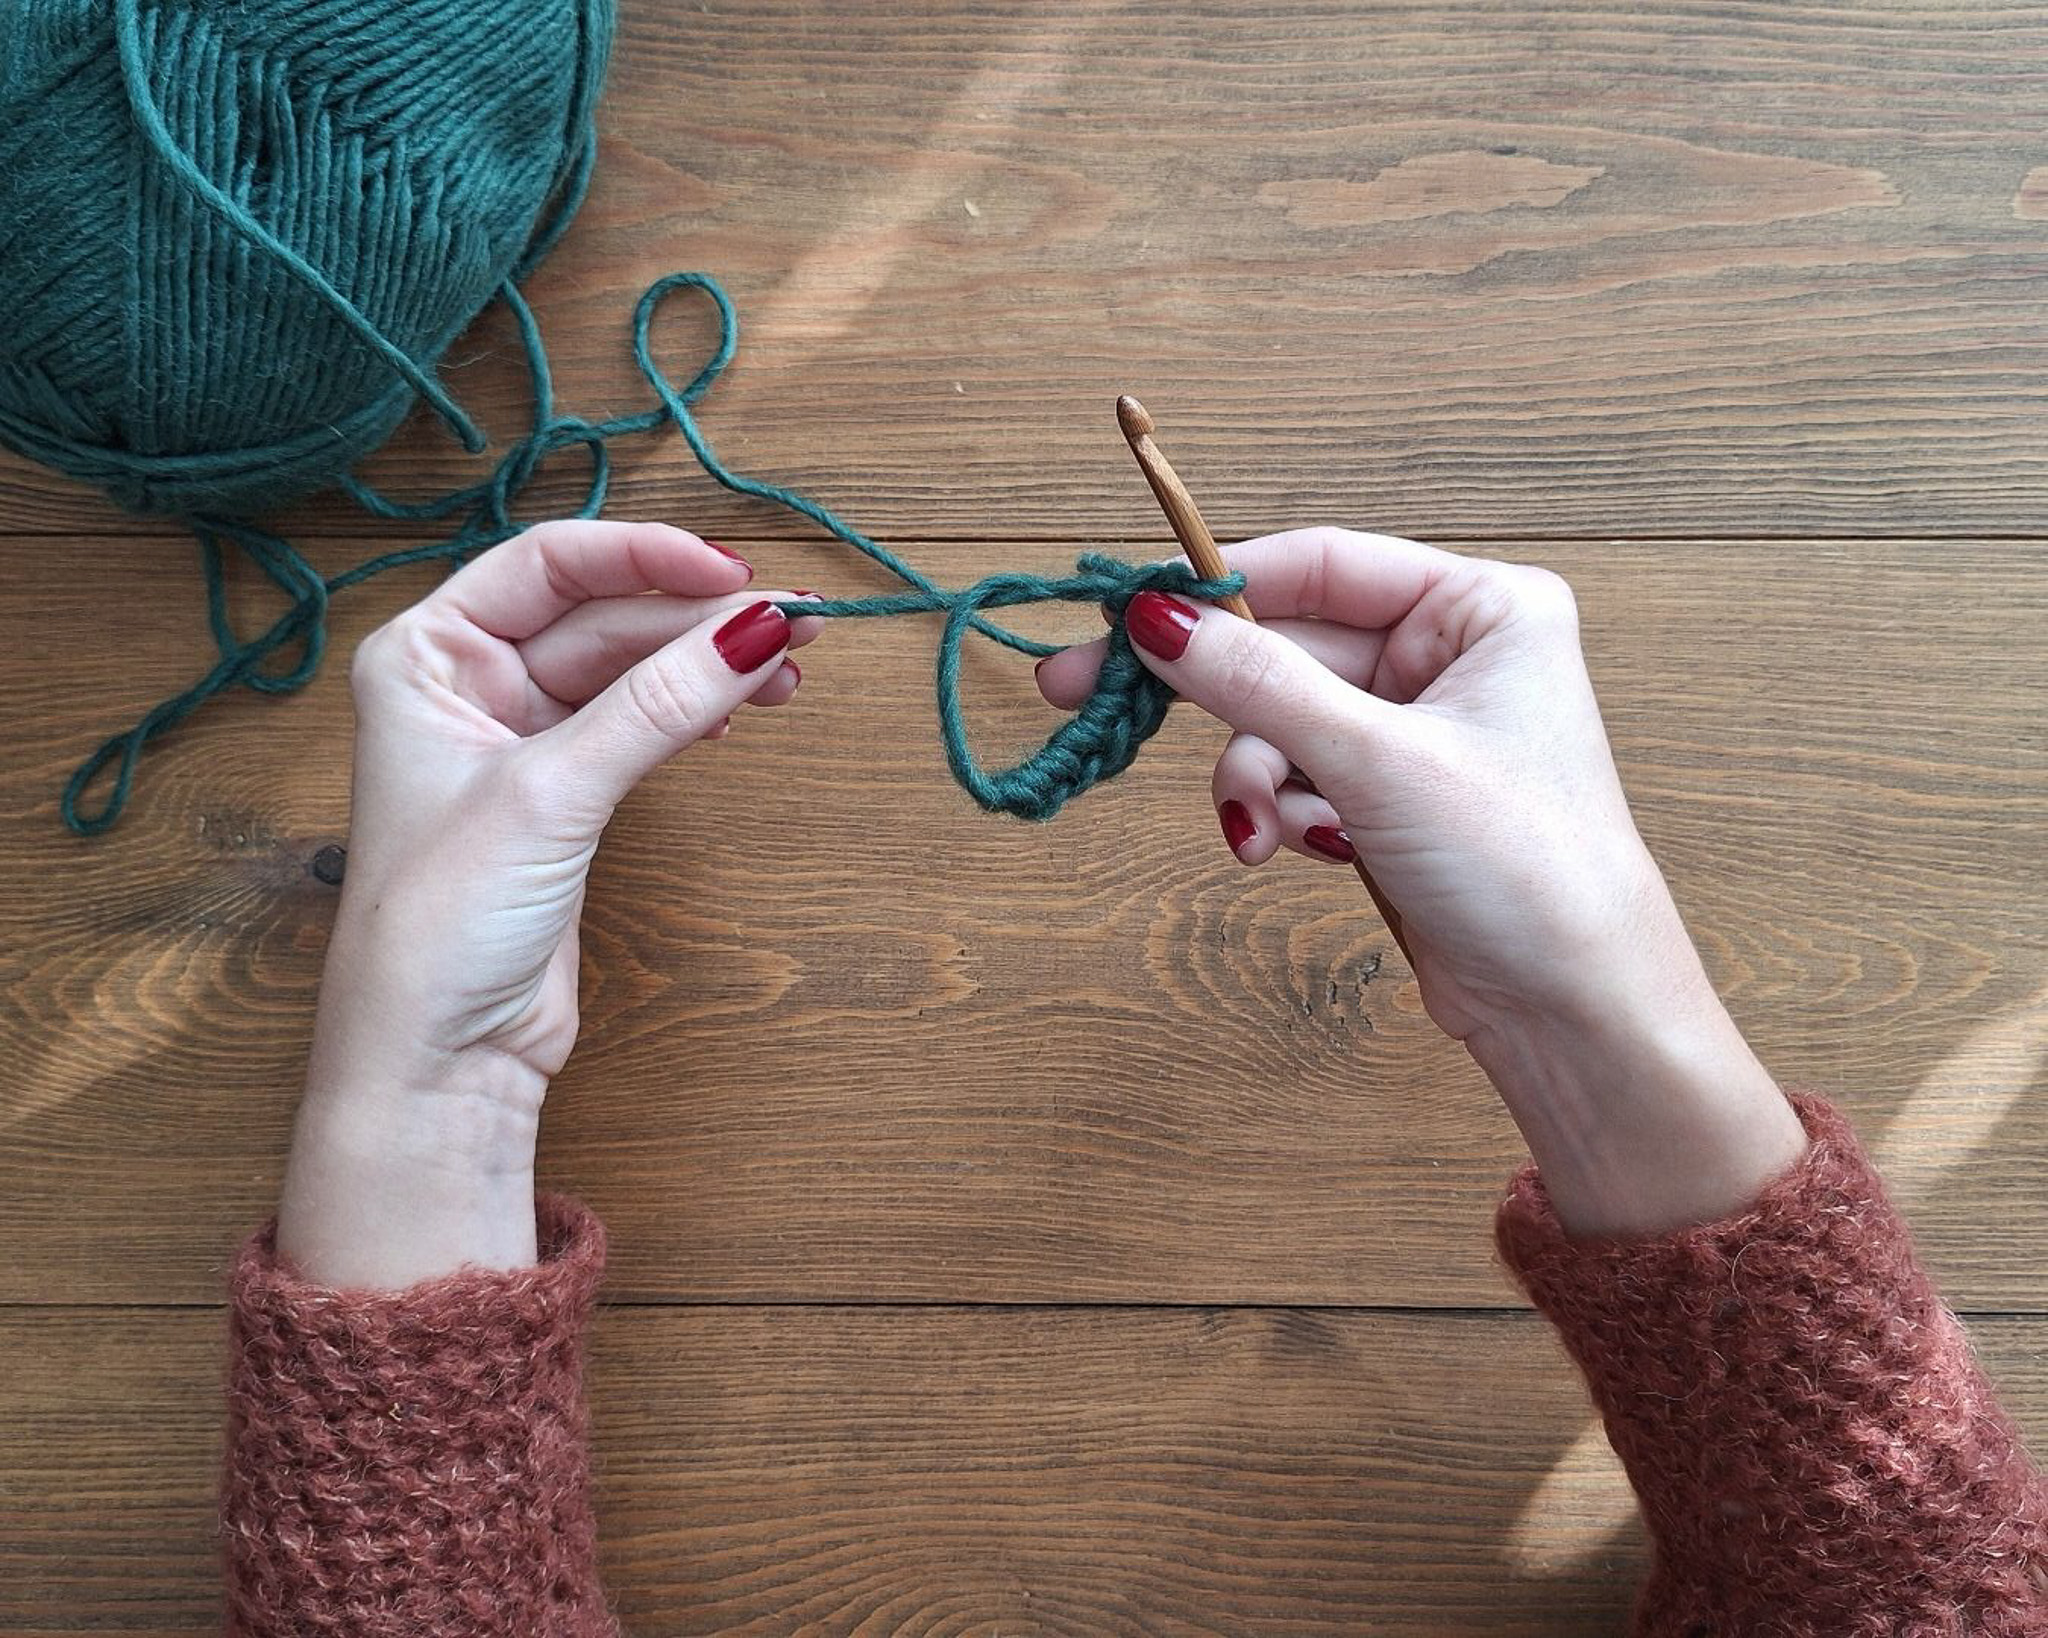
Round 2: Start by pulling the loop on your crochet hook slightly larger. You will now begin the round with a standing double crochet (see instructions below).
From now, everything is crocheted in back loop only, if you are unsure how to crochet in beck loops, see below video.
Crochet 2 more double crochet stitches into the same stitch, giving you a total of 3 double crochet stitches in the same stitch. Then crochet 2 chain stitches.
Continue by crocheting 3 double crochet stitches into the next stitch, followed by 2 chain stitches. Repeat this pattern all the way around. You should have 3 double crochet stitches and 2 chain stitches in each stitch.
If you're unsure how to crochet a double crochet or a chain stitch, watch the videos below.
Finish the round in the same way as the previous round, using an invisible join.
How to make a standing double crochet:
Start by pulling the loop on your crochet hook slightly larger, leaving a little extra yarn to work with.
- Yarn over your crochet hook, just as you would when starting a regular double crochet.
- Insert the hook through the back loop of the first stitch.
- Yarn over and pull up a loop through the stitch. You should now have 3 loops on your hook.
- Yarn over again and pull through the first 2 loops.
- Yarn over one last time and pull through the remaining 2 loops.
You have now made a standing double crochet!
Use this technique to start each new round from now on.

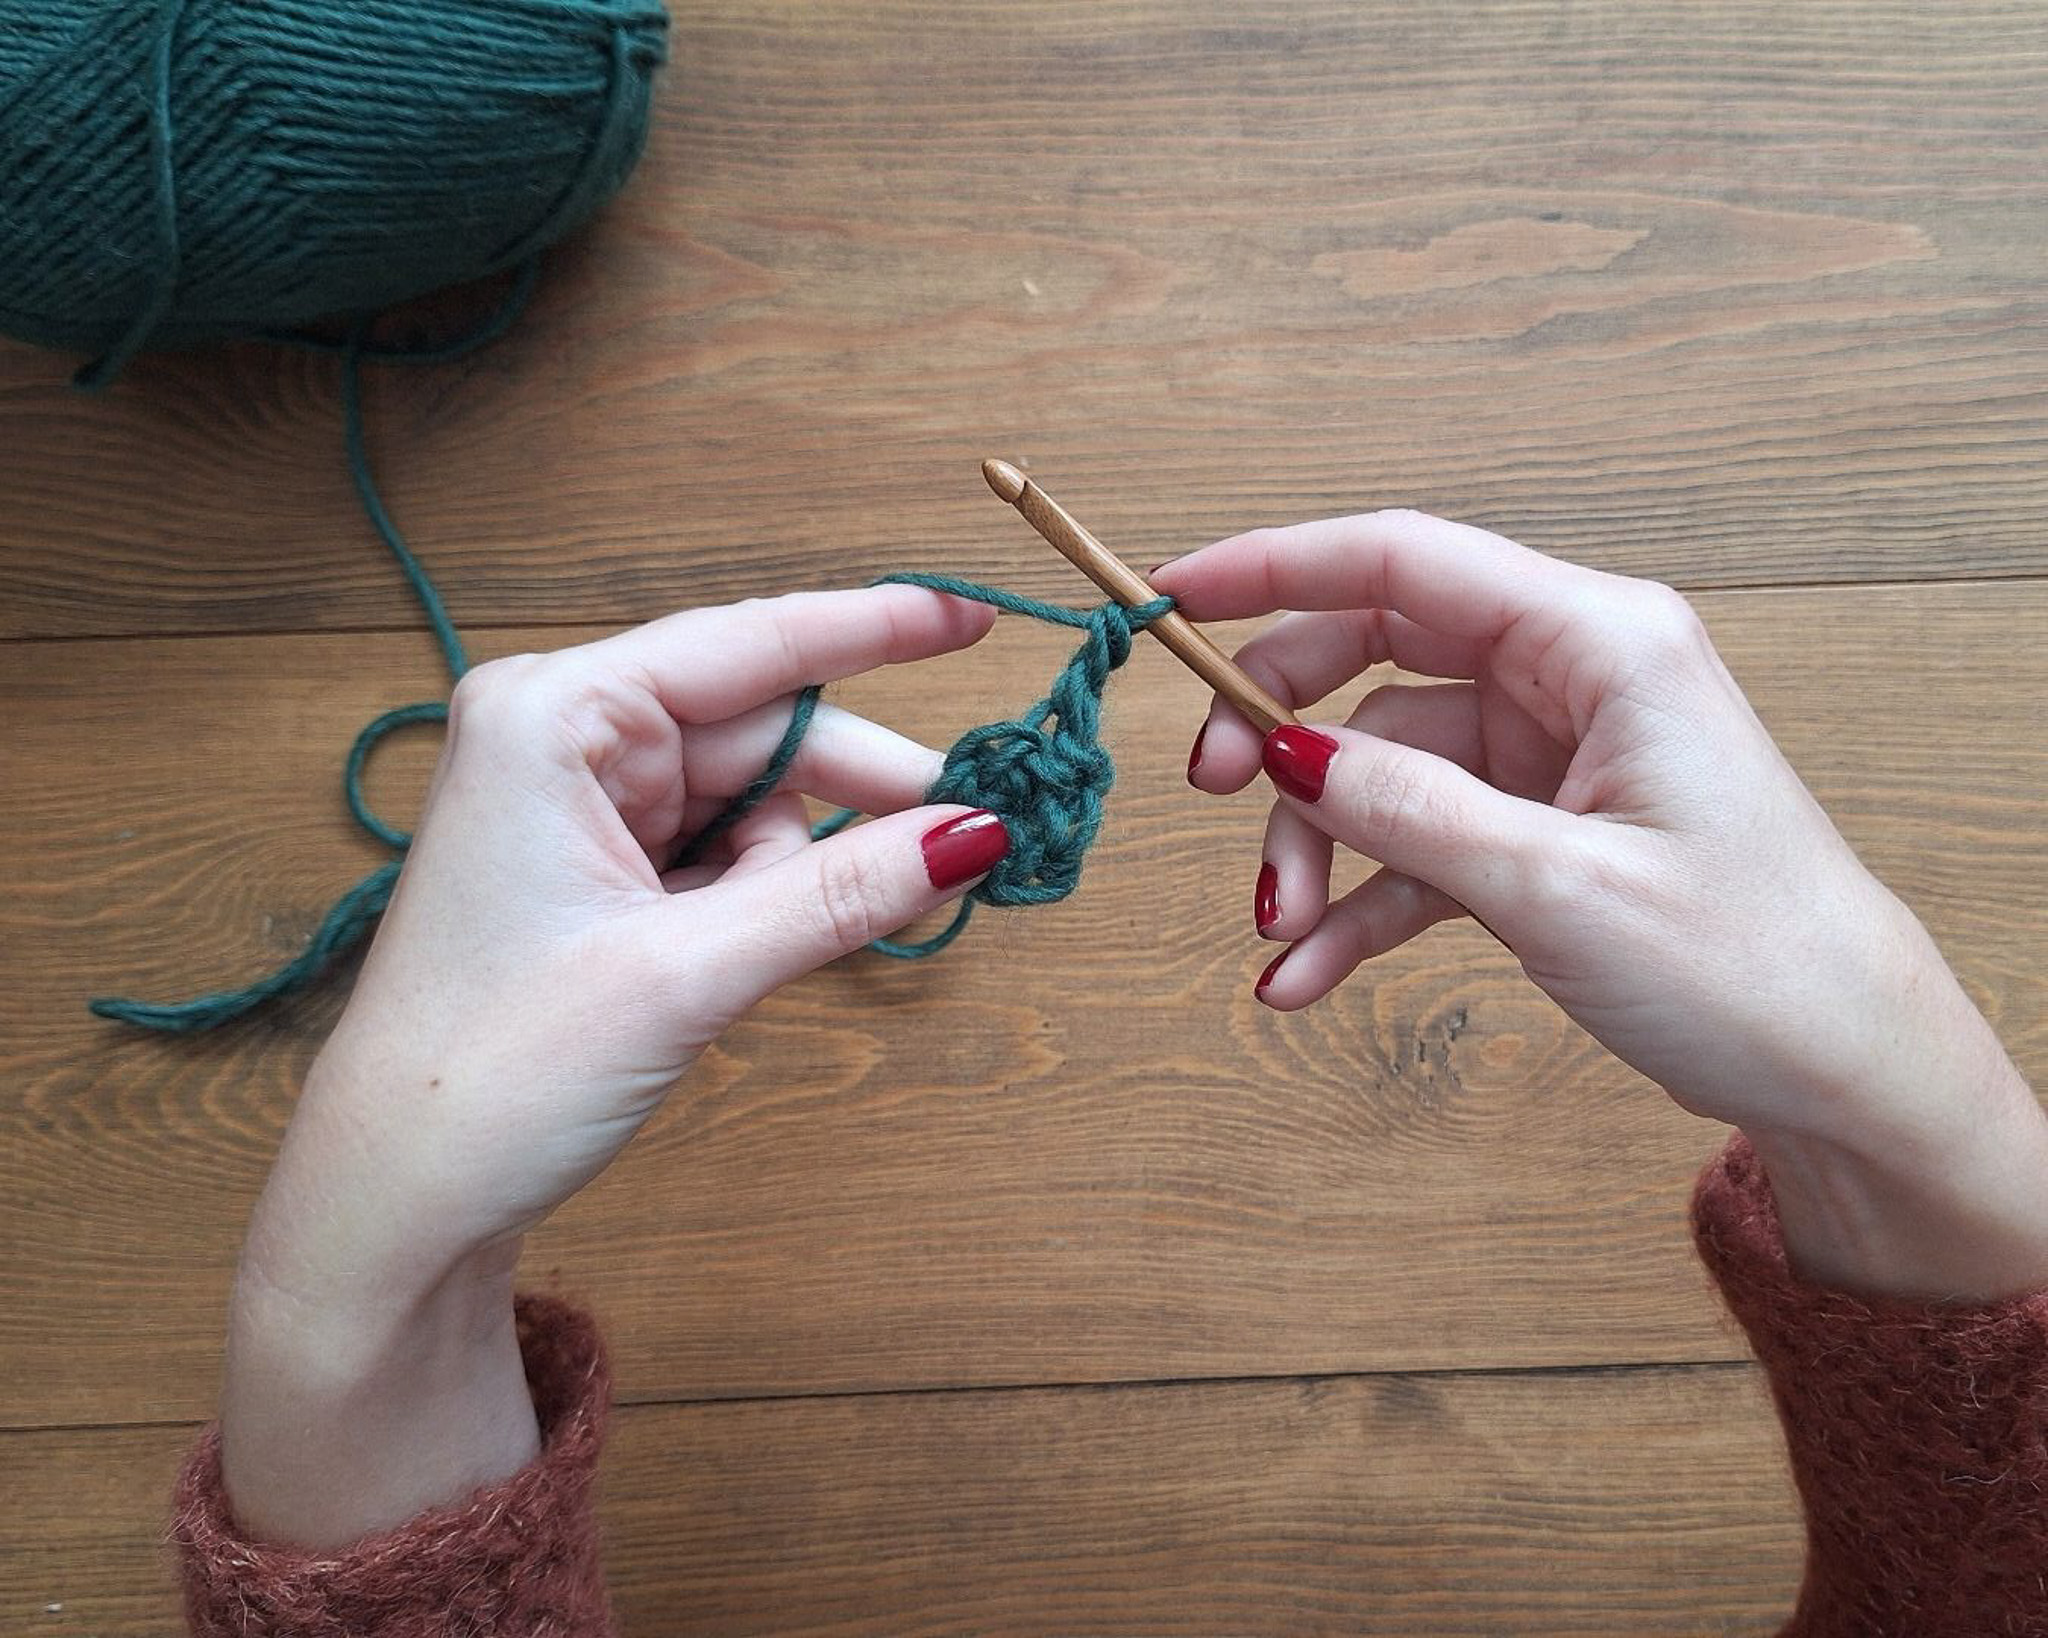
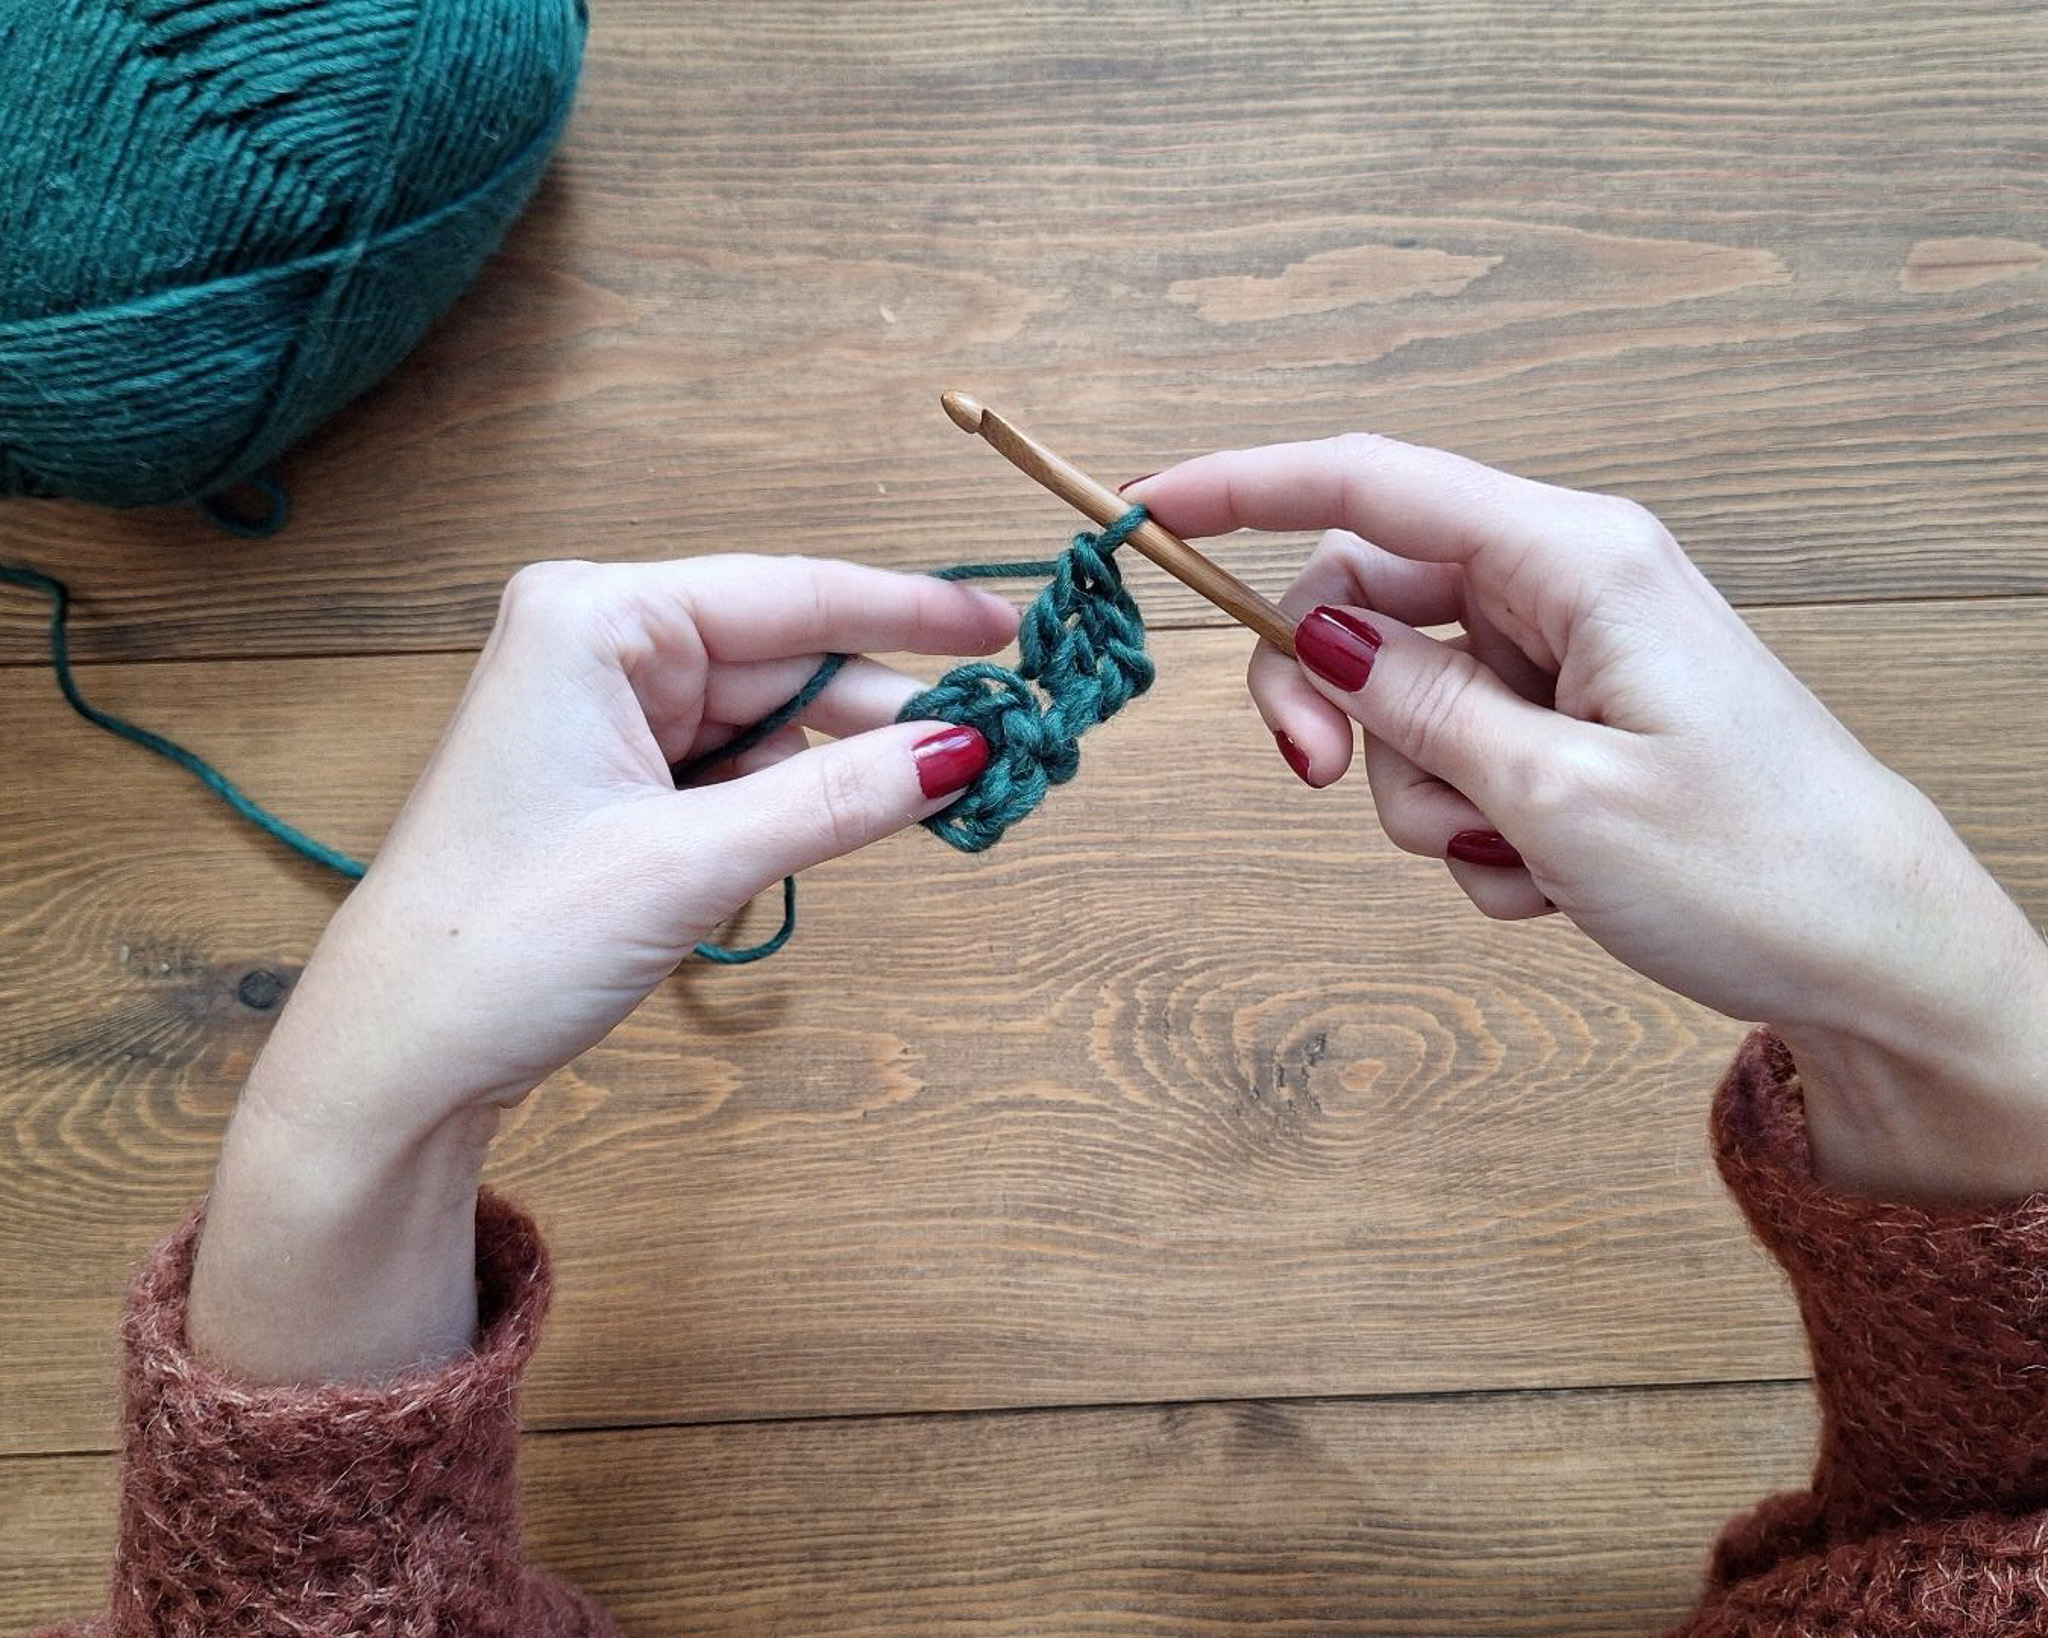
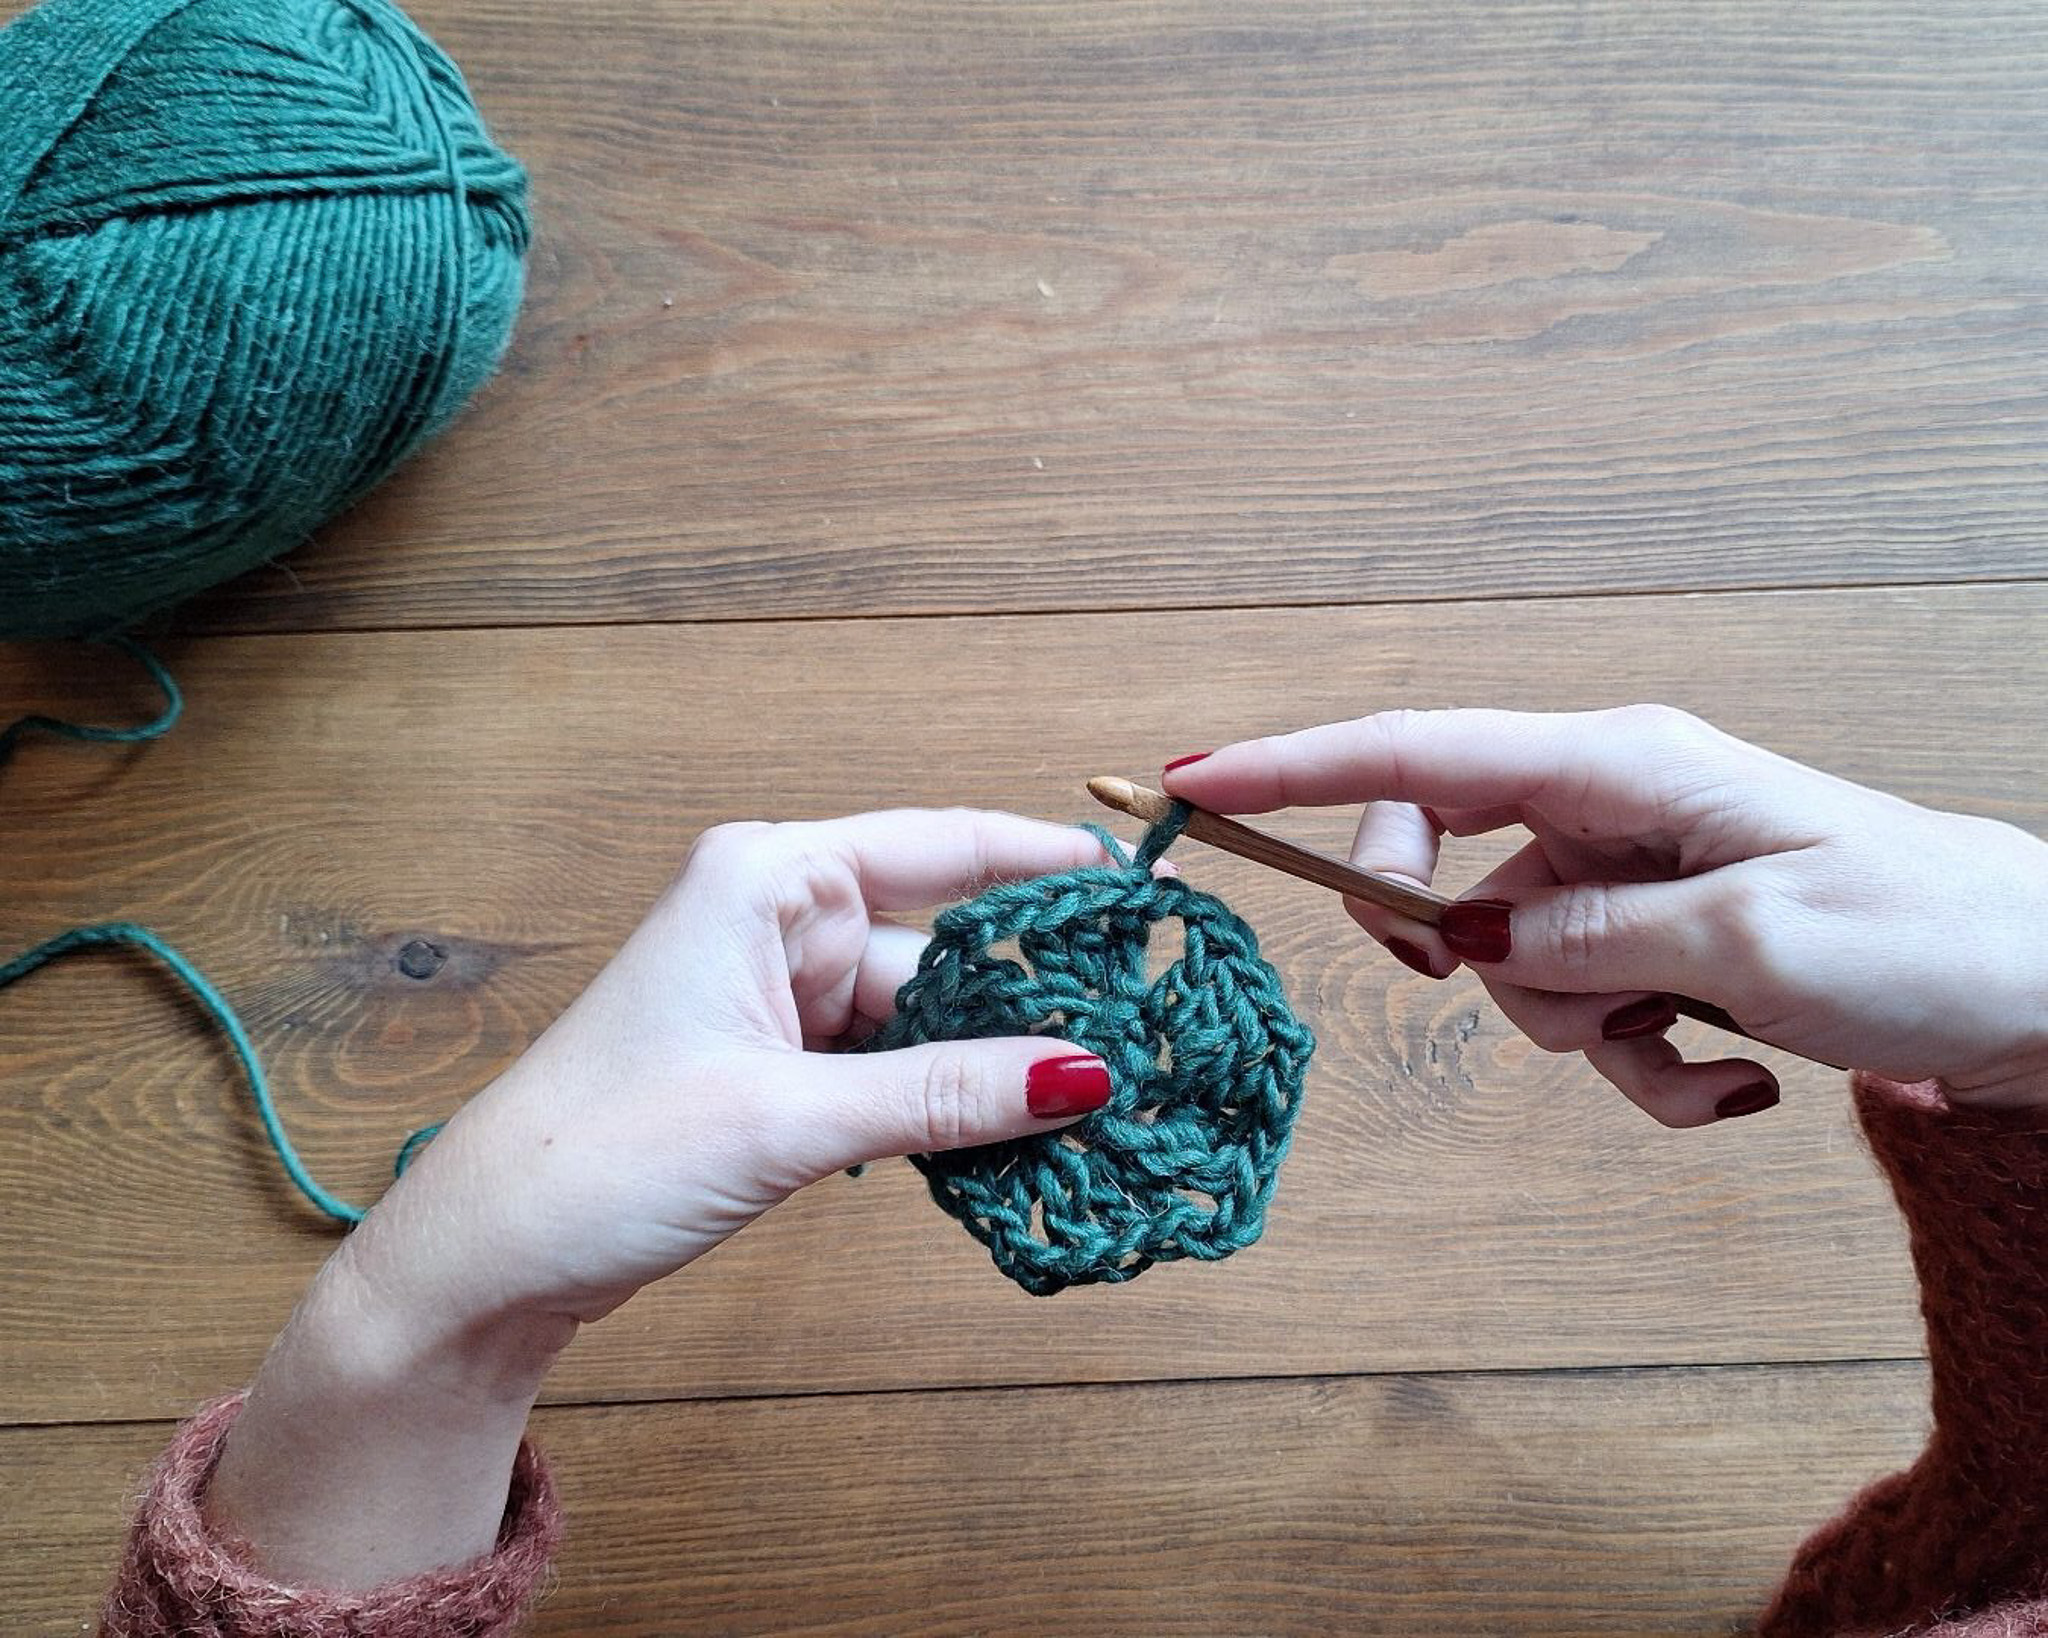
Rounds 3–7:
From now on, you will follow the same pattern for each round. Crochet double crochet stitches into the double crochet stitches from the previous round, and make an increase at each corner using the 2 chain stitches.
Round 3: Start with a standing double crochet, following the same instructions as before.
Crochet 1 double crochet into each stitch from the previous round until you reach the first corner (the 2 chain stitches from the previous round).
At the corner, do the following:
- Crochet 1 double crochet into the first chain stitch.
- Crochet 2 chain stitches.
- Crochet 1 double crochet into the second chain stitch.
Continue crocheting 1 double crochet into each stitch until you reach the next corner.
Repeat the same steps at each corner all the way around.
Finish the round using the same invisible join as before.

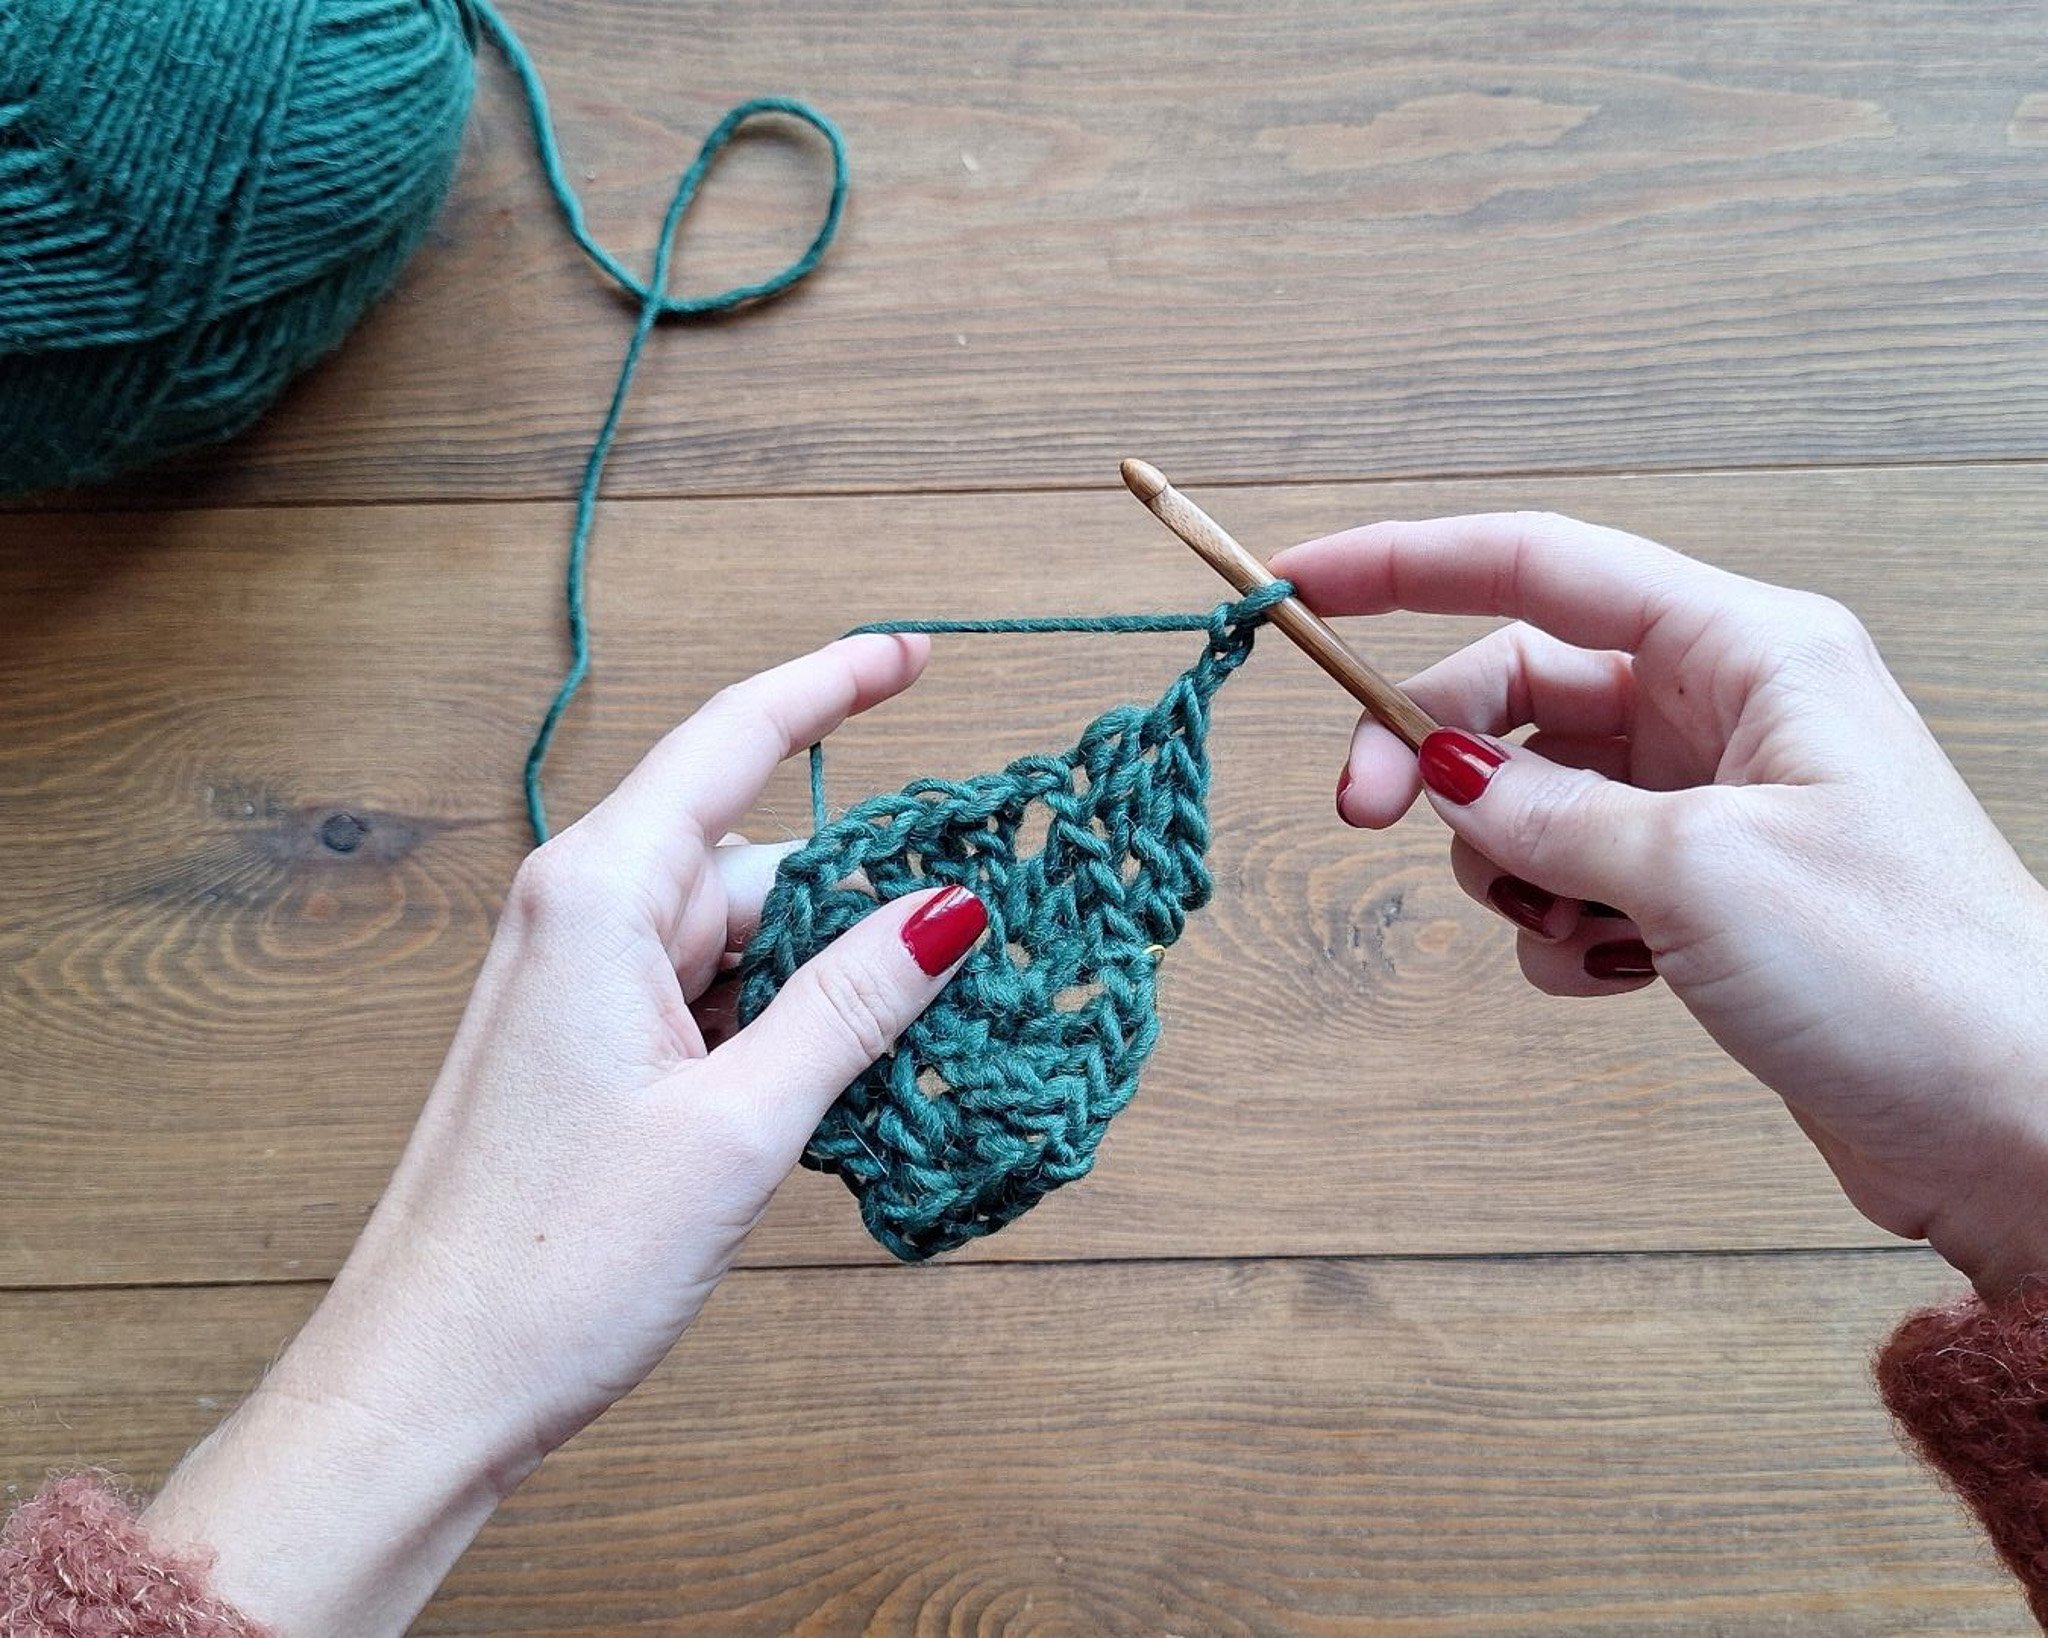

Rounds 4–7: Repeat the same instructions as for Round 3. Crochet 1 double crochet into each double crochet stitch and make the same increase at each corner.
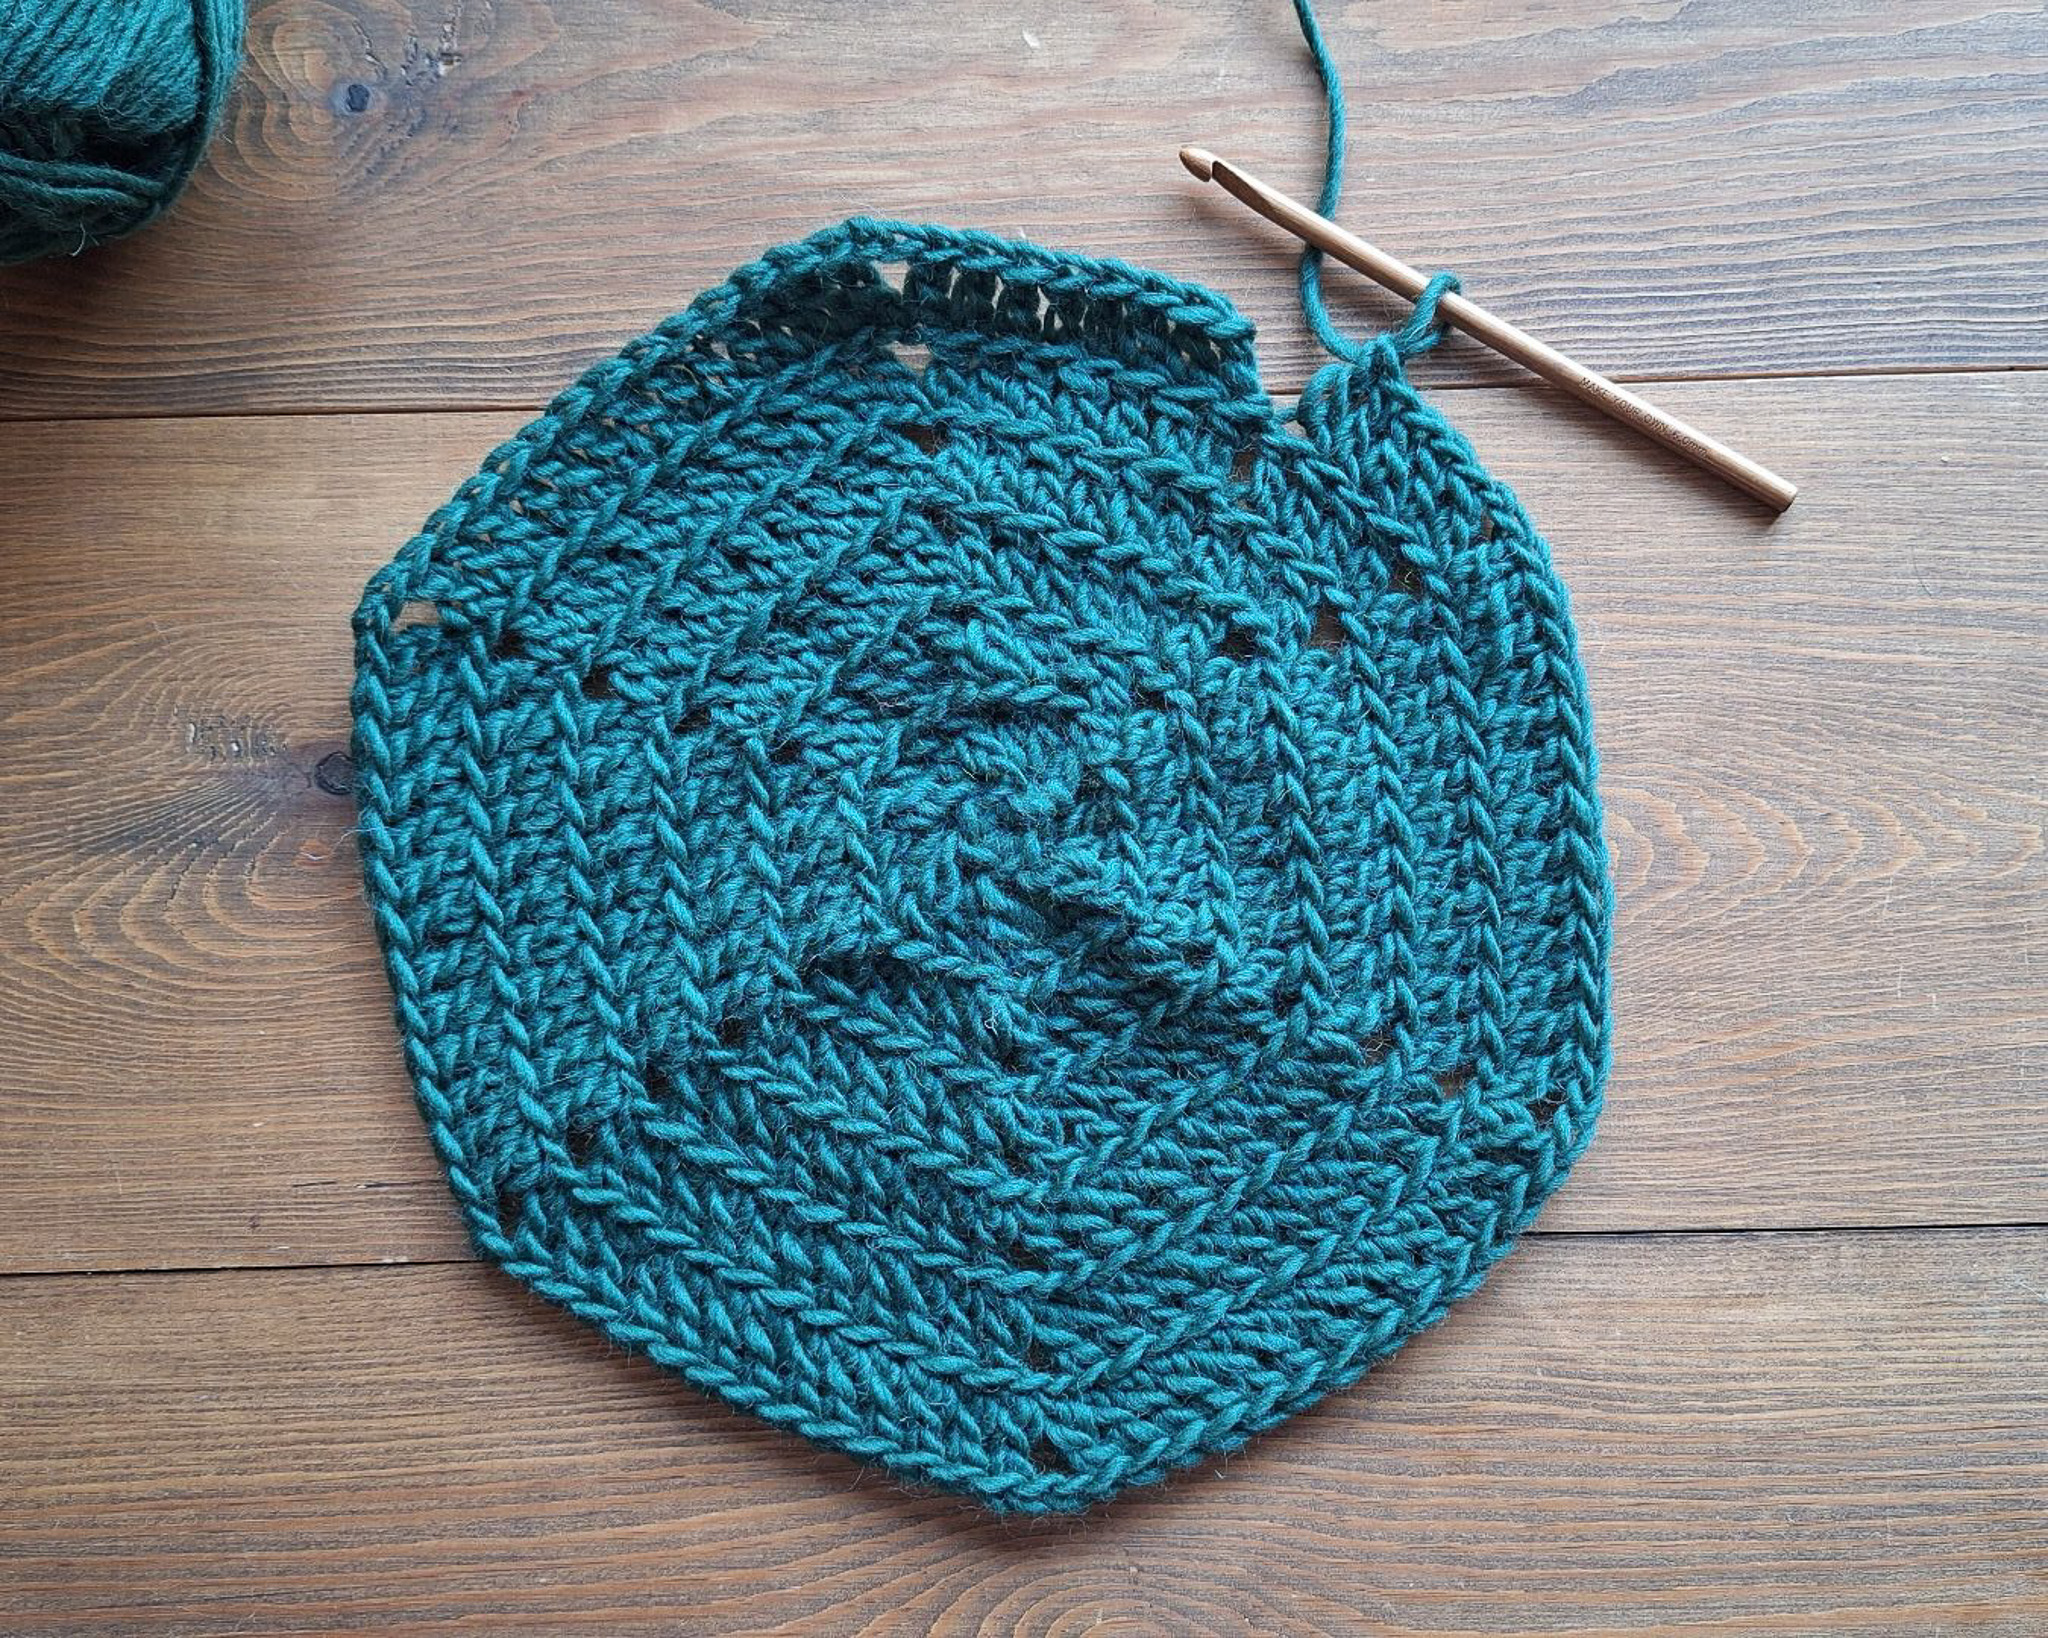
Continue until your trivet reaches the desired size.
Size guide
- 6 rounds: Small trivet, approximately 16 cm after felting.
- 7 rounds: Medium trivet, approximately 19 cm after felting.
If you would like a larger trivet, simply continue crocheting more rounds using the same pattern.
Felting
Now it's time to felt your trivet!
Wash it in the washing machine at 40°C using a regular wash cycle. Adding a towel can help improve the felting effect.
Once the wash is finished, shape your trivet and leave it to dry flat.
We recommend felting one trivet first to see how your washing machine affects the result, as felting can vary between machines.
Your felted trivet is now ready to use!
Crochet Pattern – Using Crochet Abbreviations
This section uses crochet abbreviations. If you need more guidance along the way, see the beginner-friendly version, which includes detailed instructions and photos.
Abbreviations
- ch = chain
- sc = single crochet
- standing dc = standing double crochet
- dc = double crochet
- MR = magic ring
- st = stitch
- blo = back loop only
Pattern
Round 1: Start with a MR. Work 6 sc into the ring.
Finish the round with an invisible join: Remove the loop from your crochet hook. Insert your hook from back to front through the first stitch of the round and pull the loop through. Then insert your hook back into the loop from the front. Pull the yarn tail to close the hole in the center.
From now, work in blo for the rest of the pattern.
Round 2: Start with a standing dc. Work 2 more dc into the same st. Ch 2.
Continue by working 3 dc into each stitch, followed by ch 2. Repeat this pattern all the way around. You should now have 6 groups of 3 dc, with 2 chain stitches between each group. The chain spaces form the corners of your trivet.
Finish the round with the same invisible join as in Round 1.
Round 3: Start with a standing dc. Work 1 dc into each dc from the previous round.
When you reach the chain stitches at a corner, work as follows:
- 1 dc into the first ch.
- Ch 2.
- 1 dc into the second ch.
Continue working 1 dc into each dc until you reach the next corner. Repeat the same steps at every corner around.
Finish with the same invisible join as before.
Rounds 4–7: Repeat the same pattern as Round 3.
Work 1 dc into each dc. At each corner, work 1 dc into the first ch, ch 2, and 1 dc into the second ch.
Continue until your trivet reaches the desired size.
Size Guide
- 6 rounds: Small trivet, approximately 16 cm (6.3 in) after felting.
- 7 rounds: Medium trivet, approximately 19 cm (7.5 in) after felting.
If you would like a larger trivet, simply continue crocheting additional rounds using the same pattern.
Felting
Now it's time to felt your trivet!
Machine wash at 40°C (104°F) using a regular wash cycle. Once the wash is finished, shape your trivet and lay it flat to dry.
Your felted trivet is now ready to use!
The rights to this pattern belong to MYO Make Your Own. The pattern or its pictures may not be copied, shared or resold either in parts or in its entirety, but you may sell items you have crocheted from this pattern. If you have questions about the pattern, contact MYO at hello@makeyourown.se.
Round 1: Start with a magic ring and crochet 6 single crochet stitches into the ring. Pull the yarn tail to tighten the ring and close the hole in the centre.
If you're unsure how to make a magic ring, watch the video below: Magic Ring – Single Crochet.
Now finish the round with an invisible join. Remove the loop from your crochet hook. Insert the hook from back to front through the first stitch of the round and pull the yarn loop through to the back. Then place the loop back onto your crochet hook from the front.
You have now finished the round with a neat, almost invisible join!
Round 2: Start by pulling the loop on your crochet hook slightly larger. You will now begin the round with a standing double crochet (see instructions below).
From now, everything is crocheted in back loop only, if you are unsure how to crochet in beck loops, see below video.
Crochet 2 more double crochet stitches into the same stitch, giving you a total of 3 double crochet stitches in the same stitch. Then crochet 2 chain stitches.
Continue by crocheting 3 double crochet stitches into the next stitch, followed by 2 chain stitches. Repeat this pattern all the way around. You should have 3 double crochet stitches and 2 chain stitches in each stitch.
If you're unsure how to crochet a double crochet or a chain stitch, watch the videos below.
Finish the round in the same way as the previous round, using an invisible join.
How to make a standing double crochet:
Start by pulling the loop on your crochet hook slightly larger, leaving a little extra yarn to work with.
- Yarn over your crochet hook, just as you would when starting a regular double crochet.
- Insert the hook through the back loop of the first stitch.
- Yarn over and pull up a loop through the stitch. You should now have 3 loops on your hook.
- Yarn over again and pull through the first 2 loops.
- Yarn over one last time and pull through the remaining 2 loops.
You have now made a standing double crochet!
Use this technique to start each new round from now on.
Rounds 3–7:
From now on, you will follow the same pattern for each round. Crochet double crochet stitches into the double crochet stitches from the previous round, and make an increase at each corner using the 2 chain stitches.
Round 3: Start with a standing double crochet, following the same instructions as before.
Crochet 1 double crochet into each stitch from the previous round until you reach the first corner (the 2 chain stitches from the previous round).
At the corner, do the following:
- Crochet 1 double crochet into the first chain stitch.
- Crochet 2 chain stitches.
- Crochet 1 double crochet into the second chain stitch.
Continue crocheting 1 double crochet into each stitch until you reach the next corner.
Repeat the same steps at each corner all the way around.
Finish the round using the same invisible join as before.
Rounds 4–7: Repeat the same instructions as for Round 3. Crochet 1 double crochet into each double crochet stitch and make the same increase at each corner.
Continue until your trivet reaches the desired size.
Size guide
- 6 rounds: Small trivet, approximately 16 cm after felting.
- 7 rounds: Medium trivet, approximately 19 cm after felting.
If you would like a larger trivet, simply continue crocheting more rounds using the same pattern.
Felting
Now it's time to felt your trivet!
Wash it in the washing machine at 40°C using a regular wash cycle. Adding a towel can help improve the felting effect.
Once the wash is finished, shape your trivet and leave it to dry flat.
We recommend felting one trivet first to see how your washing machine affects the result, as felting can vary between machines.
Your felted trivet is now ready to use!
Crochet Pattern – Using Crochet Abbreviations
This section uses crochet abbreviations. If you need more guidance along the way, see the beginner-friendly version, which includes detailed instructions and photos.
Abbreviations
- ch = chain
- sc = single crochet
- standing dc = standing double crochet
- dc = double crochet
- MR = magic ring
- st = stitch
- blo = back loop only
Pattern
Round 1: Start with a MR. Work 6 sc into the ring.
Finish the round with an invisible join: Remove the loop from your crochet hook. Insert your hook from back to front through the first stitch of the round and pull the loop through. Then insert your hook back into the loop from the front. Pull the yarn tail to close the hole in the center.
From now, work in blo for the rest of the pattern.
Round 2: Start with a standing dc. Work 2 more dc into the same st. Ch 2.
Continue by working 3 dc into each stitch, followed by ch 2. Repeat this pattern all the way around. You should now have 6 groups of 3 dc, with 2 chain stitches between each group. The chain spaces form the corners of your trivet.
Finish the round with the same invisible join as in Round 1.
Round 3: Start with a standing dc. Work 1 dc into each dc from the previous round.
When you reach the chain stitches at a corner, work as follows:
- 1 dc into the first ch.
- Ch 2.
- 1 dc into the second ch.
Continue working 1 dc into each dc until you reach the next corner. Repeat the same steps at every corner around.
Finish with the same invisible join as before.
Rounds 4–7: Repeat the same pattern as Round 3.
Work 1 dc into each dc. At each corner, work 1 dc into the first ch, ch 2, and 1 dc into the second ch.
Continue until your trivet reaches the desired size.
Size Guide
- 6 rounds: Small trivet, approximately 16 cm (6.3 in) after felting.
- 7 rounds: Medium trivet, approximately 19 cm (7.5 in) after felting.
If you would like a larger trivet, simply continue crocheting additional rounds using the same pattern.
Felting
Now it's time to felt your trivet!
Machine wash at 40°C (104°F) using a regular wash cycle. Once the wash is finished, shape your trivet and lay it flat to dry.
Your felted trivet is now ready to use!
The rights to this pattern belong to MYO Make Your Own. The pattern or its pictures may not be copied, shared or resold either in parts or in its entirety, but you may sell items you have crocheted from this pattern. If you have questions about the pattern, contact MYO at hello@makeyourown.se.



Share your creations with us
Thank you!
Your comment was sent!